hamilton
-
Posts
1,743 -
Joined
-
Last visited
4 Followers


Recent Profile Visitors
3,920 profile views


-
 I was just thinking about this kit before seeing this update! Great work - she's looking nice! hamilton
 -
 hamilton reacted to a post in a topic:
GLAD TIDINGS 1937 by Jerry Sturdivant - Model Shipways - Scale 1:24 - Pinky Schooner
hamilton reacted to a post in a topic:
GLAD TIDINGS 1937 by Jerry Sturdivant - Model Shipways - Scale 1:24 - Pinky Schooner
-
Glen McGuire reacted to a post in a topic:
1921 Bluenose by John Ruy - Model Shipways Kit No. MS2130 - 1/64 scale - Canadian Fishing Schooner
-
 John Ruy reacted to a post in a topic:
1921 Bluenose by John Ruy - Model Shipways Kit No. MS2130 - 1/64 scale - Canadian Fishing Schooner
John Ruy reacted to a post in a topic:
1921 Bluenose by John Ruy - Model Shipways Kit No. MS2130 - 1/64 scale - Canadian Fishing Schooner
-
Beautiful work on the sails John! hamilton
-
hamilton reacted to a post in a topic:
1921 Bluenose by John Ruy - Model Shipways Kit No. MS2130 - 1/64 scale - Canadian Fishing Schooner
-
allanyed reacted to a post in a topic:
HMS Greyhound by tennfox - Corel - 1:100 - building as USS Protector
-
tennfox reacted to a post in a topic:
HMS Greyhound by tennfox - Corel - 1:100 - building as USS Protector
-
Old Collingwood reacted to a post in a topic:
HMS Greyhound by tennfox - Corel - 1:100 - building as USS Protector
-
I didn't use any of the kit-supplied planking except below the wales and I also didn't use those metal gunport frames, but framed out the gunports with scrapwood....sorry, it was so long ago I can't really remember........ Because of the flaws of this kit, I strongly recommend just going with whatever works rather than with the kit's recommendations - that's what I did about 75% of the time on this build. If you already have those gunports installed, then the main thing is that the general arrangement (1 strake above the gunports , 1 below and whatever works to fill the gap between) be maintained, and also that whatever material you use it should be of a consistent width - at 1:100 scale I would go for the 3mm planks myself - 4mm would look a little too wide, I think, for this vessel at this scale - those can be used for the lower hull planking. hamilton
-
Old Collingwood reacted to a post in a topic:
HMS Bellona by hamilton - Corel - 1:100 - 1780 refit
-
hamilton reacted to a post in a topic:
HMS Bellona by hamilton - Corel - 1:100 - 1780 refit
-
Mr Whippy reacted to a post in a topic:
HMS Bellona by hamilton - Corel - 1:100 - 1780 refit
-
Thanks Nearshore! I feel like it's going better than it usually does, which isn't saying much, but still - I'm happy with these results so far. As we know, in ship modelling there's always more time for mistakes! Wish I had more time to work on the model, but such is life. I'm going to be heading into another really busy push at work starting mid-week, but in a couple of weeks I'll get a breather and hopefully find an hour here and there at the bench to make some progress. hamilton
-
hamilton reacted to a post in a topic:
HMS Bellona by hamilton - Corel - 1:100 - 1780 refit
-
Thukydides reacted to a post in a topic:
HMS Bellona by hamilton - Corel - 1:100 - 1780 refit
-
Mr Whippy reacted to a post in a topic:
HMS Bellona by hamilton - Corel - 1:100 - 1780 refit
-
Really impressive metal work Gregg! hamilton
-
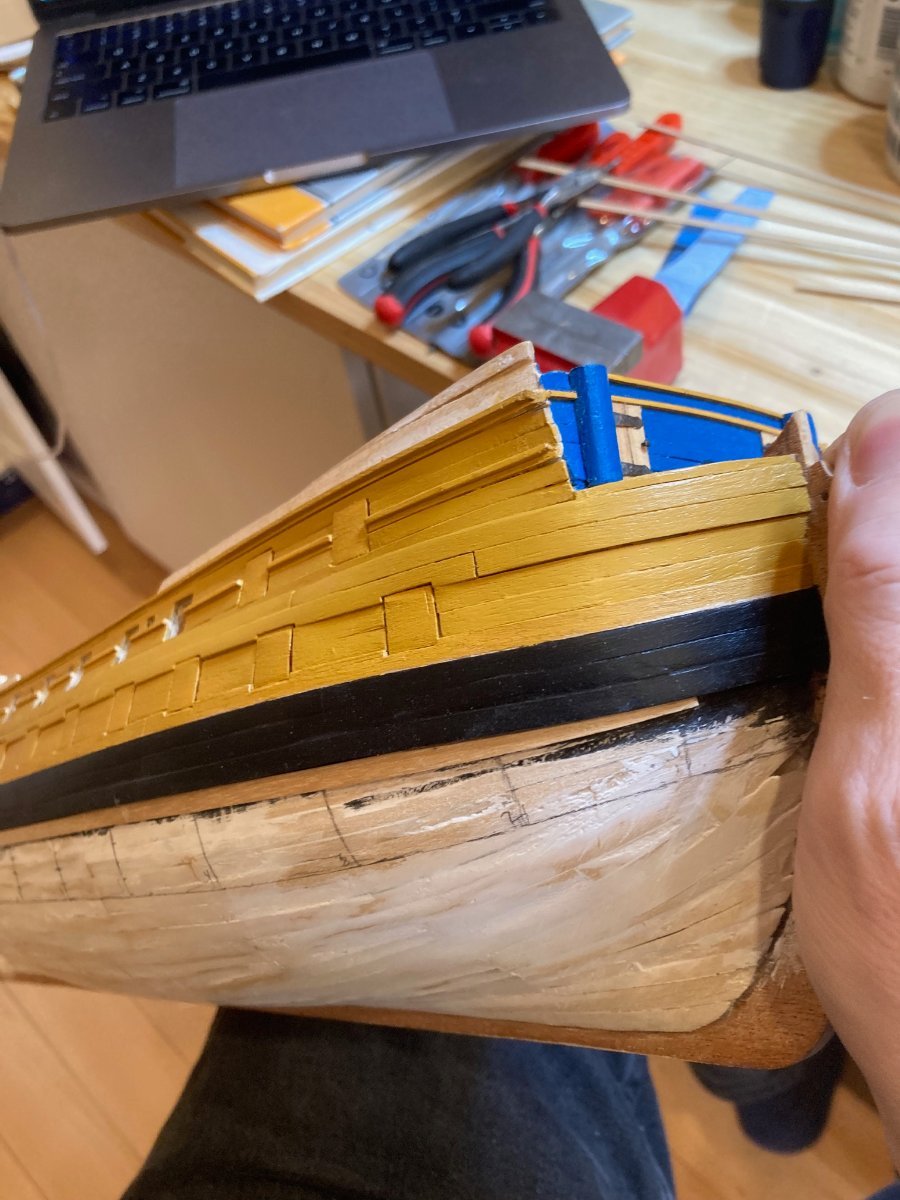
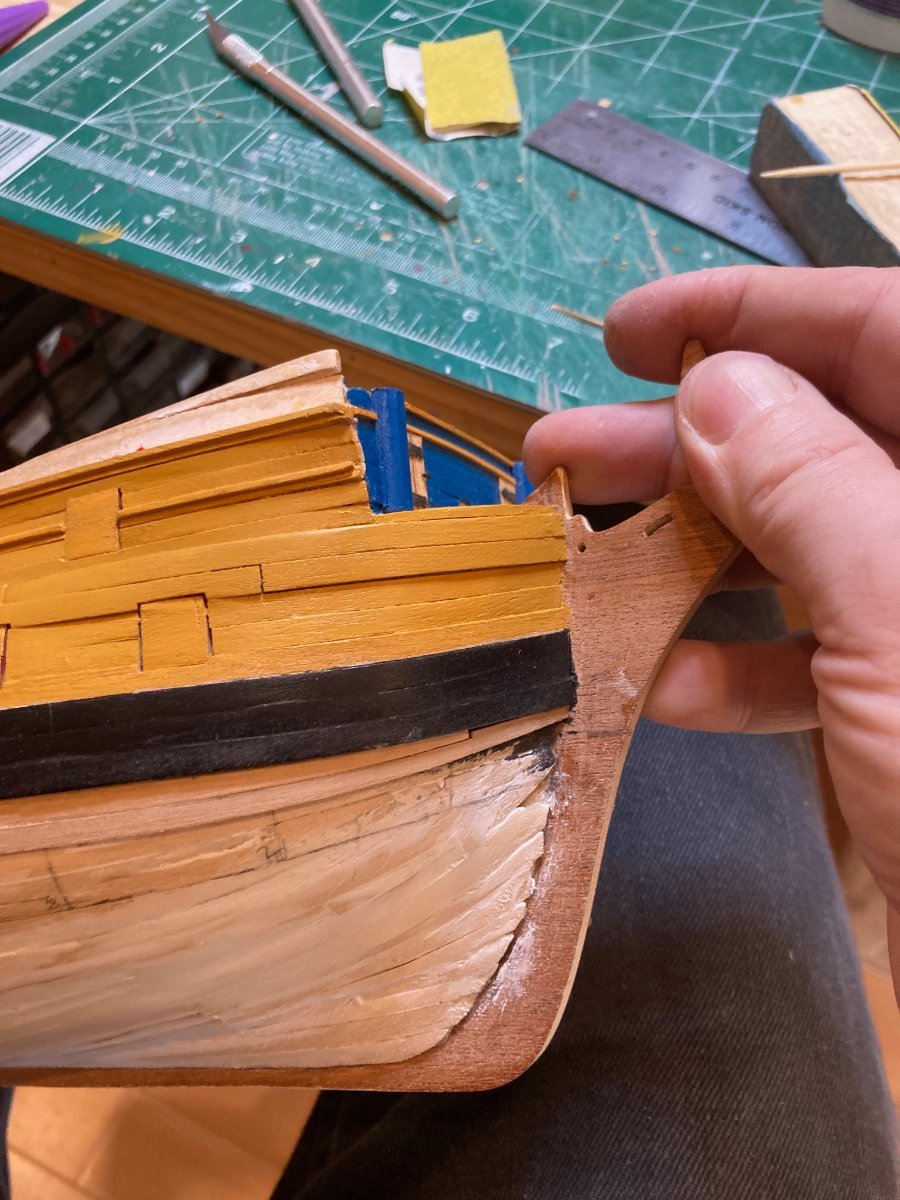
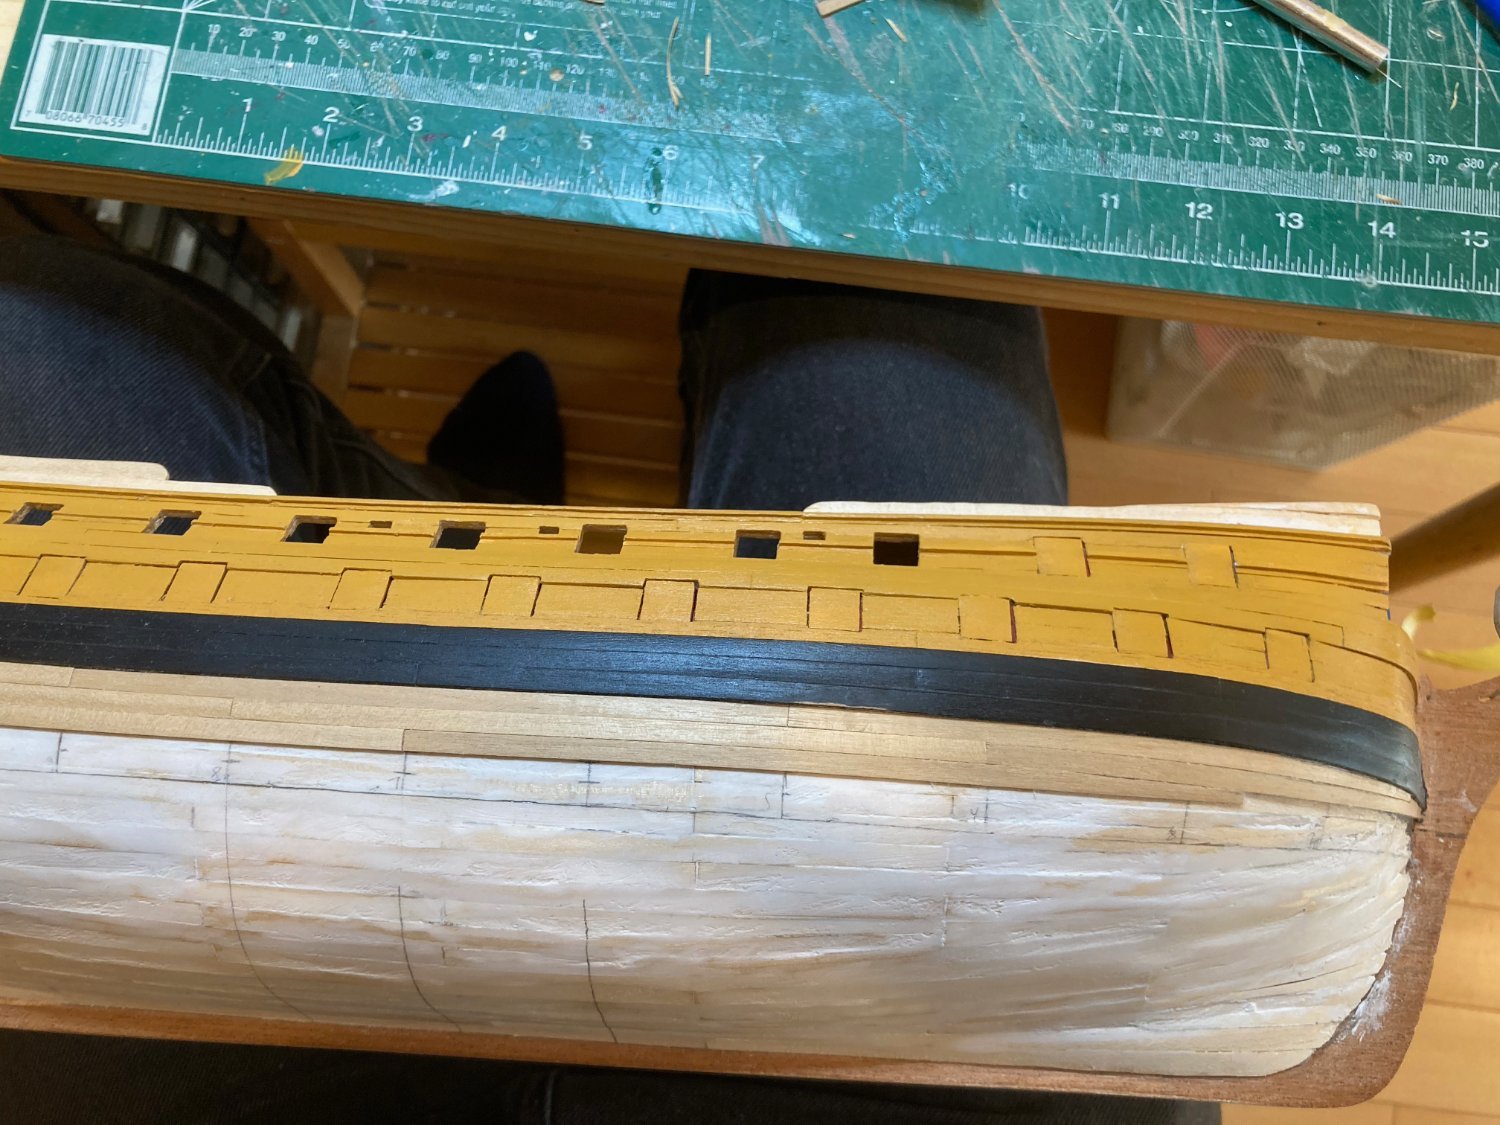
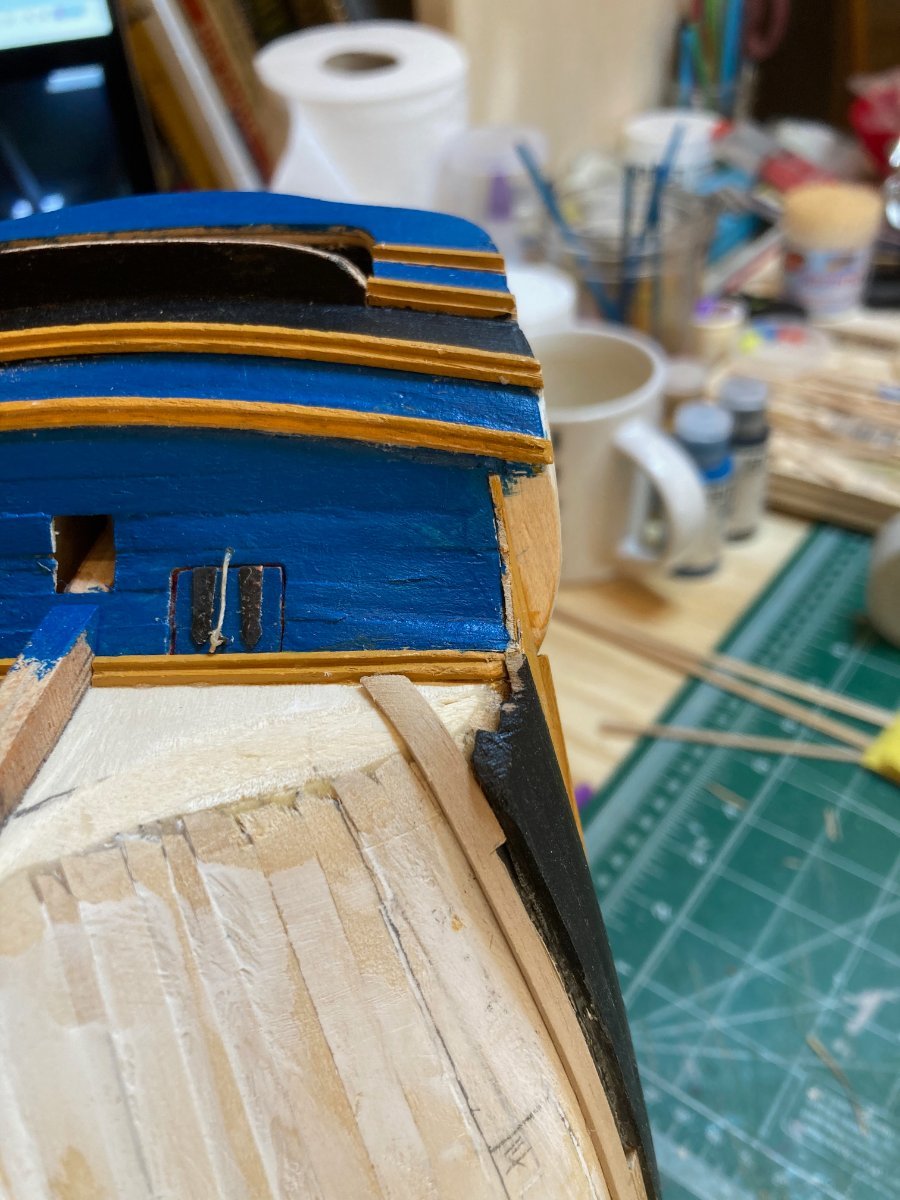
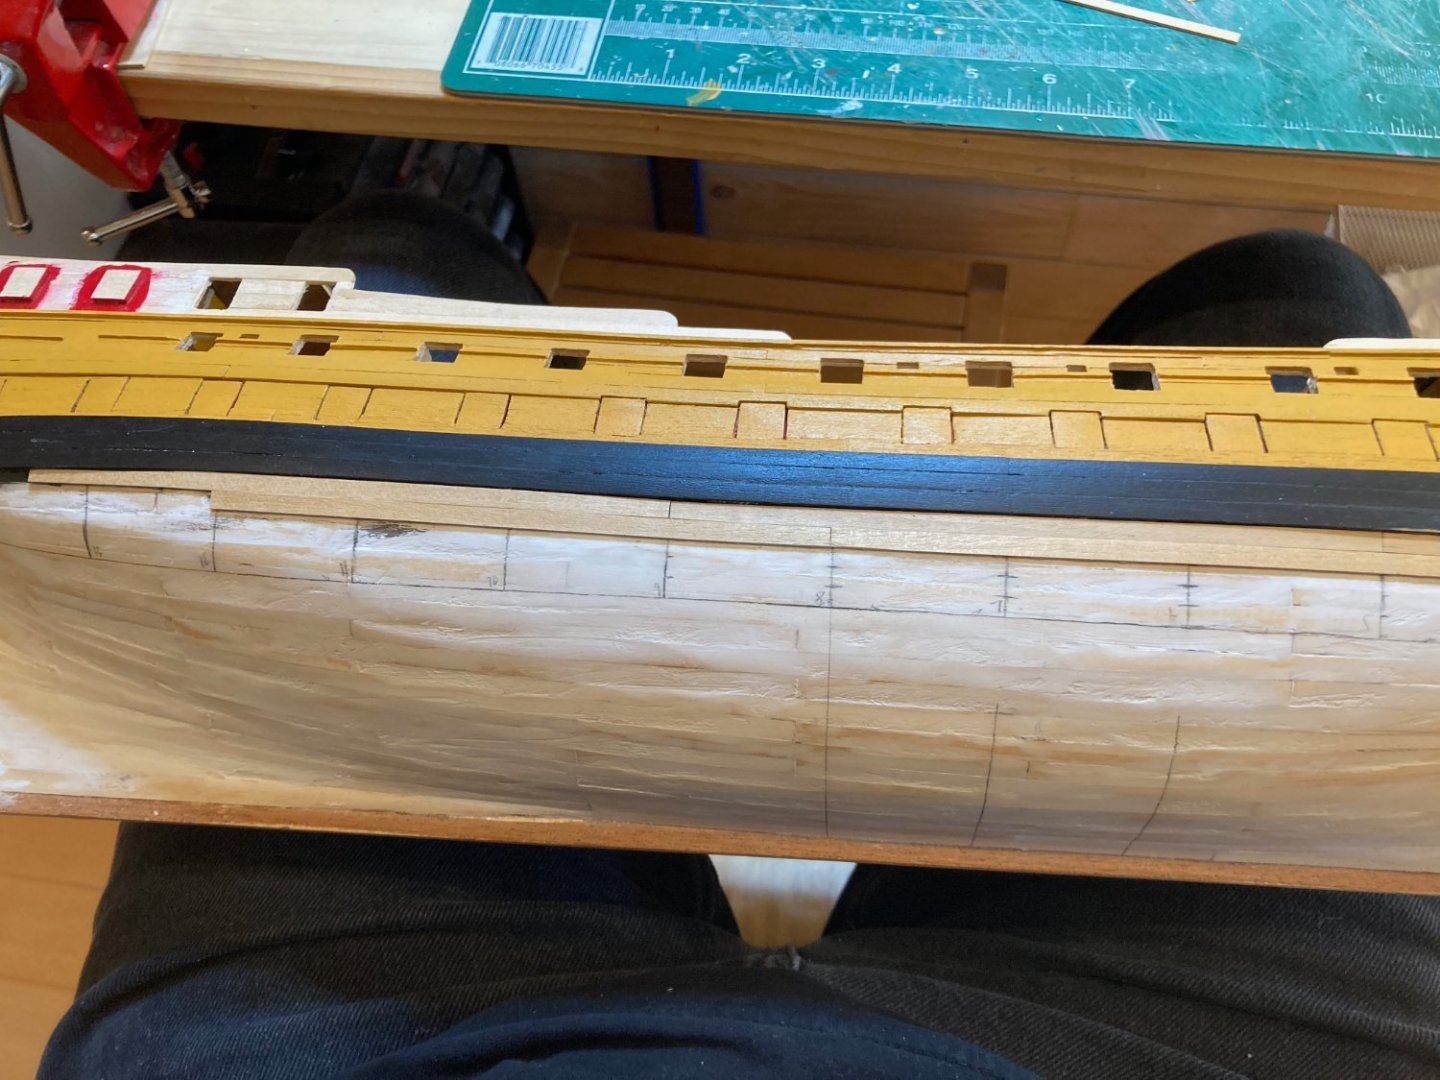
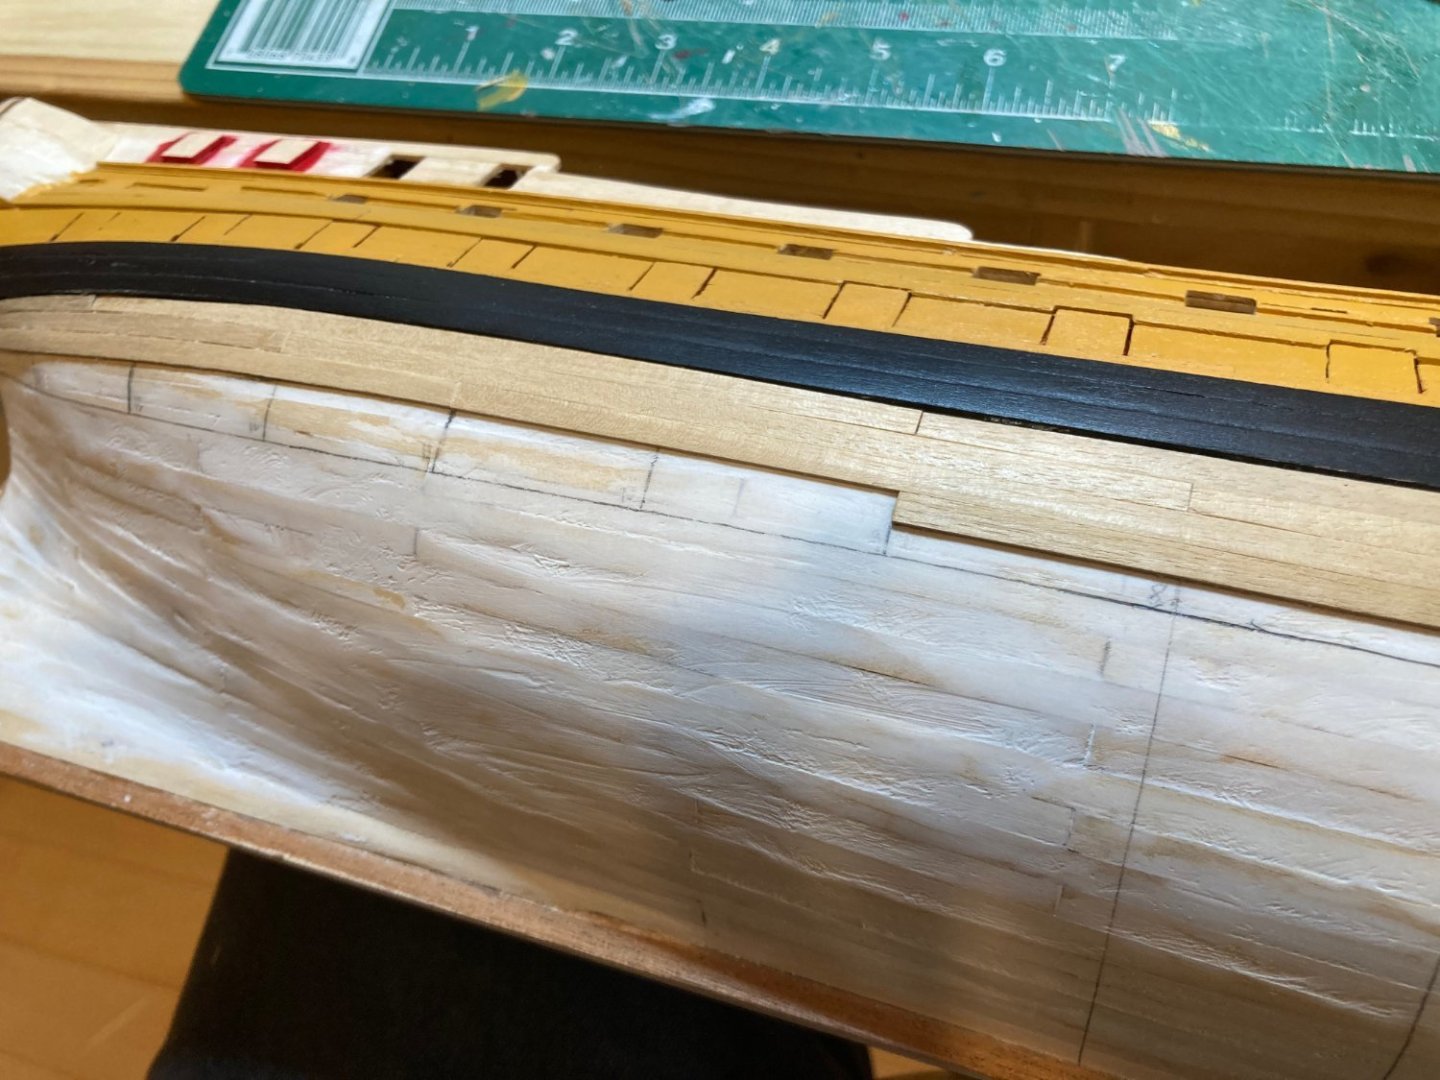
So it's been quite some time since my last contribution here. There has been very little time for modelling in the last few months, but since the last update, I've completed the bulwark planking except for the upper bulwarks in line with the f'csl, quarterdeck & poop deck; installed the false wales and main wales, and finished the outboard bulwarks (yellow ochre & black for the wales). I also did some work to correct the square tuck transom, which now that I've started the lower hull planking seems to have worked out ok - though this was a lot of nerve-wracking work with a rotary tool and a variety of sanding blocks. In any case, the photos below document my start on the lower hull planking. At the deadflat, I measured 102cm. The material supplied in the kit is 4mm wide, which translated into 23 planks of 4mm width and 2 of 5mm (which I'll use for the garboard and the strake above it, which will be coppered over in any case). There will be 5 bands - 3 of 5 strakes, 1 of 6 strakes at the bilges and a garboard band of 4 strakes. I have not lined off the hull completely, but am doing so band-by-band, starting with band "A" of 5 strakes immediately below the wales. So far things have gone quite well. Anyone who has seen my previous builds will know that hull planking is not my forte! But so far I'm pleased with the results aesthetically, though in terms of period practice they do not entirely follow convention (or architectural sense). Since I'm under no pressure to keep anyone on the vessel safe or to protect the Admiralty's investment, I'm cool with that! Here are the photos - enjoy! hamilton


-
hamilton reacted to a post in a topic:
US Brig Oneida 1809 by rlb - The Lumberyard - 1:48 scale - POF - Lake Ontario Warship
-
I always start hull planking at deck level - the top edge of the first plank you lay should be flush with the upper surface of the deck planking. Then I usually plank the bulwarks, and then line off and plank the lower hull. hamilton
-
hamilton reacted to a post in a topic:
HMS Surprise by Vincwat - scale 1/69 - Lego
-
I had no trouble completing all deck planking with the material provided - albeit, by the time I built this model I had a significant pile of leftover material (including dimensions needed for this deck planking) so I can't recall if all of the deck planking came out of the Greyhound box. My advice - though maybe it's dumb or at least really cumbersome - is that you take a total measure of all the woodstrips provided by Corel for deck planking and then get rough width and length measurements of the sub-decks. There tends to be less attrition of wood in deck planking compared with hull planking so if the numbers are close (but not over on the sub-deck side) then you should be ok - even a rough go at this will give you a decent impression. I'm envious of your progress - I have not been able to get a day at the bench in over two months due to work and family stuff - and now work is getting to its busiest time for the next few weeks - I have a couple of weeks of quiet at the end of April, so hopefully then I'll finally be able to get some time at the bench! For now, I'll enjoy yours! hamilton
-
Tack some planking strips across the bulkheads to see how they want to run - look to see if the strip is either bowing out or leaving a gap to the bulkhead. I usually run a test strip across 4-5 bulkheads and then move fore and aft and from the rails to the keel in this way to identify where things need to be sanded down or built up. Don't worry about the forward most 3 frames for now - you'll be fairing them for planking later so for now you just want to make sure you have a reasonably fair and smooth framework for the planking. The best way to ensure this is by "rack of eye", and it's hard from a photo or two to get a 100% sure assessment of the situation. However, when I look at how the bottoms of the bulkheads line up in the photo above they look ok to me. The current distance between the bulkhead bottoms and the bearding line is probably ok, because it will get filled up by the roughly 2mm of planking that goes over the bulkheads. Do some testing with a planking strip, take your time and try to get things as fair as possible. This hobby is a matter of fractions of inches and millimetres, so it can be quite exacting - particularly at this stage, where getting all the parts correct relative to one another is of crucial importance. I think your skeleton is shaping up well though, by the looks of it. hamilton
-
Yes - OC has achieved a great result here - if you can get yours looking like this, you'll be ready to move on. You don't have to build them up to the keel. Just to fit along the bearding line - here is an MSW thread that talks about the bearding and rabbet lines - the ships uses as e.g.'s aren't exactly like Greyhound but you will get the principle and general idea from this. hamilton
-
Don't cut the keel!!!! Shim the bulkheads instead - it is easier to take wood off that you've added than to add back wood you've removed, so it is much safer to correct the structural issue you're facing by shimming up the bulkhead edges. When I look at your photos, here's what I see: 1. the mid-ships bulkheads look good - they seem to finish touching the top of the bearding line and they look reasonably even. 2. Bulkheads 9/10, which you've already modified, now also look good to me - they imply a nice gentle curve for the run aft of the planking 3. The last bulkhead forward of the transom looks like it needs trimming up - you'll see that the bottom intersects the bearding line, which it should not do - imagine a curve along the bottom of the bulkheads up to the aft edge of the slot for the transom bulkhead - you need to adjust your bulkheads to fit along that line. 4. The 4th bulkhead from the forwardmost one seems to rise too soon - and the 3rd one back is too high for sure and will need to be shimmed like B/H 9/10. There is also a gentle curving of the bearding line up the stem - b/h 1 & 2 in your photo look good, but 3 is way too high to allow for that nice curve you should see at the bows. Finally - a word of encouragement. This is by far the most difficult and frustrating part of this build. It took me a long time to get through it and this was my 12th wooden ship kit, so I had some experience. Do not give up no matter how frustrating it may get. And do not hold yourself to results that the kit itself may make it really difficult to achieve. hamilton
-
Nice work on the turnbuckles! hamilton
-
Sorry if I'm chiming in late - the bottoms of the bulkhead edges should all line up with the rough bearding line I can see running along the length of the centre keel close to the bottom. This line should start gently curving up at around bulkhead 10 and then make a sharper curve upwards towards the back edge of that last slot on the centre keel where the transom bulkhead goes - this is called the "bearding line" - I'm not sure and can't remember if it's shown anywhere on the Corel plans, but take a look at see....identifying and transferring that line to the centre keel on both sides will help with the shimming up of those faulty bulkheads. Nice to see the progress on this build!! hamilton
-
I found a lot of help and support for my Greyhound/Blandford build and I am forever grateful to the MSW pros who lent their time and expertise there - couldn't have done it otherwise - I know you'll find the same as you go through - just don't be shy to ask!! hamilton