-
Posts
99 -
Joined
-
Last visited
About Snowmans
- Birthday April 15
Profile Information
-
Gender
Male
-
Location
Auckland, New Zealand
Recent Profile Visitors
-
 Jolley Roger reacted to a post in a topic:
Home Built Thickness Sander
-
 aviaamator reacted to a post in a topic:
Home Built Thickness Sander
-
 PeteB reacted to a post in a topic:
Home Built Thickness Sander
-
 PeteB reacted to a post in a topic:
Home Built Thickness Sander
-
 ranikola reacted to a post in a topic:
Micro Power Sanders
-
 harvey1847 reacted to a post in a topic:
Triton Cross Section by Snowmans
-
 Yambo reacted to a post in a topic:
Home Built Thickness Sander
-
 dewalt57 reacted to a post in a topic:
Triton Cross Section by Snowmans
-
 mtaylor reacted to a post in a topic:
Triton Cross Section by Snowmans
-
 jaerschen reacted to a post in a topic:
Triton Cross Section by Snowmans
-
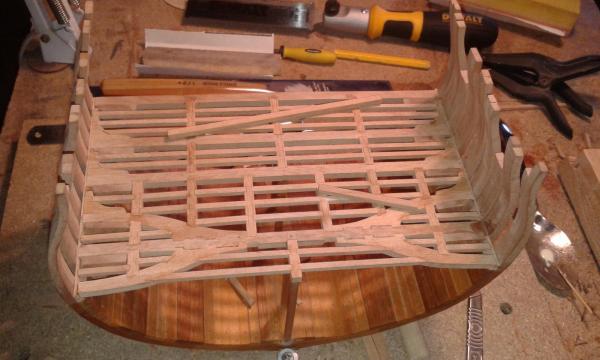
I have all of the deck beams fixed in place. Need to give them a light sand then the deck will belaid on top andit will be all hidden. This has been a good practice for the top deck, I may leave this open to show some exposed beams. Will have to decide when I get to that stage, and see how good the joints are.
-

Home Built Thickness Sander
Snowmans replied to Snowmans's topic in Modeling tools and Workshop Equipment
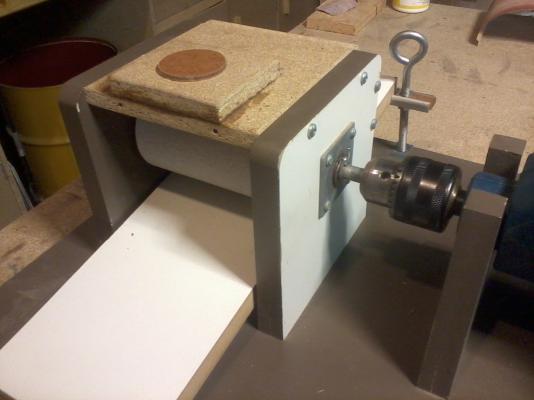
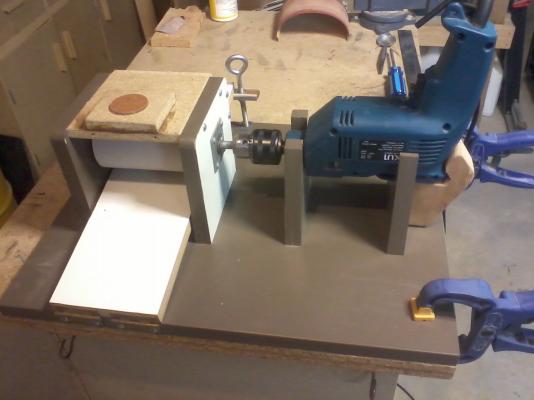
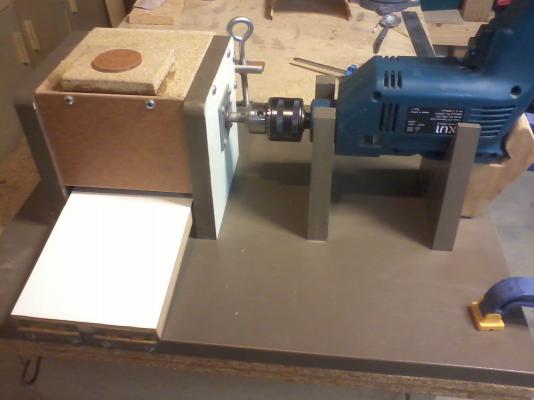
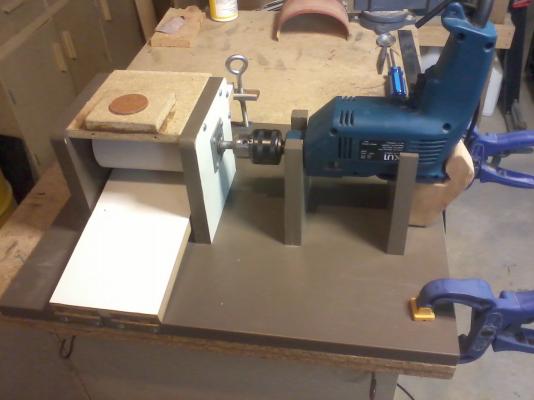
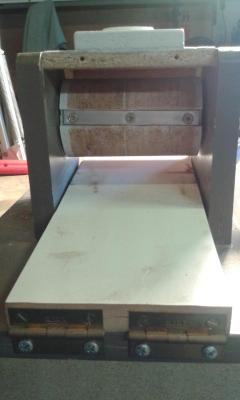
The table that goes under the drum that the timber slides on is hinged at the front. There is a bolt through a bracket at the rear to adjust the height. I have sanded down to 2mm strips on this but probably coundnt get any thinner. The drill is variable speed so this can be changed for different sanfpaper grits. -

Home Built Thickness Sander
Snowmans replied to Snowmans's topic in Modeling tools and Workshop Equipment
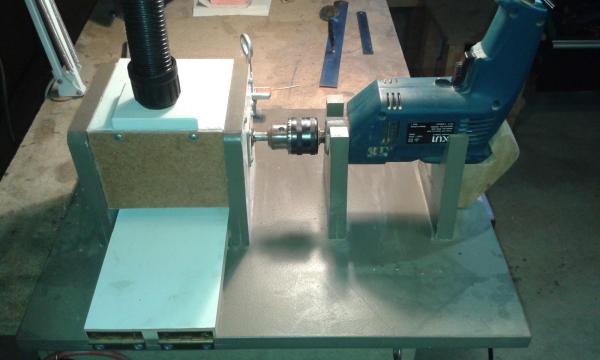
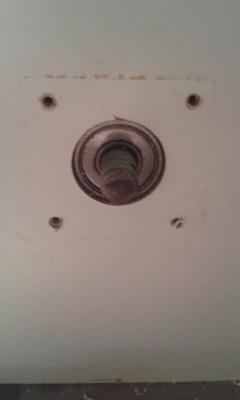
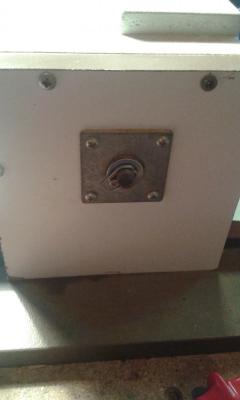
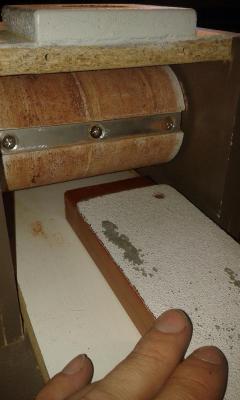
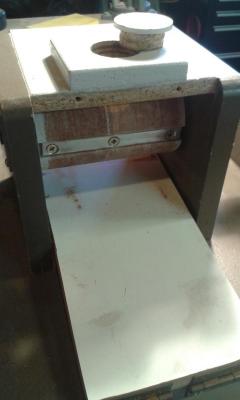
The block on top was added after a month or so of using the sander as by then I was sick of the dust that it blew out. The hole is just the right size to fit the vac hose. With the vacuum attached all the dust is taken away, I don't even need to wear a dust mask while it is operating. The round cap is used to block the hole and also to check the condition of the sandpaper during use without removing the front cover. Here are a couple of extra pictures showing some of the details. -

Home Built Thickness Sander
Snowmans replied to Snowmans's topic in Modeling tools and Workshop Equipment
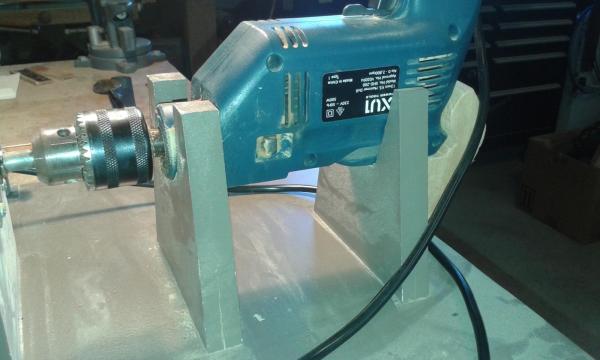
The box was then built to enclose the sanding drum from melamine and particle board. I made this with about 5mm wider than the length on the drum, the sides are 150mm square. 10mm holes were drilled through both sides to fit the shaft.Then I widened the outside holes to 18mm wide to a depth of 8mm so the bearings were held in place without any movement. I made the holes so they would need a light tap with a hammer to get them in place, and there is asolutley no wobble in the shaft. A square washer was fixed over the bearing both to keep it in place and to keep dust out. There is less than 0.5mm gap around the shaft. At this stage I then had a height to work with so I could make the stand for the drill to fit in place. The two vee shaped uprights had been cut to fit the drill into were fixed in place so the drill chuck fits perfectly over the shaft. The smaller piece at the back of the drill is screwed in place to stop the drill slipping backwards, but can be removed to get the drill out if needed. Melamine was used as the table as it is flat and slides easily. The size was as wide as I could get in and as long as the base board. From memory it is 450mm long. Two hinges fix this in place to the front of the base. A length of timer is fixed under the back with a nut epoxied in place and an eye bolt is used to set the height. 1 full turn on the bolt gives 1mm of adjustment. I do sometimes use a couple of lock nuts to keep it all in place when I am sanding a lot of timber to the same thickness so nothing moves. Now the drill is in plase and there is a flat area to work from the drum is trued to round. I fixed a fairly coarse length of sandpaper to a flat board and turned on the sander. The table was raised while the sandpaper kept mooving side to side made short work of any lumps and bumps. The photo shows the drum with sandpaper already on it, but this is just to show how it was done. As you can probably tell a lot of these photos have been taken recently. The drum then had a groove cut along the length to fit the aluminium strip that holds the sandpaper in place. When this is pushed into the slot it pulls the sandpaper tight. Three screws hold it in place and this is recessed about 2mm below the surface of the drum. -
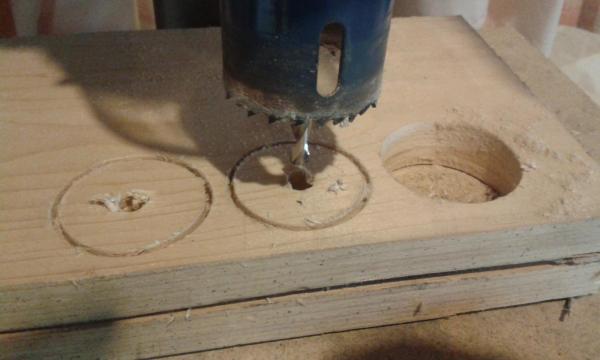
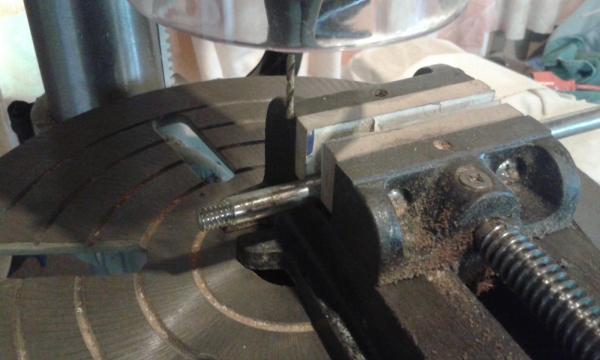
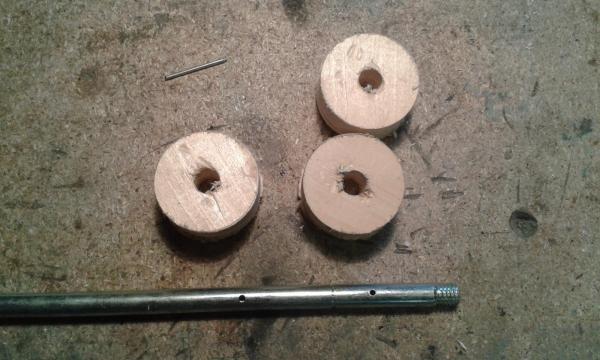
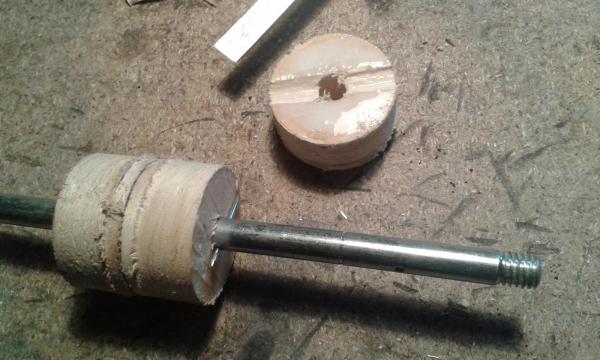
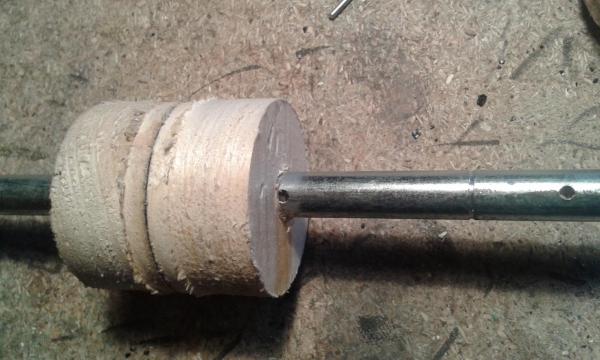
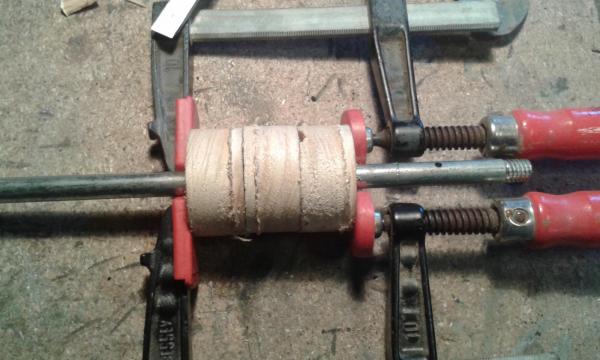
I have had a few people asking about the thickness sander I made a couple of years ago, so I thought I would put up a few photos and details to help others if they want to make their own. I spent quite a bit of time searching the net and looking at different sizes and types and this is what i came up with. It has had a couple of changes since it was first built. The idea was to fit half a standard sheet of sandpaper around the drum and to take up to 100mm wide board by 50mm thick. I haven't used anything that size through it, mostly the timber for my Triton build. The shaft that goes through the centre is 10mm, only because I had a short length that size handy and it had a couple of bearings that fitted on nicely. The wood used for the drum was 20mm thick and the circles were cut with a hole saw. I drilled about 1/3 of the way through, turned the board over and drilled the same from the other side. Changed drill bits and enlarged centre hole to 10mm to fit onto the shaft, then finished cutting through with the hole saw bit. By doing this it was easier to hold the block than trying to drill the centre once the circles had been cut out. The shaft then had four holes drilled through. These were measured and marked when I had the circles cut so they were the right distance from each other. One hole at each end for the split pin to hold the shaft in place and a hole at where the last join between the blocks would be. The short threaded end in the photo was cut off before the sander was put together. Blocks were then glued in place. Each of the end blocks have a small notch cut into them to fit a pin or in this case a nail with its head cut off through the shaft. This is put in to prevent the wood breaking of the shaft and spinning freely. Epoxy glue was used to fix everything in place then clamped and left to dry overnight.
-
This shows my multi tool table saw, made from scrap I had around the shed. The flexible shaft sits in a groove on a hinged block to set the depth and has a locking block screwed on top to hold it in place. I have put a mark on the block to line this up each time I set up. The mandrel is from a small drum sander has a small washer each side of the blade to keep it a bit more rigid. The top was screwed on then I turned on the power and raised the blade to cut through the top.
-
The one on the left is the only store bought one. The next two are made from allen keys. One is from a spraygun needle, this doesnt hold an edge as well as the others. Last two are concrete nails ground down to size. All were ground or hammered to shape then heat treated before the final sharpening. The handles range from old file handles to hardwood blocks shaped on the lathe. Some are just a flat stick with the blade epoxied in a hole in the end.
-
Thanks guys, I hadn't realised it had been so long since I posted here. I stopped on the Triton for a couple of months while I worked on a few tools and sorted out the shed to make it more user friendly. I did make a couple if small chisels - only because I dont want to spend lots of money on a range of sizes. Only the 3mm one on the left is store bought. they look a bit rough bit cut nicely. The smallest one (not in pic) is 1.5mm.
-
I have some of the hanging knees fixed in place, hopefully have all finished tomorrow. It will take a bit longer to get them glued in place. Only glueing one or two at a time otherwise they get knocked around when I try to glue the next piece. Will start the smallest of the deck beams when the knees are all in place.
-
Its been a couple of weeks since the last post. All the family has recovered and I managed to catch up on few jobs around home . Nothing more on the build. I did manage to get a couple of new tools made in the few minutes in the shed. Decided I didnt need to pay a heap of money for a small square and my others (all 5) are too big to be of any use on the Triton. So a small piece of Steel, spot of epoxy glue, and scrap of timber later I have a minature square.
About us
Modelshipworld - Advancing Ship Modeling through Research
SSL Secured
Your security is important for us so this Website is SSL-Secured
NRG Mailing Address
Nautical Research Guild
237 South Lincoln Street
Westmont IL, 60559-1917
Model Ship World ® and the MSW logo are Registered Trademarks, and belong to the Nautical Research Guild (United States Patent and Trademark Office: No. 6,929,264 & No. 6,929,274, registered Dec. 20, 2022)
Helpful Links
About the NRG
If you enjoy building ship models that are historically accurate as well as beautiful, then The Nautical Research Guild (NRG) is just right for you.
The Guild is a non-profit educational organization whose mission is to “Advance Ship Modeling Through Research”. We provide support to our members in their efforts to raise the quality of their model ships.
The Nautical Research Guild has published our world-renowned quarterly magazine, The Nautical Research Journal, since 1955. The pages of the Journal are full of articles by accomplished ship modelers who show you how they create those exquisite details on their models, and by maritime historians who show you the correct details to build. The Journal is available in both print and digital editions. Go to the NRG web site (www.thenrg.org) to download a complimentary digital copy of the Journal. The NRG also publishes plan sets, books and compilations of back issues of the Journal and the former Ships in Scale and Model Ship Builder magazines.


