mugje
-
Posts
895 -
Joined
-
Last visited
Recent Profile Visitors
2,244 profile views


-
 mugje reacted to a post in a topic:
HM Cutter Trial 1790 by BrochBoating - Vanguard Models - 1:64
mugje reacted to a post in a topic:
HM Cutter Trial 1790 by BrochBoating - Vanguard Models - 1:64
-
mugje reacted to a post in a topic:
HMS Indefatigable 1794 by Glenn-UK - Vanguard Models - 1:64
-
usedtosail reacted to a post in a topic:
HMS Speedy by usedtosail - Vanguard Models - Scale 1:64
-
BenD reacted to a post in a topic:
HMS Sphinx 1775 by mugje - Vanguard Models - 1:64
-
BenD reacted to a post in a topic:
HMS Sphinx 1775 by mugje - Vanguard Models - 1:64
-
JacquesCousteau reacted to a post in a topic:
HMS Sphinx 1775 by mugje - Vanguard Models - 1:64
-
DonSangria reacted to a post in a topic:
HMS Sphinx 1775 by mugje - Vanguard Models - 1:64
-
rlwhitt reacted to a post in a topic:
HMS Sphinx 1775 by mugje - Vanguard Models - 1:64
-
mugje reacted to a post in a topic:
Montanes 1794 by Cmm4000 - OcCre - 1:70
-
mugje reacted to a post in a topic:
HMS Speedy by usedtosail - Vanguard Models - Scale 1:64
-
 Looks super on the ship!
 -
mugje reacted to a post in a topic:
HMS Victory 1805 by kiwiron - Caldercraft - 1:72
-
 mugje reacted to a post in a topic:
HMS Sphinx 1775 by mugje - Vanguard Models - 1:64
mugje reacted to a post in a topic:
HMS Sphinx 1775 by mugje - Vanguard Models - 1:64
-
It's actual name is "Form-A-Strip"...pretty original https://www.amatimodel.com/en/tools-and-equipment-parts-per-model/product-form-a-strip-b7381.html It does make crimp marks on the inside...which is logical ofcourse, but I never experienced having them on the outside. I think when people have them on the outside, they use to much force, or in other words they make the dent to deep on the inside. Just begin with light cuts/pinches and see what happens. There isn't need much force for it to bend a bit...and then just do multiply pinches next to each other to get a more severe bend. And how thick? Depends on the material I think, but I used it also with 1,5mm thick planks without issues. For the price of the tool it's a handy thing to give it a try in my opinion
-
VTHokiEE reacted to a post in a topic:
HMS Sphinx 1775 by mugje - Vanguard Models - 1:64
-
Paul Le Wol reacted to a post in a topic:
HMS Sphinx 1775 by mugje - Vanguard Models - 1:64
-
rlwhitt reacted to a post in a topic:
HMS Sphinx 1775 by mugje - Vanguard Models - 1:64
-
Thukydides reacted to a post in a topic:
HMS Sphinx 1775 by mugje - Vanguard Models - 1:64
-
I think this is it...flow looks nice everywhere, and symmetrical. It's a bit of guesswork and we will see if it was the right guess

-
 mugje reacted to a post in a topic:
HMS Sphinx 1775 by rvchima - Vanguard Models - 1:64 - 20 Gun Sixth Rate Frigate
mugje reacted to a post in a topic:
HMS Sphinx 1775 by rvchima - Vanguard Models - 1:64 - 20 Gun Sixth Rate Frigate
-
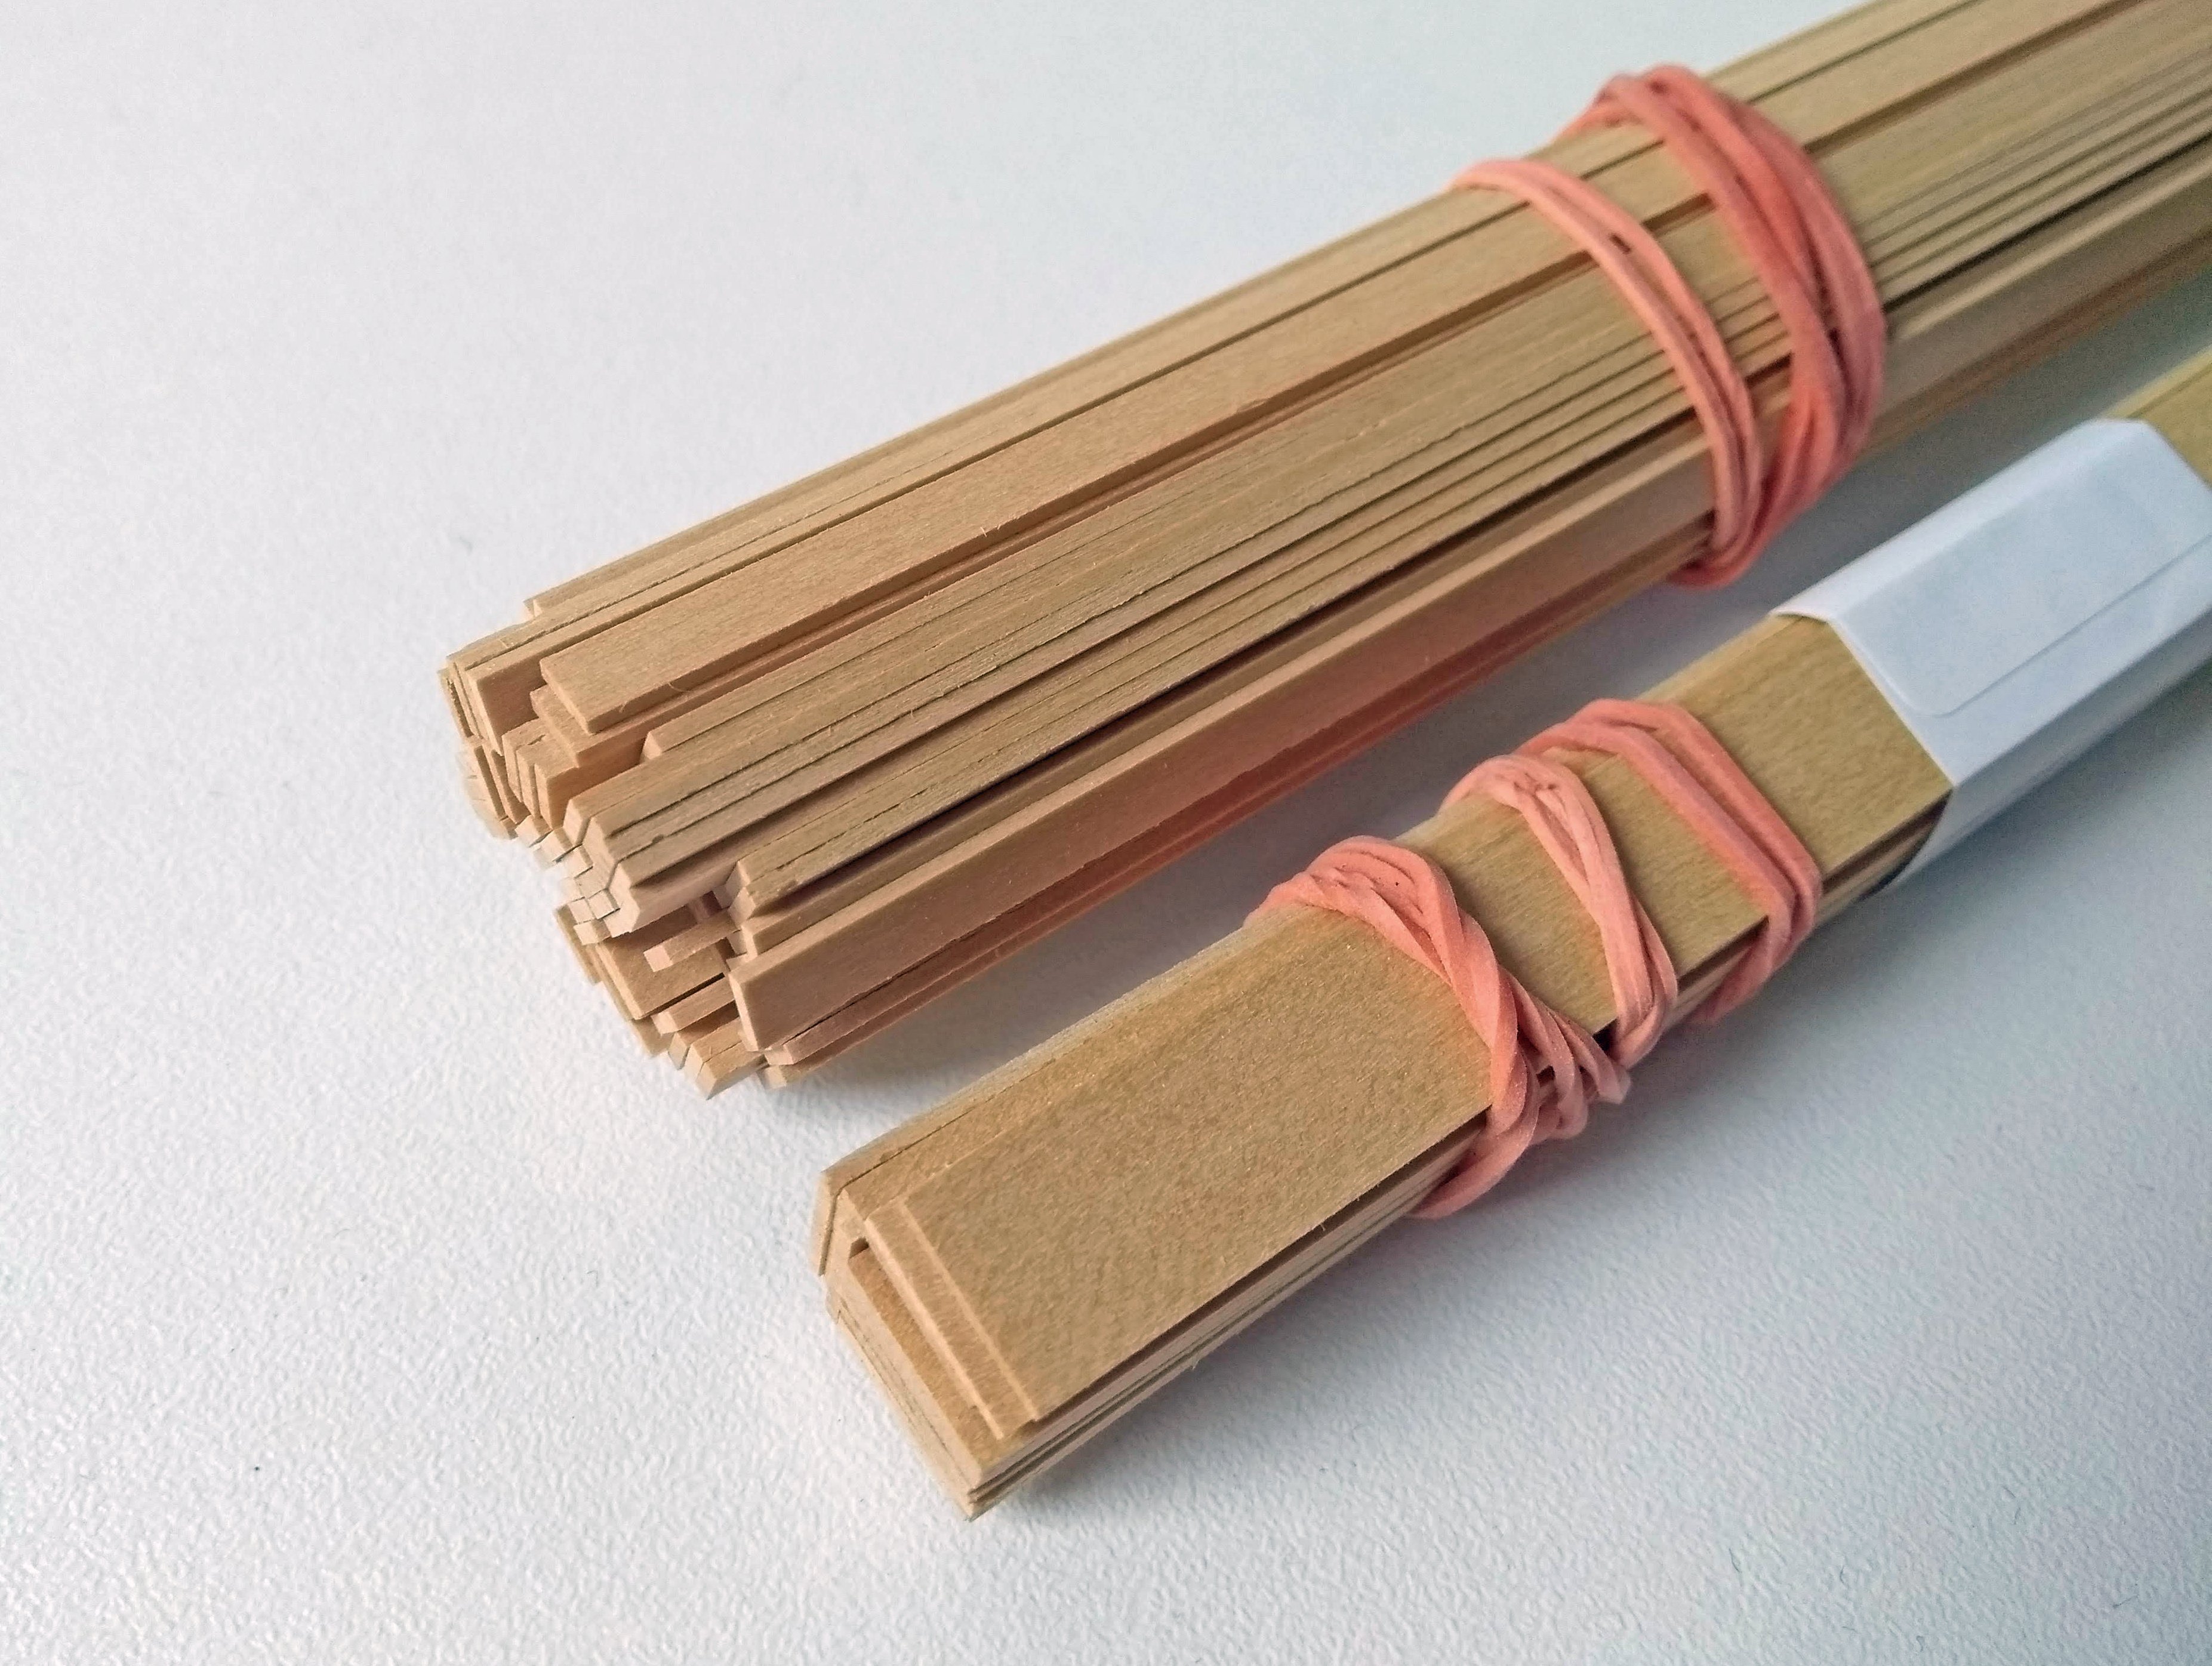
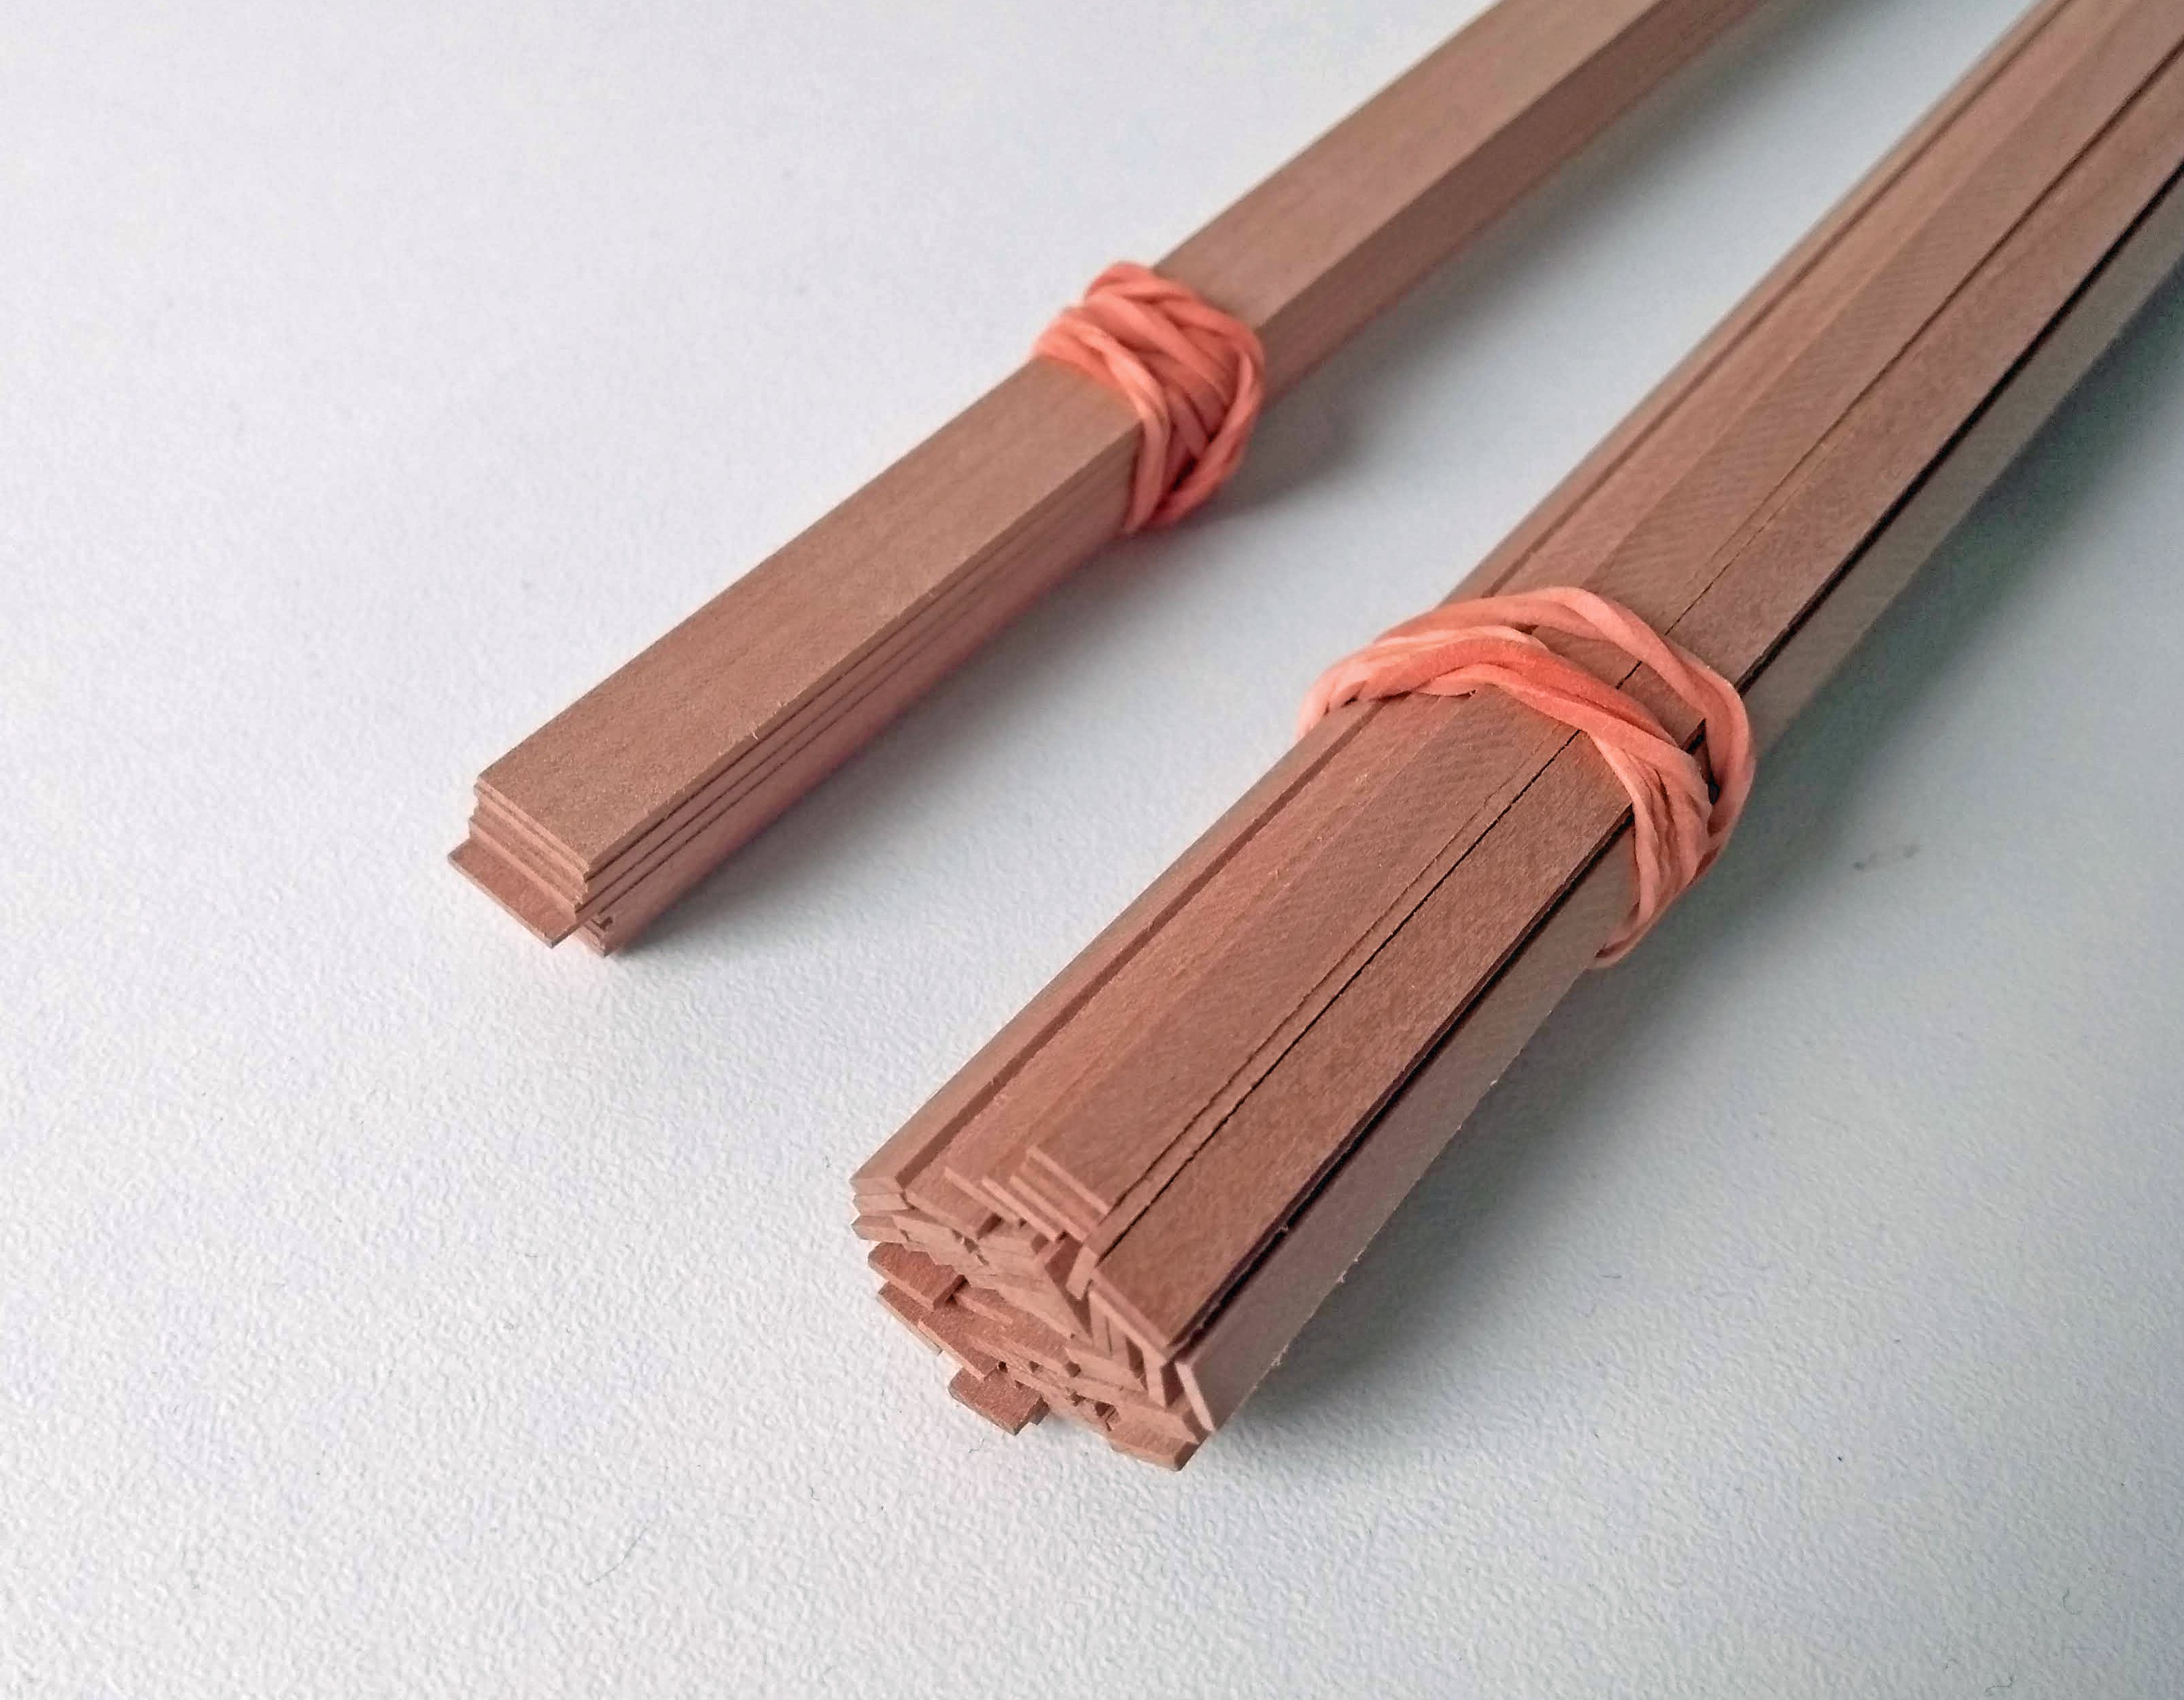
Thank you and everyone else for the likes and compliments! Yes I do have a electric plank bender and used it in combination with a Amati plank bender (a kind of pliers) to shape the stern planks. It works great...no need for soaking and waiting. Below is the Amati plank bender...I use it quite a lot, it works fast and simple

-
mugje reacted to a post in a topic:
HMS Sphinx 1775 by mugje - Vanguard Models - 1:64
-
mugje reacted to a post in a topic:
HM Gun Brig Adder 1797 by DB789 - Vanguard Models - 1:64
-
mugje reacted to a post in a topic:
HMS Indefatigable 1794 by Blue Ensign - FINISHED - Vanguard Models - 1:64 scale
-
Thanks! I use planks with a length of 12cm. I sort of calculated/measured that from the original planking plan, in a 3 shift plank pattern.
-
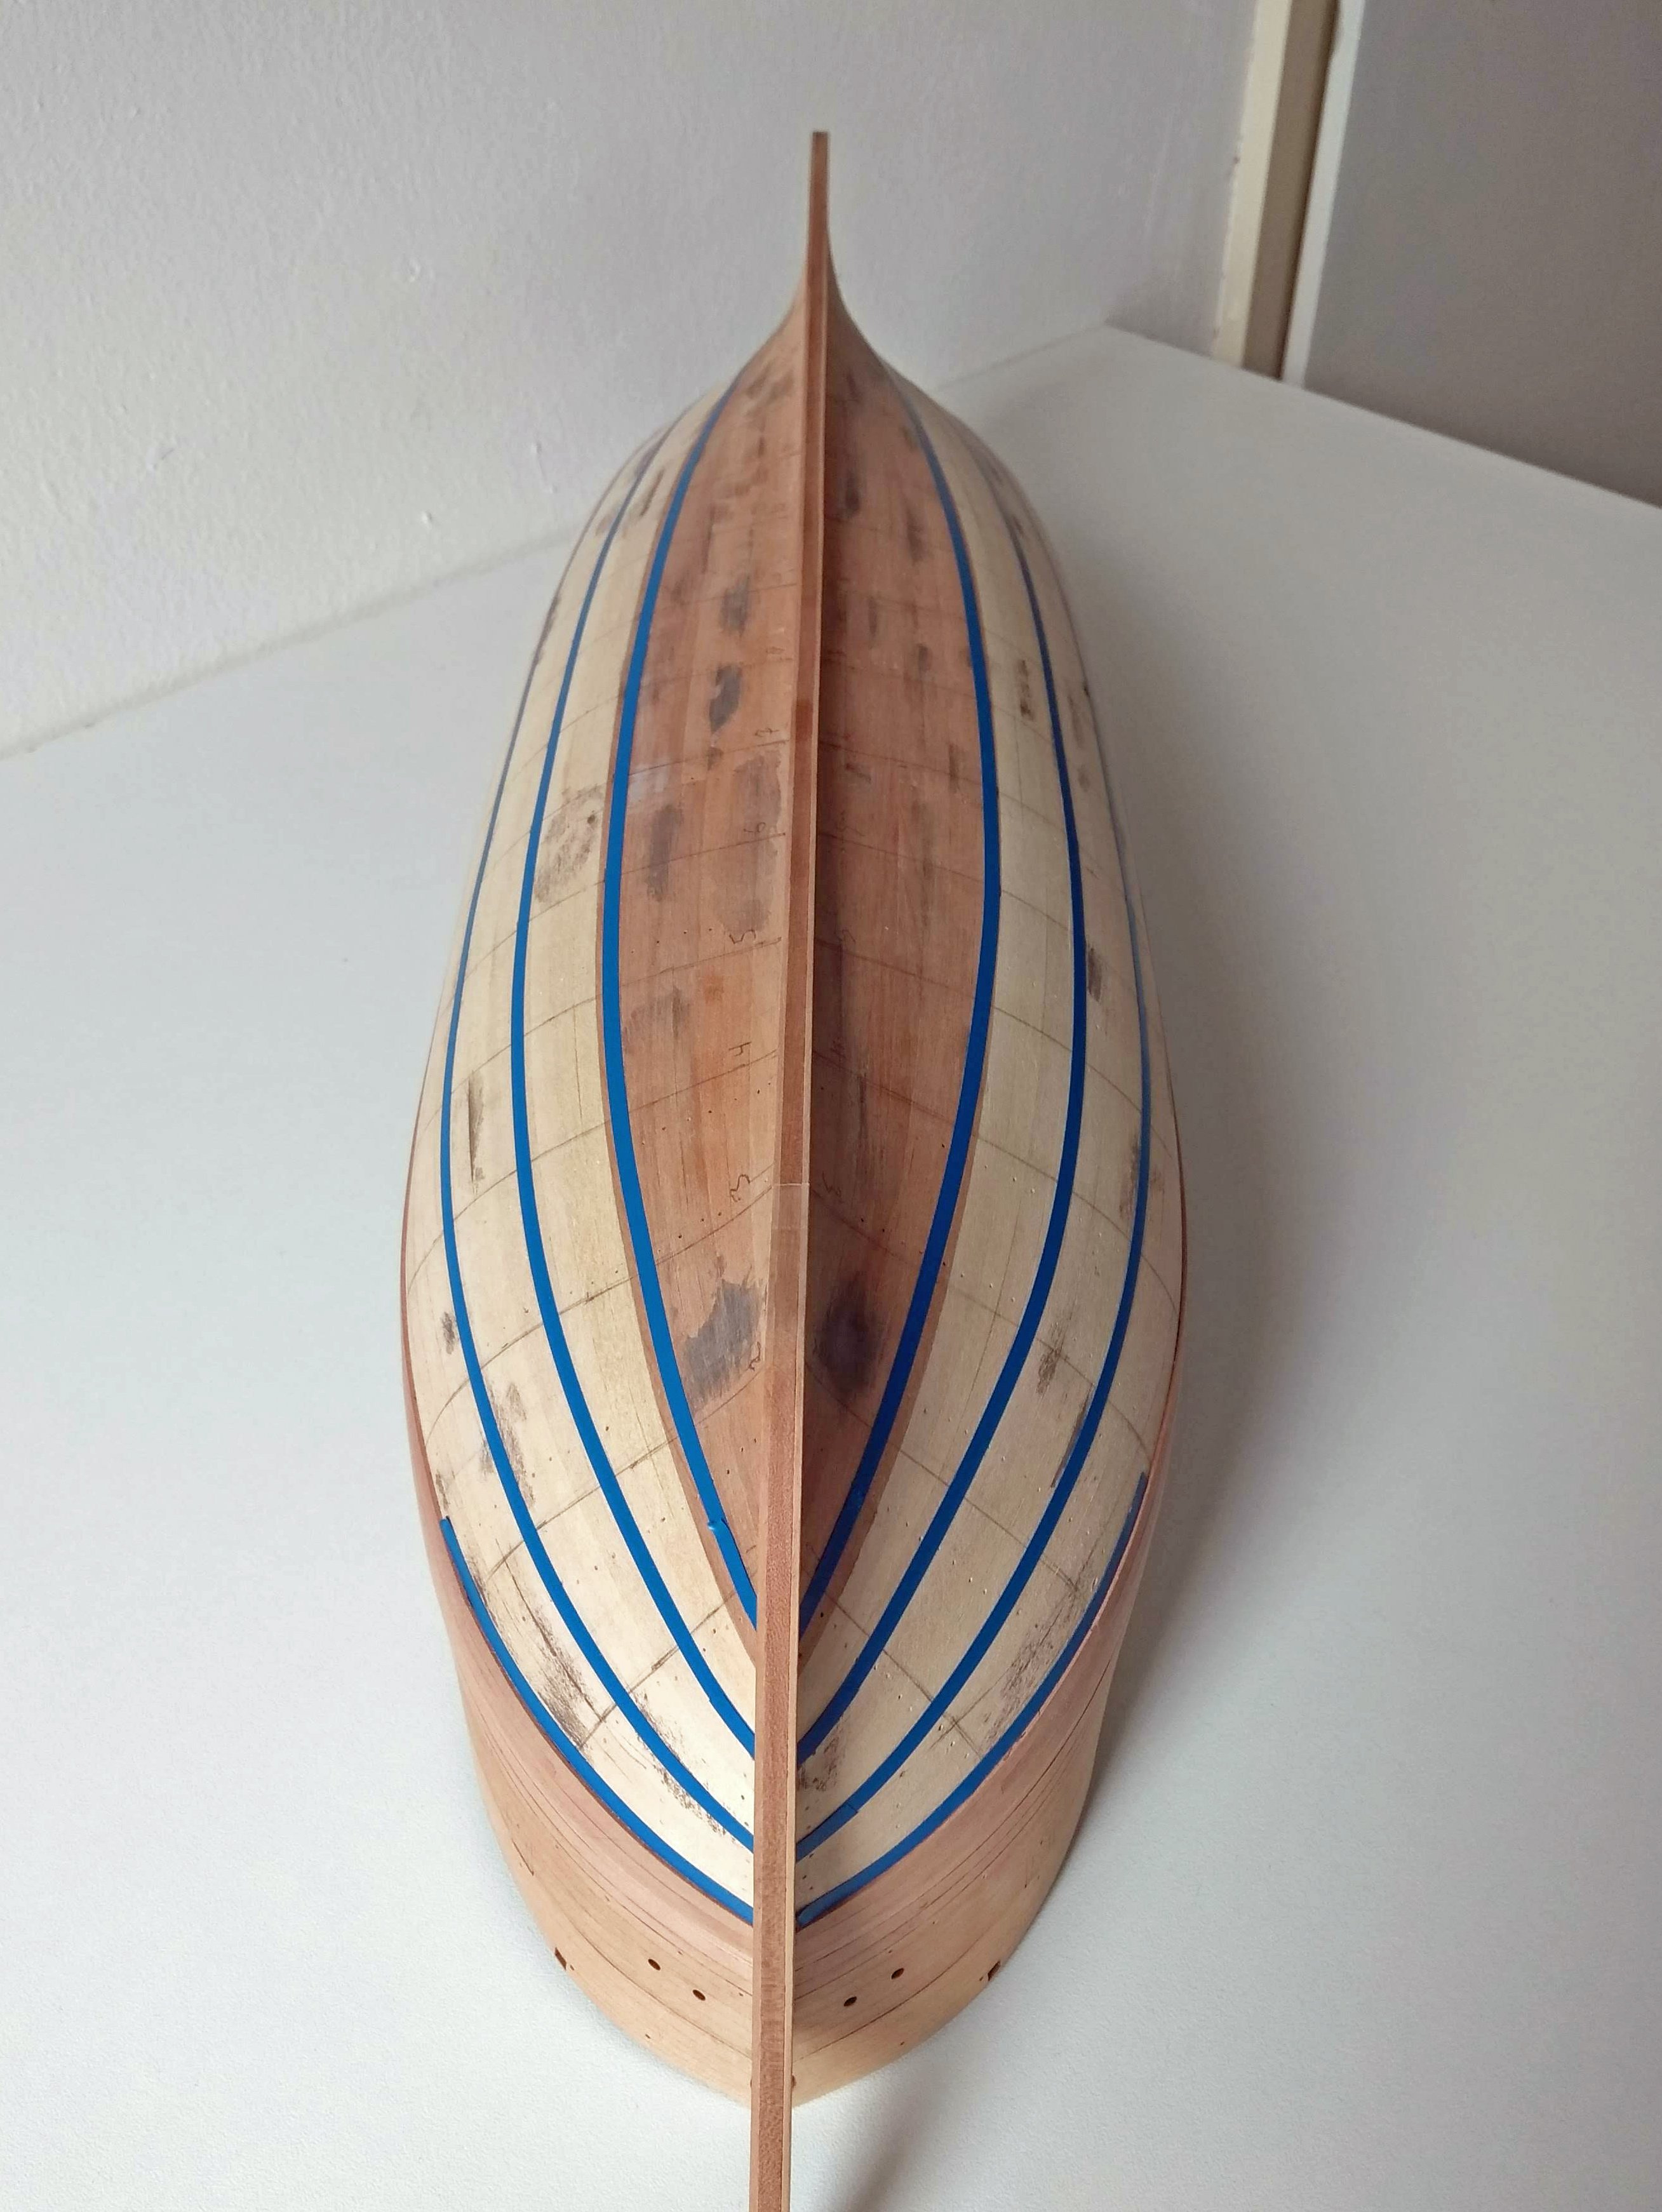
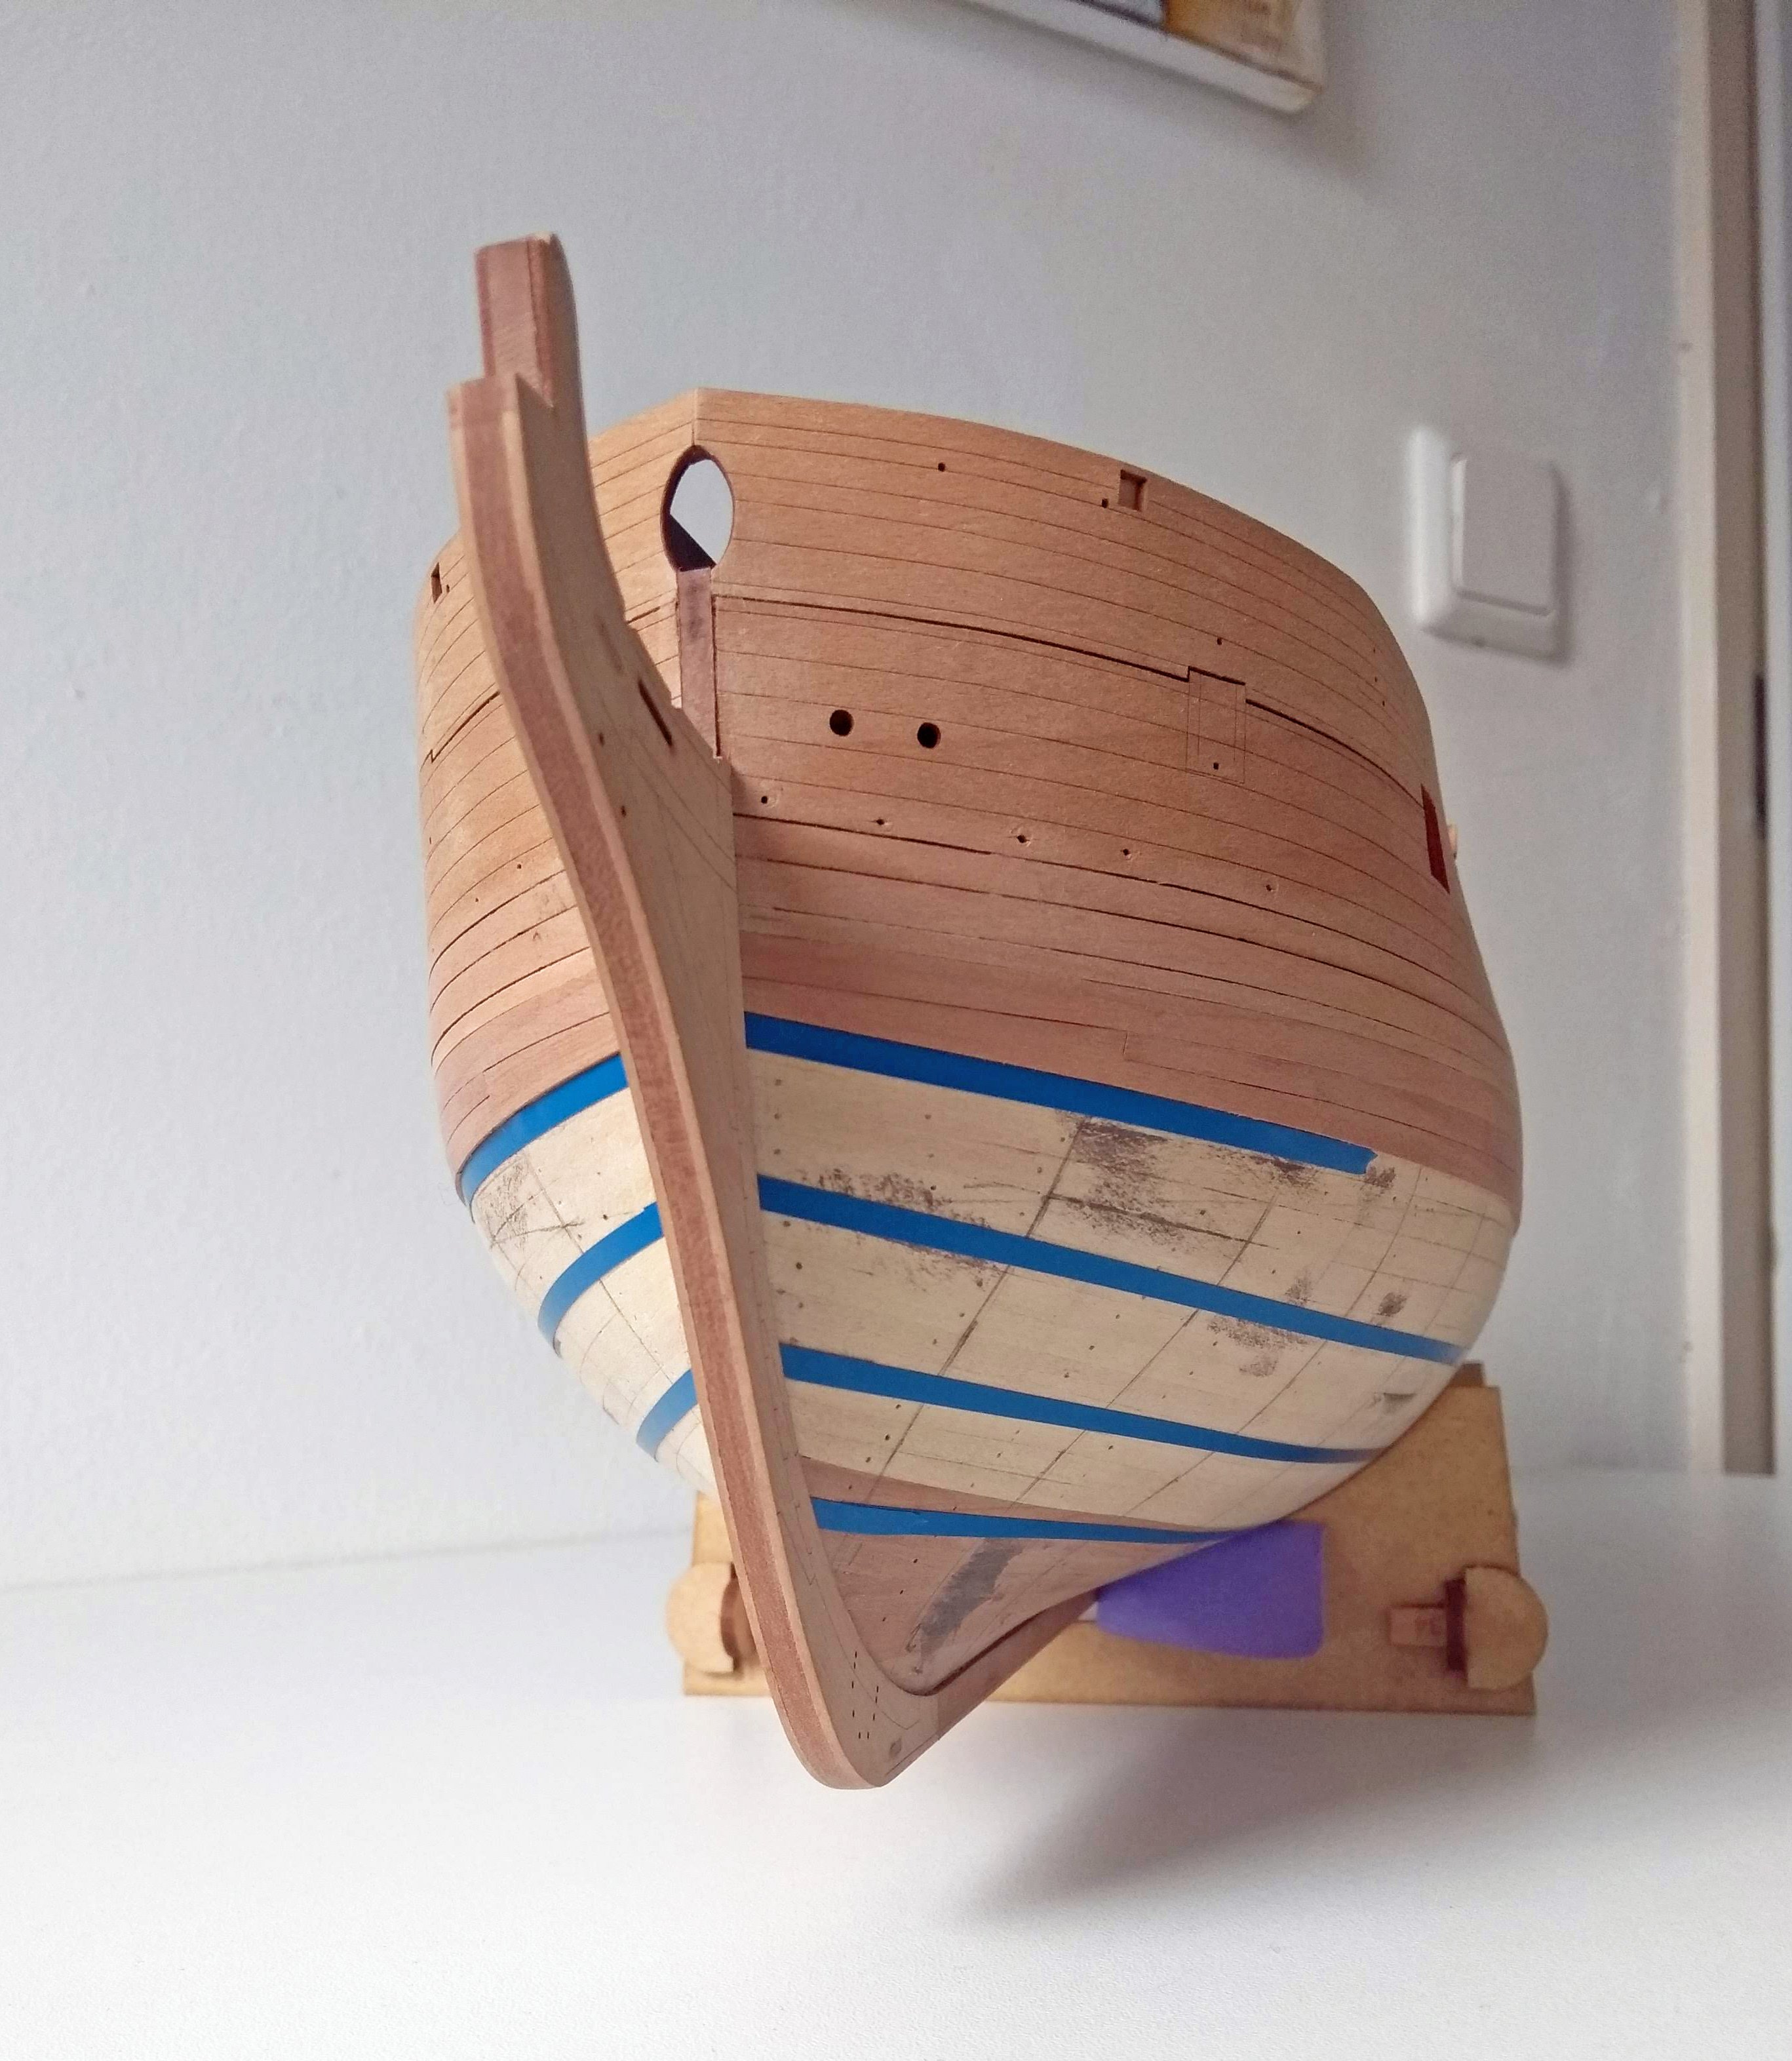
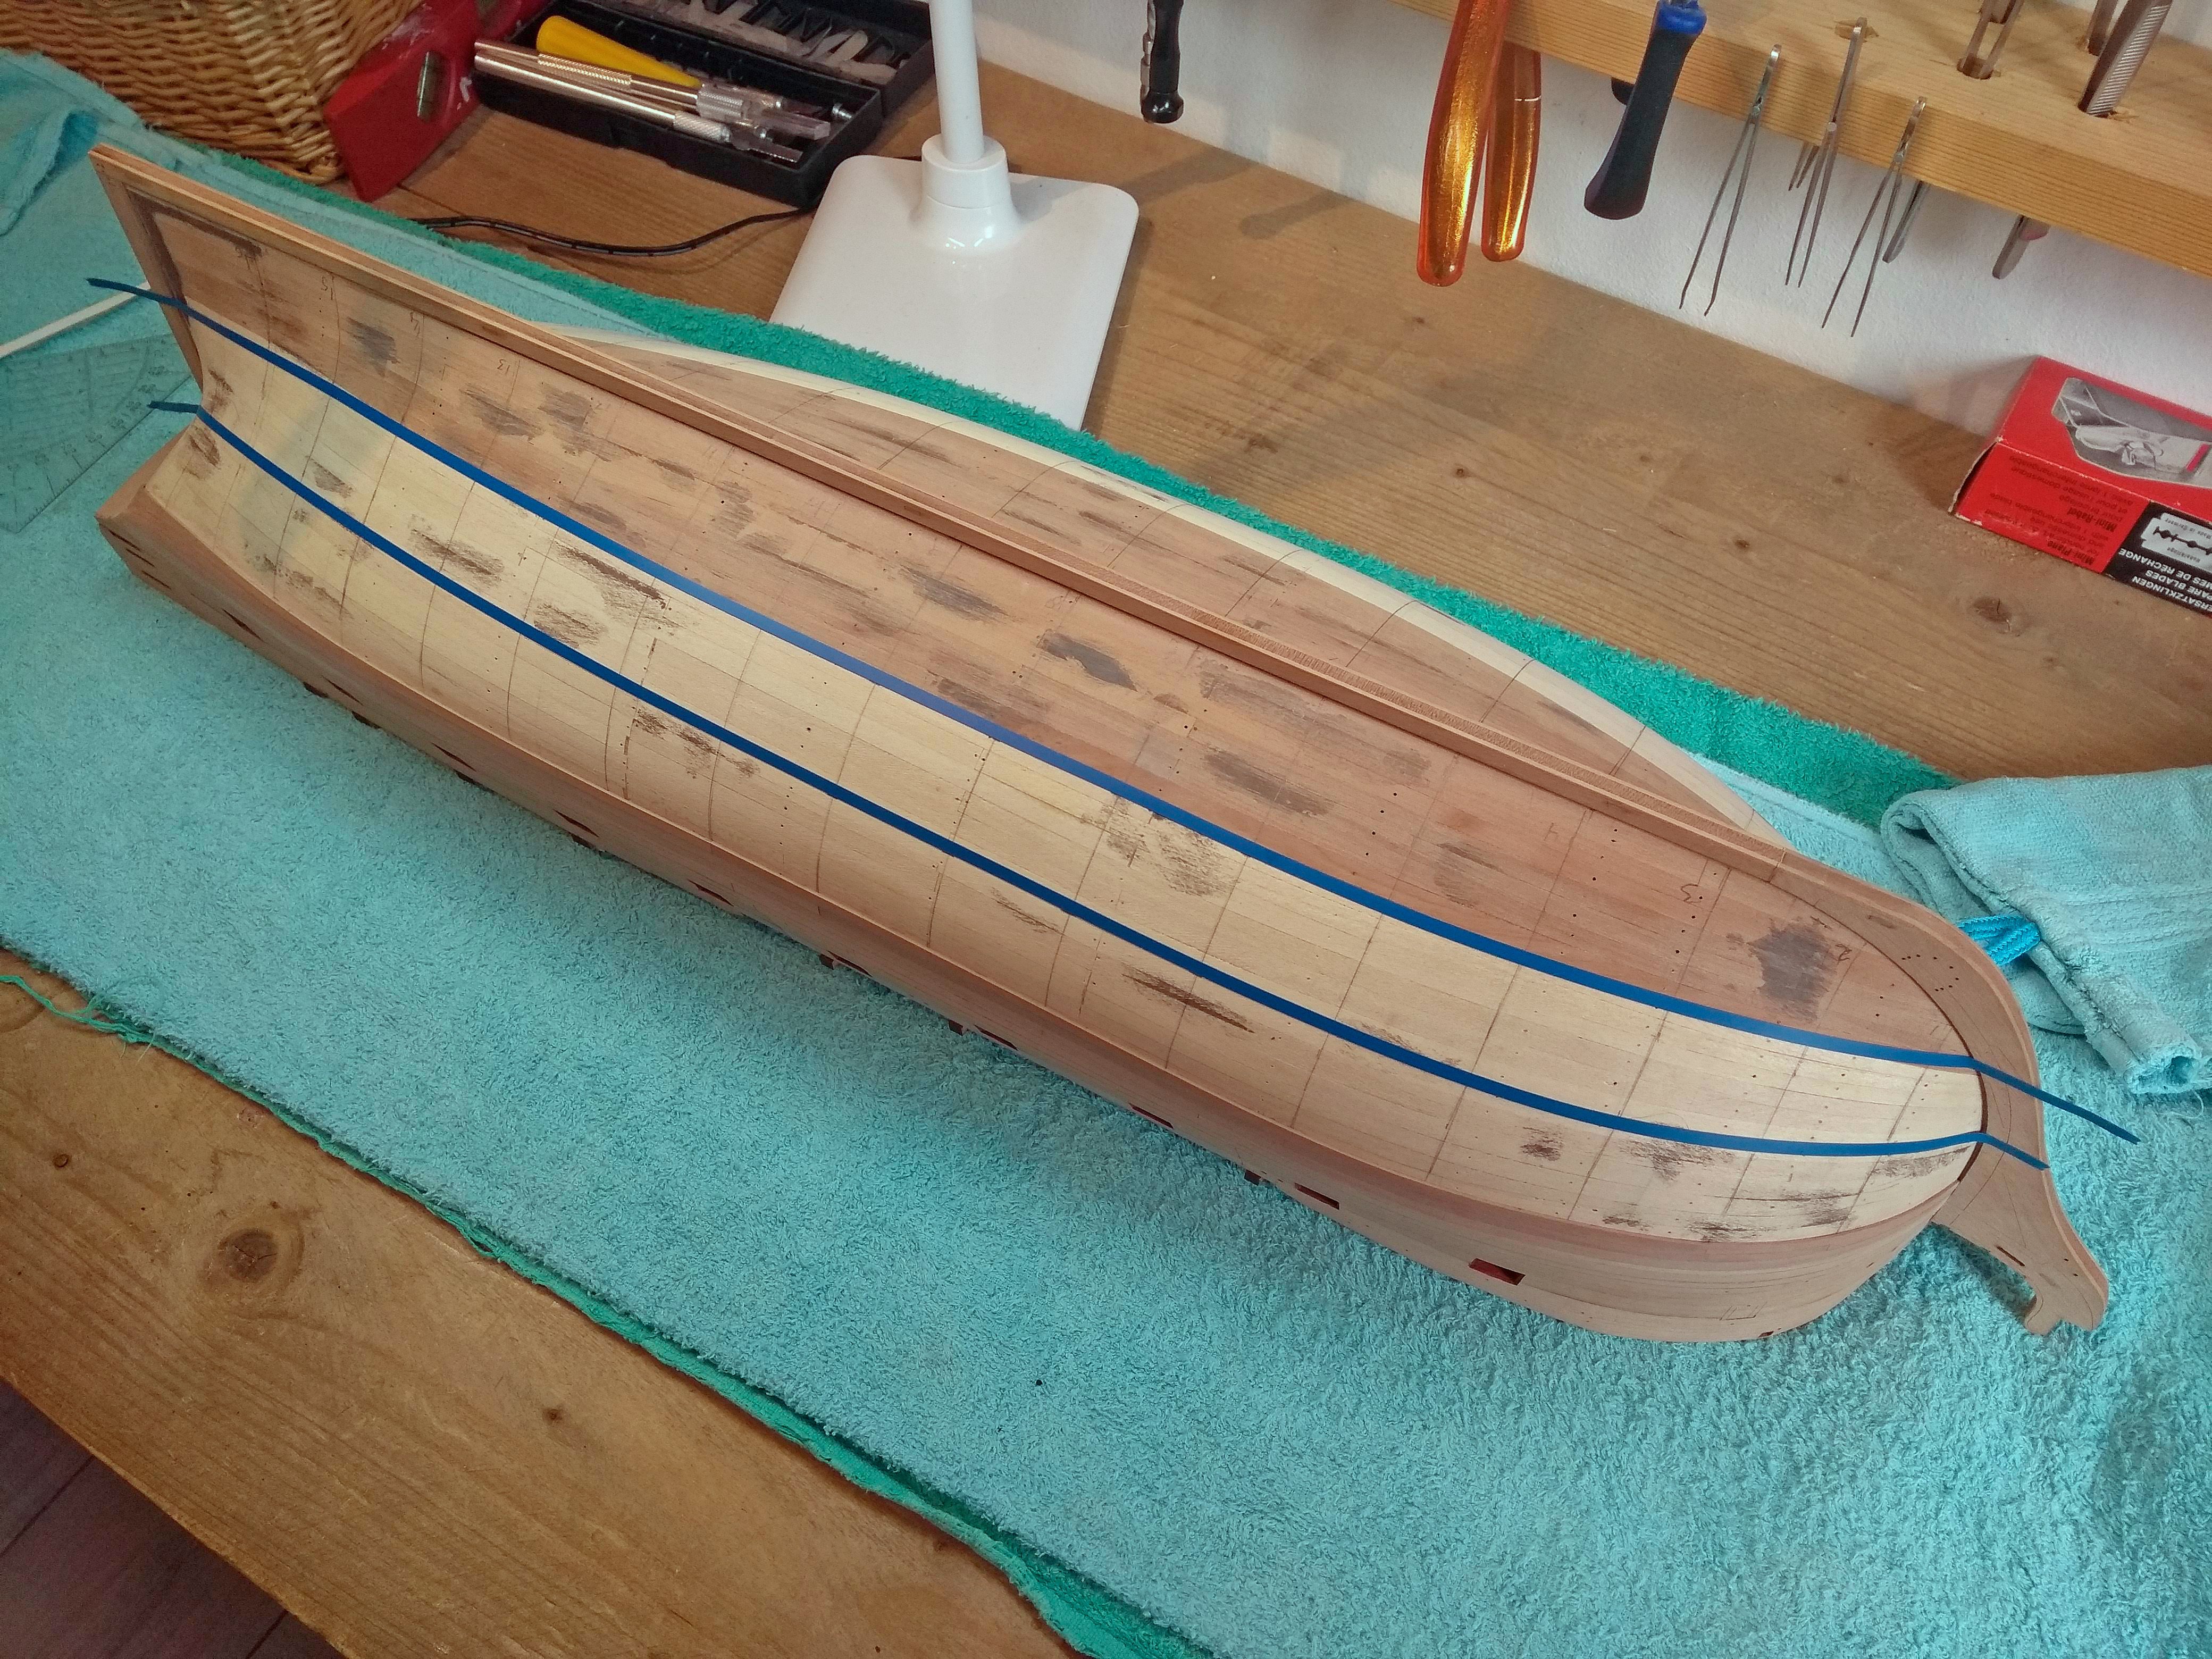
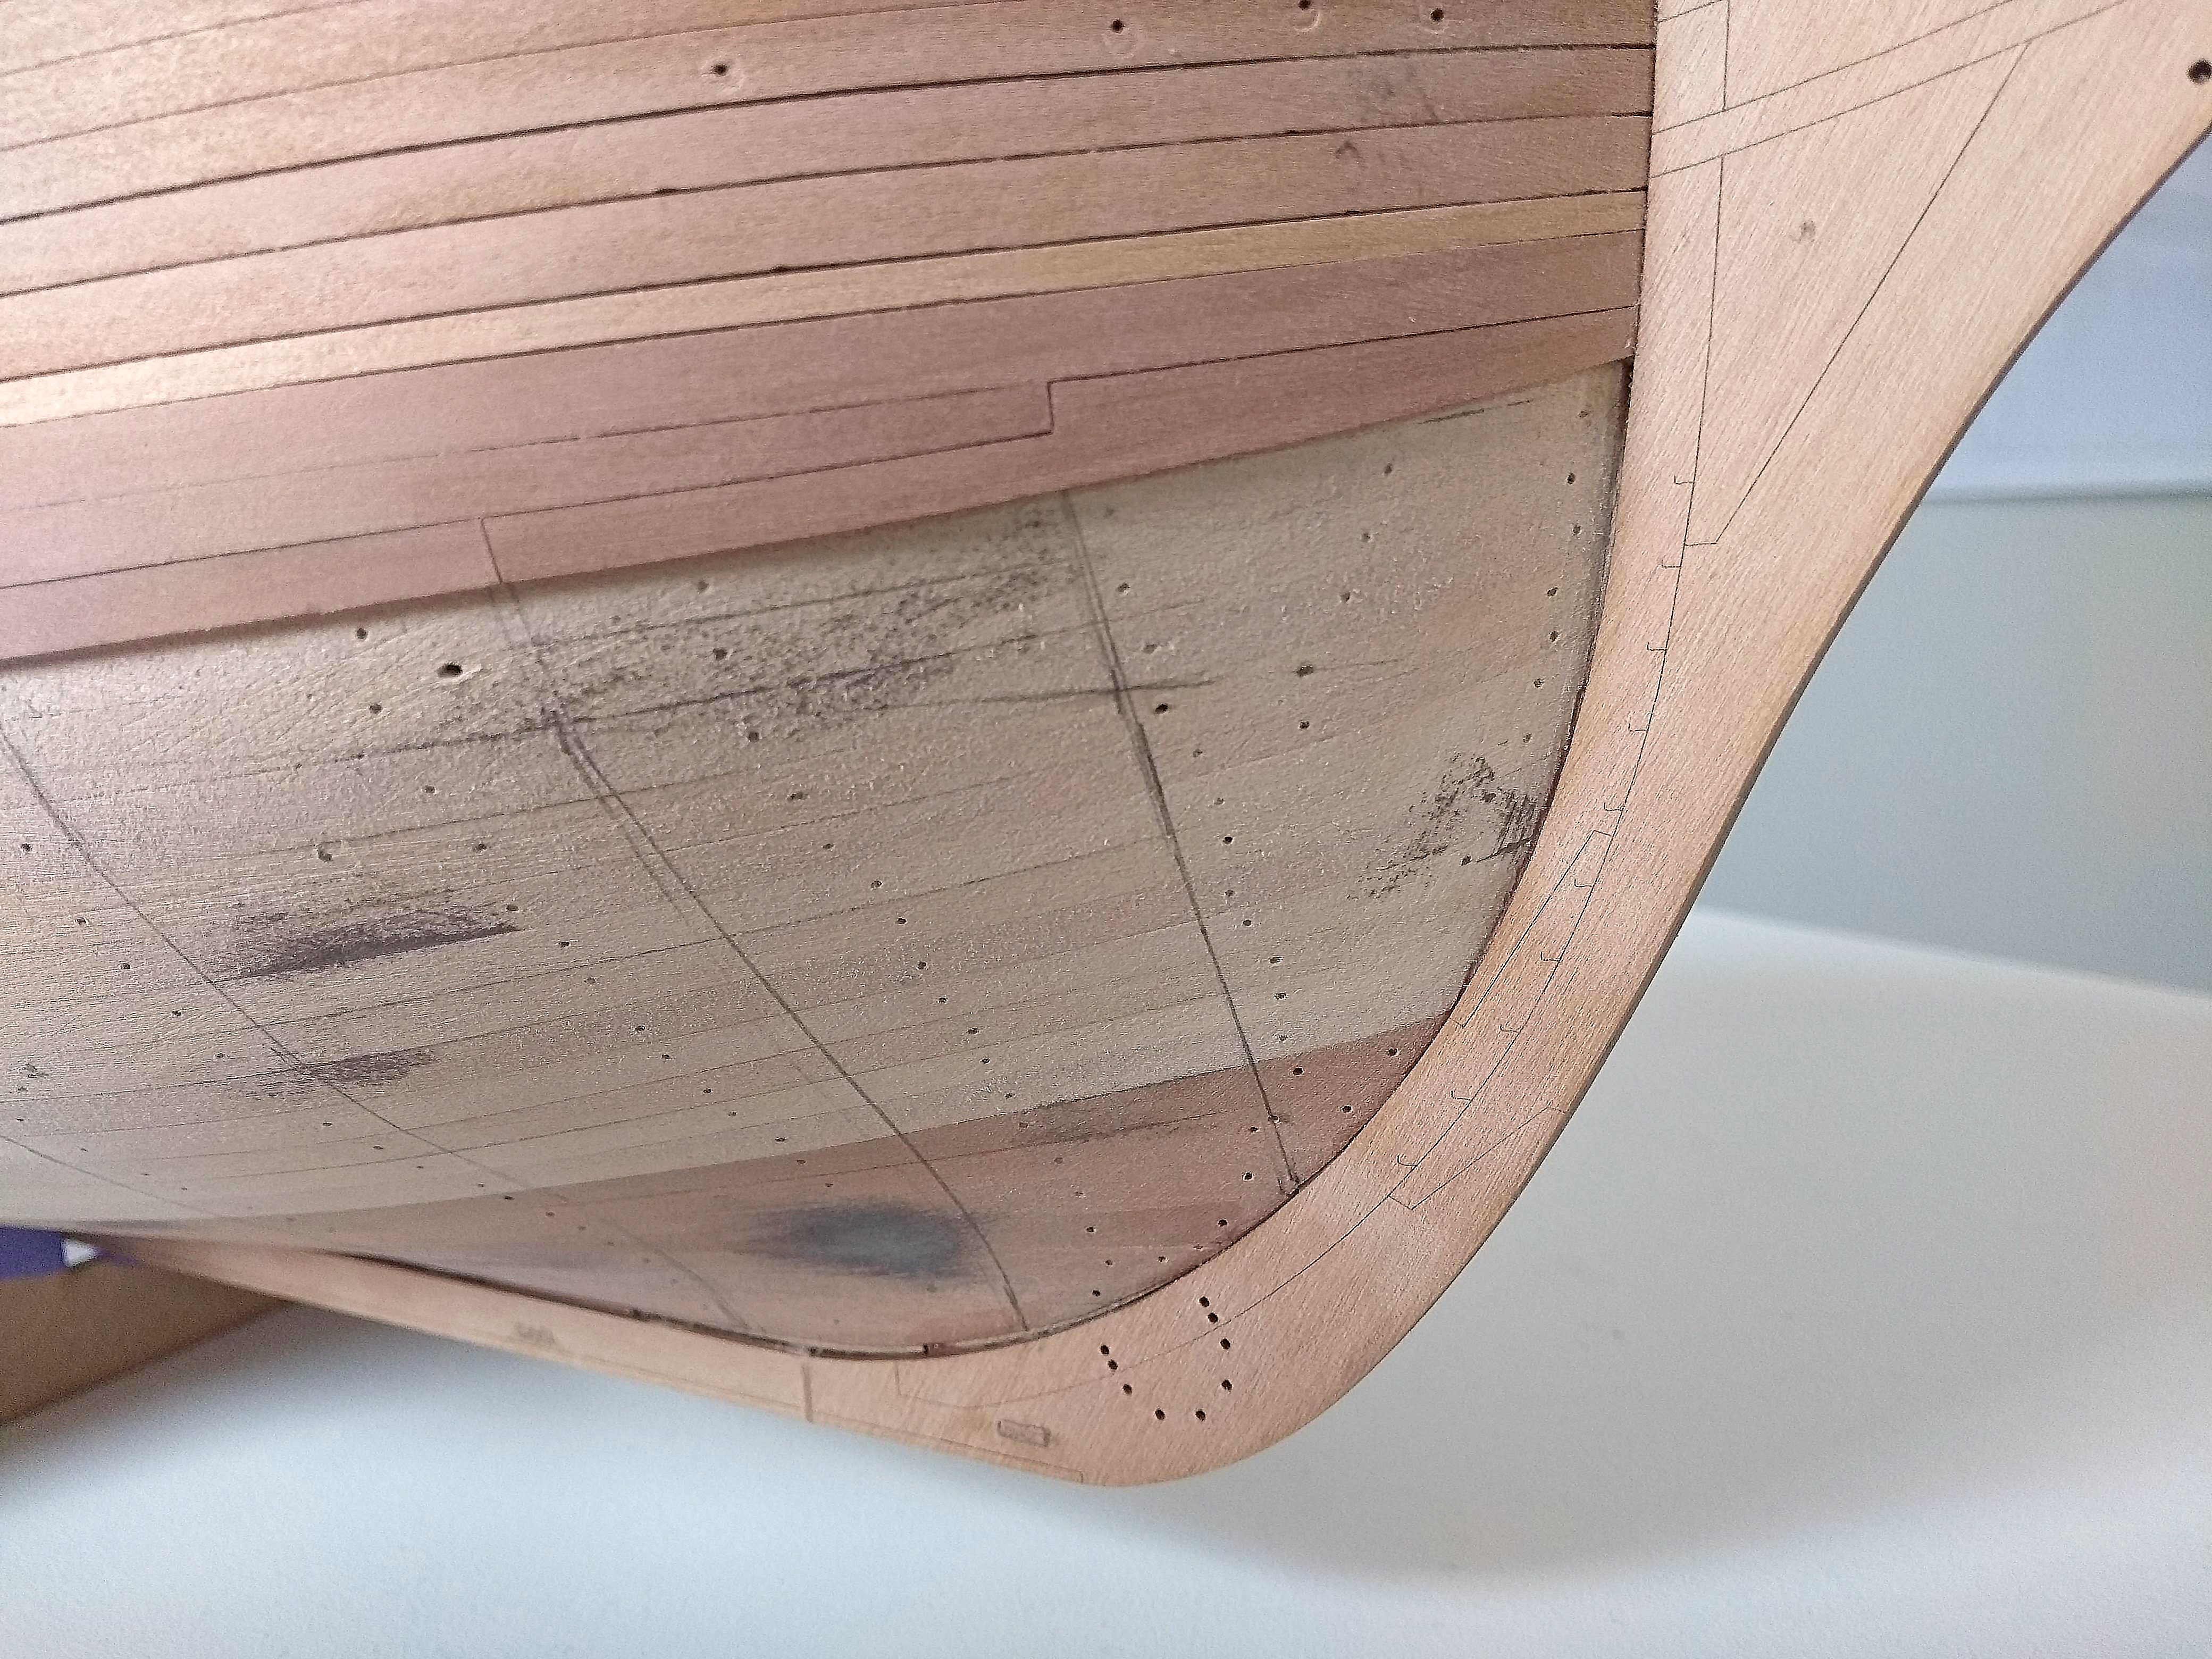
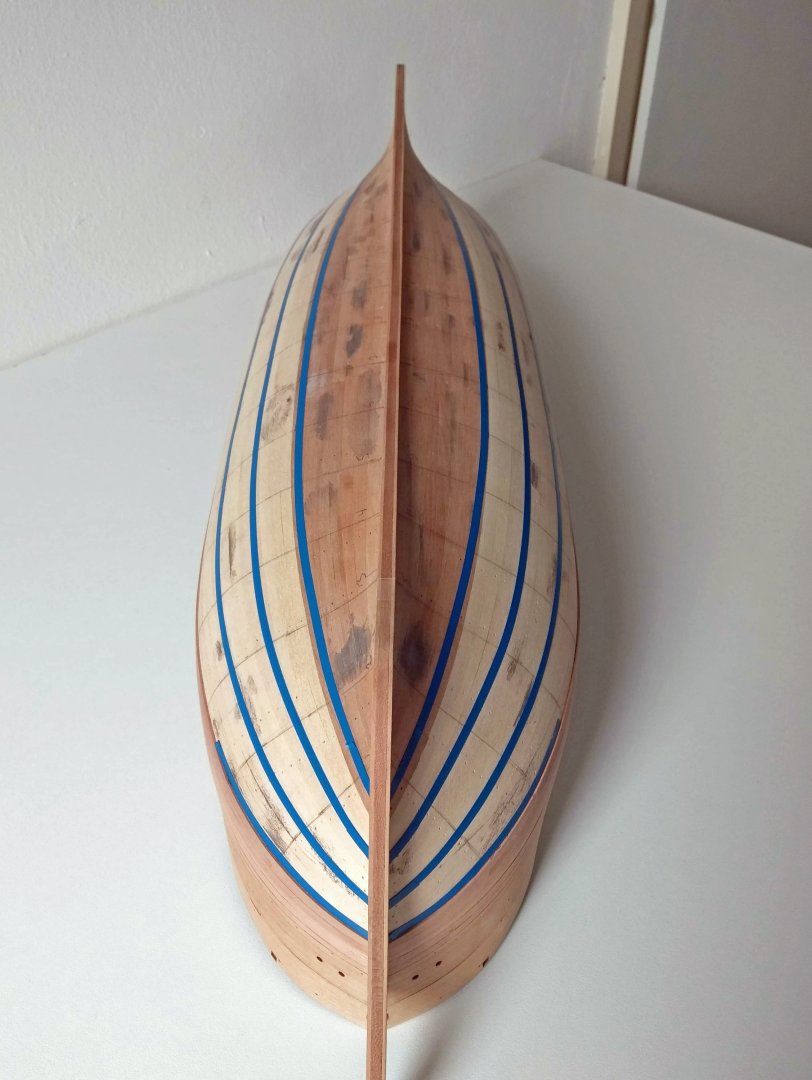
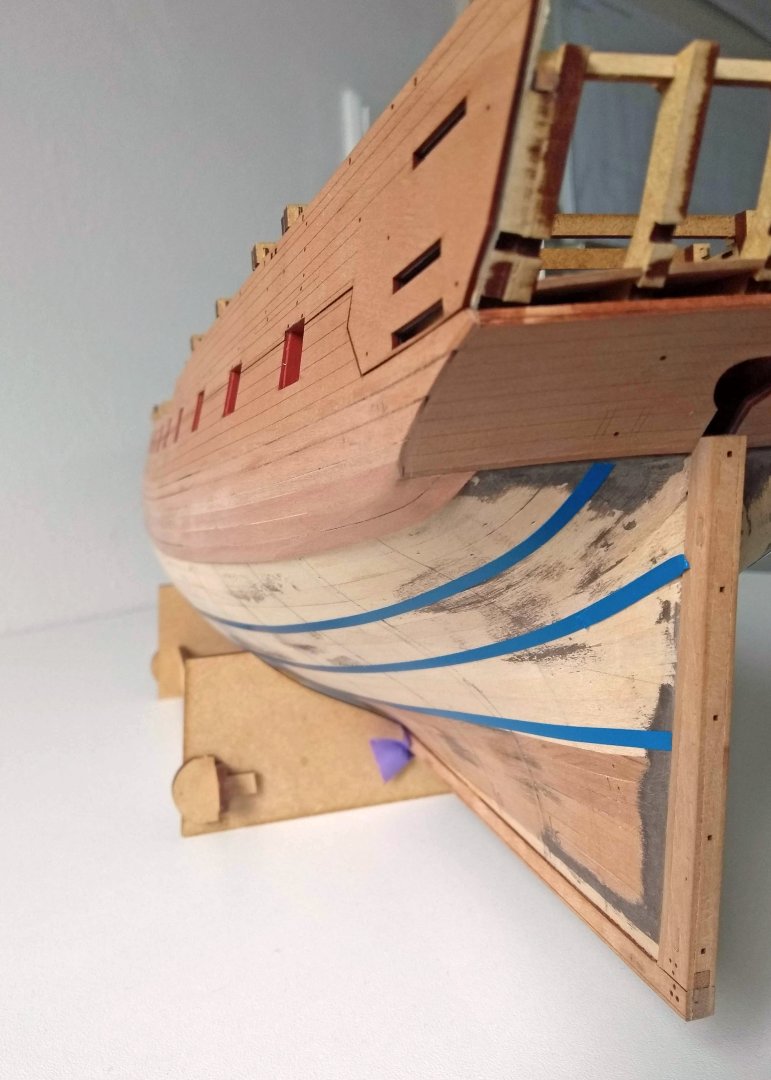
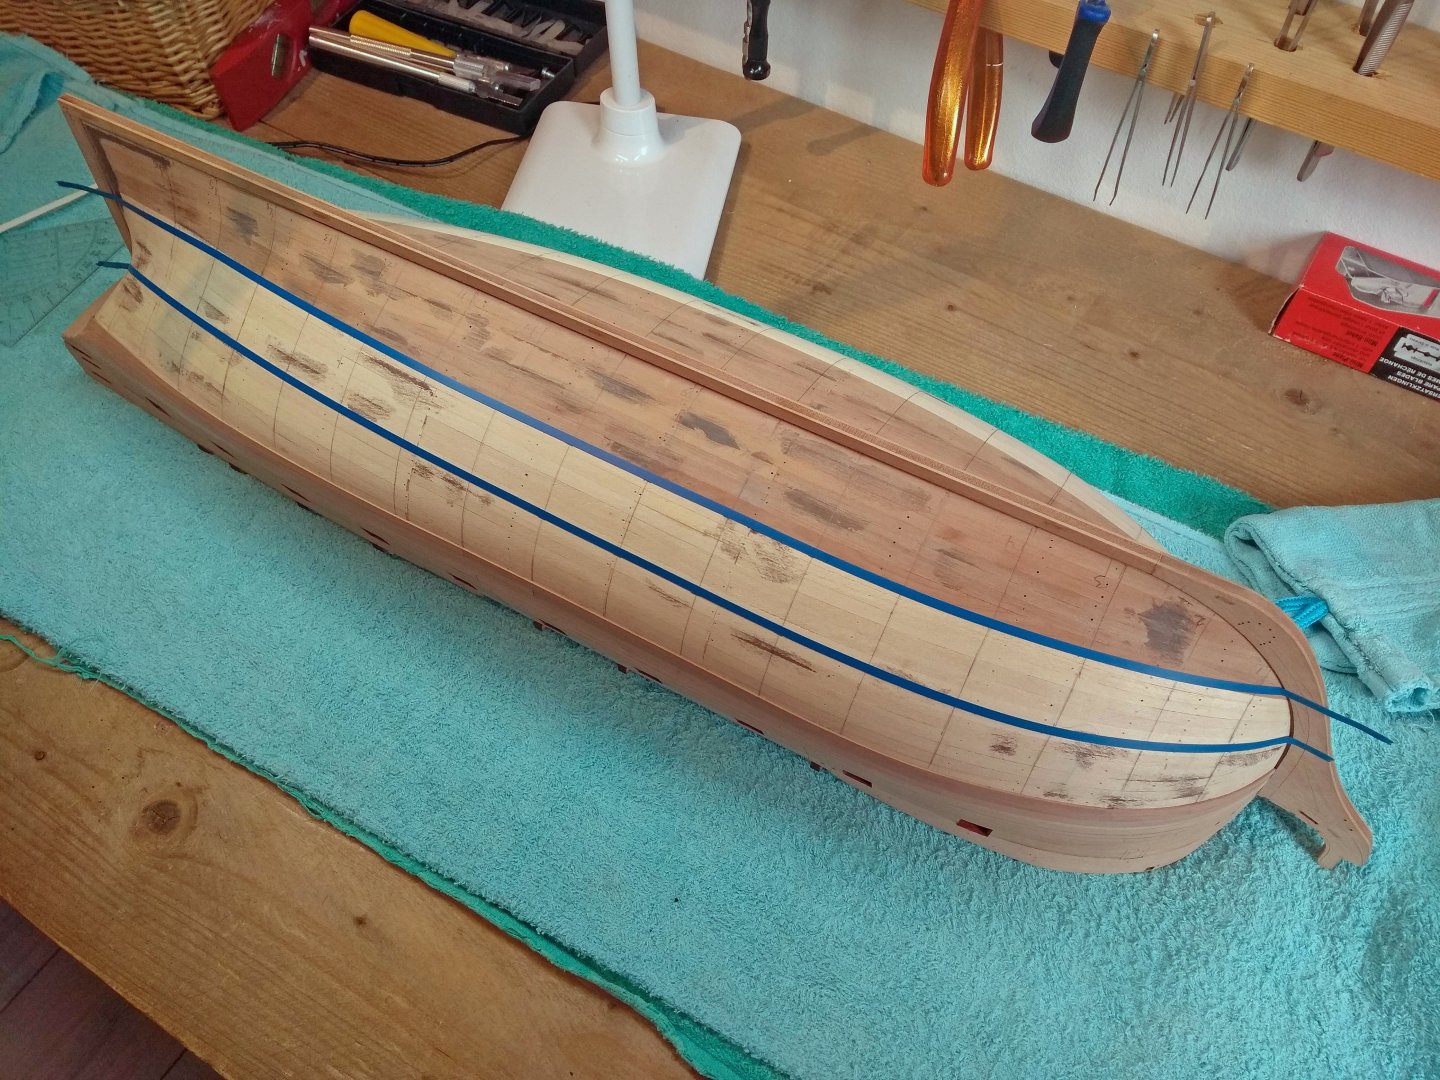
Update: I wanted to do 2 strakes with the dropplank at the bow and that difficult corner at the stern before I going to line off the hull. So I did these yesterday and I am quite happy with the results for a first try. Found it challenging and didn't really know what I was doing regarding the drop plank, but it looks okay to me. It needs a bit of sanding, but for now it's good. For the stern part...I had a really small gap there and gave myself permission to use some glue and sawdust to fill that up It sits against the lowerside of the wales...so it won't be seen anyway Now trying to line off the hull...still feels a bit uncertain if it's right or not, but you don't know if you don't try . Glad the tape does stick to the hull...did have great difficulty to stick it onto the MDF frames, but this goes well. I shall study a bit more the contemperary models to see the run of the planks.

-
Exciting stuff again!
-
Smooth!
-
Superb!
-
Same as you...I hope my skills are also up to it 😆
-
Revenge 1577 by Loracs - Amati - 1:64
mugje replied to Loracs's topic in - Kit build logs for subjects built from 1501 - 1750
Lovely indeed! Love the natural wood colors -
mugje changed their profile photo
-
Looking beautiful! Well done
-
Small review: I purchased some extra wood from boardsponser "Hobbymill.eu" so I have enough other dimensions then the 4mm kit provided pear wood. It would make planking a bit easier I have different width planks. I also purchased some boxwood for the decking. My experience with the owner Vahur ( Wahka_est here on the forum ) was very positive. The guy is friendly and patient in communication. The woods I received were just perfect, I didn't have seen any more perfect cut material in my life, so nice and clean. We also exchanged some photo's of my kit material to get a sort of matching colors of the wood in the kit, so it wouldn't be to much a difference in color. That worked quite well...it's ofcourse not exactly the same color because of screen settings etc...but it is pretty close He also added some extra material of other woods so I could feel and see what he has to offer in his shop. I really appreciated this gift 👍 So this and his reasonable pricing makes it well worth to purchase some wood here Did not include photo's of all the material, but a selection


-
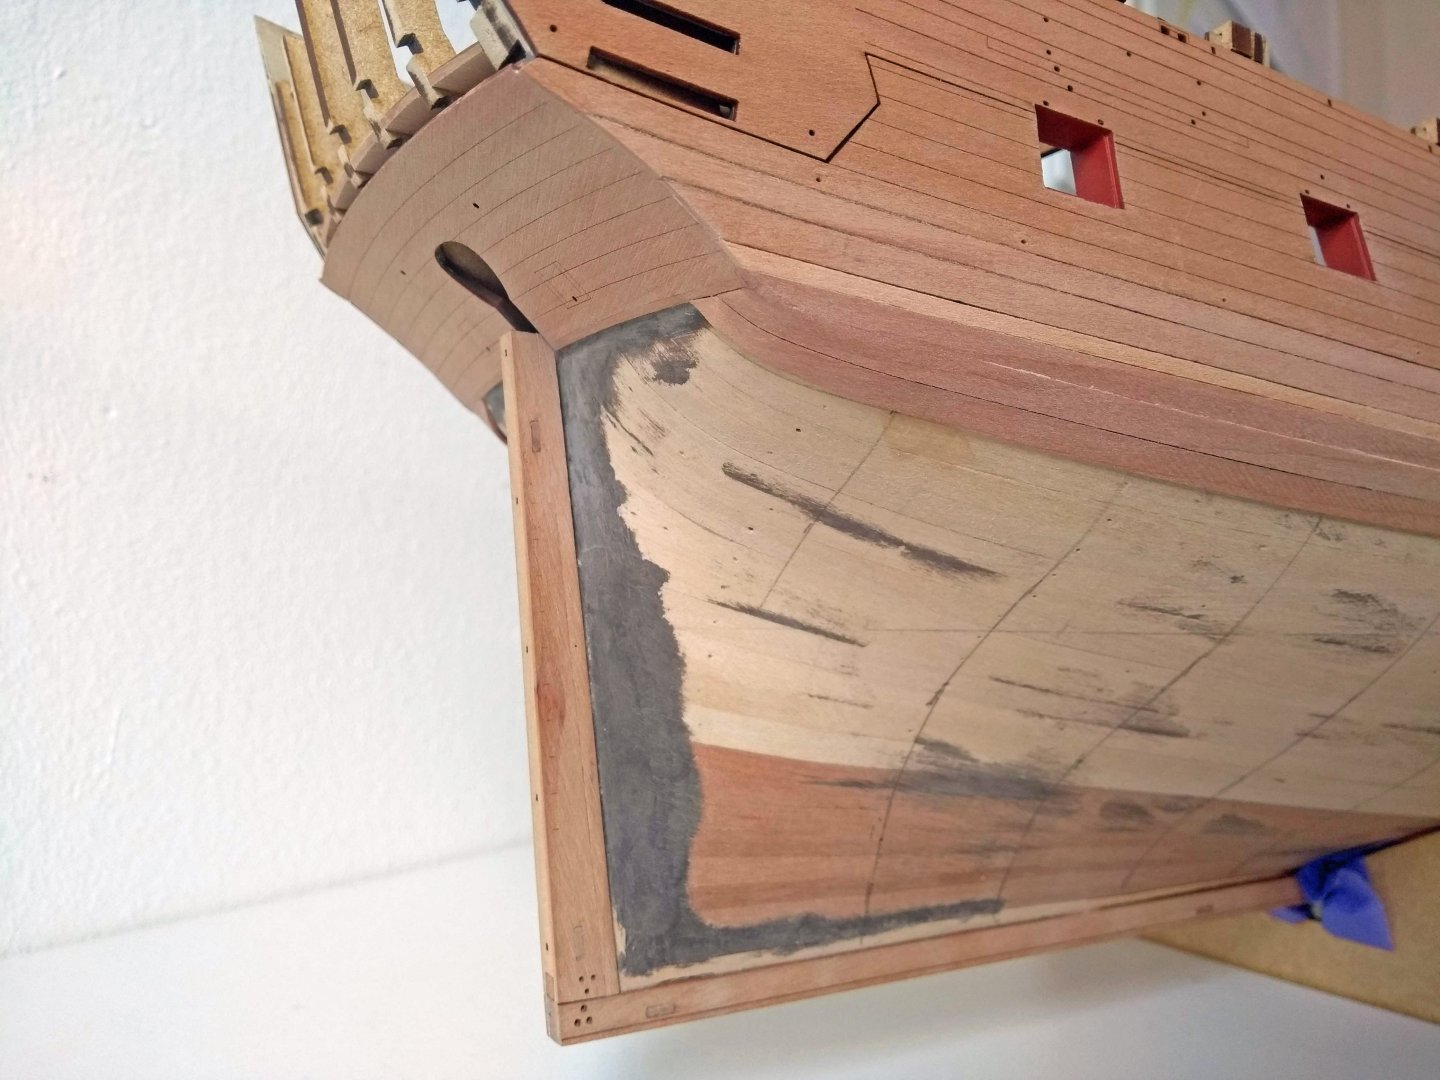
Sharp eye! Didn't notice that...I wonder if it's only a way to "end" the top and butt planking prior to that drop plank. Not sure if i'm going to add that one, will think about it. I not going to install the top and butt planking, so maybe it's not really necessary to place the drop plank there. Thanks everyone for the comments and likes! Appreciate it
-
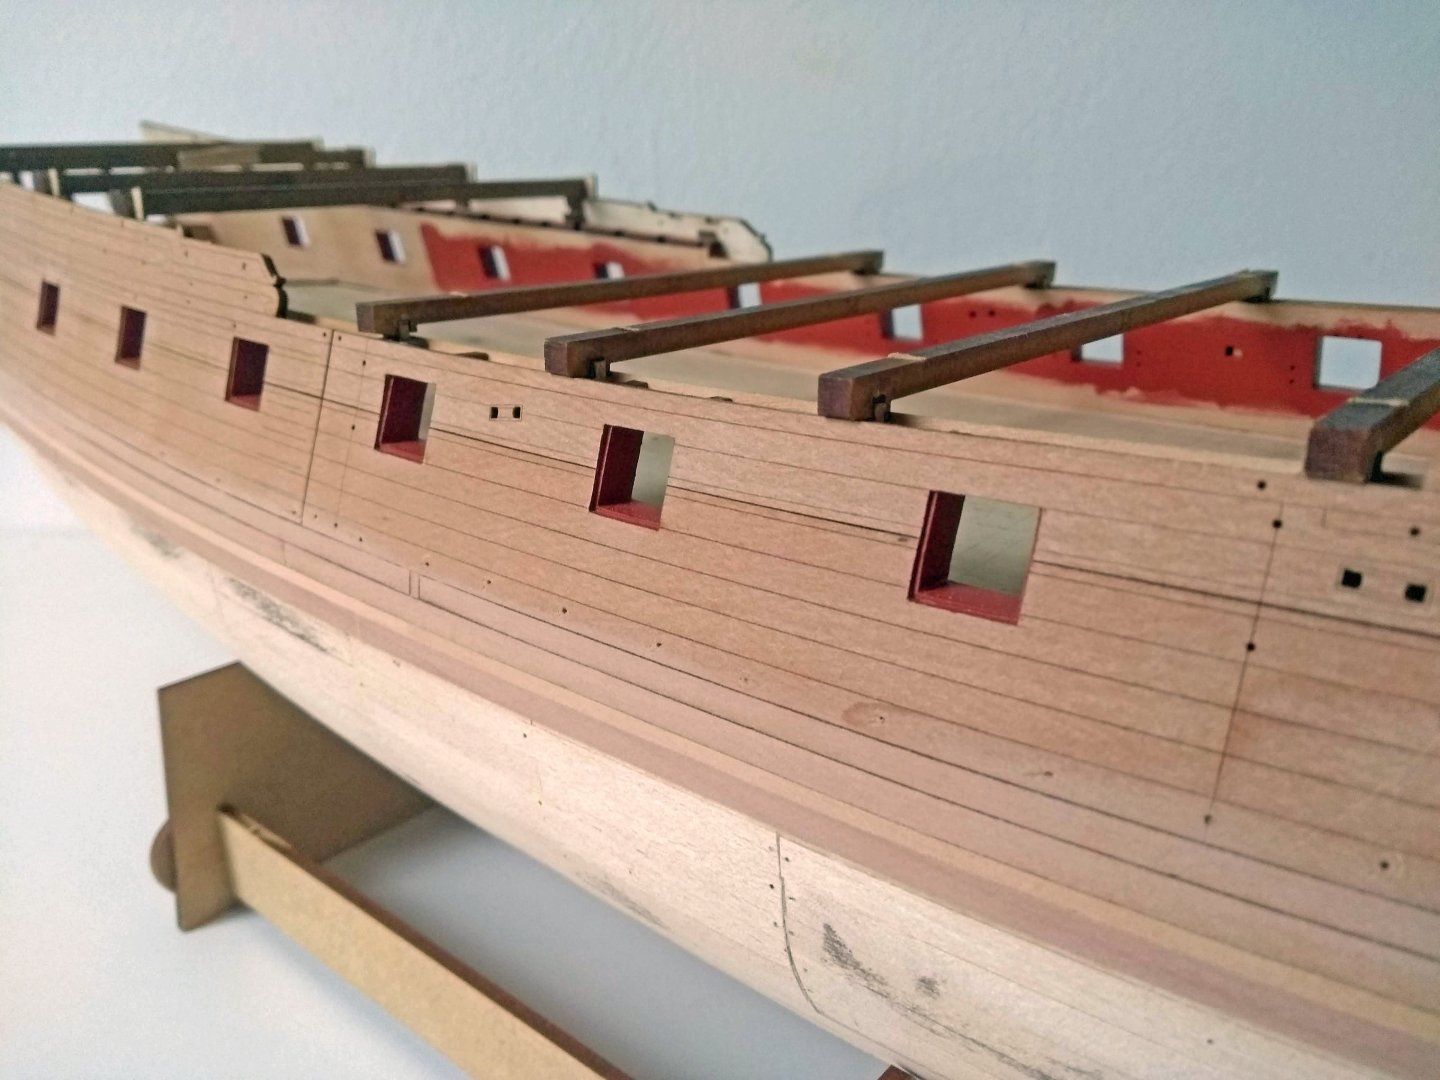
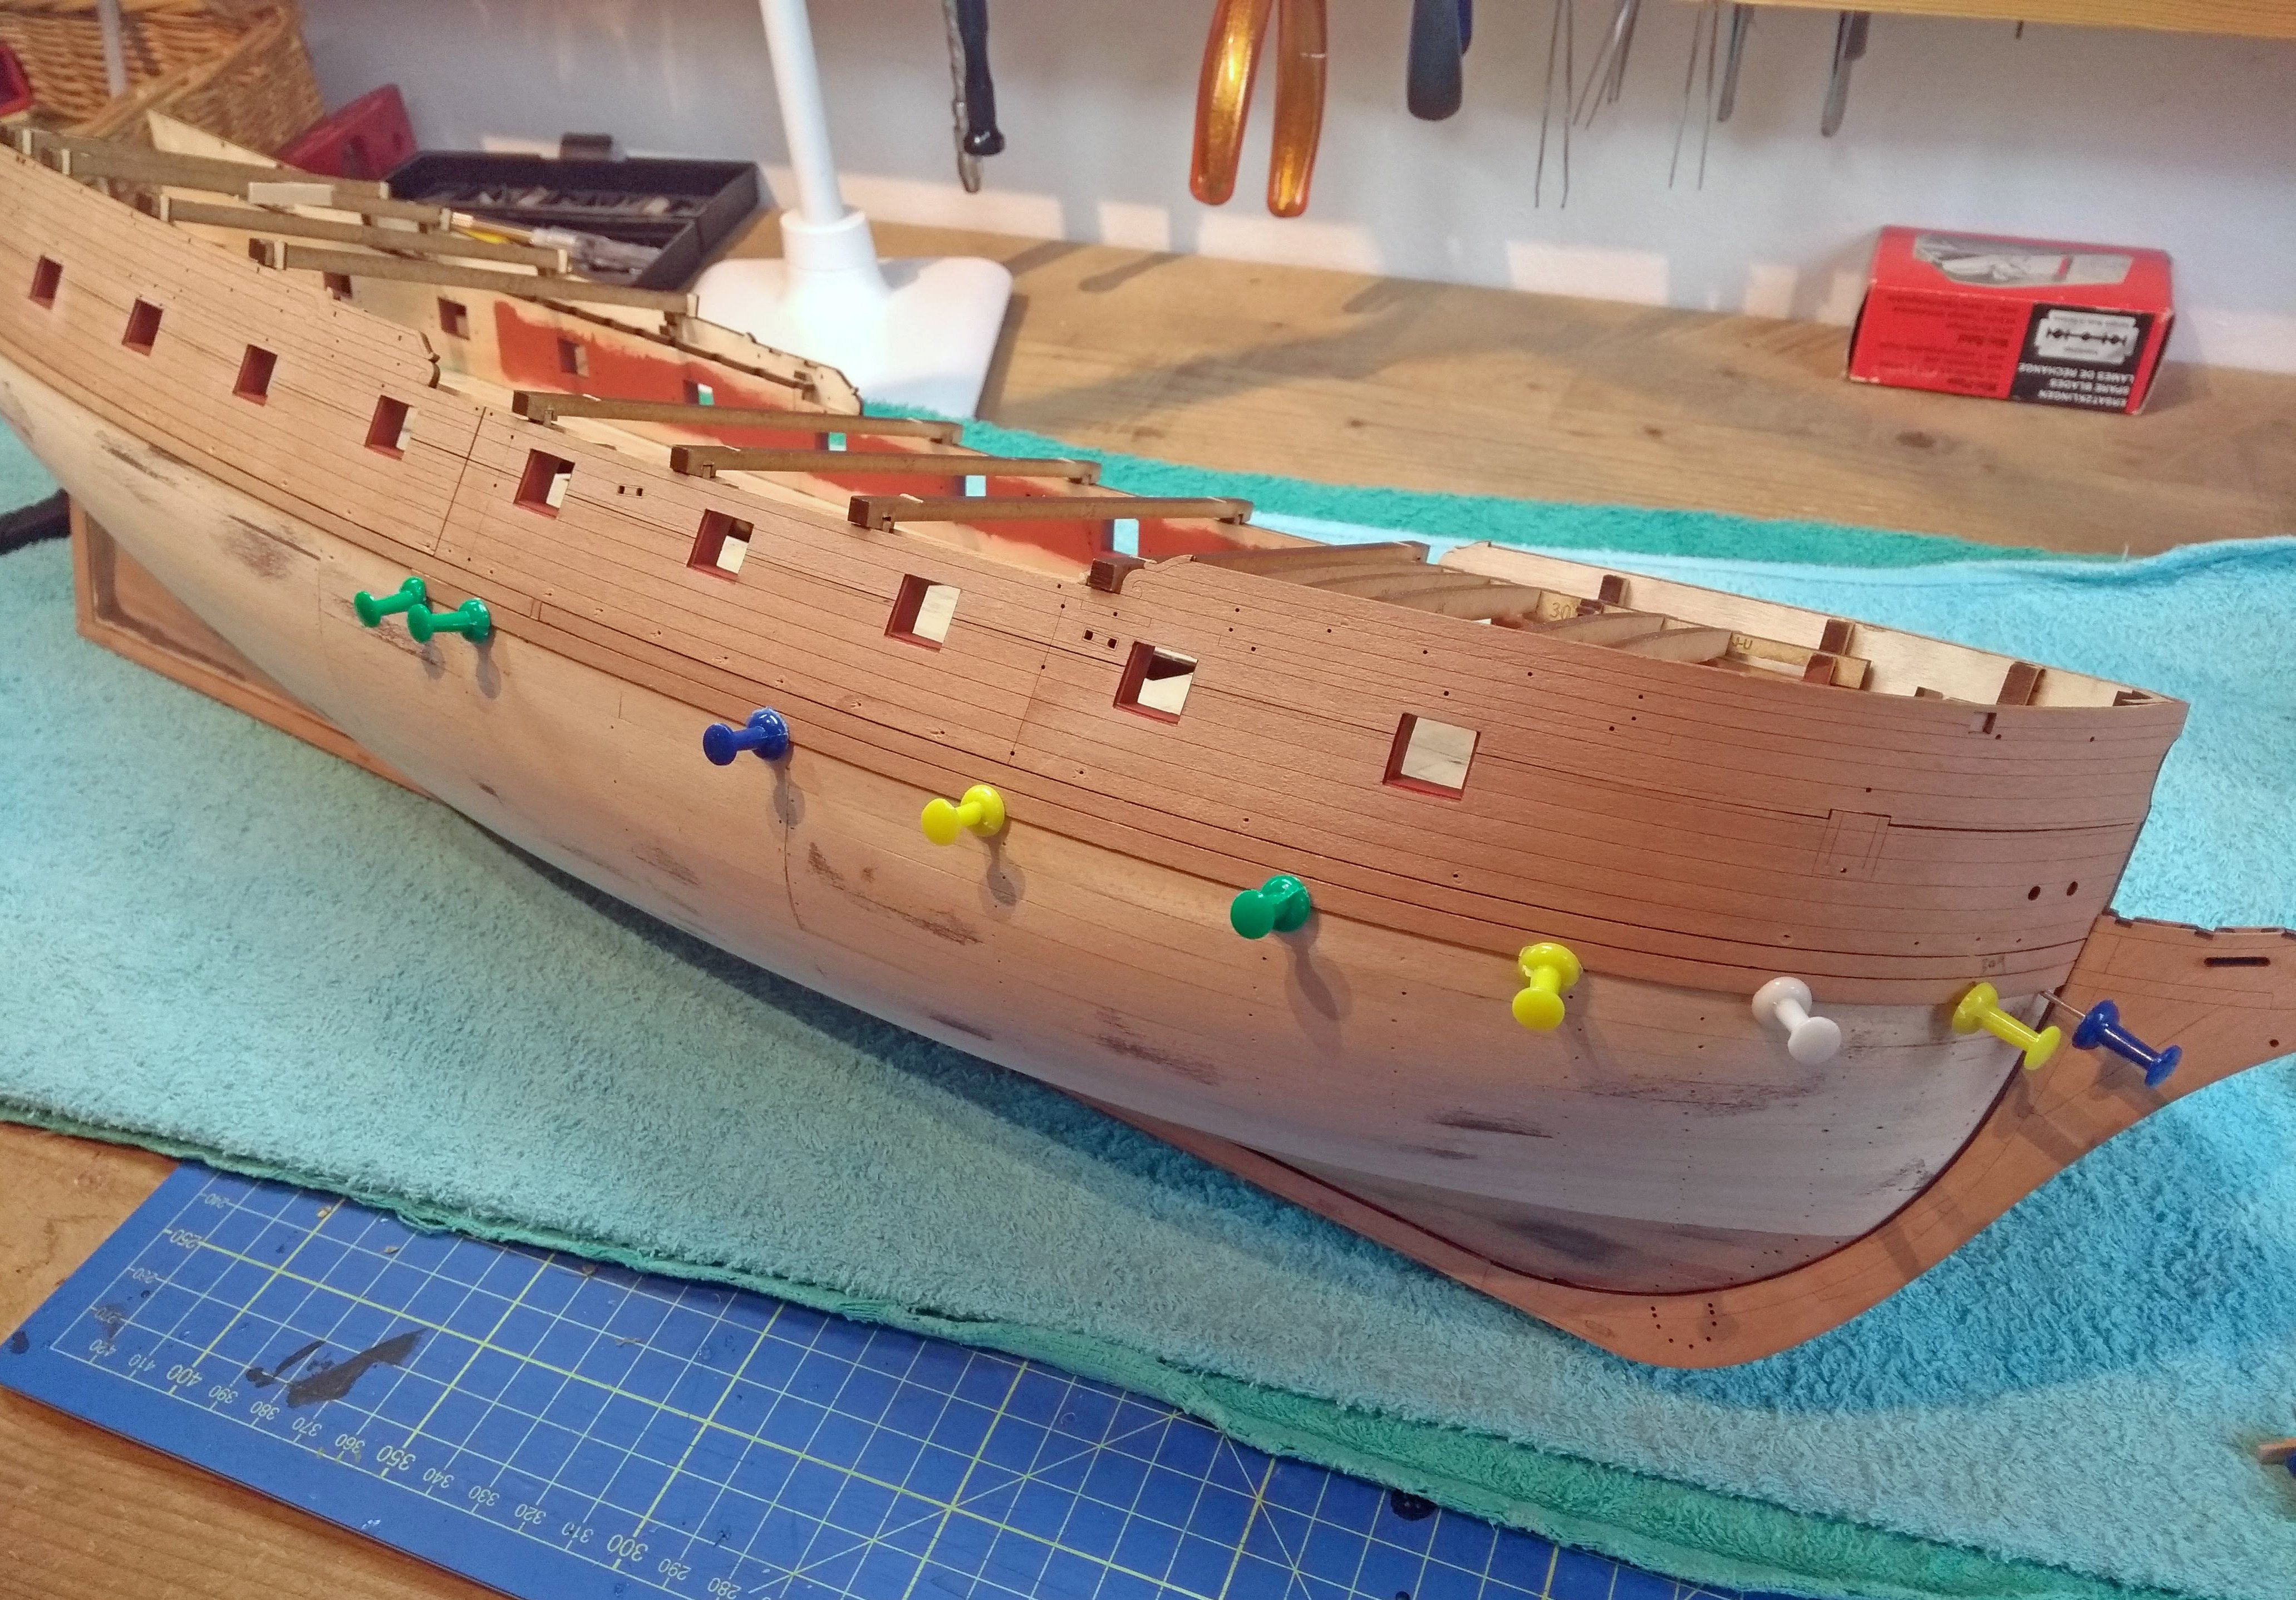
Update: I finished all the gunport linings. I took me a bit longer then I expected, but to get it nice and clean...there needed to be used some filler here and there But i'm happy how it turned out. I painted them right away...I did use some masking tape around the edges to get a clean edge. First I used some clear varnish to seal of any gaps where the red could leak into. That worked quite well. Next step was to install the pre-lasered planks below the gunport patterns, that did go well, not really something I can say more about it. I also added two more planks that should be the base of the lasered wale patterns. I measured them (about 14mm wide) so I covered that area. Now below these planks I can begin with the real test I want to leave the hull in the natural wood color, without the white color. So the planking journey begins from here. First step would be lining off the hull, mark the lines where the joints are going to be etc. In the original planking pattern (you can find it in Blue Ensign's log of his Sphinx) there was a dropplank right under the wales. That would be a cool thing to replicate and makes the rest of the planking also easier. So I'm going to see if I can make that. That's why I found it important to allready plank the area underneath the wale patterns, so the drop plank would rest to the underside of it. Well...in theory