Etcher
-
Posts
114 -
Joined
-
Last visited
Recent Profile Visitors
650 profile views


-
 ChrisSC reacted to a post in a topic:
RMS Titanic by ChrisSC - FINISHED - Minicraft (11320) - 1/350 - PLASTIC - first full build
ChrisSC reacted to a post in a topic:
RMS Titanic by ChrisSC - FINISHED - Minicraft (11320) - 1/350 - PLASTIC - first full build
-
GrandpaPhil reacted to a post in a topic:
Cazador by Etcher - OcCre - scale 1:60 - Xebec
-
popeye the sailor reacted to a post in a topic:
Berlin Tram by Etcher - OcCre - 1:24
-
popeye the sailor reacted to a post in a topic:
Berlin Tram by Etcher - OcCre - 1:24
-
popeye the sailor reacted to a post in a topic:
Berlin Tram by Etcher - OcCre - 1:24
-
popeye the sailor reacted to a post in a topic:
Berlin Tram by Etcher - OcCre - 1:24
-
popeye the sailor reacted to a post in a topic:
Berlin Tram by Etcher - OcCre - 1:24
-
popeye the sailor reacted to a post in a topic:
Berlin Tram by Etcher - OcCre - 1:24
-
Etcher reacted to a post in a topic:
HM Brig-Sloop Flirt 1782 by BobG - Vanguard Models - 1:64
-
bolin reacted to a post in a topic:
Lady Eleanor by Etcher - Vanguard Models - 1:64 Scale - Sailing Fifie
-
 Etcher reacted to a post in a topic:
Lady Eleanor by Etcher - Vanguard Models - 1:64 Scale - Sailing Fifie
Etcher reacted to a post in a topic:
Lady Eleanor by Etcher - Vanguard Models - 1:64 Scale - Sailing Fifie
-
 Etcher changed their profile photo
 -
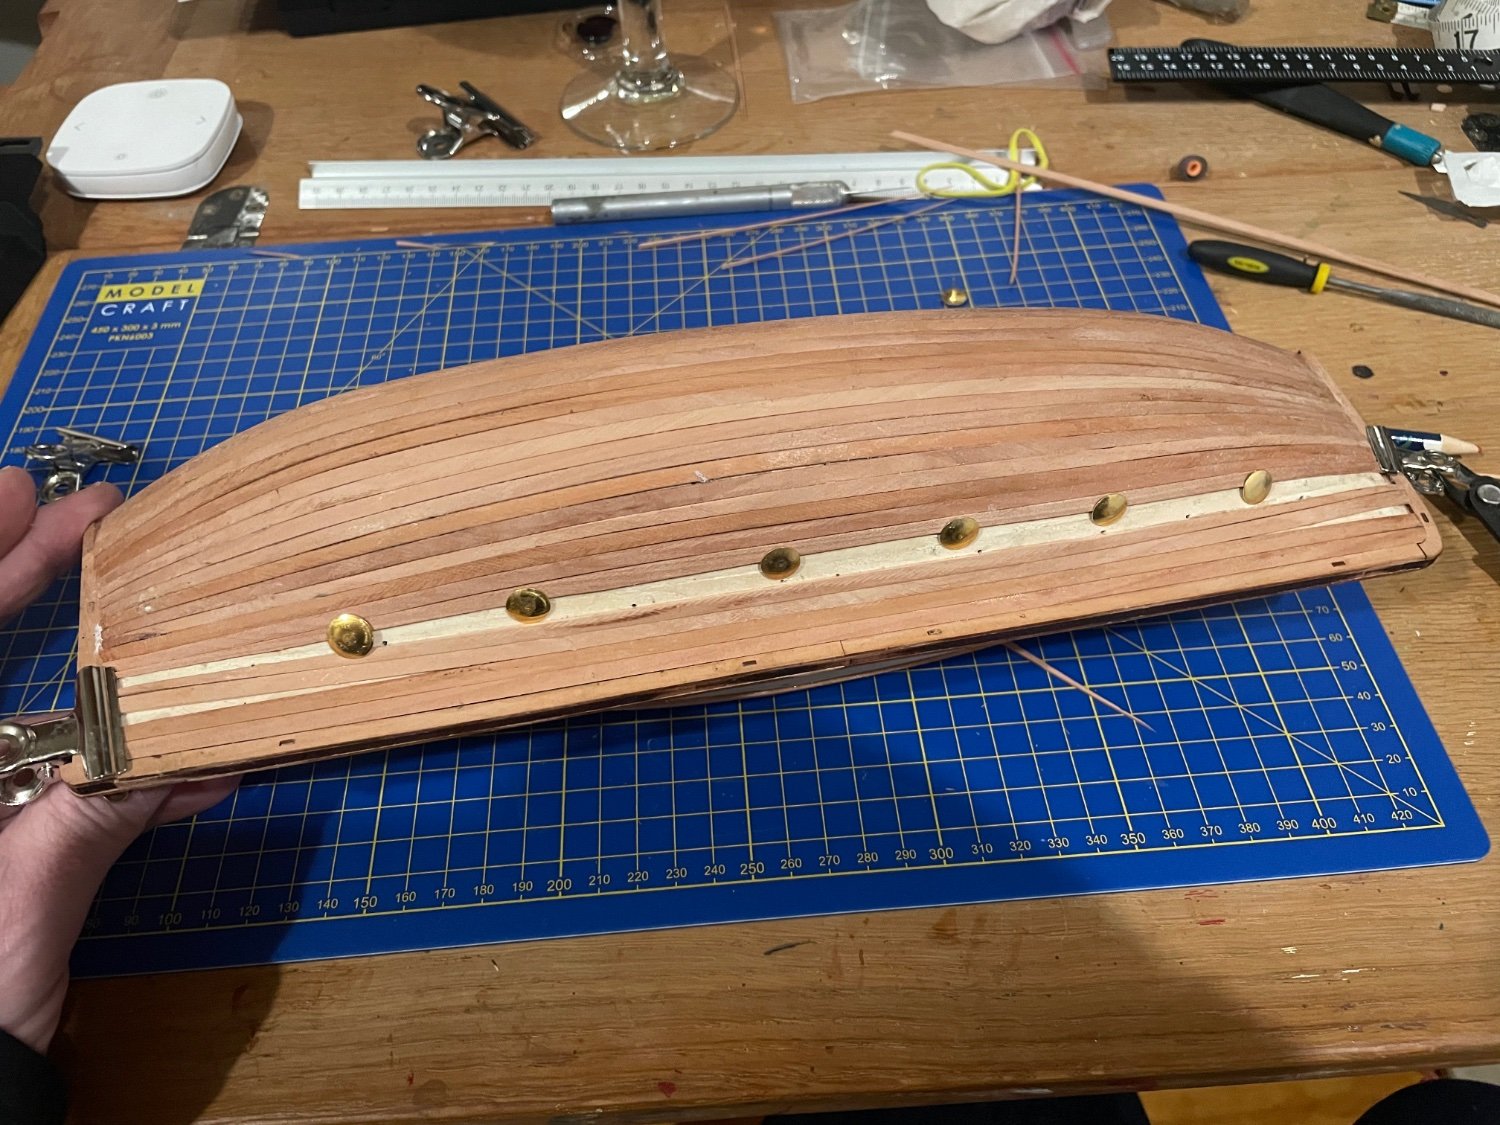
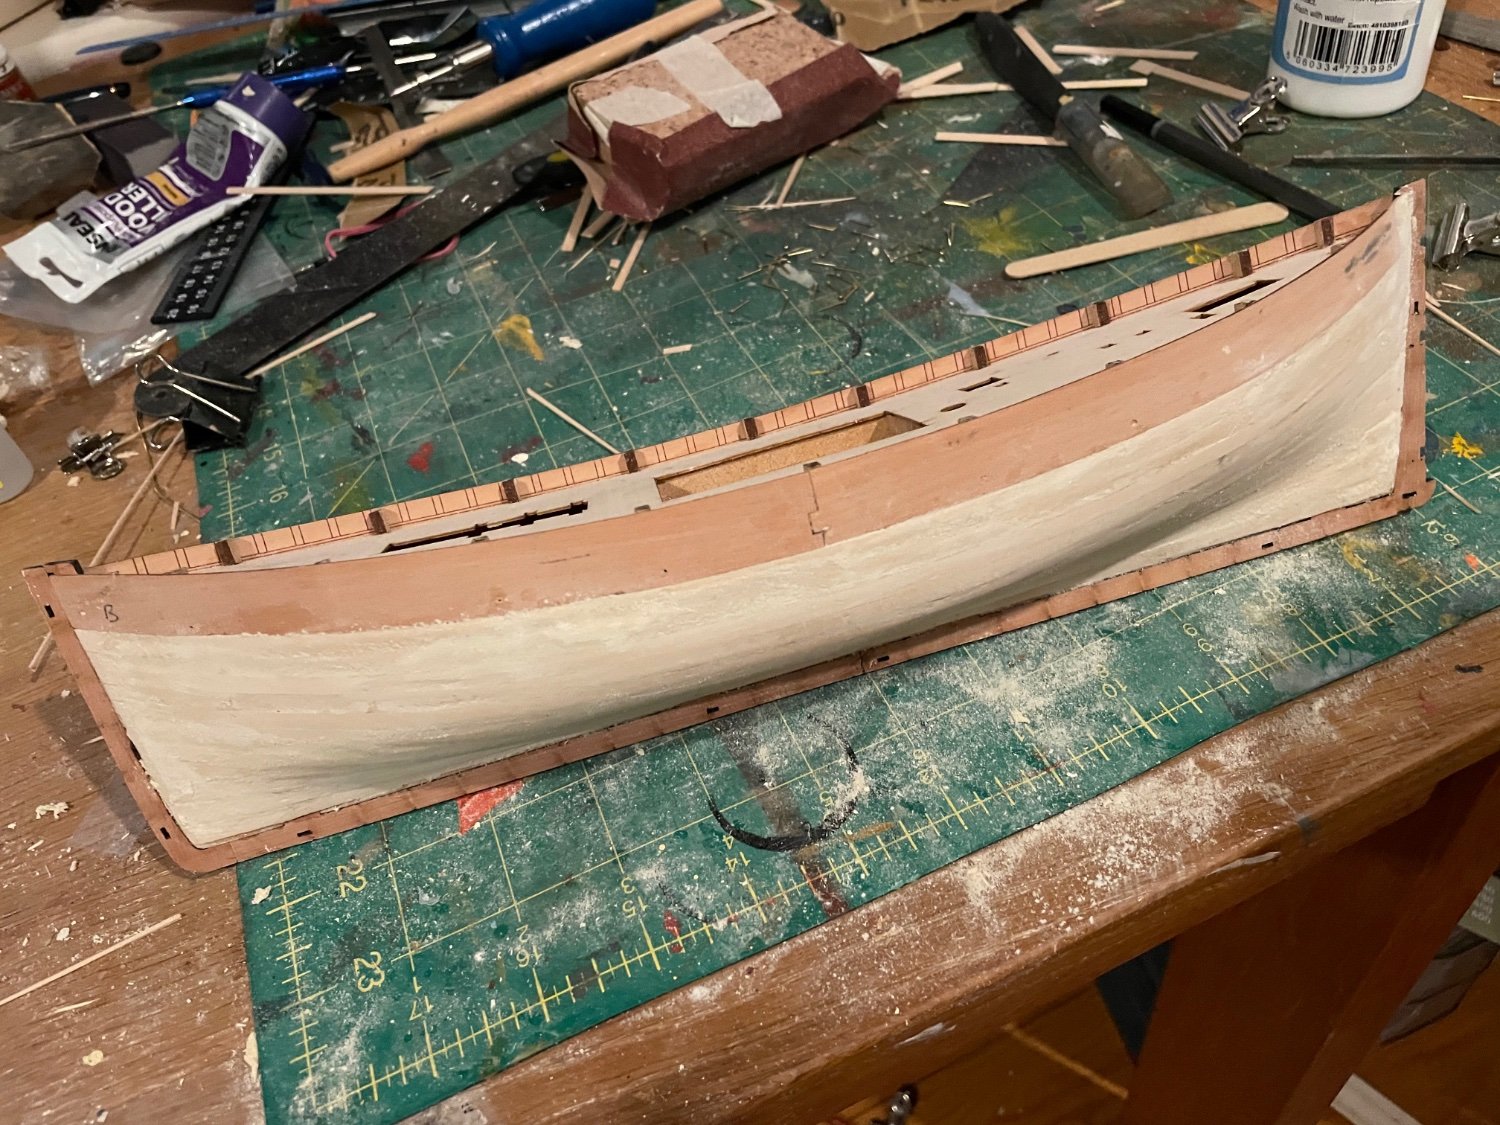
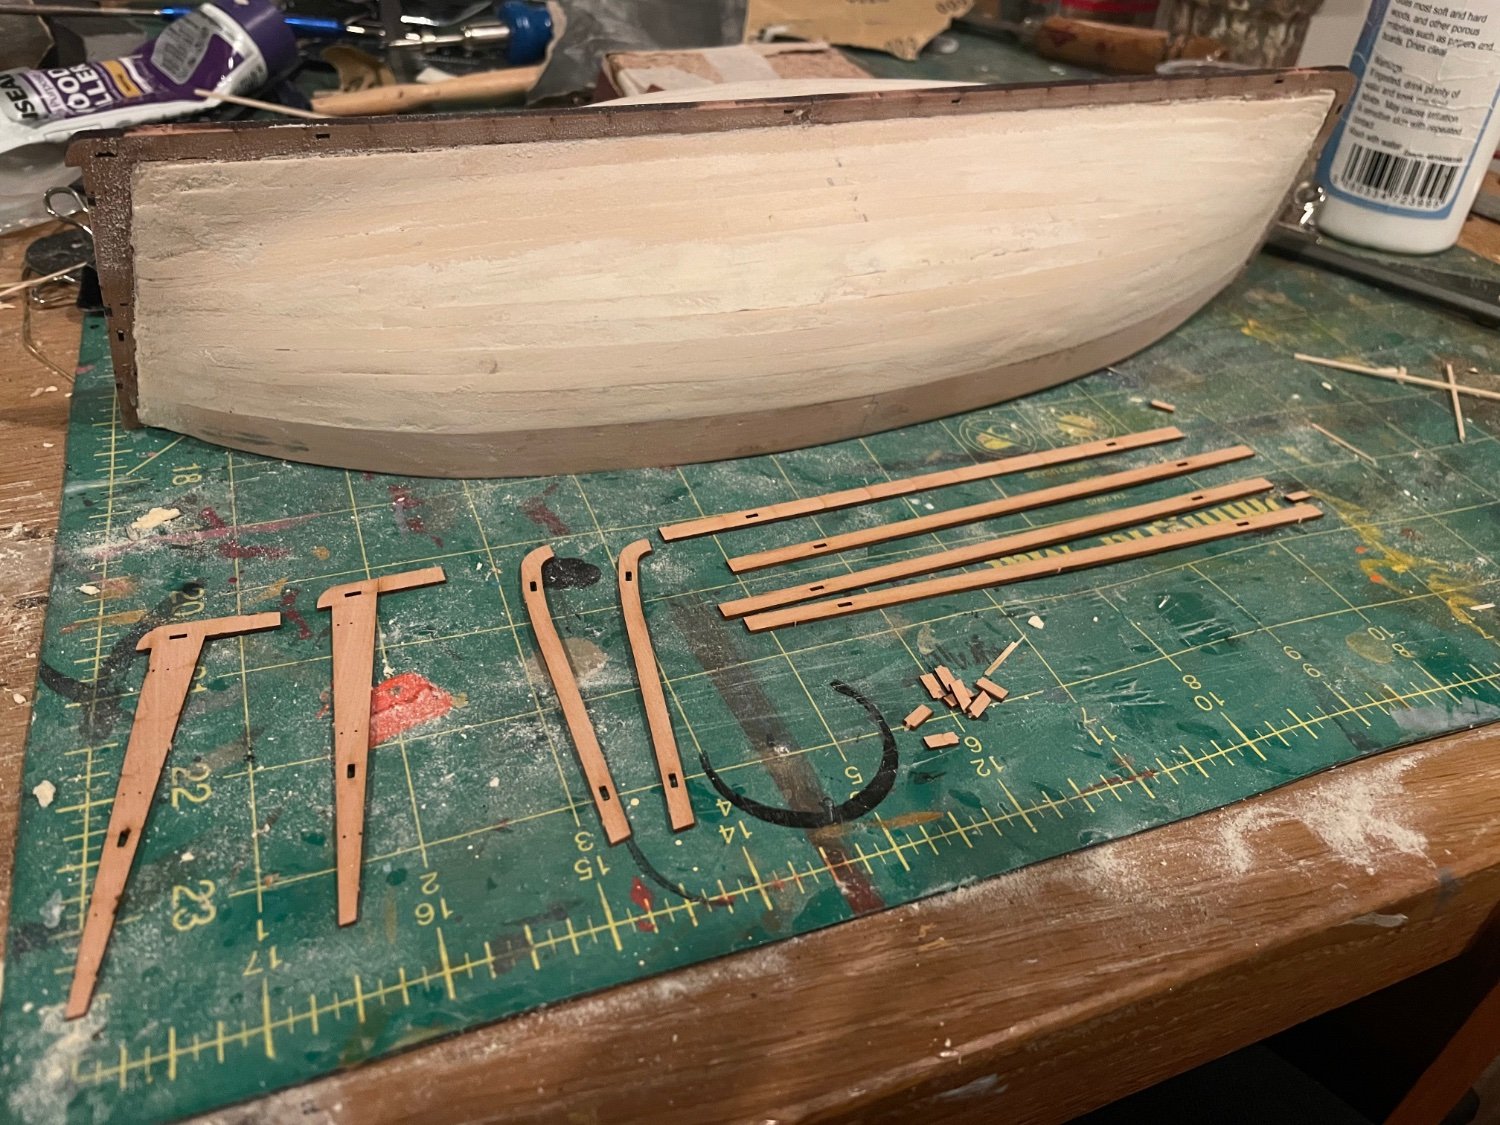
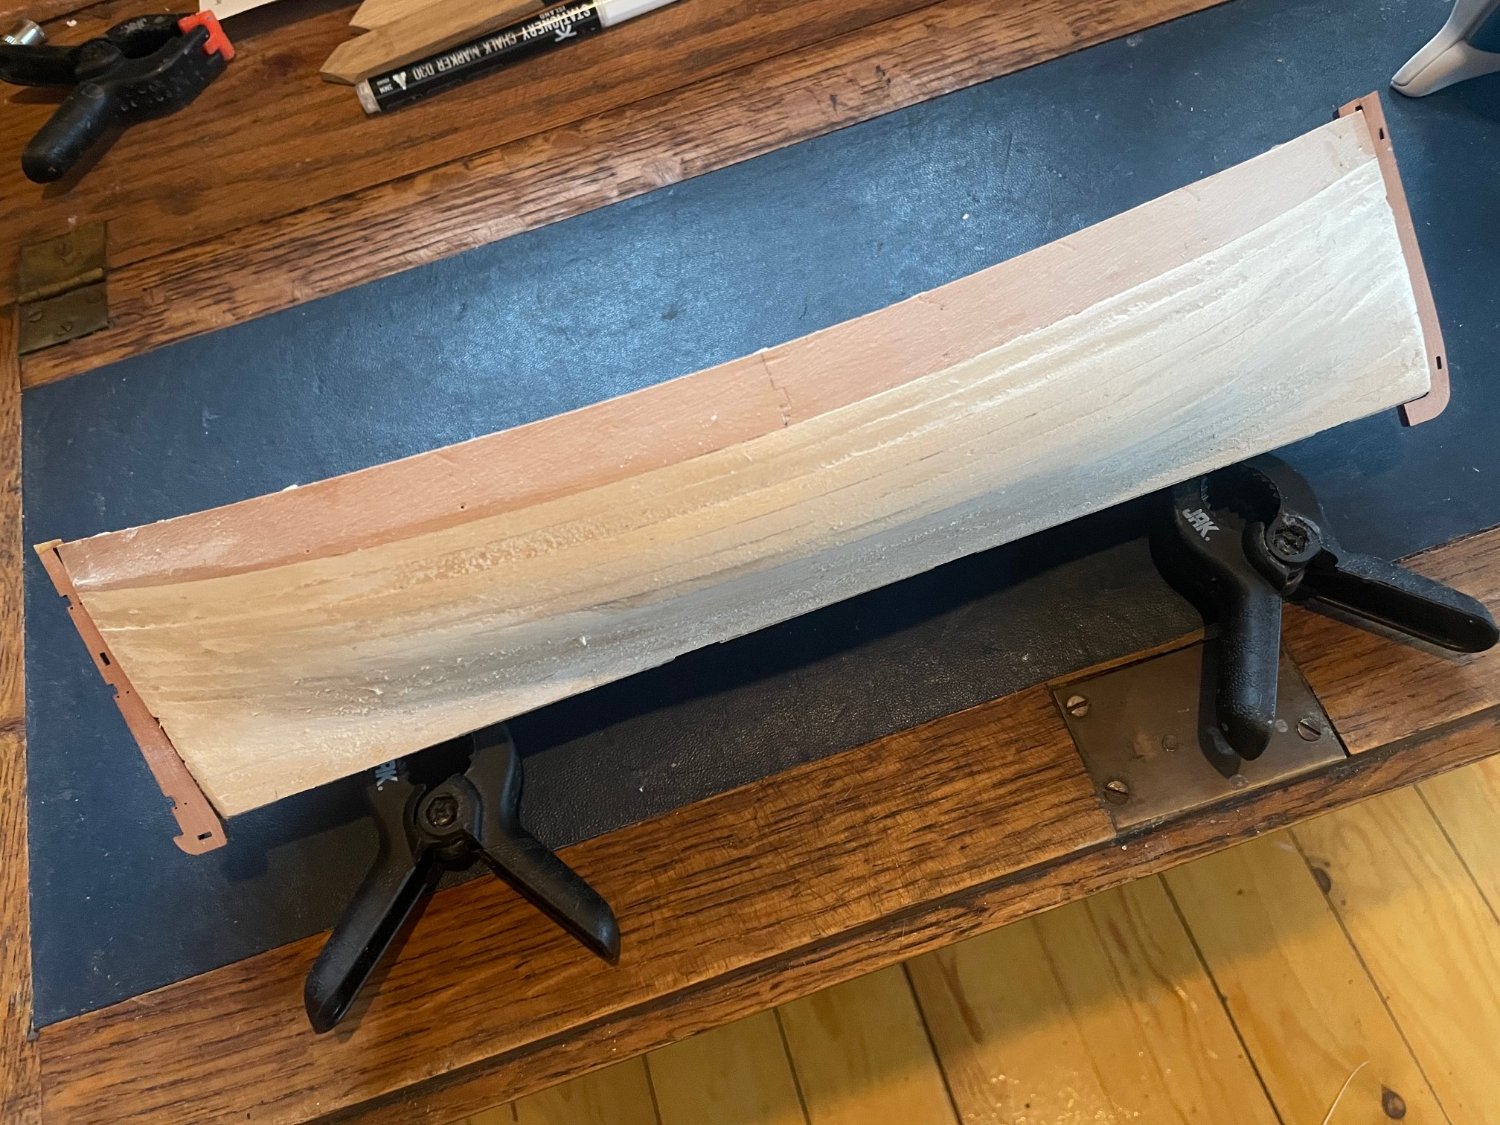
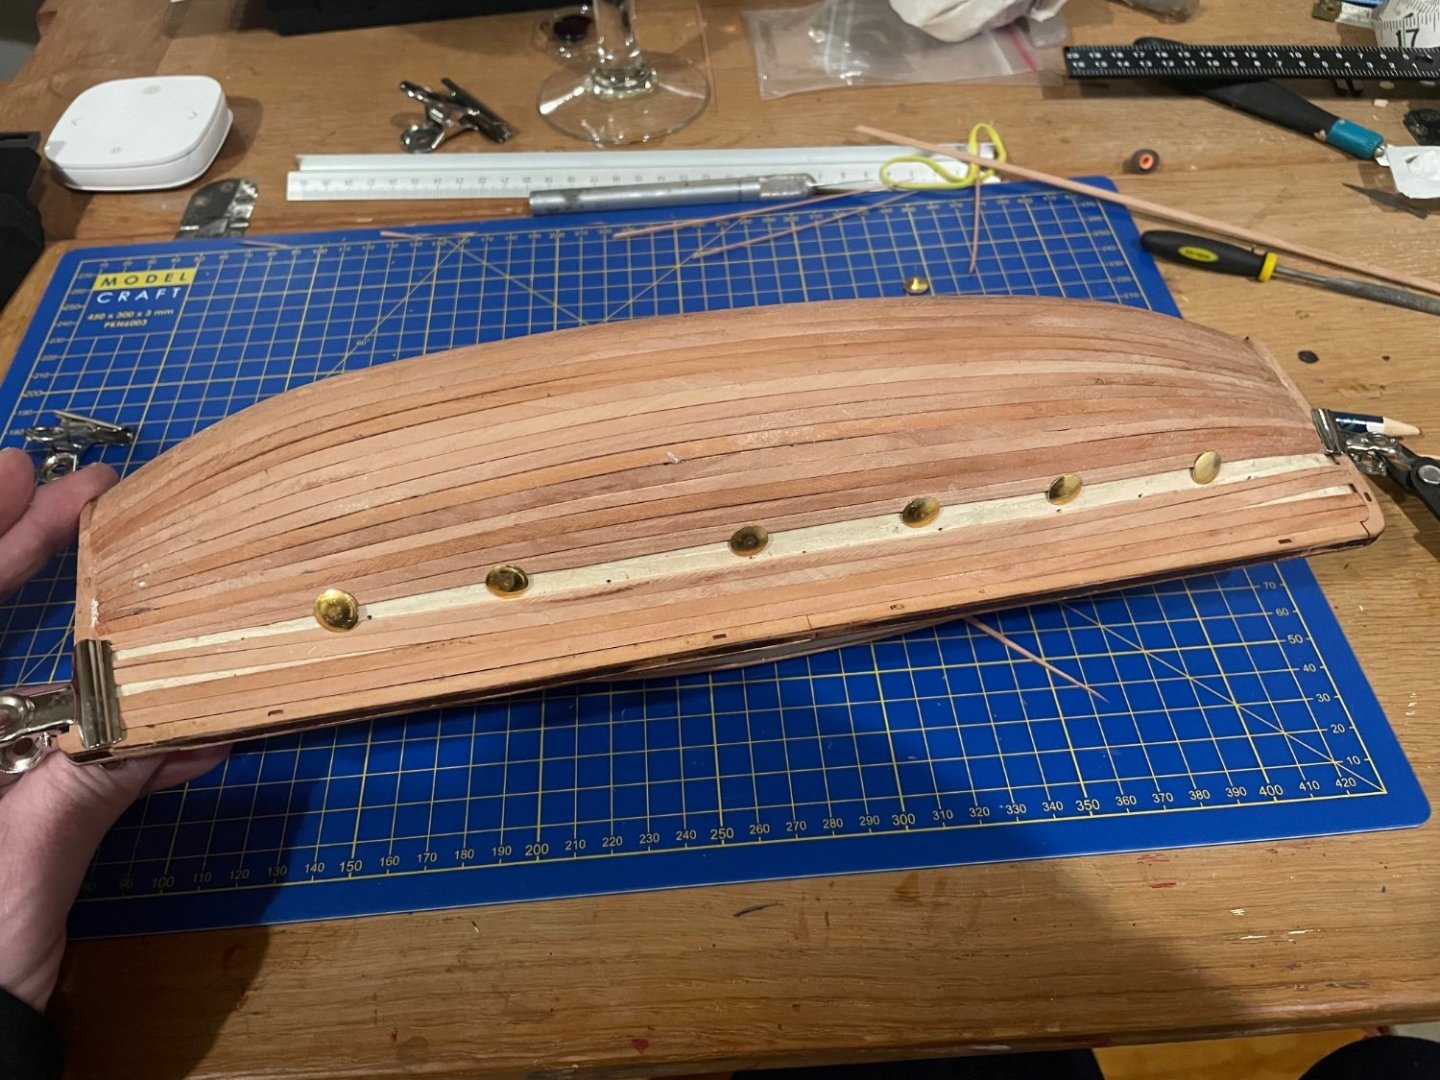
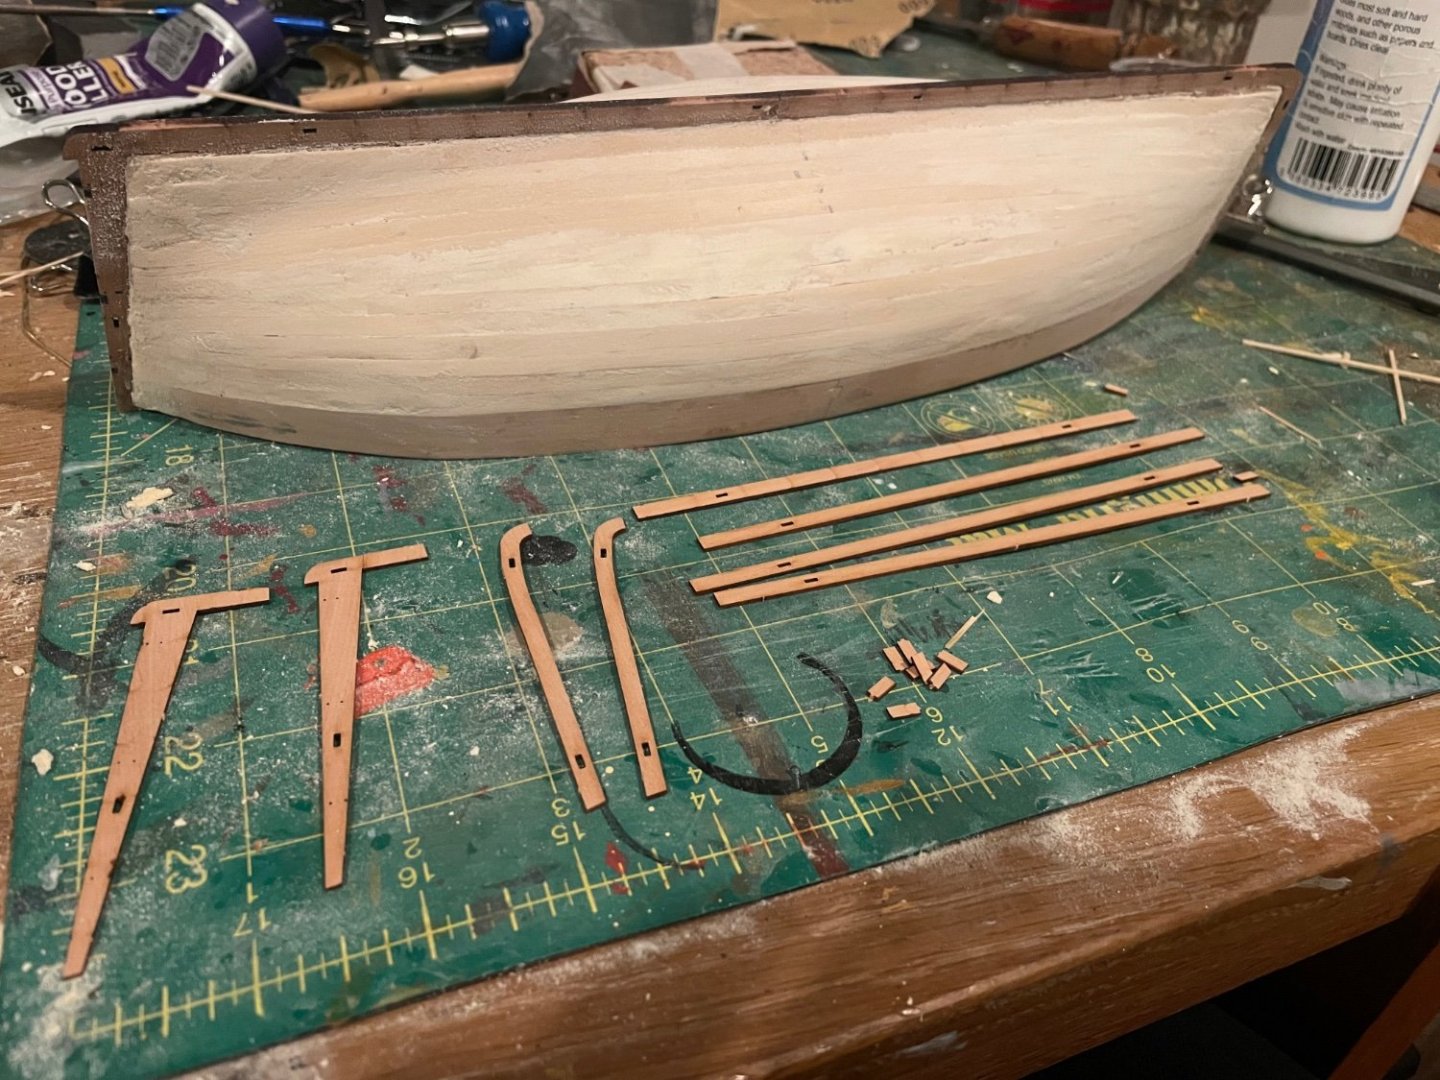
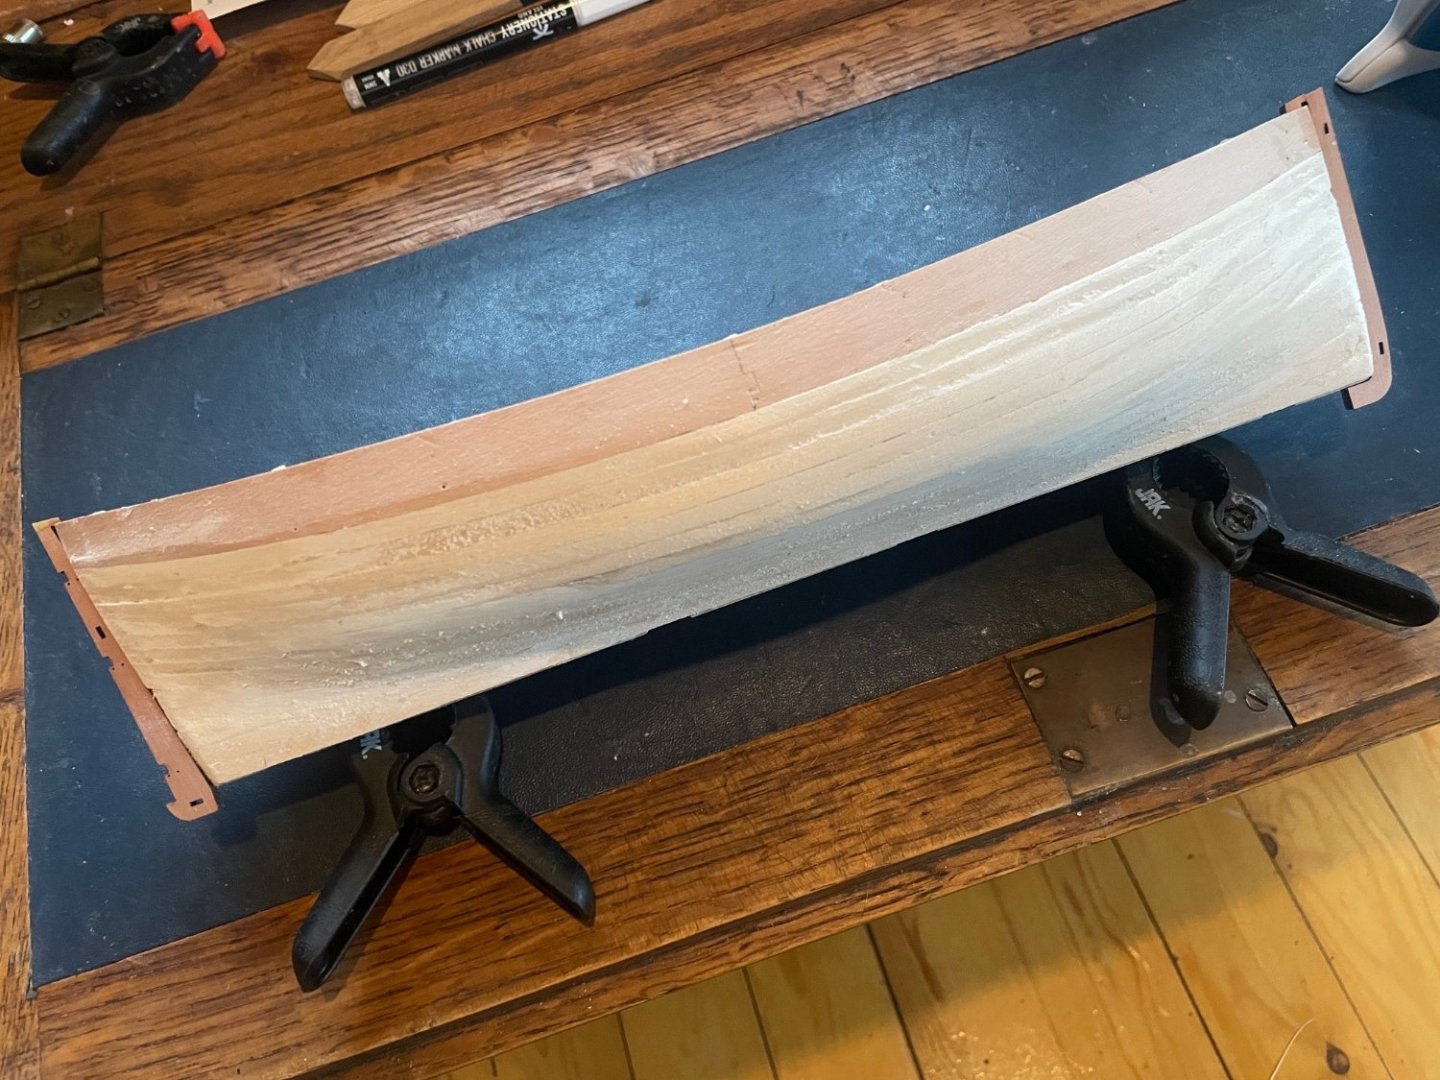
I’ve completed the second planking and sanded it. I’ve yet to apply 240 fine grit and I think maybe it needs more sanding before that, but I’m not sure how to tell when to stop. Here it is. As you can see, where to planks meet the prow and stern could be neater. I’ve also removed the top of the bulkheads from around the inside of the bulwarks above deck. Once I think the sanding is sufficient the next job is to add the rubbing strakes and rudder. Then I need to think about the paint I’ll use for the red part of the hull. Oh and I need something to use to create the waterline.


-
Etcher reacted to a post in a topic:
Orient Express Sleeping Car 1929 by aydingocer - FINISHED - Amati - Scale 1:32
-
Etcher reacted to a post in a topic:
Erycina 1882 by niwotwill - FINISHED - Vanguard Models - scale 1/64 - Plymouth Fishing Trawler
-
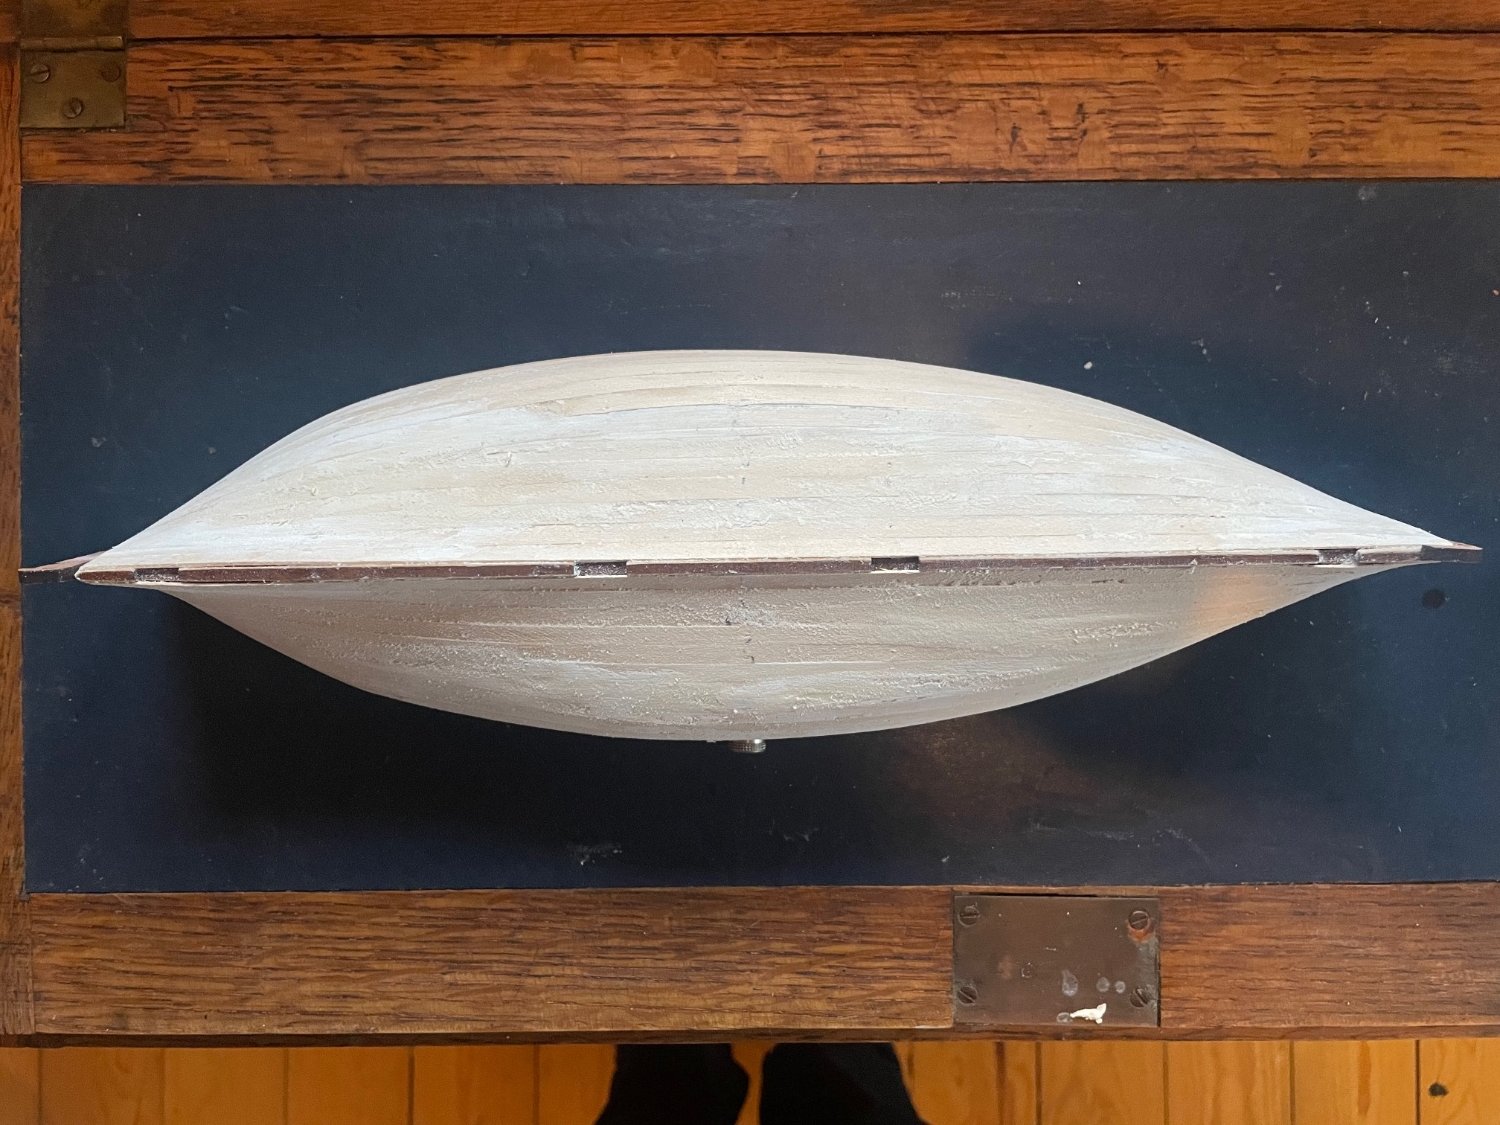
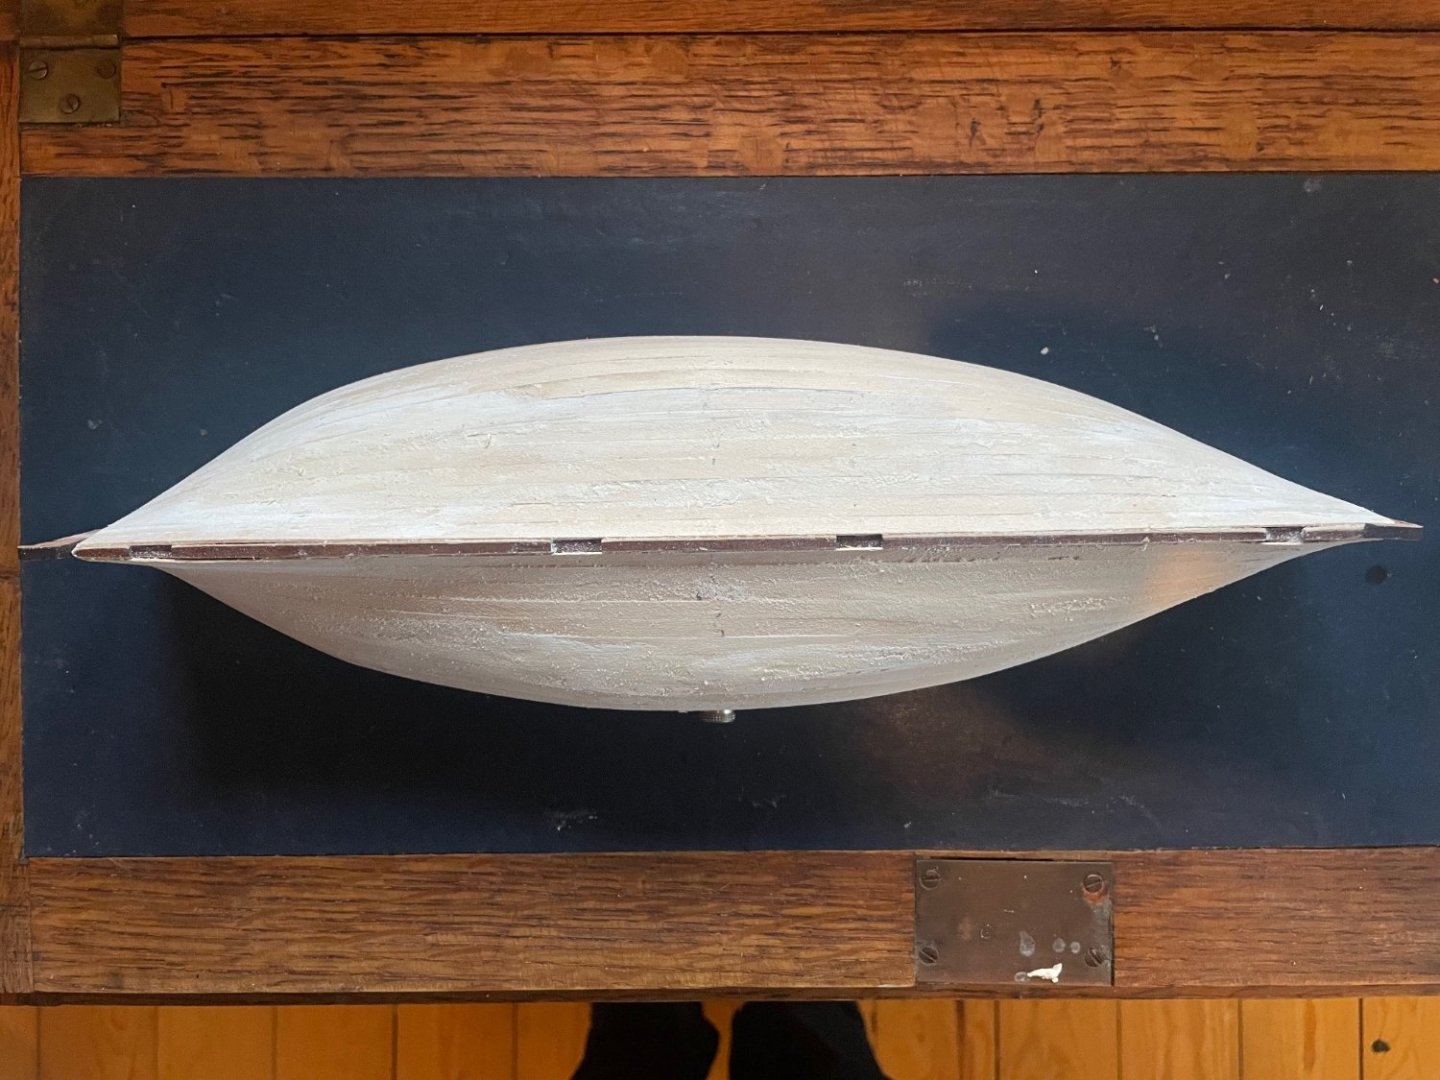
Okay I’ve nearly finished the second planking. No major problems, although not every plank fit neatly into either end. It’s difficult judging the correct length before fixing the plank in place I find. Easy to fill and it’s mainly in areas to be painted. See how it looks when sanded down. oh and new cutting mat!


-
Air brush vs paint & brush
Etcher replied to jefferyt's topic in Painting, finishing and weathering products and techniques
Thanks Tim, yes you seem to have understood the problem. My explanation probably lacked clarity! I’ll try to do as you say. Thanks! -
Etcher reacted to a post in a topic:
Air brush vs paint & brush
-
Air brush vs paint & brush
Etcher replied to jefferyt's topic in Painting, finishing and weathering products and techniques
Actually that is how it is meant to be. That is the way the nozzle is. Anyway the issue is with the adapter being stuck in the tube.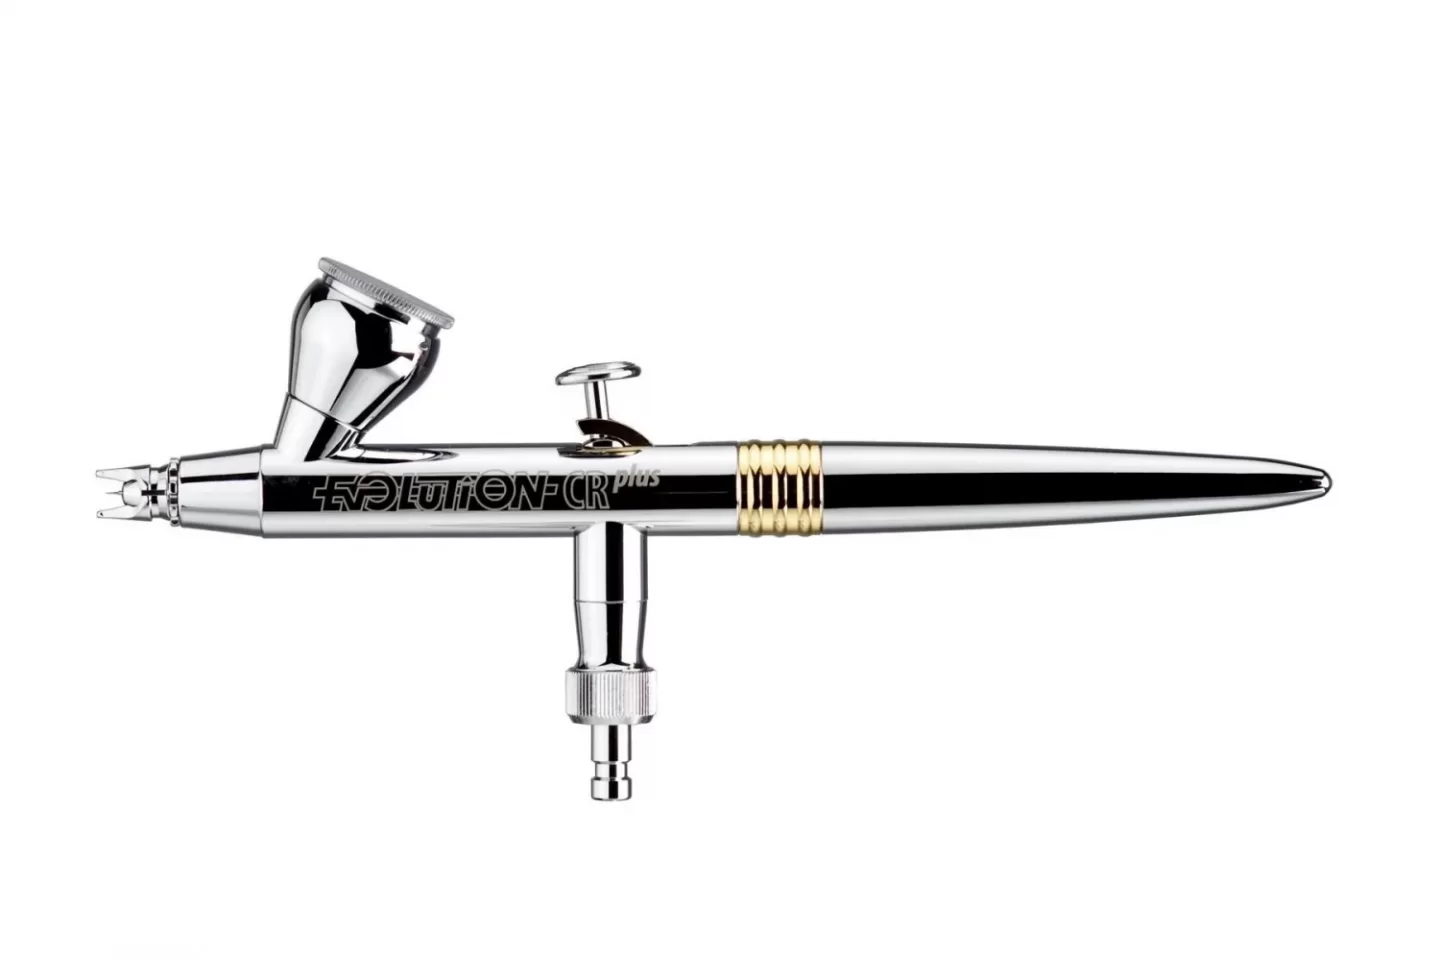
-
Air brush vs paint & brush
Etcher replied to jefferyt's topic in Painting, finishing and weathering products and techniques
Yes the nozzle is in the box. I haven’t used it for over a year. -
Air brush vs paint & brush
Etcher replied to jefferyt's topic in Painting, finishing and weathering products and techniques
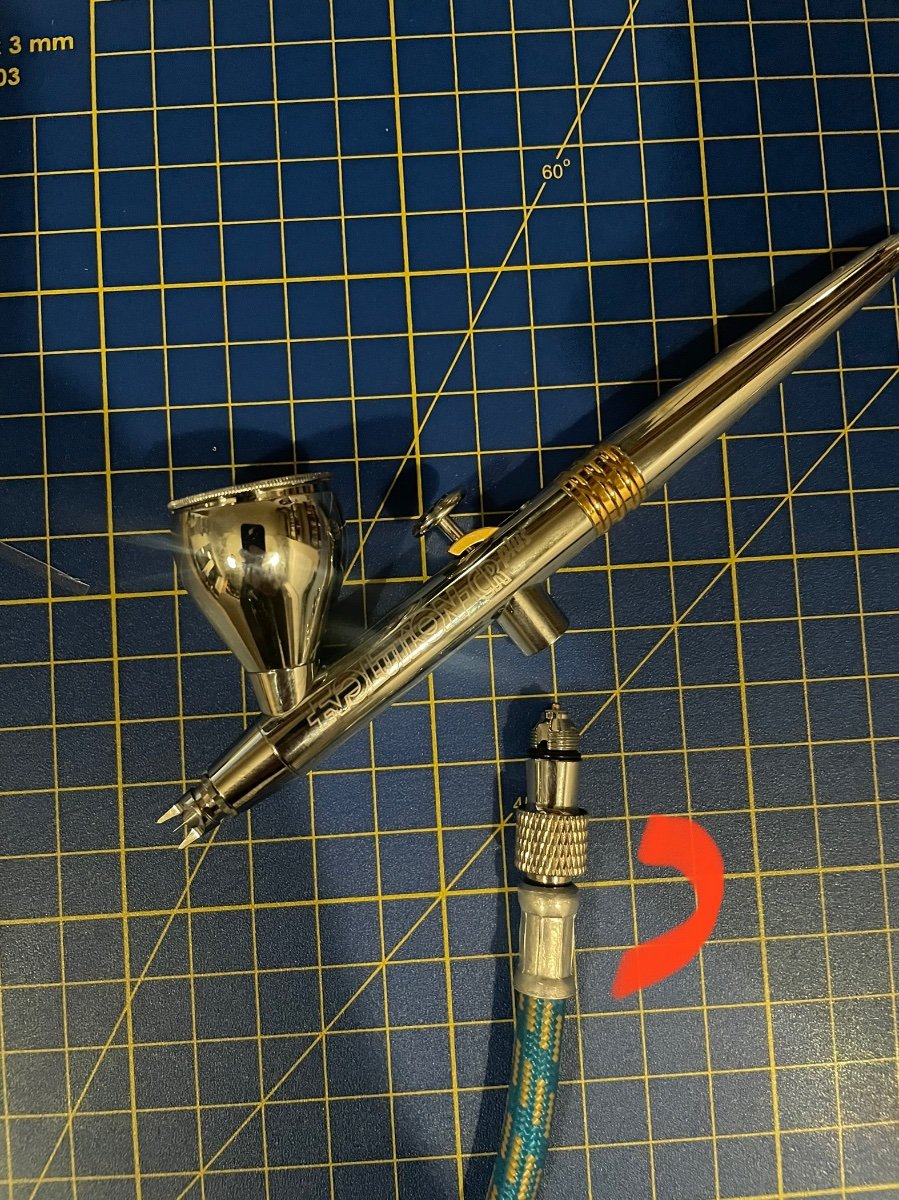
Okay, having expressed misgivings about using airbrushes above I’ve decided to give it another go and get mine out of the box. I bought an Evolution Cr plus to to replace the cheaper passche I had previously. I still have the same compressor though, which probably isn’t up to the job. One problem I have is that the part that connects the airbrush to the tube(?) is jammed in. It happened first time I tried to use it. Here’s what I mean. The red line shows the parts stuck together. Apart from that I had trouble getting the hang of the double action but didn’t really persevere.
-
Etcher reacted to a post in a topic:
Lady Eleanor by Etcher - Vanguard Models - 1:64 Scale - Sailing Fifie
-
My build of this kit started 7 years ago and it’s not planked yet, so yours is fresh by comparison! 😂 You made a much better job of meeting the bulwark pieces at the bow. It looks a lot neater. Like, ‘This is how it should look’!
- 204 replies
-
- 1
-
-
- kitbashing
- Woodcarving
- (and 4 more)
-
Has anyone had experience using a wooden kit for a diorama where it basically becomes a waterline model? I’m thinking of building OcCre’s Terror in the future but in a diorama based upon the Dan Simmon’s novel, with the ship stuck in frozen water. This will be doubly attractive to me as I’m not keen on the lower hull of that ship anyway! 😂 I was thinking maybe of building it as normal with bulkheads and basically not planking it from a bit below the waterline. Then inserting it into a wooden support. It would be a quite deep surface but I intend to maybe having text from the novel around the sides of the wooden support, probably white text on black background, with ‘Terror’ at either end. I might do a drawing of it to further plan it out. 🧐
- 1 reply
-
- 1
-
-
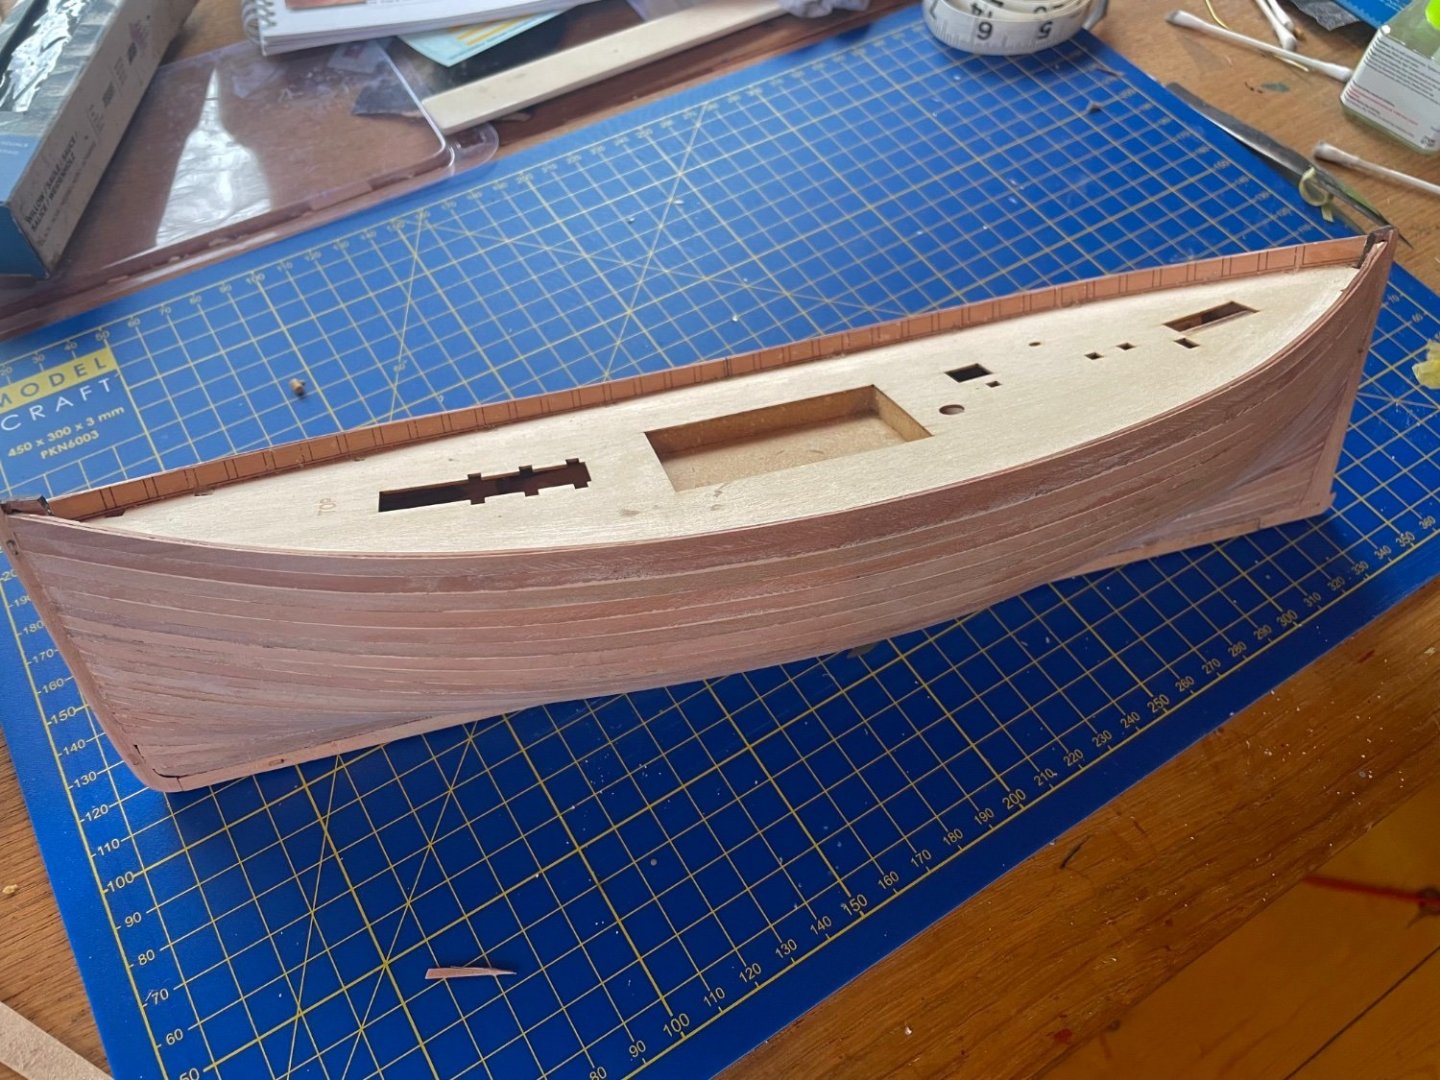
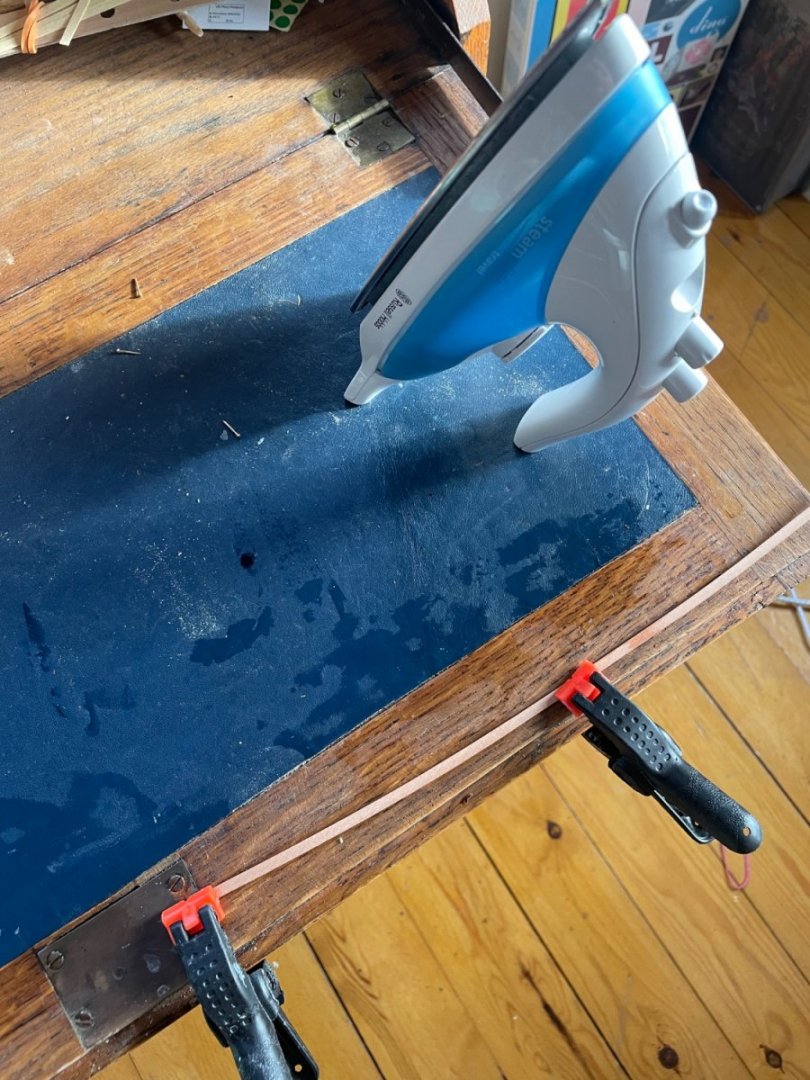
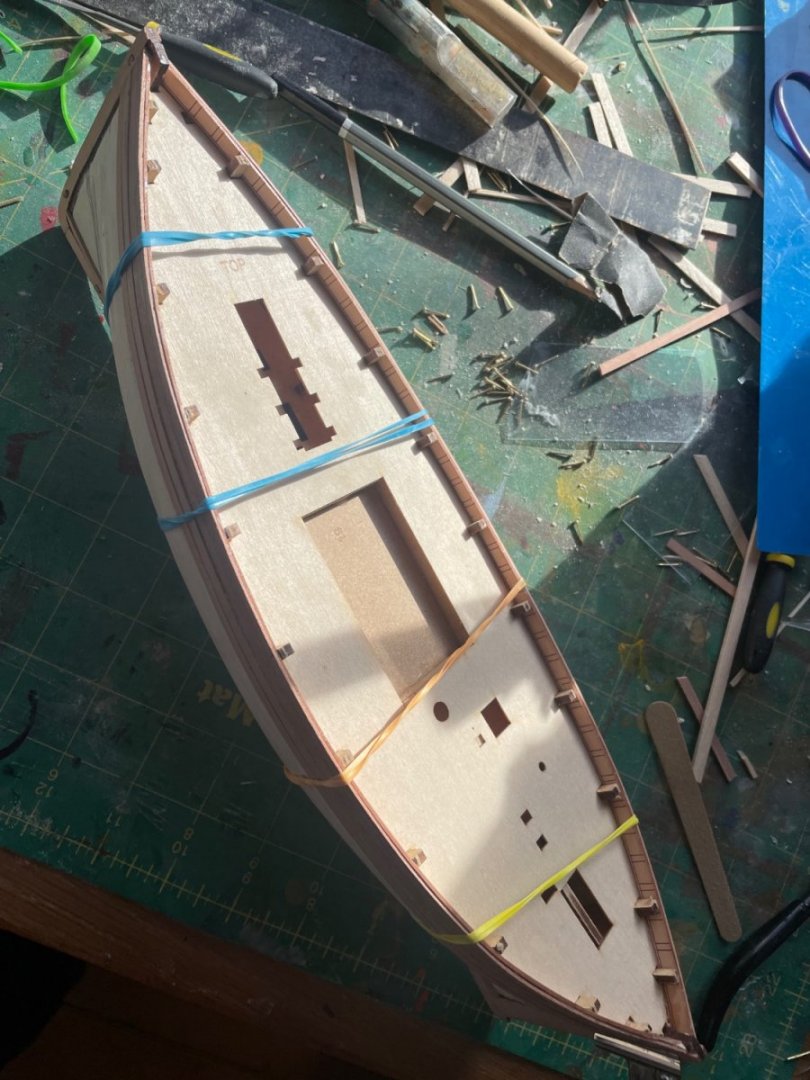
I started the second planking. I’m pre-bending with a £10 travel iron I bought recently, making the pack bender I also bought recently redundant! The iron is more useful I find. I’m mainly using elastic bands to hold planks in place and glueing with PVA, with a dab on CA on the end of the planks for fixing against the prow and stern. Now I’ve started to taper the planks as I progress down the hull, and I’ve fixed on the garboard plank.

-
This is a kit I’m interested in building. The only thing that puts me off is the odd shaped hull. During builds it always looks like it’s wrong!
-
I think Vanguard kits are a good choice for someone new to the hobby. Their instructions don’t assume prior knowledge and are very clear.
-
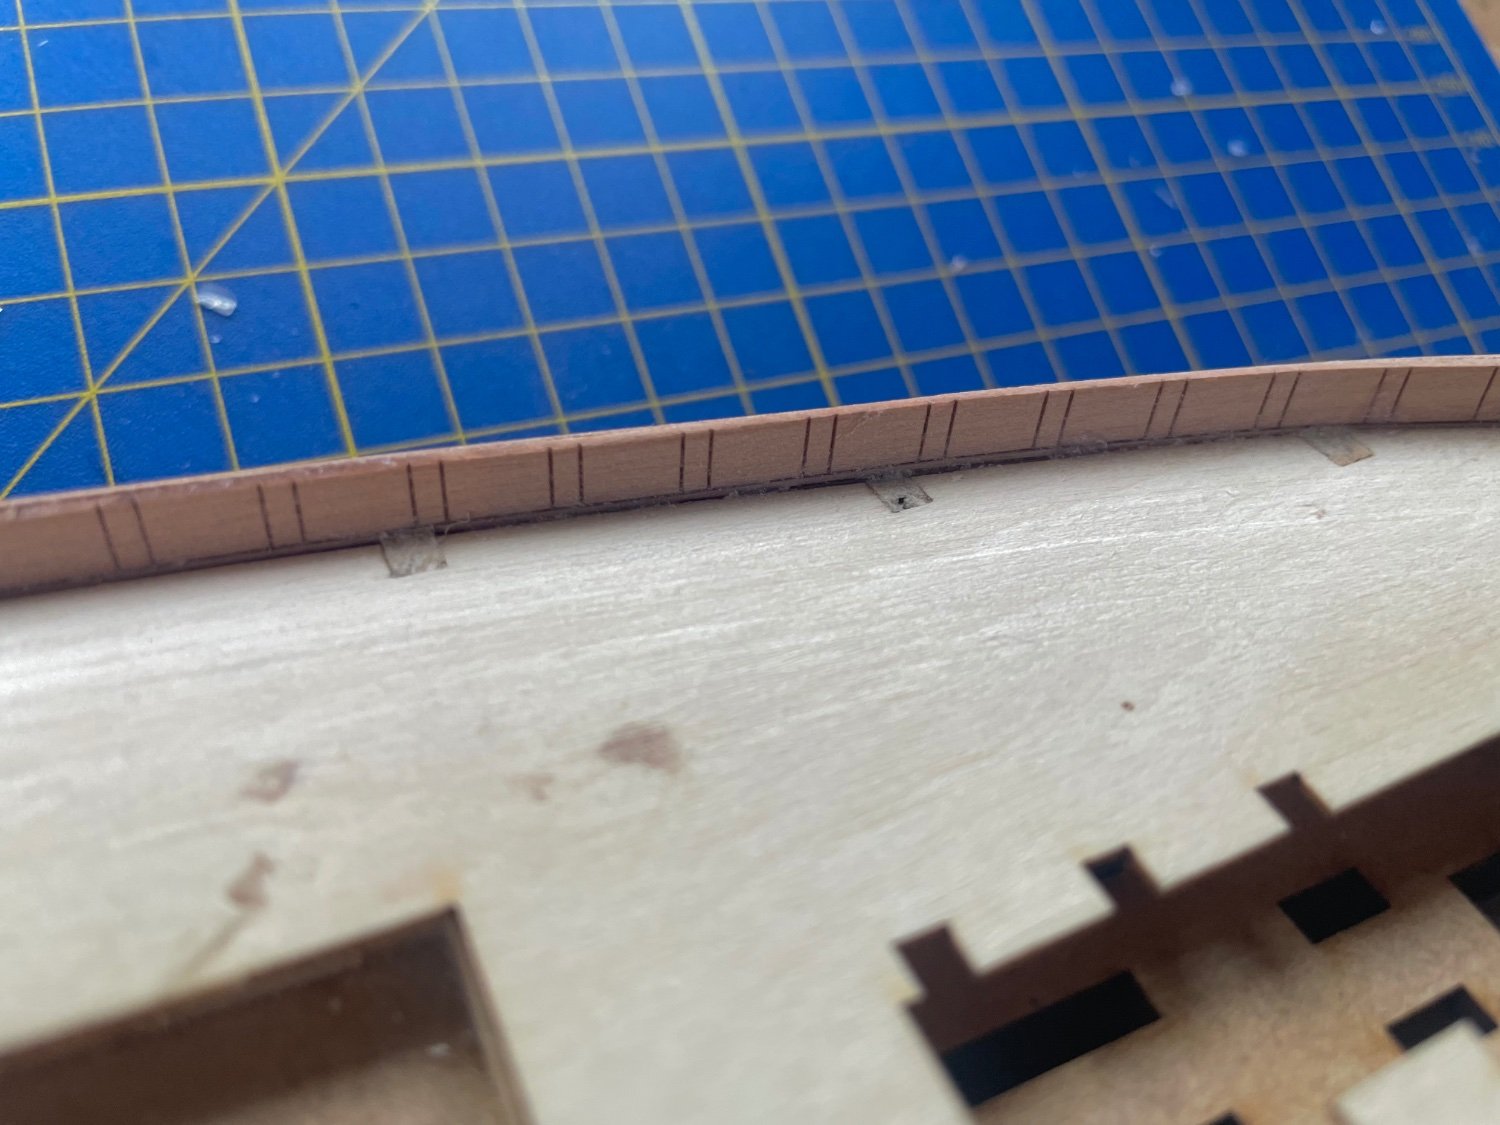
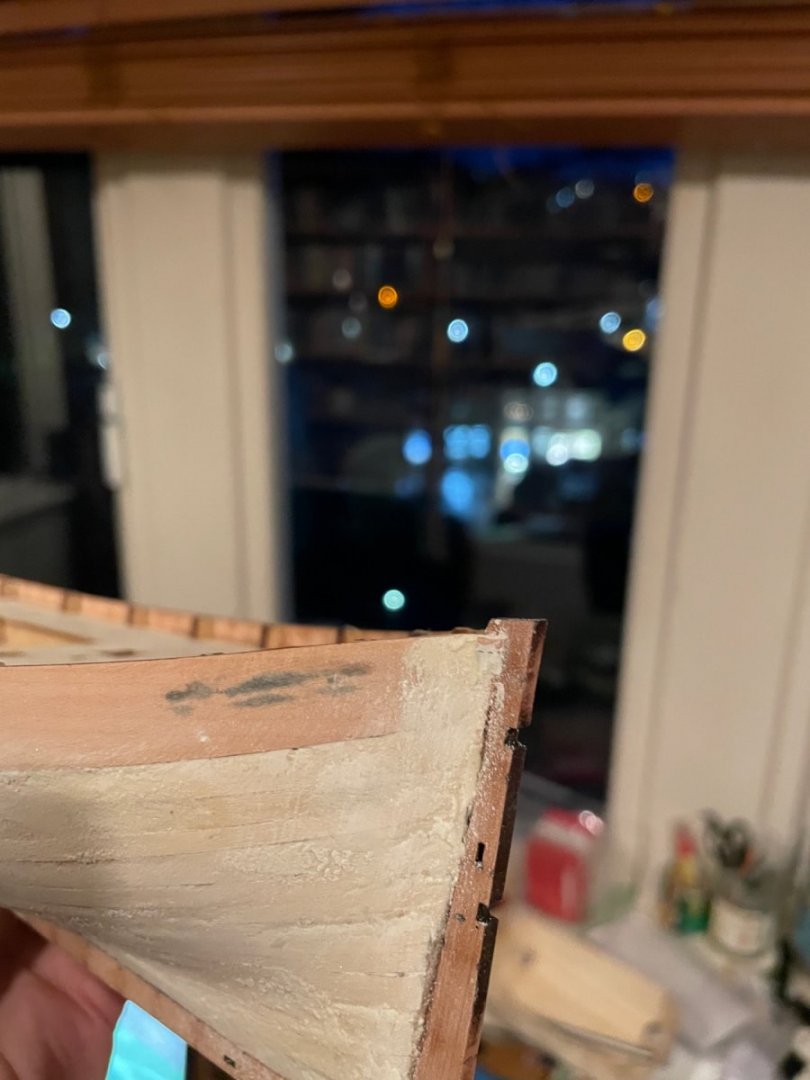
I filled the gap between the bulwark and sternpost okay. It was straightforward. And I’ve also glued the front and back keel pieces in place. Next I need to fix the rabbet in place for the keel, sternpost and prow. Here are the pieces cut from the 1mm pear sheet along with the alignment pins that secure them correctly.


-
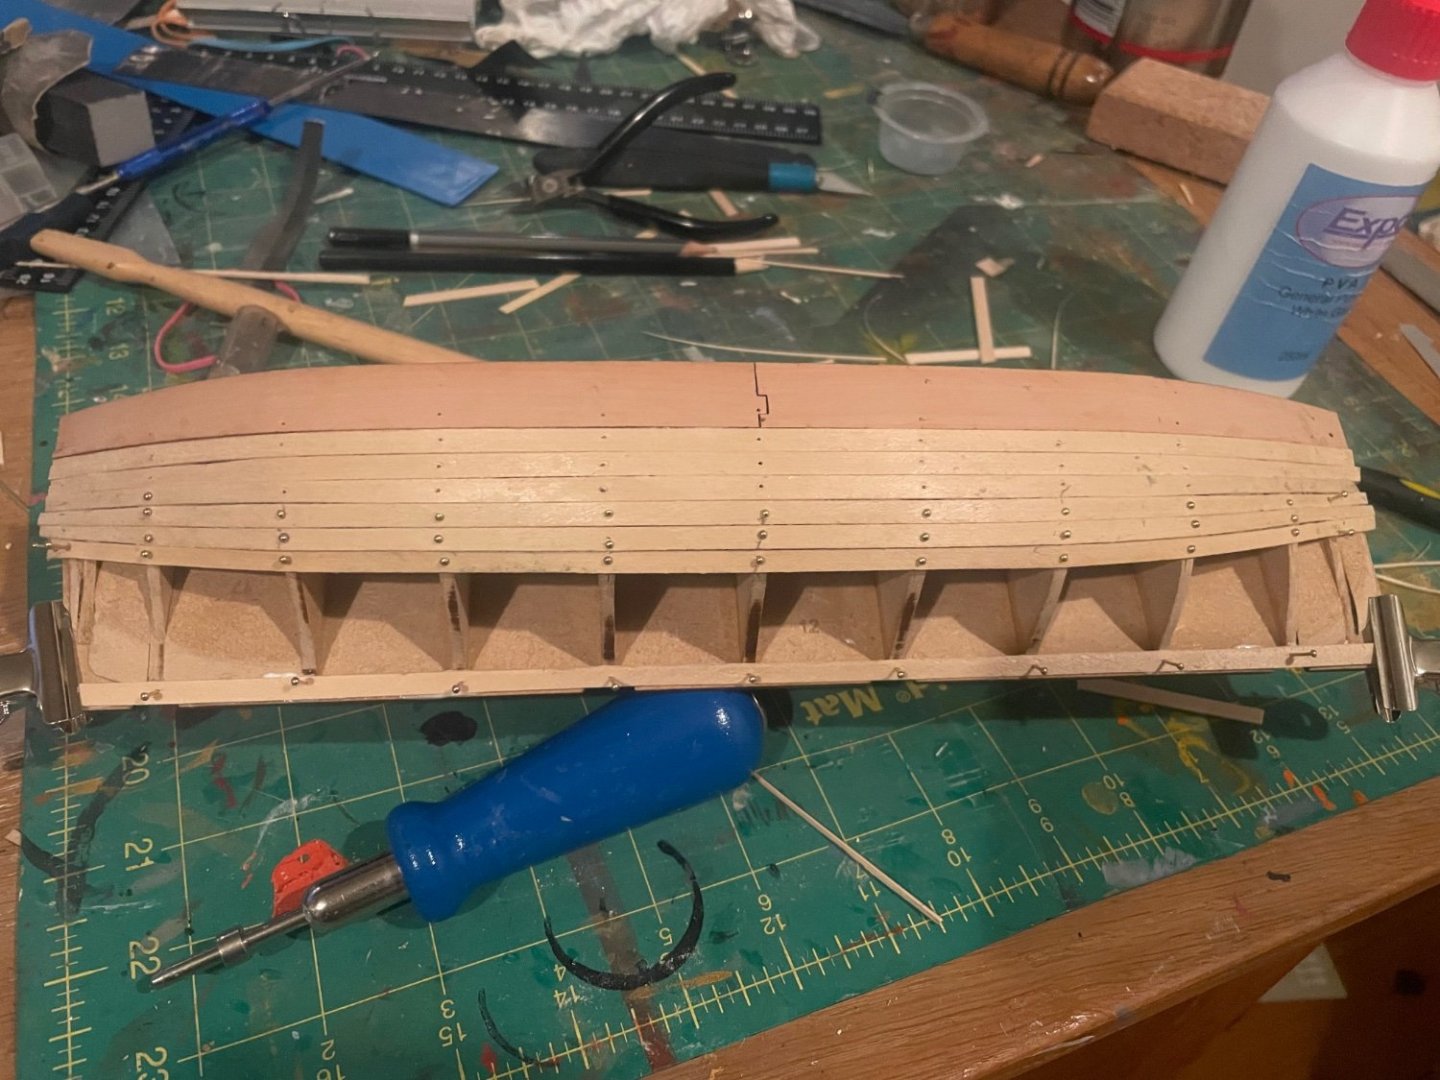
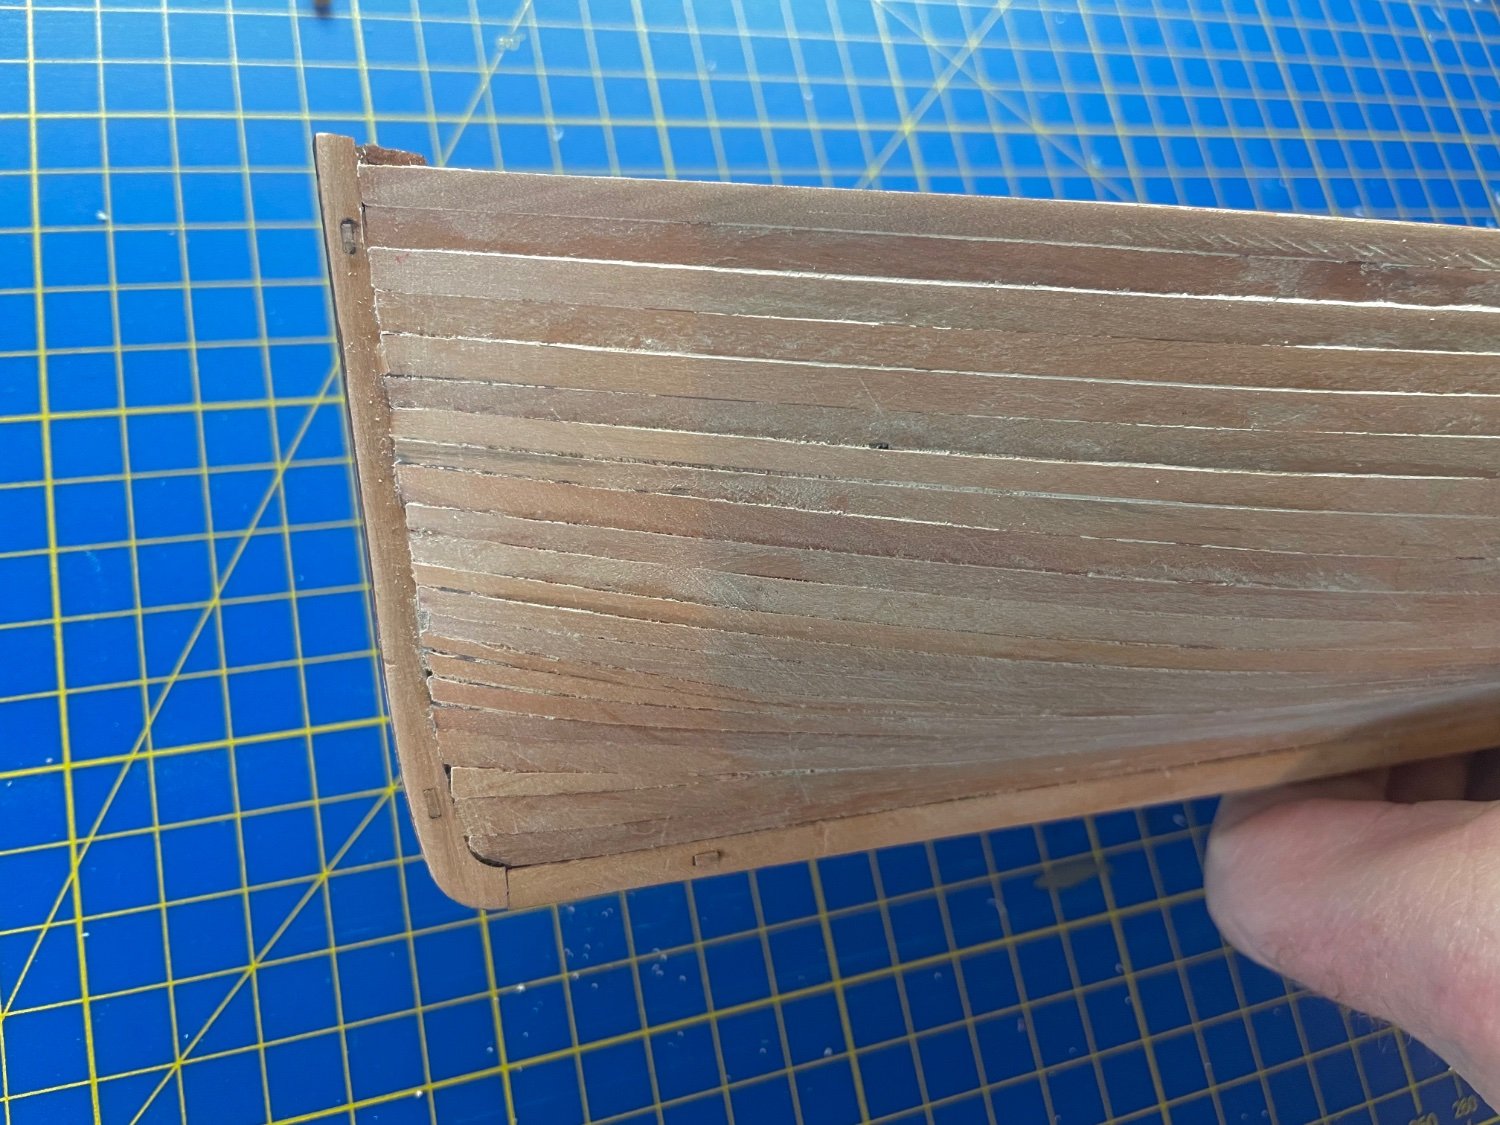
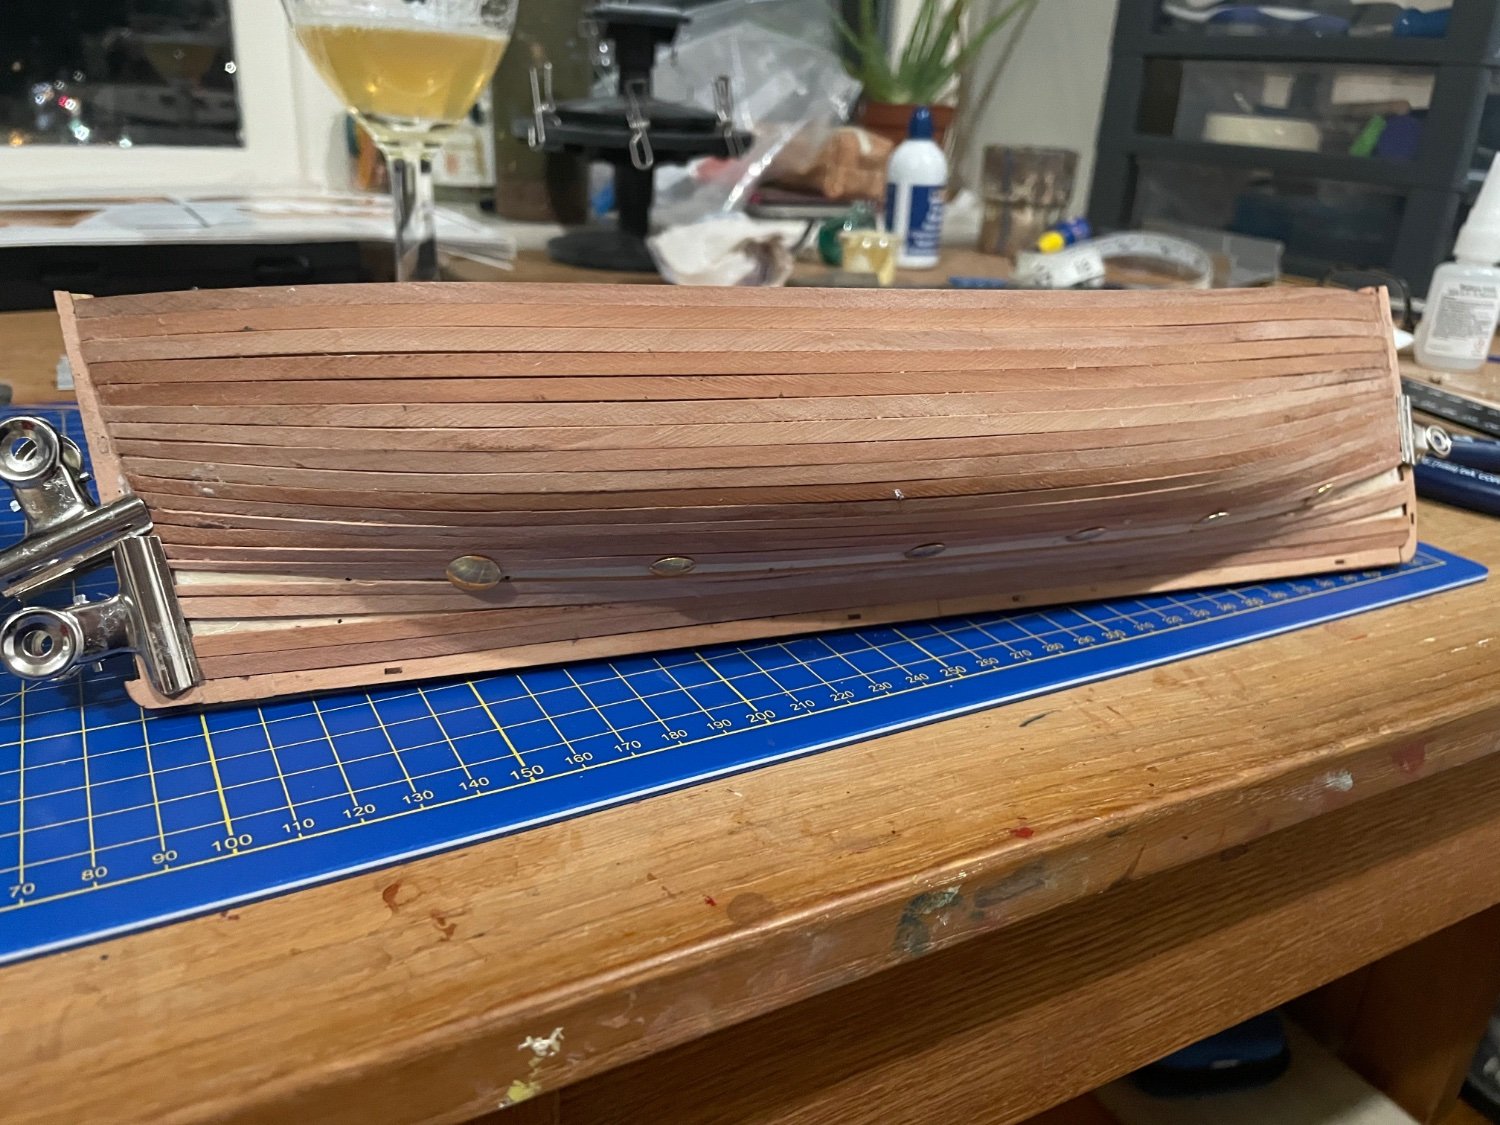
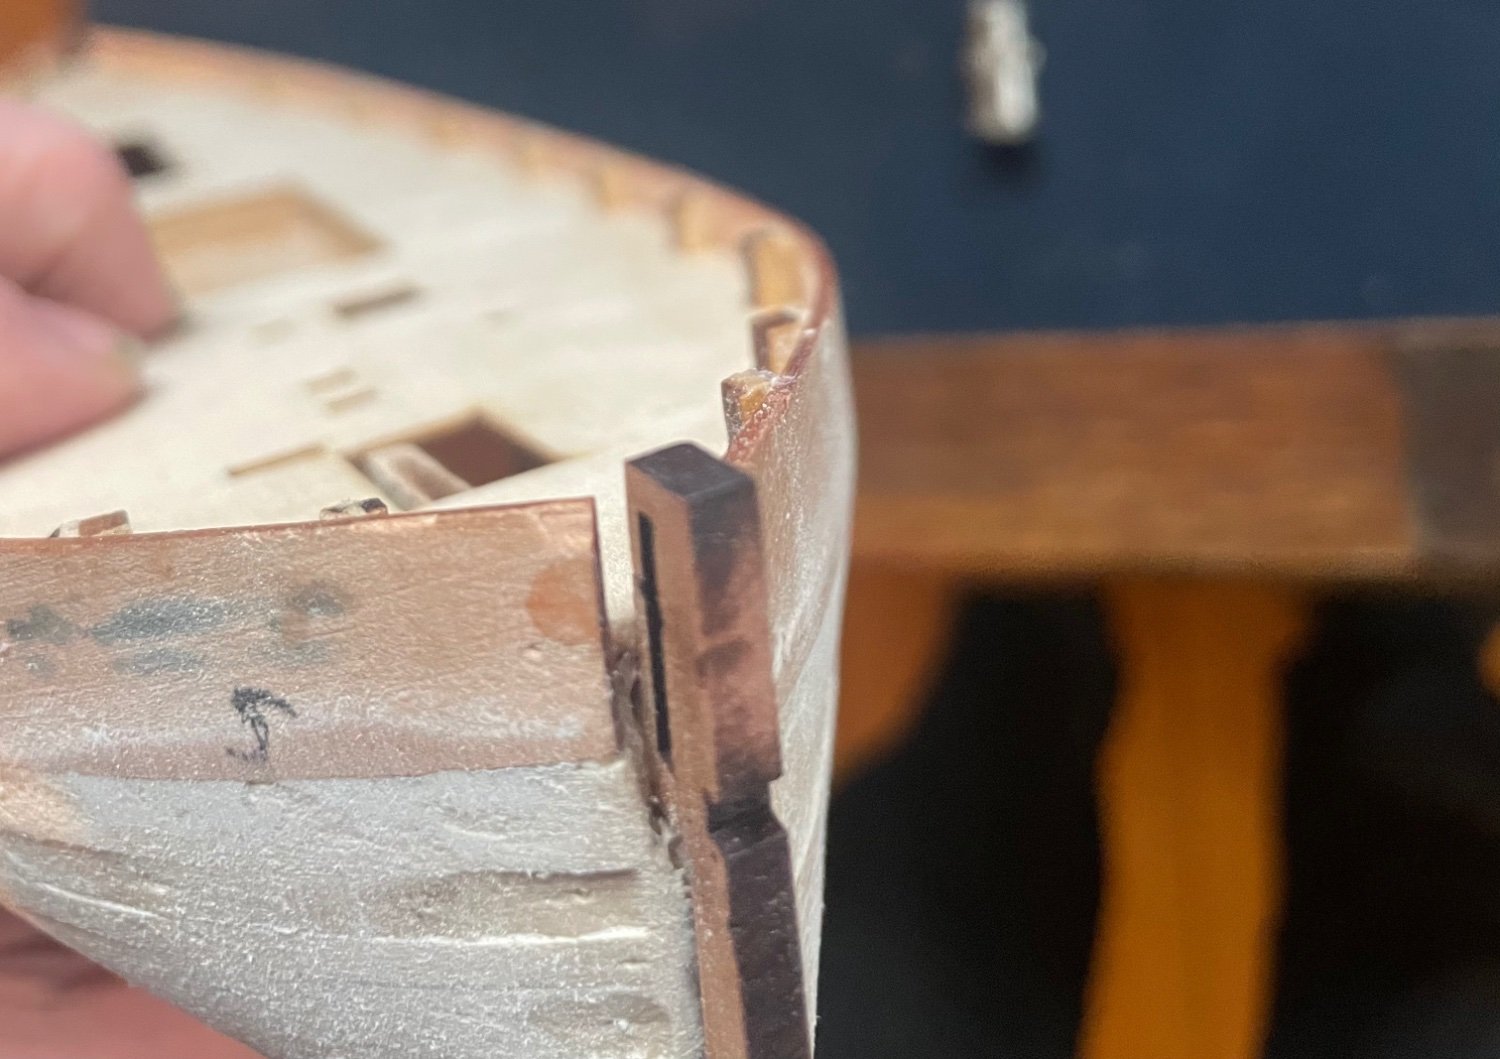
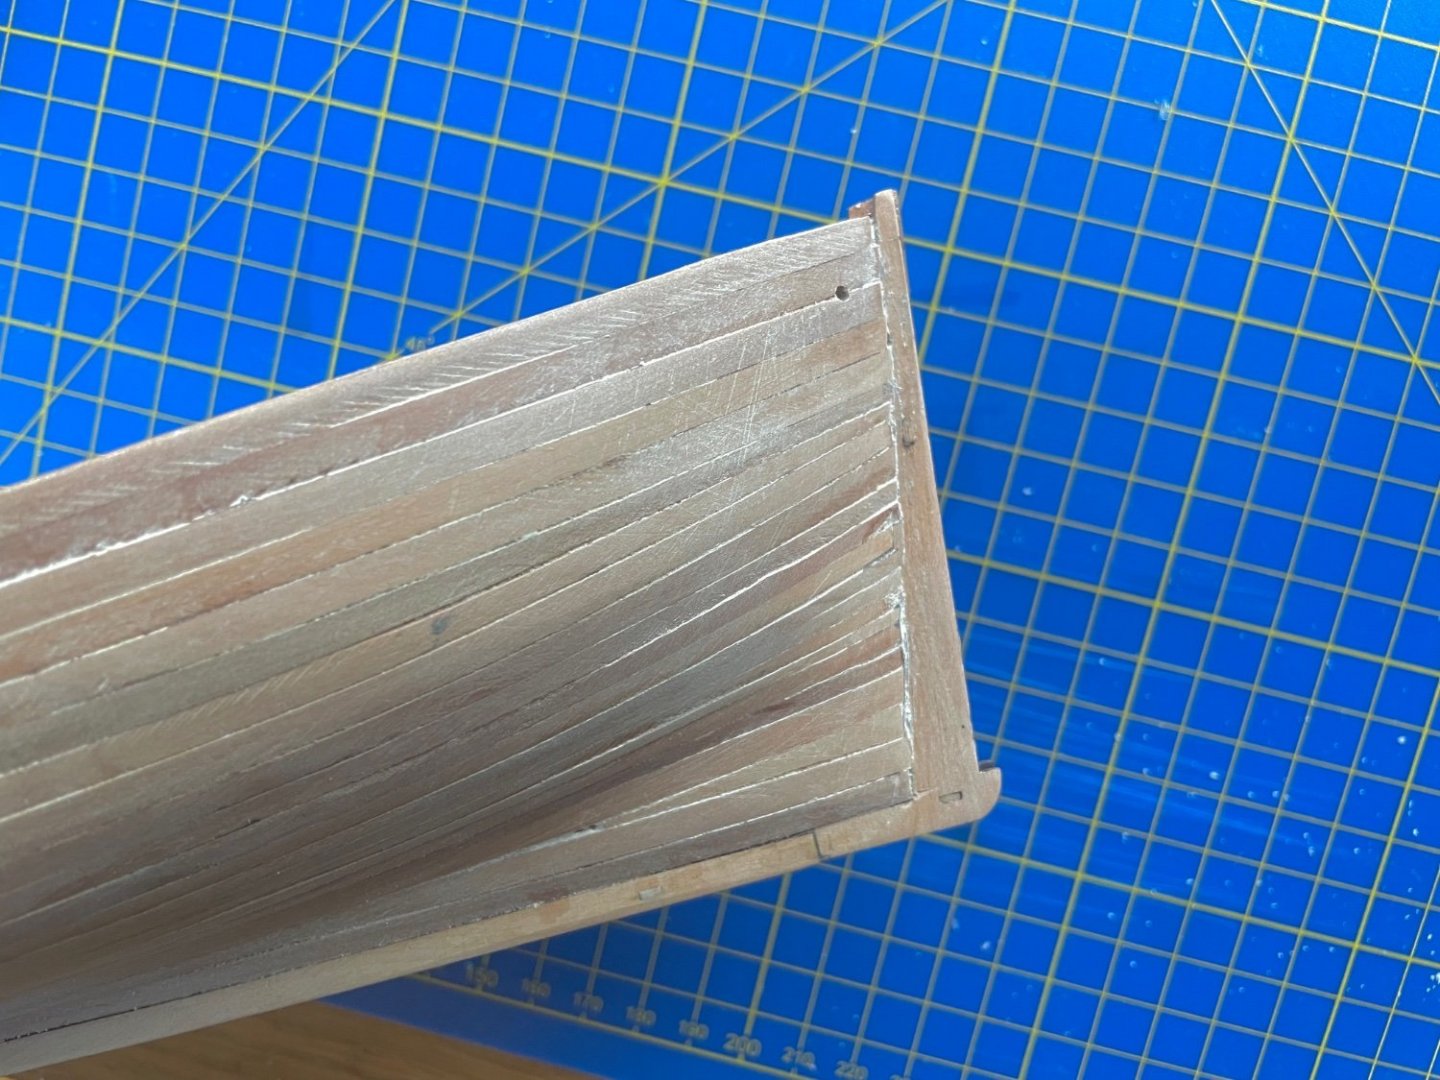
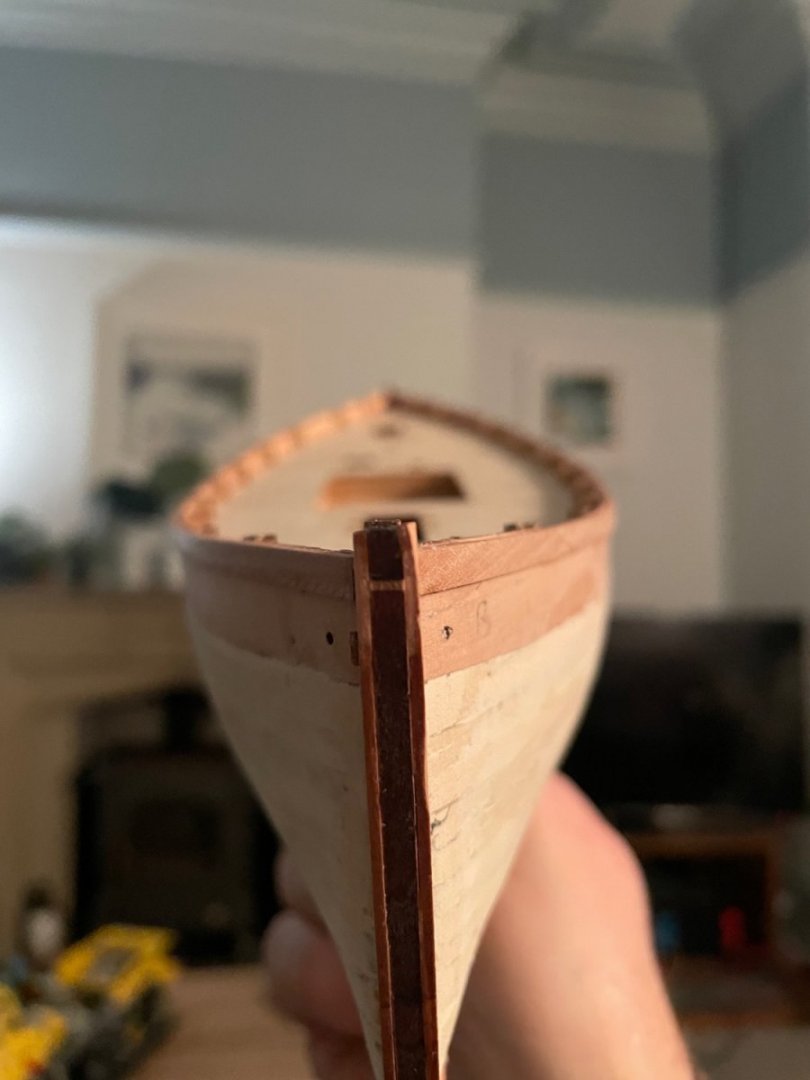
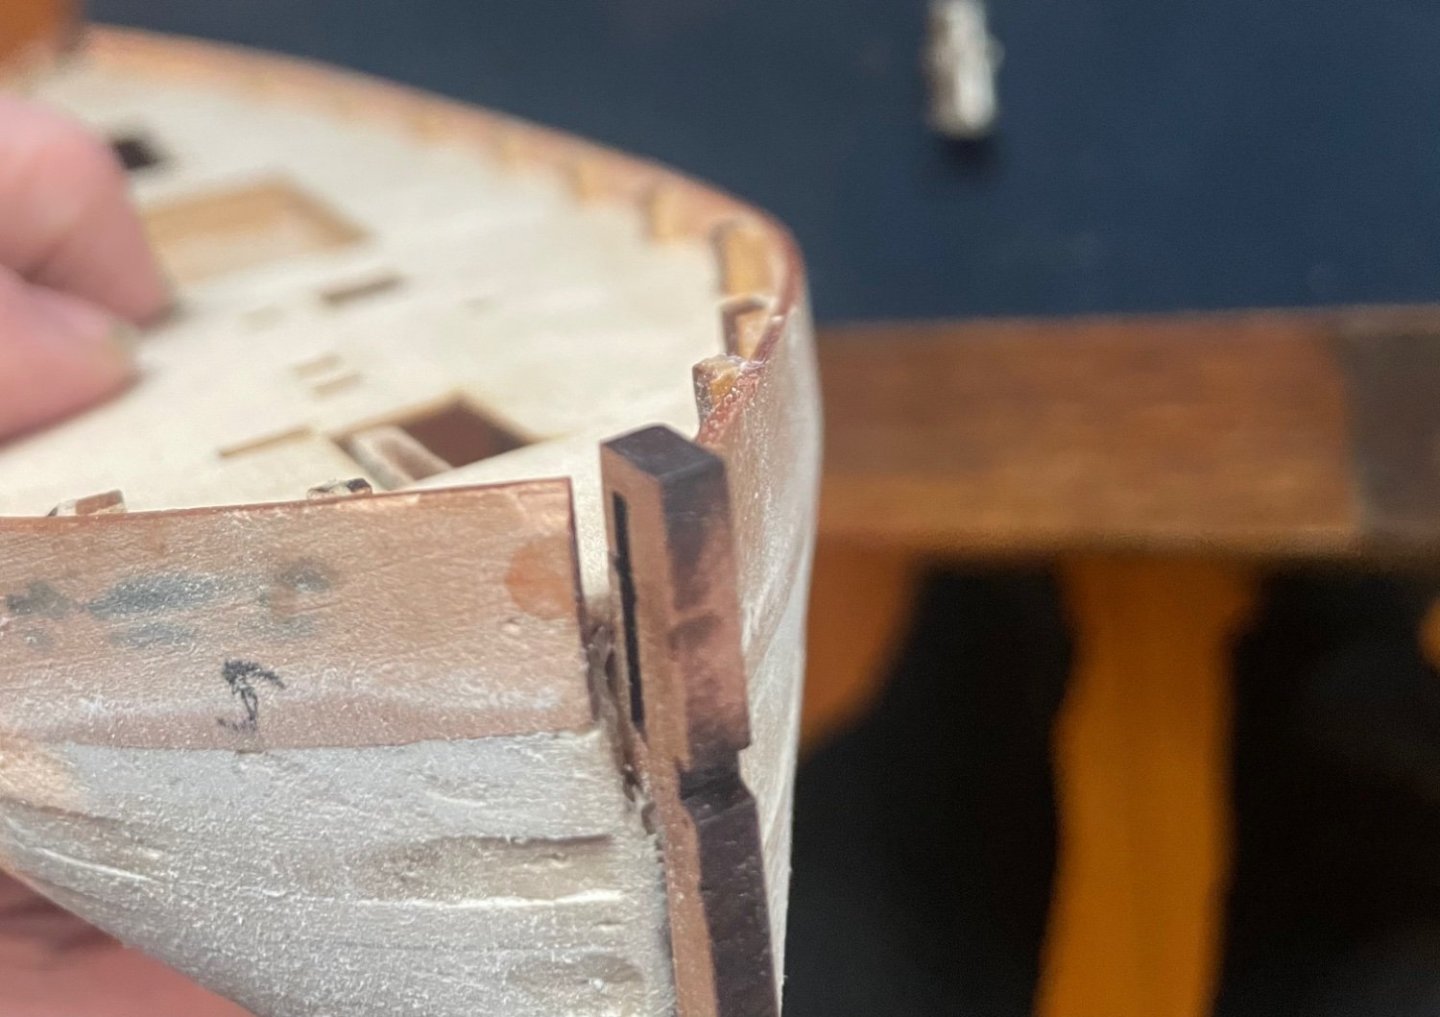
I have a problem! But first, I continued planking up towards the bulwarks until they met the ones coming down. Then I created stealers to fill the gaps created. I used wood filler in any uneven areas and then sanded it down and added the prow and sternpost. It still needs a bit more sanding but I’m not overdoing it. I think it will be a decent surface for the second planking. Now the problem. There is a gap where the bulwark should meet the sternpost. I’ll try to fill it with a spare piece of plywood I think? There is another piece to go on the sternpost that creates the rabbet that will reduce the gap slightly. The other end is fine. Not sure how I arsed it up!
-
I continued to plank both sides in the way described in the instructions, tapering from where the plank seems to want to cross the one above. I thinks it’s gone okay. I intend to use a more methodical approach for the second planking I think. After laying down planks from the bulwarks downwards I have added the garboard plank. Now I’ll work upwards. As you can see there’s a bit of stepping here and there. Hopefully sanding and a bit of filler will create a decent surface for the second planking.