petervisser
-
Posts
503 -
Joined
-
Last visited
Recent Profile Visitors
2,799 profile views


-
 petervisser reacted to a post in a topic:
Fair American by JLong - Model Shipways - 1:48
petervisser reacted to a post in a topic:
Fair American by JLong - Model Shipways - 1:48
-
petervisser reacted to a post in a topic:
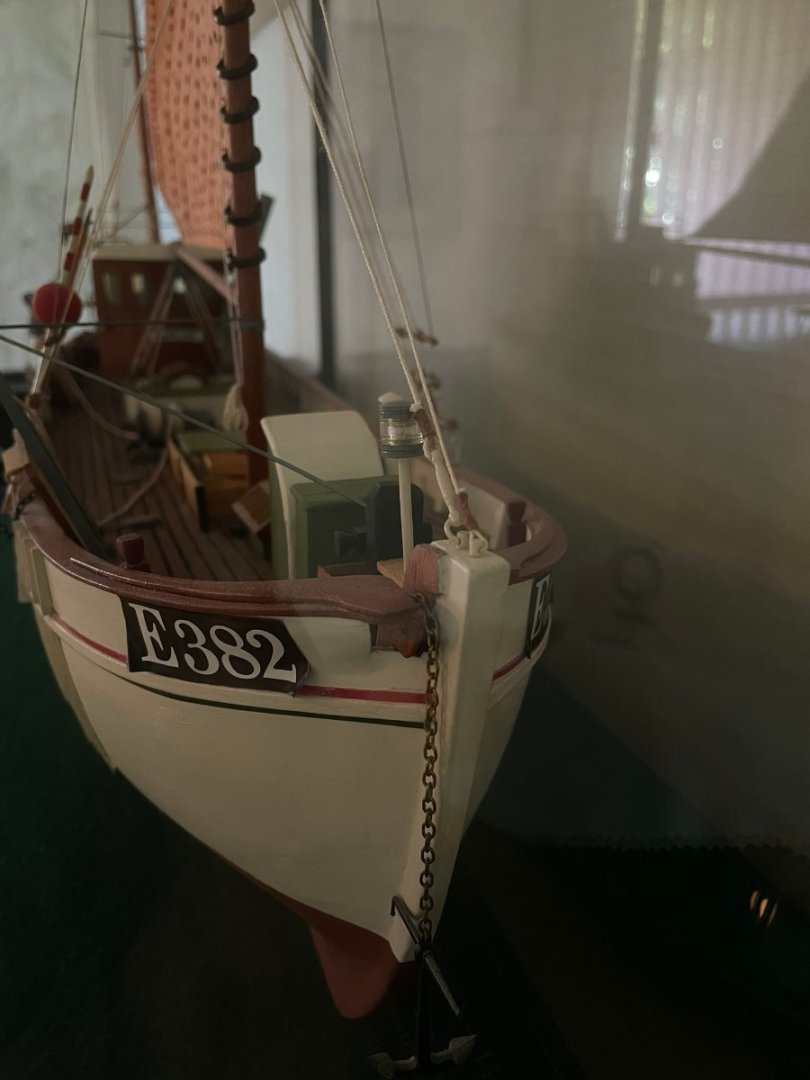
Mary Ann by laps - Billing Boats - scale 1:33
-
petervisser reacted to a post in a topic:
Mary Ann by laps - Billing Boats - scale 1:33
-
petervisser reacted to a post in a topic:
Mary Ann by laps - Billing Boats - scale 1:33
-
petervisser reacted to a post in a topic:
Norske Love by EdS - Billing Boats - 1:75
-
petervisser reacted to a post in a topic:
Roter Löwe 1597 by Ondras71
-
 Congratulations on a the completion of your beautiful model. Well done! Peter
 -
Papa reacted to a post in a topic:
Gjoa by Papa - FINISHED - Model Shipways - 5/32” = 1’ - old solid hull kit
-
Harvey Golden reacted to a post in a topic:
Gjoa by Papa - FINISHED - Model Shipways - 5/32” = 1’ - old solid hull kit
-
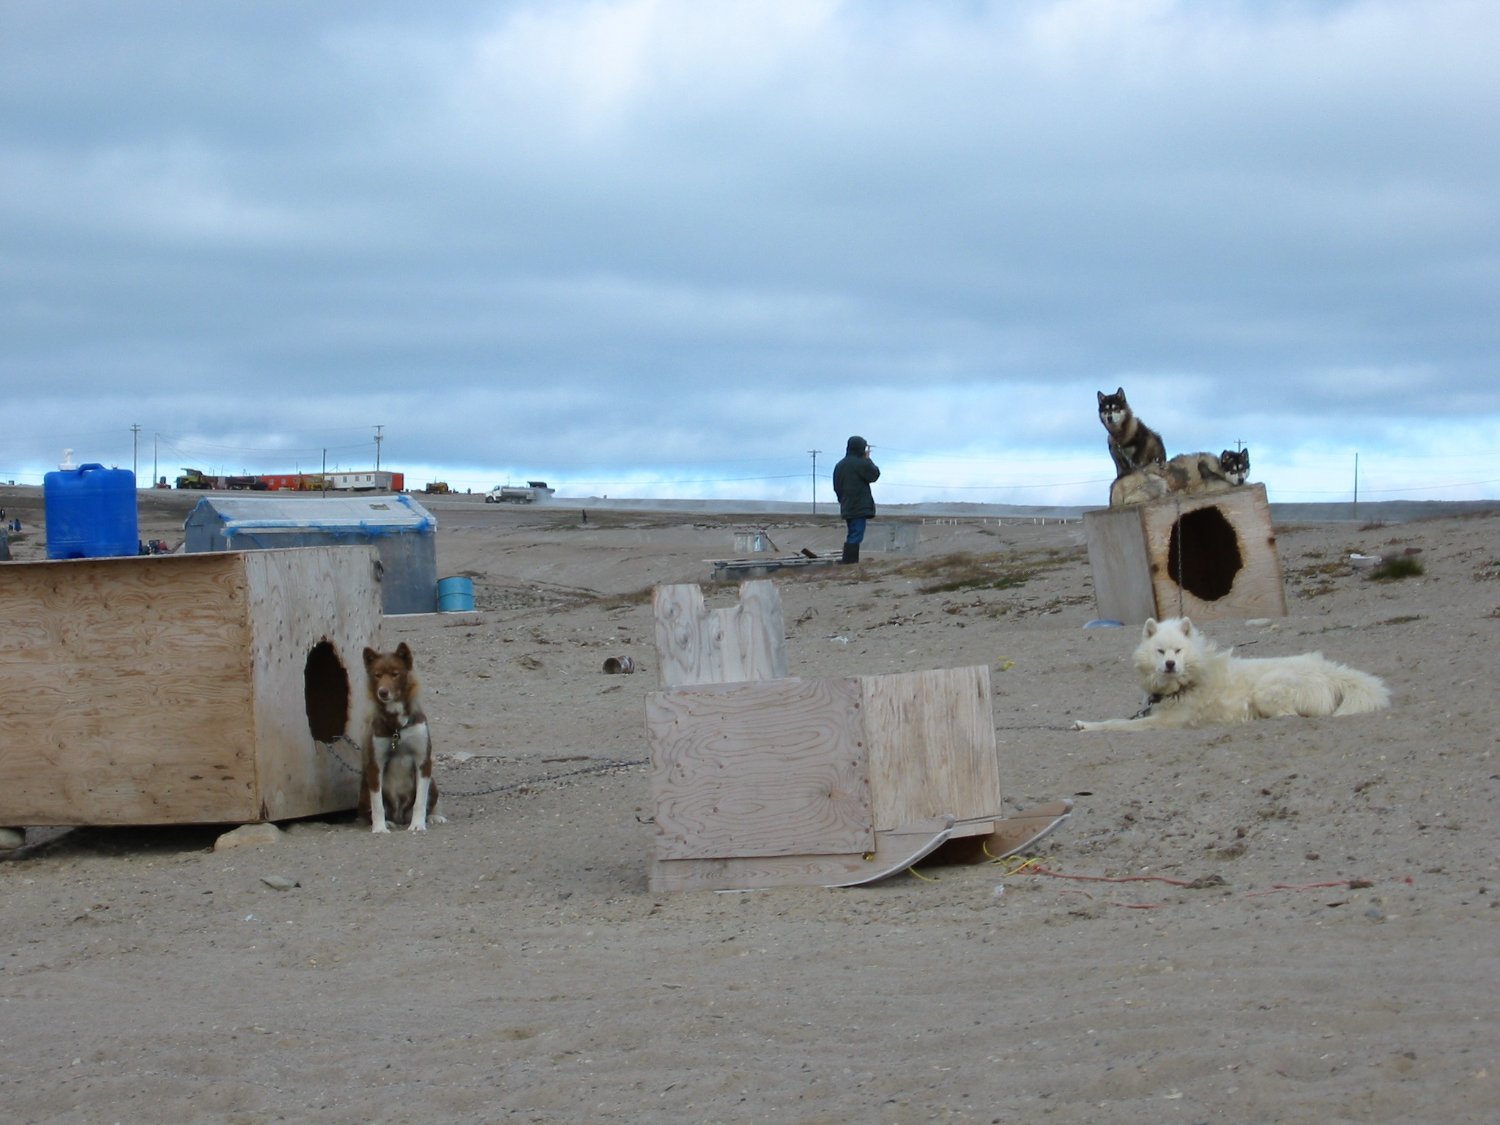
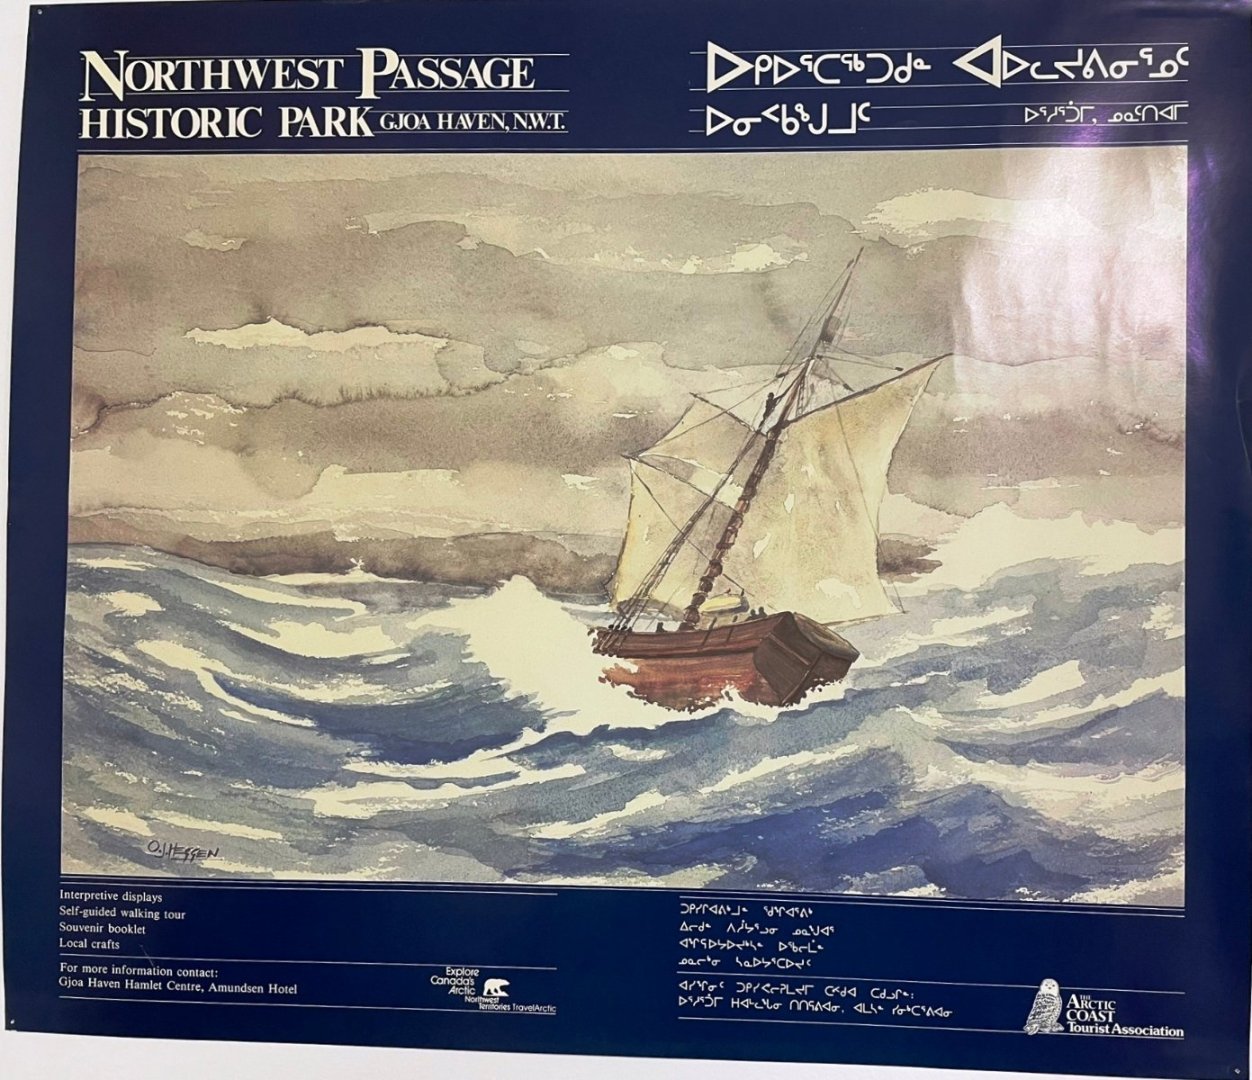
Hi Papa, Just discovered your build log of the Gjoa. What a great model you have on the go. The reason I am writing is the fact that I visited Gjoa Haven (Uqsuqtuuk) back in 2003 when I sailed aboard the CCGS Sir Wilfrid Laurier. Your model brought back some memories of the time I visited there and I thought you might be interested in seeing a few photos I took while I was ashore. I have also added a photo of a promotional poster the territorial government issued to entice some tourism. Amundsen must have been a pretty guttsy guy to take on the Northwest Passage in such a vessel as the Gjoa. All the best going forward with your model. Cheers, Peter


- 27 replies
-
- 2
-
-
- Gjoa
- Model Shipways
- (and 1 more)
-
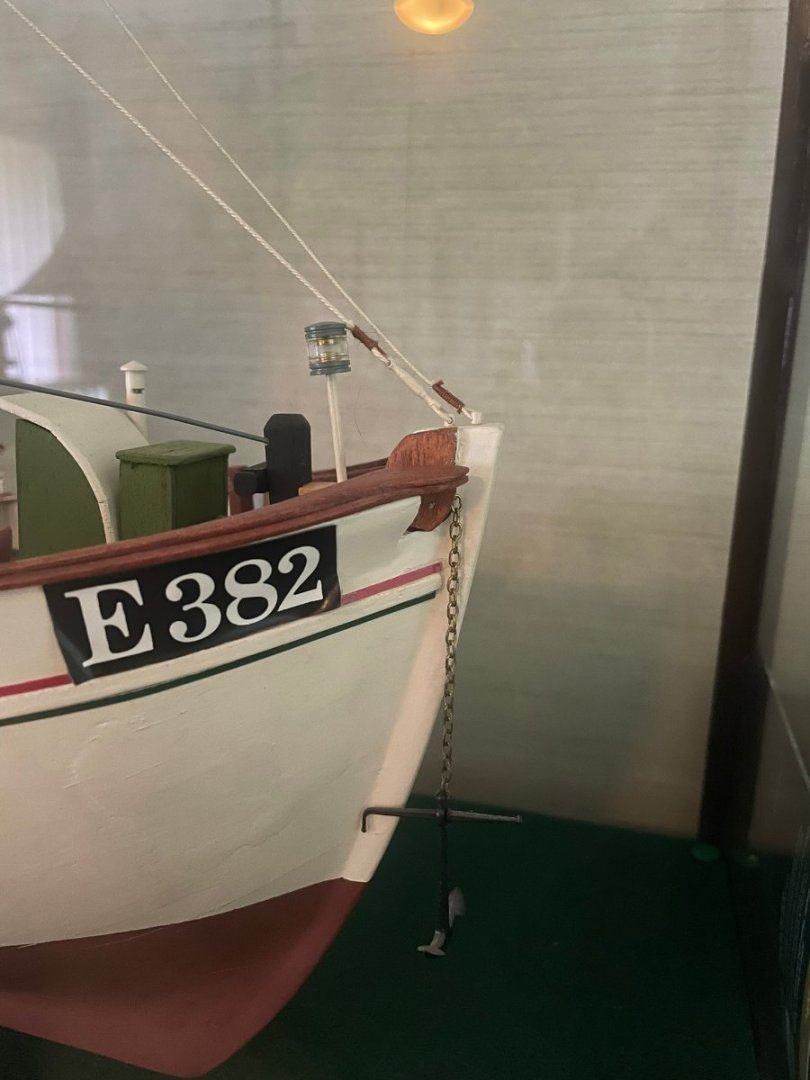
Hi Lars Peter, Boy, this model sure brings back some memories for me. It is the first wood model I built waaaay back when. I'm glad I ran across your build log. I took some pictures of my model where you have some concern and I hope that it helps some. As you can seem my model has a little wear and tear after 40+ years. But I still have it proudly displayed in my home. All the best with your Mary Ann and I will follow along. Cheers, Peter
-
mtaylor reacted to a post in a topic:
Stepping masts on Revell Cutty Sark 1:96
-
Keith Black reacted to a post in a topic:
Stepping masts on Revell Cutty Sark 1:96
-
Lost and Confused reacted to a post in a topic:
Stepping masts on Revell Cutty Sark 1:96
-
Stepping masts on Revell Cutty Sark 1:96
petervisser replied to Lost and Confused's topic in Masting, rigging and sails
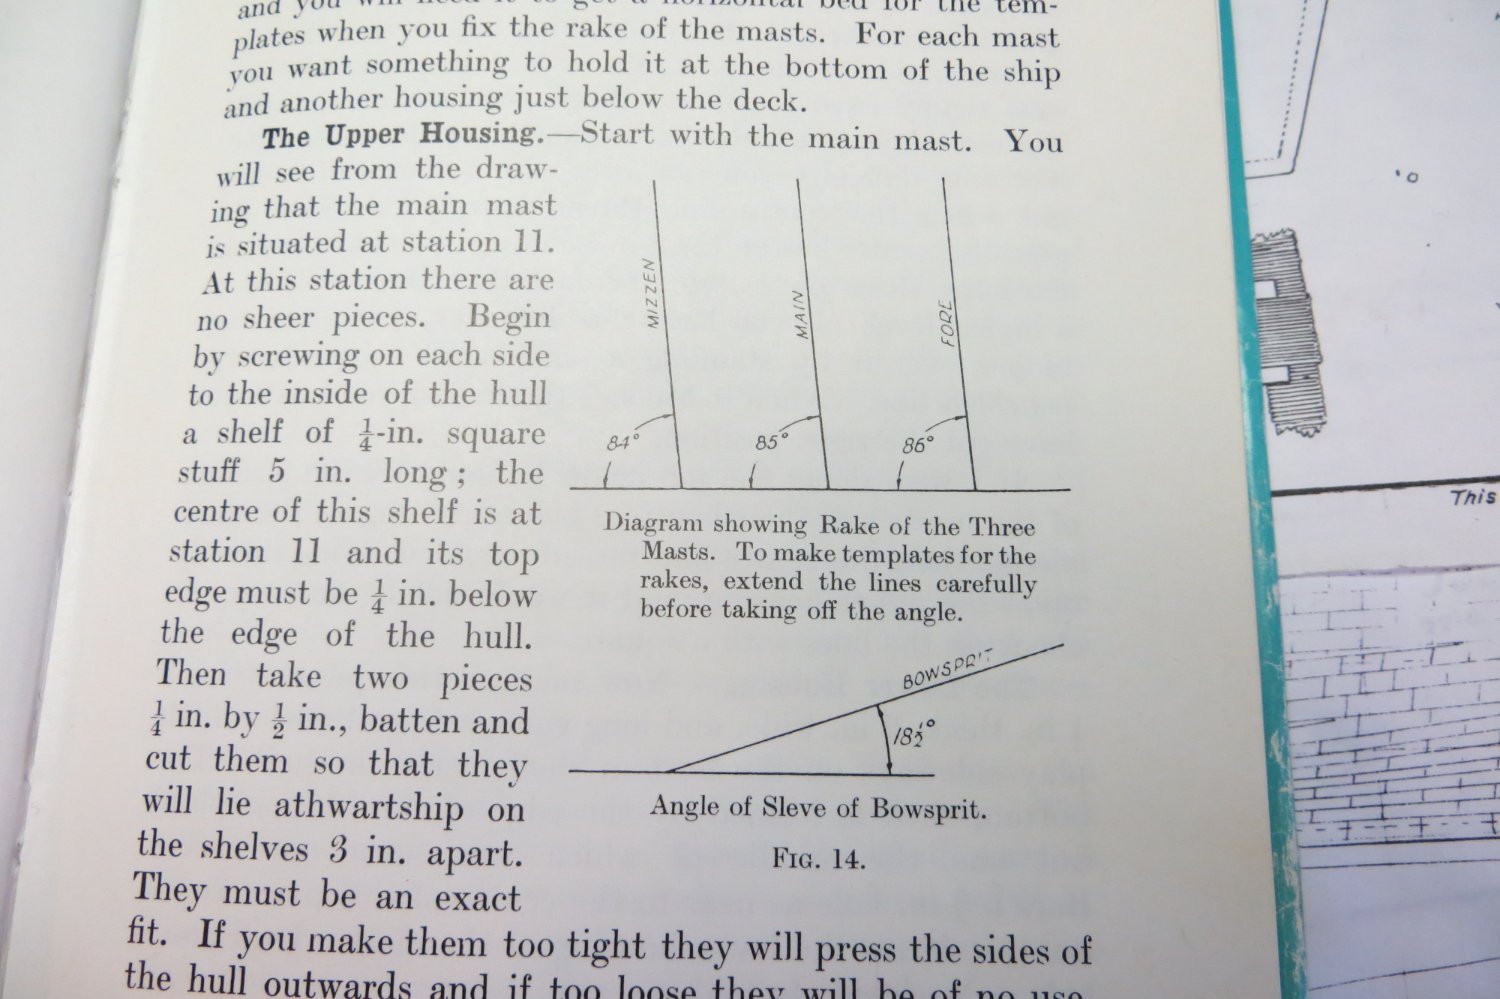
Hi Lost, According to Mr. Longridge's Cutty Sark book, the masts all have a slightly different rake. Here is what his book shows... Cheers, Peter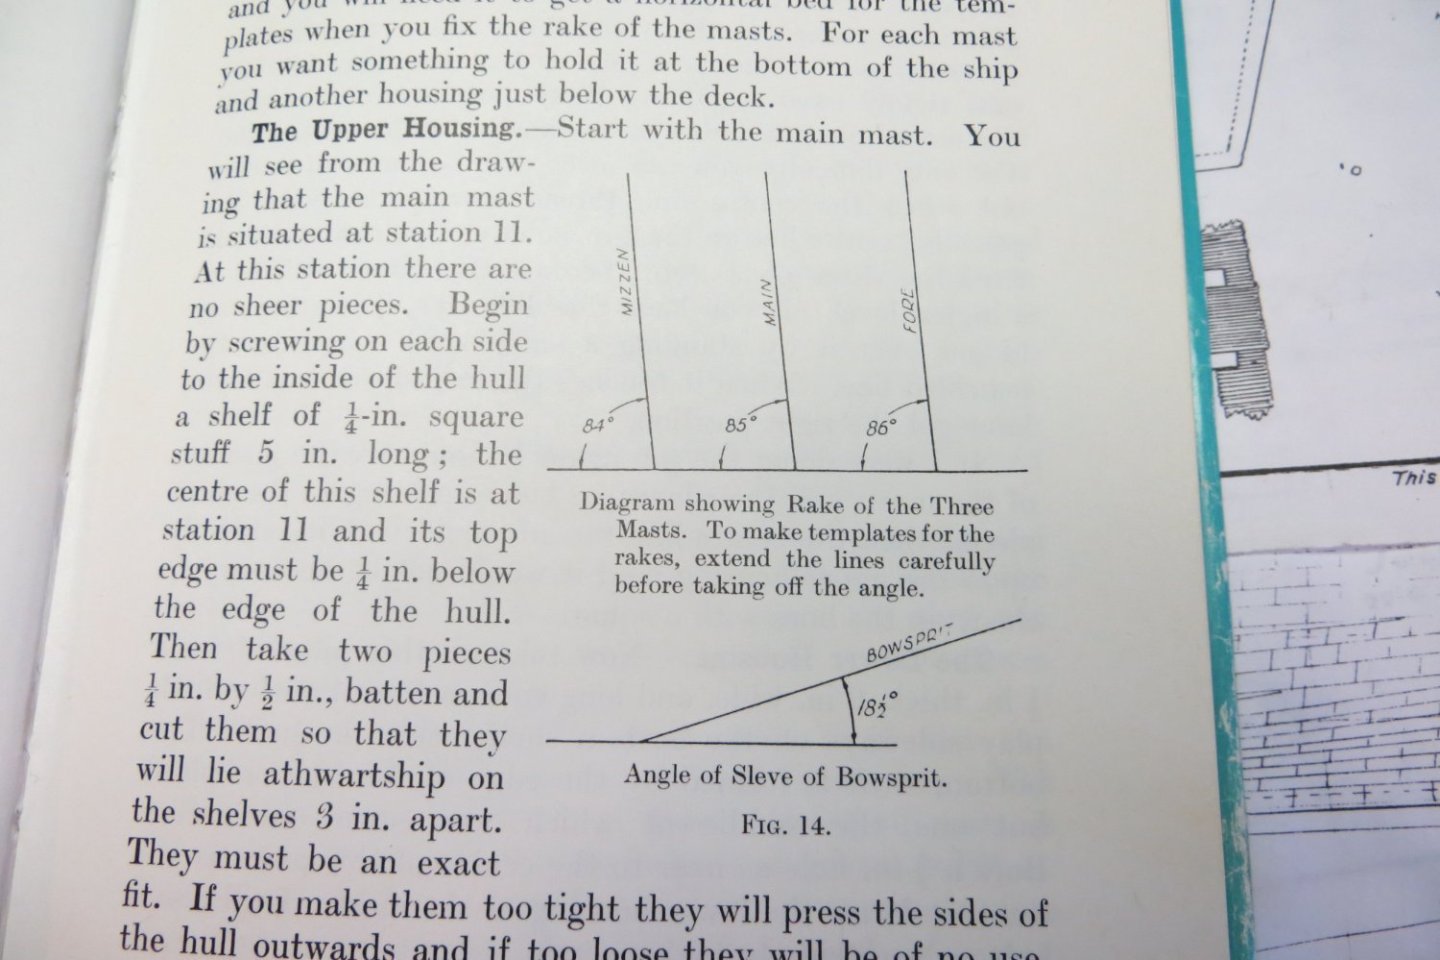
-
Very nice work on your Sperwer Julian! Working with older Billing kits certainly has its challenges but you seem to be dealing with them handily. Those planking curves at the bow and stern certainly sure look daunting! I have the Mamoli Catalina coming up next in my build sequence so I will be dealing with a very similar hull. I have also built the Billing Zeeschouw but it had very easy hull planking and it had laser cut parts so it was a pretty easy kit compared to your model. Keep up the great work and I'll continue to follow along. Cheers, Peter
-
What stunning models! All the best with your transition to tall ship building. If it's anything like your current work, it will be epic! Cheers, Peter
-
Welcome aboard Mark! Glad you made it over and look forward to seeing your modelling endeavours! Cheers, Peter
-
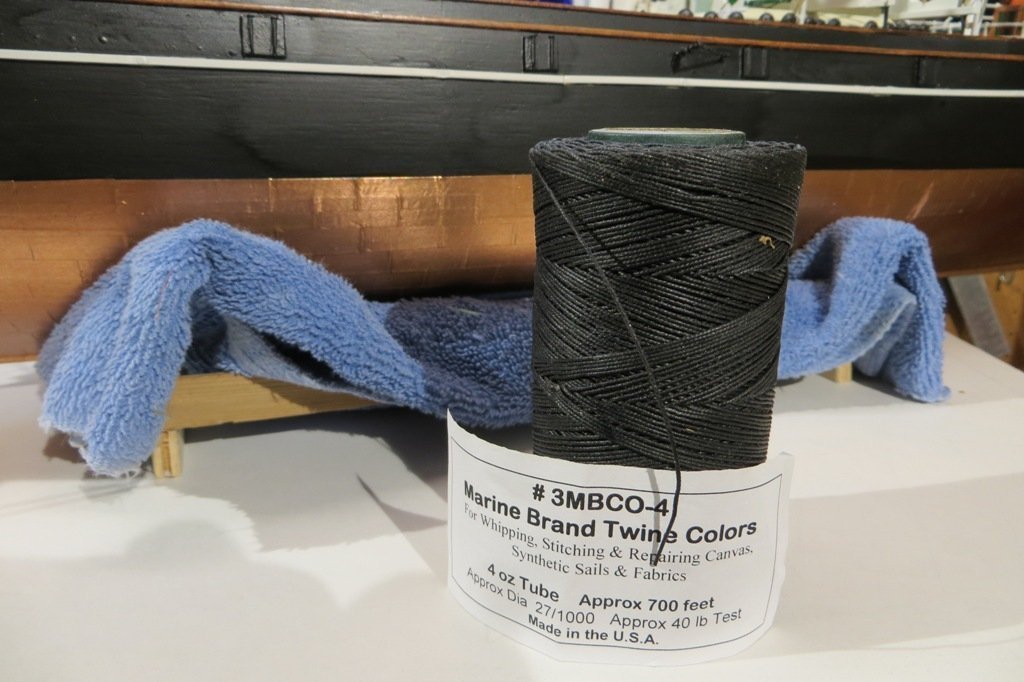
Hi Darren. Have you considered seine twine? I have used this on my last few models with good effect. It come in many diameters and is pre-waxed. So much so that I run a strand through a paper towel to remove the excess. I'm fortunate to have a marine chandler in town which usually has a good supply. I'm not sure if it's available online as I haven't looked. Good luck in your quest. Cheers, Peter
-
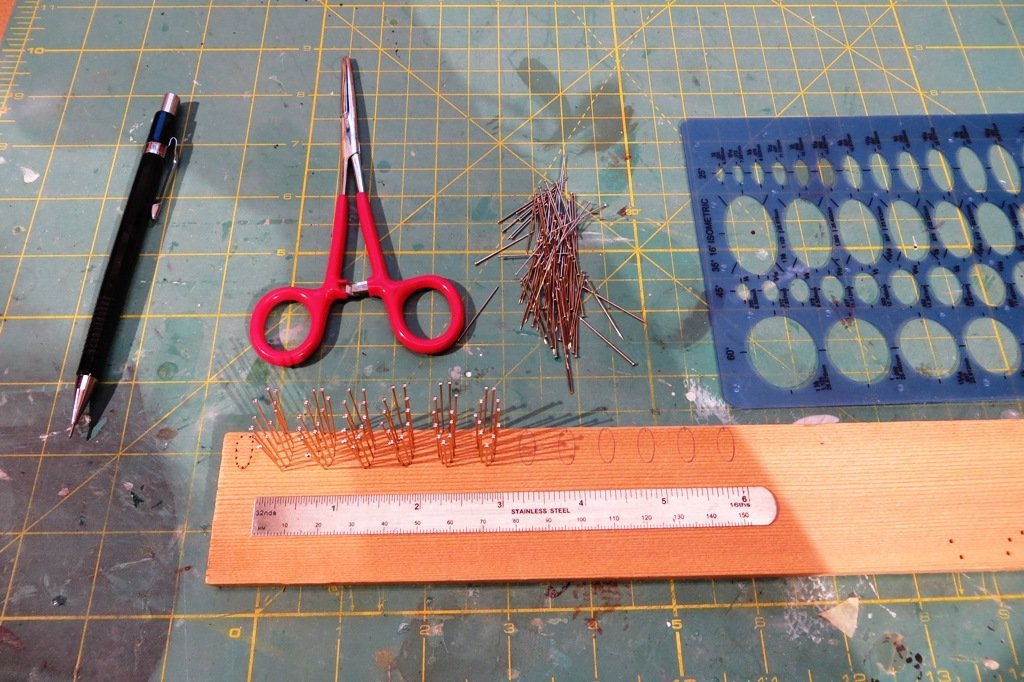
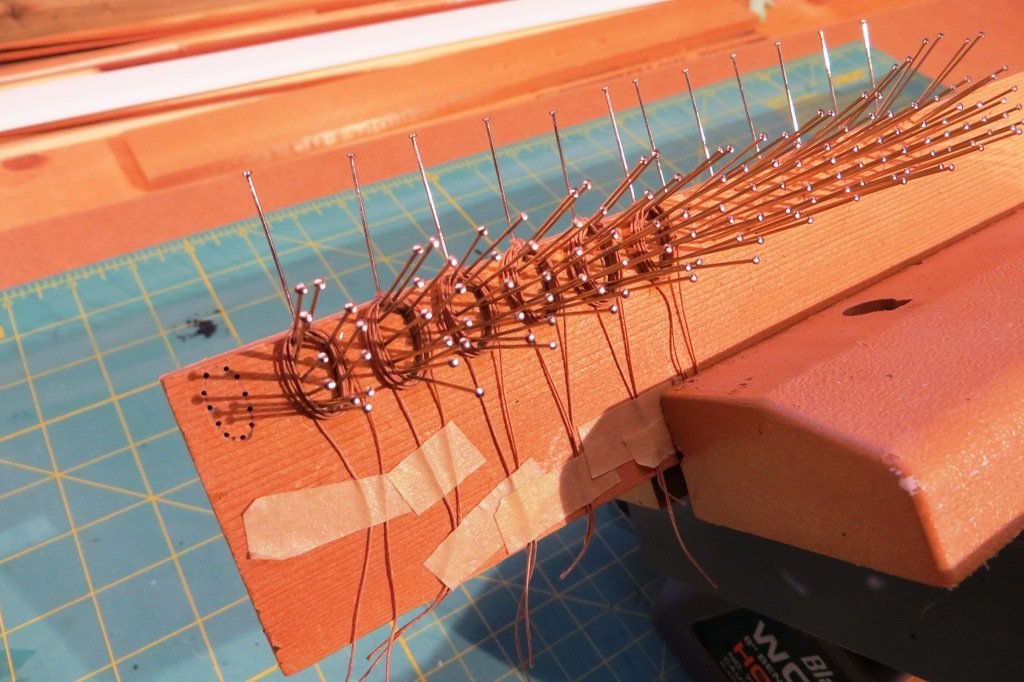
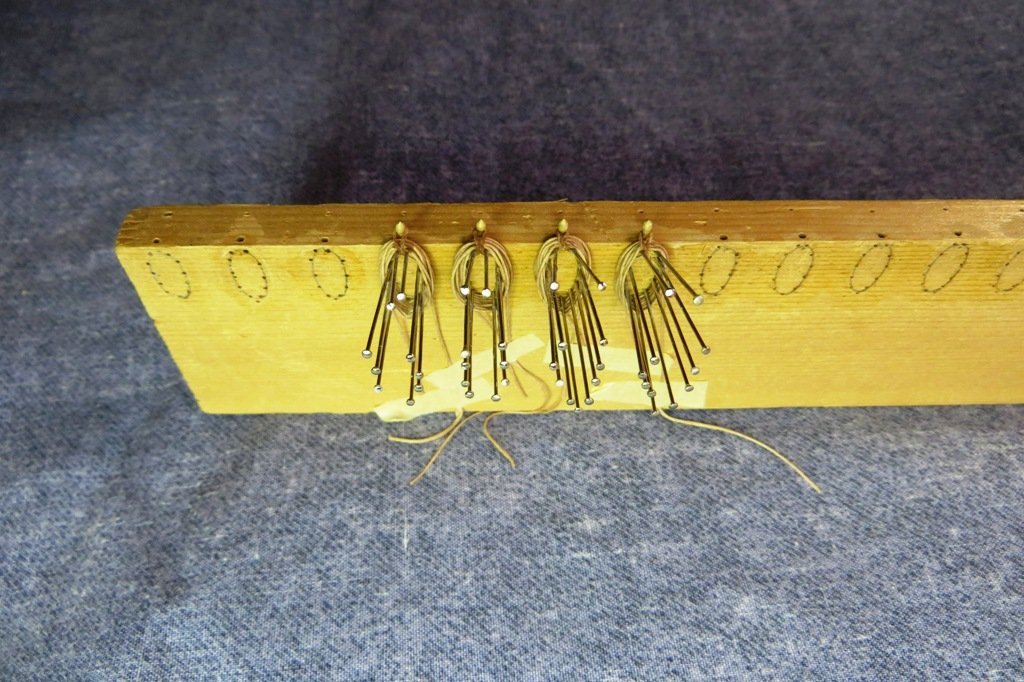
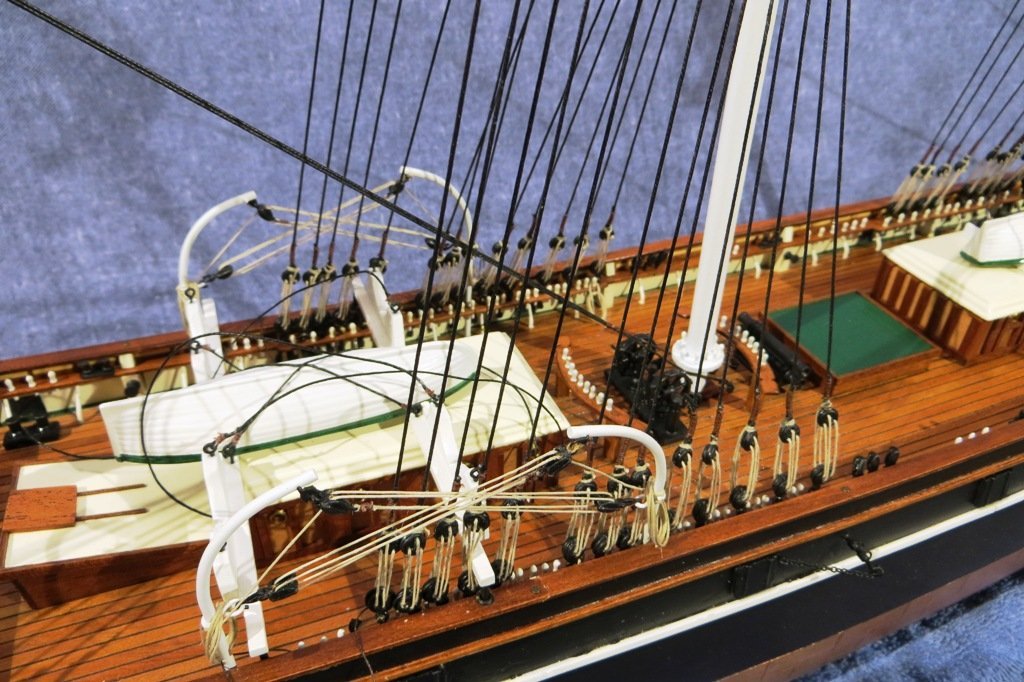
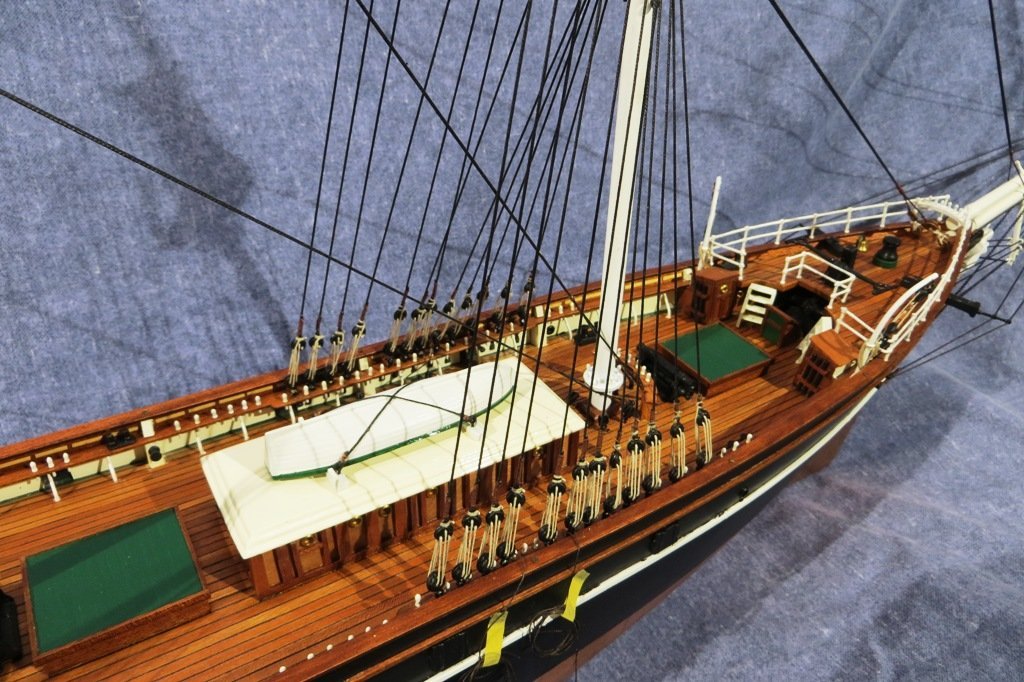
Hi Guys, I have commenced the running rigging at last, starting with the three sets of lifts for the 3 yards mounted on the lower masts. Baby steps... And what with runing the rigging to the spider bands at the bases of the masts, meant coiling down the ends of those lines. In the past, I used to leave enough thread after running the line through its various blocks and tackles and coiling the surplus several times around the belaying pin. However, with greater efficiency and less toil in mind I decided to put Tom Lauria's method into practice. He coils the lines off the model and places the coils on the pins. It is a more accurate depiction of how lines are coiled onto pins at the expense of having two lines make up each individual rope. Here's a link to his video: I did make a couple of modifications to his technique so as the loop around the pin didn't come undone and used diluted white glue to set the coils up permanently. Here are a few pic's of my efforts: Here I used a scrap piece of cedar strip as the pins were more easily pushed into it. Here are the coils around the pins with an additional pin set back from the top edge of the cedar strip. This allowed for a bigger bight to pull under and into the coil of rope. Here I used actual belaying pins to thread the bight as it made it easier to place the coils onto the model. As mentioned I used diluted white glue to set up the coils and allowed for longer tails so the bight did not become unstuck. And here are the results of the lifts' rigging onto their respective belaying points. It took a bit of trial and error to come up with a successful method but I am hoping it will alleviate some of the hassle in this repetitive task. Cheers
- 182 replies
-
- 3
-
-
- billing boats
- cutty sark
- (and 1 more)
-
She's a beauty! Looking back on some of the posts of your build log I saw some discussion about a display case. I have built display cases for all my models and it's not as difficult as it might seem at first. Take it from somebody who is not particularly talented with adult tools as opposed to modelling tools. (Me) I have discovered a site of building a display case whilst seaching for an improved method over mine and found it on modelshipcases.com by Wes Marden. It's a detailed build log of building a display case and except for a table saw, all the other tools used in its construction are pretty basic. It costs just $12US to download the instructions and I plan on using his method in building my next case. For me, it's cringeworthy that a piece of finely constructed ship model be subjected to the elements such as years of dust accumulation and cats.... Especially cats. Peter
-
First rate job on the planking Ed. She looks like a handful, size-wise. Looking forward to more entries in your excellet build log. Happy New Year! Peter p.s. Is that a Polar 8 model in the background? I sailed with a Chief Engineer who was part of the design team a long while back.
-
A superb model George. Congratulations! She looks right at home in her display case! Time to splice the main brace! Cheers, Peter
- 600 replies
-
- 1
-
-
- Flying Fish
- Model Shipways
- (and 2 more)
-
Just thought some of you might find this light assembly useful. Even though I have a double flourescent light above my work bench, I was still finding too many shadows obscuring my work. Therefore I bought a pair of light stands and LED portable work lights. I have set up the lights on either side of me and above the work area. The stands are telescopic and swivel so I can adjust the aim. The light is 3500 lumens, so now I see EVERYTHING! Cheers, Peter

- 182 replies
-
- 2
-
-

-
- billing boats
- cutty sark
- (and 1 more)
-
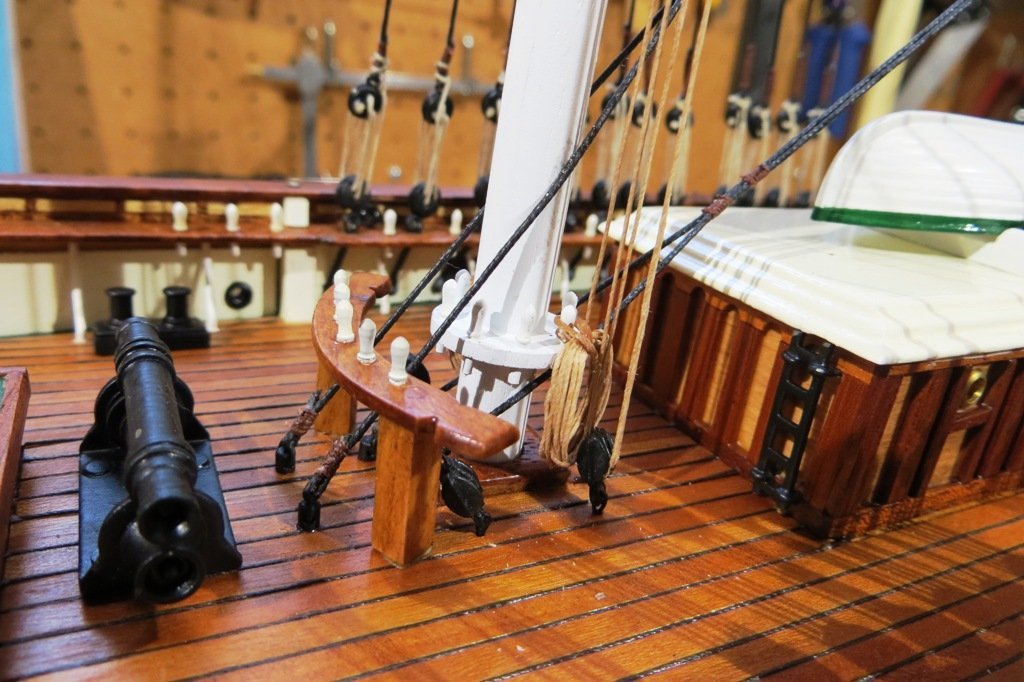
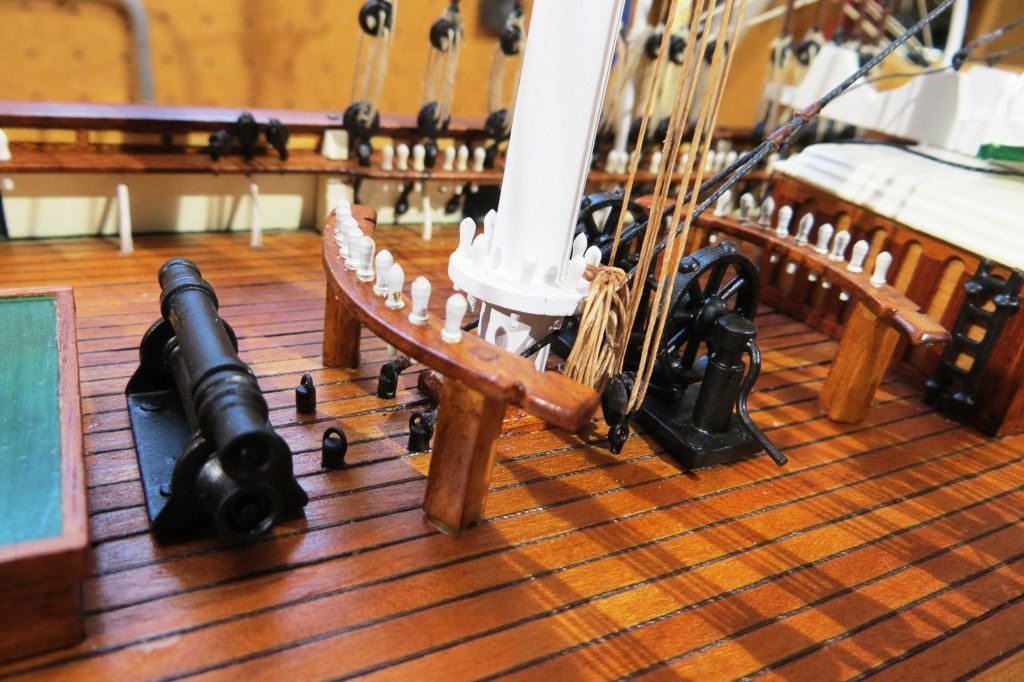
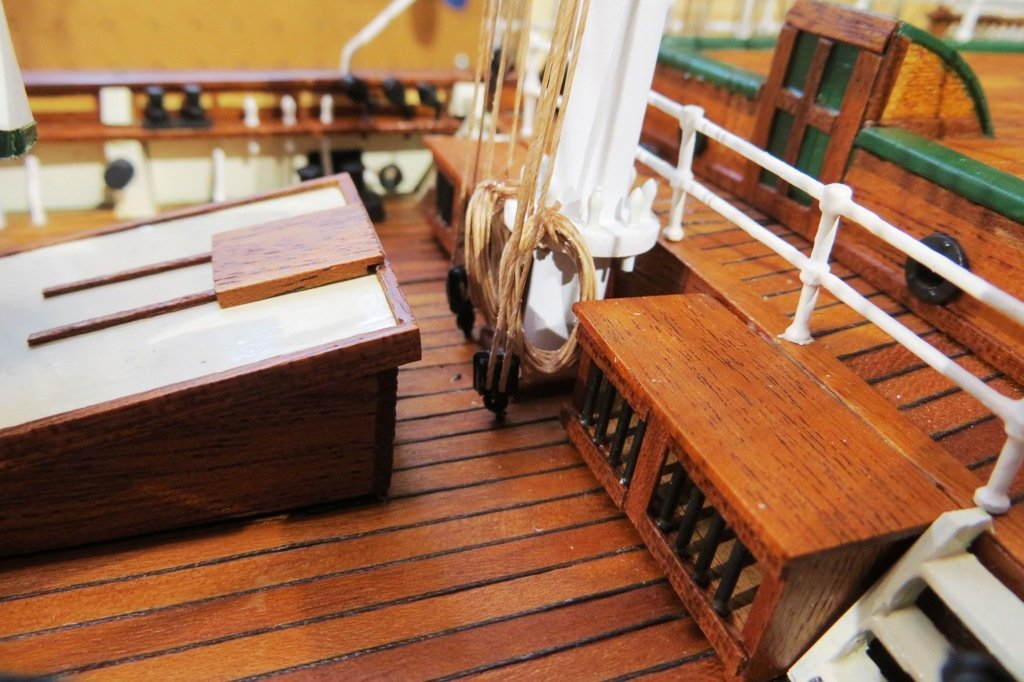
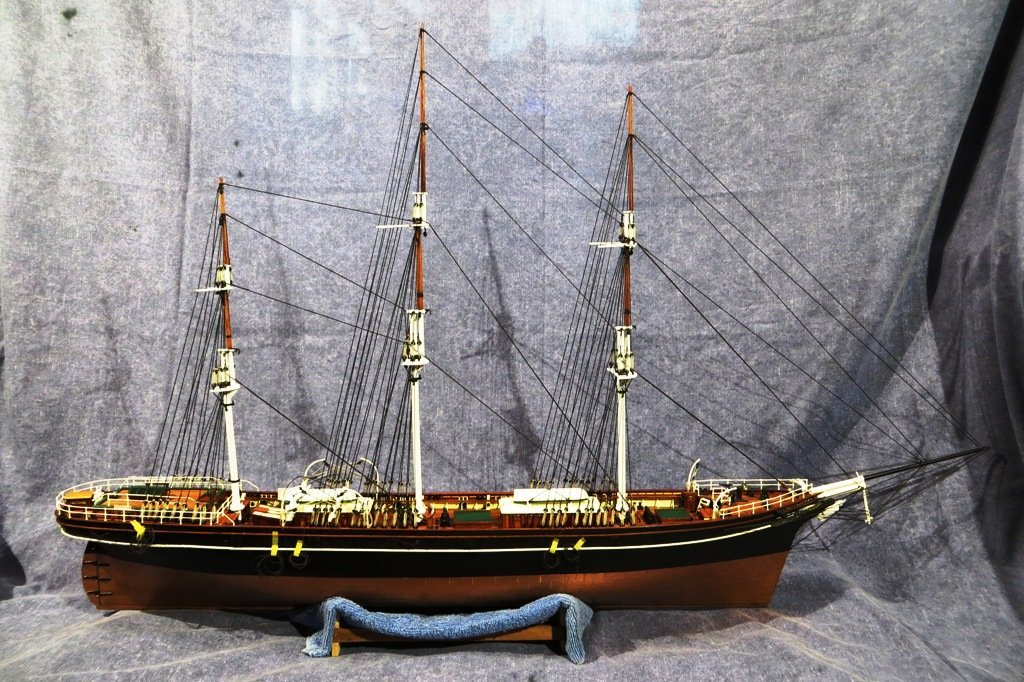
Merry Christmas everyone! I have reached a major milestone with this model just today. All the standing rigging is now in place. Phew... I counted 125 individual lines that make up the standing rigging. Happy with the results and I'm now looking forward to the next phase of the project, the running rigging. I have opted to leave the ratlines until the last. Not because I dislike tying off what seems like hundreds of pieces of rigging, but because I hope it makes the running rigging easier to access. It is for this reason that the lifeboats are yet to be secured. All the yards are prepped and ready to install. I now have to decide on the order in which to place them all. Here are some pics of the completed standing rigging.
- 182 replies
-
- 6
-
-
-
- billing boats
- cutty sark
- (and 1 more)
-
Congratulations on the completion of your lovely model! She's a beauty! When people on this forum ask, what their first model should be I'm always tempted to say a Billing model. They are well designed and interesting and relatively easy to build. They also teach the first time builder alot of the basic skills needed for more comlex projects. All the best going forward with your next project! Peter