Grendel
-
Posts
33 -
Joined
-
Last visited
Recent Profile Visitors
1,062 profile views


-
 GrandpaPhil reacted to a post in a topic:
HMS Bounty by Grendel - Artesania Latina - Scale 1:48
GrandpaPhil reacted to a post in a topic:
HMS Bounty by Grendel - Artesania Latina - Scale 1:48
-
SIDEWAYS SAM reacted to a post in a topic:
HMS Bounty by Trig - Artesania Latina - 1:48
-
 Looking good! It's always useful having bits and pieces left over from previous builds. I never throw away anything as is surprising how often left overs can come in useful, especially when you start kit bashing 😉 I like the column supports that you've made. I don't think they look out of place at all. You've got the lathe so might as well use it 😊
 -
SIDEWAYS SAM reacted to a post in a topic:
HMS Bounty by Trig - Artesania Latina - 1:48
-
Thanks for your kind words about by build. Considering some of the fantastic Bounty logs on here I feel quite honored that you have bookmarked mine. I'm itching to get back under way with it and will be in the next month or so. I considered drilling out the mast holders in the keel to a hole to fit the masts into, but decided in the end that shaping the foot of the mast to a rectangle will probably give a more secure fit. Definitely more tricky but worthwhile in the end I believe.
-
Trig reacted to a post in a topic:
HMS Bounty by Trig - Artesania Latina - 1:48
-
Hi Trig, I've just come across your build for the first time! It looks like you're making good progress so far, I'll be following with interest. I would definitely varnish the decks before fitting them. Access with a paint brush would be very difficult if you waited until they are in situ. That mini lathe is great. Fantastic value! All the best, Paul
-
Thanks Sam, I have made a little more progress since my last update, although the build had to go on hold during the summer. Hoping to get back under way again fairly soon!
-
AntonyUK reacted to a post in a topic:
HMS Bounty by Grendel - Artesania Latina - Scale 1:48
-
Ondras71 reacted to a post in a topic:
HMS Bounty by Grendel - Artesania Latina - Scale 1:48
-
JpR62 reacted to a post in a topic:
HMS Bounty by Grendel - Artesania Latina - Scale 1:48
-
Thanks for your kind words Nigel.
-
leginseel reacted to a post in a topic:
HMS Bounty by Grendel - Artesania Latina - Scale 1:48
-
leginseel reacted to a post in a topic:
HMS Bounty by Grendel - Artesania Latina - Scale 1:48
-
leginseel reacted to a post in a topic:
HMS Bounty by Grendel - Artesania Latina - Scale 1:48
-
Hi Nigel, I've only just picked up on your build log and am very impressed with your work to date. As a fellow Bounty builder myself I shall be following along from now on if that's ok. All the best, Paul
- 121 replies
-
- 1
-
-
- bounty
- constructo
- (and 1 more)
-
Grendel changed their profile photo
-
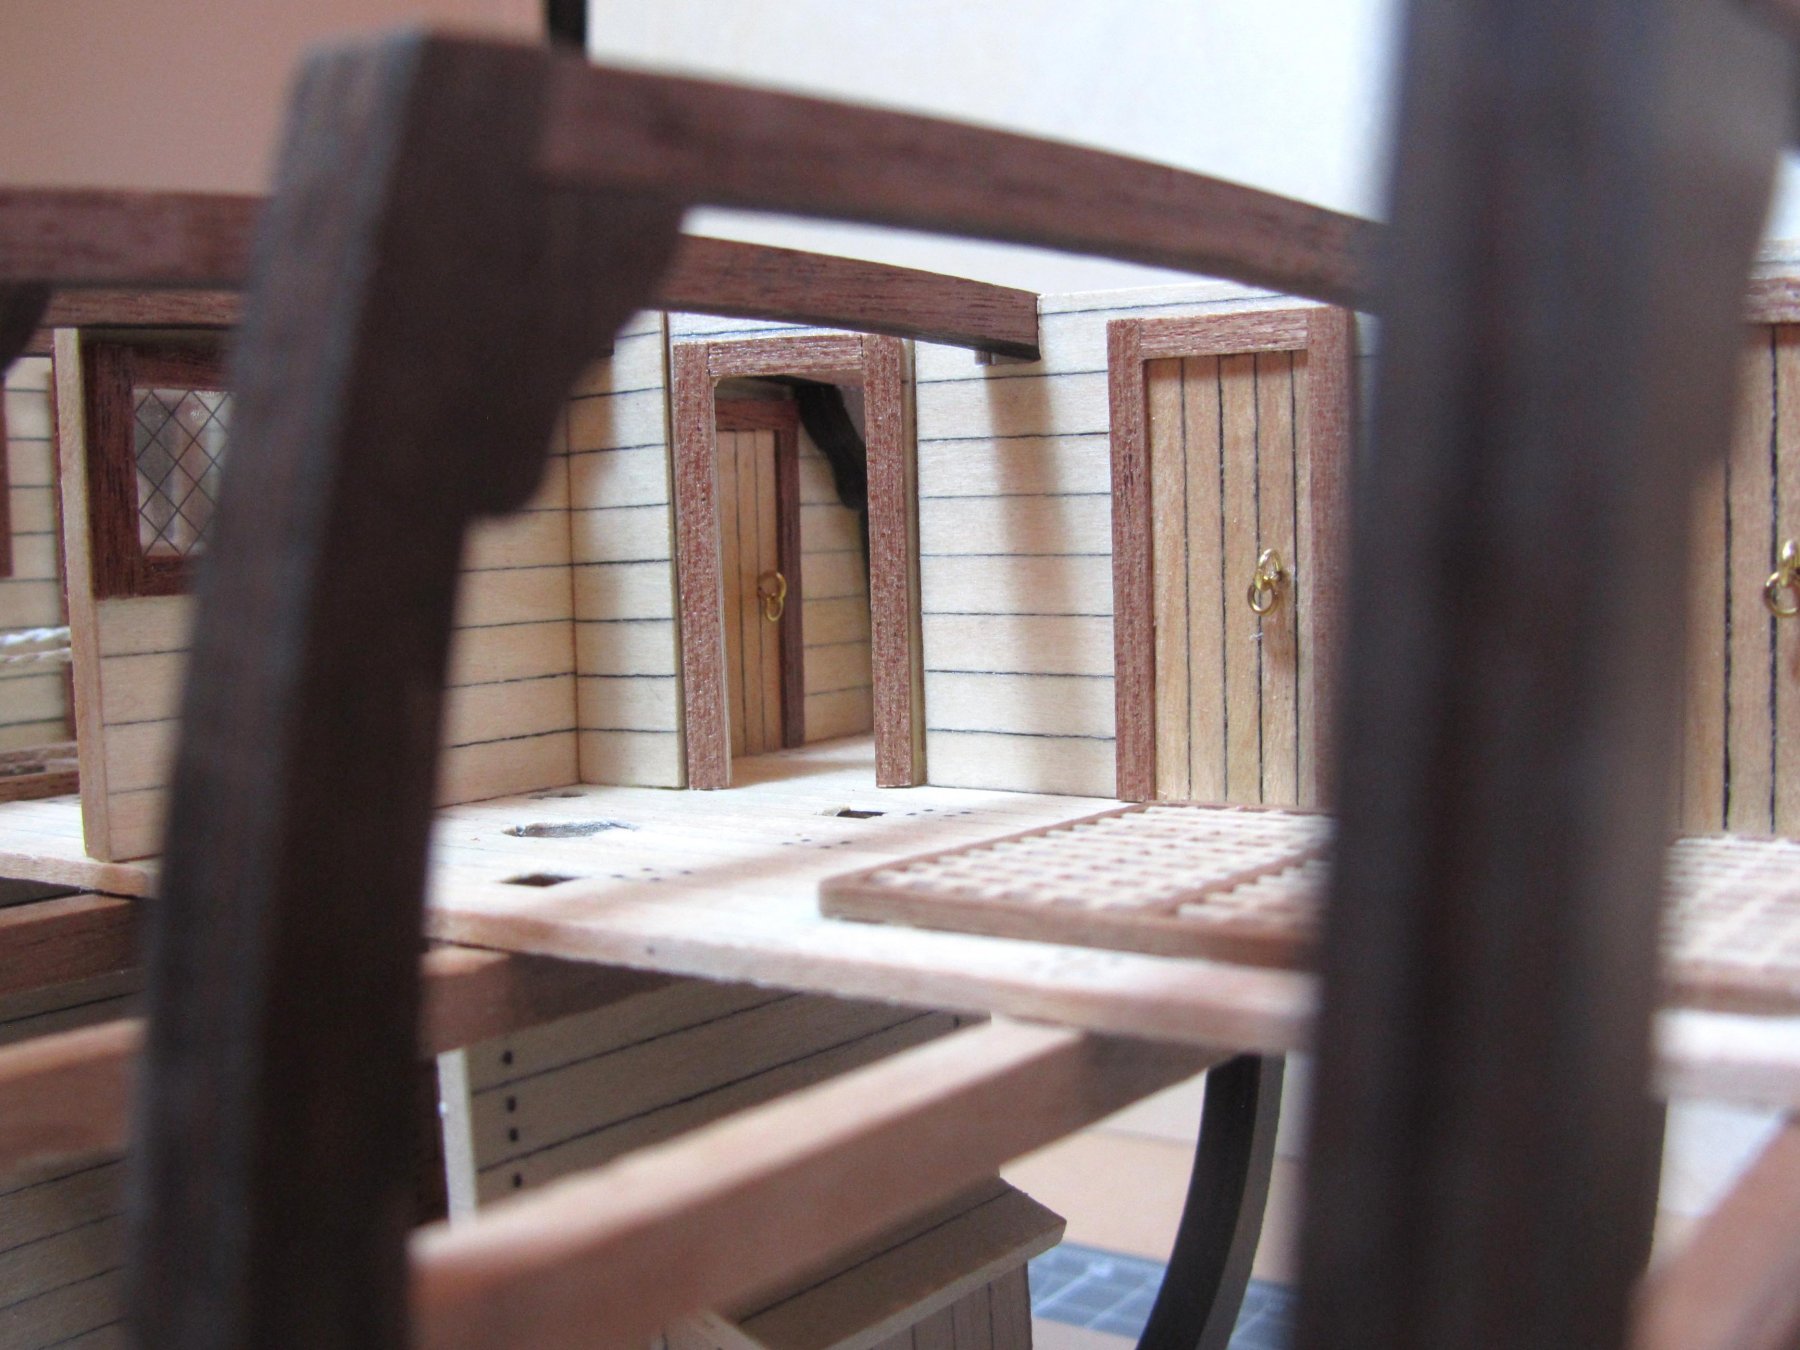
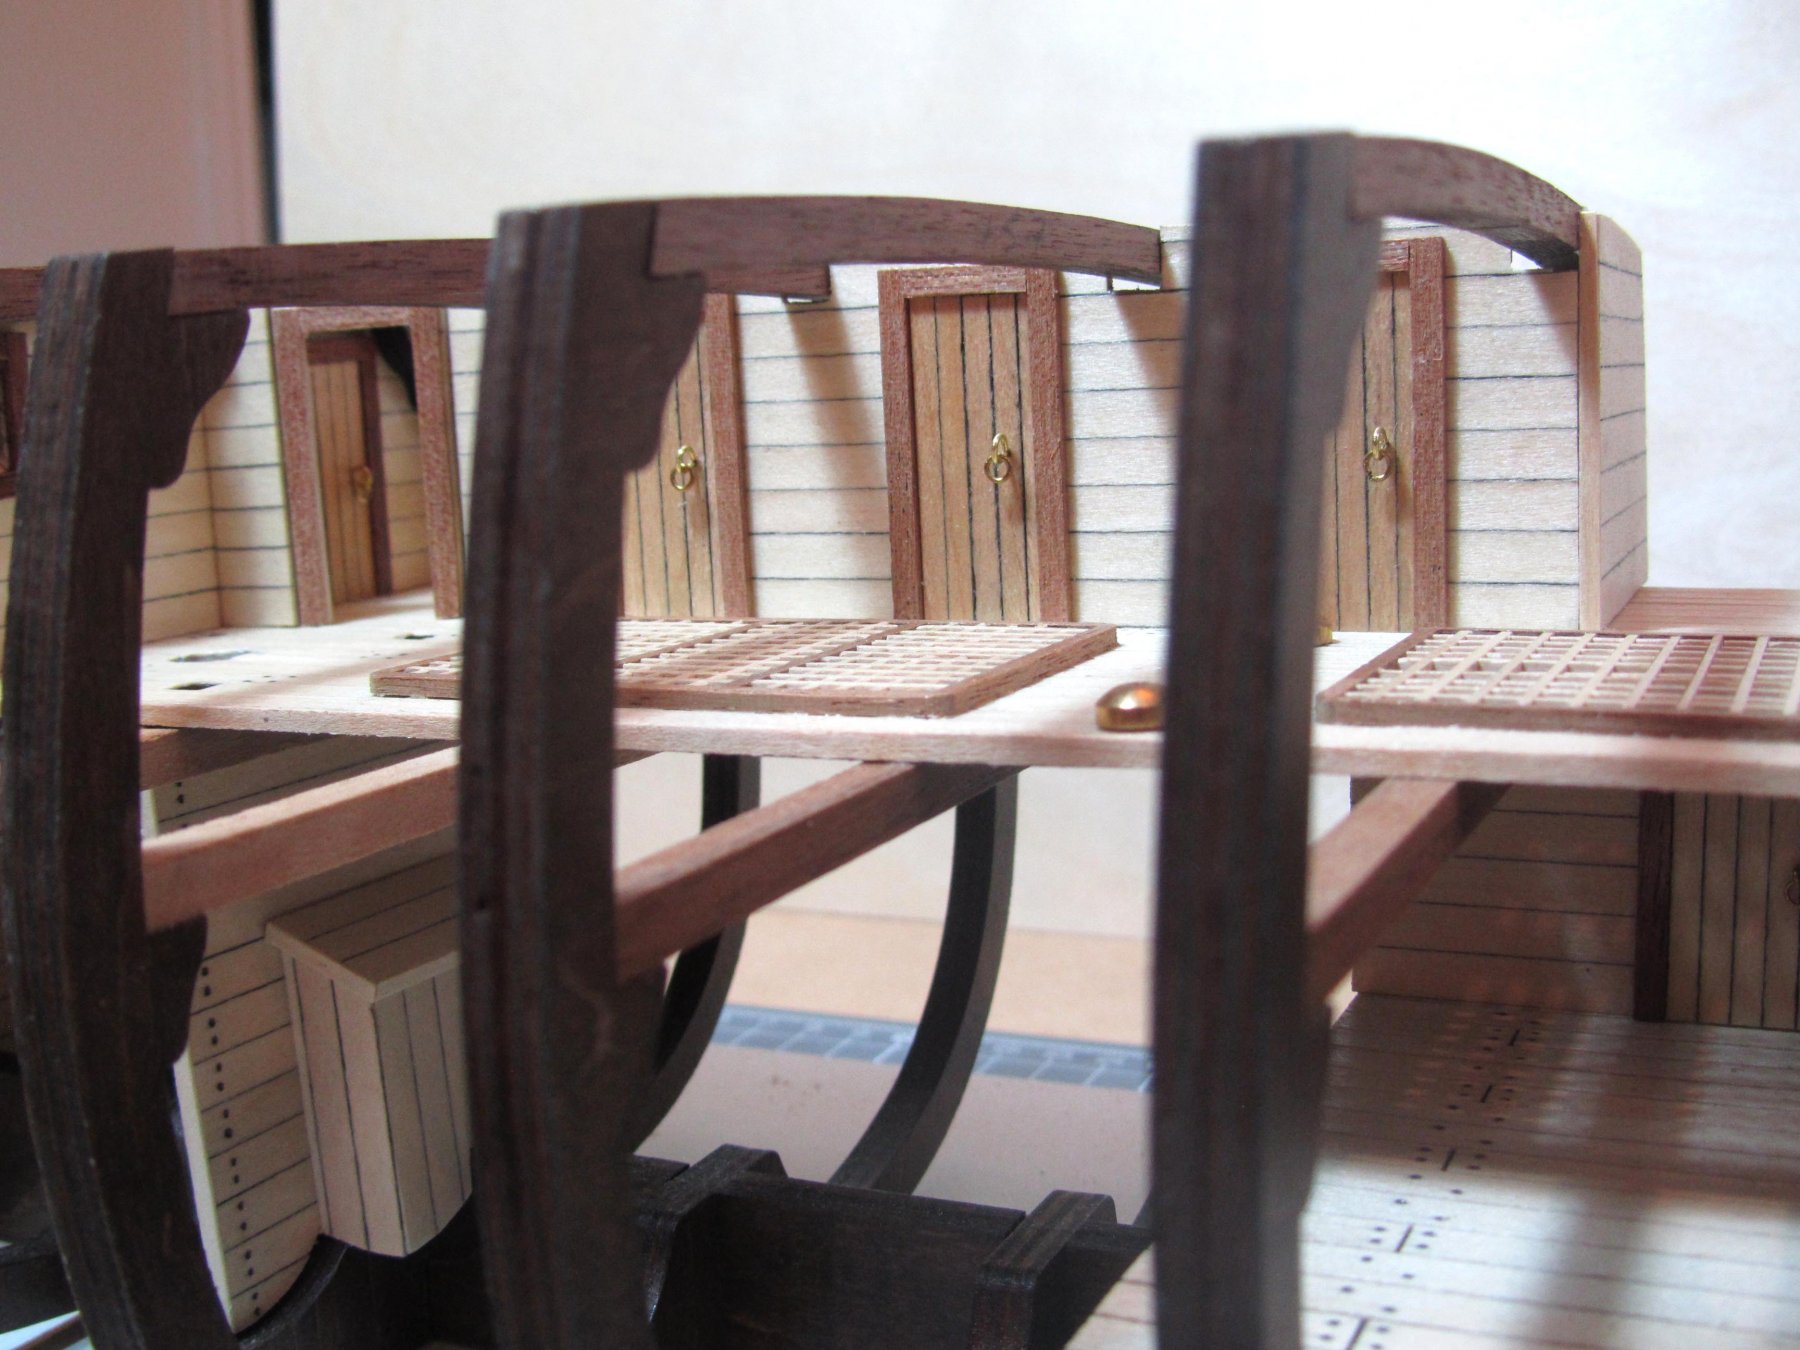
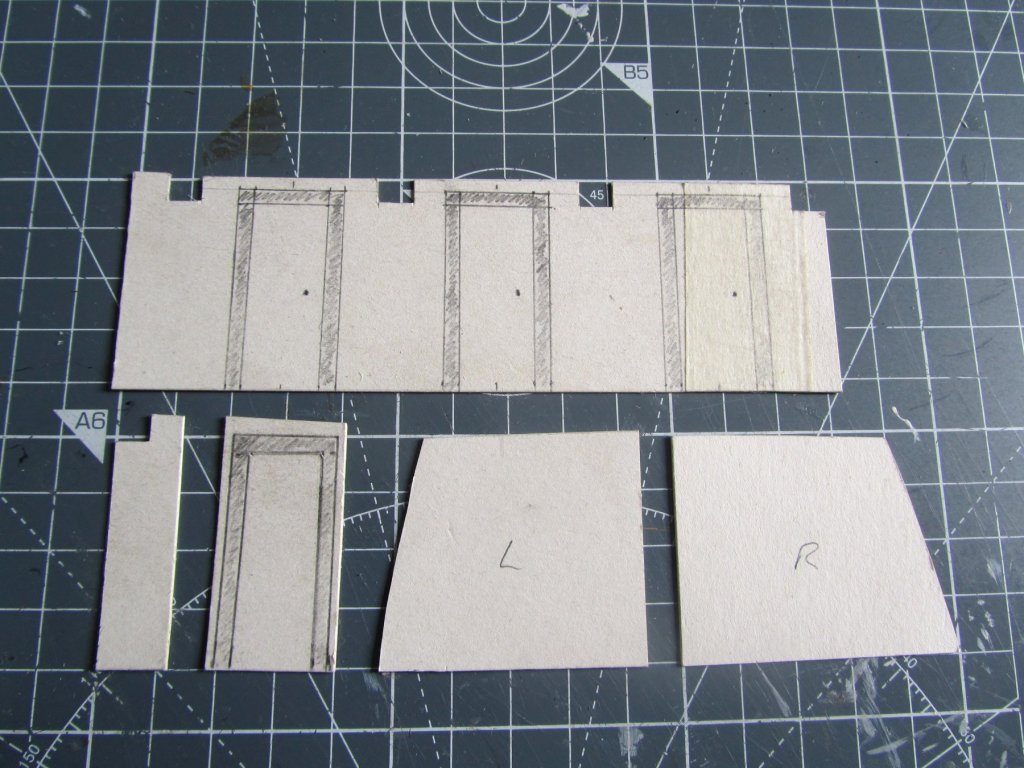
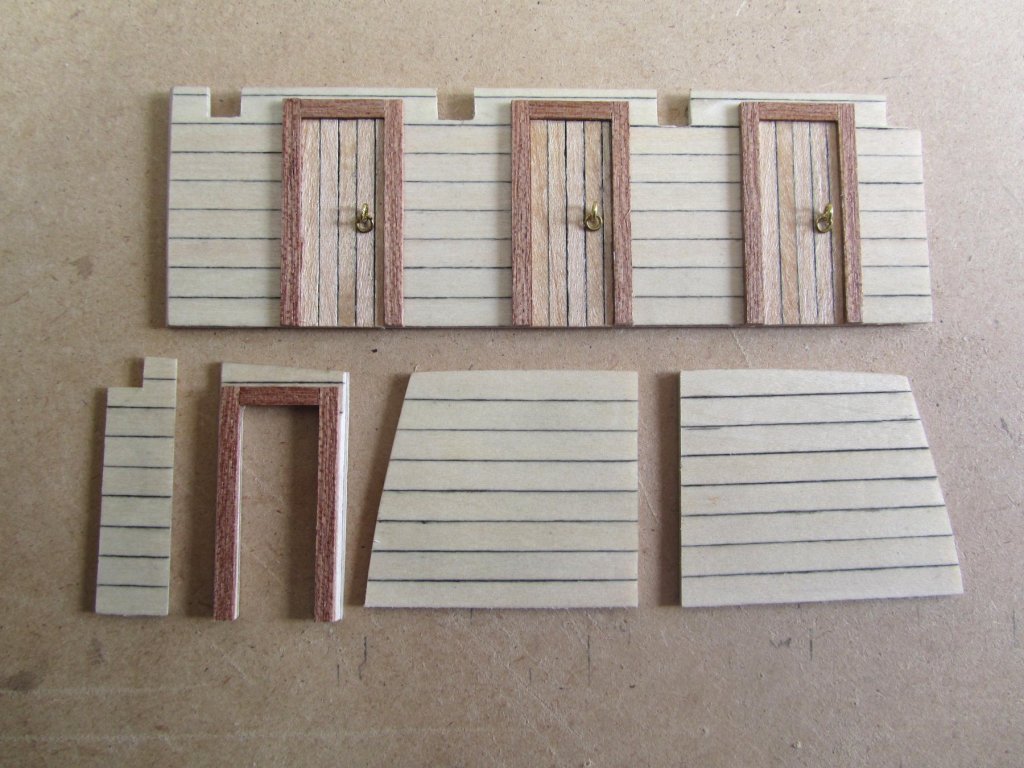
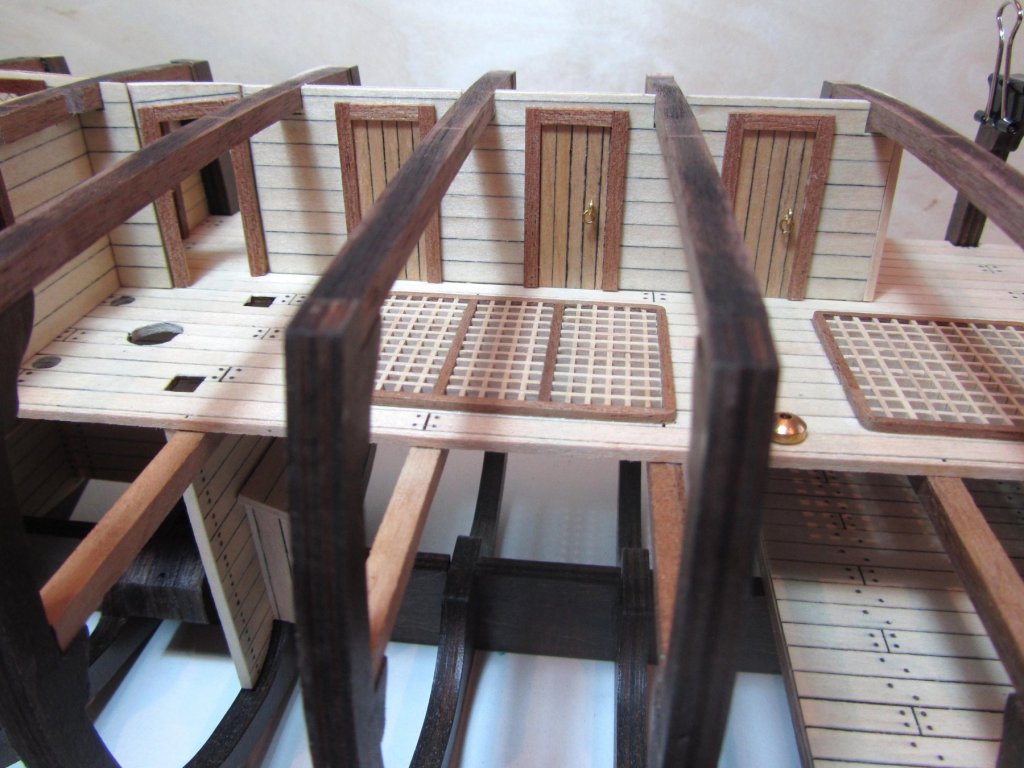
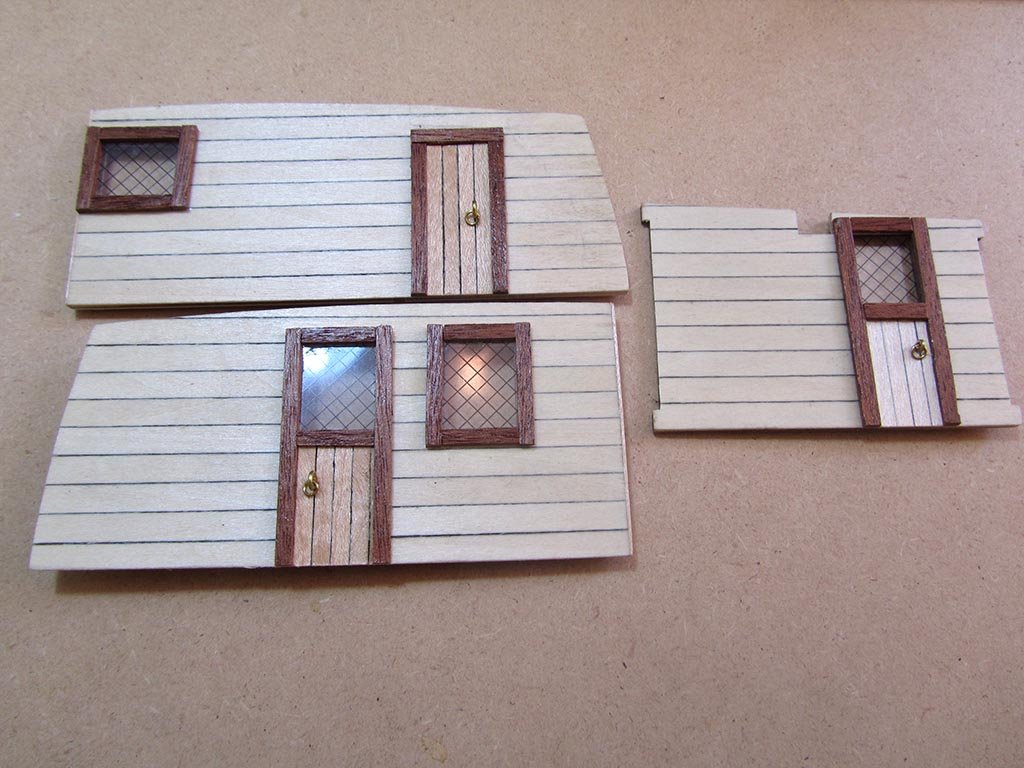
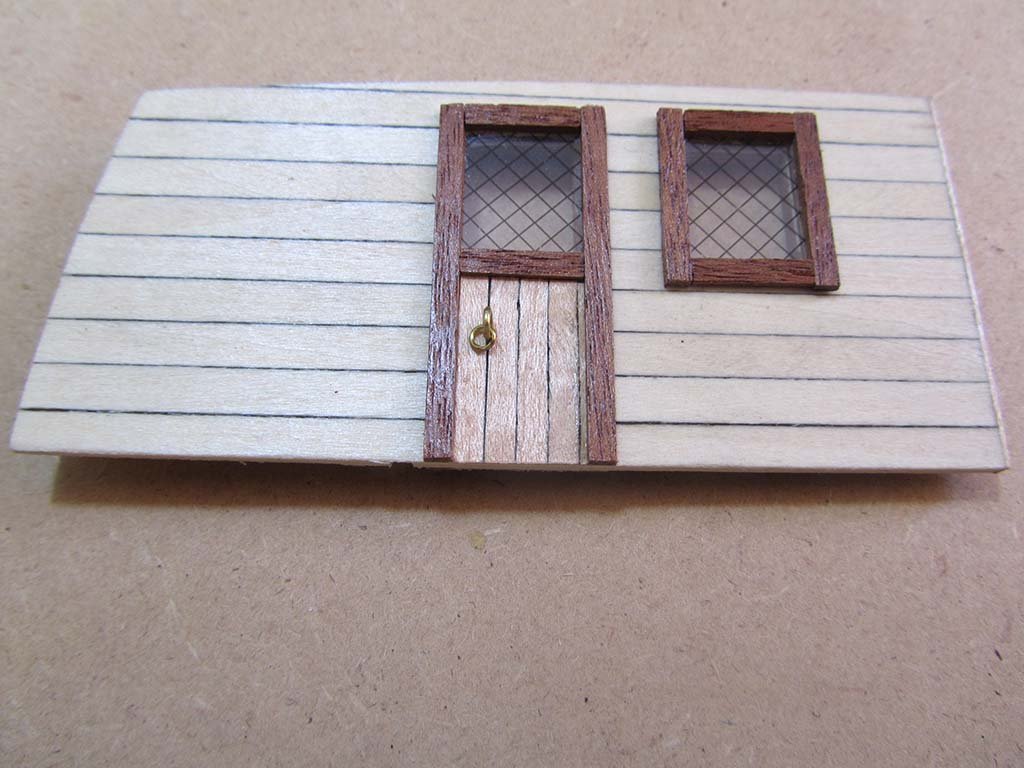
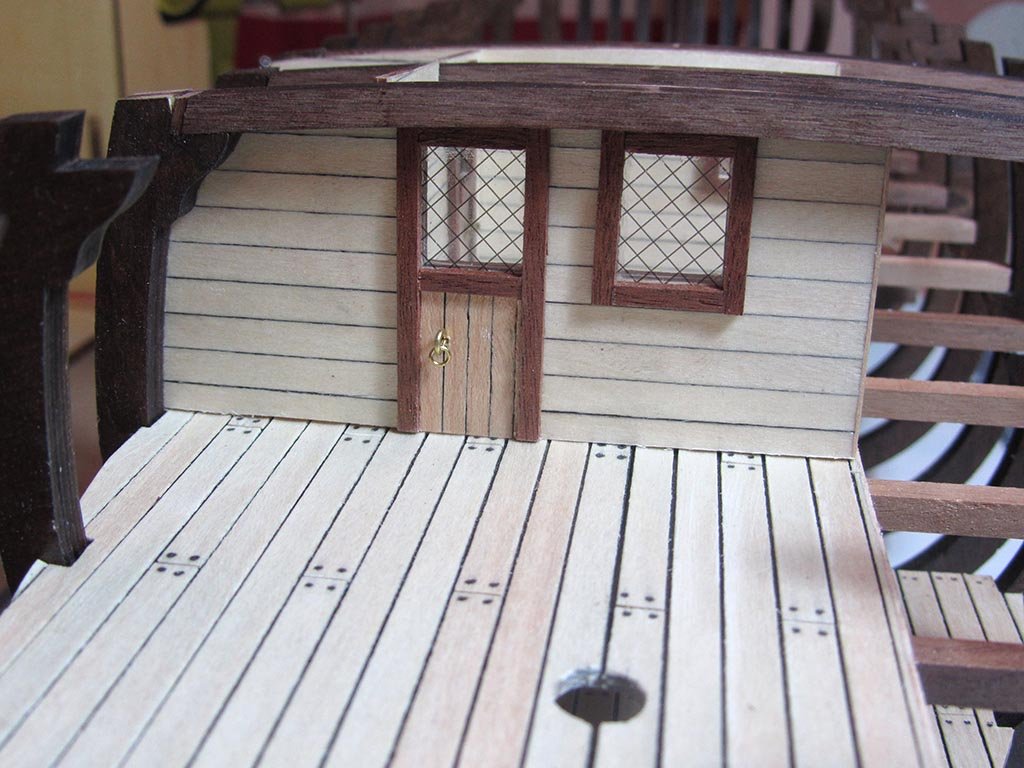
I decided to add in a few more cabins on the middle deck. After a lot of playing around with ideas and studying The Bounty book again, I settled on an idea I quite like. This is my cardboard template for the assembly: Again I copied the template onto 1.5mm ply wood and lined with 0.5mm x 5mm strips. I created the cabin doors with 1.5 x 3mm mahogany. The assembled cabins in place


-
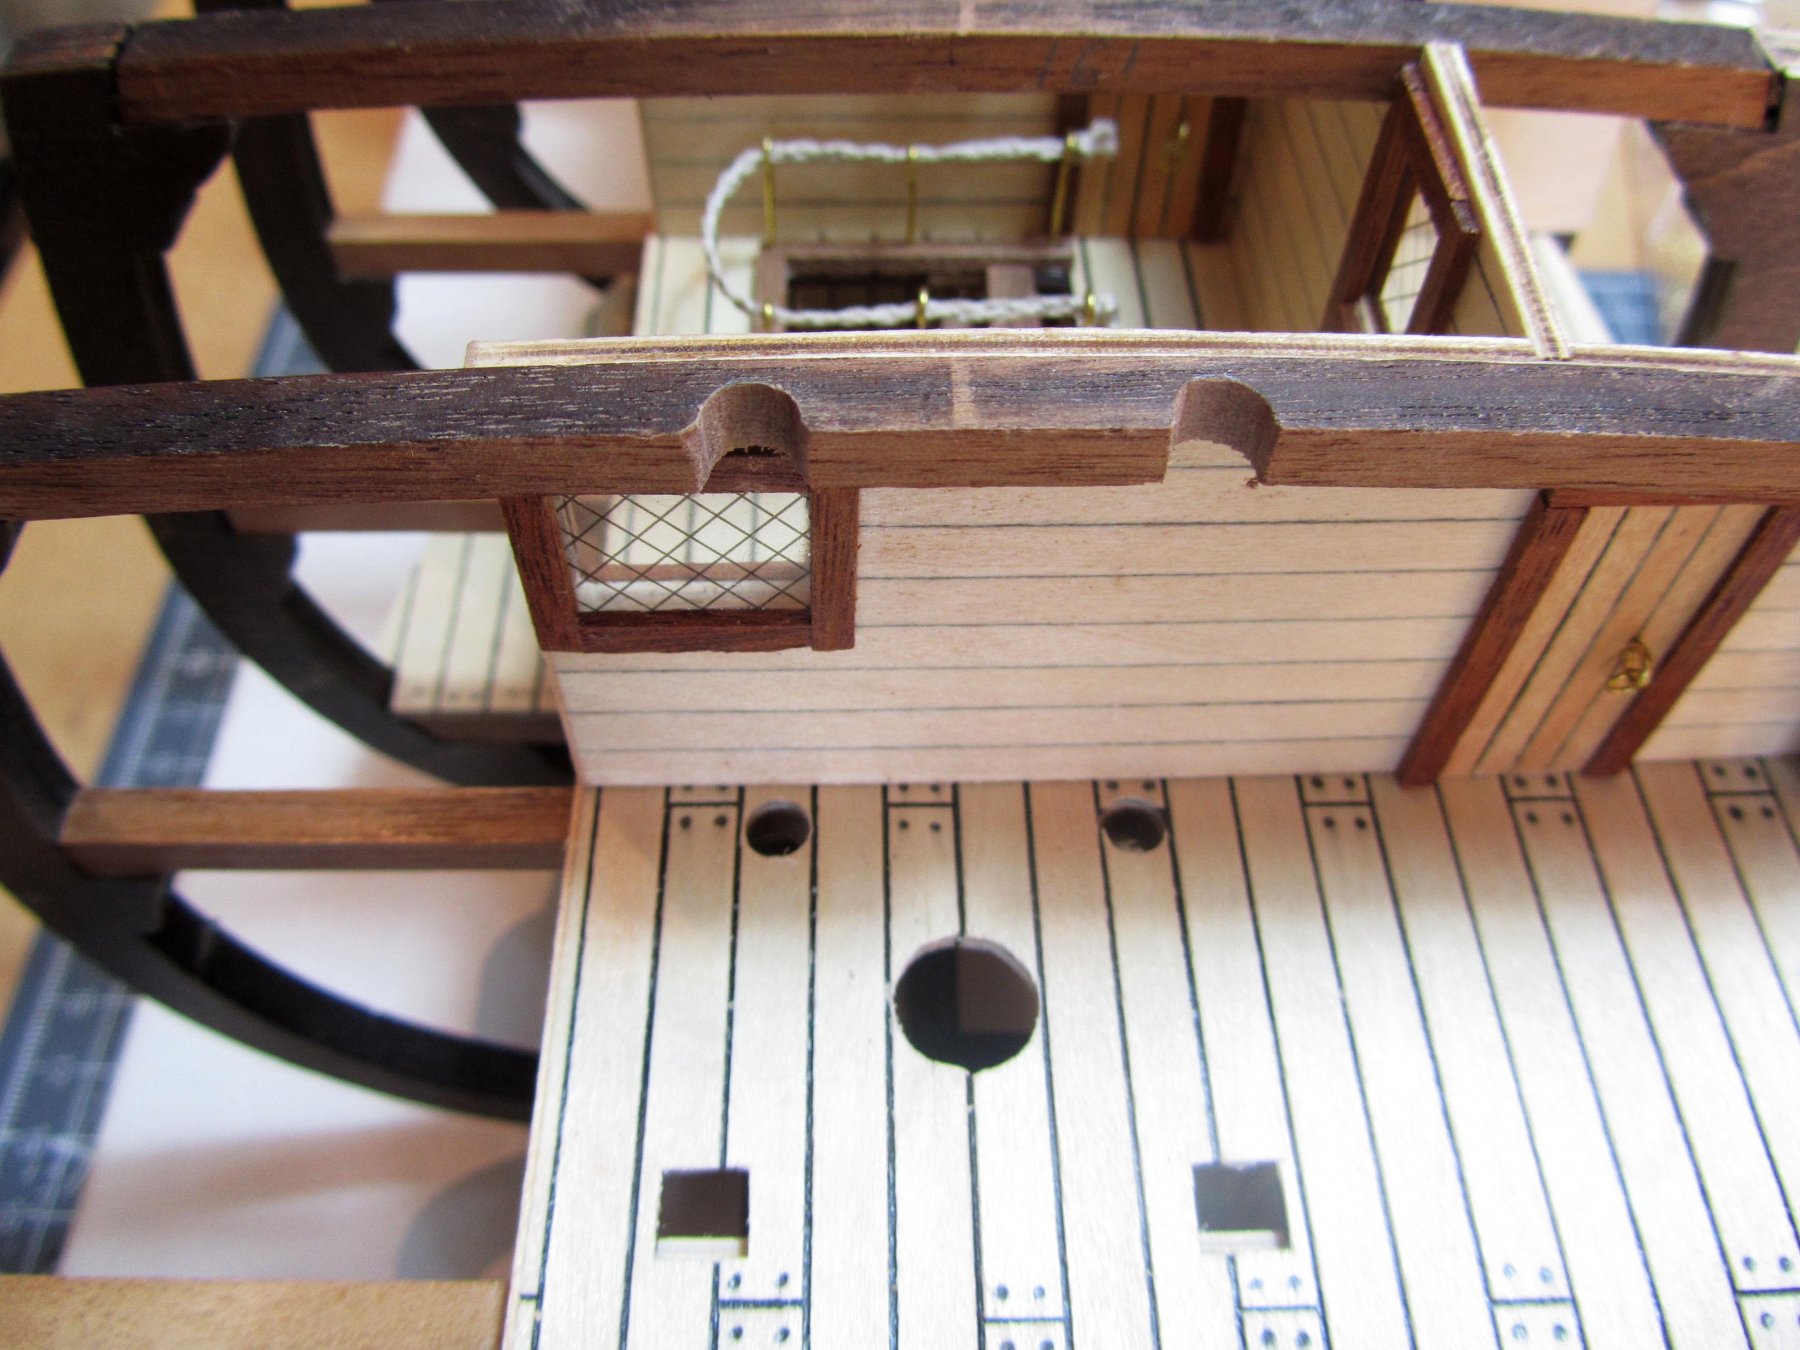
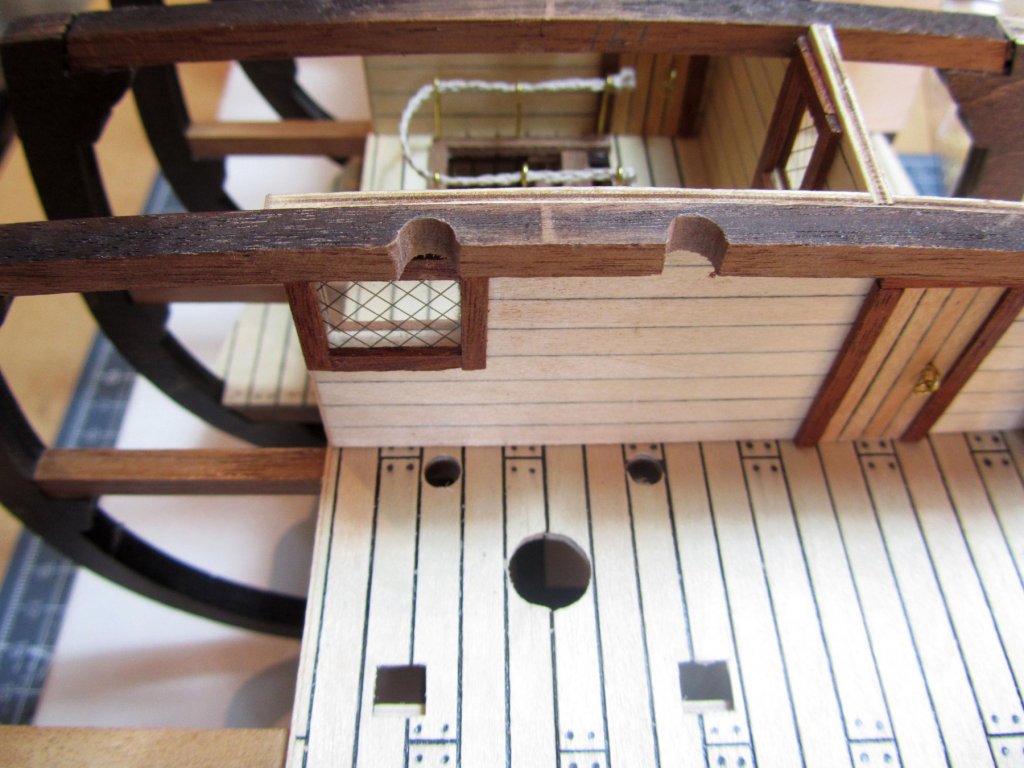
Filing the upper deck support beam for the bilge pipes.
-
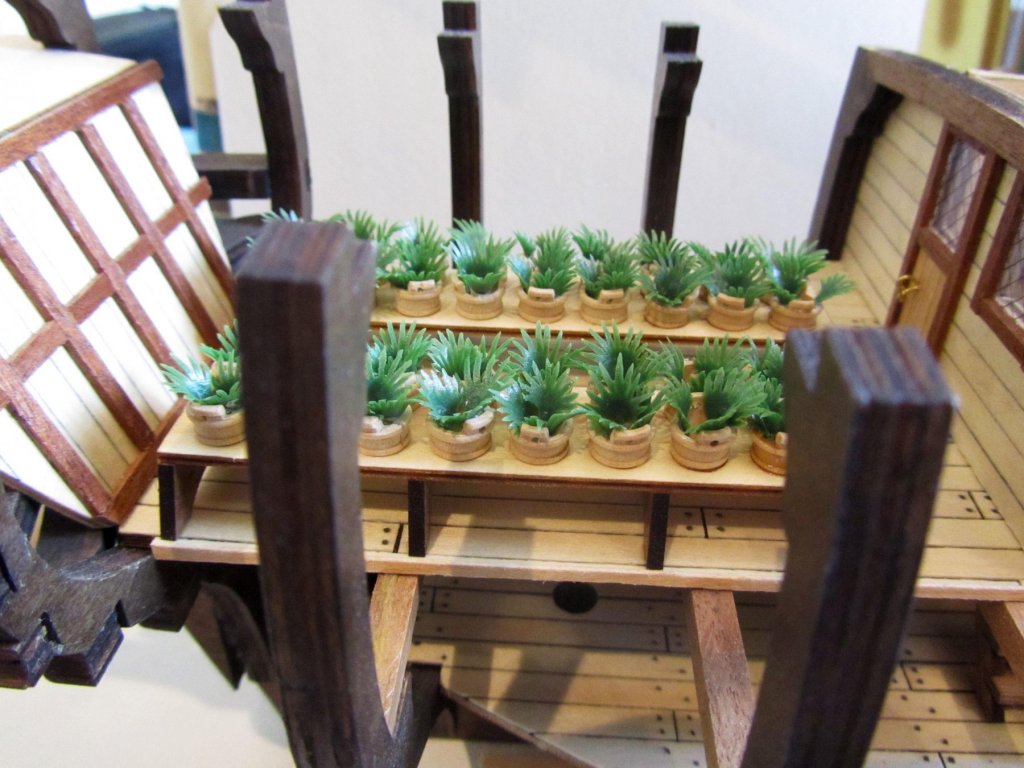
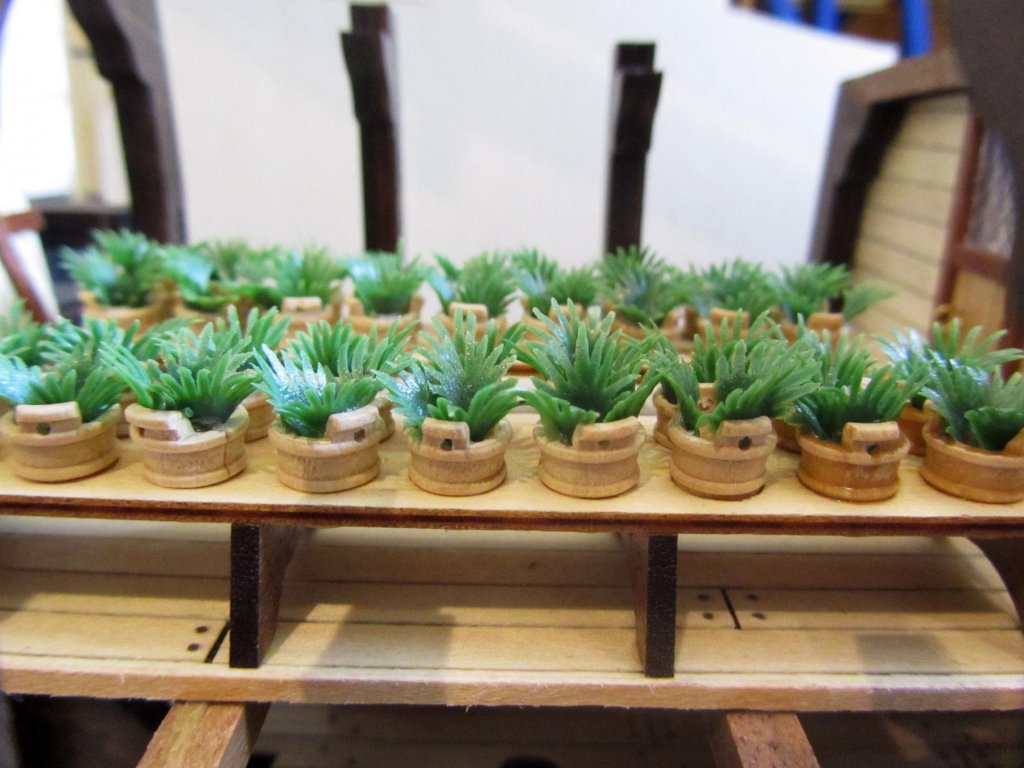
A little more progress since my last update.... The greenhouse, complete with planted Breadfruits.
-
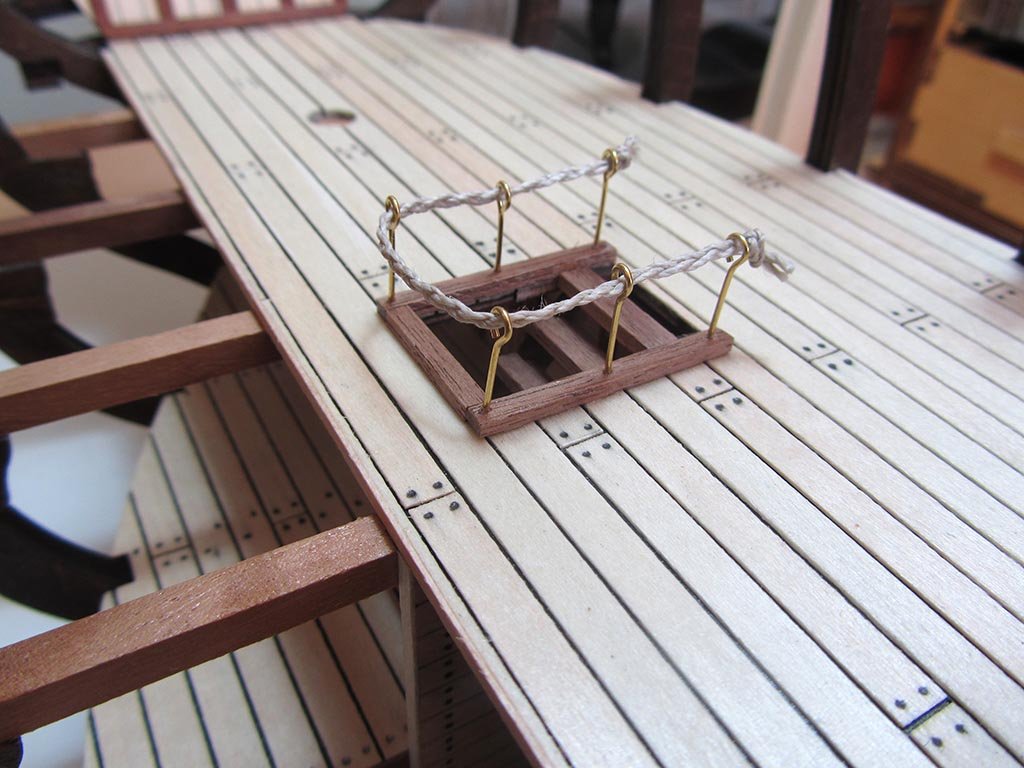
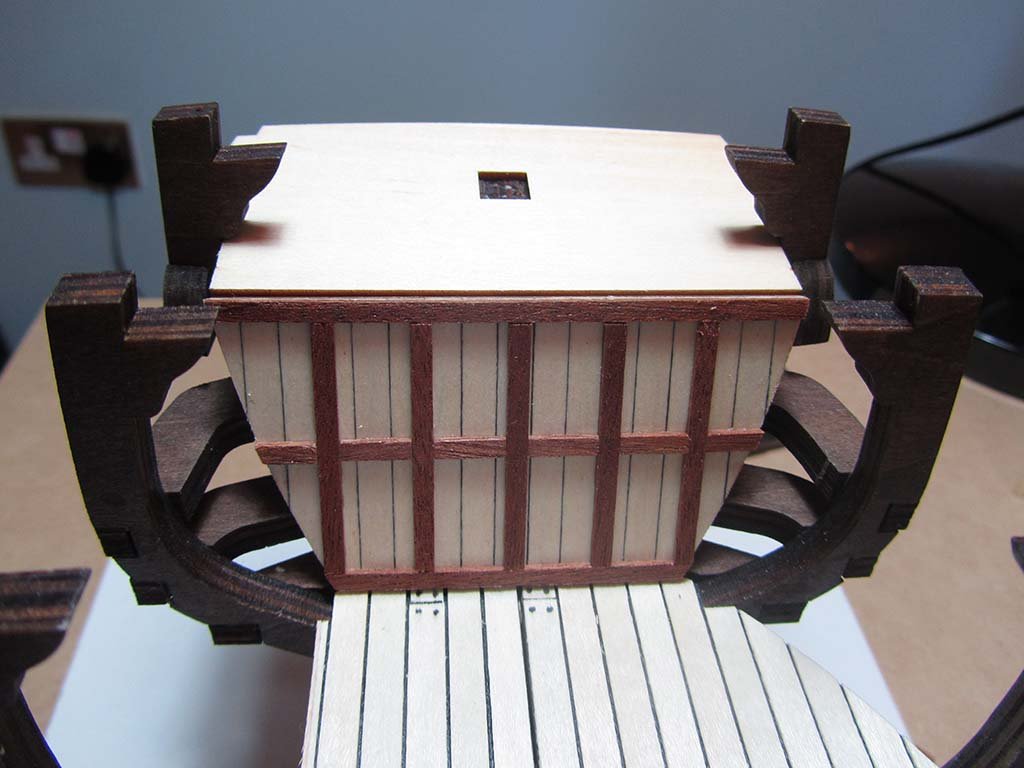
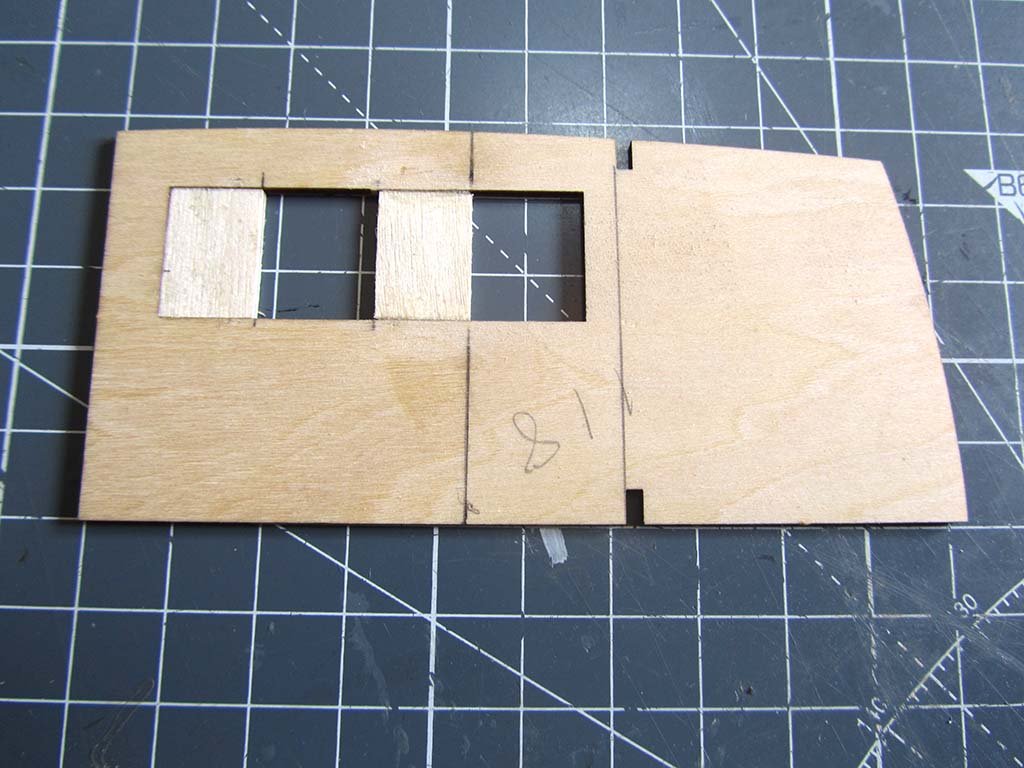
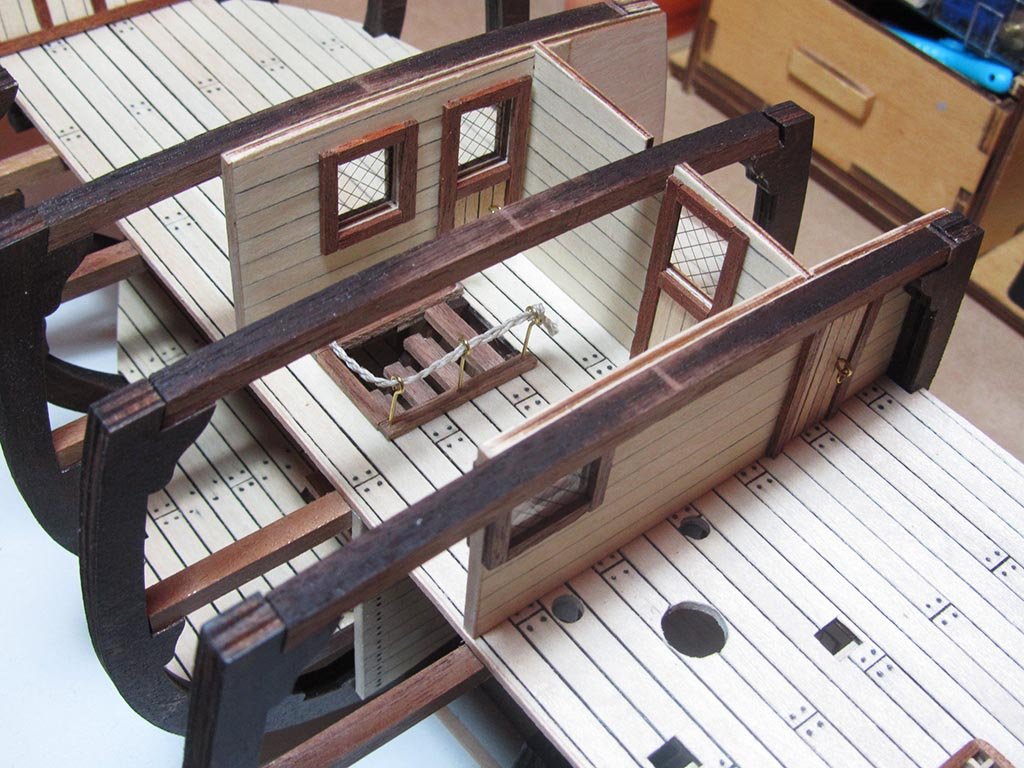
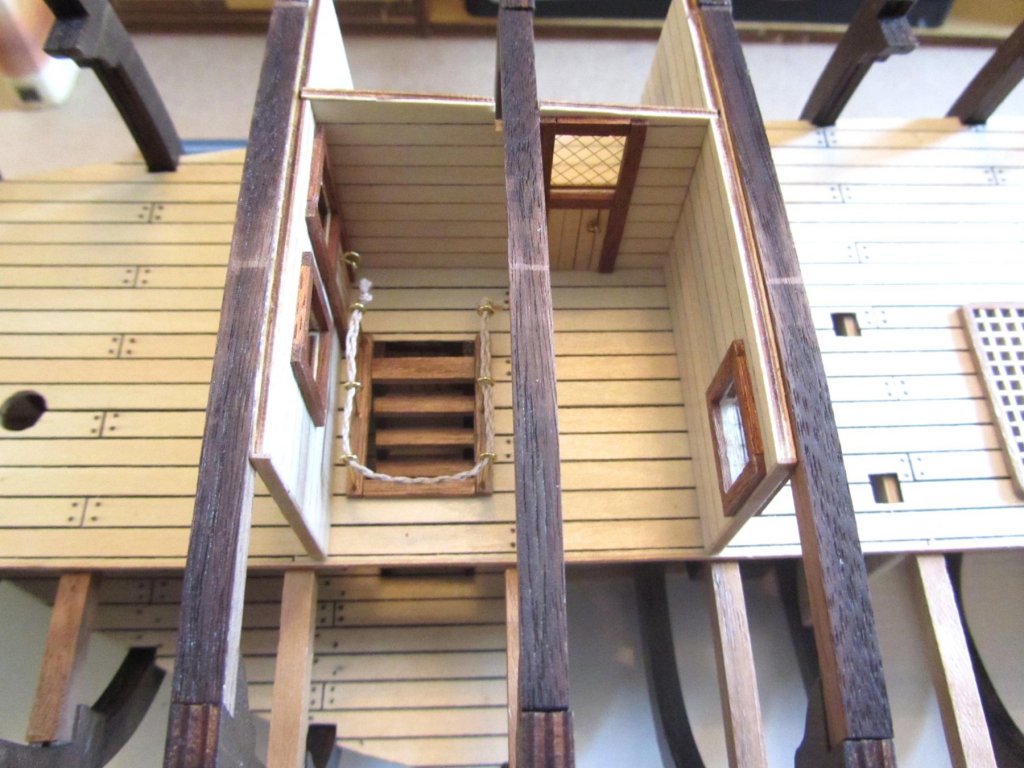
Progress has been a little slower since my last update. With spring upon us I've been doing a lot of work in the garden with not much time left at the weekends for The Bounty. However, things are still moving along. The middle deck cabin staircase You can just see in the photo above that I've veneered the visible edge of the middle deck to hide the plywood appearance. I intend to do the same with the lower deck at some point. Although there's no allowance for it in the kit, I felt that the top area of the staircase looked very empty so I added a hand rail. Initially I used a single string to simulate rope but thought it looked too thin, so I plaited 3 strings together which I think gives a more realistic effect. I really don't like the AL way of lining the walls of the bulkheads for this next section of the build. They supply 15 x 0.5 mm stripwood which really doesn't look good at all in my opinion. So I decided to use the same 5 x 0.5 mm planking that I've used on the other bulkheads that I've built so far. It keeps everything consistent too. Greenhouse rear bulkhead With thanks to other Bounty builders who pointed out that if the middle cabin is built as the instructions, one of the doors would open so that when you walked through it you'd fall straight down the stairs and the other door would open straight into the bilge pipes! So I decided to make the doorways work a bit more logically, which involved a few modifications. I added in a couple of pieces of ply wood to change a door to a window and moved the door to the opposite end of the bulkhead.... These are the three cabin bulkheads. Again, you can just see that I've veneered the visible edges to hide the exposed plywood. And the assembled cabin As you can see, the doors and windows are rearranged to make a more logical arrangement. When installing the upper deck supports around the cabin I found that the fit on a couple of them is not perfect so I added a shim using an offcut from the laser cut sheet the supports come in. I've placed these on the fully planked side so they'll be pretty much invisible when the planking is complete. Yes, I'm still dreading the planking! That's it for now. My back can't take any more gardening for a while, so hopefully my progress will move along a bit more quickly now. Thanks for looking in


-
Congratulations! Looking forward to seeing the final photos.
-
Grendel reacted to a post in a topic:
HMS Bounty by maturin52 - Artesania Latina - Scale 1:48
-
She's looking magnificent! I'm very impressed with your home made display case, she'll look beautiful in there.
-
Grendel reacted to a post in a topic:
MAYFLOWER by Captain Al - Model Shipways
-
Looking forward to following this build Al. It's a model I very nearly went for before deciding on The Bounty
-
Grendel reacted to a post in a topic:
HMS Bounty by Captain Al - FINISHED - Artesania Latina - Scale 1:48
-
Grendel reacted to a post in a topic:
HMS Bounty by Captain Al - FINISHED - Artesania Latina - Scale 1:48
-
Hi Al, Congratulations on a beautiful build. Your build log has helped me considerably with my build of this same model. I've looked through all your updated gallery photos and you've done a fantastic job. As others have said, It's all the more impressive being your first model!
- 265 replies
-
- 2
-
-
- finished
- artesania latina
- (and 1 more)
-
Grendel reacted to a post in a topic:
HMS Bounty by Captain Al - FINISHED - Artesania Latina - Scale 1:48
-
Grendel reacted to a post in a topic:
HMS Bounty by Captain Al - FINISHED - Artesania Latina - Scale 1:48
-
Grendel reacted to a post in a topic:
HMS Bounty by Captain Al - FINISHED - Artesania Latina - Scale 1:48
-
Grendel reacted to a post in a topic:
HMS Bounty by Captain Al - FINISHED - Artesania Latina - Scale 1:48
-
Grendel reacted to a post in a topic:
HMS Bounty by Grendel - Artesania Latina - Scale 1:48
-
Grendel reacted to a post in a topic:
HMS Bounty by Grendel - Artesania Latina - Scale 1:48
-
Guys, Apologies for not replying sooner. I've been away for the weekend. Thank you so much for your comments and input. It's much appreciated. Captain Al, I've just been looking at your gallery photos. She looks stunning! You've done an amazing job. Are you planning to add the sails at any point or are you leaving her as is? Boyd, your build log is one of the main inspirations that gave me confidence to take on this model so I'm thrilled that you're following my log. I'm sure I'll be pestering you with plenty of questions along the way! I'm genuinely looking forward to seeing the progress you've made since your last update, especially the planking. Anthony, thanks you for your kind words and for following my build log.