


Chief Williams
-
Posts
38 -
Joined
-
Last visited
Recent Profile Visitors
412 profile views


-
 hamilton reacted to a post in a topic:
HMS Bellona by hamilton - Corel - 1:100 - 1780 refit
hamilton reacted to a post in a topic:
HMS Bellona by hamilton - Corel - 1:100 - 1780 refit
-
Bill Morrison reacted to a post in a topic:
HMS Bellona by Chief Williams - Corel - 1/100
-
 Hello again Hamilton, I'm so sorry I've been quiet for a long time, but I went into hospital for a routine procedure, and finished up 6 (?) months later just returning home, and nearly missing a leg. I could have done my Long John Silver impression really well, but I still have both, although the left one's not working too well. I'm so impressed with your progress and your craftsmanship I'm afraid to dust off my Bellona in case I make a mess of it. I'll keep watching your progress with awe.
 -
Robert Taylor reacted to a post in a topic:
HMS Bellona by Chief Williams - Corel - 1/100
-
Robert Taylor reacted to a post in a topic:
HMS Bellona by Chief Williams - Corel - 1/100
-
Robert Taylor reacted to a post in a topic:
HMS Bellona by Chief Williams - Corel - 1/100
-
Bill Morrison reacted to a post in a topic:
HMS Bellona by Chief Williams - Corel - 1/100
-
Bill Morrison reacted to a post in a topic:
HMS Bellona by Chief Williams - Corel - 1/100
-
Bill Morrison reacted to a post in a topic:
HMS Bellona by Chief Williams - Corel - 1/100
-
Bill Morrison reacted to a post in a topic:
HMS Bellona by Chief Williams - Corel - 1/100
-
Bill Morrison reacted to a post in a topic:
HMS Bellona by Chief Williams - Corel - 1/100
-
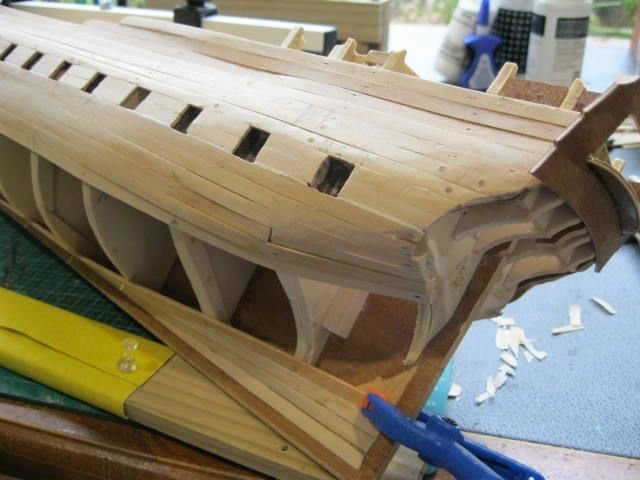
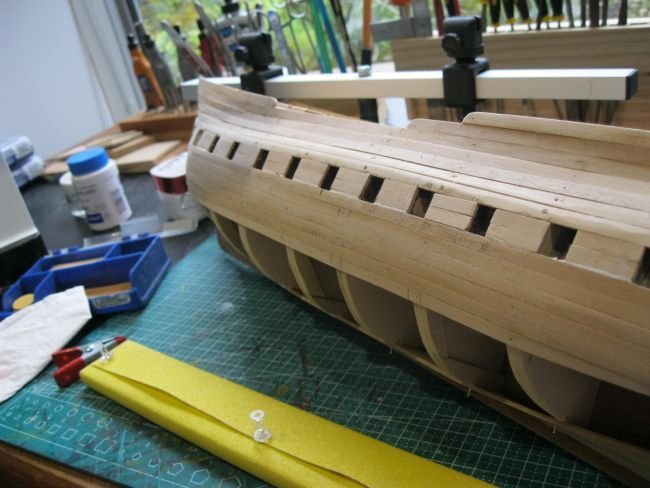
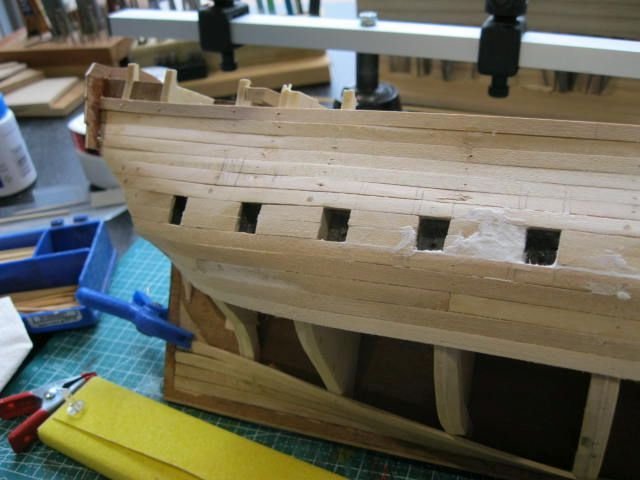
Here I am, back after a bout with the bug. It had all the symptoms of COVID, but the tests kept coming back negative. I'm about over it now, thank goodness. I would like this entry to be titled 'What Not To Do When You Aren't Feeling 100%' and the first line of that would be: Don't undertake any planking. I thought I would be able to get on with the first planking run at least, but as you can see from the attached pictures, I've made a right mess of it. I hold my hands up, if I could start again I would. My major mistake was that I didn't complete the fairing of the bulkheads before I started to plank. in a better state of mind, I would have checked the run of the planks before I fitted any of them, and adjusted the fairing to suit, but in my befuddled state, I just jumped in and started planking with the results as shown. I'm going to carry on with it and hope I can make it all better when I come to put the second planks on. Fingers crossed and watch this space.......
-
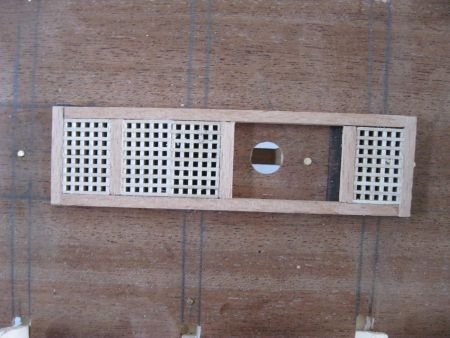
Harlequin, I've been having trouble with these gunports, and I would like to take you up on your offer of the cast gunports, if you still have them, but I would like to pay for them and reimburse you for the postage. I live in New Zealand and it's half a world away from you. Please let me know how I can get my address to you, and details of how I can reimburse you, I've had three tries at the gunports, and I've not been happy with any of them, so I've decided to build the model at anchor, with all her guns stowed and the minimum of running rigging. A bout of the current bug doing the rounds hasn't helped my workmanship any, not that it was great to begin with, but I'm over it now. It's a pity my workmanship isn't though.
-
Chief Williams reacted to a post in a topic:
HMS Bellona by hamilton - Corel - 1:100 - 1780 refit
-
Chief Williams reacted to a post in a topic:
HMS Bellona by hamilton - Corel - 1:100 - 1780 refit
-
Chief Williams reacted to a post in a topic:
HMS Bellona by hamilton - Corel - 1:100 - 1780 refit
-
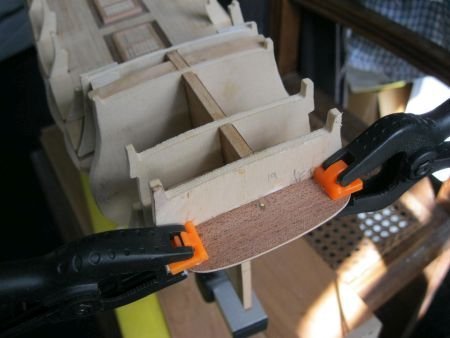
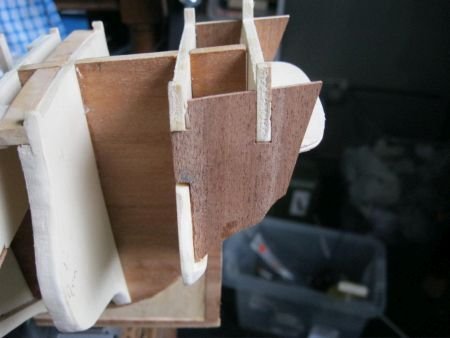
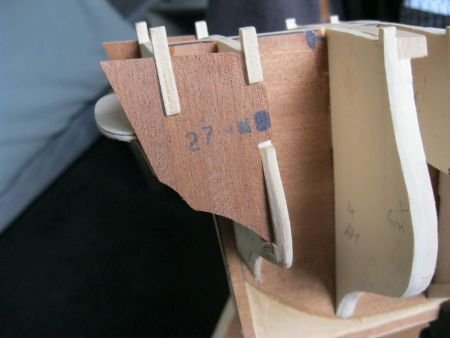
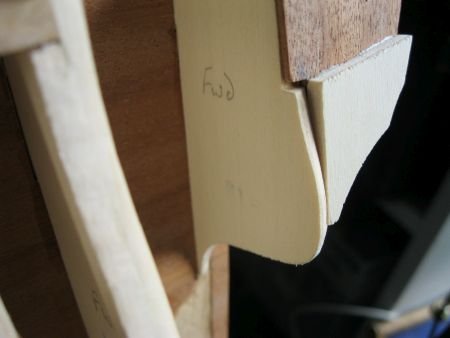
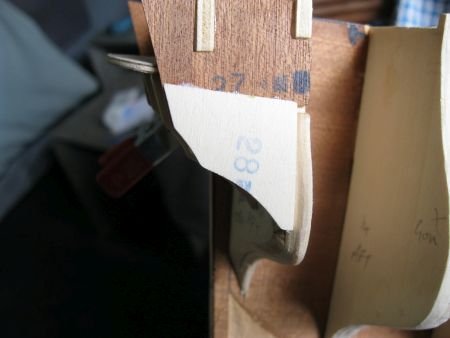
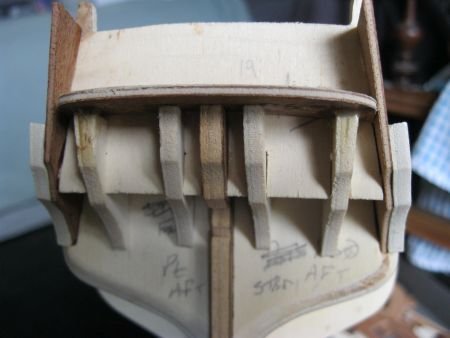
Totally agree Hamilton. It's just as well, because in my usual ham-fisted manner I've just broken the tip of another frame off. I won't publish a photo of it as I feel embarrassed. My stern framing's coming along apace, I'm glad I took your suggestion and did it before the quarterdeck. Here's the balcony deck (?) in its raw form and after planking. As you can see, I haven't put the brass on the bulkhead yet, I've made a right pig's ear of painting it, I can't seem to get a streak free finish, so it's going to go on as it is, and hope no-one looks too hard at it. I've tested the fit of the brass, and that's good, so I went ahead and put the stern gallery cheeks in. Here's the upper cheeks And the lower cheeks before I form them for the planking run. I'll save that until tomorrow though, to make sure the glue is dry. That last phot shows up how the ply split when I tried to put a nail in to hold the deck down. I wish I'd pre-drilled it....
-
I'm usually of the 'If all else fails, read the instructions' school myself. Most times, the build sequence shows itself as you go along, with the inevitable missed item that bites you on the backside. I'd looked at this and decided to put the quarterdeck in first, but reading the drawings as you said Hamilton, showed an awful lot of detail that had to be done prior to the quarterdeck being fitted. I'm glad I didn't.
-
Hiya Hamilton, I've just come to that same conclusion, I started the stern framing today, and I'll get on to the first planking after that, and I'll leave the quarterdeck and poop for when the hull is a lot more stable. I've fixed the broken bulkhead with a peg but it's difficult to get the alignment right. I'll keep trying. Look after yourself in the snowy north.
-
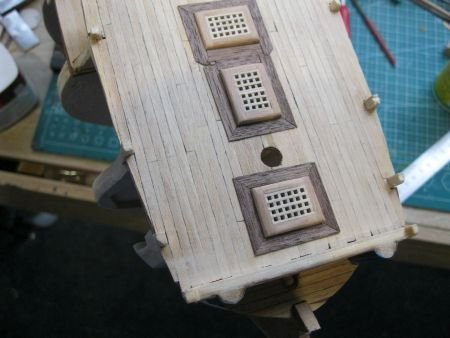
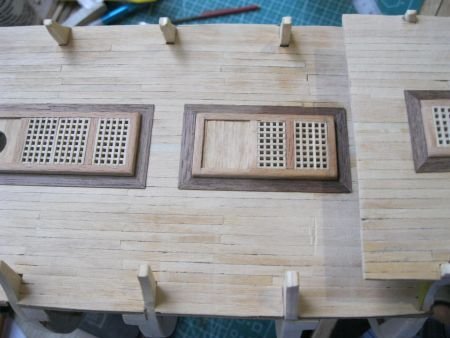
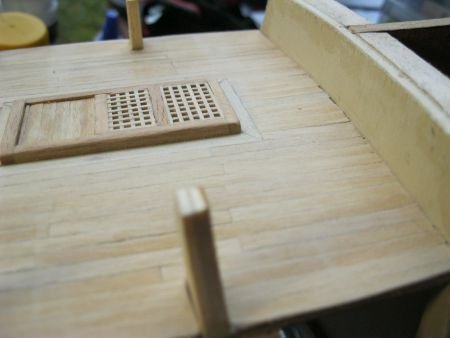
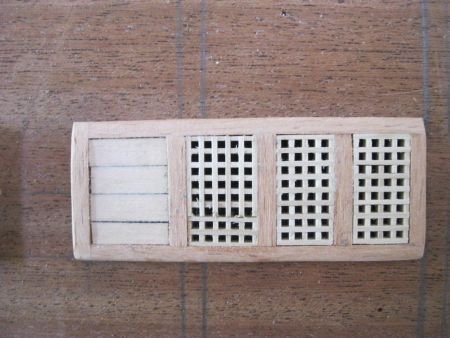
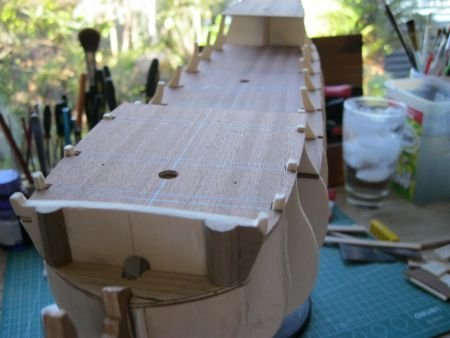
Here's my progress so far. I got the frames for the foc'sle on and planked it the same way as the main gundeck. I'd got a pack of Chinese walnut on eBay, and She Who Must Be Obeyed said it might be nice if I outlined the gratings in it. Historical accuracy went out of the window, and I did as I was told. I think it looks quite nice though. Chinese walnut seems to be a lot darker than the European, so it gives a better contrast against the Tanganyika. When all the deck furniture is fitted, and the masts and rigging are up I think that will blend in nicely. You can see the broken frame I've mentioned before, frame 12, I'll have to try and make a dummy bit to form the planks on to. It won't be visible from the inside, as the quarter deck will cover it up, but I'll know it's there. Next job is the quarter deck, but I'm debating whether to put some upper hull planking on first, so I can cut gunports and fit the four cannon that go under the quarter deck first. Any suggestions gratefully accepted.
-
Thanks Harlequin, I might take you up on that later. She who must be obeyed has decreed that she wants the gunports open with guns run out, no matter how much I whinge. I can see a few problems developing already with the siting of the U channel to hold the dummy guns, some of them appear to be floating without any support in the hull. I agree with you about the perfect build, as you say, they have no character, whereas a real build shows a lot of the character of the builder. In my case, warped in places, with a few things in the wrong place.
-
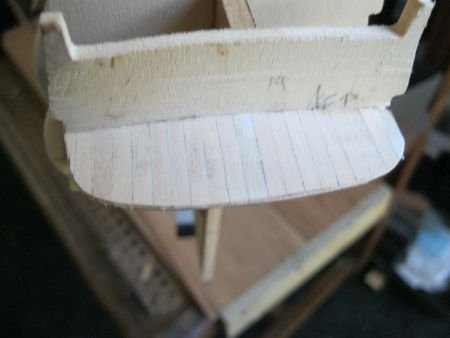
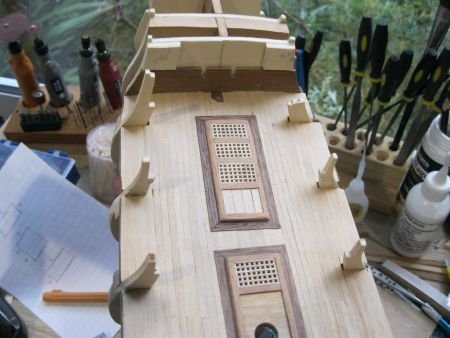
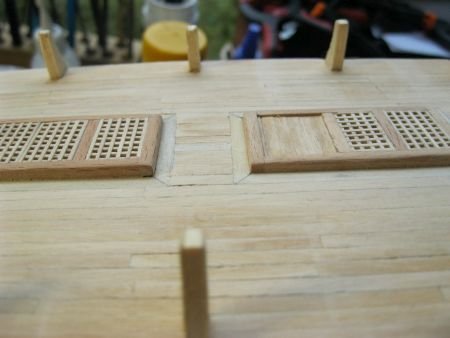
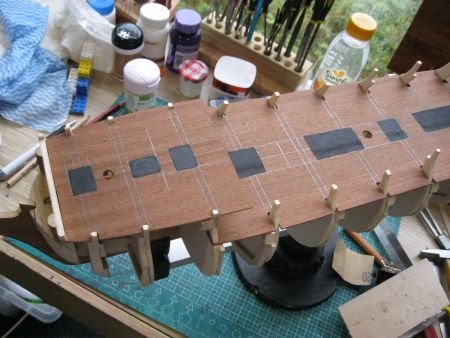
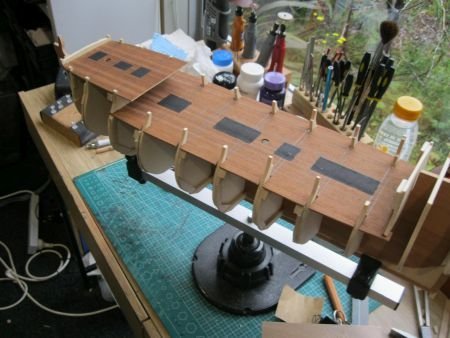
Thanks, Hamilton, for the tip about the sandpaper, it's so logical that I never thought of it. The QHM released me from domestic duties and cleaning stations, so I've been able to get some work done on the planking. I've got a thing about scale planks even though it makes it look scruffier. At a scale of 1/100 and an admiralty plank spec. of 22 to 24 feet, I decided to even things out and make my deck planks 70mm, which would equate to a plank size of 23 feet, and it also fitted in quite nicely with the dimensions of the main deck. How it fits with the other decks I'll wait to find out. Here's a picture of the fwd planking of the main deck. The sanding and finishing isn't quite complete, I intend to finish with some 1000 grit glass paper, and then a very thin coat of tung oil. I've set the hatches into the planking which meant I didn't need to sand too much of a camber into them. This shows the fettling around the coamings of the hatches. I used some scrap 4 x 0.8mm Tanganyika I had from a previous kit, which successfully covered up the fact that I didn't sand the camber properly into the hatches. Anything for a quiet life... One thing I have found though is that the quality of the deck planking in 3 x 0.6mm Tanganyika is not the best. One edge of each plank is usually straight while the opposite one varies from nearly straight to very wavy I had to choose the planks carefully to finish the main deck, and it looks like I may not have enough material to do the other three. I'll have to go online and try and source some, which is not easy, living at the back end of the world like I do. I've 'suggested' the caulking of the deck by using a 2B pencil along the edges of the planks. Sometimes it worked, sometimes it didn't. I'm hoping that the tung oil will bring out the seams better. Now my next task is the photo-etched brass furniture fwd and aft of the main deck. I'm going to give it a coat of yellow ochre to take away the shine of the brass, but up to now, I can't get an even coat. I'll keep experimenting until I get it right. As an aside, it's high summer down here and we're going through a patch of very wet, humid weather which has affected all the stock in the kit, making it very damp and bendy. Just wait until I come to plank the hull, it will be mad hot and bone dry, and my planks will turn into splinters. That's what the hobby is all about though isn't it! My Proxxon rotary tool arrived and I am over the moon with it. I've been told three times by the QHM to shut up about it, as she is getting fed up with being told how good it is.


-
Chief Williams reacted to a post in a topic:
HMS Bellona by hamilton - Corel - 1:100 - 1780 refit
-
Chief Williams reacted to a post in a topic:
HMS Bellona by hamilton - Corel - 1:100 - 1780 refit
-
I've got the main deck on, and I'm going to put most of the deck furniture and planking on this before I go any further, as it would be too fiddley, if not impossible, to try and do that with all the other decks in place. I've stuck in a few pictures of my first attempts at hatches. the hatches aren't stuck down yet, or even properly sanded for deck camber and finish. I'm not going to paint the model apart from a few small details, as i think it would be a shame to hide the wood. Maybe a thin coat of tung oil? The Proxxon's not arrived yet, and my Dremel is playing up, so everything's slowed down at the moment. It's funny that you don't know how much you rely on a tool until it's not available.
-
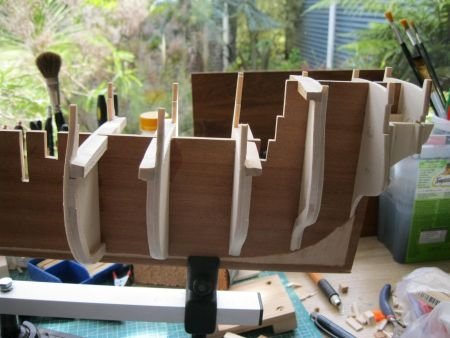
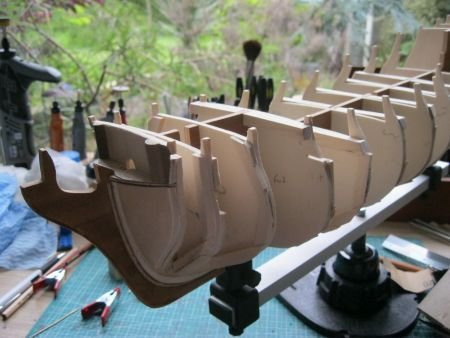
So much for a free week and making more progress. Who was it said that 'Work expands to fill the time allowed'? What with all the things that Mrs Chiefy found for me to do, and the fact that it's 36 C in my workshop by 11:00 I've not got much done. I live in the southern hemisphere, and the summer is being a beaut. I did manage to get the after frames done though, all glued and trued The first shot shows the broken bit of frame 12 quite well. I've saved it to try and stick on later. Hopefully there'll be more to follow at weekend. I've just invested in a Proxxon 28481 IBS/E rotary tool. I've been coveting one for a long time, and my wife had her back turned for a minute, so I bought one. It's on it's way from Australia, so I might get it by August. I'd be interested to hear anyone's thoughts on this bit of kit. I've been using my Dremel 8220 constantly and I'm very pleased with it, but I always thought there could be something better. I'll let you know how I get on when I get it setup and working, just don't hold your breath.

-
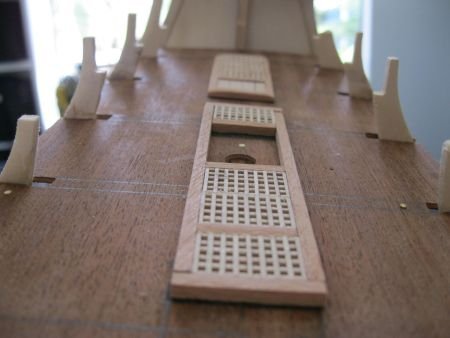
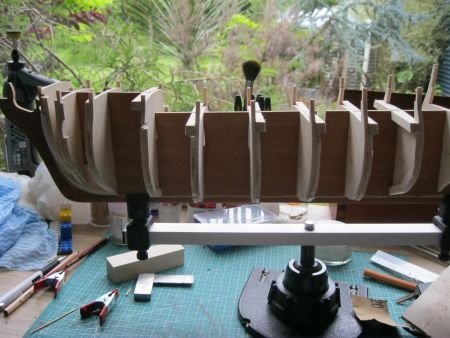
Back to Bellona after a break for the holidays. I've been looking at the chinese puzzle that's the frames/deck assembly and trying to work out the best way of assembling the frames so that I can get the decks in as well, taking into account the lugs that fit the main deck into frame 6, and also the lugs that fit the foc'sle to frame 3. I think I start with frame 12 and work forward, up to frame 6, but frame 6 has to be fitted with the main deck lugs in place. After that's all fitted and pinned/glued/elasticed down for the deck camber, then I fit frames 5 and 4, then frame 3, with the foc'sle lugs and deck in place. pin/glue/elastic the foc'sle down, and bob's your auntie. For now, though, that's a week or so in the future. I'm not even thinking about the stern galleries yet. I've been reinforcing the frames using bits of basswood to give me a better purchase when I start planking, and also to give more strength to the deck camber from when I try to pin it down. Past experience has shown me that 4mm bass ply isn't enough to hold the camber in place. (I think it's bass plywood). I've not started fairing in yet, I'm saving that joy for later. Here's the assemble with the decks fitted. I borrowed a brilliant idea from Hamilton, and painted the areas under the gratings black to give a bit of depth when the gratings are fitted. Thank you, sir. I've got a fairly free week, so I hope to be making a lot more progress with this. As always, and hints tips or criticisms will be gratefully accepted.
-
Hiya Hamilton, I started to cut the rabbet, and found like you said that the material is cheap and won't take a straight cut. I decided to carry on and make as good a job as I could of it, and apart from three place where the veneer just fell off, it didn't turn out too bad, if you don't look too closely. I've fitted all the frames and the decks but I won't be gluing anything for a long time yet. I have had a stab at the roundhouses and the planking of the beak deck, but that was just because I got bored. The glass on my workbench is water, honest. This will be the most complicated model I've ever made, so I'll be immensely grateful for all the help offered. Just as an aside, it's 32 C (90 F) in the shade here.
-
Where did you get the gunport lids from, do Corel sell them? Mind you, the time I wait for anything to arrive here at the back end of the world, I might as well make my own.