Blackie
-
Posts
102 -
Joined
-
Last visited
Recent Profile Visitors
801 profile views


.thumb.jpeg.fc5d633a7b34428fcf19419a73d56d55.jpeg)


-
 GrandpaPhil reacted to a post in a topic:
Harvey by Blackie - FINISHED - Artesania Latina - Scale 1:50 - Baltimore Clipper
GrandpaPhil reacted to a post in a topic:
Harvey by Blackie - FINISHED - Artesania Latina - Scale 1:50 - Baltimore Clipper
-
EricWilliamMarshall reacted to a post in a topic:
Harvey by Blackie - FINISHED - Artesania Latina - Scale 1:50 - Baltimore Clipper
-
EricWilliamMarshall reacted to a post in a topic:
Harvey by Blackie - FINISHED - Artesania Latina - Scale 1:50 - Baltimore Clipper
-
EricWilliamMarshall reacted to a post in a topic:
Harvey by Blackie - FINISHED - Artesania Latina - Scale 1:50 - Baltimore Clipper
-
EricWilliamMarshall reacted to a post in a topic:
Harvey by Blackie - FINISHED - Artesania Latina - Scale 1:50 - Baltimore Clipper
-
EricWilliamMarshall reacted to a post in a topic:
Harvey by Blackie - FINISHED - Artesania Latina - Scale 1:50 - Baltimore Clipper
-
EricWilliamMarshall reacted to a post in a topic:
Harvey by Blackie - FINISHED - Artesania Latina - Scale 1:50 - Baltimore Clipper
-
EricWilliamMarshall reacted to a post in a topic:
Harvey by Blackie - FINISHED - Artesania Latina - Scale 1:50 - Baltimore Clipper
-
EricWilliamMarshall reacted to a post in a topic:
Harvey by Blackie - FINISHED - Artesania Latina - Scale 1:50 - Baltimore Clipper
-
EricWilliamMarshall reacted to a post in a topic:
Harvey by Blackie - FINISHED - Artesania Latina - Scale 1:50 - Baltimore Clipper
-
 Hi Vytis Thanks for the comments. I started the Harvey model about 2000/2001 but as I have said it took quite a while because of other commitments. I built the hull first up to the deck just as the kit detailed and then it sat under a dust sheet for a long time. Then over more time, I started to do some research into Baltimore Schooners. No doubt you know that there never was a "Harvey" so I decided to use it to make my version of a Baltimore Schooner. But by then I had a hull and I decided to stick with it - it had taken a lot of work to get that far! As I researched I read books, looked at photos and then drew my own plans for the deck layout and the rigging. I probably used most, Howard Irving Chapelle The Baltimore Clipper 1965 and Lennarth Petersson Rigging Period Fore-and-Aft Craft 2007. These and other books have line drawings with dimensions for the BS craft. The books, especially Chapelle state that the BS craft all varied in dimensions but generally they grew out of the Royal Navy schooners which were "shortish" at 75' to 80', then American built in 1812 to 1820 at about 95' to 100' and then later they became longer when they began in the slave trade. No doubt other members will contradict me but the above is taken form a very quick reread of Chapelle. Those dimensions are the deck length so as the Harvey model is about 610mm on the deck it equates to 100' (30.5m) which is OK for my model which I claim is about 1812. Looking back there are some things I would change but it is completed after many years and other projects beckon. Perhaps you need to settle on a period that your model will represent and can you get copies of the above books? Cheers Blackie PS feel free to contact me anytime
- 88 replies
-
- 1
-
-
- harvey
- artesania latina
- (and 1 more)
-
Hi Genco It's been a while since I was in this website so I'll attach the instructions here. If you don't get them please send me an email address. Later I'll try and post them onto my build blog again. Also. it's been quite a few years since I built my Harvey but I see that I have scribbled a lot of notes on the instruction pages - I hope you can read them. I only used the kit up to the hull and decking. After that I did my own research and drew my own drawings of the spars and rigging which I built from scratch. Yell out if I can help. Regards Blackie Harvey Instructions.pdf
-
Hi Mark Keep up the good work. It will be worth it when you have her completed and sitting up all beautiful. It took me years to finish my Jenny Belle (AL Harvey) after I abandoned the kit after completion of the hull. In the end I think it all worked out quite good. Cheers Blackie
- 128 replies
-
- 1
-
-
- artesania latina
- Finished
- (and 2 more)
-
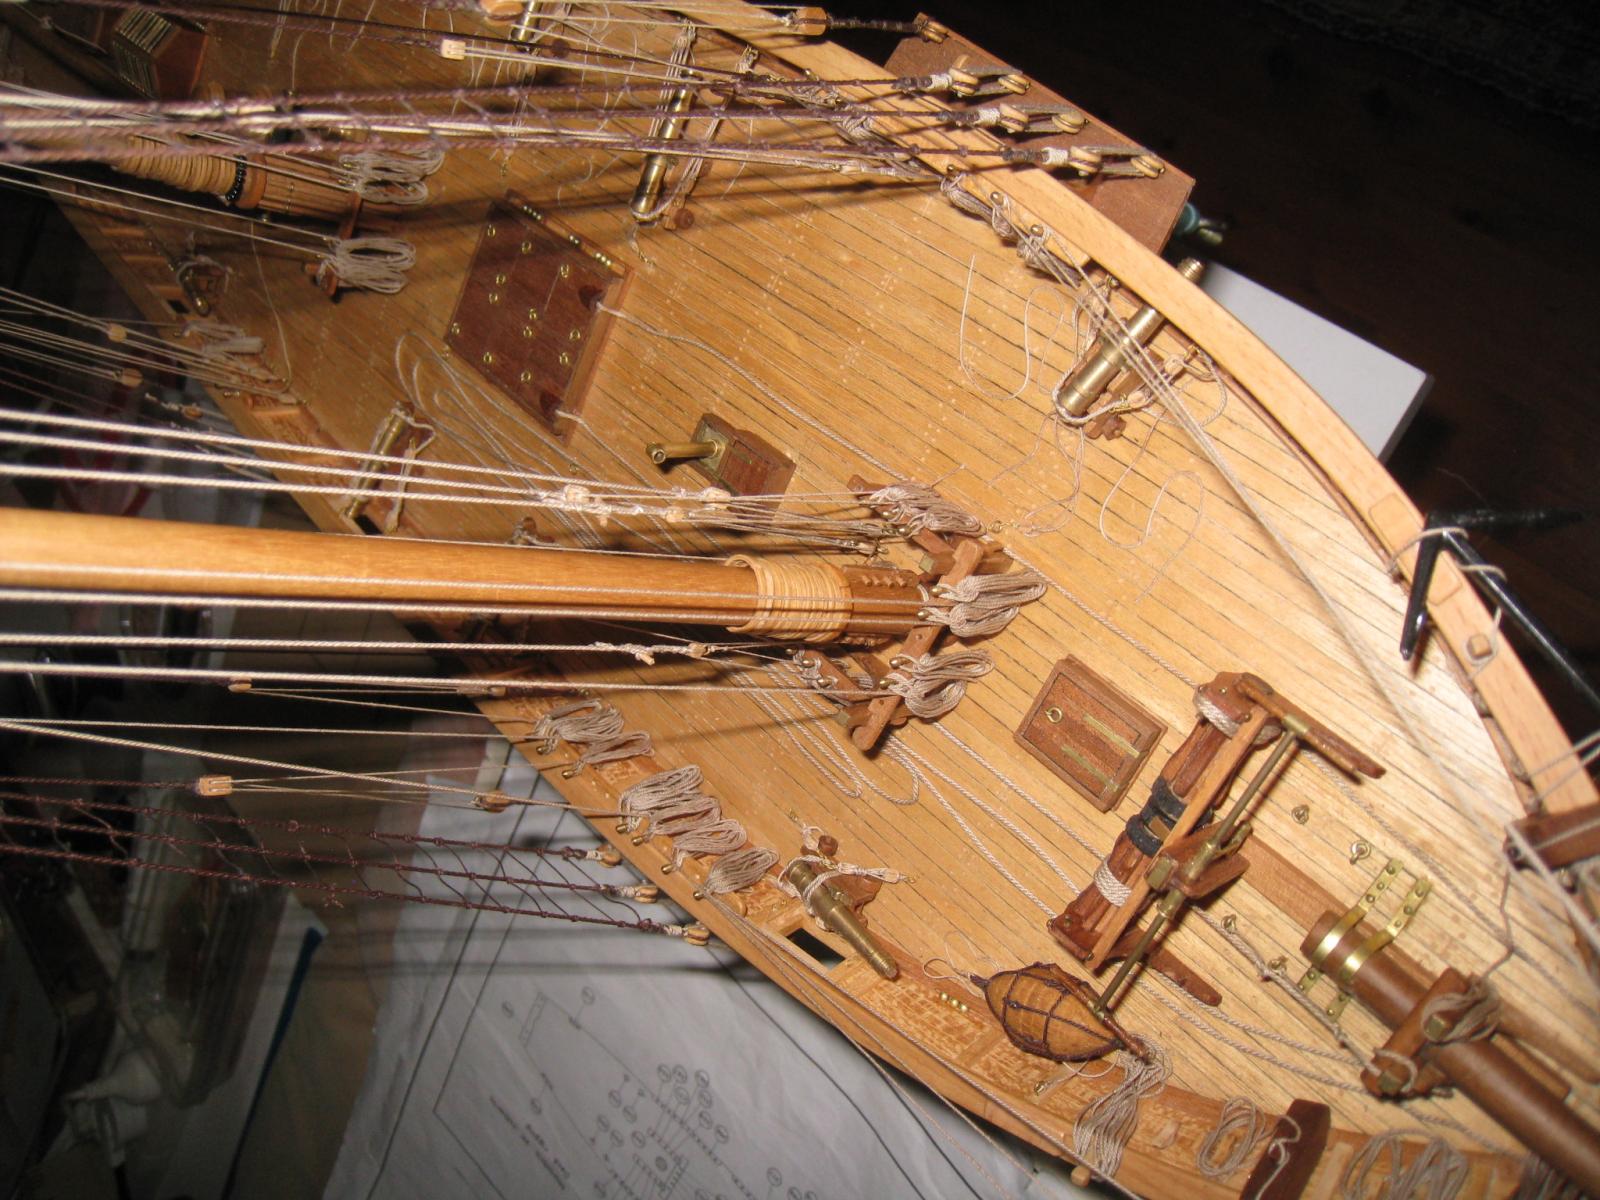
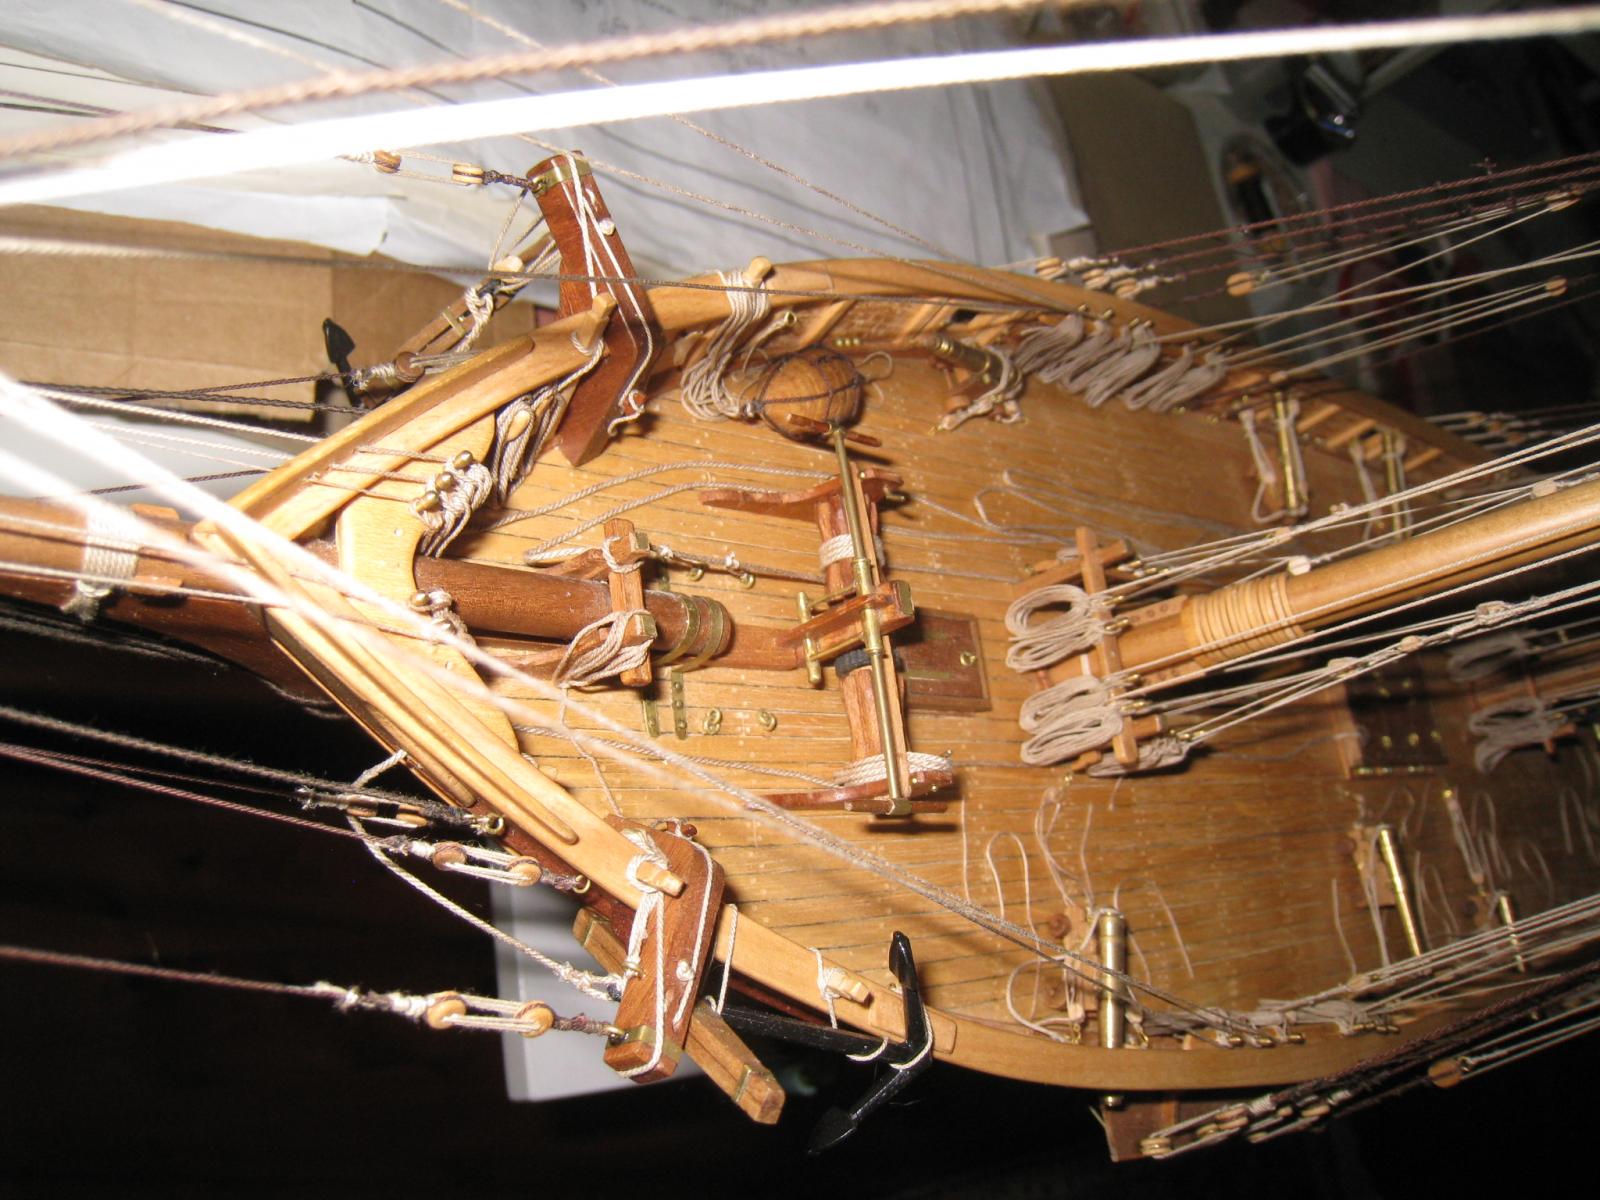
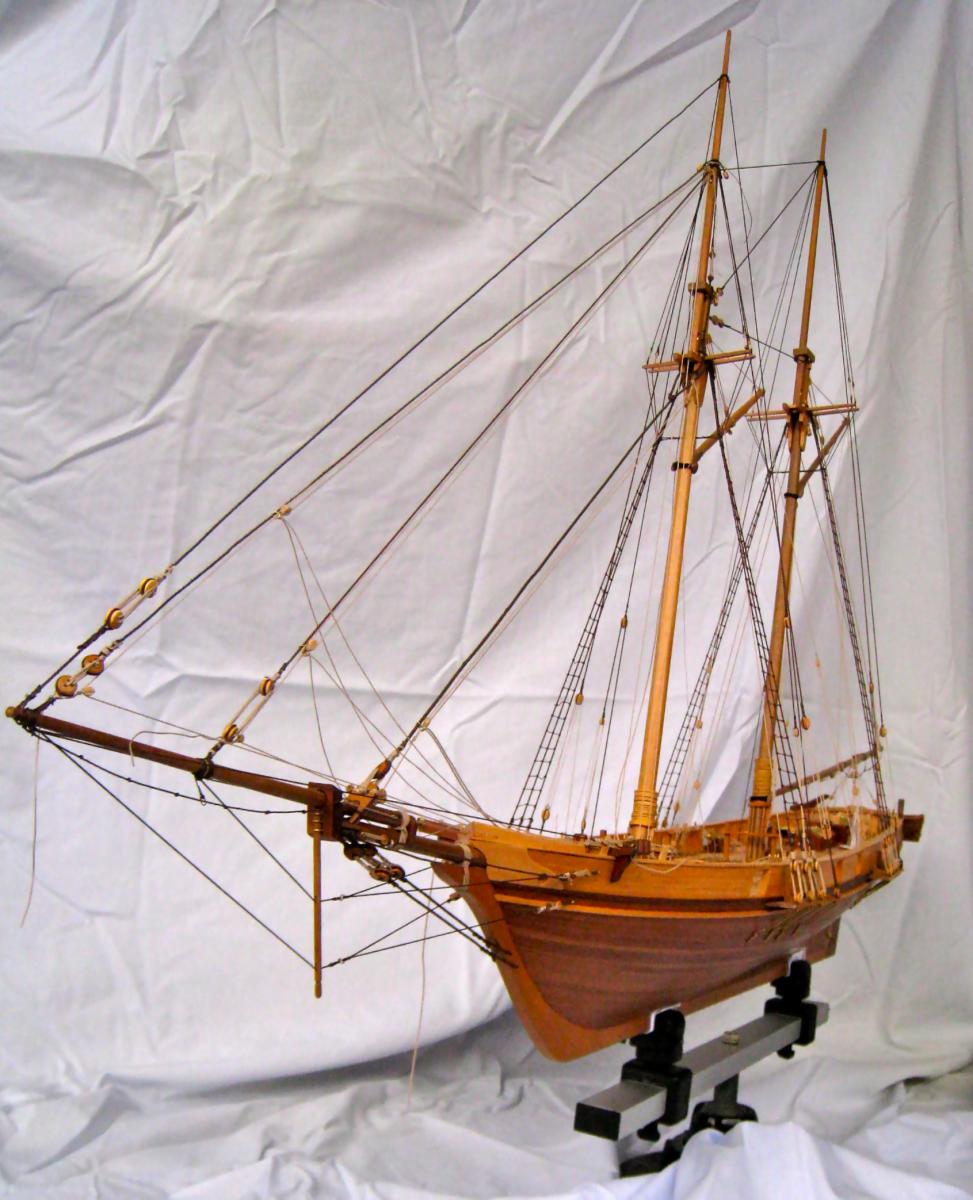
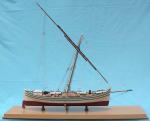
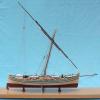
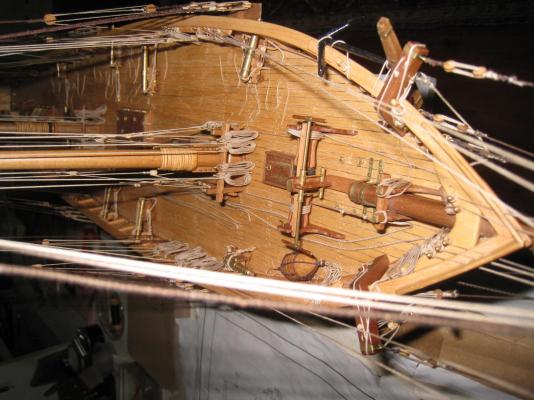
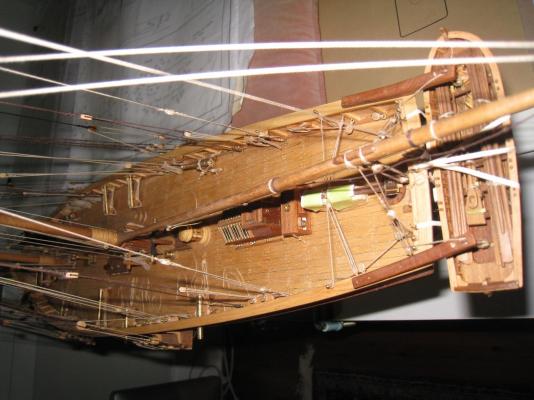
The website no longer sends me notifications so probably won't be back so this is likely my final post as the model is near as complete except for a few rope coils and mounting it somehow. I have attached a few quick shots if anyone is still interested. This modified version of the Harvey has taken me years because of work and other commitments but I am happy with it in its final Baltimore Schooner form. Probably a few errors in history but I'm not changing it now. Hooroo Blackie


- 88 replies
-
- 4
-
-
- harvey
- artesania latina
- (and 1 more)
-
HI Robert Great looking model and you are doing a fabulous job on her. Thanks for the log. Blackie
- 66 replies
-
- 2
-
-
- bluenose ii
- artesania latina
- (and 1 more)
-
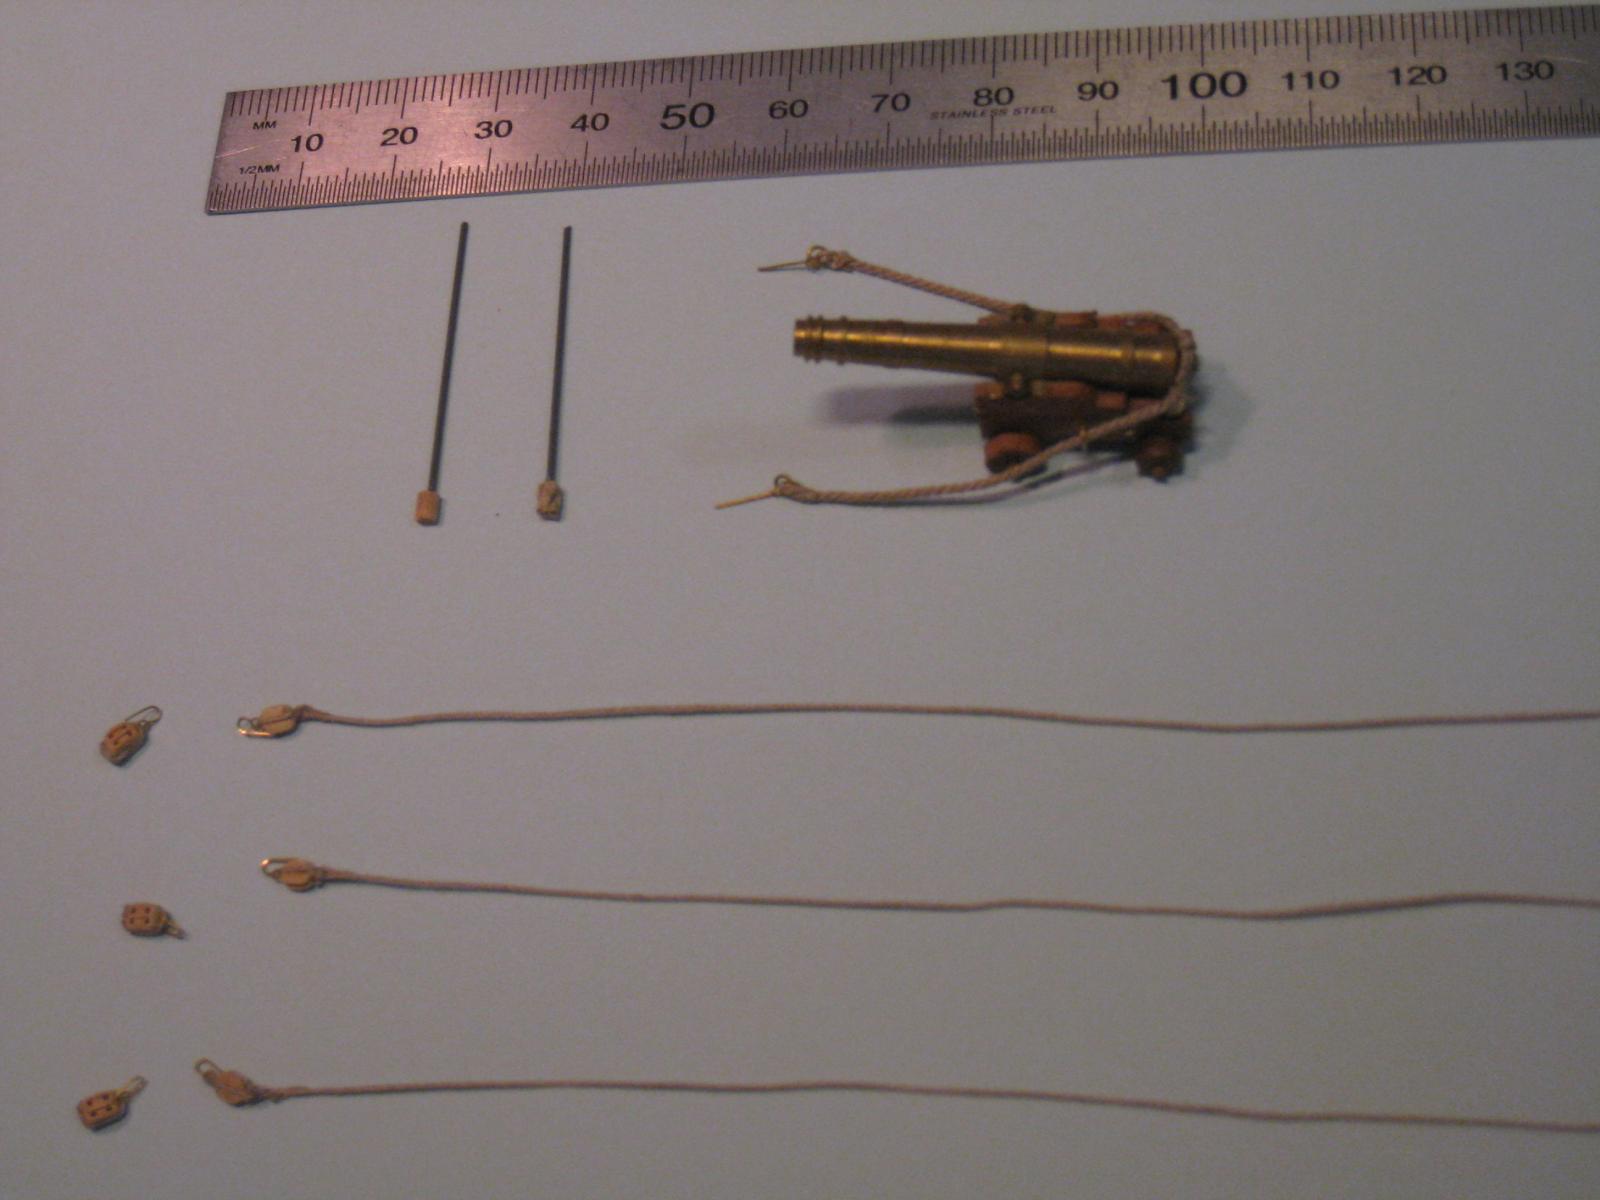
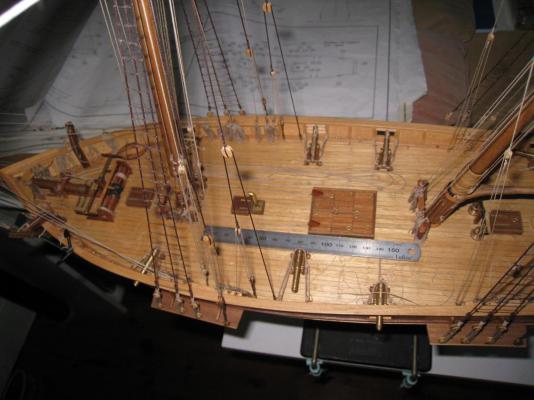
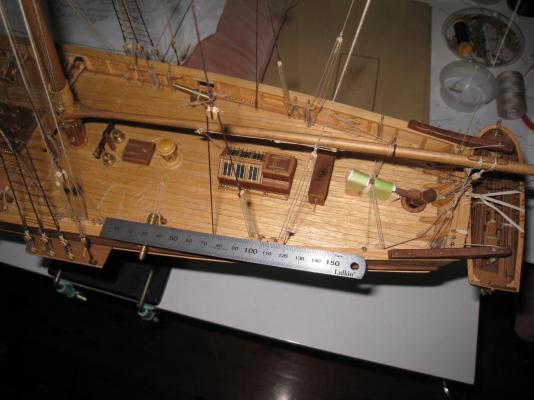
Thanks Mark Yes I did forget the scale rule, so for anyone interested the following will help: The model is 1000mm overall length by 710 high from keel to main topmast truck. The hull is 660 long plus 240 for the bowsprit and jib boom and 100 extra for the main boom. Luckily I have place for it in my house when it is completed. I am nearly finished the gun rigging and then I can fit the yards which are completed.
- 88 replies
-
- 1
-
-
- harvey
- artesania latina
- (and 1 more)
-
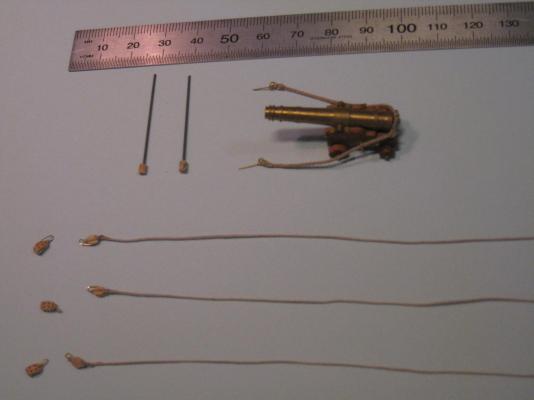
It's been some time since I added to my log. As you know, other hobbies, travel, etc get in the way. However, I have managed to rig foot ropes and stirrups to the jibboom, boom and the spread yard. I've also rigged halyards, downhauls and sheets to the fore staysail, inner jib and outer jib together with the appropriate blocks. I have also rigged brace and lift pendants to the yards which are almost ready to rig on the model. All of these are very difficult to photograph so I've included some poor photos of two guns that I have almost rigged. I have decided to rig the starboard side with guns seized up for sailing and those on the starboard side ready for firing or just fired.

- 88 replies
-
- 3
-
-
- harvey
- artesania latina
- (and 1 more)
-
Hi Brian Very nice work so far with the AVS build. With my Harvey Baltimore schooner I cut a few scuppers into the waterways and always meant to go back to do more. I never got around to it and proceeded on so probably too late now. On one of my other builds I have 17 scupper openings down each side. I see from your recent haul that you have Mondfeld's Historic Ship Models book so I suggest you look at pp138/139 which shows something about this topic. I am with you that the scuppers were cut into the waterways to eliminate the problem of the deck retaining water. Blackie
-
Blackie reacted to a post in a topic:
Armed Virginia Sloop by GuntherMT - FINISHED - Model Shipways - scale 1:48
-
Blackie reacted to a post in a topic:
Armed Virginia Sloop by GuntherMT - FINISHED - Model Shipways - scale 1:48
-
Blackie reacted to a post in a topic:
Armed Virginia Sloop by GuntherMT - FINISHED - Model Shipways - scale 1:48
-
Blackie reacted to a post in a topic:
Armed Virginia Sloop by GuntherMT - FINISHED - Model Shipways - scale 1:48
-
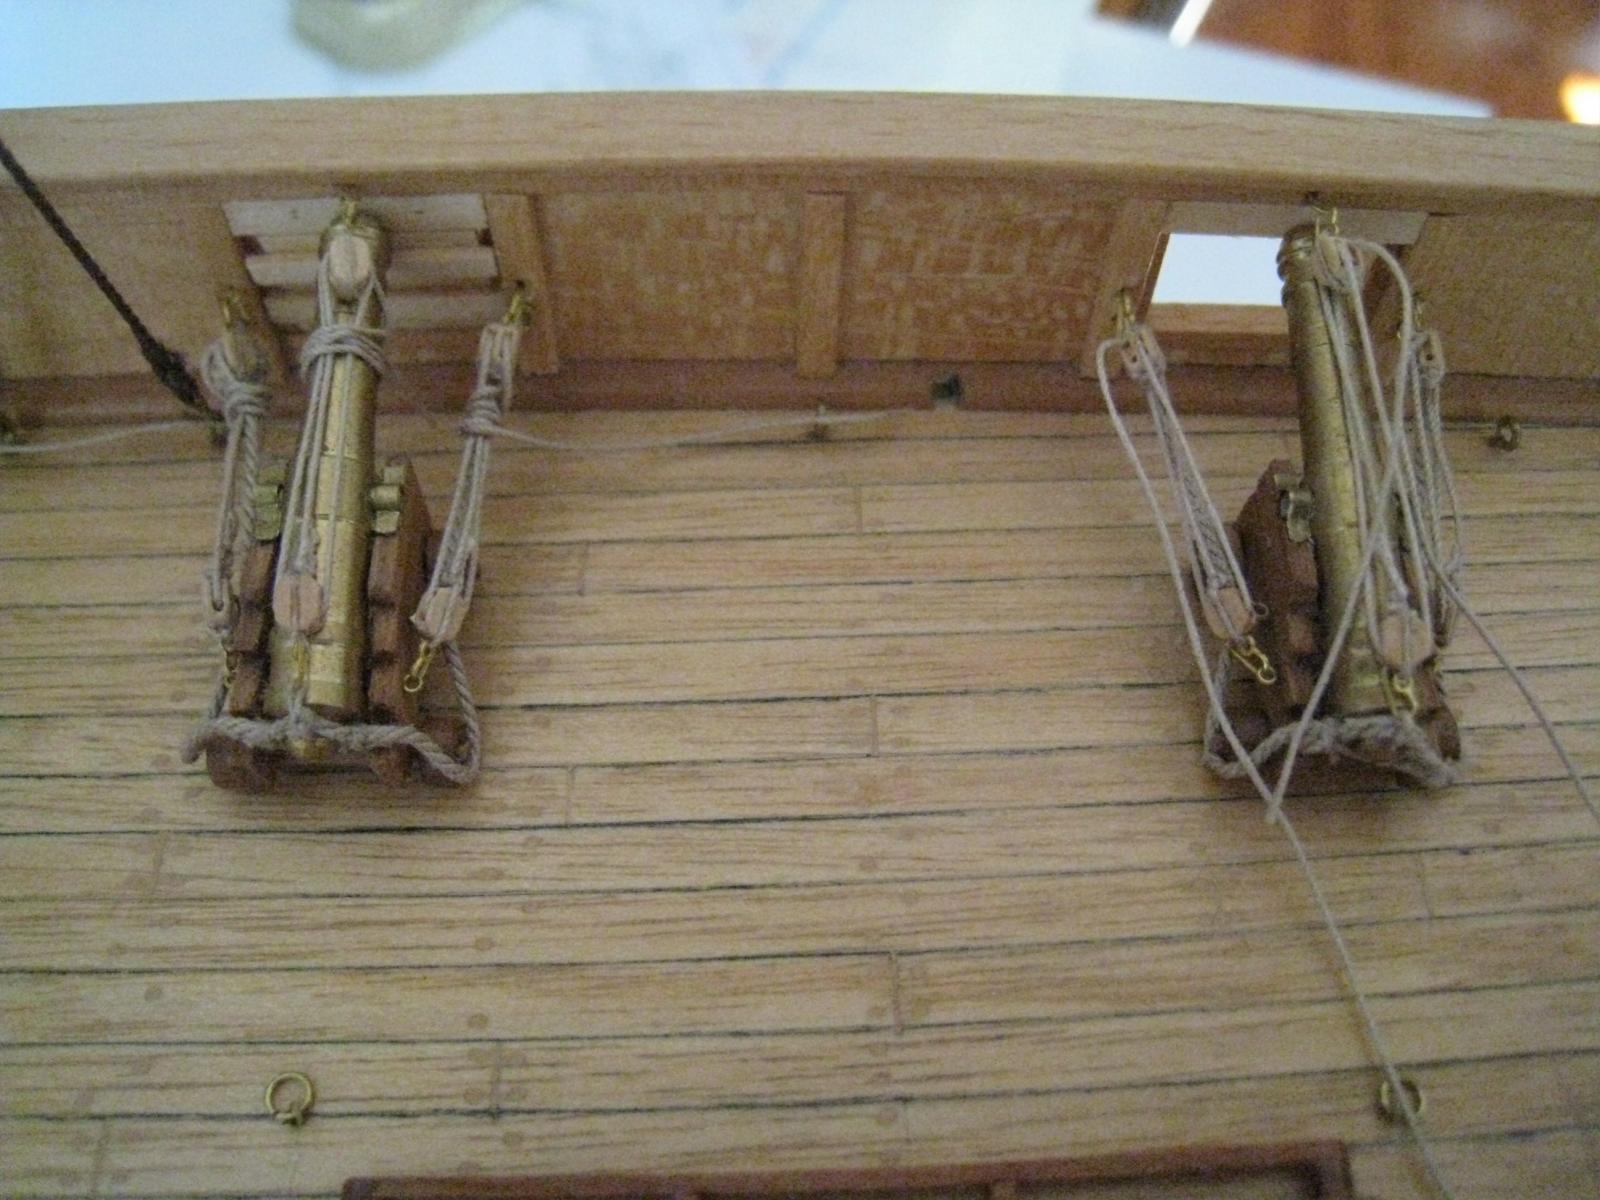
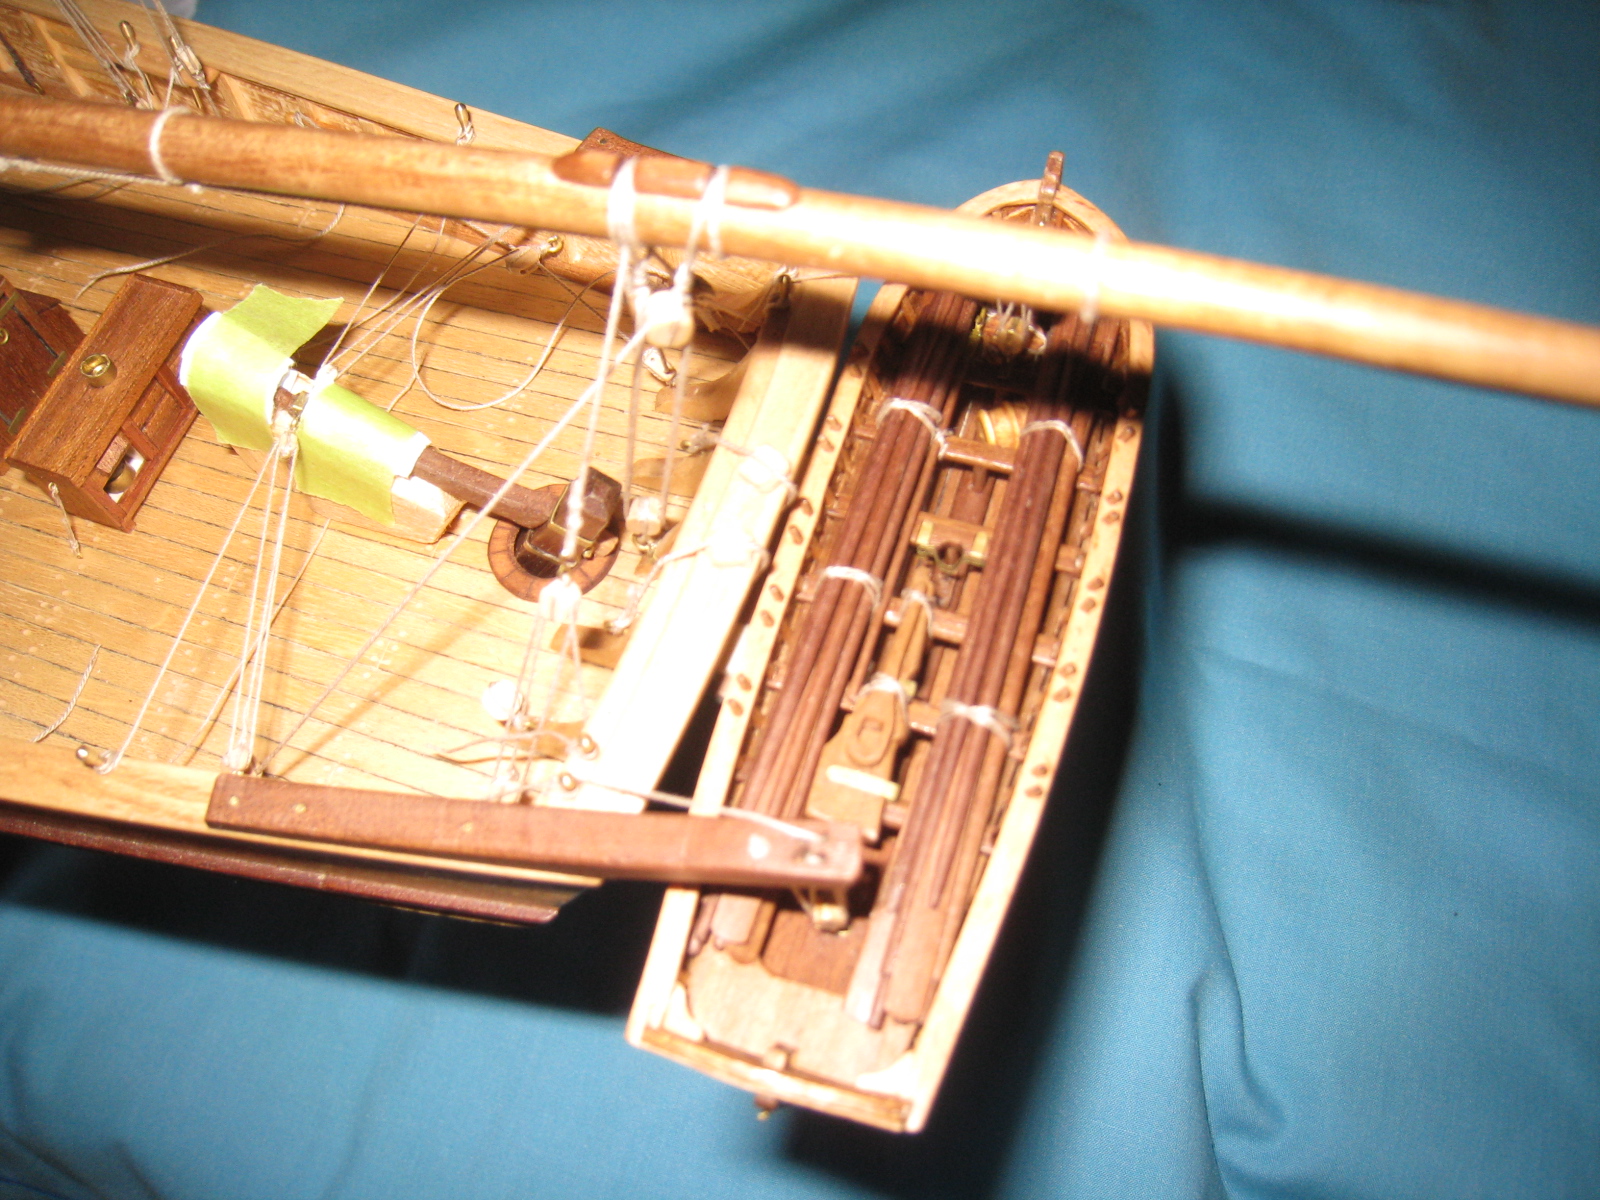
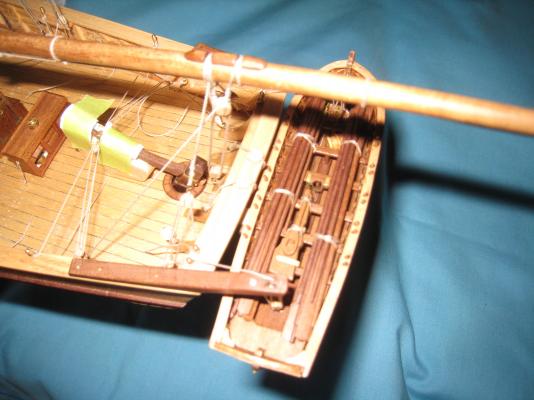
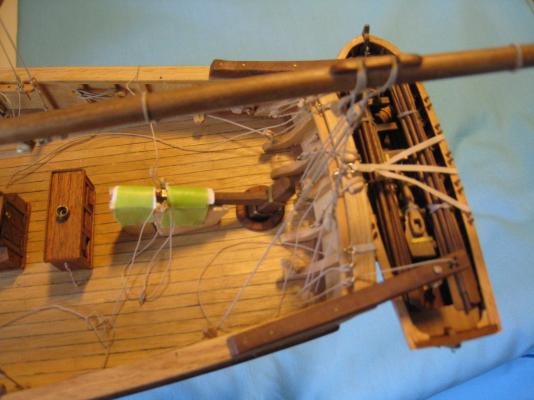
Slow and steady, but I have finally fitted the boat to the stern davits. The photos are a bit rough but show the work as it progressed. The gripes are made from an old handkerchief which the boss surrendered. It was stained in cold tea and rinsed in diluted PVA glue. After drying I cut some 2mm wide strips which were still reasonably flexible and added some brass rings to tie them to eye bolts in the stern rail. There is a gripe rail with padding between the boat and the transom but the photo of that was out of focus. The gripe rail is required to keep the boat off the rudder pendants and to pull the gripes against, same as for boats fitted to davits along the bulwarks.
- 88 replies
-
- 8
-
-
- harvey
- artesania latina
- (and 1 more)
-
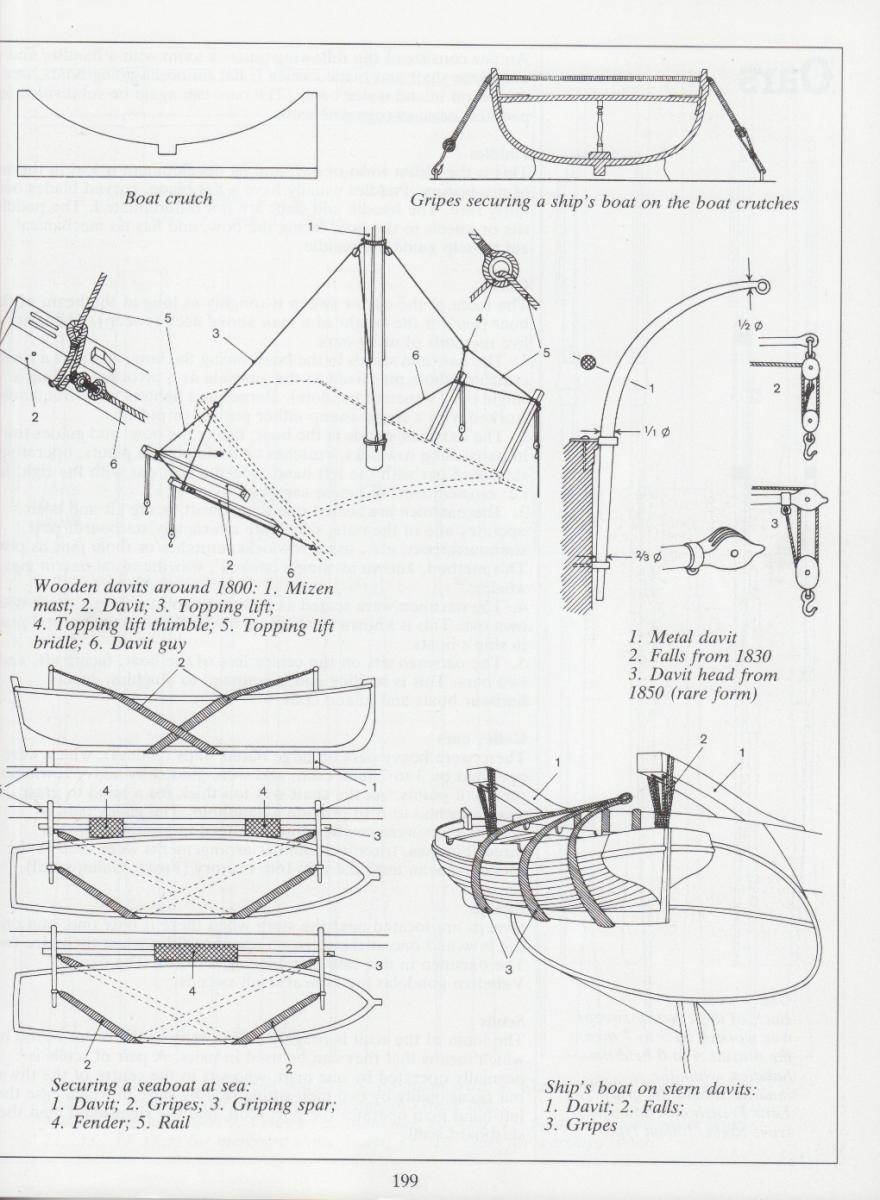
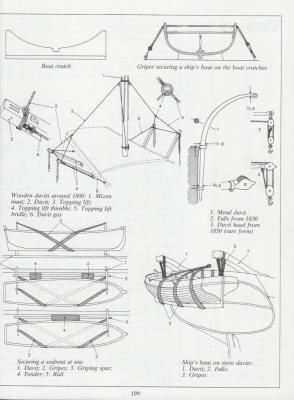
Help please. I was about to start rigging my longboat which is hung from davits over the Harvey's stern when I began to question my proposed rigging. I propose to use hooked double blocks with falls up through the davits and hooked onto eyebolts within the boat. This is the usual rigging for boats later in the 19th century, say steel baques, schooners, etc. Does anyone have an opinion on the size of the blocks and diameter of the falls for an early 19th C timber Baltimore schooner? The boat will require some gripes to stop it swinging and banging into the transom so I was also proposing to fit some type of gripes and gripe rail. Mondfeld's Historic Ship Models has the info shown on the sketch but it has no rail. In my case I have rudder pendents which might foul the rail and gripes. Any comments on gripe layout?
- 88 replies
-
- 3
-
-
- harvey
- artesania latina
- (and 1 more)
-
Blackie reacted to a post in a topic:
Endeavour by LMDAVE - FINISHED - Amati - 1:80 - J-Class Yacht
-
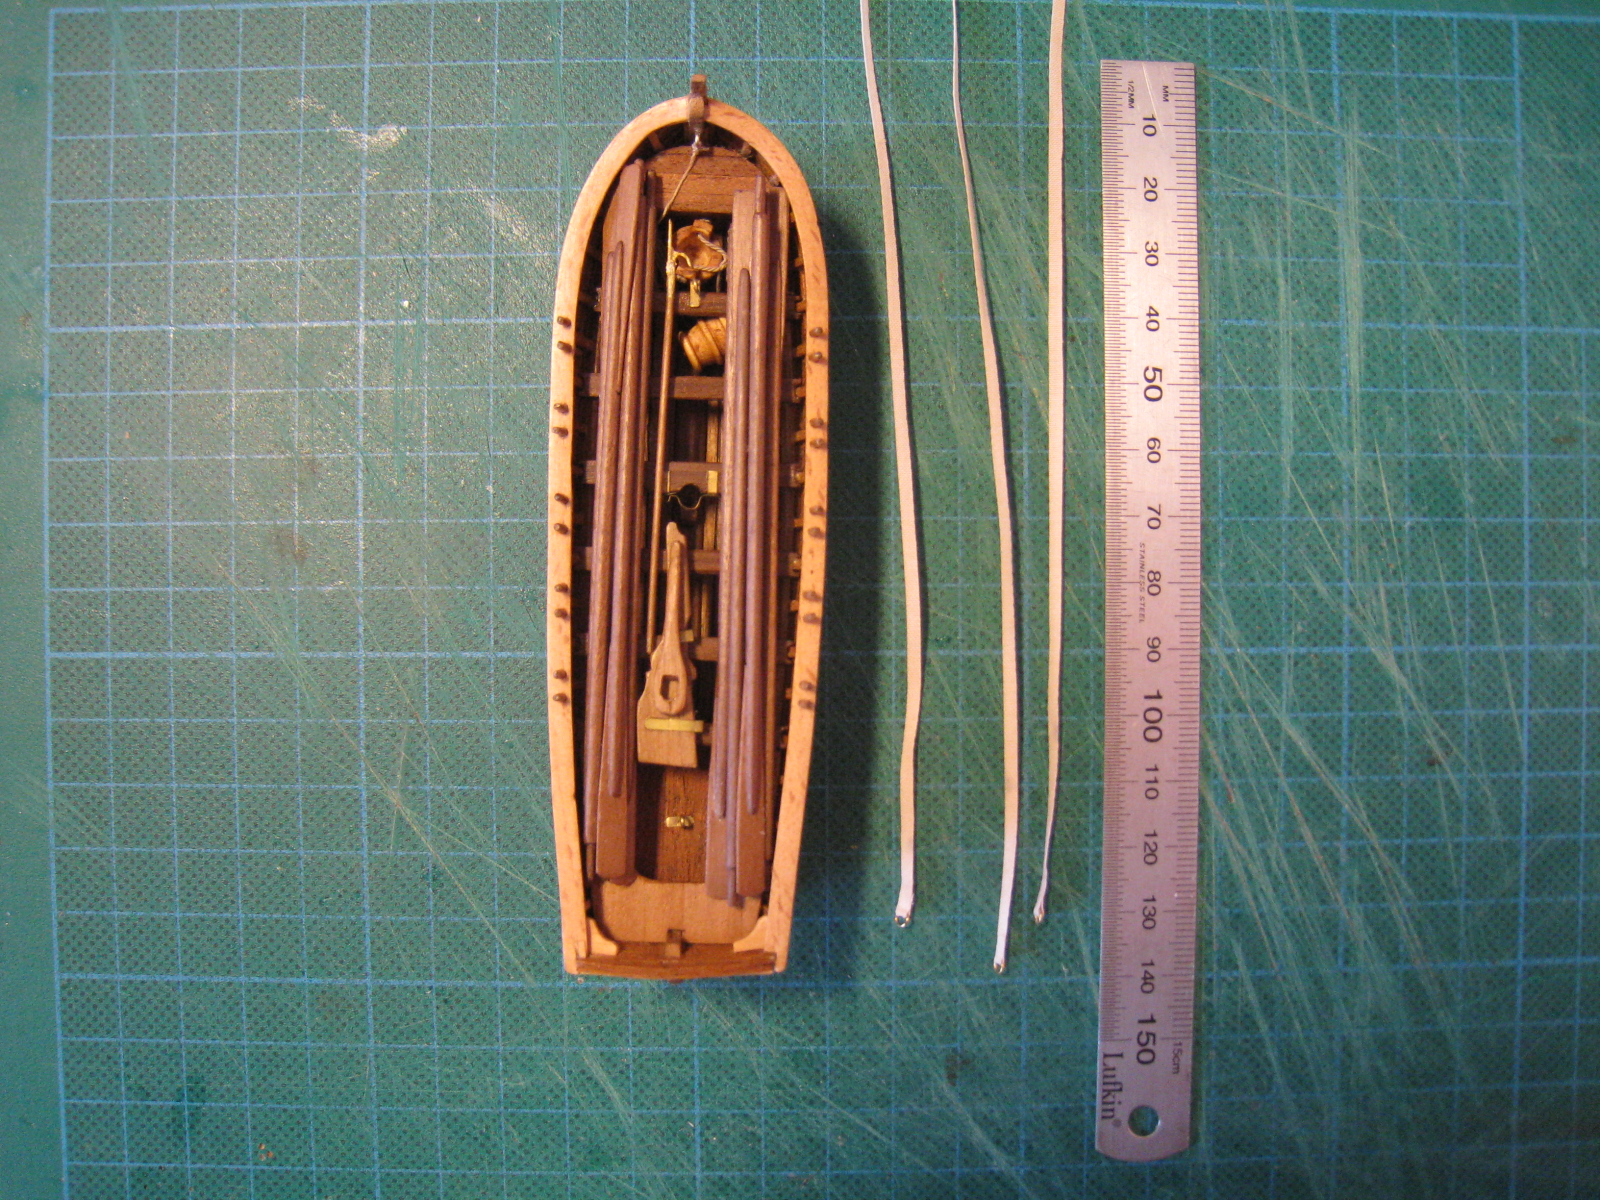
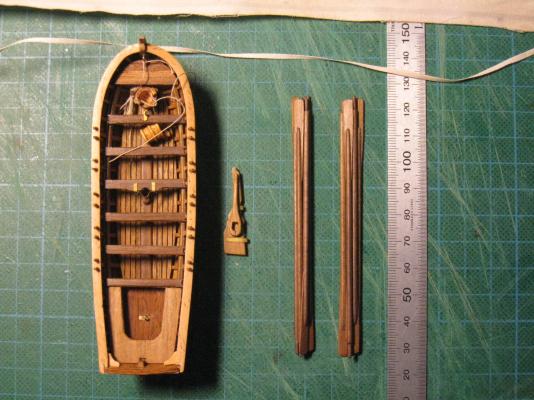
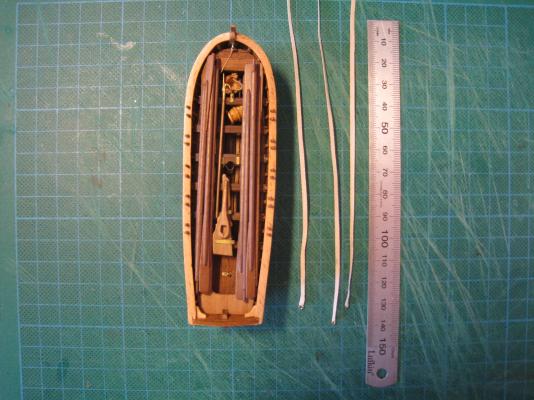
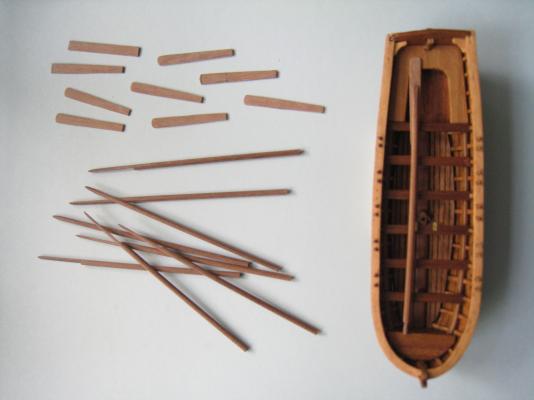
I have rigged the boom, main sheet, topping lifts but can't take a photo of it just yet. I thought that I had settled on a main sheet/block arrangement but found that when I rigged it the blocks clashed with the top of the rudder stock. Then I decided on another arrangement and cut off one of the blocks and moved the second one towards the outer end of the boom. Big lesson here - never remove something until you really, really must! I redid the main sheet and realised that while I would change the direction of the sheet through the blocks, I needed to original configuration even if they had to be shifted aft. So I remade the cut strop and refitted it which meant removing the boom from the mast and all of the unnecessary messing about that went with it. I'll think longer before next time I think that I must change something. Anyway, to do something different I thought that I would make a few oars for the ship's boat. The first two were way too short but good practice. With the longer loom and shank I needed a longer slot to take the blade and it was beyond me to do it by hand past about 6-7mm length used on the shorter versions. My blade in the electric saw cuts a wide slot which in the 2mm shank is too wide and leaves little of the narrow shank to fit either side of the blade. I then decided that as the oars would all be fitted flat onto the boat's thwarts I needed only one side of the shank and have proceeded with that Idea. The part finished oars are shown. I'll probably only fit 6 oars into the finished boat so can choose the best of the lot.
- 88 replies
-
- 2
-
-
- harvey
- artesania latina
- (and 1 more)
-
Blackie reacted to a post in a topic:
Carmen 1850 by GuntherMT - FINISHED - Constructo - Scale 1: 80 - pailebote (Schooner) - first wooden ship build
-
Hi Brian For a first time timber model you seem to have got the hang of it very well. From my own experience I would hold off glue fixing the deck houses etc until you have the masts i and set to the angle that you want. I have found that I am only now beginning to fit the deck furniture after the masts, shrouds, gaffs and boom. It has been a lot easier to tie the ratlines to the shrouds without the yards getting in the way. I guess that you will find the best way to suit you but start with the masts and take it from there as everything from here on is built up to and around them. Good luck Blackie
- 119 replies
-
- 1
-
-
- carmen
- constructo
- (and 2 more)
-
Blackie reacted to a post in a topic:
Armed Virginia Sloop by aliluke - FINISHED - Model Shipways - 1:48
-
Blackie reacted to a post in a topic:
Armed Virginia Sloop by aliluke - FINISHED - Model Shipways - 1:48
-
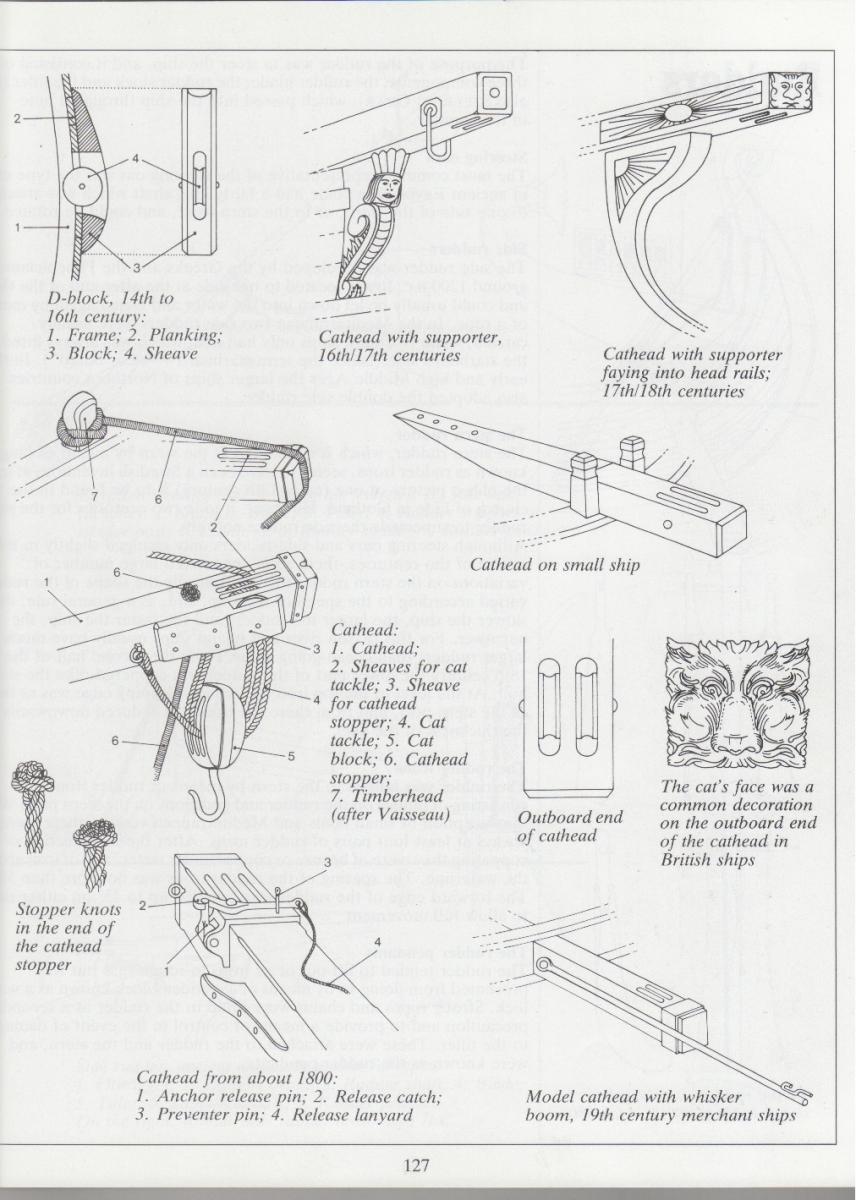
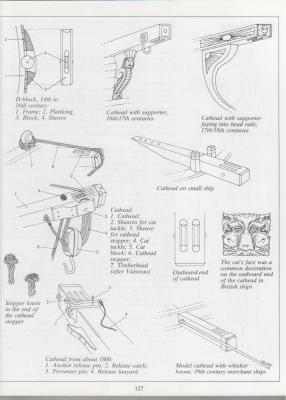
Brian You really are getting into this model. I think that part of your problem with the rudder is that the hinges are way too big for the job. Anyway they are on and look OK. The bits that you are calling davits are catheads and the attached image shows you why and how the anchor tackle works. You will find lots of info online about these beams which come in a multitude of shapes and sizes. You will see them on my log. Blackie
- 119 replies
-
- 1
-
-
- carmen
- constructo
- (and 2 more)
-
Brian, you could try acetone though I'm not sure what that will do to the timber or the metal. Before you do that, I strongly suggest that you do some research online and practice on some scrap. The Zap brand make a "CA debonder". It softens the glue but I haven't used it so do not know if it will come off completely. Blackie