Search the Community
Showing results for tags 'Pegasus'.
-
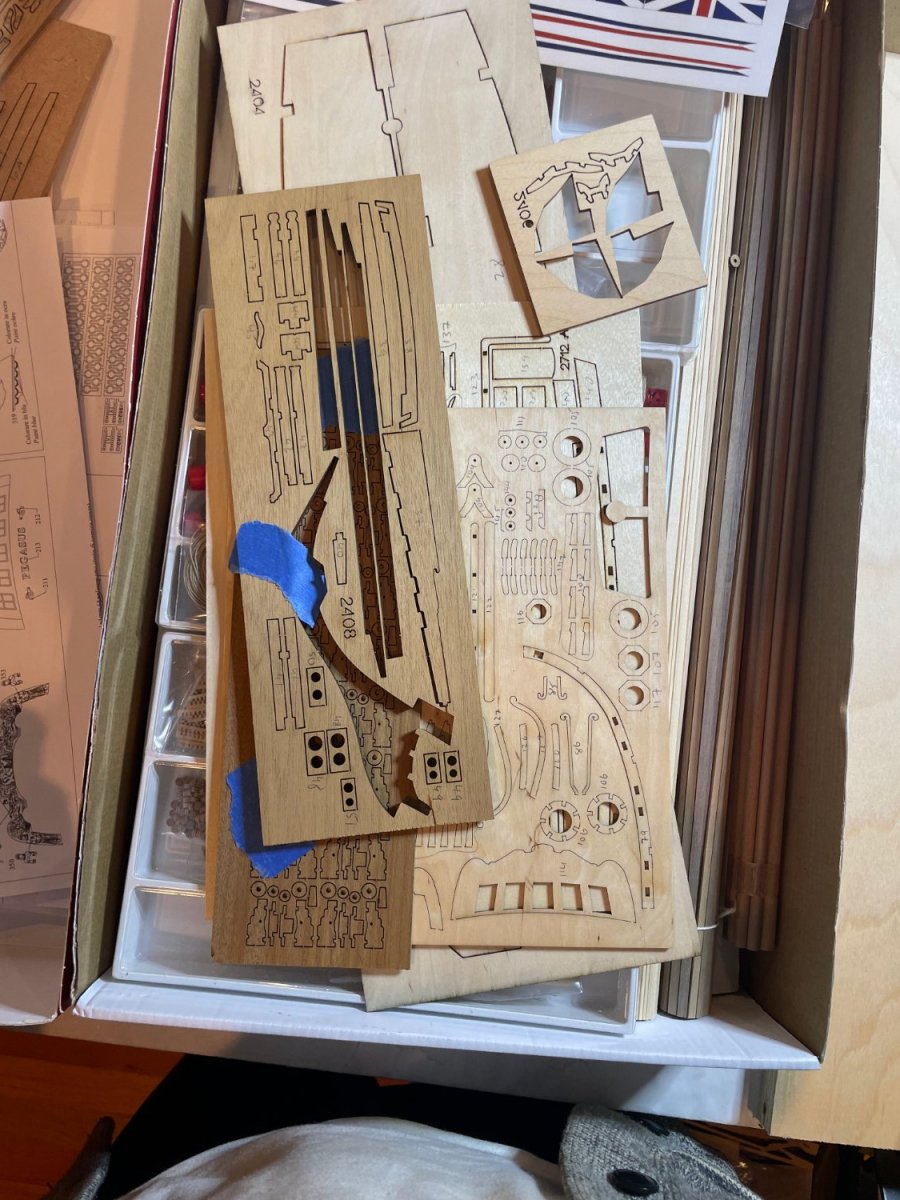
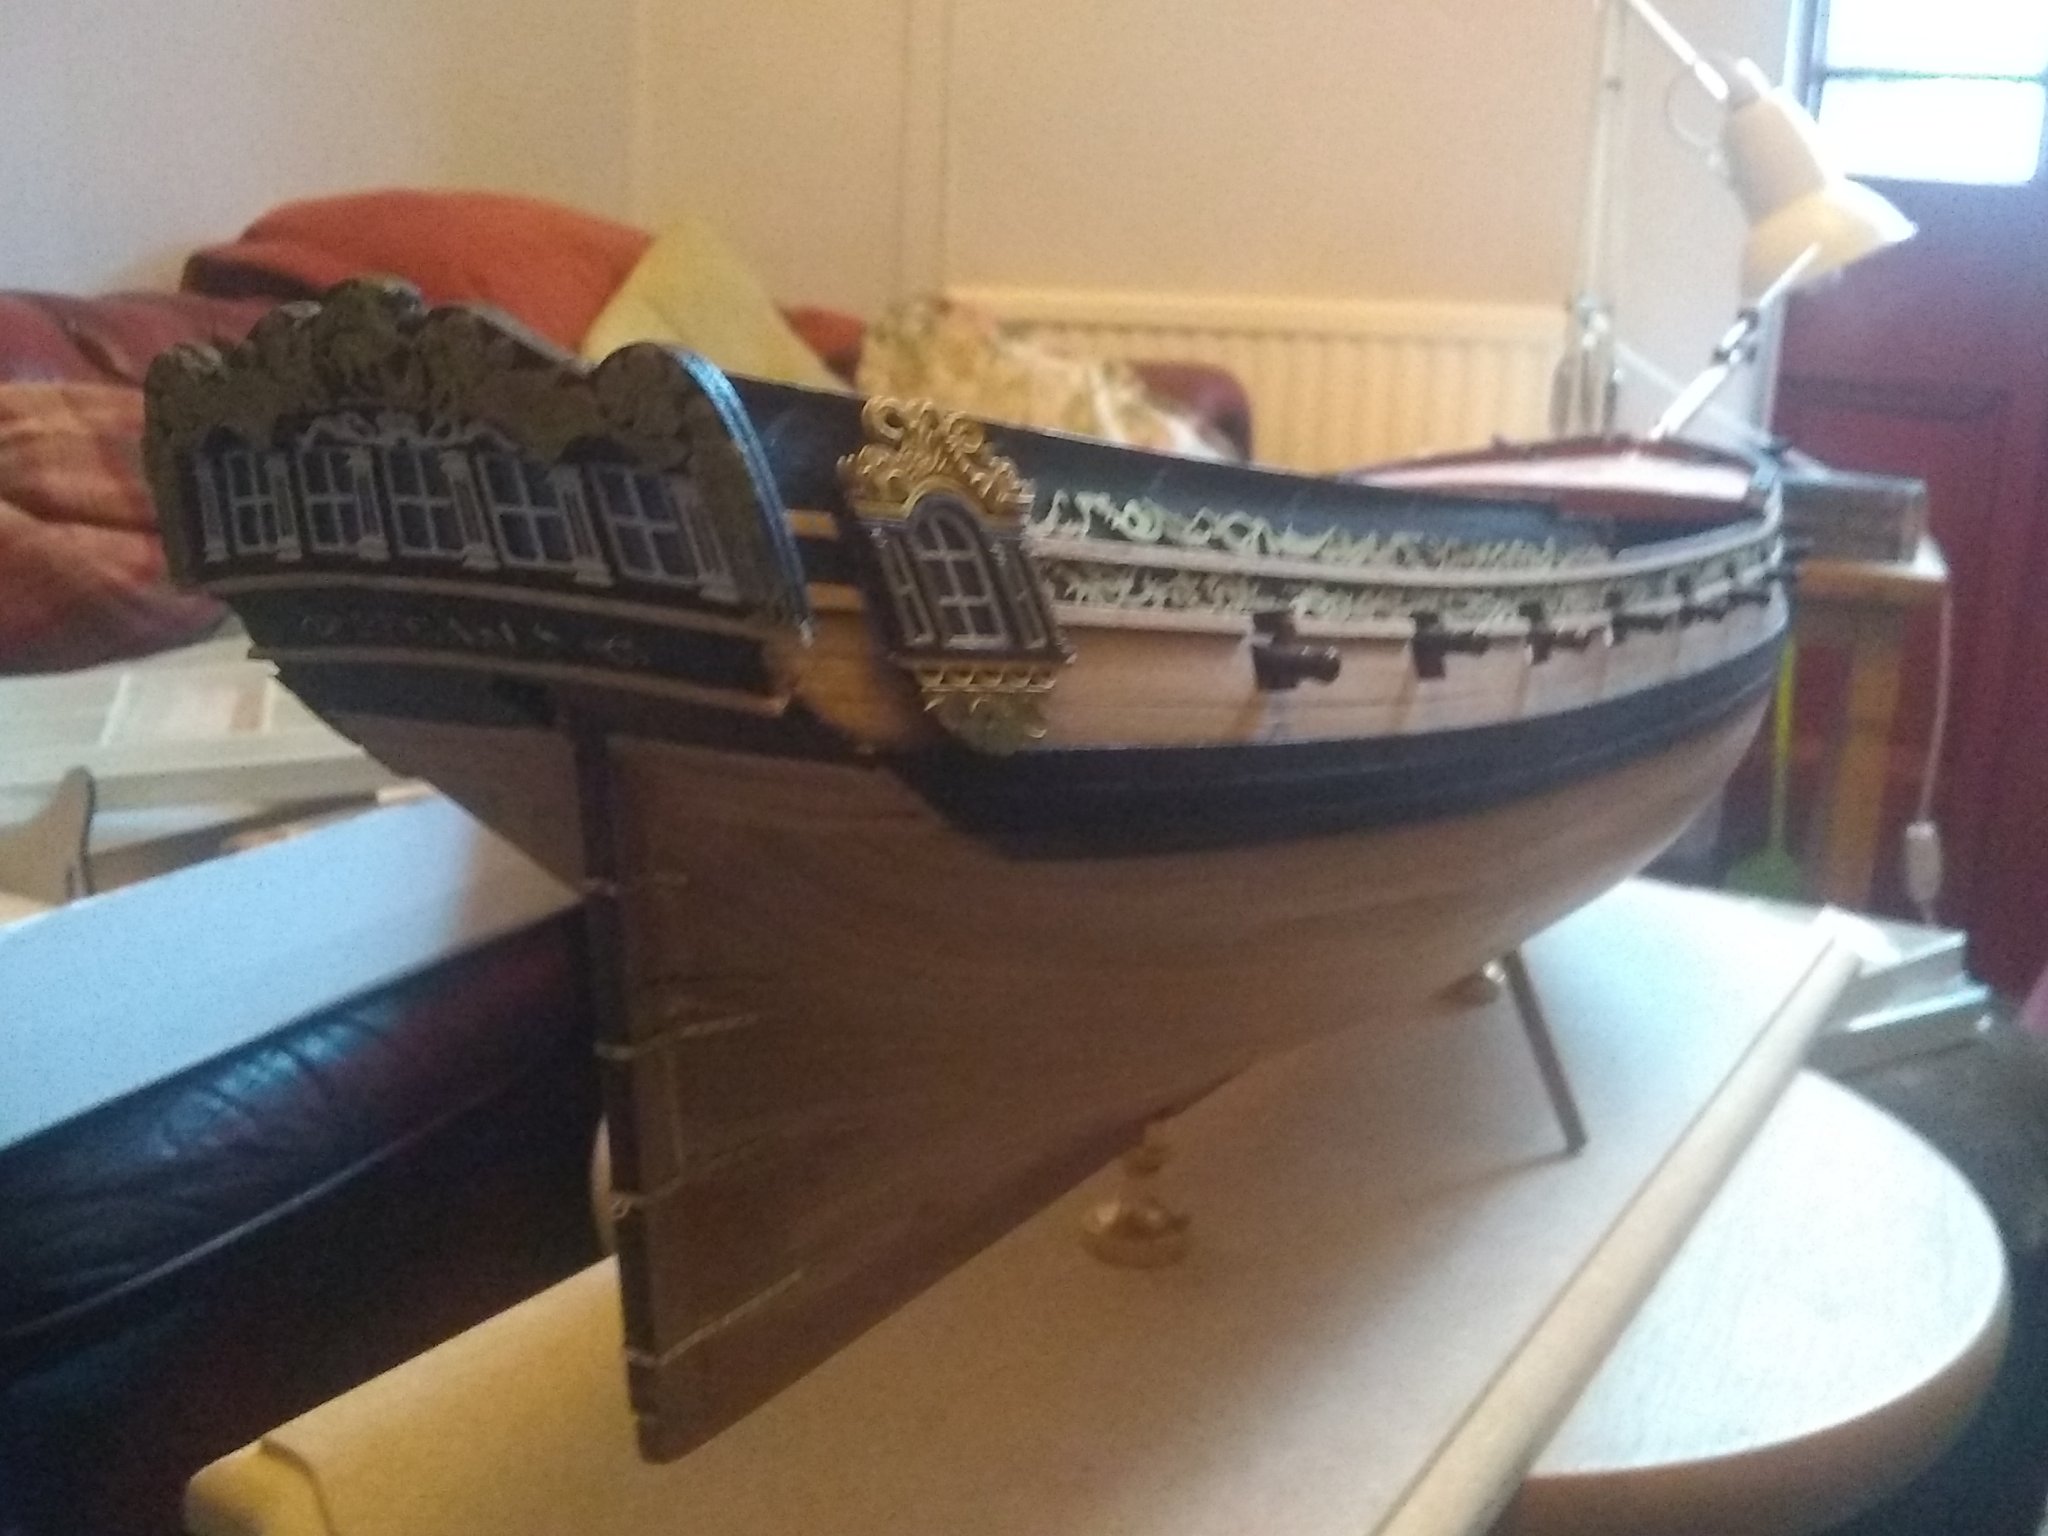
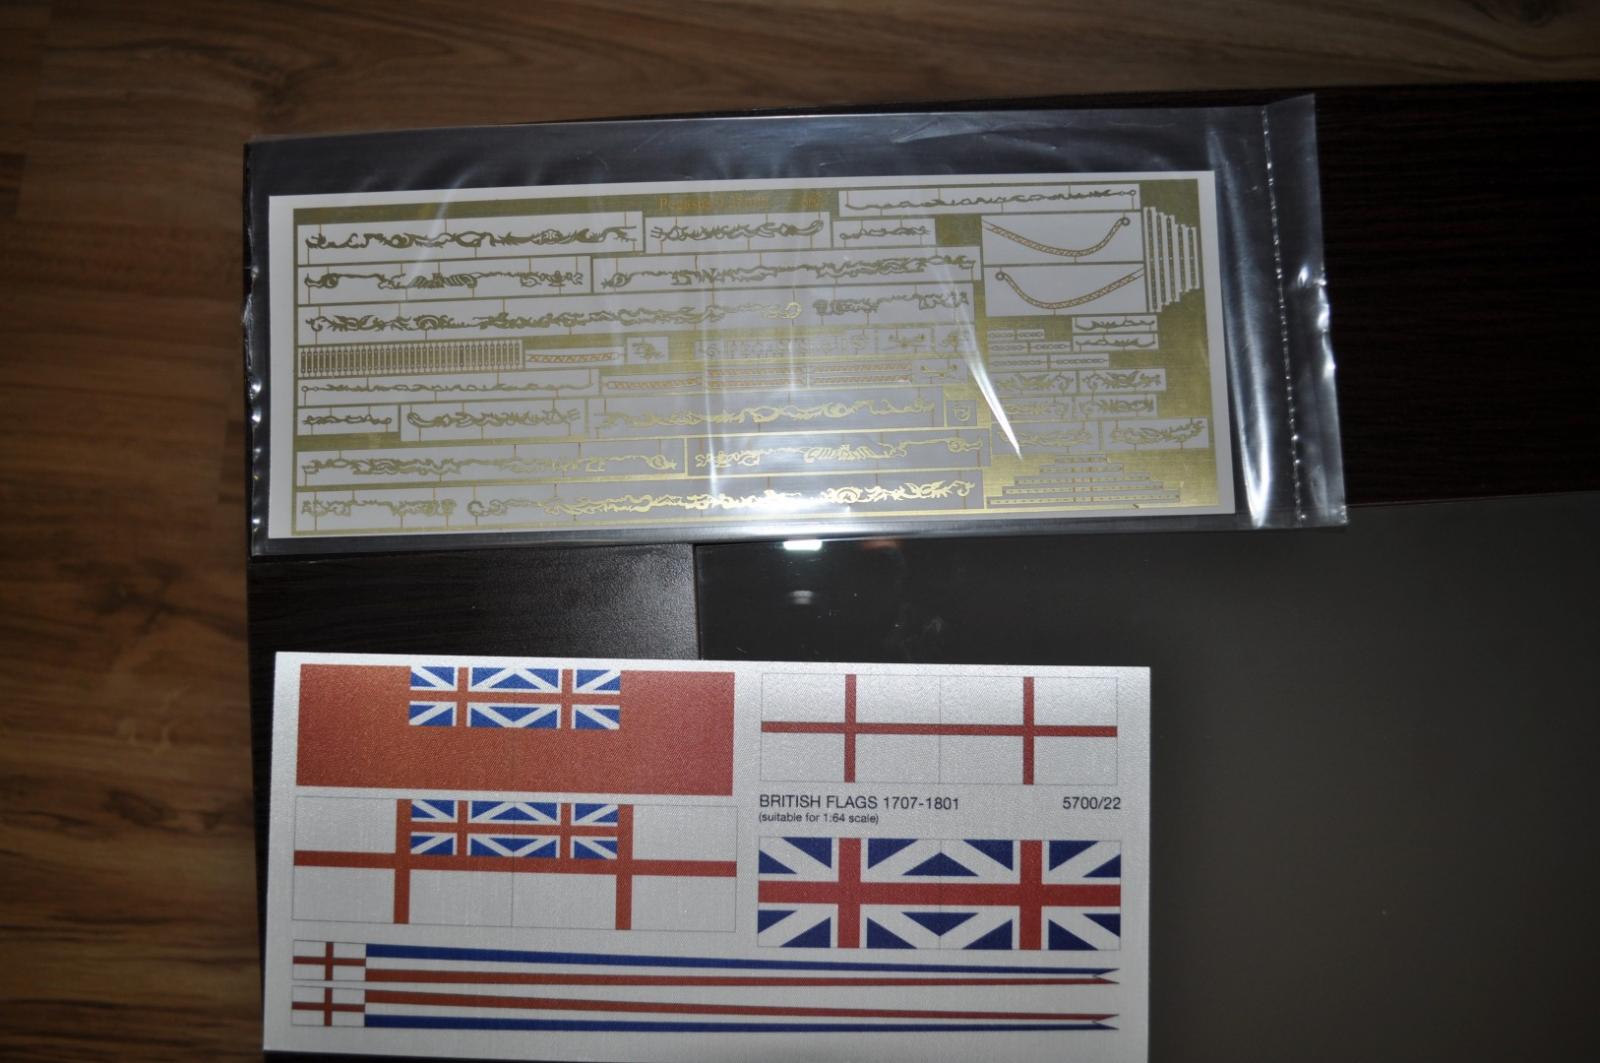
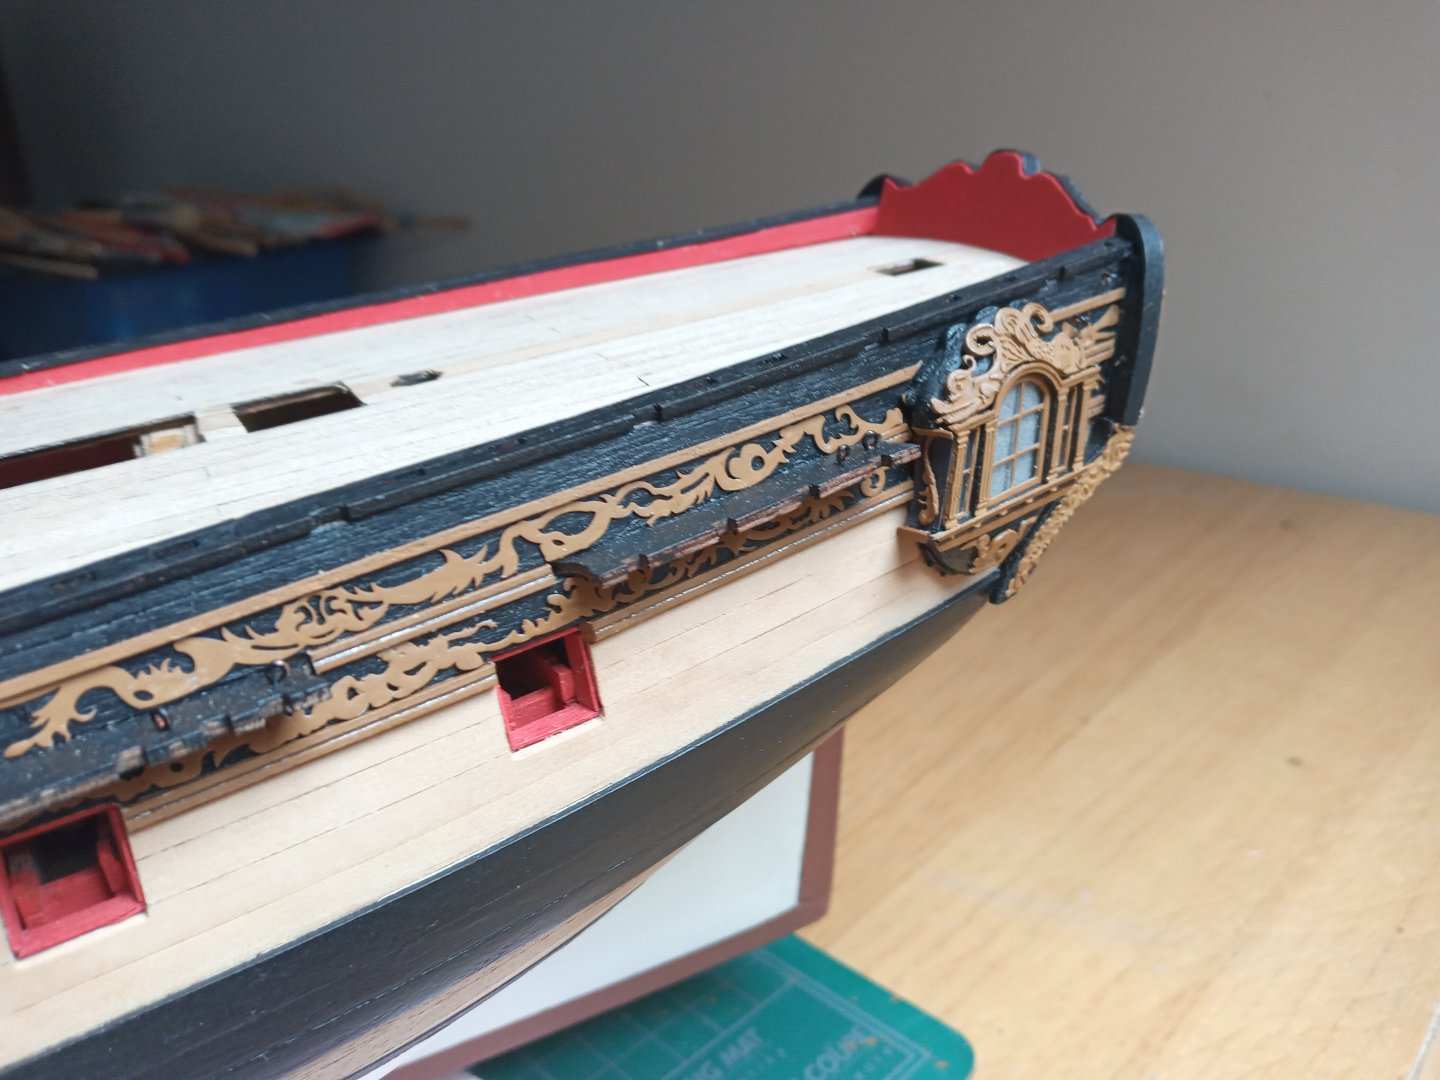
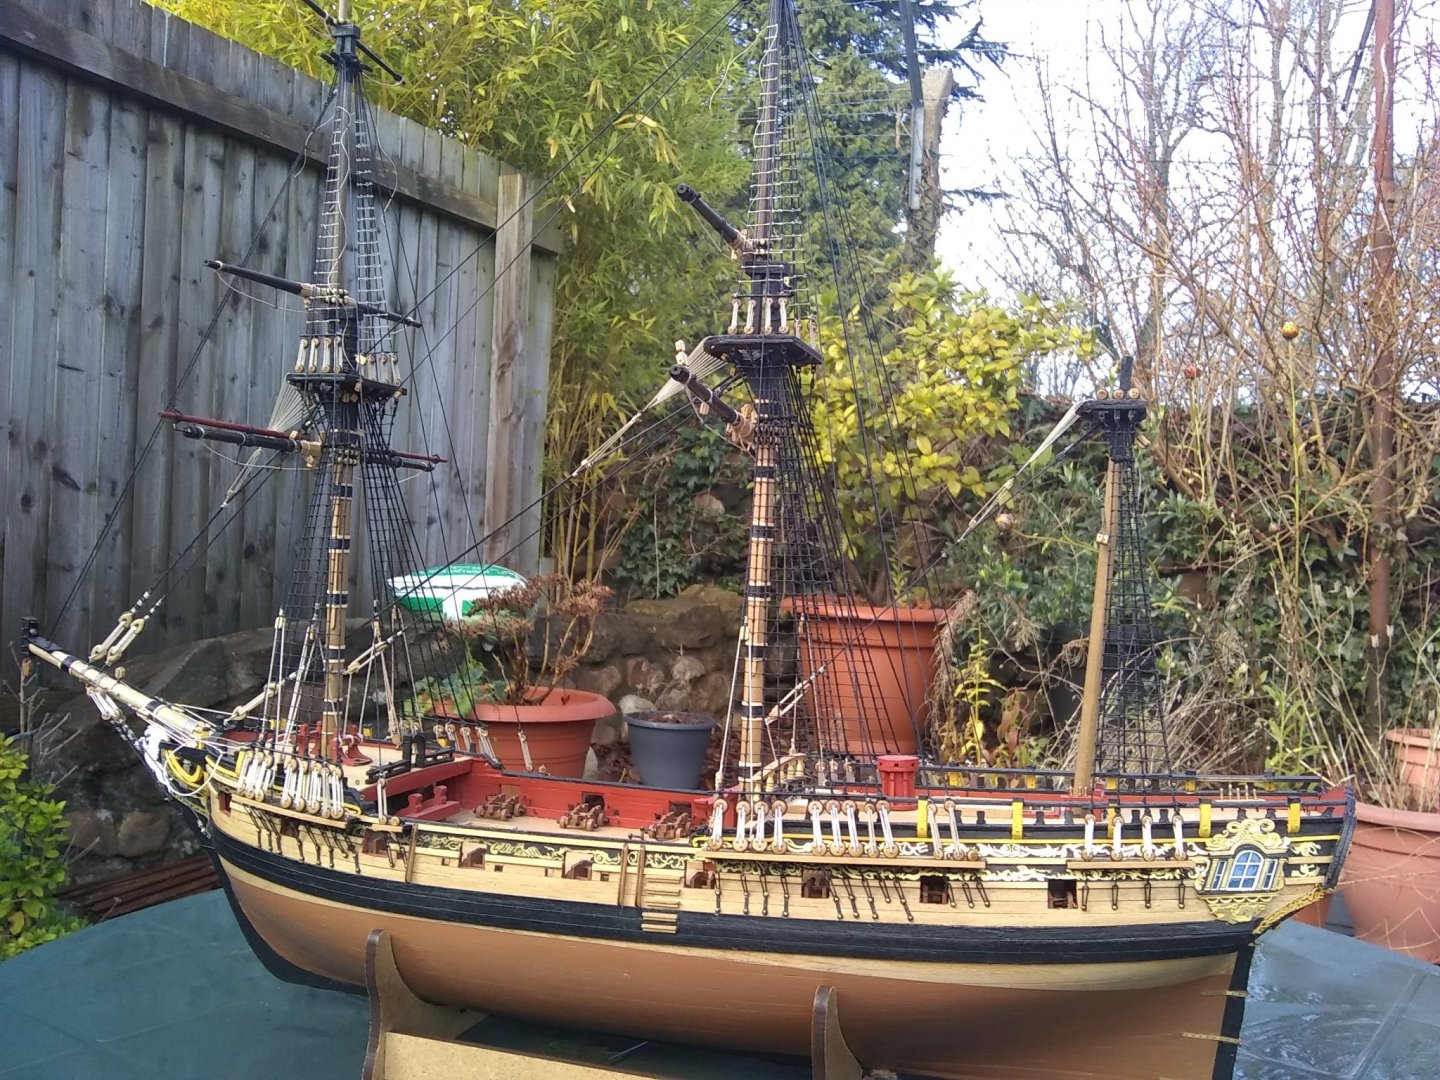
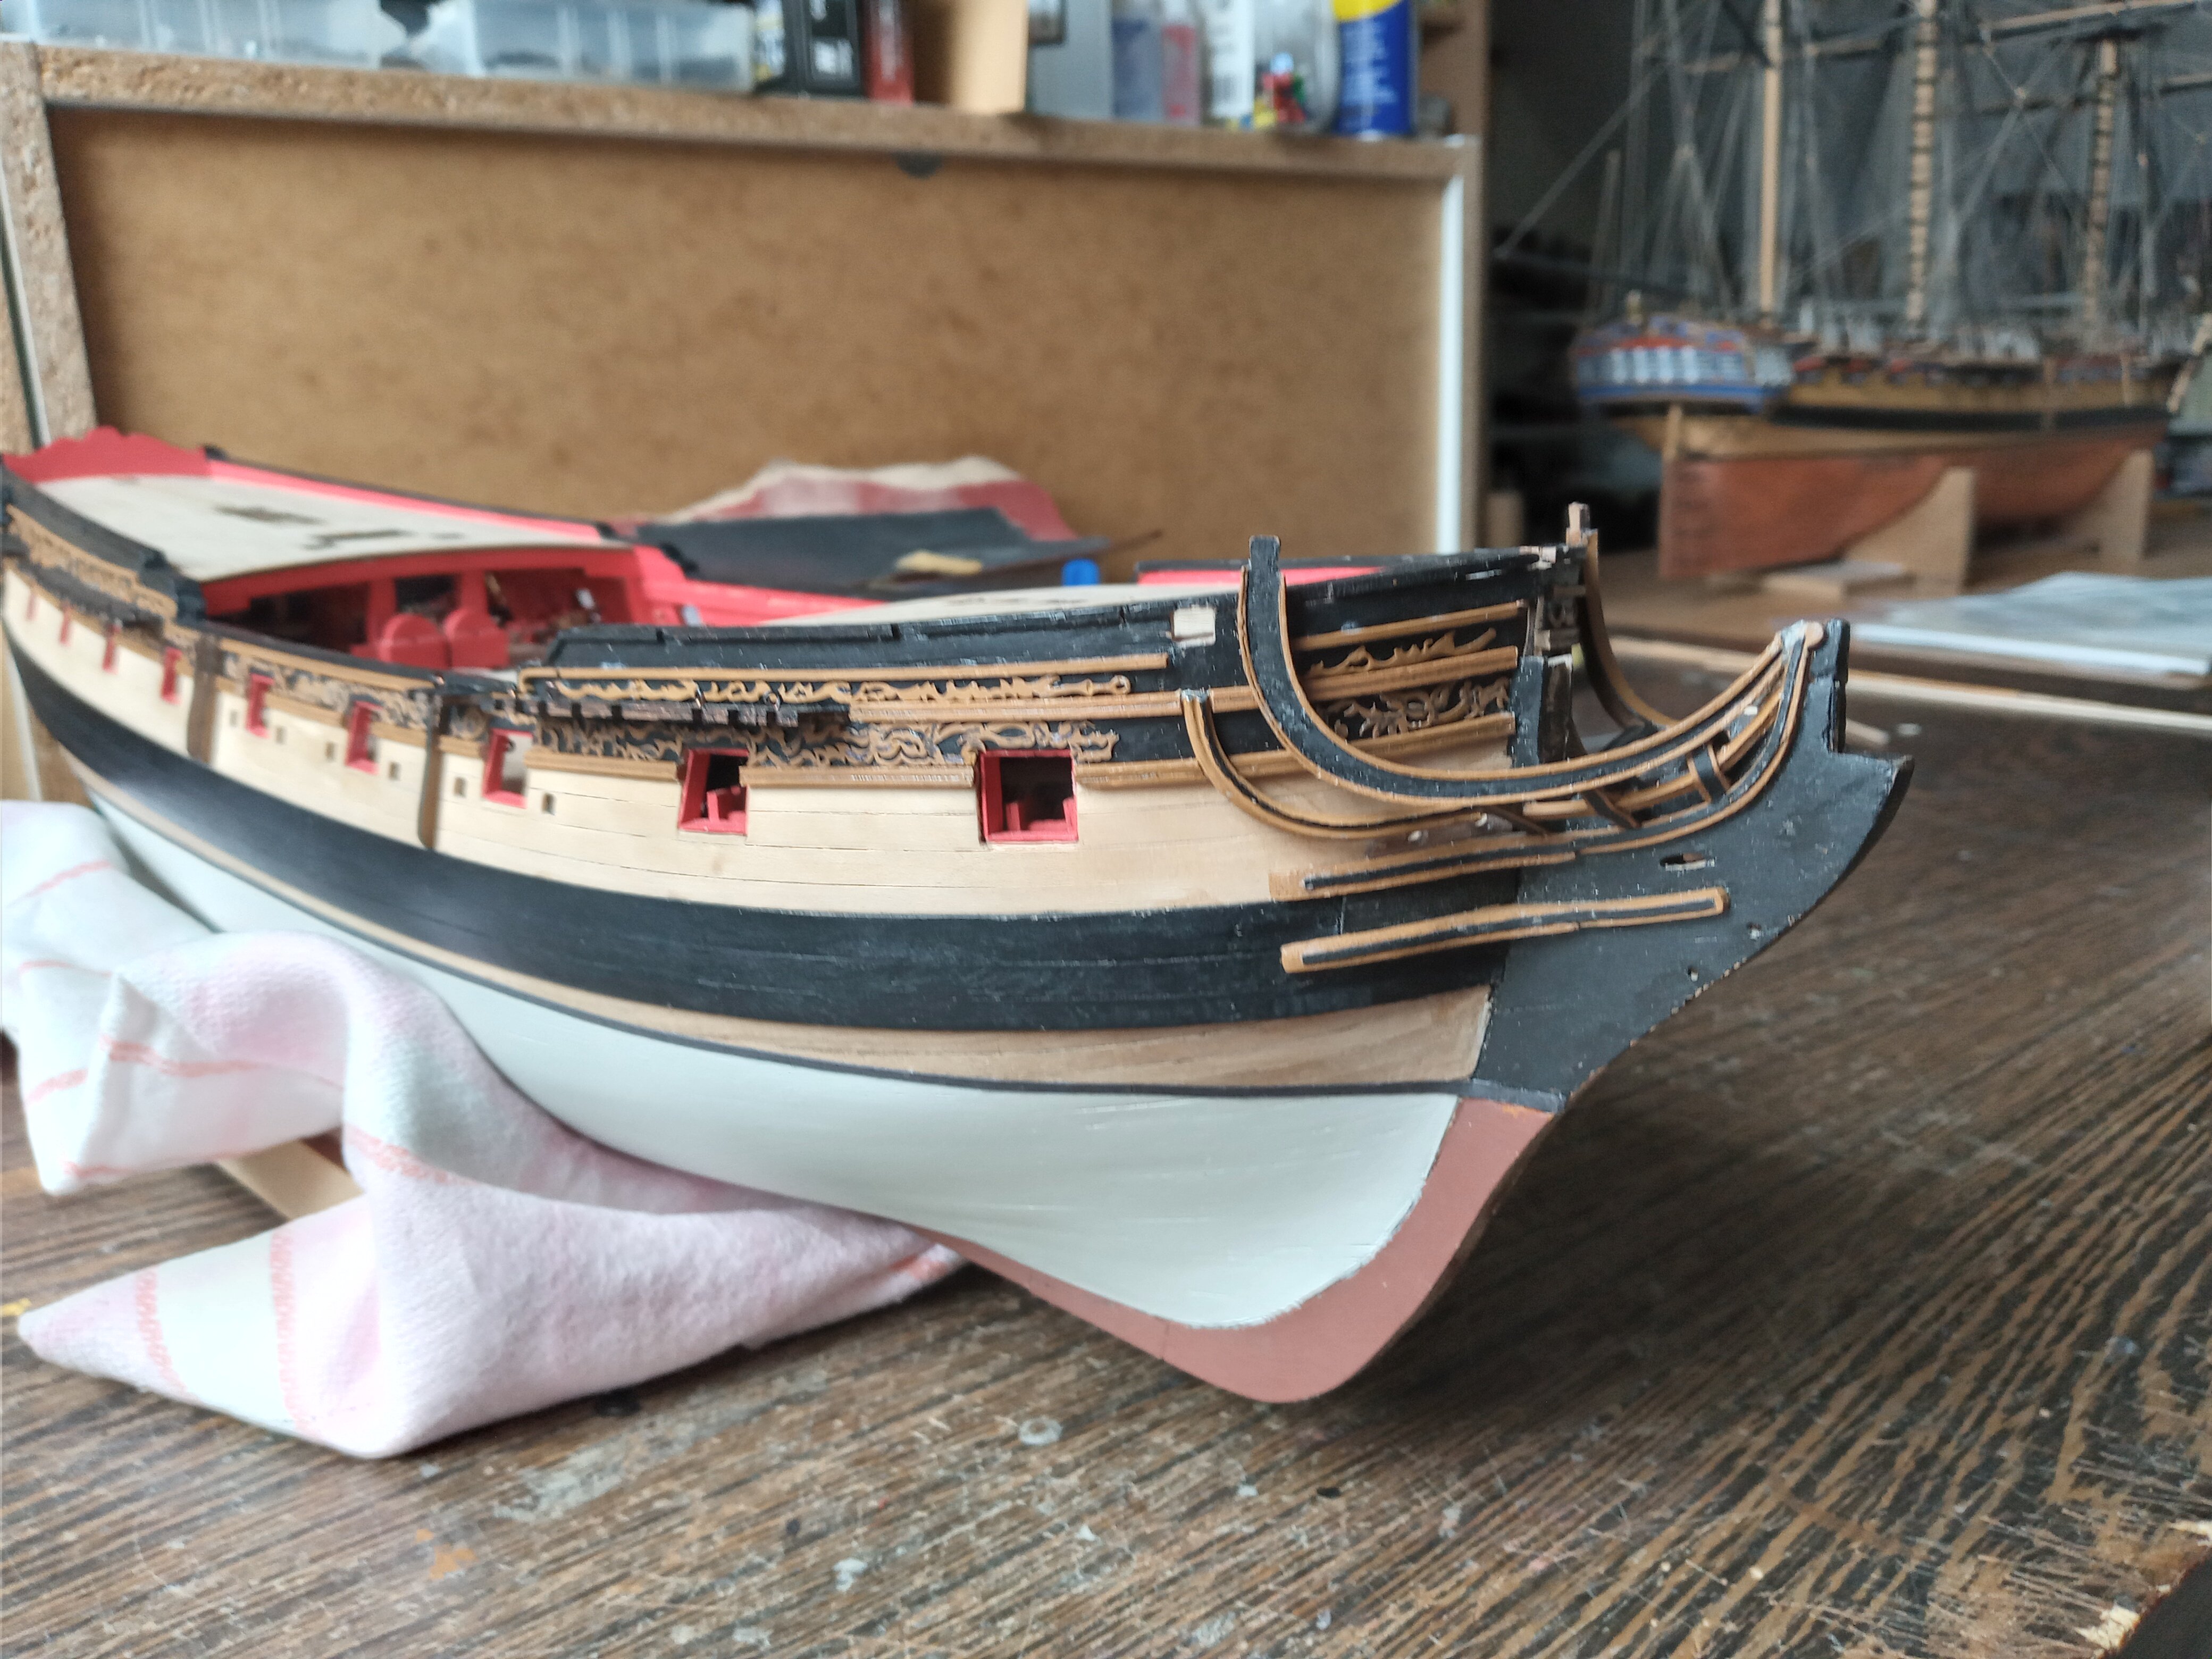
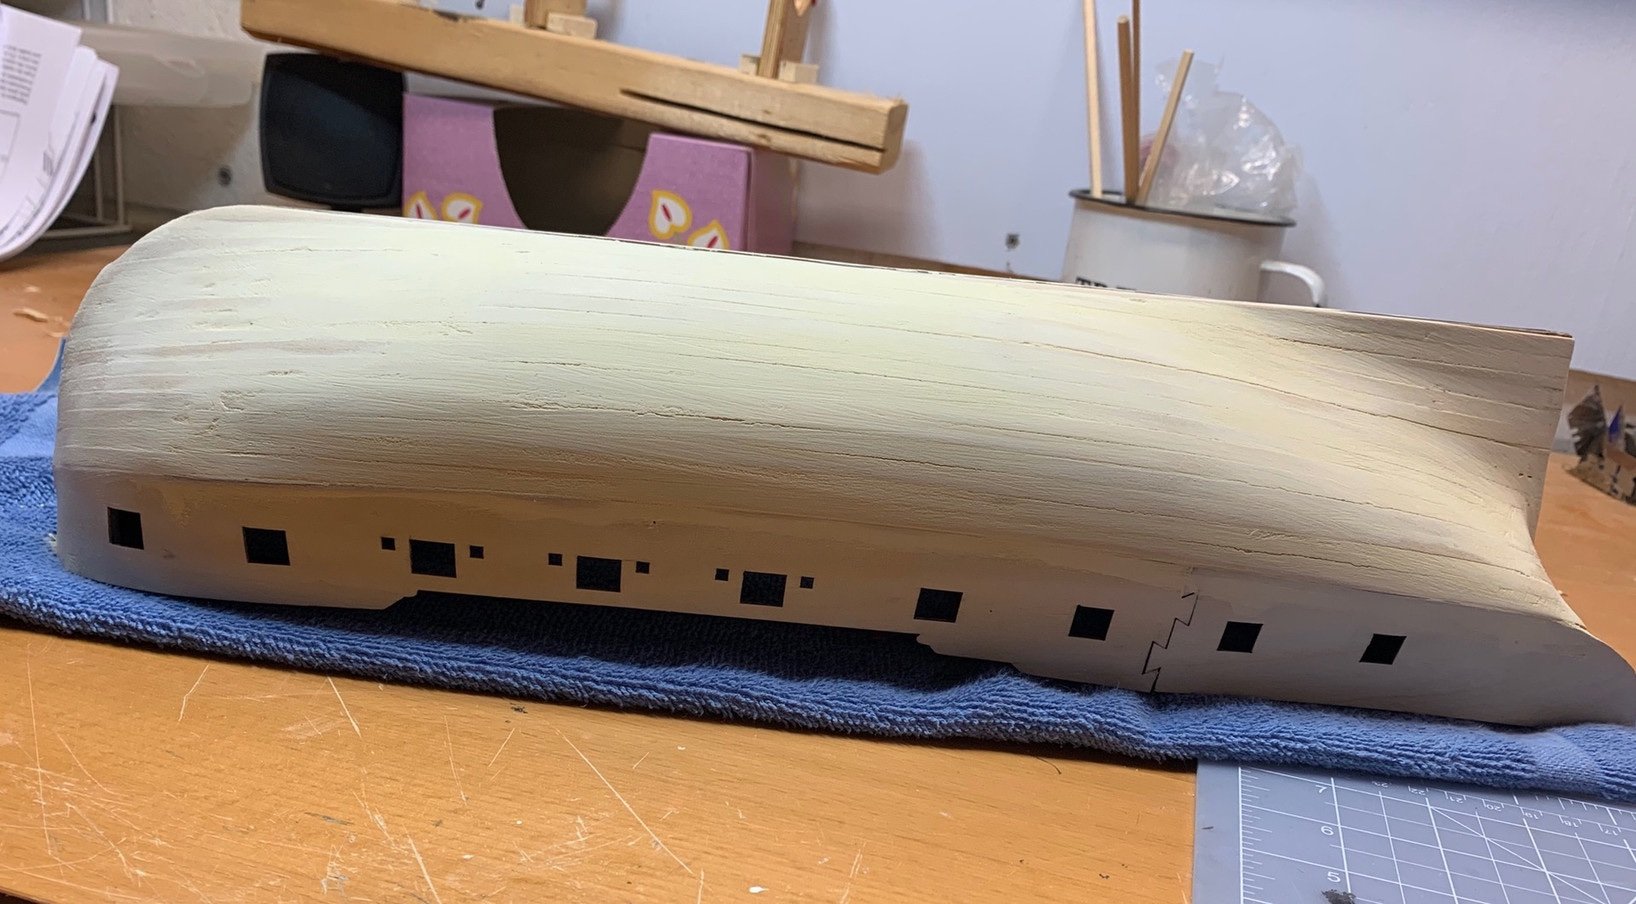
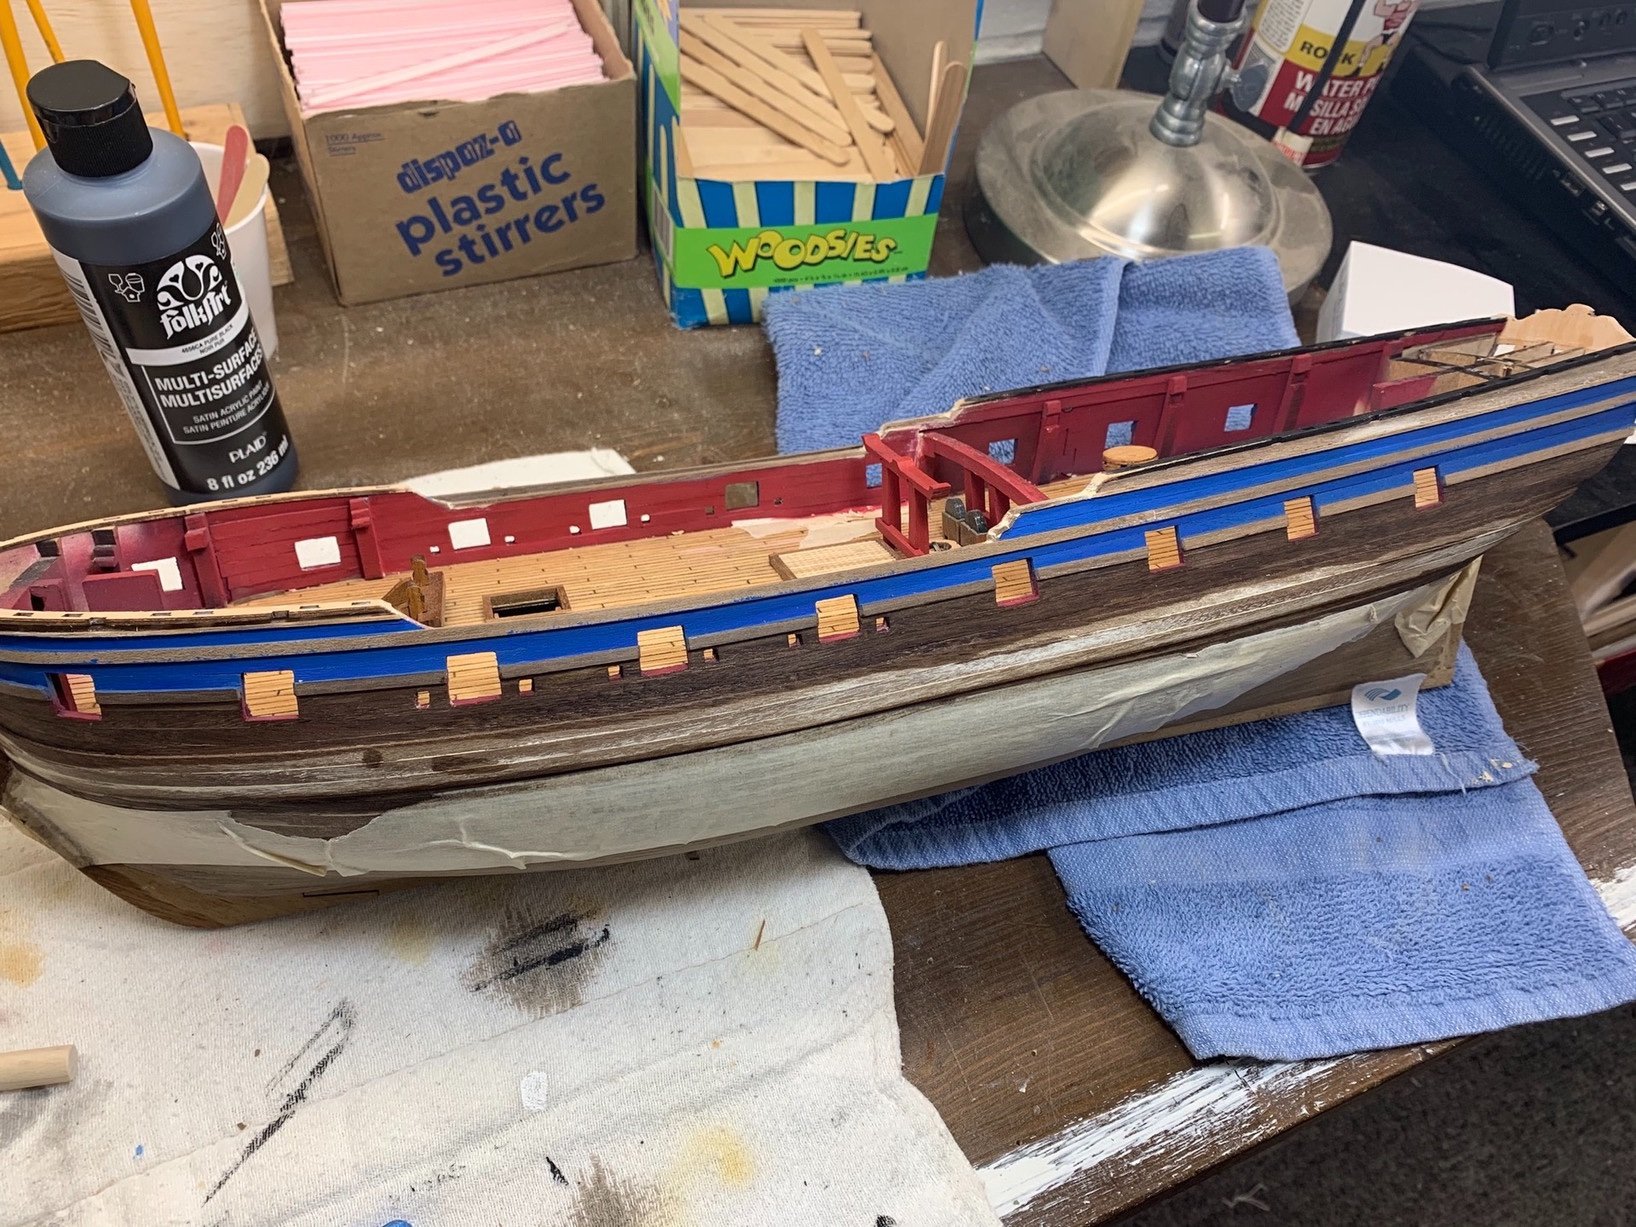
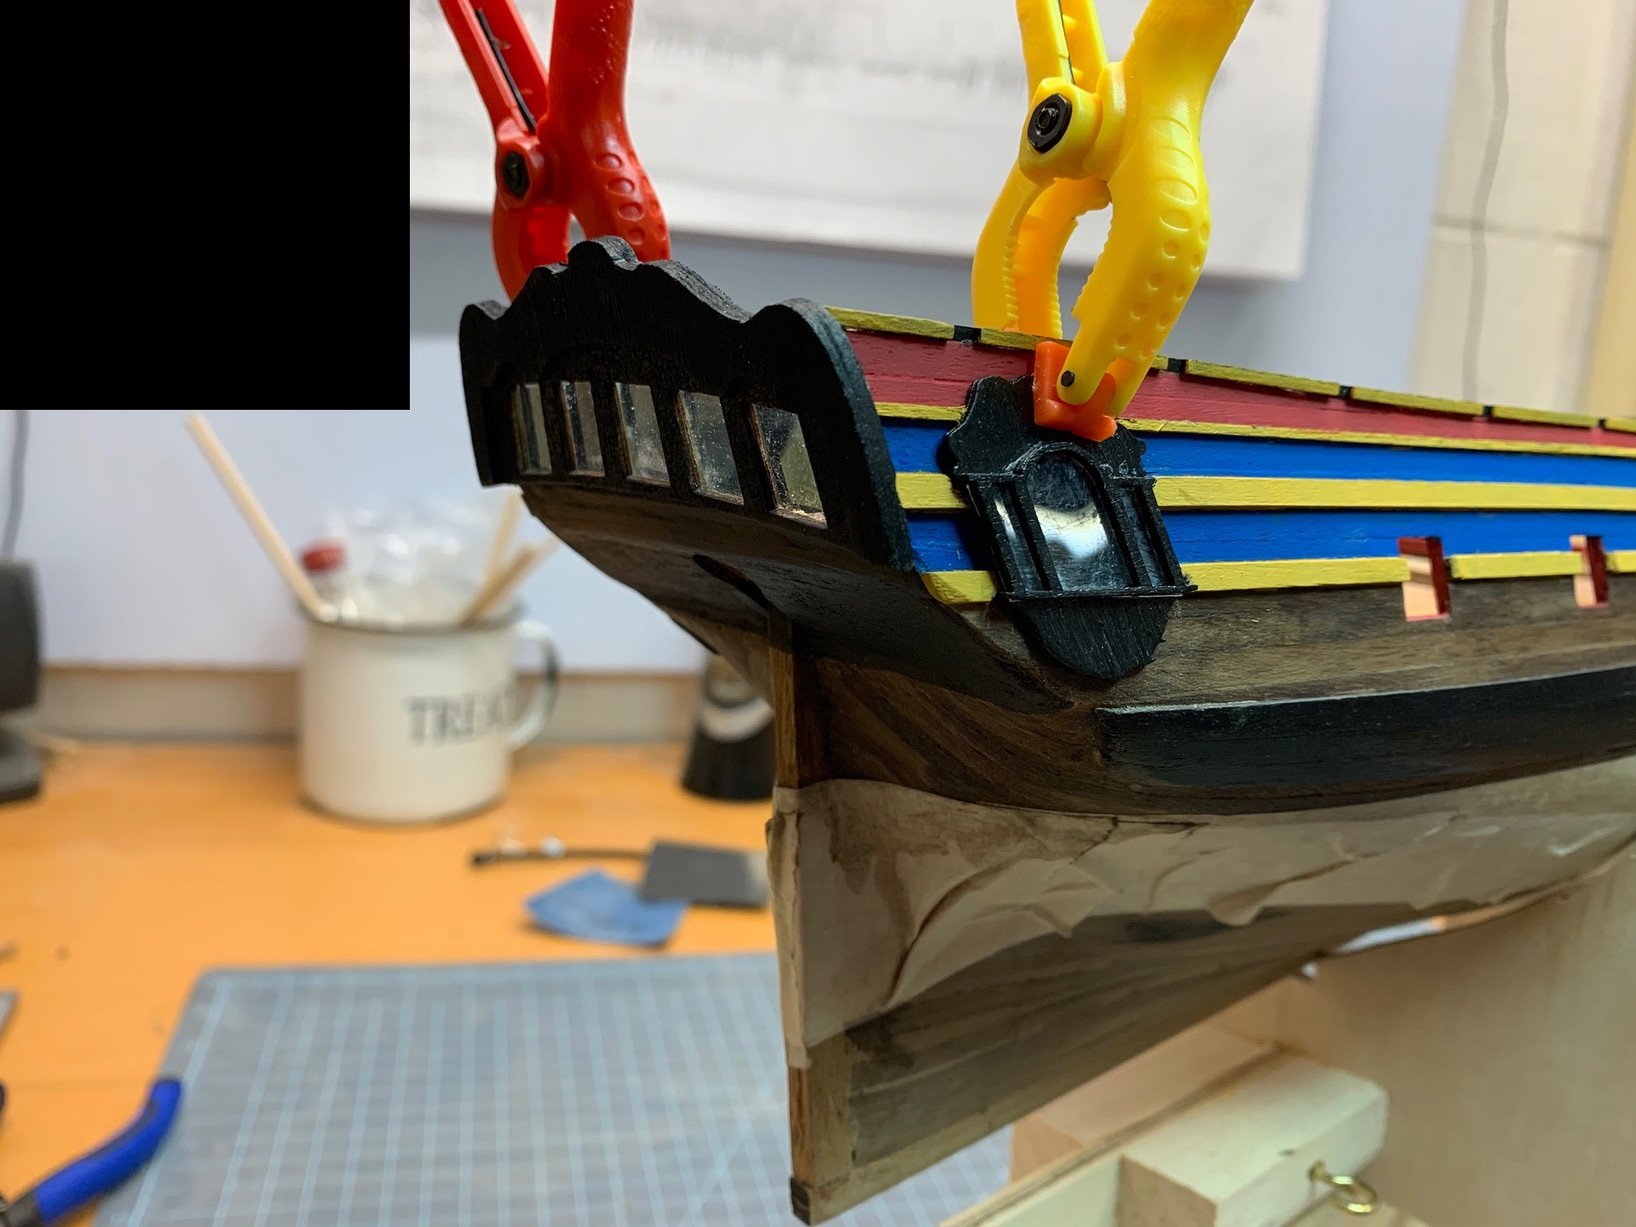
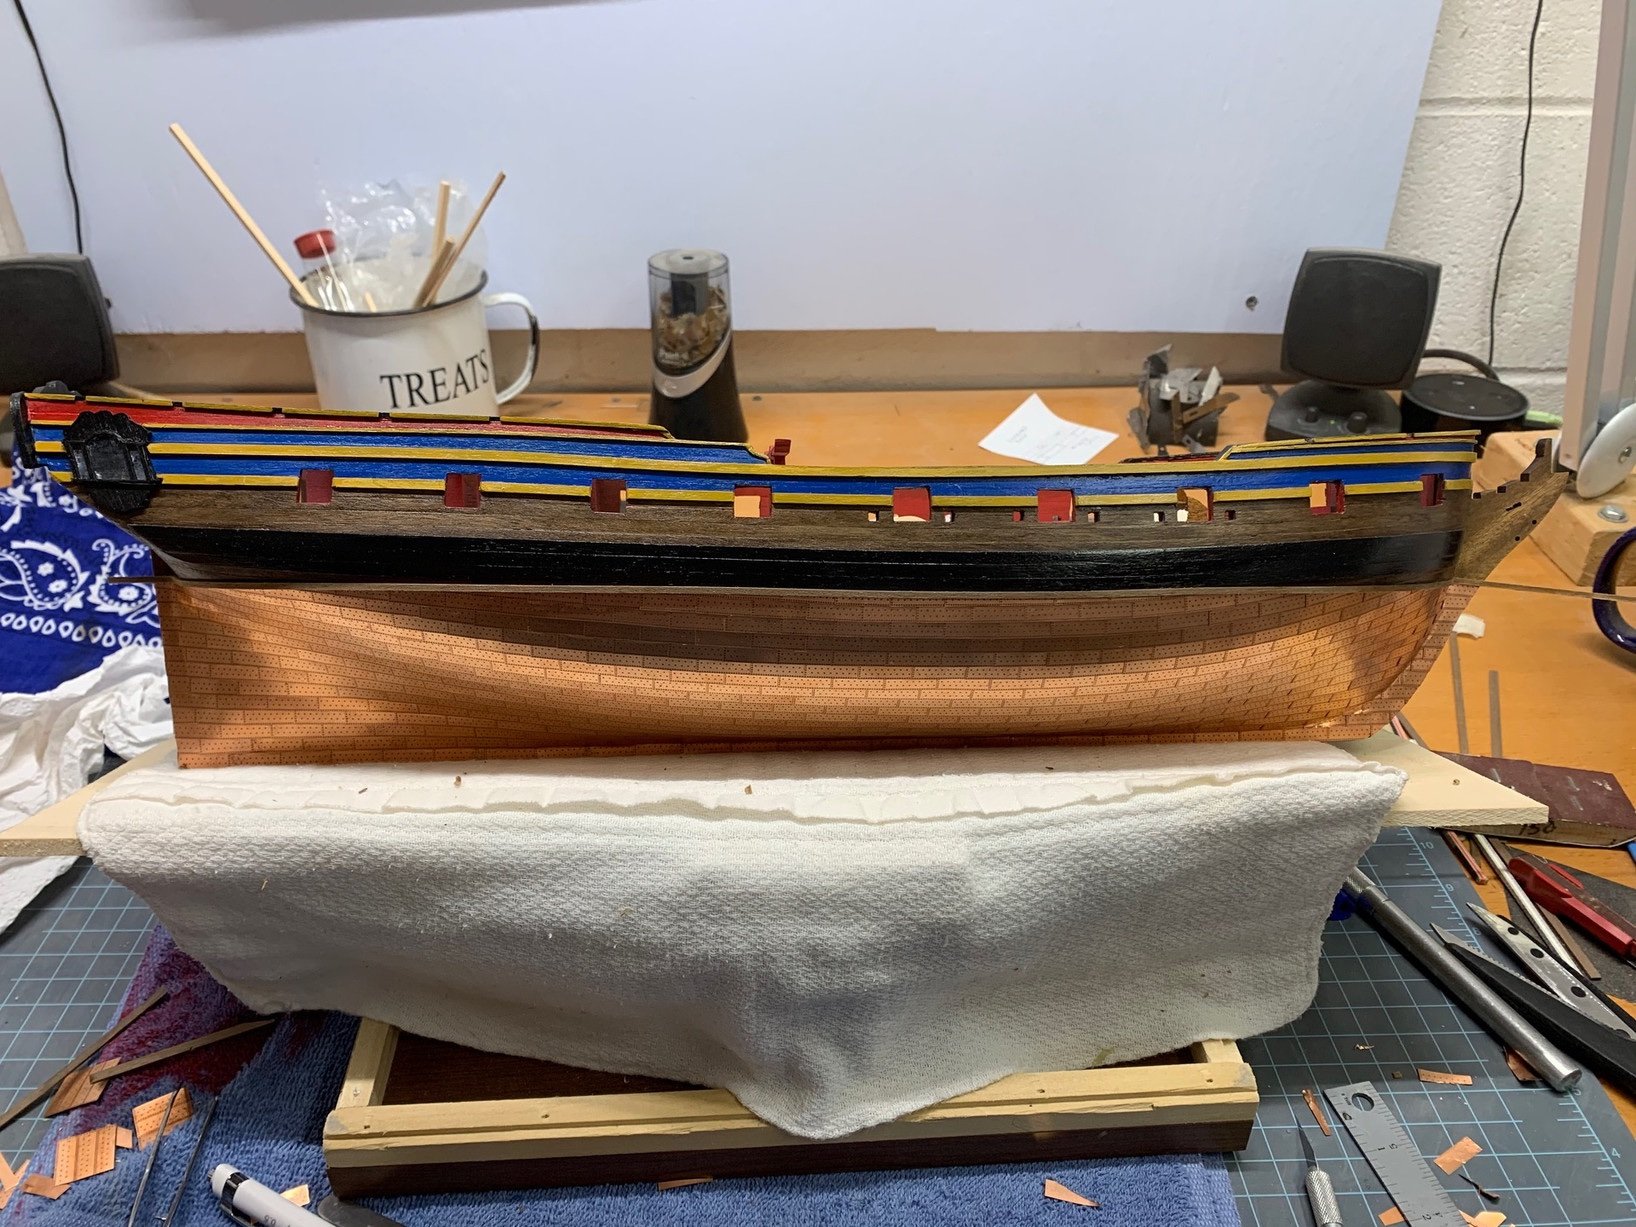
 Hi Folks, I've set my semi scratch project ( La Vénus ) on hold. Maybe some members wil recognise the feeling : filling a tank with gas-petrol-whatever...just to progress a few meters/yards. So I've started this nice kit that was almost for a decade collecting dust on the shelf. Here's the present status. ( part 1 ) I'll deliver some extra explanations next post(s), the next few days : especially regarding the quarter badge Special thanks to all members who "paved the way" regarding this subject.
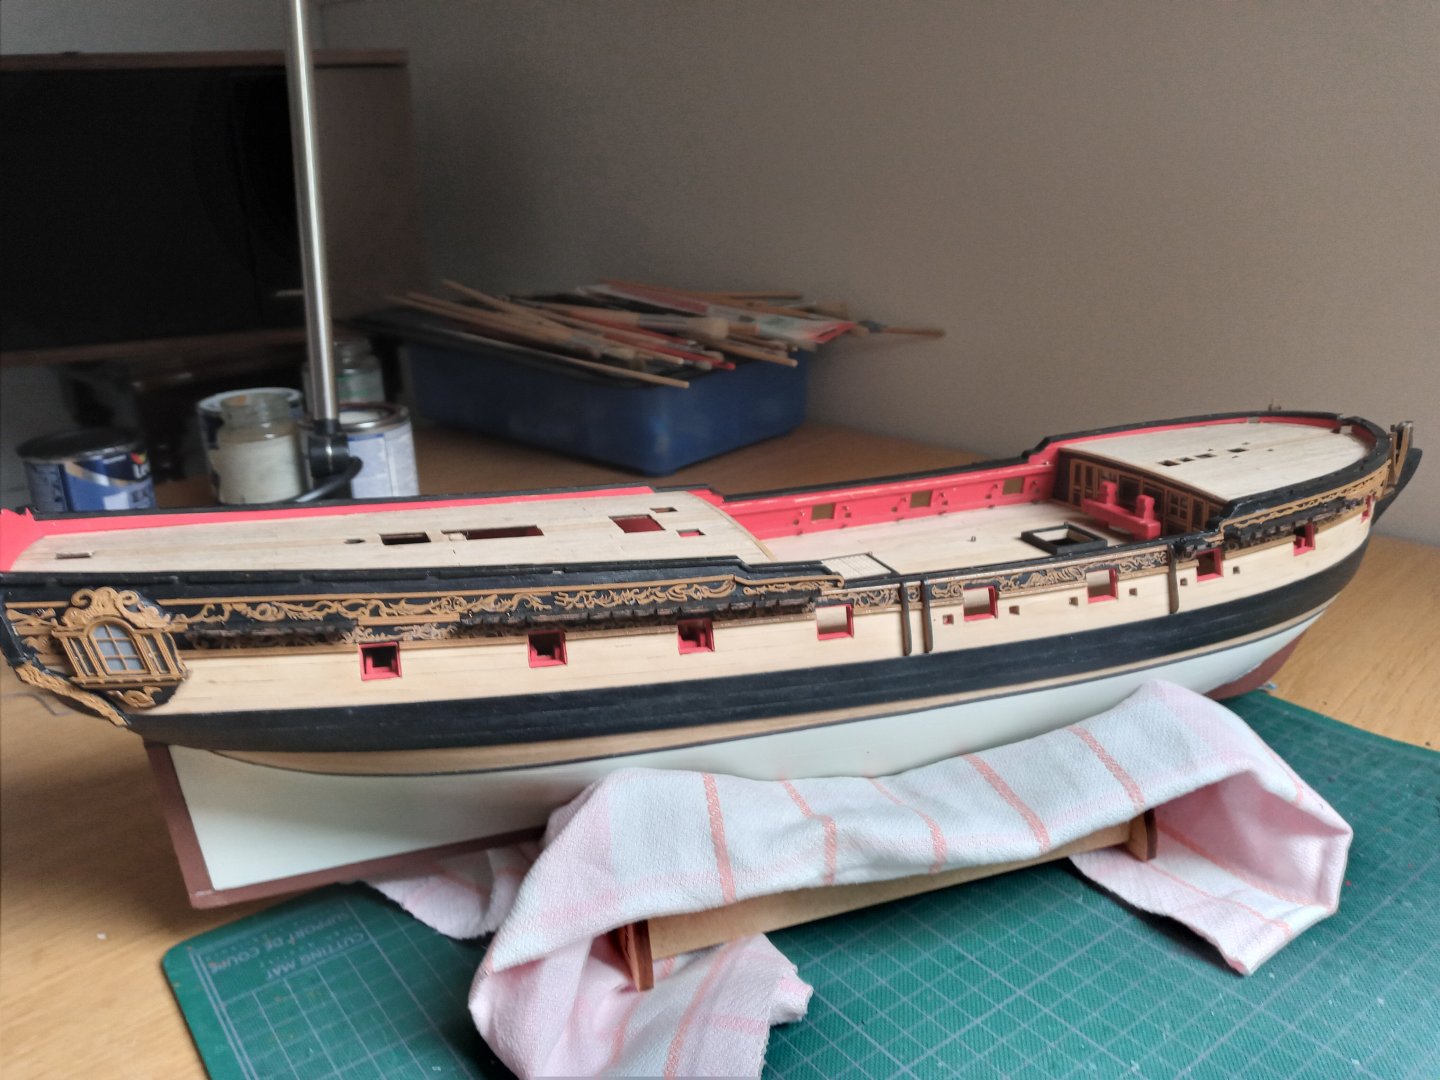

-
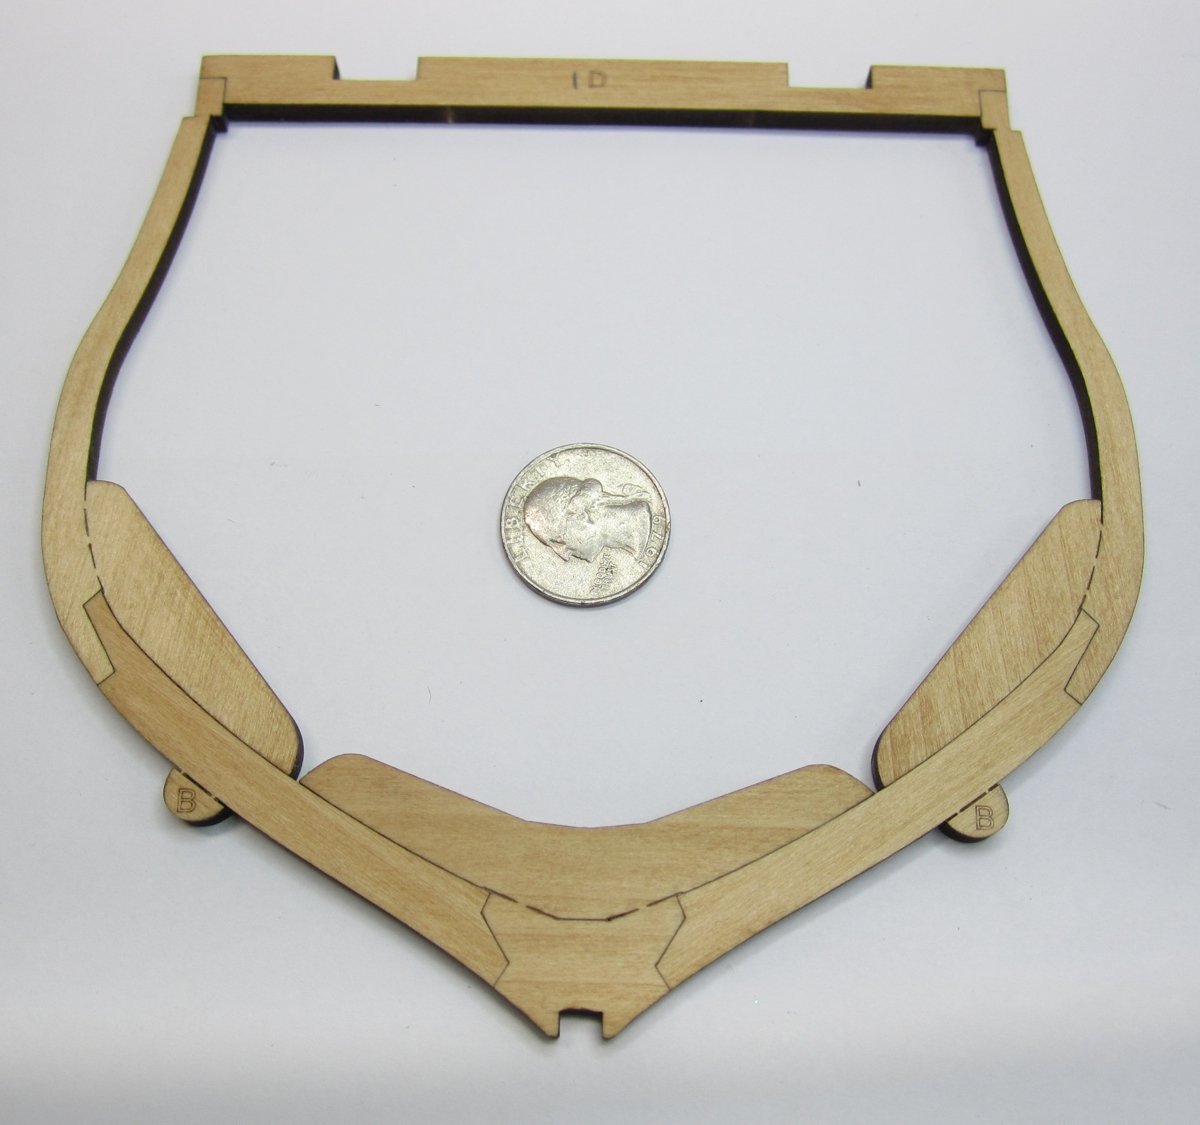
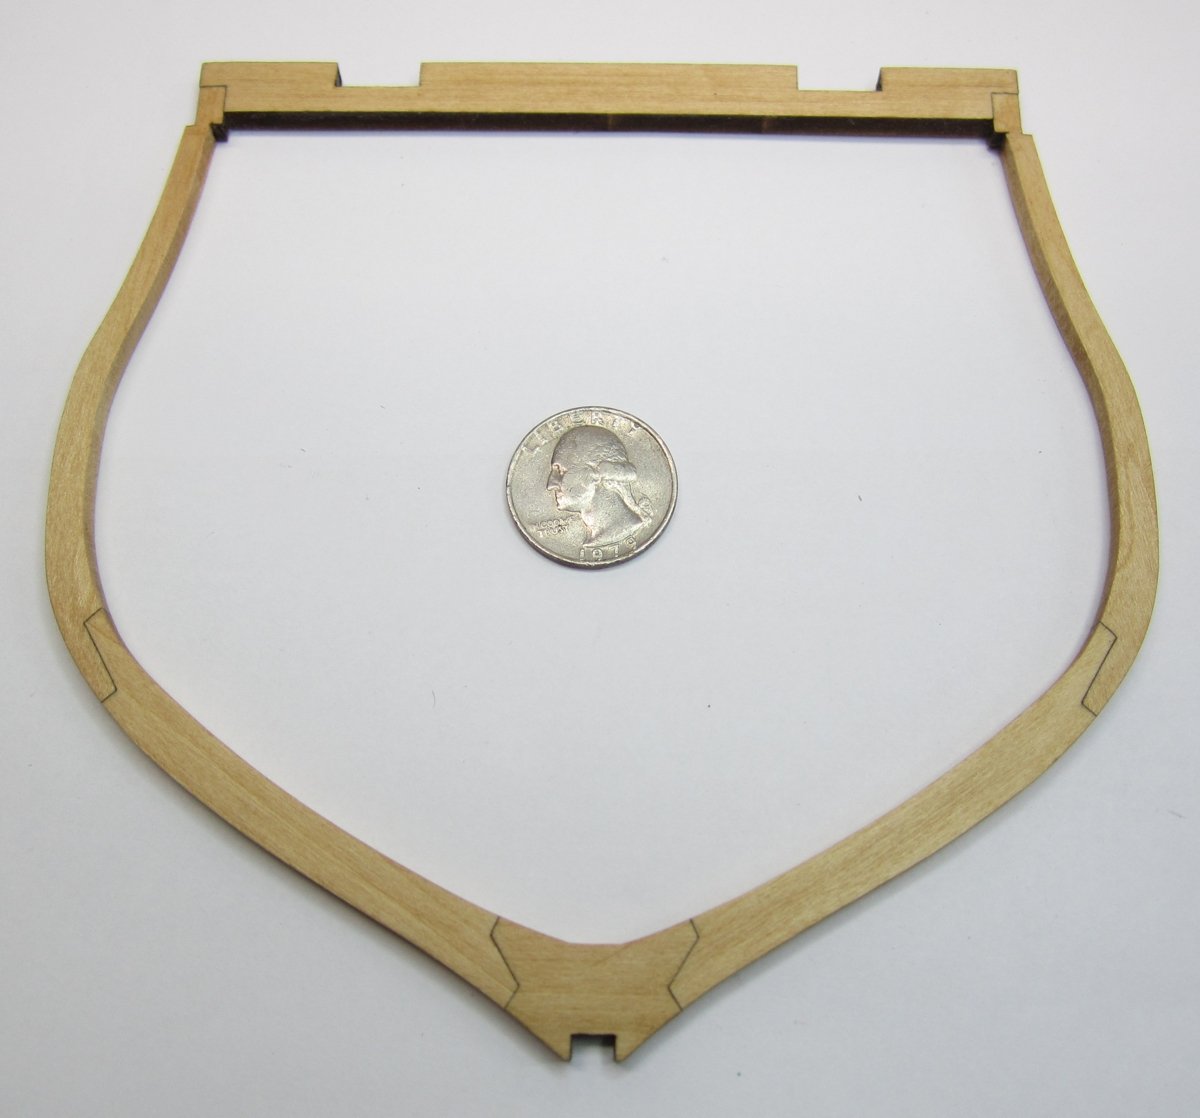
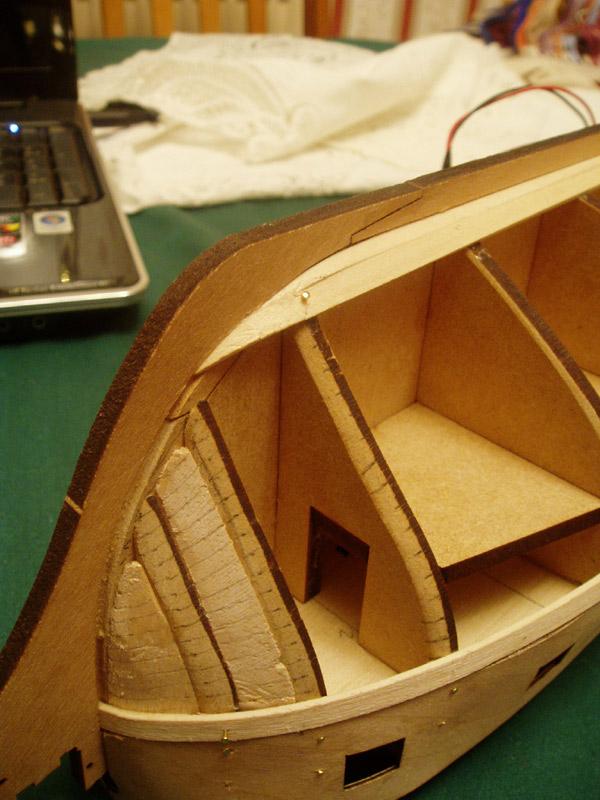
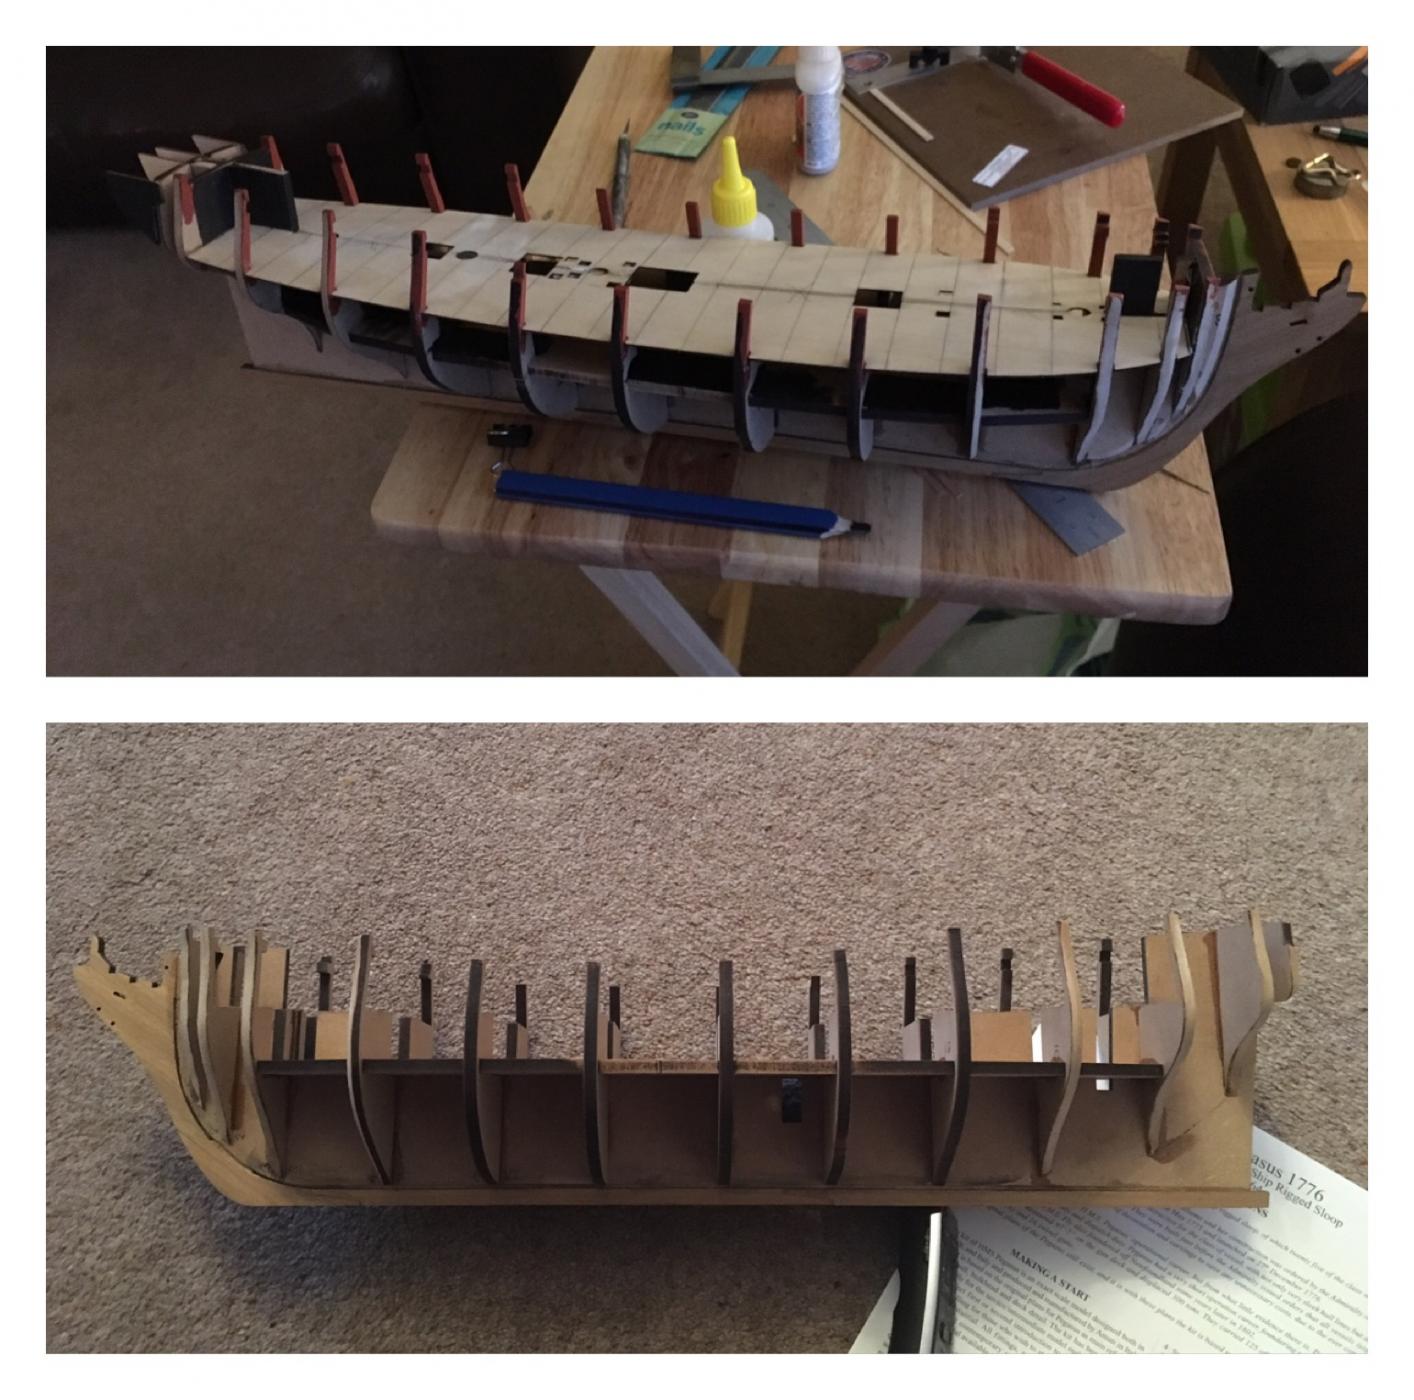
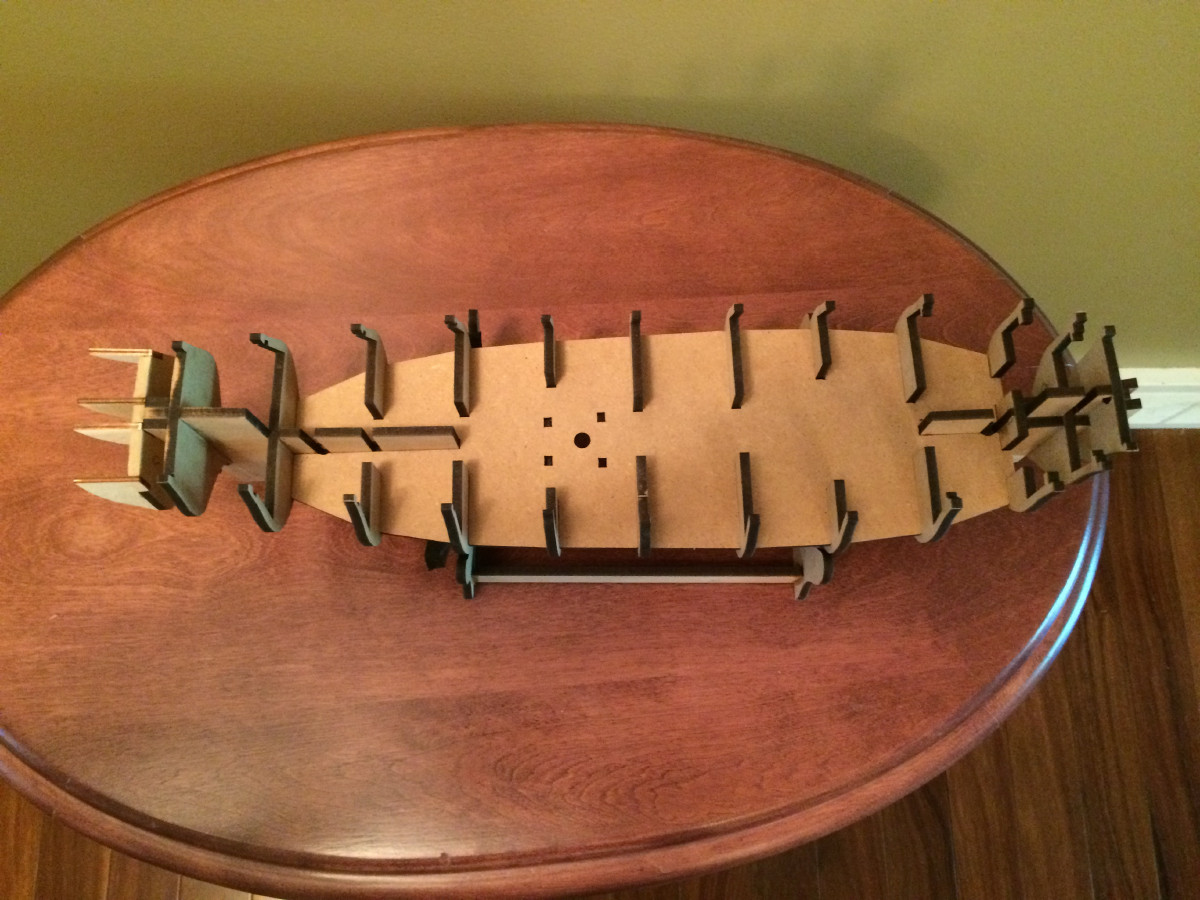
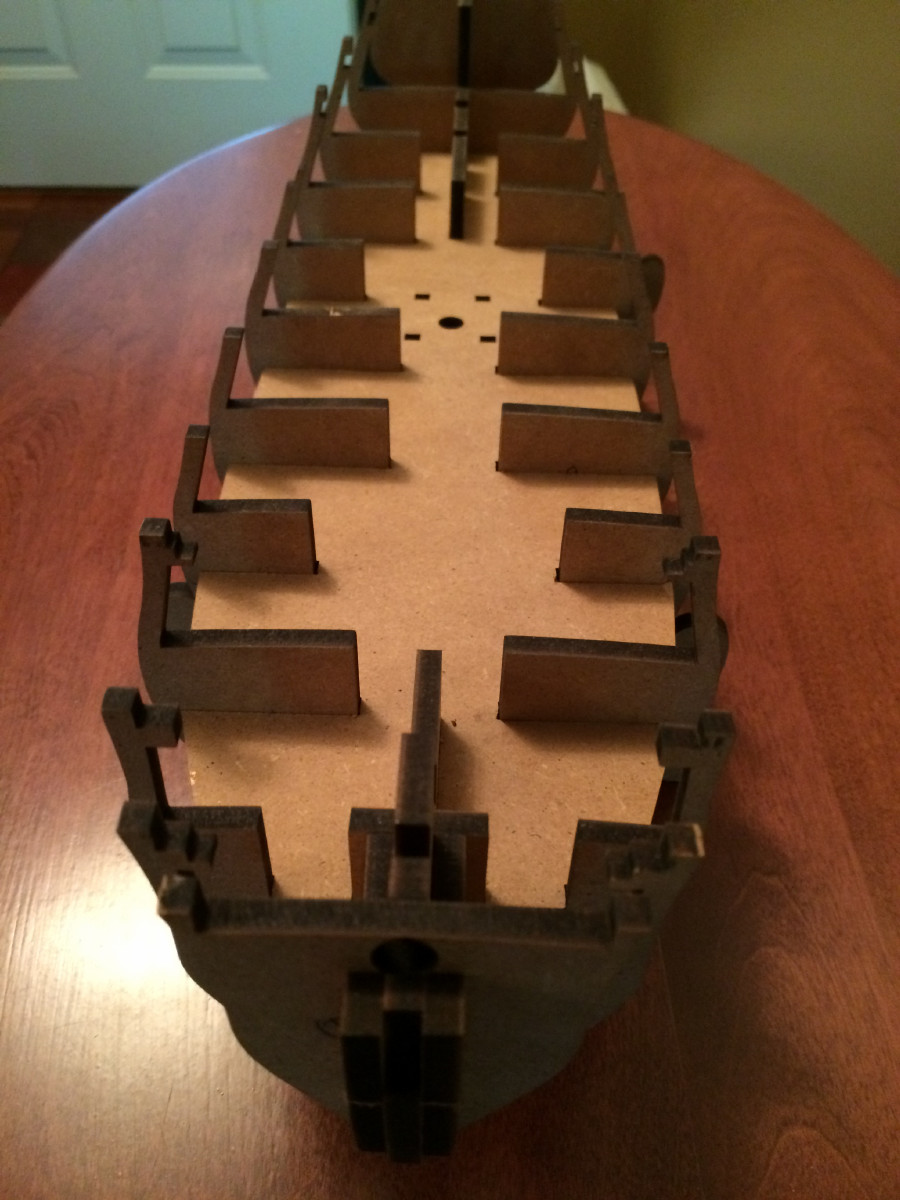
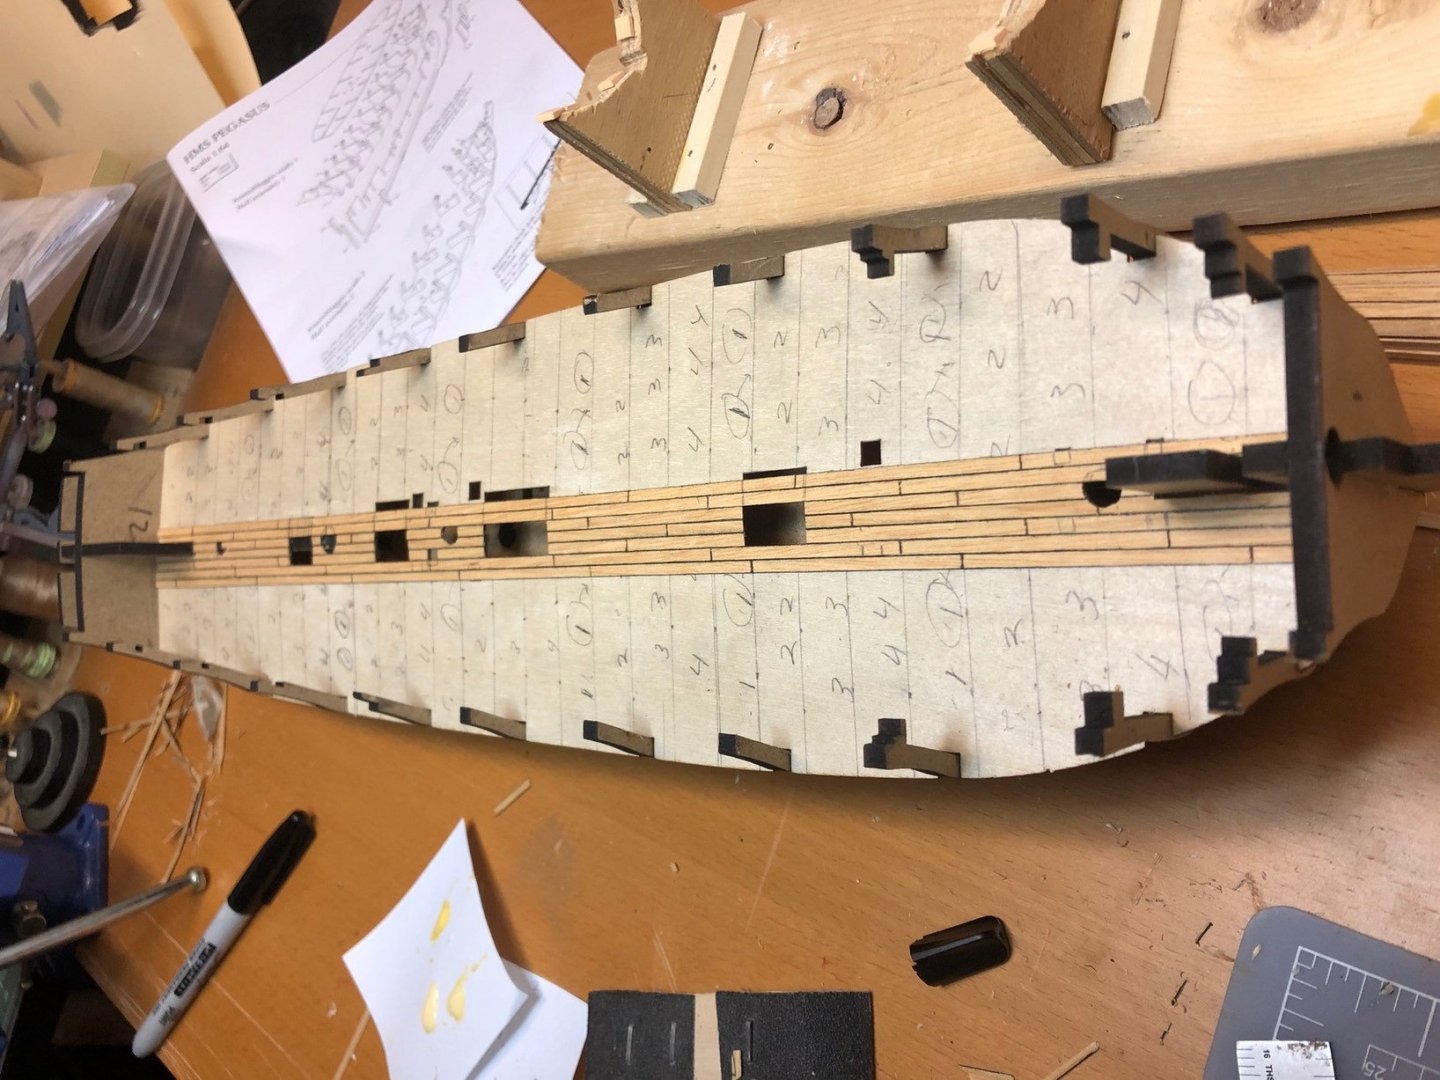
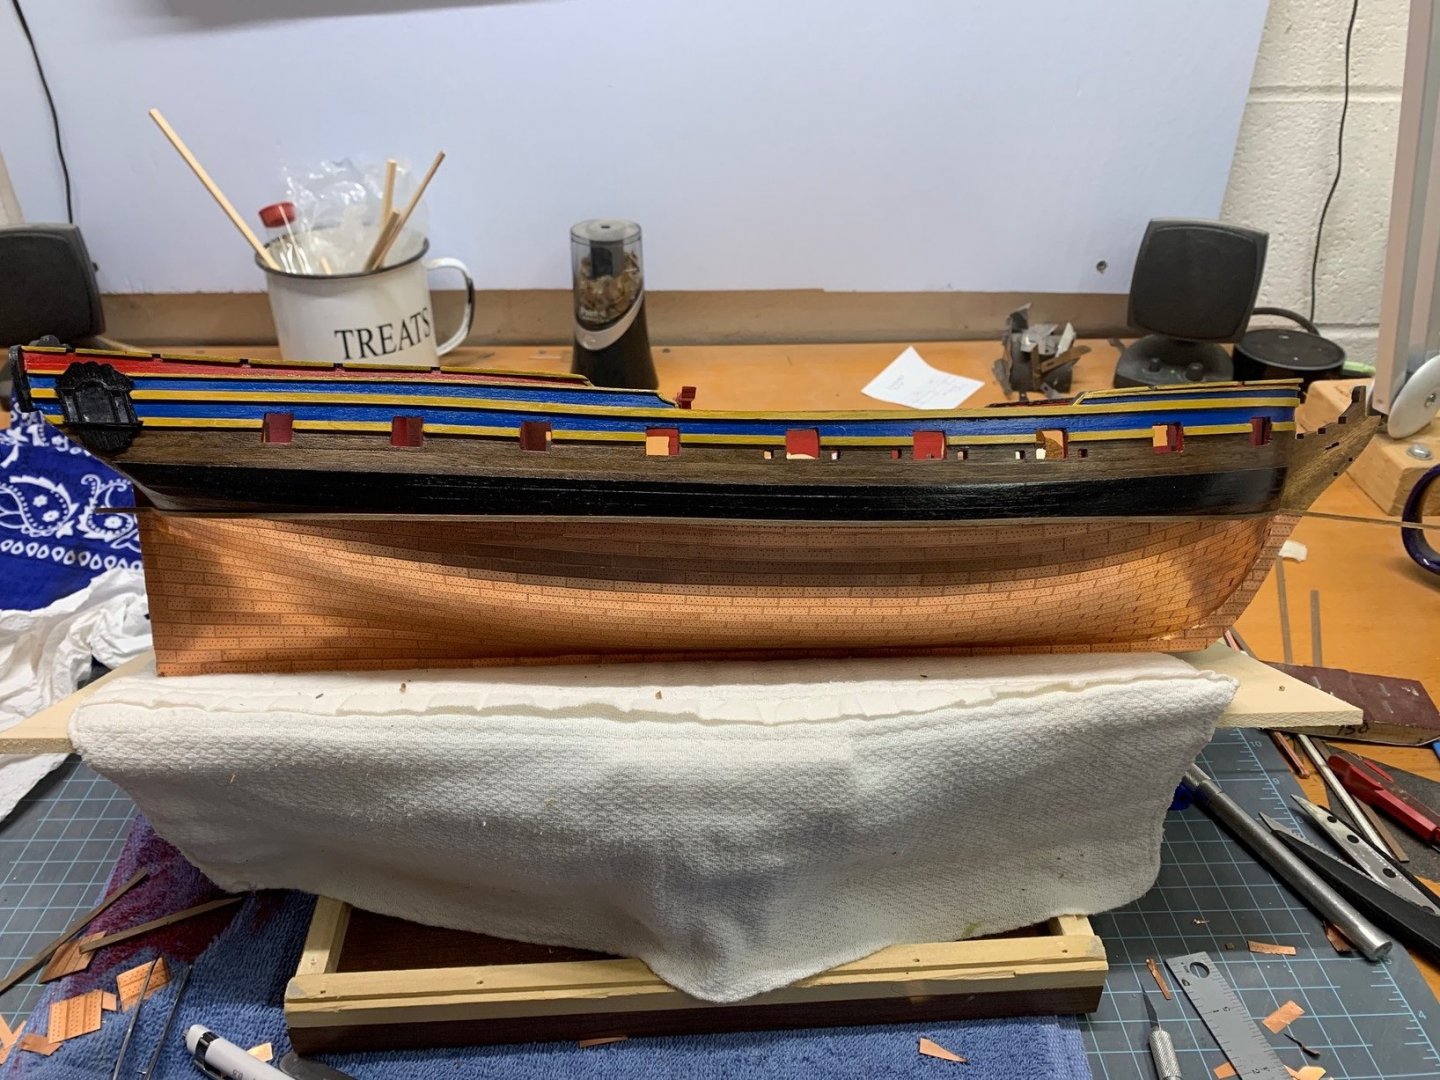
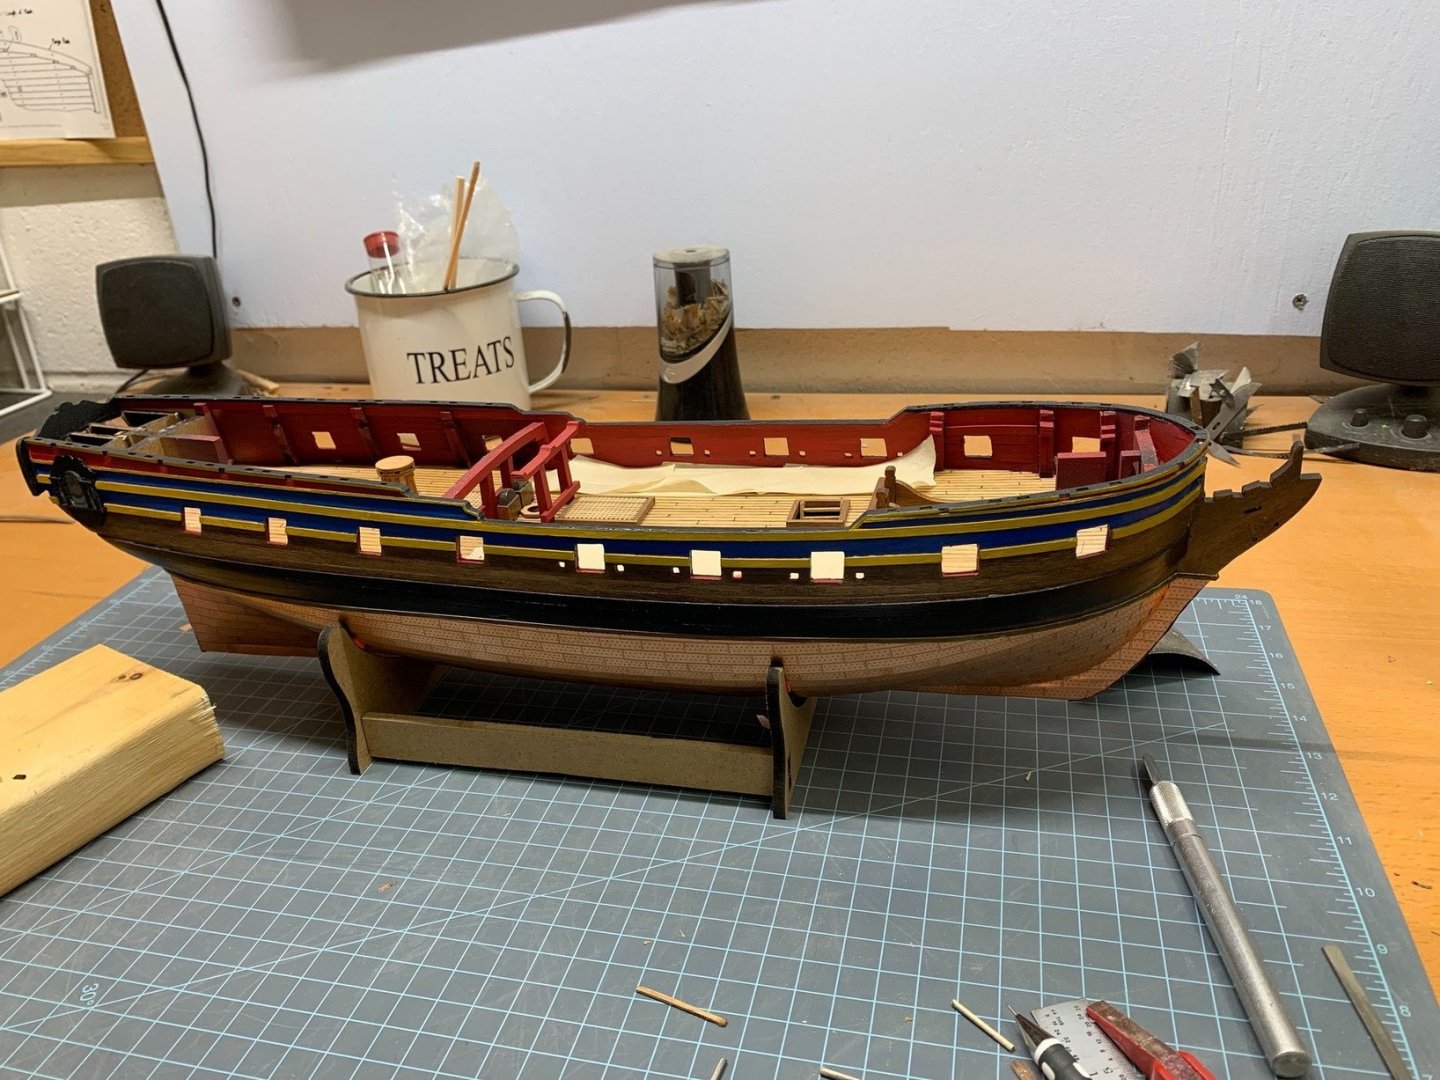
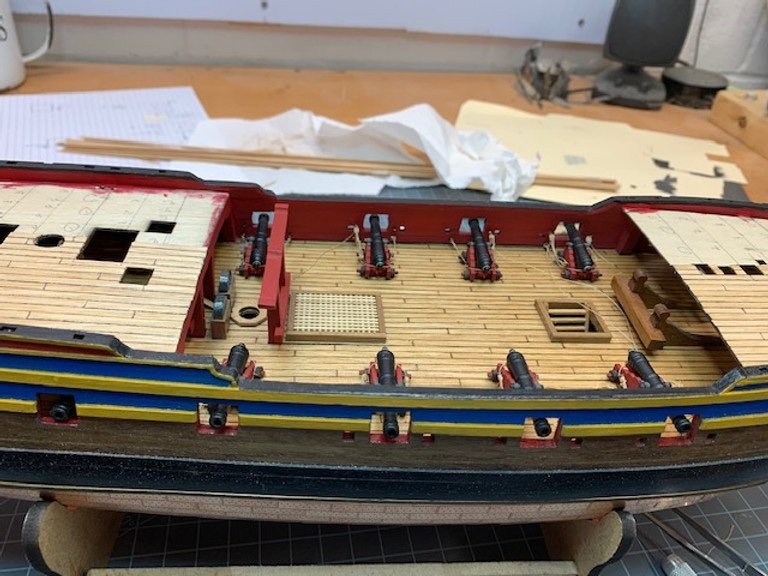
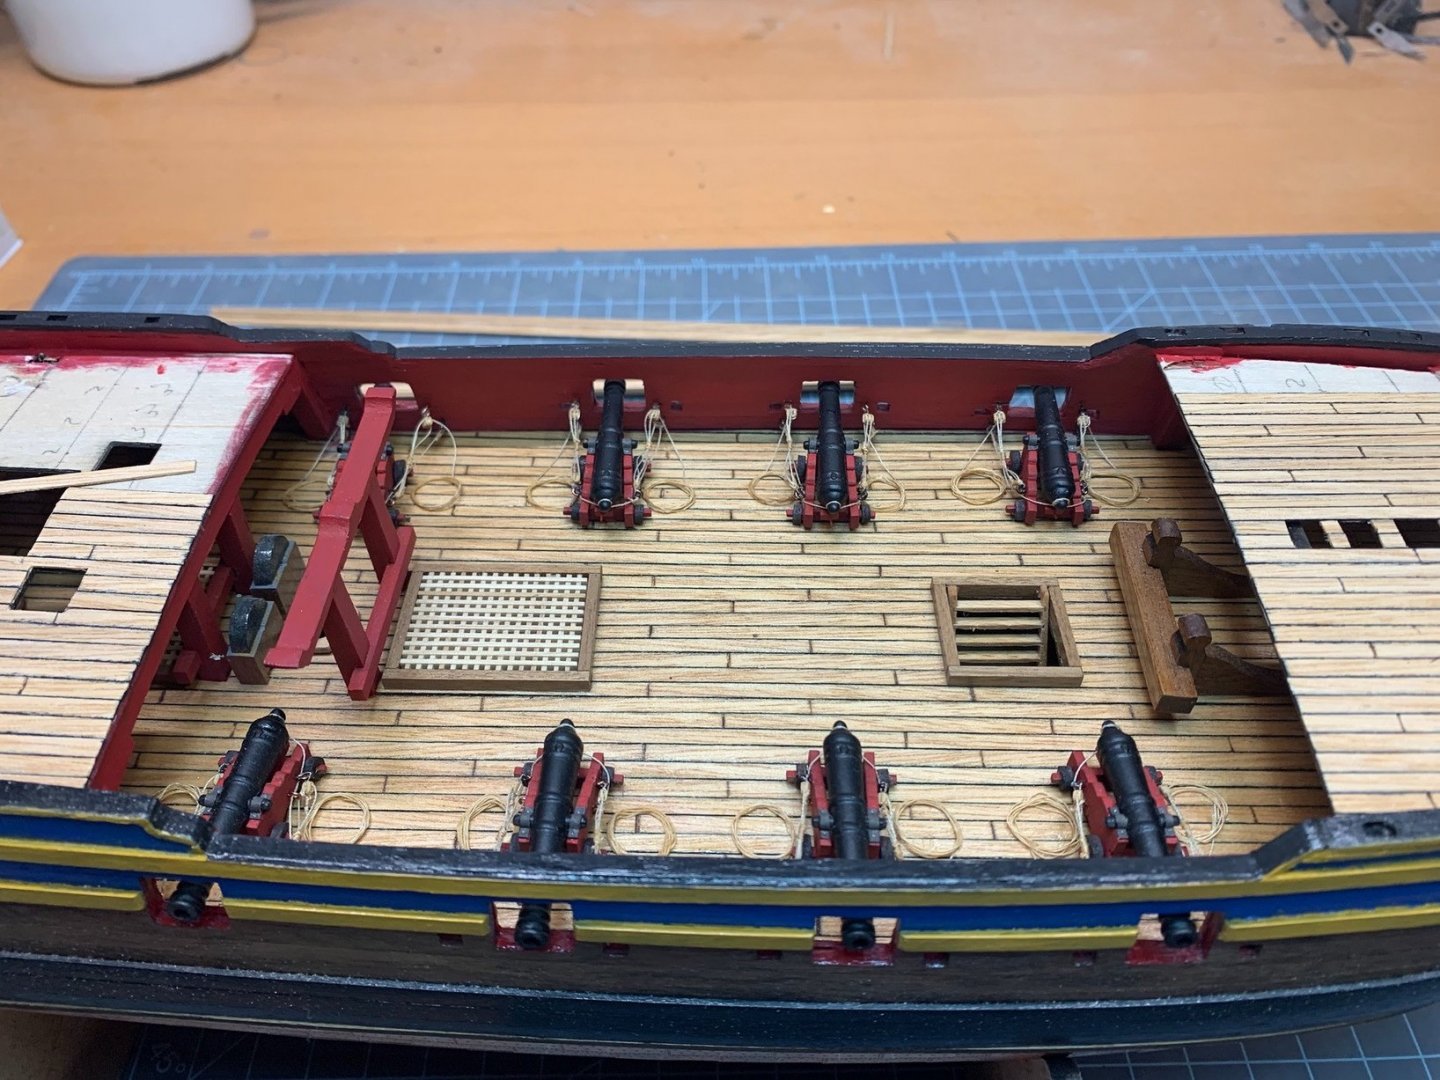
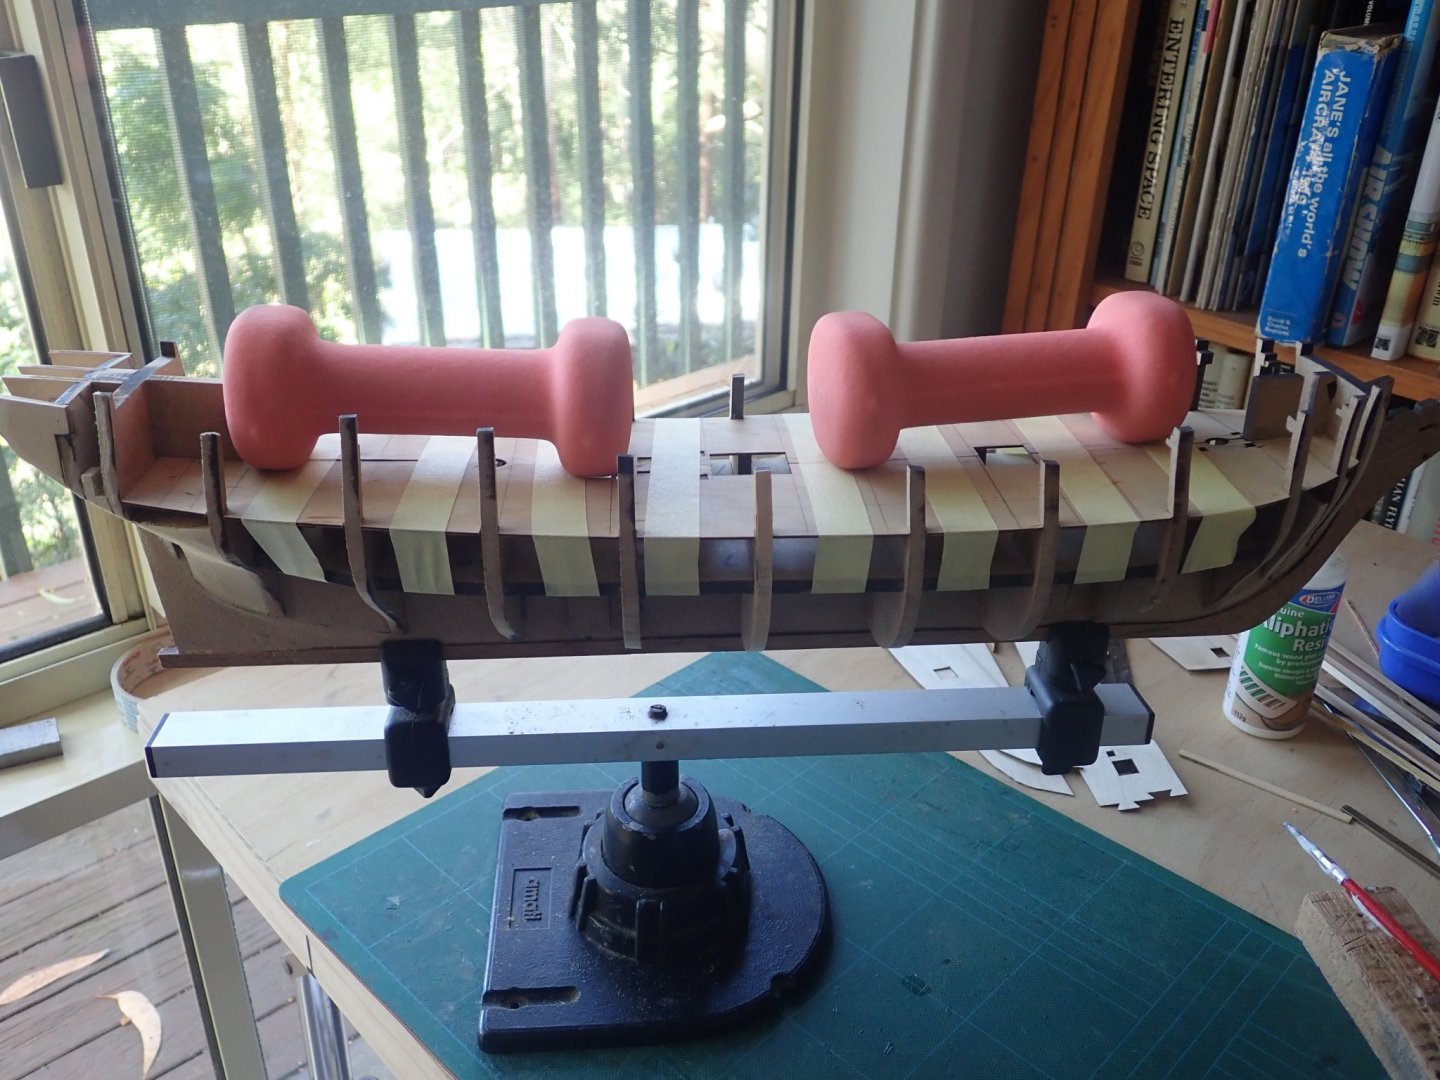
 Well here we go - after a long hiatus (and a half dozen or so planes, trains, & automobiles) I'm back in the shipyard with the HMS Pegasus. I won't spend any time on the history, etc - since Victory's Pegasus is pretty prominent throughout the forum. However, I will add a little background why she's my current project. I have four adult children (3 girls and boy) and three ships to go around. So I let the youngest pick out what she she wanted to be built for her. Nice choice kiddo. As with my previous builds, I tend to mix somewhere between 70% accuracy and 30% artistic licensed - which will be the case with the Pegasus as well. Meanwhile, I'll be leaning pretty heavily on Blue Ensign's build (which I believe sets a benchmark for Pegasus..es... Pegasi? in terms of accuracy) as well as Danny Vadas' spectacular work on the Vulture. As always - I thank you all in advance for your encouragement and support. It's good to be back. Here's the typical start to the build. I've gone ahead and added the rabbet even though the plans say it's unnecessary. As I've perused other builds, it looks like it's probably going to come in handy.
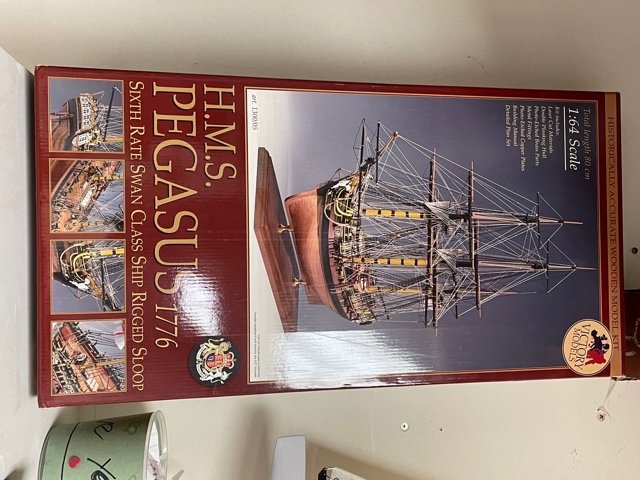

- 300 replies
-
- 10
-

-
- Victory Models
- Pegasus
- (and 3 more)
-
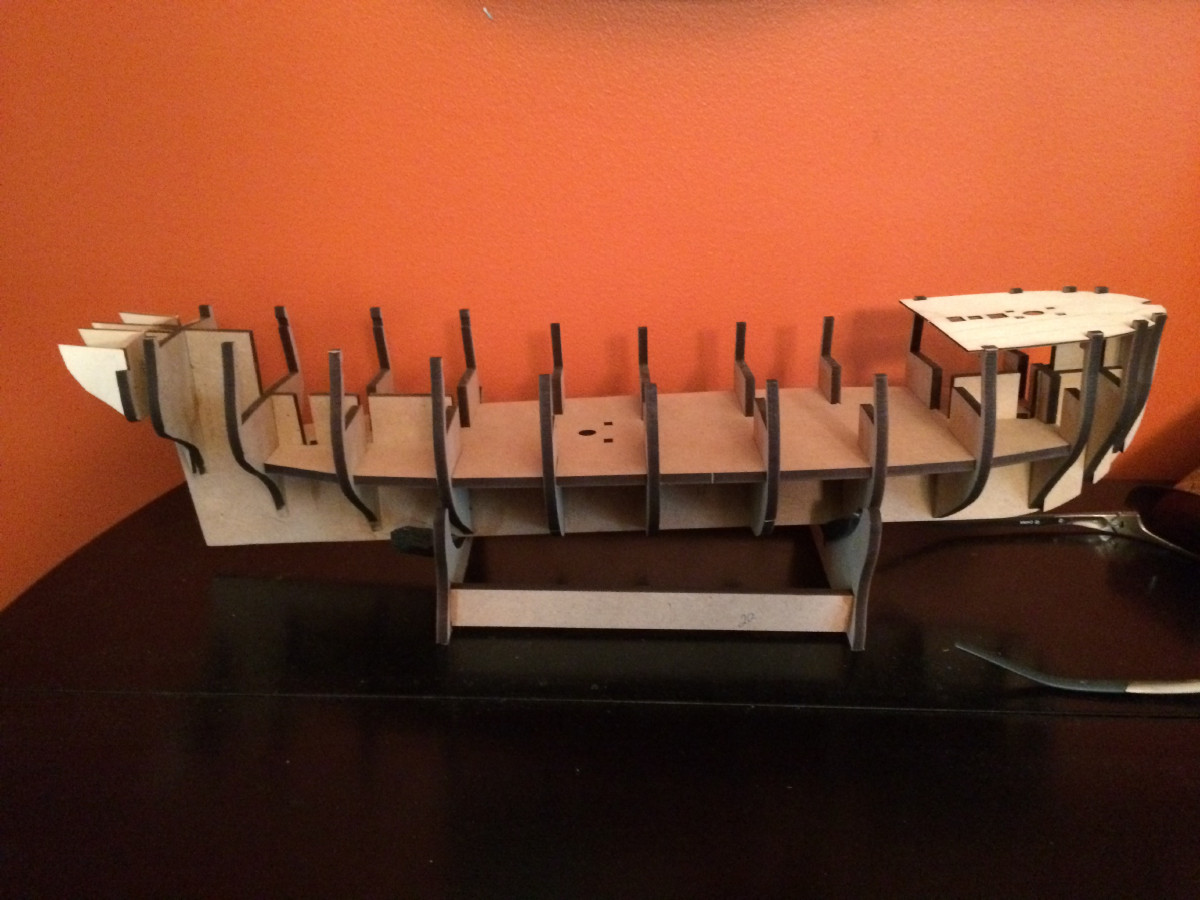
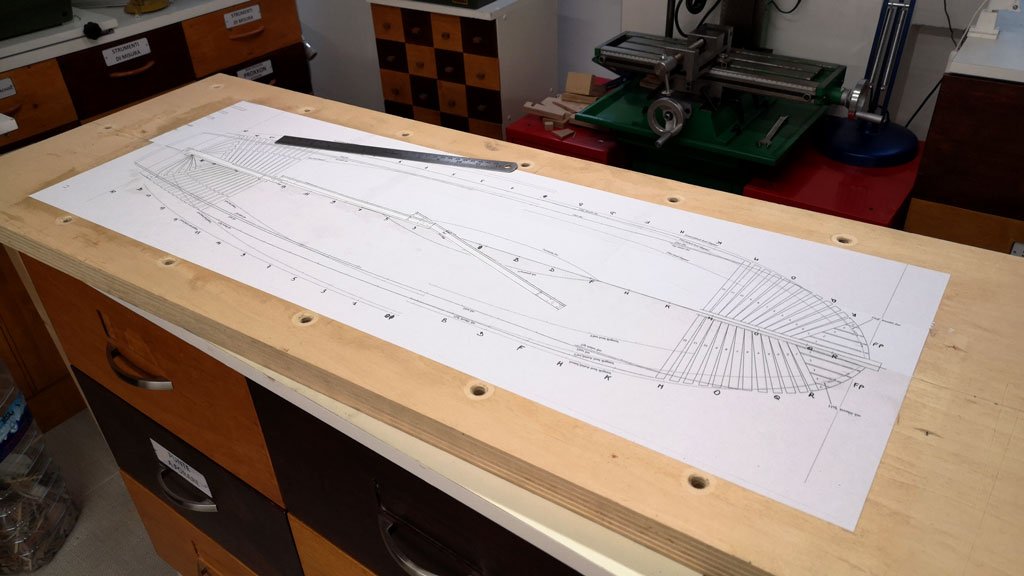
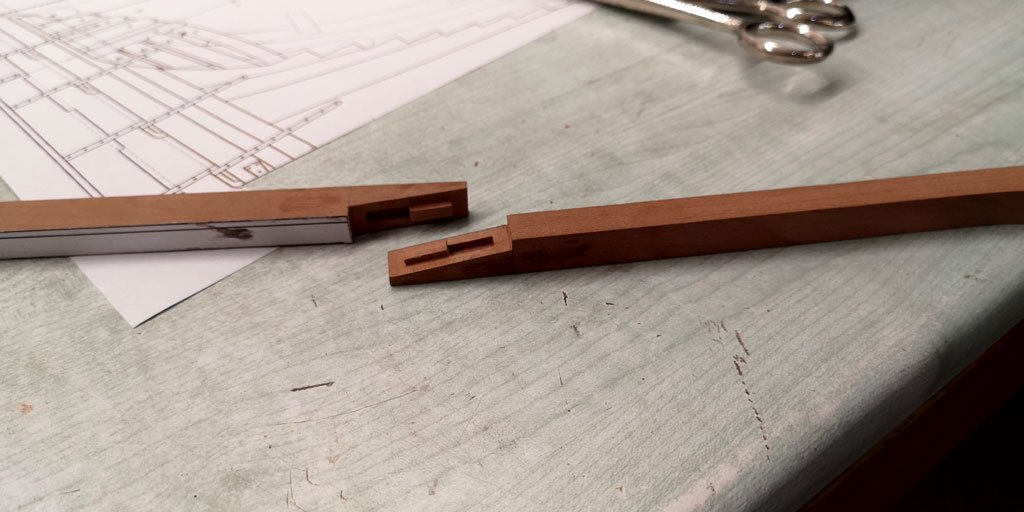
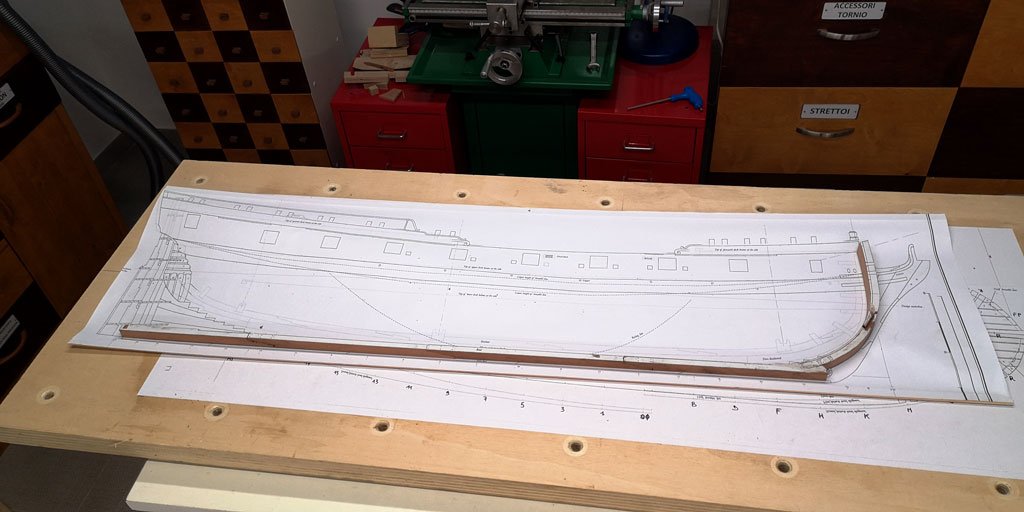
 As I had anticipated, I started a new challenge: the construction of an English frigate, with a carpentry that, until now, I had never approached. Very fascinating architecture, and a model, the Pegasus that struck me immediately, already from the first splendid images seen here on MSW. I am studying a lot, because I would like to be able to come up with a model that is worthy of the great work done by David Antscherl and Greg Herbert and I count a lot on your help and support! Meanwhile, I started setting up the first job:
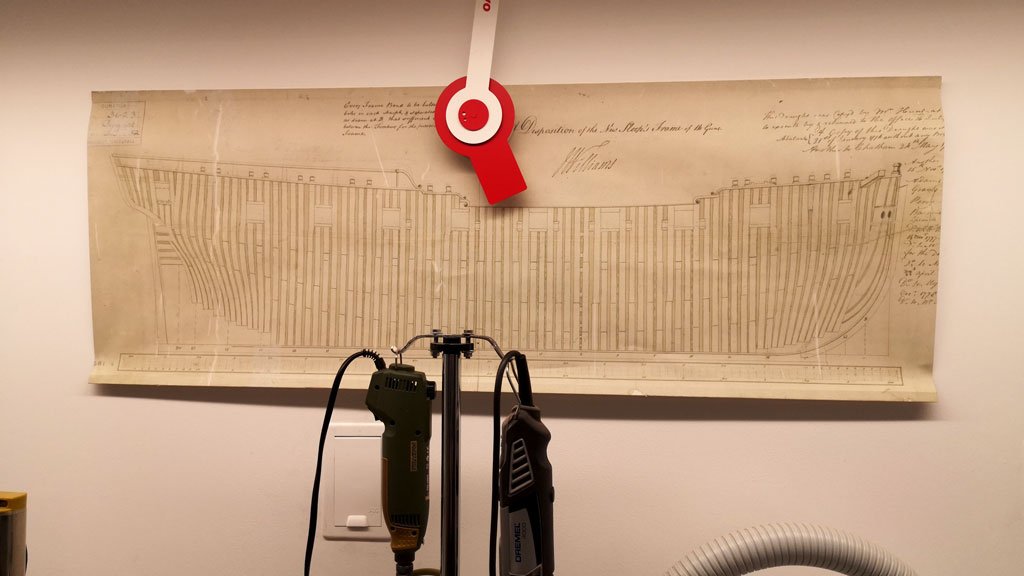
-
 I’ve been scratch building POF models since about 1995, having retired 7 years ago as an orthopedic surgeon. So my projects have been drawn out quite a bit until more recently. I started with the USS ESSEX, following the Practicum of the late Portia Tachajian, followed by the Delacroix “LE GROS VENDRE”. David Antscherl’s Practicum on the Swan Class intrigued me as it represents the methods used by the English in the 18th century, as compared to that of the French of the same period. I also met David at the NRG annual in New Bedford last year and was drawn in both by his personal appeal as well as his amazing attention to detail and methodology. So, I’ve kicked this project off, sticking to the Antscherl Practicum in 1/48 of the Pegasus, and have progressed as far as completing the bow and stern framing and beginning the full frames. The bow and stern are roughly fared and sanded. I’m fitting chicks between Cutty is and have decided to keep the sided dimension of full frames equal from floor up instead of dIminishing. I admit to being a little confused about full frame spacing and sided dimensions. Perhaps the reader could enlighten me. The text seems to indicate the use of spacers on either side of each futtuck joint, and seems to say that the spacers are as thick (sided) as the frame, at least at the floor level, and indicates the frames to be cut from 10” stock. I assume there to be similar spacers between each frame pair as well as between each frame half. Adding all that material up at those dimensions, and locating the station lines on the elevation plan as defined in the text as being mid way between the two frame halves, I understand, perhaps mistakenly, the space between each set of station lines to extend from midway through the first frame pair spacer, through a whole frame pair , to mid way through the next frame pair spacer, or the equivalent of two full frames. Using the dimensions above, the space occupied by all that exceeds the length between stations on the elevation plan by a considerable amount. So something is wrong with my interpretation of the text, I fear. HD
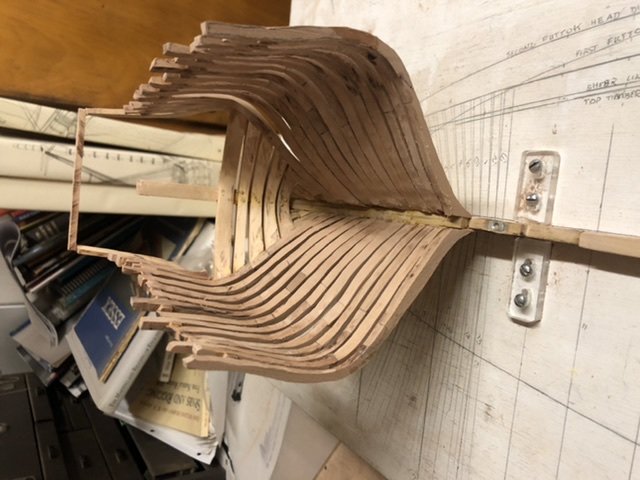
-
 This is not so much a build log from the start as a log for a restart from where I left off ,I had a full build log back on the old forums before the great server crash's in 2013 , I really didn't feel like rebuilding it after the 2nd crash and losing it all again .so I kind of just left it! ,after buying the corel Victory cross section and getting irked at it I decided I restart Pegasus and finally finish her. There isn't anything early on in the build that's different from other Pegasus builds other than I had to build a new Stem because the kit one shattered , partition for the fo'c'sle, added the missing sweep ports ,bought new turned brass guns/swivel guns and started the coppering. I've removed the copper because after 3 moves in 2 1/2 years a couple of years ago the original plates are MIA and I'd made a few mistakes so I'm ordering replacements and re-doing it! , I also had and have plans to add missing parts with the help of David Antscherl's Swan Class books , so things like gangwalk's , billboards and linings etc Richard
- 49 replies
-
- 2
-
-
- Pegasus
- Victory Models
- (and 1 more)
-
 My four year build log has alas fallen victim to the latest system upgrade, and like the ship she represents is now presumed lost, as Pegasus was in 1777. To re-instate all the information contained within the orginal log which ran for over 100 pages is a bit of an ask but where I can pick up the information quickly I will include it in this replacement log with priority being given to specific aspects where I have modified the basic kit, to produce the model which is now allbut finished. My log which was first posted in 2013 lacked much of the earlier stages of the build which had been going since 2010, and this revision will include aspects of the earlier build stages which may assist those embarking on a new Swan build adventure. I would like to thank all those members who have shown interest in my build over the past four years, and for the many appreciative comments and 'likes' I received. I still can't believe that over 257,000 visits were made to the log, but it is nice to think that it was of use to the membership. Also thank you to those who have messaged me with kind words about the loss of the original log, and with offers of help. Hopefully this revised version, risen from the ashes, will continue to provide useful information to the membership, particularly those involved with Swan Class Sloops. B.E. 5th March 2017
- 363 replies
-
- 21
-
-
- pegasus
- victory models
- (and 2 more)
-
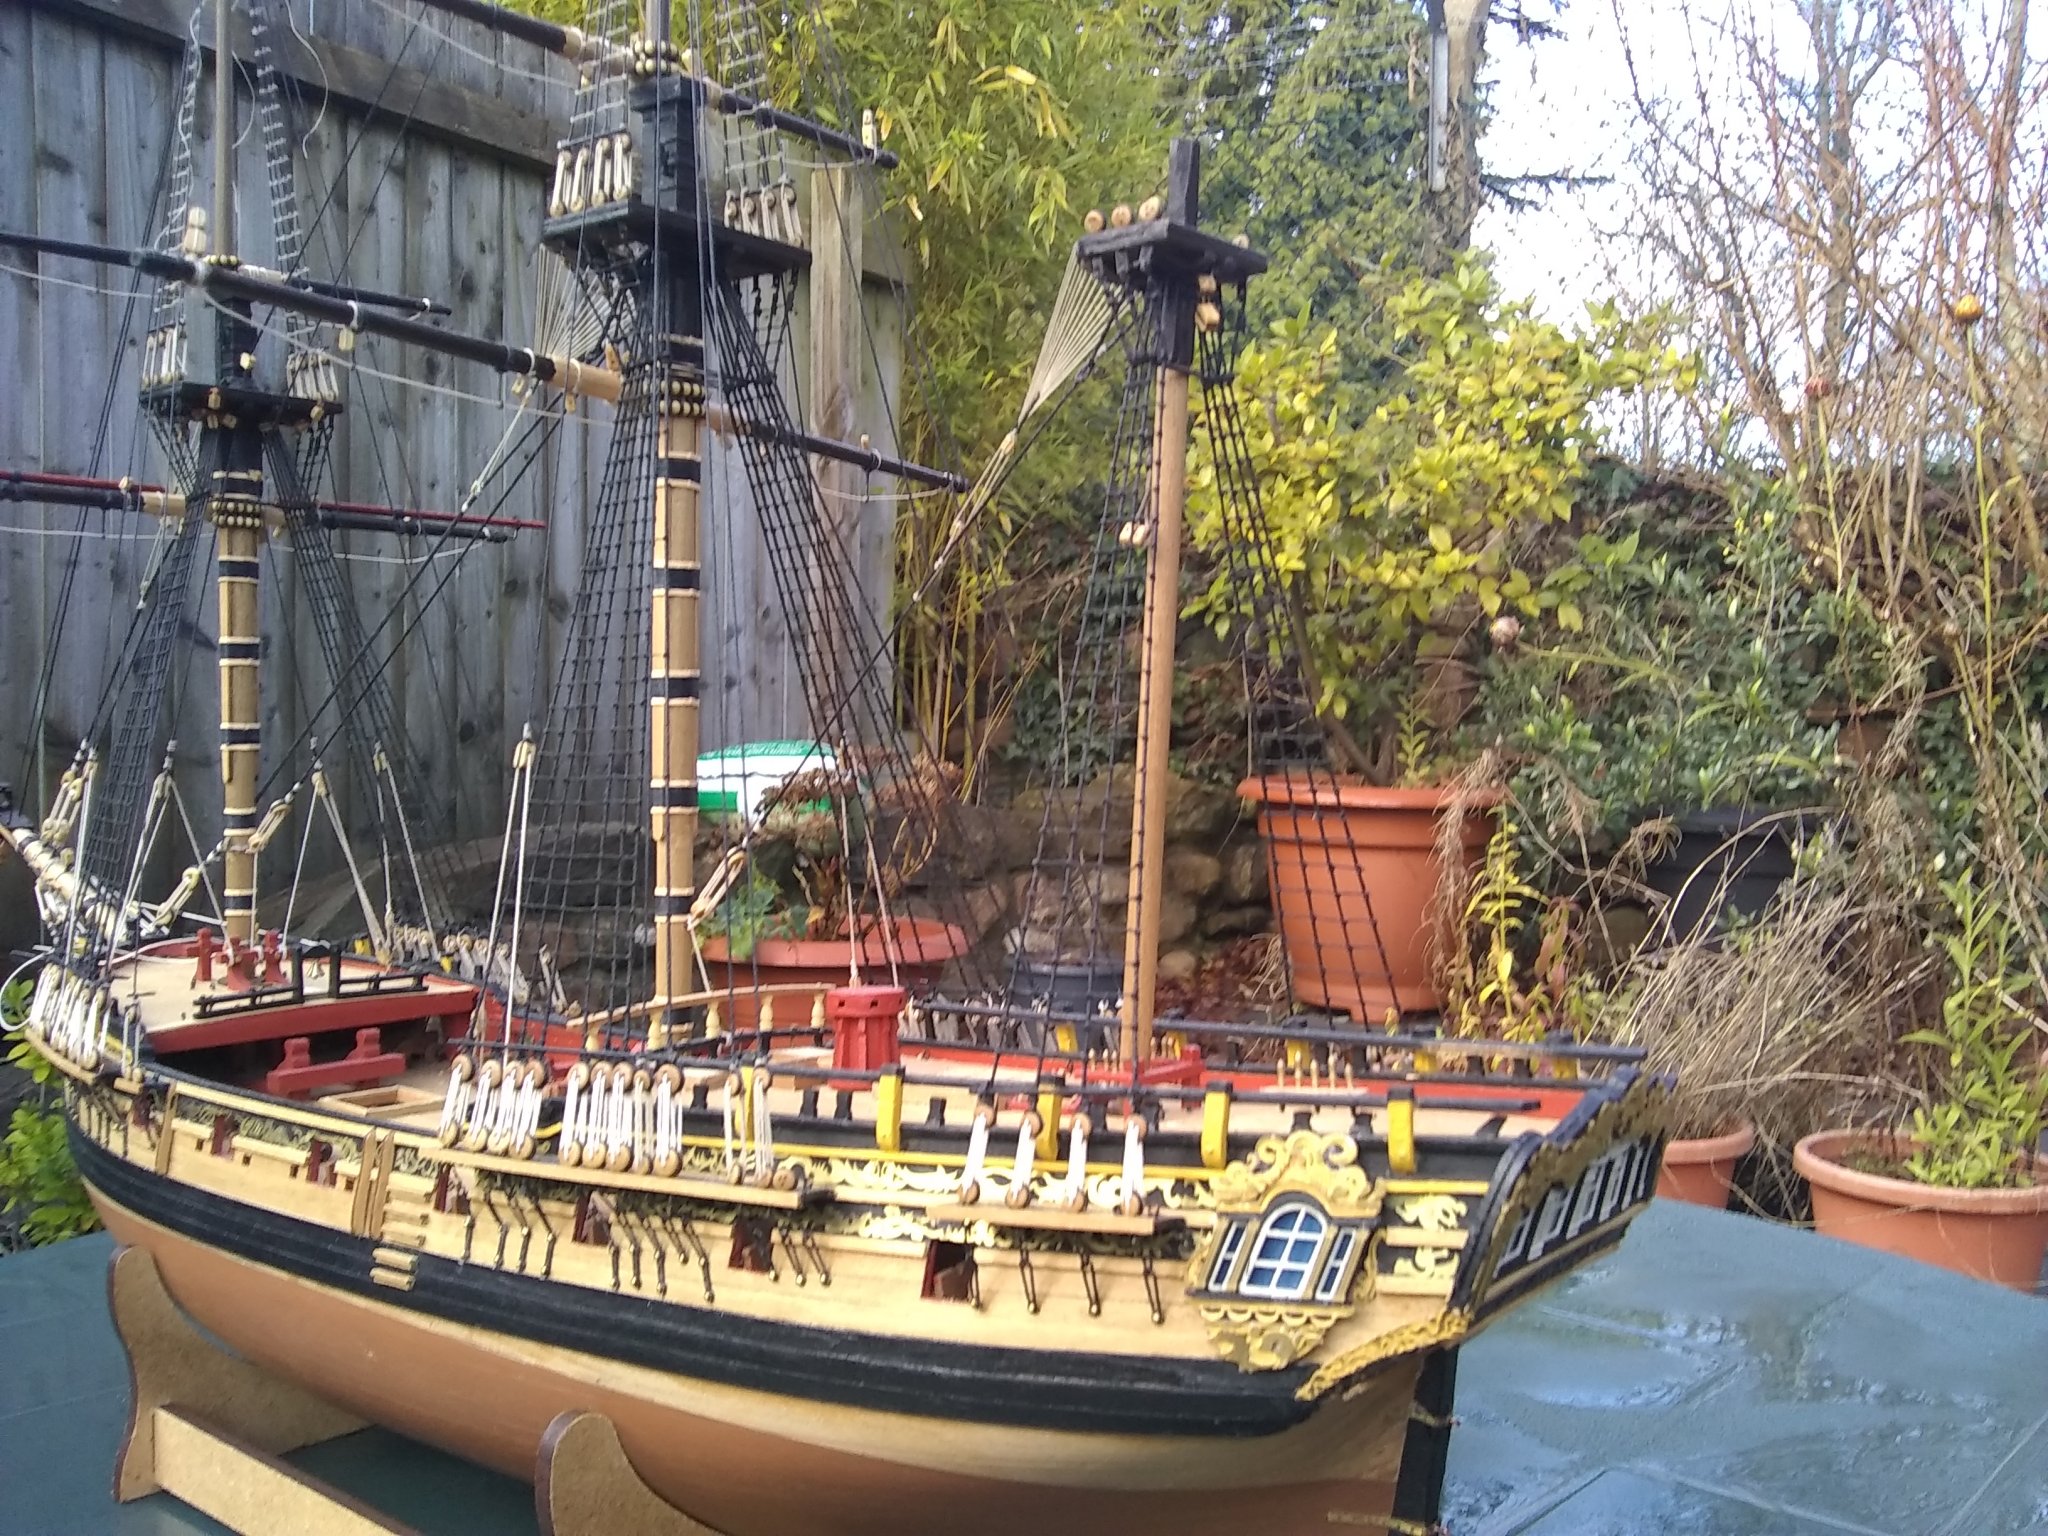
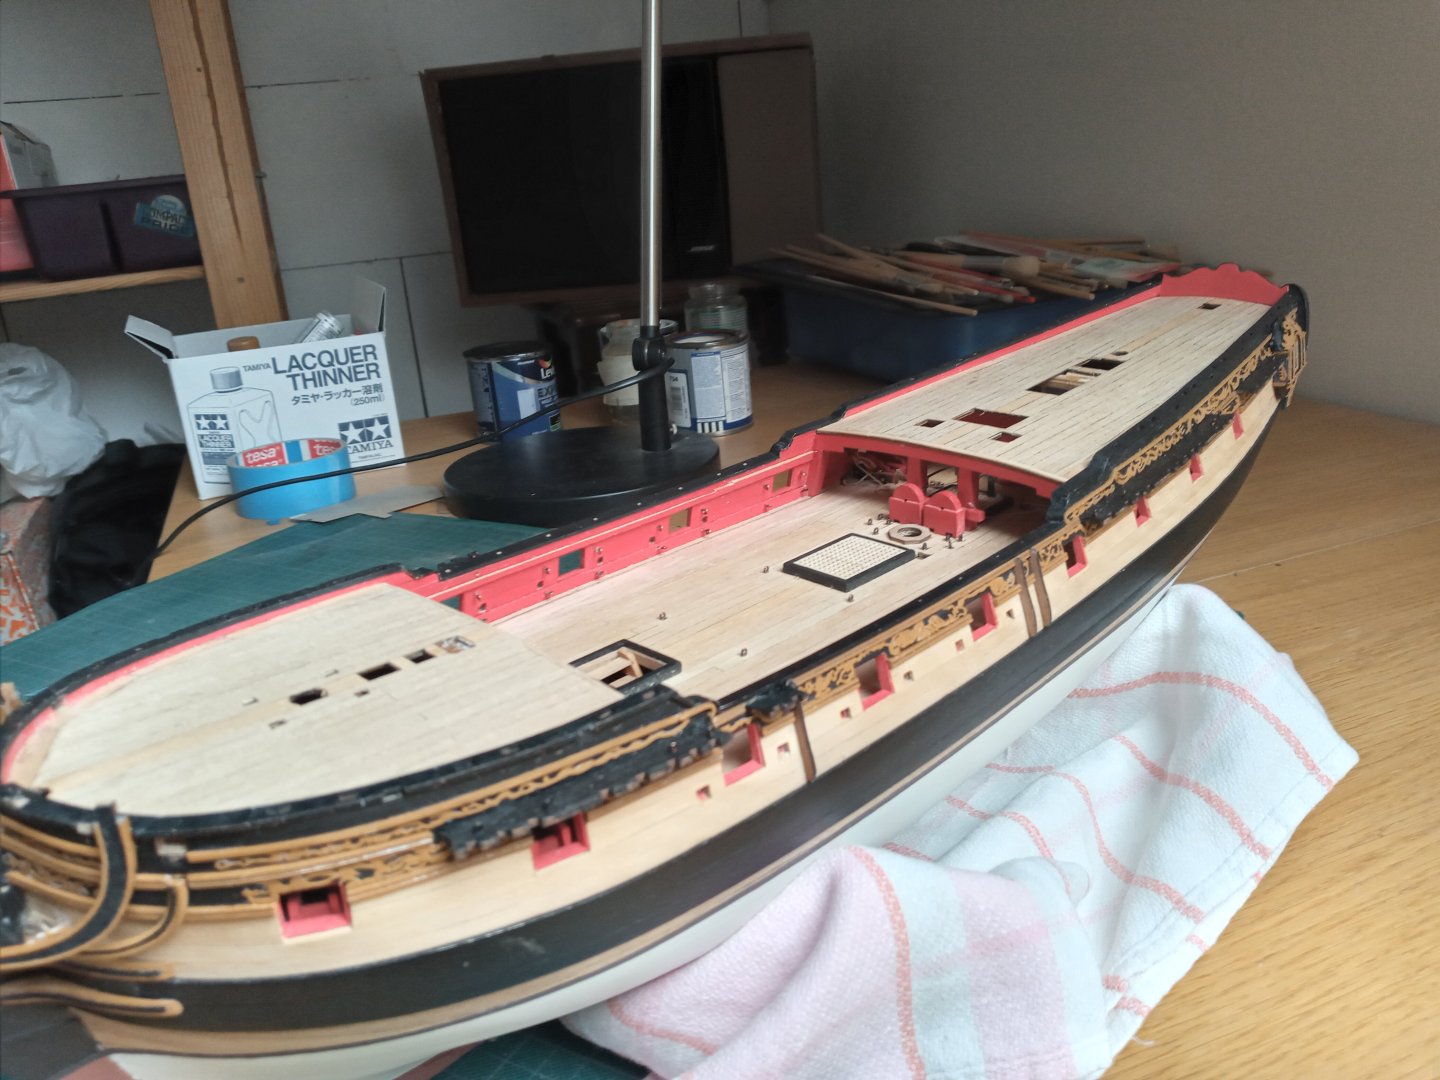
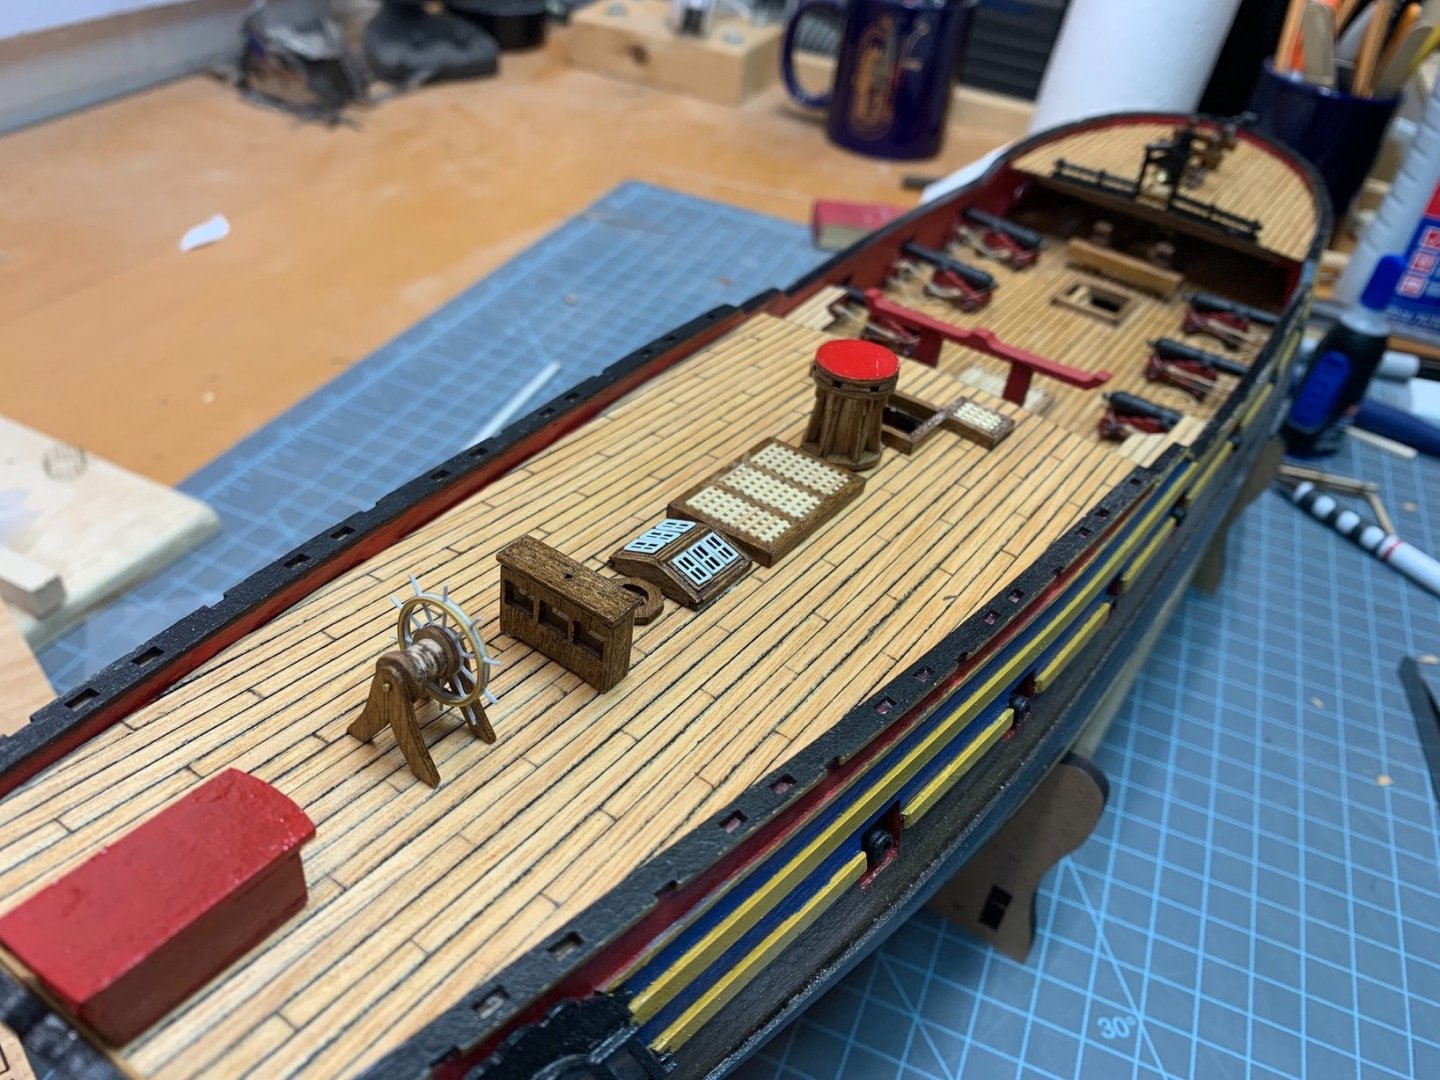
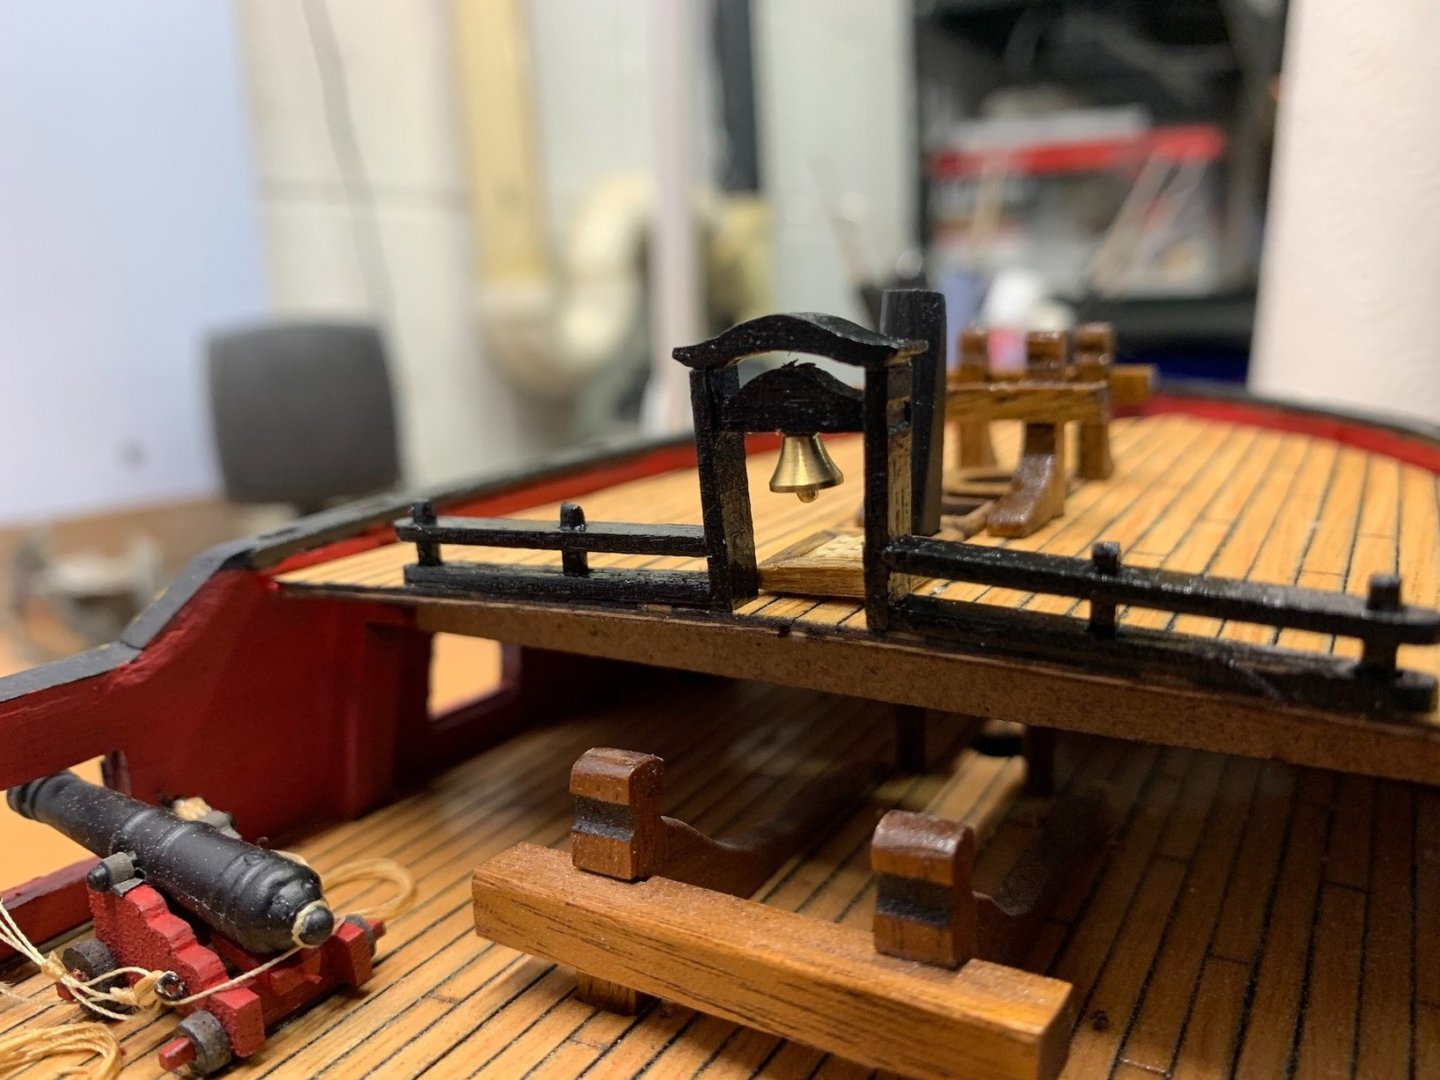
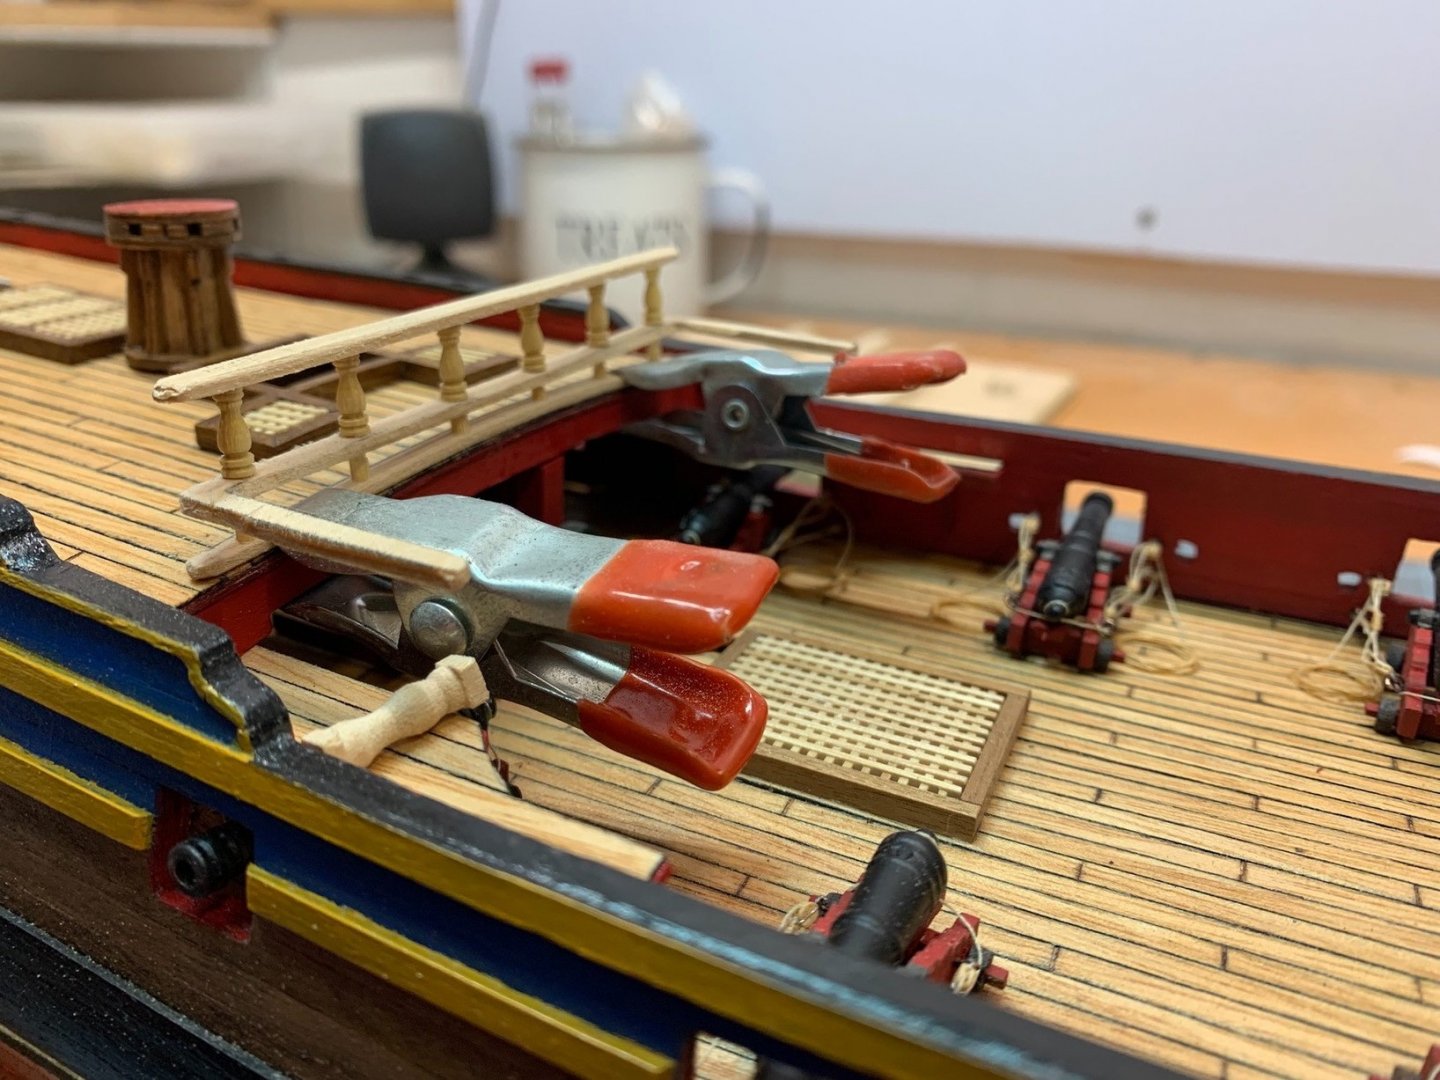
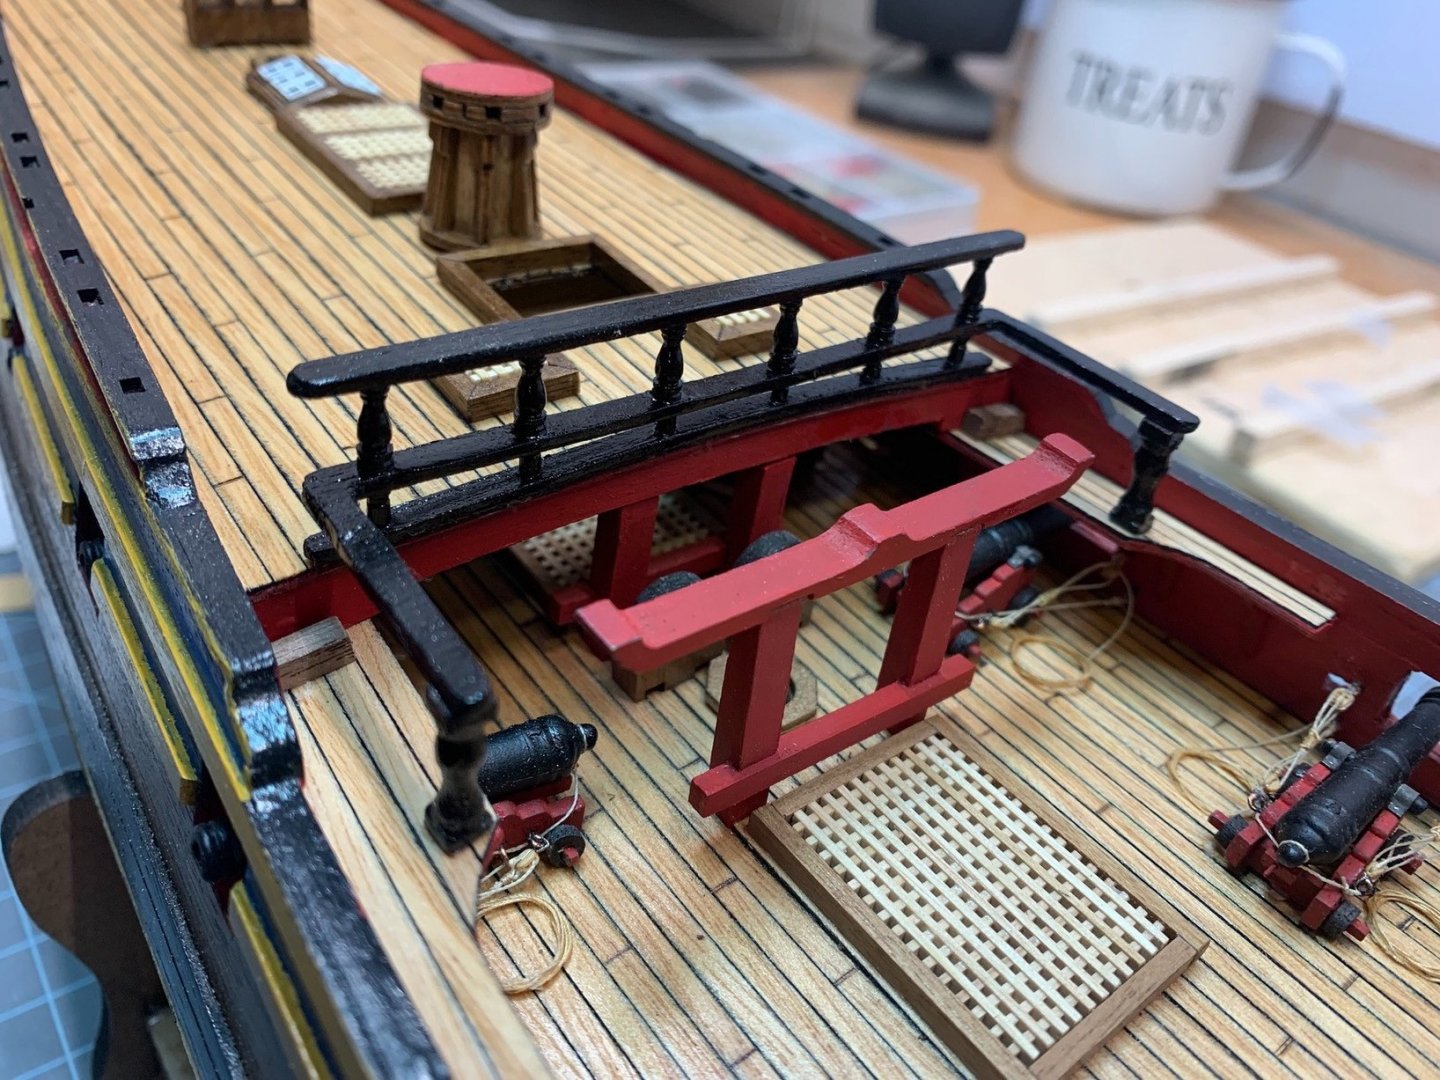
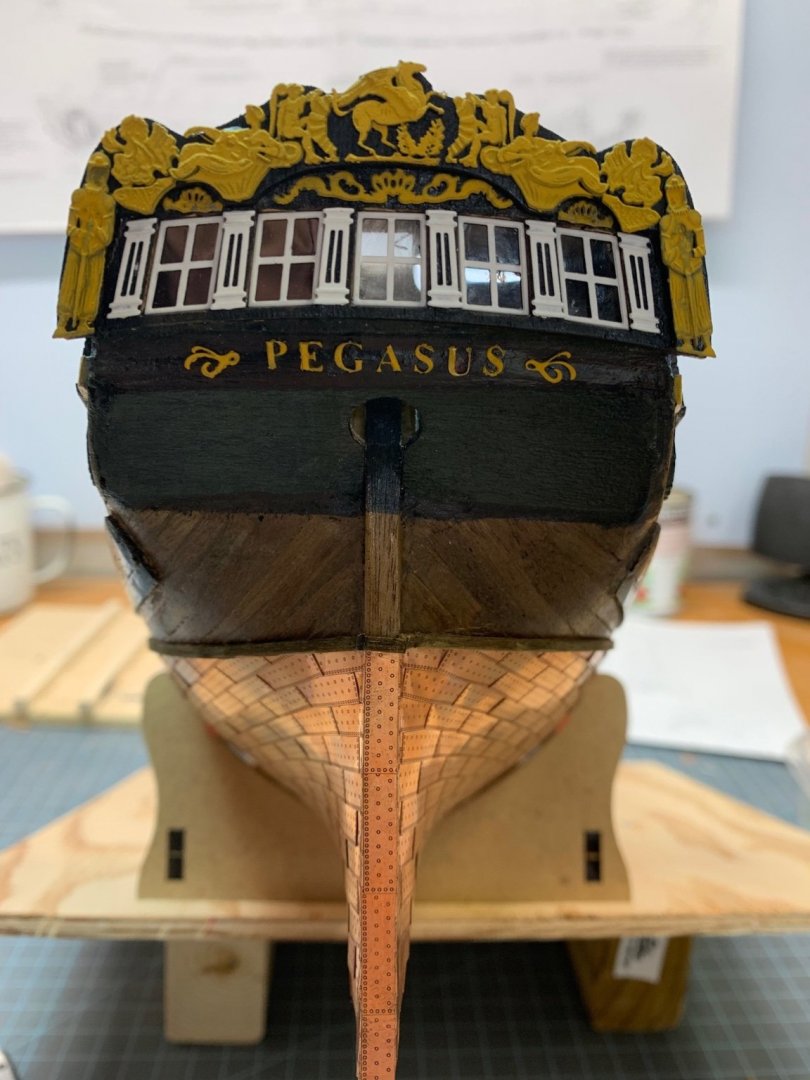
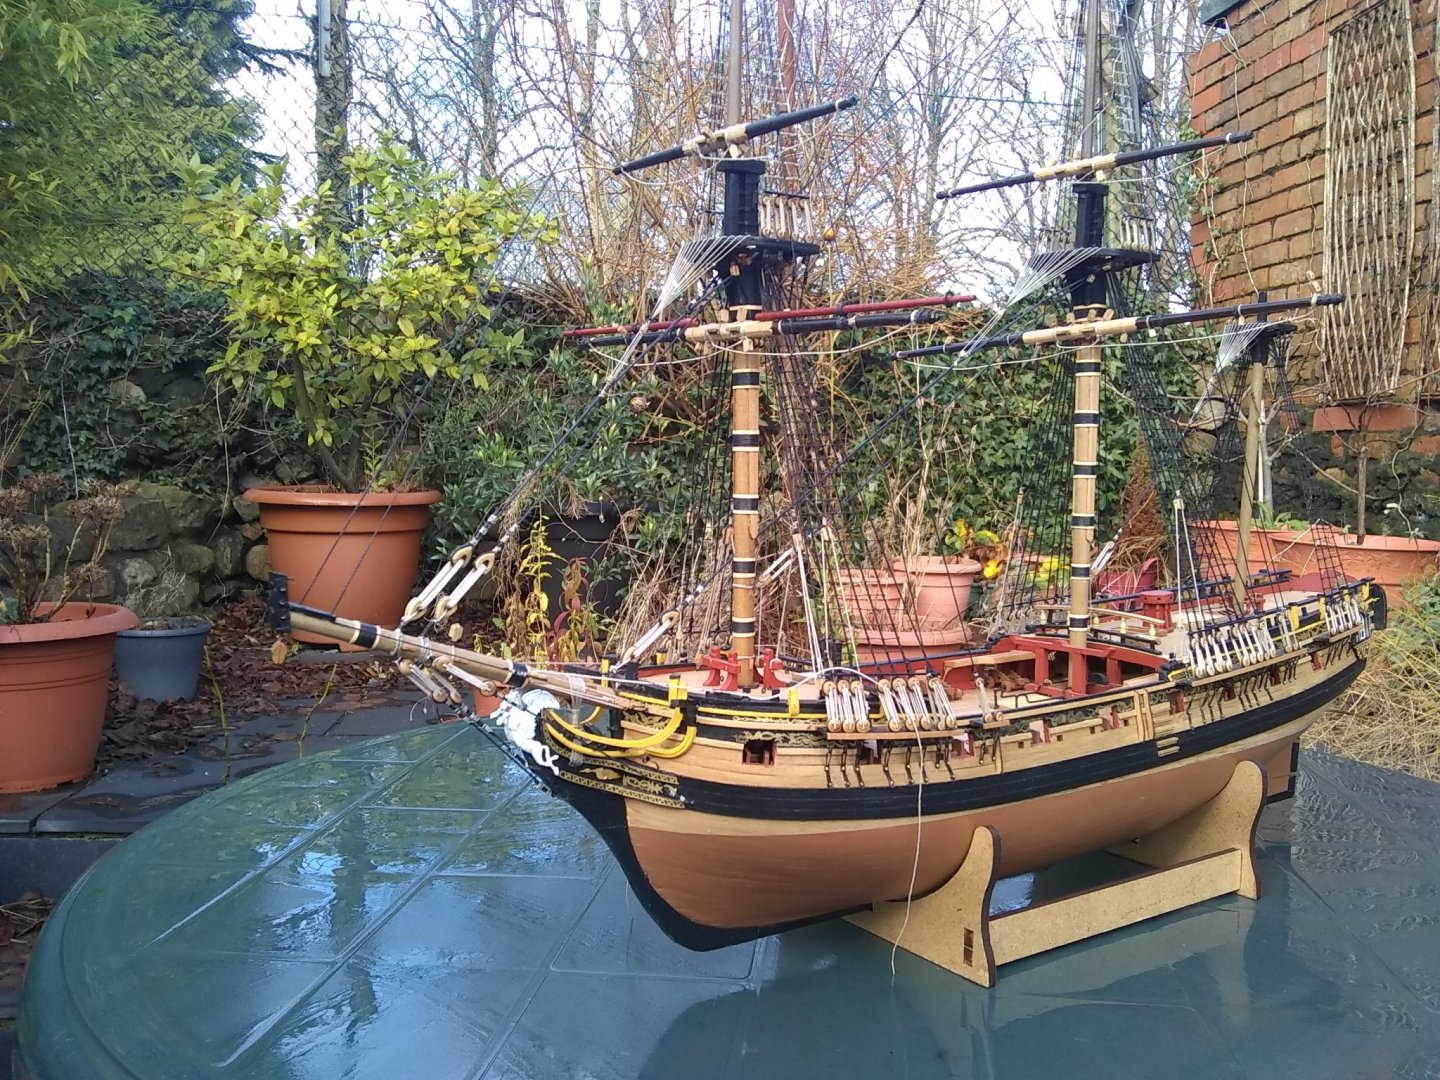
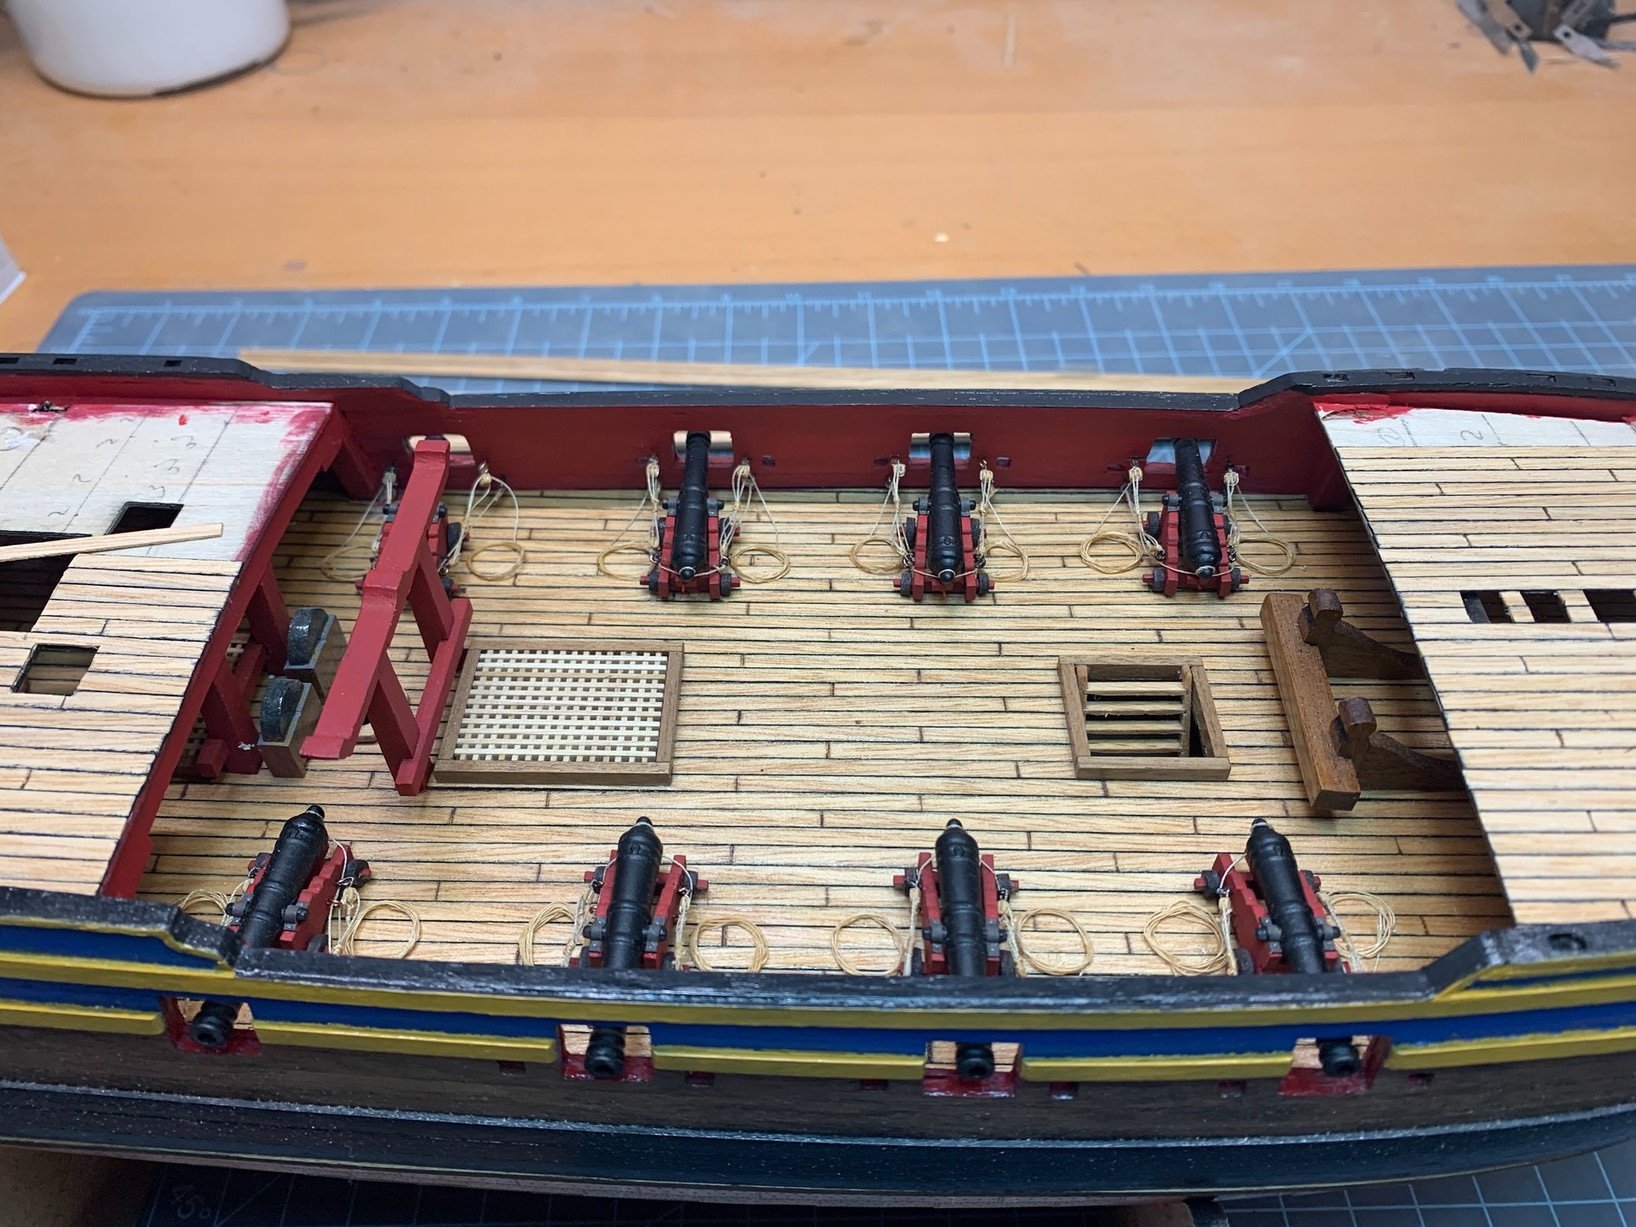
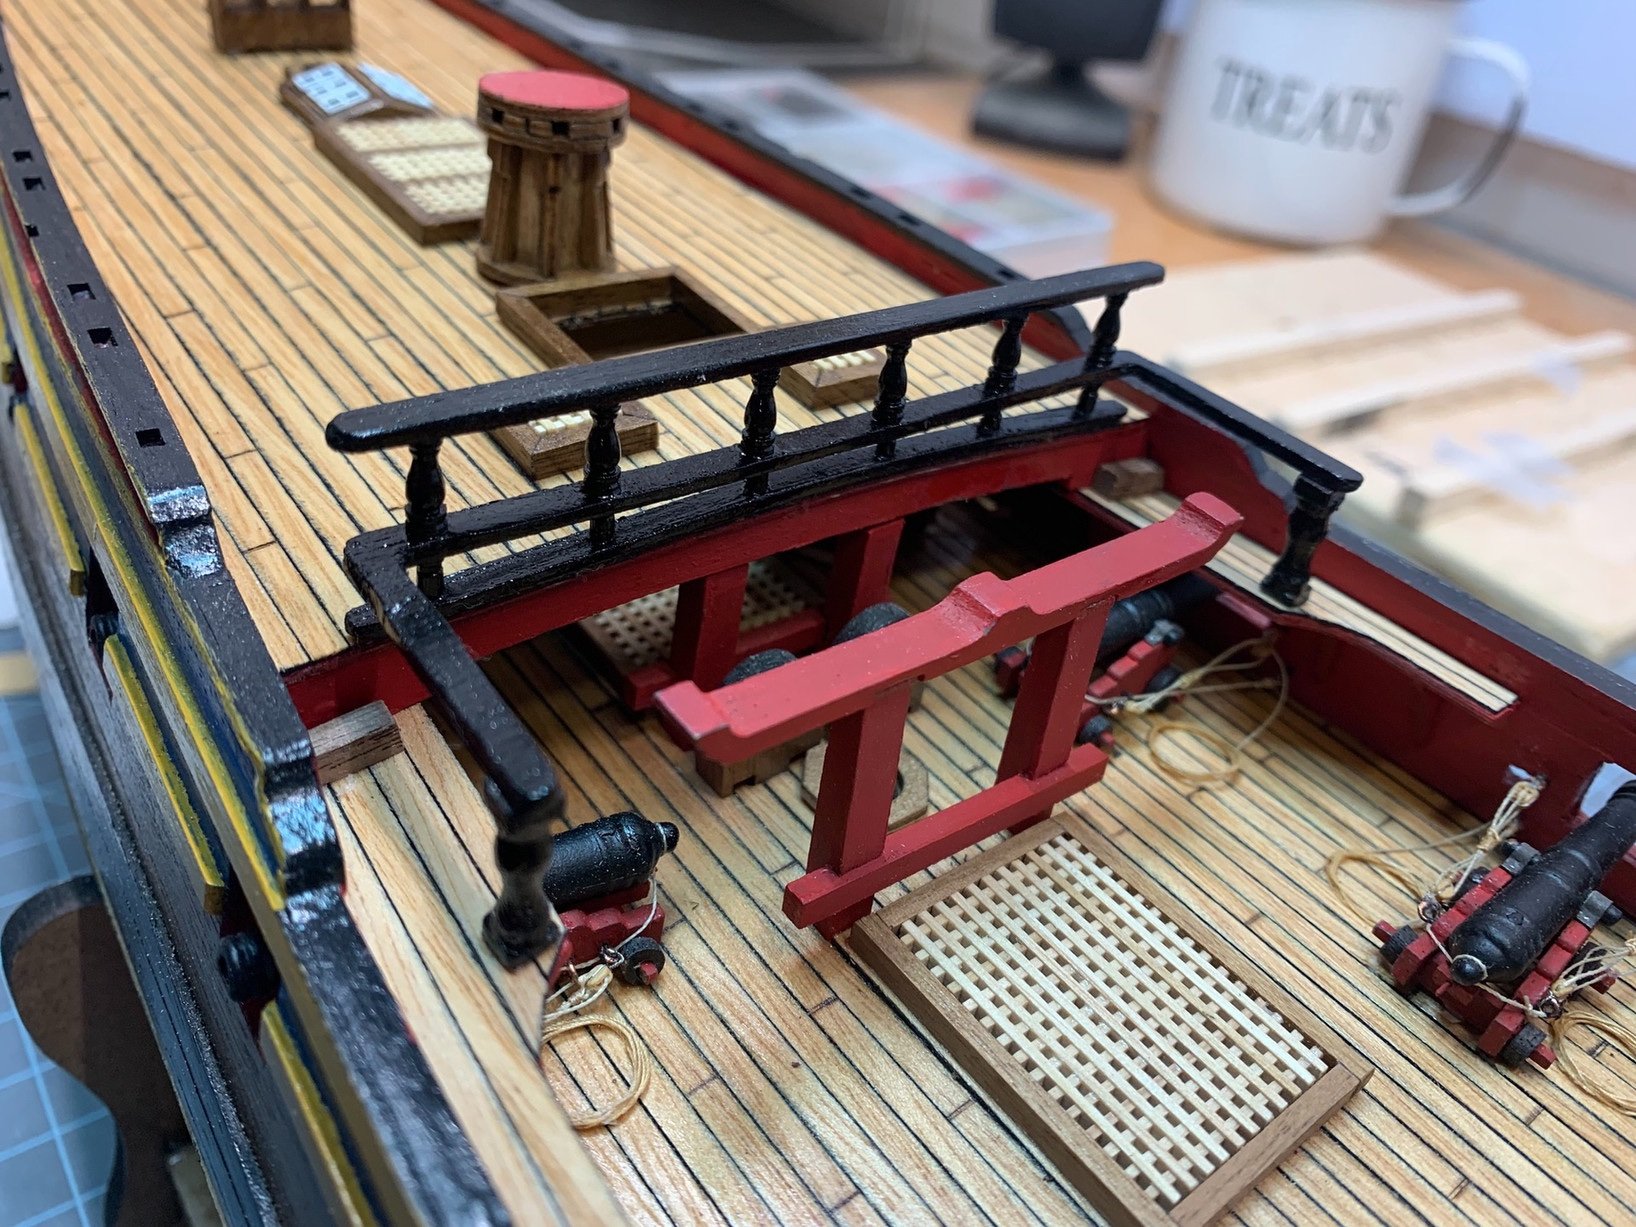
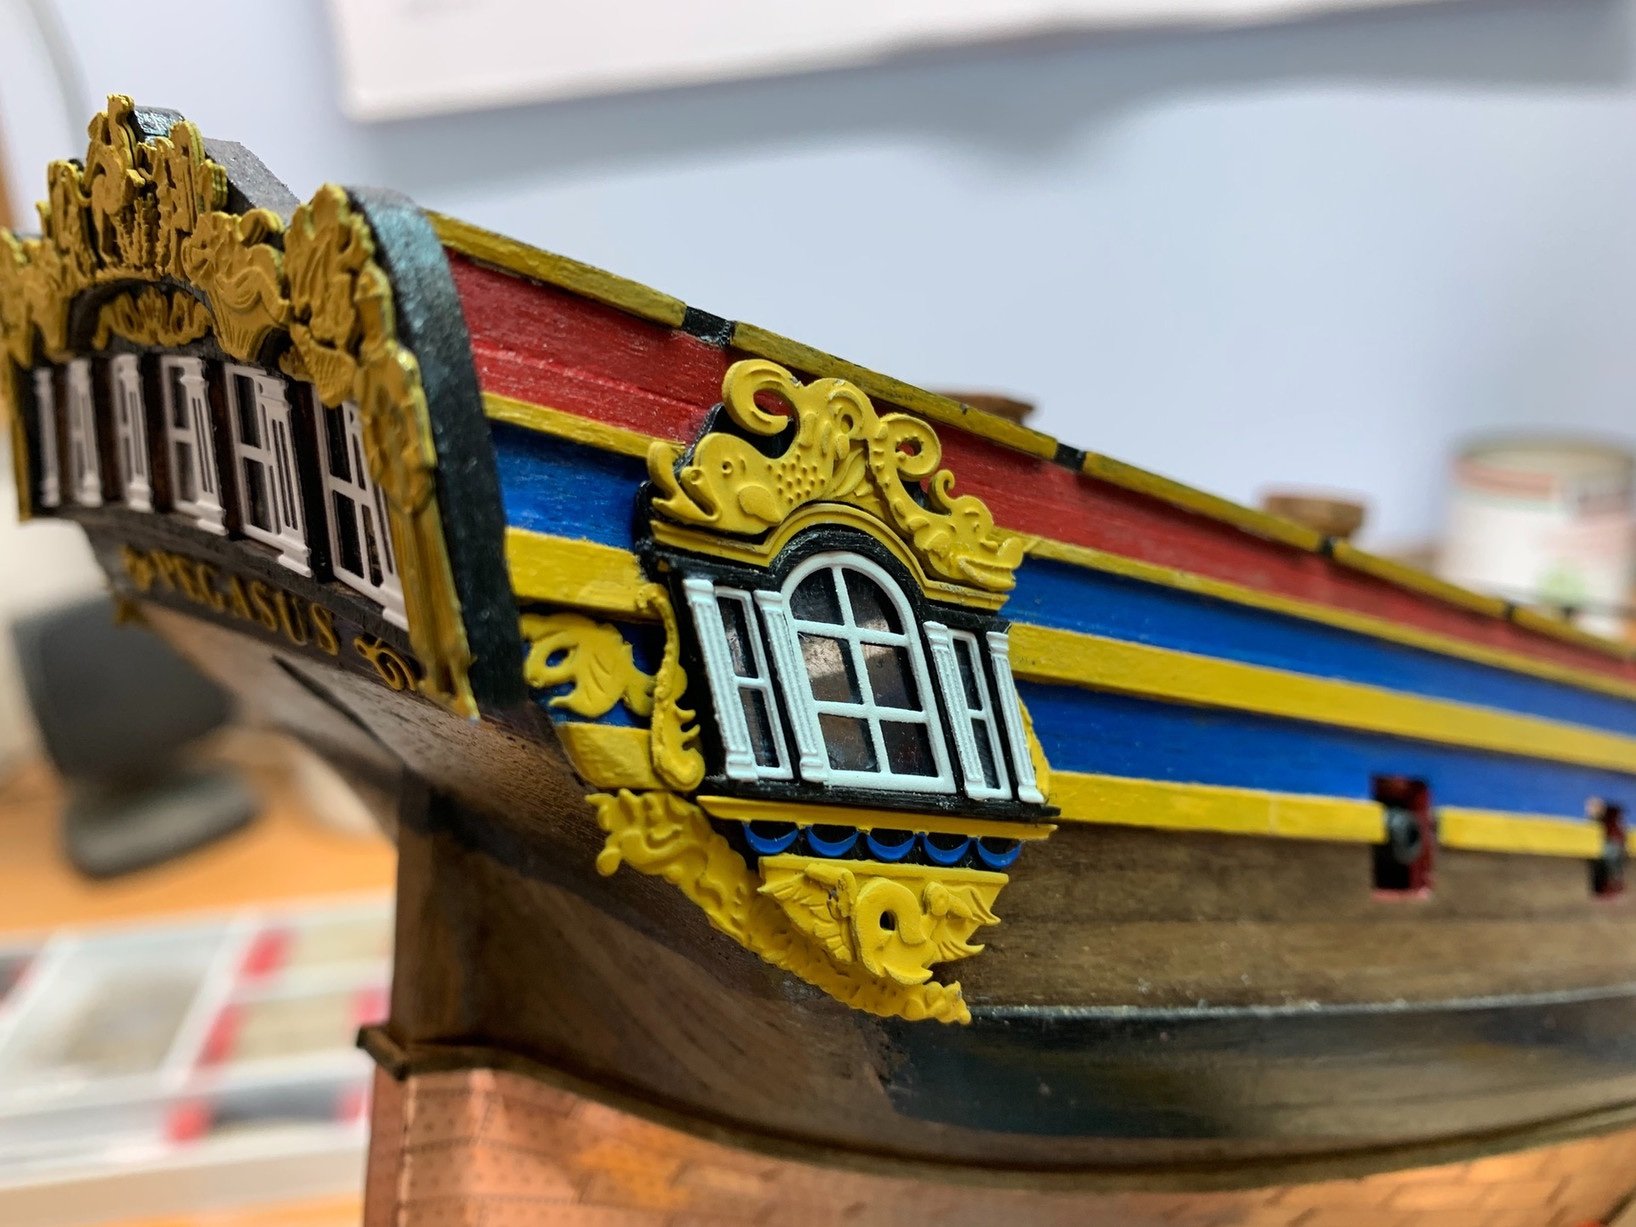
 I’m coming at this build log late. I’ve progressed a lot since these were taken, but I’m not done yet. Rather than recap in detail, I would like to post these pics of Pegasus at various spots that take me up to where I am now and I’ll pick up the build log there. Bulkheads on. Planking the gun deck. Gun deck completed. Starting the details. Pumps. Put rust detail around them. First layer of planking. Port side first layer done. First layer sanded. Second layer done and in homemade clamp. Putting gun port planks on. Gingerbread. Started to paint. Stern gallery attached. Copper plate on. Another view of copper. Gun jig I made. Gun tackle in. More deck furniture. Ship’s bell. Railing before Railing after painting and polywipe. Gold gingerbread on stern. Gingerbread on stbd stern window. This catches me up to my build. I am building a stand at the moment. Once it is complete, I will continue with the log. Jason
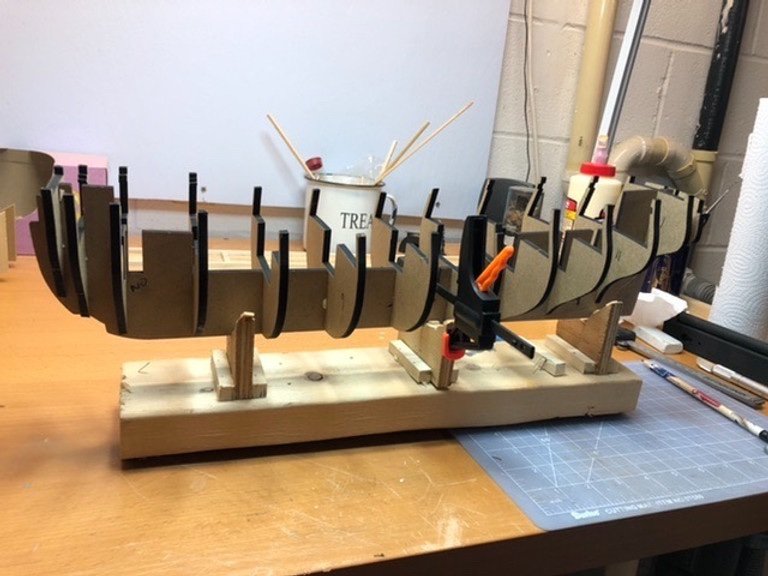


-
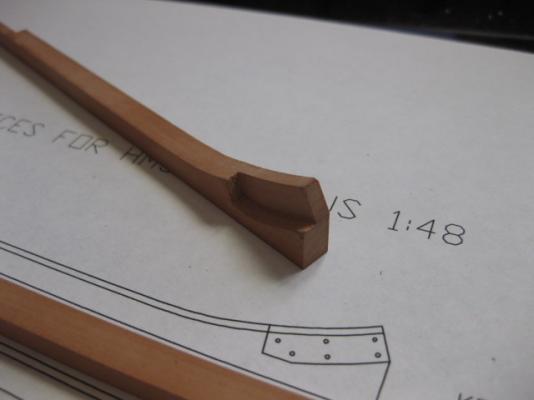
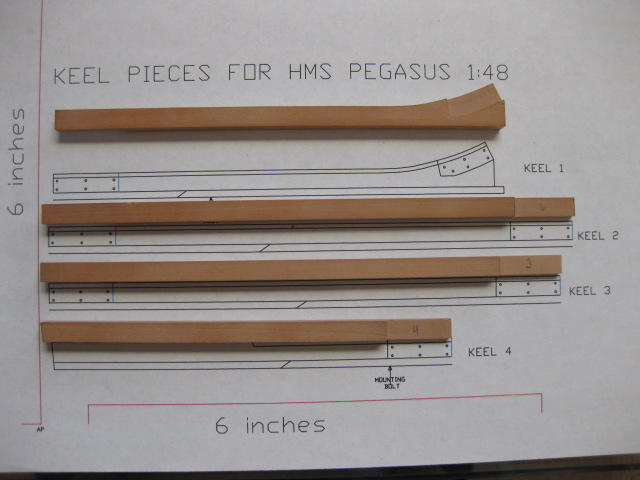
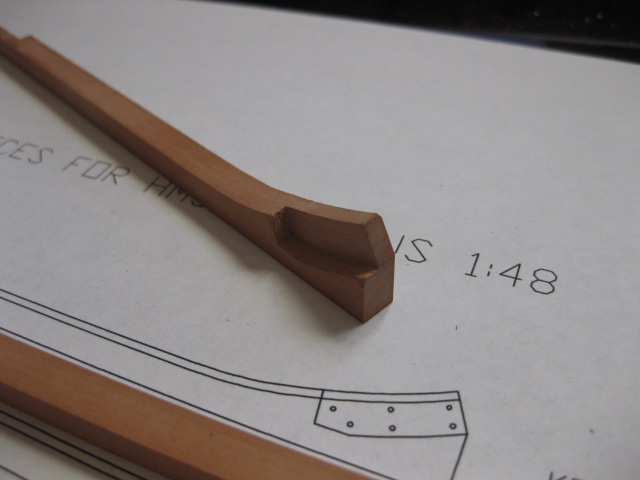
 Hi, I will be starting my second scratch build and I chose HMS Pegasus 1776, Swan Class sloop, using the plans from Admiralty models and all four volumes of the TFFM books by David & Greg. Also a full set of plans was bought from NMM and the wood package from Hobbymill in Swiss Pear wood with some highlighting in Boxwood. I intend to leave her mainly in frame with a small amount of external planking - maybe from wales up, and will be using fully chocked joints and correct framing using the Disposition of frames plan. Internally I'm thinking of only framing Upper Decks with some planking, possibly the lower deck but just framing. Depending on how I feel when I get to that point will be the decision on Rigging her. I include pictures of the main keel parts completed, halving joints were used and cut on the JimSaw, the forward keel piece with the boxing joint was cut from larger stock on the scrollsaw and the joint was chiseled out with care. This will be slow starting as I am in the middle of rebuilding my workshop and I am also going to be working on my Confederacy when I need a rest from Pegasus. Here begins another journey. ben
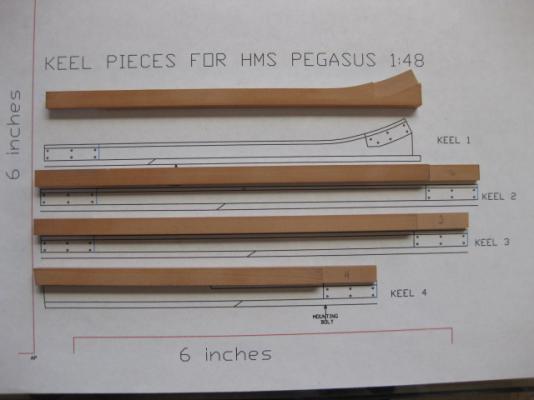
- 885 replies
-
- 15
-
-
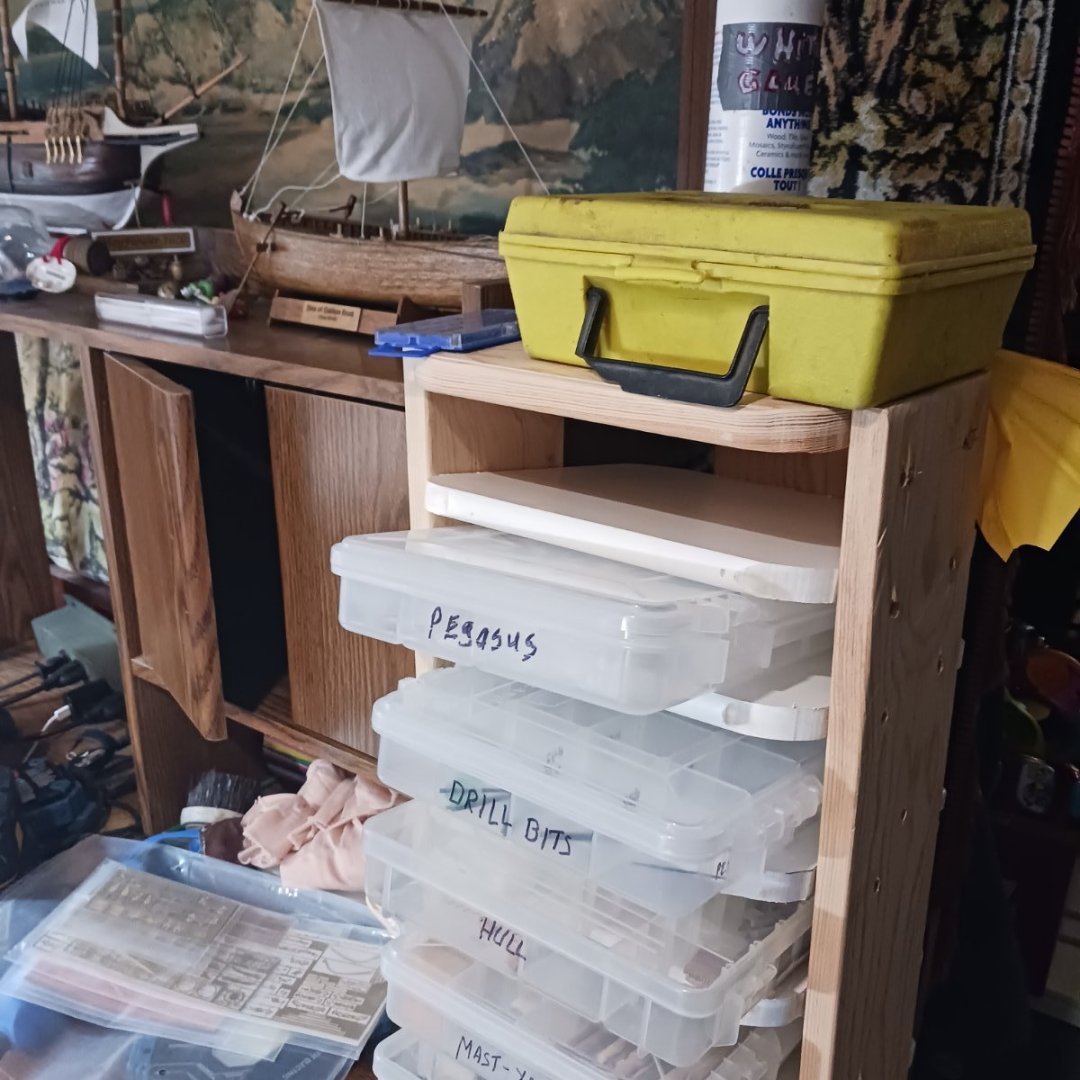
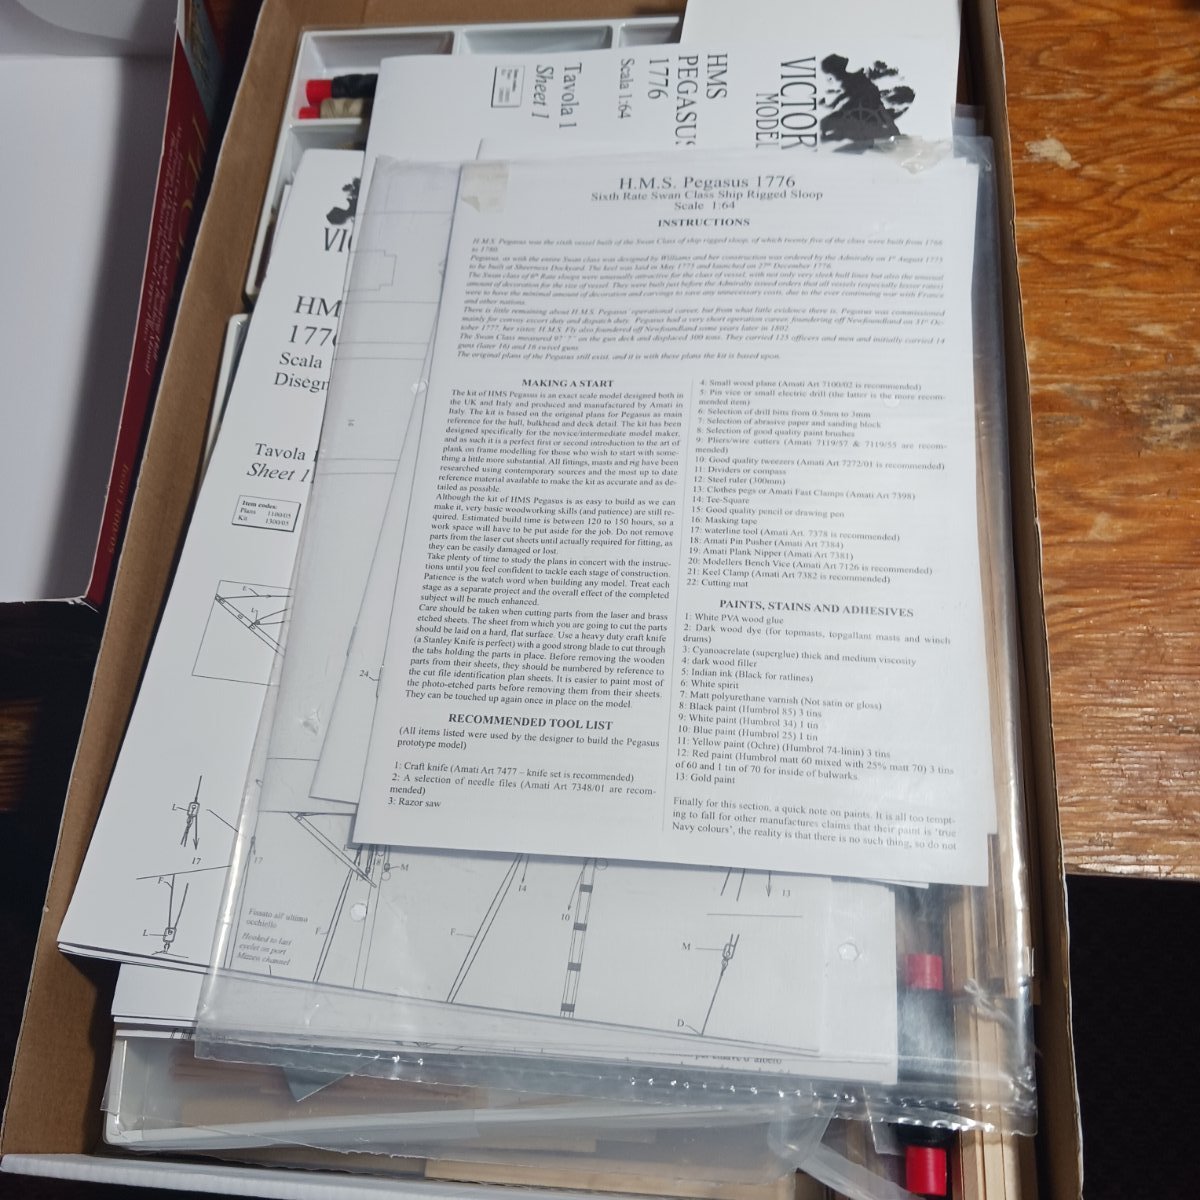
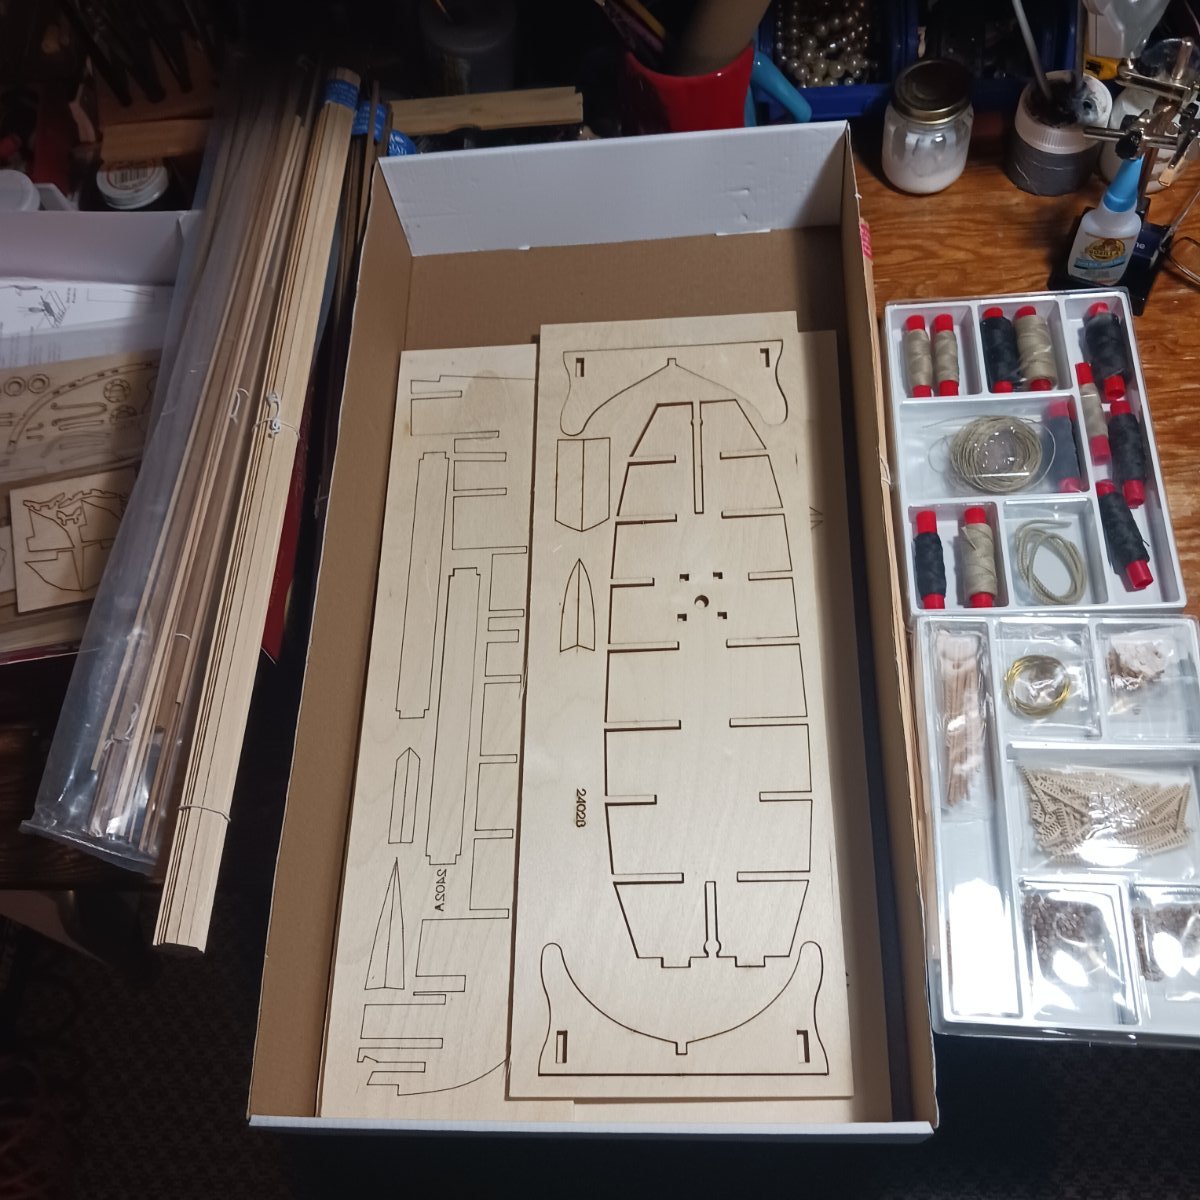
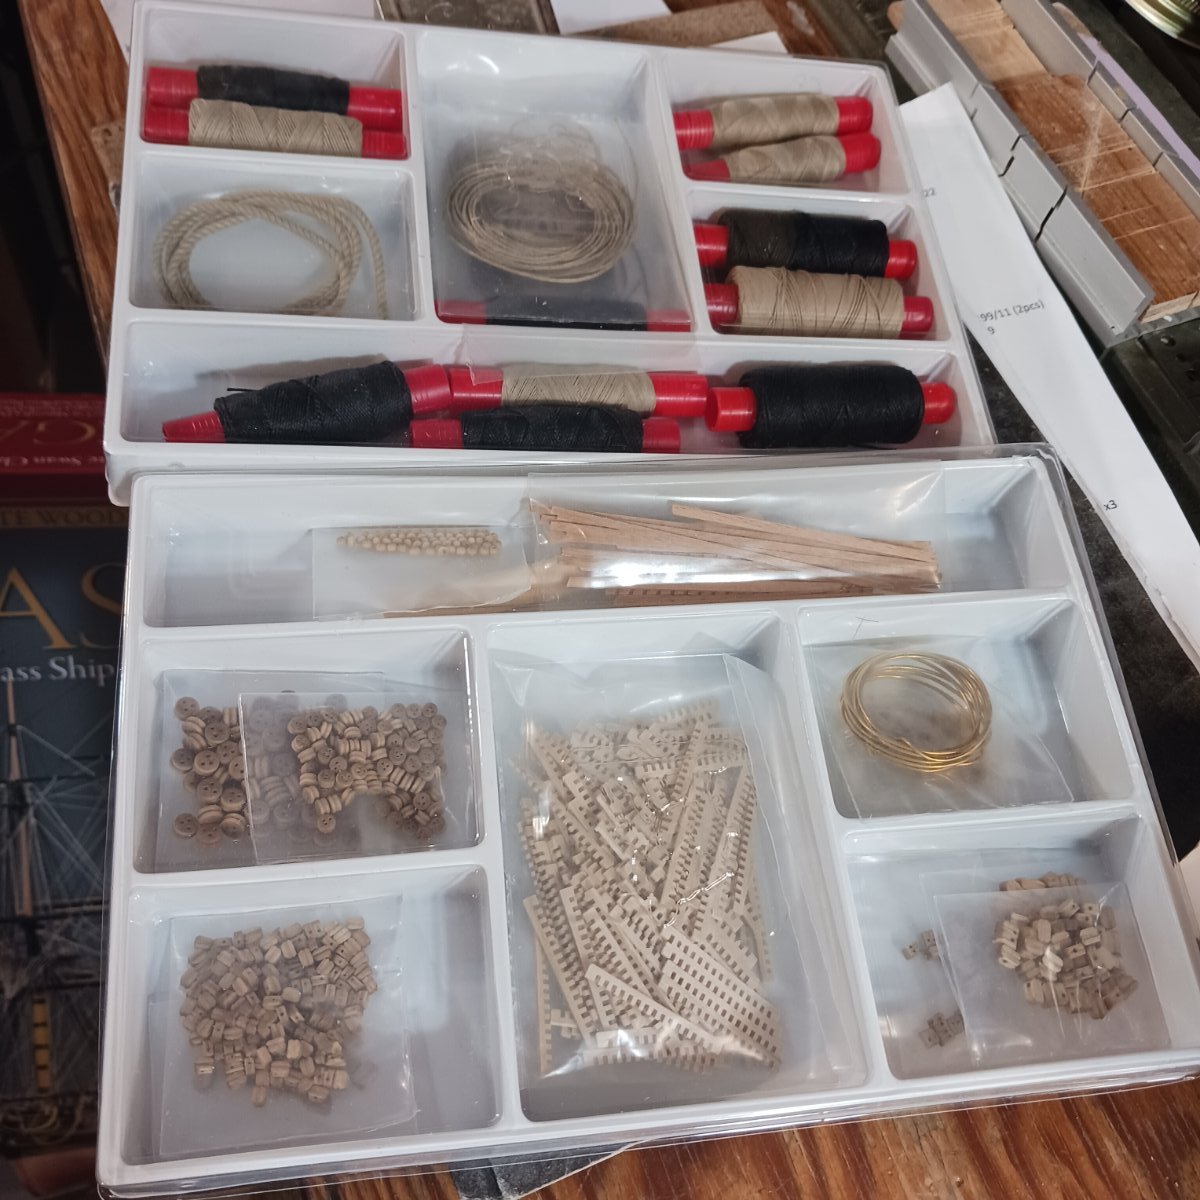
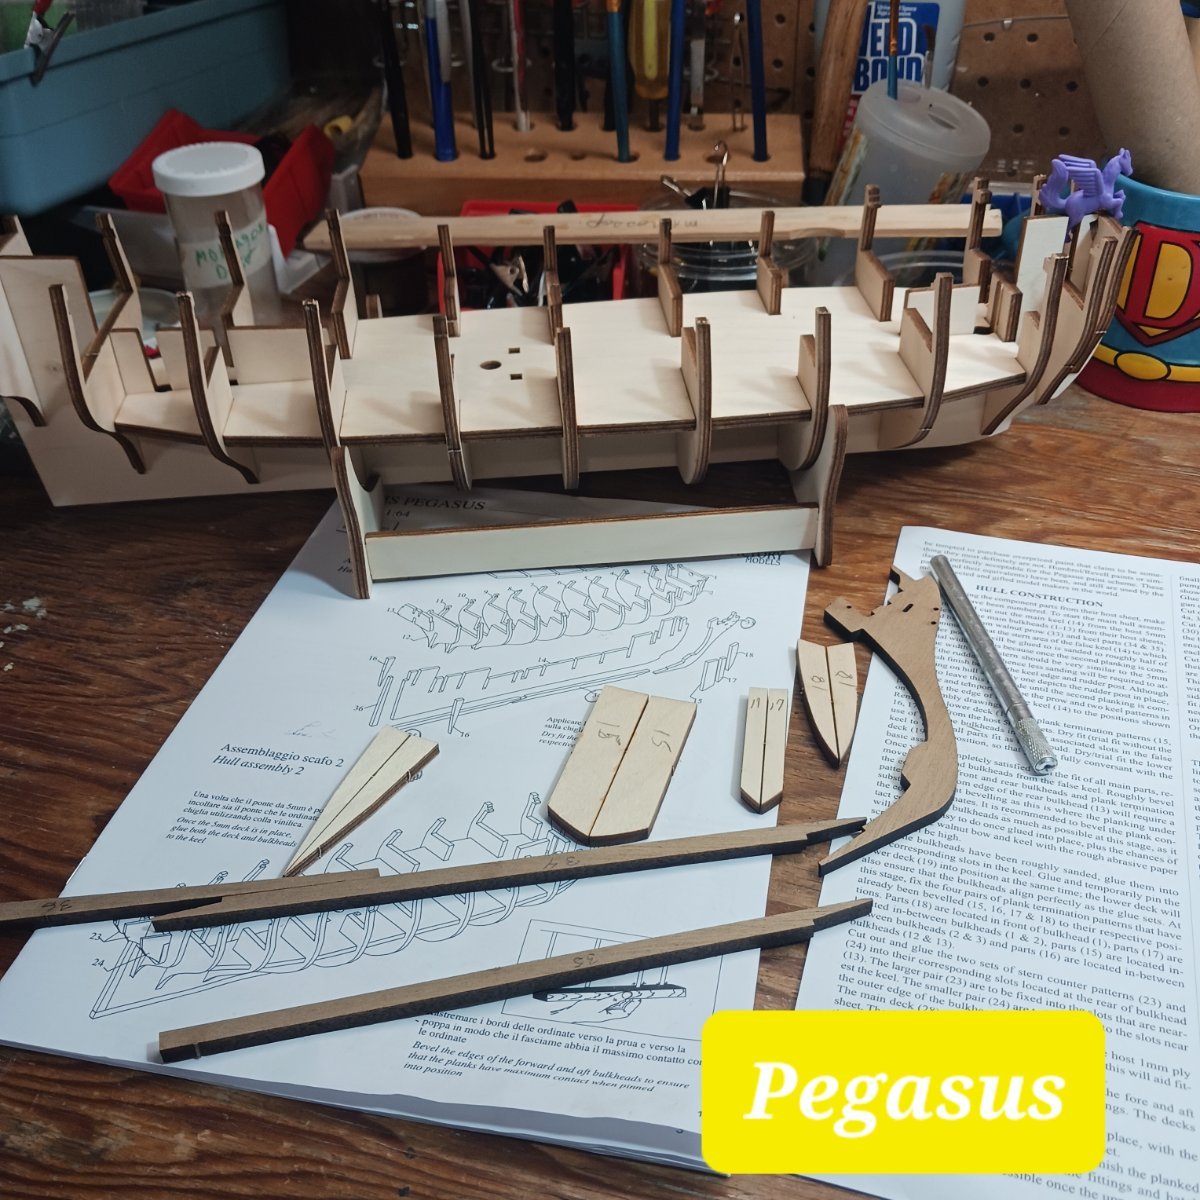
 Today I was supposed to go to work but it was raining, so I decided to do a kit opening page for my new log, the Pegasus. The contents of the kit look really good, as I put things away , and get ready to build. My keel is made of plywood, not mdf. Must be an older kit, I assume. I dont know much about the Pegasus, but she sank in Canada in 1777, a little over a year after she was launched. So putting things away, the keel fell out of the box, lol, so I decided to make the temporary stand, and dry fit everything. It went together really well. It does come with a lot of plans and books of understandable instructions. I dry fitted all the bulkheads and got all the keel parts ready. So tomorrow, I will start glueing and beveling the bulkheads, and also the four pairs of plank termination patterns. Then I will see what I need to do next. It is so helpful to know that if I run into problems, this is the place to be to get all the help I need here. Thanks so much for watching. Take care my friends. Bob M.


- 129 replies
-
- 23
-
-
- Victory Models
- Pegasus
- (and 2 more)
-
 Hello Everyone - I've just come back to ship modelling after a long hiatus - work and family took all my time and space - now I have both. Decided to start with the Swan class Pegasus. I've done several other models - the Revell Cutty Sark in the mid-60's and Model Shipways Rattlesnake in the 70's. Neither one has survived the intervening years. I have read over twenty build logs on the Pegasus, Fly and Syren. Learned a lot before starting. I will try to only show/add things that I think others might benefit from slightly more detail - or things I have decided after looking at how many others approached the challenge. I am amazed at the quality of the builds out there - truly impressive. I have already received some very good advice from a few members by asking questions about their builds - - it's a great help. Look forward to interacting with the community. SkipW Just beginning main deck planking

-
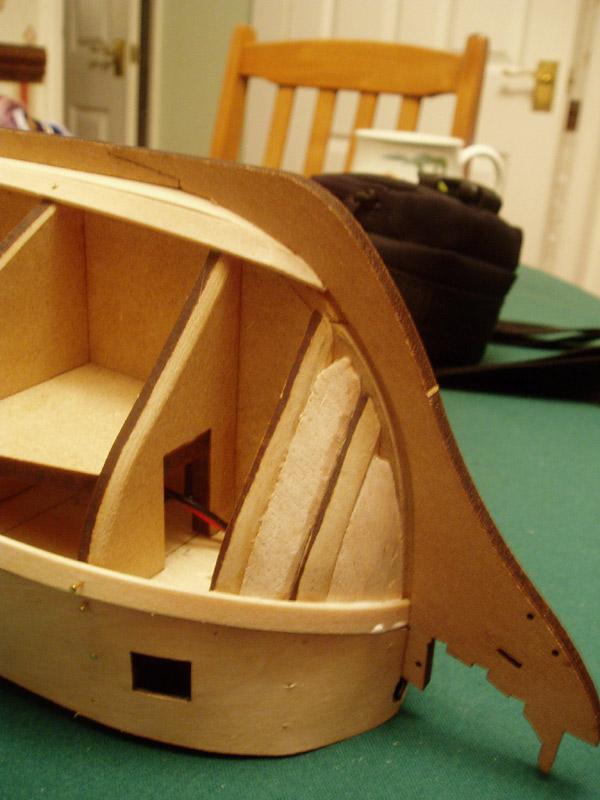
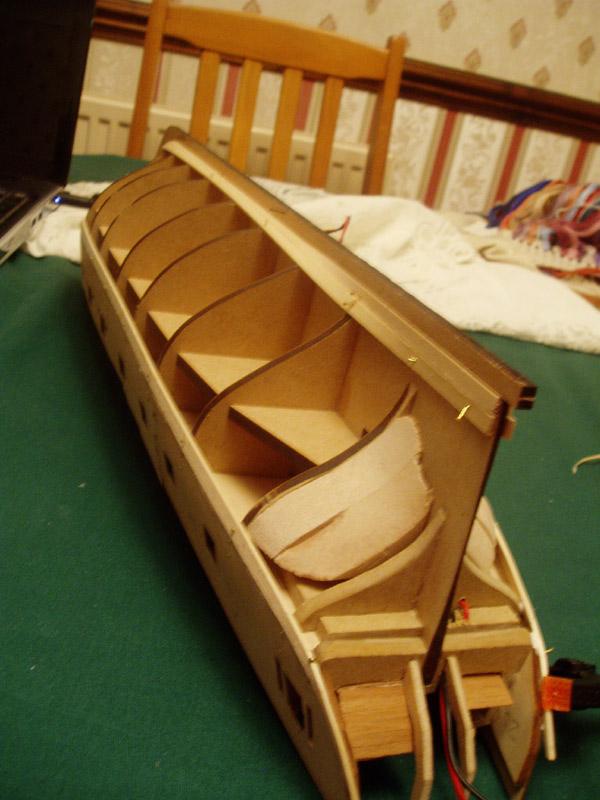
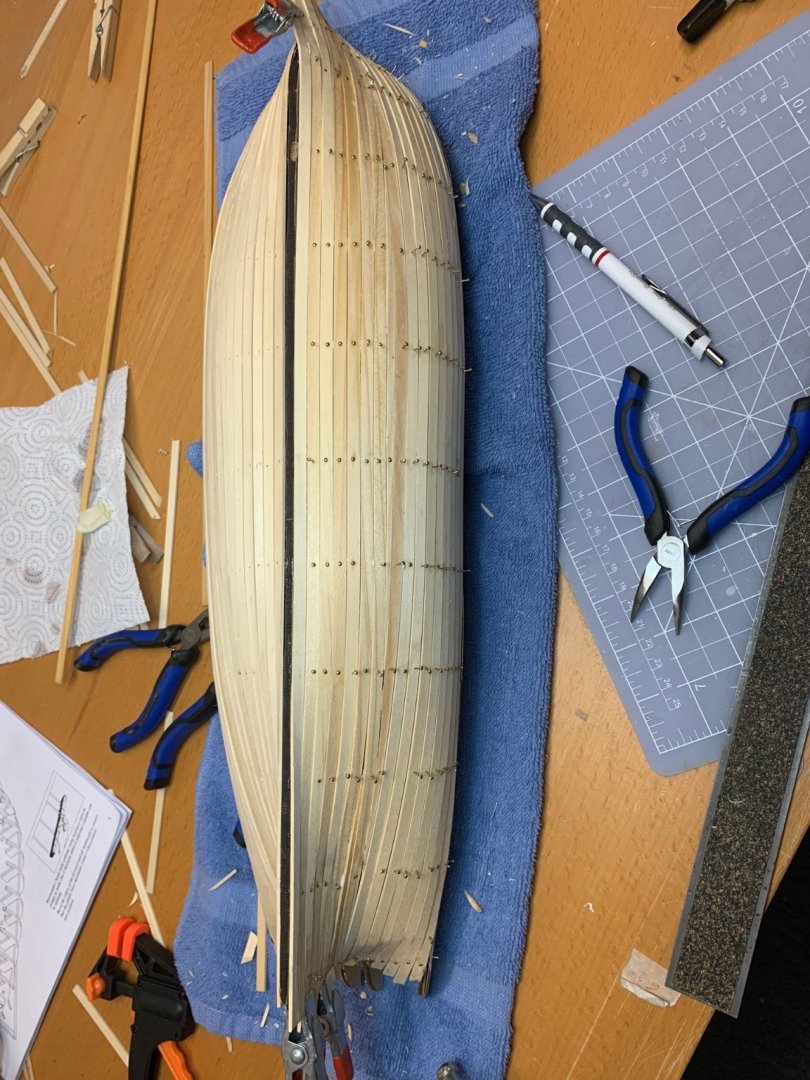
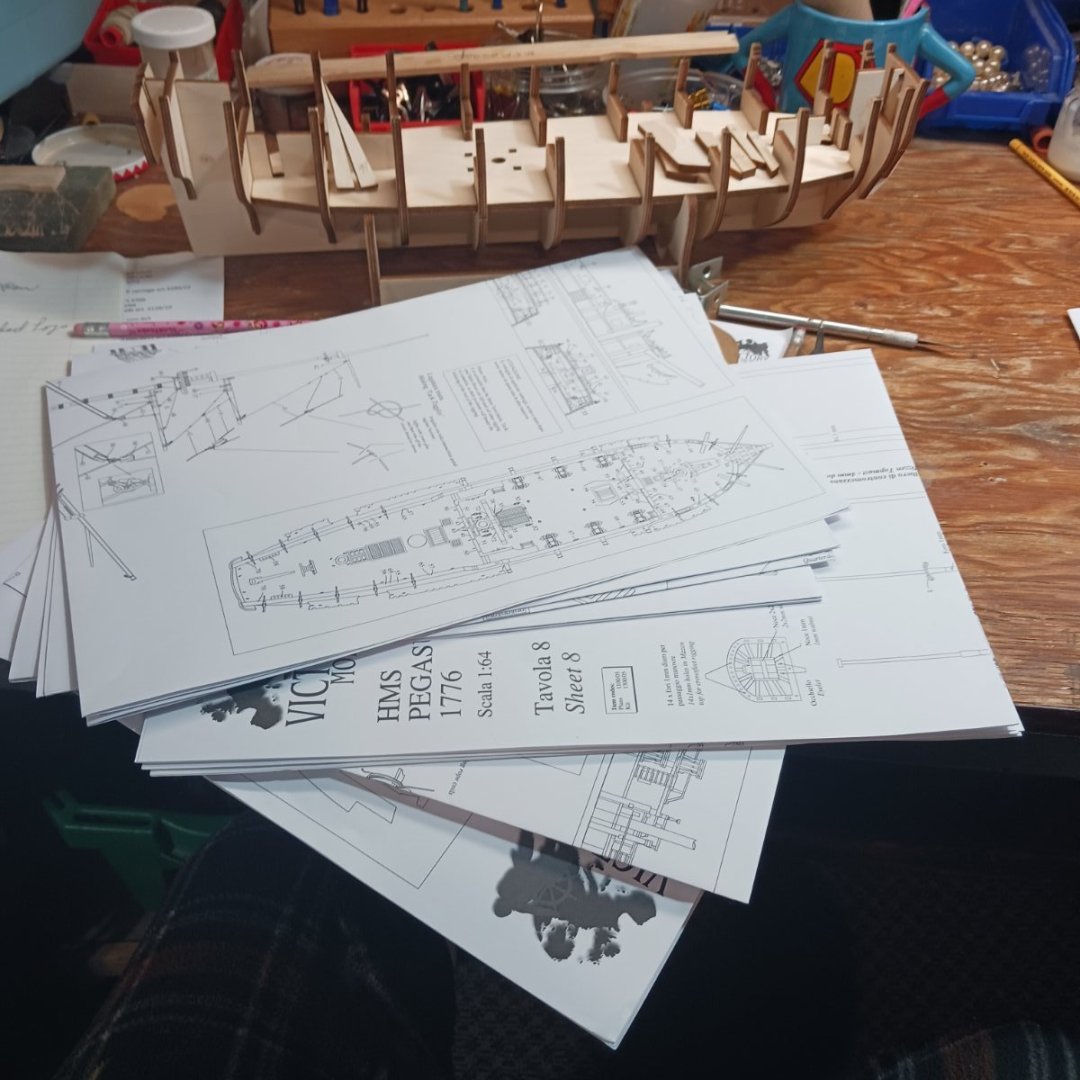
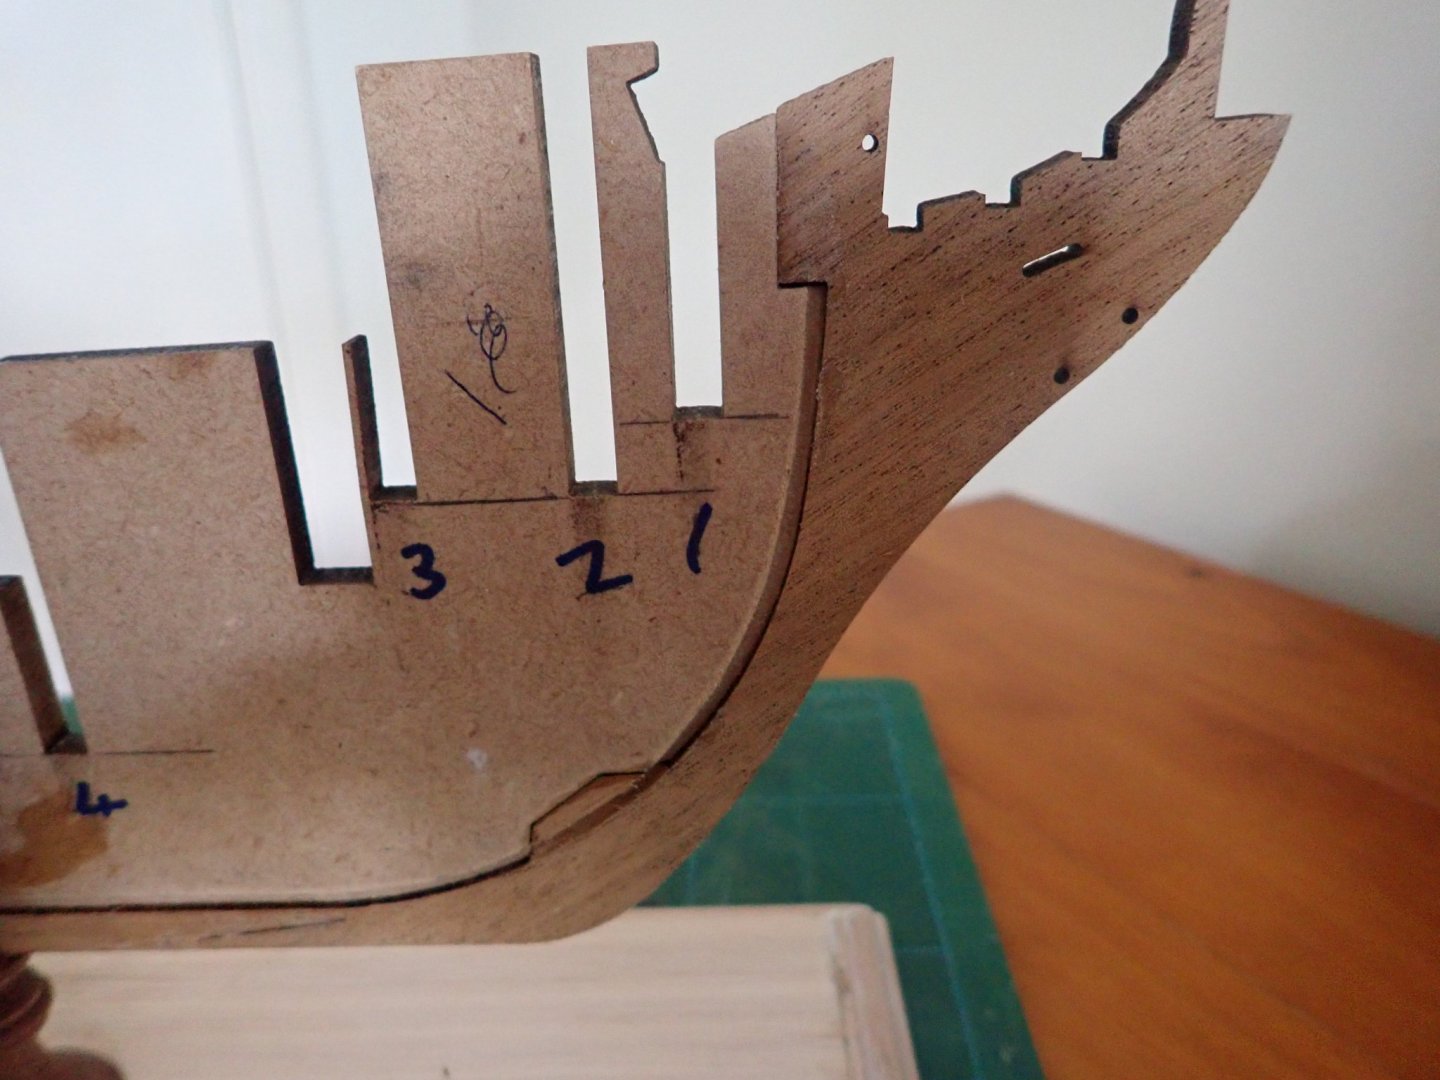
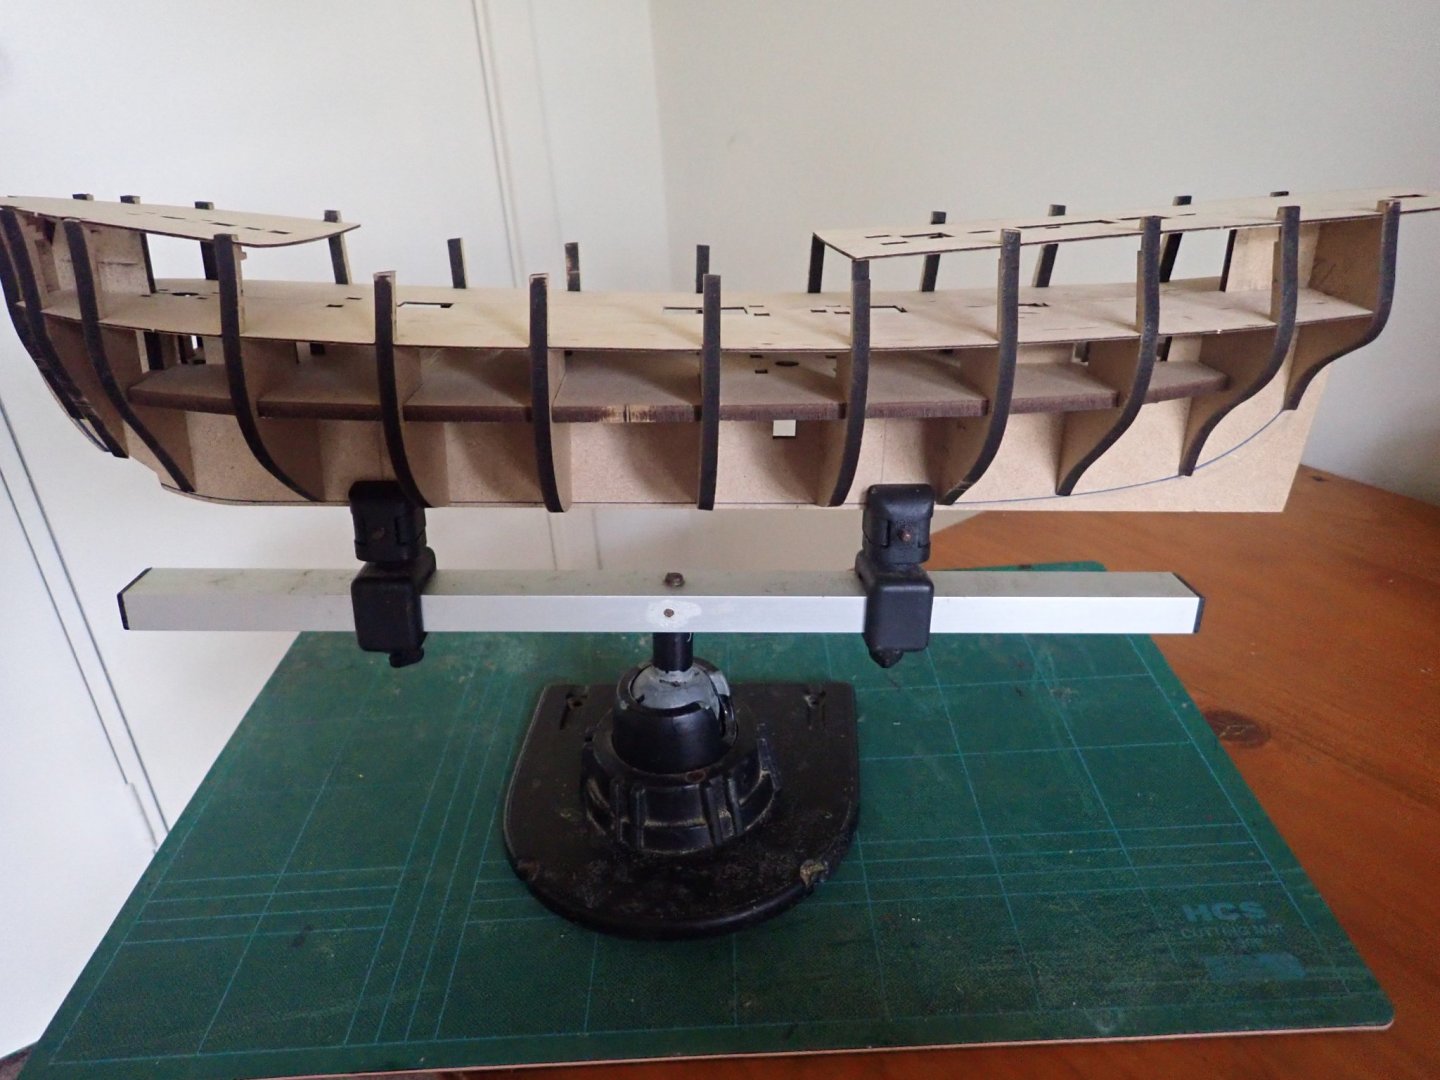
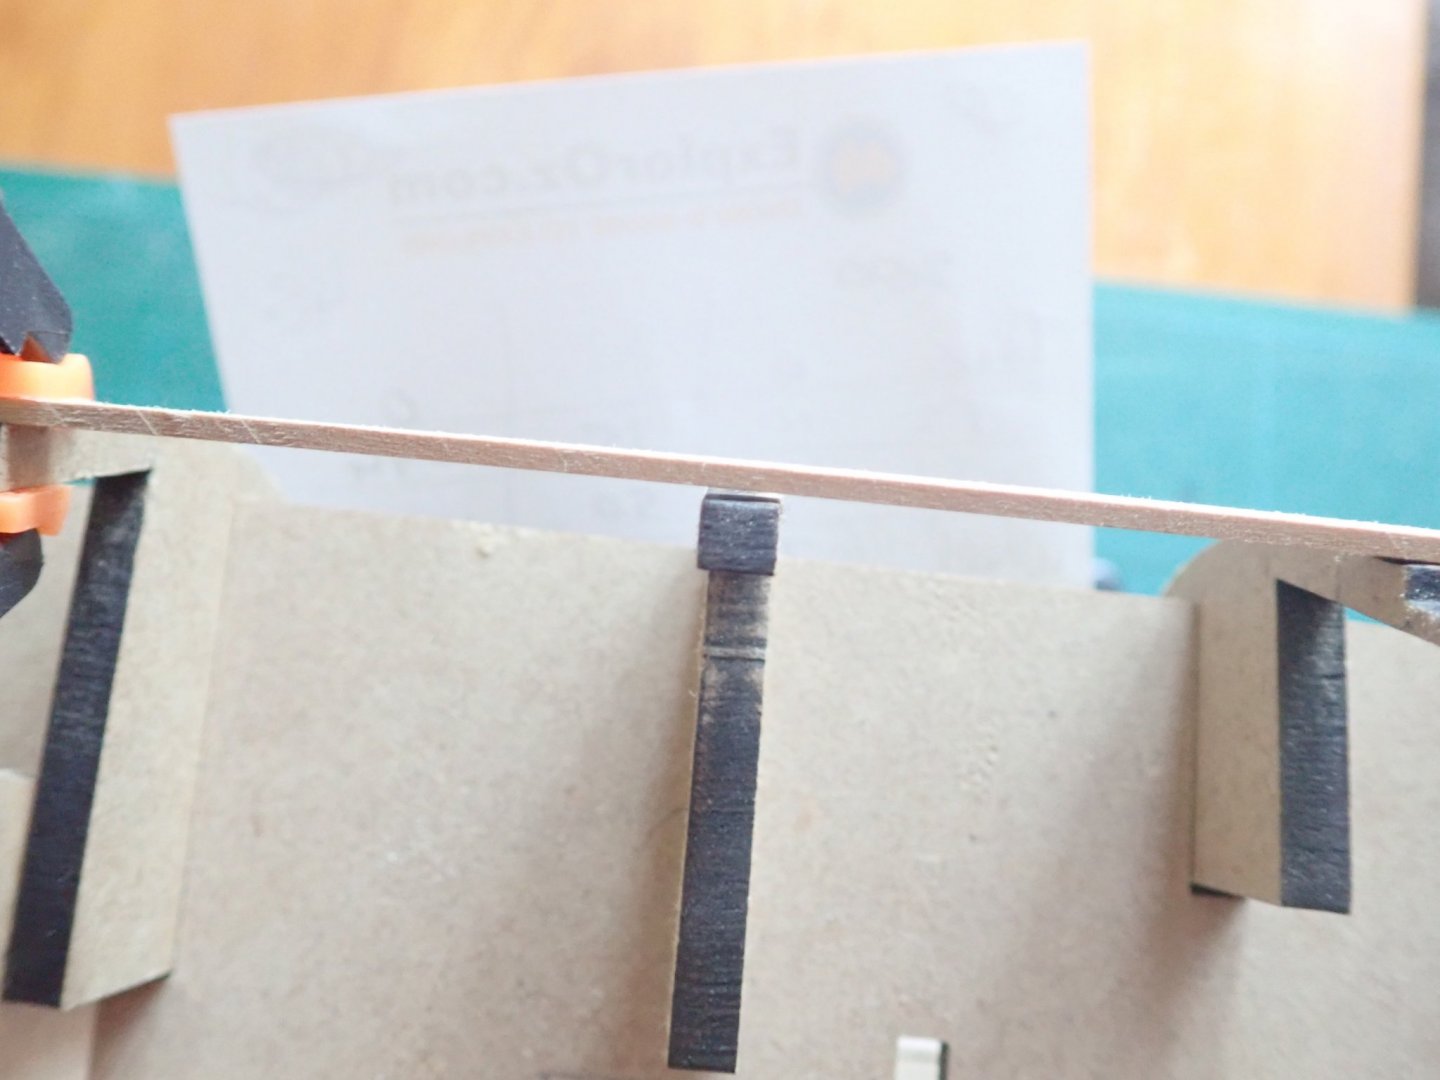
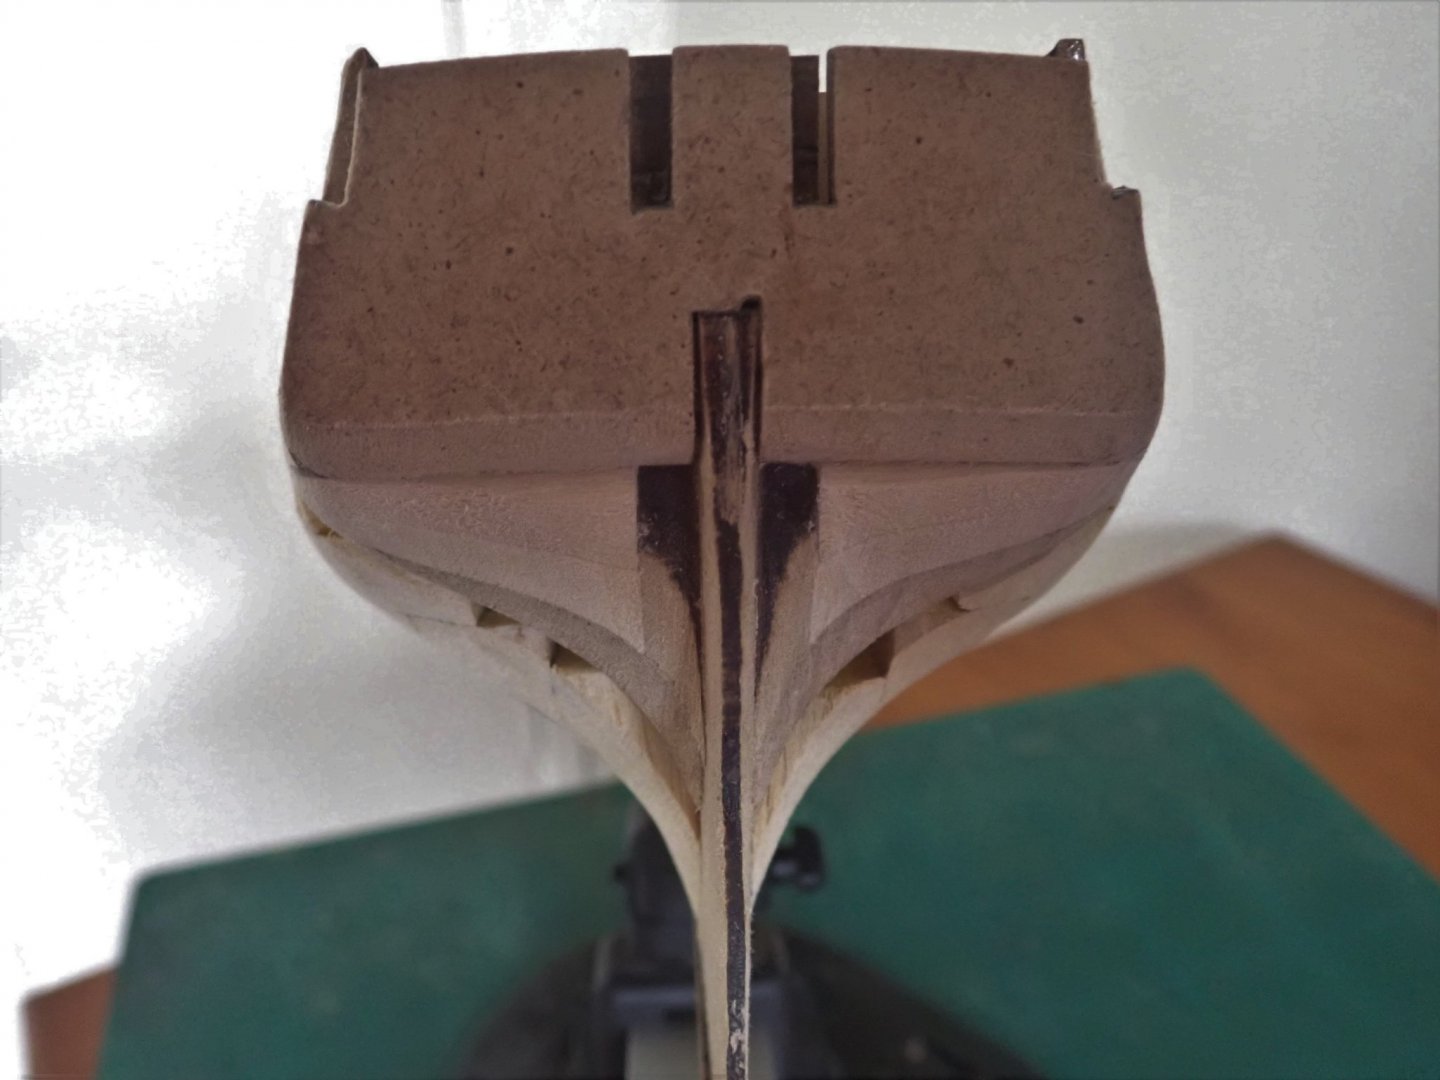
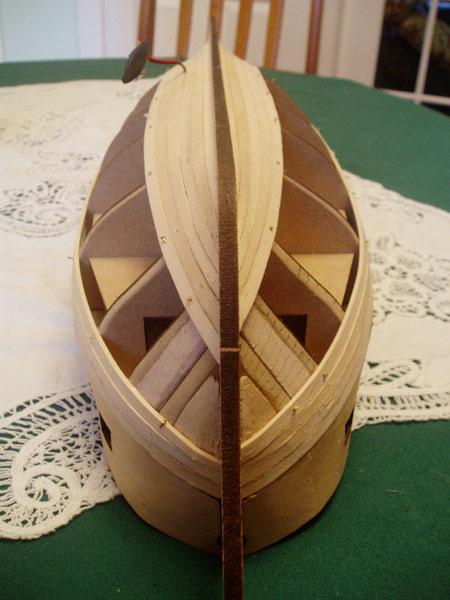
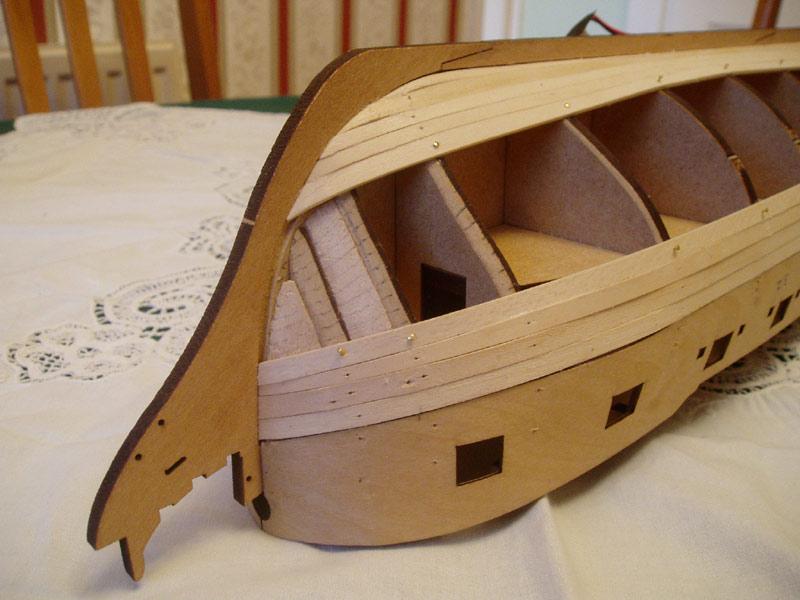
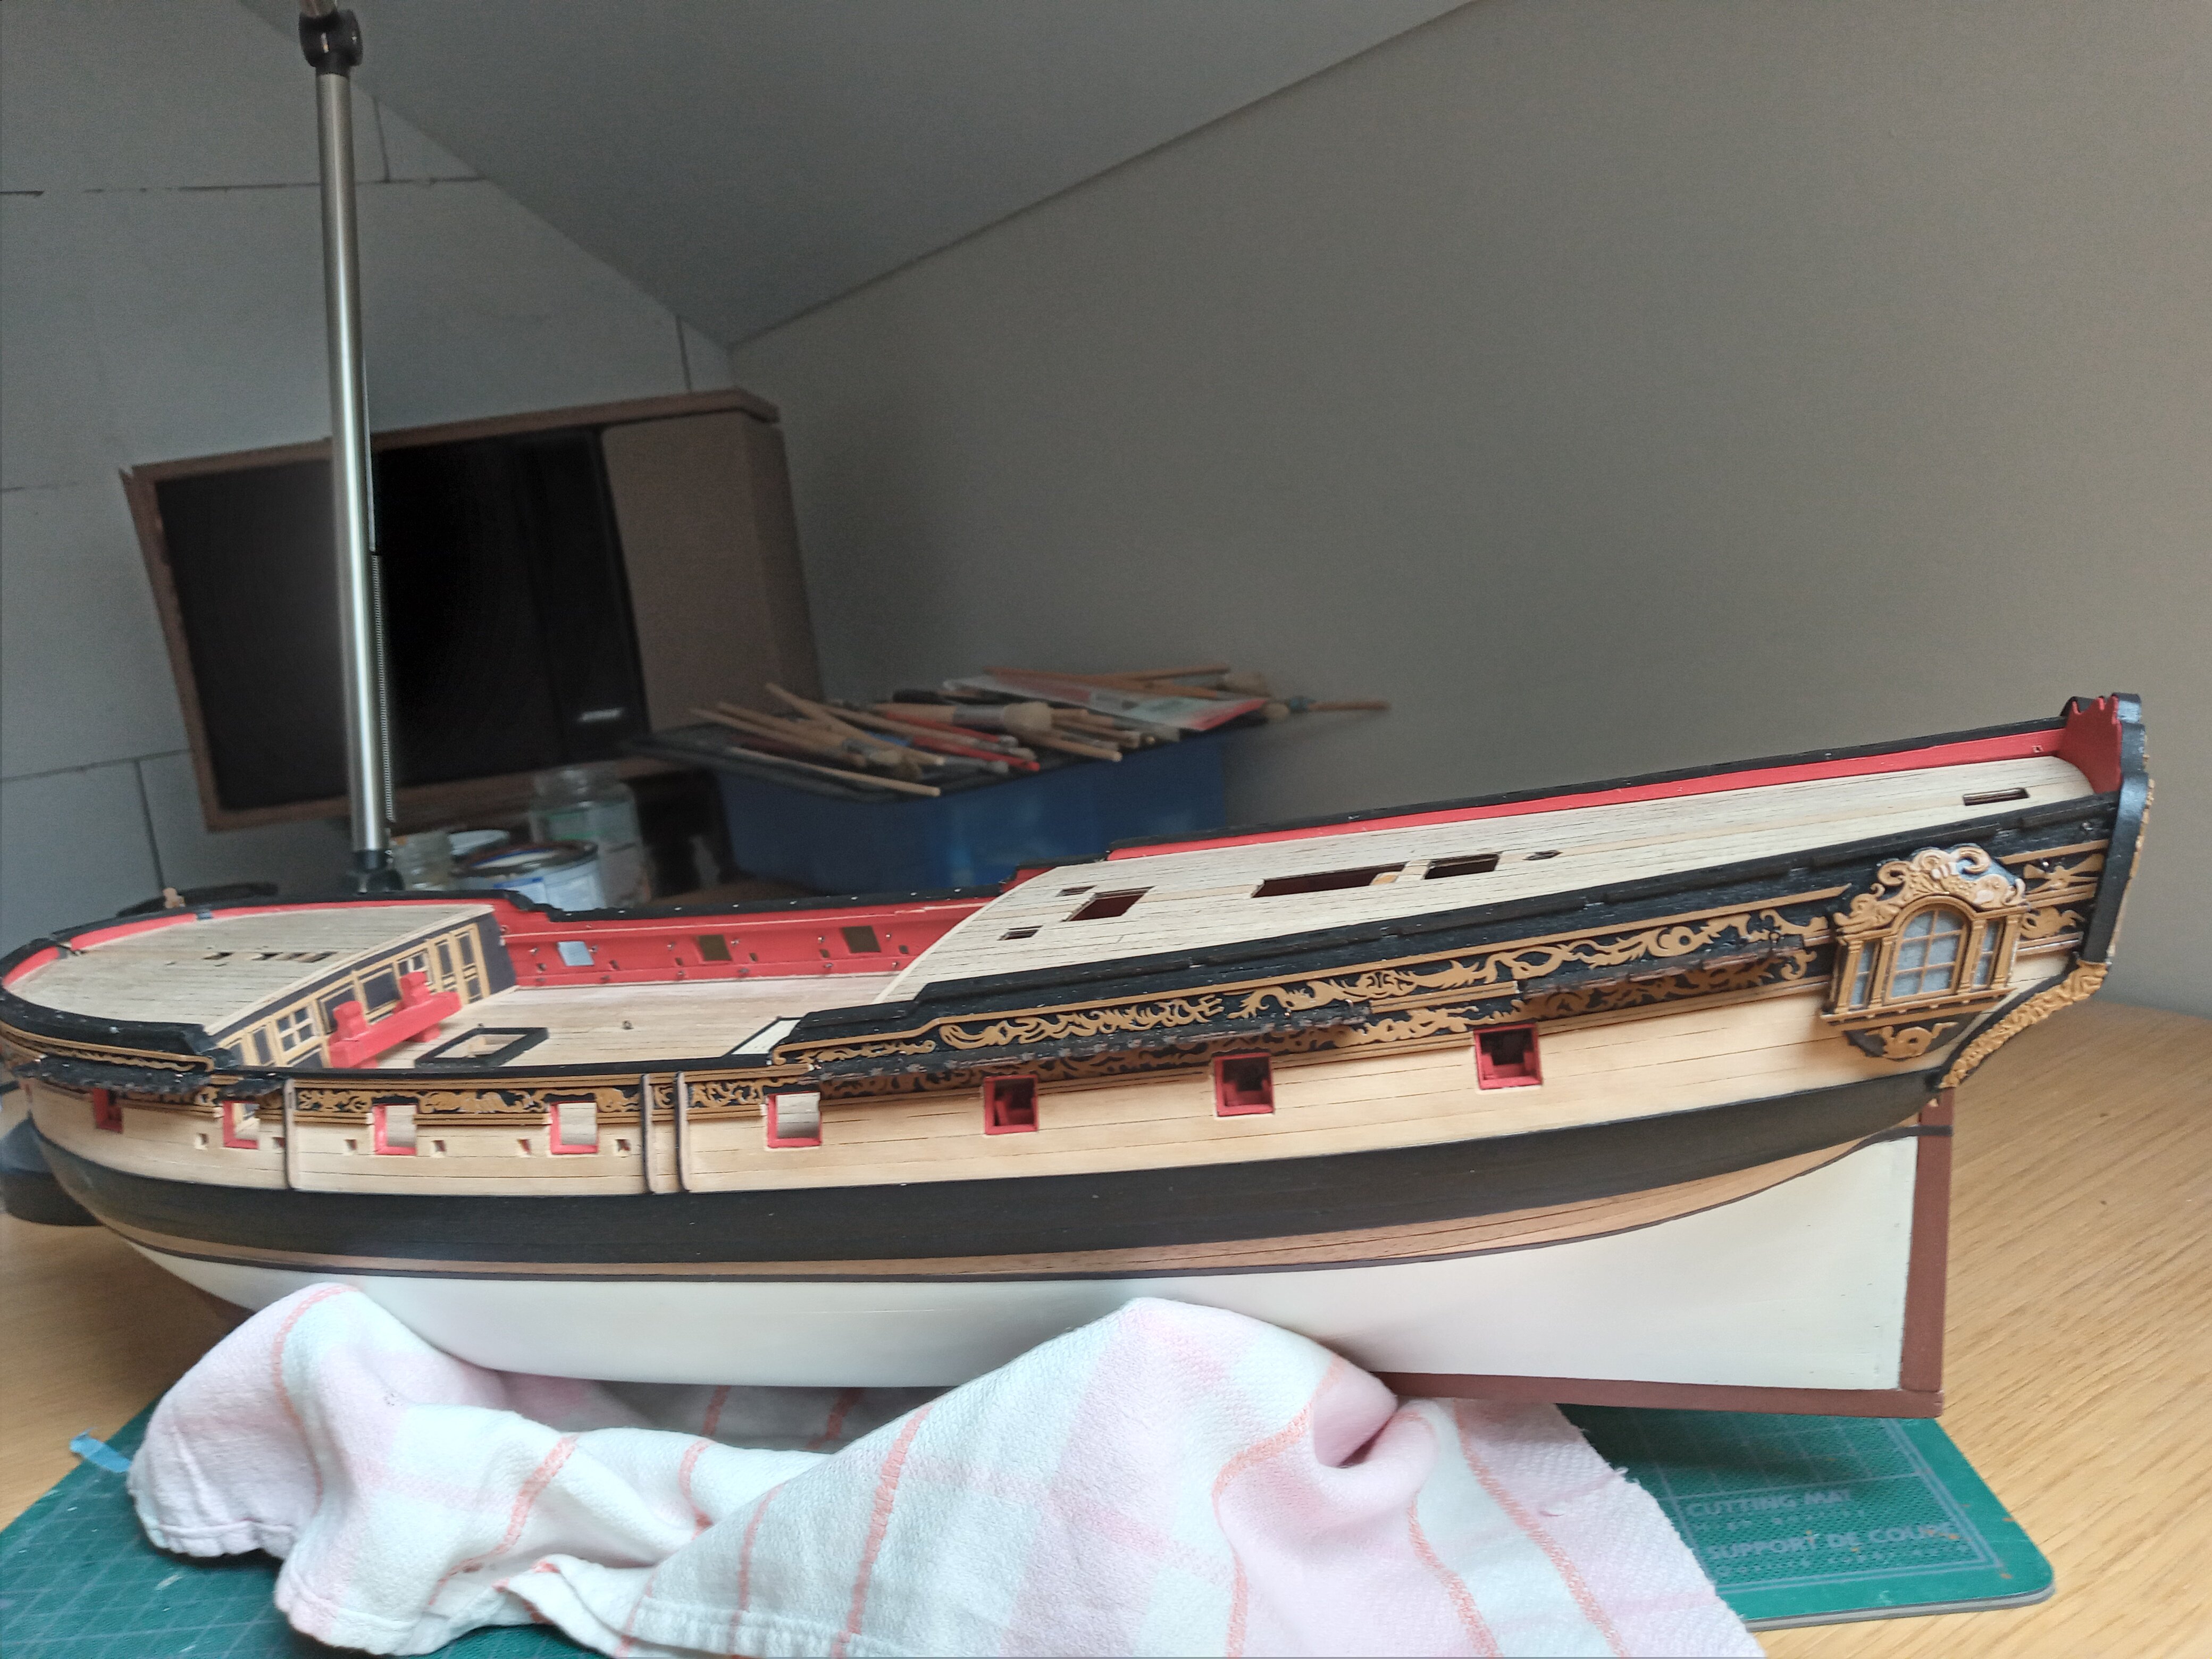
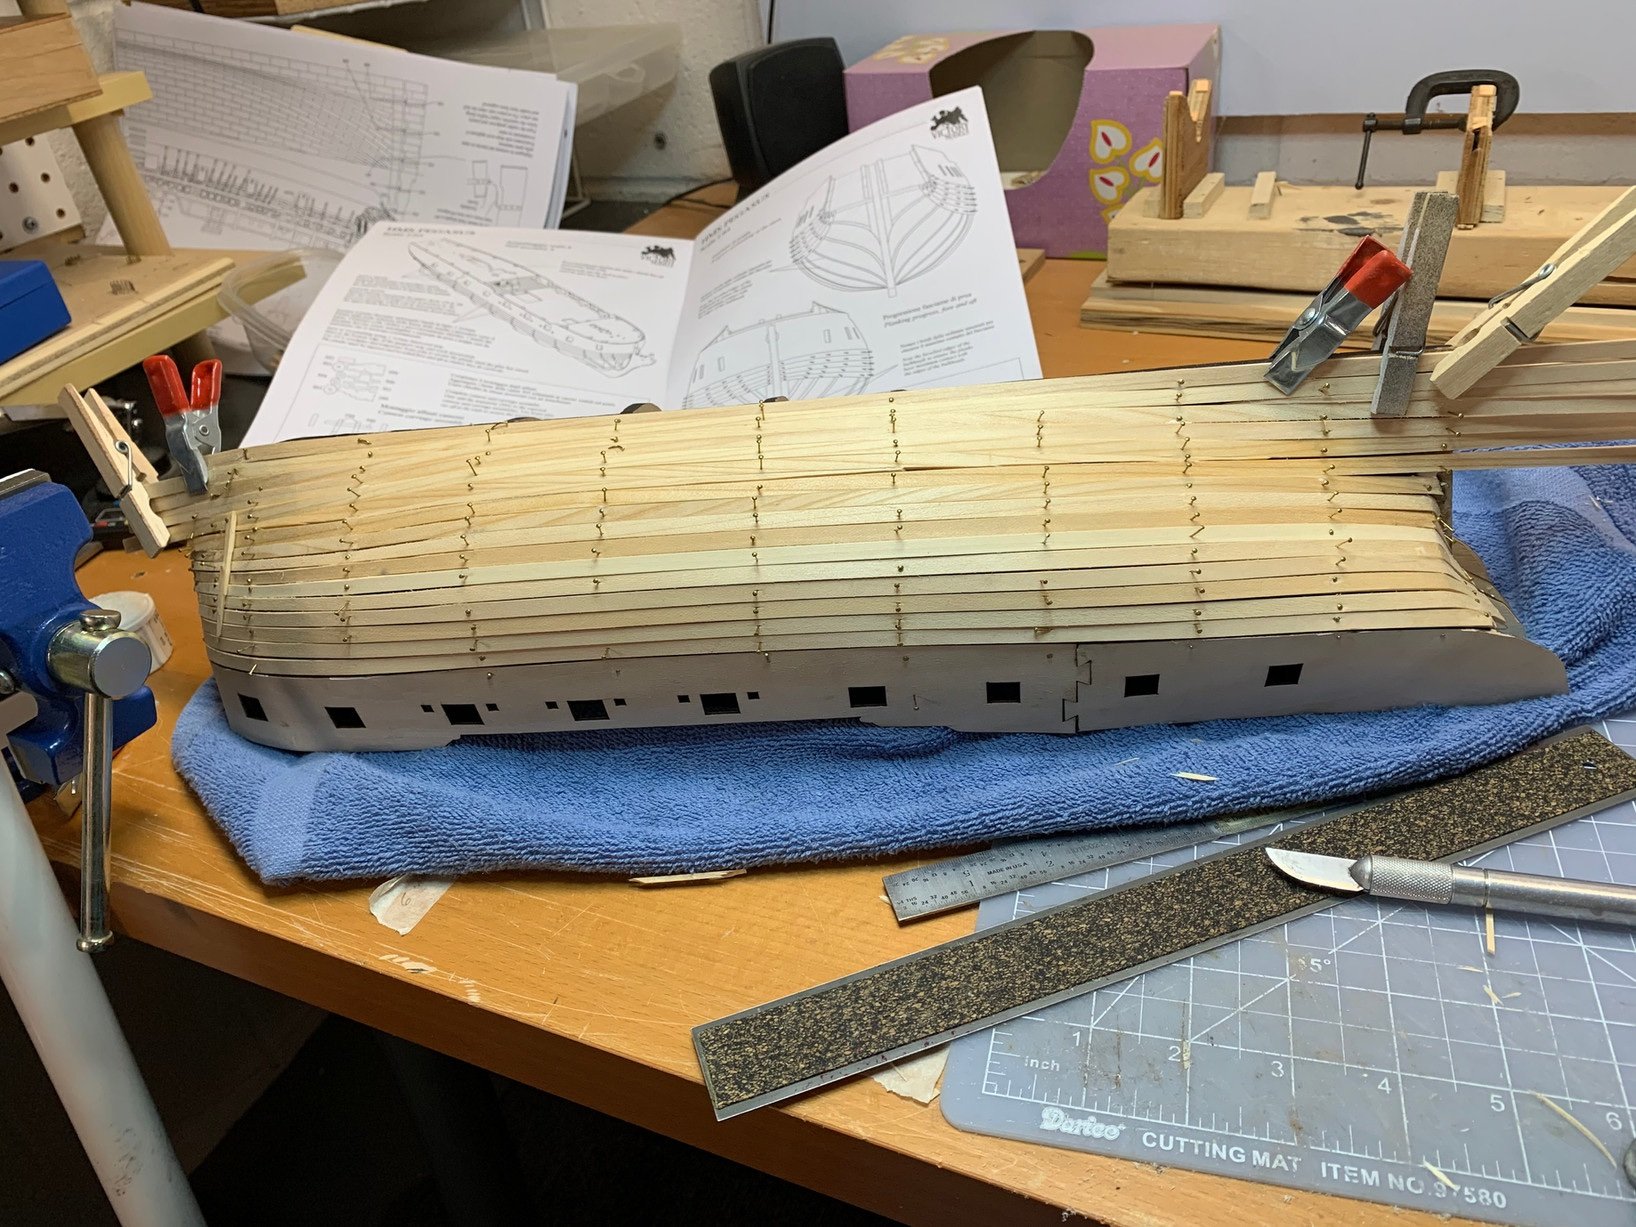
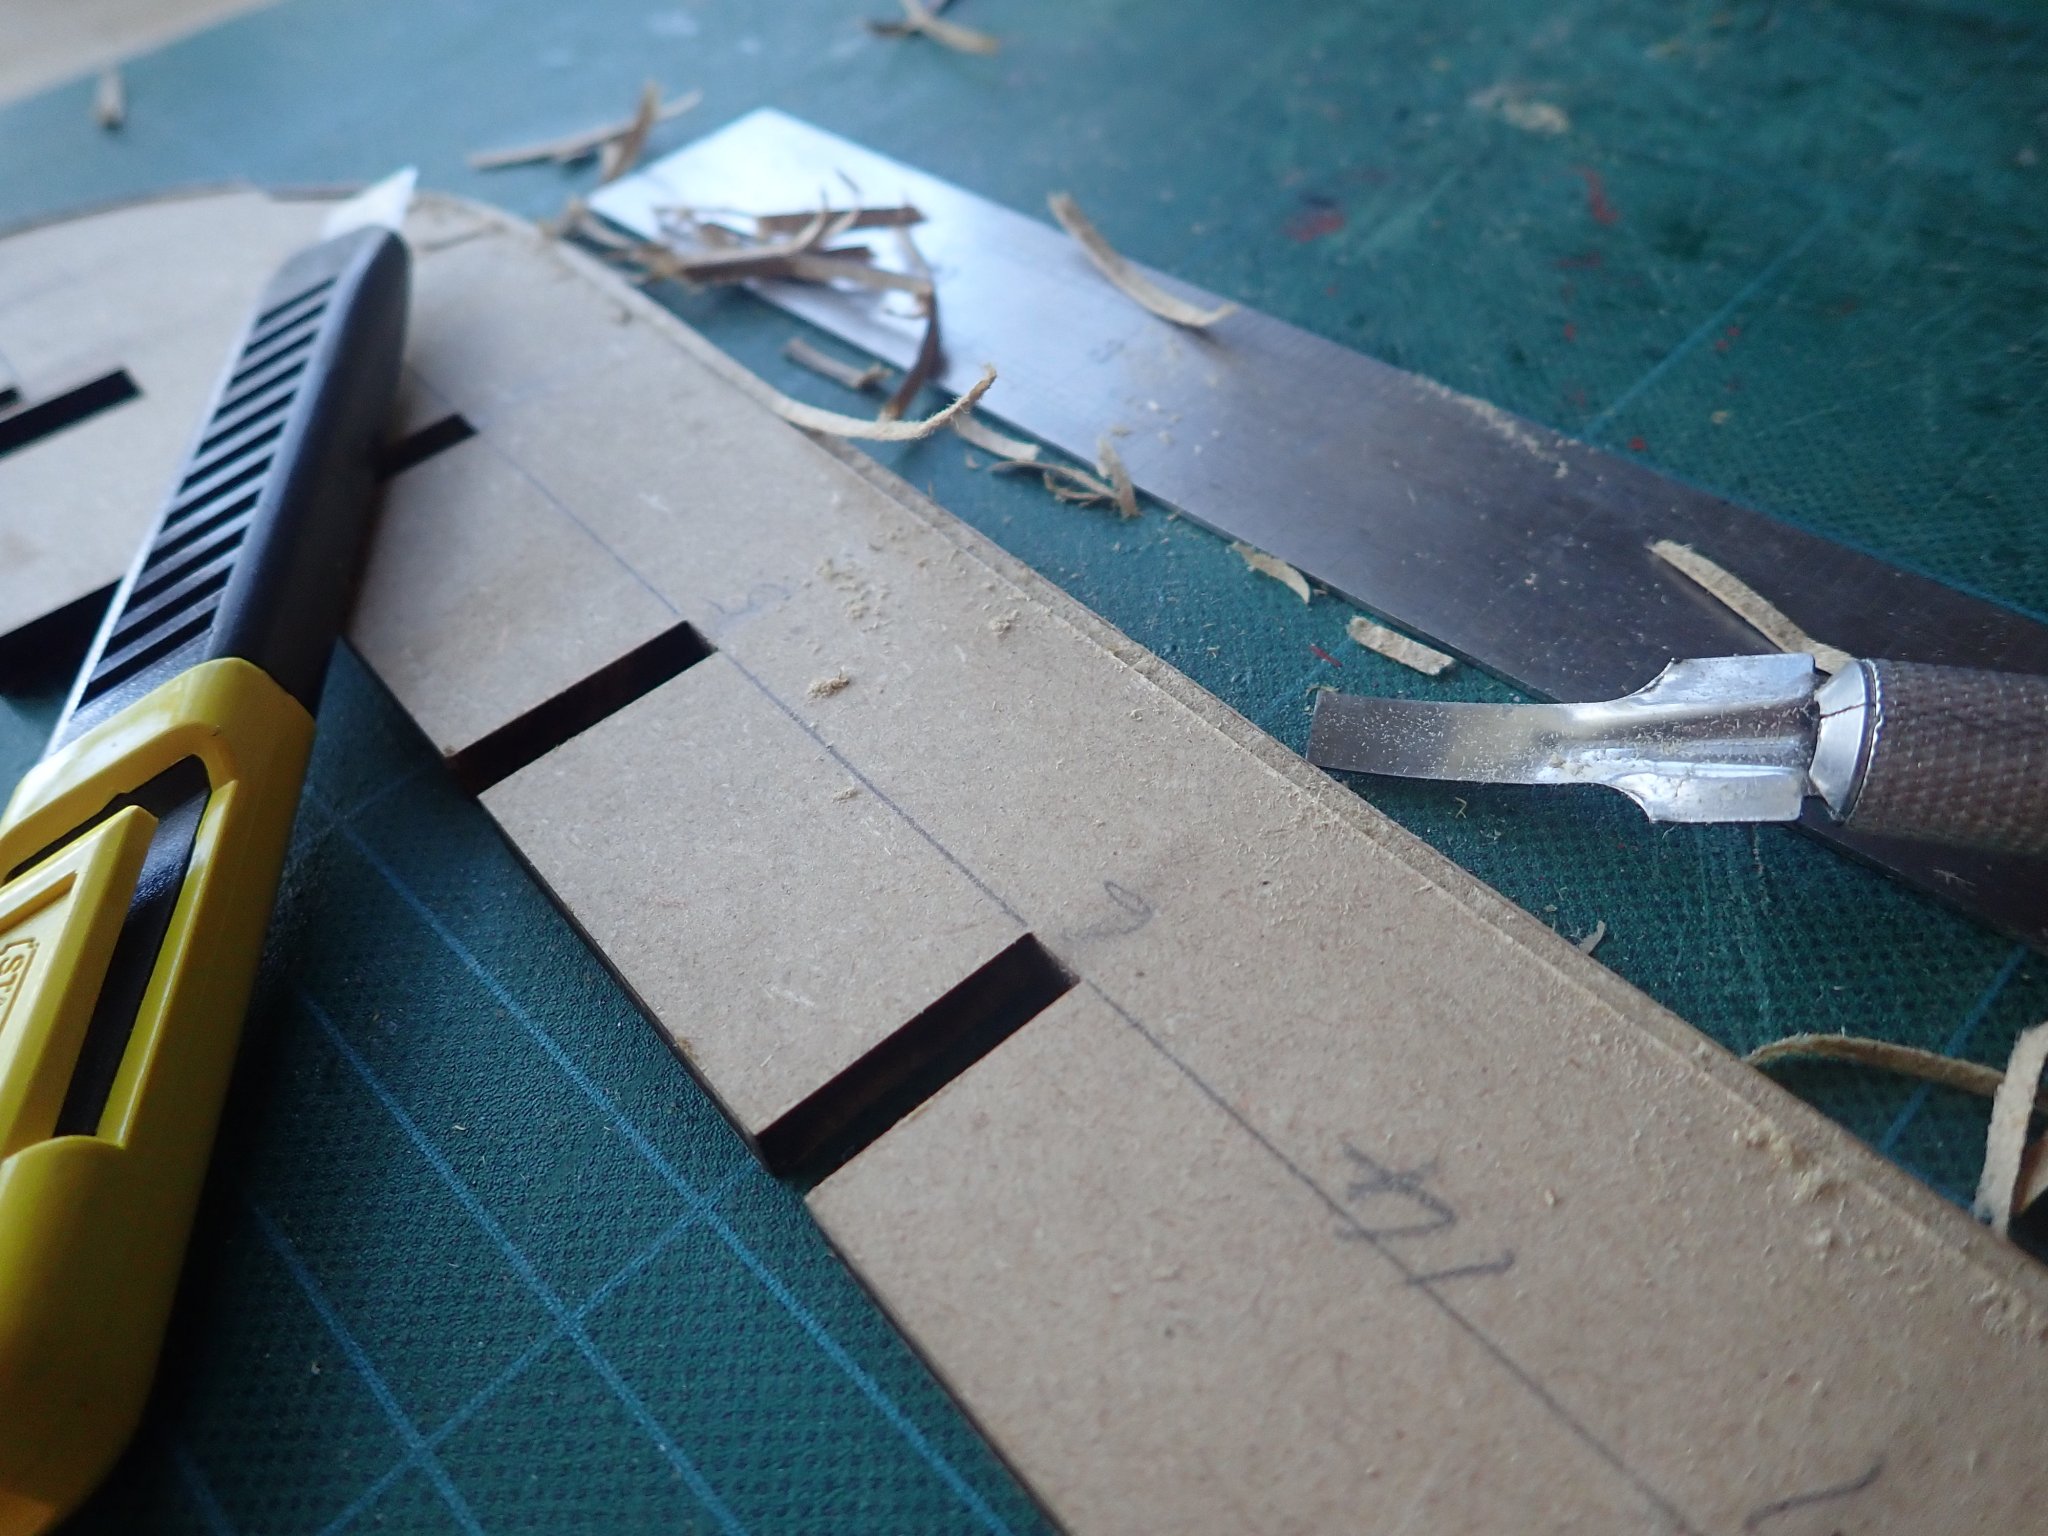
 So, my build log of the Pegasus kit from Victory. I’m not going to describe the kit contents as there are quite a few build logs here on MSW that do exactly that, the latest being that by Mugje. The first task was to read the instructions carefully, at least as far as the first planking, examine the plans and read the already existing build logs. The second task was to repeat the first to ensure that I had a more than reasonable grasp of what was to be involved in starting this build. Unfortunately, the result of all this reading was information overload, but anyway, on with the build. As well as the information in the build logs, I will occasionally refer to the "The Fully Framed Model" by David Antscherl and Greg Herbert. After numbering, the false keel and the bulkheads were removed from their sheets and trial fitted. All slots had to be eased slightly as the fit was just a little bit too tight. It was noticed that bulkhead 13, the last one, was not properly centered when slotted fully home onto its tab - it was slightly shifted to starboard. The slot in the bulkhead was widened with a few passes with a file to correct this. The false keel has to be thinned near the sternpost to allow for the thickness of the two layers of planking to closely match the width of the sternpost. To do this, the bearding line first needed to be drawn on the false keel as the thinning starts here. The kit plans do not show this, and in looking at the logs there is some variation in builders’ interpretation of where this line should be. I drew my line so that it clipped the fore edges of bulkheads 9-12 and finished under the filler block (part 16). A 2mm wide strip of wood was spot glued to the rear of the false keel to aid in sanding the false keel to the needed thickness. The bearding line was continued along the keel as a marker for a rabbet here, and then along for the stem rabbet. Although Chris Watton in one of his posts says that a keel rabbet was unnecessary, I decided to cut one for the experience. A knife cut was made along the line using a steel rule to keep it straight. A chisel was then used to pare the MDF to give the rabbet. A 2mm wide wood strip was spot glued along the bottom of the false keel to guide the depth of the cut and then removed. A similar method was used to cut the rabbet at the stem. The MDF cut easily. The walnut stem and the two keel parts were glued to the false keel. The stern post was not fitted at this time to allow easy sanding of the first planking at the stern. The rabbet at the stem completed. I’d decided to mount the Pegasus on pedestals, so mounting holes, for 3mm bolts, had to be drilled through the base, the pedestals, the (real) keel and far enough into the false keel to give secure mounting. Captive nuts were epoxied into slots cut near the end of the holes in the false keel and small pieces of ply were epoxied over these for additional strength and to help in preventing the nut from turning. The only 3mm bolts I could find locally were too short for my need, so two bolts were joined to form one by expoxying them into a brass sleeve which was then crimped. I thought epoxy rather than solder was more than sufficient. The bolts were run in and out repeatedly to ensure that there was no binding or glue blocking the holes. The ends of the bolts were rounded to enable them to easily “find” the nuts. Trial mounting onto the pedestals. The bulkheads, the false lower deck and the main, fore and aft decks were trial fitted and then removed. The slots in the main deck needed slight easing to enable it to be fitted without undue force. The lower deck, bulkheads and pre-shaped infill blocks were then glued in place on the false keel. Infill blocks were glued in between bulkheads at bow and stern. I used scrap wood that I had rather than buying a sheet of balsa, so the appearance is not as neat as others. After several hours sanding, the hull was apparently faired. Upon checking with a strip of wood though, I found the same problem with BH7 as Mugje did. (To confuse things, Mugje in subsequent posts referred to the bulkhead as BH6, though the photos are clearly that of BH7).That is, the strip does not fair smoothly past BH7, but there is a gap between it and the bulkhead. The gap was more prominent at the top of the bulkhead and decreases towards the keel, and is the same on both sides of the hull. It would seem that either BH7 is slightly undersized, or the adjacent bulkheads are slightly oversized. More gentle sanding was done on bulkheads 5,6,8 and 9 but even so, the fairing still was not smooth. So, a shim strip was glued to BH7 and finally, after BH7 was sanded, a fair run from BH5 through to BH9 was achieved. Although totally unnecessary, the lower deck was partly planked below the main hatch. Antscherl describes the kingplank of the lower deck as being 3 inches thick and, as the remainder of the deck planking is 2 inches thick, it stands proud by 1 inch. So a kingplank 1mm thick was laid, and with the other planks being 0.6mm thick, it stands proud by about 1 inch equivalent. Not that anybody's ever going to see this. The stern counter pieces were glued into their slots. The quarterdeck was positioned to ensure that the outer pieces were angled inwards correctly. A minor amount of sanding was required to fair these. The main deck was glued in place and is ready for planking. Cheers.
.thumb.JPG.f66f5f9aeb1c133160d08000317337b1.JPG)
.thumb.JPG.3b775b78cd4c915164855d008303cc24.JPG)
.thumb.JPG.3fdc1782b74f4dfa73432995cf2b33dd.JPG)


.thumb.JPG.e4e2b7195f642c45afb4f5544d0fdeb8.JPG)
.thumb.JPG.03d4c3fc86416c5f6951cb17a59ebaaa.JPG)
.thumb.JPG.f144f5b5e90adaeaf5662d209a10b61d.JPG)

- 104 replies
-
- 7
-
-
- pegasus
- victory models
- (and 2 more)
-
 Having just finished the Duchess of Kingston and waiting for my HMS Indefatigable to ship, i figured I have 6 weeks or s so I decided to start HMS Swan that I bought for Christmas as it was on sale. Could not help myself and got to work. I can see Chris Watton all over this design and how he incorporated things into Vanguard but definitely improved by providing better instructions and excellent pictures on his Vanguard models
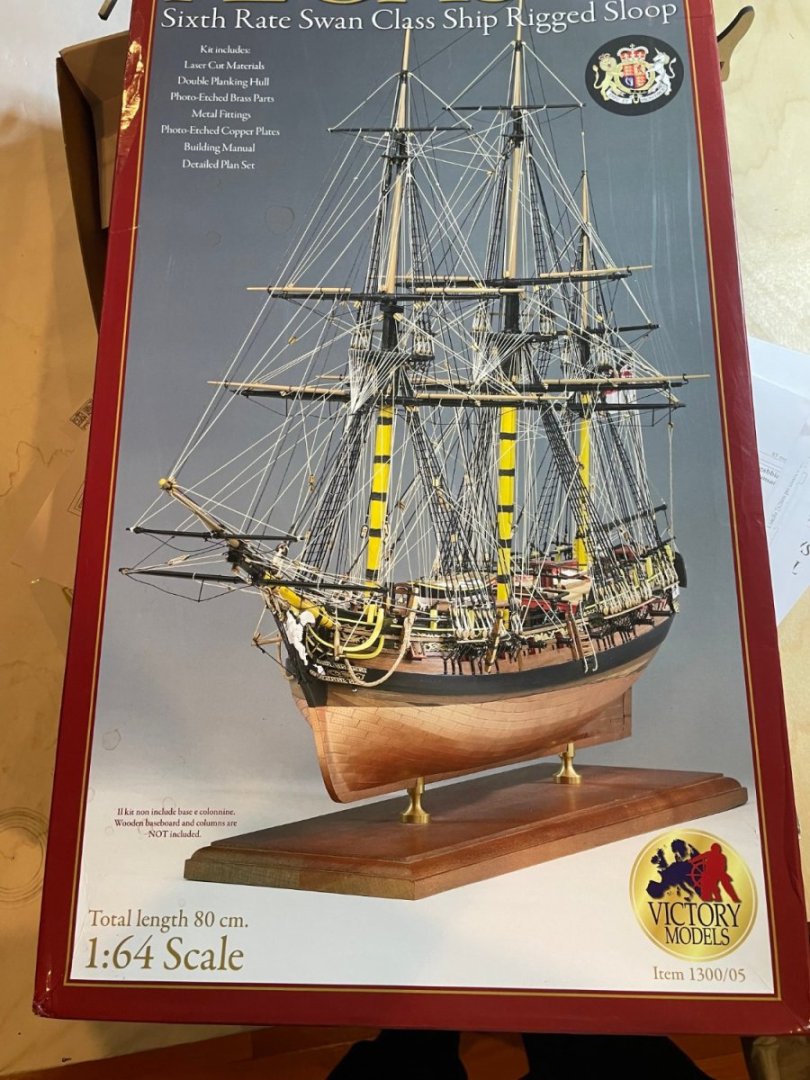


-
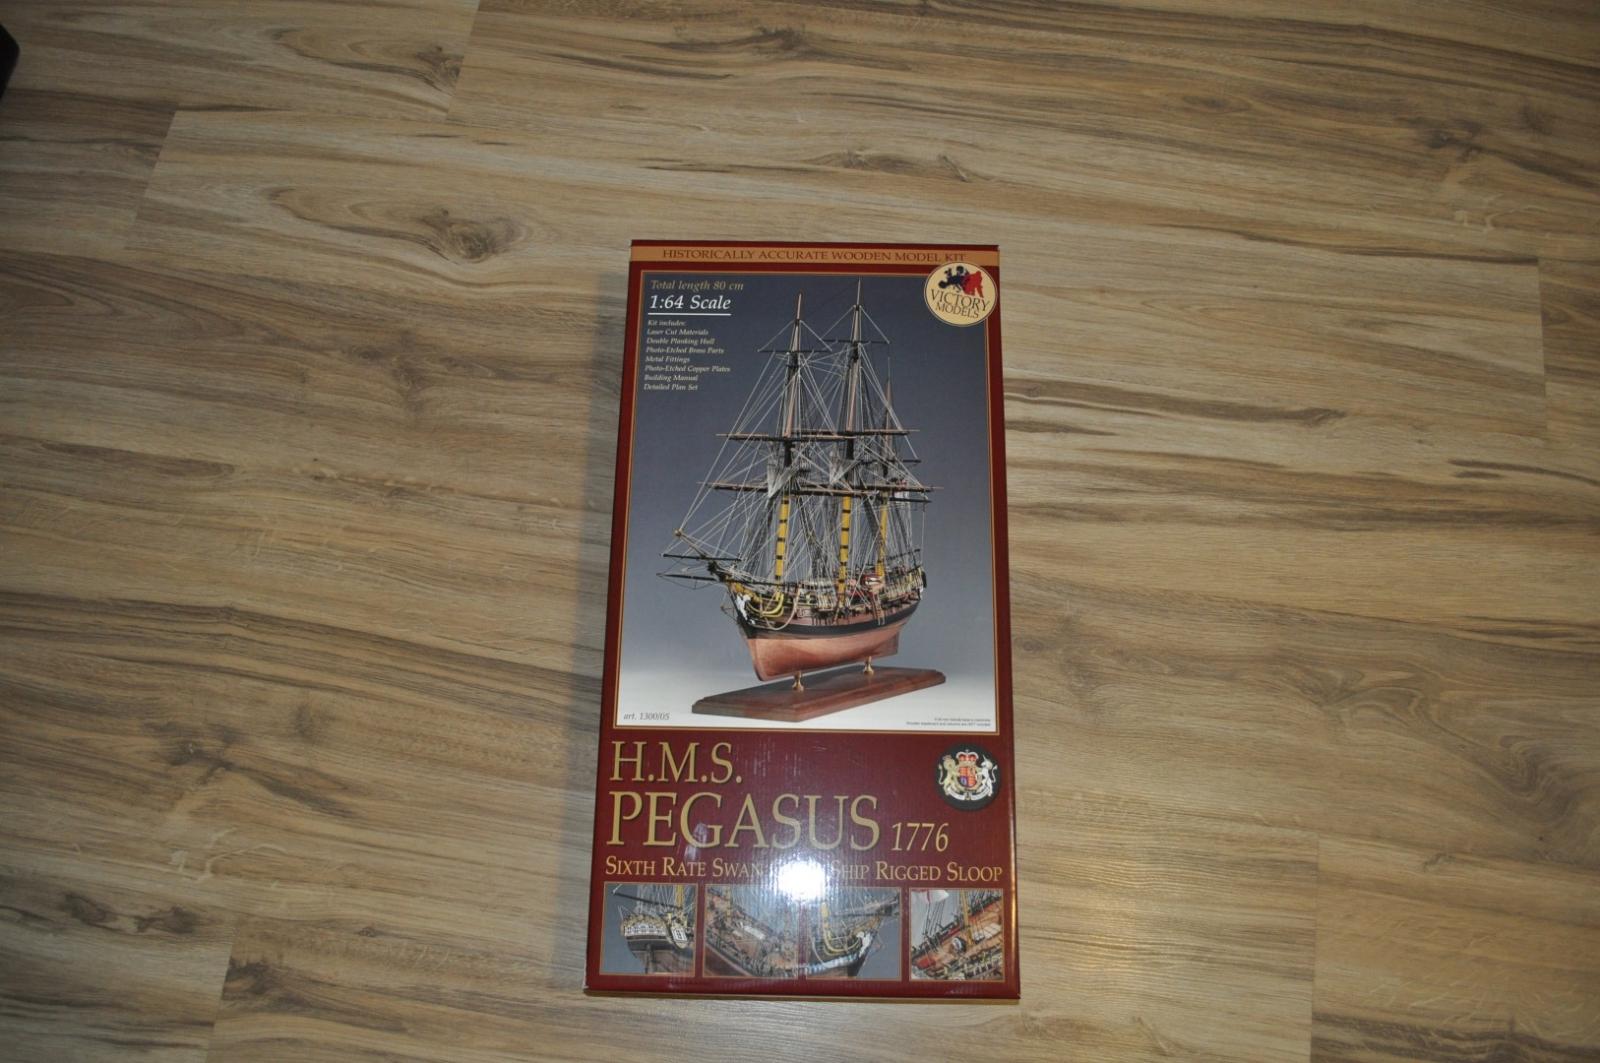
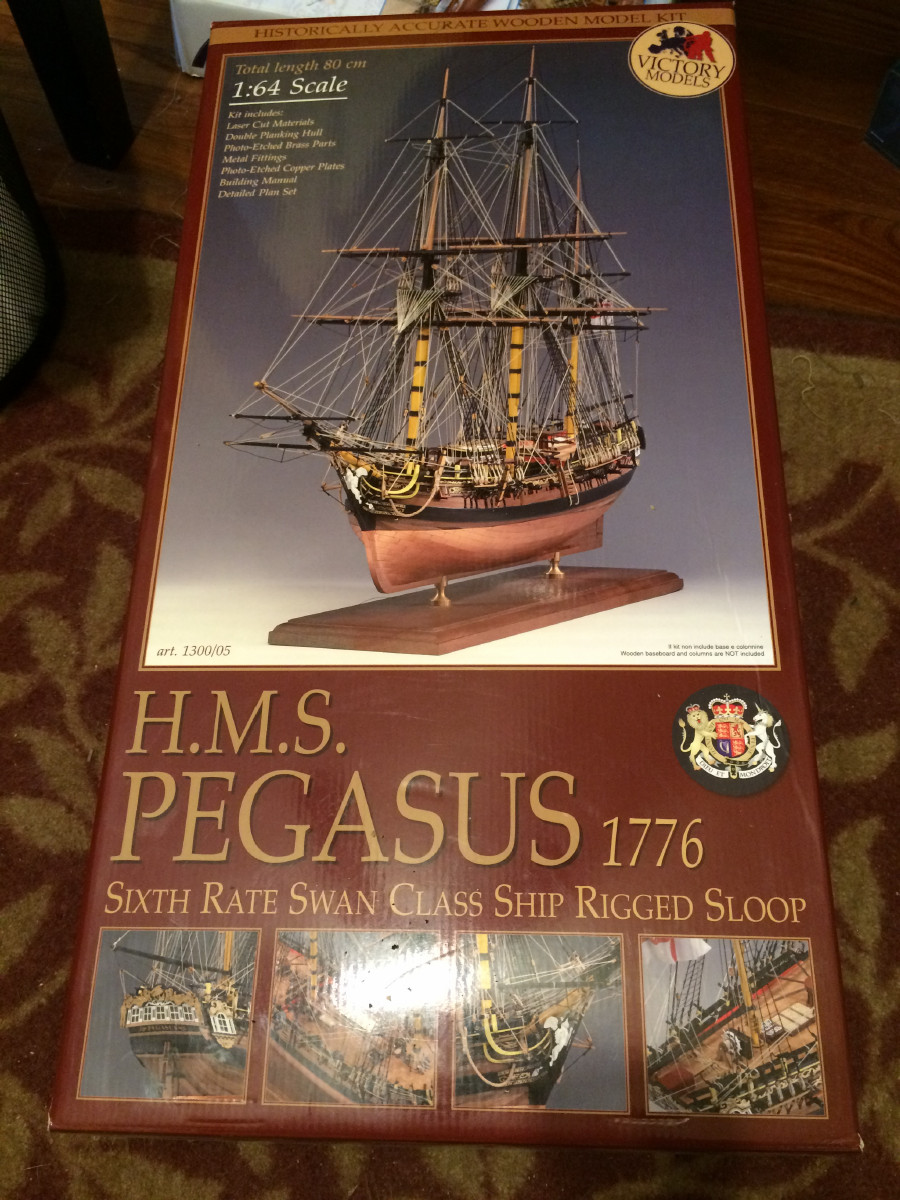
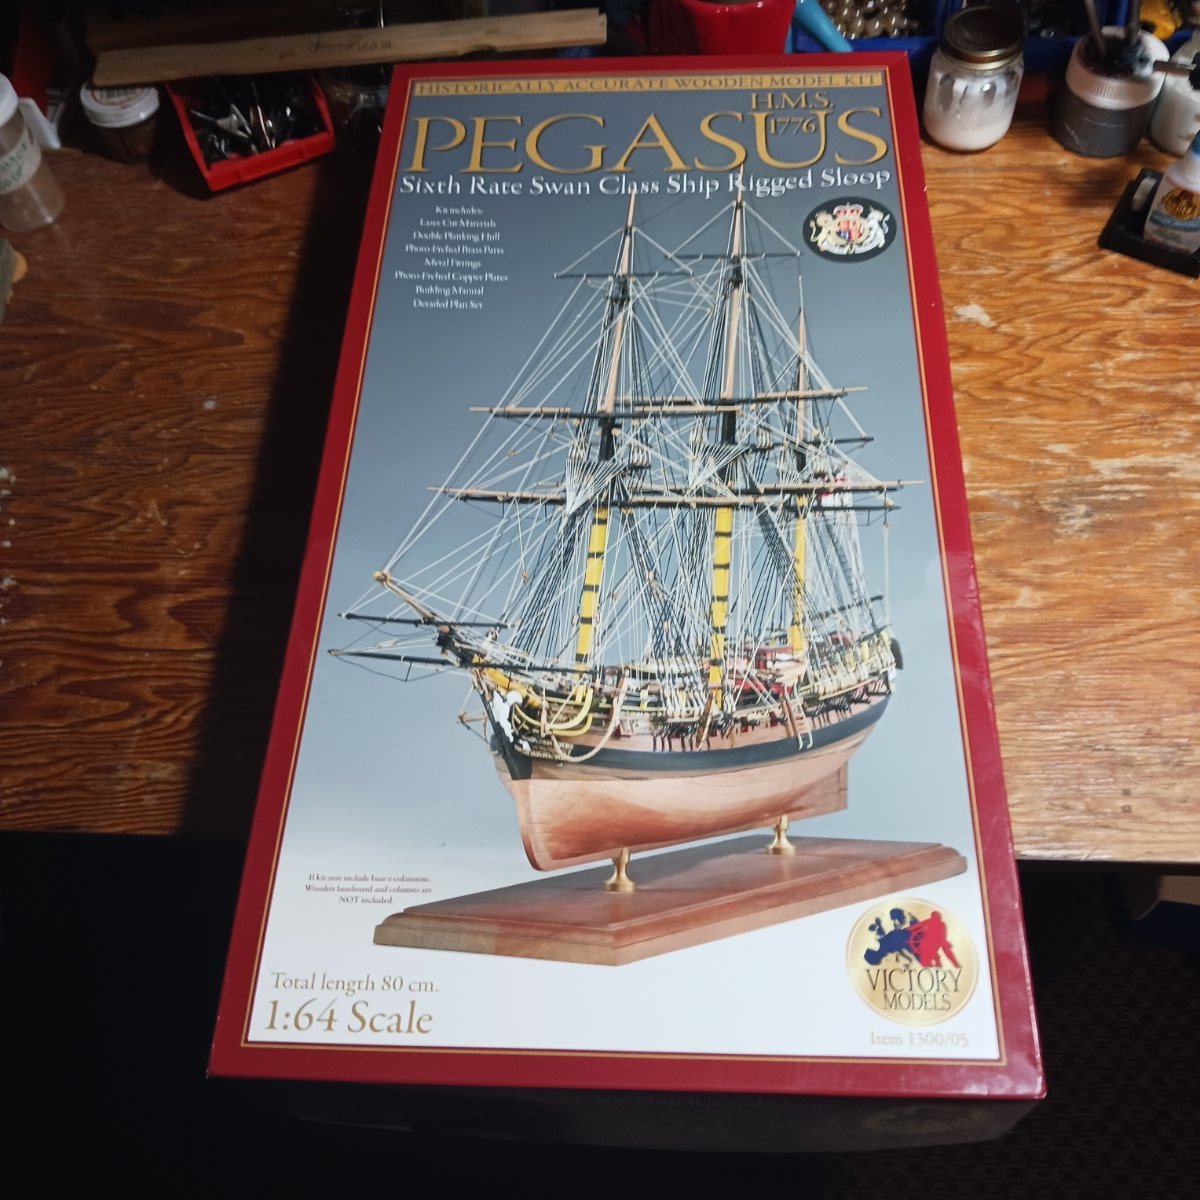
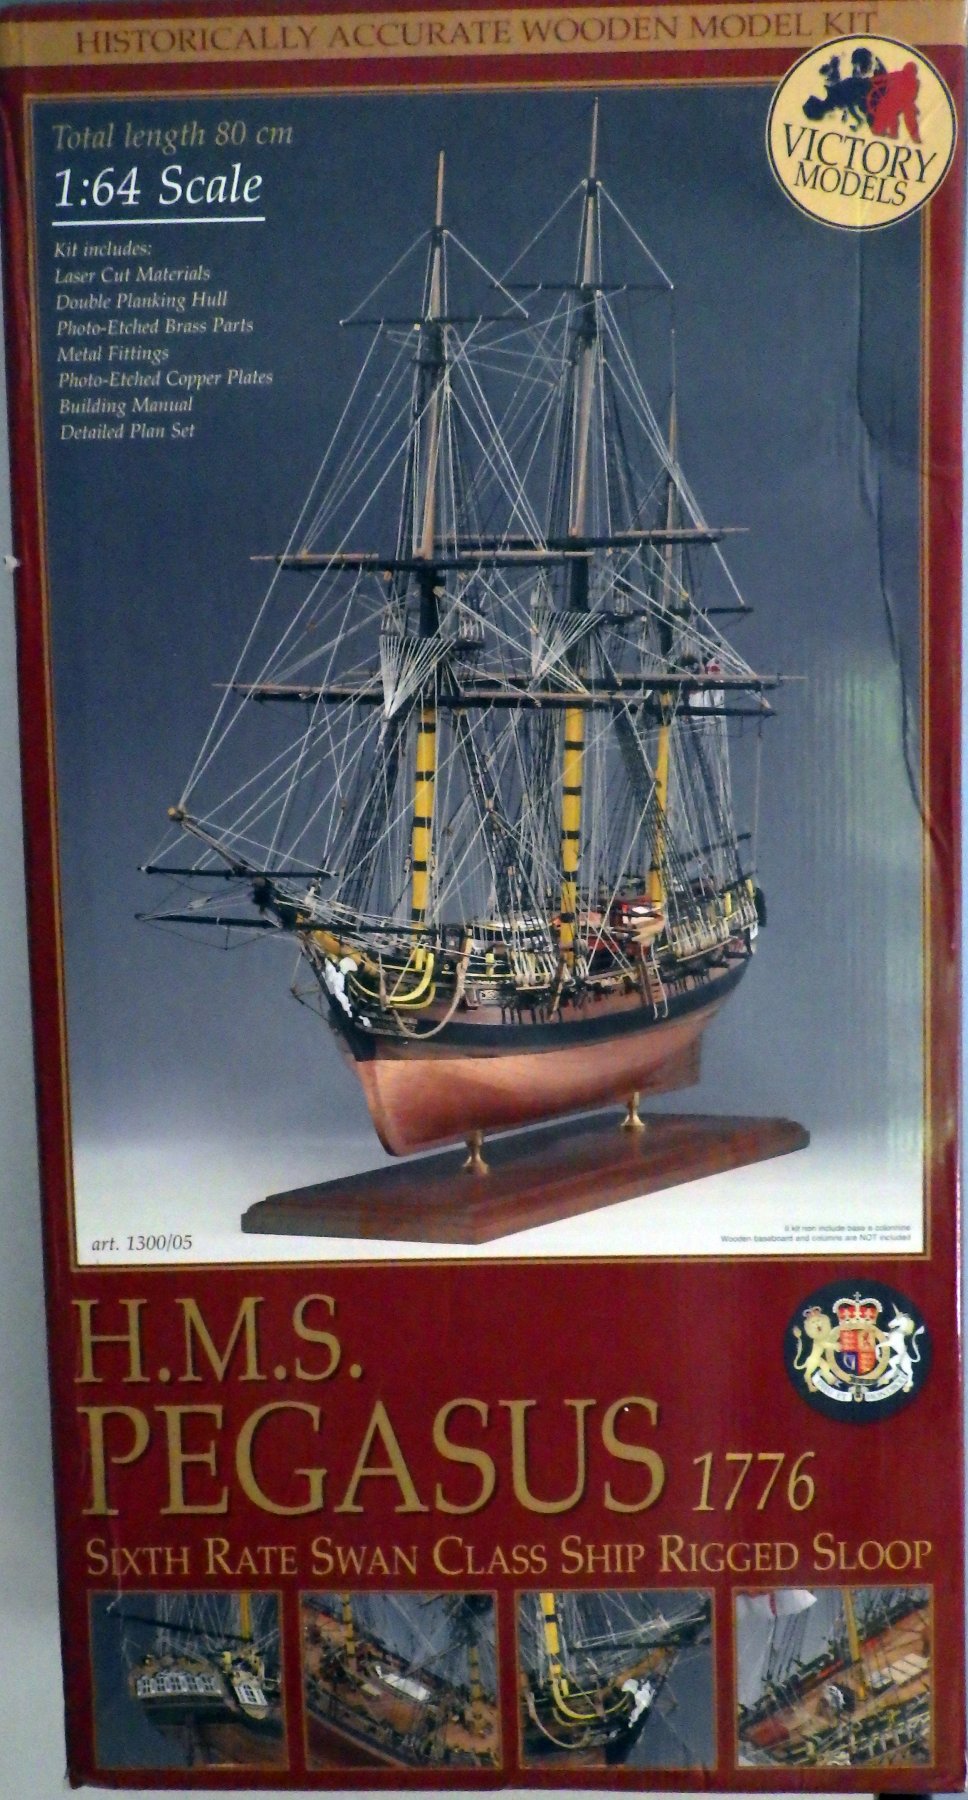
 KIT: HMS PEGASUS (1776) Manufacturer: Amati (Italy) Scale: 1:64 (800 мм/31,5") ⚓️Official store: https://store.amatimodel.com/en/box-mounting-victory-by-amati/product-hms-pegasus-b130005.html
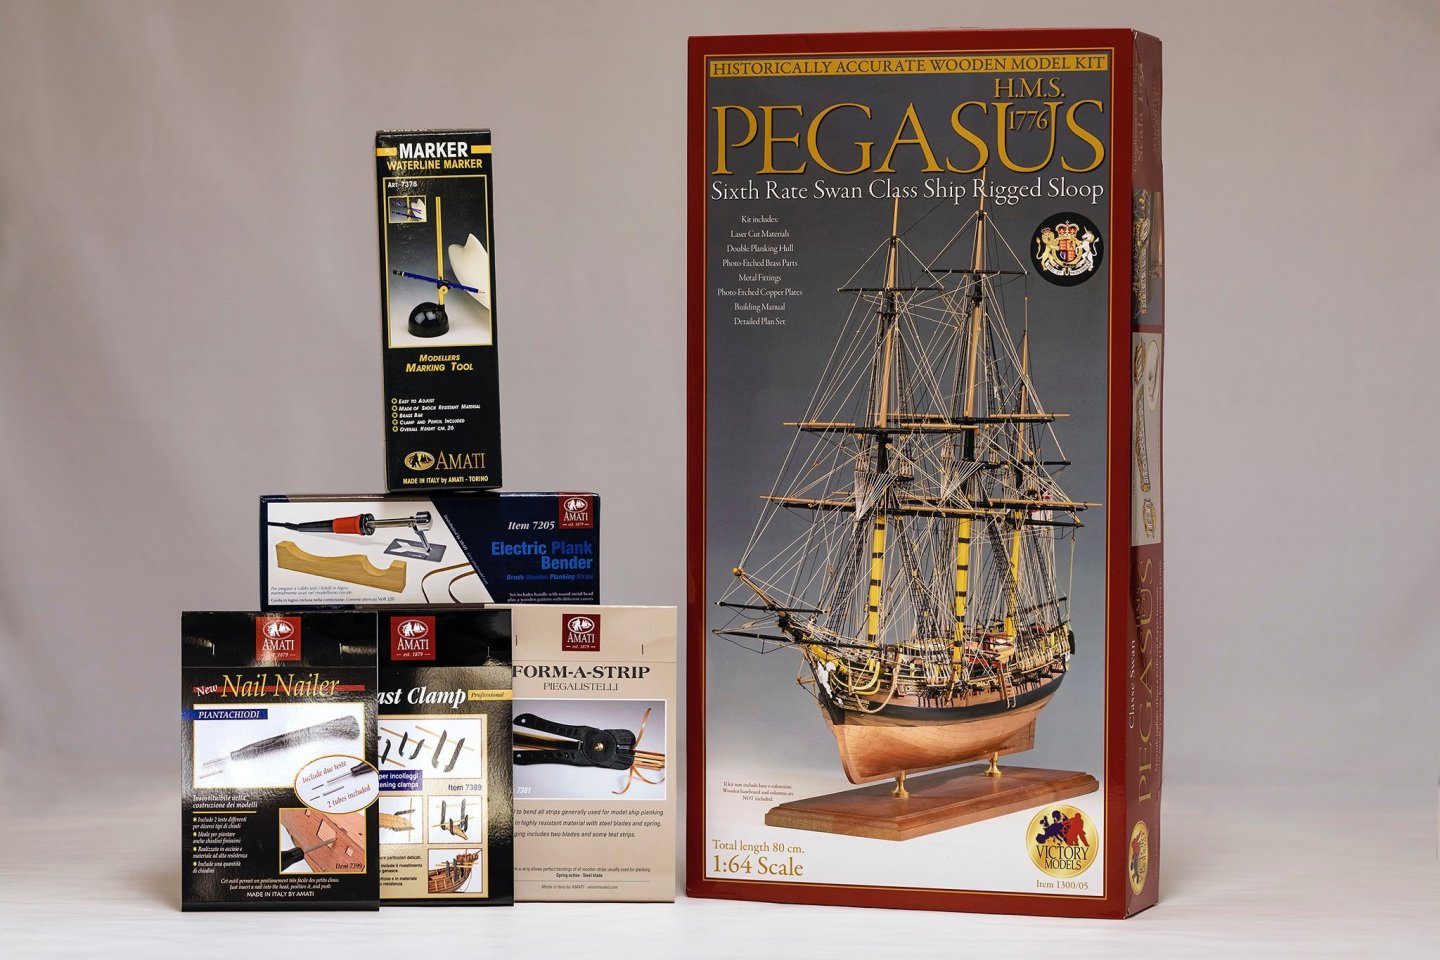
- 64 replies
-
- 6
-
-
- amati
- victory models
- (and 1 more)
-
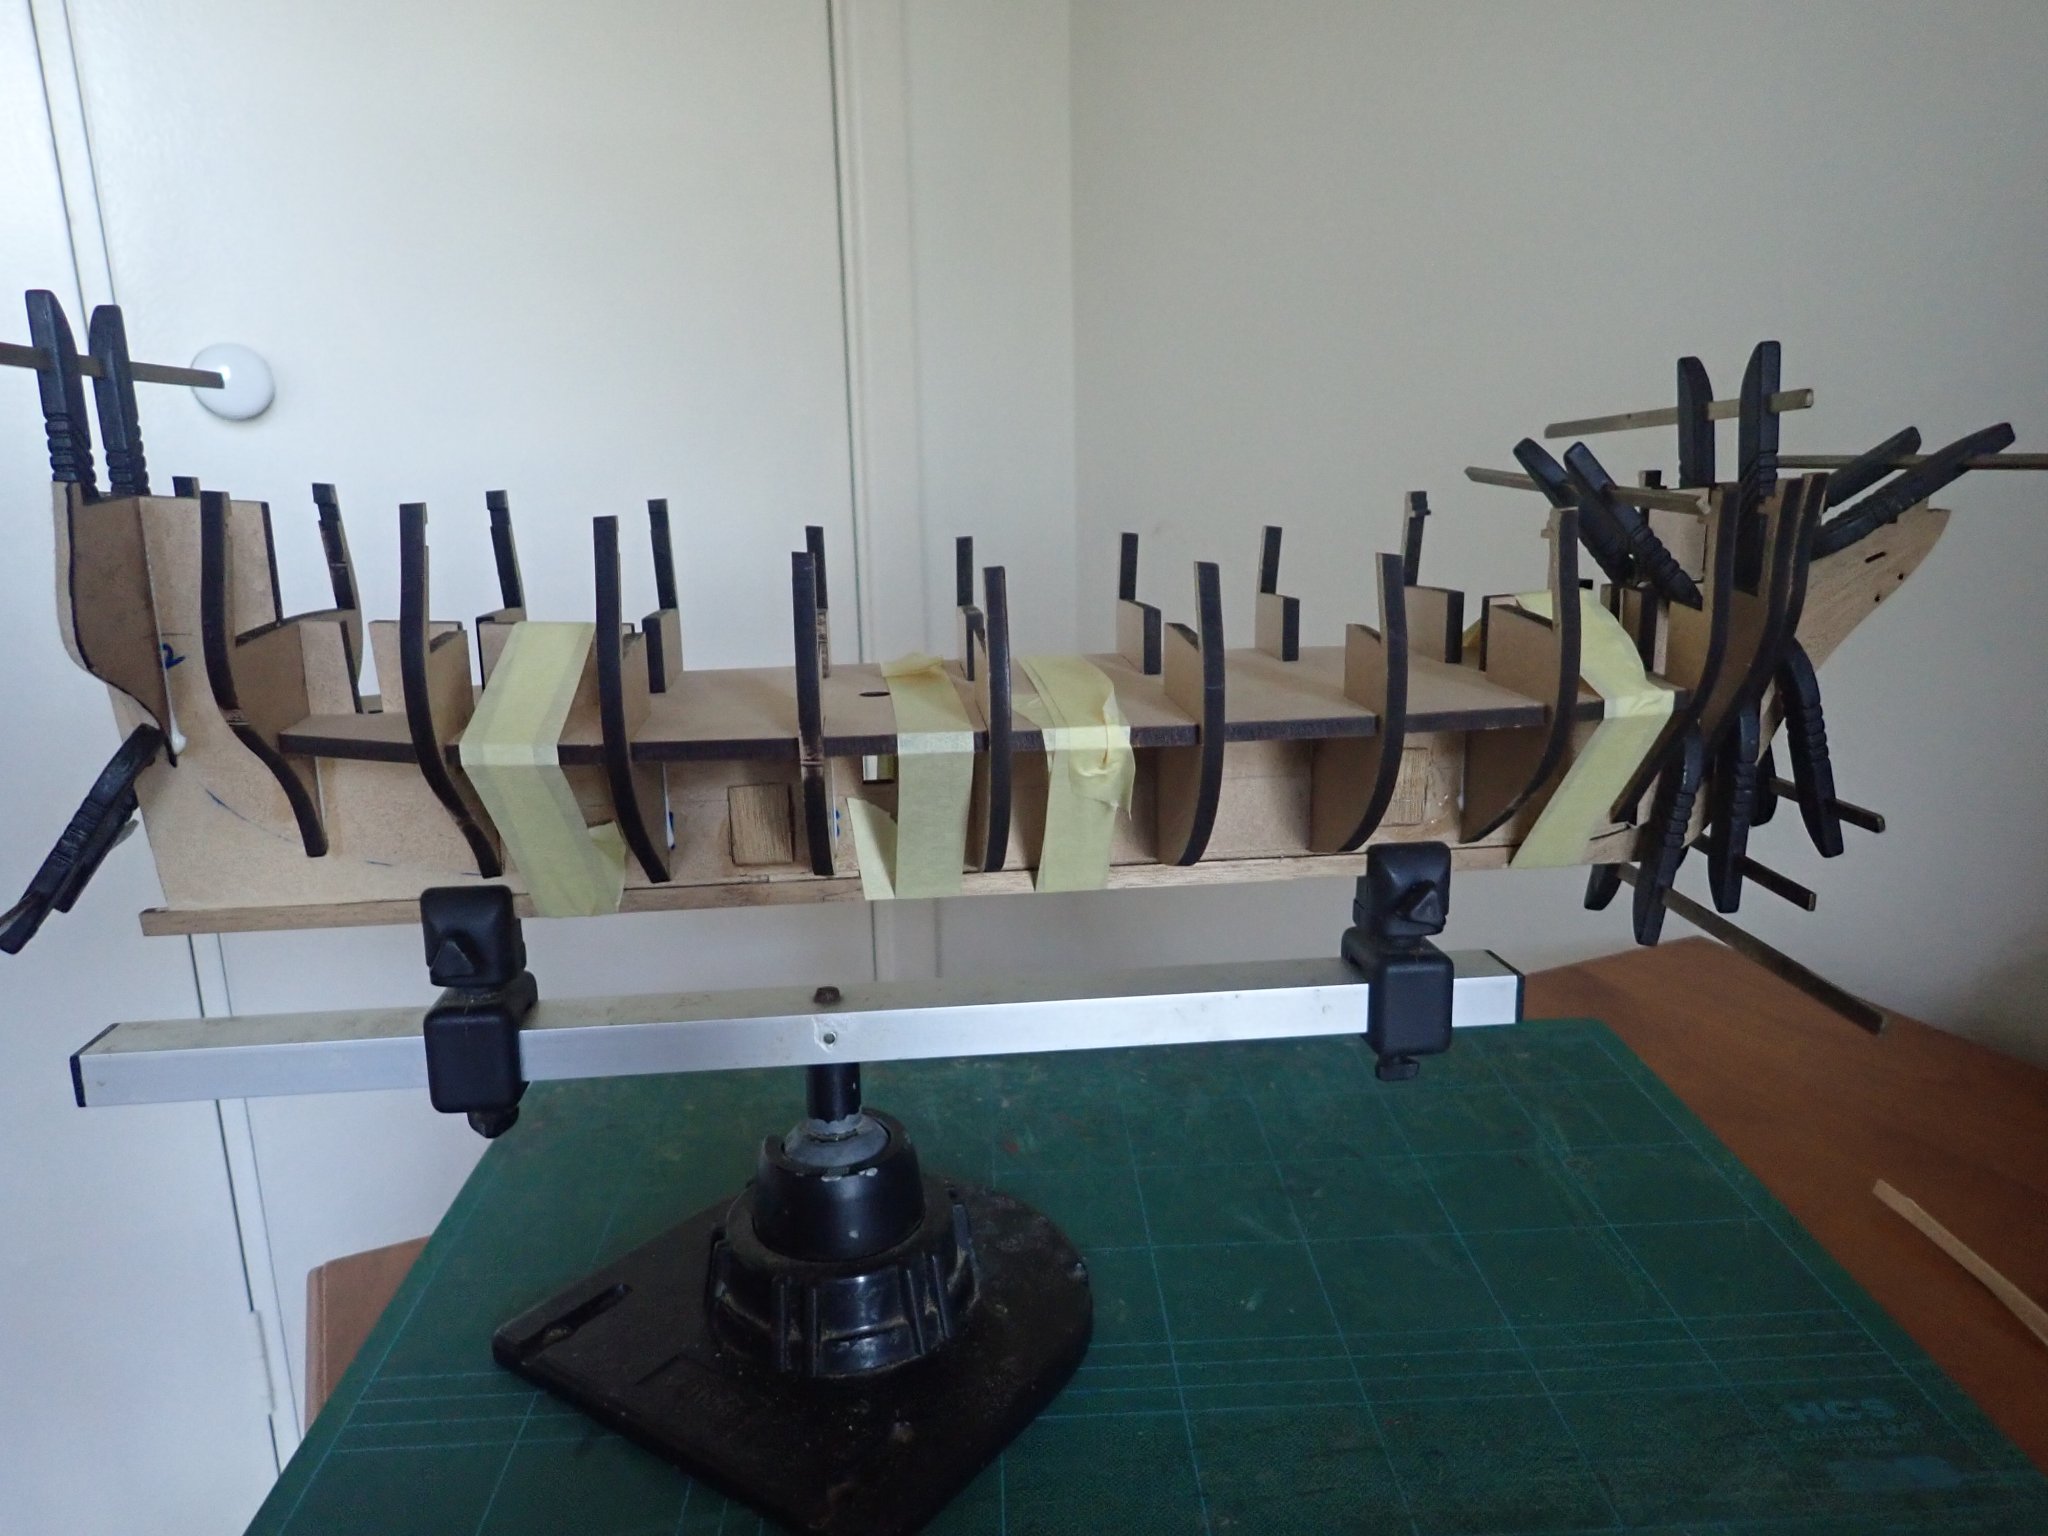
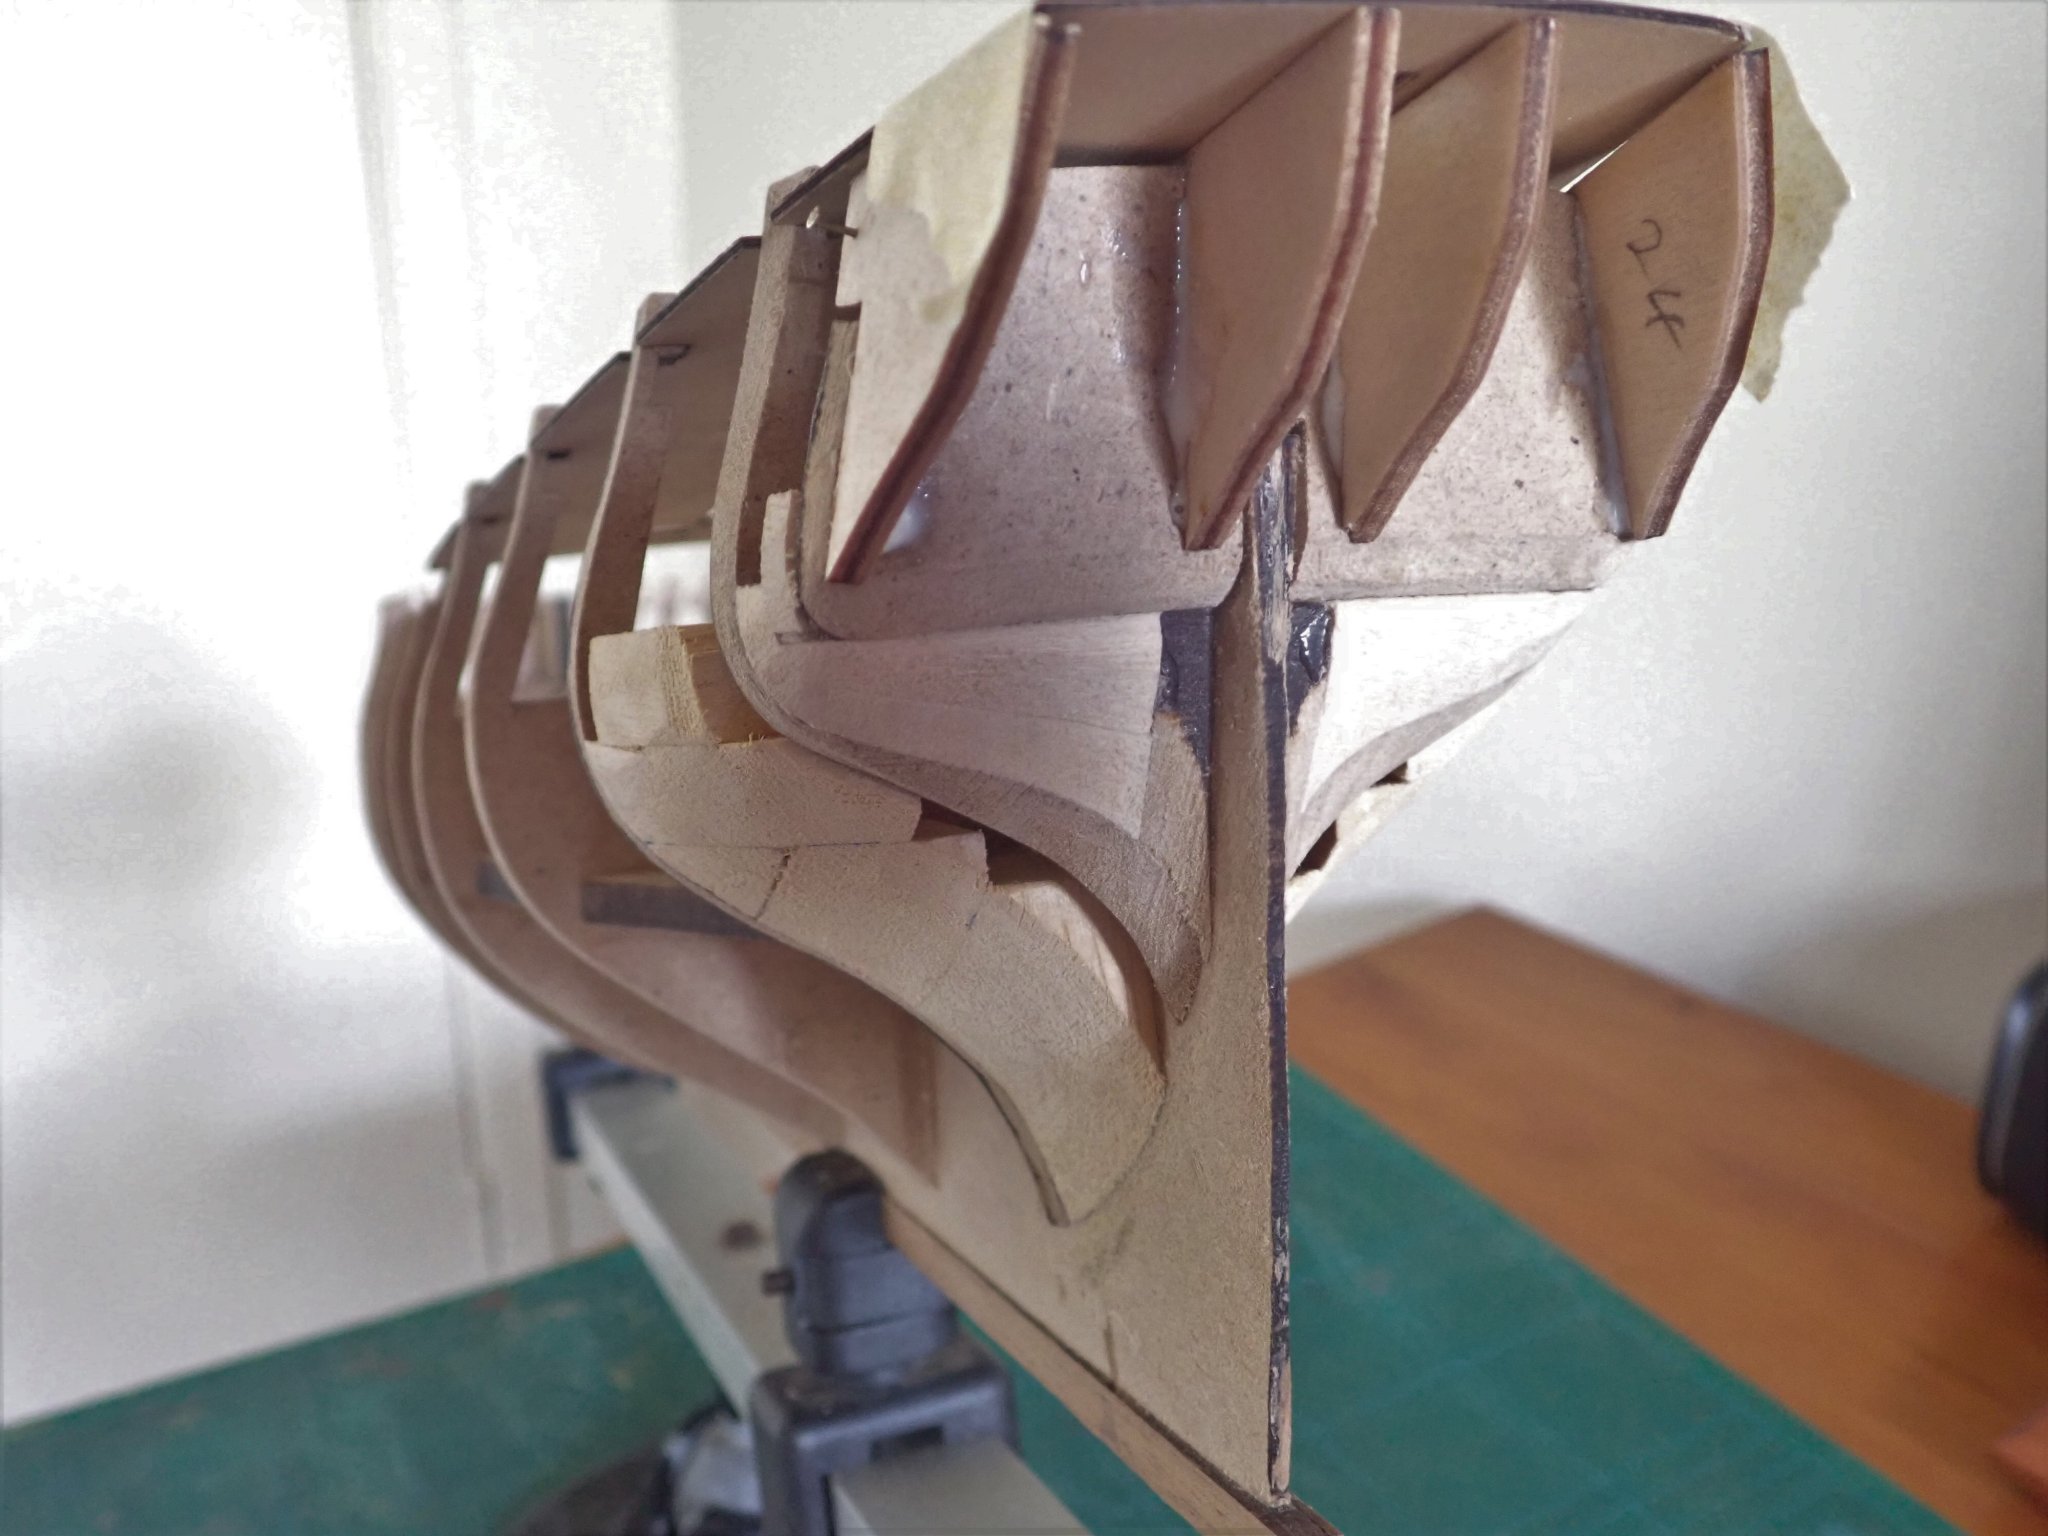
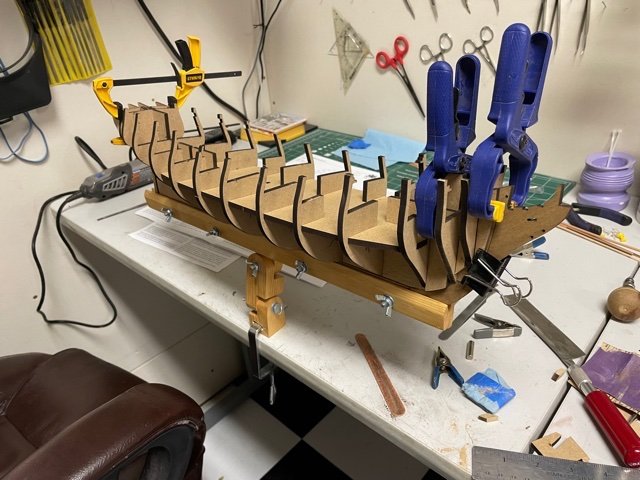
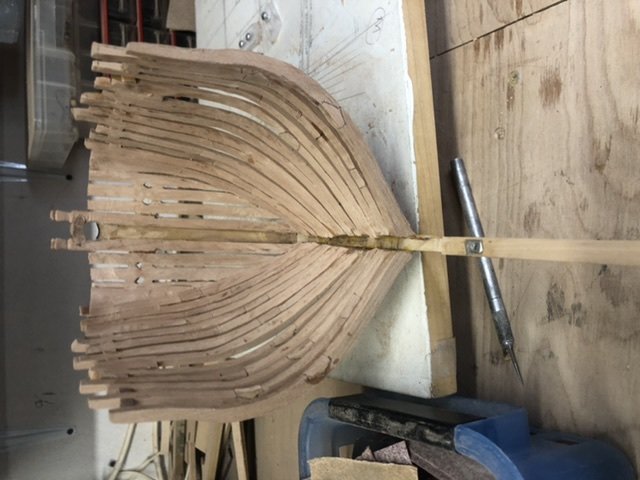
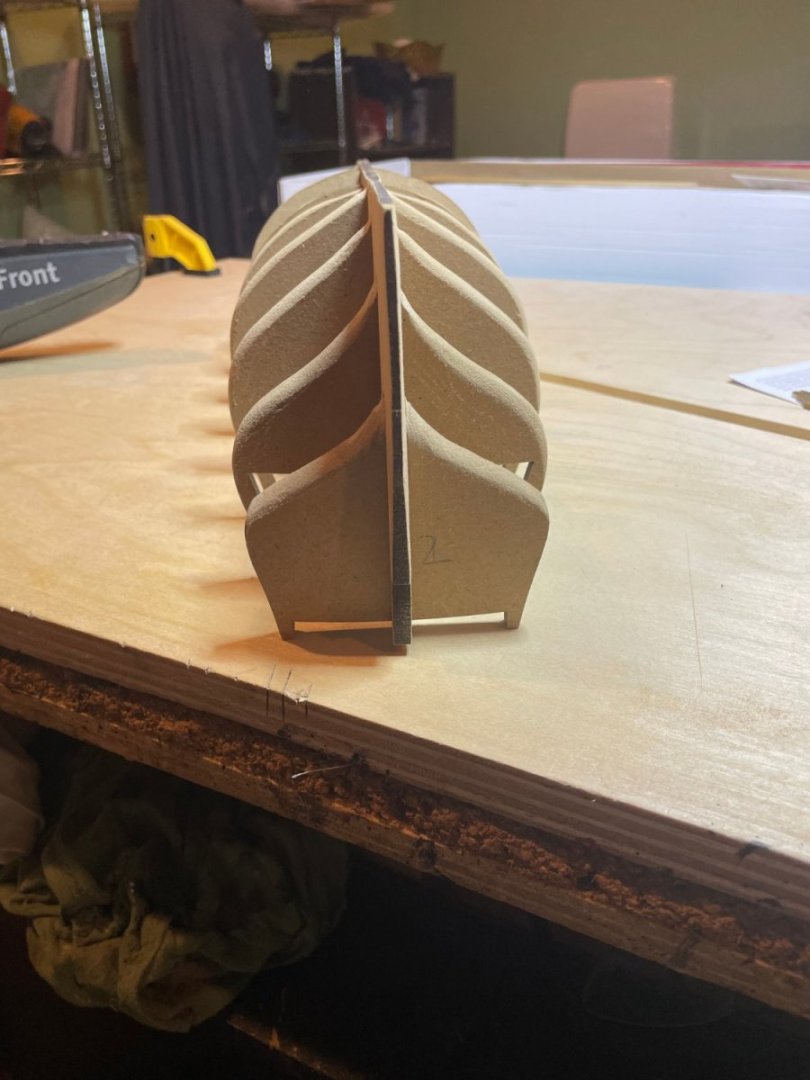
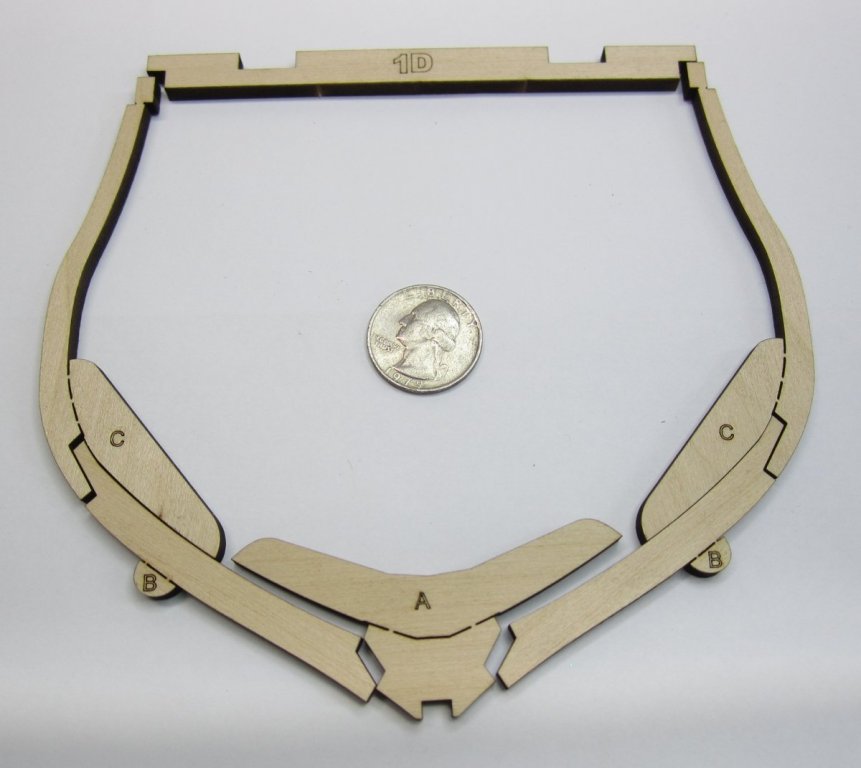
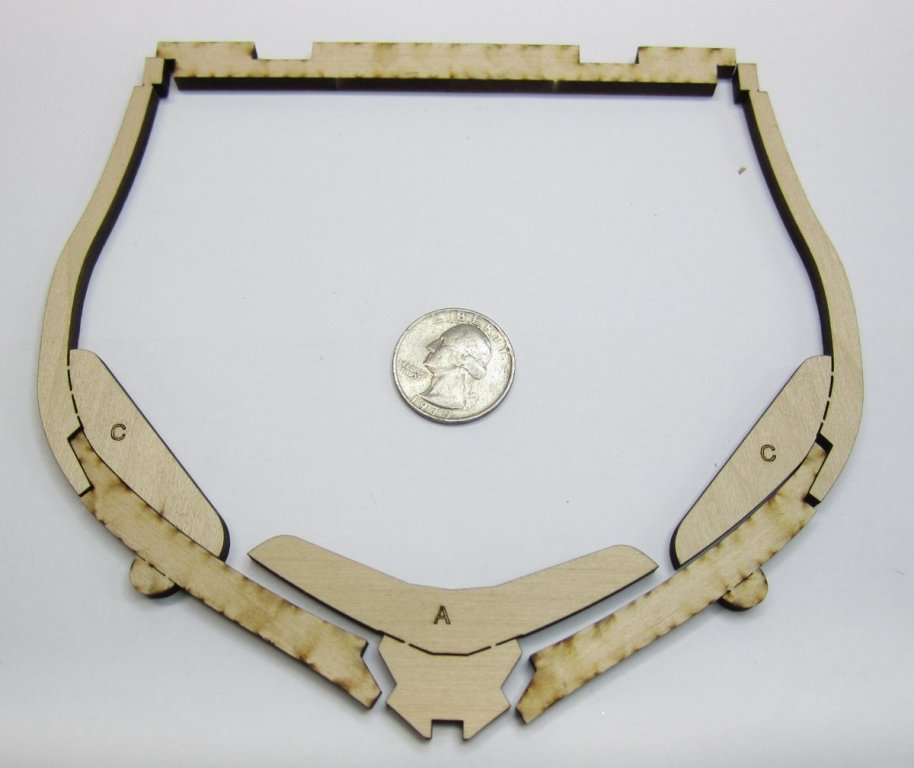
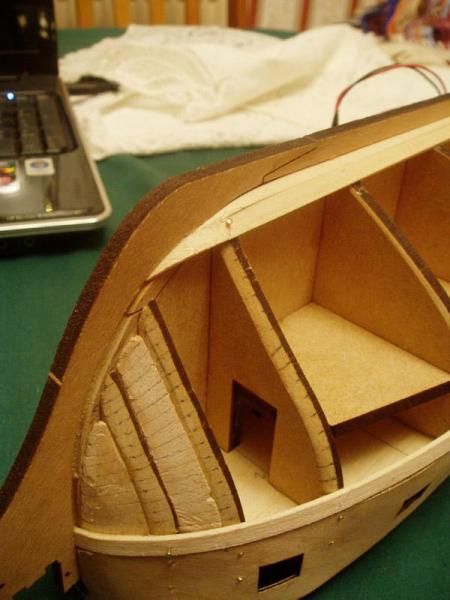
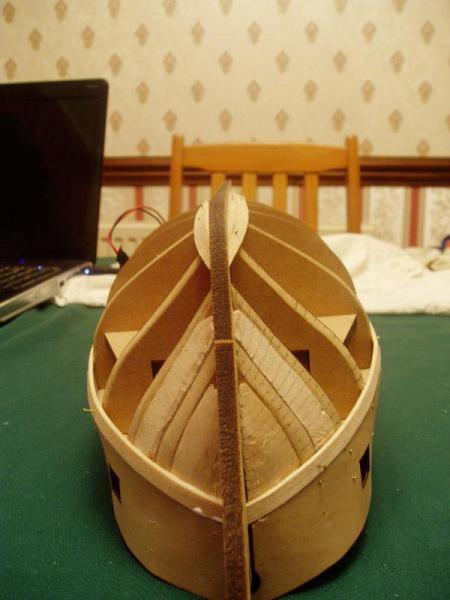
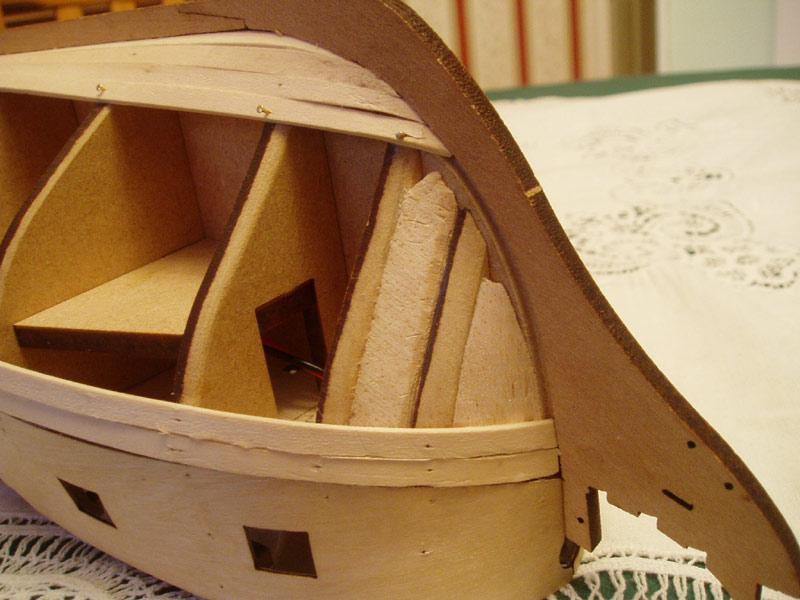
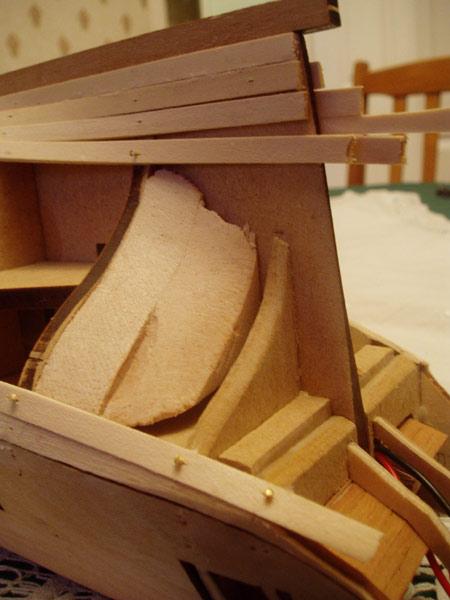
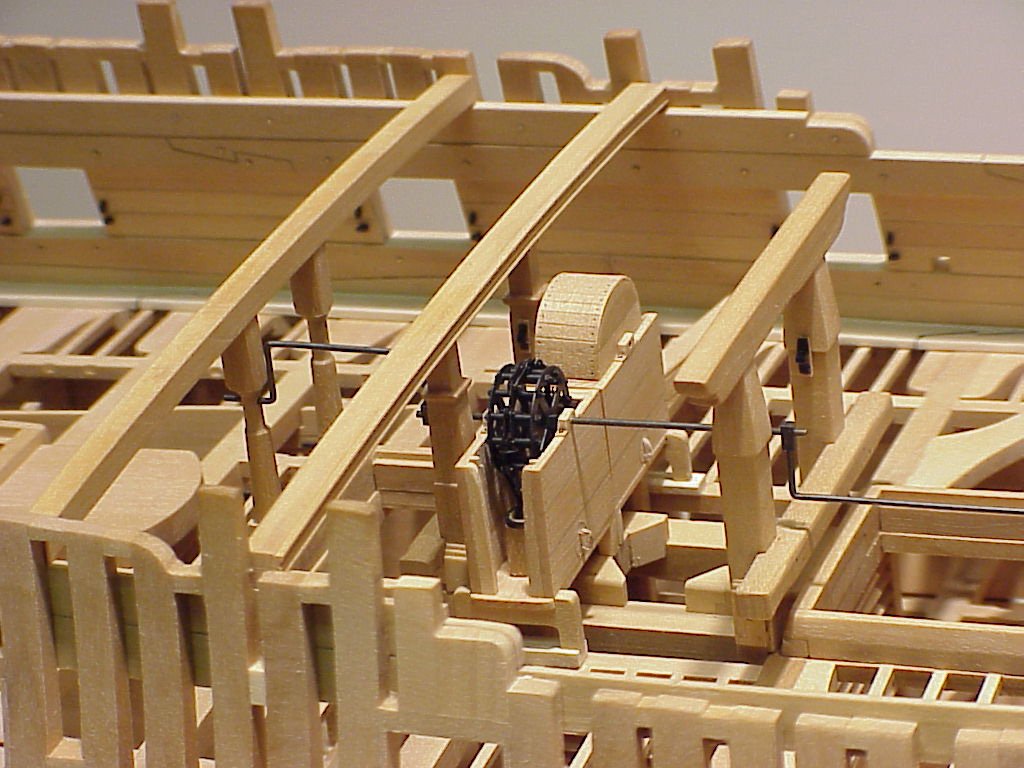
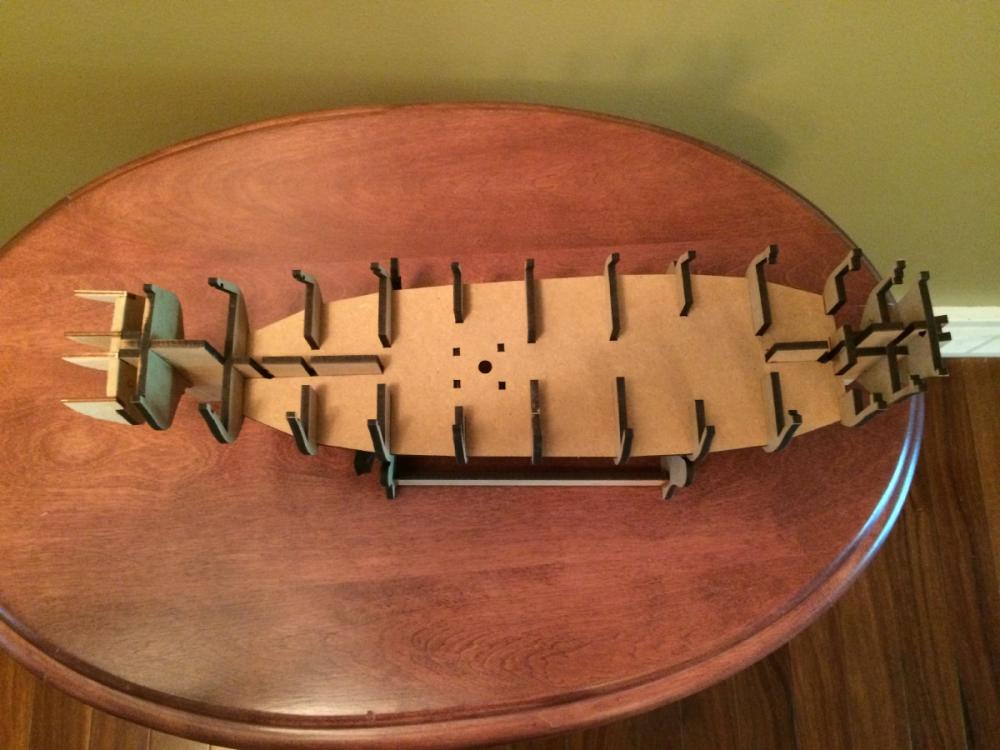
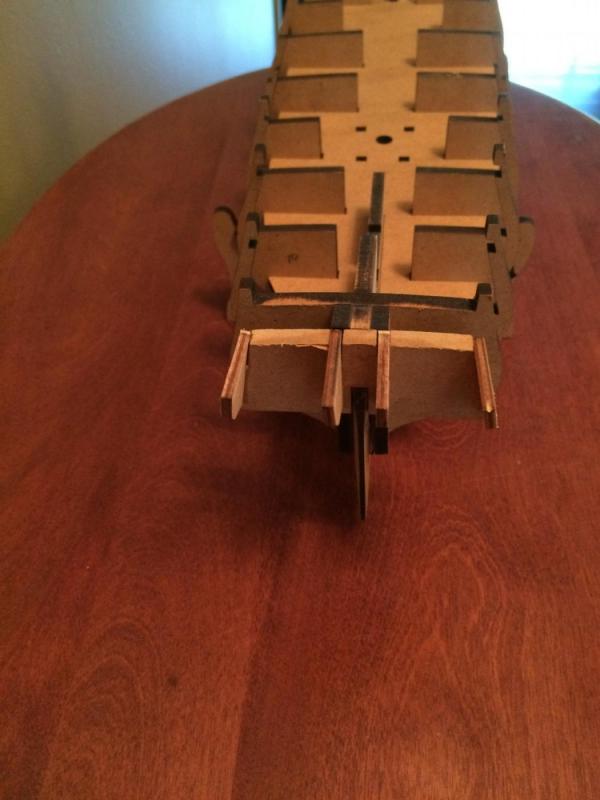
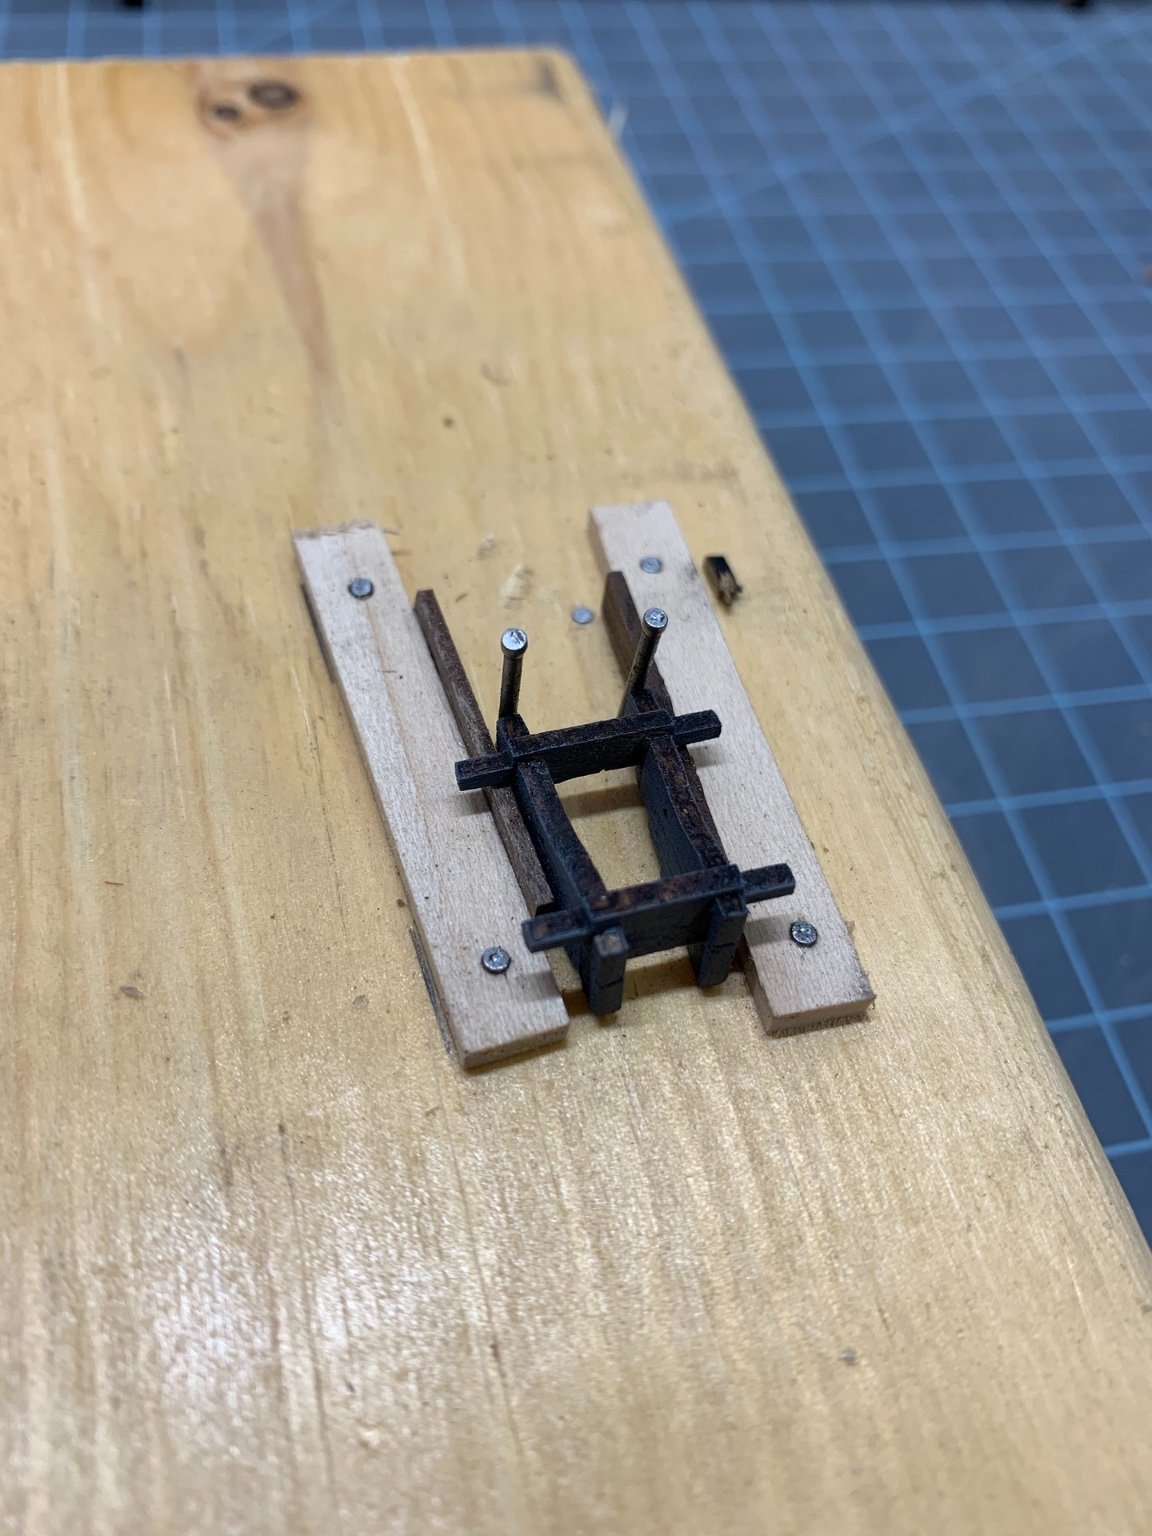
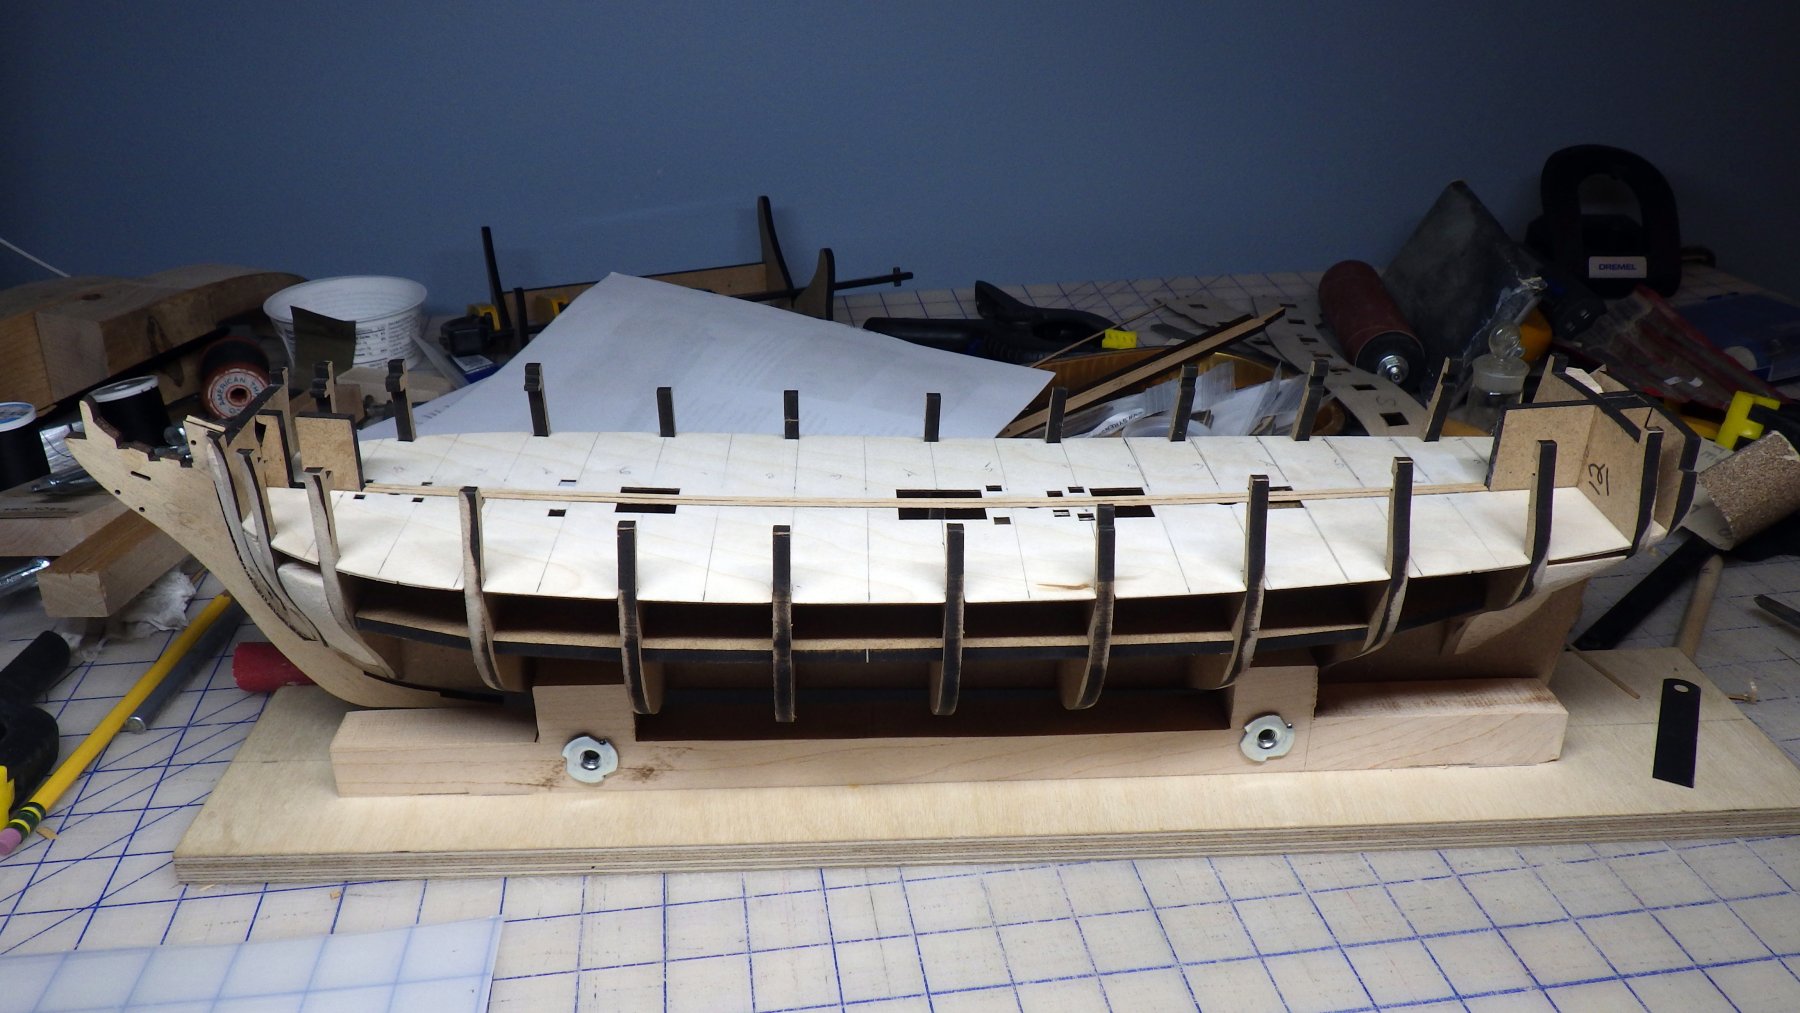
 I have started the cross section model...mostly drafting. But I figured I would start a log. I am waiting on arrival of a variety of machine screws and nuts to finish drafting the keel parts. They will be set up in the usual fashion you folks have seen but I will post that once its ready. Here is the overall plan I am working from. Hopefully it will look like this once done...planked on one side and open framed on the other. I have started drafting the frames. There will be some bent frames with curved top timbers but this is just a plain straight one. Here are the laser cut pieces.....but you will not build the frame with the parts laid out like this. Because the laser cuts on an angle, it is best to strategically flip certain parts to get the tightest fit possible. You wont get one side with a large gap which is typical. Therefore no sanding of the char is needed ...nor should you attempt to sand the char from the edges of all joints that fit together. They will fit perfectly as is. The only drawback is that you will see the seam which in some instances was not the case as they werent tarred. But thats OK.... So I flipped them as I show in the photo below....flip parts "C" and "D" for the best fit possible. Note the dirty side on the flipped parts. There is no need to build each frame on top of a plan trying to get the frame to come out the correct shape. I have created some tabbed guides which make it very easy. I built five of these frames and they all came out the same...Each one took just a few minutes. I used titebond on the seams. Just take care not to glue the guides to the frame. See below. All glued up. Then the guide tabs are cut free leaving the frame strong and ready for sanding. I sanded every edge to remove the char except for the notch in the bottom chock which stays unsanded. It needs to be a perfect press fit into notches I created in the rising wood...which I will show later. But the finished frame all sanded up up looks like the one below. The top cross bar is added for strength and also to help register all of the frames once they are glued onto the keel. That is what those two notches on the cross bar are for. After I draft more frames it will make more sense. Chuck

- 130 replies
-
- 48
-
-
- pof swan series
- sloop
- (and 2 more)
-
 I have come across some very informative videos on YouTube which have been posted by Olha Batchvarov who is a professional model boat builder. The first video covers the first planking - First Planking Video There is a nice section where a drop planks are added. There is also a video which shows the sanding process afterward - Sanding The Hull This video also covers fitted the stem and stern posts There are several more videos on her YouTube channel
 -
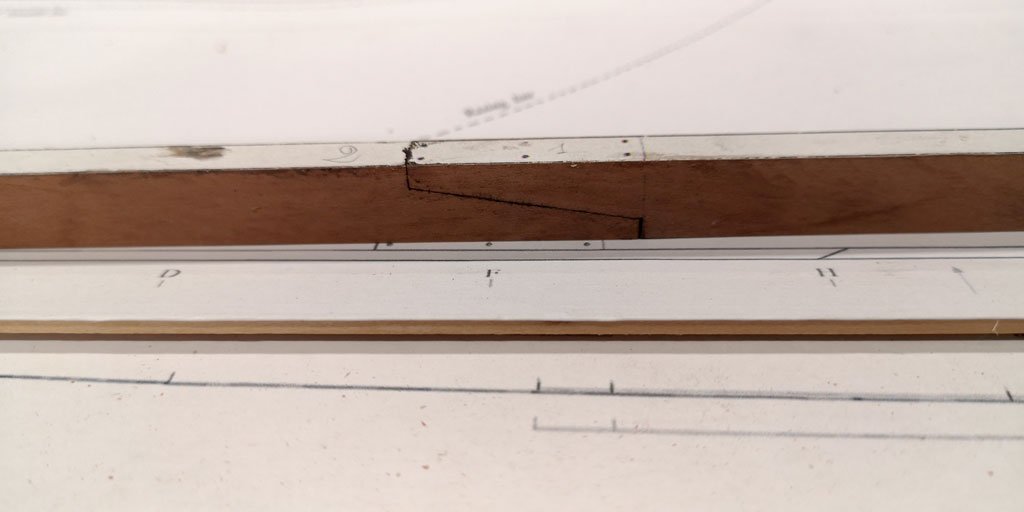
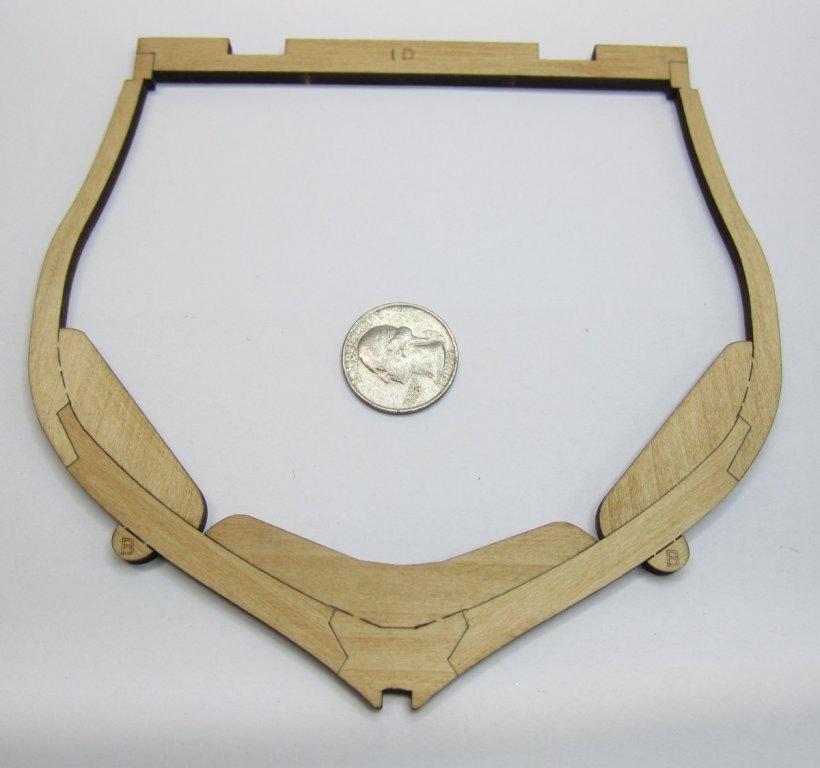
 Good Evening All This is not the most positive way to start a build log but I guess it was to be expected for a newbie like myself. So I have finally received my HMS Pegasus from Amati. The box is barely open and I already have problems. This would be a great point to recommend a build log or other resource for this build. I have found many but Im struggling on that covers the finer details that a rookie like myself needs. The instructions make no reference to a rabbet or bearding line, I have however come across reference to this in virtually every single build log that I have read on the vessel. My extreme lack of experience has lead me to several questions regarding these two subjects. 1. Rabbet line: - Am I correct in saying that they should be cut from the very bow to the very stern(excluding the vertical portion of the stern as indicated between the red arrows) -Should this line be cut 1.5mm "tall" and 1.25mm "deep" on either side of the false keel? -Do I need to sand the true keel down from 5mm to 2.5mm to match the width of the false keel after being cut down for the rabbet line?(this doesn's seem to make a hue amount of sense but it seems like this is what some people have done on some of the photos that I have seen. 2. Bearding line: - how do I determine where to draw the bearding line? - should the false keel be tapered evenly from the bearding line down to the rabbet line? - the instructions say "the stern area of the false keel to which the rudder post will be glued is to be sanded to roughly half the original width" does this essentially mean that I should sand from the bearding line to the vertical portion of the stern as well as the rabbet line(so that it tapers to the edge of the keel both vertically and horizontally?) Thanks a million in advance!
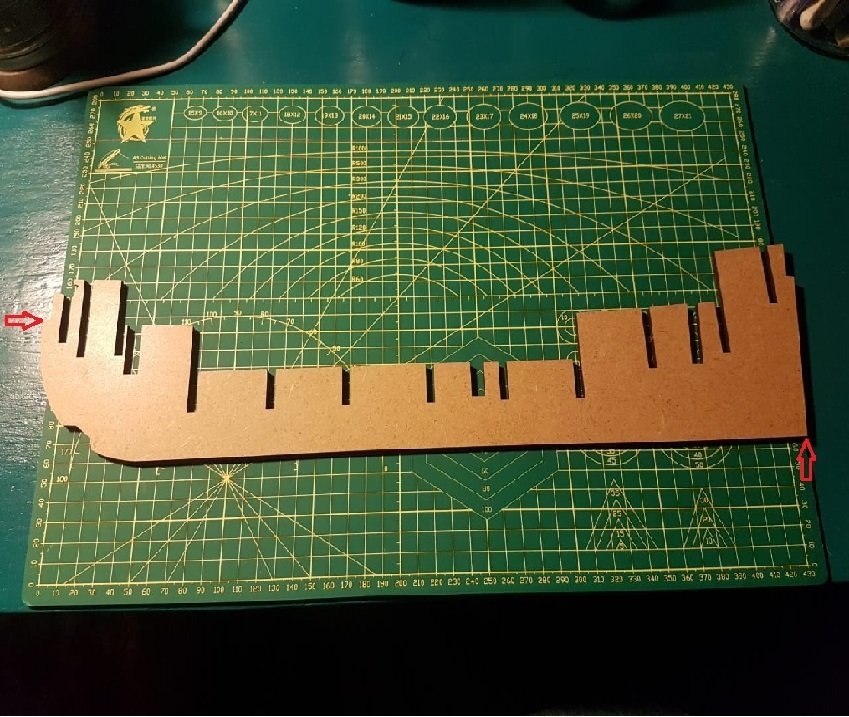
-
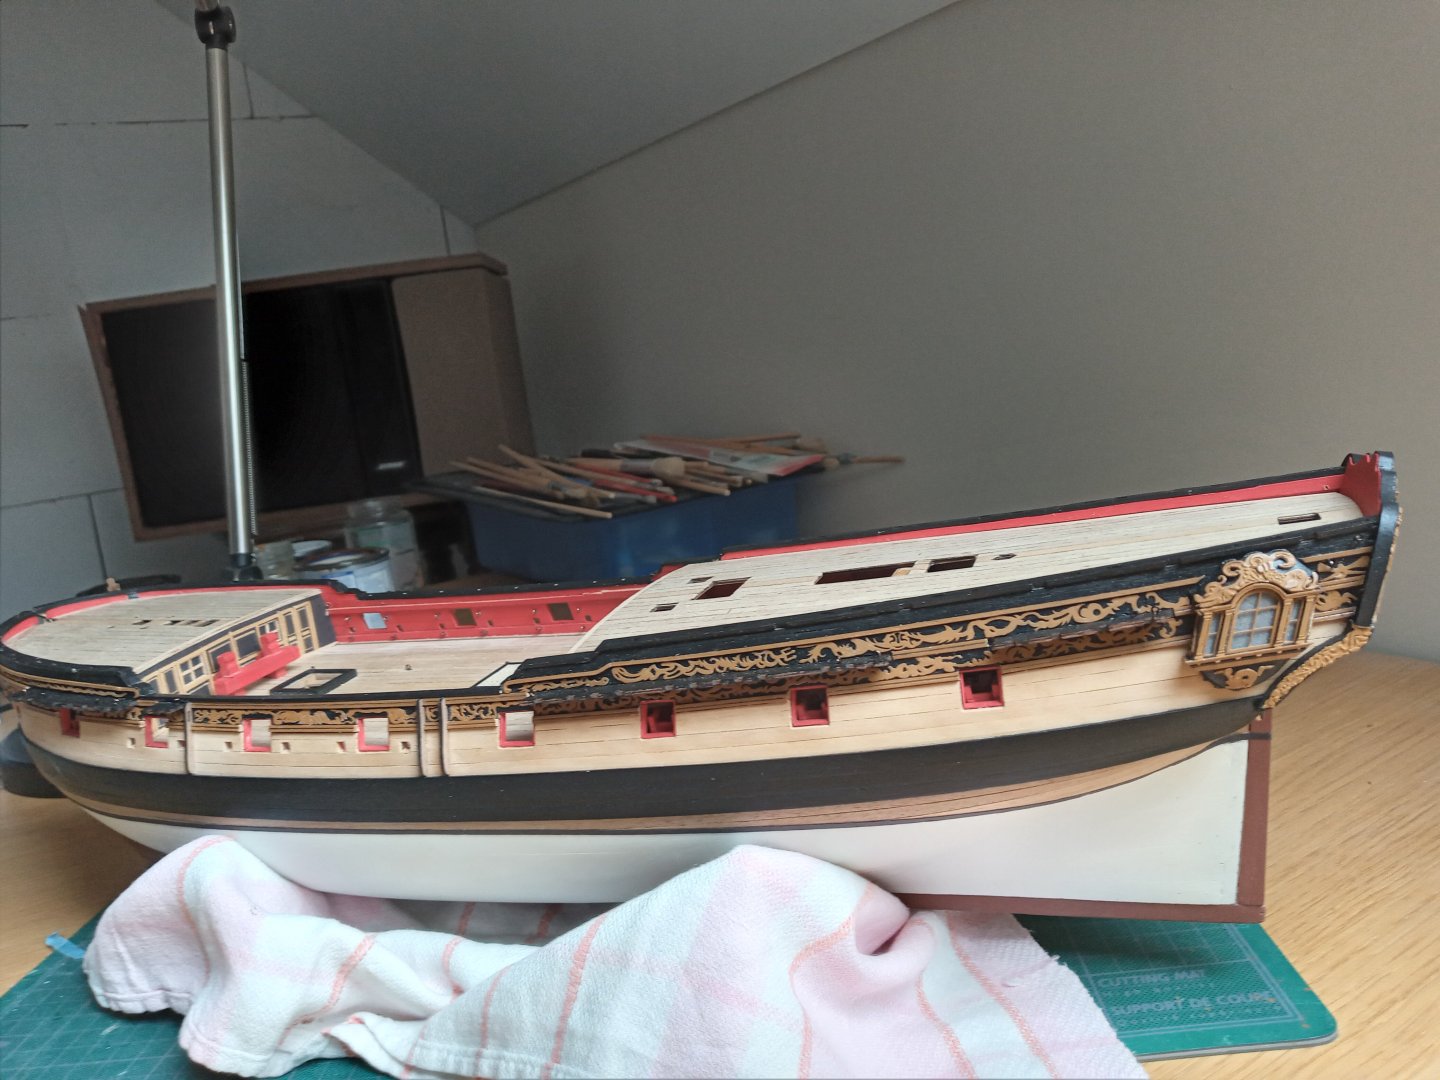
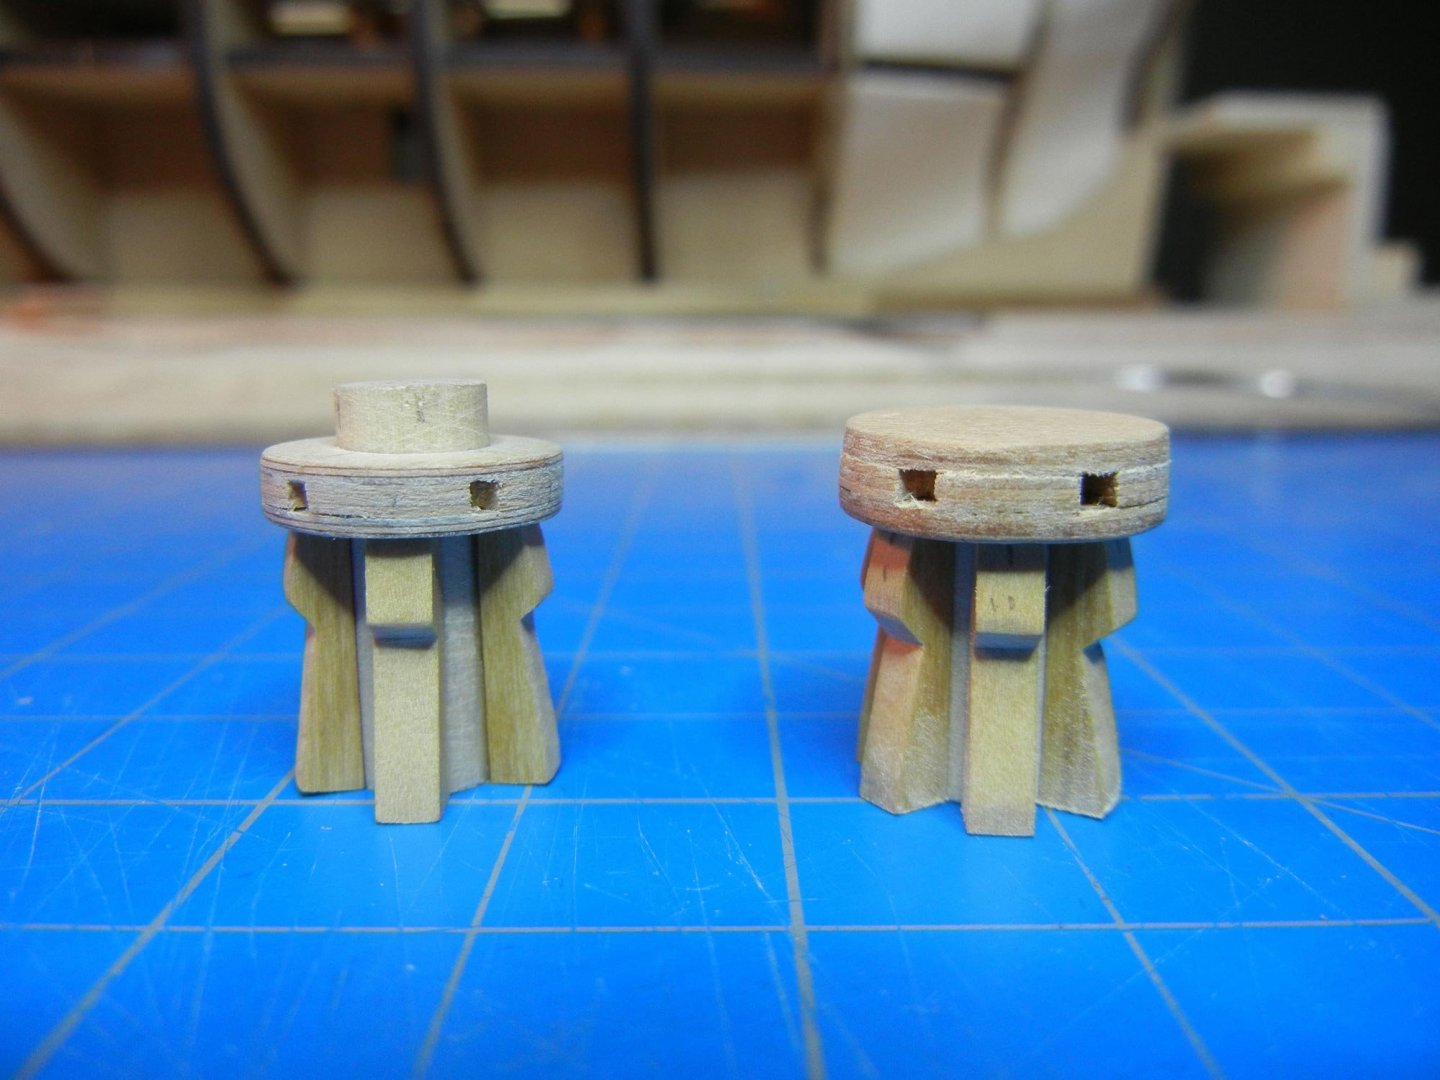
 I have been working on Pegasus for a year and a half, and am just now starting the build log. Aside from the beauty of the ship, I chose Pegasus for the wealth of guidance available here on MSW (thank you in advance, I need a lot of help). At this point I have completed through the first planking and the build has progressed normally with few surprises. This is a very good kit, but like many, it begs for some scratch and sub kit “improvements”. My first choice is new capstans based on TFFM. Looking at these now, I need to finish some details. The main deck begged for cabins, which provided a distraction from assembling the “big bones”. Working from scratch allows some design work and creativity. Trial fit of cabin partitions. Dave B
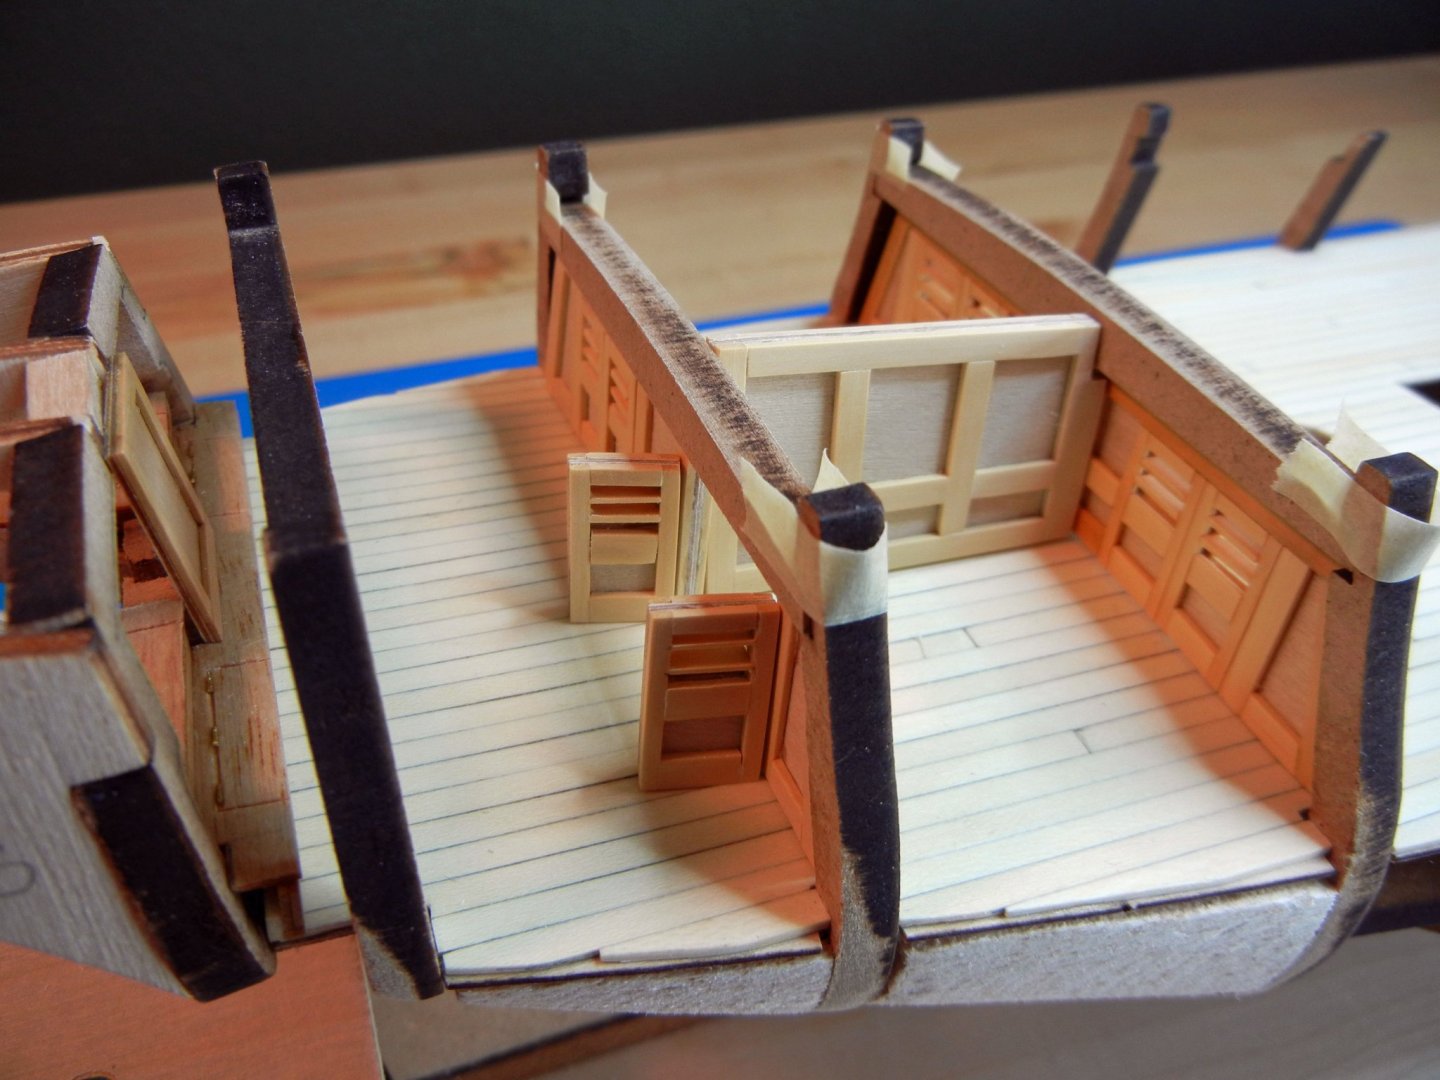

- 9 replies
-
- 9
-
-
- pegasus
- victory models
- (and 1 more)
-
 Click on the tags in the title above (shown in black) for an instant list of all the build logs for that kit subject.
 -
 I started work on Pegasus in July 2018, but unfortunately didn't take any pictures of the early stages. I had just completed the Caldercraft 'Granado' kit, and enjoyed building it so much that I decided to go for this one straight away (I wish I had taken some shots of Granado during the build now, but didn't - anyway I shall put something in the Gallery for the finished model soon). Granado only took me six months from start to finish, but I haven't been able to spend the same amount of time on Pegasus. Still quite a way to go, but I hope that alternating work on my other current build, the Russian brig Mercury, with finishing off Pegasus will keep my enthusiasm up! The first two shots are the only images I have of the earlier stages. The others were taken outdoors on a wet Welsh Christmas afternoon.


-
 My second build is the Pegasus by Victory Models. I wanted something a bit more challenging, but not something that would be out of my skill range. i also love the lines of the Swan Class ships. Some of you may remember that I modified the stern to be able to create the captains cabin. The rear bulkheads were redesigned to make this possible. I also wanted to fit out the forcastle and I have incorporated led lighting in both areas. Unfortunately I can't find the first set of photos, so this log starts with the first planking. With this build I decided to have a go at making a rabbet and bearding line:
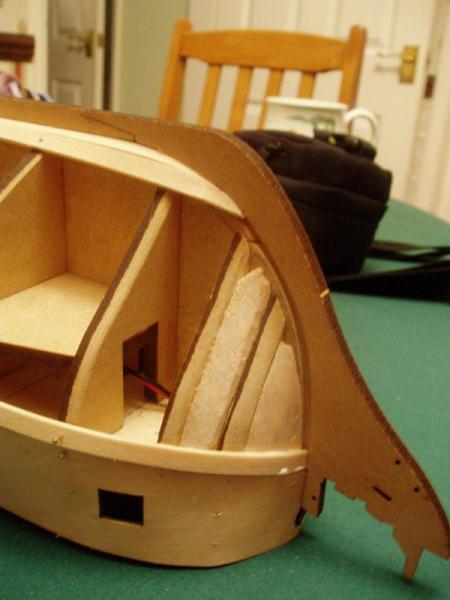

- 161 replies
-
- 3
-
-
- pegasus
- victory models
- (and 1 more)
-
Good day Gentlemen/women After much thought, research and deliberation(literally years of umming and aahing) I decided that I would bite the bullet and purchase a fairly challenging vessel to start my career in model ship building. I settled on the HMS Pegasus and I am extremely excited about getting started on it. I realise that any sane person would have started on something far more simple but my thinking is as follows... 1. I have prepared myself for what I expect to be a 2 year project. 2. The wealth of knowledge, willingness to help and attention to detail that can be found on this forum really gave me hope that I could work through this project and succeed. 3. I feel that every single element of doing this project is essentially very simple if it is broken down to its tiniest detail, every step is researched carefully and tackled without haste. 4. I like to think that I am fairly good with my hands. I do blacksmithing and carpentry both as hobbies and essential skills for a farmer in a remote part of South Africa. I hope that this somewhat simplified approach to this problem will turn out to be correct but the proof will be in the proverbial pudding. As of this moment I am still waiting for my model to arrive(I ordered directly from AMATI and paid 319 Euros including shipping). Unfortunately amati used a shipping company called Asendia who then handed the shipping over to the South African post office. This means that I can expect my package to arrive sometime within the next week or possibly during the next ice age. At this stage my primary means of securing my package is being on hold to the post office, checking my tracking number 380 times a day and thumb holding. In the meantime I have built a couple of simple tools to assist me and purchased the rest. The home made tools include. A "U" shaped desk(which through some bizarre negotiation with my girlfriend ended up being painted "teal"(thats blue to you and I)) An adjustable, lockable, rotating, swiveling, pitching, rolling keel clamp An adjustable keel rest (this is probably not the right term) And a guillotine with adjustable angles that takes a carpet knife blade. A plank bender made from a forged and polished chunk of copper and a soldering iron. I am not sure if there is a specific place where I should post photos and text about some of the tools that I made or if anyone would be interested in this but the information if available if anyone is interested. I also managed to get hold of a broken down scroll saw for a bargain and I restored it to a condition that im proud of. I have a dremmel stylus with a decent selection of attachments as well as the following bits and pieces Soldering Iron hand scroll saw razor saw multiple scalpel blade holders a variety of drawing equipment for technical drawig a variety of drill bits, sandpaper, clips, clamps, files, brushes, chisels blades, rulers, squares, clippers, cutters and pliers. If anyone has any questions, advice, suggestions or guidance for me(or perhaps a recommendation for which pegasus/fly builds to reference most) then I would be eternally grateful. Gods speed to you all! Cheers! Haiko(The Bitter End)
-
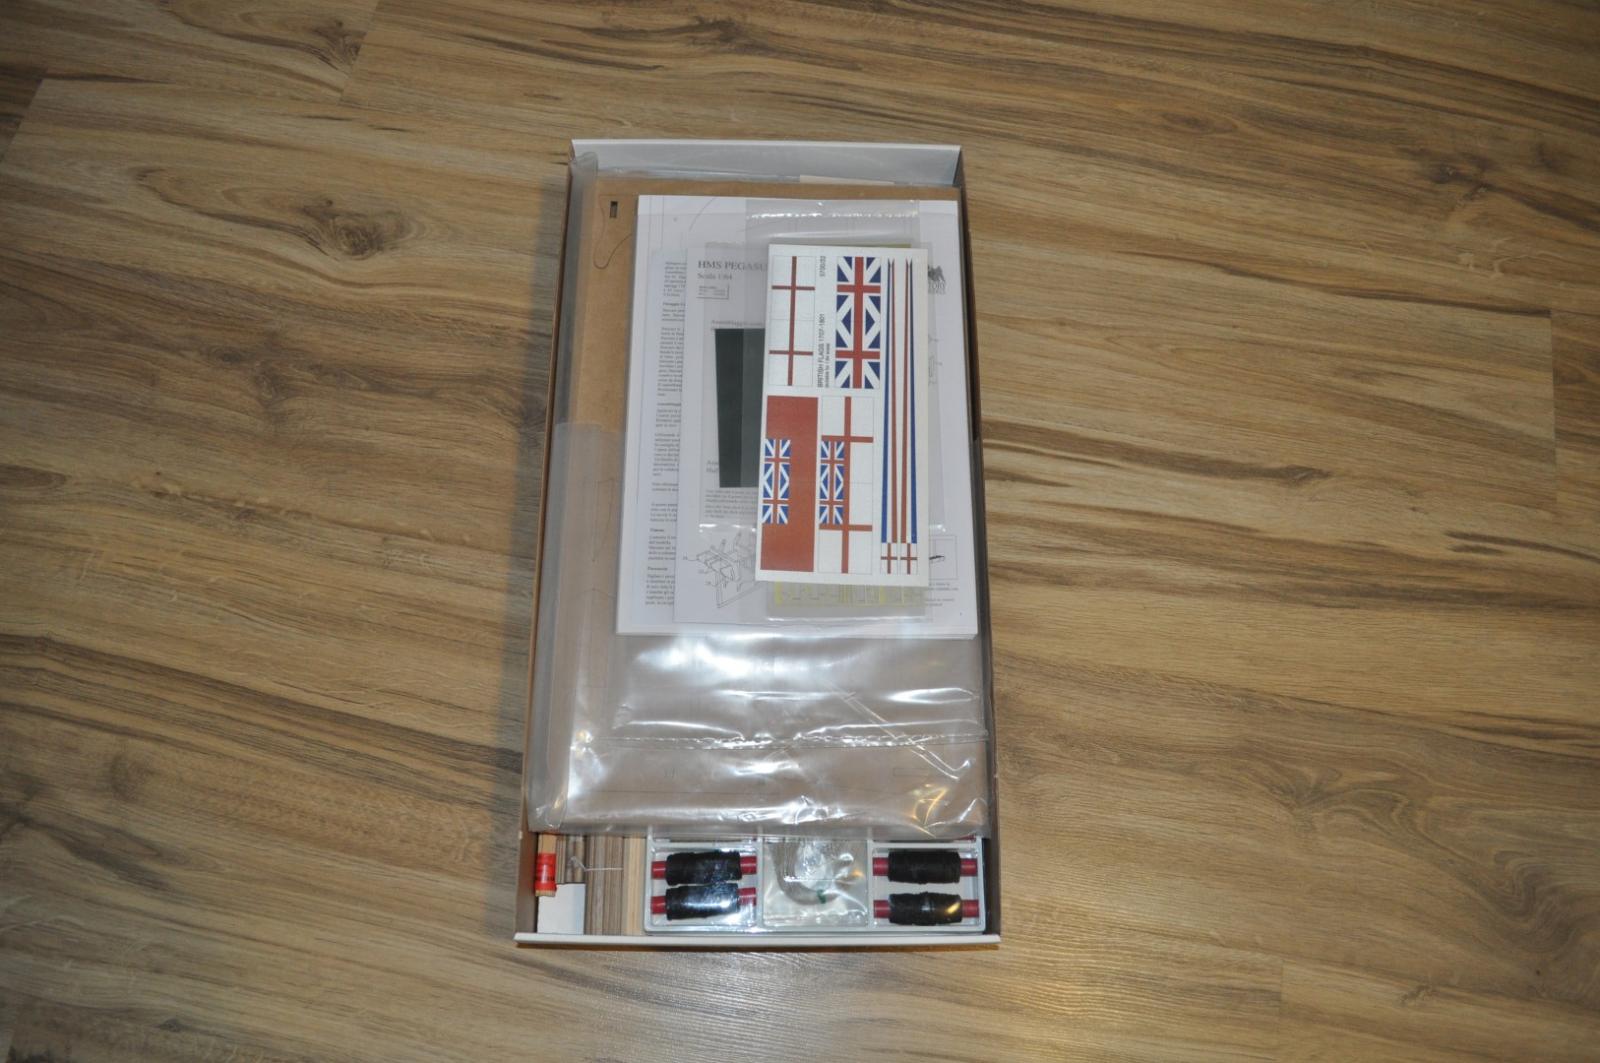
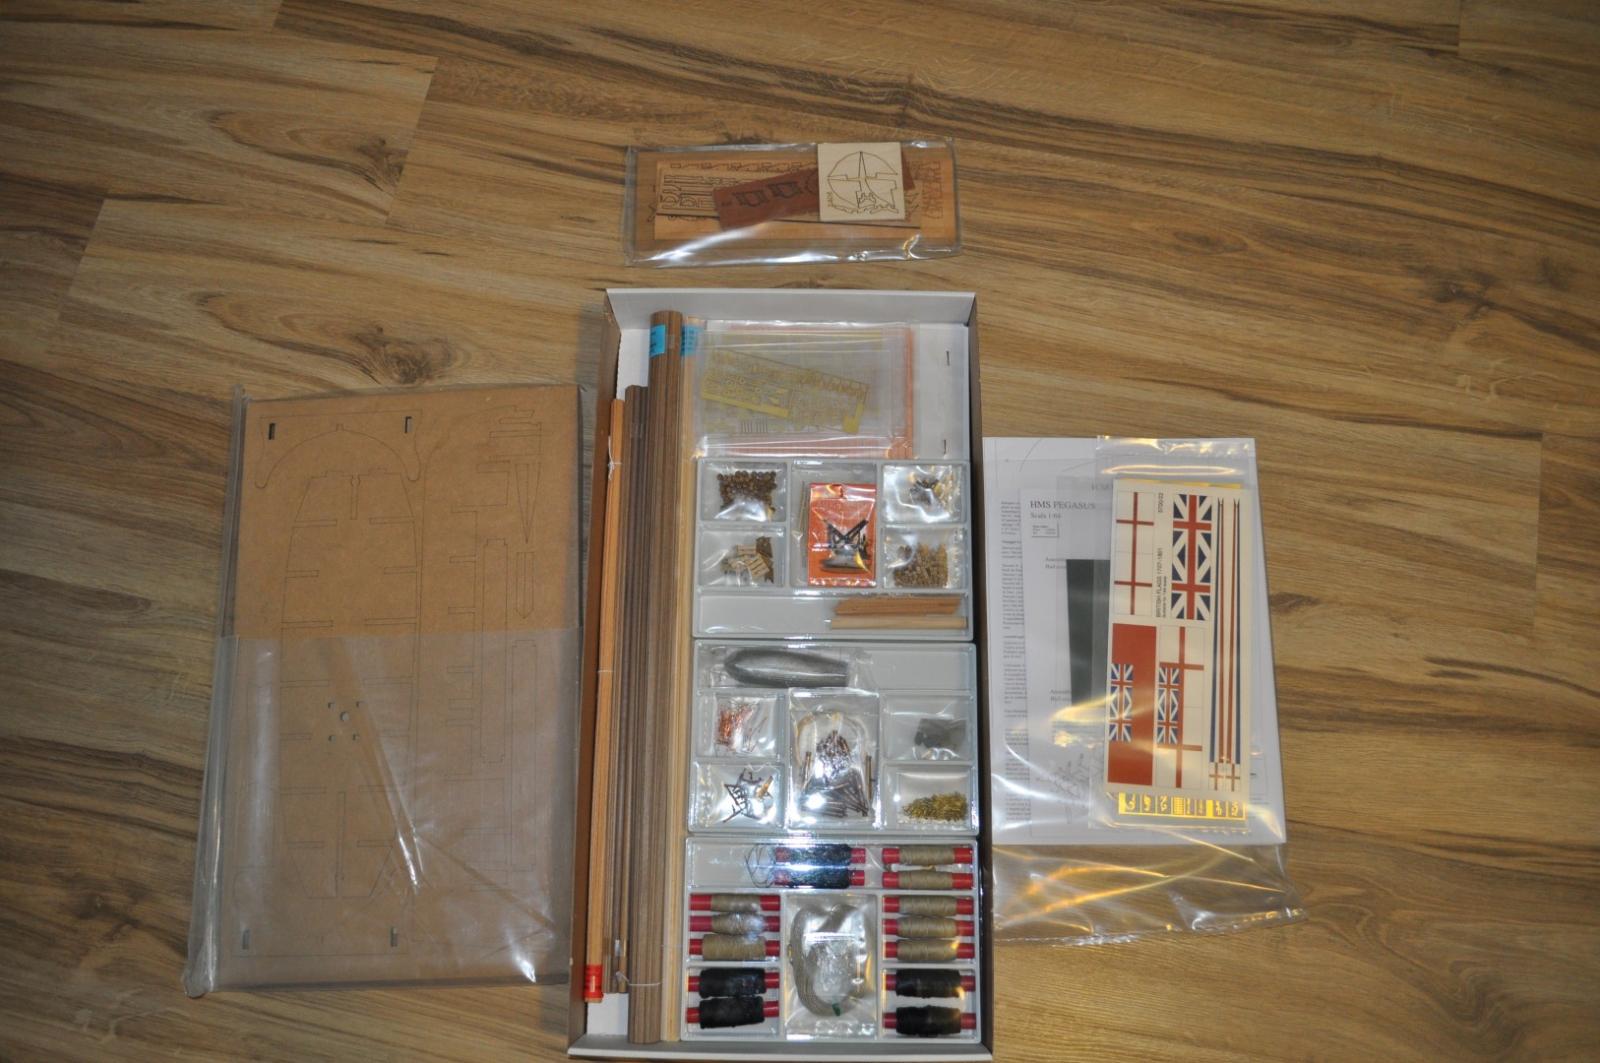
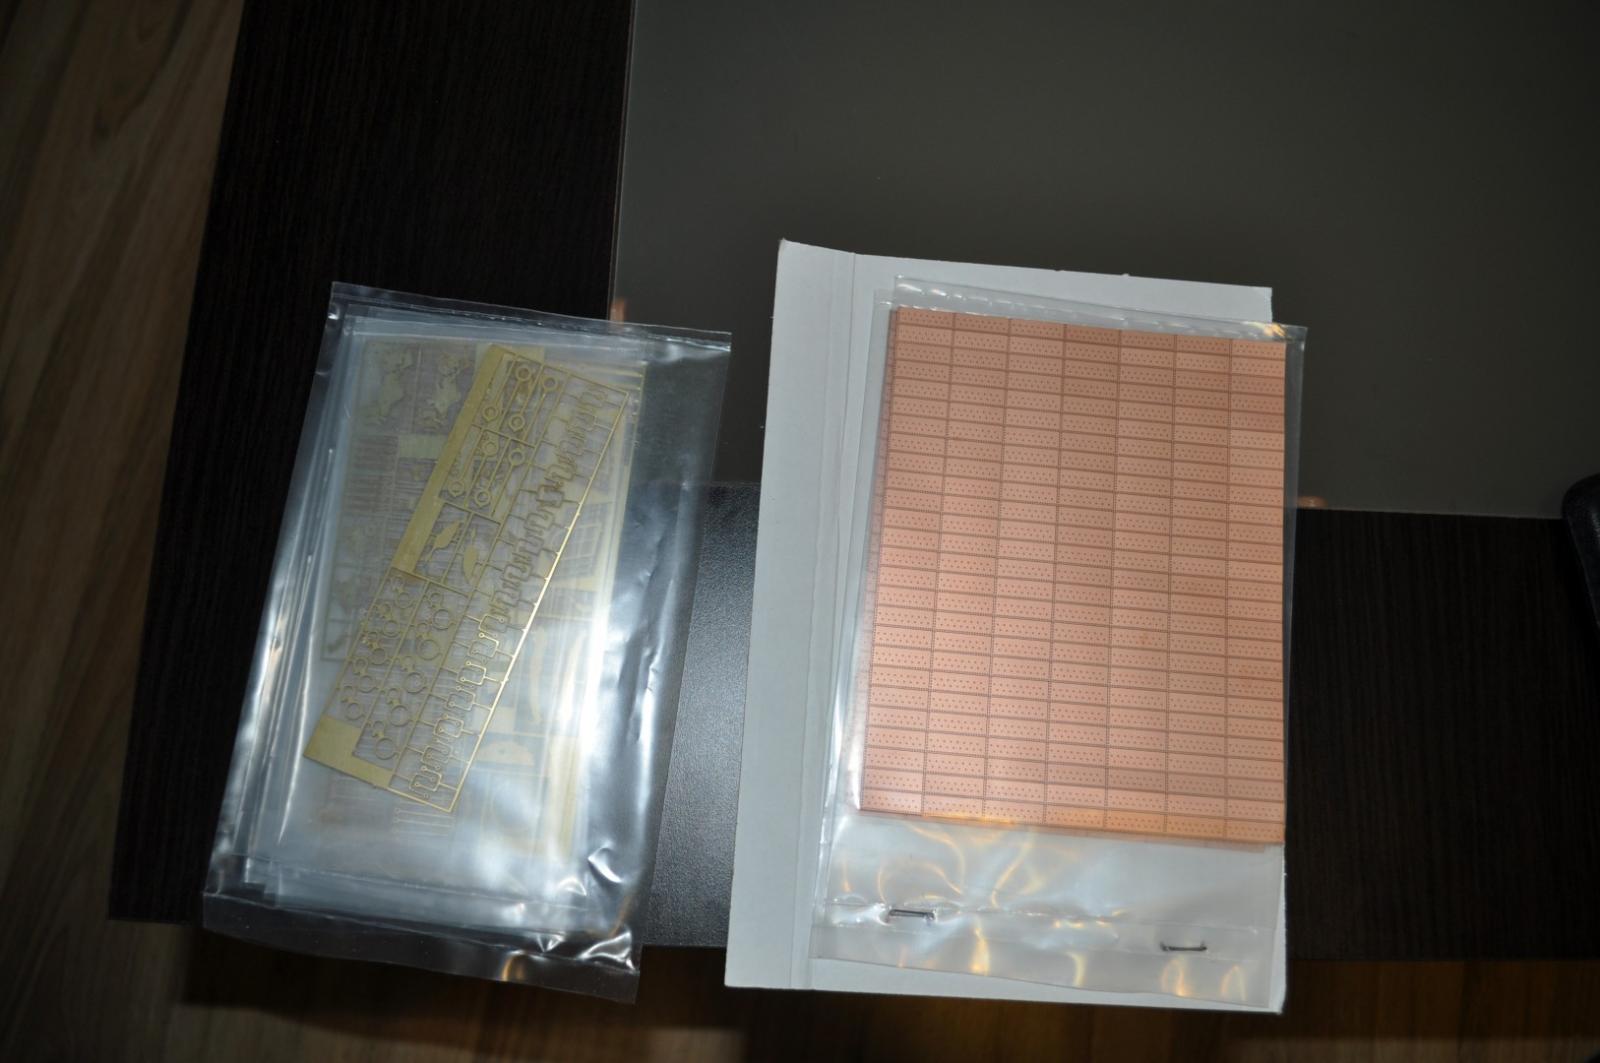
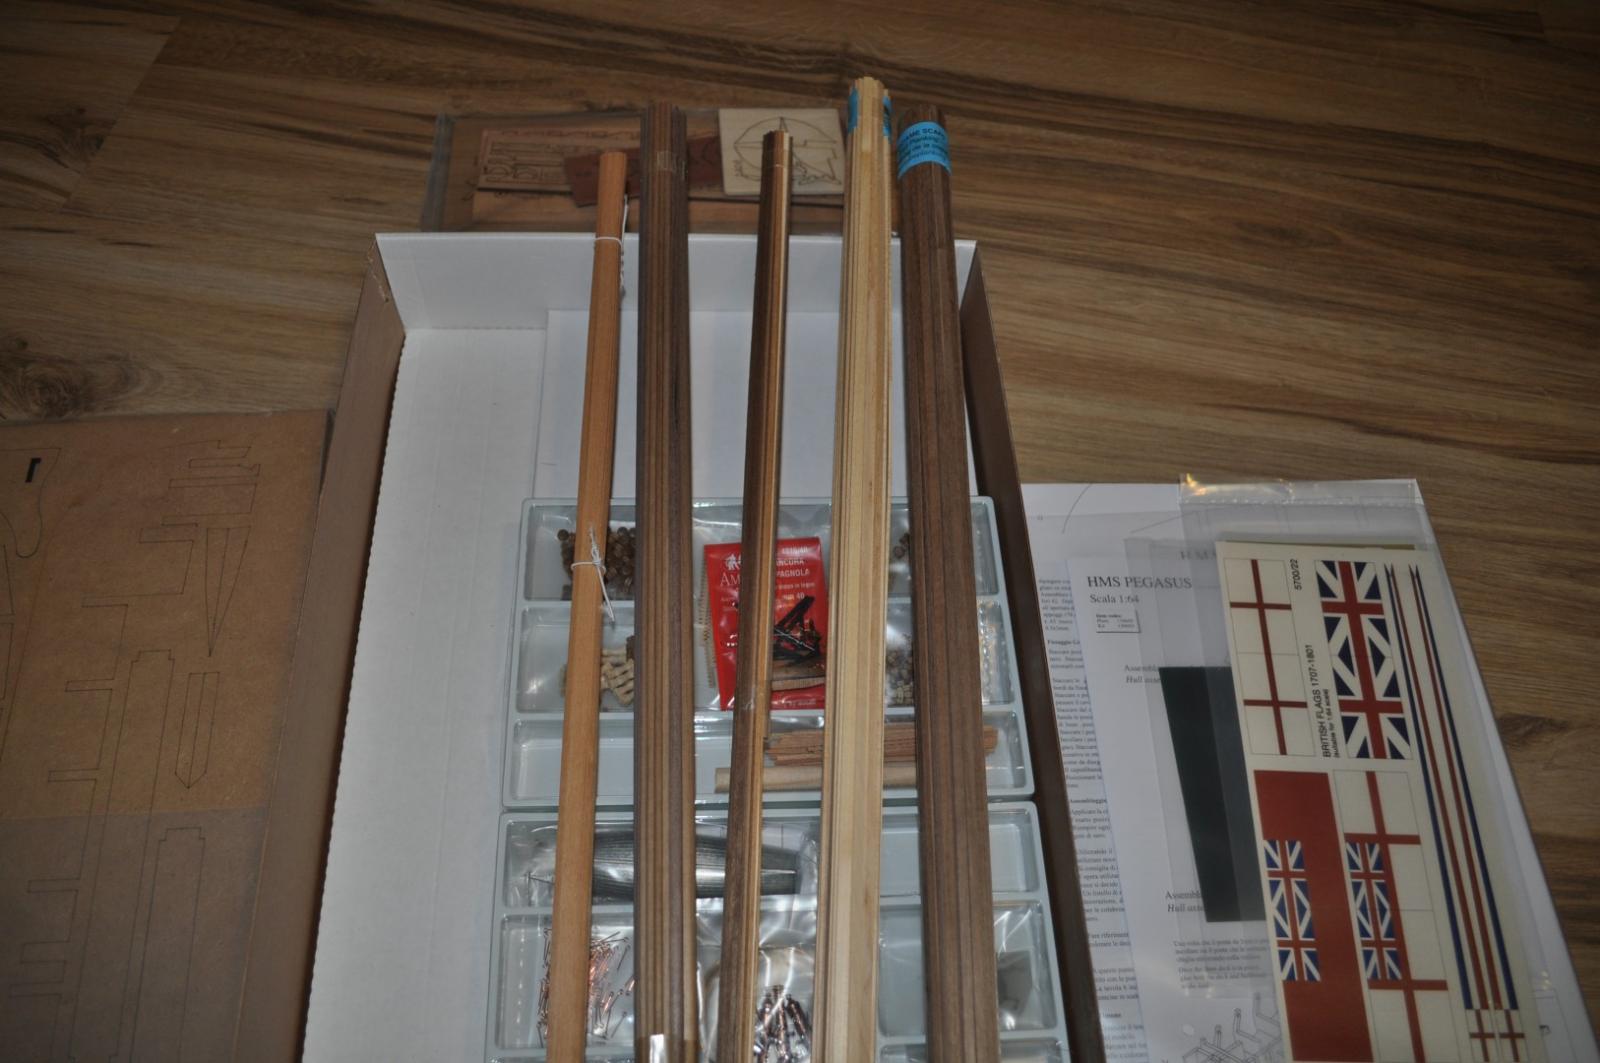
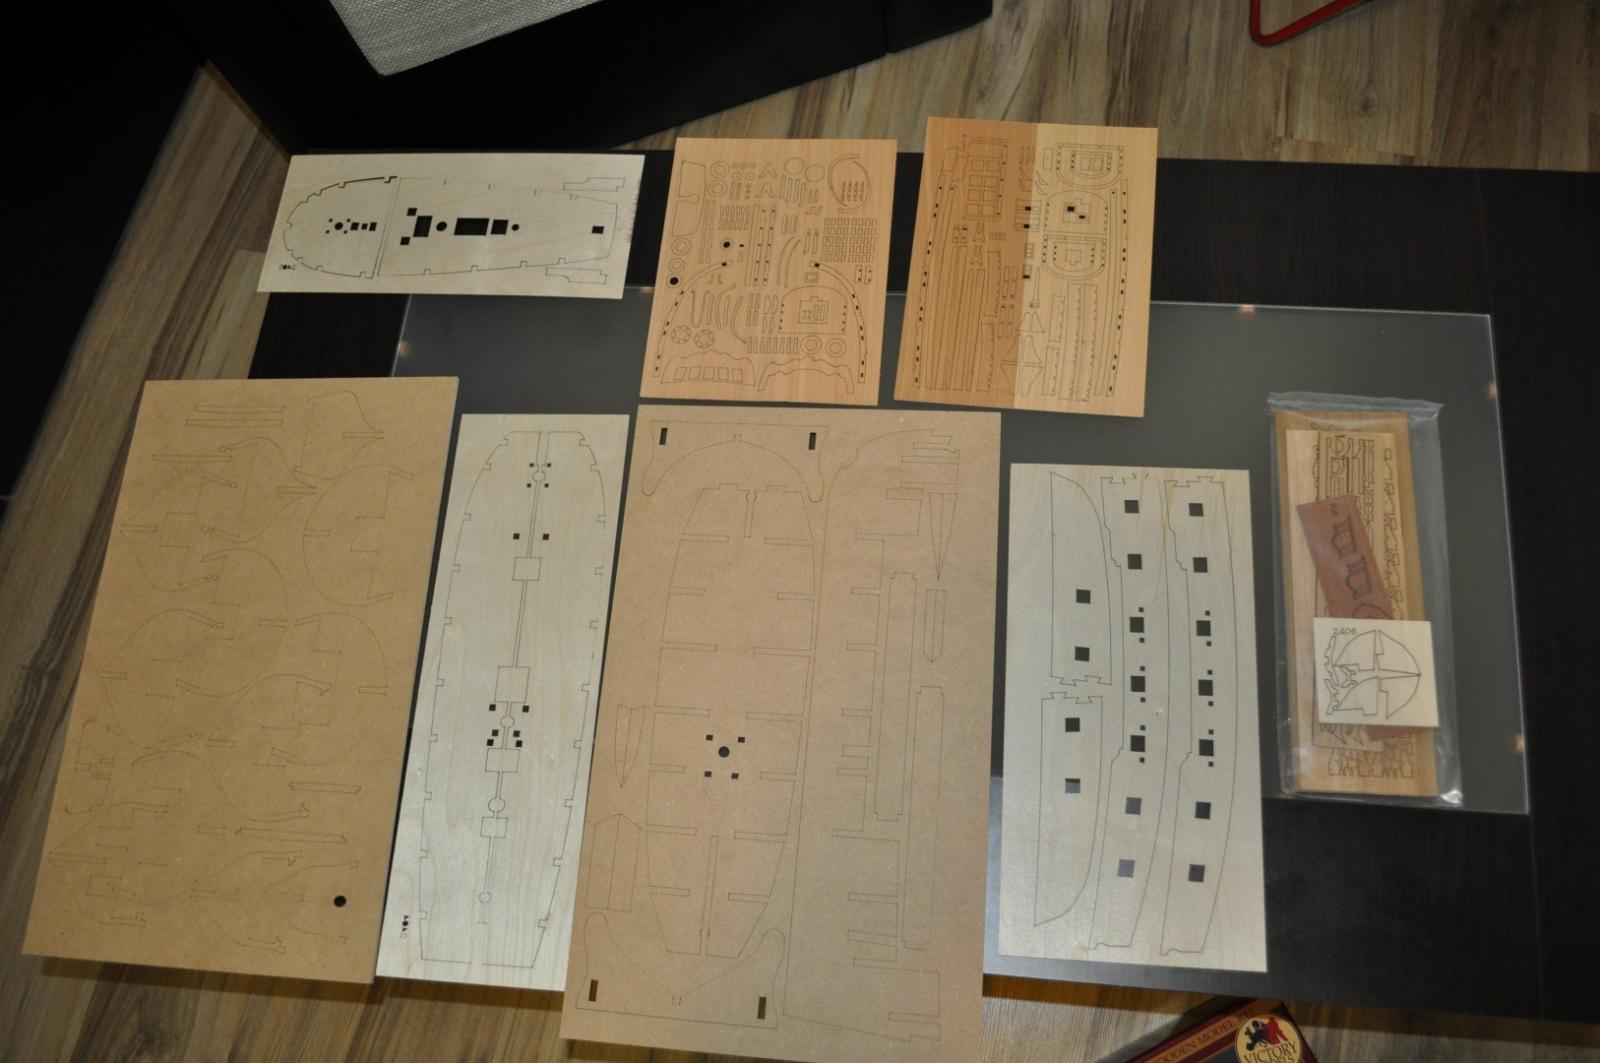
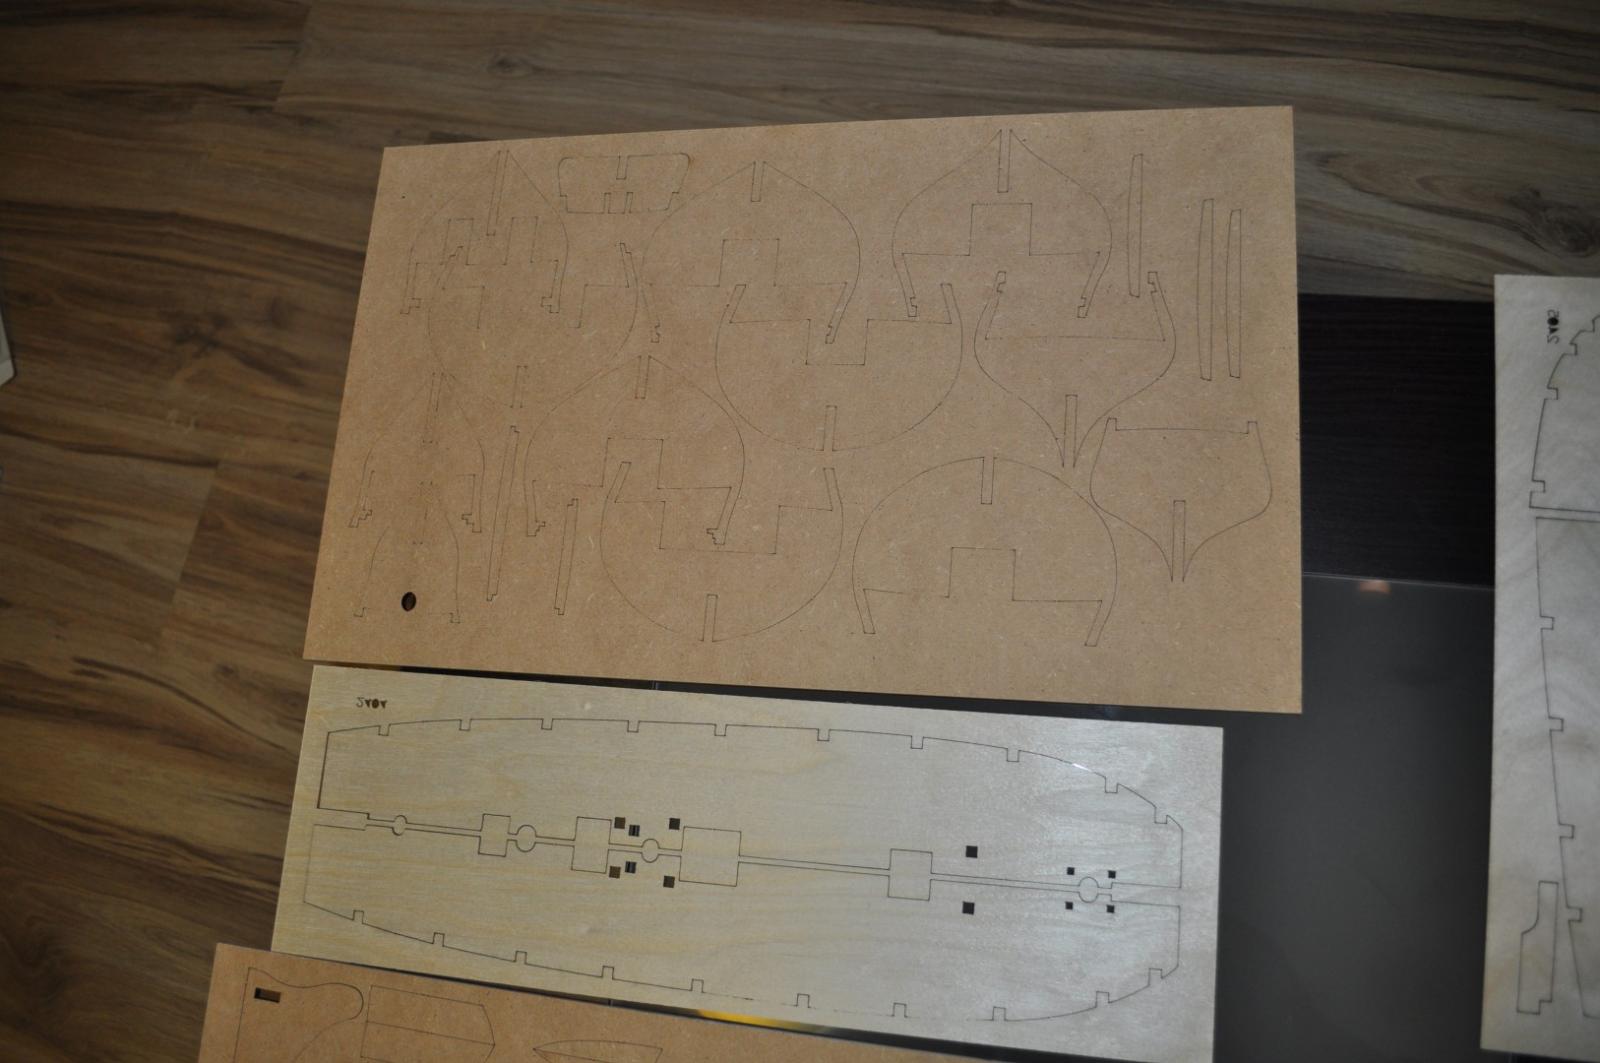
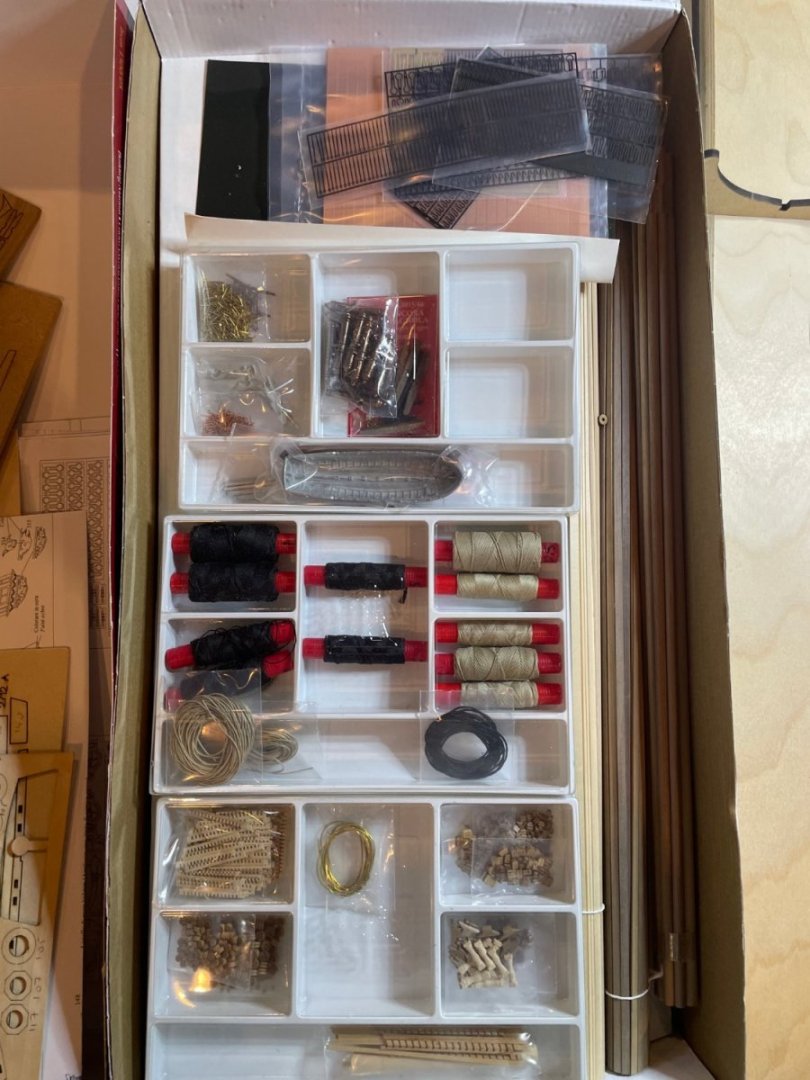
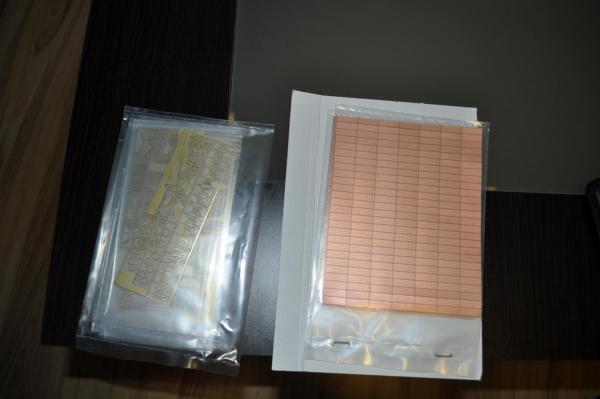
(Custom).thumb.jpg.5052058ebe53443d3e7023c1bdc7f460.jpg) Welcome to my new build log the HMS Pegasus. After some very nice builds that i've seen here, I decided to have a go and I hope I will not mess up a very nice ship... With this ship I also changed the manufacturer, from Mamoli to Victory Models and it looks like I made a good choice. I opened the box and the stuff inside looks like good quality, hope that will also be the feeling after i'll start building. Hope you will enjoy the build and as always all advice and comments are welcome For the moment a quick look to the items inside the box
Welcome to my new build log the HMS Pegasus. After some very nice builds that i've seen here, I decided to have a go and I hope I will not mess up a very nice ship... With this ship I also changed the manufacturer, from Mamoli to Victory Models and it looks like I made a good choice. I opened the box and the stuff inside looks like good quality, hope that will also be the feeling after i'll start building. Hope you will enjoy the build and as always all advice and comments are welcome For the moment a quick look to the items inside the box


- 64 replies
-
- 3
-
-
- pegasus
- victory models
- (and 1 more)
-
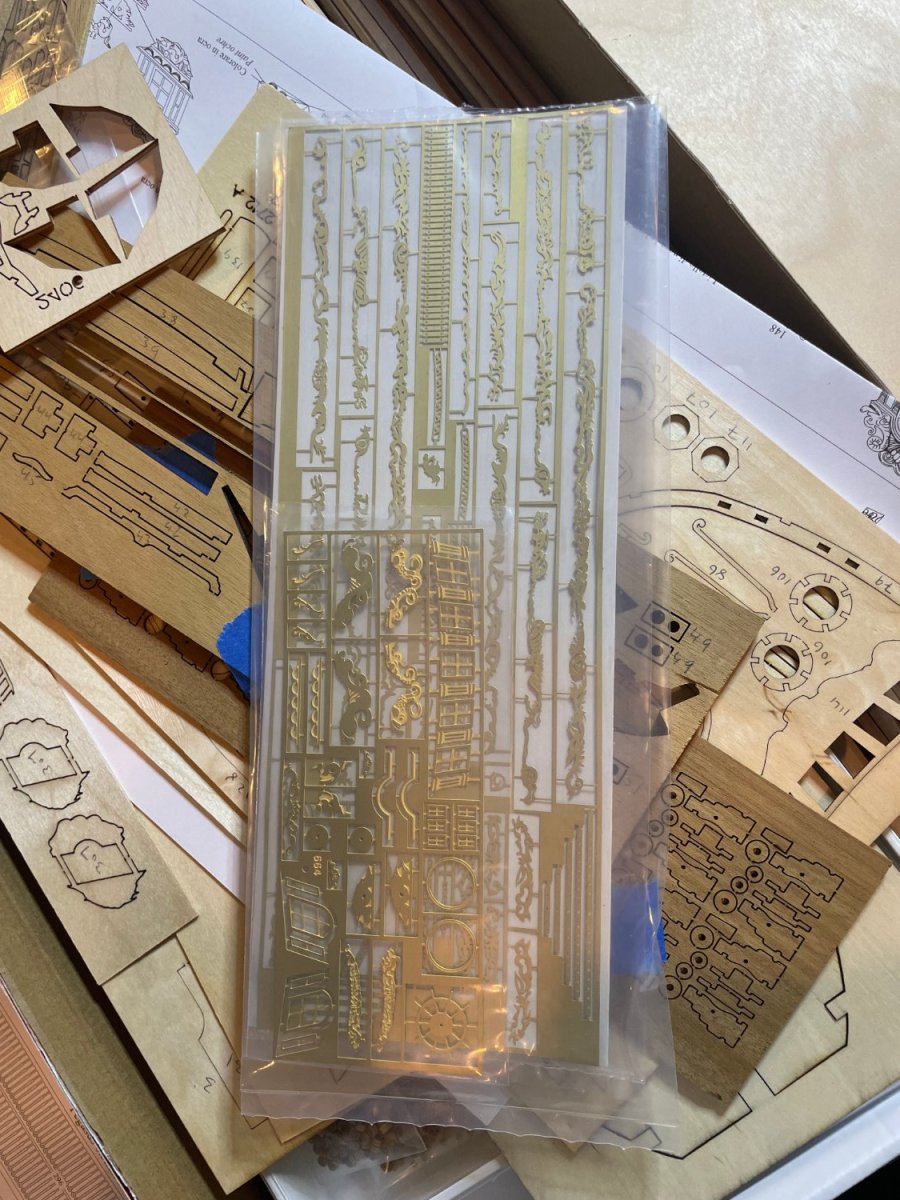
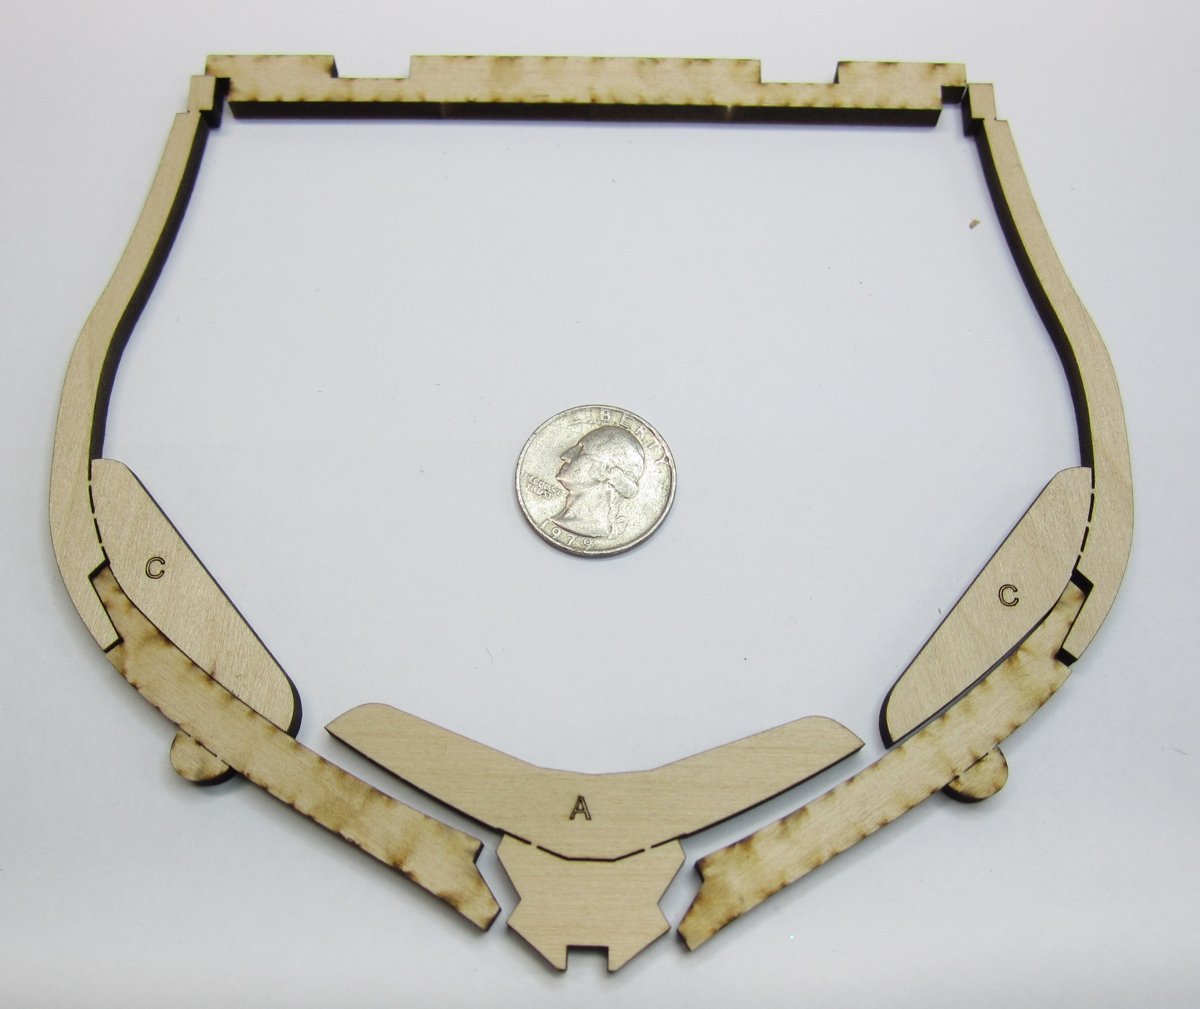
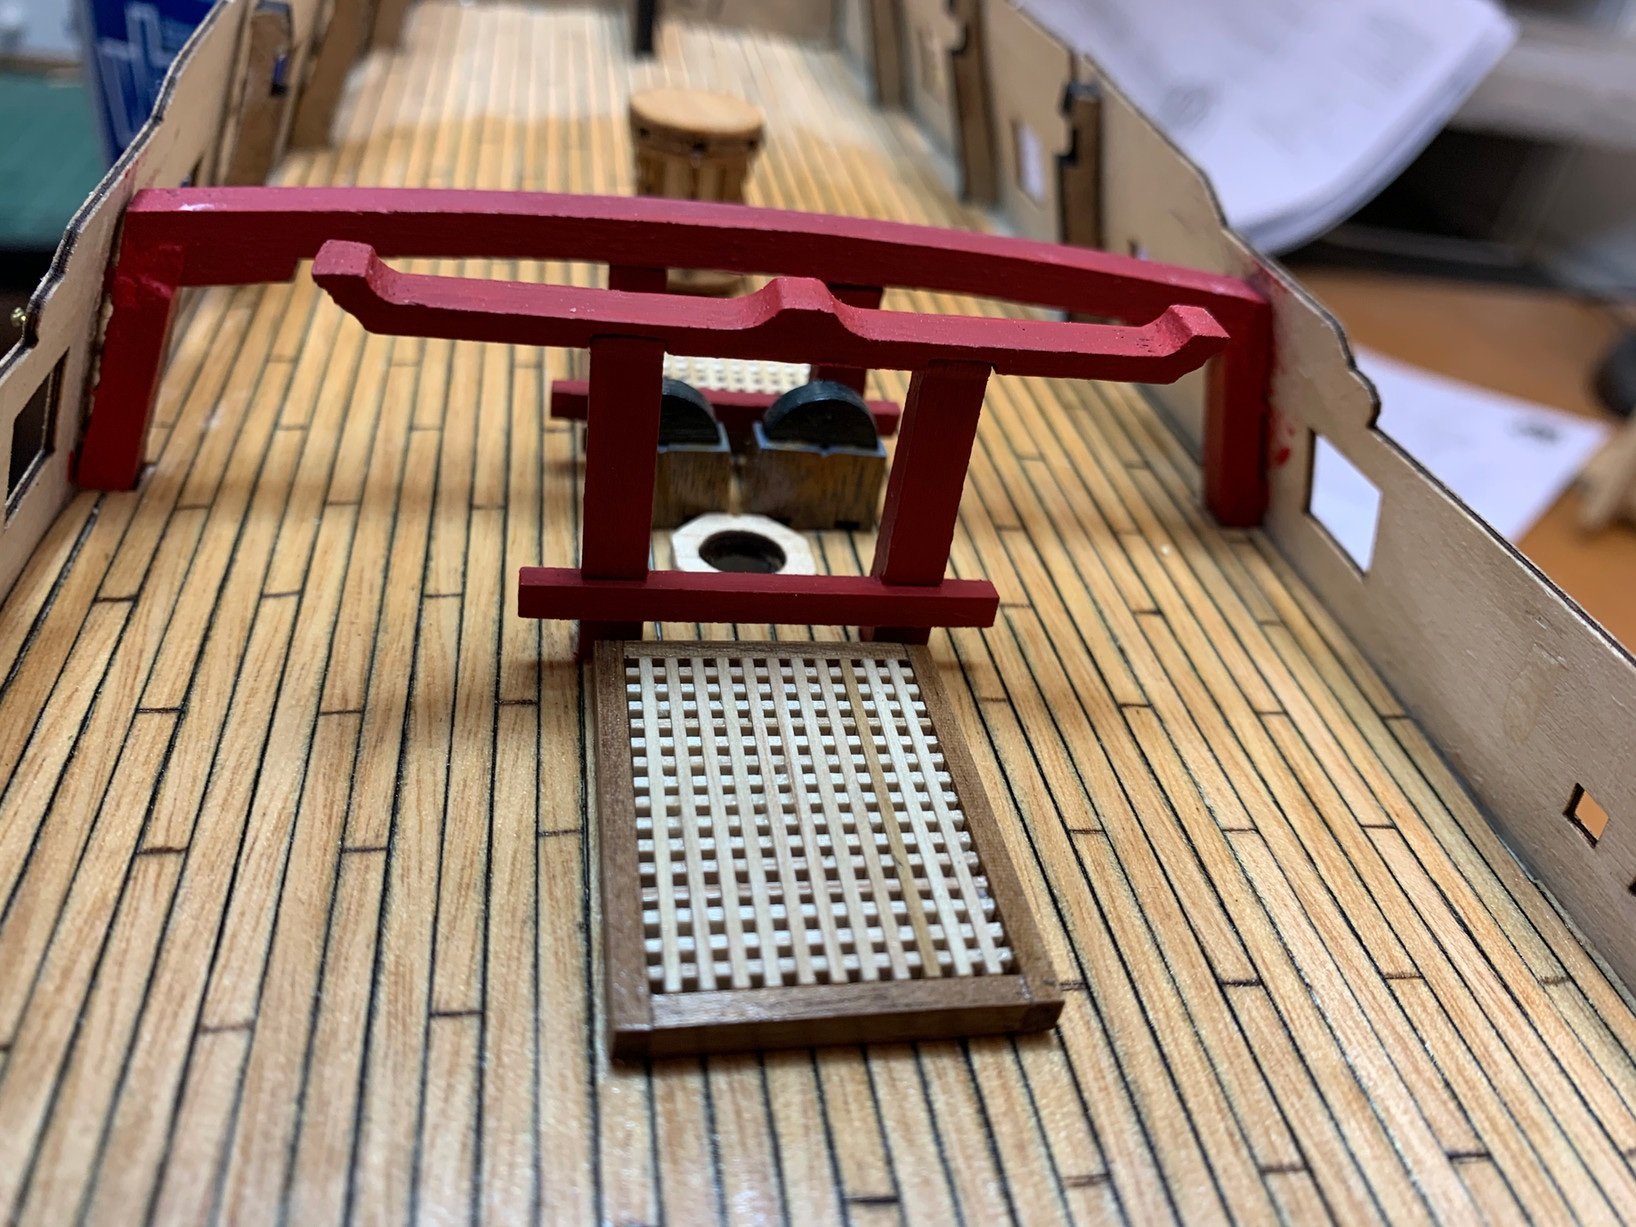
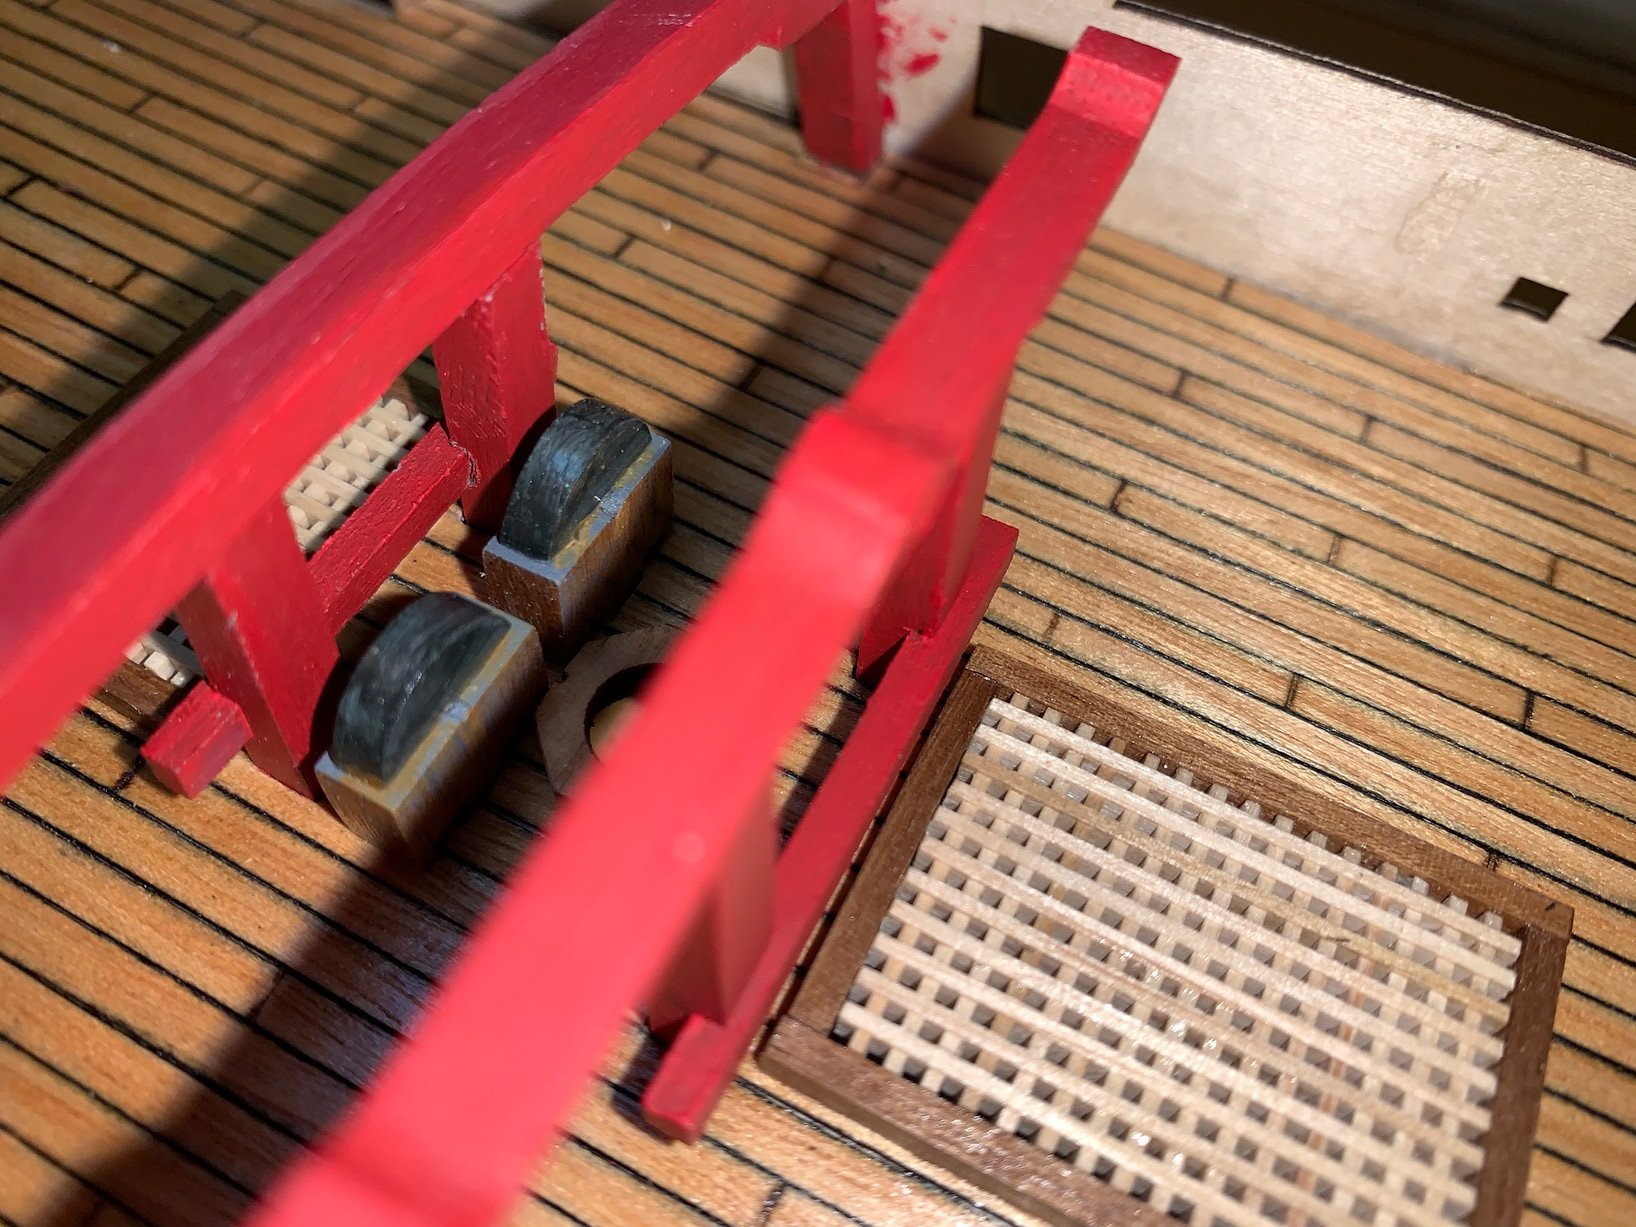
 I have had some requests for our discontinued photoetched sheets over the past few years. The sheet is depicted below and was designed for those building a Swan class model at the classic 1:48 scale. They are difficult and expensive to produce but I would be willing to do it one last time if ten individuals commit. They cost $60, plus postage. Included are door hinges, lantern brass housings, horseshoe and dovetail plates and gunport straps. In addition (and the main reason we designed the sheet) included are all the components necessary to build the complicated metal chain pumps (except the brass tubing) that reside within the pump housings. Those of you building a Swan, Echo, Triton or Chuck's new Pegasus cross section may consider purchasing one of these sheets as nothing similar is on the market. If you would like one (or more) of these sheets please send me an e-mail at dvm27@comcast.net. Please do not respond to this post here. This will be the last time these sheets will be produced! It is my impression that Chuck will not be including details of the pump mechanism in his new Pegasus cross-section in order to keep the cost managable.
- 6 replies
-
- 9
-
-
- swan
- sixth rate
- (and 4 more)
-
 Kicked off and hope to utilise previous posts to avoid the pitfalls, will be using the kit with the exception of the cannon.
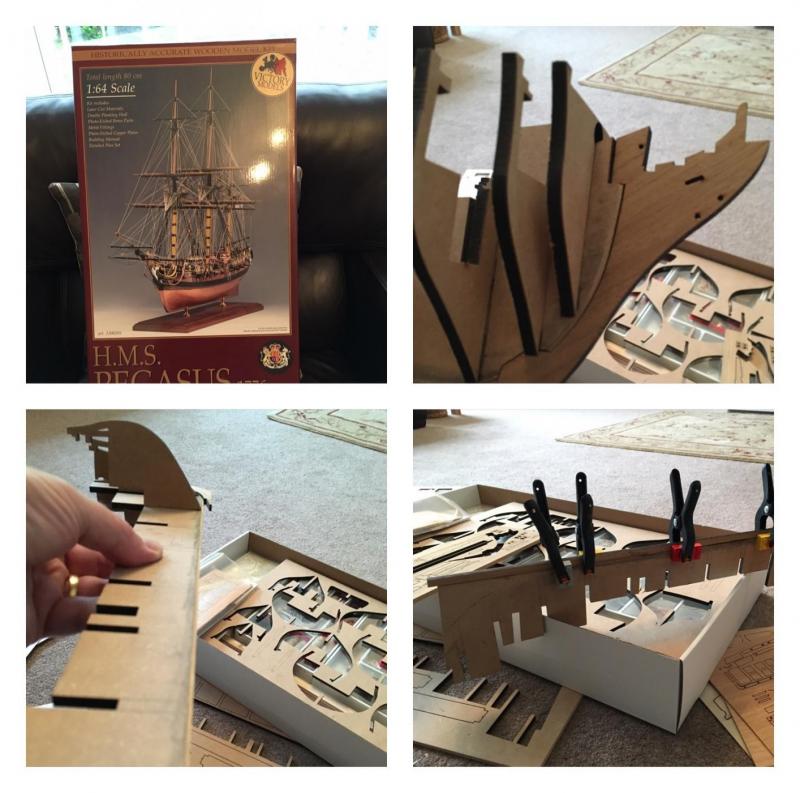
-
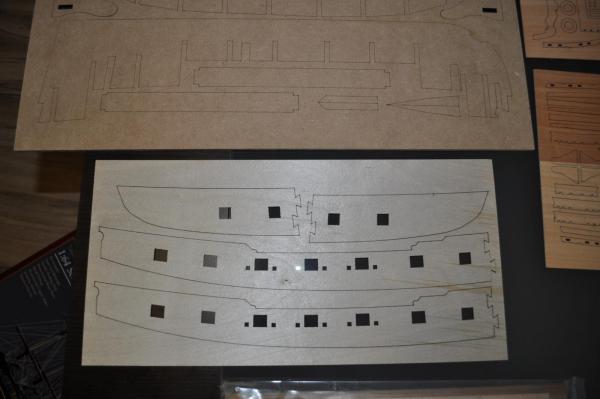
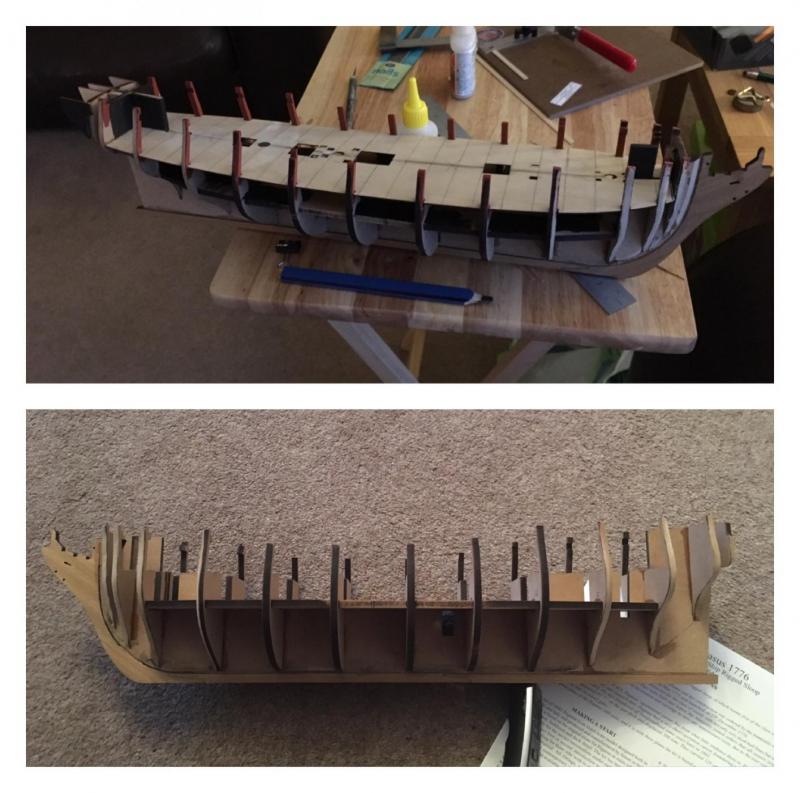
 This is the start of my Pegasus log which I have been putting off for far too long and decided I would get it going. When I started this hobby a little over a year ago I seen a picture of the Amati Pegasus and instantly wanted her, however, for once in my life I held off starting her as I knew my skill level was not there yet. I feel now if I take my time and with the help available here at MSW I should be able to stumble through and do a fairly good job. I know this is a bold step starting this kit as there is some excellent ones on the go now, Blue Ensign and Landlubber Mike are just two examples of some of the skilled craftsmen here at MSW. Although I do not plan on following in their footsteps, I mean who could, I do plan on making some changes mostly to the kit wood and possibly a few other features(cannons, rigging line etc.). I did not include pictures of the contents but if anyone is interested in seeing the contents of this great kit just say so and I will be more than happy to add them. Enough of an introduction, it is my hope that I do this girl justice and maybe someday be allowed into that elite Pegasus/fly fraternity. To date I have fitted the bulkheads and transom supports. All went together good and there was very little adjustment required. I am impressed with the mdf so far and do not see any problems arising in the future from it, it is defiantly quite a bit denser than the stuff found in the local lumberyard and should out shine the normal plywood that is typically used. The one picture shows the plywood forecastle deck in place, it is not glued down that was just me playing around. In the past year I have had this kit the box has been opened and closed no less than 30-40 times and this piece keeps falling out. So I just put in in place for safe keeping .
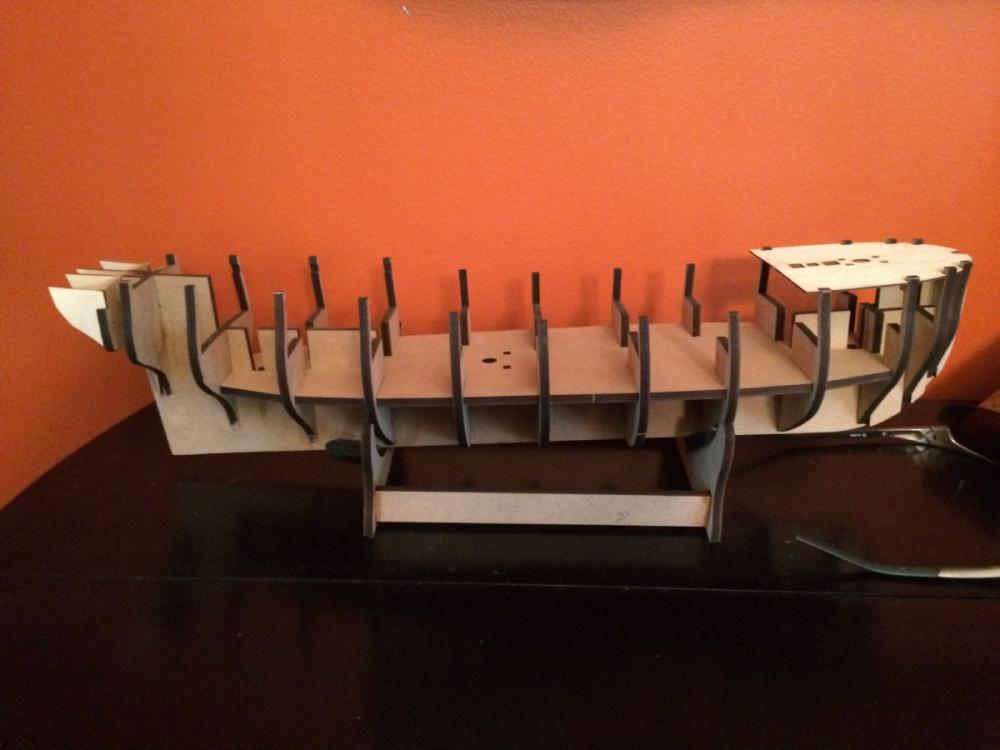


.JPG.91940b2b42fbbc55345c4e49a807e5f4.JPG)
.JPG.886eb88d1578a359474531cac018297f.JPG)
.JPG.2fa8428af67810d80d03c47bf7fab672.JPG)

.JPG.b7cb49406ab15c4595f8ac549c36704d.JPG)
.JPG.b50ddedb0c819324aa4f84783d6b9b65.JPG)
.JPG.0e16fa9b6f472a4eb10f92fb48a22ab2.JPG)