Search the Community
Showing results for tags 'Revenue Cutter'.
Found 19 results
-
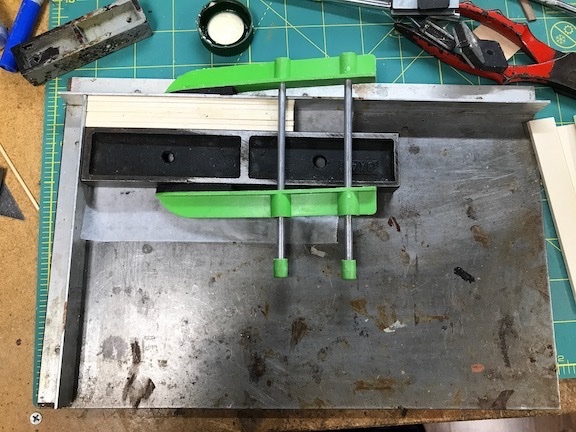
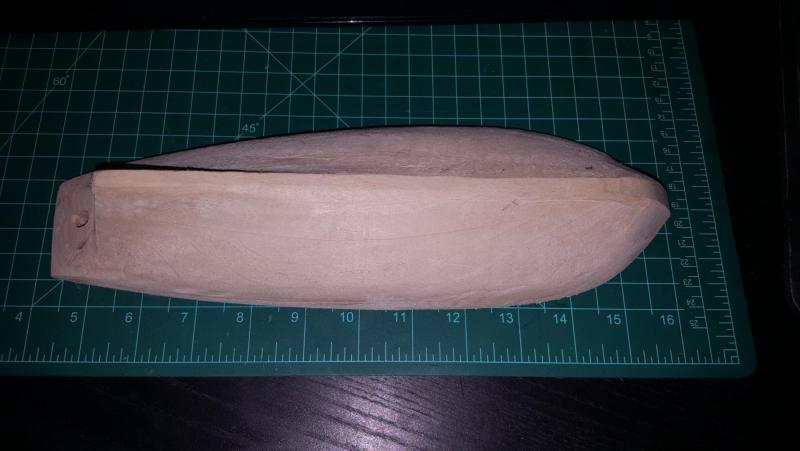
 Last November I got hit with one of those nasty respiratory virus. It knocked the crap out of me for a couple of months. By time I made it to my 91st birthday I last week I finally started pulling out of it. Now I’m getting antsy .Later this afternoon I decided to start on a small project just to keep busy. I had some basswood sheets that had been in drawer for too many years so I decided to build a mini Revenue Cutter. Cut the sheets down to 4” x 5” sheets. I ripped each sheet into six equal width strips. I glue laminated the strips into six layers. This gave me two laminated blocks the same size. I will Lay out half of the hull on each block and saw them to profiles. I wil lay out and cut the keel and sandwich it between the two blocks giving me a rough hull which I will carve to shape.
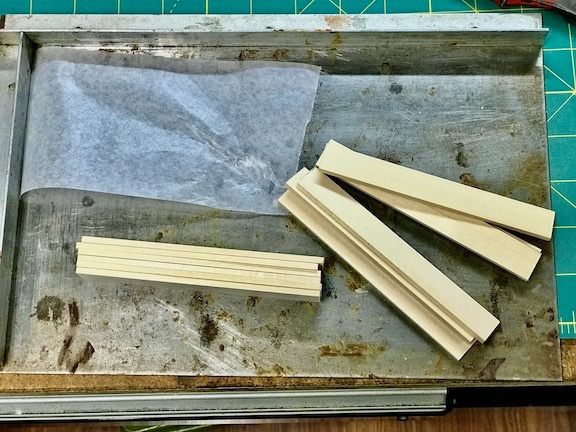

-
 I've been a bit frustrated with the scratch build skipjack so I decided to start one of the recently purchased Seahorse kits. I recently reviewed the kit here. What a pleasure. I've not progressed far--only through the first drawing--but this is so much more relaxing than home-grown! I'm only aware of one gaff on my part: I glued bulkhead 13 facing forward like all the rest. But 13 has some guide lines on it that should have been facing aft. Oh, well. I did notice one typographical error in the instructions. Part #16 is erroneously identified as 16a in the line drawing even though it is correctly identified in the shaded drawing right below. Not a big deal. I have to admit I'm not sure of the purpose of part 16. As far as I can tell they will be entirely covered. Maybe it will become clear later on. And maybe it's better that they are hidden. In the enlarged photo below I noticed that I did not get them symmetrical. (Might have helped if bulkhead 13 faced aft!) I actually didn't notice it until resizing the picture for this post. I only see out of my left eye, I wear glasses as well as a magnifying visor. Consequently, I have found that two layers of lenses and lack of binocular vision and depth perception often lead me to believe that things are straight and even when they actually are not. Must be why I'm drawn to hobbies that require visual acuity! I also think part #43/44 (the transom) is better attached in a later step. At this point the rake of the transom is unclear. Later on a couple of knees are installed which should hold the transom at the correct angle. I'll probably start attaching the first layer of the hull tomorrow. Looks kind of tricky so we'll see if I can keep my Zen going!
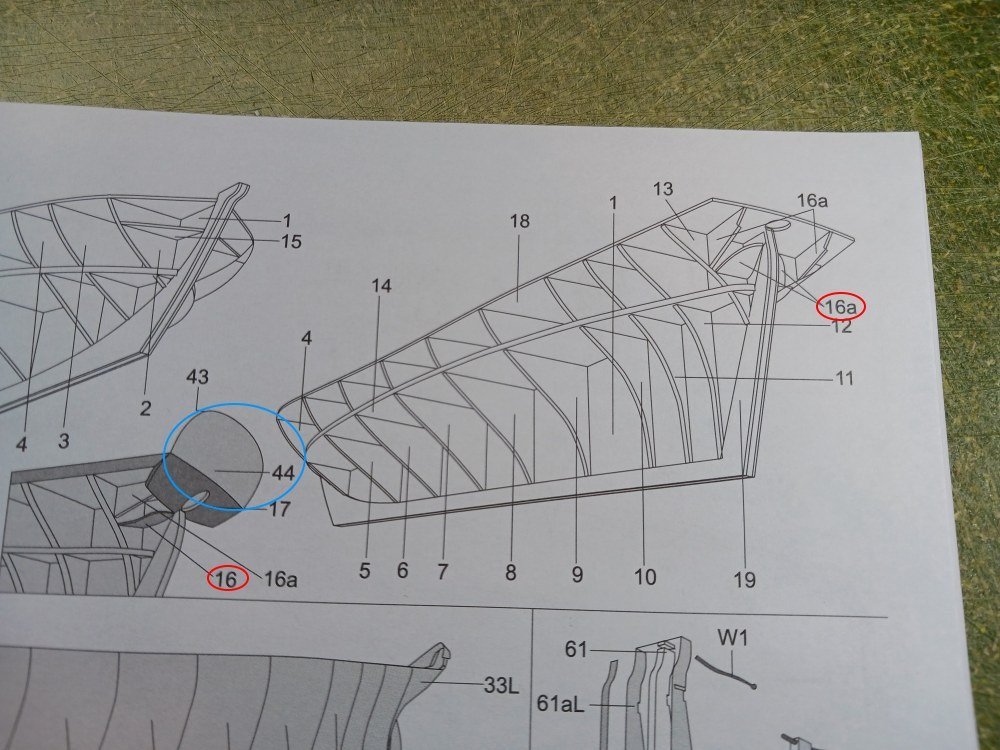
- 34 replies
-
- 4
-

-
- card
- Revenue Cutter
- (and 1 more)
-
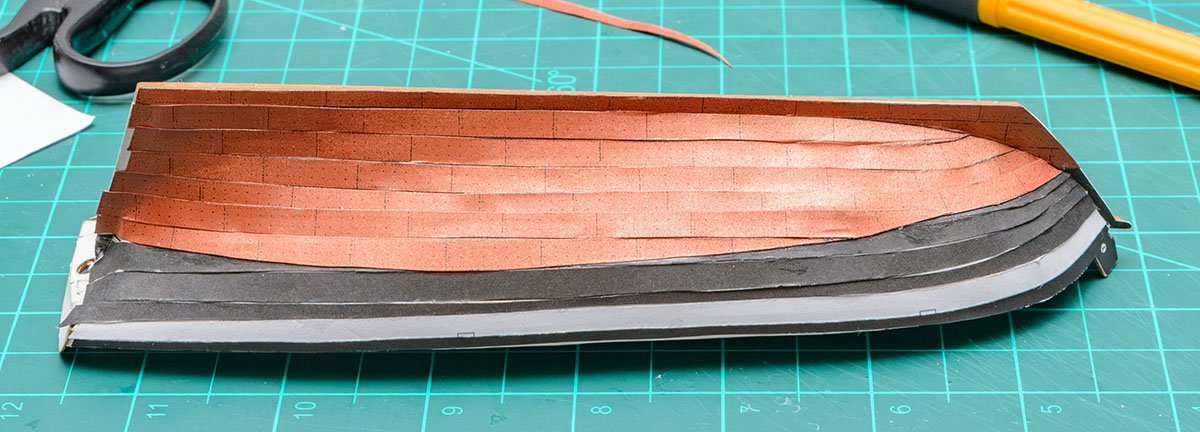
 Hello Folks, I am excited to begin my second build log and Blue Jacket kit on MSW. My first log was the "Yankee Hero" by Blue Jacket and I had a great time with the kit and posting the build. I enjoyed hearing from all the kind and supporting people in MSW. The Revenue Cutter represents what I believe is a reasonable progression from the Yankee Hero. The challenge I anticipate with this build is that I intend and (attempt) to complete this kit utilizing copper plates versus painting copper below the waterline. I was inspired to try this after I saw the Revenue Cutter build log by sjanicki. Be safe and have great 4th of July holiday weekend, Bill T.
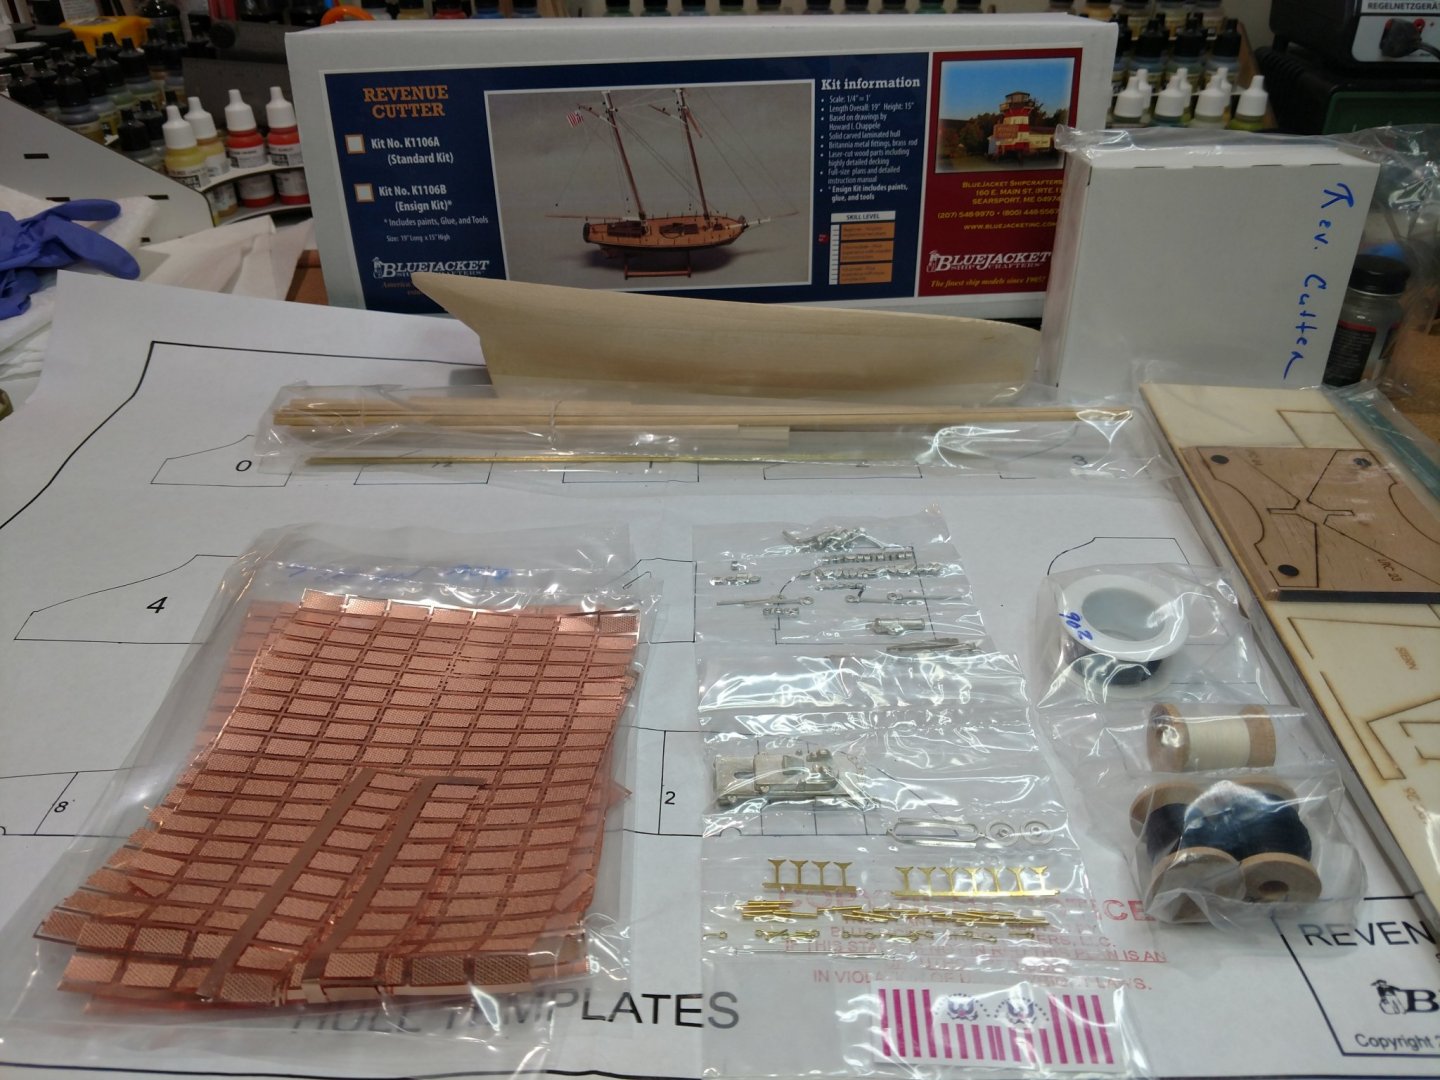
-
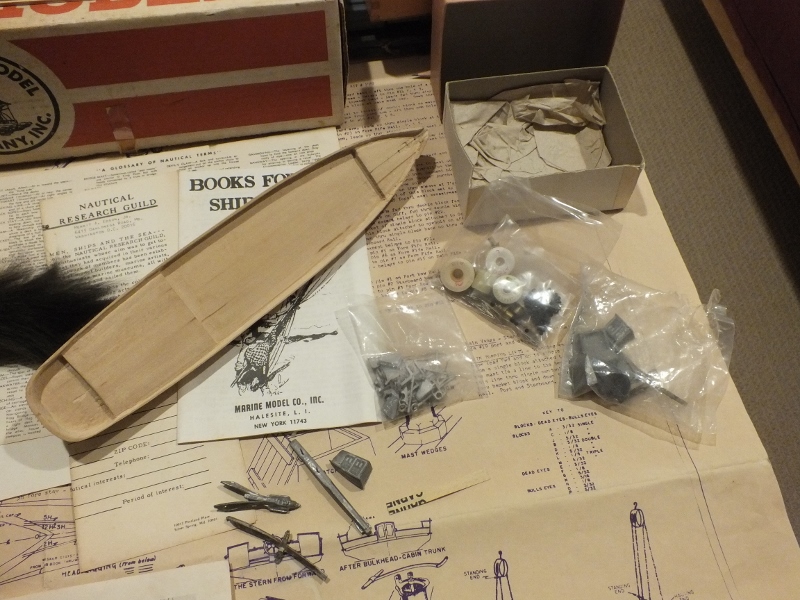
 Many years ago, my niece’s father-in-law (now deceased) purchased this Marine Models “Joe Lane” for $37.50, made a start, and quickly abandoned it. The kit sat for a few decades until my niece and her husband passed it along to me after they saw me admiring a completed model they own. Here are the contents of the kit, along with Kelly, my overseer: The kit consist of the hull, a full scale (1/8”:1’) plan, a set of generic instructions for building any Marine Models kit, a supplementary sheet with rigging and painting details specific to “Joe Lane”, a sheet of nautical terms, illustrations of what appears to be a prototype for the model, a sheet of planking, strip wood, spars, a base, a large number of diecast fittings, and rigging supplies. The original owner did some sanding and trial-fit the rudder to the hull. (He also knocked a chunk out of the taffrail, which I found in the bottom of the box and glued back into place.) Since I have very little ship modeling experience, my goal for this kit is modest: I want to produce a model that pleases my eye and not worry too much about historic accuracy or ultimate detail. I’ll stay pretty much within the bounds of the kit and plans, and try to avoid scratch-building new components, at least to start out. I have a steep learning curve ahead of me and I expect I will spend as much time planning and researching techniques as I do building. I’m looking forward to making full use of this site and its members’ wisdom.
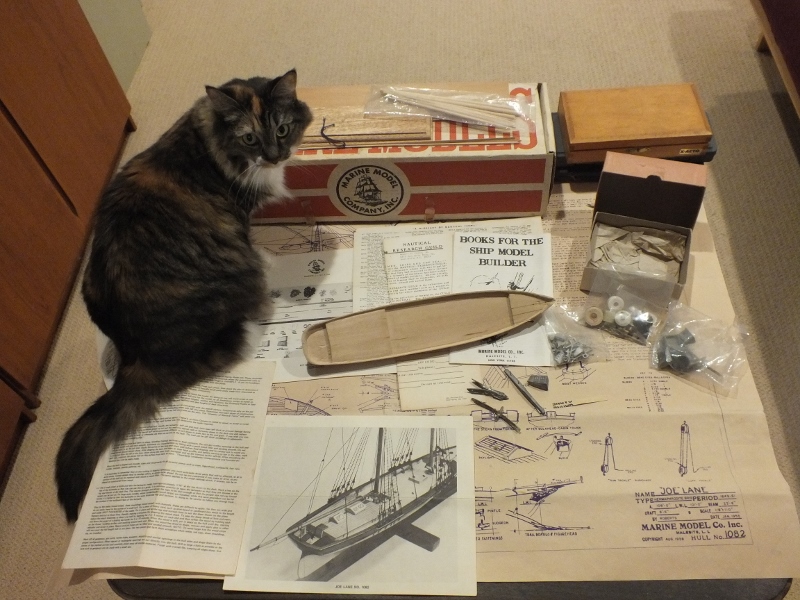
- 74 replies
-
- 10
-
-
- Marine Model Company
- Joe Lane
- (and 2 more)
-
 As before, this will be a speedy project rather than quality work. This kit was released a year ago, and I bought it with full options, such as laser cut hulls and 3D printed blocks and canons. You should check out other project by Jsk.
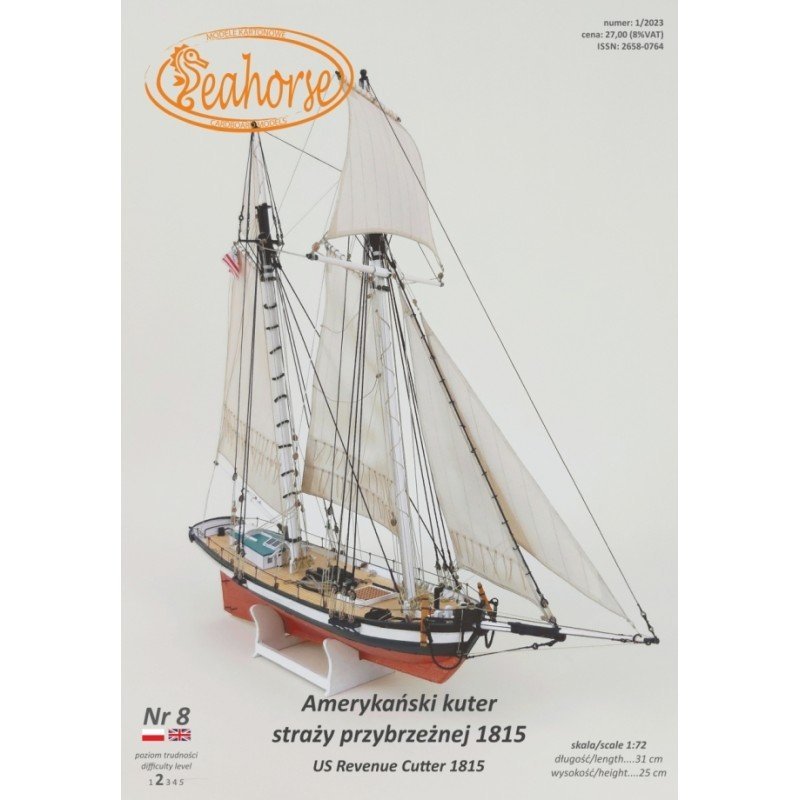


- 16 replies
-
- 2
-
-
- Revenue Cutter
- Seahorse
- (and 2 more)
-
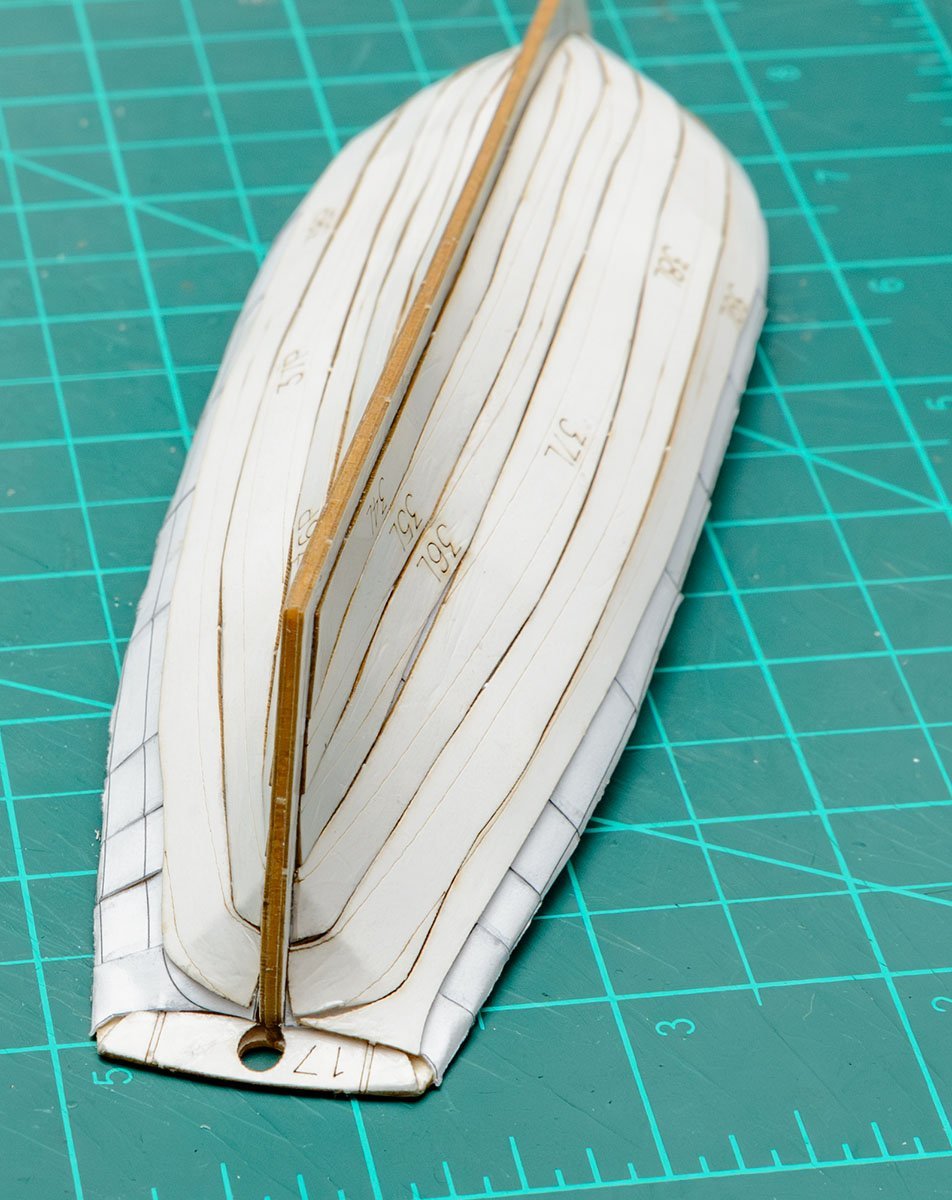
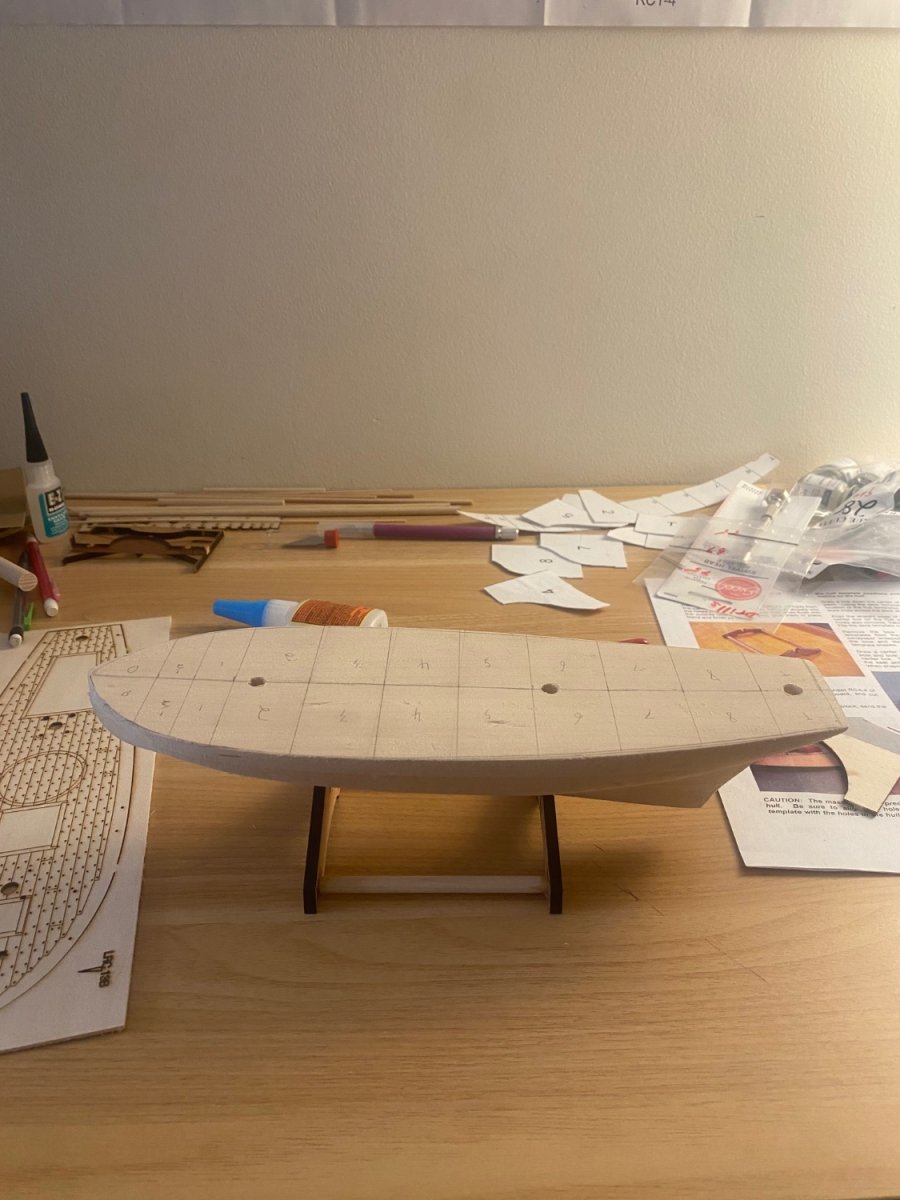
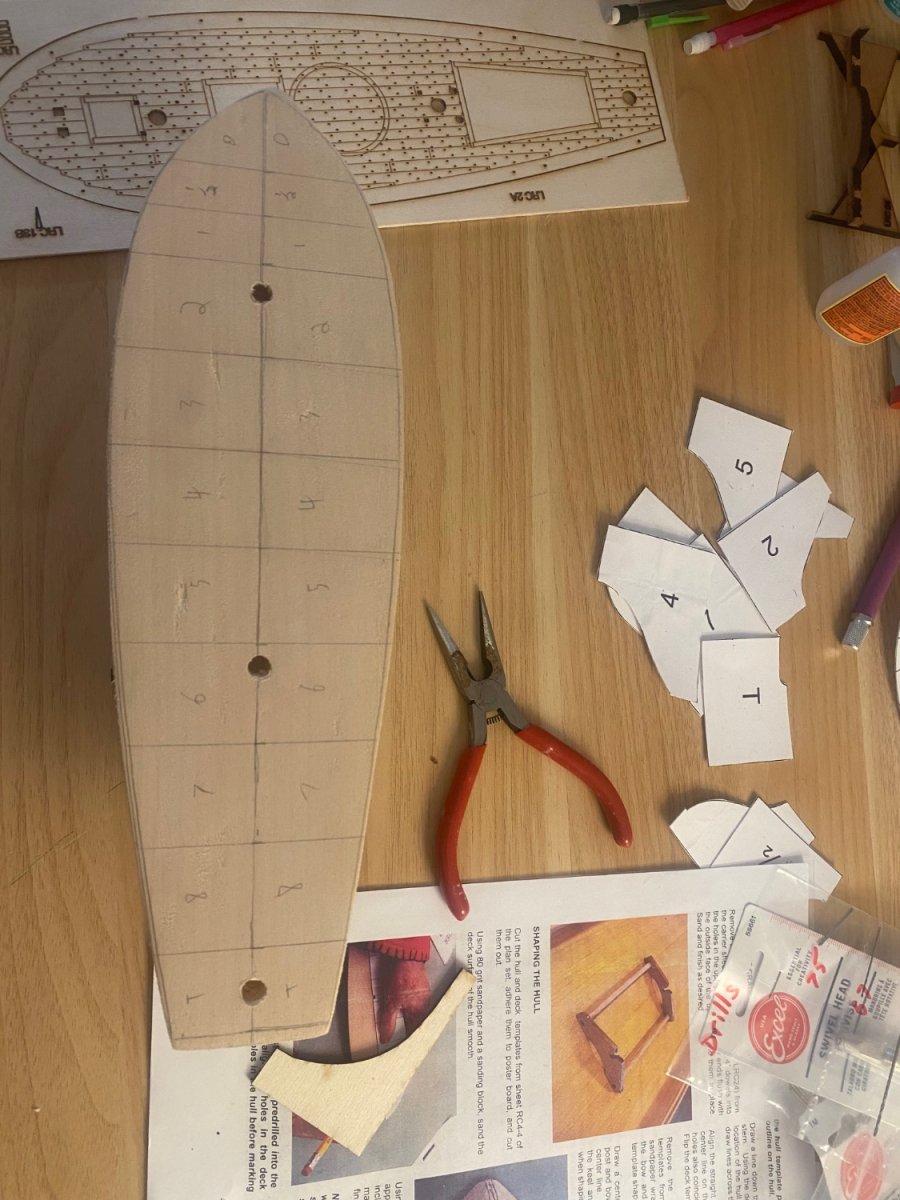
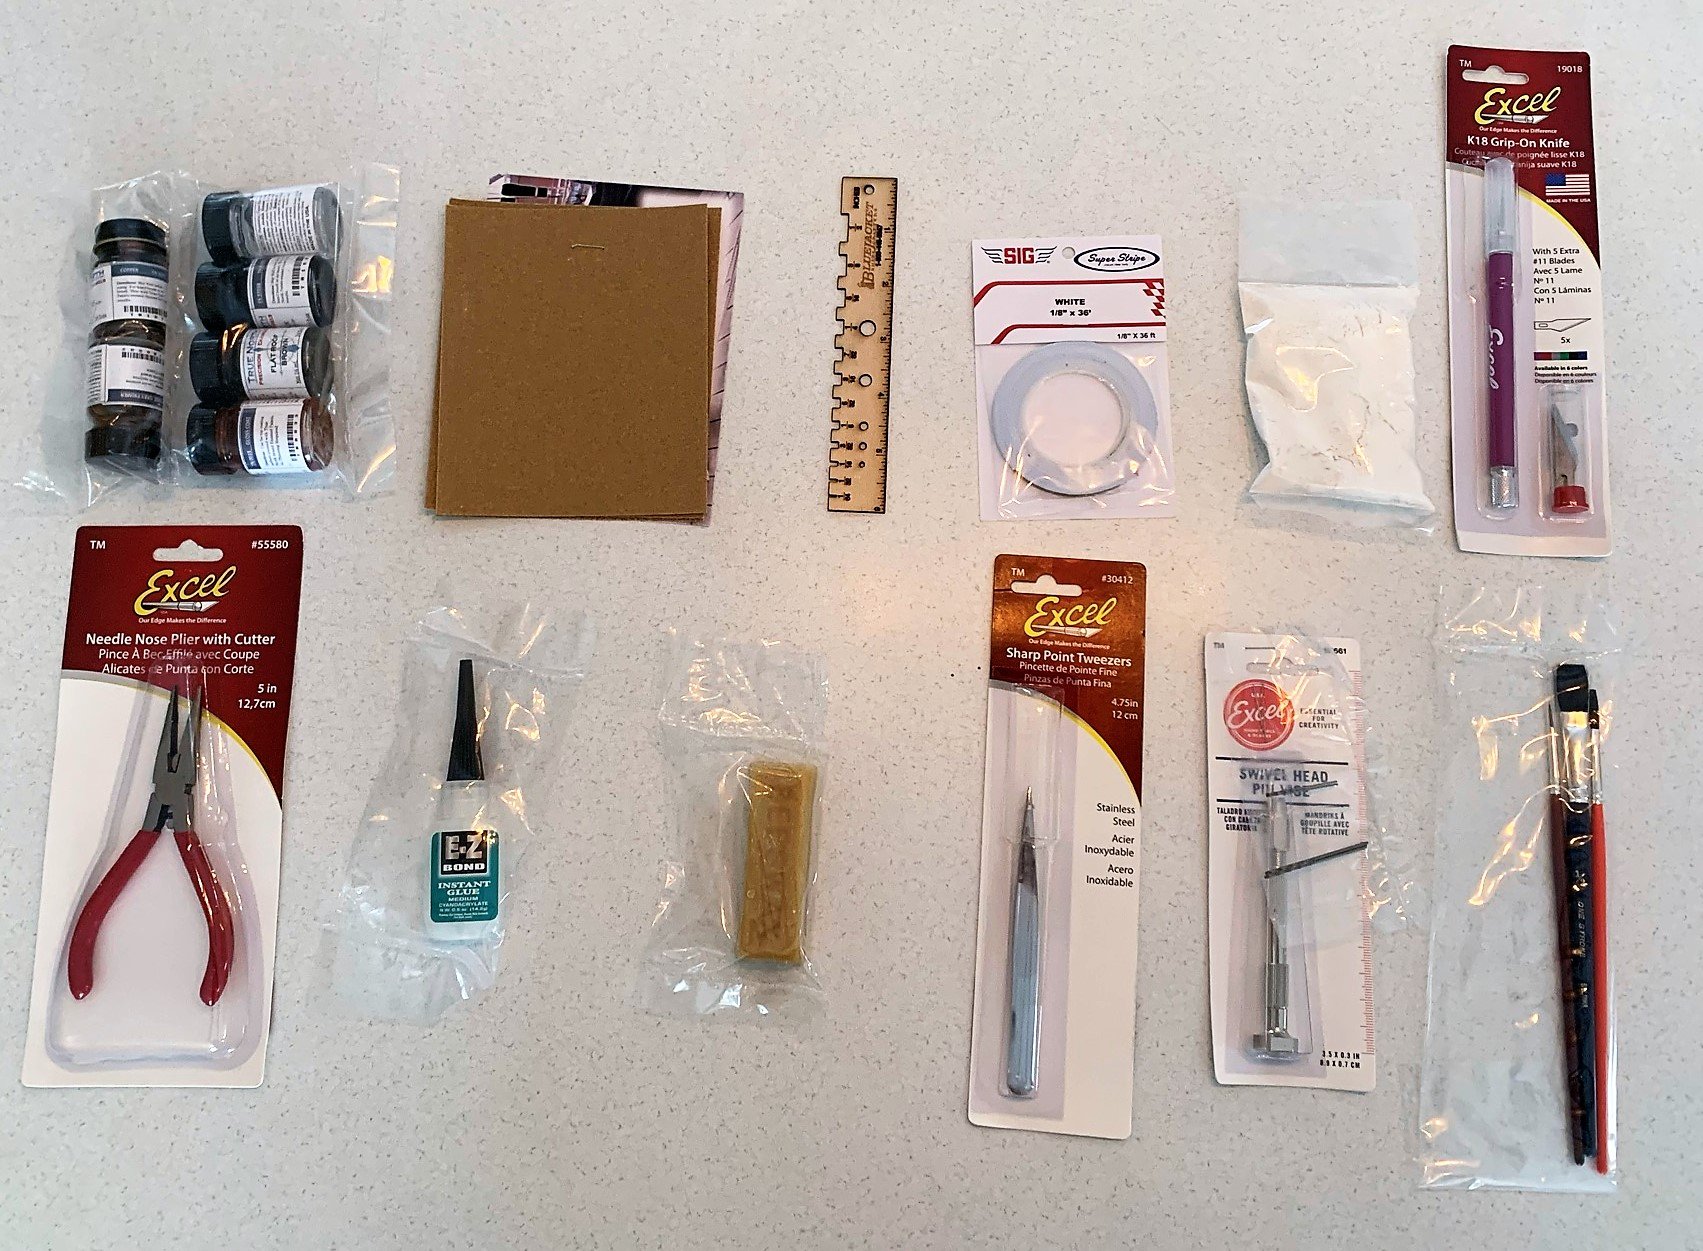
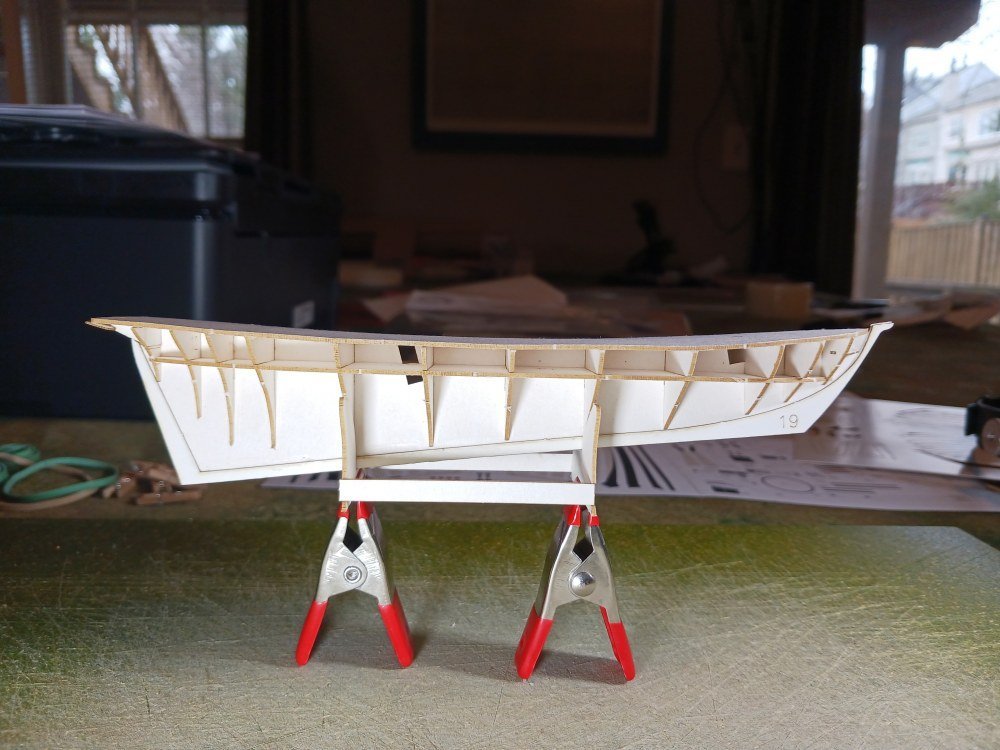
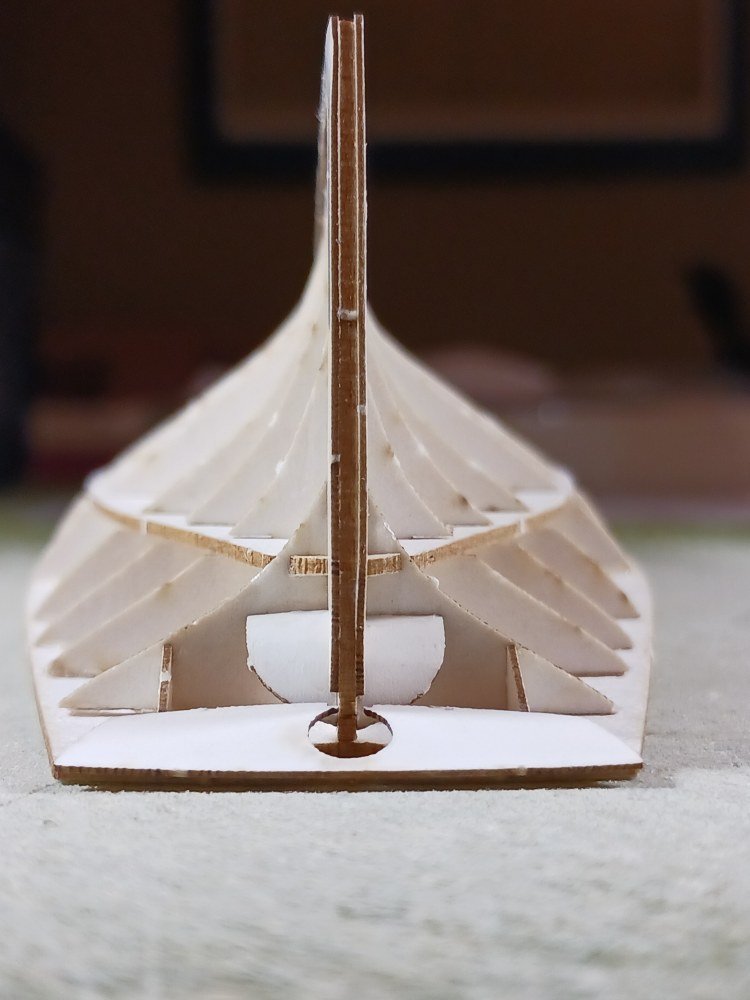
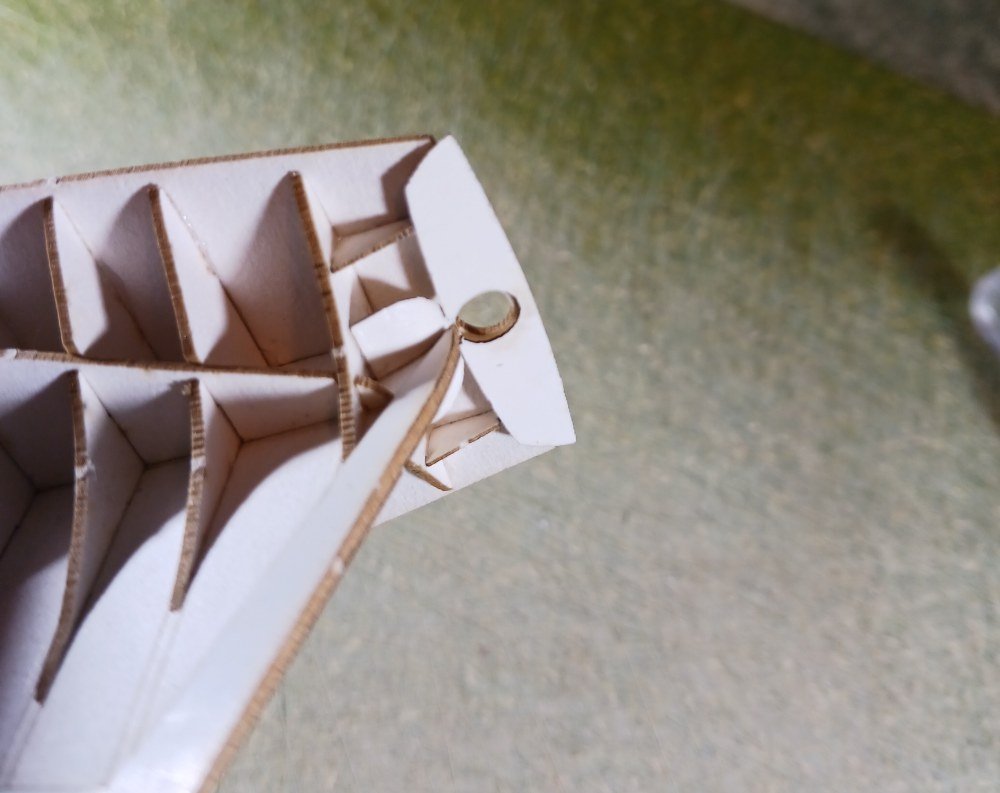
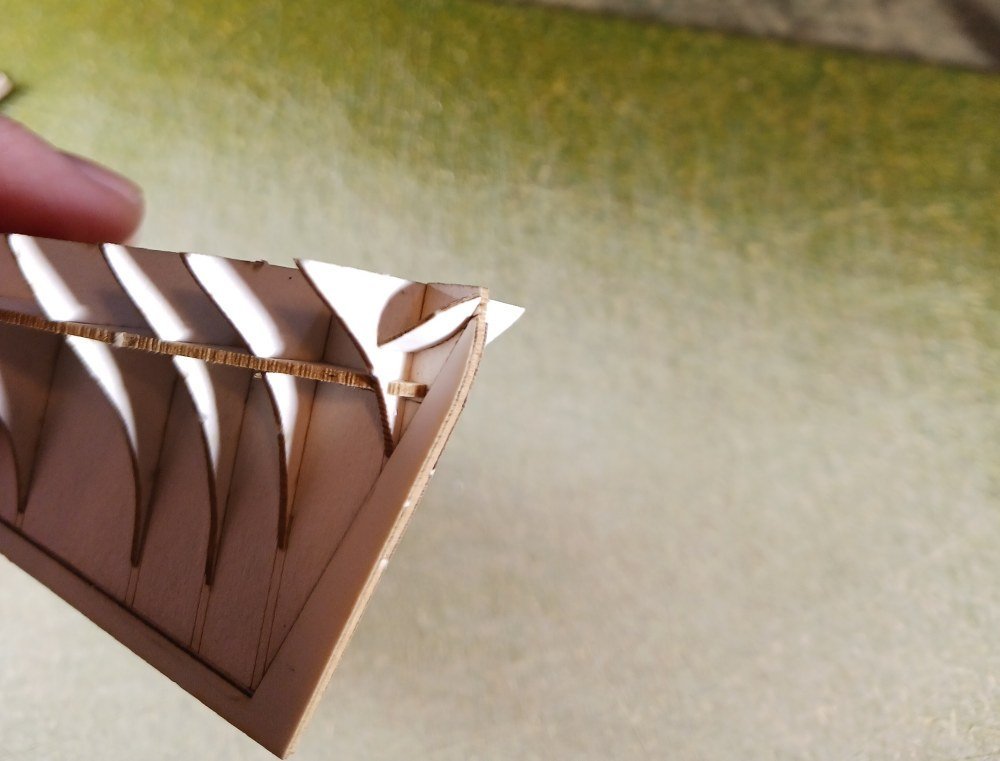
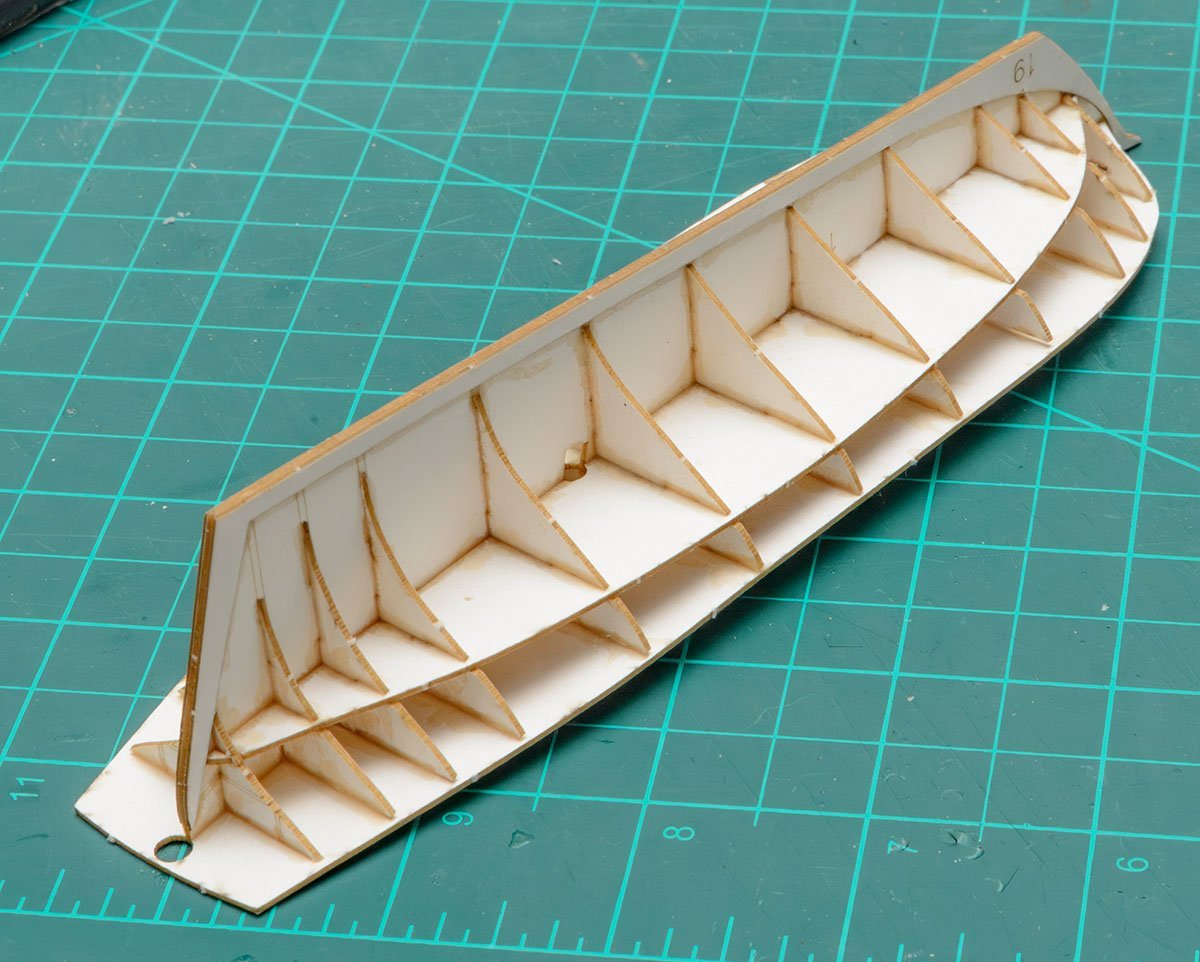
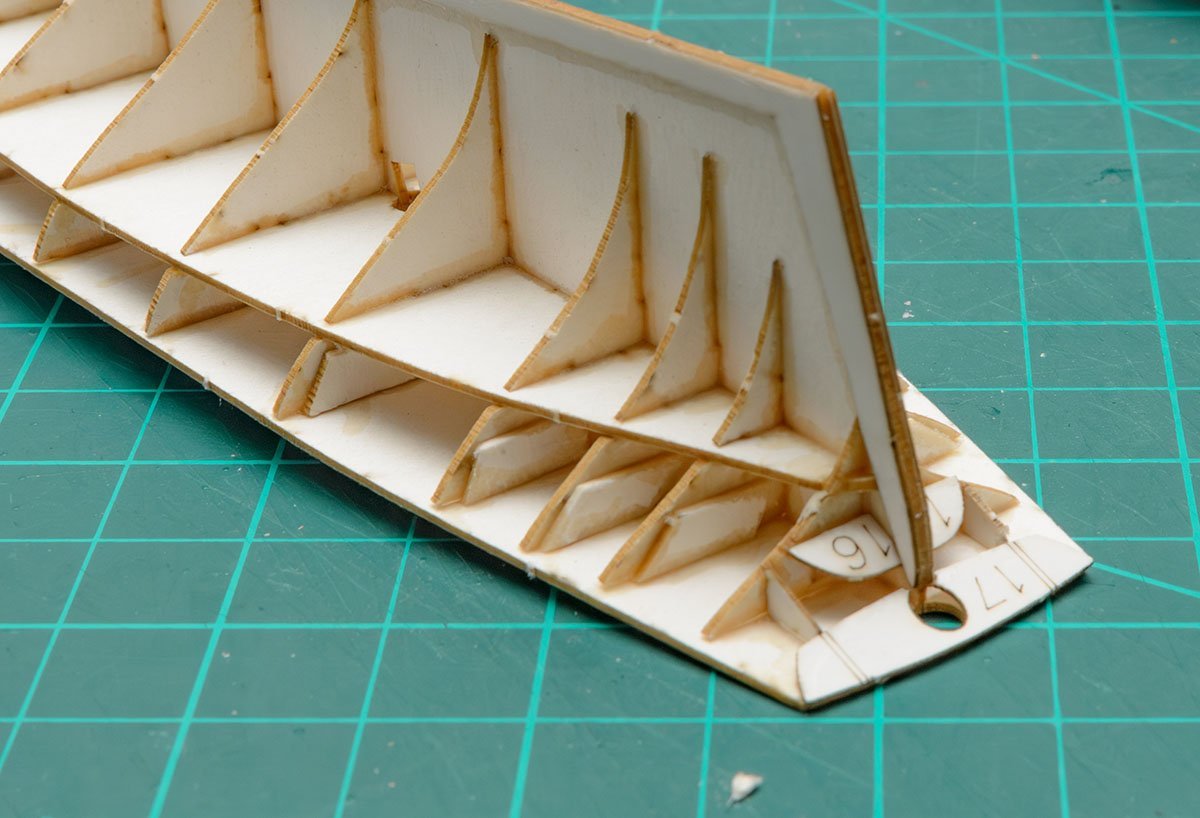
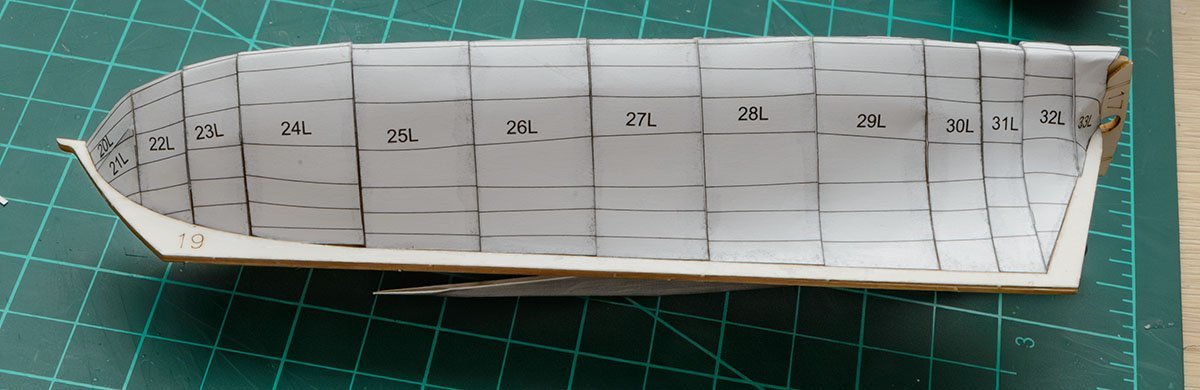
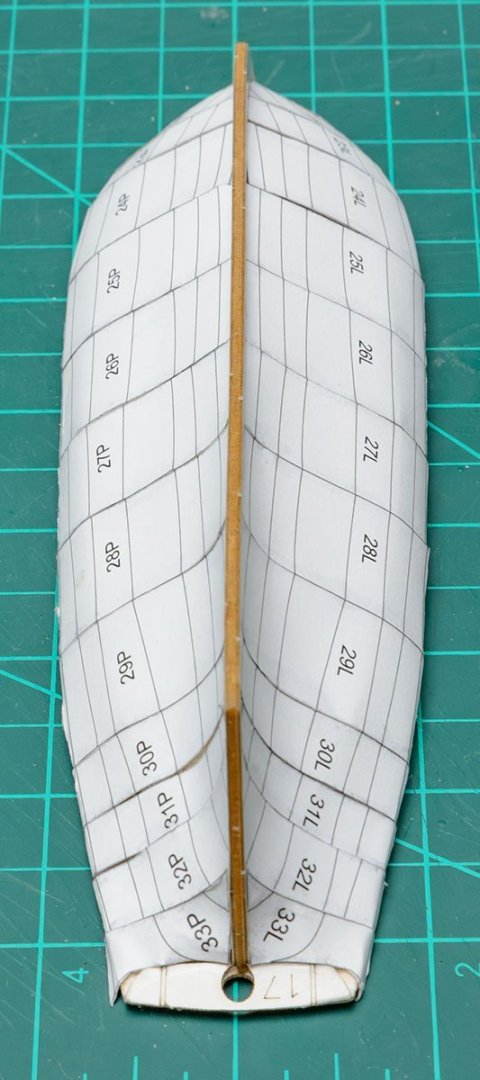
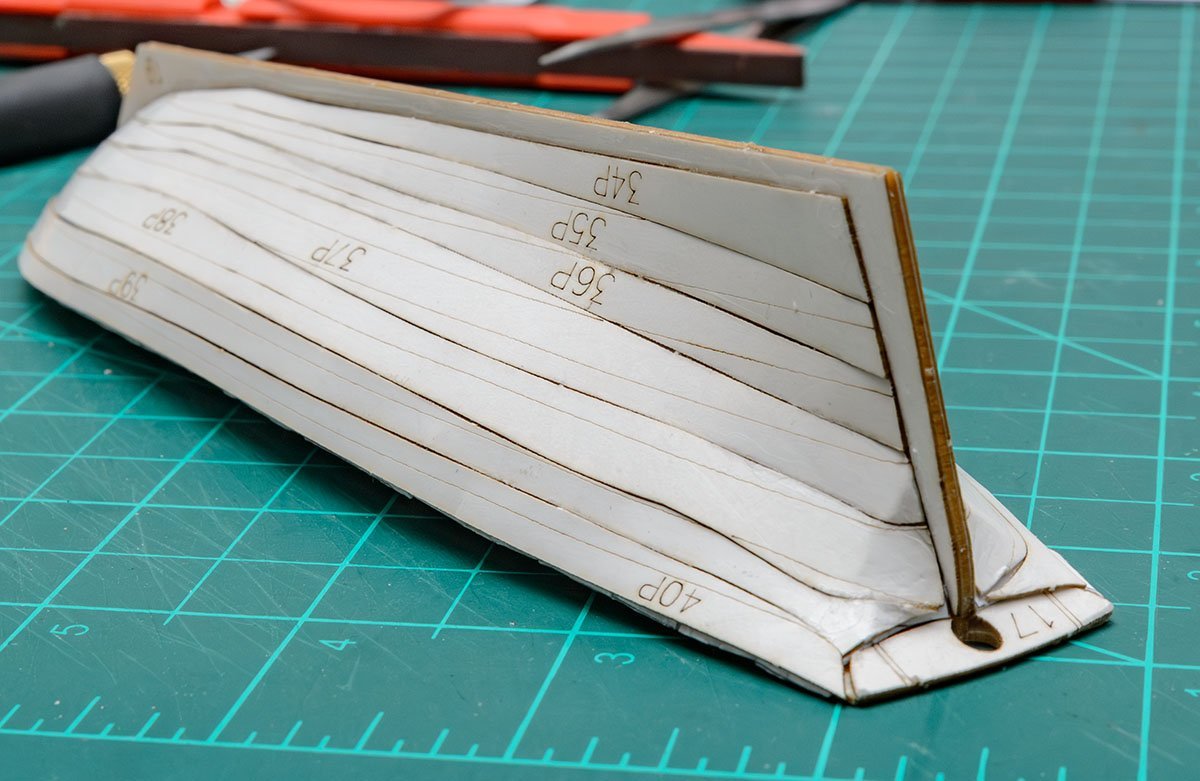
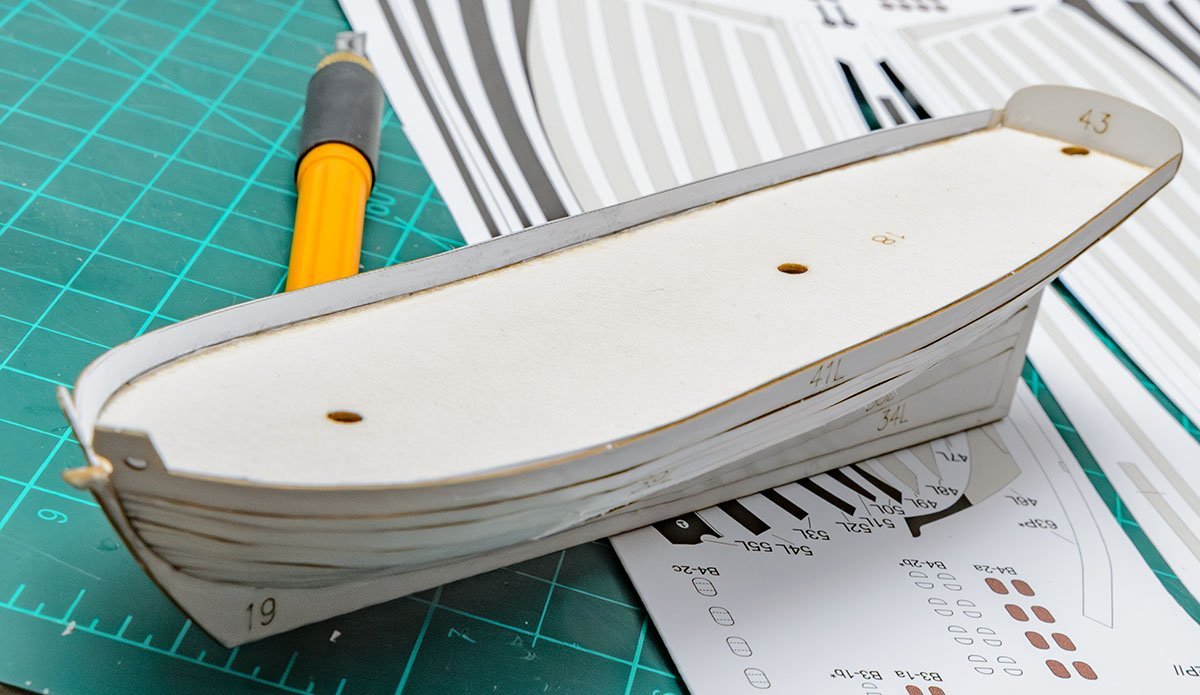
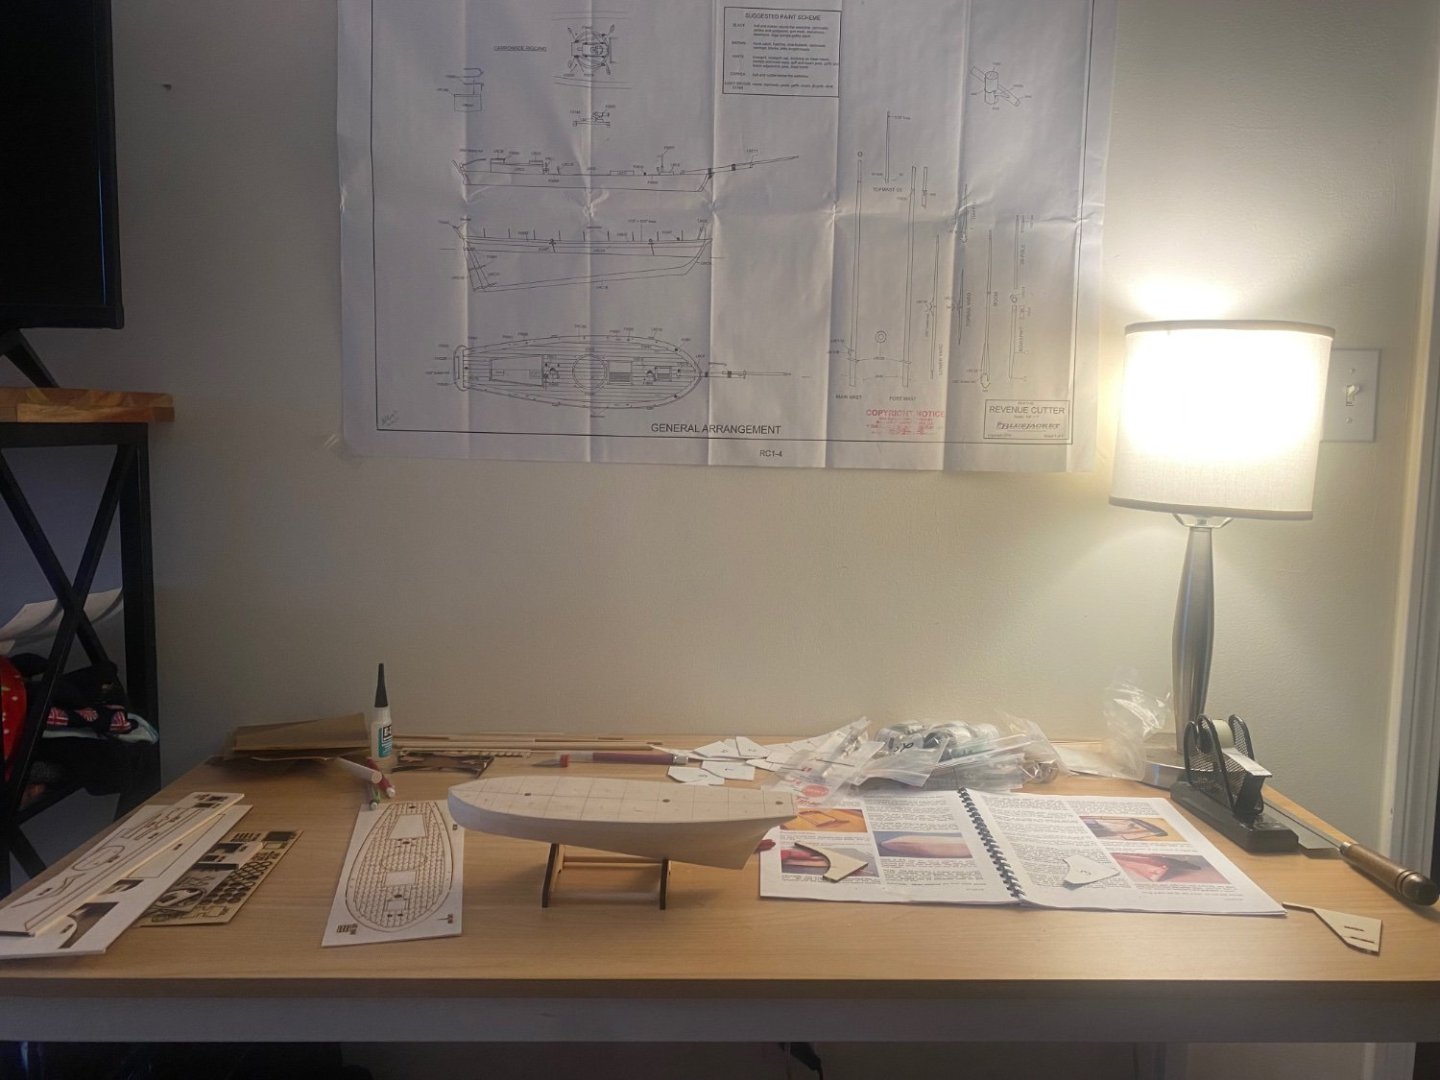
 Hello all! This is not only my first post or build log but also my first foray into the world of model ship building. Long story short, I’ve been talking about wanting to try it out for awhile now but was too intimidated to pull the trigger and get started. Eventually, my partner got tired of my talking about it but not doing anything and surprised me with the Bluejacket Revenue Cutter Ensign Kit for my birthday last month! I’m incredibly excited to get working in earnest but have been intimidated by it and haven’t made much progress beyond building the stand and cutting out all the templates. I know this might be a bit ambitious of a build for my first attempt but at this point I just want to start actually trying and hopefully posting on here will allow me to get some pointers when I inevitably get stuck. Anyway, I’ve included some pictures of the kit and where I am right now but like I said not much has been done. Going to go slow and pray I don’t mess things up ~too badly~.

-
- 7
-
-
- Revenue Cutter
- BlueJacket Shipcrafters
- (and 1 more)
-
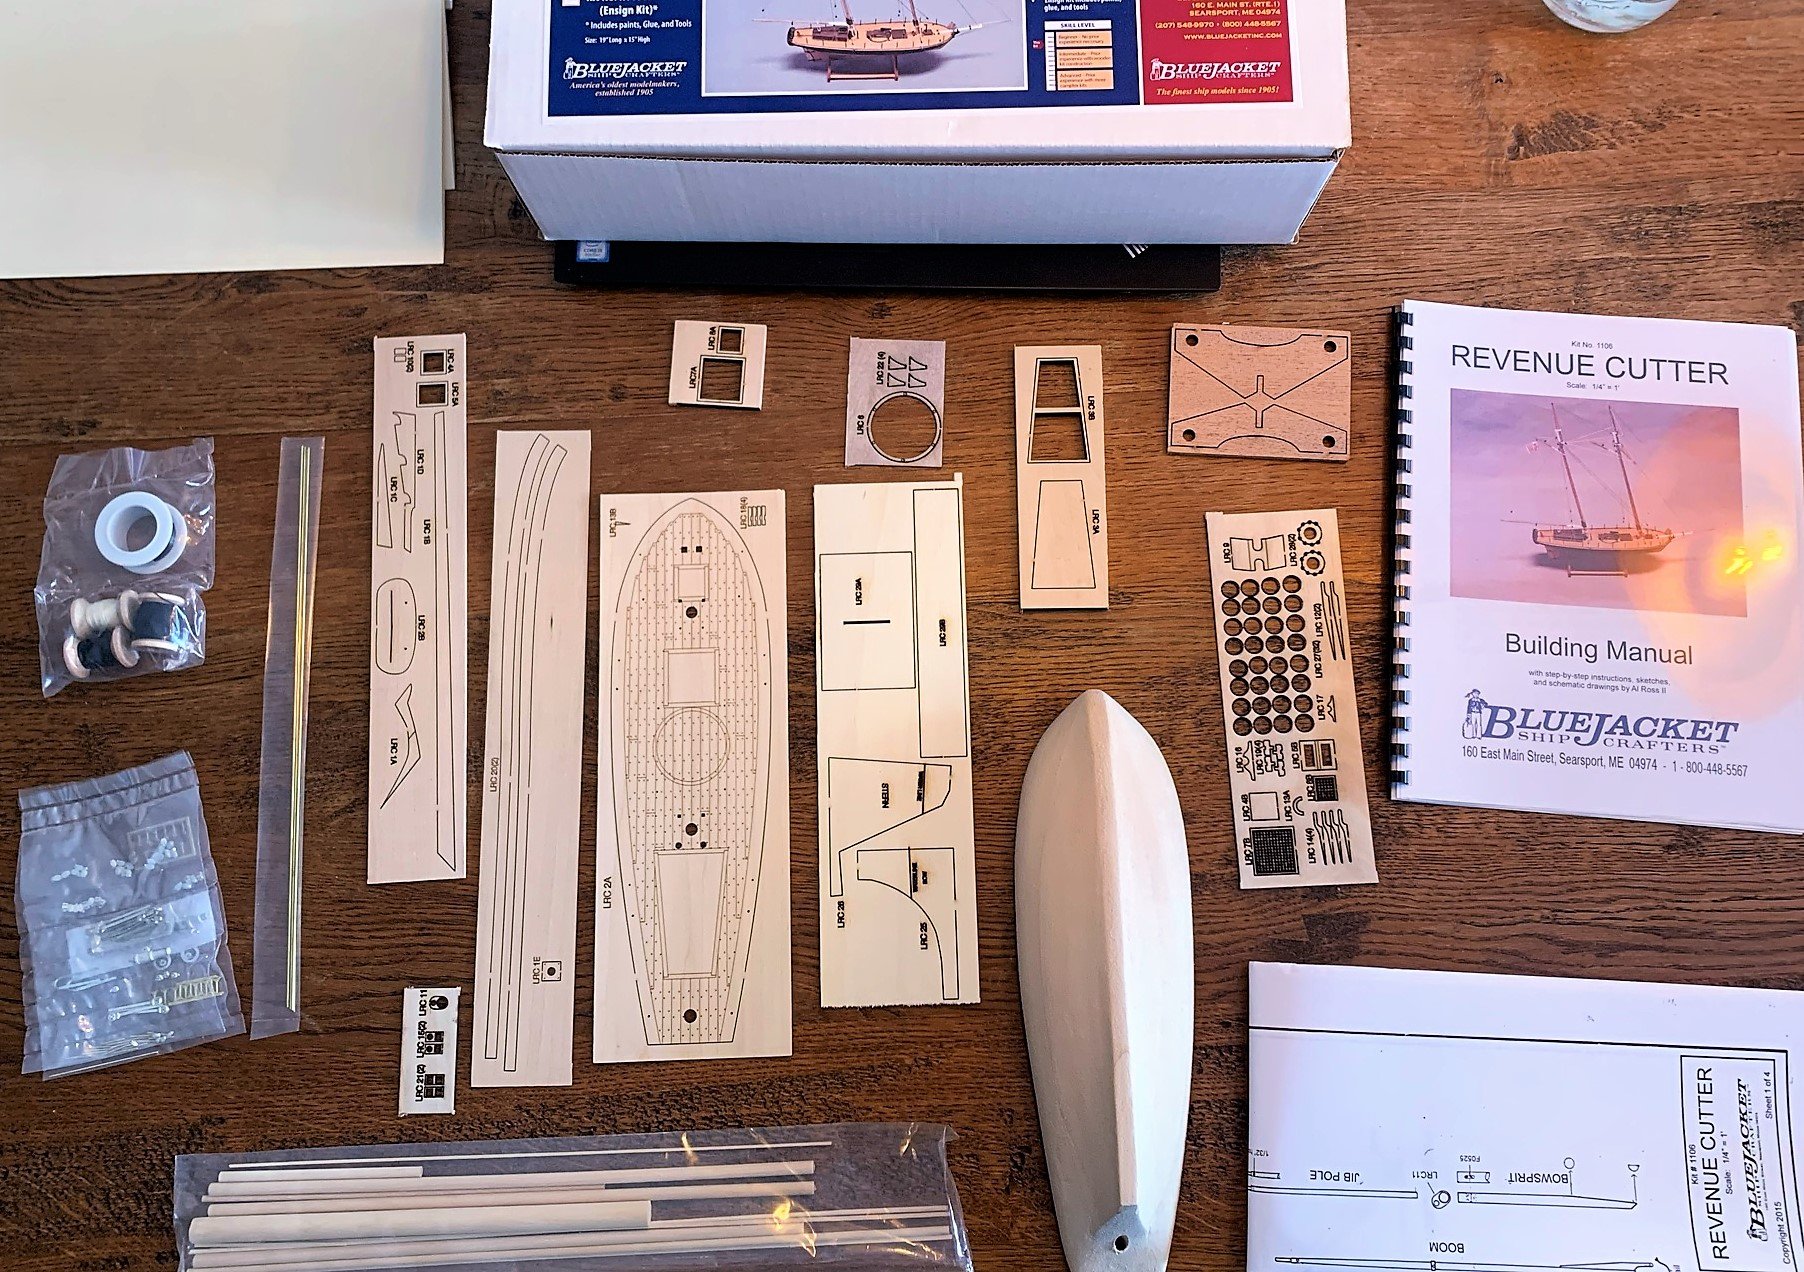
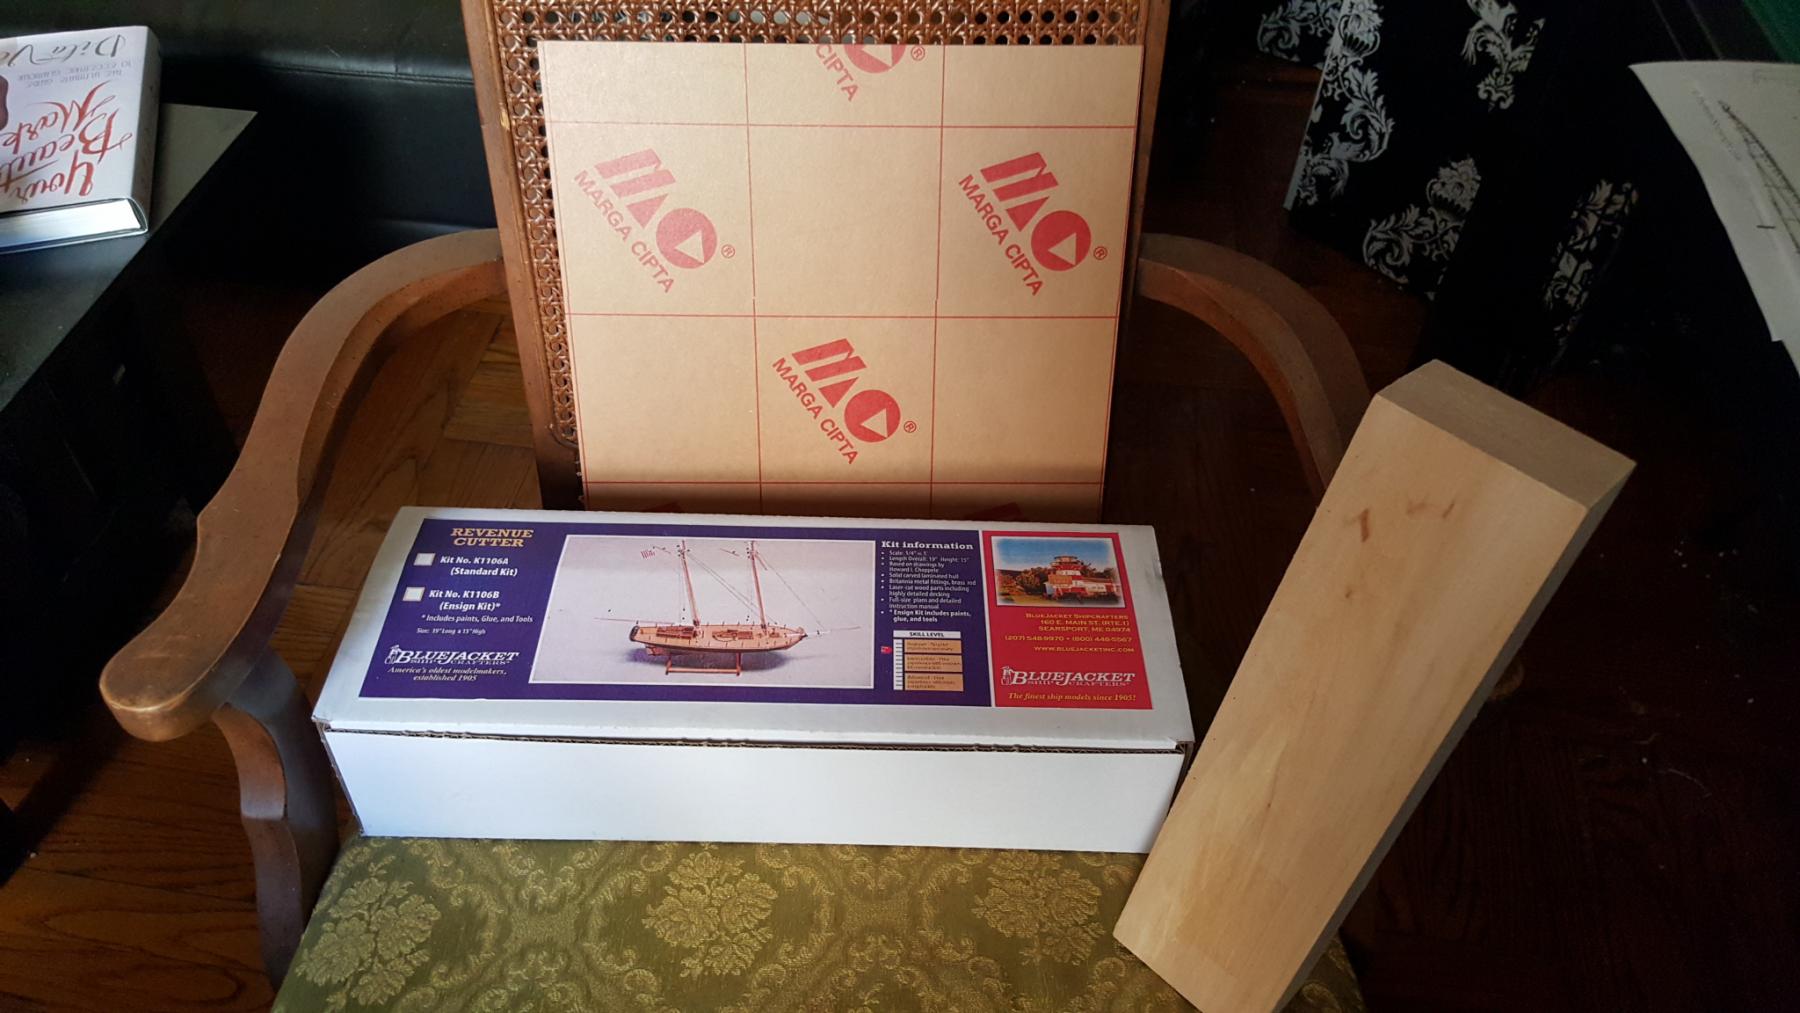
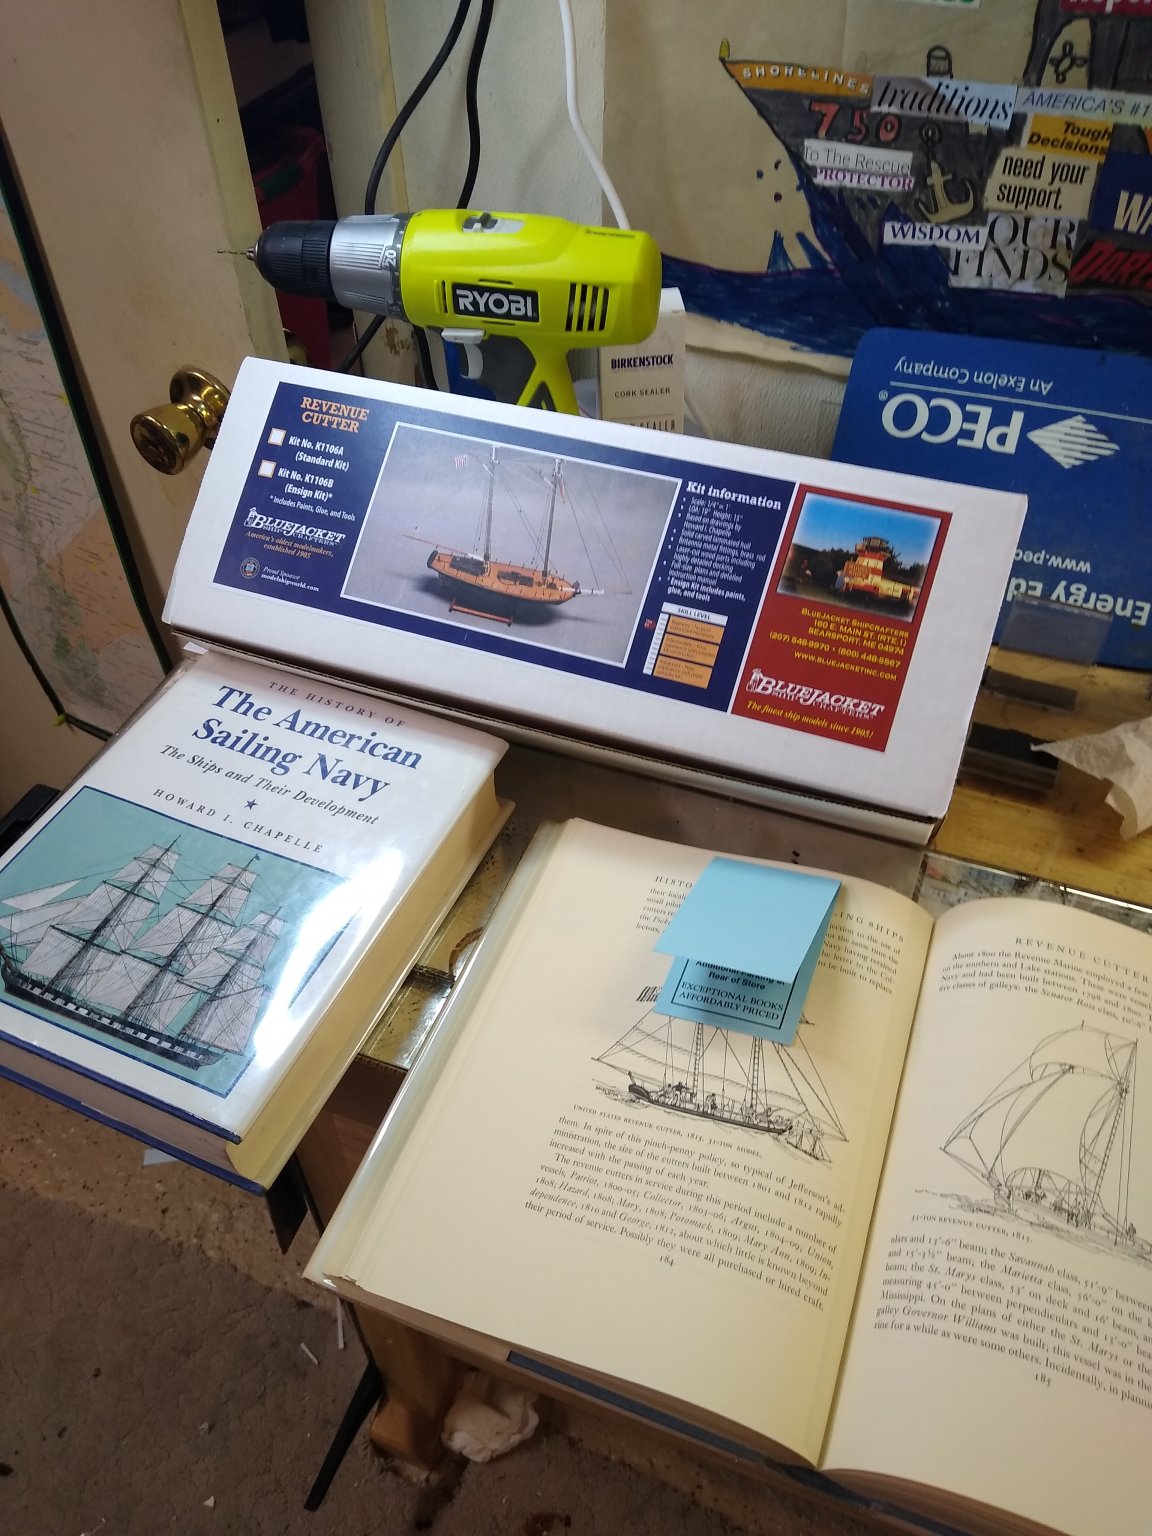
 Unboxing day: For my second kit model, I chose the Revenue Cutter by Bluejacket Shipcrafters. Was really happy with the Spray model I chose prior, so I wanted to follow it up with something slightly more complex rigging-wise. No building today, just taking in the kit: Excited about this one!
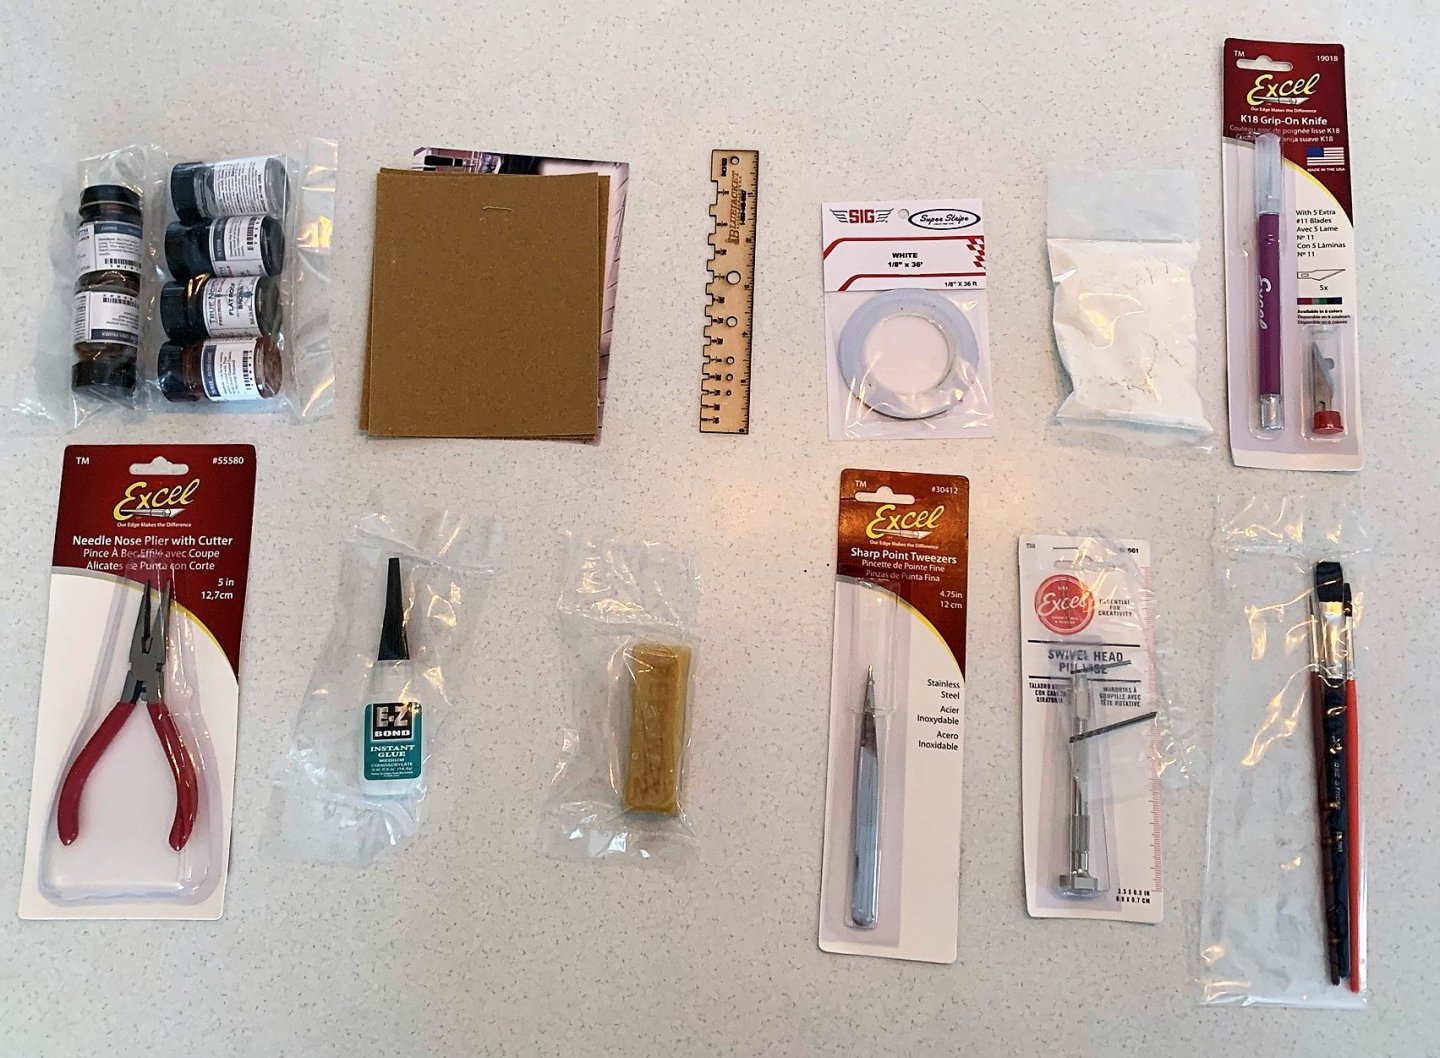

- 27 replies
-
- 4
-
-
- Revenue Cutter
- BlueJacket Shipcrafters
- (and 1 more)
-
 (Image via Model-Expo, from whom I bought the kit). This kit is meant to represent one of many ships built in the early nineteenth century for the US Revenue Marine (fore-runner of today’s Coast Guard). However, no “Ranger” was ever built for that service during this time period, so the model only approximates a real prototype. The closest real vessels, according to my research, seem to be the two Alabama-class topsail schooners built in 1819 (Alabama and Louisiana). This conclusion is based on several factors: Recommendation of the Coast Guard Modeling website Comparison to plans available from the USCG website Dimensions given by USCG fact sheet for USRC Louisiana My own calculations. The resources above list the Alabama-class cutters as having a 52’ keel and 18’-6” beam, while Wikipedia also lists a length on deck of 56’-10”. The table below shows the kit’s measurements (taken from the plans), the kit’s size at full scale converted to feet, the actual dimensions from the sources above in feet, and the difference between the two scaled back down to kit size, in cm. Deck: kit(cm) 28, kit(feet) 62.6, real (feet) 57.0, diffrence (cm) 2.5 Beam: kit(cm) 9, kit(feet) 20.1, real (feet) 18.5, diffrence (cm) 0.7 Keel: kit(cm) 22.5, kit(feet) 50.2, real (feet) 52.0, diffrence (cm) -0.8 The kit does not perfectly match the Alabama-class cutters, most notably in deck length, but it’s closer to those than the other options (the 56’ Surprise class or the 60’ Search class). At this scale, only a true historian of the Revenue Marine will notice that the model is a few centimeters off; as I intend to build it as a fictional ship rather than as Alabama or Louisiana, this will matter even less. The overall hull shape, sail plan, and deck layout seem reasonably similar, and I will probably use the USCG drawing of Louisiana as a guide when the kit plans are uncertain or I prefer the former’s appearance. For example, the USCG drawing shows two swivel-based carronades of different calibers, which I find intriguing, and overall it’s more crisply drawn than the poor-quality photocopy in the kit. I could only find a few previous build logs for this kit, which are listed here for future reference (if I’ve missed one, please inform me): Ranger by matt s.s.: heavy kit-bash of the model into a glorious pirate ship. Ranger by trippwj: unfinished log, not updated since 2014, progress as far as beginning planking; intended to follow plans for the larger Search class vessels. Ranger by Small Stuff: unfinished log, not updated since 2014, many photos missing, progress as far as bulkheads. Ranger by Woodmiester12: unfinished log, not updated since 2015, progress as far as first hull & deck planking. So it looks like I’ll embarking on a fairly new adventure here, the most challenging model I’ve tackled to date, especially with the rather poor instructions in hideous English translation. Some may ask why I’m attempting this somewhat problematic kit when BlueJacket just released what is, by all accounts, a high quality kit of a similar revenue cutter. The answer is quite simple: I purchased this kit before learning of the BlueJacket release. Both I and Mrs Cathead love the look of topsail schooners, and I thought the challenge of working with a foreign kit would be good for developing my skills. Now that I’ve bought it, I’m going to build it. And for those of you wondering why I’m not tackling another steamboat, there is a twofold answer: one, the previous sentence, and two, it’s going to take me significant time to do the research and design necessary for a new scratchbuild. I’d like to do something that doesn’t have plans, like the Missouri River sidewheeler Arabia, and that’s a long-term project. So I’ll work on this revenue cutter in the meantime to keep my hands busy and my skills developing, and work on my steamboat plans in the background.
- 93 replies
-
- 9
-
-
- topsail schooner
- revenue cutter
- (and 3 more)
-
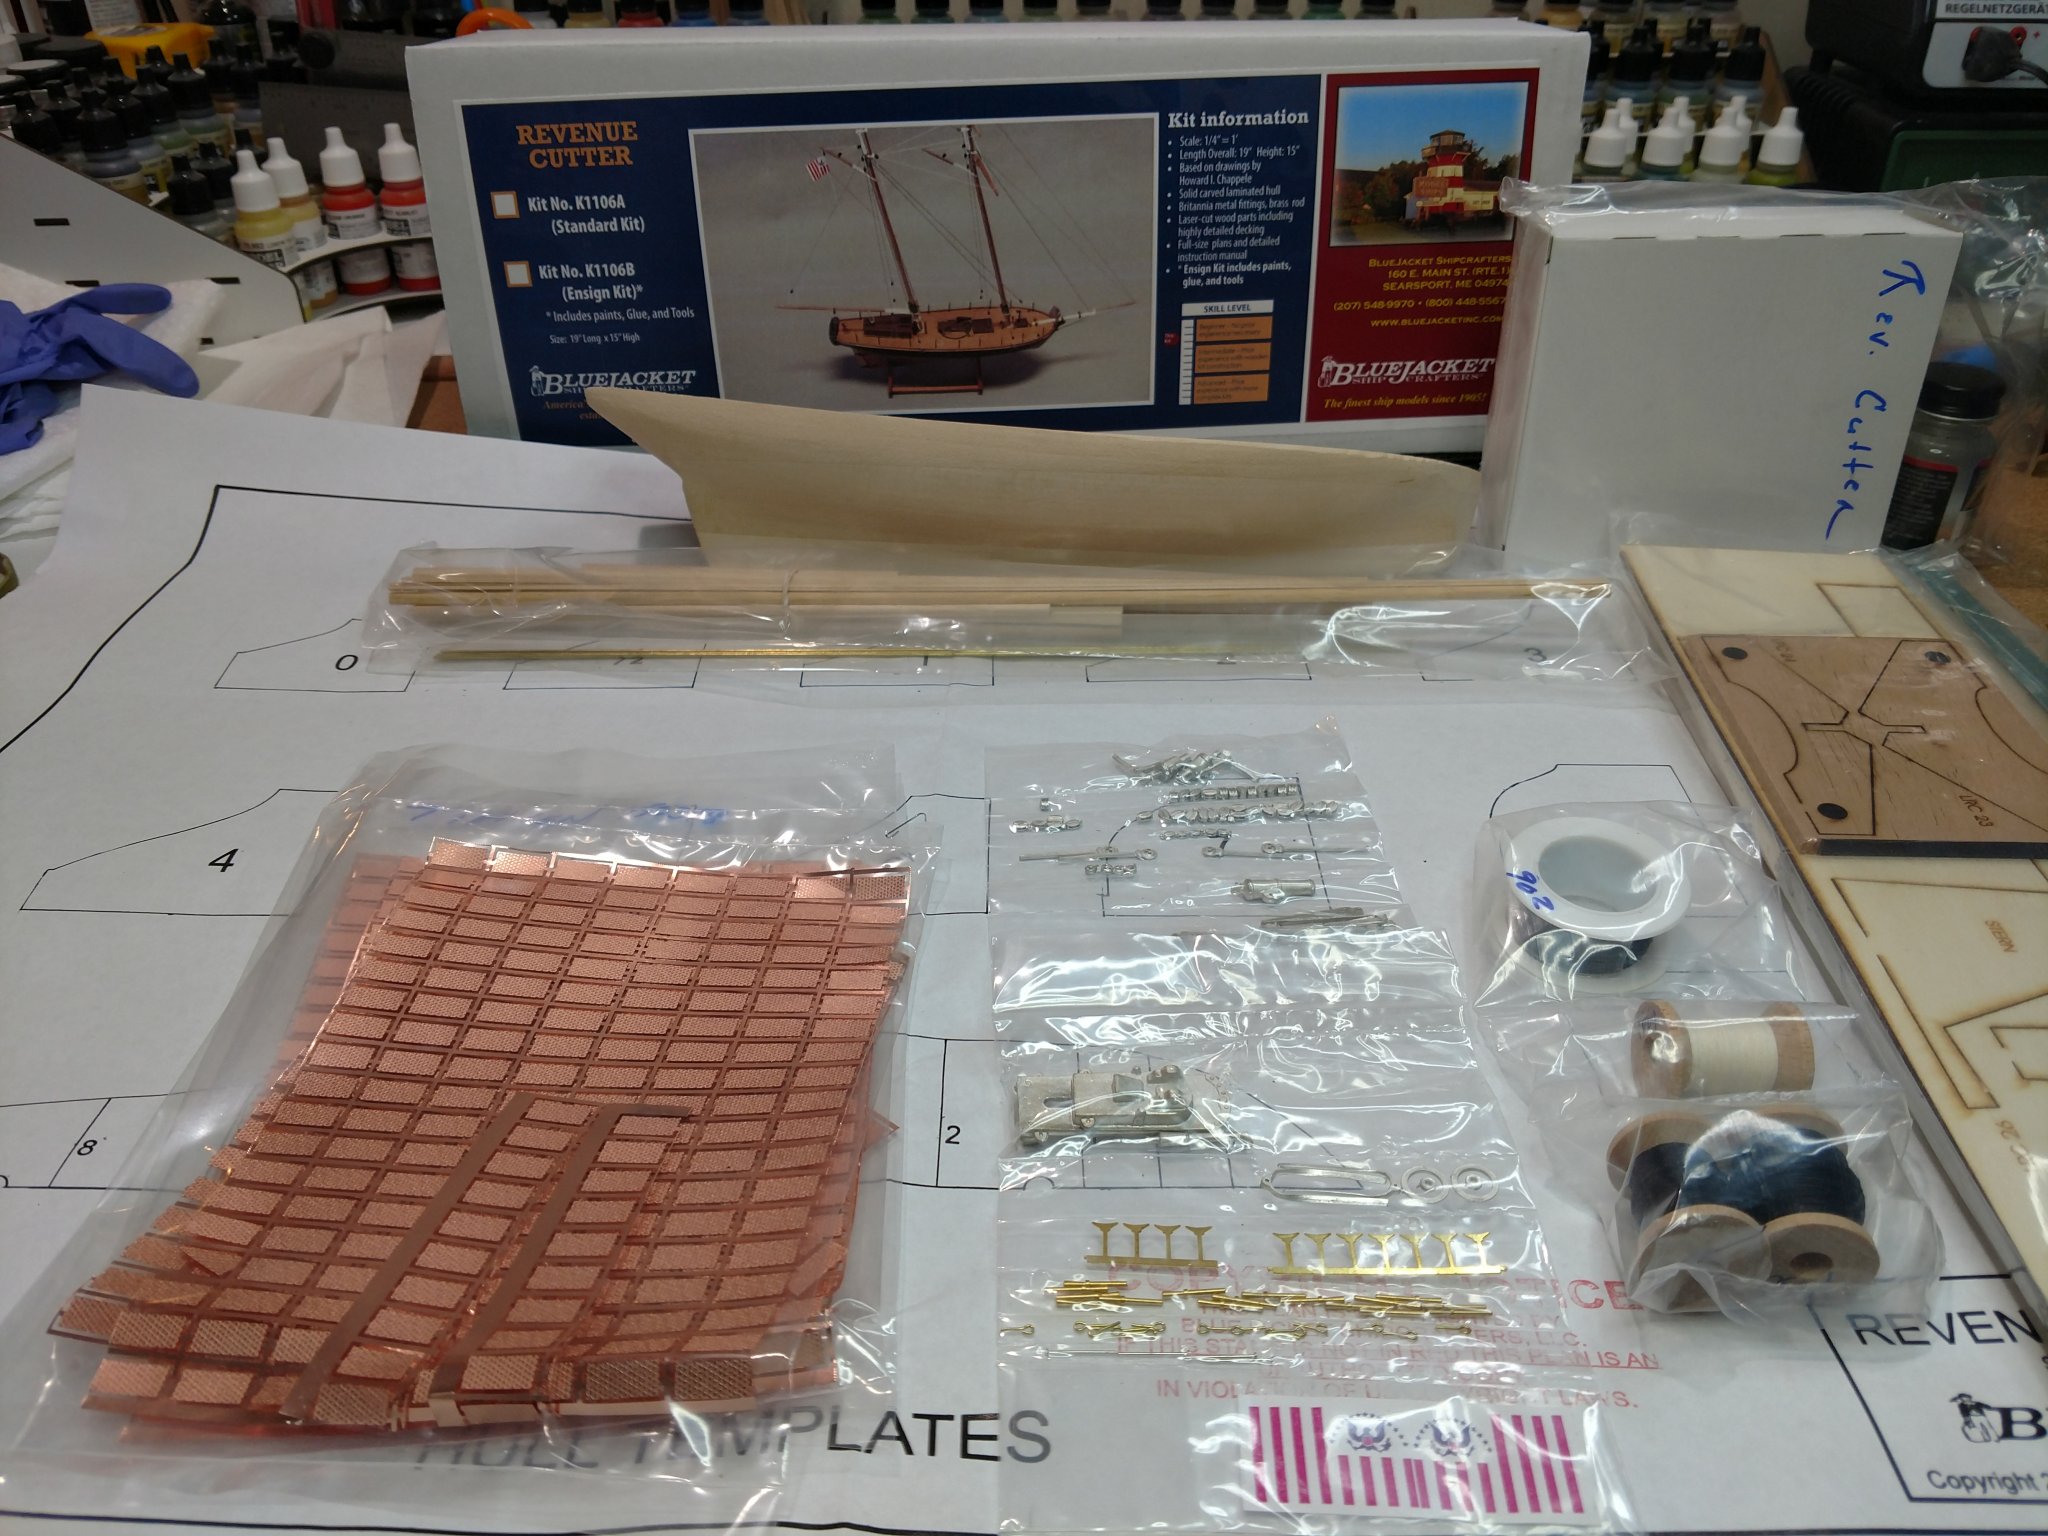
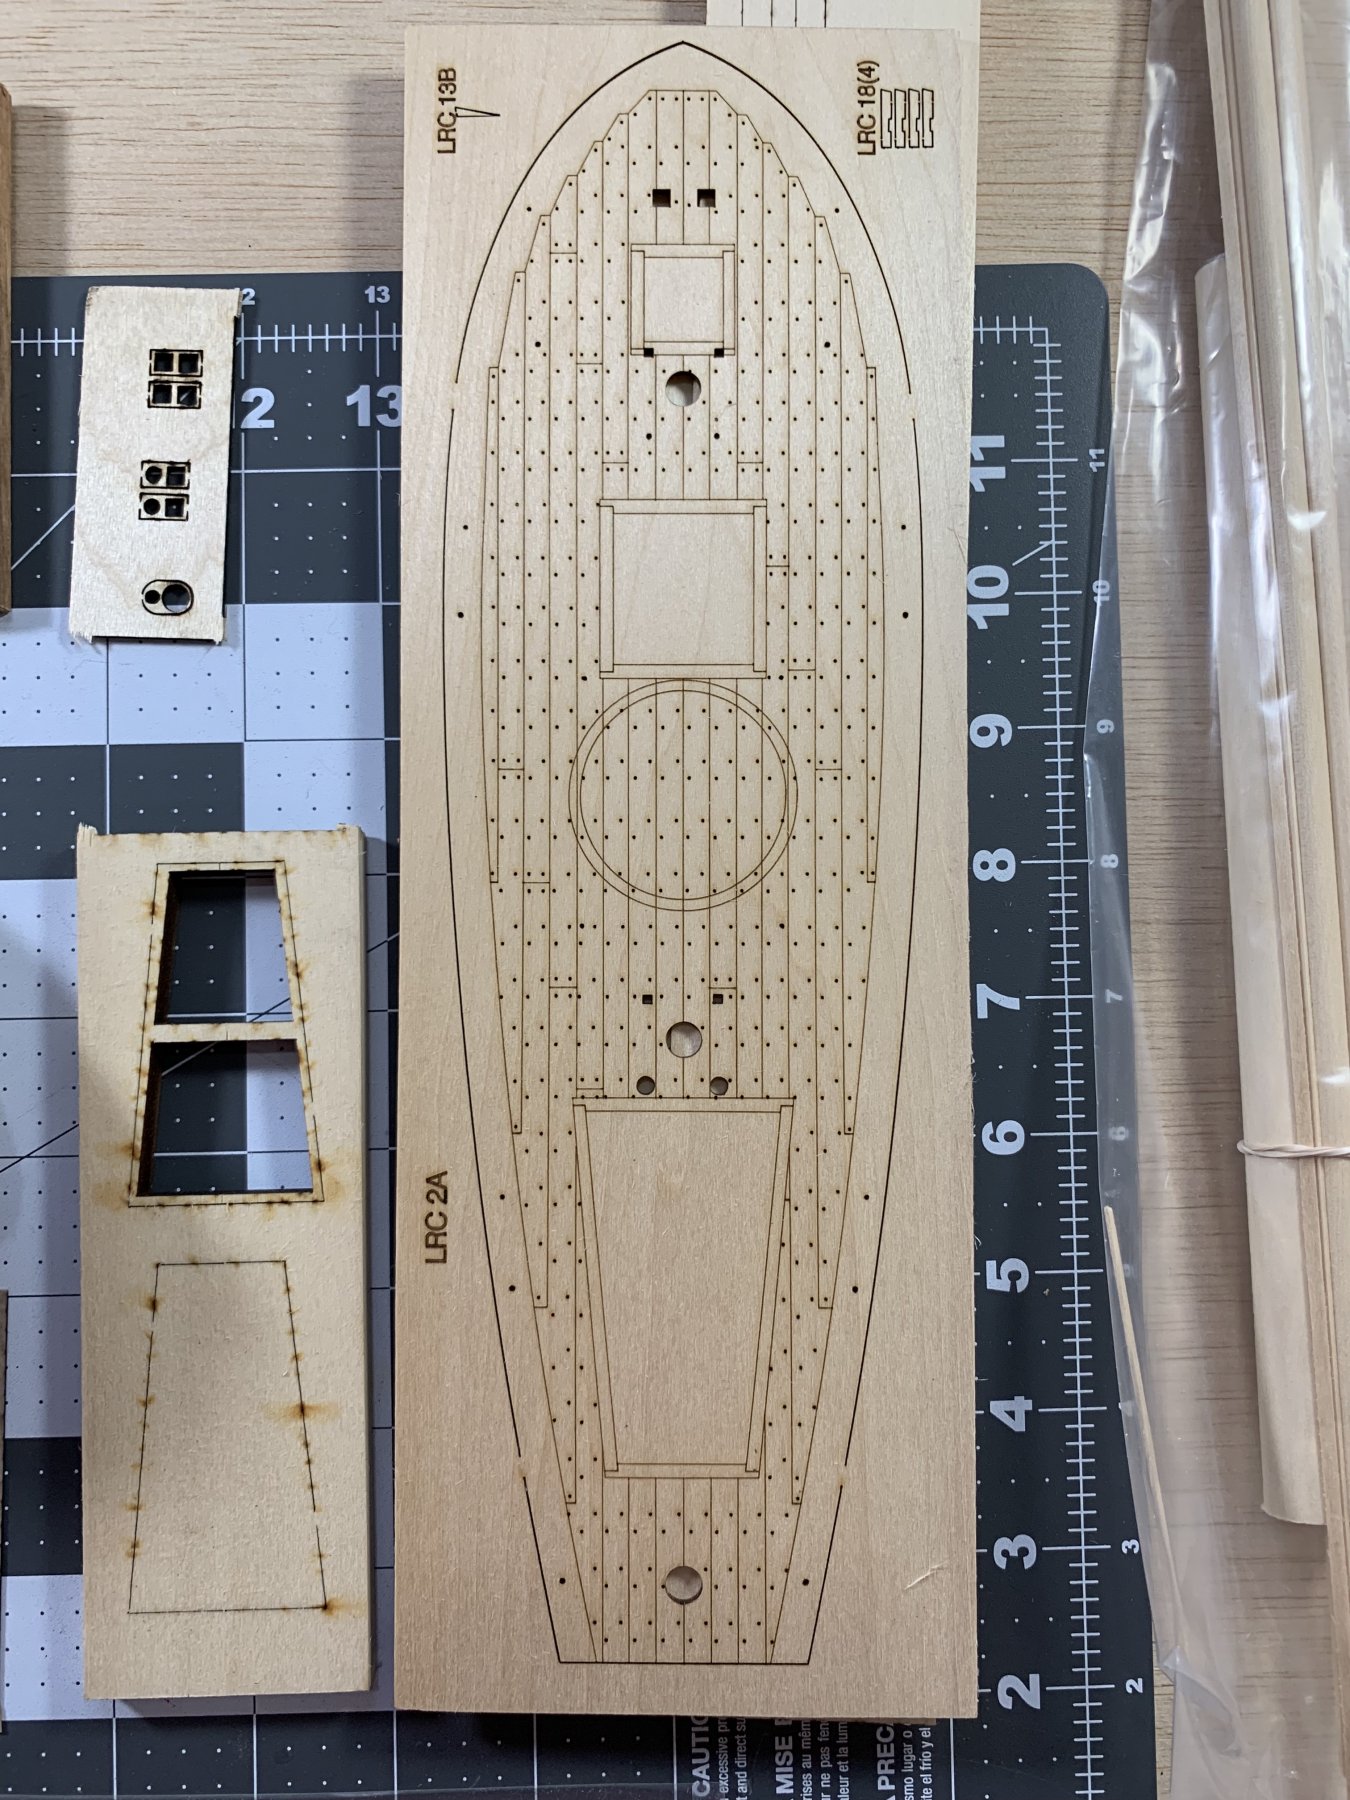
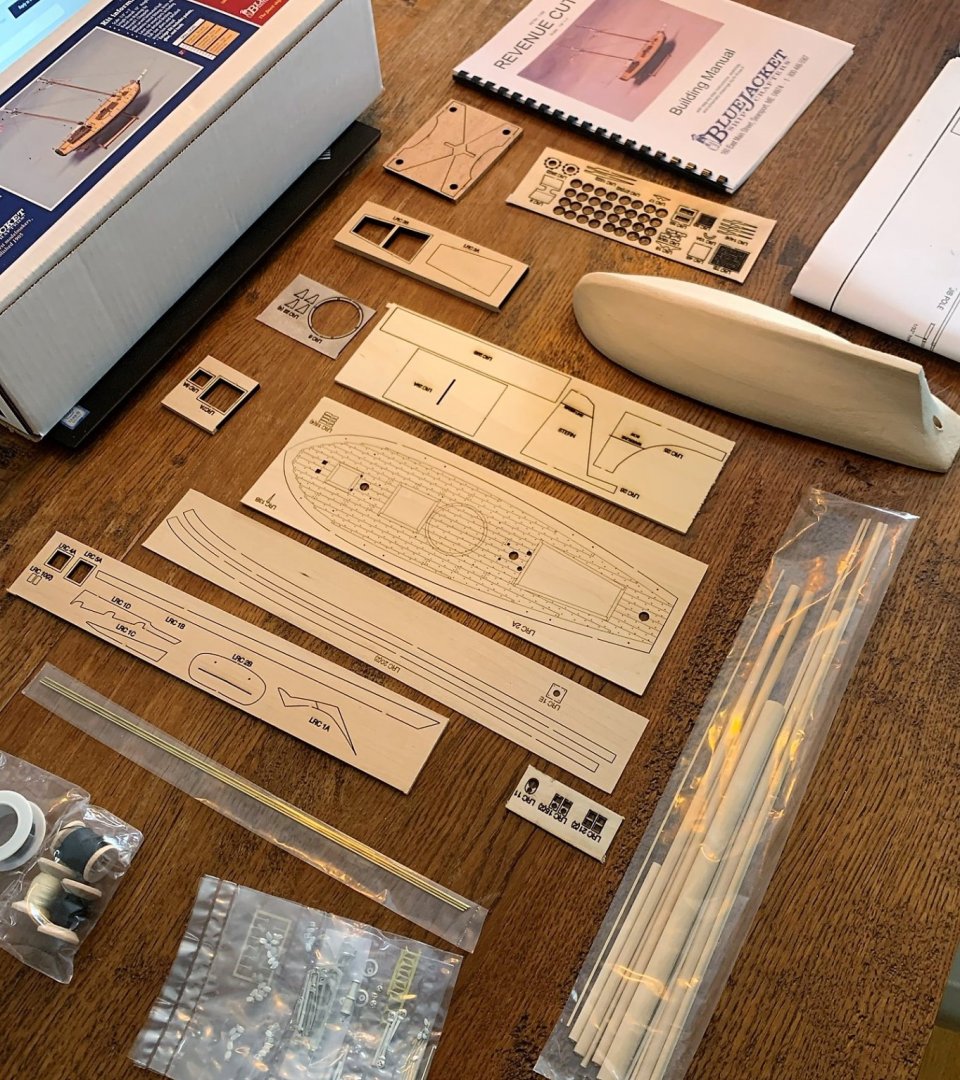
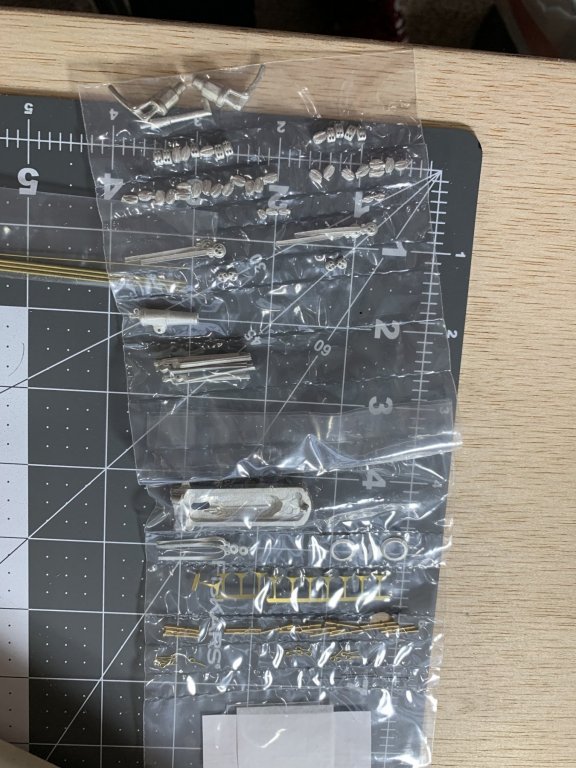
 For my third wooded model ship (after the Monitor and Virginia) I decided upon the Revenue Cutter by BlueJacket. I chose it for its entry level status but also because it will introduce me to more rigging. Anyways, on to the build log! The kit comes in a nice cardboard box with a color label showing the completed model. The kit includes a number of brass and cast fittings as well as laser cut wood and a machine carved hull. A nice touch is a display cradle is included as well. The laser cut deck is really well done. Excited to start working on the various cast components!


- 104 replies
-
- 7
-
-
- revenue cutter
- BlueJacket Shipcrafters
- (and 1 more)
-
 I believe this is an Alabama class Revenue Cutter circa 1819. Blue jacket was pretty vague on the origin. I was first concerned about the hull since it seemed to have very little room to shape. As I began working it, though, it is coming along nicely. The kit has well-drawn plans that accompany a nice instruction manual. I have never attempted a wooden ship model and have already emailed Nic at Blue jacket a couple of dumb questions. He has been great about responding and has sent photos for clarity.
- 83 replies
-
- 6
-
-
- revenue cutter
- BlueJacket Shipcrafters
- (and 2 more)
-
 In my research of the U. S. Revenue Cutter Service, I had come upon interesting items not normally written about. I am writing a small article about the overhaul of the U. S. Revenue Schooner Van Buren, commanded by Captain Thomas C. Rudulph, at Charleston, South Carolina during September 1845. One of the more unusual things noted in the vessel's logs was as described, The Gunner worked on the deck guns that remained aboard because the four 12-pounders weighed one thousand pounds each plus about three hundred pounds for each wood carriage. Custom had the guns “blackened” in previous years, but Rudulph put his brand on them this time. On September 16, 1845, the ship’s chandler, Captain Hugh E. Vincent, [ship chandler] delivered four pounds of “red ochre.” The Gunner and gang coated the guns and the “iron works” on the gun carriages with this mixture. Although an unusual color for guns, its use violated no rules or regulations. Some of the cutters painted the small boats’ interior a bright green with a white interior stripe at the top. In 1847, William Brady, Sailing Master, USN, published a book titled The Kedge Anchor; or, Young Sailor’s Assistant, containing thousands of helpful hints, procedures, and facts for sailing vessels. Under the heading of “Keeping the Copper Clean,” Brady advised that clean copper made the vessel look good, and copper cleanliness made a statement about its crew, crew, and captain. Hard labor and scrubbing the copper was the preferred method, but paint provided a quick fix, if not viewed too closely. The mix of red ochre and paint oil to the “color of new copper.” The application required calm and fair weather was calm because water would wash it off the wet mixture. However, if appropriately applied, this “will preserve a good appearance for a long time.”
- 1 reply
-
- 6
-
-

-
- preservation
- revenue cutter
- (and 2 more)
-
 Hey there fellow builders! So I finally had a chance to start cataloging all the work I have been doing on my revenue cutters alongside Sultana. Sultana is proceeding slowly but surely as will soon be updated, however as some of you may know at the last ship model convention in Connecticut I won a kit of Bluejacket's 31 ton revenue cutter. From the moment I got it I couldn't help but start tinkering with it. The reason why I put this in the scratch section is because I plan on building all my ship models (at least for the moment) in 1/64th scale since I like to be able to make size comparisons. Therefore this log will be an exercise in how to properly resize a kit to a preferred scale. So what of the kit itself? Fortunately the ship comes in 3 sizes and at 1/64th scale the 51 ton falls in a similar size to the 31 ton at 1/48 scale. So in addition to a smaller 31 ton I am going to scratch build, I will also use the wood hull and some of the kit materials to also build the 51 ton ship. The wood block and plans must be modified but let's go over the details and I will show you how I have been proceeding Also if for whatever reason this log should be moved to the kit section then by all means as I wasn't sure which section to put it.

- 362 replies
-
- 10
-
-
- active
- revenue cutter
- (and 1 more)
-
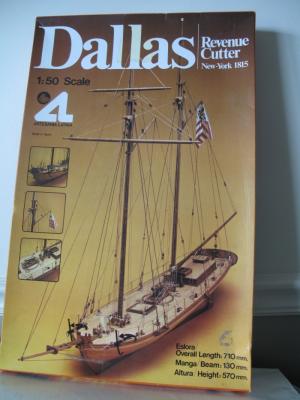
 I started this build almost 30 years ago. After completing the hull and deck fittings it was packed away (in newspaper dated 1986). I moved from to the US from the UK in 91 and brought it with me. Needing something to do to relax, I decided to restart the build and try my hand at masts and rigging. We'll see how relaxing tying small knots turns out to be! Progress so far: Basic inventory - except for rigging line, everything seems to be there. Damage - one pump handle is broken. Tools - purchased a few obvious hand tools; tweezers, rigging toolset, new x-acto blades, built a small (12"x24") workbench. Reading - as well as this site, I have copies of Ship Modeling Simplified (Frank Mastini) and Model Sailing Ships - Design and Construction (Robert F. Brien). Immediate to-do's: Read the books and plans - I need to get a better handle on terminology and techniques. Decide on any changes to existing hull work. Calculate size and quantities of rigging line - I'm thinking of using line from Syren. Start work on yards and booms. Some pictures: The original box Minor damage after a 3800 mile journey Lots still to do


- 78 replies
-
- 12
-
-
- dallas
- artesania latina
- (and 1 more)
-
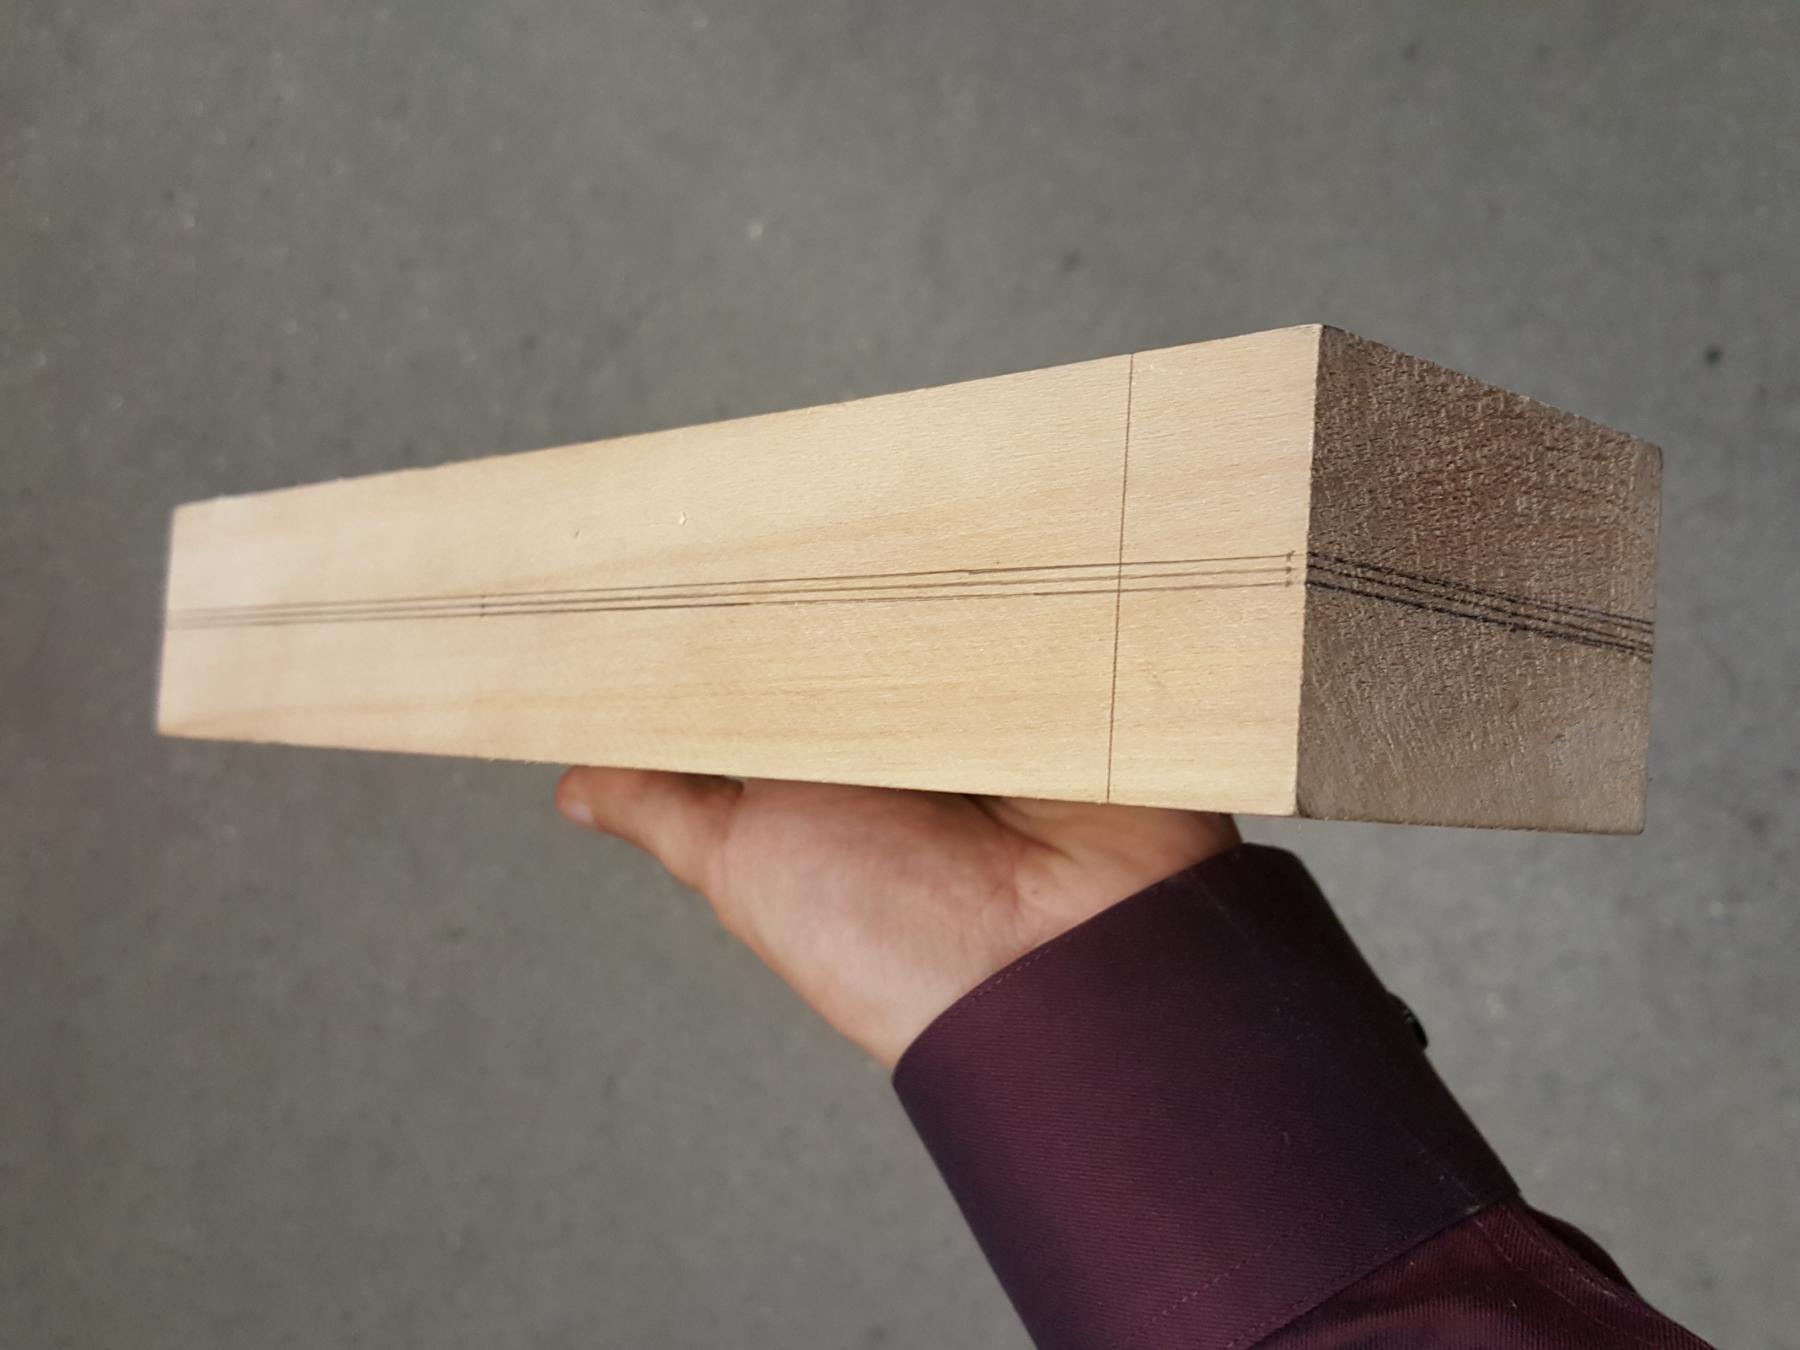
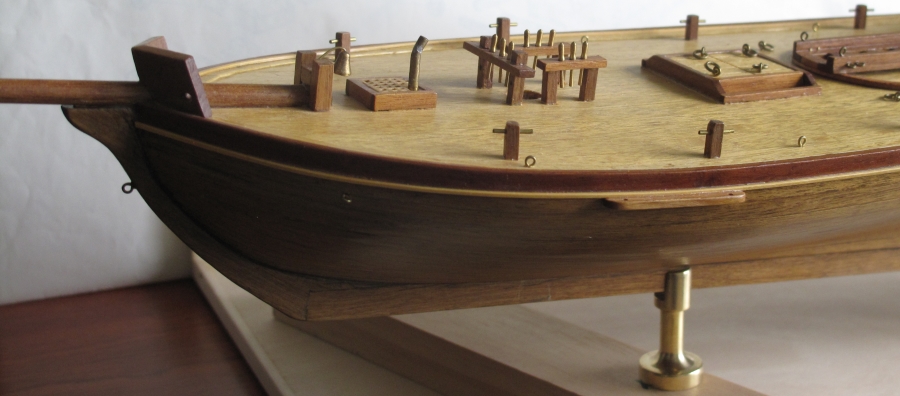
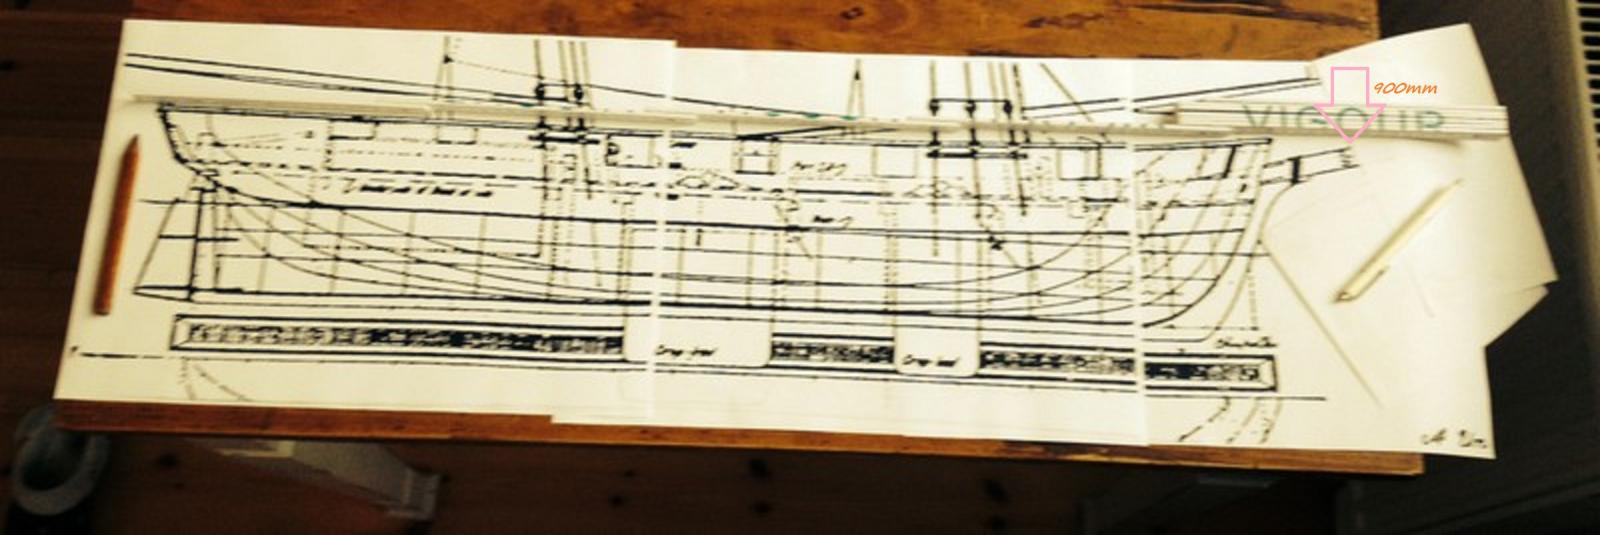
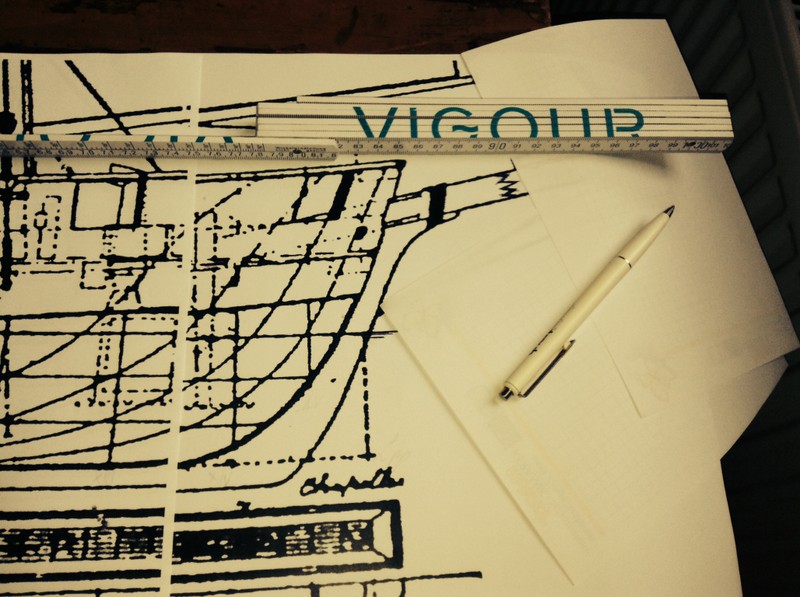
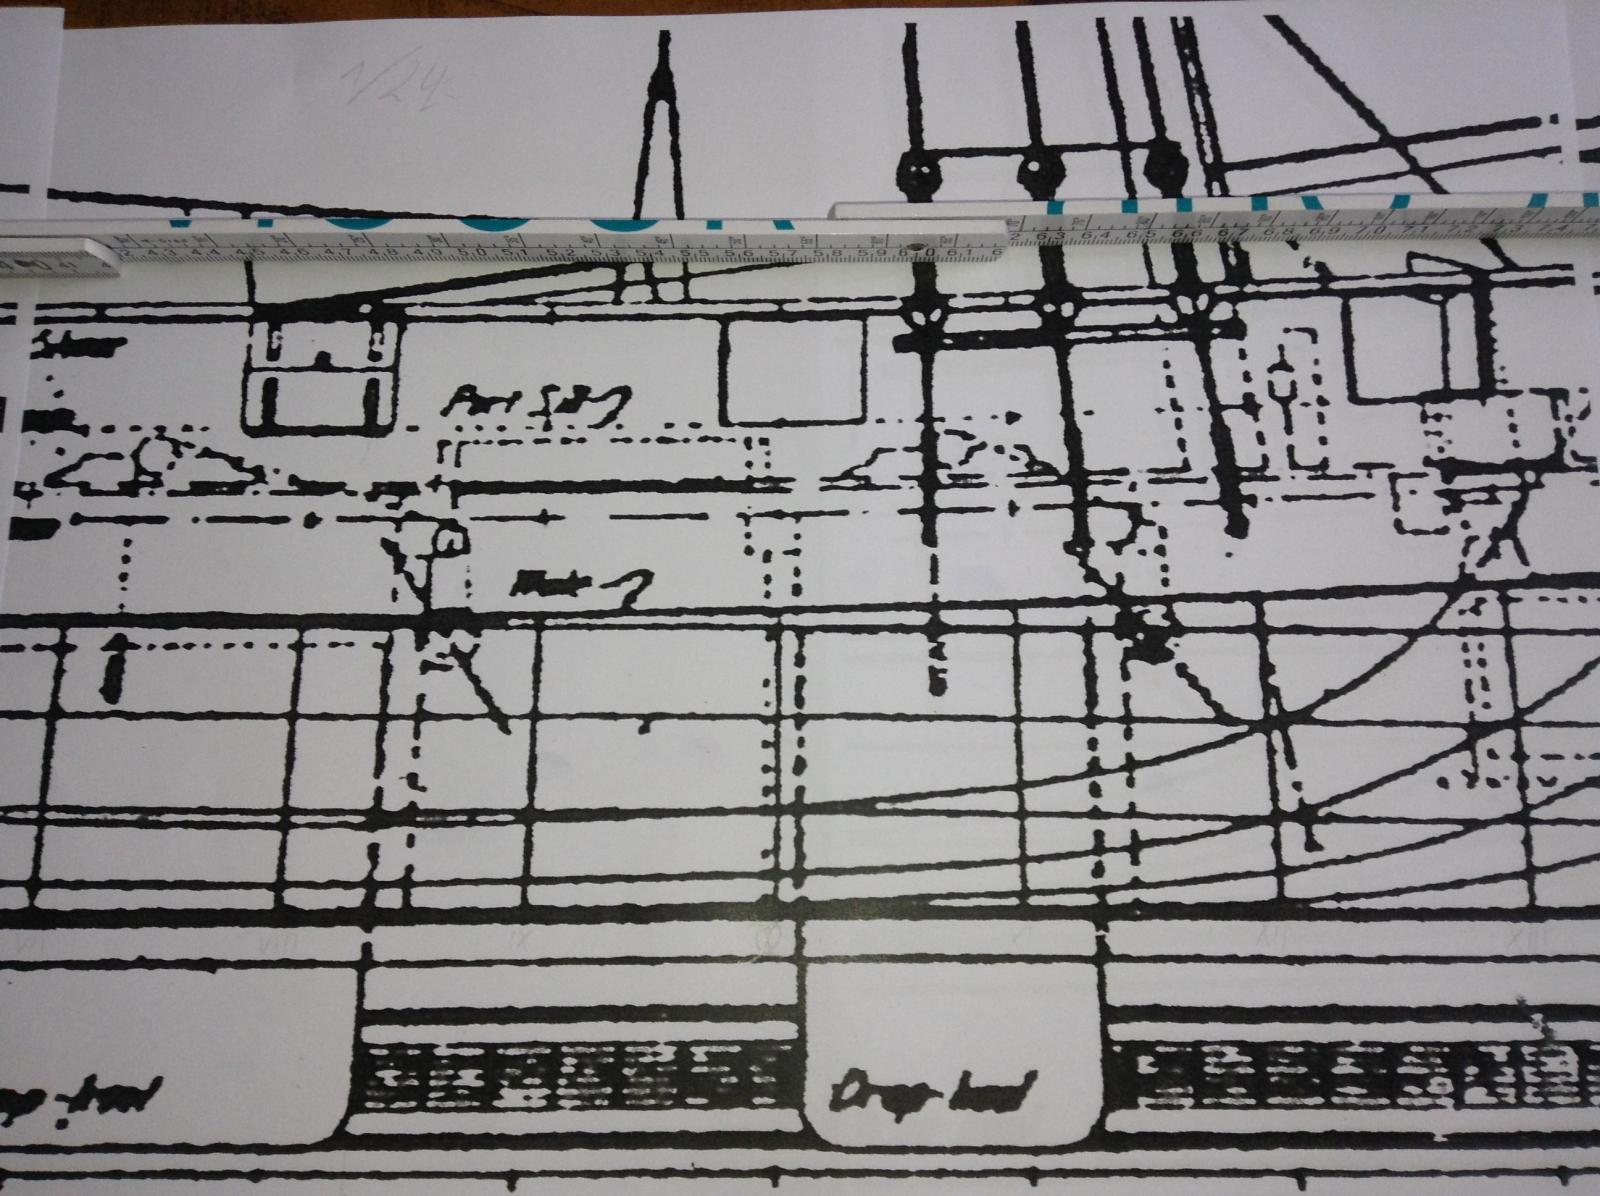
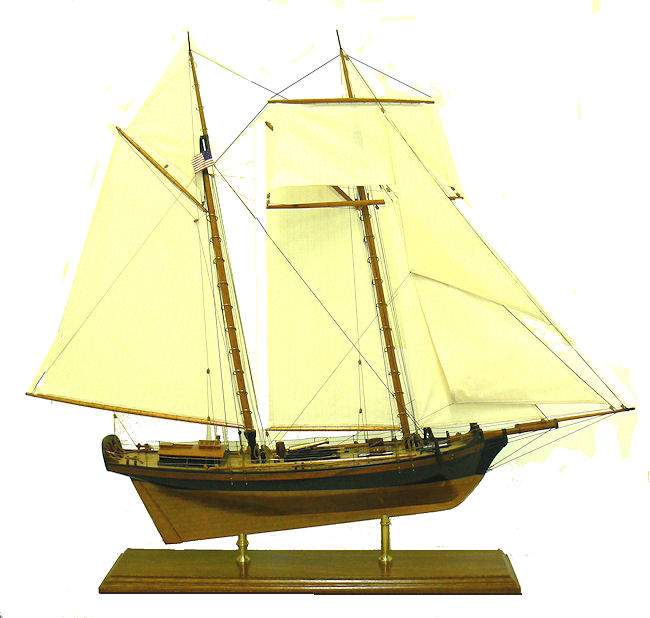
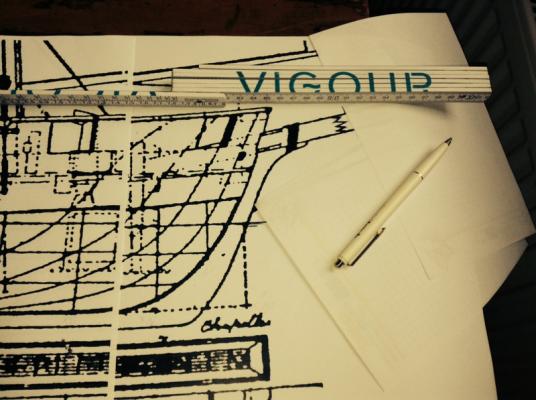
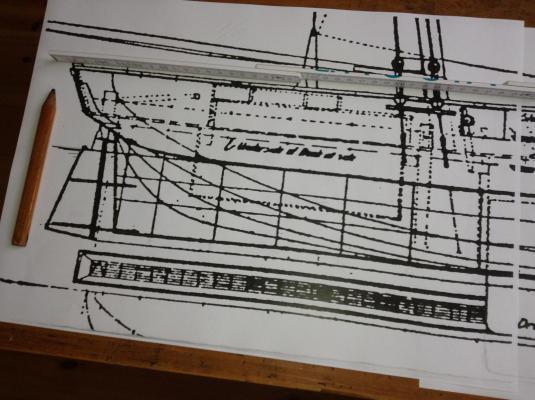
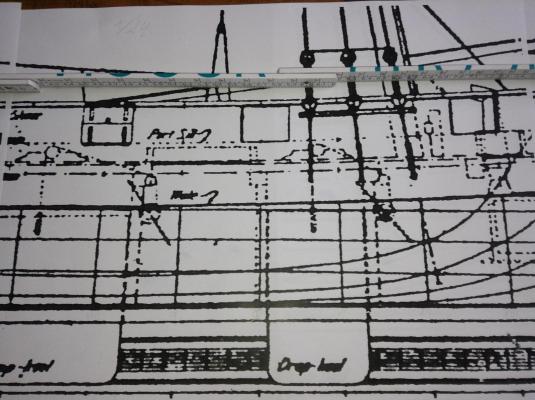
 Hello friends of the hullmodel scratchbuilding... Due to the fact I could build a hullmodel of the schooner here my collection of pictures - that will be elaborate during the next days. And the better detail of the bow part with a pencil to compare. The beauty will be 900 m/m or nearly 35 1/2 inches long. and Yours, Stan Edit: Adding the last two pictures showing the tremendous size of this hullmmodel and the cutting of the bowsprit.
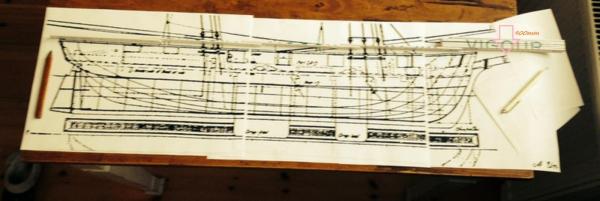
-
 Hello all. I am an extremely green ship builder as in this will be my first ever. I am going to attempt to build the revenue cutter Blue Jacket. Any thoughts, recommendations or help will be greatly appreciated..as I said this will be my first as attempt. Wish me luck Tony
- 2 replies
-
- 2
-
-
- revenue cutter
- BlueJacket Shipcrafters
- (and 1 more)
-
 Greetings gang. I started this build with a video on YouTube. There are other build logs on this same cutter and I am happy to see them all. Here is part one of the build: Thanks for viewing. Music for the vid comes from the Colonial Seaport Museum. Sorry my video editing is not great!
-
 Greetings everyone, and welcome to my first 'concurrent' build log, as I begin the semi-kit (or semi-scratch, depending on your point of view) build of the revenue cutter Cheerful, from Syren Ship Model Company (Chuck Passaro). I've chosen to place this log in the kit build section, since I am using laser cut parts from Syren for the 'back bone' - the former, keel, and bulkheads, as well as all the mini-kits that are available for the ship. This log is starting due to a set of materials that were put on sale in the trade section of this website, and I couldn't resist grabbing it, even though I have far too many kits on the shelf right now. Included in my purchase was everything that Syren produces for this ship except the new pump kit, along with what was apparently a custom wood order from Crown Timberyard with a Holly deck package and boxwood planking strips. As with my other current build log, the Picket Boat #1, this first post will be primarily for an index. The actual log begins in post #2 to follow. Section 1 - Constructing the backbone (former, keel, bulkheads). 1. The beginning - the former (false keel). 2. The keel. 3. Bulkhead start (side trip - beginning the windlass). 4. Bulkheads all on (side trip - windlass part 2). 5. Gunport sills - starboard side.
- 39 replies
-
- 15
-
-
- cheerful
- syren ship model
- (and 1 more)
-
 This is my very first build and excited to get started. Did a full check of the pieces today and was missing a couple of items (update: great service from Nic at Blue Jacket with the one missing piece and one damaged piece having replacements on their way already). Heading off on vacation tomorrow but looking forward to getting stuck in once I get back. Is it normal for thicker pieces of laser cut pieces to require more significant cutting with the Xacto knife to get it out of the template? I was starting to get the stand out and it was taking a lot of time. Decided to hold off to make sure I was attacking it the right way before ruining step one of the build.
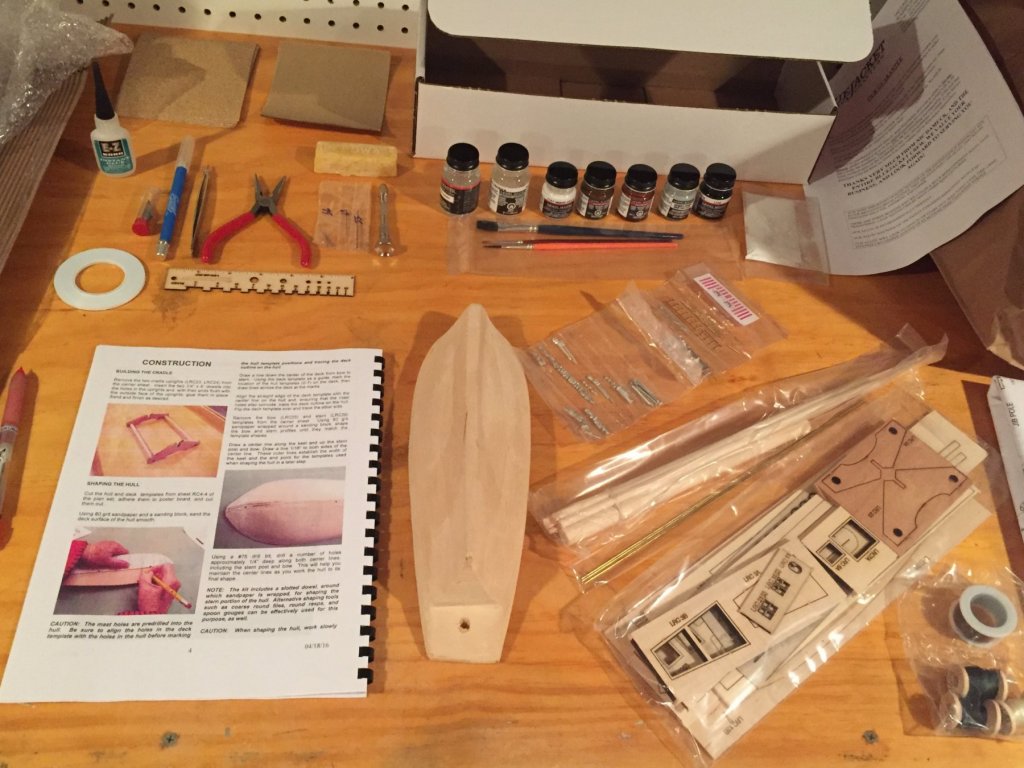
- 43 replies
-
- 7
-
-
- first build
- BluJacket Shipcrafters
- (and 1 more)
-
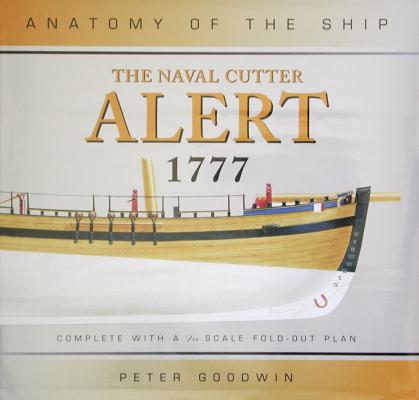
Hello friends. As I restarted my life in a new flat as a single in may of this year I restarted my hobby also - but my right eye got so bad during the last few month that I was forced to stop car driving. So I crashed the Ranger and got mad of being unable to built anything intelligent until today. I got a book at ebay and found the old Krick kit of the Alert! And I got mindsick and bought it spontaniously - due to the fact that 1/25 might be an intelligent way to outwit my eye. W'ht'n'heaven hav' I done? I first decided to bash the kit, and had to figure out that it was easier to rebuilt it scratch. Then I got the information to have copied the wrong plan. So I decided to make use of the 1829 30tons one due the rectangular hull lines. Because of this I changed the titel and set in this small statement for you to show the development of the buildingstory. So I'm awaiting the pacel and started looking for some literature and background information: https://www.uscg.mil/history/webcutters/Alert1818.pdf But in there is an intersing group of words: She was constructed of live oak, red cedar, and locust, with four ports per side. Does this text mean square formed ports with lids? ...and is the Alert of 1818 of the 57ft-Class with 75tons (without fractional number XY/95 ? I couldn't belief! ) the wrong prototype? And do I have to buy the AotS Book of Alert 1777? Perhaps you can help - during I'm rummage around in my issiue of Chapelle's book The History of the American Sailing Navy to find further answers... and start reading here: http://modelshipworld.com/index.php/topic/6400-alert-by-riverboat-krick-125th-scale/ Yours, Small Stuff