Search the Community
Showing results for tags 'digital navy'.
Found 6 results
-
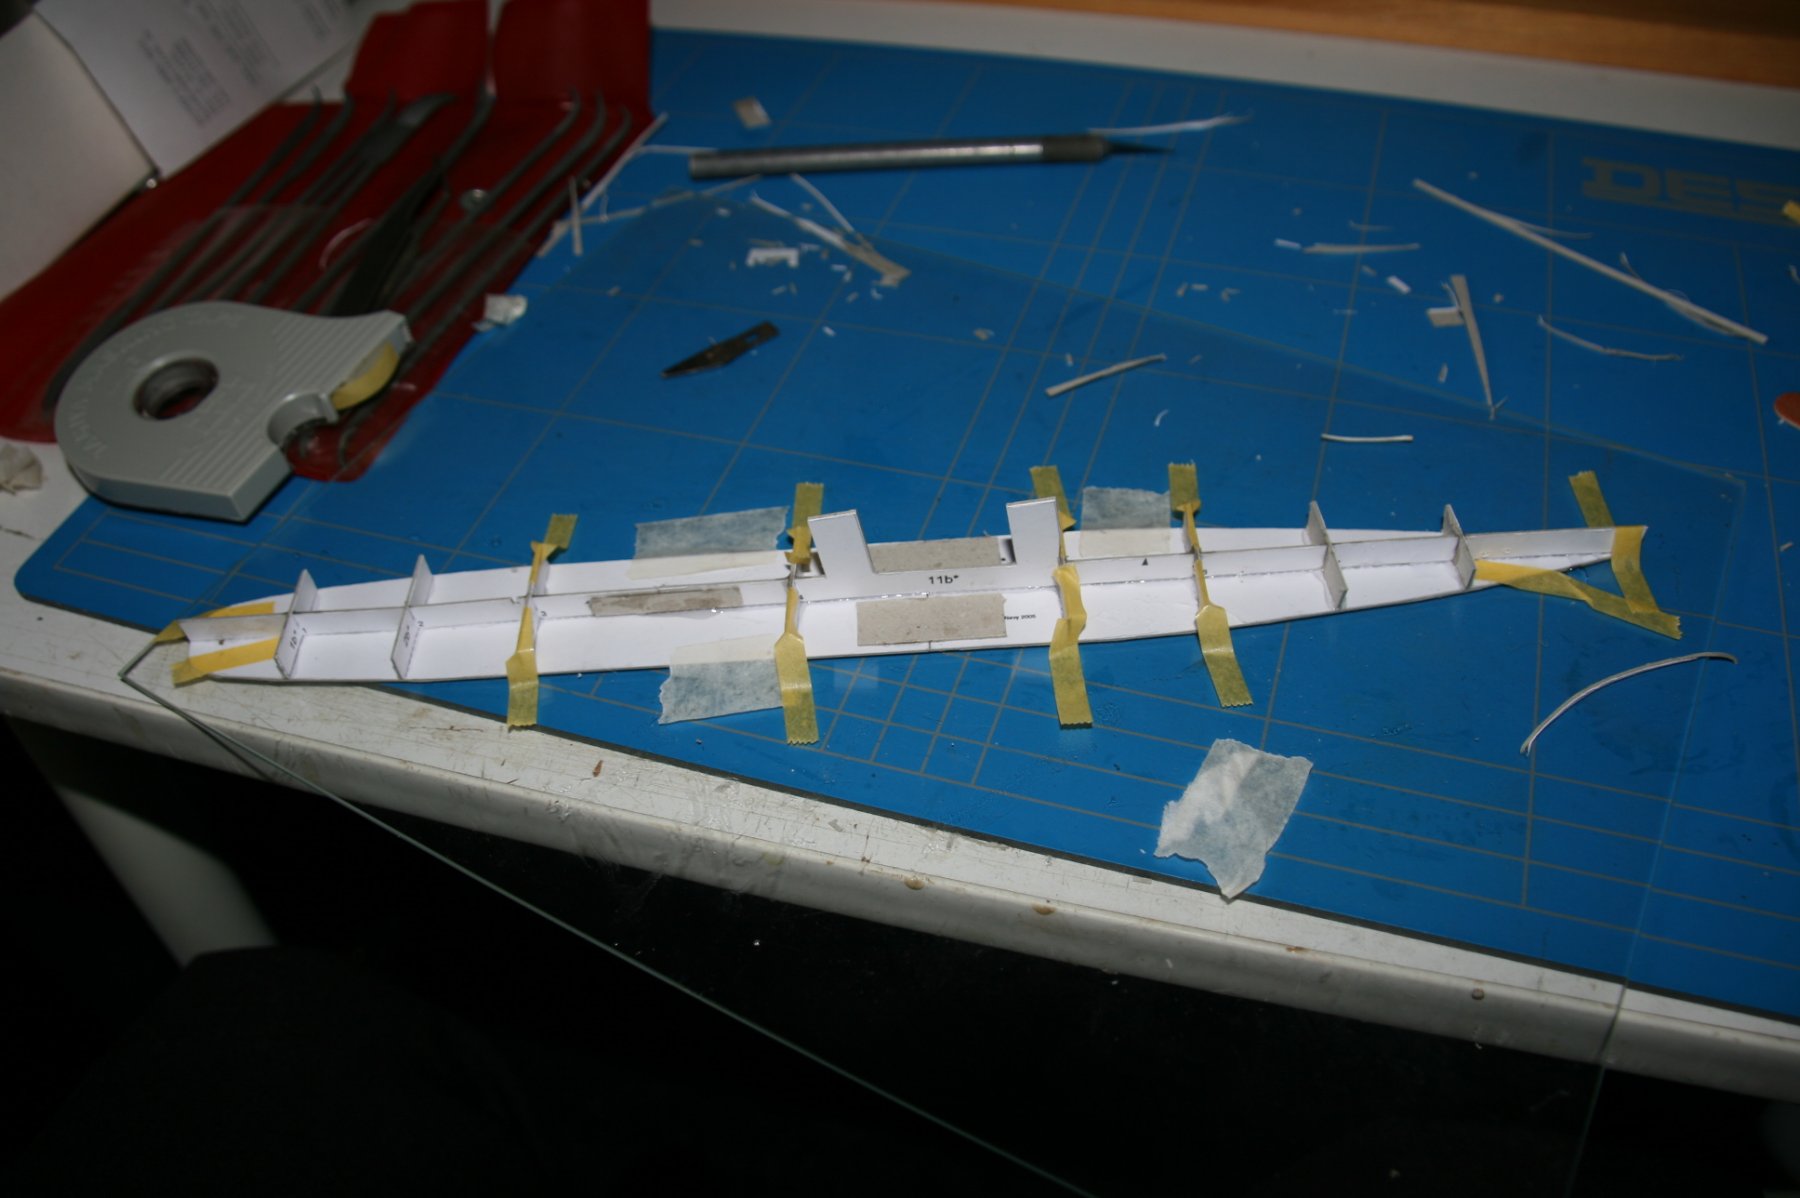
 Hello, my name is Clare. I don't know how it happened. I suppose this is typical. Somehow, without knowing it was happening, I have become a card model junkie... I began, innocently enough, experimenting with a kit from Shipyard, the 1/96-scale paper model of the cutter HMS Alert. I didn't plan on finishing it, I just wanted to start it to see what the build was like. But, it became very interesting and unexpectedly quite rewarding. I ended up completing it and a fellow modeler wanted to buy the completed model from me, so it found a home. But, building the model was such a rewarding experience, I ended up building a Shipyard lighthouse kit and starting another Shipyard paper ship model kit, HMS Mercury, which is now under construction. HMS Mercury was intended as another kind of experiment and something I would just work on in between other projects. So, I haven't worked steadily on it. But, recently, I put in some work on the model and have had a difficult time breaking away from it. After my last build log post, I figured I'd step away from it, but I couldn't help myself. I did a little more work on it. But, paper models cover a diverse range of subjects, and most paper model, or card model subjects (as some people prefer to call them), are not of sailing vessels, but of steel navy ships. My "Go To" shop for this stuff is usually the Polish seller GPM. They have all subject matter in kits from a wide range of manufacturers. One of the things I like to do is to check out some of the fascinating subjects, ships mostly, and look at the kits and available laser-cut and photo-etched accessory sets they sell for them. I've been seriously temped to try out one of these, but then I took a good look at the card modeling tutorial that Chris Coyle did here on MSW, using the German V-108 torpedo boat kit from Digital Navy as the subject. Having finally replaced my malfunctioning color inkjet printer, it seemed like a good opportunity to test it out and to print the parts sheets for the V-108 model. I hope Chris doesn't mind, but, above, I've posted a photo of his completed model from his tutorial, which is the subject of this build log. The tutorial and the links to the download can be found here: V108 Paper Model Tutorial Now, I'm not following the tutorial to the letter. Chris' model is a waterline model, and I really want some practice building the hull below the waterline too, so I'll be attempting the full-hull build. This is a small model at 1/200 scale, and I don't anticipate this taking a great deal of time, especially in comparison with a sailing ship model. So, I'm planning on spending a bit more of my time on this build. I went ahead and downloaded the files from the links provided in the tutorial. There are four pages in all, but only two of those pages are parts. They fit on standard 8-1/2" x 11" paper. I didn't end up printing anything directly on cardstock, laminating Pieces onto cardboard as necessary. I then began cutting out the structural pieces as needed and building the basic framework. Okay, so there we go with another one. I've glued up the upper and lower frames together, but don't have a photo yet. Next, I'm going to add some hardpoints to the keel so I can eventually mount the model securely on a display base. Clare


- 38 replies
-
- 14
-

-
- digital navy
- v108
- (and 2 more)
-
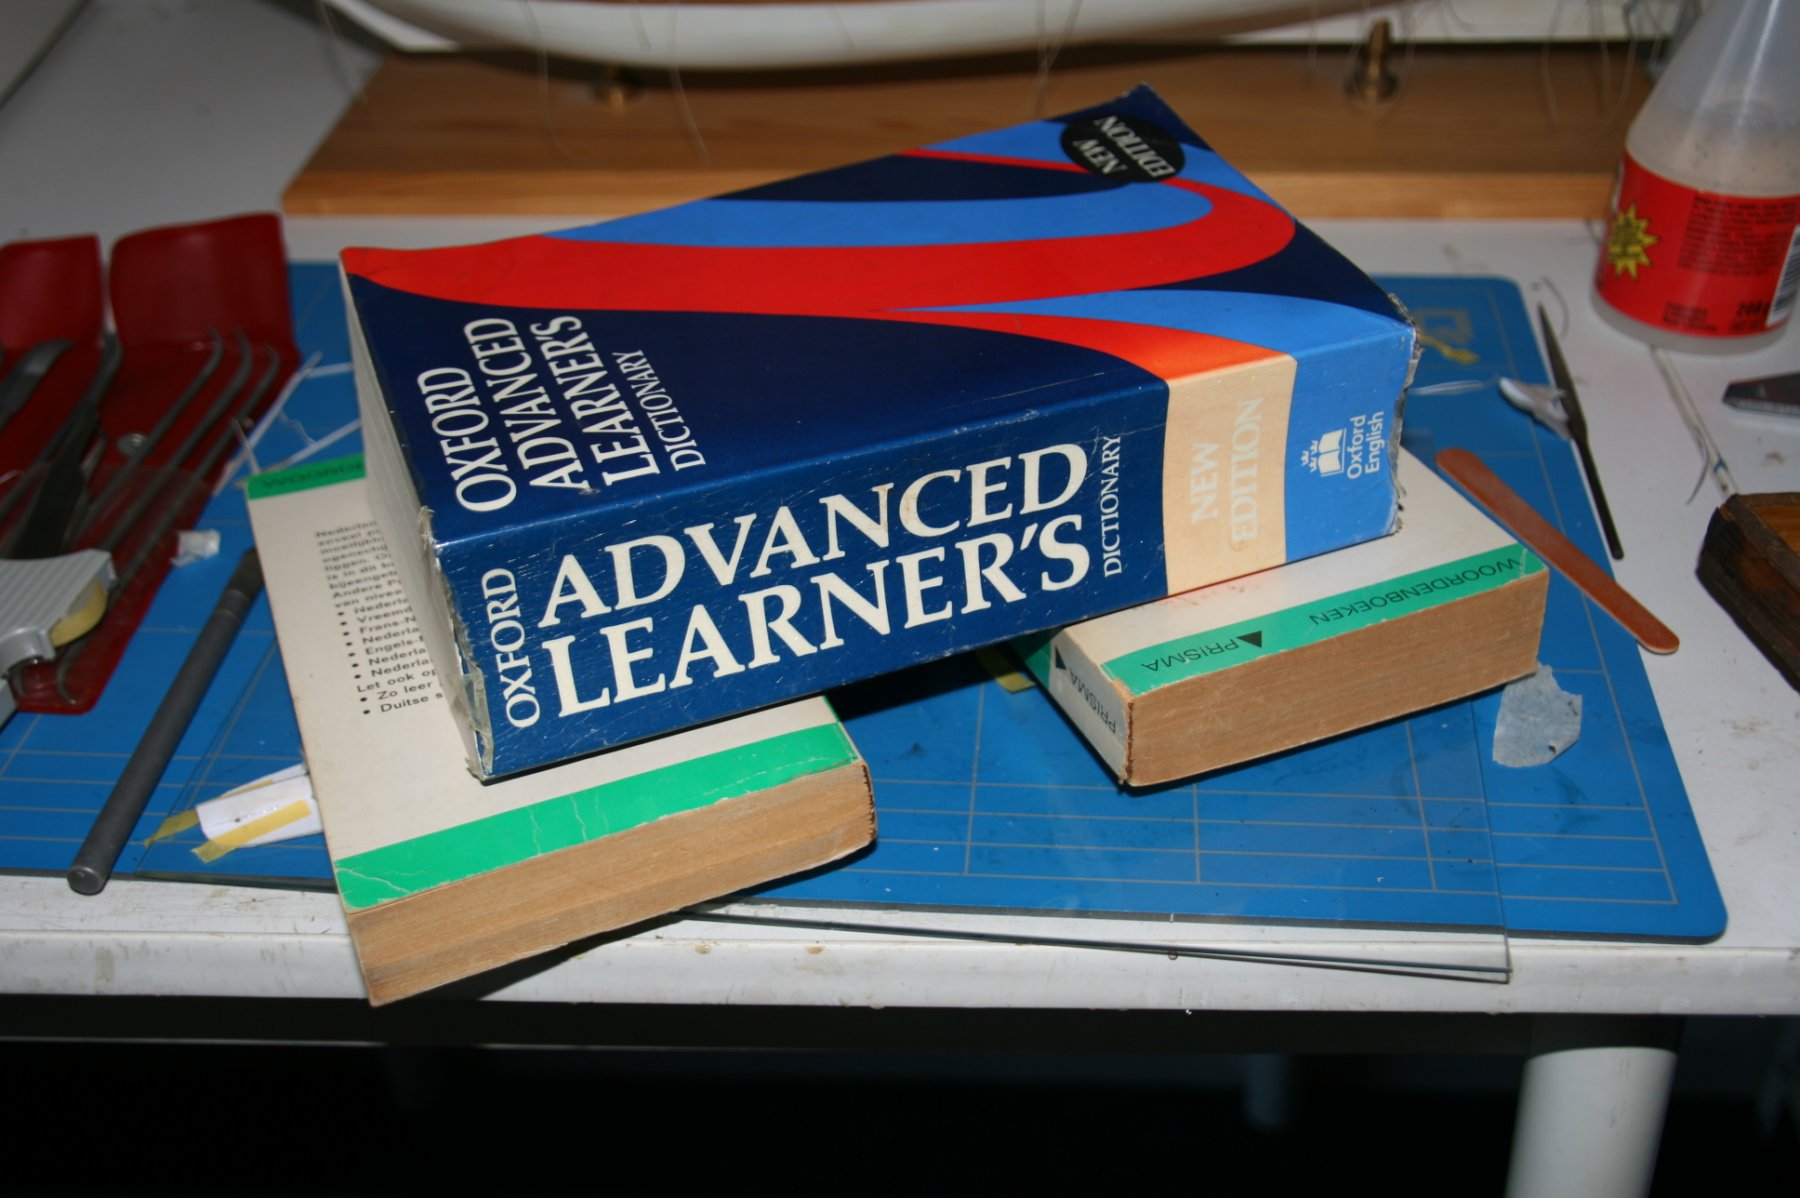
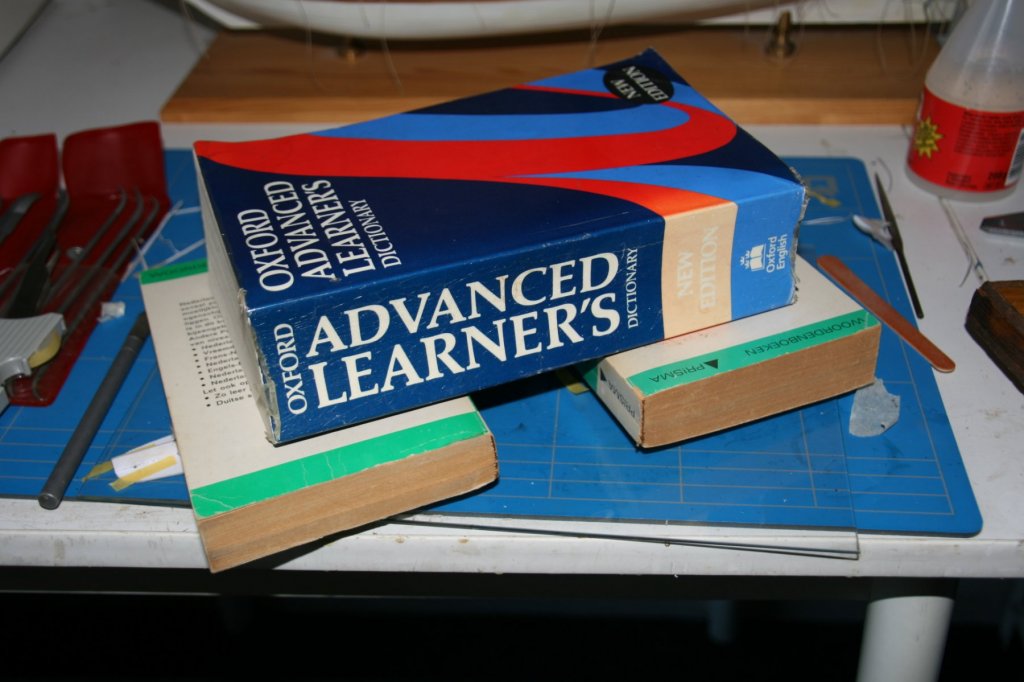
 Two weeks ago I bought myself a paper-kit of a rather nice ship (a Dutch protected cruiser (Evertsen). As there are no spare parts in that one, I decided to do a warming-up, by building the V108 Torpedo boat. Why: Quite simple: it is a rather nice little ship, there is an excelent tutorial of it in MSW, and last-but-not least, it is a free download, so if I screw things up, I can just start over. I made some little prgress over the last two weeks. Learning a few lessons: cheap cardboard is a no-go for most parts: it is curving in all directions. Keep your knife straight, otherwise you get a nice bevel on your frames where you don't want it: Don't force, otherwise straight parts aren't straight anymore: You can use a glass plate, and lots of tamiya tape to correct allmost all problems mentioned above And finally: now I know what dictionaries are for: To be continued..... Jan Ps: how do I remove uploaded pics that shouldn't be here? That skeleton of Eversten keeps popping up found it
- 58 replies
-
- 4
-
-
- v108
- digital navy
- (and 1 more)
-
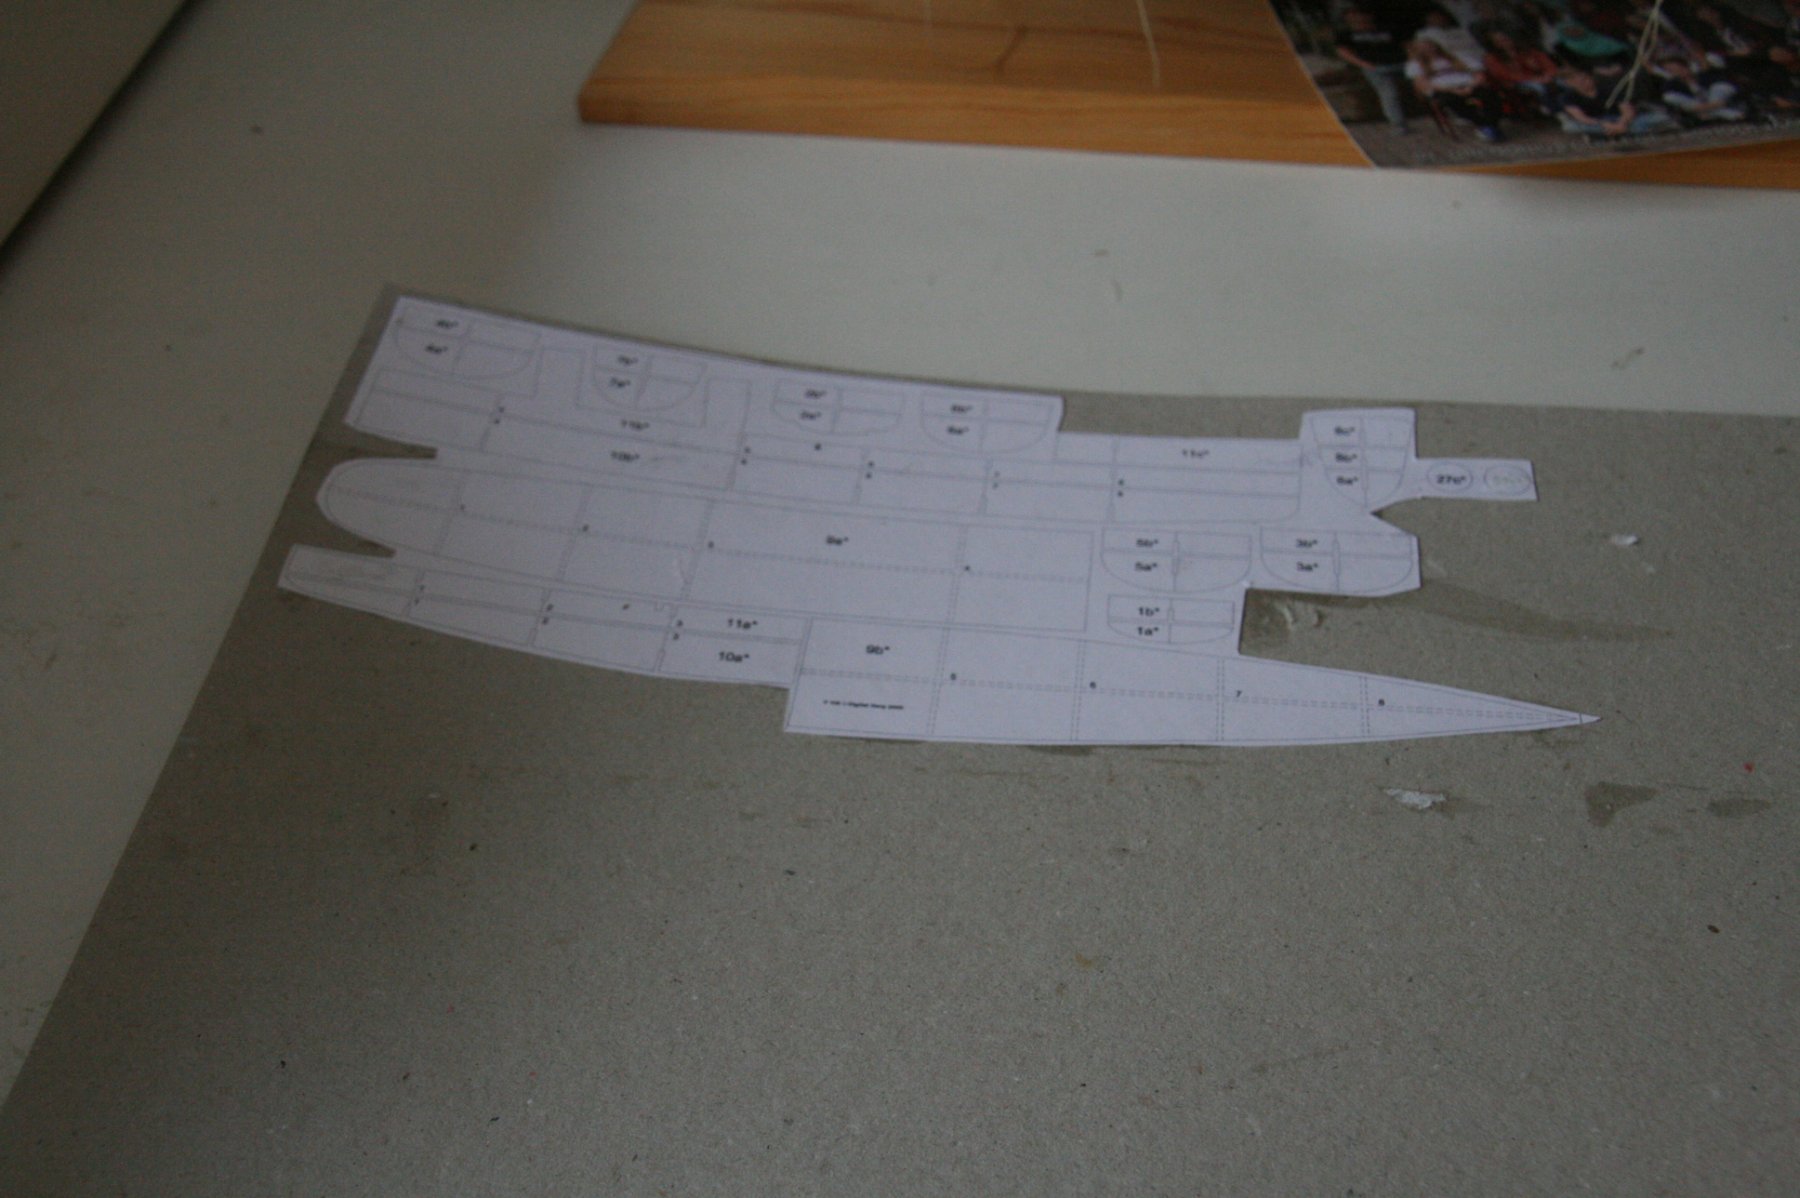
 I have decided to build the V108 using the tutorial produced by Chris. Well, I have downloaded the files and have mounted the required parts onto 1mm white card laminated with an extra sheet of index card to achieve the 1.5mm thickness required, which I will not bore you with. I will be running this build concurrently with the RMS Mauretania build also in card. I will update with photographs as the build develops in due course.
- 14 replies
-
- 6
-
-
- digital navy
- V108
- (and 1 more)
-
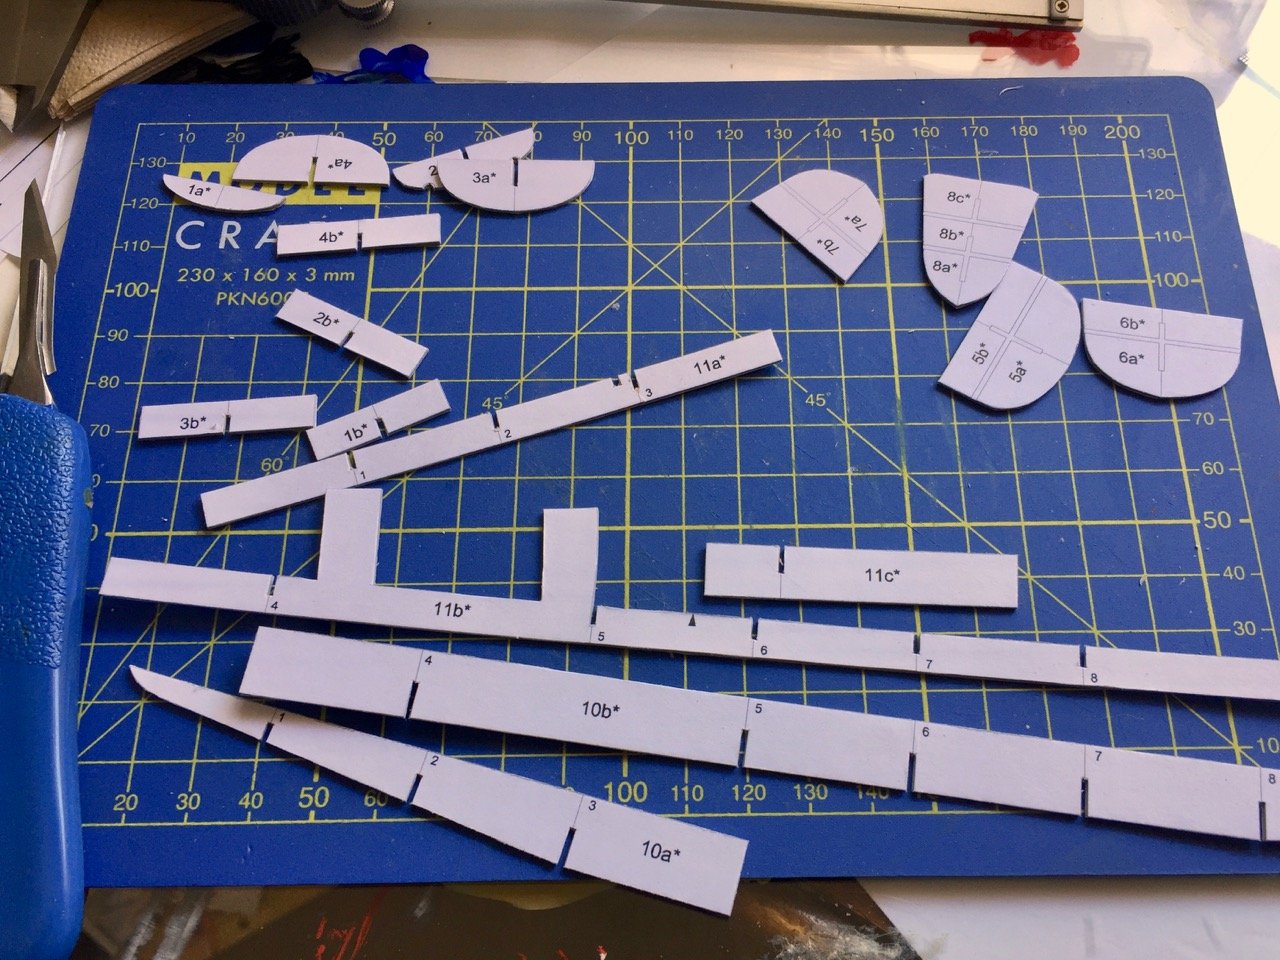
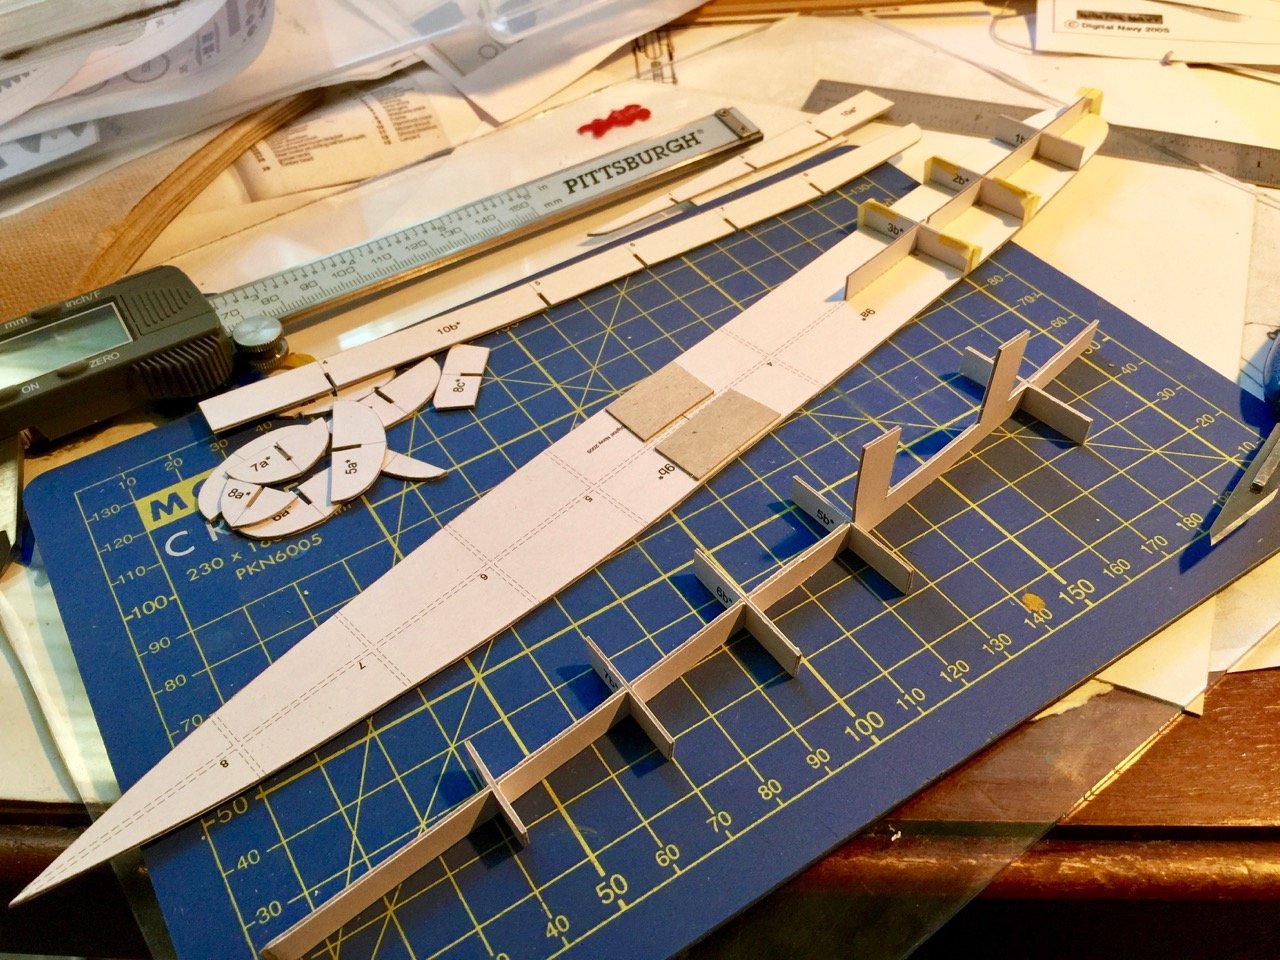
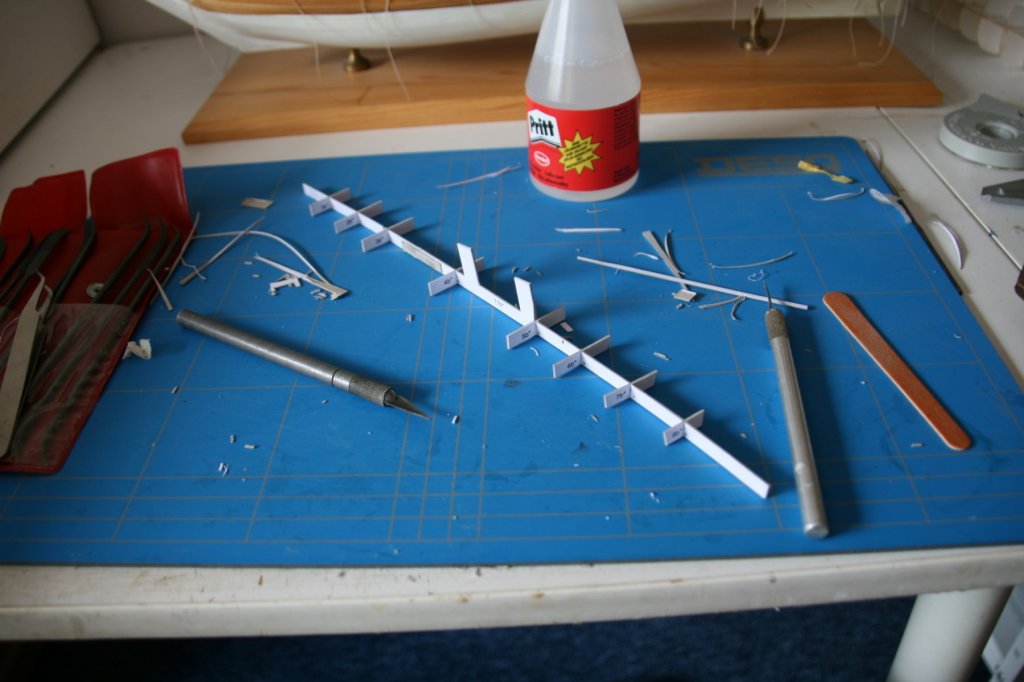
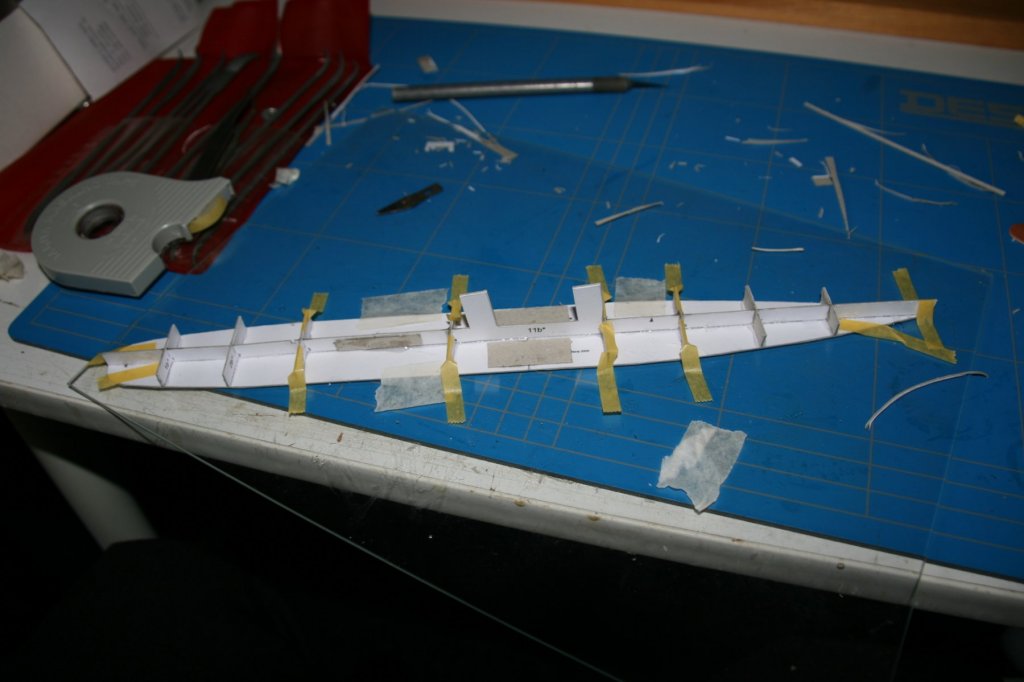
 I am starting a second build. Normally I do not like to do this, but as they are different media I think this will work. This is because I have some spare time when, for various reasons, I cannot work on wooden models but would still be able to do something that does not make too much mess like a card model. I have made some simple paper/card models before and quite enjoyed it and the increase in card model builds here has piqued my interest. Also I am also wondering if I can make this model for totally zero further outlay. Do I already have absolutely everything I need around the house to make this? I will give it a go. The tutorial produced by Chris will be my guide. Though I will probably deviate in places (who doesn’t), sometimes because I might want to do something different, sometimes just to keep to my criteria of only using stuff I already have. First job was to print the sheets on both paper and card stock. I had downloaded them some time ago. So in response to Chris’s posting on Jan 5th 2017 stating that this has been downloaded over 140 times and asking where all the build logs are. Here is one of them, I had downloaded this before then. Have I really been thinking about doing this for over 2 years. I then separated the parts that need laminating from the paper copies and stuck them to some 1mm card I had lying around. This is the stuff used for borders in picture framing which I have large supplies of in many colours and thicknesses, 1mm is the thinnest I have. I have got some spray contact adhesive, but I laminated these using slightly diluted PVA, to see how it would work. I brushed this onto the card, to create an even layer then positioned the parts that needed laminating, then used a wallpaper roller to squeeze out any excess glue. When dry these were very securely attached, so I proceeded to cutting them out. This is when I found out why laser cut framing is so preferred by experienced card modellers. After 2 pieces I would have thrown my criteria to only use bits I already had to the wind if laser cut framing had been available. We now skip the next 3 days while I laboriously cut out the rest of the framing and I still have the laminated deck pieces to go. There are some scrap pieces in the picture to help joining the longer parts. For some reason I did no work on the Scottish Maid in this period. So much for this not slowing that build down. I have done the bits for below the waterline as well. I may do this, but it appears to me that I do not have to make a decision yet. I think I would like to, so I get some practice at skinning the bottom. That is where I am. The next job is to clean up some of the slots where the fit is a bit tight. I will be back once I have done that and started gluing. Still not sure about attempting two builds at the same time. Glenn
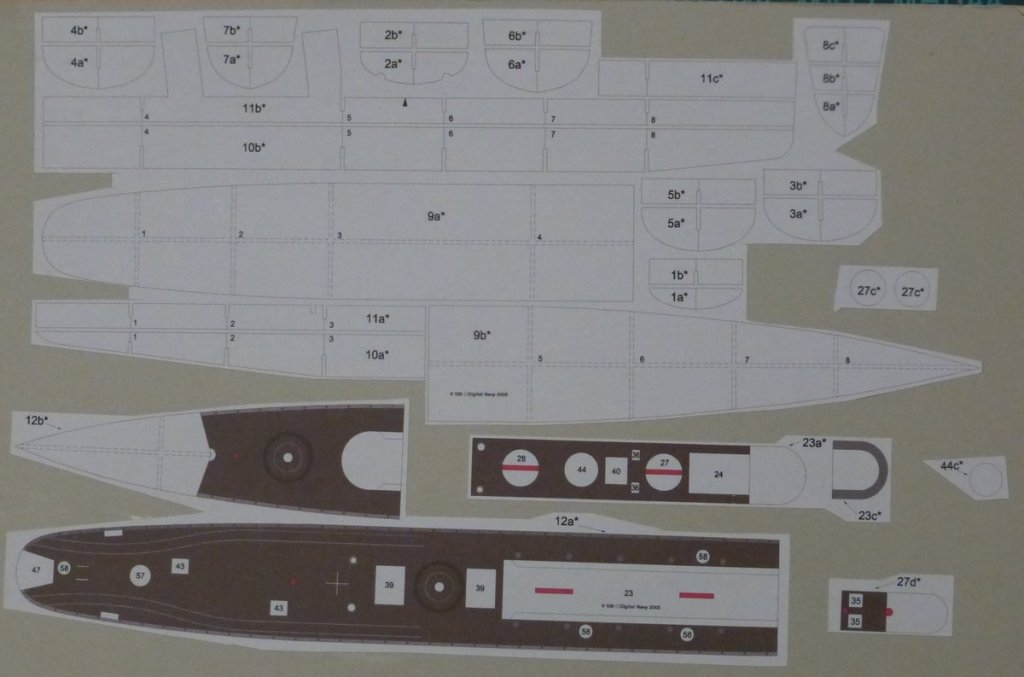
- 10 replies
-
- 5
-
-
- v108
- digital navy
- (and 1 more)
-
 This is my diary of HMS Dreadnought made from CARD, something I picked up to stop the boredom during my tea break (15mins) and lunch (30mins) at work, and belive me the people I work with a boring!!!! So this cost me all of £6, took some tools in and while stuffin' me face I build this. more in the next post....
- 12 replies
-
- 4
-
-
- dreadnought
- Digital Navy
- (and 1 more)
-

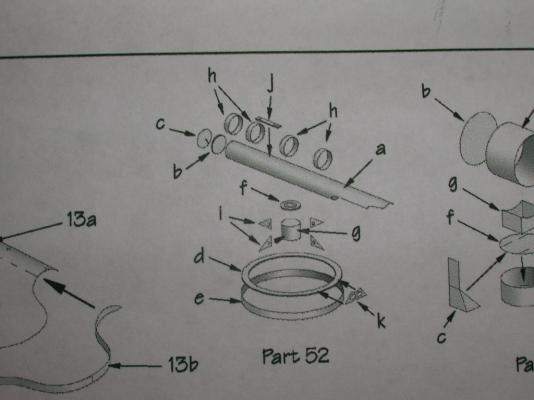
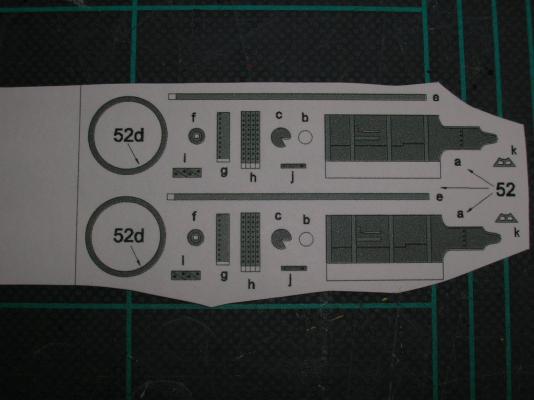
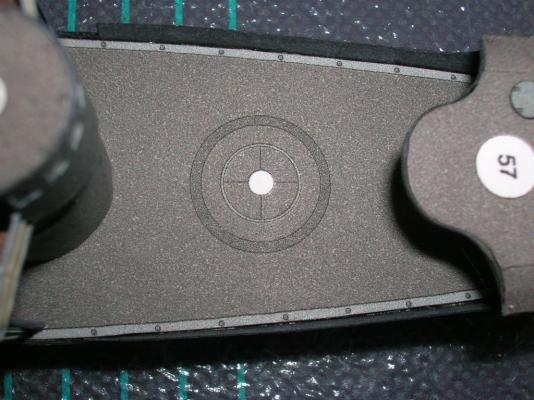
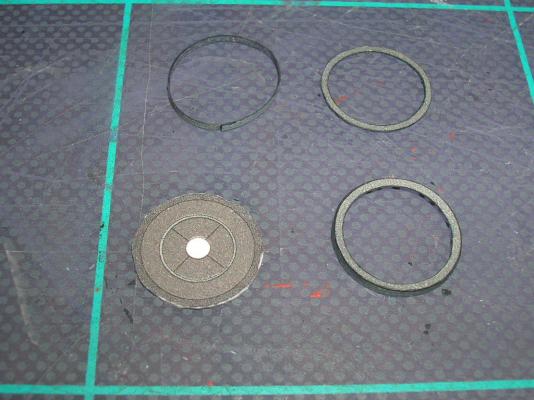
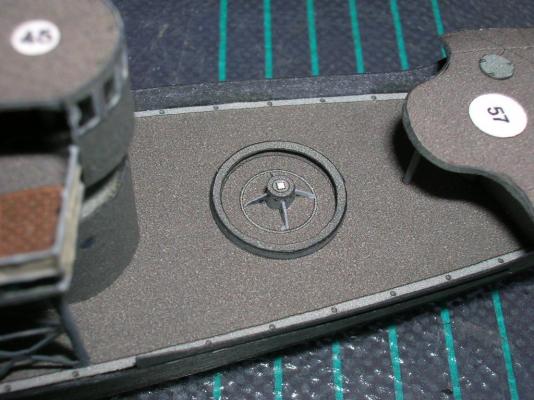
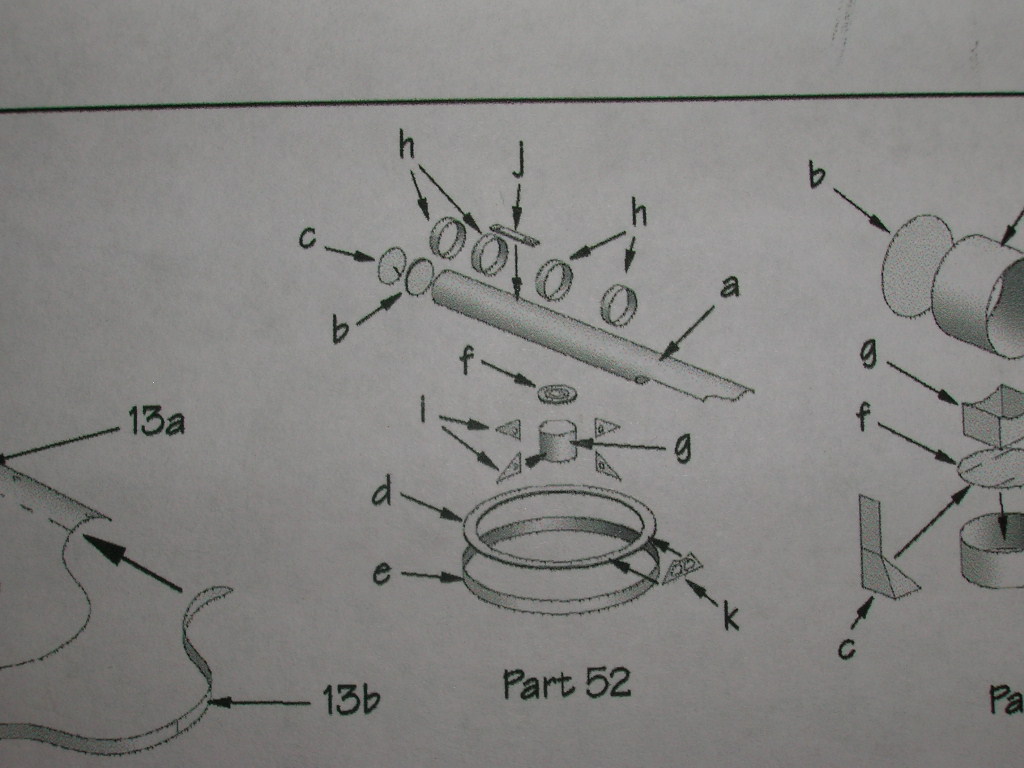
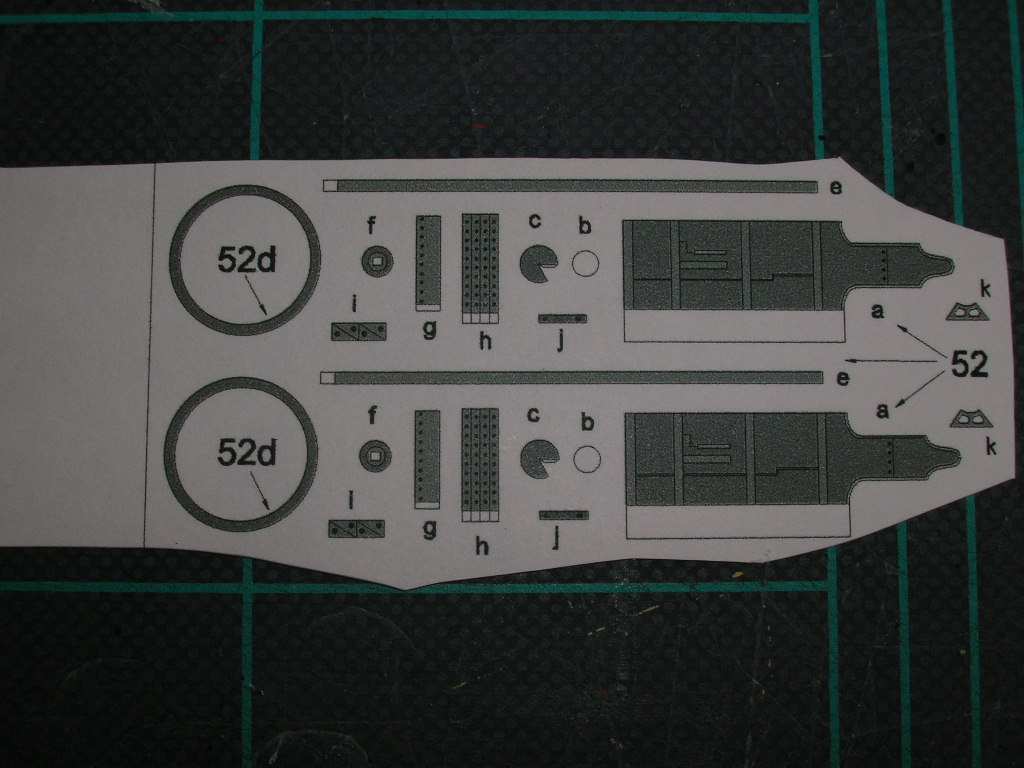
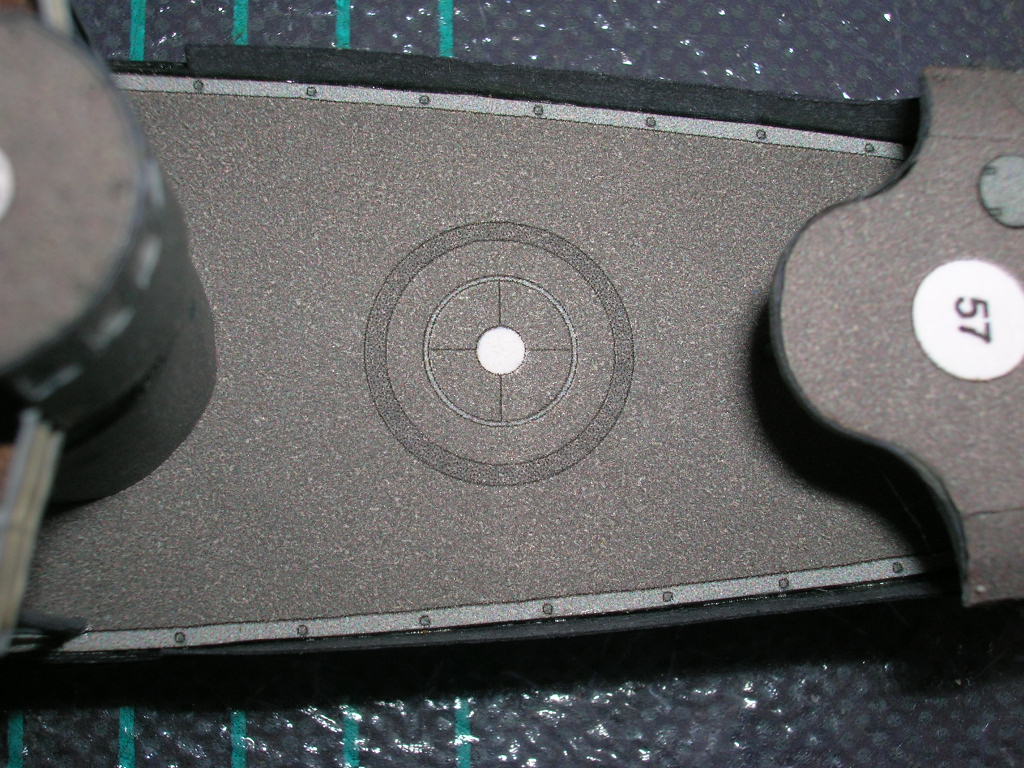
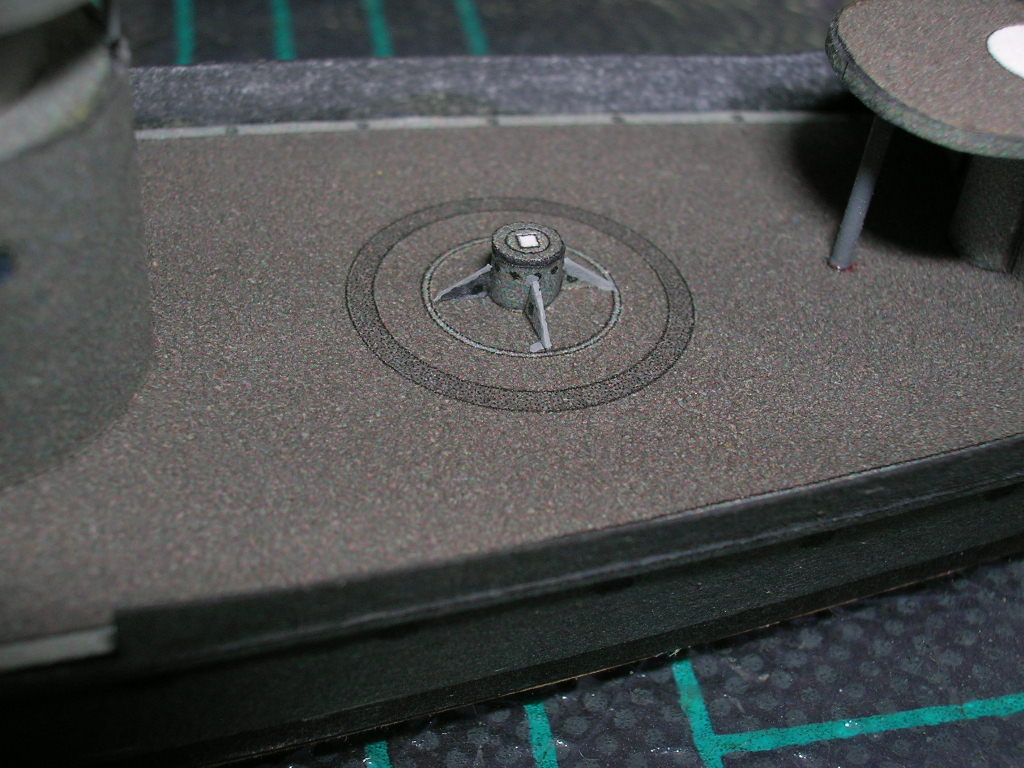
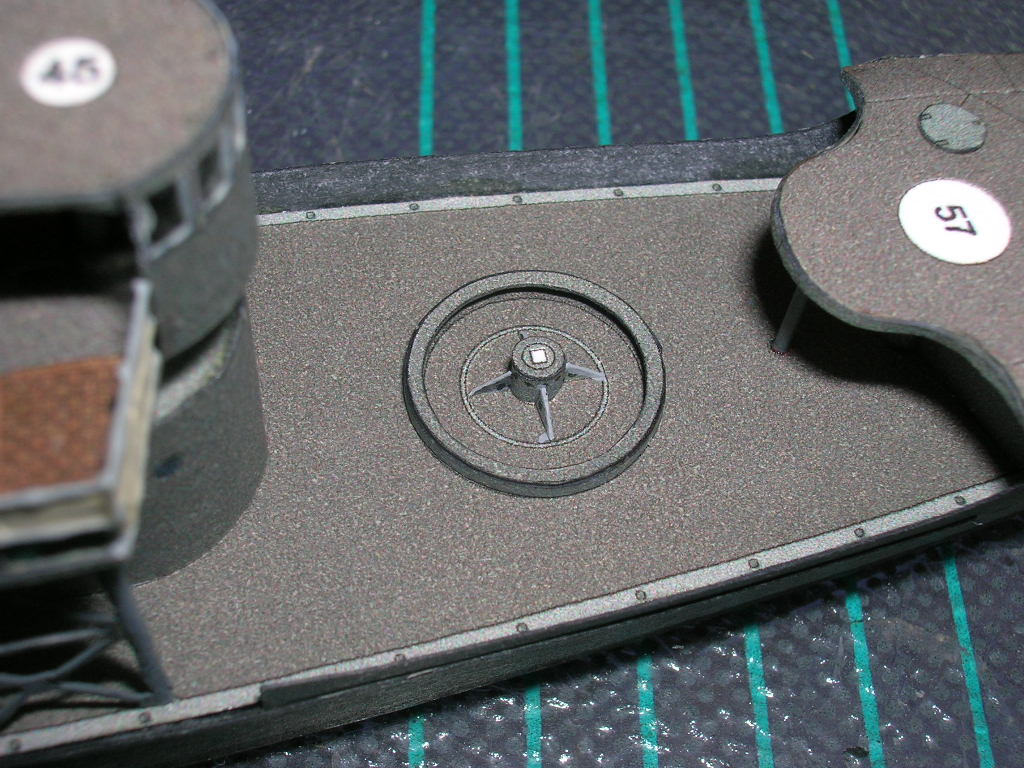
Intro to Card Models Part VII: Building V108 - Armament
ccoyle posted a topic in Card and Paper Models
The first armament to be installed will be the torpedo launchers, two seemingly complex and fiddly structures consisting of 16 parts each. The parts for these are conveniently located together on the parts sheet. Believe it or not, I have built models where this wasn't the case - go figure. There are two launchers on the model, one forward of the bridge, and the other aft of the superstructure. The launchers are identical, and on assemblies like this I prefer to build them simultaneously instead of first one, then the other. This is another construction sequence where it makes more sense to me to assemble the parts out of sequence. We'll start with the pedestal. Cut, color, roll, and glue the pedestals (52g), then add the caps (52f). Glue these down to the deck. Next, add the triangular support brackets (52i); these are tiny right triangles, and the long leg of the triangle goes on the deck. The finished pedestals look like this: Next comes the ring-shaped structure that I'm presuming is a kind of track that the tube support brackets (52k) travel around when the tube is aimed. This consists of two parts, the ring (52e) and the circular track (52d)(the upper parts in the picture below). The inside of 52e needs to be colored, because it will be visible on the finished launcher. The ring, when closed, will be rather flimsy, and mating the track to it will be difficult. To fix this, we're going to use the spare deck printed on 20# bond. Remove two small squares containing the launcher locations from the spare deck, then laminate these to a couple of sheets of card. When dry, cut out the circular mount location, being careful to cut inside the line. Presto! Now you have a circular former to help you get the ring (52e) nice and round before adding the track (52d) (the temporary former is in the lower left of the previous photo). Work the ring carefully around the former and be sure it is seated at the bottom of the ring - we don't want to accidentally glue these two parts together. Next, cut out and add the track (52d); remember to remove the inner circle first, color the inner edge while the part is still on the sheet, then cut the outer circle. After the ring and track are glued together, the temporary former can be removed. The finished ring/track is in the lower right of the previous photo. Here's the forward ring glued down to the deck. Return to Part VI: The Superstructure