Search the Community
Showing results for tags 'miniature'.
Found 4 results
-
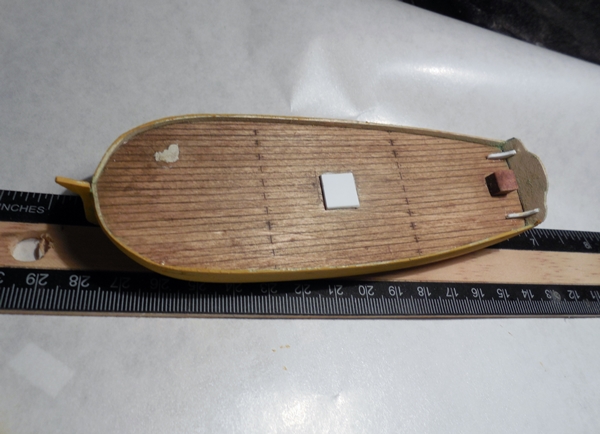
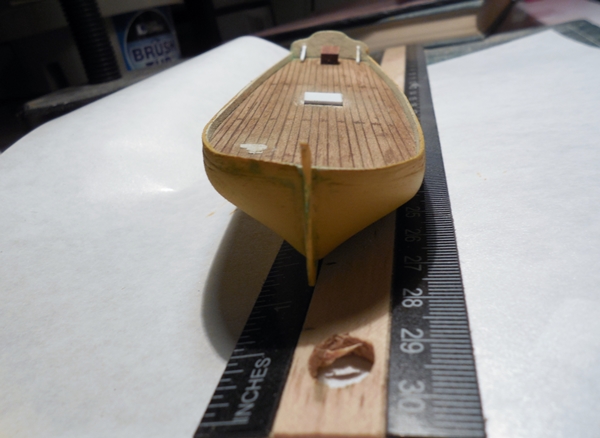
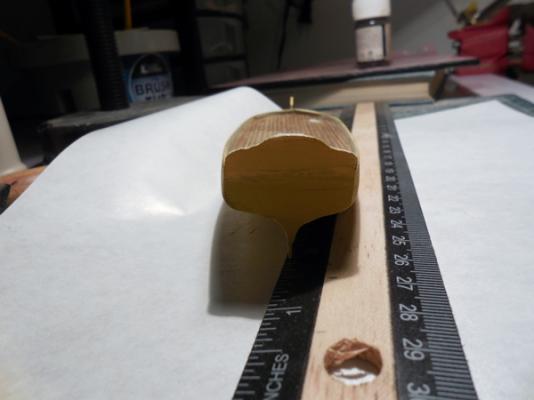
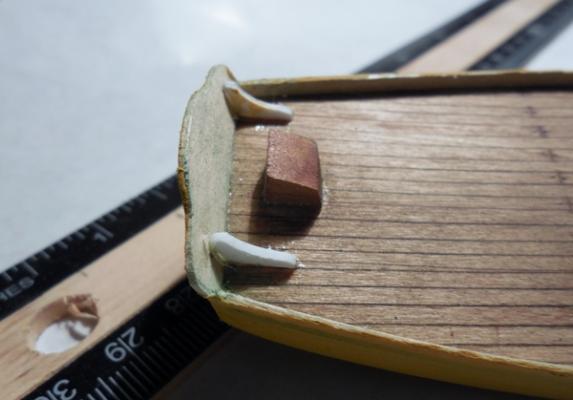
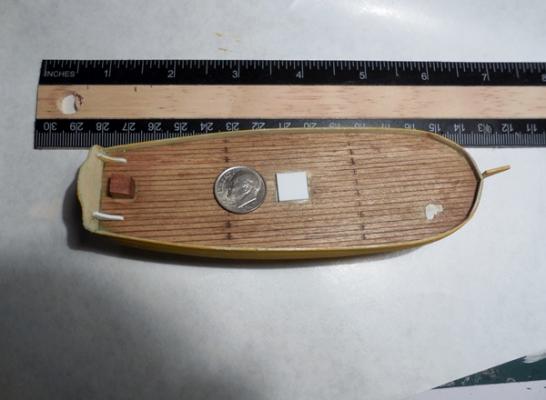
 I am determined to see this to some sort of completion. I have modeled now for 30 years however this is my first ever wooden ship from scratch. I choose the Anchor Hoy for a few reasons. 1. Looks Strange. 2. Easy to Build, (I hope.) 3. This little ship has more meaning than just being a ship. Think about it. All the Clippers, Men-O-War, Whalers all rely on the unsung small boats that day in and day out did and still do most of the work. 4. I wanted to see if a quality model can be made in small scale. I have seen in kit instructions and other places where something is "too small to be considered do-able." I also wanted this project to show that a nice looking wooden ship model can be produced for under $50. I am using the plans from AMERICAN SHIP MODELS AND HOW TO BUILD THEM. I began by transferring the profile and station lines to tracing paper and the n using transfer paper, I drew the lines for the hull on a 8"X6"X2" basswood block. The station lines were drawn on thick plastic stock and cut using a #11 Blade. With the lines drawn I sawed the profile on my small band saw. Once that was done I remarked the station lines and carved and sanded the hull to shape using the plastic templates I made. Careful if you are building tiny models. One little slip of the file or even sandpaper means lots of "Do it Again." I attempted to add the Keel, Stem and Rudderpost using thin bass wood. Well that was a disaster as the thin weak wood went to pieces if you looked at it wrong. I tried about every wood I had, but it either broke to easy or I could not bring myself to painting fine wood. So, I have used plastic card for the stem, and keel. Not my favorite option, but now I have some strength in this important part. I now used the same thin basswood sheet to make the deck. Boy did I sweat this one! I drew the deck out and then scribed the lines. Holy Cow! That process took forever and by the end I was exhausted. I looked at my work and went "I sure did a great job. Too bad you can't see the lines. So I read through the forums and consulted books on how to make the lines visible and accurate. In a moment of "Oh well what have I got lose," I sprinkled Vallejo Burnt Umber Pigment on the deck and rubbed it in. Hoping against hope I brushed the excess off and then with 0000 steel wool rubbed out the rest. I was very impressed. As this is a working vessel doing work with greasy chains, mud, tar, and whatever else I made the deck used and dirty. I then went over the entire with three light coats of Danish Oil which was then buffed with the same 0000 steel wool. I made hatch covers and coming in basswood and they look 100% US Grade A Terrible. So they had to go and will be replaced by hatches of plastic card. The companion way is made of reclaimed cherry, and still needs a bit of detailing done. The transom and support knees are right from the plans and made of basswood and card. The one thing I most dreaded were the low Bulwarks. I cut my 2mm strips of basswood and boiled those for 5 minutes. I then wrapped them around a can and secured them with rubber bands. When dry I was surprised that they fit perfectly and glued in with not one bit of trouble. I have given the hull a Yellow Ochre coat to find any flaws. Oh and I found a bunch that need some attention. So, onward I march. More later shipmates. Don Author of OF ICE AND STEEL and EPITAPH
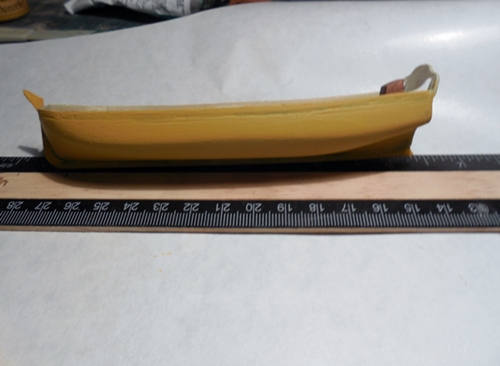


- 25 replies
-
- 9
-

-
- anchor hoy
- miniature
- (and 1 more)
-
 Good Morning to all! 1/8"=1foot Benjamin Latham. Model Shipways, Bogota.. https://photos.app.goo.gl/m5rX3cJELFDeW6Sg6 Guy here. This has been gathering dust under my workbench.. Modeling and Fishing Boats always a love.. but past many years I had no time.. Last Oct 2021 life changed. I had my second right cerebral stroke in Norfolk, visiting my special needs son. This is 3 hours from home. I had taken the day off from UVA where I was a director. Well, after 2 hospital stays, learning to walk and having to go on permanent Disability after 20+ years at UVA and another 25 in semiconductor and optics I am now home in my basement. Now a shop of sorts.. I am planning to finally build something with my hands.. my fine motor sitting down is ok.. standing up and moving a completely different story. I love smaller models ( fan of Philip Reed and his books.. I have em all). Tto build my skills I will start here I think.. or one of the shipyard card models (modified greatly with wood).. Any way.. I will read the book that came along with the model in the yellow box.. the prints are 2 colors! nice back then... There are poured parts (lead?) or is it pot metal.. I dont know.. Just saying Hey! Guy PS.. I have stopped, started or ignored several builds here.. please forgive me.. I did not have the time..
 -
 Hello, I recently posted an extensive tutorial on how to paint cast metal ornaments for ship models. In this tutorial I will skip the basics of preparing and priming your model detailed in the previous tutorial, and instead skip straight to painting some small scale historic figures. Step 1: color block The first step after priming your model is to block in its basic colors. Simply use a fine brush and paint the elements of the figure in the color you want. I advise to use a small amount of colors as this makes it easier and results in a better looking model. Using more than 4 or 5 different colors is usually a bad idea, as it will confuse the viewer and look amateuristic. Note: For this tutorial I used a white primer because it photographs easier. Normally I would use a black primer as its easier to get good coverage. A white primer is harder to cover with colored paints, often needing two coats to get good coverage. Step 2: Wash After you have applied the colors on your model it does not look great... yet. A very easy way to bring out the details in your figure is to apply a wash. This is a specialised, watery thin ink that runs into the recesses of your model while staying clear of the raised areas (sort of). Paint manufacturers like Citadel and Vallejo have a range of these, in various colors and I can highly recommend them. The trick with washes is to be very generous in applying them. Use a larger brush and "flood" your figure, allowing the ink to run over it and into all the recesses. If a certain area is heavily flooded, use a brush to wipe it into different areas of your model until you get an even coverage. Don't be put off if it looks "too much", after drying the effect is much more subtle. In fact you could use a second layer of wash after drying to get more intense shadows. Usually one application is enough though. Washes take a long time to dry (relatively speaking for acrylic paint) so you can speed things up with a blow dryer if you want. I used Agrax Earthshade (brown) shade from Citadel on the entire figure. You could use different color washes on each section but I wanted to get this aged, slightly yellowed painting look anyway. Usually its not worth the trouble using a blue wash on blue parts etcetera unless you are aiming for a specific result. 99% of the time I use a black wash or a brown wash for everything. Step 3: Highlights Once the wash has dried your figures will look pretty good. One could stop here, if you are happy with the level of detail. However, with a bit more work the models can look even better. By adding some highlights you further bring out the details and "depth" in your models. You could argue that the natural lighting falling onto your model is already doing that, but experience learns that small figures need "a little help" to augment this lighting. We do this by adding highlights to areas of the model that would naturally "catch" light. Usually the raised areas. To make highlights simply apply a lighter color of the one underneath with a fine brush. Using acrylic paint its very easy to mix up a nice range of colors quickly. Be sure to thin down your paint a little bit wit water so it flows easily. Don't paint straight from the pot as it will give a blotchy result and often is a struggle to apply. In the picture above I added lighter browns to the raised wrinkles in the trousers. I used a beige color to touch up the shirt of the guy on the right and the flesh/face parts on both figures. You can already see the model coming to life. Let's add some more detail highlights: I mixed some lighter blue and touched on the jacket in places. Don't overdo it, just a few small fine lines here and there is all it needs. I used white to clean up parts on the left guy, his belts and ends of the jacket arms. I used a gray to highlight the black hat and boots, with a fine pure white dot on the boots to suggest "gloss". The shirt of the guy on the right was finished using some lighter beiges. Finished & Some Thoughts Here's some pictures of the finished figures, which took less than 1 hour to paint up. Some final thoughts I'd like to share on painting miniatures like this: Small scales: As you can see from the examples above, small figures like these don't hold up well when photographed up extremely close. The result can look disappointing when in reality when viewed from a normal distance they look fine/great. Keep in mind that when painting on a very small scale (these are 1:85 I believe) it is really difficult to paint each individual detail. Often the detail is simply not present in the cast model, because of its small size. Things like eyes, lips or even hands are merely "suggested" at than really sculpted. This calls for a more "suggested" style of painting too. You should aim to get an overal look of a figure, letting the shadows and highlights doing its work. By keeping things a bit vague you let our brain "fill in the blanks" often giving a much better effect than trying to paint in all details. Overdoing the highlights or trying to paint in eyes or other small details often results in a weird cartoonish look. Another couple of figures I did on this scale: Take it easy Don't worry too much about making things perfect. Even if you do a color block and 1 layer of wash, your models will already look great. Applying the small highlights is something learned with practise. I encourage you to give it a try, as you might be surprised about yourself. Even if you do it in a basic fashion it will provide awesome results. Whatever you do I assure you you can do better than just flat-coated figures with awful shiny Humbrol. Love to hear your experiences, if you paint something up using my tutorial post some pictures here for us to see!
 -
 I was at a hobby shop for the Rocky Mountain Shipwrights show. It was a Wednesday night so it was pretty slow. I noticed they had some of these Metal Earth models so I decided to try it out. I finished it in the three hours that I was there. It seems there is some interest in this forum for these ships so I took a lot of pictures to do a build log. I want to point out that this ship looks an awful lot like the Disney Pirates of the Caribbean Black Pearl. It is not Disney trade marked. I wondered about that at first and found the answer on the back of the package. It read's, "There once was a real ship named the Black Pearl captained by Henry Morgan. one of the world's most notorious pirates. The Black Pearl which first sailed in 1669 fought many battles, the most famous of which was an invasion in Panama in 1671." So keep in mind that this is Henry Morgans Black Pearl not Jack Sparrow's. They look an awful lot alike but they're not. Wink wink ..nod nod. So yea it's a knock off but since it's sold in the US so I think it's a legal knock off. Here's what came in the package. Two metal sheets and instructions. It's a little backwards you start with the masts. The hardest part about this ship is the tiny metal tabs. I do a lot of small stuff but these gave me some real trouble. If you decide to do one have a good pair of strong tweezers. Now you put on the hull. The instructions are vague on this part. Use the stand for the ship to figure out how wide the base should be. Since I didn't do this the bottom of mine is to thin which makes the stand useless. Also watch the tabs. Pre bend them to fit especially in the bow. That part took me way to long because I didn't set up for it. Also if you can glue the pieces together then bend that tabs that may be easier then just bending. Getting the hull together was the hardest part. Watch your tabs and know where they're going before you put the pieces together. Make sure they are bent in the right direction. Then the back piece and the sails. The sails were a bit of a pain to get through the rigging. Have patience they do fit. So their you have it. I Jerry rigged the stand to work sort of. I made a little better when I got home. For $16 it's not a bad little model. Definitely an attention grabber. I'm sure Jack Sparr...er Captain Morgan would be proud.
- 3 replies
-
- 2
-
-
- metal earth
- black pearl
- (and 2 more)