Search the Community
Showing results for tags 'painting'.
Found 17 results
-
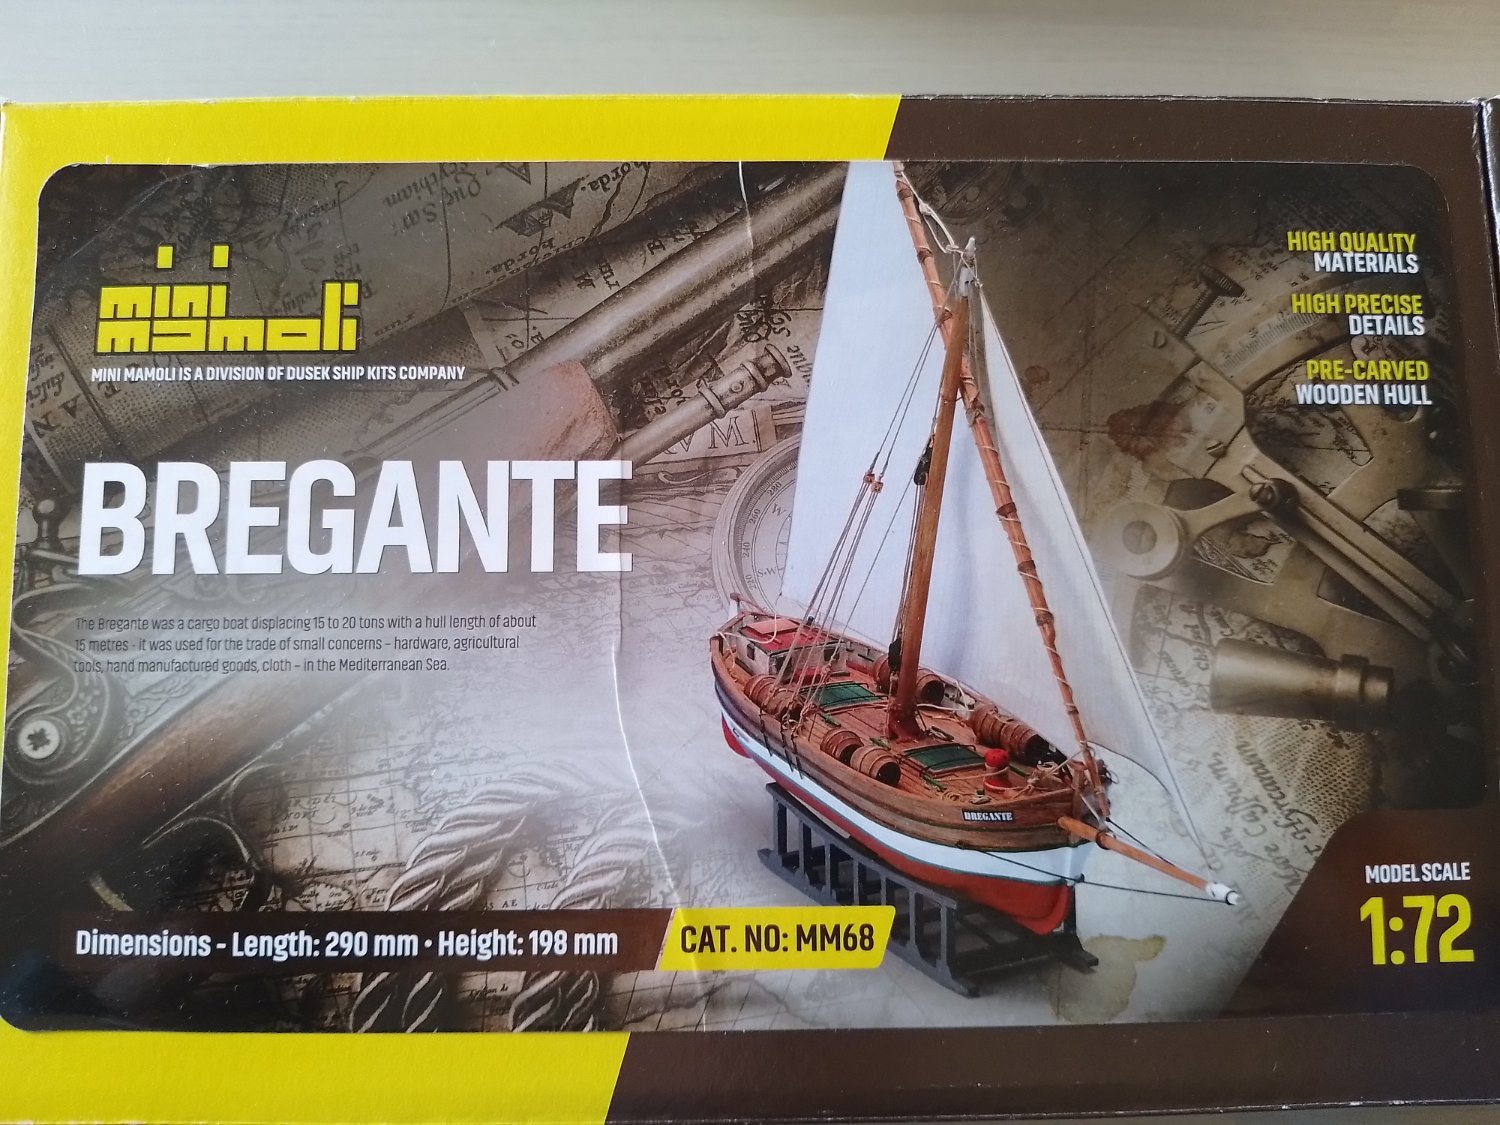
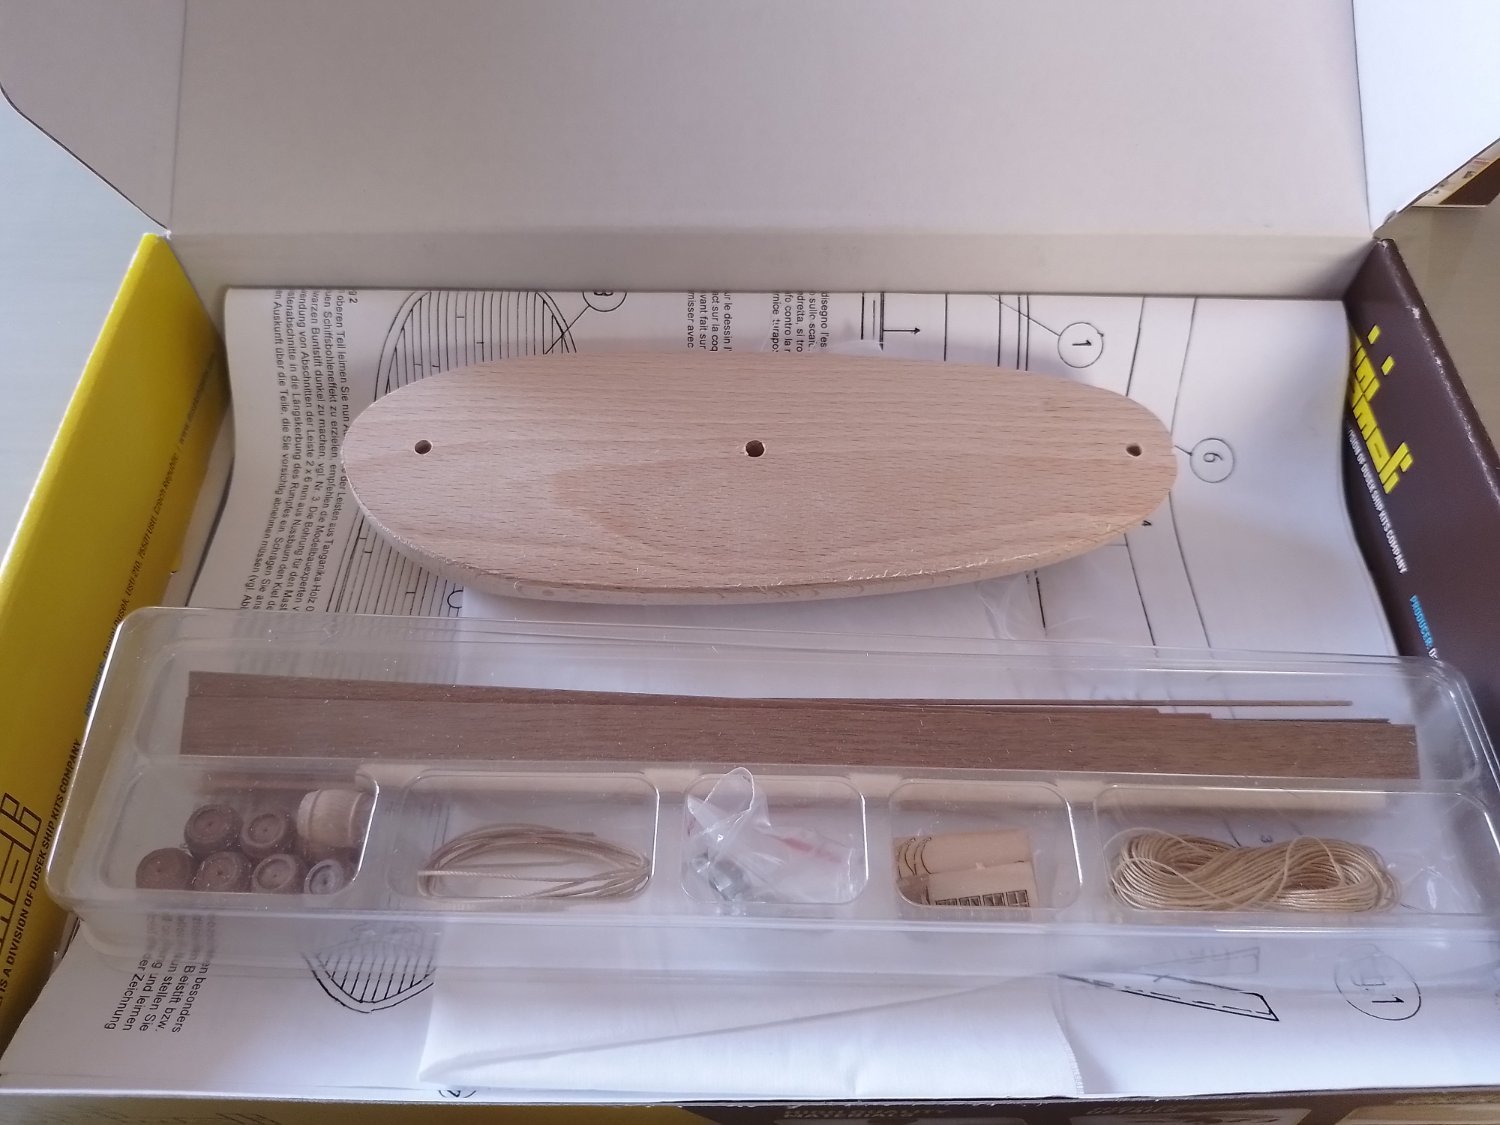
 I have just recently gotten my first model, bregante by mini mamoli, and I need help painting it. I havent built it yet but I just want to buy all equipment I need at the same time. So I was just wondering, do I use a primer before painting with acryllic paint and what wood varnishes do you reccomend? Also do I put the varnish before I paint the model, or after its been painted? If anyone can give me answers I would be most grateful.

-
I am at m\d ;point ]with rigging and did some research about painting the raw wood that came wjth the kit - ROYAL. CAROLINE.= masts ands spars There does not seem to be any common view, Ths rest of the ships is extensively pained in b right colors. What is best to do ?
-
I am a first time modeler and used airbrush for my build. I touched the deck when wet creating a nick. My question is if I sand down can I just spray the damaged area and have it blend in to the original job? Clearly trying to avoid painting the entire deck again I haven’t found anything online.

-
.thumb.jpg.5a33ce11c7bd2c0f448734dd2e7ea95b.jpg) Hello everyone! I am asking another favour. I am painting the hull and i am how do i paint the lines on it. Do you have a special techniche/homemade machine that will at least mark the lines straight? I am looking at this post right here: And i am wondering how does he know at what height to start and end the line. Thank you in advance!
Hello everyone! I am asking another favour. I am painting the hull and i am how do i paint the lines on it. Do you have a special techniche/homemade machine that will at least mark the lines straight? I am looking at this post right here: And i am wondering how does he know at what height to start and end the line. Thank you in advance! -
 In my research of the U. S. Revenue Cutter Service, I had come upon interesting items not normally written about. I am writing a small article about the overhaul of the U. S. Revenue Schooner Van Buren, commanded by Captain Thomas C. Rudulph, at Charleston, South Carolina during September 1845. One of the more unusual things noted in the vessel's logs was as described, The Gunner worked on the deck guns that remained aboard because the four 12-pounders weighed one thousand pounds each plus about three hundred pounds for each wood carriage. Custom had the guns “blackened” in previous years, but Rudulph put his brand on them this time. On September 16, 1845, the ship’s chandler, Captain Hugh E. Vincent, [ship chandler] delivered four pounds of “red ochre.” The Gunner and gang coated the guns and the “iron works” on the gun carriages with this mixture. Although an unusual color for guns, its use violated no rules or regulations. Some of the cutters painted the small boats’ interior a bright green with a white interior stripe at the top. In 1847, William Brady, Sailing Master, USN, published a book titled The Kedge Anchor; or, Young Sailor’s Assistant, containing thousands of helpful hints, procedures, and facts for sailing vessels. Under the heading of “Keeping the Copper Clean,” Brady advised that clean copper made the vessel look good, and copper cleanliness made a statement about its crew, crew, and captain. Hard labor and scrubbing the copper was the preferred method, but paint provided a quick fix, if not viewed too closely. The mix of red ochre and paint oil to the “color of new copper.” The application required calm and fair weather was calm because water would wash it off the wet mixture. However, if appropriately applied, this “will preserve a good appearance for a long time.”
- 1 reply
-
- 6
-

-

-
- preservation
- revenue cutter
- (and 2 more)
-
Just recieved 2 model ships from my grandfather and would like to try and restore it. Would love any tips on cleaning, finding or making new parts, painting, etc... Any tip on any part of restoration would be much appreciated.
- 8 replies
-
- 2
-
-
- santa maria
- restoration by a novice
- (and 4 more)
-
 Hey guys - I'm on my second try of hull color for my first build, the Smuggler. The manual says to use 50:50 Floquil Boxcar Red and Roof Brown. In looking for a flat reddish brown enamel I came across True North's Flat Royal Navy Hull Red. After looking at it for a few days, I'm thinking it's too orange. Any thoughts? The topside color is Flat Euro Dark Green.
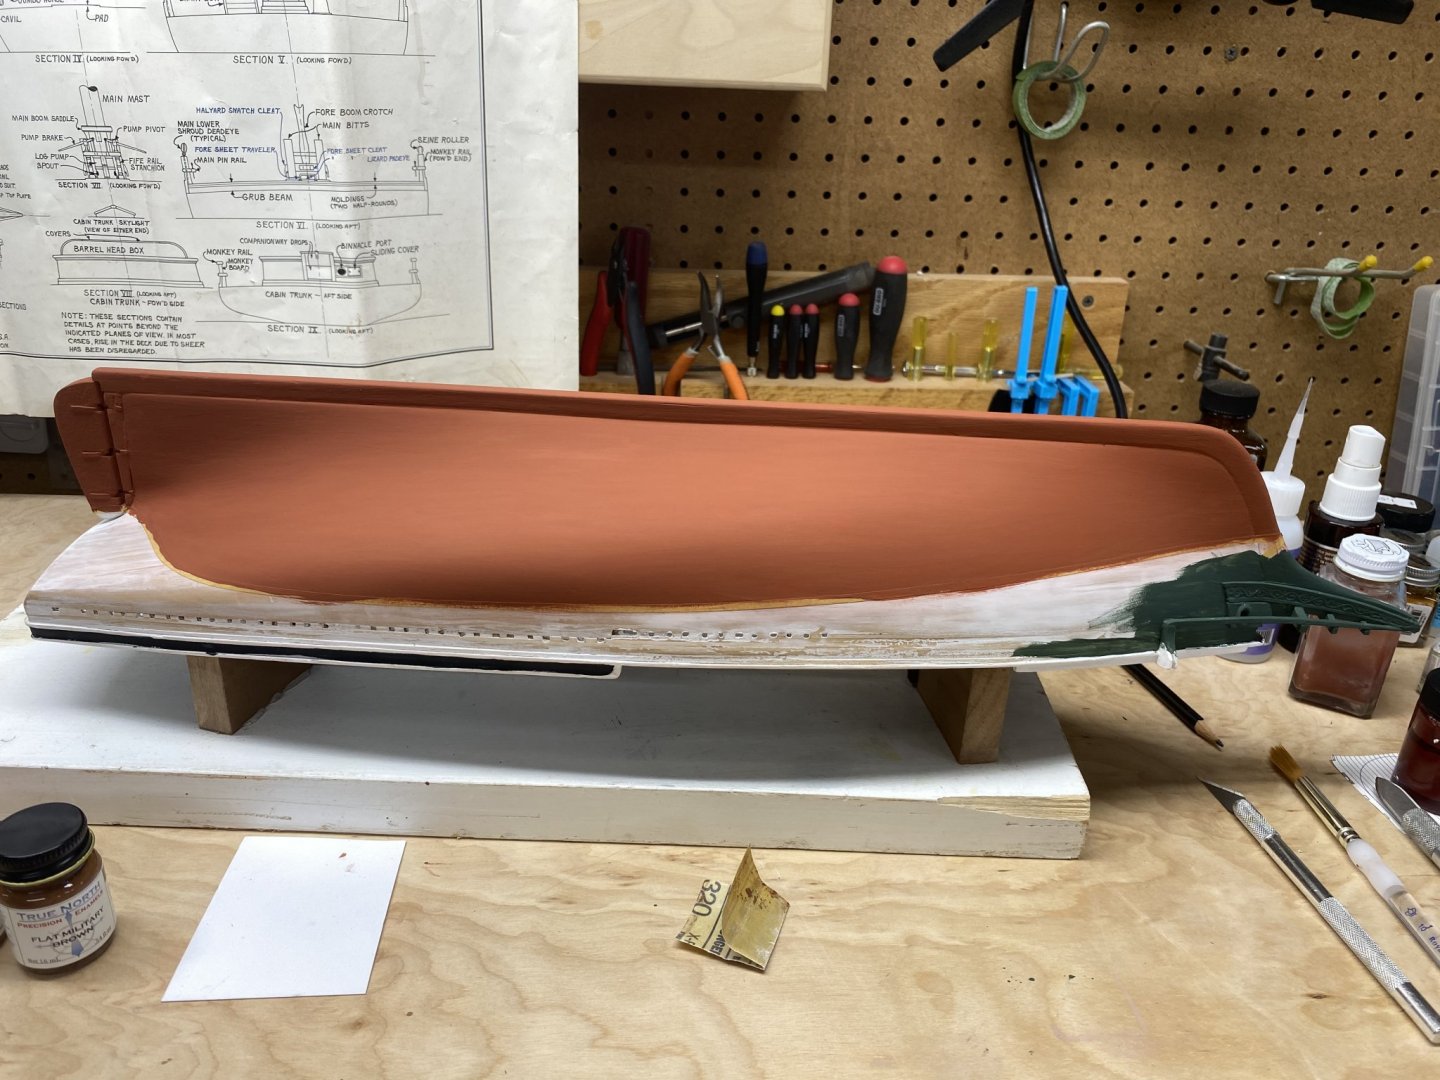
-
 https://youtu.be/ulWFoG5Inmw Paul
 -
 Good Day I am busy building the Bluenose by Amati. I'm new to ship modelling and are gettting all the tools ect as the need arises. So, here is the thing; Im looking ahead at the painting on the bluenose and all the accents. Now I know the hull to be black, white and red, however, Im not sure on what type (Acrylic or Enamel), what shades of the colors to use and should I use Matt or Gloss? Does the wood need to be primed before it can be painted? If anyone has built this model before (as many has) could you please advise on what paints was used ect. I want this model to look as close to the original as possible. Thanking everybody in advance for their help and advice.
 -
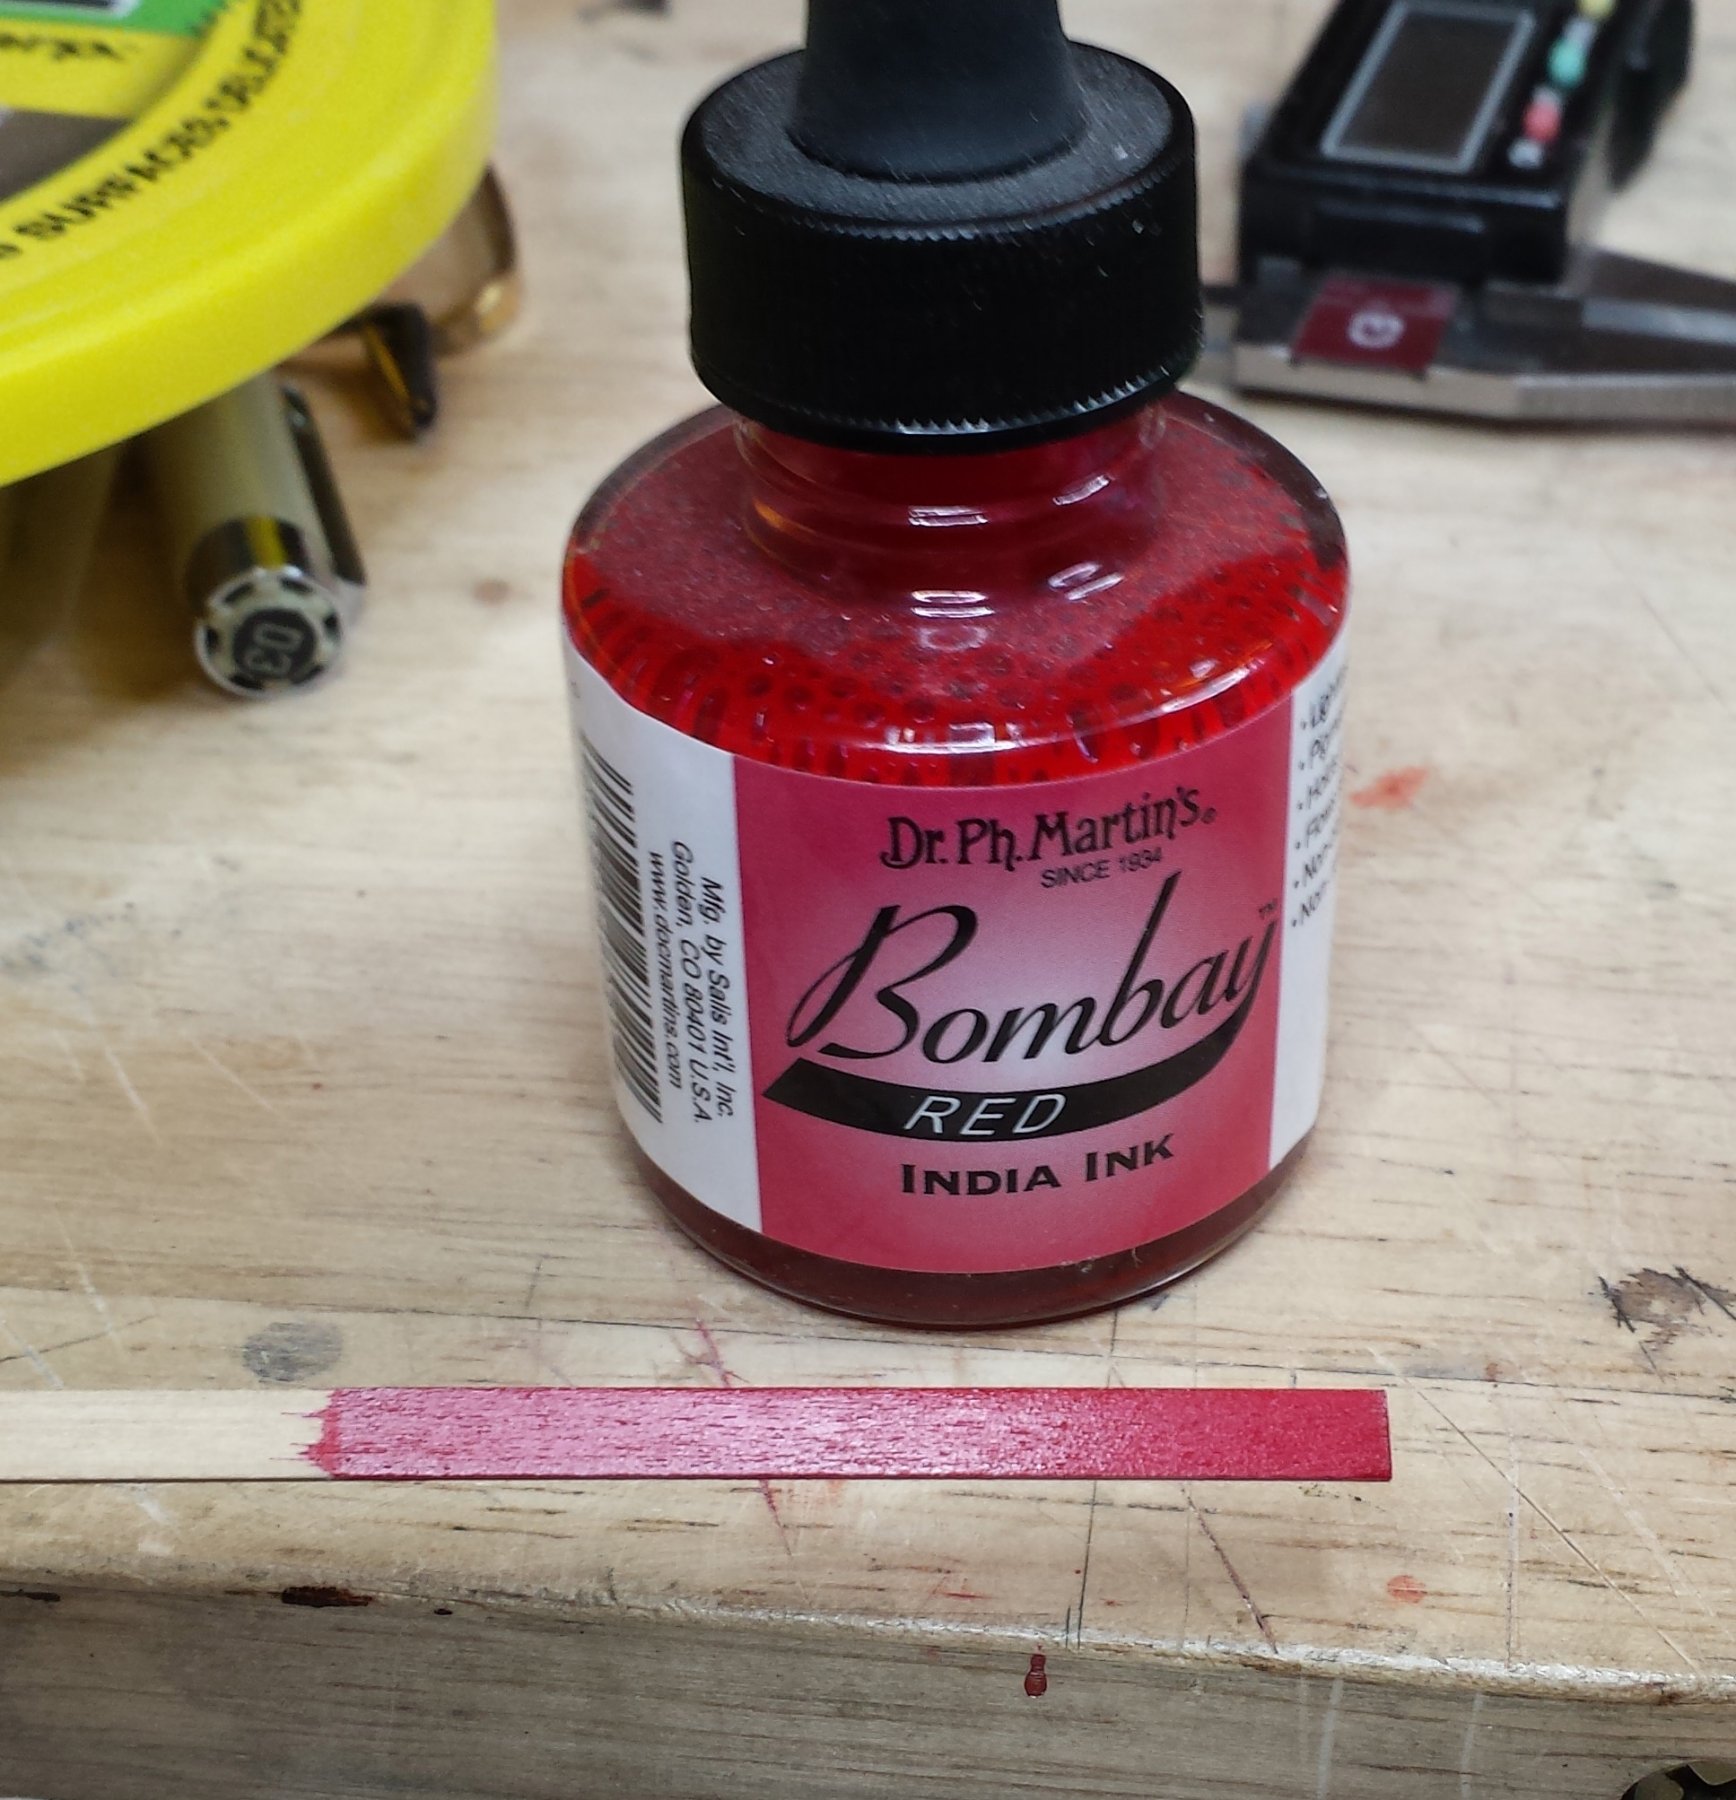
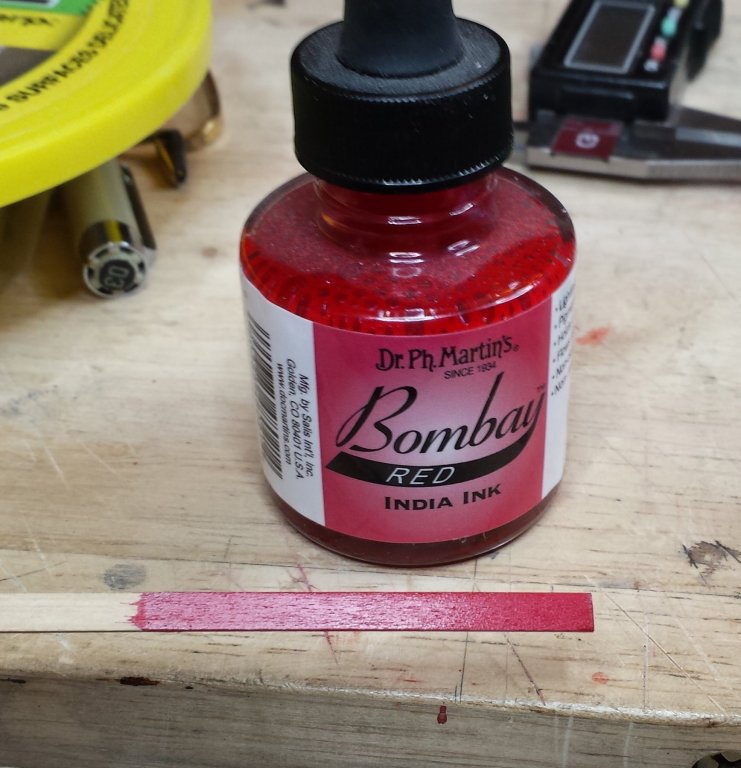
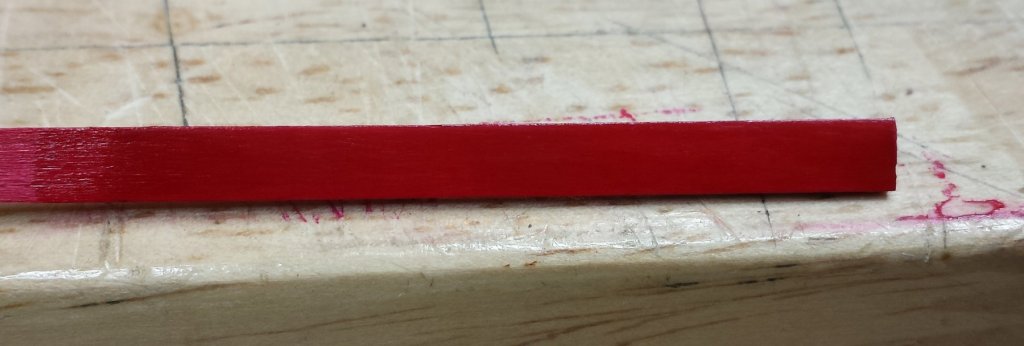
 Anyone tried this? In my continued experimentation with about every step of my first ship I've been working through various options for paint; it's easy enough for me to do a perfectly level painted surface in most cases, but that would be extremely inaccurate, I'm looking for something more organic, allowing the character of the wood to show but at correct scale- grain bumps/grooves that scale out to two and three inches high/deep are just as bad as a perfectly smooth finish. I remembered I have a nice set of india inks that promise to be lightfast and waterproof, and I also know from previous experience that it can be applied as glaze coats and have a bit more translucency than paint, so I decided to try the red (which is pretty close to most versions of RN bulkhead red) on a piece of boxwood, which is what the inner gunwales of my little cutter are planked with. This is the plank sanded cleanly with 400 grit and then given one "coat" of ink, which is really about three passes with thin glaze coats, waiting about 30 seconds between. The color is good but the grain has been raised considerably. This is after three "coats" (~ 9 glaze coat passes) with sanding between, first with 1200 that took it almost to bare wood again and second time with 2000 that was as much leveling as possible without removing significant color. Diffuse color. Harder to see here than in real life, but it has visibly more translucency than paints (that have effectively 0) while still having nice color saturation. I like the effect overall. And here's what the surface looks like. I also like this scale-wise, mine being 1:64- this seems pretty close to me for that scale. So, pros: Perfect consistency for brush painting Goes on with zero brush marks as glaze coats, looks like 2-3 would be = to typical brush painted coat Can be semi-transluscent allowing some of the wood to show. Translucency can be controlled between somewhat translucent to 0 translucent with complete color saturation Coats can be sanded < 5 minutes after final glaze coat. No kidding, dries fast. Use a hairdryer on low and you could run through the whole three coats and two sandings continuously with no significant waiting Seems reasonably tough, more so than I thought it would be and certainly more than Tamiya paints. A little piece of dust got in a coat and dried before I saw it, and it took a surprising amount of effort and resorting to putting on magnifiers to dig that little bastard out of the finish. But the scene of the crime disappeared completely with the next sanding and coats. Cons: ? Any experience/thoughts appreciated.
-
 Hello, I recently posted an extensive tutorial on how to paint cast metal ornaments for ship models. In this tutorial I will skip the basics of preparing and priming your model detailed in the previous tutorial, and instead skip straight to painting some small scale historic figures. Step 1: color block The first step after priming your model is to block in its basic colors. Simply use a fine brush and paint the elements of the figure in the color you want. I advise to use a small amount of colors as this makes it easier and results in a better looking model. Using more than 4 or 5 different colors is usually a bad idea, as it will confuse the viewer and look amateuristic. Note: For this tutorial I used a white primer because it photographs easier. Normally I would use a black primer as its easier to get good coverage. A white primer is harder to cover with colored paints, often needing two coats to get good coverage. Step 2: Wash After you have applied the colors on your model it does not look great... yet. A very easy way to bring out the details in your figure is to apply a wash. This is a specialised, watery thin ink that runs into the recesses of your model while staying clear of the raised areas (sort of). Paint manufacturers like Citadel and Vallejo have a range of these, in various colors and I can highly recommend them. The trick with washes is to be very generous in applying them. Use a larger brush and "flood" your figure, allowing the ink to run over it and into all the recesses. If a certain area is heavily flooded, use a brush to wipe it into different areas of your model until you get an even coverage. Don't be put off if it looks "too much", after drying the effect is much more subtle. In fact you could use a second layer of wash after drying to get more intense shadows. Usually one application is enough though. Washes take a long time to dry (relatively speaking for acrylic paint) so you can speed things up with a blow dryer if you want. I used Agrax Earthshade (brown) shade from Citadel on the entire figure. You could use different color washes on each section but I wanted to get this aged, slightly yellowed painting look anyway. Usually its not worth the trouble using a blue wash on blue parts etcetera unless you are aiming for a specific result. 99% of the time I use a black wash or a brown wash for everything. Step 3: Highlights Once the wash has dried your figures will look pretty good. One could stop here, if you are happy with the level of detail. However, with a bit more work the models can look even better. By adding some highlights you further bring out the details and "depth" in your models. You could argue that the natural lighting falling onto your model is already doing that, but experience learns that small figures need "a little help" to augment this lighting. We do this by adding highlights to areas of the model that would naturally "catch" light. Usually the raised areas. To make highlights simply apply a lighter color of the one underneath with a fine brush. Using acrylic paint its very easy to mix up a nice range of colors quickly. Be sure to thin down your paint a little bit wit water so it flows easily. Don't paint straight from the pot as it will give a blotchy result and often is a struggle to apply. In the picture above I added lighter browns to the raised wrinkles in the trousers. I used a beige color to touch up the shirt of the guy on the right and the flesh/face parts on both figures. You can already see the model coming to life. Let's add some more detail highlights: I mixed some lighter blue and touched on the jacket in places. Don't overdo it, just a few small fine lines here and there is all it needs. I used white to clean up parts on the left guy, his belts and ends of the jacket arms. I used a gray to highlight the black hat and boots, with a fine pure white dot on the boots to suggest "gloss". The shirt of the guy on the right was finished using some lighter beiges. Finished & Some Thoughts Here's some pictures of the finished figures, which took less than 1 hour to paint up. Some final thoughts I'd like to share on painting miniatures like this: Small scales: As you can see from the examples above, small figures like these don't hold up well when photographed up extremely close. The result can look disappointing when in reality when viewed from a normal distance they look fine/great. Keep in mind that when painting on a very small scale (these are 1:85 I believe) it is really difficult to paint each individual detail. Often the detail is simply not present in the cast model, because of its small size. Things like eyes, lips or even hands are merely "suggested" at than really sculpted. This calls for a more "suggested" style of painting too. You should aim to get an overal look of a figure, letting the shadows and highlights doing its work. By keeping things a bit vague you let our brain "fill in the blanks" often giving a much better effect than trying to paint in all details. Overdoing the highlights or trying to paint in eyes or other small details often results in a weird cartoonish look. Another couple of figures I did on this scale: Take it easy Don't worry too much about making things perfect. Even if you do a color block and 1 layer of wash, your models will already look great. Applying the small highlights is something learned with practise. I encourage you to give it a try, as you might be surprised about yourself. Even if you do it in a basic fashion it will provide awesome results. Whatever you do I assure you you can do better than just flat-coated figures with awful shiny Humbrol. Love to hear your experiences, if you paint something up using my tutorial post some pictures here for us to see!
 -
 What is the best way to apply stains? I am planning to use Minwax oil stains on a Philadelphia Gunboat. Traditionally on home projects I would wipe on the stains, let it set and then wipe off the excess and rub down. Many areas of a model, especially the interior, are not accessible for wiping and rubbing. Does everyone stain each individual piece before gluing?
 -
 Greetings, A client asked me to describe the drybrush painting technique and I thought I'd ask the question here. Where do people use this technique and do you have any pictures to show? I'll start by saying I use the technique regularly but I only have pictures of this technique being used on car models. I've attached a picture where the various nuts and bolts have been detailed using this technique. In essence, the brush is dipped in the paint and then pretty well 90% of the paint is removed. With whatever is left on the brush one can brush back and forth across a slightly raised part and give it some color. In the tiny nuts and bolts on that car part, a wet brush would have simply dropped gobs of paint on the model. It would be pretty well impossible to get those tiny screws on the left to look even without using this technique. Can people add some boat pictures using this technique? Best Regards,
-
I am going to paint my hull with "Hull Tallow, MS4803" and am concerned on how thick the paint is. I have done some small test and not knowing the solids content, am concerned about coverage if I dilute. The hull has been sanded several time and sanding sealer applied between. Is more than a single coat the norm? Thanks All, This site is a life boat!!!
-
 Hi All, I'm just finishing up the deck furniture on my Racehorse and trying to decide which oil to use to finish the hull, furniture, and other wooden bits. A friend recommended True Oil, of which I had never heard, but by which he swears. Some quick research showed that it is manufactured as a finishing oil for gunstocks (which means it must be weather-resistant), and it seems to be popular for re-finishing guitar necks. The manufacturer says it is a mixture of linseed (unsure if raw or boiled) and other oils. So, has anyone ever used it? Does it work better/worse/same as regular linseed oil or tung oil? Thanks, Tony
 -
 Hi all. I have several barrels to decorate in my Spirit of Mississippi build and the only decoration other than varnish are black hoops. Having no other painting on the barrels they need to be right first time. Not having done this before and painting not being my forte, has anyone any good hints for painting the hoops right first time This is one of the barrels and the idea is to paint the rebated hoops. Help please