DSiemens Posted December 30, 2013 Share #31 Posted December 30, 2013 Now that is a tight fit. This is turning out to be a very impressive project. Quote Daniel We're ship in bottle builders, it's an occupational hazard. www.siemensbottlingco.blogspot.com http://www.bottledshipbuilder.com Current Builds: Bermuda Sloop Wood Krafters Pirate Ship Completed: 20 Gun Frigate Olympic 470 Bermuda Sloop Super Mini Queen Anne's Revenge German Cutter Mercury Santa Maria Link to comment Share on other sites More sharing options...
molasses Posted December 30, 2013 Author Share #32 Posted December 30, 2013 Now that is a tight fit. A half millimeter is as good as a mile as long as it clears. DSiemens 1 Quote Current Builds: ESMERALDA Chilean Navy School Ship, 1/640 in a bottle insanity Dan Clapp's hard water race boat in a bottle Completed Build: Prairie Schooner OGALLALA 1/96 in a bottle Research Project: Cruizer-class Brig-Sloops "Beer is proof that God loves us and wants us to be happy." - Benjamin Franklin Link to comment Share on other sites More sharing options...
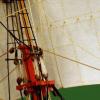
molasses Posted January 5, 2014 Author Share #33 Posted January 5, 2014 (edited) Did some hull detailing and bowsprit rigging, then encountered a problem due to a deficiency of prior planning. Two piece hull, separated. Note the gammoning at the bowsprit to the stem, and the bobstay and bowsprit shrouds. Two piece hull, assembled. Bobstay and shrouds are rigged to eye bolts in the hull with .010 in. (0.25mm) diameter eyes made from 36 gauge (.0055 in./0.14mm) wire. Here's my problem. I tried to pass the upper hull through the bottle neck knowing there would be contact with the inside of the neck at the top edges of the bulwarks and the lower corners - just enough contact to hold the hull in place for this photo. What I didn't see in my planning was that there will not be room for channels attached at the top edge of the lower black strake, as you can see here. The gap there, strake to bottle, might be as much as .020 in./0.5mm. Fortunately, Ogallala is my own design and after considering my options I've decided to move the shrouds to the top of the bulwarks without channels as was done on boats. I think (hope?) this will solve my problem and not cause another later. We shall see. I know better than to plan for a "close fit" - but did it anyway. This will learn me. Dave Edited May 8, 2014 by DFellingham Aussie048, Mfelinger, Elmer Cornish and 5 others 8 Quote Current Builds: ESMERALDA Chilean Navy School Ship, 1/640 in a bottle insanity Dan Clapp's hard water race boat in a bottle Completed Build: Prairie Schooner OGALLALA 1/96 in a bottle Research Project: Cruizer-class Brig-Sloops "Beer is proof that God loves us and wants us to be happy." - Benjamin Franklin Link to comment Share on other sites More sharing options...
augie Posted January 6, 2014 Share #34 Posted January 6, 2014 So in this case, it's designer's choice. Fair enough! mtaylor 1 Quote Augie Current Build: US Frigate Confederacy - MS 1:64 Previous Builds : US Brig Syren (MS) - 2013 (see Completed Ship Gallery) Greek Tug Ulises (OcCre) - 2009 (see Completed Ship Gallery) Victory Cross Section (Corel) - 1988 Essex (MS) 1/8"- 1976 Cutty Sark (Revell 1:96) - 1956 Link to comment Share on other sites More sharing options...
DSiemens Posted January 6, 2014 Share #35 Posted January 6, 2014 (edited) As tight of a fit as the wheel was this is just that much more. She'll look great either way though I think. The only other option is removable shrouds but that is a problem all on it's own. Probably best to keep on your current coarse of action. Running out of space in the bottle neck reminds me of a line from How to Train your Dragon paraphrased its, "We're SiB builders it's an occupational hazard." Some times it doesn't matter how much you measure something just sticks out to far. Edited January 6, 2014 by DSiemens molasses 1 Quote Daniel We're ship in bottle builders, it's an occupational hazard. www.siemensbottlingco.blogspot.com http://www.bottledshipbuilder.com Current Builds: Bermuda Sloop Wood Krafters Pirate Ship Completed: 20 Gun Frigate Olympic 470 Bermuda Sloop Super Mini Queen Anne's Revenge German Cutter Mercury Santa Maria Link to comment Share on other sites More sharing options...
Shamrock Posted January 6, 2014 Share #36 Posted January 6, 2014 Good day to you There has actually been built a fullscale windwagon by som guys here in Sweden. They had a background as volunteers in building the ship "Göteborg" and found some information about a design by Thomas Smith, who built the original in 1853. When ready they used the wagon named "Astrakan" and sailed through the Nevada desert to the film festíval "Burning man" 2012 Look in youtube - search "windwagon" Doreltomin, Elmer Cornish, coxswain and 1 other 4 Quote Link to comment Share on other sites More sharing options...
Doreltomin Posted January 6, 2014 Share #37 Posted January 6, 2014 Hi Dave, Just found your excellent thread! Your little wonder is impressive even by itself... not to say it will be put inside a bottle! Good luck with your build.. hope it will squeeze through the bottleneck! Quote Link to comment Share on other sites More sharing options...
molasses Posted January 6, 2014 Author Share #38 Posted January 6, 2014 Doreltomin: I'll get this ship in a bottle even if I have to commission a custom bottle for it. Running out of space in the bottle neck reminds me of a line from How to Train your Dragon paraphrased its, "We're SiB builders it's an occupational hazard." Some times it doesn't matter how much you measure something just sticks out to far. We even have to allow for the thickness of finish coatings. The first time I vowed to not figure my clearance too tightly I got fouled by the thickness of the paint and had to re-touch the damage inside the bottle. Good day to you There has actually been built a fullscale windwagon by som guys here in Sweden. They had a background as volunteers in building the ship "Göteborg" and found some information about a design by Thomas Smith, who built the original in 1853. When ready they used the wagon named "Astrakan" and sailed through the Nevada desert to the film festíval "Burning man" 2012 Look in youtube - search "windwagon" Reminds me of a pair of miners who used a landboat to cross a dried up lake bed near the Mojave Desert on their journeys to and from town back in the early 1900s. Iceboats are the fastest sail-driven vehicles on earth capable of speeds of 10 times the wind speed. Unconfirmed speeds of over 150 mph (240 kph, 130 knots) have been rumored and there is a documented record of 143 mph (230 kph, 124 knots) set in 1938. Modern land yachts (iceboats with wheels instead of runners) are the second fastest sail driven vehicles. The official land speed record for sail driven land vehicles is 126.1 mph (202.9 kph) set in 2009. Chinese records mention sailed carriages in the 6th and 7th centuries AD. Several European windwagons are depicted in artwork of the early 17th century. Ship of Fools by Hendrik Pot, 1637 Windwagons built by Simon Stevins for Prince Maurice of Orange in 1649 A sail wagon built in Brooklyn, New York, ca. 1910 Windwagons actually were used on the American prairies in the 1860s. From 1877 until at least 1887 the Kansas Pacific Railroad used sails on handcars. Here's the link to the Kansas Historical Society windwagon article: http://www.kshs.org/kansapedia/wind-wagons/12239 NASA is studying the feasibility of wind powered rovers for future exploration of other planets. mtaylor, michael mott and Elmer Cornish 3 Quote Current Builds: ESMERALDA Chilean Navy School Ship, 1/640 in a bottle insanity Dan Clapp's hard water race boat in a bottle Completed Build: Prairie Schooner OGALLALA 1/96 in a bottle Research Project: Cruizer-class Brig-Sloops "Beer is proof that God loves us and wants us to be happy." - Benjamin Franklin Link to comment Share on other sites More sharing options...
KevinR Posted January 28, 2014 Share #39 Posted January 28, 2014 Hi, I just found your build. I love the idea. It looks great. Can't wait to see the finished Ship/wagon. Quote Kevin Hampton, VA Current Builds: Skipjack Albatross - 1:32 On Hold: Yacht Atlantic - Scientific Completed: Ships Boat - MS - First Planked Kit Link to comment Share on other sites More sharing options...
molasses Posted January 28, 2014 Author Share #40 Posted January 28, 2014 Thanks, Kevin. Where do I know you from? Quote Current Builds: ESMERALDA Chilean Navy School Ship, 1/640 in a bottle insanity Dan Clapp's hard water race boat in a bottle Completed Build: Prairie Schooner OGALLALA 1/96 in a bottle Research Project: Cruizer-class Brig-Sloops "Beer is proof that God loves us and wants us to be happy." - Benjamin Franklin Link to comment Share on other sites More sharing options...
molasses Posted January 28, 2014 Author Share #41 Posted January 28, 2014 I was not happy with changing my design by eliminating the channels - I was looking forward to doing them and their associated details. I also wasn't pleased with my bottle either because of the rough surface finish and thickness irregularities that will cause distortion of the view of the ship inside. Doreltomin: I'll get this ship in a bottle even if I have to commission a custom bottle for it. This flippant comment got me thinking. After an internet search and e-mailing a few glassblowers in the Los Angeles area (I live in the desert east of LA) I decided this was the way to solve both of my problems. I continued work on Ogallala, as designed with channels, while finalizing the details of getting my bottle made. Today I ordered a custom bottle of similar size to the gallon jug but with a larger opening and, except for the pain in my wallet (yes, it is expensive), I'm happy about it. I'm excited about getting glass that will be much better than that ugly gallon jug. mtaylor and KevinR 2 Quote Current Builds: ESMERALDA Chilean Navy School Ship, 1/640 in a bottle insanity Dan Clapp's hard water race boat in a bottle Completed Build: Prairie Schooner OGALLALA 1/96 in a bottle Research Project: Cruizer-class Brig-Sloops "Beer is proof that God loves us and wants us to be happy." - Benjamin Franklin Link to comment Share on other sites More sharing options...
augie Posted January 28, 2014 Share #42 Posted January 28, 2014 That, sir, is a stroke of determination. Well played! mtaylor 1 Quote Augie Current Build: US Frigate Confederacy - MS 1:64 Previous Builds : US Brig Syren (MS) - 2013 (see Completed Ship Gallery) Greek Tug Ulises (OcCre) - 2009 (see Completed Ship Gallery) Victory Cross Section (Corel) - 1988 Essex (MS) 1/8"- 1976 Cutty Sark (Revell 1:96) - 1956 Link to comment Share on other sites More sharing options...
Bedford Posted January 28, 2014 Share #43 Posted January 28, 2014 The lengths we will go to............. I do admire the way you think though, if it won't fit the bottle make the bottle fit the model. It should be worth it. Steve Quote Ships built :- Schooner for Port Jackson Thermoplylae Bluenose II Full size Tammie Norrie dinghy 1:8 scale Miss Caroline, model of the full size boat I built Under construction :- Royal Caroline, this one is special as it is in memory of my 13 year old daughter, Caroline who passed away in 2005 Miane three masted schooner R/C, scratch build (on hold) Charles W Morgan (on hold) Scratch designed and built R/C Mahogany and Walnut speedboat (on hold) In the que :- S.T. Waratah, maybe! Link to comment Share on other sites More sharing options...
mtaylor Posted January 28, 2014 Share #44 Posted January 28, 2014 I agree.. it'll be worth it in the end. Quote Mark "The shipwright is slow, but the wood is patient." - me Current Build: Past Builds: La Belle Poule 1765 - French Frigate from ANCRE plans - ON HOLD Triton Cross-Section NRG Hallf Hull Planking Kit HMS Sphinx 1775 - Vanguard Models - 1:64 Non-Ship Model: On hold, maybe forever: CH-53 Sikorsky - 1:48 - Revell - Completed Licorne - 1755 from Hahn Plans (Scratch) Version 2.0 (Abandoned) Link to comment Share on other sites More sharing options...
molasses Posted May 8, 2014 Author Share #45 Posted May 8, 2014 Finally making some progress on this project. I have seen SiBs built in light bulbs, clear glass Christmas ornaments and vertical bottles and liked the ability to view the model inside with minimal distortion from almost any angle and decided on an 8 inch (200mm) diameter sphere with a hole about 1 3/8 inch (35mm). My custom "bottle" A characteristic of Conastoga wagons, on which Ogallala's hull is based, is the external ribs. During the design phase I chose to have most of these external ribs do double duty as attachments for shrouds and backstays. Channels and external ribs in place. I also installed pinrails on the inboard side of the bulwarks but they don't show up well because they are red and don't have the belaying pins inserted. The tedious part of doing the ribs was achieving an "invisible" butt fit at the line where the hull separates into two parts. Another view. Can you see the dividing line? The ribs look kind of irregular because they are aligned to the corresponding points on the masts for the shrouds and backstays. I'll touch up the black on the edges of the channels after installing the deadeyes. Close up of ribs. You might be able to see the dividing line if you click on this for the full size image. I have tried different methods of simulating blocks at SiB scales - thread knotted and glued around the point of a needle (thread blocks) and using small seed beads - without being satisfied with the results. Neither of these look much like a block. So I came up with using two discs cut from ca-stiffened card stock to sandwich the line passing through the block then tying the end of a line around the sandwich and gluing it. Here's the result after some experimentation. This block is .040 inch (1mm) in diameter on one of the gaff bridles with halliard attached. Of course, double and triple blocks can be made by adding threads and discs to the stack. I have all my spars made but still have some detailing to do to them. Here are the fore crossjack with two micro eye bolts installed and the fore topsail yard with four installed. They also have .010 inch (0.30mm) dia. holes drilled in them very near the tips. The topsail yard is 1.650 inches (42mm) long, .037 inch (0.94mm) dia. at the center and .027 inch (0.68mm) at the tips. This is about my limit for a spar with a usable hole, I have not (yet) been able to feed a thread through a smaller hole. Fore crossjack and topsail yard. Here's a close-up of an eyebolt made from .005 inch (0.13mm) copper wire made by bending the wire around a .010 inch (0.25mm) hard wire then twisting the ends until the eye is snug. I also installed four of these in various places in the foretop and seven in the maintop and still have several to install on the deck. Most of these eyebolts will be covered with disc blocks during rigging after feeding thread through the eye. I'm glad to be back at work on Ogallala after my set-back as a result of miscalculating the overall width of her hull. Stupid me. Dave Piet, augie, reklein and 5 others 8 Quote Current Builds: ESMERALDA Chilean Navy School Ship, 1/640 in a bottle insanity Dan Clapp's hard water race boat in a bottle Completed Build: Prairie Schooner OGALLALA 1/96 in a bottle Research Project: Cruizer-class Brig-Sloops "Beer is proof that God loves us and wants us to be happy." - Benjamin Franklin Link to comment Share on other sites More sharing options...
Bedford Posted May 9, 2014 Share #46 Posted May 9, 2014 I'm back on board. Keep it comming. Quote Ships built :- Schooner for Port Jackson Thermoplylae Bluenose II Full size Tammie Norrie dinghy 1:8 scale Miss Caroline, model of the full size boat I built Under construction :- Royal Caroline, this one is special as it is in memory of my 13 year old daughter, Caroline who passed away in 2005 Miane three masted schooner R/C, scratch build (on hold) Charles W Morgan (on hold) Scratch designed and built R/C Mahogany and Walnut speedboat (on hold) In the que :- S.T. Waratah, maybe! Link to comment Share on other sites More sharing options...
augie Posted May 9, 2014 Share #47 Posted May 9, 2014 Wonderful to see her coming across the prairie again! Quote Augie Current Build: US Frigate Confederacy - MS 1:64 Previous Builds : US Brig Syren (MS) - 2013 (see Completed Ship Gallery) Greek Tug Ulises (OcCre) - 2009 (see Completed Ship Gallery) Victory Cross Section (Corel) - 1988 Essex (MS) 1/8"- 1976 Cutty Sark (Revell 1:96) - 1956 Link to comment Share on other sites More sharing options...
captainbob Posted May 9, 2014 Share #48 Posted May 9, 2014 And with those colors you would see it from a long was off. Looking good. Bob augie 1 Quote Every build is a learning experience. Current build: SS_ Mariefred Completed builds: US Coast Guard Pequot Friendship-sloop, Schooner Lettie-G.-Howard, Spray, Grand-Banks-dory, a gaff rigged yawl, HOGA (YT-146), Int'l Dragon Class II, Two Edwardian Launches In the Gallery: Catboat, International-Dragon-Class, Spray Link to comment Share on other sites More sharing options...
molasses Posted May 9, 2014 Author Share #49 Posted May 9, 2014 And with those colors you would see it from a long was off. Bob I get a lot of comments on the colors. The historical builder was a ship's carpenter turned wagon wright who had some cheap barn red, yellow ocher and black in his paint shed but not enough of any one of them to do the whole job. Truth is I thought the color scheme looked good in my first drawing and accented the details well so I kept it just for fun. mtaylor 1 Quote Current Builds: ESMERALDA Chilean Navy School Ship, 1/640 in a bottle insanity Dan Clapp's hard water race boat in a bottle Completed Build: Prairie Schooner OGALLALA 1/96 in a bottle Research Project: Cruizer-class Brig-Sloops "Beer is proof that God loves us and wants us to be happy." - Benjamin Franklin Link to comment Share on other sites More sharing options...
captainbob Posted May 10, 2014 Share #50 Posted May 10, 2014 Yes, the colors are great. Bob Quote Every build is a learning experience. Current build: SS_ Mariefred Completed builds: US Coast Guard Pequot Friendship-sloop, Schooner Lettie-G.-Howard, Spray, Grand-Banks-dory, a gaff rigged yawl, HOGA (YT-146), Int'l Dragon Class II, Two Edwardian Launches In the Gallery: Catboat, International-Dragon-Class, Spray Link to comment Share on other sites More sharing options...
molasses Posted May 18, 2014 Author Share #51 Posted May 18, 2014 I've been working on some very fiddly bits the last few days so it doesn't seem to me that I have much done when I look back on the time I spent at the bench. I made a test assembly of my dead eyes. The dead eyes were fabricated from two discs .060 in./1.5mm in diameter of ca stiffened card stock with another disc .040 in./1.0mm sandwiched between and centered. In this test I seized the thread around the dead eye by passing the thread through itself twice with a needle. If you think threading a needle is challenging try piercing a thread with a needle. Satisfied with the general results I punched out the discs needed to make 24 dead eyes with plenty of extras to cover mistakes. I also made my ship's wheel from the ca stiffened card stock. Made 3 rings, glued two together then cut notches for the 36 gauge wire to fit into. Did similar with the hub of the wheel, then assembled the wheel and glued another ring and hub in place. I also used the card stock to build up the wheel stanchions. I turned the spindle from basswood. Here's the wheel after going into the paint shop, attaching the tiller rope and installing the completed unit to Ogallala's deck with the tiller ropes passing through holes in the deck. While working on the wheel I also assembled the dead eyes and painted them. Here's one of the dead eyes with a shroud seized as in the test. This dead eye has blackened 36 gauge wire wrapped around it and twisted just enough turns to conceal the twist when attached to the channels. I may need to blacken the wire some more, it looks black in normal light but with the lights for photography the copper shows through. If I blacken the wire too much it just flakes off. I haven't decided if I'm going to drill holes for the lanyards or just fake them by gluing short pieces of thread to both sides of the dead eye pairs. Now to make smaller dead eyes for the topmasts. Dave mtaylor, avsjerome2003, Elmer Cornish and 7 others 10 Quote Current Builds: ESMERALDA Chilean Navy School Ship, 1/640 in a bottle insanity Dan Clapp's hard water race boat in a bottle Completed Build: Prairie Schooner OGALLALA 1/96 in a bottle Research Project: Cruizer-class Brig-Sloops "Beer is proof that God loves us and wants us to be happy." - Benjamin Franklin Link to comment Share on other sites More sharing options...
molasses Posted May 20, 2014 Author Share #52 Posted May 20, 2014 I decided to drill holes in the dead eyes and to rig lanyards rather than to fake them by gluing segments of thread to both faces of the dead eyes. I don't fully trust ca (used to make the dead eyes) and paint, in particular, to withstand rigging stresses. By rigging them, even if the ca fails, the dead eyes are less likely to come apart with the lanyards to assist in holding them together. By faking the lanyards I would be trusting the paint-to-deadeye bond to not fail. In either case repairing failure(s) would be next to impossible inside the sphere. I realized I had no choice but to rig them for real. I started by fabricating a fixture using a standard spring clothespin as a clamp to hold the dead eye for drilling through guides in the clamp. I used 1mm hobby plywood to make the parts added to the clothespin. The guide holes are .010 in./0.25mm. The pieces on both sides of the clothespin keep the two wooden parts of the pin from shifting sideways. Three bits of ply glued to one of the ply yaws to locate the dead eye and the three guide holes for drilling. I also made a fixture to hold an upper and lower dead eye for reeving with a lanyard. I modified two mini clothespins to hold the dead eyes by the previously installed tails with a piece of the ply positioned between to sort of wedge the dead eyes against the clamps. Dead eye reeving fixture, lower dead eye to the right. Closer view of the fixture. The out-of-focus light thread is the tail from the knotted end of the lanyard. I used some thinned white pva glue to secure the lanyard in the holes and on the knot. I will secure the other end of the lanyard after rigging the shrouds and attaching a stretcher just above the dead eyes. I know this all seems backwards to the method used on larger models but tying and seizing and reeving the lanyards on the model at this size seems to me next to impossible. It was hard enough with the parts held steady in clamps and fixtures. This way the only tying while on the model will be of the shrouds at the tops to form short splices or bight splices with a needle similar to the way I seized the dead eyes. After letting the glue set I removed the shroud from the fixture and posed it in position in a channel on the model with an X-acto blade for size reference. The lanyard is not tensioned at all. It has acquired a bit of a twist which comes out with a little tension. I have to be careful when I reeve the lanyard so that the lay doesn't tighten as I pass it through each hole of the dead eye. Now to get back to the other eleven pairs of dead eyes to drill holes and reeve lanyards, then go through the whole process again, starting with cutting discs, for the smaller topmast dead eyes and shrouds. Dave bhermann, Cap'n Rat Fink, JesseLee and 11 others 14 Quote Current Builds: ESMERALDA Chilean Navy School Ship, 1/640 in a bottle insanity Dan Clapp's hard water race boat in a bottle Completed Build: Prairie Schooner OGALLALA 1/96 in a bottle Research Project: Cruizer-class Brig-Sloops "Beer is proof that God loves us and wants us to be happy." - Benjamin Franklin Link to comment Share on other sites More sharing options...
augie Posted May 20, 2014 Share #53 Posted May 20, 2014 Thanks for the size reference. It's easy to forget how small things are here. Well done! Quote Augie Current Build: US Frigate Confederacy - MS 1:64 Previous Builds : US Brig Syren (MS) - 2013 (see Completed Ship Gallery) Greek Tug Ulises (OcCre) - 2009 (see Completed Ship Gallery) Victory Cross Section (Corel) - 1988 Essex (MS) 1/8"- 1976 Cutty Sark (Revell 1:96) - 1956 Link to comment Share on other sites More sharing options...
captainbob Posted May 20, 2014 Share #54 Posted May 20, 2014 Fantastic Bob Quote Every build is a learning experience. Current build: SS_ Mariefred Completed builds: US Coast Guard Pequot Friendship-sloop, Schooner Lettie-G.-Howard, Spray, Grand-Banks-dory, a gaff rigged yawl, HOGA (YT-146), Int'l Dragon Class II, Two Edwardian Launches In the Gallery: Catboat, International-Dragon-Class, Spray Link to comment Share on other sites More sharing options...
mtaylor Posted May 20, 2014 Share #55 Posted May 20, 2014 Yikes... that is tiny. Well done, Dave!!! Quote Mark "The shipwright is slow, but the wood is patient." - me Current Build: Past Builds: La Belle Poule 1765 - French Frigate from ANCRE plans - ON HOLD Triton Cross-Section NRG Hallf Hull Planking Kit HMS Sphinx 1775 - Vanguard Models - 1:64 Non-Ship Model: On hold, maybe forever: CH-53 Sikorsky - 1:48 - Revell - Completed Licorne - 1755 from Hahn Plans (Scratch) Version 2.0 (Abandoned) Link to comment Share on other sites More sharing options...
Piet Posted May 21, 2014 Share #56 Posted May 21, 2014 Beautiful work Dave, and thanks for showing your method. Cheers, Quote Piet, The Flying Dutchman. "Your greatest asset is not the quantity of your friends , rather the quality of your friends." (old Chinese proverb) Current Builds: Hr. Ms. Java 1925-1942 VOC Ship Surabaya Planned Builds: Young America Diorama - scale 1:3000 Future Builds: KPM ship "MS Musi." Zuiderzee Botter - scale 1:25. VOC Jacht in a 6" lamp, Buginese fishing Prauw. Hr. Ms. Java - Royal Navy Netherlands Cruiser. Completed Builds: Hr. Ms. O16 Submarine Hr. Ms. O19 - Submarine Royal Navy Netherlands Ship Yard Diorama with Topsail schooner - Friendship Sloop Gwenfra Muscongus Bay Lobster Smack Golden Hind - Cutte Sark (both not in this forum) Link to comment Share on other sites More sharing options...
molasses Posted May 21, 2014 Author Share #57 Posted May 21, 2014 Thanks for the kind words, everyone. You're welcome to sit in, Crackers - and you can take a front row seat if you share. While looking over my photos I noticed that the group of holes in the dead eyes were a bit off center (by about .004 in./0.1mm) and corrected the drilling fixture. Quote Current Builds: ESMERALDA Chilean Navy School Ship, 1/640 in a bottle insanity Dan Clapp's hard water race boat in a bottle Completed Build: Prairie Schooner OGALLALA 1/96 in a bottle Research Project: Cruizer-class Brig-Sloops "Beer is proof that God loves us and wants us to be happy." - Benjamin Franklin Link to comment Share on other sites More sharing options...
michael mott Posted May 21, 2014 Share #58 Posted May 21, 2014 Dave, Brilliant! the jig is a keeper. the dead eyes look so crisp. Michael Quote Current builds Bristol Pilot Cutter 1:8; Skipjack 19 foot Launch 1:8; Herreshoff Buzzards Bay 14 1:8 Other projects Pilot Cutter 1:500 ; Maria, 1:2 Now just a memory Future model Gill Smith Catboat Pauline 1:8 Finished projects A Bassett Lowke steamship Albertic 1:100 Anything you can imagine is possible, when you put your mind to it. Link to comment Share on other sites More sharing options...
molasses Posted May 22, 2014 Author Share #59 Posted May 22, 2014 I've been building ships in bottles for more than 35 years and every one of them has been a waterline model, most under full sail, with the wind direction and strength appropriate for the sails and correctly depicted (more or less, as my experience and knowledge grew) in the sea state and swell direction. However, there was always something that bothered me about my models, increasing as time went by, because I had no confidence that I could succeed in modeling something that everyone is extremely familiar with. I have finally gotten to the point where I can no longer leave out these details. In case you haven't guessed, I'm talking about putting people on my models. There's nothing like human figures to give a strong sense of the scale of a model and bring it to life - or ruin the project if they are poorly done. I'm no artist, just a modeler, and I was always lousy at drawing people. Just the thought of sculpting human figures had me extremely intimidated so a couple months ago I started research and study of the human body from an artist's point of view and on ways to make very small figures. Ogallala seemed to me a perfect project to introduce people into my work since it is a rather large scale and has become an experimental test bed. It's basically a 2X scale Conestaga wagon mated to a 1/2 scale topsail schooner rig, then reduced to a scale appropriate to the bottle I initially selected. The result is roughly 1/96 scale, about 10% smaller than HO. I rejected using HO figures (which would be large anyway) because I couldn't learn anything by buying figures and adapting them. Most methods I researched begin with wire armatures, so that's were I started. My first armature with the arms not yet bent at the shoulder joint and arms and legs not trimmed to length. I dropped - and thought had lost - that first armature, made a couple more, threw them away and finally got one that might work as a first try. I rejected using any kind of clay and settled on building up the armature with an acrylic gesso, mostly because Lloyd McCaffery uses gesso. [bTW, I found that first armature today while doing a bit of work area clean-up and photographed it. I'm convinced that a smooth, bare concrete floor is the best thing under a modeler's work bench/table, I hardly ever lose dropped objects on that floor except for the semi-microscopic bits I don't even bother to look for.] So, here's my first try after three coats, applied at about 30-45 minute intervals, between drilling holes in groups of dead-eyes. Front view. He's posed for steering, weight on left foot, left hip against the wheel stanchion, both hands on the wheel. Left quarter view. I think I have the head and shoulders pretty close but he's still a bit thin elsewhere. The long left leg will be cut below the foot to glue into a hole in the deck. Right quarter view. He's 5'-9"/1.75m tall to scale - 11/16 in./17.5mm. One or two more coats of gesso should have him ready for detailing. I'm very surprised at how easy this method is, at least this far into it. If I was doing a larger crew, say 20 figures, at this scale (I'm only going to do three or four for Ogallala), I would be able to apply a coat of gesso to all, go back through them with successive coats and have them all ready for final detailing in one day, perhaps four hours or much less with practice or for a smaller scale. Making the 20 armatures and posing them in a wide variety of activities would take longer. The gesso, being a little thicker than Model Expo paint, builds up easily with a paint brush and sets quickly. Used as a base for painting, it's a brilliant white, so it's a bit difficult to see the shape of the growing figure - and very hard to photograph; my first photos were just white silhouettes with no shadows to give a discernible 3rd dimension. I'll add a bit of black paint to the gesso for the final coat to make it easier to see as I finalize the fleshing out and the drape of the clothing. I'll continue working on this figure to learn about the rest of the process before starting the two or three more needed. Don't be surprised if he winds up being a less cartoonish version of Windwagon Smith. Looking back on my agonizing over doing people, I feel really stupid (a frequent feeling) and timid (very rare) for not trying this 20 years ago - it's not at all like drawing, it's really just modeling after all. I guess it took Lloyd McCaffery's work to make me see that I might be able to do it combined with the realization that I had no choice but to at least attempt it. As you can probably tell, I'm very pleased with what I have so far. He's off to a much better beginning than I expected and my confidence now is high, which is probably the most important result of this experiment. I will greatly appreciate any comments, positive and negative. I need to learn quickly how to do these figures, and other eyes - and the intellects that go with them - may notice what I have missed. Dave captainbob, Mfelinger, themadchemist and 8 others 11 Quote Current Builds: ESMERALDA Chilean Navy School Ship, 1/640 in a bottle insanity Dan Clapp's hard water race boat in a bottle Completed Build: Prairie Schooner OGALLALA 1/96 in a bottle Research Project: Cruizer-class Brig-Sloops "Beer is proof that God loves us and wants us to be happy." - Benjamin Franklin Link to comment Share on other sites More sharing options...
Chasseur Posted May 22, 2014 Share #60 Posted May 22, 2014 Dave, looking good for a first attempt. I think I might have some files on sculpting that I used when modifying some Wargaming figures. If I find them I'll forward them to you as if I'm not mistaken they were excellent regarding anatomy and posing figures. Jeff Quote A mighty fortress is our God a bulwark never failing! Link to comment Share on other sites More sharing options...

Recommended Posts
Join the conversation
You can post now and register later. If you have an account, sign in now to post with your account.