Search the Community
Showing results for tags 'Albatros'.
-
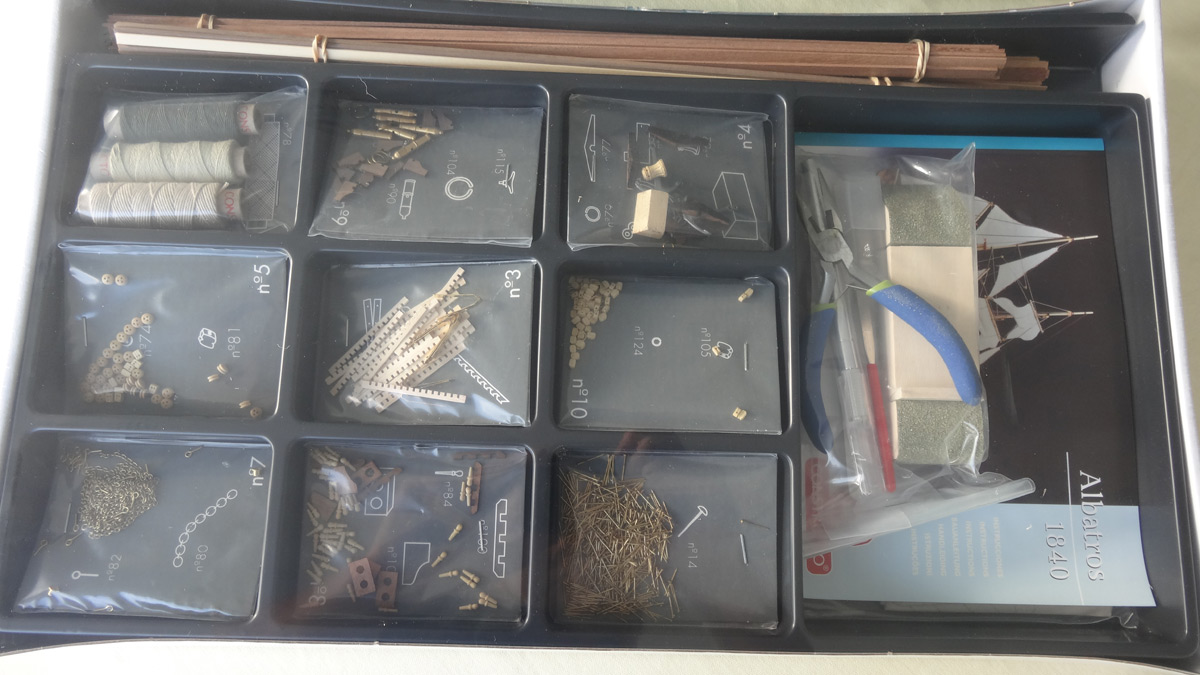
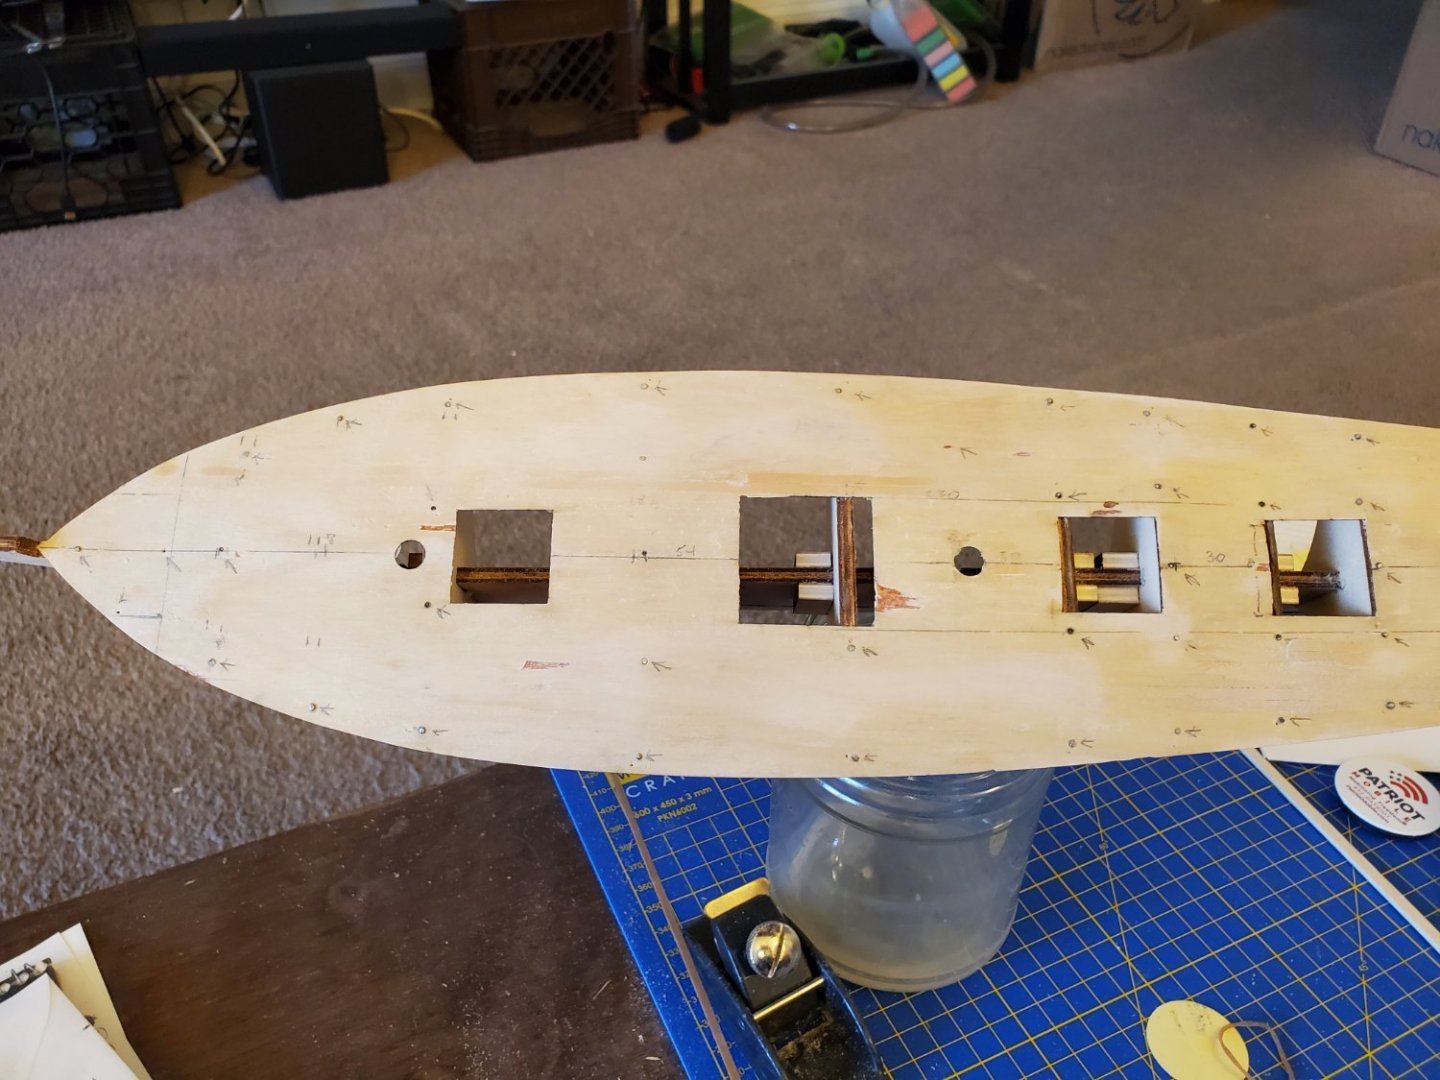
 It is not the first build log showing OcCre's Albatros but it is the very first wooden ship model I will build. To start with shipmodelling I have selected the Albatros as she should not be too tough to build and there is a series of YouTube videos showing the build step by step I can refer to when I need it. I have started this project at the end of November last year and already have spent some 60 hrs working on it before I have joined MSW a week ago. Therefore this log will be a rough wrap up of what I have done so far and then will join the actual stage of the build - rigging the guns. As I am not a native speaker I will have to translate some nautical terms from German to English and getting the photographs uploaded and resized first. Starting tomorrow I think that all posts will be done until sunday. You will see a lot of mistakes I think so any help and comments which will help me to improve my modelling skills are highly appreciated. Thanks in advance ... Kai
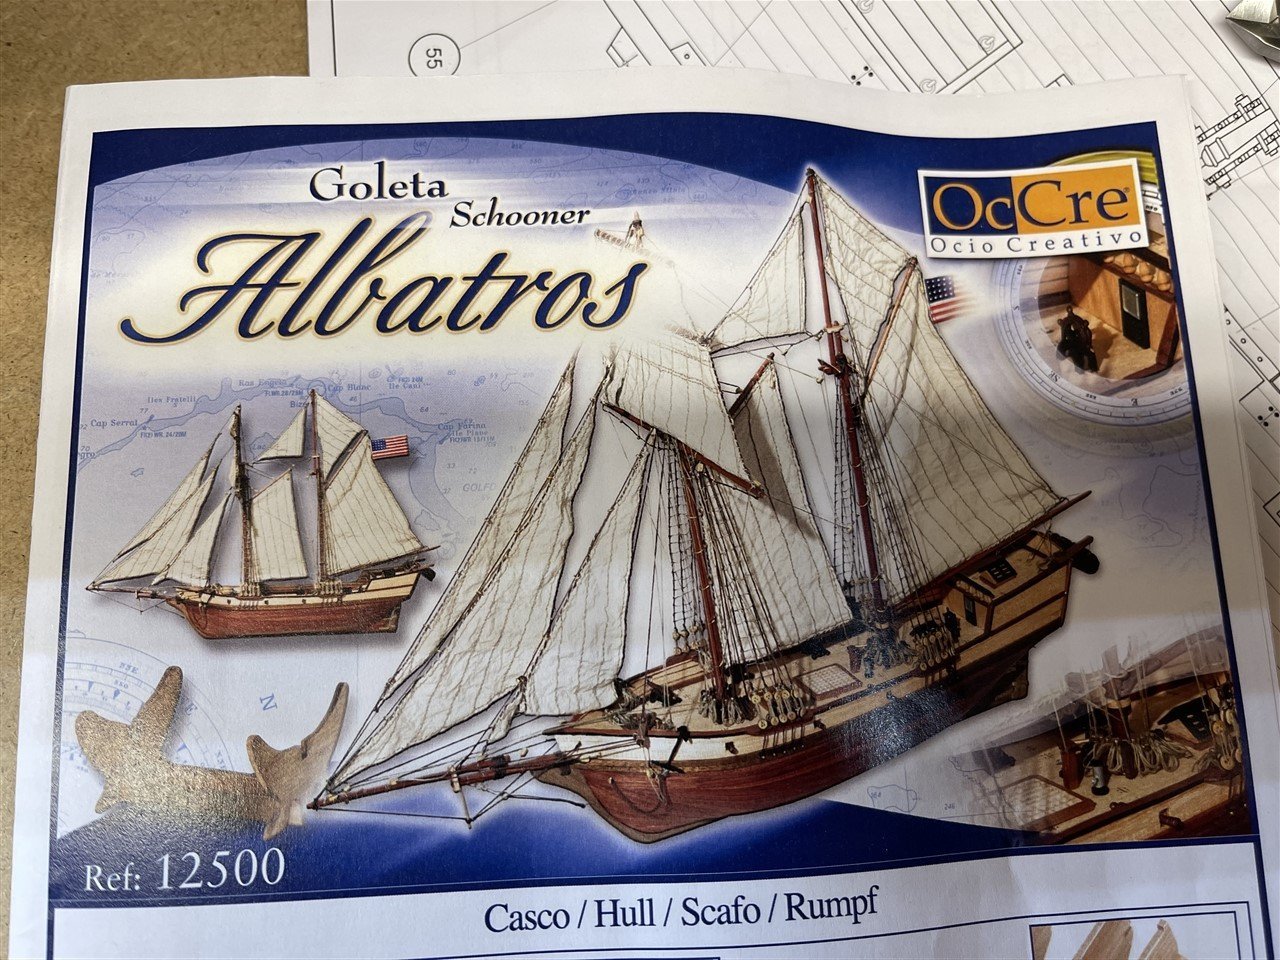
-
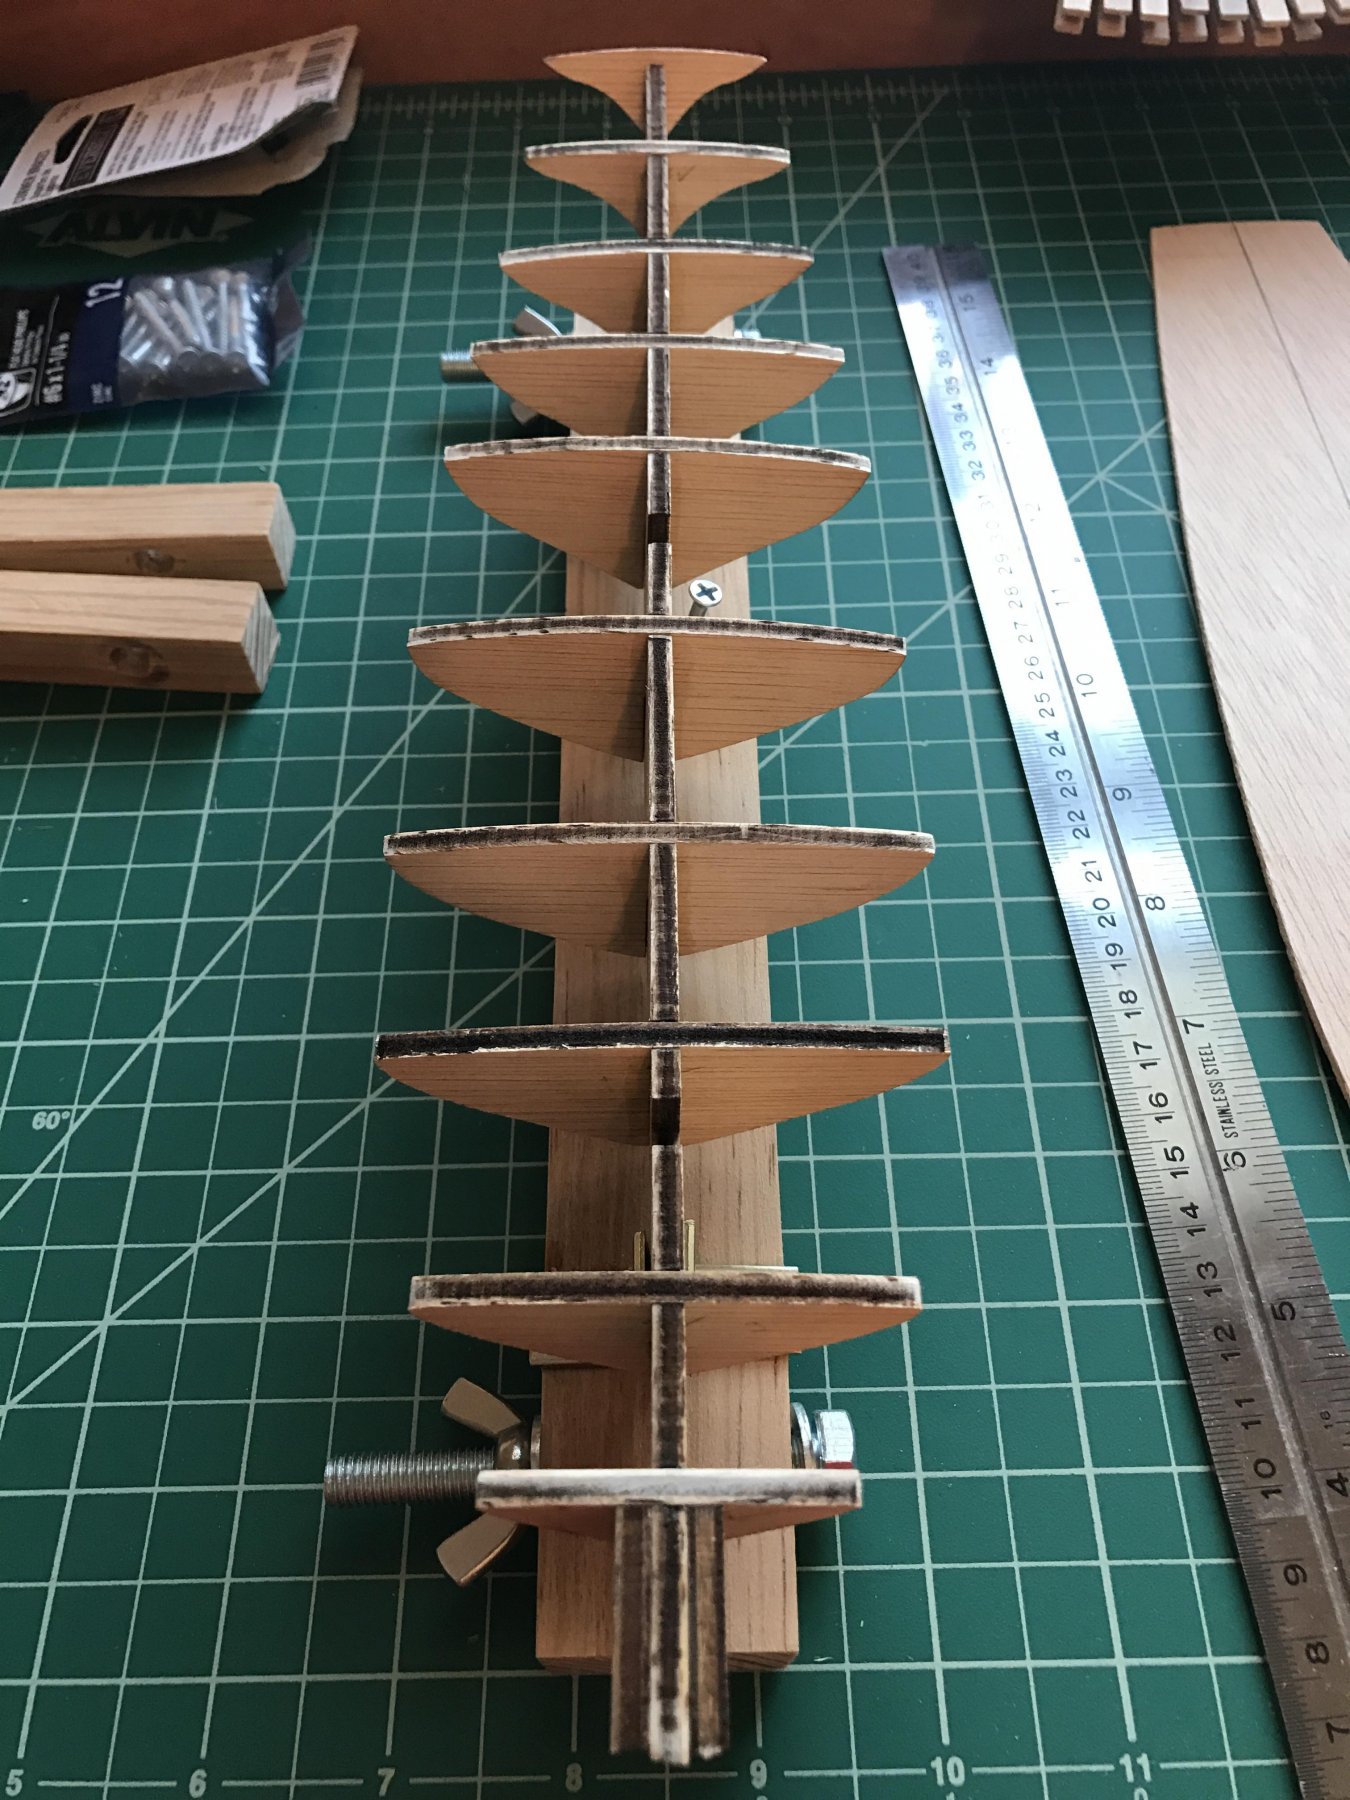
 I am resuming a build of the Mantua Albatros "Goleta tipica di Baltimora" - a Baltimore clipper, fitted out as a revenue cutter. I started the kit back in the mid 1980s and finished planking the hull. Then other things came along (buying a house, getting married, etc.) that left little time for ship modeling. The partially completed hull has resided on my bookshelf for about 30 years. I really like the lines of these ships so I decided to resume the build, but I am not sure what it will end up being. I am building it to get experience with a few new techniques. NOTE: THE RESULTING MODEL DOES NOT REPRESENT ANY ACTUAL SHIP. I MADE SEVERAL ERRORS IN THE CONSTRUCTION, AND HAVE TRIED TO POINT THESE OUT AS I GO ALONG. BUT I HAVE PUT A LOT OF RESEARCH INTO TOPSAIL SCHOONERS AND REVENUE CUTTERS SO I HOPE THIS THREAD WILL BE USEFUL TO OTHERS. This is the 1980s kit, and it is different from the latest Mantua Albatros kit description on line. The new kit has a false deck, apparently of thin plywood, and the 1980s kit does not. The newer kit seems to have mahogany hull planking, and the older kit used tiglio or lime wood. The older kit came with two drawing sheets, hull construction and sail plan, plus brief instructions. The Mantua web site says the new kit has three drawings, and at least one appears to be the same as the 1980s kit. The 1980s "instructions" are a joke - one page saying to assemble the hull frames, plank the hull, assemble the base, build the masts and finish the rigging - just about that brief! For me this isn't a problem. I have been researching and scratch building plank on bulkhead models since I was a kid. I have searched and found no record of a Baltimore clipper named "Albatros." The kit name suggests Mantua's "famous" ship is just "typical" of a Baltimore clipper. Looking at the plans for the model and plans for actual Baltimore clippers I can see quite a few differences. This raises several questions, and I would appreciate any help you can offer. 1. Scale. The 1980s kit plans and instructions give no scale. Comparing with other ships I guessed it was about 1:64 scale. Some sites say the Mantua model is 1:55 scale, and the latest Mantua web site says it is 1:40 scale. The model is about 27" long (tip of bowsprit to end of the spanker boom), and this is what Mantua says is the length of their latest Albatros model. The waterline (length between perpendiculars) is about 17 inches. This would give a full scale hull length between perpendiculars of: 1:40 - 56' 4" and about 70 tons 1:55 - 78' and about 100 tons 1:64 - 90' 8" and about 180 tons Baltimore clippers were constructed in approximately all of these sizes between 1800 and 1820. Since the model has only six cannons plus one larger gun on the centerline, I assume the 1:40 scale is close. There were several 60 foot ships built. Any thoughts? 2. Mast angles. The Mantua plans show the rake of the fore mast to be 2-3 degrees and the main mast to be 5 degrees relative to the water line. I examined plans and drawings for 17 Baltimore clippers and found the mast rakes to be: Fore mast - 11.5 degrees average, with a range of 7-16 degrees Main mast - 13.75 degree average, with a range of 8-22 degrees The rake of the masts is one of the outstanding characteristics of these ships, and none were as boring as 3-5 degrees! I plan to build it with 11.5 and 14 degree rakes. 3. Deck fittings. The Mantua kit has four hatches with gratings and one flat solid hatch on the deck. Looking through Chapelle's books I see that almost all of the revenue cutters had some form of low deck house and companionway, even the small 30 ton ships. I think I will build deck fittings similar to an actual 70-80 ton revenue cutter. 4. Stern. Most Baltimore clippers had either round tuck or square tuck transoms. A few appear to have had curved transoms. The kit plans seem to show an odd flat stepped square tuck like nothing I see in any of the Baltimore clipper plans. In any case, when I started the kit in the '80s I constructed a curved transom faired into the hull lines, more like some of the later schooners I have seen. It may not be accurate for an 1815 revenue cutter, but I am not going to deconstruct the hull and start over again! The model stern is similar to the "V transom" that was introduced in the 1840s to 1850s (according to Howard Chapelle's The American Fishing Schooners). 5. Colors. The hull was painted with white lead below the waterline. Chapelle says American schooners after the Revolution were painted yellow topside with black trim. In the early 1800s they were painted yellow topside with a broad black stripe along the gun ports. Deck houses were white or light gray, and bulwarks could be red, brown, green, blue, white or varnished. The kit box cover shows a broad yellow stripe along the gun ports with brown/black trim, and yellow bulwarks with brown/black trim. I am inclined to use the broad black stripe along the gun ports (between the main deck and cap rail) with yellow trim above and white below the waterline. The bulwarks will be white or yellow, and the deck furniture white. 6. Deck planking. I am familiar with nibbing, but this may not have come into practice until the mid 1800s. Before that planking was tapered and hooked. I have thought about this, and read the few tutorials on hooked deck planking, and I just don't understand the procedure. If you start planking at the center line and work outwards, you apparently have to curve the outermost plank while laying it and then cut into the previously laid plank to create the hook. Nibbing is a lot simpler! By the 1850s planking on revenue cutters was nibbed, so I guess I could build the ship as a mid 1800s revenue cutter. But I need the practice with the hooking technique for the next build I am planning to make (Rattlesnake). I guess I will create a CAD plan of the deck and practice making the hooked deck planking. I'll post some pictures of the 1980s hull and current modifications later.
-
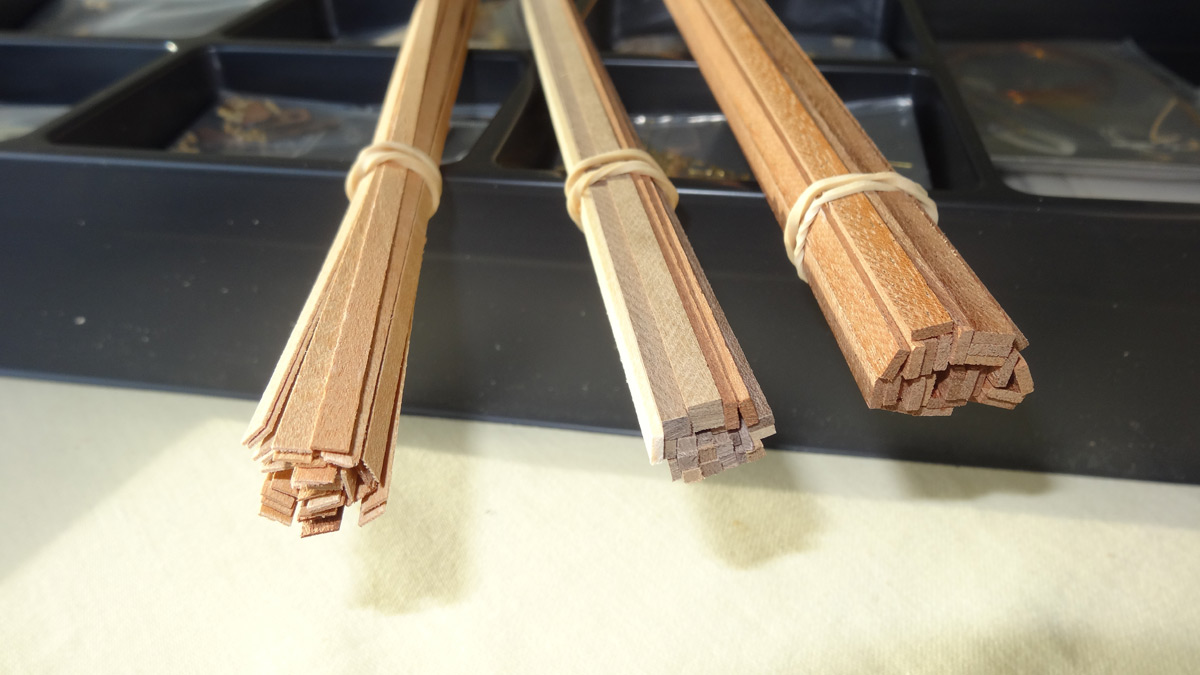
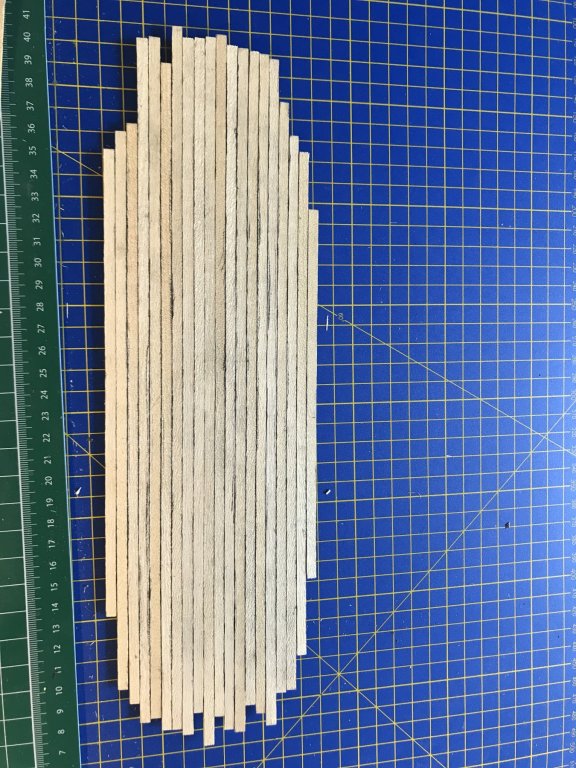
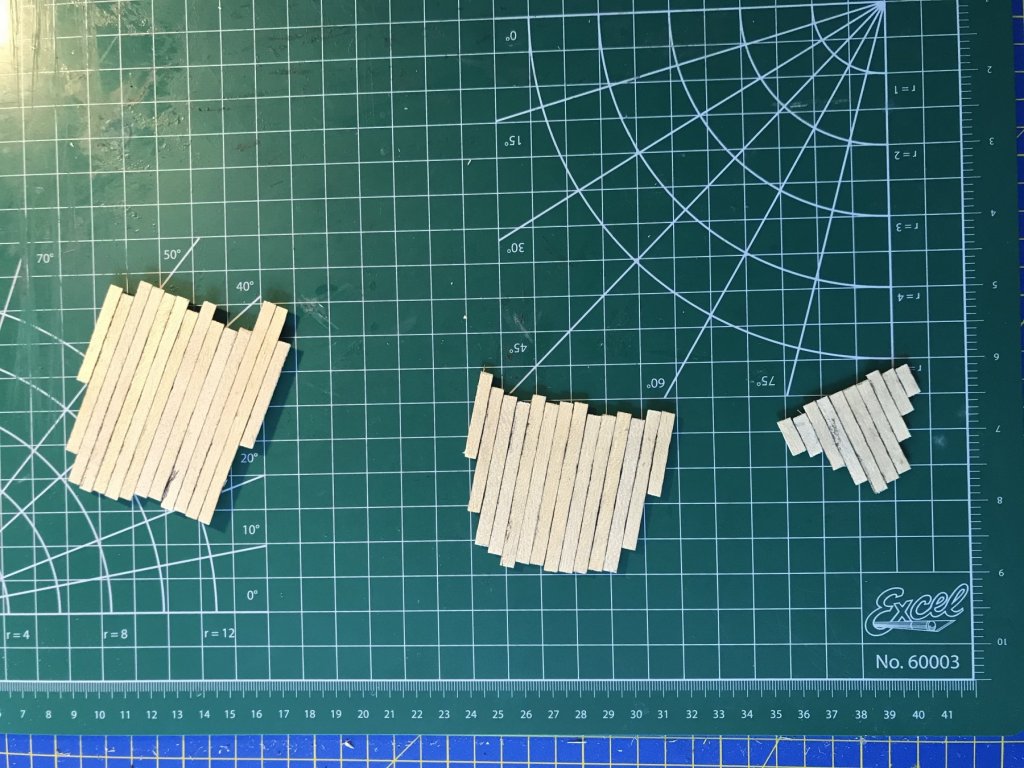
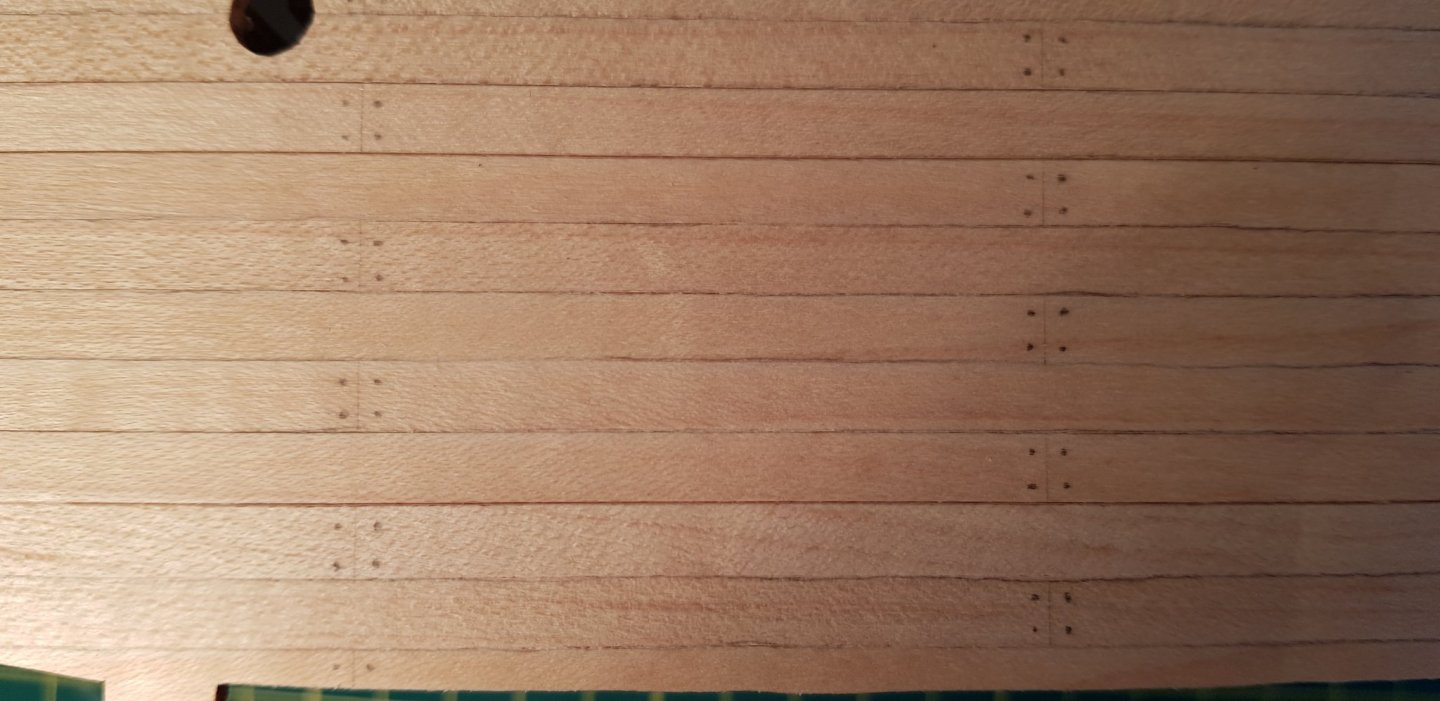
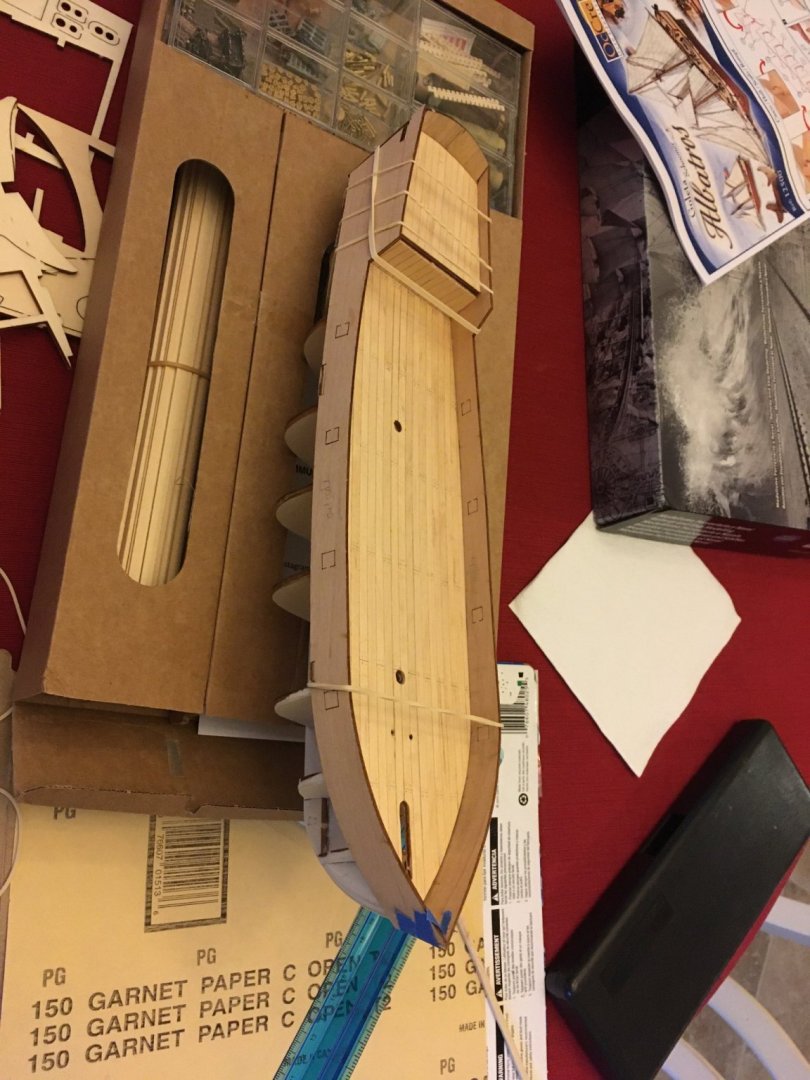
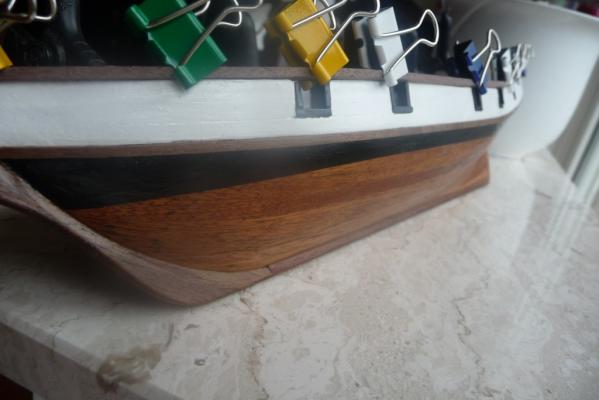
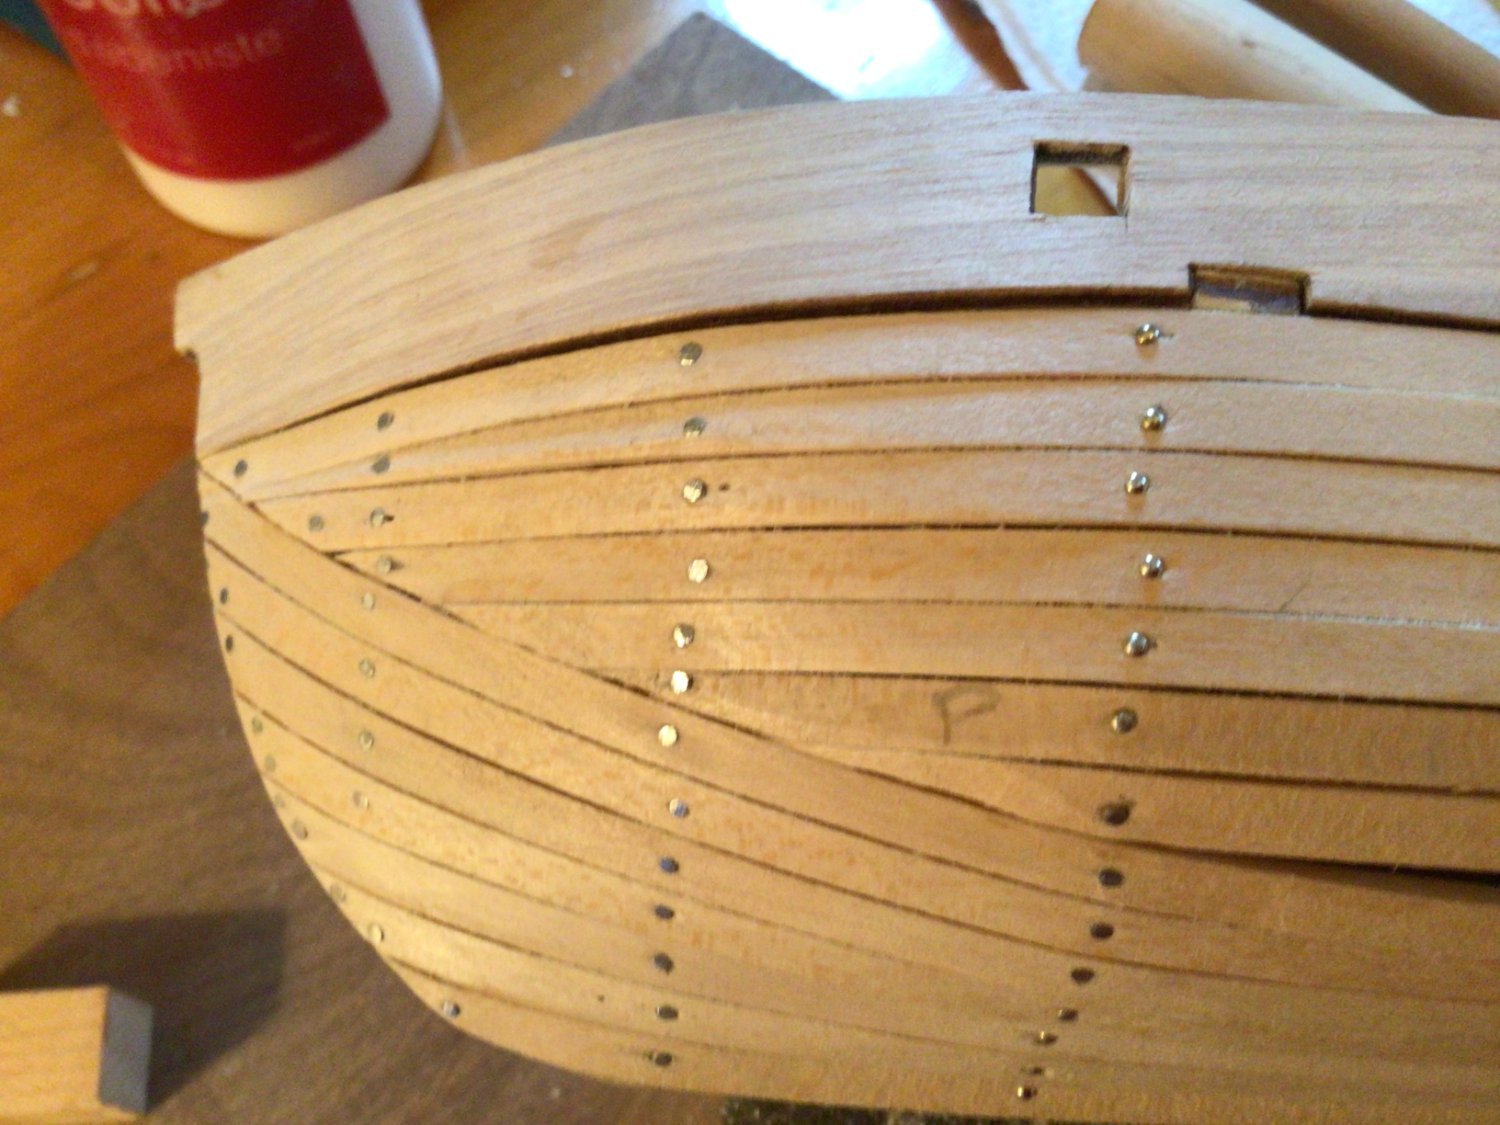
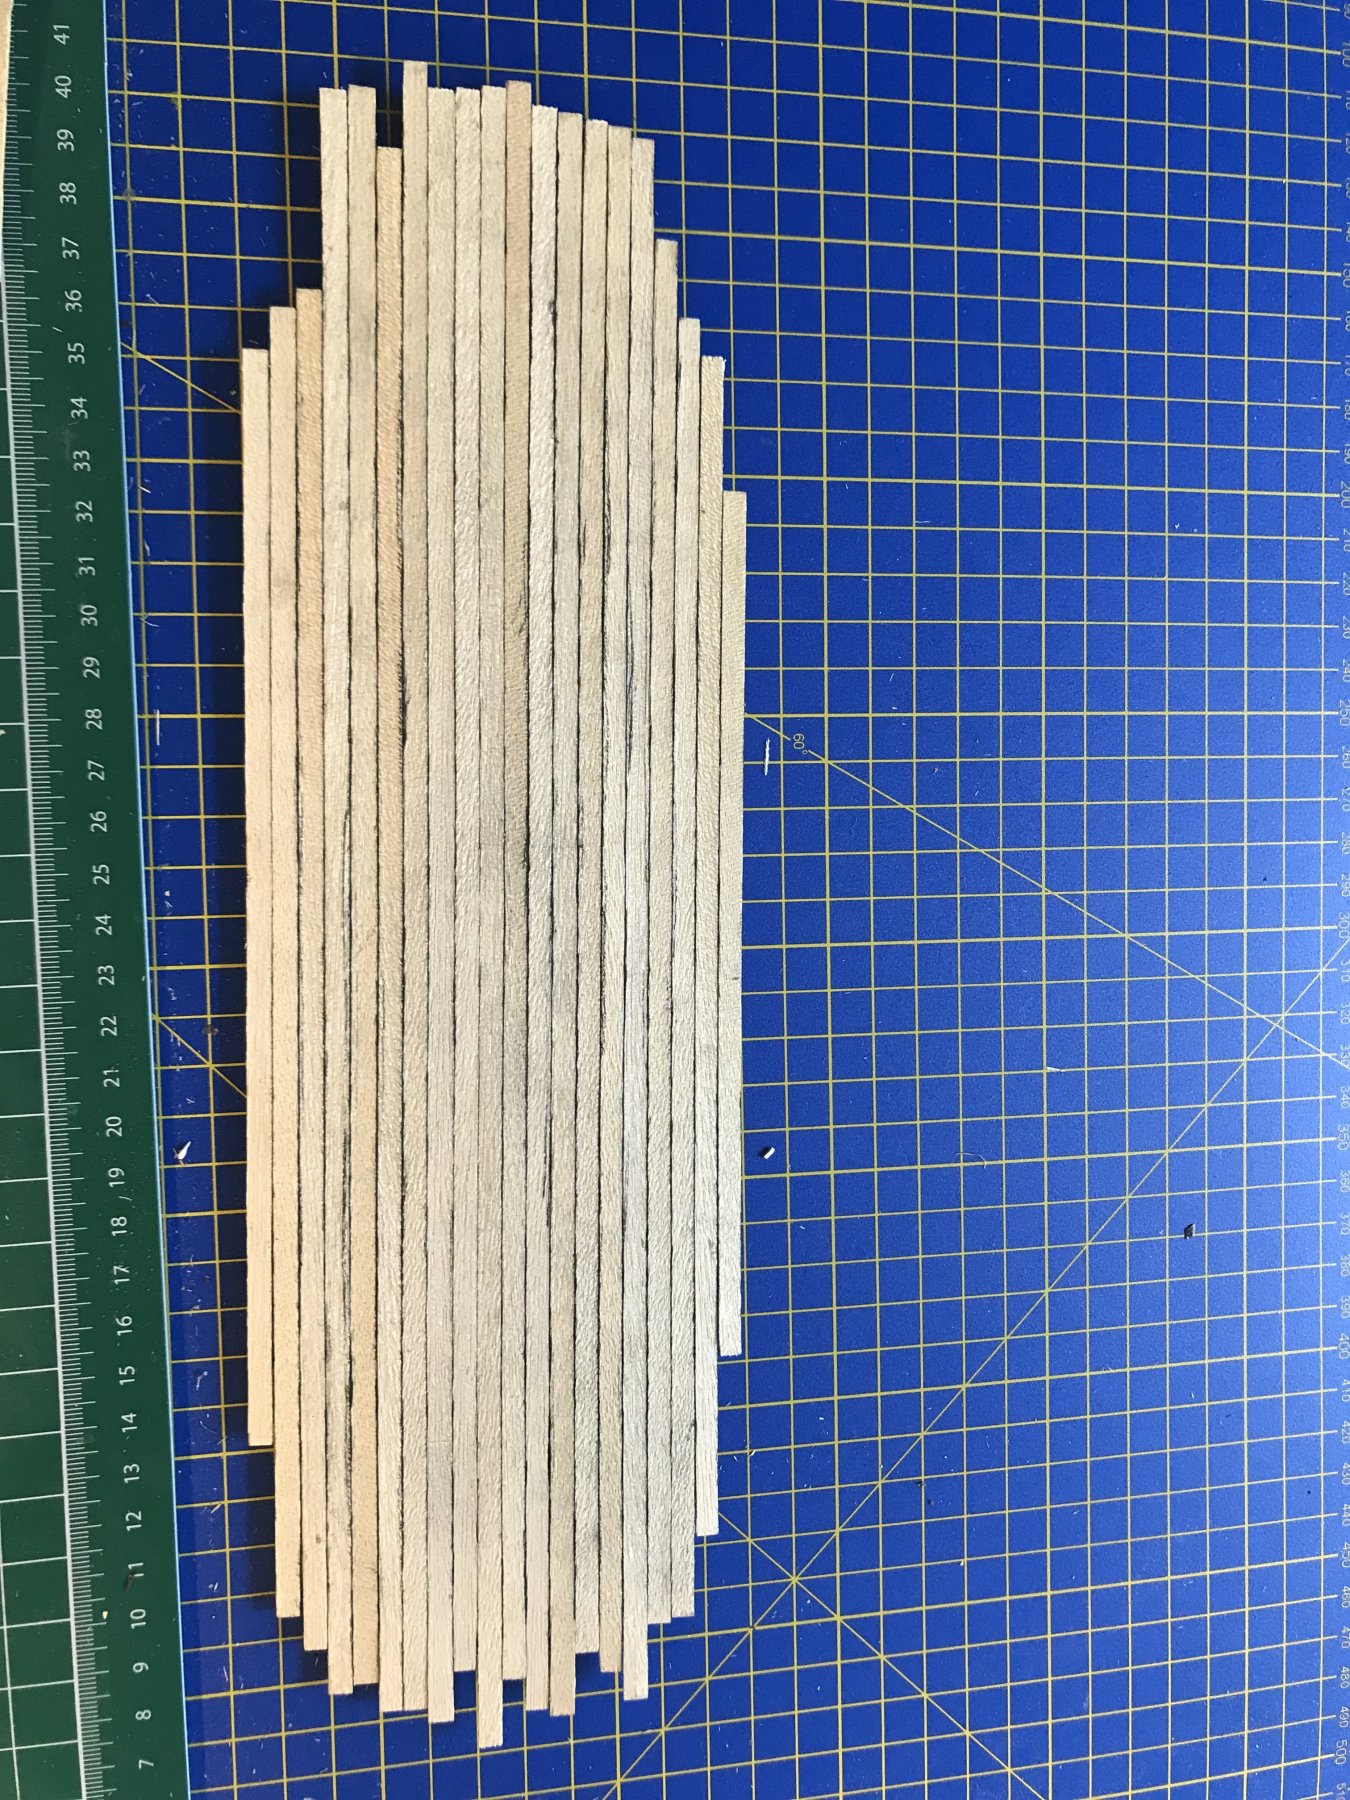
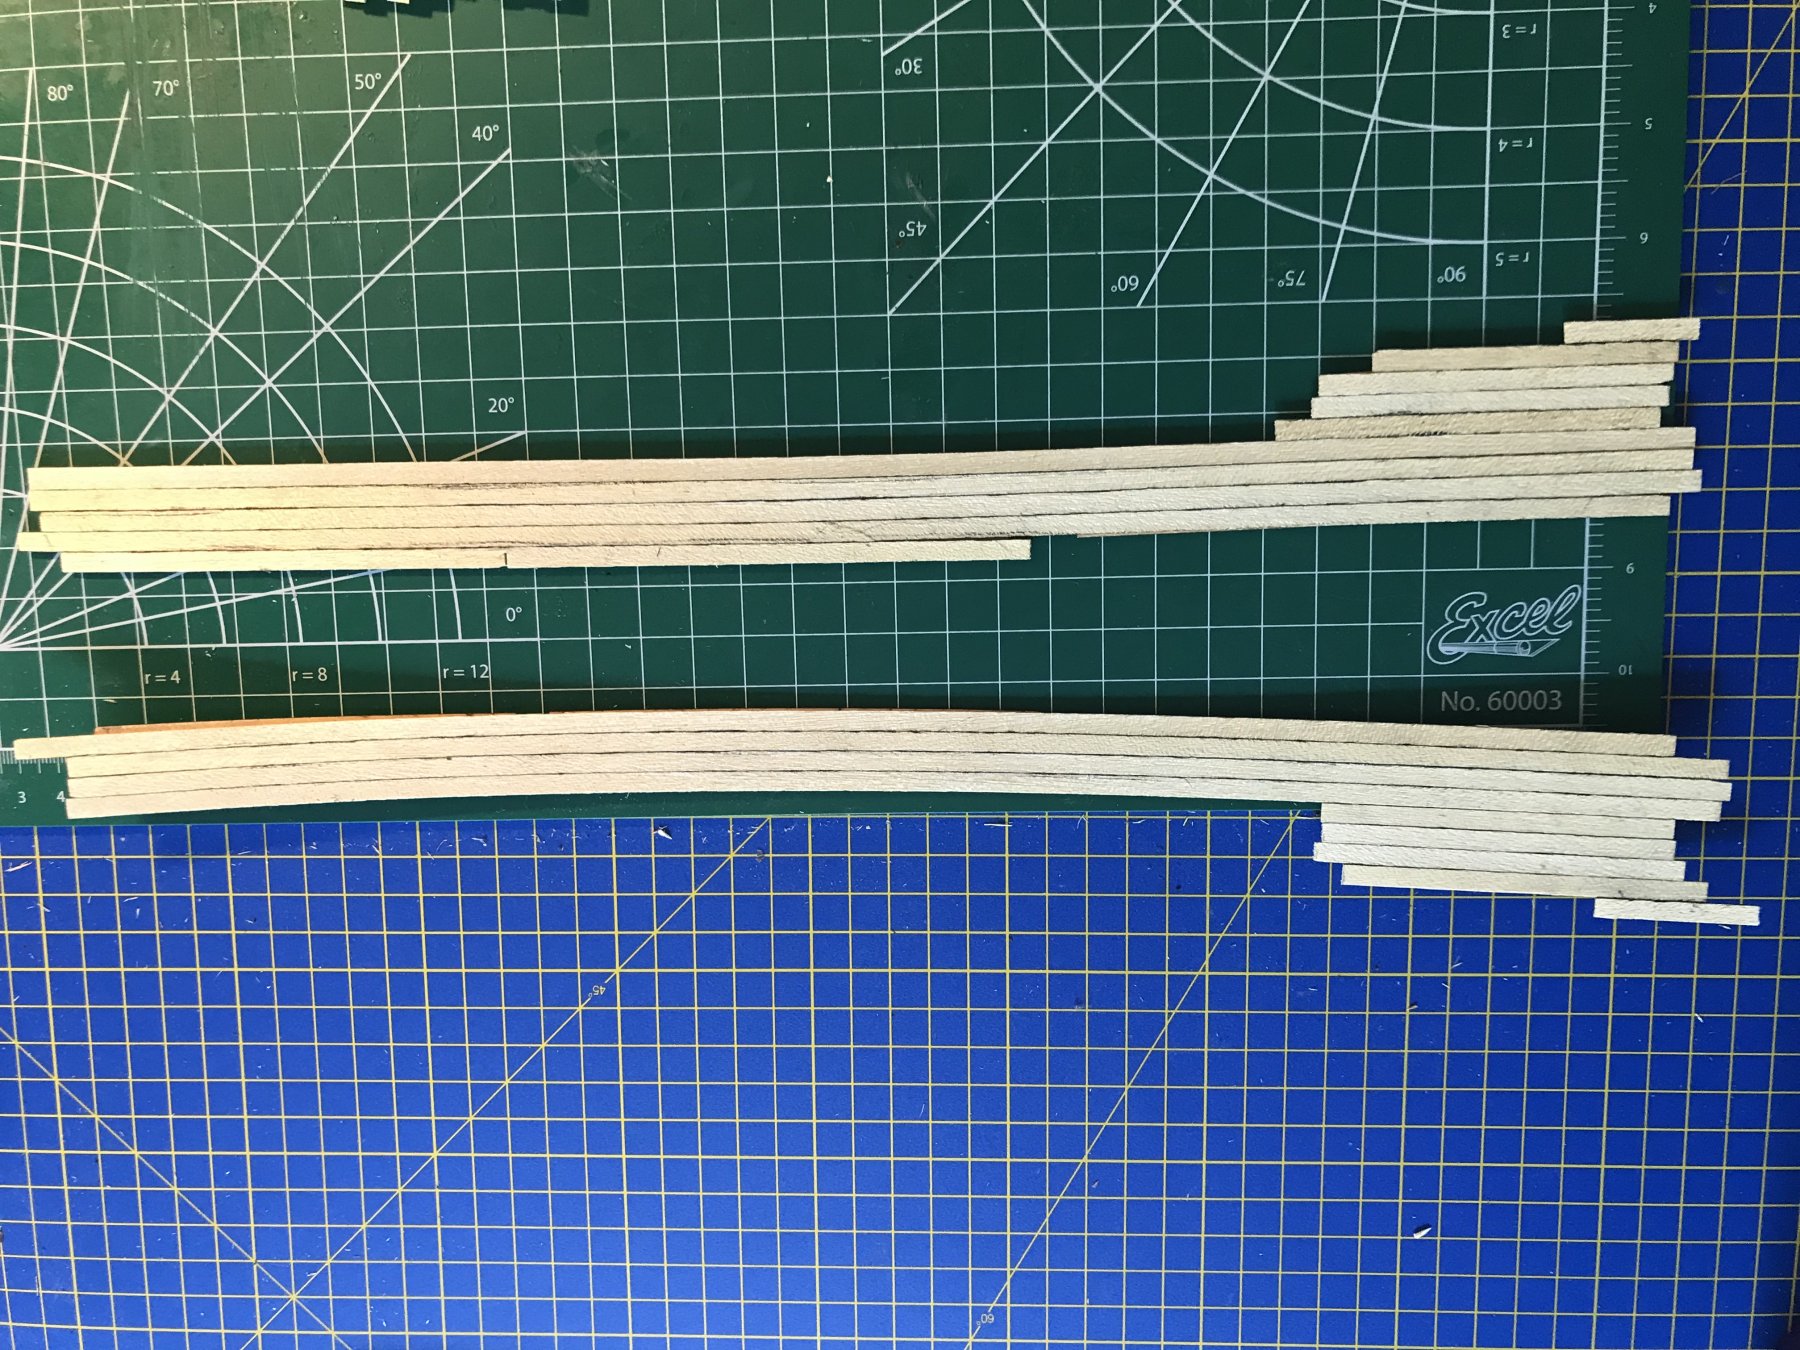
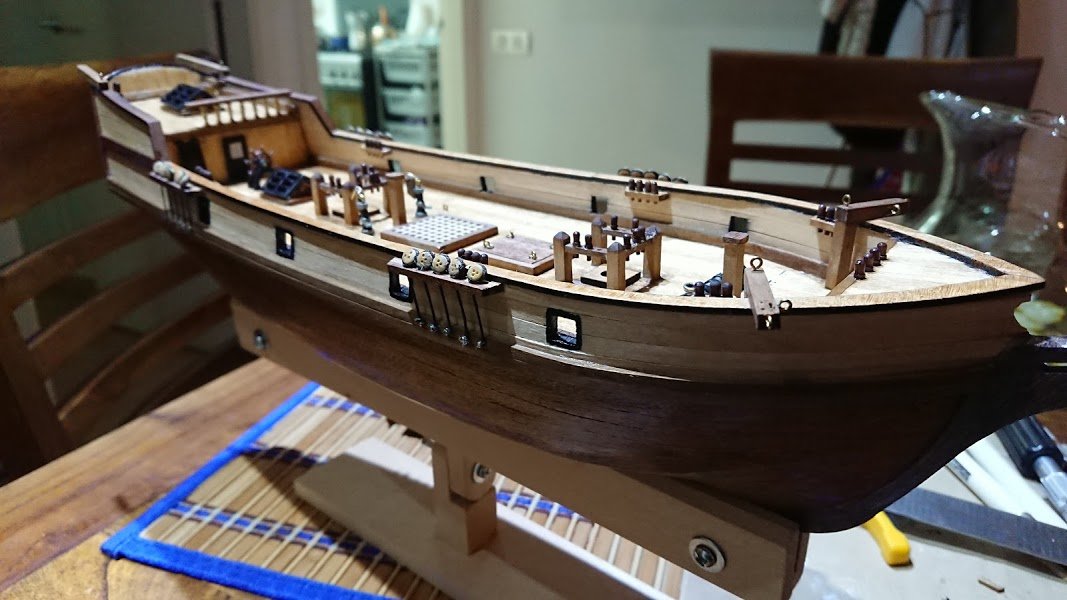
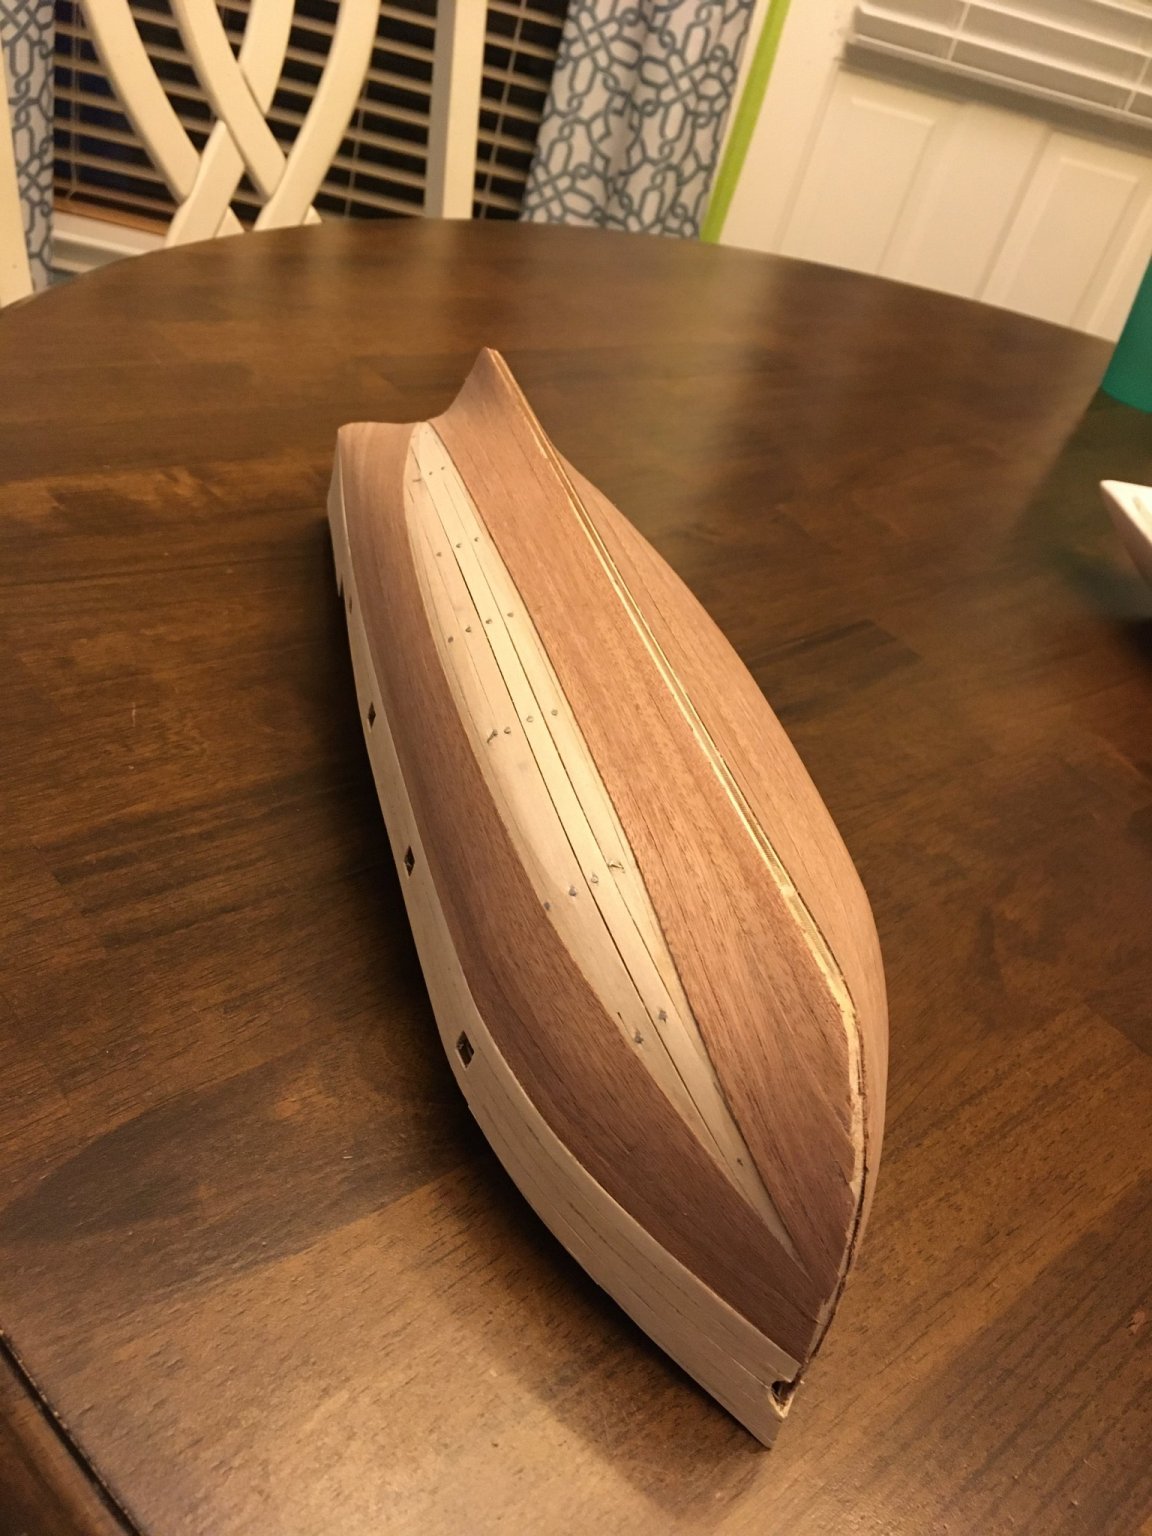
 Slow progress here indeed, but I'm enjoying it very much. The instructions say I should next install all the 'deck furniture', that is items like the windlass and pumps, hatch, etc. I am beginning to stain and paint those bits and pieces. However, I am looking forward to doing the rigging, so have begun making the masts and spars at the same time. As you can see, the photos here are mainly to show the planking and rudder details. I didn't use the secondary planking provided with the kit. Those mahogany strips were 5mm wide. Since we're dealing with a scale of 1:100, that would represent planks about 20 inches wide! I didn't like that idea, so I went to my stash of cherry-wood strips and picked the narrowest, which were 1/8" wide and .5mm thick. For the finish I brushed on two diluted coats of polyurethane gloss varnish, followed by a final coat of diluted satin, rubbing down between each coat. I much prefer to use these products thinned down. Granted that means more coats, but I'm not in a rush.
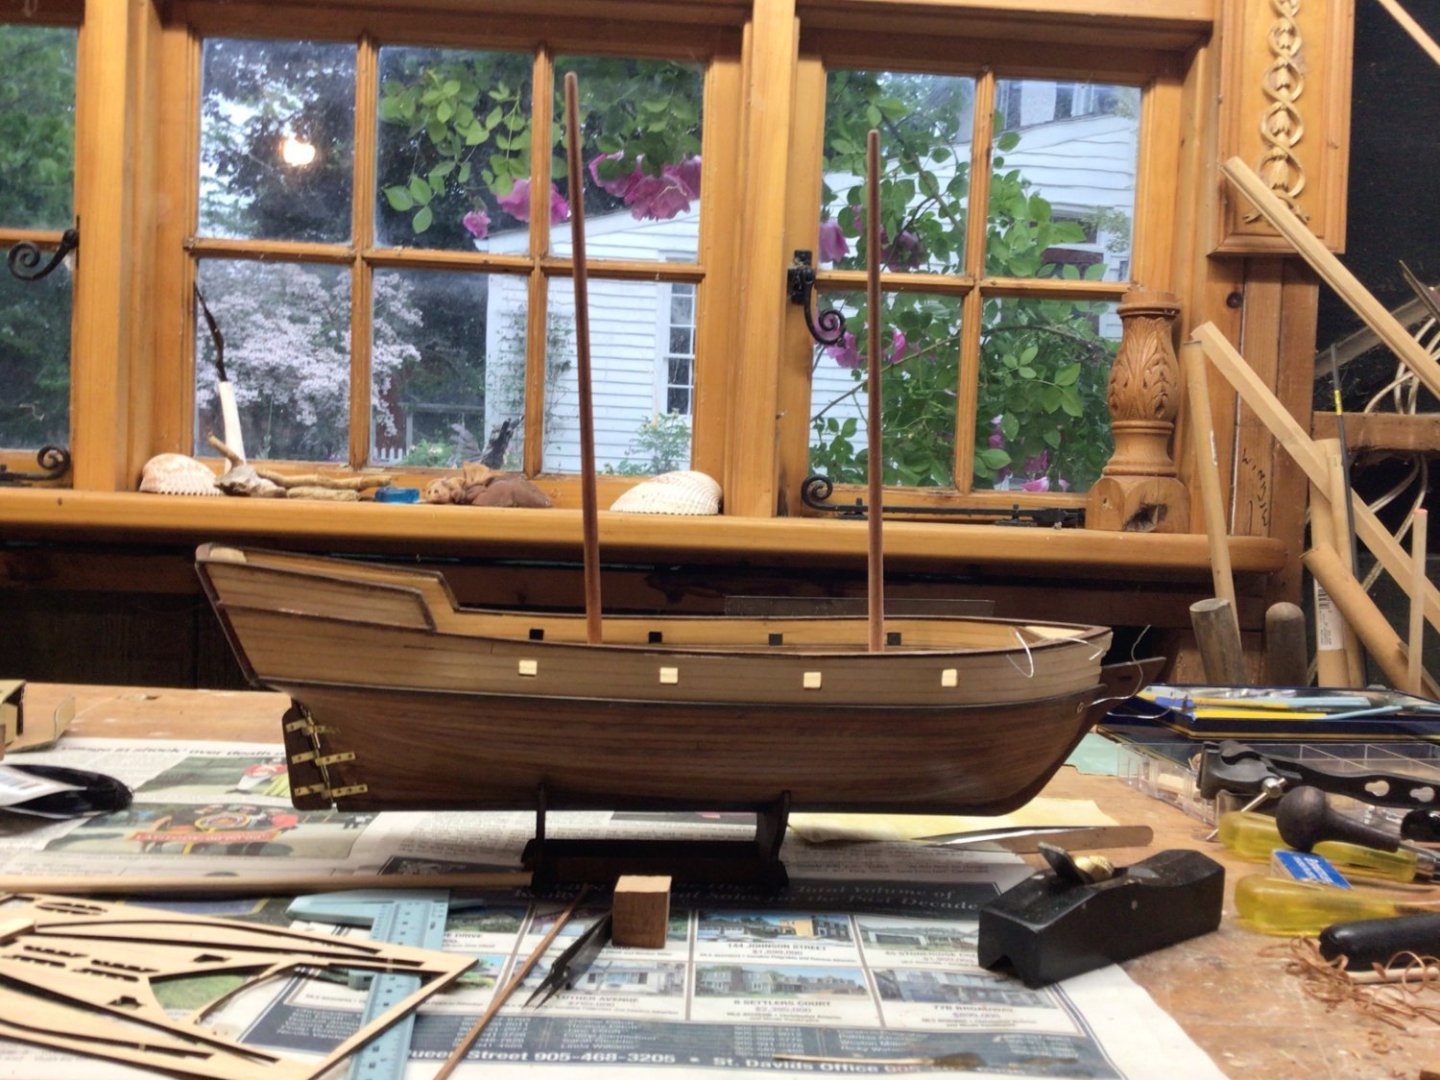

-
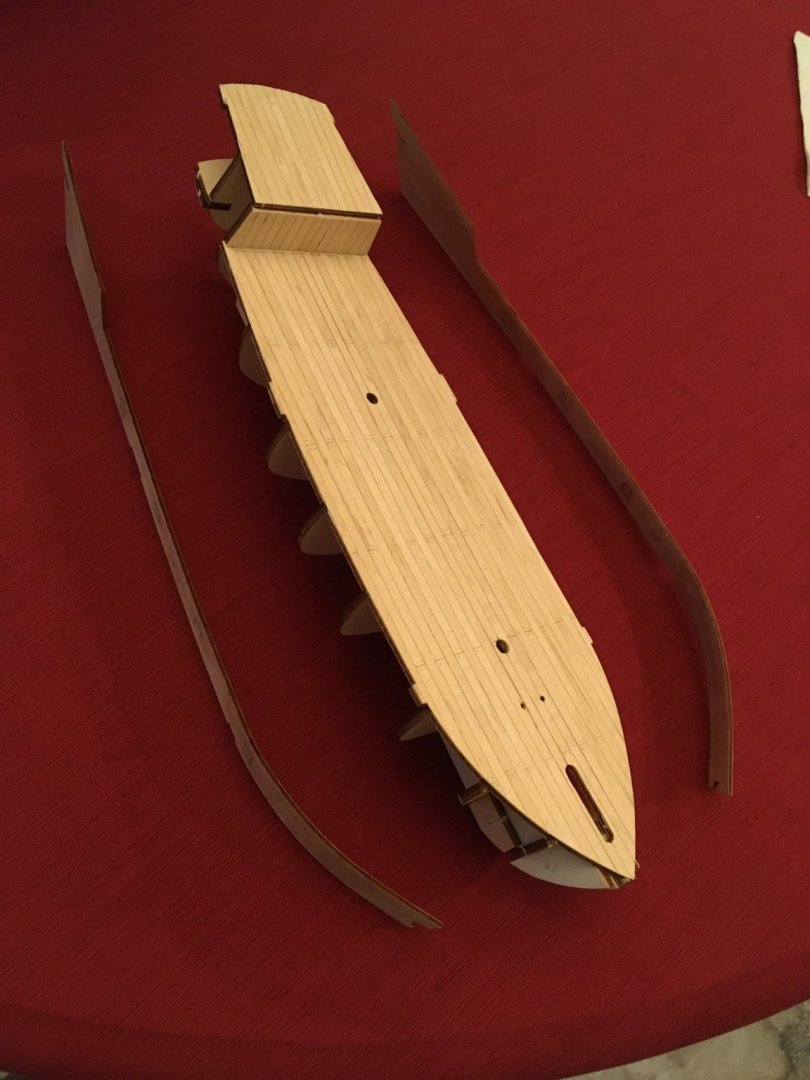
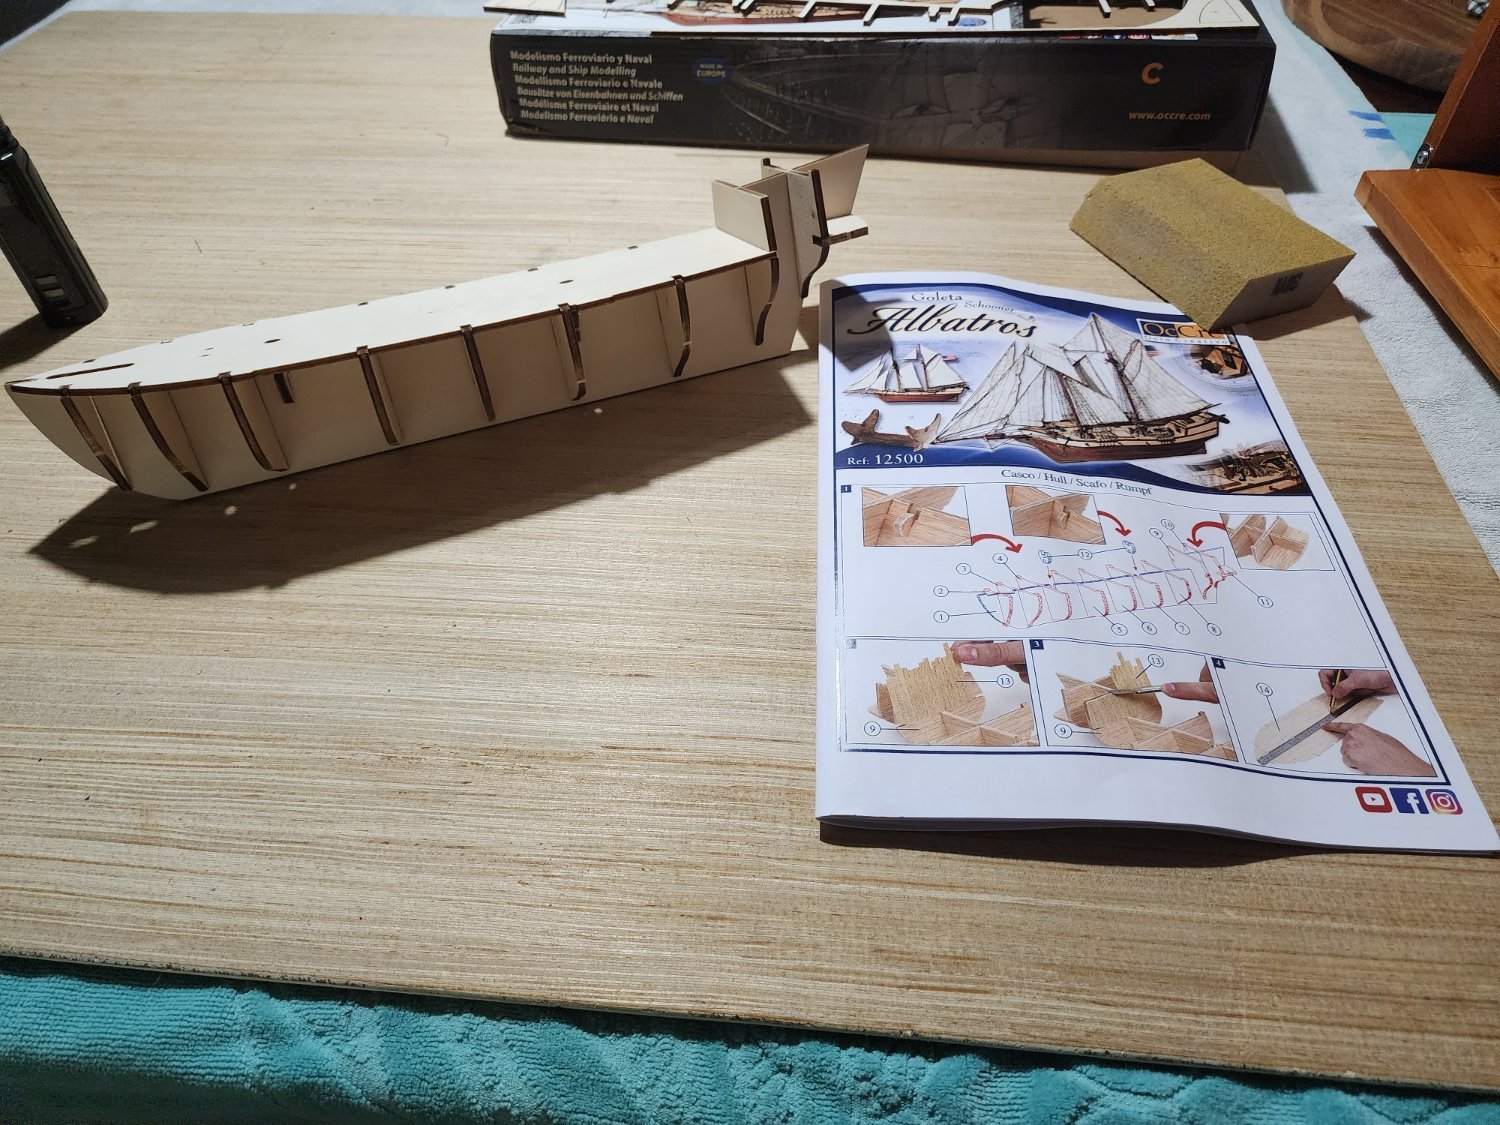
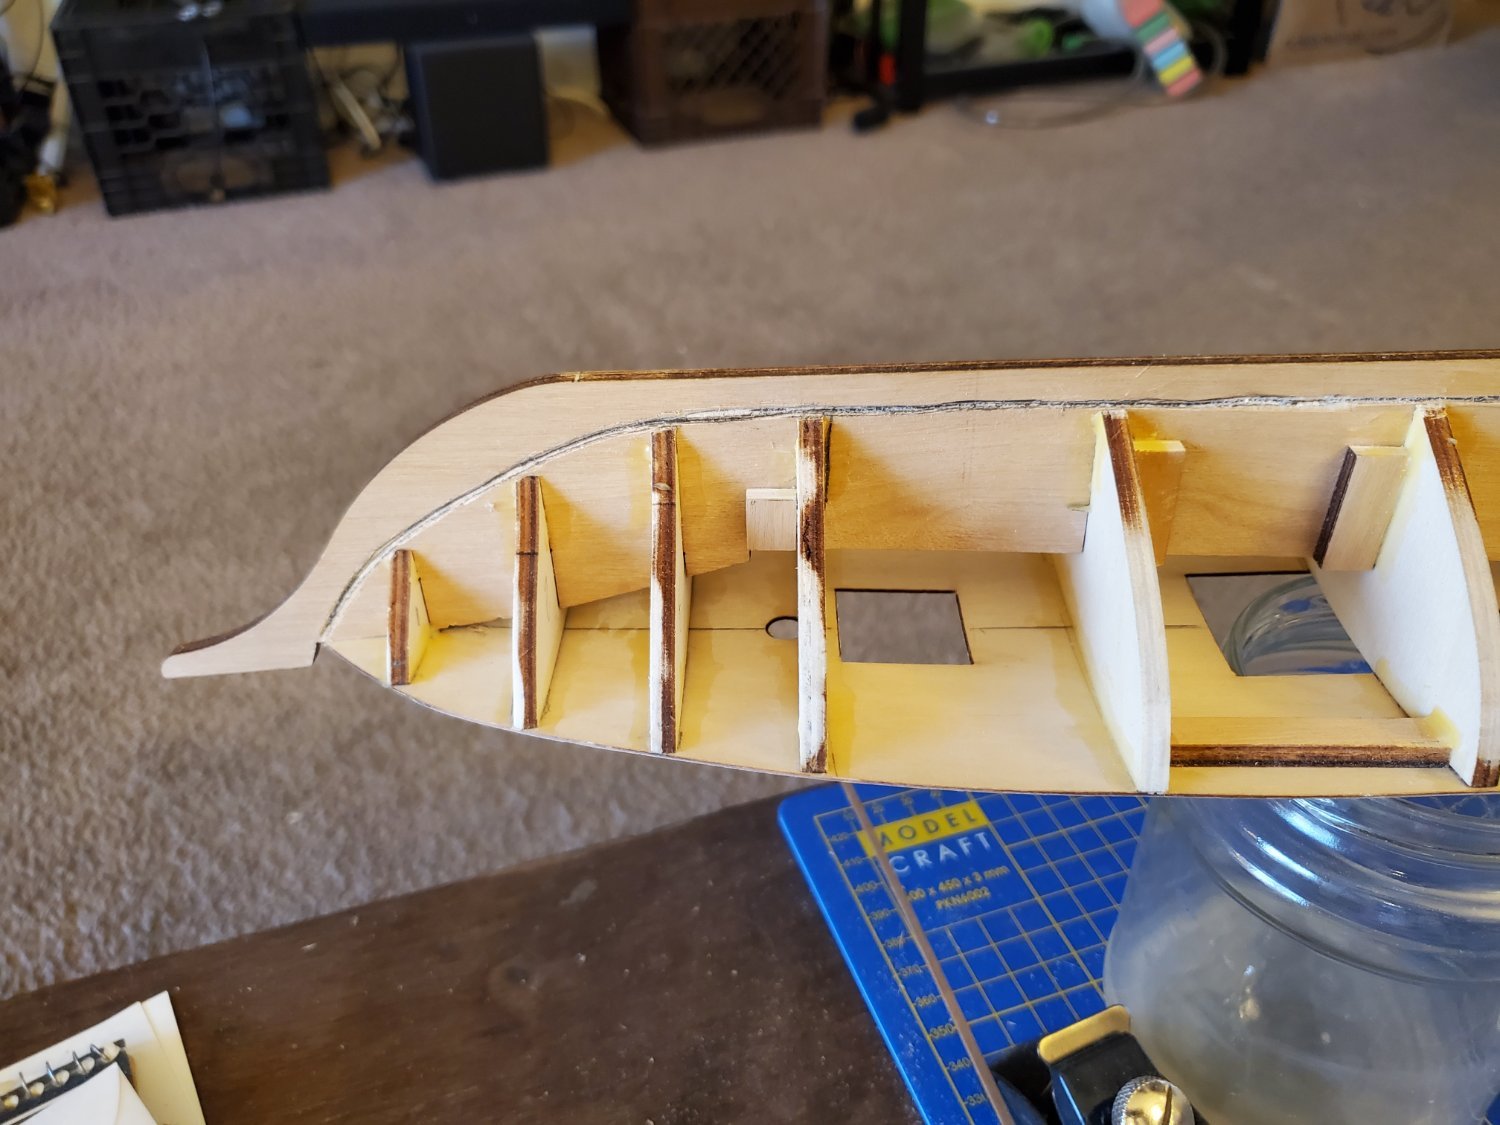
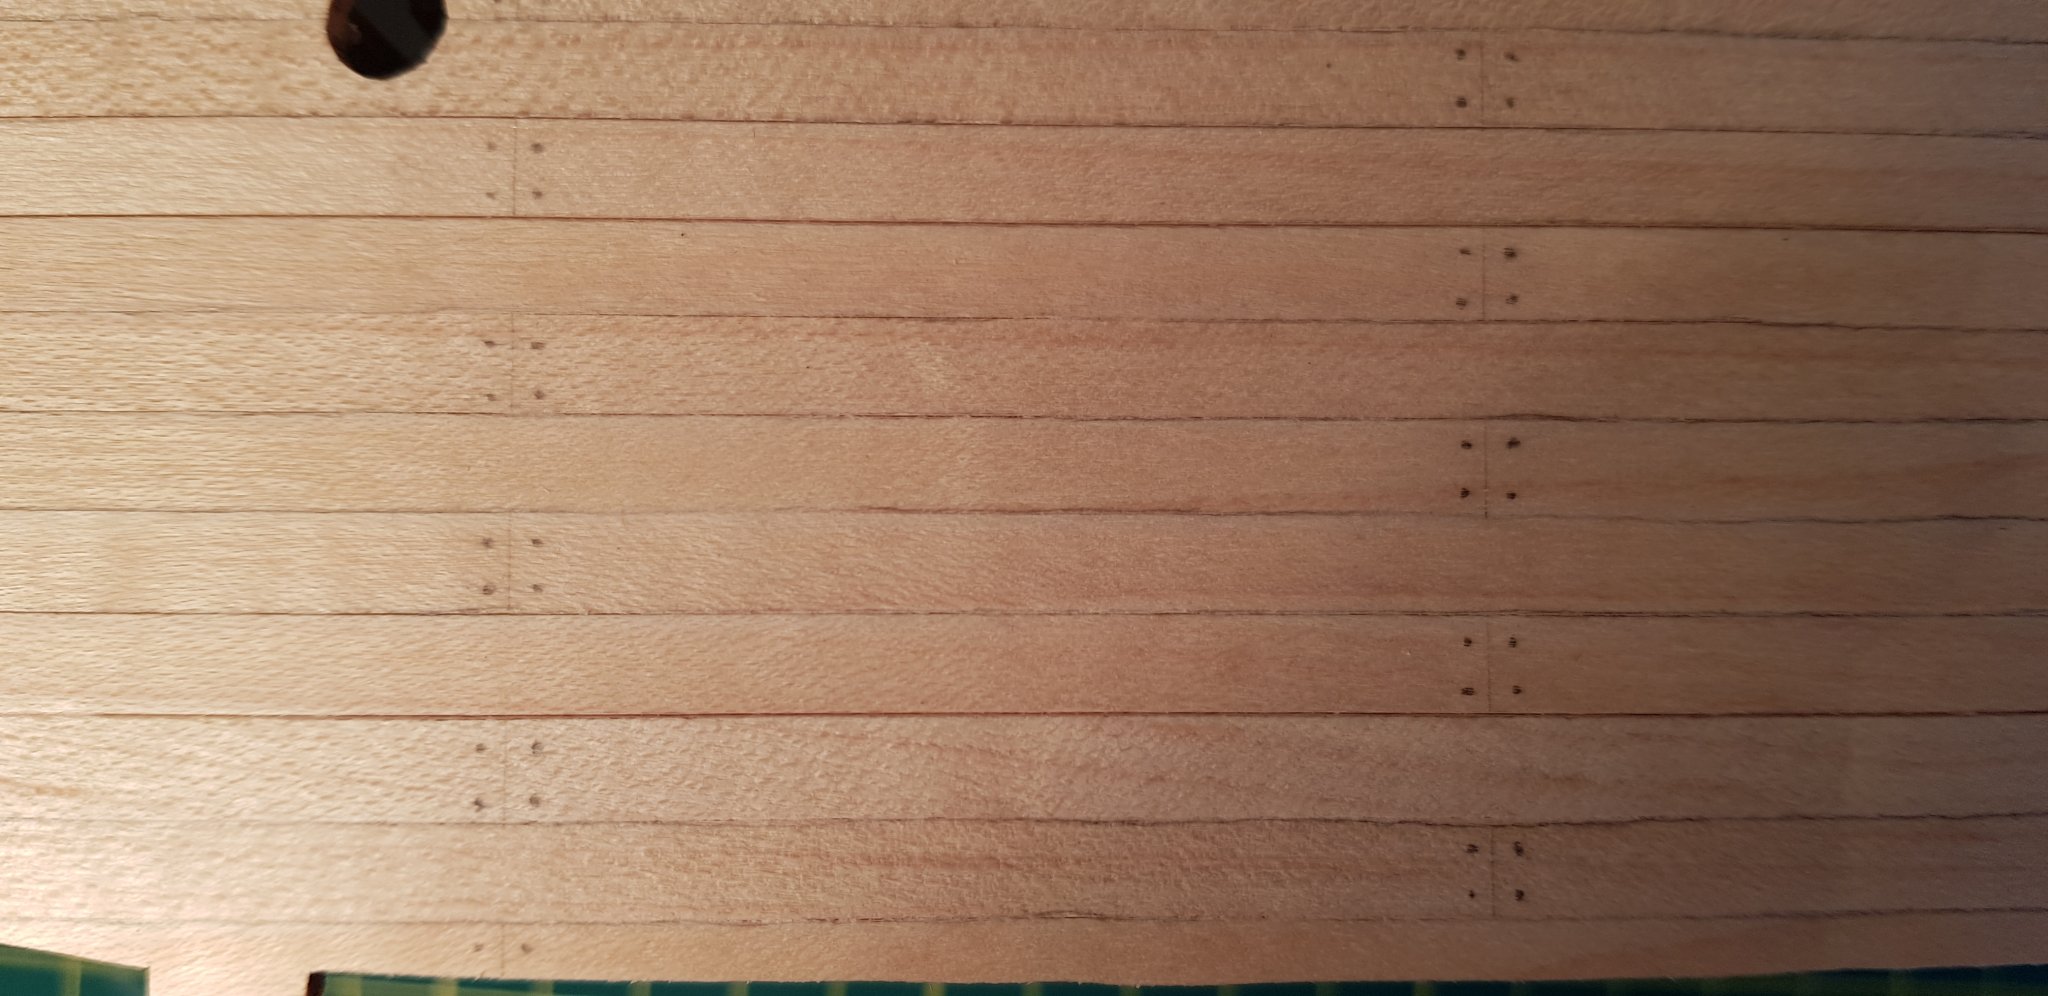
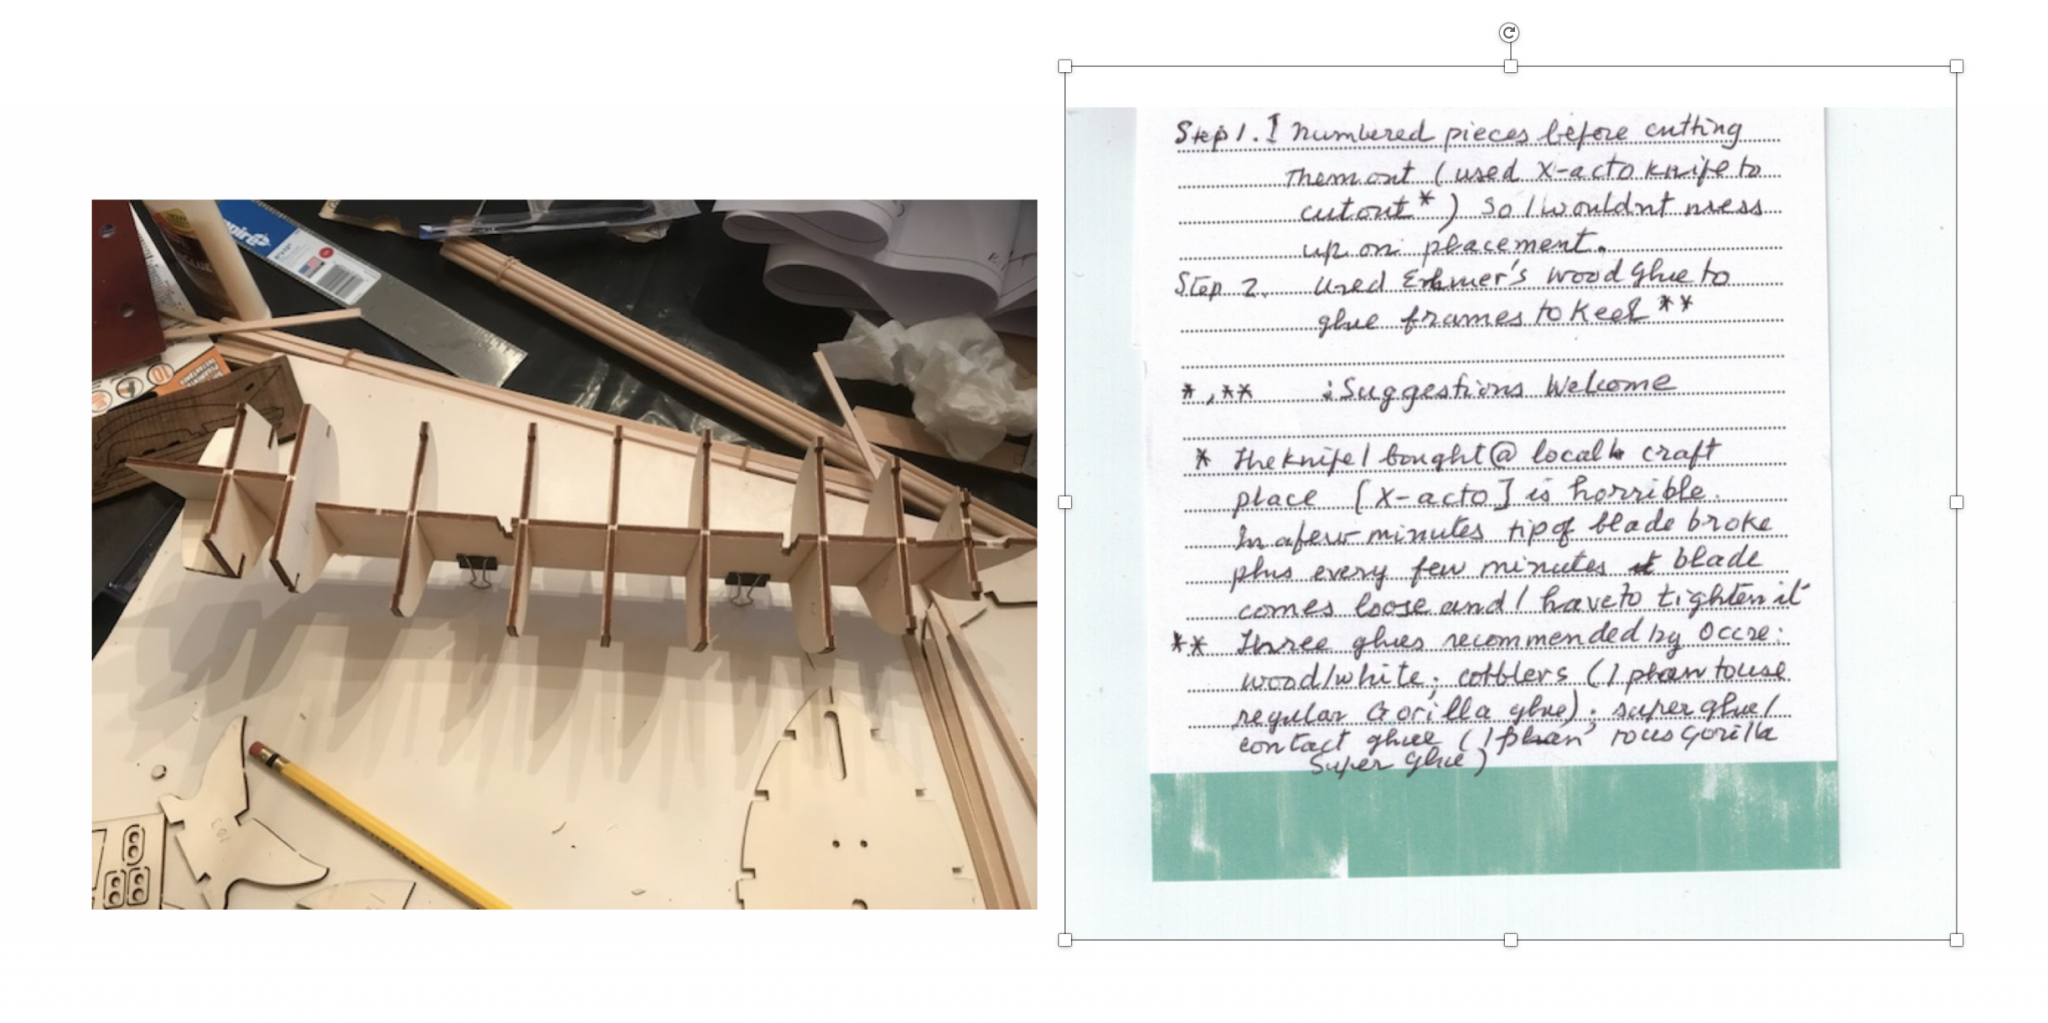
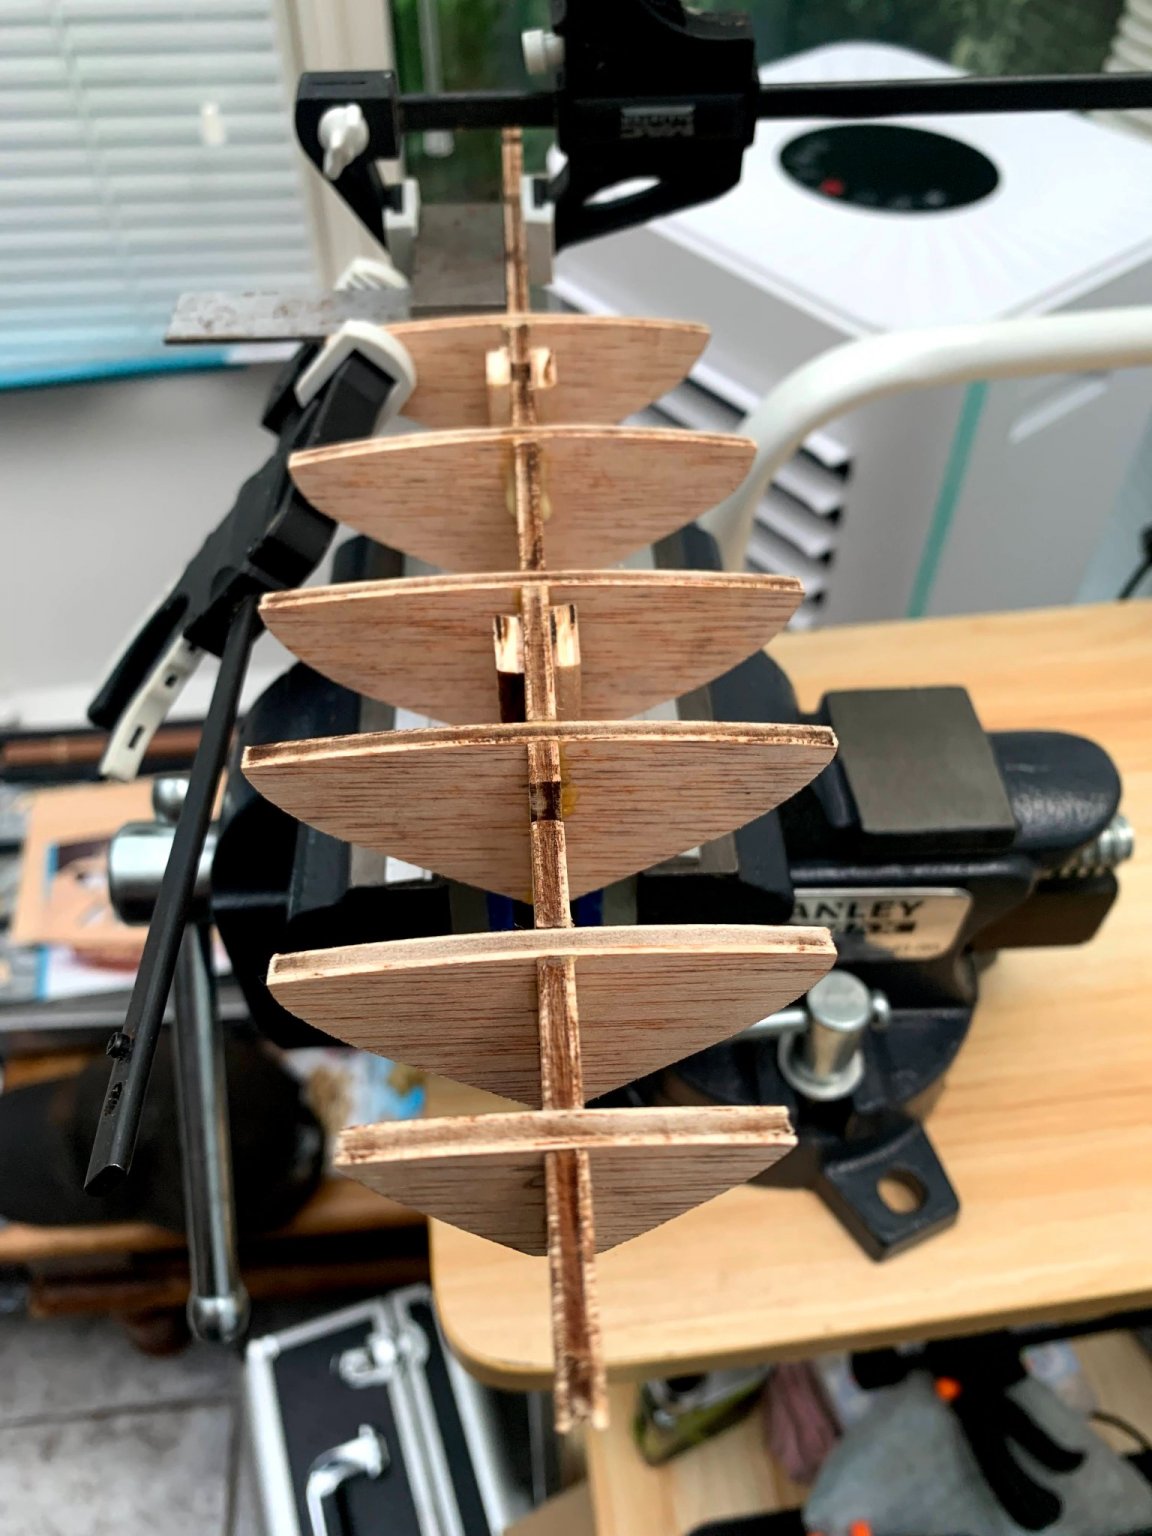
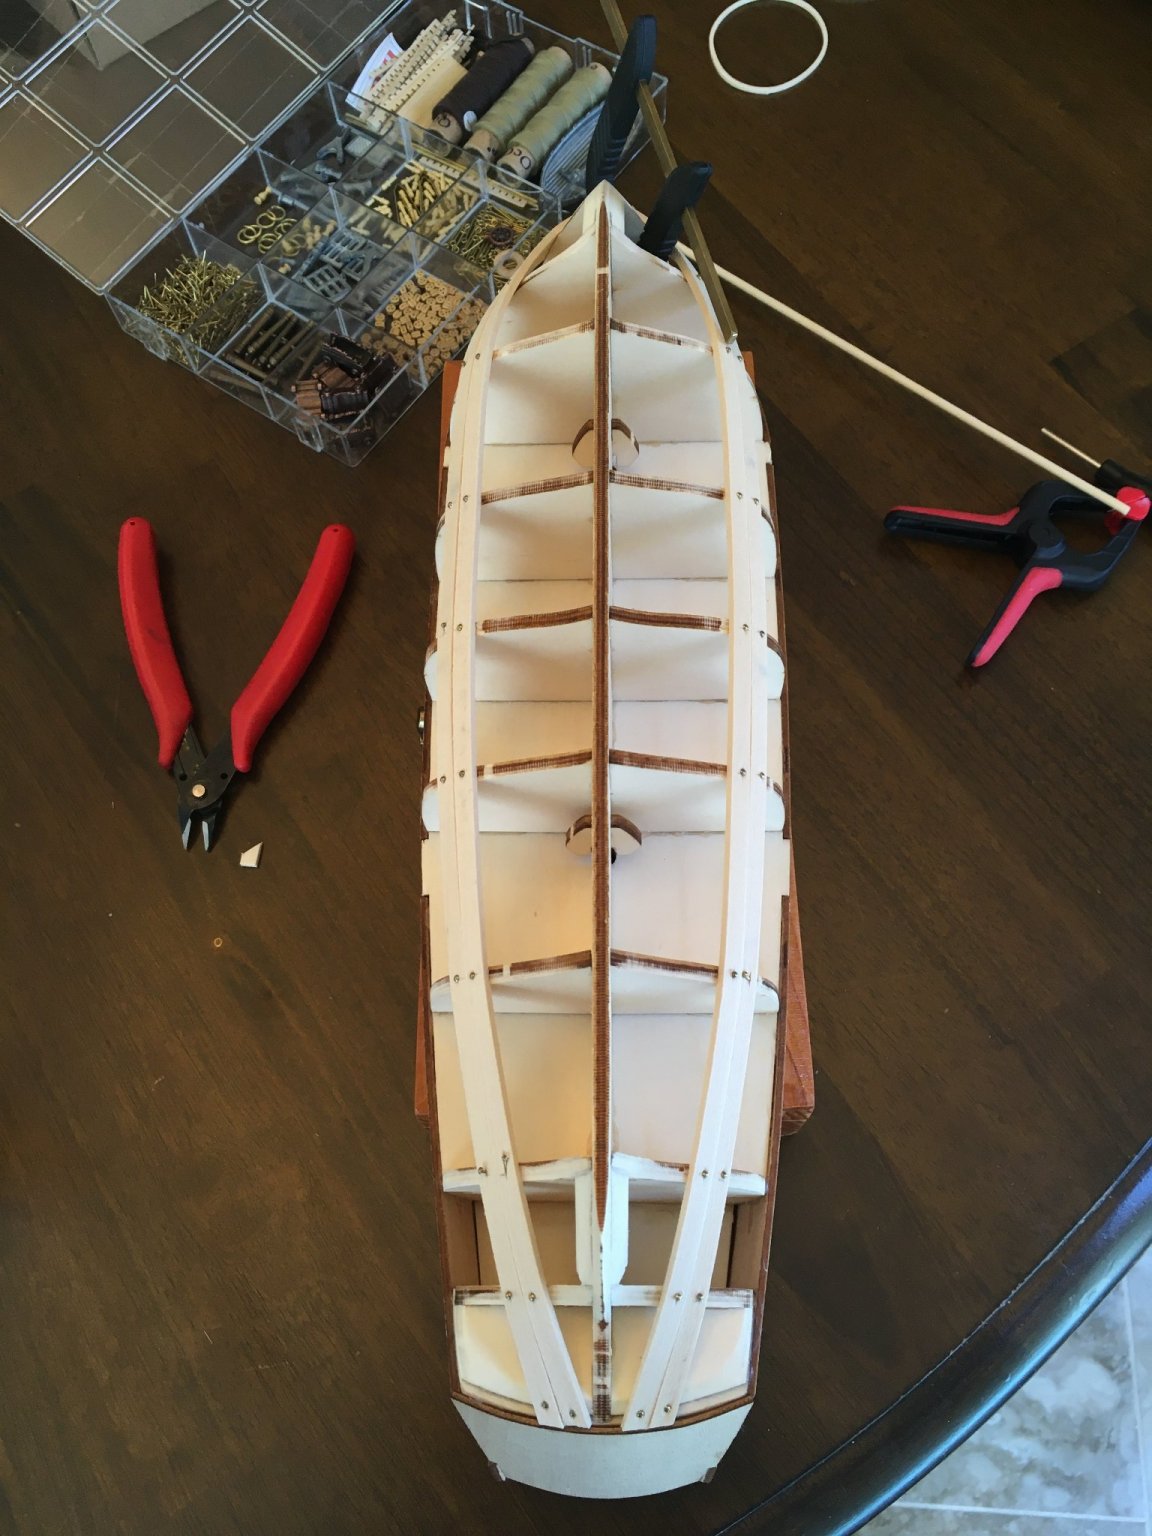
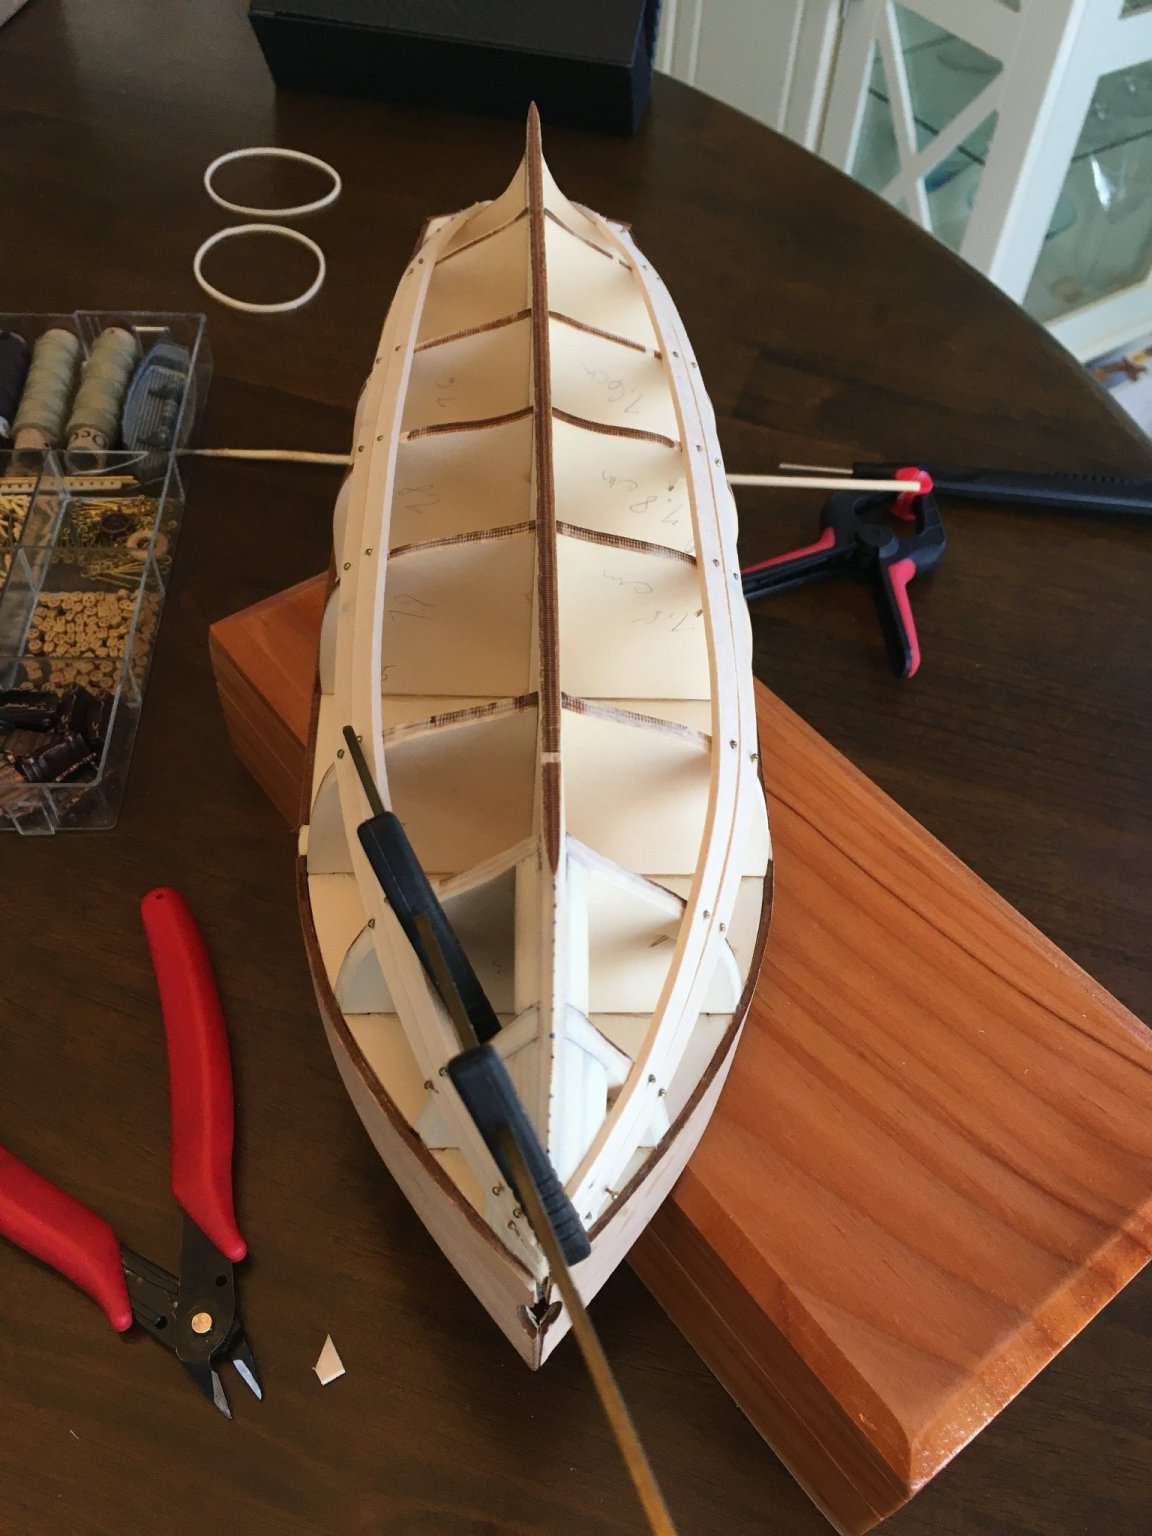
 Here we go again, beginning the next model in a journey toward learning this wonderful craft. I’m also continuing the trend of modeling something a little bit bigger with every new entry. The Albatros by OcCre. An American schooner which I do not believe is meant to directly represent any specific, actual ship. Still, a good deal larger than the smack I just finished before Christmas. The first step was to open the packaging and cut some parts free. I have to admit that I was a bit disappointed by the plywood. Maybe I was just spoiled by the previous kits but I’d gotten used to the solid wood. That didn’t stop me from plowing ahead and directly into my first challenge of the build. The central spine of the ship was curved, rather severely by my inexpert estimation. So I looked across other build logs here and found out a couple of things. This isn’t an uncommon occurrence, and the most recommended correction is to use a jig of some type to hold the spine straight. I decided to take a different approach. I glued the first few frames in as squarely as I could and then proceeded to add additional bracing between them. Here, I have the deck temporarily in place to hold things square while the glue on those braces dry. Doing it this way was a slow, meticulous process but resulted in what I think was a very satisfactory result. They may not be perfectly even, but everything was square and the deck will be flat. The braces will ultimately be hidden anyway. Next came planking of my deck. The instructions recommended drawing lines on the planks every 100 mm. I opted for every 4 inches, which allowed me to divide that 4-inch span into 4 equal parts. Doing that would allow me to get a 3-butt shift pattern of 1-4-2-3. From there I could cut my “planks” into 4-inch lengths, colour the edges with graphite to simulate tar caulking, and start planking away. A little bit of sanding flat and I got my 3 deck pieces ready to go. I’d also skipped the wall where the cabin door will eventually go, so planked that the same way. Which brings me to where I stand now. The next step in the instructions is to glue the main deck in place, but I’m considering staining it first. The big decision there will be to use the “oak” or the “pine” stain. I’m not sure which would have been the more typical wood to use, so I’ll probably end up staining a few scraps to see which I like better before committing to the actual piece. Im excited to have a ship to work on again and I’m ready to jump into this next adventure.


-
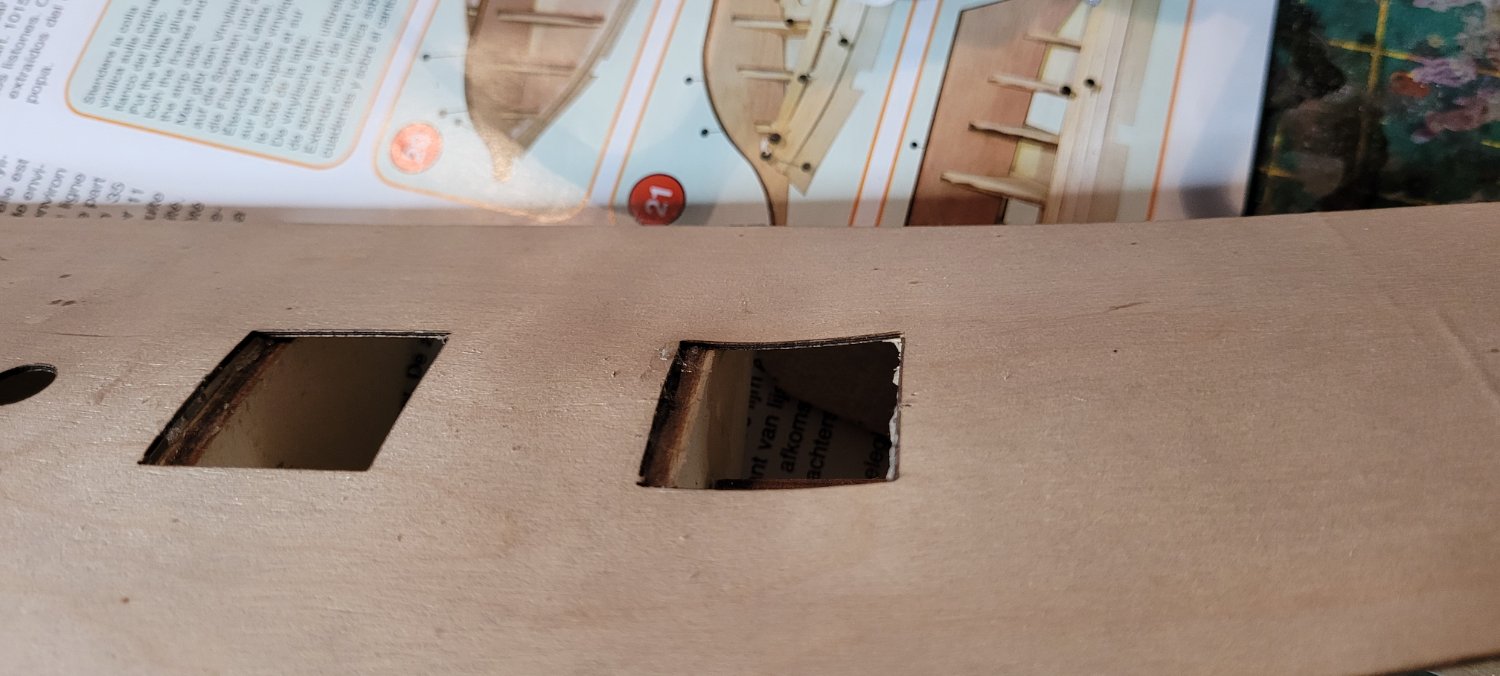
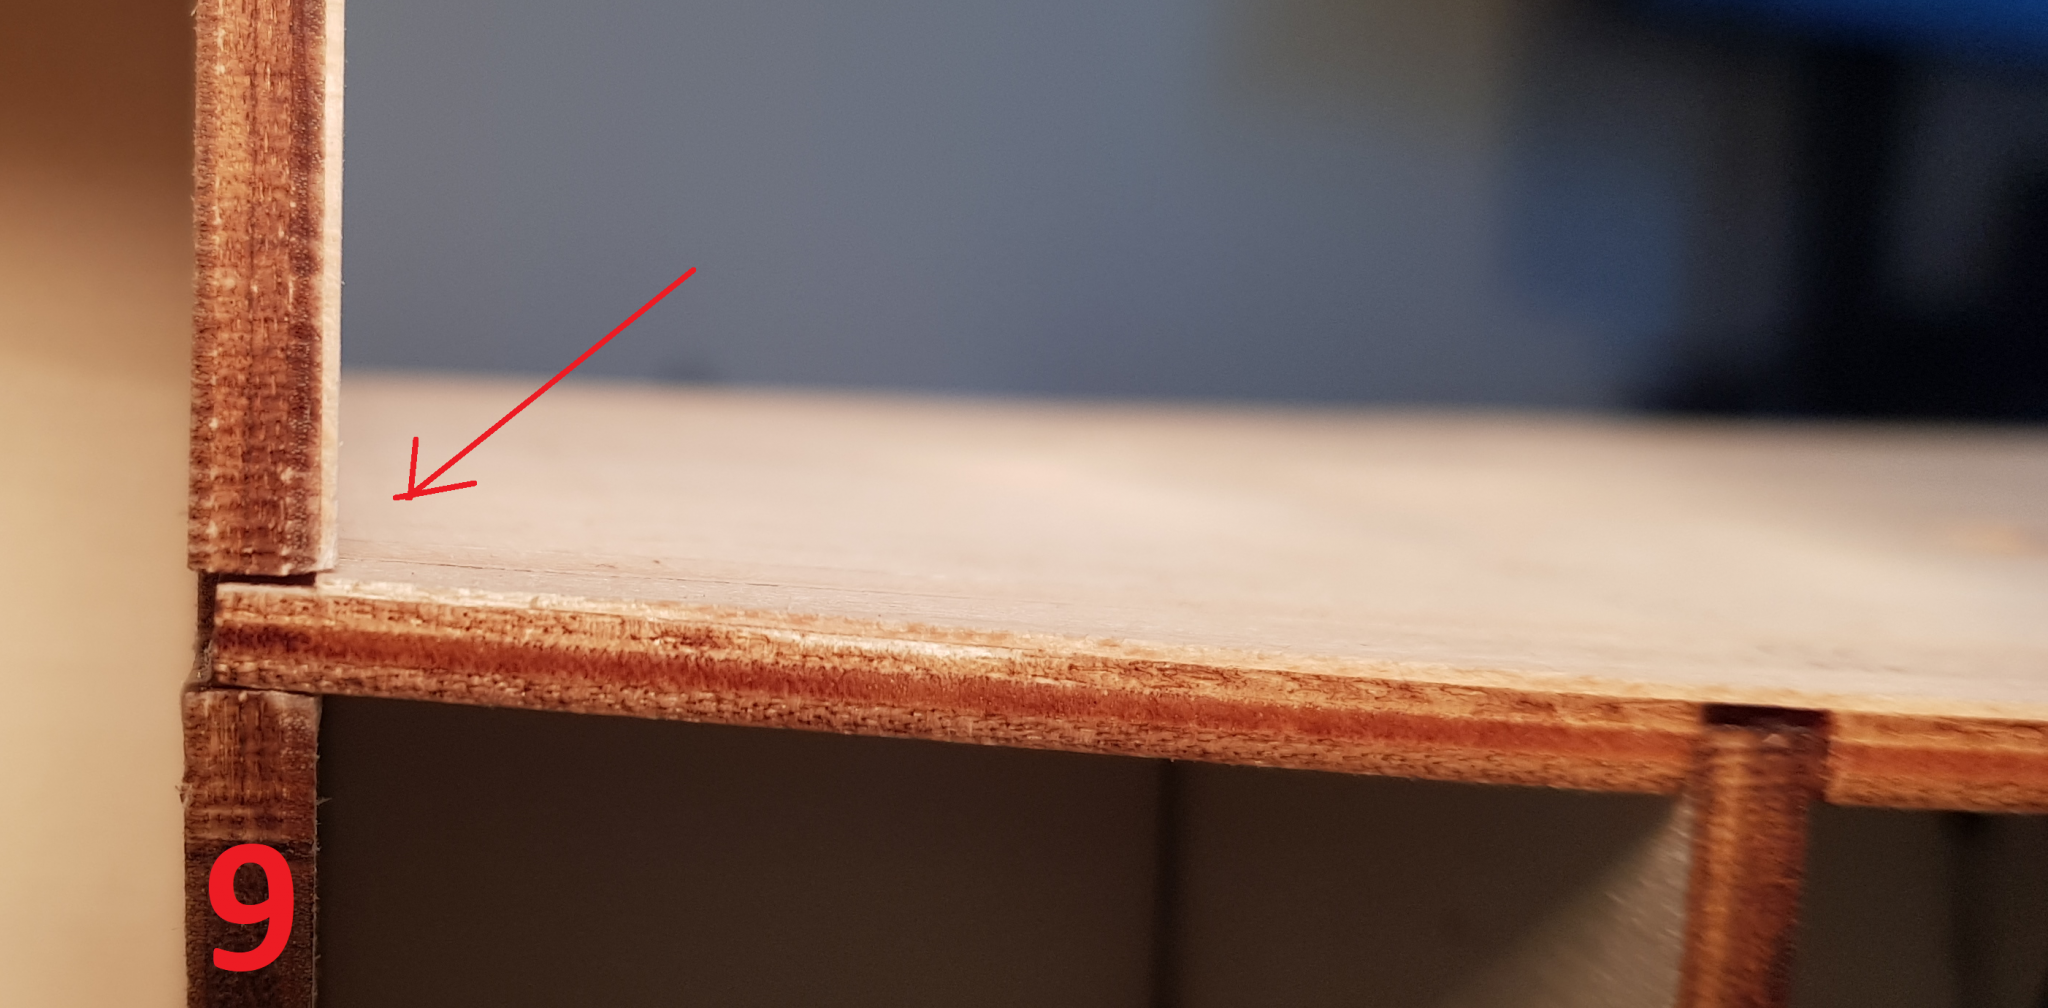
 ...and it certainly looks like it! I started this quite some time ago, over the inbetween years I picked up some tools and equipment at car boot sales thinking I would get back to it sometime and after finding this forum a couple of weeks ago, decided that it was time. This is the first wooden ship I've tried. I followed the instructions but it is obvious there's more to the planning than I put in at the time. The benefit of a good few years and having the advice on sites like this would have helped, but you have to start somewhere. I've been looking at the other build logs and can see that it's not just me though, particular thanks to Rach10199 for her posts, which are doing a lot to boost my confidence and overcome my initial reluctance to have a go again. So here we go. Good news that I found everything and moved it inside from the garage. After doing a review, there are some things to fix, some I think can be worked around and some I need advice on. it would have been easier to sand the bulkheads prior to assembly in preparation for planking, but this is easily overcome. I also remembering struggling to glue the deck down in one session (probably the reason for putting it aside). Patience would have had its reward as it doesn't quite conform to the top profile of the bulkheads, particularly 9 as labelled in instructions. I doubt this will be noticed when finished, but you can see it now. Careful camera angles used throughout this entry! I'm also going to add some support on the edges of the deck hatch at 9, the curve of the deck in two directions has pushed the edges perpendicular to the bulkhead into a curve. I think a bit of extra support now will save issues later. And now for my request for help. Bulkhead 9 is obviously short (of the bearding line?). I know I have significant profiling of the edge of the bulkheads to do before planking, but should I do anything else? It is correctly positioned, and is really well attached. If I had known at the time... Thanks for the warm welcome, so far so good (in that it's on the table again!) and thanks for looking. Charlie

-
 I've been working on this kit for I while now, but I haven't gotten around to starting a log yet. This is my first wooden kit, and I'm pretty pleased with how it's looking so far. The one thing I'm still uncertain about is the sails, because the weaving is way too large.
-
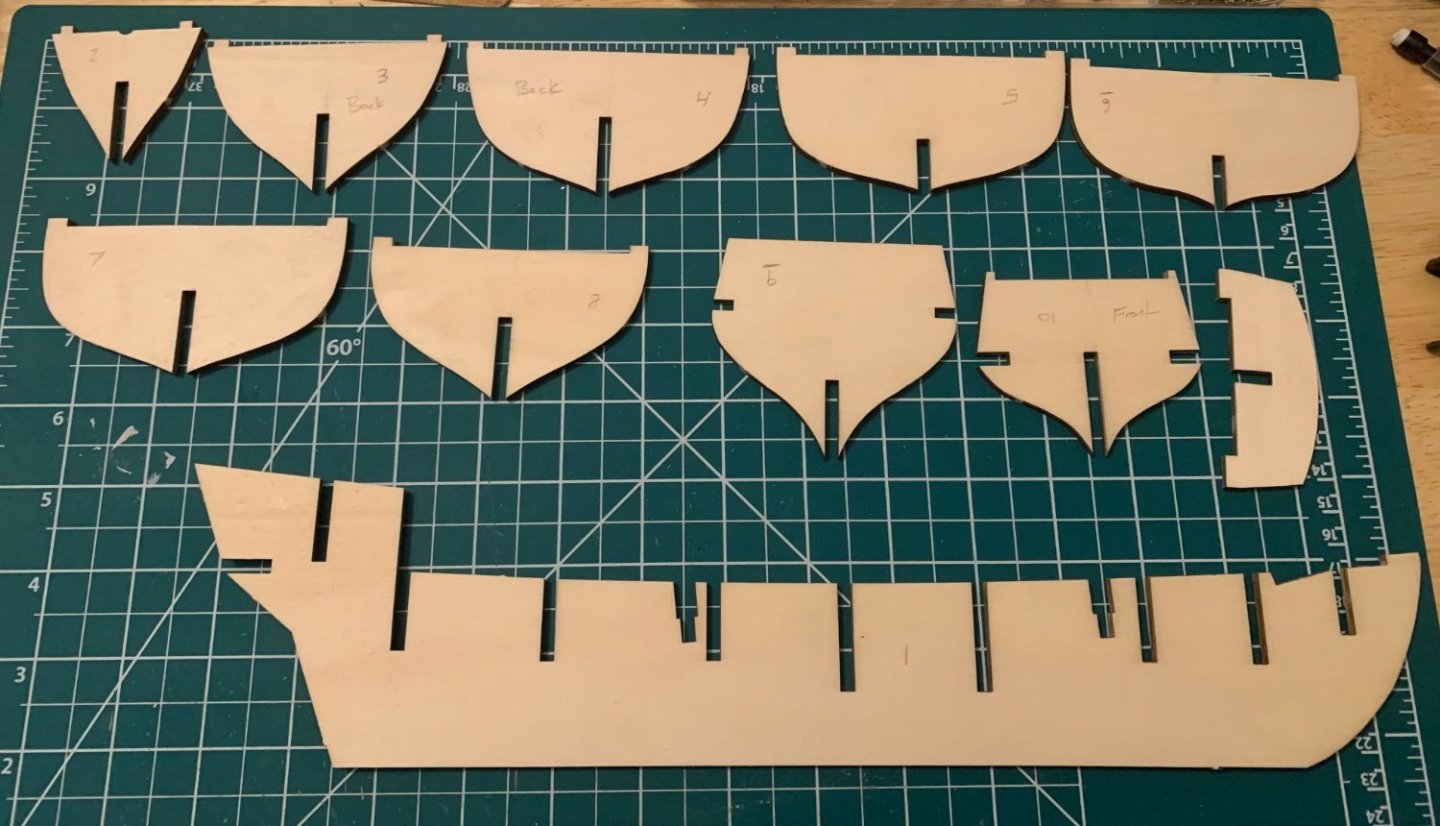
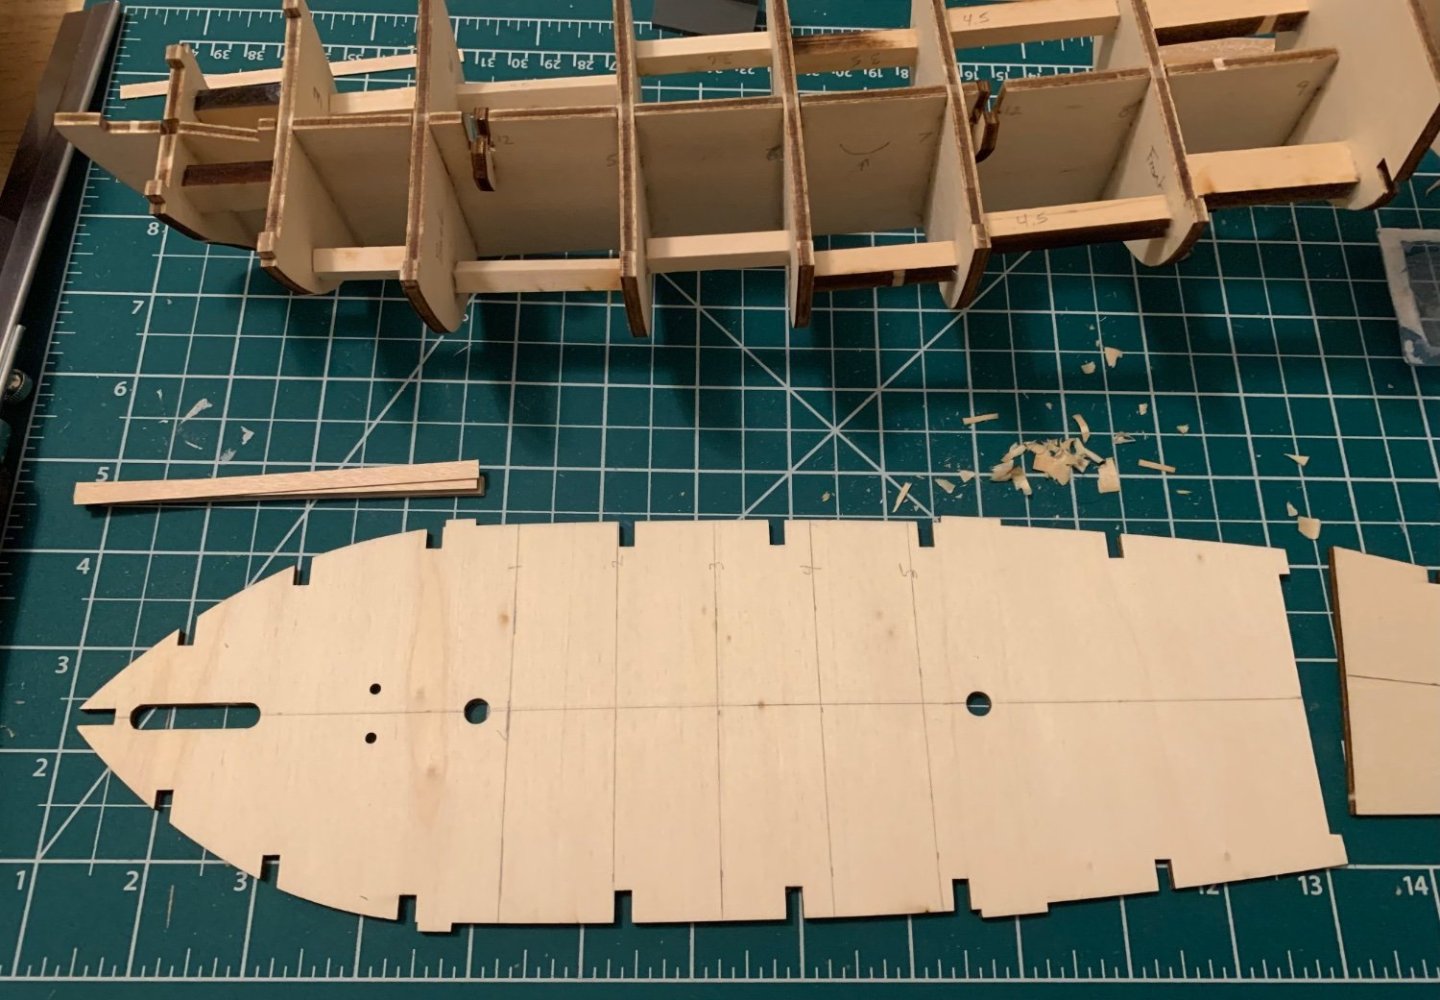
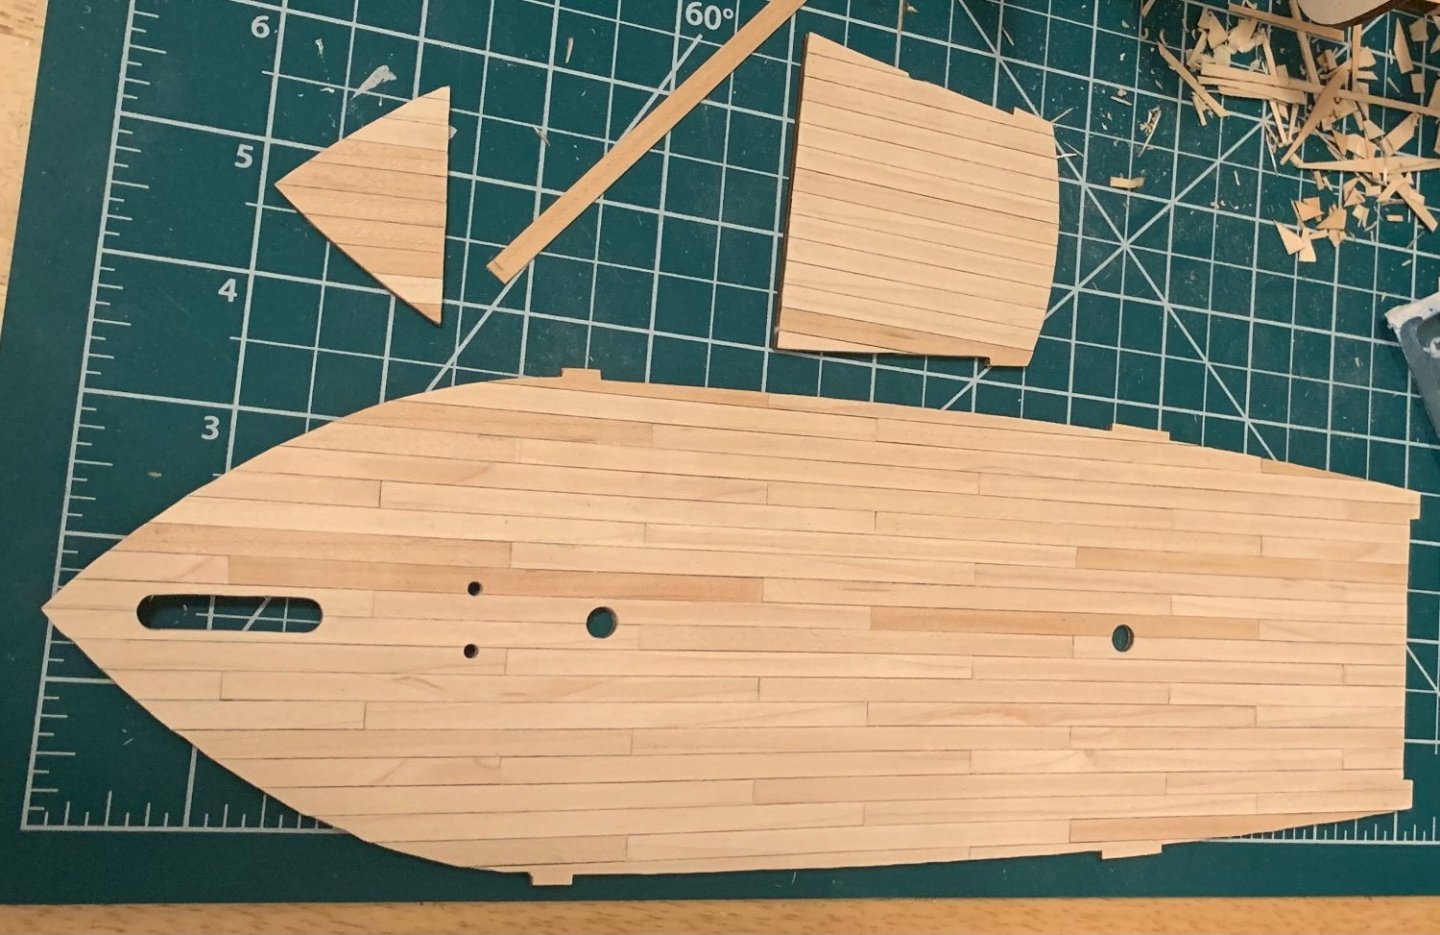
 1. Opening, material check ,cut out the hull piece's and dry fitted.
-
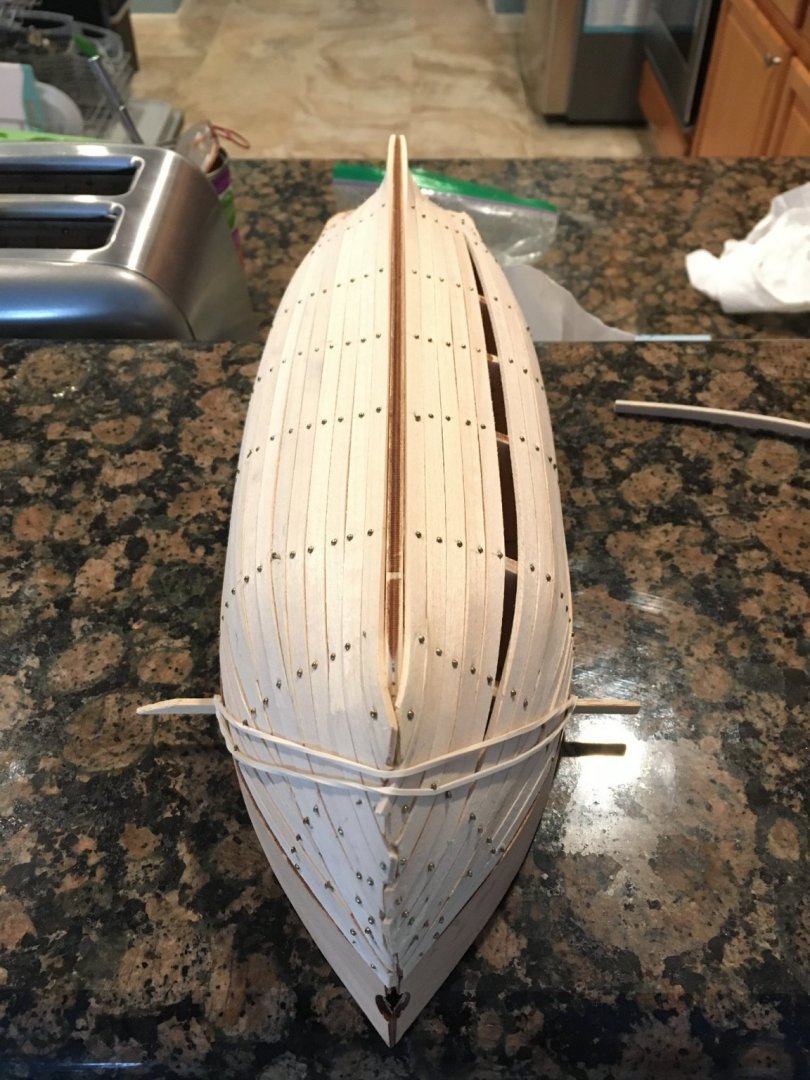
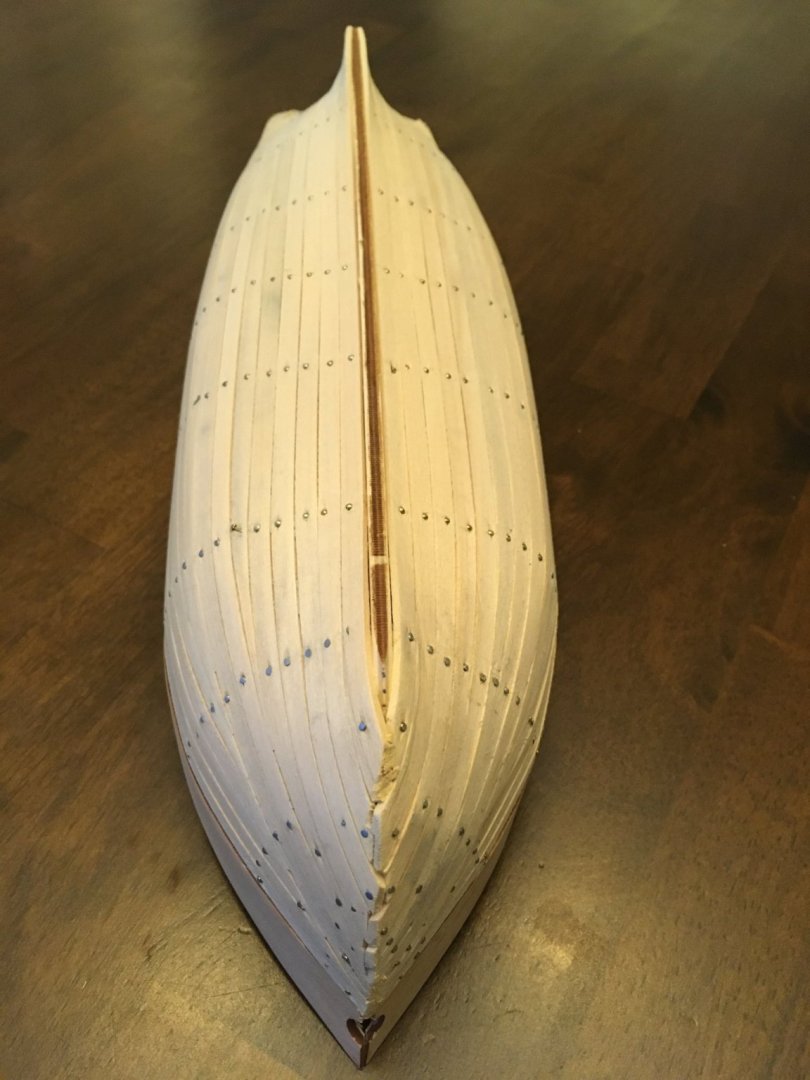
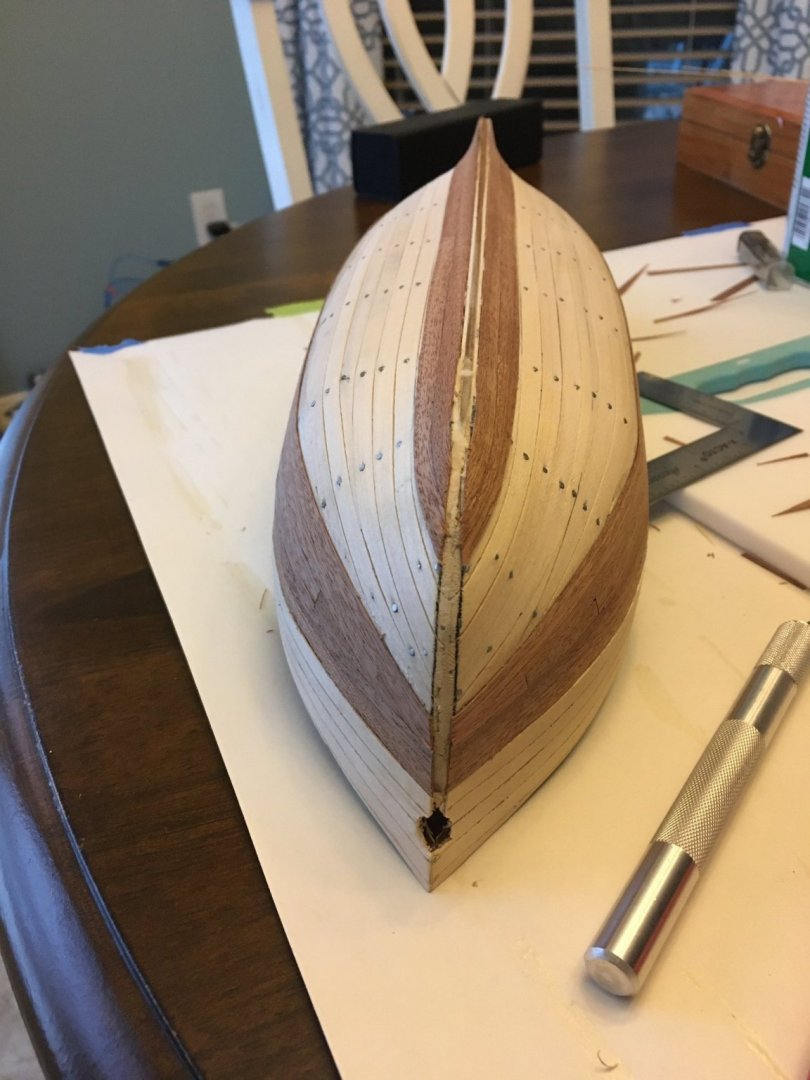
In my imagination I see a man , surrounded by those basic woodworking tools we have used for thousands of years. The Romans had planes just like ours, and an artifact of turned wood has been discovered dating from 3000BC. I can see that this man is a shipbuilder. He is laughing; shaking his head and laughing at me, as I dip my toe in the water and begin to learn the art of planking. As you can see from my illustration, I have made a dog's breakfast of it so far. But hey, tomorrow is another day, when I shall first file off the pinheads and sand the hull smooth, next make peck marks on prow and stern and at each bulkhead, then measure and carefully cut and plane each individual new plank with appropriate taper to bow and counter so that the second layer, if not perfect, may at least be a lot better . Thanks for the help already received.

-
 I unboxed and started on the Albatros this weekend, actually started a little early on Friday. Managed to get the bulkheads on and set at 90 angle. I also planked several pieces for future use. I received the kit as a present in 2011 and have now taken the leap to get at it. I had not noticed until fully unpacking the kit that there were no written instructions just a 7/8 picture guide. I know they say a picture is worth a thousand words but a little more specifics would be helpful. Does anyone know if OcCre has produced anything in recent years? I don’t see anything on there website that would indicate if they exist. Thanks for any ideas.

-
 Day 1 of my first build! Still have some cleaning up to do and sanding. I've seen quite a few others who started with the Albatros so I feel I'm in good company. This will be slow going as I'm facing a bust spring and summer, but I'm looking forward to getting into it. Thanks! Kramer
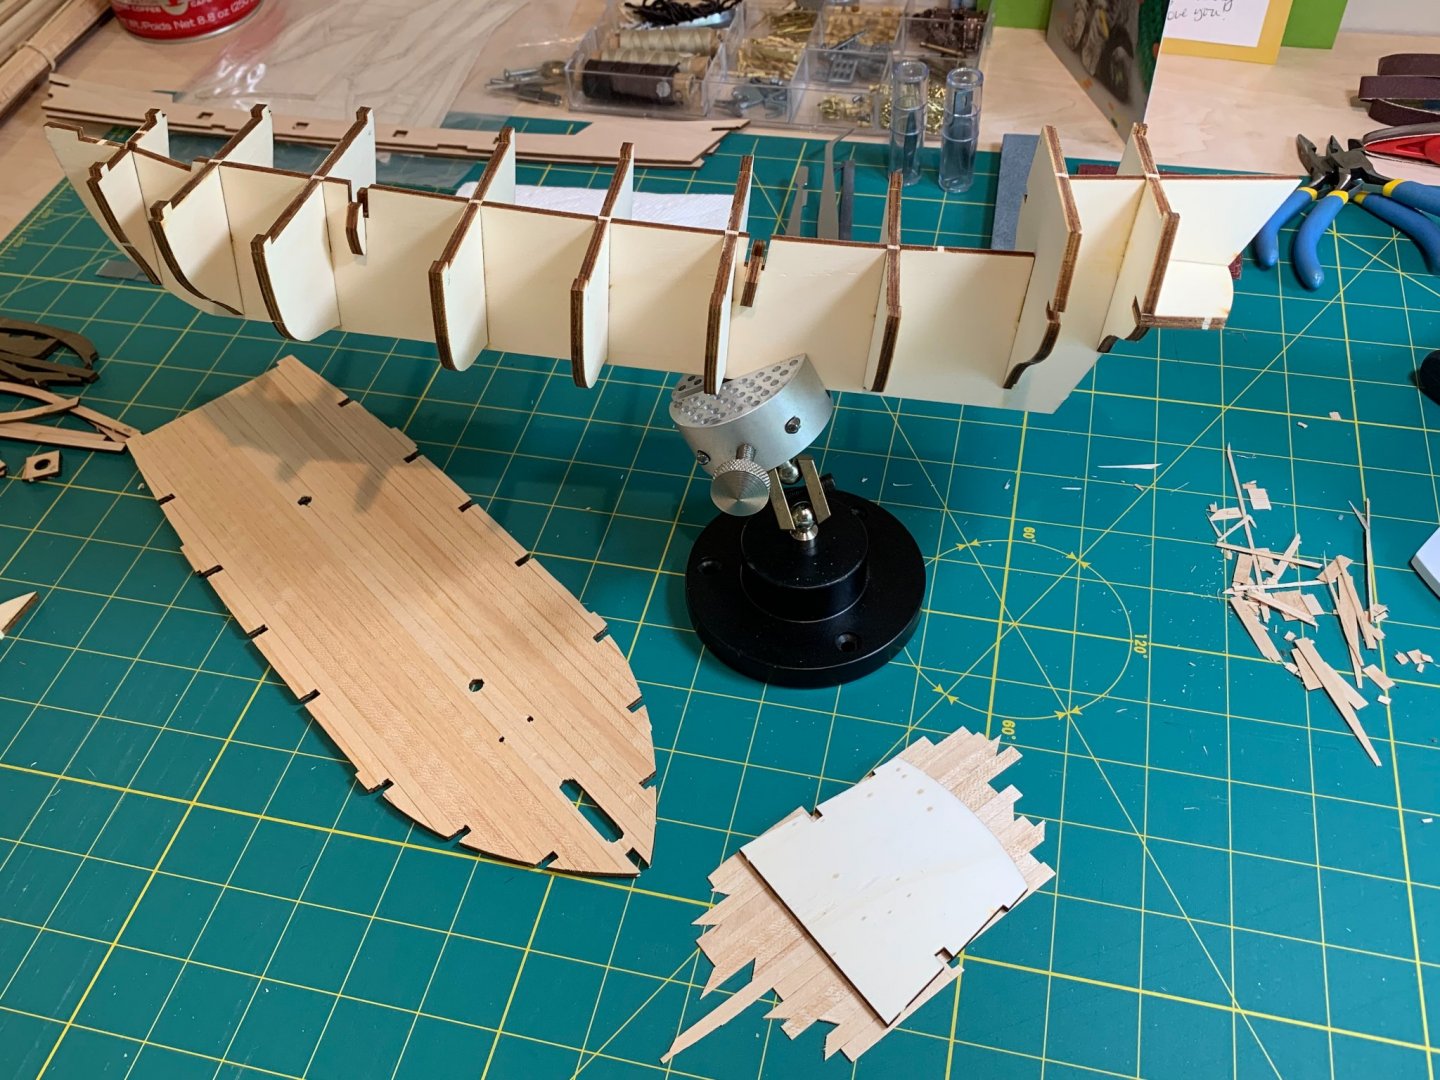
-
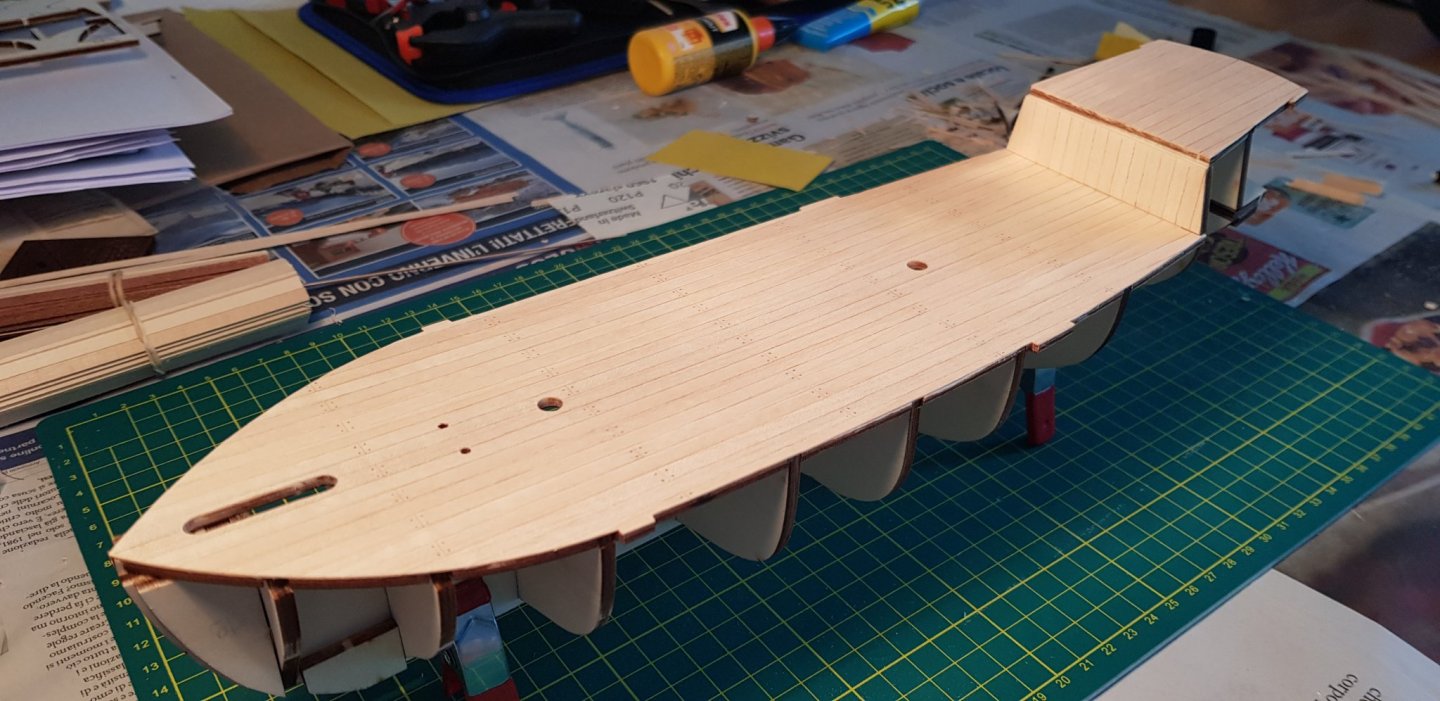
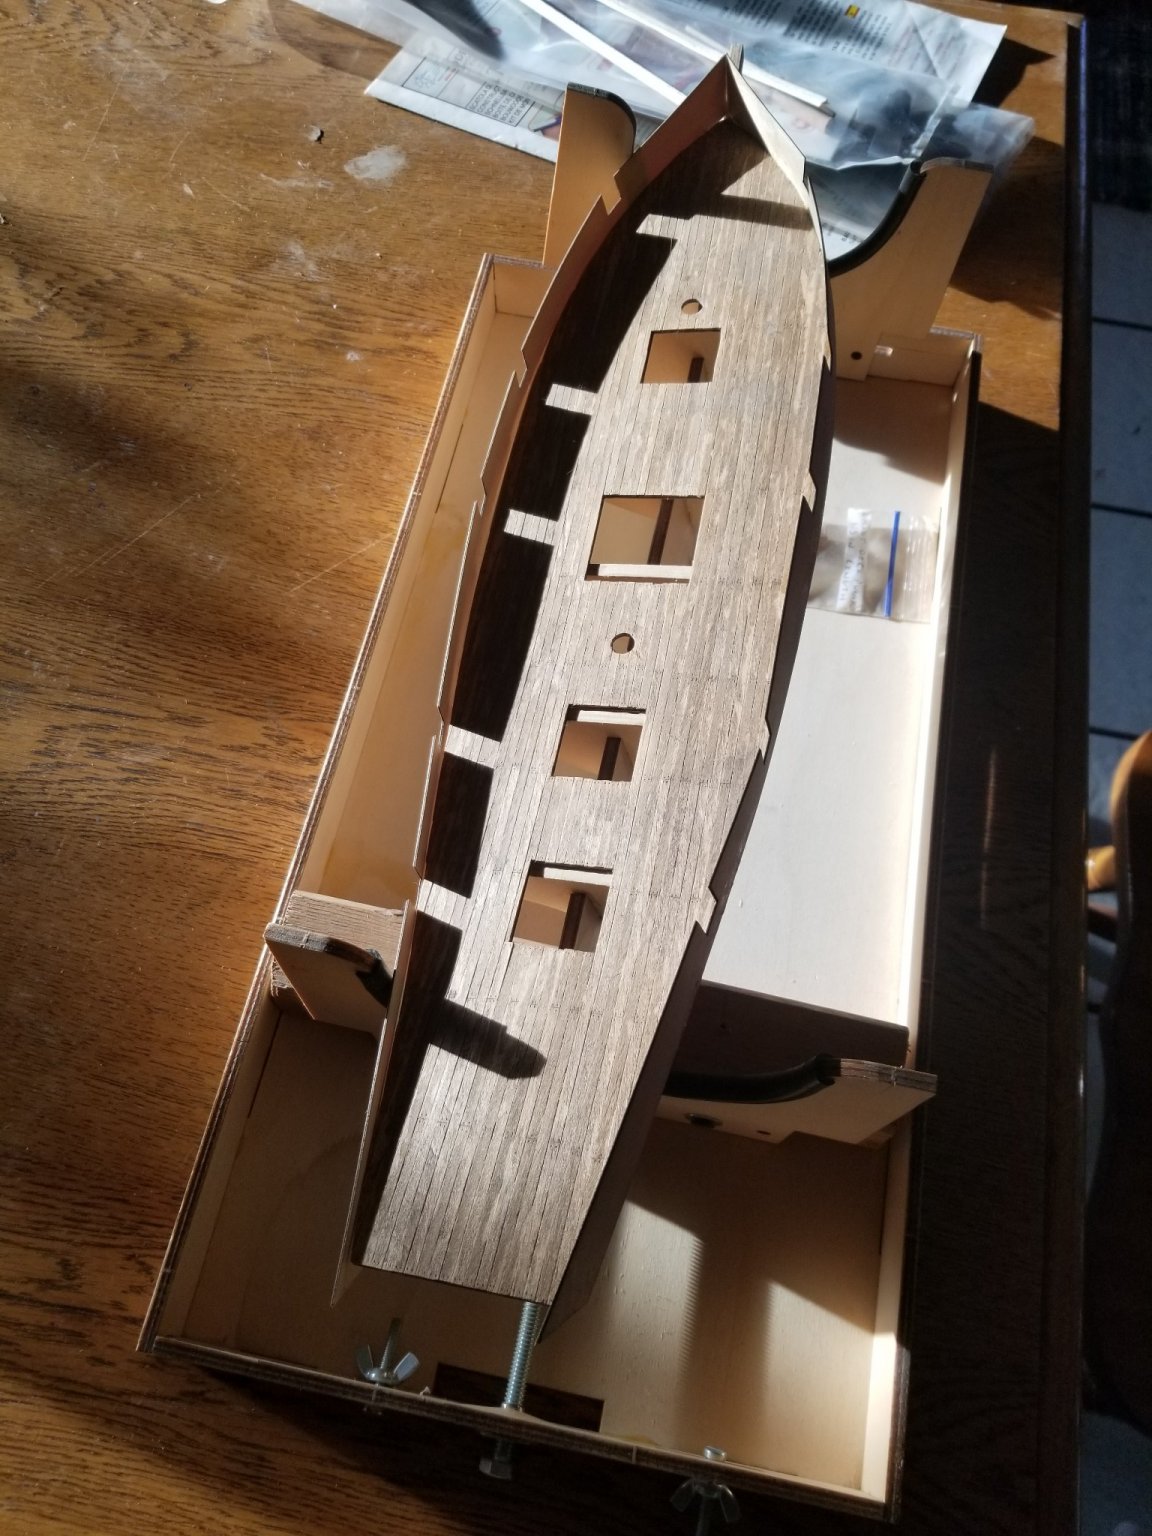
 Welcome to my build. Pull up a chair and get comfortable and follow along, as I try to fit all these pieces of wood, string and metal into a model resembling what is on the box. This is my first build in over 50 years, so I'll be dusting off some old skills and learning new ones along the way. Opened the box and removed the "instruction manual " and line drawings to see what I was in for. The line drawings were 1:1 for the kit, which is always a bonus as you don't have to keep trying to get measurements correct. The instruction manual left much to be desired, but the pictures sure are pretty. The parts list is on the back of each section of the manual. Next step was acquiring to necessary tools for the build. I'll be in that process for a while. Next was removing the parts from their respective bags and labeling them so I could readily find them when needed. Small parts such as blocks, belaying pins were left sealed in the bags they came in. Removed keel, bulkheads and false deck from the sheets they were attached to and dry fit the parts. Unfortunately for the fairing process, I was on my own, as there are no "cheat lines" suggesting the fore to aft tapper along the bulkheads. Been there before, it just means a lot of hand fitting and sanding. That reasonably accomplished, I glued up the keel and bulkhead, and then cut the rabbet line. False deck was then added for more strength, More sanding. Marked false deck centerline and drew athwart ship lines every 20mm for reference when planking. Hull planking began. Mantua used balsa wood for the hull planking on this kit, and it is fairly forgiving, but very thick, but narrow 50mm wide by 20mm thick, would have liked something a little wider and thinner. The kit is supposed to be double planked, but there is not enough finish wood to accomplish this. Knowing my limitations anyway, I had planned on painting the hull, so this was not a big deal. Here is where I am at today:
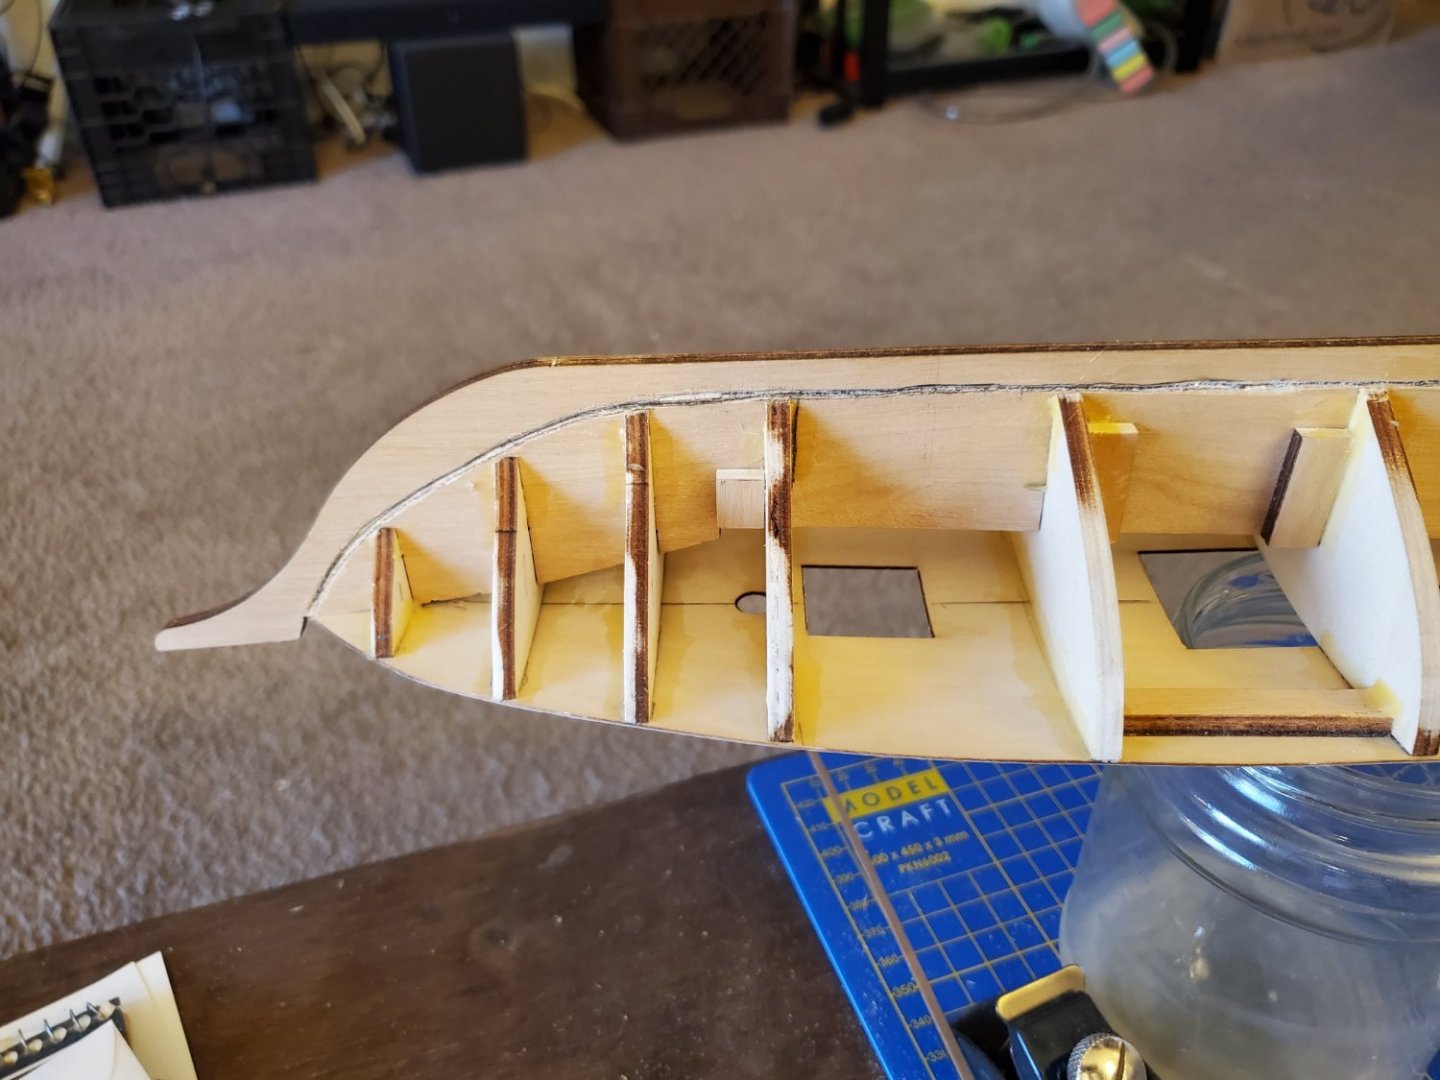

-
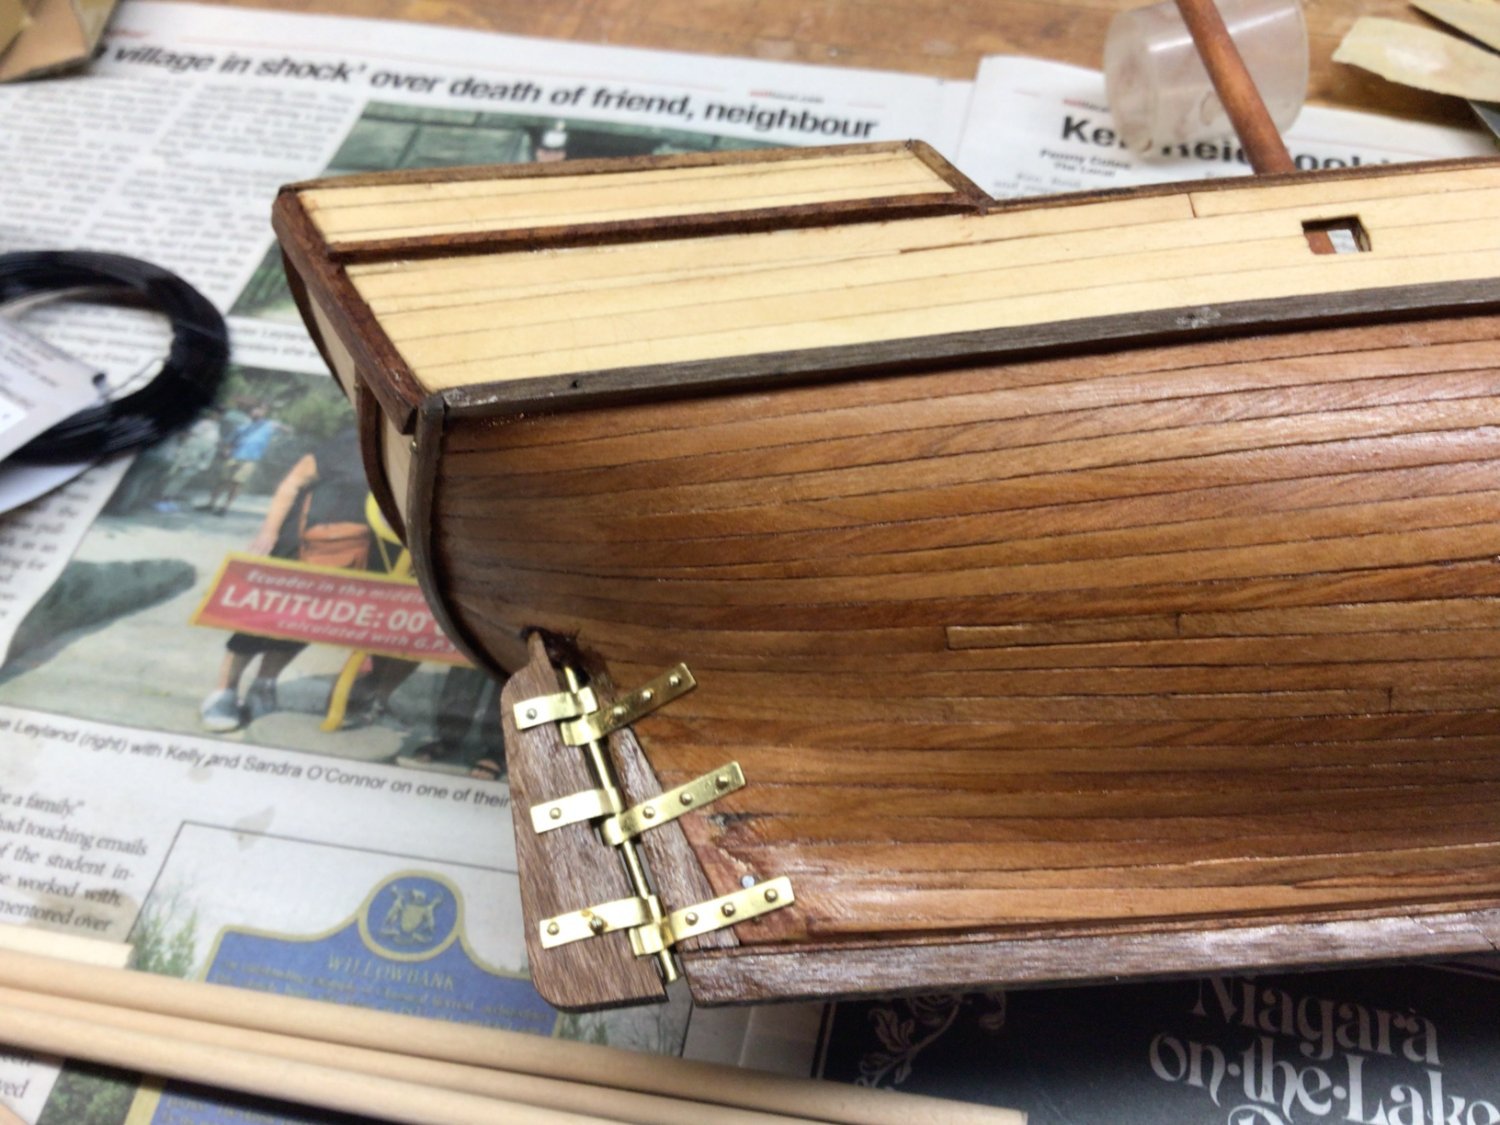
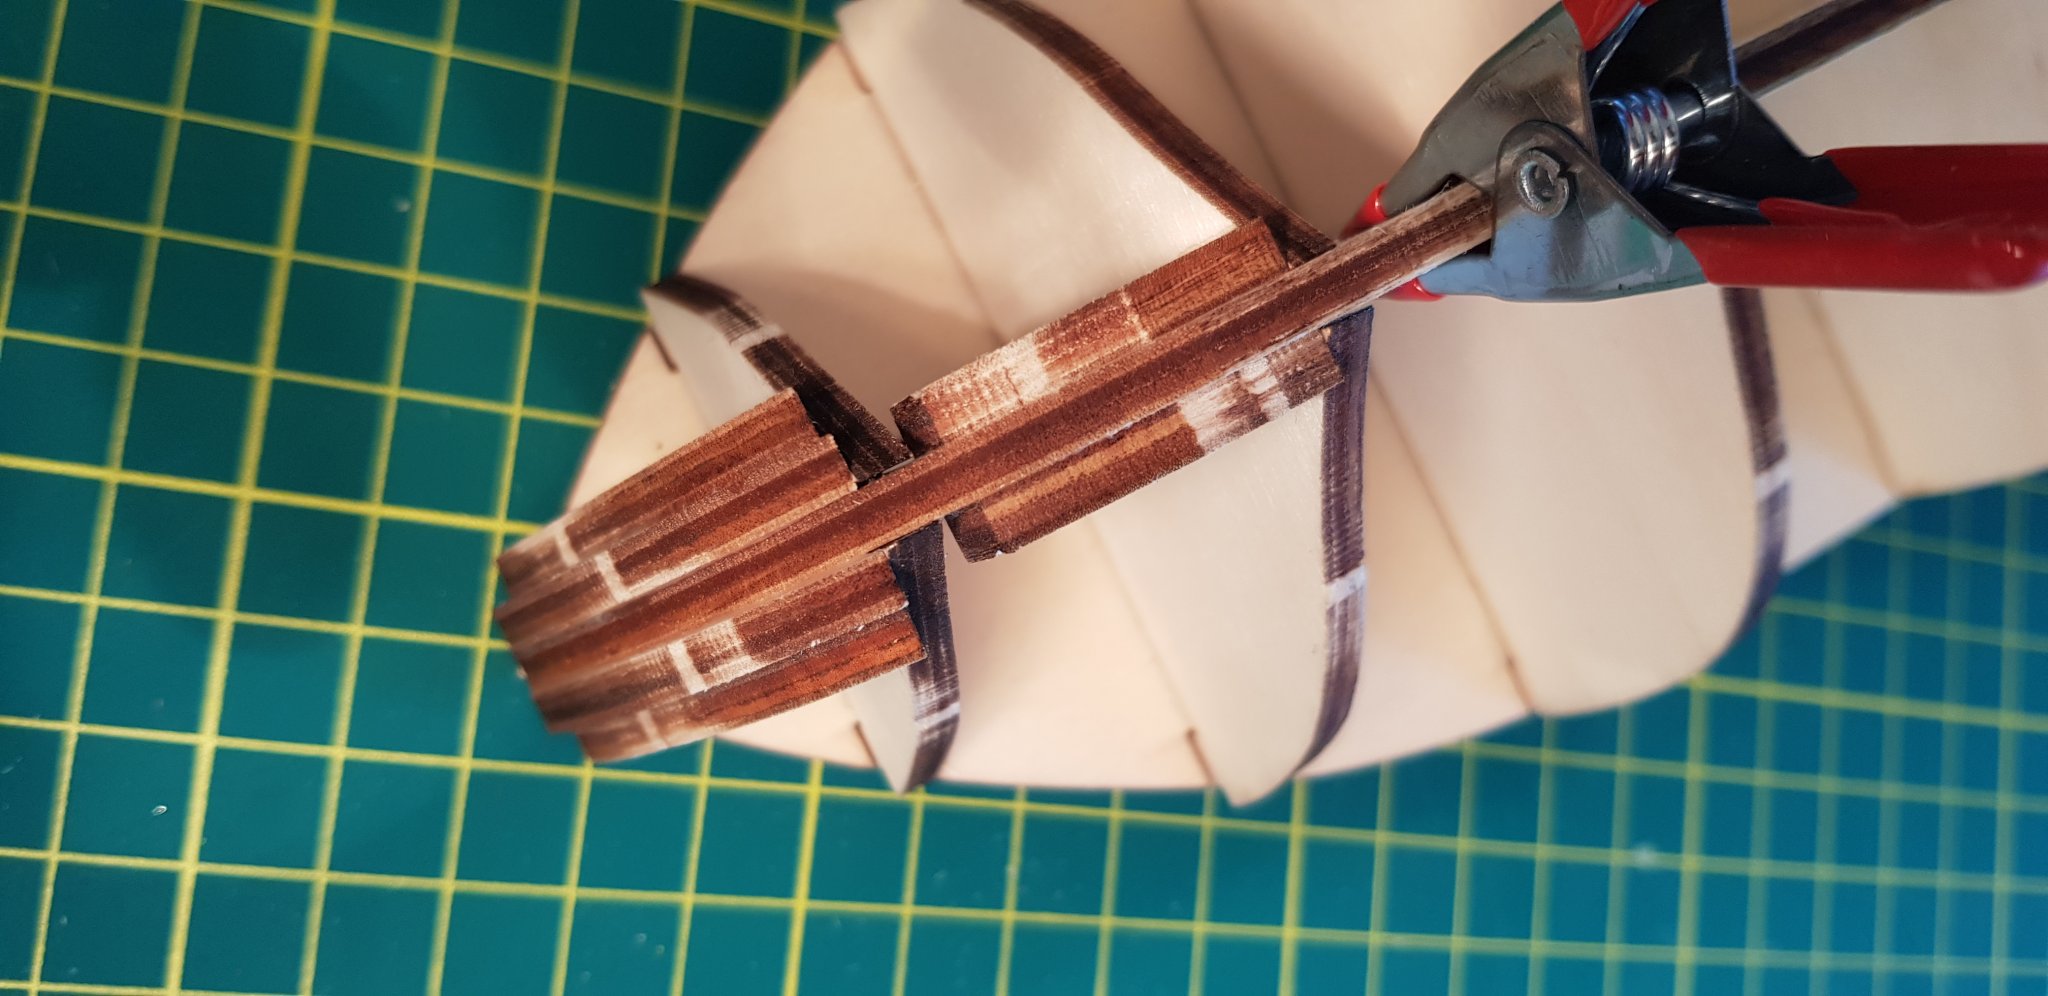
 Hi, After a few clumpsy and failed attempts to build a kit as a teenager, I decided (ten years wiser) to jump give it a go to ship building again with Occre's Albatros. There is already good logs and videos on the kit around, but there are still a few unanswered questions for me. With this log I hope to get help answering them and, maybe, to help future beginners as well. Let's start with the tools: I started from scratch, getting the basic kit, the nail pusher, a cutting mat and some small clamps from Occre. Additionally I bought extra drill tips, larger clamps, white glue and contact glue from a local store. The wood paste I'll hopefully not need, but you never now. At first sight the kit looks very good and "approachable": Occre provides illustration and textual instructions for all steps of the construction. Ready to go! The first ~8 steps are fairly straightforward, but still I was able to do a few minor mistakes: Aligning the frames "by eye" was not enough for me, I still had to fight a bit when gluing the deck. I wish I had seen Barry1's log before, his approach definitely allows for more precision. Take your time when lining the deck: minimize the amount of glue and remove the excess immediately. Also, I found that the contact glue is way easier to clean up from the model than white glue, resulting in a clean surface. I used a regular pencil to draw the nails and the dirt/shadows between the planks. A light stroke seemed sufficient to me, but next time I'd probably use black for the lines. Do make a dry try before gluing the deck, in my case I had to remove 1mm at the front of the main frame and cleanly cut the bottom of the lining of frame 9 in order to have the hull fit. Next I attached the reinforcing chocks to the false keel. The scar next to the rudder in the right image is a reminder to cut out your pieces properly with a knife rather than pushing them. Luckily that part will not be visible at the end. This is the result so far, hopefully I'll quickly get past these trivial issues in the future. Now it starts to get interesting, and I have a few questions on how to continue: For the first planking of the hull. I think that many people soak, bend and let dry the planks first, and only afterwards they attach them to the frames. Is there anything wrong in attaching them when they are still wet? I've seen in other logs that the bulwarks don't bend uniformly, in particular because the front gunport weakens them. I'd like to bend them better by soaking them in water, but I also read that this can be dangerous with plywood parts as it could delaminate. Any advice? Below is a picture of the part. Cheers, and happy new year! Matt
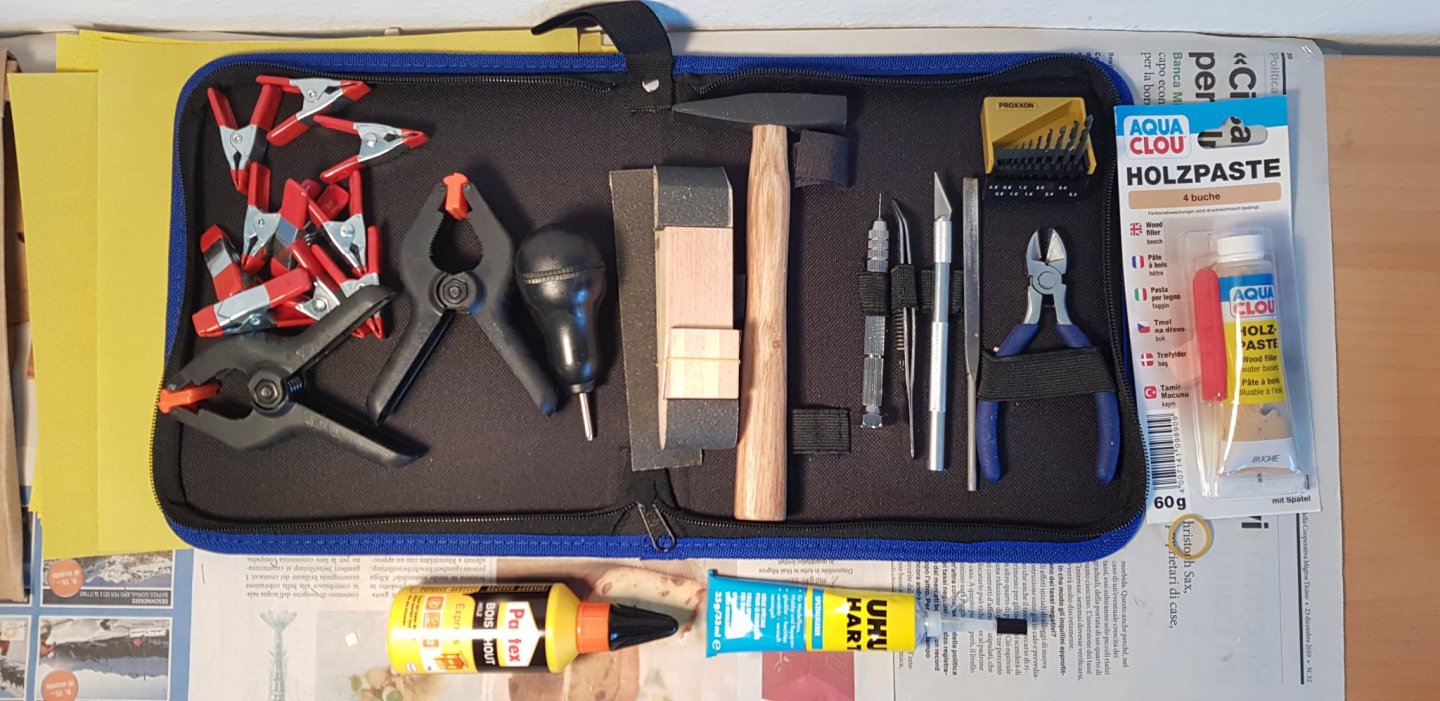


-
.thumb.jpeg.fc5d633a7b34428fcf19419a73d56d55.jpeg) I can't recall if it was @VTHokiEE or @ccoyle, but someone mentioned that Amazon had a few of these paper models and at $12 dollars, I was game. I attended an event at the National Lighthouse Museum (https://lighthousemuseum.org/) yesterday as part of a demonstration of ship modeling by the SMSNJ (http://www.shipmodelsocietyofnewjersey.org/) (of which I'm a member despite their better judgment). And I thought, I can't lug all the stuff I need at this point my wooden model build, so I'll try a paper build. I figured I would share here. May the bridges I burn light the way for others!!
I can't recall if it was @VTHokiEE or @ccoyle, but someone mentioned that Amazon had a few of these paper models and at $12 dollars, I was game. I attended an event at the National Lighthouse Museum (https://lighthousemuseum.org/) yesterday as part of a demonstration of ship modeling by the SMSNJ (http://www.shipmodelsocietyofnewjersey.org/) (of which I'm a member despite their better judgment). And I thought, I can't lug all the stuff I need at this point my wooden model build, so I'll try a paper build. I figured I would share here. May the bridges I burn light the way for others!!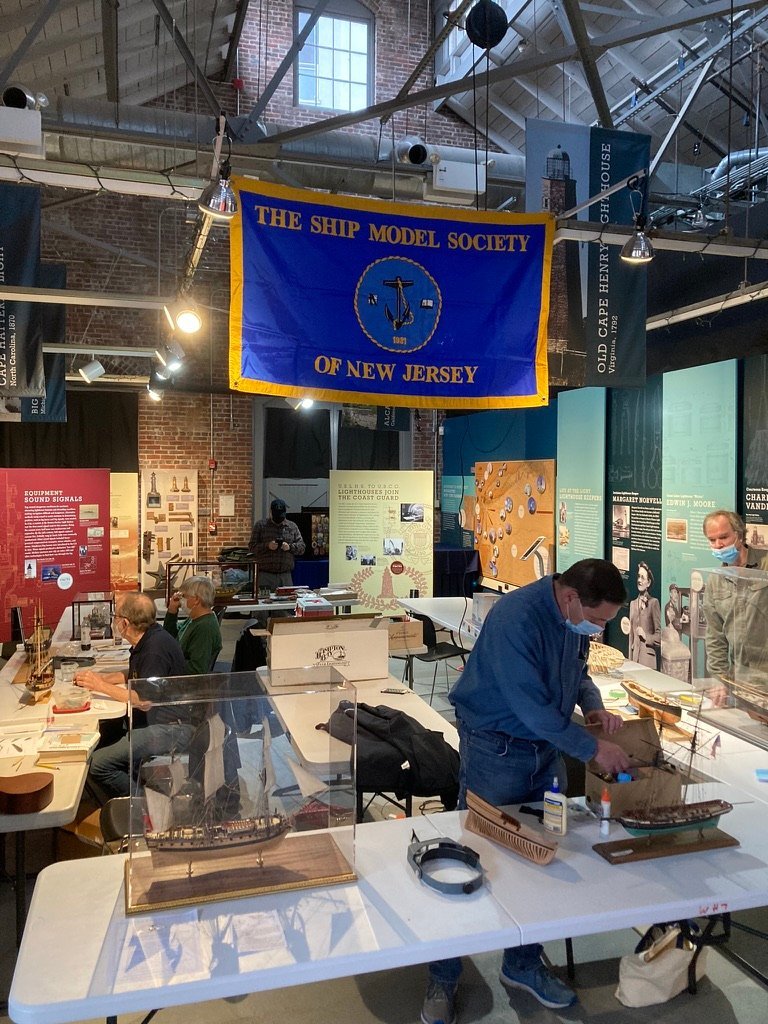

- 43 replies
-
- 10
-

-
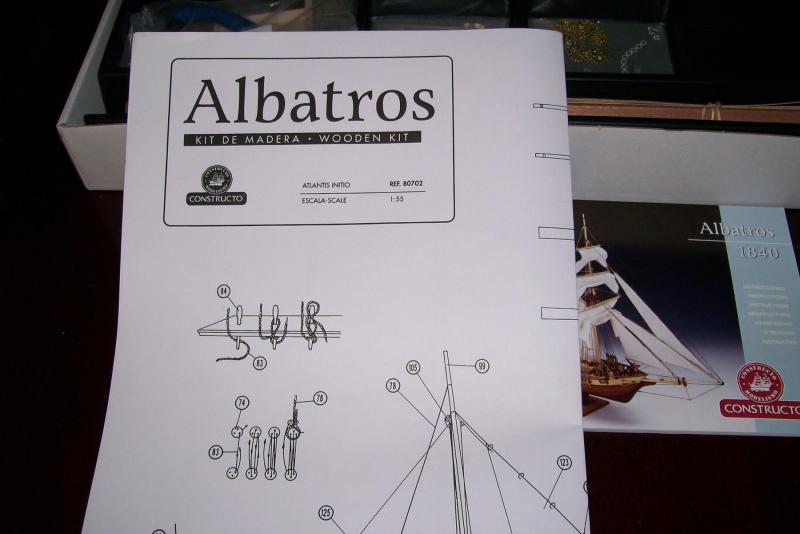
 Hi everyone, Firstly, great to meet you all, I'm really pleased to be joining this wonderful community. I've recently decided now is the right time to have another go at building my first wooden ship model after a couple of false starts a few years ago. I'll be attempting to build the Albatros from Constructo and keeping this build log as a way of motivating myself and sharing my journey with you all. I've already made a start and absolutely loving the experience so far. I would add a disclaimer here that I am very much a beginner in this hobby, please forgive any mistakes in my terminology. I am very willing to be corrected or questioned if I get a name wrong. Some initial thoughts from me upon opening the kit. 1. I didn't realise it was a single plank construction! I've gone and purchased a handful of thin veneer type strips of Mahogany and Italian Walnut to use as a second layer of planking to give myself a bit of breathing space should the first layer go awry. However, my plan is to not need these and see how clean I can get the first layer to build it as originally intended. 2. Despite being ultra careful and using a scalpel type blade to remove the false keel and frames, some of the peices have split a little right at the tips 😞 I'm not worrying about it too much for now as I think I will be able to fill any gaps prior to planking if needed but already acknowledging this is something to keep my eye on. So far, I have glued the frames to the false keel (with the help of a set square and clamps), started faring and am currently in the process of creating filler blocks for the bow and stern using some basswood craft blocks. The wood is tougher than I'd expected, pondering whether balsa would have been an easier option for carving but once in, I'm convinced the basswood offers more rigidity and less risk of being damaged/deformed prior to planking. Final point of note, I know that I probably need at least one jig to hold the hull while I'm building it. My intention is to create the first one to hold the hull upside down for planking, then once the keel is on, I will build a new one to hold the ship the right way up for the remainder of the build. Until then, I'm making do with my vice and some plywood scraps to seat the keel frame. here's a few photo's of my work so far. (I'll once I figure out how to stop them uploading upside down 🙃)

- 18 replies
-
- 1
-
-
- constructo
- Albatros
- (and 1 more)
-
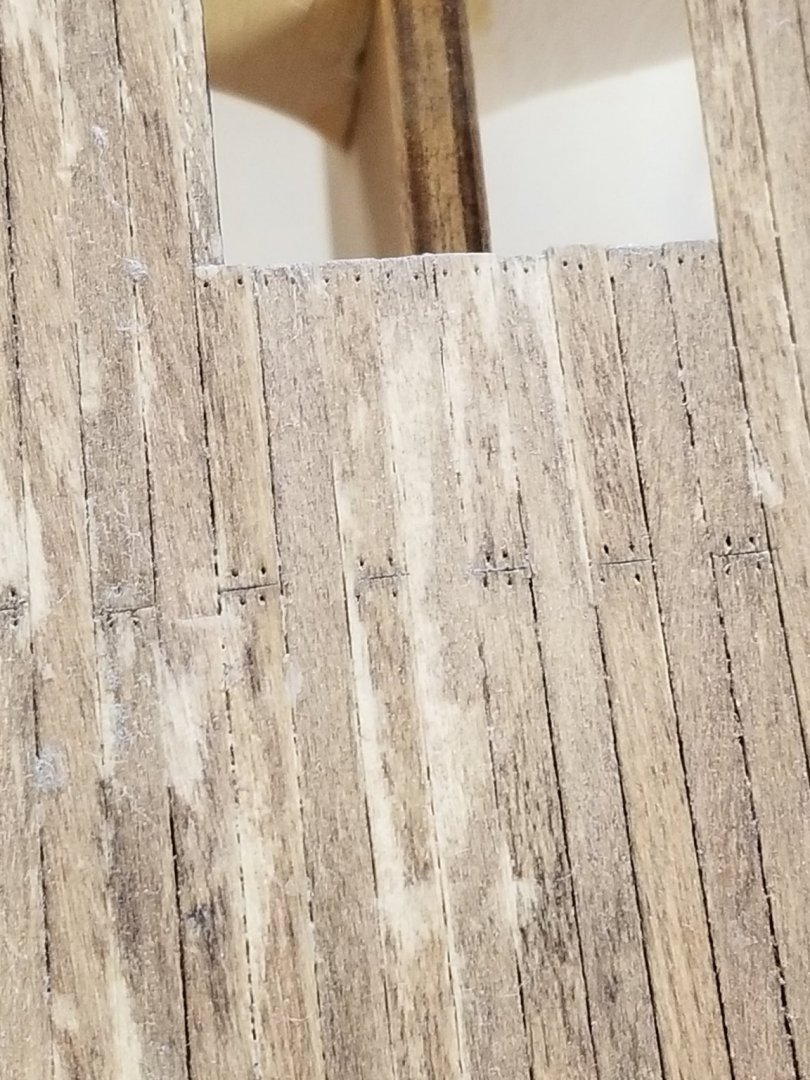
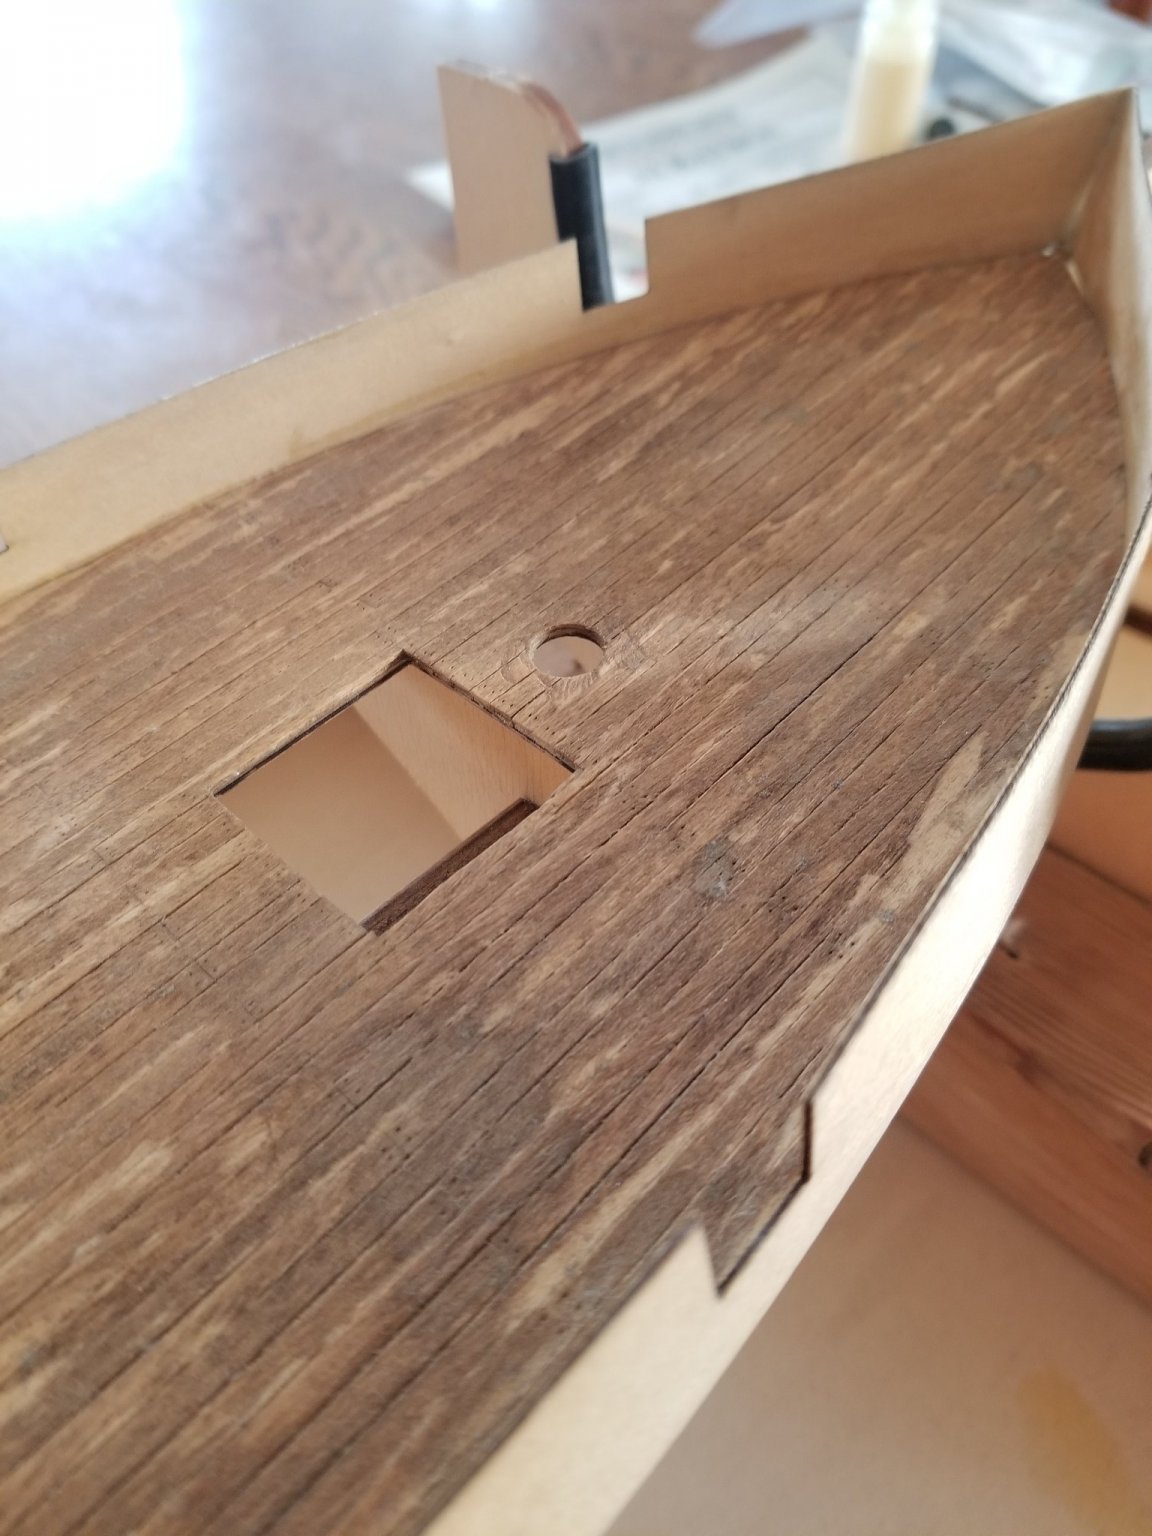
 This is my first build log (please forgive me if it lacks pertinent info) for this ship kit, however, not my first build. I finished a little schooner years ago but cannot remember the brand nor year I purchased it (sorry). I can post some pics of it if anyone is interested. I started the Albatros about 6 years ago but then life happened and it had to be put into storage. I no longer have the box it came in but luckily I haven’t lost any of the parts. I don’t know much about this type of ship other than it was built around 1840 at the Baltimore shipyards. It was designed to defend the Atlantic coast with its speed and easy maneuverability. The kit came with a false deck where the bulkhead frames of the hull do not come above the deck. The instructions had me plank the deck with individual planks before planking the hull. This is as far as I progressed. I didn’t place any caulking material between the planks and now I wish I had. I made tiny pinhole marks on the timber to resemble nail heads. At the time, I decided I wanted to distress the deck planking but now I’m rather regretting it. I’m guessing a wood stain would help conceal the damage? I haven’t applied any sealer to it yet thank goodness. I would like to construct a better keel clamp before I move forward as the one I have now is quite awkward and unreliable. I’ve seen many tutorials for this so hopefully next time I post I will have something to show you. That’s all I have for you now, and please, any suggestions/advice will be appreciated by this amateur builder😄 ~ Rachel


-
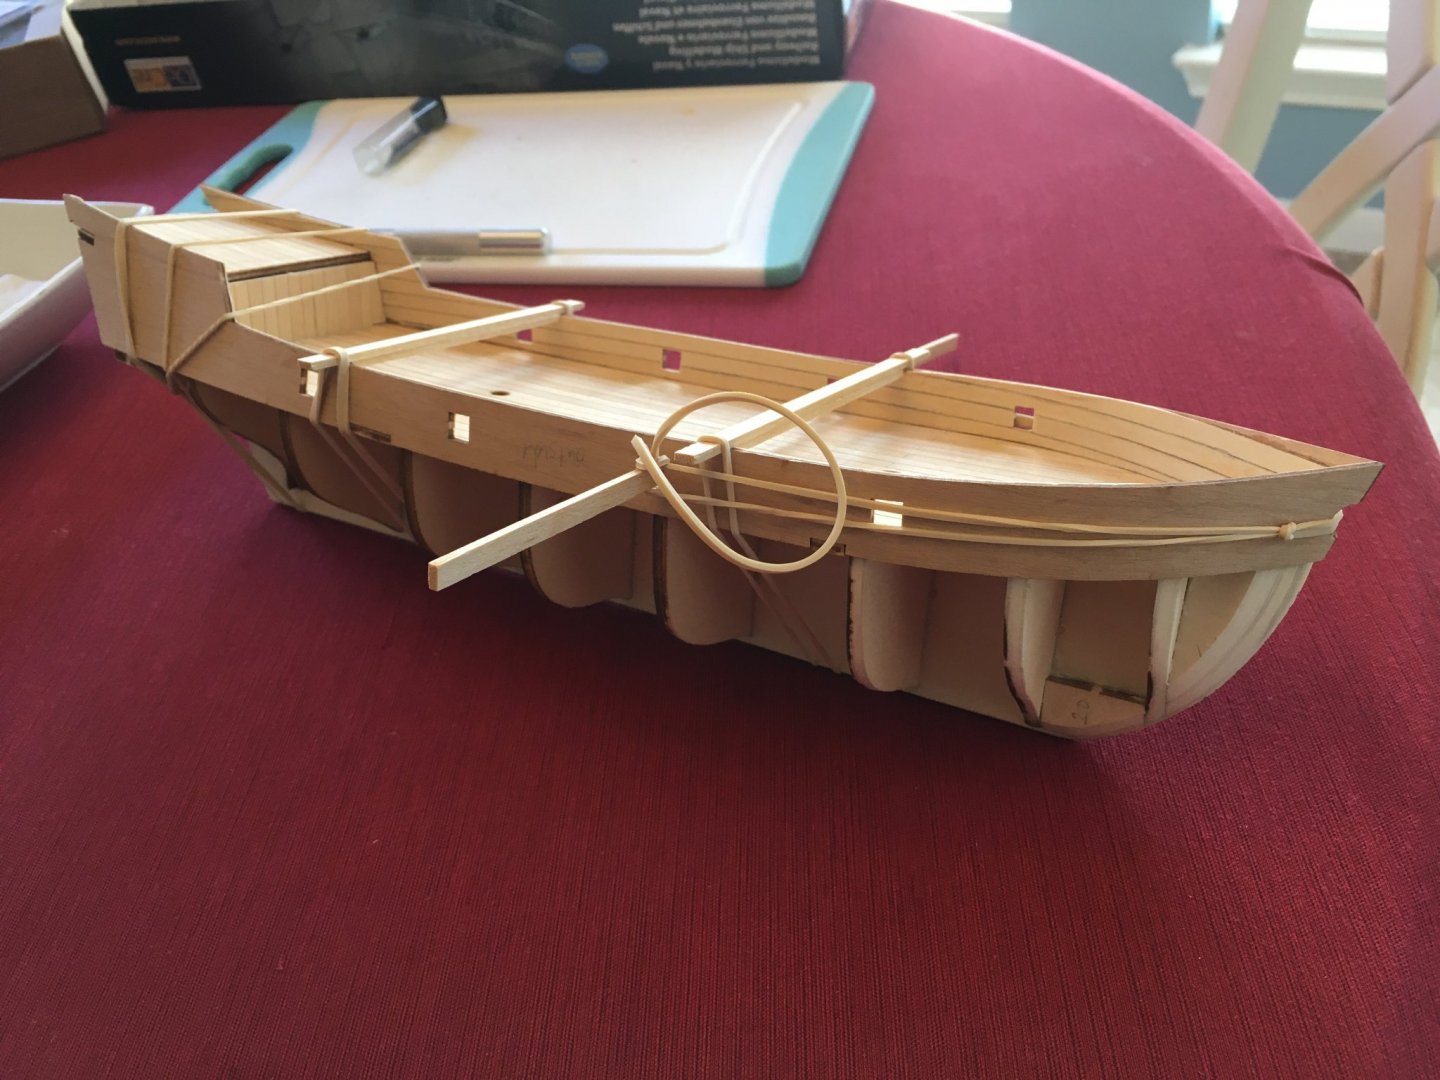
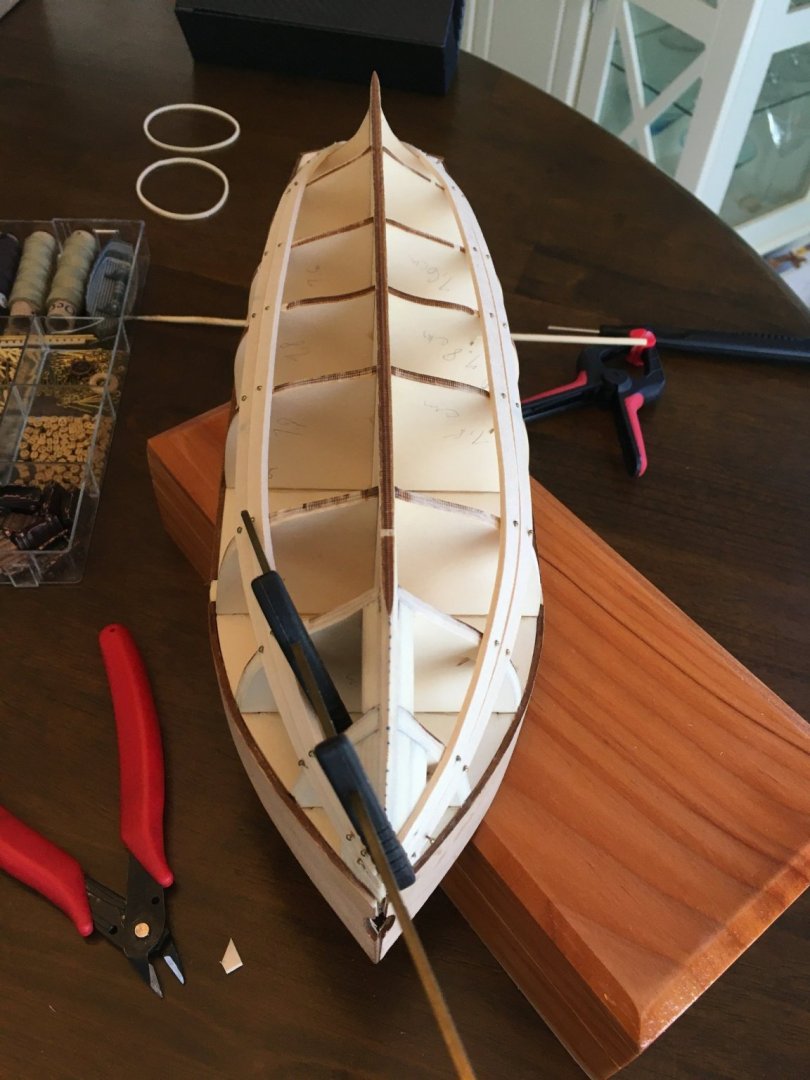
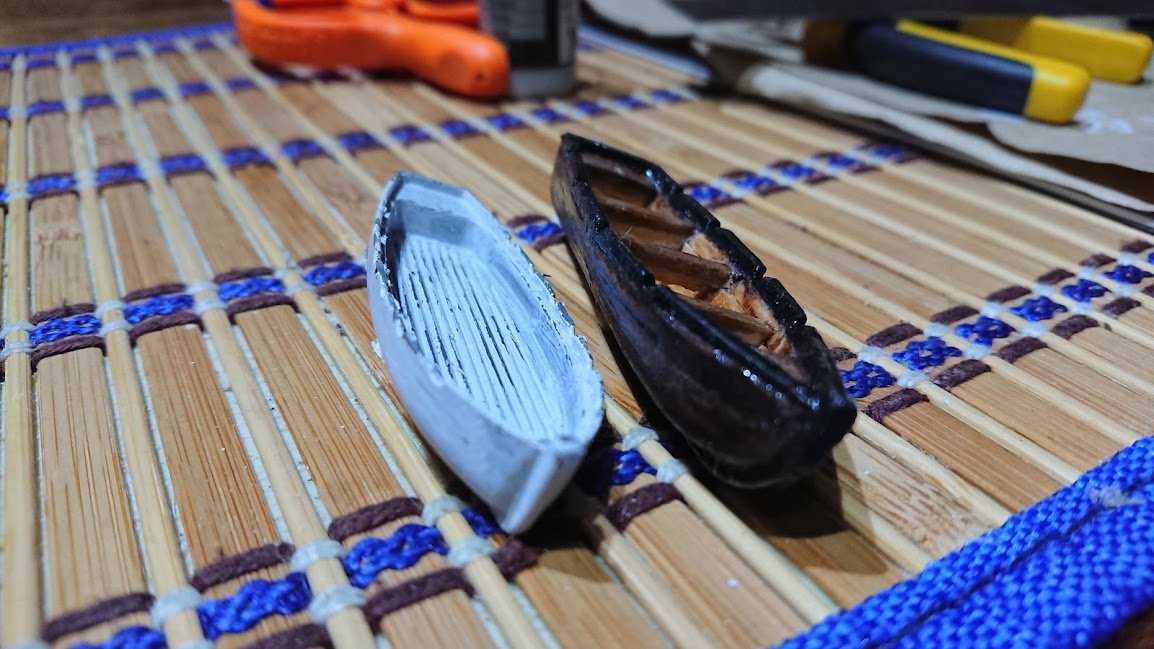
 Hi there. This is my first post on this forum so apologies for any missteps... From what I can see this is an Occre/Artesania Latina kit and it seems to be sort of a generic build as I haven't been able to locate any references to a ship that existed under this name. This is my second kit, the first one being a Mantua kit that was a disaster and I abandoned. I've never done any sort of woodworking or model work so this is all pretty new to me. I bought this kit back in December 2017 and have been working on it with small breaks since then. At the time of posting this I have already finished most of this structure. Regarding this kit: Good points: - Ideal beginner's kit that is not too hard but provides enough of a challenge. Bad points: - Illustrated instruction booklet is terrible. It's 8 pages of inconsistent, vague and saturated colour images that in some instances cause confusion. - There is inconsistency with the parts illustrated and in some cases the measurements of small parts which is very frustrating In my endeavour to experiment and develop my skills a bit, I tried to weather the deck but I fumbled and ended up blotching the deck with black ink. I had to resort to sanding it to remove most of the stains but with limited success. In addition I decided to replace the metal launch boat provided with my own scratch build. On to the anchors next. Some pictures attached.

-
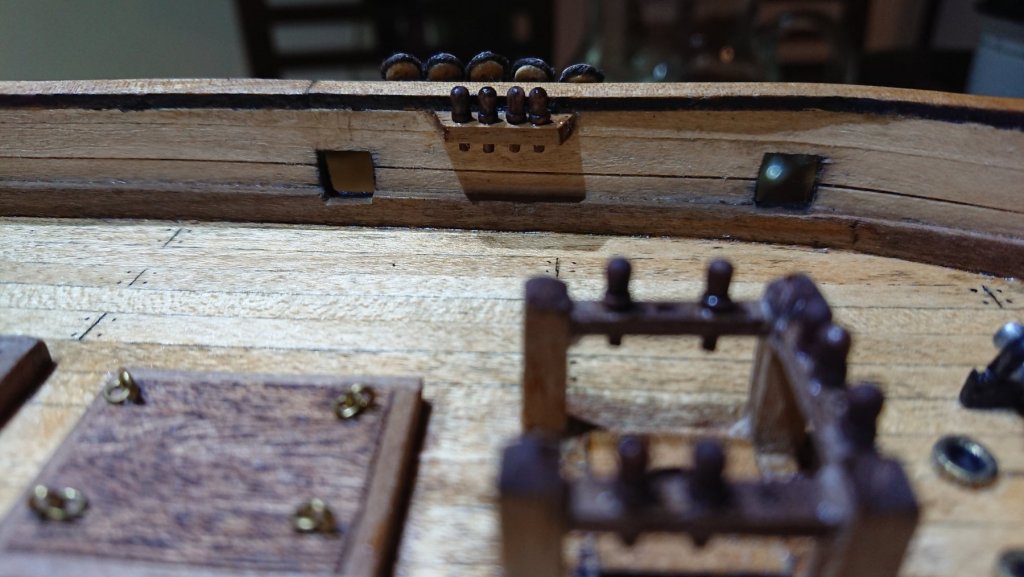
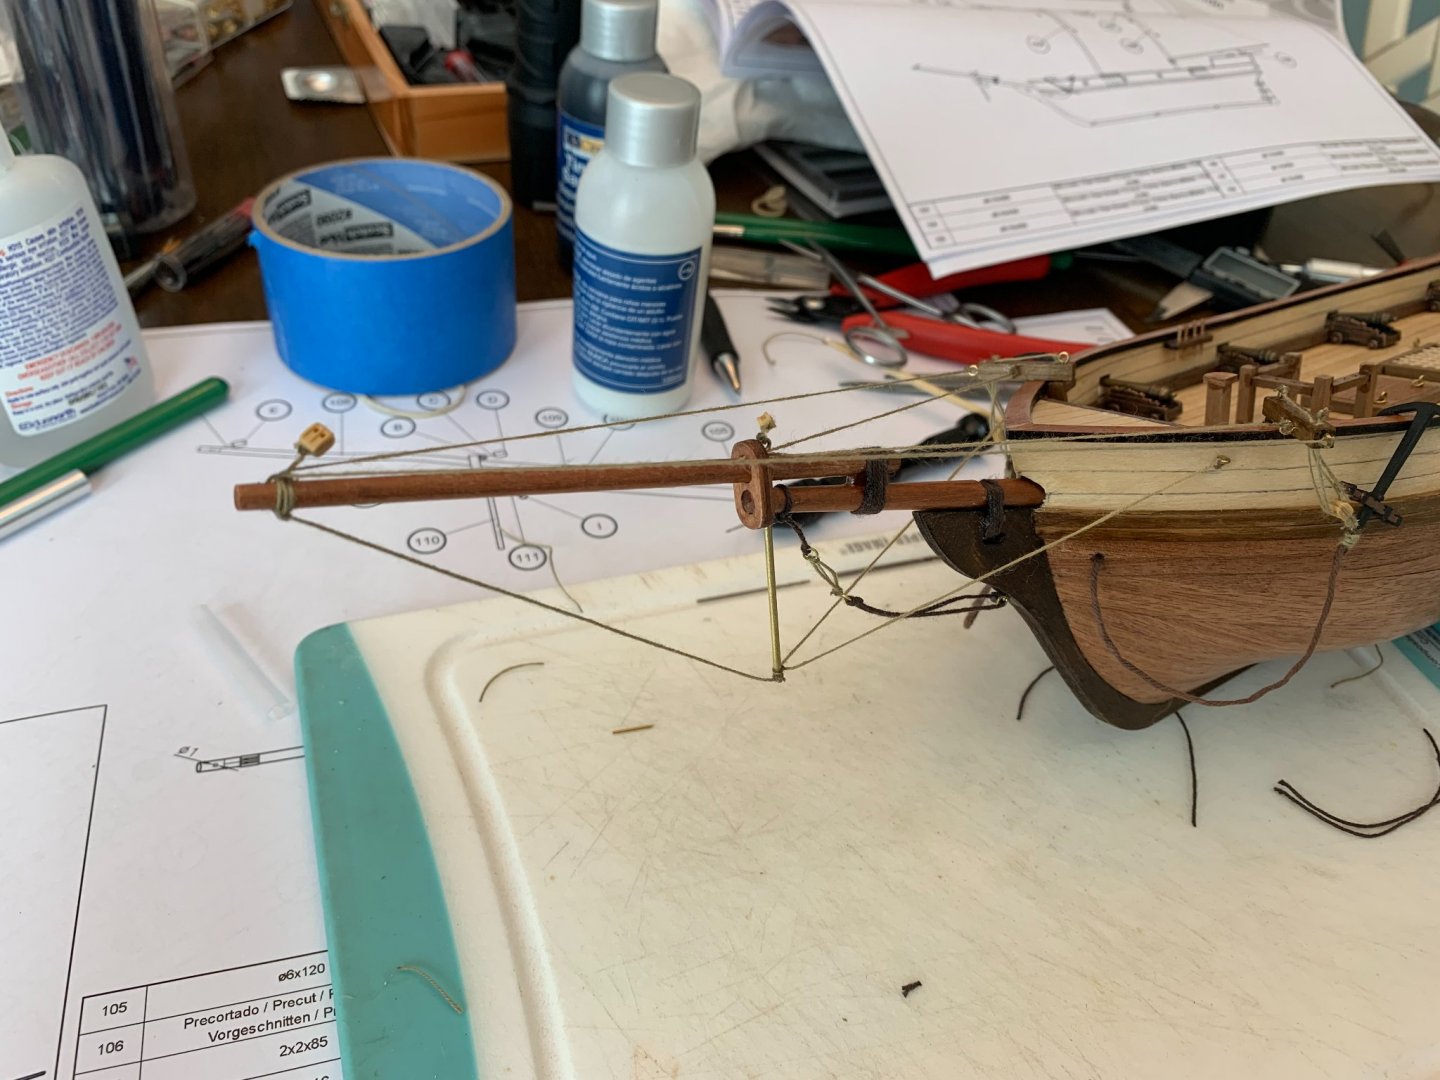
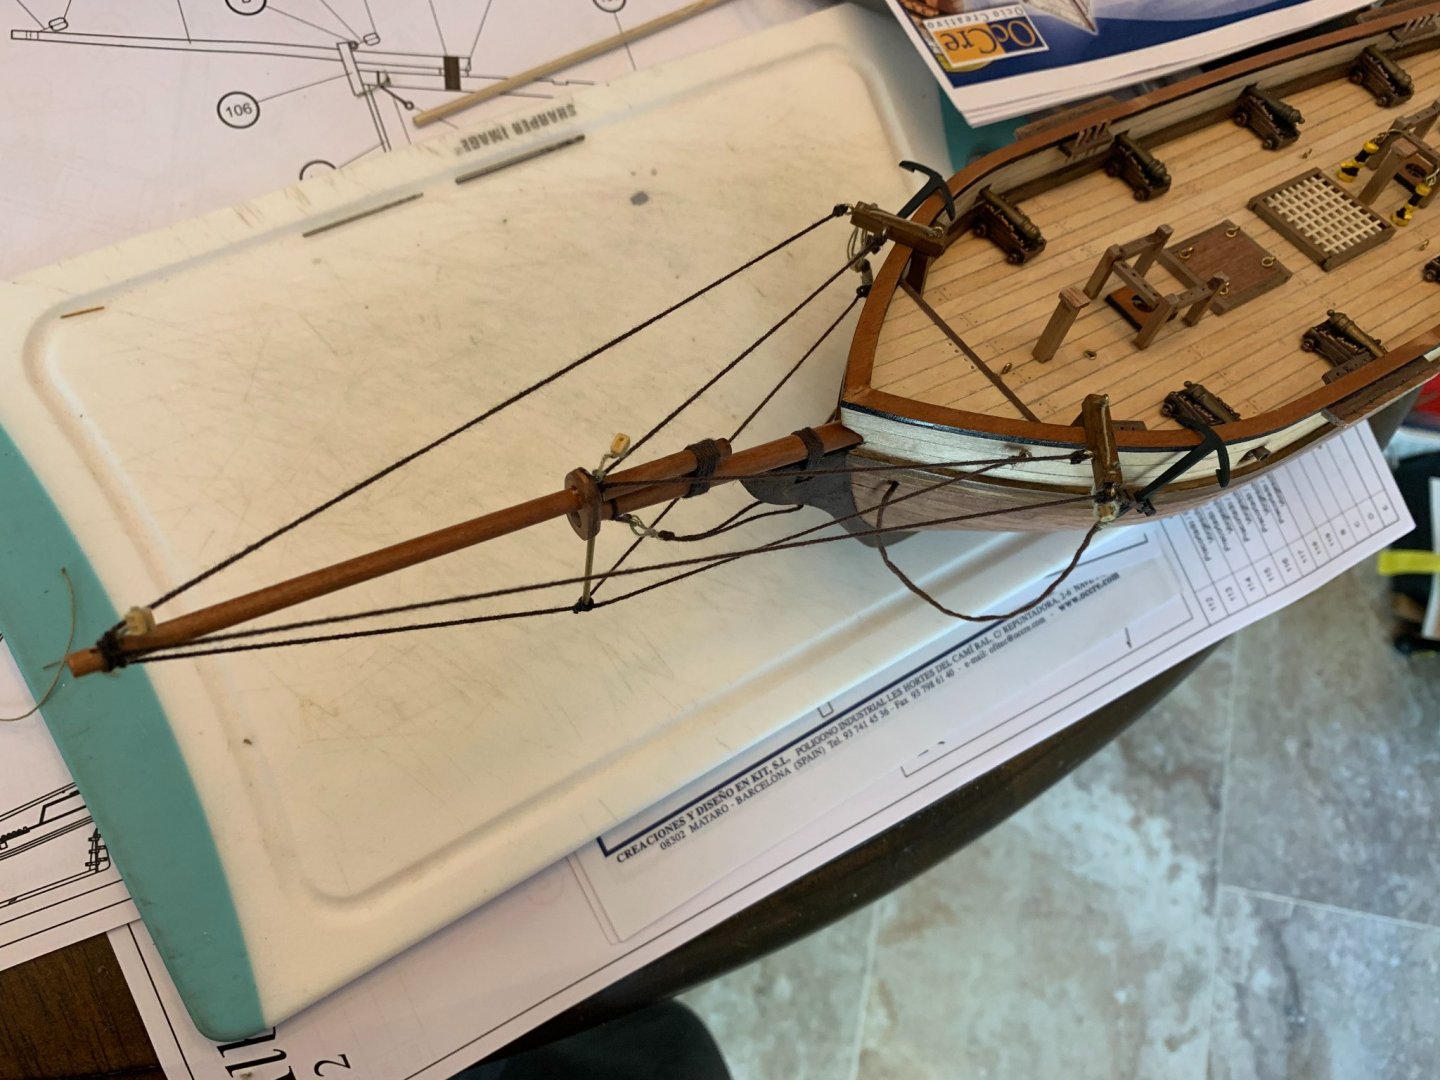
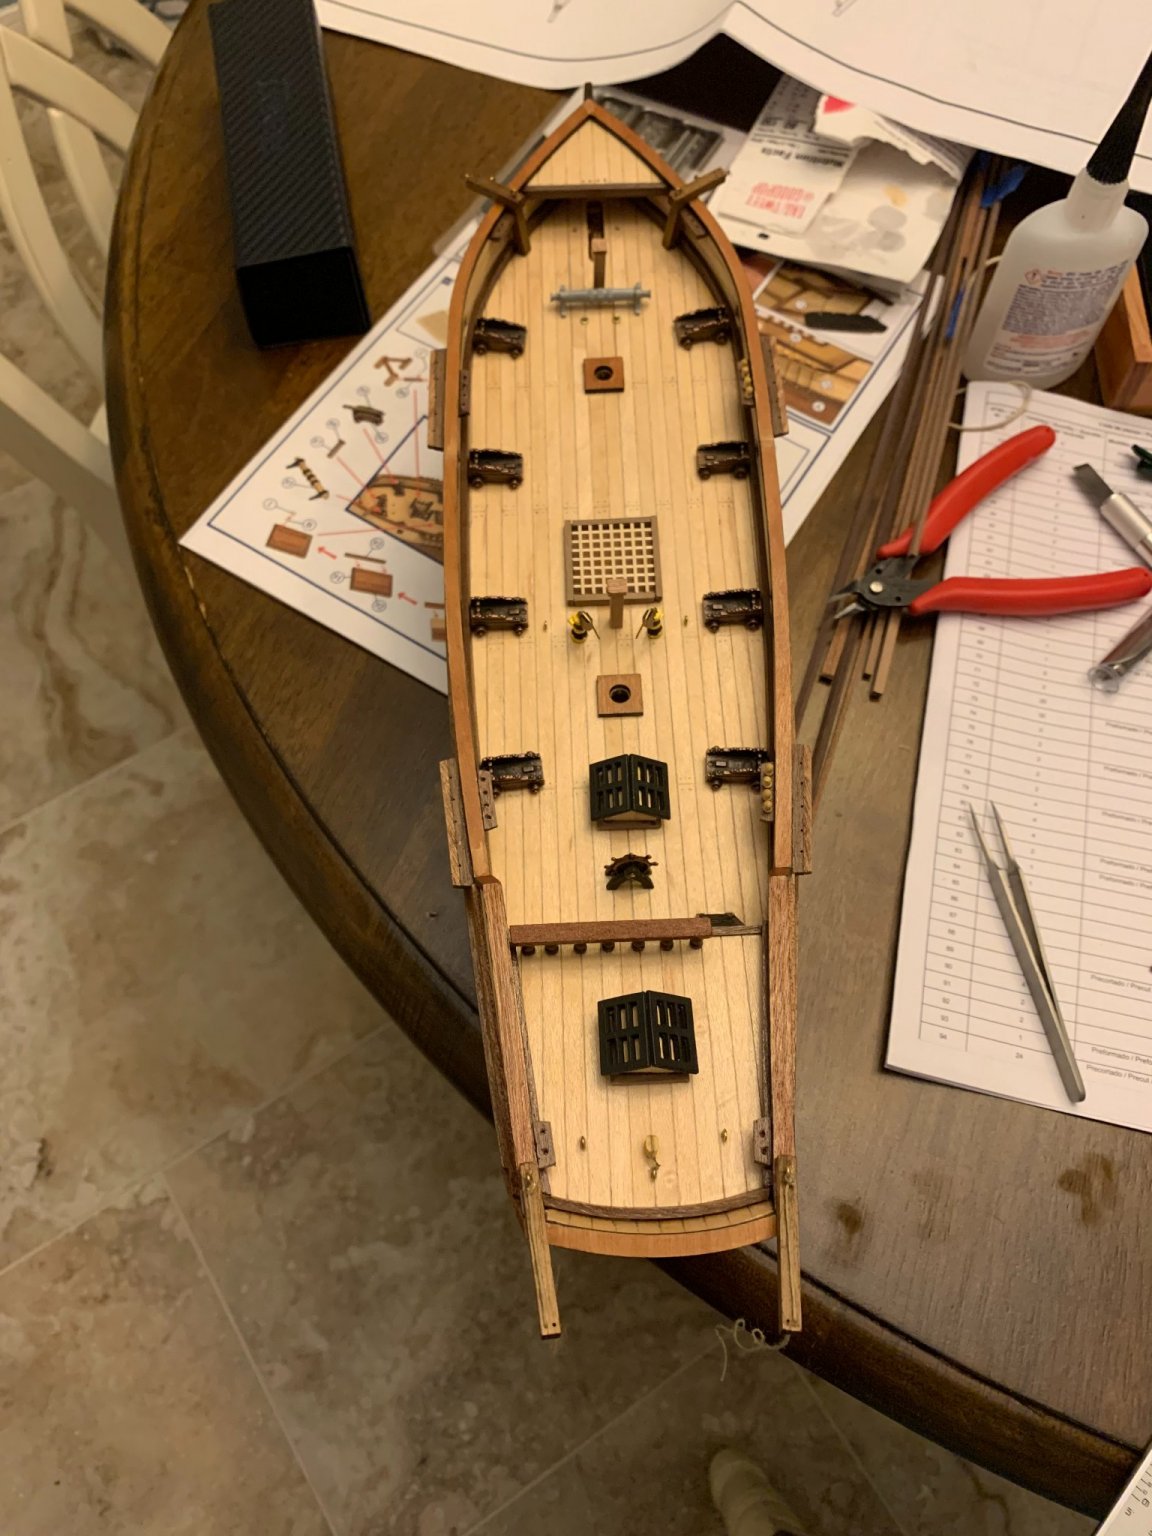
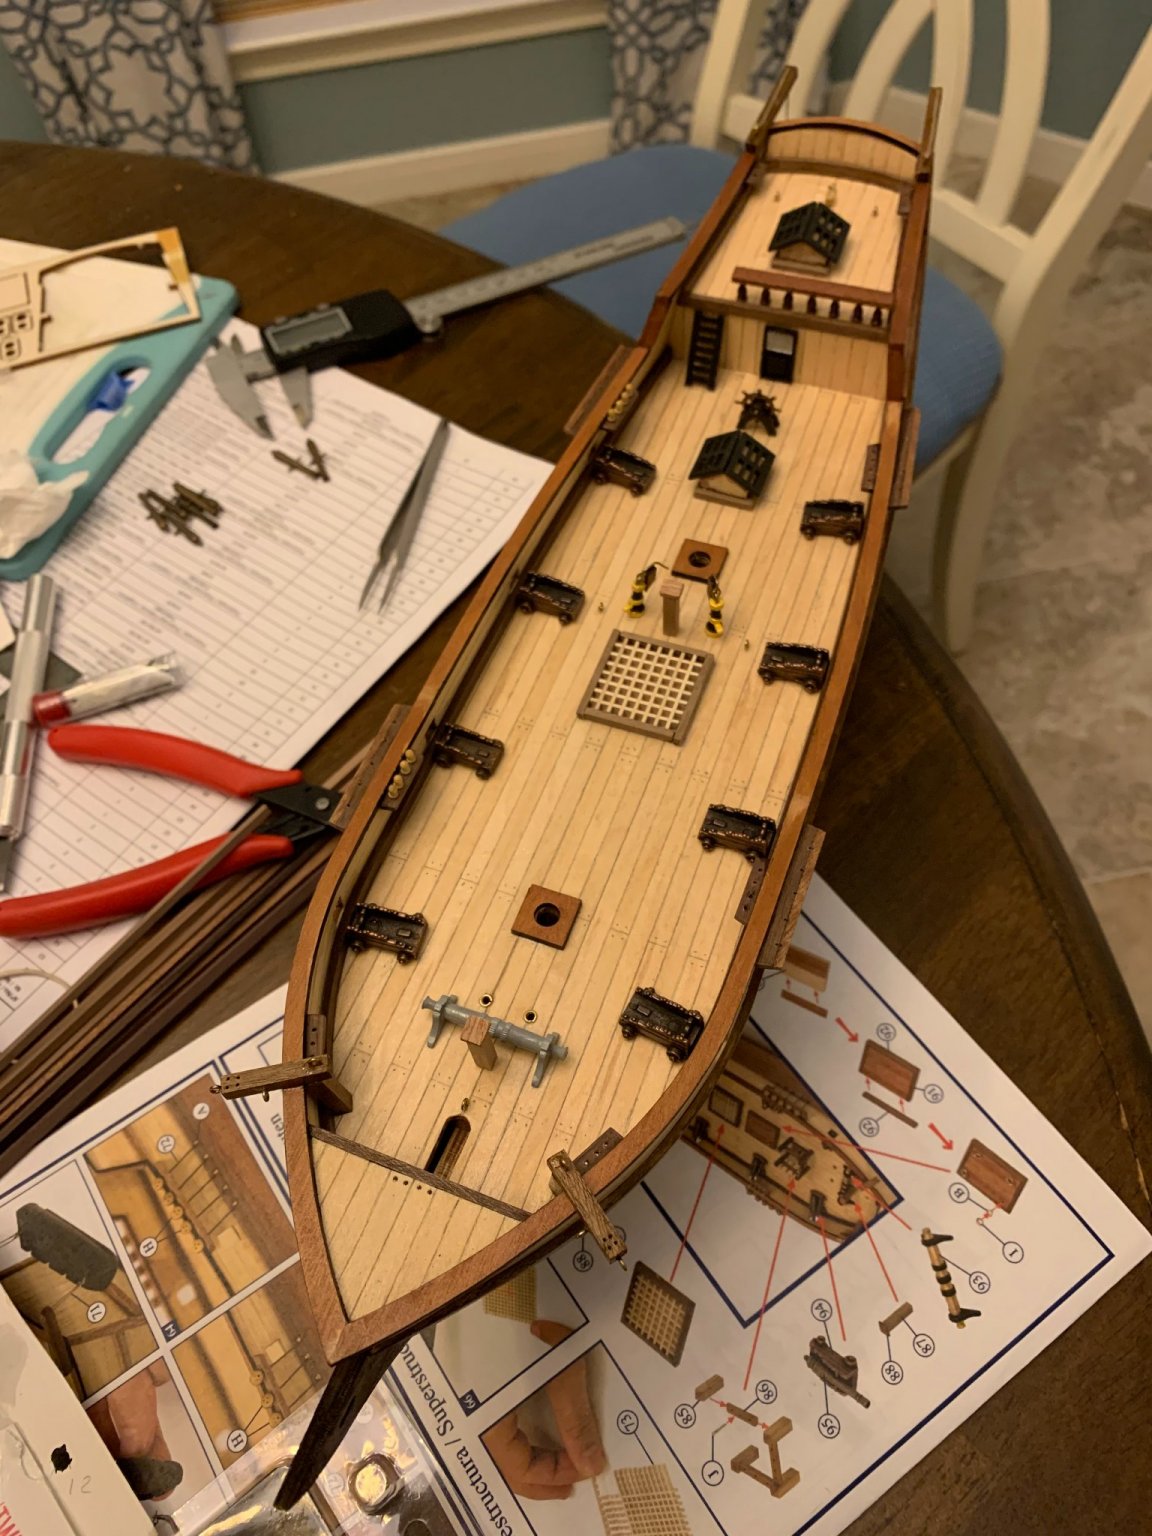
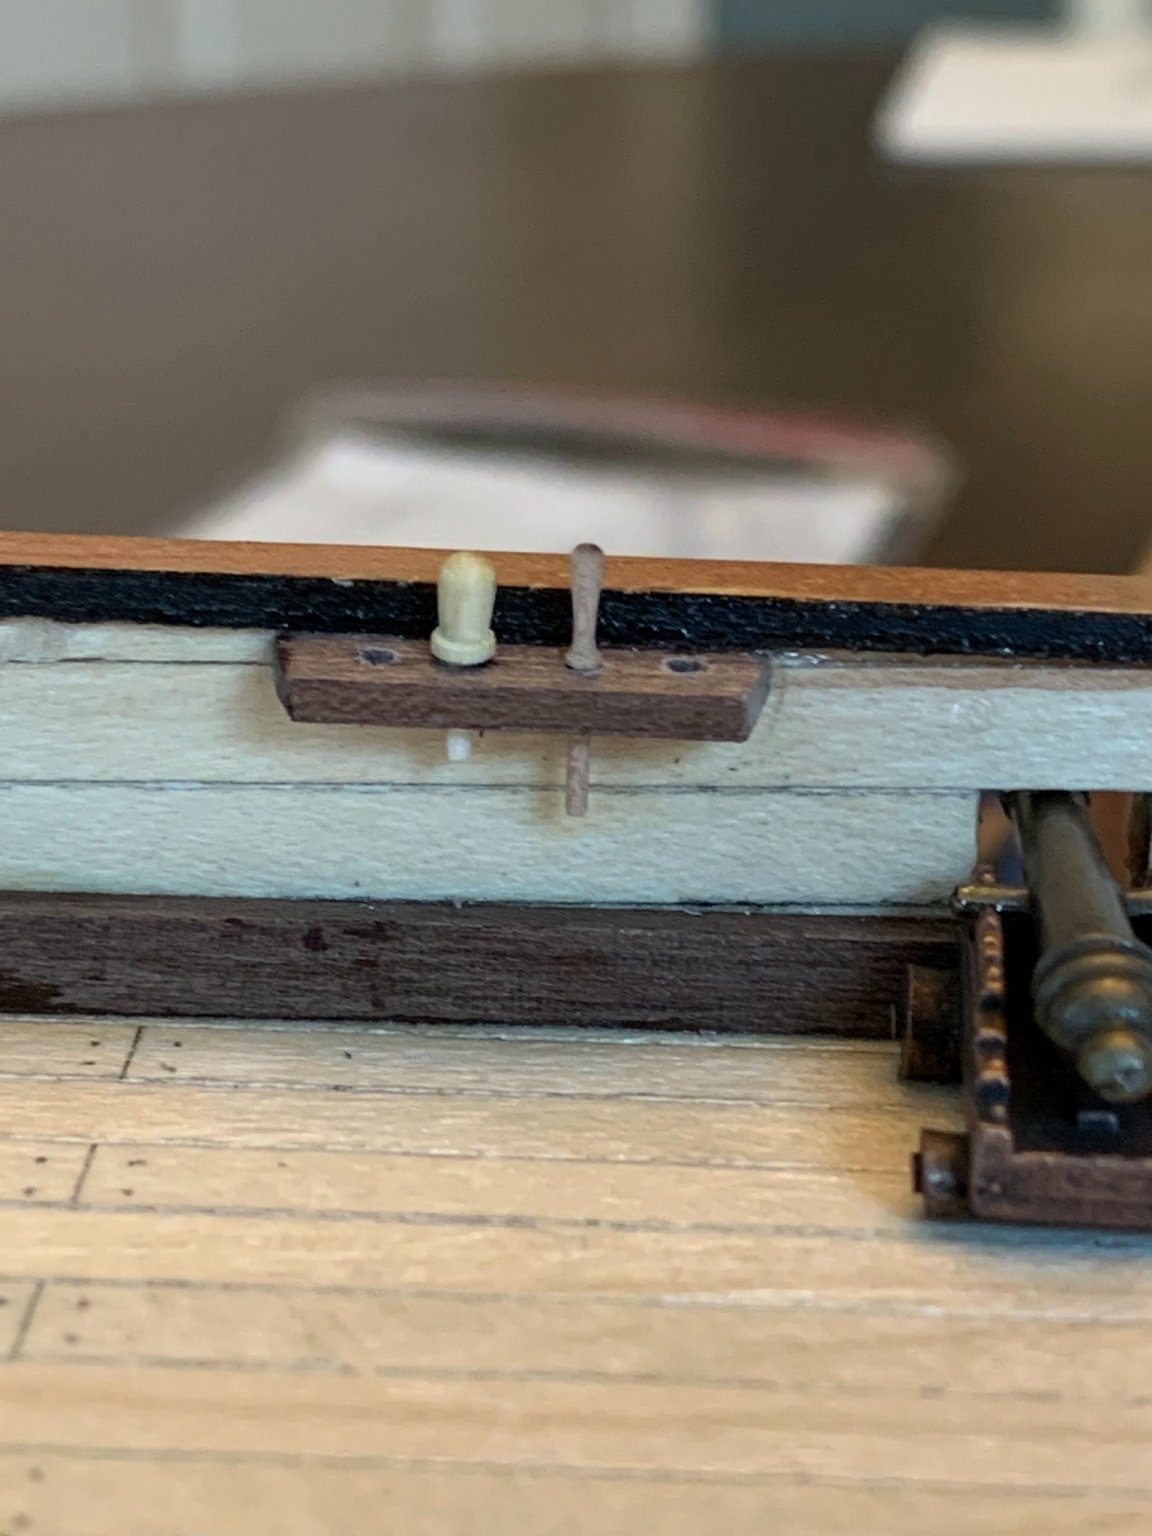
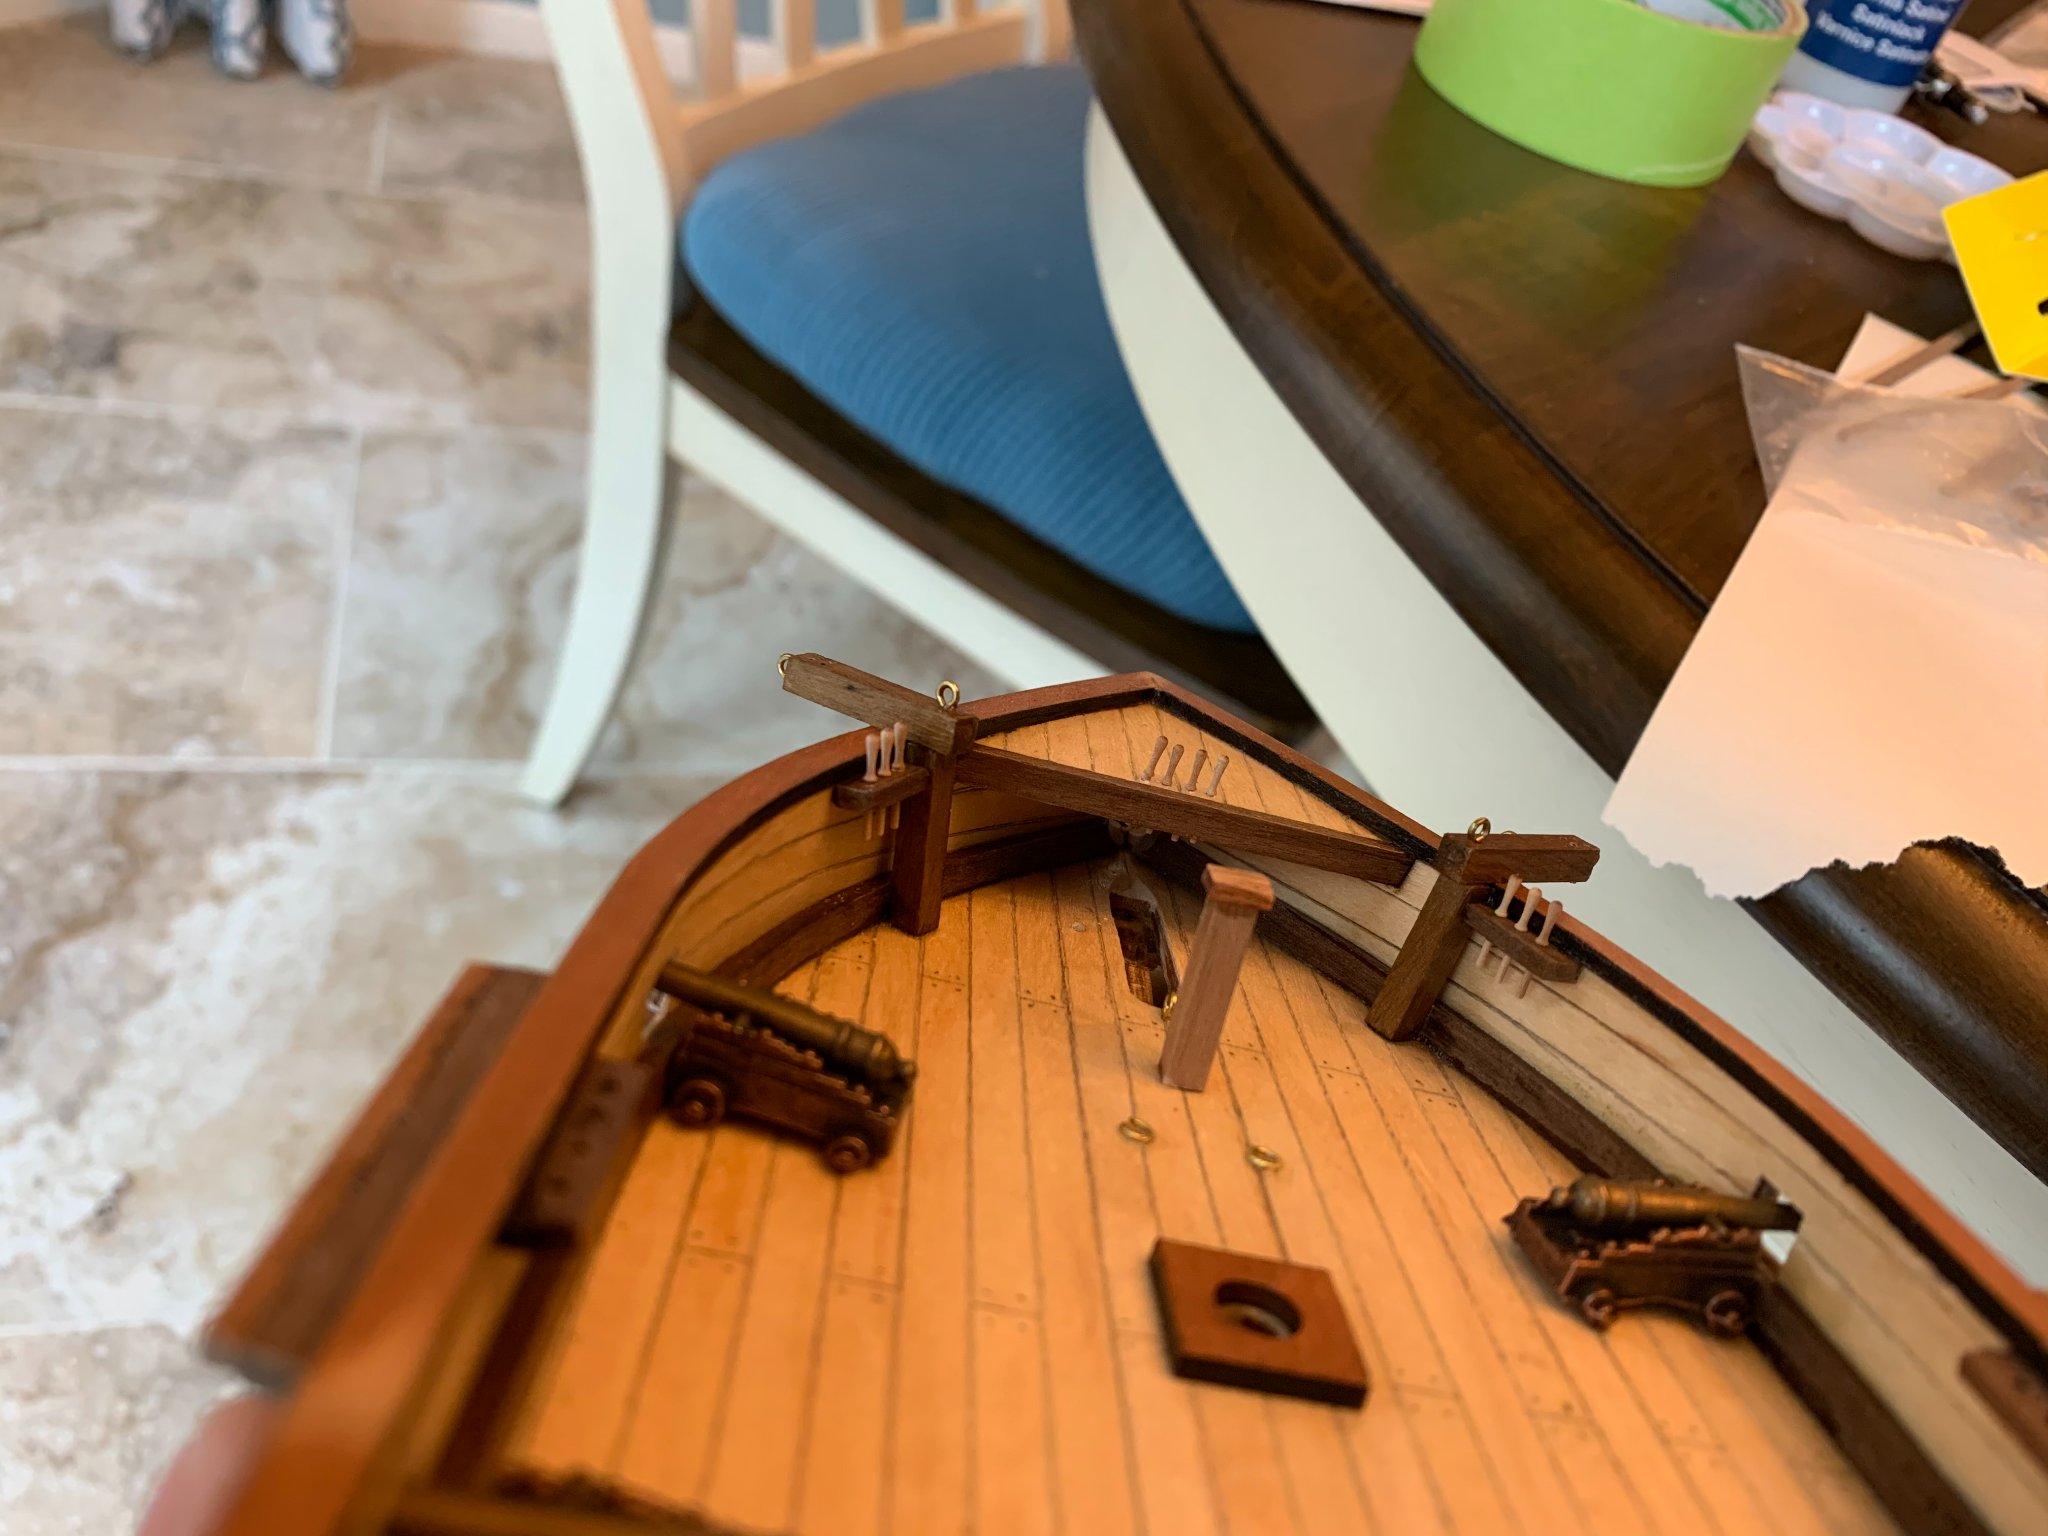
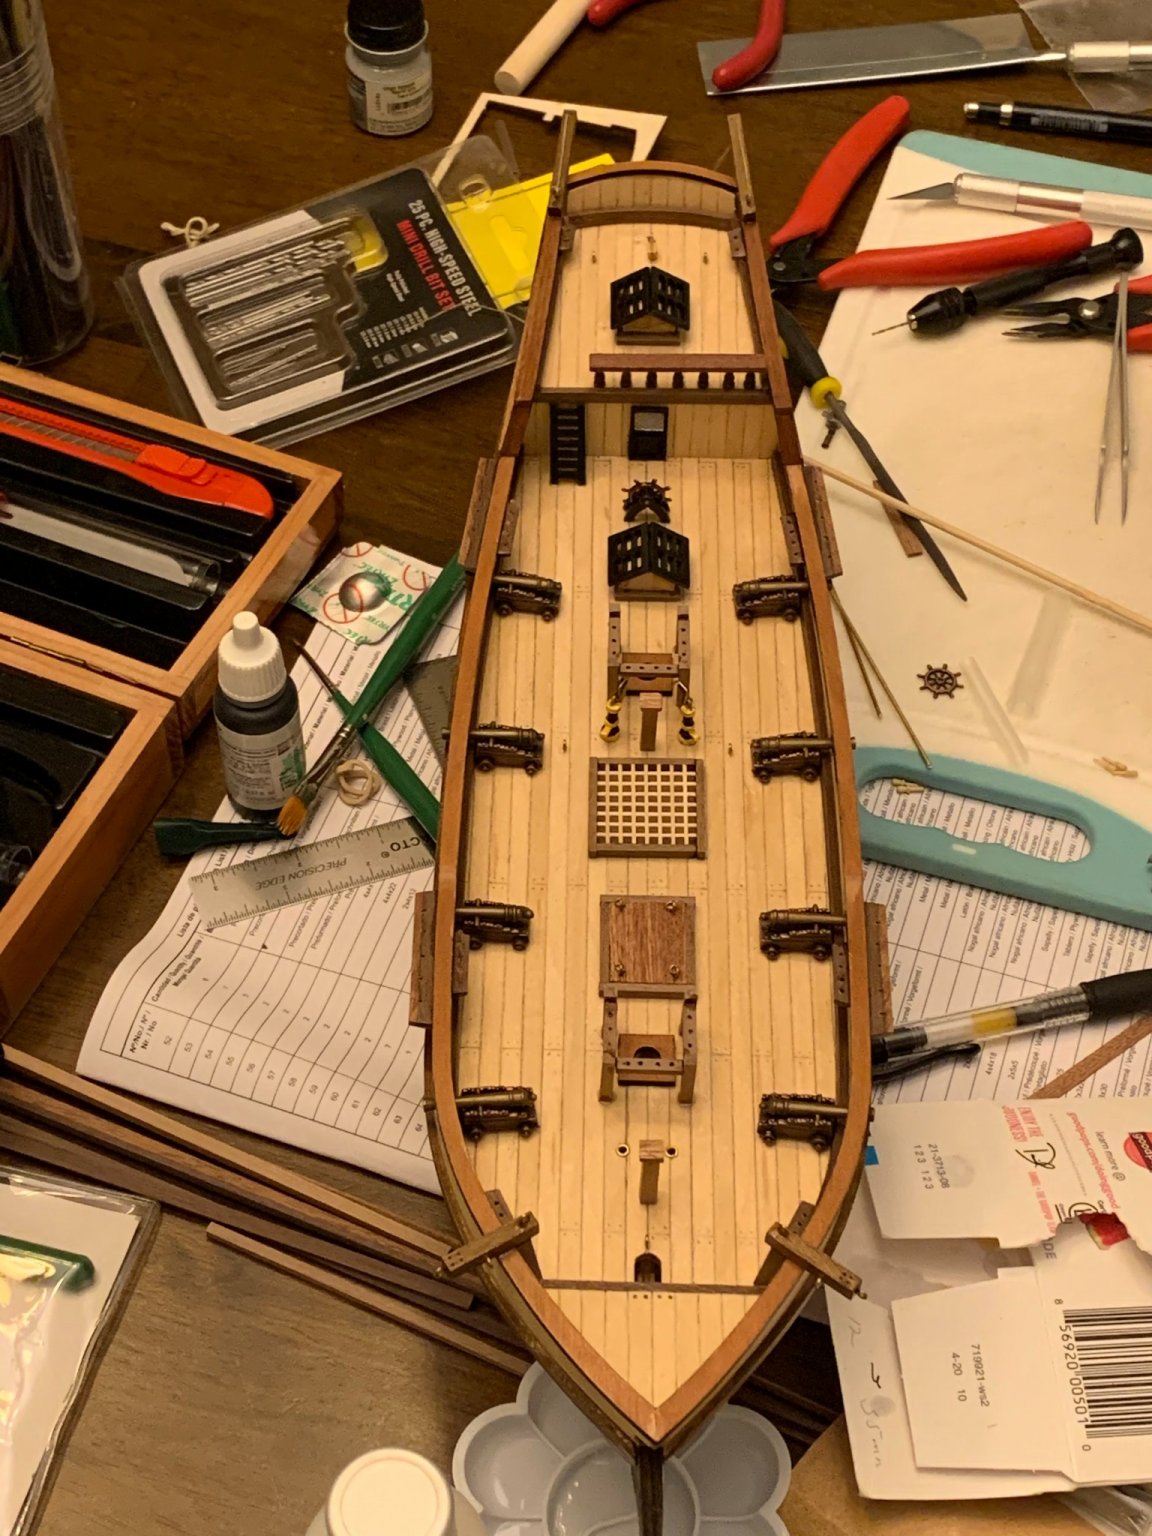
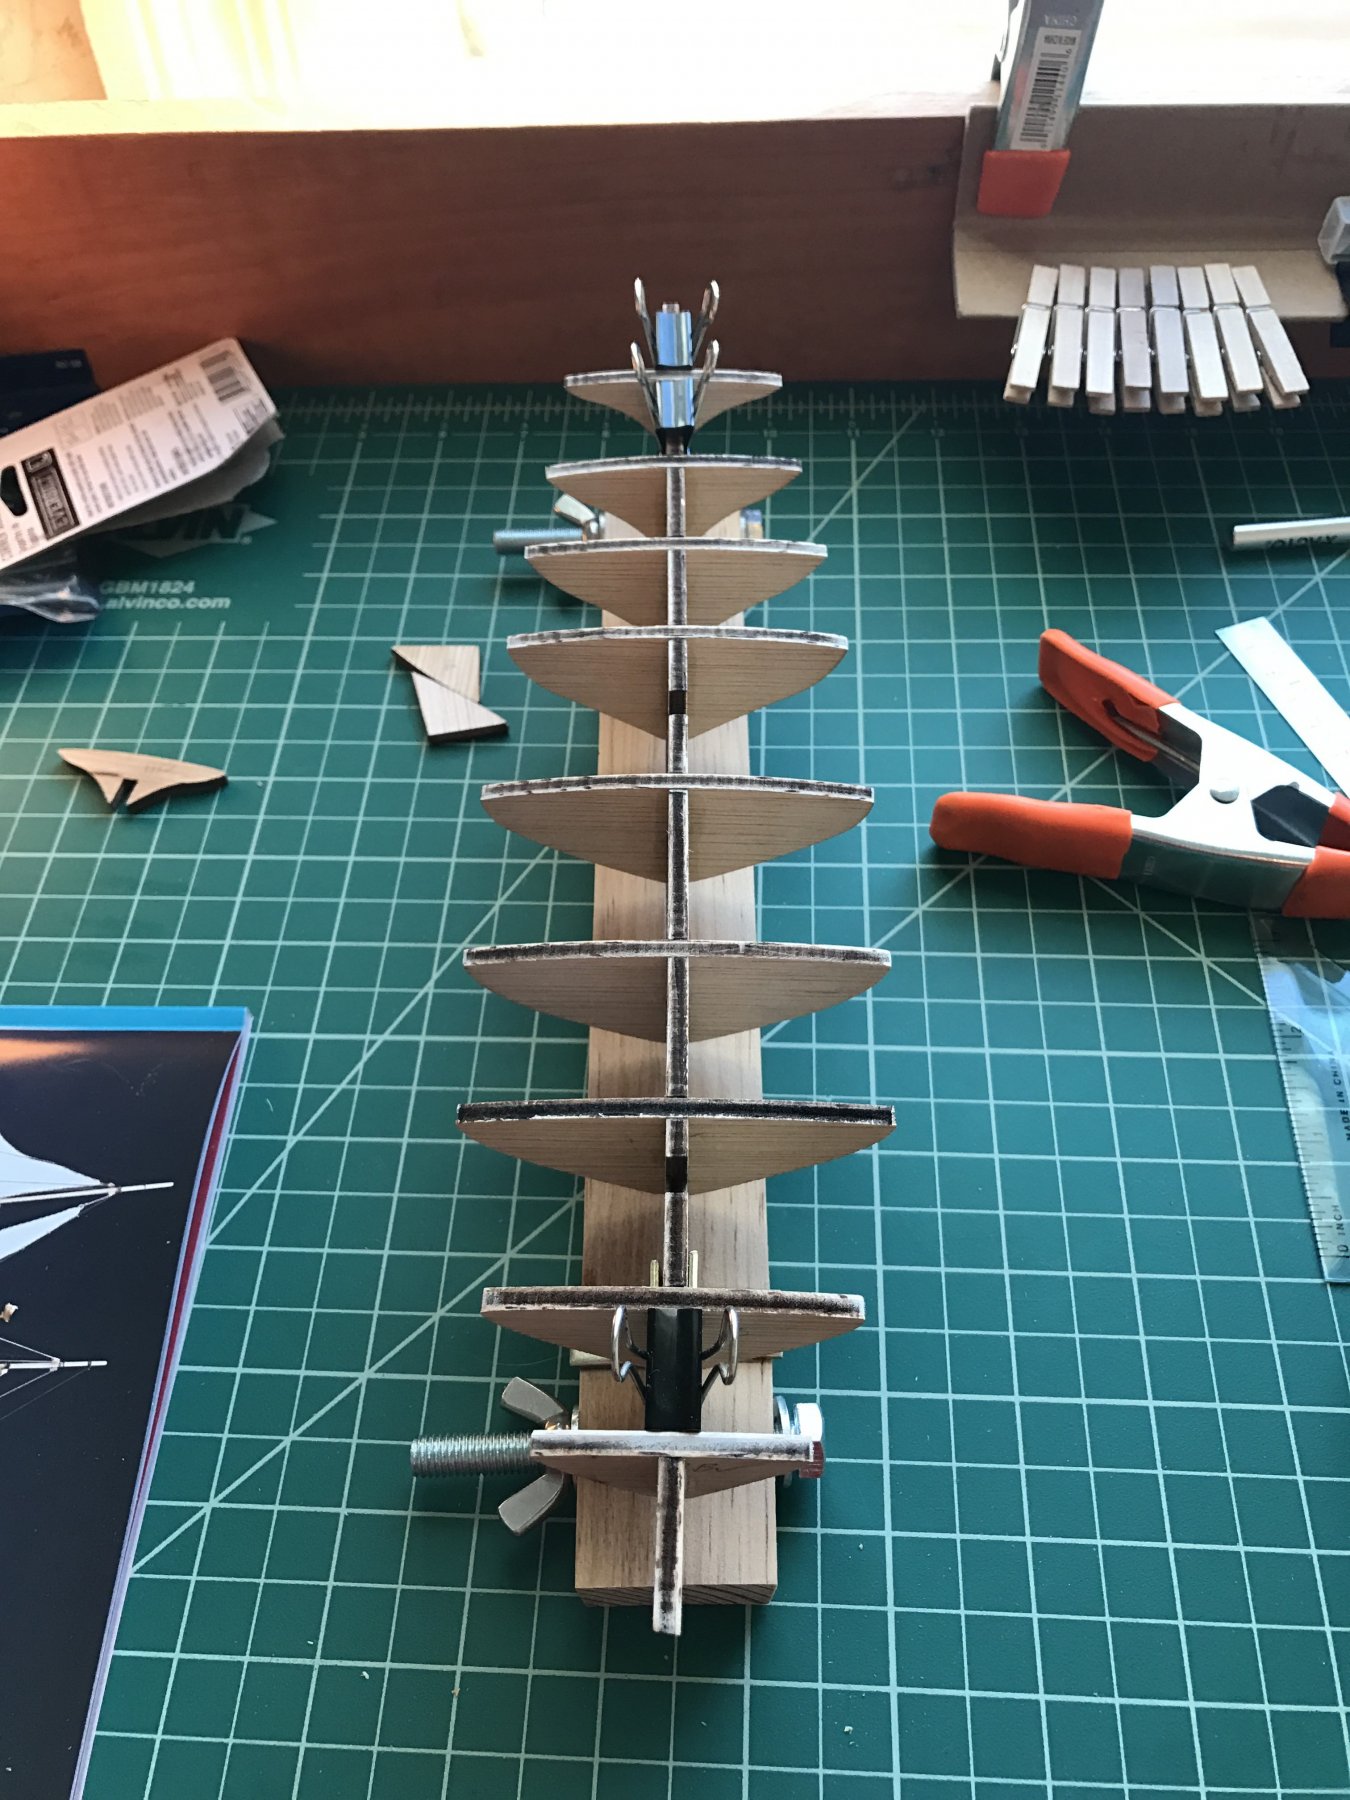
 Hello all, I'm working on my first build. I'm about half way through. I had been surfing the forums for advice, suggestions and to take a look at what others have built. I finally decided to join. First of all, I want to thank everyone here for sharing their knowledge and experience. I've found this site to be a great resource. Below are some pictures showing my journey. to attach, or choose files... Other Media I decided to bend the bulwark before lining them and gluing them to the hull. I had seen some videos and pictures where the bulwark cracks. I wanted to avoid that if I could. I then sanded the reinforcing chocks and frames. Below, I've attached the bulwarks. Like many other builds I've seen, they don't quite meet. However, in the pictures included in the instructions they meet perfectly. I'm not sure where I went wrong but I decided to continue and will fill it in with wood putty. Afterwards I lined the hull. I wasn't happy with how it was looking. I wasn't sure if it's supposed to be this rough. But I figured, I could always sand and fill, so I went ahead. I was concerned about how all the other parts would fit since even after sanding, it still looked really rough. a After more sanding and creating the 4mm flat surface for the keel, it started to look ok. From here, I lined the hull and glued the keel. I'm not completely happy with the lining, you can see some gaps. The varnish helps hide a lot of my mistakes and makes is look better. I deviated from the instructions. The instructions have you attaching the rails and deadeyes before all of the other structures on the deck. I decided not to. I saw the following picture from another post. I noticed that in some pictures, of the ship, they were incorrect. So I glued the rails but will hold off on the deadeyes and chain plates until I have the masts up and can line them up properly. I ended up breaking some rails. Very frustrating. I have an issue with OcCre's belaying pins. They tell you to drill a 1mm hole and, according to my caliper, the pins are >1.2mm. I tried to make the holes wider and I also shaved the pins so they were narrower. I finally got them to fit but, I had another issue. They are 8mm long. They were too short for the bow deck. Luckily, I was able to find some that were longer. Below is a picture of the bow. You can barely see the longer pins, at the bottom, that I replaced the 8mm pins with. I don't know how OcCre expects you to tie the ropes to the belaying pins when the 8mm ones they provide are way too short. Anyway, I went ahead and finished the structures on the deck. Next step is to do the masts. And, that is where I'm at now. You may notice that there are a few items missing. I'm waiting for paint and more belaying pins. I had just ordered 1 package to see if they worked. Now that I know they work, I've ordered a bunch more. 02MAY2021 I finished the Bousprit this morning. Since this was my first boat and all, I was so proud of myself. I was showing it off to my wife, again, so proud. I then placed it down and looked at the pictures in the instructions, then I saw it. You NUMB SKULL, you used the wrong thread! After another hour, I finished the Bousprit again. But, this time with the correct thread.


-
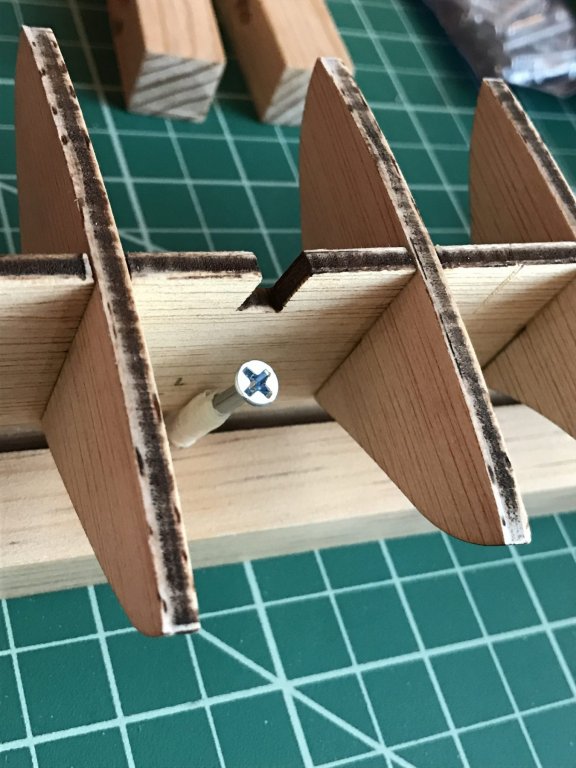
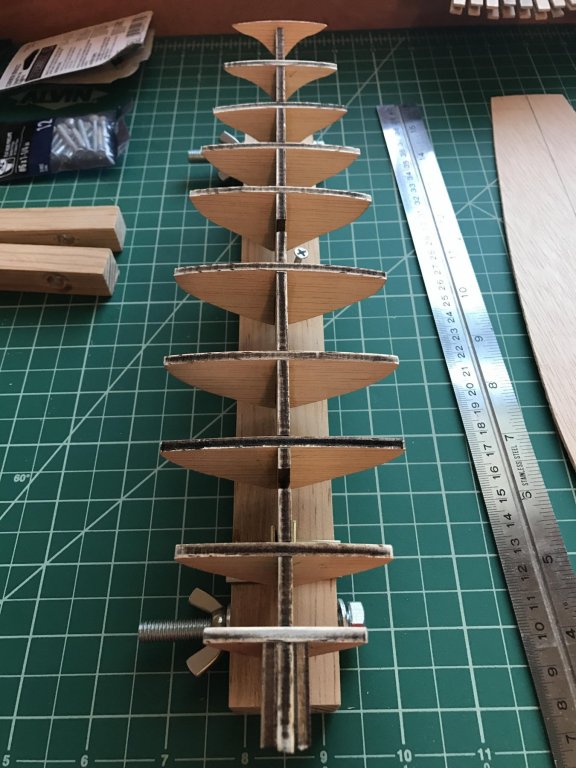
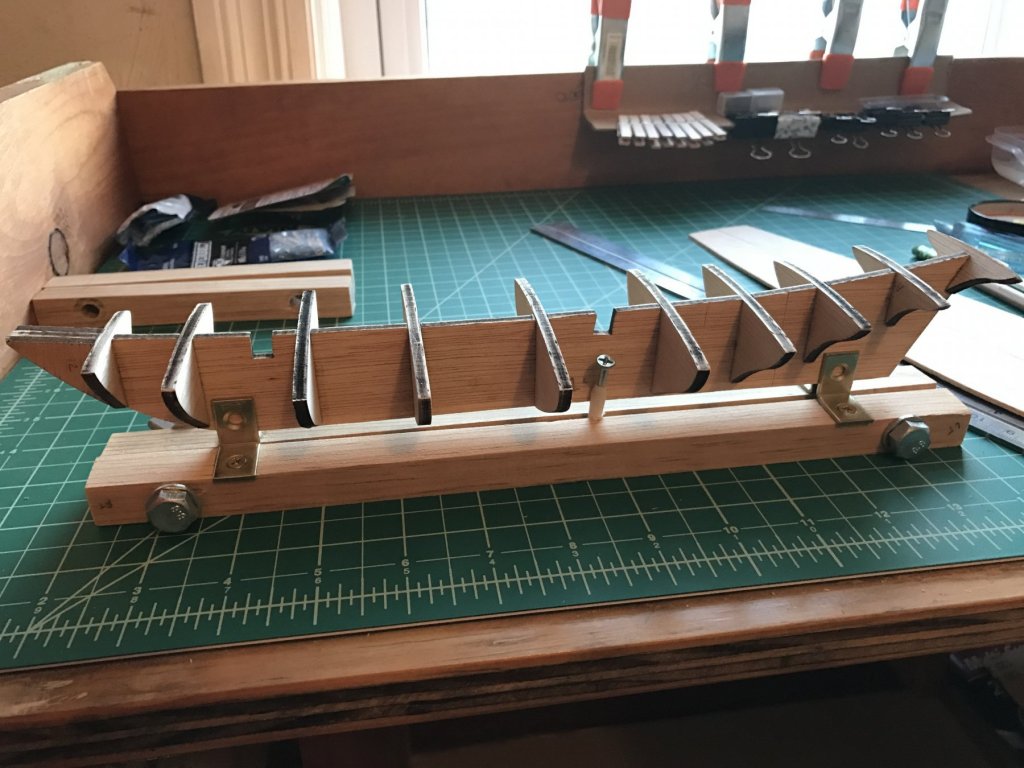
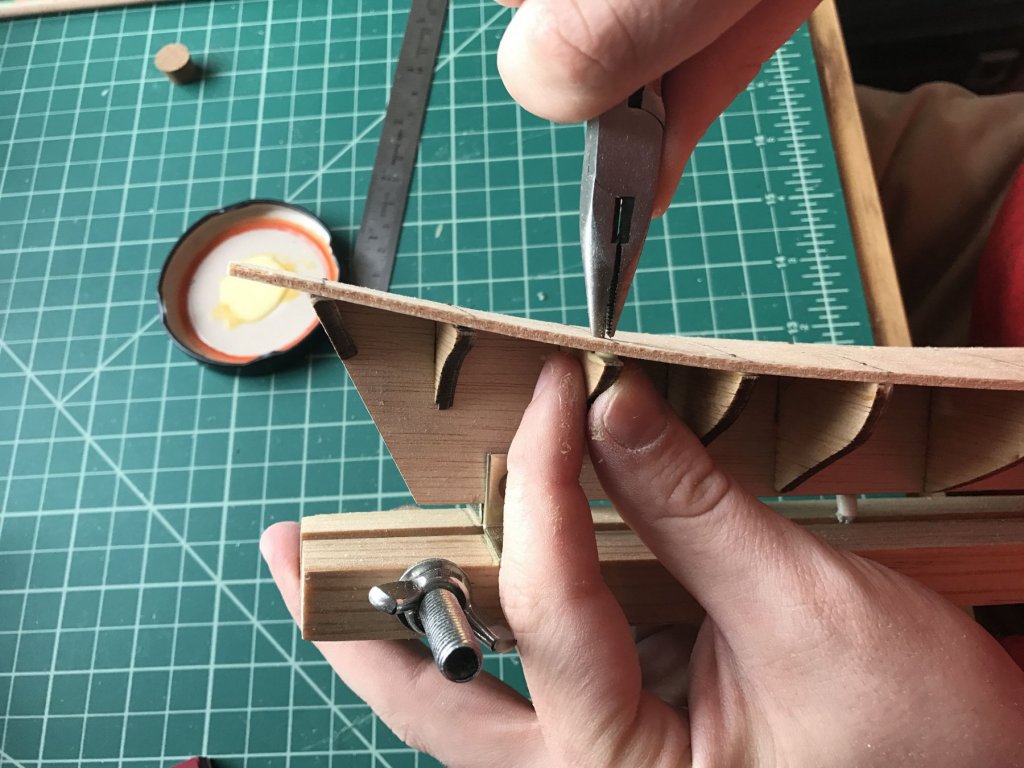
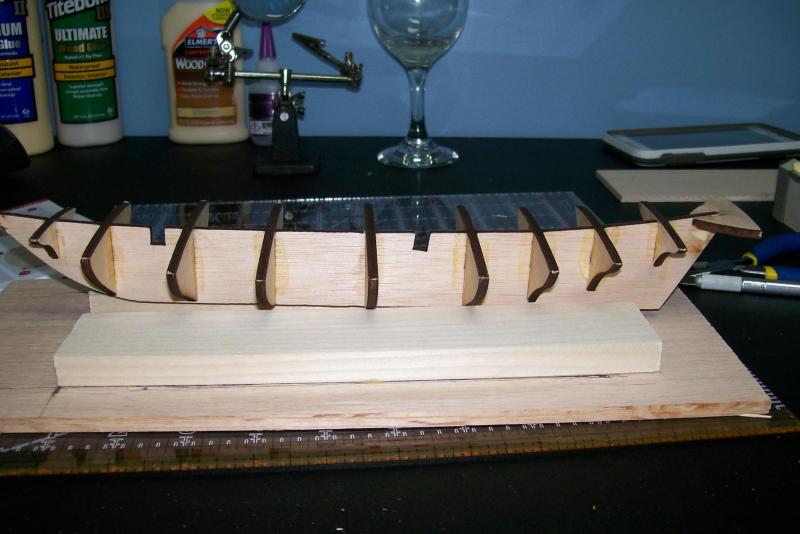
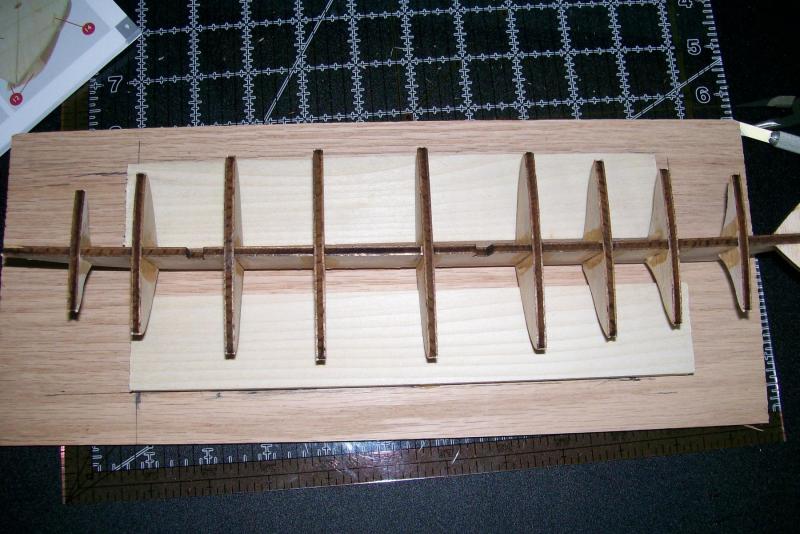
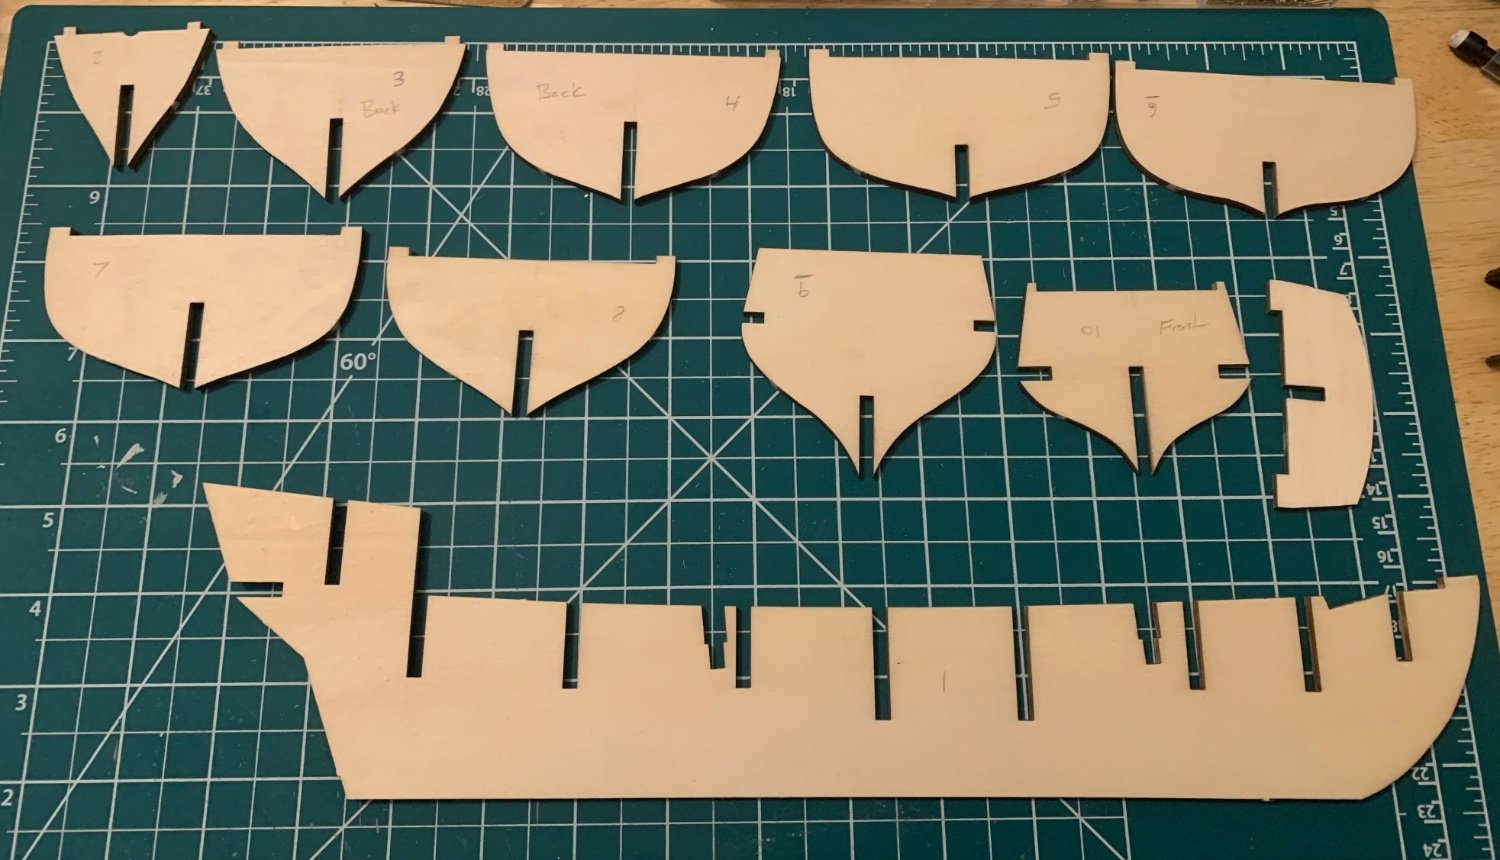
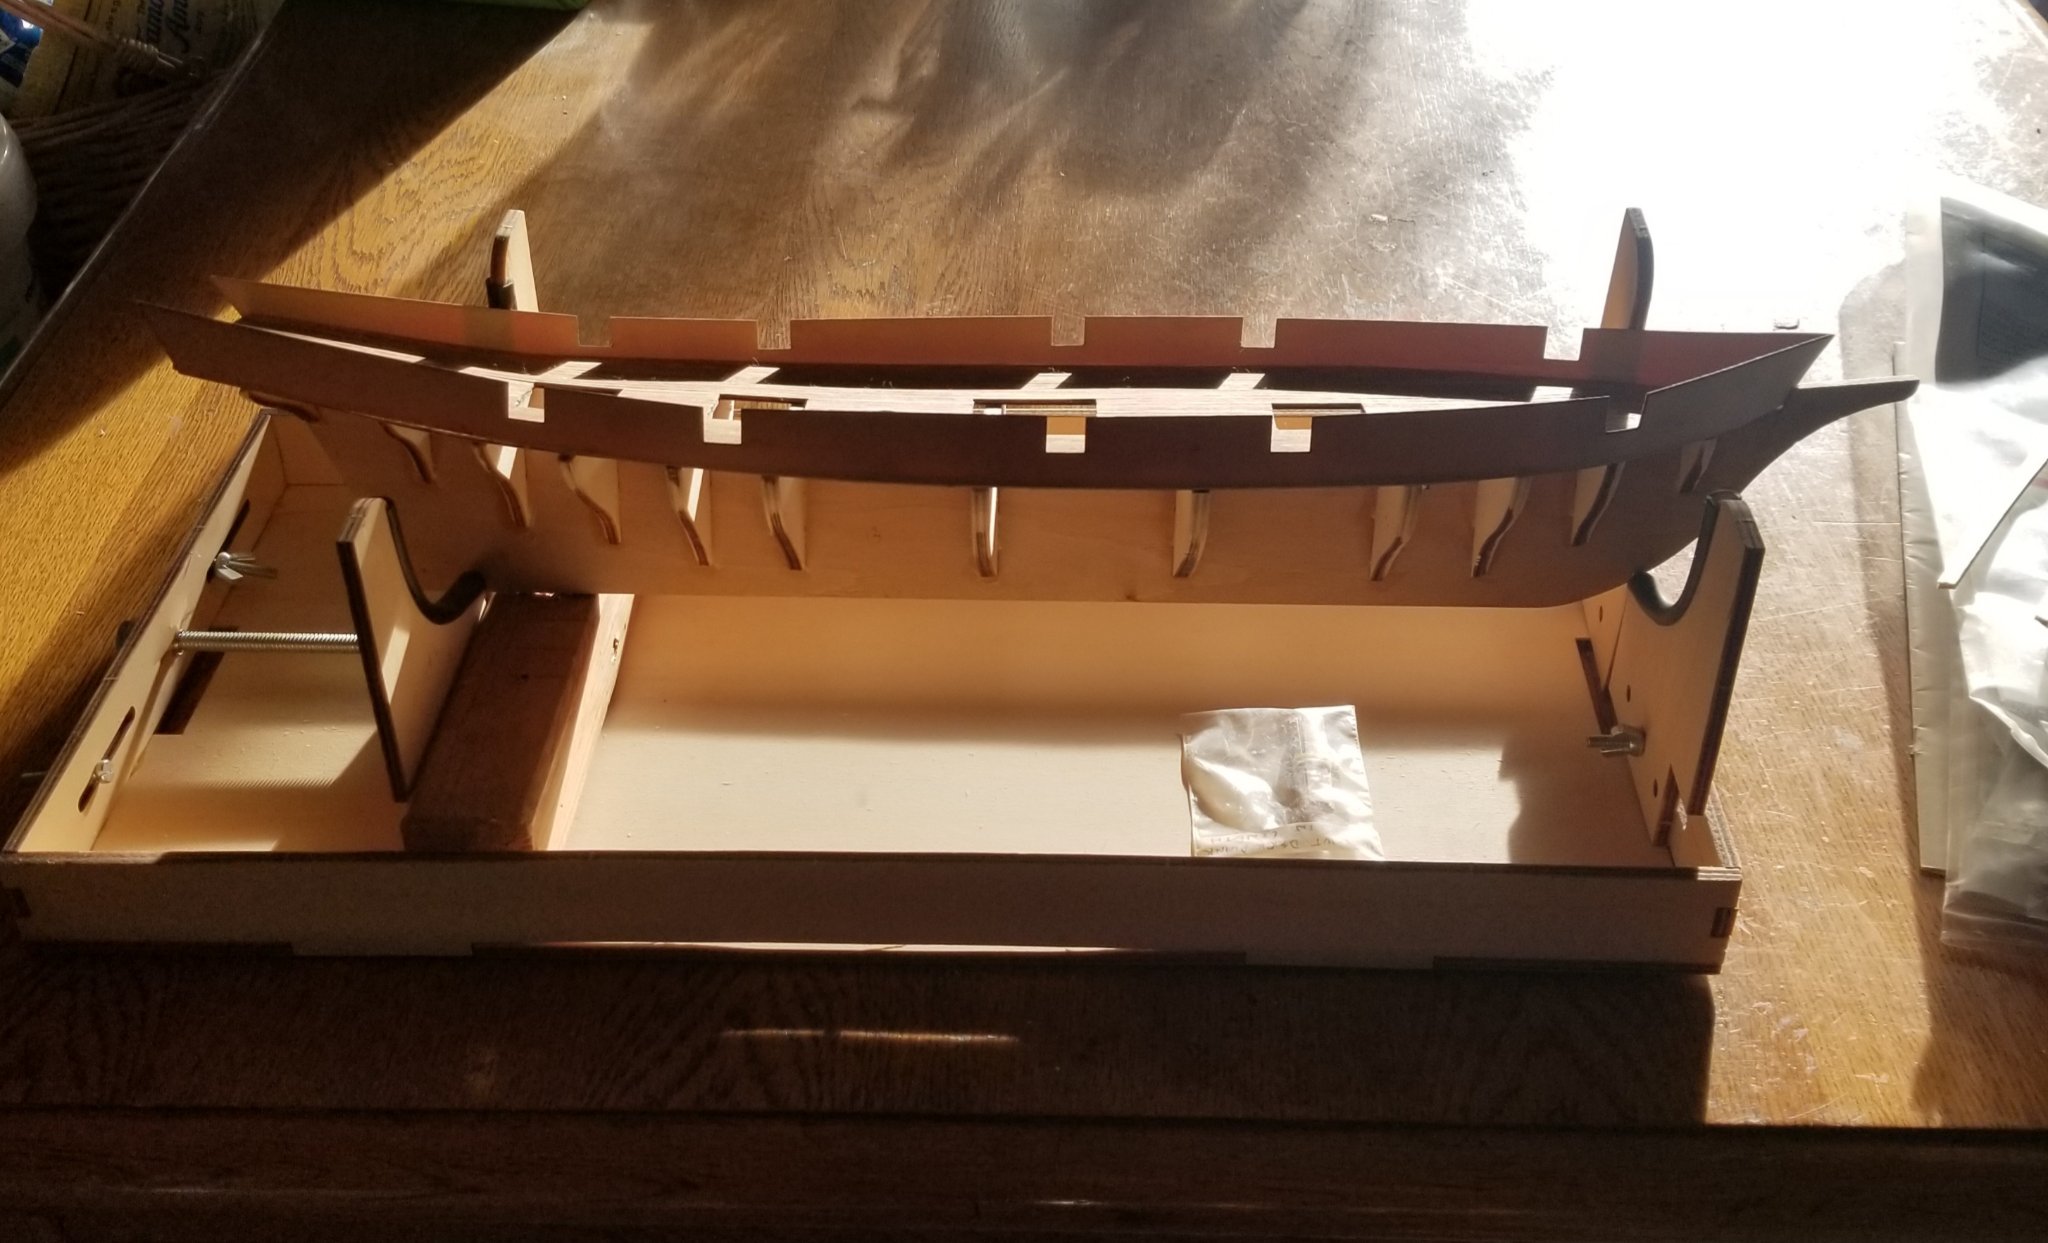
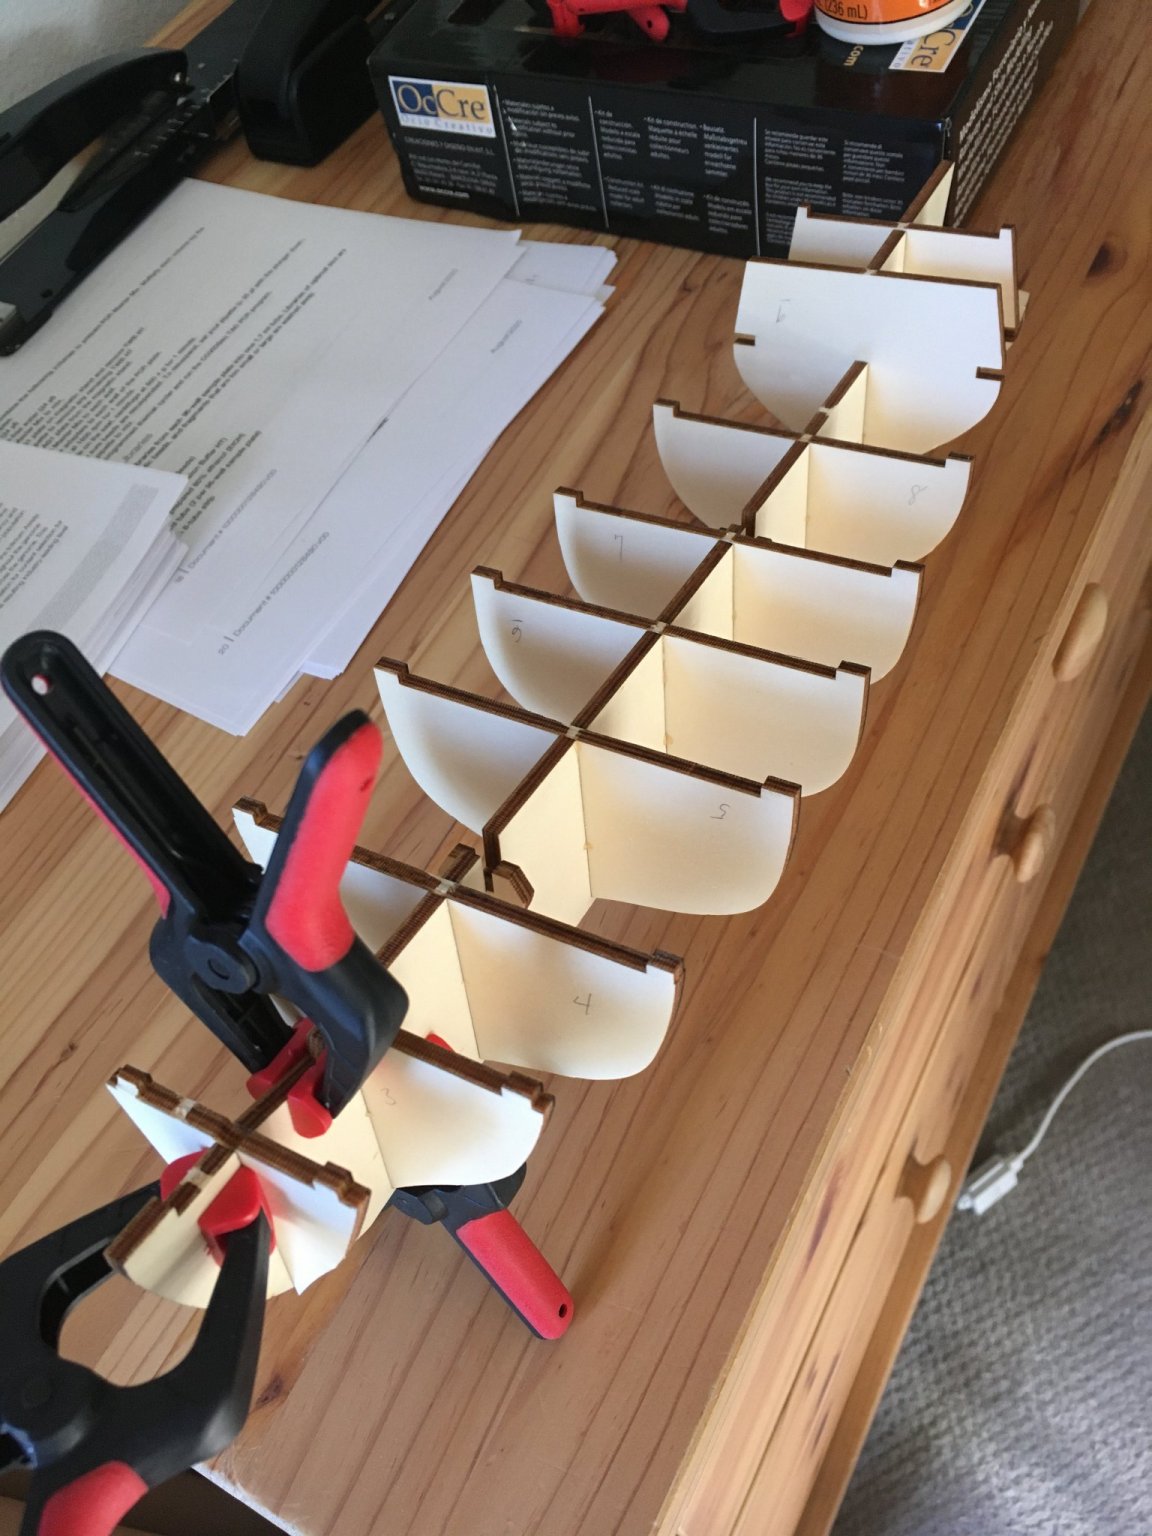
 First build. I'm hoping that this log can be useful to people in the future as well, so I'm going to approach it as a beginner, speaking to beginners. Went with Constructo's Albatros for a few reasons: 1. I have ambitions to do larger POB builds, but wanted to try the hobby out to make sure it was for me. I thought this kit was a good way to get planking experience on a small build. 2. Schooners have a special place in my heart, being from New England, and I like the sail plan and rigging options the kit allows. 3. Cost. First build! 4. Kit includes some tools, including smallish needle-nose pliers, knife blades and a handle, a sanding block, and a file. Note, only the pliers and knife blades have been useful; the collet on the knife comes loose too easily, the file is rubbish, and the block hasn't been a good size for anything yet. First thing I noticed was that the plywood sheet from which the keel-frame is cut had a bend the long way. About 2.5-3mm. All the advice I read here said to request a replacement, but I thought I would try to fix it so I trudged along. Cutting out, numbering, and sanding the bulkhead pieces took about an hour. I built a jig for attaching them to the keel-frame flush and square, and used binder clips for the ends: In the picture above on the right you can see the slight bend. My solution was to tighten the jig I'd built to hold it and simply warp it back straight using a screw, which acted as an adjustment knob. It worked pretty well: After fairing the bulkheads to accept the deck, I attached it using wood glue (TB II) and the included nails, which, quoting a previous builder of this kit, bend just by looking at them. I found using the included needle-nose pliers like this, with steady, gentle pressure, worked the best (if you don't want to get one of the nail pushers): After drying, I took it off the jig and the keel had stayed nice and straight, so I'm calling it a success. Planking next.
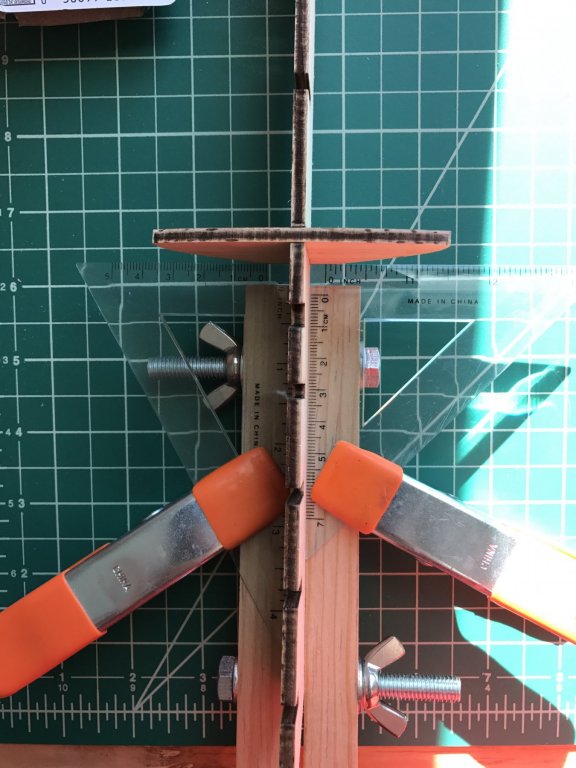


- 13 replies
-
- 1
-
-
- constructo
- Albatros
- (and 1 more)
-
 Hello Everybody.. My Name is Saif - 26 - Egyptian Living in Kuwait and this is my very first Ship model i am currently working on with my father's help @mhegazi .. I'd like to share my work with you and i would appreciate any feedback and any inquiries.. I want to make sure that i got everything right and the methods used r the correct ones. Thank you very much
.thumb.jpg.1cd2d2694ba7f2cb9a0c93793a6f493d.jpg)
.thumb.jpg.878f3bdf81741598fa8163b779871463.jpg)
.thumb.jpg.b4f092c2f1fd9e929472a2a42ee1a792.jpg)
.thumb.jpg.787228627c23381c310f5078919d7e28.jpg)
.thumb.jpg.e57cb89bd107bc9cbce5a80ed23ac4cf.jpg)
.thumb.jpg.1fc86a574fab0d6022fa196d64cd72d4.jpg)
.thumb.jpg.e95f737fcec54c754f953db328bad9b0.jpg)
.thumb.jpg.1ee01ed424d2d708f2bb48d6a343409f.jpg)
.thumb.jpg.b83fd7ef7d6f46c3c1314c8023ab9bbe.jpg)
.thumb.jpg.9331d2c1b8657c09b42725a6909bb042.jpg)
.thumb.jpg.0f1fde3203366e330619ca4cf925b784.jpg)
.thumb.jpg.a8b717a48674848e566a22f7940ceebf.jpg)
.thumb.jpg.7b0da7e419abbf1df4018e8512a32d19.jpg)
.thumb.jpg.ac7a83fde6db100e8bfab31dce861382.jpg)
.thumb.jpg.245ebadfd42db9c6ce89554415d77d5e.jpg)
.thumb.jpg.413c1399fecc21acee4a7c7f10c75fc1.jpg)
.thumb.jpg.9e96cf64bb2d2dadc3e545e568d05e65.jpg)
.thumb.jpg.0b7e9efe76dc98b066b486006becbf57.jpg)
.thumb.jpg.5d03ccc44b867d0b5b50084395a73d51.jpg)
.thumb.jpg.ae594cbe2c33697610aeea4880010c8b.jpg)
.thumb.jpg.b7ac535656195dd7b140a5a4ff68851e.jpg)
.thumb.jpg.195a93bdcacf108a1b59263fb4d048ee.jpg)
.thumb.jpg.d9009dc25c0981bace4423d9414d0a62.jpg)
.thumb.jpg.f7918dada2307545e50925c20a6e6e65.jpg)
-
 Ok I am posting my First Build Log on my 2nd 1st build. its the Constructo Albatros. So for the instructions are so much better than my first kit.I will (hopefully) post pictures of the kit and Frames on false Keel. I am looking for input and much encouragement on this first build. BRIAN DELLIS
-
Greetings fellow ship enthusiasts! I've been doing research regarding some of the kits out there and was looking for some feedback regarding size variations of Baltimore Clippers. Specifically with regard to the Albatros I've noticed 3 kits available Mantua, Constructo and Occre which lists scale at 1:40, 1:55 and 1:100 respectively. That said the model lengths are reportedly 27" 20" and 22.5" respectively which doesn't make much sense. I am aware that the Occre kit leaves something to be desired and doesn't look much like the other two but the scales must be off between the Mantua and Constructo kits as well? I've been looking at the other Baltimore Clipper (or similar looking) kits available Lynx, Pride of Baltimore and Roger B. Taney whose scales are around 60-64 and sizes range from 27-34" the Harvey which is 36" at a 1:50 scale and also the Dapper Tom via Model Shipways which is 24ish" at 1:76 scale. For the most part looking at the models they all seem somewhat similar in design gunports, hull shapes etc, so unless the Albatros was a significantly smaller than average clipper ship I'm wondering if there is some sort of logical explanation. Thanks all
-
 As a kid I tried my best to finish a partially built Billings kit from H.M.S. Bounty that was given to me by an acquaintance who gave up in frustration. Being too young/inexperienced/impatient/much interested in 1:24 plastic car models, I never finished it either and got rid of the kit after many years. Somehow, this hobby got under my skin so I chose to pick it up again. Since I was overwhelmed by the technical skills that are required when working on the Bounty, I decided to make an easy start so I got myself the Albatros from Constructo. I am well aware this is not a very detailed model and after opening the box I also found out that the materials are acceptable at best. All the better for me though, because I want to gain experience with planking and rigging. I will post pictures and my thoughts as I go along, but being very busy with my work please don’t expect me to do so on a very regular basis. Feel free to comment on my work and do share your thoughts and expertise, as I haven’t done any wood modelling for more than twenty years. Natan


-
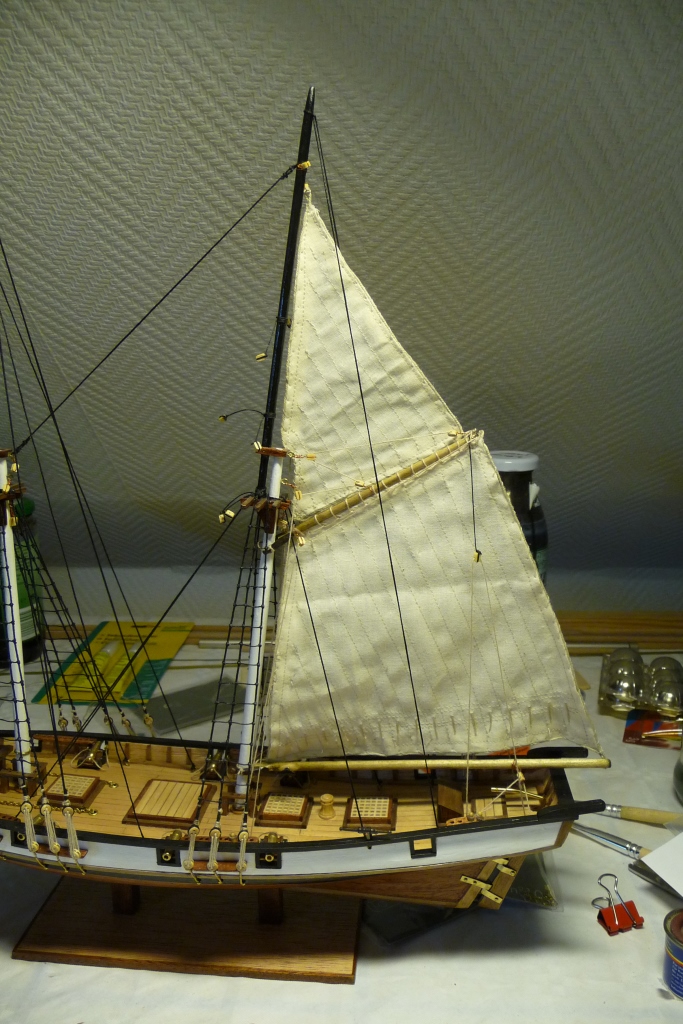
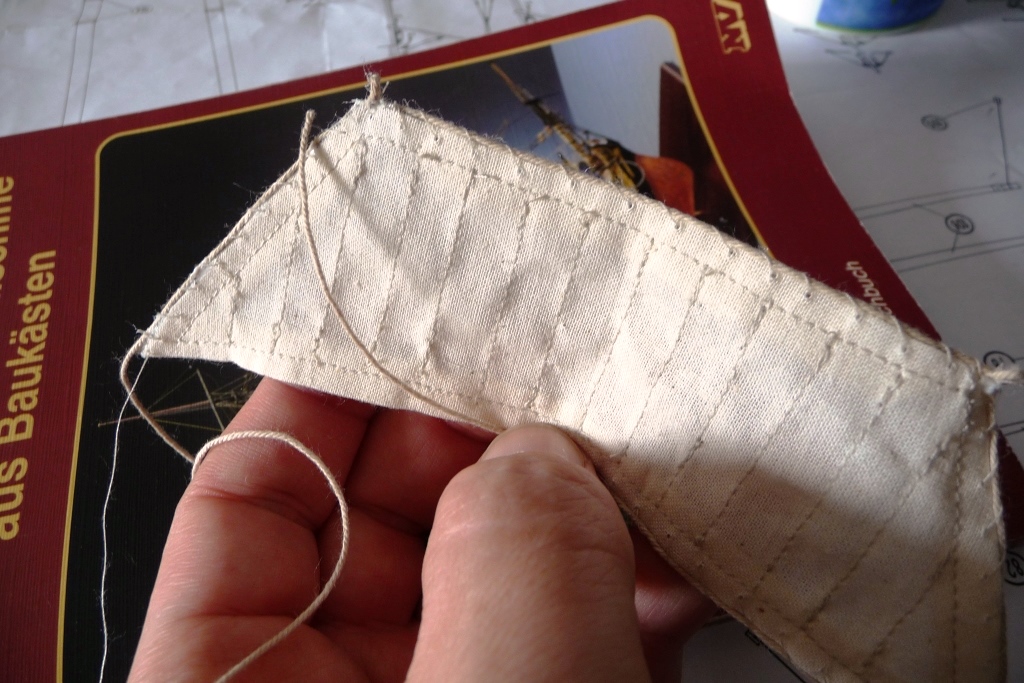
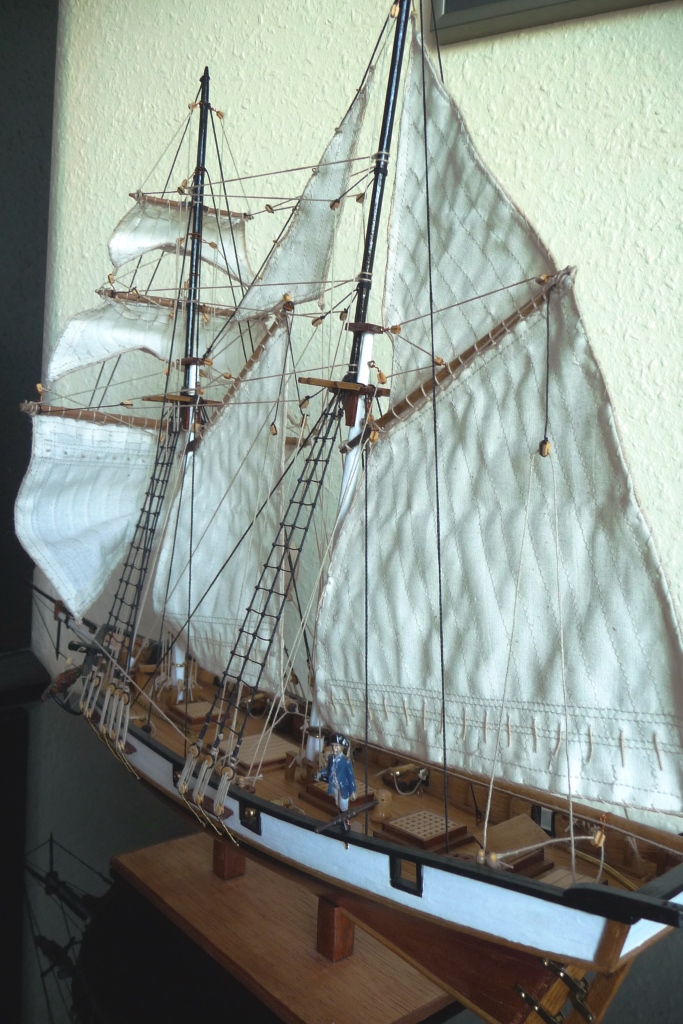
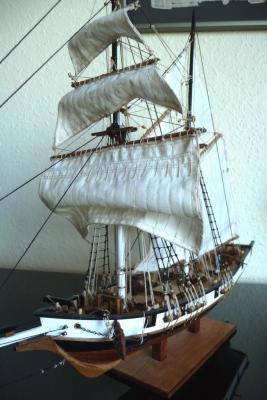
 Hello to all, i, like many others lost my first log in the big collapse of the page. I post again a few pictures to show the progress. Now - after 2 winters, i'm almost ready. There are only a few litle jobs left and i still have 3 foresails to attach. It is very complicated to sew the bolt ropes on the sails. (This is not my favorite work.)But I love it to study the construction reports for hours. I'm glad that the page is back!! Regards from Germany Volker


- 20 replies
-
- 2
-
-
- albatros
- constructo
- (and 1 more)
-
 I've posted 2 videos on youtube of my build progress of a Constructo brand Albatros kit.If anyone would be interested in viewing them and leaving feedback here of what they think with any comments on anything I may be doing wrong etc. that would be greatly appreciated...thanks loads. Shawn


.jpg.b393d6a398aecf995b0f46b3c1130fdb.jpg)
.jpg.baef0b4ea190e1e0ccab894c7ce8d2ec.jpg)
.jpg.39441d63d501e256e57901064d4256e0.jpg)
.jpg.0a8badea2484143d63103bcbb9fc192b.jpg)
.jpg.7ebcc7c21e20ed1671f11e2834443818.jpg)
.jpg.4afb6b53c34b87b80505af318385f042.jpg)
.jpg.2776c0a0ff5f6fd4d91d065239613e9a.jpg)
.jpg.628b35fdc53d9fee580402592362df1f.jpg)
.jpg.0f9298ed53551ec179d4e03303cc209b.jpg)
.jpg.358dc6efe9d5c3ce548571909b933a86.jpg)
.jpg.bb657924fc72d32fa7ebc9b6fc174962.jpg)
.jpg.fba0600c15ab193227f47d5f1e8e7349.jpg)
.jpg.22f0963f8c6dde159ed98f5d8d30646c.jpg)
.jpg.e4f577102dace3f27cd13cc692488567.jpg)
.jpg.f28d80aff794b14e0bafabad1a836a89.jpg)
.jpg.ed047c1a2eea57e52d277a278f05e52e.jpg)
.jpg.0b905e68448c5c12f0570a008af61371.jpg)
.jpg.ce3ac361defbdb9b3d15a7d0212bf5d1.jpg)
.jpg.12fdb0e0e5ce47aad874829e9e615d6b.jpg)
.jpg.1f096c1cbc53f45e00f4d4349b01c1cc.jpg)
.jpg.c3cf819ad859ab291582dc634f1388e1.jpg)
.jpg.cab7ef2c28d6dae0dbd9705d8cede9e7.jpg)
.jpg.9b8885b3793227ceab3ce2f272a0ec22.jpg)
.jpg.952cb8692ad6586985a2157941424ffe.jpg)