Search the Community
Showing results for tags 'Cutty Sark'.
-
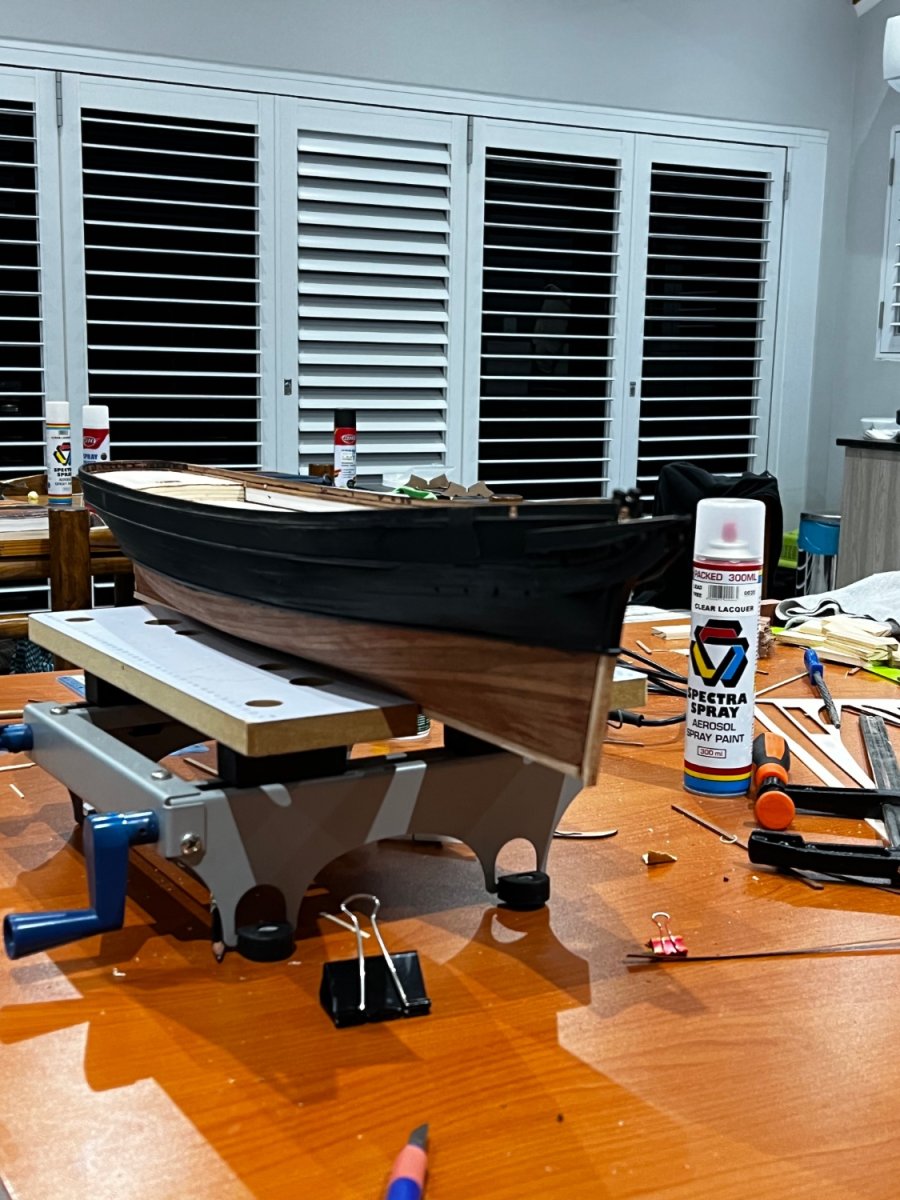
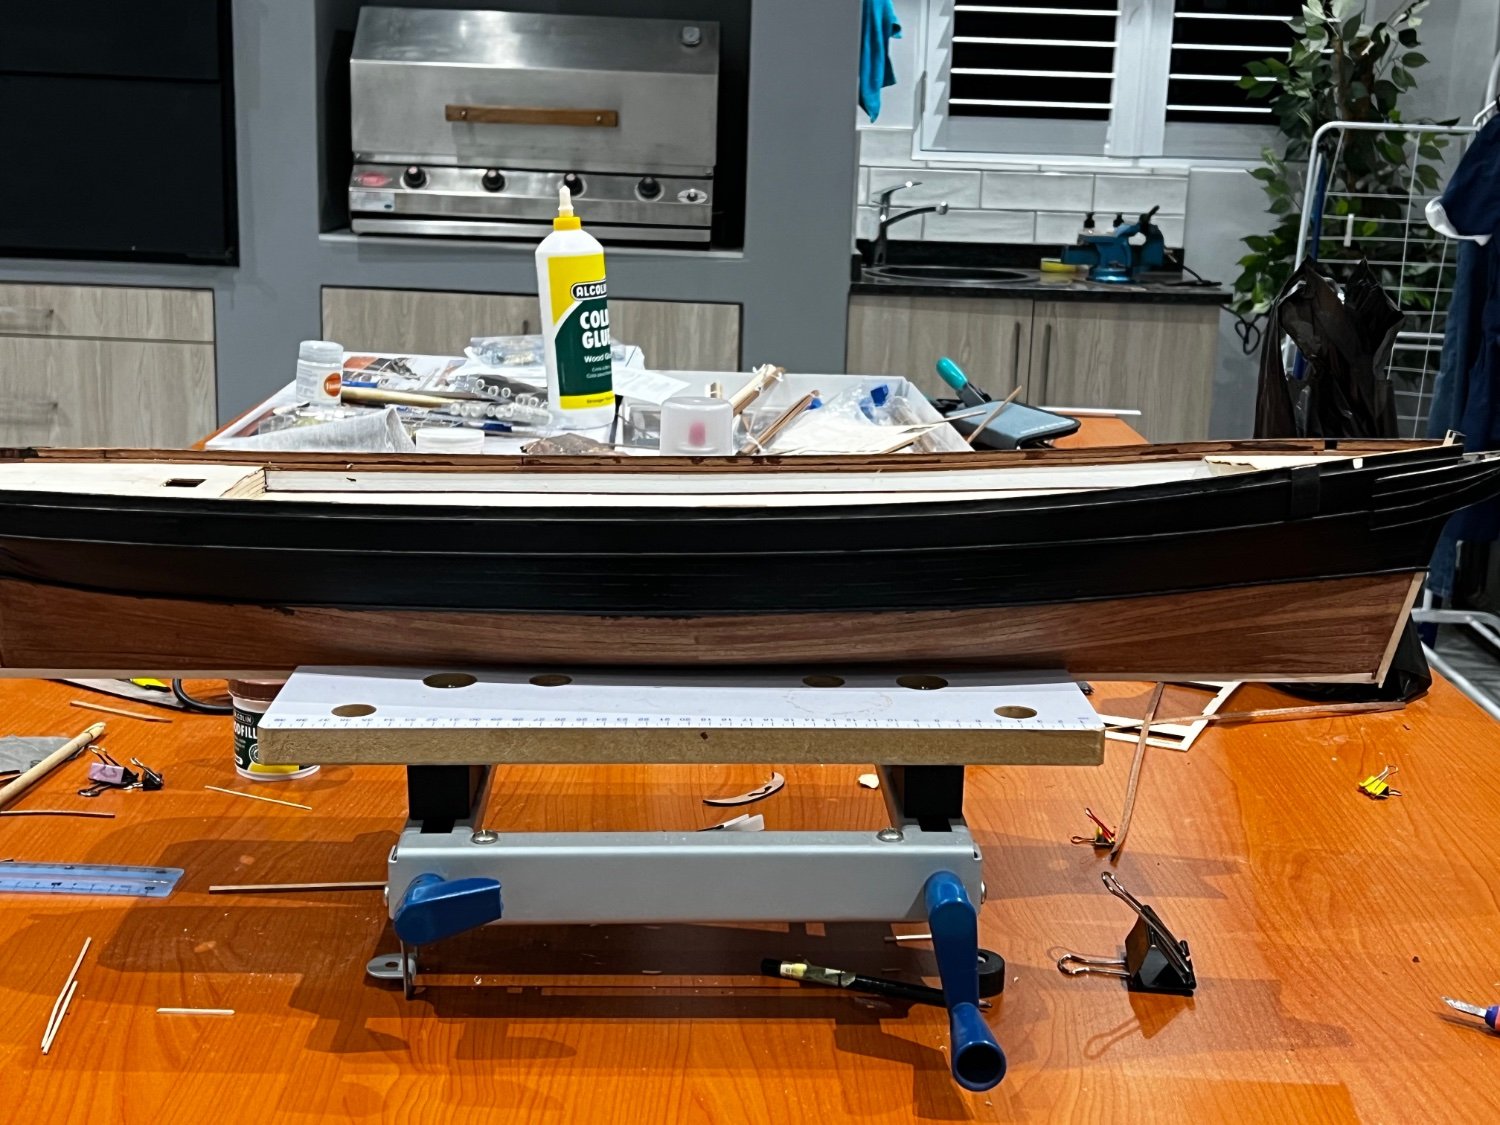
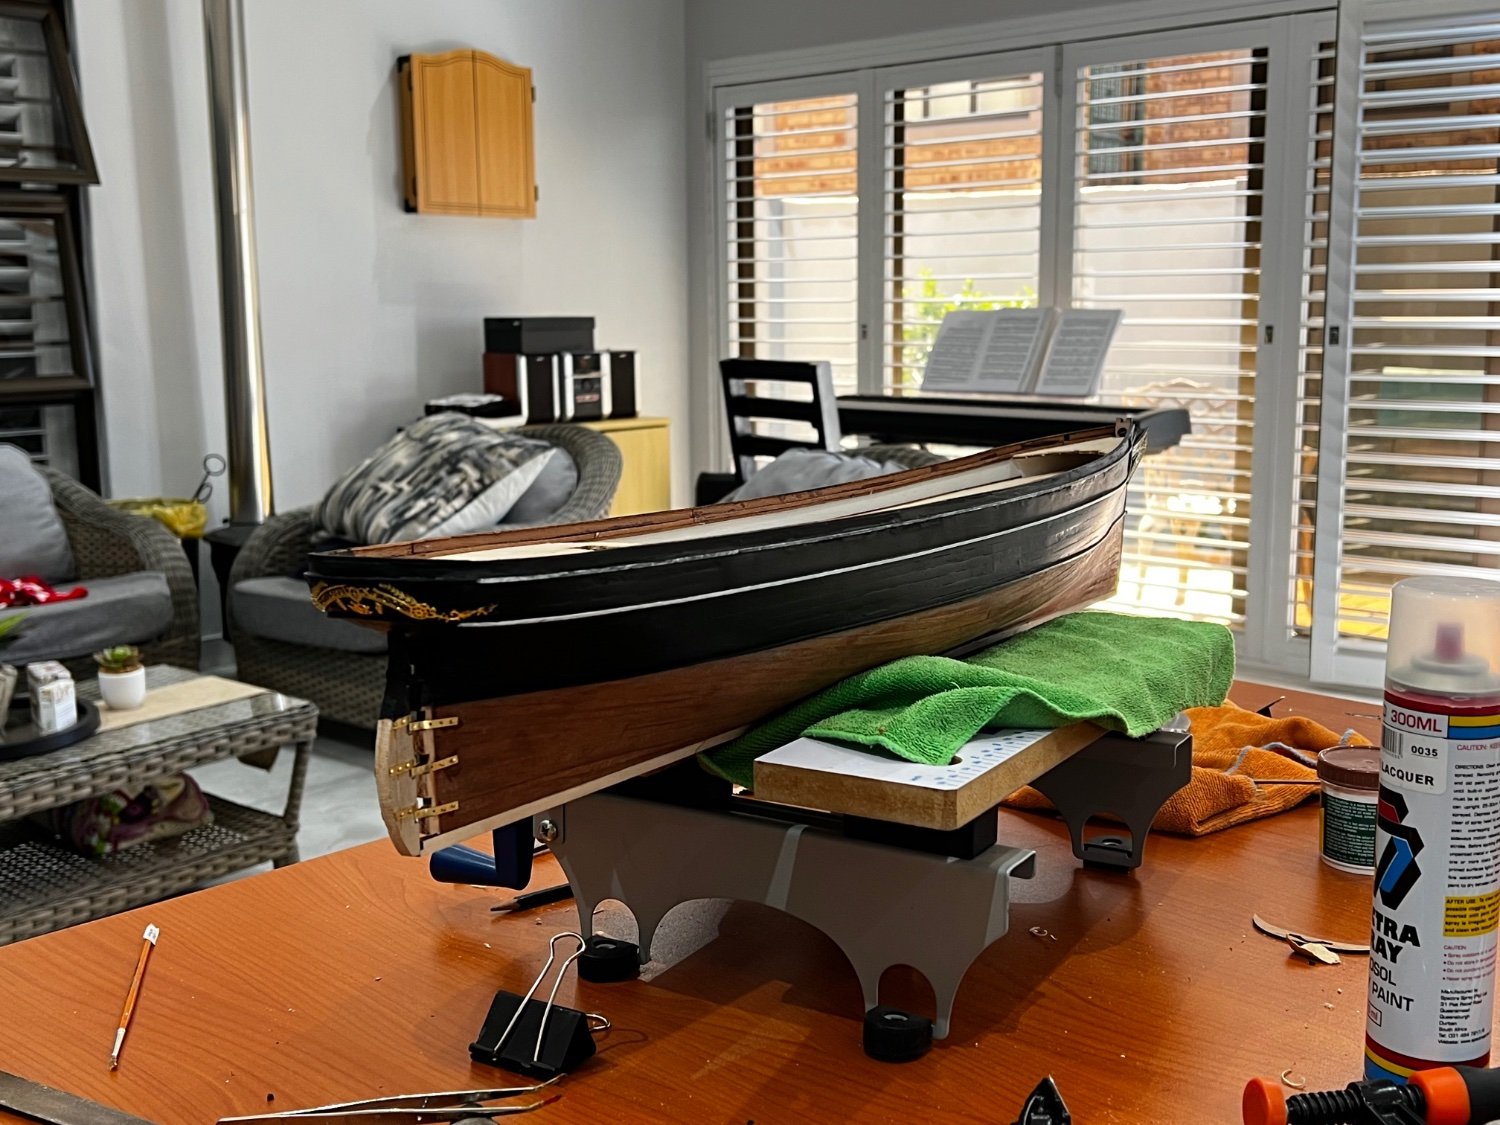
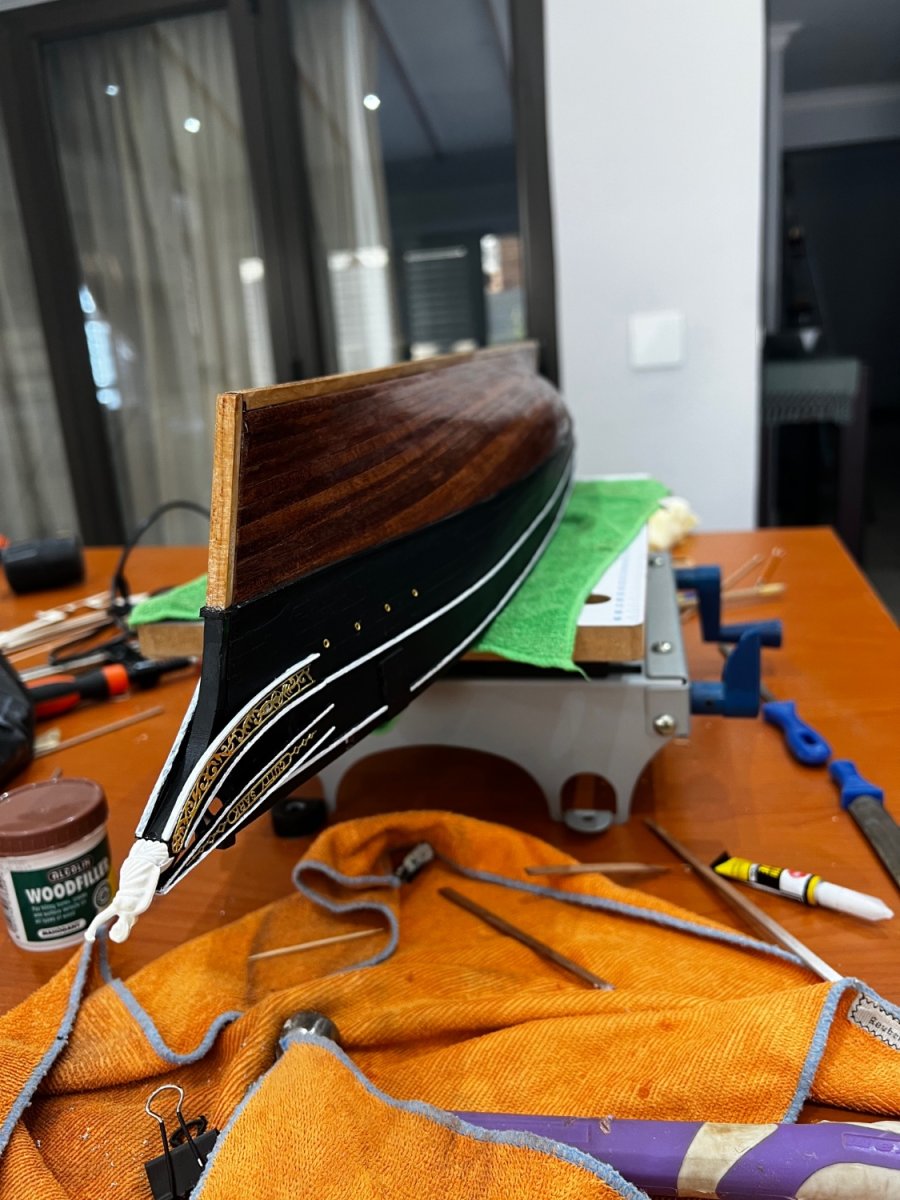
 Question, In the instructions it shows gluing the ship to the stand early in the build. I worry that might restrict flexibility in painting. Can/should I wait until closer to installing masts etc? David
- 60 replies
-
- 2
-

-
- Cutty Sark
- plastic
- (and 3 more)
-
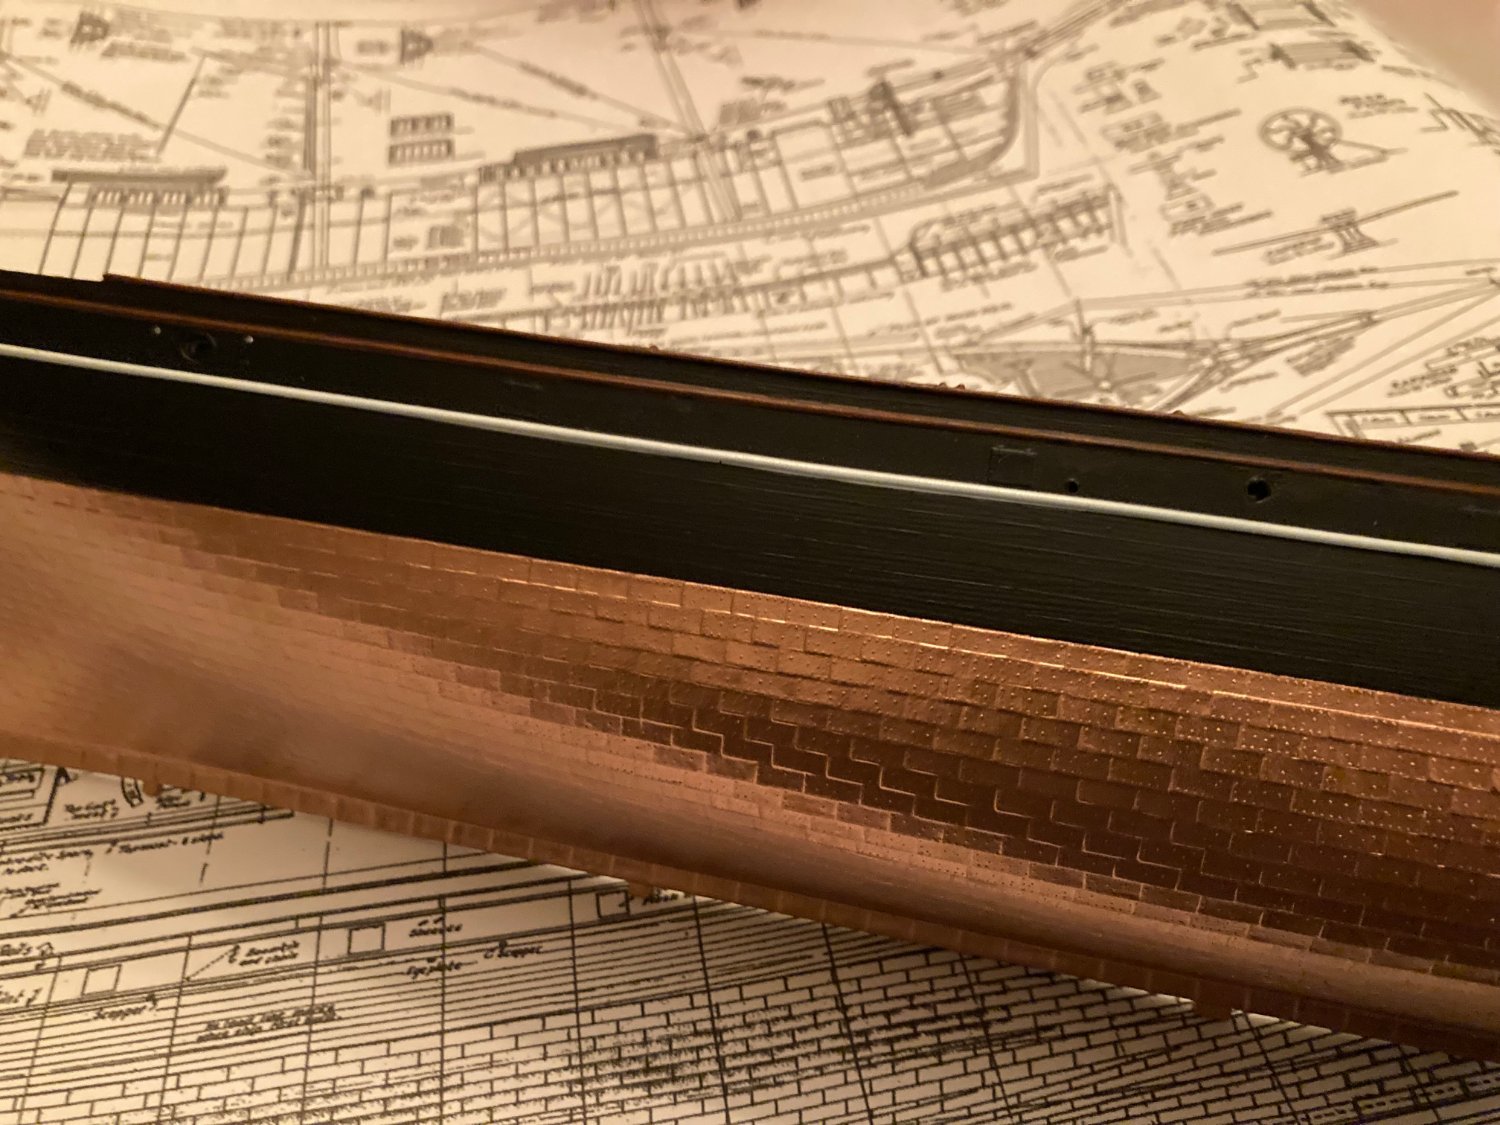
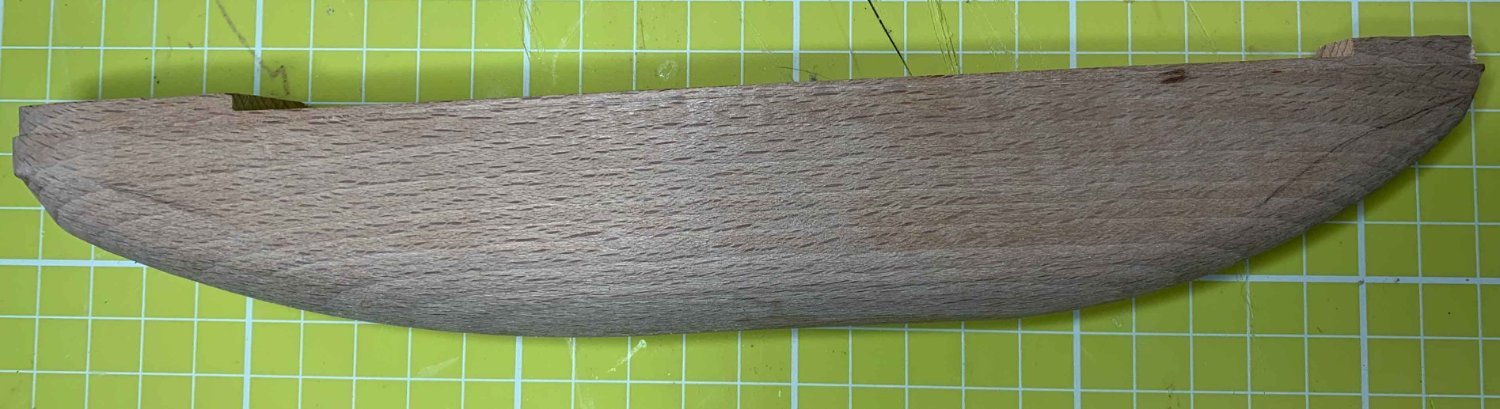
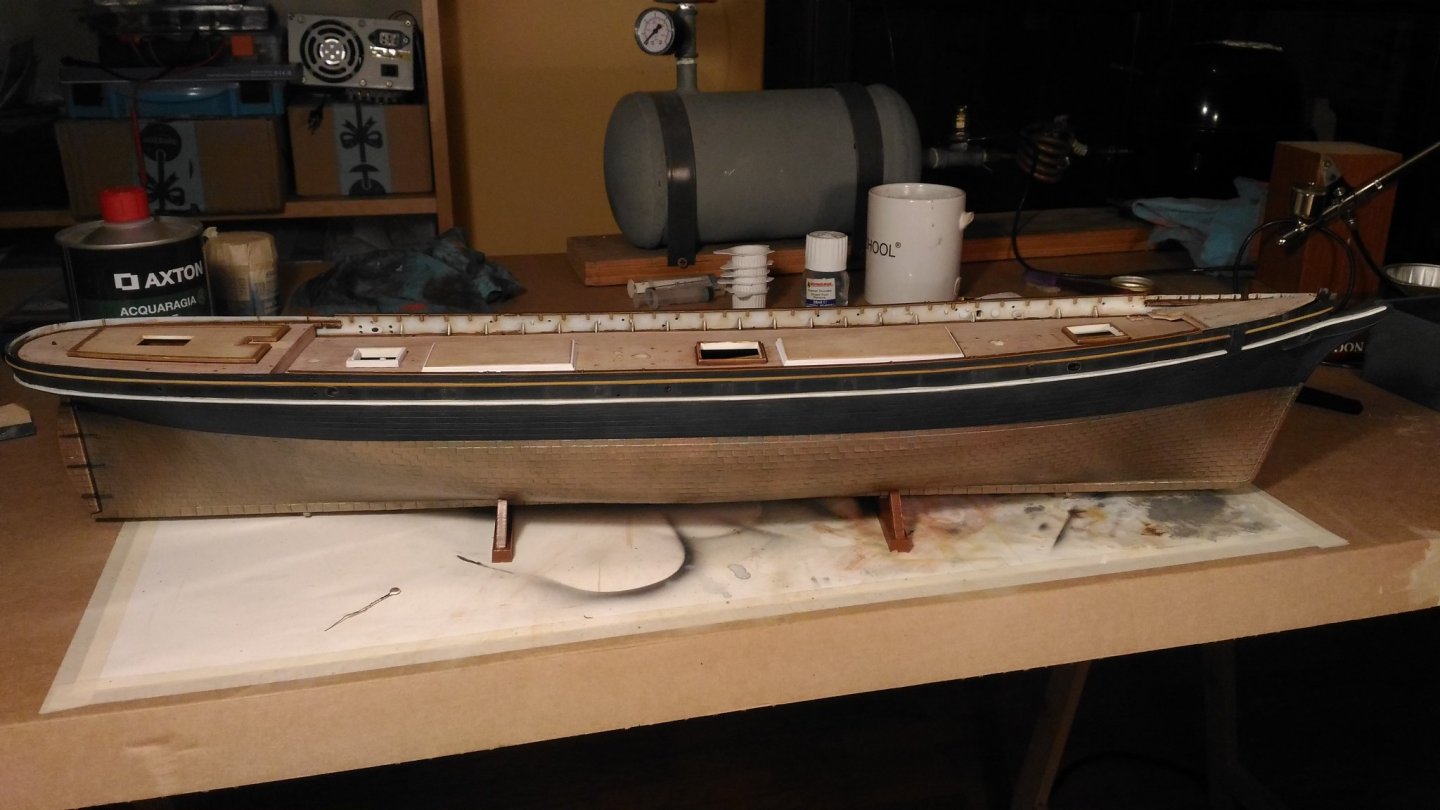
 Hello everyone. This is my first model ship and my first build log here. English is not my native language, so sorry for any mistakes. I started more than one year ago but I’ll start the log from the beginning, hoping to help other members not to do the same mistake I did. As suggested by the instructions, I started from the hull: The base coat was made by airbrush, acrylic colors (gunze and tamiya), followed by oil filters, dry pastels and oil dry brush in order to simulate the wood planking and to highlight some details. Tyre black was used for the hull, highlighted with gray. A mix of copper and gold, washed with green/blue oil were used for the Munz metal planking. Buff, desert yellow and similar tones were used the base for the wood. Burnt umber filters helped to break the uniformity and bring the wood a better look (at least I hope…) and the details were highlighted by pastels and oils (remember that the detail are raised and not recessed in this old kit). That's it for now. Hope you like it and don't be afraid to criticize!
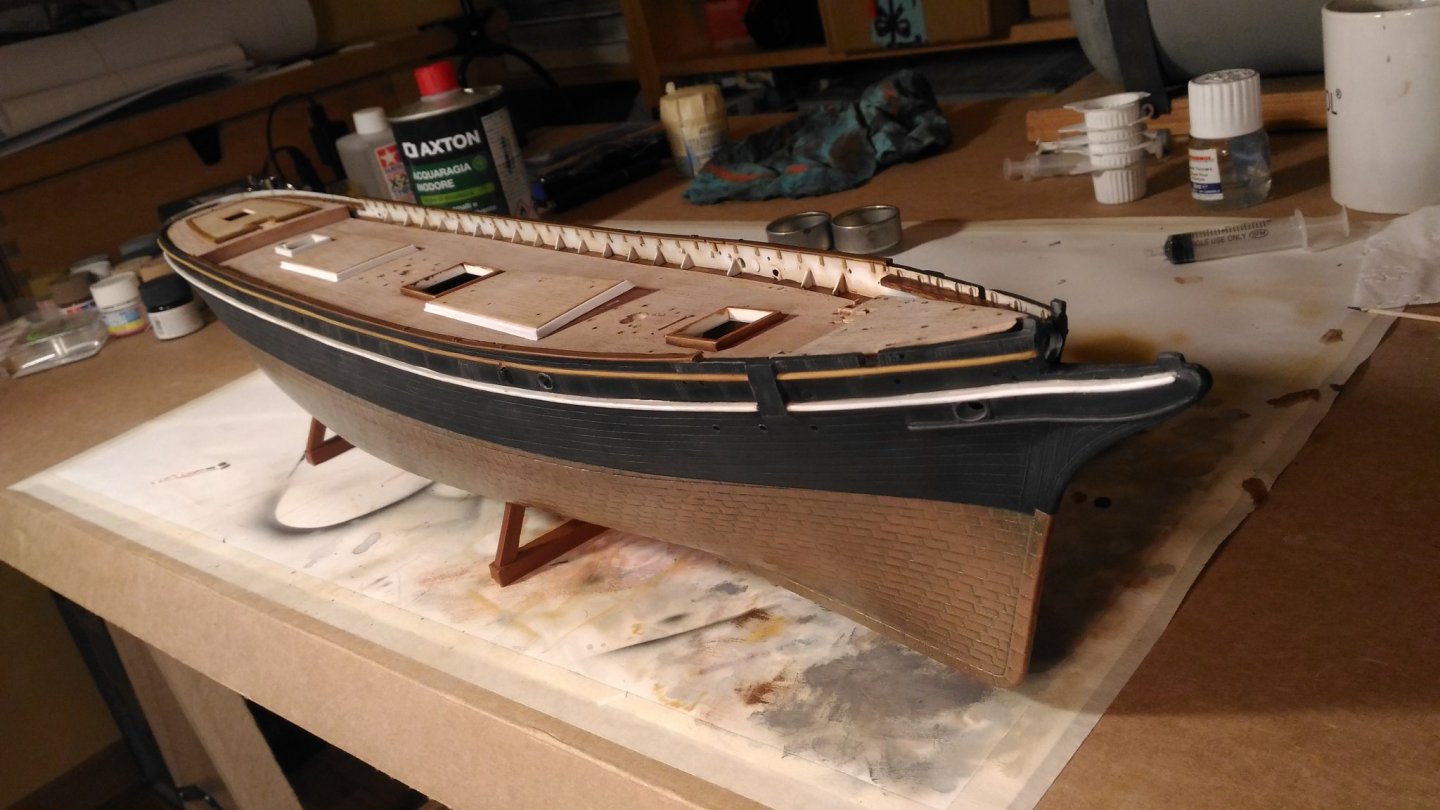

- 397 replies
-
- 12
-
-
- cutty sark
- revell
- (and 2 more)
-
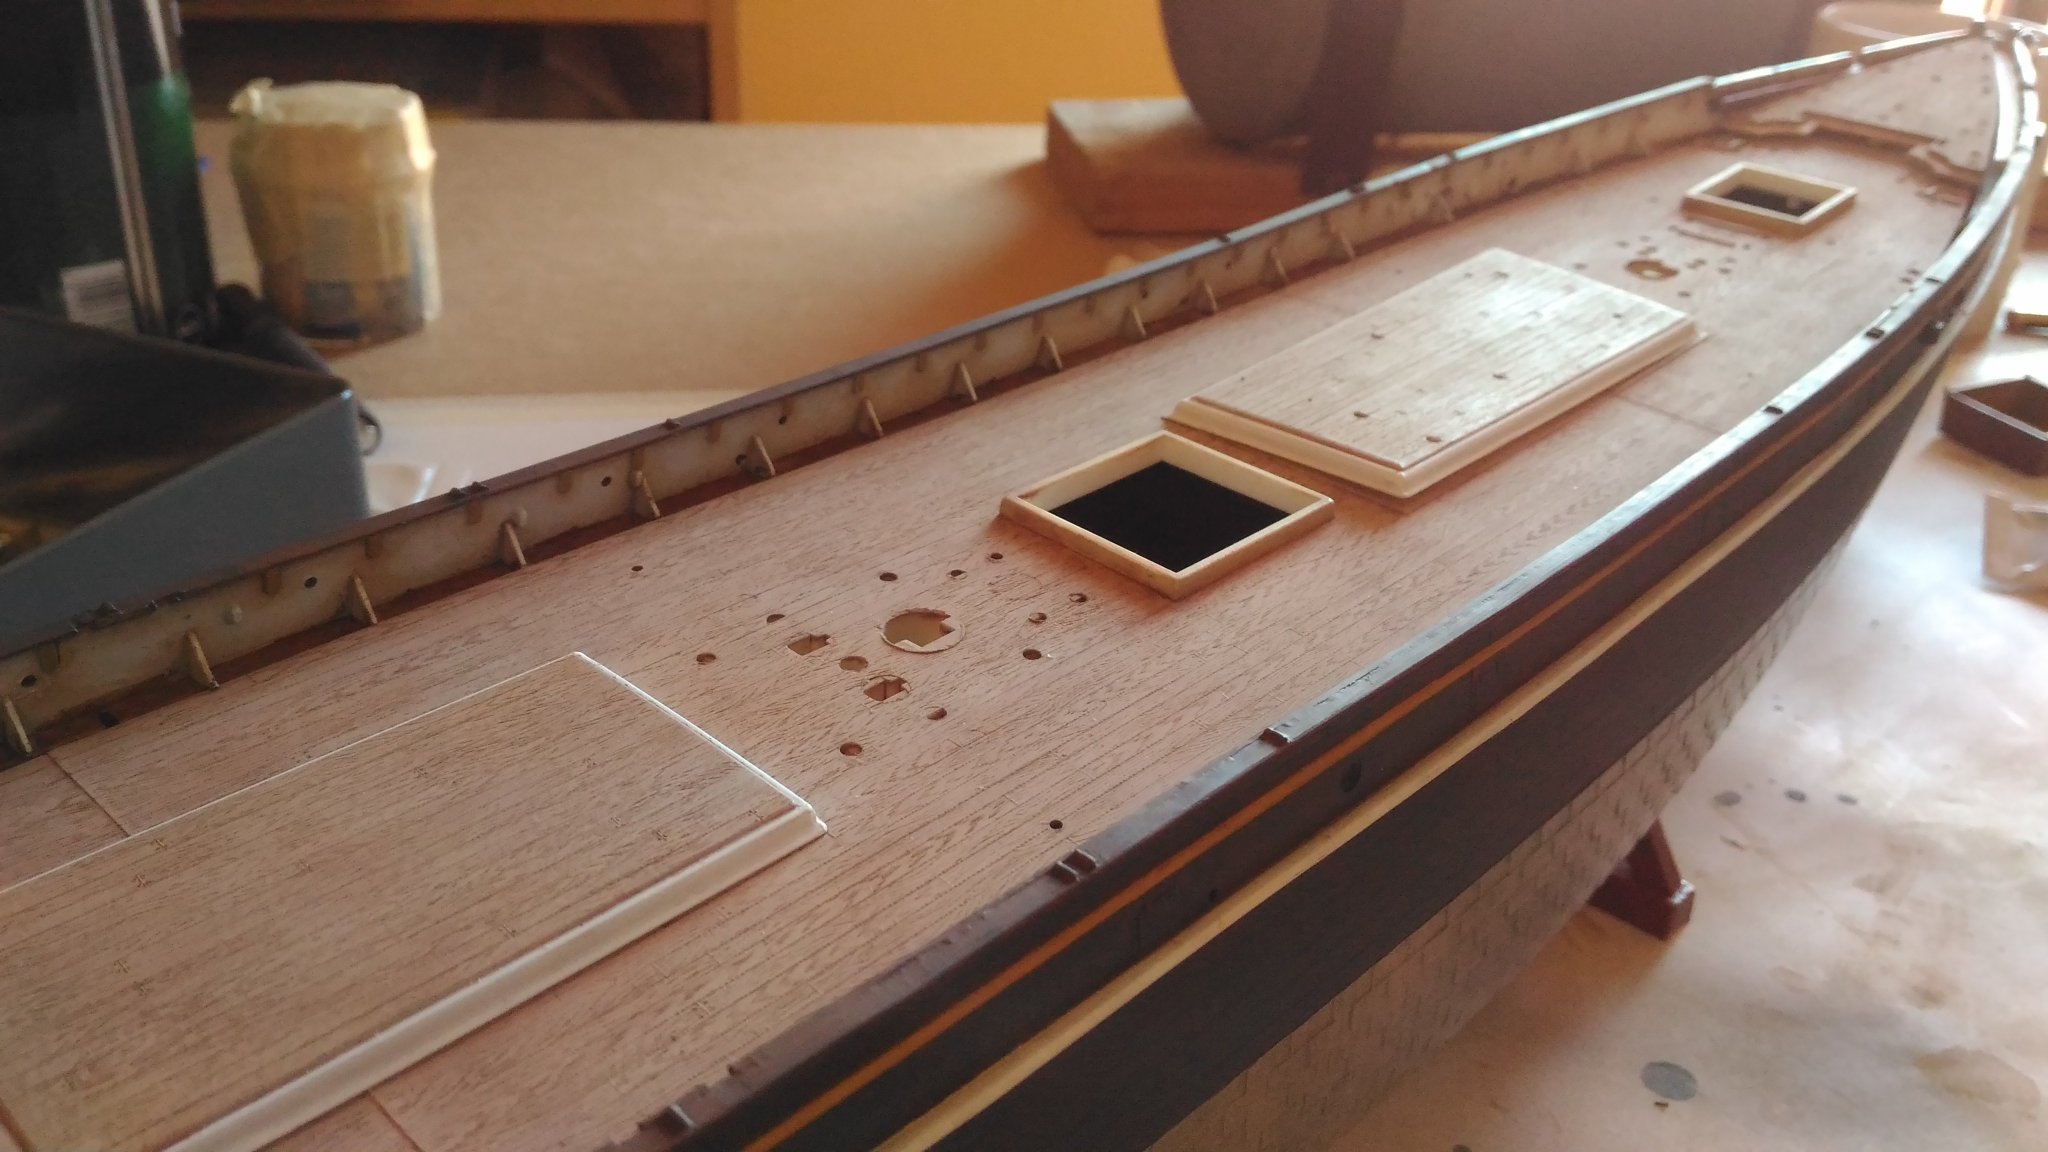
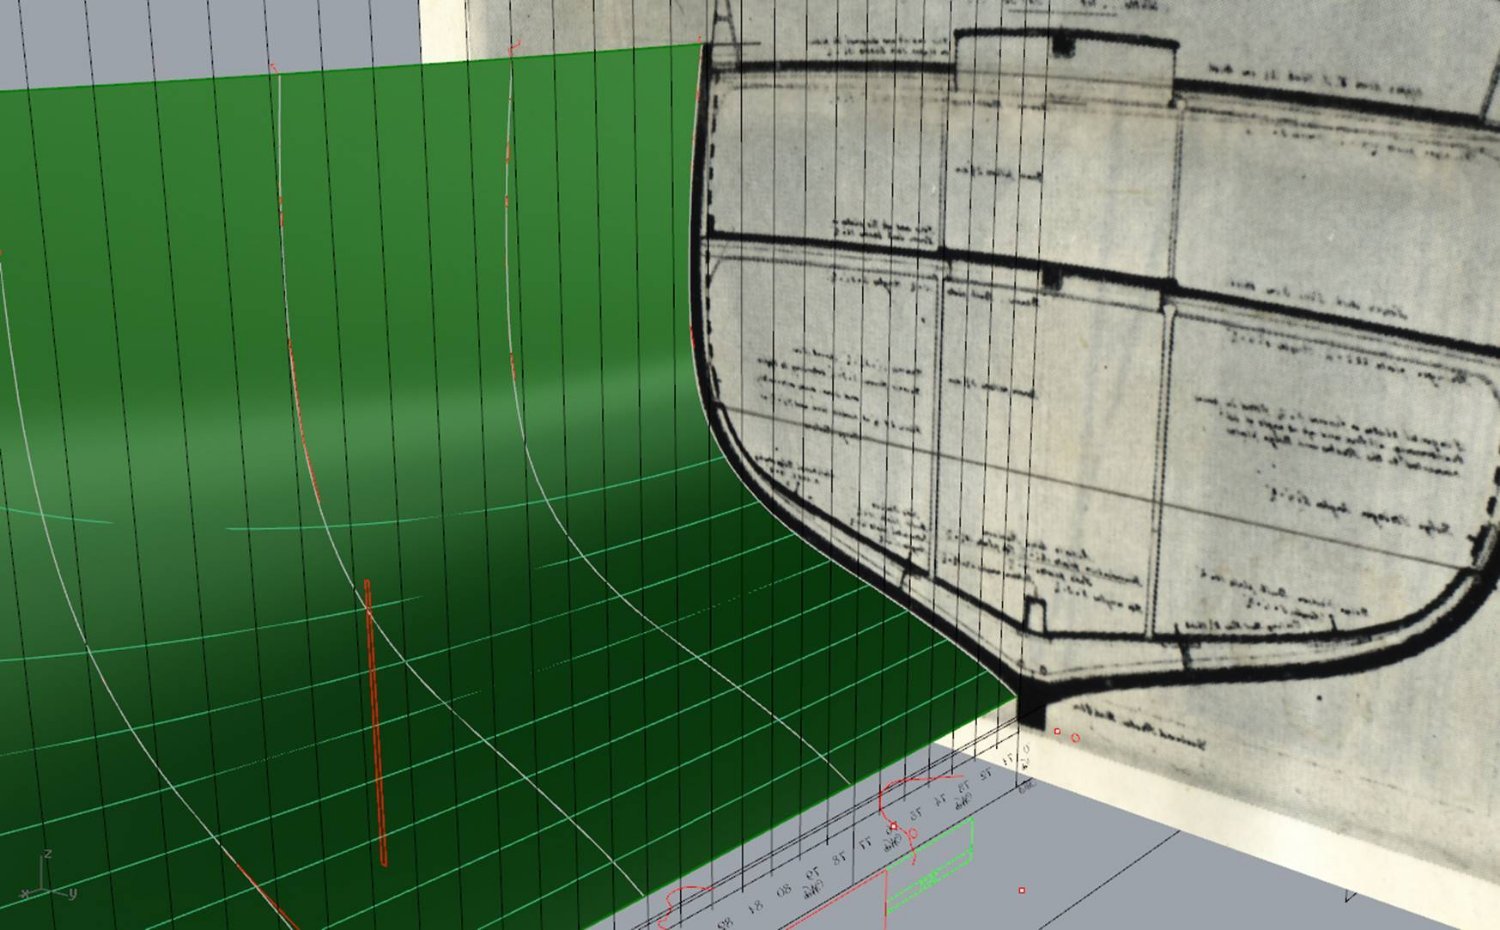
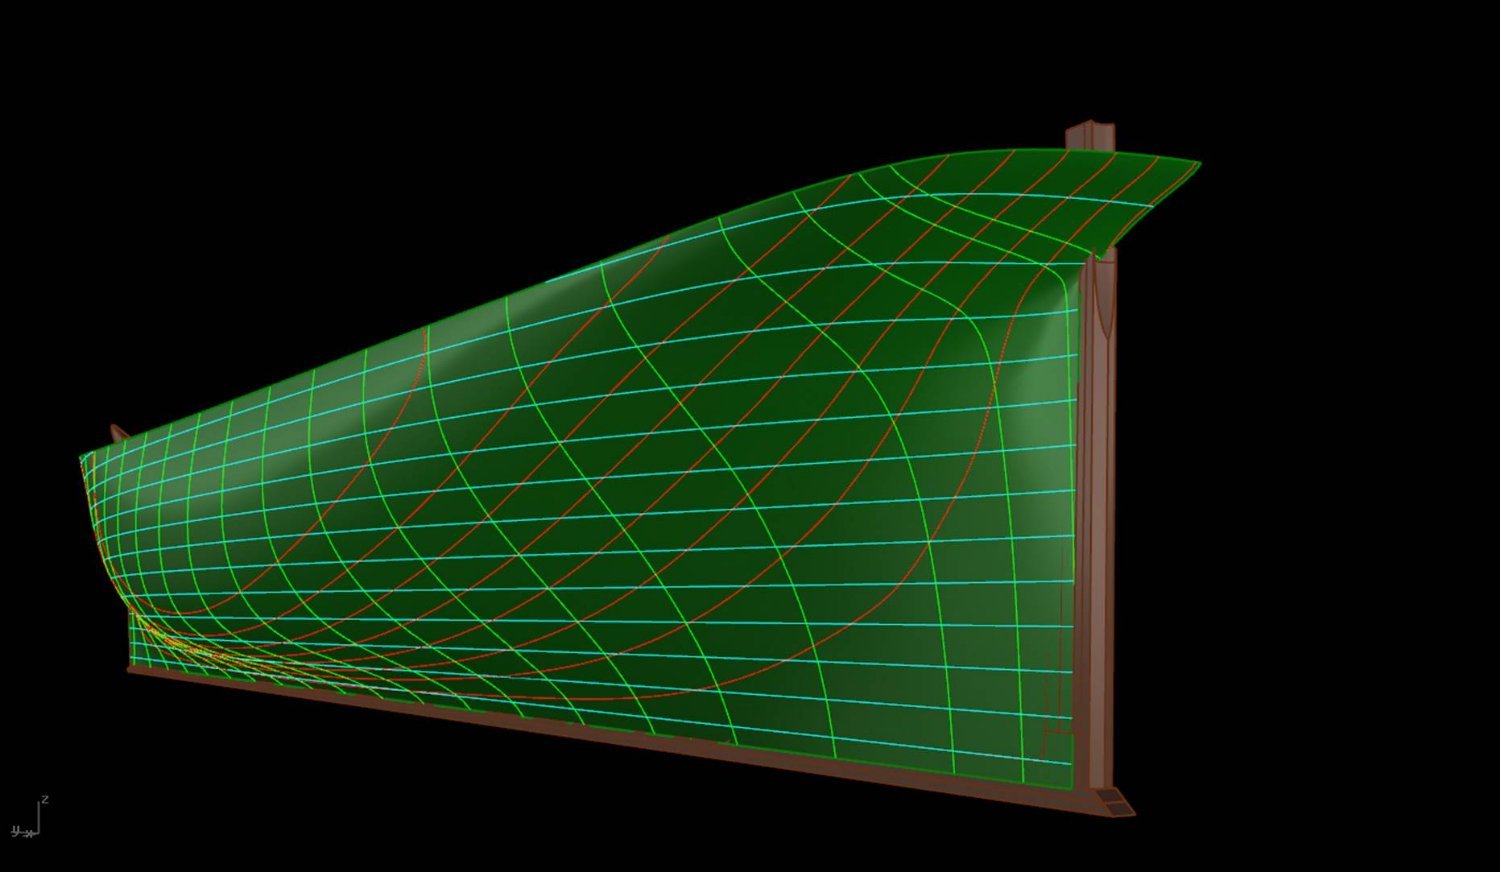
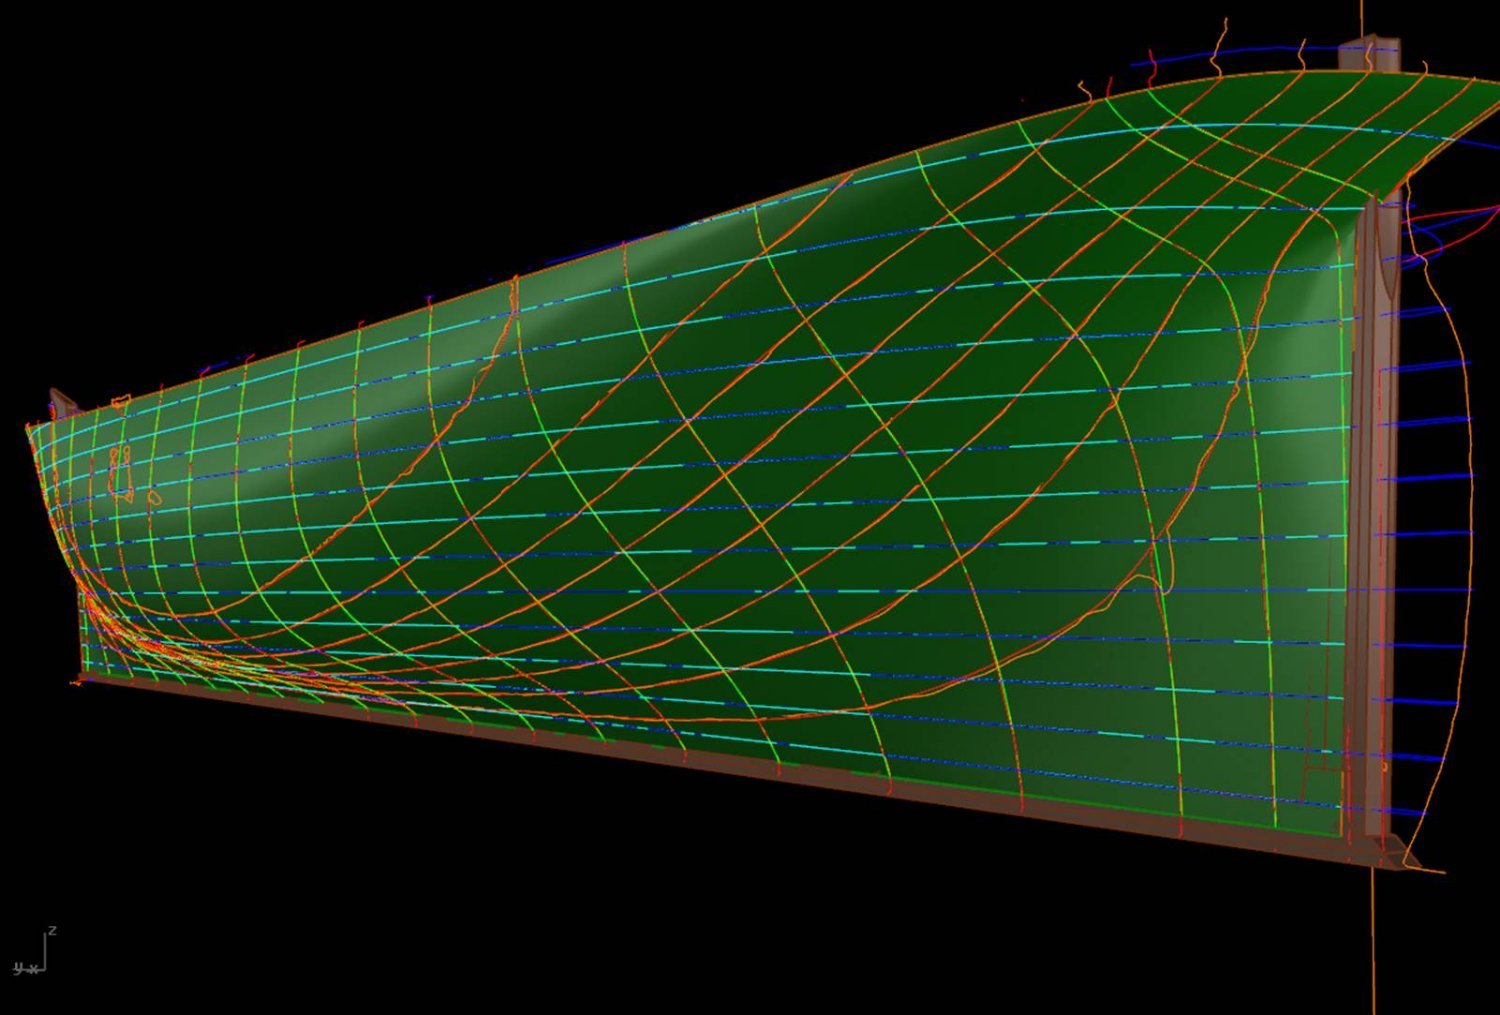
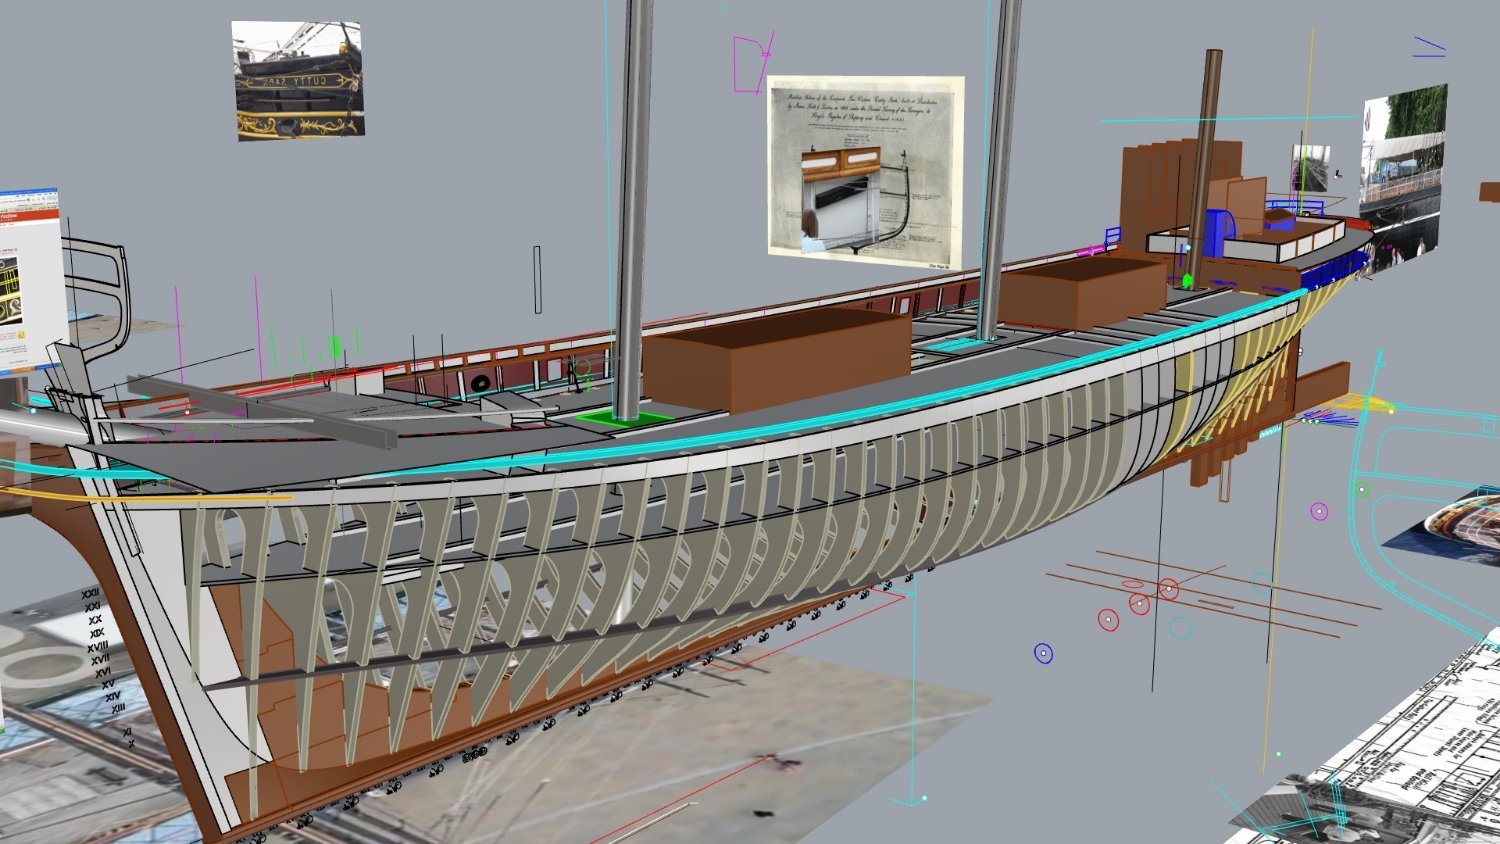
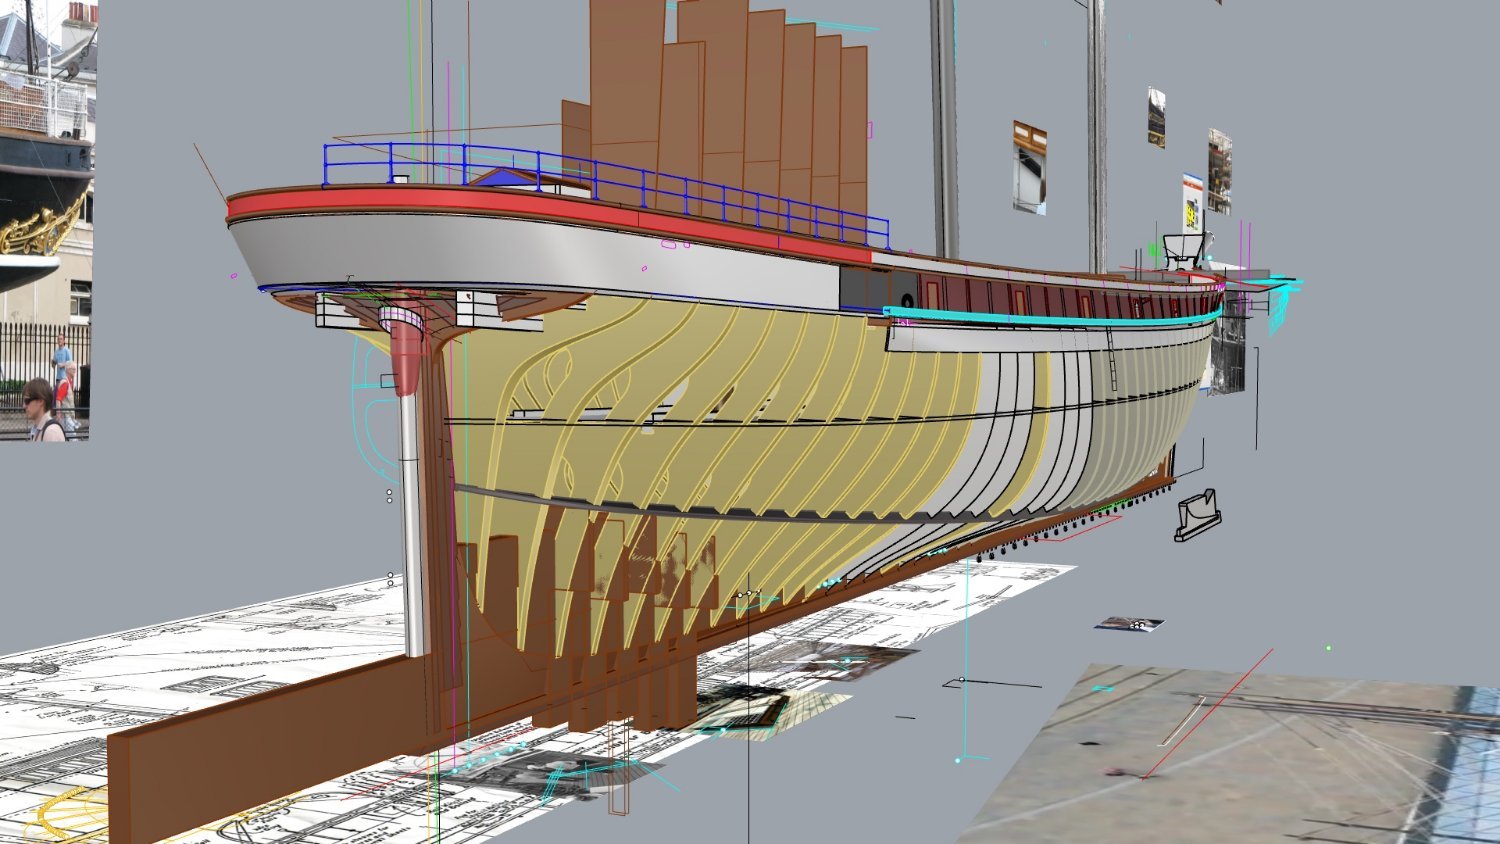
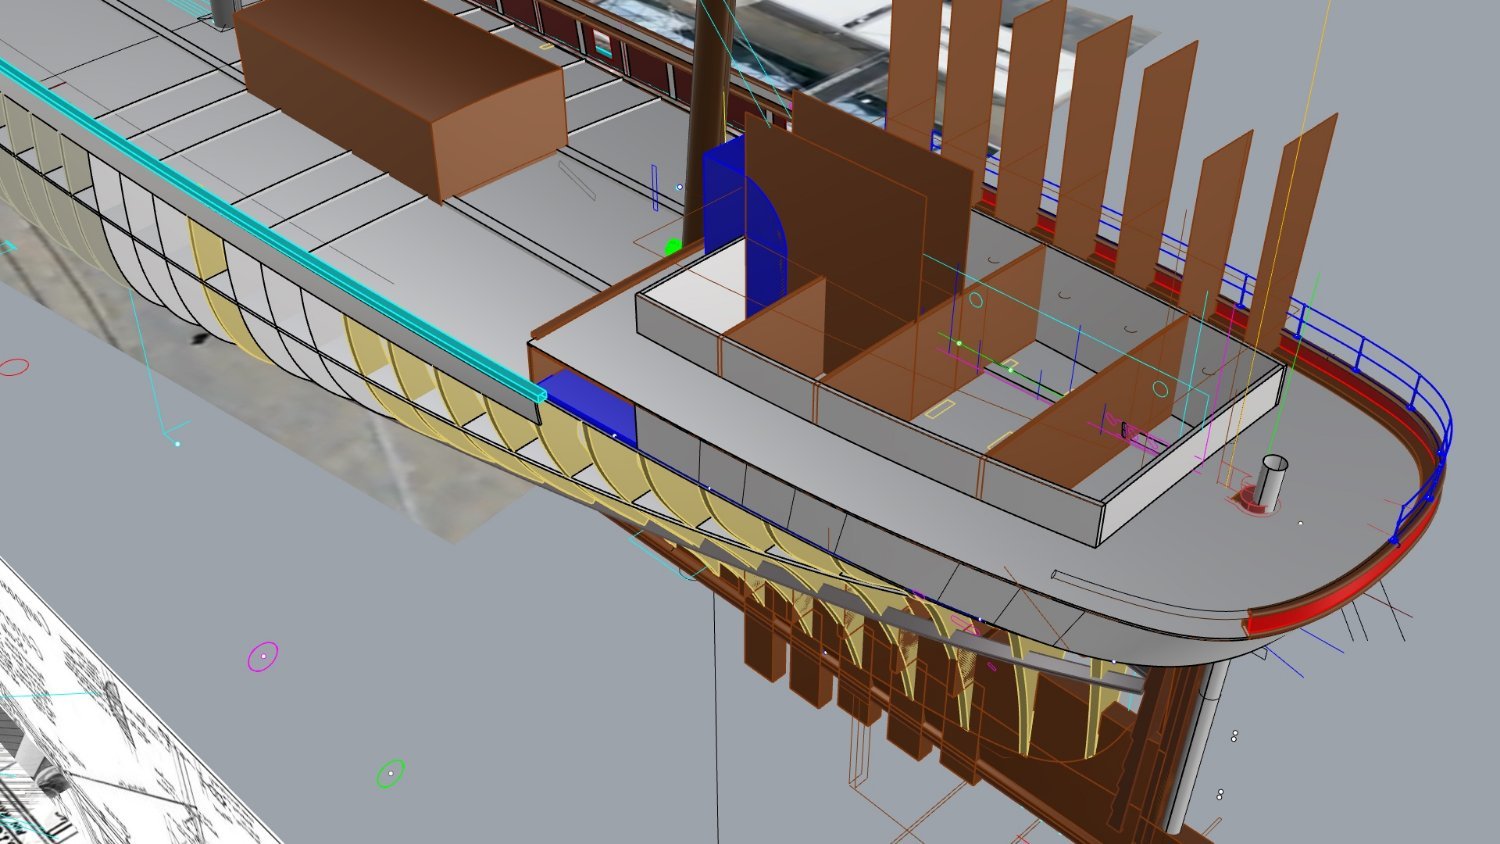
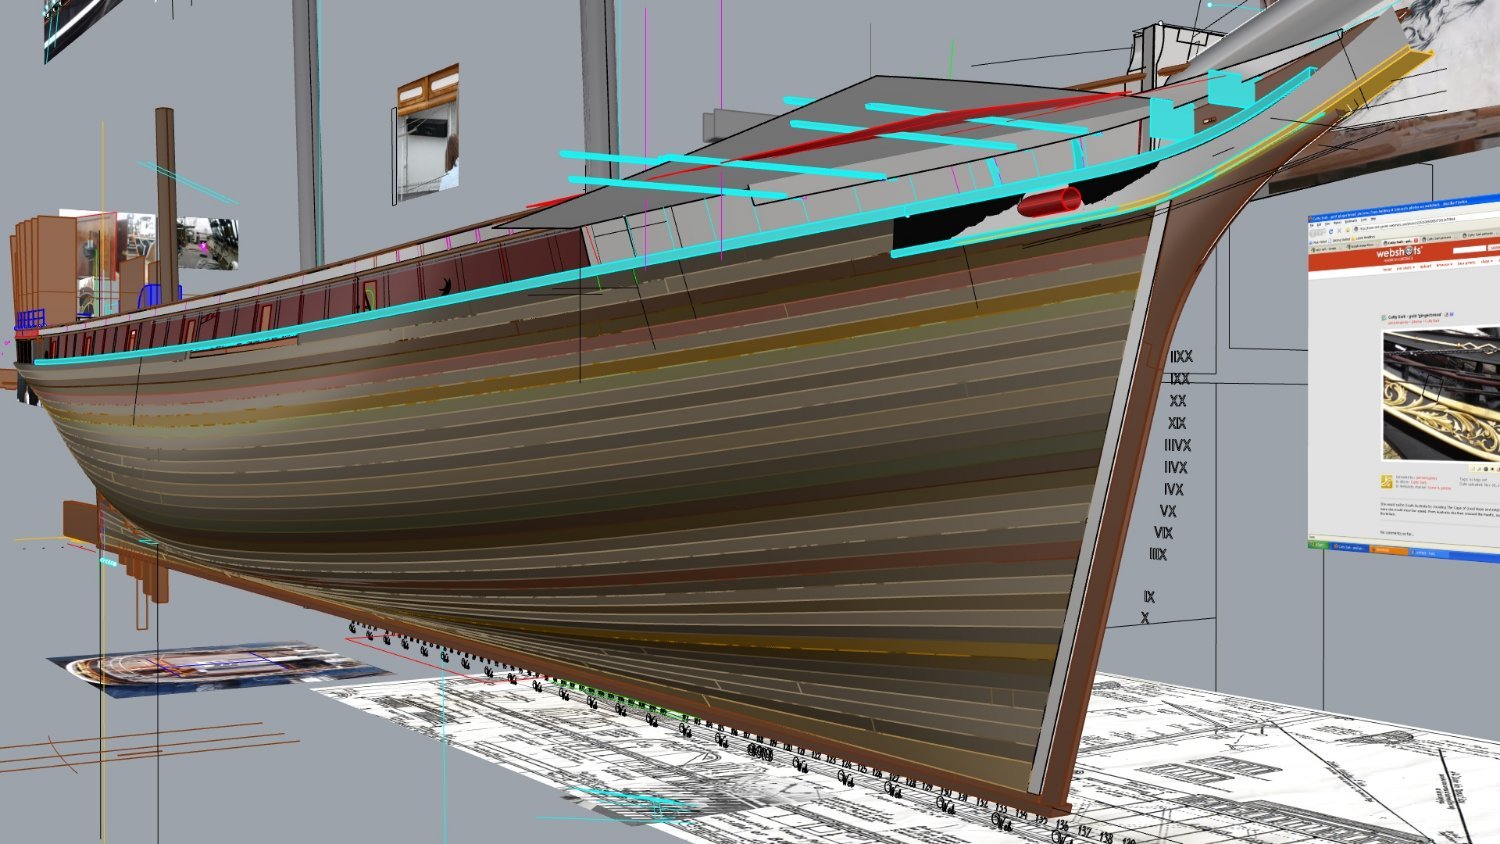
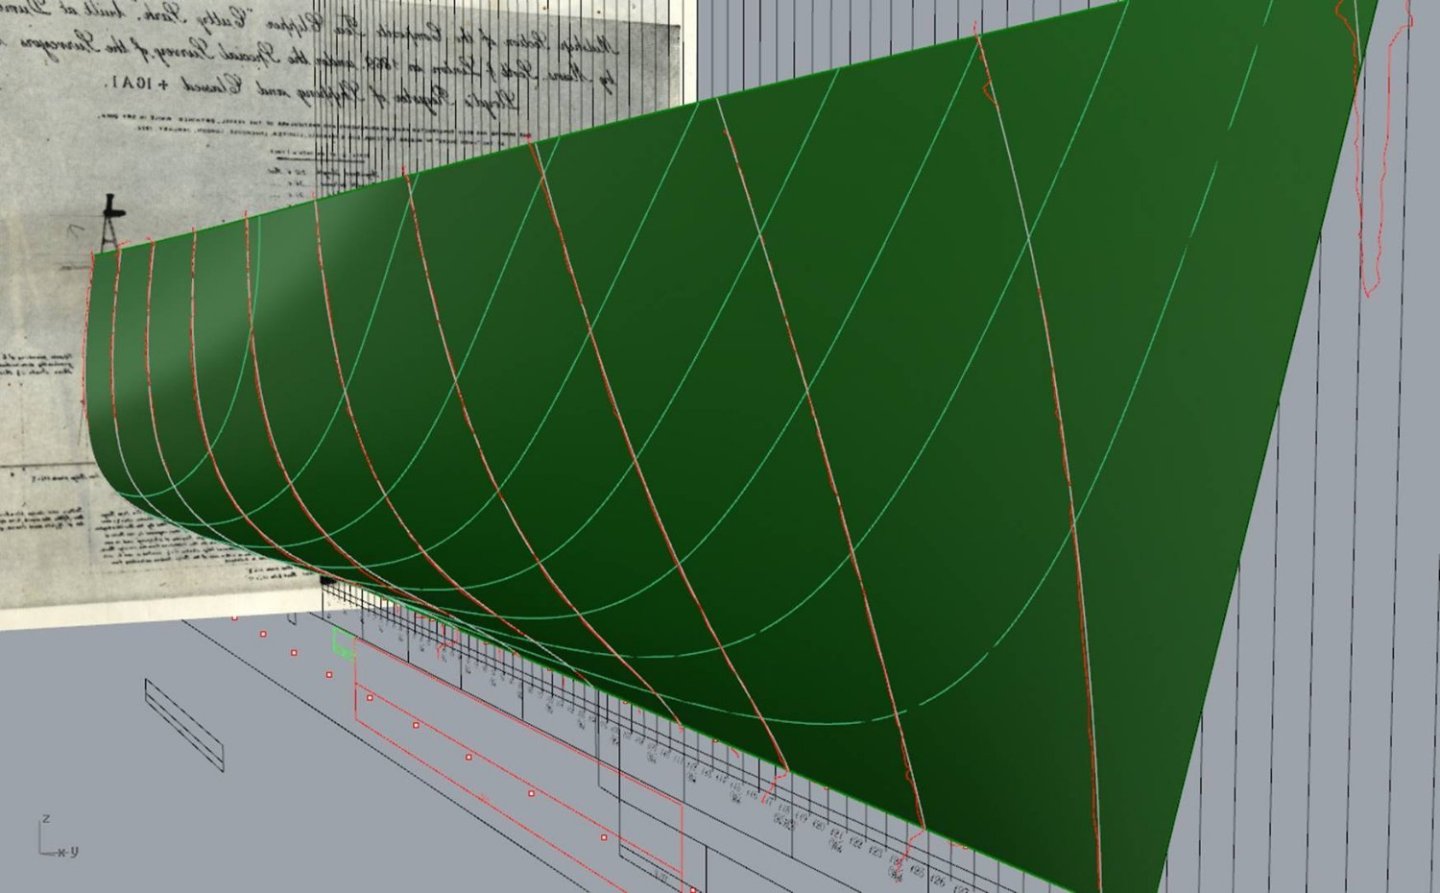
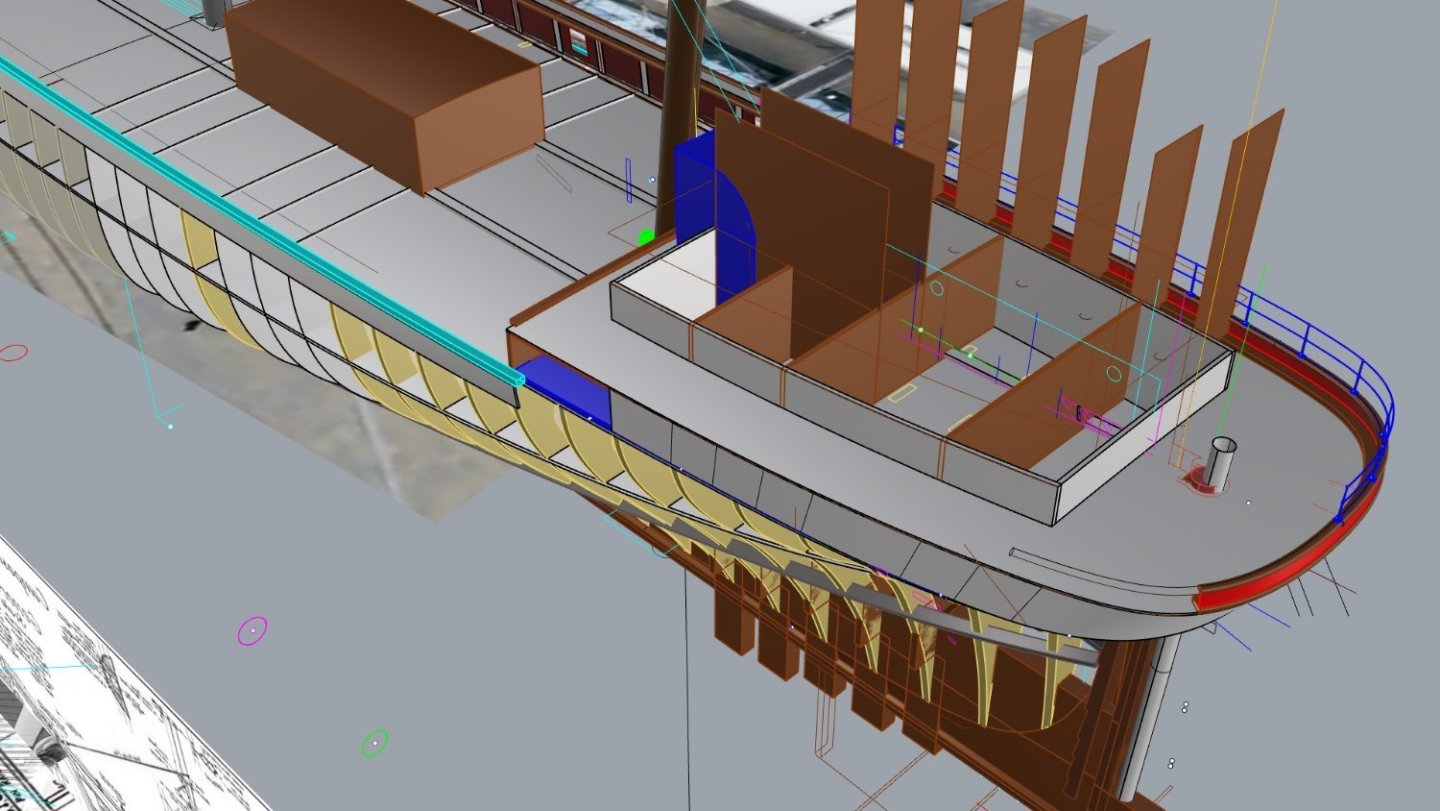
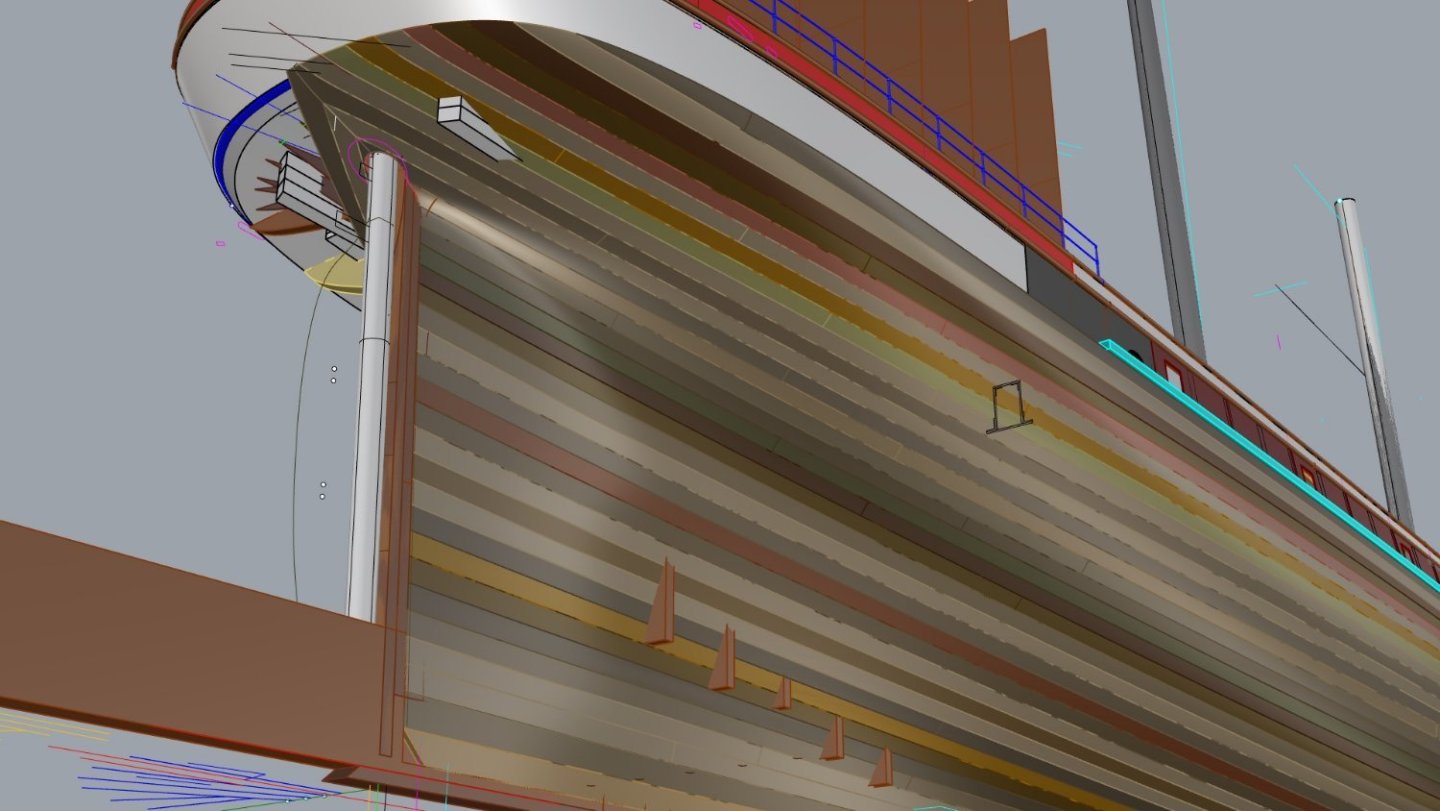
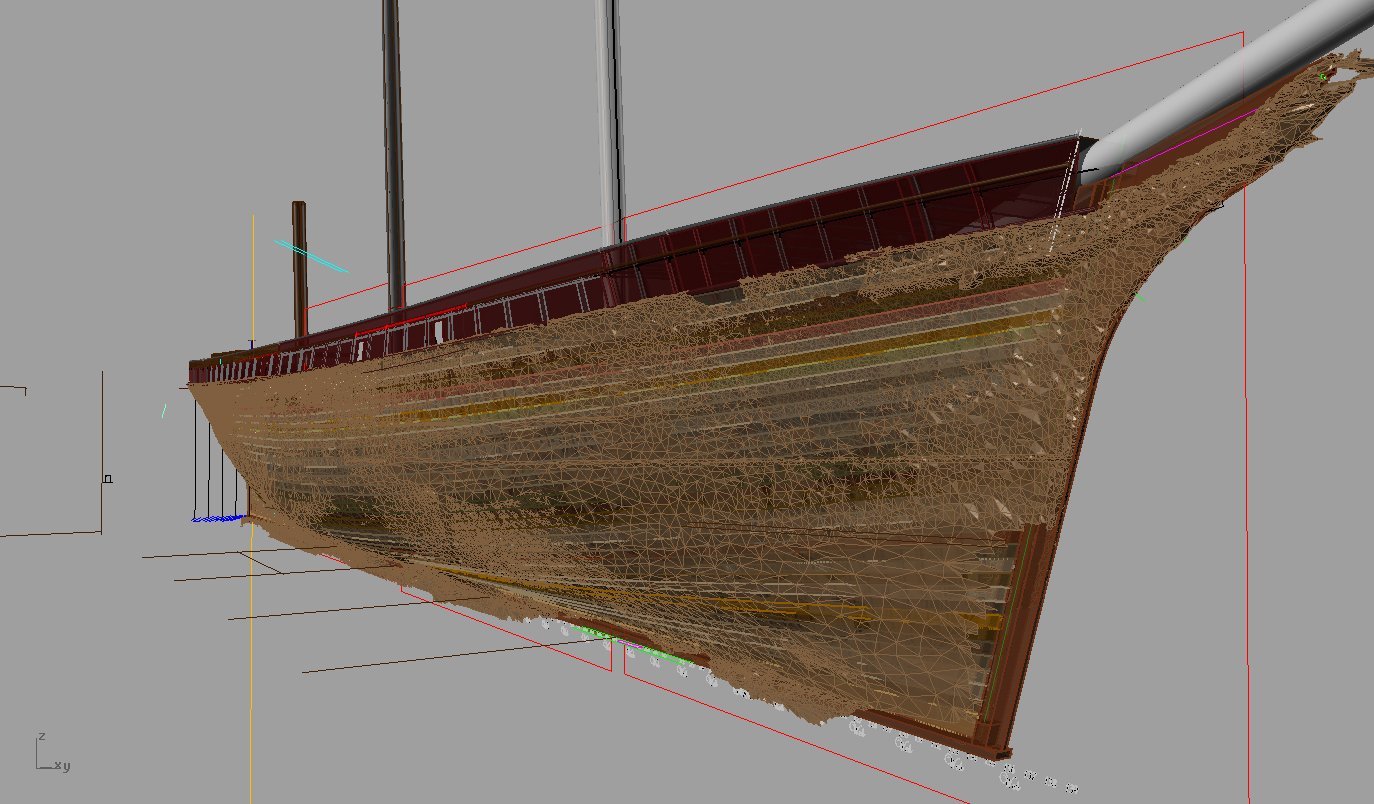
 I hope this is in the right section, sorry if its not guys. I am wanting to know if anyone out there is interested in trialling a semi kit I am currently developing for a client. The kit is a 1/40 scale Cutty Sark but unlike all the kits out there this is based on measurements taken during the restoration of the ship which I was involved in recording the structure. The lines are taken from a scan of the hull to exacting precision and the accuracy is carried forward into every part of the model.. For those who don't know what a scan is, its the process of lasers placed around the object in a set grid formation which bounce rays off the surface these points are stored as points in 3d space and are then connected by a surface in CAD software to form the surface, certain surface types respond better than others but the accuracy of the data is precise. Measuring the hull in this manner has not been done before 2011 and as a result plans that exist have all derived from calculated guessing and visual study of the shape, old preliminary midship plans (Rennie) which were not built to and sometimes based on similar ships, all that is fine if the data is not available ,which is was not so some did a good job of getting the form Below can be seen the resulting mesh overlaid over the model, it was used to deign her current display system suspending her above the dock,. I should mention I have compared all available plans of her against this scan and not a single one is correct, some are better than others but all have failed in one area, the sheerline, some are too flat aft, some re too flat forward, some have the rise of floor totally wrong but as you can see we have this info now, these are significant errors to 2-3 ft in full size which is amazing to me. I should point out as well that the sagging of her hull structure and dropping of her bilge as a result has been allowed for as it was not over the whole surface but only in certain areas that were not shored up. Anyway these images will show how close the model is to the laser scanned surface now. I should add I am also able to provide a lines plan now if anyone just wants the proper lines for a model and take it from there. It has been in research for 10 years and it's taken me some time to find the time to do this. The kit will consist of all the wood and plywood parts needed to build the hull and planking of hull and decks including the panel work of the deckhouses, it is based on the woodget era while she was in the wool trade. I was drawing this up in 2010-2012 from measurements of her structure while she was just an iron skeleton, this enabled the unseen parts of the ship to be measured like never before, although a lot of this is not relevant to model like the deadwoods etc it did make it possible to get every detail correct. I do not expect the interest in this to be large, if any at all, as many kits exist already albeit out of scale and incorrect but if that's ok with you then great but I like to do things right as a record of history. The hull is framed using the actual ships web frame positions and the planking is to scale and correct as per ship with even the butt positions the same as the original. I will go into more detail later and expect to be cutting the first set in the next few days from .4, 1mm, 2mm, 4mm birch high quality plywood, the 4mm ply is 8ply, and very stable. The backbone and pre-shaped planking is Cherry and Anigre for decking. The bulwark plates I will cut from brass, at least at this stage I plan to. Below are some images of the 3d model of the kit showing some of the structure. Hull length is about 1600mm and 280mm beam. the beam is the biggest limitation if yards set square but at this scale it can still be displayed in a house with 8ft roof I am doing this for a client for a personal model but if anyone is interested in an accurate model let me know. An example of the details and what was measured without structure in the way, here is the top of the stempost under the bowsprit, hundreds of these were taken and drawn into plans If you have any questions please PM me, I can do trials after I assemble a version myself and fix any fit issues and could do it for cost of materials only, weight should be low, less than 6kg Lines from scan of hull, the orange lines are the scan sections compared to the faired red sections used C Jordan got the midship pretty spot on in 1922 Planking Framing Interior of coach house being built for what's seen through skylight.


-
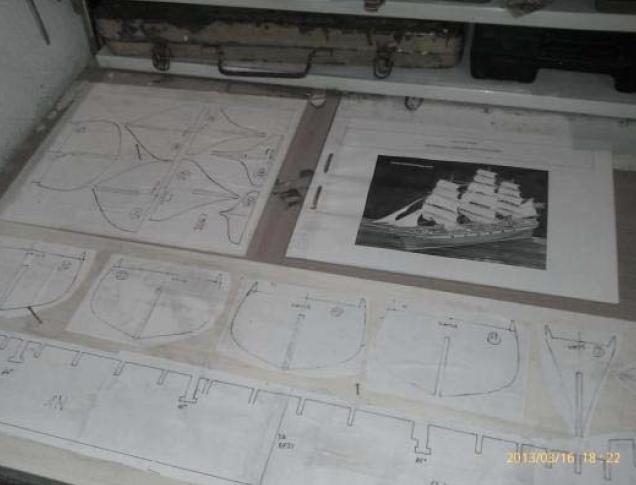
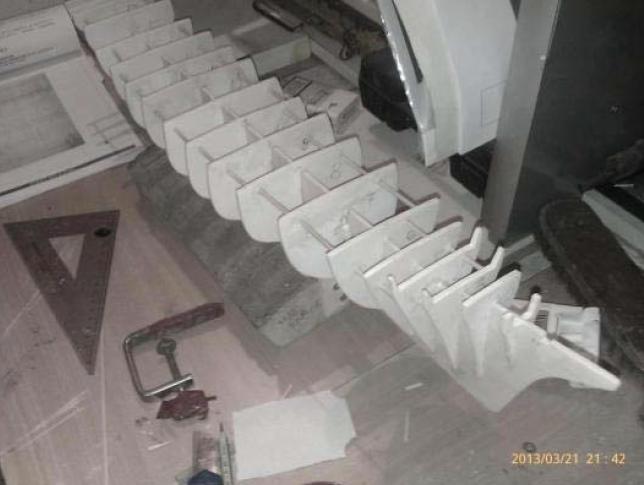
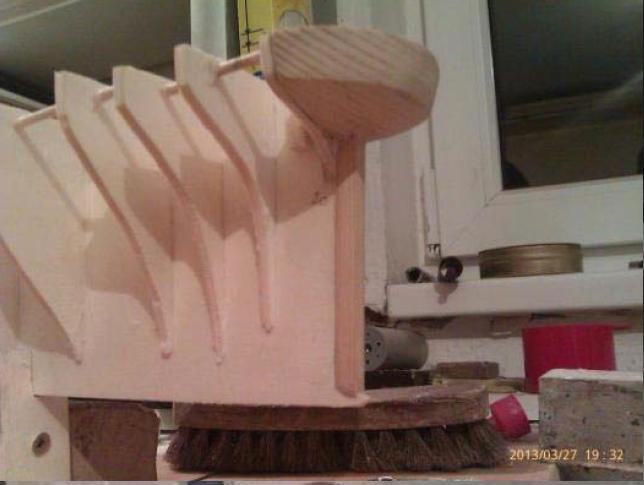
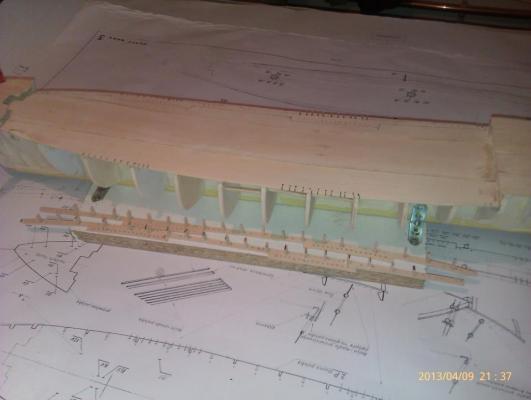
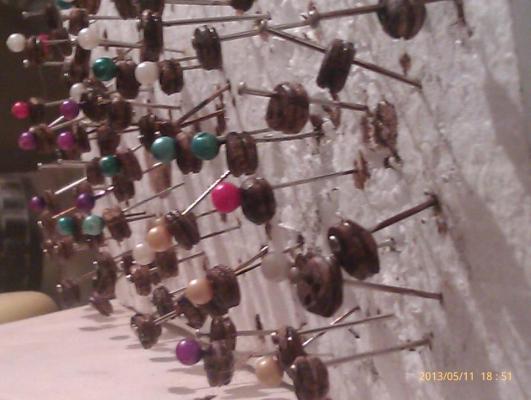
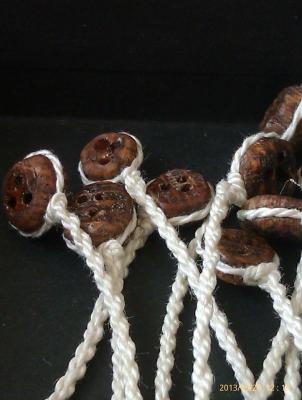
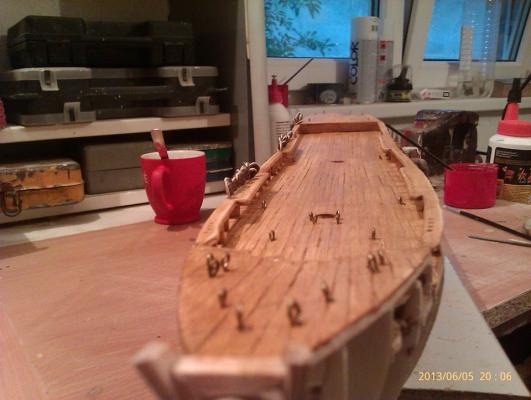
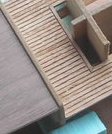
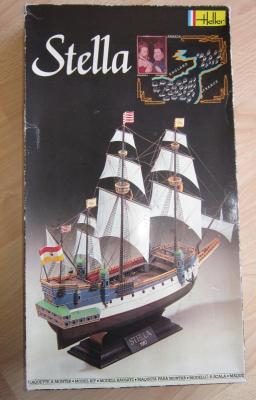
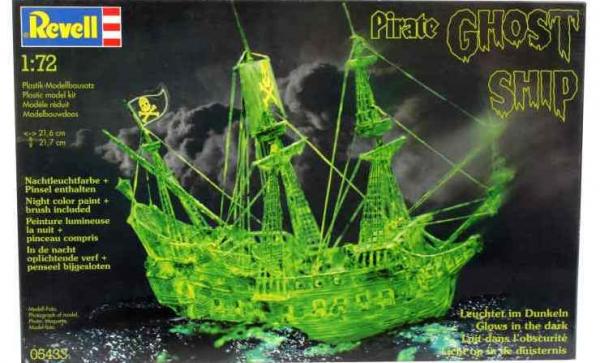
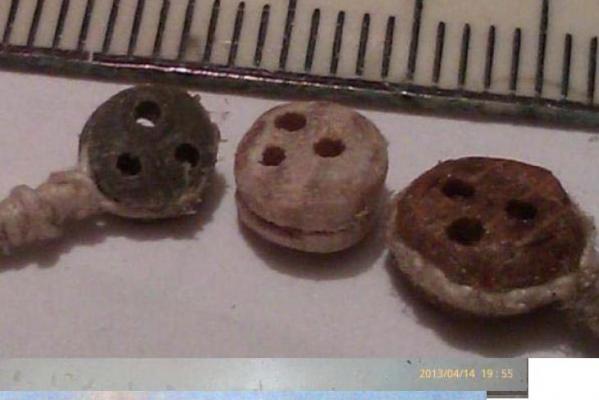
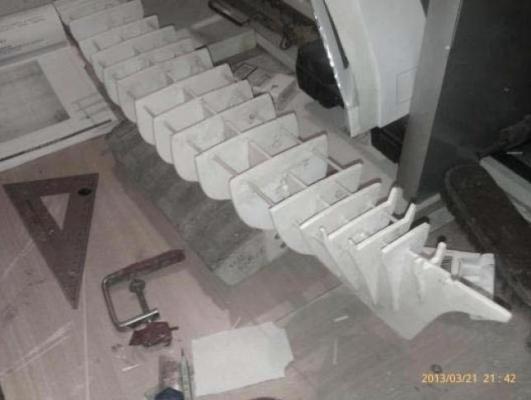
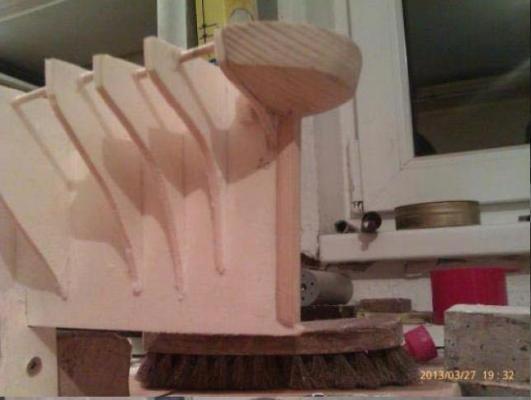
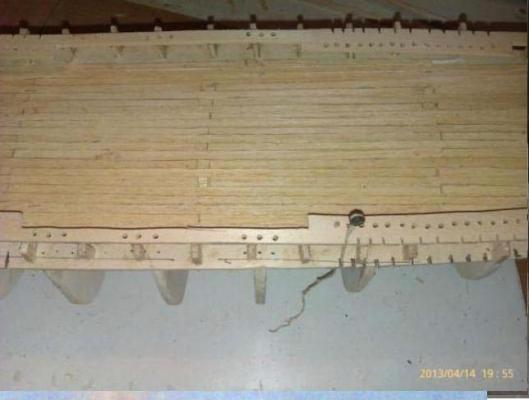
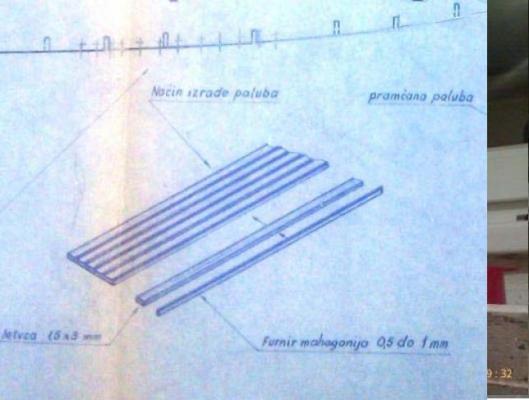
Link to content is in signature Introduction This log is intend to be personal track record of first "serious" attempt to scratch building of my very old Cutty Sark kit, started long ago and forgotten somewhere in house, mixed with some personal observations and notes Edits notes and remarks will be inserted later, to show points what are dangerous place (for dummy as me) to bump in undesired situation caused by in-patience, an-experience and God¨s will I am not a master, rather novice with too much ambition, but think in MSW there is enough room for all of us to share and learn, to keep a good time together My long lasting journey in wonderful world of ship modeling started long long ago in, I think, usual way. As almost every kid I tried myself in some cheep plastic plane models, fast and furious, short life each ( they can not fly...) Then after a while in paper car models ( my own creation), made about 30 pieces, no one leave ( they can not drive). Then, in a high school I made some no-name (or forgoten name) plastic kit ships, also no one leave ( they can not stay above heater ...). Last one, "Stella" ( Heller) died and rest in peace during cleaning dust few years ago This little Heller model on some way entered me door to "yellow brick road": Heller original colors in kit, by my opinion, were on such a type that model rather looks as toy, so I experimented with colors to catch color of wood, added extra details on deck and extra ropes ... joy in playing, and obviously first sign with arrow to entrance for something that on MSW is called "dark side" And then, once upon a time ... very long ago during the study of law, I make my first step for modelling ships in wood. I got done Columbus Santa Maria (If I remember well, also TEHNODIDAKTA Pula, but I am not so sure about manufacturer from this time distance) , made it, with a lot of improvisation, and with extra added ropes which to me it belongs ... but it looked nice for me. In that time I do not know nothing about real ship modelling, made it without necessary thinking, with half of brain, and in unnecessary hurry. Santa Maria got her way with my first wife more about 30 years ago. Somewhere on that days, my twin brother made little and simple Heller`s Cutty Sark, and maybe that moment I fall in love with sail ships and their beauty Then I finished law study, went in Army for one year, Navy in Pula, Croatia, former Yugoslavia ... and that was this ... 35 years ago only "Tehnodidakta" from Pula had made wooden models in kit. ( It was impossible for us mortals to order and pay kit from other country, even to know something more about ships, models, modeling techniques, tools and so). I was delighted with that discovery, and I bought wooden kit with plans and materials for "Cutty Sark". If I remember well, only few models were there ( Santa Maria, domestic ship "Jadran", some ships from old Dubrovnik, Bounty - not sure, and some domestic smaller historical models). And as every youth, wanting to be different and to choose the greatest of offered kits, a beautiful and extremely complex model with many sails and ropes, I bought it, knowing not in what I am just entering. To say again, I did not know absolutely nothing about Cutty Sark, and having no idea what serious modelling really is To write about Cutty Sark is unnecessarily, there is so much written and published, sure on much better way I can do. Also, She is still alive in her Museum I started working on model in 1984. and it kept me up until 1985-6, when I met friend with a really nice model of Cutty done, and I realized - or should I do it right, or it does not work anyway. And she went in deepest dark in my attic to collect dust and to cry silently in her dark corner Then came usual things: got a steady job, got a wife, divorced, abandoned study for doctorate, and another wife, and two little children, start and finish building my house, become a attorney, etc etc etc... and, after "only" three very fast decades, finally the time has come to proceed, if I do not want to watch TV or read a book, or work, and there is no other homework to do. Children ( 22 and 24) are not children any more, and they need me only for money ( joke), they are adults now with their own life ( students finishing their study) ... and, suddenly, I find that appears a few hours in day exclusively concerned only for me. Amazing discovery In meantime, trying to interest my son, we (I) made some simply plastic, I think Revell Pirate ship toy Jolly Roger. Failed attempt, made in less than a week, but I enjoy making it The real trigger of my come back in wooden ship modeling was a appearance in Serbia of DeAgostini`s specialized periodical journal ( in 100 appearances) with successive parts of galleon, and I like it very much, but do not like many simplification of details which are important for me. Drawing boards on the deck with a graphite pen ? No, thanks. Waiting two weeks for single part ? No thanks. And then I remembered that I already have a plans of Cutty, the one of the nicest sail ship ever. Of course, the one with the most complicated rigging ... For difference, now, after 30 years I finally have a working corner and a mini-workshop in heat-room near the garage (and not to forget, continuous war with my daughters Persian cat and long cat hair eveeeeeerywhere). All rest wooden parts were 30 years old, and they have dried up and became largely and almost unusable. In fact, there are left only plans, some old strips and veneer, and some plastic / metal parts that I should see if I'll ever use them. So, I made up my mind, dig on mess of old things in attic of house, FIND Her, and a few months ago I started from the beginning, only with saved old blueprint sheets ( old misfit try of Cutty went in trash) with the big important difference that exists today „His Majesty the Internet“ and a millions of pictures of finished models and details of the models, which is of invaluable help. Not to forget , today in Serbia there are affordable many required tools like Dremel/Einhel tools, and so. A great help is the fact that "my" ship still exists reconstructed in Greenwich, and there are available many photos of her details for research Edit on september 23.2013: At the begin of this month I find Campbell plans, and from that time my work goes mainly by them, and my dedication and way of looking to my work rapidly change from day to day Beginning And so ... my first brave steps toward swamp, with more braveness than a brain presence I did not mention "swamp" accidentally. As time goes by, I decided to do some steps in building in my own way (?), not in way which is ordinary, and in sheets. (for example - making my own dead-eyes ( later - blocks ?) and, later - ropes, my way of planking, etc etc). What a confident fool ... but ... that is just me - whole life I discover hot water again and again ... Later I discovered that sheets have mistakes and insufficient instructions, my hands and experience are mainly not precise as I want, patience ... what is that ? But they are much better than 30 years ago, and my imagination and improvisation still exist, and I learn every day Really significant stage of my build is finding MSW, and here are first steps ... First decision was that I do not want to pay somebody for laser cut. What then rest for me to do ? Using paper with photo copy of plans to transfer plan to plywood. A "bit" of cutting and a "bit" of glue, and my way (?) to hold angle of 900 and to assume required stiffness skeleton for further work . Later, when time to mount deck come, I found that ship's ribs are not well drawn in plan, or I did not cut and mount them properly. Not provide proper and sufficient longitudinal and transverse slope of the deck. Yes, it will be quite a job to fit it There was a lot of my unexperience in this , very very very significant stage of building. In POB building (I discovered later) the crucial thing is right dimensions, position and angle of ribs. EVERYTHING later depends. Consequences can be, and in my build are - catastrophic. Months of lost time trying to correct mess, and all time re-examining myself - was it better to go from start. If that happen - to hell with everything, and start over without more thinking. If you do not do this - be sure that at moment you think that succed in correcting one part, another part will protrude out and jump right on your hand. And when fix this, third part will hit directly to your face. And when fix this, you discover that first corrected part is not good. Some kind of perpetuum mobil and never lasting process. You will spend months instead week or two to make keel and ribs again, this time with thinking and measuring. And as you are impatience full running to start planking on this messed bulkhead construction, as I was, be sure that you will have great enjoyment in unnecessary work And there is stern from one piece (it was corrected later in proper angles) - not just one correction, smart learns from others' mistakes, and fool ... In that stage, I have not idea how complex are curvatures of whole ship, and how much time I have to spend on it ... to lose them ... and to find them ... and to lose them again ... And, oh, what a self-confident ... Later I concluded that keel is little distorted, mainly by "my way" of assuming "right" angles, but there is no way to correct this .... Deck mounted with many previous corrections of ribs to assume slope. This was big big big MISTAKE. Right order is : first planking hull, and after that - deck mounting. See posts #240 and connected future posts. If you want to follow lines on upper side of ribs that lead to longitudinal and latitudinal curvature of deck, do not this. Deck can not be from one single piece of veneer 1mm width, as I did. You can not twist it in proper way. There is no way to do it. I tried, and result is - months of trying to correct mess and find lose lines. You can not correct it at all never again. So, better is to plank with strip by strip. For consequences, see later post http://modelshipworld.com/index.php?/topic/2501-cutty-sark-by-nenad-m-tehnodidakta-19711983-campbell-plans/page-42#entry156687 Holder for dead-eyes and wedges in one peace, not in four parts as in plan. It is much easier ( ha, ha ha !!!) way to follow the line from planes. Also mistake from same reason.I lose proper lines of hull, and this hang over my head all the time ... And holders must be redone completly Whole deck planting with veneer, also not in original plan. In original kit was wooden plate 2mm with 1mm deep and 1 mm wide grooves carved full-length of plate. I mounted that on old Cutty. What a joke ! First two pictures represent deck from kit, then part of a sheet, and at last picture is my try Edit Martch 31. 2014 : Fore and Aft deck - third time re-planked, main deck - second time re-planked Fool made dead-eyes rather than use plastic from kit ( For details - post #16). 66x designated only above deck. There will be so much more latter. Enormous work, and enormous lost time. Yes, I have to make them again in better way And twisted rope handmade instead wire. More elegant an more real, as I thought - obviously on that time I had no right idea what all this will be to the end Plastic dead-eye from kit at left, and self-made in center and right on picture Preventive cover with light sadoline, and view from the future bow - Once again mistake, I had to remove all traces of sadoline And then, when I join to MSW, was a time just start planking, planking, planking ... and to discover that ALL first moves on this chees table are just - wrong


- 4,145 replies
-
- 5
-
-
- cutty sark
- tehnodidakta
- (and 1 more)
-
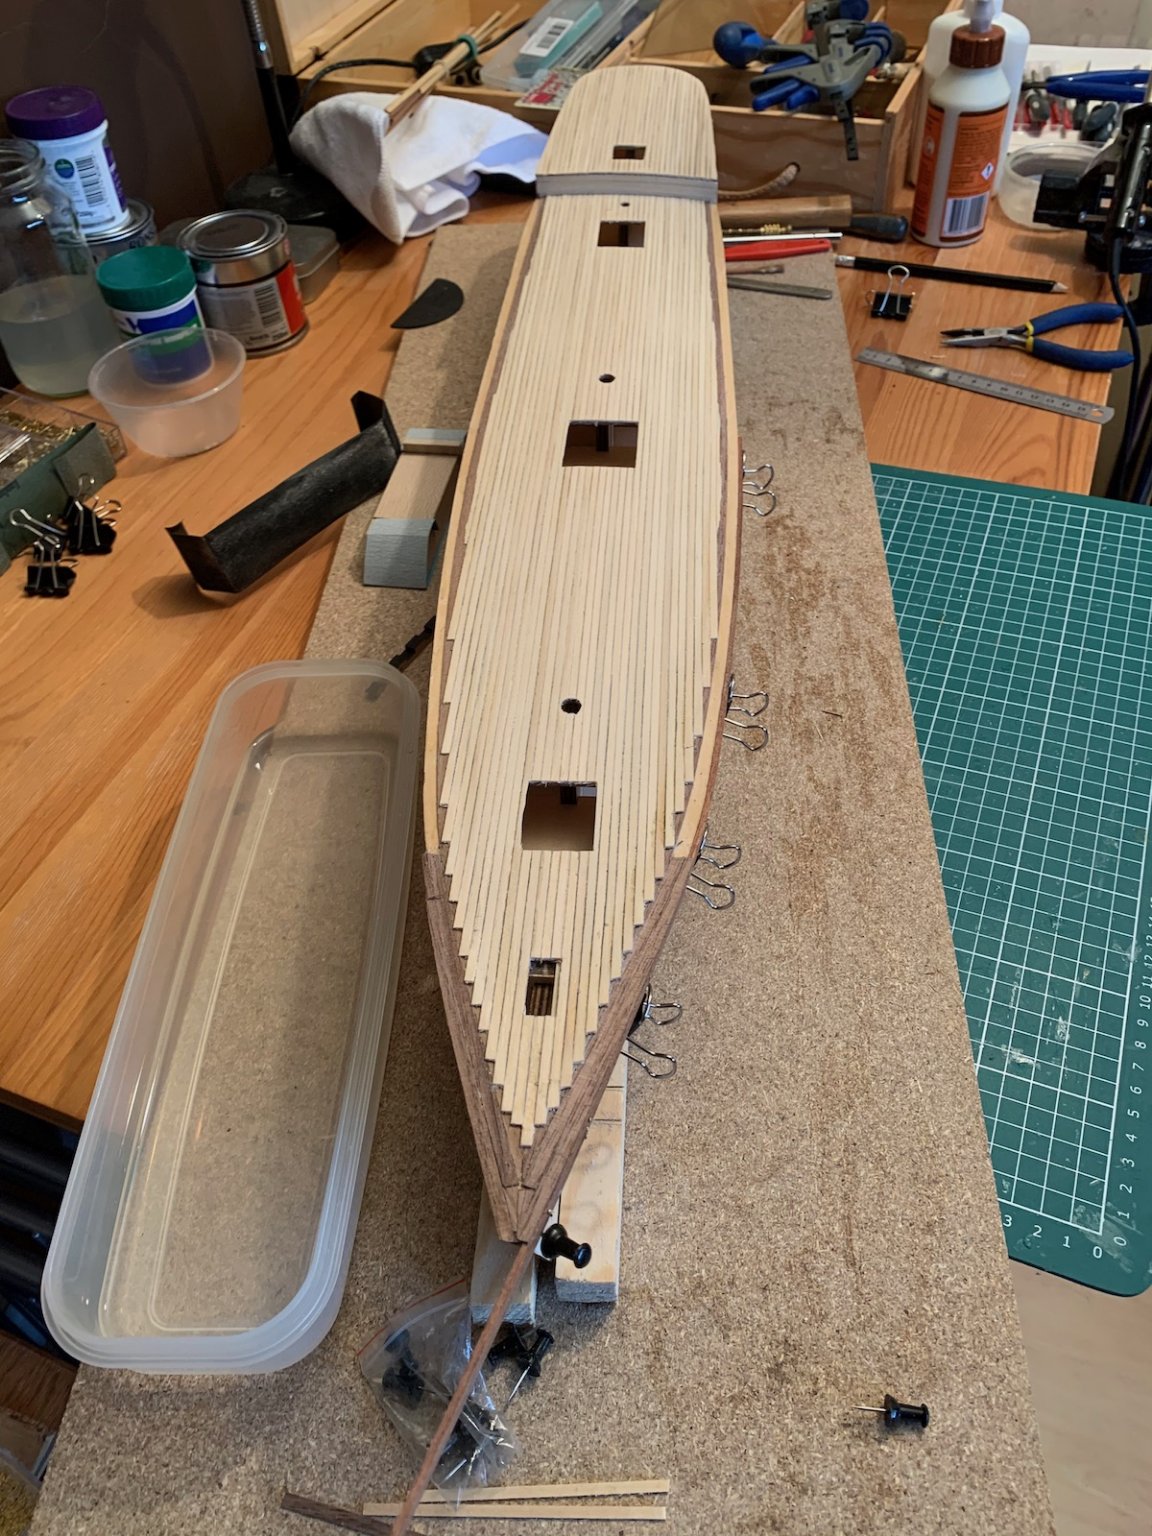
 Hi all, After some time into the build i decided to create a build log of my progress on the sergal cutty sark 1:78. This is the first wooden ship model i am building, so everything is new to me and this forum was and is a blessing to me to learn all the tips and tricks of building ship models. The sergal kit comes with very little instructions, only about 4 pages of text without pictures, and a lot of real size plans. Not ideal for a beginner like me so im getting the "know how" else where. I also bought the Campbell drawings of the real ship, which help me to add detail. I started this kit in 2015, but after planking one side of the ship it stayed untouched on my shelf for about 6 years. Suddely i felt an urge to continue the build, and i did not stop since. Its going very slowly due to working a full time job. SO hope you enjoy this build log, and im looking forward learning from all of you fellow ship builders.
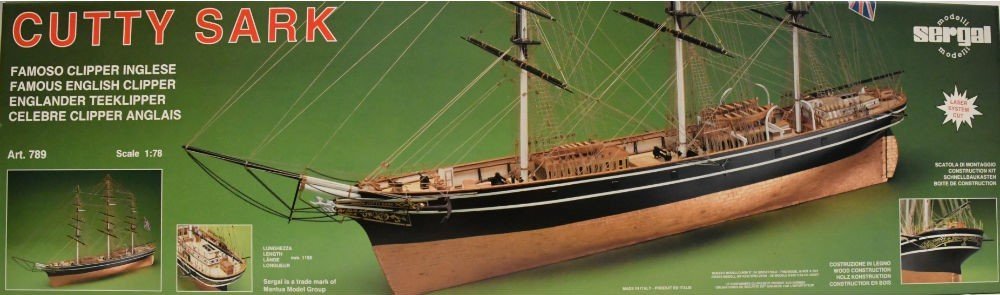
- 15 replies
-
- 2
-
-
- Cutty Sark
- Sergal
- (and 1 more)
-
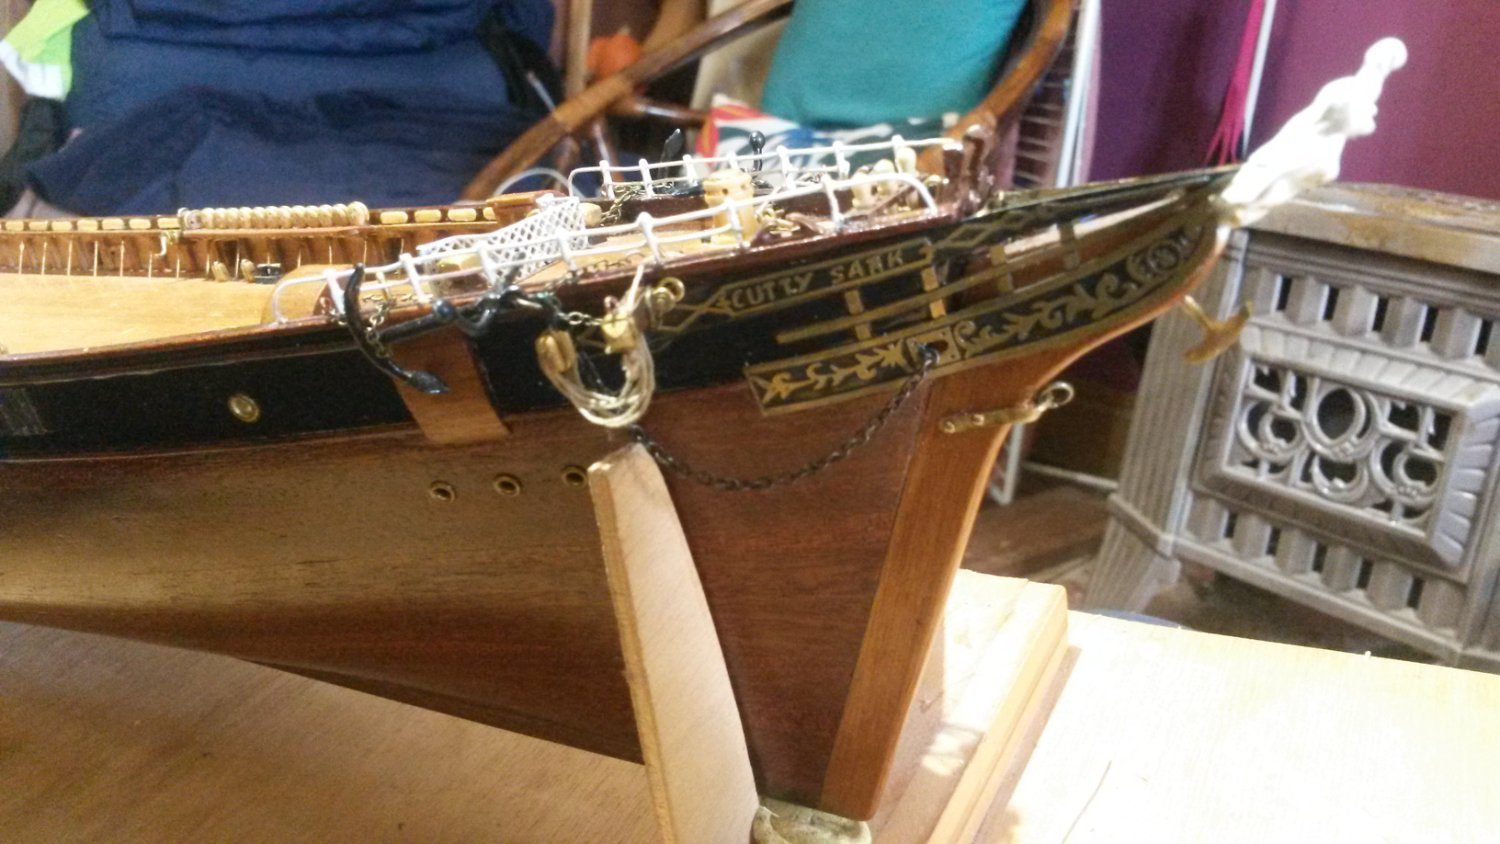
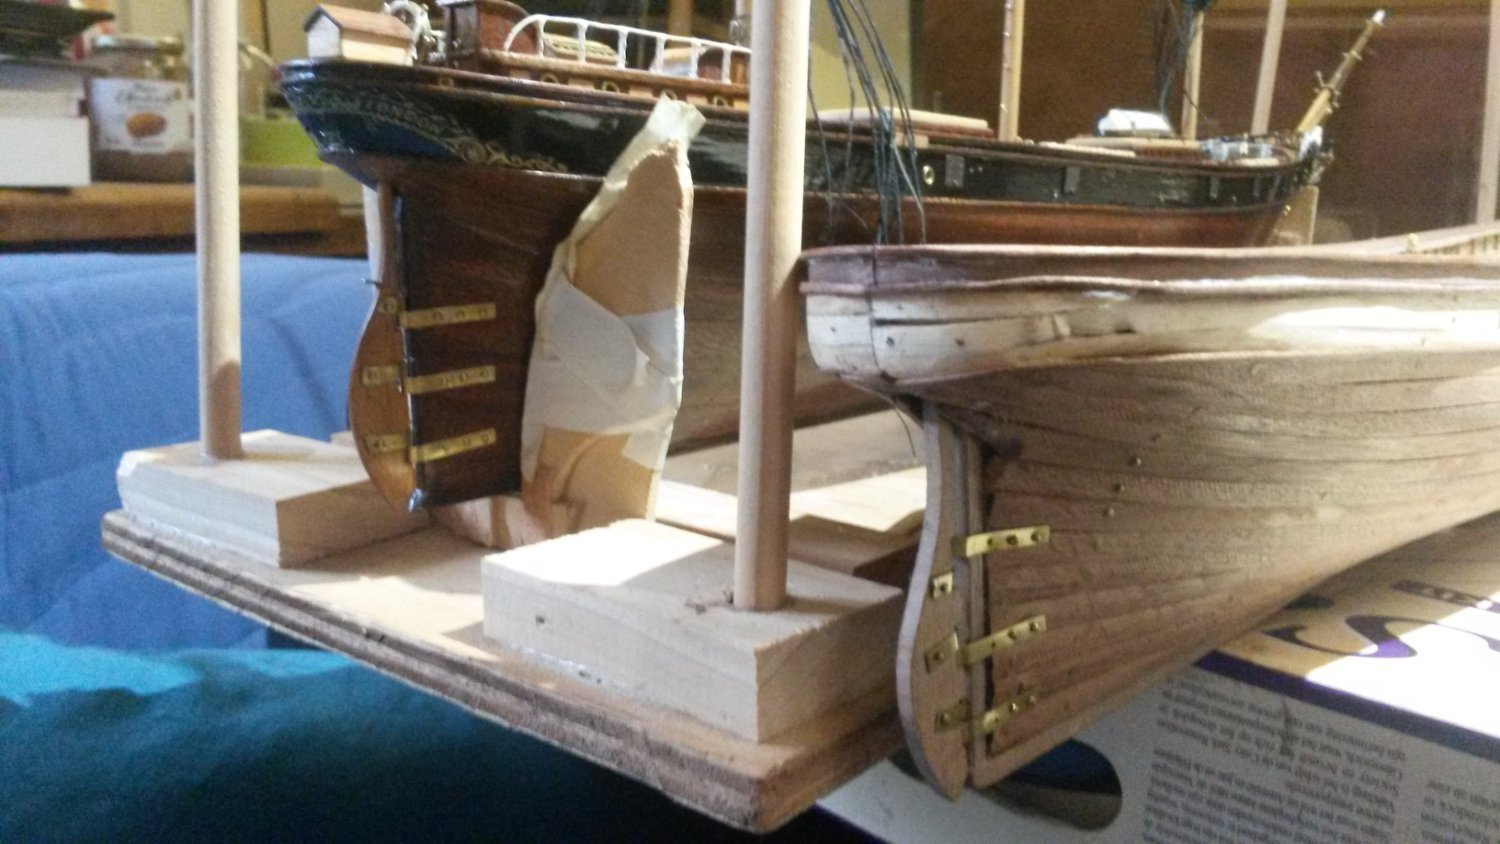
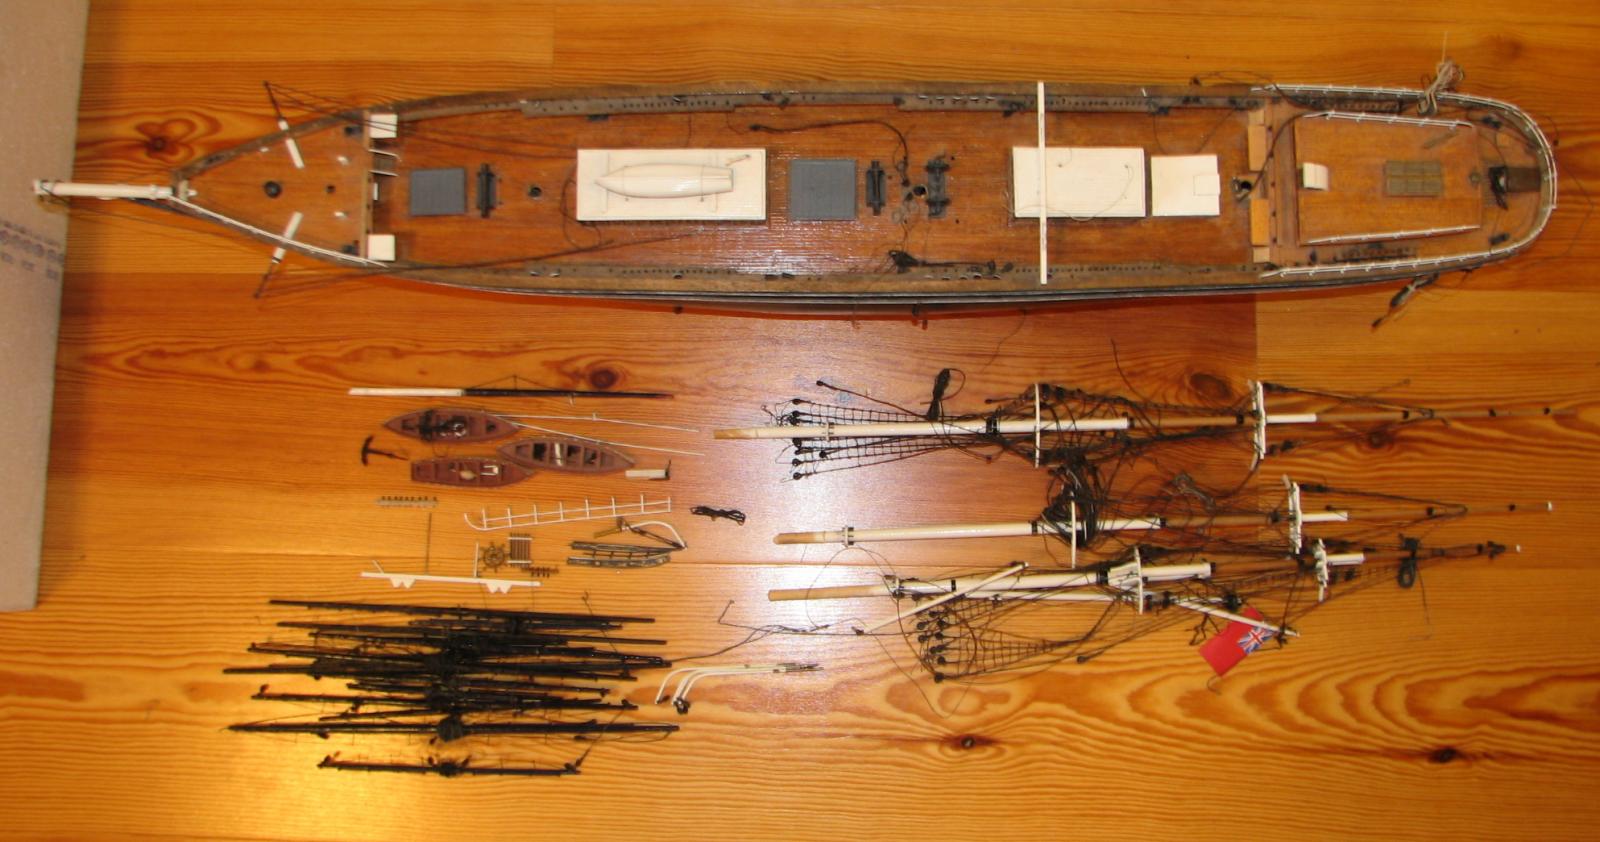
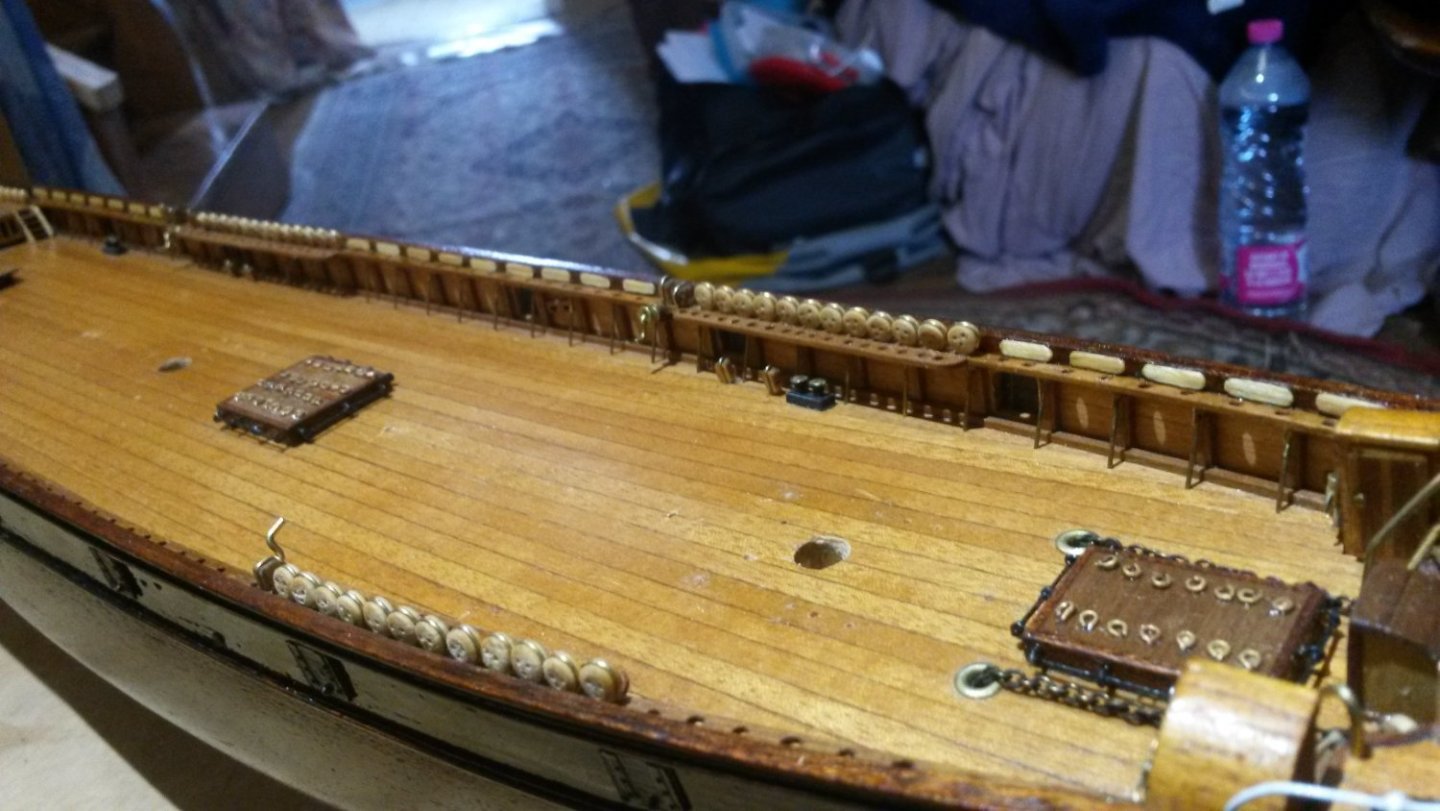
 First build after about thirty years, a christmas present that i try to do justice to. Sorry ,but quite advanced in the build and i did not log it. Made the mistake of trusting the kit at first , built the hull and some other stuff before looking at the rigging plans and realising the errors of my ways. Didn't even know the ship still existed , i am ashamed to say ! (But maybe they should have informed me in the instructions!) Some stuff will have to stay , but i am trying to scratch what i can to improve things and i am quite happy with that. The scale is rather small for such a ship , i think the kits at 1/84 or 1/72 would be preferable. So here is a kit illustration and a few recent photos. Feel free to comment on my catastrophies prow main deck with misplaced anchor hawsers plus oversize planking and deadeyes...many non kit additions. the poop , pictured with a cousin that i have just recovered for spares, allthough she is not on her best form. She makes me feel better when i look at mine ! try uploading here as i have been struggling!
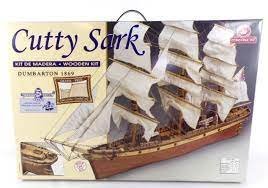


-
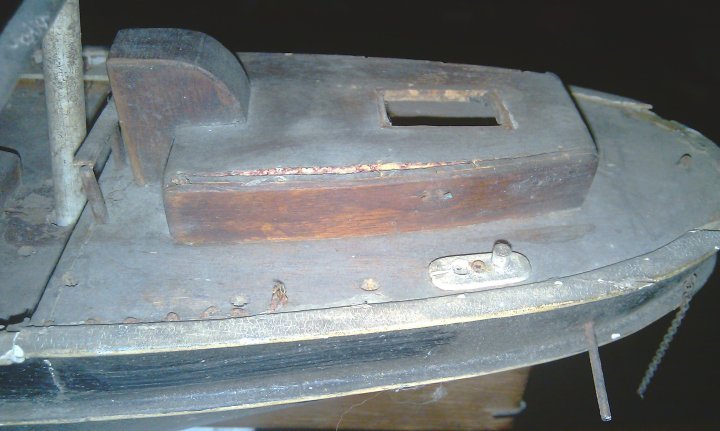
 Hi everyone. I am based in the UK and am taking on what I expect will be a substantial project. I am not new to modelling, as a teenager, I built numerous Airfix kits, starting out just assembling them out of the box and finishing up filling my bedroom with Aircraft and Warships completed with detailed paint jobs and made to look as realistic as I could. Joined the Model Club at me Secondary School where we built balsa and tissue flight ready models, I made a free flight glider and later on a Powered Cesna for Radio Control flight. I was born in 1958, and my father, who was a keen modeller, died in 59 so have little to remember him with. Some time in 57, after the Cutty Sark was opened to the public, he started a model of the ship, built from scratch, and finished it before his death in 59. The model was sold, not by me and a sore point, but was restored to me about 5 years ago, but was in a sorry state. It had lost all its rigging and the deck fittings were either missing or damaged. Over the last few years, I have wanted to restore her to her former glory, and I had immediately gave her a fresh covering to her deck and re-did the painting on the hull. Then I stalled. I had no plans to look at and much of what I had got back showed that Dads versions were a little crude. I wanted to restore her but also wanted to improve on his version, thinking that there are much more in the way of resources available to me than were to him. However, I do not want to turn this into a totally new model and intend to use as much of the original parts as I can. Its been a while since I did any detailed modelling so am a bit out of practice and have never taken on such a daunting task, so appreciate the article on reviewing build logs of newcomers to the hobby, but I hope that my reason for selecting such a complex task is clear. I am lucky in that I live in London so have access to Greenwich. I did visit the ship when I was i my early 20's, long before the fire of 2007, I watched the tv coverage of the fire when getting ready for work, ending up being late for work as I could't take my eyes of the images on the screen. I keep promising myself a revisit now she has been restored and is once again open to the public but never seem to get the time. The hull is very similar in size to a 1:90 scale and my budget is limited, so much of what I need to make has to be from scratch. There are some things that I am just not going to be able to fabricate so will have to buy them, such as Deadeyes and Blocks and others will just have to have simulated as I can afford to buy 70-80 Chainplates. So I will be doing my best to stay true to the ship but I also have to stay true to dads vision of the ship, so forgive me if I have to take a bit of poetic licence when recreating some things.
-
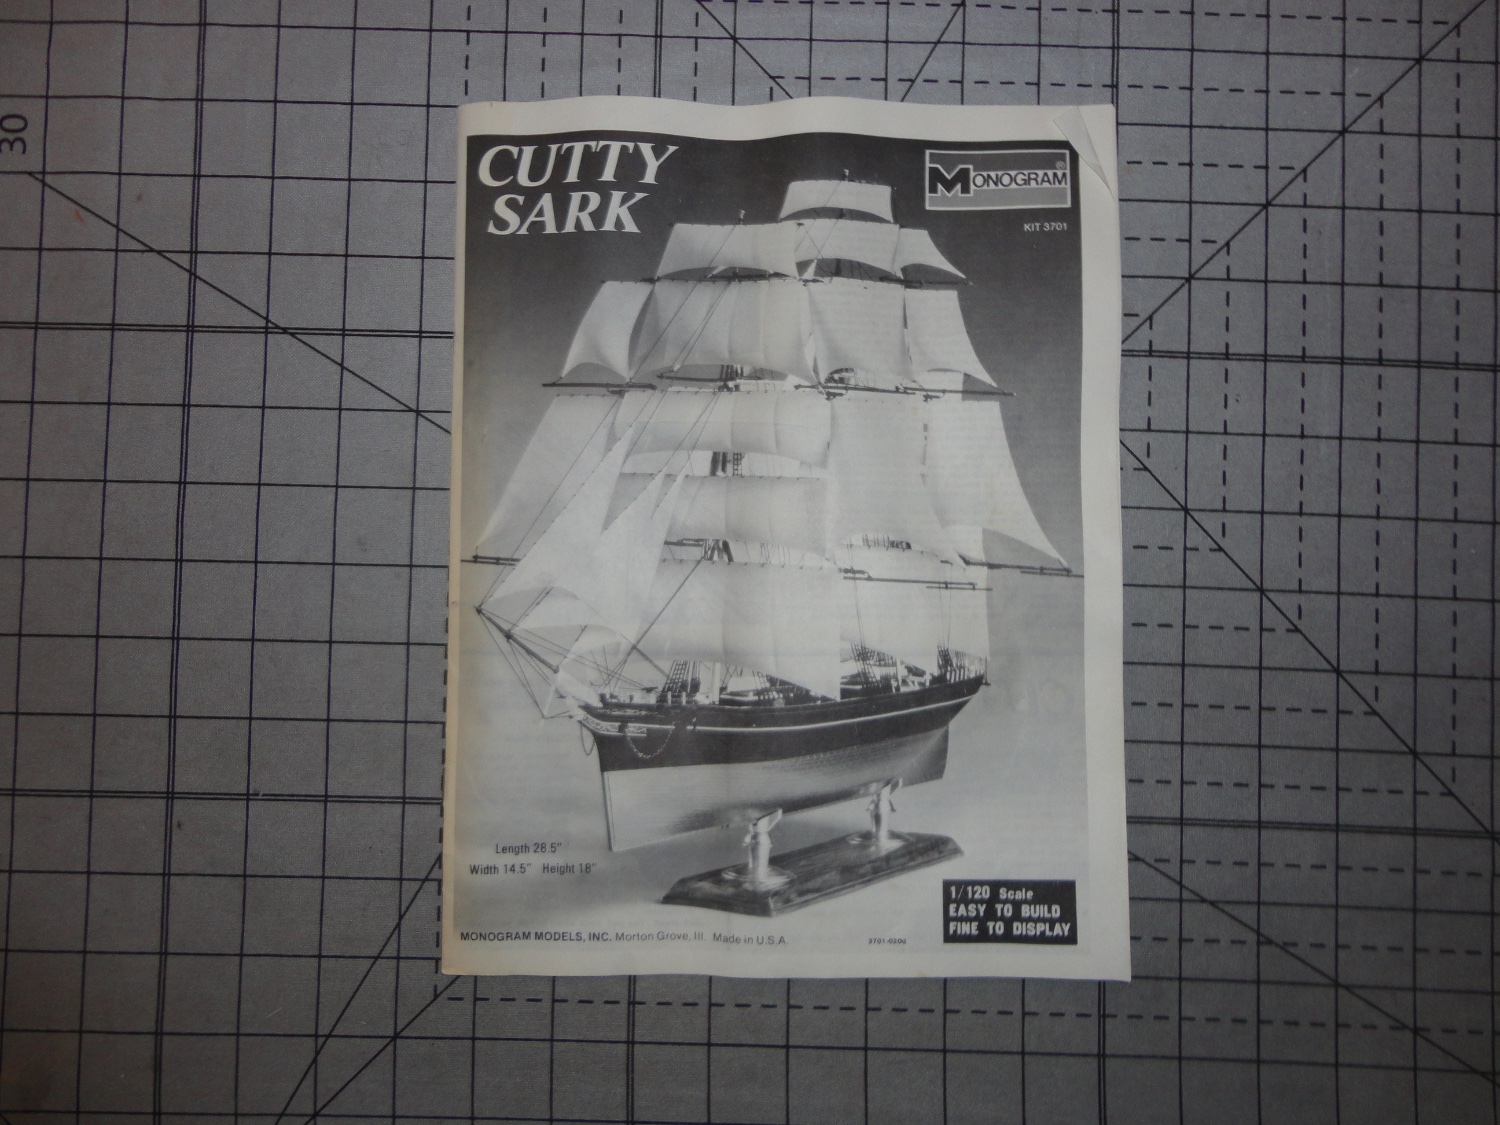
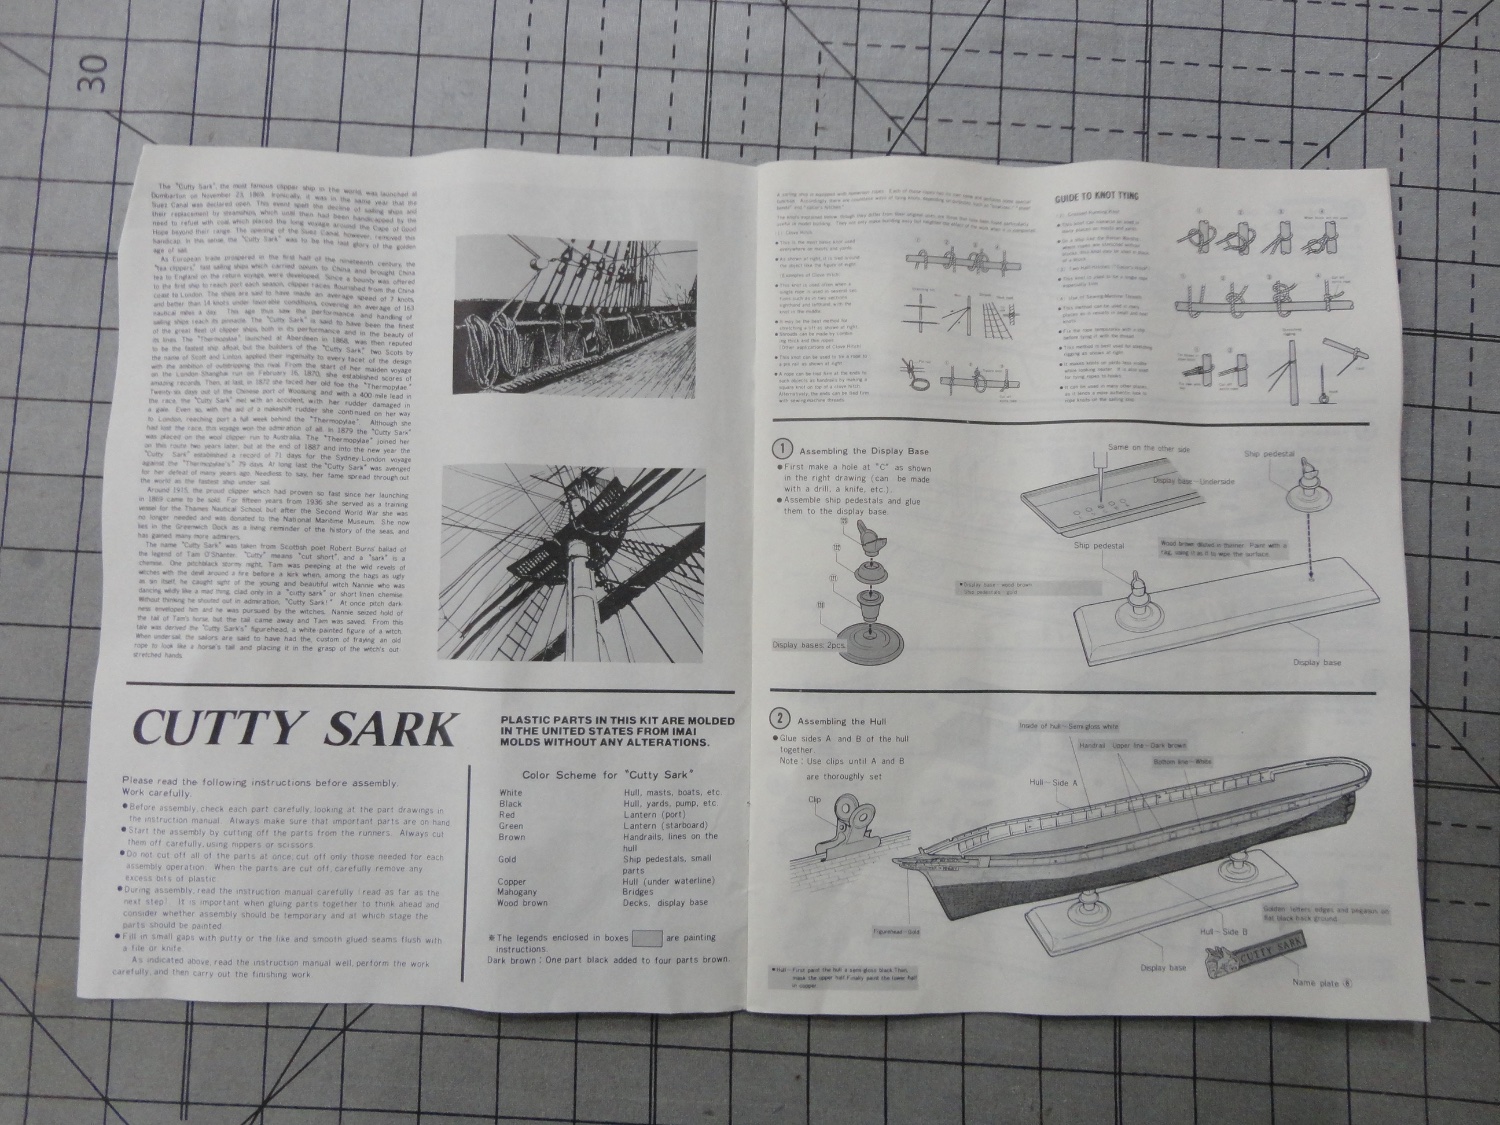
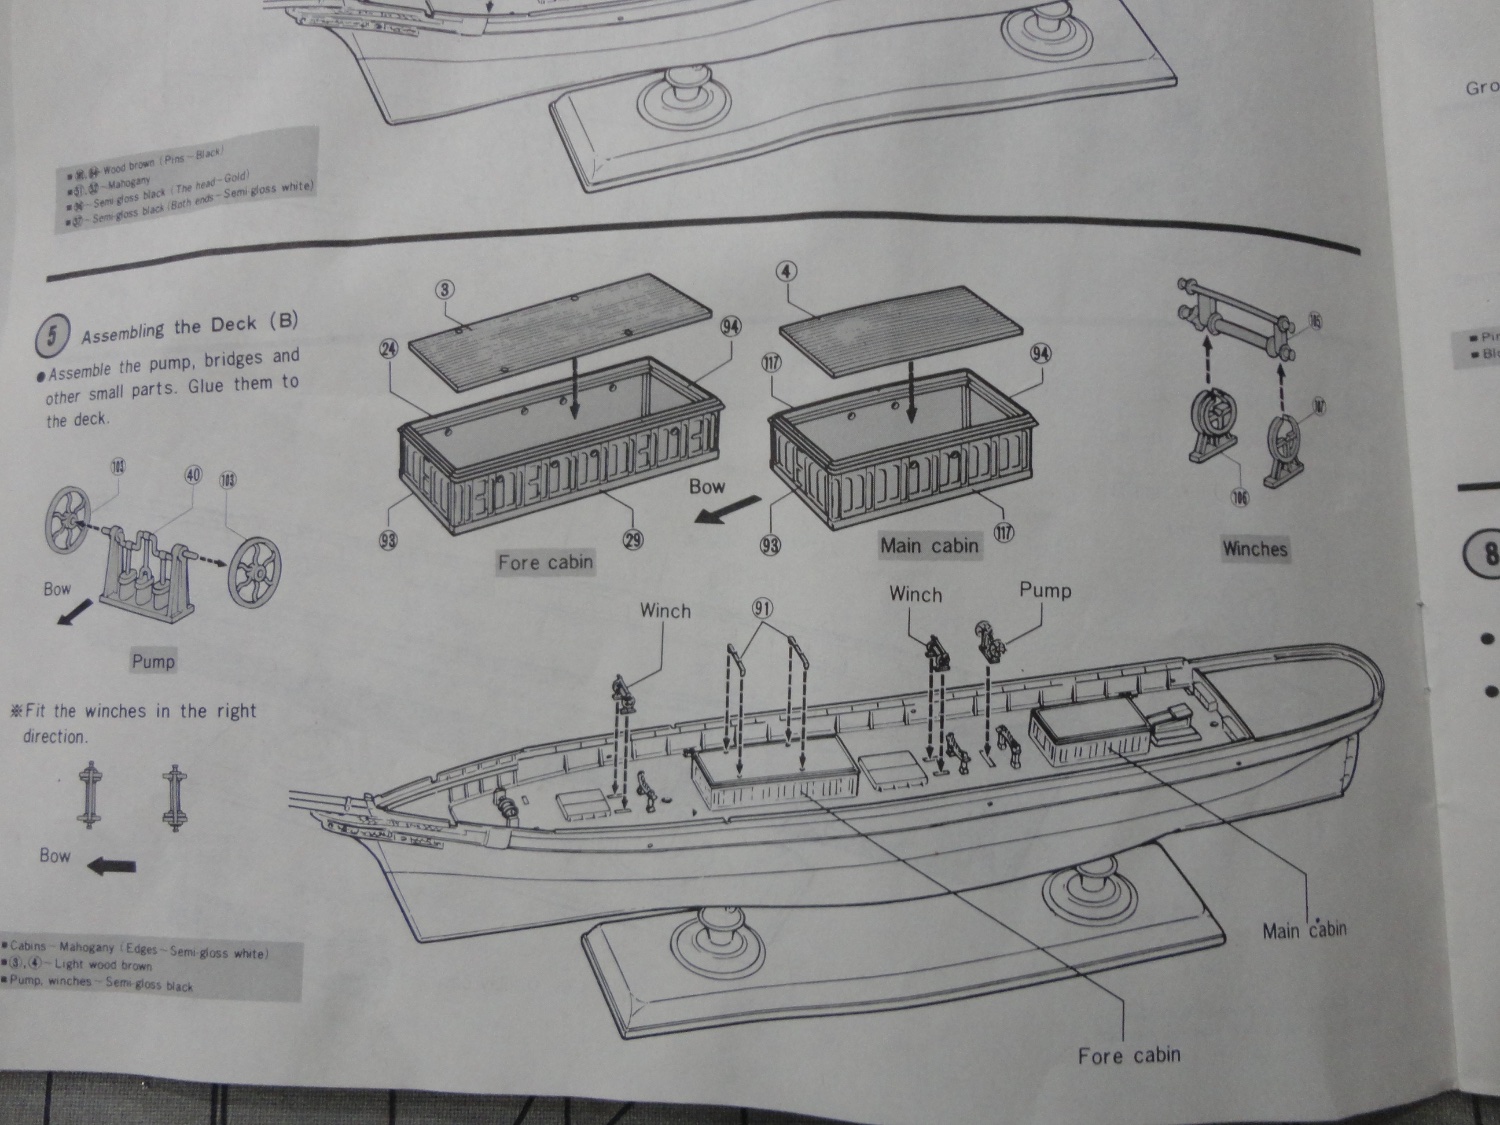
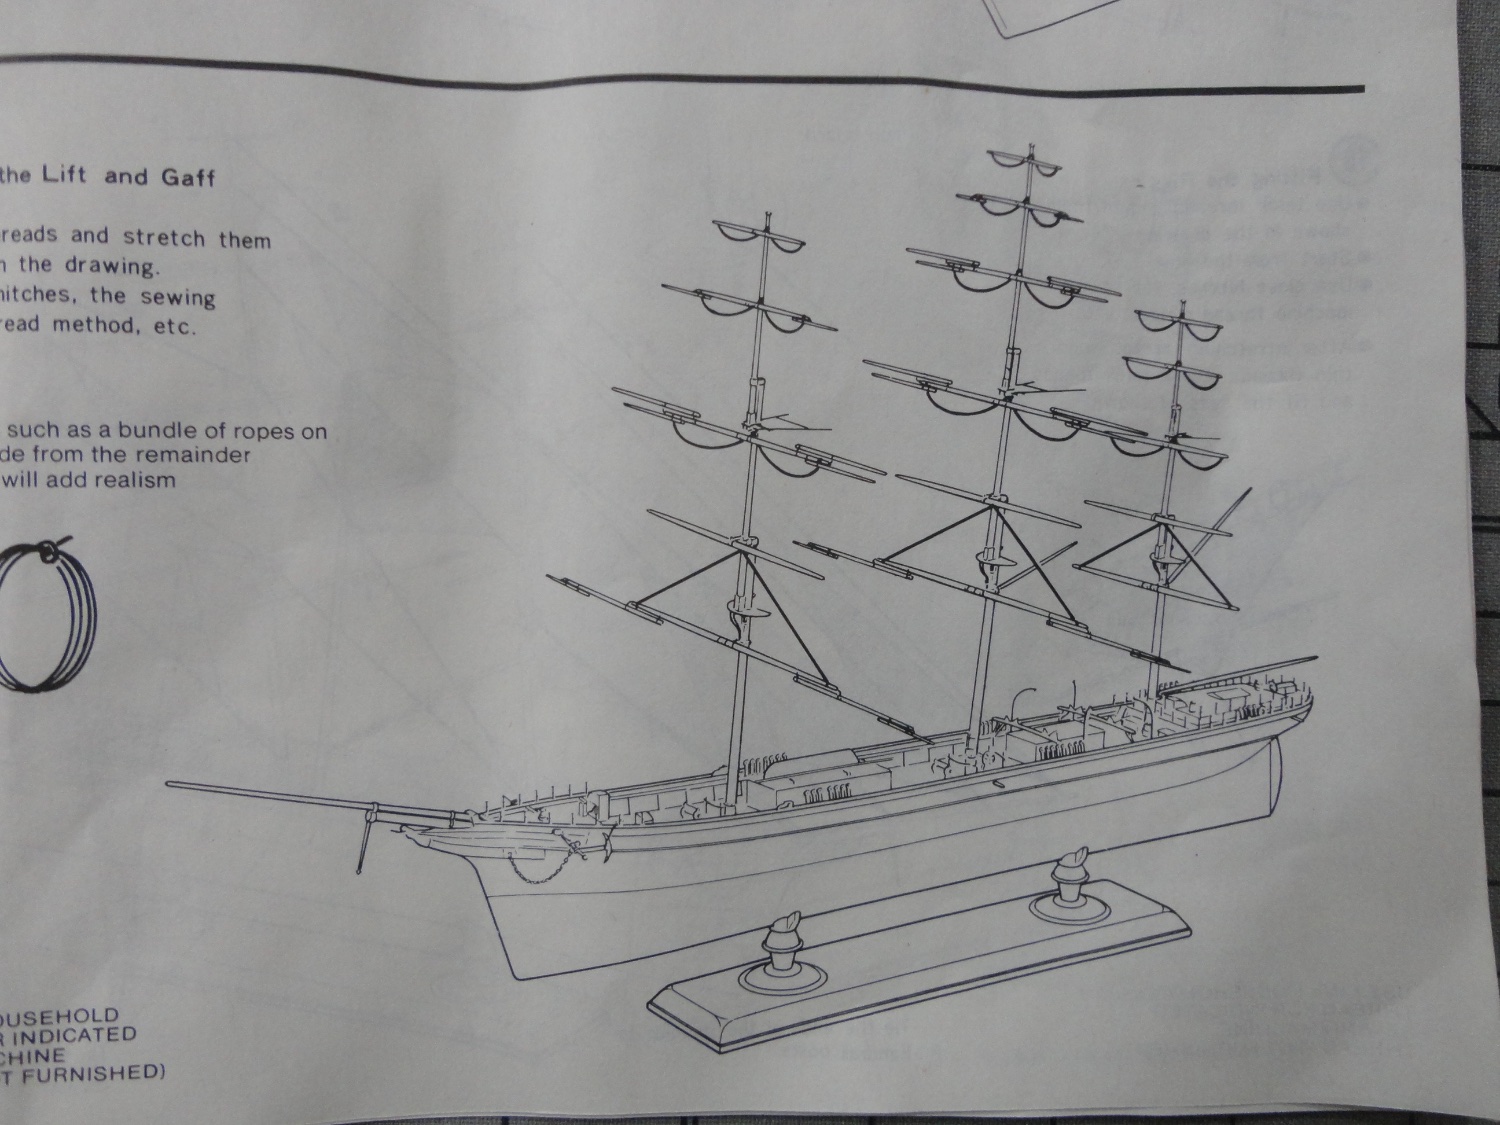
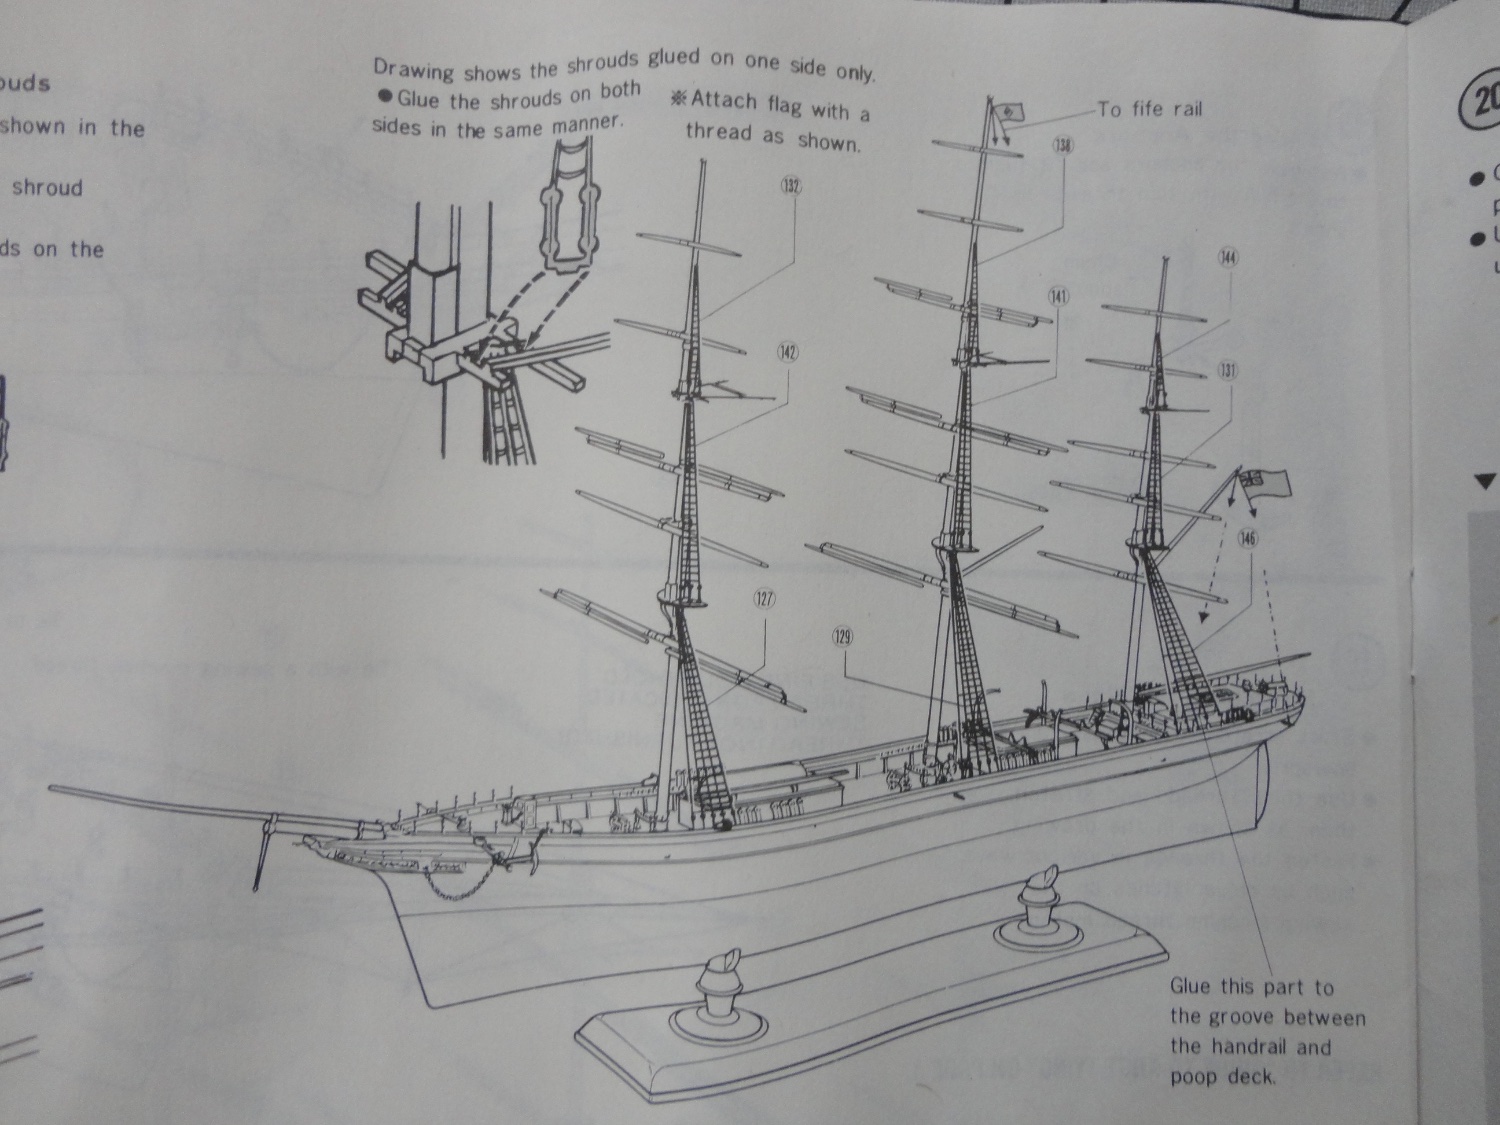
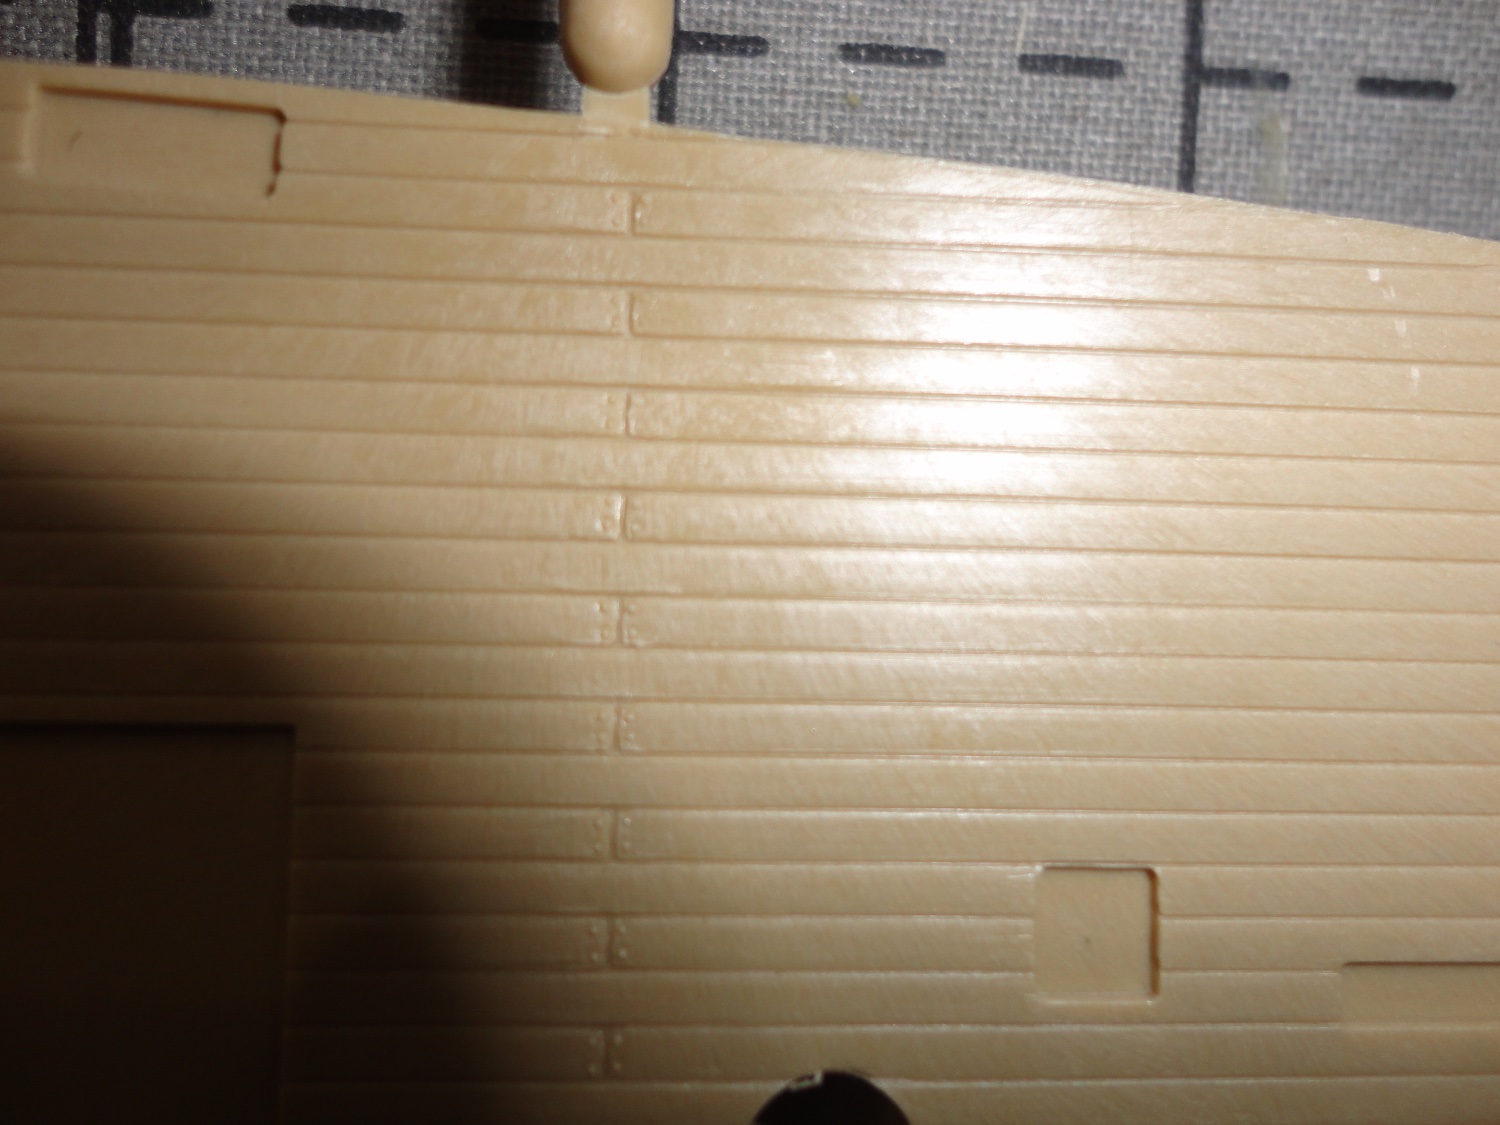
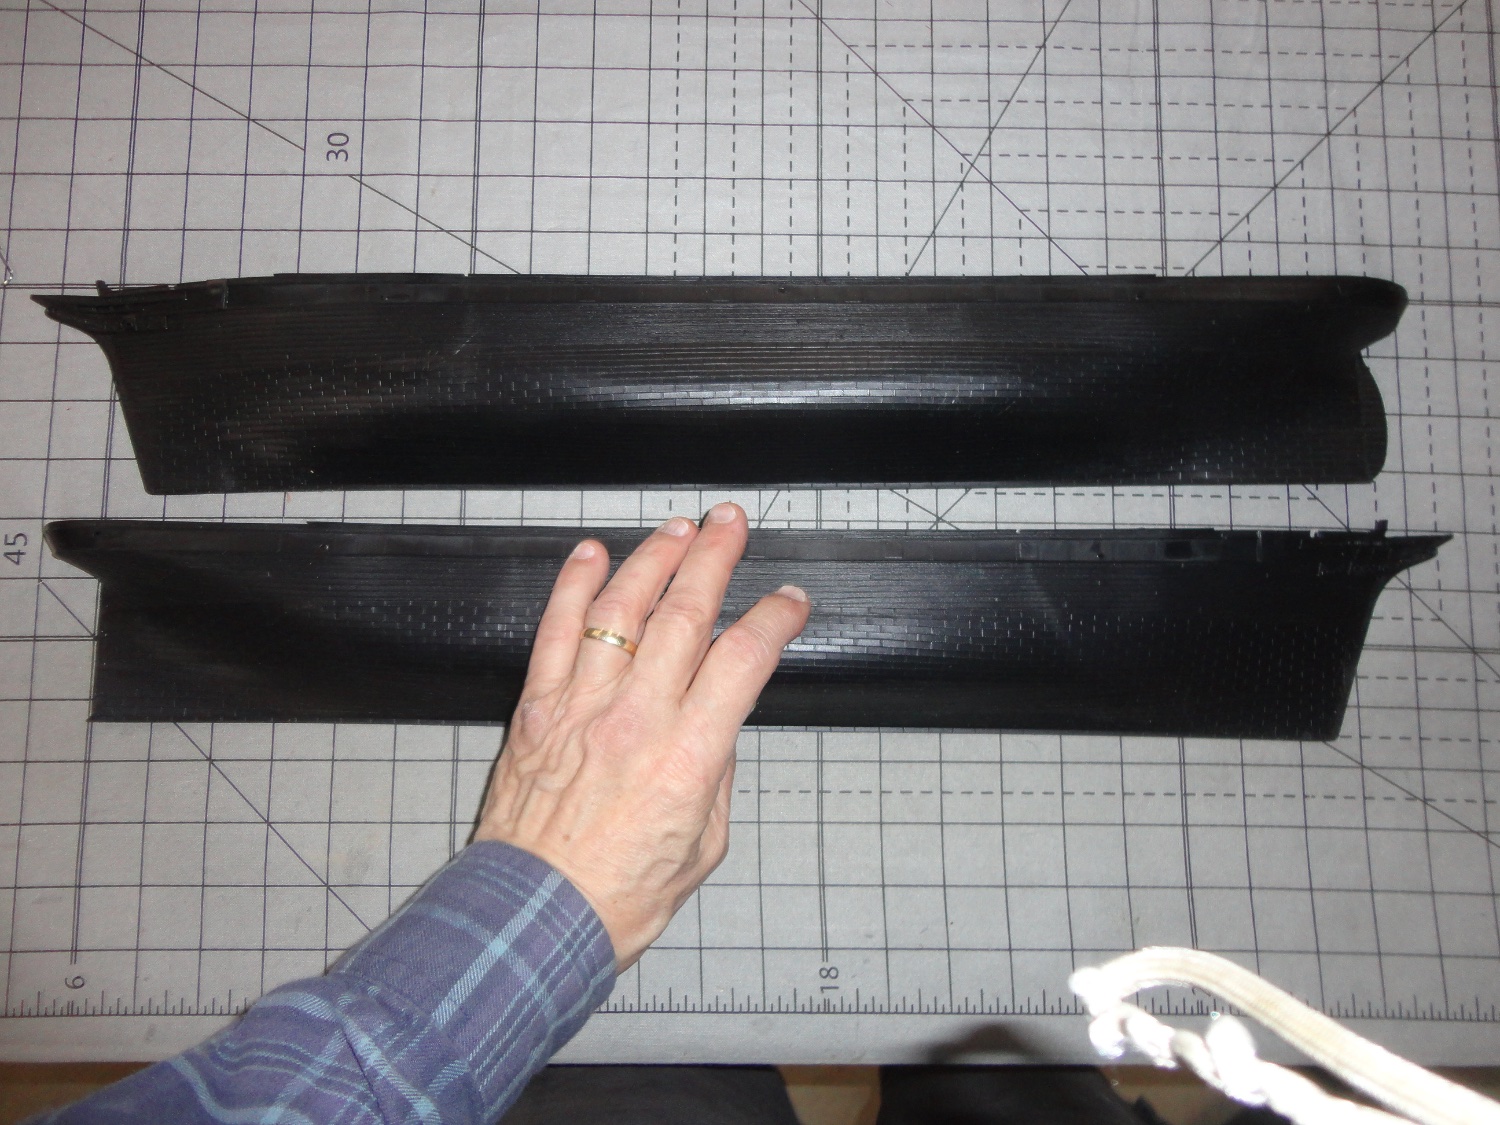
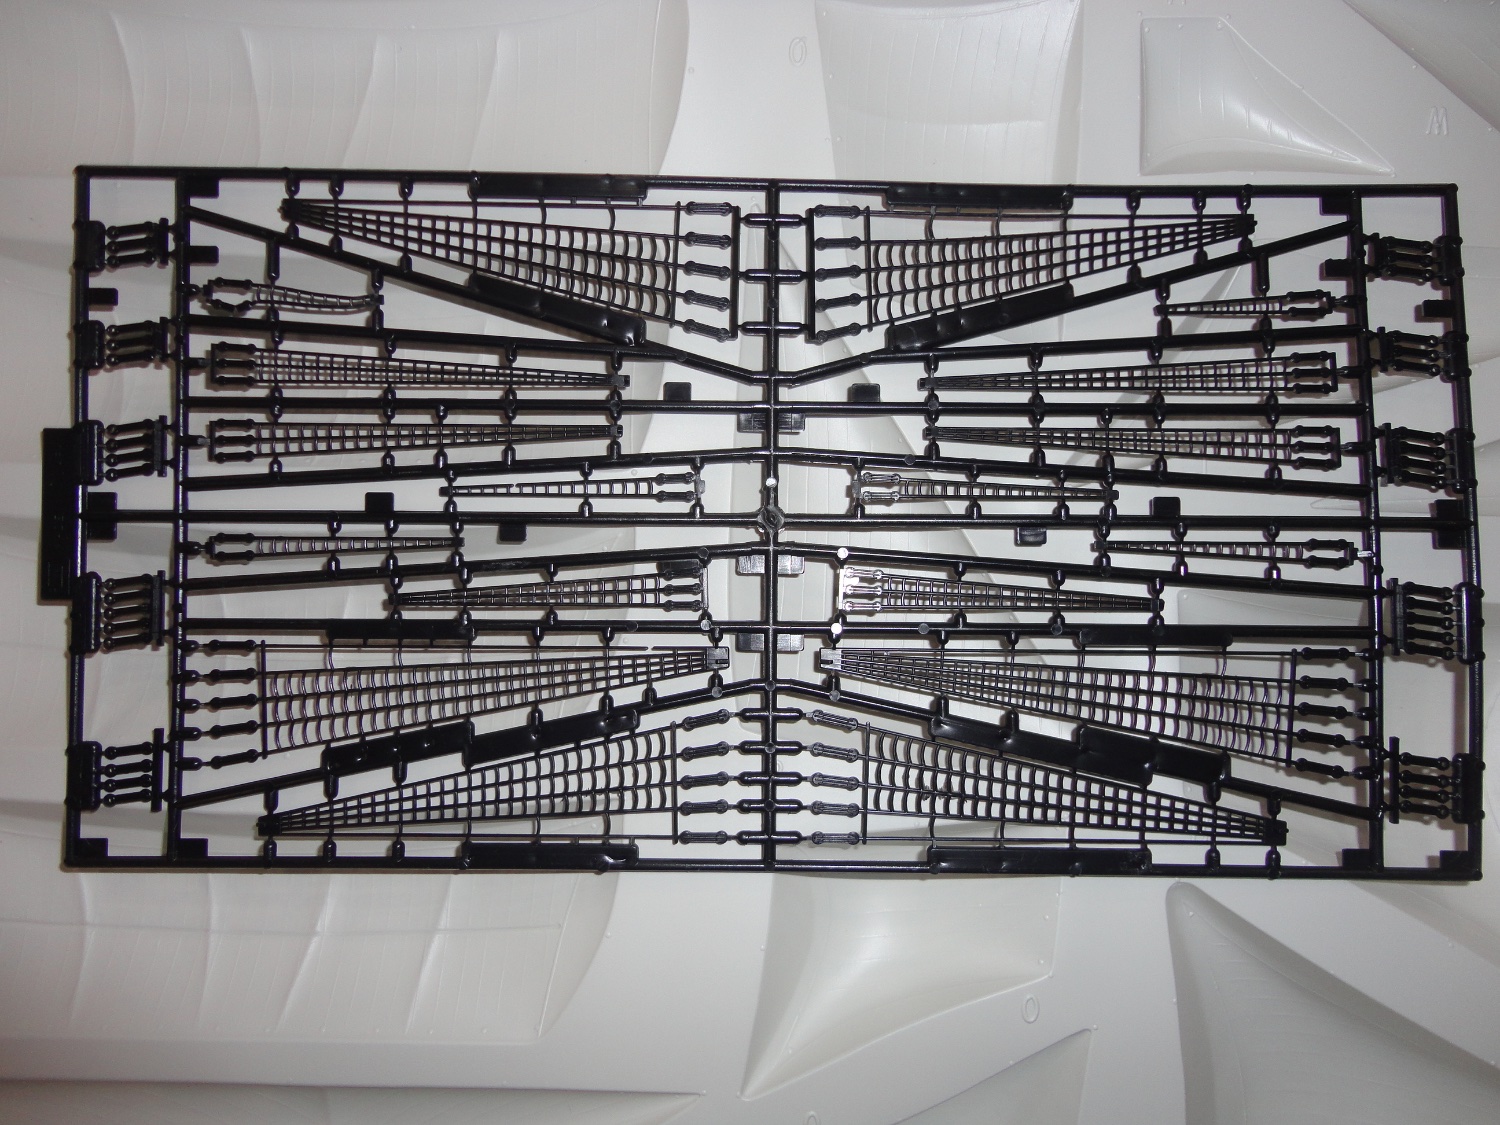
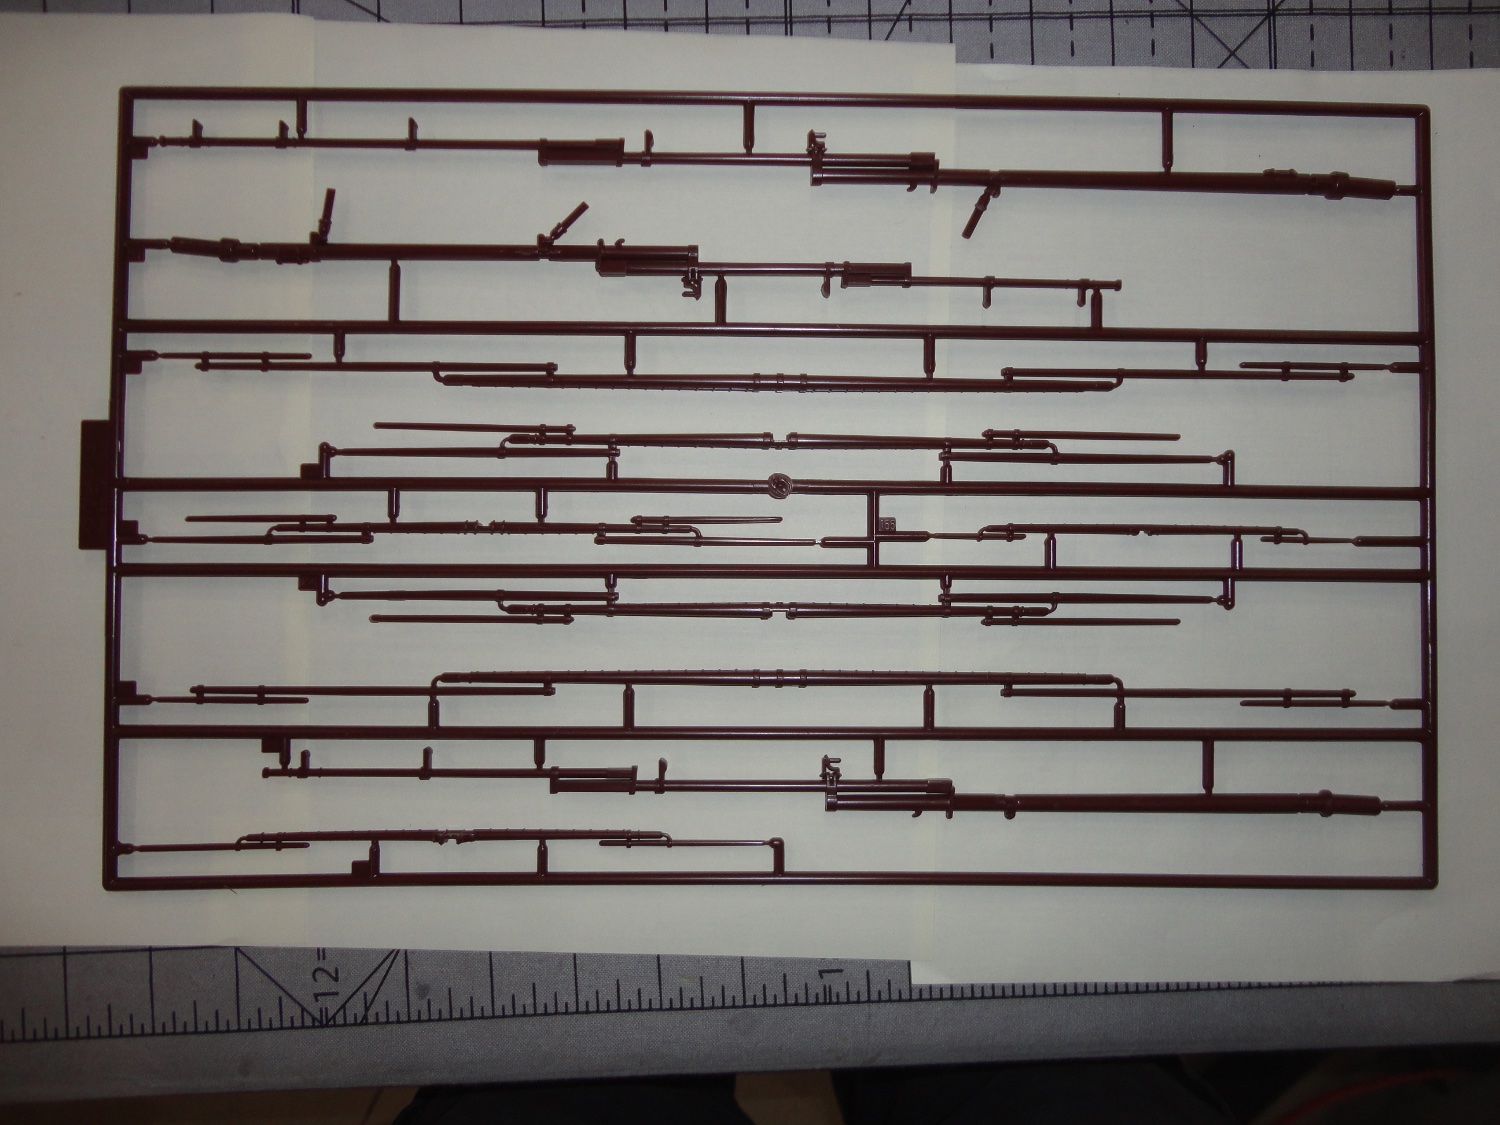
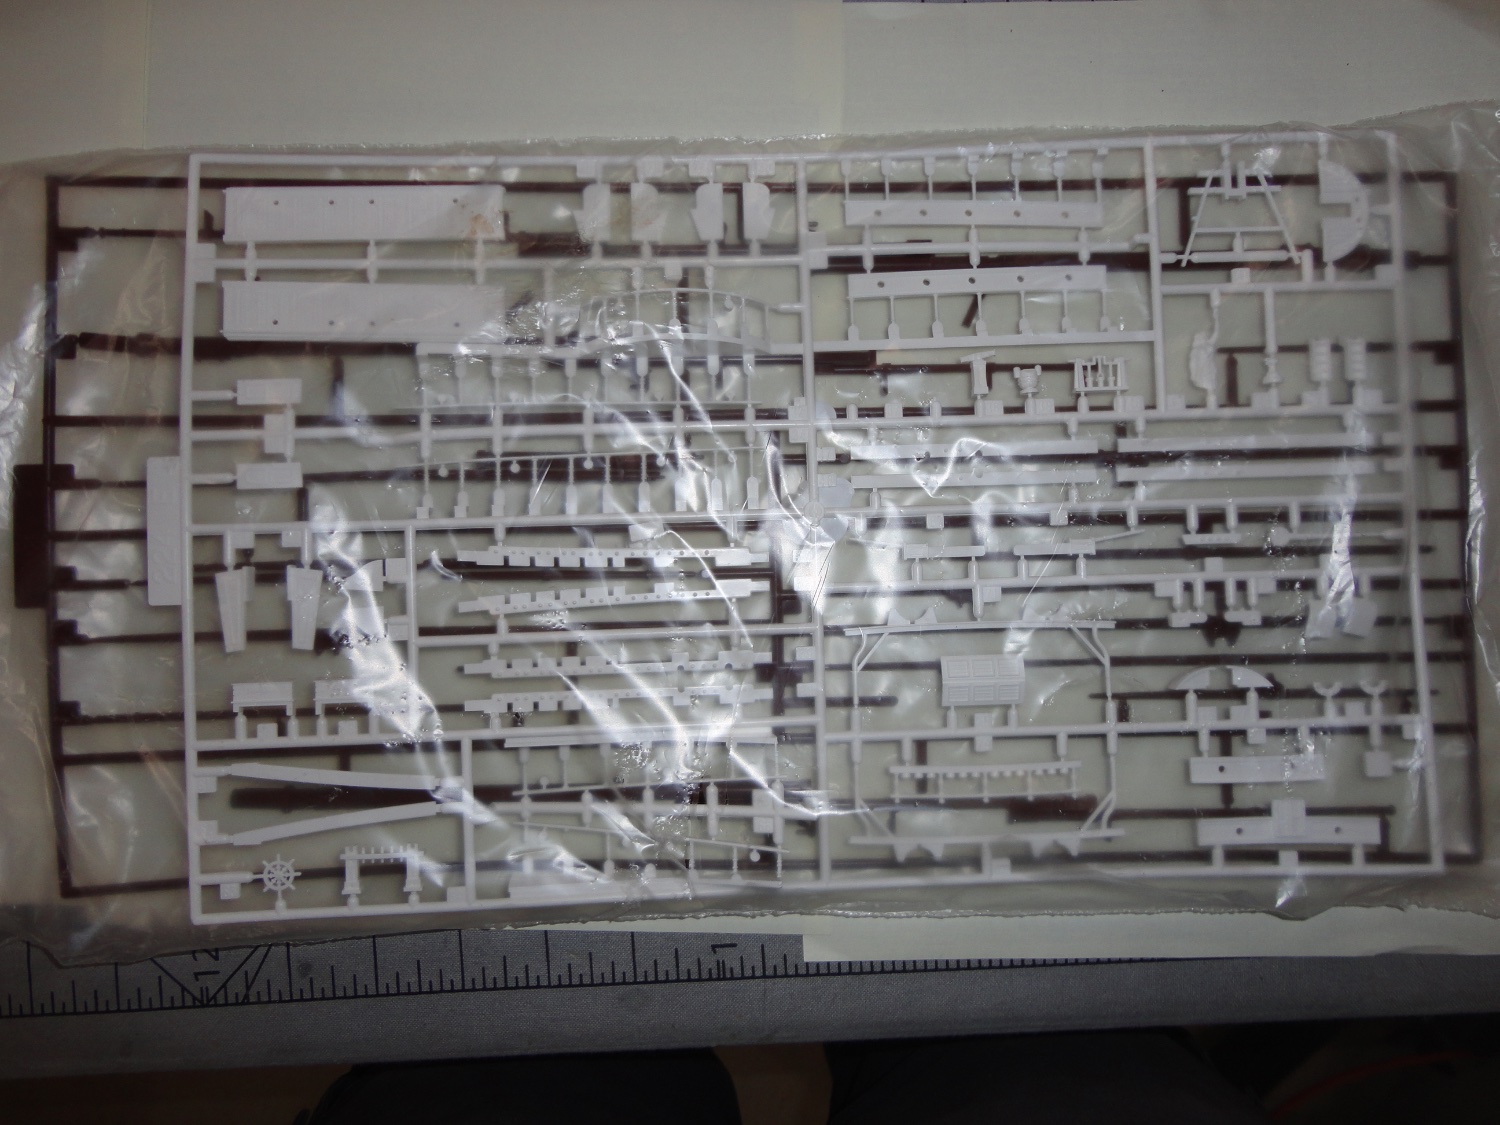
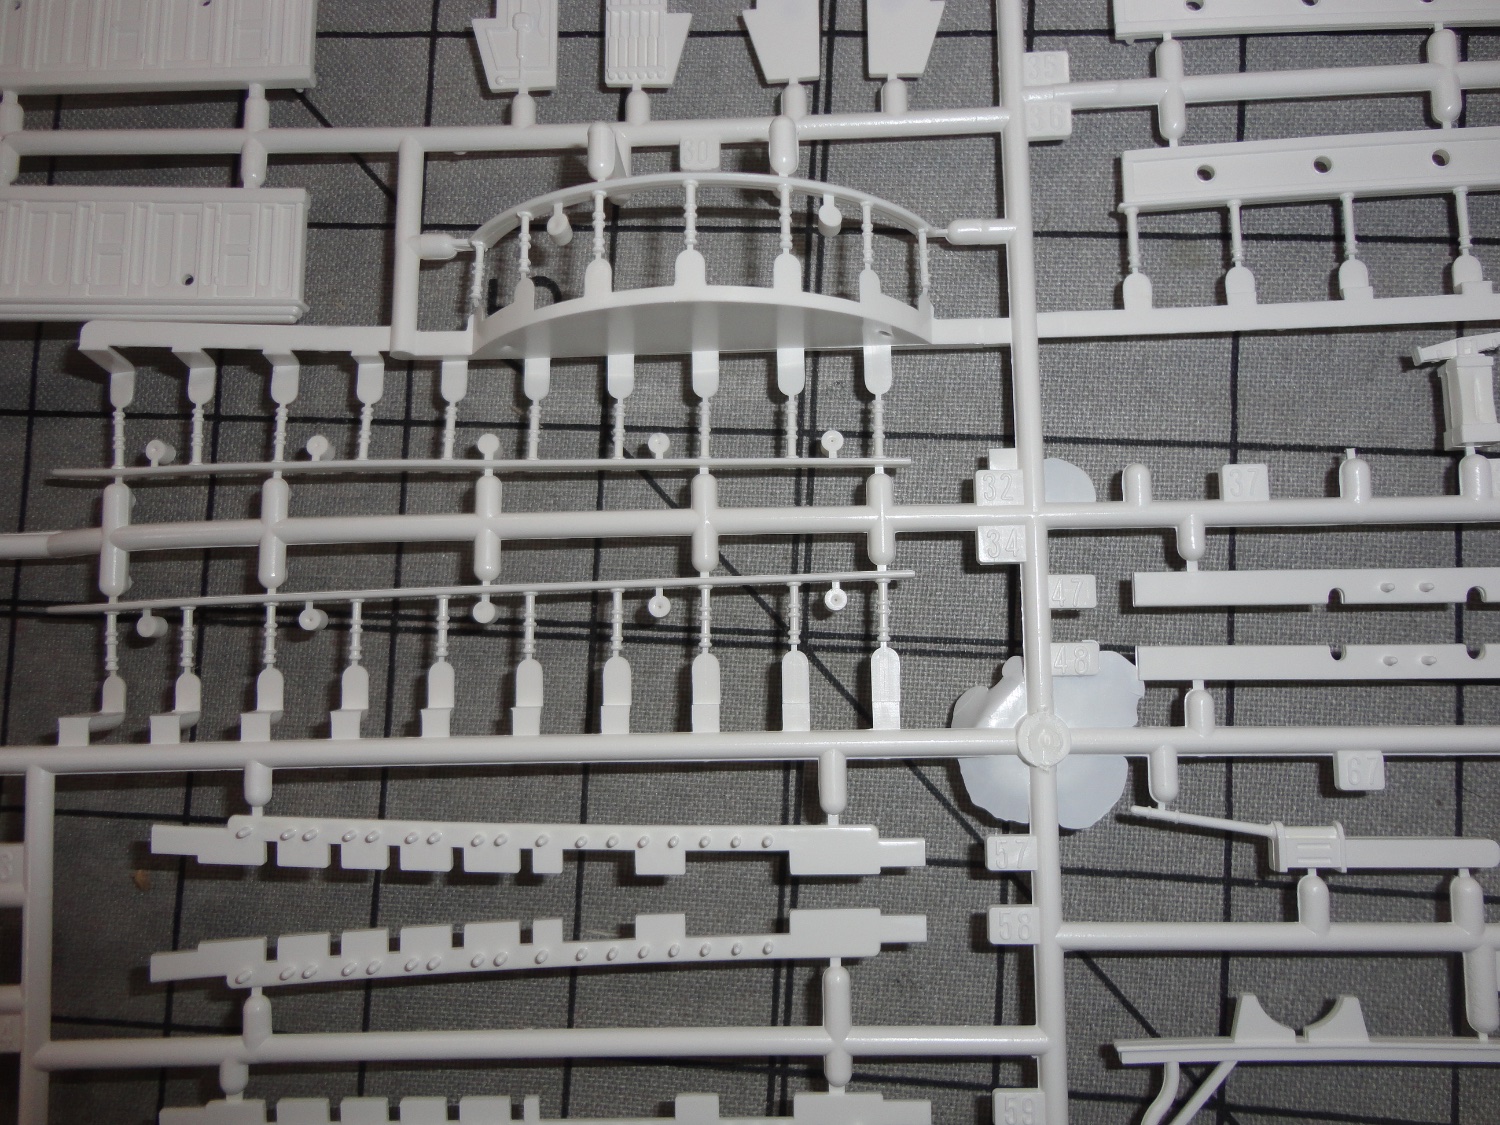
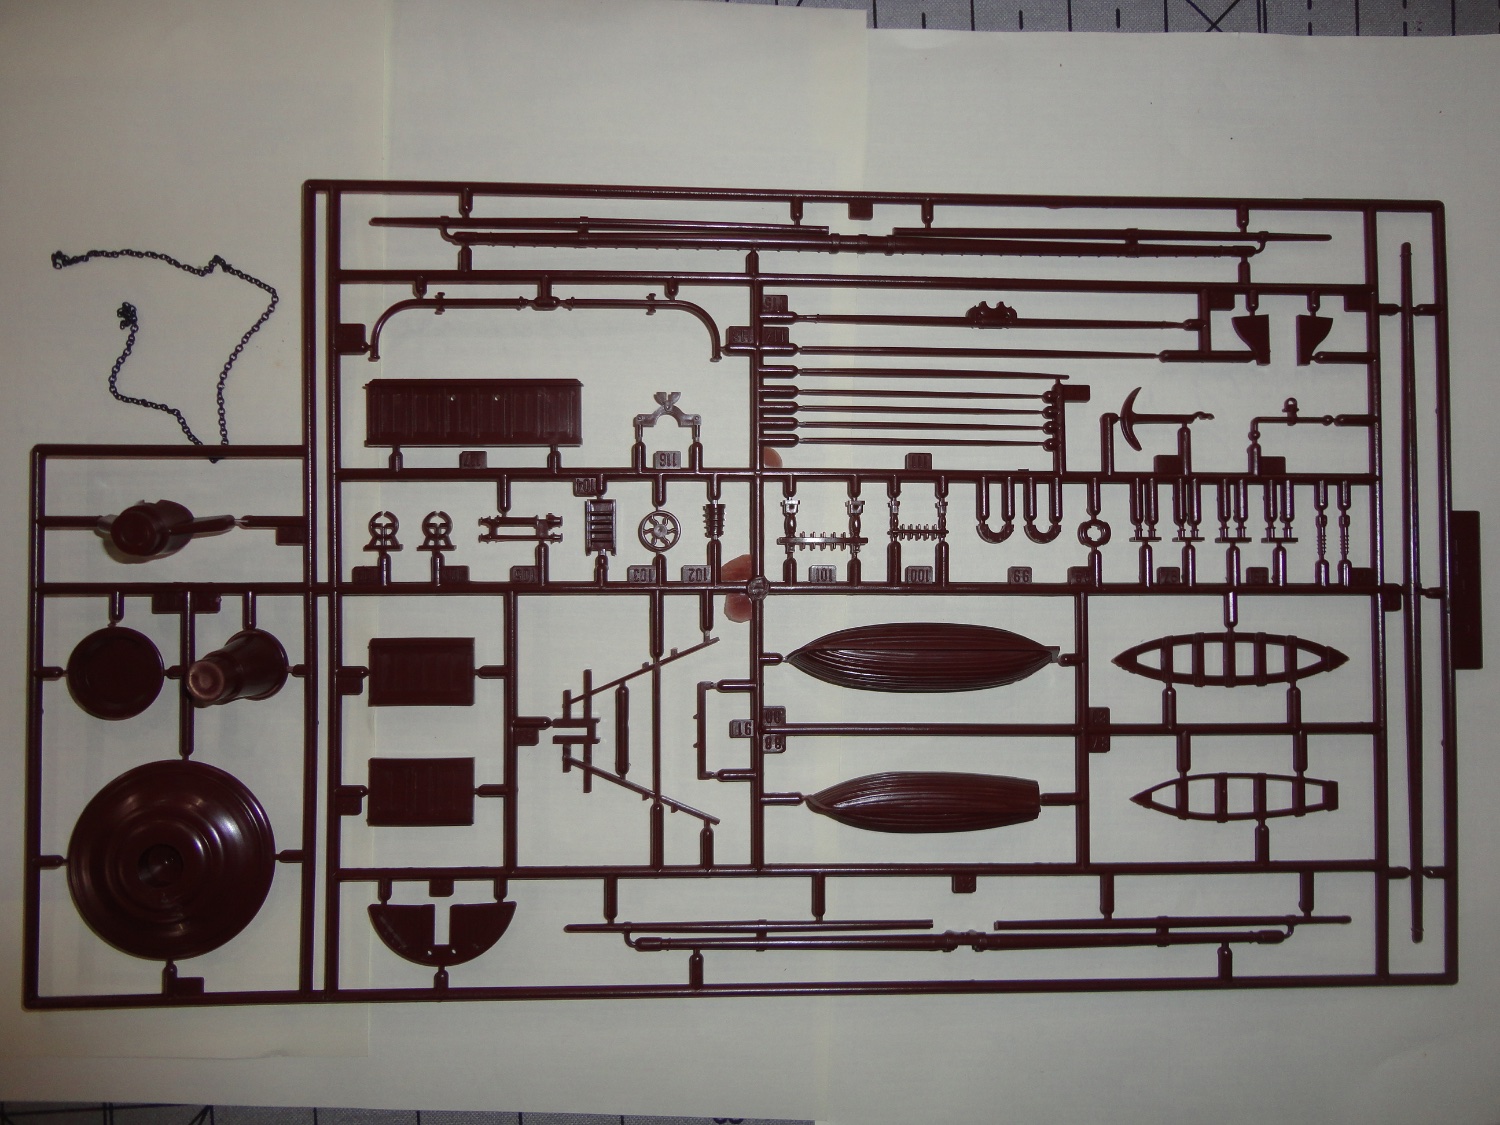
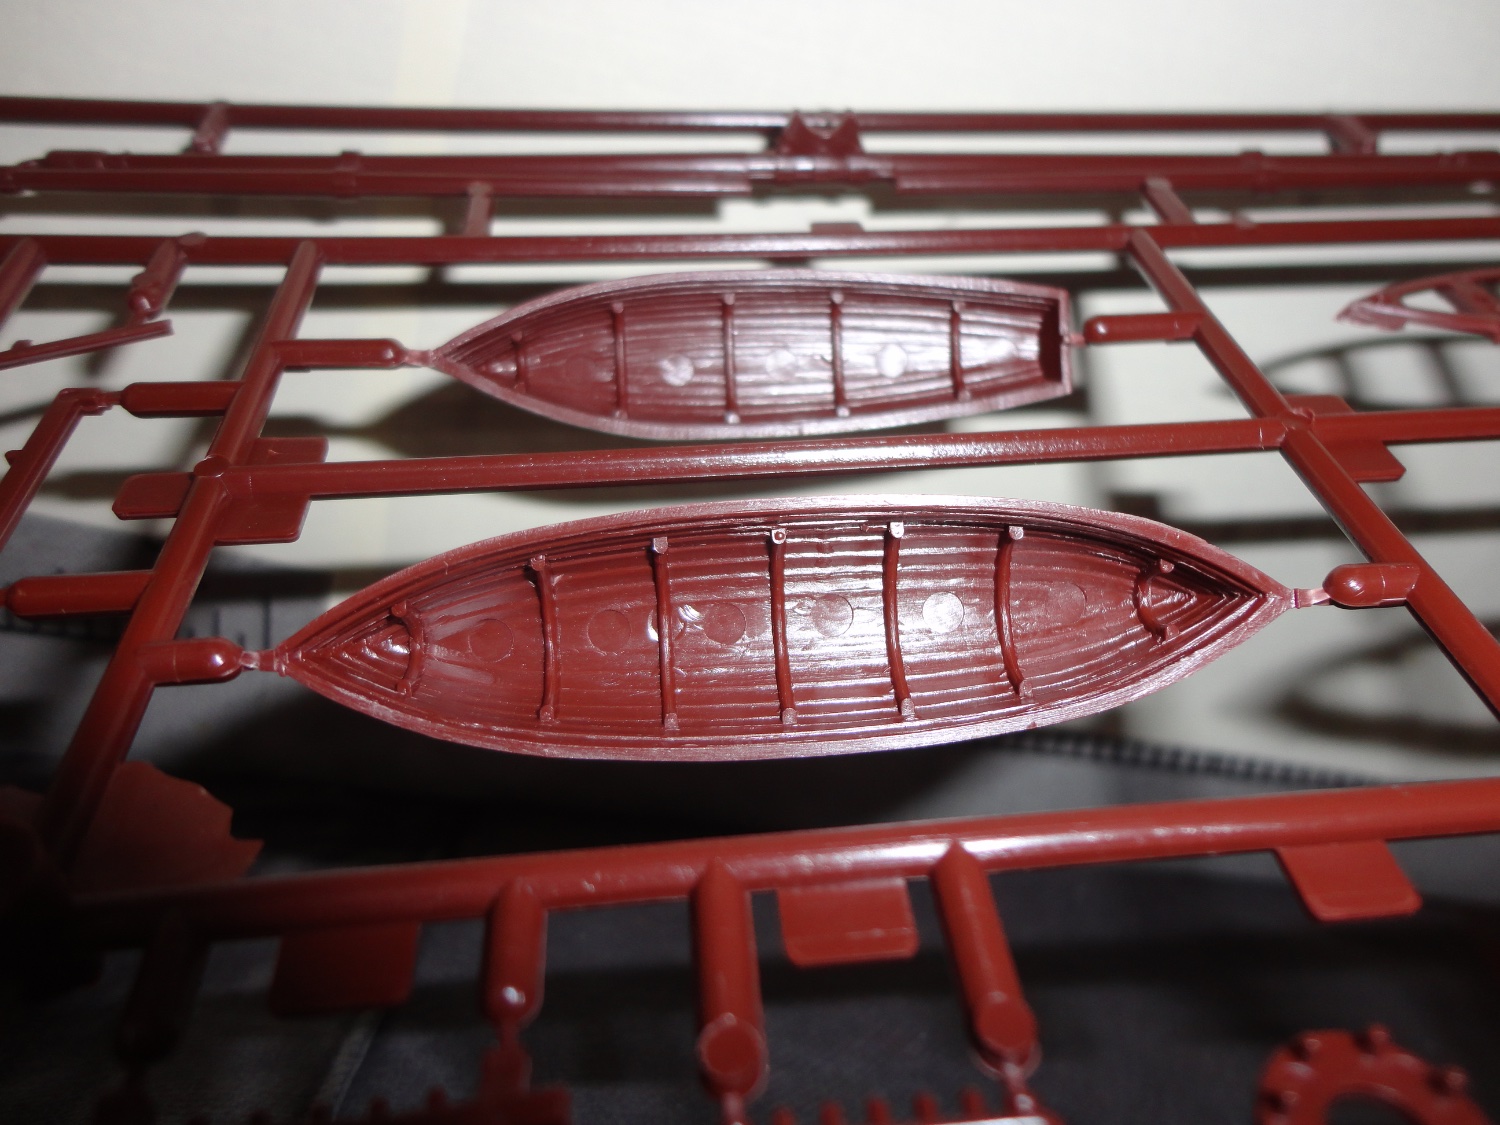
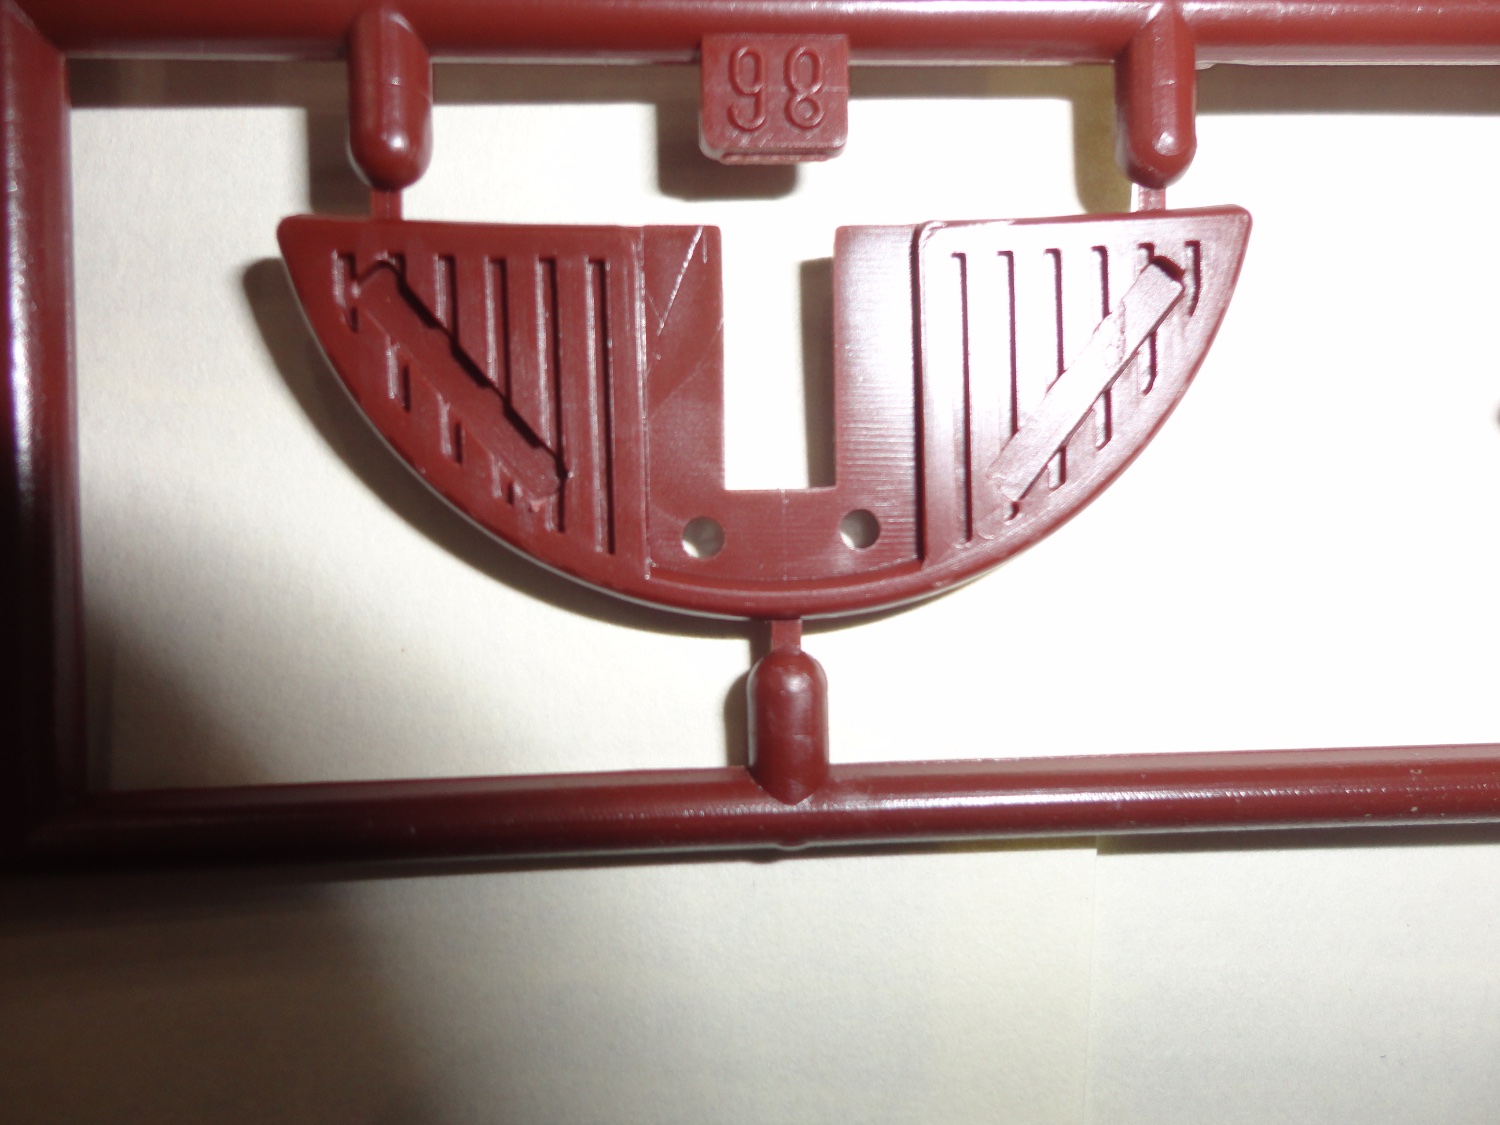
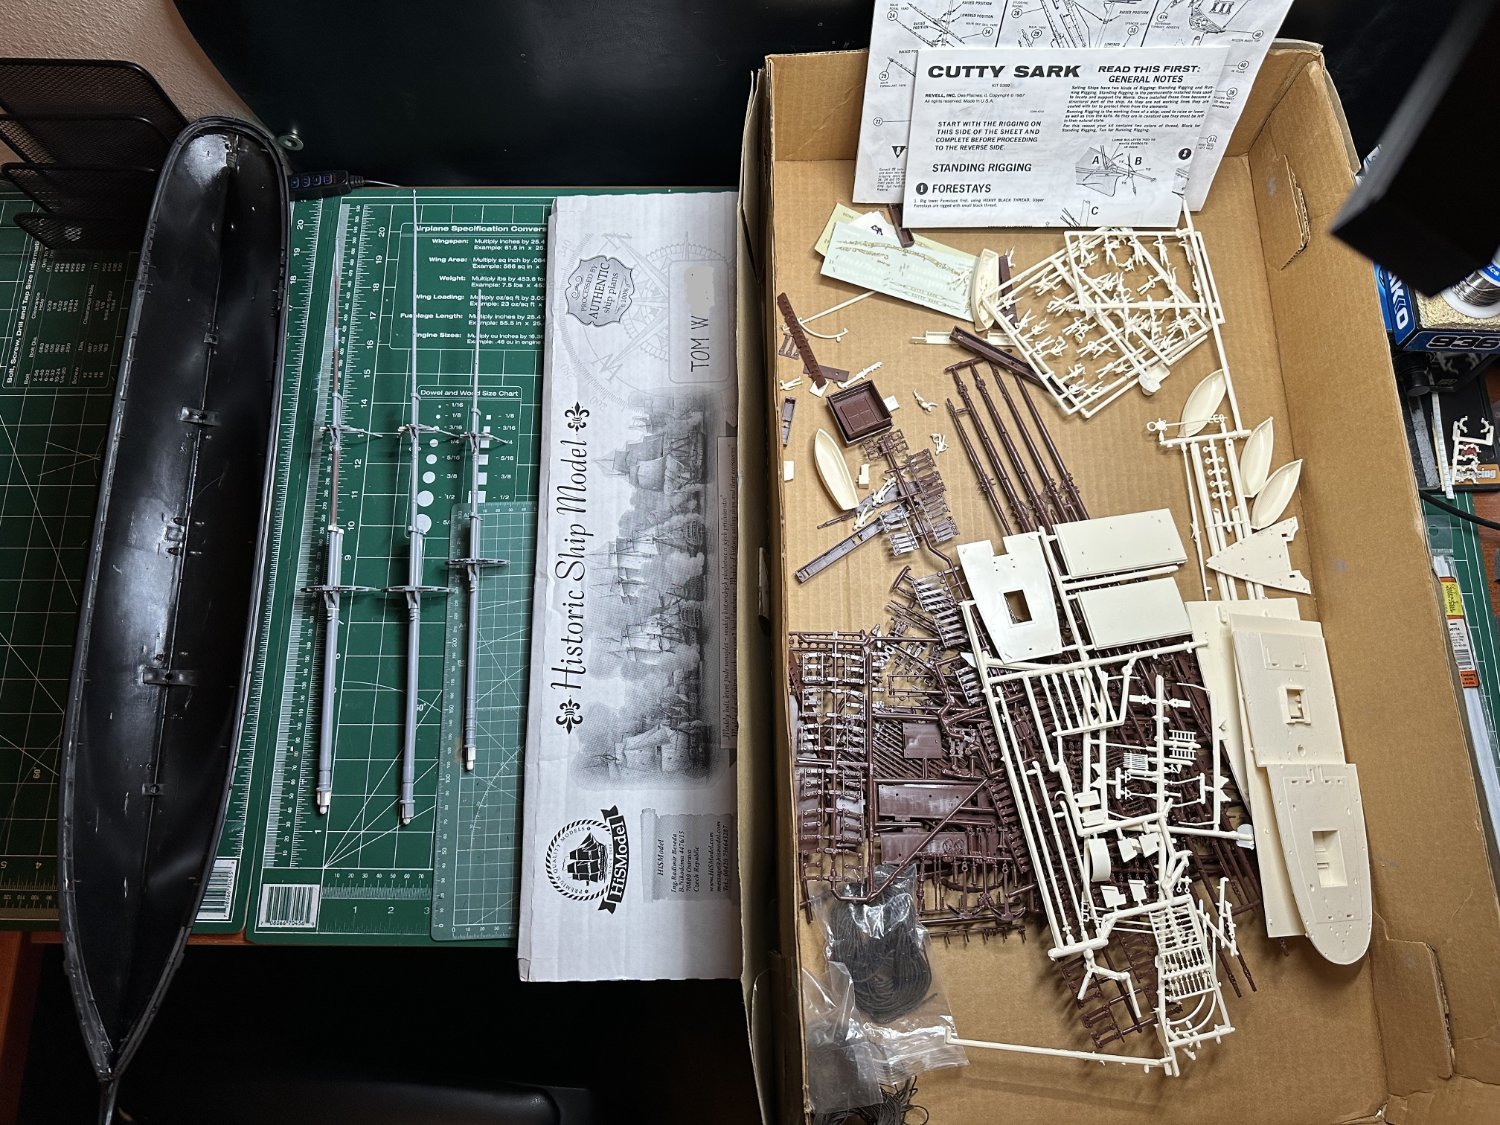
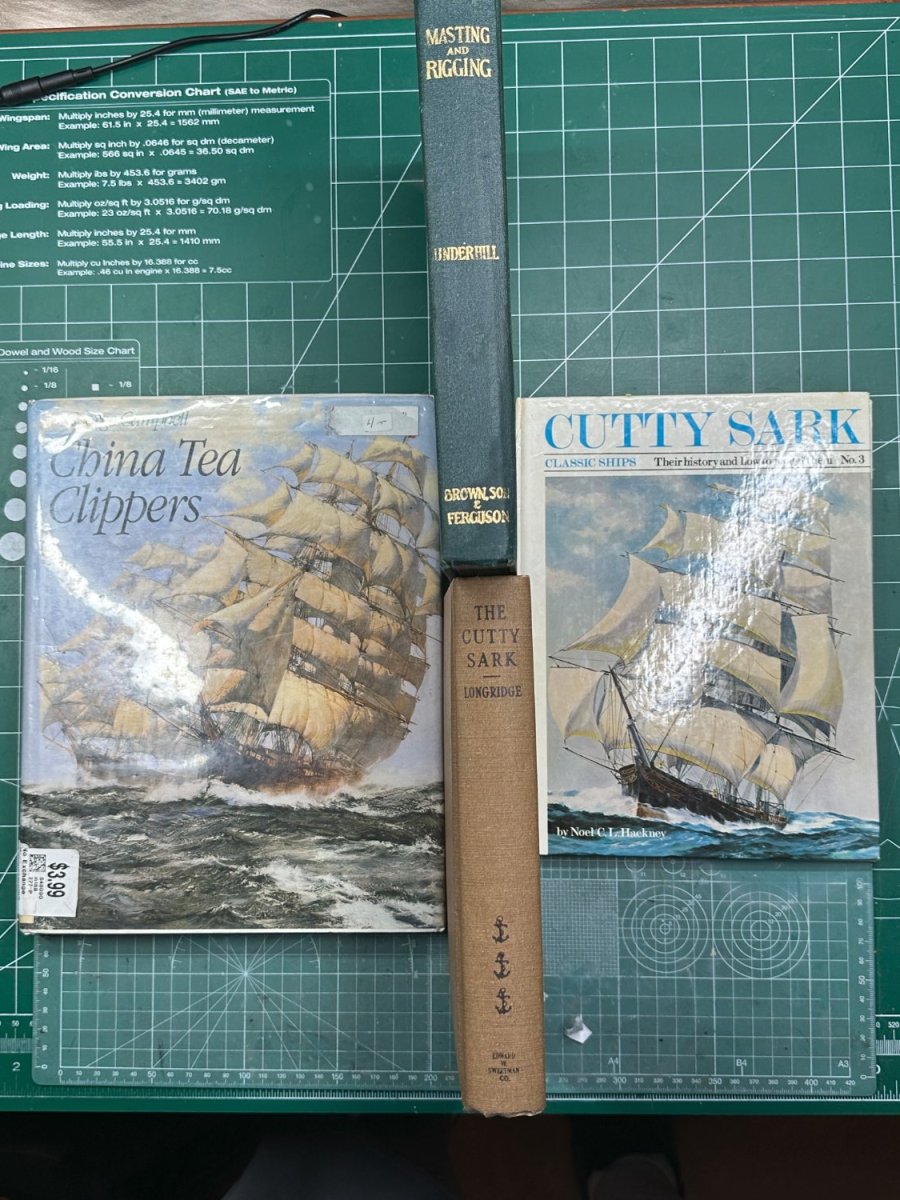
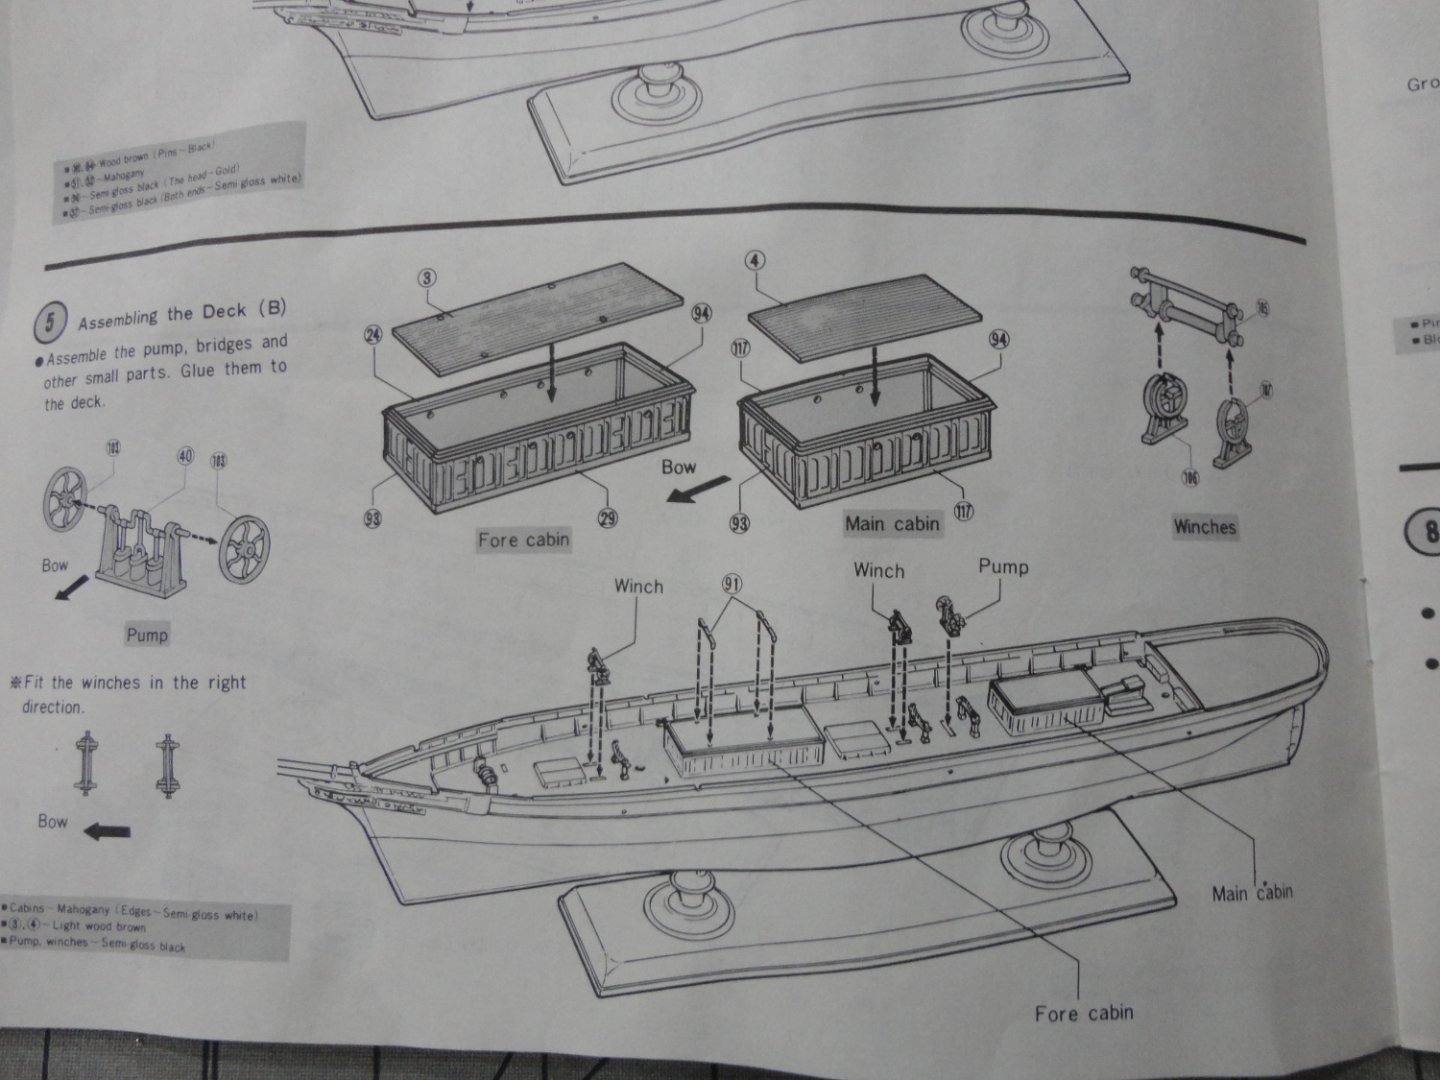
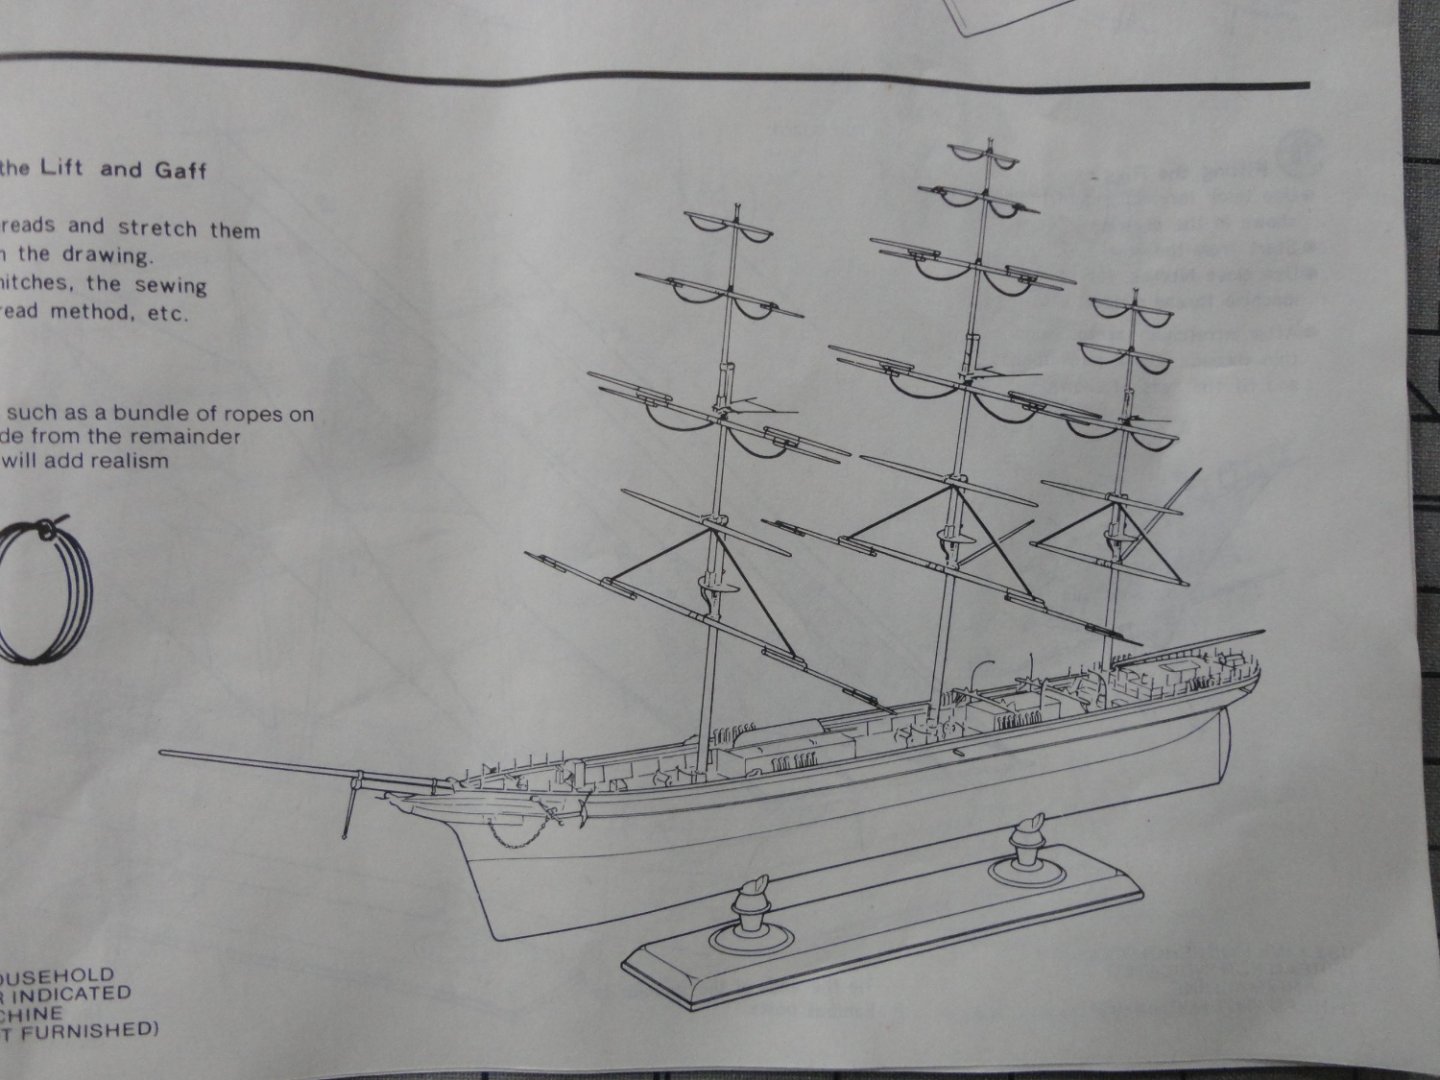
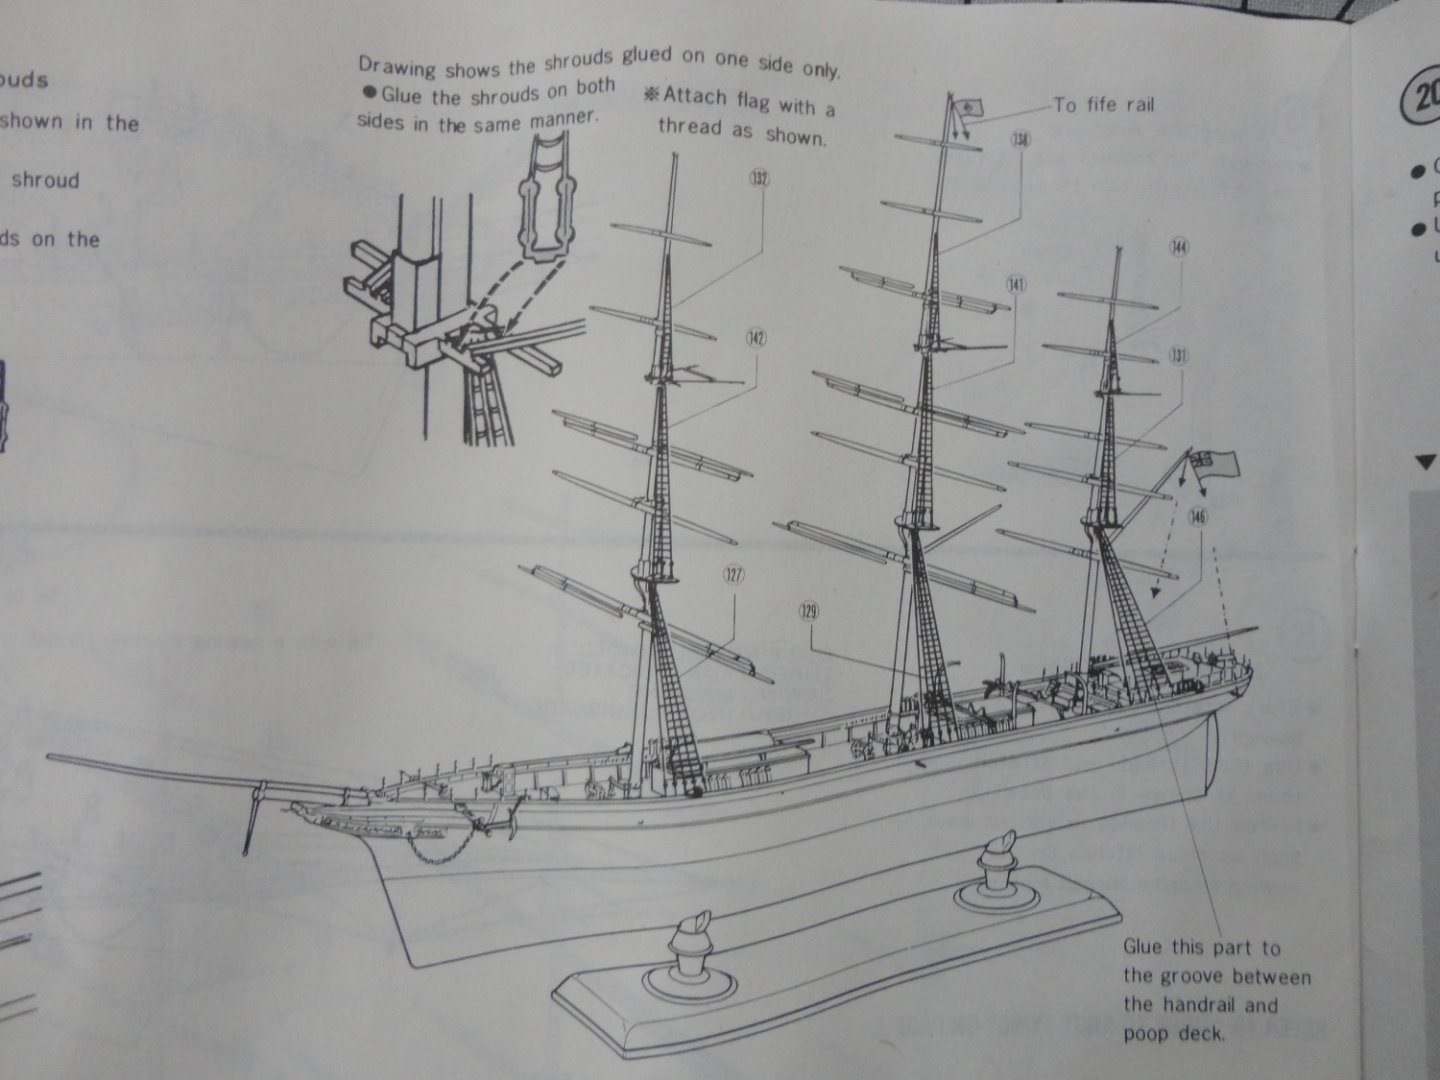
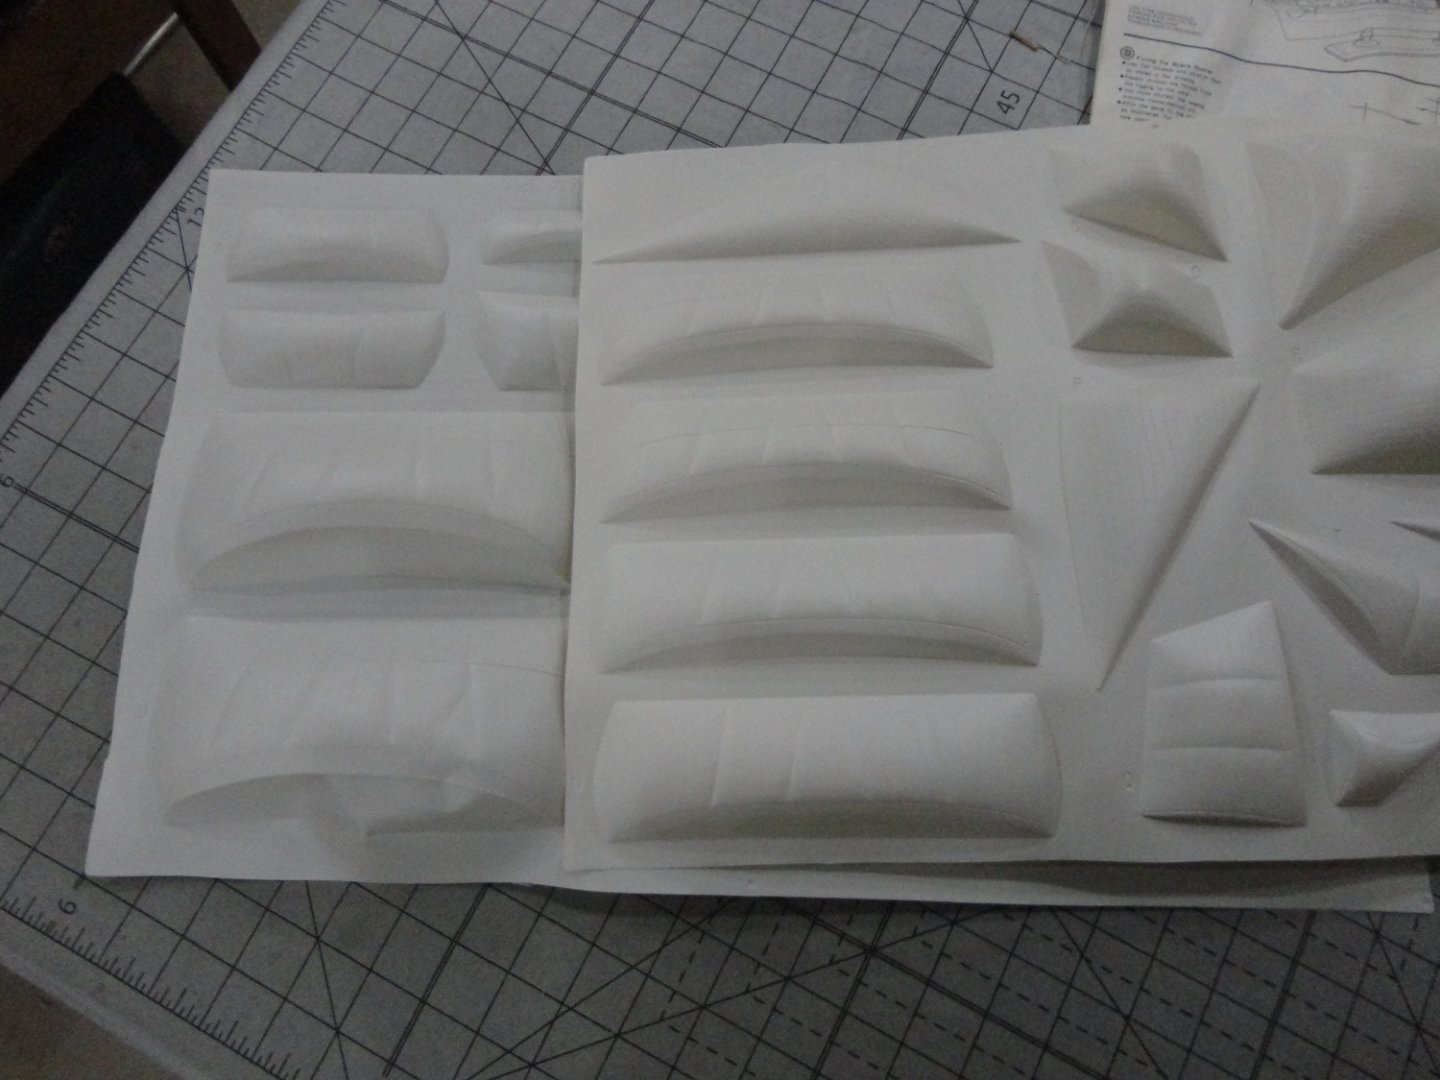
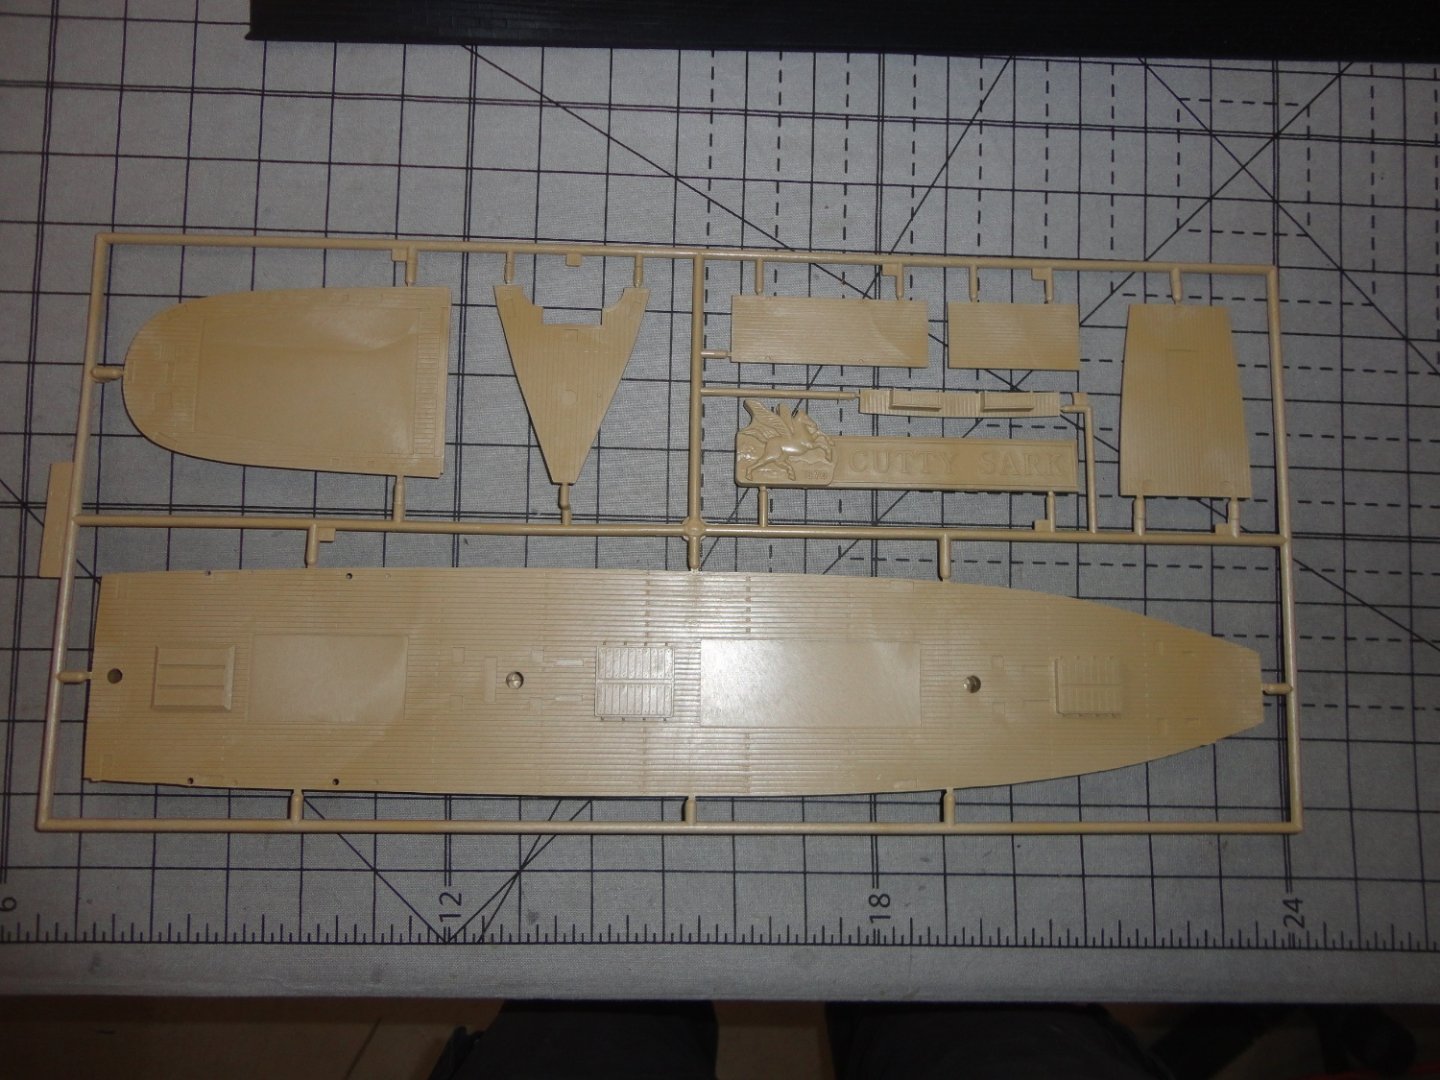
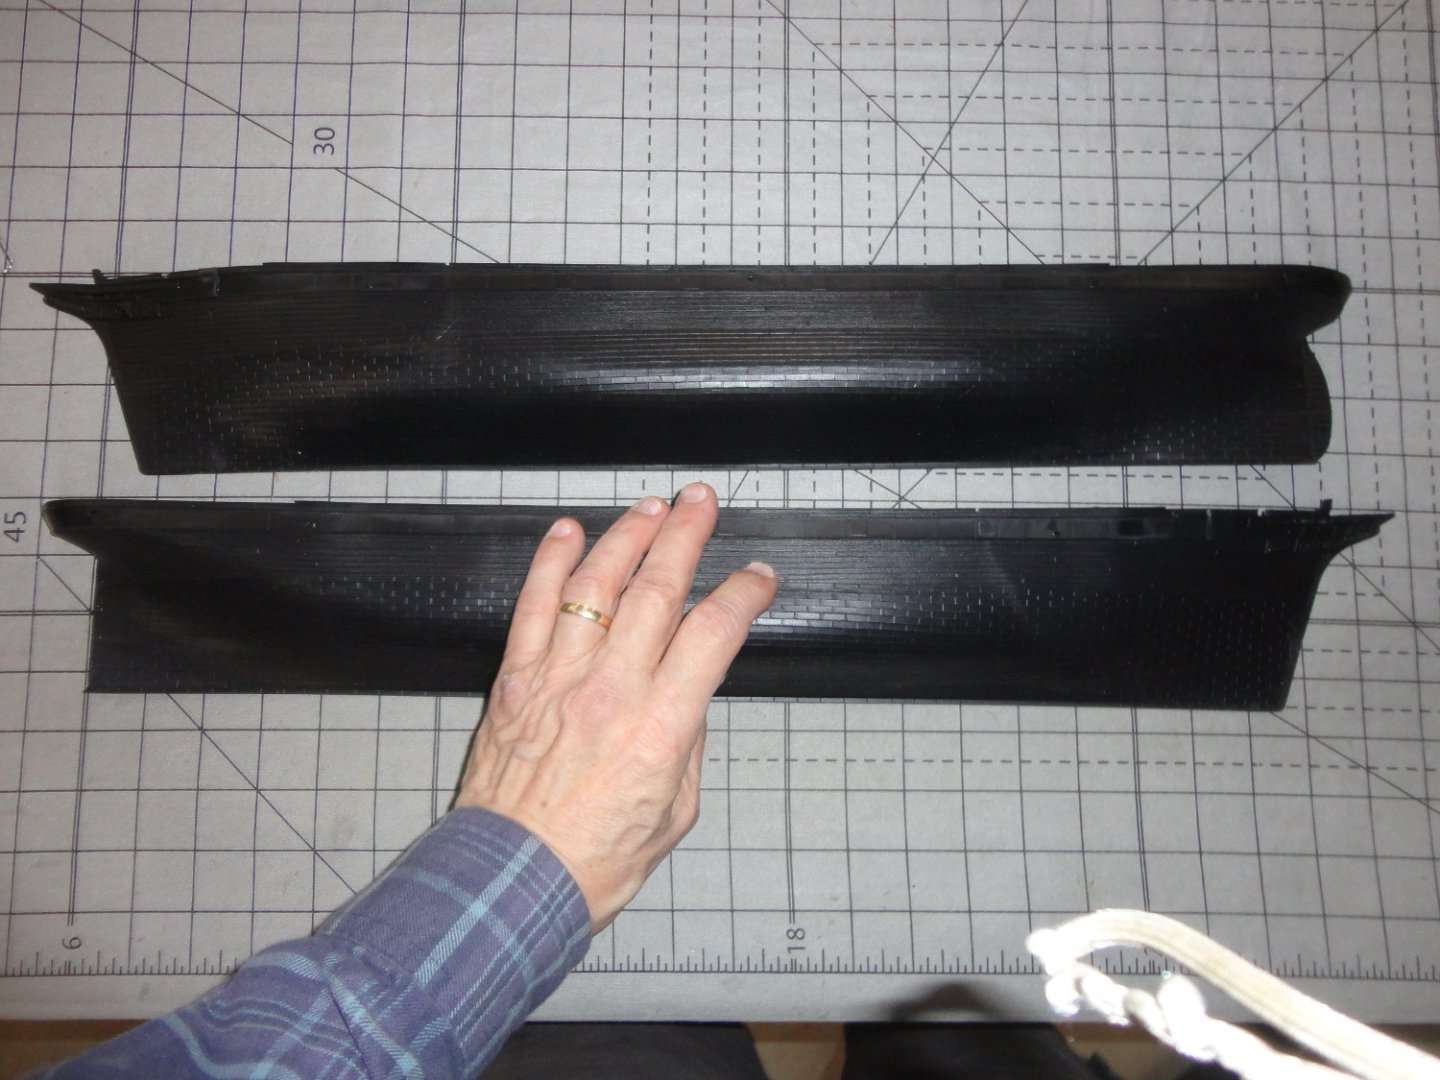
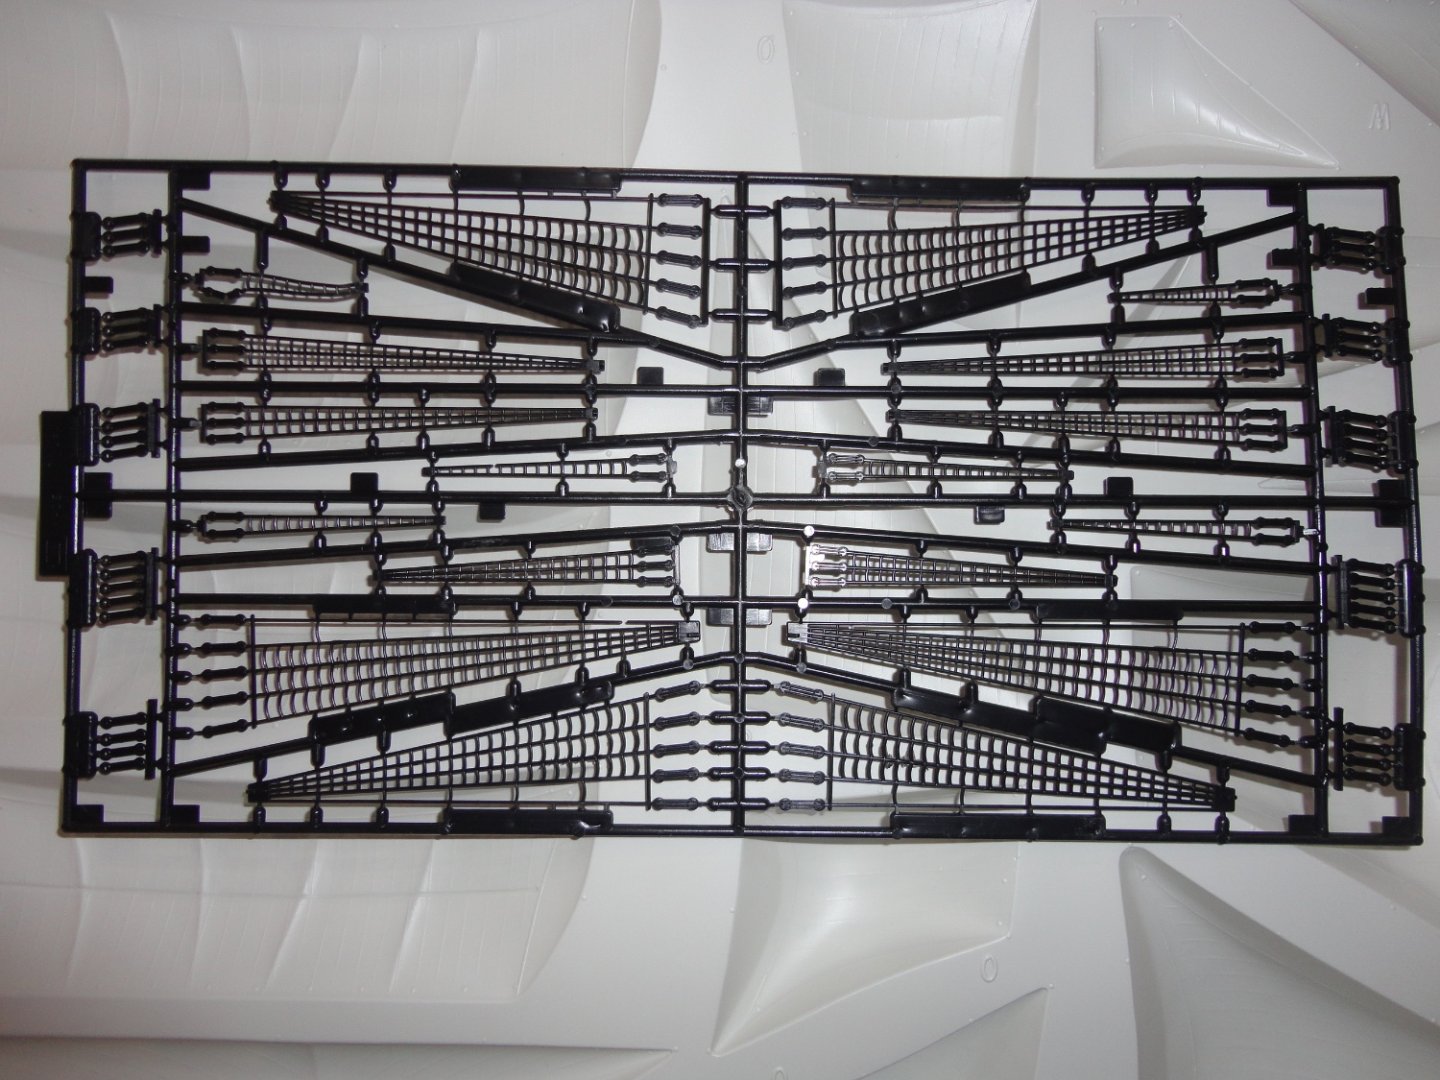
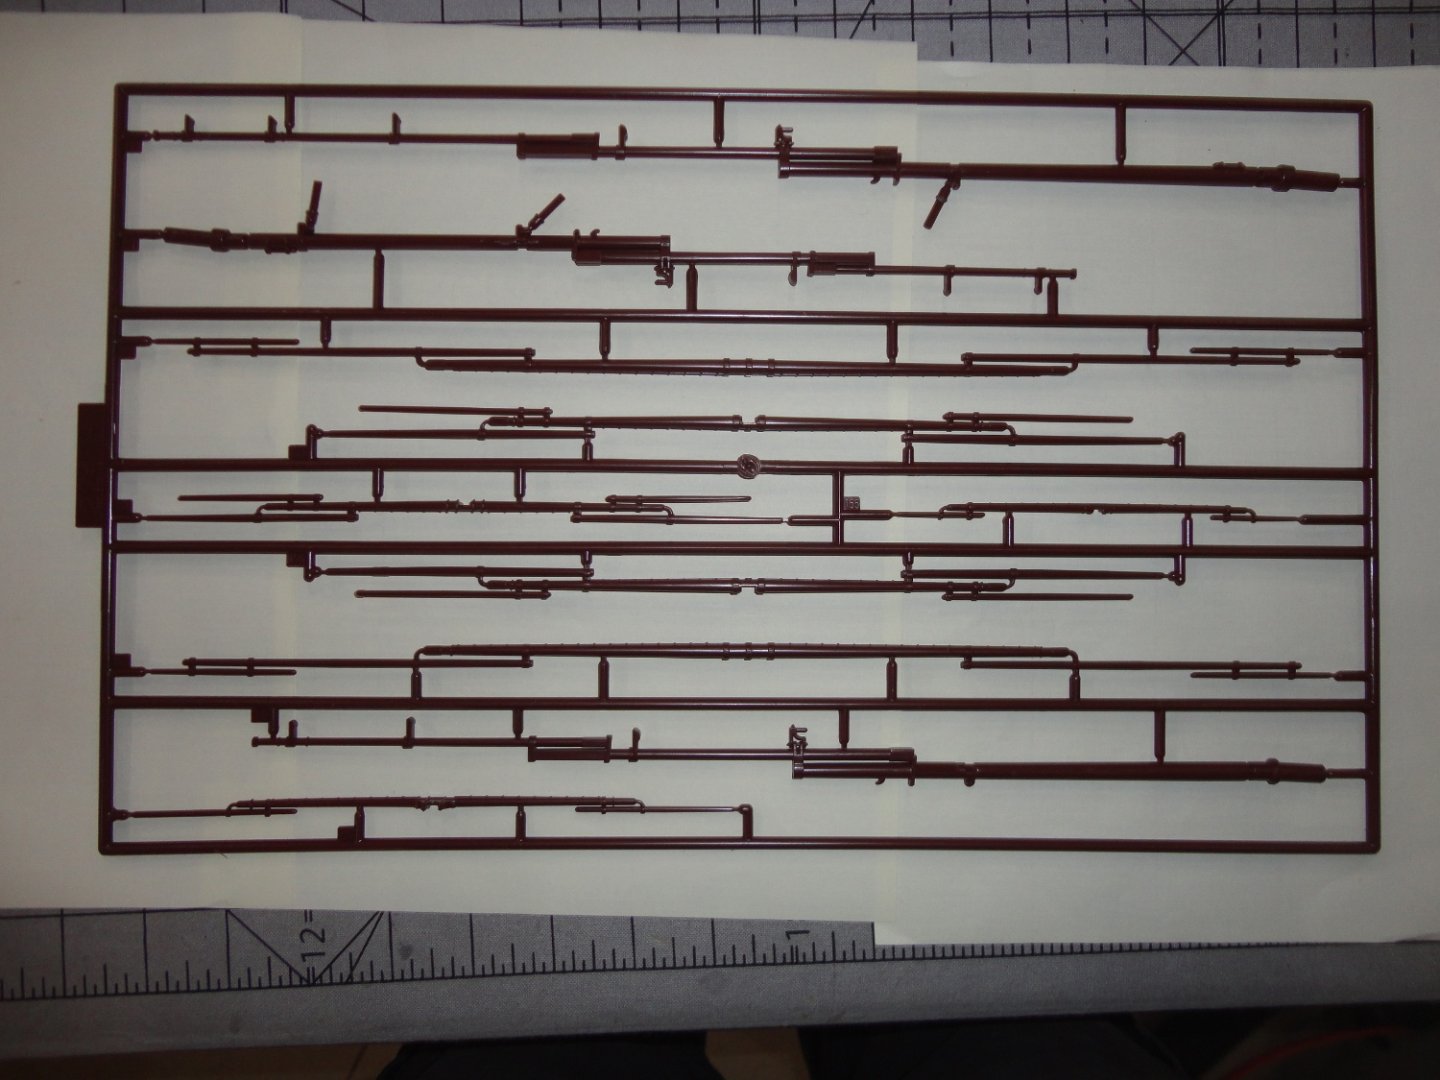
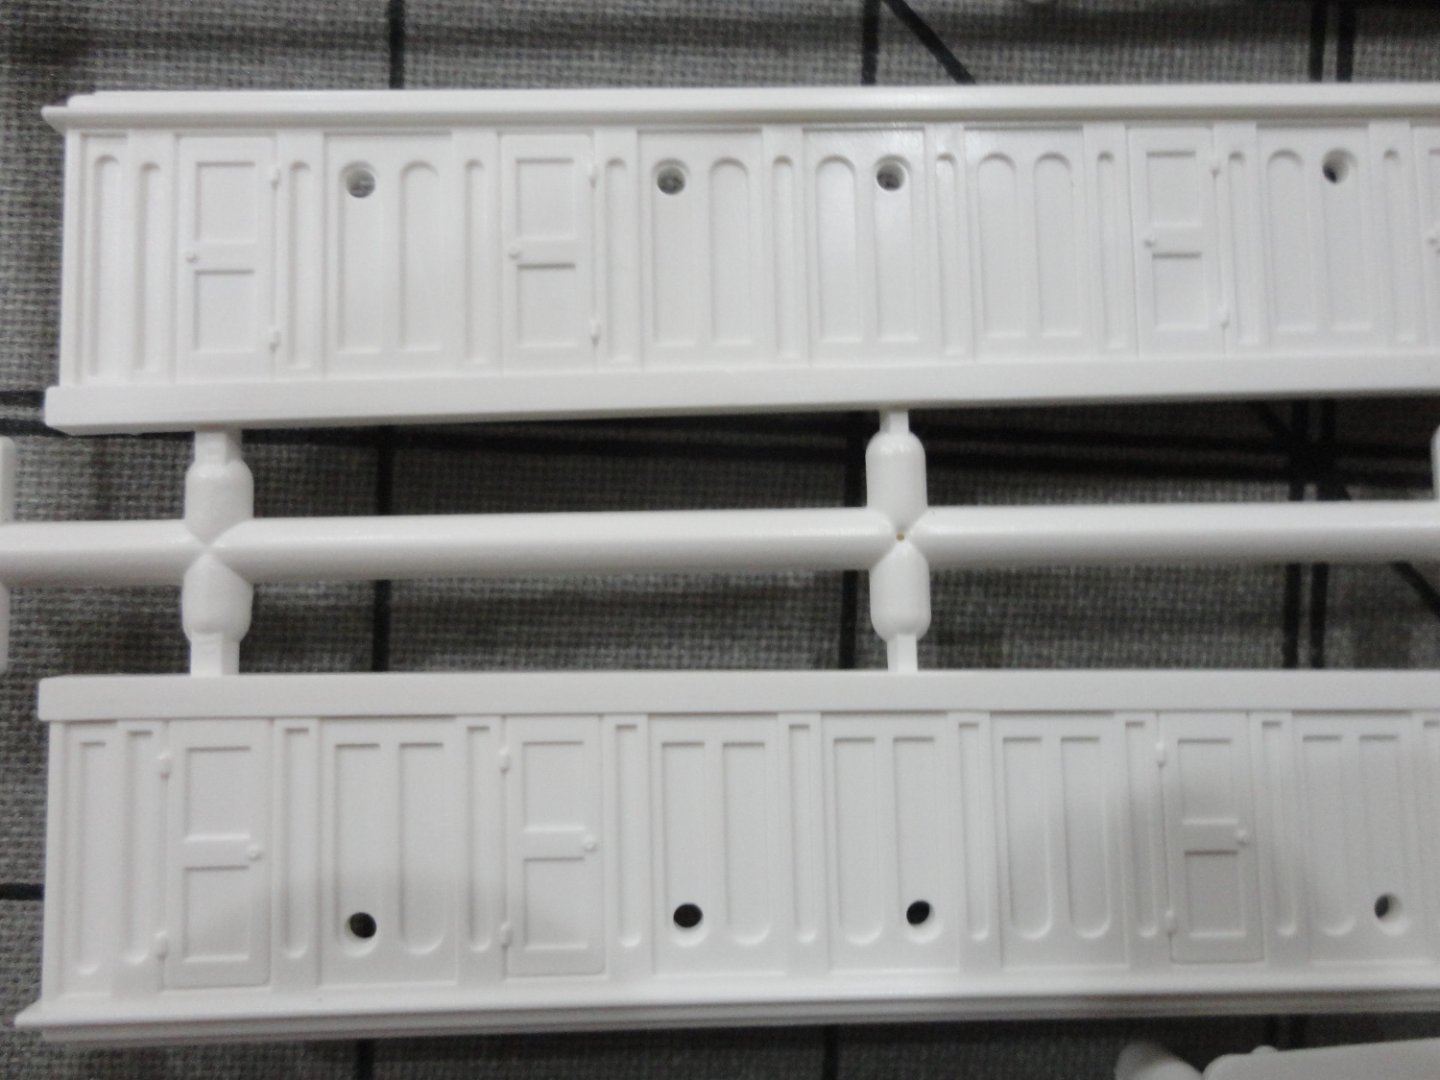
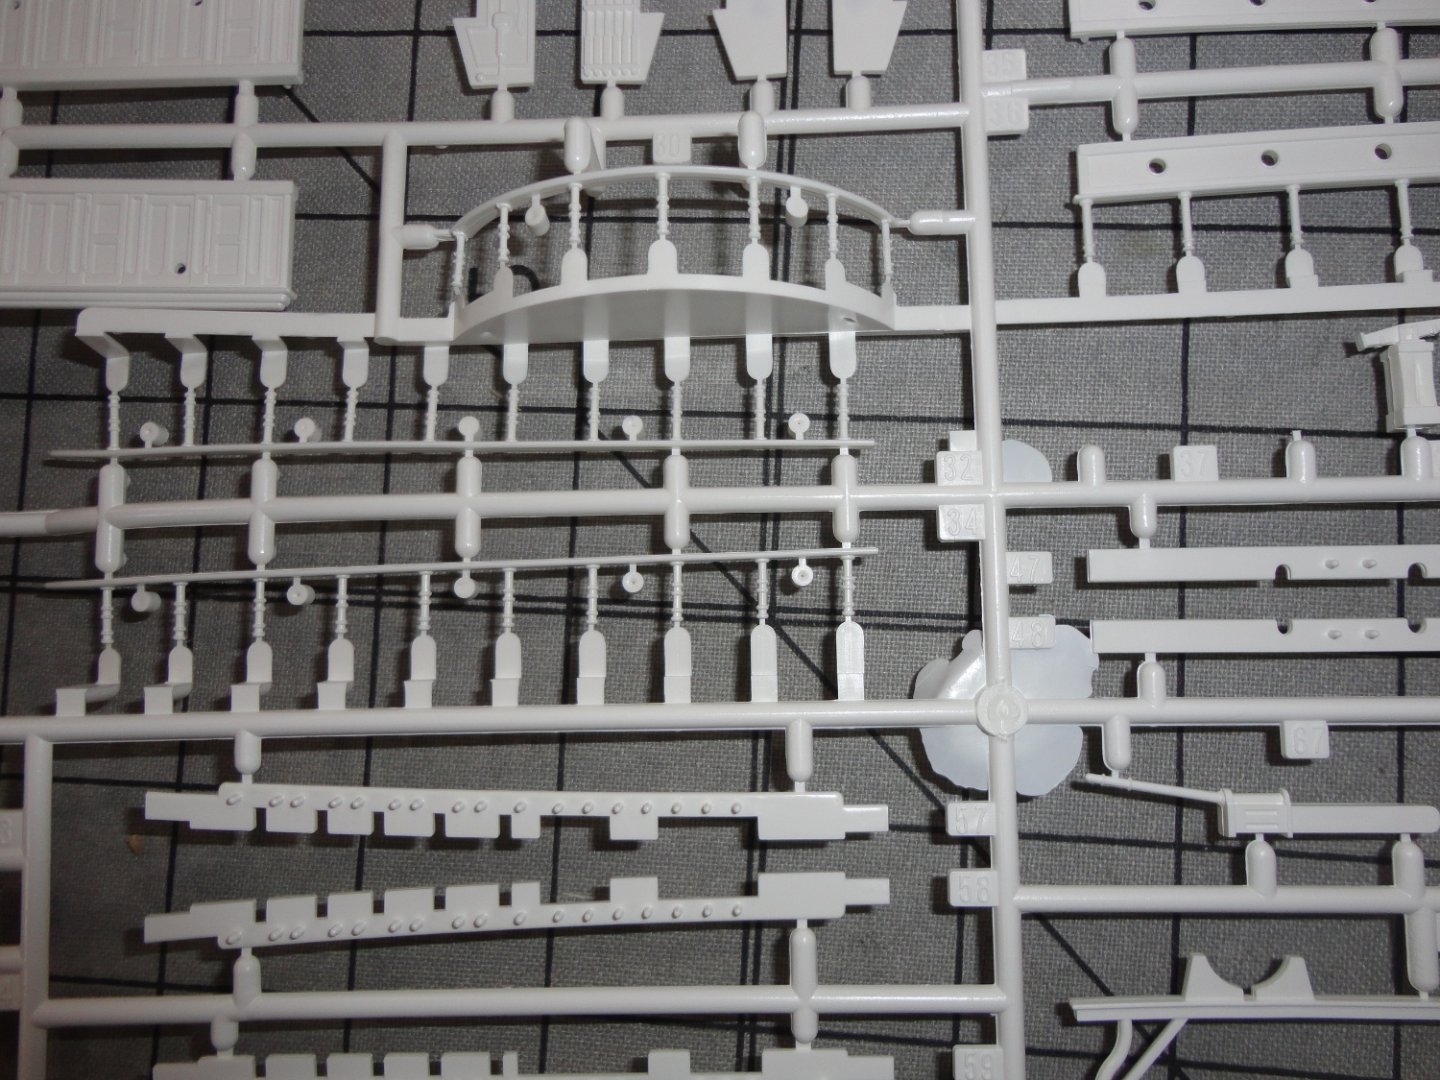
 As indicated elsewhere, I sprang for a Monogram release (early 80s?) on 4 color plastic sprues at a true scale of 1:120. I gave up trying to fiddle with a 'so-called' (per the box) 1:130 CS Airfix "Vintage Classics" release (only a few years old) that turns out to 1:168 by Noel Hackney's book on the original kit - having a 15.7" hull and VERY small parts & quite thin yards (among other pieces) made nearly 'rubbery' due to the soft nearly blonde plastic used. There have been comments on softer plastic used in 'later releases' of many kits (originally well-regarded) where aging molds have less definition and more flashing. First and second releases of the Airfix molded in better black plastic come up on Ebay now and then for around $50 (USD) or so, and may be doable for someone with the skill and inclination to accomplish miniature work. Note: other than on the cabin, no stanchions for railings are in the Airfix kit. A 1:150 Academy CS I examined for a while (said to be a 'shrunk down' version of the original IMAI 1:120 CS) was molded in 4 colors and, apart from only having fully extended studding sail booms on the yards (some have cut these and re-glued in a retracted position), it is in my opinion a much better kit (but not large - having about a 16" hull) suitable to encourage a young builder to try the hobby. And thus I gifted that kit to 6th grader who expressed an interest in models. I binned the 1:168 Airfix. Below is the boxtop of the Monogram kit. But I've digressed ... the short history is that Imai of Japan produced a fine 1:120 Cutty Sark plastic model having a 22" hull (compared to the nearly 28" hull of the 1:96 Revell CS or Thermopylae). That makes it halfway in terms of length between the Revell and the Airfix versions. Monogram acquired the molds a some point (others will be more familiar with the history of this kit, as well as the convoluted history that follows ownership of the Airfix molds). Aoshima produced the kit next, followed by a hiatus and then a re-manufacturing period early in the present century. They were considered 'pricy' for a plastic model (and still are, since production was limited compared to other sorts of kits and even the later Aoshima kits are now 'out of stock' according to retailers ... that leaves Ebay - and a few other sites, or the odd model kit collectors' show - as the most likely source for it. I paid $125 plus $15 shipping from New Jersey (UPS truck) to my small town well West of Philadelphia. Having examined the contents I'm pleased with it as a means to get a hull ready without having to stick-build, so I can practice rigging it as well-explained in Hackney's book - which can serve as a decent set of instructions to make up for the cursory sort that came with the kit, mostly valuable for the line drawings of assembly. I figured the Monogram booklet would be in English - which it is, as the Japanese versions are only in ... Japanese. Having built a Woody Joe kit, I got Google translate on a phone - and it did indeed translate (more-or-less) what would otherwise be unintelligible lines of unfamiliar characters. But I think the Hackney book, 'Cutty Sark' ... just one book in the 'Classic Ships - Their History and How to Make Them' series sponsored by Airfix goes well with the 1:120 kit, as most of the modifications and all of the rigging information is applicable. In 1:120 scale, this project is far more practical for a builder not wanting the rigor of a nearly 4 foot long 1:70 wooden kit - nor wanting something nearly as large size of the plastic 1:96 kits (nearly 3 feet from stem to stern). I believe I've found a very good compromise. So let's look at what's in the box. First, some of the instruction booklet. I found 'Made in Japan' on at least one sprue, and the IMAI mark on the underside of the display stand. But one can see able that Monogram identifies the parts as made in the US from unaltered Imai molds. BTW, there are several locations marked on the underside of the stand for the builder to choose where to drill through for the stanchions the hull will sit on. I plan to fashion a wooden base of colored hardwood and turn metal stanchions. The page shown below hints at excellent detail on the cabin sides (and I found this to be true), but also to the most obvious mis-calculation on the design of the hatchway on the weather deck just in front of the poop deck. Others who have modeled this kit advise correcting the goof using sheet styrene - not too hard to do. Also, both winches each have one cable lifter (another mis-interpretation of the Campbell drawings), thus one rom the rear wench must be cut off and applied so that the front winch will have have lifters on both side for the anchor chain. Some reasonably fine chain was included in the kit, but perhaps a longer length would have been better. The next shot depicts fully extended studding sail booms - which I expected would be provided in the kit. But the presence of SIX masts (each molded as a single piece ... might have been nice to 'build them up' like in the Revell kit) had me confused, 2 Foremasts, 2 main masts and 2 mizzens ! Only by looking all the sprue over did I discover that the 7 yards having booms ALSO have them molded with the booms in the retracted position ! This is cool, so the builder can choose which to use. All the other yards are common to either way of building. Below is a picture with the booms in-board ... the sensible way to make the build, since if the booms are fully extended one HAS to put sails on them or the model will look odd. Thin plastic sails are included (quite typical), and I'd only use them as forms to mold lighter material pretreated with watered-down PVA or other stiffener. The decking is molded in tan, and has negative caulk lines between planks. There is no joggling, and the jointing may appear to regular for some - as a more staggered pattern might have been better. But the weather deck is all one piece ... no sectional joints to deal with like in the 1:96 kits. A closer look. I'm pleased with the detail on most of the parts - yet plan on using veneer for decking rather than paint, just one more way to go. A closer look is below. Now the hulls look well formed, but my attempts to get close shots with the lousy camera used didn't turn out. The detail at the bow means no decals are needed there. A decal is included for the stern decoration. Whether is can still be used is uncertain, but I could carefully cut it out and apply to tie a low profile 3D appearance. 'Don't think there is any PE for this kit. The fretwork at the bow is not pierced, but this might still be done. The rudder is molded on. The ratlines are molded (often typical), versus having to weave them one's self as with the Airfix. But the 1:120 scale is large enough to do actual deadeyes (as well as blocks) - even if they go a little out-of-scale. I did not a slight deformity to one upper molded ratline molding - still fixable. There was a slight bending to some of the sprue, but the individual parts look OK. The bowsprit has a slight bend to it - again correctable with care, but I plan on replacing it with a turned piece of wood - since I want to drill through for fore stays. Below is the sprue with the yards having extended studding sail booms - very wide ! Note also the three masts. Some have carped that the top gallant mast sections are a little thicker than they should be. I really don't notice it, and as molded there shouldn't be deflection is the rigging is not overly tight. I note that all the yards (as molded) will be in the raised position, and I intend to have the lower able yards in the lower position (Hackney's "harbor rig"). So the mounting pads for those yards will have to be re-positioned. There were two sub-bags each having two sprues - the parts shown thus far were not in plastic bags. Below is the sprue with the yards having booms NOT extended. Note the loose white piece - a few parts had come off but were in the bag, due to handling over about 40 years. I note that one thin railing stanchion had broken off (but was present), and two others were not fully molded. This is fixable with sprue or styrene - but I might also turn my own railings since I have a Unimat miniature lathe with a universal 3-jaw chuck (it came in handy in the Khufu Barge build). A closer picture of the cabin detaining. Various parts on the white sprue. The boats seemed OK. The tops were not pierced, than can be done with care. To rig more authentically, a builder will have to make lubber holes, but any notion of individual fair leads may be impractical - so those lines can pass through where the slats will be pierced linearly. Below is a closer shot of the boat interior - nicely done, and a little dressing is all thats needed. A closeup of a top. The molded deadeyes/ratlines would glue in the depressions - but for rigging with actual deadeyes or beads, the voids must be filled in, the slats pierced and holes drilled for the deadeye fastenings as needed - all optional, of course. A plastic base is included with some 'average' rigging rope (I won't use), a decal and paper flags. Below is the Imai mark molded on the underside of the base. For hull comparison (to the Imai hulls show much further up in this post), I show the Revell 1:96 Thermopylae - another 'keeper' of mine that I really want to do 'justice' to by 'busting' where needed to get closer to the ship its supposed to be. Its a pretty big model as plastic models go, so starting with the 1:120 CS version (as I said - mainly to try out rigging ... also to become reacquainted with plastic modeling and painting) may be a good experience without loosing my eyesight (or patience) with anything smaller. My opinion is that the Imai/Mongram/Aoshima kits are reasonably well thought out (with only a couple of corrections needed), well molded with good detail, and can be made into a much better model than simply building 'out of the box'. Some scoff at the price examples have gone for ($125 - $165), but the supply is limited and shrinking all the time. You can't 'take it with you', mate. So if this floats your boat, go for it ! Fair weather ! Johnny
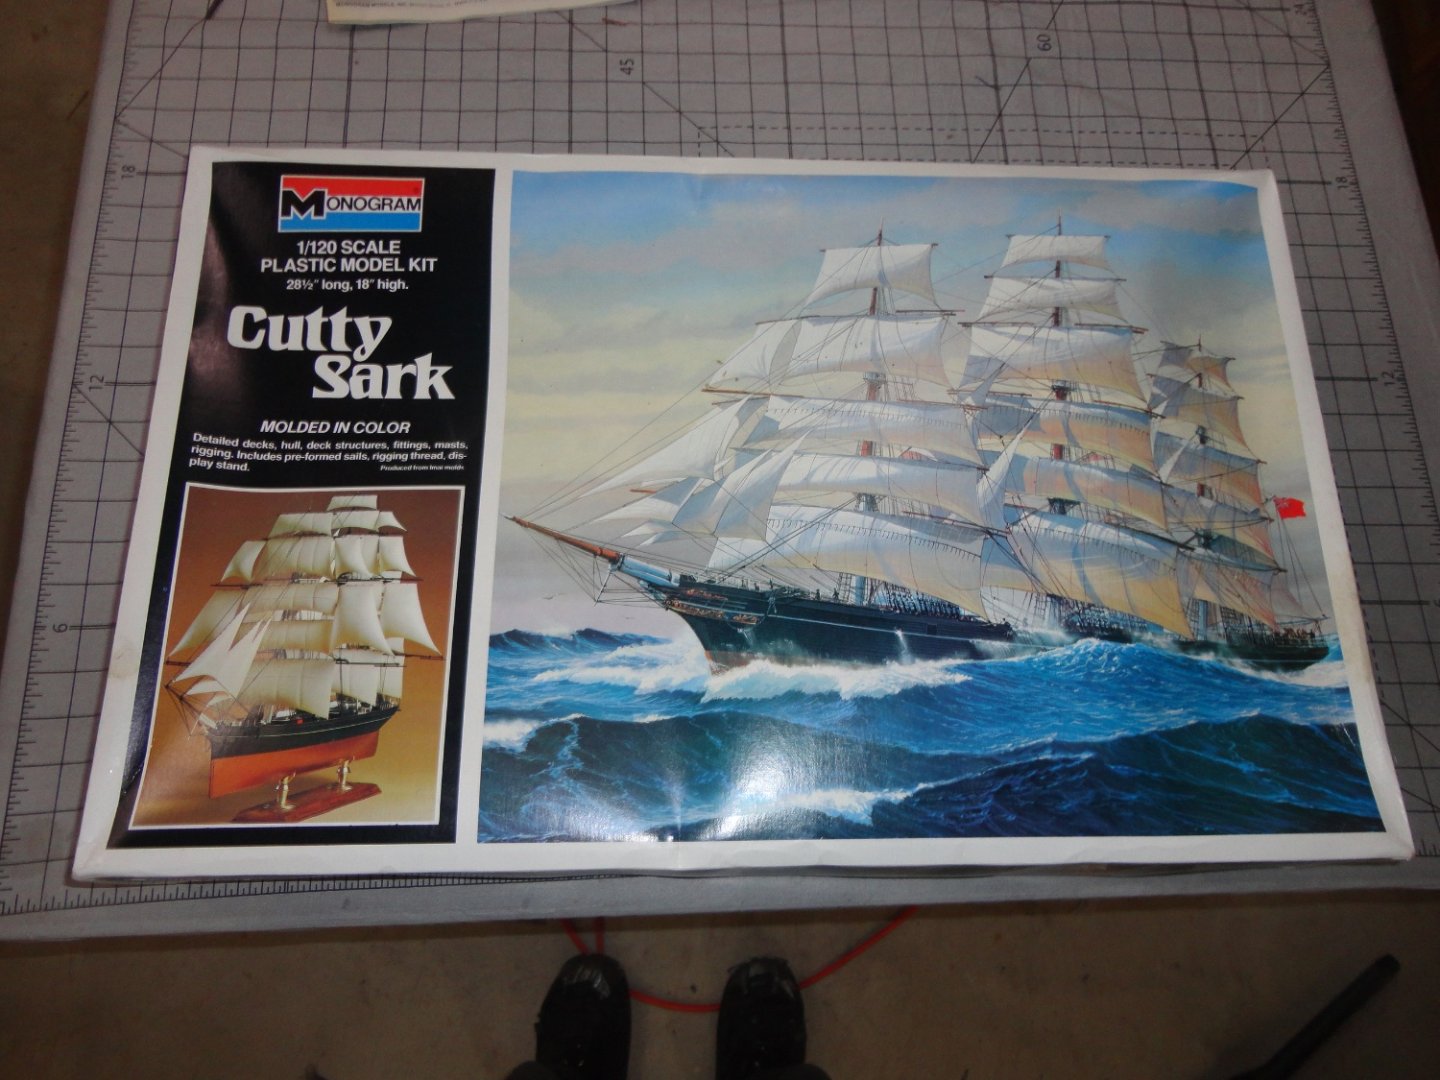


-
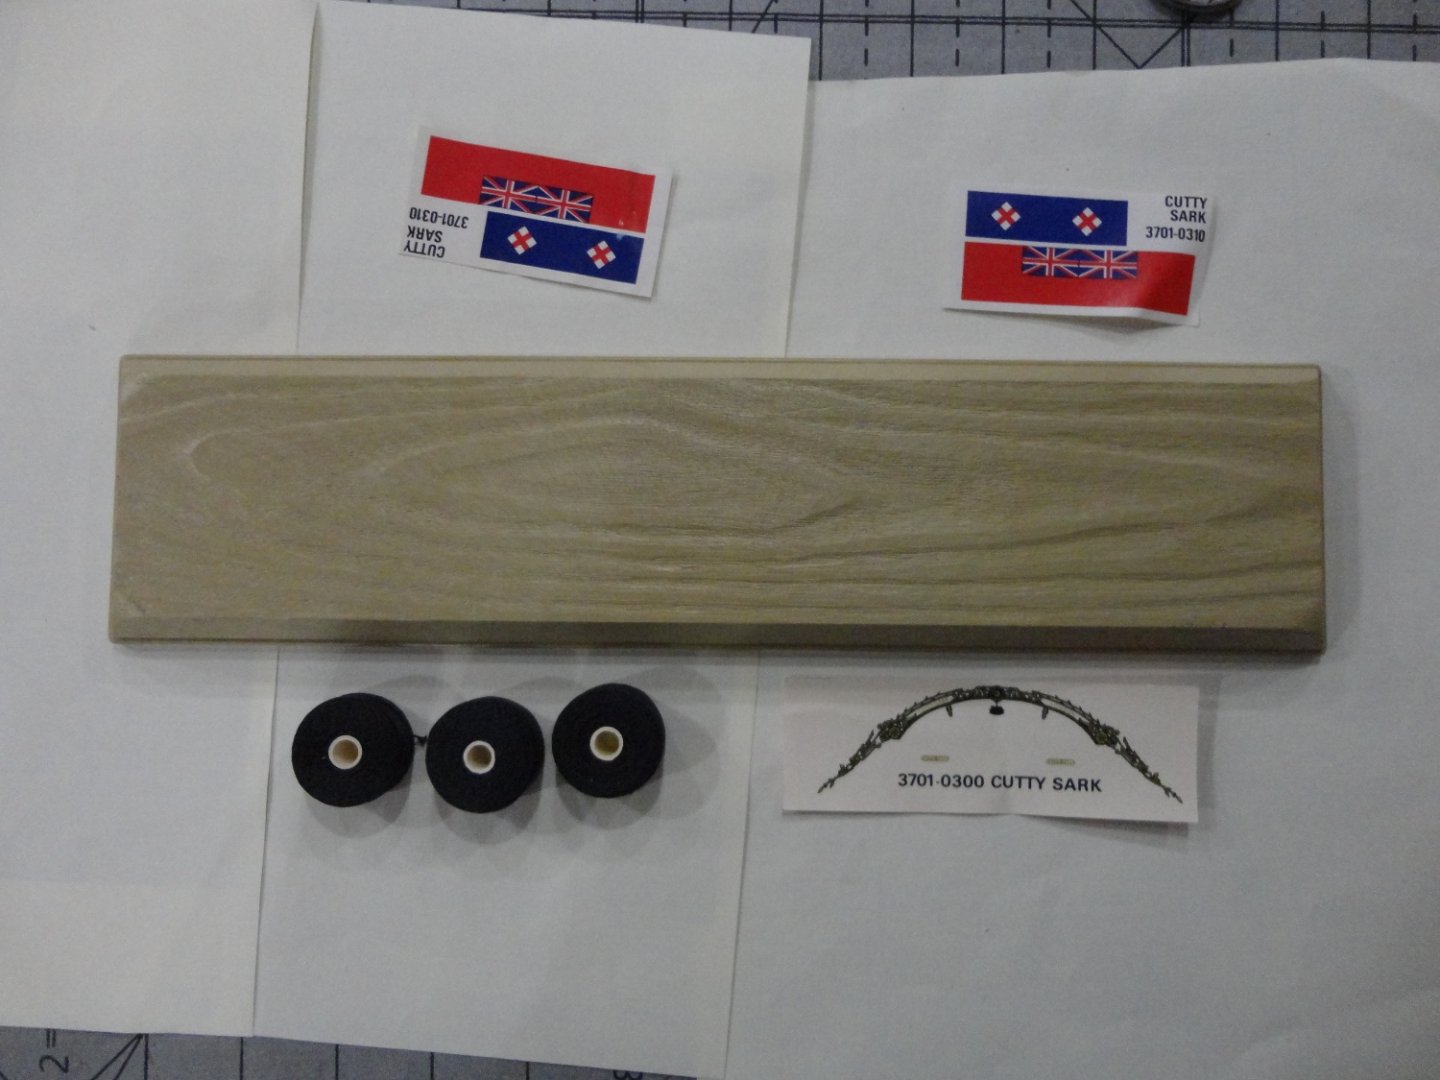
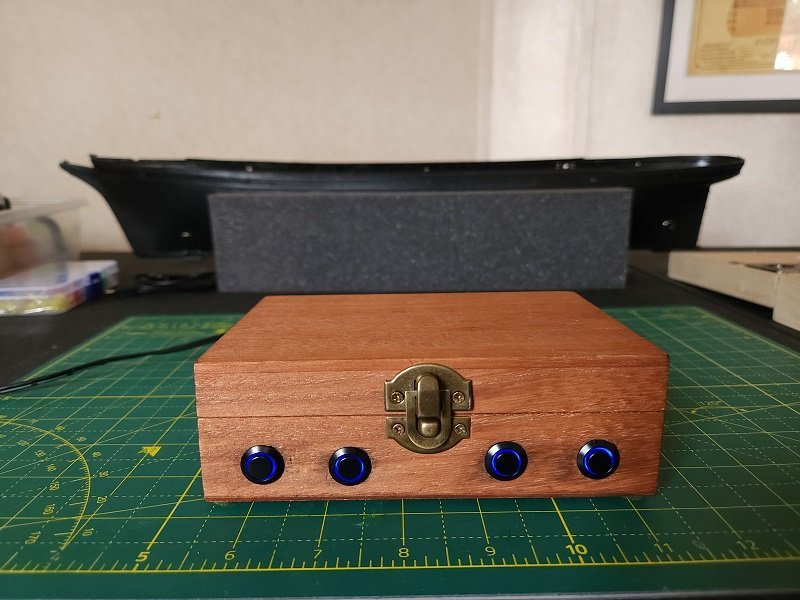
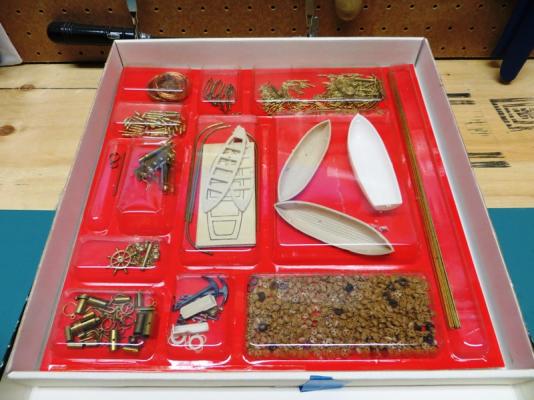
 Well, I have been lurking here and meddling in others' build logs for quite some time. Most of you know I abandoned my previous Cutty Sark build and I'm very anxious to start anew. I have the kits (one as a working kit, the other is spare) and almost all of the necessary extras. However, I'm still awaiting one more delivery consisting of a wood deck, windows, rope and a few other accessories. They're coming from Radimir at HiSModel in the Czech Republic and, though he's a bit late, I am confident they will arrive soon. Until they do, I have finished the control box for the lighting. The lighting will consist of navigation (running) lights and interior illumination of the three deck houses. Power is a 12-volt 2-amp wall wart that plugs into a socket in the back. Output voltage is currently set at 6 volts for each regulator. I haven't installed the box-to-ship connectors yet, I need to determine the pinouts and that's a tedious process. The wood is very soft so I have some tearout from the drill but not enough to make me do it over. I may make another one in hardwood at some future time. I debated with the boss over labels for the switches and she won out (she always does). They're not really necessary and detract from the aesthetic.
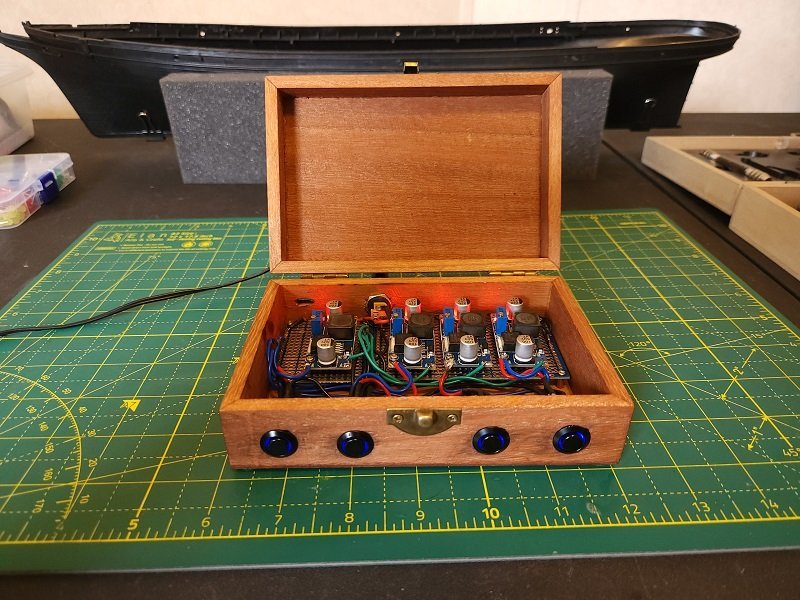
- 85 replies
-
- 5
-
-
- Cutty Sark
- Revell
- (and 2 more)
-
 Well with winter round the corner, it's time to hunker down and get back into the shipyard with Cutty Sark. This is a model I have always wanted to build since starting out in this hobby with Billing's Mary Ann. Thanks to Kip (aka Sawdust), I was able to acquire this second hand model which he purchased from a neighbor for 2 bottles of wine. He also sold me Nepean's book and Campbell's drawings so I have lots of info over and above what Billing supplies which isn't much. Thanks to Lou's lead, I have also purchased J.J. van Griethuysen,s drawings which are spectacular. As you can see from the photos, this is an early Billing kit , from the 70's I would guess. Einar Billing includes a little intro with the Reader's Digest version of instructions they are known for. In them he states that the kit is intended to be built and not merely assembled. He expects the builder to exercise skill and imagination in the building of the kit. Sage advise indeed. As with all earlier Billing kits, the hull and fittings are sold separately. Billing believed some modellers might want to create their own fittings. They also recognized that many models are never completed so why buy a bunch of fittings that might never make it onto the model which will never be used. The majority of the wood in this kit is mahogany, which you can imagine is now rather dried out and a little warped. I have decided to replace the hull planking with obechi which I have used on previous Billing kits. It's not expensive, bends easily with a little steam and will be painted, so no need for top quality timber. As the build progresses, I will decide what other wood needs replacing. As can be seen from the photos, the kit is already started. The original owner of the kit did get it stared but then realized he no longer wanted to continue. So I have the kit framed and with the false deck installed. The rest will be all me. He has done a first rate job, and the keel is straight so it is a good point to resume where he left off. Job one will be to bevel the bulkheads. So here's a couple of pictures of what is to come...
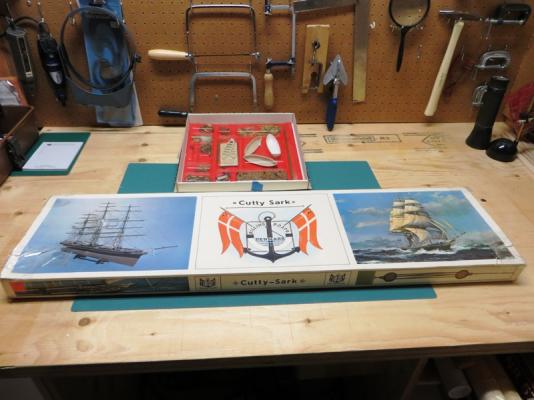


- 182 replies
-
- 3
-
-
- billing boats
- cutty sark
- (and 1 more)
-
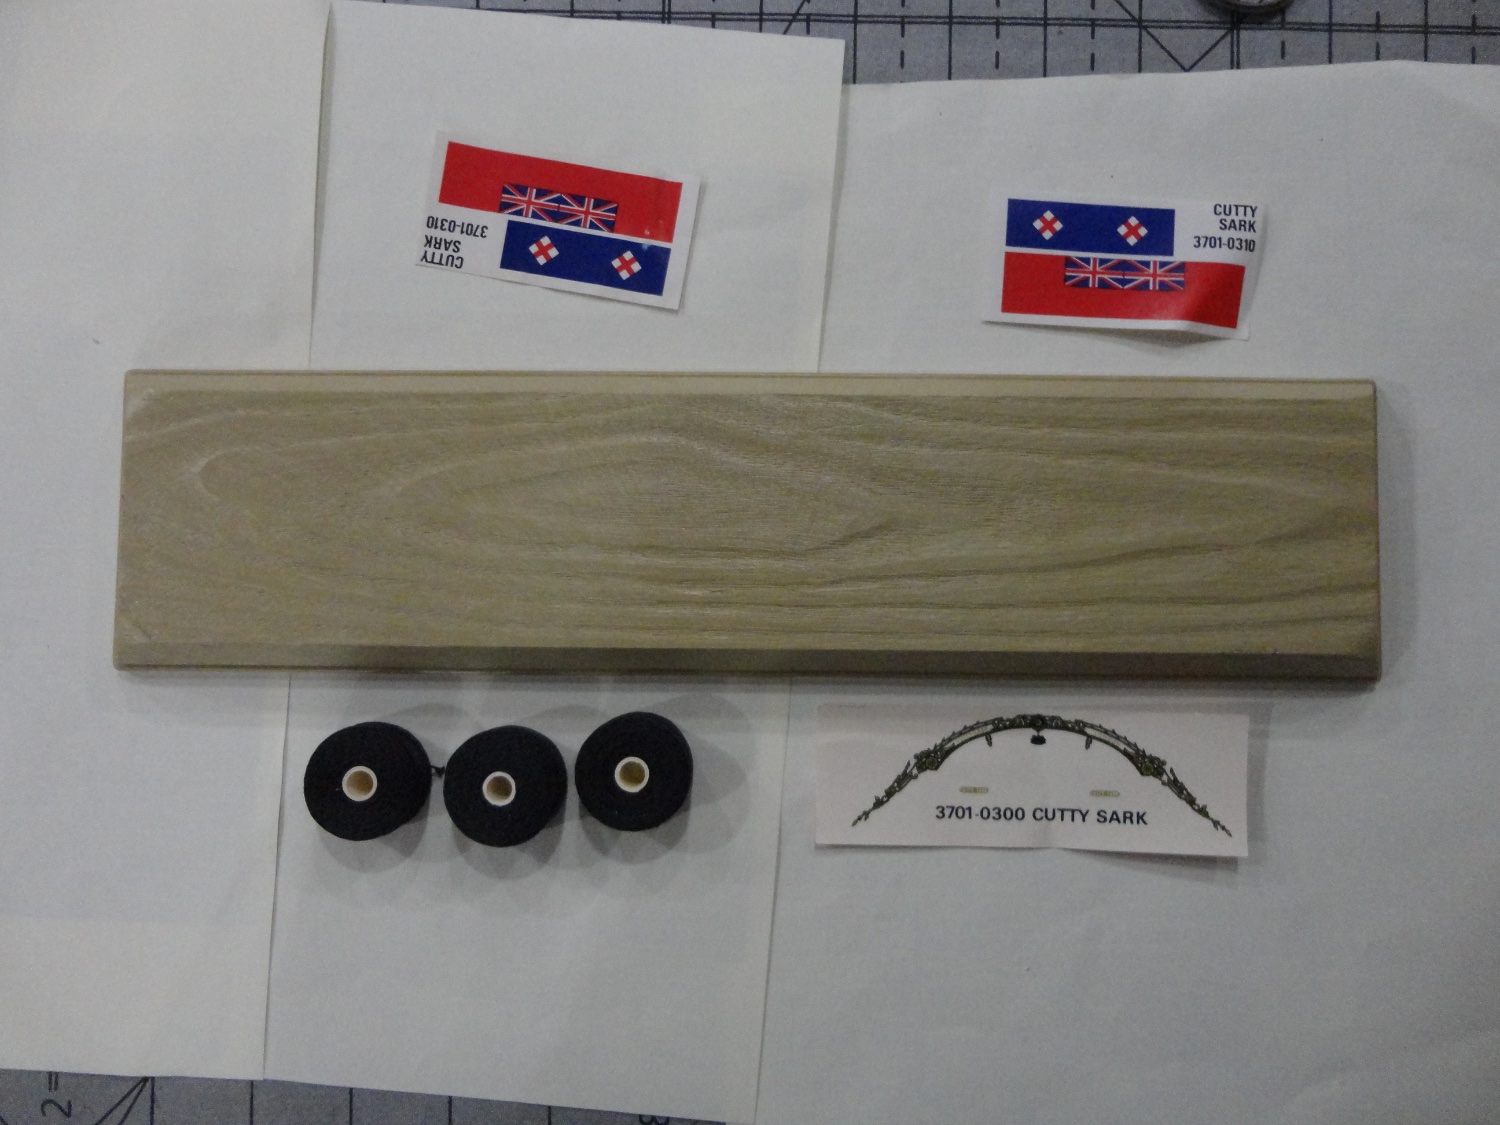
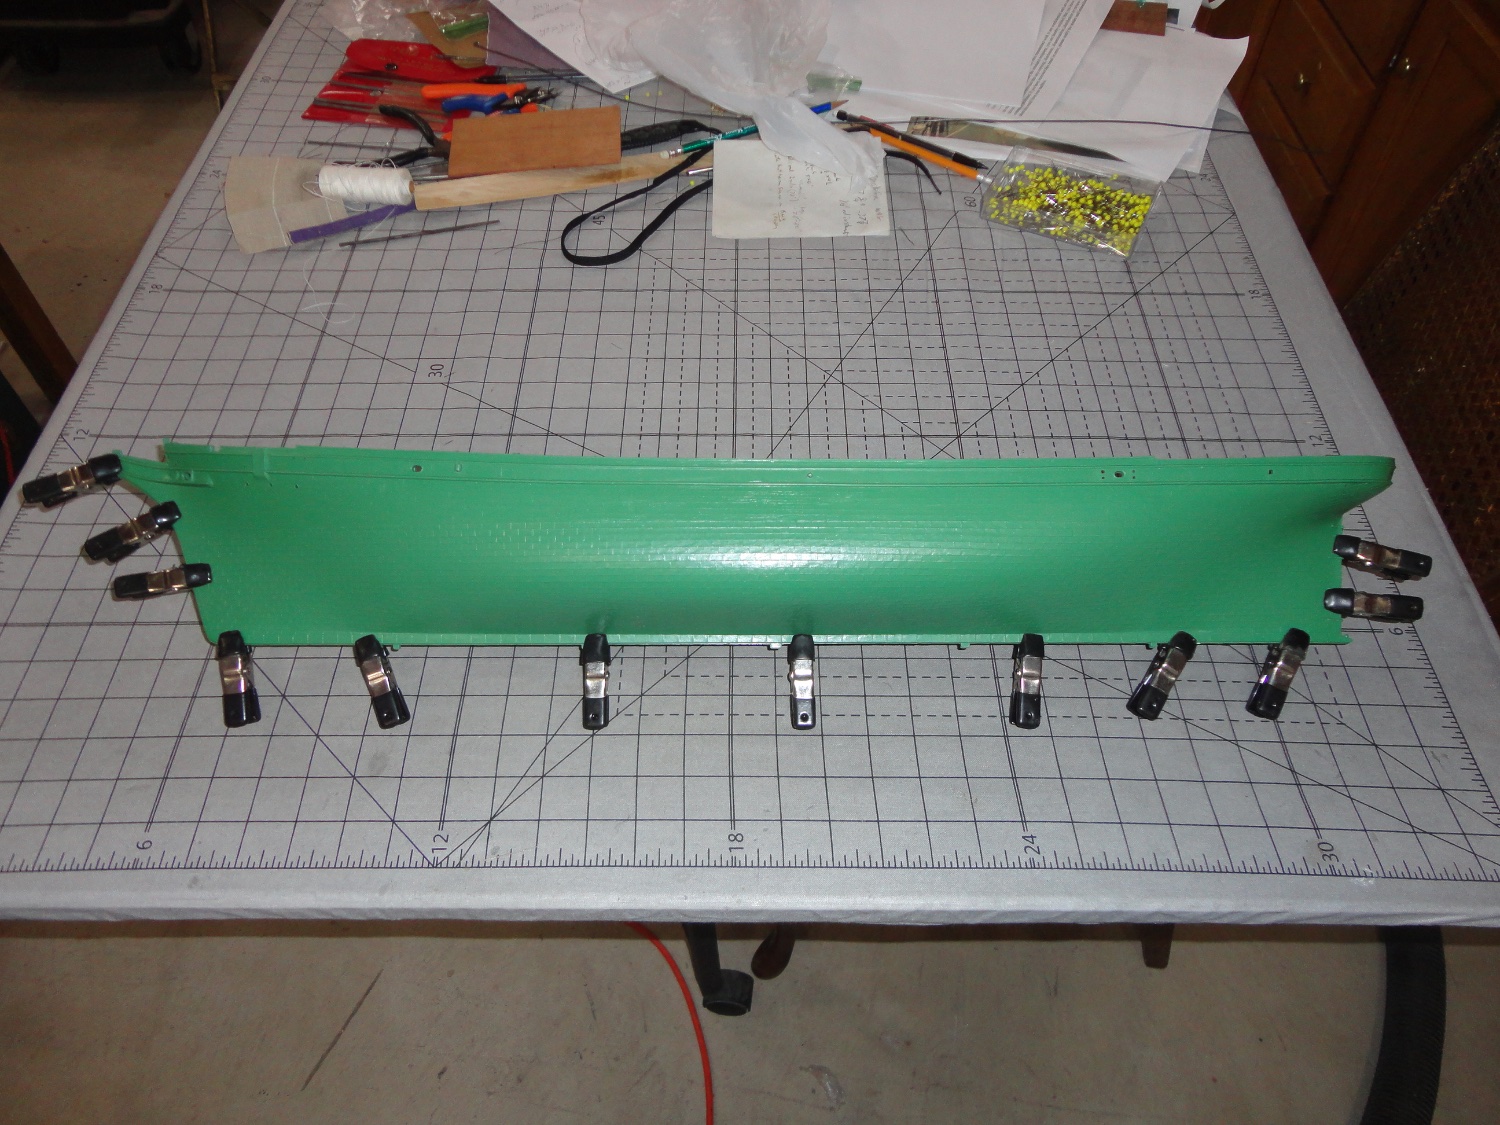
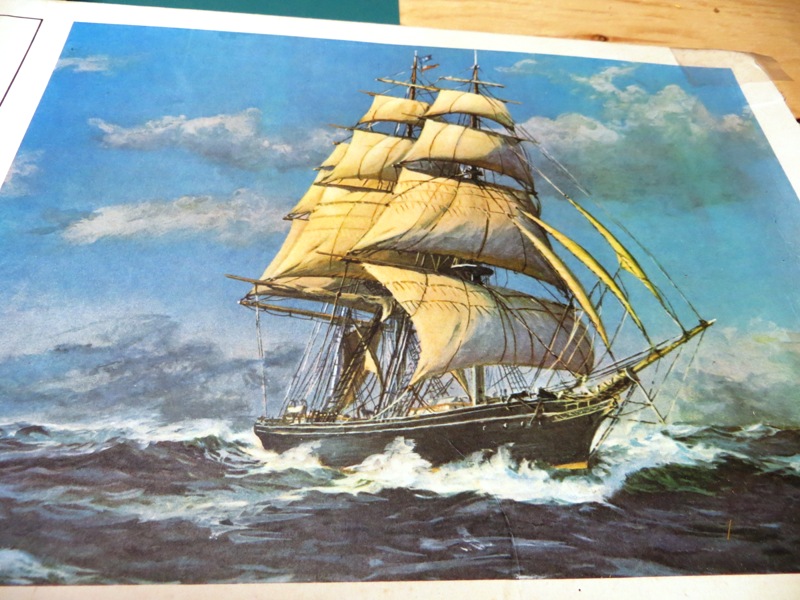
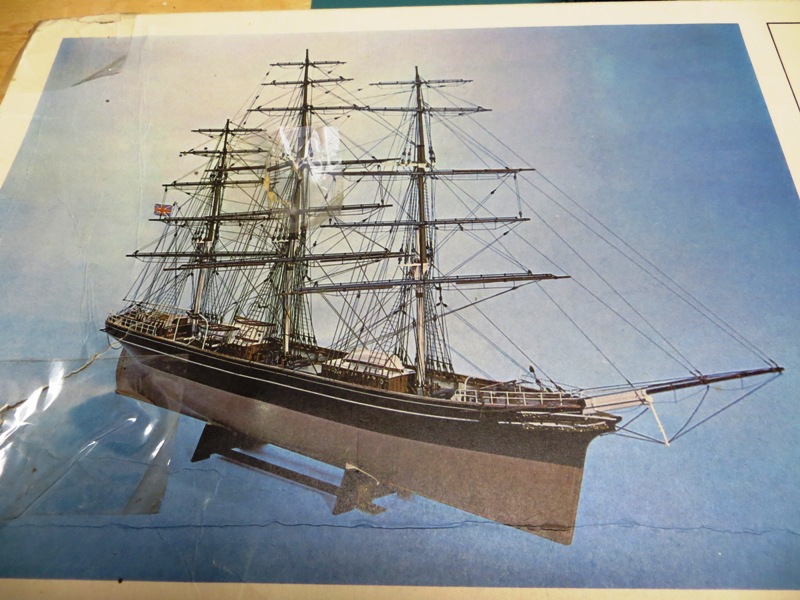
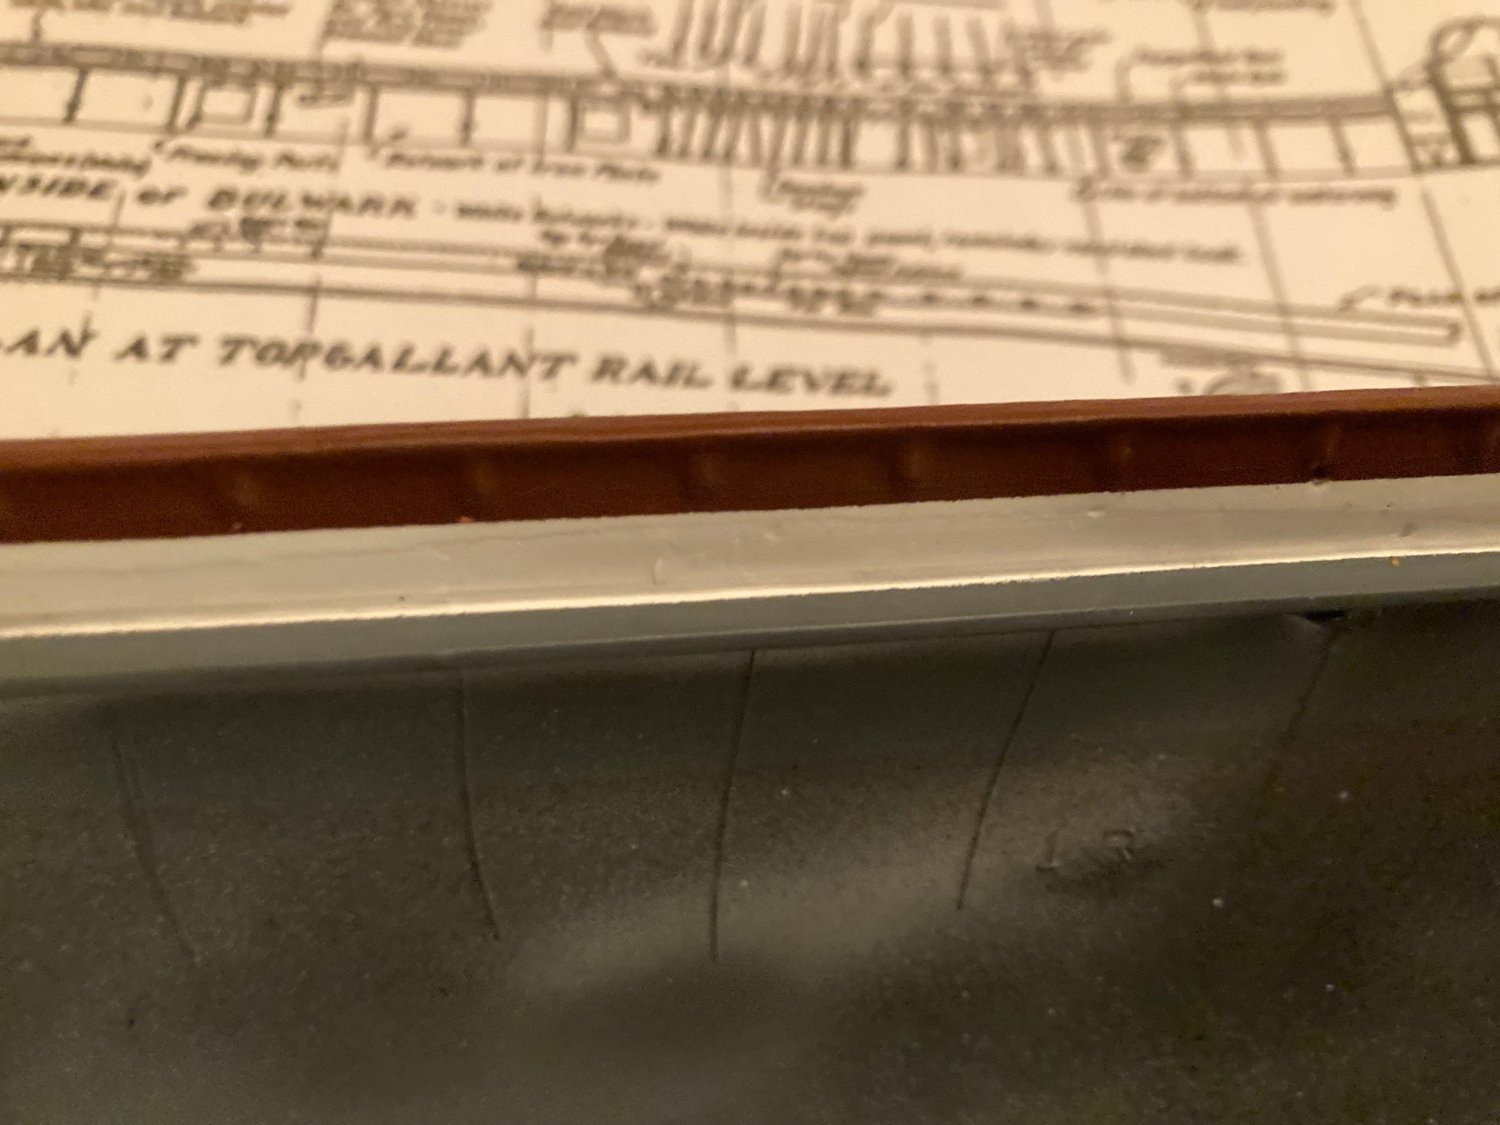
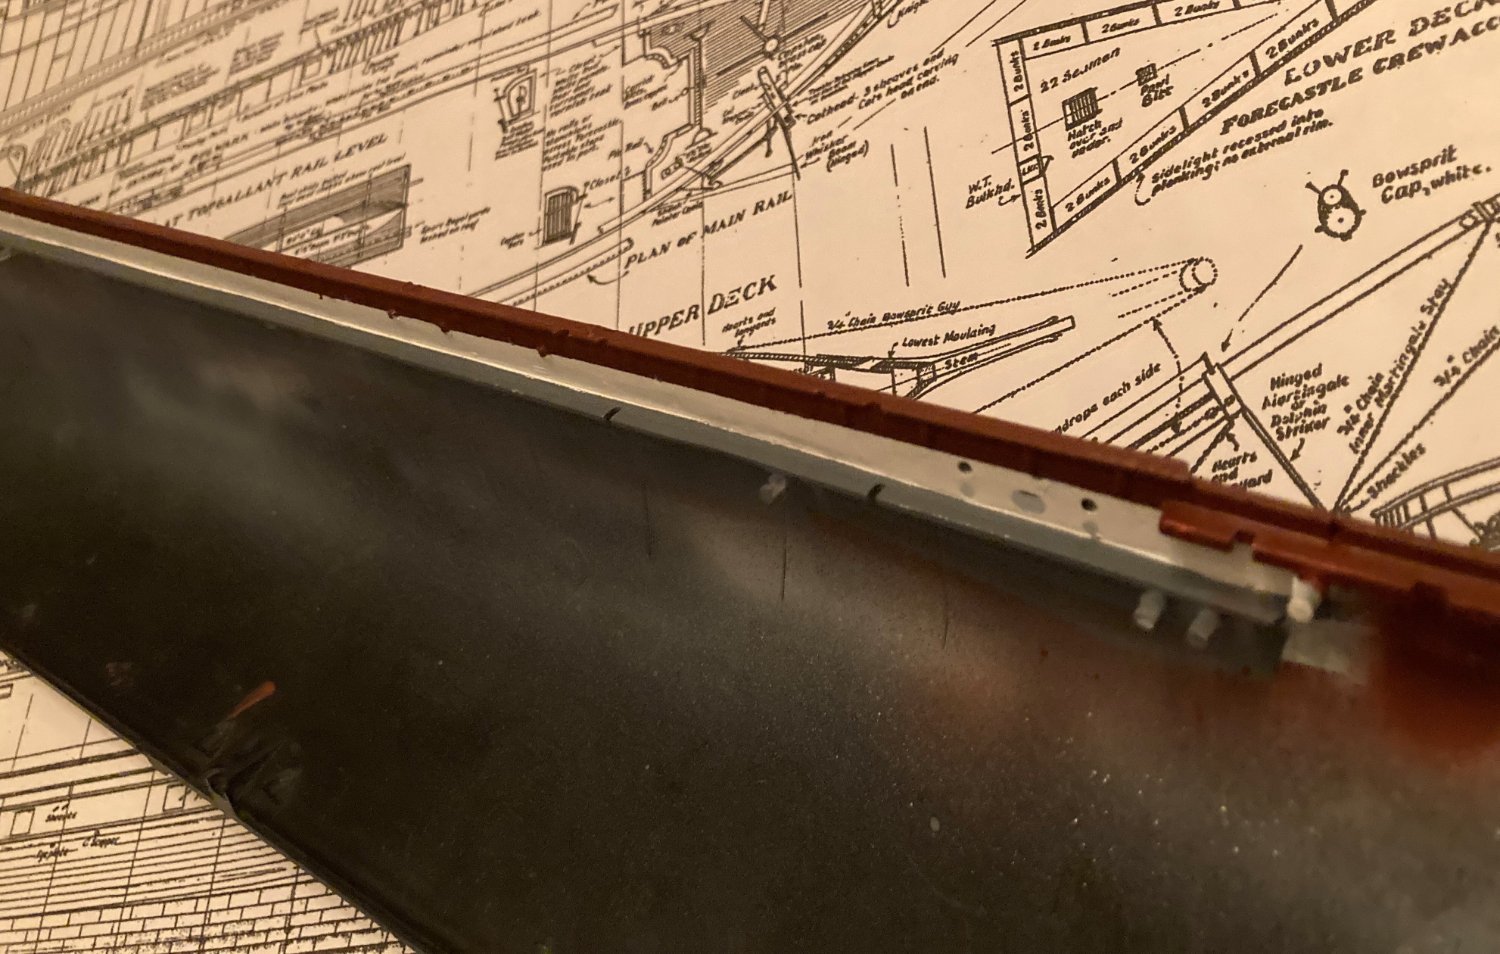
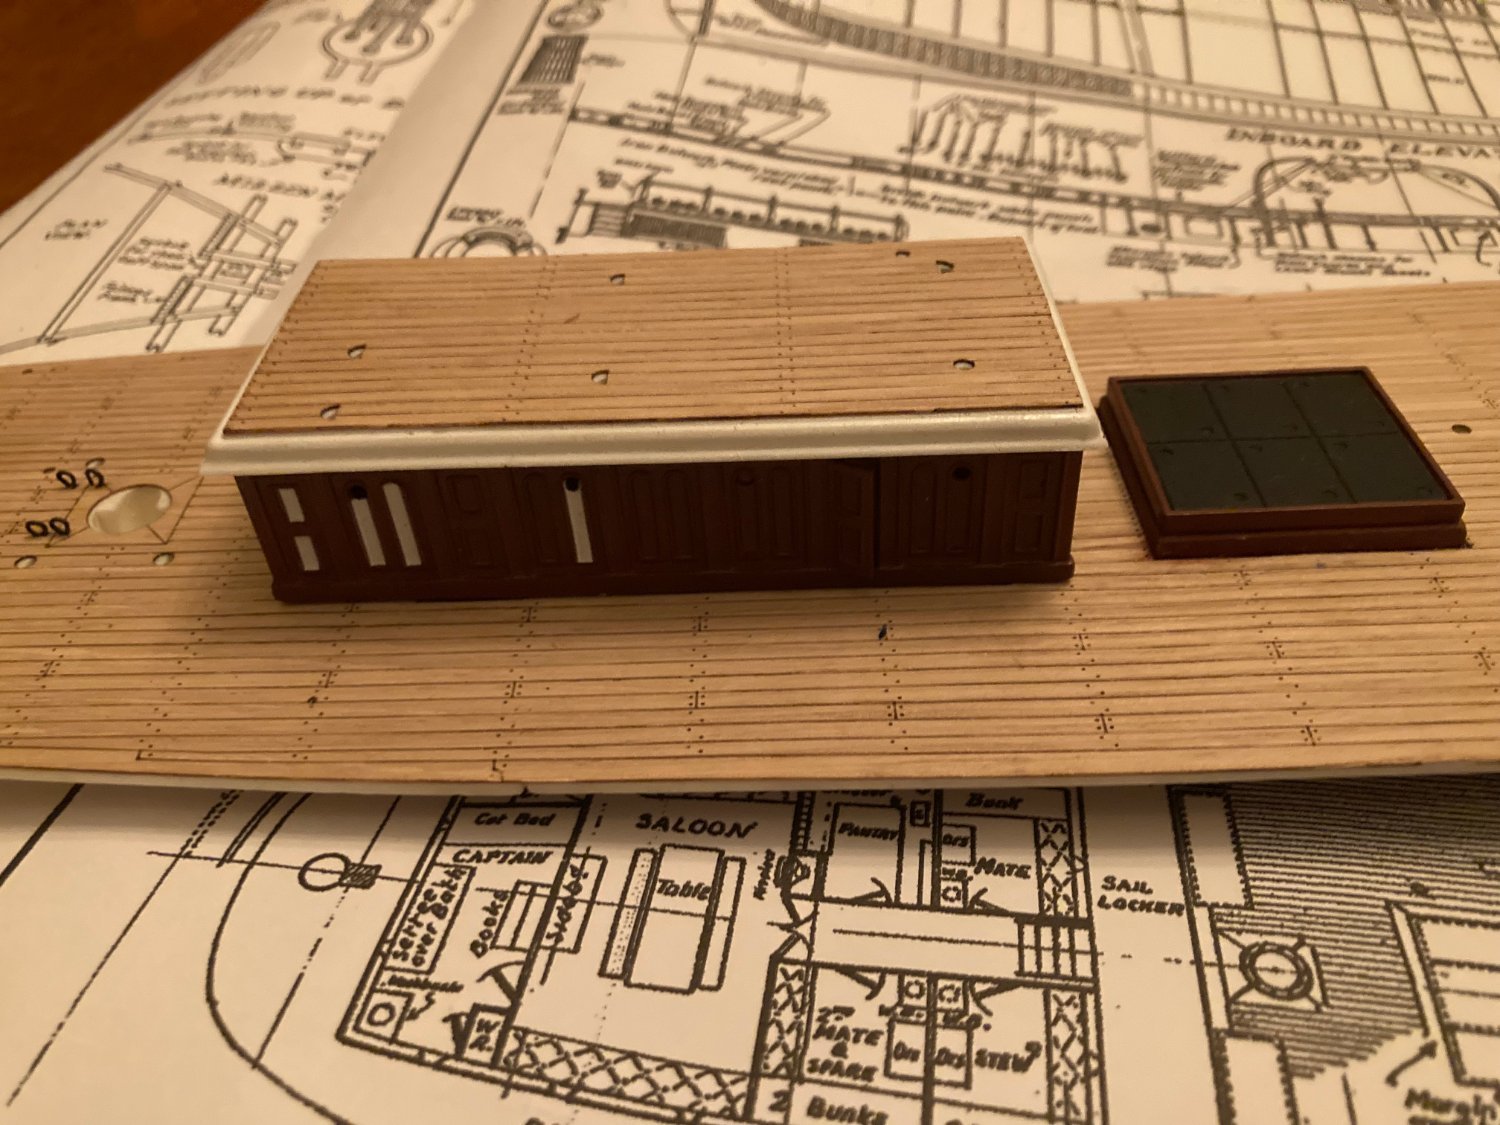
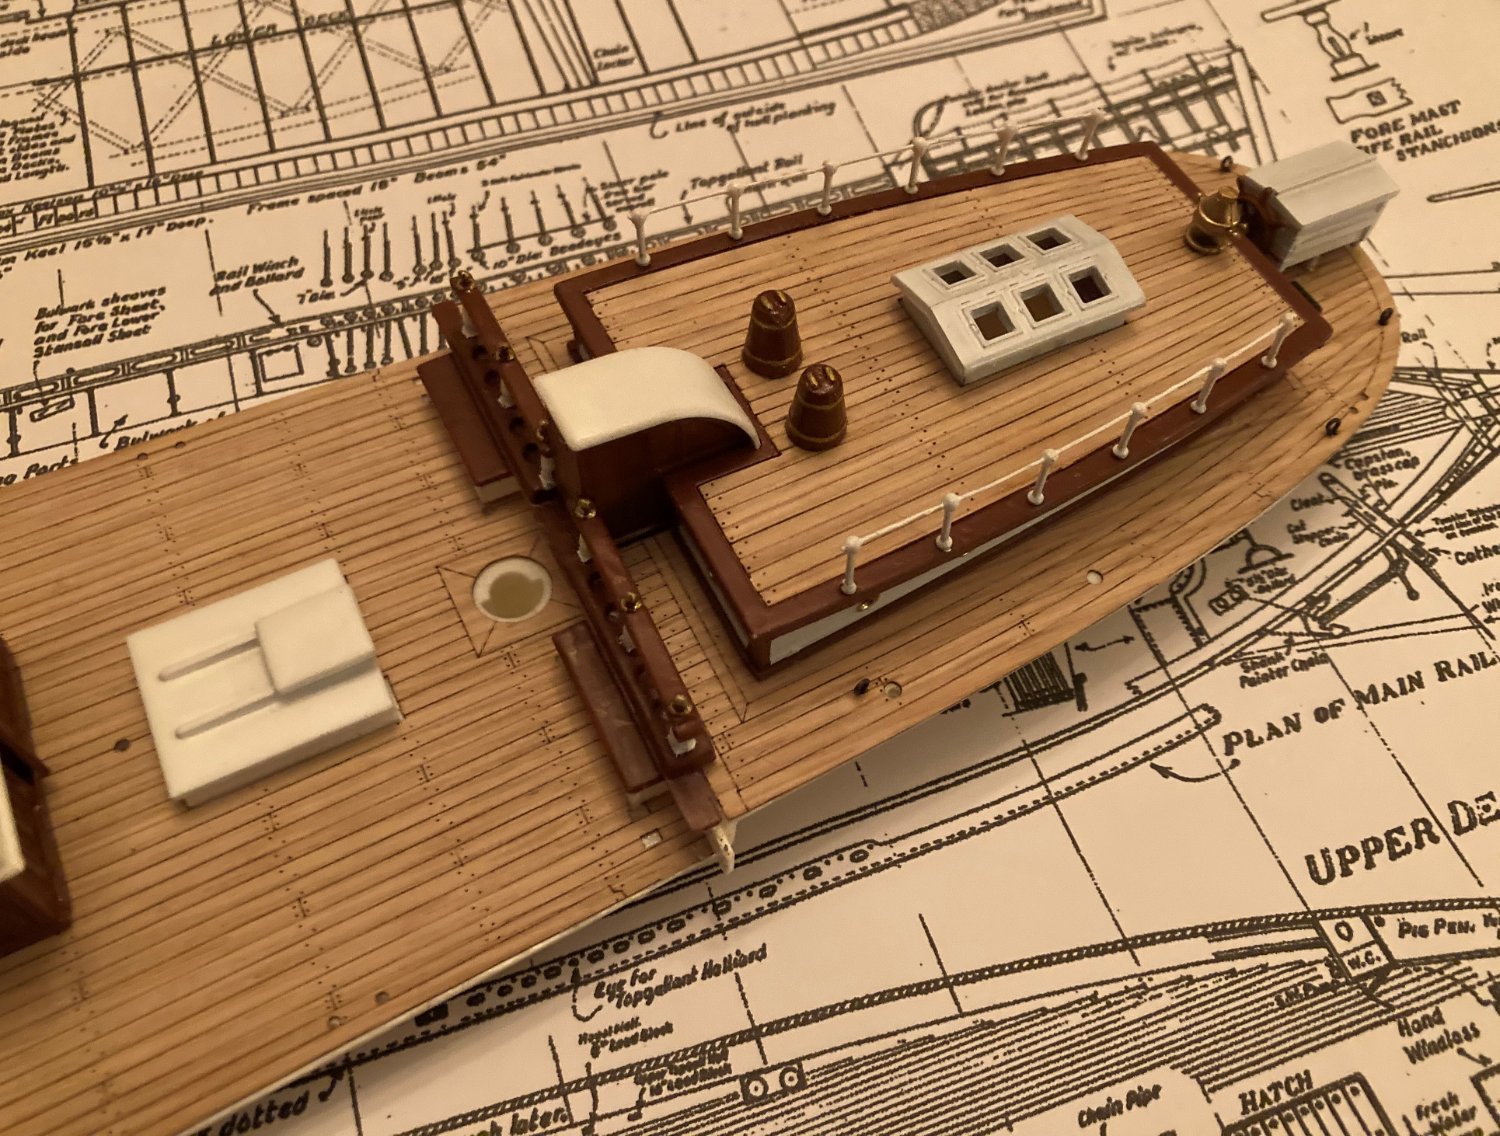
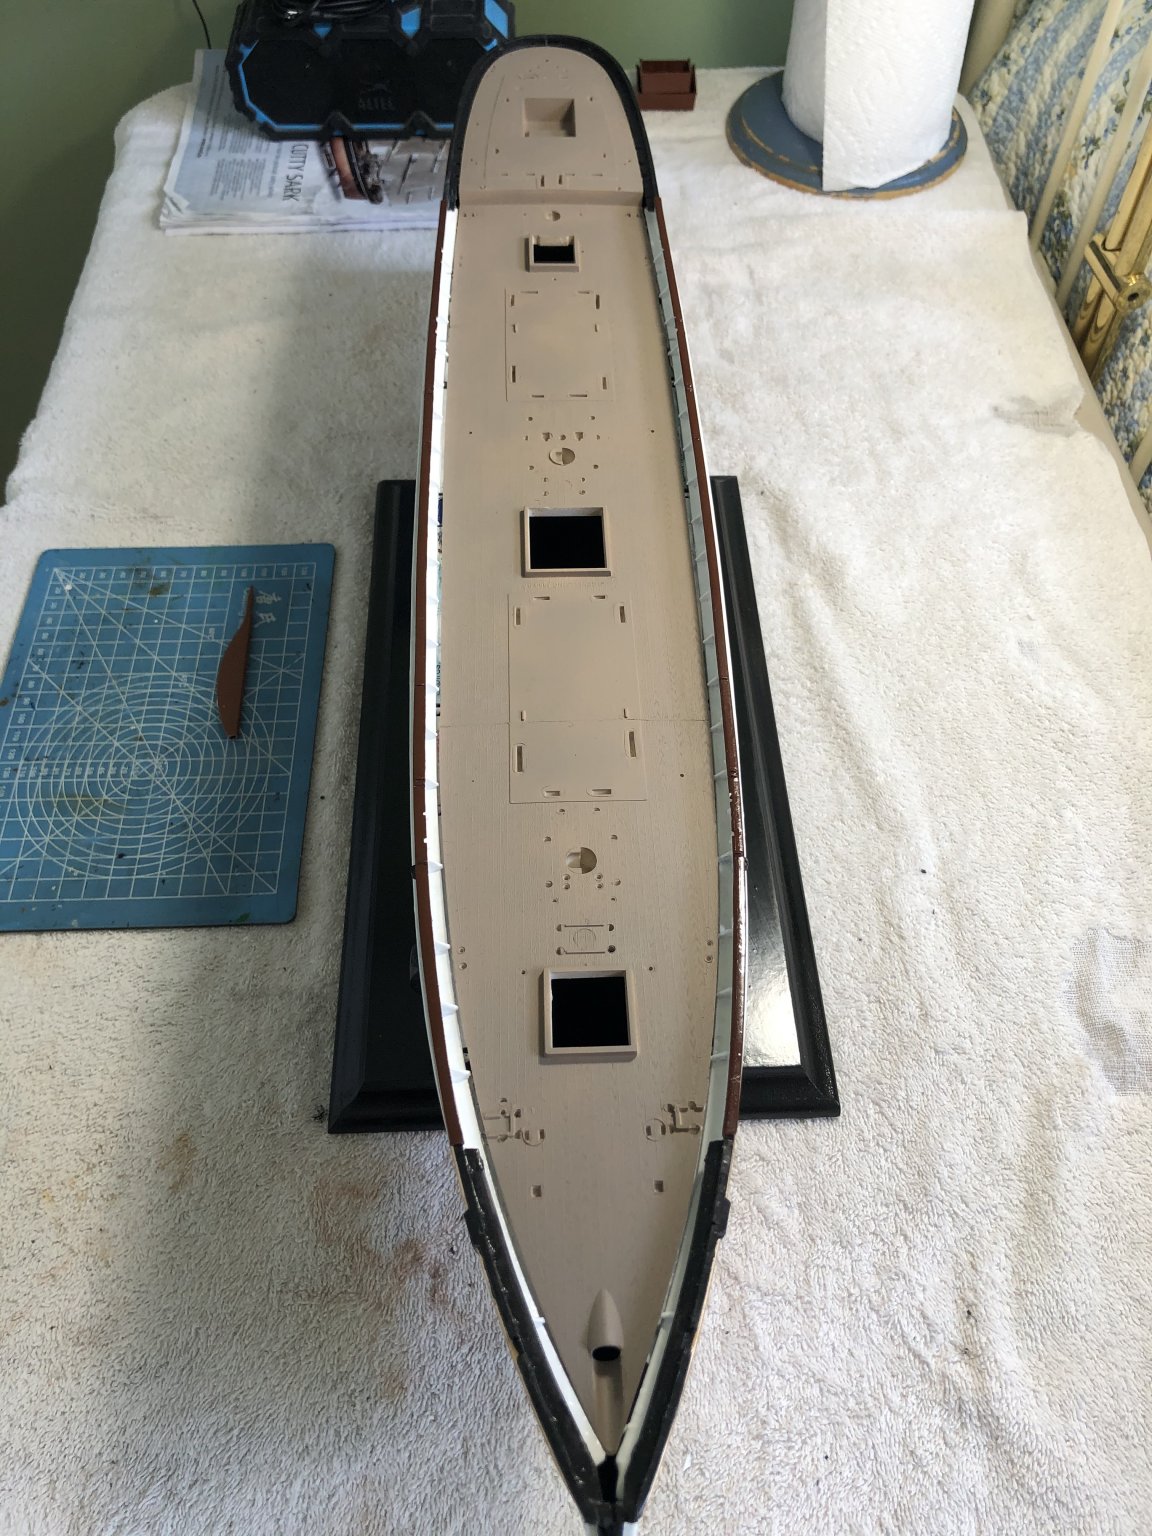
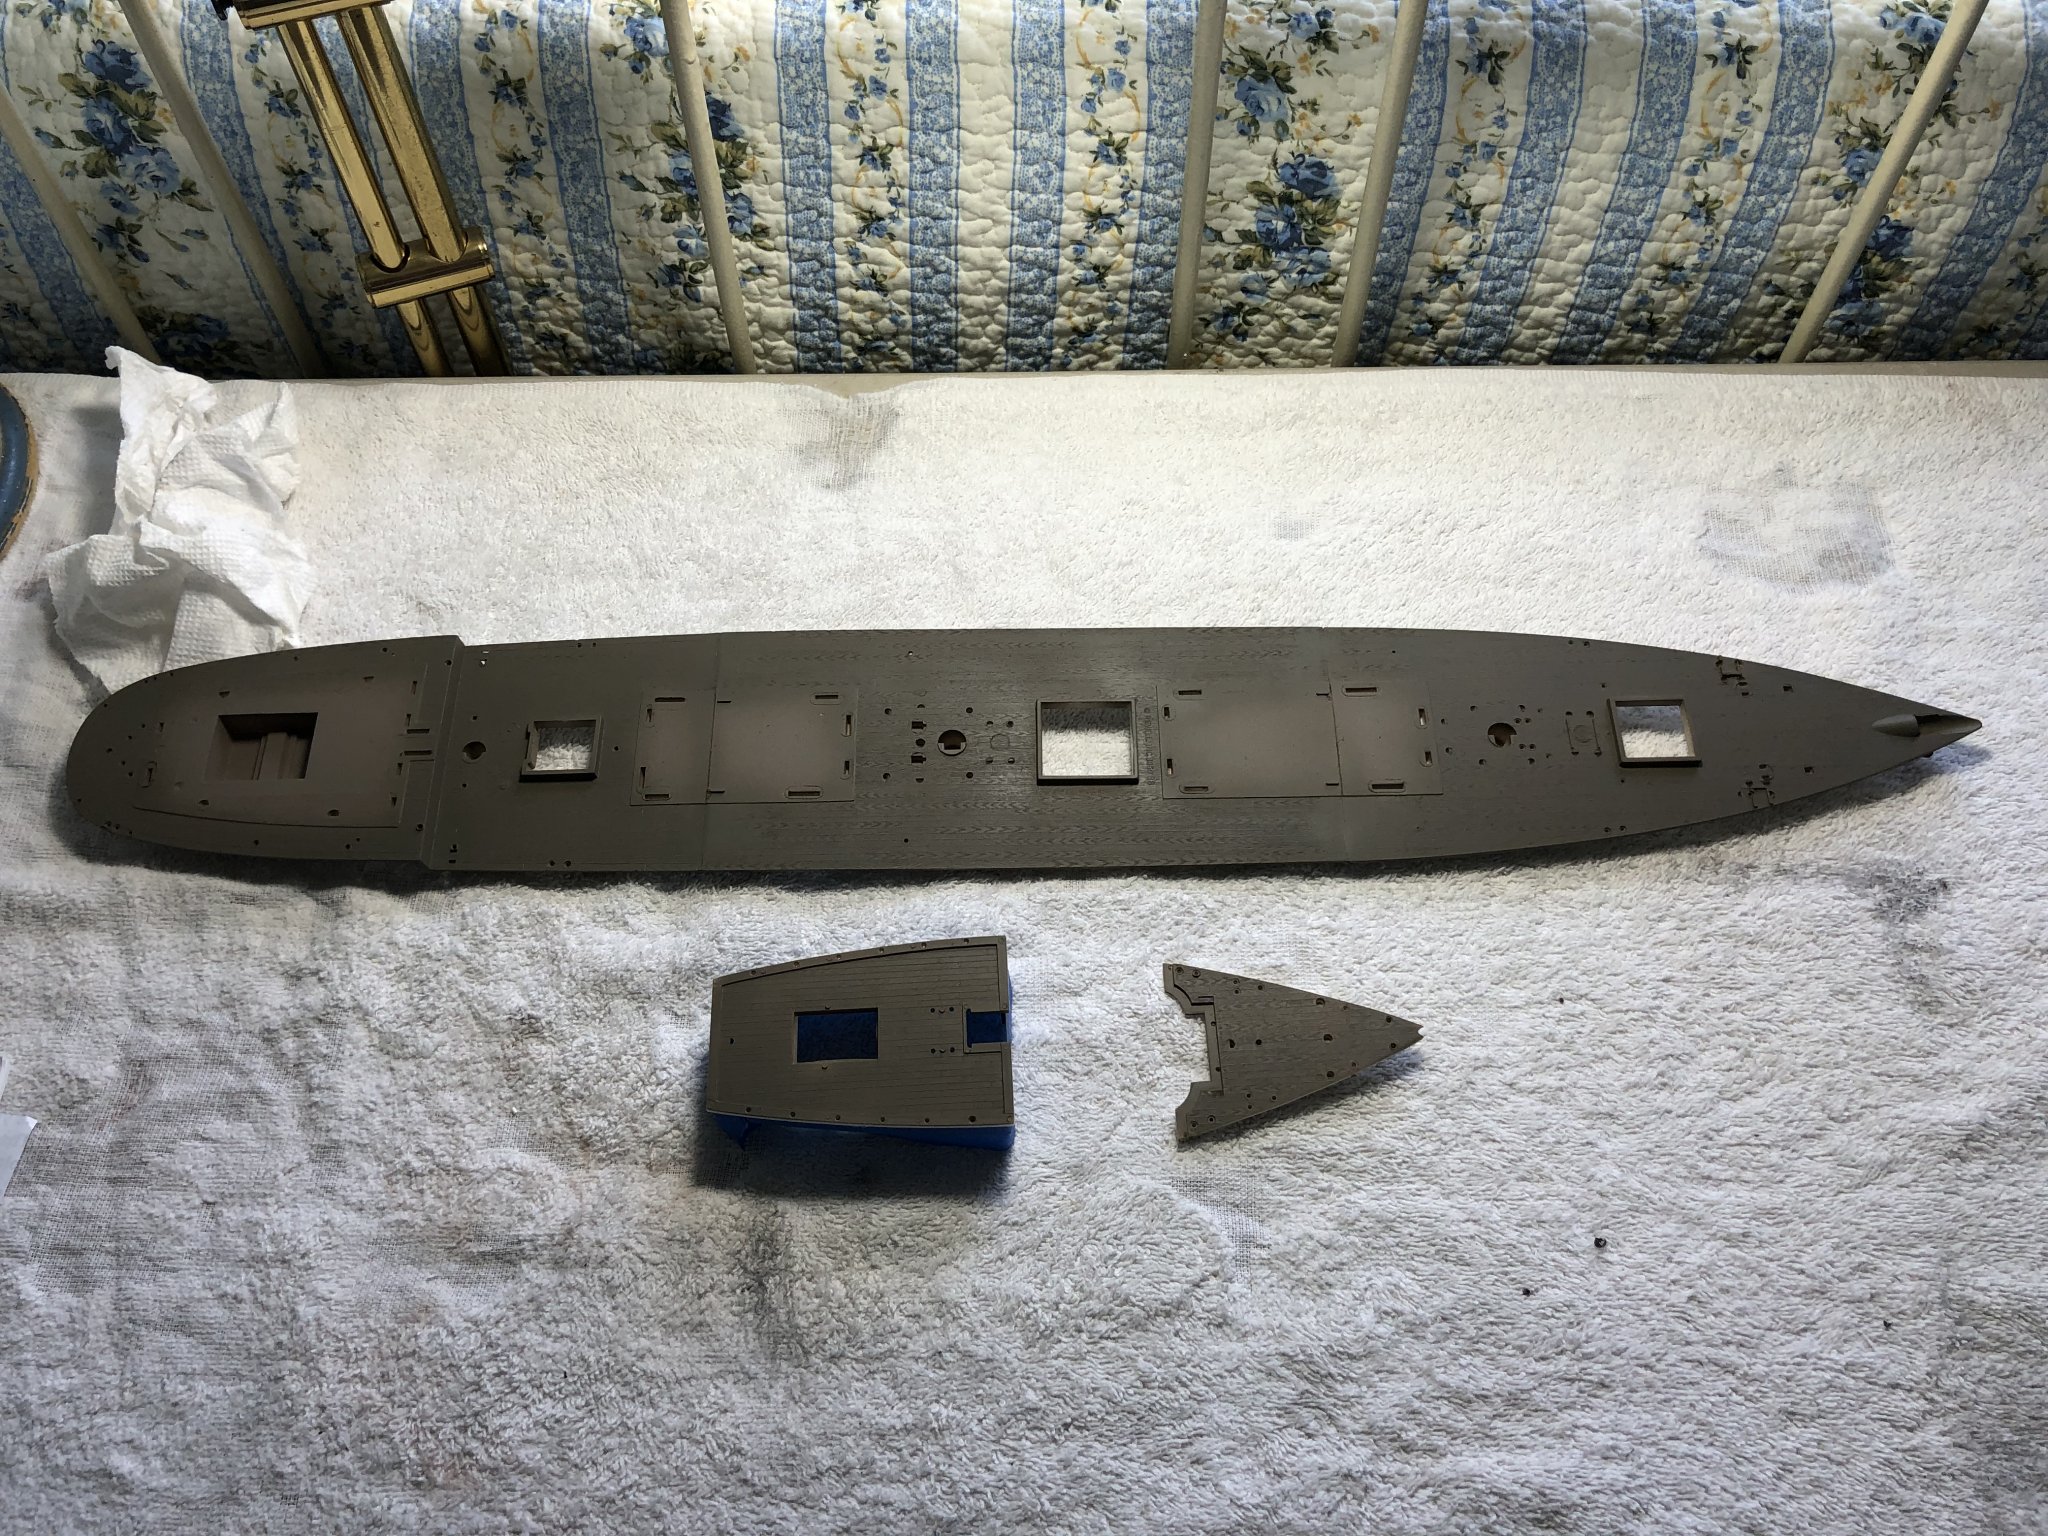
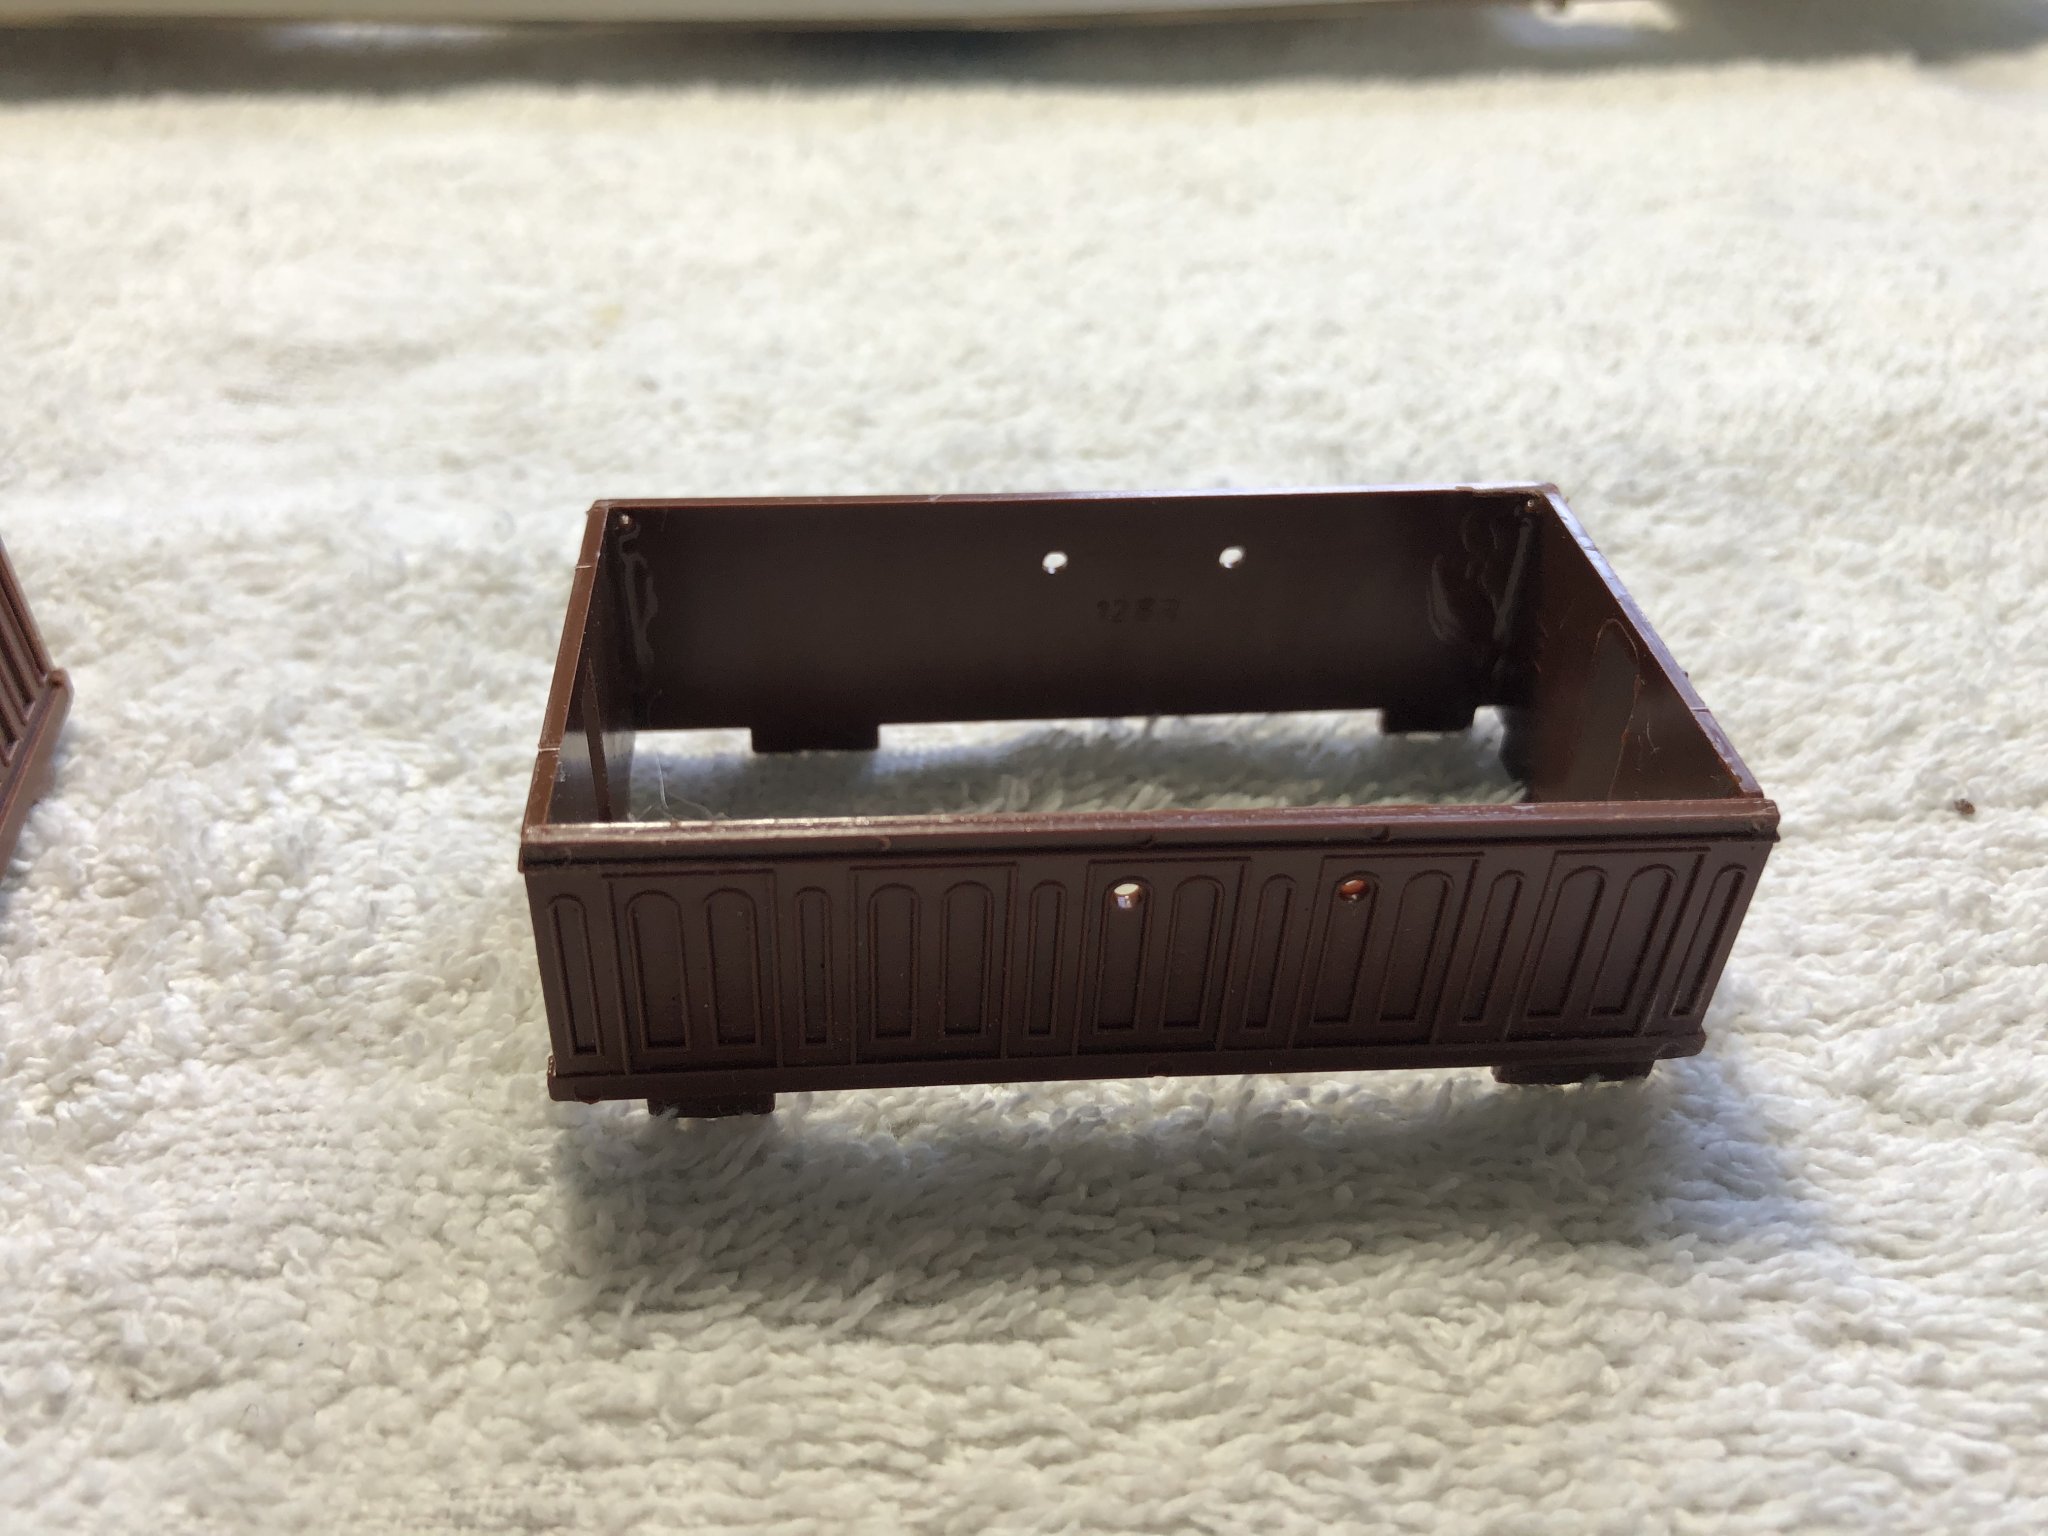
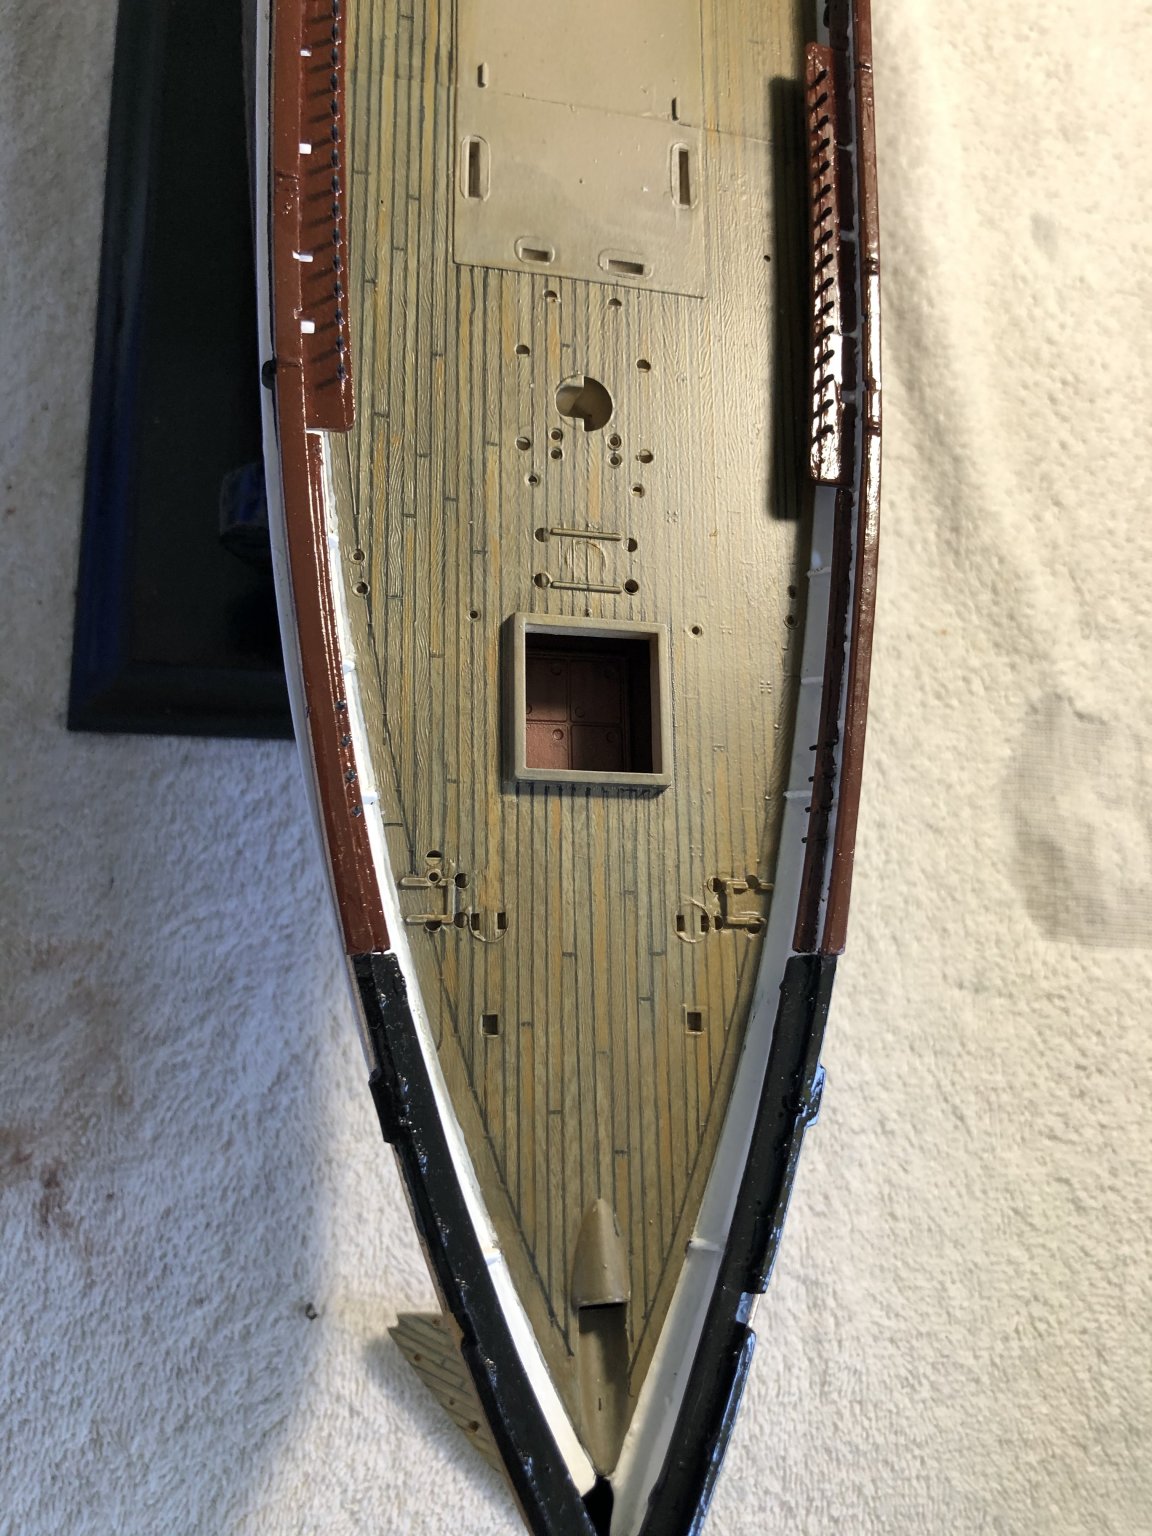
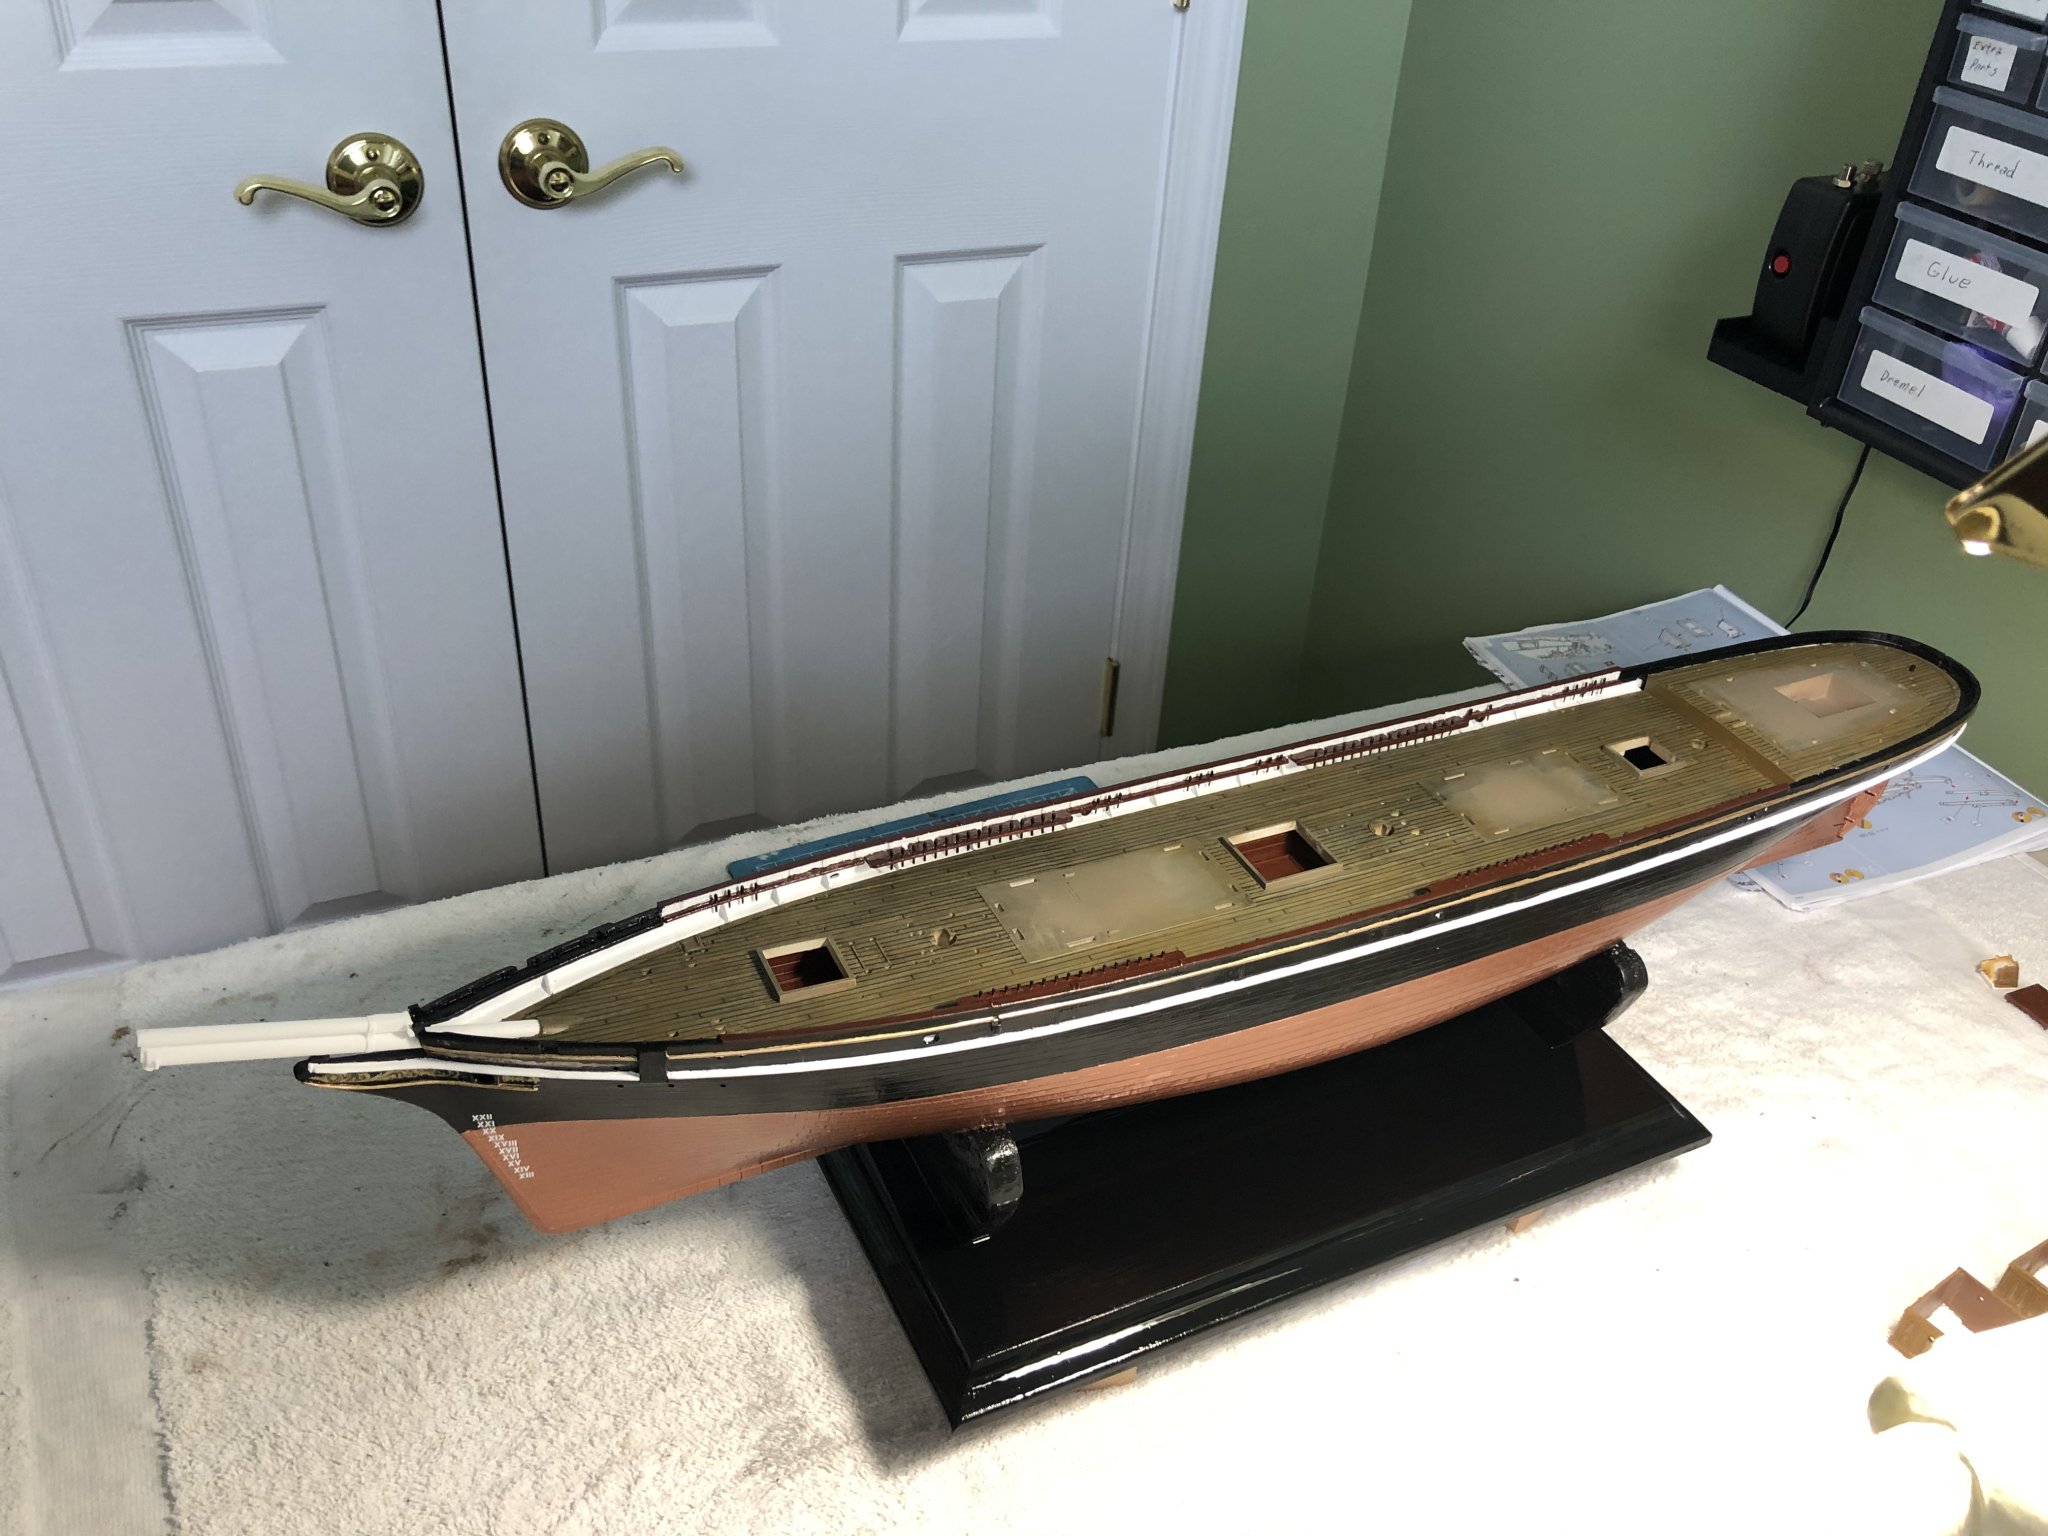
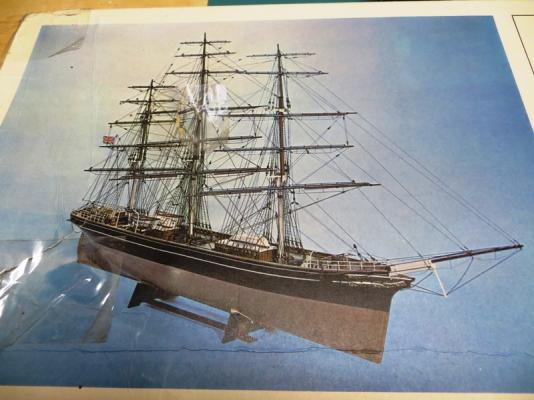
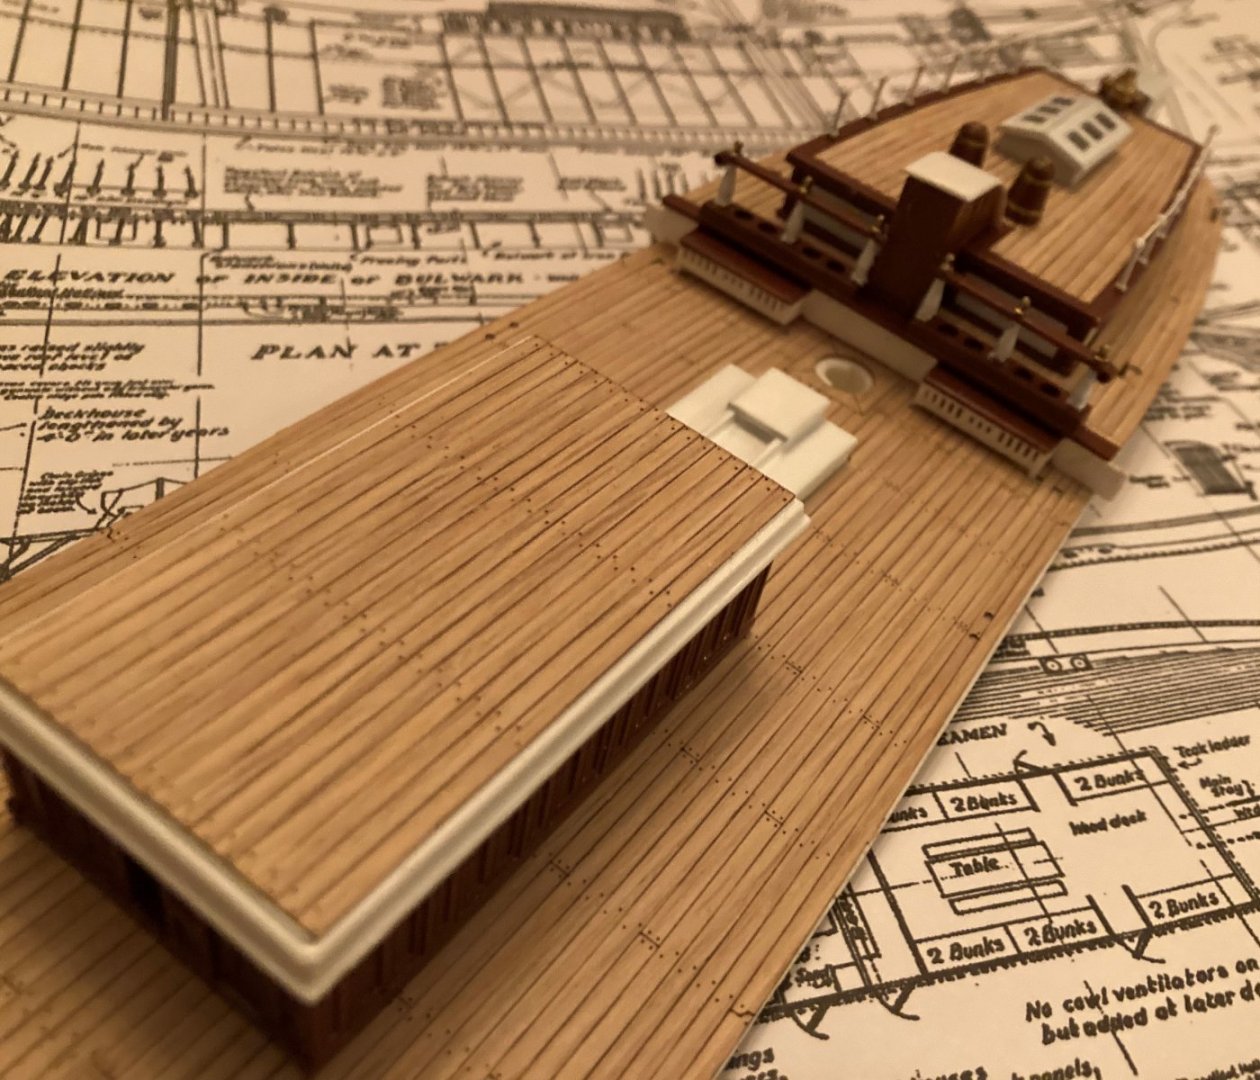
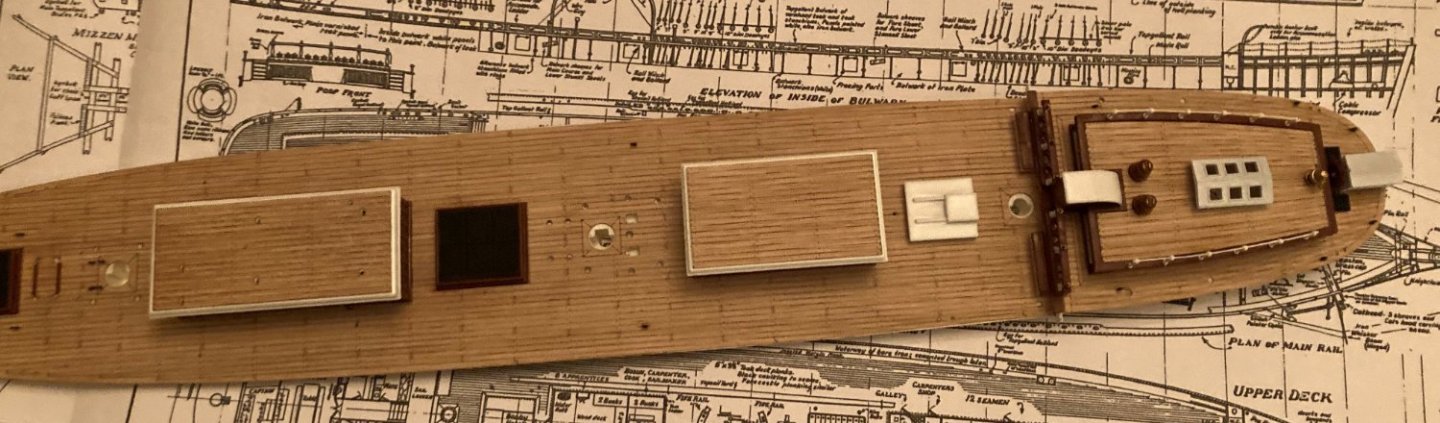
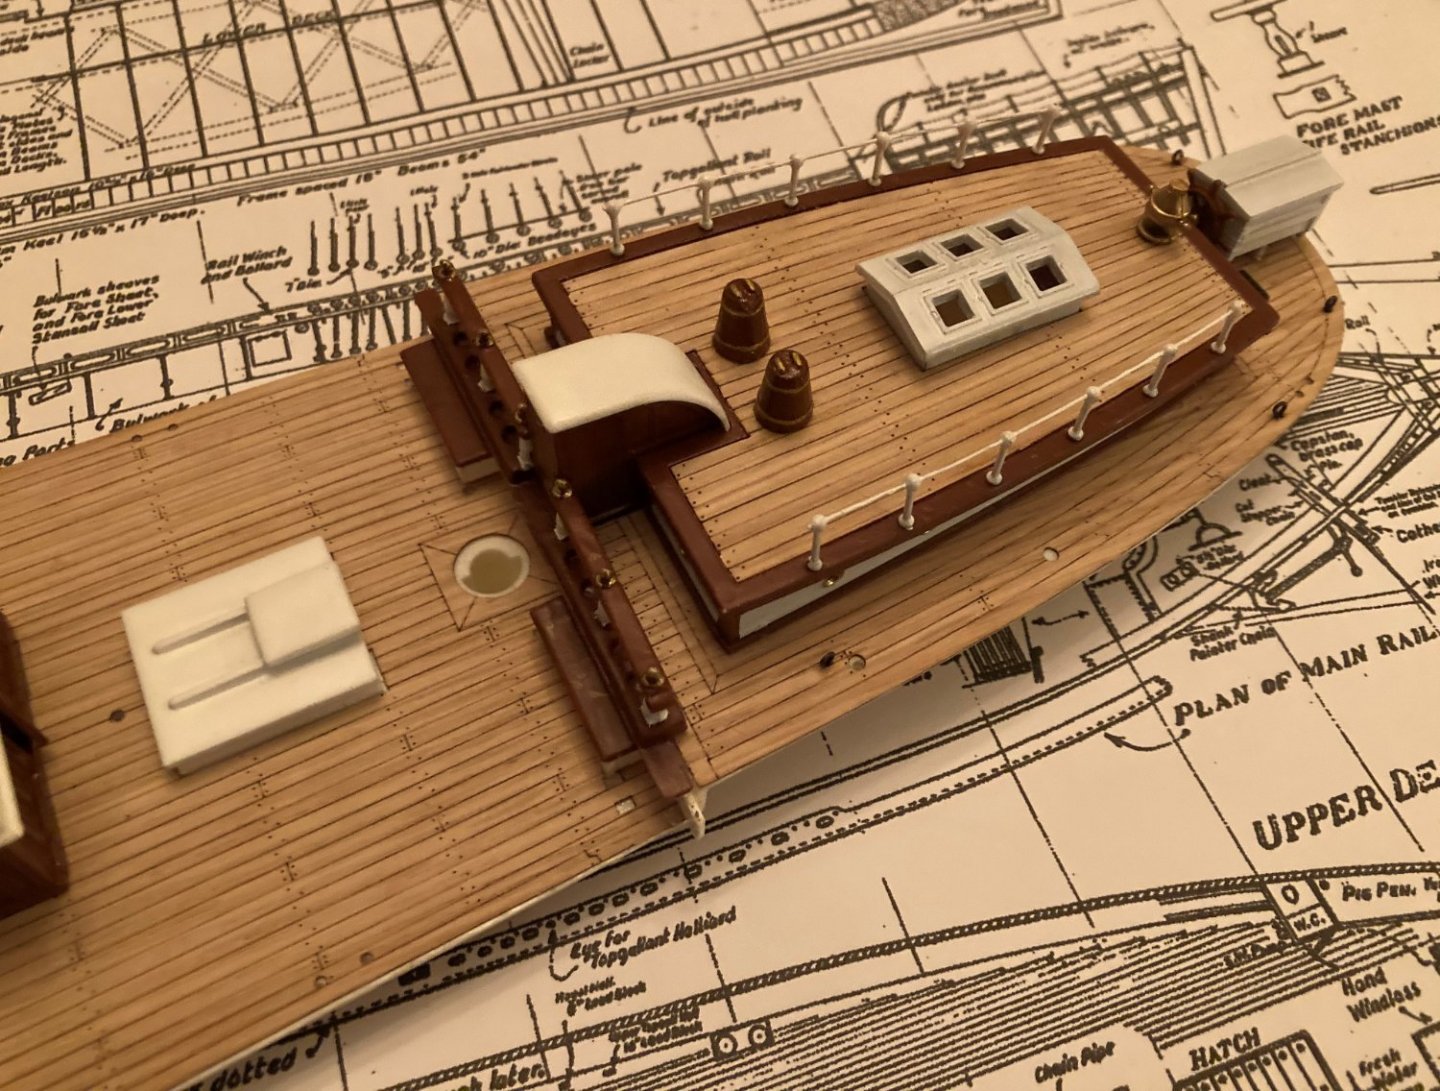
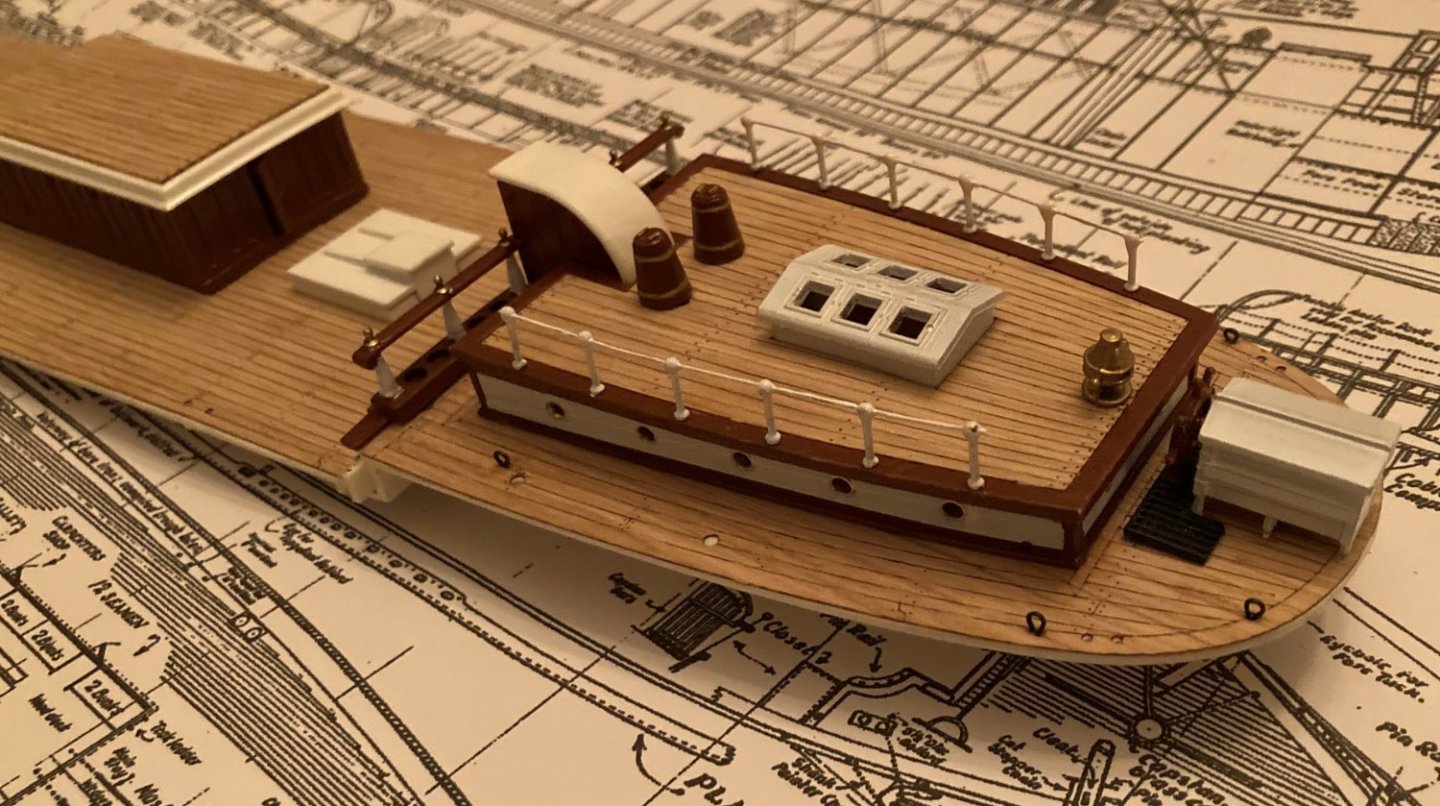
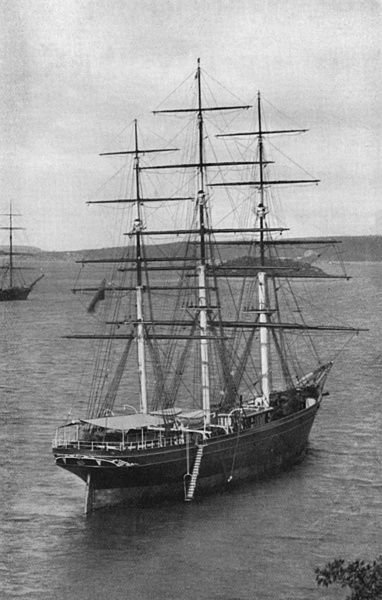
 I am working on the Revell 1/96 Cutty Sark. I haven't gotten too far along, even though there have been many hours spent. The hull is painted and ready to assemble. I have been working on the deck as paint drys elsewhere. The photo taken in Australia is my reference along with books and plans. The model will be what I call clean, by not trying to create a diorama on a stand with weathering and all, just making a replica of a ship in 1/96 scale. I am not sure who else likes the look. I removed the wedges from the inside of the hull. I am going to replace them with small plastic rod. Testors enamel is being used with an air brush and also painting by hand with a paint brush. There are brass stanchions with brass wire. Decals are being used to add the white panels to deck houses. I will also use decals to add the white portions of the inner bulwarks. The eye rings are made by me with annealed wire. The deck covering is from His-Model. I plan to fully rig the ship, something I haven't done before. I am not going to add green to the copper, as copper only turns green in the open air. In the water, it remains copper. The only part of the sheaving that is green is the part out of the water. There is a good picture showing this at the Charles W Morgan website. The ship was being lifted out of the water. Also, I am not going to weather anything. I'll be posting more as I go. I am new to this build format.


- 481 replies
-
- 9
-
-
- Cutty Sark
- Revell
- (and 2 more)
-
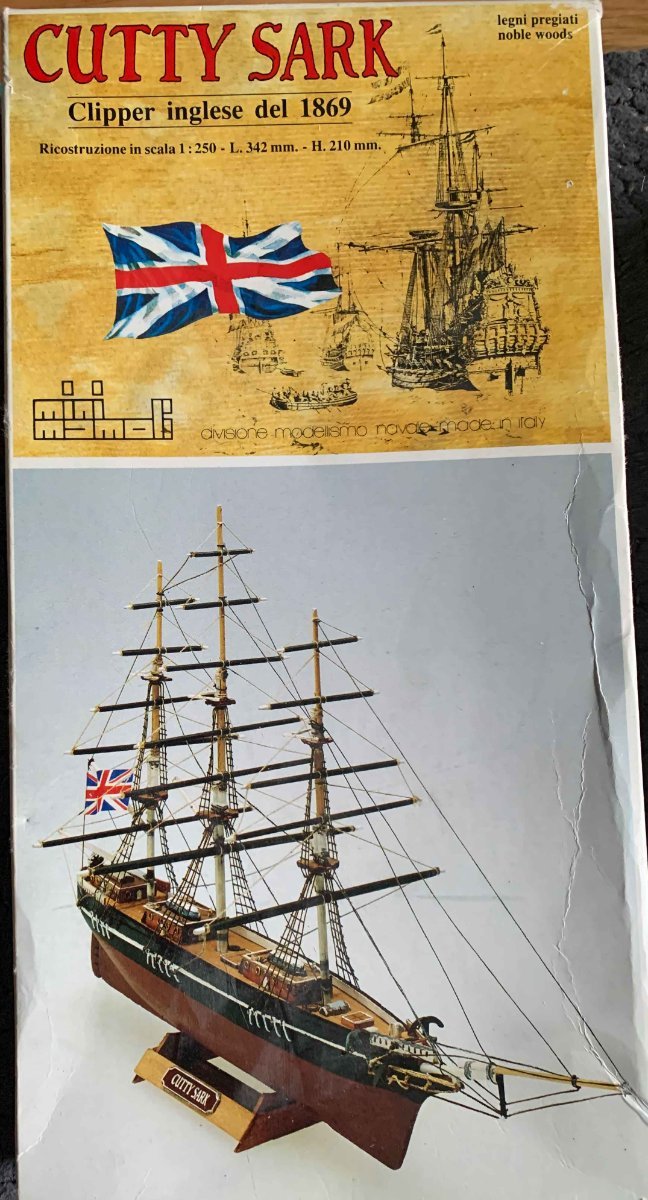
 This topic is created to show the build of my first model ship, which is a Cutty Sark (not the easiest one to start with I agree, but I have patience ). The kit is from Del Prado (no longer on the market) and bought the complete set from ebay. This kit was sold in 100 different packages, I guess there were weekly issues that could be bought from newstands or order to home. My package supposedly was sitting in a cellar or attic, and seems to have everything I need to build the complete ship. I have read many bad things about Del Prado - mostly of the scale and the not accurate details (of which I can live with without any problem). After scanning through all the packages I found a few broken pieces what I will have to recreate somehow, and one major problem.... The figurehead Del Prado provided in the sealed package is of the HMS Victory and not the Cutty Sark, so either I use that (unlikely) or reproduce the original figurehead once I got there (more likely). Also I decided to create some minor upgrades to the build if possible (not redesigning the model or changing the scale, but mostly adding extra feature). For this I am closely monitoring Nenad's and Bob's log of their build. Now the reason: I am not a new guy in modelling, I usually work on dioramas of WWII, building in 1:35 scale, using kits, natural materials and polystirol. Recently less kits and most scratch work of my own. Since I am not only making tanks and figures I usually take up half to room (nearly half the flat we live) for my hobby, so my wife (from now on my Admiral) told me to create a Sail ship for her, so I took the challenge, and her we go.... Pictures to come later Gyula
- 74 replies
-
- 2
-
-
- del prado
- cutty sark
- (and 1 more)
-
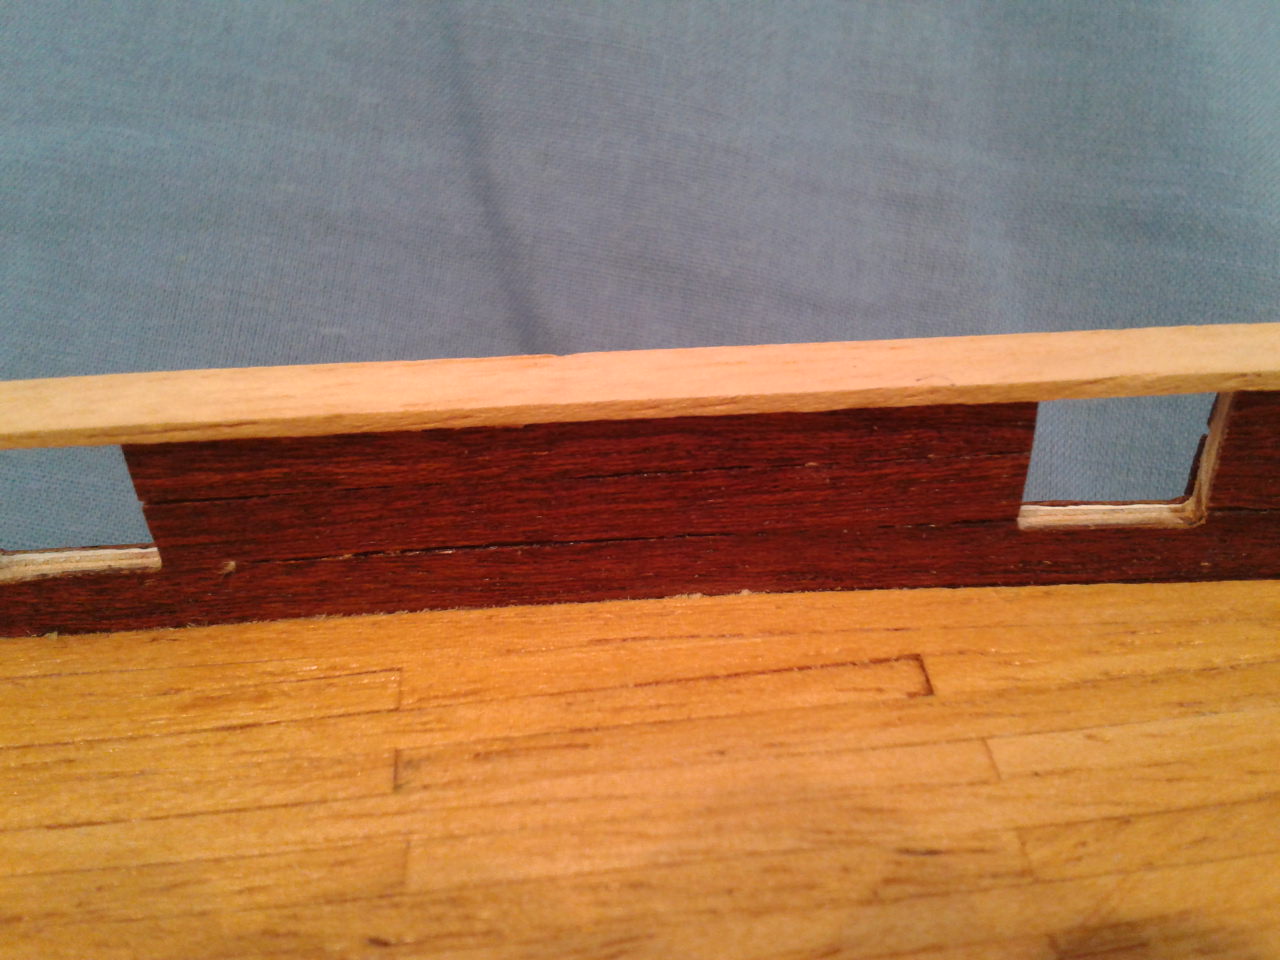
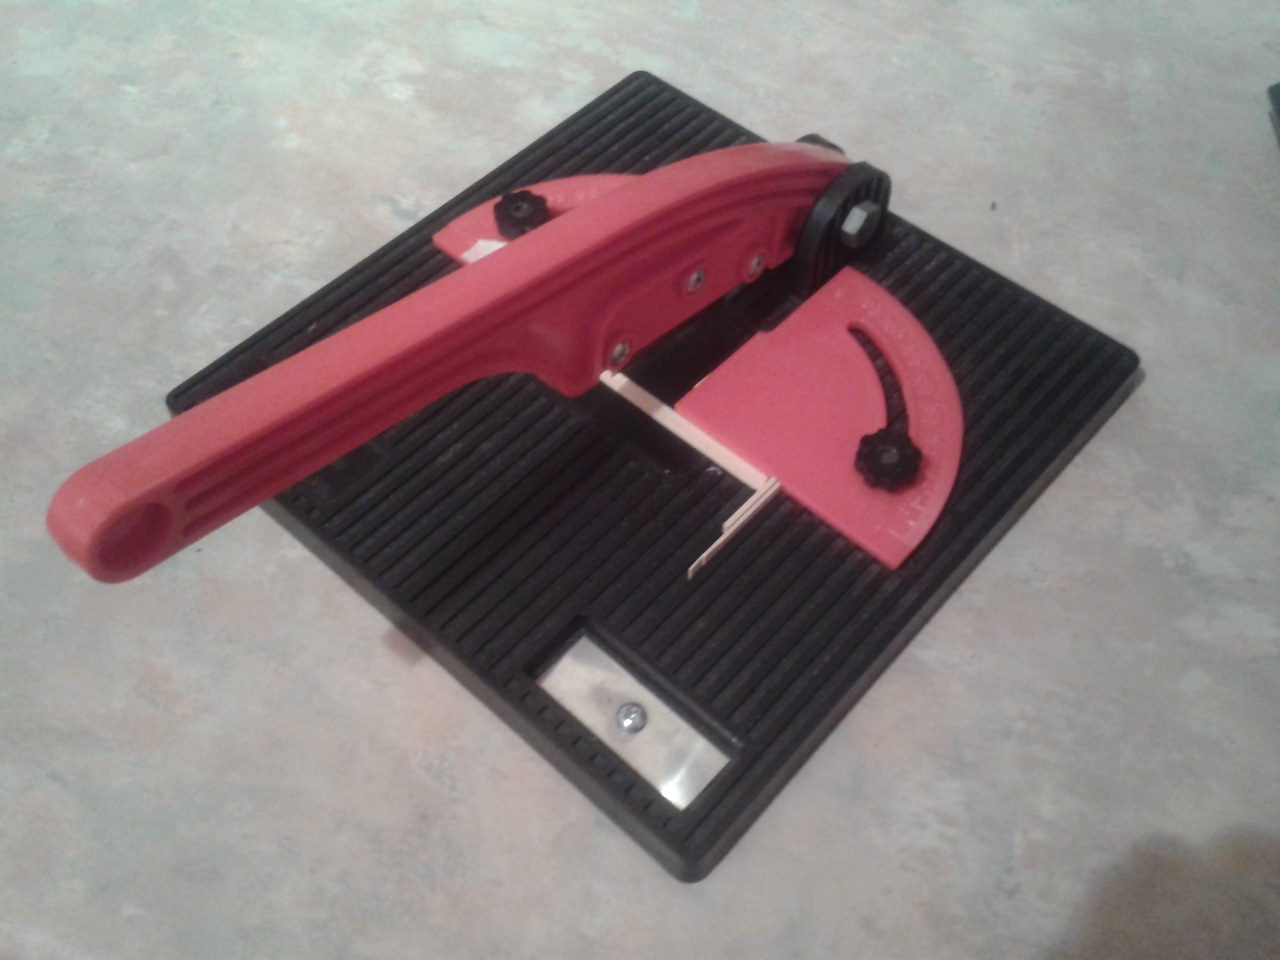
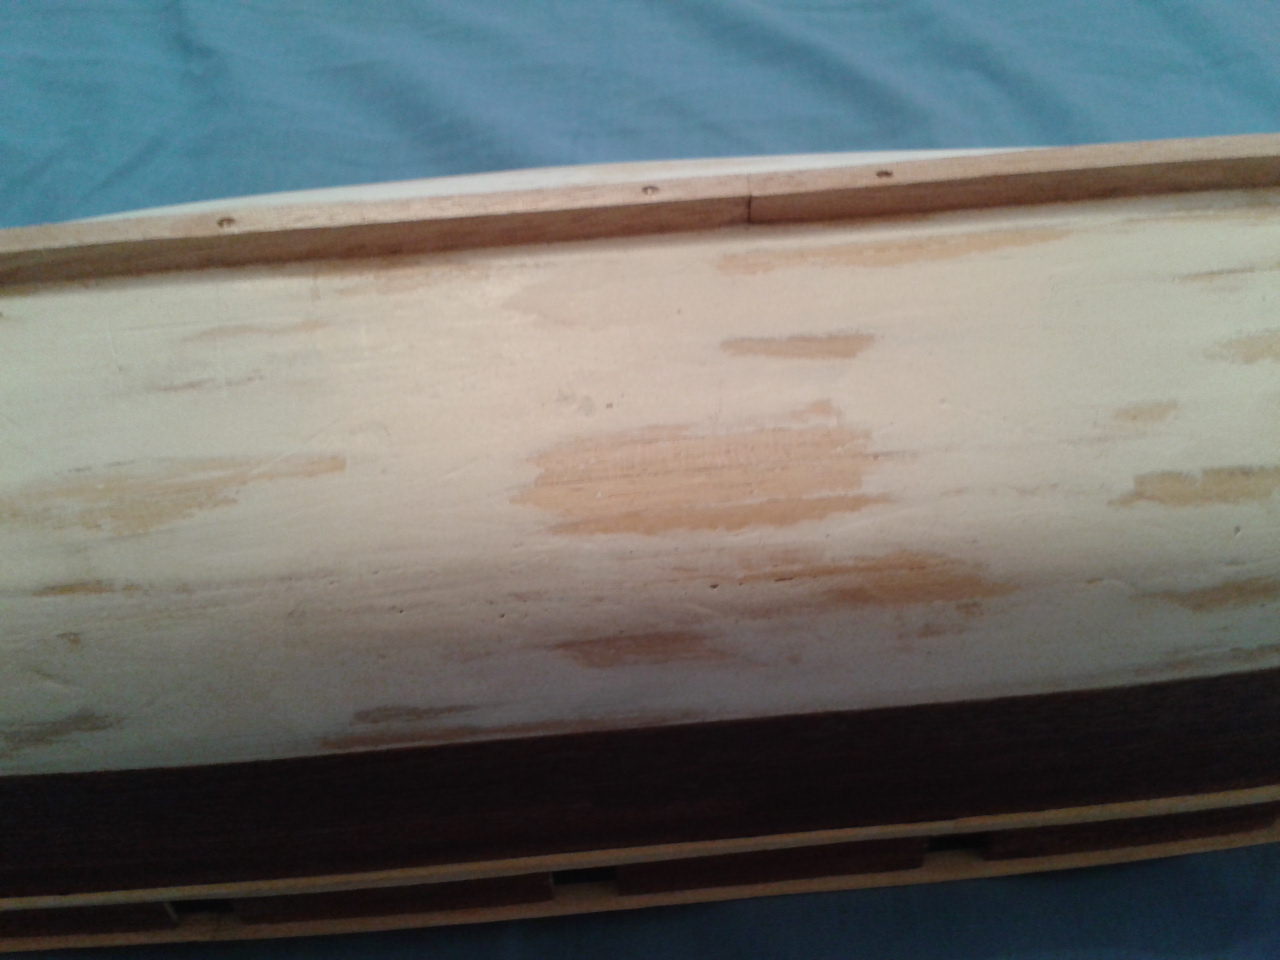
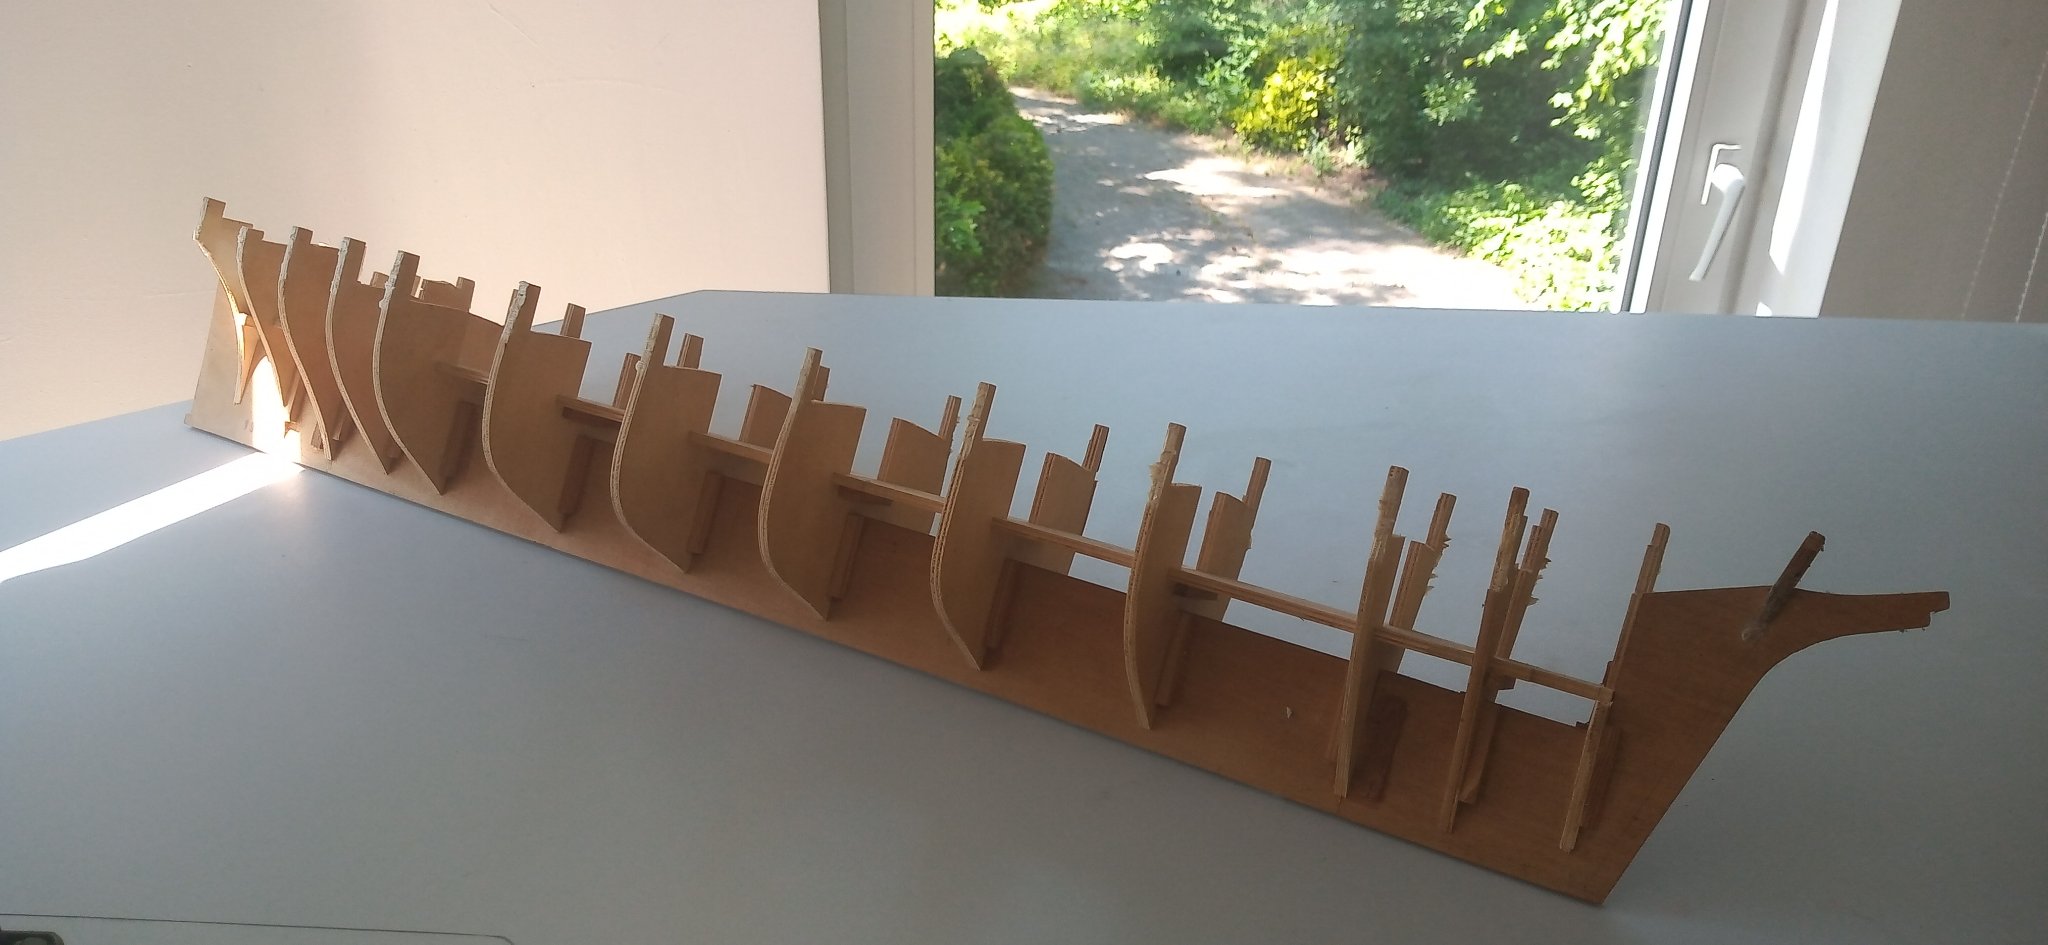
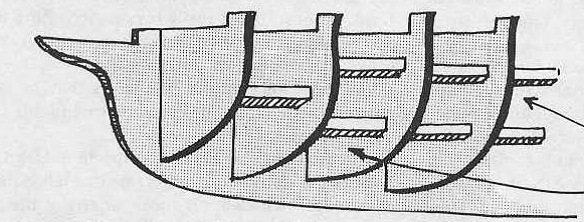
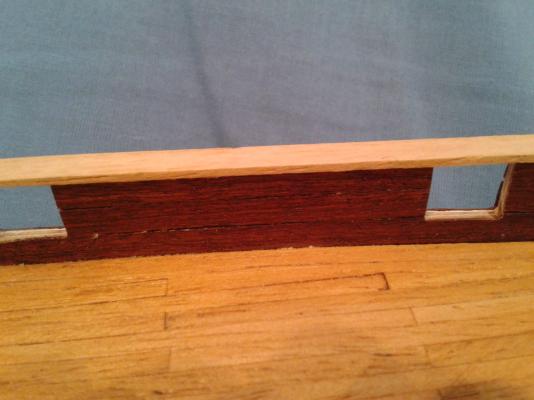
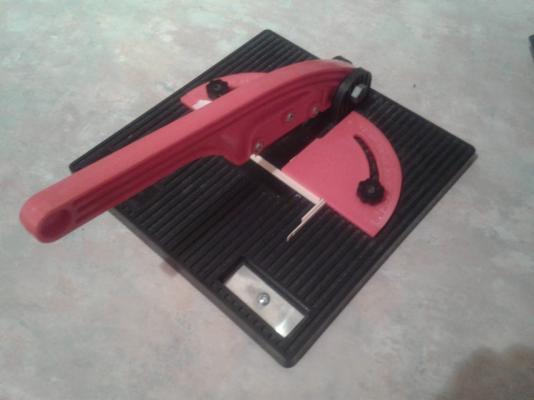
 Hi – this was purchased as a skill leaning exercise prior to finishing my Billing’s Cutty Sark version and was purchased through Ebay as was cheap with some parts missing. No pictures of early stages as never thought of taking any! I will detail the changes I made/make as it may be of help to other new builders. If anyone has comments always welcome as first time I've posted to ant forum The model was published in weekly/monthly parts sent through the post. Not sure how people got on with actually building it on this basis, as having all of the building instructions to go through prior to starting is helpful as the build sequence and instructions are vague in many places and also after mounting the masts and yards holes need to be drilled in these to attach other parts. Difficult as the yard being drilled is attached to the mast and unsupported. Although expensive if bought on a monthly basis this would result in the project being broken down into small manageable parts with no confusion as to what is the correct part to use for where and also step by step instructions, useful for other projects as well. Recommendations before building would be:- To go through all building instructions to get an understanding of how the build progresses and work out what needs completing before a part is attached. Obtain a copy of Harold G Underhill’s Cutty Sark plans, as recommended by other members on this site. I purchased mine from Royal Museums Greenwich (£14.50 for 3 plans including postage), but also managed to download a set for free from the internet. Don’t rush, make sure that the parts fit correctly prior to gluing. To obtain a really detailed scale model a lot of additional work will be required to most parts, but if built as per instructions will give a good representation of the Cutty Sark plus a lot of building experience gained. To assist with rigging suggest obtain copy of the Revell 1/96 rigging instructions (available on the internet) as these give a lot clearer understanding of the various rigging parts and where they go. To date the problems encountered have been:- Hull developed a twist in building despite following planking instructions. Would suggest that anyone building it adds additional bracing between the frames, making sure that masts can still be mounted, I would suggest sheeting diagonally from keel to deck level. To form a triangle between deck and keel. Attached diagram just shows square timber, but the main frames appear to be set at a distance of 62mm so easier than if all frames at different distances. Certain liberties appear to have been taken to simplify the build. Two options are either ‘go with the flow’ or amend as per additional information obtained. Certain dimensions are not given so it’s either a bit of guess work or look for the information elsewhere, luckily I have the Billing’s plans for CS so have used them To date hull completed as per following picture:- Hull was built as per instructions but would suggest that all of the keel is glued together prior to adding frames as care is needed to ensure that the hull remains square, filling in between frames as suggested above would stiffen structure up. The masts are kept in place on the keel by a square box, however I found that the position of these results in a vertical mast not canted backwards as is correct, easy fix for the foremast and mainmast is to leave out the front part of the box as this is against a frame and for the mizzenmast to once again leave out the front portion and glue a spare piece of material across the front of the sides, this will result in 3 rectangular boxes allowing front to rear movement The hull was planked as per instructions but nails were only partially inserted and removed when glue set. Planks bend quite easily if soaked in water. For the planks around the stern planking was soaked in water, excess water dried off and the formed round jar with masking tape and elastic band. Careful shaping of stern and bow braces is required to ensure smooth flow of lines of planking. One major error in the design, presumably for ease of construction, is that the fore and rear decks are flush with the top of the hull whereas the hull should extent above these slightly. Decks form part of the hull and sit on top of the frames so only easy solution would be to add a 2-3mm extension on top of the current planking all the way round. Deck planking per instructions is cut to 12.5mm x 3mm lengths which does not fit the pictures of the build. I modified this and cut to 62.5mm x 3mm, which gives actual life size of plank of 18.5ft x 10.5inches. About right for length but twice the specification width, which was 5 inches. I put a border plank around the outside of the hull and all main deck structures and then planked to these, but didn’t joggle the planks where these joined. Latter per the instructions the main deck planking is cut back by 2mm to add the bulwarks, which are 2mm thick, I moved the edge plank in on the main deck in by the 2mm to avoid trying to remove a thin strip after planking I cut all planking using a balsa cutter which was useful as the surface was divided into 1.5mm strips so made measuring easy, as a stop could be set to get all planks equal length. The bulwarks are pre-cut and require two strips joining together with a strengthening piece glued inside and then planked outside, and after fitting planked inside. After joining and planking the outside I cut off the strengthening piece to give a smooth surface inside. Once hull planking completed I made a mixture of polyfiller, PVA glue and water to fill gaps etc. and then sanded to a smooth finish (shows as white in the photo). Adding too much PVA glue, as I found out, results in a very hard surface which is difficult to sand, ended up using a wood chisel in the end. Careful sanding at bow stern and where bulwark joins is required to obtain a flowing shape. A second layer of thin planking is added of either sapele veneer or ‘copper planking’ so finish after sanding does not need to be ultra-smooth.

- 12 replies
-
- 2
-
-
- cutty sark
- del prado
- (and 1 more)
-
 13/12/21 I started looking at this kit 2 or 3 weeks ago, as an ‘in-between’ project while I take a break from the Victory. The kit is from 1976, it’s a bit brittle and there’s a lot of flash, some of it so heavy that I’ve needed to look at other logs in order to know what to trim off and what to leave. While I don’t want to get into 3D gymnastics on this kit, I’m re-making most of the deck furniture i.e. the windlass rotor, winch rotors, fife rails, sail lockers, cabins etc, as these are very quick and easy to model in F360 and equally easy to print. I wouldn’t say the end result is better than the kit part, detail-wise, just cleaner/crisper and I get to duck dealing with some joints.
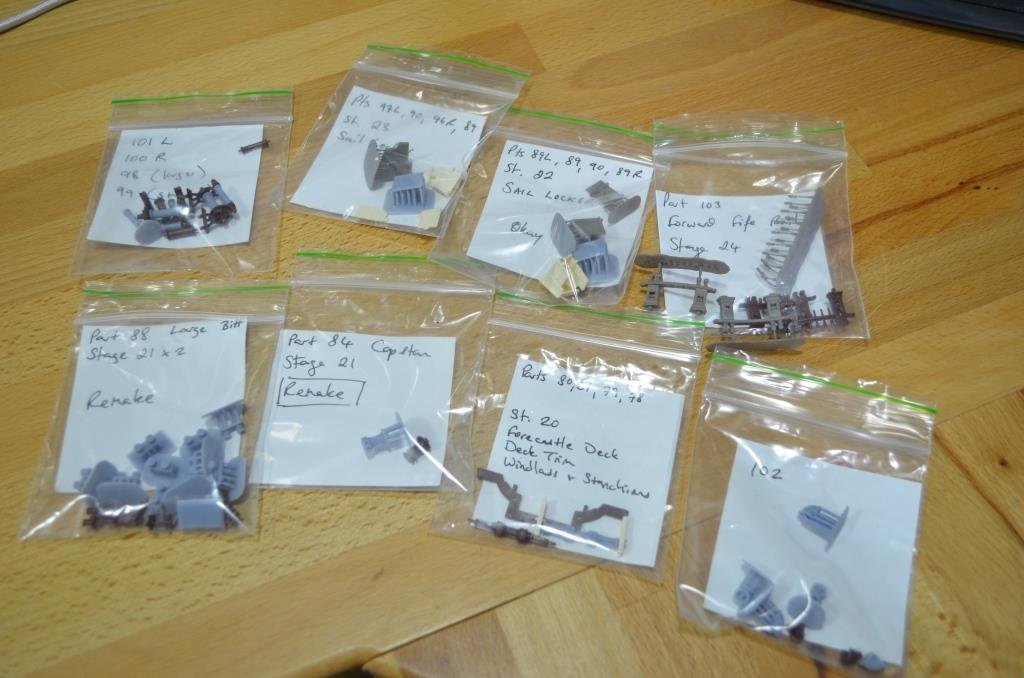
- 443 replies
-
- 5
-
-
- Cutty Sark
- Revell
- (and 2 more)
-
 After 15+ years of storage in a plastic bag, I am going to try and continue with this Constructo Cutty Sark. I, do have some full size plans, but no written instructions. First picture is freshly in covered. Second with some repairs. Third showing some really brittle fittings, what are they called? Fourth is more work done. I am not hopping for a scale build, but just getting it to look like a ship! Terry
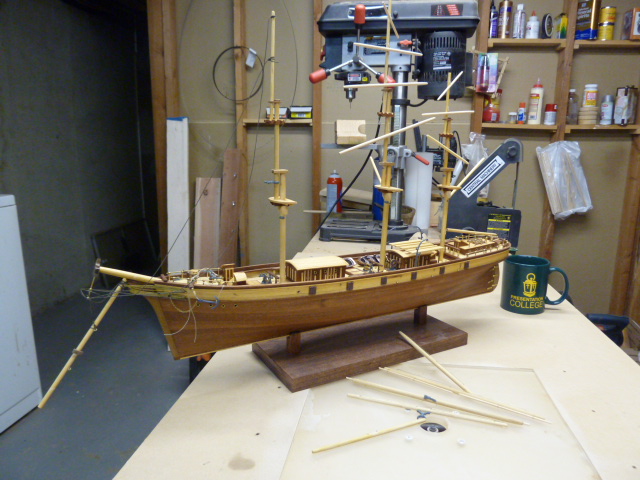
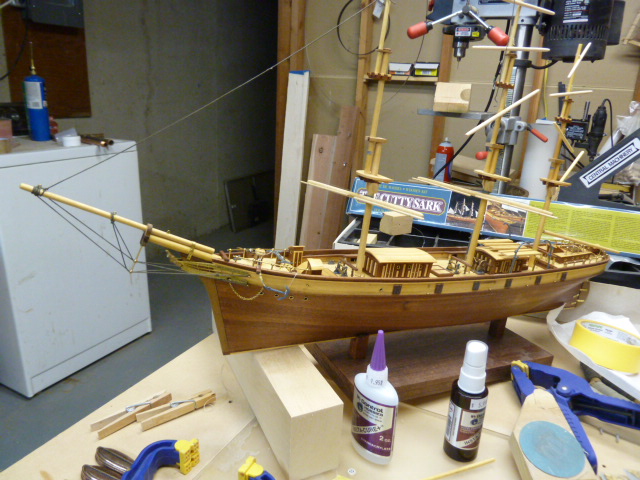
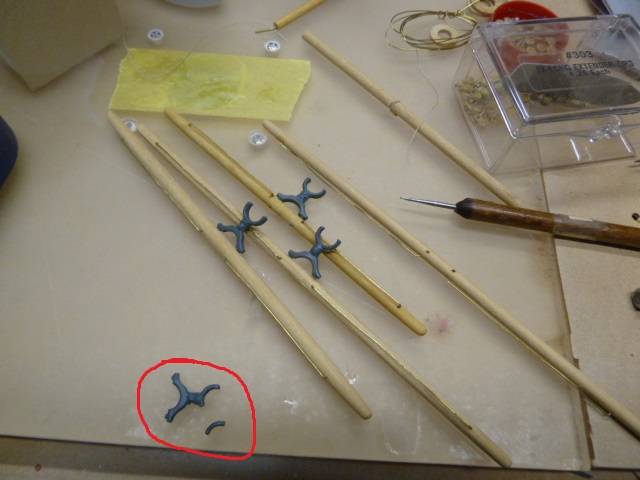
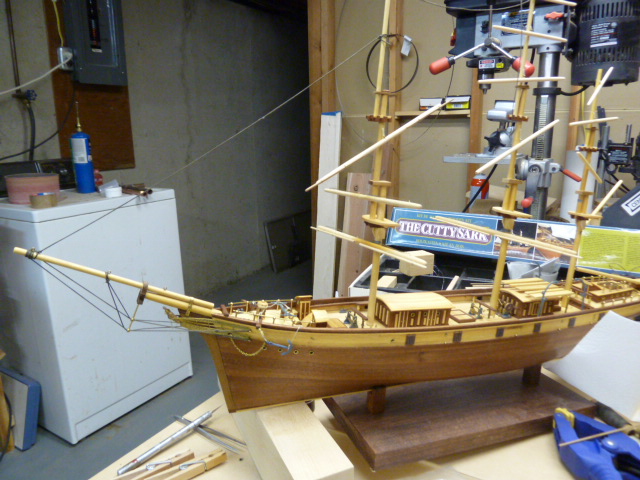
- 12 replies
-
- 11
-
-
- cutty sark
- constructo
- (and 2 more)
-
 My stepfather has been building a partwork HMS Victory for the best part of a decade, and so I finally caved and bought myself a ship to work on too. I decided to stick with something at least (mostly) injection moulded rather than wood, but it's ended up slightly larger than I expected - baby for scale: It will be built here: The build will not be wholly as instructed, as there are a couple of modifications I'm planning to the base kit which are quite simple such as the bulwark stanchions and moulding around the deck houses. More significantly there are a few aftermarket parts available for the kit - the main one being the replacement of the plastic, three-part deck with a laser cut oak veneer equivalent. The supplied deck has 'positive' timber outlines and so even if I can fix the glaring gaps between the three deck sections and rescribe the grain it's still going to look quite bad. There are also photo-etched names and ornamentation, draft decals and flags which I think I will avail myself of, but the rigging and its level is yet to be determined (see later) Anyway, on with the build, commencing with purchasing two hardback books about the ship (by C. Longridge) and getting the hull together. The first modification are on the bulwark stanchions - seen here: These should be metal posts rather than fillets, so I have cut away and sanded them flush as below. You can see the fairly awful decking laid in place: I experimented with fixing the decks together with supporting styrene to get them as level as possible and extra clamps, but even so the joins are very obvious indeed. As such, I'm expecting to use the laminate decking and will work under that assumption: Despite enjoying the occasional ferry and reading the Aubrey-Maturin series I've no meaningful knowledge of rigging and only a very minor familiarity with terms (please excuse me - lots of googling going on). I am aware that hismodel provide both rigging plans as well as CNC machined deadeyes, photoetched eyelets and hooks, etc. but frankly I don't know if that's just going to end up being too much for me. I think I would be quite happy with the rigging as described by the Revell kit instructions, except for the fact that the shrouds and their associated deadeyes/lanyards are moulded plastic - it just doesn't look right to me. QUESTIONS ABOUT RIGGING: Is real rigging a fools errand for a first sailing ship build? I don't mind taking time but I don't want it to be impossible! I'm thinking given the low cost to replace the eyelets and hooks with photoetch/wire as standard. My first thought was to use the Revell hardware placements like-for-like, and then add any additional for the 'real' rigging as I go along (if I take that path). Is that sensible, or should I really know upfront? If I go ahead with replacing the shrouds with thread, how much time is that as a proportion of the time spent doing a) the Revell rigging, or b) real rigging? I want to know if I'm going to commit to that whether I should just go the whole hog, or whether there really is a large gap and I need to think carefully. It is also really not clear to me why I would replace the belay pins, though it seems to happen frequently - I appreciate they are about twice the size they should be, but they are still very small. Does the fact they are plastic play a role? QUESTION ABOUT OTHER AFTERMARKET PARTS: Most build logs seem to replace the plastic railing stanchions with turned brass equivalents - not cheap at all, worthwhile? Many thanks for reading, see you all soon.
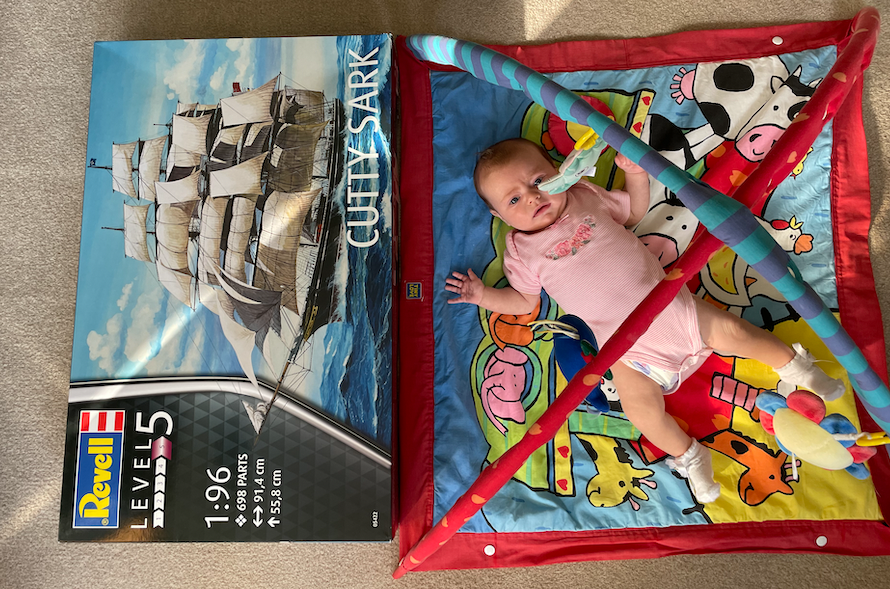
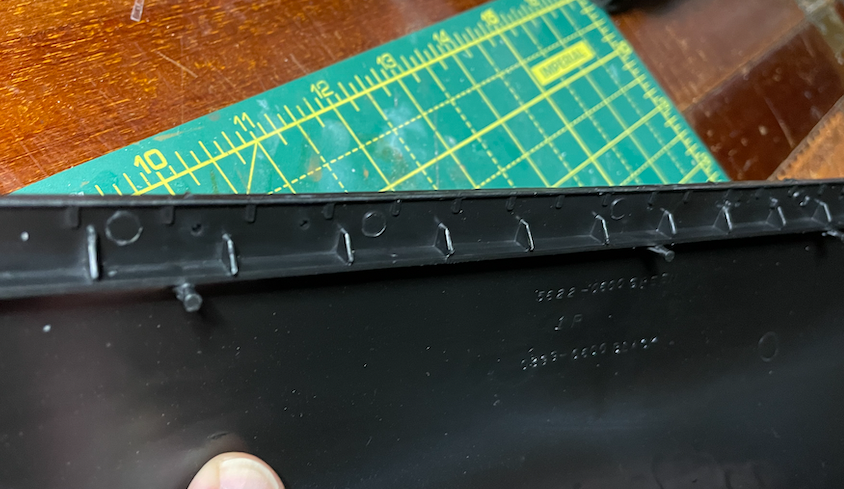
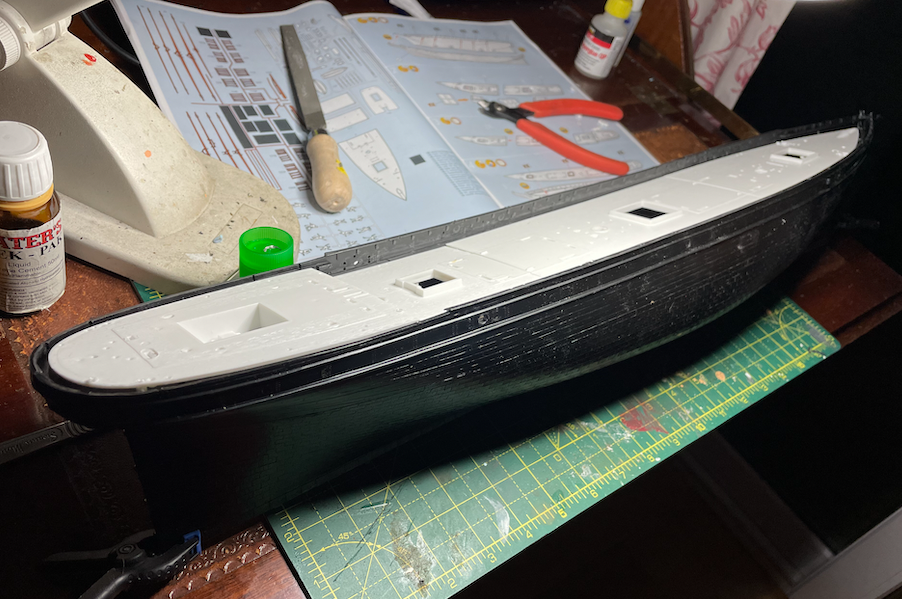
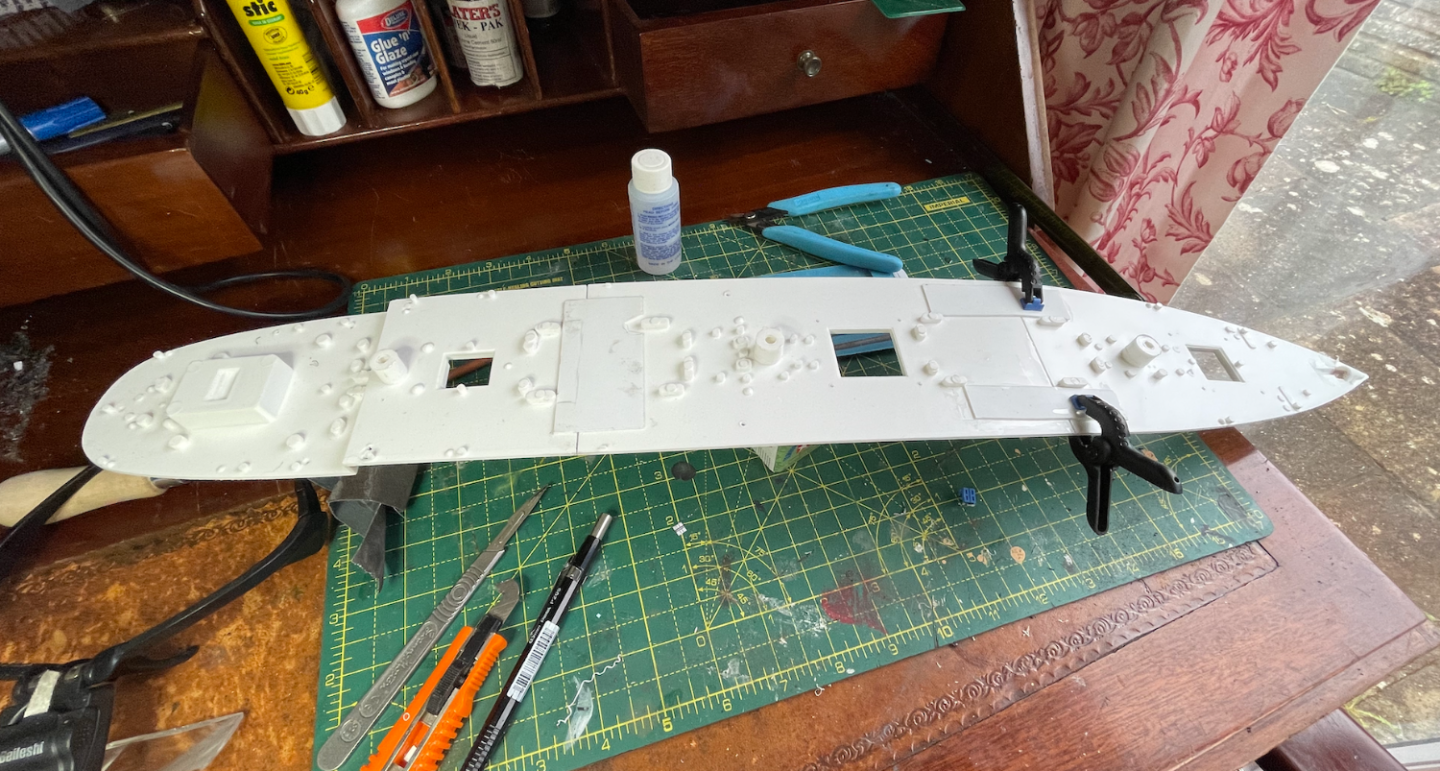
- 6 replies
-
- 6
-
-
- Cutty Sark
- Revell
- (and 2 more)
-
 Hello. I have been inspired to pick up on my long ago started Cutty Sark. I started this one in roughly 1987-1988 right after I finished the Revell USS Constitution. It didn't take long for me to get burnt out on after doing the Constitution. It has been packed away ever since. It has survived 2 marriages and several moves. Fortunately I wasn't very far along on it, and it was able to fit back in the box, even with the hull halves glued together. After unboxing it again only one broken leg on the foremasts second section. Not to bad for having been unloved for years. I have read the following build logs a couple of times to pick up ideas and tips. Cutty Sark by Bruma - Revell - 1:96 Cutty Sark by Kevin-the-lubber - Revell - 1:96 Cutty Sark by bcochran - Revell - 1/96 Cutty Sark 1/96 Cutty Sark by VitusBering - Revell - 1:96 - Redux Cutty Sark by Bill97 - FINISHED - Revell Here is where I am restarting from. I have already started to rework the foremast. I am also working out how to lower the main deck, if it's even feasible. I was the recipient of another kit that had been started a few years ago so I have it for experimentation. The rest of the kit isn't usable the decks are horribly warped and the masts are assembled very poorly. But have plenty of spares of everything else. I have also picked up the most recommended books I have seen listed. I will probably have plenty of questions. And my naval terms knowledge is not very good. But I do port from starboard (I think). Looking forward to getting in deep with this. Thanks for looking. Tom W.
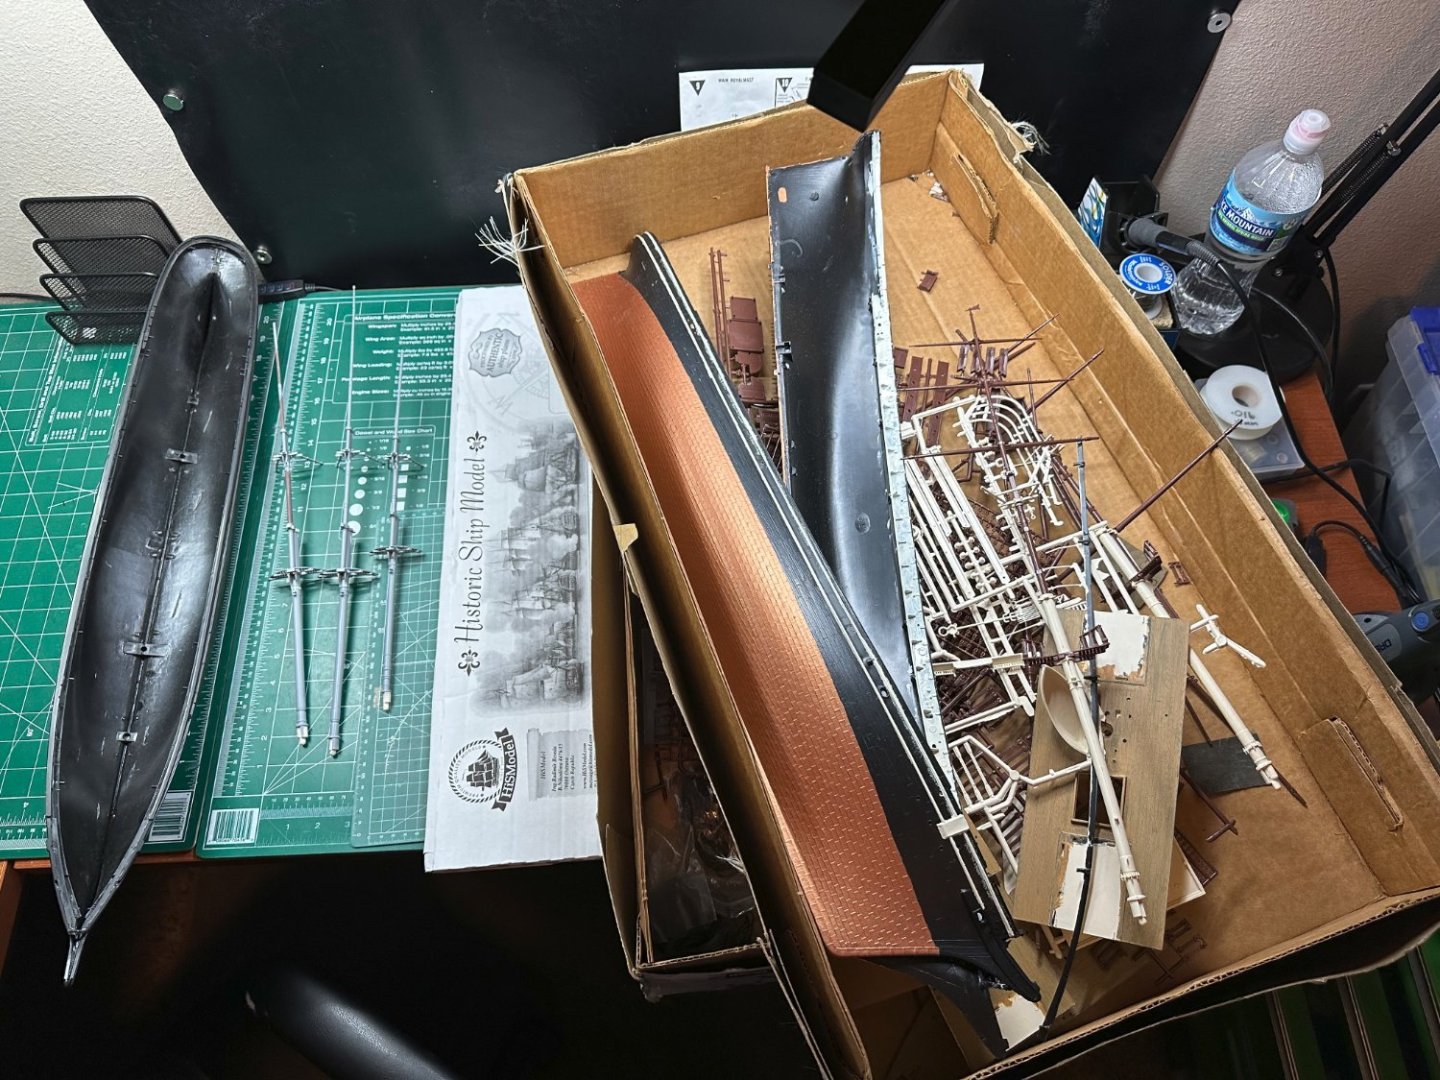

- 2 replies
-
- 4
-
-
- Cutty Sark
- Revell
- (and 2 more)
-
 Hi everyone! This will be my official build log for Construto's Cutty Sark 1/90. I am already about 5 weeks into the build and finished the hull planking, deck cabins & decorations and is currently working on masts and rigging. I start my build log this late because I do not want to end up not finishing the model at early stage and everyone knows about it. While I was building the ship, I tried to stick to manufacture's plan with no side work of sketch builds. I will also not paint or stain my model as I think the original dark and light wood color scheme is quite nice. First is a little bit history of Cutty Sark form the Manufacture: "The Cutty Sark is a clipper ship. Built in 1869 for the Jock Willis shipping line, she was one of the last tea clippers to be built and one of the fastest, coming at the end of a long period of design development which halted as sailing ships gave way to steam propulsion. The opening of the Suez Canal (also in 1869) meant that steam ships now had a much shorter route to China, so Cutty Sark spent only a few years on the tea trade before turning to the trade in wool from Australia, where she held the record time to Britain for ten years. Improvements in steam technology meant that gradually steamships also came to dominate the longer sailing route to Australia and the ship was sold to the Portuguese company Ferreira and Co. in 1895, and renamed Ferreira. She continued as a cargo ship until purchased by retired sea captain Wilfred Dowman in 1922, who used her as a training ship operating from Falmouth, Cornwall. After his death she was transferred to the Thames Nautical Training College, Greenhithe in 1938 where she became an auxiliary cadet training ship alongside HMS Worcester. By 1954 she had ceased to be useful as a cadet ship and was transferred to permanent dry dock at Greenwich, London on public display. Cutty Sark is one of three ships in London on the Core Collection of the National Historic Ships Register (the nautical equivalent of a Grade 1 Listed Building) – alongside HMS Belfast and SS Robin. She is one of only three remaining original composite construction (wooden hull on an iron frame) clipper ships from the nineteenth century in part or whole, the others being the City of Adelaide, awaiting transportation to Australia for preservation, and the beached skeleton of Ambassador of 1869 near Punta Arenas, Chile." There are some photos of the packaging.
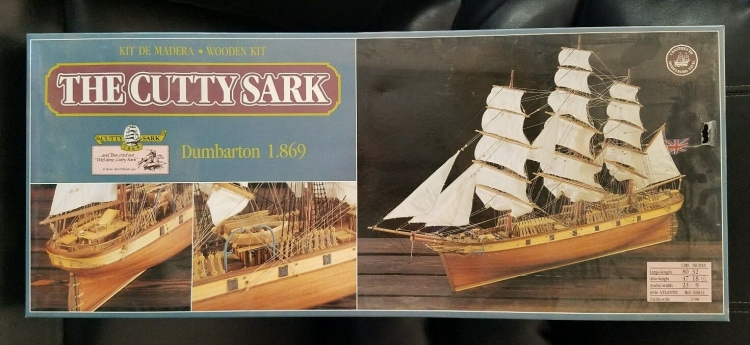
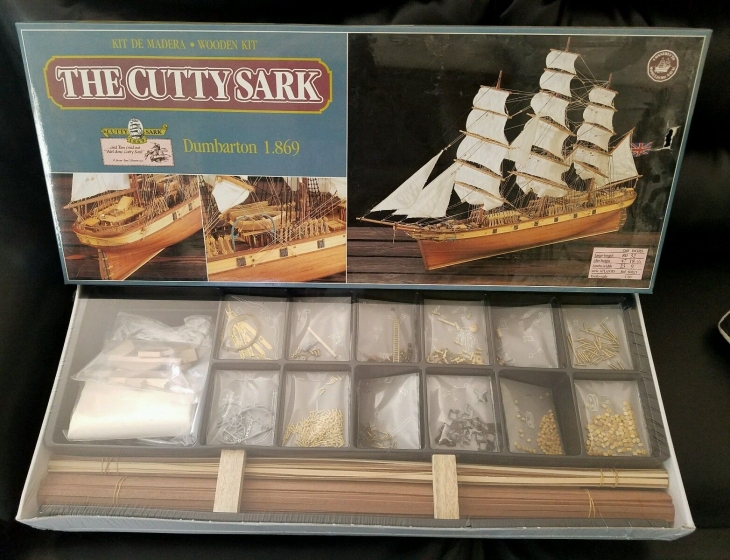
- 18 replies
-
- 1
-
-
- constructo
- cutty sark
- (and 1 more)
-
 Hi all. This will be my first build log and will be of my 3rd model ship kit. I started this build back about a month ago and have only now thought to do a log. Not many photos have been taken up until this point. I will post the photos that I have up until today. I will then update you all as I go on to another step.
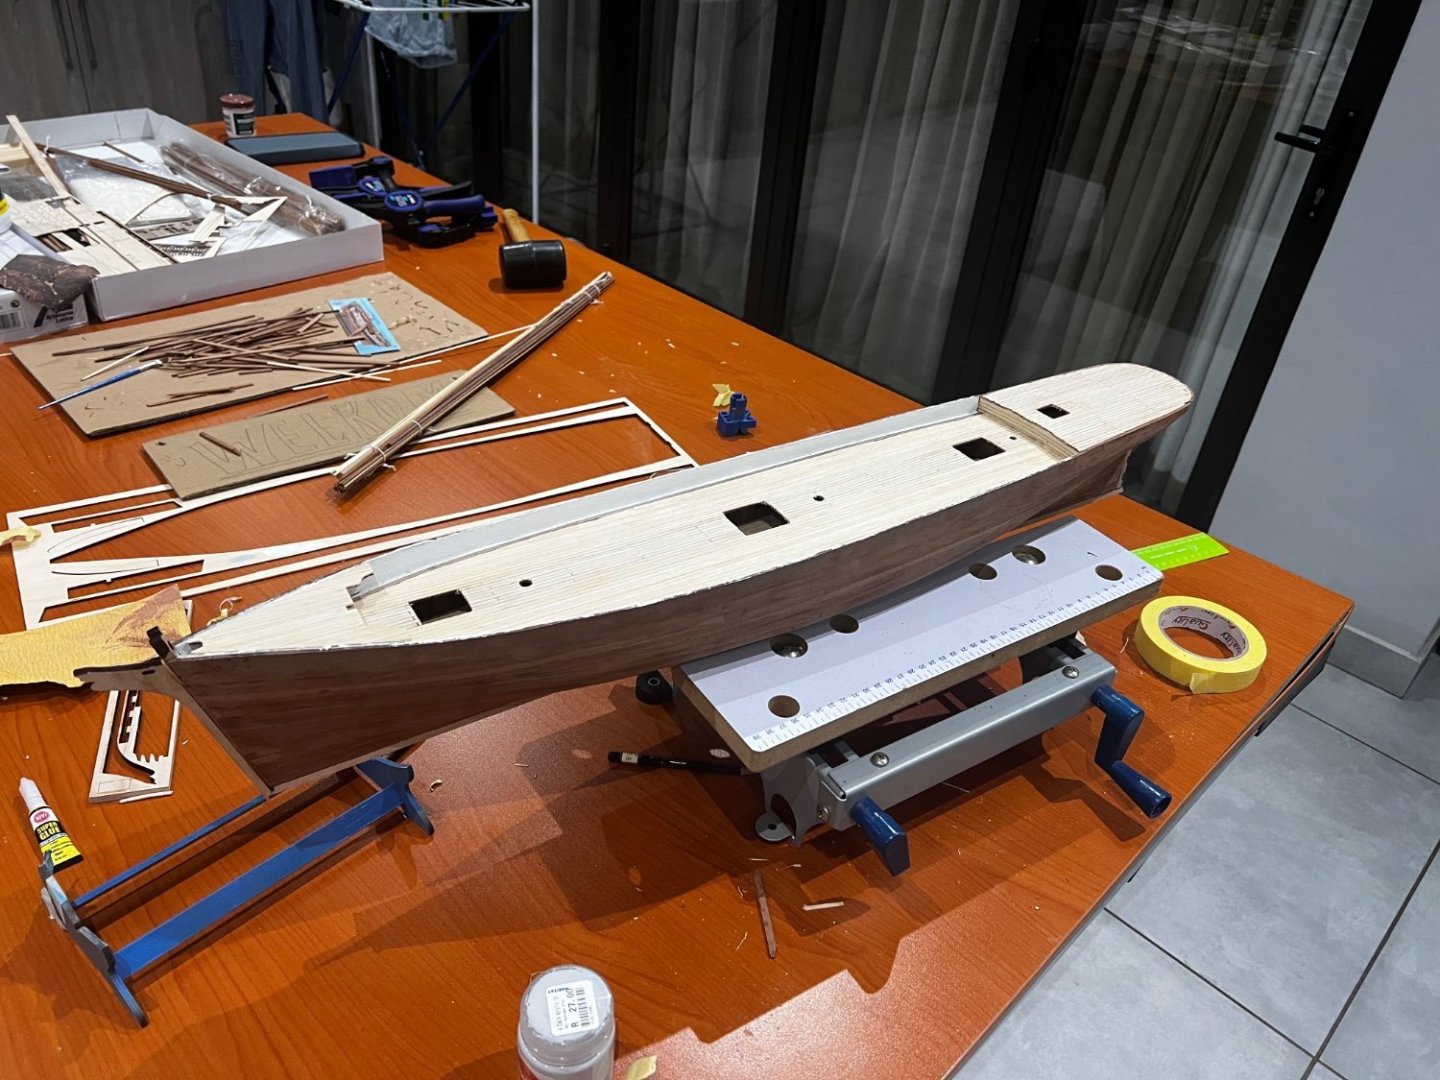

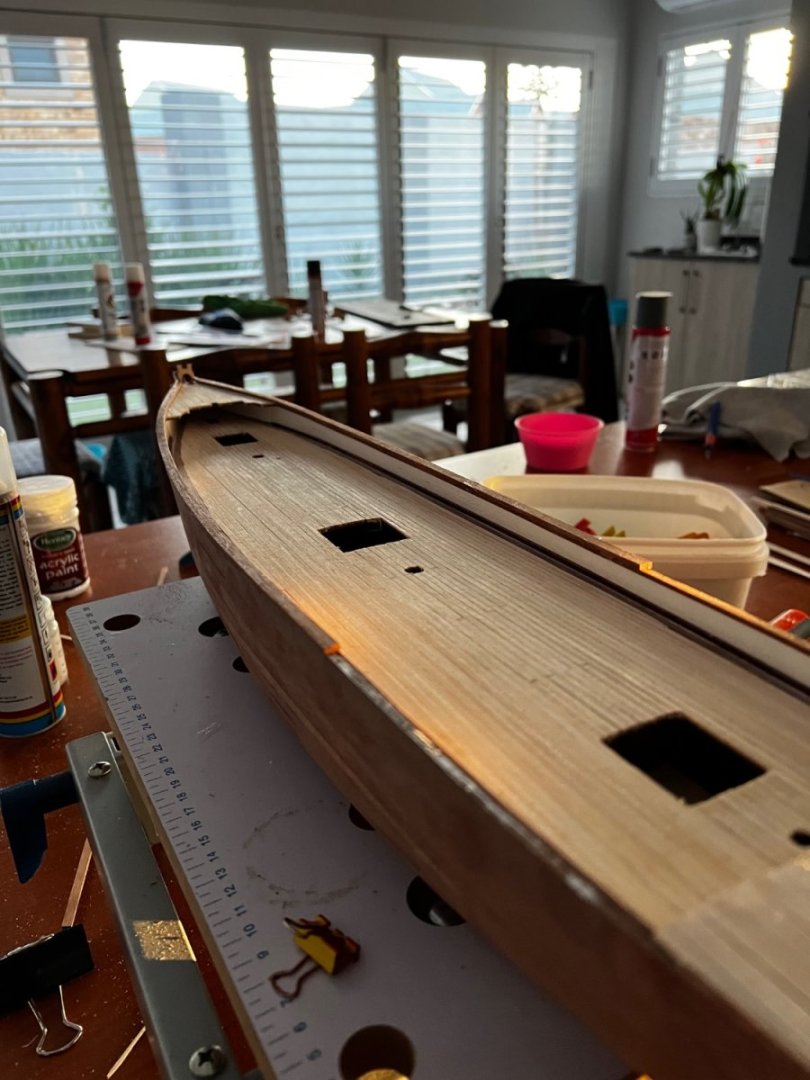


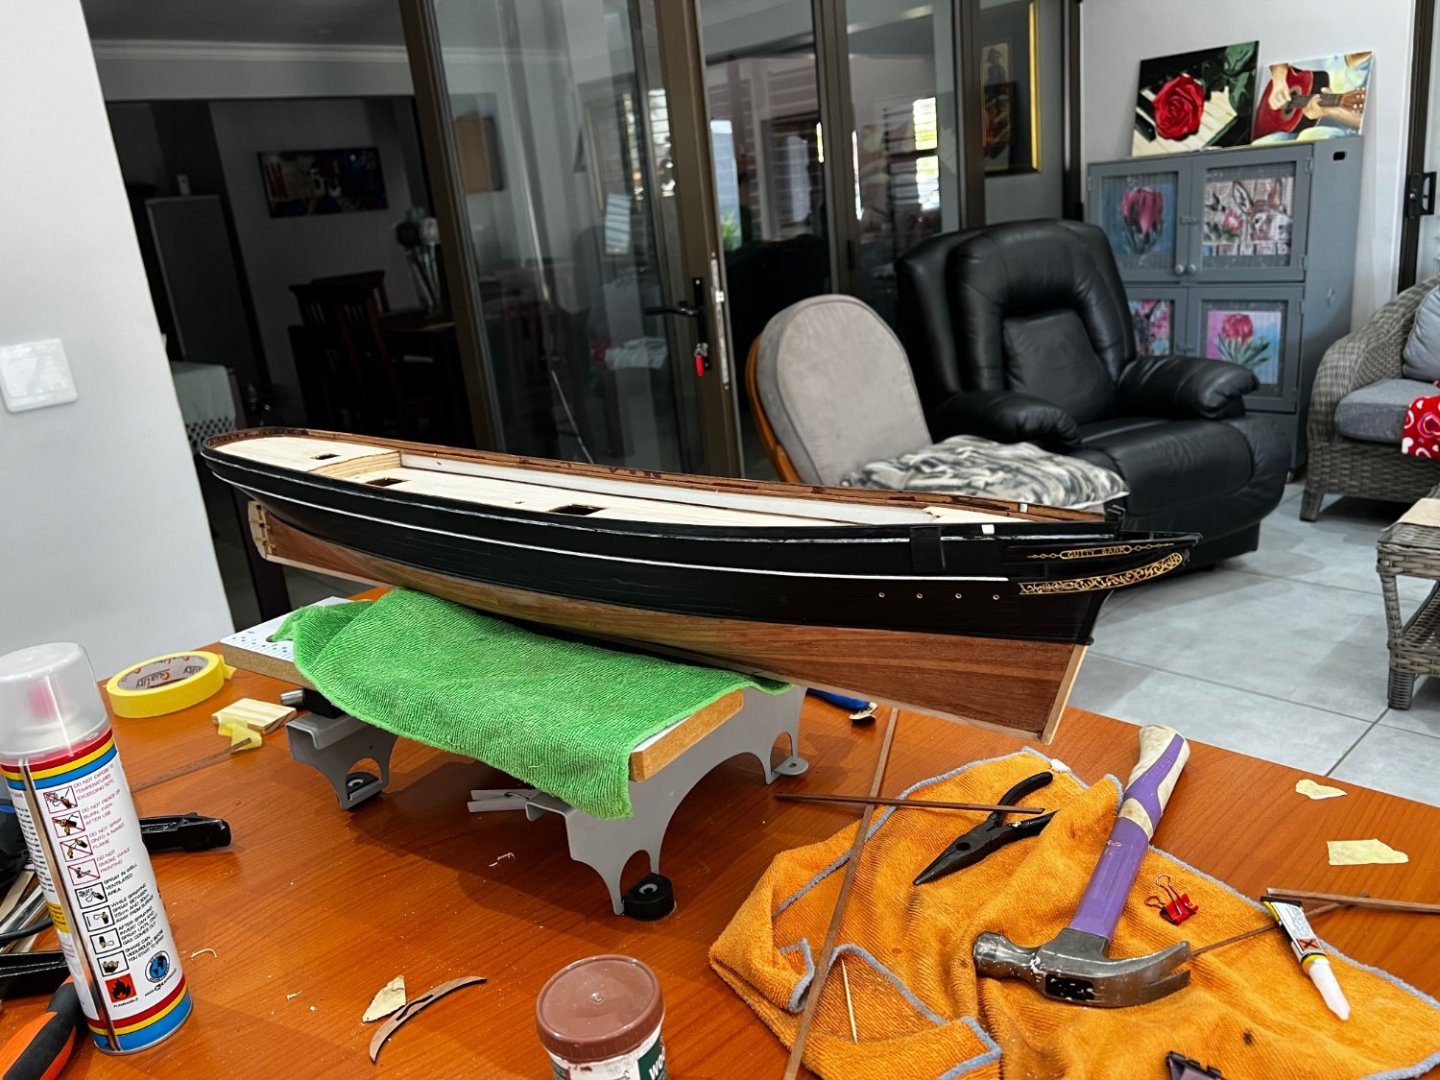

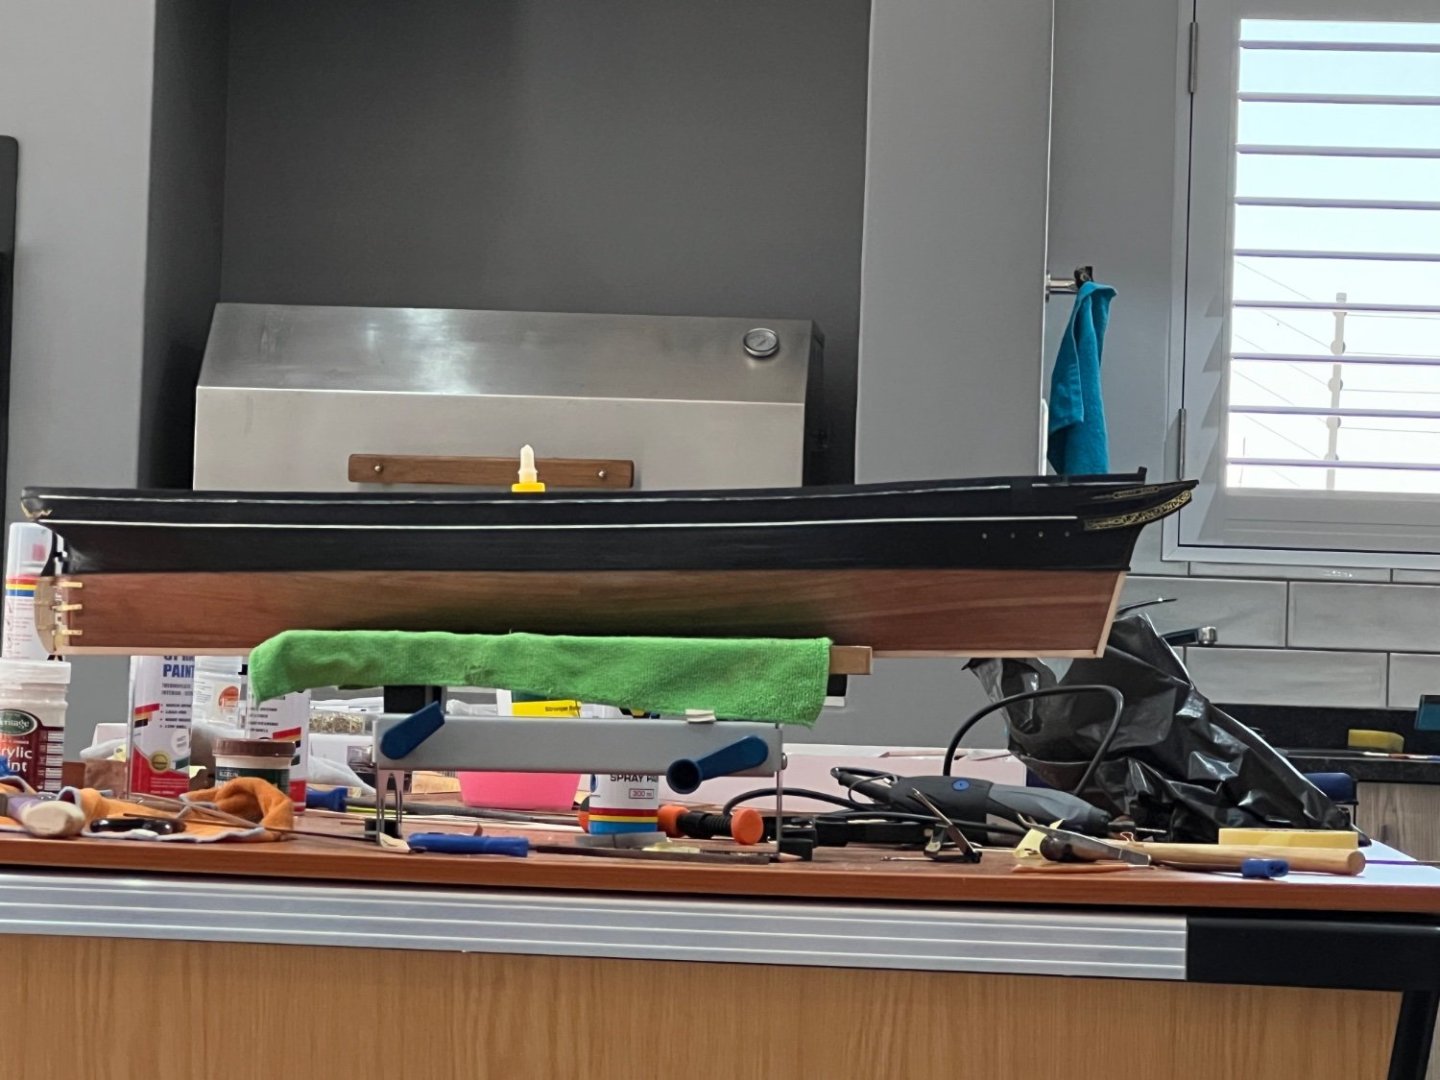
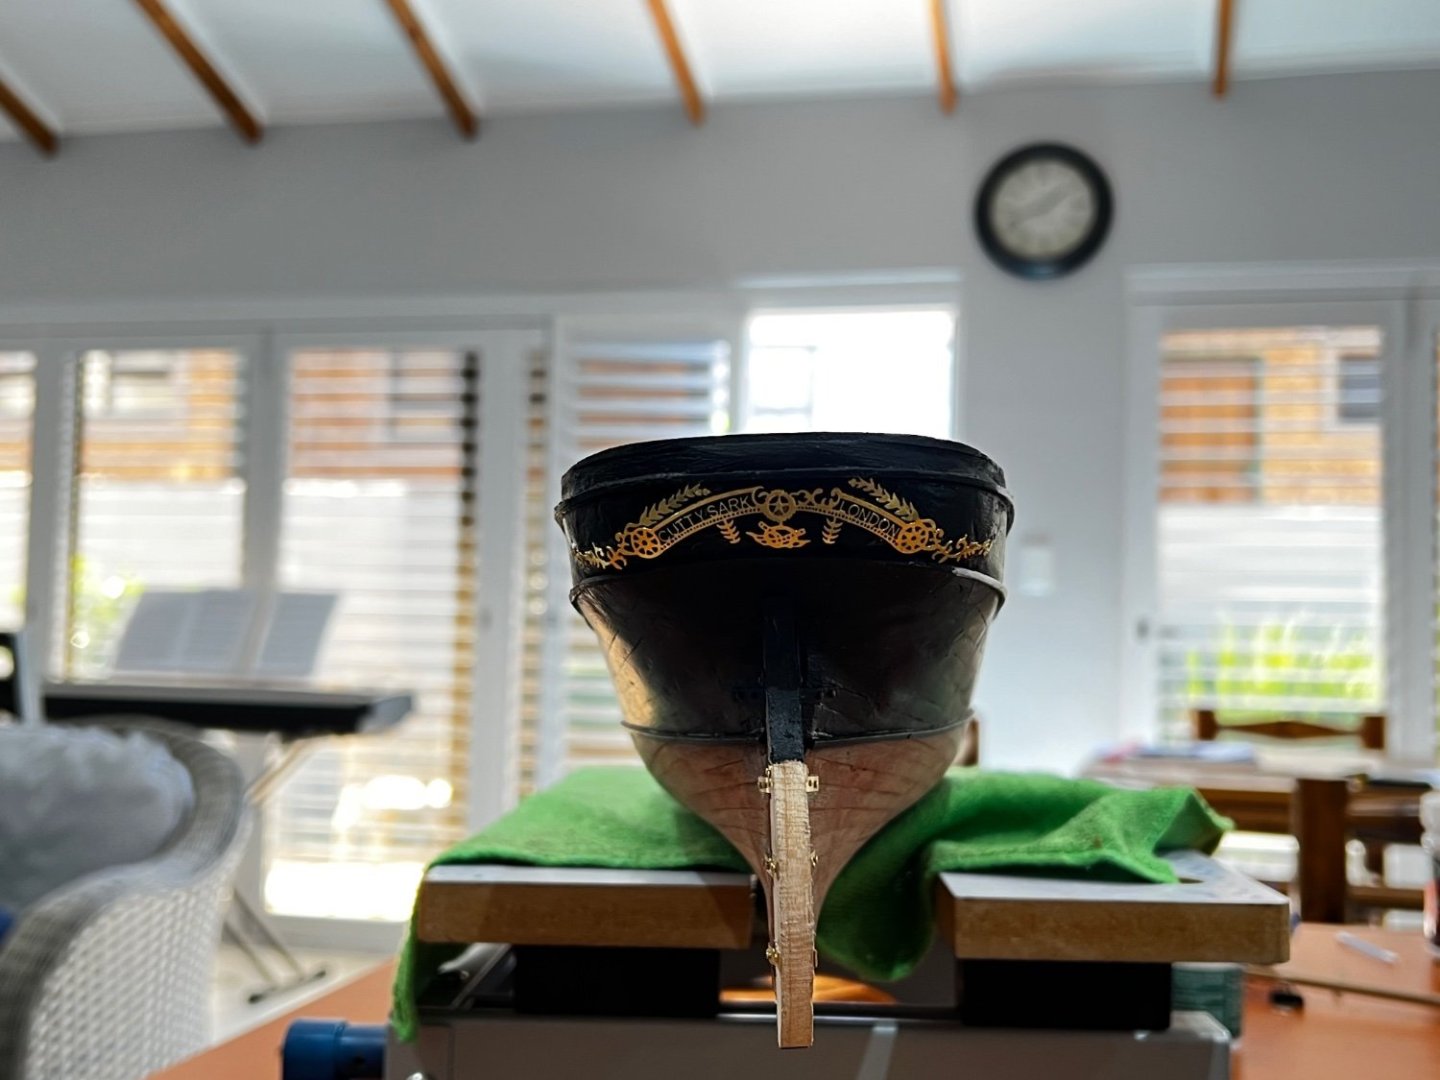


- 47 replies
-
- 6
-
-
- Cutty Sark
- Artesania Latina
- (and 1 more)
-
 I built the Revell 1/96 Cutty Sark some 50-55 years ago as a teenager. After recently finishing the Revell USS Constitution I decided to do the Cutty Sark again using the skills I have refined over the years as well as the patience that comes with age. This time I decided to work with acrylics as well as enamels to achieve the effects I want, or hope for. Will include more pics as I make my way.
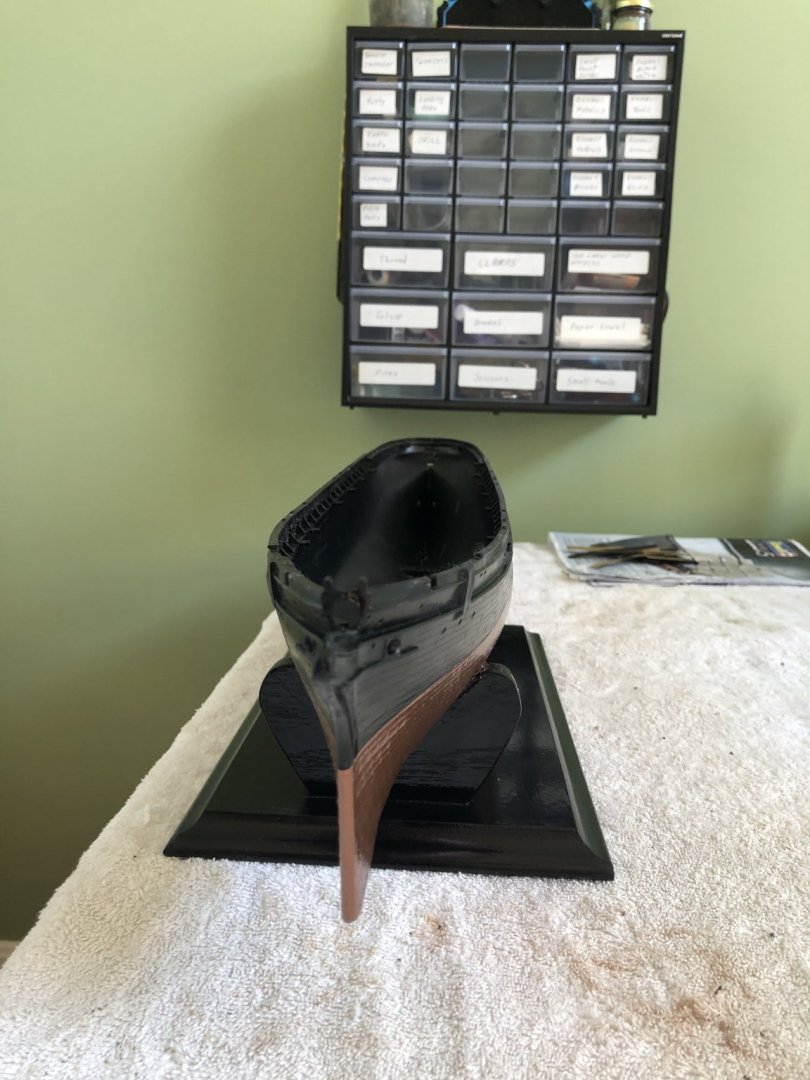
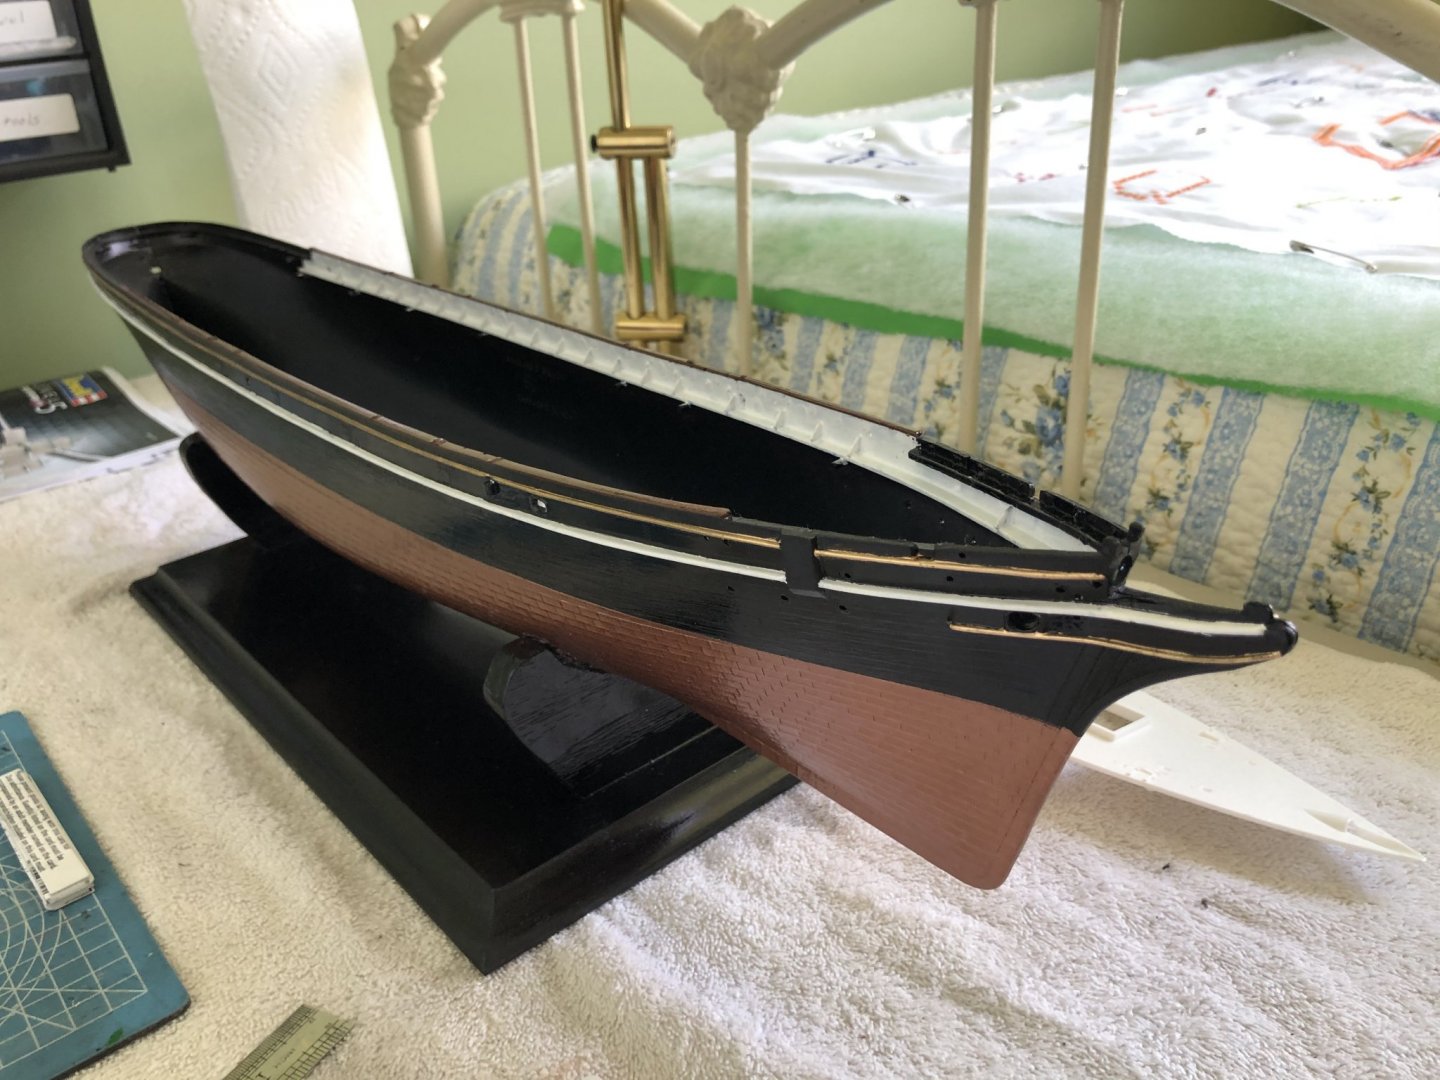
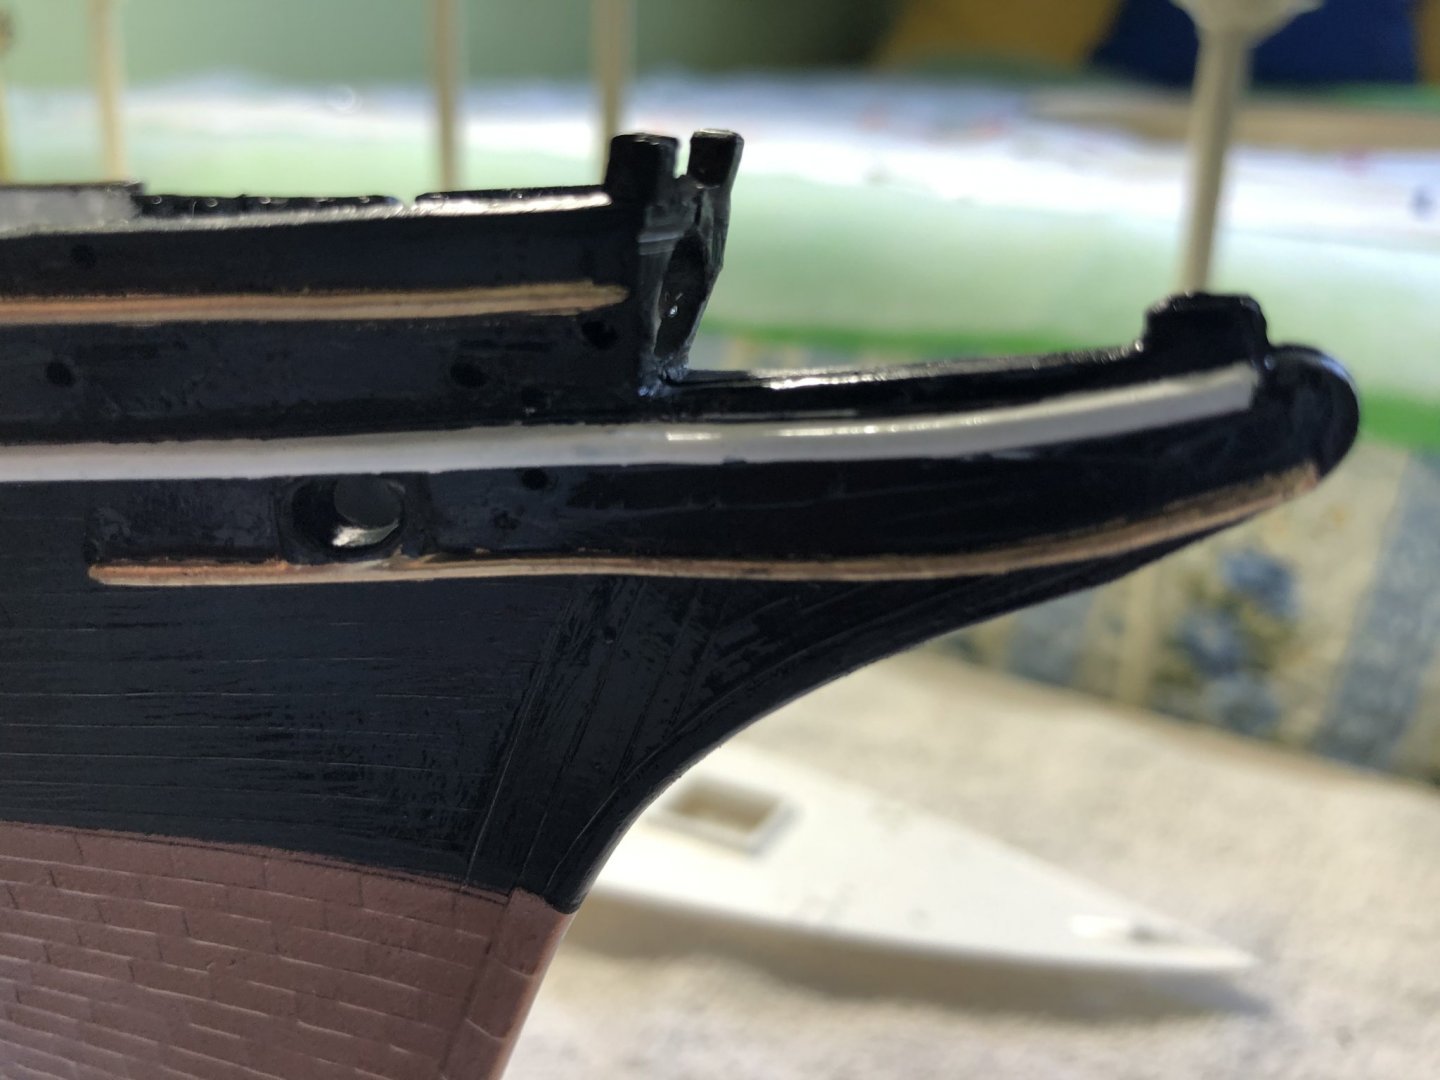
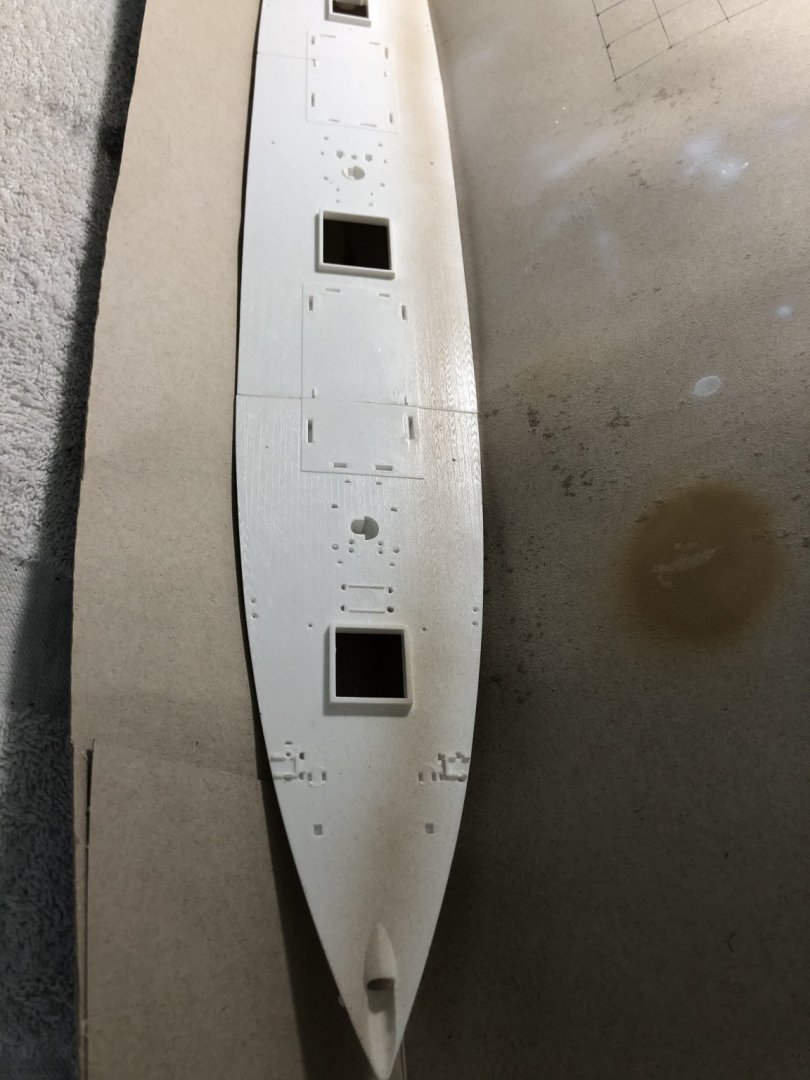

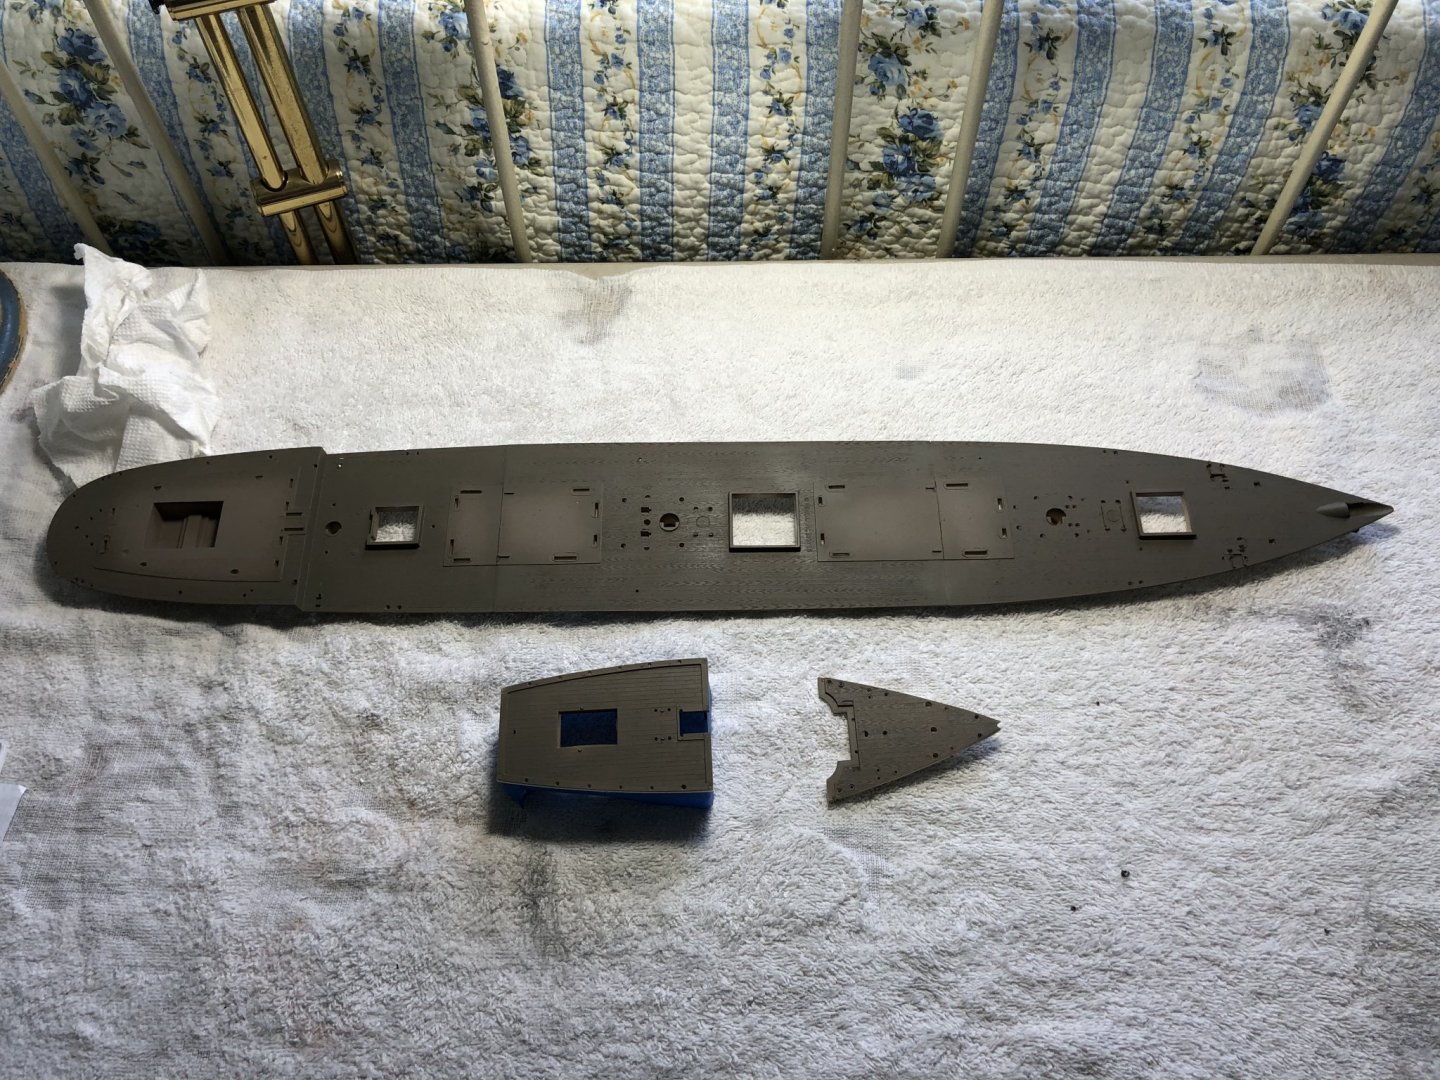

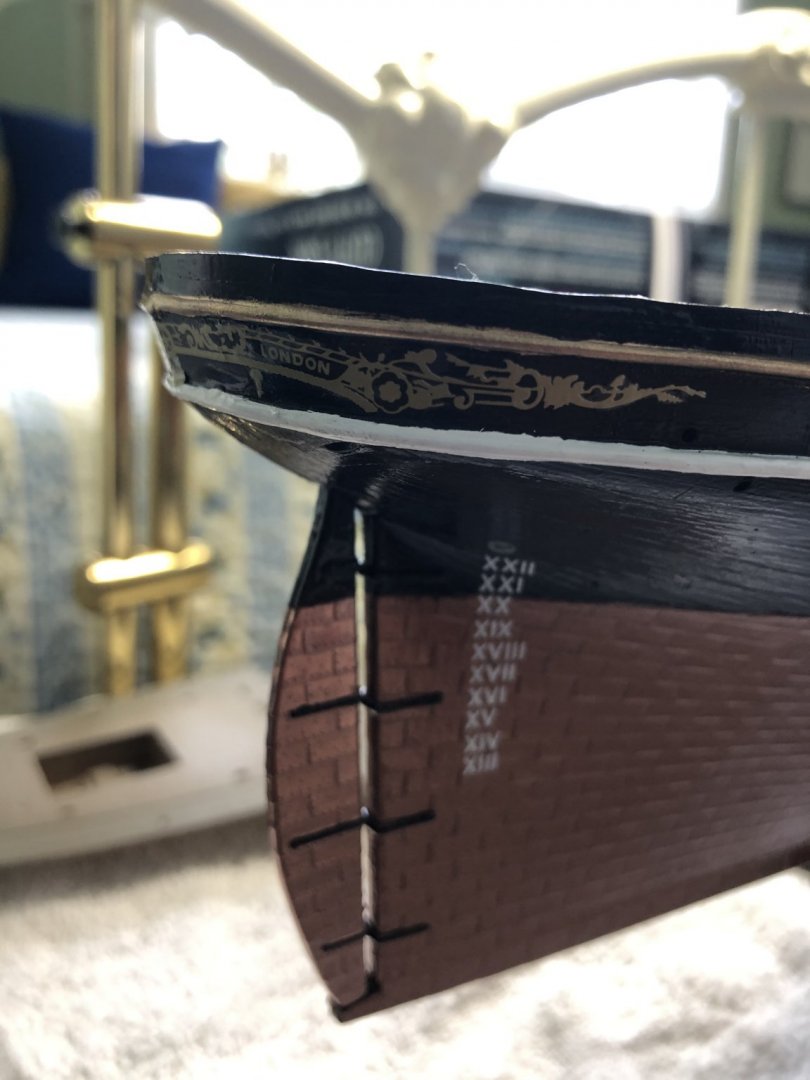
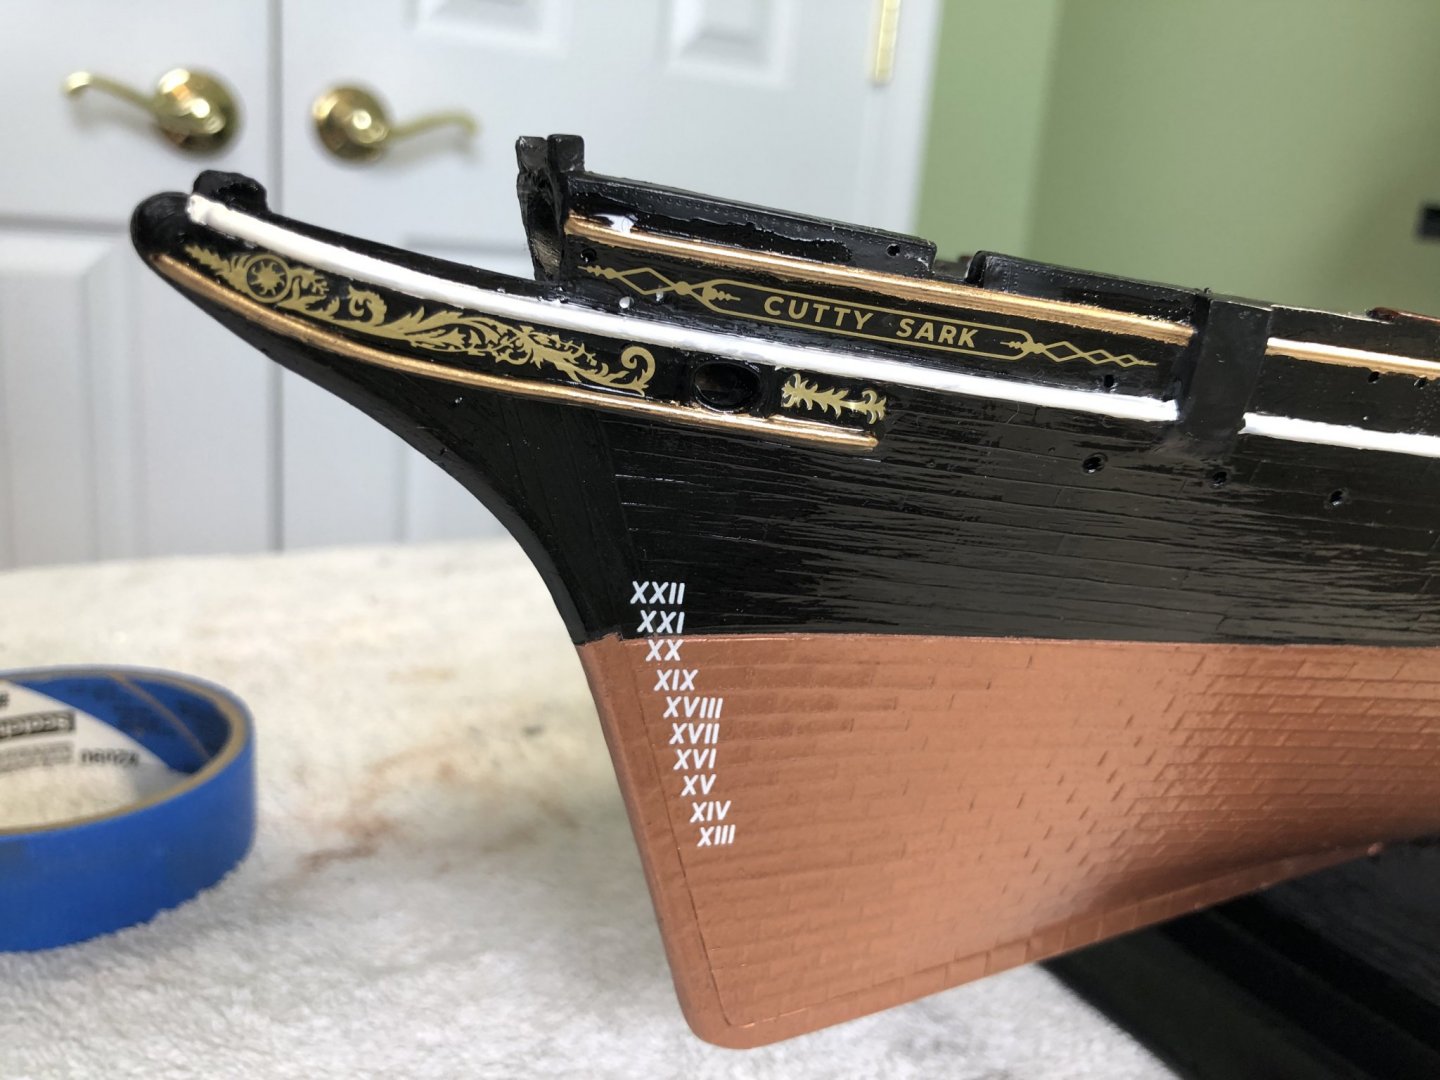
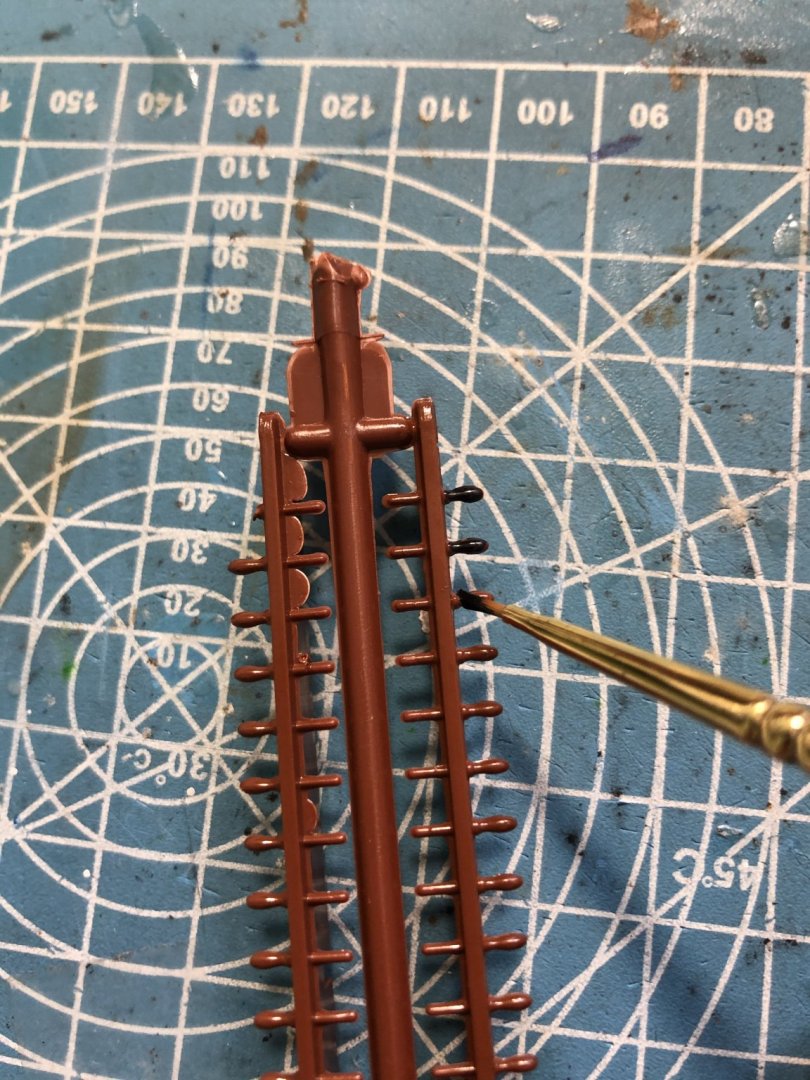
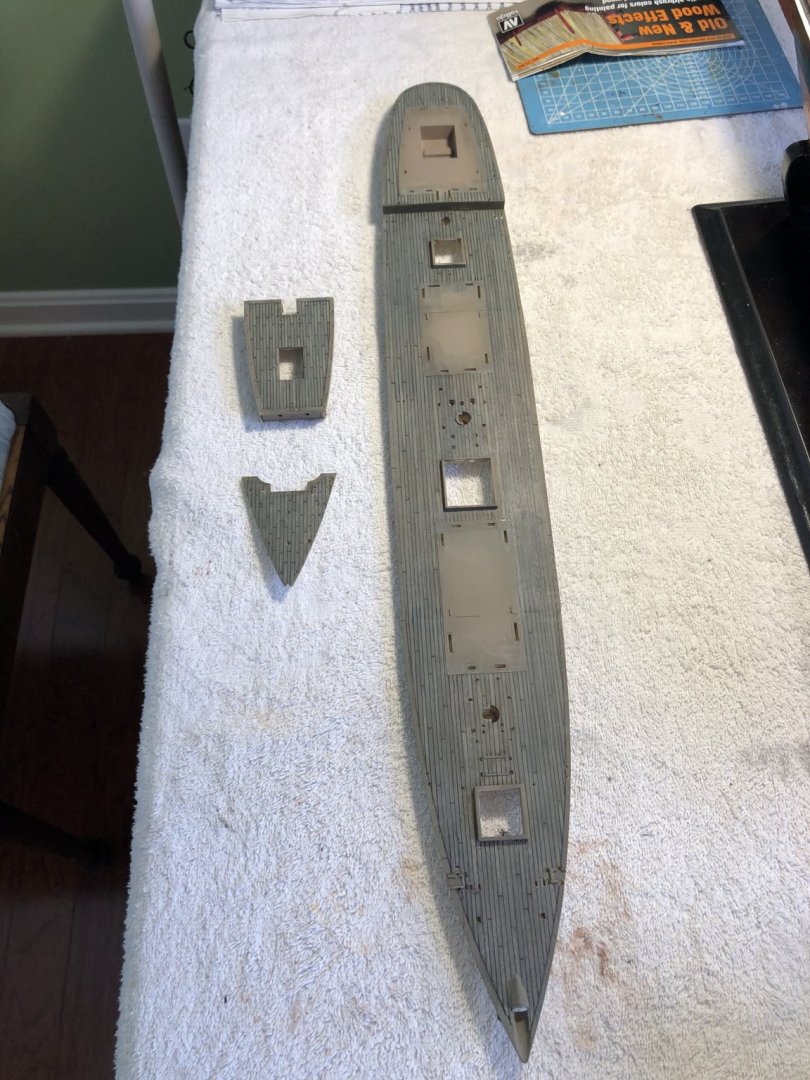


- 78 replies
-
- 15
-
-
 Hi All. This is only my second model ship and I started it in February so a bit of catching up on the log to do. I wasn't going to do a log but another member suggested it could be useful to others so here goes. I want it to look nice rather than be historically accurate in every detail. I will skip quickly through to where I am now. I will add a few images from the early stages as well. I made up the frame and put the decking on. I used a 2B pencil on the edges of the planks for the caulking.
- 19 replies
-
- 5
-
-
- Cutty Sark
- Artesania Latina
- (and 1 more)
-
 Yes, another Cutty Sark build log. 😉 I have been lurking on this wonderful site for some 2 months and I cannot but start a build log myself about the beloved Cutty Sark. Let me first introduce myself. I am living in Belgium, so English is not my mother tongue, forgive me therefore my mistakes in English. As a youngster I started building plastic planes, the Cutty Sark and Saturnus V rocket, but also gliders (Kleine UHU from Graupner, Piviere from Aeromodelli and a glider based on my dad’s plans) and a motorplane (Taxi from Graupner) in balsa wood. A sailing boat (Collie) and a motorcruiser (Nautic – both from Graupner) completed the collection. At a later stage I built a tugboat (Oceanic from Revell) and started on a pusher boat Thyssen II from Graupner. While at sea, I built the Harvey 1847 (from Artesania Latina) and Bluenose II (from Billing Boats) with little tools. Children, chores and other hobbies kept me away from modelling. Now as a retiree, I have more time but also more hobbies, but modelism is becoming more and more important in my daily life. So I started by renovating my Collie, as well as my Kleine UHU and completed the Thyssen II. Going out and flying/sailing with my models will be for after the pandemic and in the meantime I dusted off my Cutty Sark from Sergal. Renovating Harvey and Bluenose II will help me in improving my skills. I bought several books about the CS as well as general books on POB modelling. I also discovered Modelshipworld and now I cannot wait any longer to get started – or continue as only the bulkheads have been placed on the keel. As I aim for a very detailed ship and will be consulting Longridge book, comparing with the Campbell plans, I allow myself a 10 years building time frame. Leo
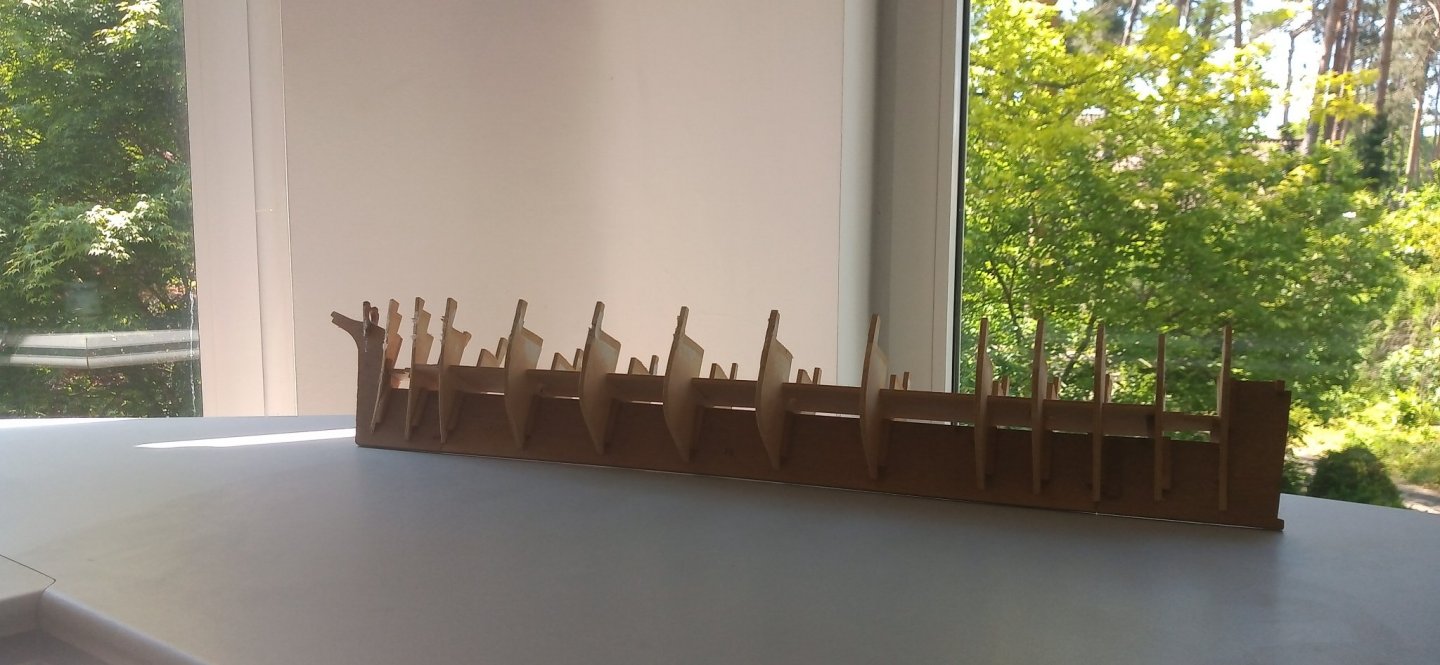
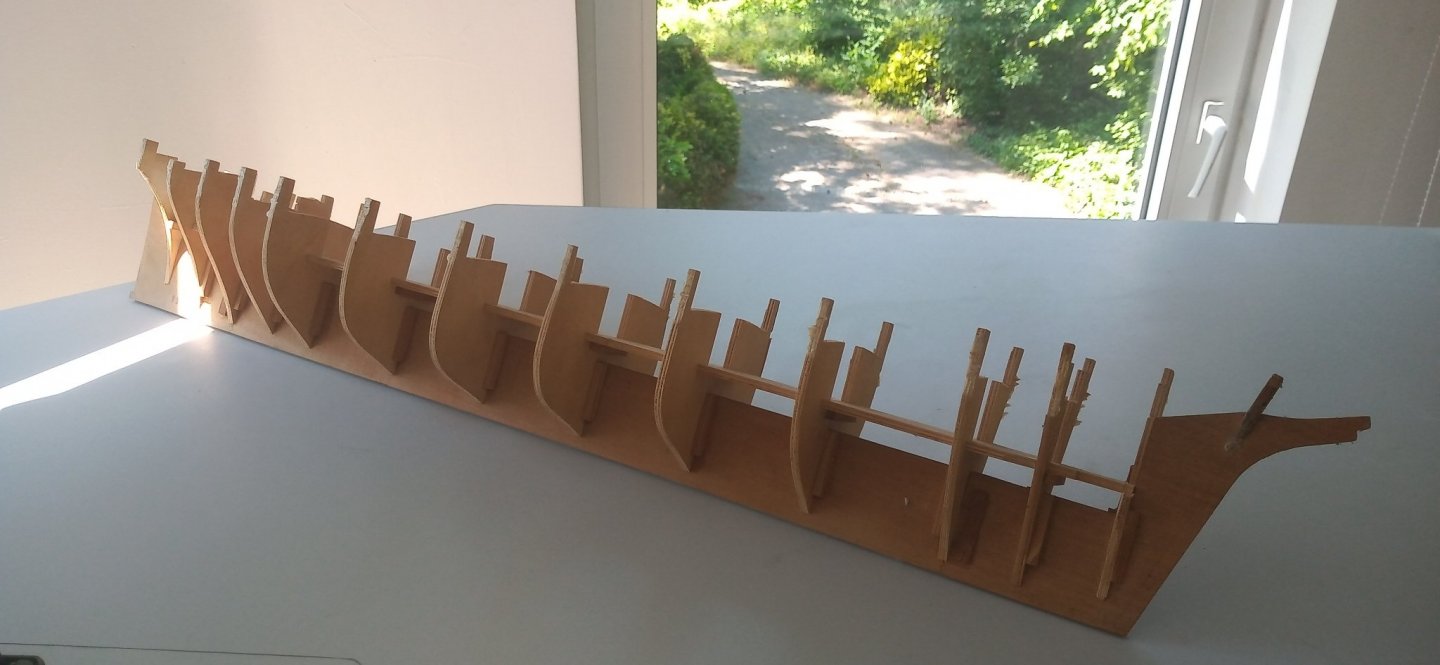
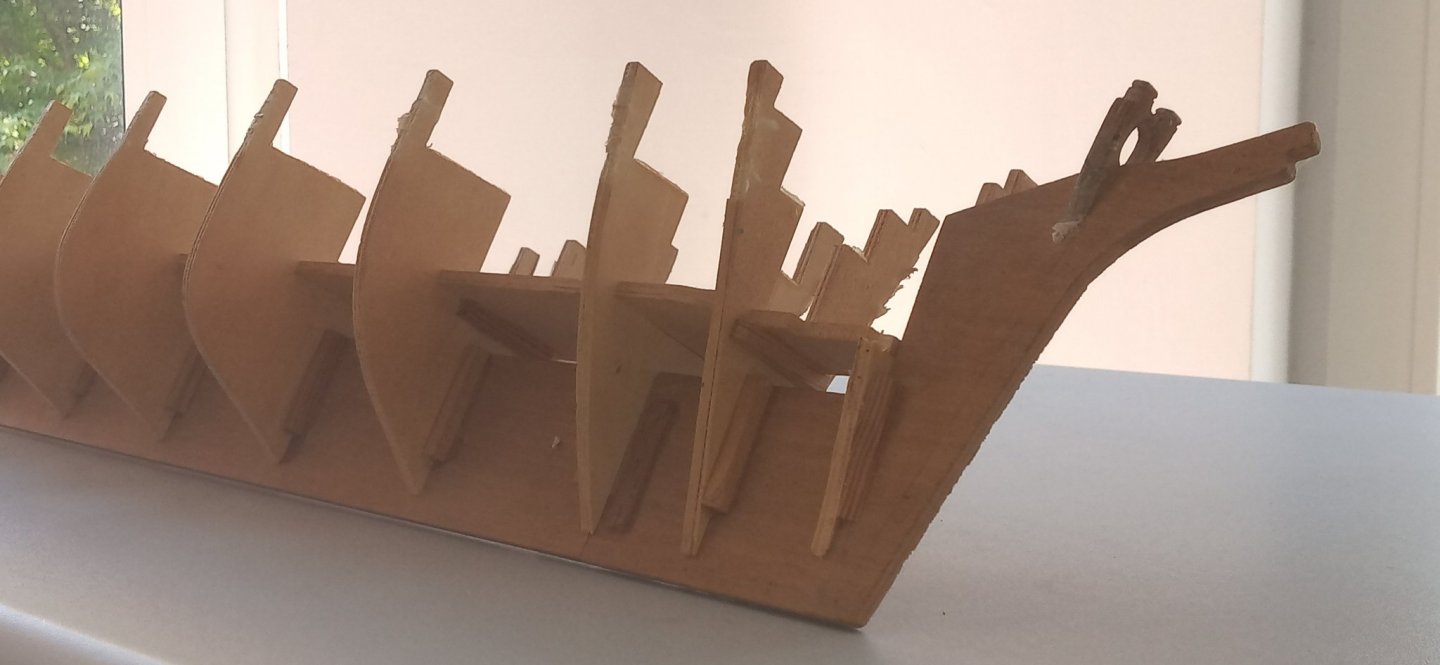
- 35 replies
-
- 2
-
-
- Cutty Sark
- sergal
- (and 1 more)
-
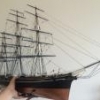 Hi all, Just joined the forum. I have a couple of half finished things to finish off, so apologies if I'm not starting from the beginning. First up is my old Cutty Sark model, started in the eighties that was pretty near finished, but I'm now re-rigging. (Next will be my Corel Wasa, that is much less progressed) The model was nearly done, save for some rigging details on the fore mast. However, in order to take it with me to Australia, I took the whole rigging down, so I'm restarting from this point. (Added picture of model some 5 years ago, before packing and transporting to Australia) Just starting on the mizzen now:
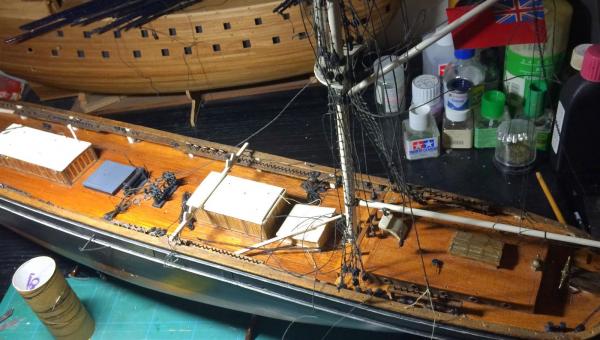
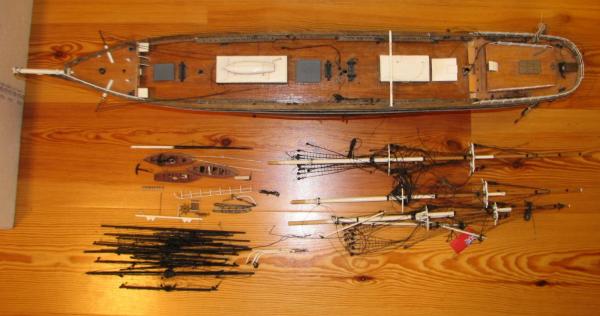
- 92 replies
-
- 5
-
-
- Cutty Sark
- Billing Boats
- (and 2 more)
-
 Decided on this from my small stash of models as it looks like as fun build without too much detail. As you can see, it's an older version - This is NOT the Dusek version which is much better. Box contents - not a huge amount! Solid hull will need some shaping. Wheel all wrong, added 1 ships boat, eyes, pins and 2 more ladders to the contents. The slotted pieces usually used for gratings are meant to be the guard railings. A small start, but much to do to get a reasonable shape 😅 With a bit of luck I may be able to pull this off - Lets see!
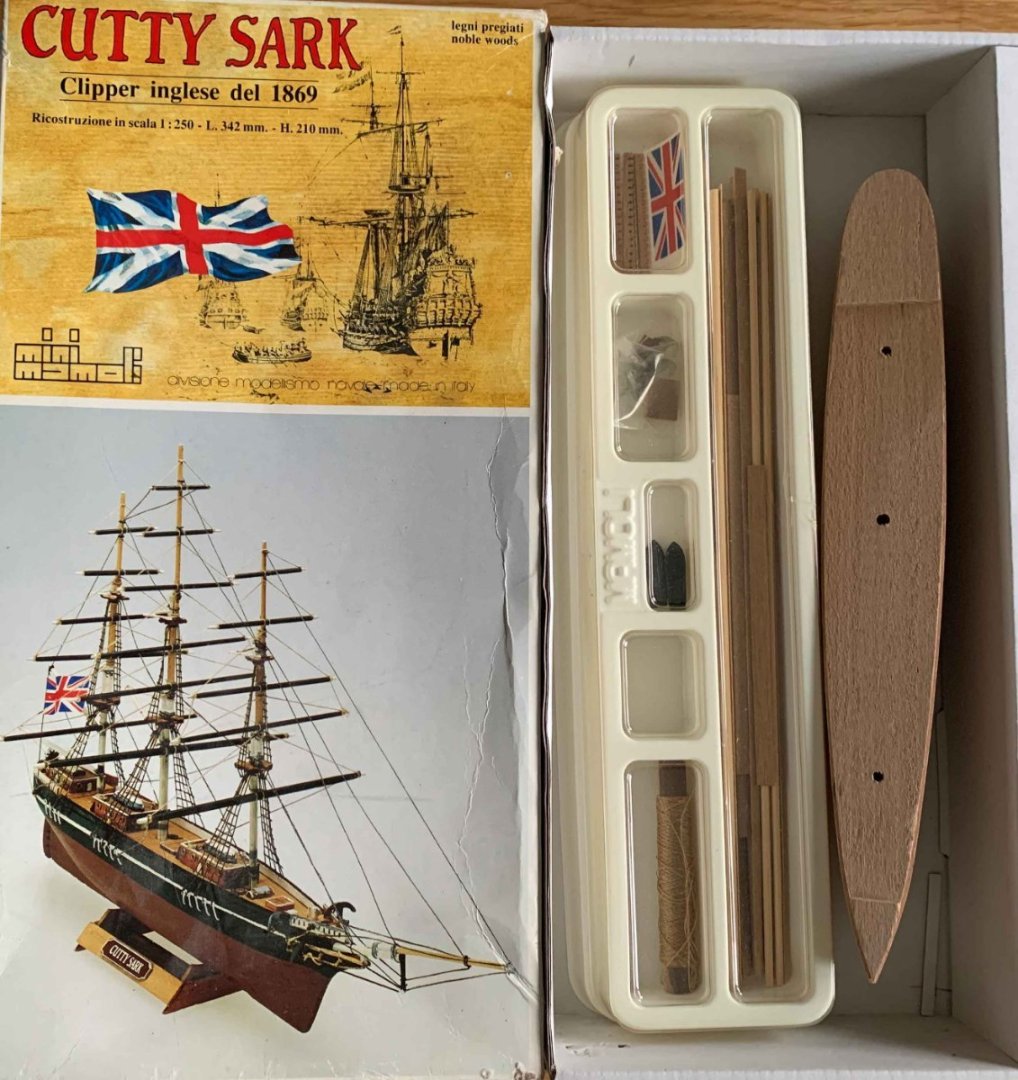
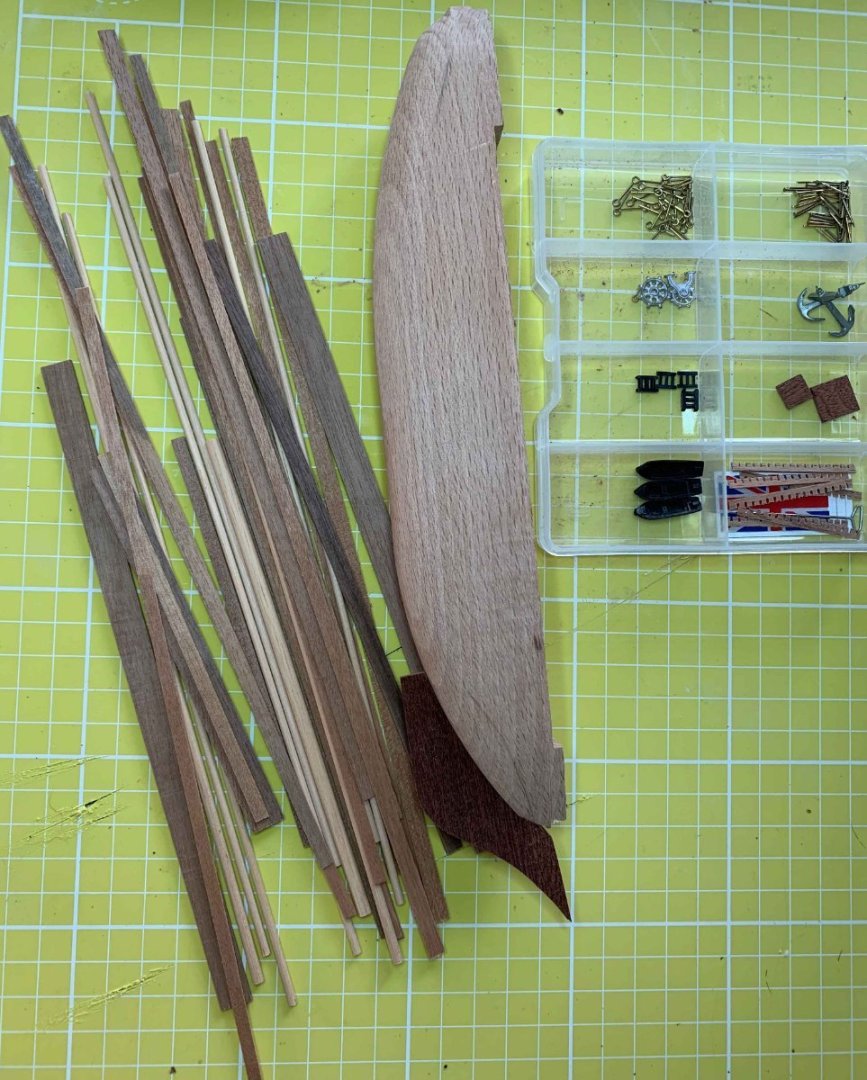
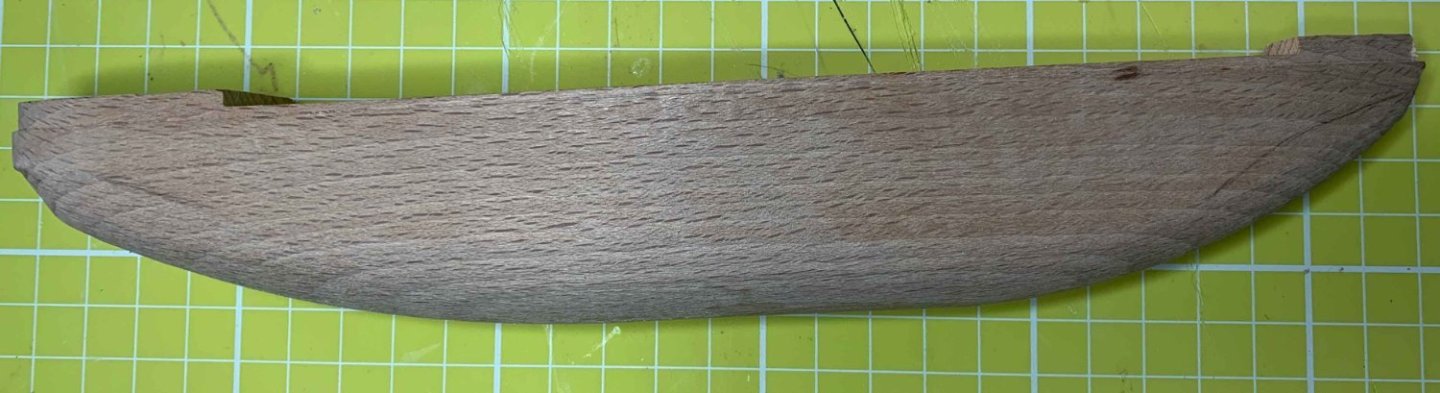
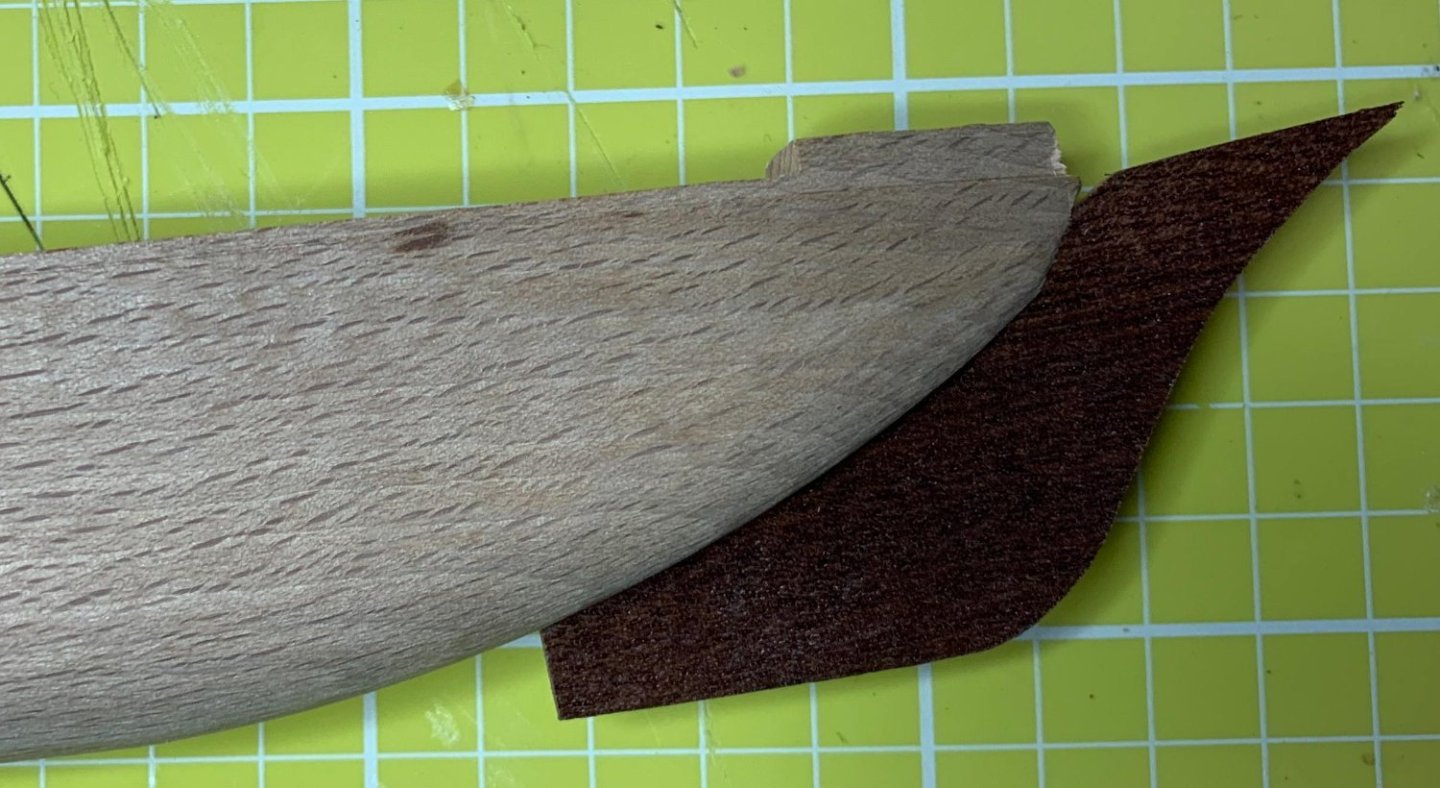
- 9 replies
-
- 5
-
-
- Cutty Sark
- Mini Mamoli
- (and 1 more)