Search the Community
Showing results for tags 'J-class yacht'.
Found 2 results
-
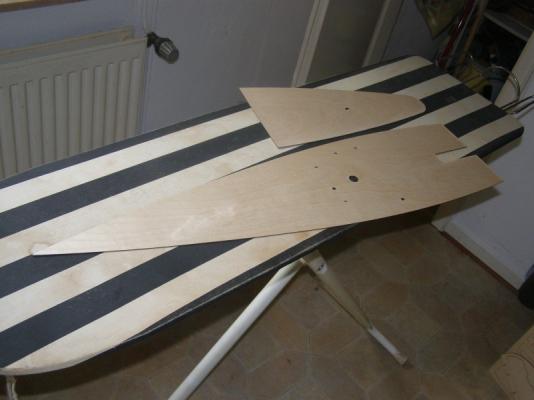
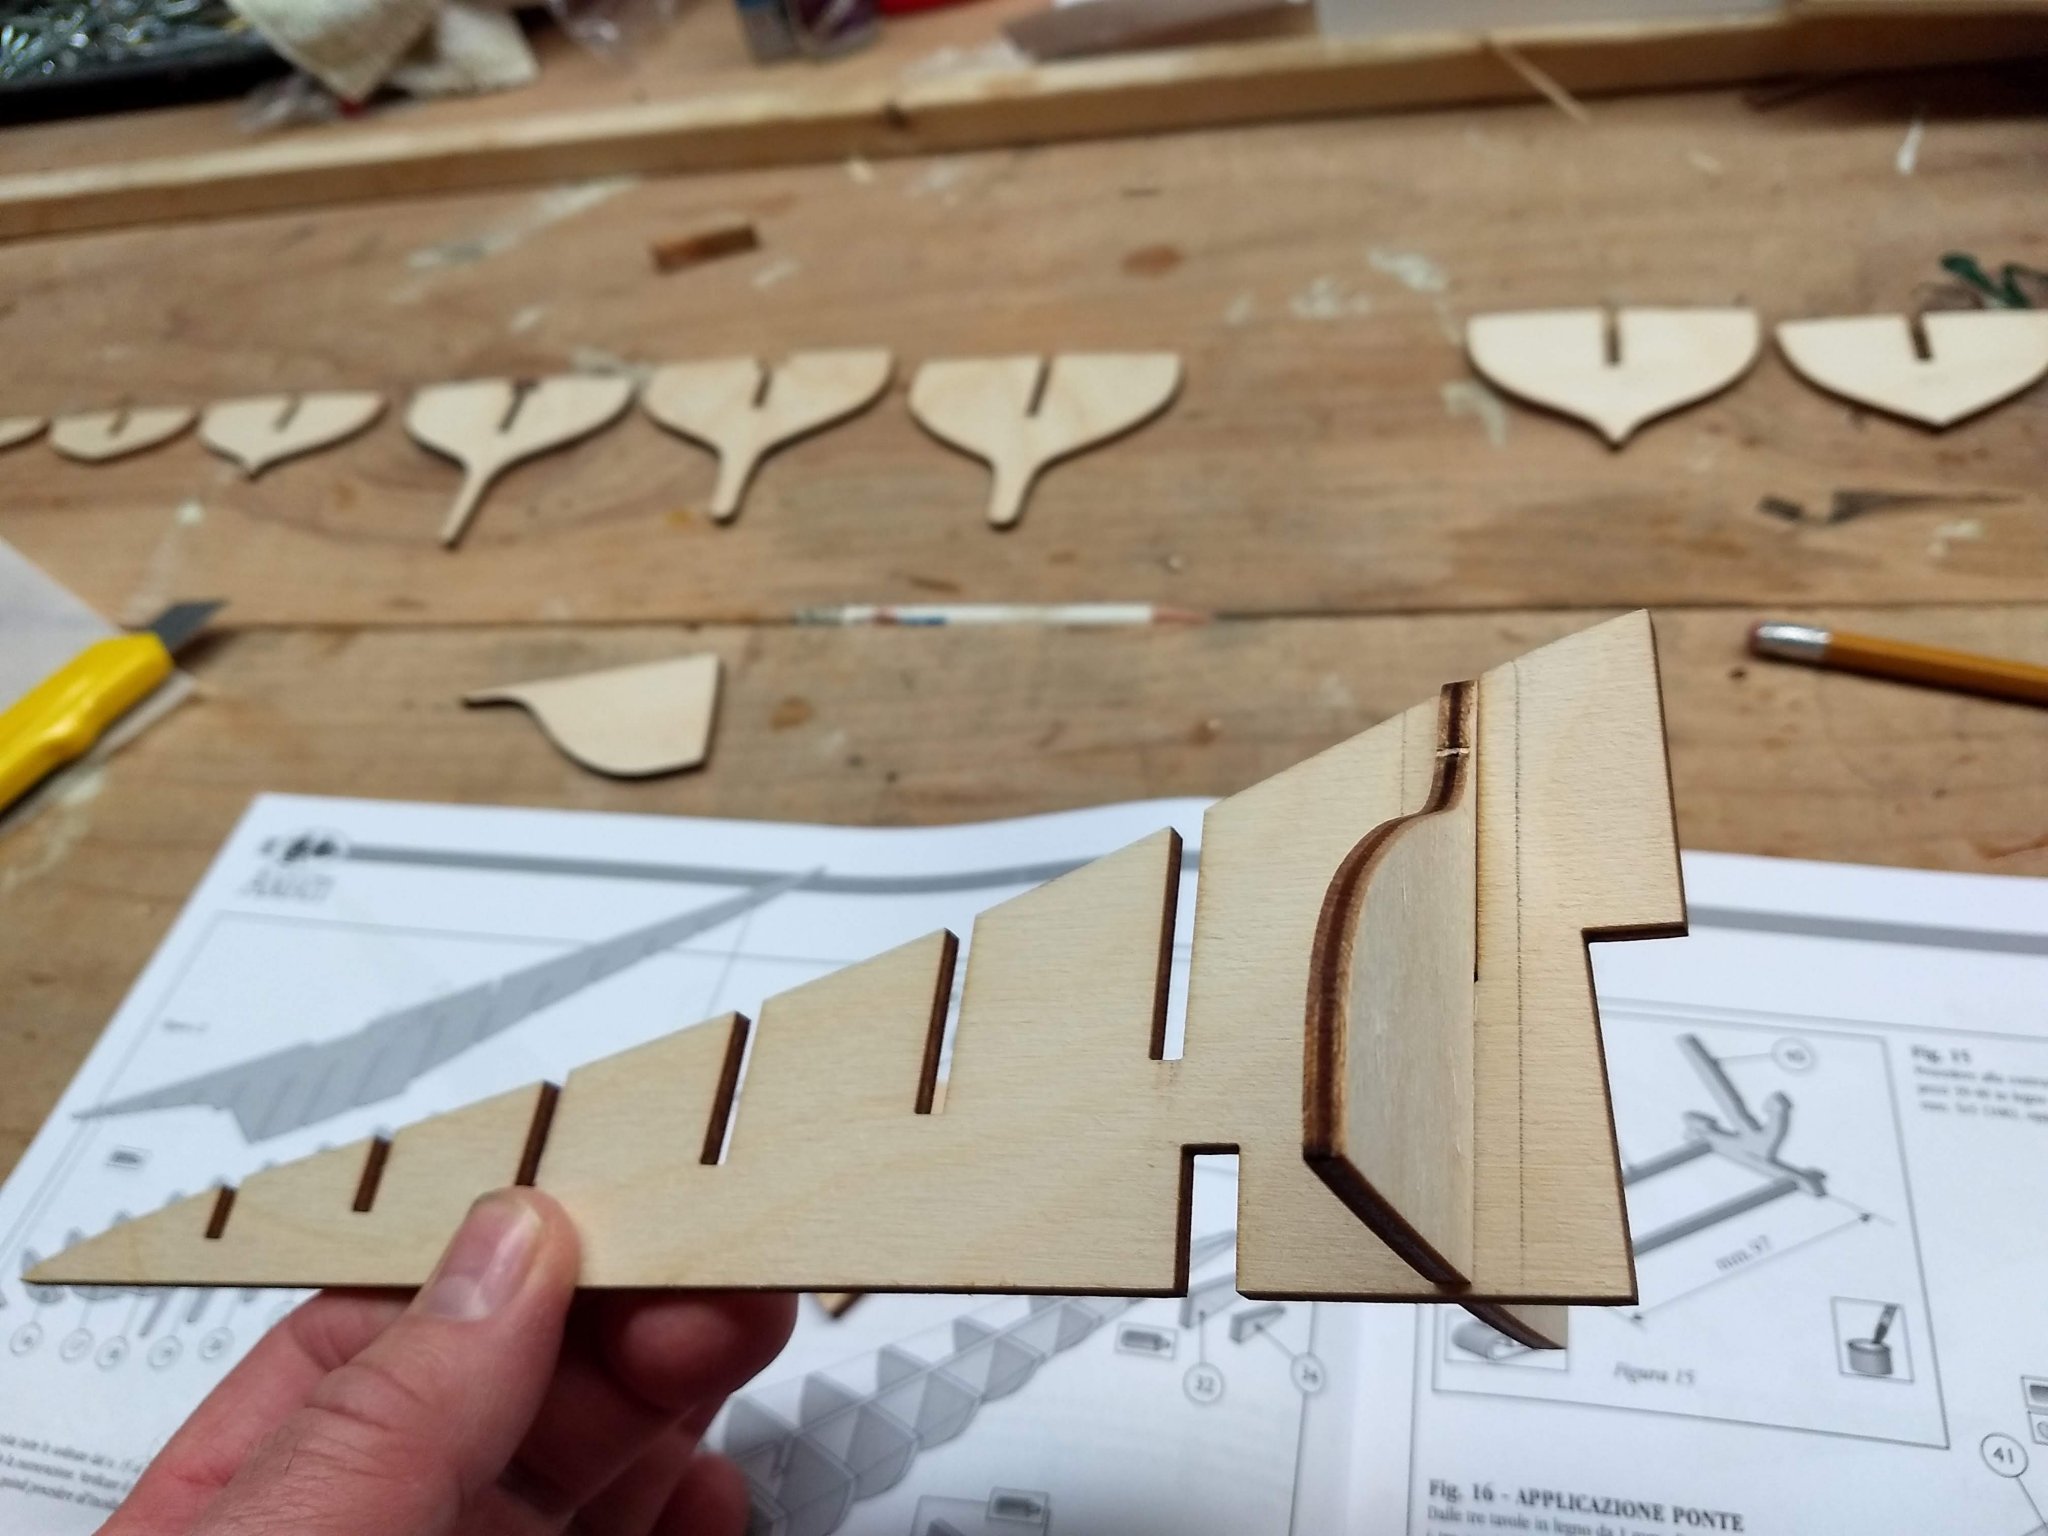
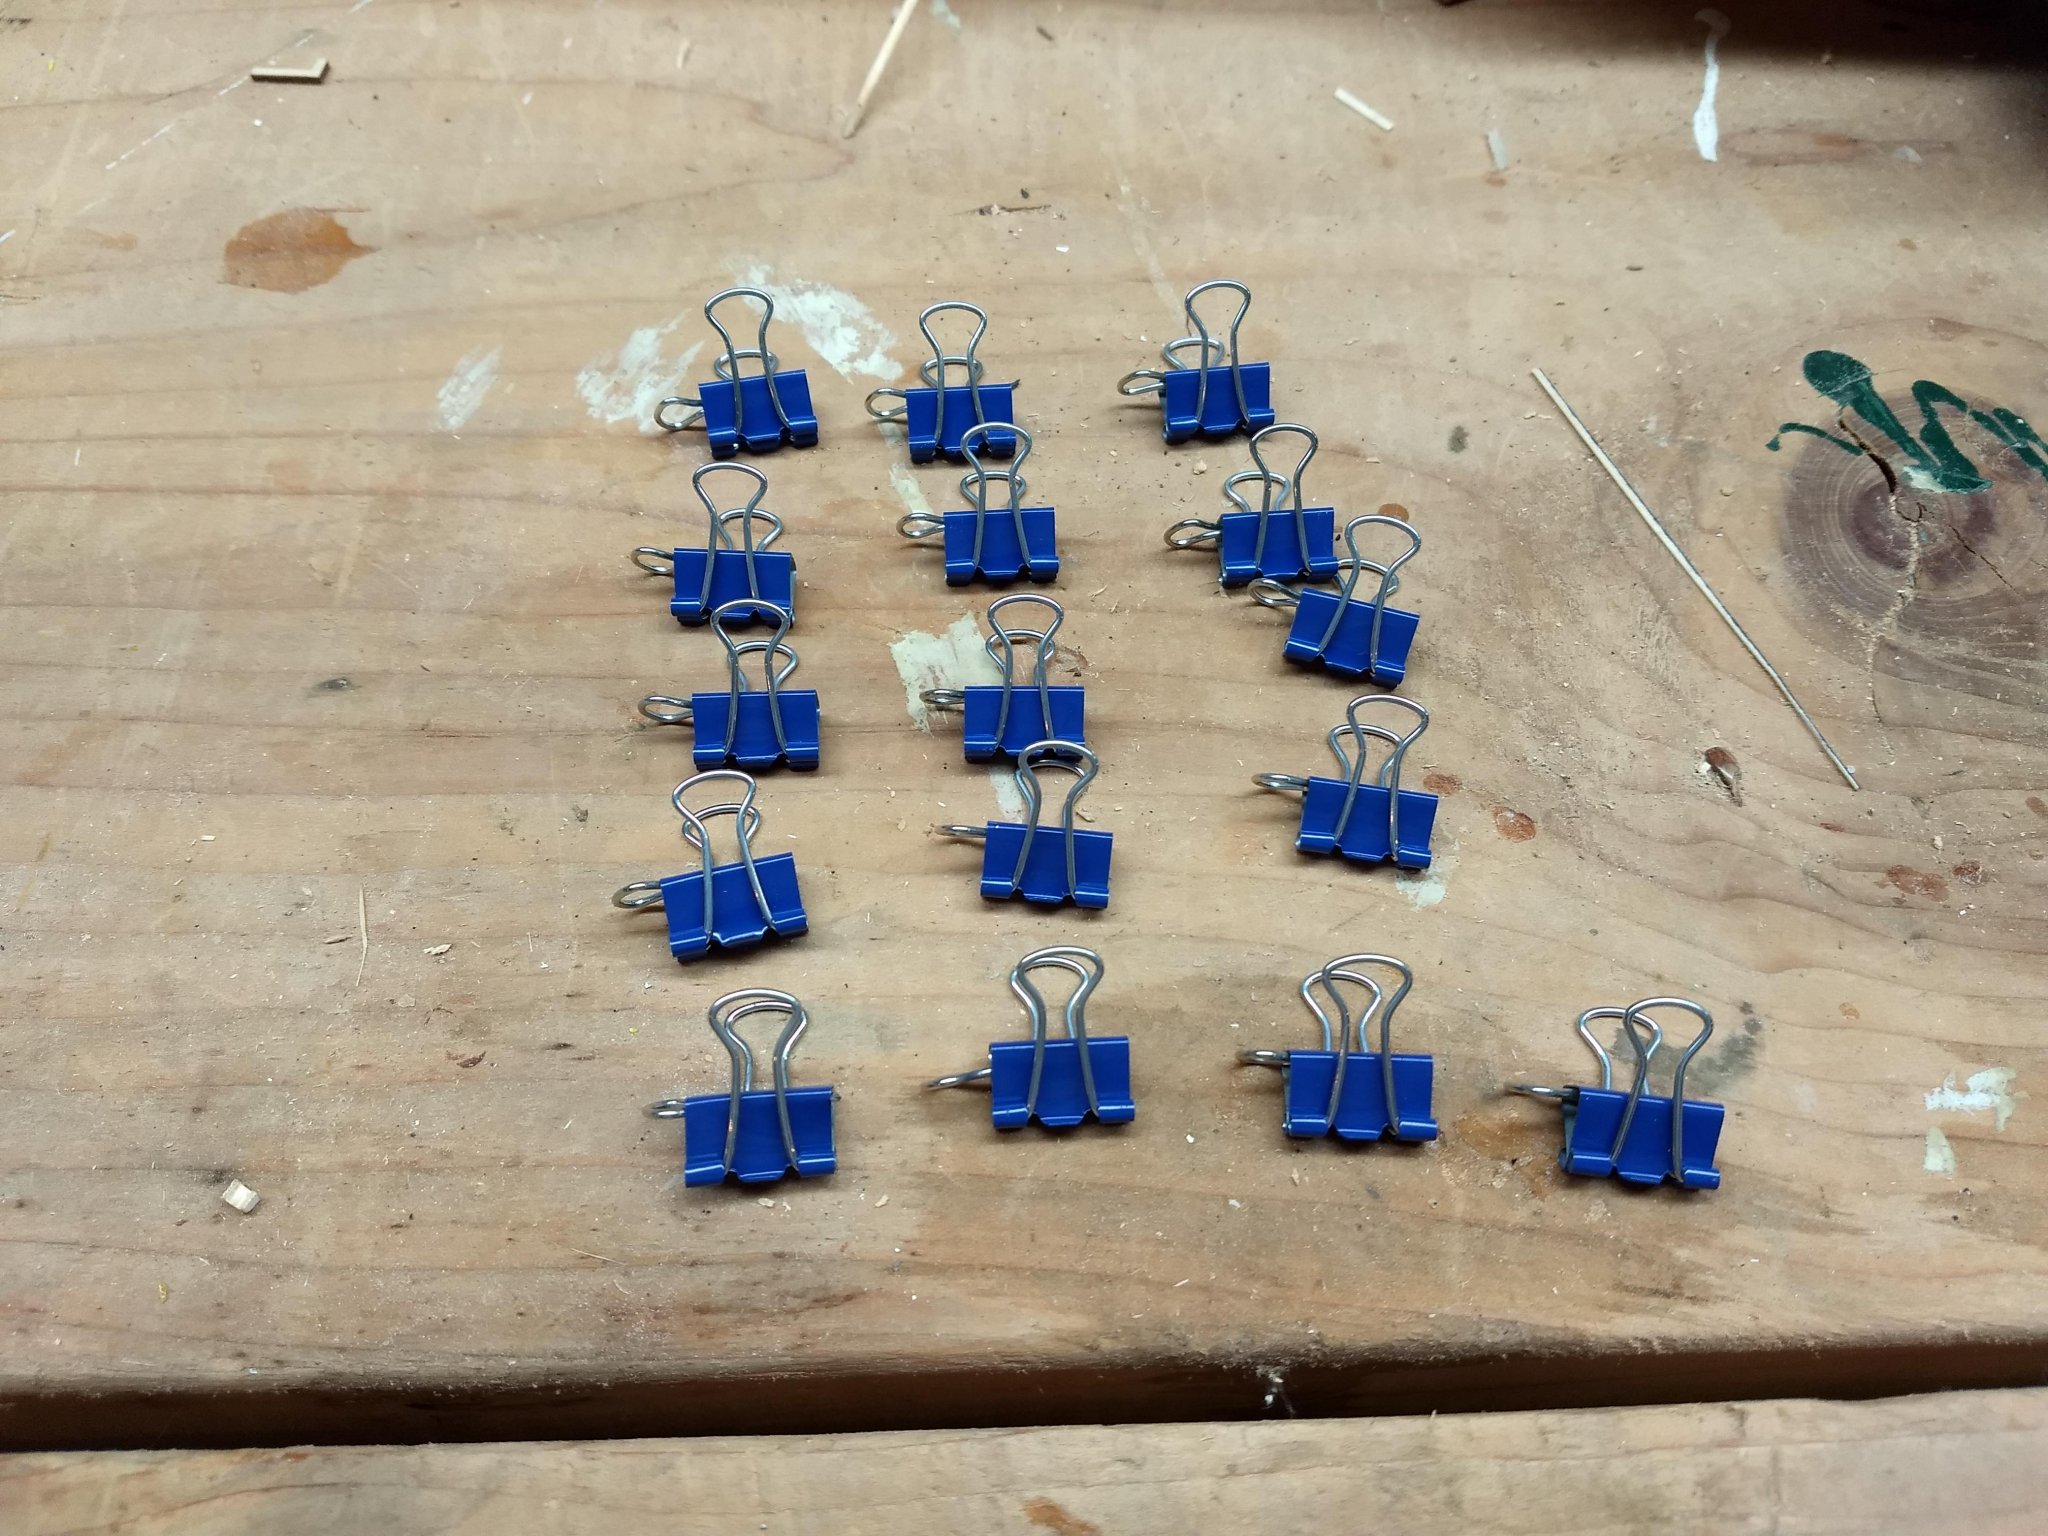
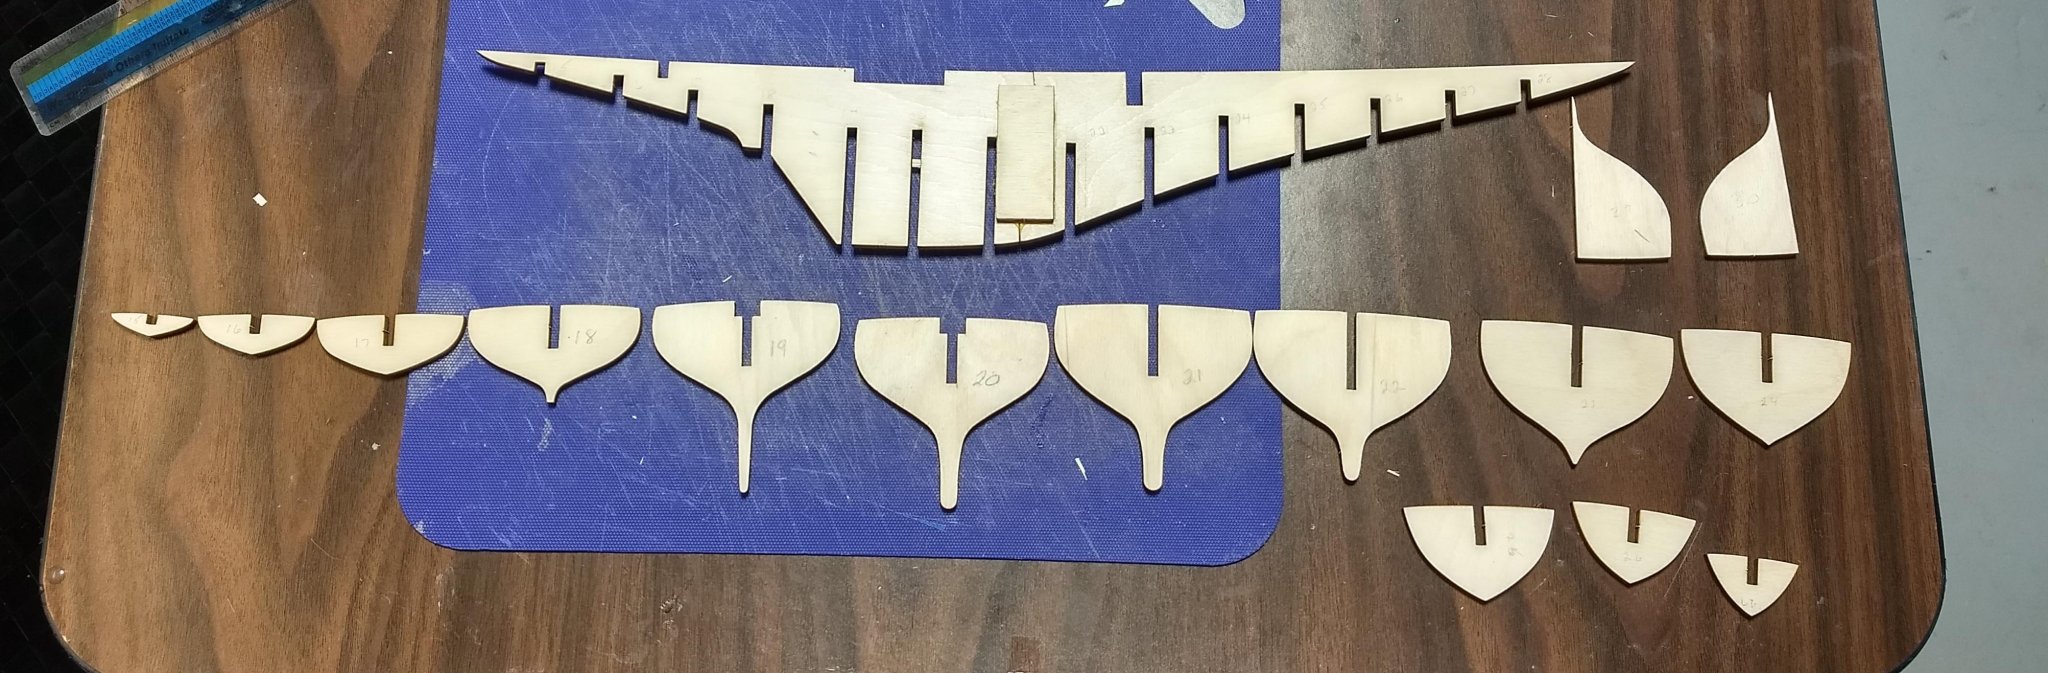
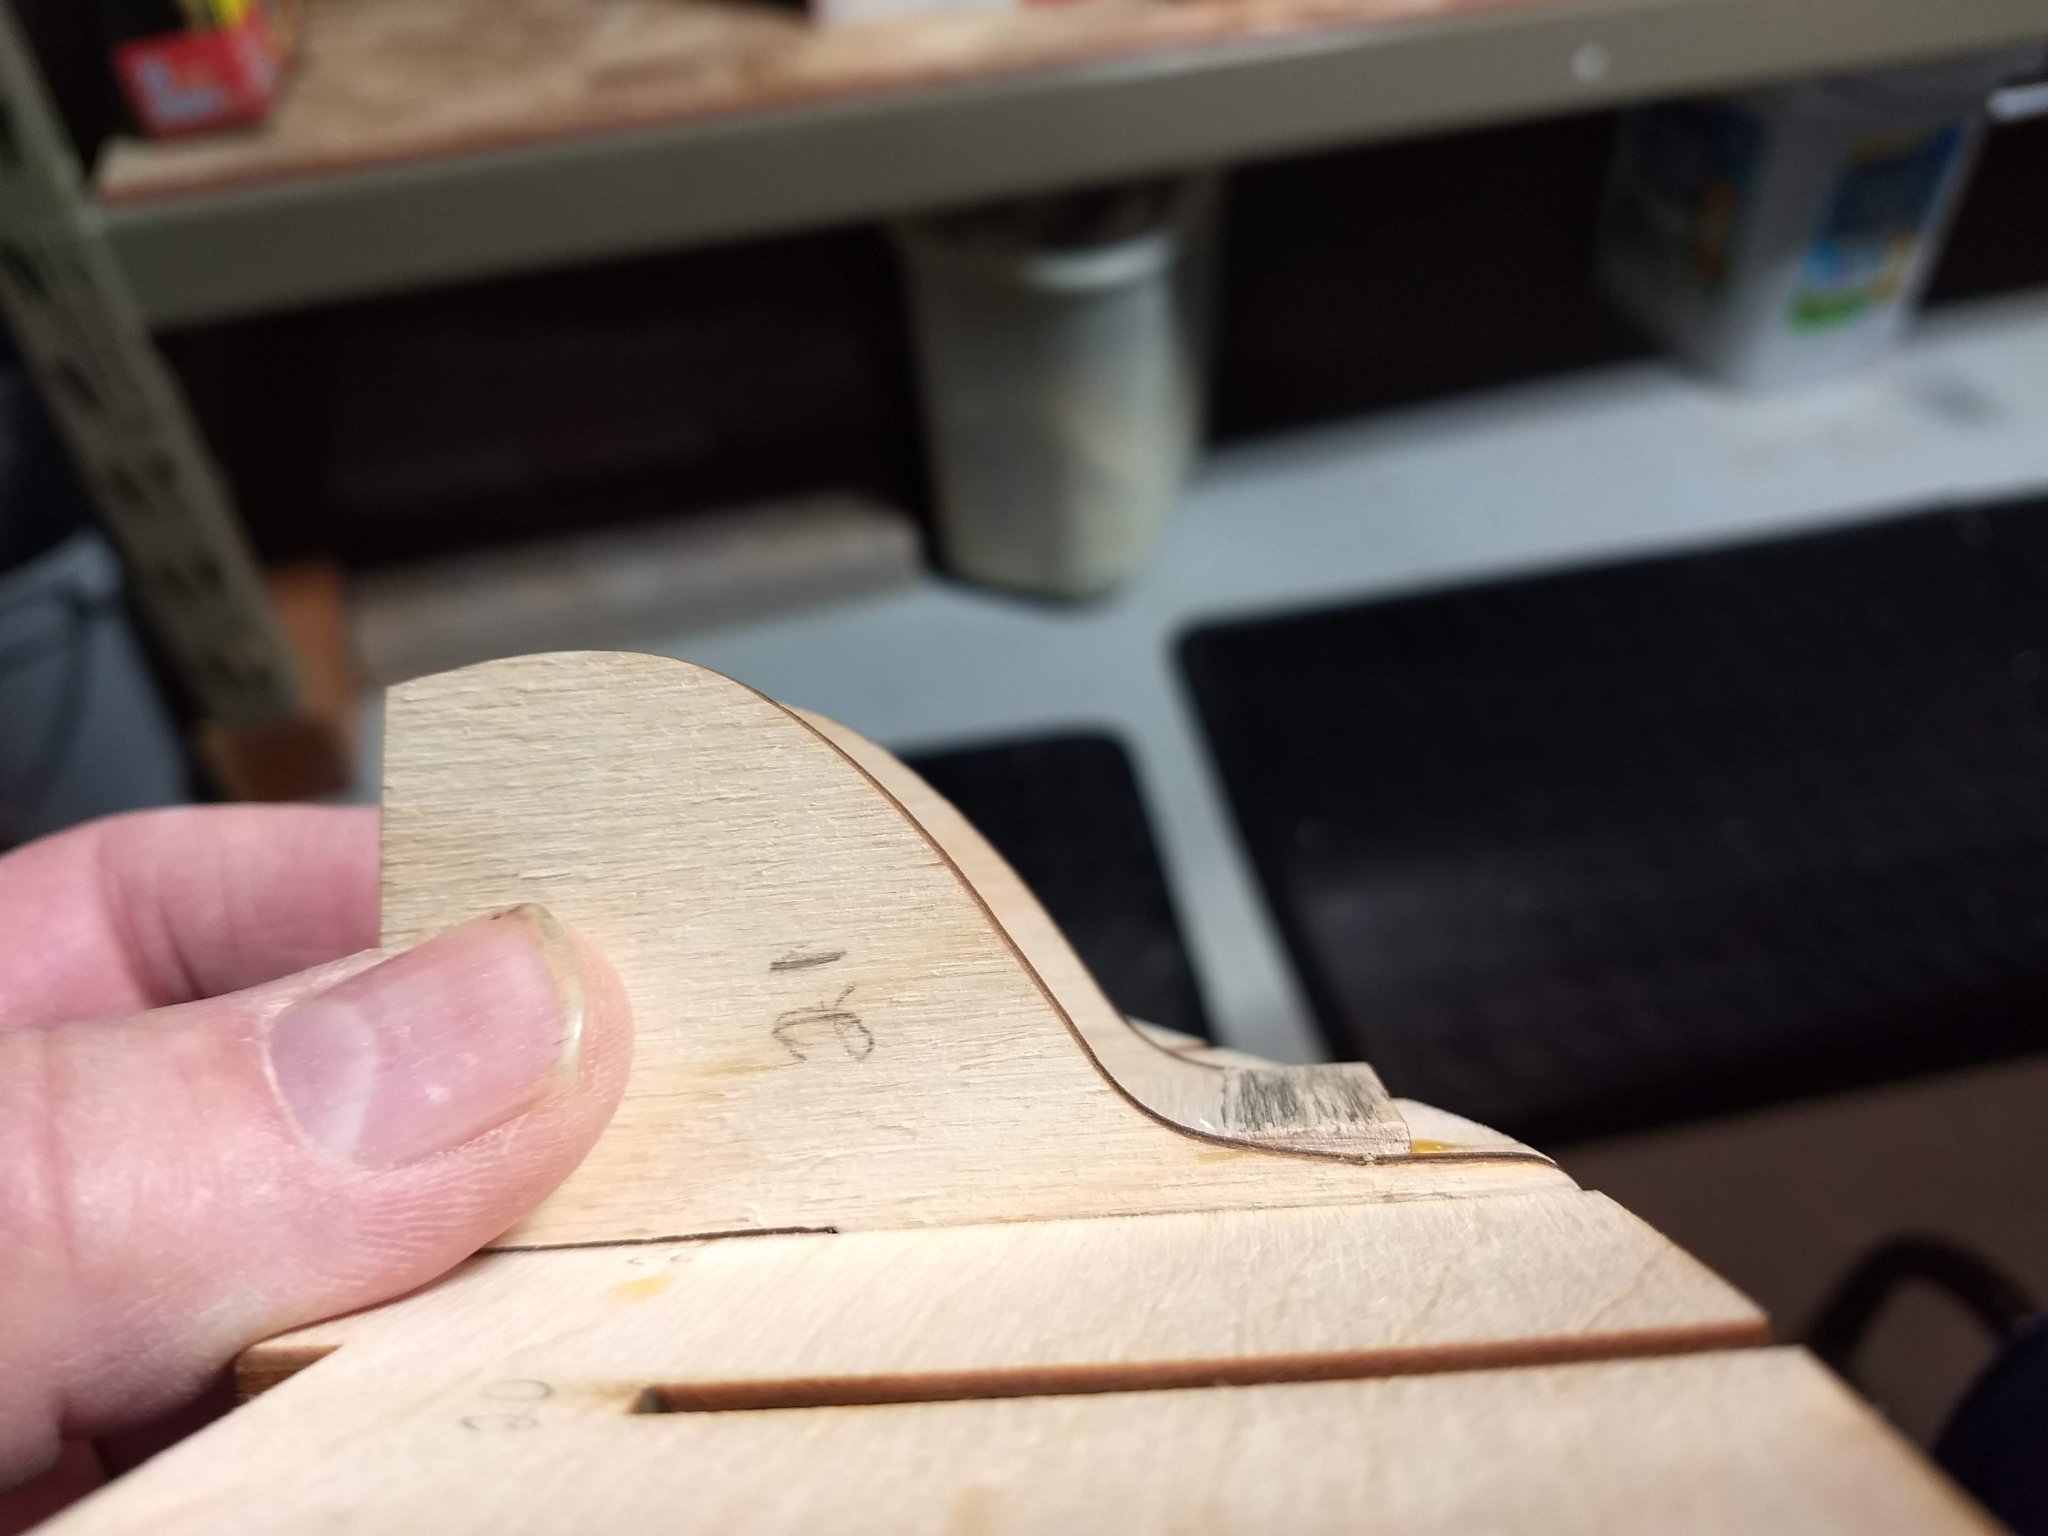
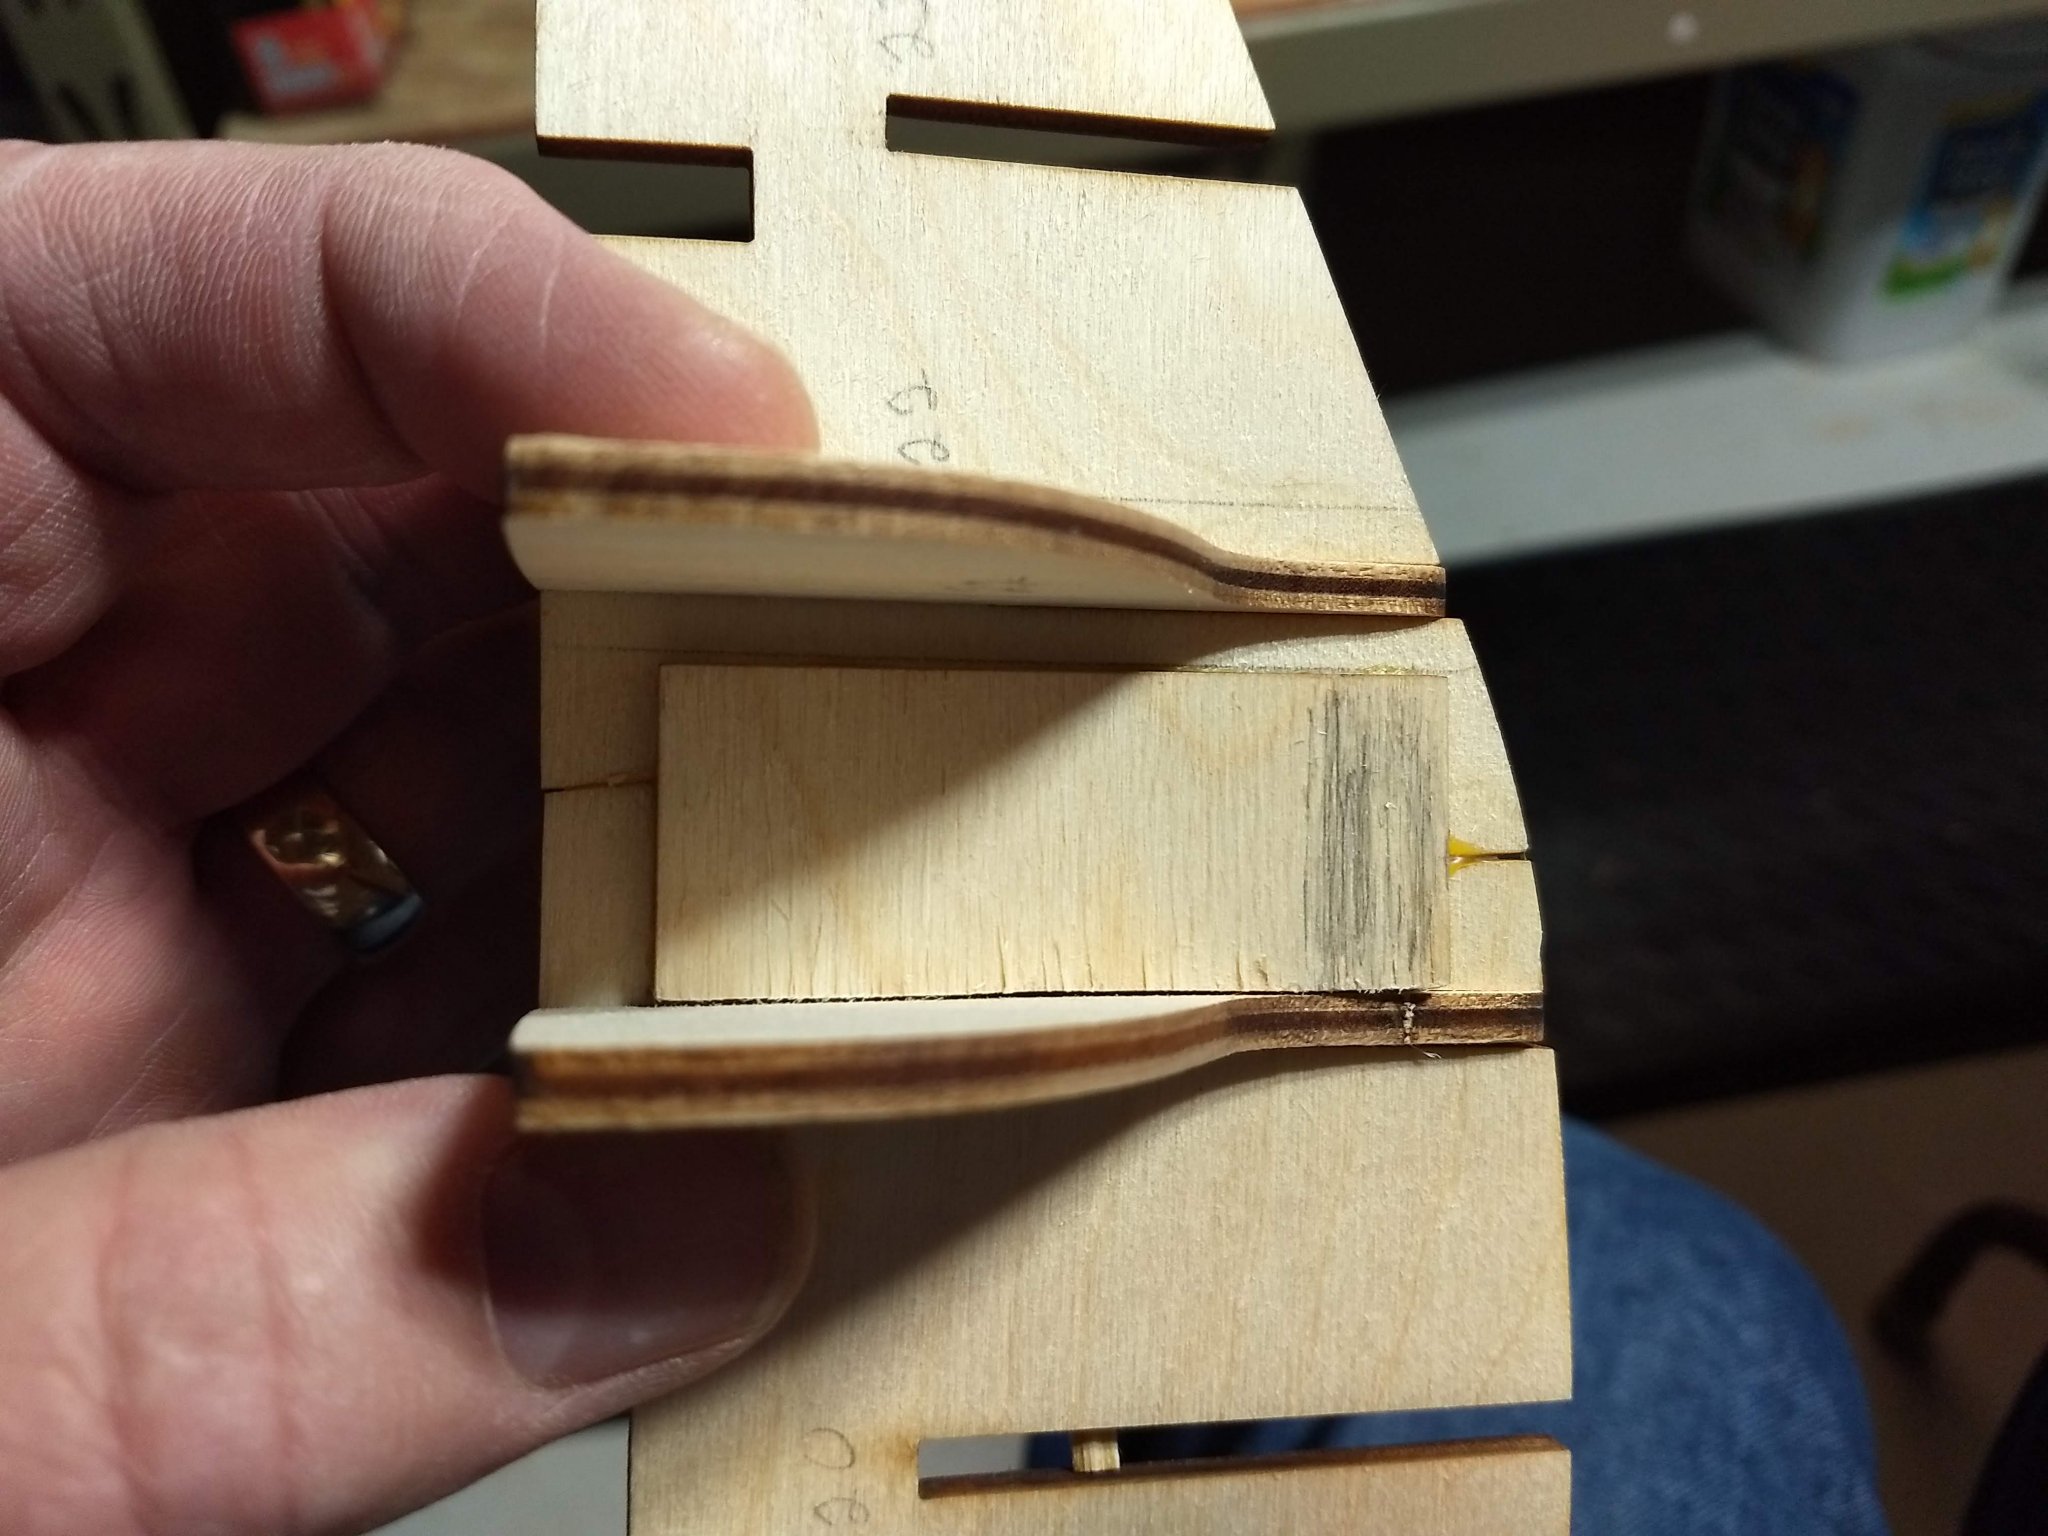
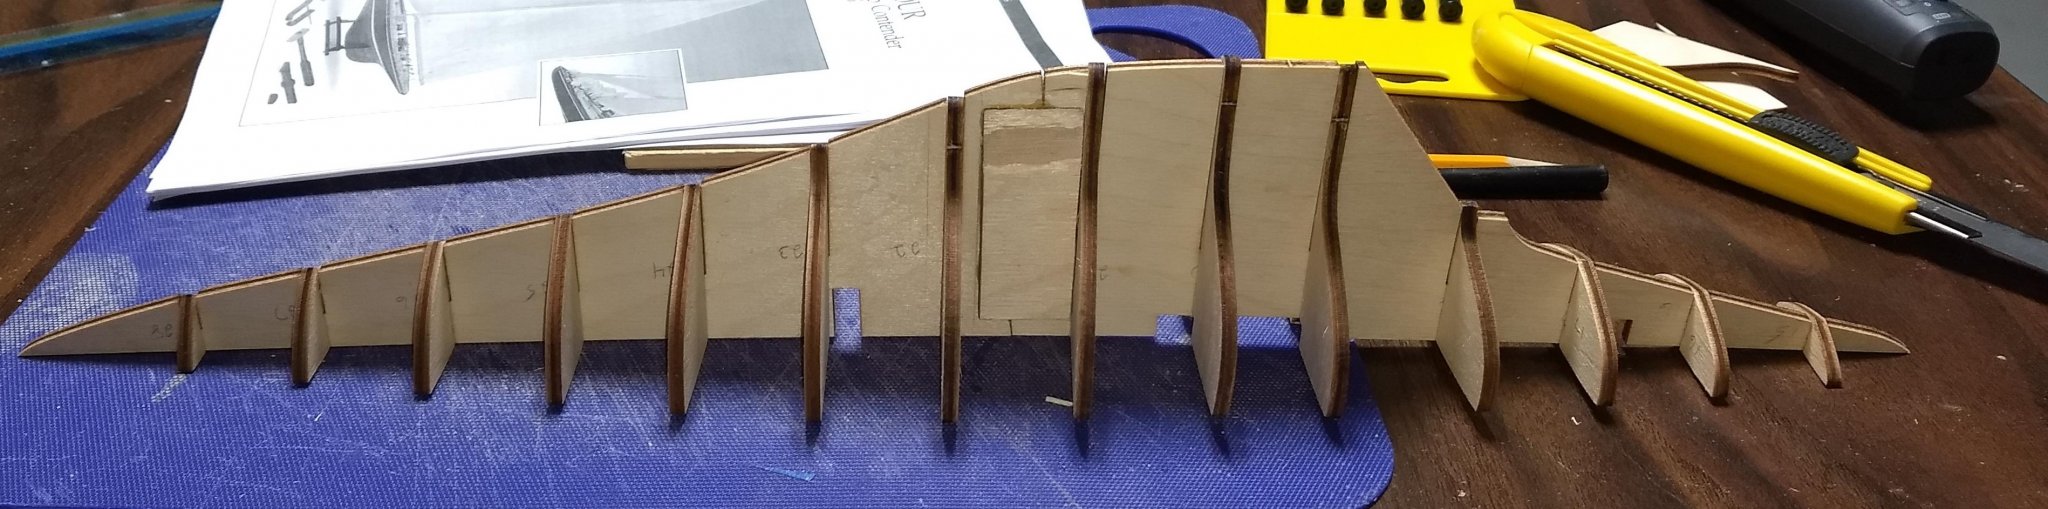
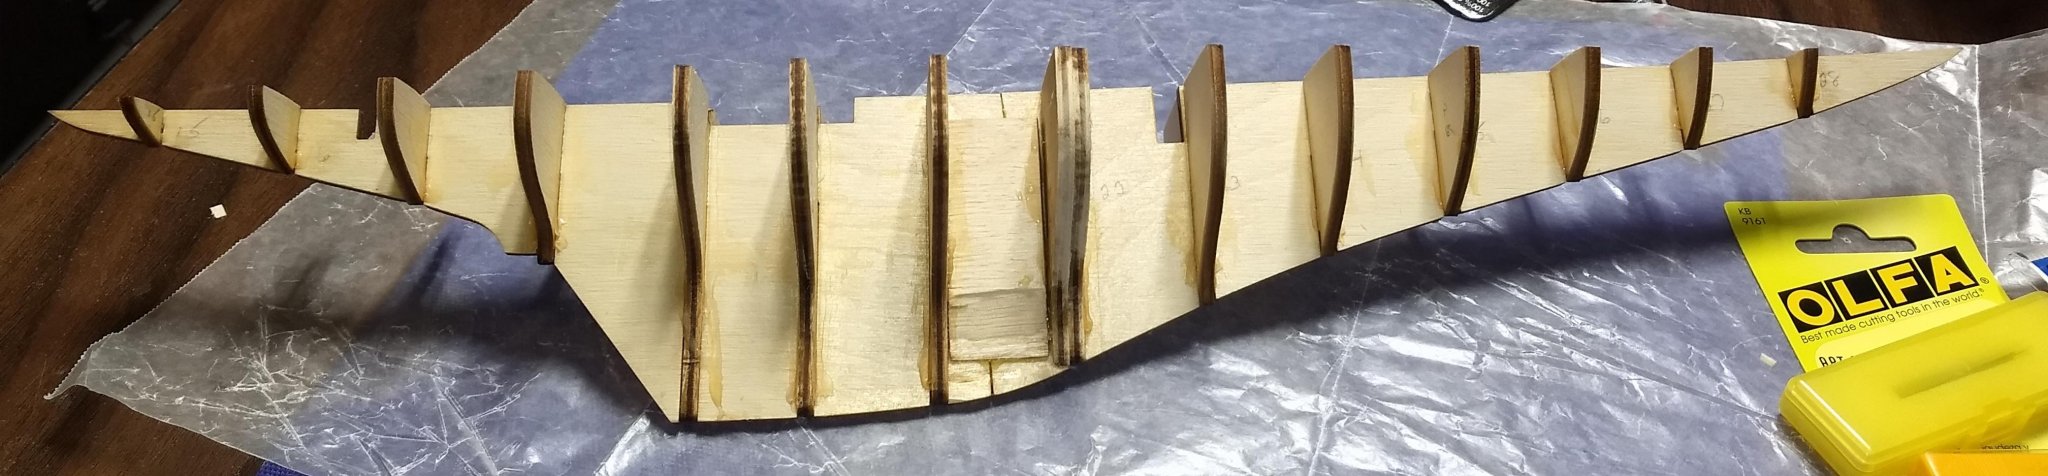
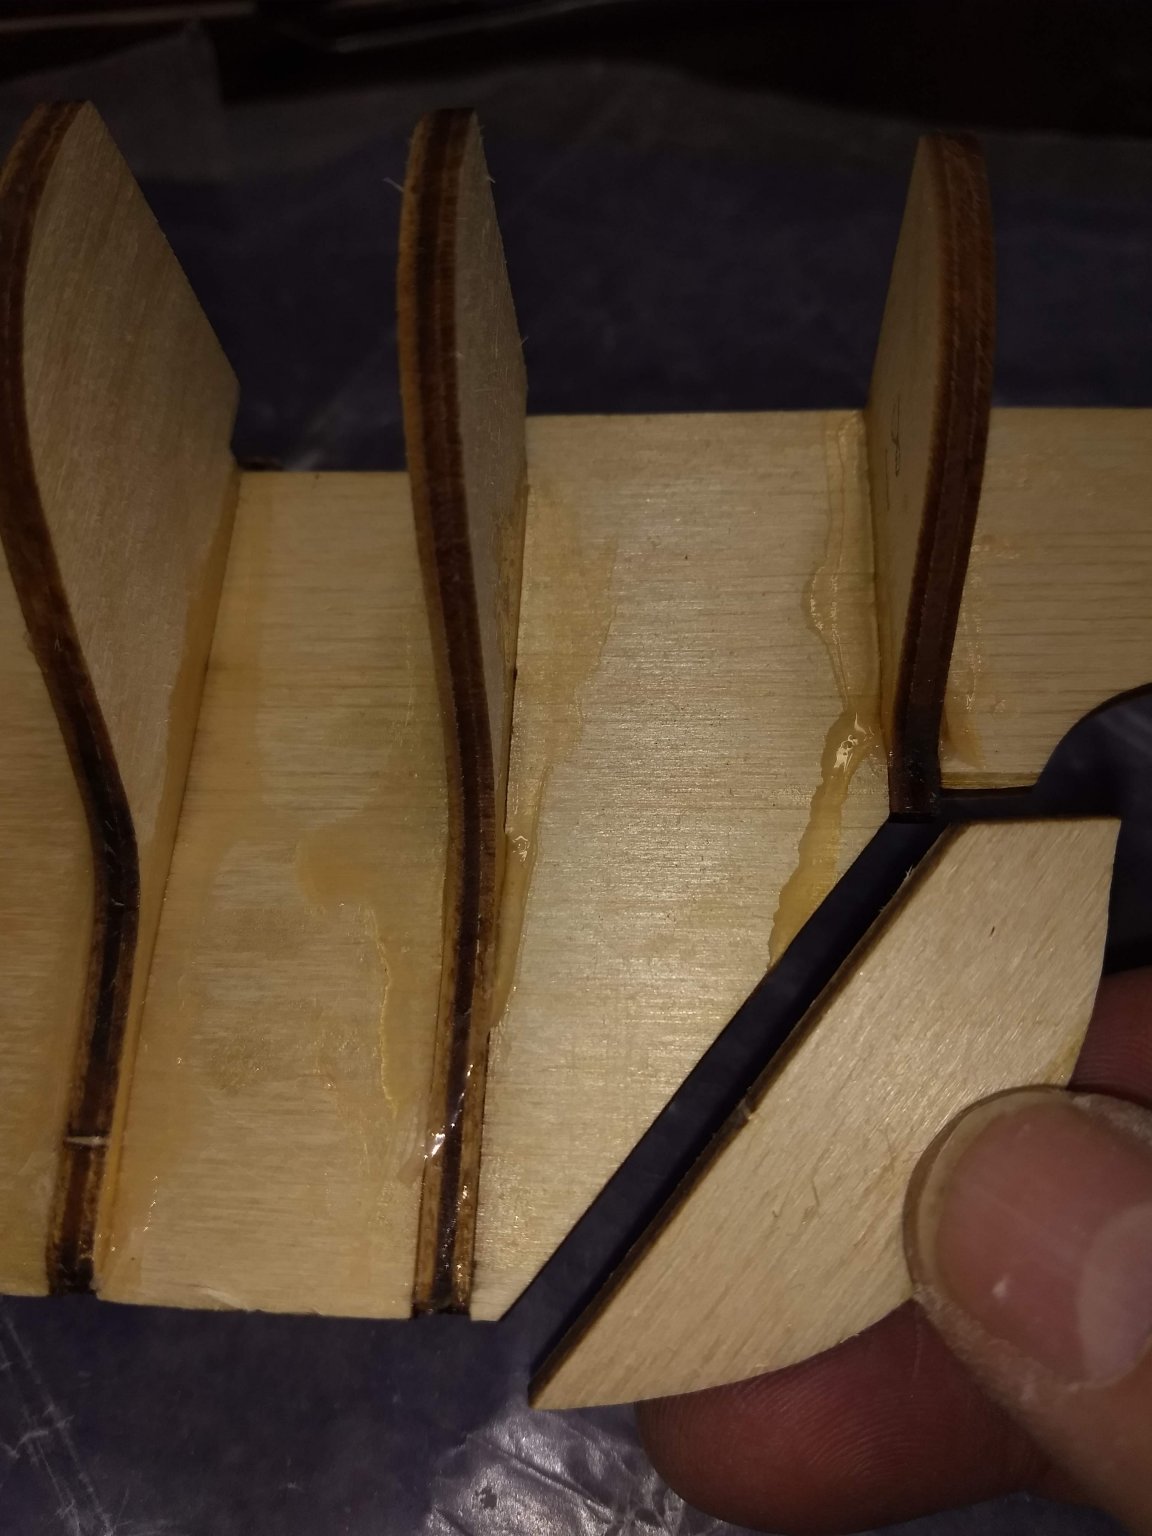
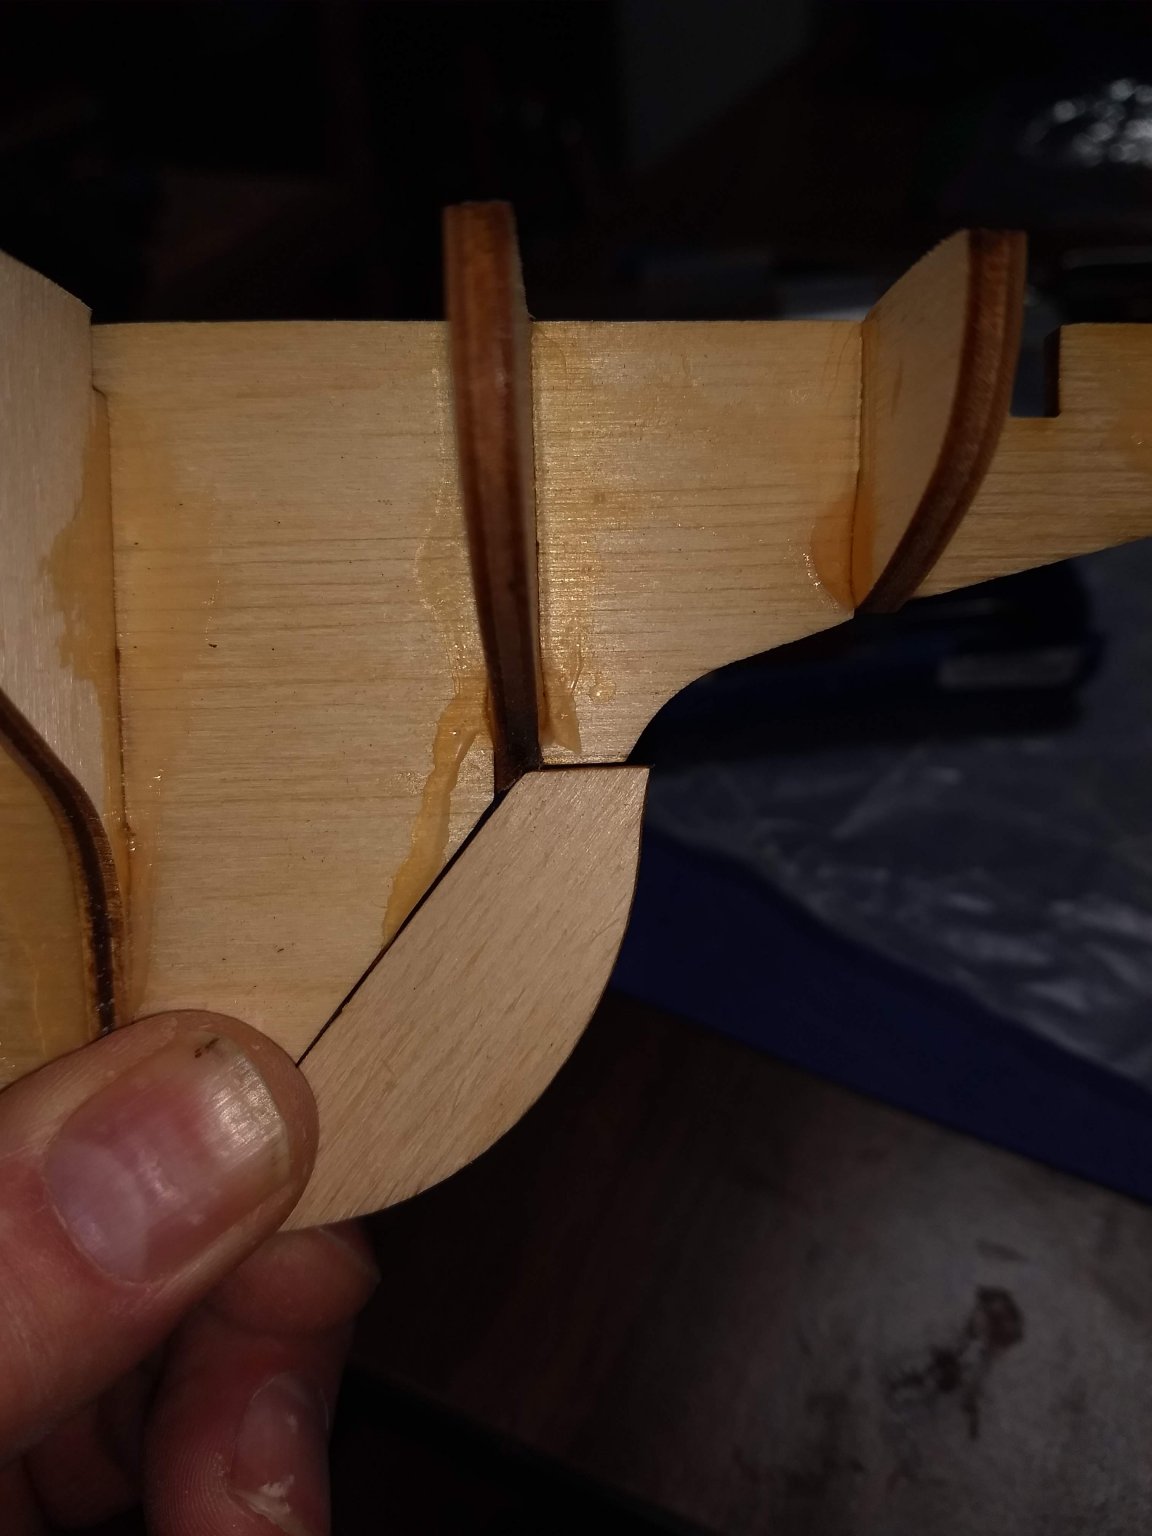
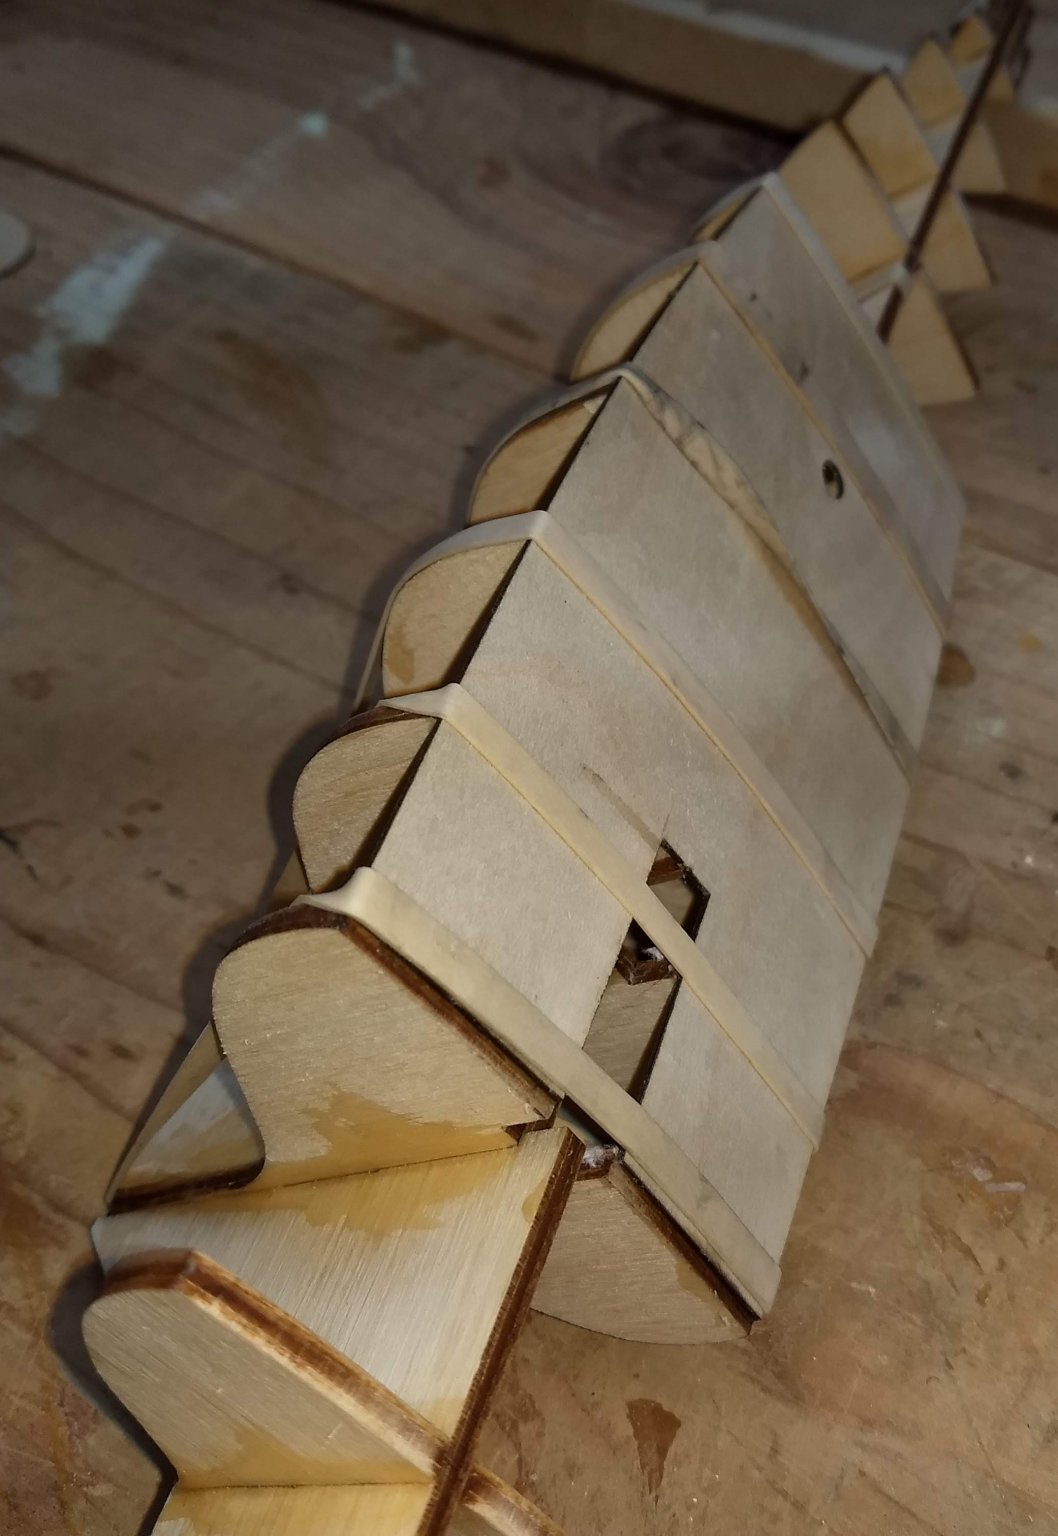
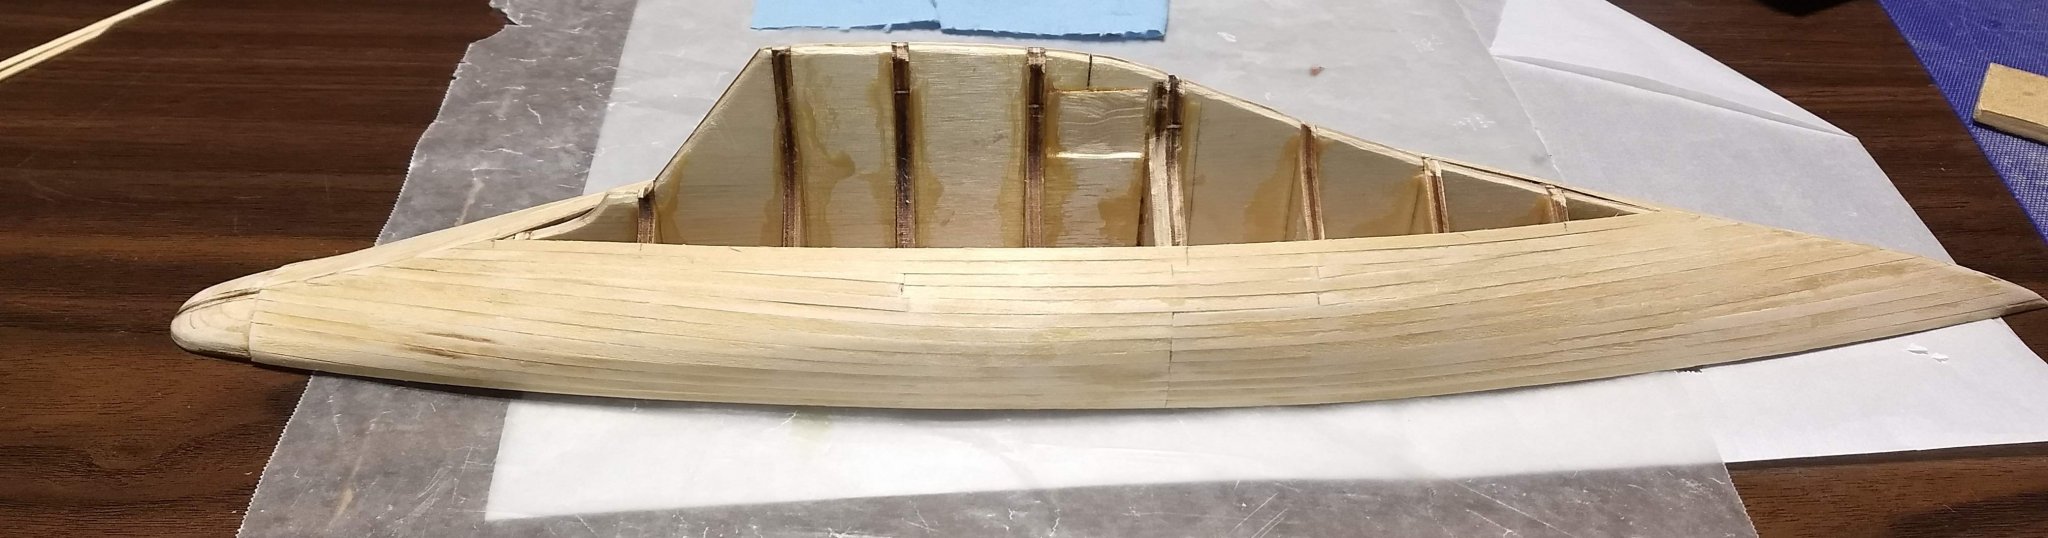
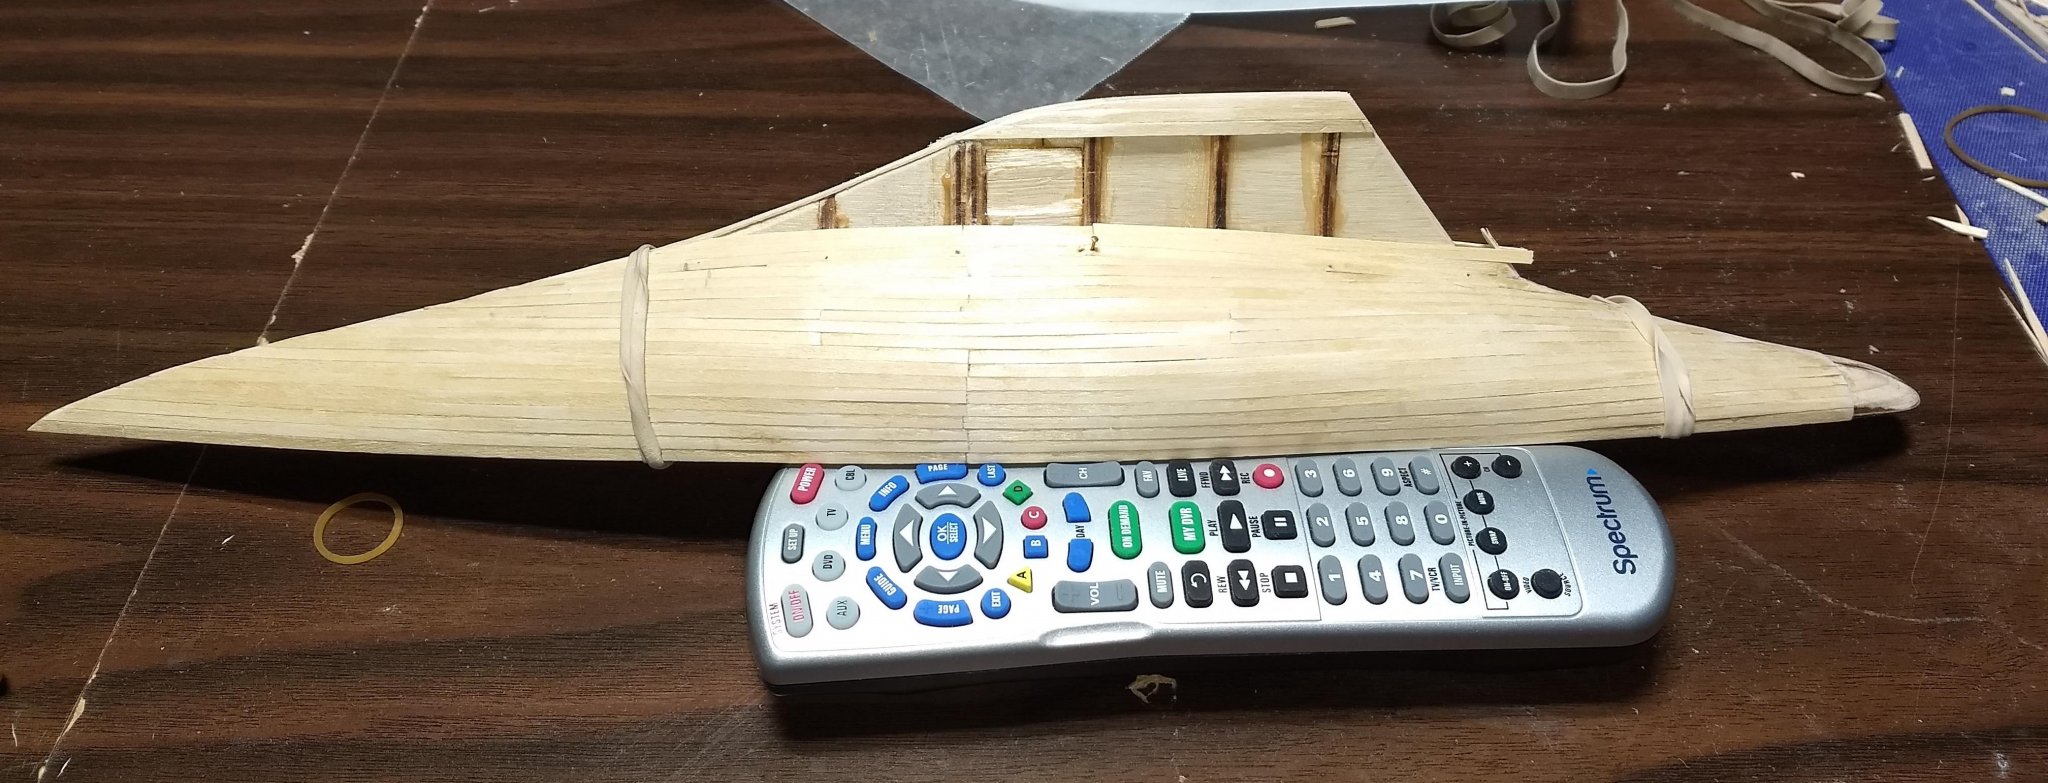
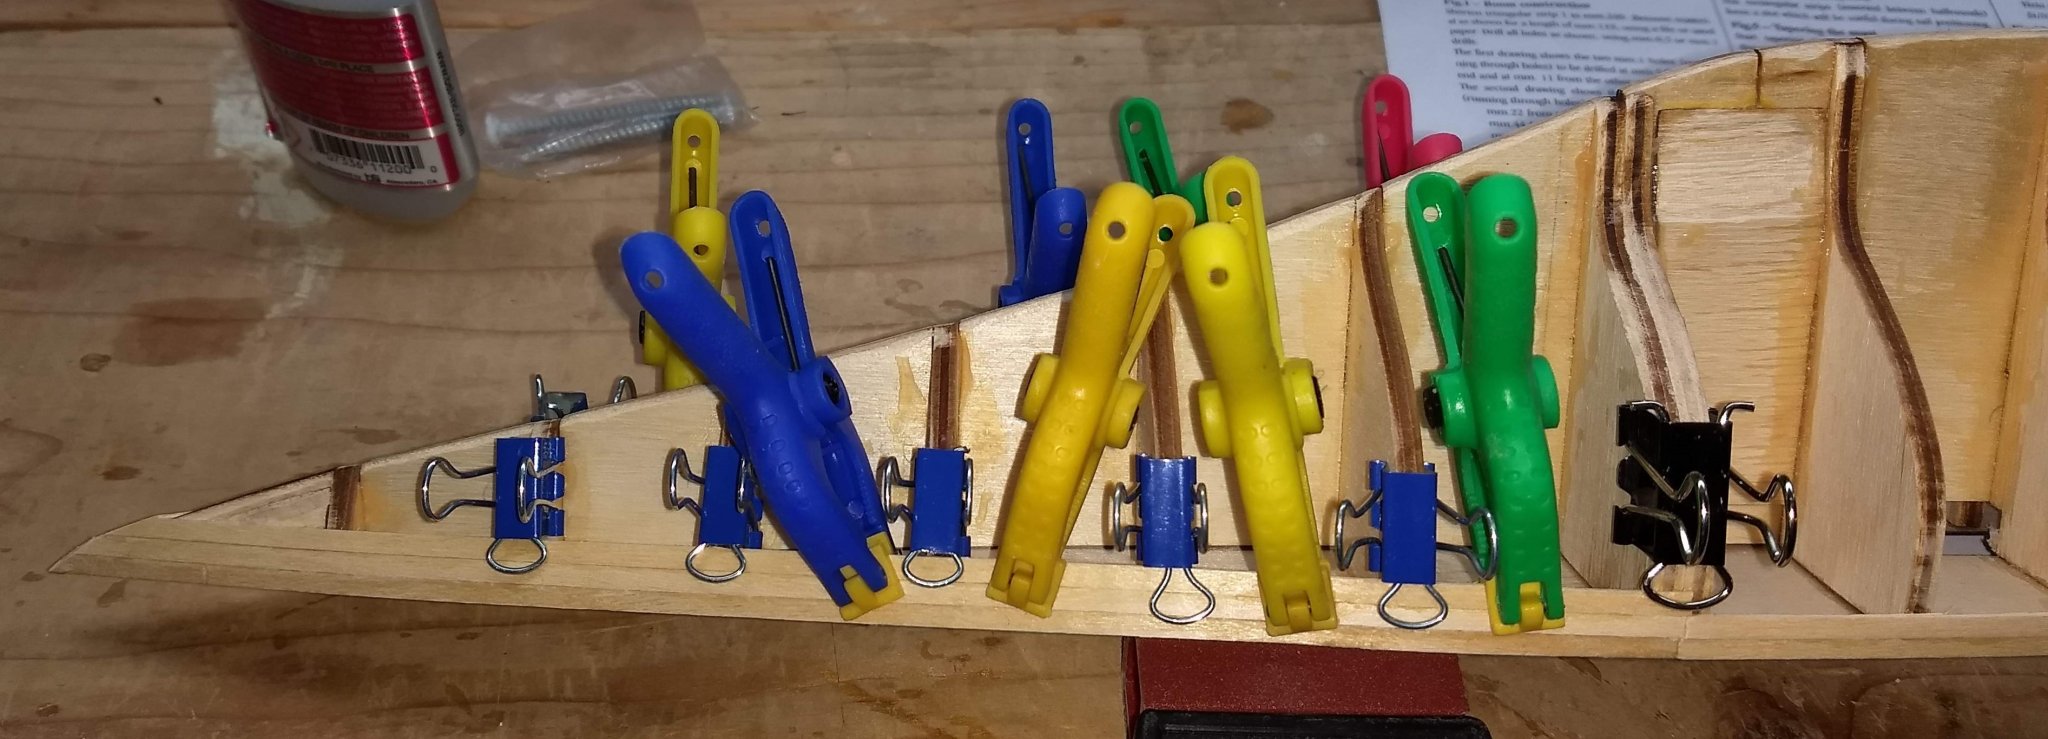
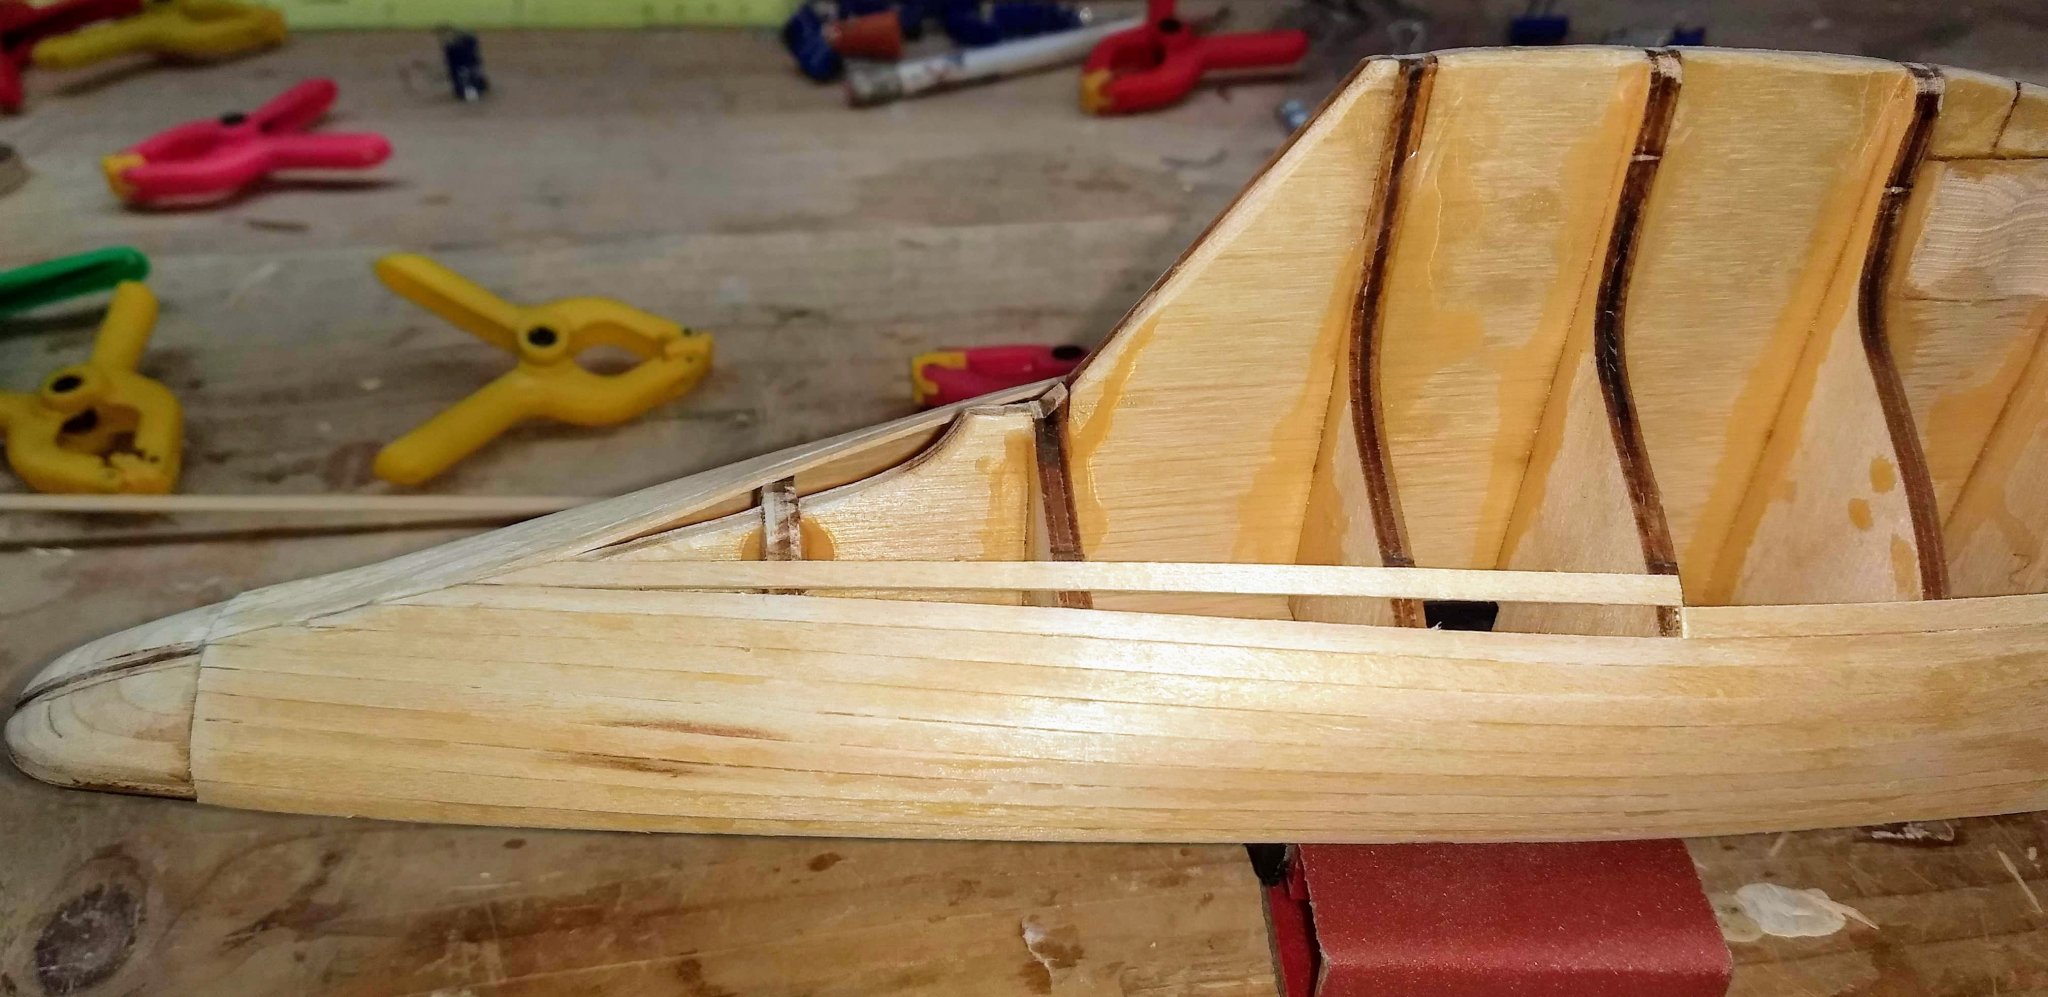
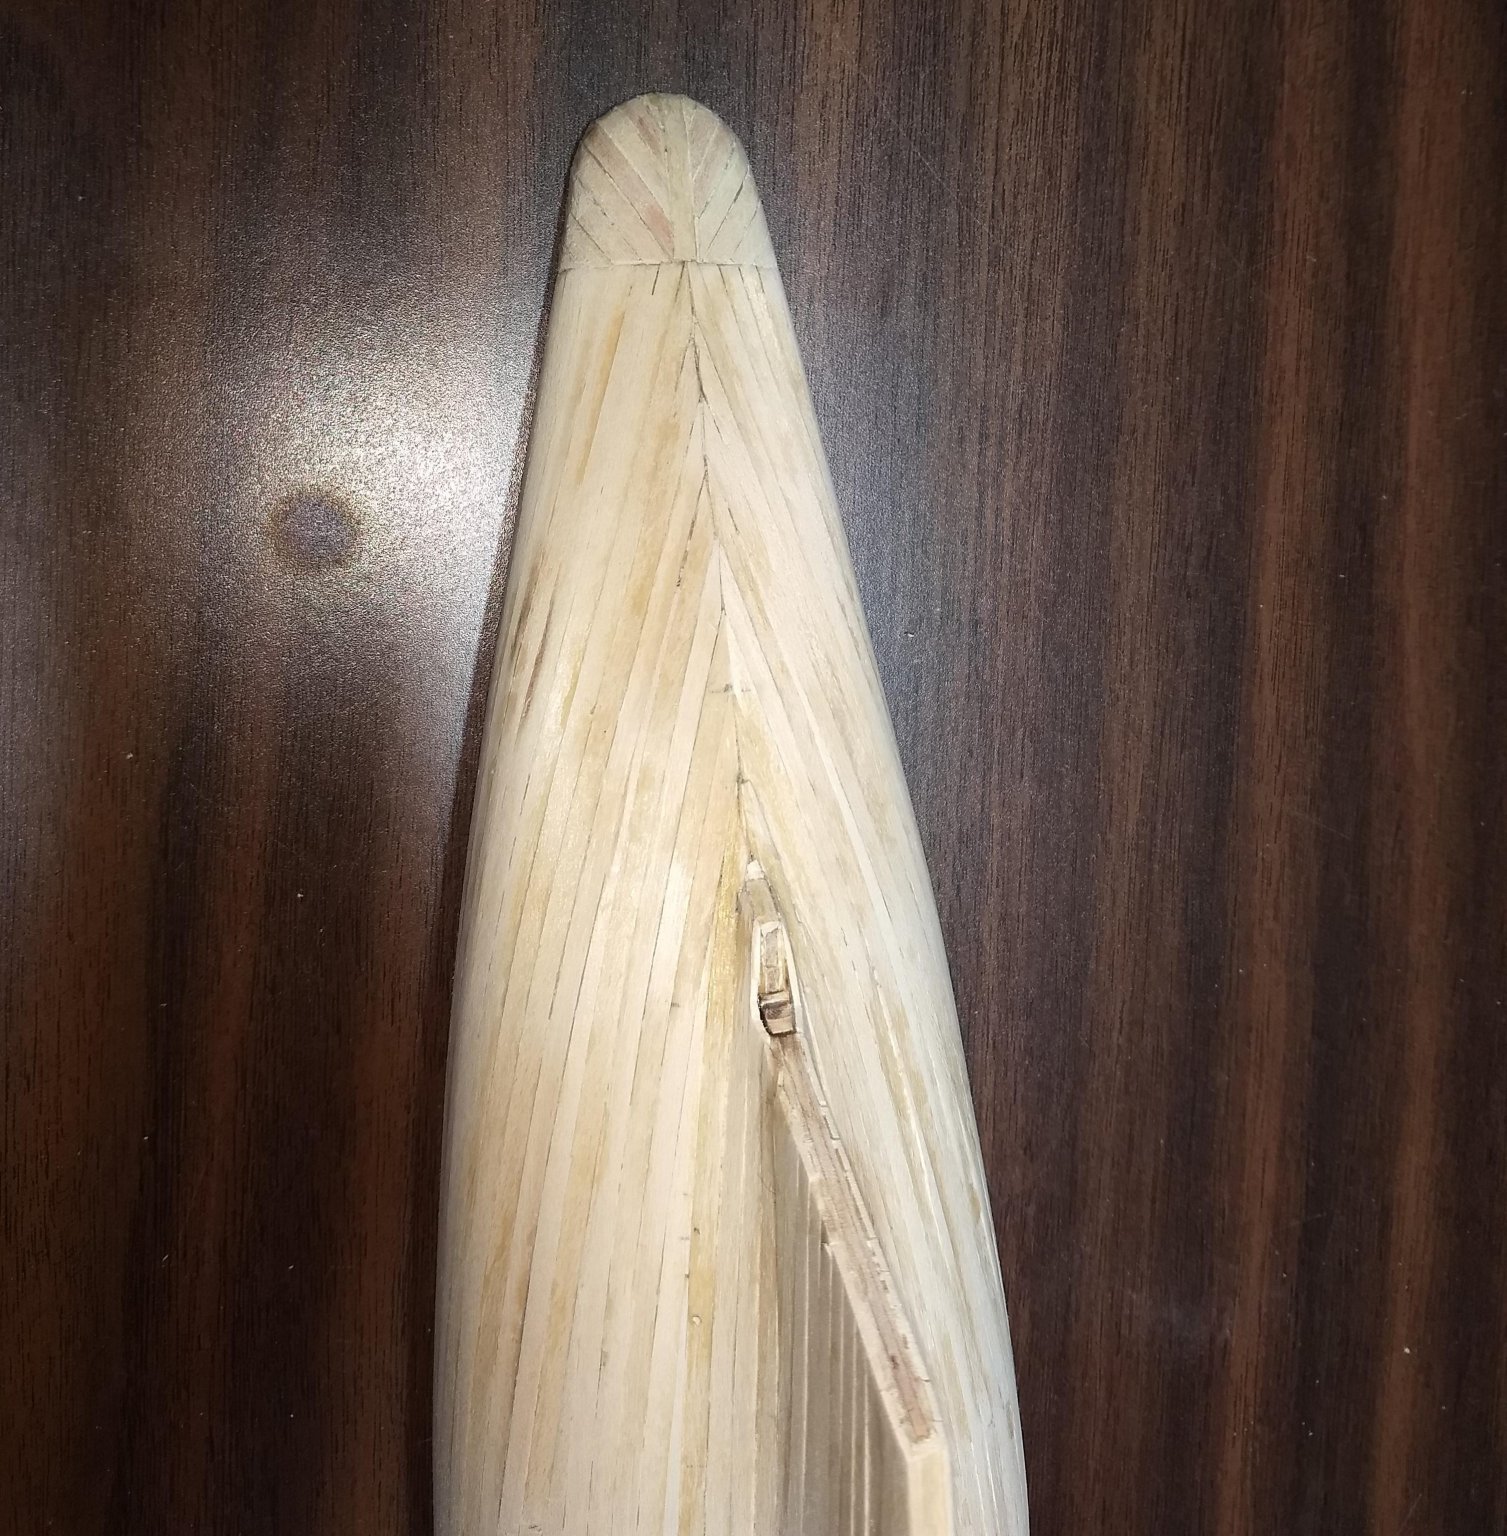
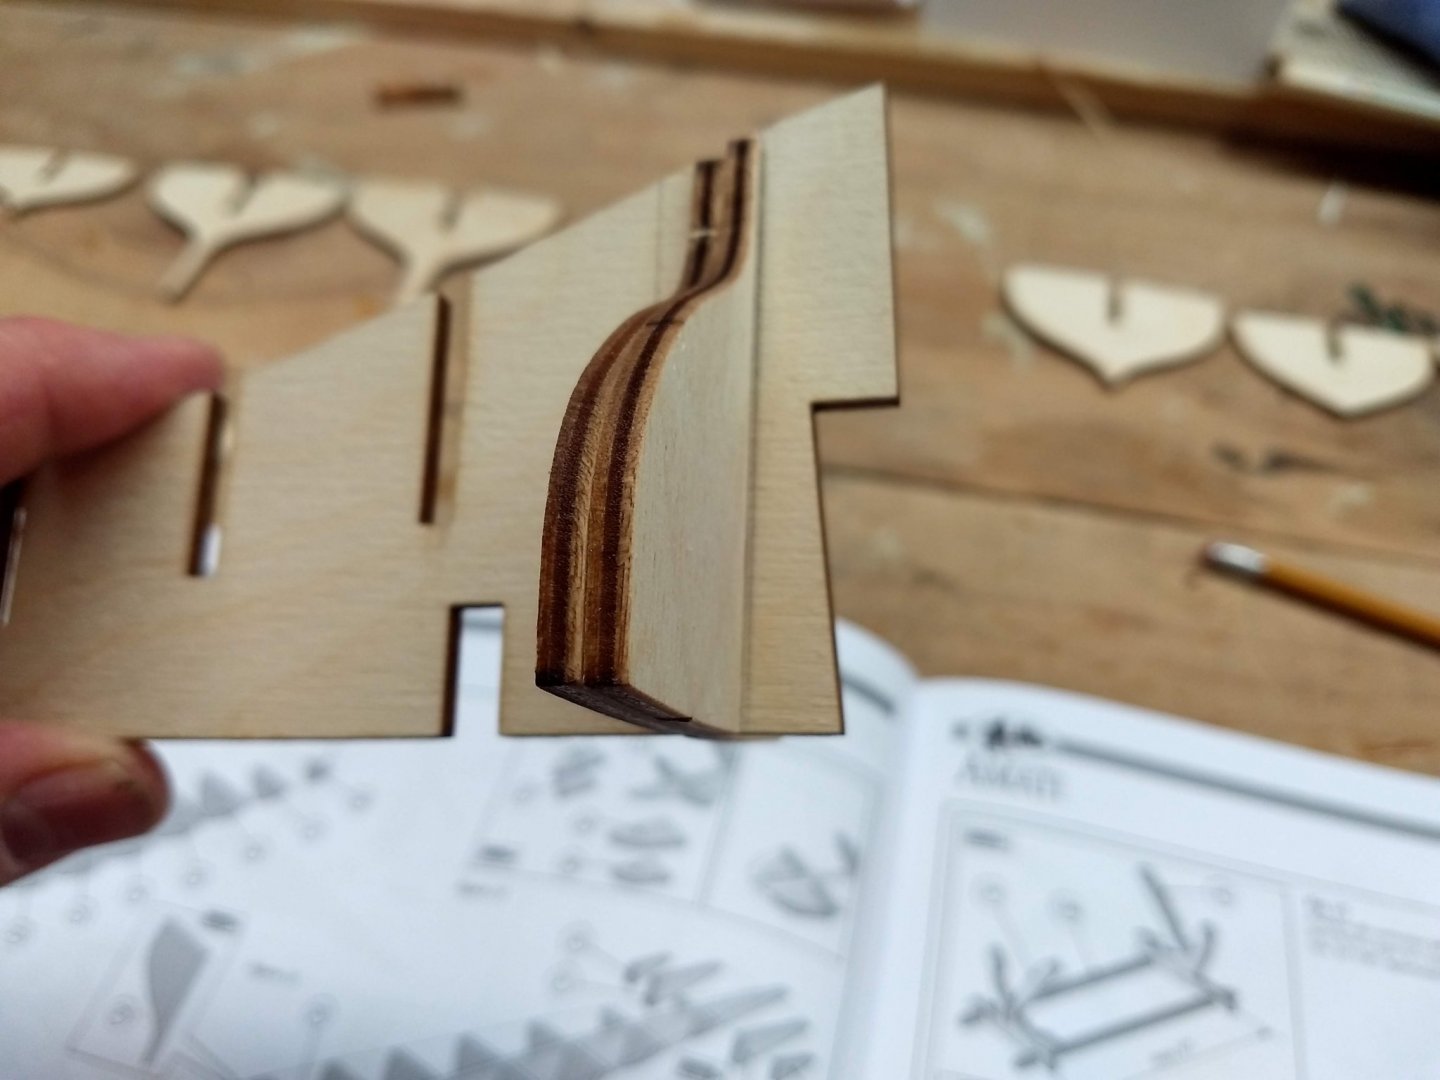
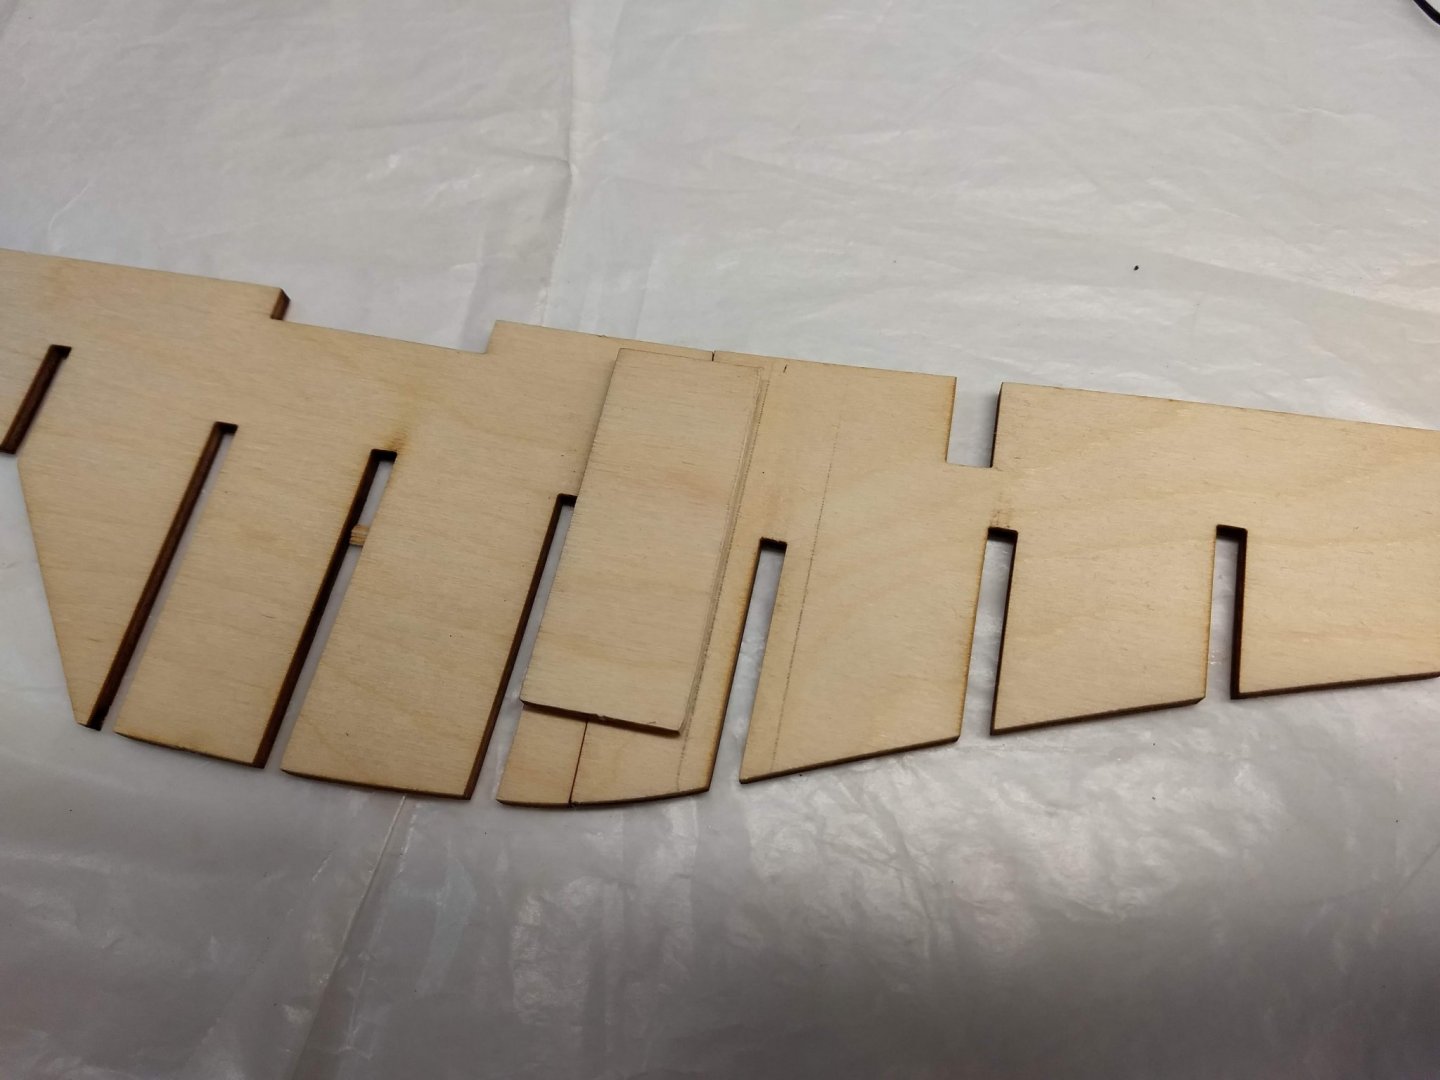
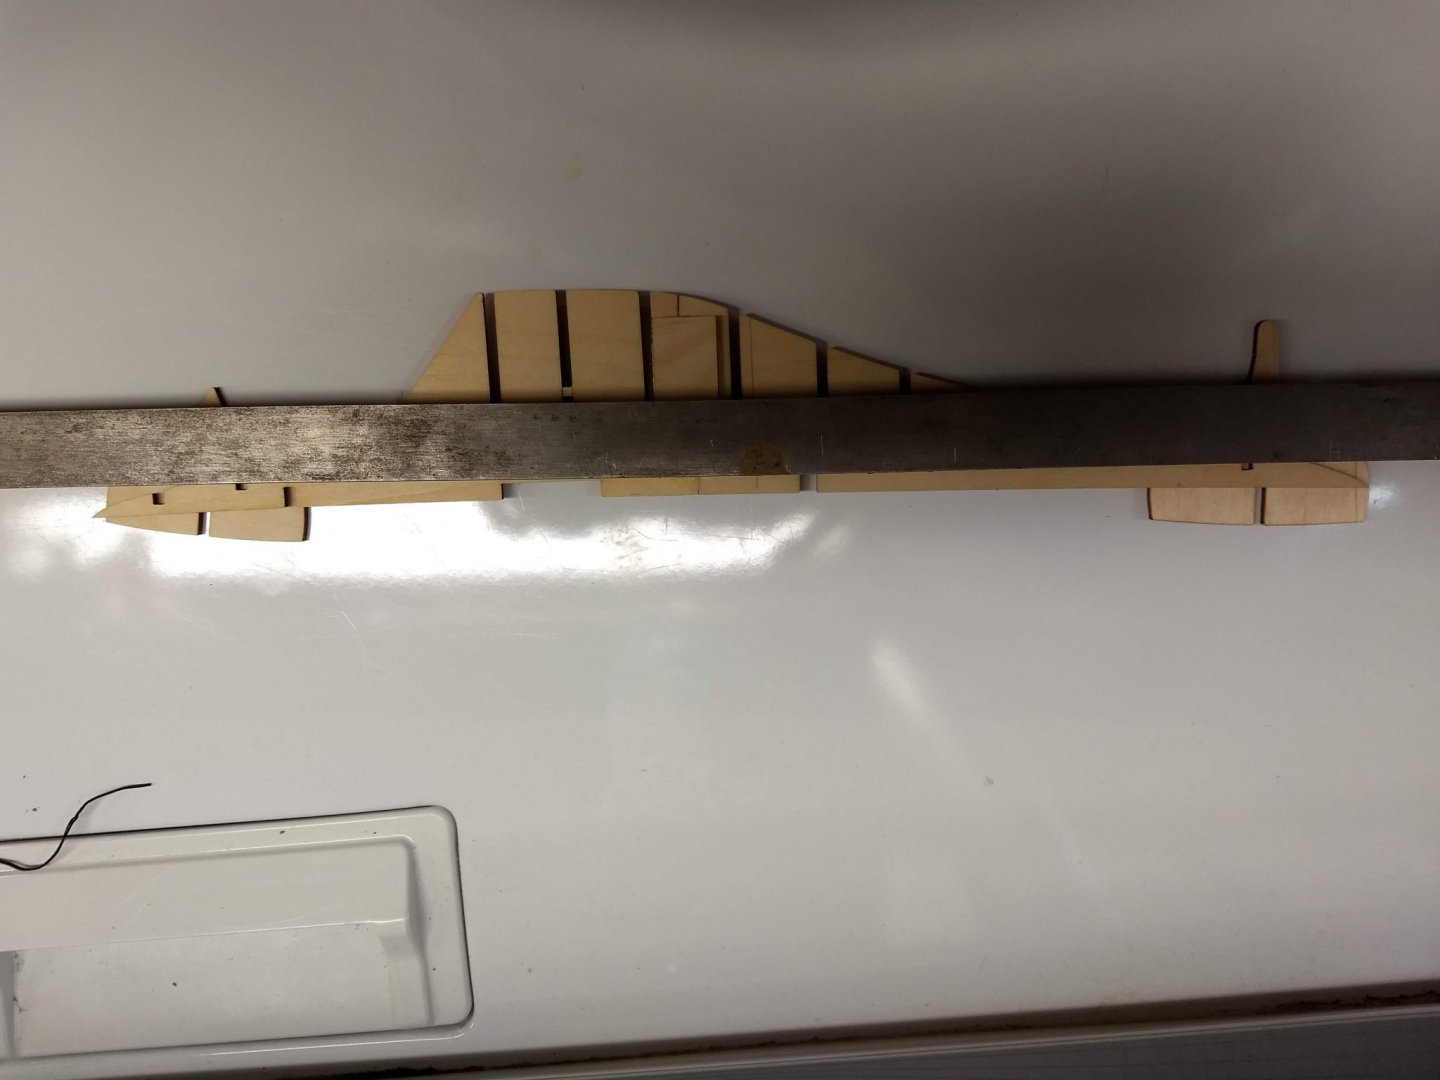
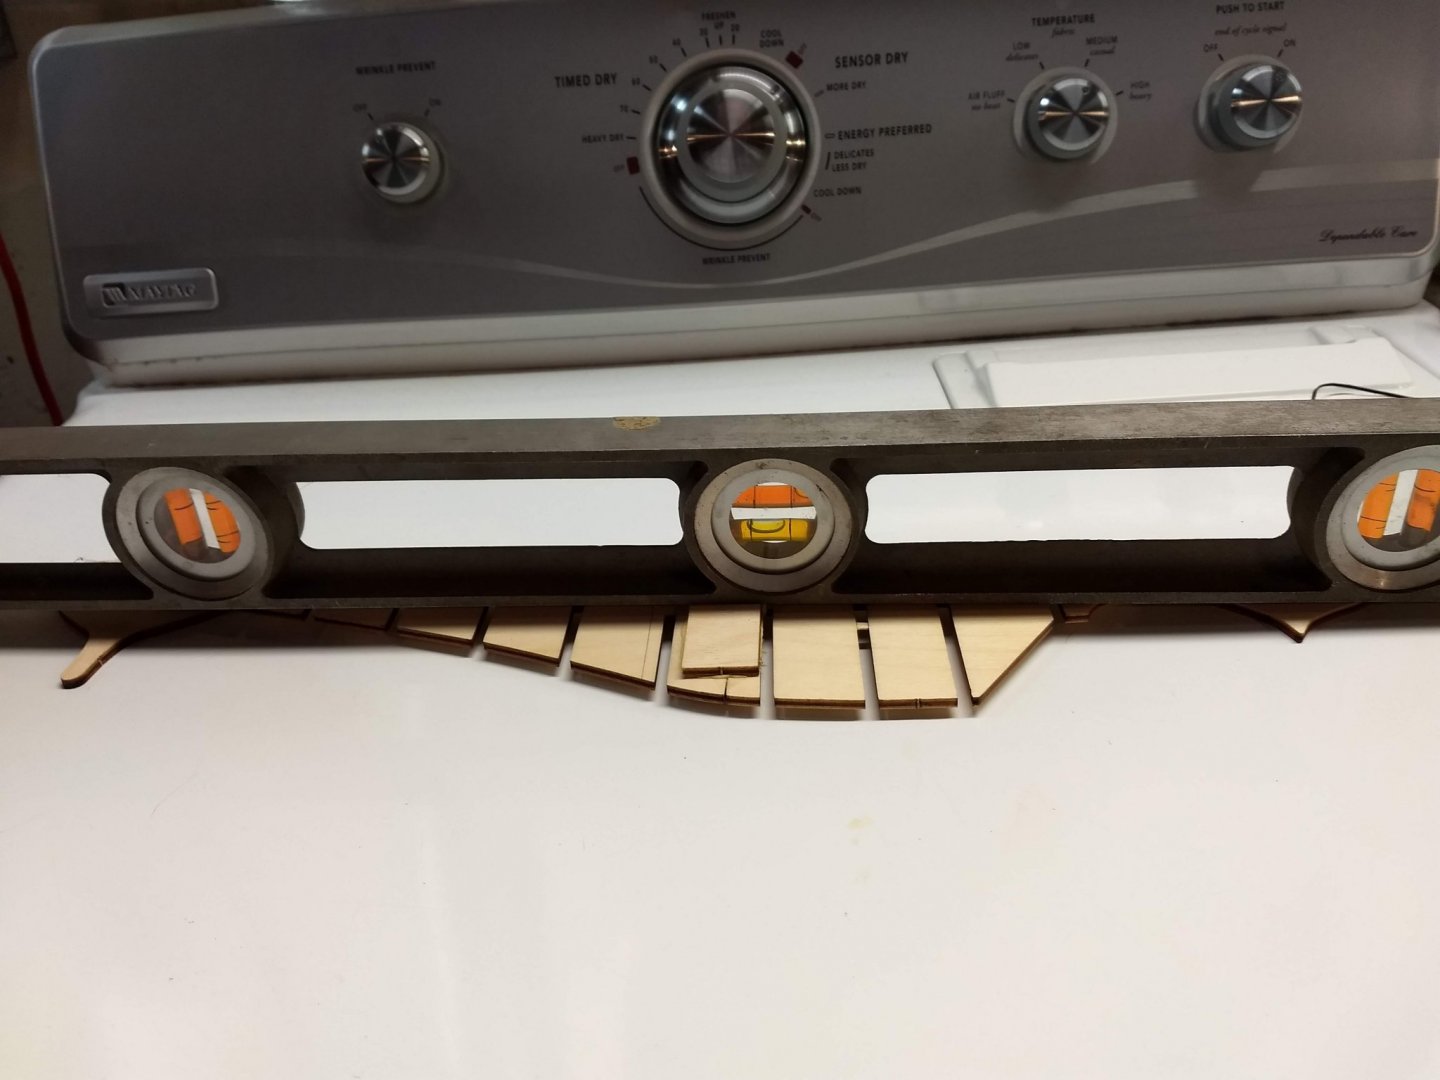
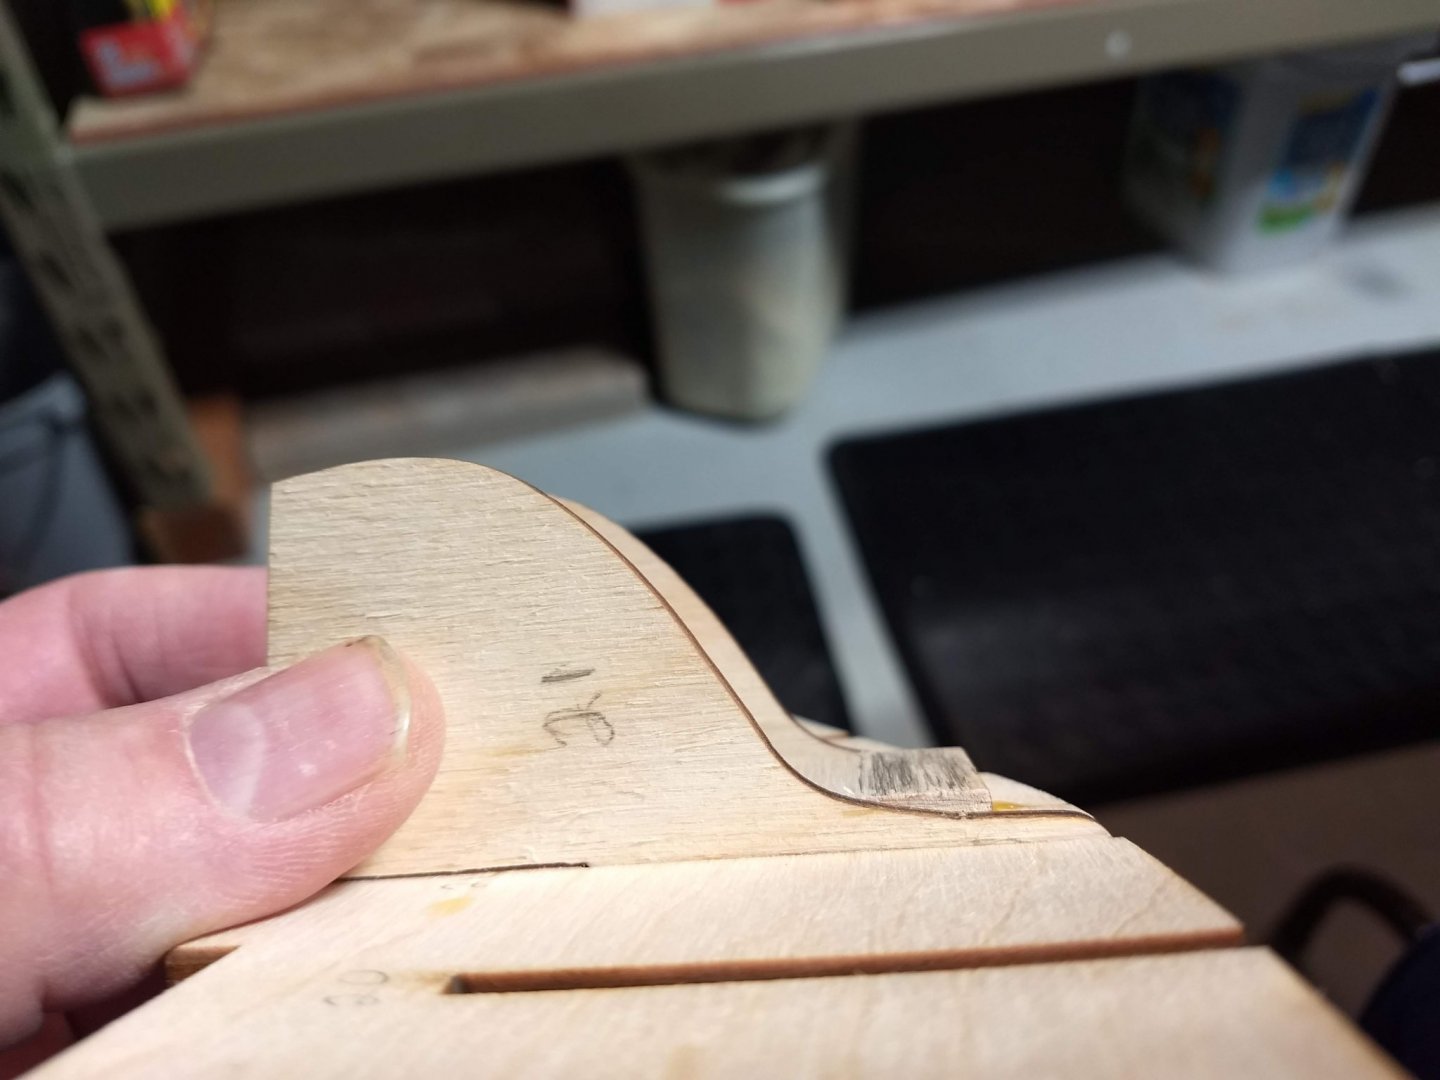
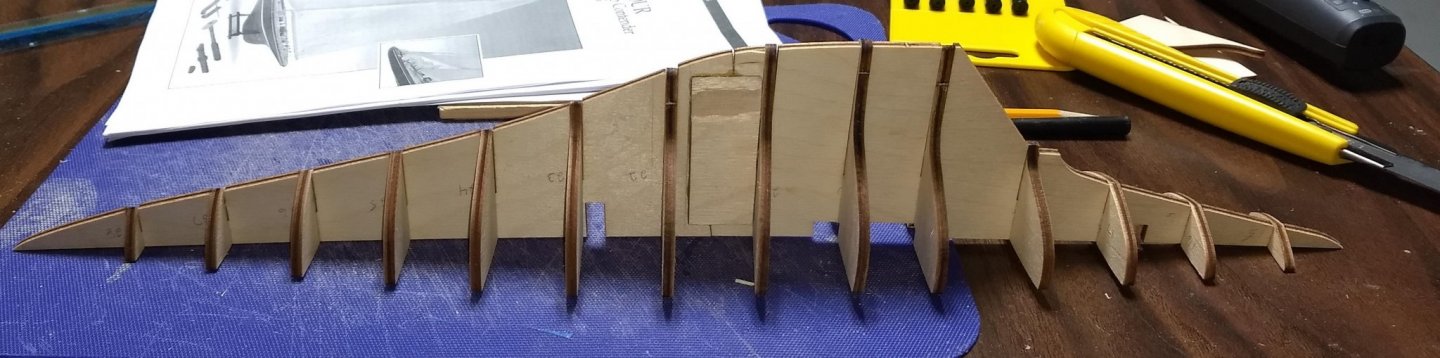
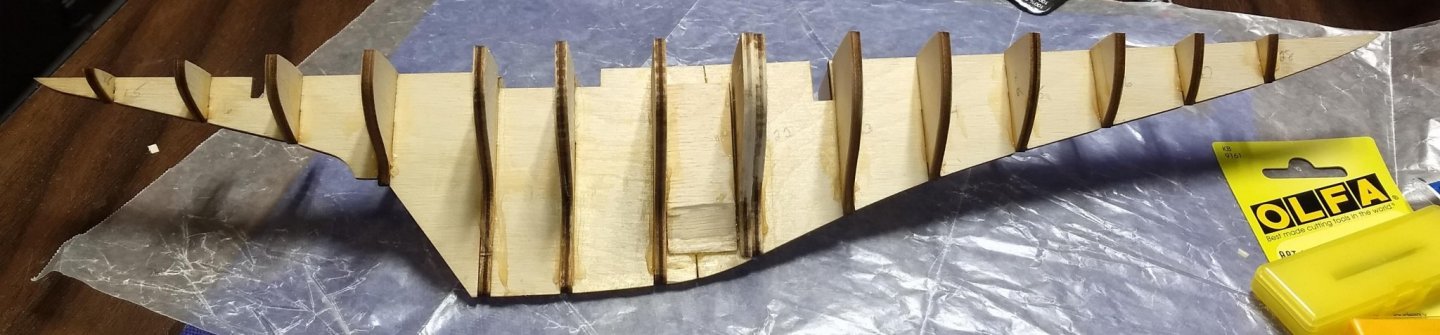
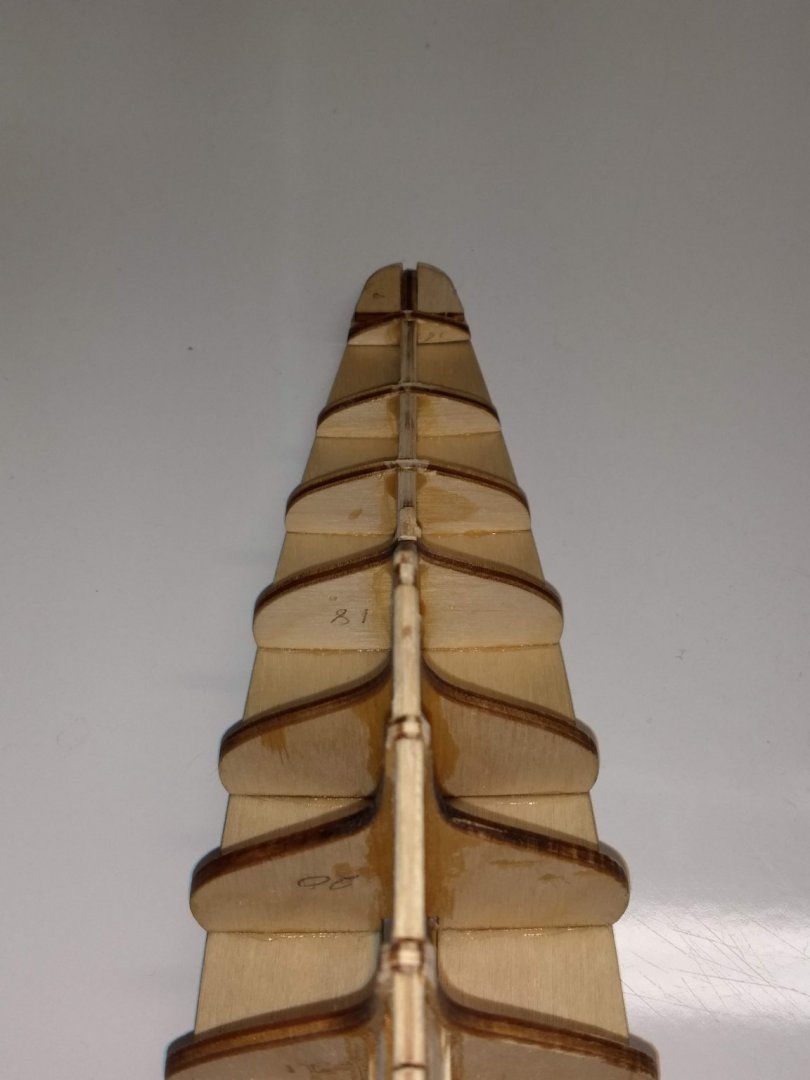
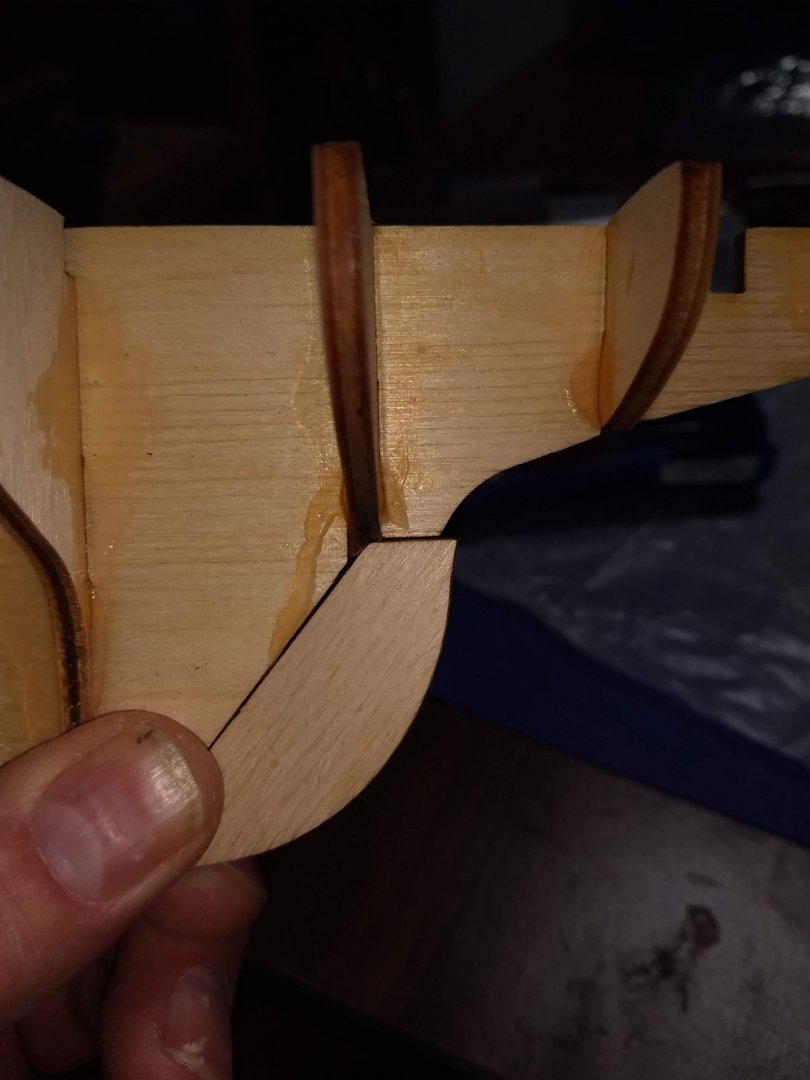
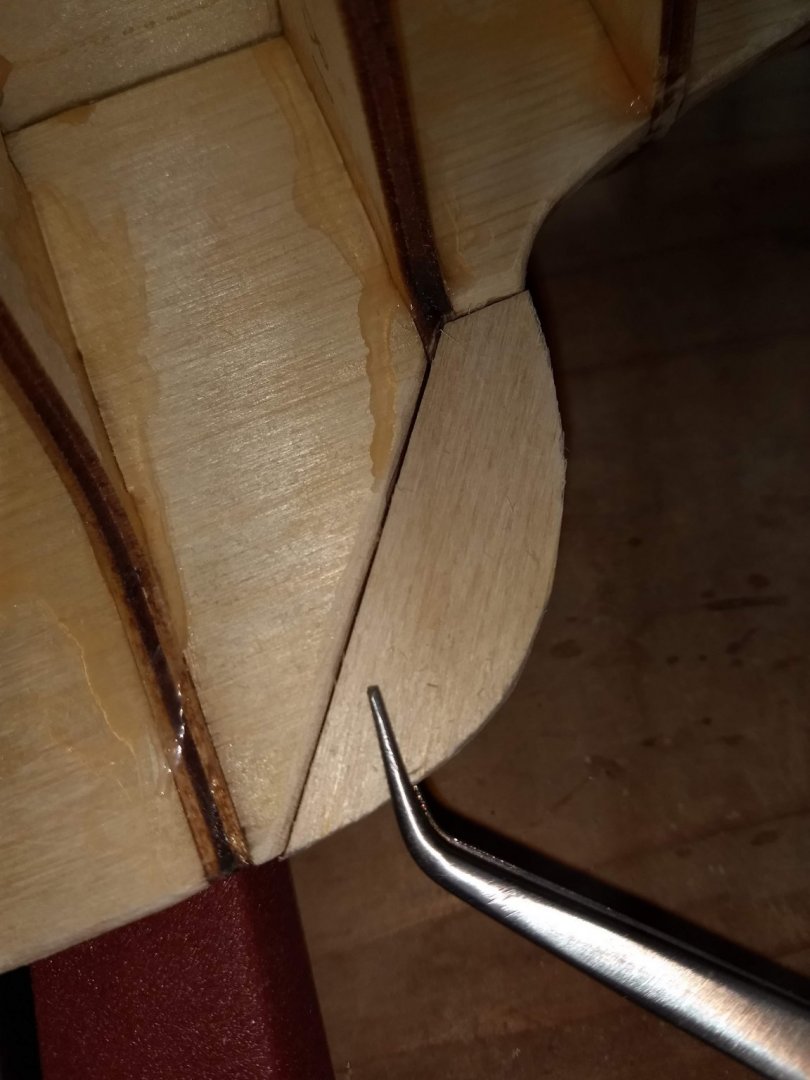
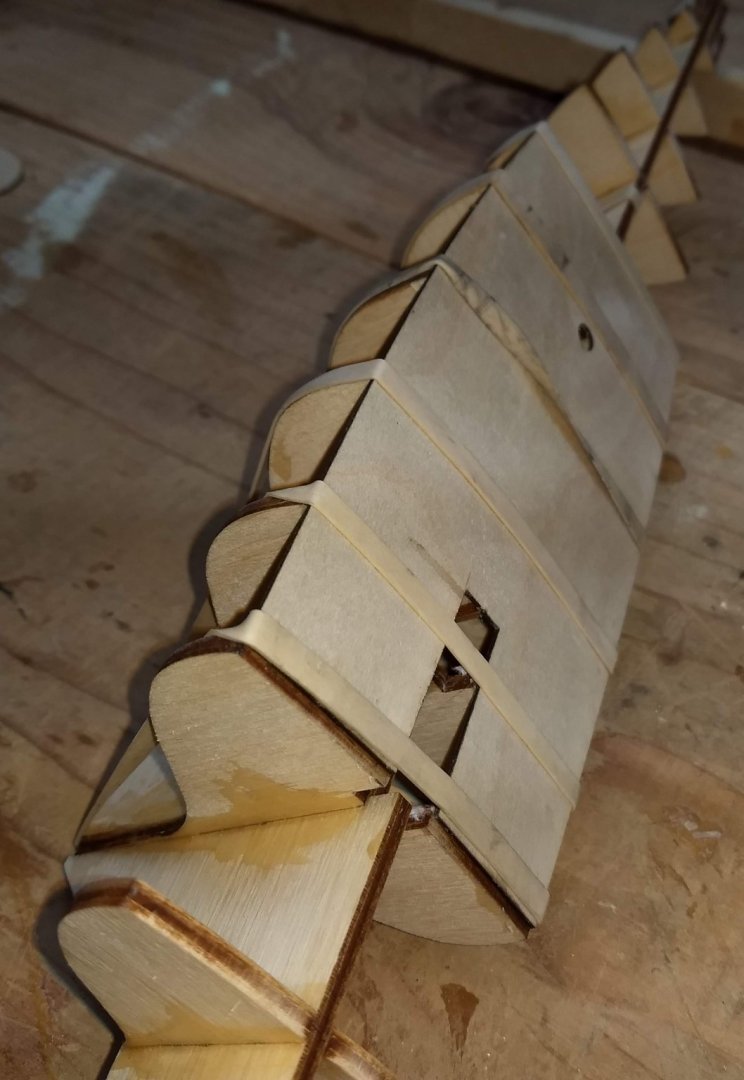
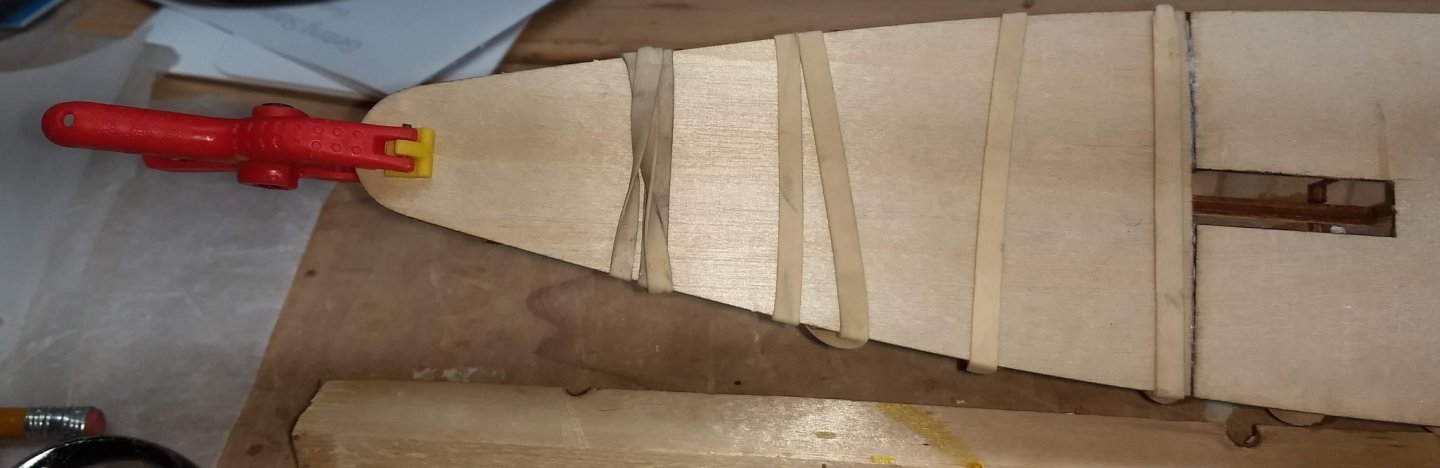
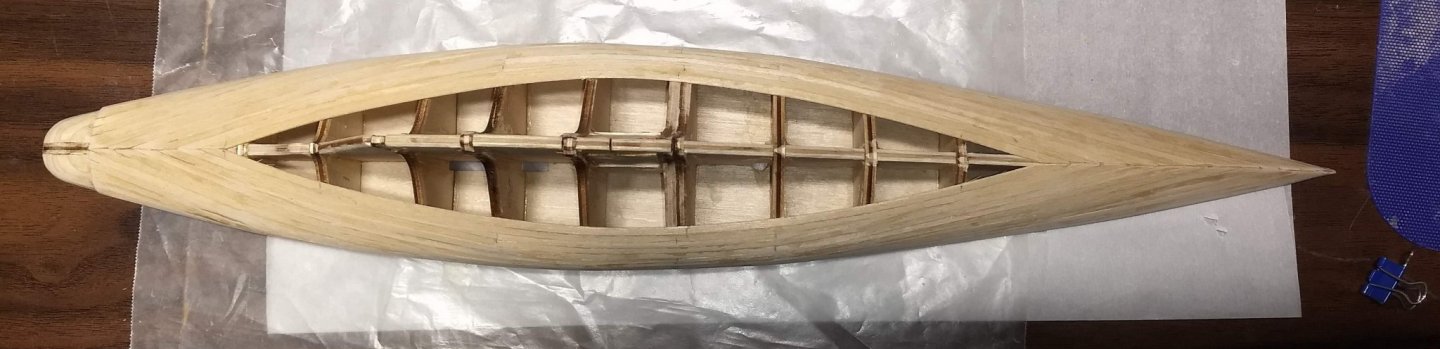
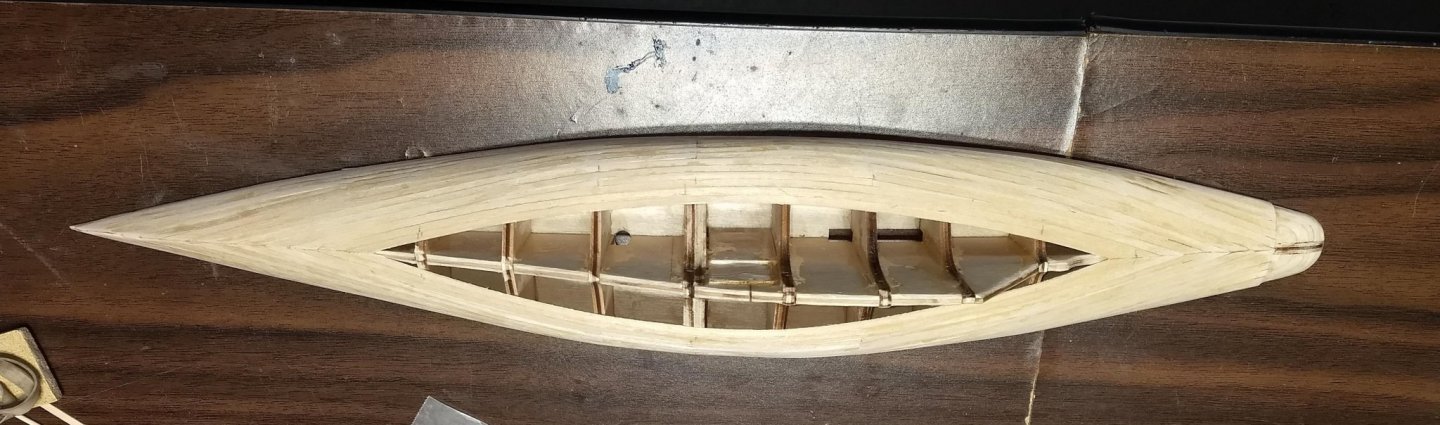
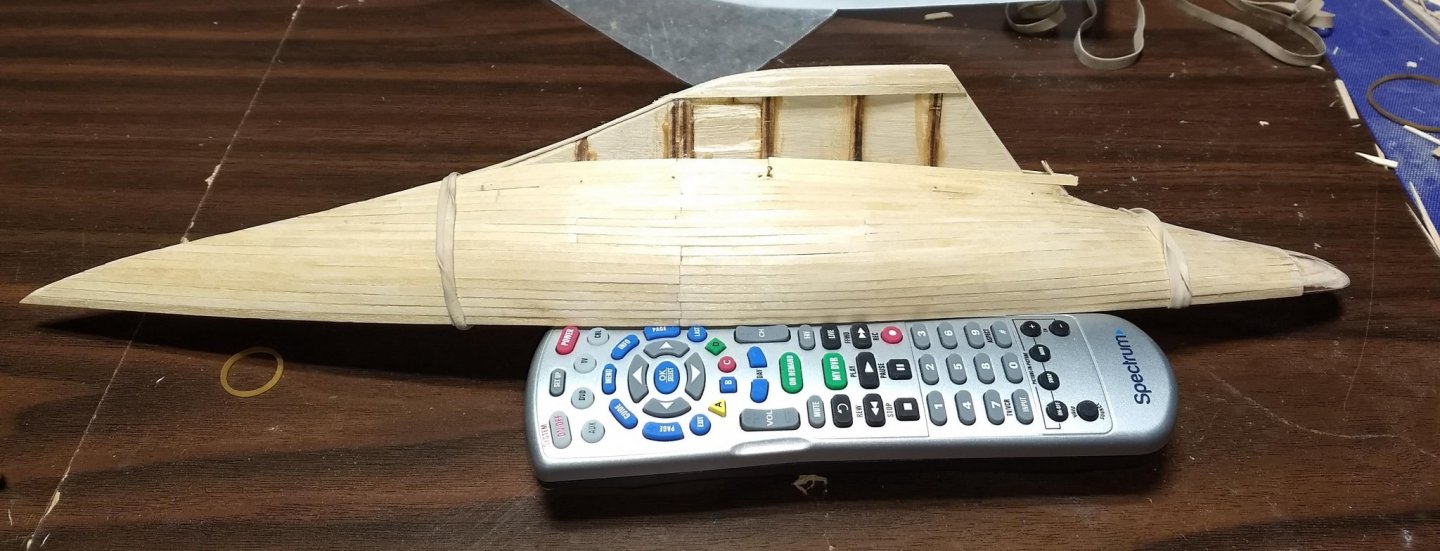
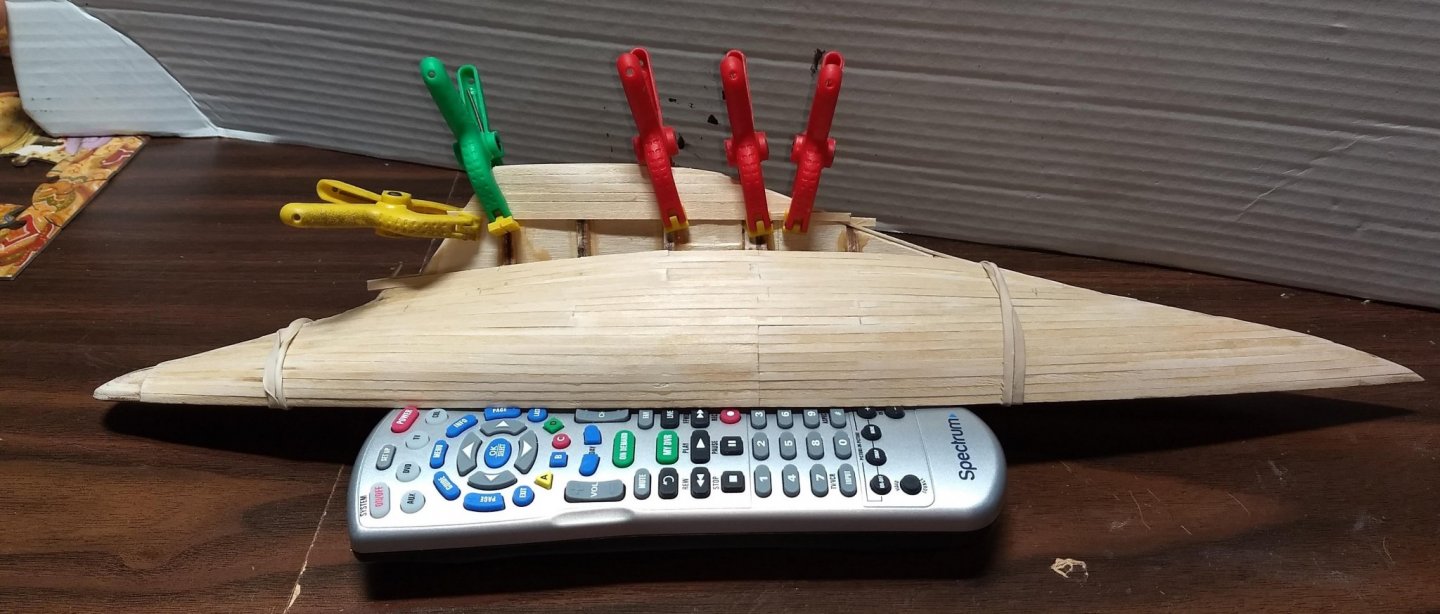
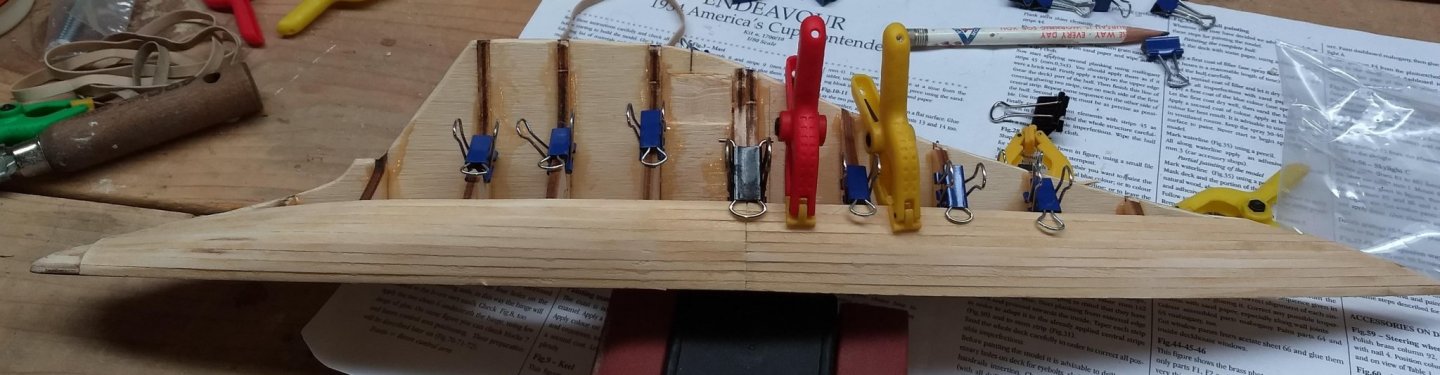
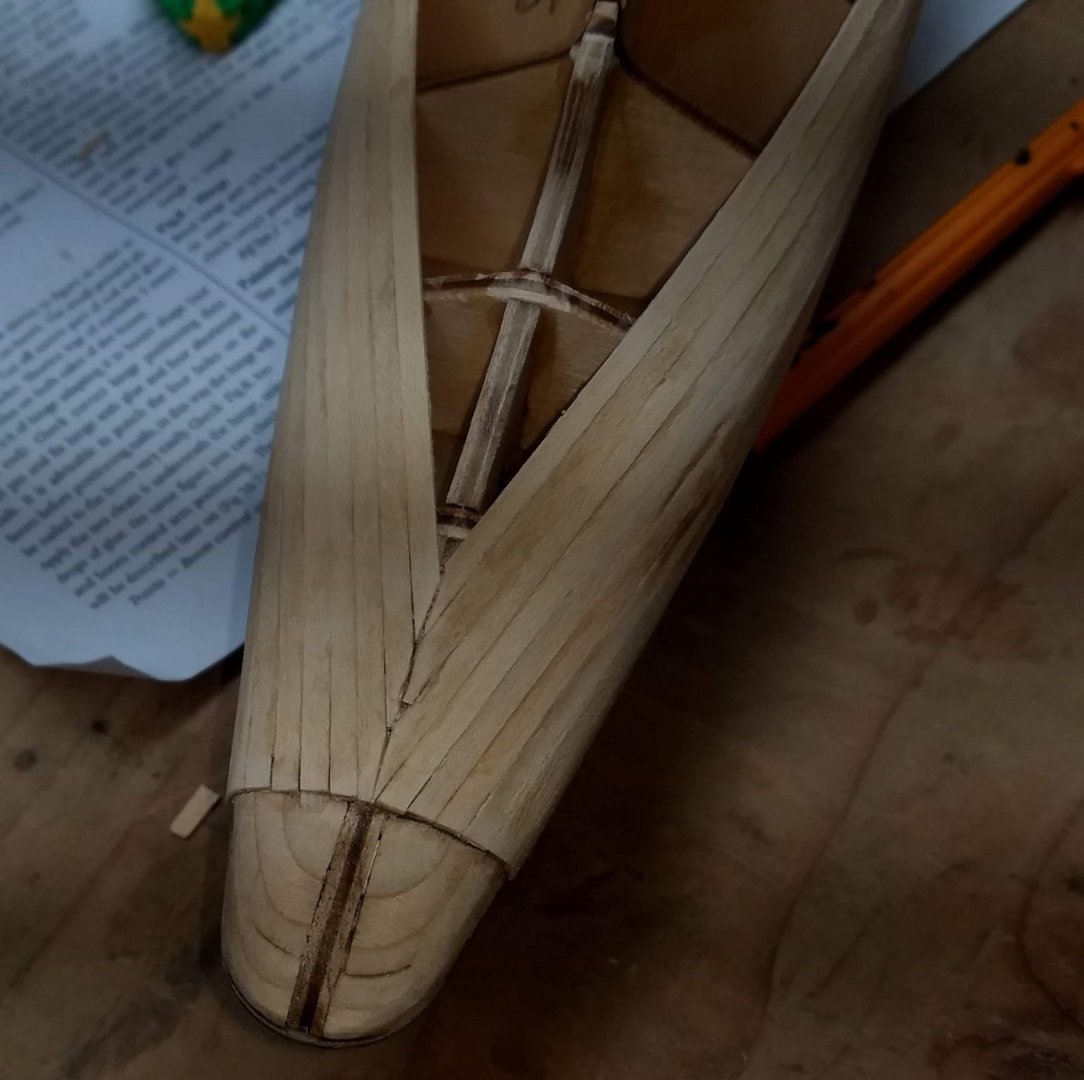
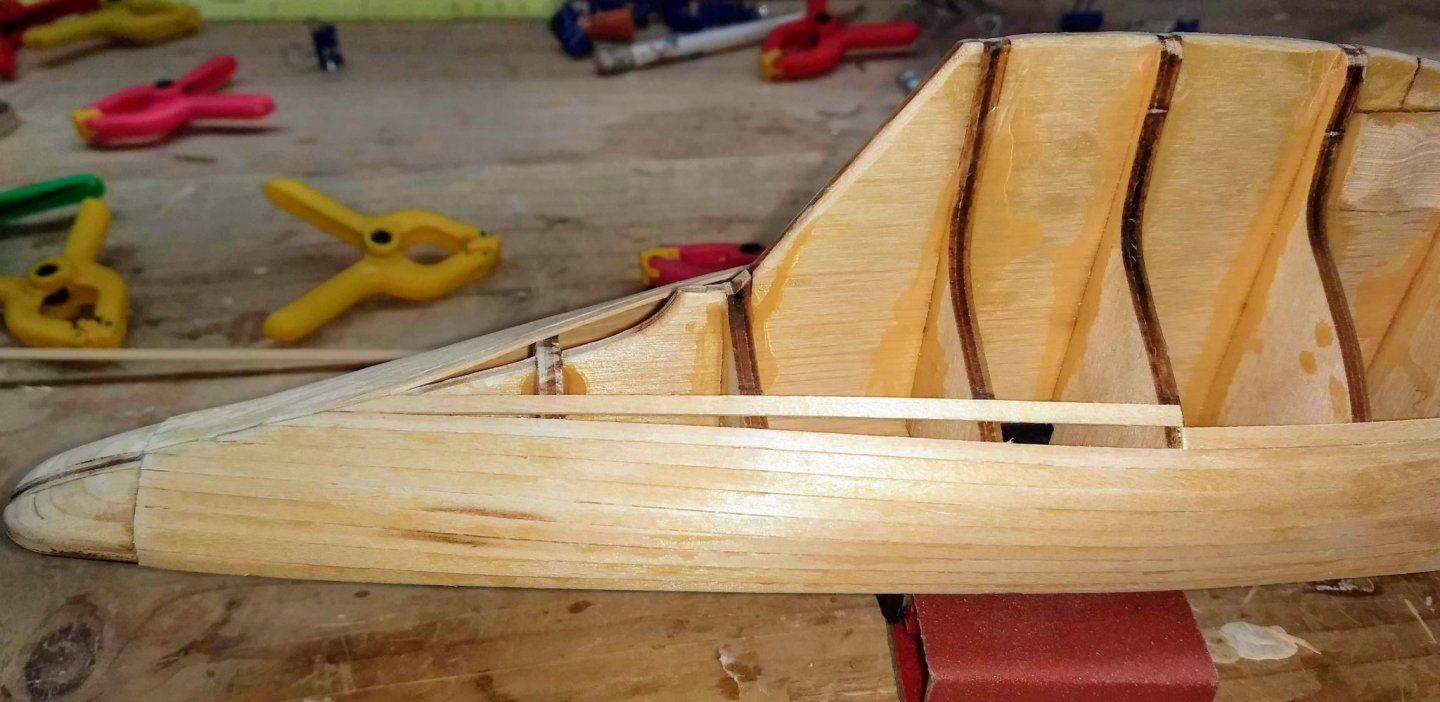
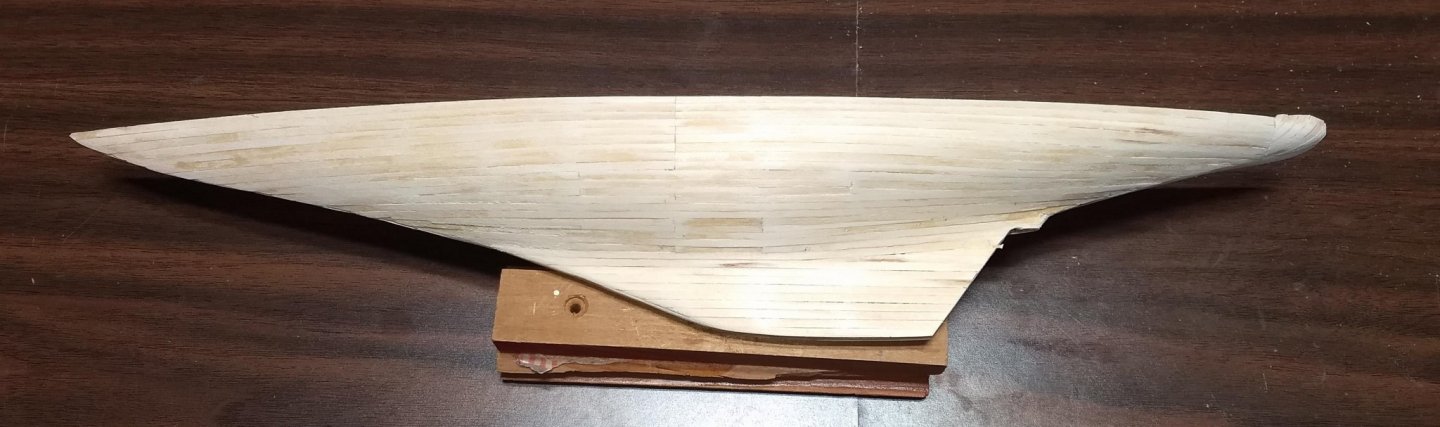
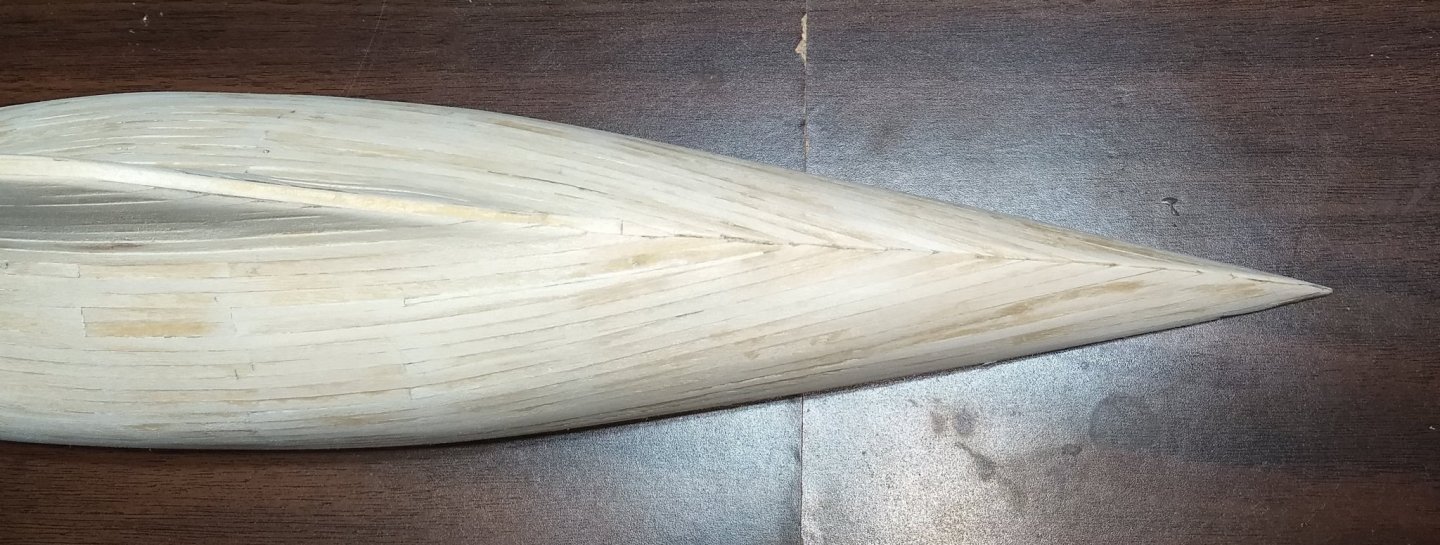
 Just starting up the build of the J Class Endeavour Yacht. If some of you have seen my other logs, you know I am a beginner builder at best. Main thing is that I really enjoy the builds. In my past (earlier) life I raced 36' sloops (22 sq meter class) so the J Class yacht always caught my attention. So when looking for a model to build, the Endeavour caught my eye... As others have done, the instructions call to first build the mast and boom, but I was too excited to start the hull, so my mast and boom will come later too. Instructions call to fist connect the two keel sections with two rectangular support pieces - One on both sides of the keel. Does not specify an exact location. However you really need to insure the support pieces will not interfere with the section of the hull that is double reinforced as those double frame pieces are really close to these support pieces. In my case I dry fit the two double reinforced pieces and drew a line at the edge of the 2nd support piece. That way you will know where to locate the two rectangular support pieces. 2nd piece removed and line drawn. You need to verify when you add the two rectangular support pieces they do not cross this line... or you will have some "adjustments" in your future. With the double double reinforced frame pieces removed you can not glue the two halves or the keel. First side is easy just lay the tow keep halves together and glue on the support piece Support piece on the other side is more of a challenge, as you have to add a pieces of scrape wood under the bow and stern sections to keep the keep straight. In addition to scrape wood under the bow and stern sections I added a level (for weight) on top in an attempt to keep the keel straight as the glue dried. Not sure if that was a good idea or not, as then the glue dried and I looked town the keel, it still had a small bend to it. Maybe I should have used a vice to hold the pieces together. In any event, the bend was not severe, and I think when the deck is added, it will straighten out... Lets hope,,, Kind of hard to notice in the picture but there is a slight bend in the keel as it goes aft. Before I begin the frame sections, I decided to build some planking clamps out of paper binder clips. These are the same other modelers have made and really make the planking much easier. In my case I bought the smallest binder clips I could find. Before adding the frames, they were numbered just to keep them straight. Not so much with this model, but with another model I worked on, I did not number them and they were very similar is shape. And after getting them all cut out and put in a pile, it was a challenge to keep them straight. In any event, a good idea to number them. Below shows the first two frame sections added. Note in the first picture the double frame section is right up against the line I drew earlier. While the line helped me with fore and aft positioning of the keel support pieces I did not think of up and down positioning. Note in the picture above and below, the shaded wood. This is wood that sticks up above the frame section and needs to be shaved down. In reality the two keel support pieces need to be higher more toward the top of the keel, or as in my case, you will need to do some "adjustments"..... The instructions seem to imply the keel support pieces can more or less be positioned anywhere between the two frames.... So,,, do as I say, not as I do... Side view showing the keel support pieces sticking up above the frame pieces Adding the support frames is more or less straight forward... Be sure to verify each support piece is perpendicular to the keel. I would suggest some sort of right angle like a corner brace to hold each frame as the glue dries. In my case I attempted to keep the frames straight, but I have to admit there are a few close but not exactly perpendicular to the keel. I have a feeling I will pay for this with the later planking,,, At this point I was curios as to what the rudder would look like so I dry fitted it to the keel. Unless I am mistaken, the rudder is too large for the keel. Assuming this was a mistake with the kit i trimmed down the rudder to match the keel. After I did that, initially I was feeling pretty good as it turned out OK. But afterwards I got a little anxious wondering if the kit was correct and the mistake was me trimming it down. We will see later on... Below is the trimmed keel. Next the fore and aft sections of the deck were added to the frame. As I was hoping earlier, with rubber bands, clamps, and a little muscle, the bent frame straightened out when the deck sections were added. Let the planking begin,,,,, Below are a few pictures of the planking. Not much to say here as planking is pretty straight forward. I started at the top and worked my way down each side alternating each plank to avoid warping the hull, Every once in awhile I had to add a filler strip to keep thing straight, but no real issues with the first planking Closing in on the end,,,,, Complete with first planking,,,, Just need some sanding and wood filler to smooth things out. At this point the debate is still on as to whether to make the hull blue (like the real Endeavour) or have it natural with the walnut finish. Will make that decision after the 2nd planking,,,, How that turns out will probably determine which way I go,,


- 45 replies
-
- 7
-

-
- j-class yacht
- amati
- (and 2 more)
-
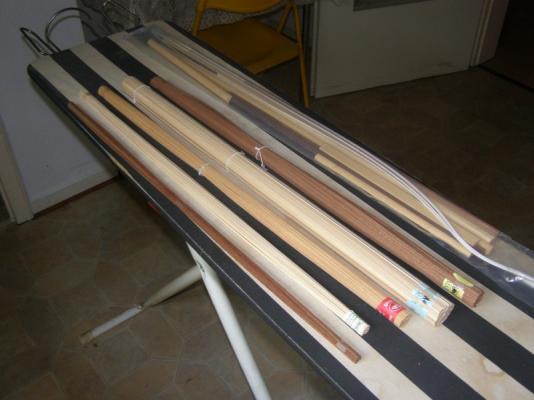
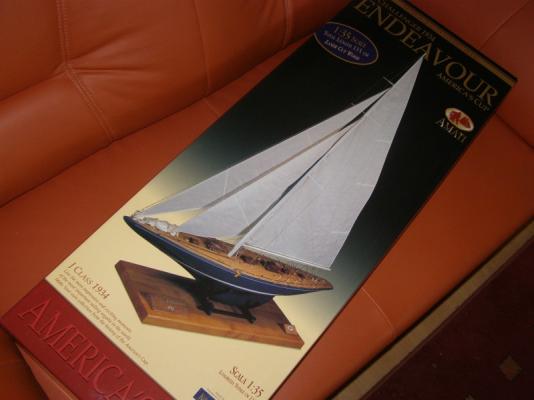
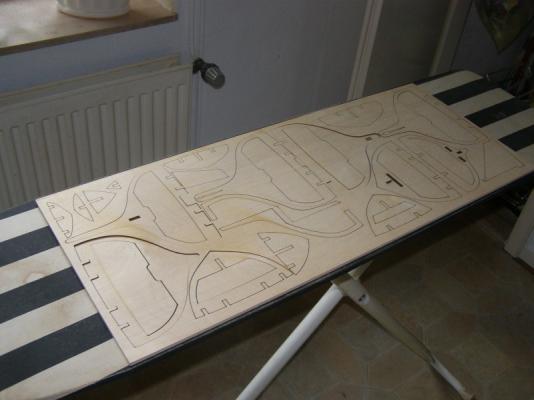
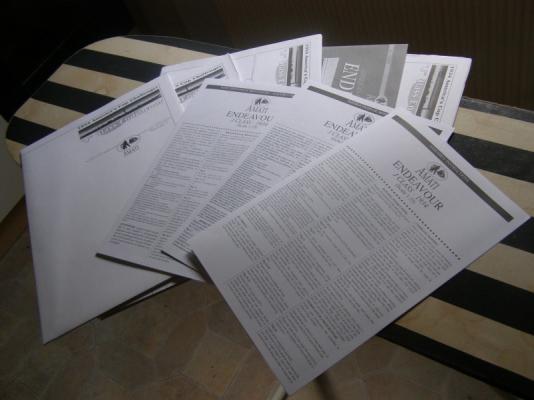
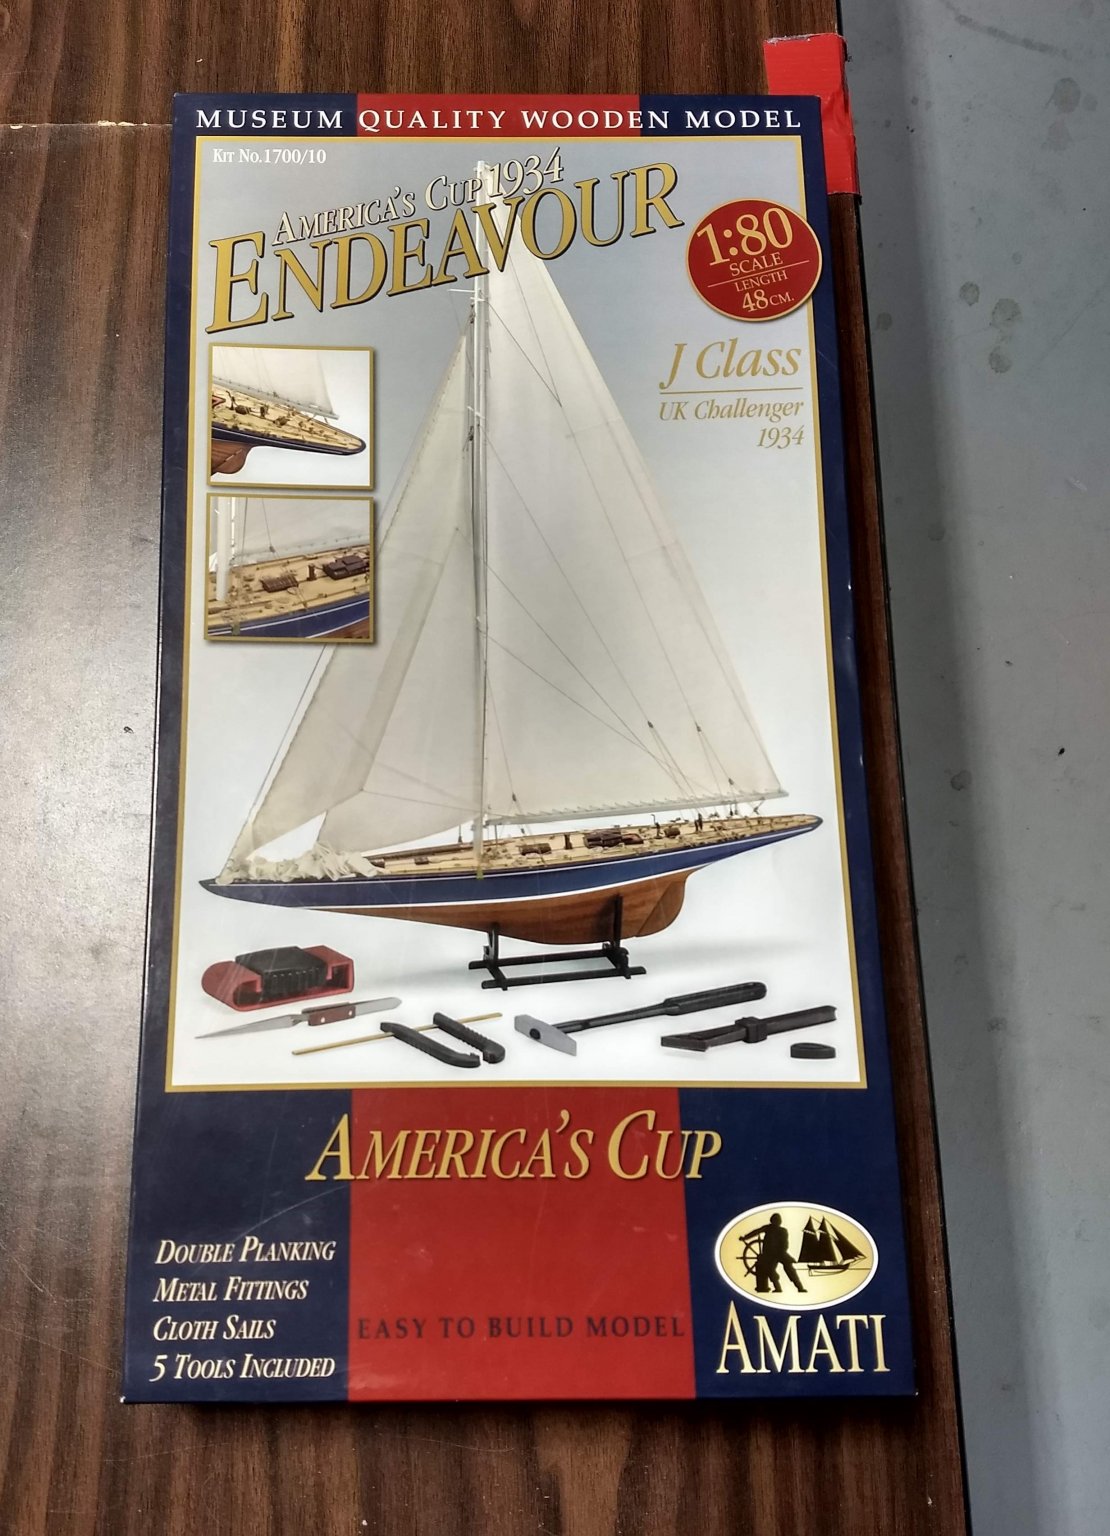
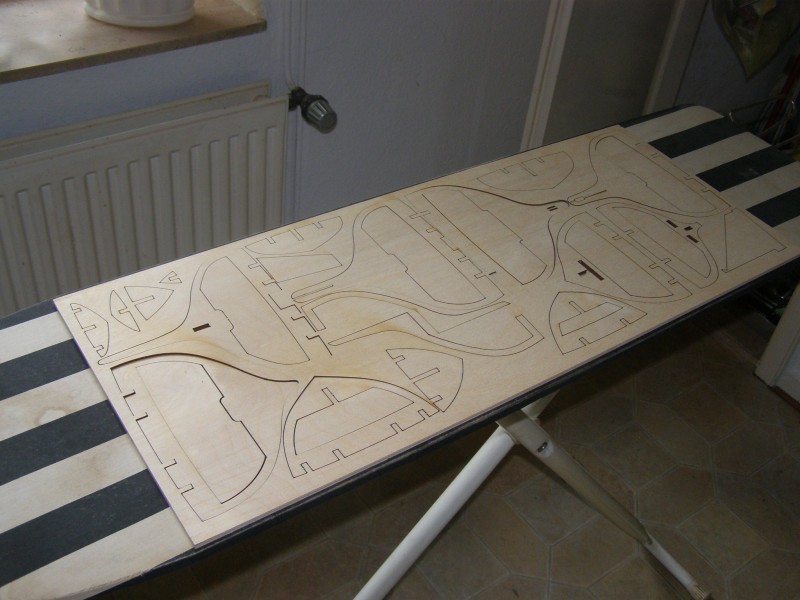
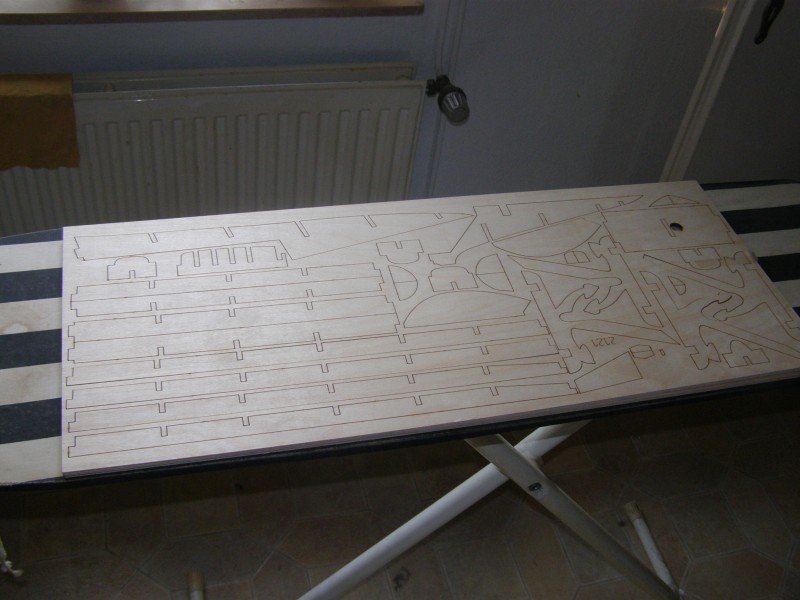
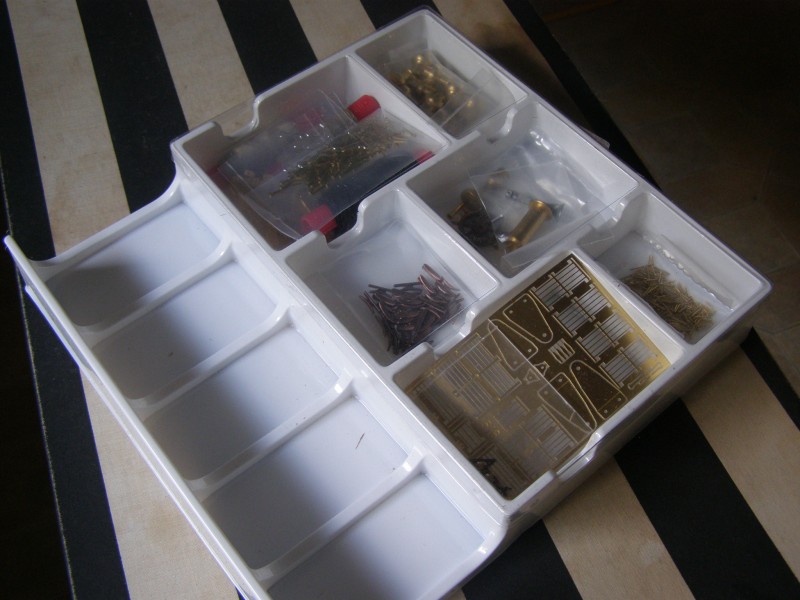
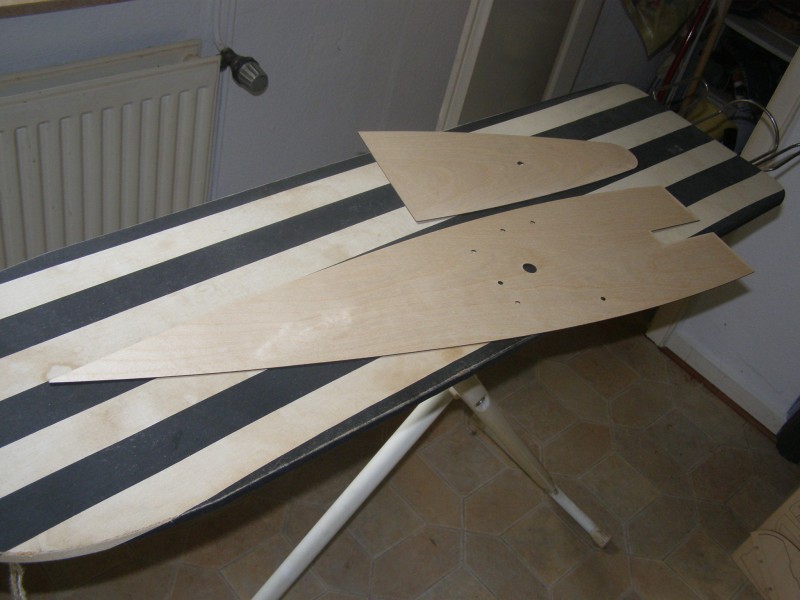
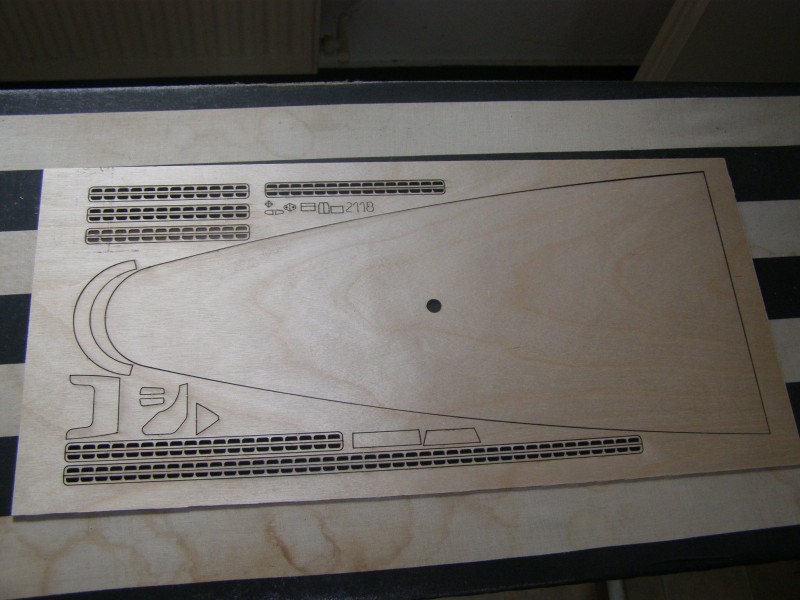
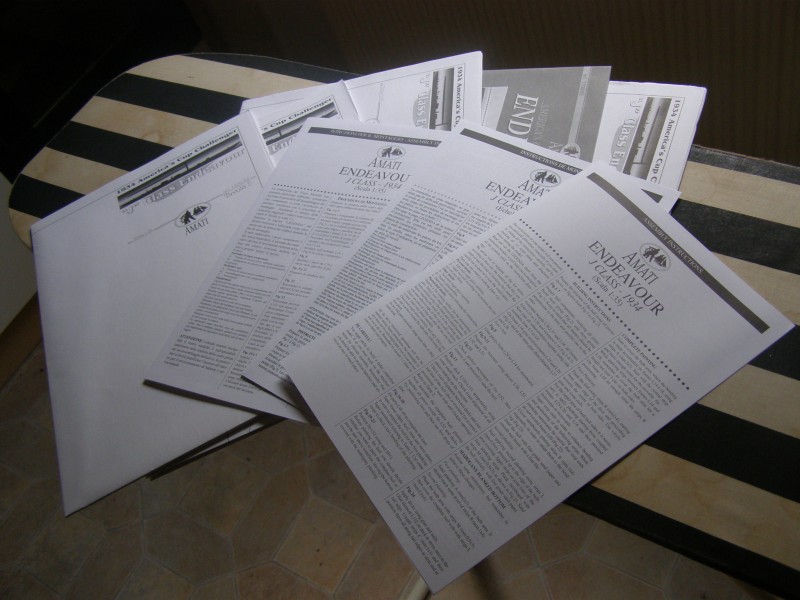
 Hello, today a huge box came in. When the rigging of my Pickle is done I‘ll start with the America‘s Cup yacht Endeavour. The 1/35 scale kit includes laser cutted parts for the deck, keel and frames, limewood and mahogany planking material, brass and wooden fittings, photo etched brass details, cloth, plans, instructions in three languages (Italian, French and English). Endeavour is a 130-foot (40 m) J-class yacht built for the 1934 America's Cup by Camper and Nicholson in Gosport, Portsmouth Harbour, England. She was built for Sir Thomas Sopwith who used his aviation design expertise to ensure the yacht was the most advanced of its day with a steel hull and mast. She was launched in 1934 and won many races in her first season including against the J's Velsheda and Shamrock V. She failed in her America's Cup challenge against the American defender Rainbow but came closer to lifting the cup than any other until Australia II succeeded in 1983. (Wikipedia) The box Frames and keel Metal parts Wooden strips for planking and the material for the mast The deck and the wooden fittings The building plans The Amati kit is really impressive. The wooden parts are of good quality, only the sails are not sewn. Anyway, I can‘t wait laying the keel.