Search the Community
Showing results for tags 'finished'.
-
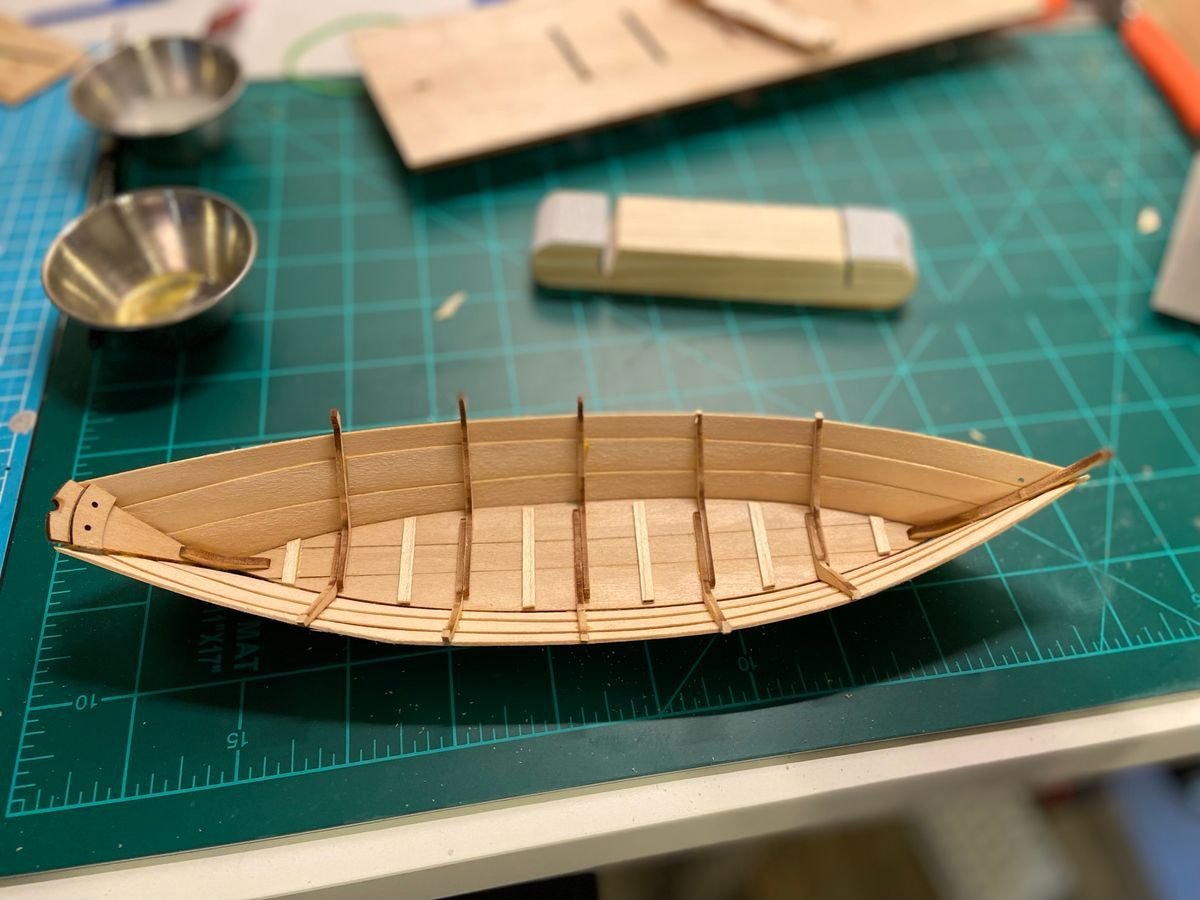
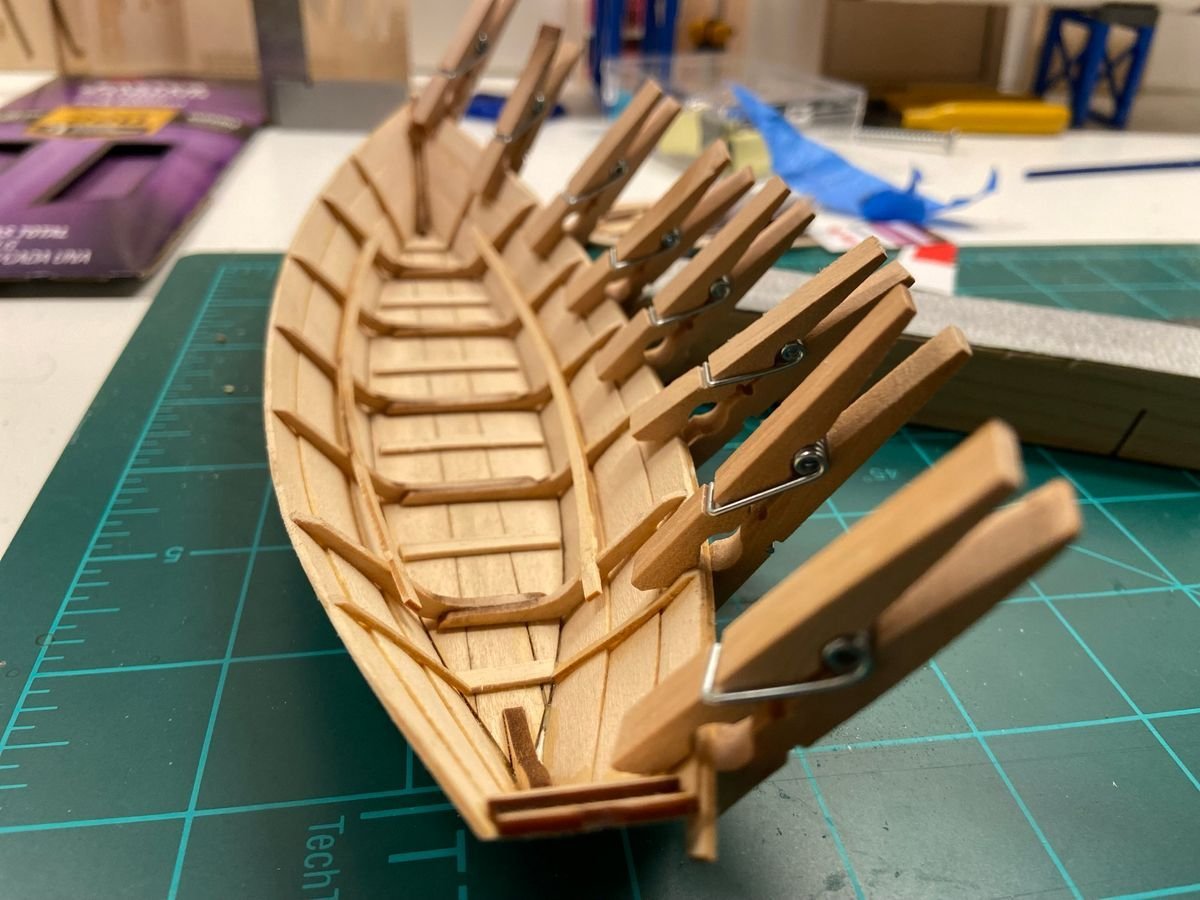
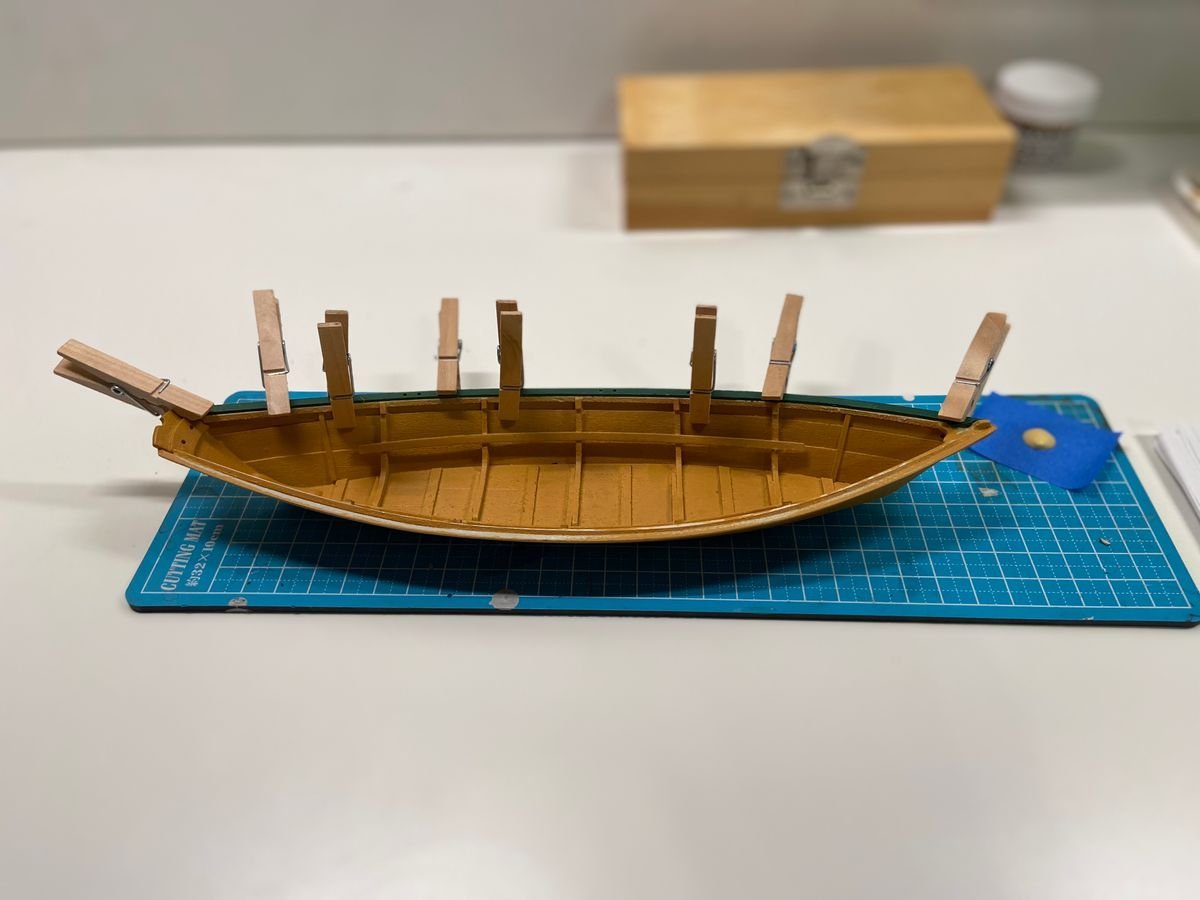
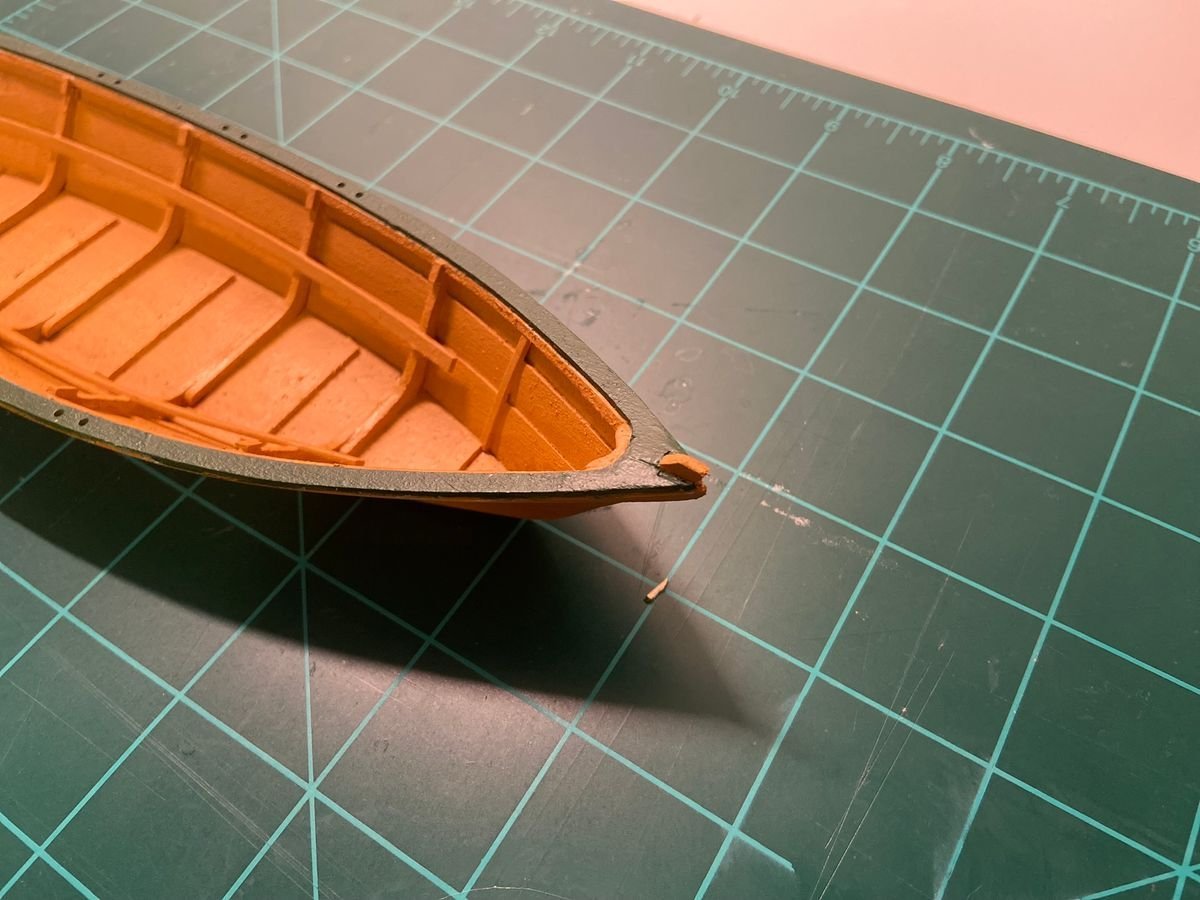
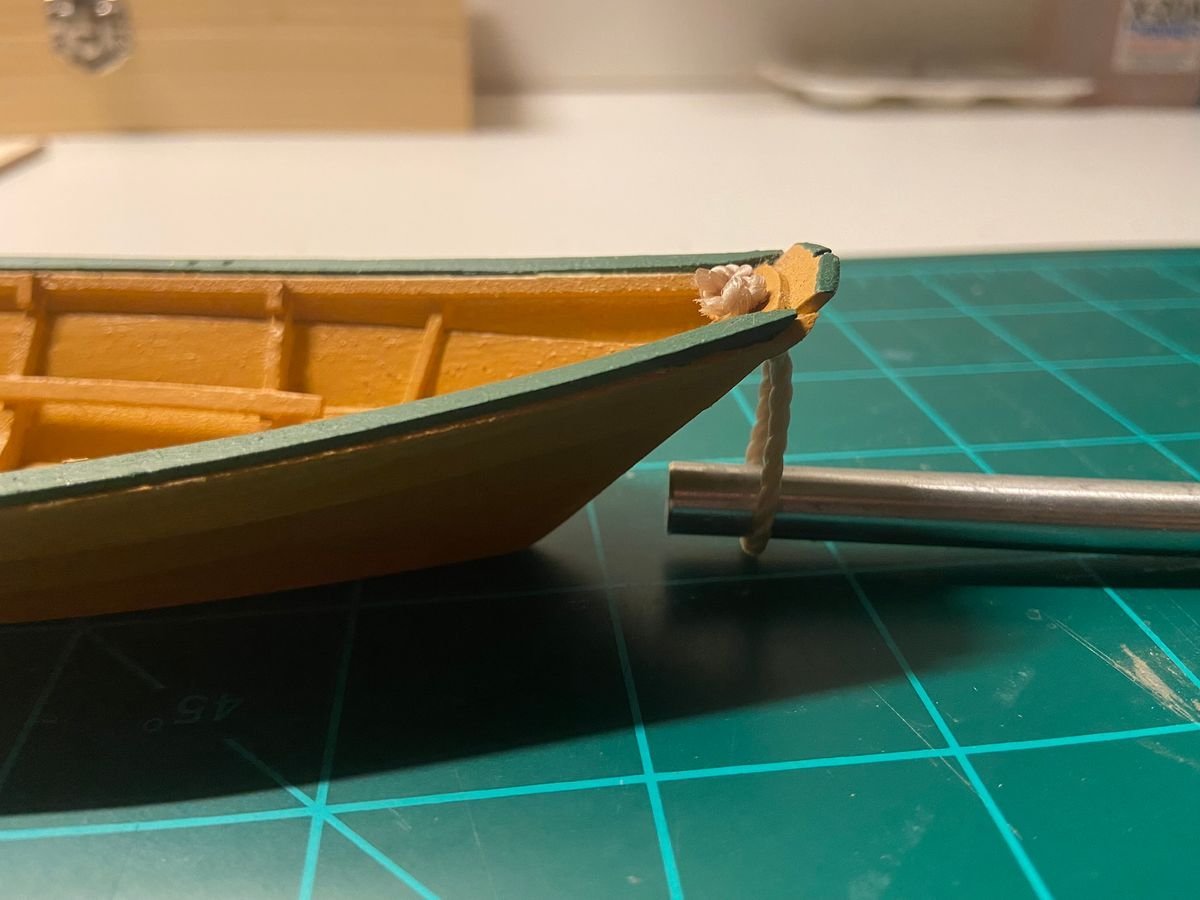
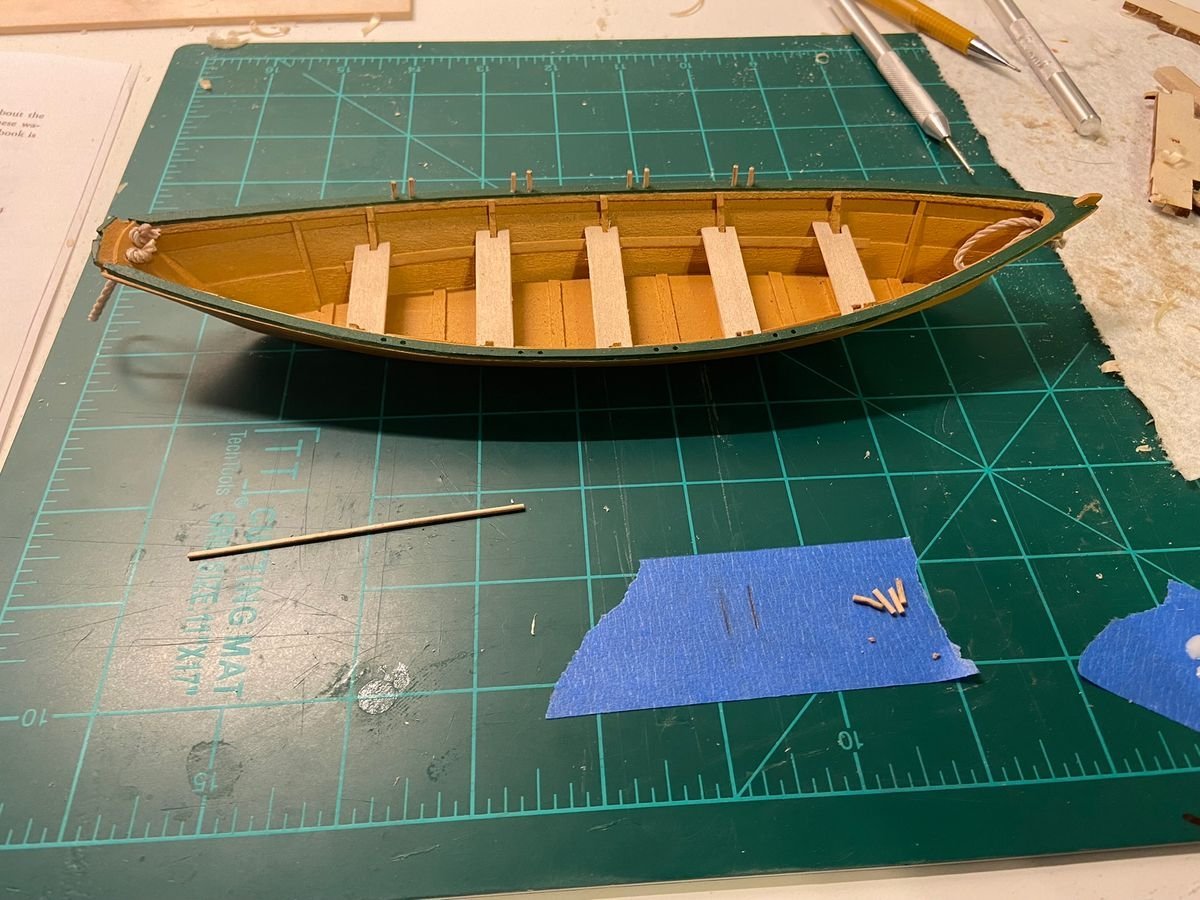
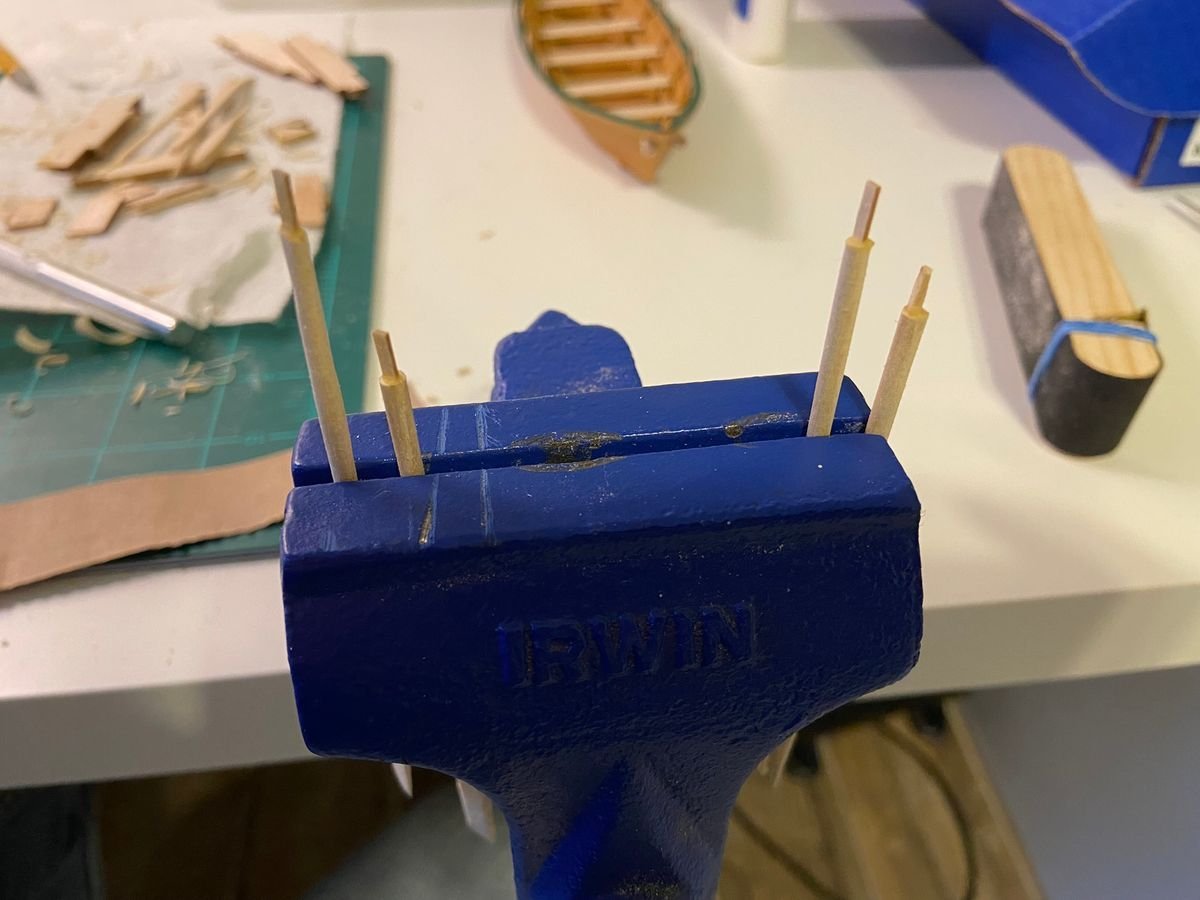
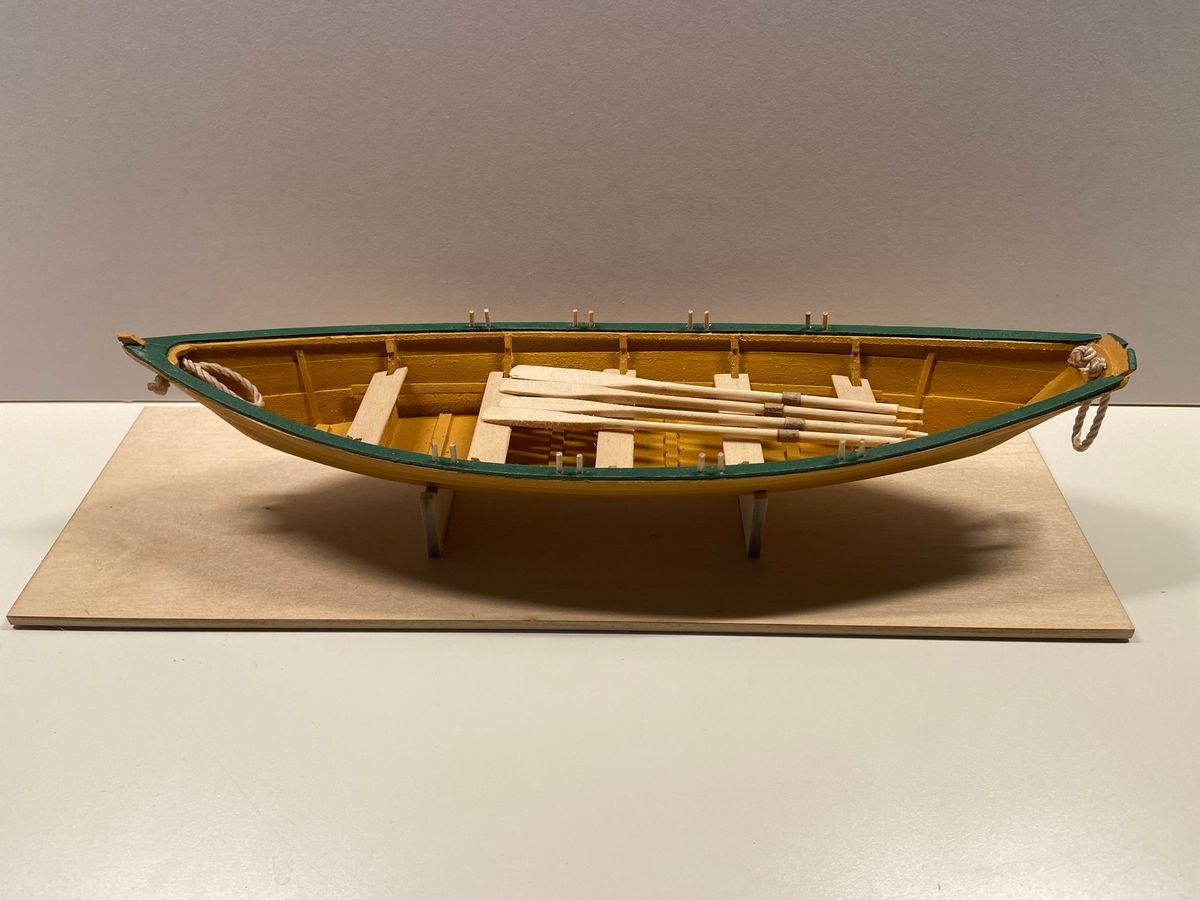
 Hello Model Ship World members. I’m Reece and I'm a new boat modeler. I decided to start my start my journey with the Model Shipways Shipwright Series. The first build is the Lowell Grand Banks Dory. I don’t have all the pictures from this build but I have a fair amount and wanted to post this for those that may be looking for references in the future. I thought this was a great introduction to ship modelling and thoroughly enjoyed my time spent on the project. I definitely learned a thing or two and look forward to applying those to my next build in the series. Here are some of the steps I struggled with on this build and how I corrected them: I had trouble aligning the bottom/stem/transom assembly with the frames and building board. This is something I should have spent much more time on because it ultimately affected the outcome of the planking. I should have spent some more time getting the stem and transom holders securely placed. Some slop here caused the transom to not be exactly perpendicular to base of the building board and resulted in the planks being slight asymmetric when viewed from the bow. I ended up just sanding this as best I could and the planks are slightly uneven. Lesson learned for next time for sure. My seat risers were slightly off and had to be removed and reattached as it made the thwarts out of level. I tried to thread the beckets without applying CA to the tips first. This caused me to waste an entire section as it unraveled before my eyes. I was able to salvage this step with the remaining pieces by dividing the remaining rope in half and giving myself extra material to work with beyond the recommended 4" section. I think in the end the pieces ended being about 5 1/2" each. I had just enough and was able to trim the excess to match the pictures in the instructions. The oars. I was too heavy handed when sanding the oars and completely lost one when it snapped in my hands. Yikes. Luckily the kit includes an extra laser cut piece probably for this very reason. I ended up snapping the hand holds on several of the oars as well and had to glue some little pieces of balsa I had left over to make them look somewhat like the pictures. Not my finest moment but I’ve definitely learned a lesson here that I can use on future models. I’m not totally satisfied with the shape and look of the oars. I might try to revisit in the future if I’m looking for something to do. Other Notes: I found the section on the thole pins was slightly different. In the instructions it mentions using a 3/64" dowel and cutting the pins to length. I spent some time looking for this until I realized that a dowel was actually not provided but was replaced in the kit by a strip of 3/64" balsa. I ended up cutting this in half and shaping it on a drill press. I inserted the balsa half way into the chuck, set the speed on the lowest I had available (approx. 500 rpm), and then proceeded to very lightly apply sandpaper to the strip as it spun. I flipped the balsa piece in the chuck and repeated. It made short work of creating the dowel. Overall I had a great time with this kit and would definitely recommend anyone who’s curious about building it to give it a go. Its a great model to learn some basic ship modelling skills on. The completed Lowell Grand Banks Dory. Attaching the sheer plank. The Dory right side up and about to clean the frame tops. Gluing on the starboard gunwale. Attaching the cap rail after painting the model using the recommend Hull Yellow Occre and Bulwarks Dark Green. Close up of the bow after rebuilding the stem top so that it was aligned better with the cap rails. This was a result of poor original alignment of the bottom/stem/and building board before planking. Using the handle of a model knife to force the becket into place after applying the watered down PVA glue. Cutting and installing the thole pins. Attempting to fix the oar handles. Another shot of the completed Lowell Grand Banks Dory.
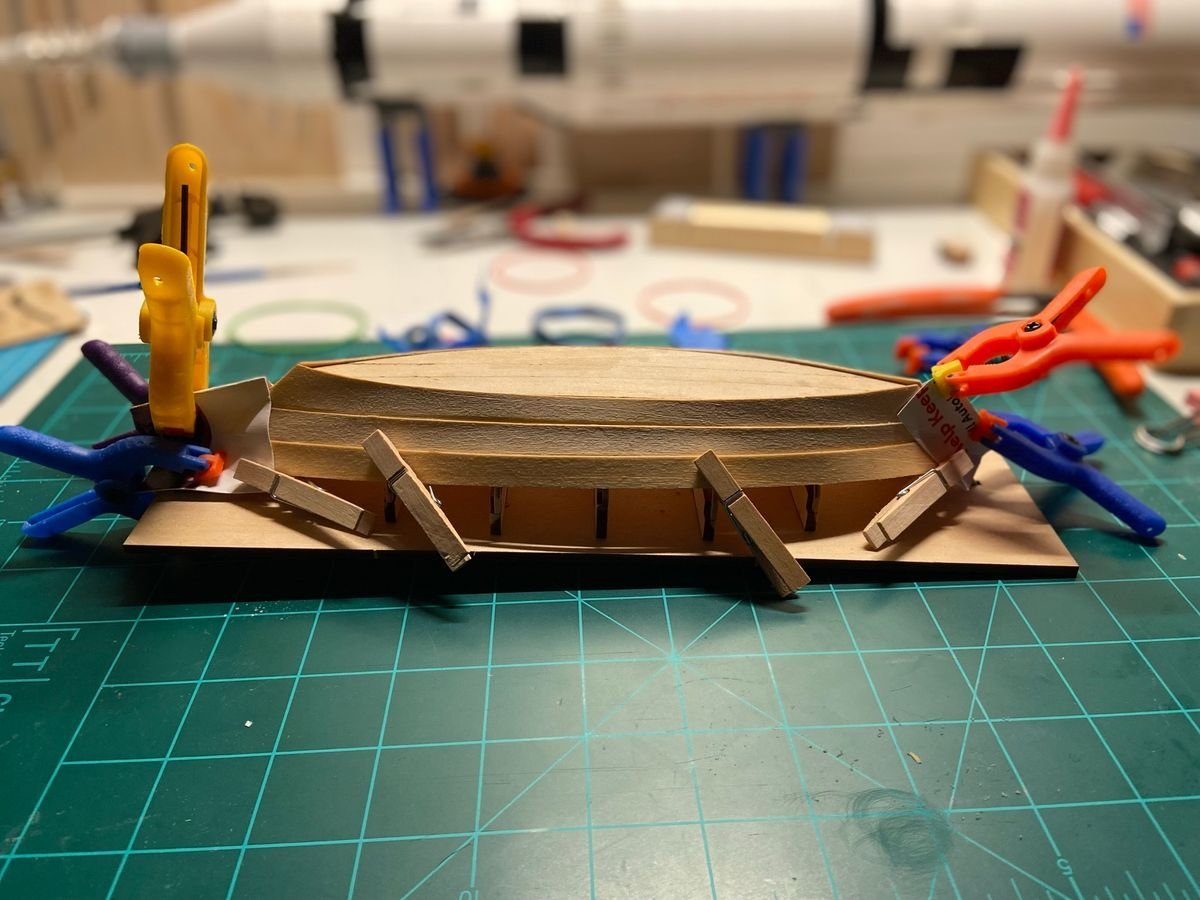
- 9 replies
-
- 9
-

-
- Model Shipways
- Lowell Grand Banks Dory
- (and 2 more)
-
 Hi, I start the construction of a new model, it is the English frigate Euryalus, the scale that I adopt is 1:56, the usual 74 cannons🙂
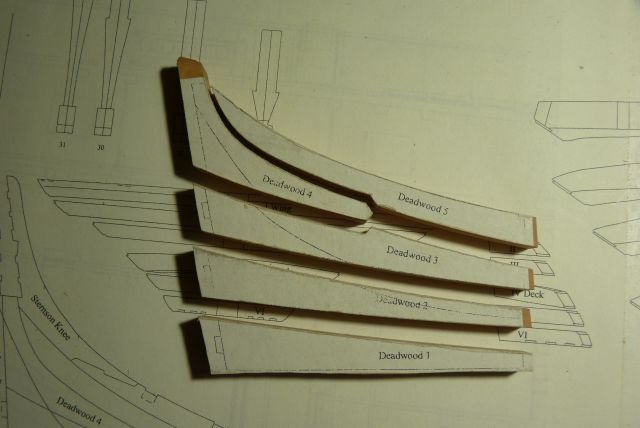
- 349 replies
-
- 34
-
-

-
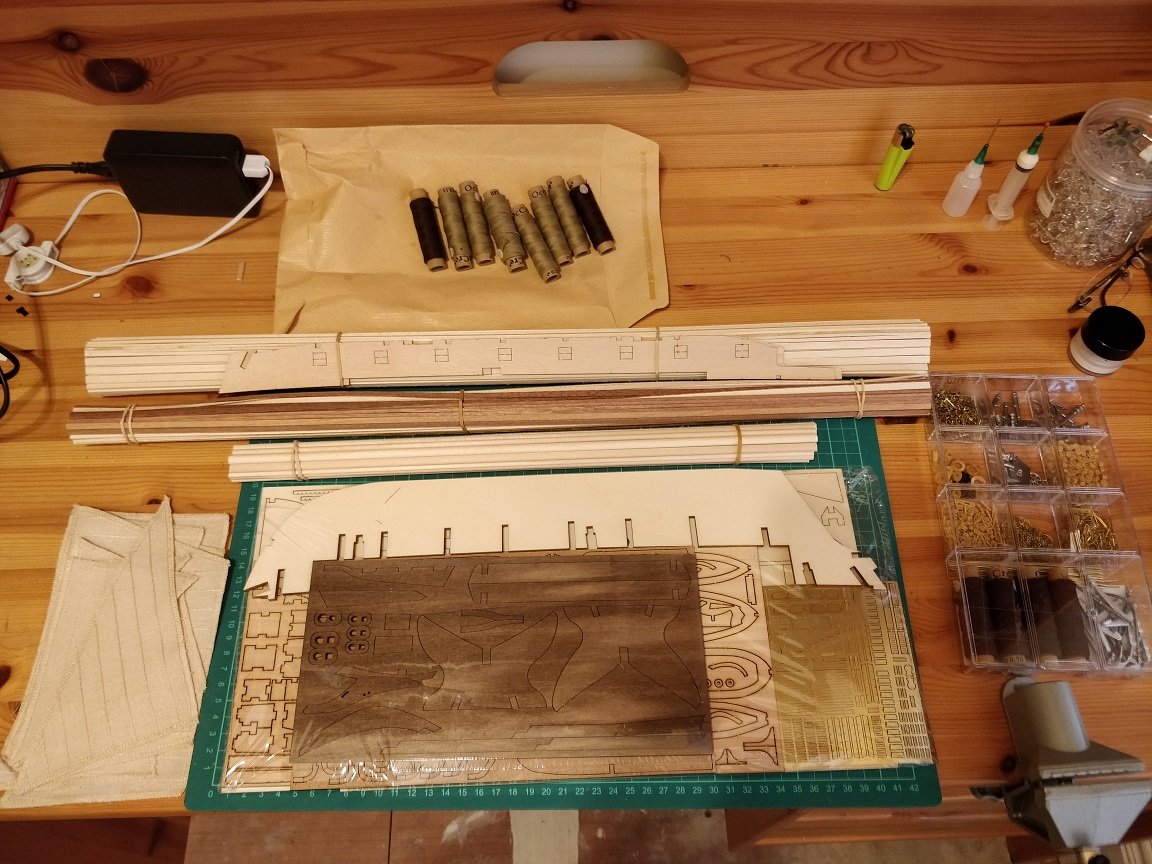
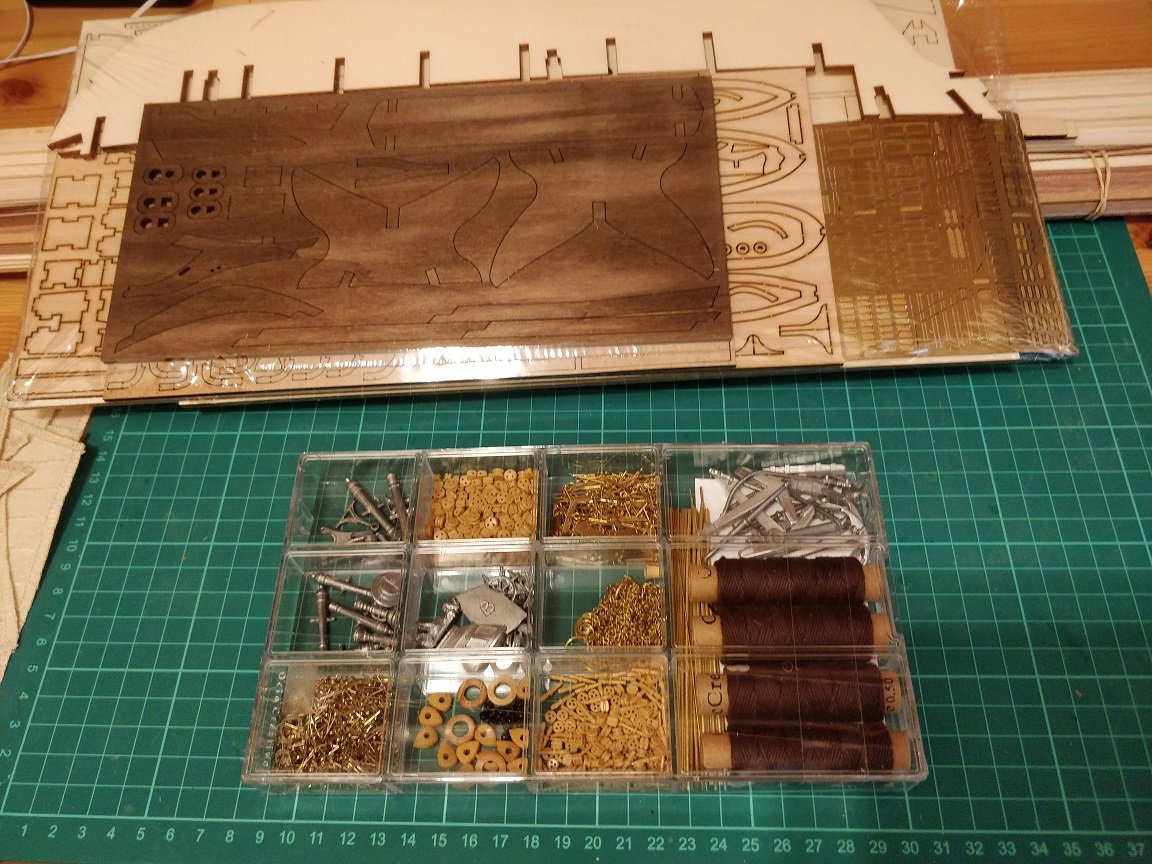
 I received a very nice delivery from UPS this morning. Yes the V2 kit has arrived. My plan with the V2 Sphinx kit build is to: a) take my time, making sure I am totally happy with everything before parts are finally assembled b) try to be much more careful with this build, my aim is to significantly reduce the number of silly mistakes I normally make c) try out some different ideas to improve my building skills, using the additional spare parts I've ordered. d) take note of the lessons learnt so far with my current build, which has become a practice build e) to have fun and to enjoy the V2 Sphinx kit build and to start and keep a build log charting my progress. f) to continue with the V1 kit build for the time being which is now being used as a practice build.
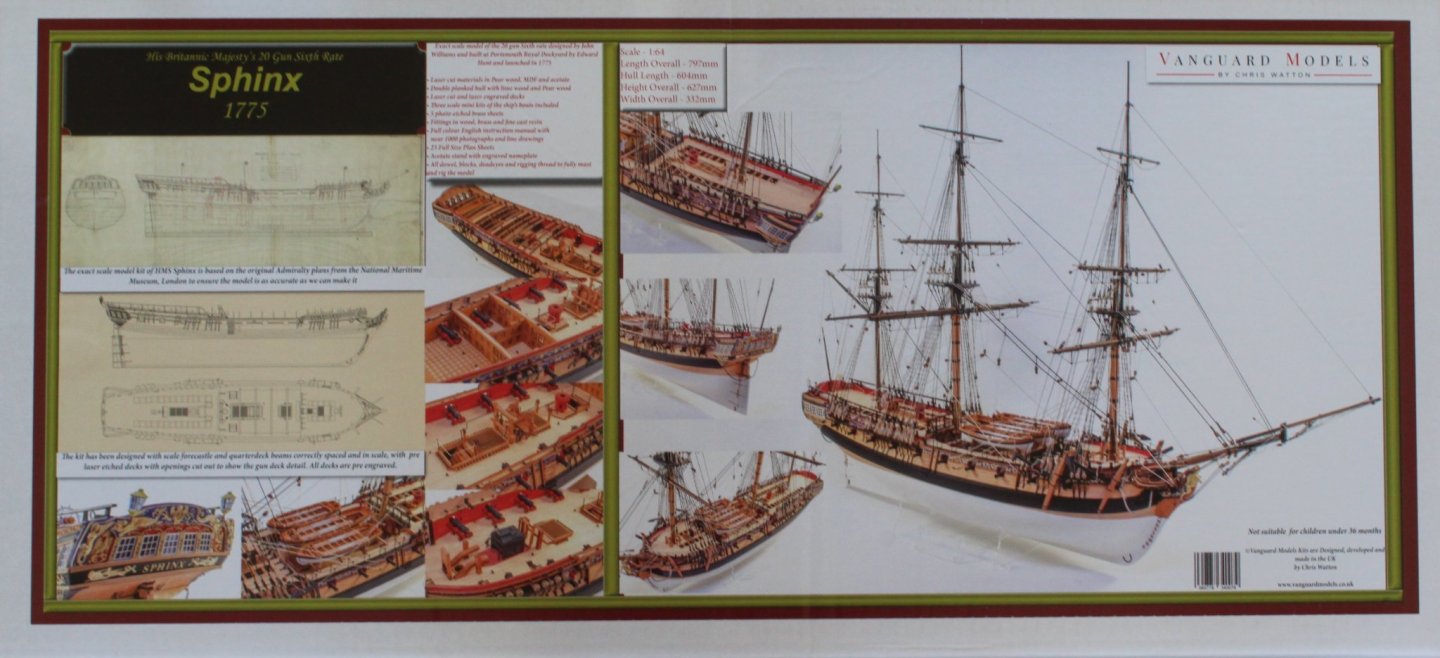
- 476 replies
-
- 11
-
-
- sphinx
- vanguard models
- (and 1 more)
-
 Hi guys, Here we go, starting my second ship. My first ship was HM Schooner Ballahoo, but I didn't make a build log for that one. To be honest I didn't think I would get very far with it. However, I did complete it and was quite happy with the result. During the build I relied very heavily on the build logs of others (especially The Lazy Saint) and now realize how important and useful build logs are to people new to the hobby. I'm obviously hoping this build goes well and I can get it completed. I must admit I'm still having problems with a lot of the nautical terms and the whole thing is a learning process for me. I started making plastic models of aircraft as a young boy back in the 60s and 70s (my father was in the Royal Air Force). That continued for many years, eventually moving on to military fighting vehicles in the 80s and 90s. Then last year, after a few years of deliberation, I took the plunge and got my first wooden ship, which as I said turned out okay. Now I'm converted Chimp

-
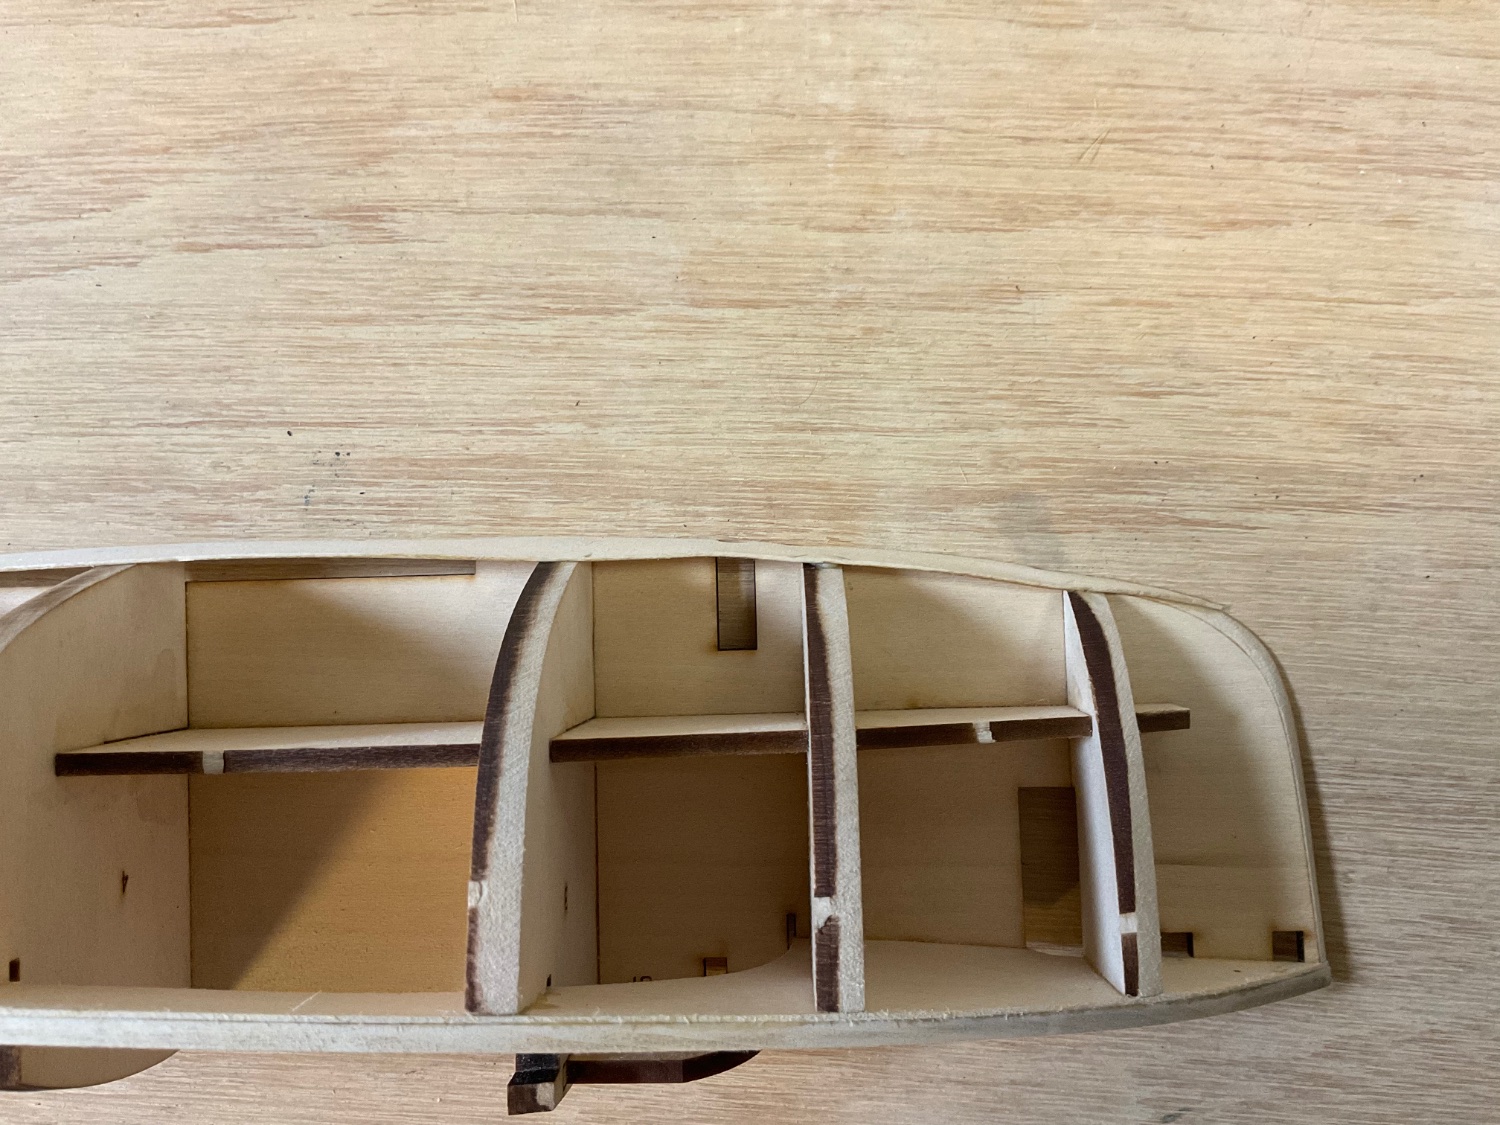
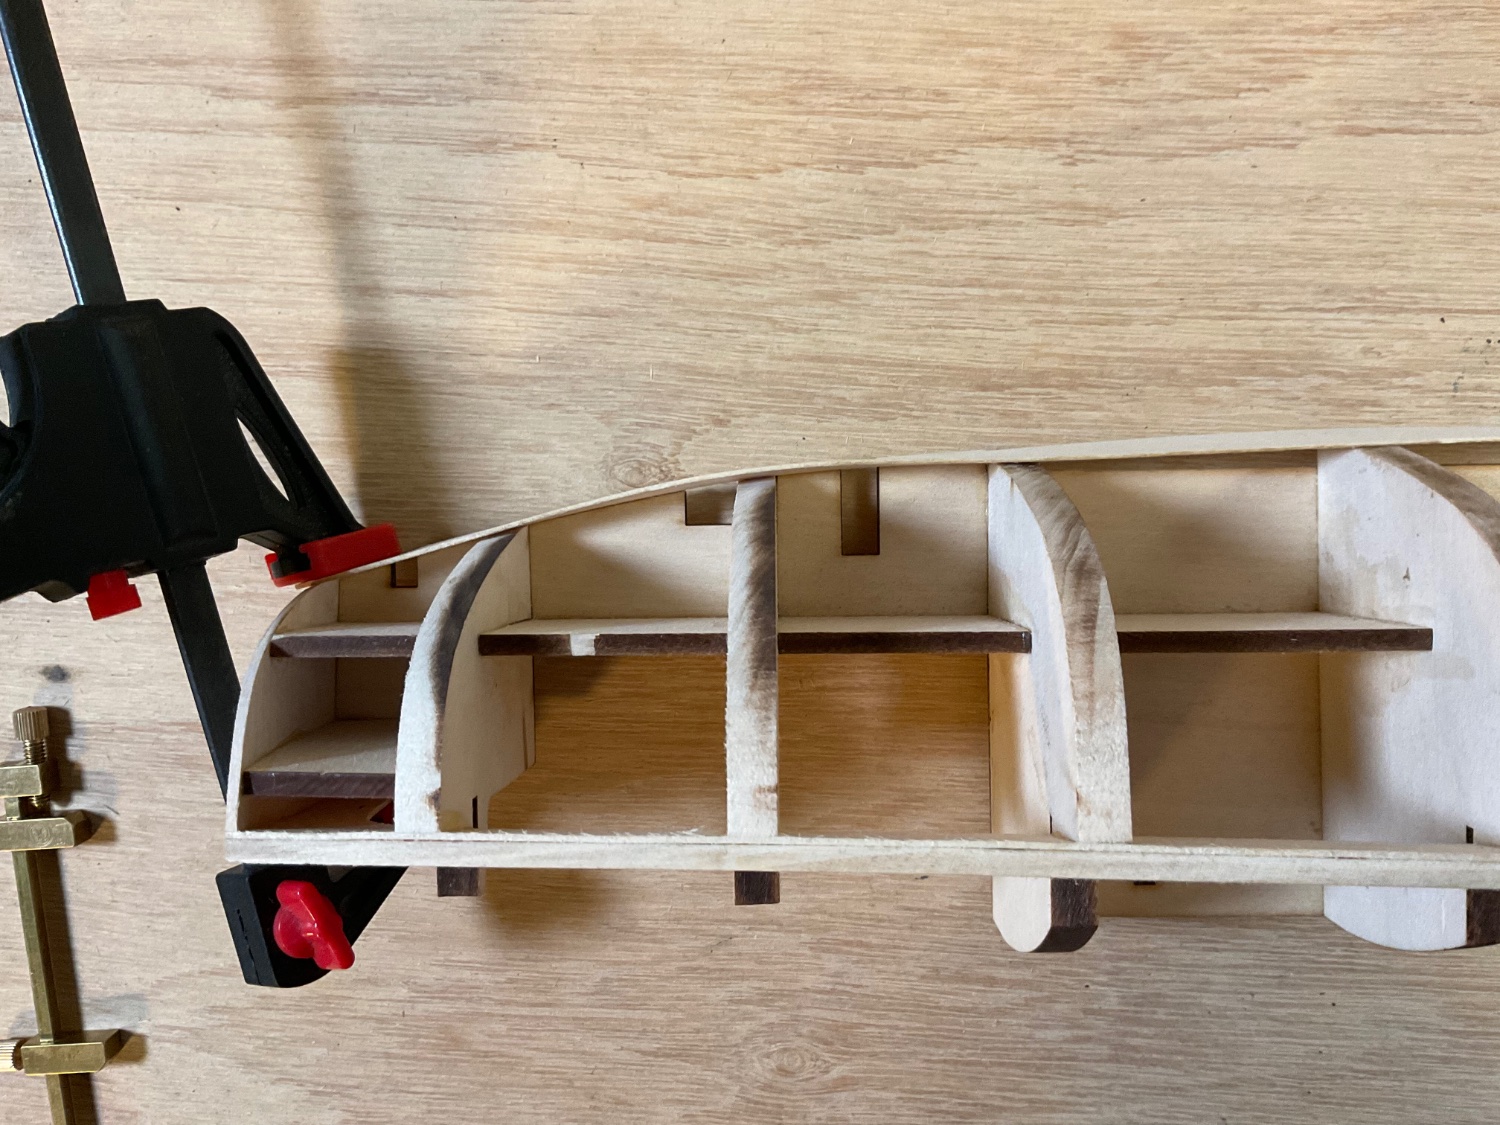
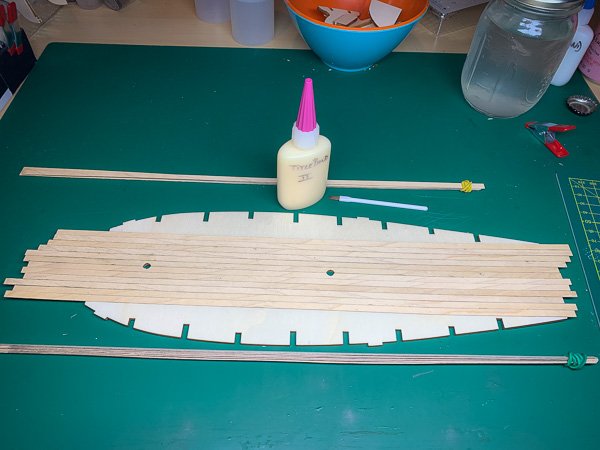
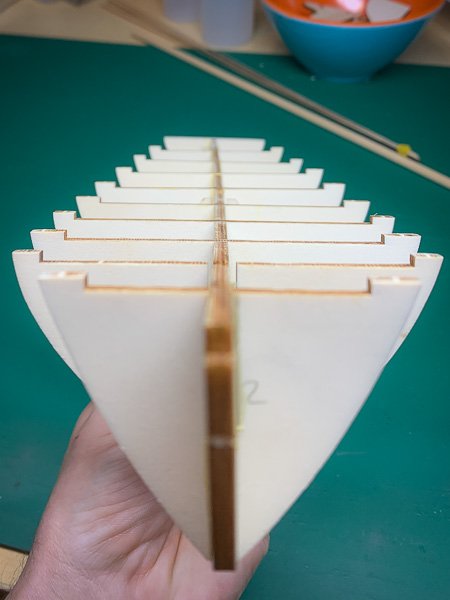
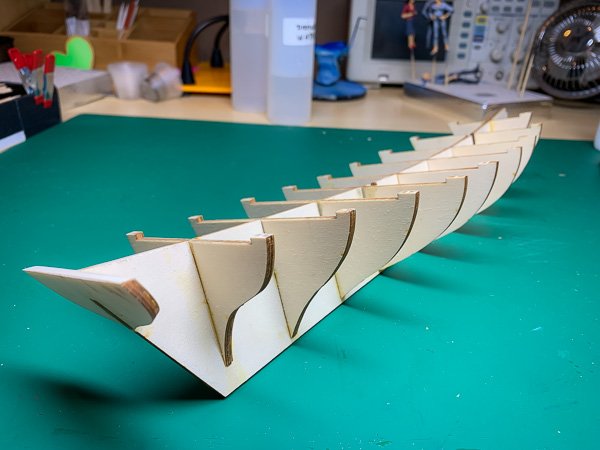
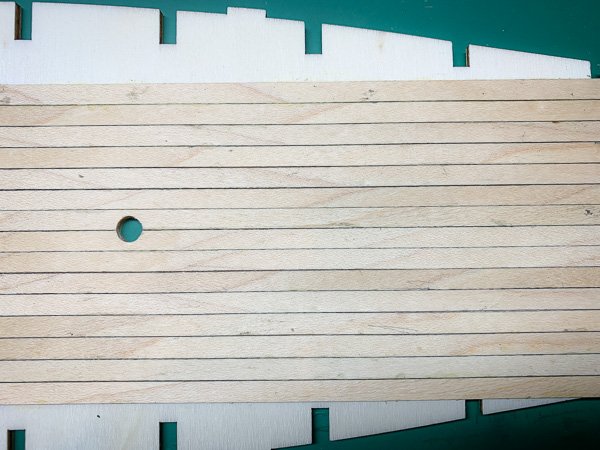
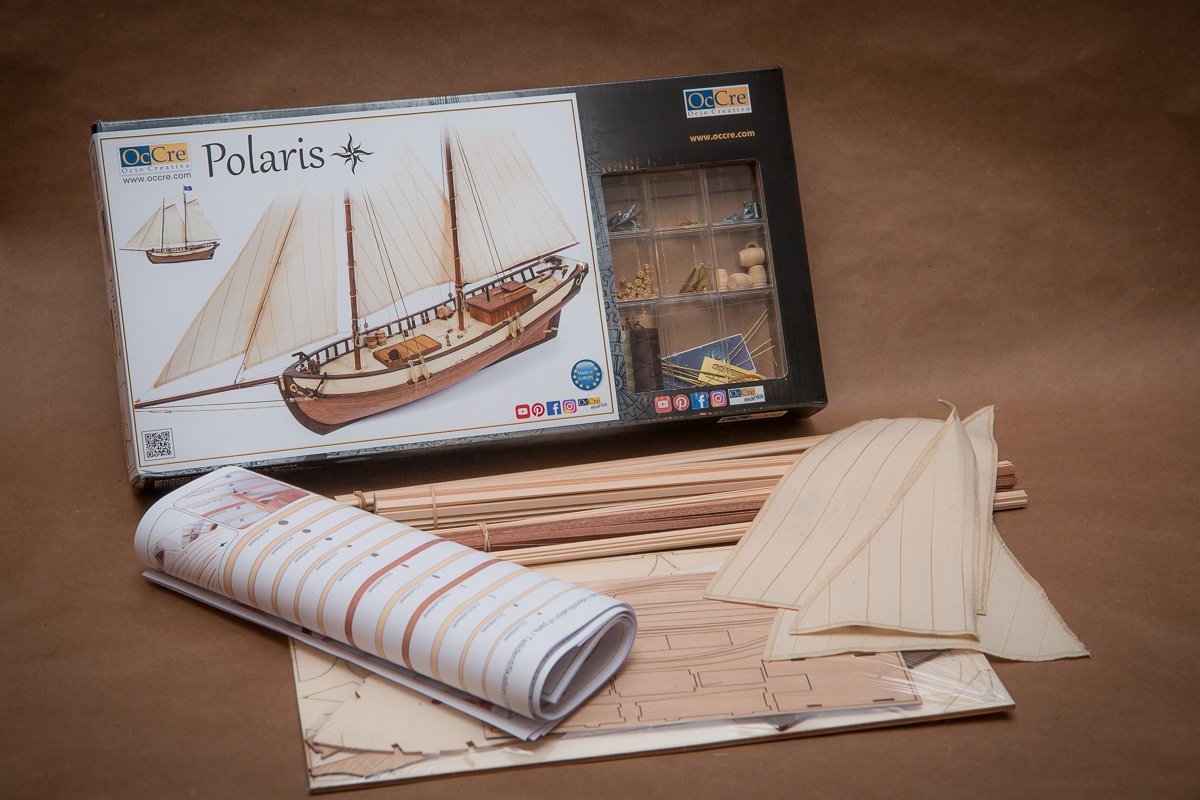
 Reflections on the kit and build: I thought it might be more useful for others, who might be thinking about building this kit, to write a short summary about my experience, and put it in this first post so it is easier to find. First off this kit is meant for first time builders, which I am, and I think they got it right. Its detailed picture-based instructions and the accompanying videos make it very clear how to build everything. There is no guesswork involved. I had only a few moments with the final sail rigging where the instructions were a little too brief but even then the videos helped fill in the slight gaps. The quality of the kit was also very good except for the deck planking strips but for my level of building that is a nitpick. However, the thing that I most liked about the kit is its level of difficulty; it was definitely challenging but not overwhelming. I felt that the time put into the build (which was 77 hours for me) was truly well spent. It really has a bit of everything so that when I now look at other more advanced builds I have a good appreciation of what level of attention and effort is required to achieve good results (which is actually very humbling). The other thing about the kit is that it's fairly forgiving with mistakes. I made a bunch of them and didn't executed things as well as I might have hoped but the design and relative simplicity of the boat is forgiving enough that you still end up with a good looking vessel. All in all I'm very please with the experience. It has whetted my appetite for more and that is a good result for a beginner's kit. Now back to the actual build log. Enjoy.... Another first time builder here, attempting to build OcCre's beginner kit: Polaris. I know nothing about ships or their historical accuracy and such, just want to get my feet wet and the Polaris seems like a decent enough kit to start out with. [There is a MSW review of the kit: here] I've managed to assemble the bulkheads/ribs to the false keel. This was relatively simple using small metal angle plates with clamps to get each rib square using Titebond II: I have to say there was quite a bit of play in the joints and while I did get the ribs square to the sides of the false keel, I wasn't paying attention to making it square along the top: And you can see that false keel has a slight bend too. However, I'm thinking it's not a problem as tolerances for mounting the deck shouldn't be that demanding. Well, I hope so. Currently working on the decking: Again using Titebond for glueing the deck planks rather than using contact glue per the instructions. I'm able to get a thin bead of PVA onto both the plank and deck, using the dispensing bottle shown in the picture above, and smooth it over with a small brush to avoid beads of excess glue forming. Working out really well. I get down 2 or 3 planks at a time and then use heavy books to press the planks while they set. Not so happy about the planks themselves. They have a lot of large grain criss-crossing them and I think ruin whatever scale effect the planks might have had to begin with. Not really a problem as I'm not looking to create a realistic model this time out. I'll be glad to just have something that doesn't look like a dog's dinner at the end of all this!
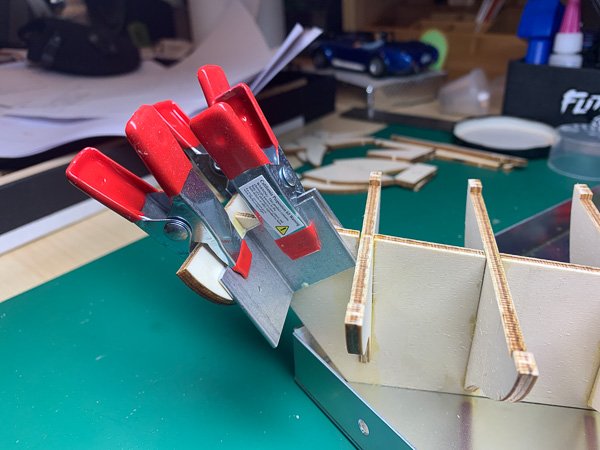
-
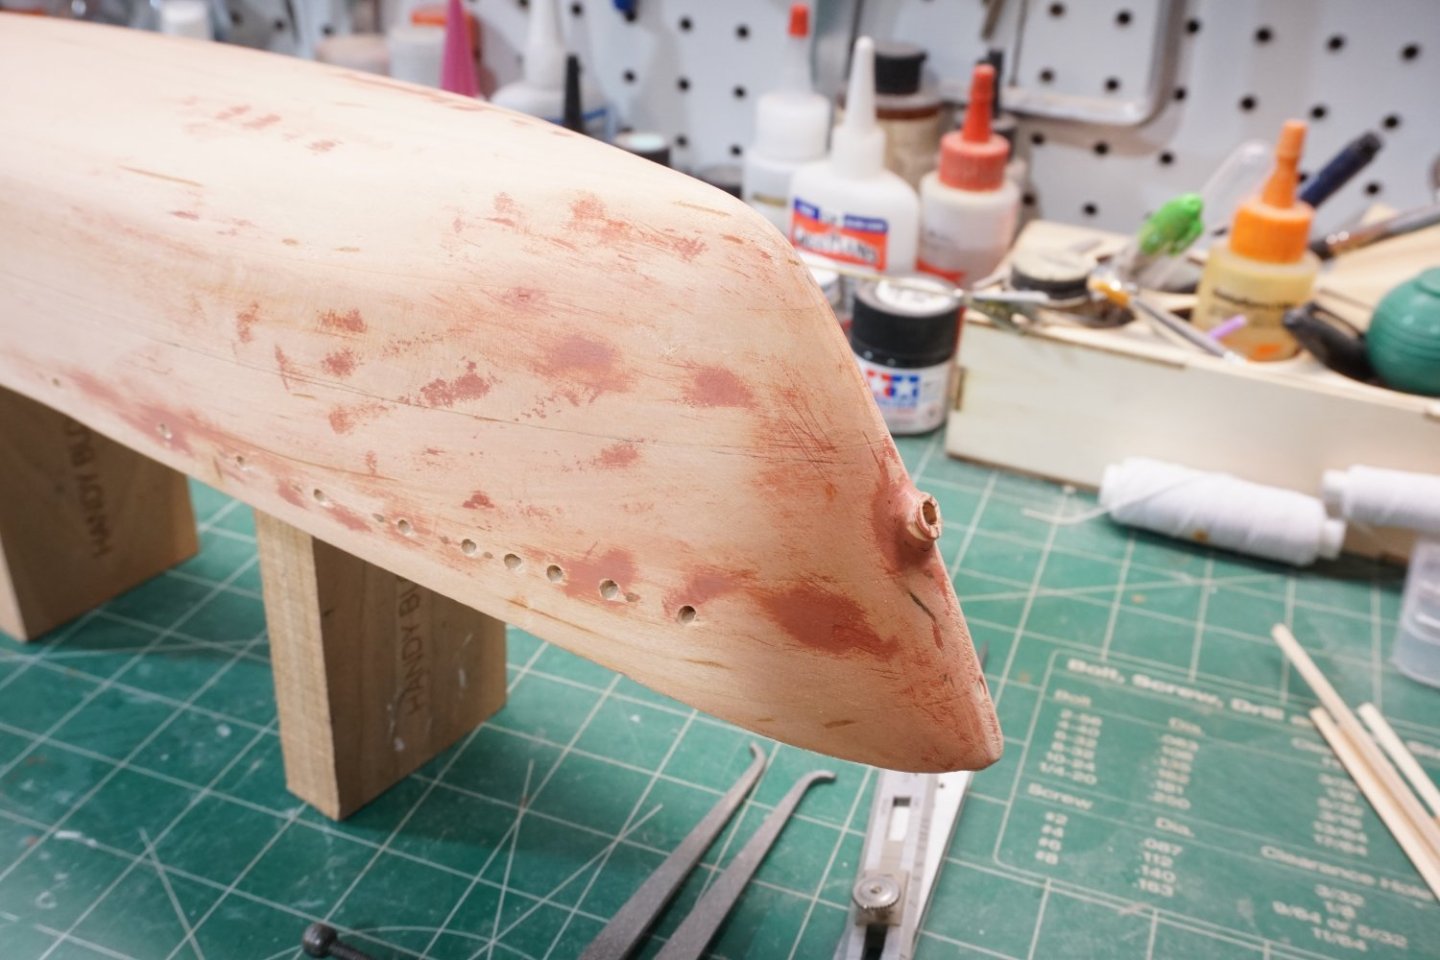
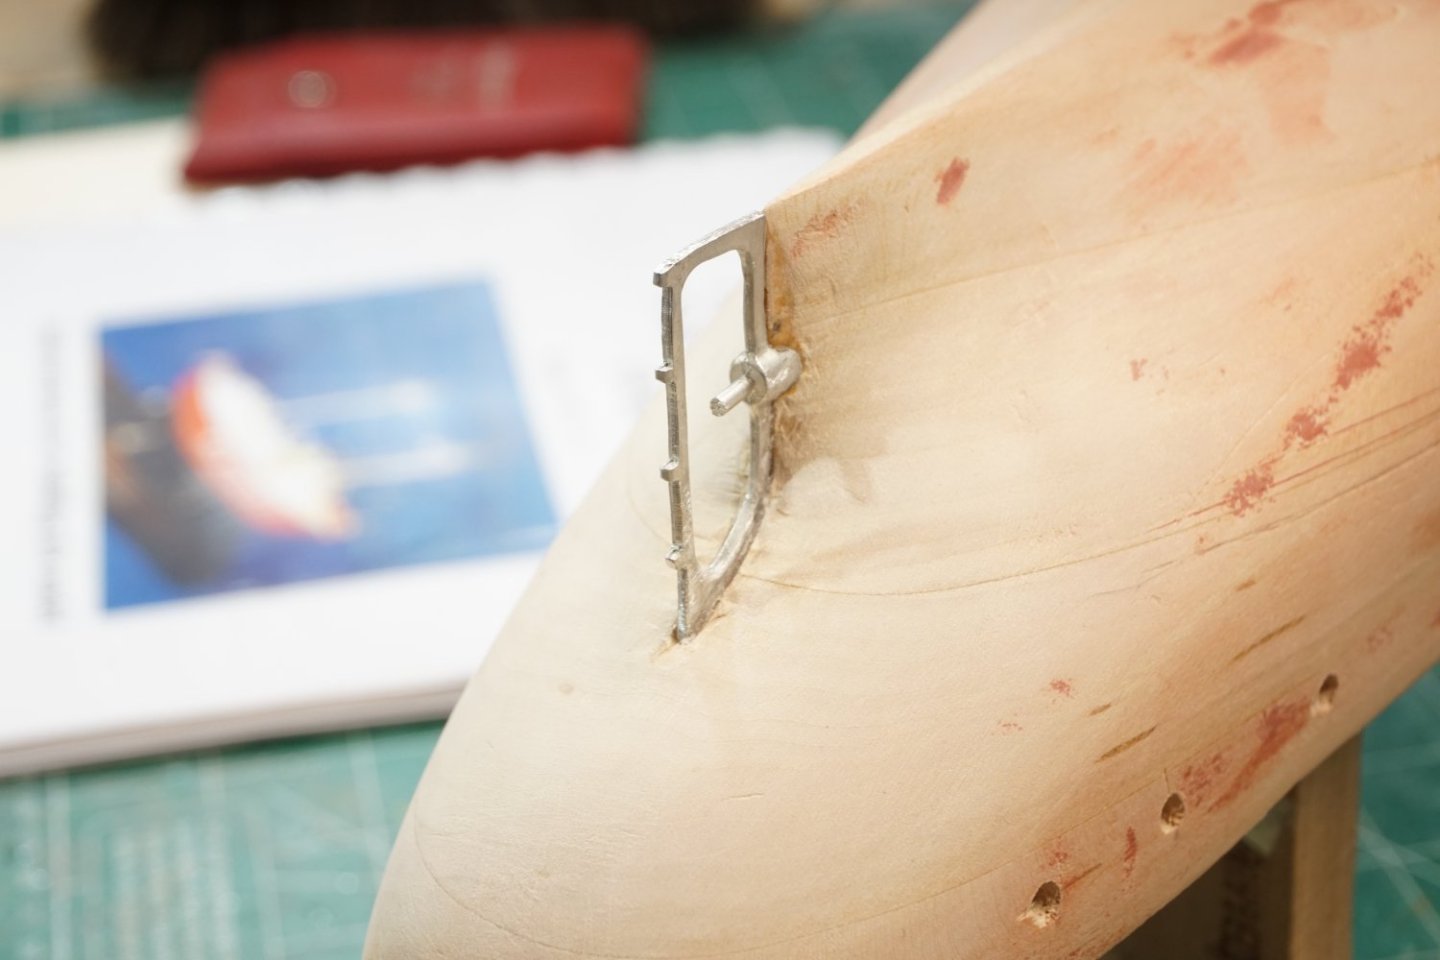
 After the last several months away from ship modeling, I started building Bluejackets Lightship #112 Nantucket from 1936. This was a kit that I purchased at Bluejacket several years ago while vacationing in Maine. After reading through the manual and studying the plans I proceeded to shape the hull. This solid hull was very close to plans and very little wood had to be removed, therefore, according to manual, the use of hull section templates was not needed. At the bow, I drilled out the hole for the central anchor hawsepipe boss and glued it in place. Marked out locations of all portholes and drilled them with an 1/8 drill bit. After gluing in the propeller frame/sternpost casting I proceeded to the next step but I'm a little confused. Unsure of the ship's forefoot construction, the kit gives you a 1/16" x 3" x 6" piece of basswood for this step. My question: Is this supposed to be just a continuation of the keel around the curve of the hull, or is it to simulate an additional plate of steel that was welded to the hull in this area?
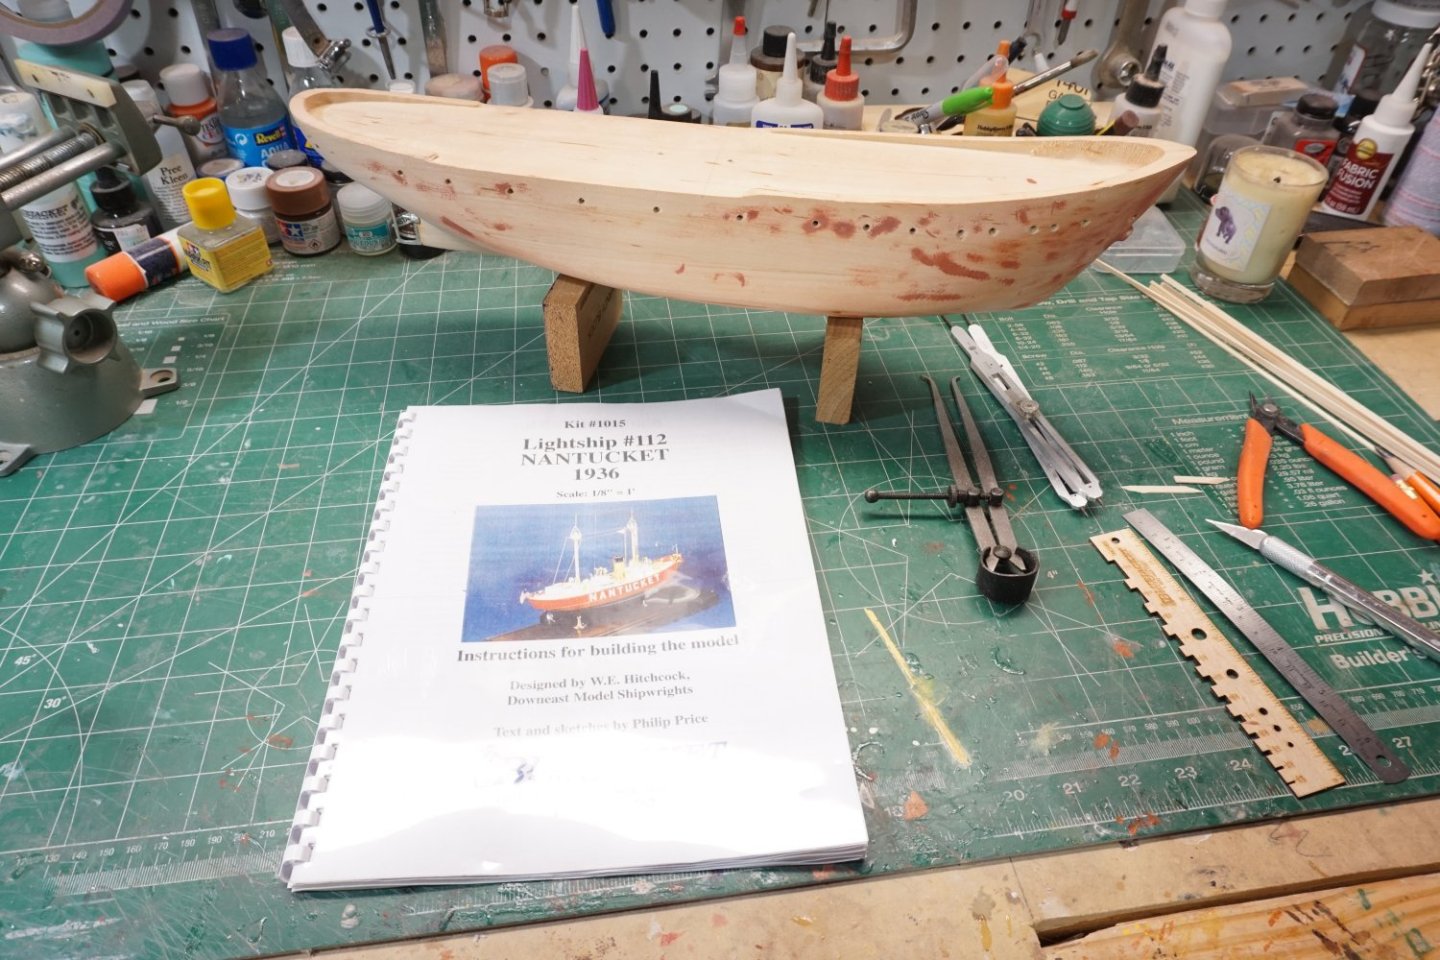
- 29 replies
-
- 9
-
-
- Nantucket Lightship
- BlueJacket Shipcrafters
- (and 1 more)
-
 HMS Indefatigable 1794 The Prologue. I find myself once again beguiled by that modeller’s honeypot known as Vanguard models and I finally succumbed to Chris’s latest offering, having mulled it over for several weeks. Why the wait, wots not to like, some may say, but this will be the largest project I have undertaken since Norske Løve way back in the 1980’s. Indefatigable is about the same hull size as Norske Løve, (1:70 scale) but not so tall. It will still demand a sizeable display area. As with my Sphinx build this will be Navy Board style, I’ve no room for masting and rigging, and I have developed an affection for the look. I opted for the basic kit as all the masting, rigging line, and block work will not be used, simply added to my ever-growing pile of discarded kit parts. If I decide to add stump masts my preferred material is Ramin. From a preliminary assessment I don’t think Chris has left me much to fiddle with. He has addressed the issue of realistic Quarter galleries, the provision of Lodging knees, and a properly fitted out Great Cabin, complete with Rudder housing. He has solved the issue of lower deck cannons coming adrift early in a build, and the stern decoration and Figure are wonderfully sculpted. In terms of authenticity this kit hits the spot and is what in the end persuaded me to go for it. As with Sphinx I will be taking a minimalist paint approach, and will look to represent the ochre band along the gunport line more subtly, using natural woods. It was the all-painted hull that also delayed my decision; authentic as it is, I prefer the natural beauty of wood on a model of this type, and I needed to have a clear idea of the approach in my mind. The makings are expected to arrive on Tuesday, and I will be working the initial stages of the build in conjunction with my current Medway project. B.E. 05/03/2023
- 614 replies
-
- 25
-
-
- Indefatigable
- Vanguard Models
- (and 1 more)
-
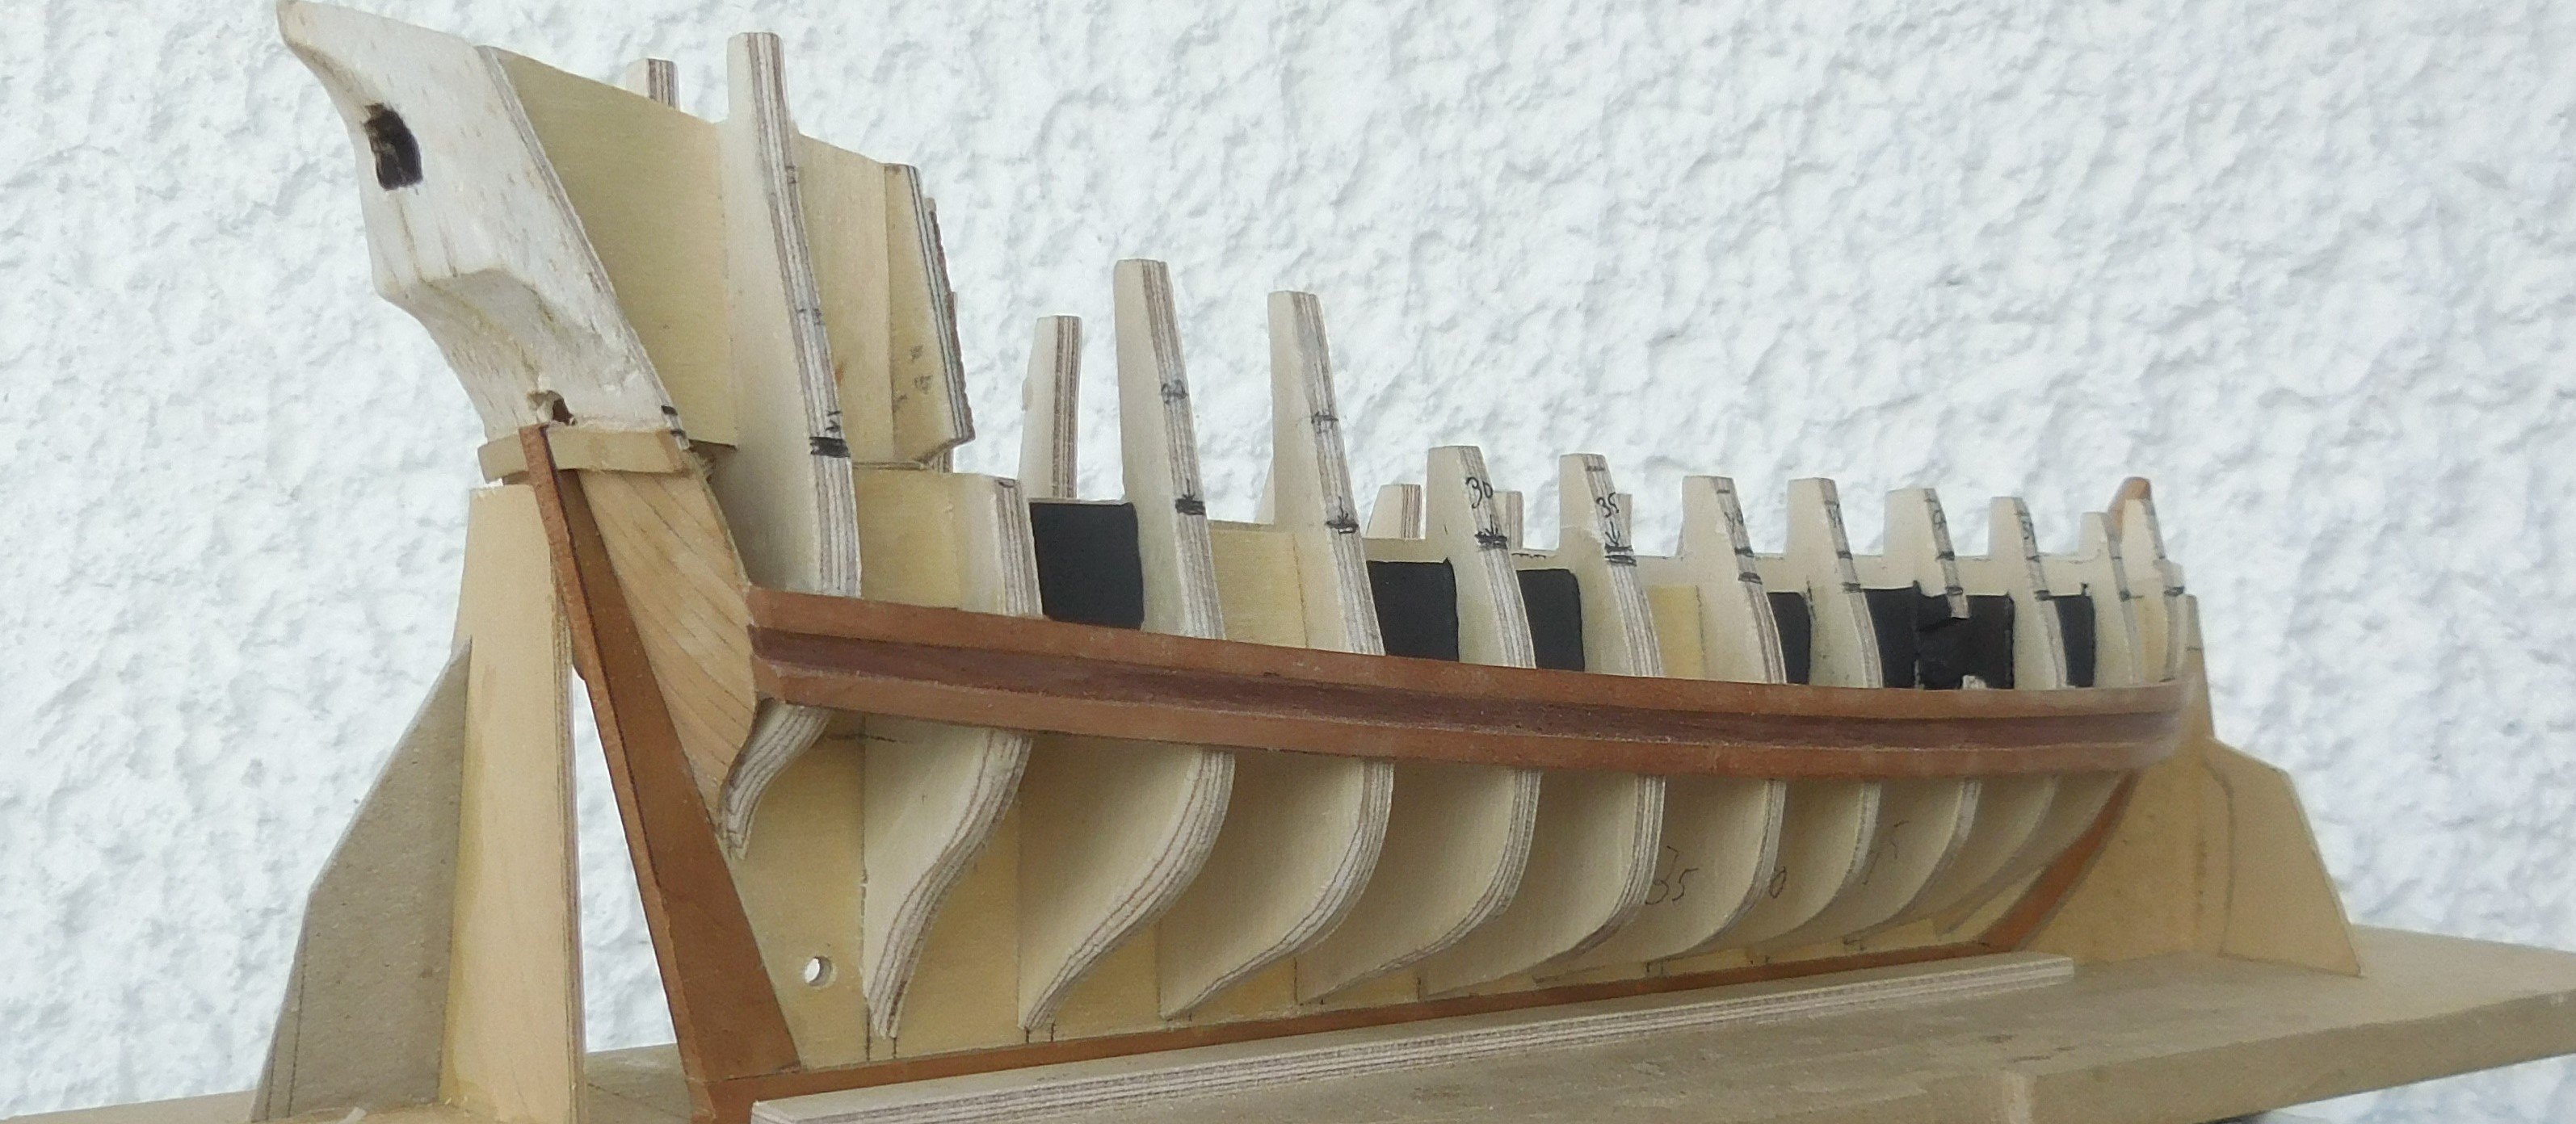
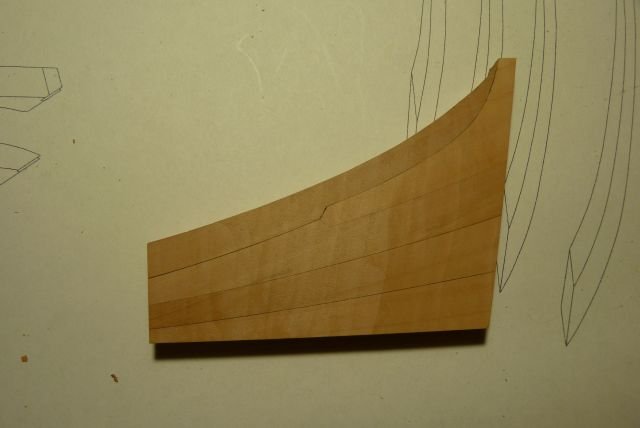
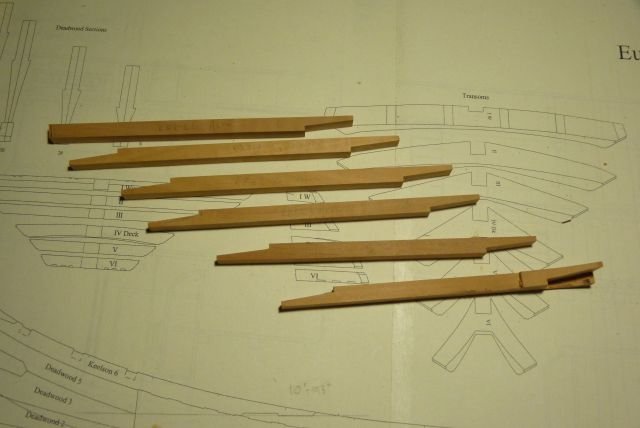
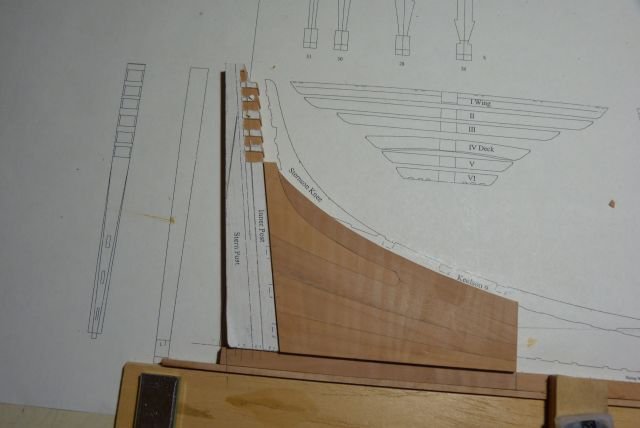
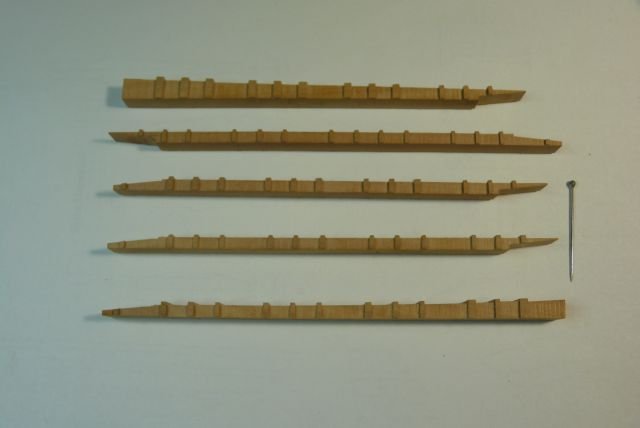
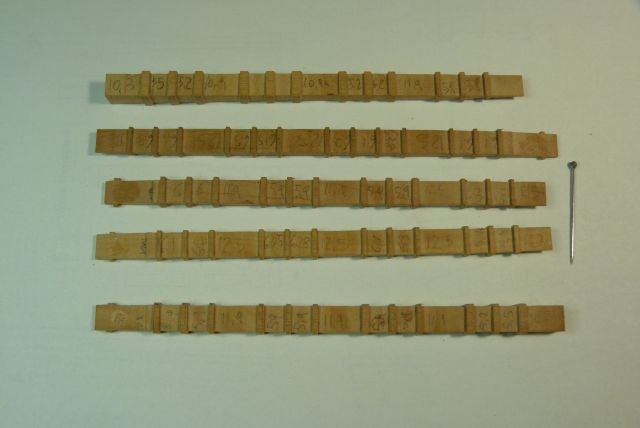
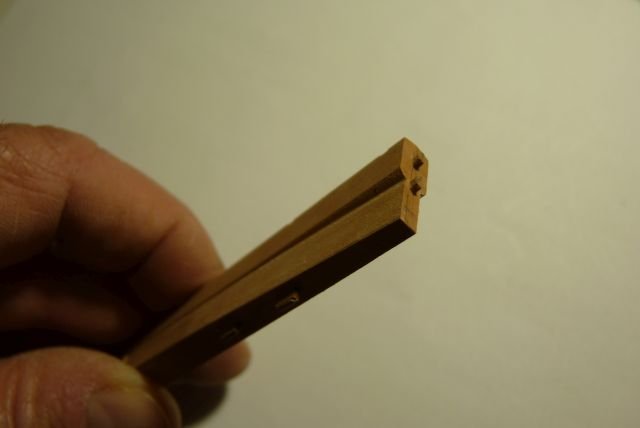
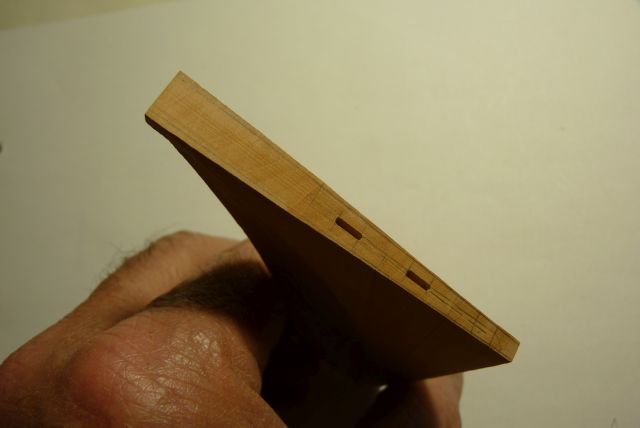
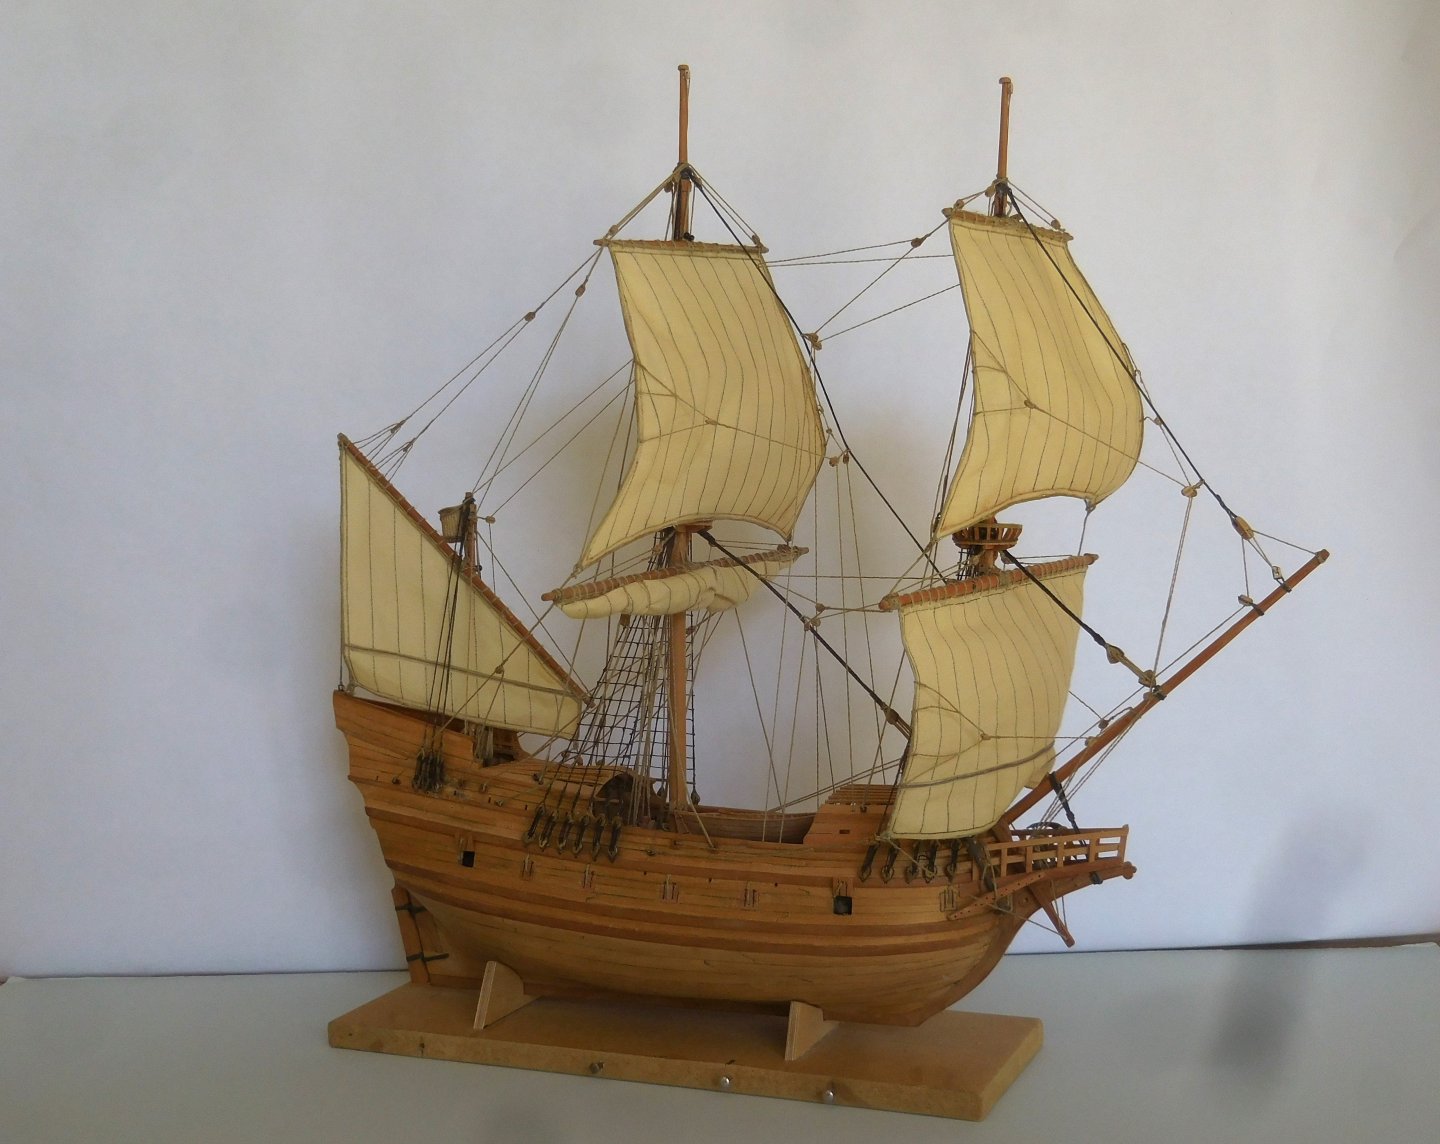
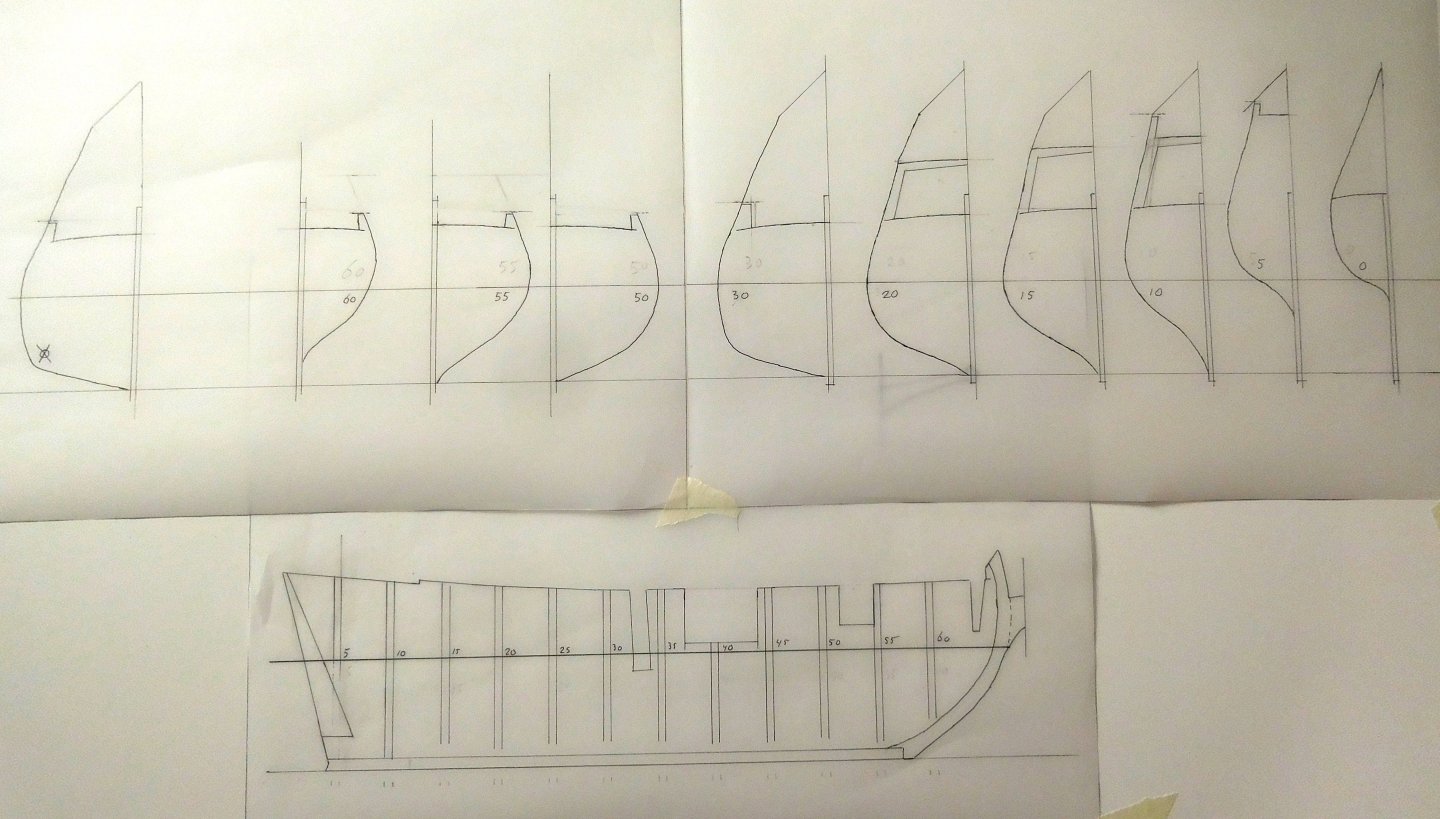
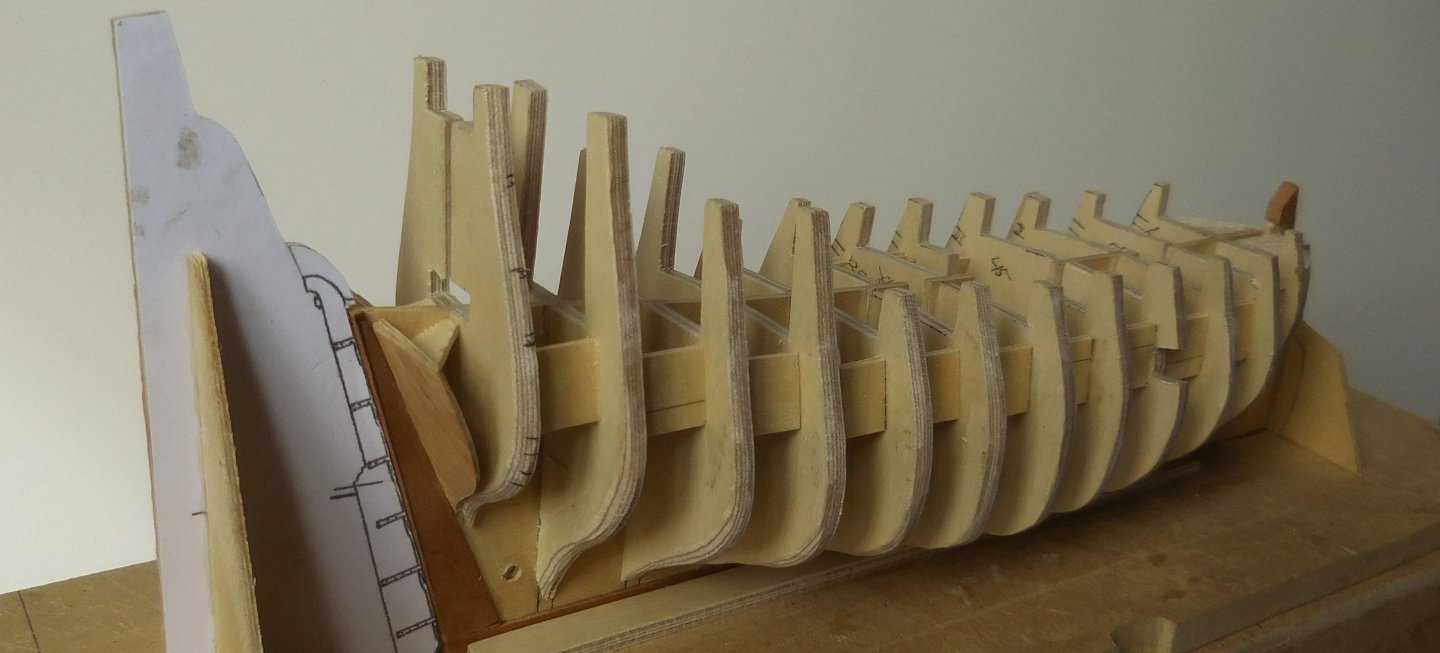
 In this topic consisting of several episodes, I am going to tell you something about the construction of this ship. Although it is very small in real life, and many times smaller on a scale of 1:87, it was a fairly difficult job to get it done and it is based on a lot of research. At the beginning of June 2018, I started building a model of the ship on which Willem Barents sailed to Nova Zembla in 1596. The Northern trade route had to be found, but that failed and Barents had to spend the winter on this island in the Arctic Ocean with 16 other crewmenbers. But the year after they returned to Holland. Shortly after this event, drawings were made of this ship that served as illustrations for the travelogue of Gerrit de Veer, one of the members of the crew. The two ships of Heemskerk and De Rijp. The commander was Barents, who was on Heemskerk's ship. The names of the ships are not mentioned anywhere. As a result, reconstruction attempts were made to find out what the ship looked like. Ab Hoving has written a book with fine detailed reconstruction drawings, which form the basis of the construction of the model with which I started. By the way, I am not supposed to call this model “the ship of Barents”. I never build models of ships that had a name, but only build ship types. In consultation with Ab Hoving, we decided to call this type an "Early Pinas". A Pinas is a very well-known type that was built frequently, especially after 1600 in Holland. This ship dates from just before that time, around 1590, and at that time a number of later inventions had not yet been applied. Since I have built more ship models on HO scale, so 1:87, it was logical that I would do that again. The models can then be compared in terms of size. Installing the rigging took a lot of time, also because it was all still unknown territory for me. In the previous 40 years, I did long-term research on Latin-rigged ships that sailed around the Mediterranean, and built models on a scale of 1:87 as a result of those studies. The rigging and hull construction are vastly different from square-rigged ships. This was my first square-rigged ship. At first I looked despondently at the drawings of the rigging, but after a while I understood all the functions. Repeatedly, I had to remove it again and try again. Ab Hoving was always ready to provide me with the necessary advice. His help was indispensable because he had also carried out the entire research on this ship and had described it in his book; HET SCHIP VAN WILLEM BARENTS. Een hypothetische reconstructie van een laat-zestiende eeuws jacht (A hypothetical reconstruction of a late sixteenth century yacht).ISBN 90-6550-772-8 Many of the techniques that can be found here are also described on my website; www.constantwillems.nl And the same applies to this model; it is a reconstruction, so there is a chance that the ship looked different in details. The construction of the hull A start was made with transferring the trusses, obtained from data from Hoving's drawings, to paper. Those drawings are on a scale of 1 : 75 and it was a simple action to take those drawings to a copy shop where they were transferred to scale HO., 1 : 87. Like all my models, I built this boat mainly from pear wood. Part of it is made of paranapine. It is built on rafters of plywood thick 3 mm. Actually a bit too thick but I tried to imitate the lip welds of the original construction and then a wide enough surface is needed to make those welds on those rafters. The trusses as I first drew them I always work with half-trusses, as can be seen in the drawing. When all the half-trusses on the port side are glued to the central truss, all imperfections on that side can be repaired very accurately by filing away excess material. When everything is satisfactorily secured, I start with the other side. To this end, moulds are made from the already glued trusses, which are carefully sawn out and glued to starboard. Thus, everything is completely equal on both sides. The longitudinal truss is made of plywood 1.5 mm thick. The bow, keel and stern are made of pear wood. These parts were glued all around against the longitudinal truss so that on the port and starboard side there is still above those parts 0,75 mm to support the ends of the planks. The locations of the numbered half-trusses are indicated on the longitudinal trusses, as shown on the drawings in the book. Because the longitudinal truss is quite thin, it can bend easily, so it was screwed onto a board and I added small distance partitions between the rafters. At the bow arrived a filler piece of balsa wood that had been filed into the right shape to give the planks at the bow the correct shape. After unscrewing the longitudinal truss, it turned out to be an indeformable unit and the other rafter halves could be glued. When everything was in place, on both sides of the longitudinal bilge, I made the stern. The construction has quite a few bends and to make that easier, a mold was placed on the work board to make the right shapes. The top piece was made of balsa wood. The black hole is the interior of the cabin where a window was later added. The lower timbers have already been installed here, which already gave the framework a lot of strength. The transom is of one mm. plywood with the planks glued on top in the right pattern. Later, the openings were added. The support boards between a number of trusses are painted black. They are behind the open, or closed, gun ports. The struts for the bulwarks were made of plywood. This is only necessary to attache the planks above the deck which form the bullwark. Once they are glued on, the plywood pieces were carefully removed and then be replaced by the struts in the correct dimensions and material. The top of the bulwark was called the rahout (Dutch word; ra is yard, hout is wood). On an early pinas it was customary to lower the yards on the bulwarks in order to stow or strike the sails. This is how the name rahout came about. On later ships, the sails were stowed or struck on the hoisted yards.
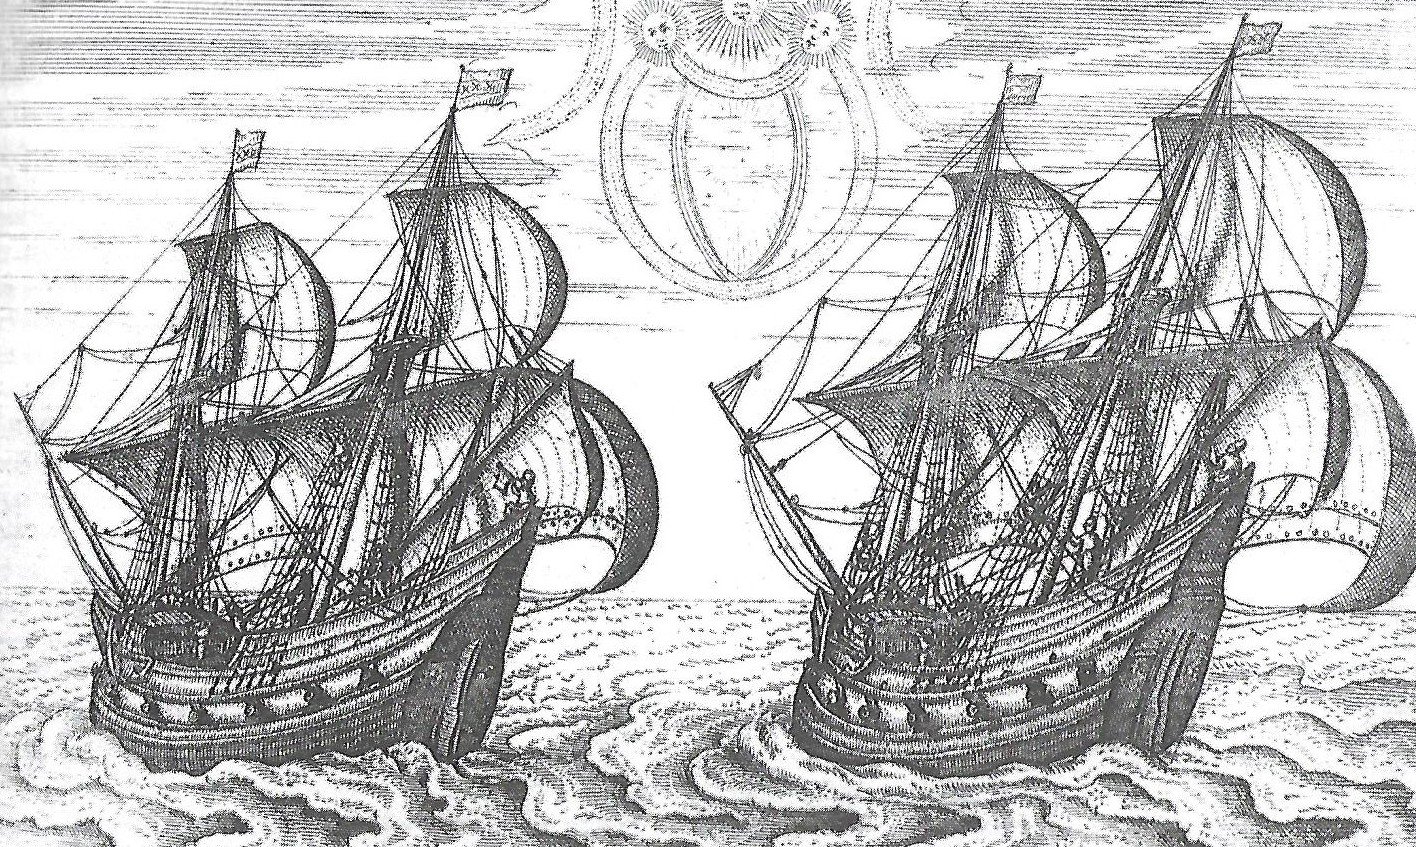


-
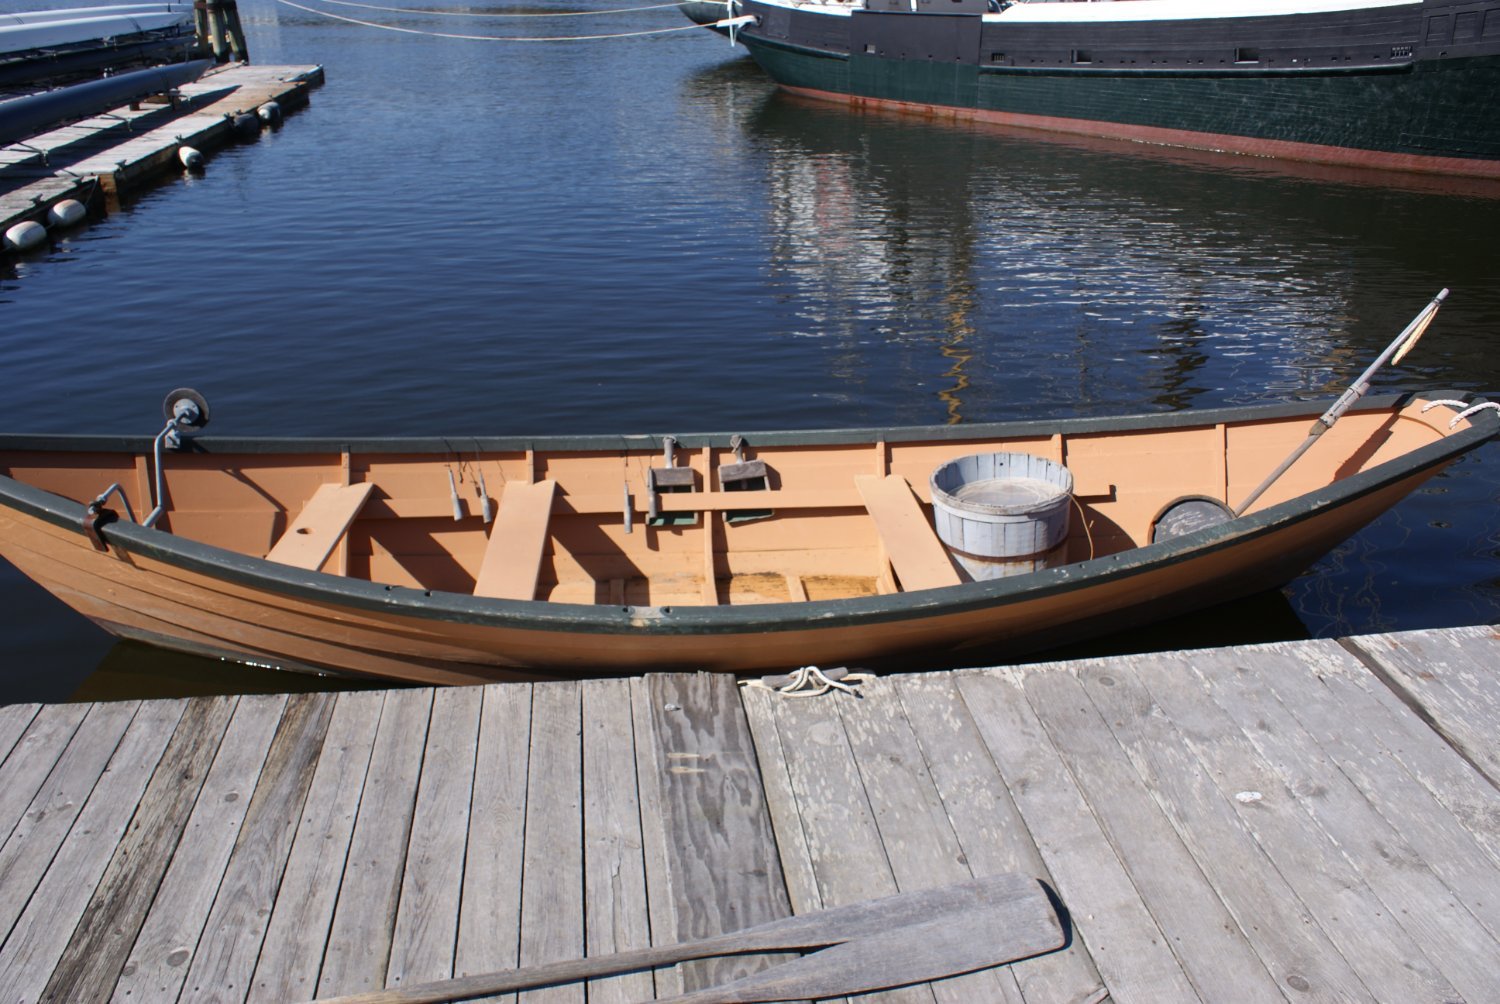
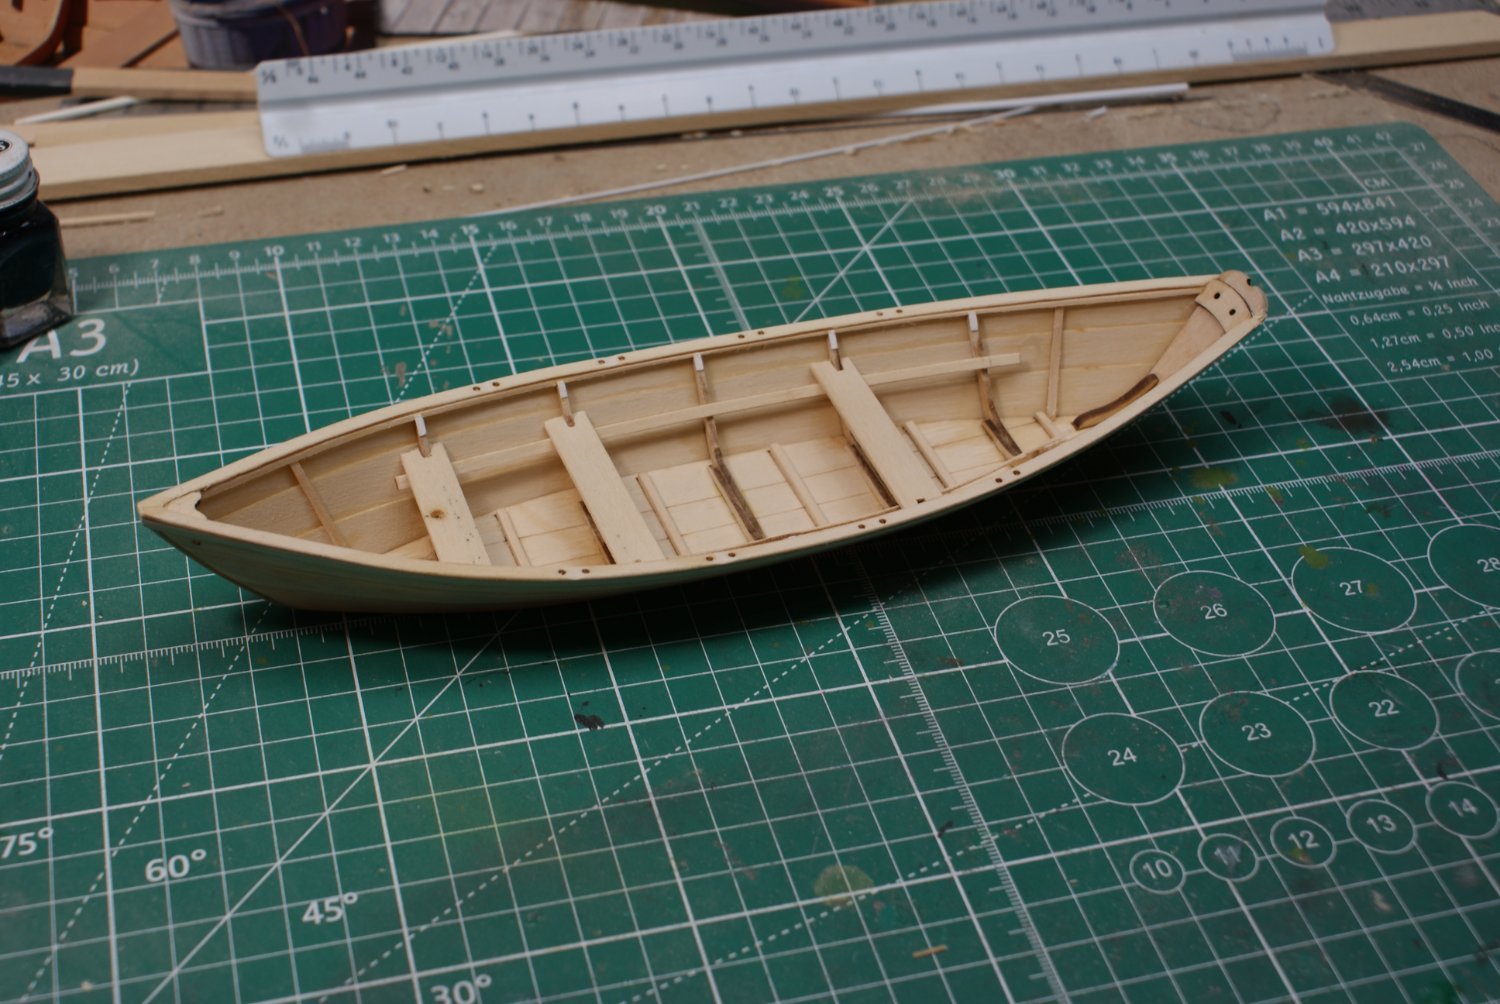
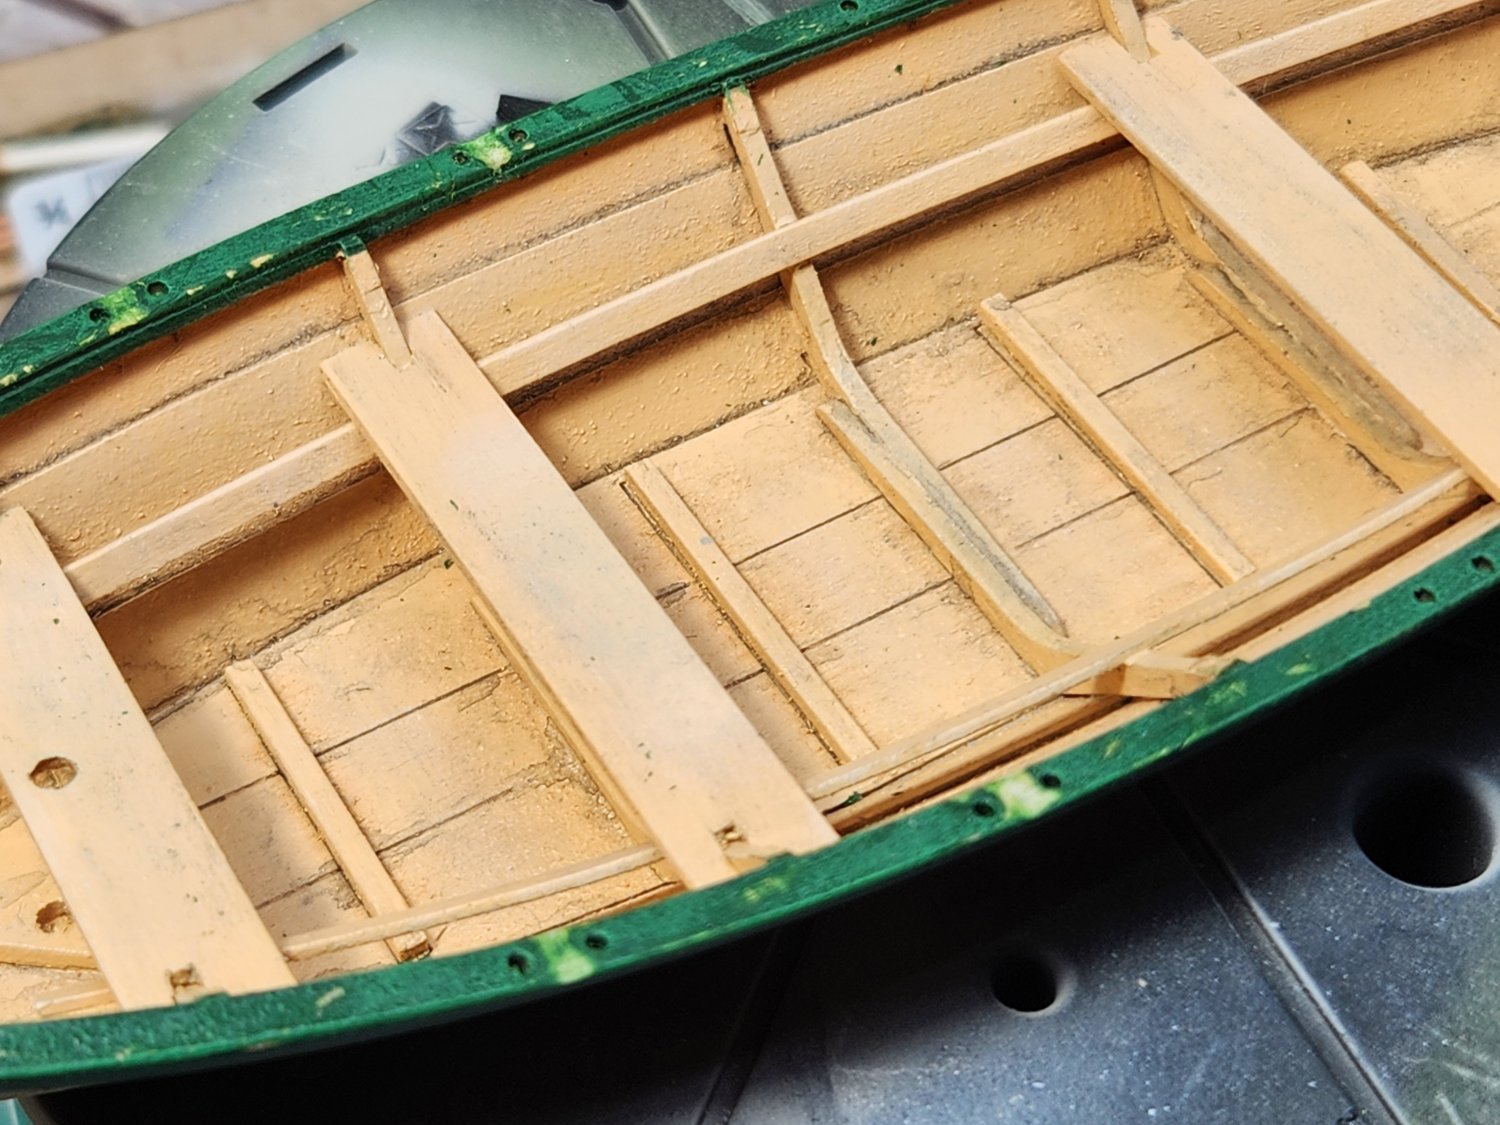
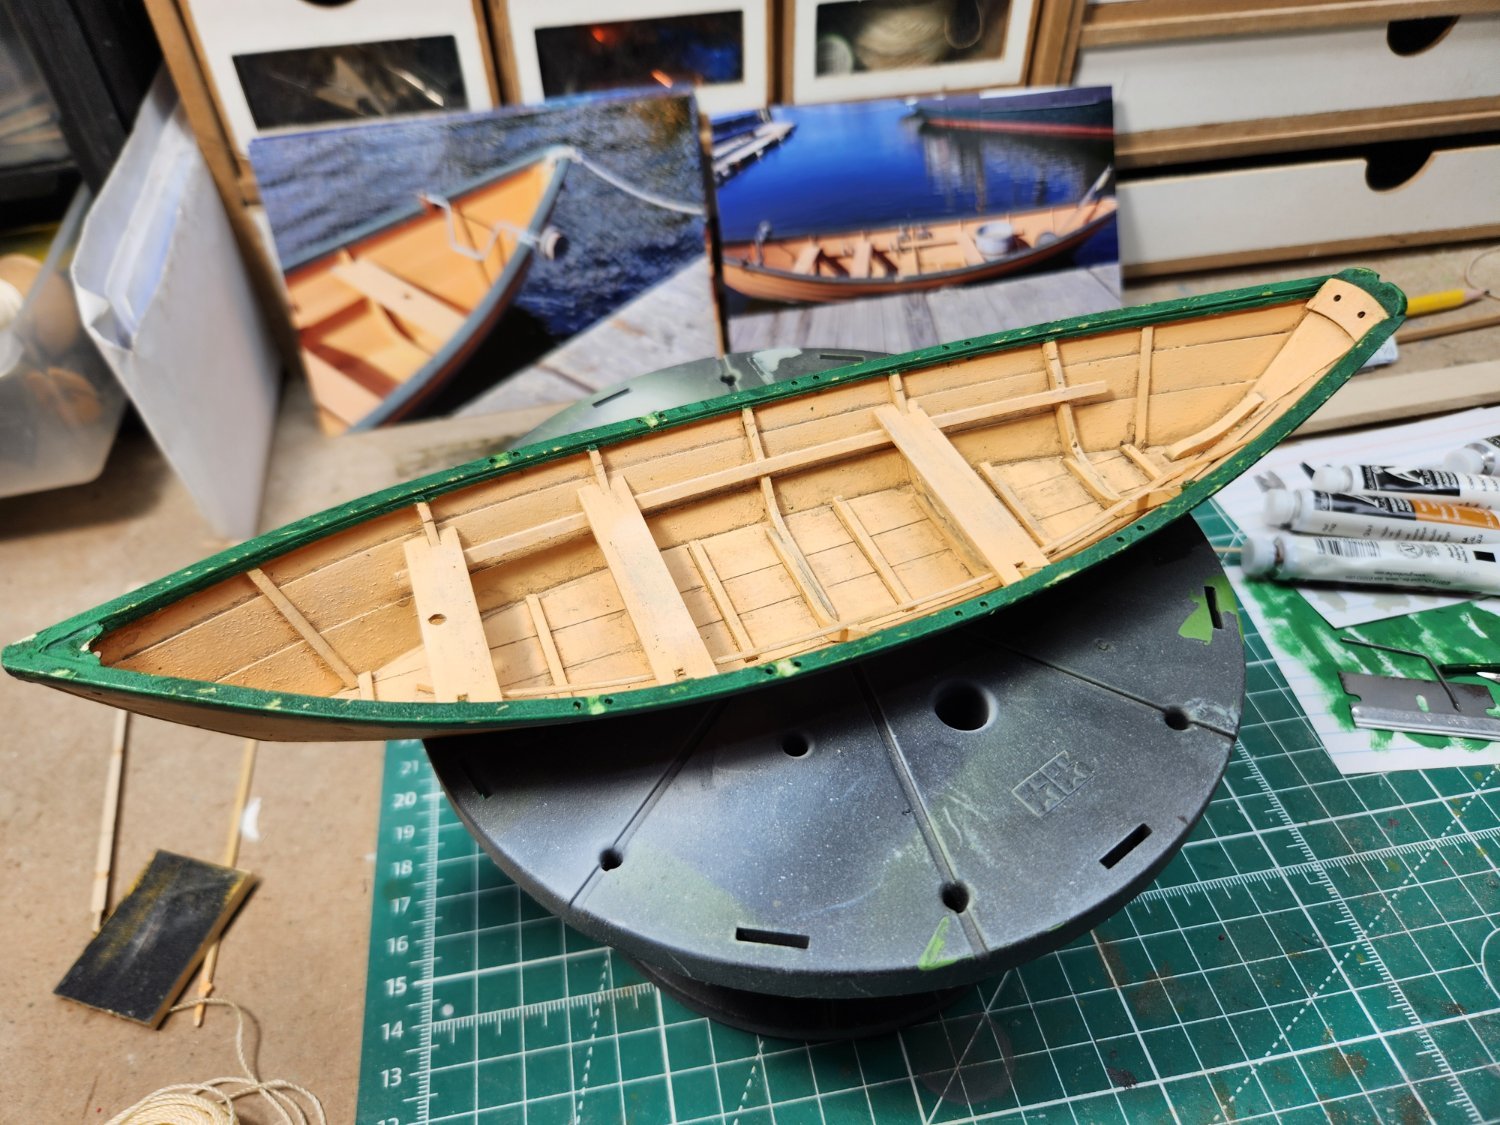
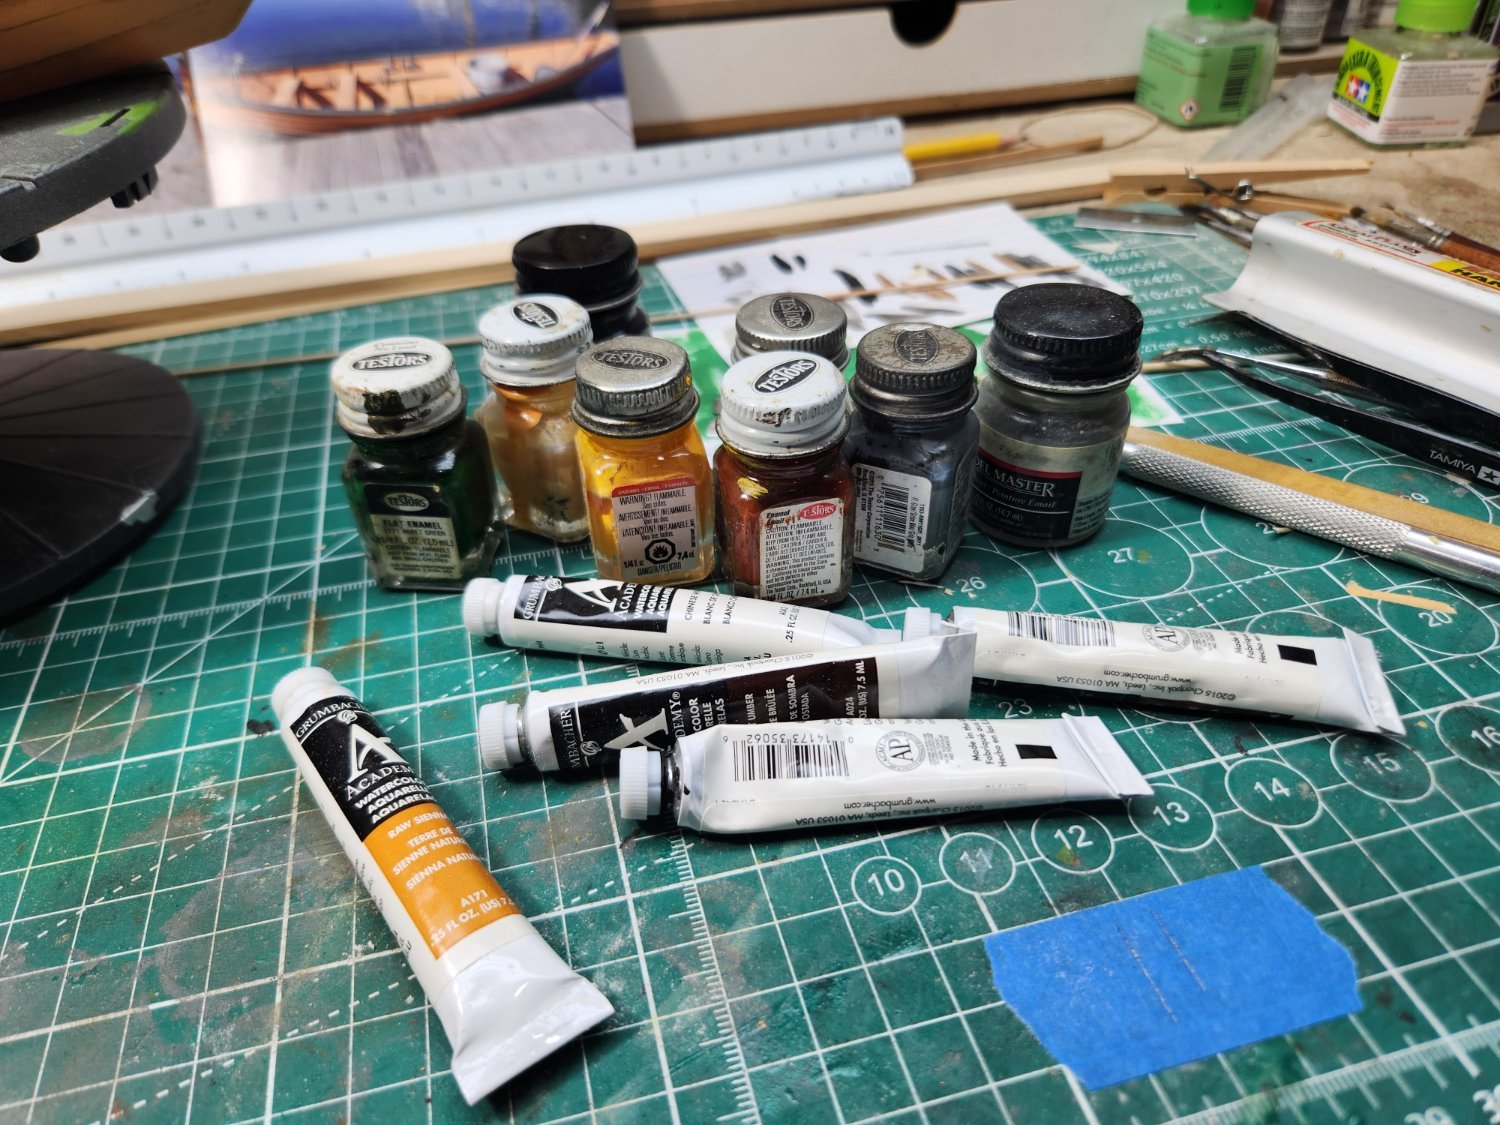
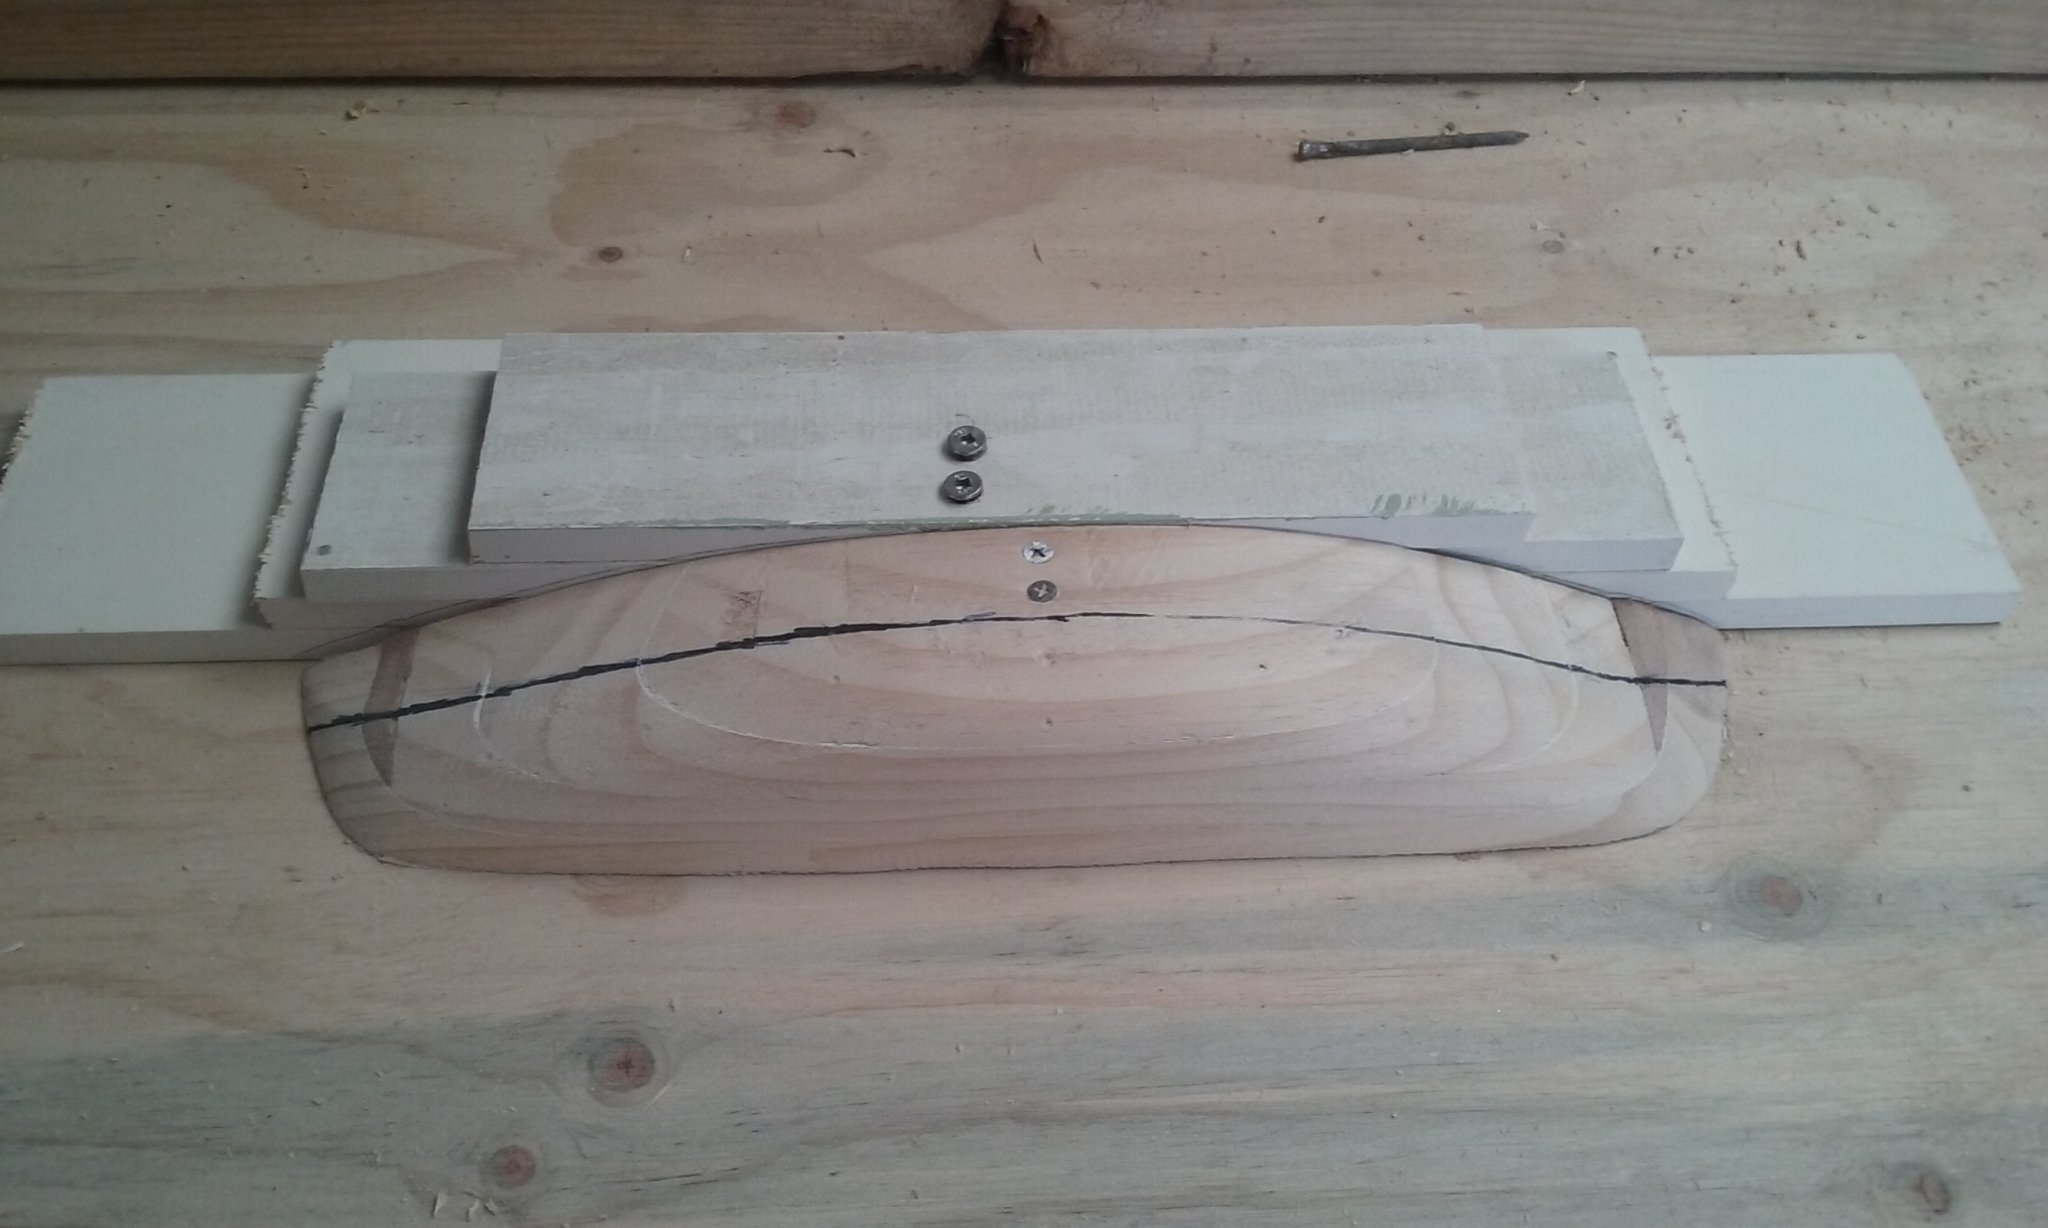
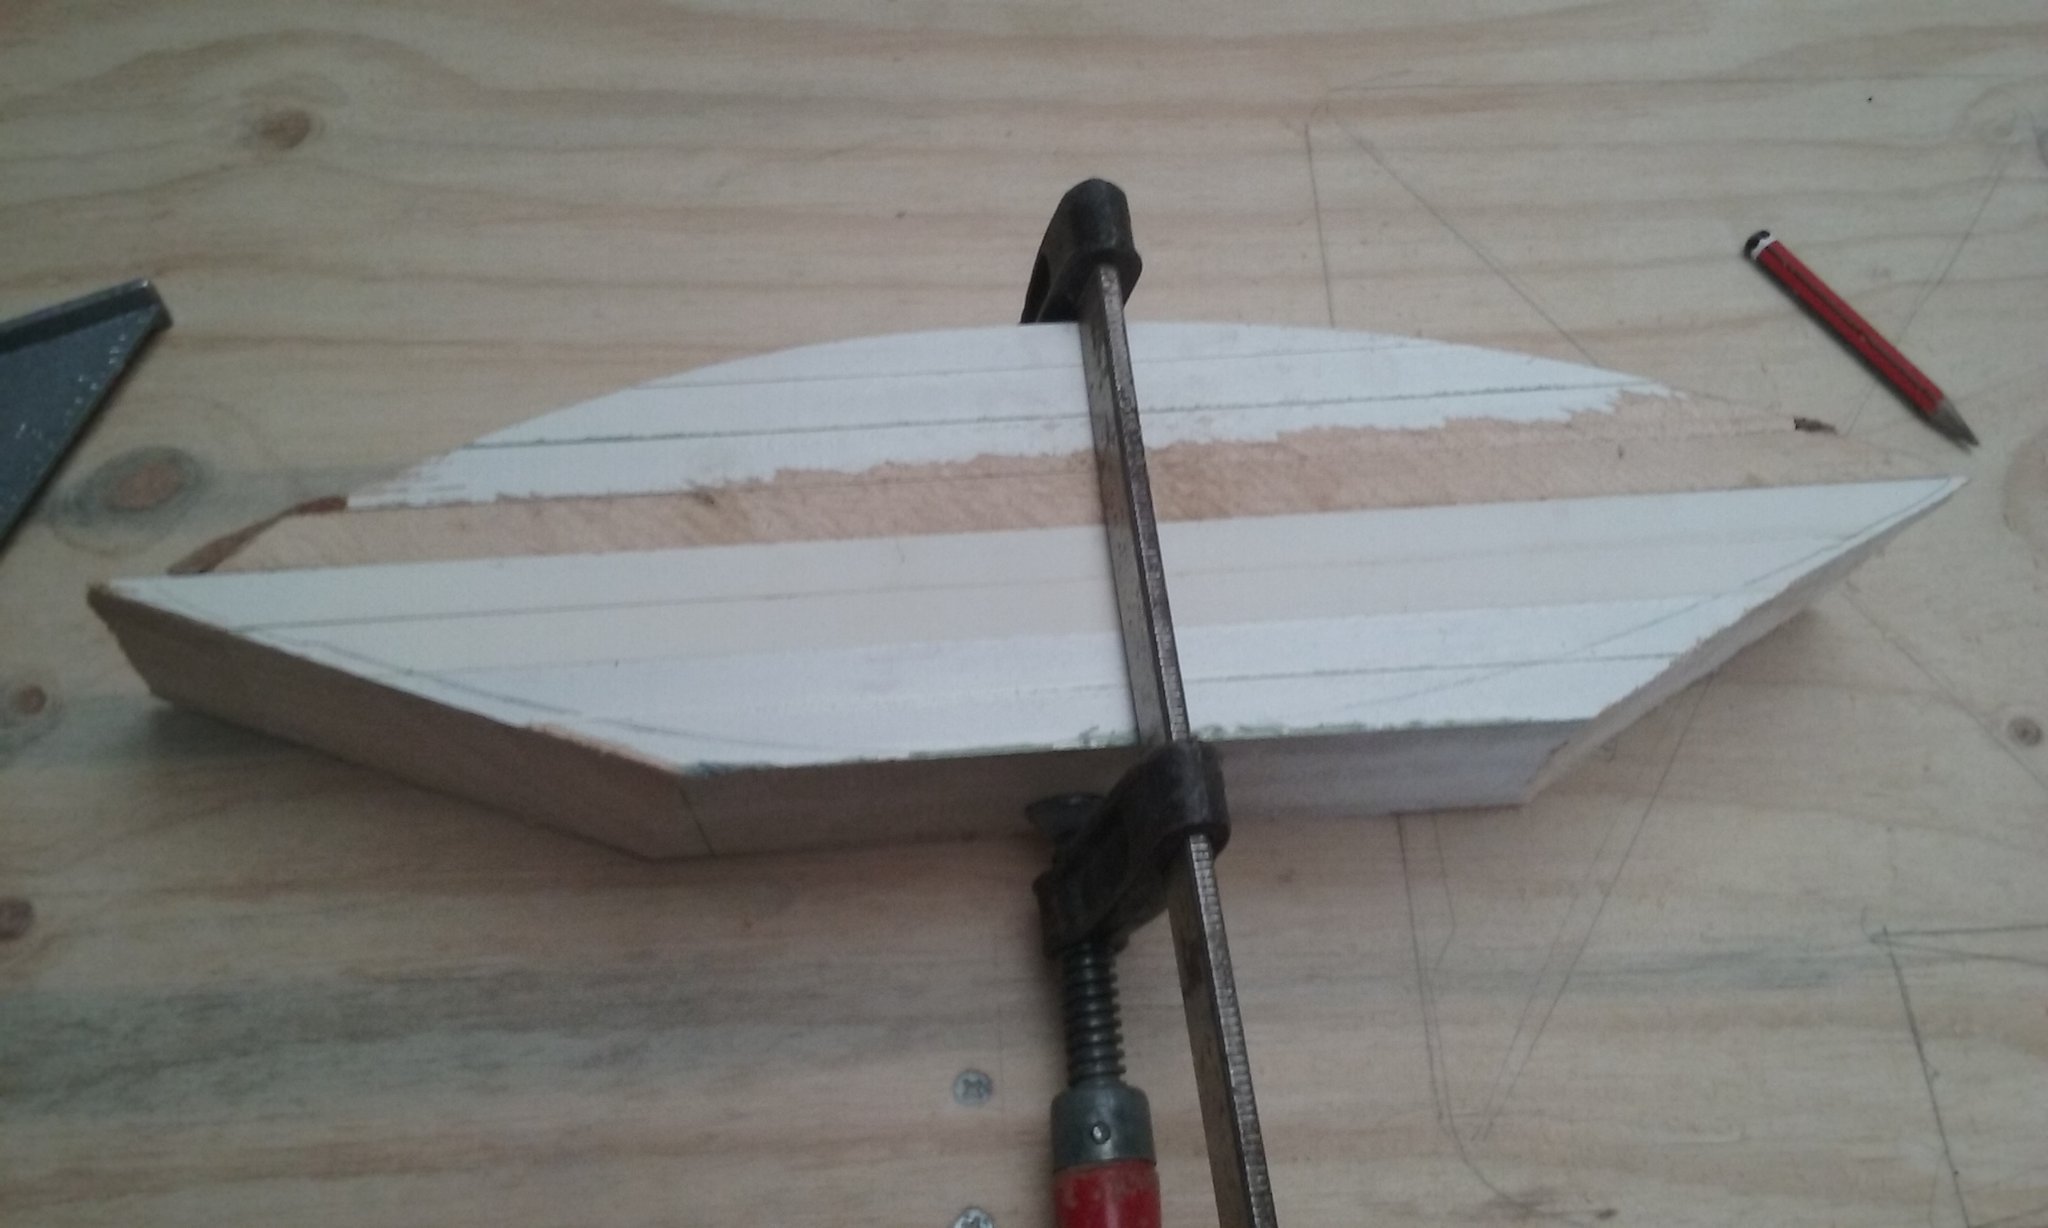
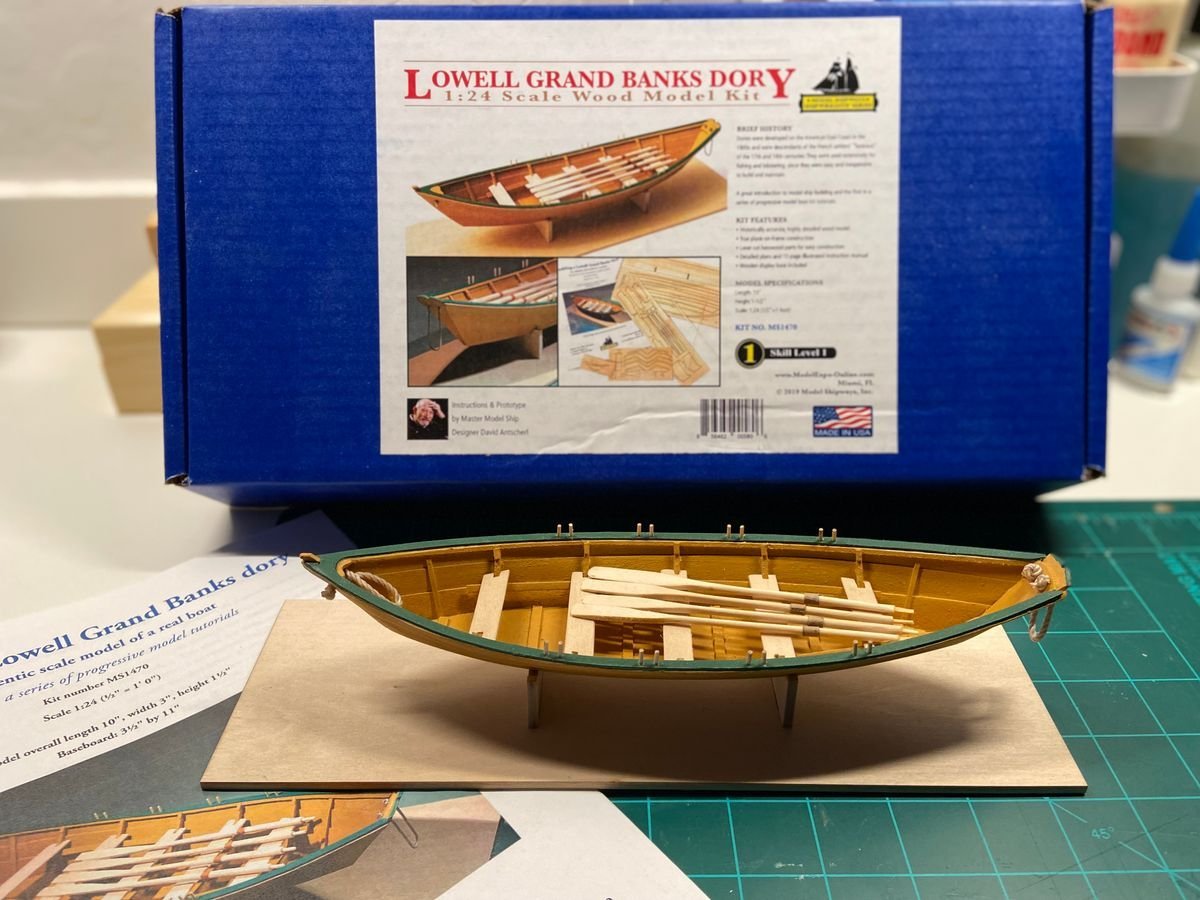
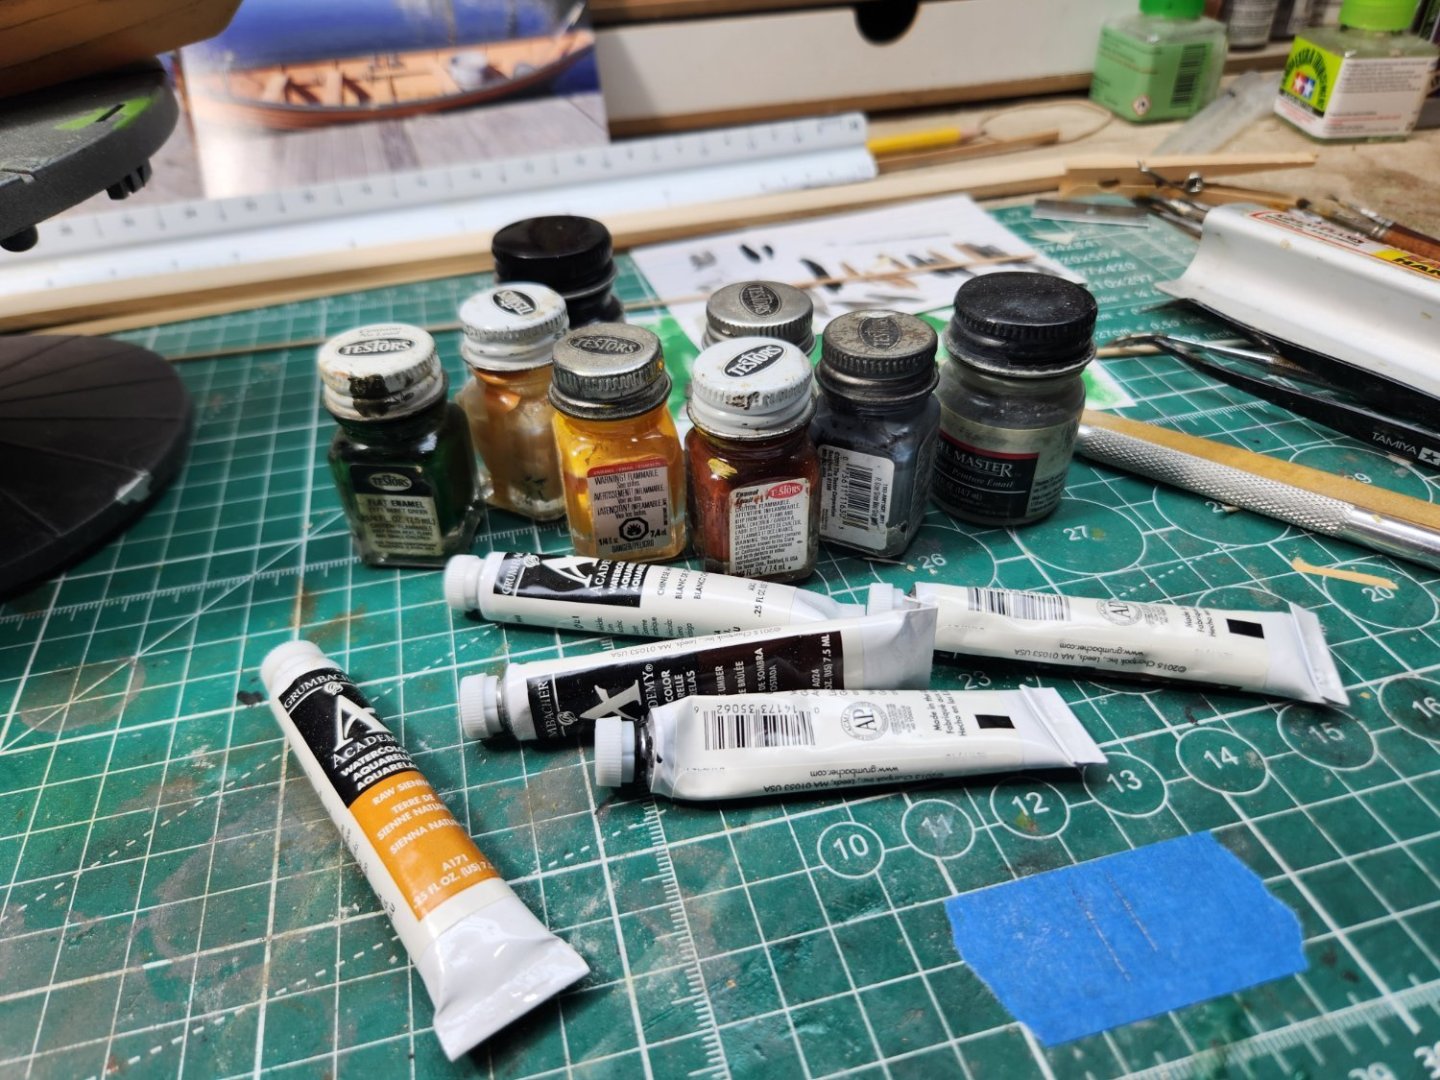
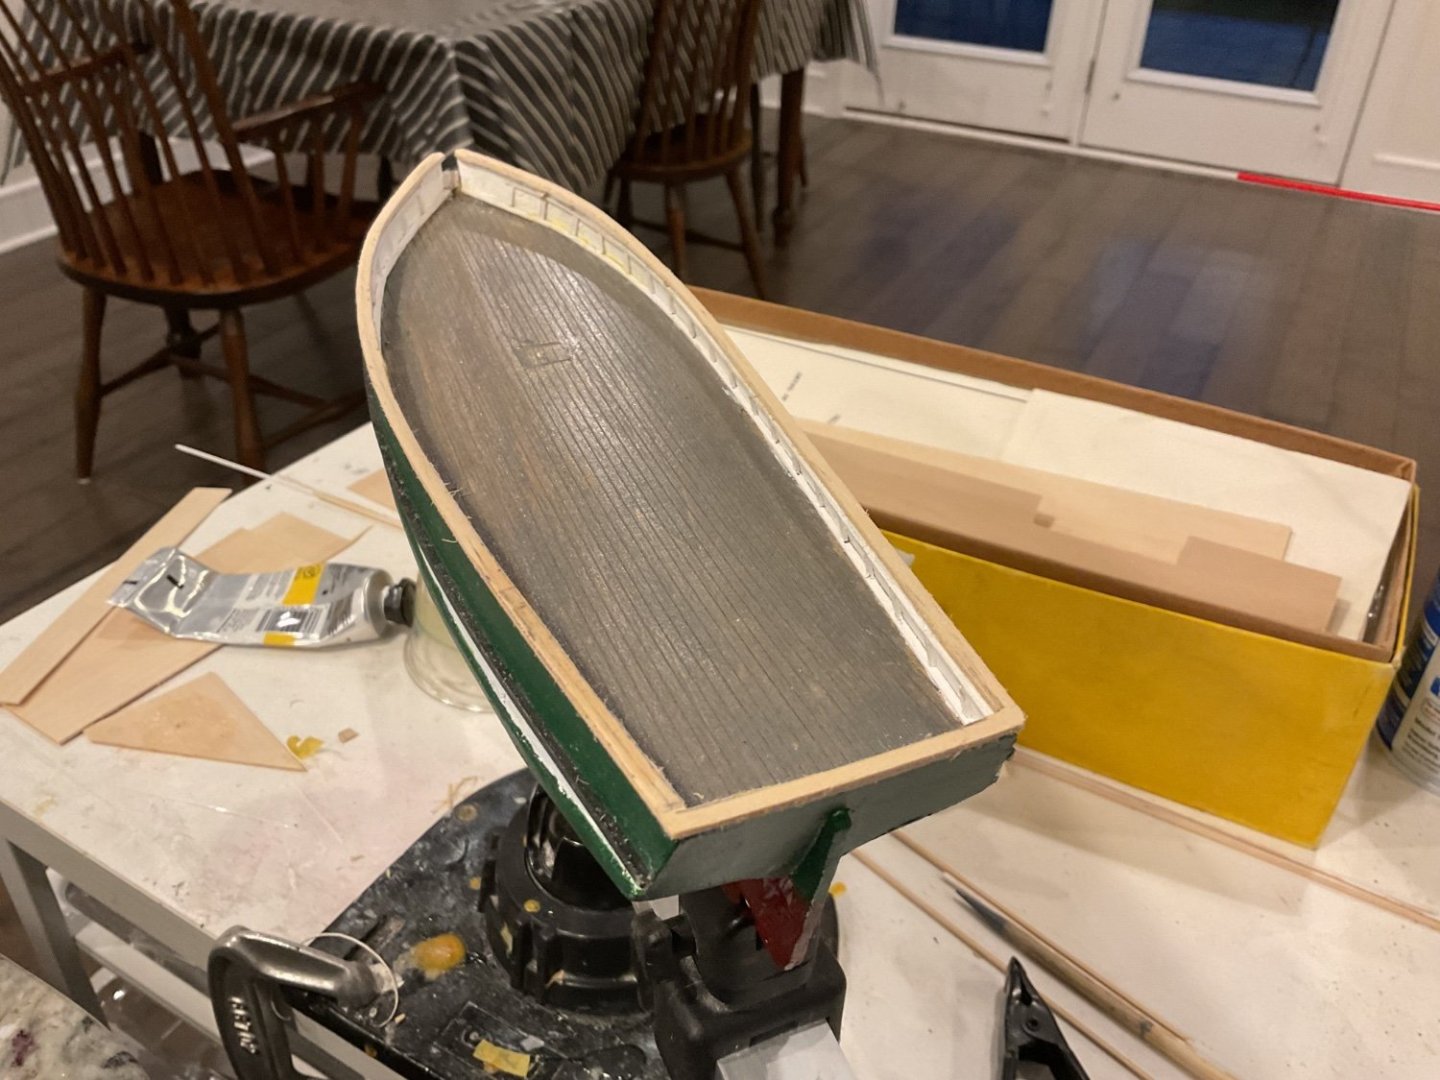
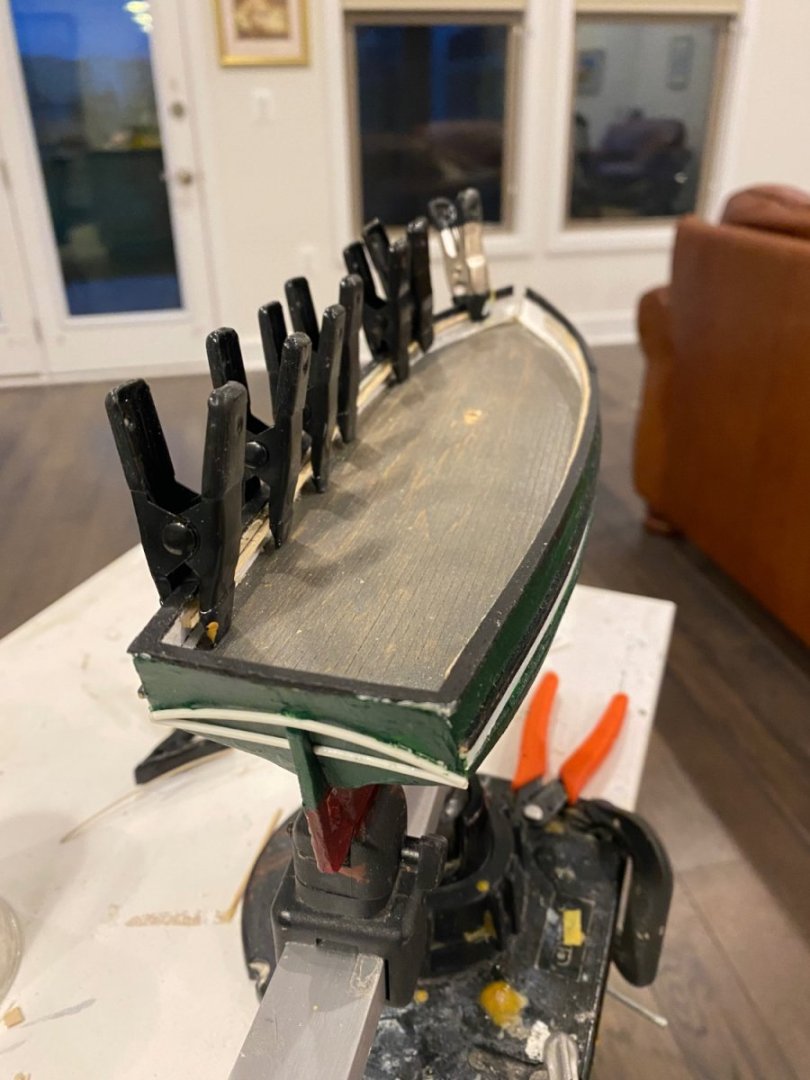
 Started this build approximately six weeks ago, it's my first build log. As a volunteer at Mystic Seaport Museum, I regularly pass a Dory exhibit and I thought it would make an interesting subject for a Diorama. My original thought was to recreate the scene in the photo, the boat tied to the dock. However, my biggest concern was modelling the water. If I mess that up, the project fails! Another option I considered was to build a scene of a Dory on a Schooner. So, that's my plan. Decided the base would be a section of deck, the last Dory being prepared for launch from the L. A. Dunton Gloucester Fishing Schooner, circa 1923 (currently undergoing full restoration at Mystic Seaport Museum) for daily fishing. The Dunton carried 10 Dory's stacked five high, port and starboard. She had a crew of 24, Captain, 3 crew, and 20 fisherman (2 per Dory). Dories could carry several tubs of longline trawl that would be set away from the schooner. Each tub could carry as much as 1,800 feet of line with a hook every fathom, or six feet. If a commercially viable fish was found on 50 of those three hundred hooks it was considered a decent haul. Dory's were painted a buff color which would show up in the fog and in bright sunlight, the same color the spars on the mother ship would carry and the dory might have a small rope on the bung, should the boat overturn. There's lots of small detail that can be added, line tubs, dory fog horn, trawl anchor, trawl buoy, bailer's, sail, etc... Fortunately, I found some 1/24 scale figures I think I can modify. To start with, build the Dory! The Kit is the Model Shipways Lowell Banks Dory, "a beginner kit is not just for beginners"! No need to document the build, there are many Dory Build logs. So, fast forward, after few minor kit modifications, base painting, I started the weathering is a work in process in process. I mixed my own batch of base colors using enamel paints. For washes I use "only" watercolor paints". Not acrylic paints. Watercolor paints are much more forgiving, if you make a mistake, just wipe off with a damp cloth or paint brush. I never weathered a ship model; I'm having fun with this! Some dark grey wash, dry brushing and paint chipping, the detail starts to develop.


- 11 replies
-
- 10
-
-
- Model Shipways
- Finished
- (and 2 more)
-
 I have just accidentally deleted my entire build log. I thought I was deleting one post rather than the whole thing. I must now redo the entire log. This is most distressing, but at least I have the opportunity to make improvements in what I did. Fortunately I still have all the photos that I used. Unfortunately, all the likes, comments, and photos that were posted to my log by other MSW members are lost. Work on this will commence this afternoon. Unless the moderators object, I will do a series of posts, rather than try to do the whole thing in one. I plan for each post to be on a particular topic, or phase of construction.
- 110 replies
-
- 3
-

-
-
- Bluejacket Shipcrafters
- Constitution
- (and 2 more)
-
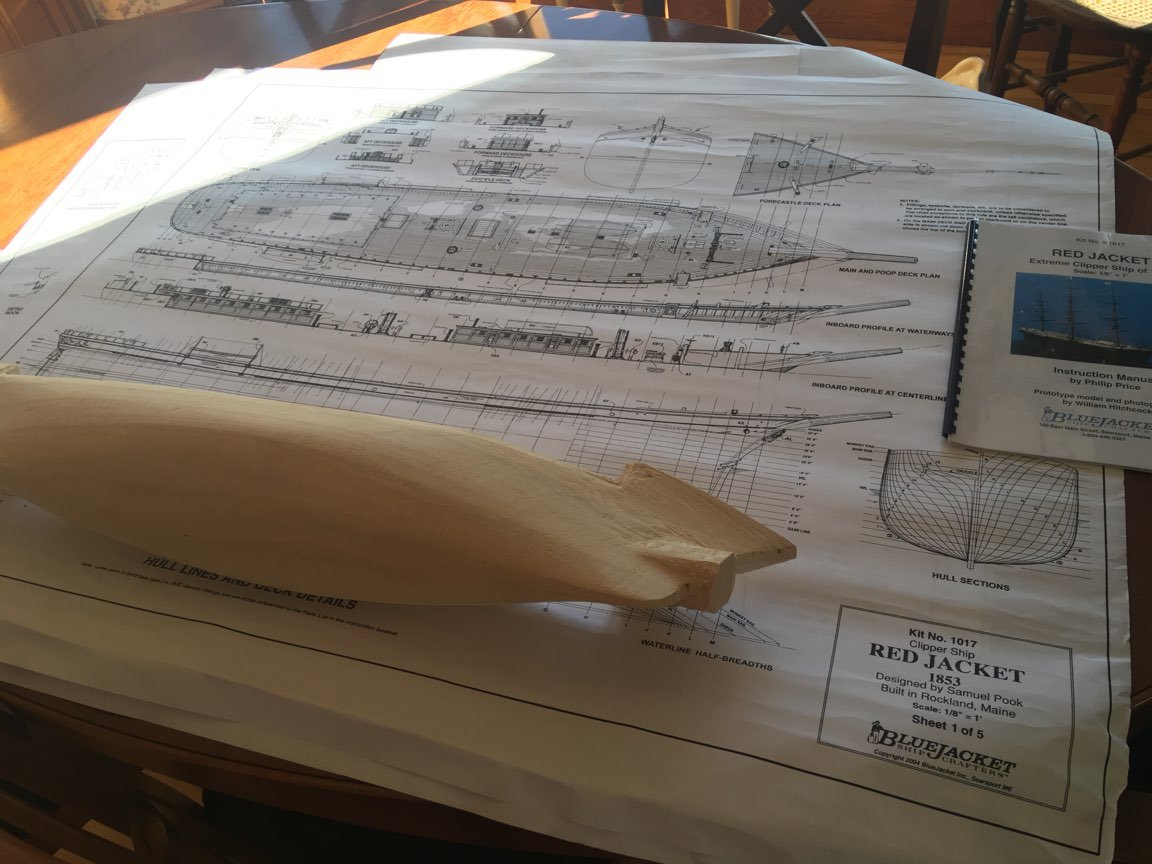
 Time to start a new model. Made in Rockland, Maine in 1853, the Red Jacket was a clipper ship, one of the largest and fastest ever built. She was also the first ship of the White Star Line company. She was named after Sagoyewatha, a famous Seneca Indian chief, called "Red Jacket" by settlers.She was lost in a gale in 1885.On her first voyage, Red Jacket set the speed record for sailing ships crossing the Atlantic by traveling from New York to Liverpool in 13 days, 1 hour, 25 minutes, dock to dock. That record still stands today for commercial sailing vessels. The BlueJacket kit has 5 sheets of plans. Sheet 1 has the pre-carved hull laid on top of it. This is going to be a large model! (41" LOA)
- 355 replies
-
- 17
-
-
- red jacket
- finished
- (and 1 more)
-
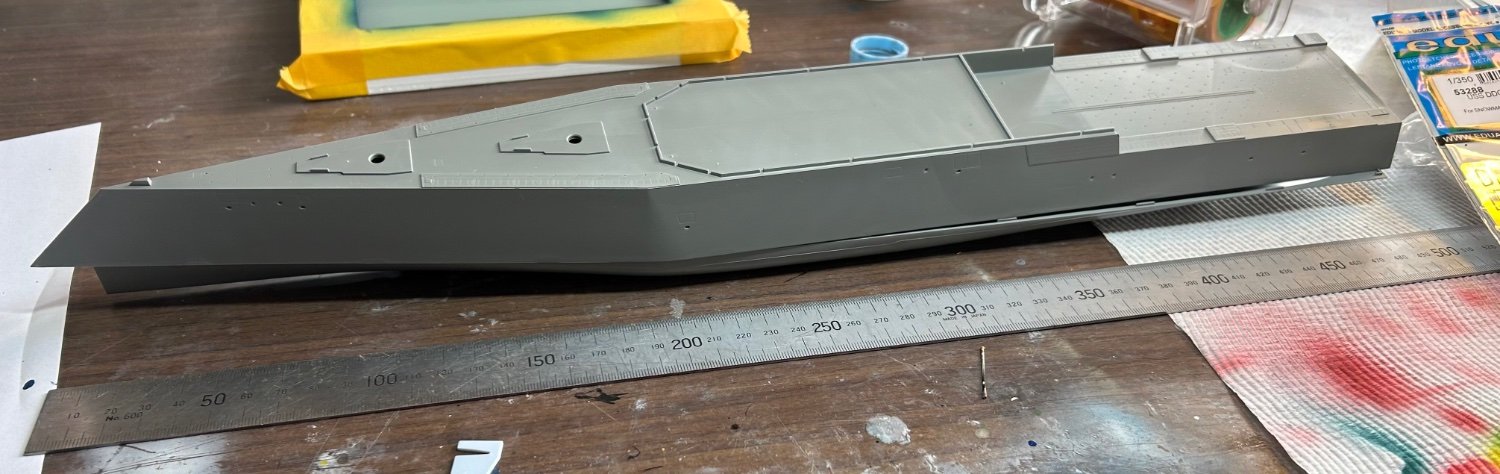
 When I first built Dreadnought I did not own an airbrush and used rattle cans and paintbrushes. I was really happy with the build at the time and it’s time to redo her in a different way. hopefully better.
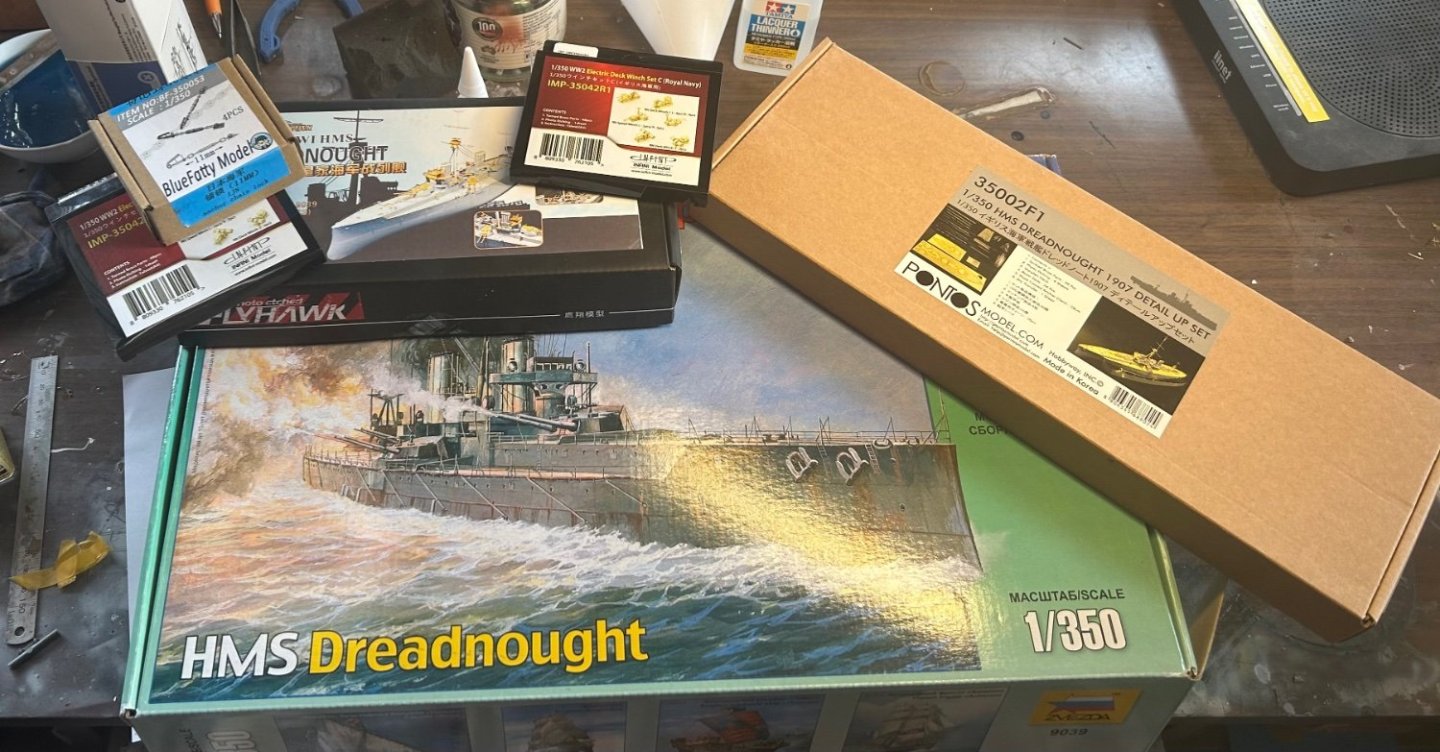
- 212 replies
-
- 11
-
-
I’ve been sitting in this one for a while, and there are not that many builds out there. Eduard makes a small upgrade kit and there are some aftermarket helicopters to use as well.


- 47 replies
-
- 8
-
-
- Zumwalt
- Snowman Model
- (and 2 more)
-
 Having built the Model Shipways shipwright beginner kits by David Antscherl, I thought I’d try out the latest kit by Antscherl being offered by Model shipways, the Nonsuch 30 catboat in 1:24. I just started the hull planking, up to this point the build process has been rather straightforward for a plank on bulkhead kit. However, the start of the planking process has not gone smoothly. The Garboard plank is the first one to be placed on the bulkheads. I could not get the plank to lay smoothly on the bulkheads and keep the precut holes lined up with holes in the spine. The next two pictures show how warped the plank turned out. I will have to remove this plank and reapply it. My solution was to cut the plank into 4 pieces and lay them individually. I just had to sand the edges of the pieces a little to get a good fit. The bulkheads are rather thick, so this worked out ok. We’ll see how the following planks lay down.

- 27 replies
-
- 2
-
-
- Nonsuch
- Model Shipways
- (and 1 more)
-
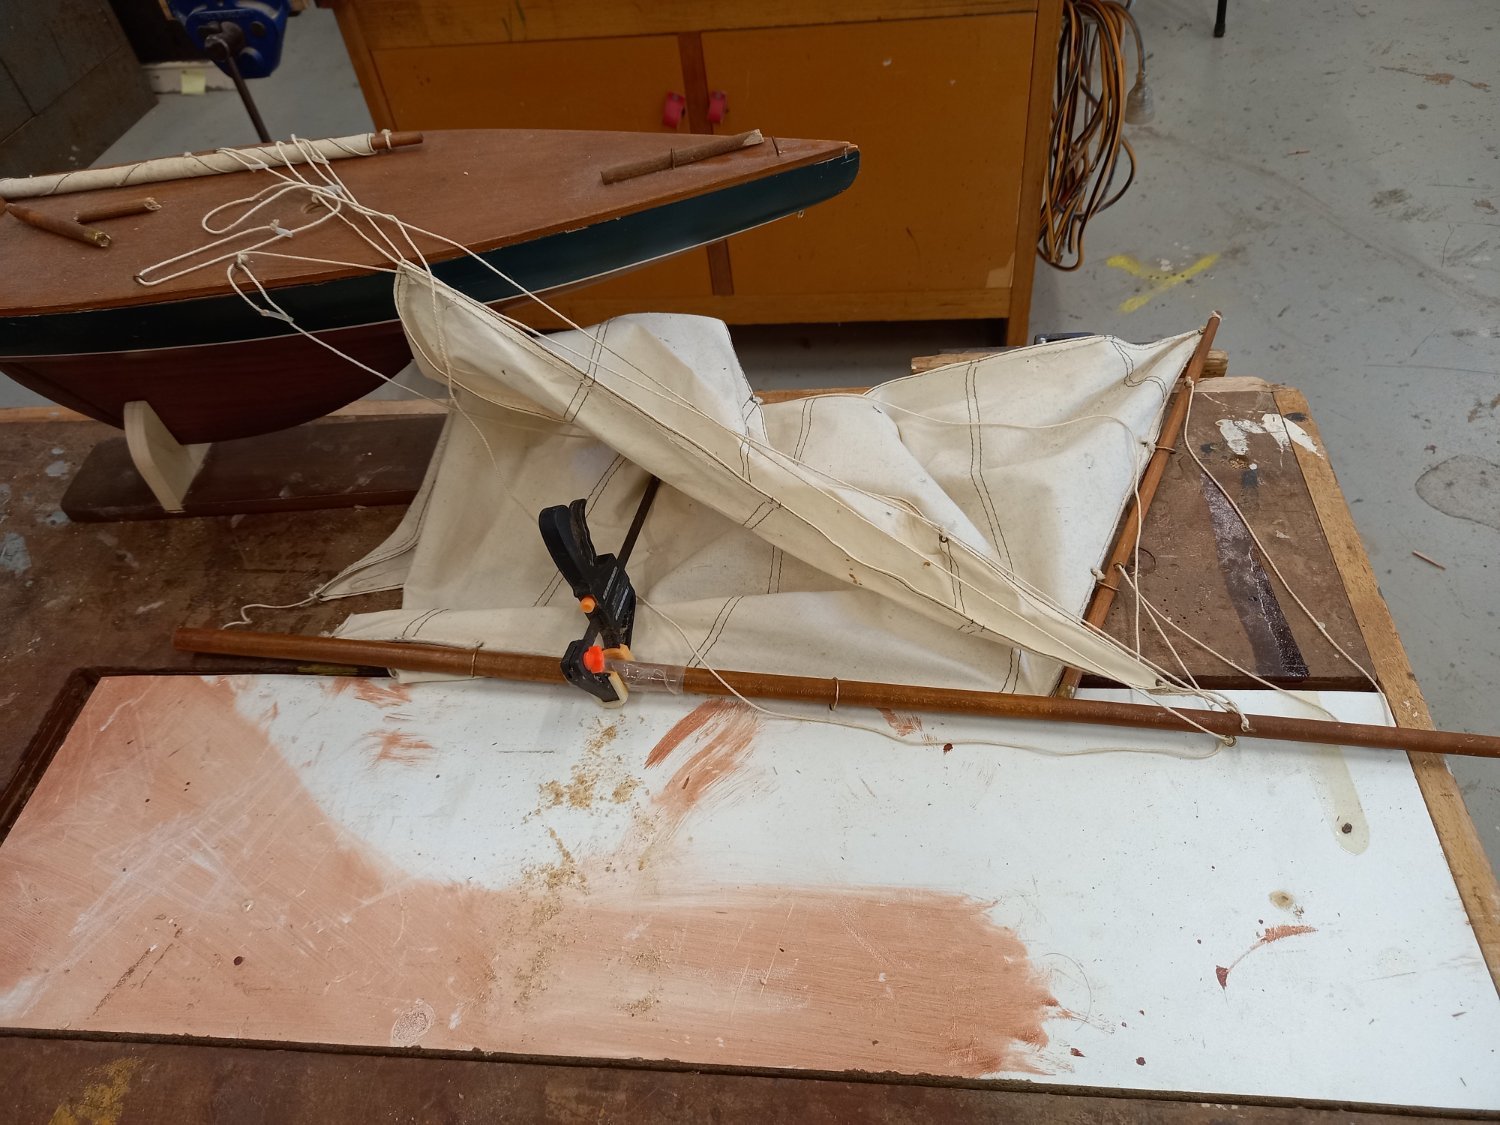
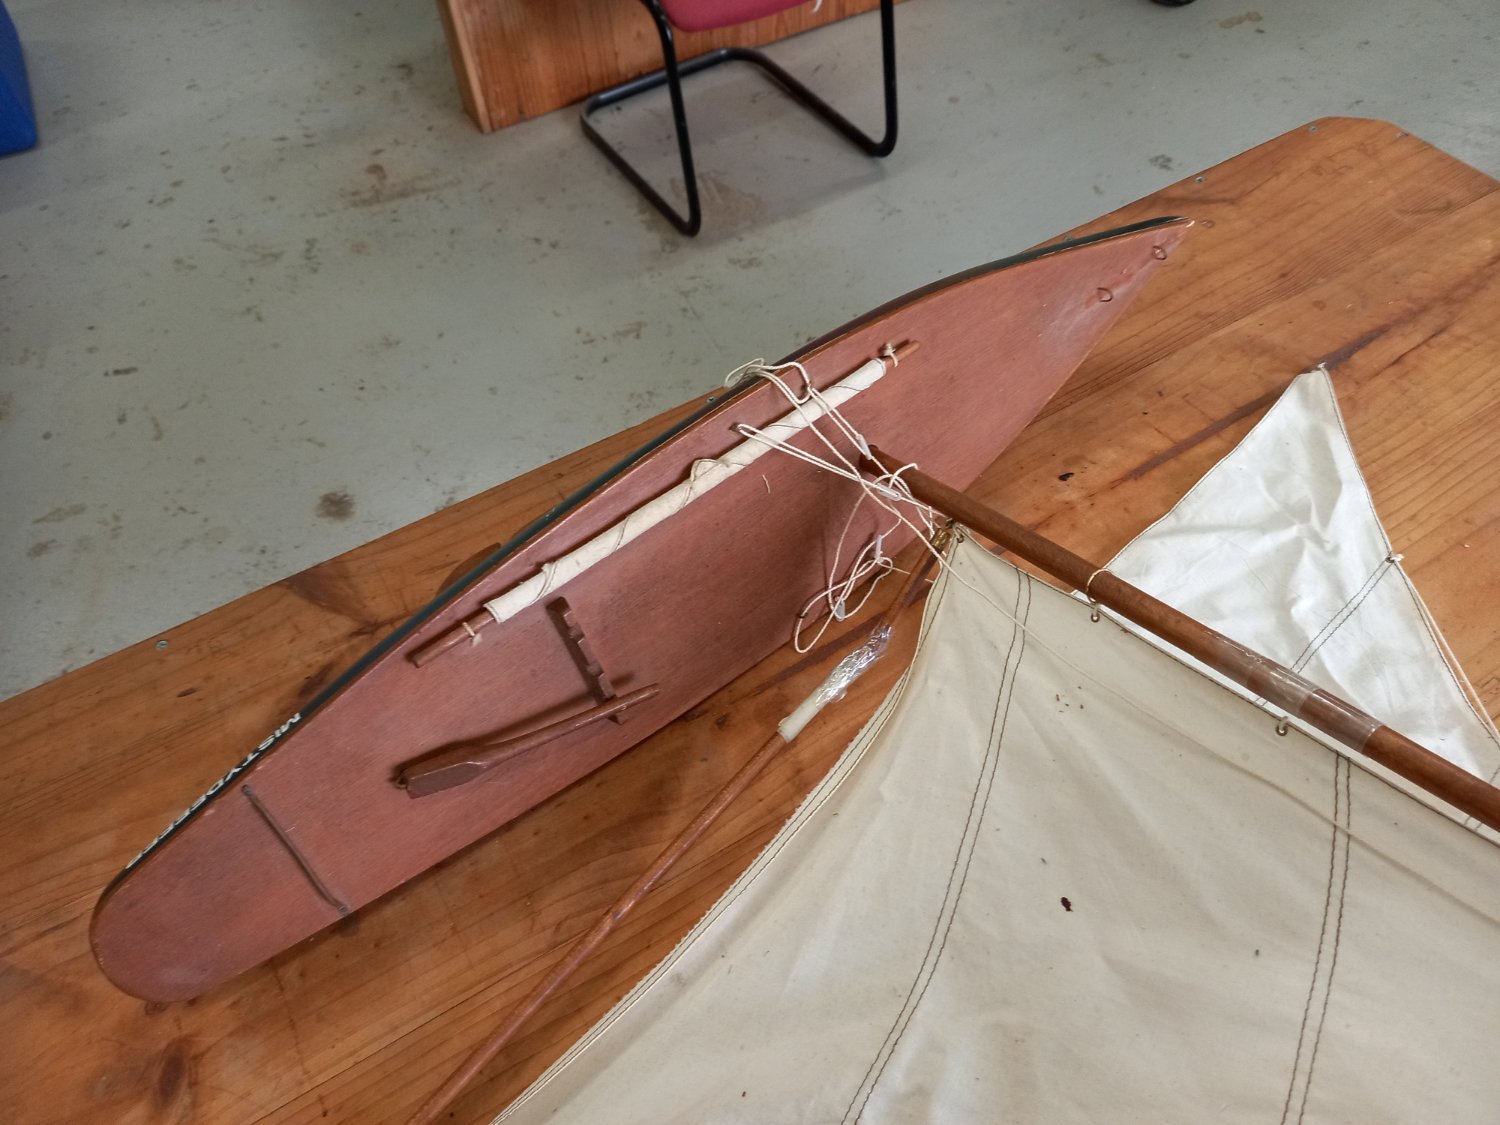
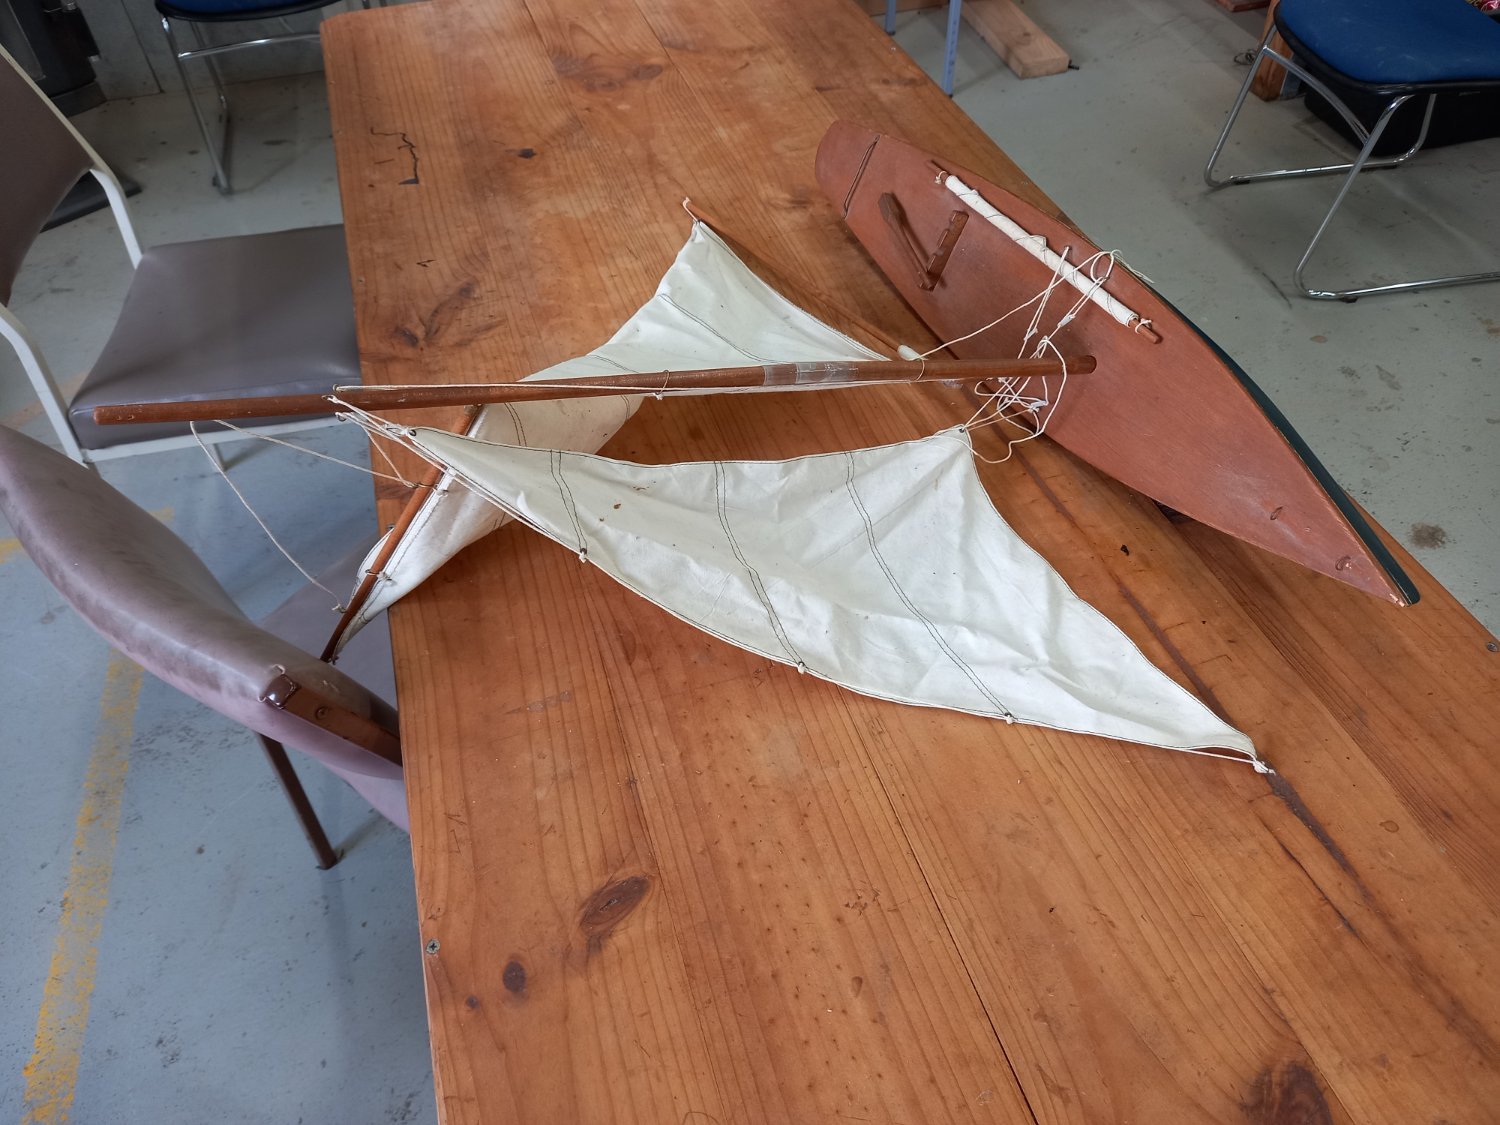
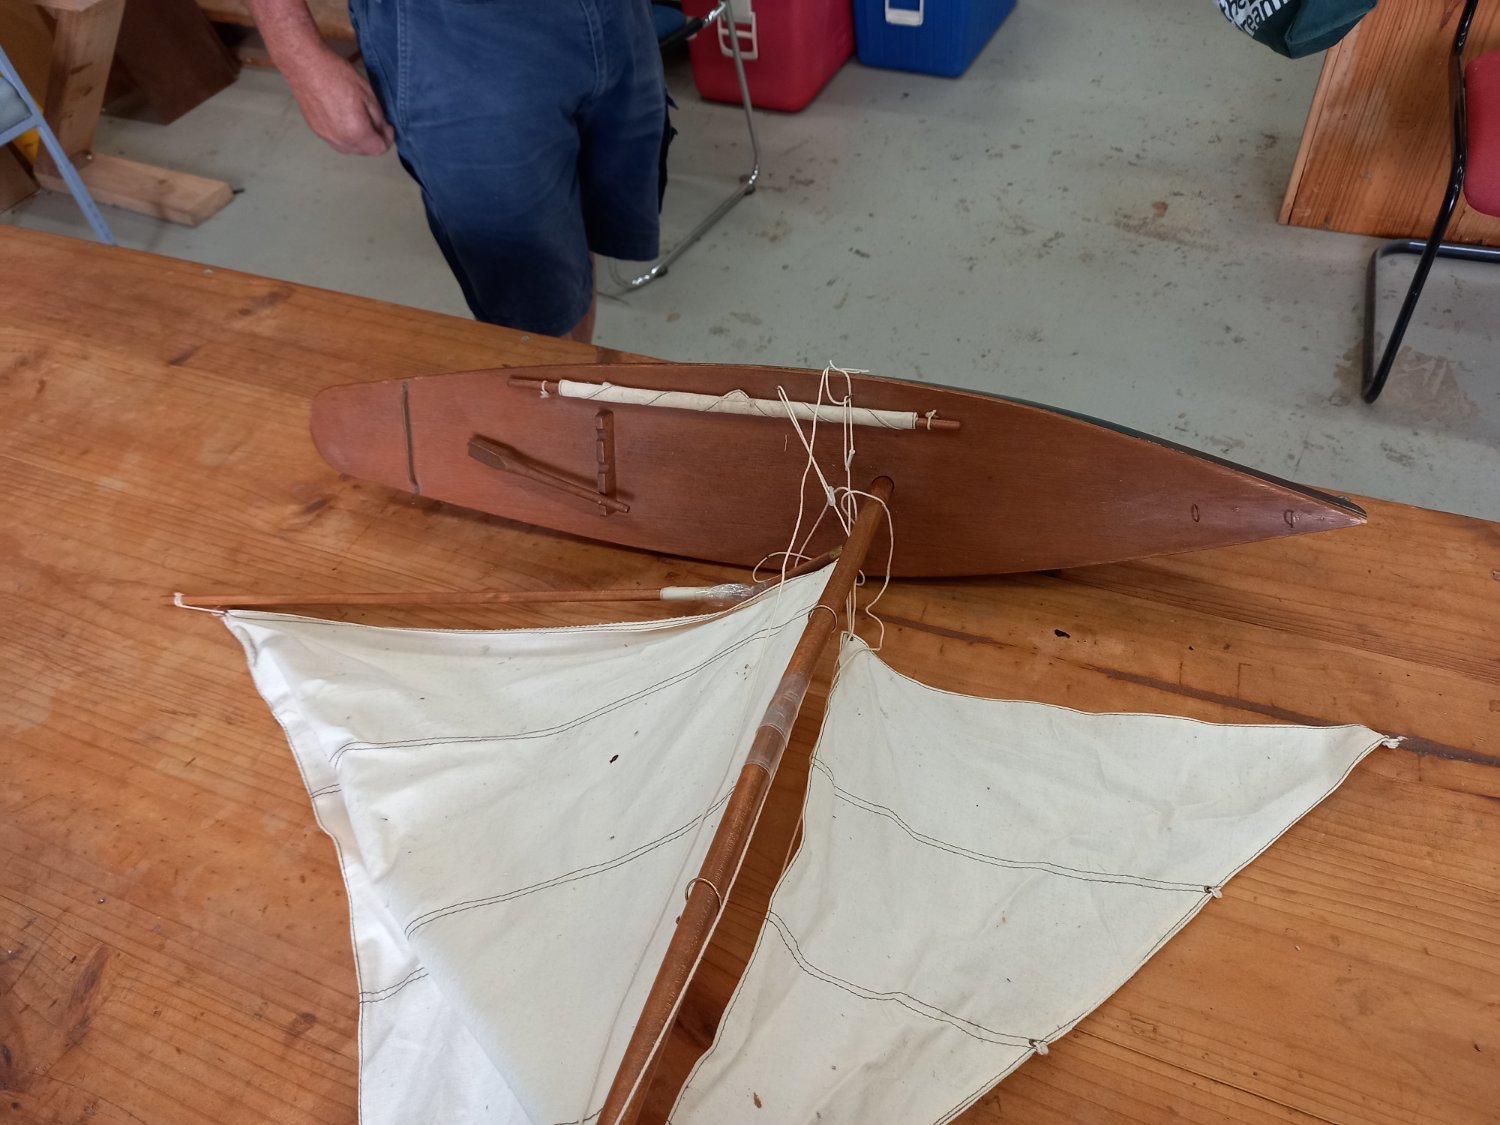
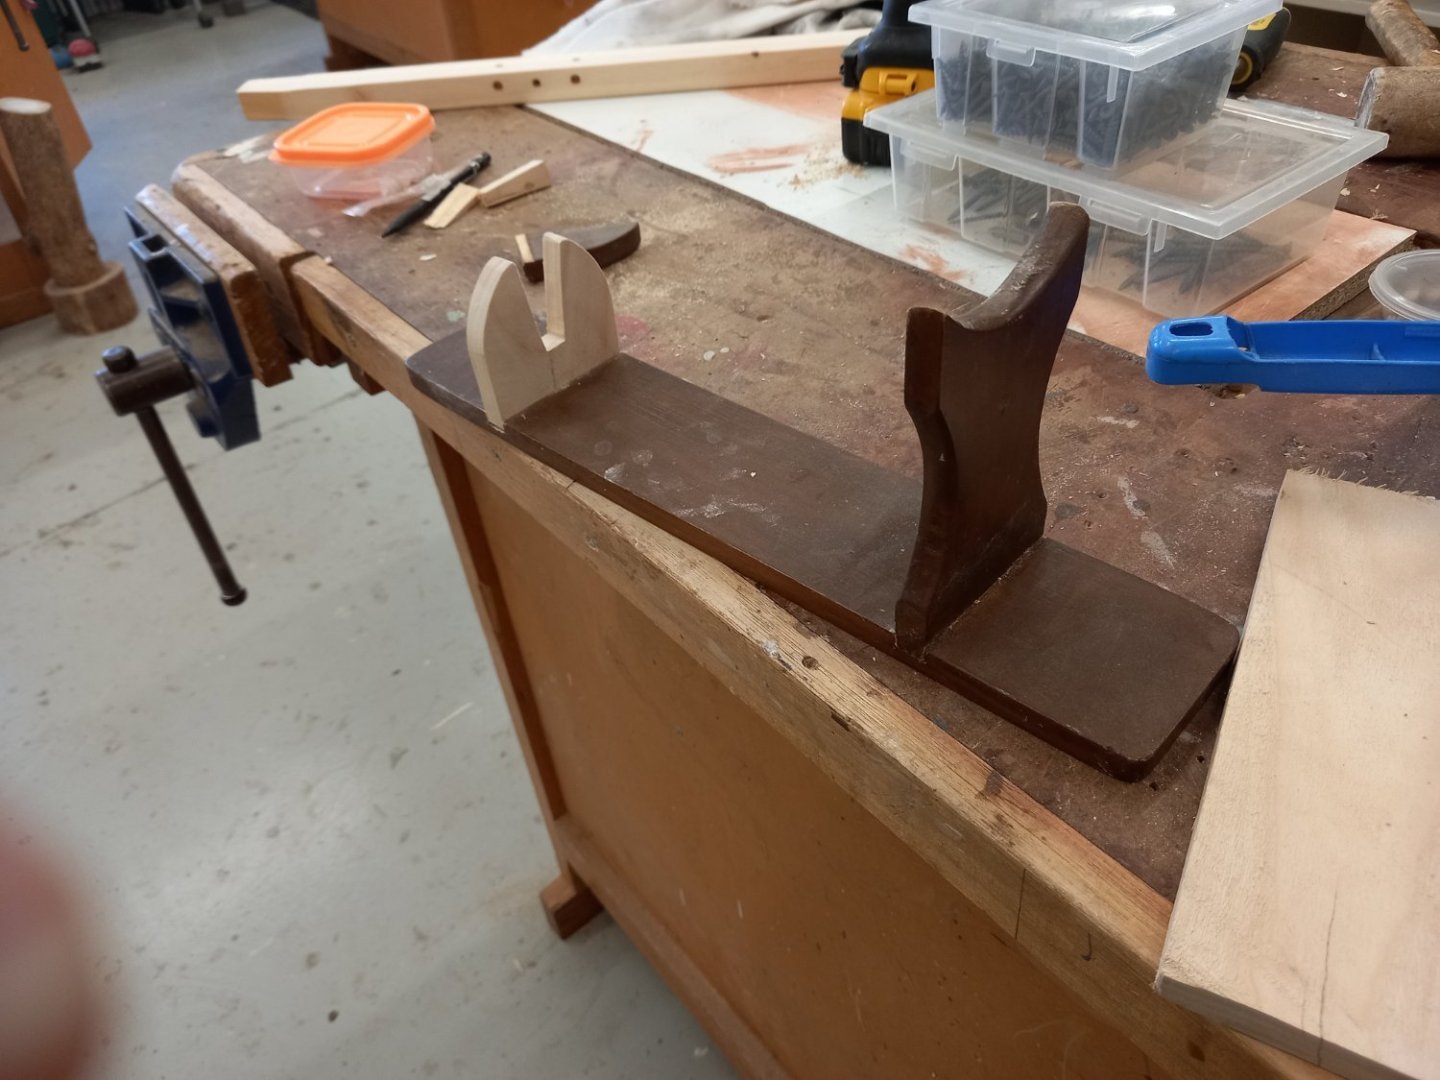
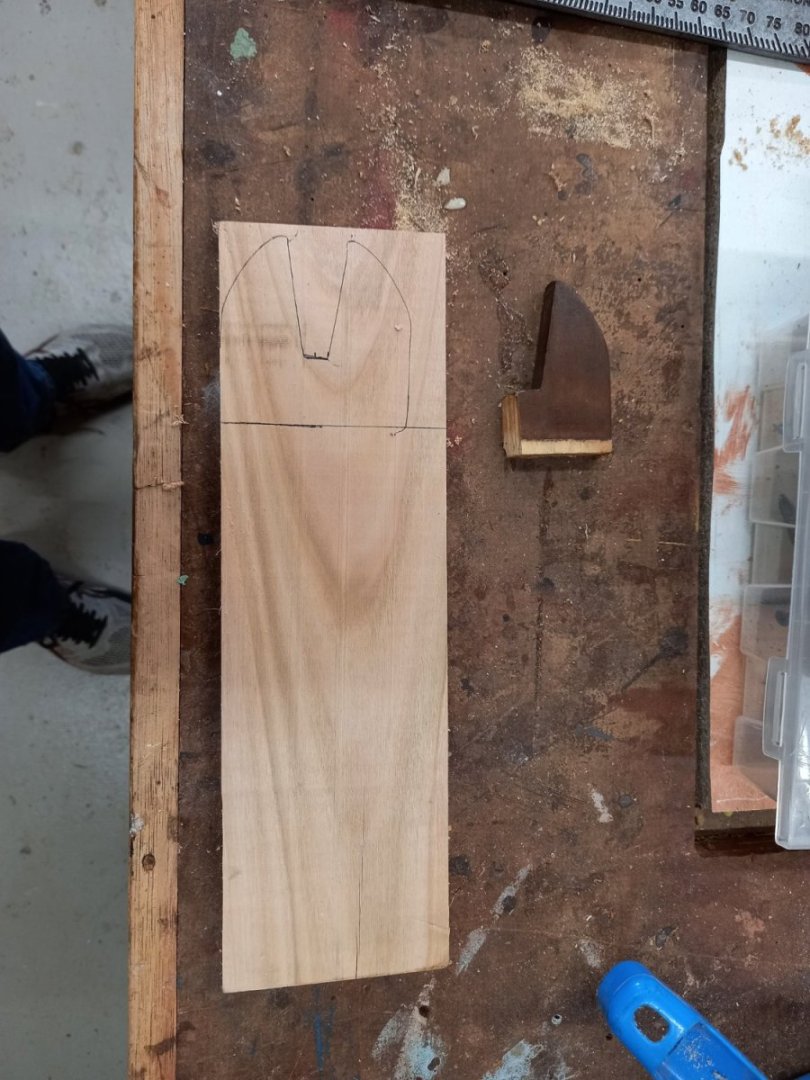
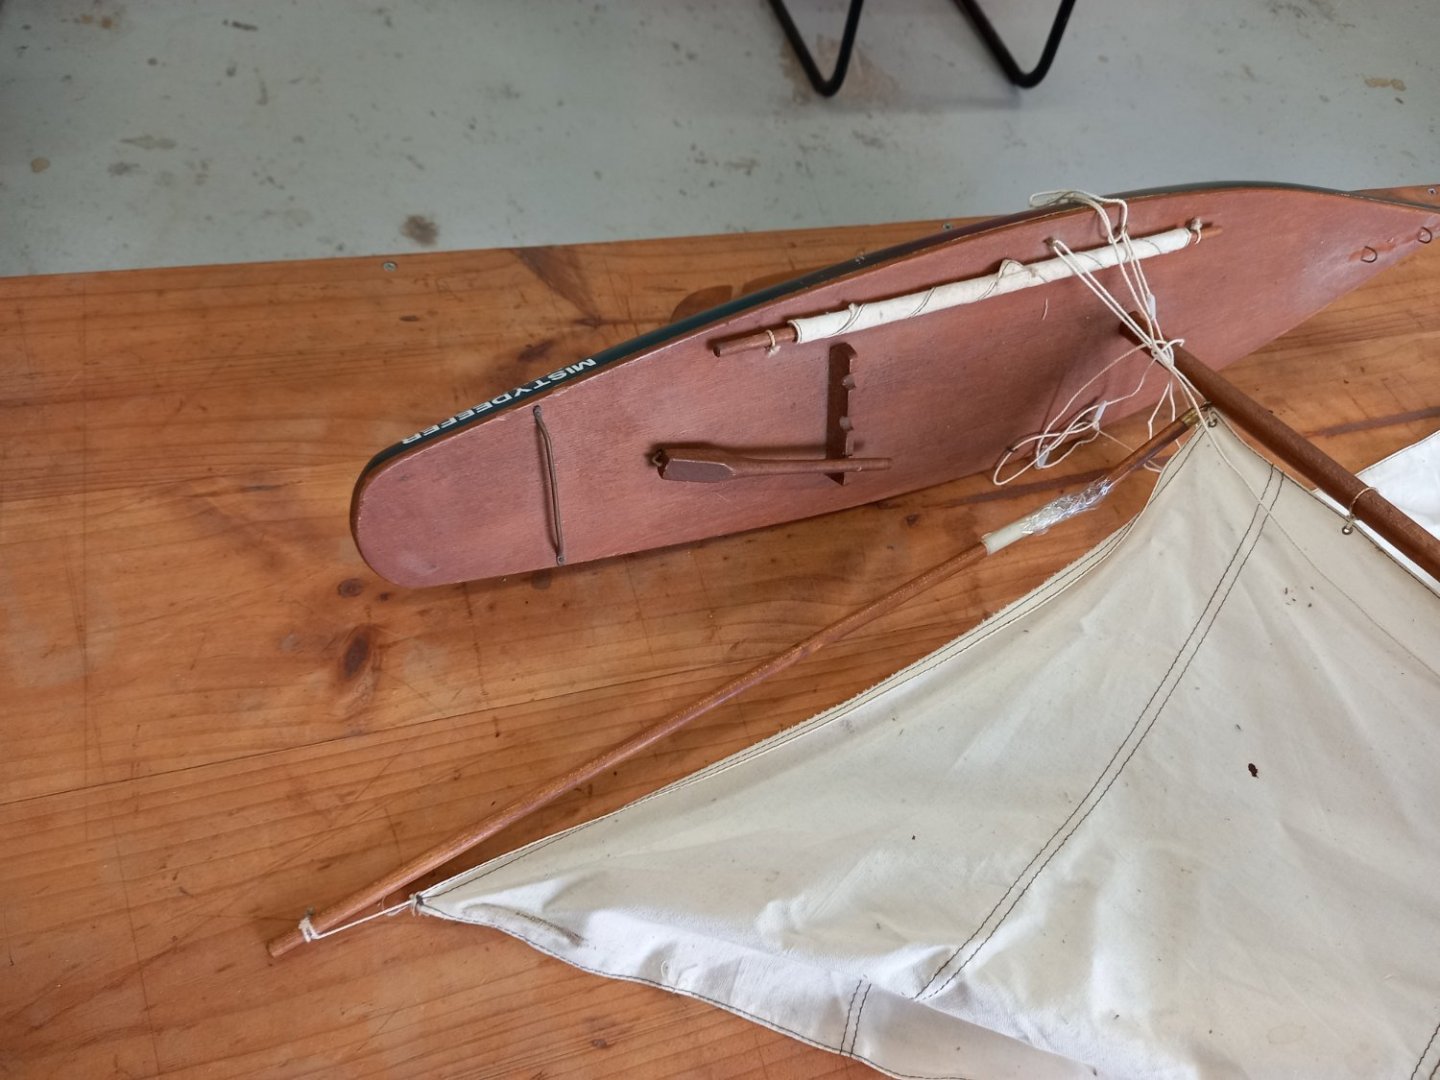
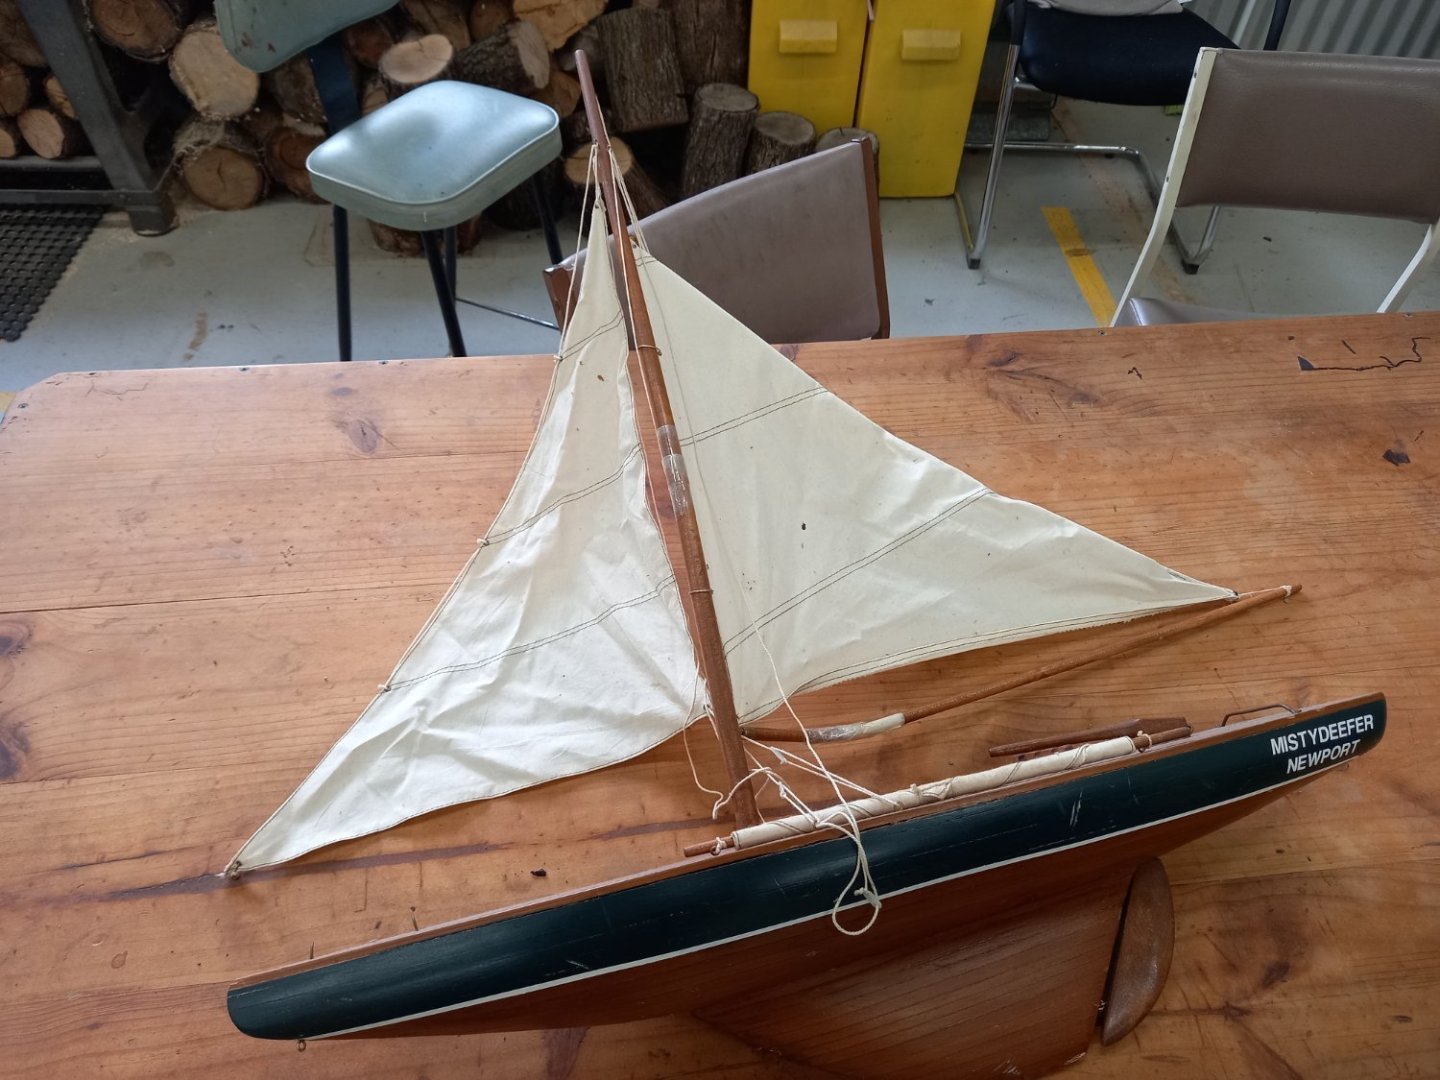
 As if I didn't have enough to do, a guy from the Men's Shed that I play at 2 days a week has brought in a damaged model yacht for me to fix. It's not really in terrible condition - a break in the mast, two breaks in the boom, bowsprit broken in at least three places and part of it missing, a broken part of the stand. And needs cleaning. It's a decorator model, solid hull. I've worked on it for about a day so far, allowing for breaks while the glue dries, and have made a new piece for the stand and repaired the mast and the boom. I left the sails and rigging in place as I was worried I wouldn't be able to work out how to replace them. A bit of a problem with tangled ropes as I fixed it, but I think it should sort itself out with a bit of patience. The bowsprit was beyond repair so I told the owner to buy a piece of dowel the same diameter and I'd make a new one. I'll post photos when that's done. Fortunately I was able to find some woodstain that matched the existing, so it's looking like it should all work out OK (touch wood!) Steven


-
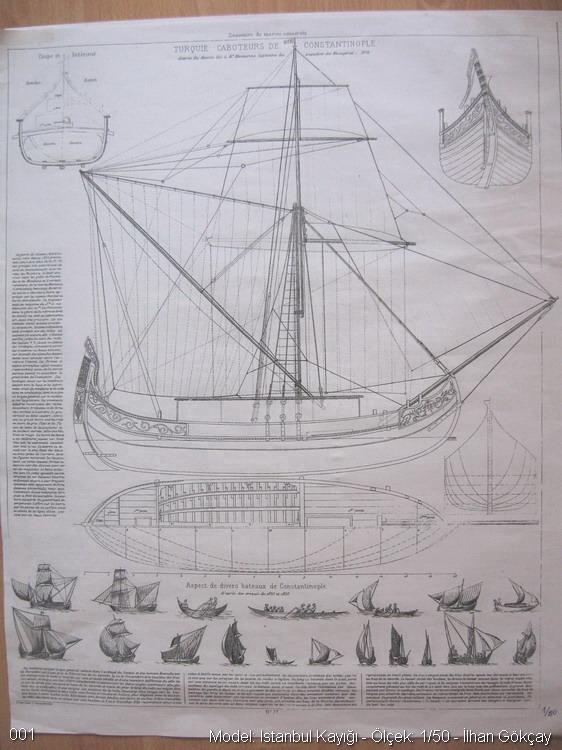
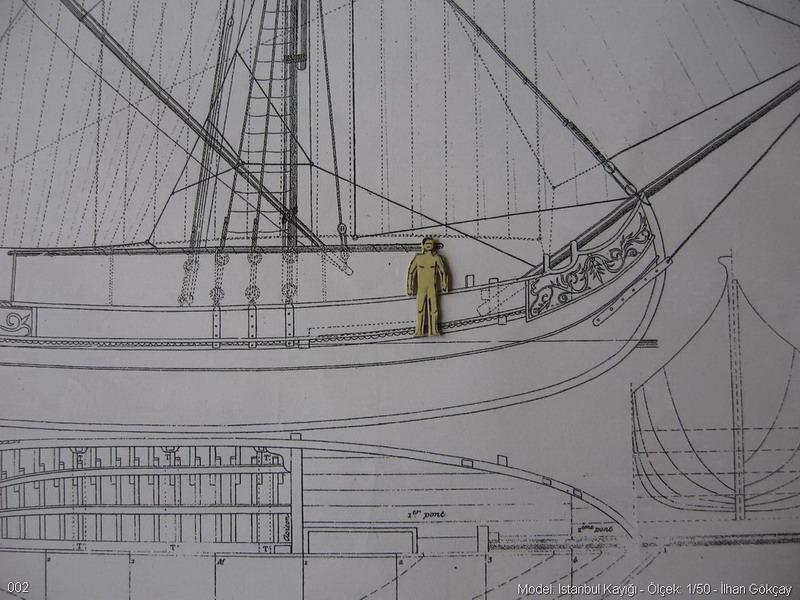
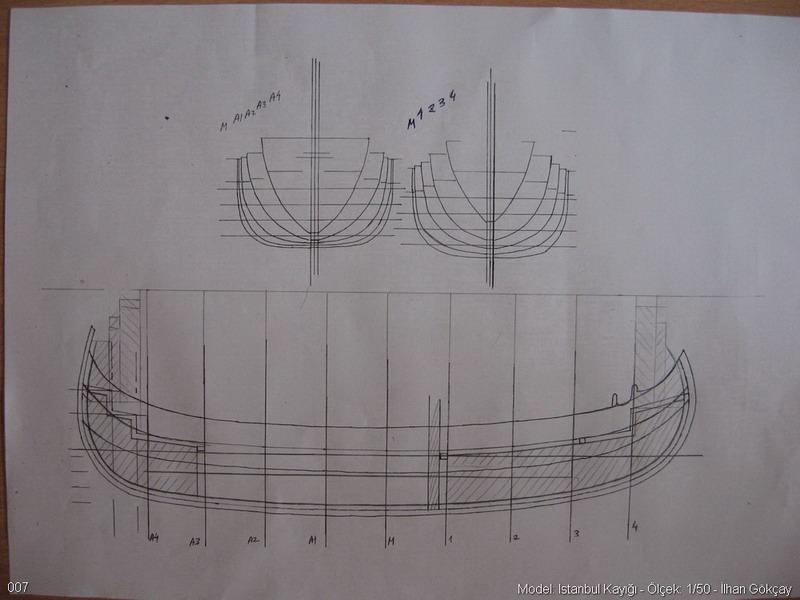
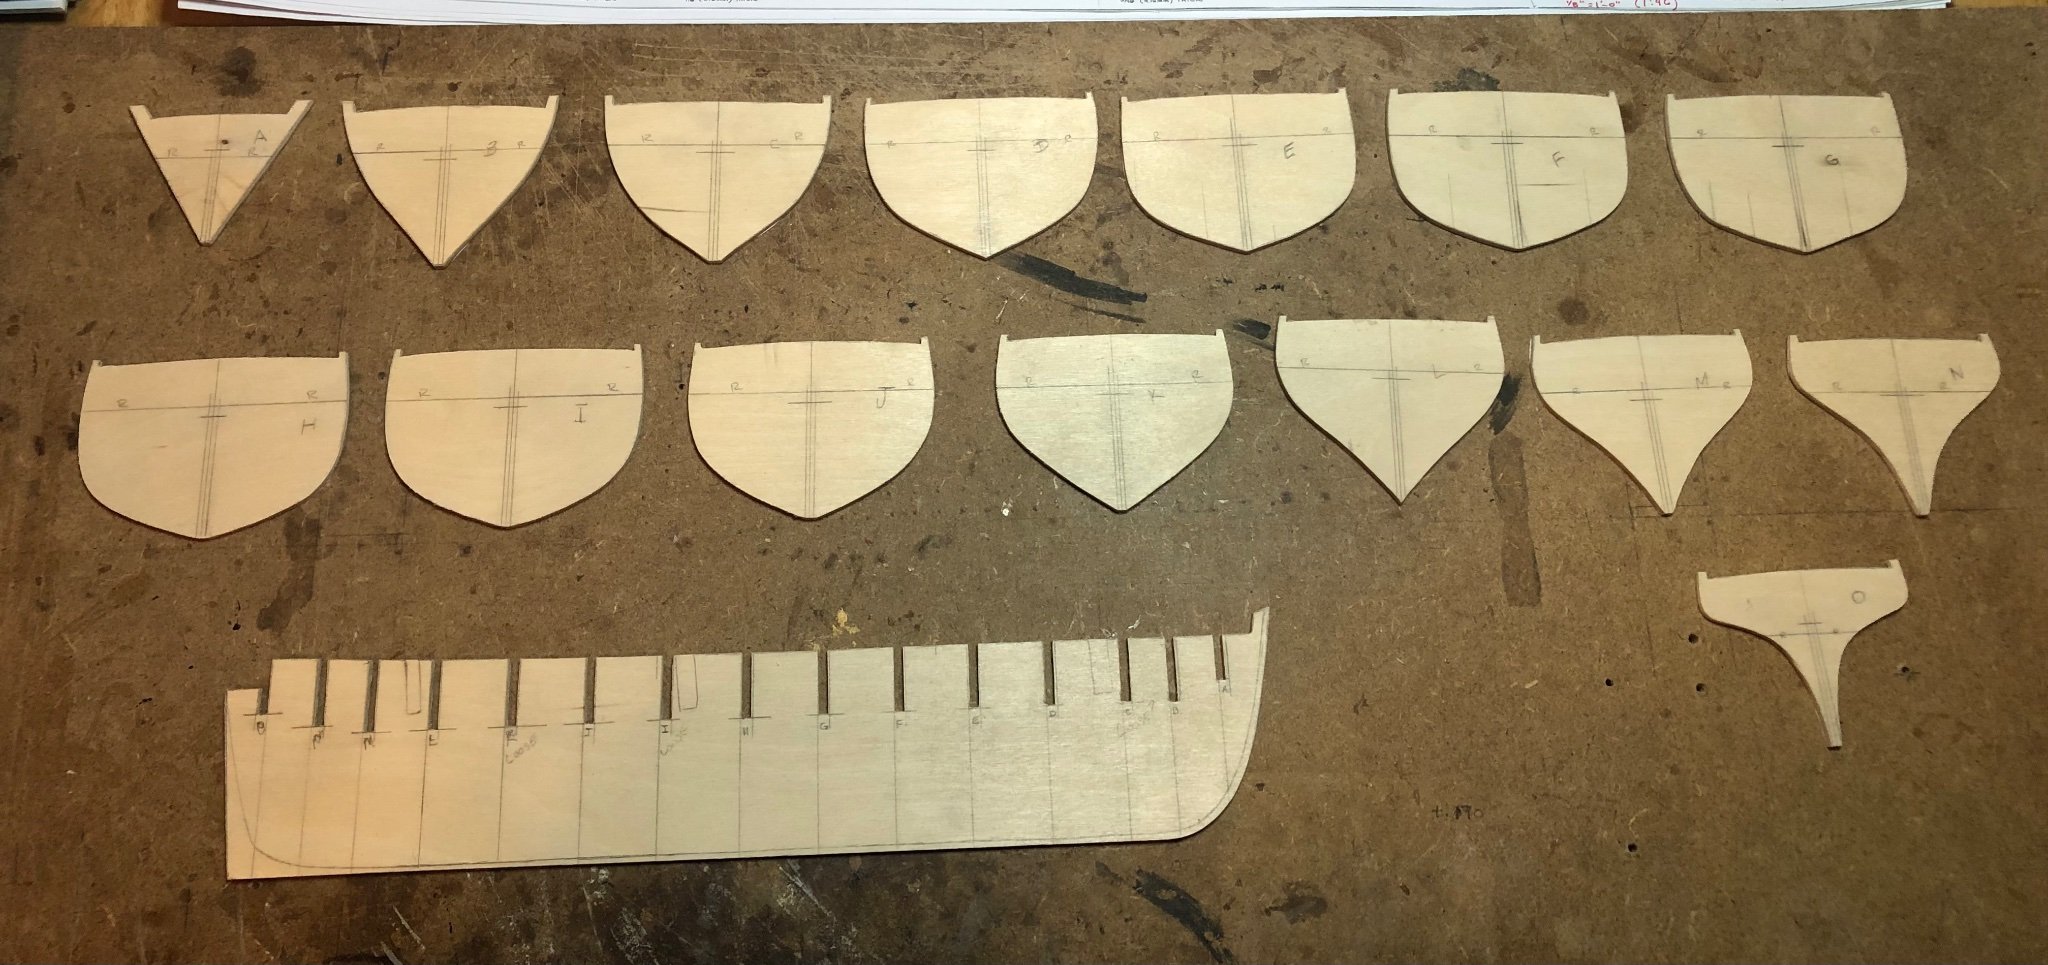
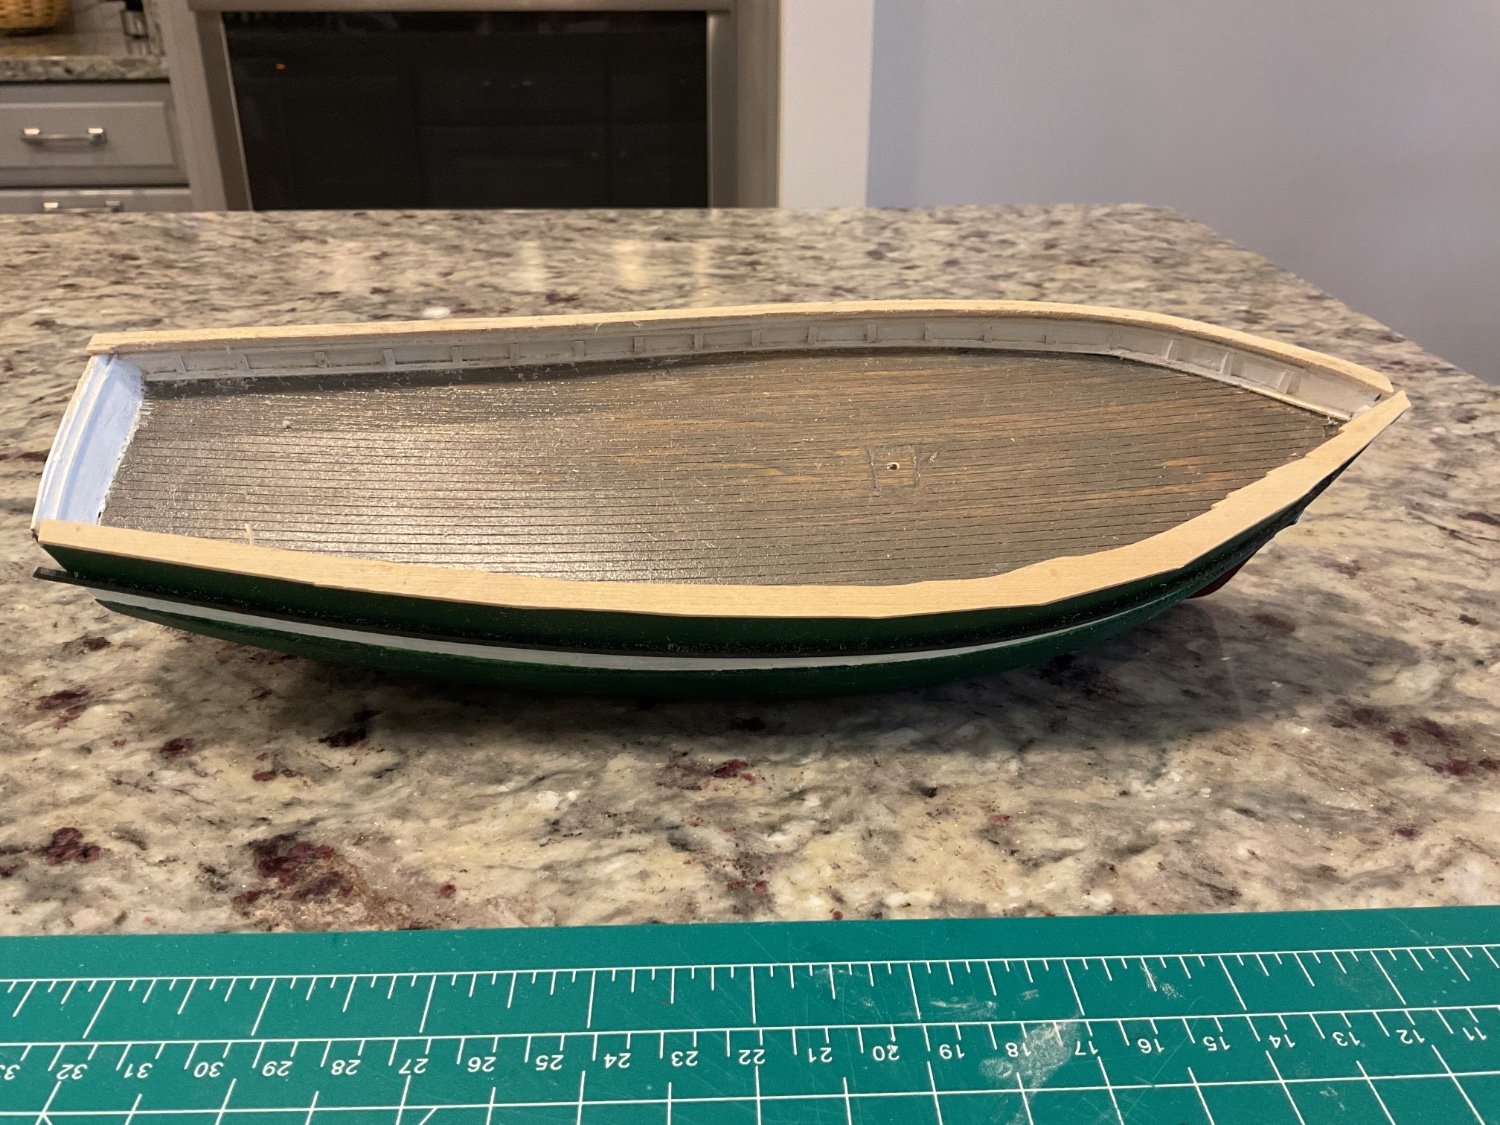
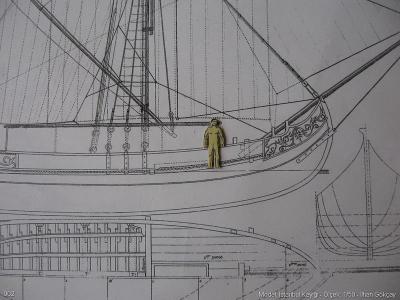
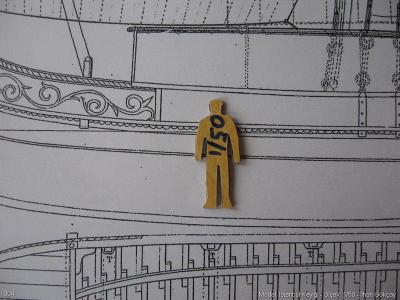
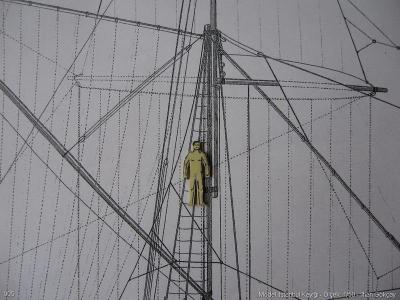
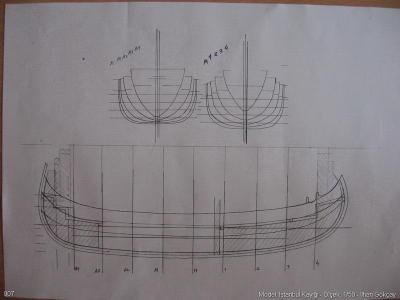
 Unfortunately I did not saved the English text of this build log. So I will repost at first only the photos. There are plenty of photos, so I hope that explanations are not that much necessary. Ilhan
-
 Hi everyone out there. I have finally begun my new project, the whaler Charles W. Morgan based right here in Mystic CT about a hour away from me which is a big reason I chose this ship. I am a member of Mystic Seaport and have been on her many times. The last few taking many pictures of things most tourists don’t even look at. 😁. I was able to see her dry docked as well this summer while some restoration was being done to the hull. These ships are MUCH bigger out of the water. Sometimes you just don’t realize how much is going on below the surface. I bought a set of plans from Model Shipways (1:64 scale) that has 6 pages of very details drawings of everything I should need to get through the basic build. Of course there will be hours of supplemental reading and research to finish it off I am sure. This being my second scratch build I am quite sure I have plenty to learn about. In between painting rooms other house projects I have snuck in an hour here and there to review the plans and get started on the center keel and bulkheads. Time to sit back and enjoy the ride. Tom
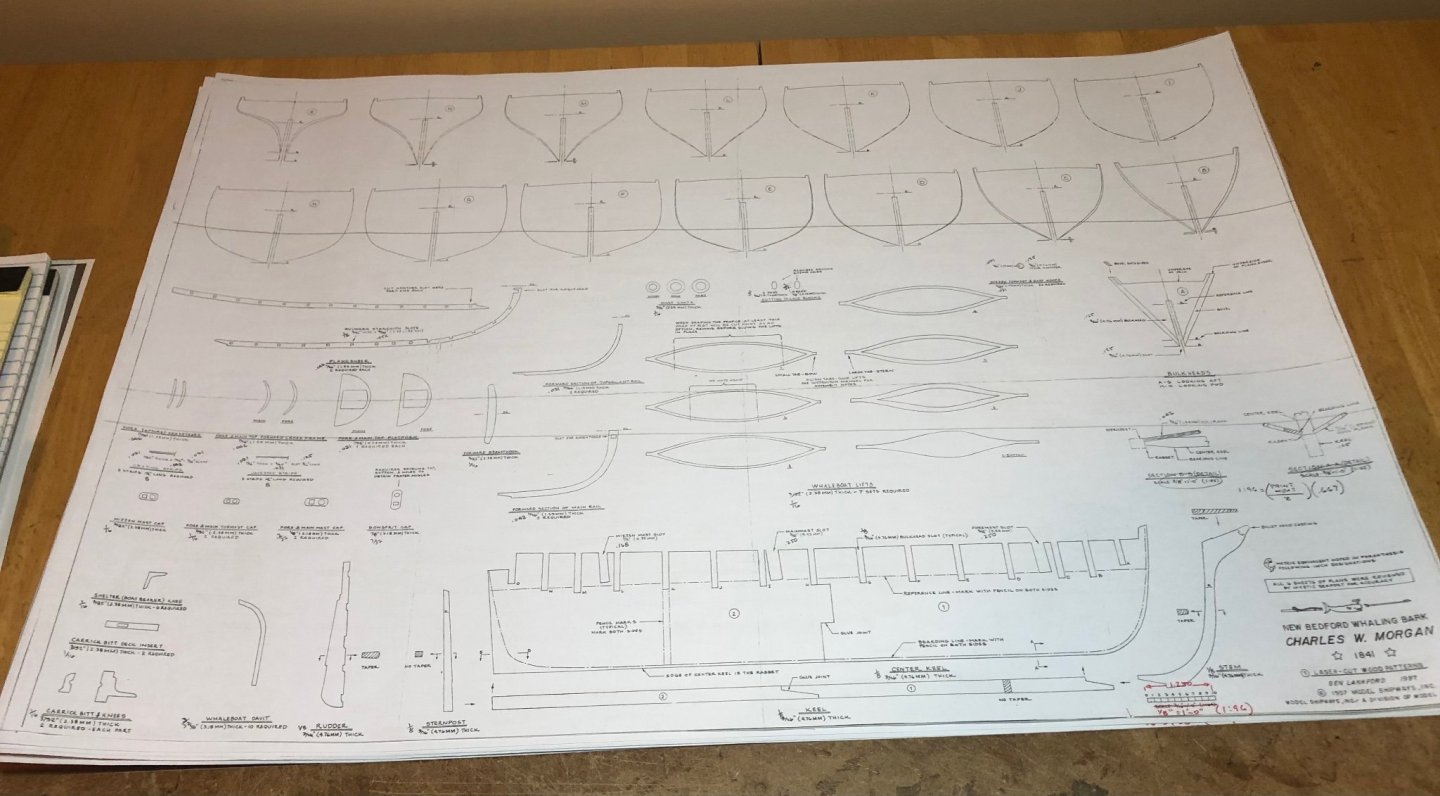

- 197 replies
-
- 11
-
-
- Whaling Bark
- Charles W Morgan
- (and 1 more)
-
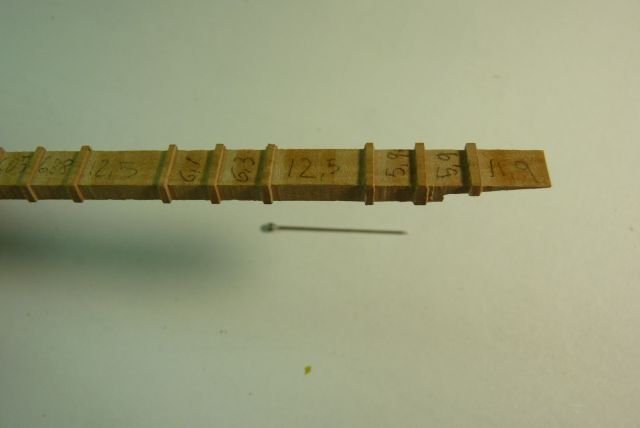
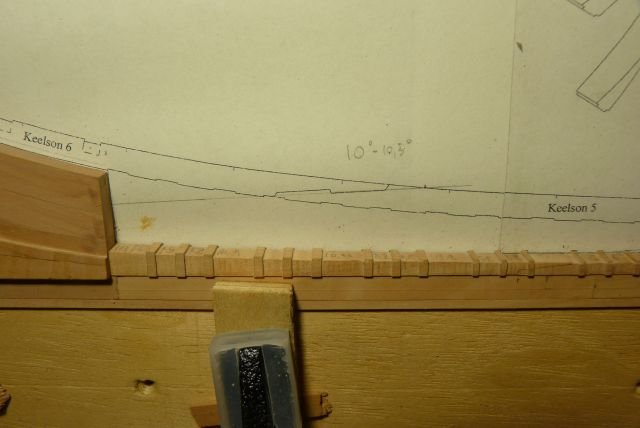
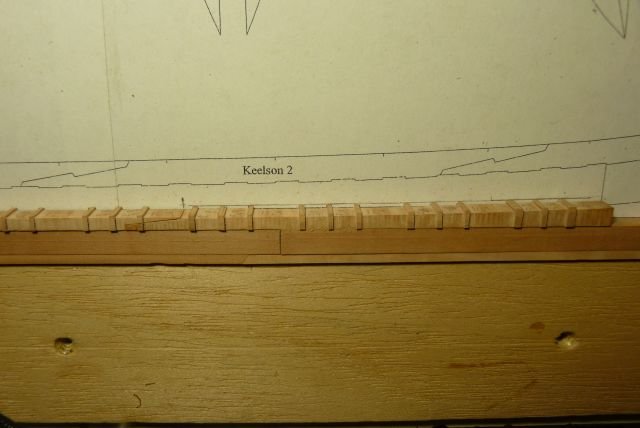
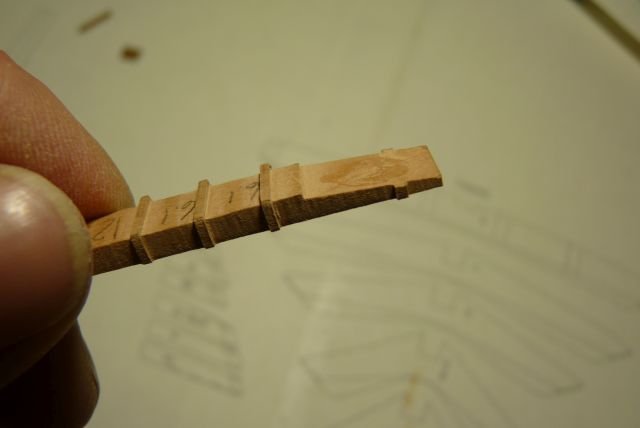
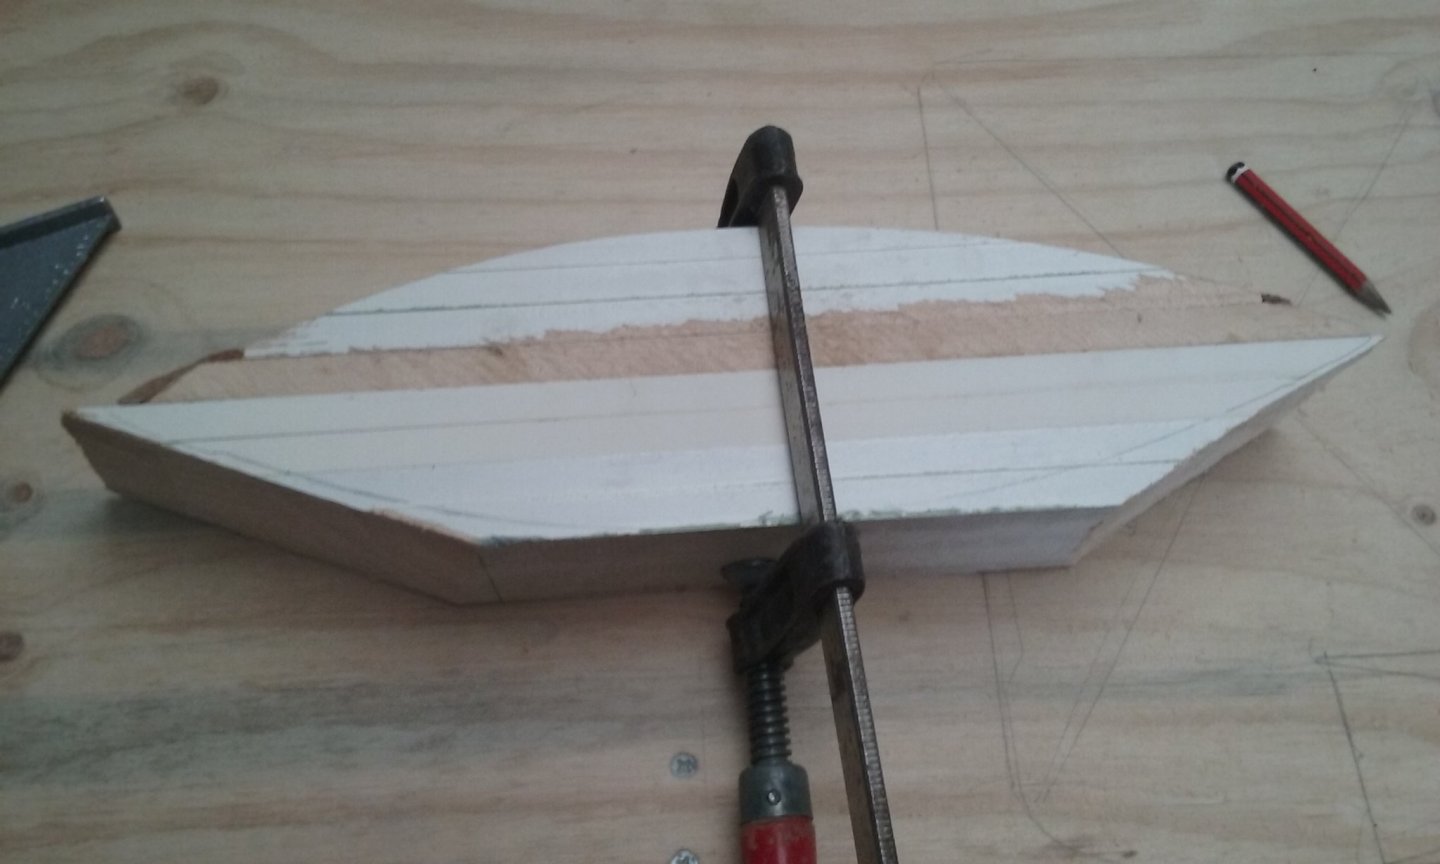
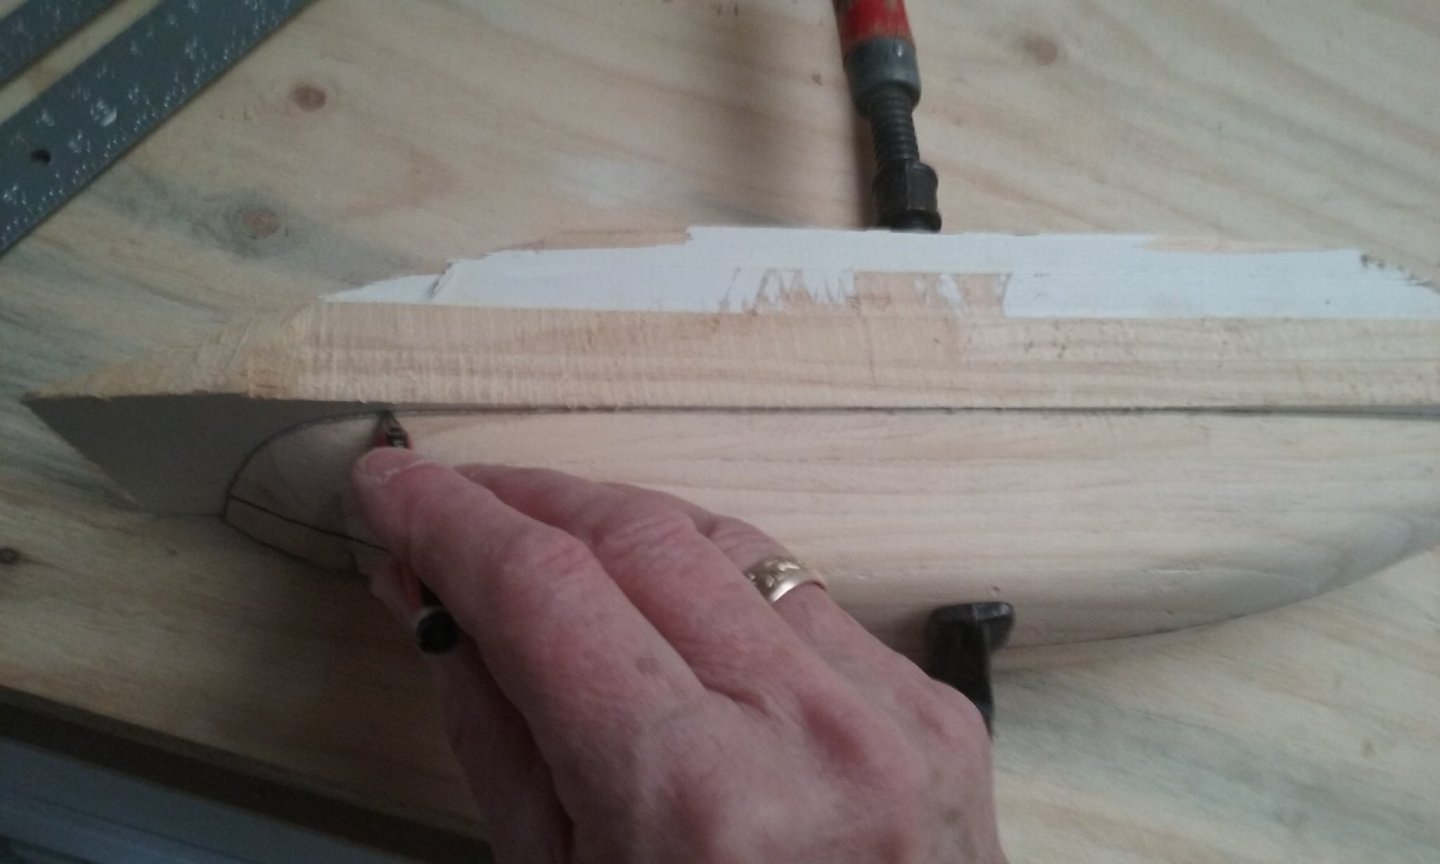
 Gjoa was used by Roald Amundsen to traverse the North West Passage from 1903 to 1906. She was built in 1872 and used as a herring fisher until Amundsen purchased her in 1901. This kit is an old Model Shipways “yellow box” kit that I purchased on eBay several years ago. These kits have minimal instructions and just a few parts: a machine shaped solid hull, some blocks for deck houses that are never the right size, dowels for masts and yards, and a bag of metal fittings. I worked on the kit off and on over the last several years but failed to take any photos. Once I finished the paper model of the liner United States I decided to attack the Gjoa seriously. Attached are a few photos showing the construction of the cap rails and the pin rails. For the cap rails I traced the out line of the bulwarks onto a piece of sheet wood, widened the line to the cap rail width, leaving plenty of extra wood. The rough rails were then glued in place and shaped to fit. The pin rails were done similarly with lots of test fitting with final shaping after they were glued in place. In the photo the port side pin rail has just been glued .
- 27 replies
-
- 6
-
-
- Gjoa
- Model Shipways
- (and 1 more)
-
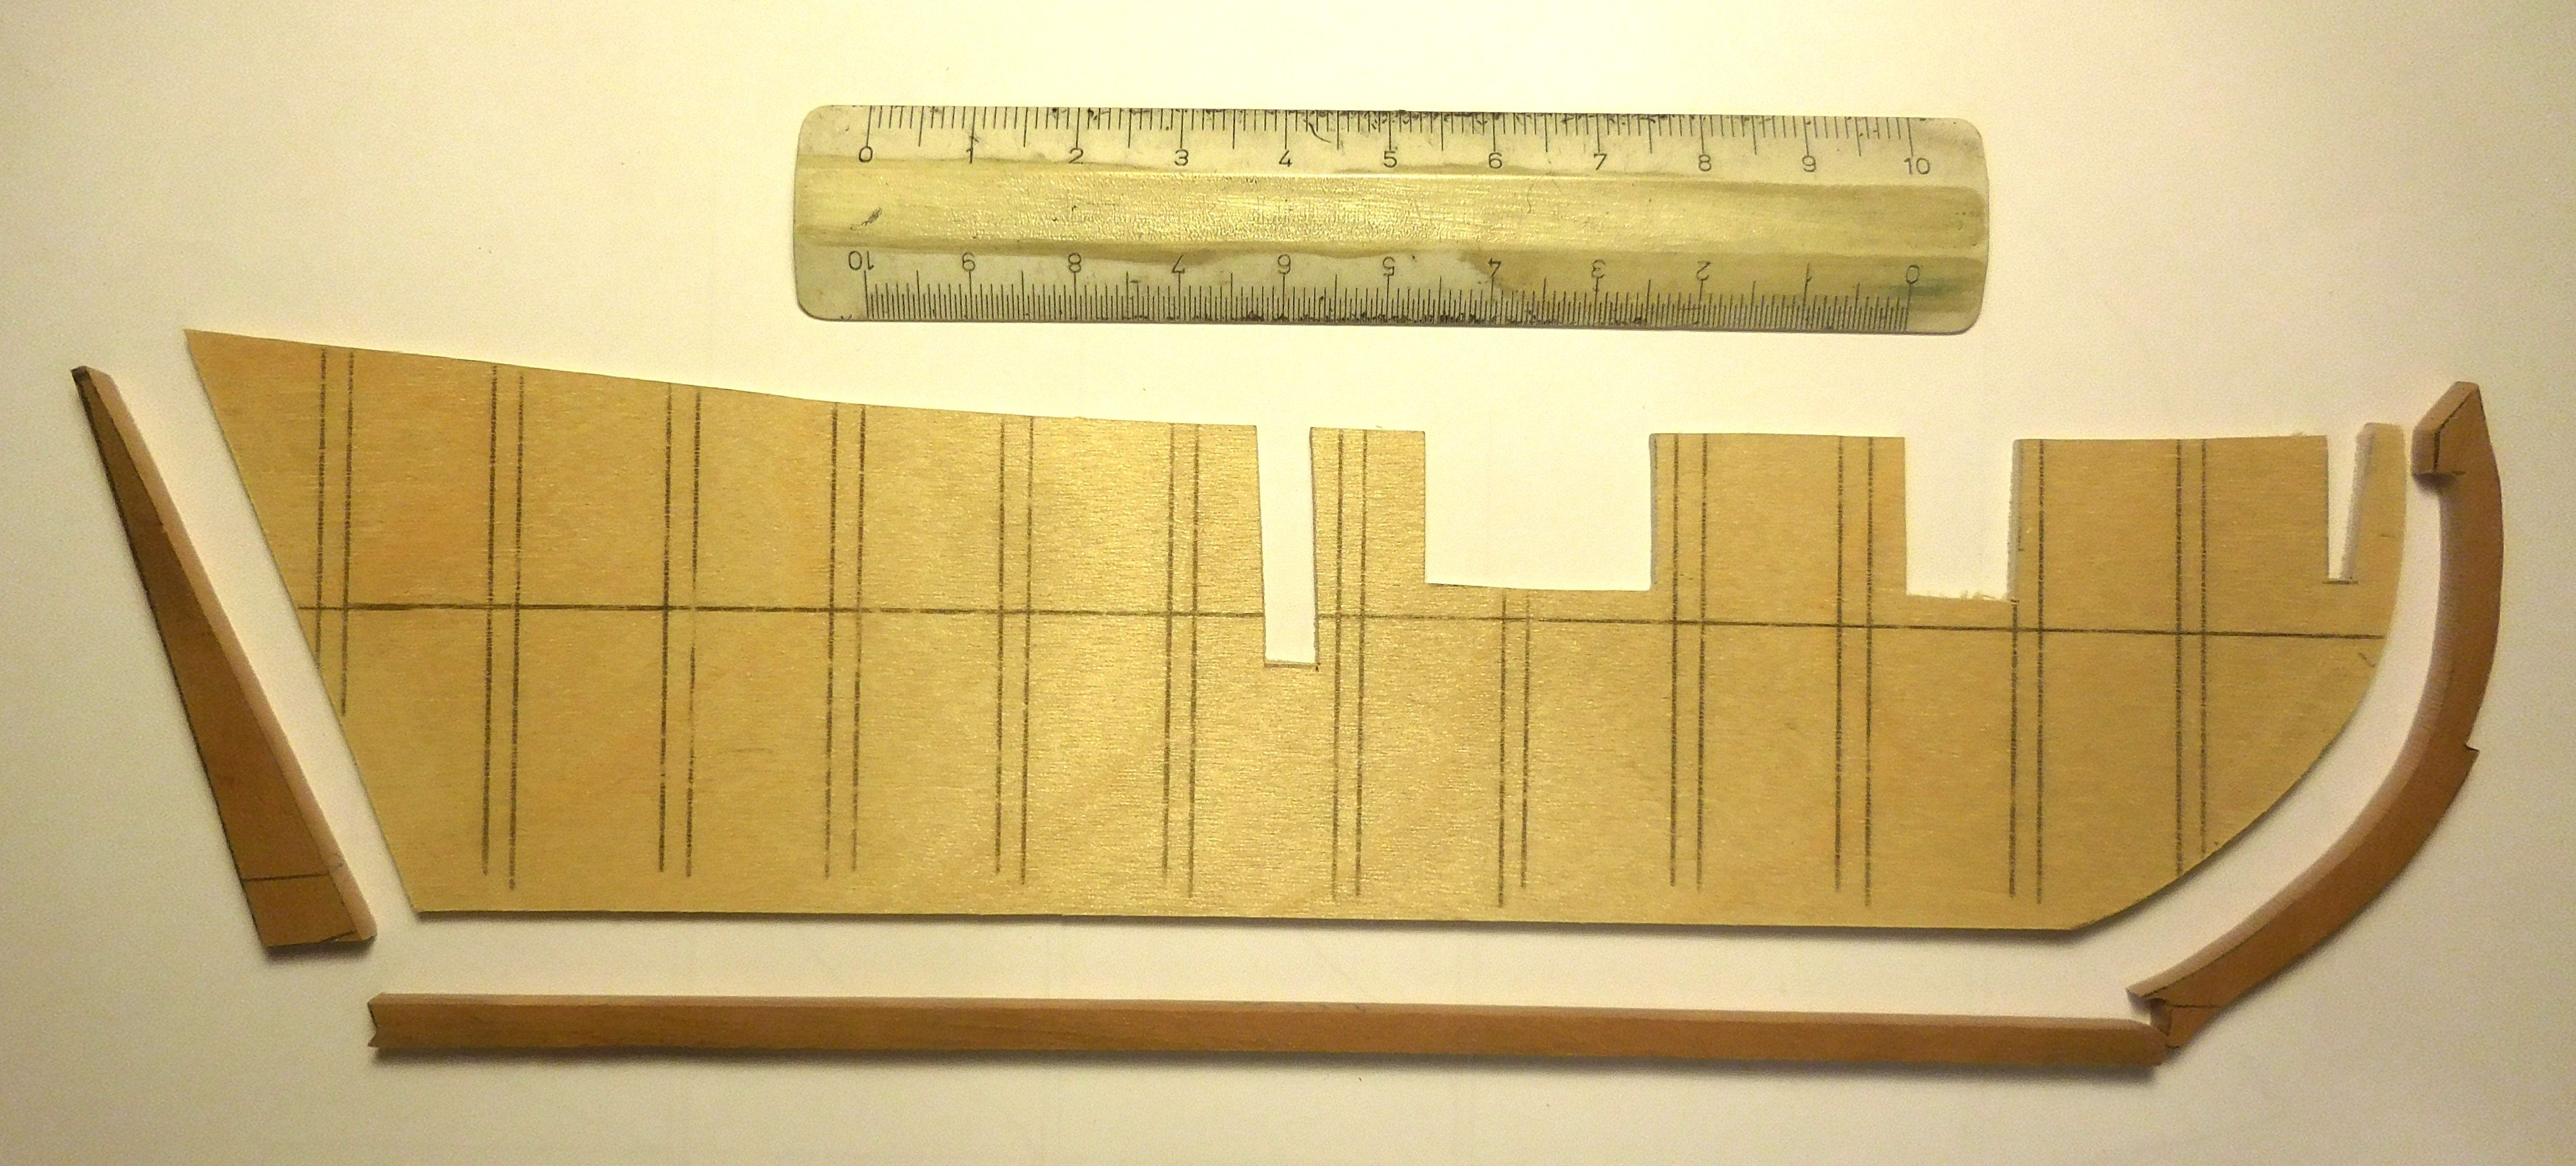
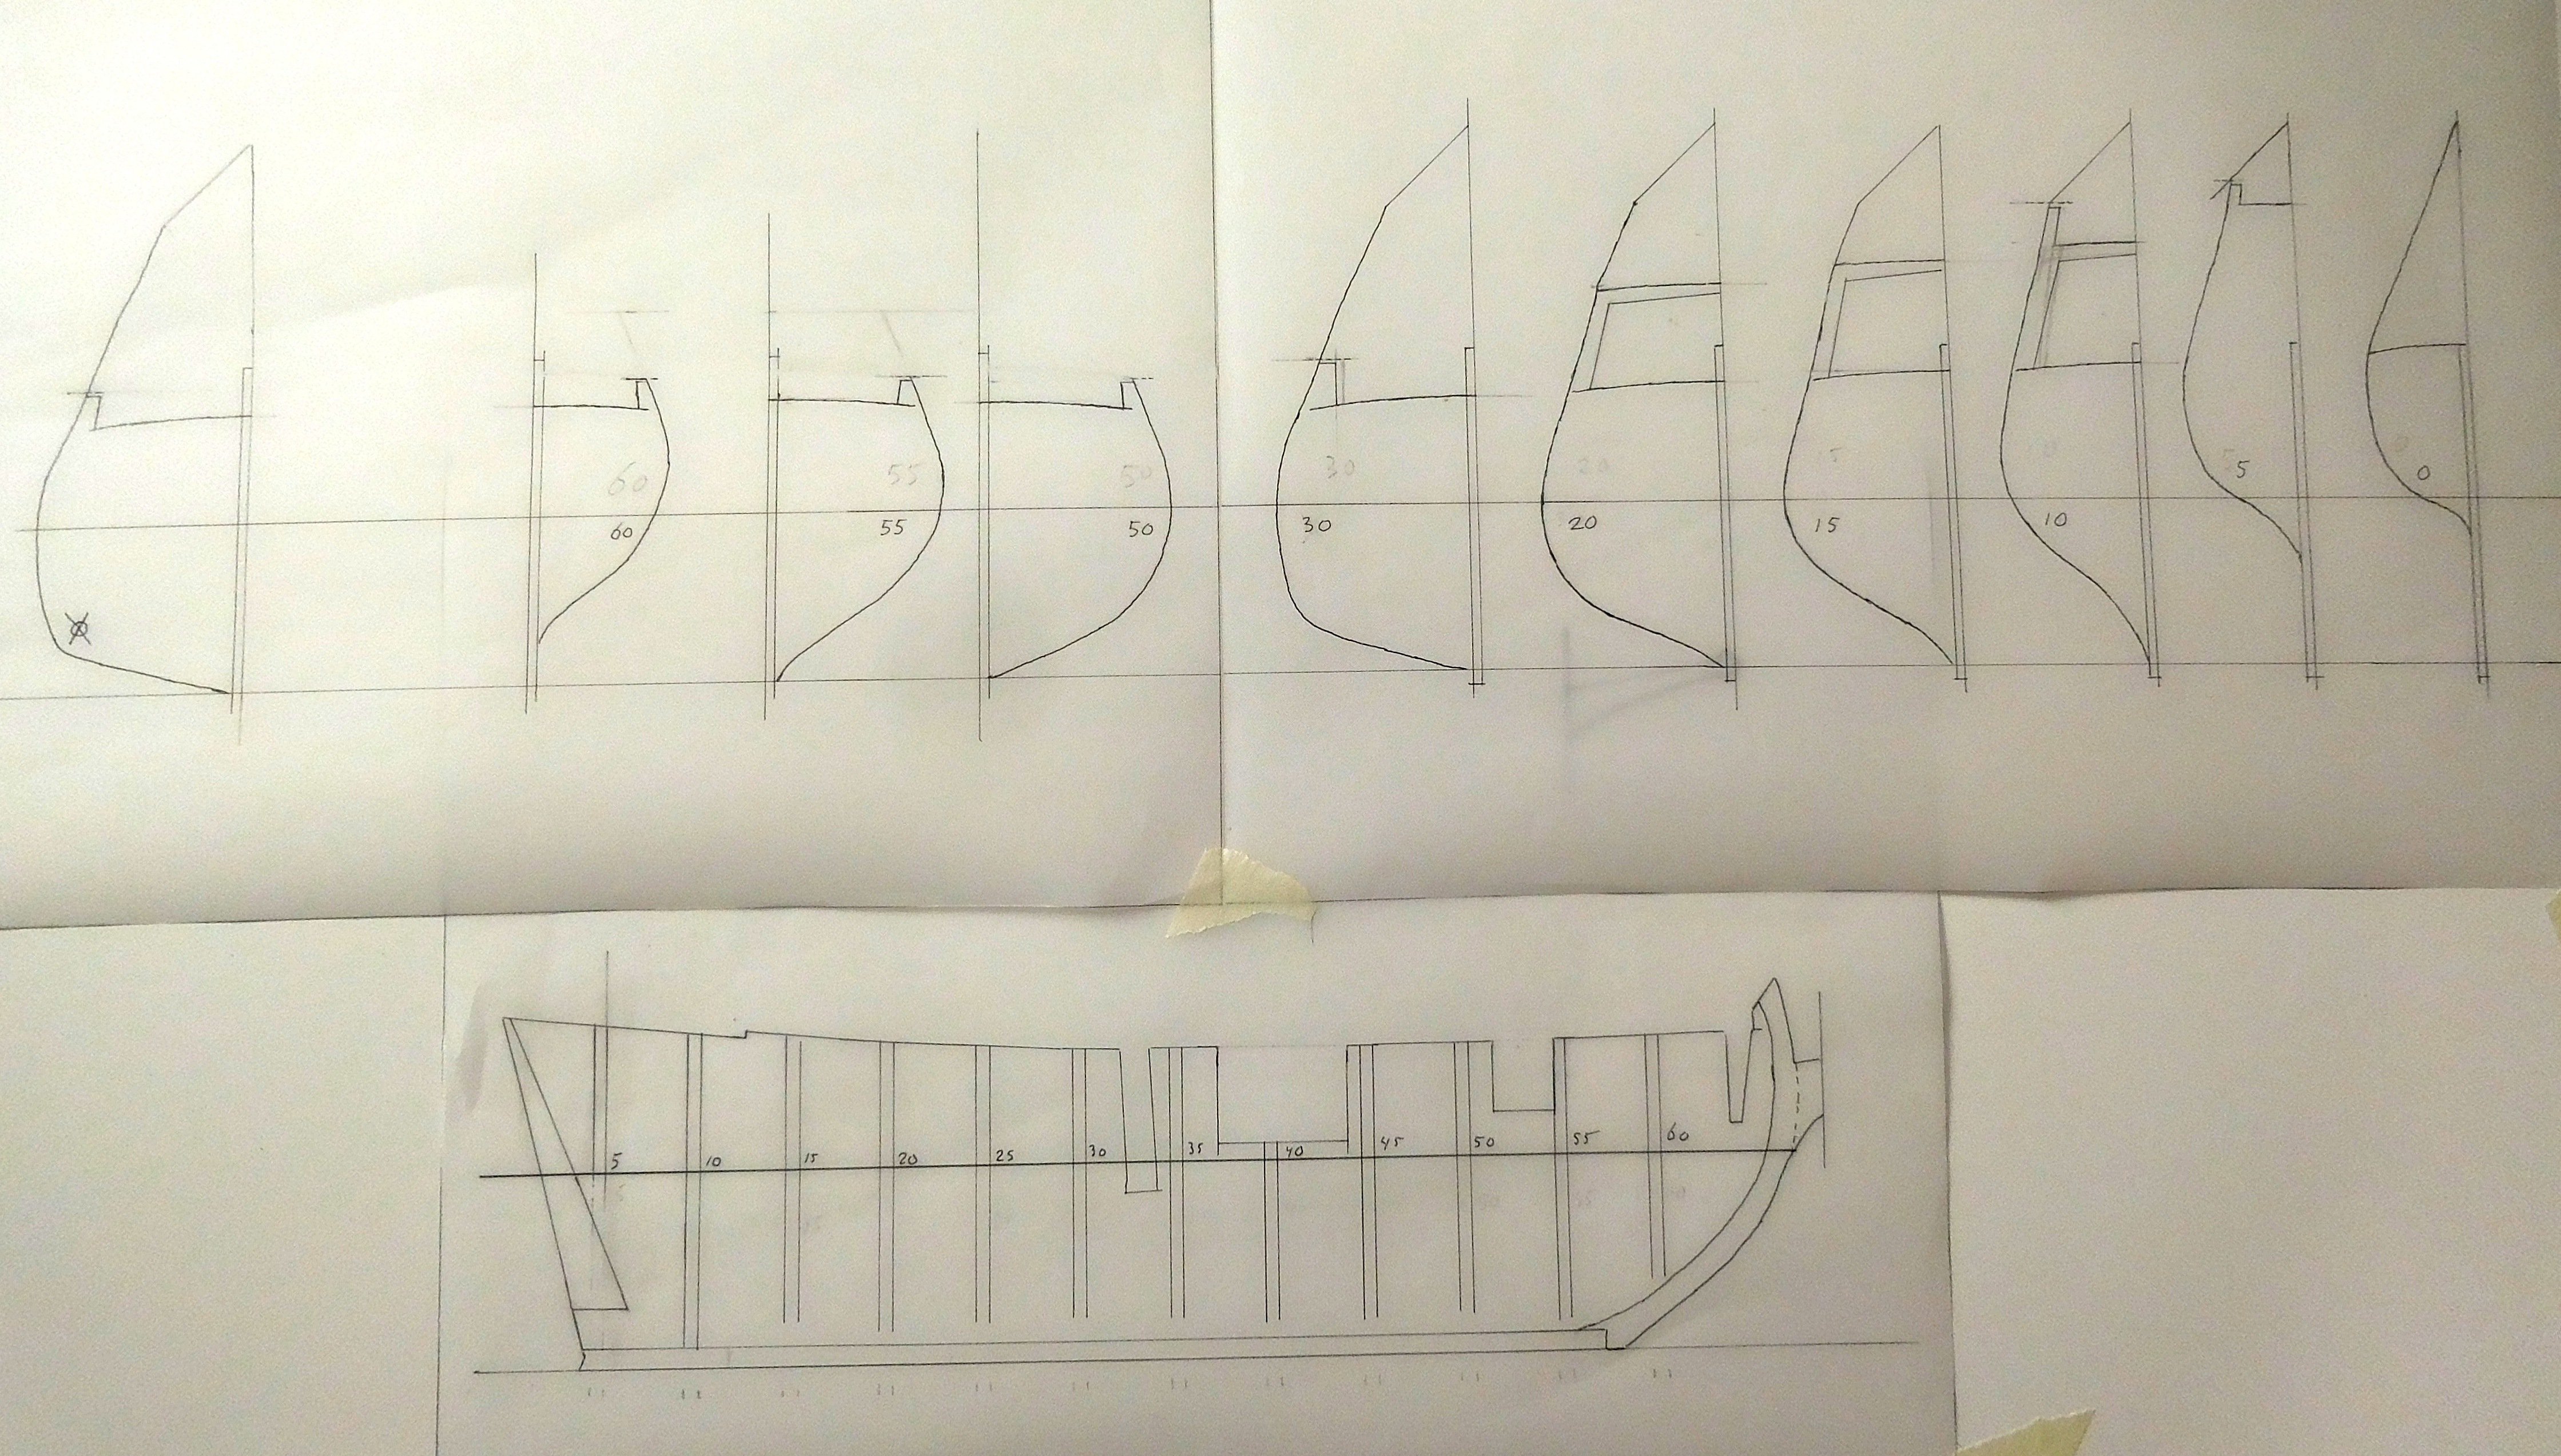
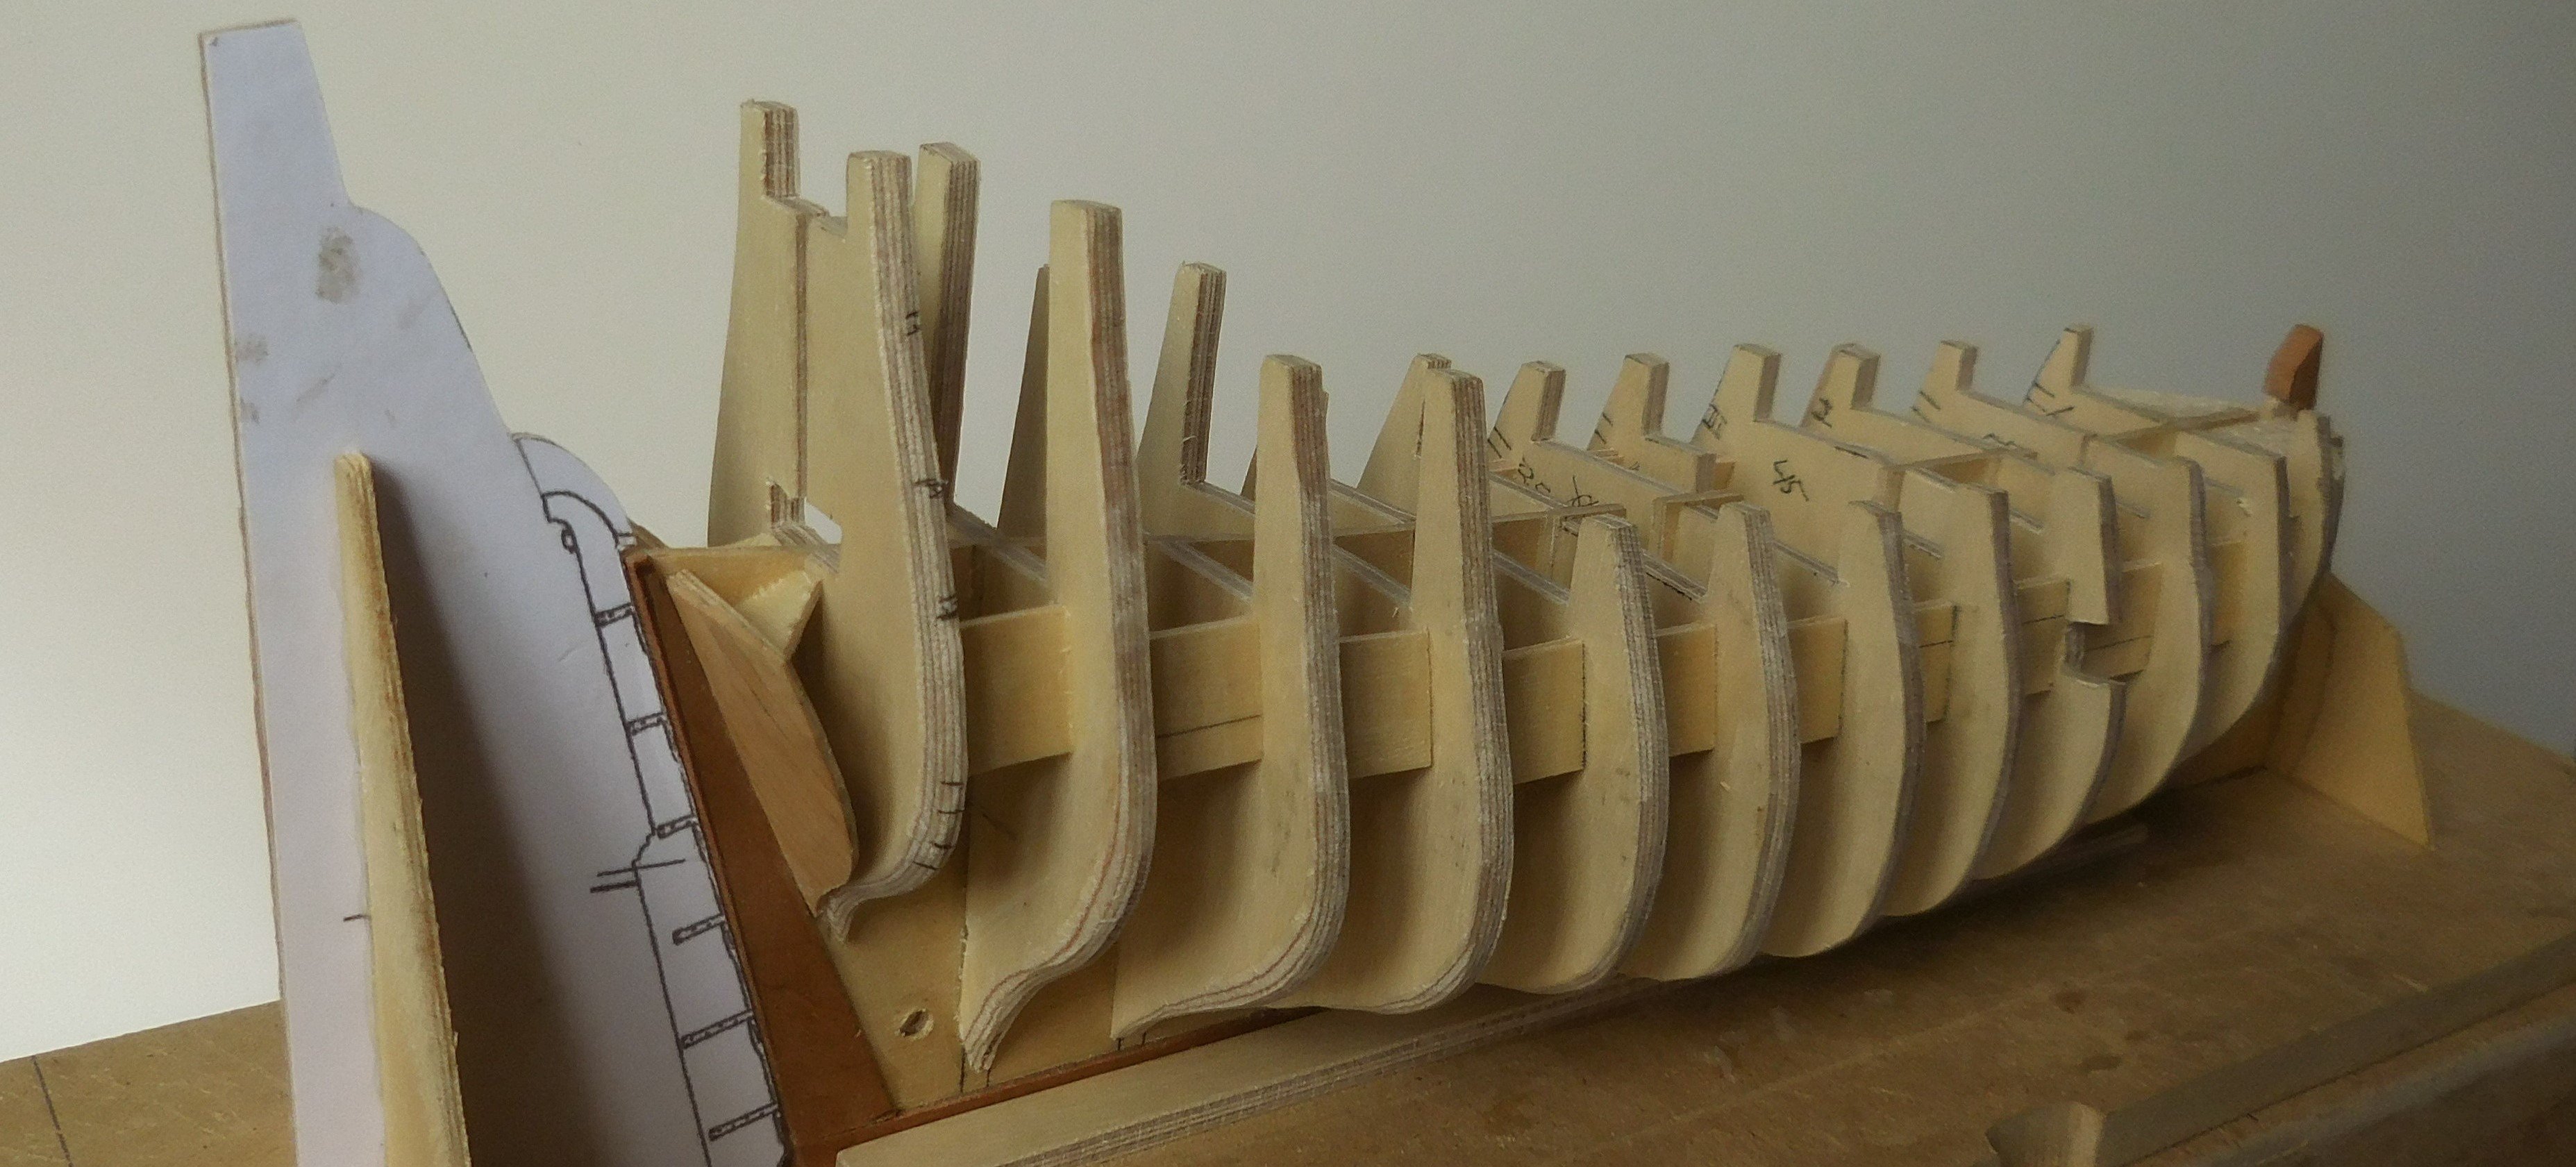
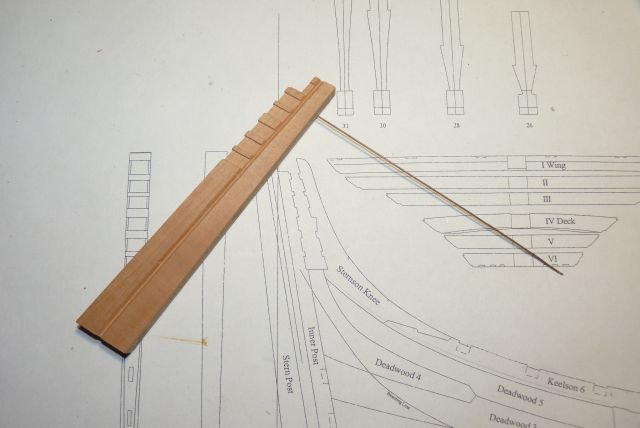
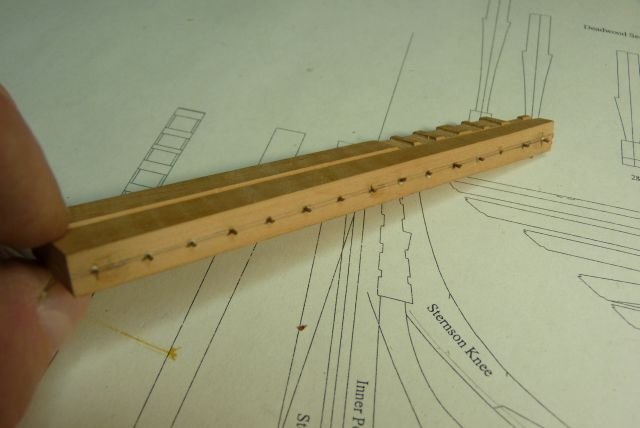
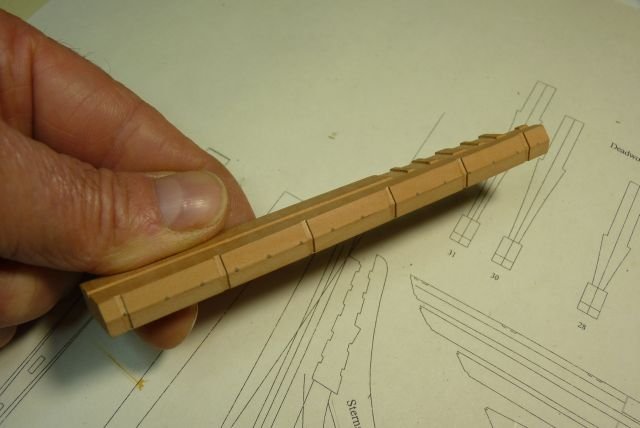
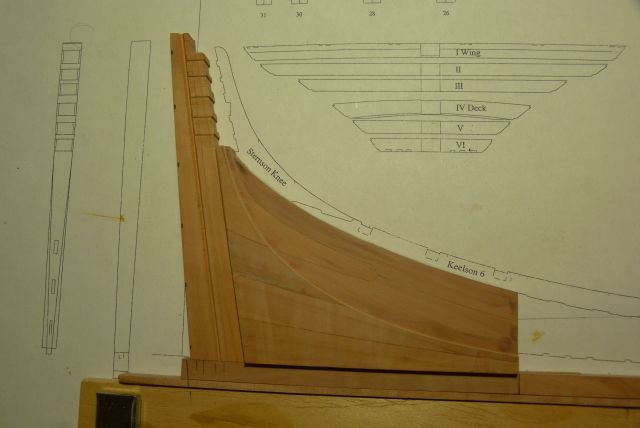
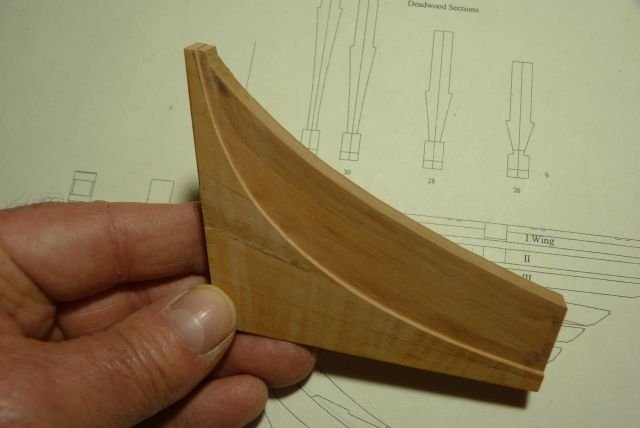
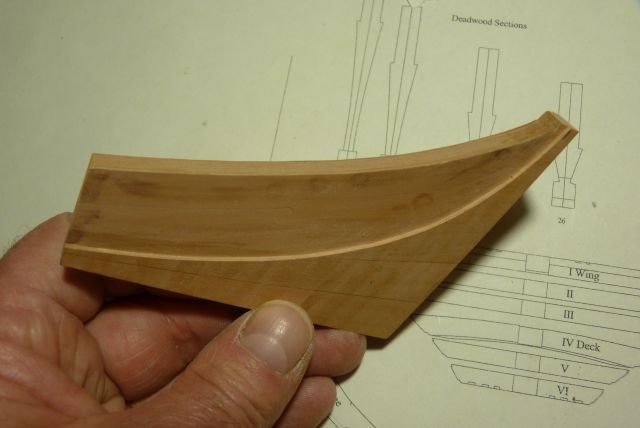
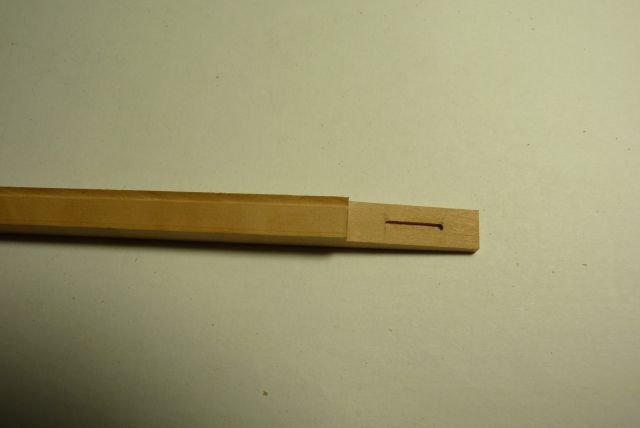
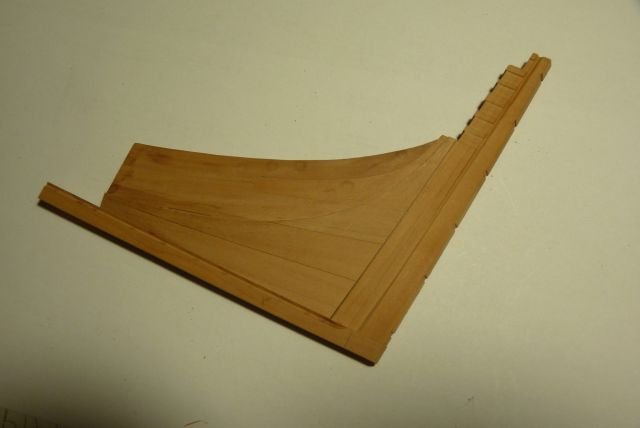
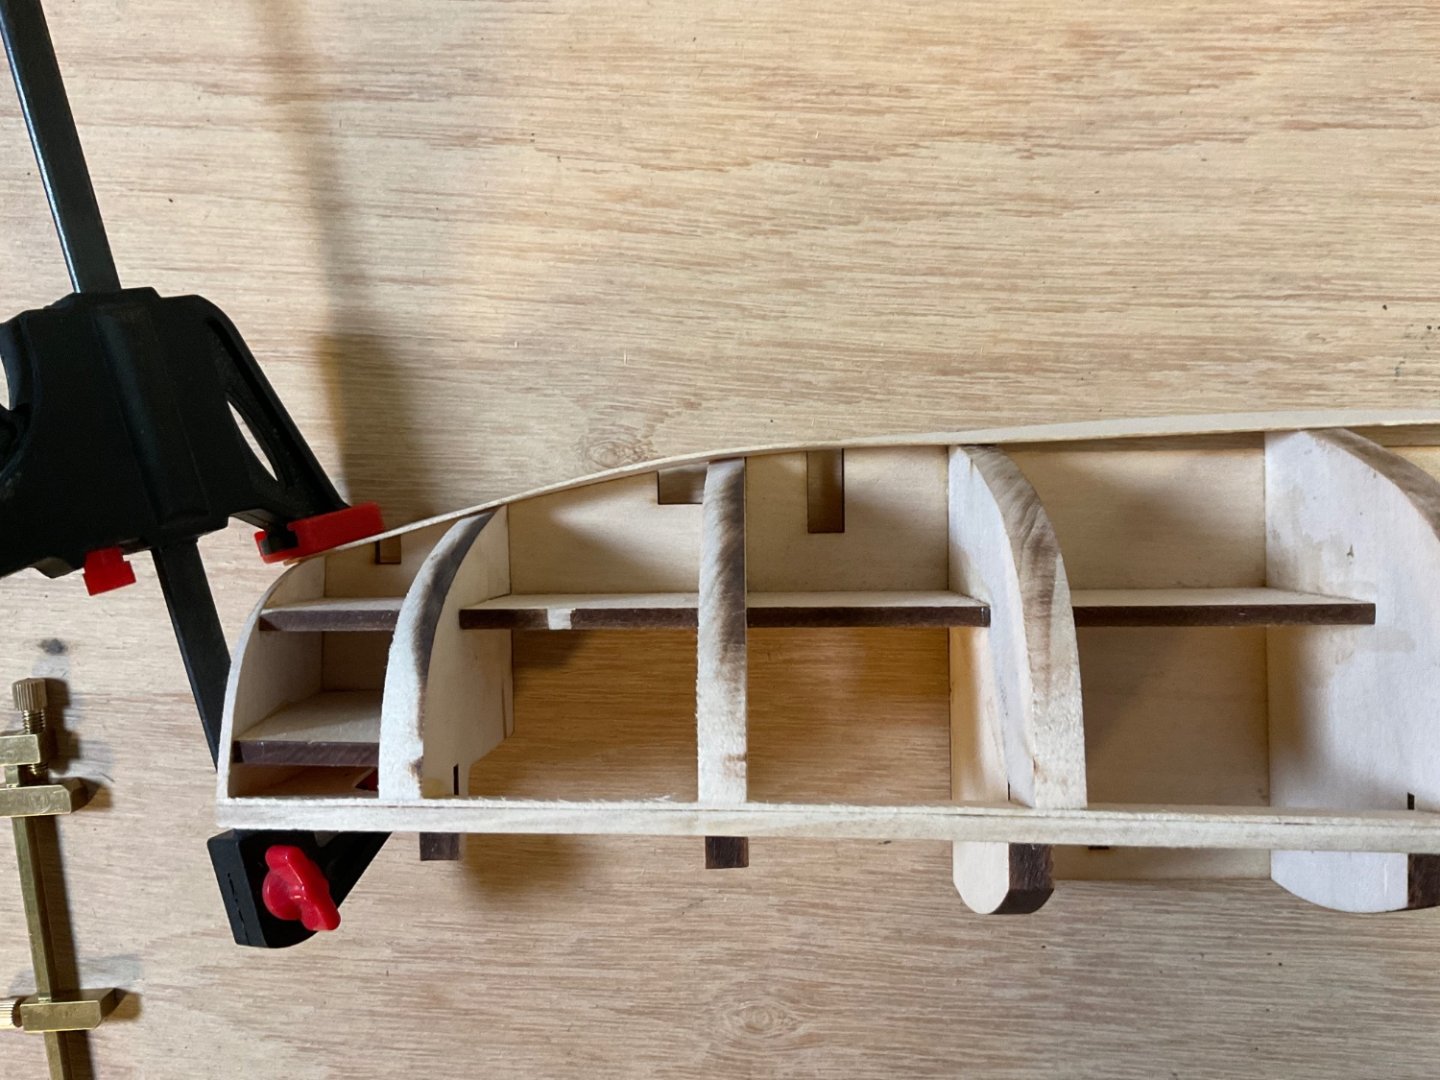
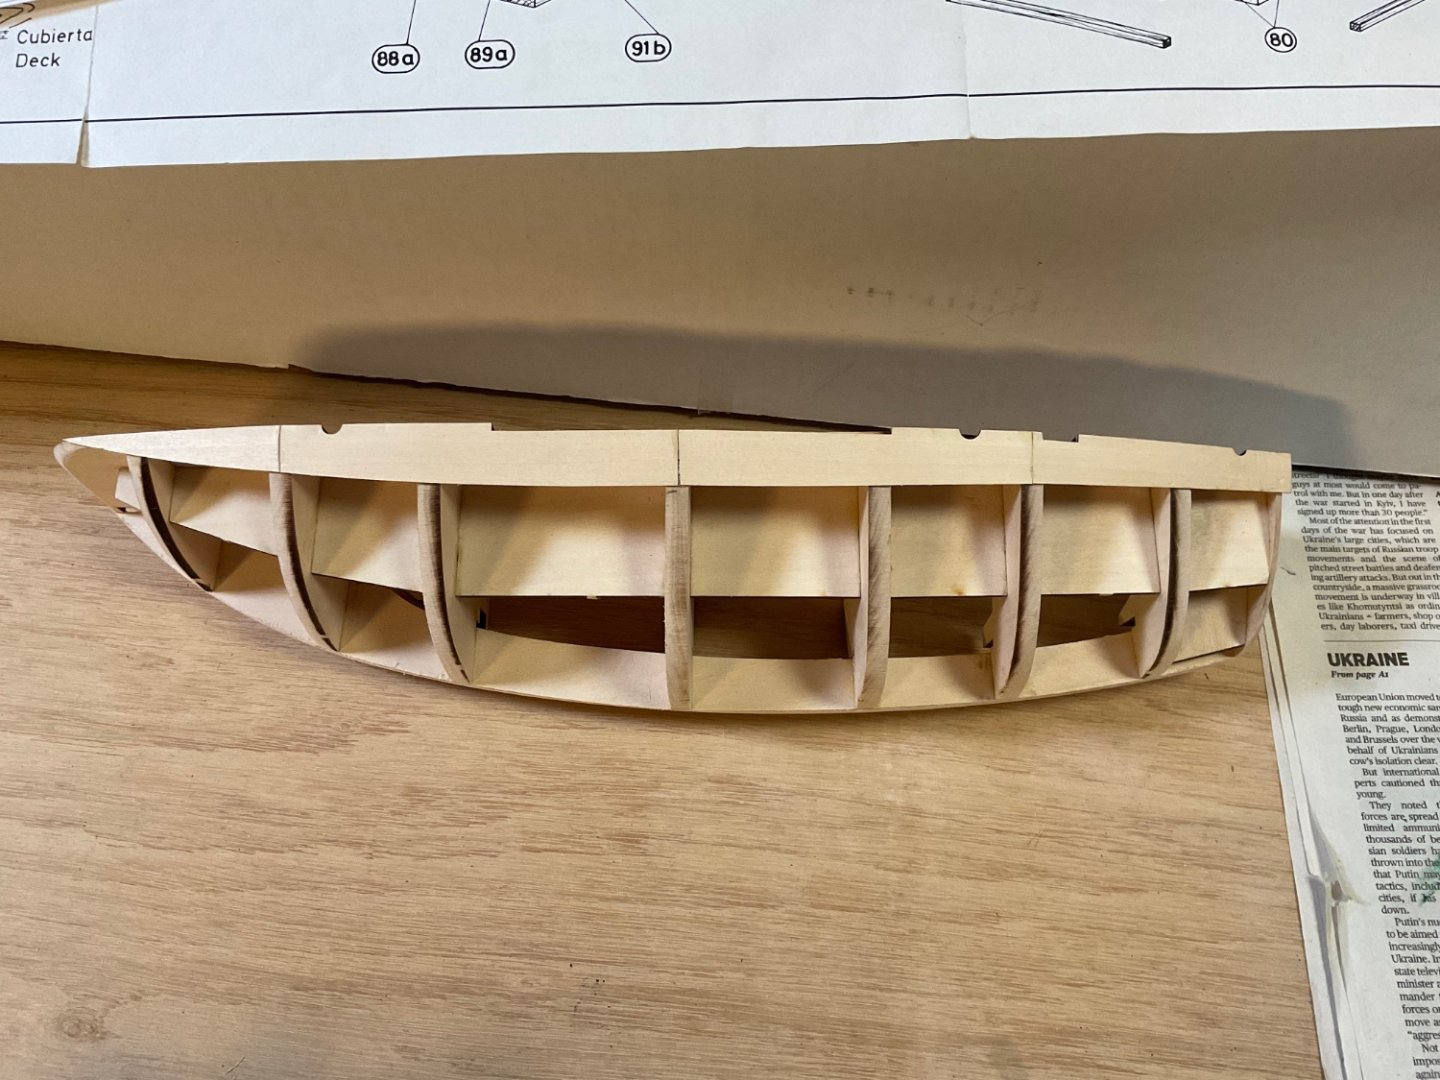
 Ciao a tutti, Ho realizzato lo scaletto e sinceramente è stato abbastanza difficile essenzialmente per due motivi. Il primo motivo: l'utilizzo della linea del ponte per realizzare la dima di pontuale per i riferimenti delle coste e la seconda dima per il cassero sovrapposta alla precedente. Il secondo motivo: il disegno in pianta del ponte, questa misura non tiene conto del cavallino del ponte, quindi se avessi utilizzato questo disegno senza le dovute modifiche delle quote in lunghezza avrei ottenuto sulla dima di pontuale con una sagoma più corta di circa 5mm. Alcune foto dello scaletto. Se notate da una parte ho messo il disegno con la chiglia a pari e nell'altra foto si vede quanto il disegno è stato allungato. Hi everyone, I realized the ladder and honestly it was quite difficult essentially for two reasons. The first reason: the use of the bridge line to create the pontic template for the rib references and the second template for the formwork overlapping the previous one. The second reason: the plan drawing of the bridge, this measure does not take into account the pony of the bridge, so if I had used this design without the due changes in the dimensions in length I would have obtained on the pontual template with a shorter shape of about 5mm. Some photos of the ladder. If you notice on one side I put the design with the keel on the same level and in the other photo you can see how long the design has been stretched Dima di pontuale finita Scaletto Qui ho posizionato la dima del cassero Un Salutone a presto
- 415 replies
-
- 17
-
-
 I am starting work on Joshua Slocom’s Spray. This is my first model being tracked in Model Ship World. My previous models have been Dumas sailboat models and this Bluejacket model is my first real plank-on-frame. Previous build-logs that have been posted of this model have been invaluable in helping me approach this build..
- 54 replies
-
- 3
-
-
- Spray
- BlueJacket Shipcrafters
- (and 1 more)
-
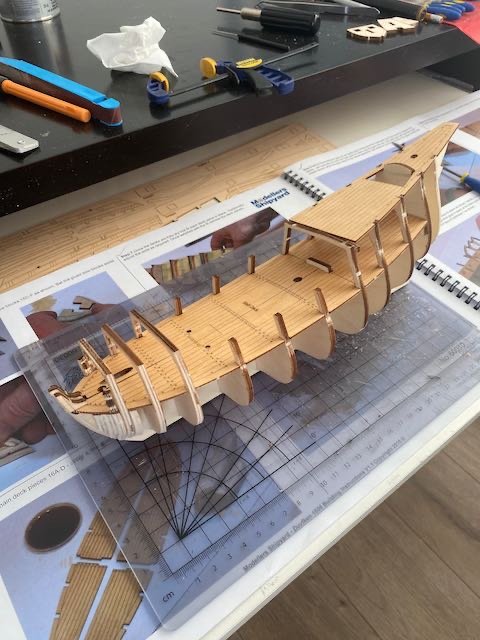
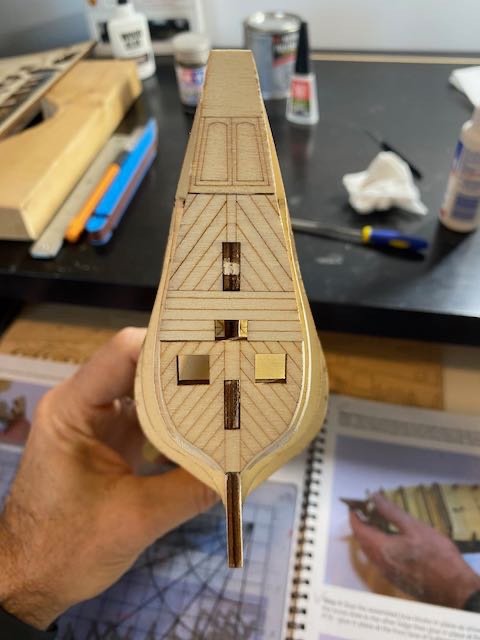
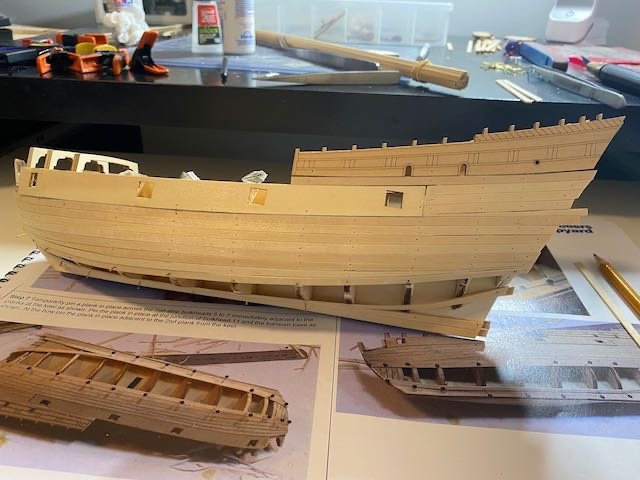
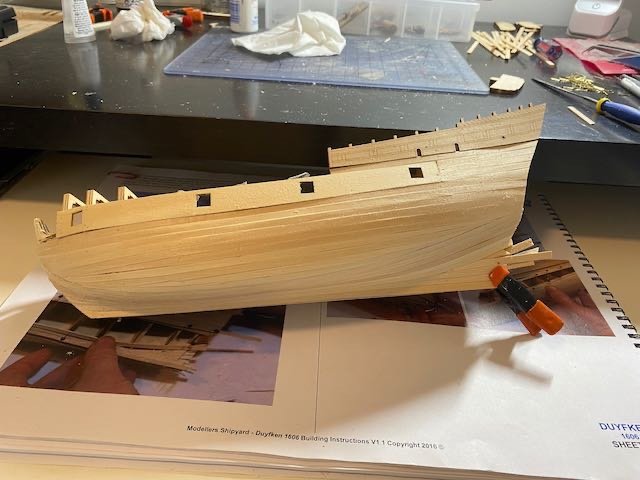
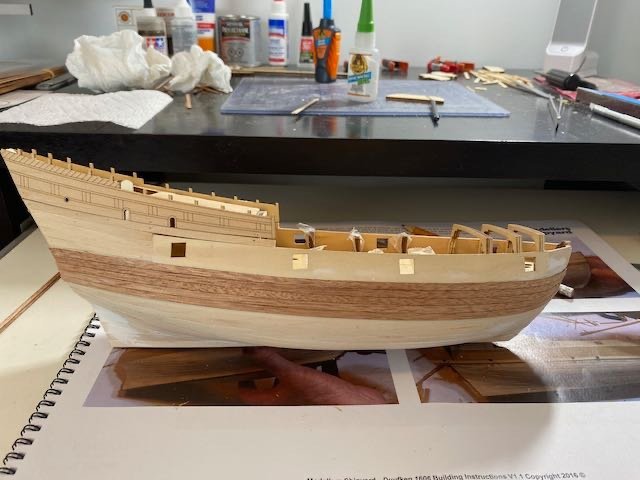
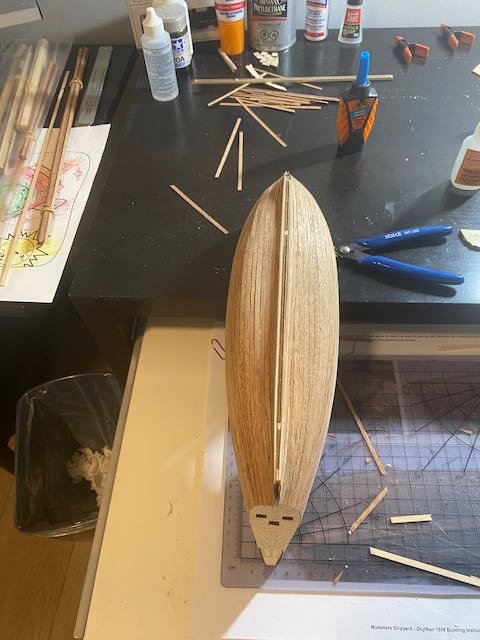
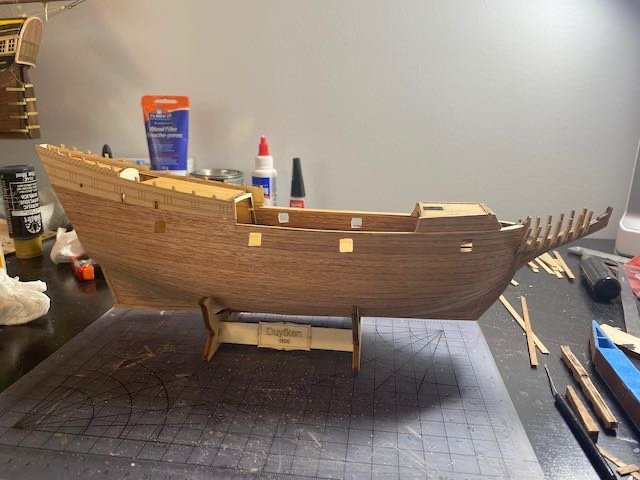
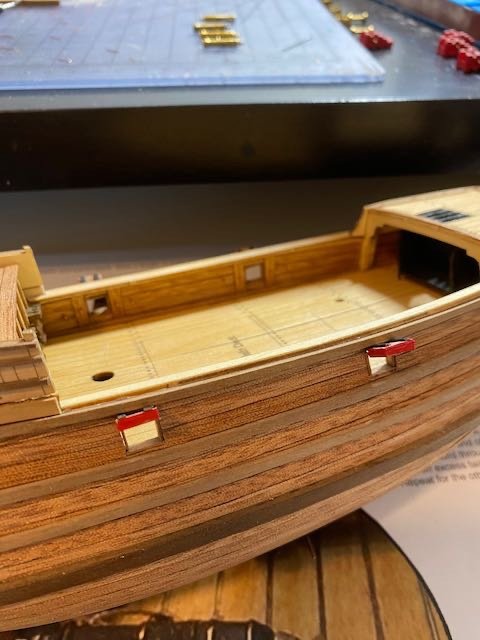
 I have started my next build, named Duyfken. The kit is a pretty good one from Modellers Shipyard, have not seen any issues with parts so far. Here are some of my progress pics..

- 16 replies
-
- 6
-
-
- Duyfken
- Modellers Shipyard
- (and 1 more)
-
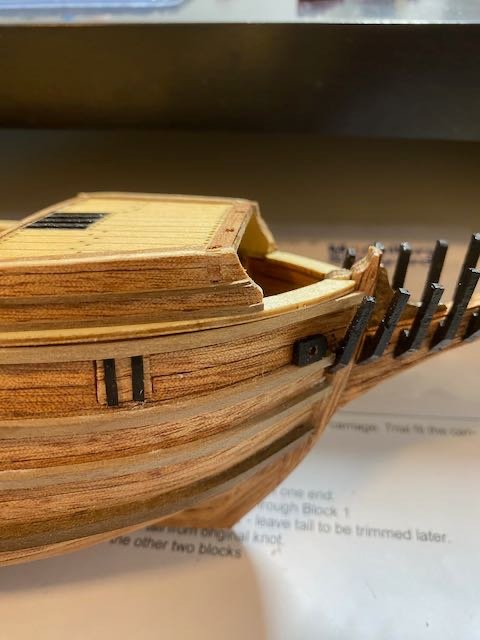
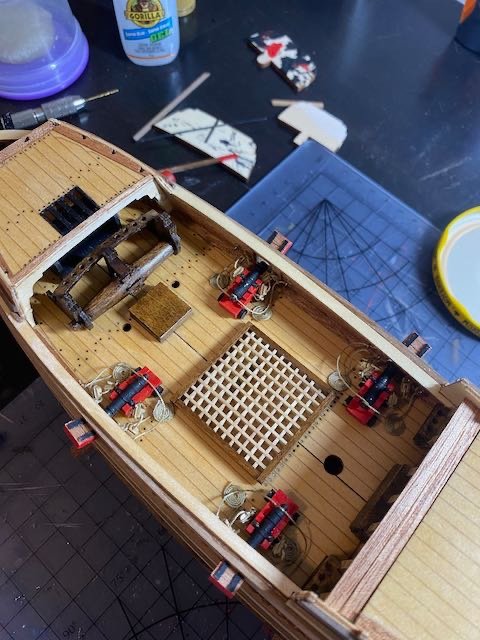
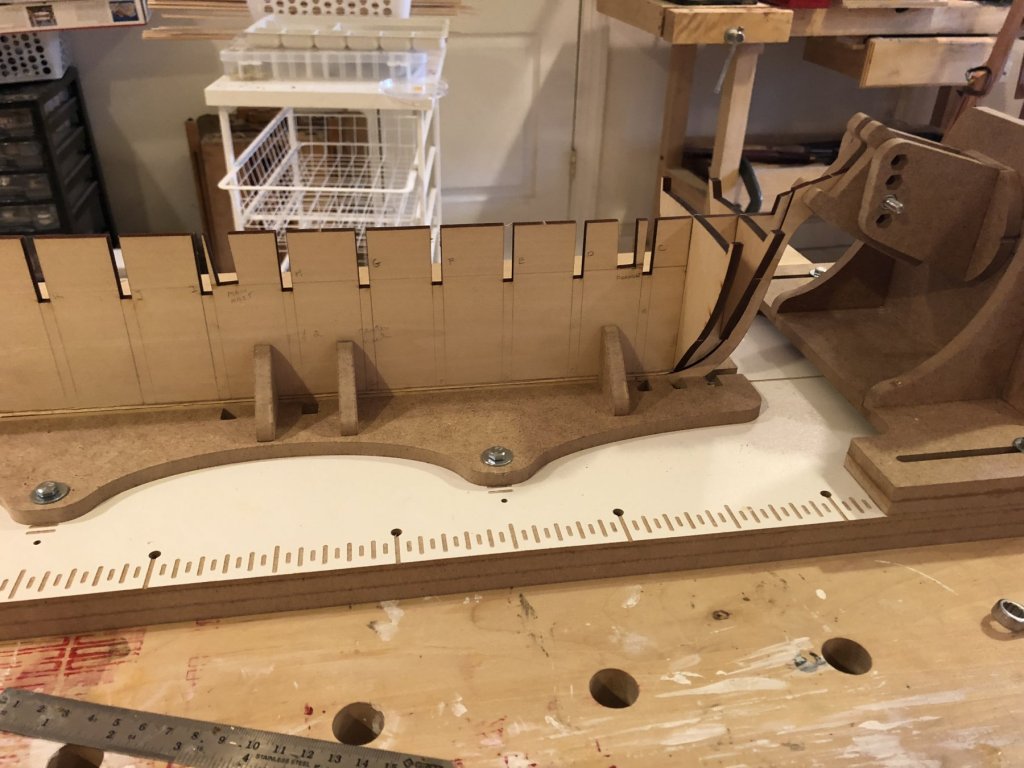
 I got the King of the Mississippi kit for my third build. I’ve reviewed several build logs for this kit to prepare for my build and I referred to many when I had questions, they are helpful. There are a lot build logs for this kit (popular kit). This kit includes several laser cut planks, small parts are in a plastic containers, and documentation. The documentation is pretty good, it includes a large drawing showing the completed boat with the part numbers identified, the part numbers are referenced in the instructions which includes a parts list. The instructions include a manual with color photographs showing various steps and a manual with text in four languages (the text is minimal but adequate when used with the pictures). I test fitted the frame pieces and I remembered that other build logs mentioned that frame pieces 4 & 5 were mislabeled (thanks for the heads up). The frame pieces fit very well, they fit snug and I could press them in place by hand.
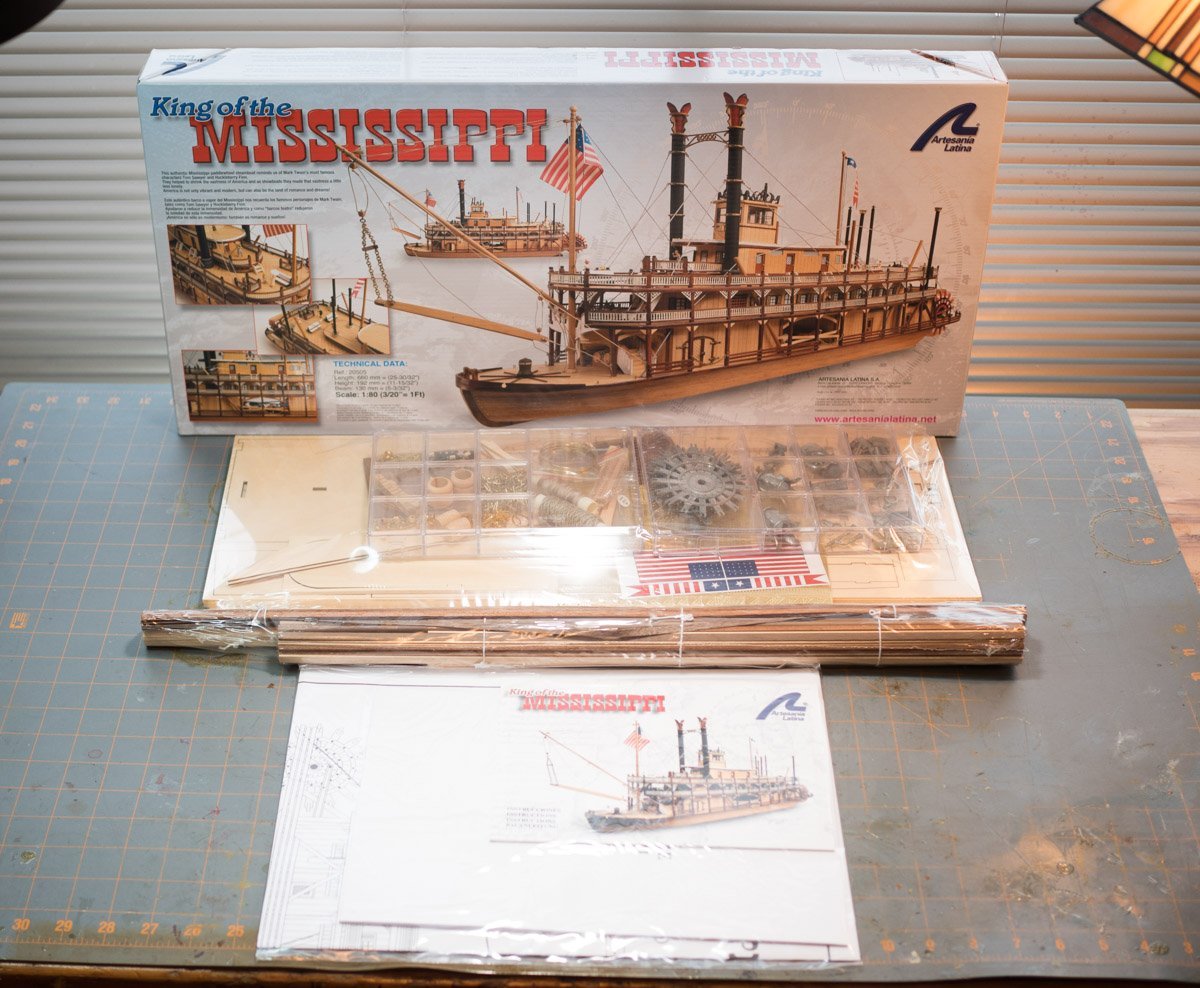
- 128 replies
-
- 3
-
-
- King of the Mississippi
- Artesania Latina
- (and 1 more)
-
At long last I have started my CWM. This kit has been in my stash for quite some time. I saw no point in photographing the kit contents as there are quite a few Morgan build logs showing the parts. I will note that, contrary to the instructions, the center keel was a single laser cut piece, not 2 pieces. I do not know if this is still the case, but it makes for an easier start to the build. The photo shows my building slip set up to start test-fitting the bulkheads.
- 294 replies
-
- 9
-
-
- charles w morgan
- model shipways
- (and 1 more)
-
 Hello all the work I want to publish is the 1/48 scale HMS Enterprise 1774 vessel. I started from the CAF model kit and I customized the model creating the complete interiors. For the realization, I used various documentation, including the Pandora monograph, Shipright 1/96 drawings, and different documentation collected by the Forums. I have reported on the scans of the caf drawings in 1/48 the scans of the Pandora drawings in order to have a uniform scale, and those of Shipyard. The model is half wrapped and half exposed.
- 60 replies
-
- 3
-
-
- enterprize
- caf
- (and 1 more)
-
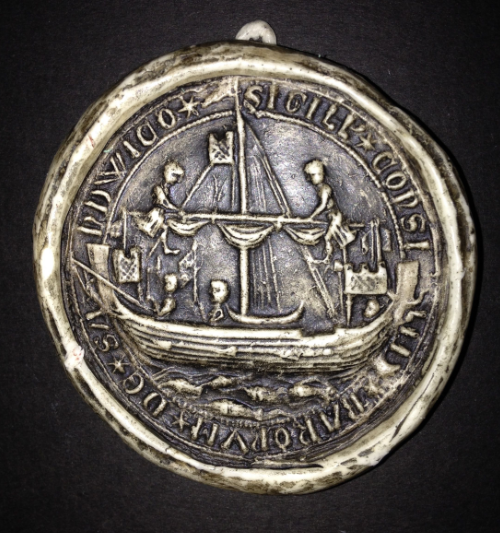
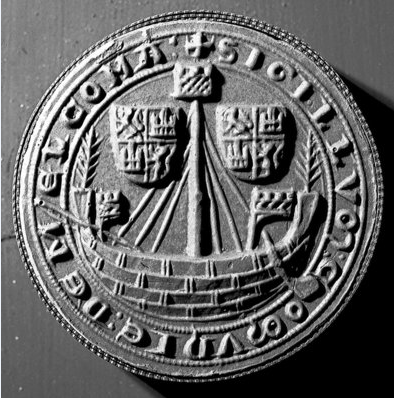
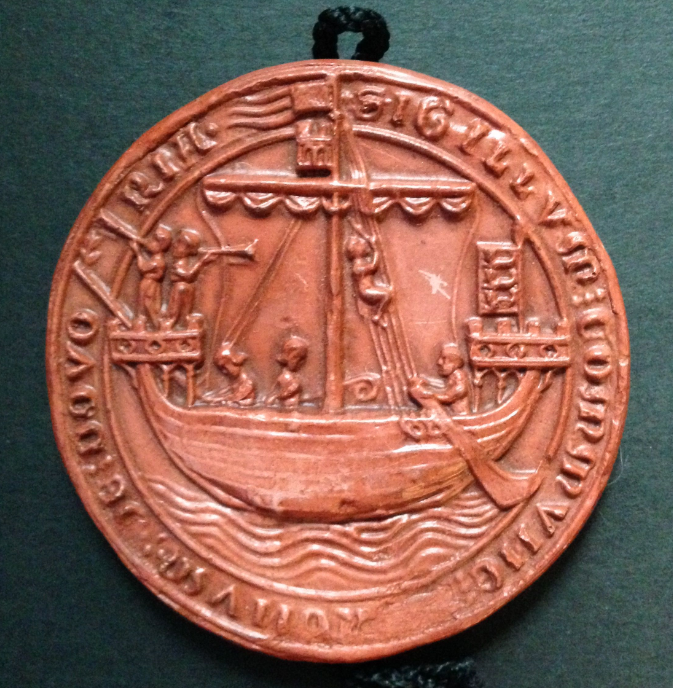
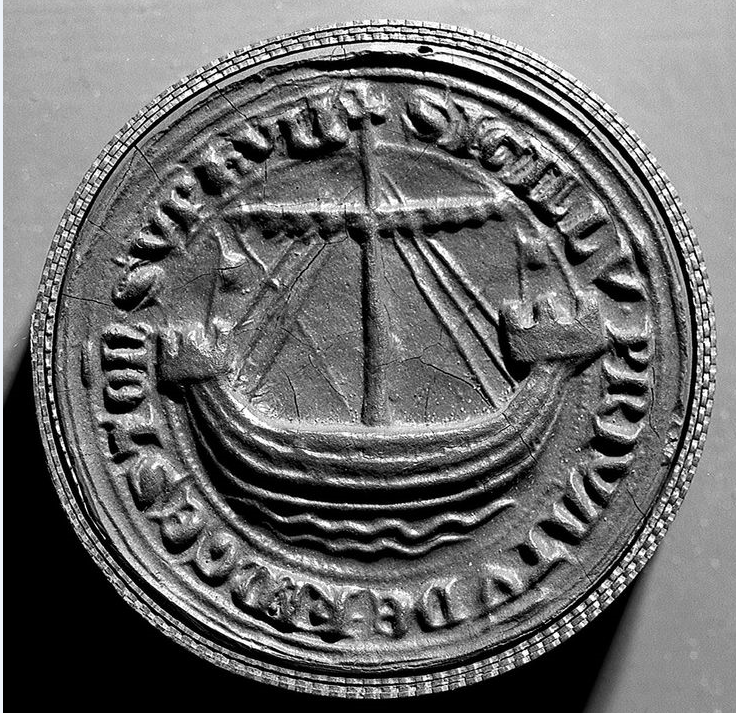
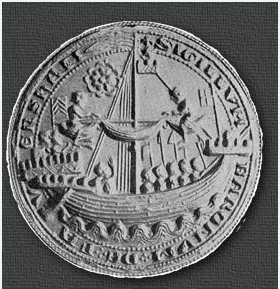
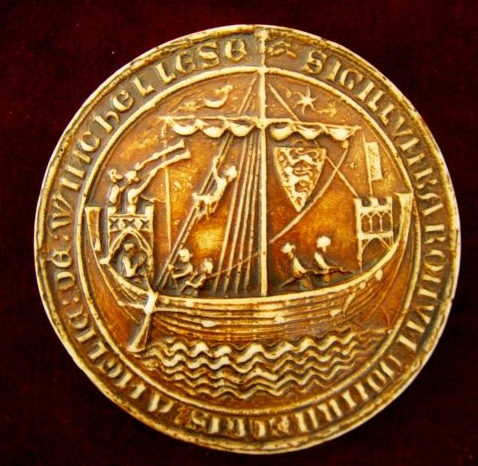
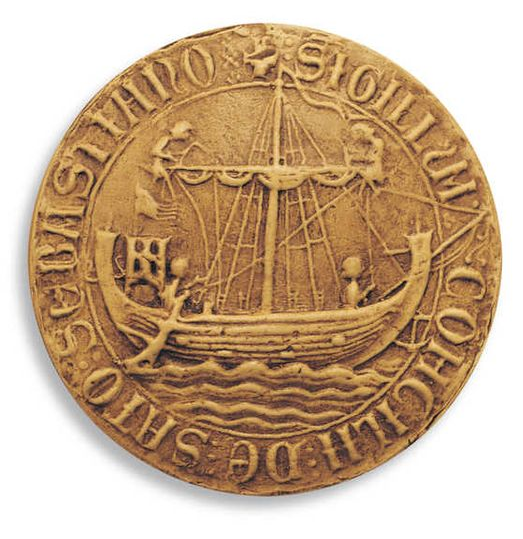
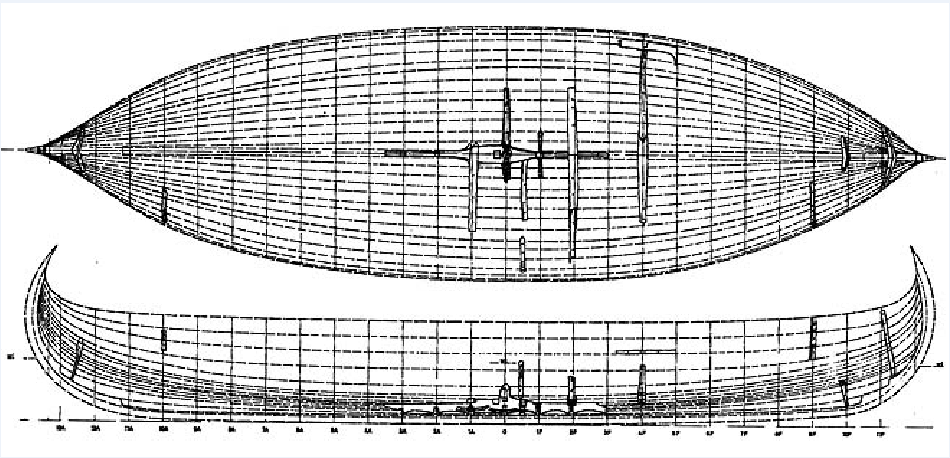
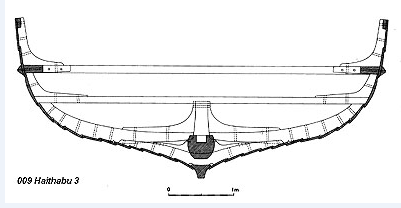
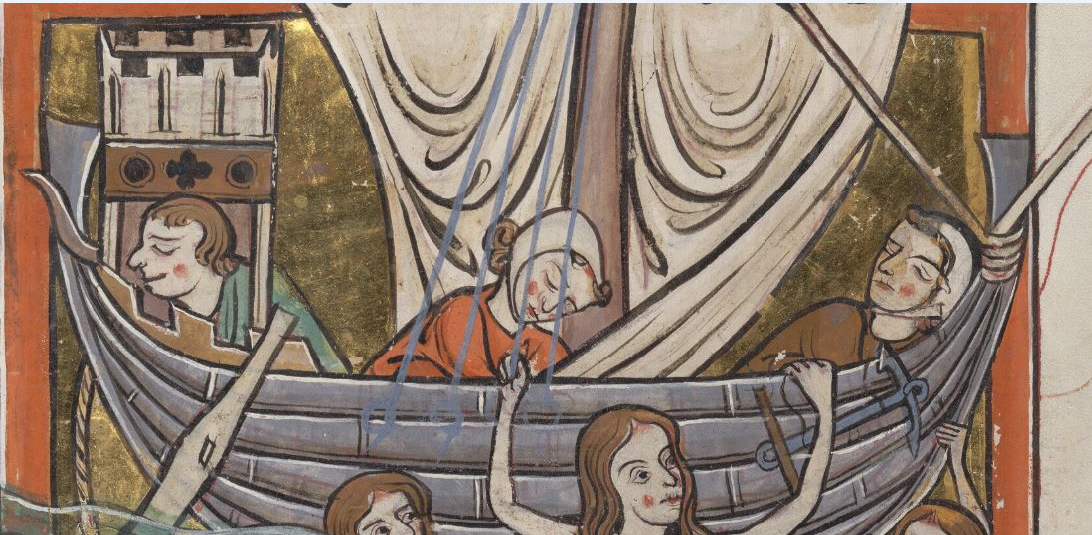
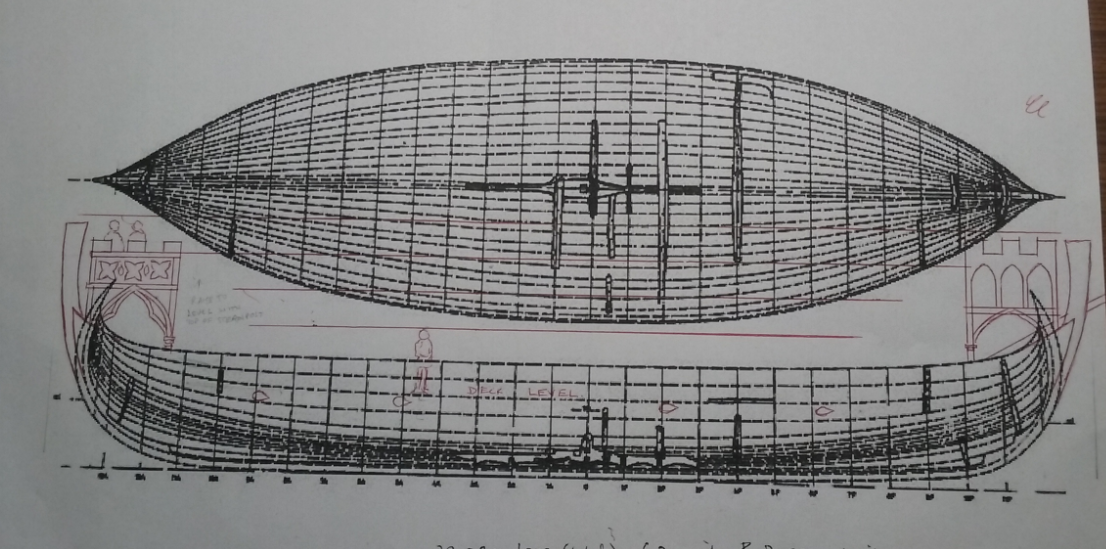
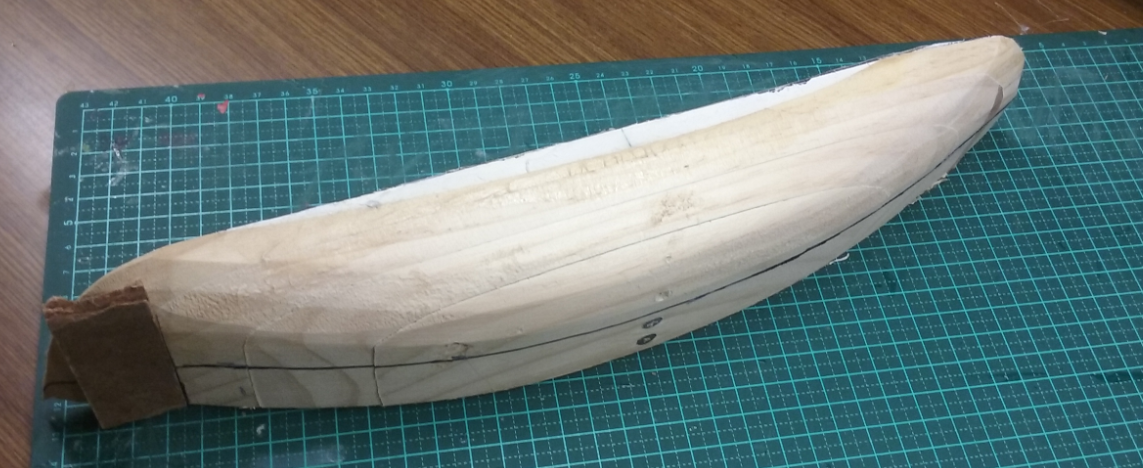
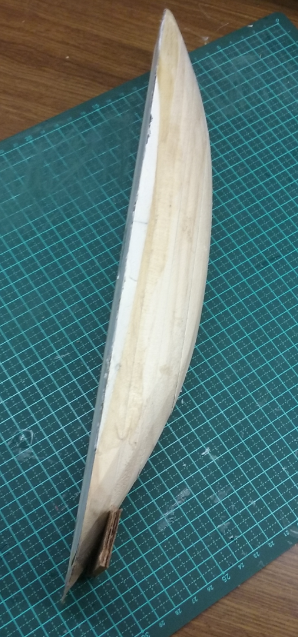
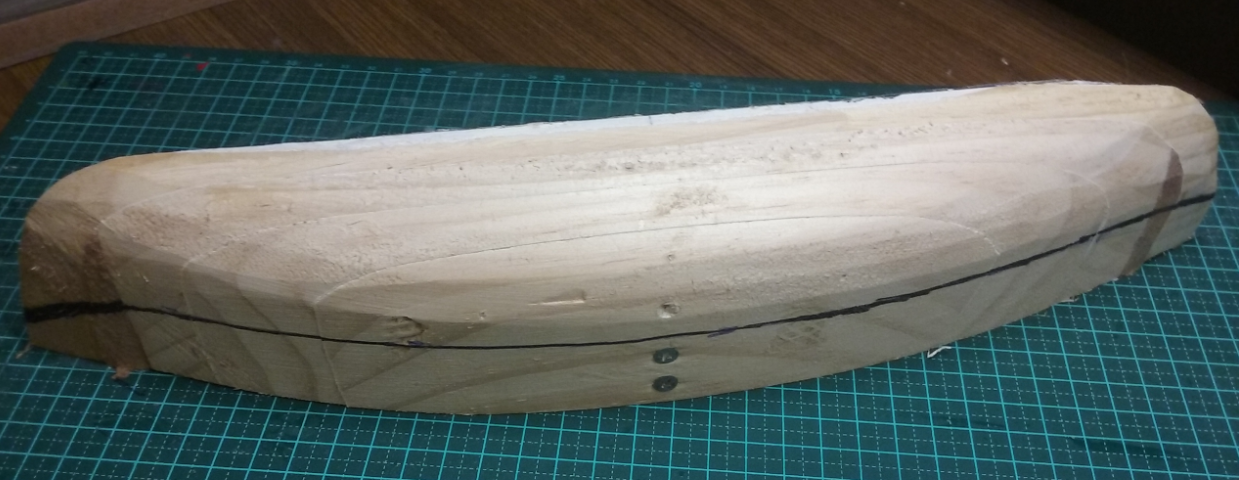
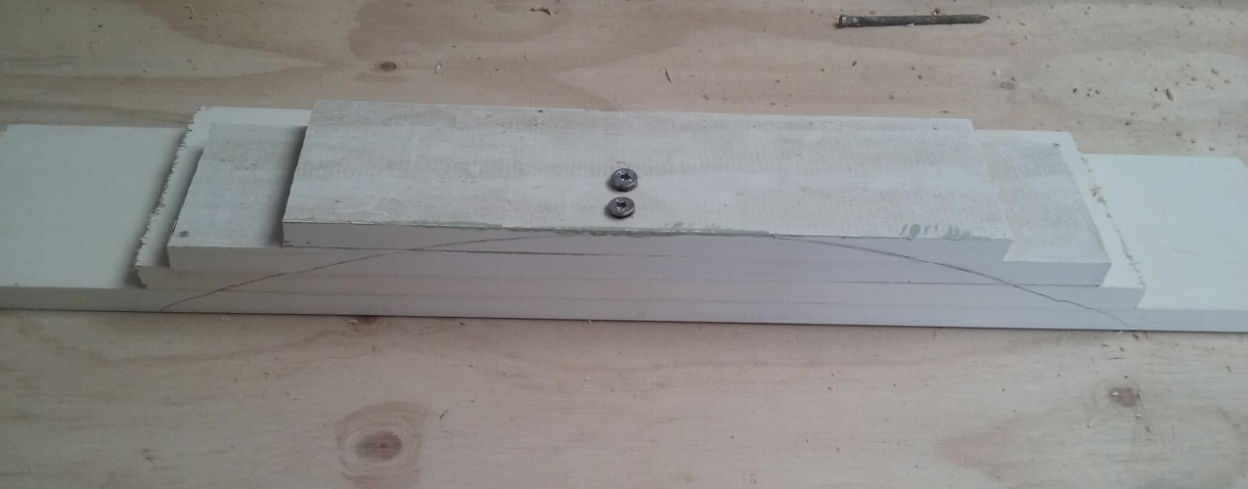
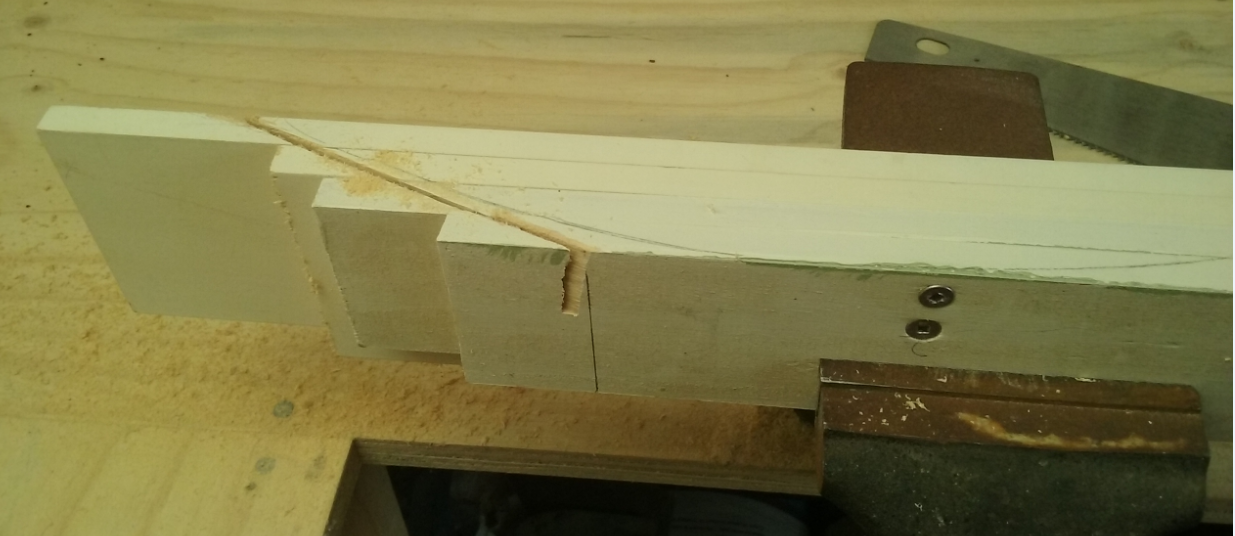
I've found that since I finished my dromon and was left with only the Great Harry, concentrating on a single build I sometimes get a bit stale, so I've decided to start another one. When I get tired of working on one, I can go to the other with a fresh viewpoint. It's also good while I'm waiting for the glue to dry. I've always been enchanted by the "longships" with castles (often described as "nefs" - the Mediaeval French word for ship) shown on the seals of port cities from the end of the 13th century. Though I originally thought of these as Crusader ships, by the time they start appearing, the main Crusades were all but over. The first of these had castles separate from the hull - many with a castle at each end, but some with only one, at the stern. Here are a few examples, out of quite a large number I've managed to collect while researching these vessels. Seal of Sandwich - 1238 Seal of Melcombe Regis - 1290-1305 Seal of San Sebastian, Spain - 1297 but over time they were incorporated somewhat, with the castles extending over the stem and sternposts. Seal of Dover - 1284 Seal of Kingston-on-Hull - 1348 Seal of Faversham - Date unknown I like the earlier ones better - they're much more attractive in my view. And the most beautiful of all is the ship from the seal of Winchelsea, dating to 1274. I spent quite a lot of time thinking about the form the hull would take - were they long and sleek like the Viking longships (Gokstad, Skuldelev etc)? It is usually assumed the representations on the seals are shown shorter than the reality, to squeeze them into the circular shape of the seal, but on the other hand, though these would certainly serve as warships, I believe their main function would be as merchant vessels and would have to be wide and deep enough to carry cargo. Getting a bit speculative here, bit I decided to take mine as following the tradition of the knarr, the cargo ship used by the Vikings. So I'm basing the hull shape on the largest knarr found, Haithabu/Hedeby 3. From the website https://www2.rgzm.de/navis/ships/ship009/ship009engl.htm "According to the reconstruction the ship had a total length of 22.08 m [72 feet], a width of 6.2 m [20 feet] and a height of 2.52 m [8.26 feet]. The cargo capacity would have been about 60 tons." Using information from the above website, I managed to get diagrams of the ship as reconstructed - from above, from the side, and a midships section. There is more information out there to help with the shape of the hull. One thing I will change, however, is the shape at the bow and stern. The stem and sternposts of knarrs curve backwards into the body of the ship, but in a nef they curve outwards. In fact, the shape of stem and sternpost in these vessels seems to be characteristic throughout the type, always wider at the top, with the outside of the curve following the line of the hull, with the inner surface of the stem/sternpost curving inboard somewhat. I'll be building this ship on a plug - rather than work out frames on paper, I decided to make a shape that looked right, using the midships section and other information I've collected (from other knarrs) to give an idea of the bow and stern sections. And it'll be clinker built - I'm going to try just overlapping adjoining strakes on a smooth plug and see how that works. So, here we go: The plug is made of 4 relatively thin strips of wood each side, which are temporarily screwed together and then shaped. Note: I stuffed up a bit with the 2nd inner strip - made it a little too short - so I had to add a bit to pack it out, then sand it to fit the rest of the hull. And now the other side: Marking out the hull shape. Next step is to smooth off this side of the hull to follow the pencil marks, then pull the two halves apart and line up the strips of the second half with those of the first half, and shape them so they are mirror images of each other. More to come. Steven


- 324 replies
-
- 18
-