Search the Community
Showing results for tags 'j class'.
Found 10 results
-
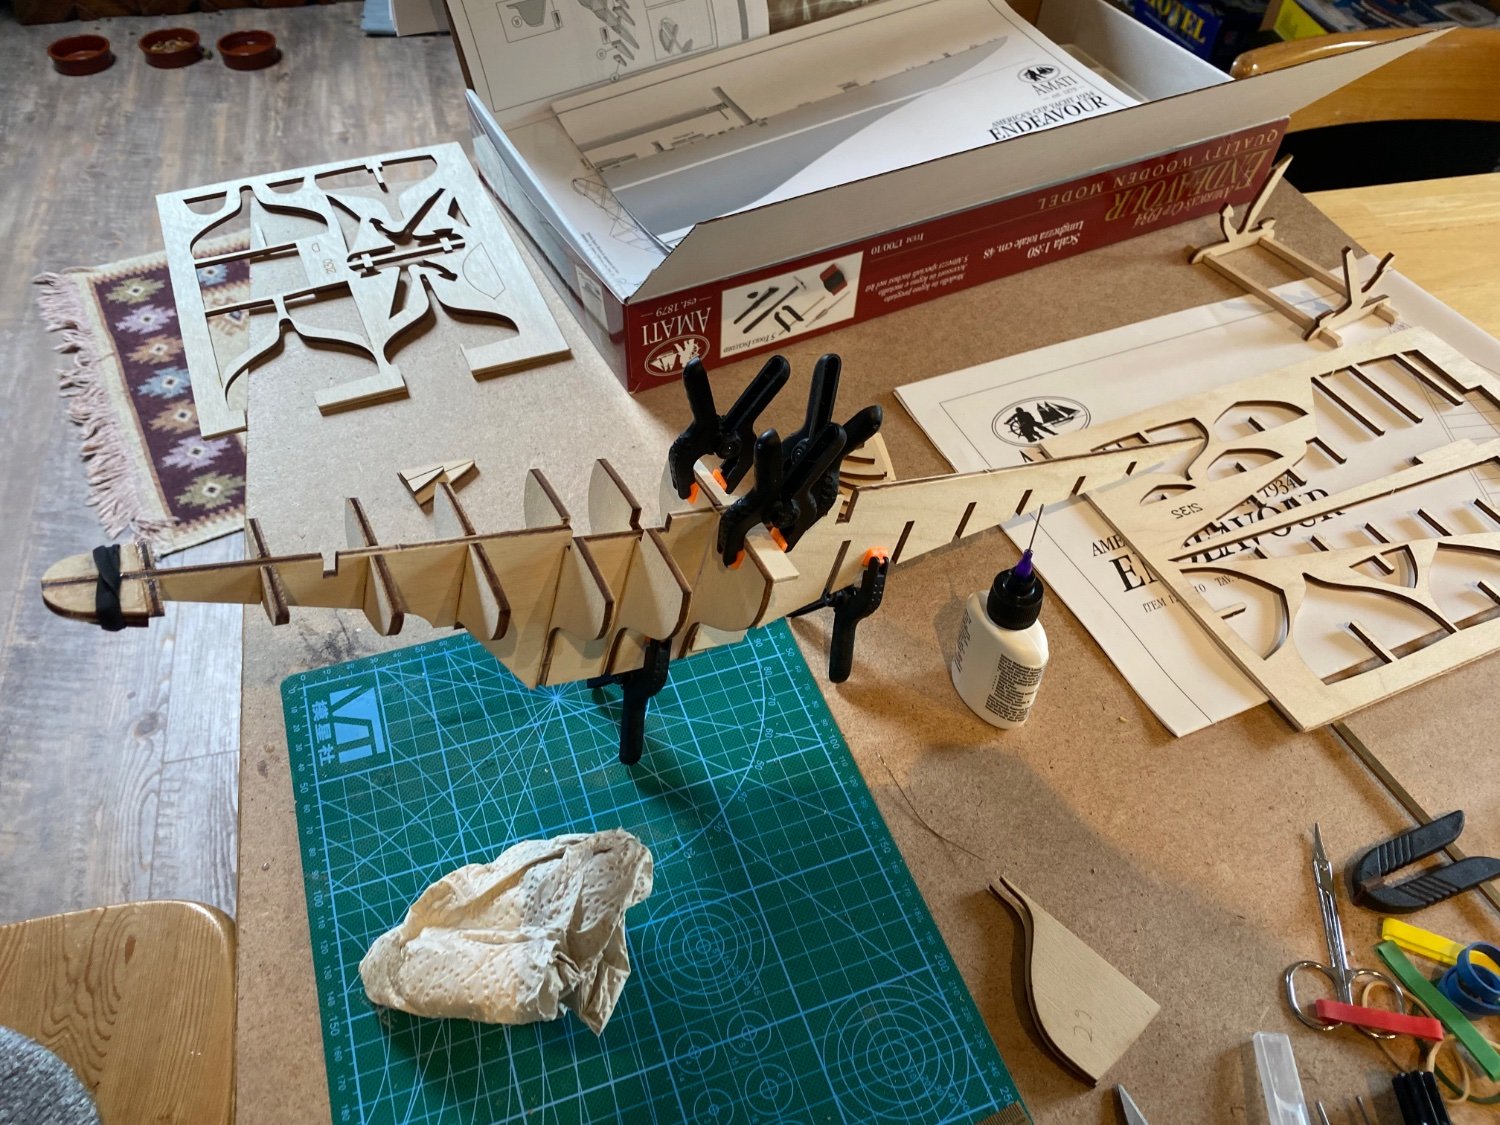
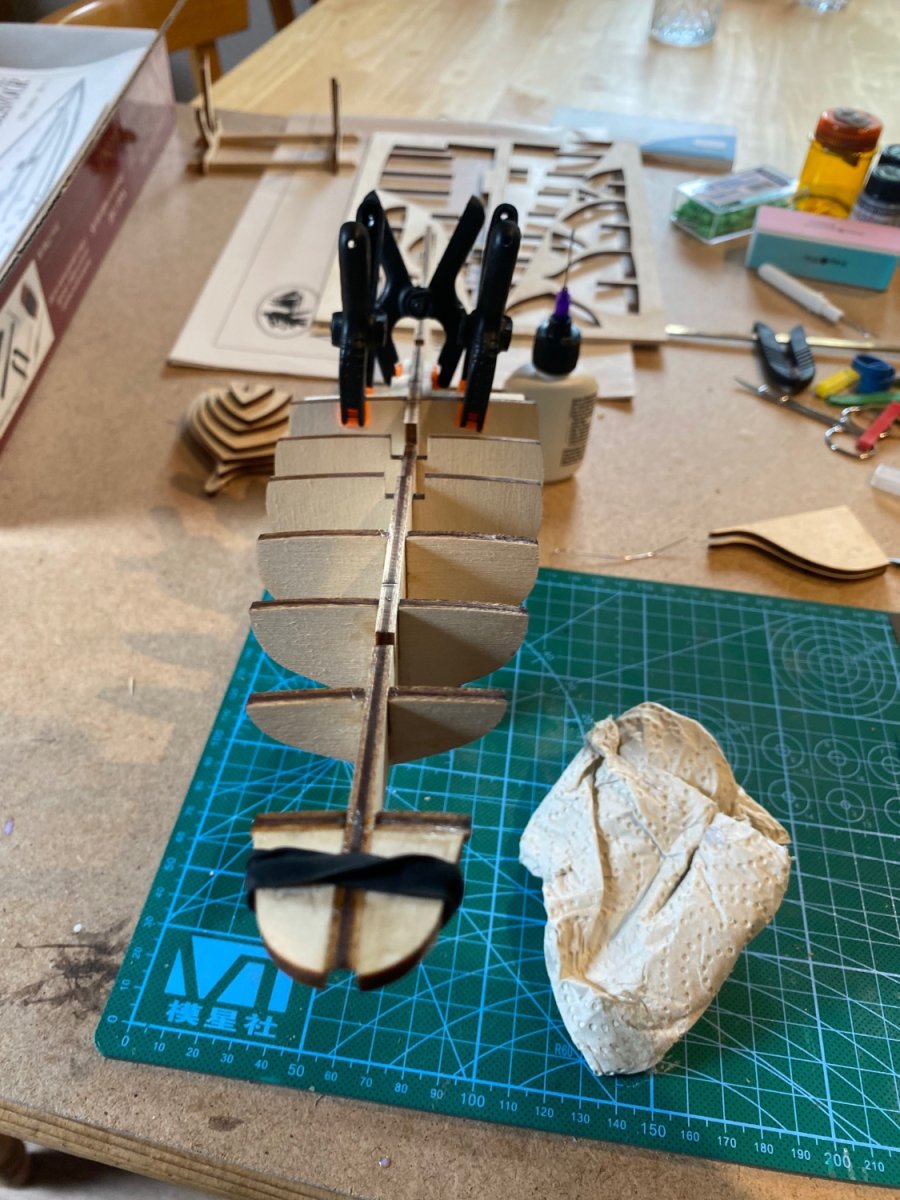
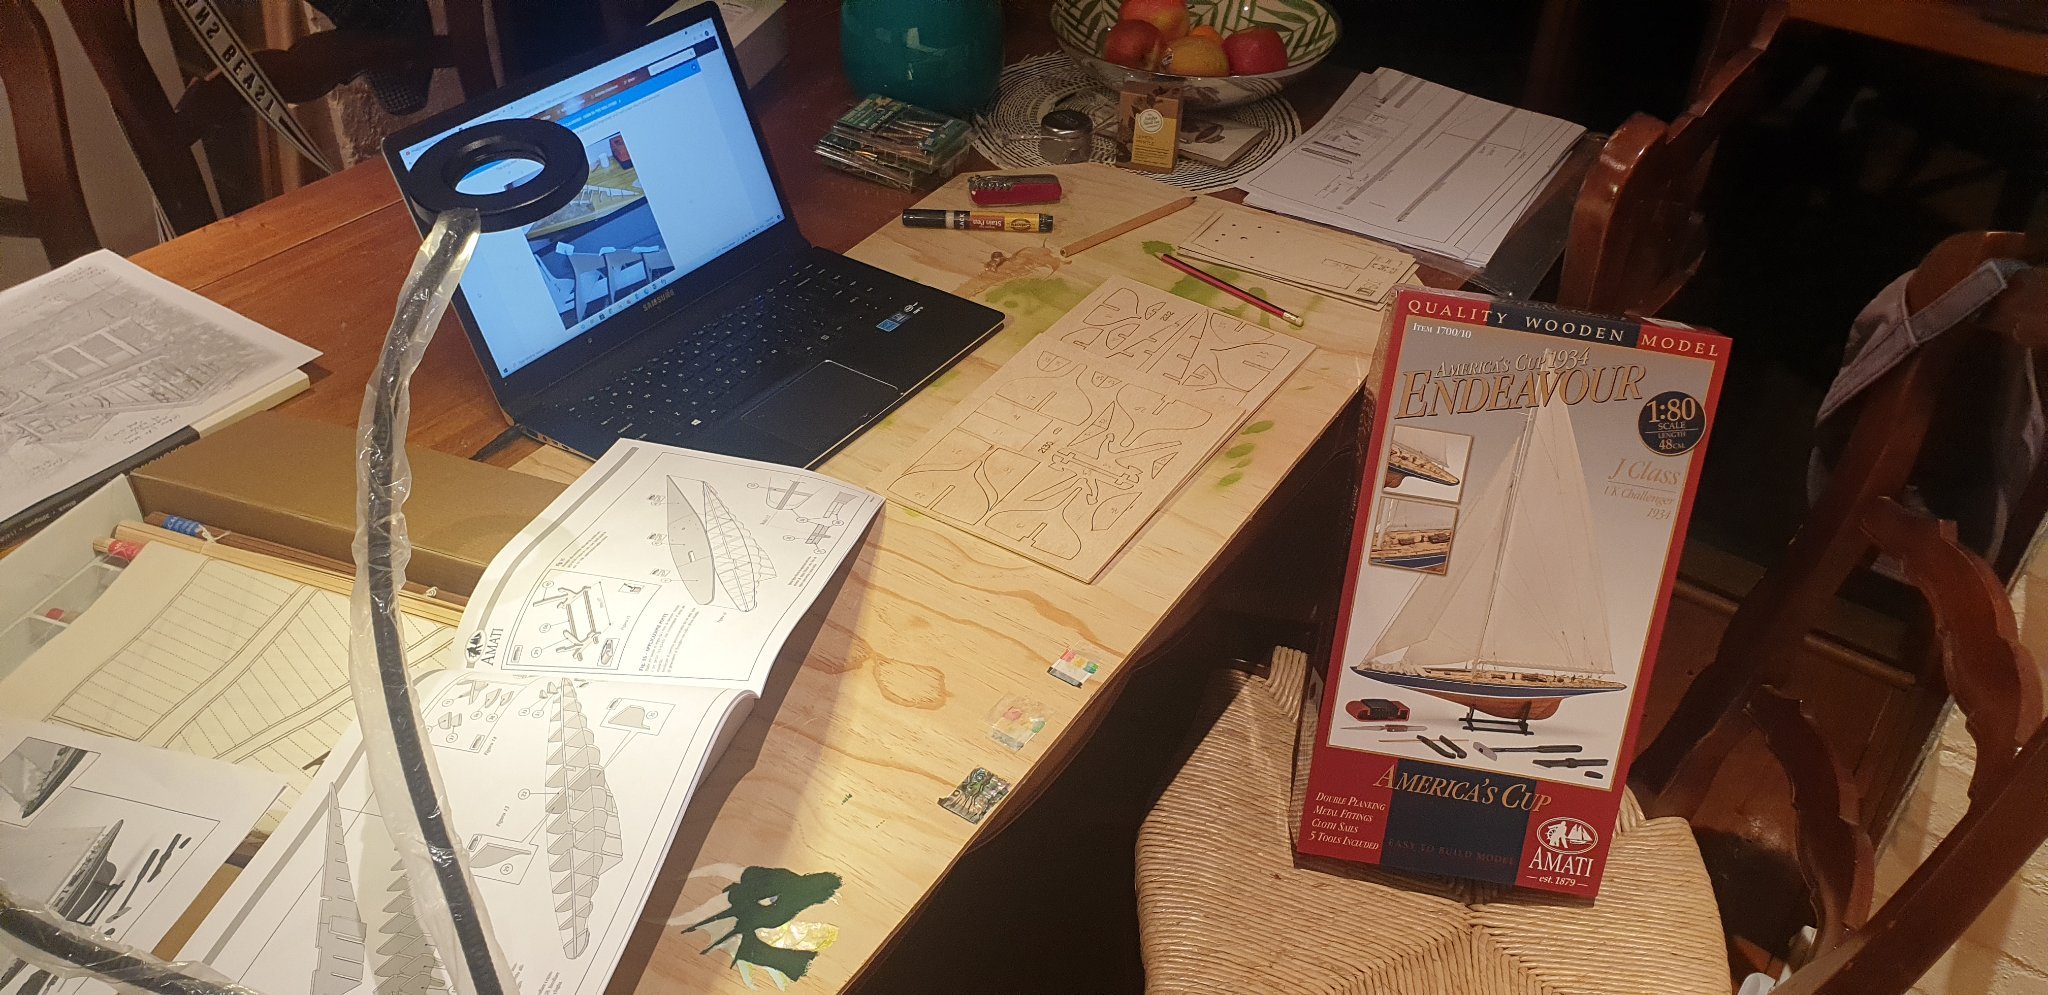
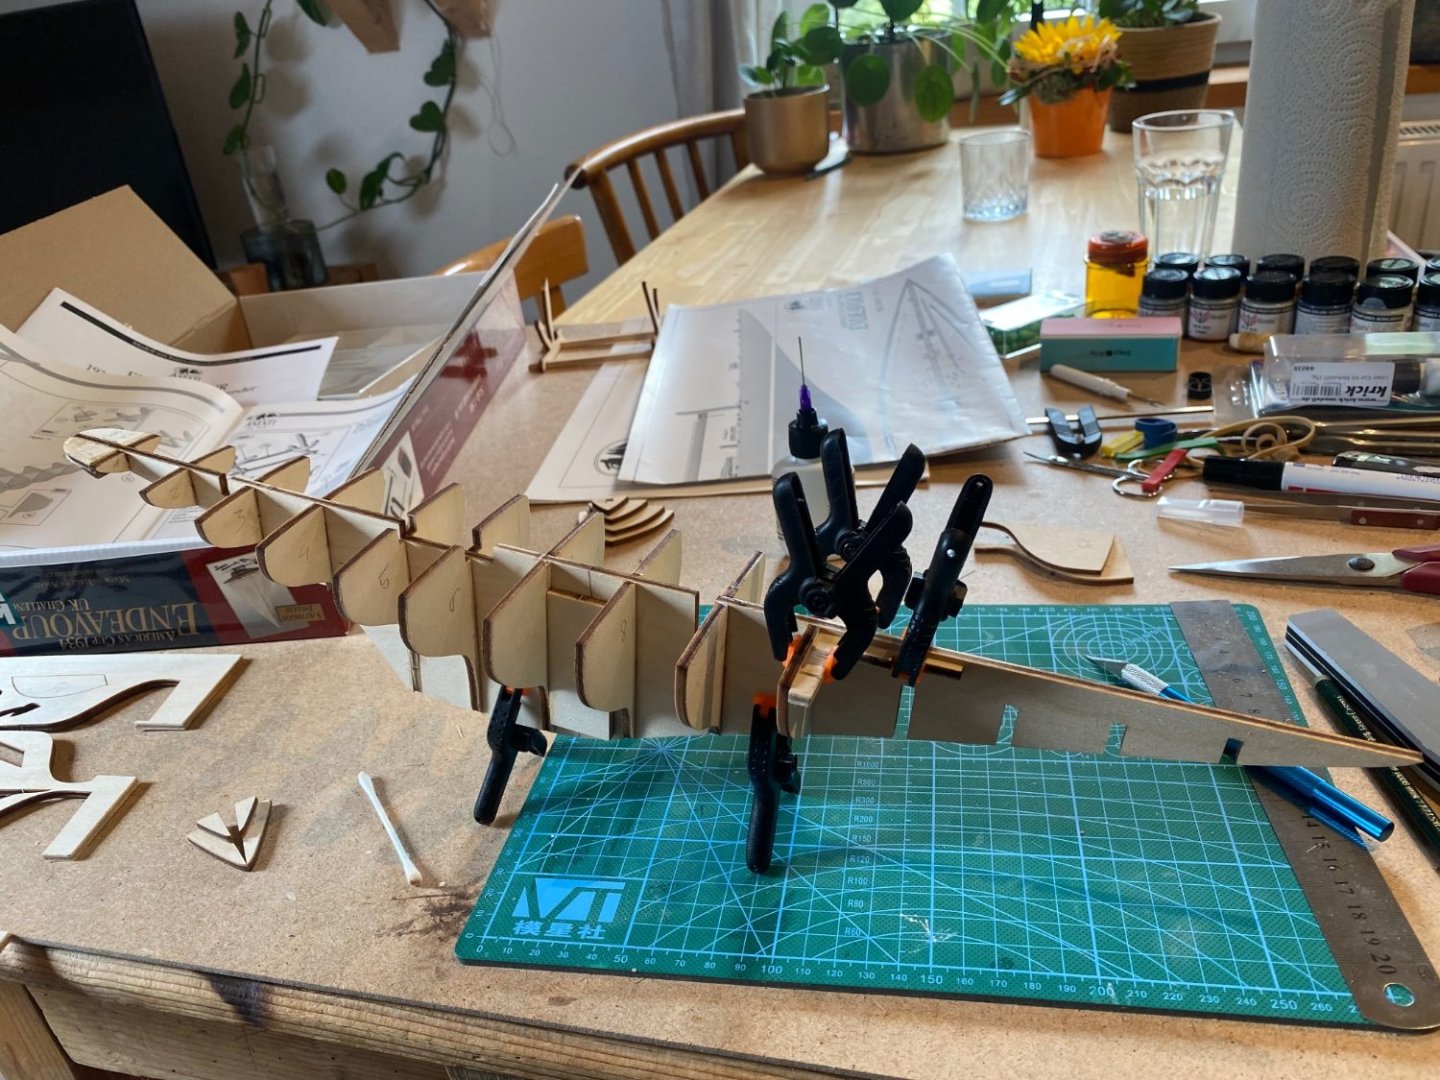
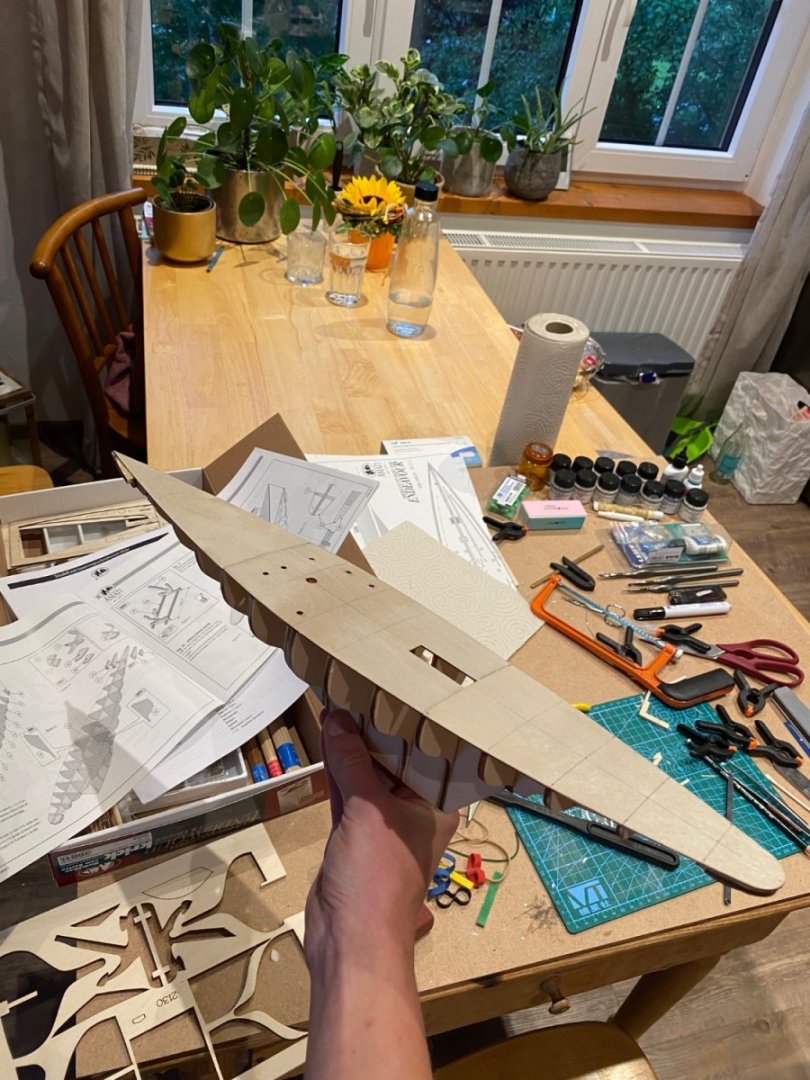
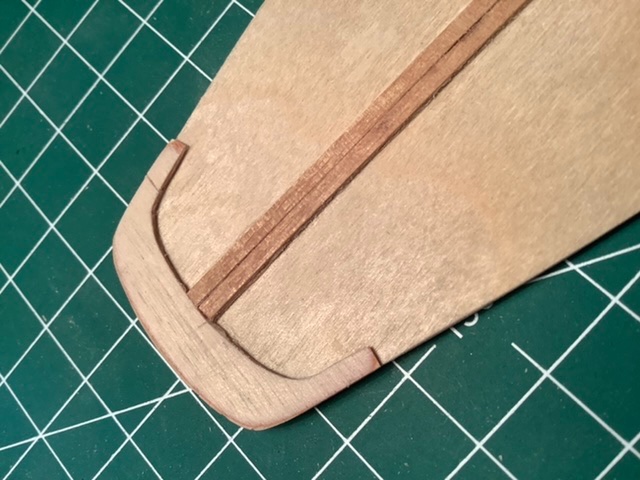
 Besides my first ever wooden build, the Goletta Elisabeth and a little side projekct, the Optimist Dinghy I decided to go for the Amati Endeavour 1:80 as my first bigger and more advanced model. I somehow really like the elegance and sporty look of those J-Class ships. Kit was openend and wow this is a whole different story than those other two kits I did. This will be way more difficult and time consuming, but I am on fire for it so checked out the instructions and plans and started constructing the hull right away. First step was to glue the two kiel parts plane together and adding the frames. Numbered them before and prechecked if they fit well. Needed some sanding first with some parts. To make sure to have them in a right angle to the kiel I and clamp them I constructed two rectangles out of some spare wood which worked out well. Next step was adding the rear and bow reinforcements and one reinforcement in the middle. Rubber bands did their job here. Net up adding the first deck and fixing it with the provided nails and again lots of rubber bands. Was a little bit tricky since the deck slightly bends to the right and left. Thats it for now. Net up is sanding of the frames, bow and rear parts to make the first layer of planks fit right. Will probably take some time.
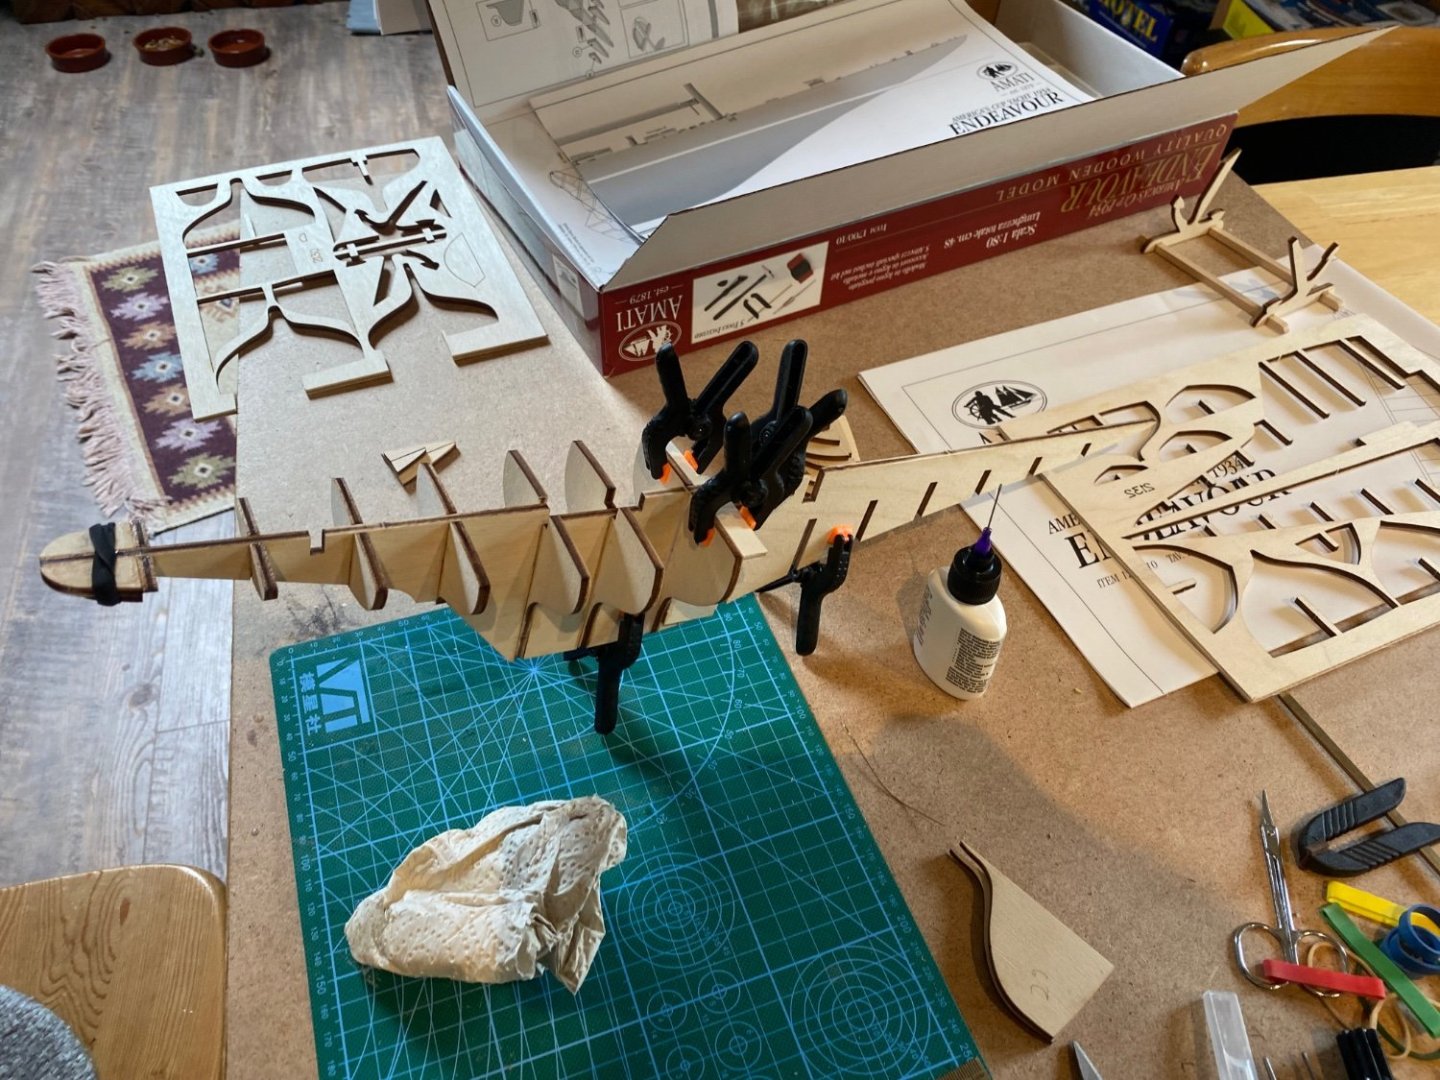

-
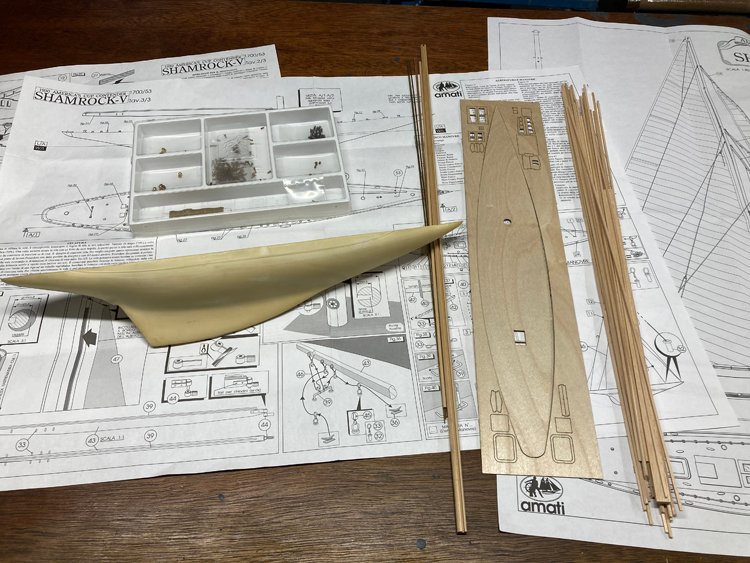
 Hello Again, Well, I certainly didn't expect to be building a J Class yacht until yesterday when a friend called and asked if I'd build his Shamrock V for him. He has had the kit collecting dust on a shelf for many years and doesn't anticipate ever getting to it, so asked me if I'd build it for him. I have learned that Amati makes a range of America's Cup yacht kits, but the Shamrock V is one that has been discontinued. Since yesterday I have been poring over the kit. It will prove to be a relatively simple build, but appears to be a high quality kit. The fittings are excellent and the instructions and plans are very clear and easy to understand. (I do have a question about the rigging, but I'll ask that in a separate post under the right topic.) This kit has a pre-cast hull ( a type of resin, I guess) which will cut down on the amount of work needed considerably. I have never added sails to a model before, but I think this is one model that definitely needs them, so I'll be reading through everything I can find on making sails. The fabric provided in the kit is very fine and I don't think it will need to be replaced. Here are a couple of shots of the kit: So, an unexpected change of pace. David
- 31 replies
-
- 13
-

-
- Shamrock V
- Amati
- (and 2 more)
-
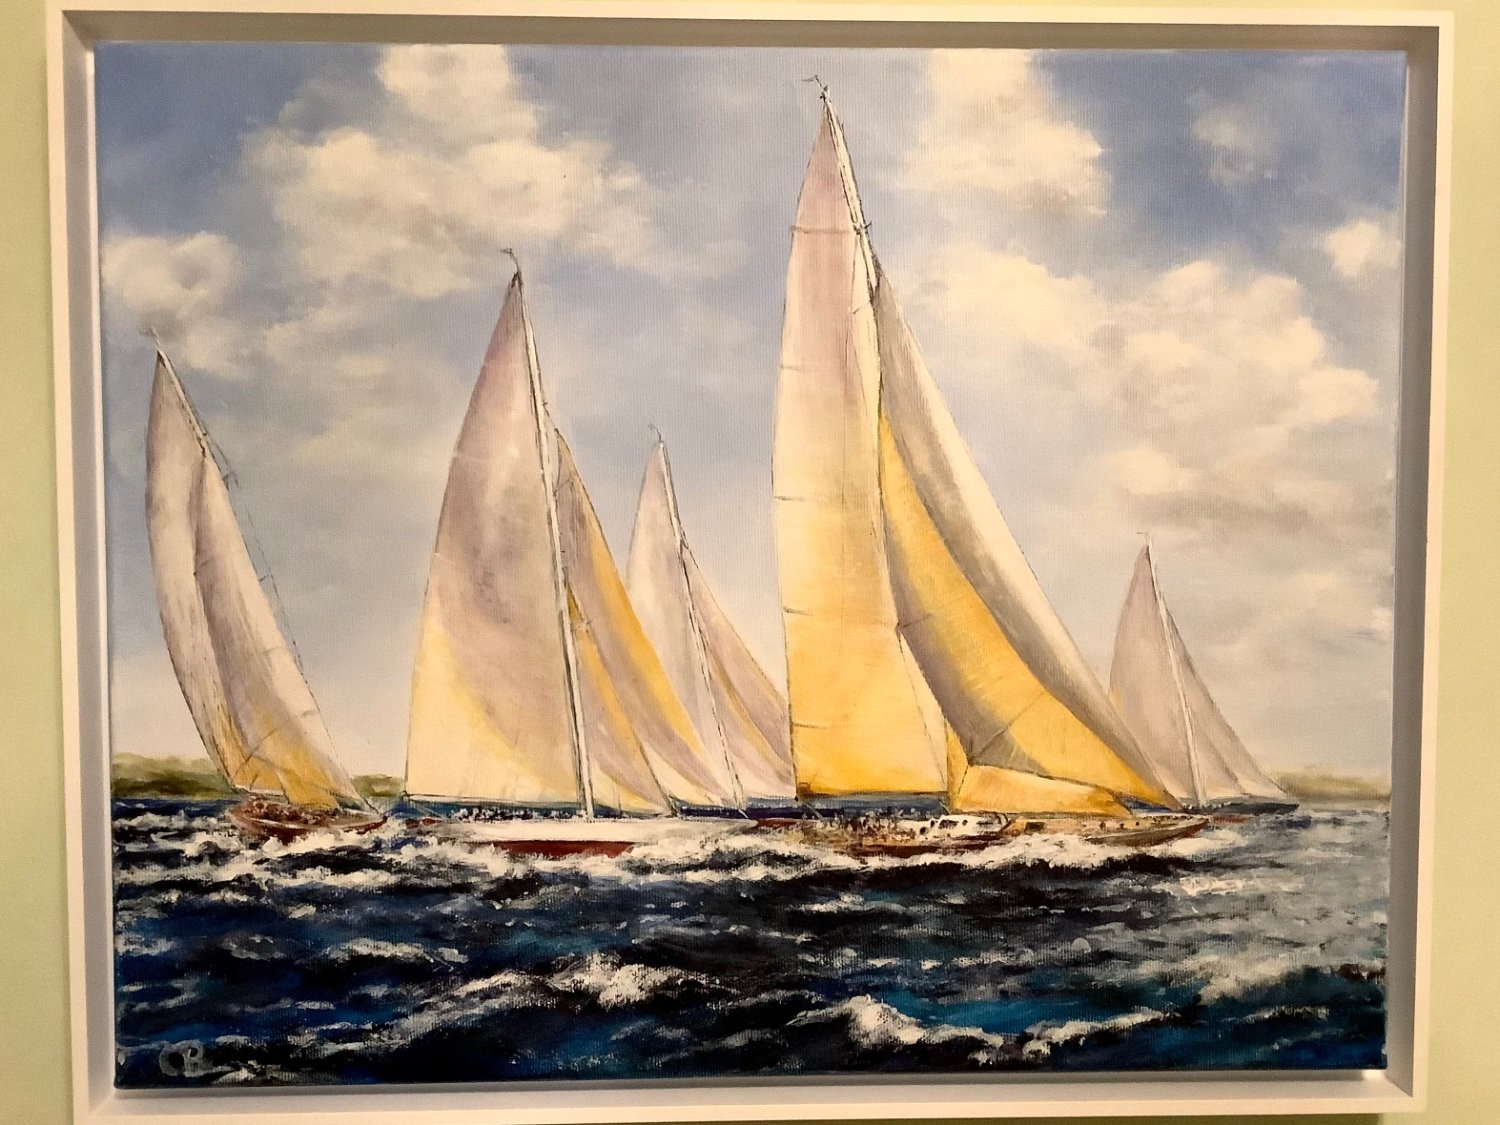
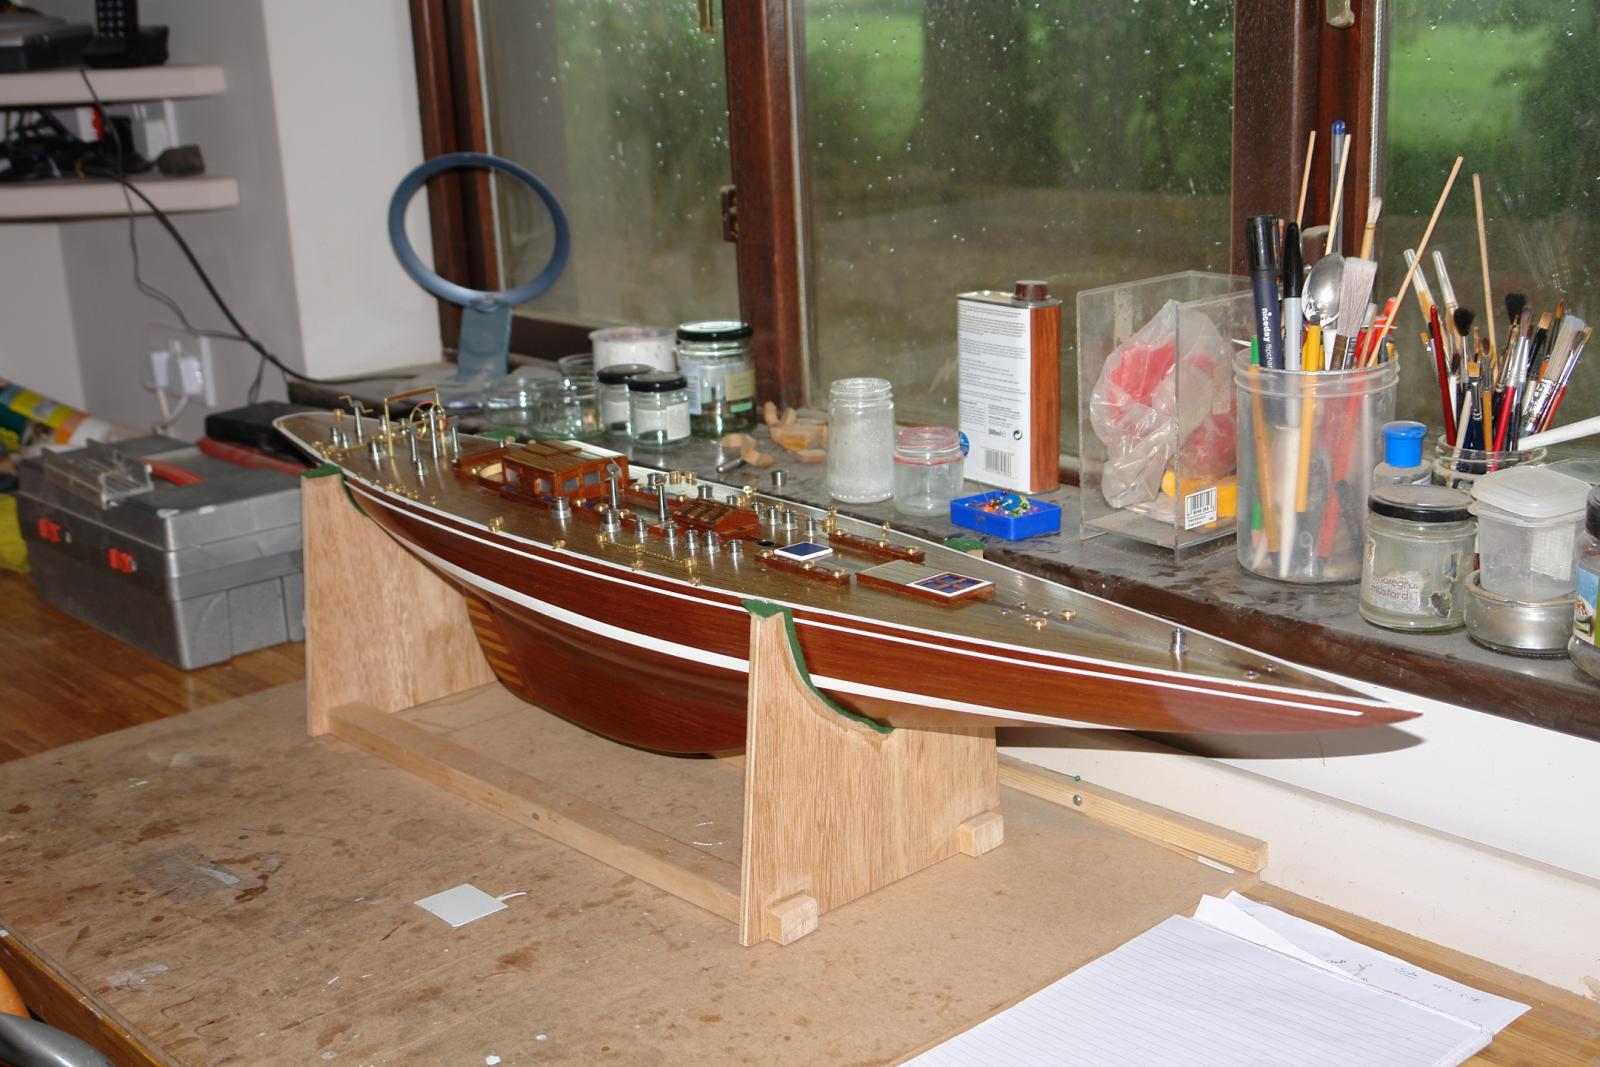
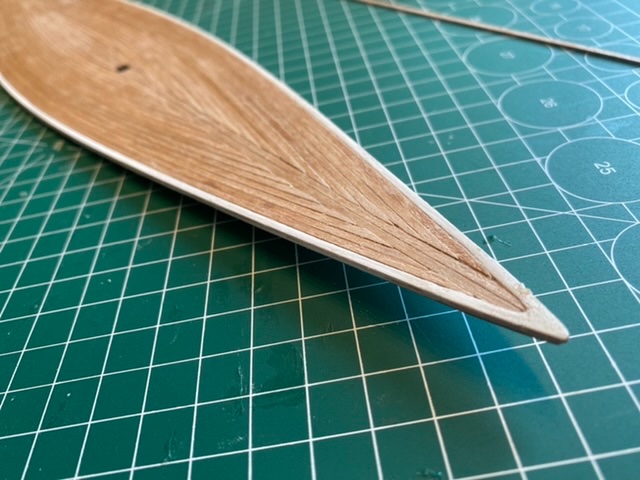
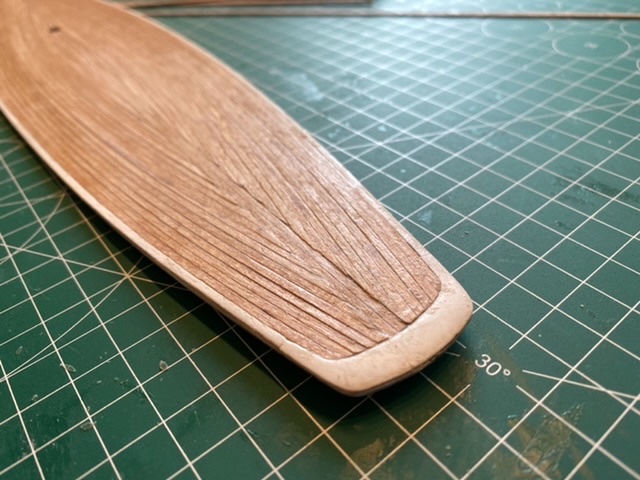
 So here is my second project, the Amati J-Class Endeavour. It took me quite a while to start this and as a sort of motivation I had this acrylic picture painted by a friend. The template was a picture I found in the net. Since the model of the Rainbow, which was the winner of the 1934’s Americas cup, came with a ready resin hull, the model of the challenger, Endeavour, has a wooden hull. So this is a new challenge for me.

-
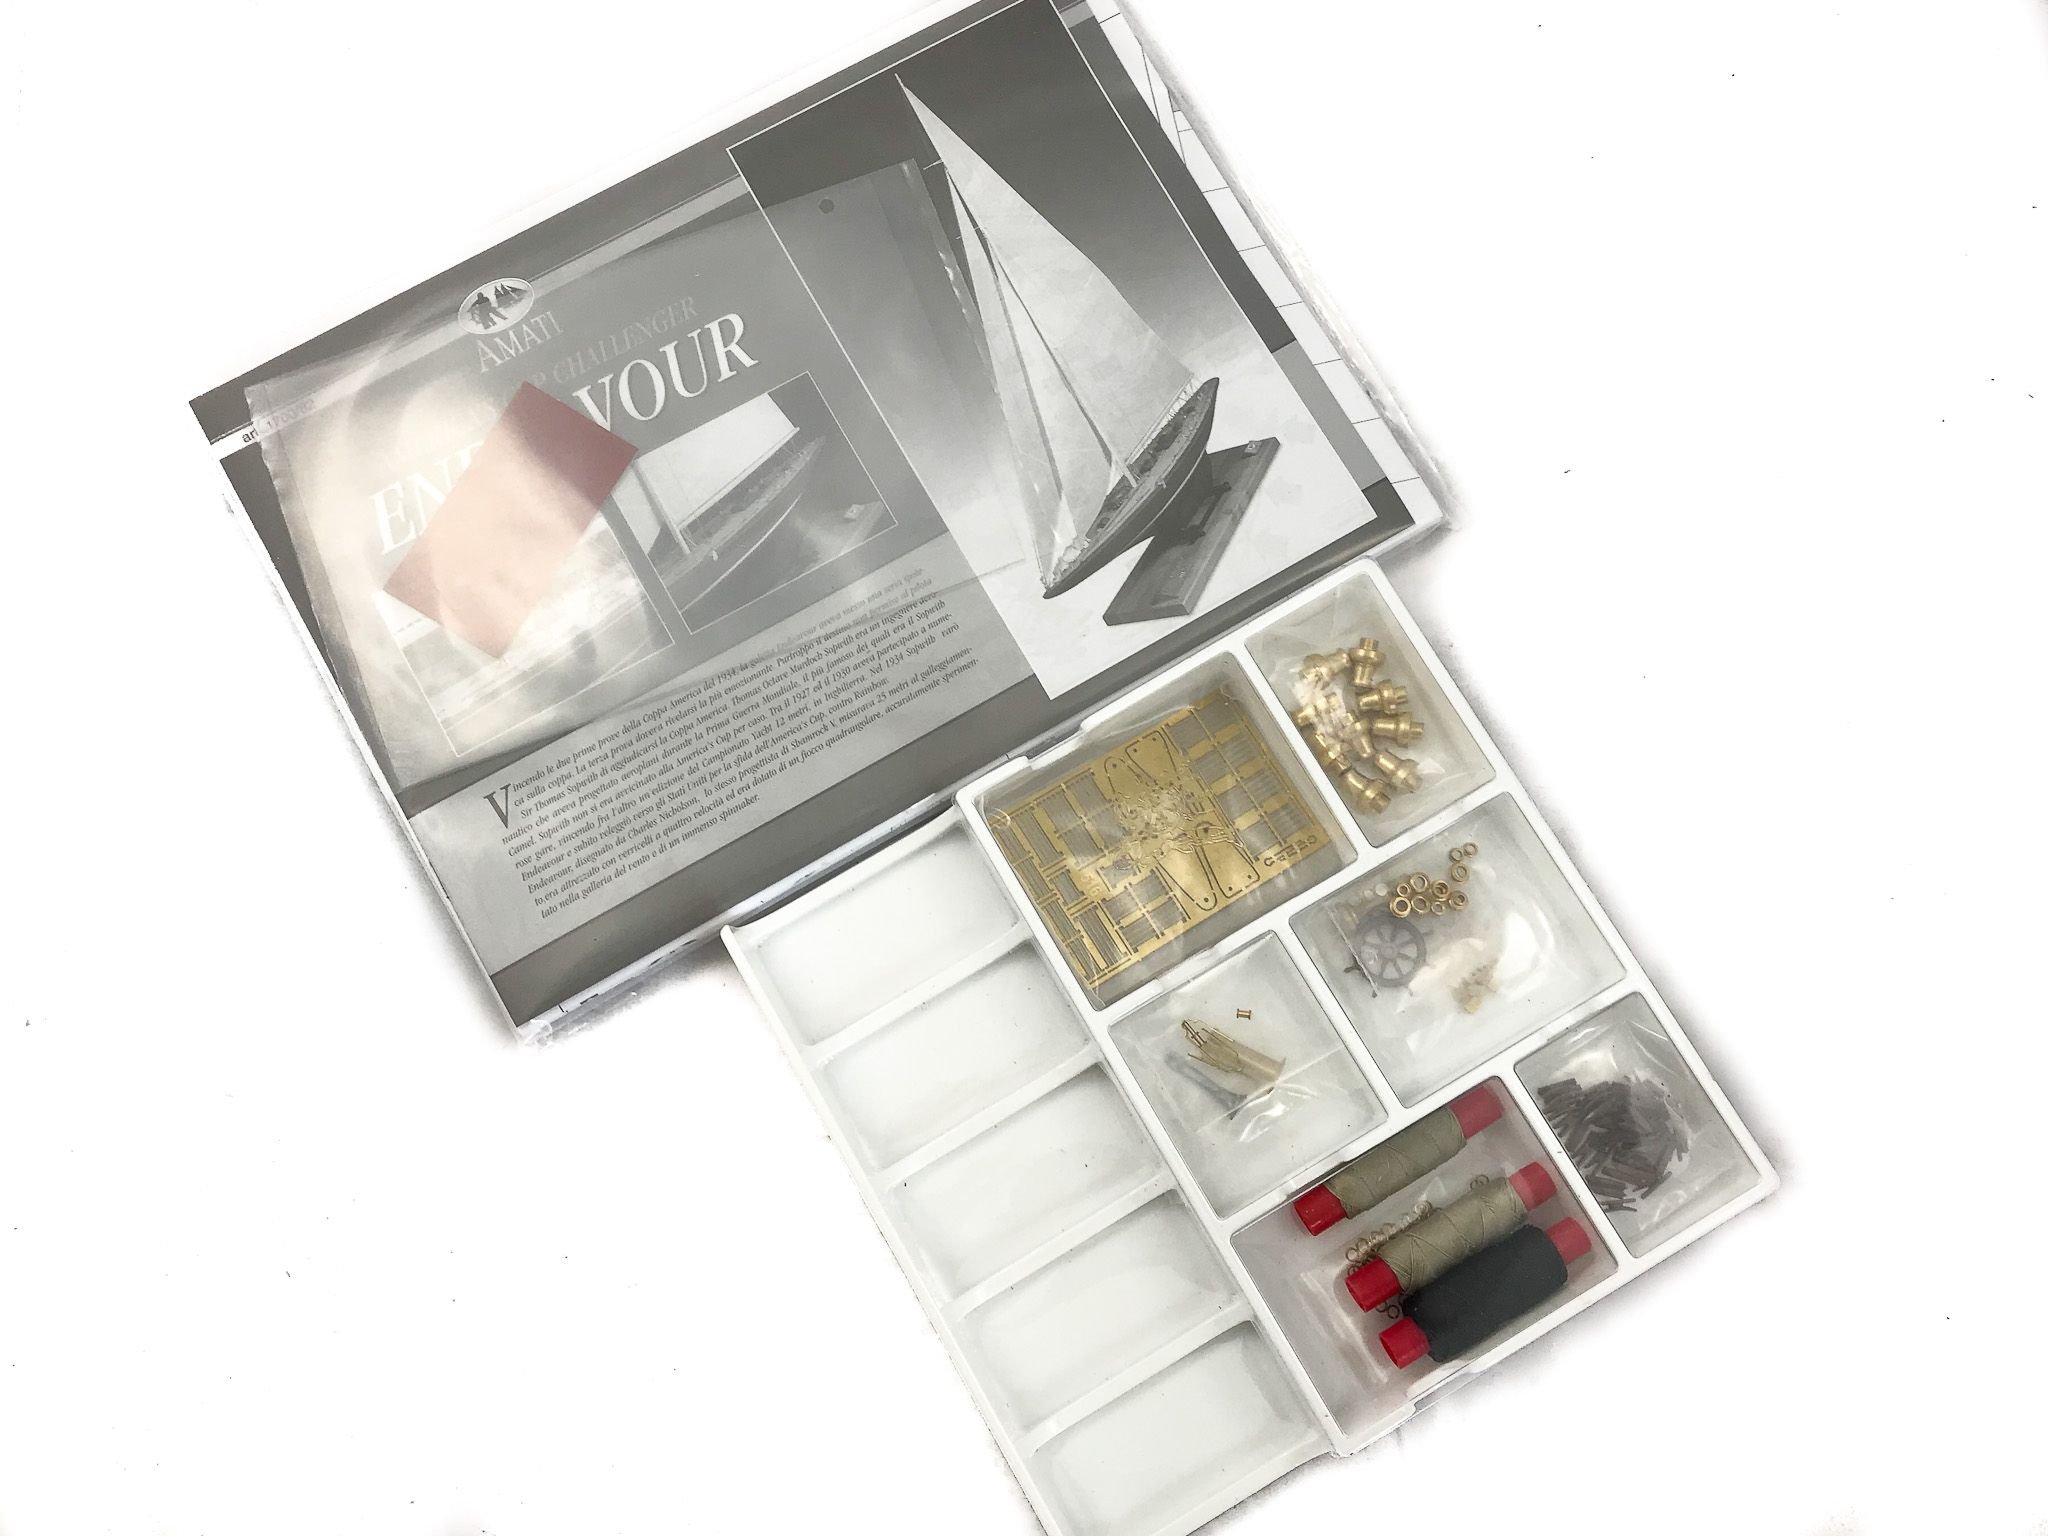
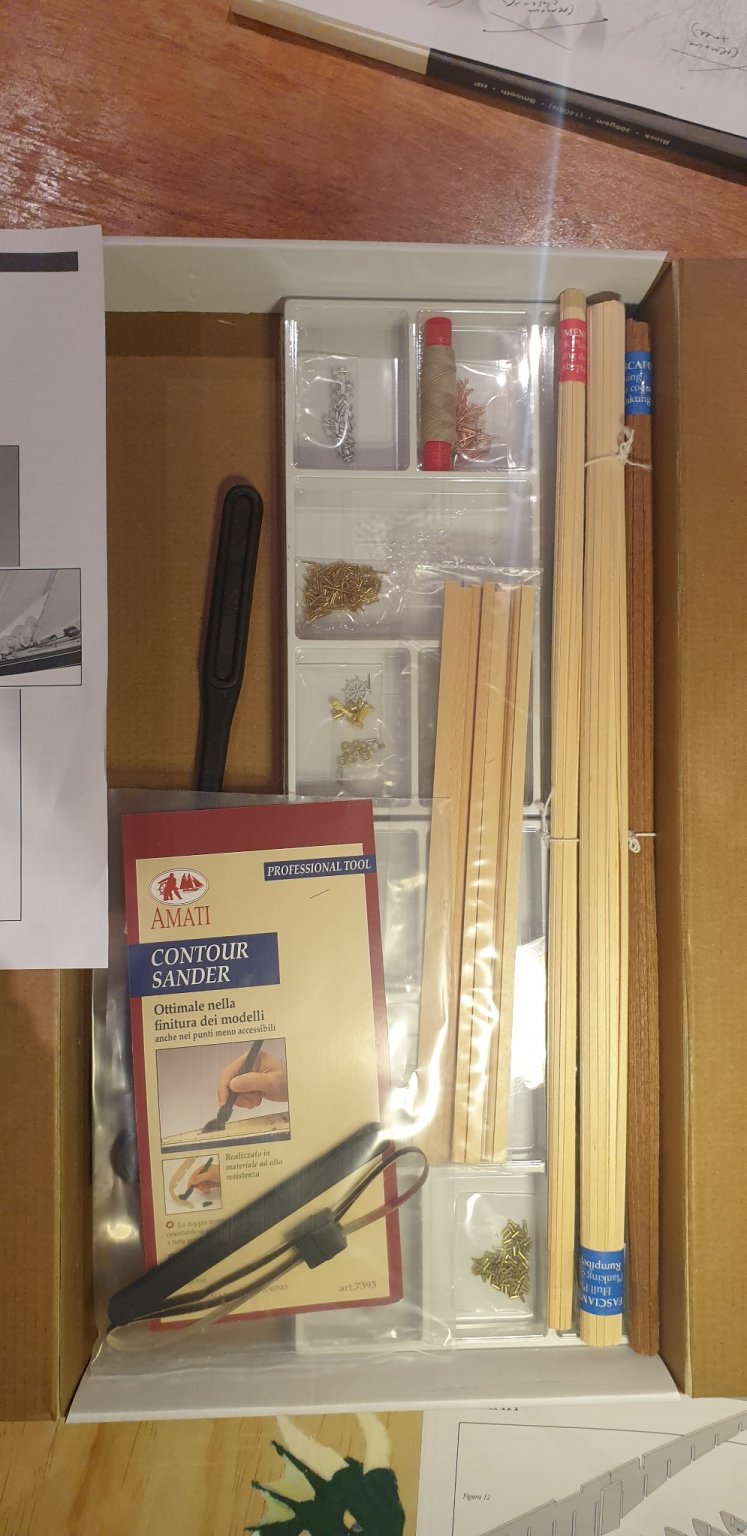
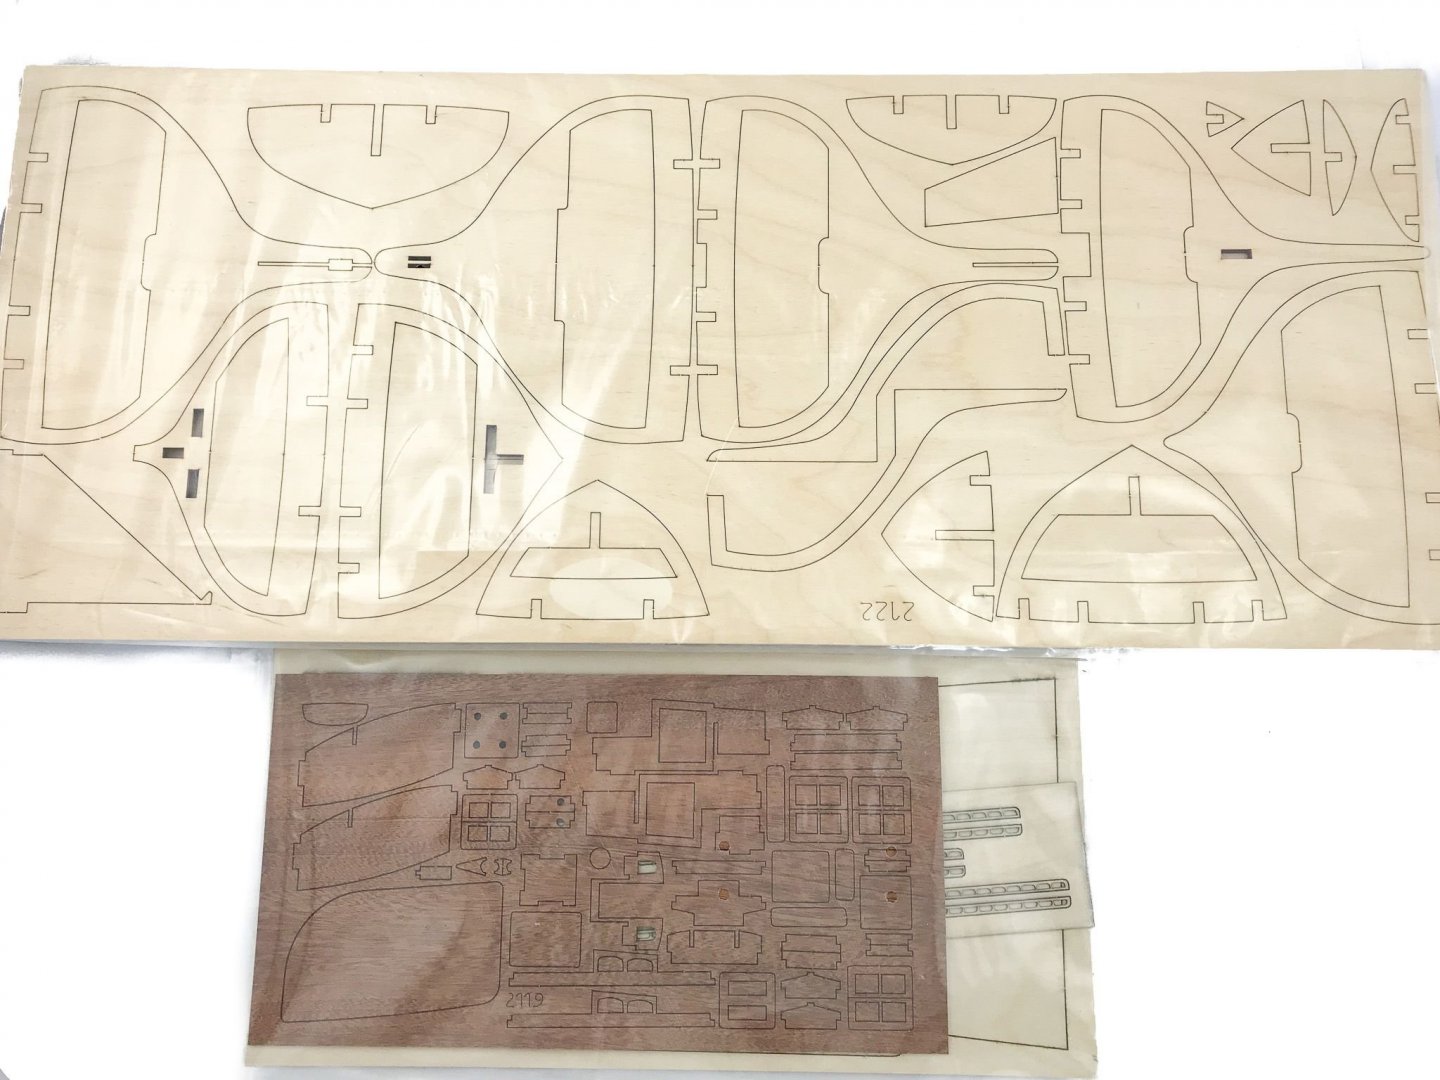
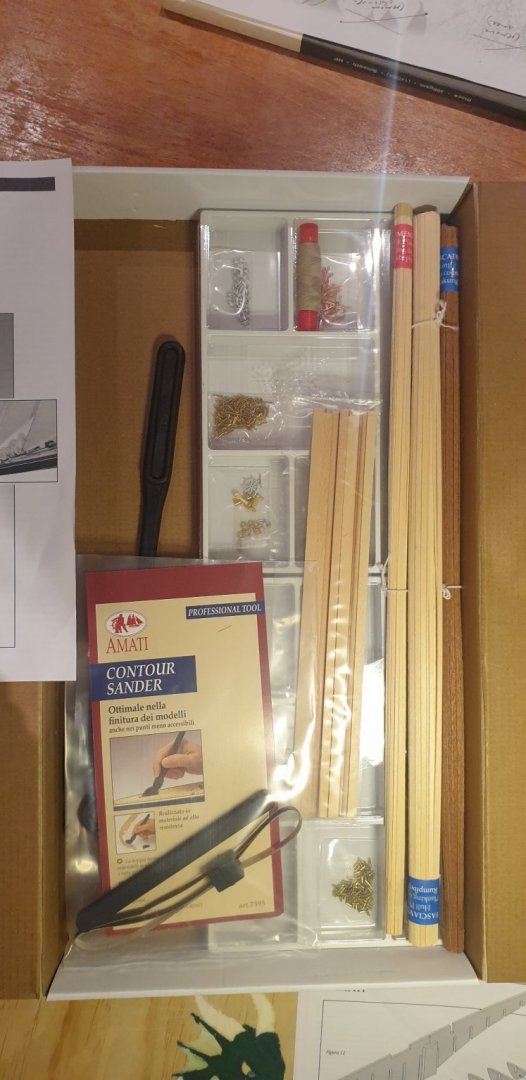
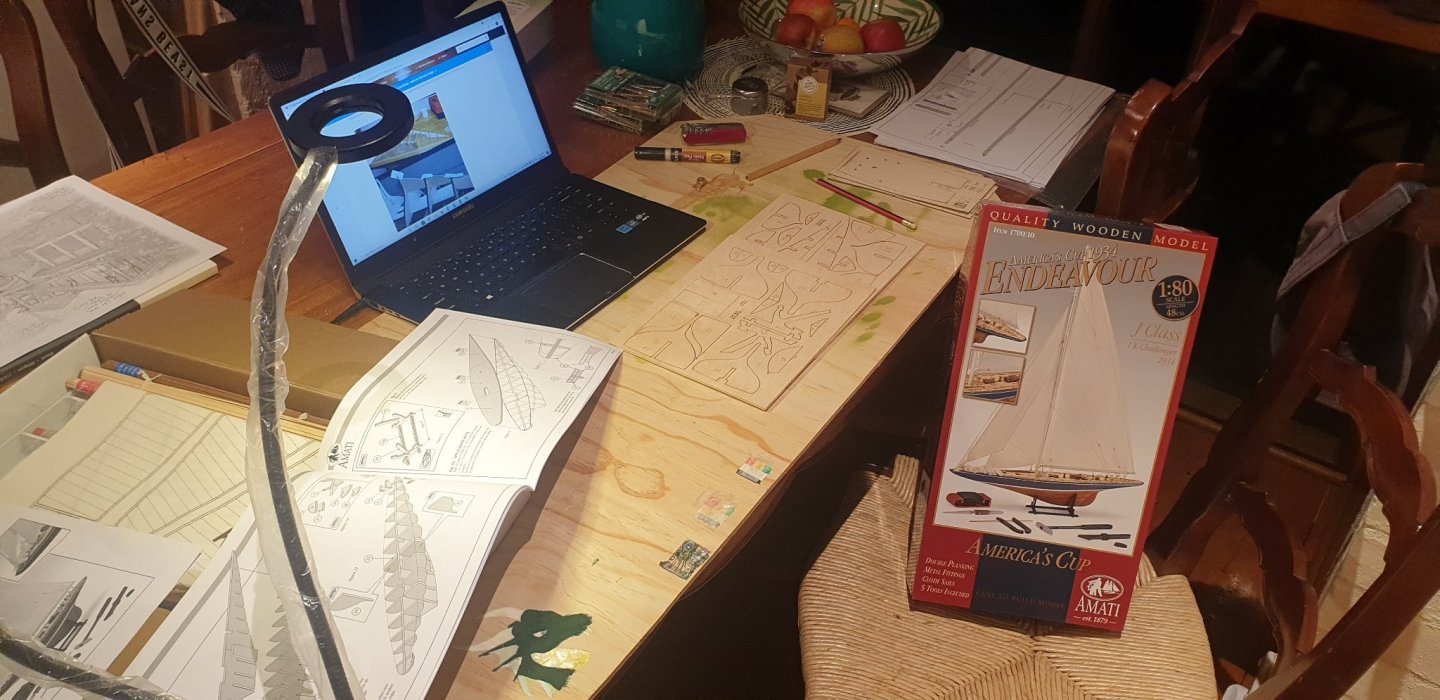
 We're in the midst of an epidemic and my wife asked me what I would like for Christmas. I replied that is was sick of watching the ubiquitous boxed-sets on the telly and I always used to like building model kits. We both like sailing and we do have a 'nautical themed' lounge and conservatory with various ornaments and pictures depicting nautical themes. With an impending 3rd lockdown in the UK commencing in January it seemed like an excellent idea to get my teeth into and maybe re-kindle skills learnt from my woodwork 'O-Level'? Christmas day arrived and I was presented with a massive box, which I unwrapped and was presented with the Amati kit. Inspecting it revealed the huge, full-size plans plus the laser cut ply pieces. Reading theinstructions quickly revealed that they were aimed at a seasoned model boat builder with terms, processes and procedures that are alien to me! The internet and Google beckoned and so I started on my journey of building this monster! Here are some pics of the box, plans and contents:

-
Dear forum members, I‘m a newbie both in this forum and in building models as well. I‘d like to tell you about my first approaches as well as asking for some tipps. When my wife had the idea that two sailboats would be a nice decoration I bought a ready assembled model of a J Class Yacht and was totally disappointed about the poor quality. So I found the kits of Amati‘s Rainbow with a resin hull and Endeavour with a wooden hull. With a first glance at the pieces I began to foresee on which adventure I had embarked. I hope you don‘t say „oh no, not another Amati J Class kit“! Since I wanted t o have a good edging of the deck, I built a bow and stern on my own and painted it in white together with the outer deck planks. After that the further planking with a scalpel and 600 sandpaper. Unfortunately I was not able to fit it together absolutely mirror-inverted.

-
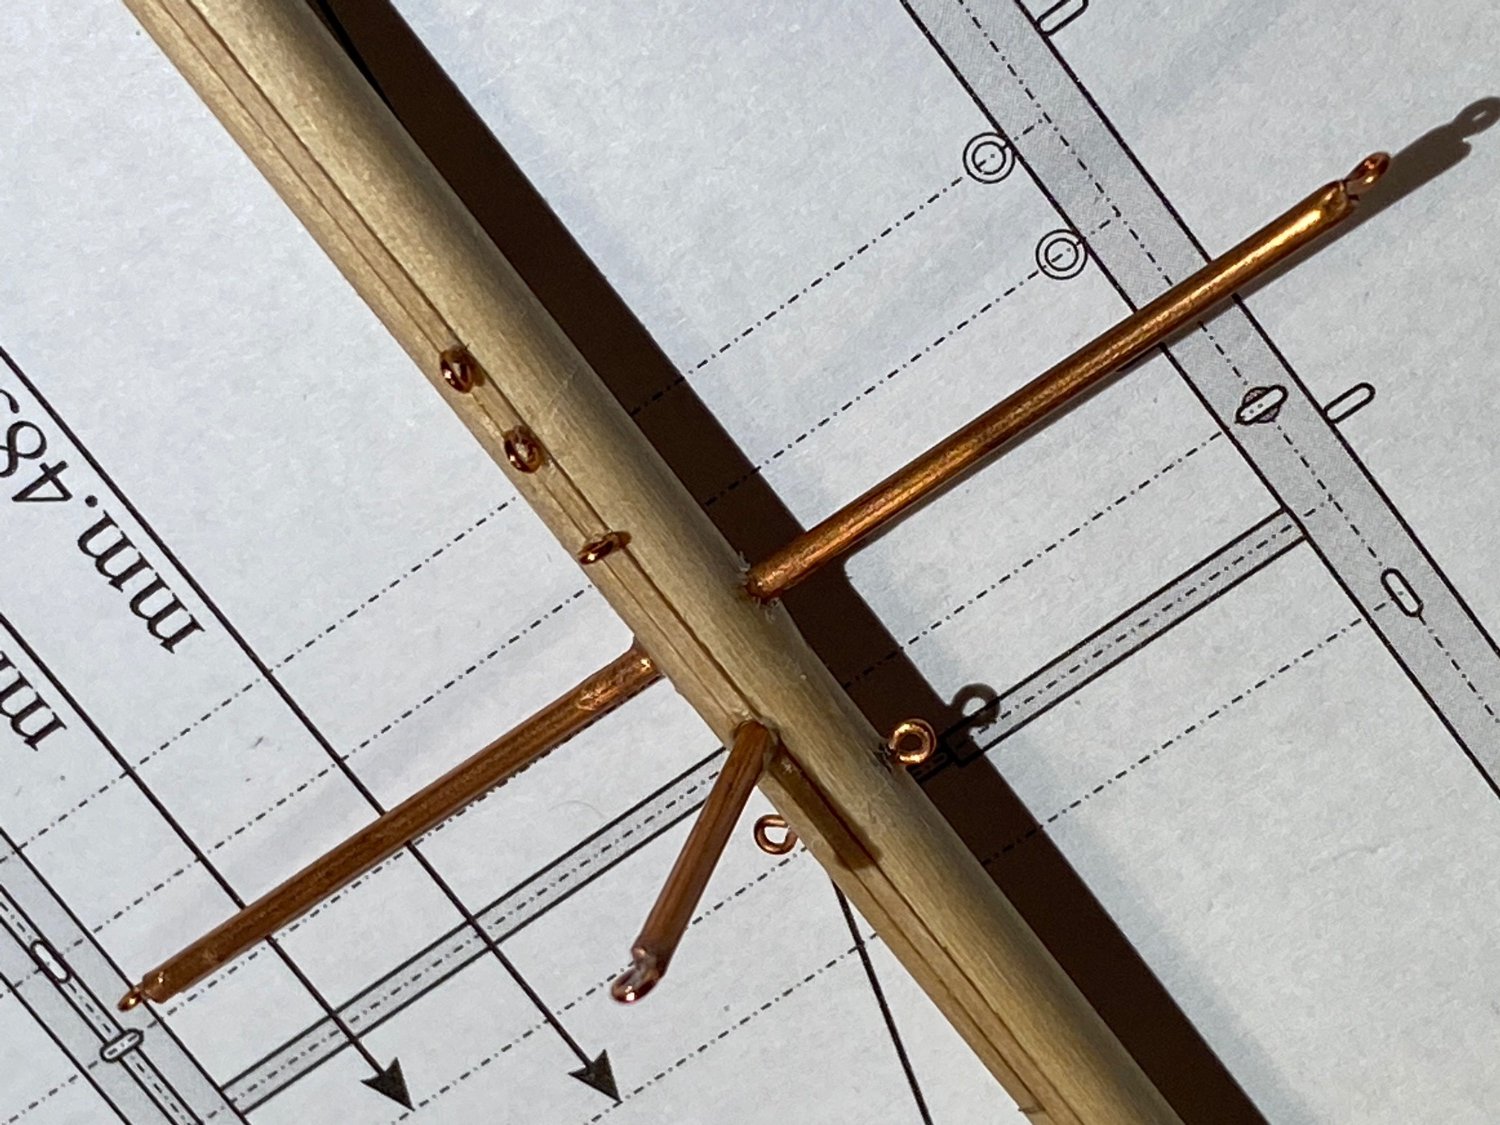
 I'm starting my second wooden build. I've have been eying this build for a while, but always looked at the 1:35 kit. After seeing how big the 1:35 is (4 ft long 5 ft high), I saw Amati offered a 1:80 that was plank on frame also. So, that is the route I went. I see there is another build of this scale active (Henry James) which hopefully we can help each other. The drawings and instructions are not near as detail as the MS Bluenose, and are not in English, but hopefully I can follow along well with the experience I had from my first build. I'm looking forward to the painting of the hull. The combination of natural wood, white water line and blue should look fantastic if done right. I all boils down to the second layer of planking at the bottom since that will be seen. For some reason they show the first step of assembling the main mast. I'm skipping that and going straight to the keel assembly. Anyway, here are some kit pictures.
 -
 Hi, This will be my first model ship build. I first spotted the 1:35 scale Amati model of the Endeavour which got me interested in the idea of making a model boat. However, I was concerned it was probably too ambitious for a first attempt. Having read a number of the build logs on this site on the Endeavour I decided to go with the 1:80, and if I enjoy it then maybe one day I'll tackle something larger. We're in lockdown at the moment (covid), so I've been ordering everything through post and am still without a few key tools, but the kit is here and I'm going to get started! The kit comes with a sanding block, a small hammer, large tweezers, a clamp and smaller sanding stick for smaller grooves. I've a tube of Selleys Interior Wood glue that dries clear, and a box of assorted elastic bands and bull dog clips and a scalpal. This should be enough for now. Looking forward to any advice/tips/encouragement as I go! Thanks, Brendan
-
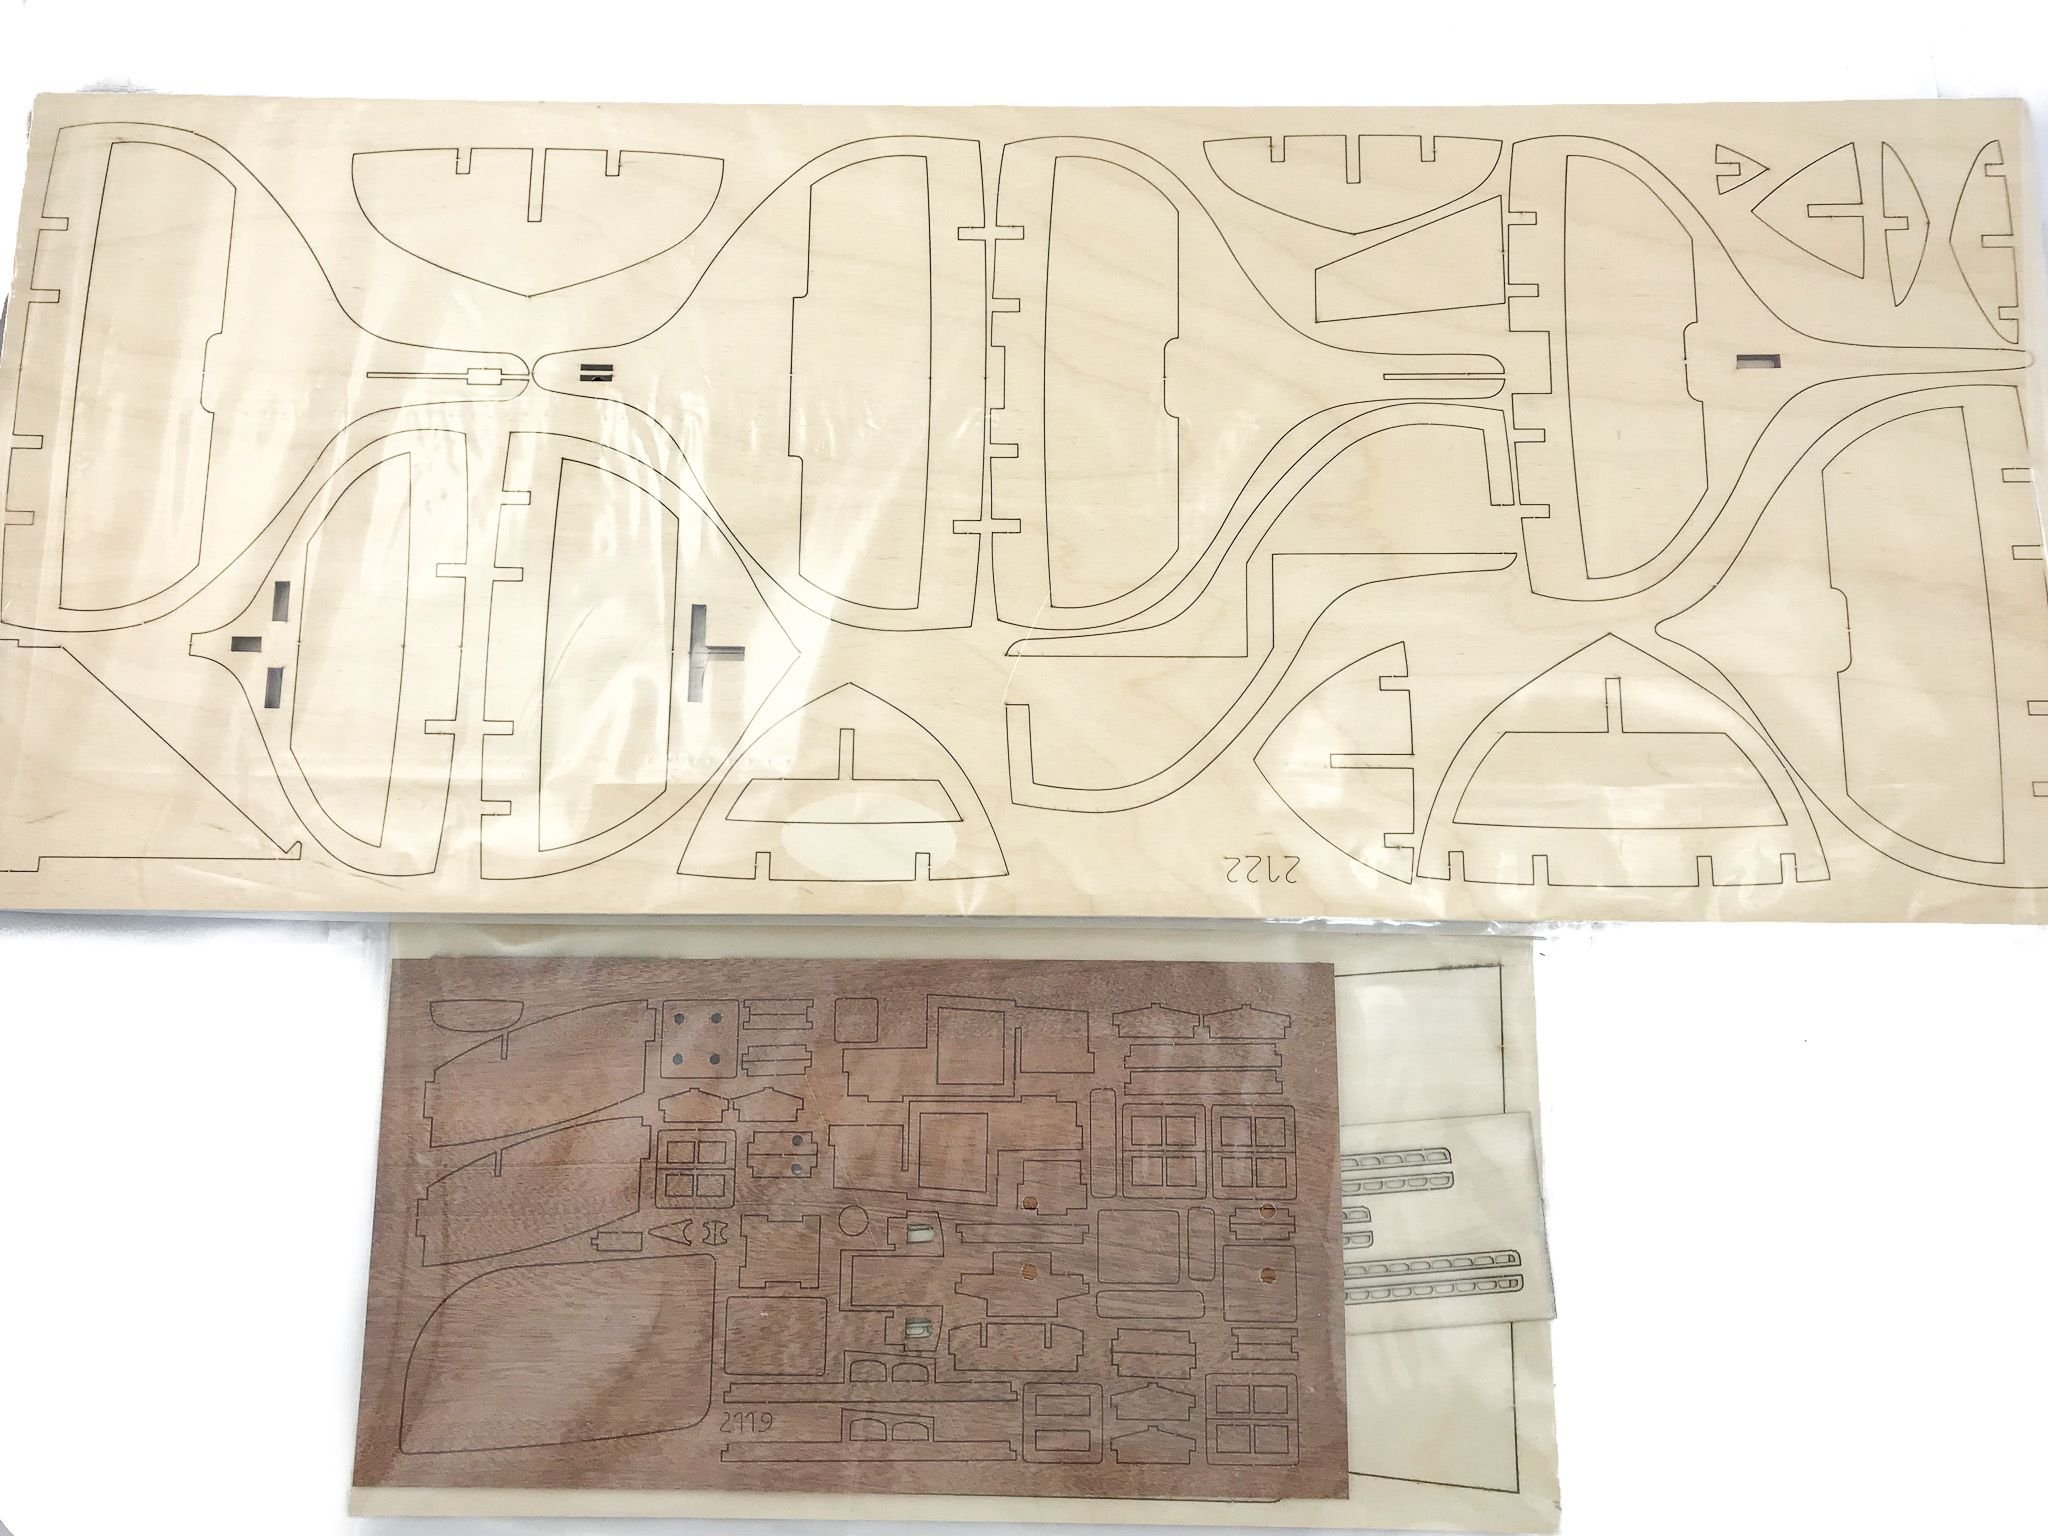
 Starting this thread makes me feel like a teenager writing a book called, "How To Live Your LIfe." The kit finally arrived late today. It's late and I didn't want to open everything up so I just set up a quick photo shoot of the contents So far, the only problem I have is with the instructions. You are probably asking yourself, "Because they are in Italian?" No, because the print is so small! The last time I built a model ship was in 1965 and it was plastic. This kit is made like an Oyster compared to that. Since I can't afford an Oyster, this will do. And I'm gonna to need a bigger work table.
- 562 replies
-
- 16
-
-
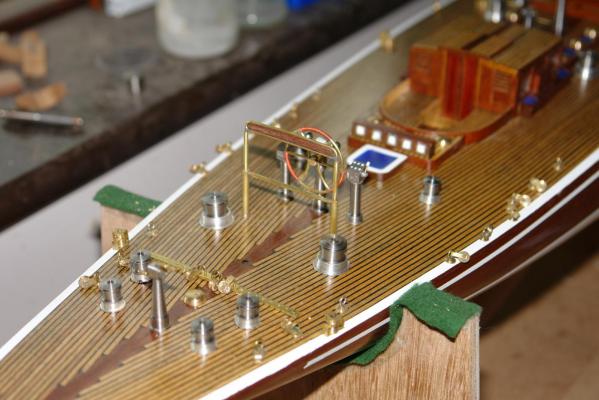
 Having spent a number of years scratch building HMS Cornwall (Type 22 Frigate) at 1:96 scale I felt I wanted to tackle something a bit quicker and easier. I also wanted a model that provided the opportunity for enhancing the kit to create something a bit different from the norm. After a week or two trawling through the range of kits on offer I decided to build Amati's Endeavour at 1.35 scale. Although the kit features Endeavour in her 1934 guise I decided to model her as restored in 1989. To do this I have relied heavily on the web based photographic resources. The kit was a Christmas present from my kids and when finished my Daughter has claimed the model for her bay window. The building of Endeavour has been covered in detail in a number of build logs and I don't intend going over the ground they have covered so well. What I intend doing is covering some of the things I have done differently and what I learned in the process. I will start where I am now - in the middle of the build and then go back to the start, working through a series of updates over the next couple of months. Hopefully with summer out of the way I will get back to building in September and complete in time to add another kit to my wish list for next Christmas. Here are a few photographs to start the process.
- 85 replies
-
- 12
-
-
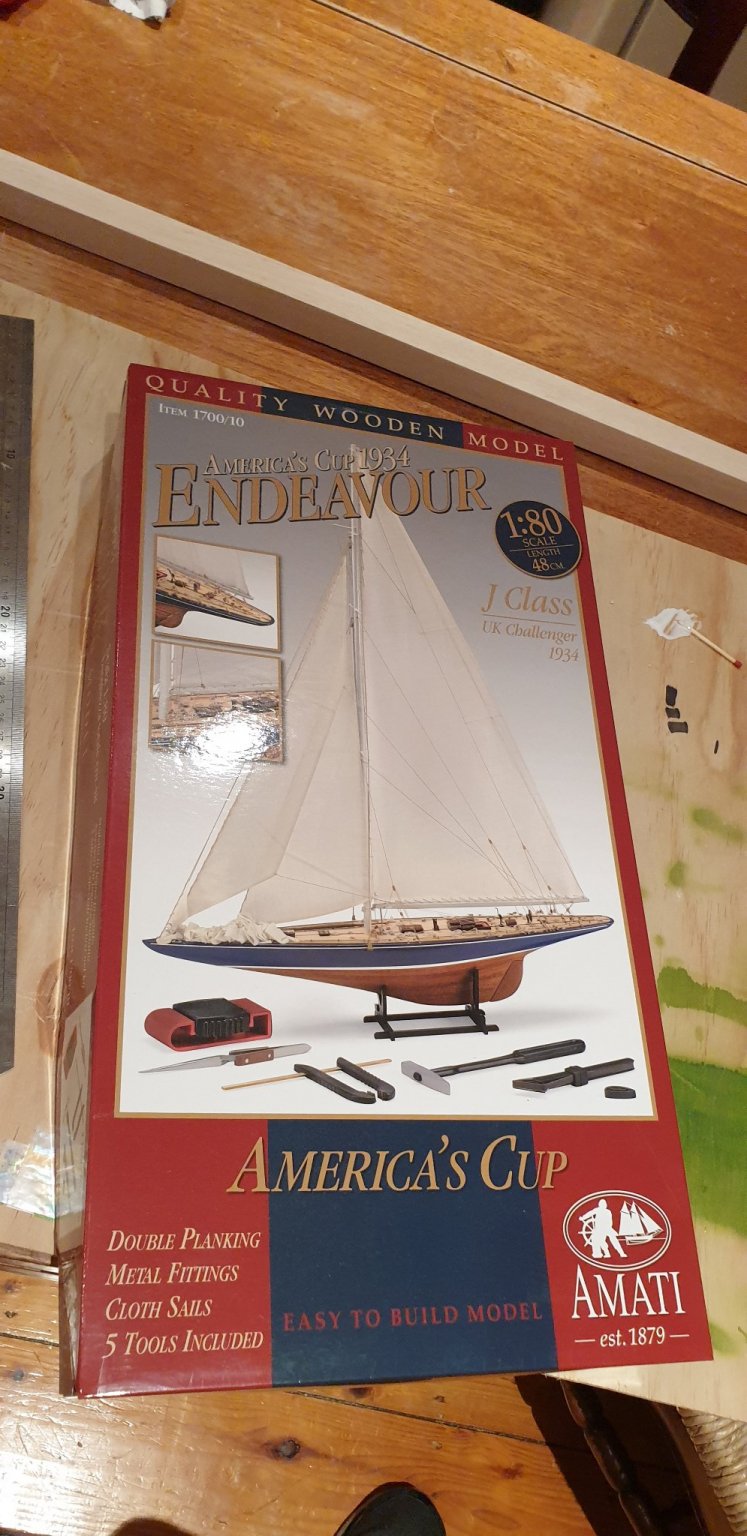
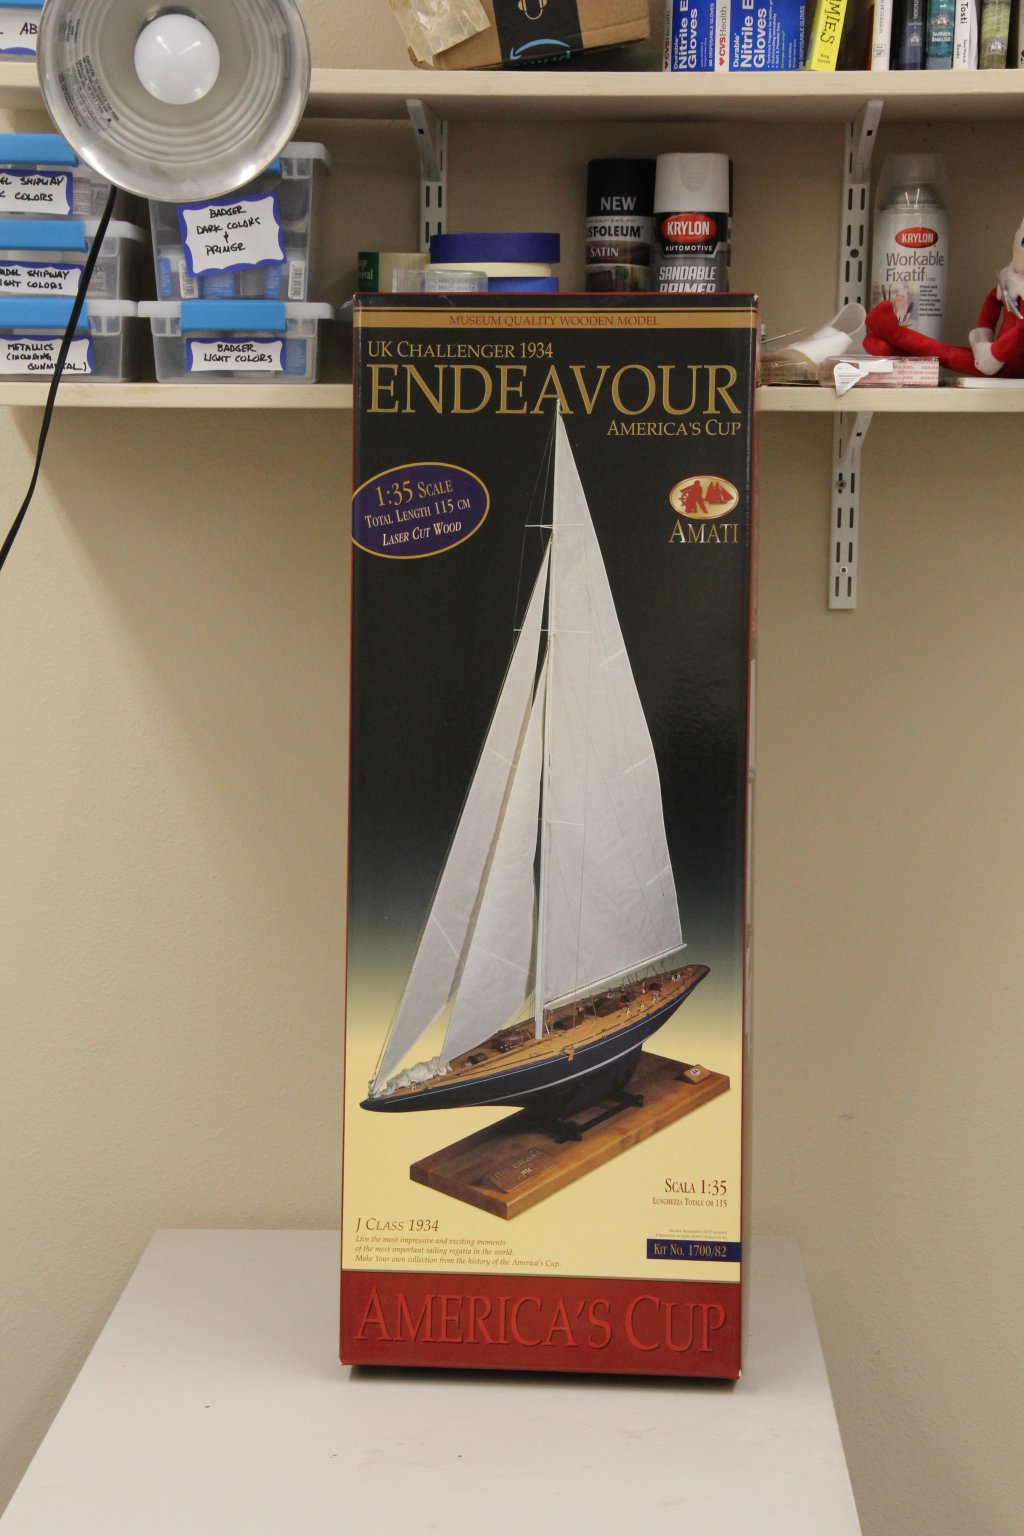
 After completing (except getting it in the case) the US Brig Niagara I decided I was "done" with square riggers (and square rigging) for awhile. I had intended to build this one to go over the fireplace in my house in Virginia (it would have replaced a "cheap" model of the 1934 Endeavour that was purchased from a model home) that is about the same size. But that house is gone and finding a home for this one will be a challenge but I will press on anyway. So here is the box on the relocated (from Niagara days) workbench