Search the Community
Showing results for tags 'niagara'.
-
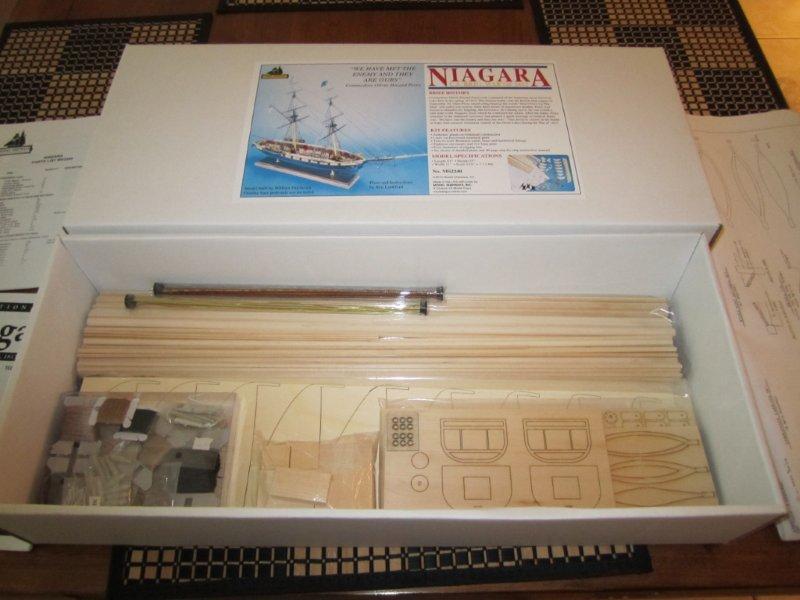
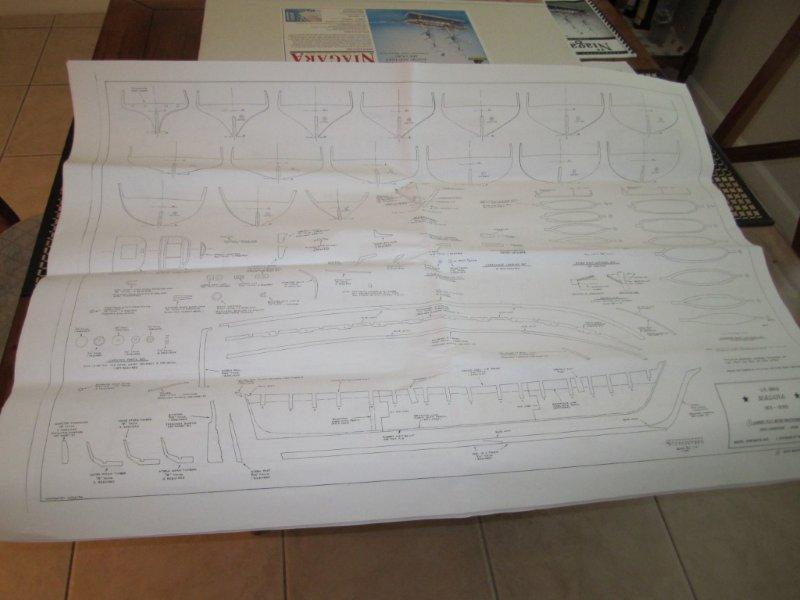
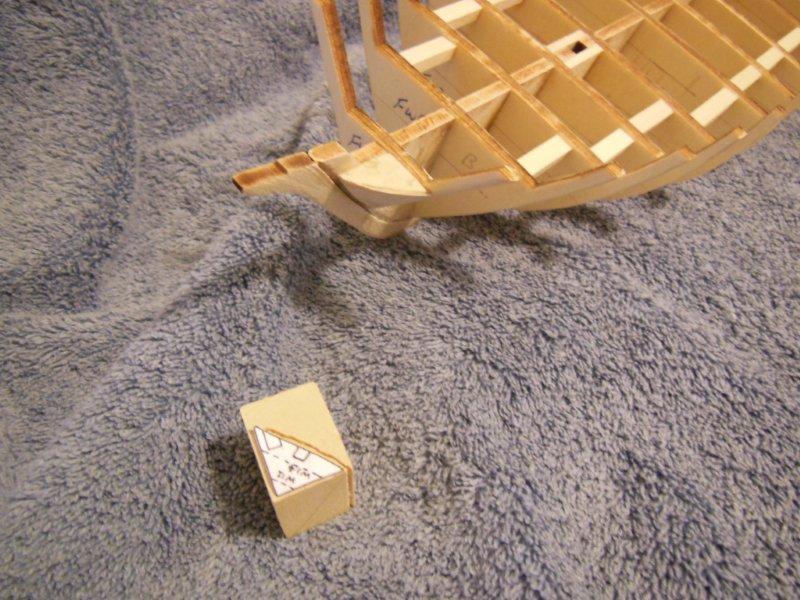
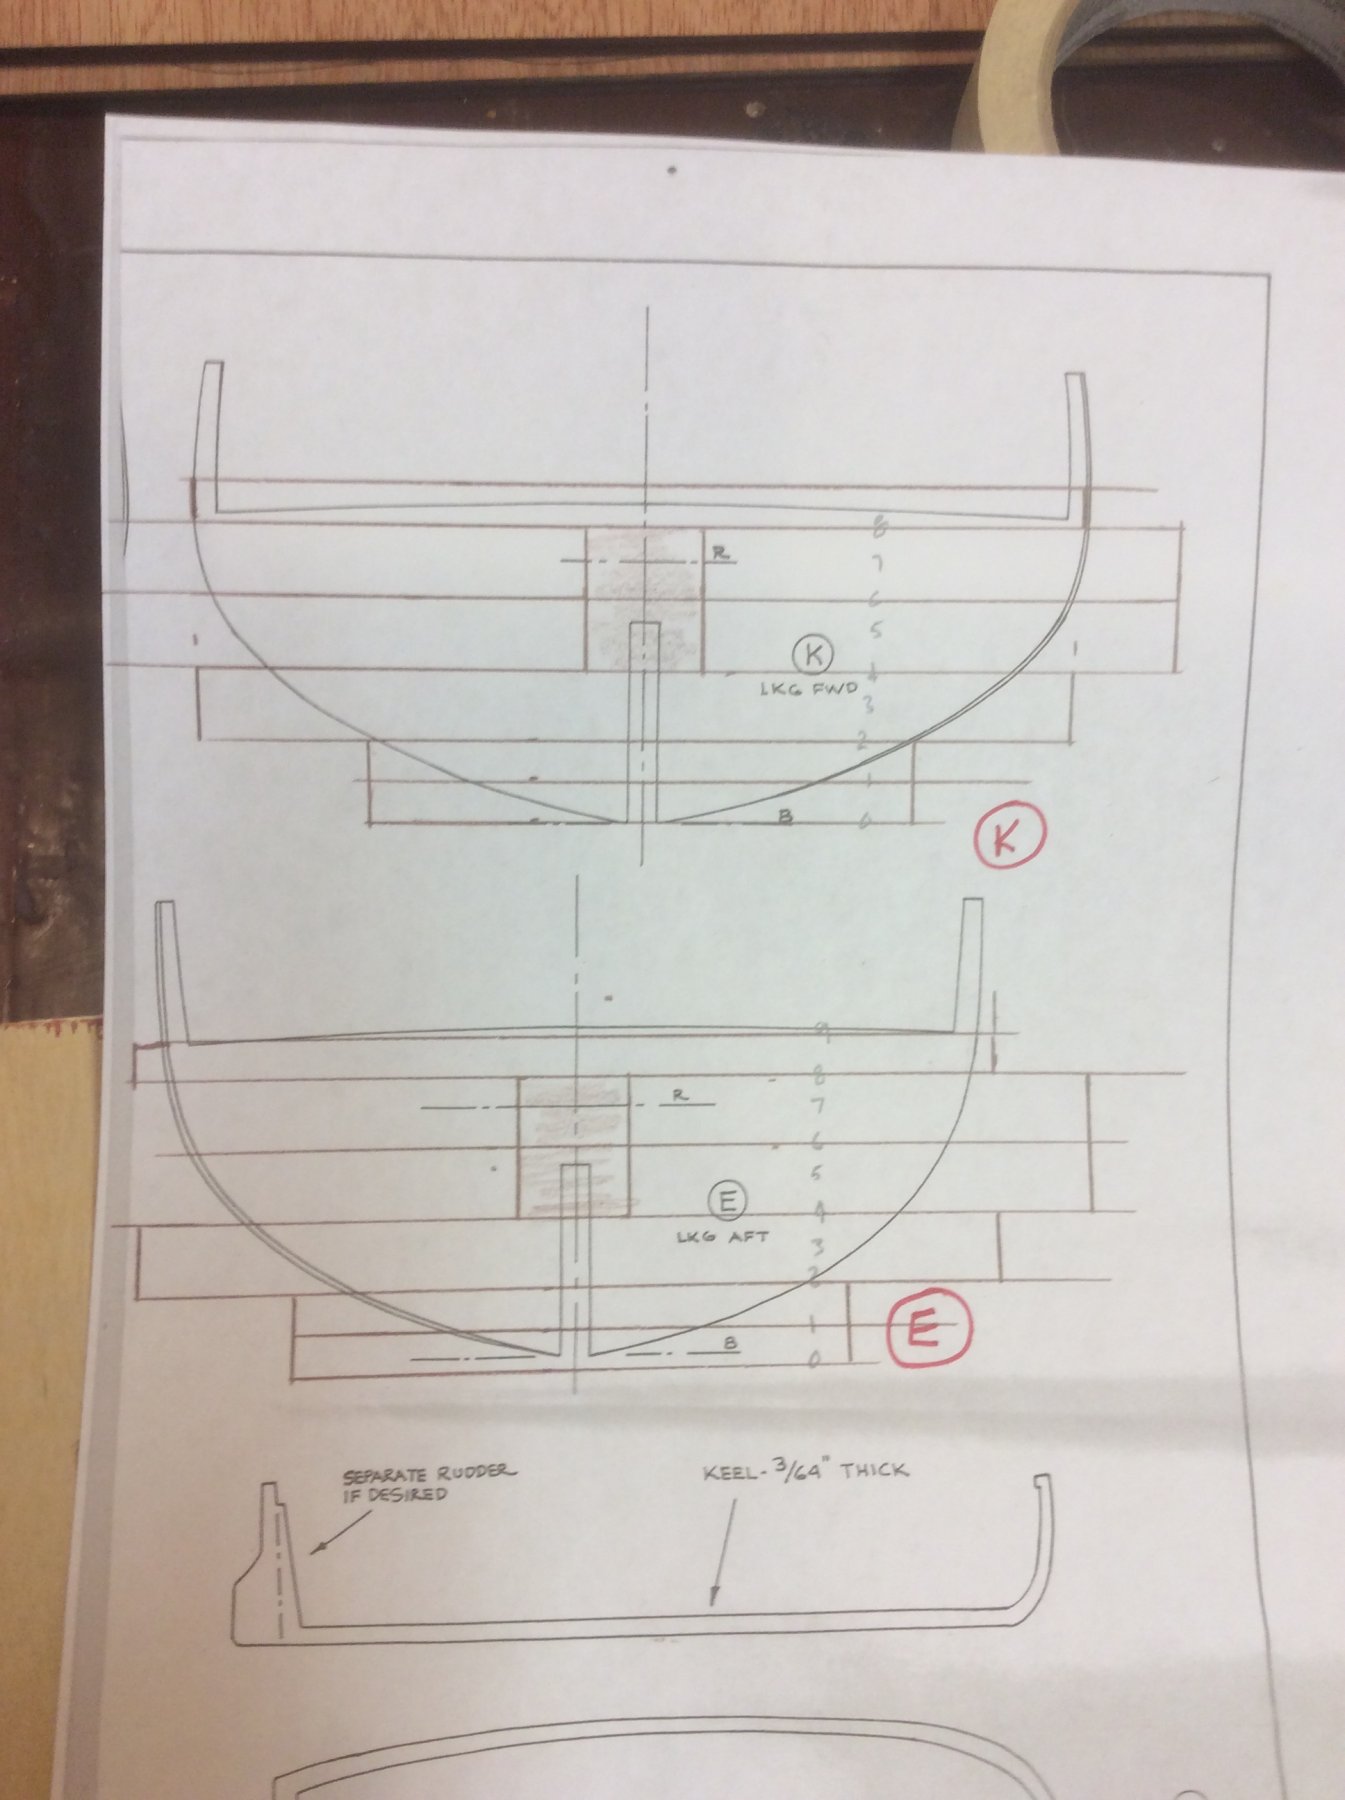
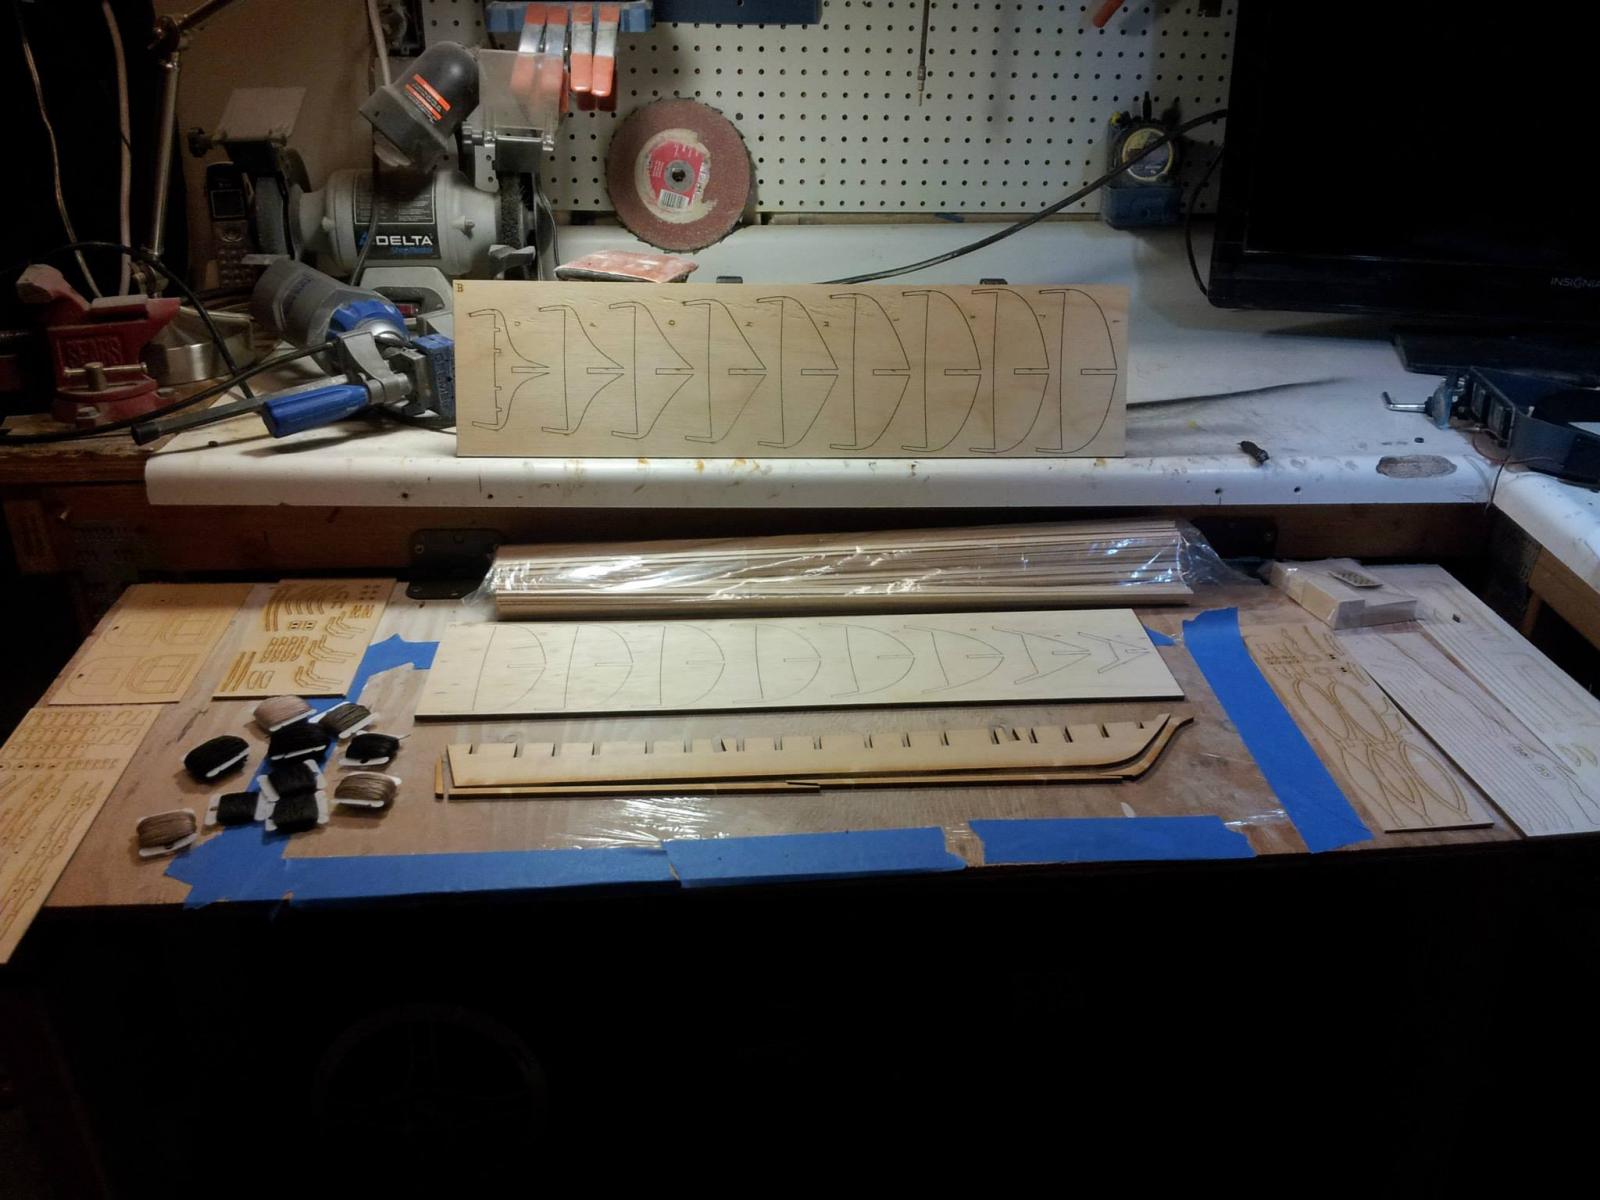
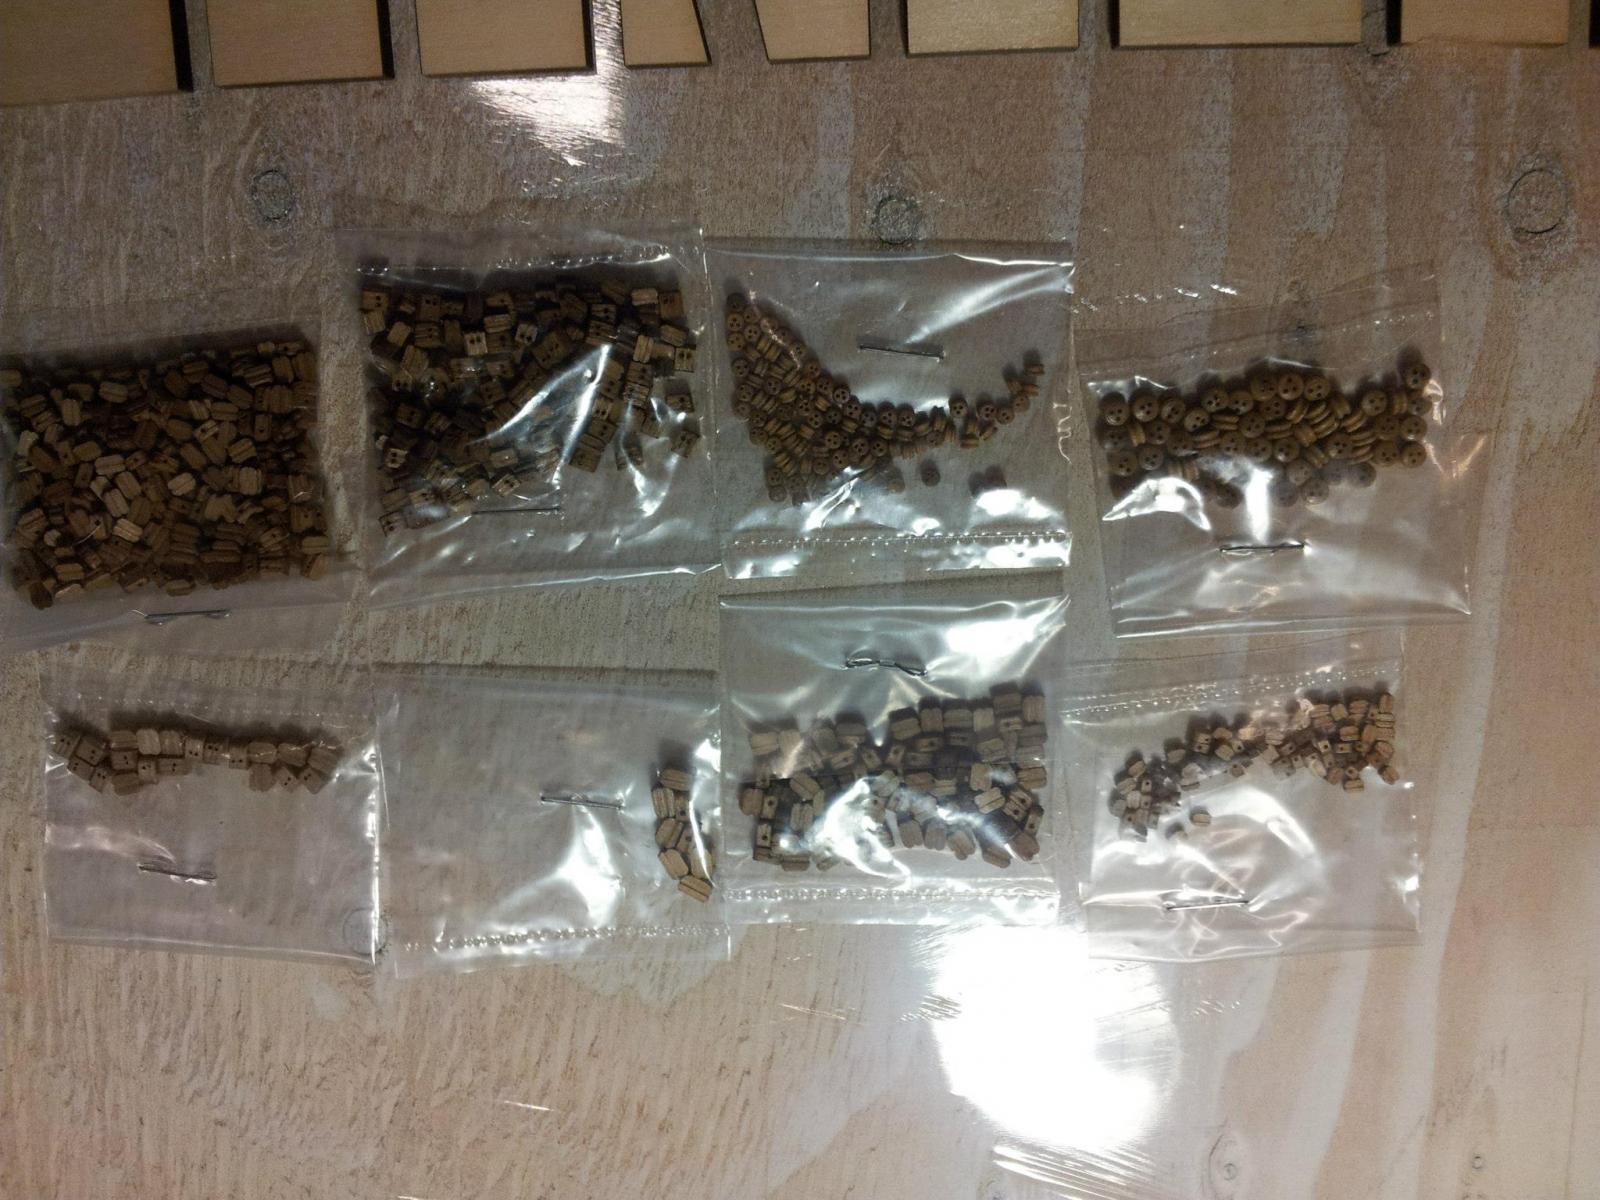
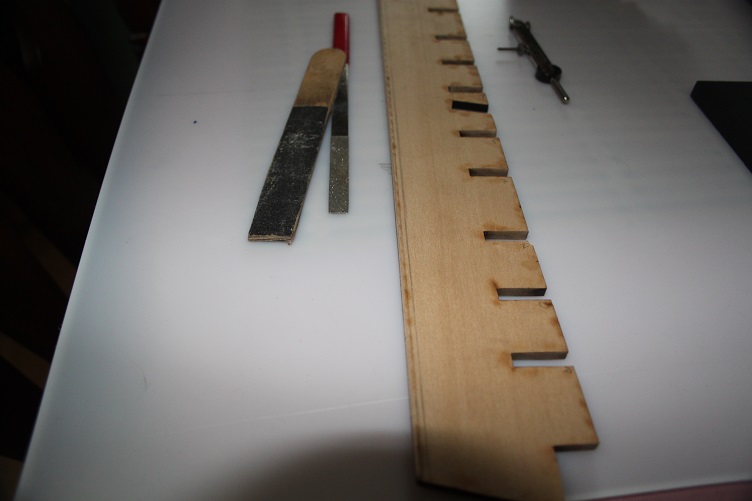
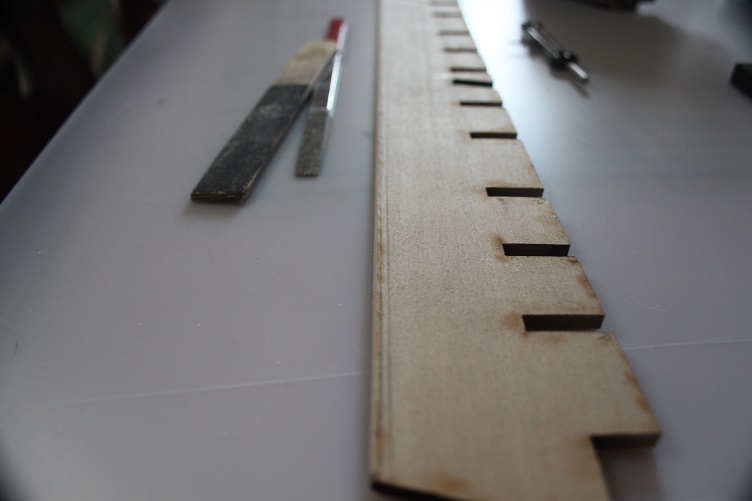
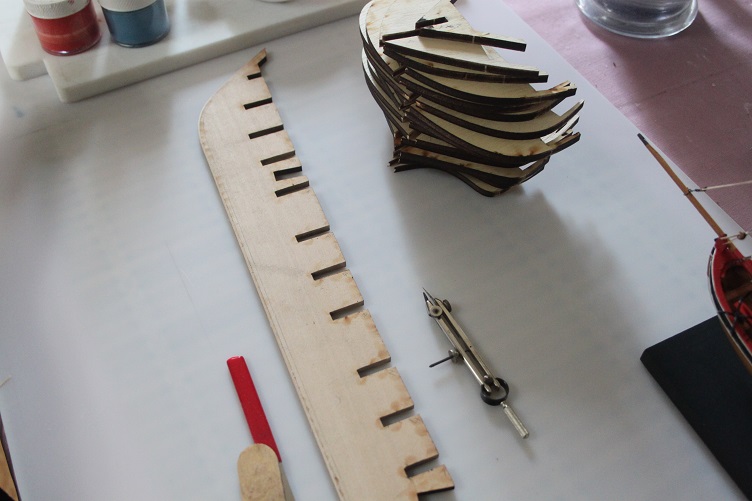
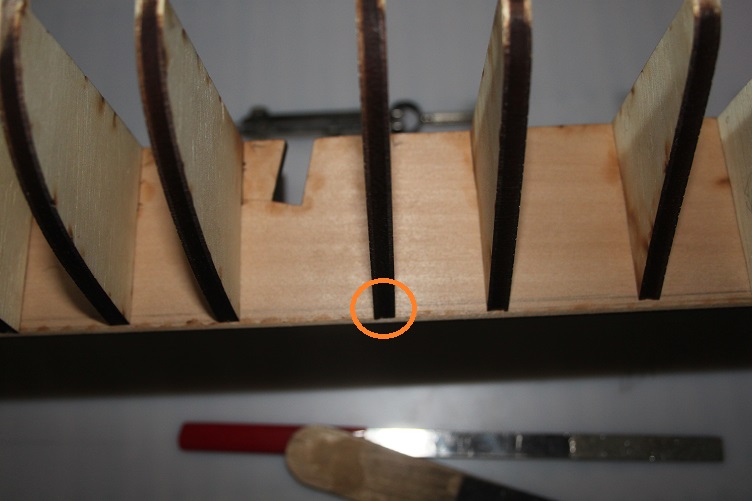
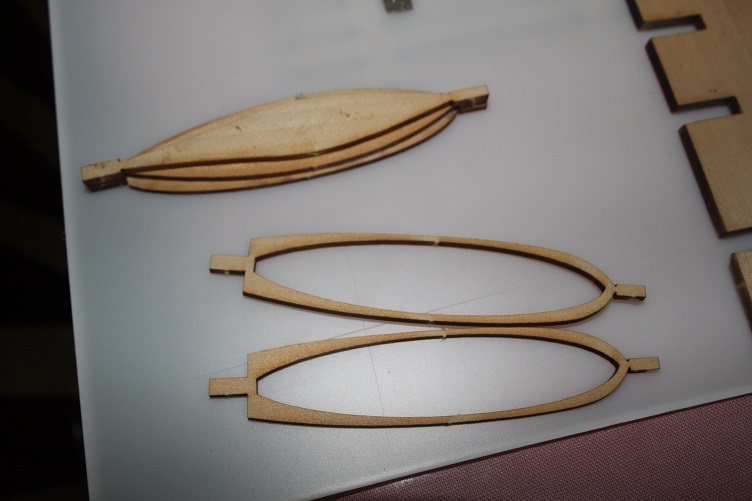
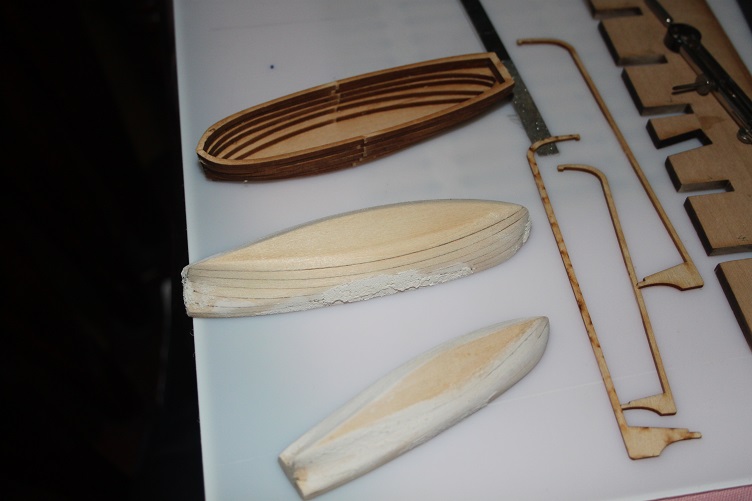
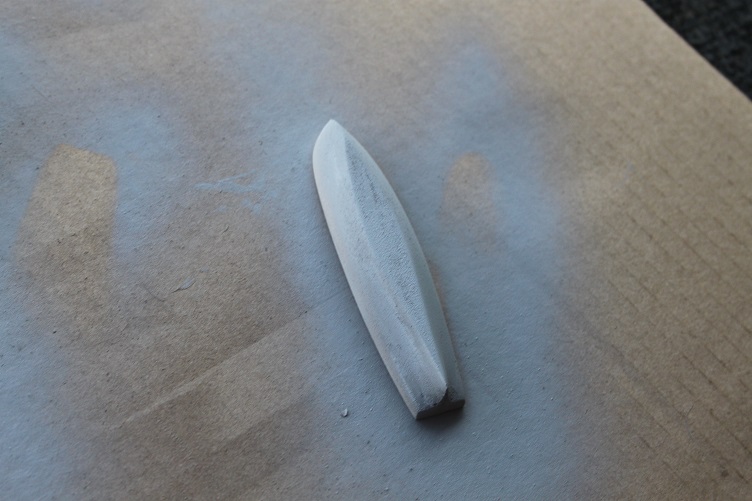
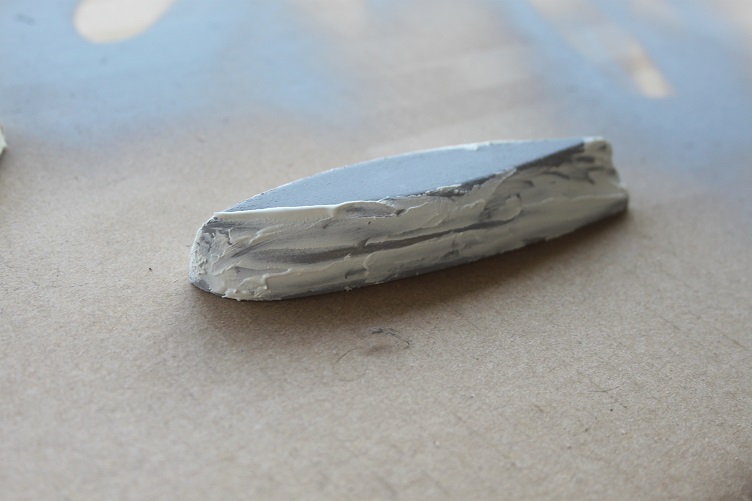
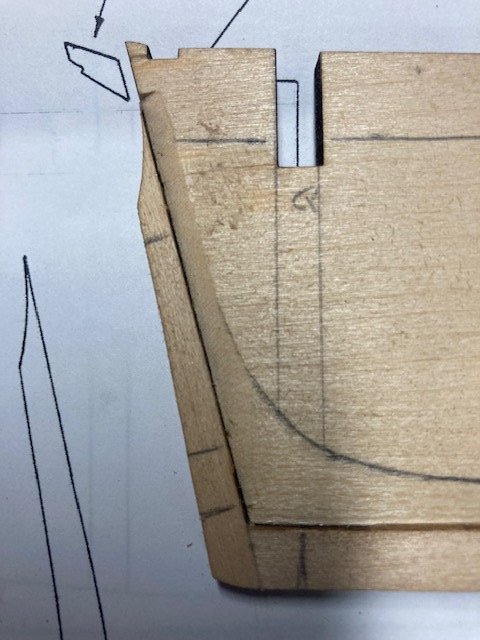
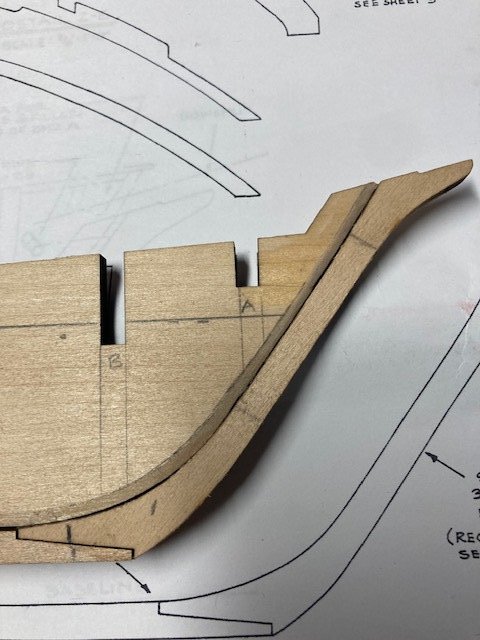
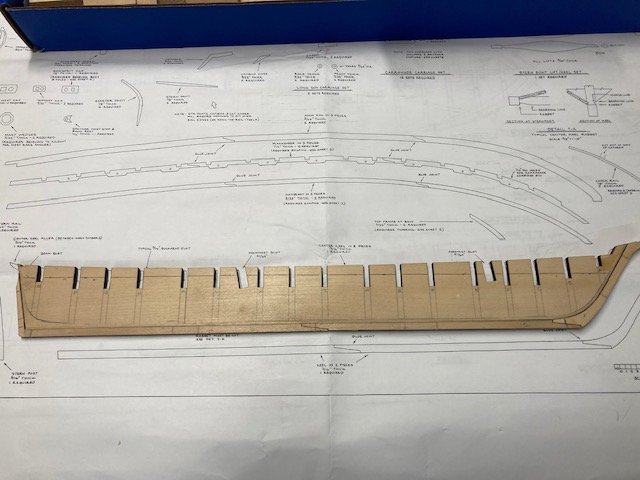
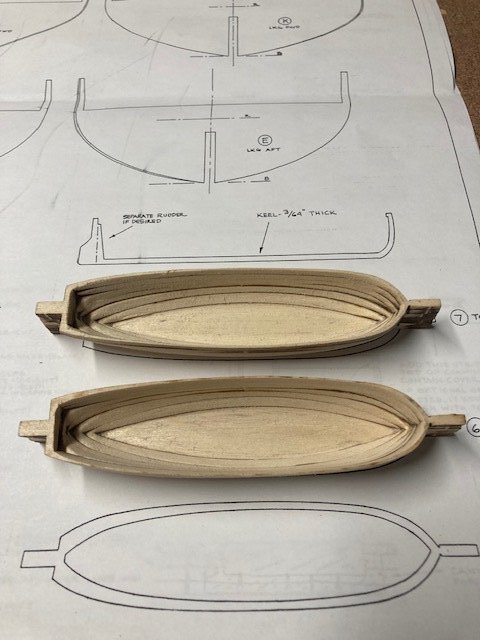
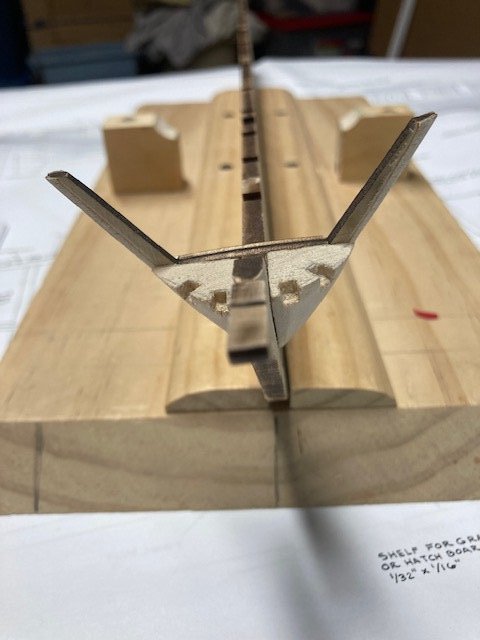
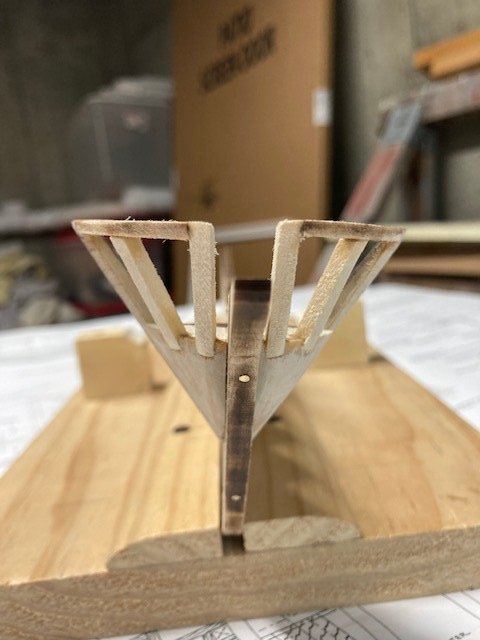
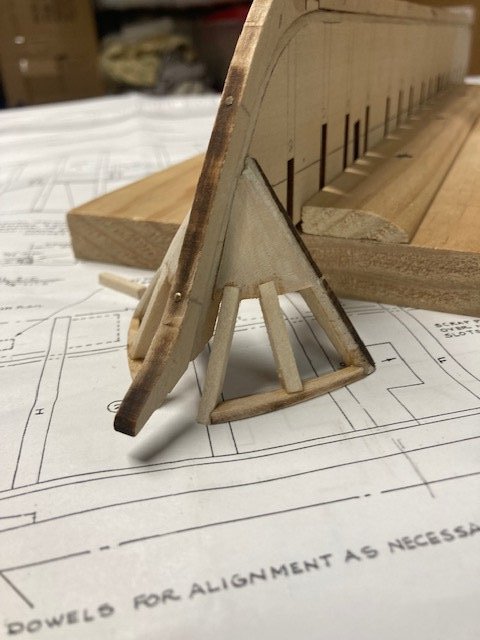
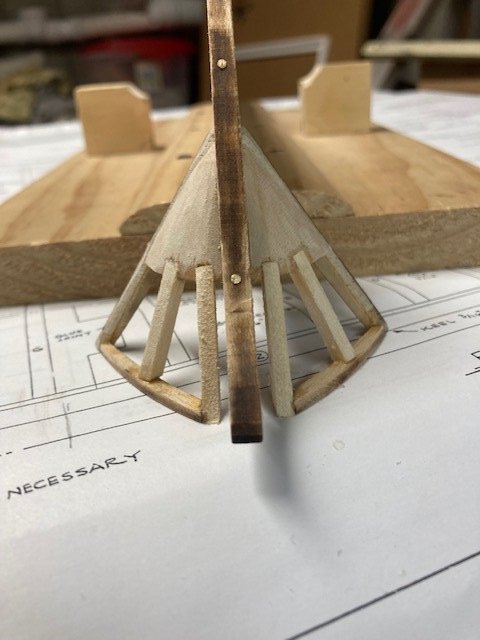
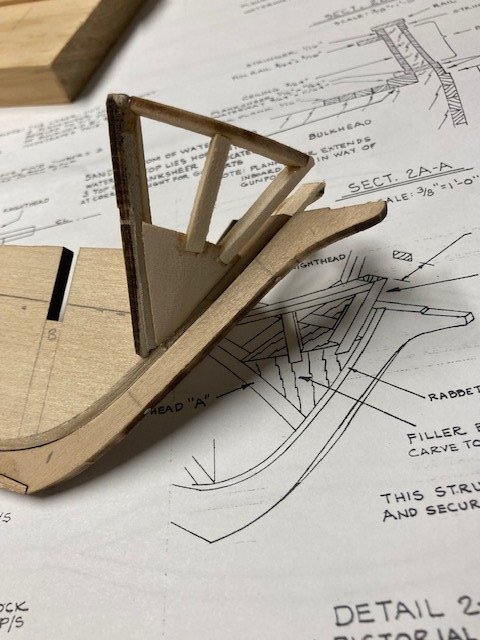
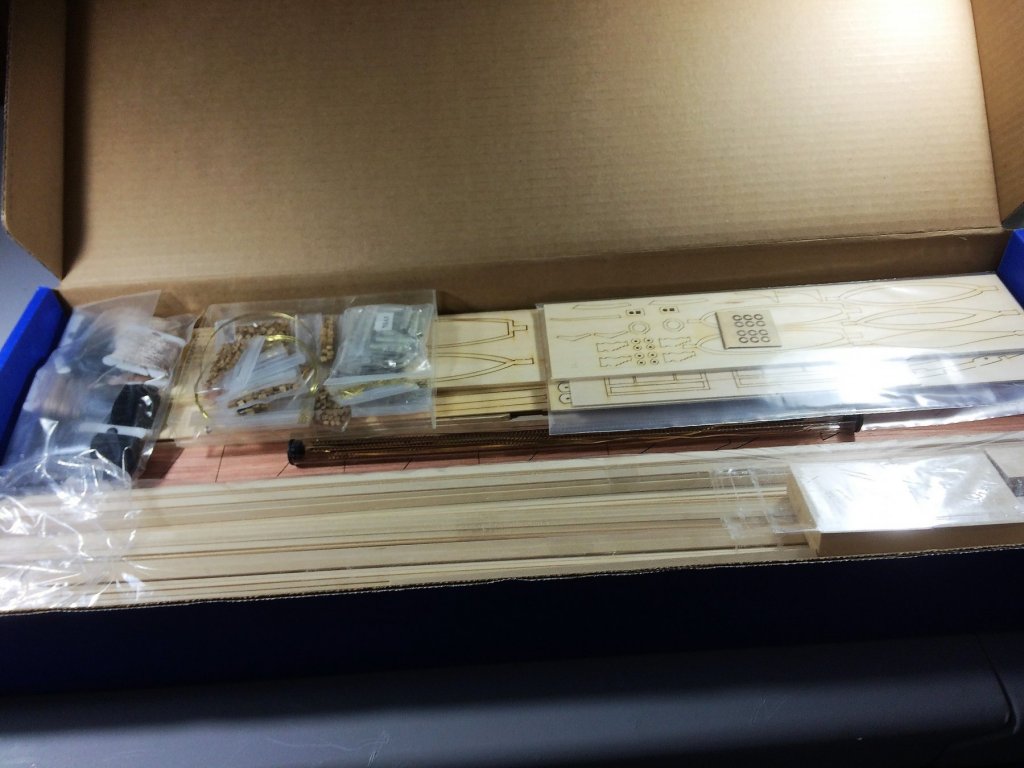
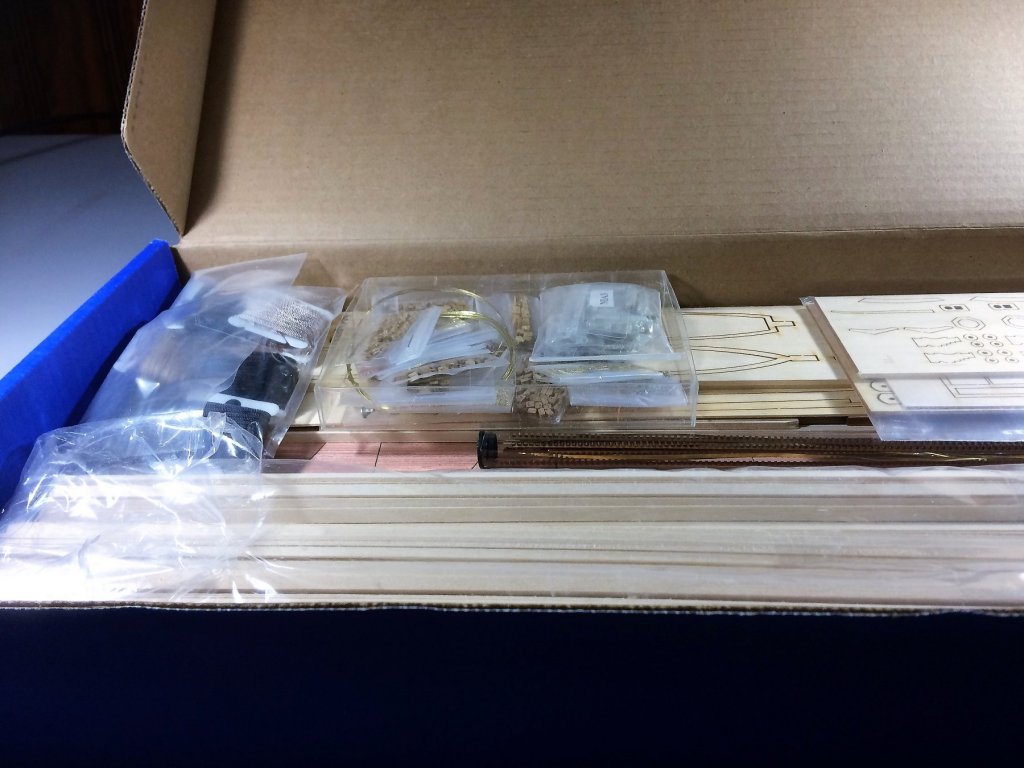
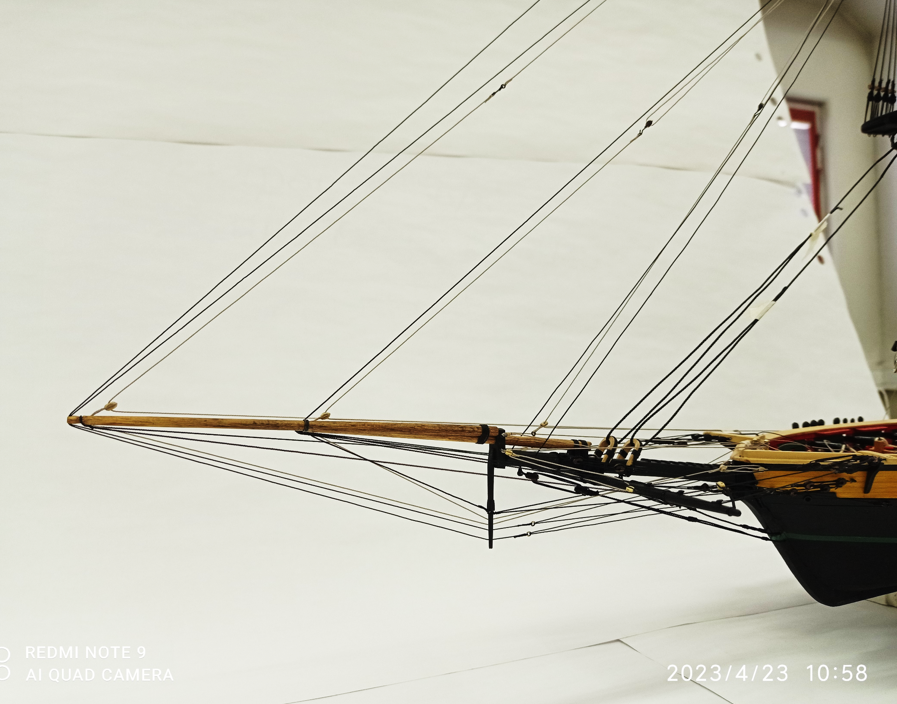
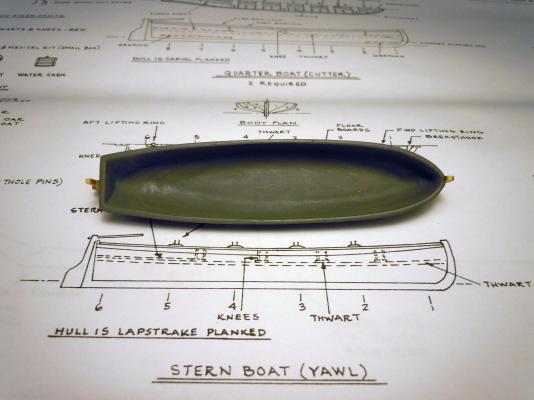
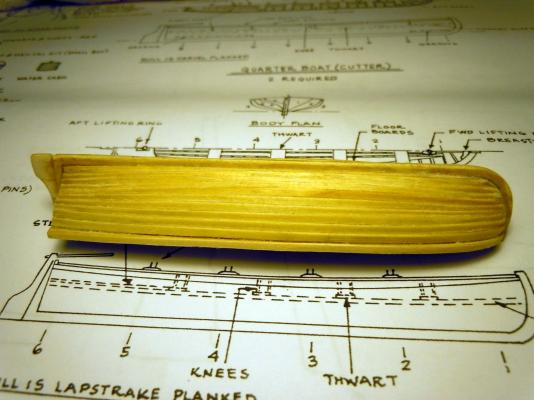
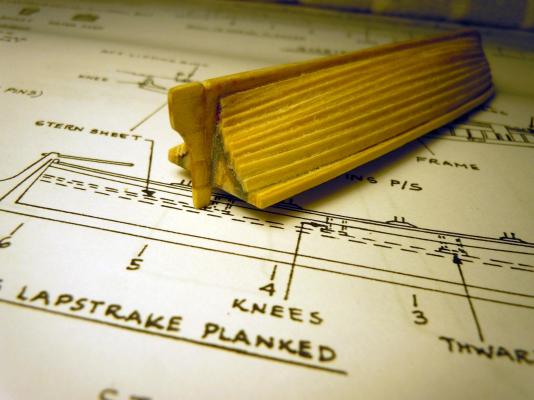
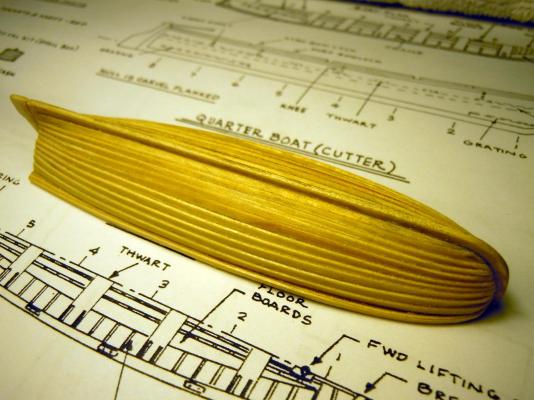
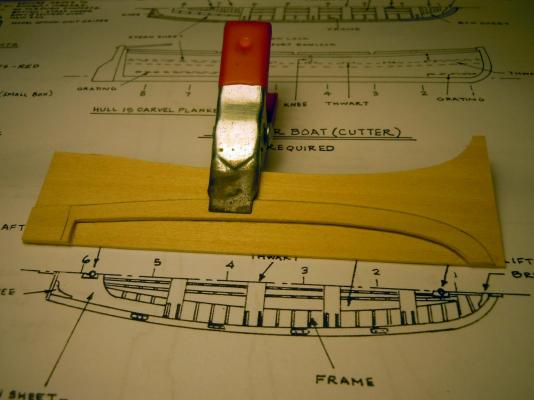
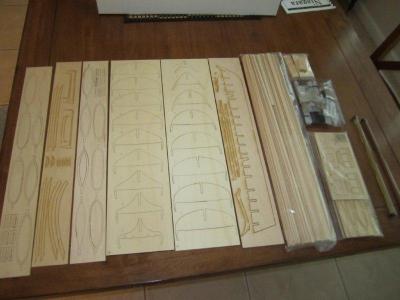
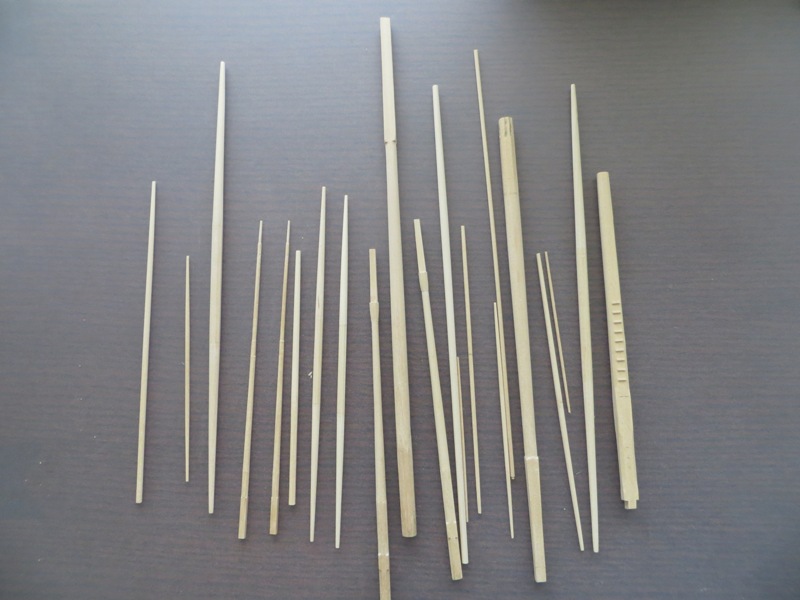
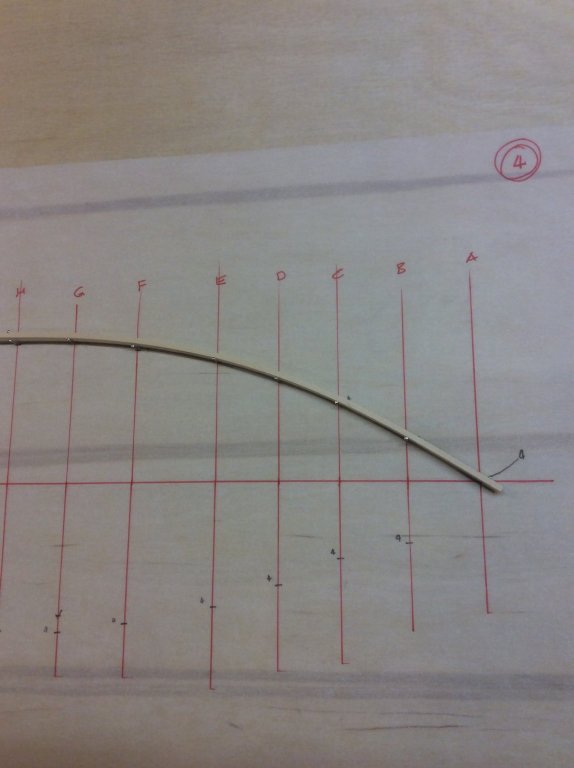
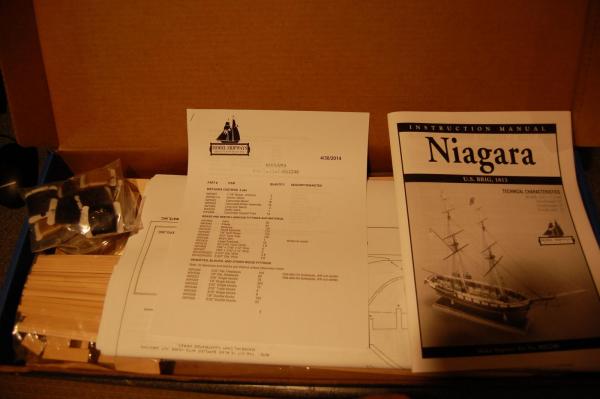
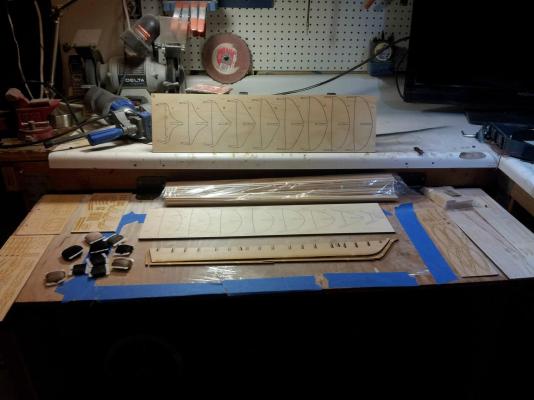
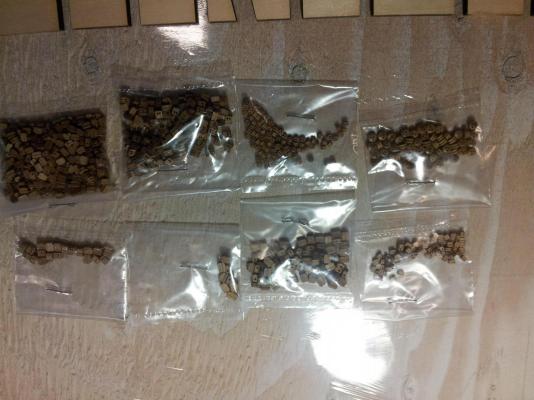
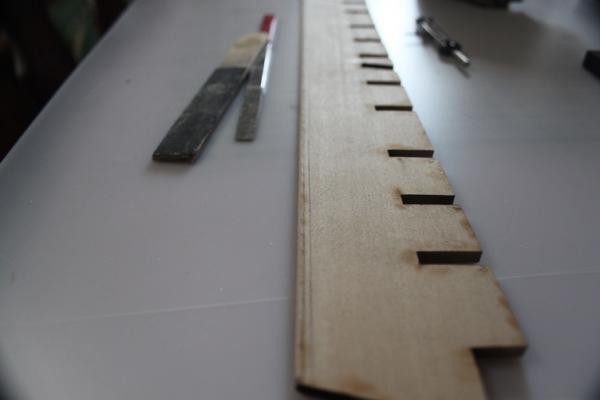
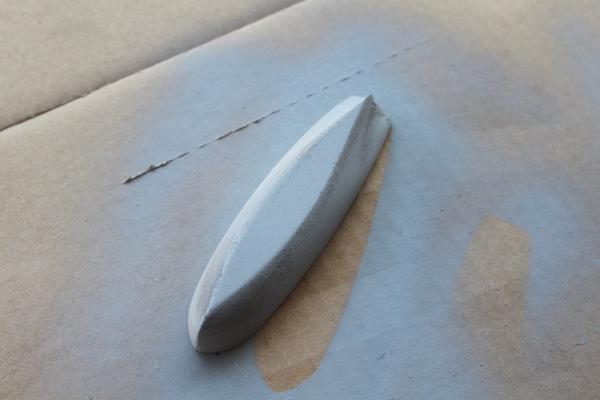
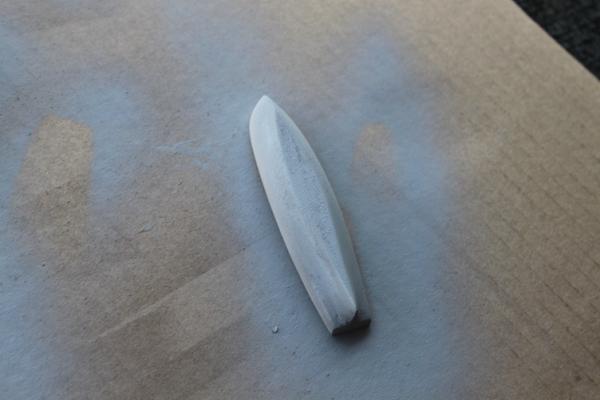
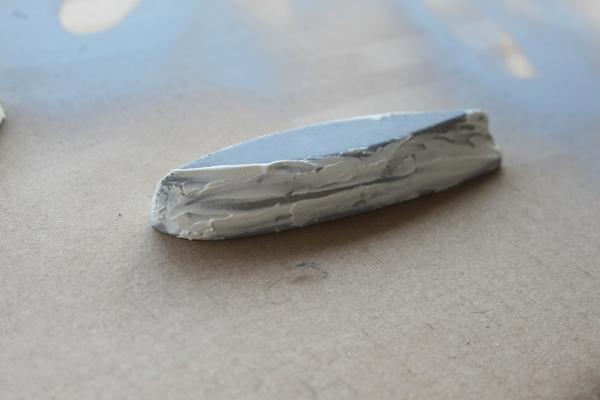
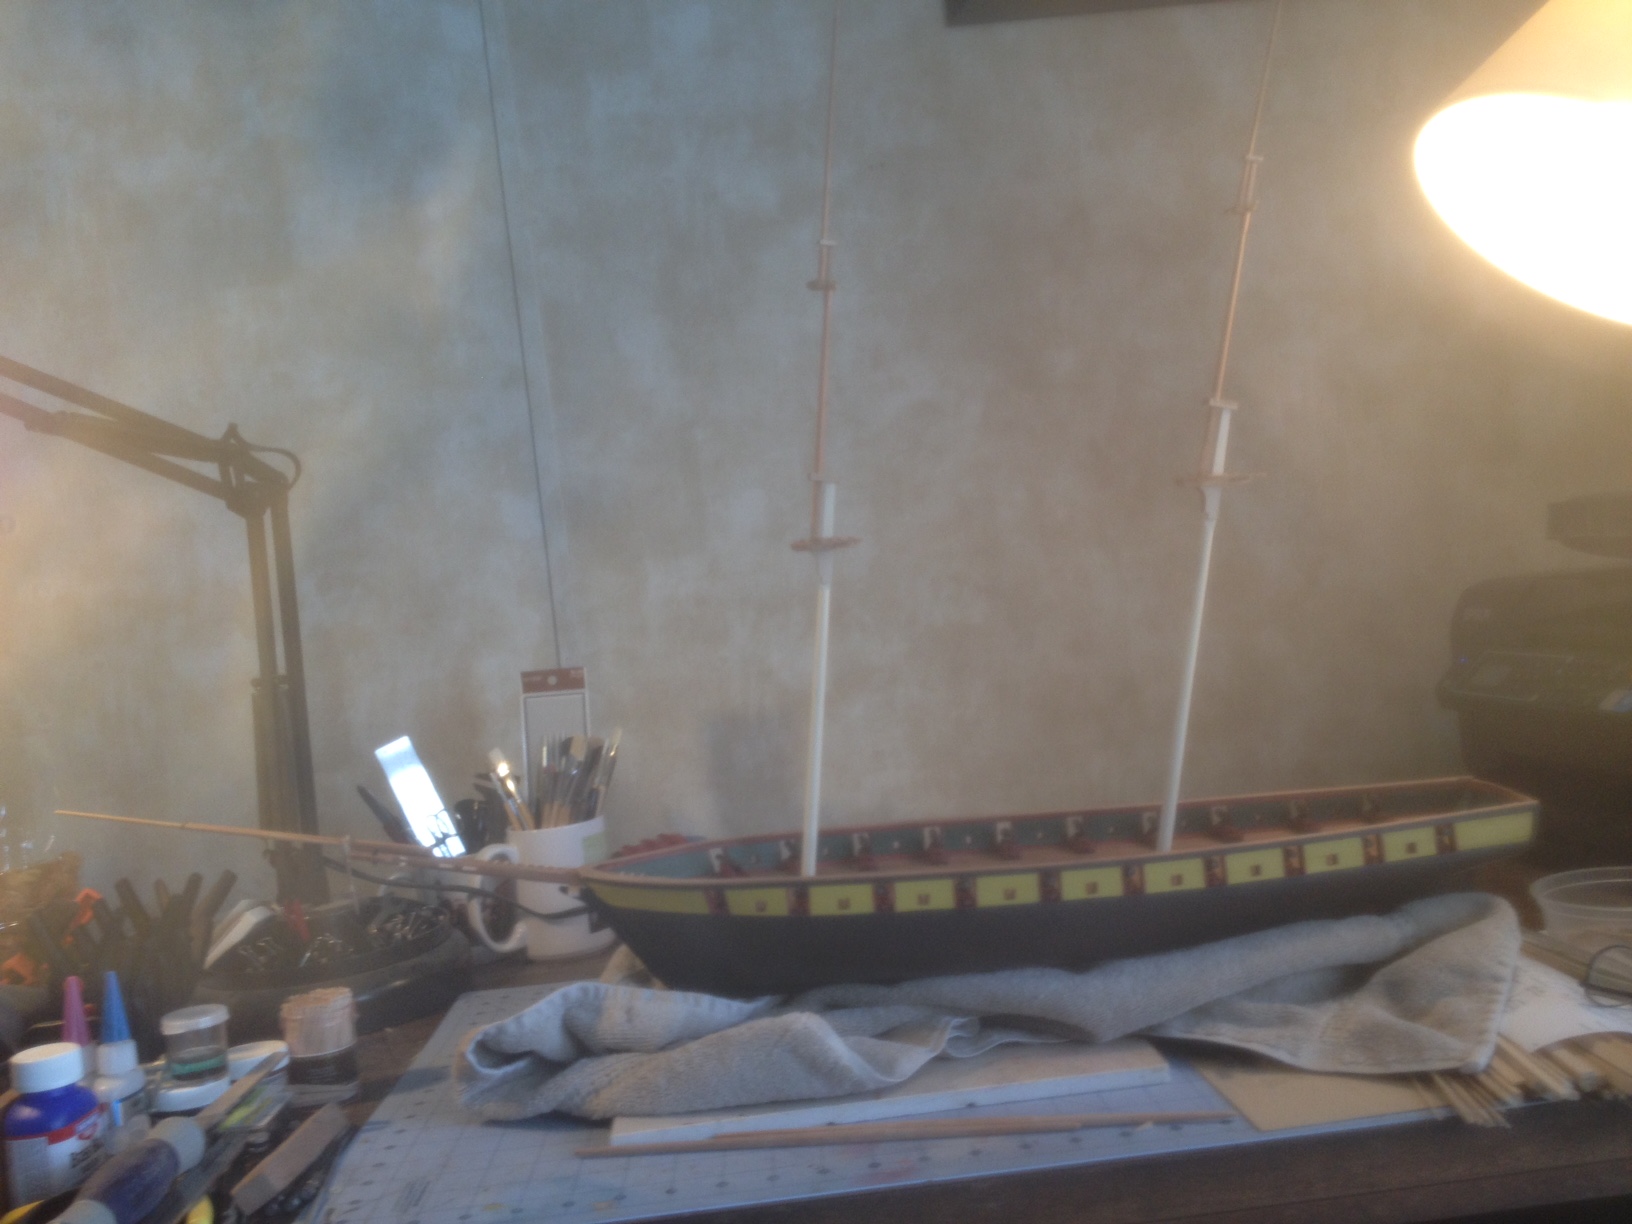
 I recently completed the US Brig Syren. In my last post of the Syren log, I indicated that my next build might be the Constitution. However, after seeing the scale of the Constitution (48") and looking ahead to the size display case that would be required to display her, I decided against it. Instead, I am now embarking on my fourth build, the US Brig Niagara. The Niagara is a little shorter (43"), so I think the display case for it would be more manageable. And, based on some logs I have reviewed, the Niagara build is very similar to the Syren in many aspects. So, here I go. I ordered the kit from Model Shipways (see photo). As is typical, I checked the parts list against the contents and found that the ships bell was not included and I was short some blocks and nails. Everything else was in order. I labeled the size of the various bundled wood strips for quick reference. The kit comes with 6 detailed plan sheets and an instruction manual which I gave a precursory review before getting started on the build. I also jotted down a few notes that I thought would be helpful from my review of a few Niagara build logs. I decided to deviate from the instructions and start with the quarter boats and stern boat. I glued the various laser-cut lifts together and secured them. While waiting for them to dry, I turned my attention to the one-piece keel. Right out of the box Murphy’s Law crept up. The center keel fell off the work bench and the bow at bulkhead A and stern at bulkhead Q broke off – clumsy me. I glued the pieces and allowed the keel to dry overnight. To mix things up, switching to the center keel, I decided to make the rabbet before attaching the keel, stem, and sternpost. I marked the bearding line on the center keel with a pencil. For the stern bearding line, I made a copy of the plan, cut it along the bearding line, placed it on the keel and traced the bearding line. For the rabbet depth, I laid a strip of 1/16” thick plank flush against the bottom of the center keel and traced a line along the keel. I flipped the keel over and repeated the process. This gave me a good line to follow when bearding the keel. I used an x-acto knife to carefully cut the rabbet. The rabbet was then evened out with a sanding block and flat file. I checked the depth of the rabbet repeatedly by placing a piece of planking against the keel stem. Next, I glued the keel and stem together and allowed it to dry overnight. Continuing, I marked the location of dowels to secure the keel and pre-drilled holes in keel and stem. Also, I pre-drilled pilot holes for the pedestal mounting screws. The pedestal location is a matter of preference, but I typically locate them 1/3 of the way from the stern and the bow stem. I applied carpenters glue to the keel and secured to the center keel with brass pins inserted into the predrilled holes and applied clamps to hold the keel in-place while drying overnight. Before adding the stern post, I deepened the rabbet. The stern post was then glued and pinned. I cleaned out the rabbet of some glue with a flat file. I’m glad that I created the rabbet before adding the keel – it was much easier. Sanded the exterior and interior of the quarter boats and the stern boat to a rough finish with sand paper and a Dremel. I will apply some wood filler to even things out. I won’t spend much more time on the interior because once all the thwarts, seats, gratings, etc. are added much of the interior will not be readily visible. Also, I'm afraid to make them too thin. There’s a lot more to be done on these. I plan to jump back in forth between the boats and the ship while glue is drying and to break the monotony. Moving on to the bulkheads. I beveled bulkhead A. I took the advice of some other build logs and assembled bulkhead A and the bow filler pieces, knightsheads, timberheads, and support pieces before permanently installing the bulkhead on center keel. The filler blocks were made from the kit suppled 3/4"x1"x1" basswood blocks - they're a little harder to shape than balsa wood. It took quite a lot of sanding and filing to get the right shape. Once that was done, I made a copy of the filler block top from plan sheet 2 and used it to mark the cut outs for the knightsheads and timberheads. The cut outs were notched with x-acto knife and evened out with a flat file. Next, I cut (from 1/8" x1/8" basswood), test fit, assembled, and glued the knightheads, timberheads, and laser cut top stiffeners. A added a little CA at the joints to further secure the pieces. I did some final filing to further shape the assembly. Next up, bulkhead Q and the stern blocks. Stay tuned.
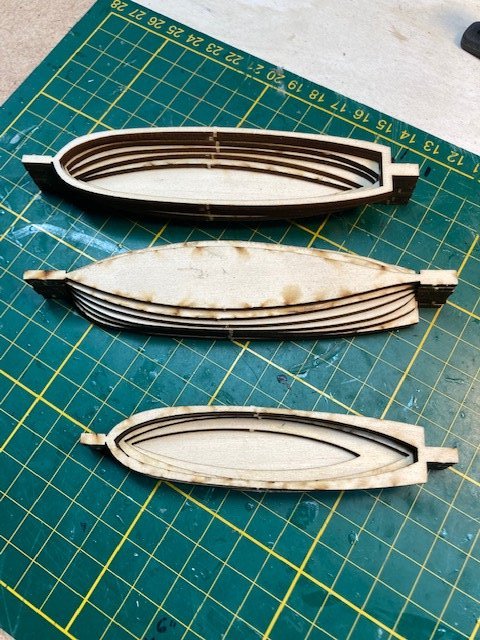
.jpg.01106b7d1bbbcbebe22e25f802c31a94.jpg)
.jpg.9f6eafbbc0c8b29bde6952ce8a169e29.jpg)
-
 I am restarting my build log. I had to suspend construction in 2019 for various reasons, 2 knee surgeries, covid, etc., etc. I don't know how to or if my old build is still available, but let's start from here. Hull is completed and painted. I built the deck with nibbing strakes. Starting on cannons. Pictures will follow (Iphone not cooperating today). PS: I build at a slow pace so posts will not be regular. I got a plaque from NRG stating "Tain't a hobby if you got to hurry" and that is my motto.
 -
 Good day! This build log will cover the second wooden model ship I am tackling, after the Drakkar Amati. Unlike the Drakkar I decided to do a build log of this. Why the Niagara - two reasons: My wife is from Erie PA where the reconstructed Niagara can be found, and thought that this should be my next build - who am I to disagree especially as she purchased the kit! I like the lines of the ship and it is simpler than other multi deck models out there Pictures of in progress build to follow - I have been working on it for a few weeks now making steady progress as work and other things allow - happy for all comments/suggestions Stuart
 -
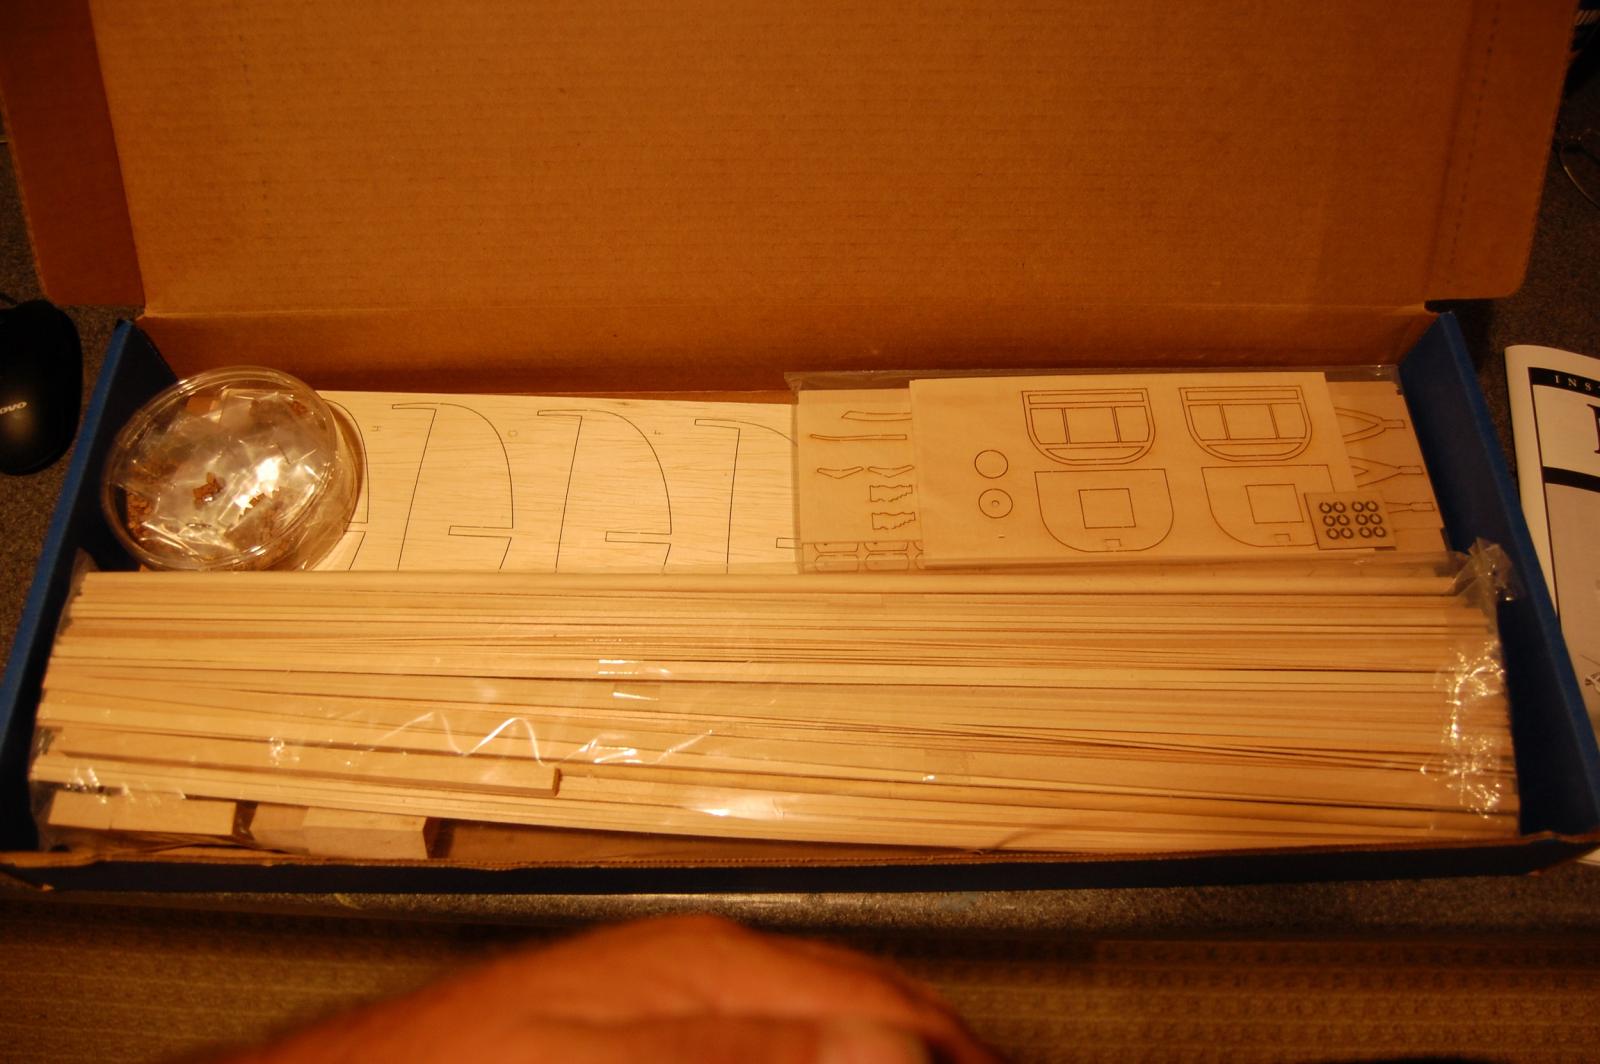
 Hello Model Ship World! I am starting my build log for the Model Shipways Niagara. Although not new to model ship building, this will be my 2nd foray into wood. I recently finished the 18th Century Long Boat and learned so much, that I feel confident in moving to a larger ship. I am very slow and methodical when it comes to building. I'll let stuff dry for a week before touching it! I'm including the shots of the box and contents as it will probably be the last time it looks so neat and organized I cant thank other folks from the "Niagara Club" such as 6ohiocav and Mikiek (among others) for their build logs, your logs have been a wealth of information. Time to start counting sticks and get a keel laid down! Updates to follow! Tom E
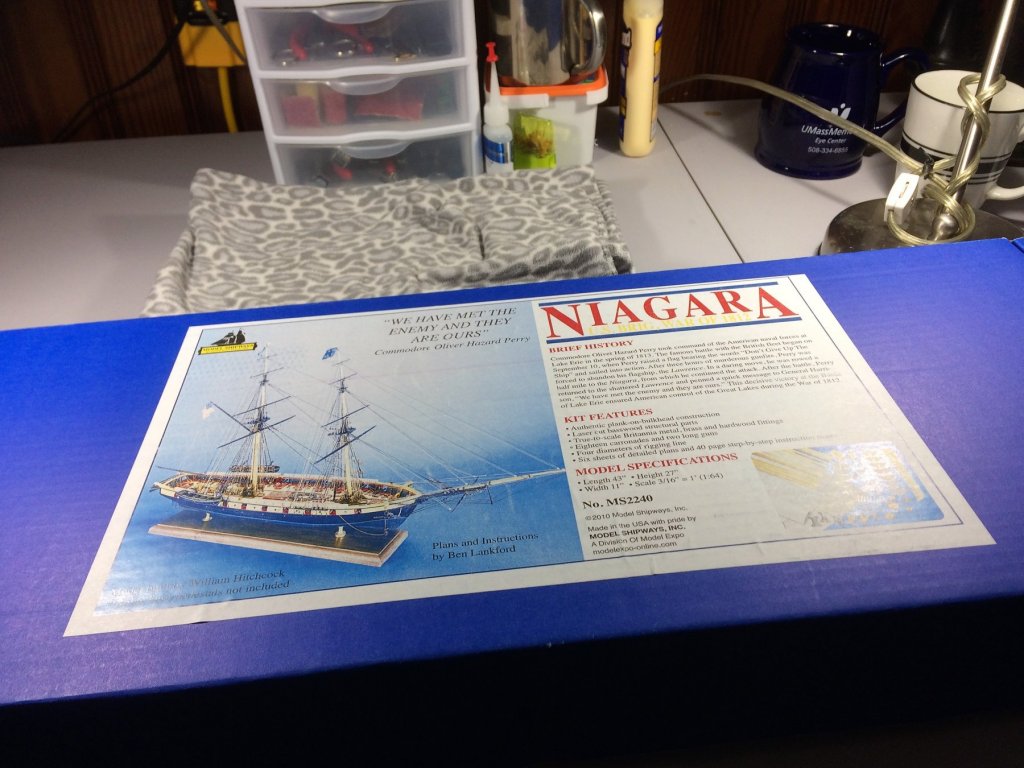
-
 Good morning - I decided to get into model ship building during the pandemic when everything was shut down. I completed the 18th Century Armed Longboat by Model Shipways, and now I've decided to try my hand at the Niagara. I wish I had discovered the site earlier as I've seen a ton of great info and build logs here that would have helped me avoid some issues on the Armed Longboat. I'm a few steps into the Niagara already so I apologize for starting the build log a bit late.
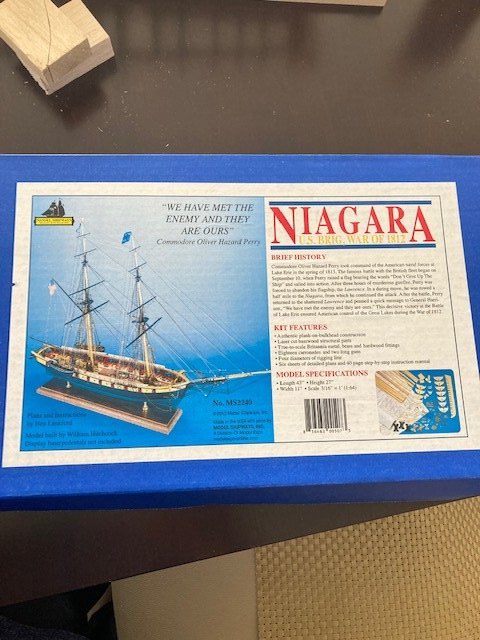
-
 I sheepishly reenter the water with my fellow Niagara shipwrights. I have been "lost at sea" for the last three years after my Niagara build (and as I later found my build log) took a raking broadside in a work bench accident causing damage to its stern and keel. More on that later, But I start with a short introduction. I am an amateur woodworker in Northeastern Ohio with a keen interest in military history. I am a true landsman, with no sailing experience. I built styrene models as a kid, including Revel's Cutty Sark, and gained an interest in building ship models, albeit in plastic. In the late 80's after graduating from college, and with a misguided motion that I would have plenty of free time, I purchased a POB kit, the La Toulonnaise. My unsuccessful efforts to negotiate the poorly translated, and nearly non-existent instruction manual, coupled with my lack of proper tools and modeling skills, doomed the project from the start. I kept that unfinished kit (I hit a road block at the construction of the stern fillers) for many years. I now regret that I must have thrown that kit away during one of my many moves and life changes. I sure wish I had it today. In 2011, I rediscovered my interest in wooden ship building after a visit to a tall ships event on Lake Erie where I toured the Niagara. That fall, Model Shipway put the kit on sale, and alas. I found myself back at it. There was one big difference however, While surfing the Model Shipway site, I came upon the link to this Forum. This was a real game changer. I found build logs from expert modelers like Bahama Diver and others that were building the Niagara. While the Model Shipways Niagara has a pretty good instruction manual, the color pictures on this site and the ability to ask stupid questions gave me the confidence to forge ahead. I started my build and the build log in January 2012. I completed the framing and bulwarks (and got past the dreaded stern fillers) by May of 2012. Then disaster! My bench table, an antique drafting table with a swivel top, somehow gave way, and my Niagara in its stern vice, and all of the material, tools and everything you can imagine we carry on our benches, was dumped onto the concrete floor. The fall crushed the stern fillers (of course) and broke off half of the keel. Surprisingly, there was no other damage, but the mess was extreme. I had just enough energy to clean up the mess, but not enough to continue the build. Fast forward to today. I was in Boston in December and had the privilege to see the Constitution in dry dock. What an experience. The inspiration of witnessing such a beauty gave me the initiative to take my Niagara out of ordinary and get it back to the shipyard. Of course, I attempted to access my build log, and discovered my ship was not the only thing that took a raking broadside. It was gone by way of the big crash (the administrators need to use live oak to build their hard drives). Since all of my photos were on an old computer that is long gone, I thought the log was a lost cause. I have been hard at work since January. I fixed the damage, finished the bulwarks, planked the hull and the deck, built the guns and most of the deck furniture, and just about finished the masts and yards. Here are some photos (forgive the poor quality) of where I am. Nothing is glued down, and is set in place just for the photos. I wasn’t going to post a log, but guilt and finally some luck pushed me otherwise. Over the holiday, I got my camera out for a family picnic and lo and behold, the shots of my build log were still on the camera disc. Since I spend so much time getting tips and help from others logs, I felt compelled to give back. Over the next several weeks, I will be adding the old pictures and recreating the narrative (that is truly gone). And as I go forward, will humbly place myself along side my fellow Niagara builders for the end run.


- 647 replies
-
- 8
-

-
- niagara
- model shipways
- (and 1 more)
-
 3D Brig sloop of the late 18th or early 19th century, modeled 100% based upon real-world plans, from a number of different ships. Topic opener, more to follow shortly.
.thumb.png.60dc990ff7a5a97477c950fdce2bca6d.png)
.thumb.png.23f8420327ef8cb7045d8907cb1466dd.png)
.thumb.png.bdb83b3280530addd3b39165992e217b.png)
-
 Hello everyone! A few years ago I started assembling this amazing ship. the elements from the set are not quite satisfied - they are very brittle. For this reason, I had to do a lot myself and took a lot of time. for some period I was at a dead end until I found this forum - I have very little information on the ship. Here I looked at the topics on this model and was inspired by the model again.


-
 I have tried Ad nauseam to post in the scratch-built area. It won't let me so I will do it here, untill a moderator can move it to the right area. or remove it all together. I am building the US Brig Niagra , from scratch, This isn't your daddy's bathtub floater, it will end up being about 8 ft in total length. most everything I will have to make by hand, but I have a full machine shop to make the Iron work . and a 3D printer to do other tasks.. This is the first sheet of plans , laid out on my 10 ft long work table
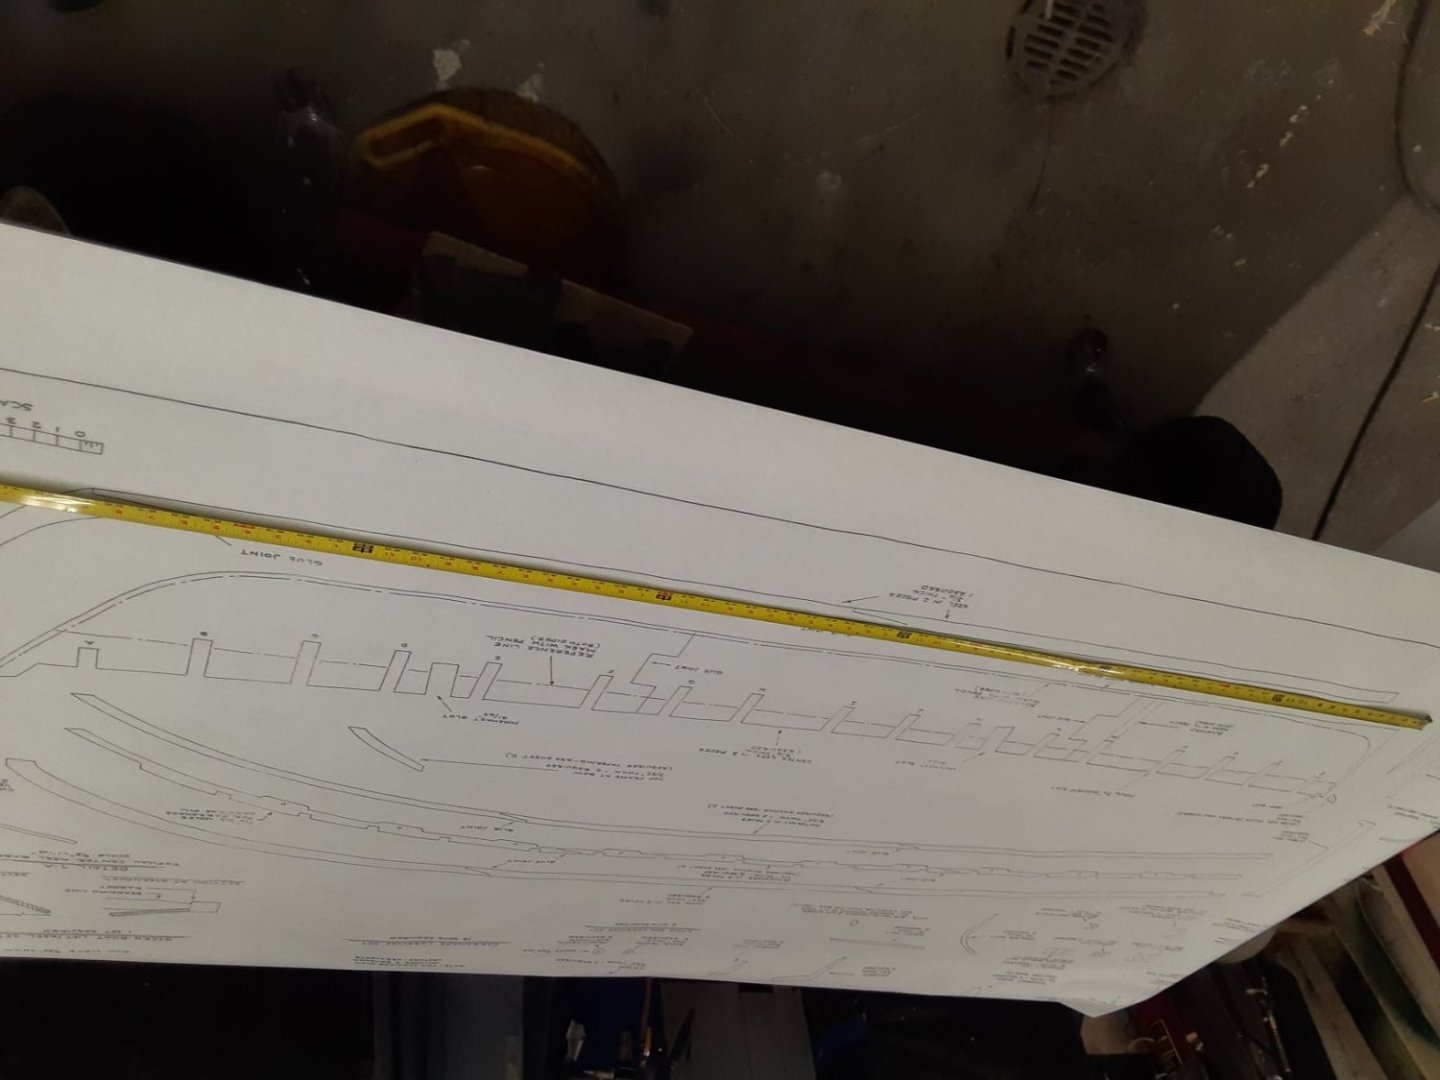
-
 Starting over with correct title. I started the yawl first to learn the basis of ship building. I layered the parts and carved the basic shape per instructions and then primed and sanded to develop the final surface. Here is a view of the inside. It got very thin in places and I also noticed while carving the end tabs and center line did not exactly line up. I then looked at adding the side layers; from my airplane building stock I found that Midwest item #8003 .0208" x .0625 scale lumber was what I needed to use; soaked in water and started at the bottom keel and worked my way up doing both sides at the same time to match. Please bear with me since this is my first attempt at ship lapping. Here is a rear view. Here is an overall view with rub boards added. This shows tracing the top board to match left and right and were then carefully trimmed to to the inside ribs. Next I will start adding the inside details. Also need to learn how to add the text below the pictures.
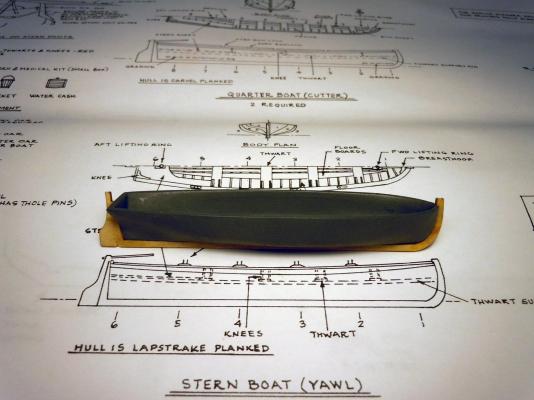
- 440 replies
-
- 4
-
-
- niagara
- model shipways
- (and 1 more)
-
 The US Brig Niagara is my second build. Just the possibility of completing a build of this level is due to the sharing of experience and advice from the many talented people on MSW!


-
 While this is not my first model ship it is my first attempt at a build log. My previous kits were all fore and aft rigged fishing schooners so this is my first real attempt with square rigged sails and all the yards, rigging etc. that comes alone. I have scrolled through many build logs and will follow what I have seen numerous times by starting with a picture of the kit box sitting on my workbench. I plan on working the ship's boats first as I am waiting for my new Byrnes disk sander to arrive and the ship's boats look like they will be a challenge while I wait.
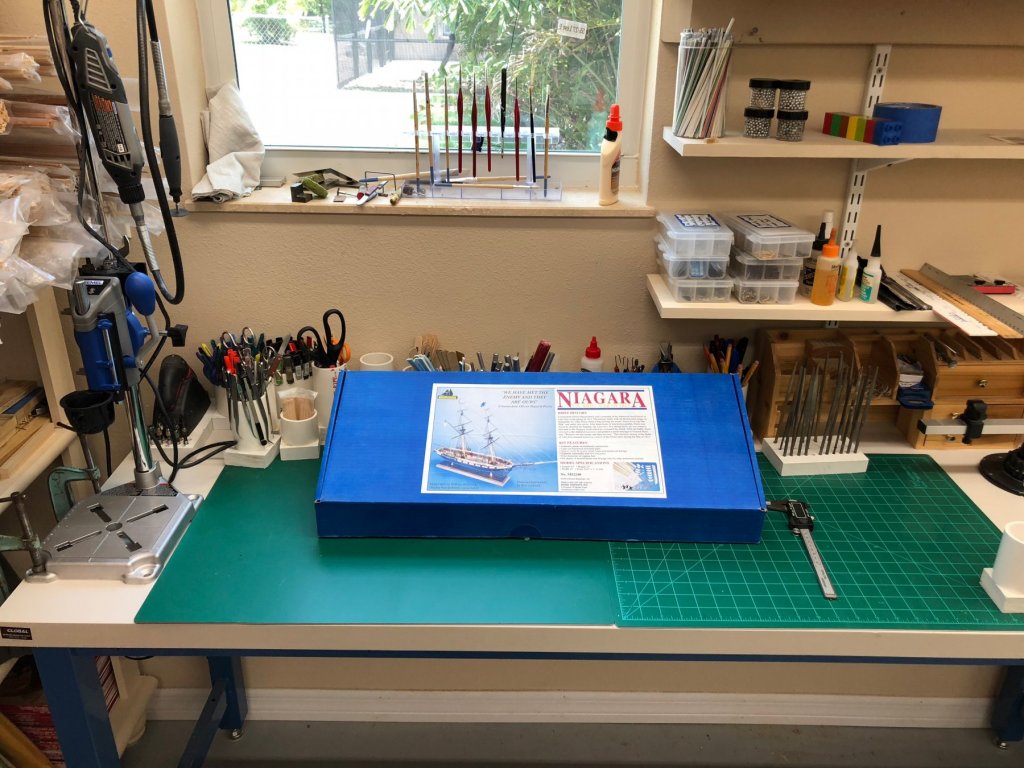
- 367 replies
-
- 6
-
-
- model shipways
- niagara
- (and 1 more)
-
 And so my next build begins. Here the instructions tell us to put wood dowels through the keel and into that center wood piece. I used a small carbide drill (right) to put in a pilot hole and then followed up with the appropriately sized drill bit (left) for my wood dowels. Commander, the keel has been laid. Lets see how much I learned from building the Rattlesnake, my first wood ship build of this skill level.
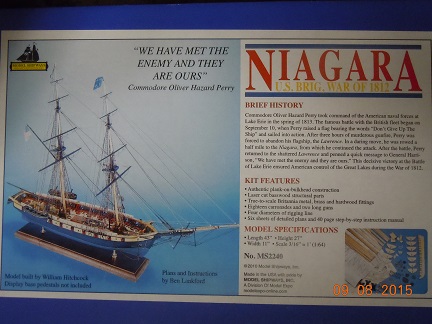
-
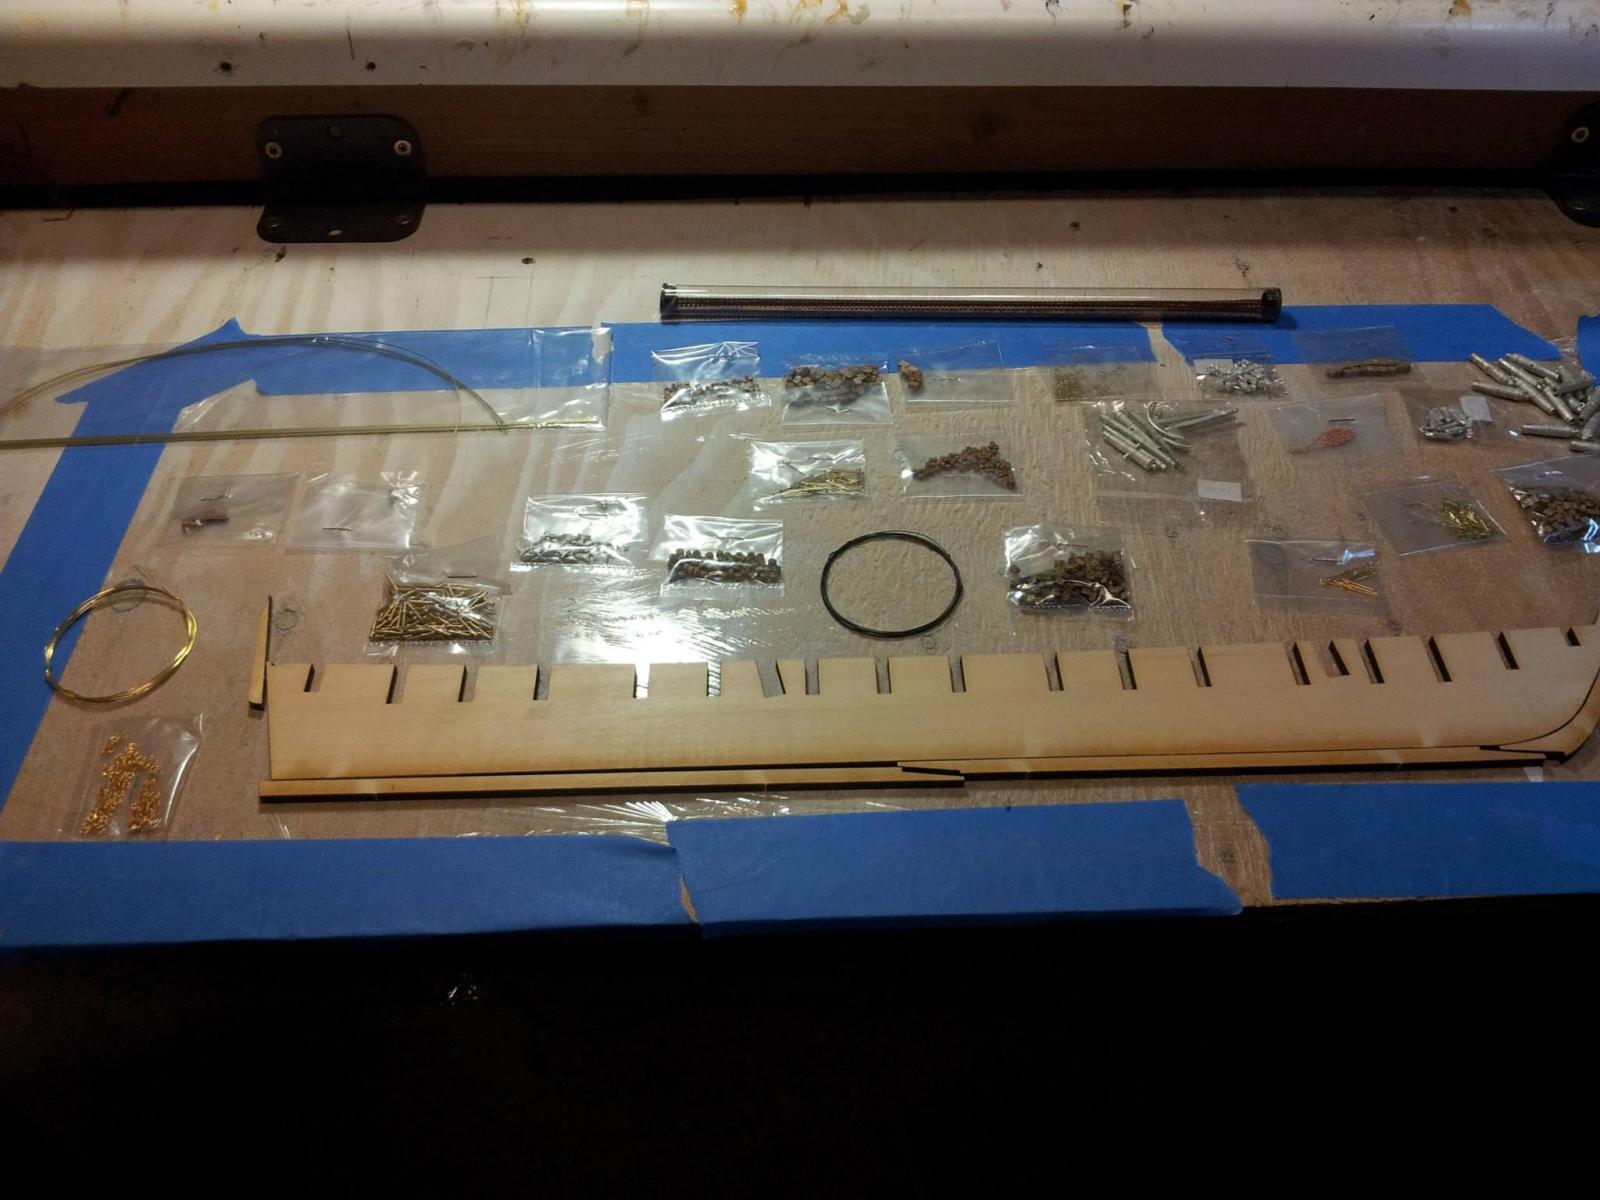
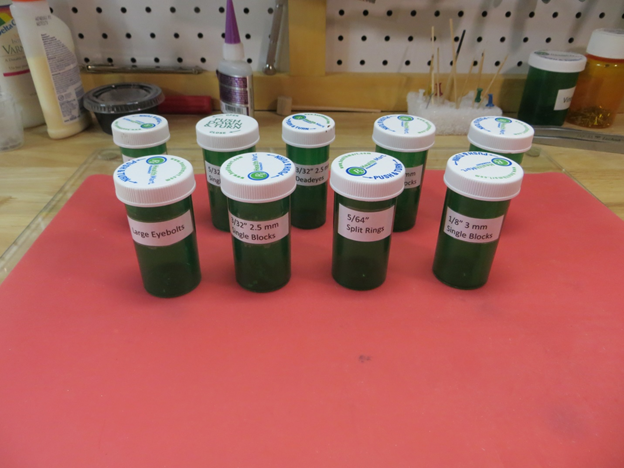
.thumb.jpg.1da981e493a7fe8bed83bce0fbcfa3c4.jpg) After building a couple of ships I decided to actually create a build log. I have built and learned a lot building the Phantom and the Pride of Baltimore both from Model Shipways. The Admiral bought me the Brig Niagara, also from Model Shipways for Christmas. I went down to the workshop this morning and started to open the box and did and inventory of the parts, all there. I then repackaged all the small parts. From history I ended up either loosing the parts or droping them to never be seen again. I am re-purposing some old medication bottles to store the parts. It normally takes a while for me to complete a ship so it may be a while before I have an update. The Pride of Baltimore took me over two years to complete. I enjoy the build so I take my time.
After building a couple of ships I decided to actually create a build log. I have built and learned a lot building the Phantom and the Pride of Baltimore both from Model Shipways. The Admiral bought me the Brig Niagara, also from Model Shipways for Christmas. I went down to the workshop this morning and started to open the box and did and inventory of the parts, all there. I then repackaged all the small parts. From history I ended up either loosing the parts or droping them to never be seen again. I am re-purposing some old medication bottles to store the parts. It normally takes a while for me to complete a ship so it may be a while before I have an update. The Pride of Baltimore took me over two years to complete. I enjoy the build so I take my time.
-
 I'm just posting what I have of my Niagara log. Well, mainly it's going to be just pictures at first. I am getting close to an actual update point though.


- 299 replies
-
- 2
-
-
- niagara
- model shipways
- (and 1 more)
-
 Here we go!
 -
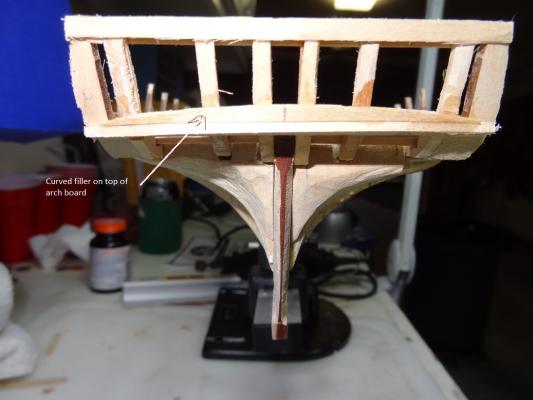
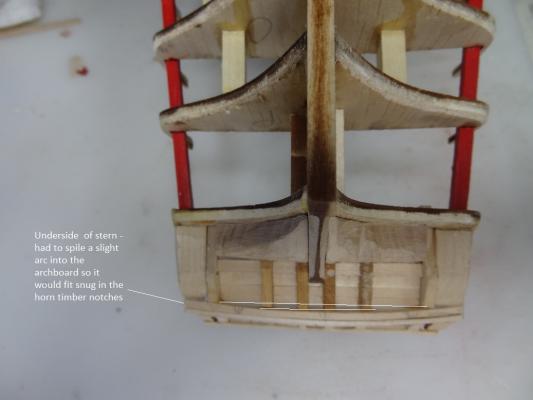
 I have debated starting a build log for some time. Mainly because I fear I won’t keep it up. Also, there seems to be a rash of Niagara builders out there right now – many with great detailed logs. I’ve been at it for about 6 weeks so I’m also wondering why start a log now? Add to all that, I’m terrible with pics in posts. Goodness knows I could use the help. I haven’t assembled a model in 45 years. I’ve never tried a wooden one or one this detailed. I also have no real woodworking experience. It was just a wild hair that got me started. I saw a few models on display and decided I wanted to try. So why Niagara and not something a little more simple? After browsing model kits for several weeks I realized that all the ones that caught my attention were the 2 masted Brig/Schooner kits. They had enough complexity but still had a simple, clean look about them. They just seemed to grab me. Research seemed to indicate that Model Shipways instructions/plans were better than most so that seemed like a plus. In hindsight I am debating that fact now. Sooo, I began this ordeal on 10/05/15. I’ve assembled the hull & bulkhead frames – got them reinforced, squared & faired. Sadly, I did not take any pics during that process. I added the filler blocks and really struggled with the stern ones for a couple of weeks. The plans were absolutely no help. I came across a website that actually had a practicum for Niagara (for $$$). This builder took a different approach that seemed to make sense (1 piece per side rather than inner and corner fillers), but I felt like I was still missing something. Getting tired of fretting over it, I went that route. But it turns out I missed some of his details - there was a bit of a language barrier. Then, I went back to the 2 piece approach. I actually had a nicely shaped inner block(s) but couldn’t figure out the corner block. What I was gleaning from the plans just made no sense. Of course that was probably my ineptitude. Then I found this site and was excited to see several Niagara build logs, however the first few I came across on this site seemed to gloss over the topic. Then I came across lb0190’s (Larry) log - http://www.modelshipworld.com/index.php/topic/313-niagara-by-lb0190-model-shipways-wood-pob-164th-lb0190/ - and that got the wheels turning (posts 7-12). Finally – the corner block shape should take on the profile of the outer horn timber. That was the missing link for me – easy enough to carve out, but weeks wasted getting to that point. Like Larry admits, I busted up the horn timbers more times than I will admit (bulwark timberheads as well). Also, I did not realize the notches in the horn timbers for the Arch Board were at different offsets so I ended up with the outer horns on the inside. I further mangled those up by chipping them out, so I ended up cutting an entire new set. My new scroll saw proved invaluable (and fun) there. I have a question about those notches which I’ll ask at the end of my speech. About the same time, I began my indecision with placement of the stern Quarter Stanchions. I came across lots of pics but most all had the stanchions partially covered with other parts, so there was no clear view. The plans could/should have given some measurement of the spacing from the outer horn timber – no help again. I have seen some pics where the bottom edge ran parallel to the stern and others where the edge was parallel to the side of the ship. I finally came across a statement saying that the external bulwark planking was supposed to lay on the outside edge of the stanchion and terminate at the stern edge. So clamping some planks to the outer side of the timberheads and seeing where they ended up (at the stern) gave me the clue I needed to place the stanchions. That was another week long inquisition. Still not sure if I got that right, but it seems to make sense. So that’s about where I am right now. The transom is framed but not yet planked. It was truly a relief to have that part of the assembly behind me! I apologize for the length of this post. I will attempt to be less verbose as things progress. I do have a few general observations: 1. I finally found a use for a Dremel tool. I have owned one for 15 years but never used it for anything other than grinding/sharpening my lawn mower blade. In a lot of cases I now find myself using the Dremel to cut (grind) pieces and also to do a lot of the rough filing. I do have to wonder if this is sacrilege to the long time modeler/woodworker. 2. I had hoped this was going to be a relaxing thing to do. To the contrary, I have found myself really stressing over many aspects of the build so far. There was a real sense of relief when I finished the transom framing last week! 3. I have a much steadier hand than I thought I would working with small detailed parts. Questions: 1. The notches for the Arch Board on the underside of the horn timbers are in different places. The inner 4 all line up the same but the 2 outer horns have the notch slightly closer to the stern. What is the point with this? Is the Arch Board supposed to arc (arch) a little to fit in all the notches? I can say a straight piece will not fit in all the notches. I did go ahead and spile a slight arch into the arch board so it fits the notches. But it also causes some grief – see question 2. 2. Still at the stern, the exterior transom planks look like they are stacked up on top of the Arch Board. Most pics also show them and the arch board slightly arcedupwards. My arch board did not do this. I ended up cutting a "filler" plank very thin, arching the top and glueing that to the top of the arch board. When I go to add the rest of the transom planks, they will follow the arc - at least that's the plan. 3. In placing the Planksheer pieces, I have noticed the notches that fit around the timberheads are way off in some places. A few by as much as ¼” - 3/8” off. I realize this can be adjusted, but is this much deviation normal? I cam across a few statements saying not to make adjustments to the planksheer. Instead do it all to the timberheads - even if that means they come out very thin. 4. I need to get the chocks for the mast feet glued to the keel before I forget. The plans show an octagonal foot although most pics I see the foot is rectangular. Any thoughts there? How in the world do you cut a cylindrical shape (the mast) into an octagonal one? 5. During the gun port framing process (my next step) several of you have stated do not add the upper & lower strip to the framing as suggested by the plans. Instead run a 3/32 square strip along the top of the timberheads. I'm headed down that path but I'm wondering where the square starts and terminates. At the stern does it go all the way to the transom - I saw 1 log where it stopped at bulkhead Q. At the bow, does it start at bulkhead A or all the way at the timberhead we added into the bow filler block? This site has really been a blessing so far. I wonder how many total years of modeling knowledge we have at our fingertips. I look forward to hearing from you and even getting to a point where I can contribute. Sail on….
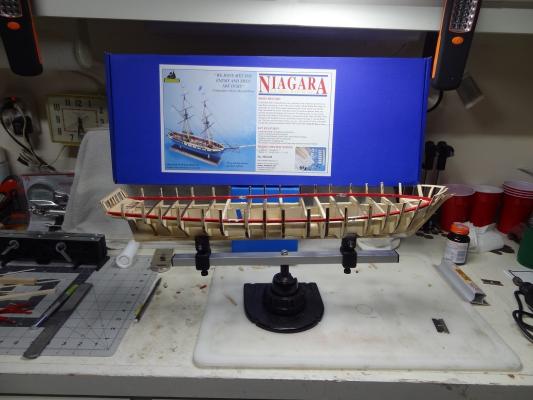

- 843 replies
-
- 8
-
-
- niagara
- model shipways
- (and 2 more)
-
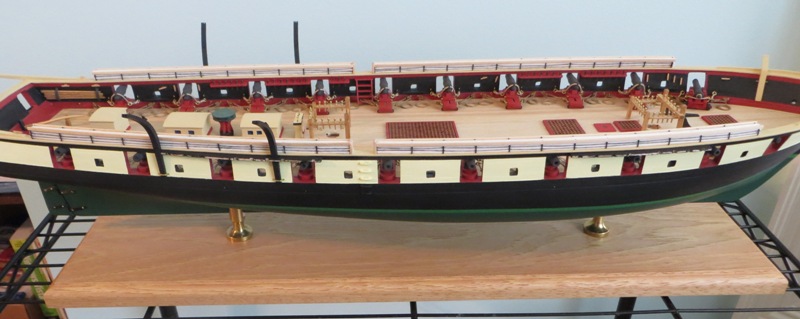
 Another Niagara build log.... I'm Dave, from Columbia, Missouri. This is my fourth ship model project. My first, the Marseille by Mamoli, I built about 30 years ago and it turned out well for my first kit. Then I started the USS Constitution kit by Mamoli when I was in my 20's and got frustrated and put it away (it's still in my closet). I didn't build any more ship kits until I bought this Niagara kit 13 years ago. After planking the hull and deck I again got sidetracked as our children were born and I put it away. In the past few years I have completed two kits, both with the help of Bob Hunt's practicums, his Halifax kit and also the Kammerlander Duke William kit and I think these both turned out nicely. Of course, there were step by step instructions so it was easy to just follow along and produce a good result. So a couple months ago I decided to try a bigger challenge and complete my Niagara kit. I have been trying to get some good photos and I'm having some trouble getting them to look as good as I want but here are a few, showing where I'm at currently. I have benefitted from all the other Niagara build logs here, so thanks everyone for your assistance. Patrick suggested I do a build log so here goes. My main issue at this time is that the instructions don't really provide a lot of guidance as to the order to do the various steps in the masting and rigging. I'm hoping I have done everything I should before starting on them. I have done the rough shaping of all the masts and yards and I think I will continue to refine these and try to make them look like the plans show with all the various little parts attached to them. So that's what I'm working on now. I happily welcome any comments and suggestions! Dave B

-
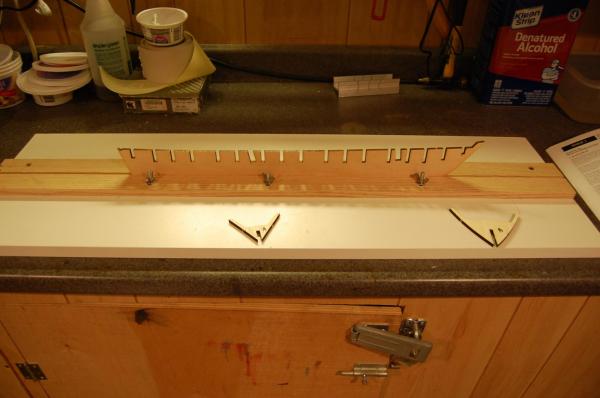
 After doing a fair bit of research on MSW and thinking critically about my abilities, I've settled on the USS Niagara as my first wooden model ship. My experience with wooden models has been limited to RC planes and the tissue covered balsa variety. I must say, laster cut parts are significantly better than the stamped balsa variety! I began by constructing a building board out of 3/4" MDF. To hold the keel perpendicular to the board I designed a frame and clamping system out of Makerbeam (a small extruded aluminum t-slot profile with 4 faces) and attached it to the board via countersunk holes through the back of the board.
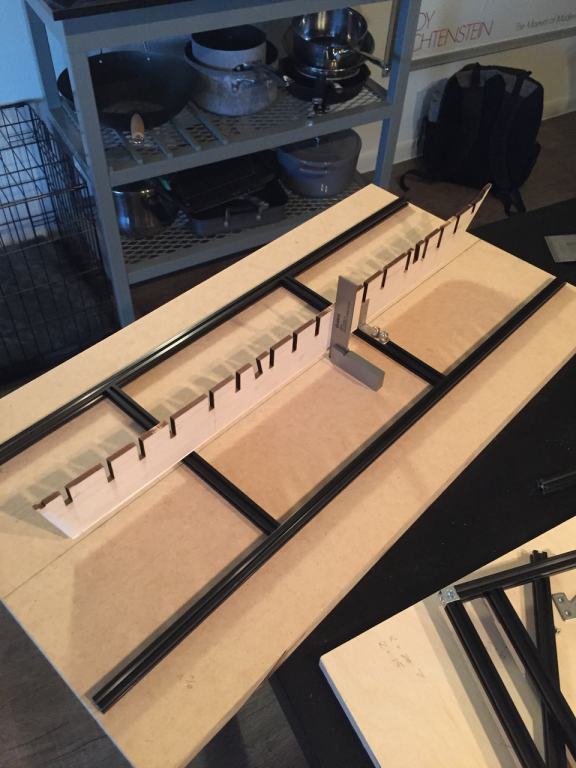

- 18 replies
-
- 8
-
-
- niagara
- model shipways
- (and 1 more)
-
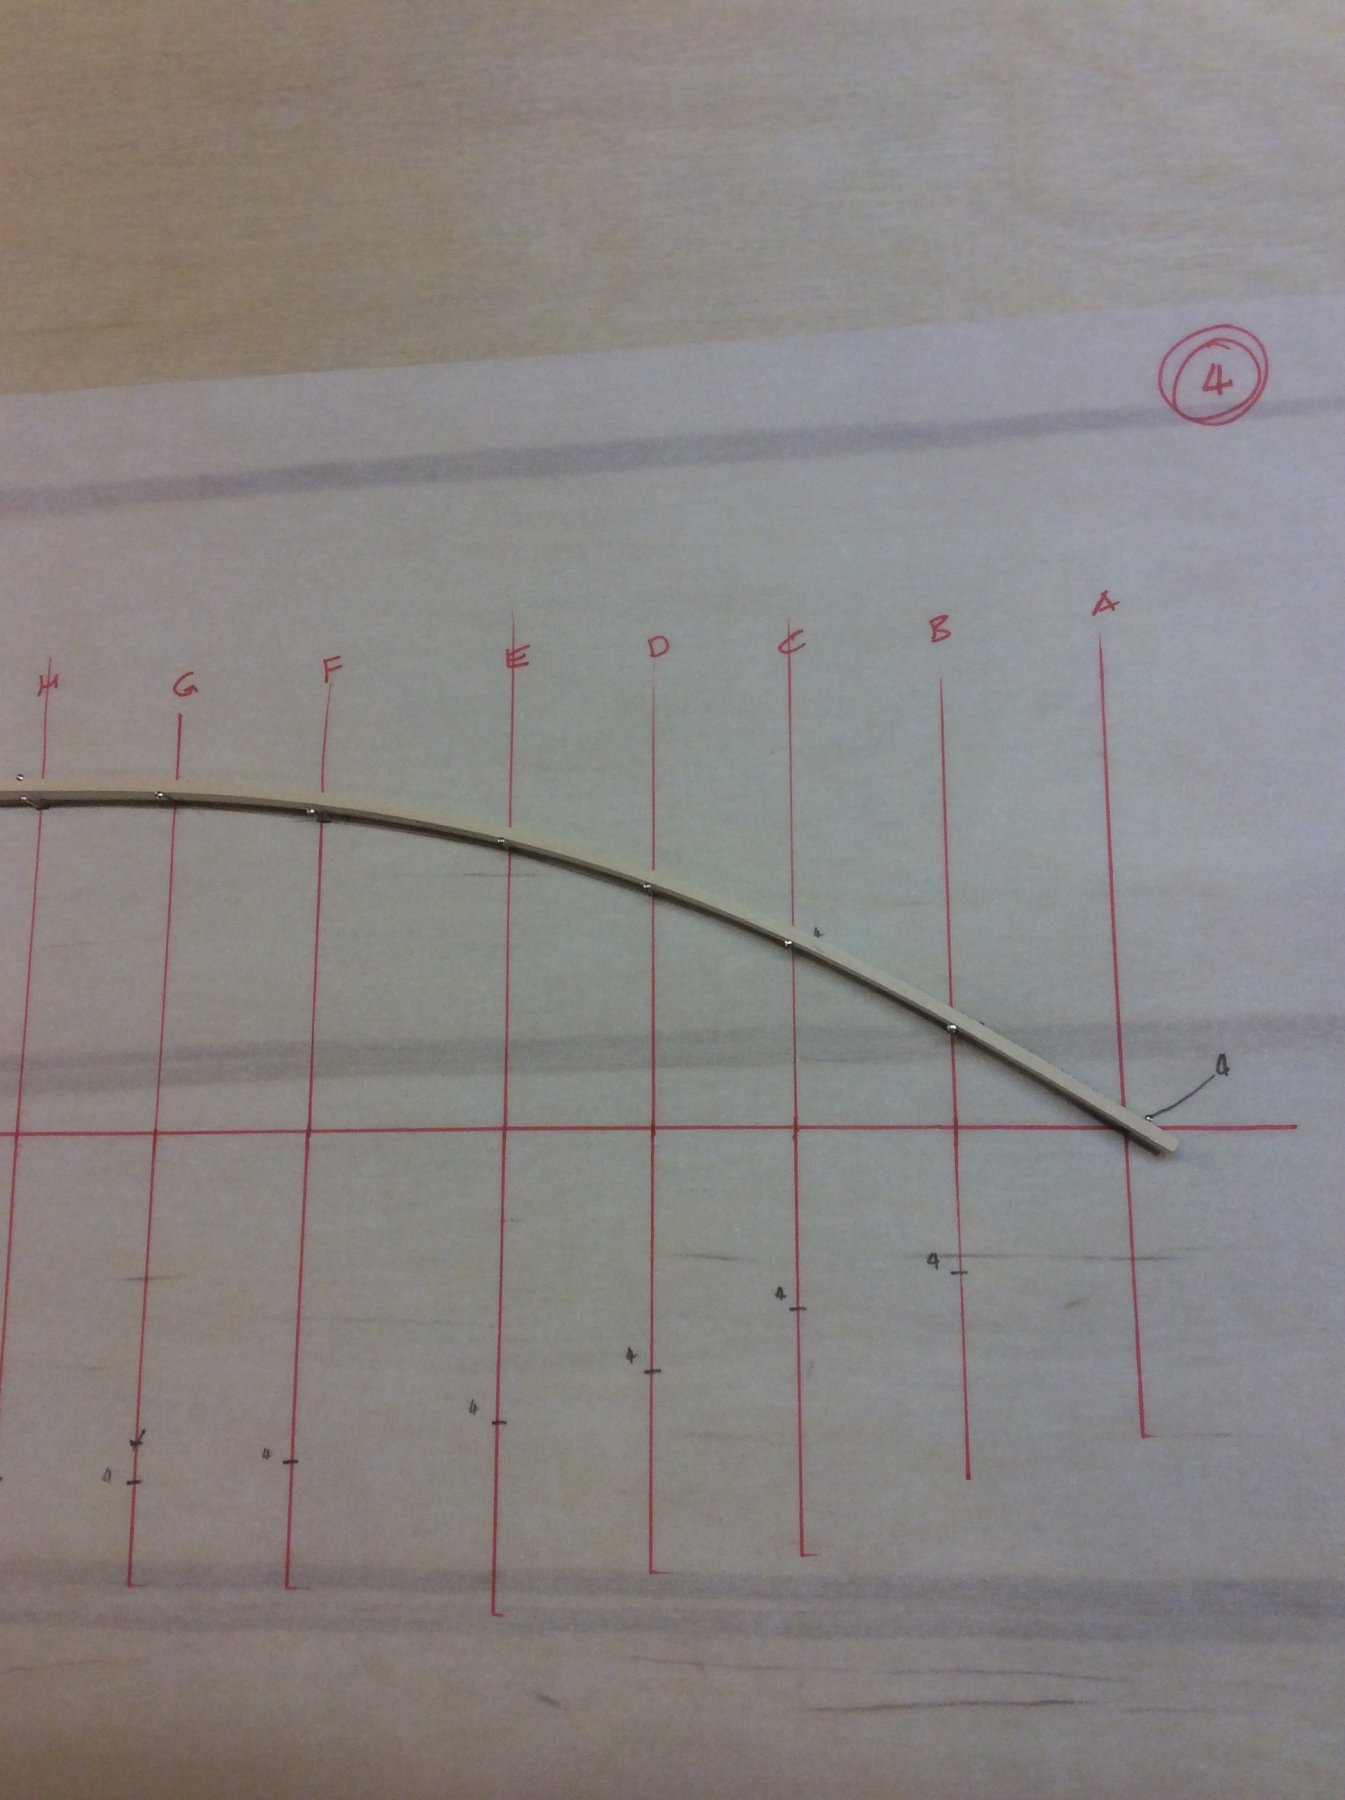
 This will be my first build log, and I wasn't sure if I should have it here, in the Kits forums, or in the Scratch build forums, since I am diverging so much from the normal, plank-on-bulkhead technique. I decided on the Kit forum, since nearly everything I'm doing is, well, based on the Model Shipways kit and drawings. All of my previous builds (Yankee Hero, Fannie Gorham, We're Here, Dapper Tom, and a recent 1/2-hull - 1/2- model of six masted schooner Wyoming) have been solid hull projects. I found dealing with my builds of New Bedford Whaleboat (PoF) and Grand Banks Dory (PoB) to be tedious due to the light weight construction. When I decided to build Niagara, I thought I'd try to construct a solid hull upon which to later apply the planking, and then complete the model per kit instructions. I have made some some progress on this effort, and thought I'd share the experiences of this experiment. A couple of thoughts to begin. My old microbiology professor preached "Hinkley's Law", which said "Most experiments are failures." I expect that may turn out to be true for this one, as well. During this build I have found the build logs of 6ohiocav and mikiek very informative; the website Niagaramodel.com is invaluable. The responses to my earlier post on planking a solid hull by BACKER and Pete Jaquith were helpful. I chose to ignor the advice in wefalck's response (sorry). So, here we go. Hold fast! My first task was to create a set of waterline drawings from the drawings in the kit. Let me say up front that creating these was fraught with the opportunity for error. Every time a point is transferred from one drawing to another, or from paper to wood, error can occur. I calculated that given the number of sections, the number of points on each section, the number of transfers, I had a 1 in 960 chance of matching the kit drawings. At best. I first drew onto the kit sections of the bulkheads the outline of my wood layers. From these I measured from centerline to the intersection of each layer with the section curve of the bulkhead. This distance I transferred to an overlay of the kit plan. Then, on another overlay, I connected the points for each layer by faring with a wood strip pinned to the drawing. This gave me a pattern to glue to my wood layers for cutout. Next: attacking the wood.
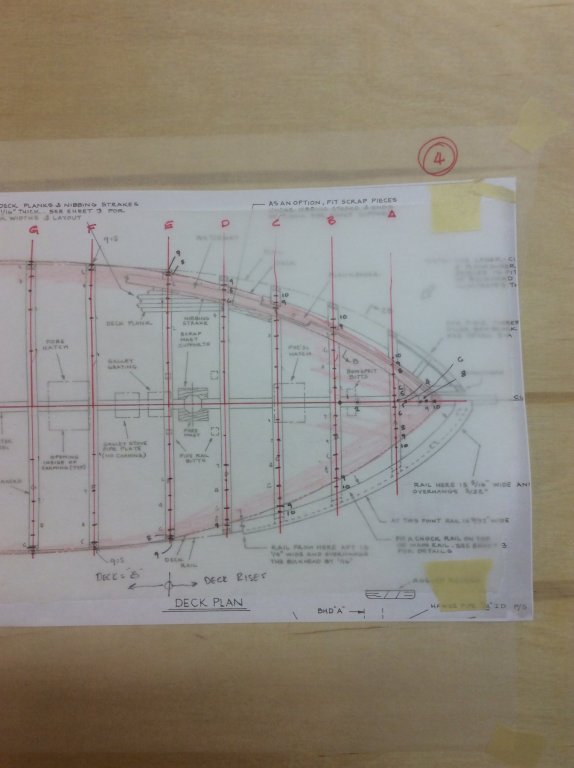

-
 Well, it appears to be that time. I have cracked the box and going to try and make some thing that appears like a ship. I gained a little bit of experience building the New Bedford Whaleboat but this is a whole different animal. Checking off the items now and looks like a whole lot of laser burn removal in my future. Made a build board for this part but I am wondering if I should buy a keel clamp or make something similar. Anyone have any thoughts on what is best to build and plank? I know a lot of people have completed or in the process of building a Niagara so I will have plenty of questions. Will continue to update as I go. Thanks for everyone's help. p.s. I did a search for adding completed builds to login and could not find it. Any help would be appreciated.

-
 First build. I chose this model because it was described as intermediate AND we are from Michigan. I.E. the great lakes where she was afloat. Also fond of any time we kicked British butt! Since I'd built untold plastic models from cars, to submarines, beginning at the age of 10, I thought I could handle an intermediate. I do believe I was wrong. But, I'm having fun and amazed at how much I've already learned. What not to do that is... So, take a back seat and see what else I do wrong. Learn from my mistakes. Do not as I say, nor as I do.
- 287 replies
-
- 4
-
-
- niagara
- Model Shipways
- (and 1 more)
-
 So with the rebirth of the site I have a new motivation to post my build log instead of just stalking everyone else's. I moved on to wood ships after branching out from plastic ones and got hooked. Since then Ive build the Phantom and the MS Mayflower. The Mayflower as well as Chuck's amazing practicum helped me learn a lot of techniques. And that brings us to...the Niagara! Im mostly done the prerigging stuff and am looking forward to making all the masts. I decided to make the cannon/carronades run out but ropes stored. I also decided to spend half a millennium making all the tackle for the guns. Another coat of paint is needed to touch up the oops and things but I'll be saving that for last as smudges and things will undoubtedly happen. And enough words...on to the pictures! My amazing ship holding device.... And heres where I am now, making all the parts for the chainplates. And in other news im still terrible at soldering. Blacken-it is my new best friend I feel like im not uploading these images correctly...any tips of how to make them smaller until you click to expand them would be appreciated.
 -
 Hello, everyone; I'm new to posting on MSW but have been working on my Niagara build for a few weeks now; I hope I get the "posting learning curve" correct (thank you, moderators) and become a productive member of this great community! I'm sure I'll get more out than I put in, as I am a relative beginner, but I'll try my best First question: how do I resize my photos so they fit? Thanks for your help. Bob
 -
 Hello everyone, This will be my third build log here on MSW...the US Brig Niagara, a Model Shipways kit. I acquired the kit awhile back and had it in the queue. I was waiting until I could visit the real vessel in Erie and do some research and get some photos. As in my other logs I plan to post all here the good and the bad, the successes and failures, highs and lows. So without further adieu, welcome to my Niagara build. I started by laying out the rabbit on the false keel by measuring it off the plans with a small compass and transferring the 1/16in dimension to the f-keel. As the plywood supplied was relatively soft instead carving the rabbit I decided to use files and sanders and sand it in. This went very quickly and worked well. Next came sanding and fitting the bulkheads until they fit the f-keel without being forced, once completed they were fitted taking note of which ones will need extended into the rabbit, glad I tested these, there are a few that will need to be fine tuned. At this point I started looking at the sheets that contained all the parts for the ships boats, they are to be built up in lifts using the 'bread and butter' technique, Having never built in this manner before I decided to set the main hull aside and work on the little boats. The parts separated from their carrier frames nicely and the glue up was uneventful, what followed was a lot of sanding, filling, sanding, filling, priming filling and more sanding. If I were doing it again I'd leave the bottom off as i think it would make shaping the insides easier. Still a ways to go on these little guys. Well that's all for now, sorry for being so long winded, pics follow THX J
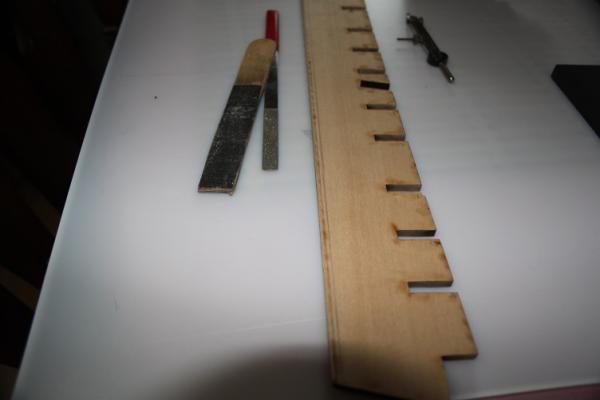


.png.f2bf648df756264f651de66fb3ac0d63.png)
.png.3c0108c955e7be68e23975e08c4a4a9b.png)
.png.699a2c2fee9c81743624155b87762280.png)