Search the Community
Showing results for tags 'occre'.
-
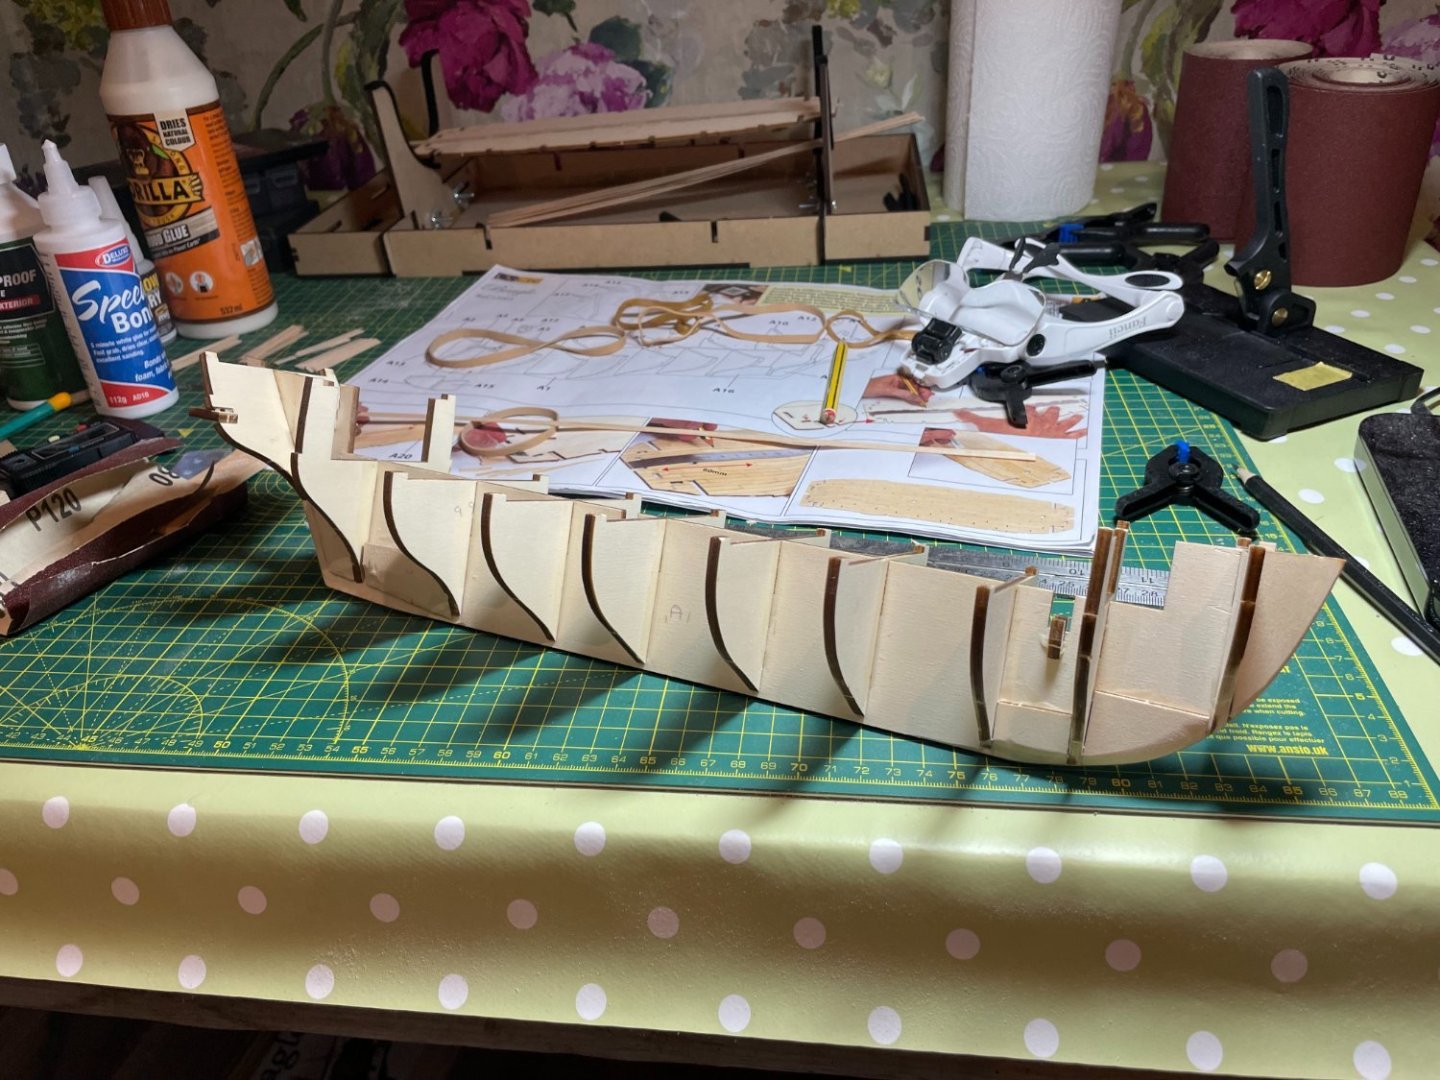
 This is my first ever build but it is something I have wanted to try for years so thought I would jump in the deep end despite reading lots of horror stories of those who have started something too complex for their first build. Anyway I started after Christmas after looking at some of the other build logs and thought I would share progress as a complete newbie.
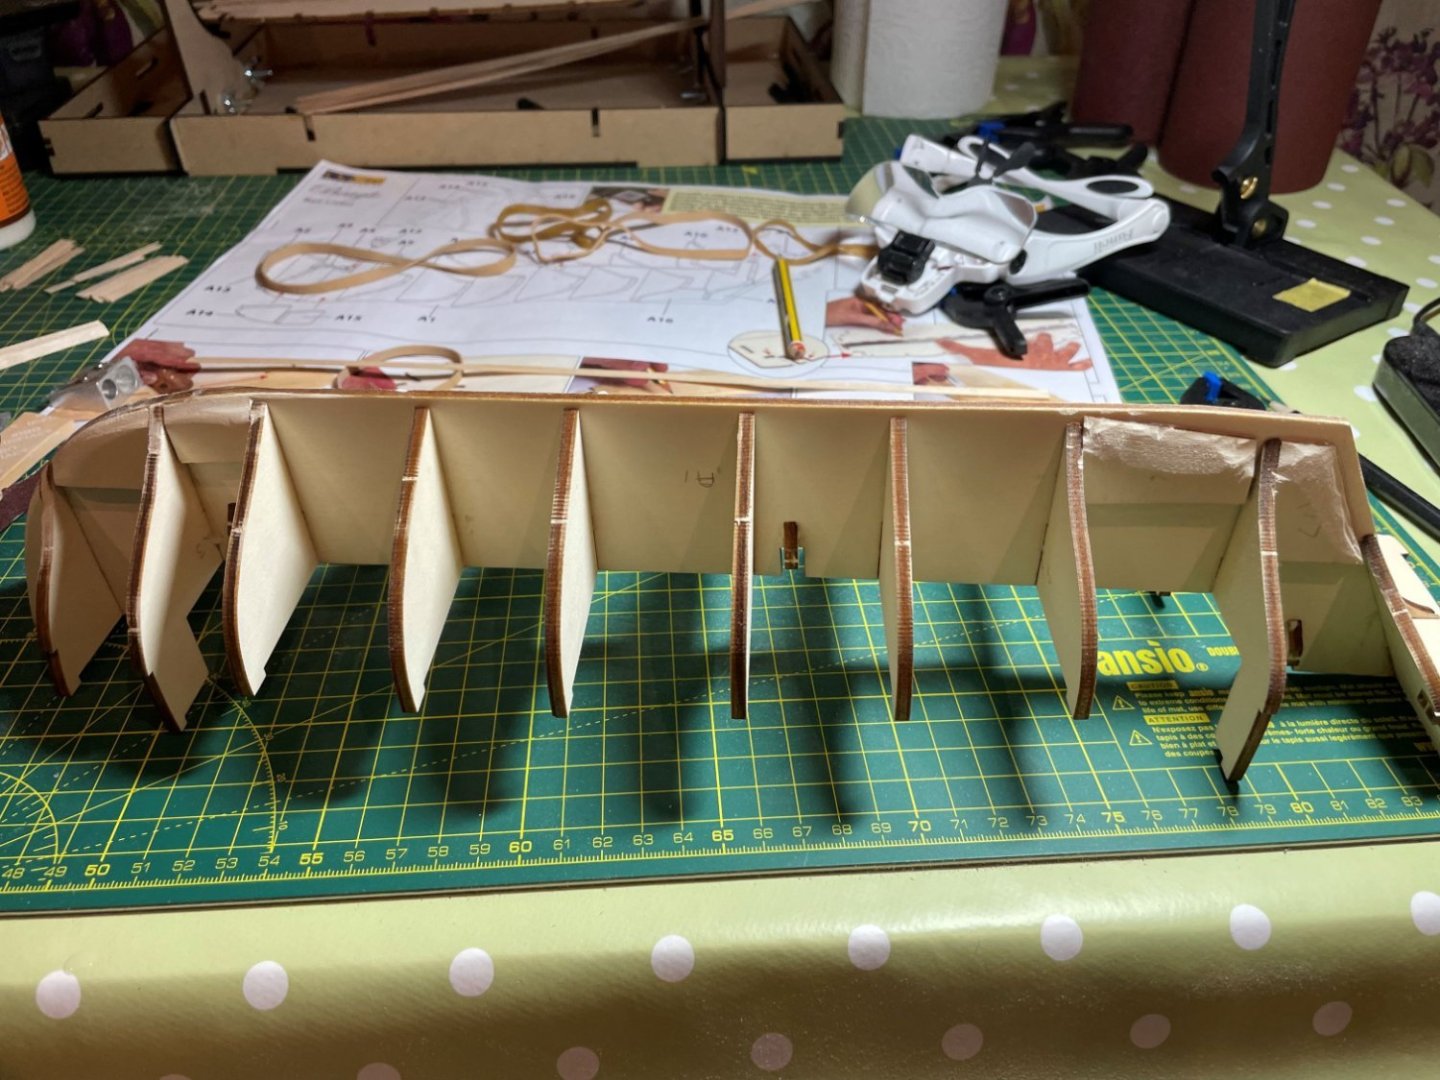
-
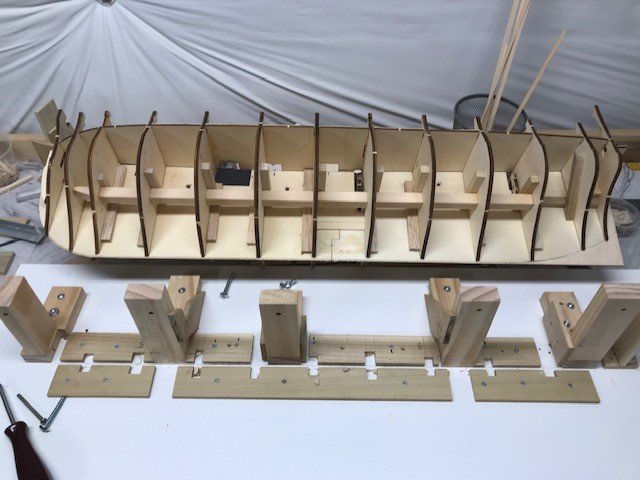
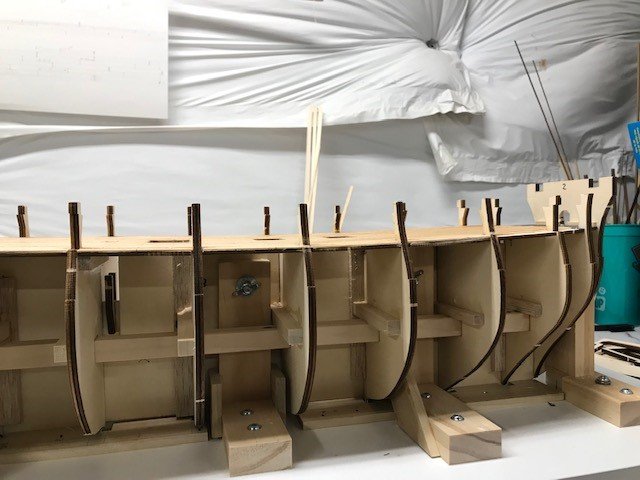
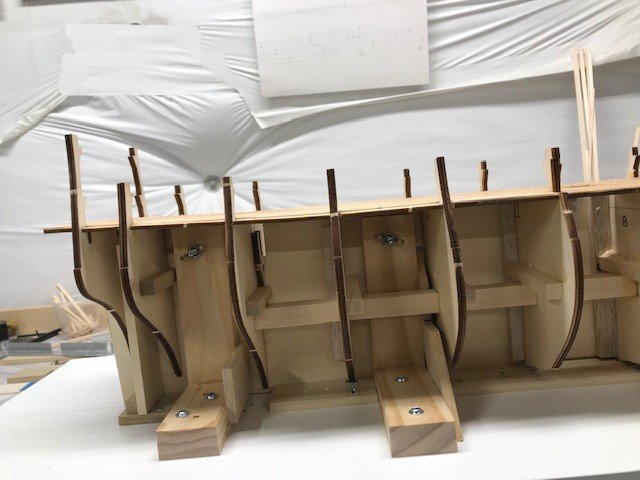
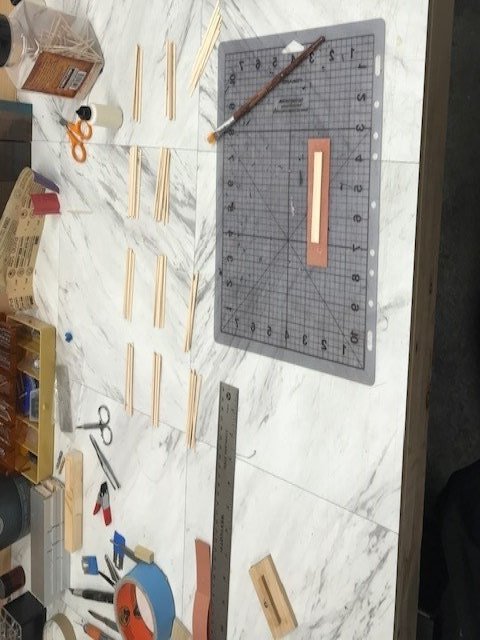
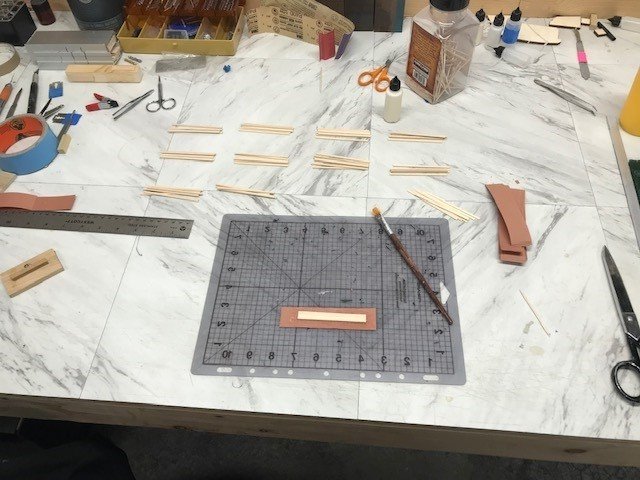
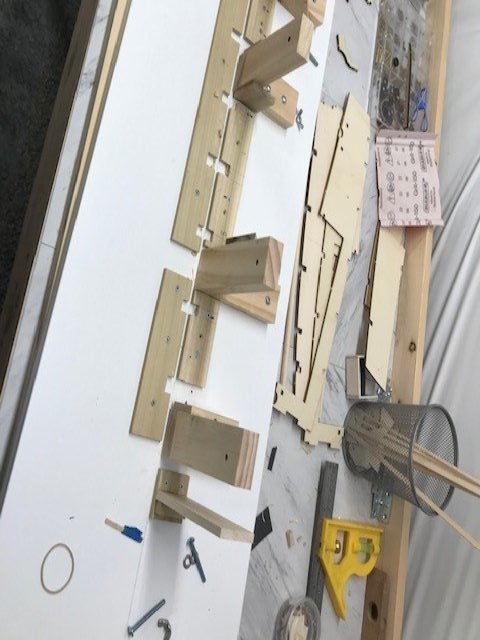
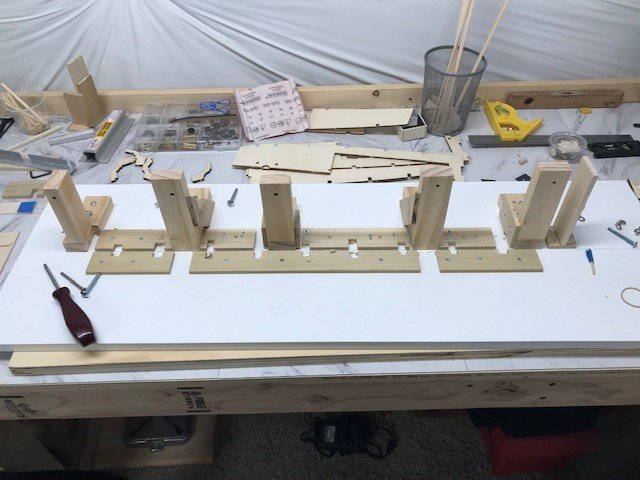
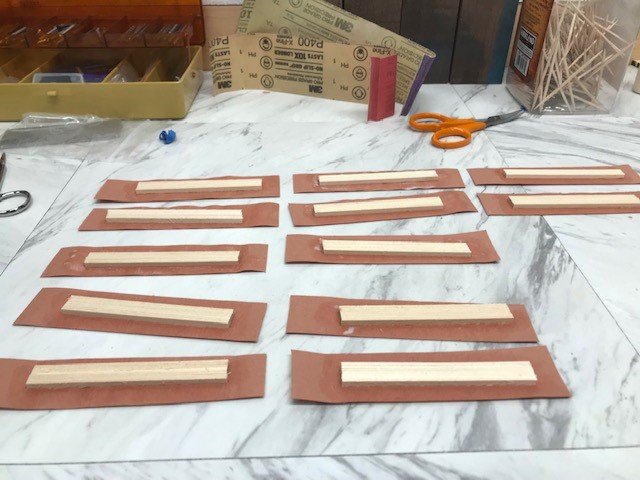
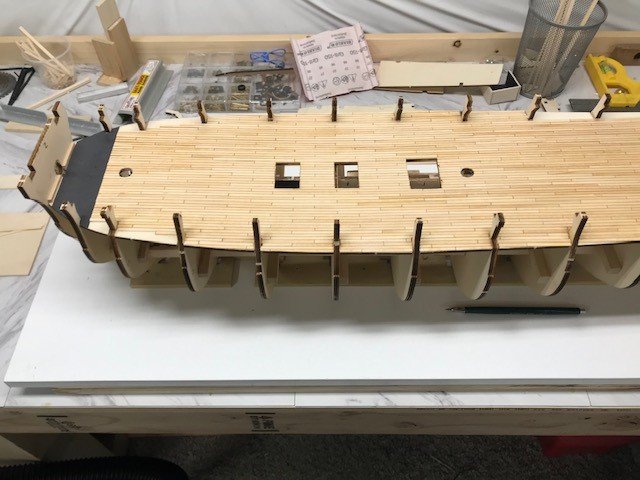
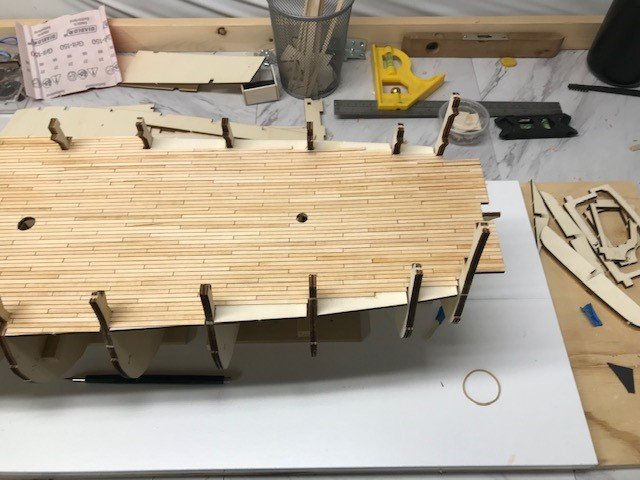
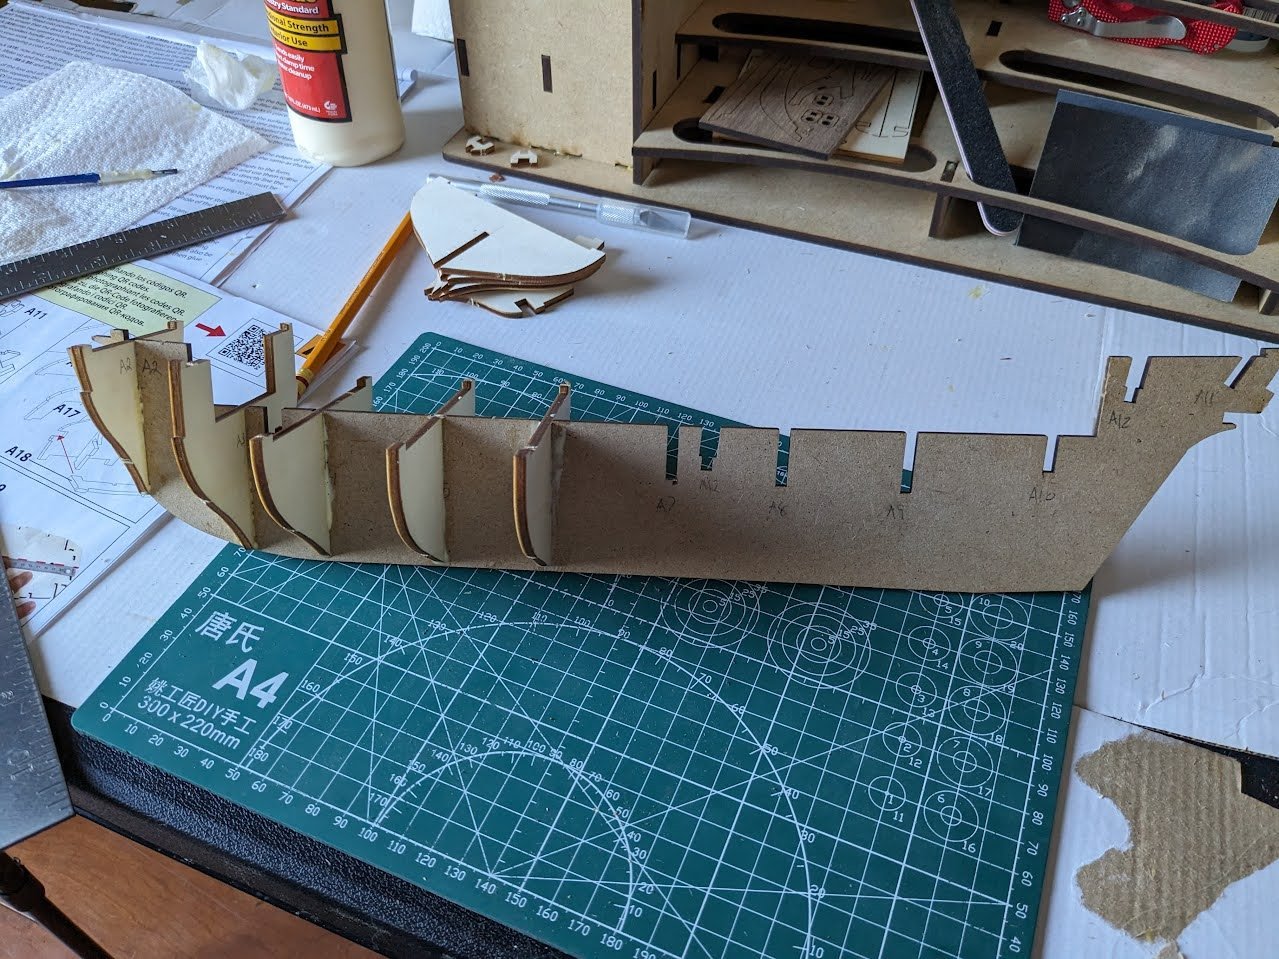
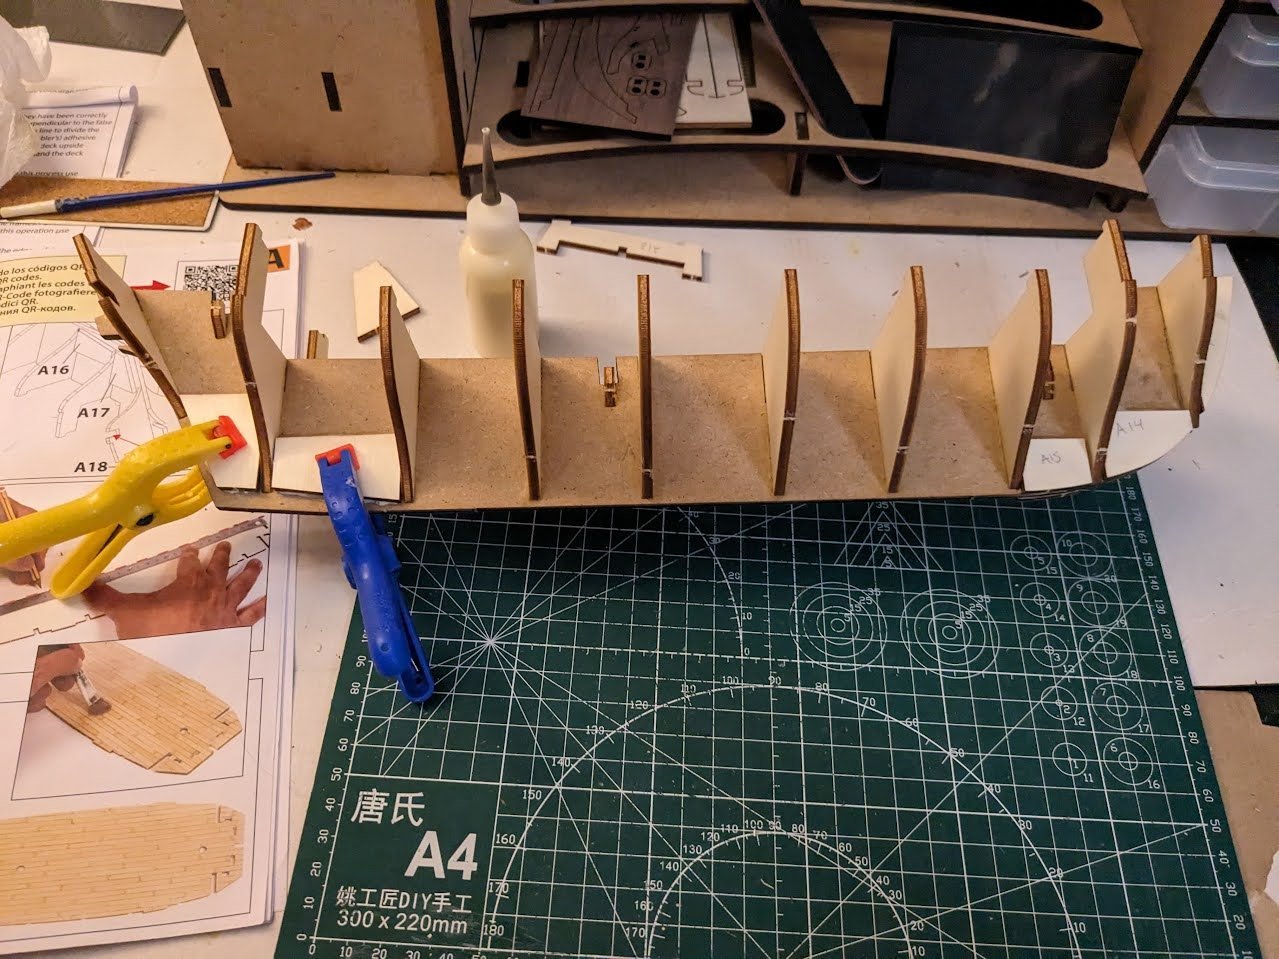
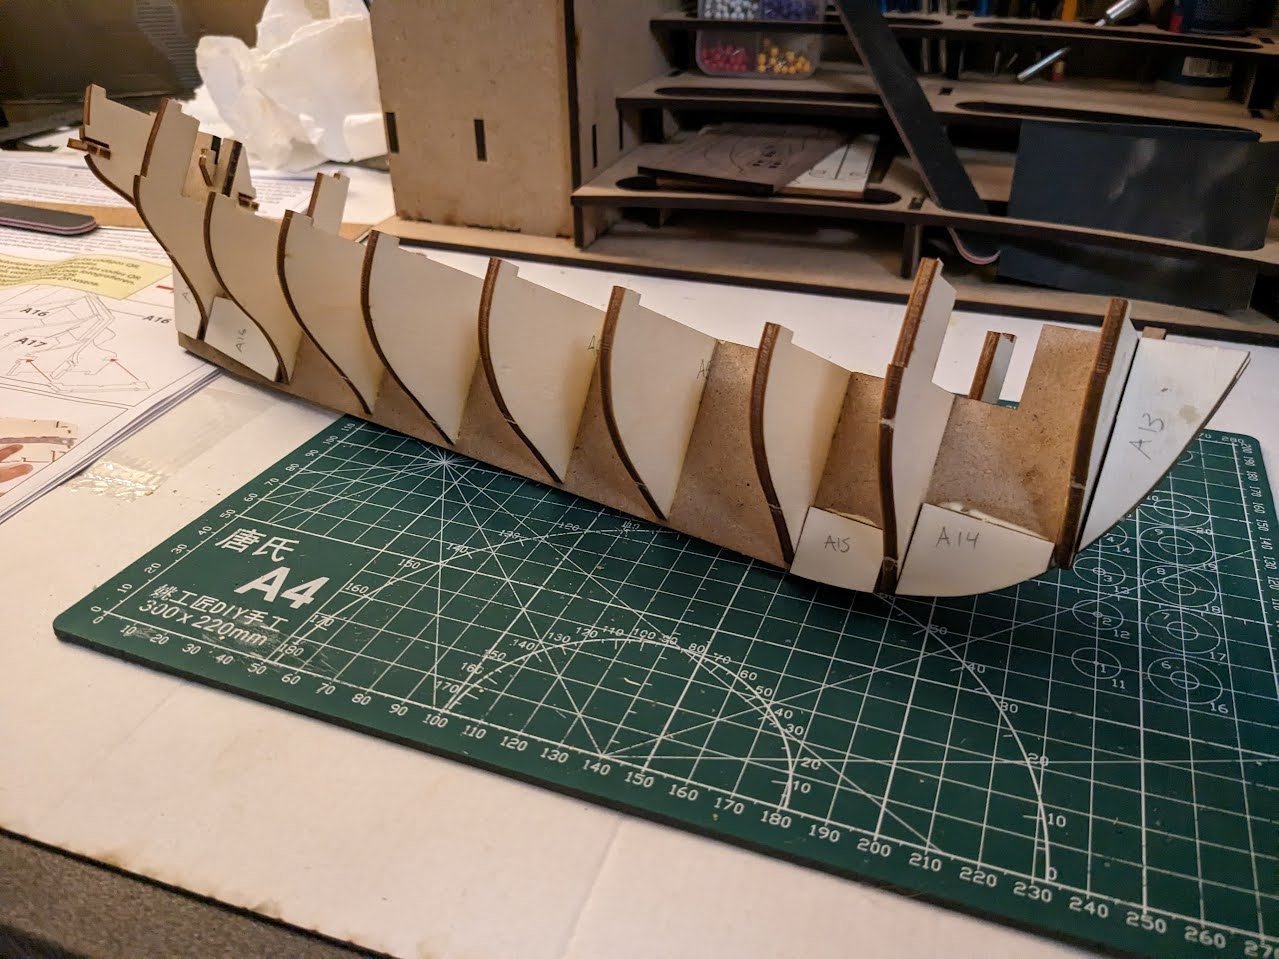
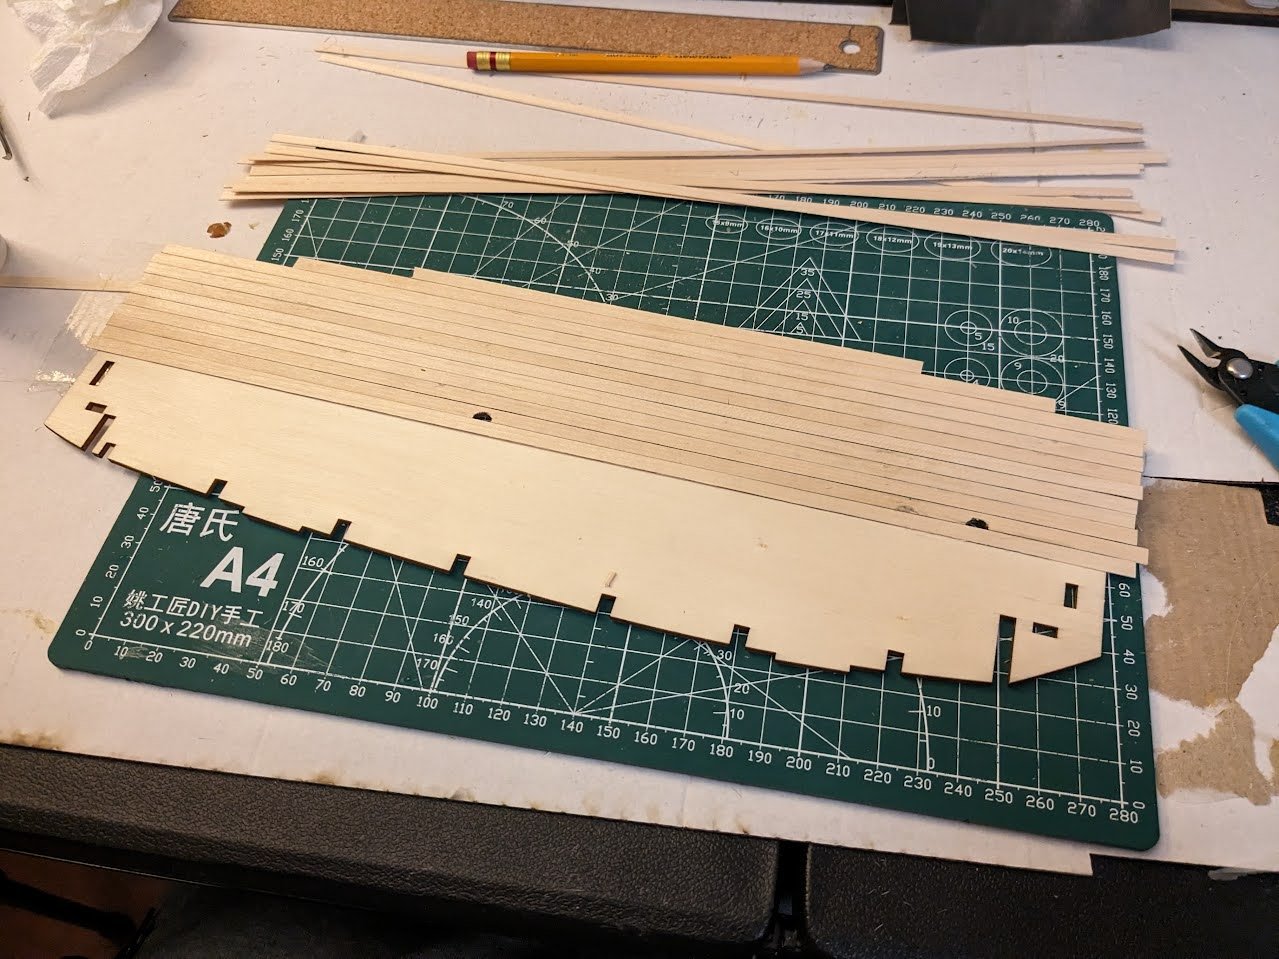
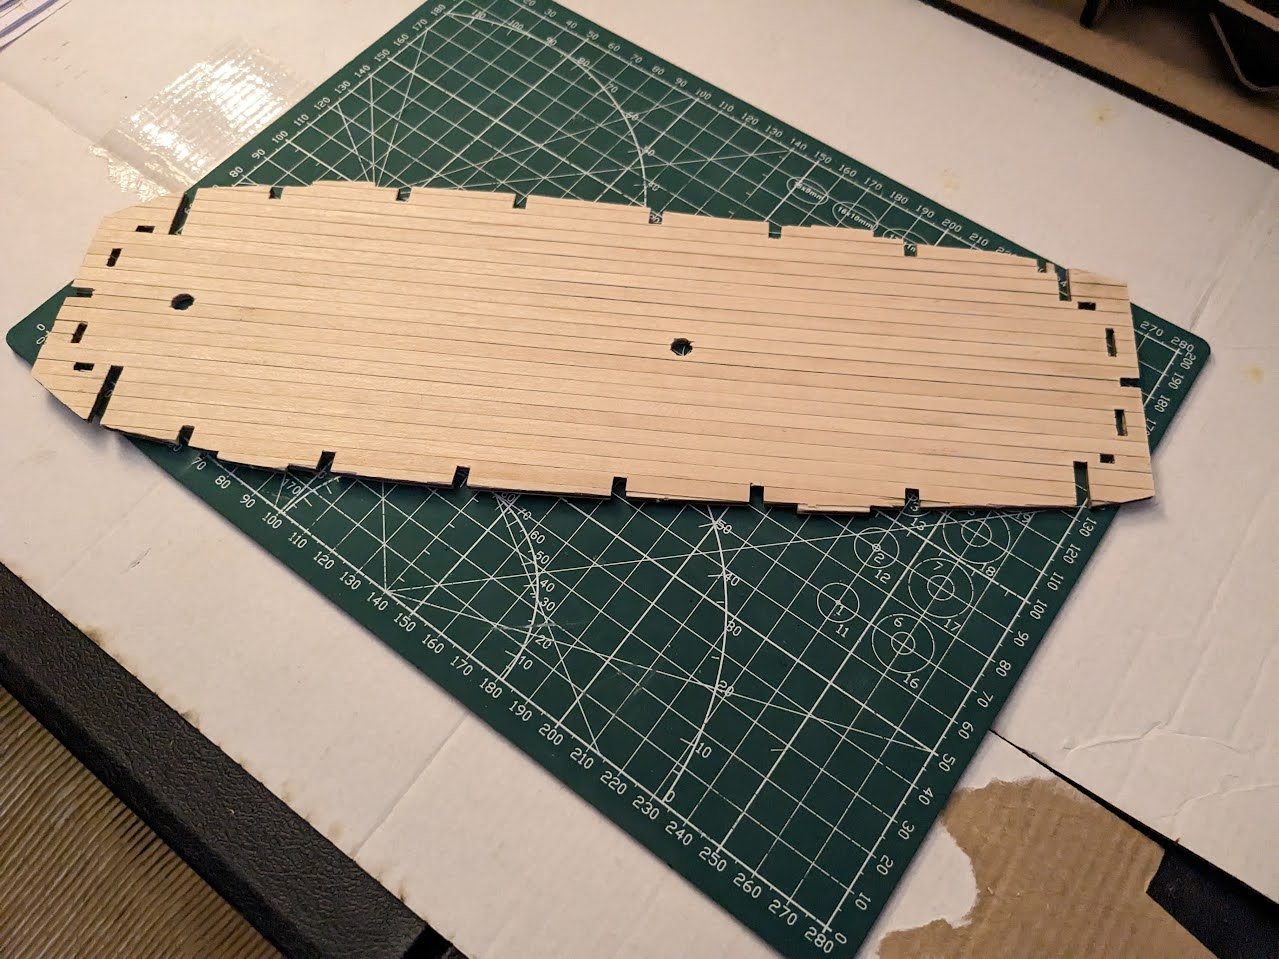
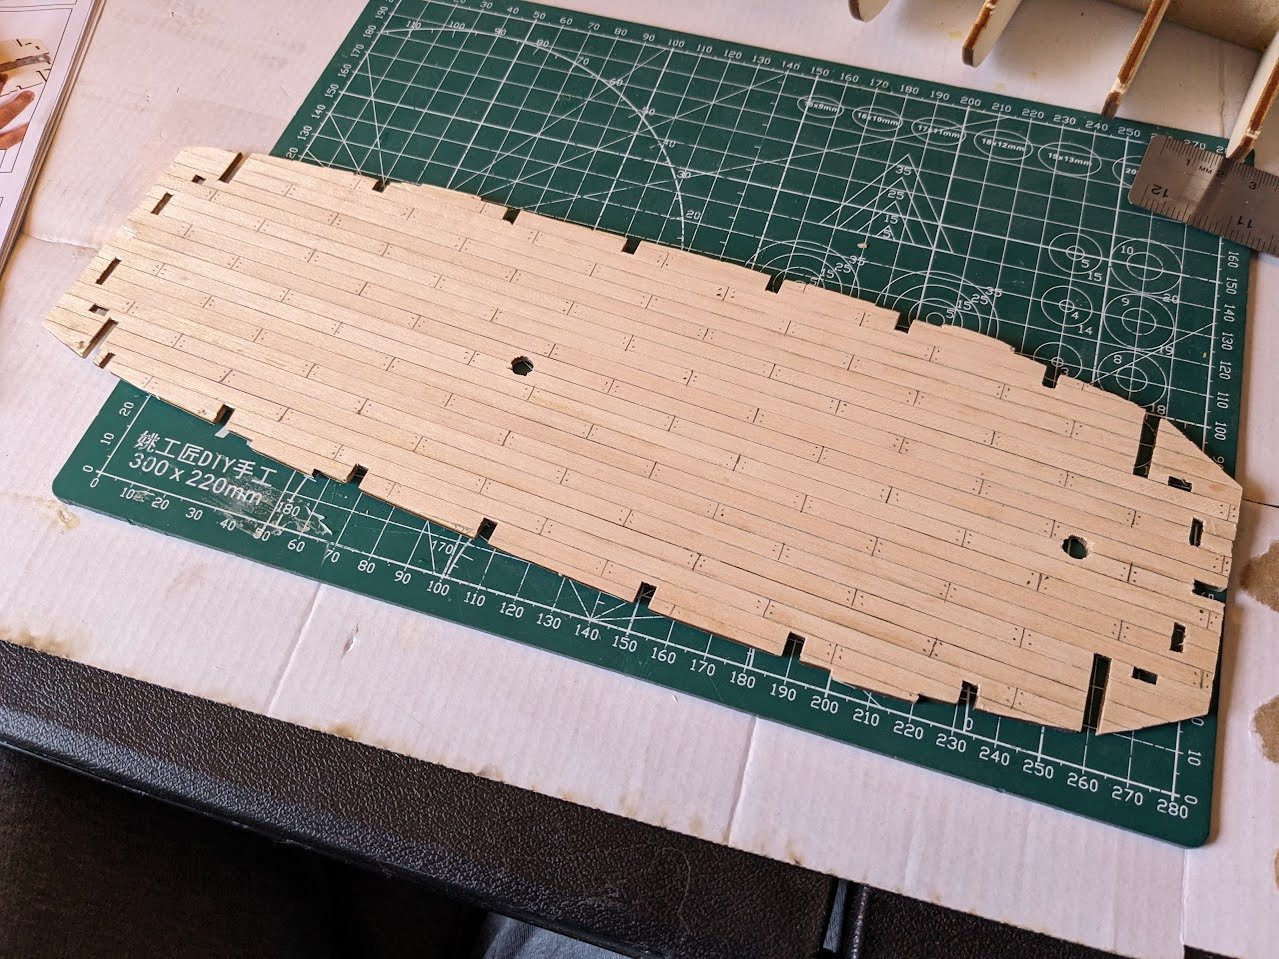
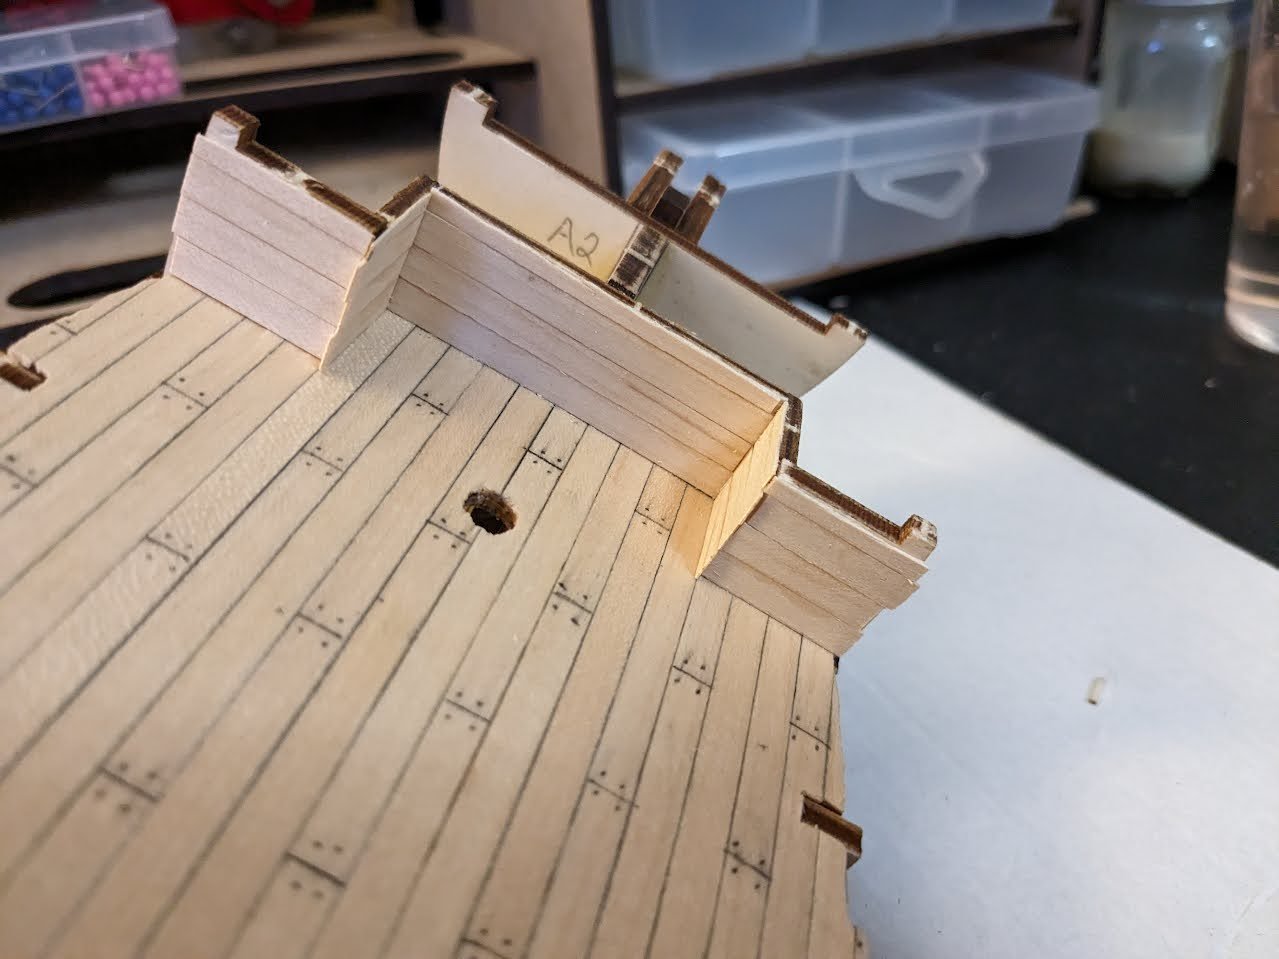
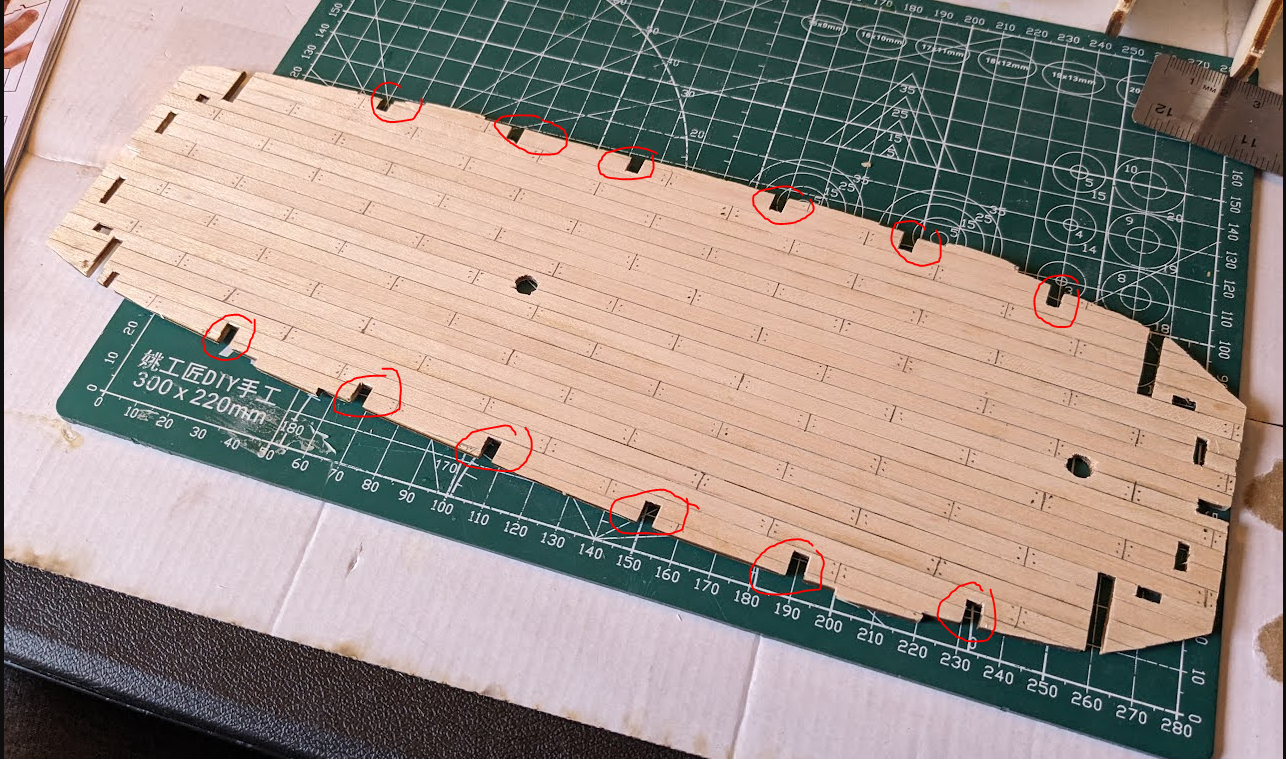
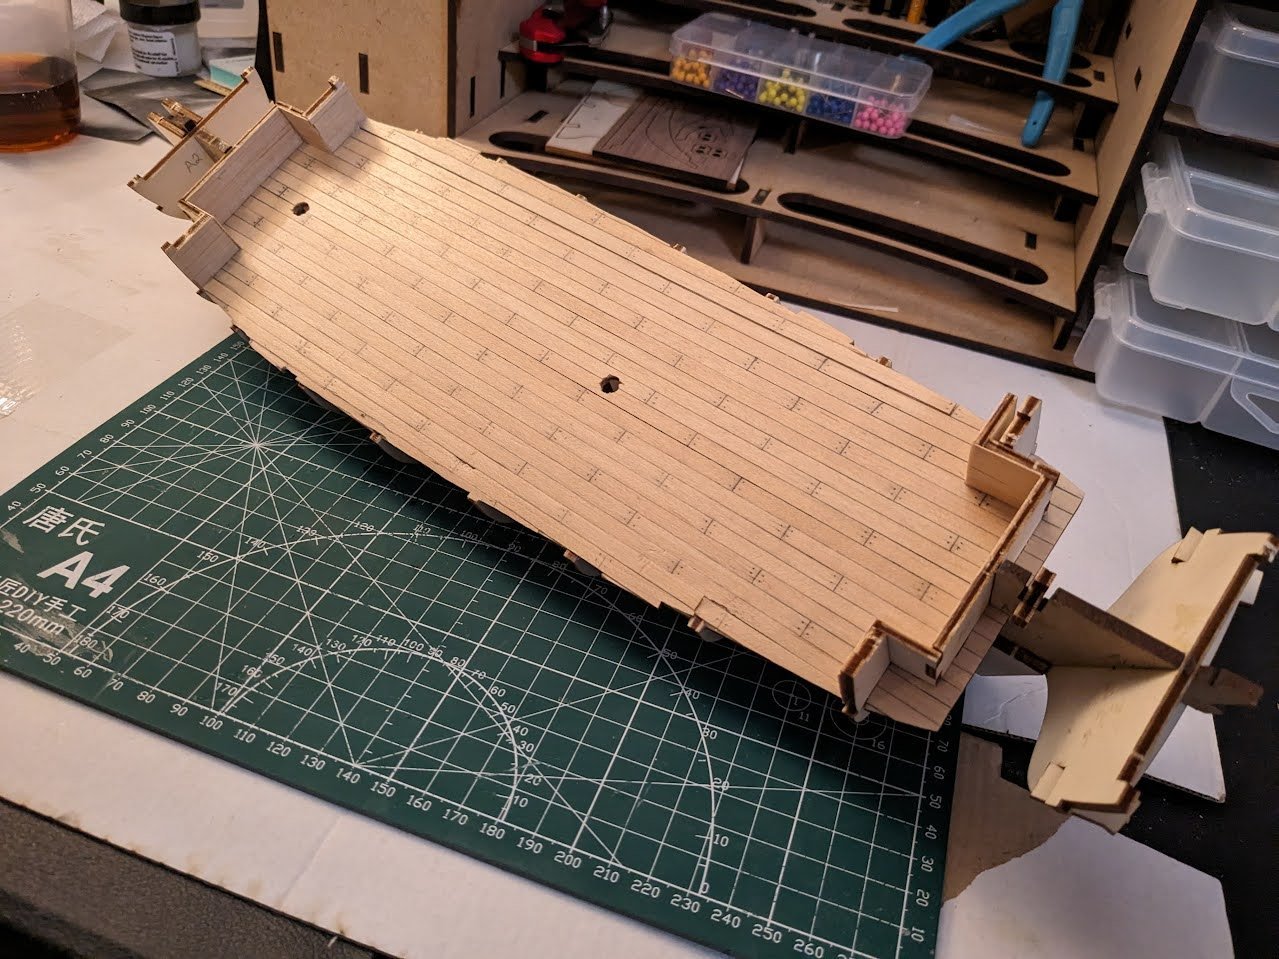
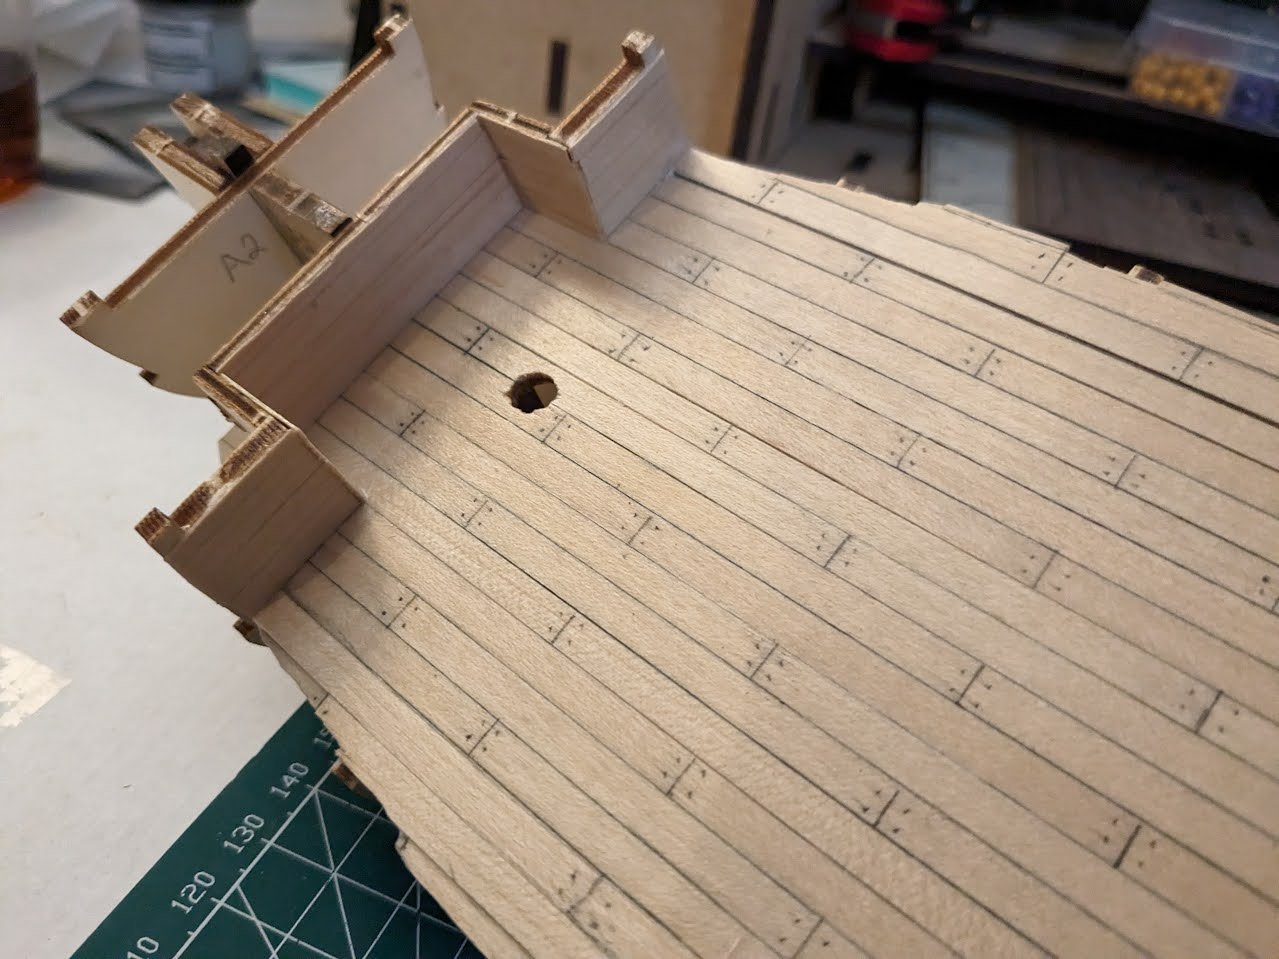
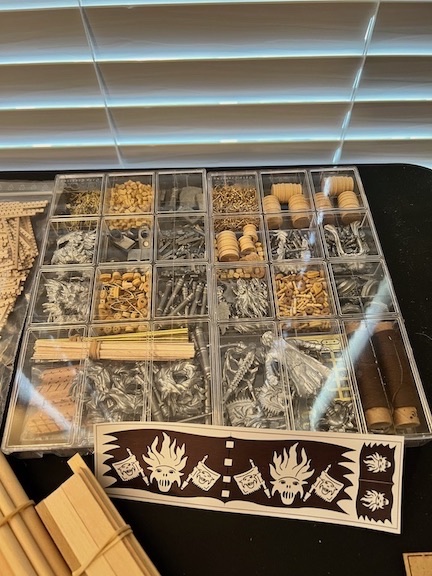
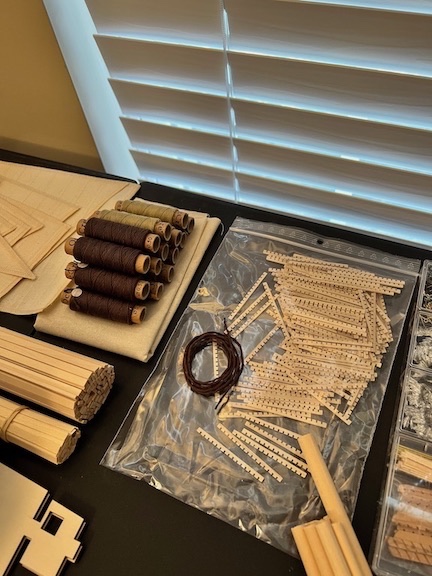
 Greetings All, Build log for the Occre Montanes. Pretty happy with the kit everting was nicely packaged and wrapped. All the ply was flat and not warped all the strips and dowels nicely banded together and all the small parts in plastic compartmented trays. The instructions are good, there is a book of photos and a separate book of instructions. The plans for the masts are nicely printed at 1:1 scale. I did take the plans to my local copy shop and have them single side printed and had the plan for the side view enlarged to 1:1 scale instead of 1:3. My last ship had double sided plans and it got old constantly flipping them over. This is my third build and I wanted to work at a bigger scale, this ship is big! I had to build another bench to make things easier. For the build board I went to my local home improvement center and got a melamine shelf board, a "premium pine" furring strip and poplar strips for the bottom slot. The shelf board gives a nice flat smooth surface and I have a piece of 3/4 ply underneath, roughly $40.00 for materials. I Made sure the uprights were perfectly squared then made sure they were in line using a 3' steel level. The notches in the bottom boards are for the bulkheads. The notch down the center is to keep the false keel straight. On my first kit I didn't take much time with the build board and the false keel twisted. I was able to fix it, but I had to remove a lot of planking and add reinforcements to the false keel not fun! For the frame I cut the rabbet and the bearding line with a Proxxon mill. I sanded all the bulkheads, so they were snug but not tight and dry fitted everything at least ten time before I started gluing things together. I stated with the bow bulkhead and worked to the stern. the big square reinforcements were sanded so they would slide in without being forced. I squared each bulkhead to the false keel and plumb to the build board. I also added a lot of bracing (might have gotten carried away a bit but I don't want the disaster I had with my first kit). The instructions show planking the decks then gluing them in place. I don't know how I could have gotten them glued to each bulkhead correctly as the have significant slope towards the bow and stern, so I opted to pin and glue the decks in place first then do the planking. I Deck Planking: Decided to use the method I saw here on MSW with construction paper. After consulting with the admiral and her staff, decided the light brown looked best. (Tried black, dark brown, pencil and sharpie). The hardest part here (other than making what seemed to be an endless number of planks) was getting the glue consistency down. Too think and the paper does not bond well, too runny, and it gets between the planks. I also found the brushing the glue on worked best for me. I used watered down PVA. When gluing the planks to the paper make sure they are snug with each other. After the glue dried, I separated the planks using a double-sided shaving razor blade. Oh, and put tape on the blade to avoid nasty little cuts! After the planks are separated repeat the process for the ends. You only need to do one side and one end for the planks. I used a four-plank shift starting from the centerline. Not hard just have to keep track of where you are and make sure the construction paper caulking is facing the right way. I didn't take the planking all the way to the first bulkhead since it will never be seen.
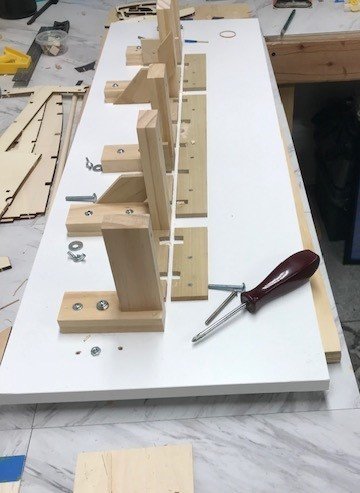

-
 Hi guys, Here we go, starting my second ship. My first ship was HM Schooner Ballahoo, but I didn't make a build log for that one. To be honest I didn't think I would get very far with it. However, I did complete it and was quite happy with the result. During the build I relied very heavily on the build logs of others (especially The Lazy Saint) and now realize how important and useful build logs are to people new to the hobby. I'm obviously hoping this build goes well and I can get it completed. I must admit I'm still having problems with a lot of the nautical terms and the whole thing is a learning process for me. I started making plastic models of aircraft as a young boy back in the 60s and 70s (my father was in the Royal Air Force). That continued for many years, eventually moving on to military fighting vehicles in the 80s and 90s. Then last year, after a few years of deliberation, I took the plunge and got my first wooden ship, which as I said turned out okay. Now I'm converted Chimp

-
 I was given this model by my family as both my wife and sister in law volunteer at Down House which is a few miles down the road. Down House was the family home of Charles Darwin for 40 years and where he wrote "On the Origin of the Species" which was published in 1859.
 -
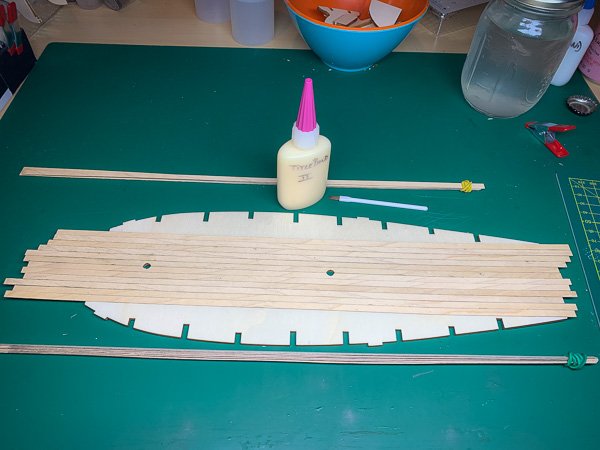
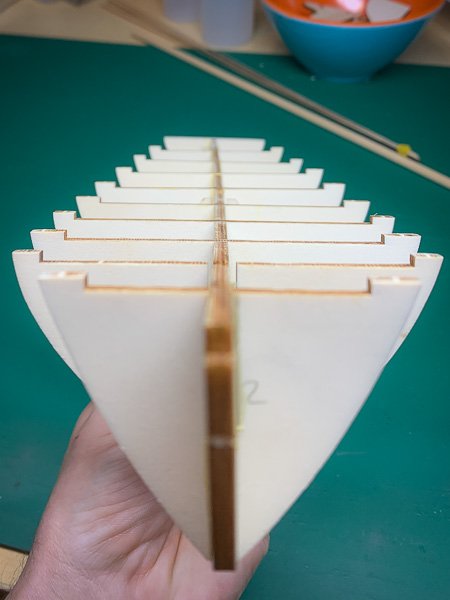
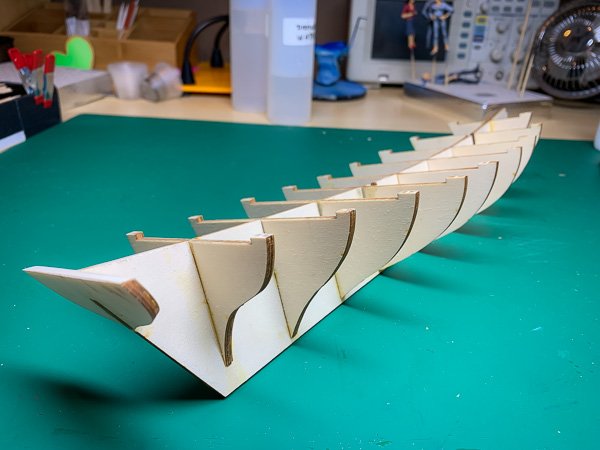
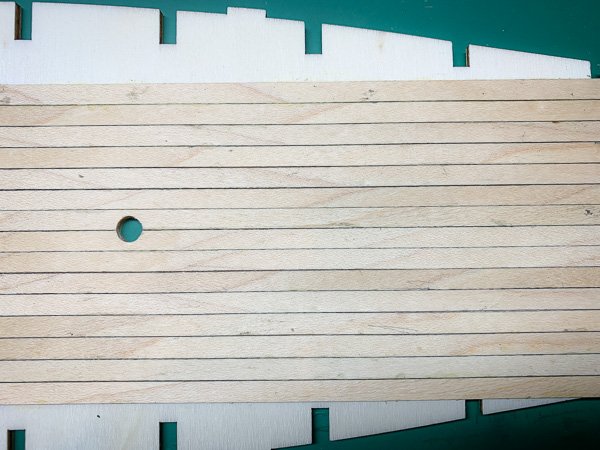
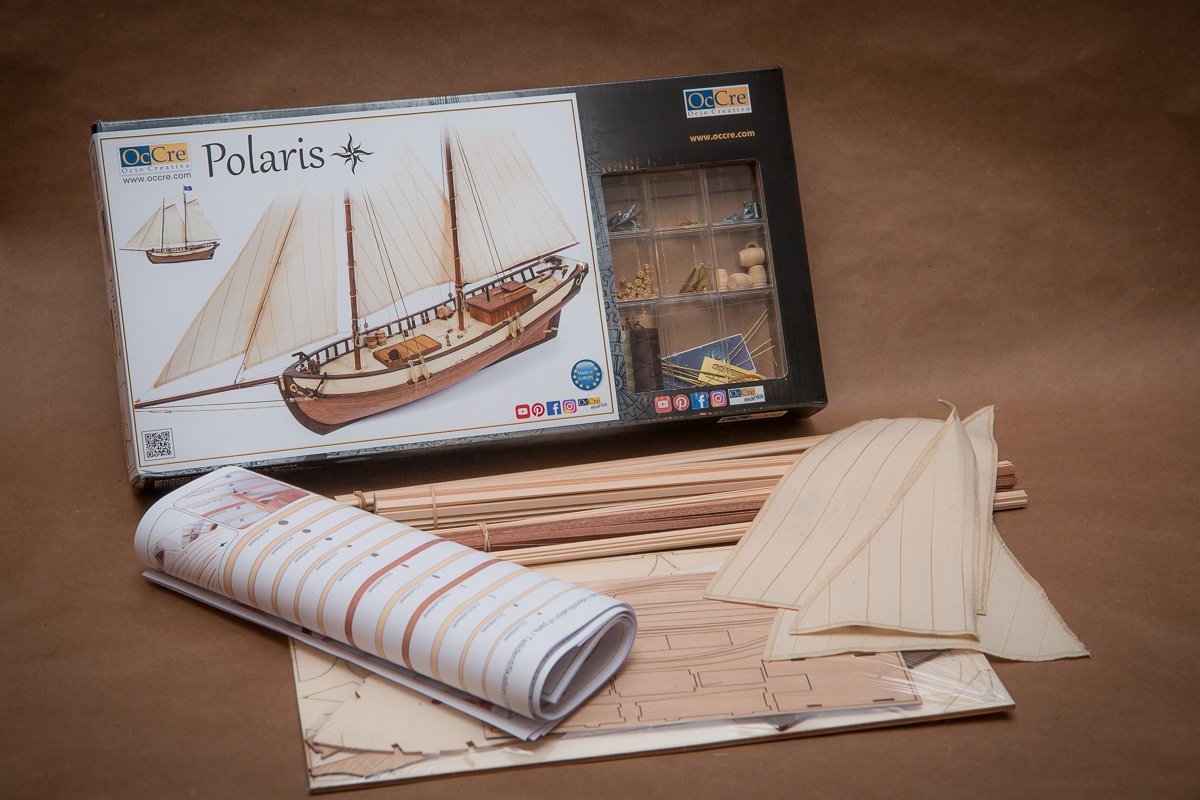
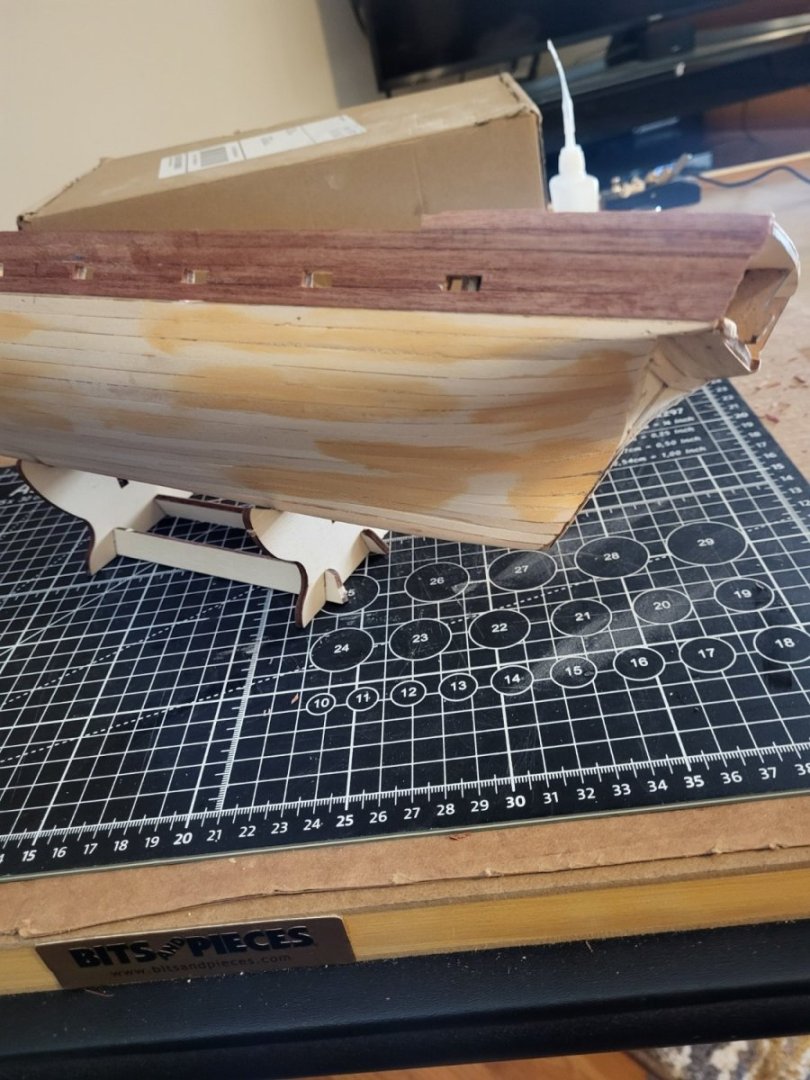
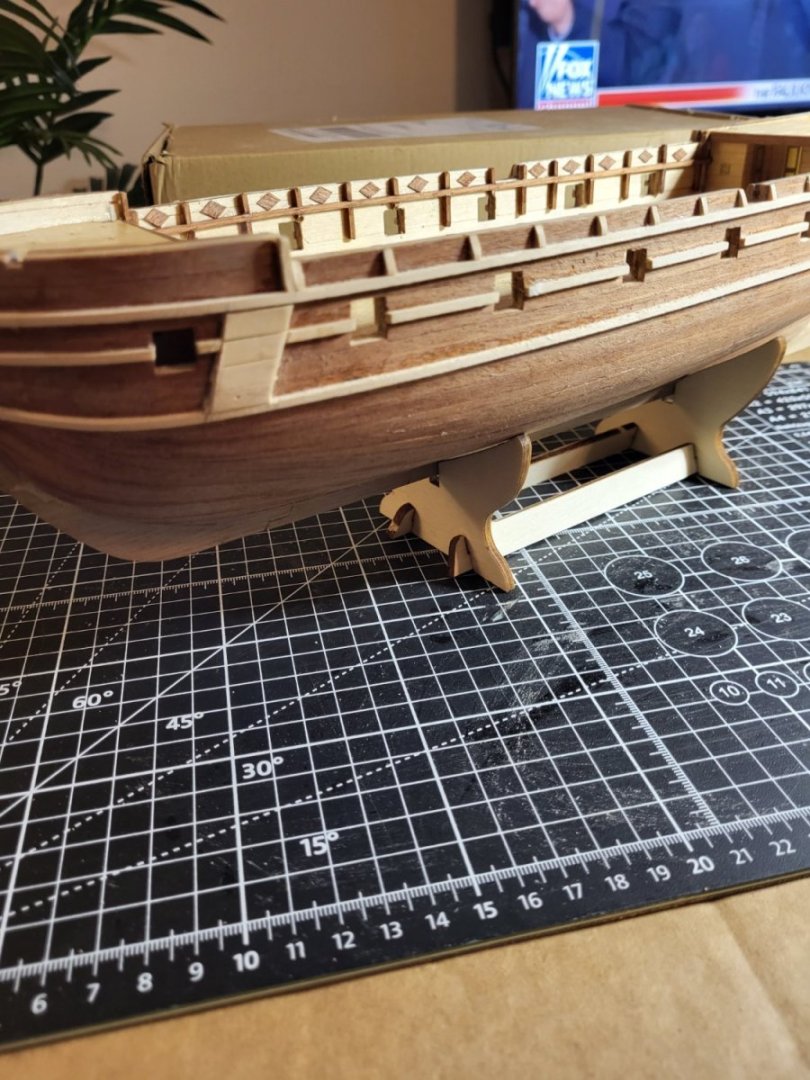
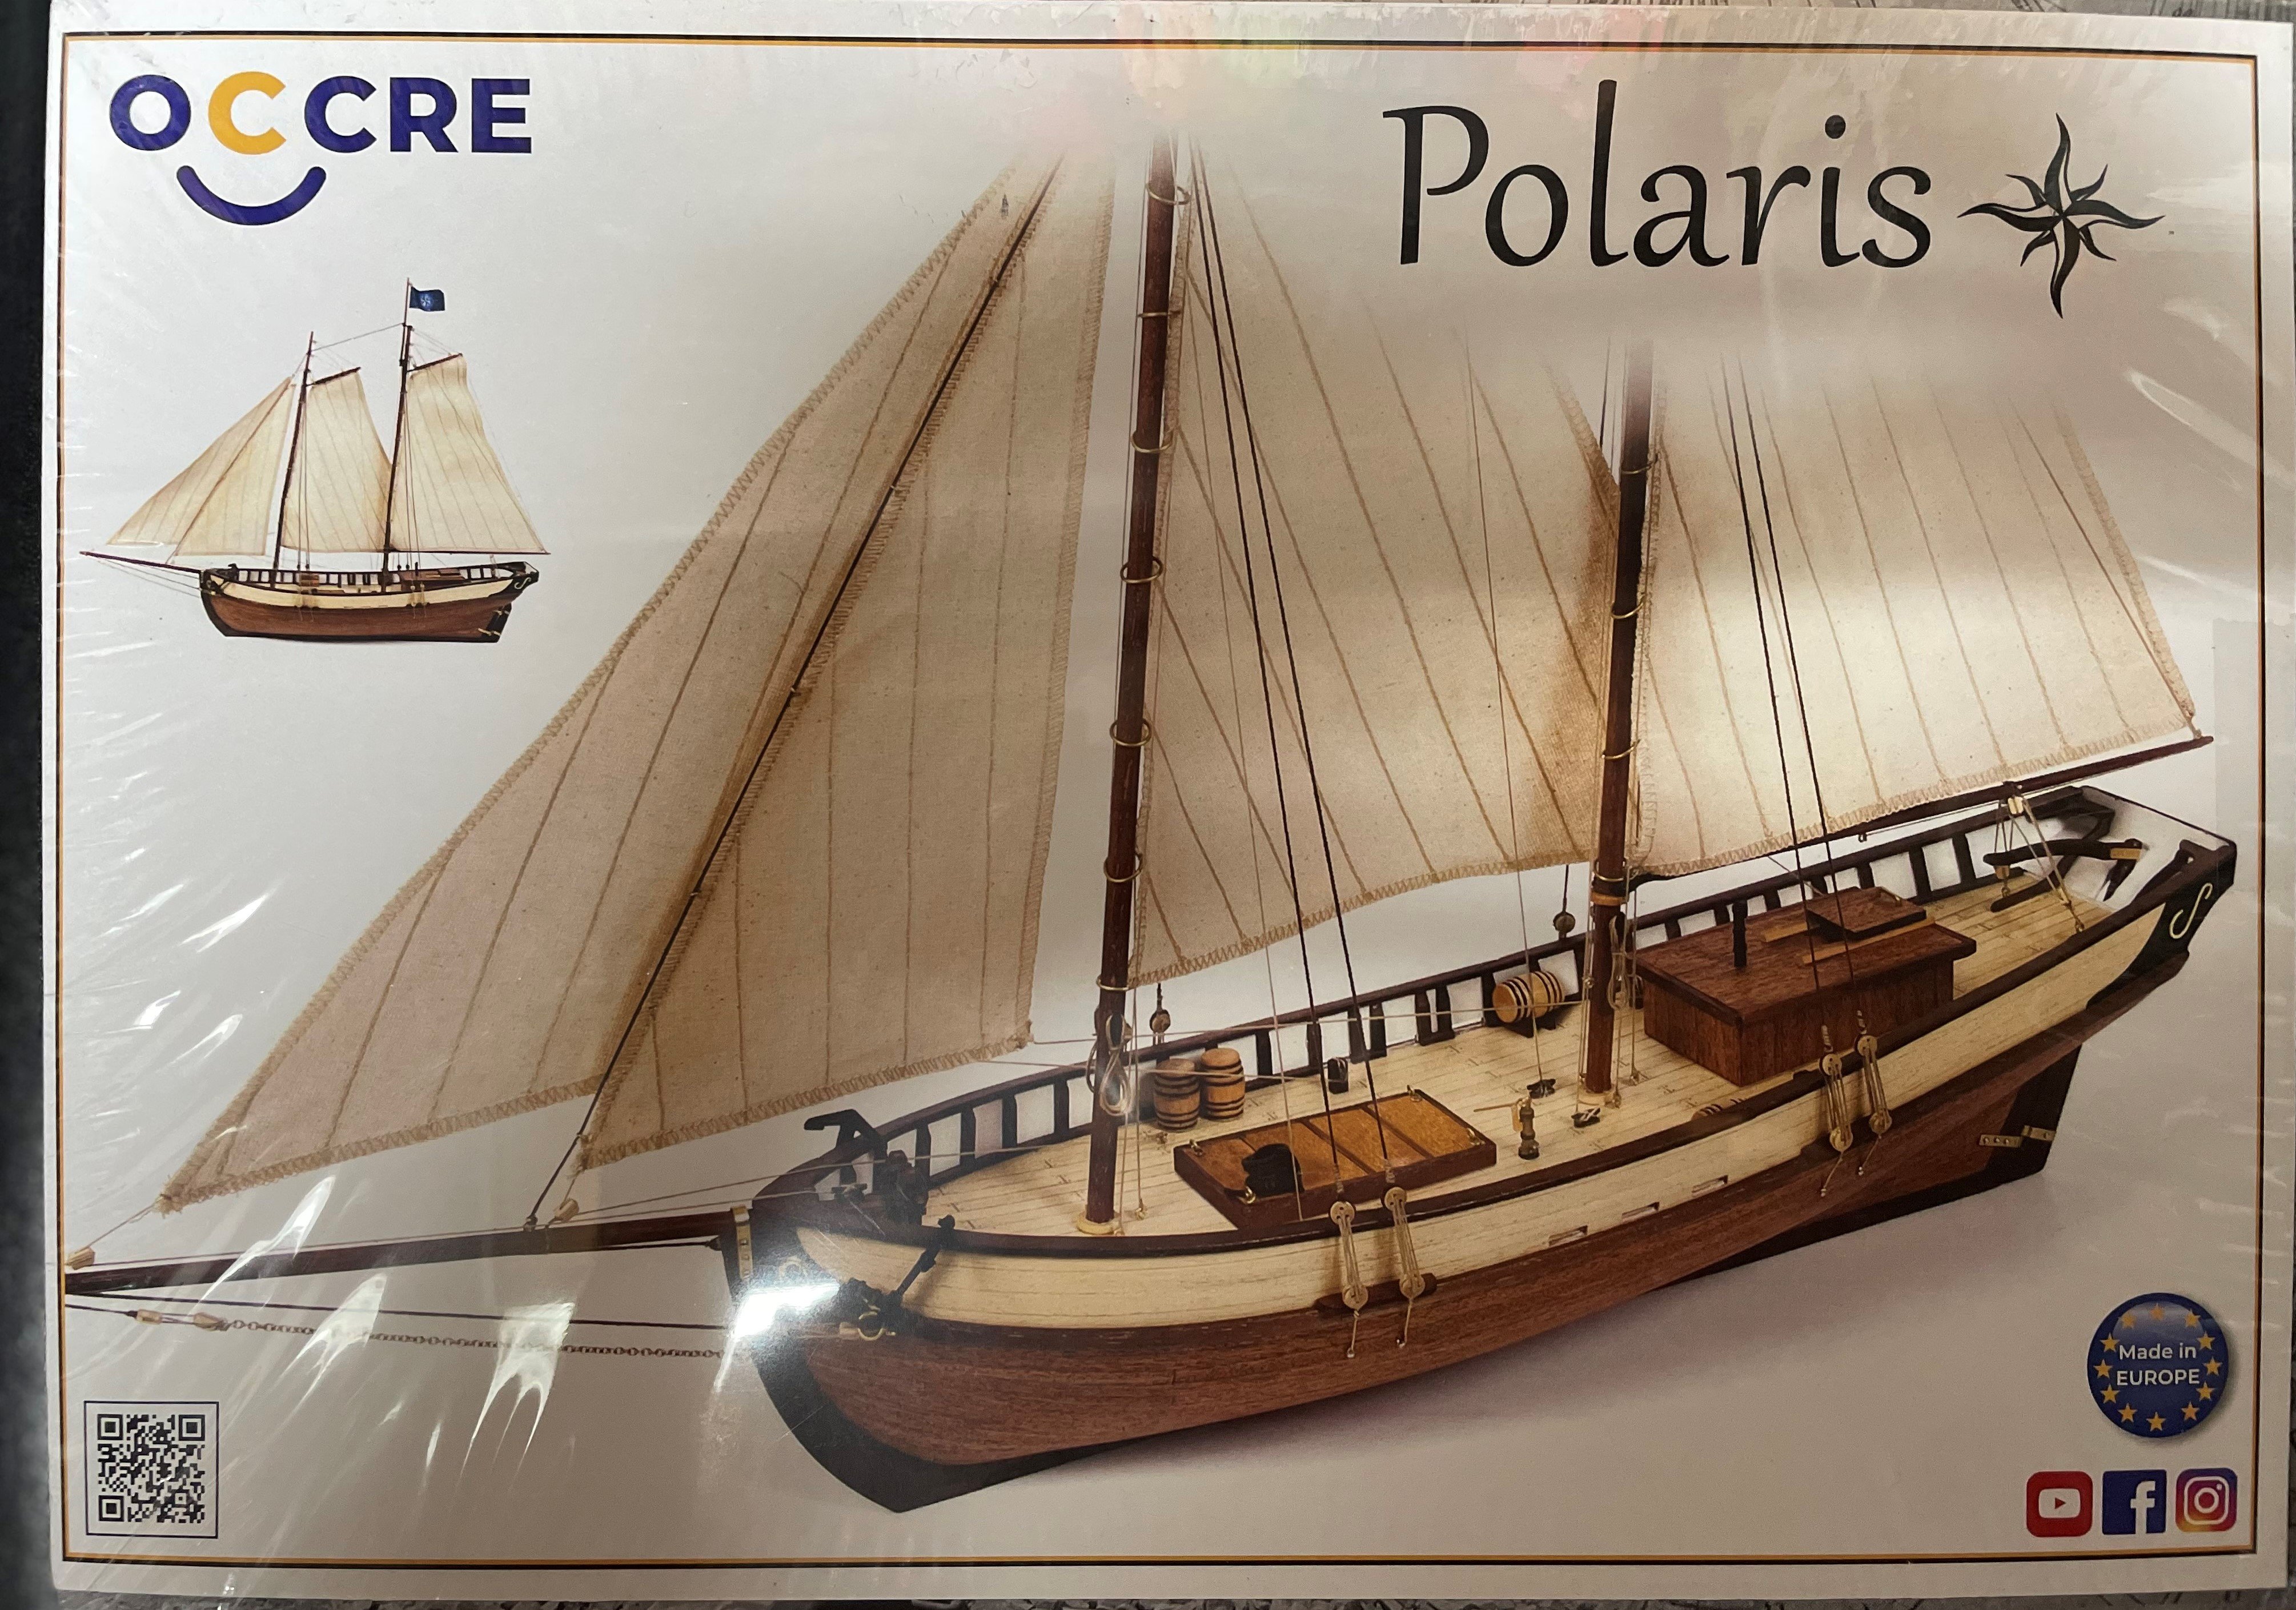
 Reflections on the kit and build: I thought it might be more useful for others, who might be thinking about building this kit, to write a short summary about my experience, and put it in this first post so it is easier to find. First off this kit is meant for first time builders, which I am, and I think they got it right. Its detailed picture-based instructions and the accompanying videos make it very clear how to build everything. There is no guesswork involved. I had only a few moments with the final sail rigging where the instructions were a little too brief but even then the videos helped fill in the slight gaps. The quality of the kit was also very good except for the deck planking strips but for my level of building that is a nitpick. However, the thing that I most liked about the kit is its level of difficulty; it was definitely challenging but not overwhelming. I felt that the time put into the build (which was 77 hours for me) was truly well spent. It really has a bit of everything so that when I now look at other more advanced builds I have a good appreciation of what level of attention and effort is required to achieve good results (which is actually very humbling). The other thing about the kit is that it's fairly forgiving with mistakes. I made a bunch of them and didn't executed things as well as I might have hoped but the design and relative simplicity of the boat is forgiving enough that you still end up with a good looking vessel. All in all I'm very please with the experience. It has whetted my appetite for more and that is a good result for a beginner's kit. Now back to the actual build log. Enjoy.... Another first time builder here, attempting to build OcCre's beginner kit: Polaris. I know nothing about ships or their historical accuracy and such, just want to get my feet wet and the Polaris seems like a decent enough kit to start out with. [There is a MSW review of the kit: here] I've managed to assemble the bulkheads/ribs to the false keel. This was relatively simple using small metal angle plates with clamps to get each rib square using Titebond II: I have to say there was quite a bit of play in the joints and while I did get the ribs square to the sides of the false keel, I wasn't paying attention to making it square along the top: And you can see that false keel has a slight bend too. However, I'm thinking it's not a problem as tolerances for mounting the deck shouldn't be that demanding. Well, I hope so. Currently working on the decking: Again using Titebond for glueing the deck planks rather than using contact glue per the instructions. I'm able to get a thin bead of PVA onto both the plank and deck, using the dispensing bottle shown in the picture above, and smooth it over with a small brush to avoid beads of excess glue forming. Working out really well. I get down 2 or 3 planks at a time and then use heavy books to press the planks while they set. Not so happy about the planks themselves. They have a lot of large grain criss-crossing them and I think ruin whatever scale effect the planks might have had to begin with. Not really a problem as I'm not looking to create a realistic model this time out. I'll be glad to just have something that doesn't look like a dog's dinner at the end of all this!
-
 Hello; Over the weekend, I began work on OcCre's Polaris. I choose this model as it appear to a good kit for a beginner. There was one for sale in the area that I purchased last week. I have looked over amazing build logs of this ship that have been book marked for future reference. It seems the place to start is a picture of the box. The following weekend, I opened the box and checked that all the pieces were present and counted. The false keel had a very small bend in the middle but didn't seem to be a bad as others have shared. After gluing the ribs in place, I learned two things; use less glue and buy white glue. Not shown in the picture are the corner pieces I used to square the ribs to the feel. They are were to big to glue more than rib at a time. While waiting for each rib to dry, I managed to get the deck plates marked up with a 7 HB pencil and marked the center line on the deck plate. Sunday was a trip to store to buy wood glue that dry's clear and some contact cement. Comments and critiques are welcomed. David
.thumb.JPG.a0e4a9c837e65b71d6ed91a0be5ba0c4.JPG)
.thumb.JPG.e7f06b48e02ce6a91fb34d258caa0e3b.JPG)
-
 Just opened my next project. I am going to attempt to build the OcCre Endeavour. This will be my first completely wooden model after years of building plastic. I see there numerous builds of this ship in the index and will look to each of them for help and advice.
 -
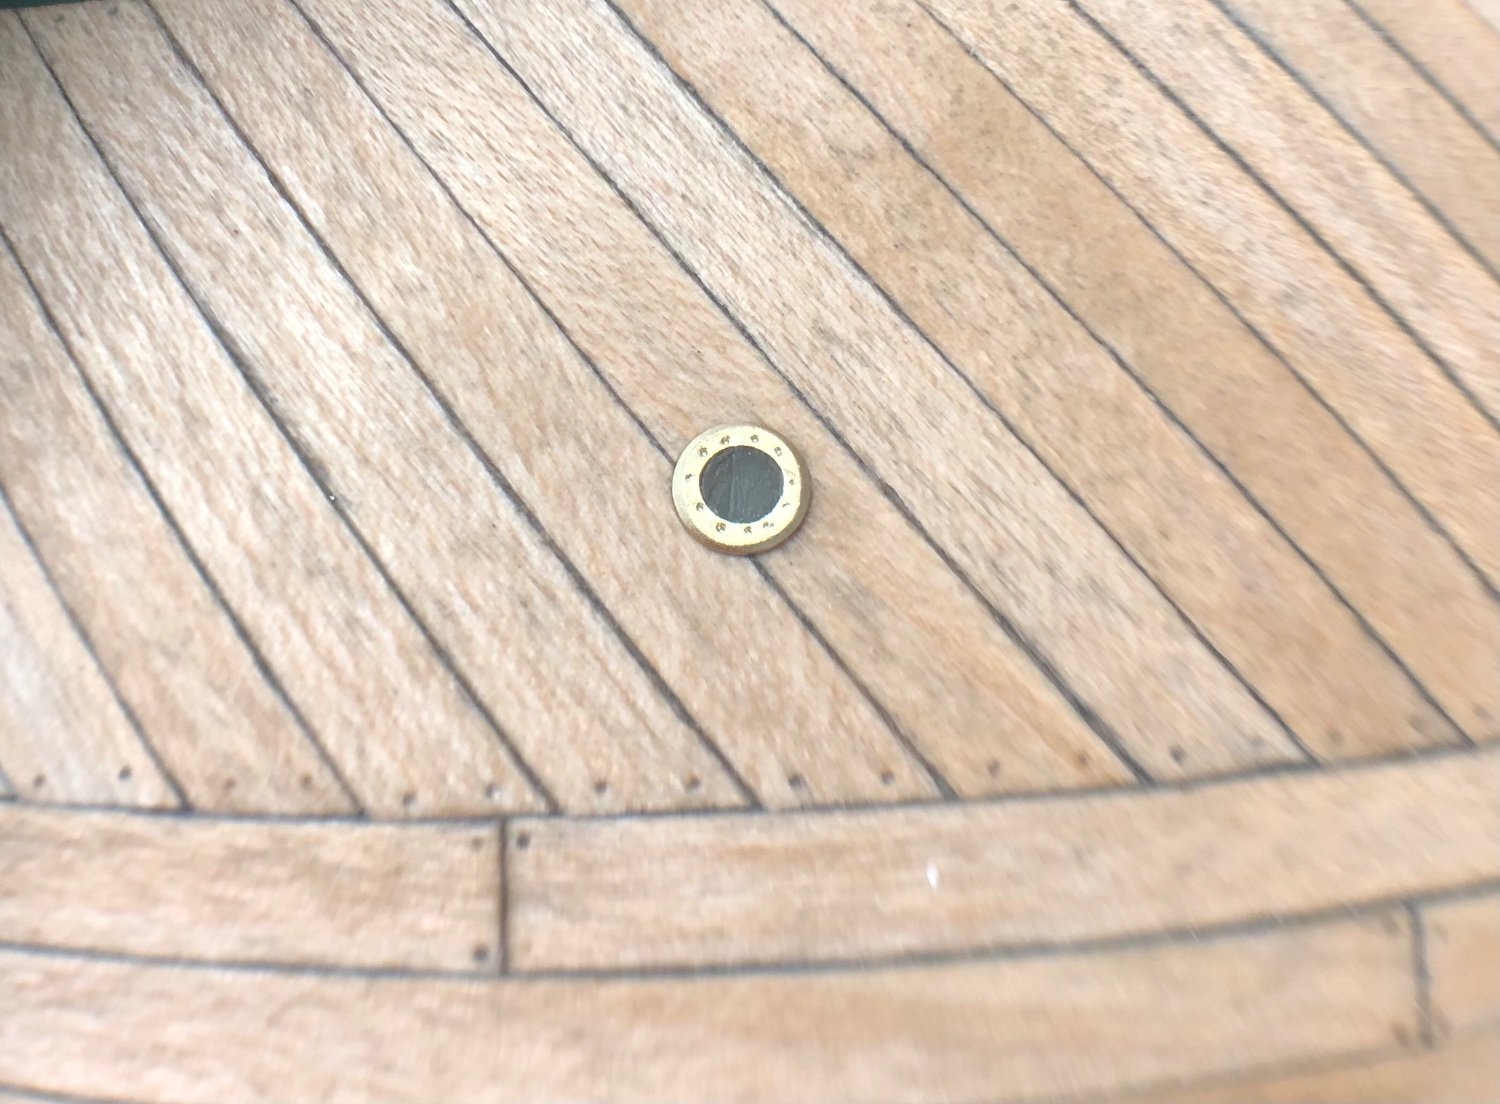
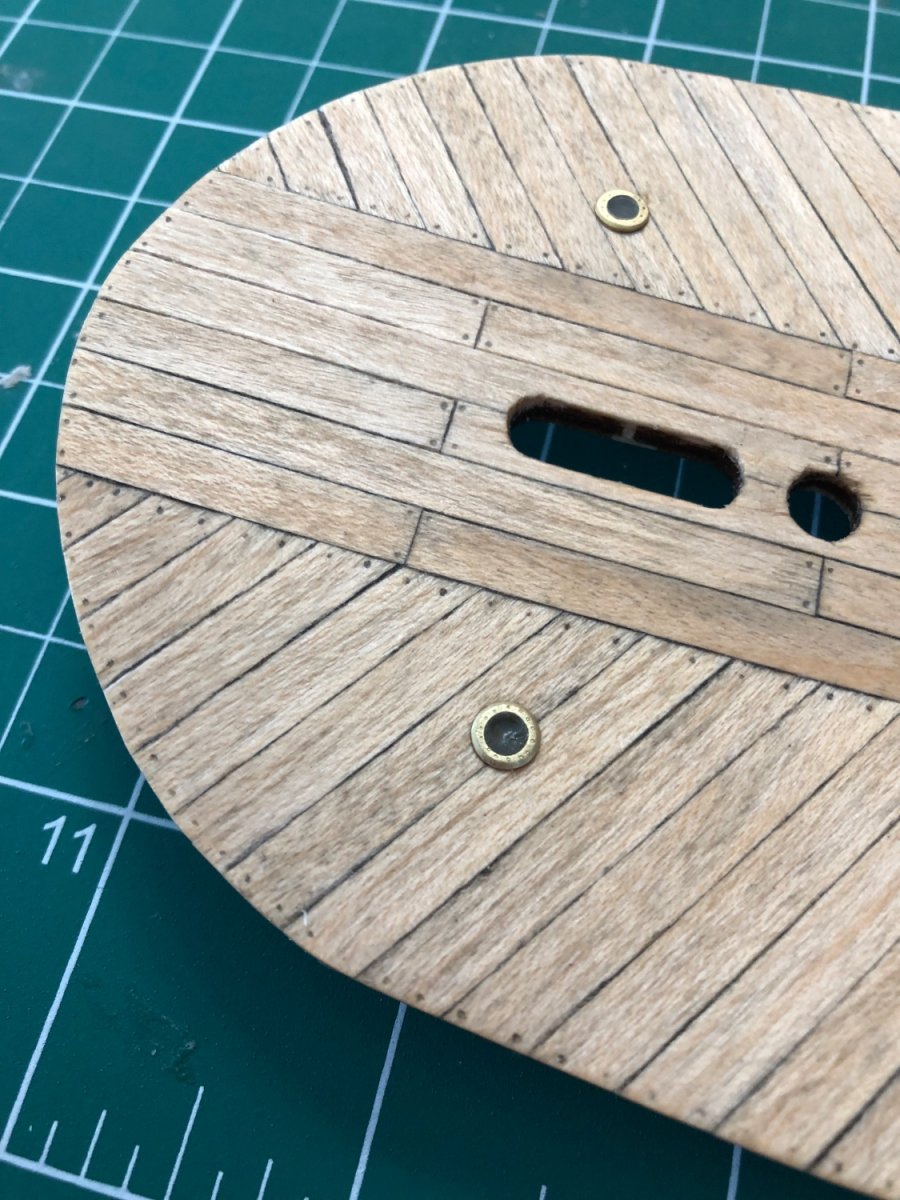
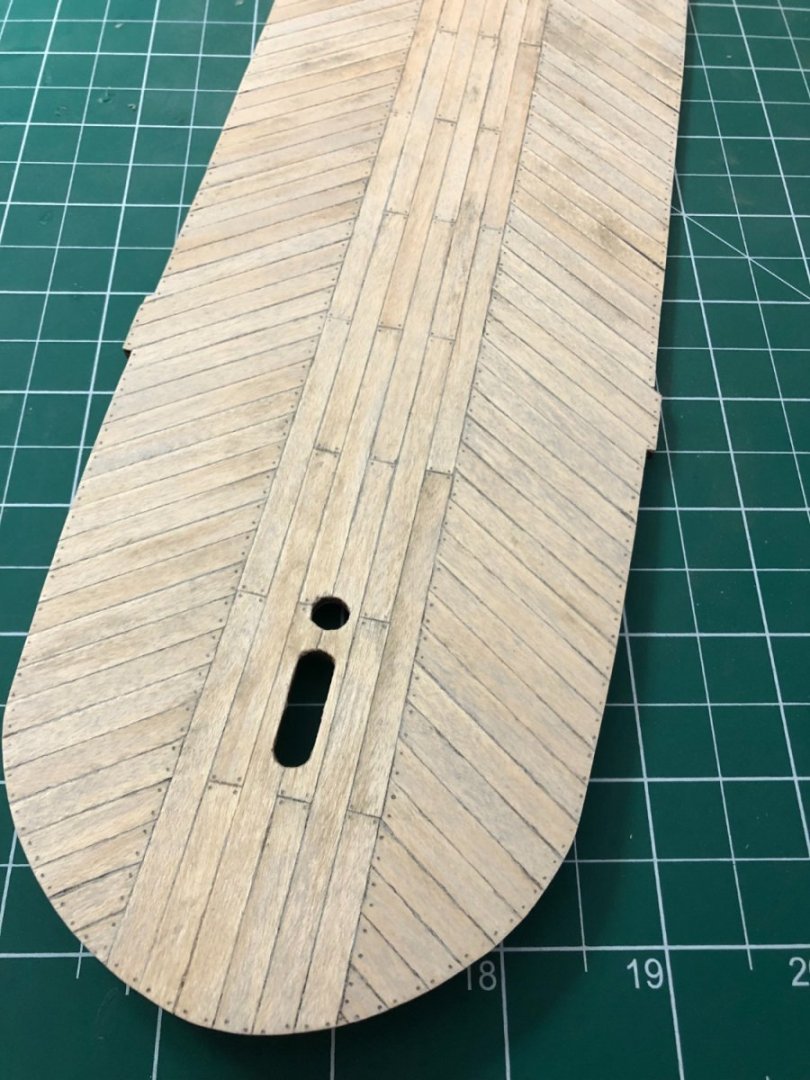
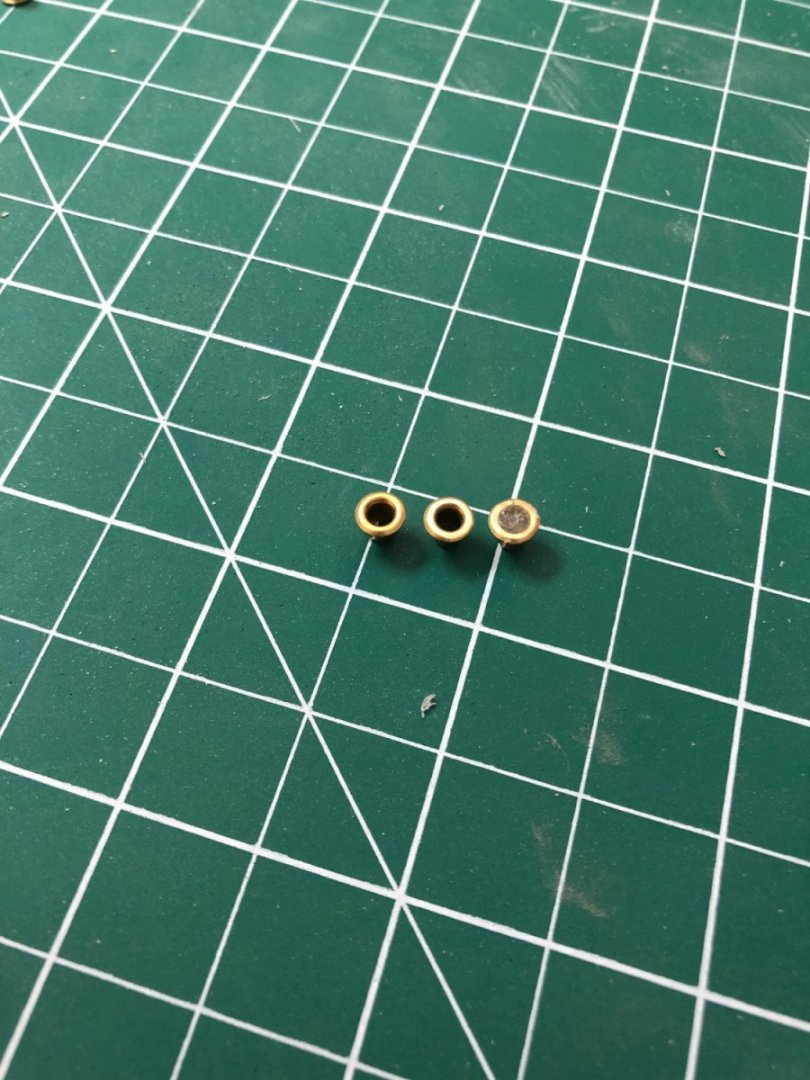
 Hello MSW! This post serves as an introduction to yet another build log for the Endurance kit by Occre. First, a little about me: I started this wonderful hobby as a teenager and kept at it when I could as I was traveling all over for the US military. This made it difficult to set up a permanent workshop (or table as it were) so my first and second ships stayed on standby for most of this time, with small bursts of productivity here and there. Unfortunately, the San Fran in my signature was lost to rough handling by a shipping company (yay army movers!) many many years ago, when I got out of the military. The Newport is currently on my newly-setup work table and I have been making slow progress with it and will need to update that log soon. I've built a dinghy and a skipjack on the side, which I don't necessarily count as "wooden model ships" in the class these vessels are in. That being said this kit will be my 3rd model ship kit. Anyway, we're here to log my rendition of the famous Endurance. She needs absolutely no introduction, and I'm going to point anyone who wants more information to the numerous and great build logs from others, as they've done a remarkable job documenting the ship's beginnings in their logs. First thing is first, my kit is currently in the mail on its way to me. While waiting for the kit to arrive I have already read through every Endurance log on this website and will probably read them all again for good measure. While making my way through the logs I took note of every bash and scratch build people have done to make this model more historically accurate. I'm not going for 100% accuracy, but perhaps somewhere around 90% accurate, to the extent my modeling skills allow. There was great advice given to focus on a particular 'load out' as this ship seemed to change a little here, a little there over the course of her voyage. I am particular drawn to the very beginnings of being stuck in the floes, so I imagine I will gravitate towards this set-up. I don't have all of the details nailed down yet in my notes for this period of the voyage, but over the next few weeks as I work on the obvious structures, I'll continue research and make decisions as we go. Things I already plan on changing (so far): Under the forward deck will be open (I have a question on this at the end of this post). All belaying pins replaced with brass. Stanchions will be 3D brass with brass wire rod, soldered then painted white. 2-Blade brass prop (someone in another forum said it was 25mm. I could only find 30mm, so I hope it's not too big). Coal loading covers instead of the o1 stacks on the aft main (lower?) deck. Probably scratch capstan. Steering gear with chain (thread as backup). Anchor cats shaved down towards deck. Deck planks 2.9mm wide (for 8" planks). Portholes are too small, so either fill and drill new or drill bigger (and not using the brass inserts). I'm sure I'm missing something else but you get the idea. That sums up where I currently am at: the very beginning. I've always enjoyed curating a log on these forums and is why I keep coming back after so much time has passed. I appreciate anyone and everyone stopping by and offering suggestions, thoughts, concerns, and motivation. Please feel free to post any historical data you might have that's relevant to the ship's configuration as she entered the ice floes. I'd be eternally grateful! I have a few questions to start off with: - Area under the anchor deck. What was it used for? What did it look like? Are there any images that show this area? @Tomculb has a great interpretation of this at this post, and I'm inclined to do the same. - In this picture it appears the ritz has a chimney coming from the port forward side. Is that correct? If so, I'll be including it in my model. - Was the steering gear exposed when they first entered the ice floes? OcCre has it covered, but I want to model it. However, since I'm going for a particular time in her voyage, I'm not sure if it was covered in the beginning of the floes or not. Until next time! --------------------------------------------------------------- Edit 3/31/24 - Over the course of this project I have created a handful of .STL models that can be 3D printed which replaces some of the items in the kit. I'm editing this post and including a link so it can be found easier by anyone building this kit in the future. Click here.
 -
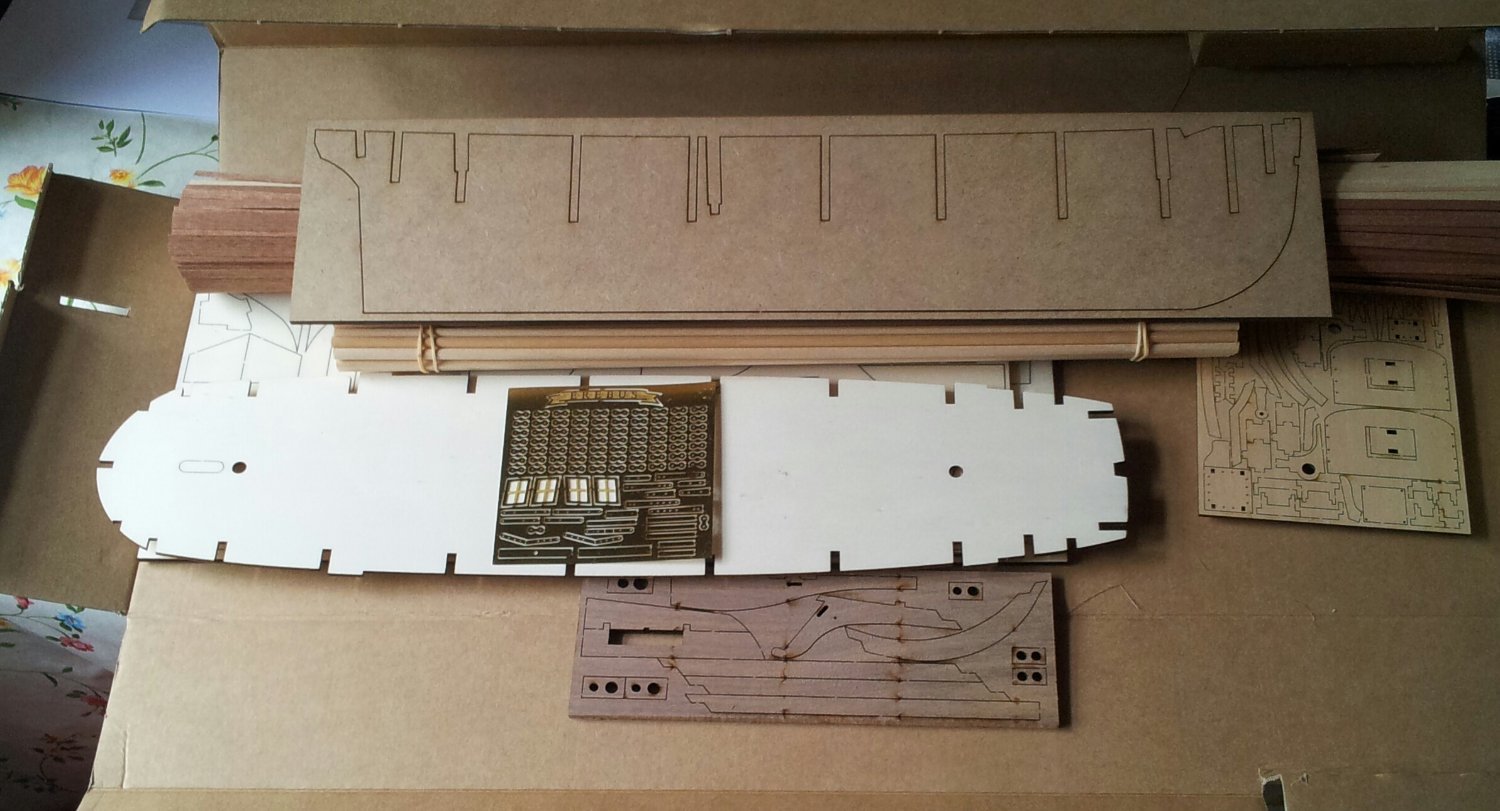
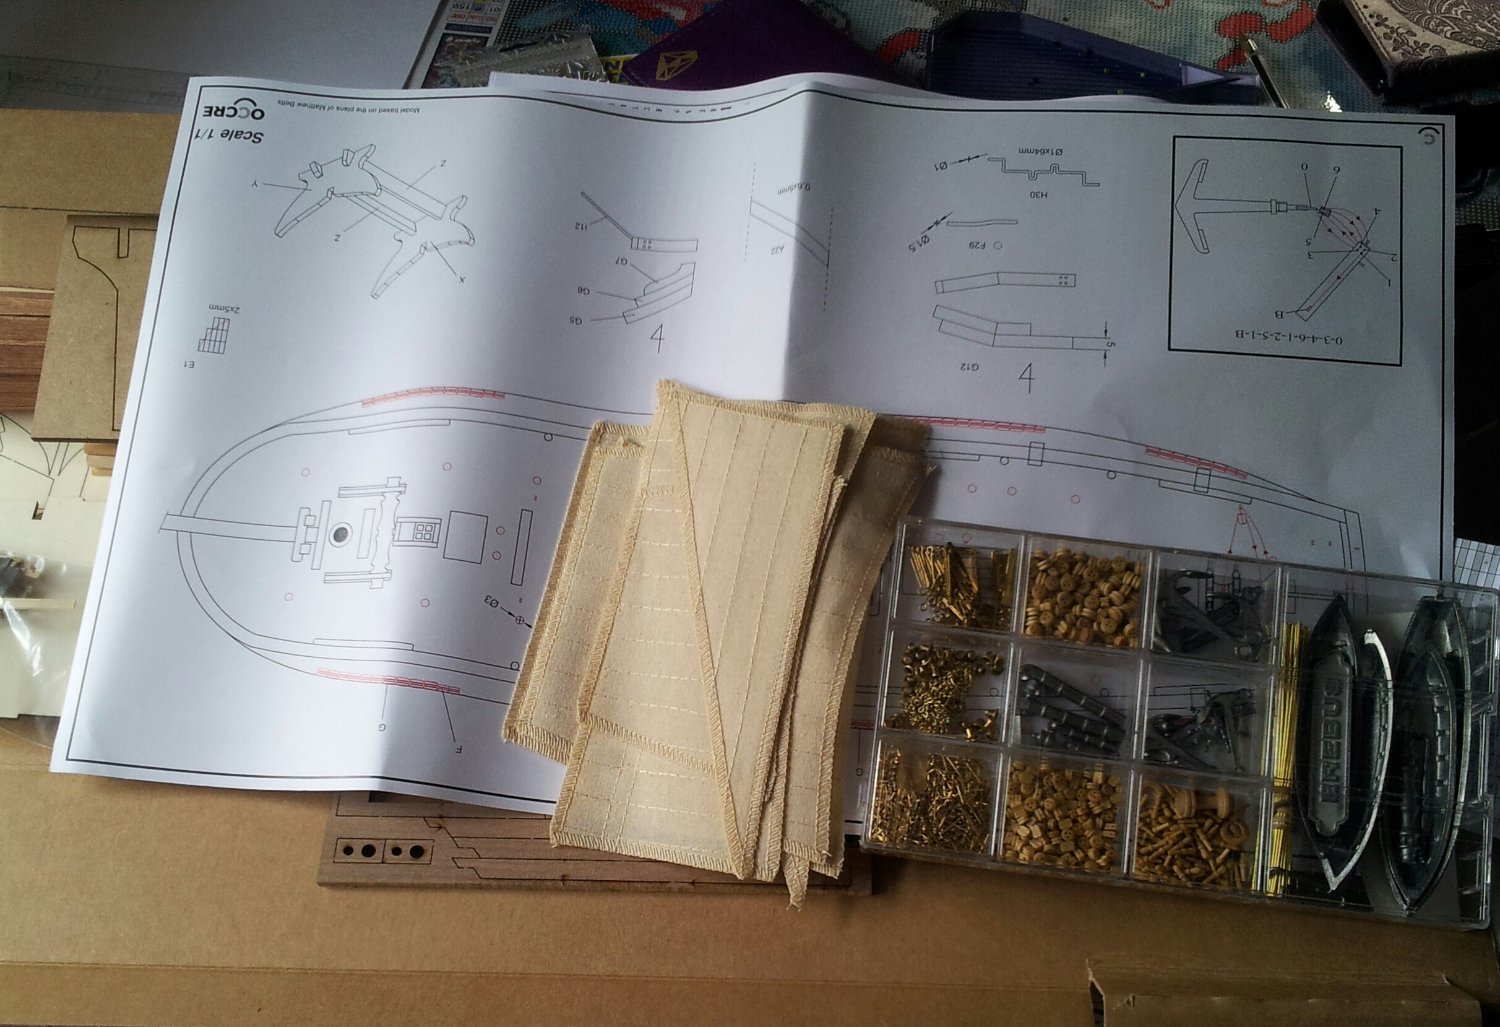
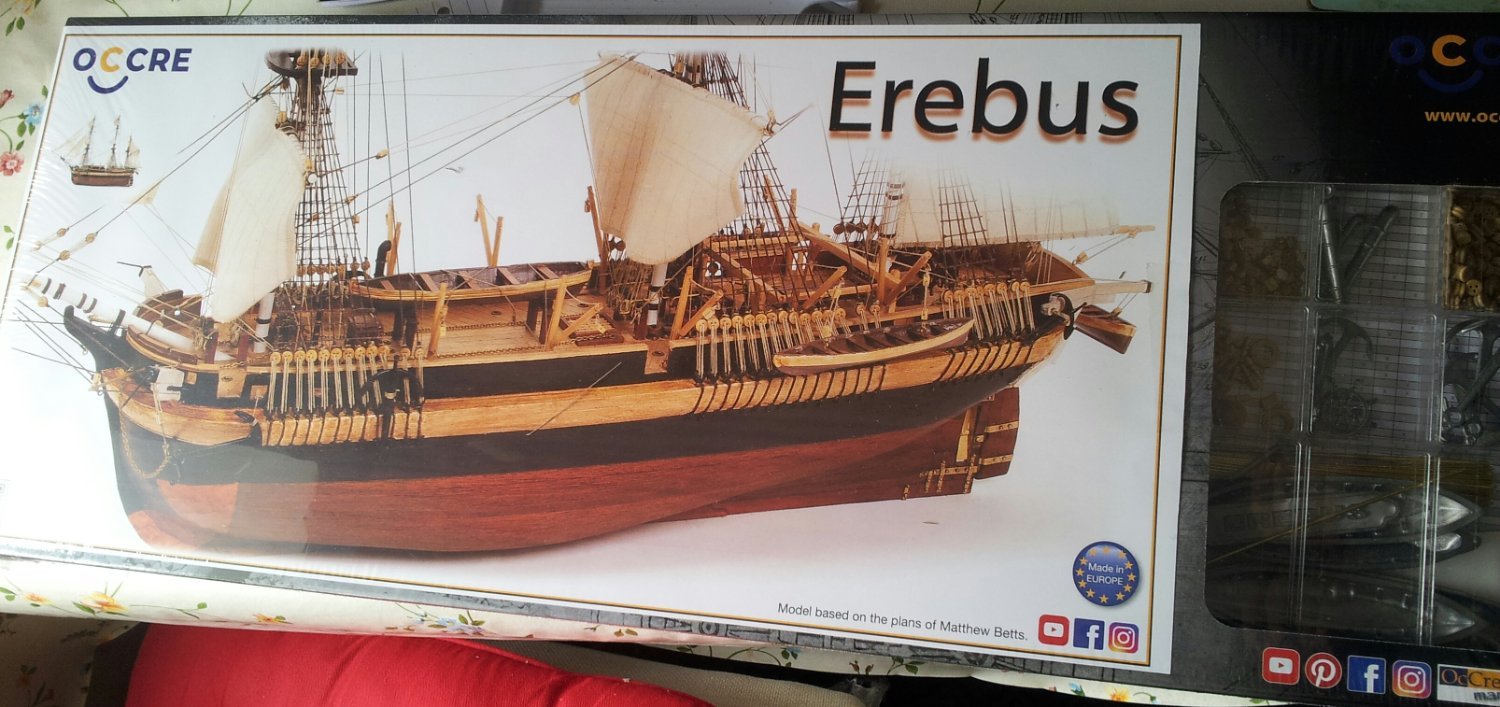
 Here i go again!!! After not learning my lesson with occre's Terror here i am with their Erebus (at least i know more about the ships this time😁). Received the kit yesterday and as i suspected it is their Terror kit with a couple of amendments. This means the hull is 12mm too short, but i might just leave that as i am more inclined to alter the incorrect shapes of the frames towards bow and especially the midships to stern section -Matt Betts stated in his blog that the frames pictured were altered to stop piracy and i think it is these occre used when designing their Terror kit. Onto the kit - they have used M.D.F. instead of plywood (which seems the norm now for occre) for the longitudinal (keel) bulkhead while the frames and deck are in ply- the deck still has the bowsprit location for Terror which will need altered- another alteration is the shape of the forepeak on the stem/ keel/ sternpost sheet (looks like the style of the one on the infamous lithograph was used as inspiration). Also the etched brass sheet now has a nameplate added which looks like the style used on 'The Terror' series. Everything else is what you get in the Terror kit which has an excellent review on here and also see Keith S and my build logs for our little Terrors (even before the kit arrived i had already bought two of the caldercraft 10 spoke ships wheels)! Not sure when the build will actually start as busy rebuilding my outdoor messy jobs workshop. Take care all Keith
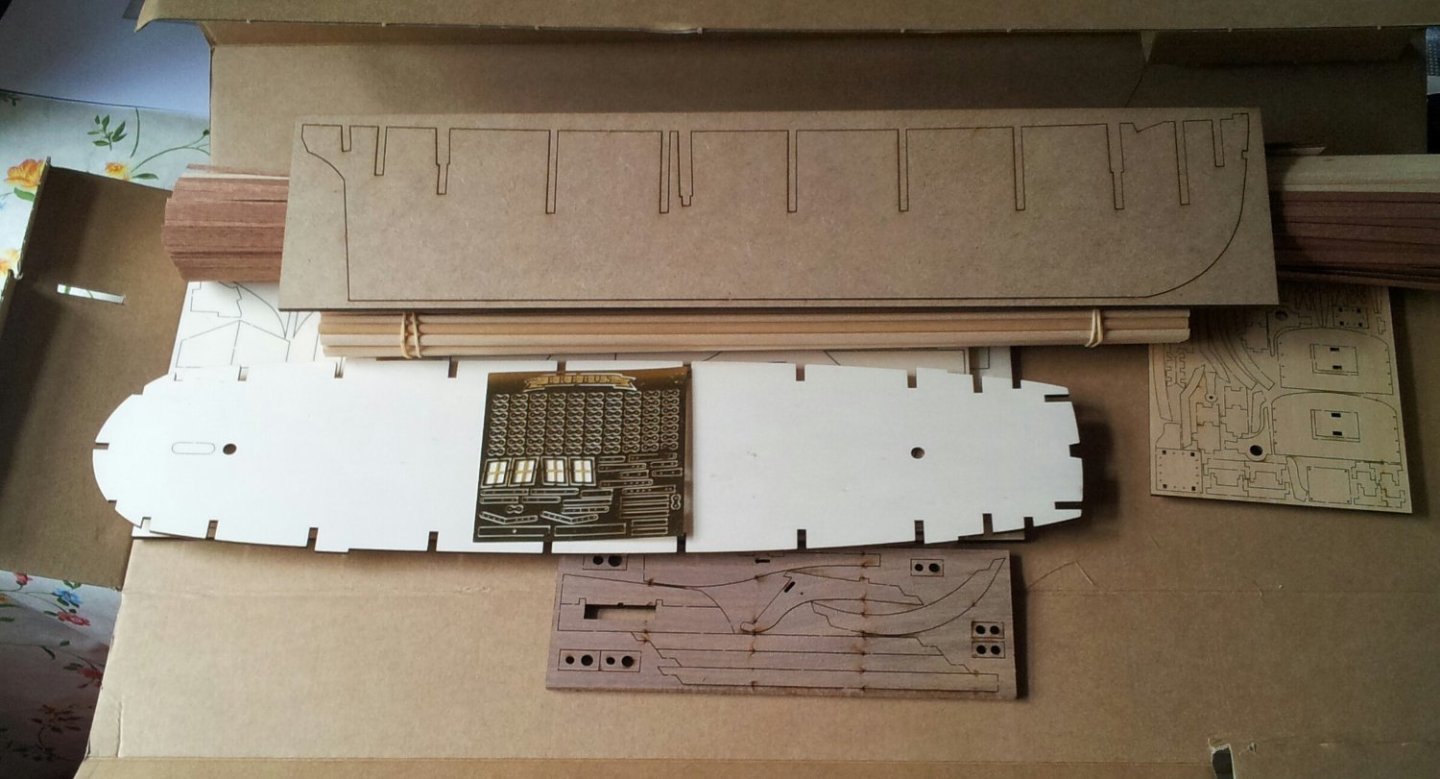


-
 Started my build in November 2023. Found this website and it has been a great help from many of your builds. And thanks for those that replied. Looking forward to this build more than ever. Will update my progress. Just starting to paint. Most of the build going forward looks quite intimidating! Sure will need help. My only comment on this model so far is the directions & plans are a real challenge.

-
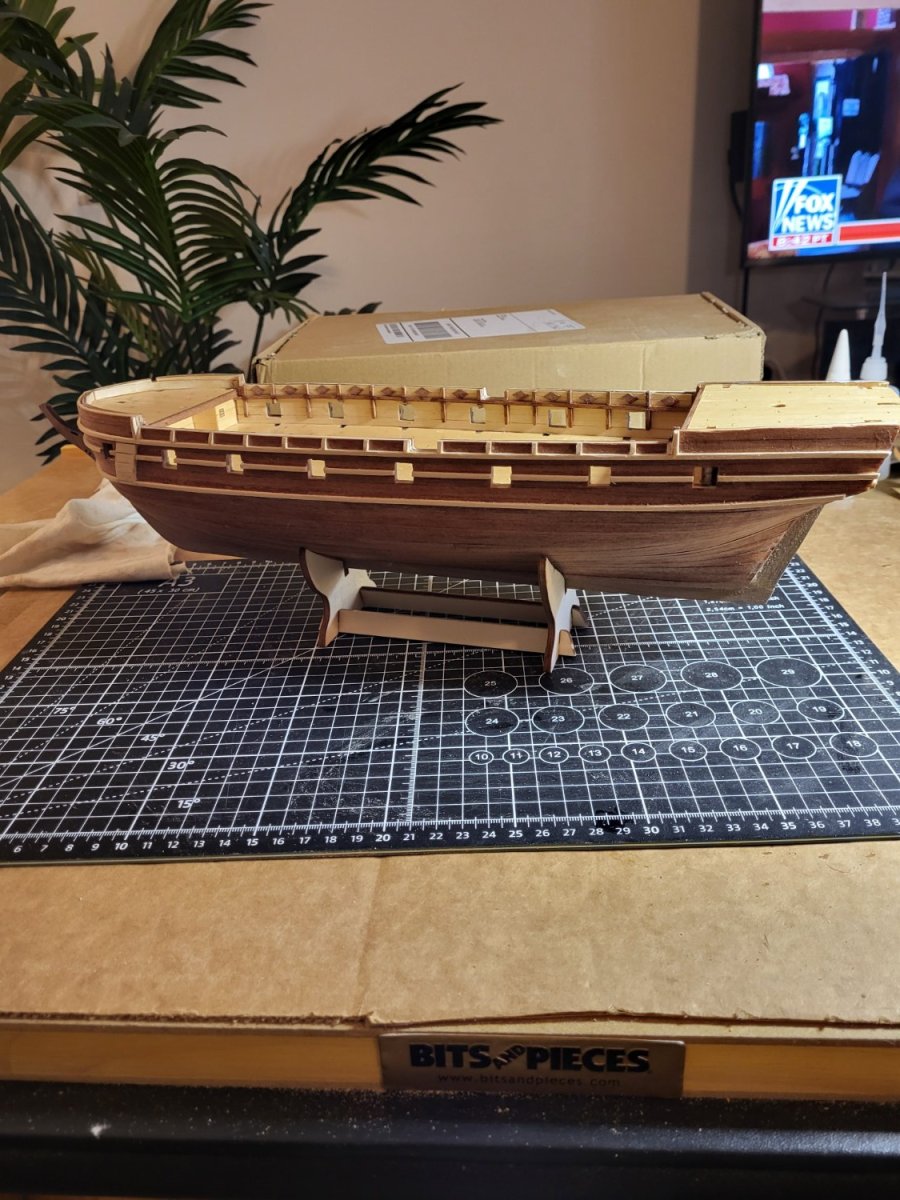
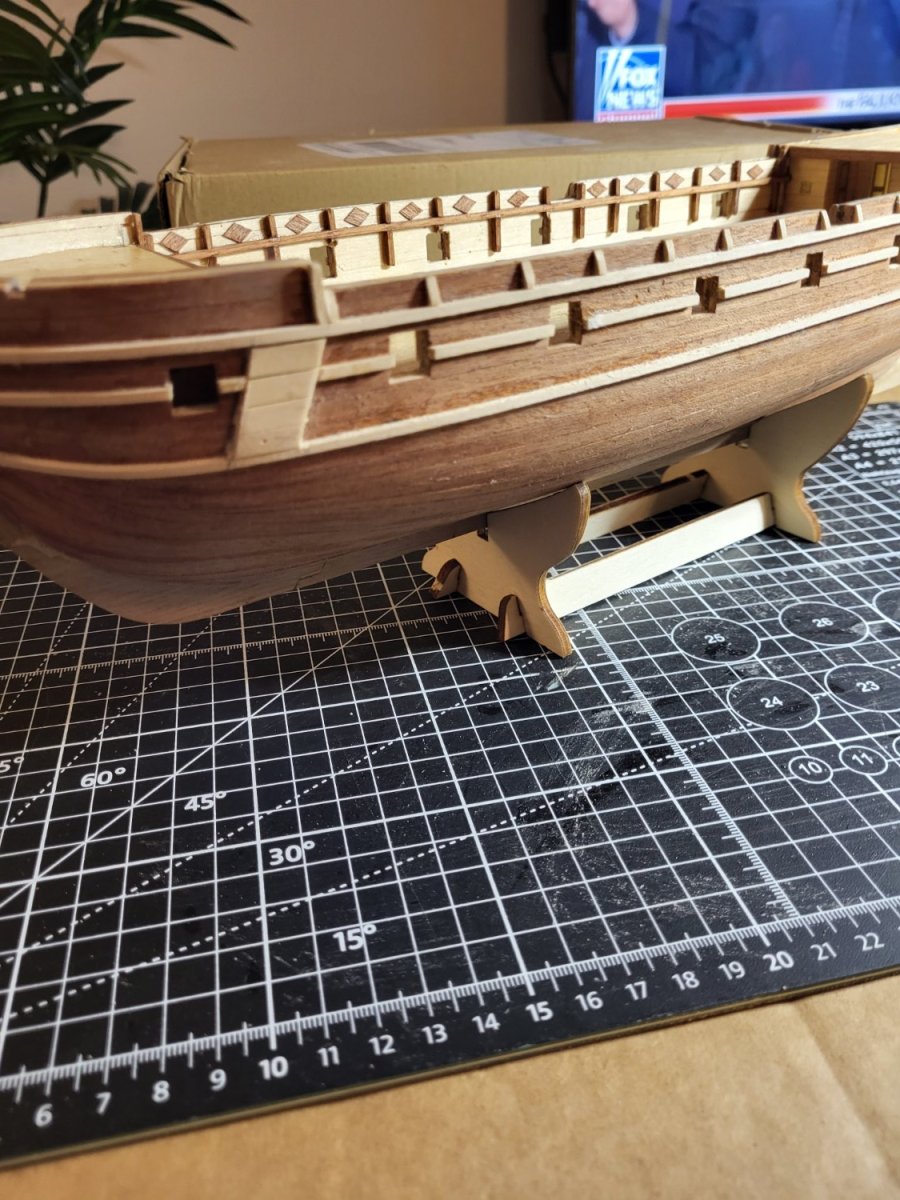
 Welcome to my next adventure, the Amerigo Vespucci.
-
 Somewhat presumptuously, given the many Endurance build logs already on these boards, I have decided to add yet another one. This post will explain why. Within the next day or two I will add posts listing the research sources I have come across, and photos of some kit-bashing I am doing at the very beginning of the build. It seems to me that ship models can be placed on a continuum, with beautiful models at one end, and historically accurate, or at least realistic, ones at the other end. Built as instructed, OcCre models are toward the former end -- exposed brass, different kinds of unfinished wood, etc. My first model, 30+ years ago, was Artesania Latina’s Bluenose. Nothing on it is painted, and it has a variety of beautiful woods, and brass anchor chains. I’m proud of the work I did, and I admire the beautiful models of this style others have displayed on this great website. But since that first model, I have gravitated more toward the other end of the continuum, trying to build models that are at least credible reproductions of the real thing. Not better than the ones just described; just a different style. Doing so with this OcCre build will require some kit-bashing, and that is what I hope to devote most of this build log to. I also hope to be advised, informed and inspired by the comments of those who choose to follow me on this journey. And with a little luck, maybe I can return the favor.
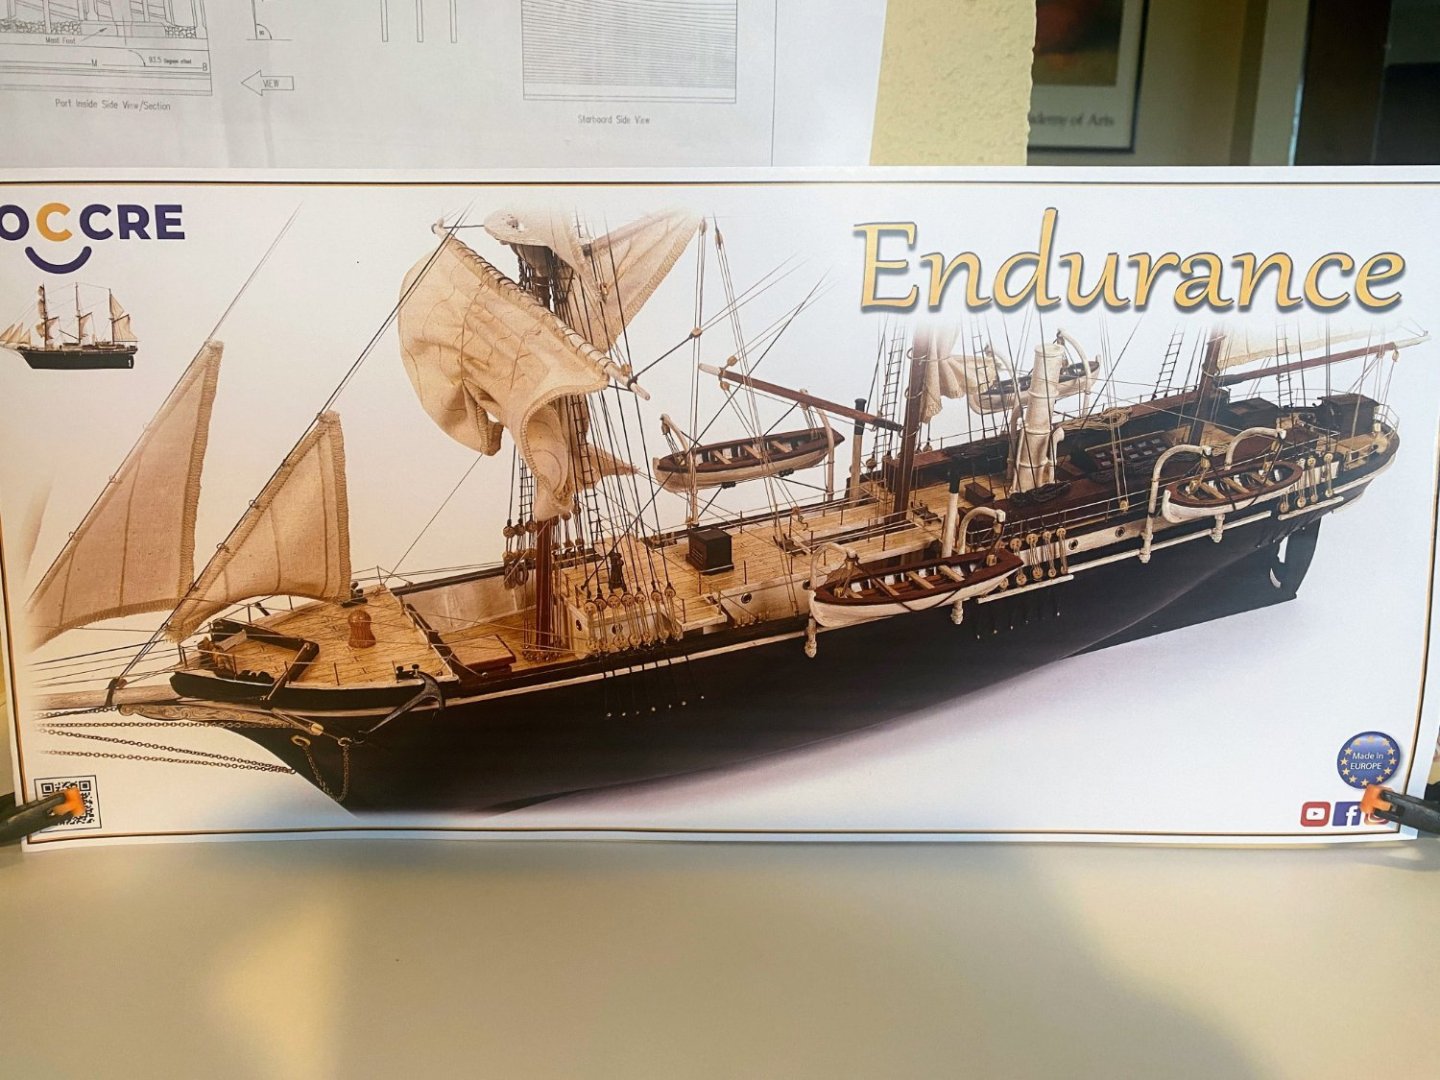
- 98 replies
-
- 5
-

-
- Endurance
- Shackleton
- (and 1 more)
-
 Hi all! I’m starting a build log here of the Occre HMS Terror kit after spending many weeks greatly enjoying the other Terror builders’ logs, the incredible amount of research that went into making each of your models more accurate than the base kit, and the general supportive and collaborative spirit I’ve seen here on the forum. So far I’ve built up the keel and bulkheads and finished the deck with the Preston Patent Illuminators, now moving into fairing the bulkheads and hoping to begin the first layer of planking this week. Looking forward there are certainly a lot of enhancements many of the other builders have added to their Terrors that I intend on including in my build, but for now here are some pictures of the build to date.


-
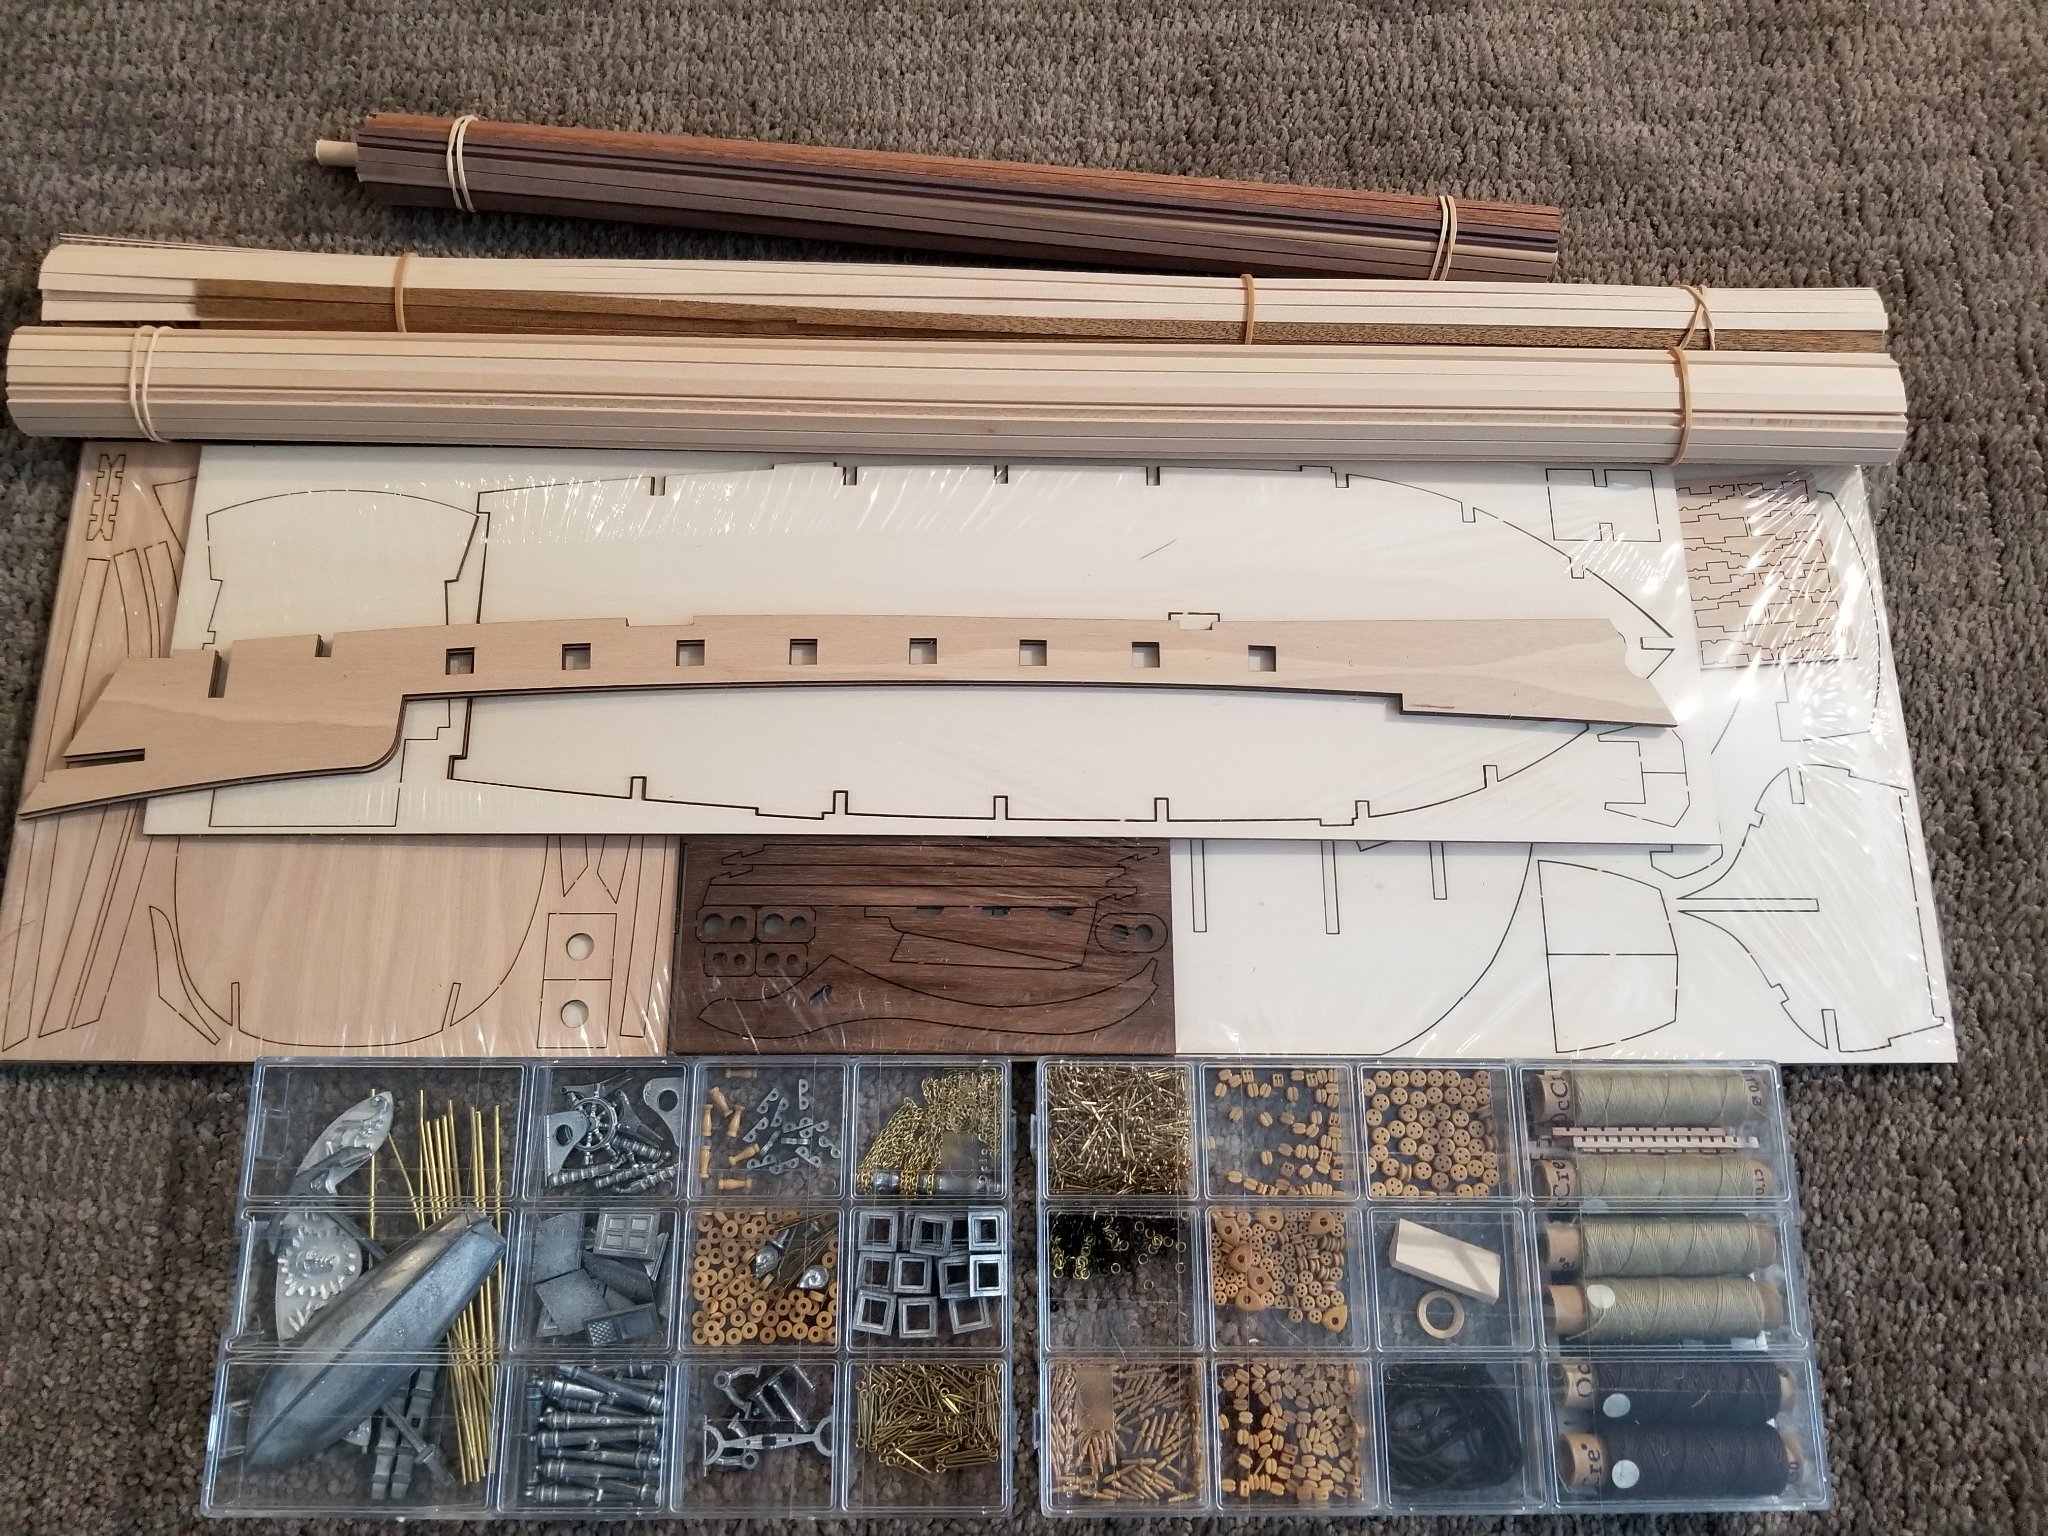
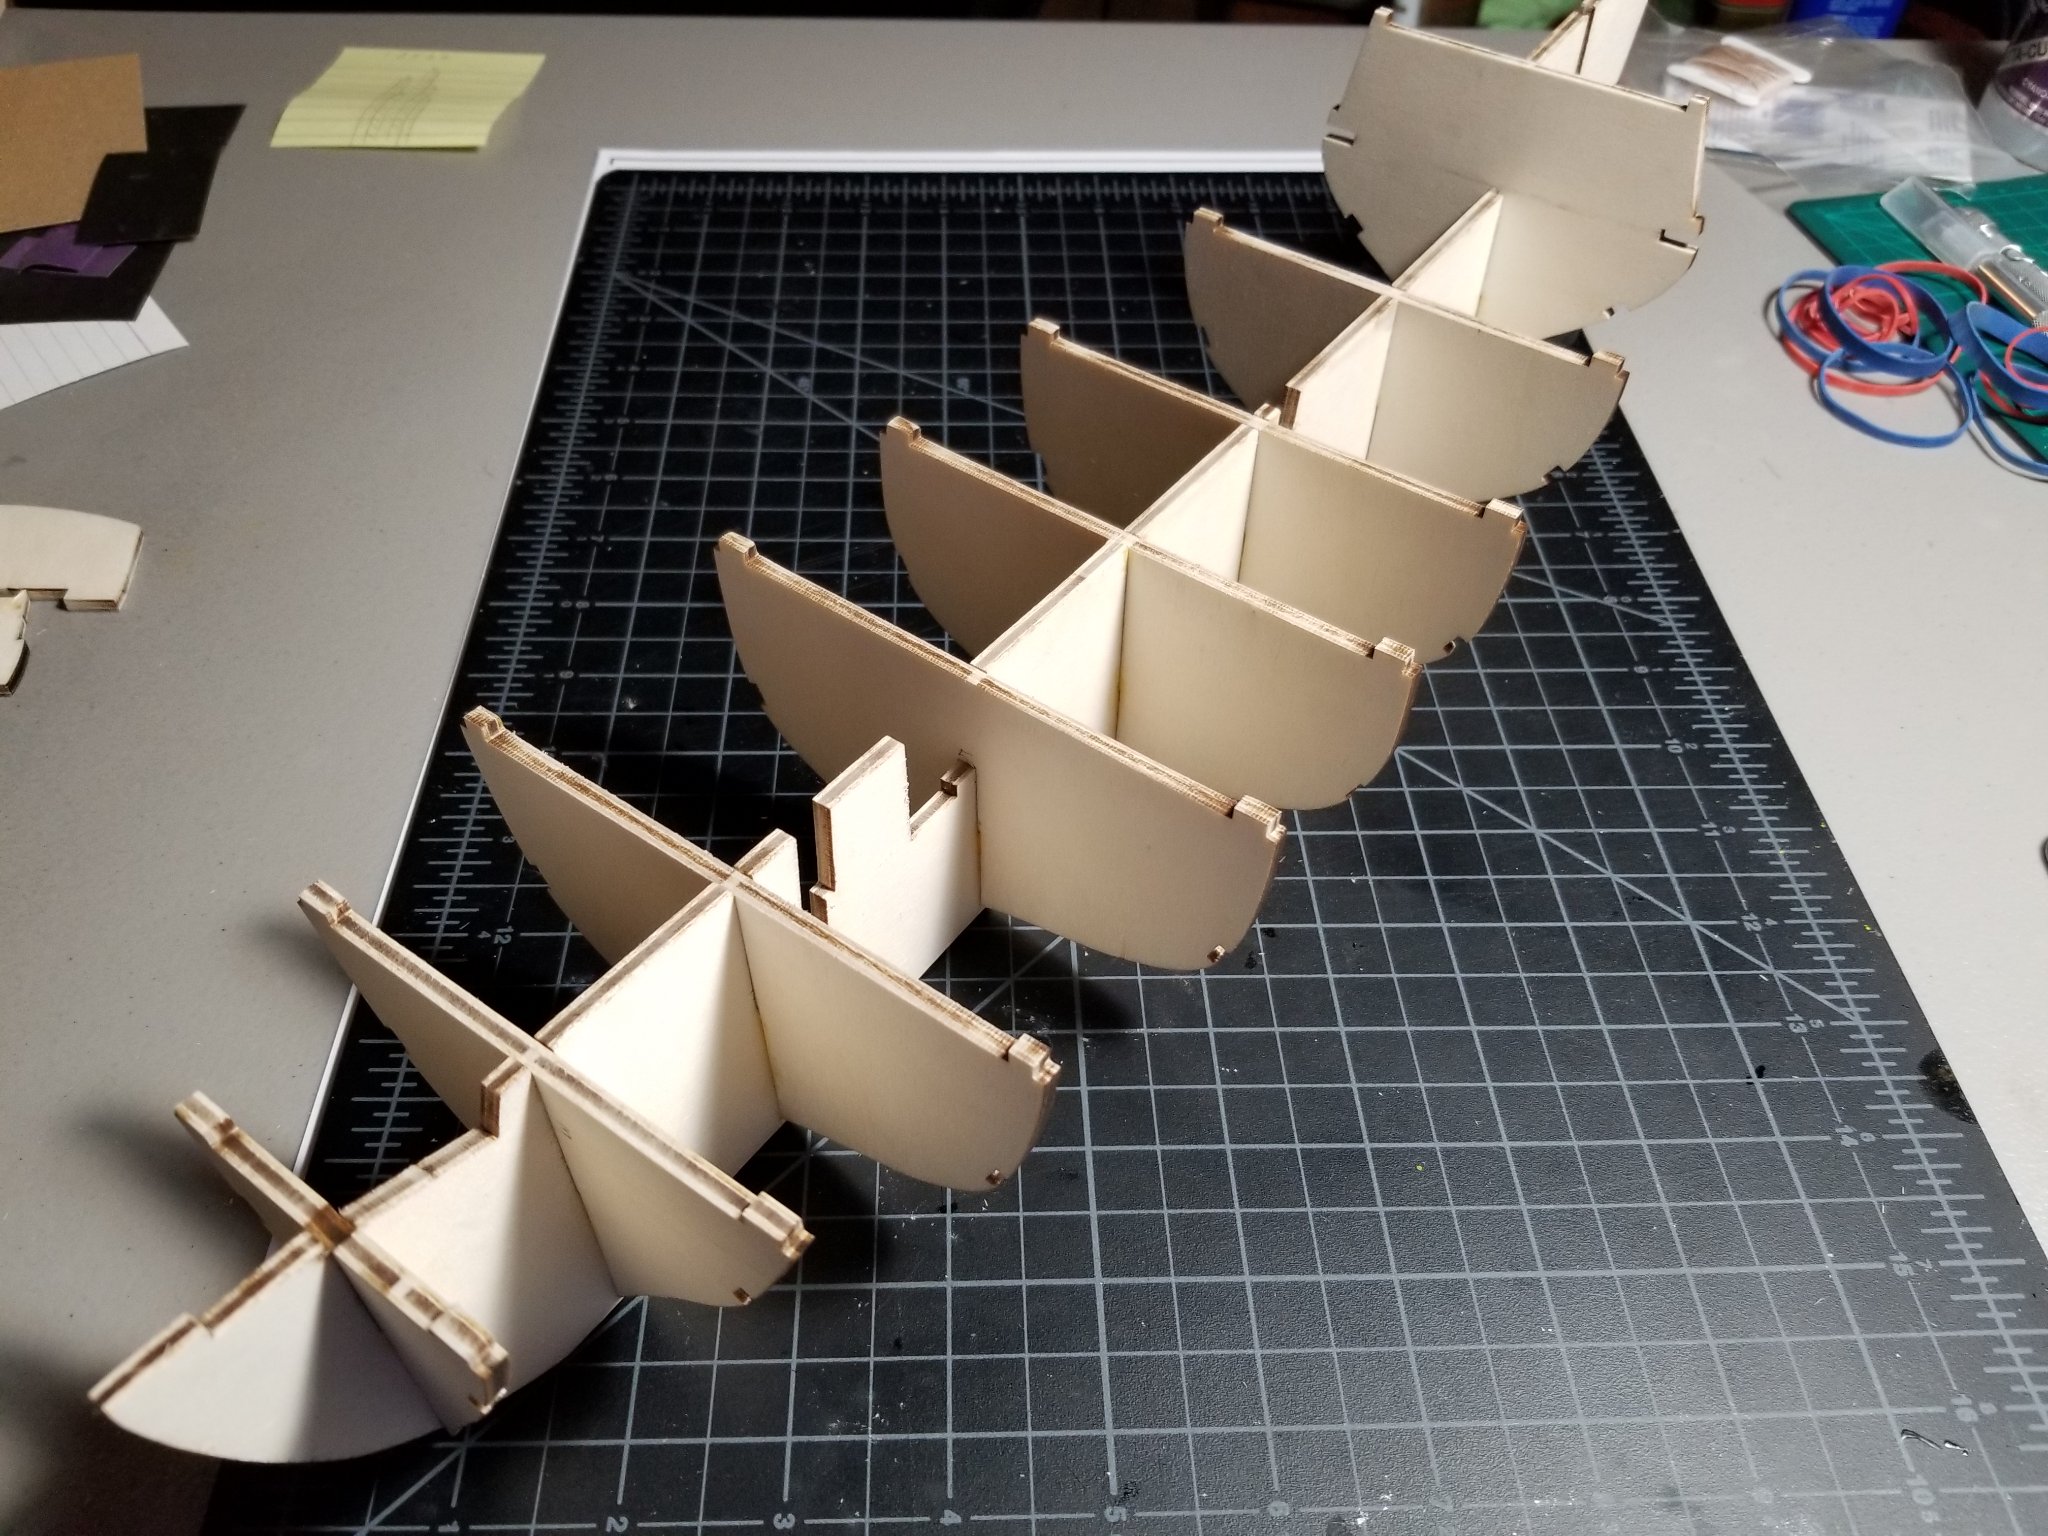
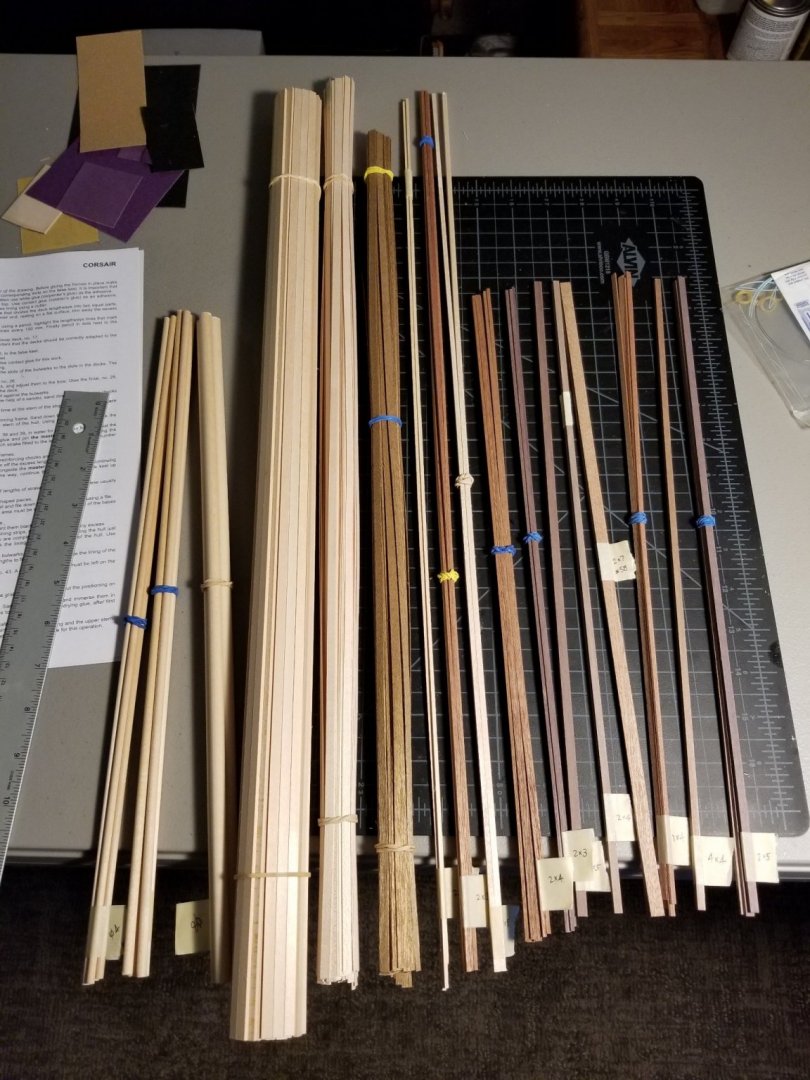
 Hello everyone, This will be my second build log on MSW, now for the Occre Corsair! I saw this kit selling for a very good price and decided to snag one while I could. This will be my first actual ship, since the other kits I have built have been much smaller boats. I think this kit will be a good intermediate level build, since it only has two masts and the build does not seem overly complicated. Looks like a good opportunity to try planking and rigging for a larger and more complex subject. Plus, as far as I can tell, it is a fictional ship so I do not have to worry about being accurate with every detail. Plus, it's a pirate ship! So let's get started.... First up was to unbox the kit and sort/inventory everything. The blocks and deadeyes are made of plastic, but I think they will look quite good in the end. The metal castings look well done and it does not seem that there will be all that much cleanup required. I am less thrilled about the rigging thread, it seems to have quite a lot of fuzz and I do not really like the color of the lighter line. That will be simple enough to replace when I get to the rigging later down the road. I marked the laser-cut pieces with their numbers as suggested by the instructions.. Next all the wood strips were sorted (there sure are a lot): Next I removed all the bulkheads and cleaned off the char from gluing surfaces as best I could. The larger laser-cut pieces are just plywood and the charred edges are very rough so this took quite a bit of filing but I think I have removed enough for glue to hold well enough. After dry-fitting everything a few times, I glued the bulkheads onto the spine one at a time, using the deck to hold them in place while the glue set to make sure they are lined up correctly. The deck is already sort of warped in the correct direction along the spine, but it is also curving upwards athwartships. It does not seem so stiff that it will need to be soaked to flatten it; I think the curve is small enough that if I glue it to the tops of the bulkheads strategically it will be fine. However that also means I will want to glue it to the ship before doing the deck planking so that it will be flat... I do not think I will have major problems with that strategy but we will see how it goes. While all that set, I decided to try planking the poop deck. Using this link for reference: http://modelshipworldforum.com/resources/Framing_and_Planking/Deck_PlankingIIbuttshifts.pdf I chose the "Every 5" strategy which means the plank ends are staggered like this: I picked a 120mm plank length (scaled up that's about 31.5 ft, for us Yanks). The edges of the planks are marked with pencil to darken the joints. Cutting, marking the edges, and gluing was surprisingly time-consuming for such a small part. Once they were all glued on I used a razor saw and files to trim the edges. I like the result. I am not sure whether to sand it to even out the seams, I am worried that sanding would remove some of the pencil shading as it is mostly on the corners of the pieces. In any case I am thinking I should put on a single light coat of Wipe-On Poly so that I can lightly knock down the grain after the first coat, since that will probably be much more difficult once it is on the model and more assembly is done.

-
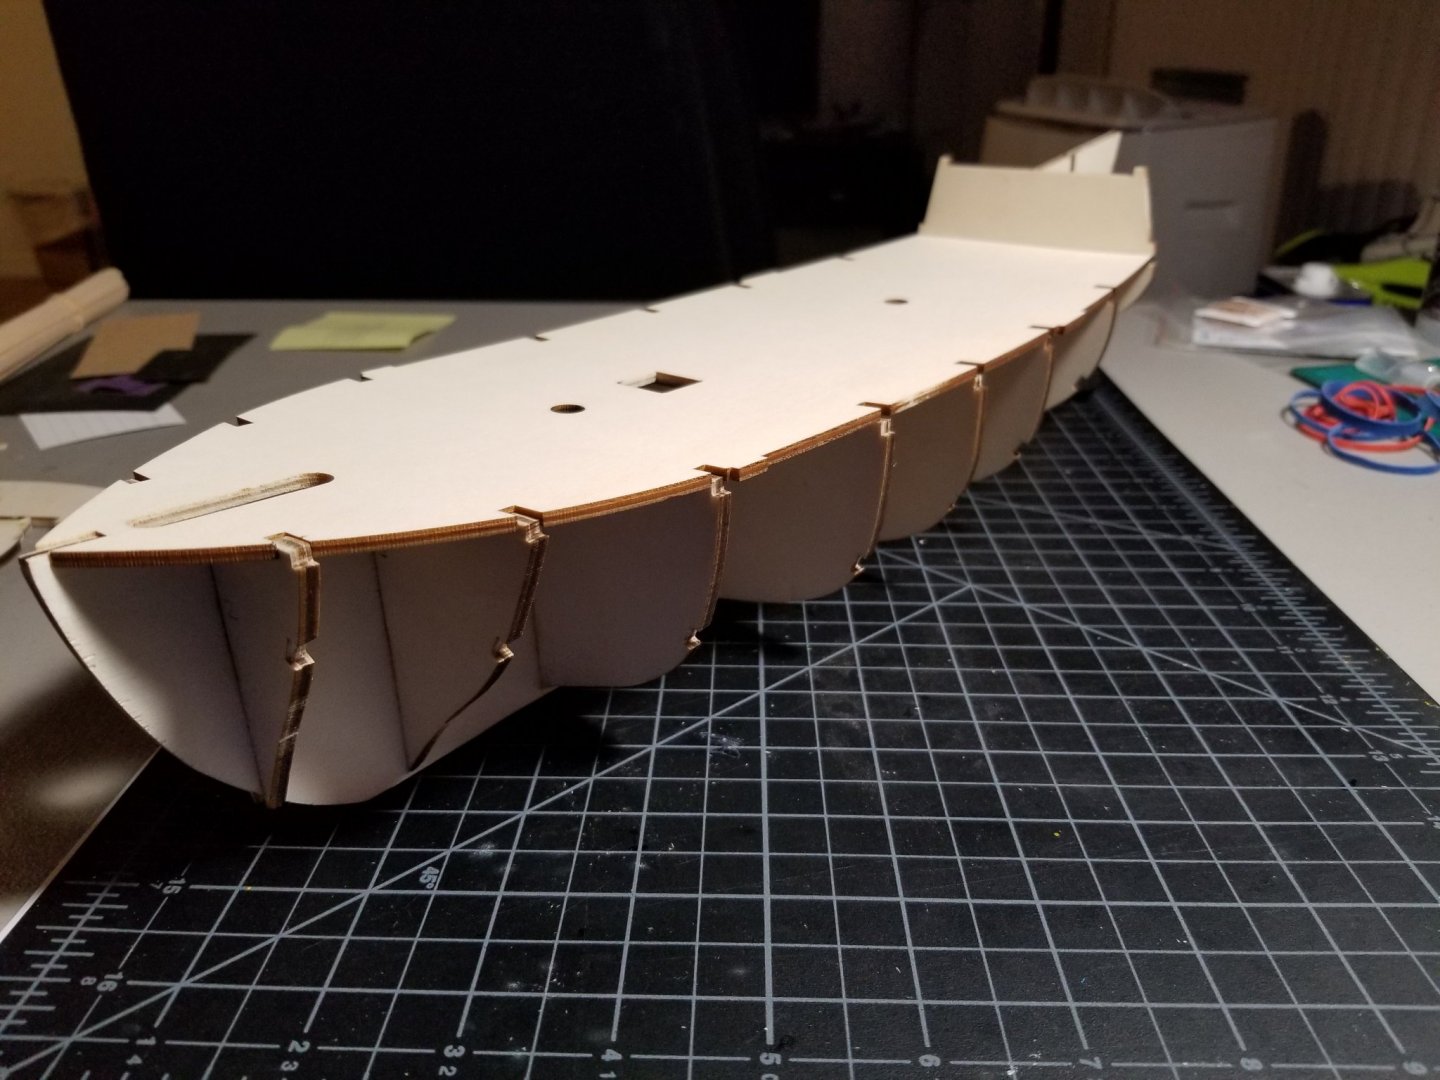
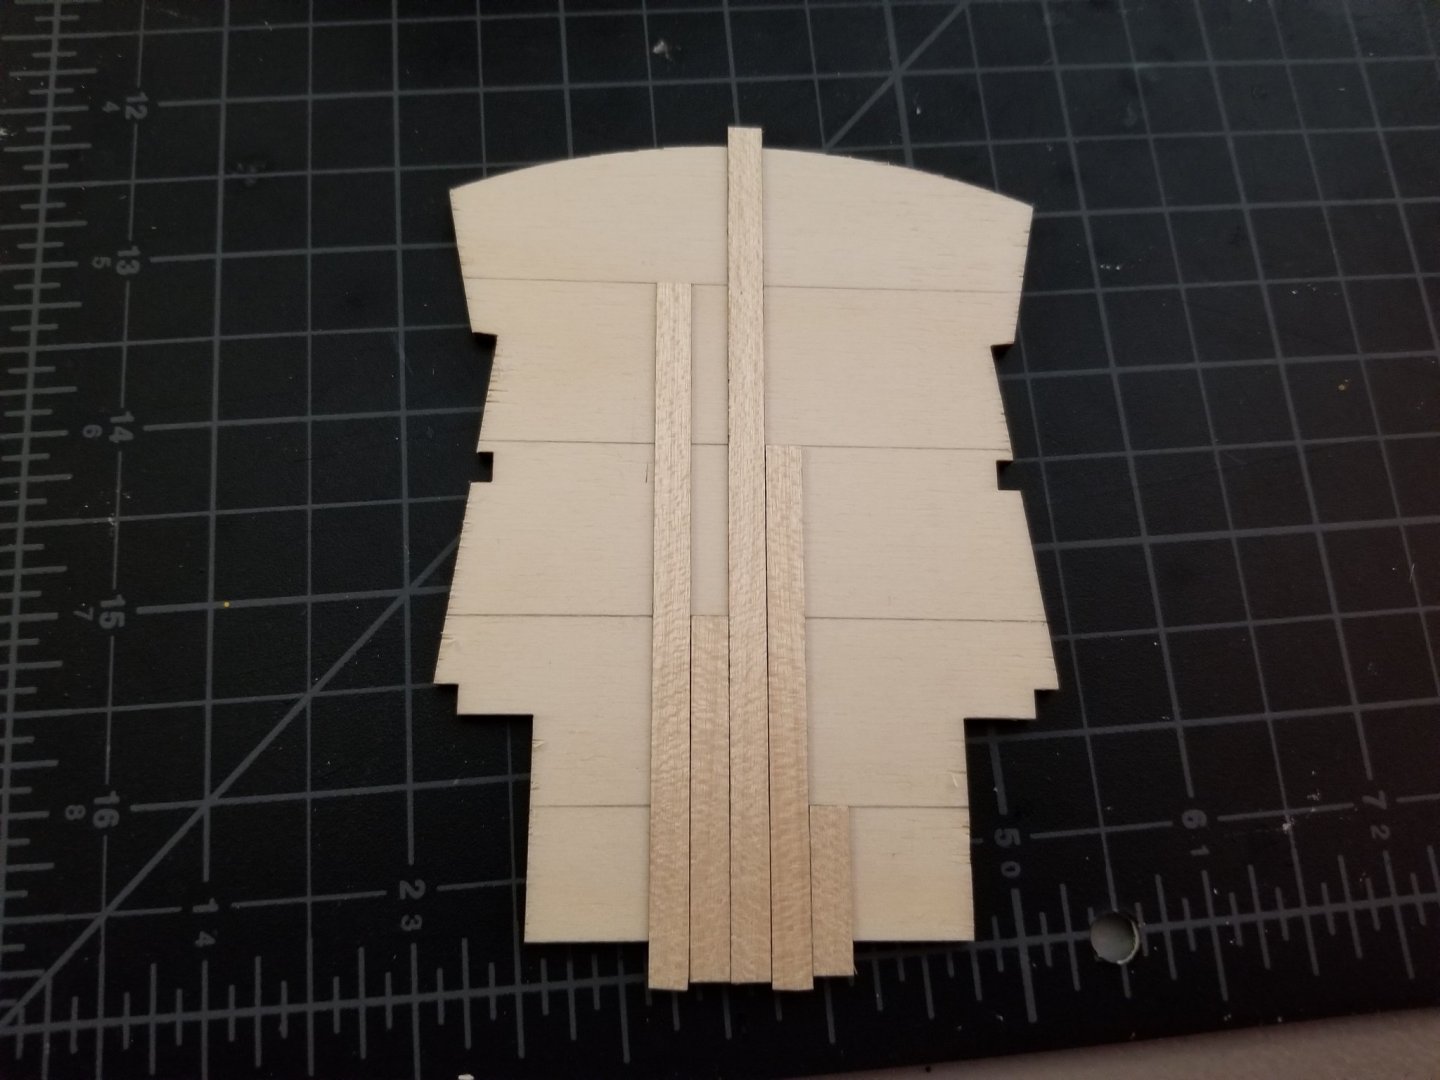
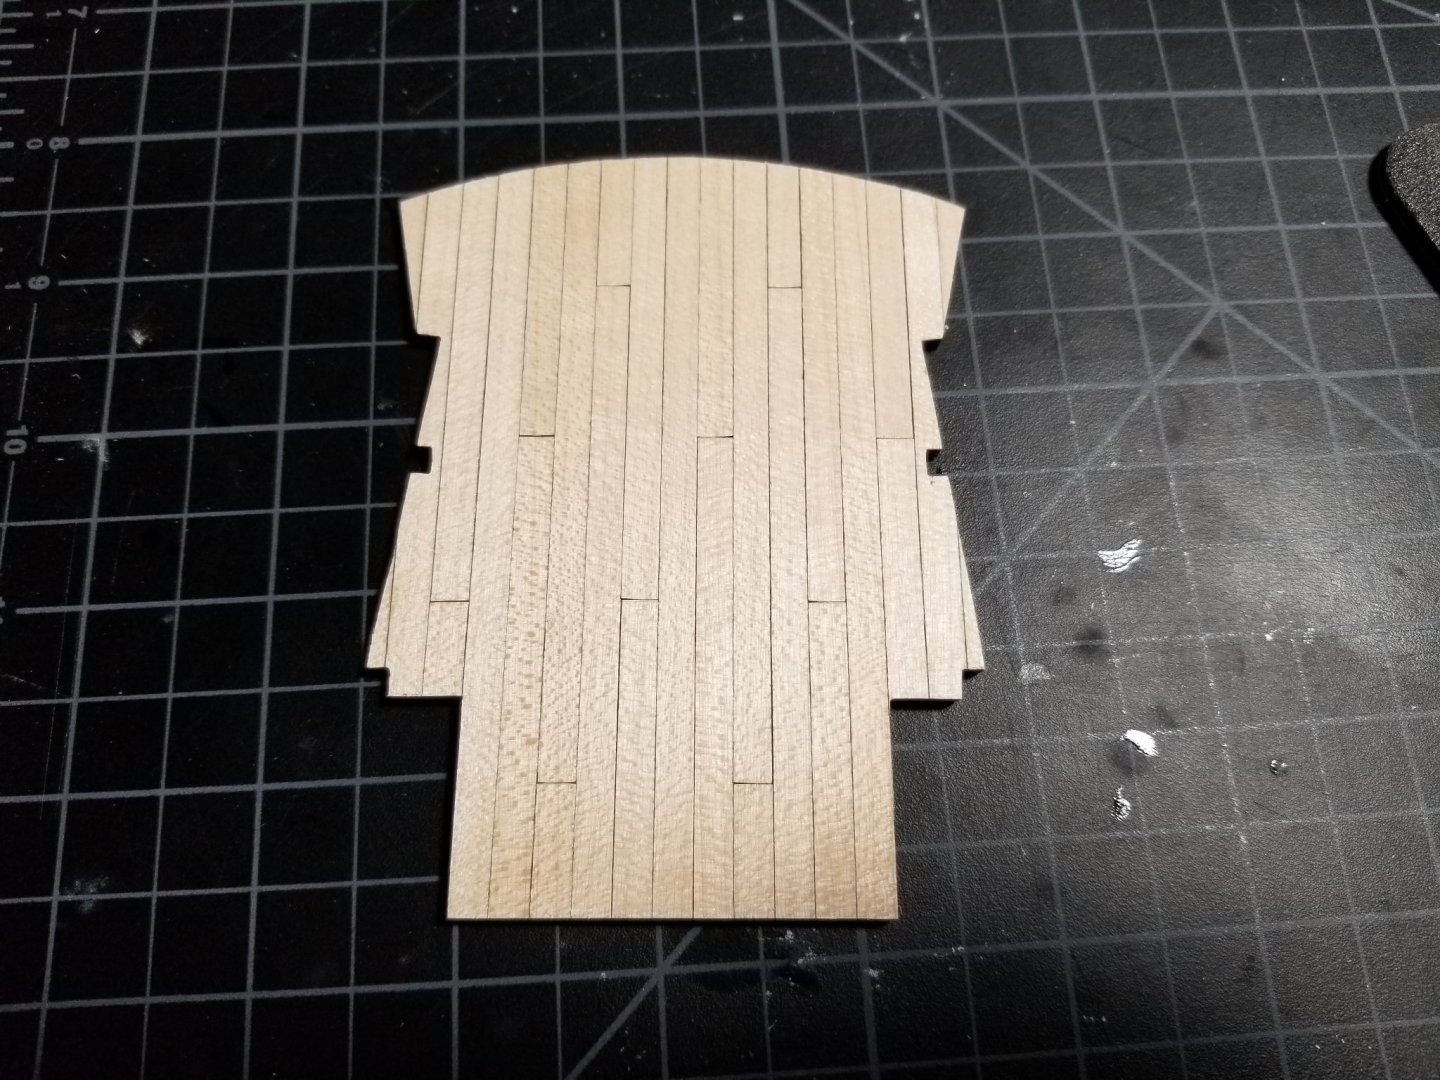
 Welcome to those passing by on my build log of the Esmeralda. I will consider this my first build of a wooden ship kit. I acquired the kit end of last year but started it only a few days ago. I hope it will be interesting for others. It will certainly be interesting for me to look at it later to see progression when I tackle new projects. As a disclaimer, my nautical vocabulary is not that extended. I do my research but I am sure I will use some wrong words. Corrections will bewelcome and highly appreciated. I didn't find much information on the ship itself on the web. So here are some facts from the manufacturer: "The topsail schooner "Esmeralda" was built in Majorca between 1916 and 1919. With an American style in terms of her figure and a most elegant line of sail. This schooner was one of the largest and most beautiful to be rigged in Majorca." I certainly agree with the words above. I find the ship very elegant and this is what made me select the kit. Below is a photo of the finished kit I took from the manufacturer's website.
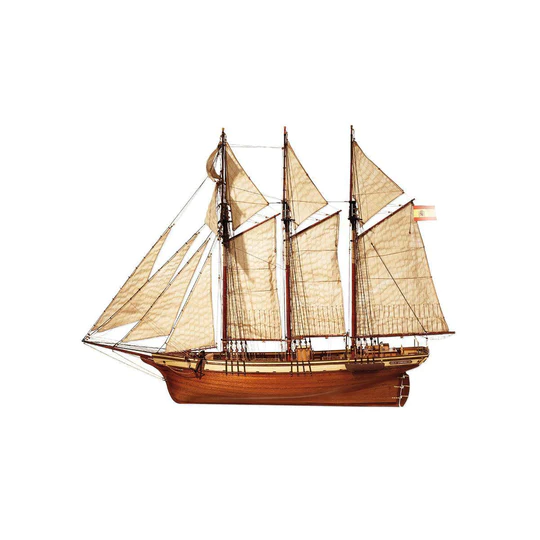
-
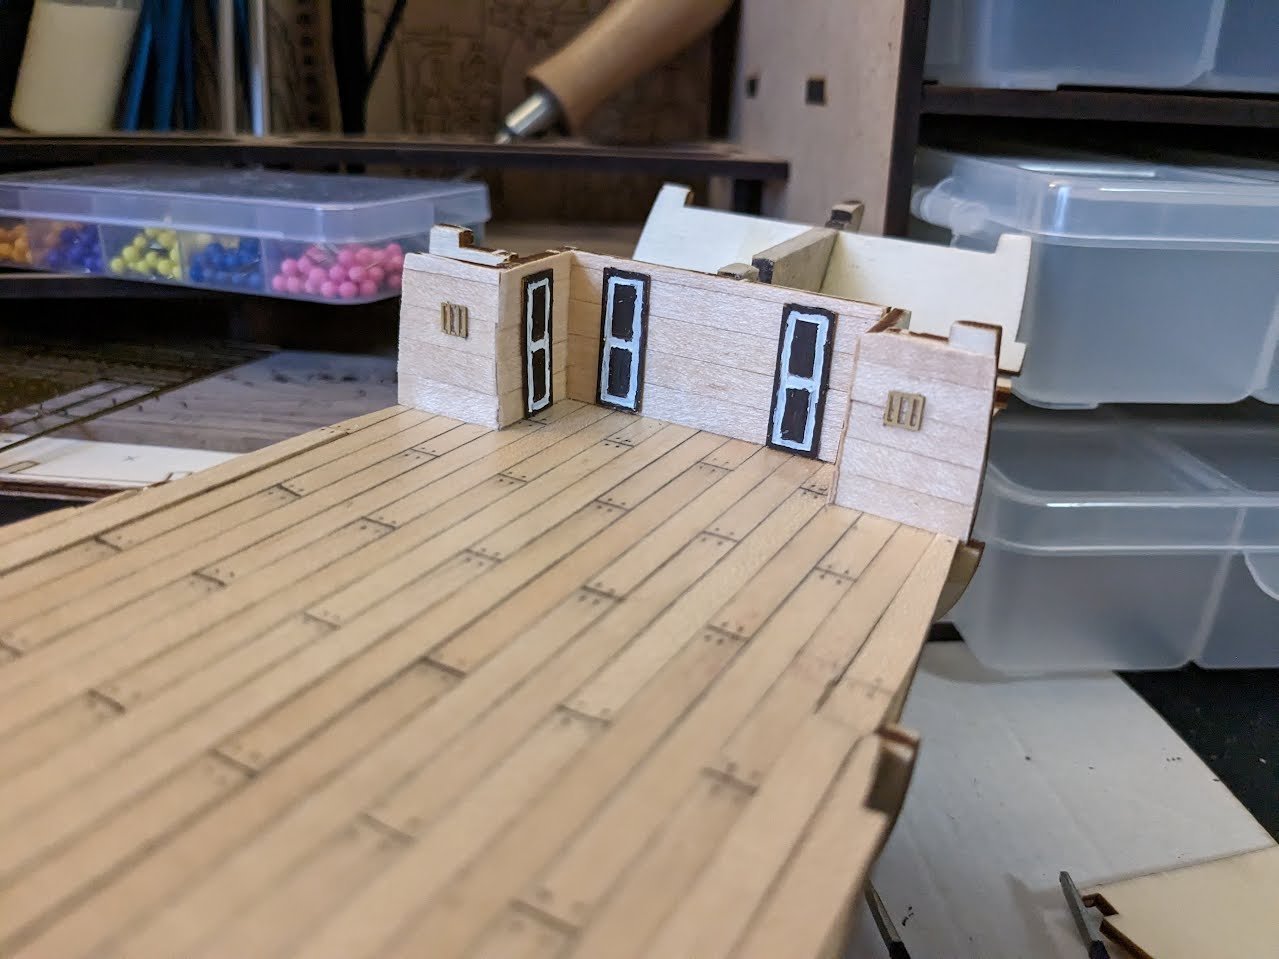
 Hello all, I got a start on my first wooden ship model over the weekend. I have had a great time so far, with a few frustrating moments created by myself, an injury at the dockyard and a realization I am terrible at small scale painting. I do have some modelling experience, I built quite a few plastic model airplanes, cars, and military equipment in my youth so I do know some techniques but it has been 20 years since my last model, and as I have found out wood is a completely different animal. I do have some questions on the paint colors, other than the picture on the box it doesn't seem like there is any guide in the instructions on what color parts should be painted. I bought a paint kit for HMS beagle from Model Expo, but I'm just not sure what colors should be used for, I could definitely use a hand explaining some of these colors I have never heard of. I'm still learning sailing/ship terminology so please be patient If I name something incorrect. Anyways here is my start on the HMS Beagle log. Here are the colors that came in my kit, any help on these would greatly be appreciated. Here is the assembly of the skeleton of the ship, nothing much to look at yet just lots of glue and making sure pieces are squared away. Once I had the frame glued together my next step was to start planking the deck. I used a pencil to line the boards, and then lined them at 60mm and added nails. I know the pencil caulking and nails are controversial, but I wanted to try the process out for myself and see how it looked. Veterans of this kit will notice a mistake I made at this point, I still wouldn't notice it for another night. The next day I started to assemble to fore and aft interior ship walls and started to add planks to the walls. After dinner I sat down and started to look over the instructions, I then noticed my deck looked "off" compared to the instructions, and it hit me that I got a little carried away trimming the deck cutouts. Maybe I shouldn't watch American Football Playoffs while I work on the model...... This is where the dock workers should have stopped for the night and started fresh the next morning. A little frustrated at my mistake I decided to try and see if I could pull up a few of the planks and replace them. The only tool I could find to fit the job of prying the piece up was a razor blade, I got one piece up without too much trouble and then started on the second piece. This is when the razor blade slipped out from the wood and straight into my right hand behind my thumb, it was a very deep cut. The dock medic quickly came over and we cleaned the wound and closed it up with some super glue, no workers comp granted for this dock worker. Getting back to the model I decided just adding planks on top of the old planks and sanding them down a bit was the safest solution. The spouse says you can hardly notice the mistake, but as most model builders know your own mistakes are the most obvious. I also finished planking the fore and aft walls, you can also see a closer view of my correction, not super noticeable from afar, but if you inspect closely you can see the extra wood. Next up was the doors. I wasn't a fan of the solid laser cut brass doors and couldn't find much info on what color the doors should be so I settled on using the American Walnut paint (not stain) that came with the kit and giving it a white outline to kind of match the ships color. I have not painted with material this small in a long time, and I understand why so many of you have magnifying glasses now. My doors look terrible, but I came to the conclusion that it was the best I personally could do with what I have, and to not spend too much time getting hung up on them. I'm still not satisfied and may come back to them, but I'm really not sure I will be able to do much better. That's all I have for now. If you read through all of that, I appreciate your time. I am new to the hobby so any advice, tips, hints are greatly appreciated. Being a new student is one of the most fun parts of a new hobby. My main lesson I've learned so far is you really need to pay attention to the instructions on these kits, and I am starting to follow other Beagle build logs to help along the way.


-
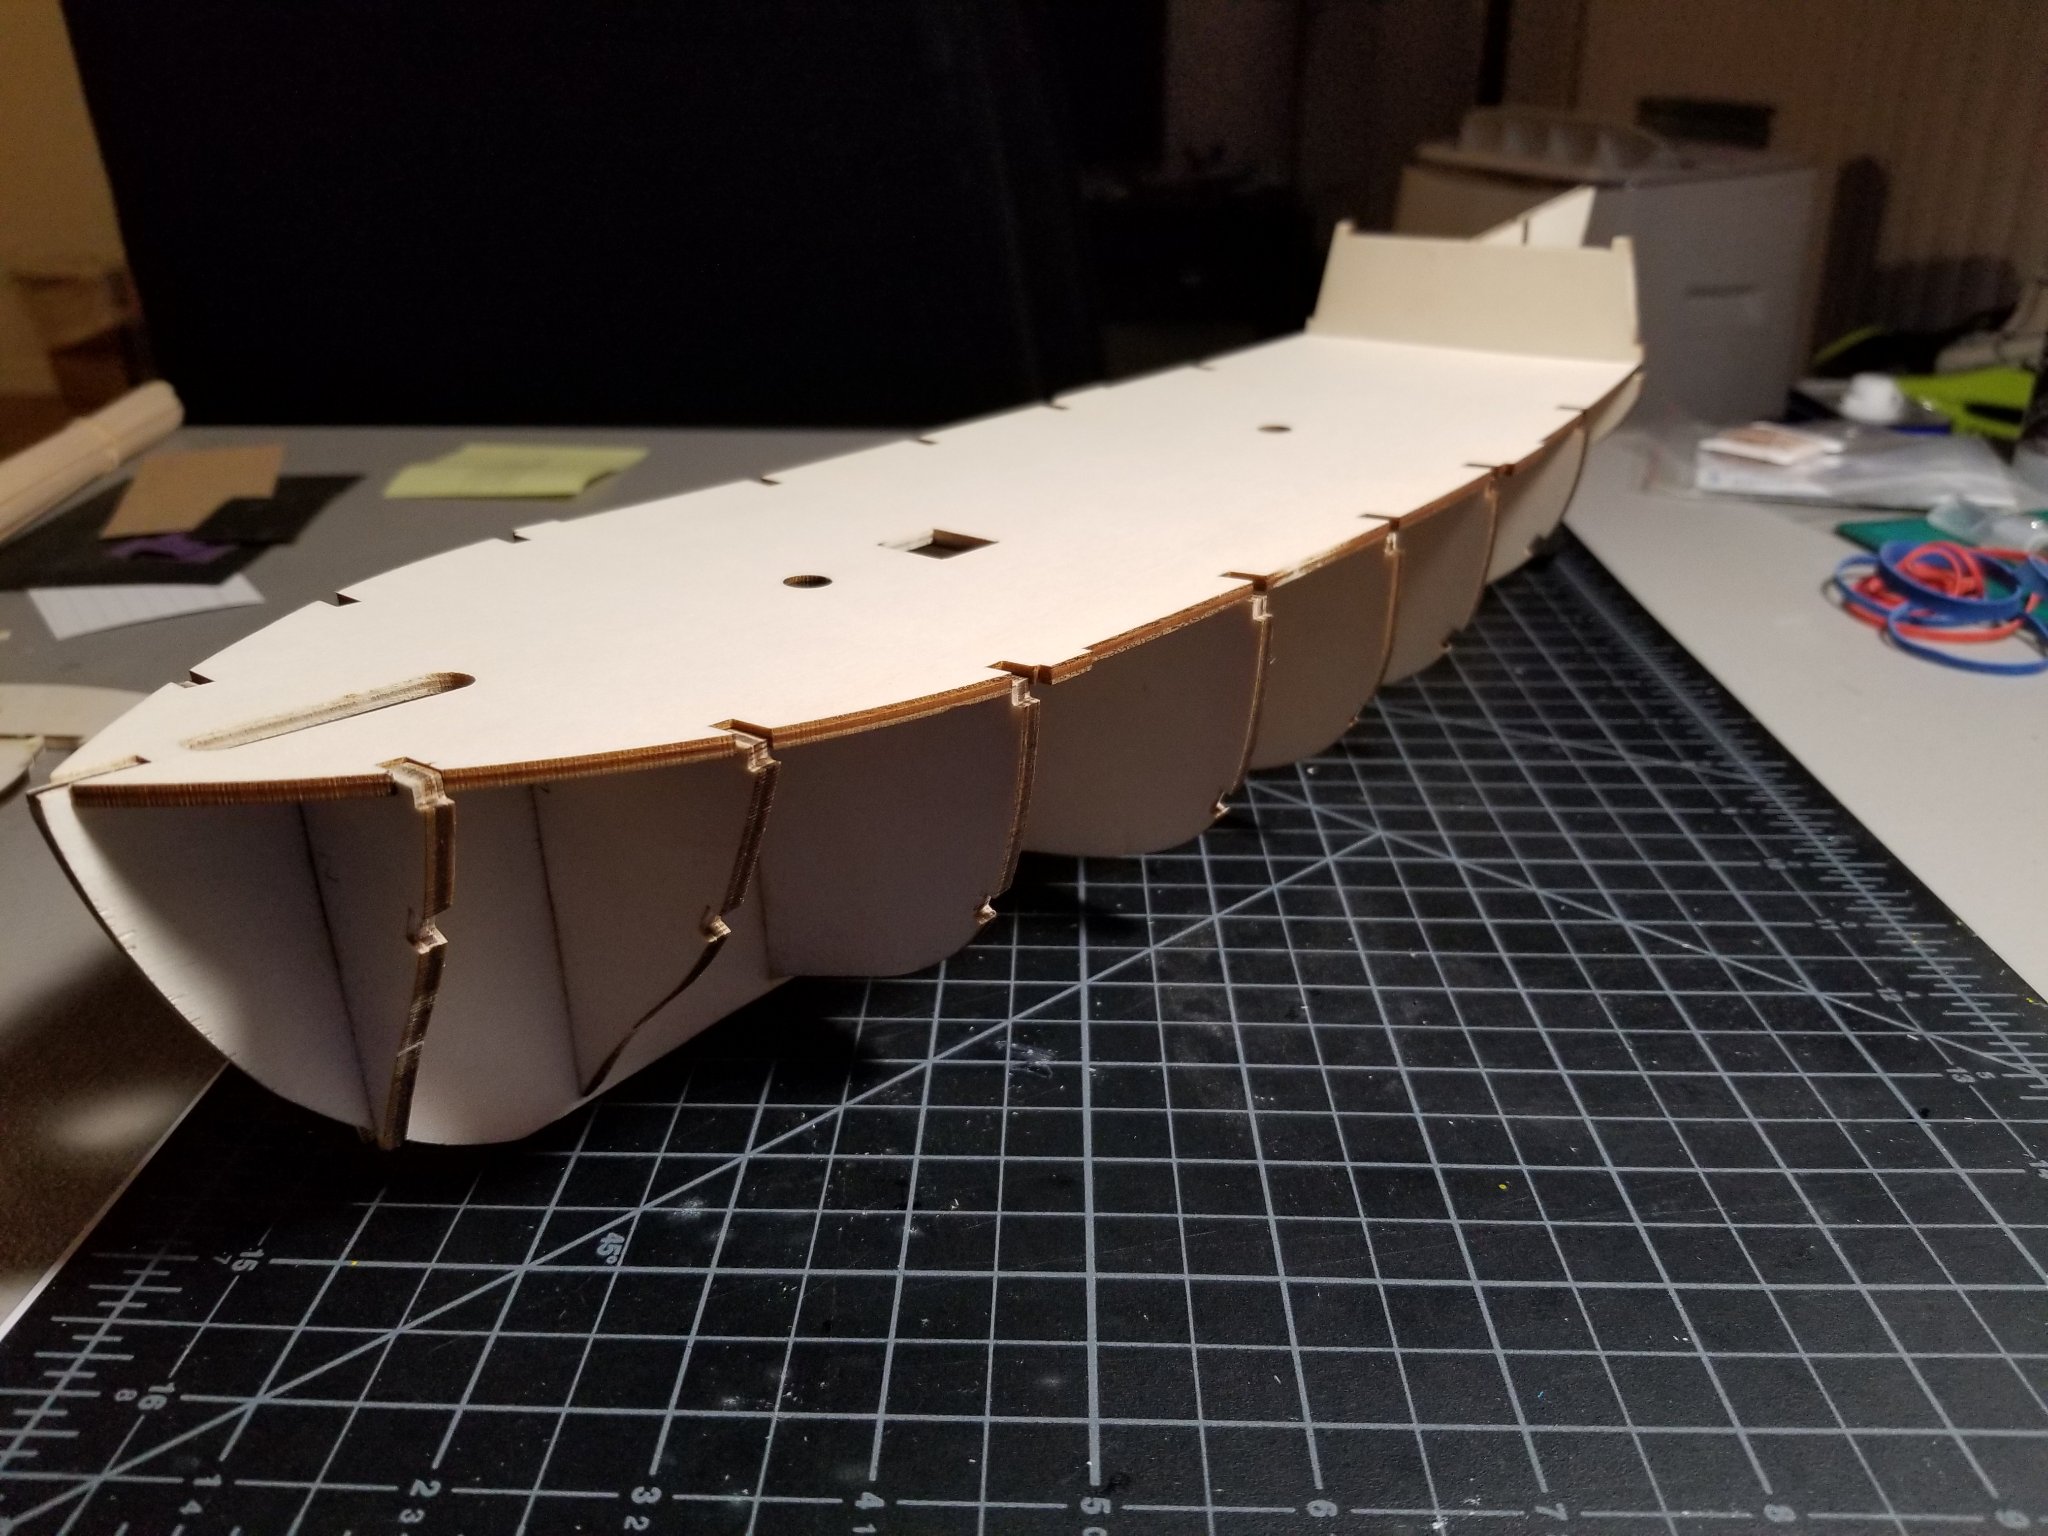
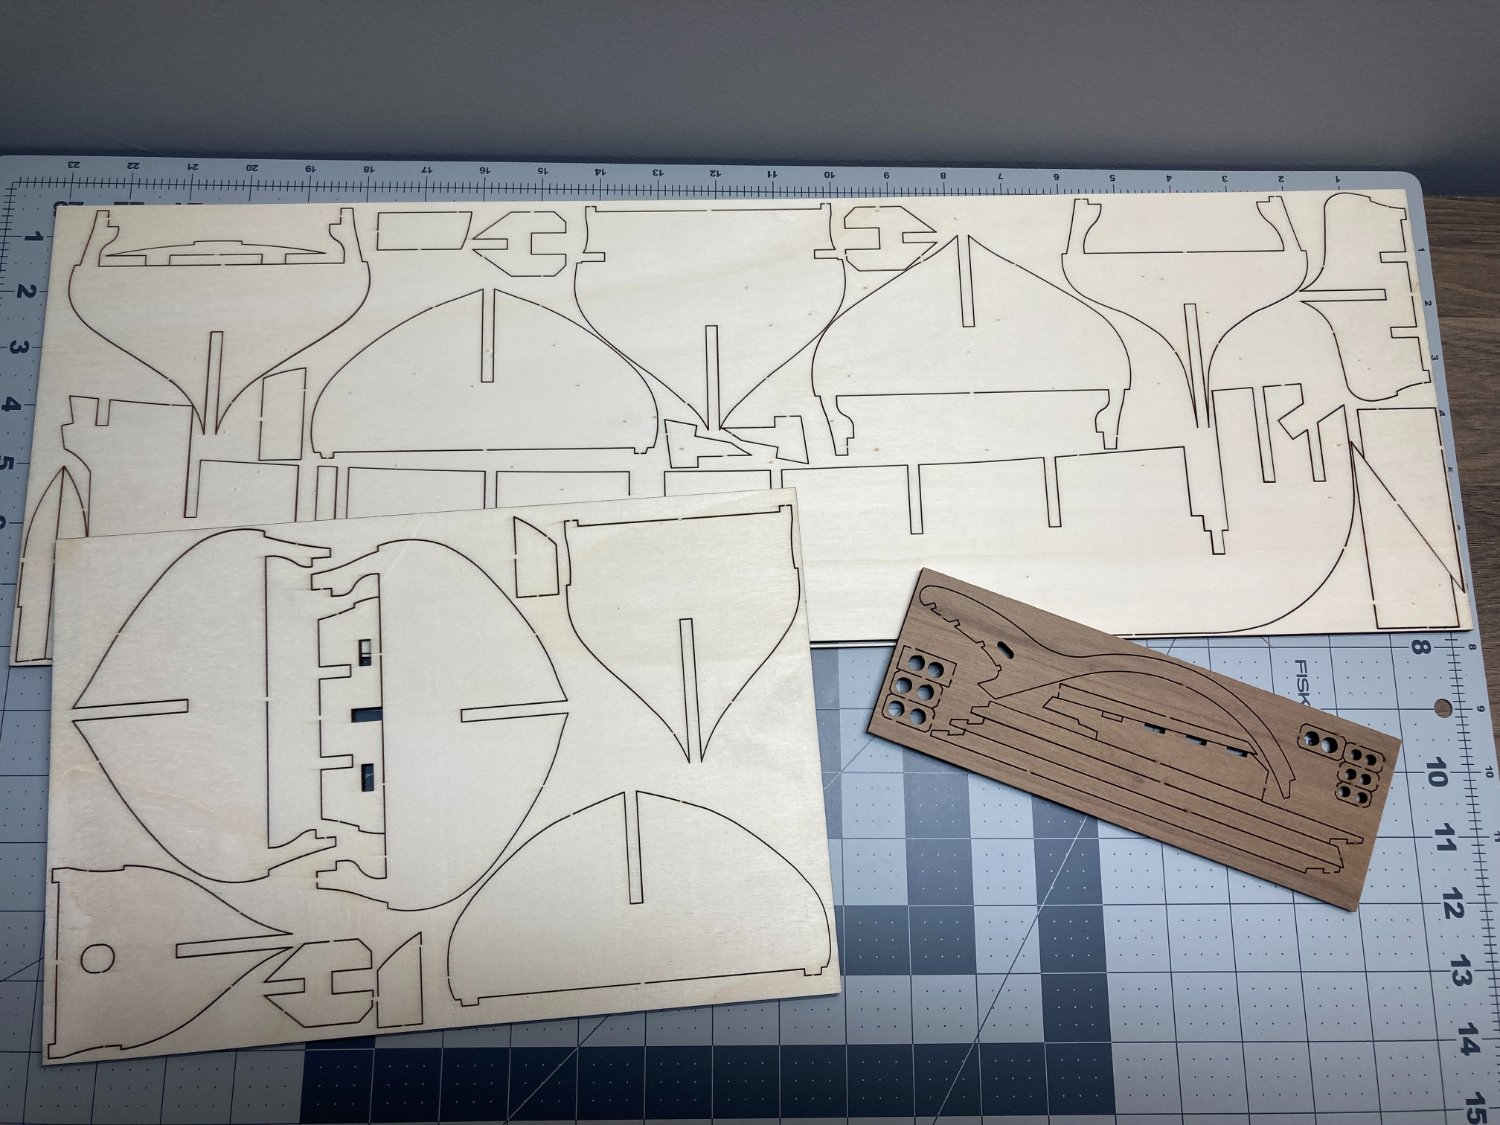
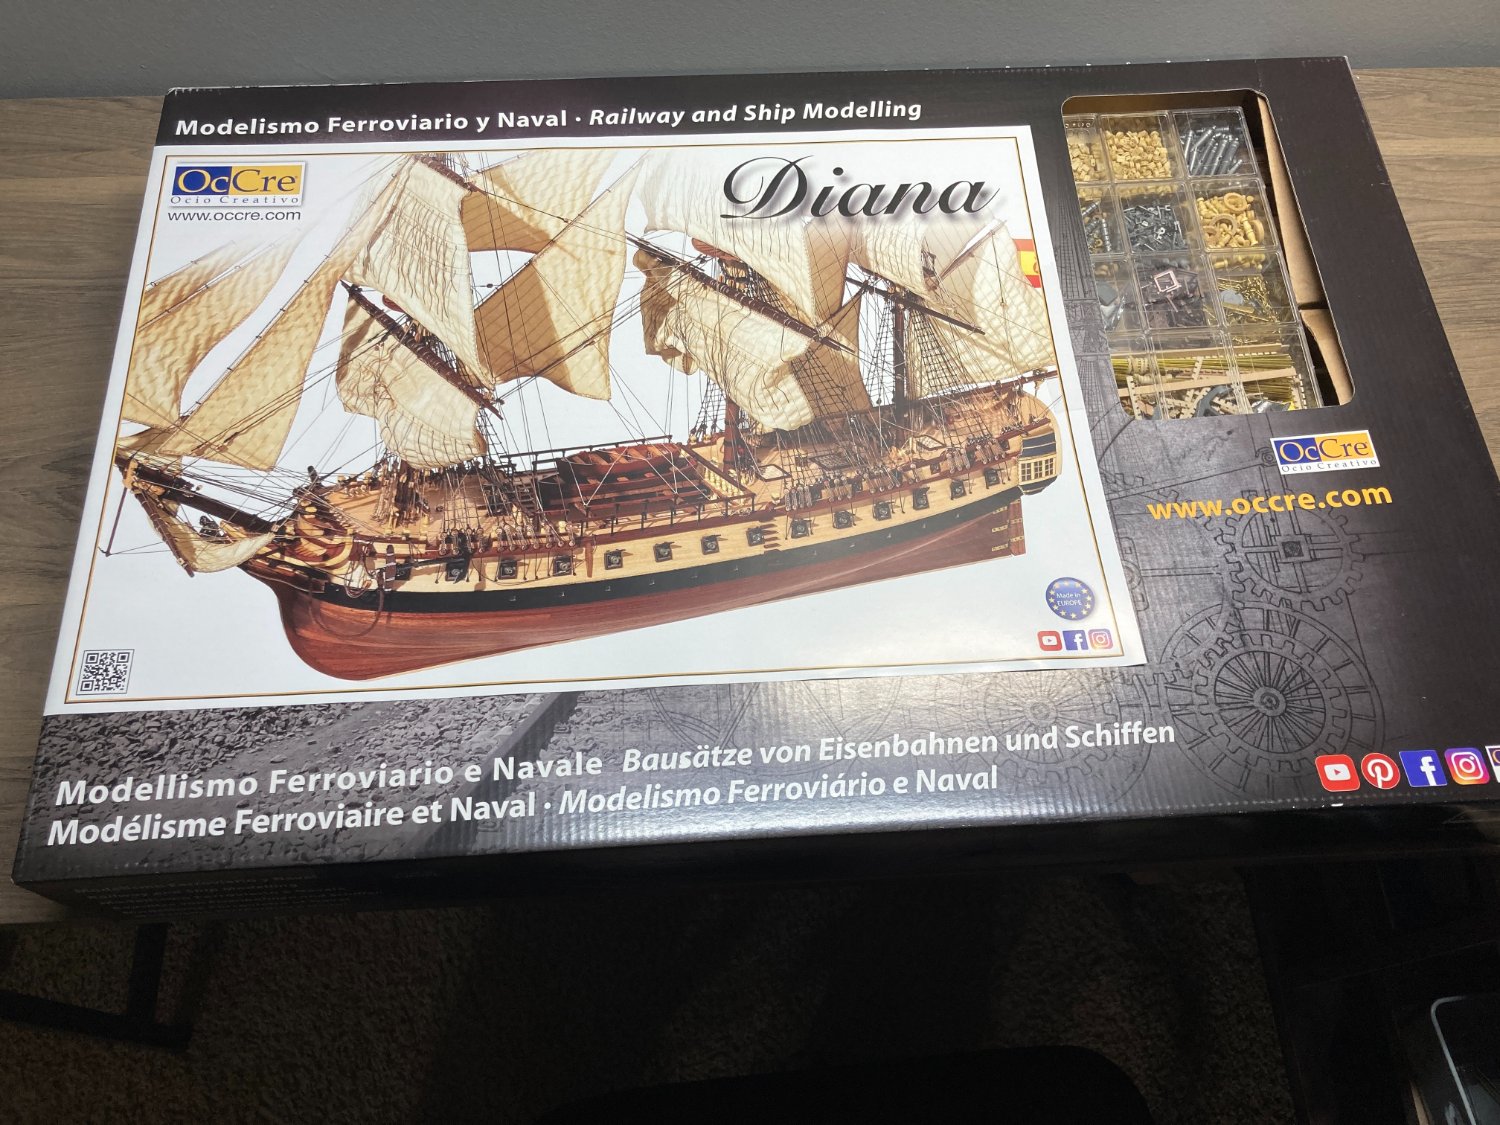
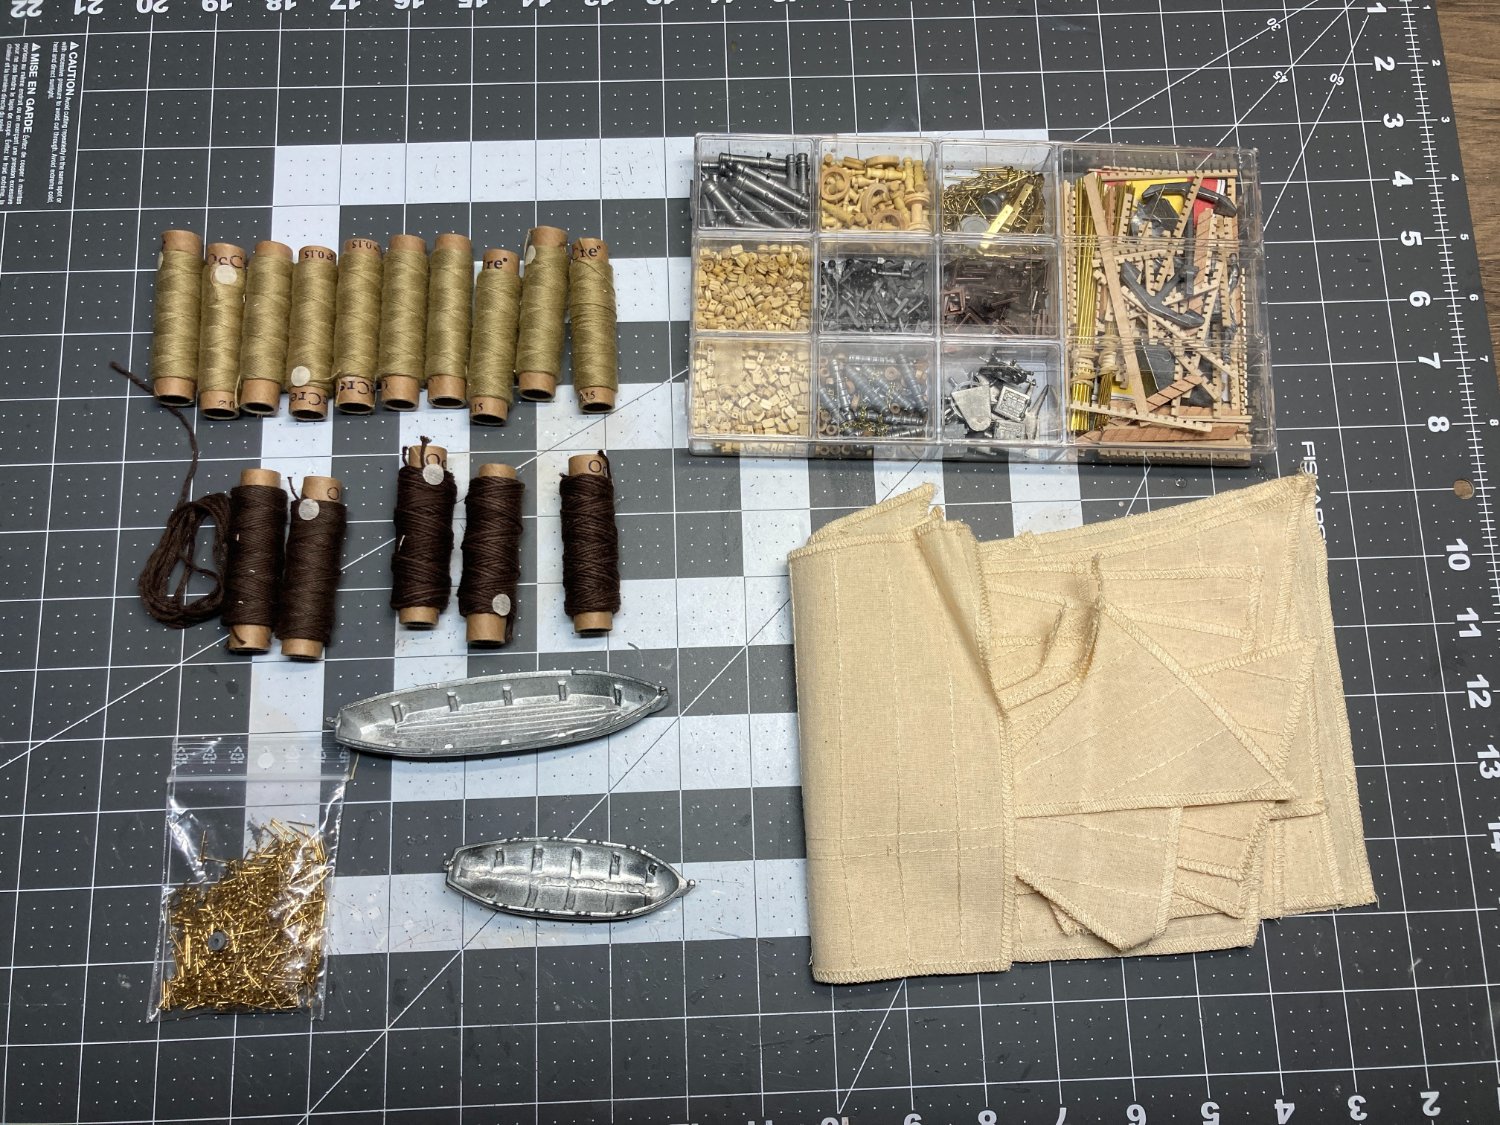
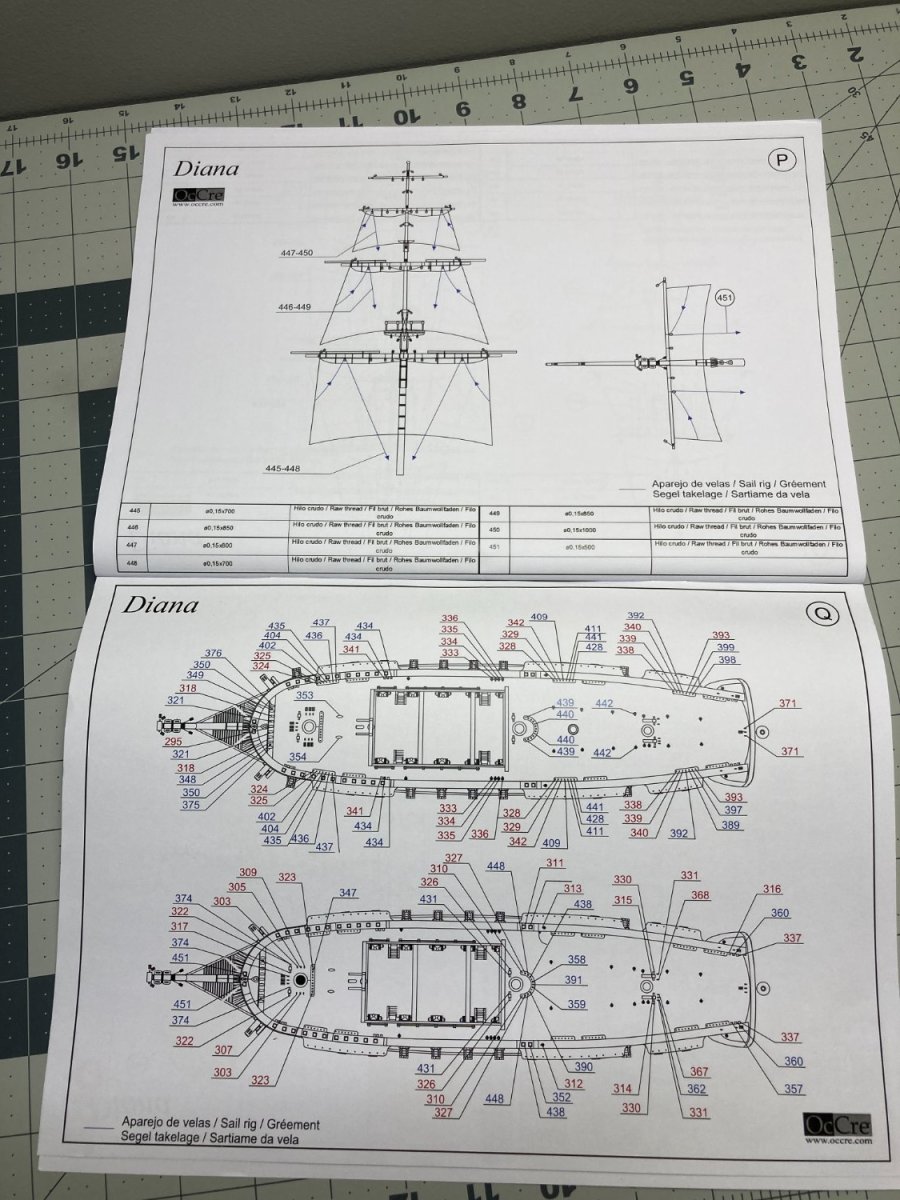
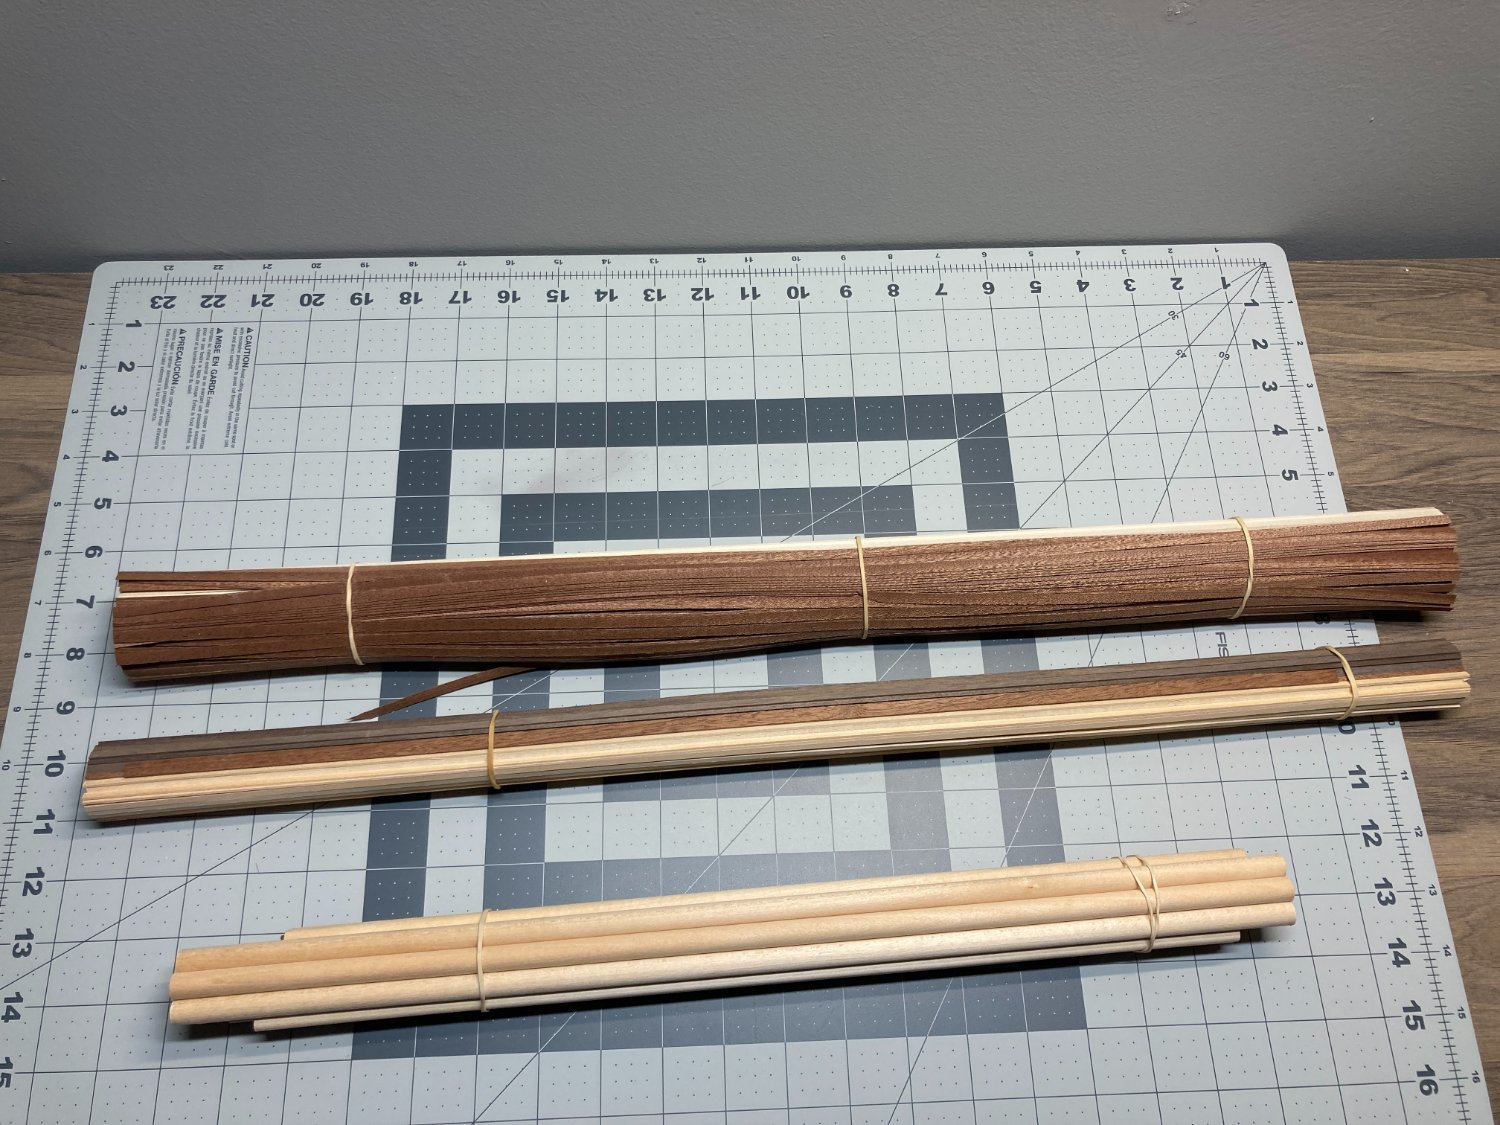
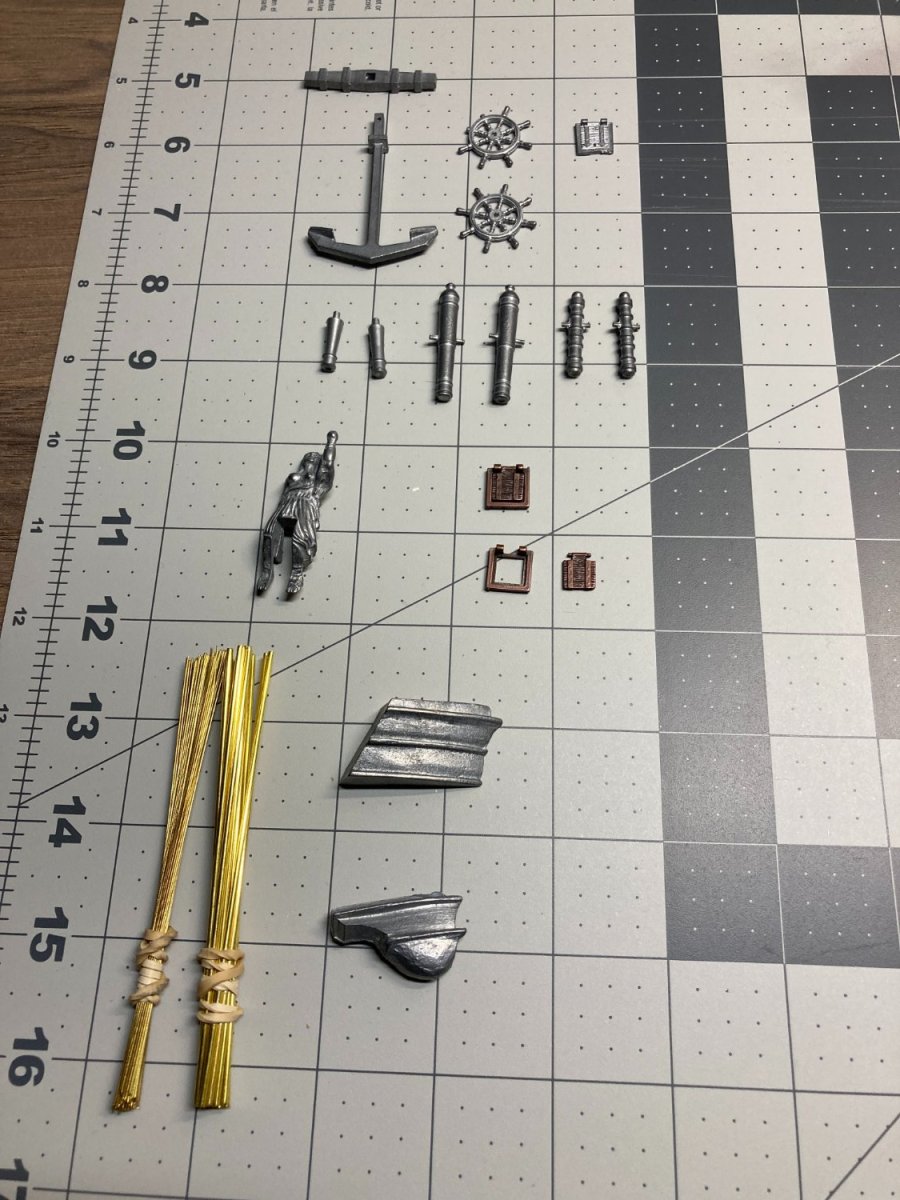
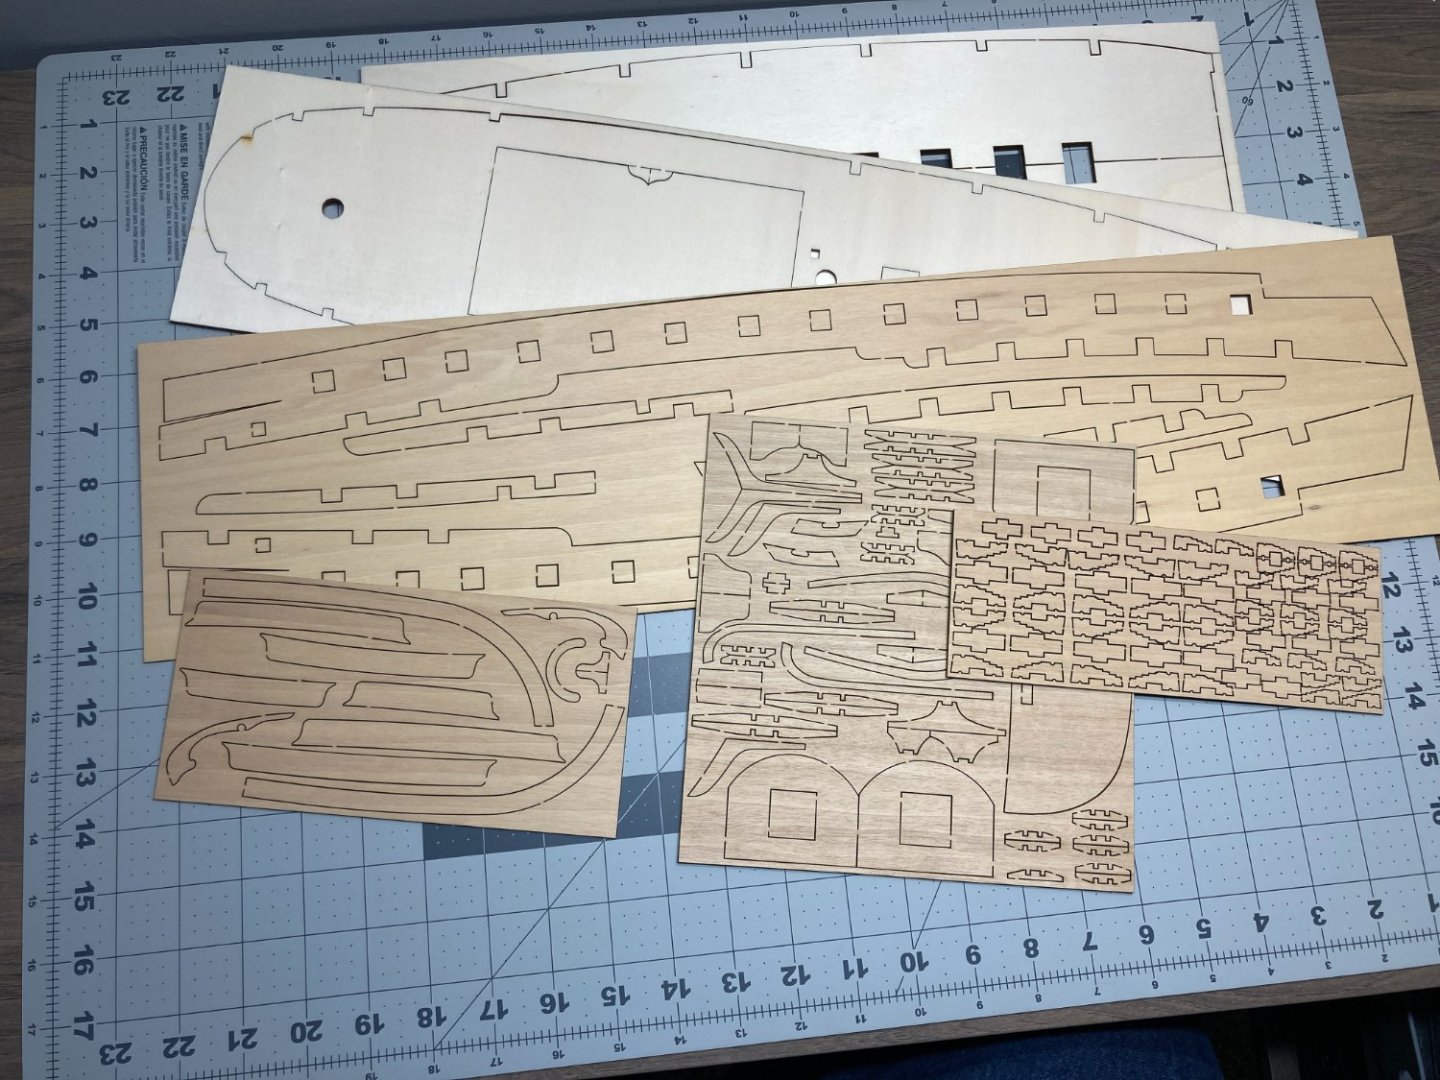
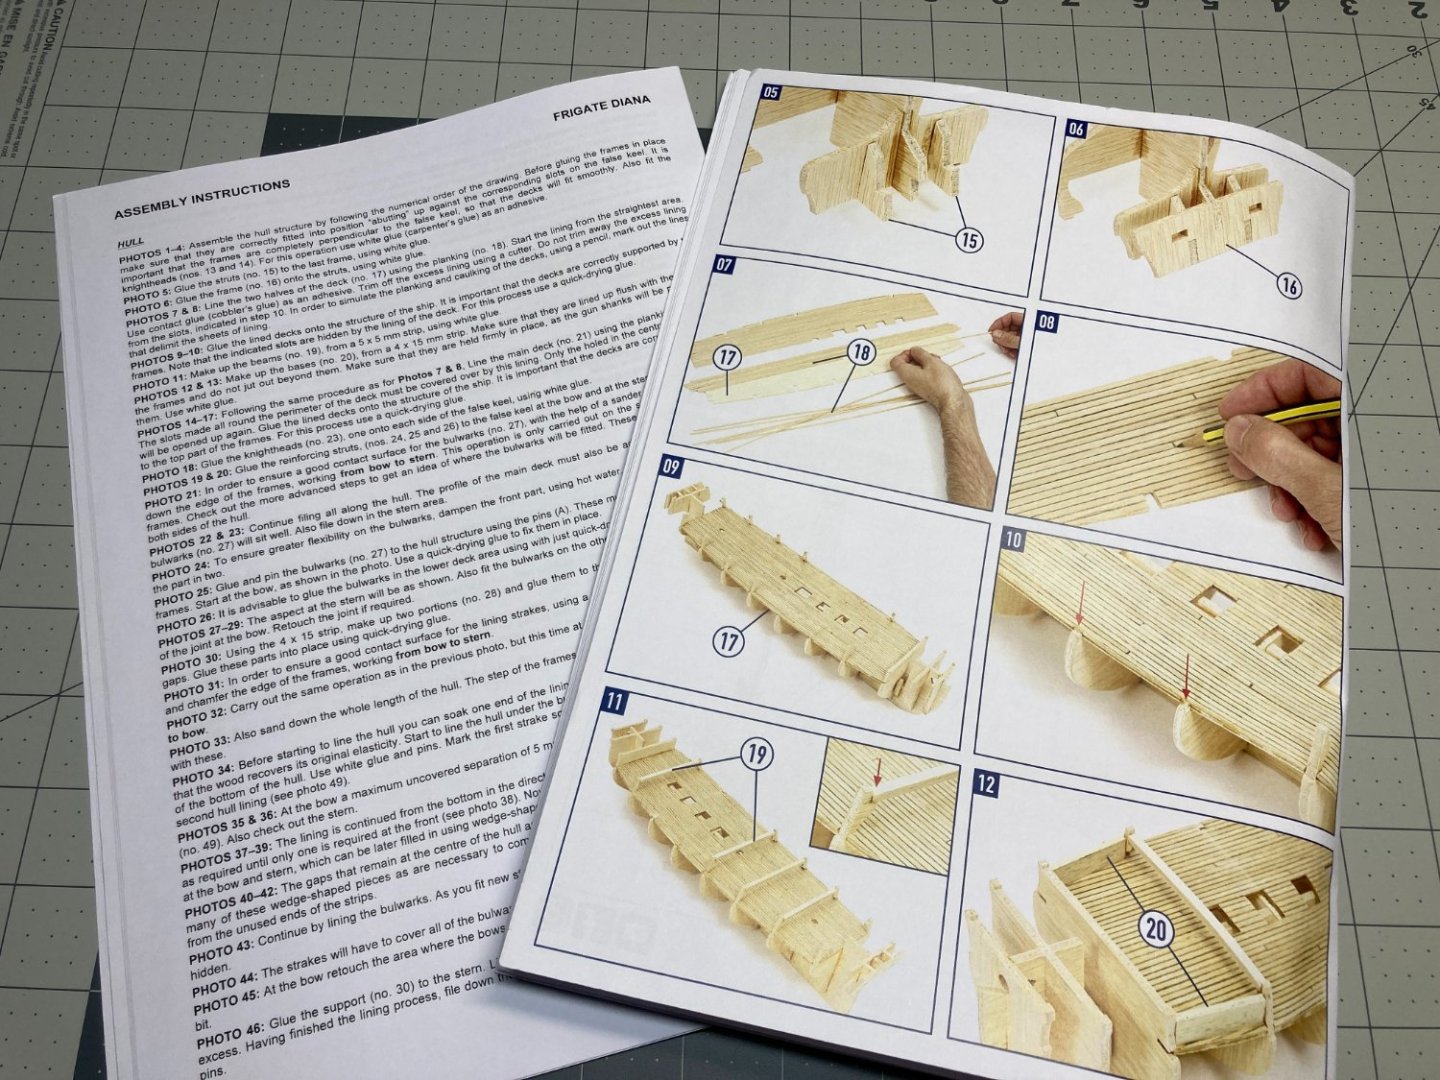
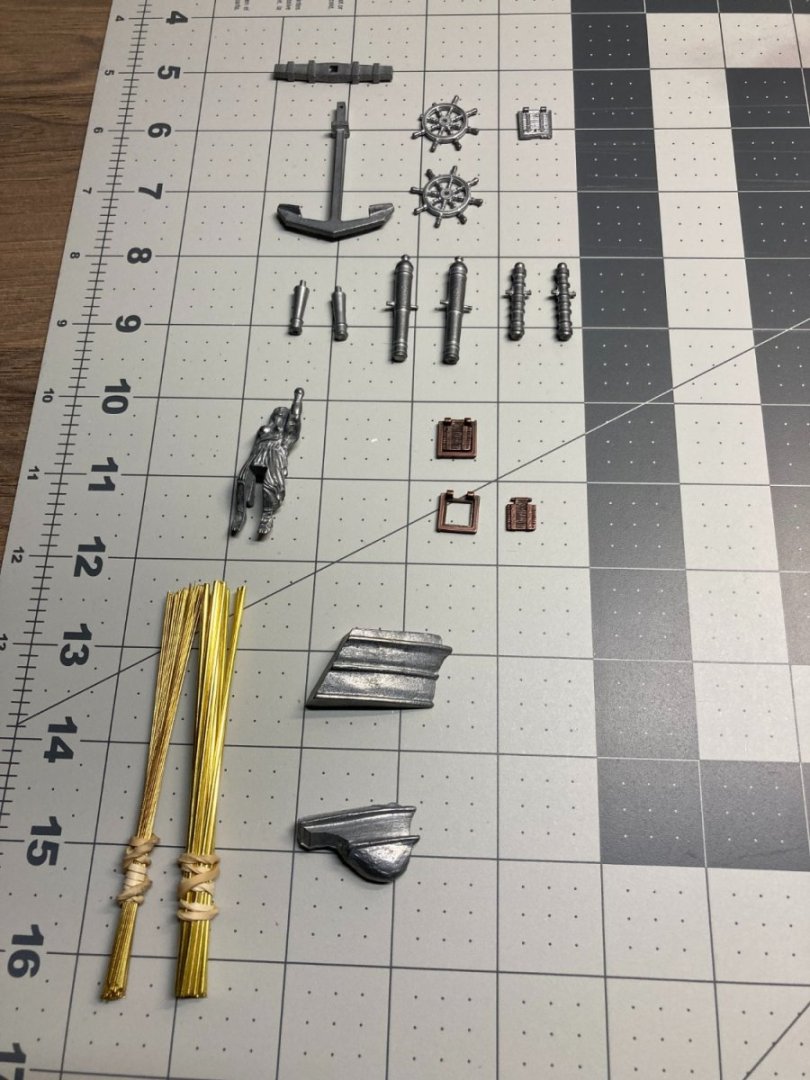
.thumb.jpeg.ffac2f8a24d212961a83eab4efb06a6c.jpeg) I have recently completed my first model ship, HMS Beagle by Occre. I am now starting my second, Frigate Diana, also from Occre. I have decided to document this build with a build log. I am hoping to get feedback and advice from more experienced modelers and to hopefully be a source of information to other beginners. Some of the members that post on this site are meticulous about being as historically accurate as possible. While I respect the time and effort that they put into researching and building their models, I am less concerned with this aspect of the hobby. For me it is about the relaxation and satisfaction I get out of building the model and the aesthetic of the final result. While I am pleased with the overall result of my first model, I am looking forward to improving on my second build. One area that I am focused on is the first layer of the planking. I am planning on installing the first layer of the planking using some of the techniques that I have read about on this web site. This may be overkill since I am still planning on adding the second layer of planking, but I am viewing it as practice for someday building a model that only has a single layer of planking. I am also hoping to be more precise on items like the trim on the deck railings and the masts and other deck features. My rigging got better as I progressed on my first model, and I hope to make all of the rigging better on this model. I am also hoping to learn more about the proper terminology for the various parts of the ship, especially the rigging. Thank you for taking the time to read this build log and please add comments and questions about my work. The parts were in great shape except for one of the ship's wheels had two broken spokes. Occre is really good about replacing broken parts and makes the process pretty easy. The laser cut parts are all in good condition and nothing is warped. Occre provides over 100 pages of instructions and plans including detailed rigging plans. I hope the have be basic frame assembled in a few days and will post on my progress.
I have recently completed my first model ship, HMS Beagle by Occre. I am now starting my second, Frigate Diana, also from Occre. I have decided to document this build with a build log. I am hoping to get feedback and advice from more experienced modelers and to hopefully be a source of information to other beginners. Some of the members that post on this site are meticulous about being as historically accurate as possible. While I respect the time and effort that they put into researching and building their models, I am less concerned with this aspect of the hobby. For me it is about the relaxation and satisfaction I get out of building the model and the aesthetic of the final result. While I am pleased with the overall result of my first model, I am looking forward to improving on my second build. One area that I am focused on is the first layer of the planking. I am planning on installing the first layer of the planking using some of the techniques that I have read about on this web site. This may be overkill since I am still planning on adding the second layer of planking, but I am viewing it as practice for someday building a model that only has a single layer of planking. I am also hoping to be more precise on items like the trim on the deck railings and the masts and other deck features. My rigging got better as I progressed on my first model, and I hope to make all of the rigging better on this model. I am also hoping to learn more about the proper terminology for the various parts of the ship, especially the rigging. Thank you for taking the time to read this build log and please add comments and questions about my work. The parts were in great shape except for one of the ship's wheels had two broken spokes. Occre is really good about replacing broken parts and makes the process pretty easy. The laser cut parts are all in good condition and nothing is warped. Occre provides over 100 pages of instructions and plans including detailed rigging plans. I hope the have be basic frame assembled in a few days and will post on my progress.


-
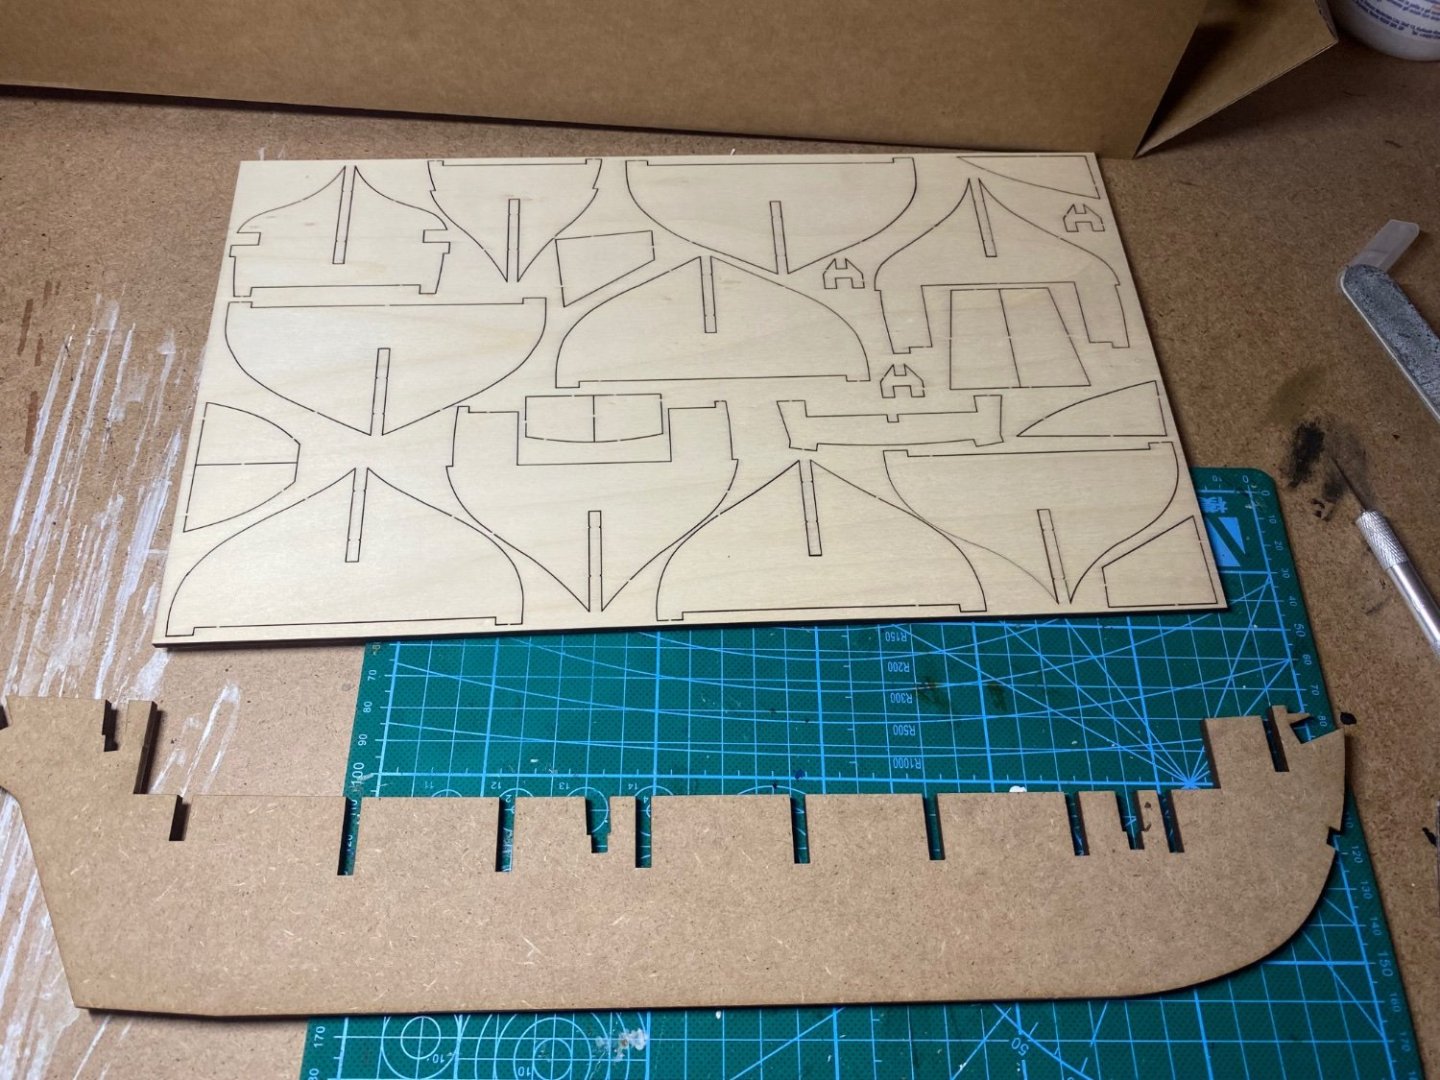
 It is not the first build log showing OcCre's Albatros but it is the very first wooden ship model I will build. To start with shipmodelling I have selected the Albatros as she should not be too tough to build and there is a series of YouTube videos showing the build step by step I can refer to when I need it. I have started this project at the end of November last year and already have spent some 60 hrs working on it before I have joined MSW a week ago. Therefore this log will be a rough wrap up of what I have done so far and then will join the actual stage of the build - rigging the guns. As I am not a native speaker I will have to translate some nautical terms from German to English and getting the photographs uploaded and resized first. Starting tomorrow I think that all posts will be done until sunday. You will see a lot of mistakes I think so any help and comments which will help me to improve my modelling skills are highly appreciated. Thanks in advance ... Kai
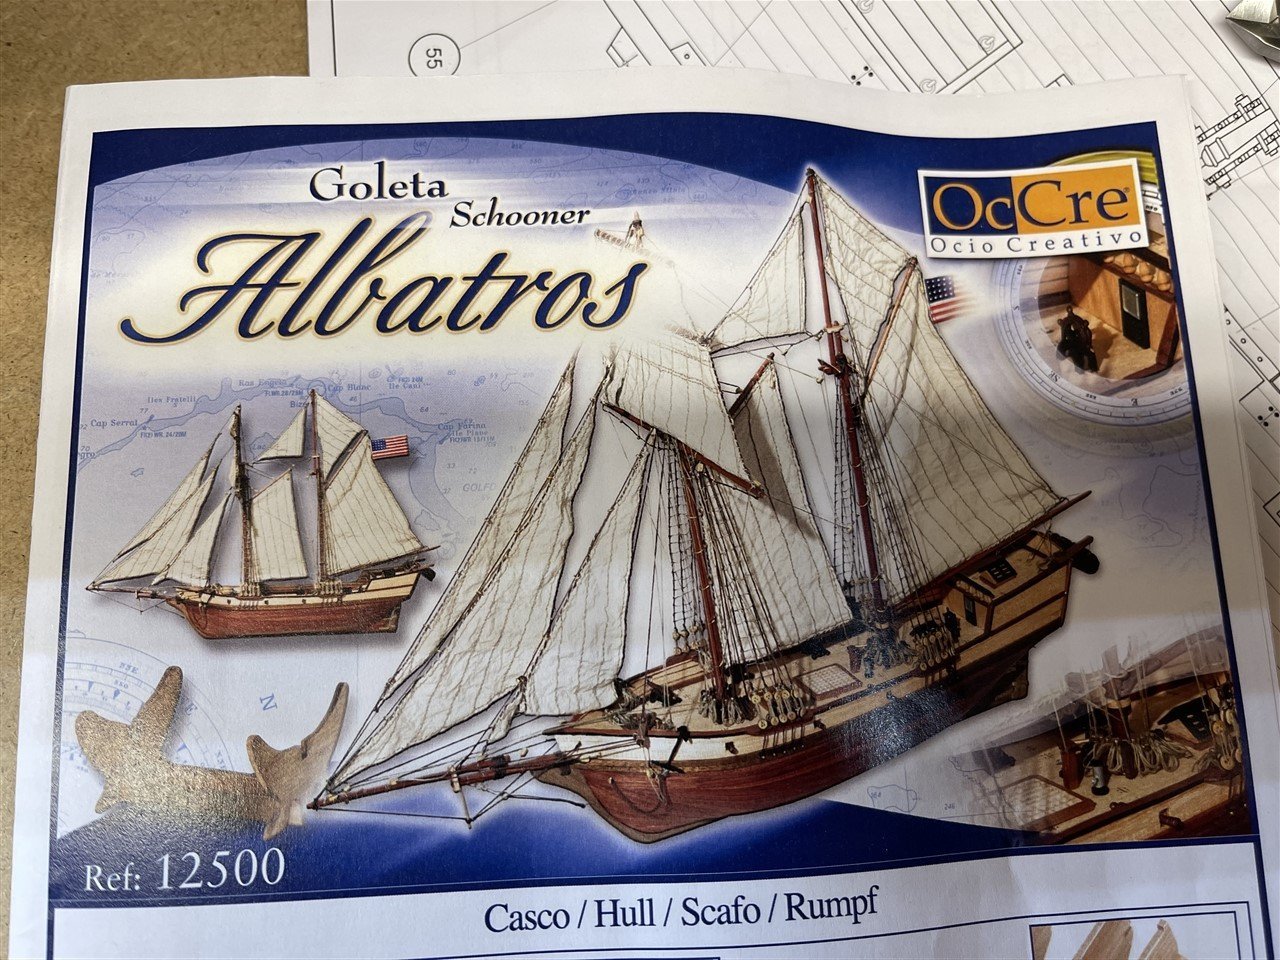
-
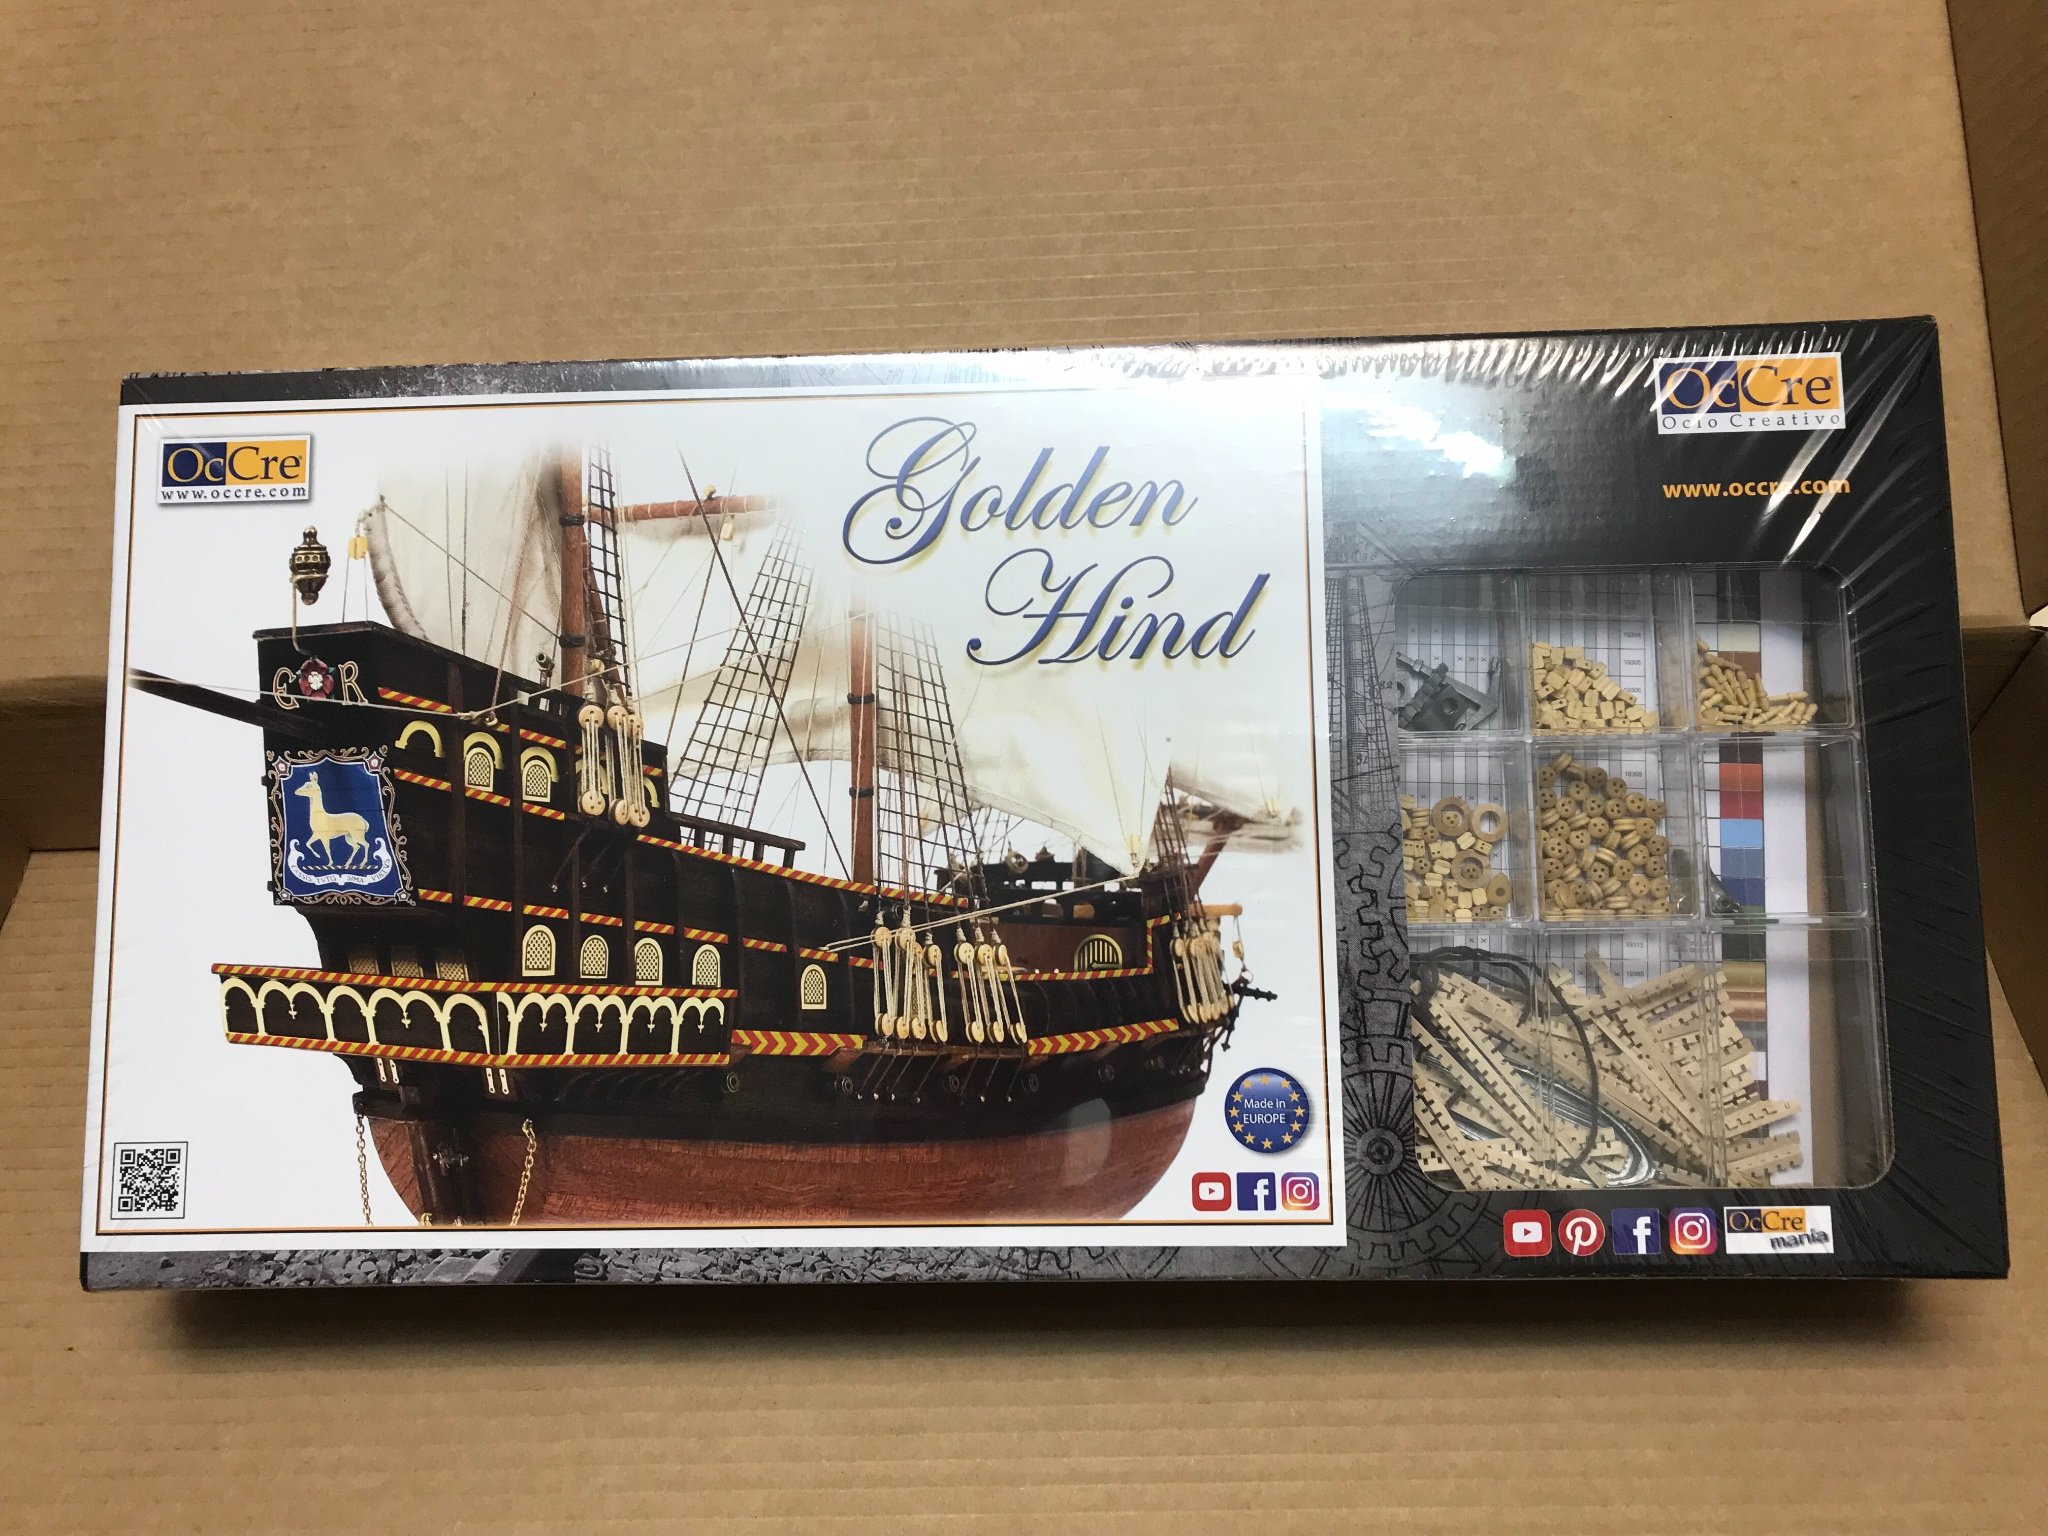
 Good evening everyone, this is going to be my second build. The package arrived today. While i was waiting for the model i did a basic research about the Golden Hind and some plans showed up. What do you think about this deck? Having cannons on the upper deck.. like HMS Revenge.. In my opinion, I really like the ideia of having cannons on the upper deck. That’s why I’m requesting your opinion on this subject. 🙏🏻 1st image - box 2nd image - deck (picture taken from internet)
-
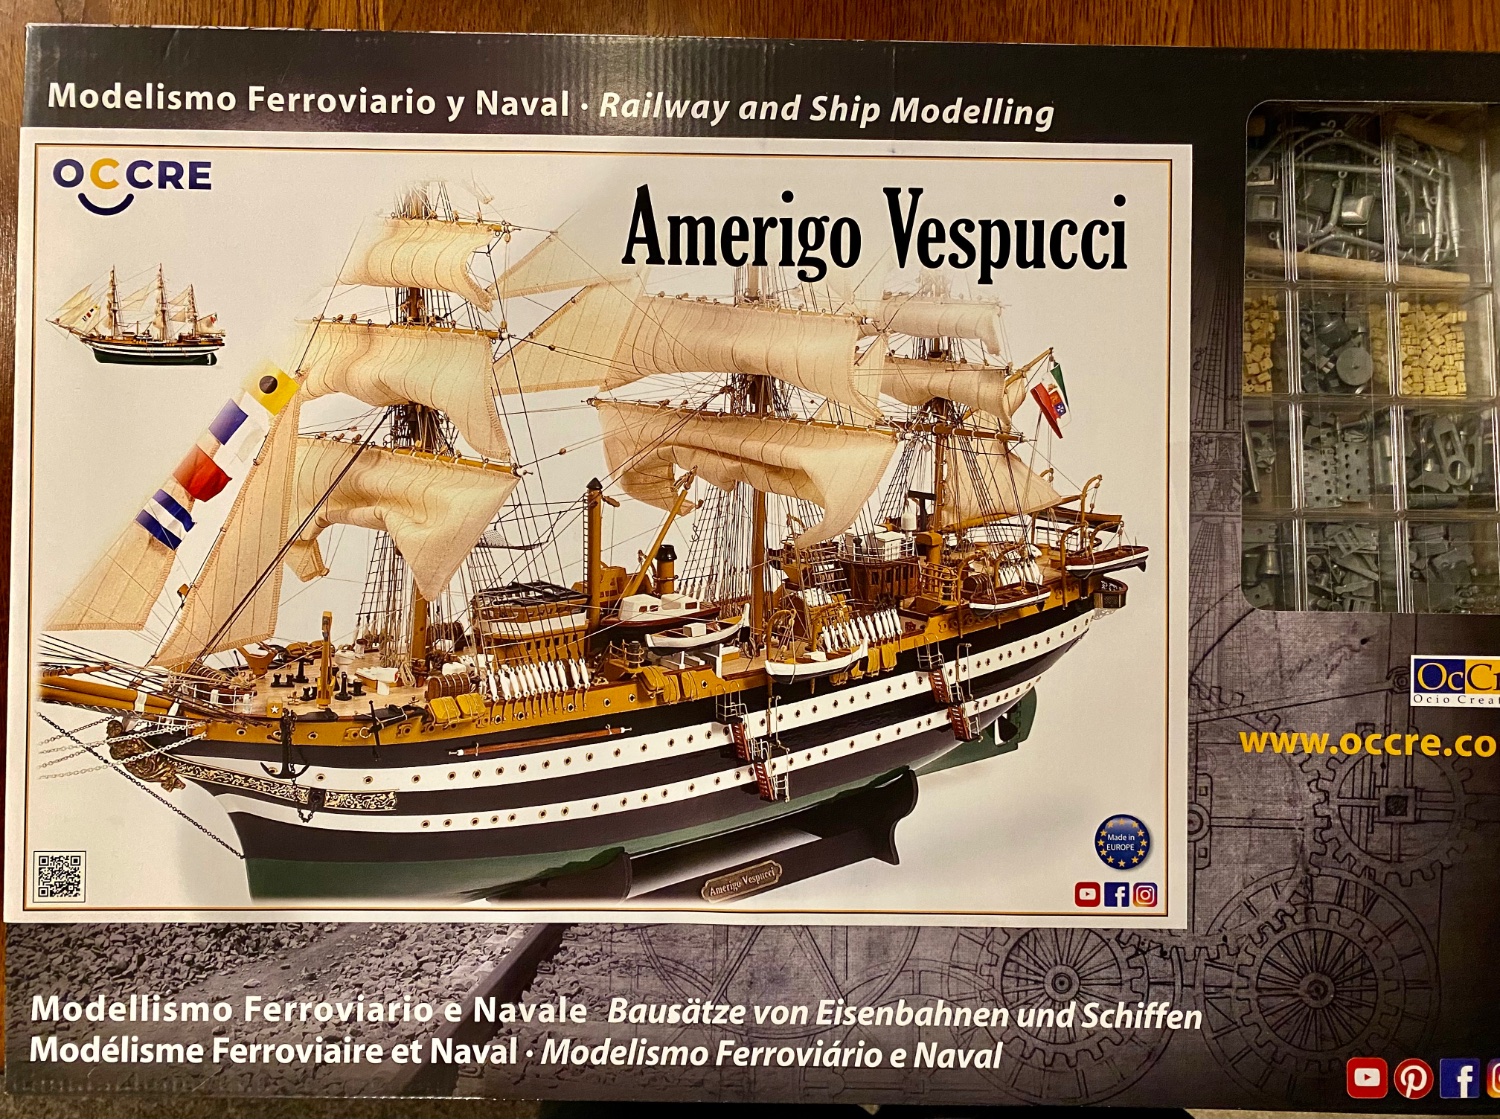
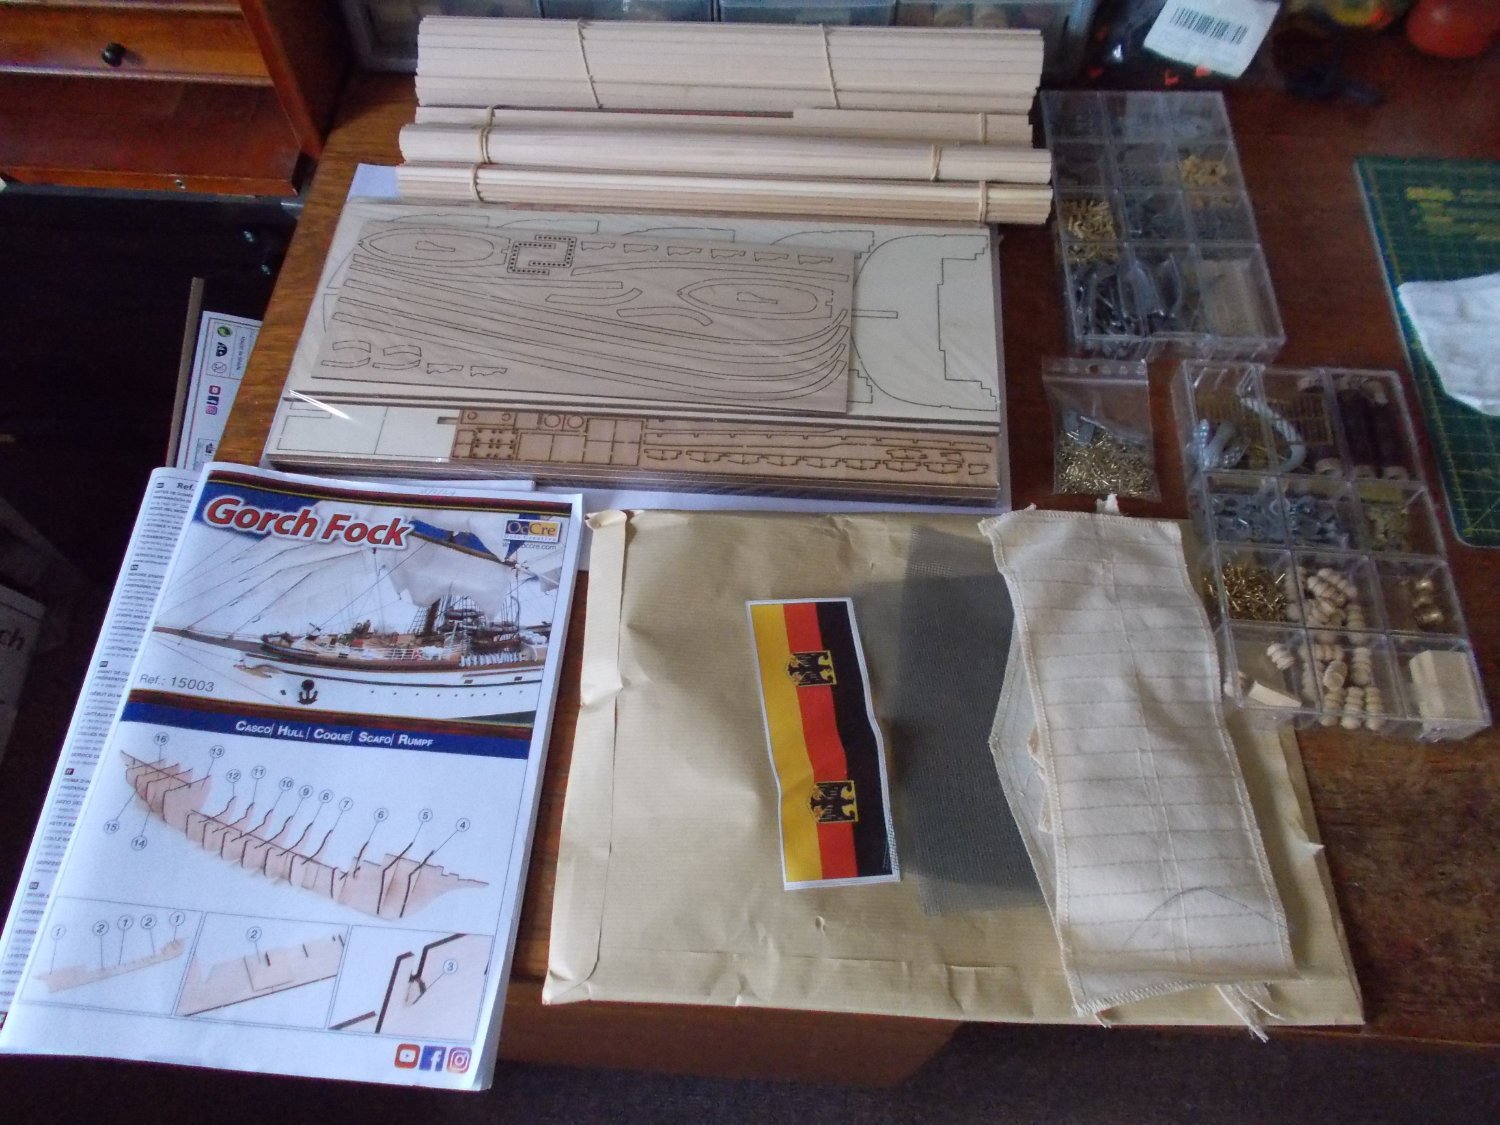
 It is ages since I tried to do a build log on this forum so I thought it was about time I did! I have made loads of models since my last but not done logs on any of them. I love the look of the tall ships and I have recently finished the Occre version of the Amerigo Vespucci with full lighting and loads of changes to the kit instructions to make her more like the real vessel. I am going to try and light the Gorch Fock as well although I wonder sometimes why I set myself these challenges. I can already see from the instructions that I will have to make a few alterations to the kit but otherwise I hope to build her more or less out of the box this time without looking too carefully at the real vessel. At first look the instructions are the usual Occre quality, the wood looks good and the fittings fine. I will change the navigation lights so that I can fit lights. I don't like the photo etched stanchions but changing them costs a lot as I know because I changed them on the AV so I will put up with them this time. The sails again are usual for Occre but to be honest they do look OK in the end. I made some for the AV as the kit didn't come with them but they didn't really come out better so I will stick with those provided. Let's see what else I find as I go along. For those who want to know this is what is in the box!
-
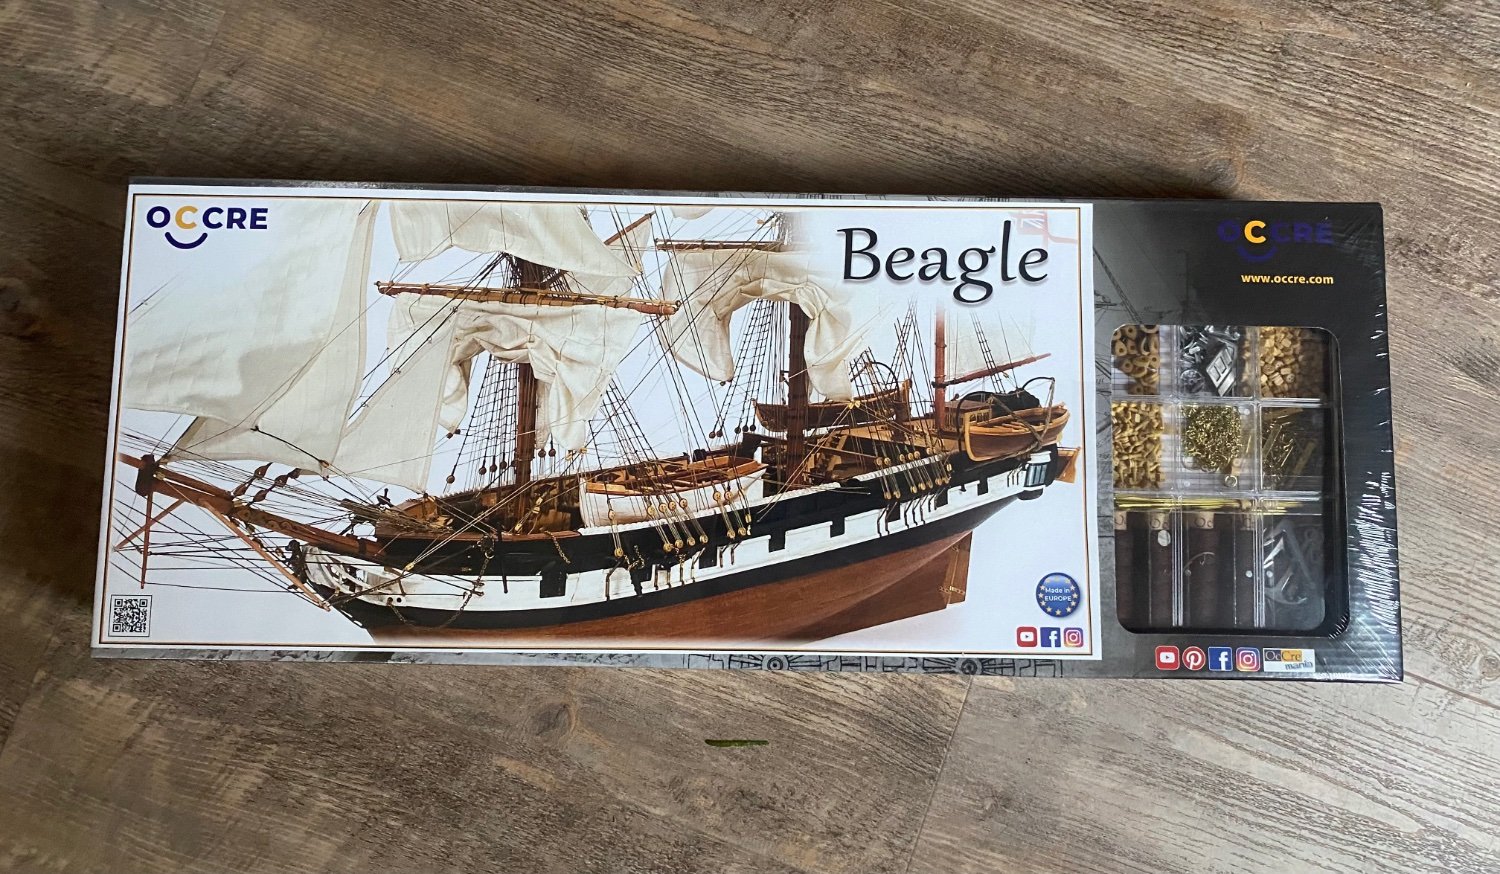
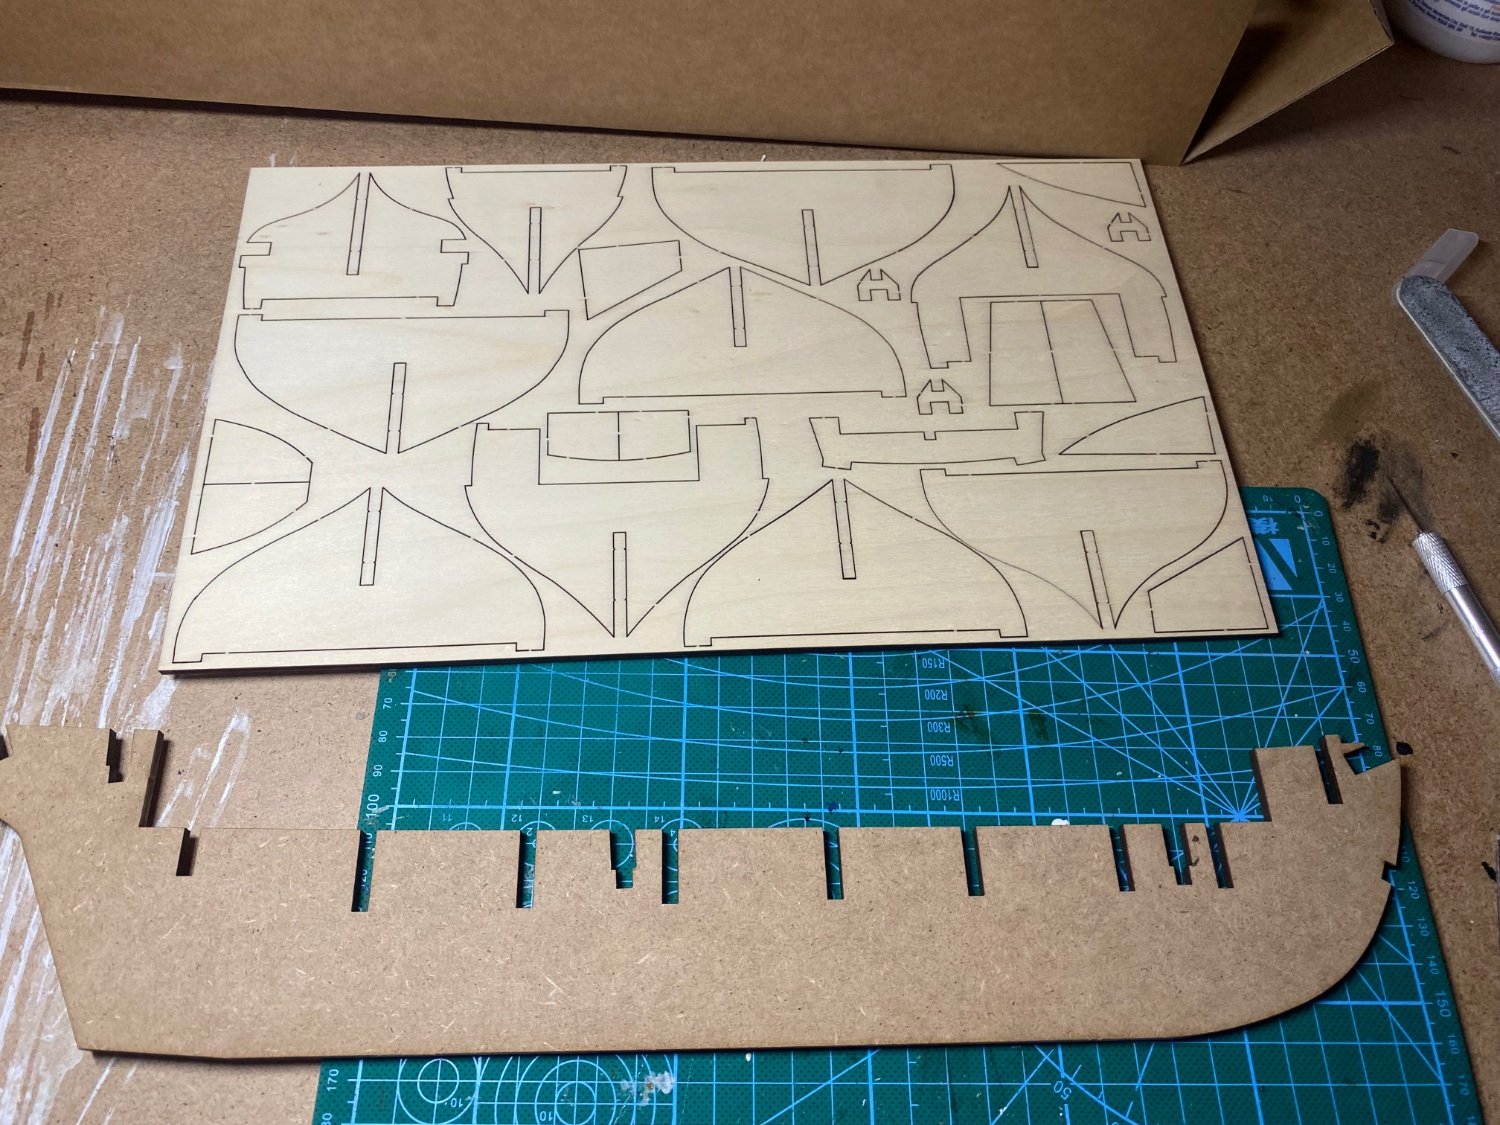
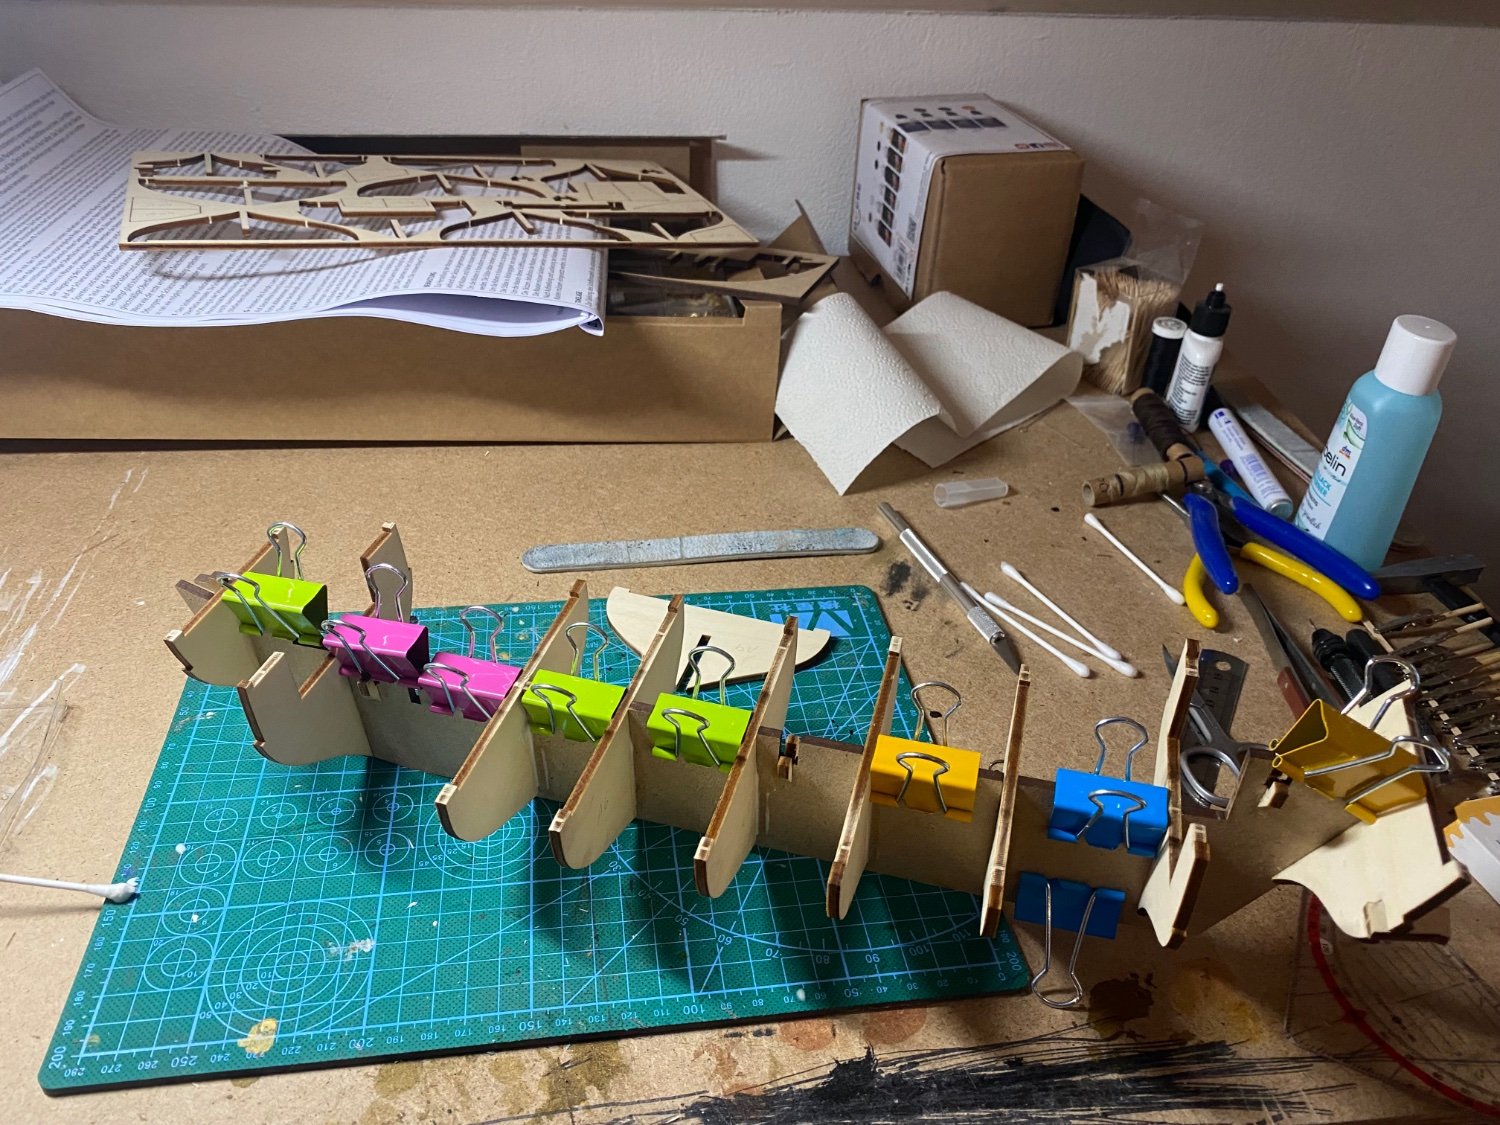
 After finishing my OcCre Polaris I wanted to go more advanced and chose the Beagle for my next model. I really like the look and also the historical background of Charles Darwin. There she is: Kiel is perfectly straight: doing the skelleton applied the deck before planking. I can fix it with some nails this way. cabin walls added, thats it for the start:


-
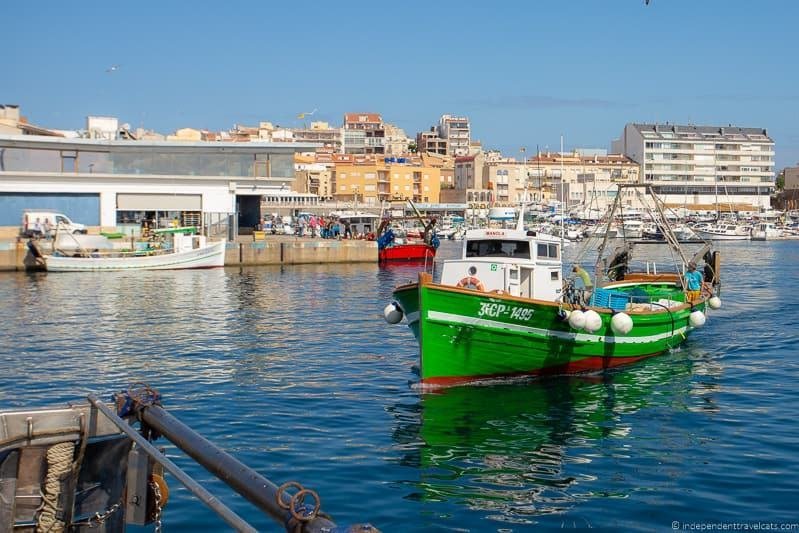
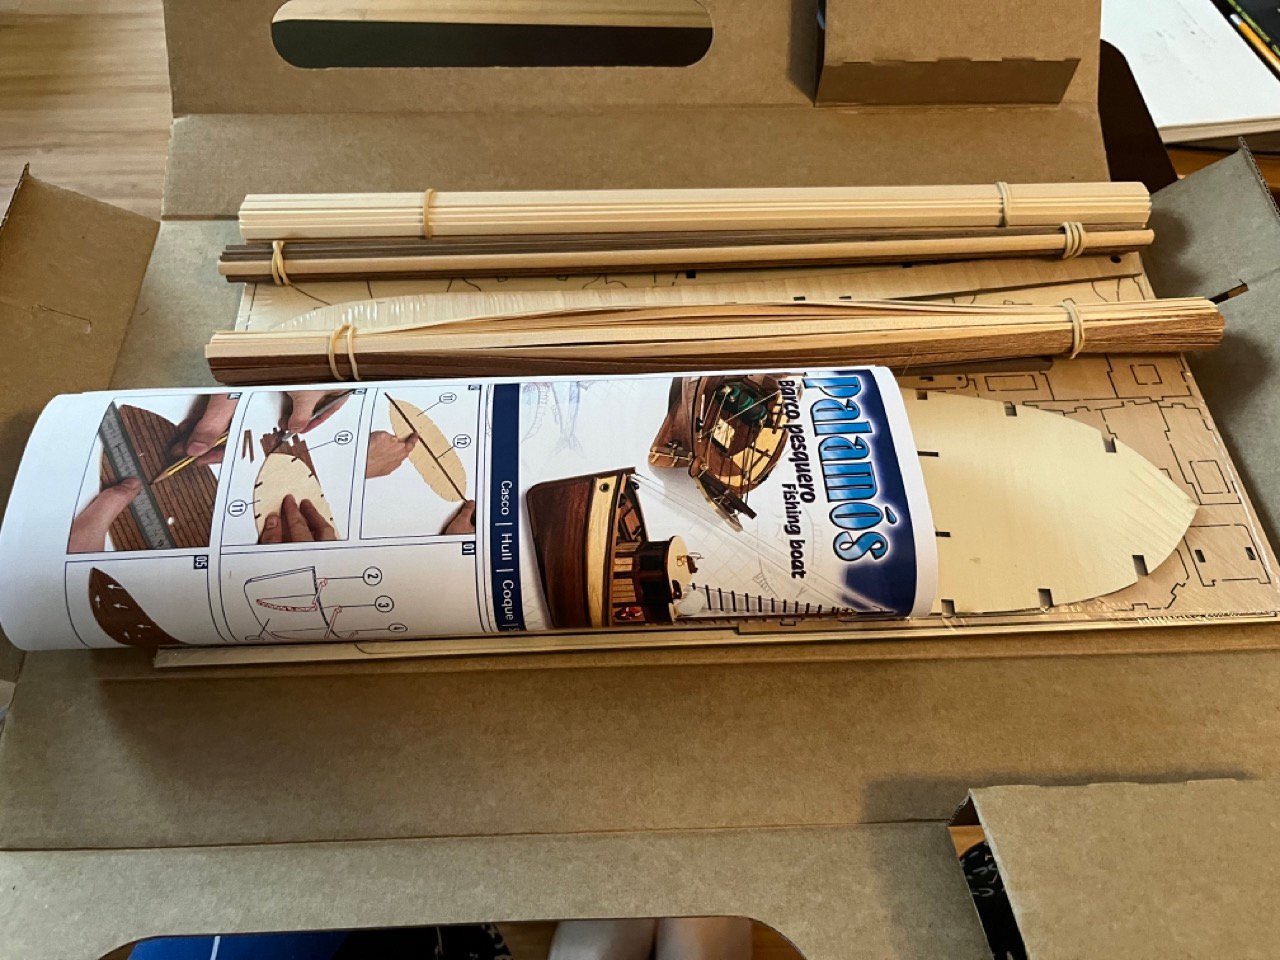
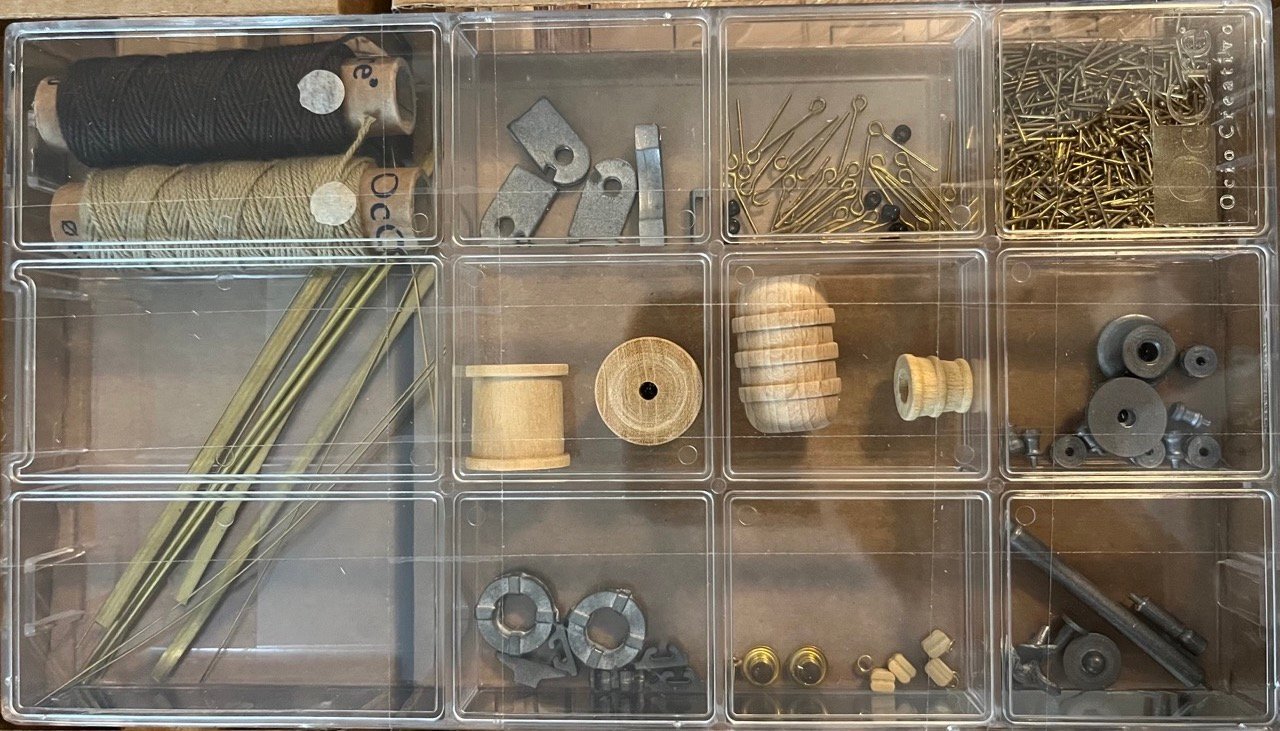
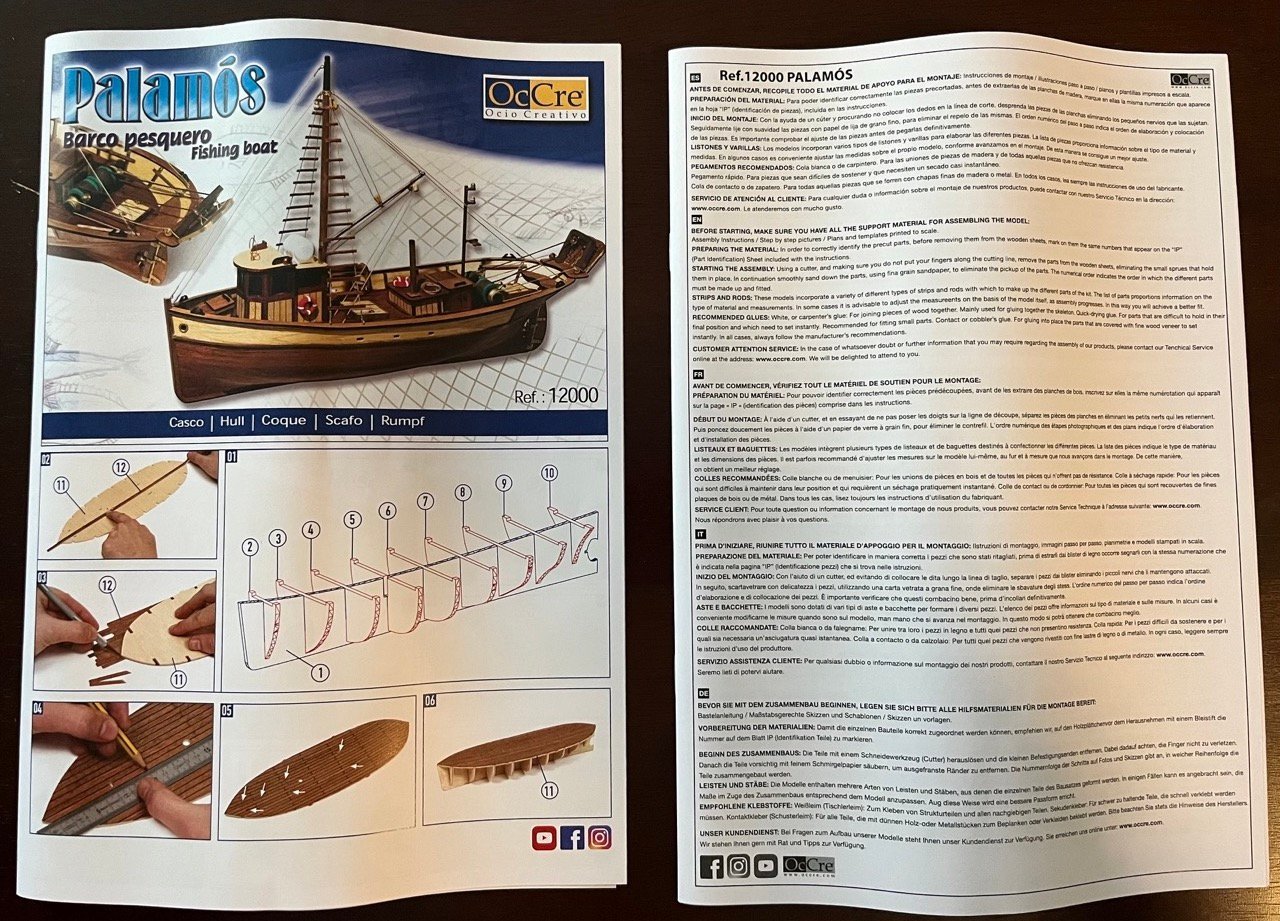
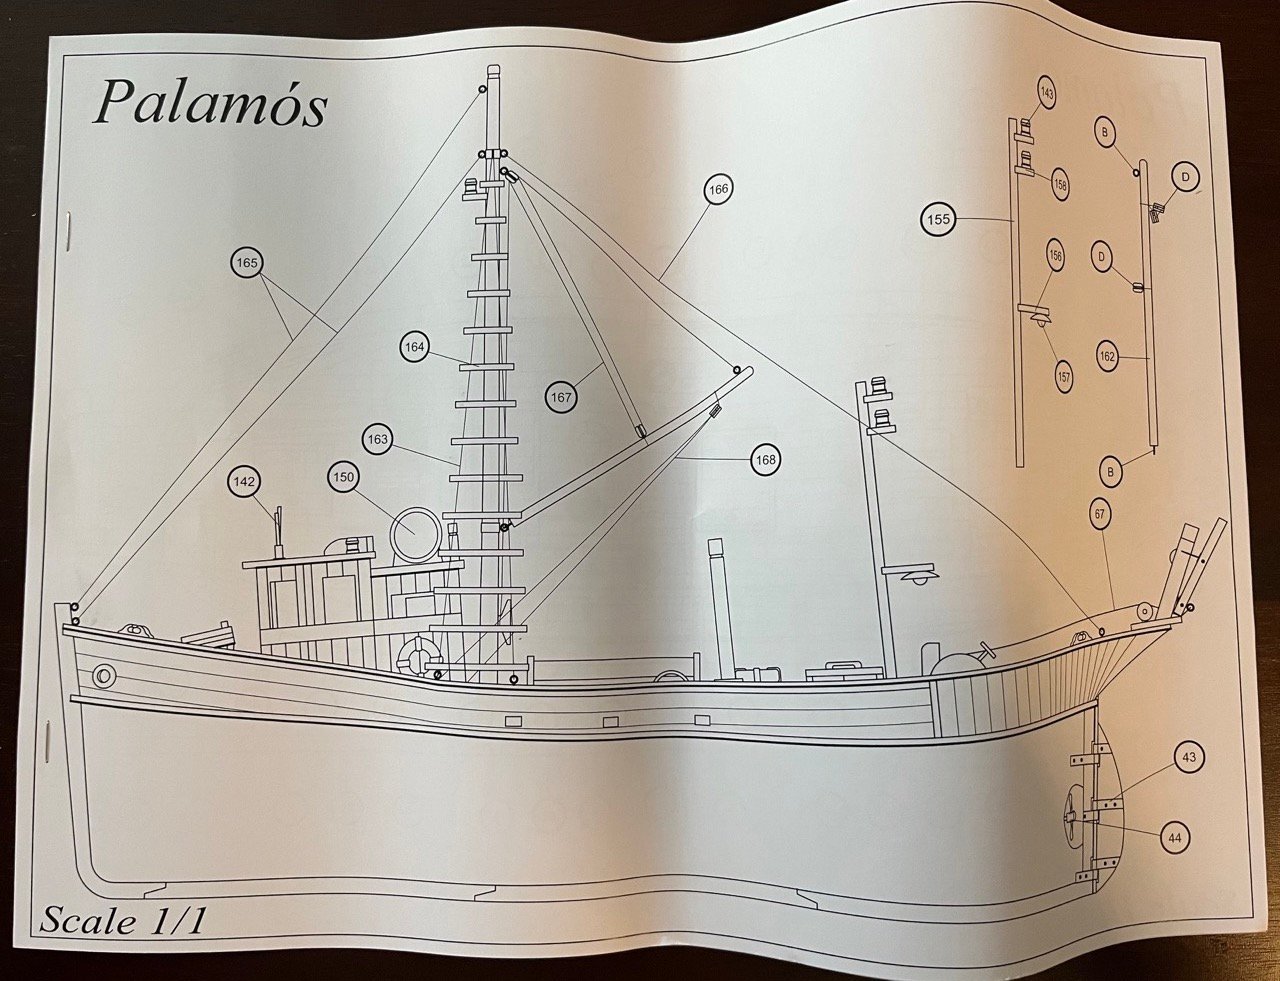
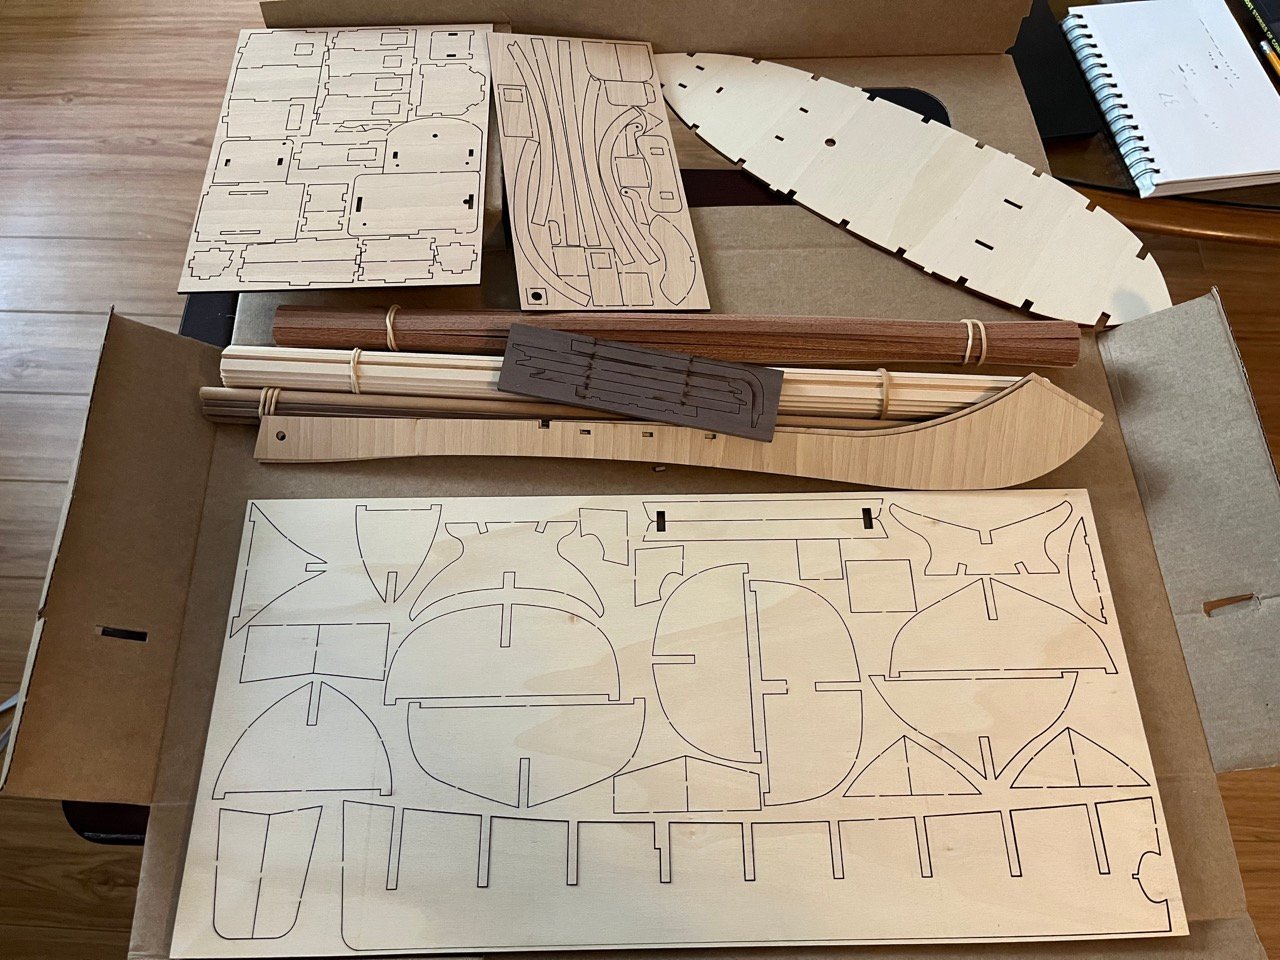
 For my fourth build after finishing the modelshipways series. I am going with the Palamos by Occre. It seems like a fairly good beginner build, I like trawlers and I managed to find it on clearance for $75. It appears that the boat isn't modeled after any particular fishing boat (at least as far as I could find) but rather is a general representation of fishing boats seen around Palamos Spain. I like the clean wood colors of the Occre model, but it looks like the real fishing boats were all painted bright colors. I am a bit torn on if I should paint the hull or leave the nice looking wood. Opening the box everything looks to be in good shape. There are 3 pages of 1/1 model scale drawings and separate instruction and photo reference booklets. There is also a paint chart that isn't photographed. I was planning on doing a parts inventory, but the way the parts list is labeled and references the instruction booklet photos, it would be quite time consuming and difficult. Upon comparing it to my previous builds, there are only a few sheets of wooden parts but all of the planking is with strips rather than laser cut strakes. All in all, it looks fairly well organized and should be a good build.
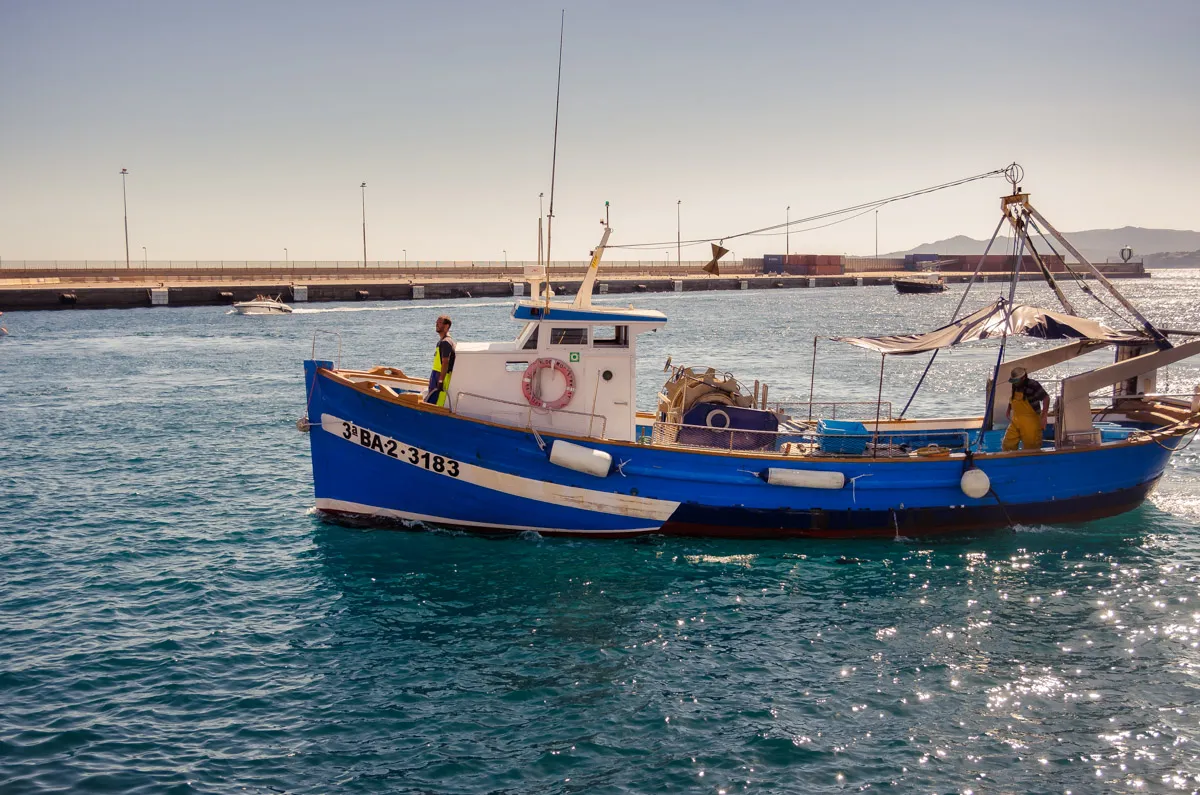

-
 I came across the Flying Dutchman when it was first released a couple of months ago and quickly decided that it was a model I wanted to build. I am a big fan of the Pirates Of The Caribbean movies and pirate movies/stories in general and this looked like it would be a fun model to work on. This is only my second wood model, and barely that, as I have been taking my time on the Bluenose (https://modelshipworld.com/topic/32741-bluenose-by-fubarelf-model-shipways-scale-164/ and have a long way to go. I figured this model would be good as a skill builder and provide an opportunity for some creativity. I have no experience with Occre, but the kit seems to be well made. There are lots of laser cut parts and two boxes full of detail parts. Nice feature to have all of that neatly organized in the plastic boxes. Something I am sure to reuse down the road. When I bought the kit, the offer included the paints and stains needed along with a custom base and LED light kit. I plan to build this with the open hull as designed and to utilized the lights. Occre creates a very easy to follow, color illustrated manual for the build. No drawings to follow along, but they do have a detailed rigging plan. Occre has also posted a full video series on building this model to YouTube. They pretty much follow the manual verbatim in the videos. An interesting feature of the parts list is that, instead of listing out all of the stock (i.e. - 48 - 1mm x 3mm x 600mm strips) they give specific dimensions for pieces to be cut from the stock (i.e. - 12 - 1mm x 3 mm x 65mm). Well, on to the build...
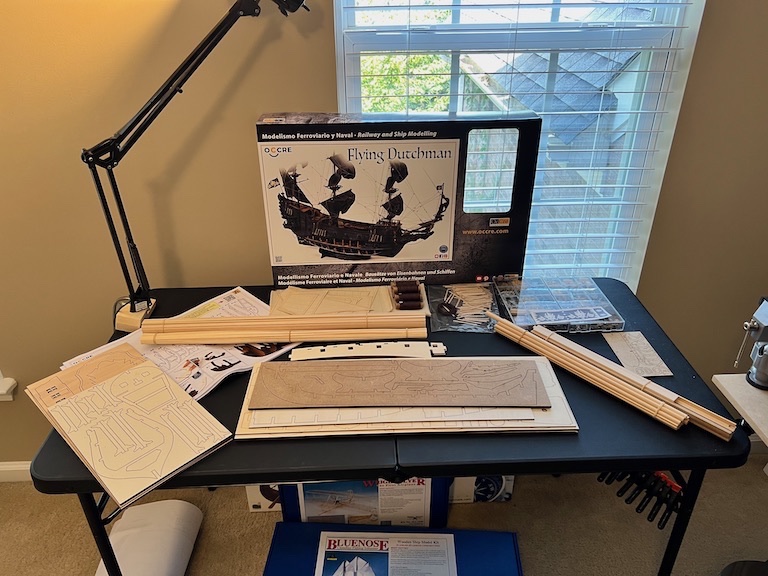
-
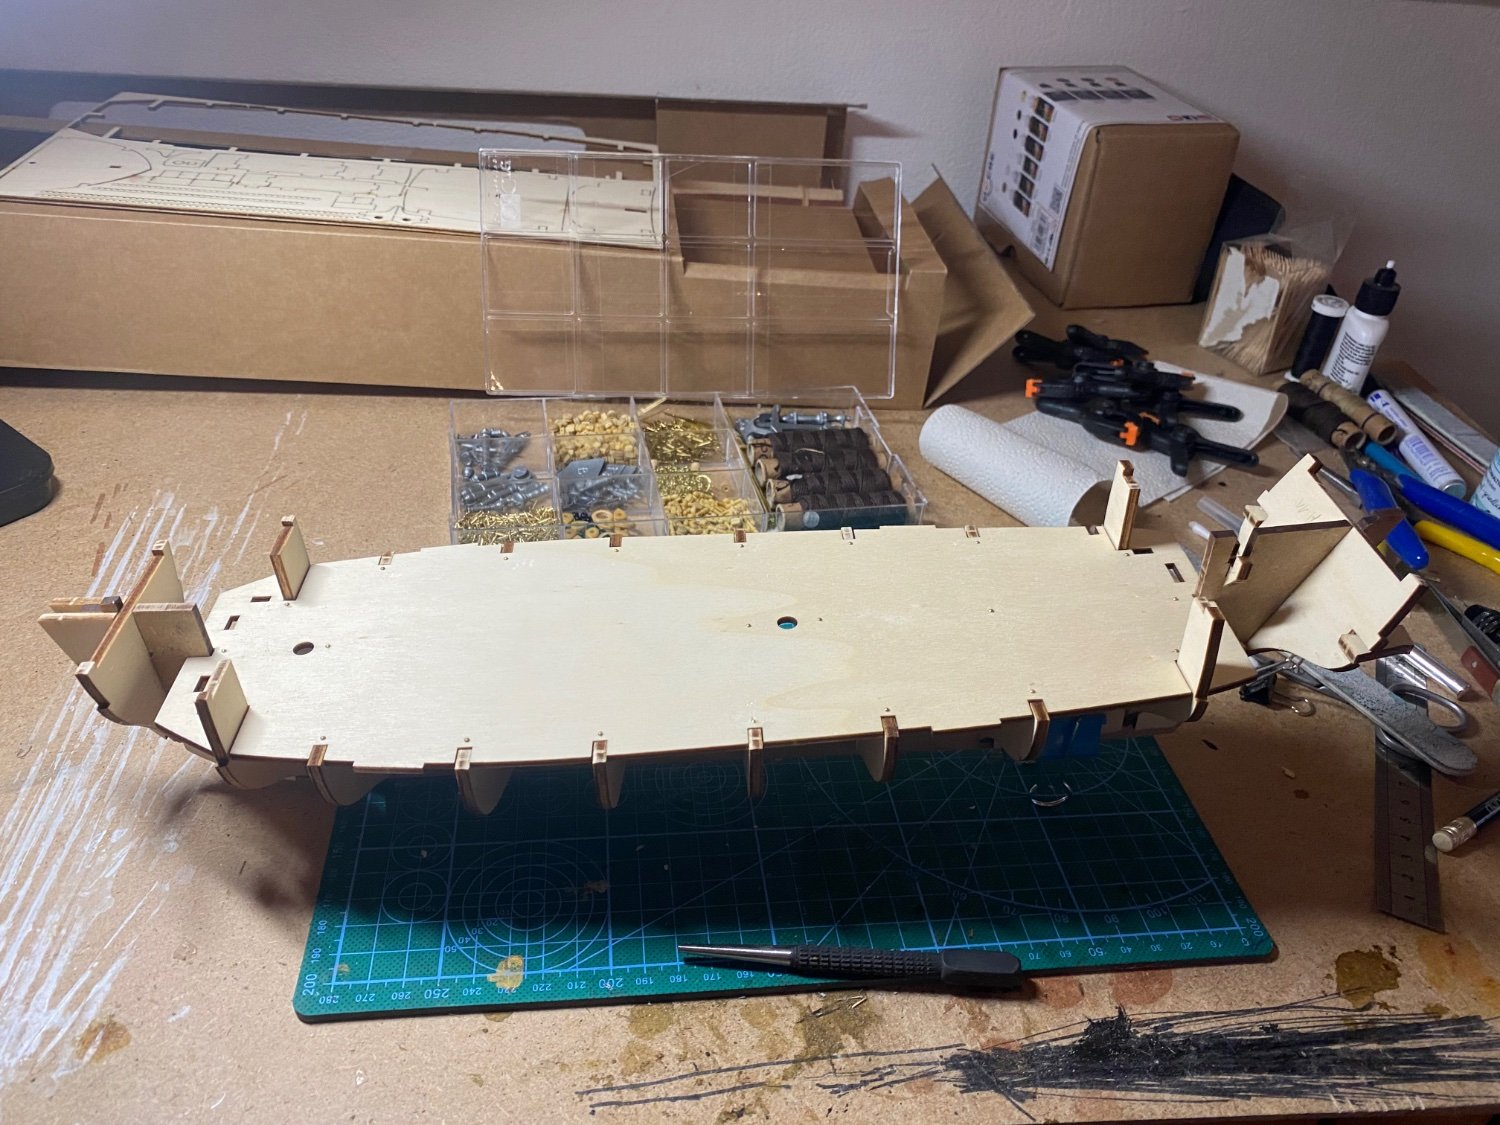
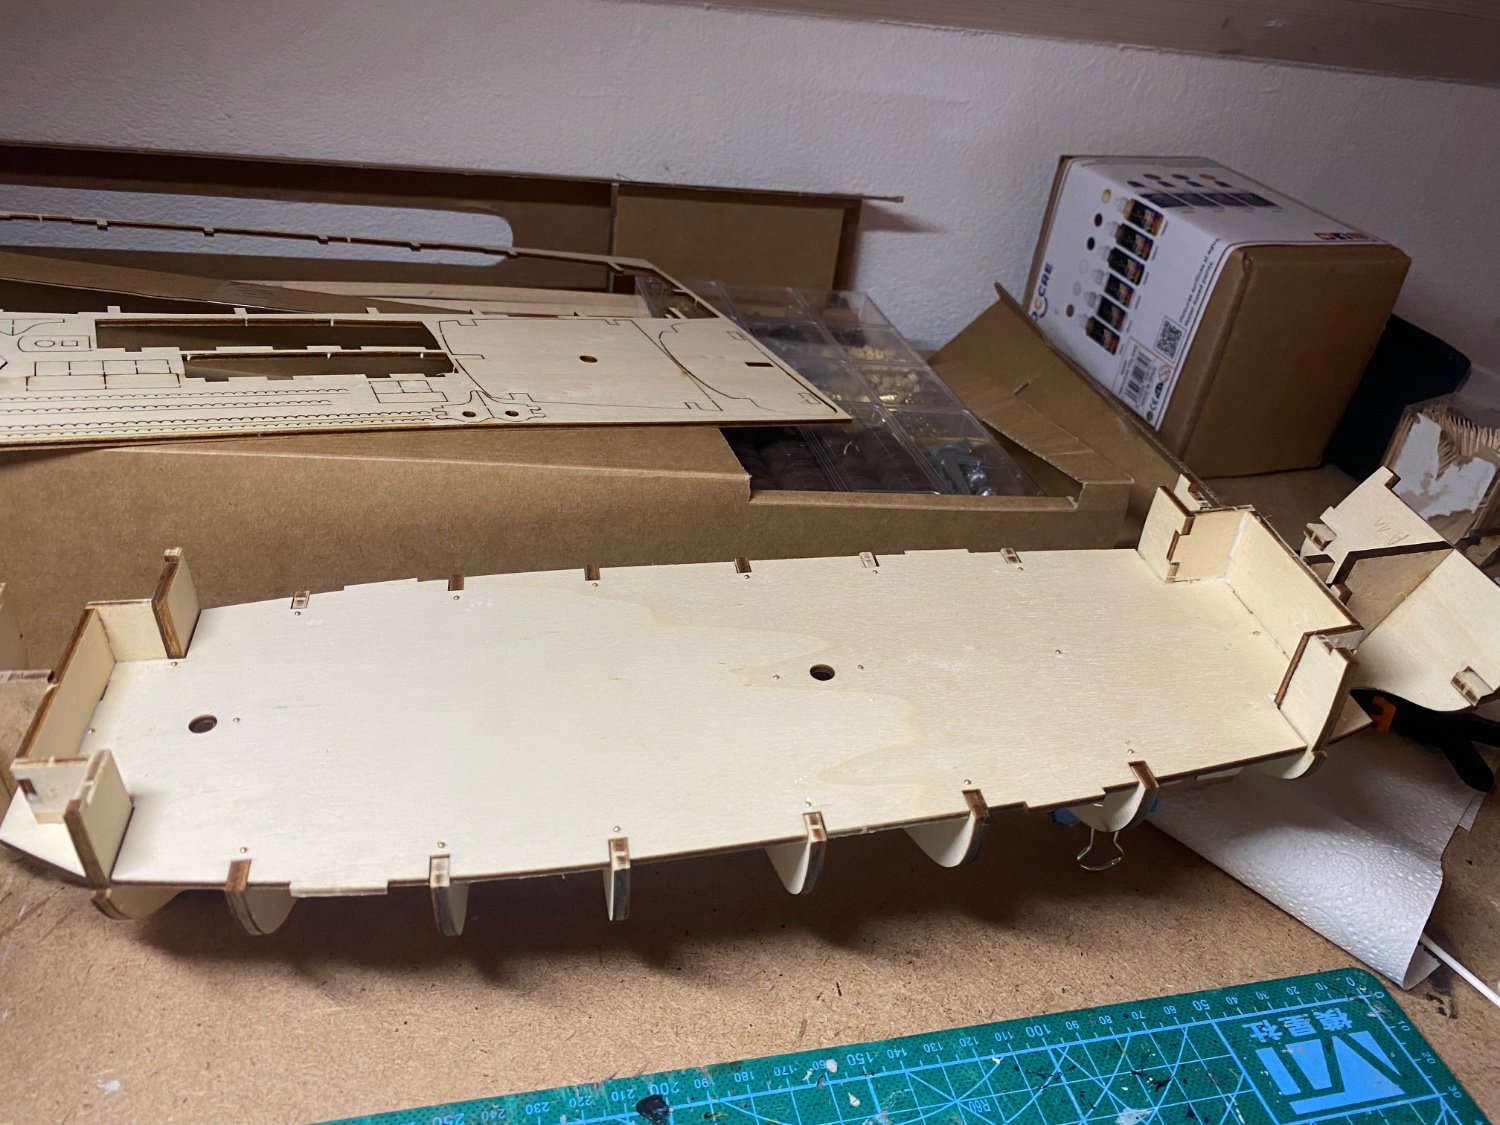
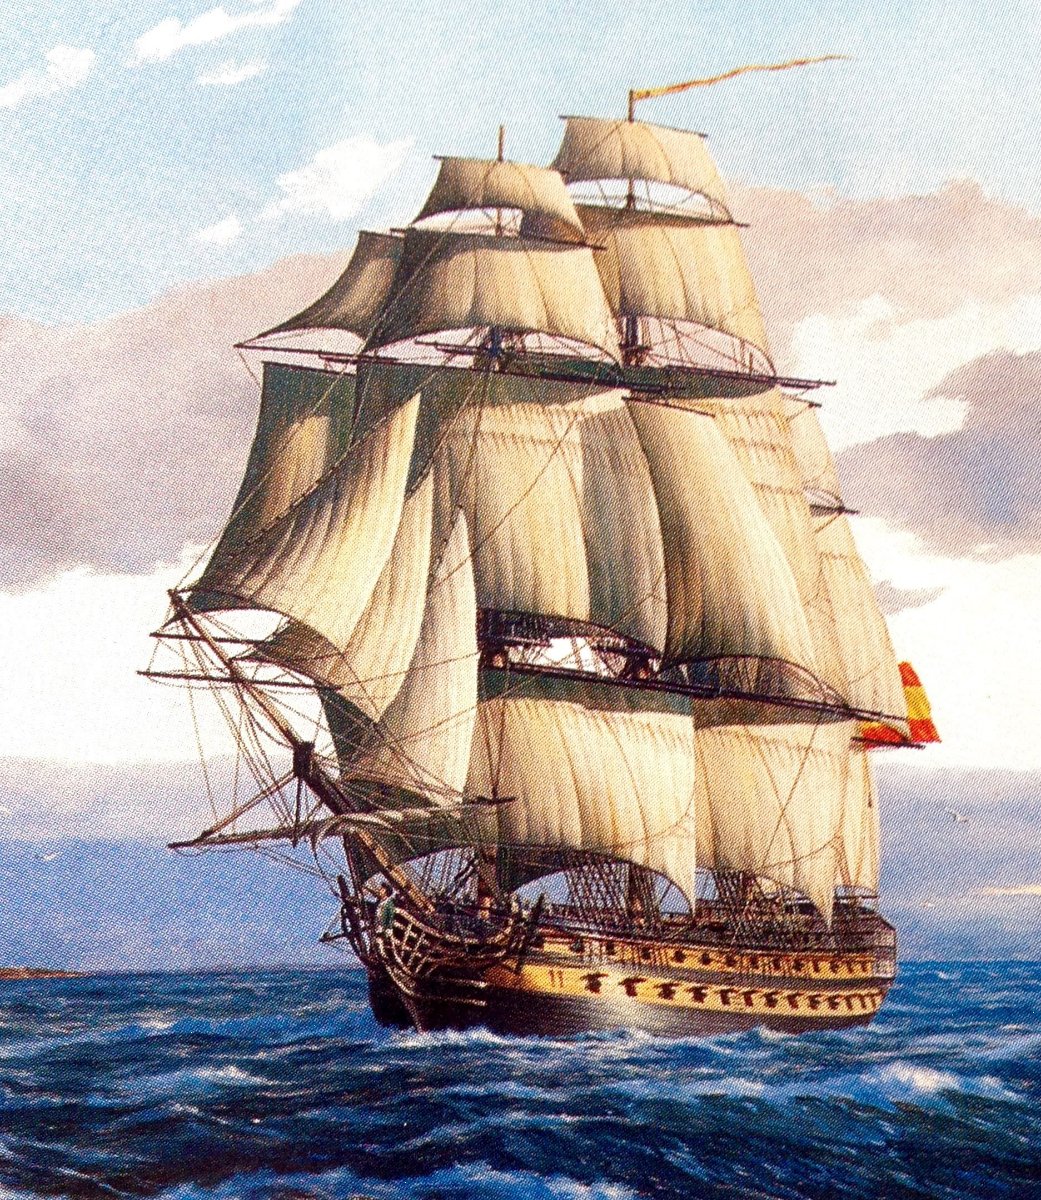
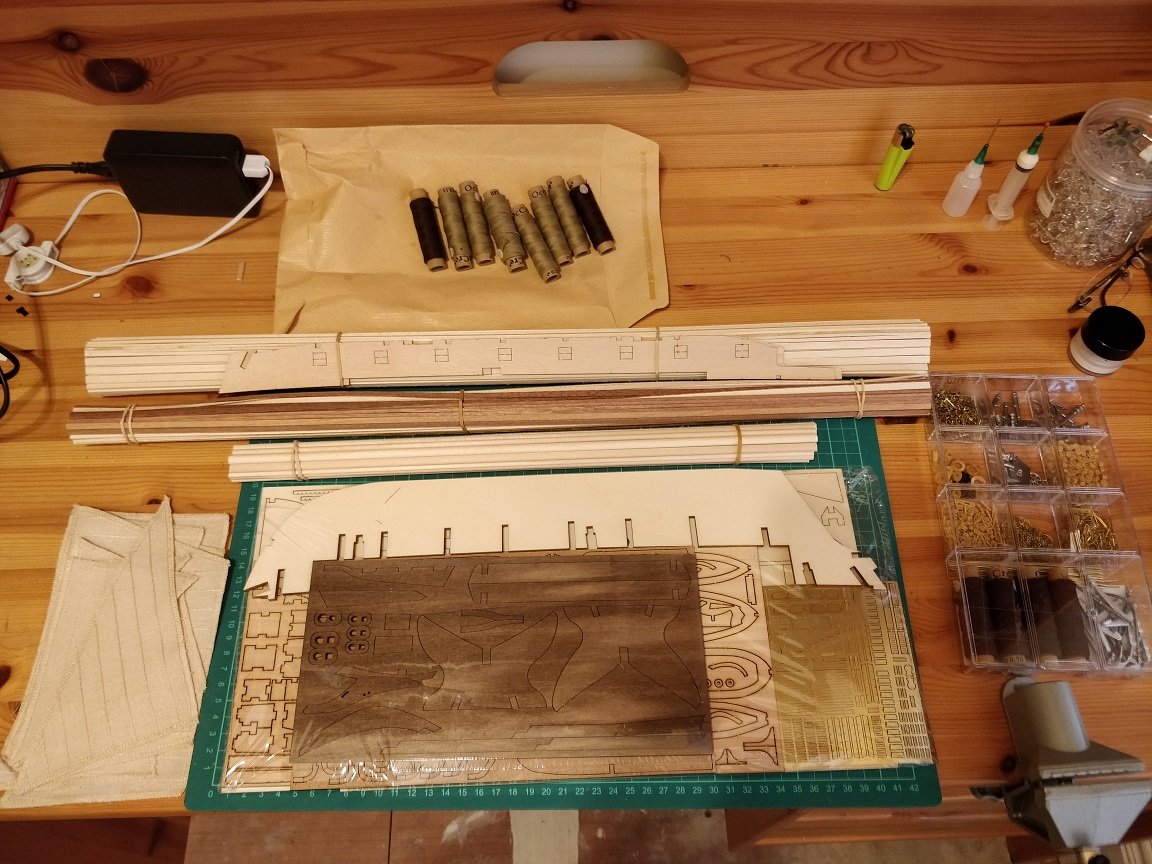
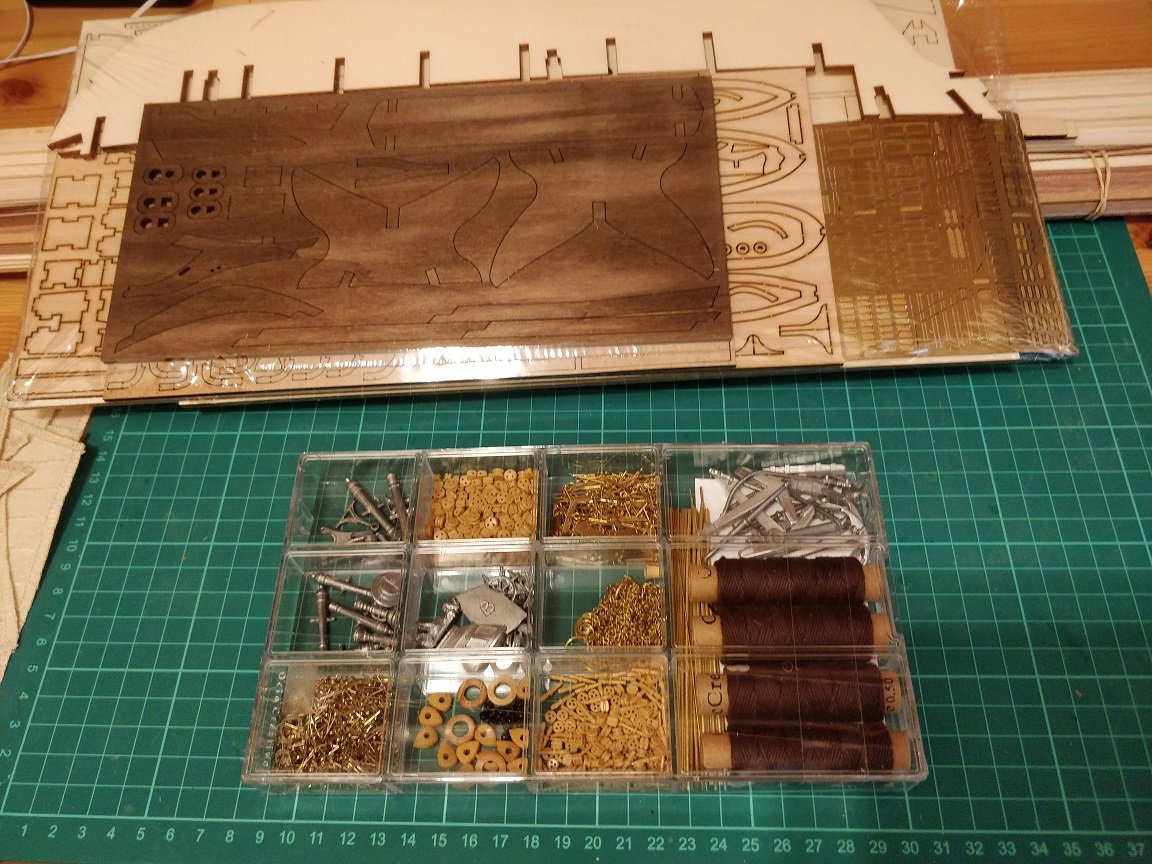
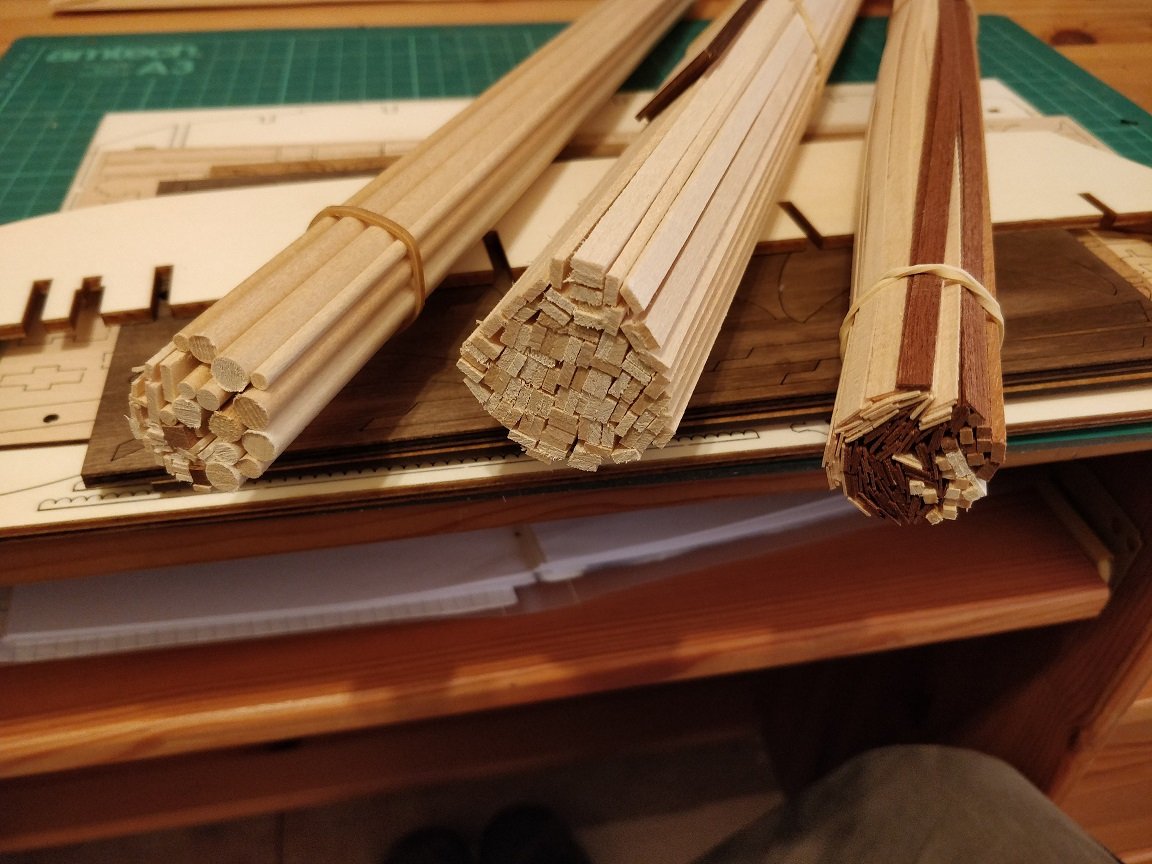
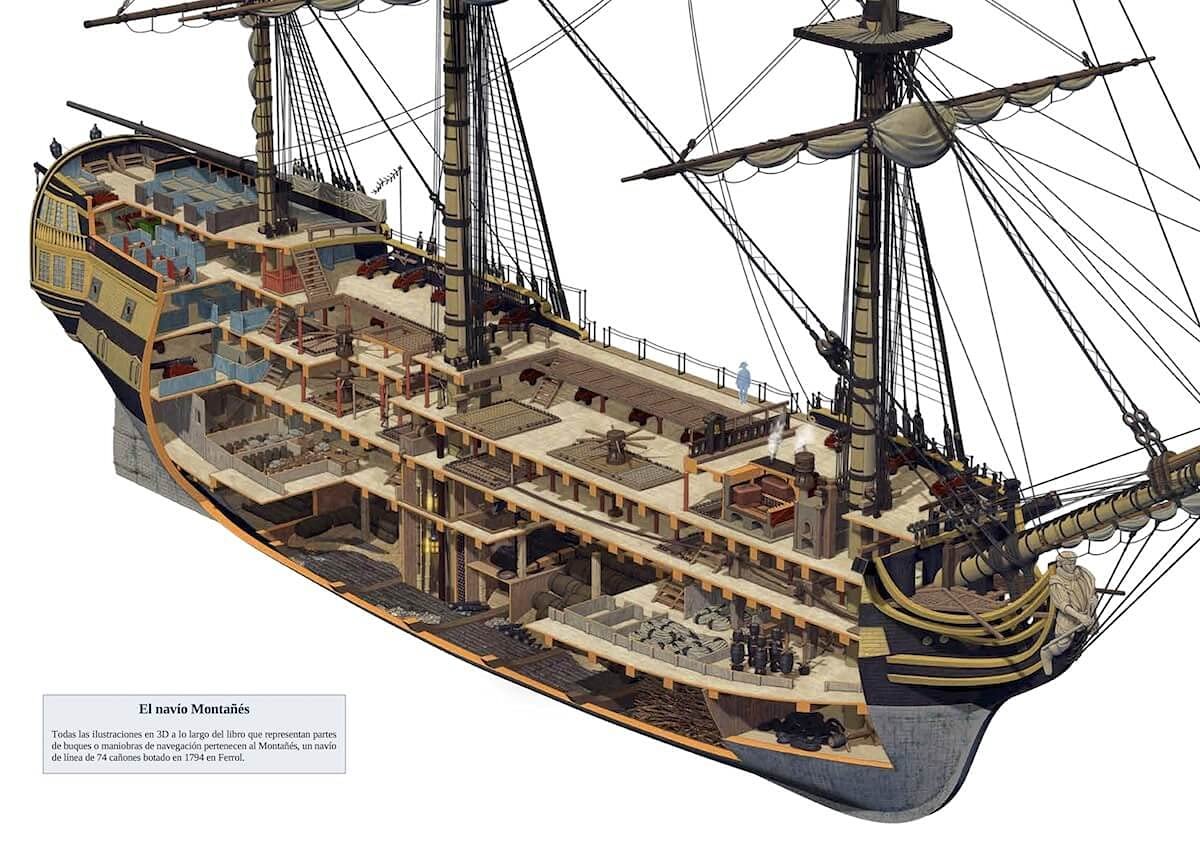
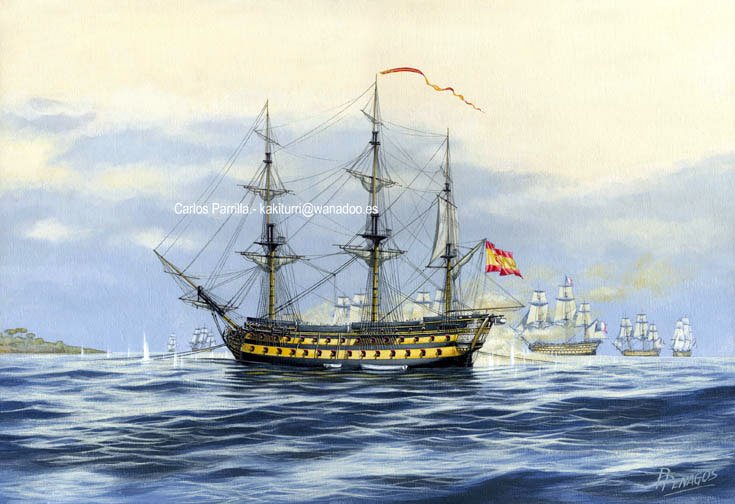
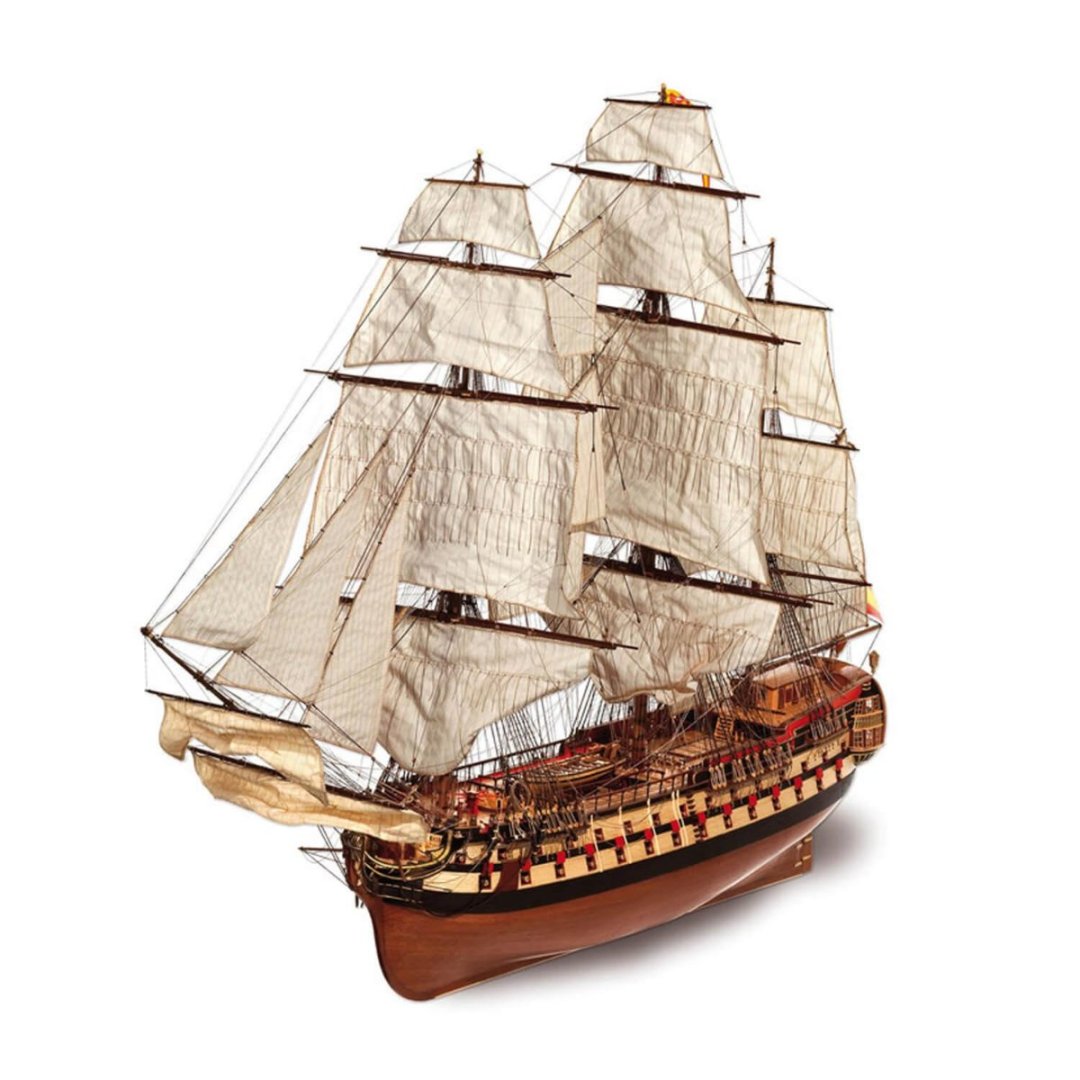
 Hello everyone ! Today I'm glad to present you my new project for the upcoming months (years?). Context: I may have been too ambitious ... 🤔 My initial plan was to choose a medium size kit after finishing my King of Prussia from Corel, for less than 300€. But there was the black friday at Occre, I saw this beautiful kit at -30%, at 370€ instead of 530€, I could not resist the temptation. I am now building the most complex ship from Occre, while I am a student in last year of civil engineering school 😅 For the historical point, the Montanes was a 74 guns Spanish ship launched in 1794 and wrecked in 1810. It participated in the battle of Trafalgar but was only slightly damaged and managed to return to Cadiz. Objectives: Besides finishing this model, I have set myself a few other goals. The first one will be to illuminate the model with a method I've never seen before in model making, using LEDs designated for Lego sets. Secondly, I would have liked to have a french 74 gun ship, but I only know one kit, Le Superbe from Mantua, which does not seem to be of such good quality. So, the goal will be to modify this model to be closer to a French ship, while keeping some details specific to this model, making a hybrid Spanish/French ship. The model as a whole will be a fictional ship, but I will try to make historically accurate modifications of some elements. I will base my work on pdf's from Jean BOUDRIOT's collection "le vaisseau de 74 canons' ' and many other build logs (Montanes, san ildefonso or Superbe) , especially on John Aliprantis' video series of the Montanes. I hope this log will be interesting !! The next post will be the unboxing.
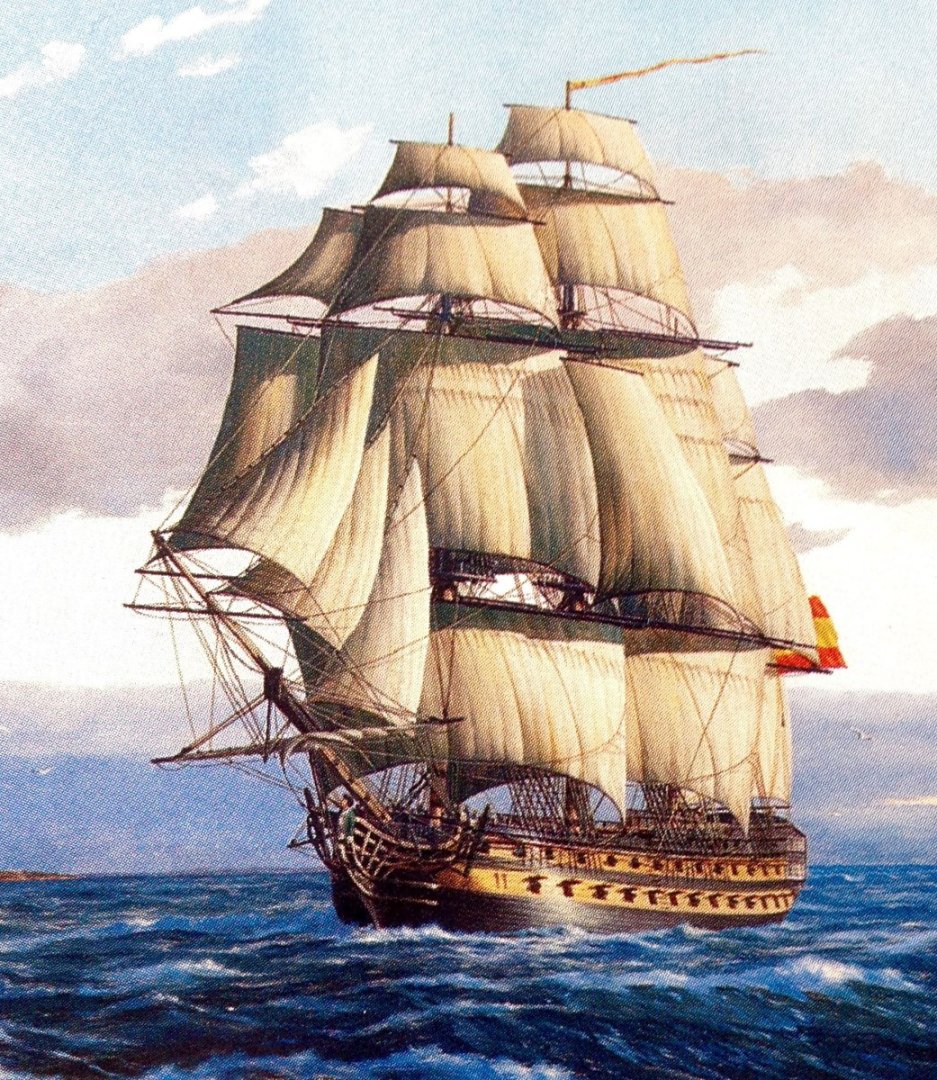
-
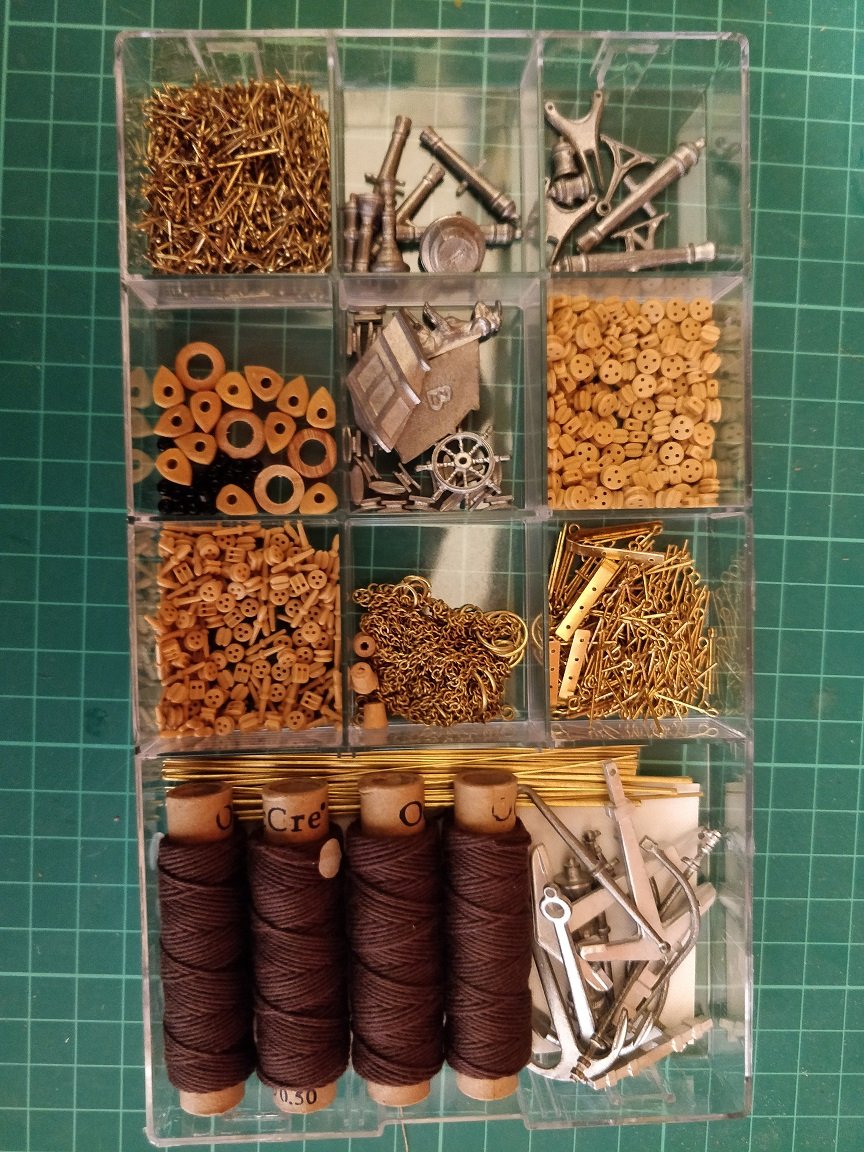
 Hello All; I have just started this project and thought I'd share a few pictures and notes as I go along and requests for advice. As there are several excellent build logs already for this kit (see YouTube for a couple - Timelapse (model ships) and a series by John Alprantis from 3 years ago) so I don't believe another detailed step by step will add value to what is already out there. This is my second OcCre kit, I built the Candelaria last year to see if I liked their models and found that it was designed in a very similar manner to recent Latina kits. What I preferred with OcCre was that in addition to a printed set of pictures (AL wants you to download PDF from their website) they also provide a decent package of drawings. Neither company provides great written instructions (but other than the one Victory (Amati- Chris Watton) model I did, really who does). First off, while unpacking I discovered that one of the wooden part sheets had split and one part was broken; I reached out to OcCre about it and got immediate response and instructions on how to get a replacement. Below is my first couple of pictures (and my first oops) - a new record as I am about 3 days in.


.JPG.8c9d05c627edf60ad2b00c8ac5b9c6a3.JPG)
.JPG.db22e6df8fcacd851a340351145b1a3b.JPG)