Search the Community
Showing results for tags 'swift'.
-
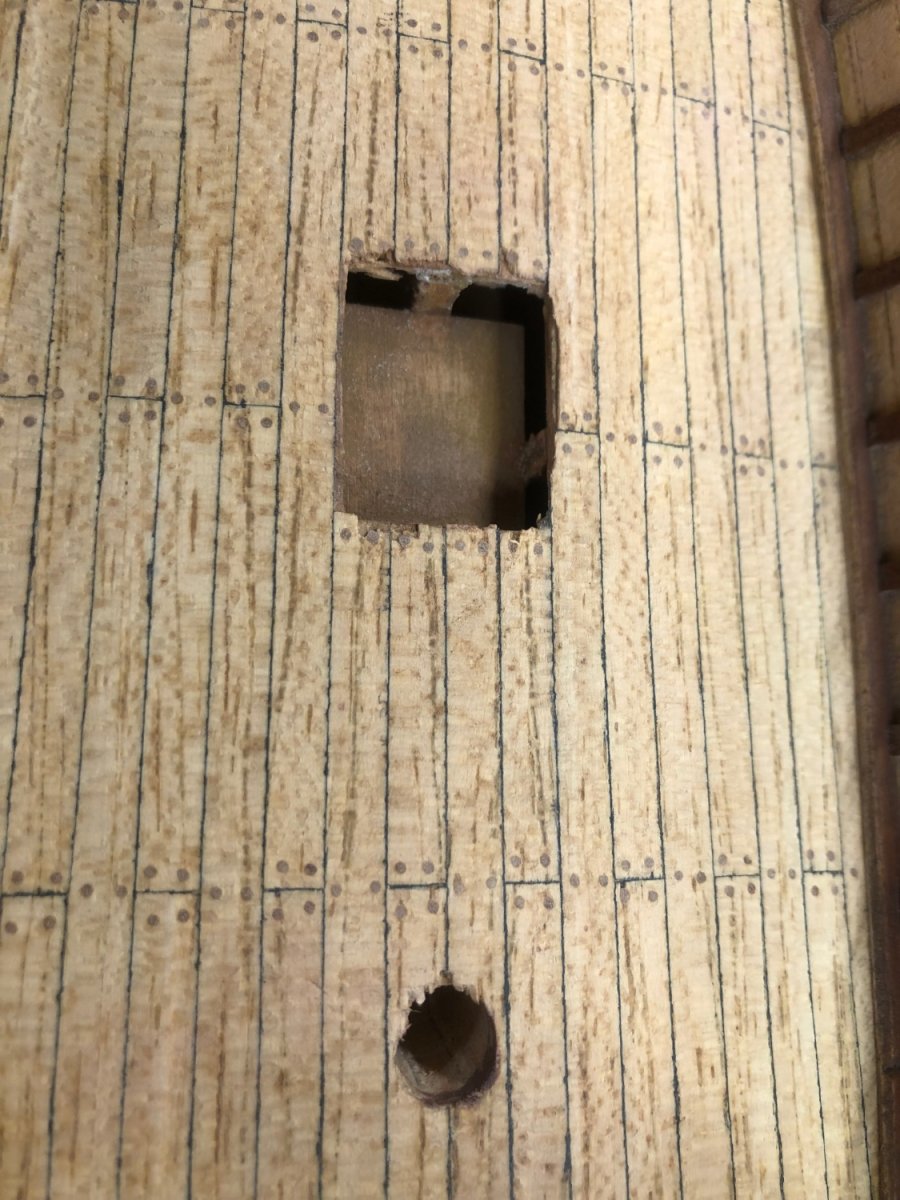
 I bought the boat model from Model Expo back in 1989 along with the solid hull Phantom which will be another re started build! I framed it up and planked the deck and used toothpicks for the treenails, using a sharpie around the edges of the deck planking! I then performed the first hull planking and this is how I left it since 1989! My hopes are with my renewed interest in model ship building I will finally finish what I started decades ago! Tonight I added one more plank to the hull both side of the hull since then now understanding tapering! More building and pics to follow!
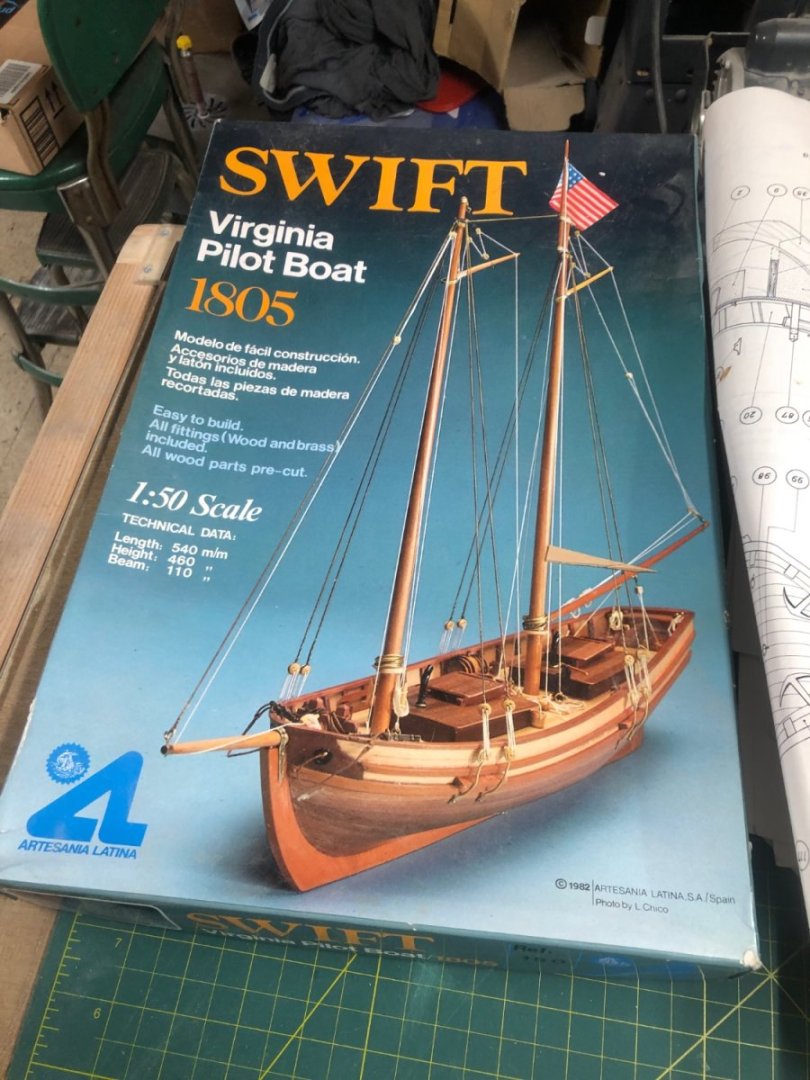


-
 Like many, I had an old kit sitting around for years (this one from early/mid 80's) and finally got to it. It's one of 4 models I have, two I bought to build "some day", and two more my father bought but passed on to me when he realized he was running out of "some days" as it were. I didn't start recording all the steps so this is going to soon jump right into the thick of it with some pictures of things I finished up in the last month. I'm also going to artificially break down some of the steps into separate posts just so there's a bit more of a focused subject for each one. Before showing what I started recording with photos, I thought I'd share some of the steps I did "off camera" and what I learned, plus what I used as motivation and learning. First, the plywood bulwarks were a real pain to get right. I quite like the approach that the OcCre kits take, where there is a notch in the bulwarks that fits into a protruding part on the deck plywood so they go just where they should. If I'd seen this before I assembled mine, I'd have been tempted to modify them to use that technique. Second, rather than plank the first layer around the very bow and stern, I built them up with balsa infill. I left the infill proud of the frames such that they had the same surface as the main hull first layer of planks. I got this trick from the YouTube builder Harry Houdini Models. See this video starting about 2:30 for the technique. Third, I quite liked the planking approach that OcCre uses on their models, where they place full width planks without tapers, then fill in with wedges. Their Endurance YouTube series shows it well I think, plus it's got the most pleasing music I've ever heard on any build video! Here's their starting video for planking. Next post will be a fast-forward to the close to finished hull.
- 44 replies
-
- 2
-

-
- first build
- Artesian Latina
- (and 1 more)
-
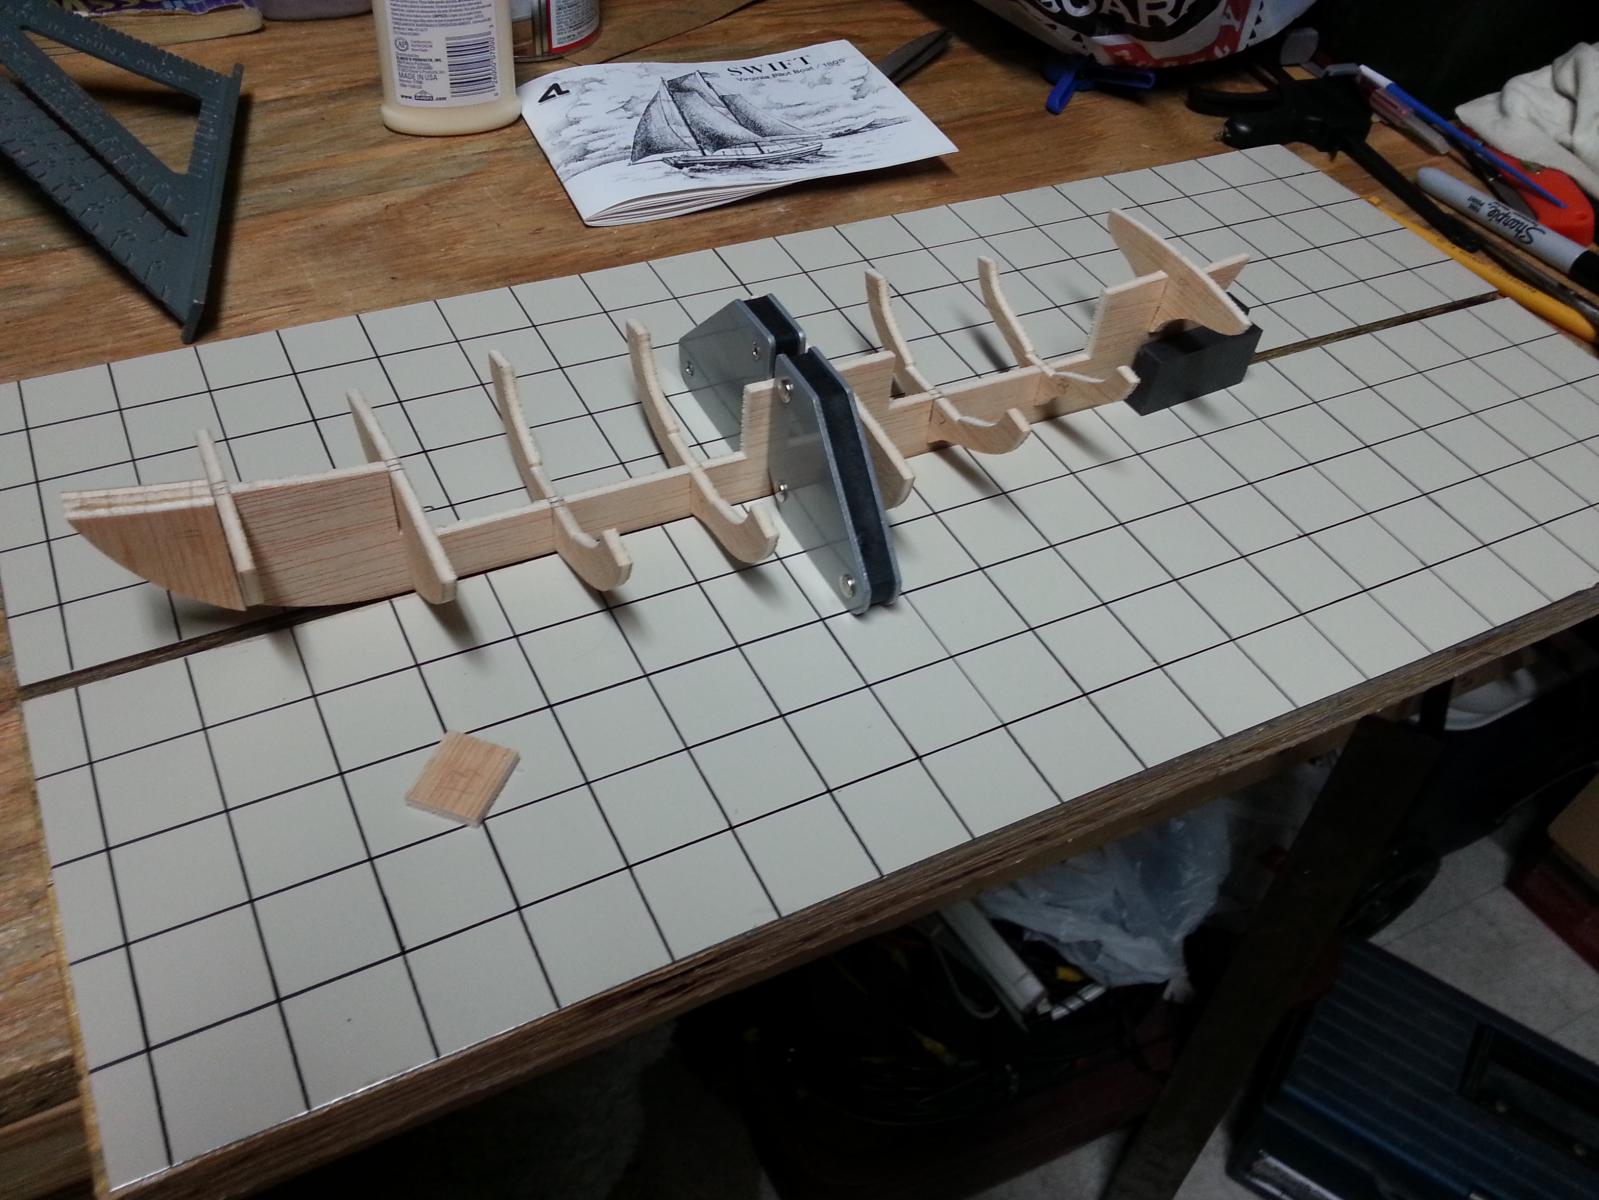
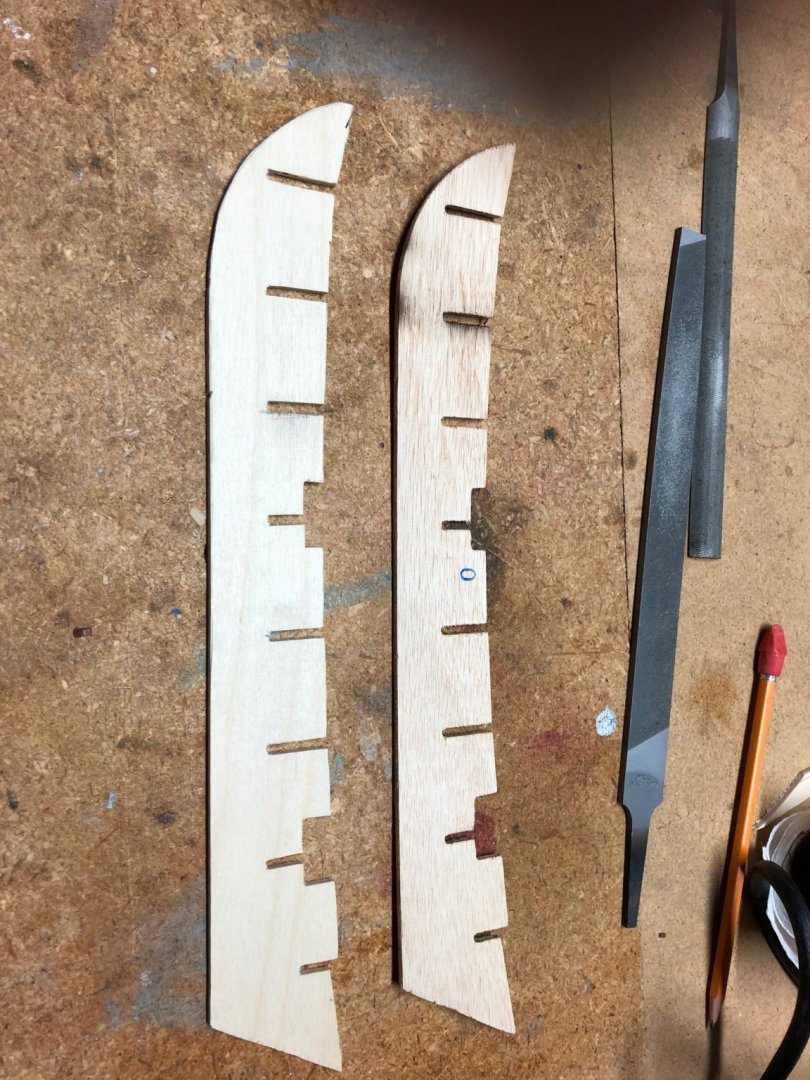
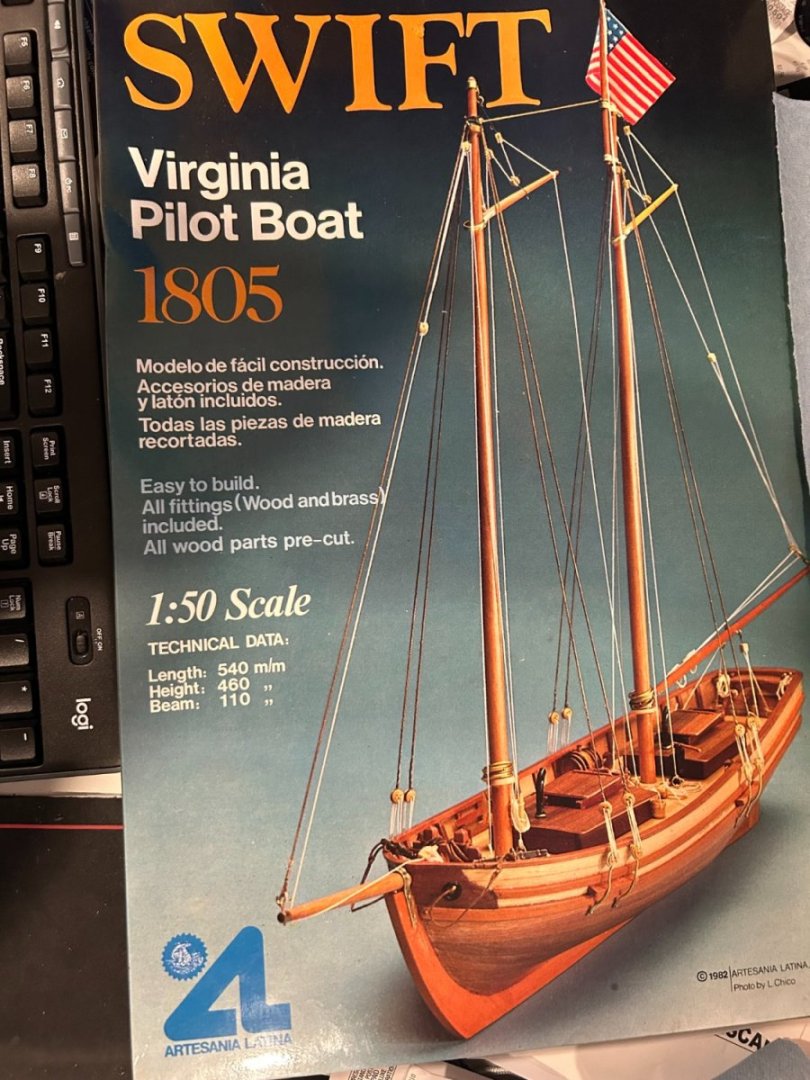
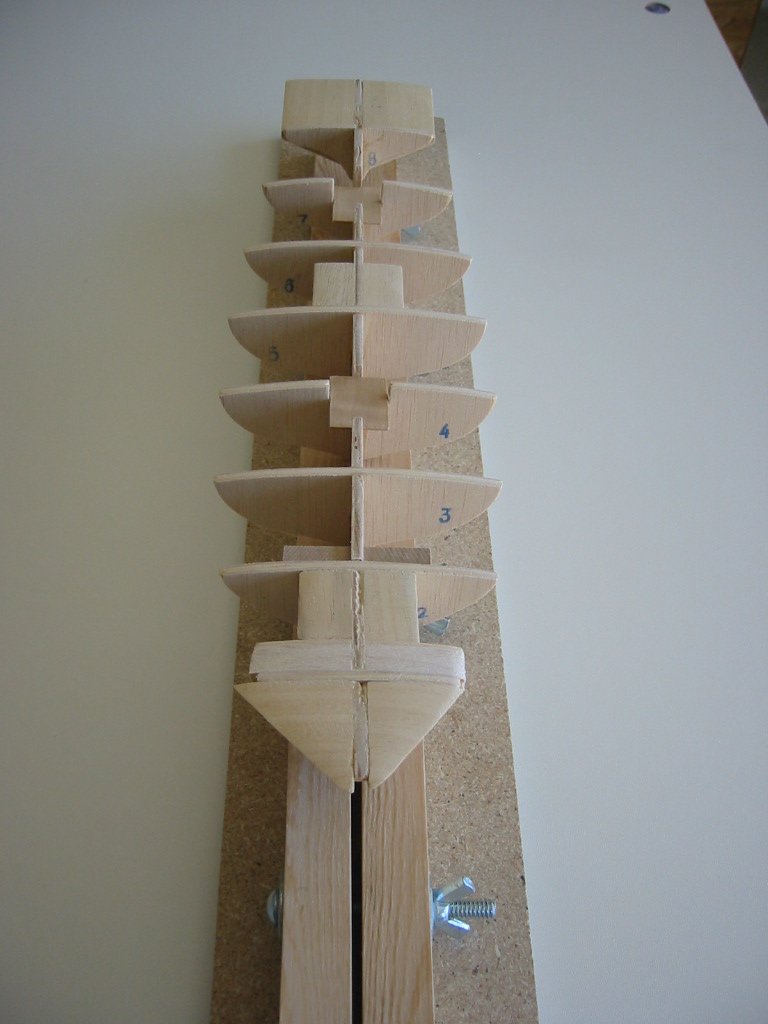
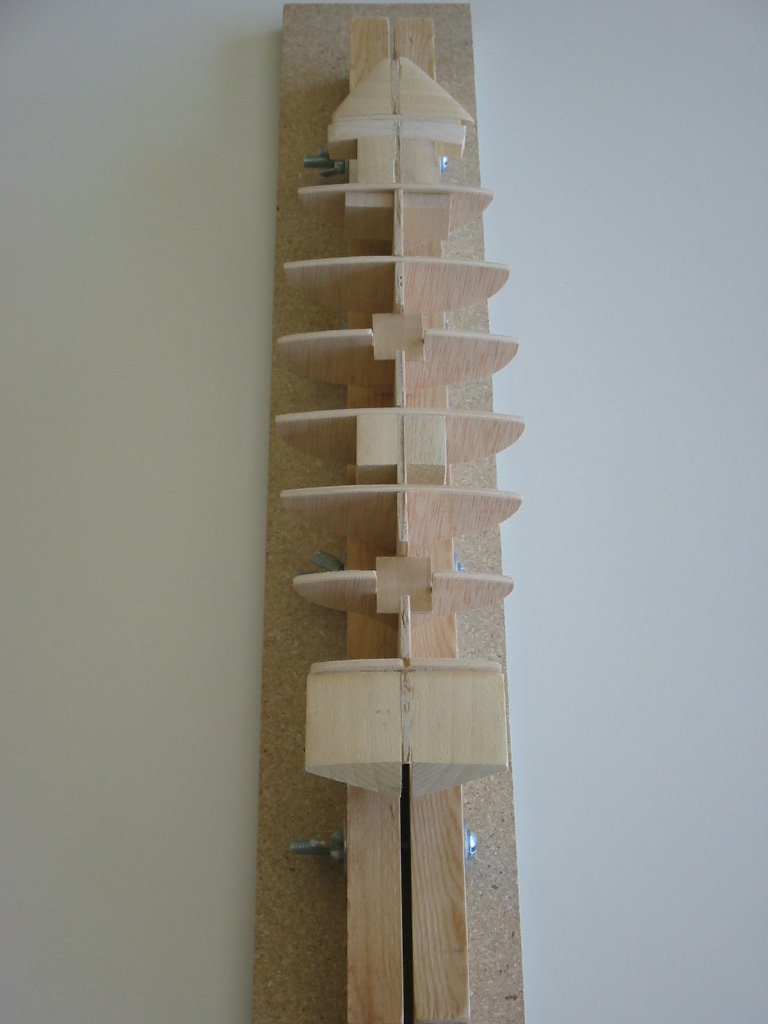
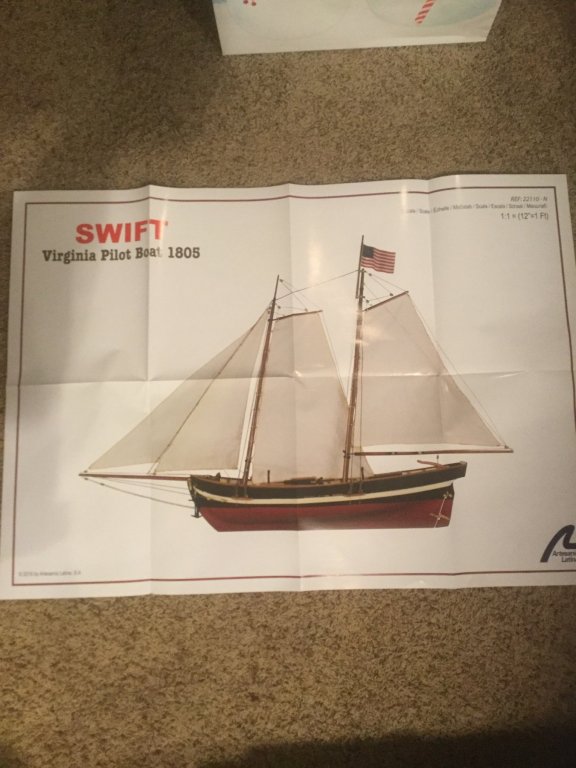
 The Swift is my first wooden boat build, so I’m a newbie. I appreciate any suggestions, advice or input from you more experienced builders. I used to build plastic and wood aircraft models as a kid, but that was more than 50 years ago. Now that I’m retired, I have really been looking forward to building models again, particularly ship models. I’m hoping I can maintain my enthusiasm through the trials and tribulations ahead. When I first opened the box I noticed that the false keel was warped. I know for my reading (the kit directions, “Ship Modeling Simplified,” by Frank Mastini, and various articles in this forum) that it is essential to get the false keel and bulkheads perfectly aligned. So I posted questions on the Building, Framing and Planking forum about this issue, and got some good advice. Mtaylor suggested just cutting a new false keel, and both he and michael101 talked about inserting spacers between the bulkheads and clamping them to straighten out the keel. The more I looked at the false keel, the more I realized that the most obvious warps were right on the bulkhead cut lines. See attached pictures. So in the end I ordered some plywood of the same thickness and I have now cut the new false keel. It’s quite straight and I’m quite happy with it. I have begun fitting (but not gluing) the bulkheads. Obviously I’m just getting started. I really appreciate the availability of these forums because I’m convinced I’m going to need lots of advice.
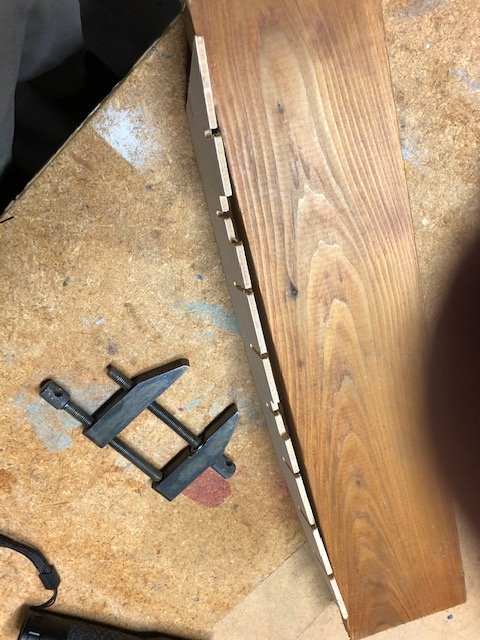

- 16 replies
-
- 3
-
-
- artesania latina
- first build
- (and 1 more)
-
 Hello shipmates! Last year i started this new build. I decided to give the old Artesania Latina's Swift Pilot boat, a different look. I find this little schooner a very beautiful ship. When i started on shipmodeling, i did't have the opportunity to start with kits, so this kit it would have been the perfect kick start, but it didn't happened. So, 20 years later, i gave my self a second chance, and with the plans, i decided to give it a try, giving it a different look, as the manufacturers gave it. Unfortunatly we are not talking about a ship that it existed in the real life, so what you will see here is just a mix from differents ship of the era and the time, there is not a theorical basis to follow, i hope to reach a good port. But, enough talking, lets make same sawdust!! I'm posting some pictures from the first steps, up to today, and i'll keep reports from now on.
- 21 replies
-
- 3
-
-
- Swift
- Artesania Latina
- (and 2 more)
-
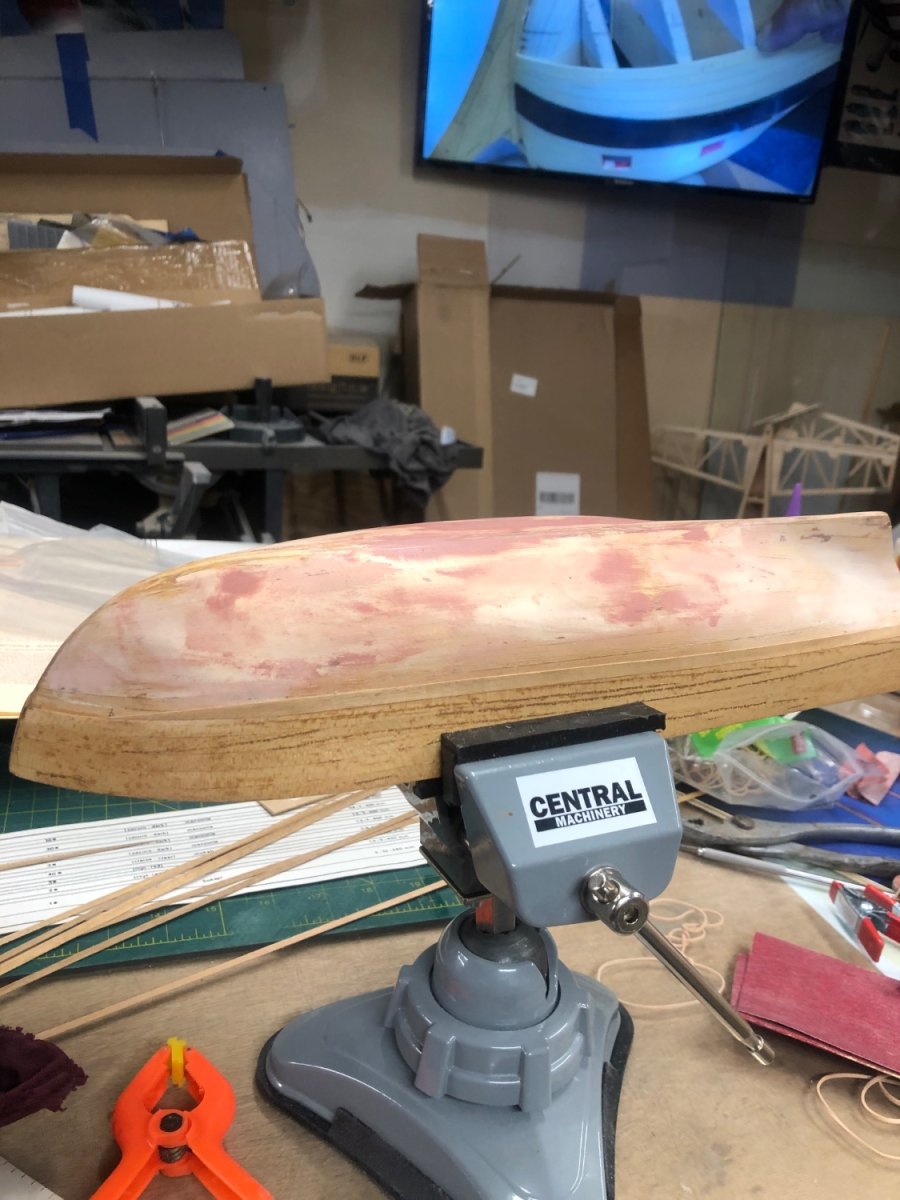
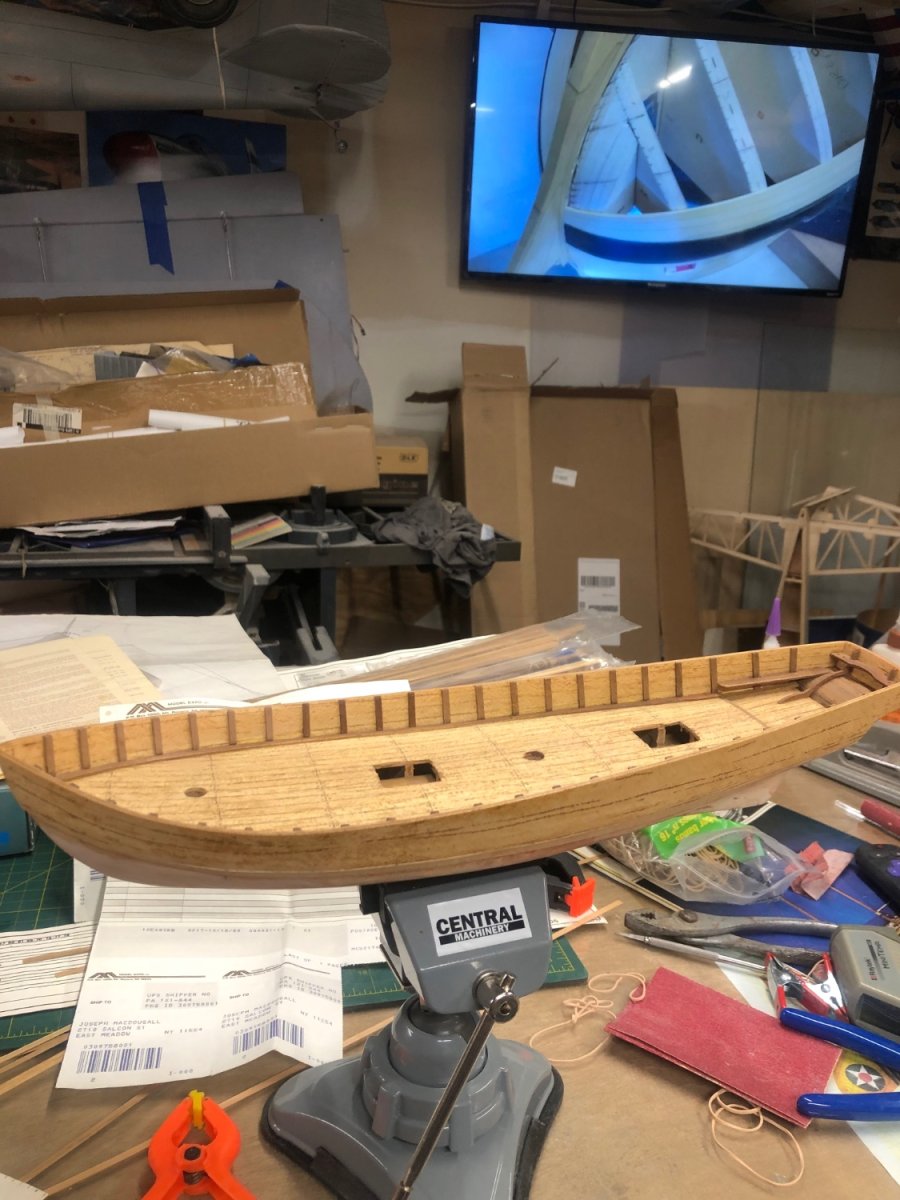
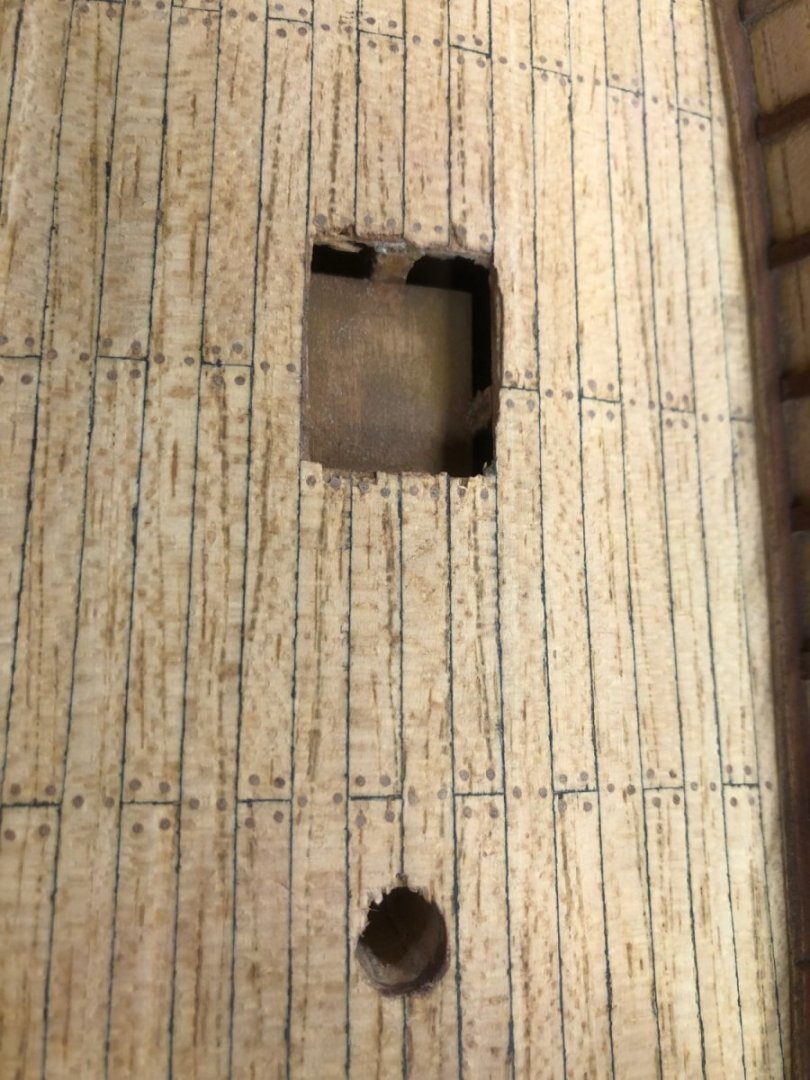
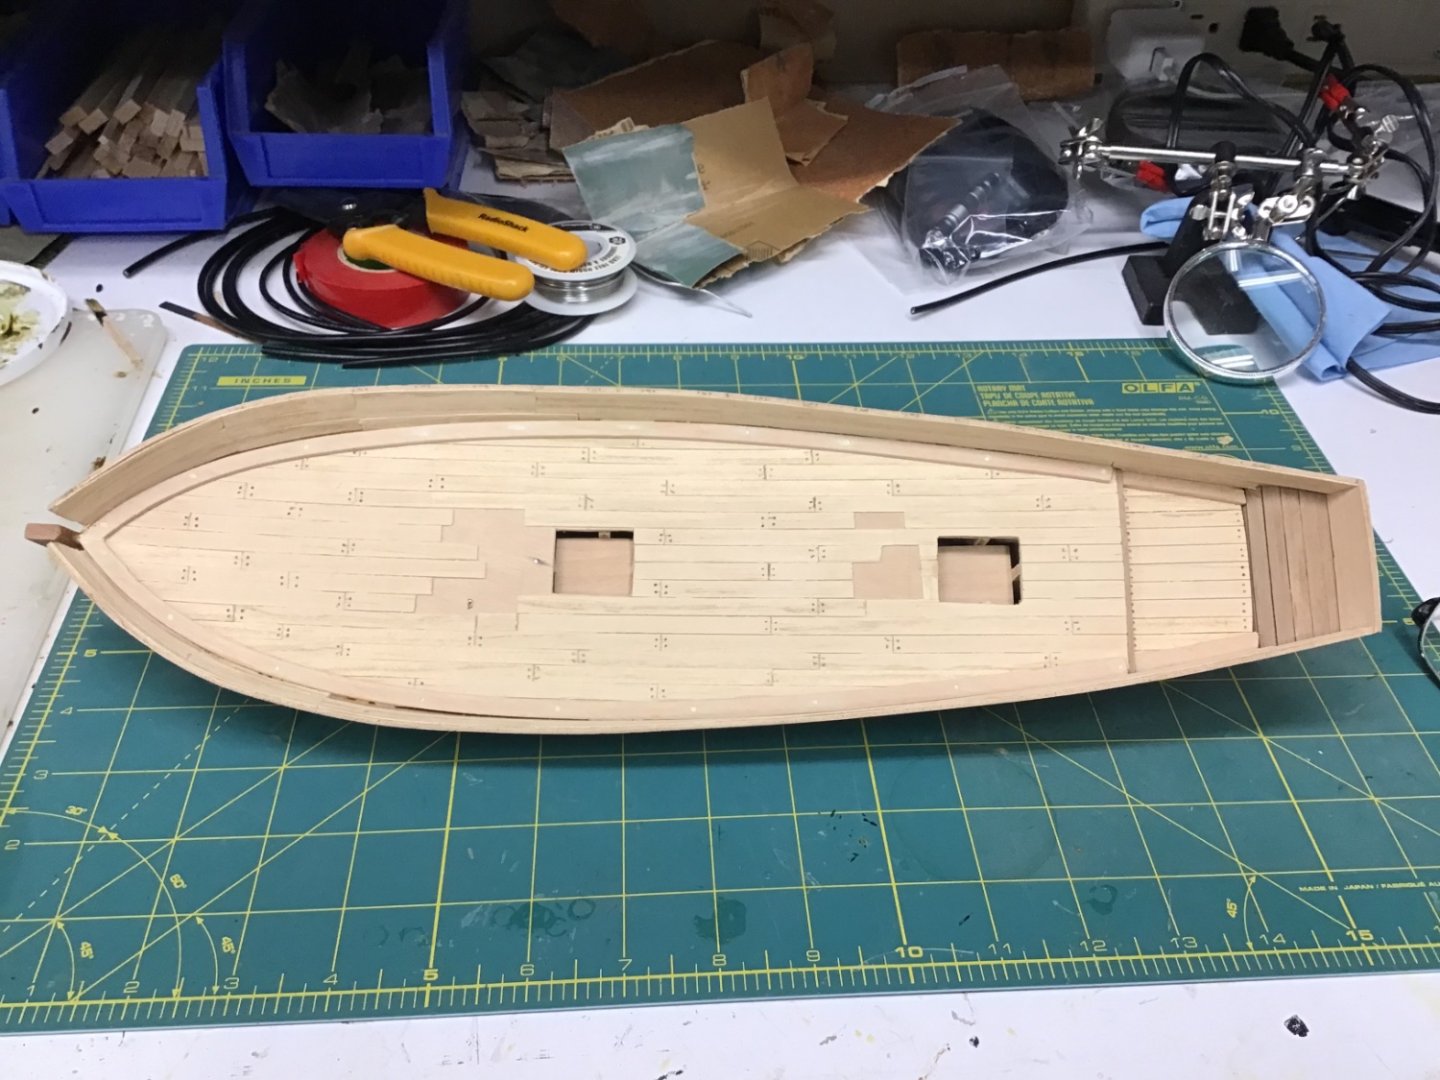
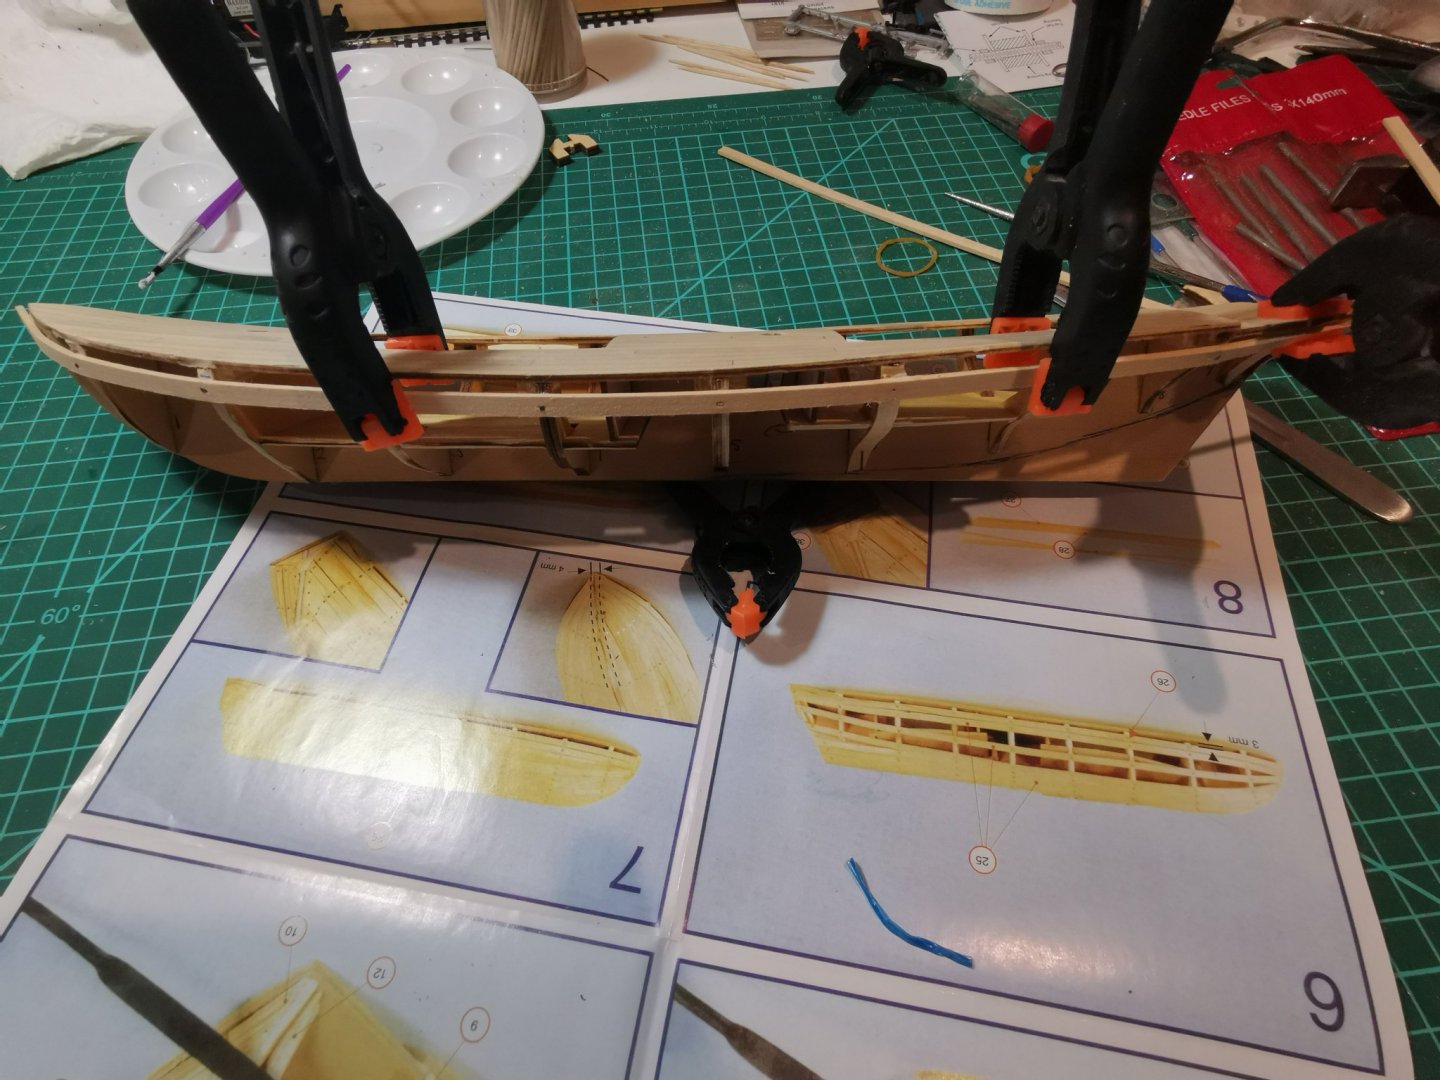
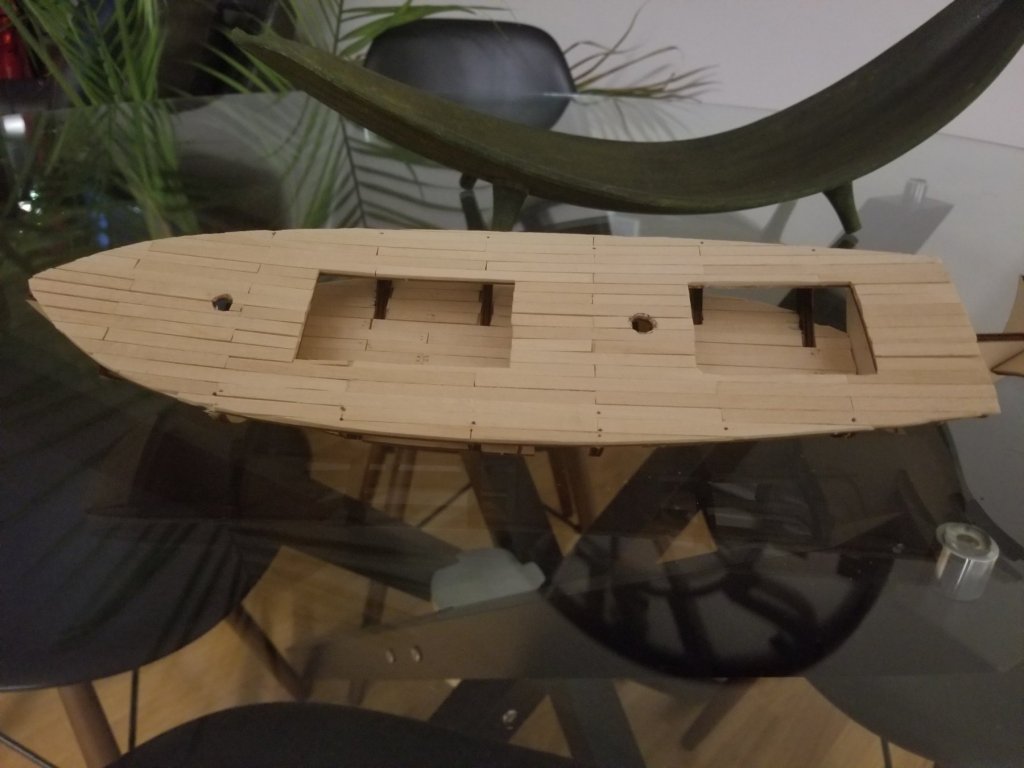
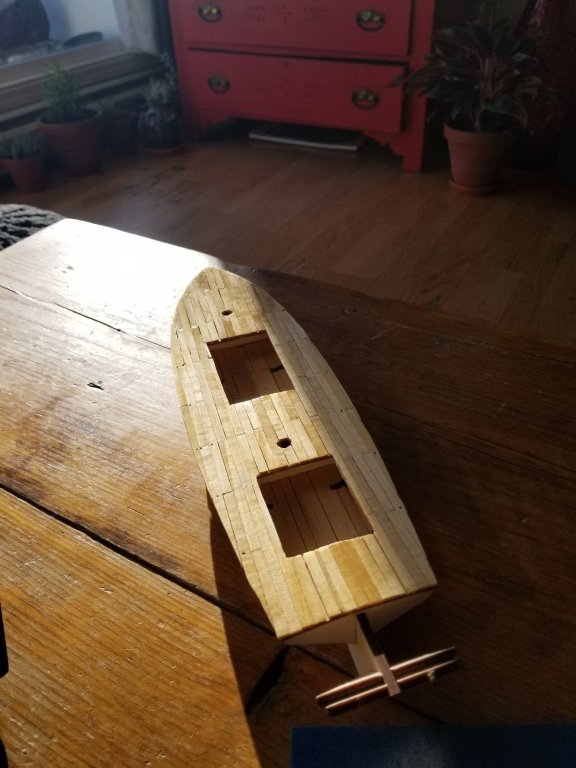
 I gave this kit to my aging Dad back in 1984. Bought it new from Model Expo for $39.99 and still have the receipt! He had been an avid plastic modeler when I was a child in the 1960’s and from whom I gained much of my knowledge and skills building plastic models. The last model I completed was a big scale SR-71 Blackbird in 1995 or so. I haven’t touched one since, until now. While moving some boxes from a closet last spring, I came across the kit, still in the box it was shipped to me in 1984. I’m retired from disability with neuropathy in my hands and have turned 65. I can’t imagine what I was thinking when I made the idiotic and expensive decision to attempt to build my first ever timber ship model but it has been extremely rewarding and frustrating at times. I had a lot of tools to begin with from my plastic modeling days but knew I would need many more to tackle this project. While it was a kit, I feel it was closer to scratch build given the shaping of each and every part and the need to make scratch parts when some got broken or damaged thanks to my clumsiness. Although its Feb 2023 now and I am now making the masts, spars, boom, bowsprit and flag mast, I’ll start where I started in June of 2022 and work up to the present. If you something I did that was a rookie mistake, please feel free to offer better ways for the next time I try this. I already have noted dozens of things I would have done differently from experience and lots of YouTube videos and reading here. I find sometimes there are just too damn many ways to do something and I have to find the one that works best for me. I’ll never build museum quality models but my friends and fam are already wanting me to leave this ship to them when I go! The Frame: I only thought to start photo journalizing this build after I’d completed the first step of getting the ribs together but took an abundance of pics after that to create a time lapse movie of at some point for my YouTube channel. I read the instructions ahead thoroughly and noticed they get less detailed as you go as though the author got tired and really wanted to finish. That and the translation from Spanish was lacking in places. Nonetheless I trudged forward not noticing the last stern rib was misaligned top to bottom. We’ll deal with that soon enough. I should have used squares to line up my ribs instead of my eye but puddy and sanding will cover those tracks since it will be covered. It was at this point that I realized I had to look way ahead to see what pitfalls I was setting myself up for and the journey began. I would miss the parts of the build that would be covered soon enough. The instructions had me install the false deck on at this point too, not sure if that was the right move but was afraid of cracks in the deck planking if I planked it before bending the false deck over the ribs. I measured where the ribs would be so I’d know where to put the nails and marked them on the deck. So far, I felt ok with how it was going together but was just dipping my toe in. Frame, balsa inserts and false deck complete. Next, the first planking. Oh joy. . Pre-nailing the false plywood deck for installation.
- 59 replies
-
- 4
-
-
- Swift
- Artesania Latina
- (and 1 more)
-
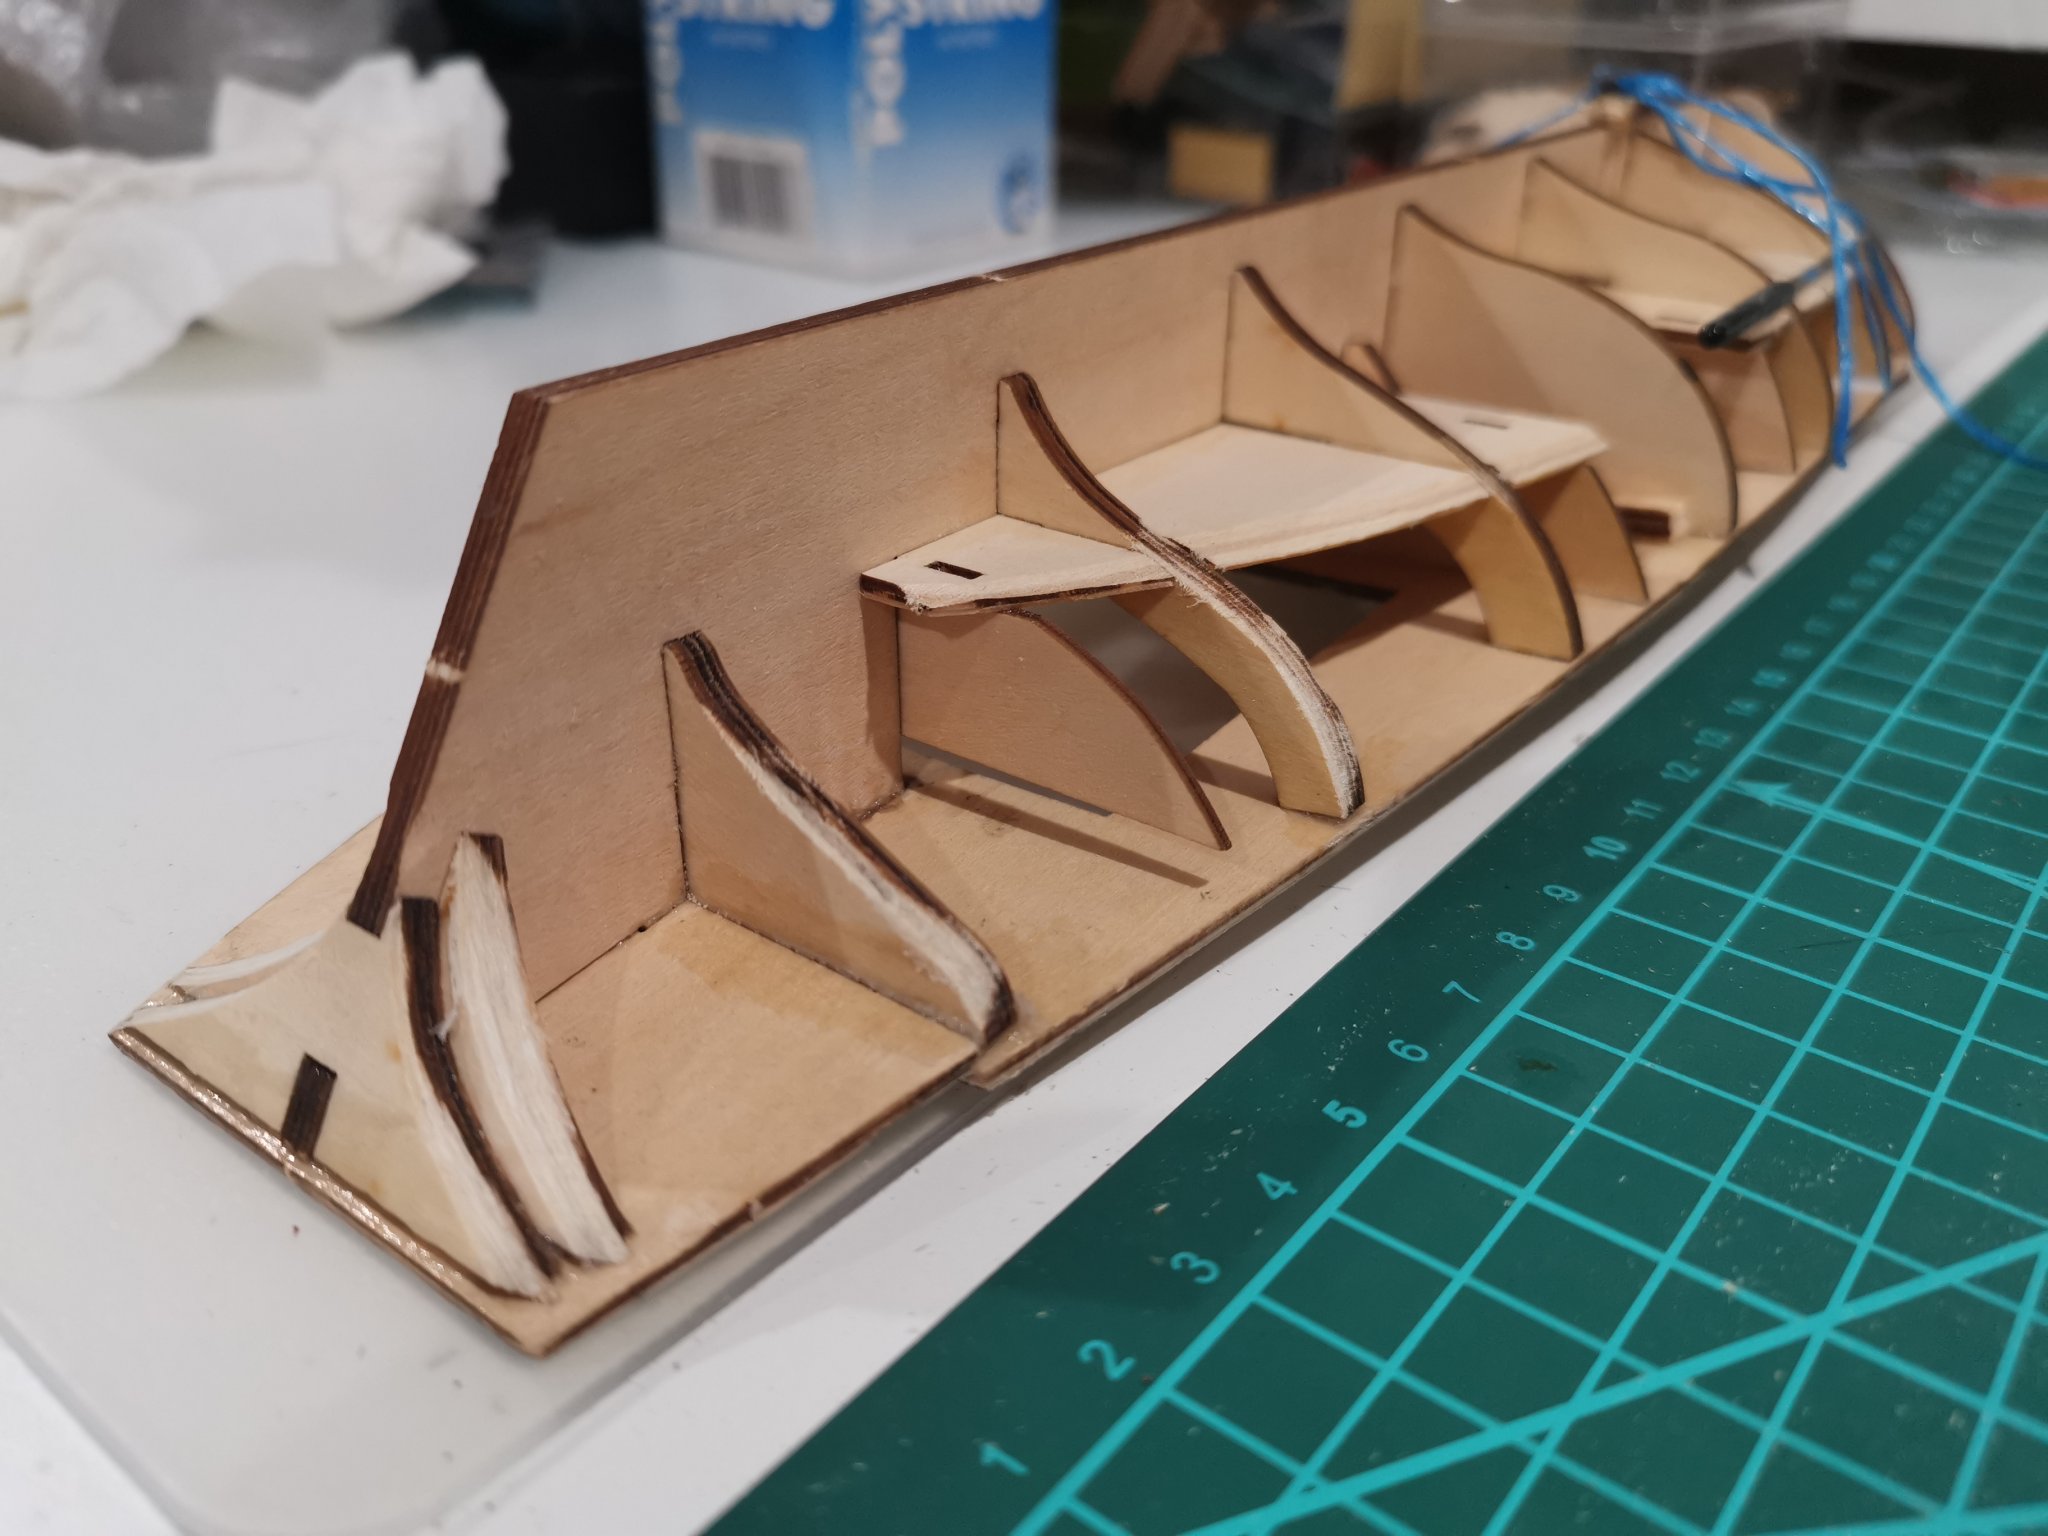
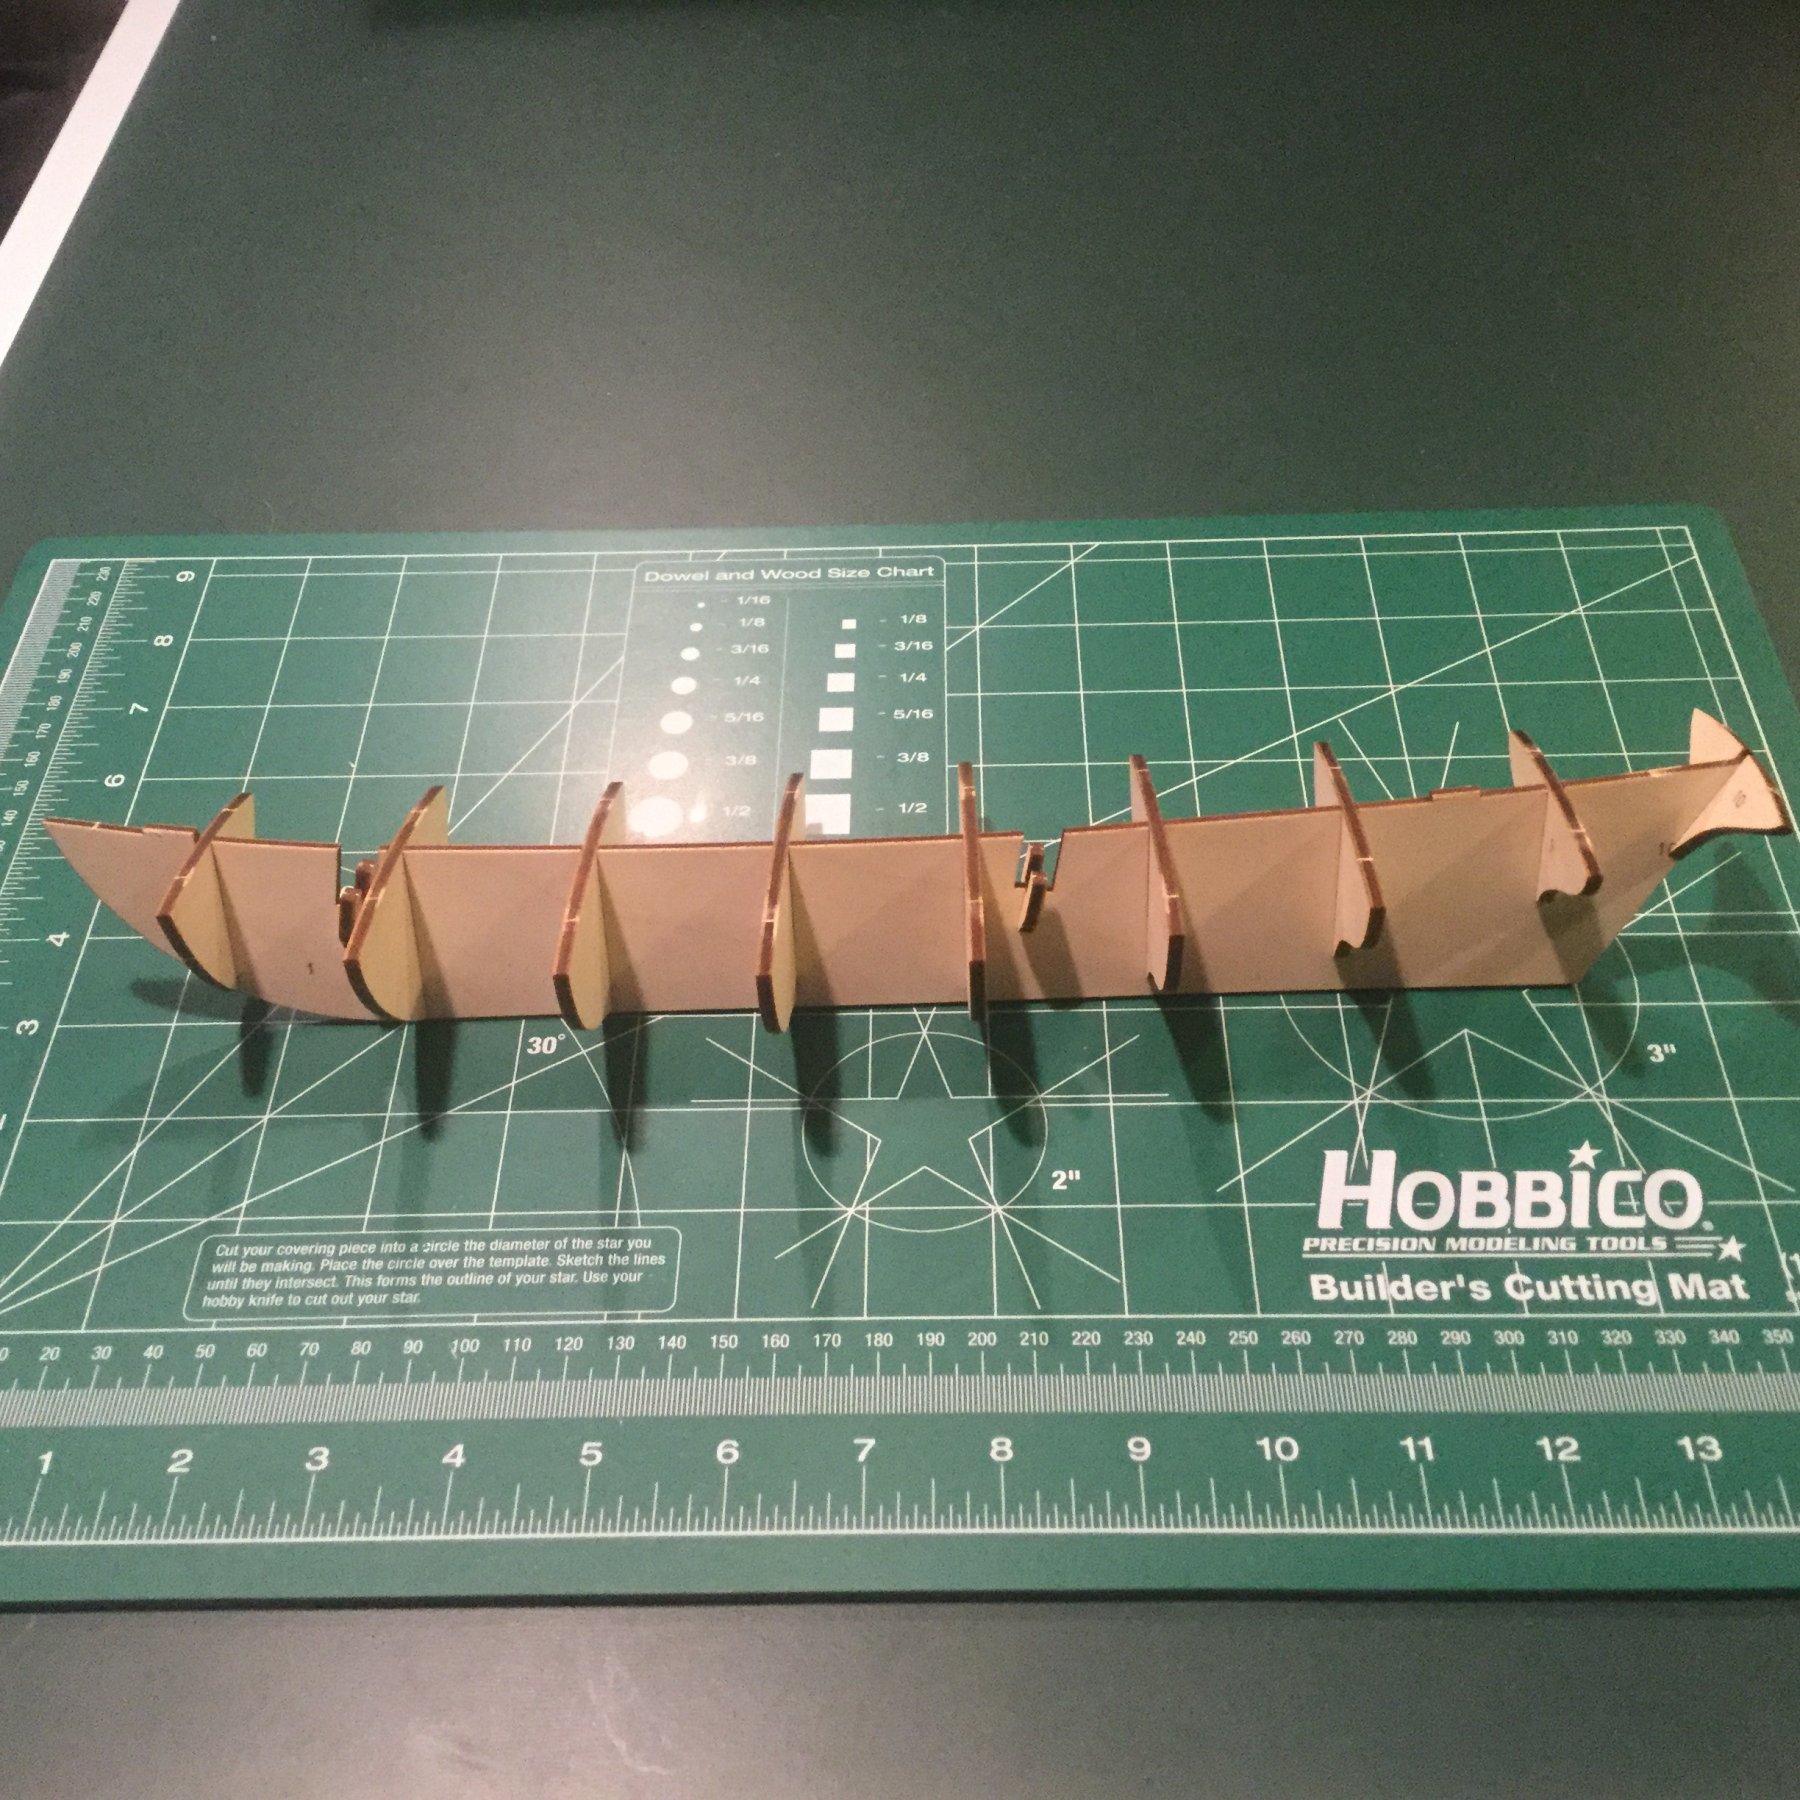
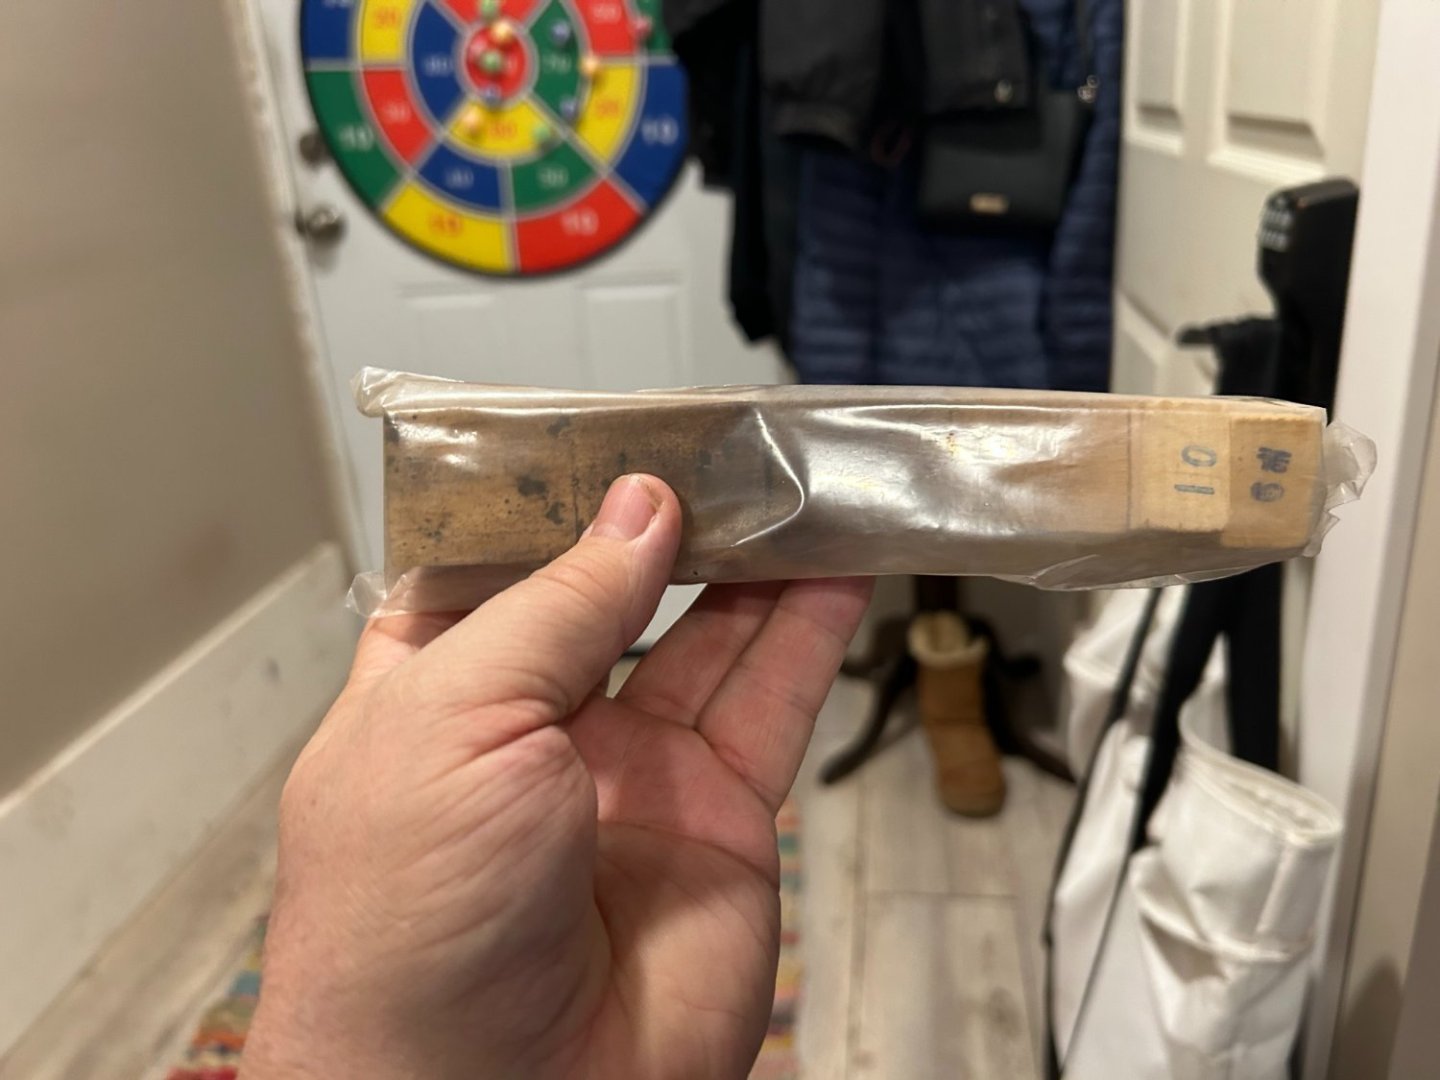
 So while I am waiting on some tools I started the Swift. I got it off Ebay and it came with the original receipt. It was first purchased in 1983. It looks like they were die cut in 1983 versus laser cut. Laser Cut didn't exist then. Looks like everything is there. Only is issue is mold on the spacing blocks. That is not a problem. I do mold remediation for a living so this will not be an issue. I put the frames on.


-
 I decided some months ago to expand my fascination with the age of sail into wooden model building. With no experience I spent much time reading and researching to be certain of what I was getting into. I haven't started this log earlier, as I wanted opportunity to make a bunch of mistakes on my own first. Picked up this swift kit open box but unstarted and complete for a song. Looked like a perfect 'starter' kit. I have my next two kits on the shelf already, each a step up in complexity. Makes me even more anxious to get this one done. Sometimes I follow the directions, sometimes not. As I progress I find it easier to pay less attention to the instructions.
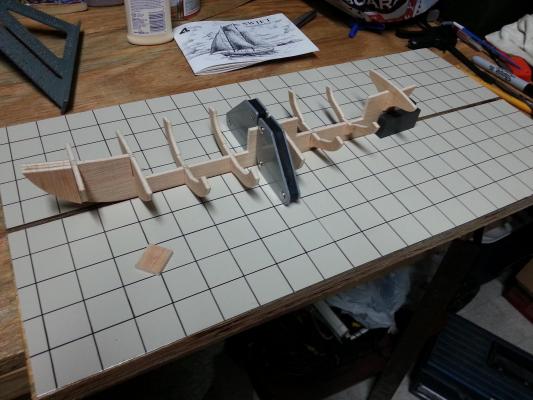
- 114 replies
-
- 5
-
-
- swift
- artesania latina
- (and 2 more)
-
 I had started the AL swift pilot boat even before the CWM thought I would start a log from the current status These are photos of current build
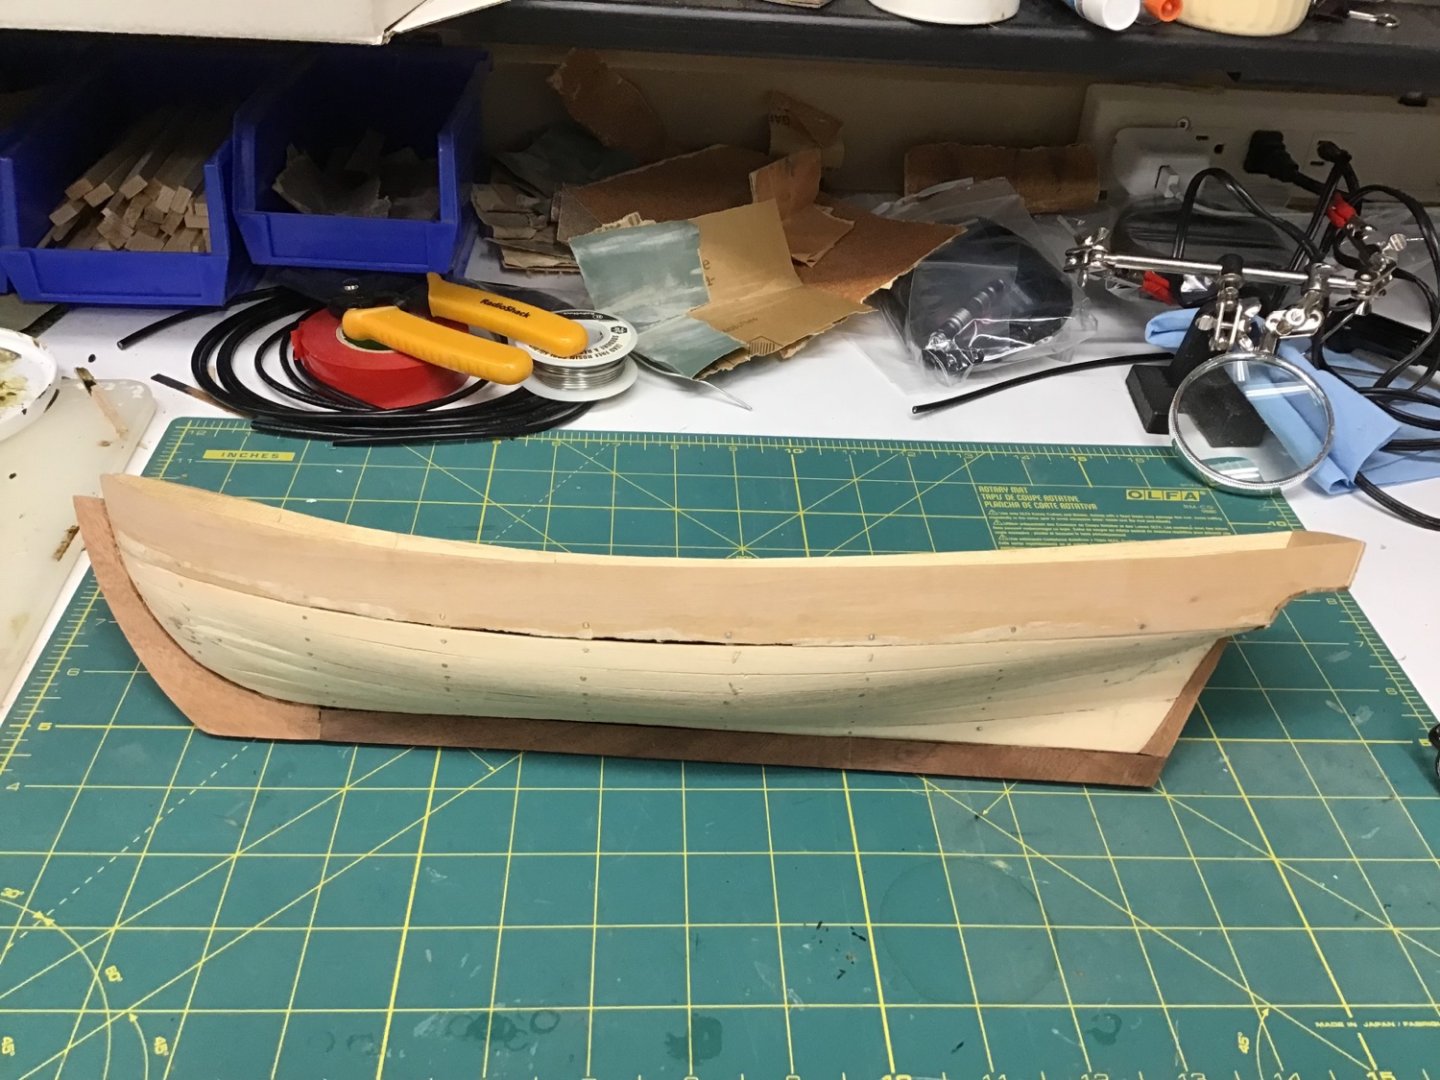

- 1 reply
-
- 4
-
-
- Swift
- Artesania Latina
- (and 1 more)
-
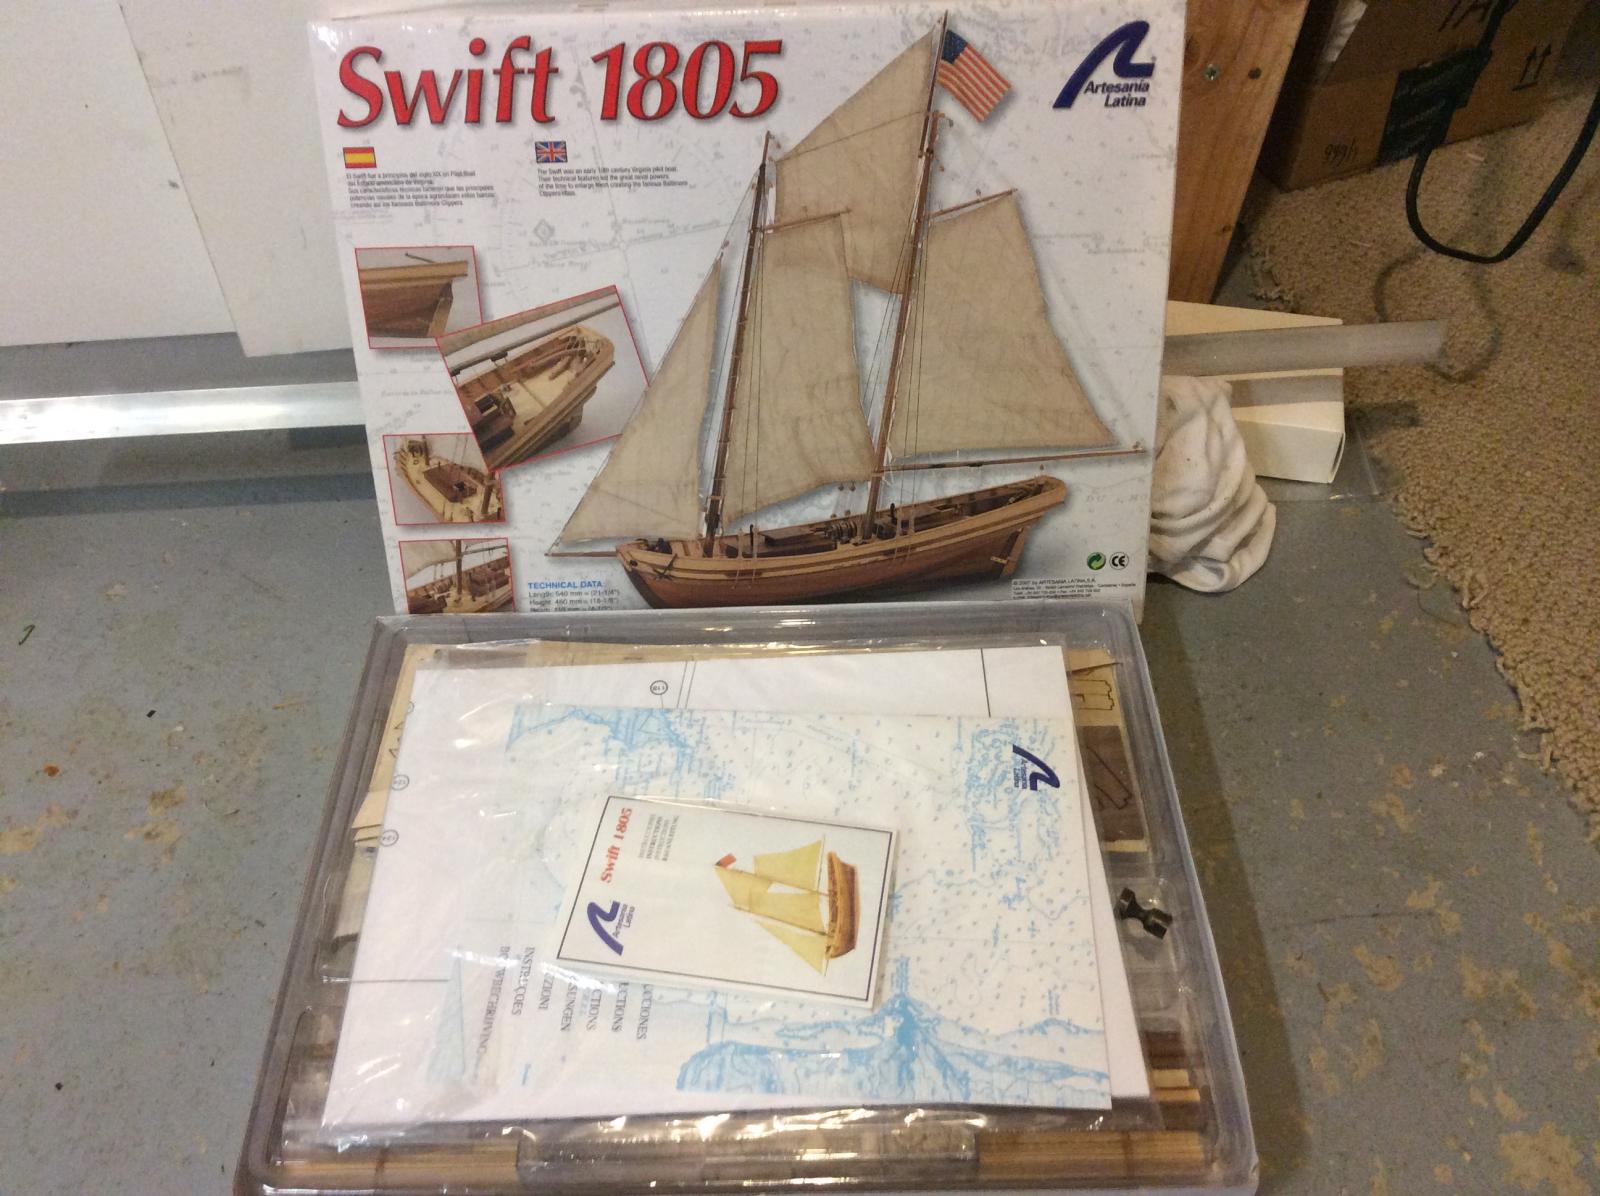
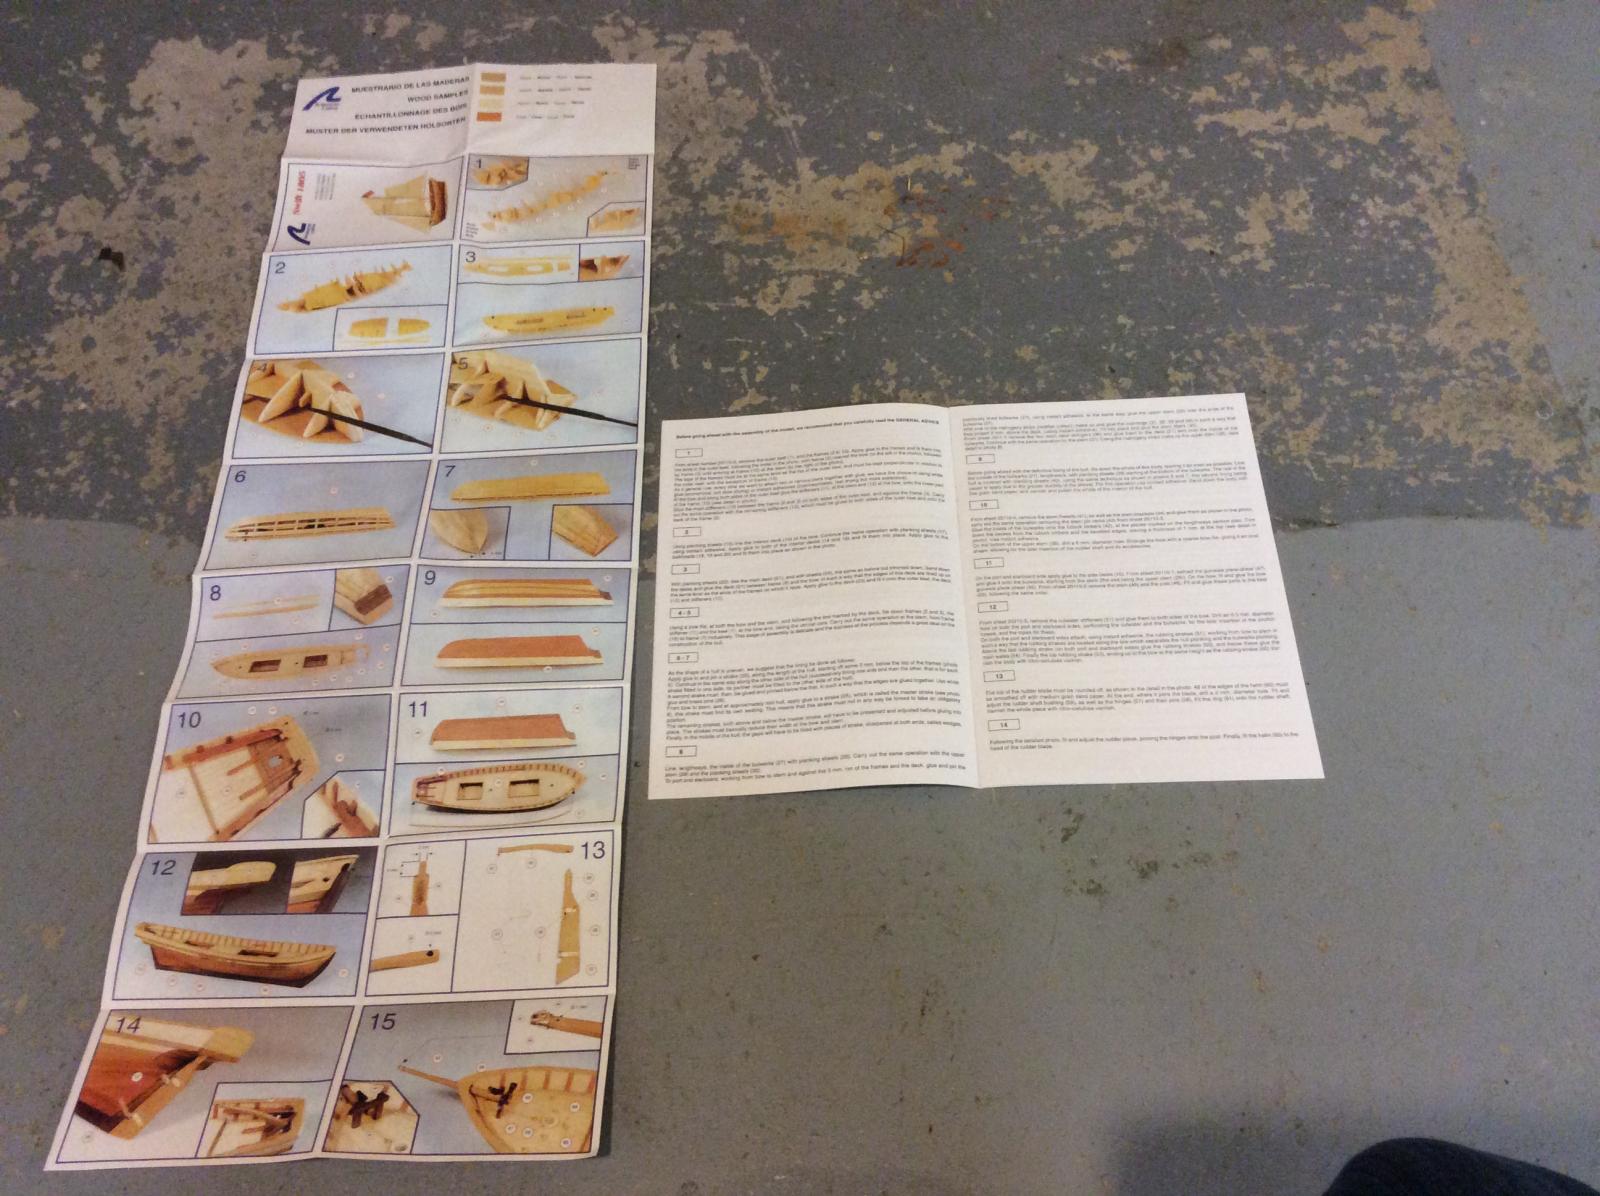
 Welcome MSW to my Swift log. This is my first wooden ship model. My only other model ship was the USS Arizona, which suffered an inglorious fate by an M-80 after being stepped on (by my sister I think, but she never fessed up). I'm no Amish furniture craftsman, but I know my way around tools well enough to jump into this hobby. My first attempt was going to be the USS Constitution - 1:76 (MS2040). Fortunately it was backordered (Christmas gift from my pop). After previewing the 80 or so pages of instructions, I thought it prudent to start with something a bit easier. I chose the Swift 1805. So here we are. Initial thoughts: Upside: Upon opening the package, I was surprised (and a bit relieved) to see a good mix of "laser cut" wood, along with a bunch of neatly tied lumber and well packaged miscellaneous parts made of metal, wood, or string/line, and pre-cut sails. I say relieved because, being new to this hobby, those parts are less intimidating than seeing neatly bundled stacks of wood in various forms. The parts were all present and in good shape (no excessive warping), seemingly detailed instructions existed, as did a DVD (!). I've found that there are several versions of this model. This one does not have the 2nd lower false deck. Downside: The DVD and instructions. The instructions and other videos (tips on painting, shaping the masts, etc) were available on a DVD. It's probably expected that wooden ship kits would be lagging with technology - especially given that this kit was a 2016 version (it's actually pretty cool how timeless the actual models are). I had to dig up an old family laptop that had a DVD drive, to print the instructions (that presented it's own set of issues). Once printed, the instructions appeared to be very robust, until I realized that rather than extensive details, I had about 2 or three ambiguous sentences presented in about 20 different languages (the Italian to English translator was no master linguist). The illustrations were also a bit lacking (for a beginner). General Build Thoughts: I didn't think I'd create a build log, because of the time (I barely have enough time to work on the Swift), but I'm trying as I can. As I start this log, I'm currently working on creating the door hinges (completed the planking of the hull and deck, and the first of the hatches, pics to be uploaded). As I progress with Swift, I've found that the instructions were typically just vague enough to somewhat confuse me, but left enough general direction for completion via a YouTube search, or a great online group, like this one. I also have come across some instruction errors (for example, the parts needed for the hatch cover). However, they've been easy to spot and remedy, and it seems there are enough spares provided (with planking and bundled wood). The Swift is not hard, but presents a lot of challenges which are exacerbated by its scale (small) and shape (curvy). A lot of my build was slowed by lacking the appropriate tools. I was quick to order things I needed but many were on back order. Being a big believer in the right tool for the job, waiting for backorder fulfillment stalled my build significantly at first - I never realized how many different clamps were available 🙂 I find this hobby to be a problem solving effort. Each section is akin to a new problem in need of a solution. The tools, keel, bulwarks, fairing, planking, painting, hatches, hinges... all take some time to asses, plan and solve. At first I found it to be a bit of PIA, but I find myself enjoying the problem solving aspect more and more. I often find myself running out to my girls upon completing a particularly fun/tricky build ("check out this planking!"). They are polite and make believe they enjoy it too 🙂 [I'll update my build periodically (I'm not retired and have young kids). I'll catch up my log with my build and plan to complete both].

- 110 replies
-
- 5
-
-
- Swift
- Artesania Latina
- (and 3 more)
-
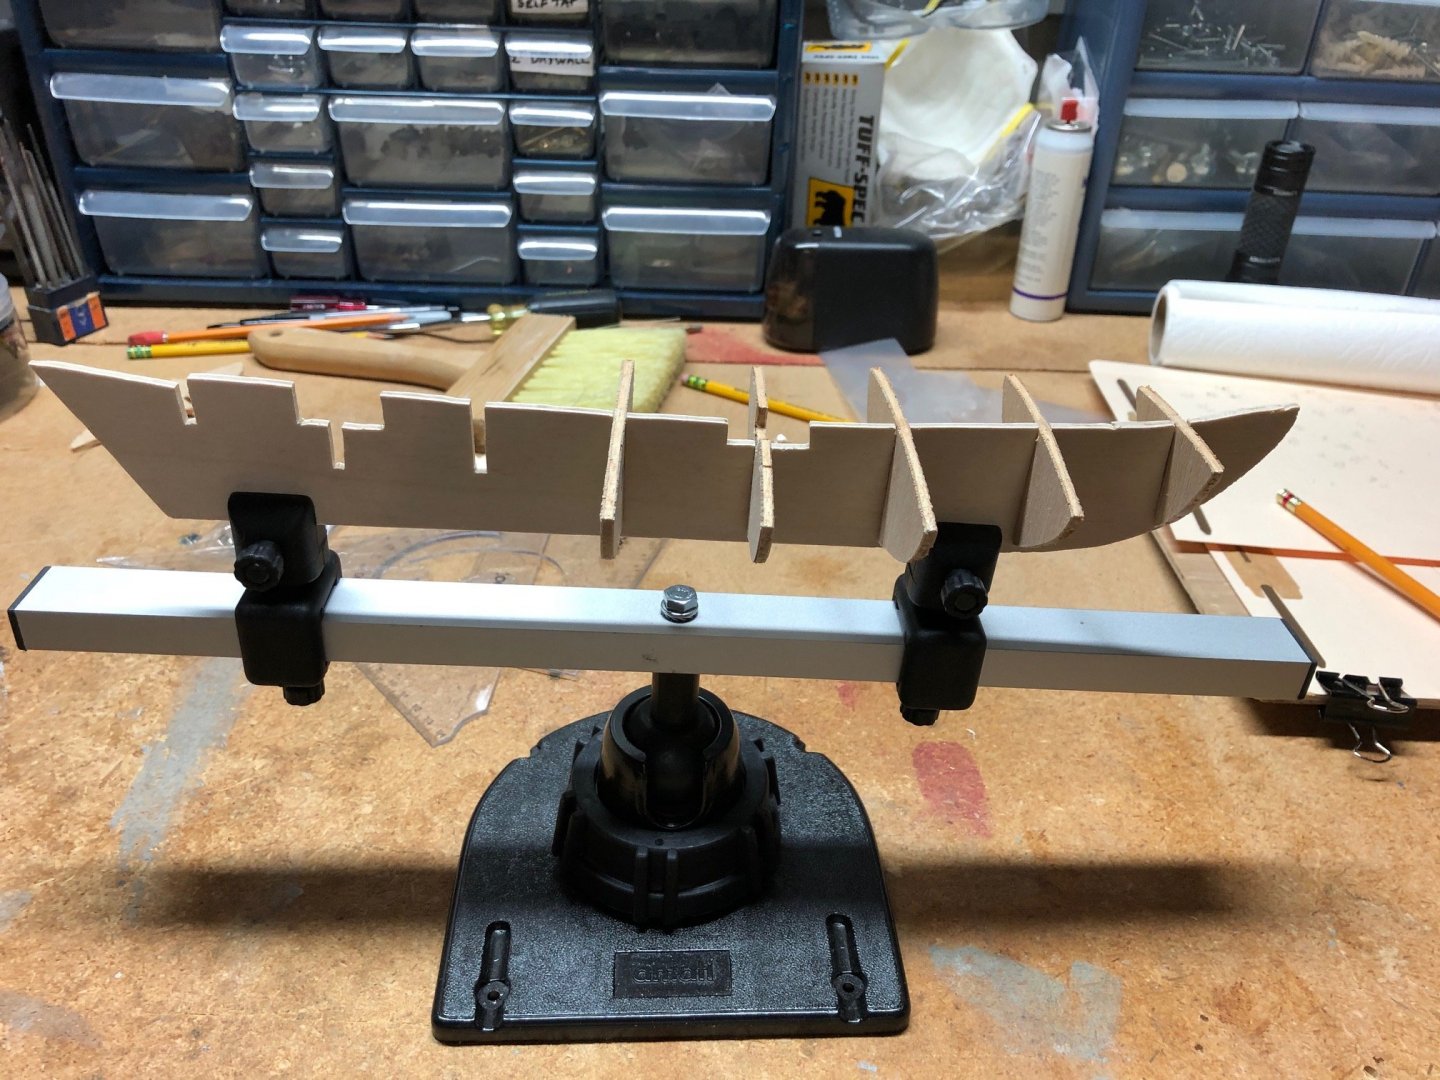
 I posted this in the Member's intro section, but on suggestion there will start this log... I bought the Swift kit a few years ago as a first ever timber ship kit, but put it down after constructing the frame and half-planking the deck, when I realised I wasn't happy with the planking I had started. This last week I picked it up again and decided that no-one else would ever realise that some of the planks didn't quite look perfect! So progress since then has been to finish the deck planking, fit the deck to the frame, and start planking... I ended up clamping the deck down pretty hard to get the curve to the bulkheads, but it looks really good so I'm pretty happy with it. One thing I have noted is that I was not happy with the hull curve generated by bulkhead 6 (it really pinched in and didn't flow well at all) so I have packed it slightly - it can be seen in the last photo as the bulkhead with an extra pin in it near the keel. I've been reading a lot on planking techniques - and reading through @stripehunter's build log - some excellent advice all round. I daresay this will go through stages of modelling energy, but I'll get there eventually
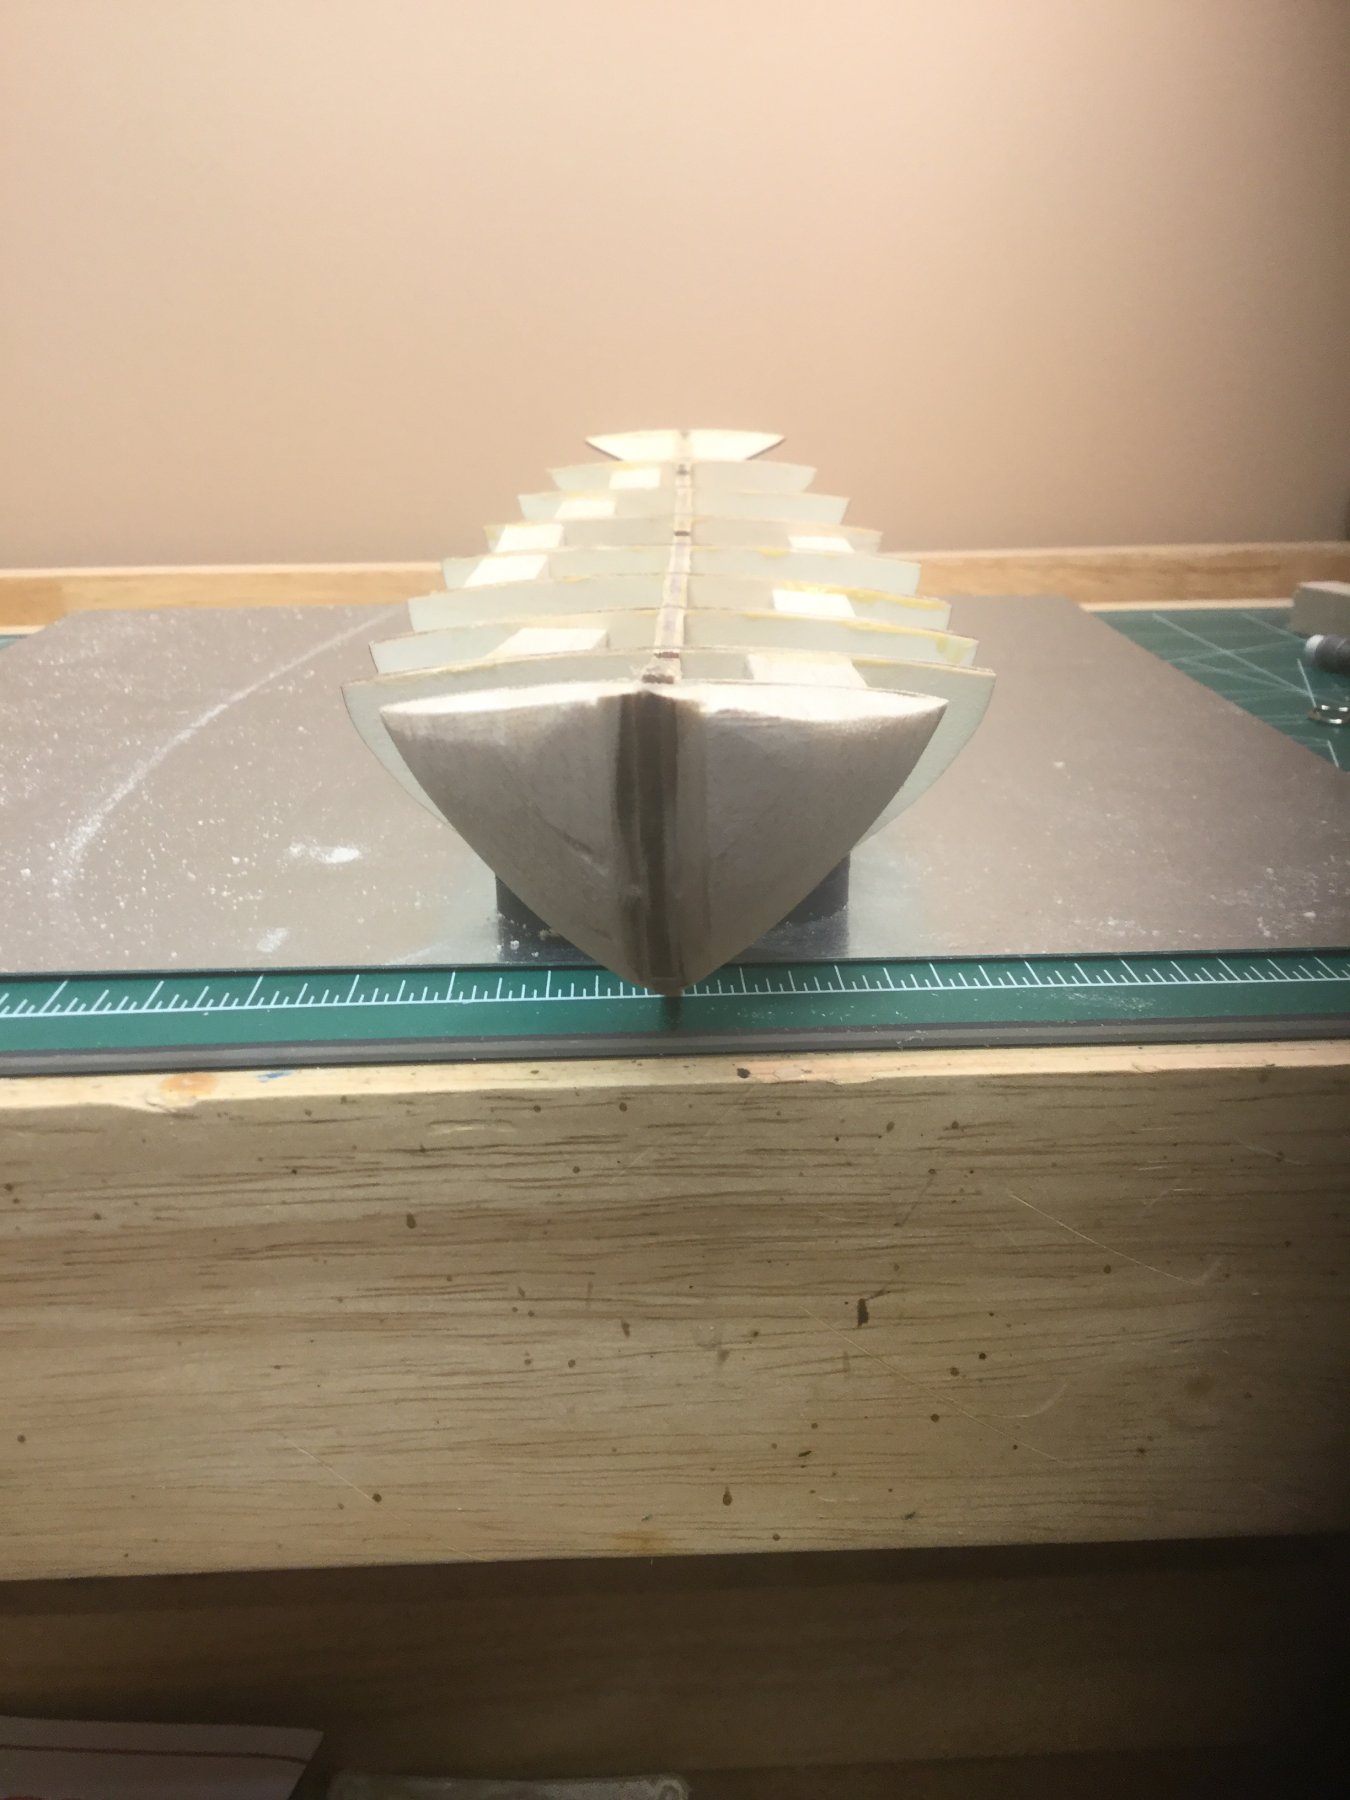
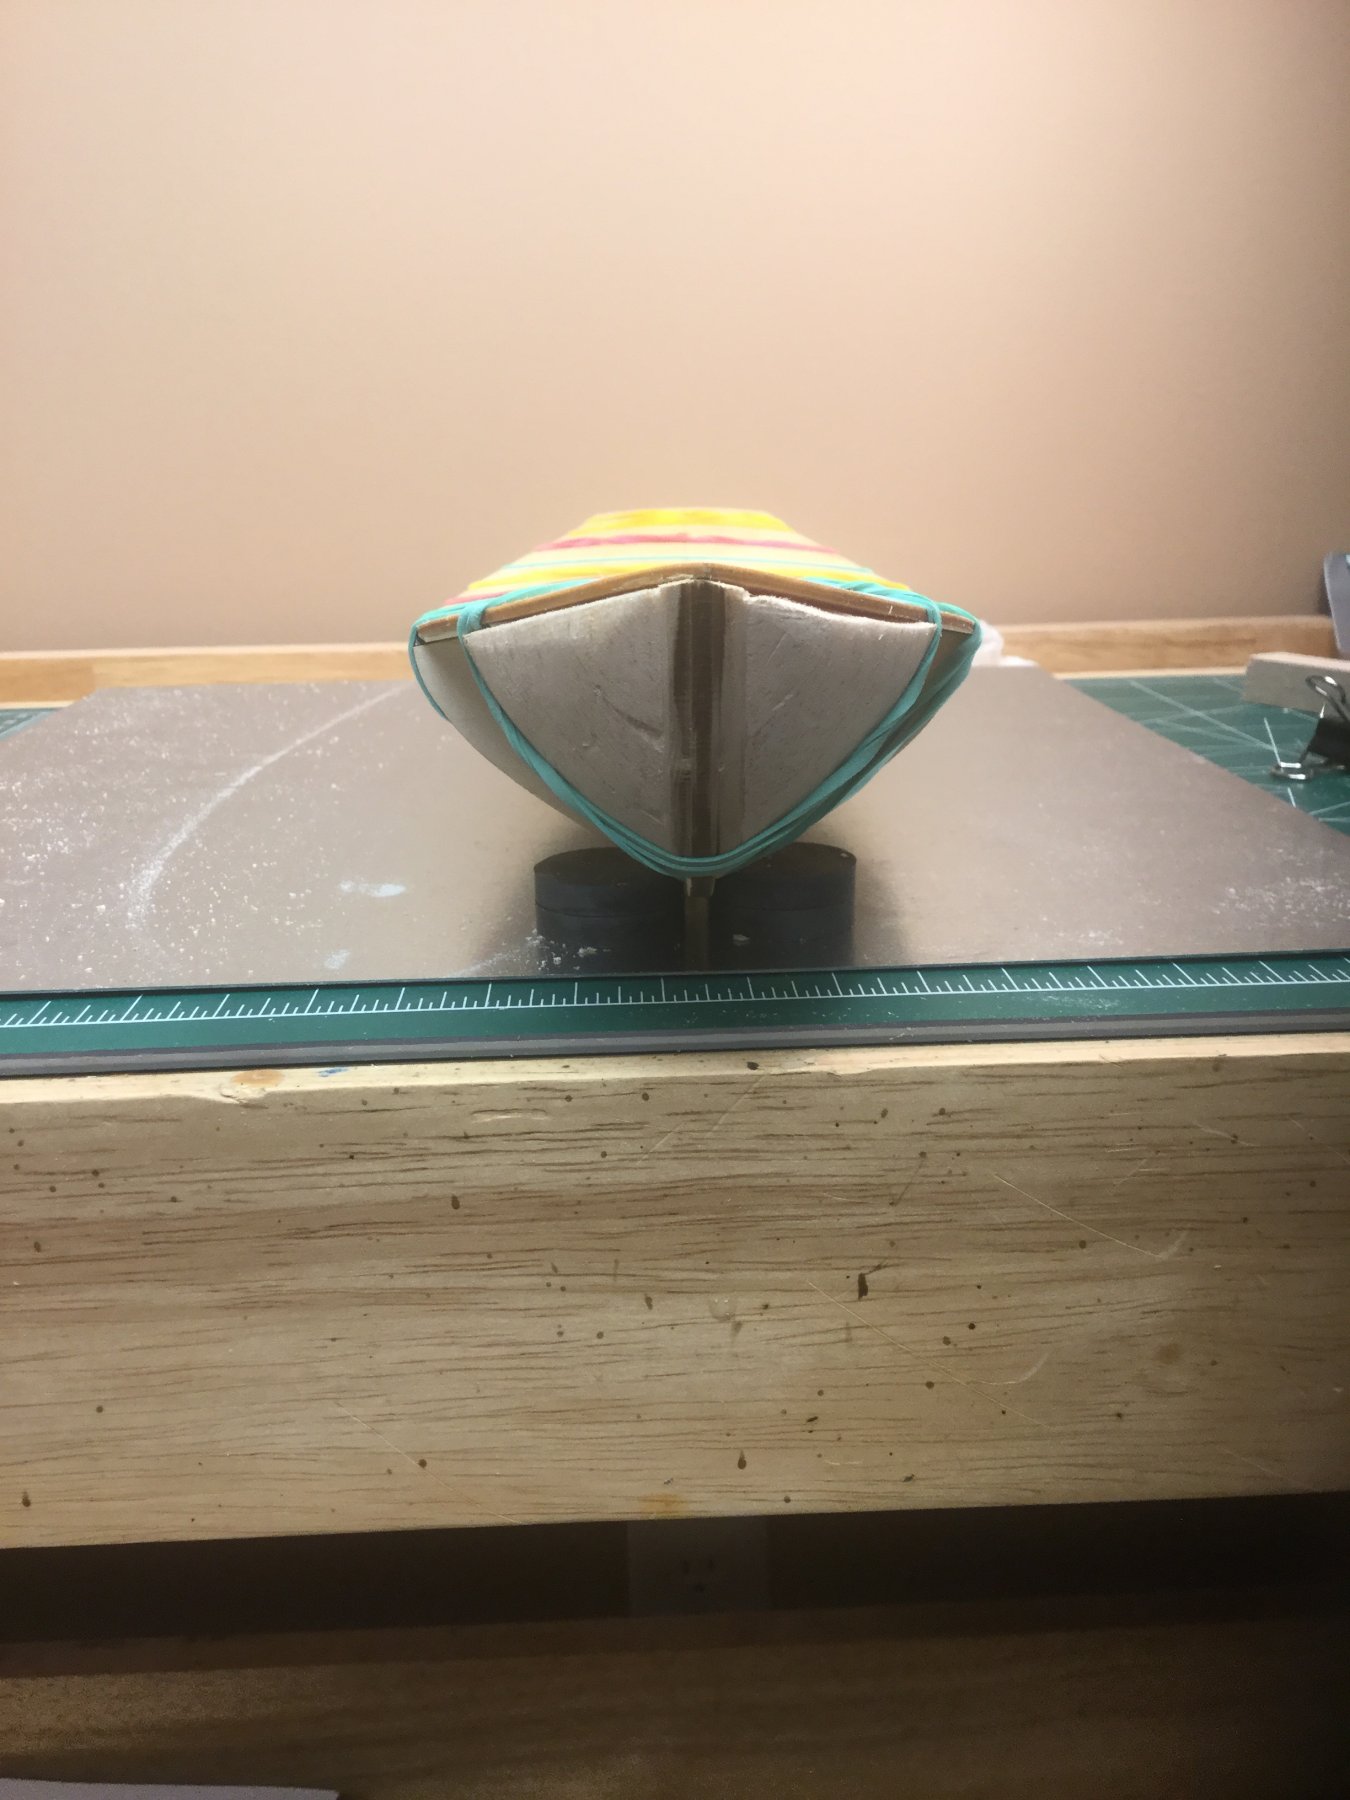
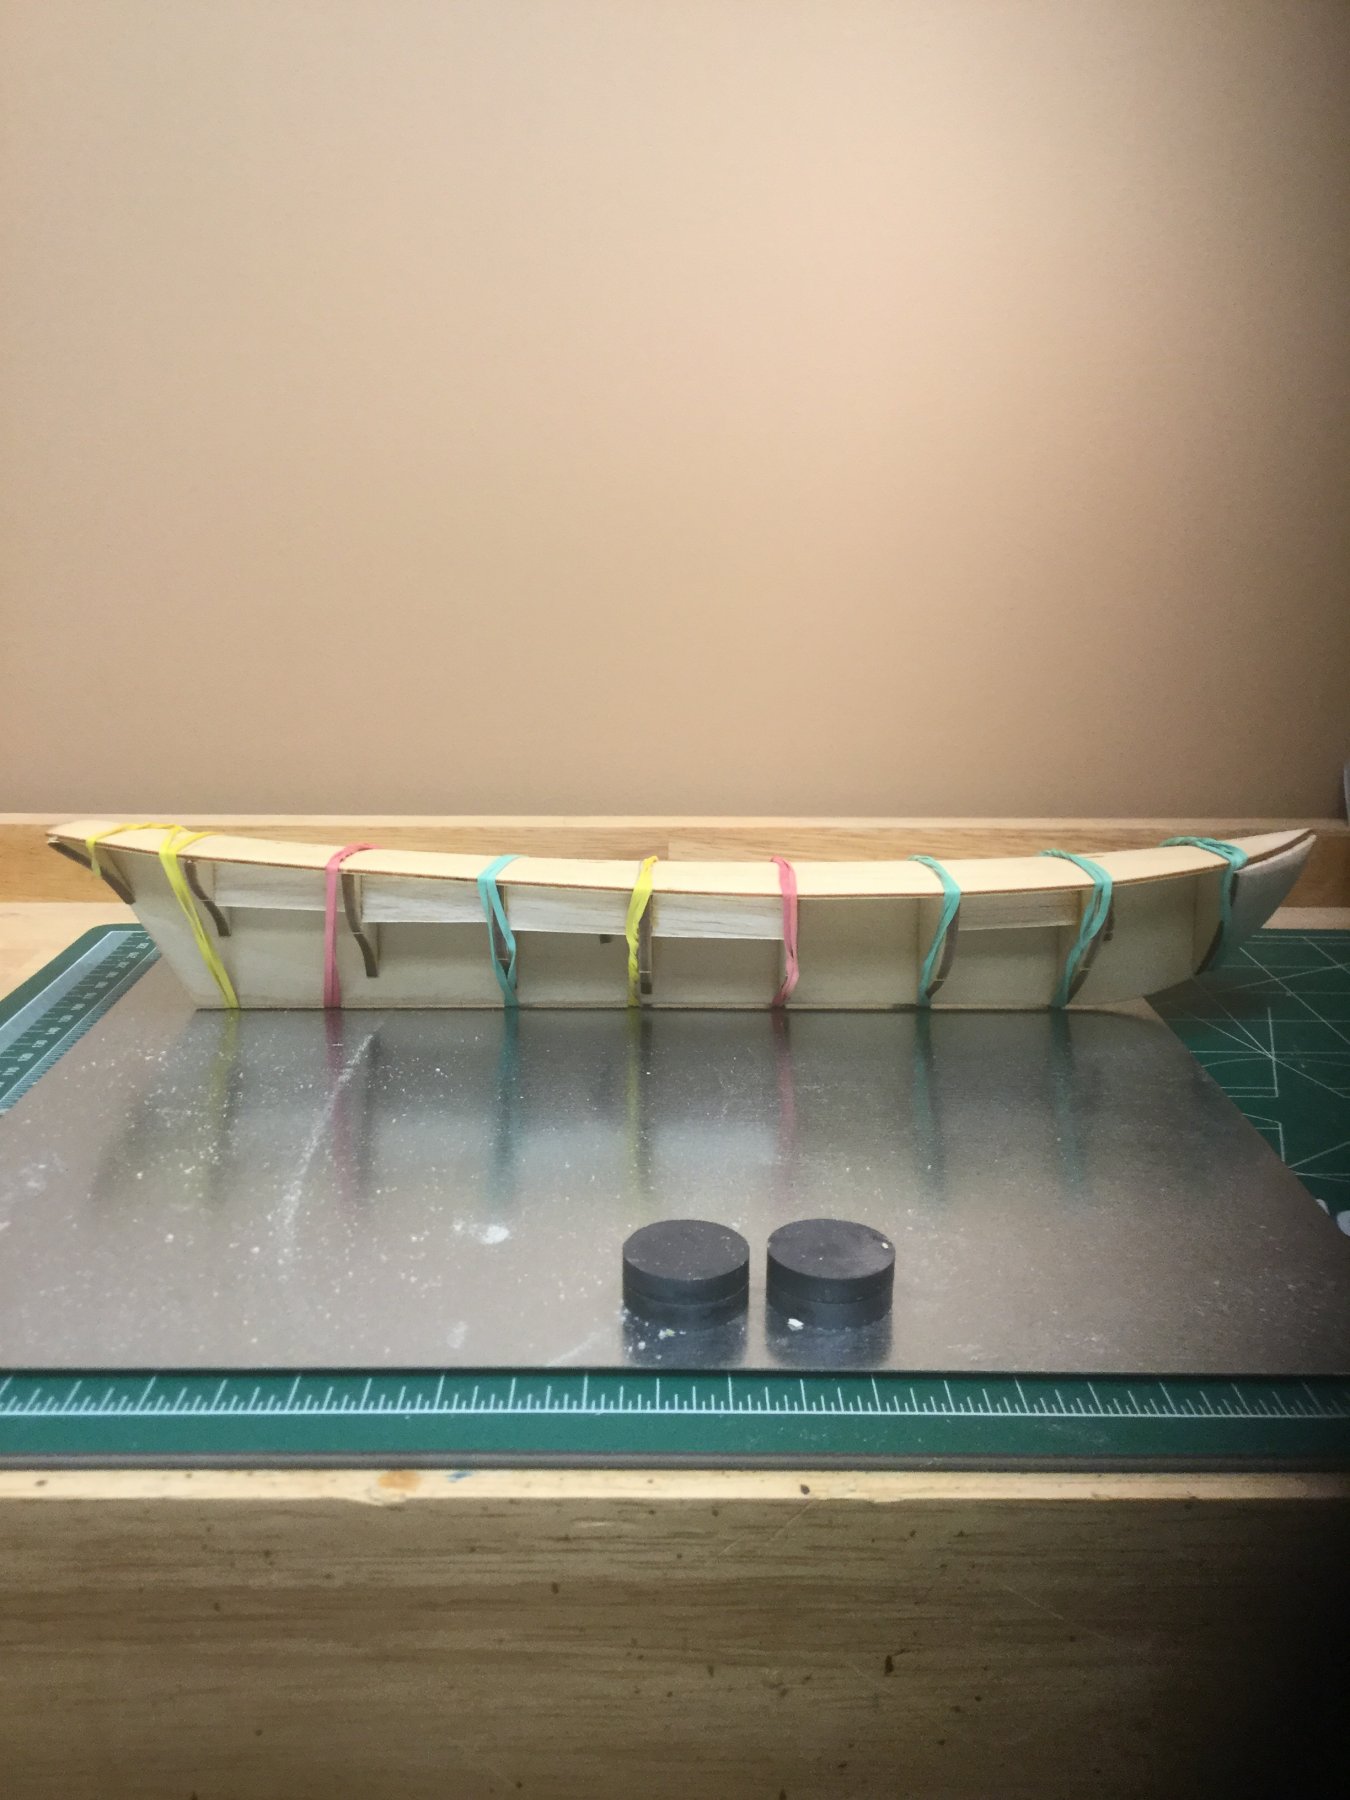

- 24 replies
-
- 2
-
-
- swift
- artensia latina
- (and 1 more)
-
 Hi my name is Arthur and everything we go out to eat and I see these model ships I want to build one for a long time now and I finally got one I just don't know what tools I may need to help process and where to start any information would be widely appreciated I plan to start this in next few days I've done some research and know some things I may need but looking for any input from you experienced folks thanks in advance for reading and any input you have
 -
Hi MSW community - what a great resource! Like many folks, I used to build plastic models when I was young. Unlike many, I then ended up blowing most of them up with M-80s. Many years later I have a daughter who loves Legos, and as we've built more and more advanced Lego kits (recently finished a Star Wars X-Wing), I found myself looking for more of a challenge. It also happened to be a good time for new indoor hobby with my COVID driven full time telework (took up the violin last year). I initially decided to jump into the deep end of the pool with Model Shipways' USS Constitution (MS2040). After previewing the 80+ pages of instruction (after I had already ordered the model), I changed my strategy and decided that an appetizer was probably needed before tackling Old Ironsides. I chose the Aretsania Latina, 1805 Swift. I started mid December, and just completed planking both the hull and deck. MSW has been an indispensable resource, and I plan to add my own ship log in the hopes that I can help someone else, if for even a minute detail they can't quite get. Fortunately, Constitution is on back-order, because this little Swift is taking longer than anticipated. Between work, family, sports, other hobbies, life.., progress has been a bit slow. Both modeling and the violin present interesting challenges, and have some surprising similarities, such as patience and attention to detail. I'm very happy to have come across this resource at the beginning of my build. Too bad MSW doesn't have a violin forum 🙂 Cheers!

- 30 replies
-
- 13
-
-
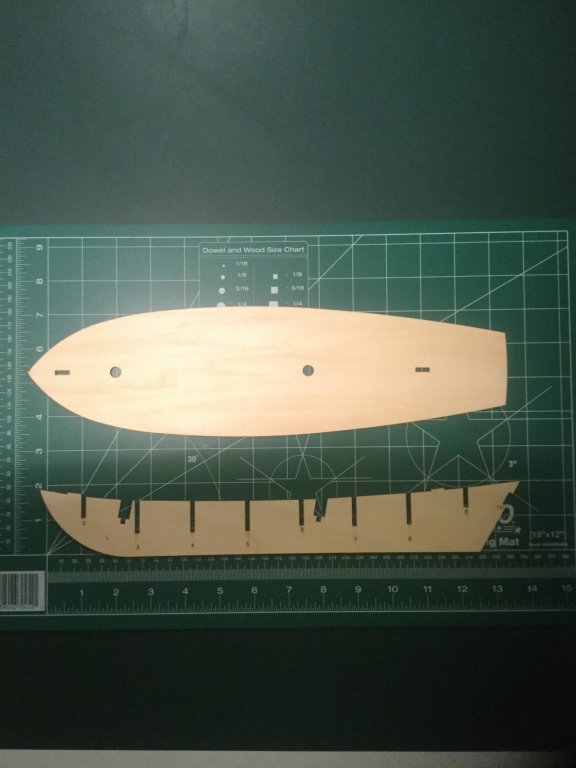
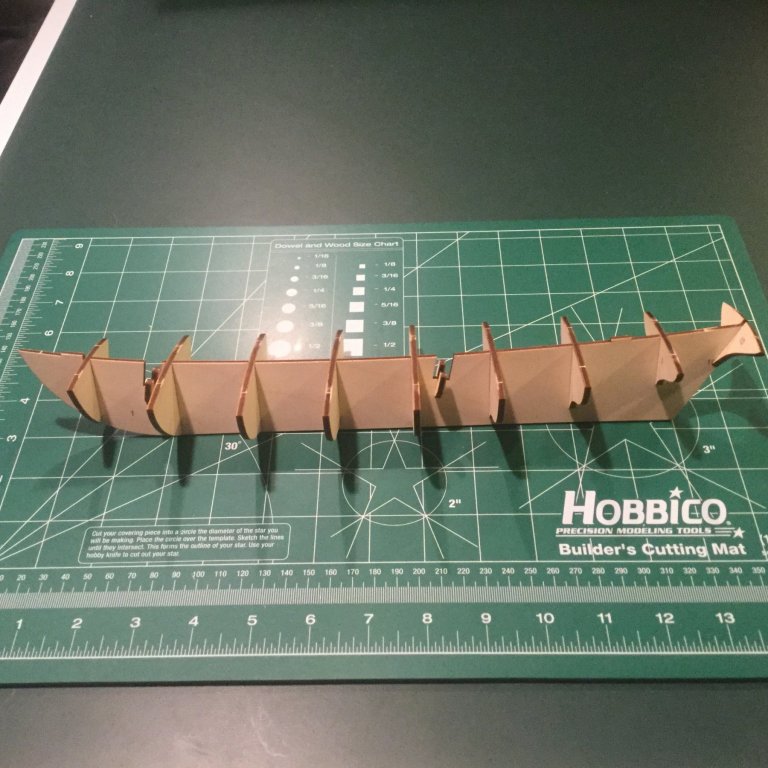
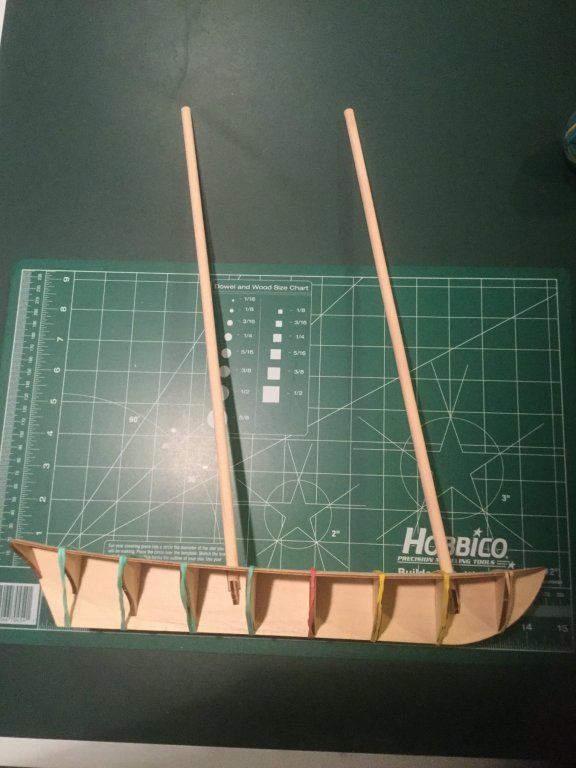
 Ready for another Swift build. I originally was going to do the Lady Nelson as my first build but couldn't find many build logs on it, so after seeing all the Swift logs, decided to do it. It looks like a good first build, not being to big and detailed. Opened it up yesterday and checked the parts, and cut out the keel and frames. After reading all the logs and the problems everybody was having with warped keels and frames with problems, was expecting the worse. But the keel was straight with no structural damage. Then dry fitted the frames and checked everything. The frames were in good shape, non warped or damaged. The only thing I found wrong was frame #7 was off a little, so filed down the keel slot and re-adjusted. Then added the decks and they fit well. Now my question is, am I ready to glue the bulkheads, or do I glue the decks first. ??


- 159 replies
-
- 1
-
-
- swift
- artesania latina
- (and 1 more)
-
 On Again Off again build. 15 April 2021 sanding and filling gaps first layer of Hull planking. I find the instructions to be minimal. In an earlier phase of build, I missed that Bulwark planking and stern planking are different. Not all the different planks were separated in the kit...easy to miss a slight change in width. Enjoying the build despite minimalist instructions/photos. 4 April 23 Just a place holder for the "Hangar Queen" Have not worked on it for months and Mayflower is looming so this is just a gentle admonishment recognizing she needs to be finished.

-
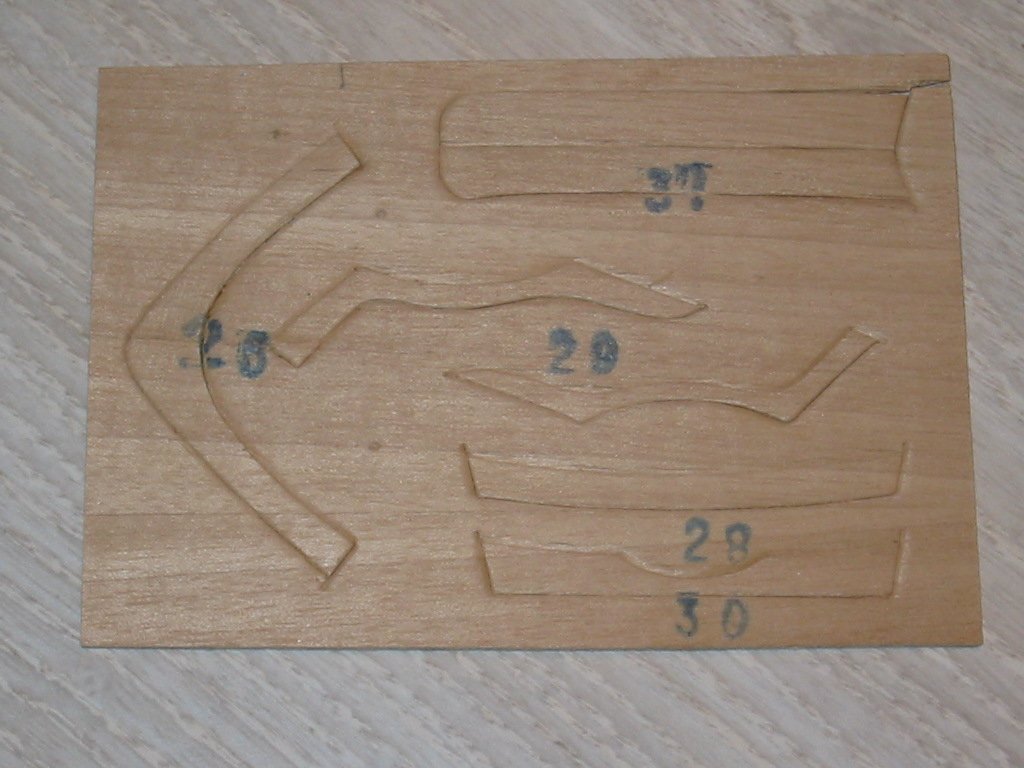
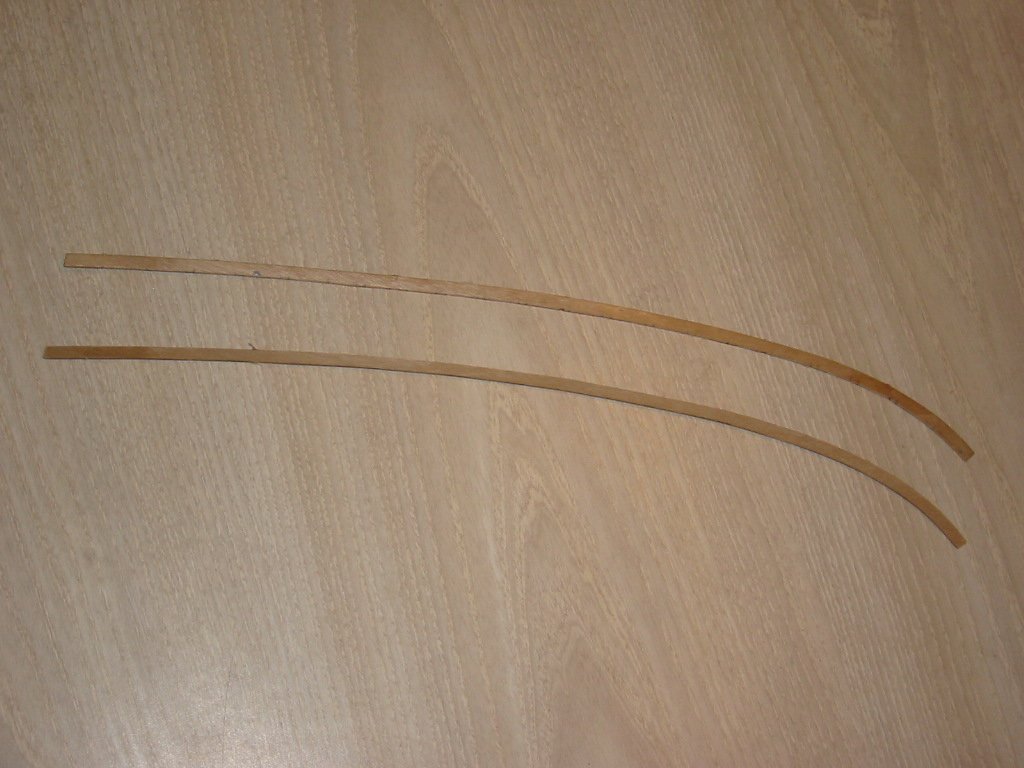
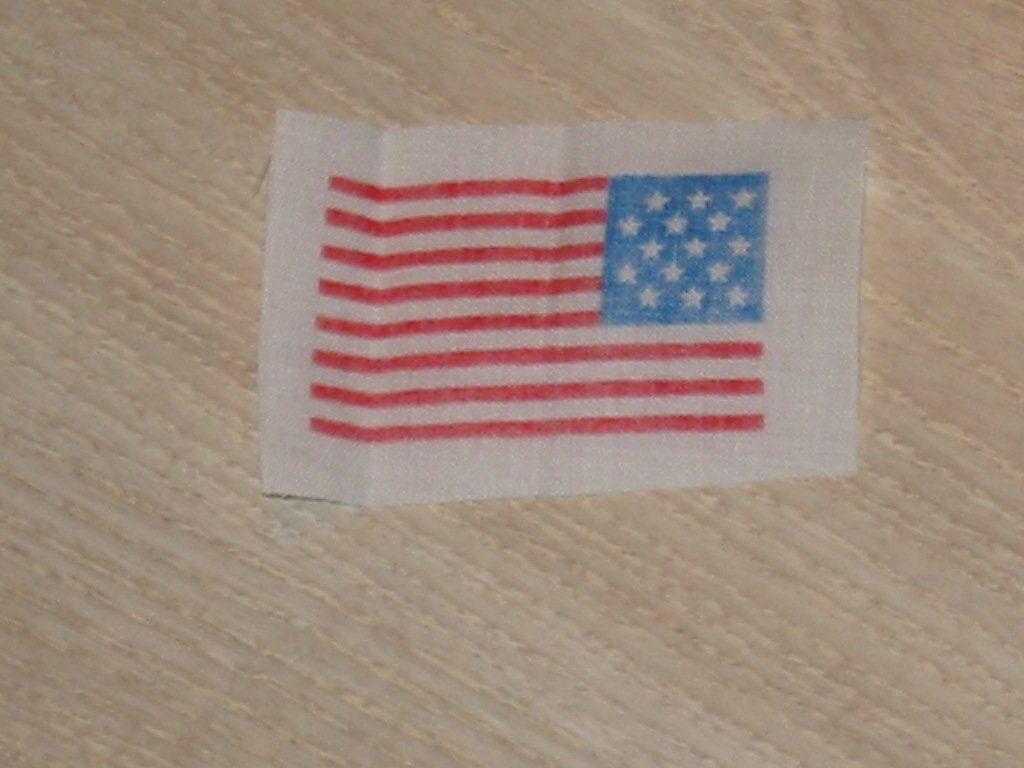
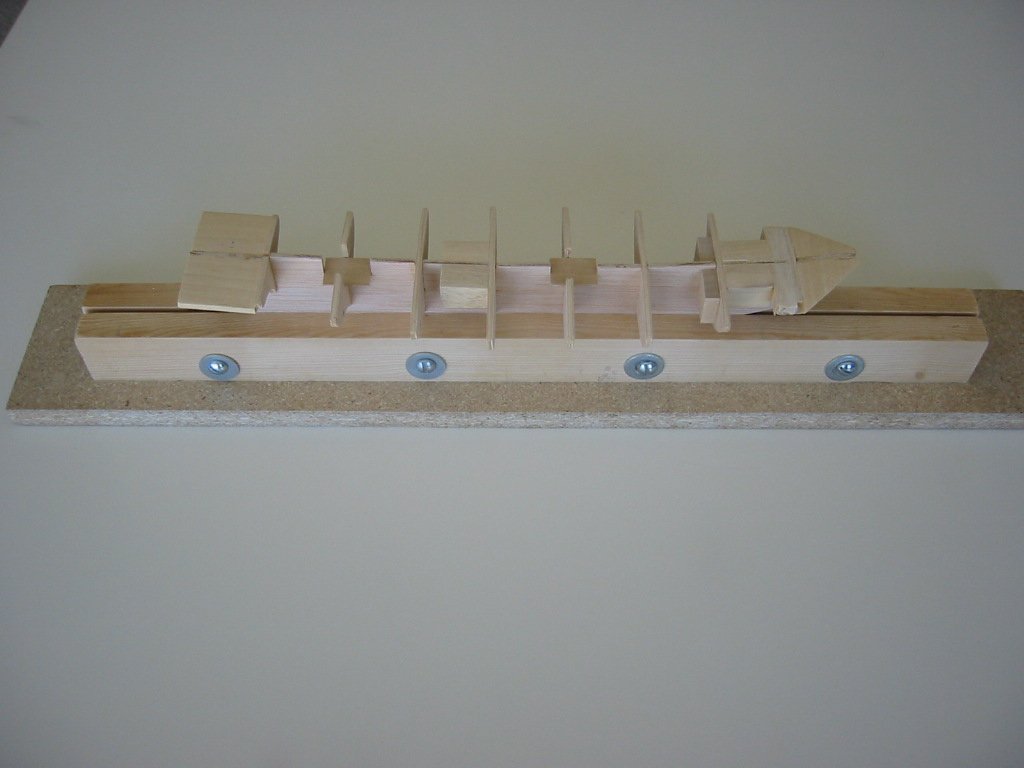
 Greetings! New guy here and wanted to share my work on the Swift. This is my third wood ship kit and I am almost finished, but have photos from the beginning. This is the version of my kit: Compared to the other kits I have done and the ones I have waiting on the shelf, some of the material in this kit was really poor quality. As I progressed through the build I had to substitute much of the kit supplied wood with spares that came with some of the other kits I have acquired. Examples of items I did not use from the kit include: Perhaps I am being too picky about these items, but they really don't compare with the quality of the other kits I have. The first hull planking wood was horrible - all twisted, splinters, and very brittle. The cap rails came a thin plywood and just did not look right along with the flag which was printed on one side only. The plywood keel was a bit warped but I was able to use it and the frames. There were other items in the kit that I did not use which I will mention later in the build. Started as usual with keel and frames. Added some additional blocks to help get everything straight. I did use clamped lego blocks to square up the frames, but can't find the images or maybe lost them: This part of the build went well and once everything dried I moved on to the deck which I will post next. Many thanks for having a look - comments and questions are always welcome and much appreciated! Happy Holidays . . . Bill
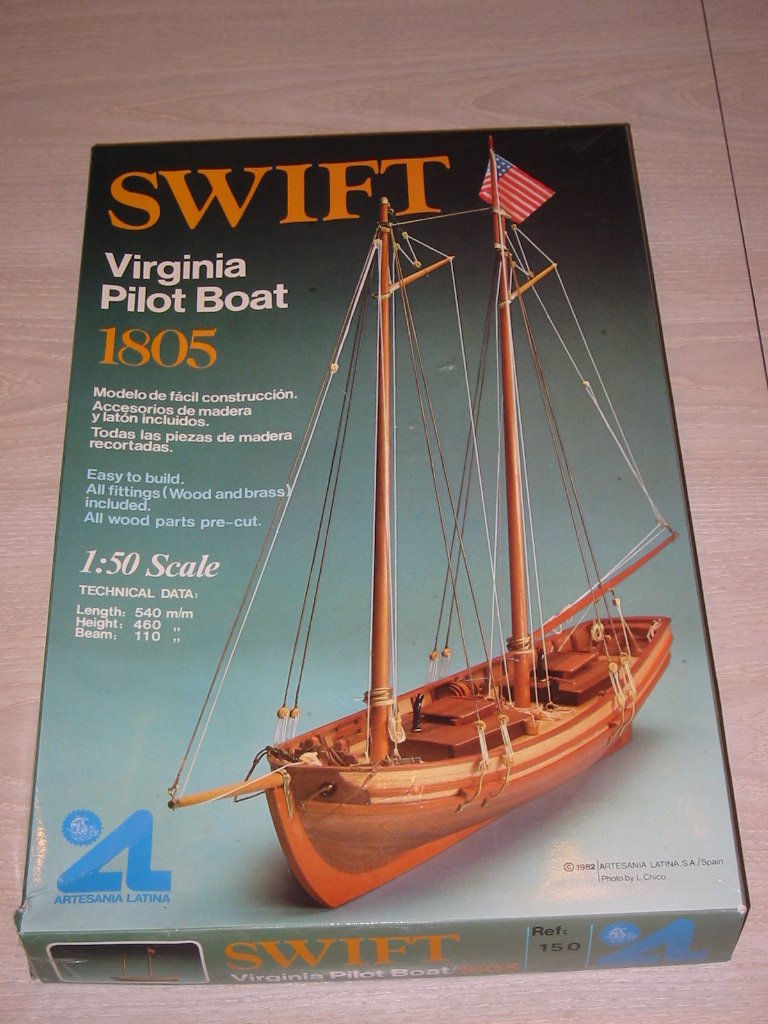

- 10 replies
-
- 2
-
-
- Swift
- Artesania Latina
- (and 1 more)
-
 Hello Esteemed Builders, First, I would like to say that it is very exciting to see all the great work everyone has posted on MSW. I am completely new to the hobby of model ship building. I took a course in the history of sea power during college and fell in love with tall sail ships. Some how I landed on a website looking at wooden model ships and before I knew it I had the Swift kit in my hands. Lucky, I have now found some time to work on it and am excited to see how it goes. I wanted to say hello and I certainly welcome all advice and expertise as I build the swift. Tyler
- 114 replies
-
- 2
-
-
- swift
- artesania latina
- (and 1 more)
-
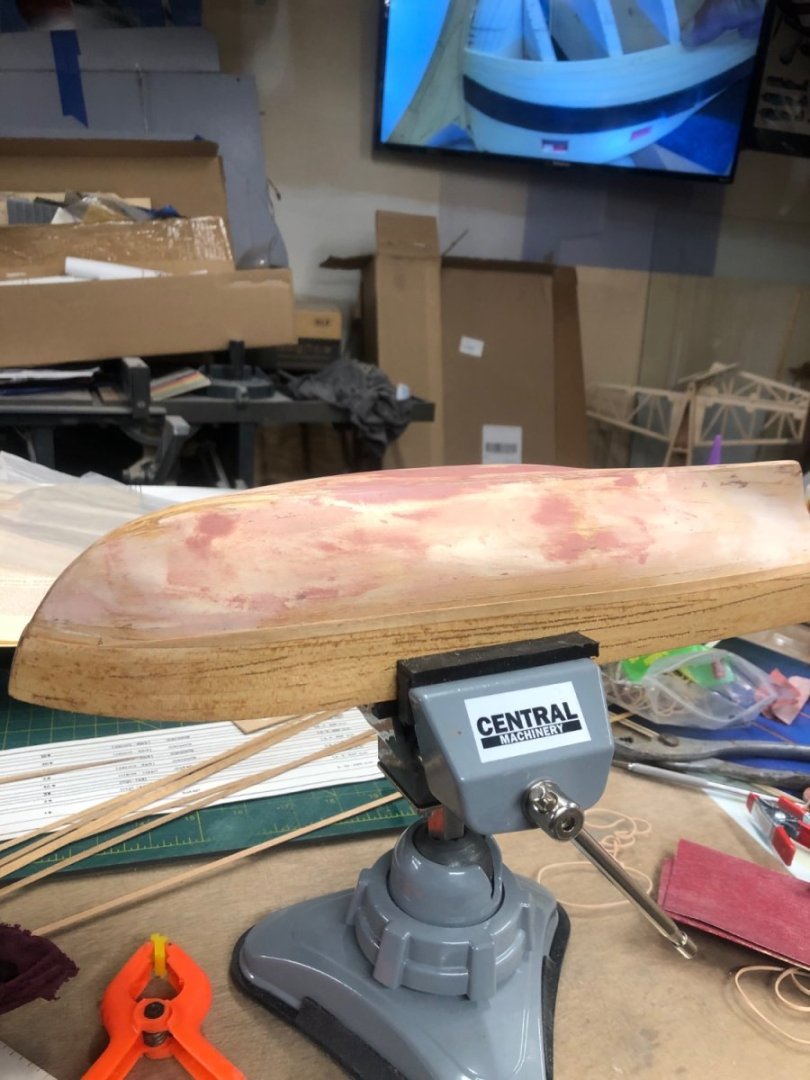
 Given the copious amounts of free time afforded by the Coronavirus lockdown, I decided to try my hand at building the Swift by Artesania Latina. I've just finished the planking, so I'll share some photos of my progress and a few brief comments. May 30, 2020 I purchased the kit on eBay from someone who had been carrying it around with them for 30 years or so. They included some old catalogs and tools from the 1980s which were a curiosity but this is what I was after: The kit was in perfect shape. No missing parts or warped wood and the bags were all sealed. I wasn't terribly scientific with the hull. I checked that all pieces were flat and extended pencil lines on the bulkheads from the slot to the top, checking for squareness. I then test fit all pieces, ensuring they were level with the top. I used some pretty high end tools to get everything nice and square: So here I made a bit of a mistake, which I didn't find out until later on. Bulkhead #5 was flush with the deck but the bottom bit closest to the keel was slightly above the hull line formed connecting bulkheads 4 and 6. I didn't realize at the time that this would cause a dip in the planking. We'll see how this plays out later. The provided small inner decks and filler blocks were no problem and were useful in ensuring squareness of the bulkheads. I took the opportunity to test some Satin minwax and did not like it at all (maybe because I only did one coat). I sat on this one for awhile. The stern filler block was a real bear. I didn't understand how to find the shape of this block from the plans, nor did I know about the old line plans available online. So instead of making these concave, I made them convex. It looked good though it was a deviation from other builds. With the hull structure (mostly) satisfactory, I then attached the upper deck. I saw some other build logs in which people had problems with this. I found it to be very straightforward by following the instructions included in the box. I traced a centerline on both sides and carefully marked out perpendicular lines for each bulkhead, then transferred those to the top. I then used the little brass nails provided with the kit to clamp the centerline and let the Weldbond dry overnight. This was pretty important because the upper deck bends in two axes, so it needs to be attached firmly before proceeding to the second bend. The next morning, I glued and nailed down the sides and used some rubber bands to help keep the shape. This was challenging because the rubber bands weren't all that strong. A couple of small clamps helped. I also managed to go through the sides of a couple of the bulkheads with my nails. But in the end, the deck laid flat with no gaps between it and the bulkheads. You'll notice that the quarterdeck has been attached as well. I was careful to bevel the stern filler block down, following the horizontal curve of the main deck. This enabled me to keep a consistent 1/8" distance between the two decks at all points. It's a small detail but it looks nice.
 -
 Hello! This is my first ever post on MSW. A friend and I recently found out about ship building and through looking at kits and build videos, we were immediately hooked - fortunately, it only took a couple days of "research" until we found MSW. Before we even had kits in our hands, we read through many build logs - the resources here are tremendously helpful, thank you all!!!! I have little woodworking experience and no modeling experience, but I was ready for the challenge. Looking at all of the beautiful boats on here is quite inspirational, and certainly narrowed my "type" of model to a wooden ship kit. As a college student, I was on a budget when looking for my first kit. The Swift kit by Artesania Latina seemed like a common starter kit, which I liked (there are already many build logs for this boat which is largely why I chose it!) I managed to find a "new" kit (the older version from 1982) on ebay for $70 with some tools/stand included. I have already started building so I will add to this thread. Bear with me - this is most likely going to be messy and slow!!!! Thanks again to everyone who's log I have already read.
- 27 replies
-
- 9
-
-
- swift
- artesania latina
- (and 1 more)
-
 This will be my second build. I bought it on eBay for $15.00 + shipping. It looks like all the major parts are there. If not I will either make them or buy them. The frame and false deck was already built. But it wasn't to my satisfaction. So I bought somemore basswood. My plan was the take everything apart trace the old parts and make a new frame. But the old parts weren't symmetrical and wound up scraping the new cut out parts. So what I did was scanned the drawings and cut the parts out and glue them on to the wood and cut them out. I only wish it had sails. That is okay. I want the experience before my HMB Endeavor build. Tomorrow I will start putting it together. As long as I don't get tired I will keep working on it. This is a hobby not a job. Russ
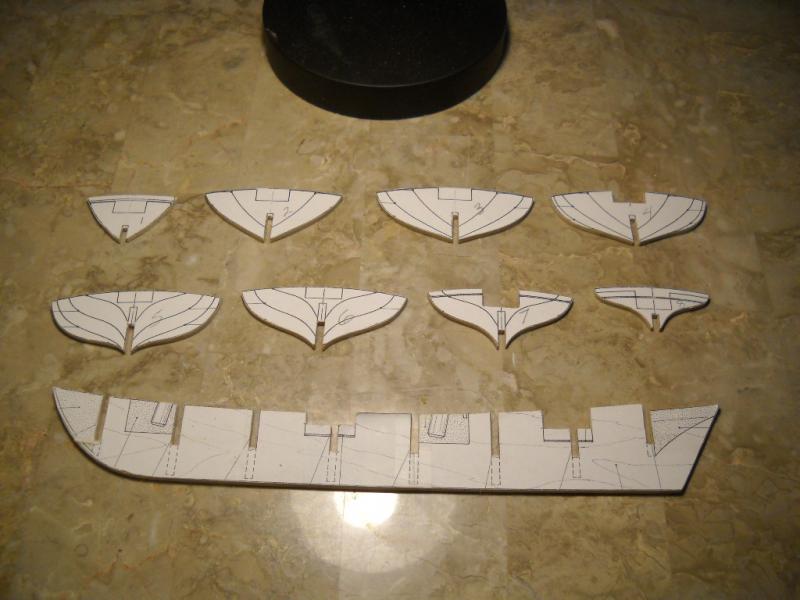
-
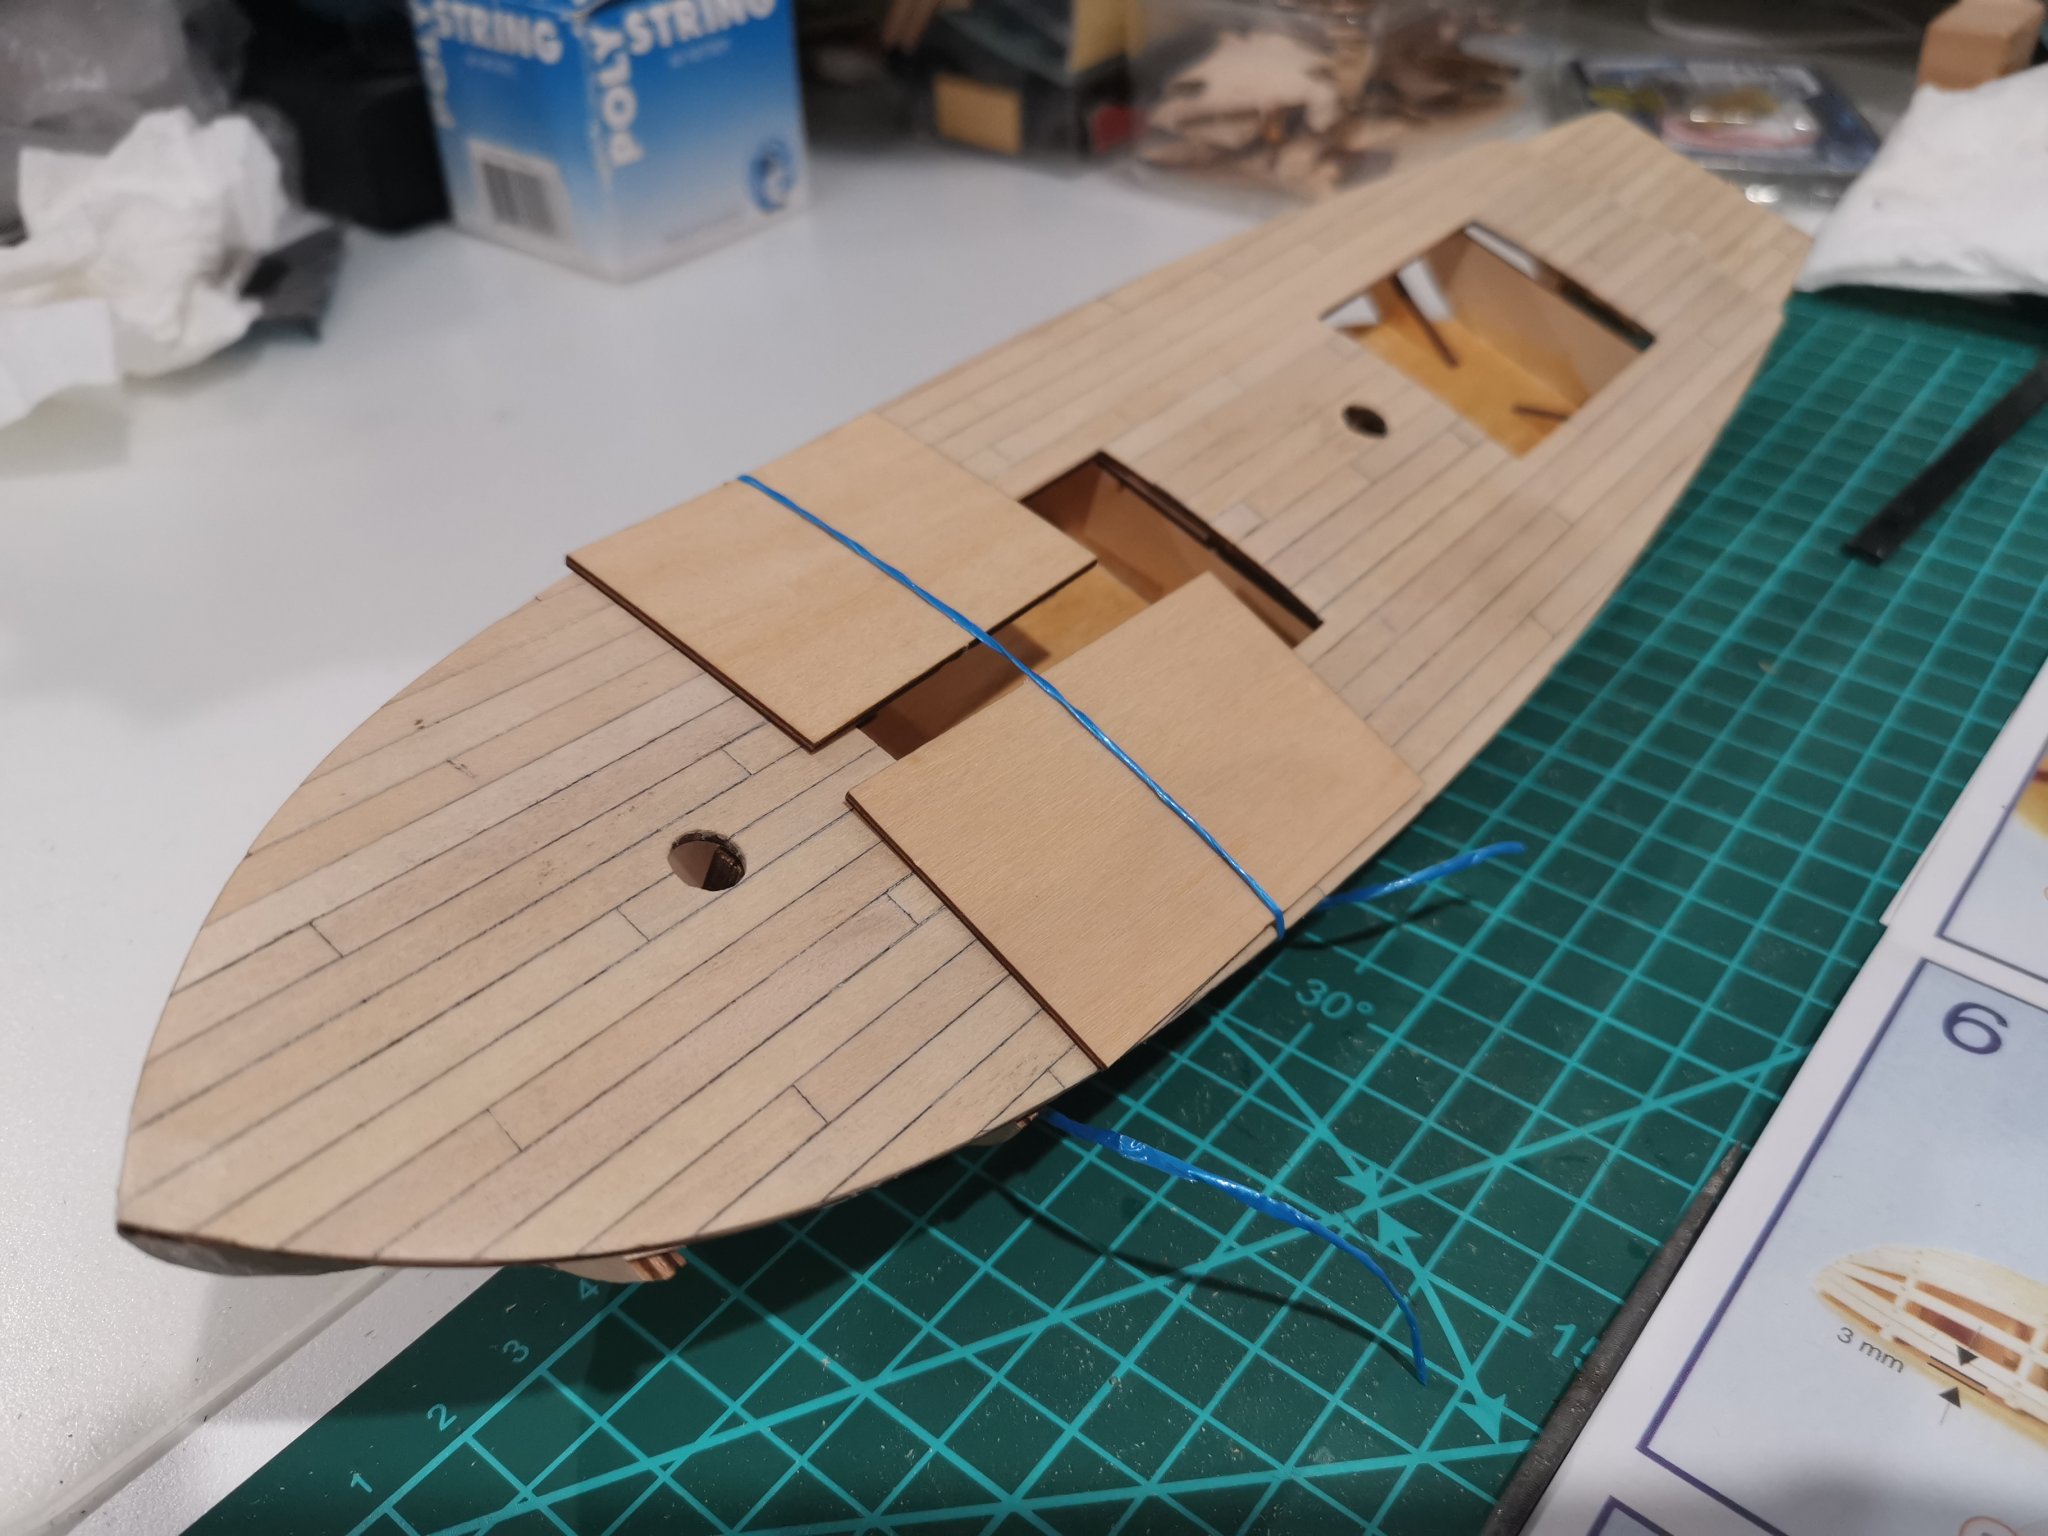
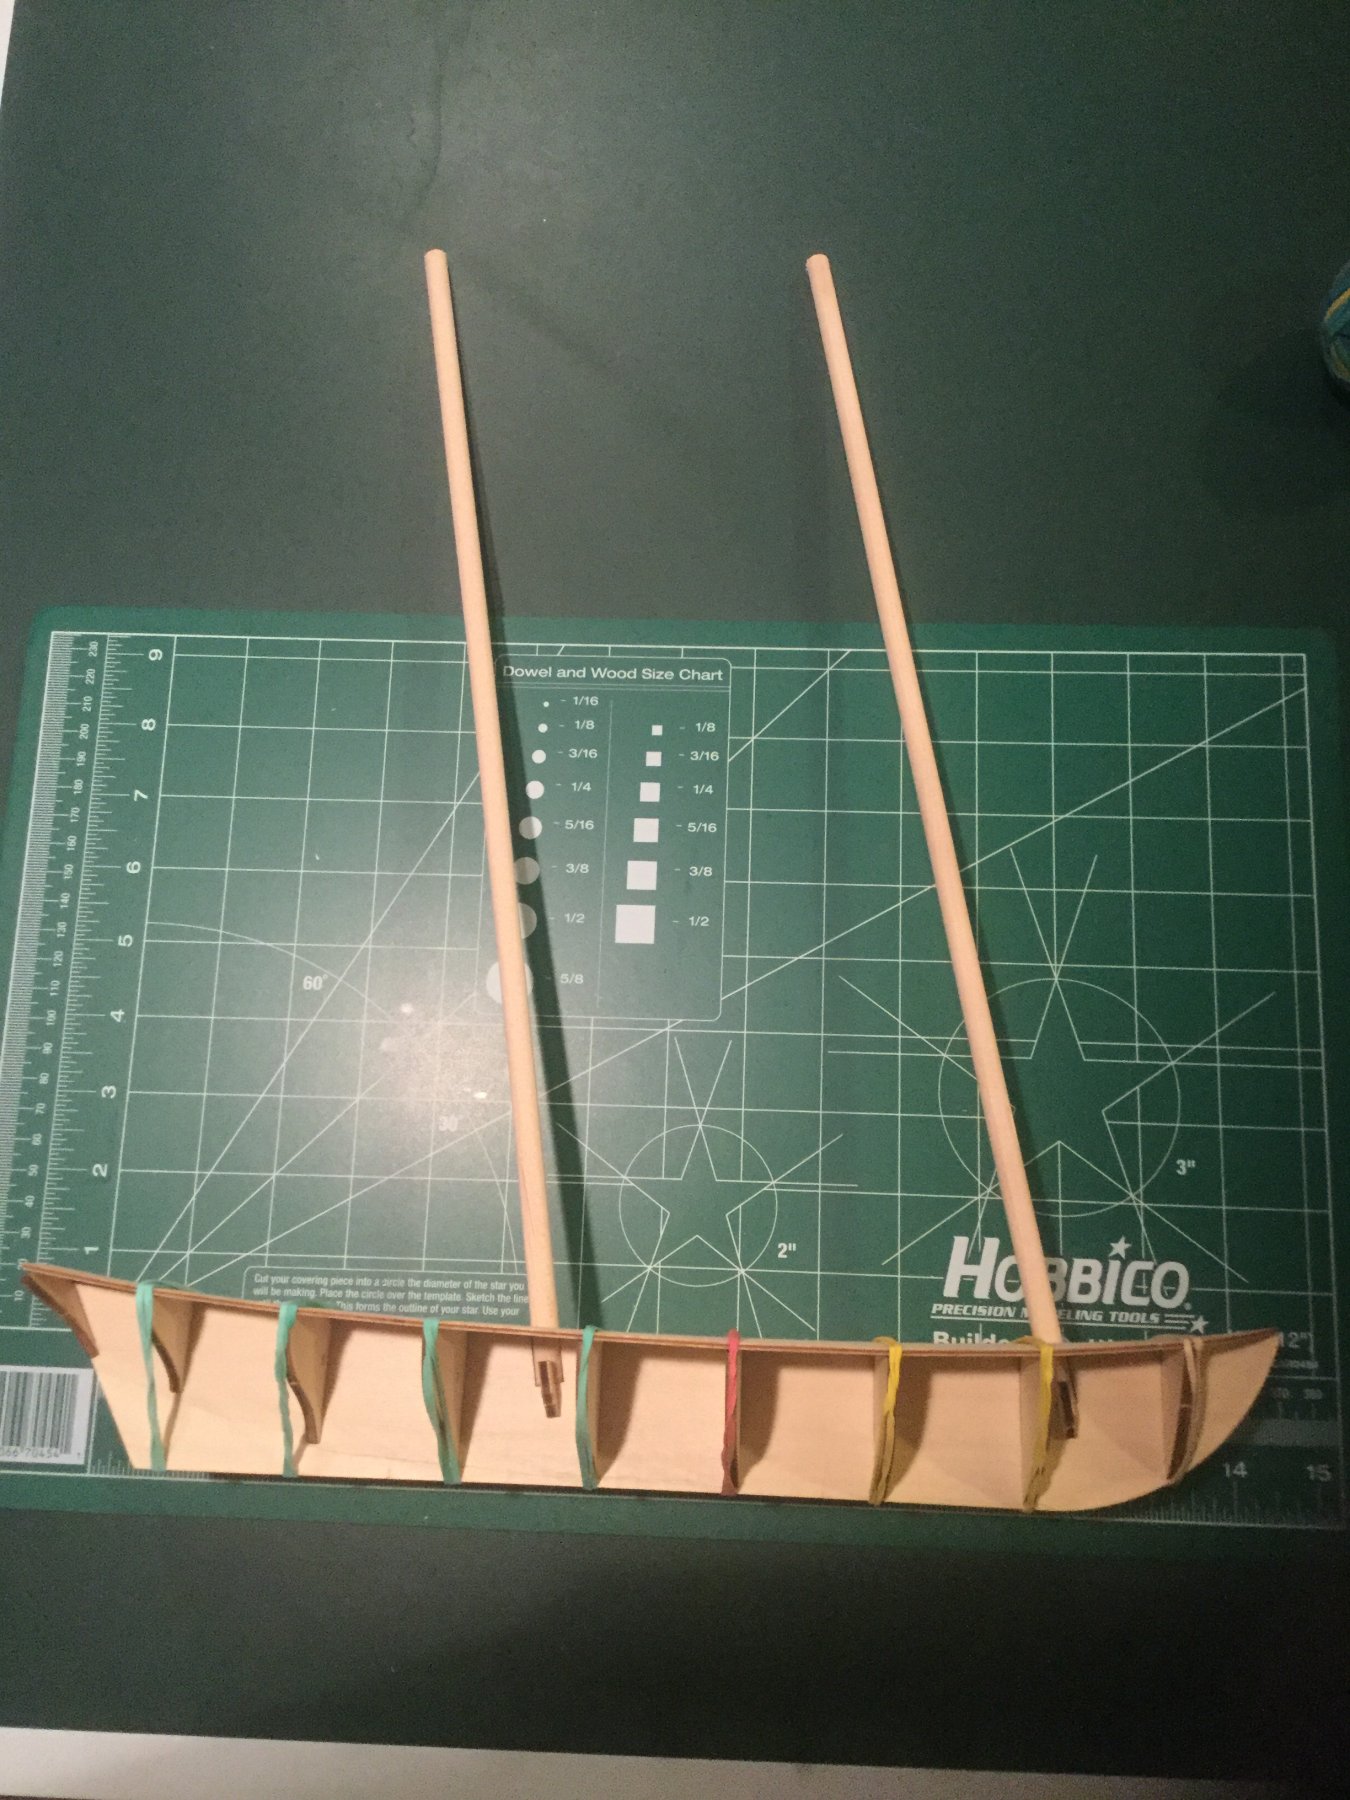
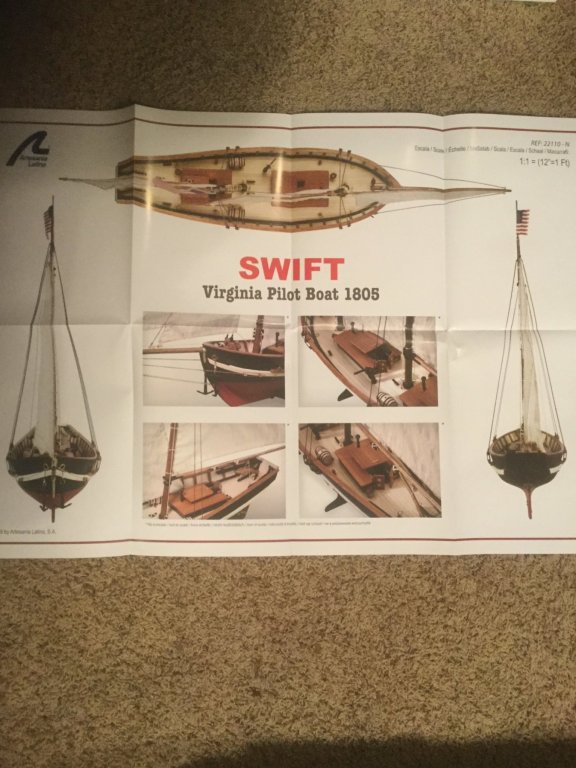
 I’m posting a build log for my first build: the “New” Swift from Artesania Latina. Apparently, this kit has gone through a number of iterations over the years. Since I ordered it in November from my local hobby shop, I assume this is the most current version. For those who have posted build logs for this boat, you’ll notice the differences. Some of the changes made are somewhat superficial (in my opinion as a rookie modeler), like the sail configuration has been modified. Other changes are more substantial. The boat no longer has a lower deck beneath the cabins. The false deck is one solid piece. It is also only single planked, which I understand will likely force me to paint it? I had hoped to leave in with a wood finish, unpainted. Oh, well. On to the build. One curious thing about this kit is that there are no plans. Only a poster of 1:1 color photos of different views of a completed build. I contacted AL by email to inquire whether plans should have been included. After a few days, I received a response that the plans were those photos. I don’t consider those “plans” in any sense, really. But that’s all there is. The instructions with a couple of generally technique videos come on a DVD in the kit and are also viewable on the AL website if you view the Swift model online. I dry fit the bulkheads on the false keel. They seemed to all go in fairly easily. Unfortunately, the keel is warped. I tried a number of times and ways to straighten it by moistening, bending, flattening with weights, moistening only one side and clamping flat...nothing worked. I finally decided to use balsa fillers between bulkheads at selected spots to either mildly constrict or expand the interbulkhead distance in that spot to try and straighten it in that manner. I also added some filler at the bow and stern to aid in planking. It’s not perfect, but hopefully workable. I soaked the false deck and left it rubber banded in place over night to develop the compound curvature necessary, then I glued it the next day. Now I’m ready to start planking. Attached are some photos to document my progress. Hopefully, I will get better at posting. Not sure how this will work, but here goes...


-
 Hi: This is going to be my first build. However it will be a challenging one, my skills will be put to the test immediately and that is because the kit is incomplete. It is missing all the hull parts, keel and bulkheads are not present. It might not be the best idea to start this hobby with an incomplete kit (I have a few others complete) but I like challenges. Wish me luck.
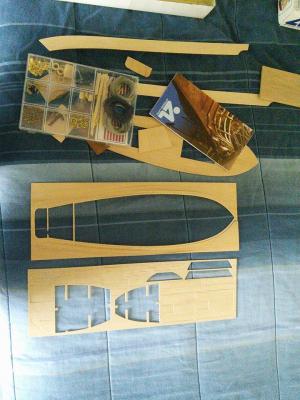
- 21 replies
-
- 1
-
-
- swift
- Artesania Latina
- (and 1 more)
-
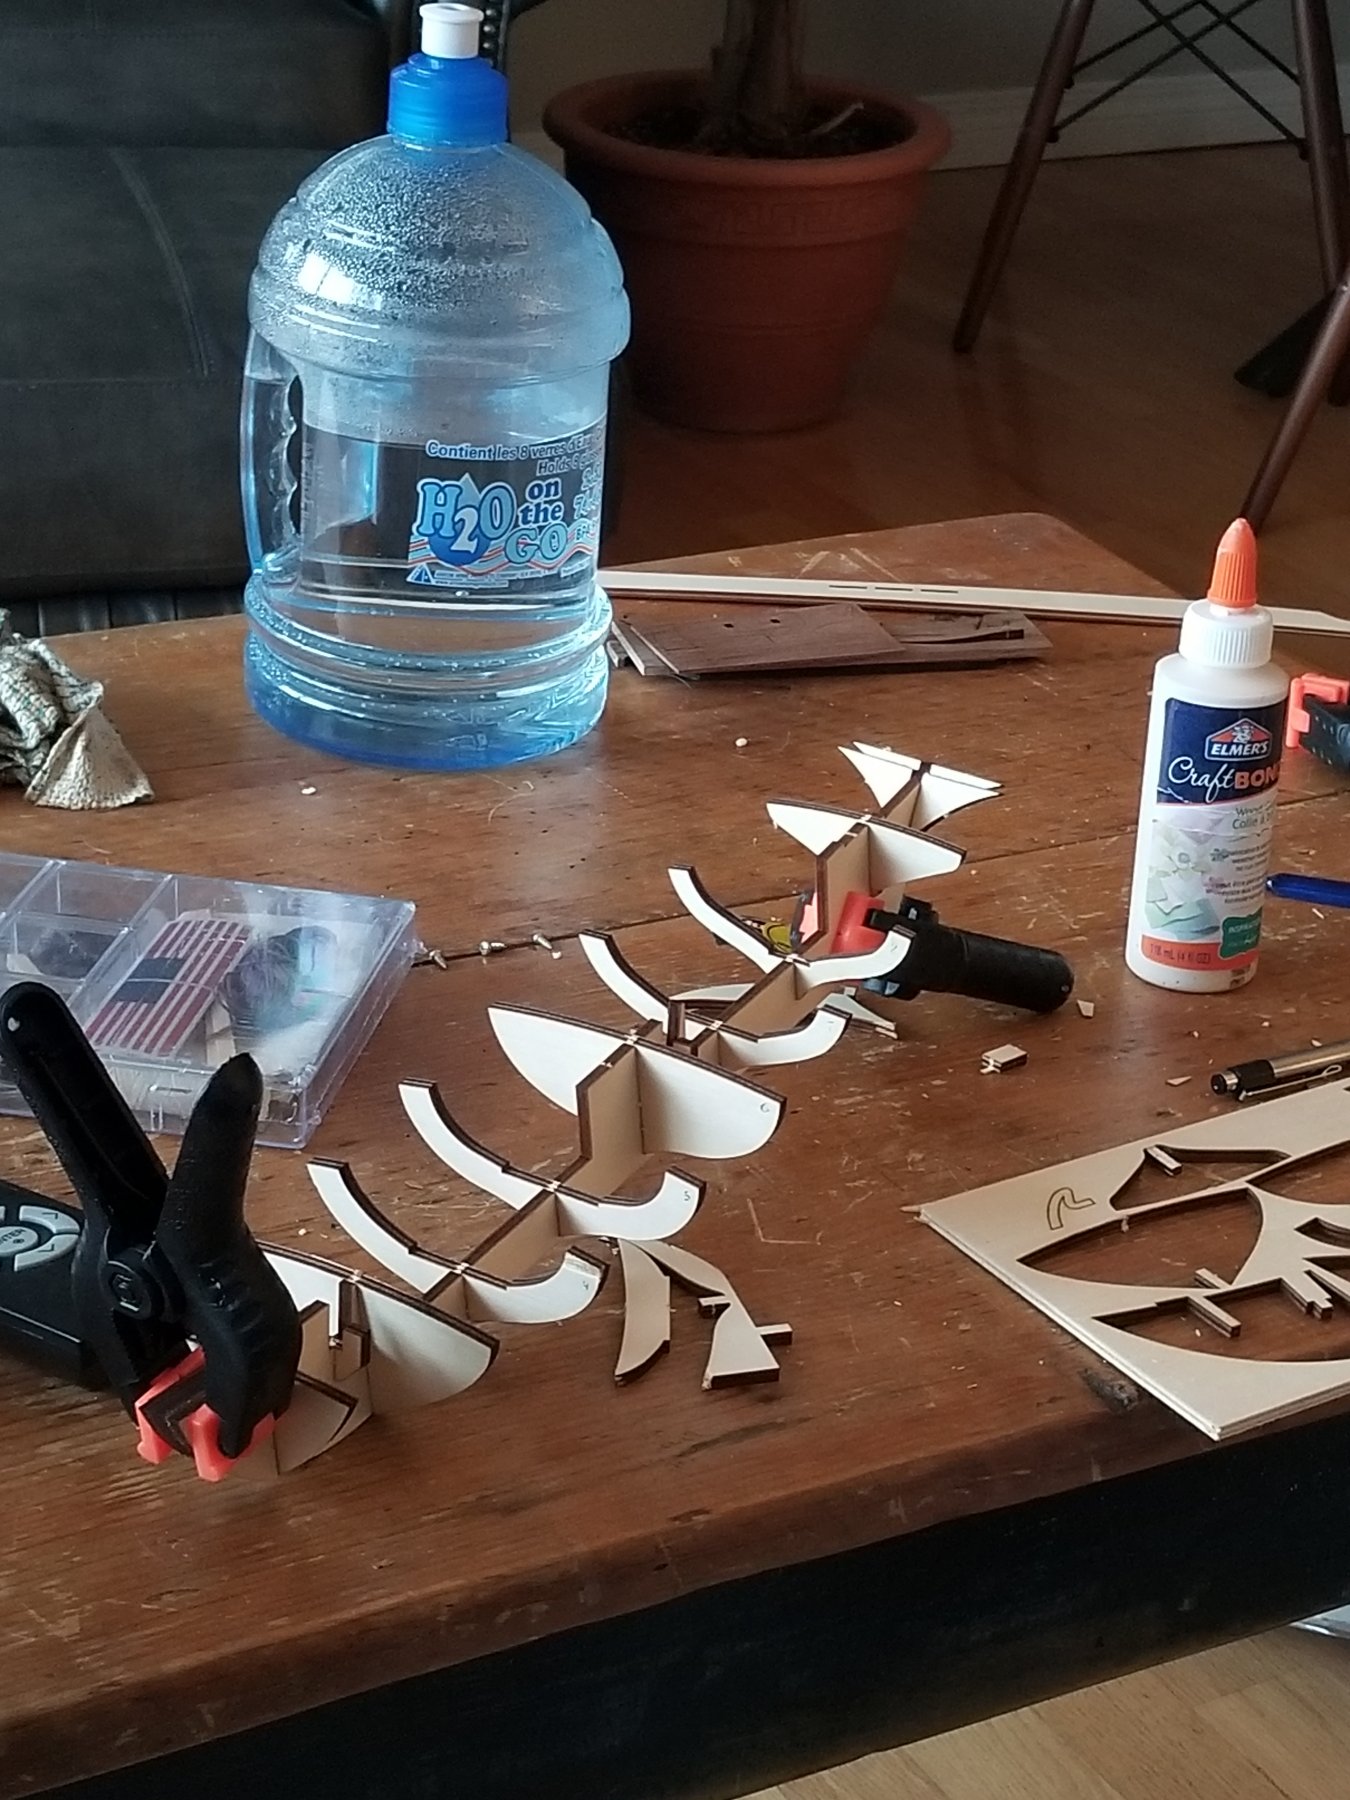
 First build here, i read somewhere that the first kits have detailed instructions that build your knowledge base to know how to fill in the blanks when it comes to the less detailed instructions on the larger / more complex kits.. if that's the case I sure am glad i started with this little guy because i'm really struggling with the instructions! The miniature furniture kits / scratch-build tutorials i've worked off of have been drowning in detail. The build was going reasonably smoothly until I got the planking, where the instructions call for installing the sheeting, after rummaging through the kit a few times looking for a sheet of planks I decided it must be another name for strip wood. I didn't question this until i was securing the deck and the spacing between planks grew out of scale that I started second guessing and, digging through the kit one more time, found a pile of veneer strips - at this point i'm not sure if i've used my hull materials as planking or not! The images all appear to be strip wood, so i'm going to carry on and assume everything is fine. It's incredibly difficult to tell from any of the images online which wood was used, i seem to be the only one having this existential crisis. Yesterday was spent sanding / sealing the decks and today I will tackle filing down the ribs so I can start working on the hull.

- 9 replies
-
- 6
-
-
- first build
- swift
- (and 2 more)
-
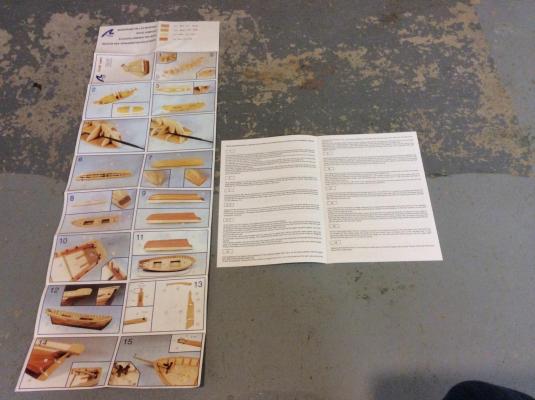
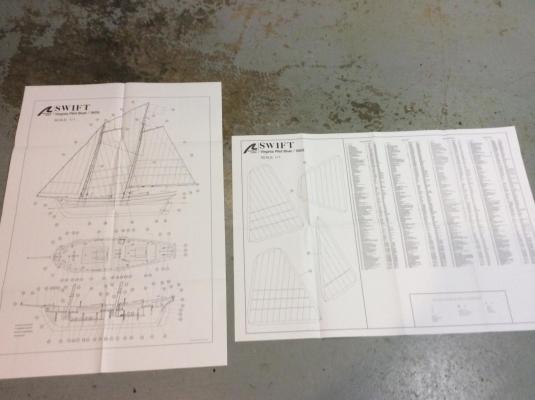
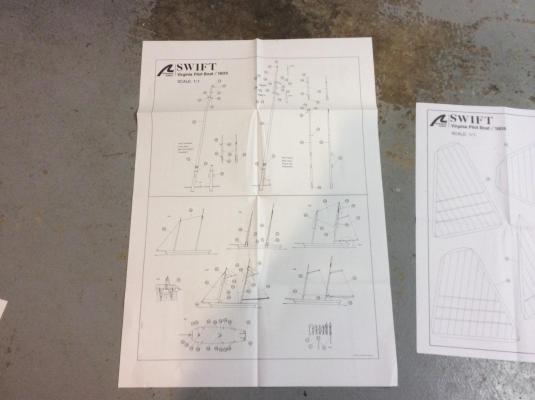
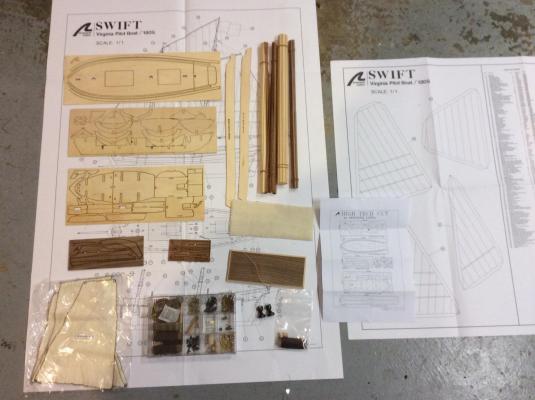
 This build is coming right on the heels of the Bounty Jolly Boat. I decided to go with the same maker, Artesania Latina, while I was not particularly impressed with their instructions it did leave me with some creative license in the end. I chose the Swift 1805 at 1:50 scale. I wanted increase in size and complexity, double planking and two masts. The following is the unboxing and contents. I noticed it was definitely bigger but not by much. Much bigger than this and I will need a bigger shipyard. Admiral?! Some nice selection of parts. I noted 167 parts on the part list. Here is a picture of the simplistic instructions. One picture of the completed step to be paired with a short two or three sentences on what to do. Make note here, never do they say how to do it. But that was this forum is for, and build logs! I really excited about the two little decks under the main deck, don't know what they might be call beyond a hold. The plans, nice, they say 1:1, big readable, I'll have to check to make sure they are 1:1. Long part list. Spar/mast lay out as well. A fair bit more rigging diagrams, but I have bought a reference for that since the Bounty had basically no guidance. And here are the wood bits and pieces. Comes with sails. And a base and mounts. (Still trying to figure out the base for the Jolly Boat)
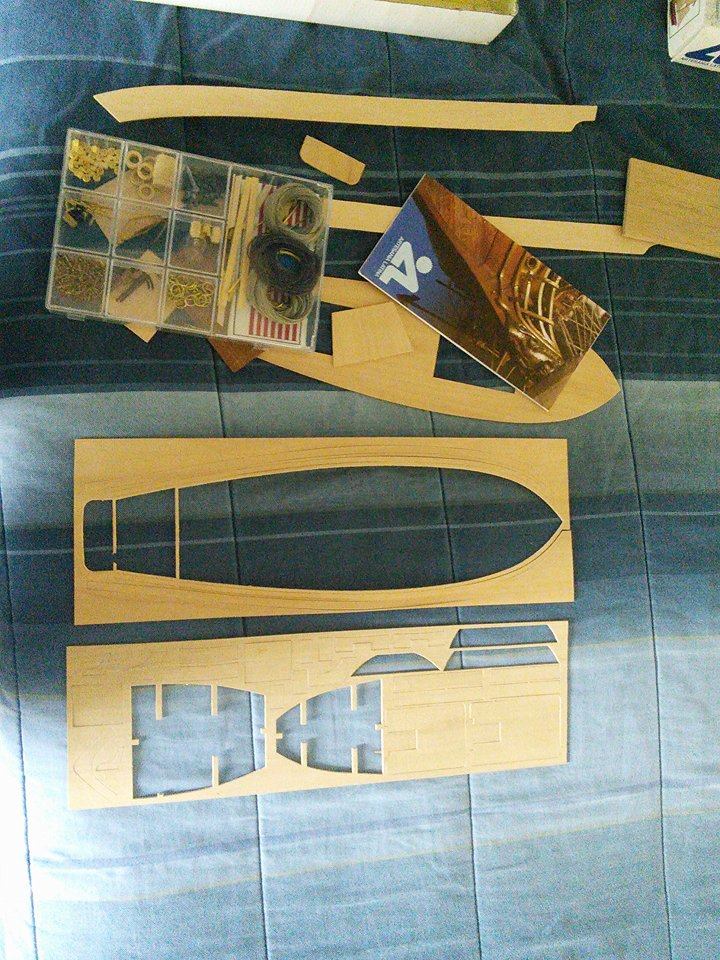

- 84 replies
-
- 4
-
-
- swift
- artesania latina
- (and 1 more)
-
 Ok, here goes. This is my first model and it's not going to be pretty so I apologise in advance for my butchery of this fine starter kit. There will be blood (I must use round nosed scissors), sweat and tears along the way. Hopefully not too much blood. What there will be is lots of questions as I stumble through the process but, I am looking forward to learning. Firstly I need to work out how to post pictures etc so bear with me. So gripping my nose, cheeks puffed out like a child jumping into swimming pool, here goes. Wish me luck.
- 153 replies
-
- 3
-
-
- swift
- Artesania Latina
- (and 1 more)
-
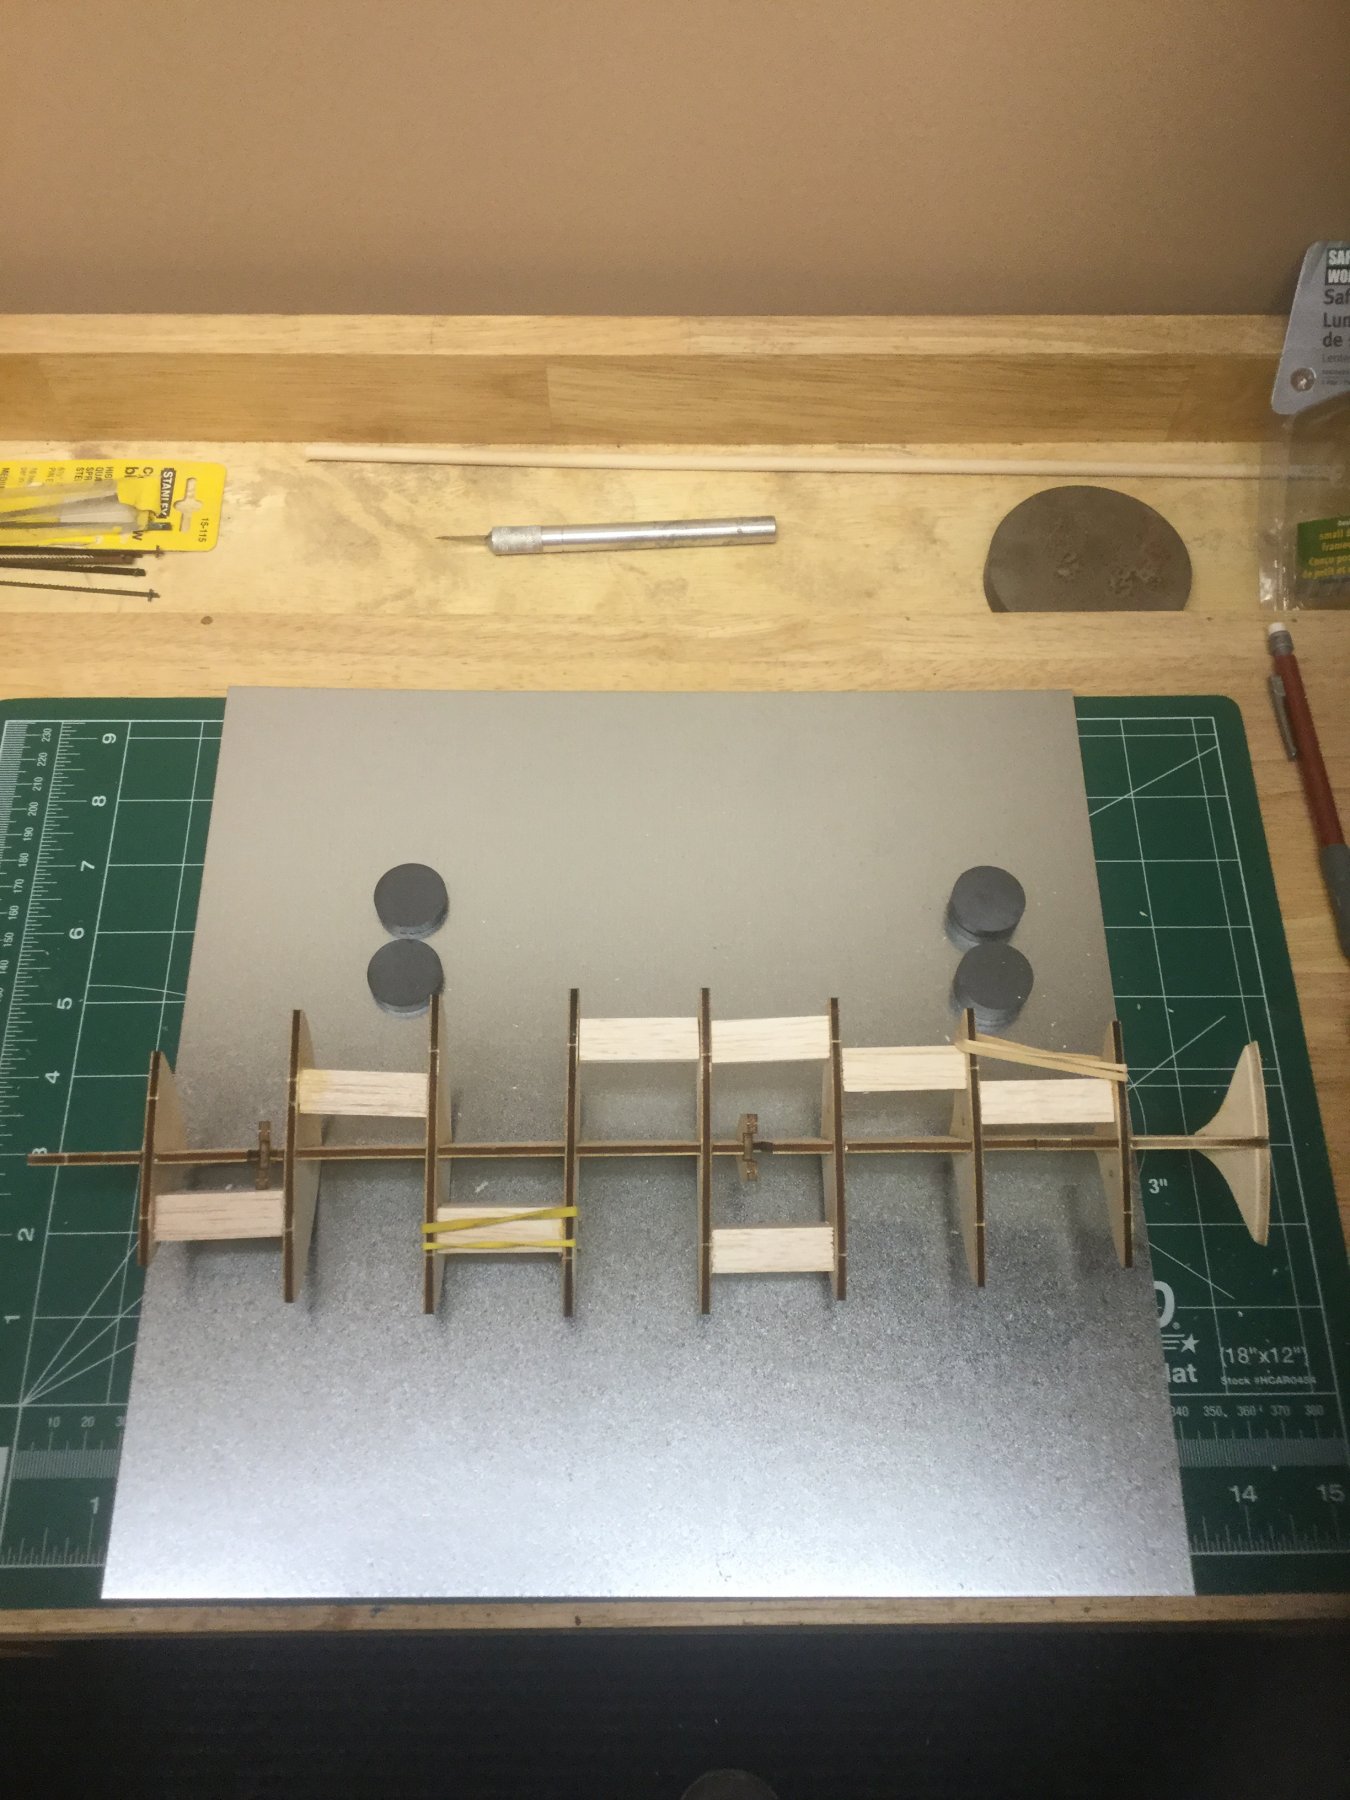
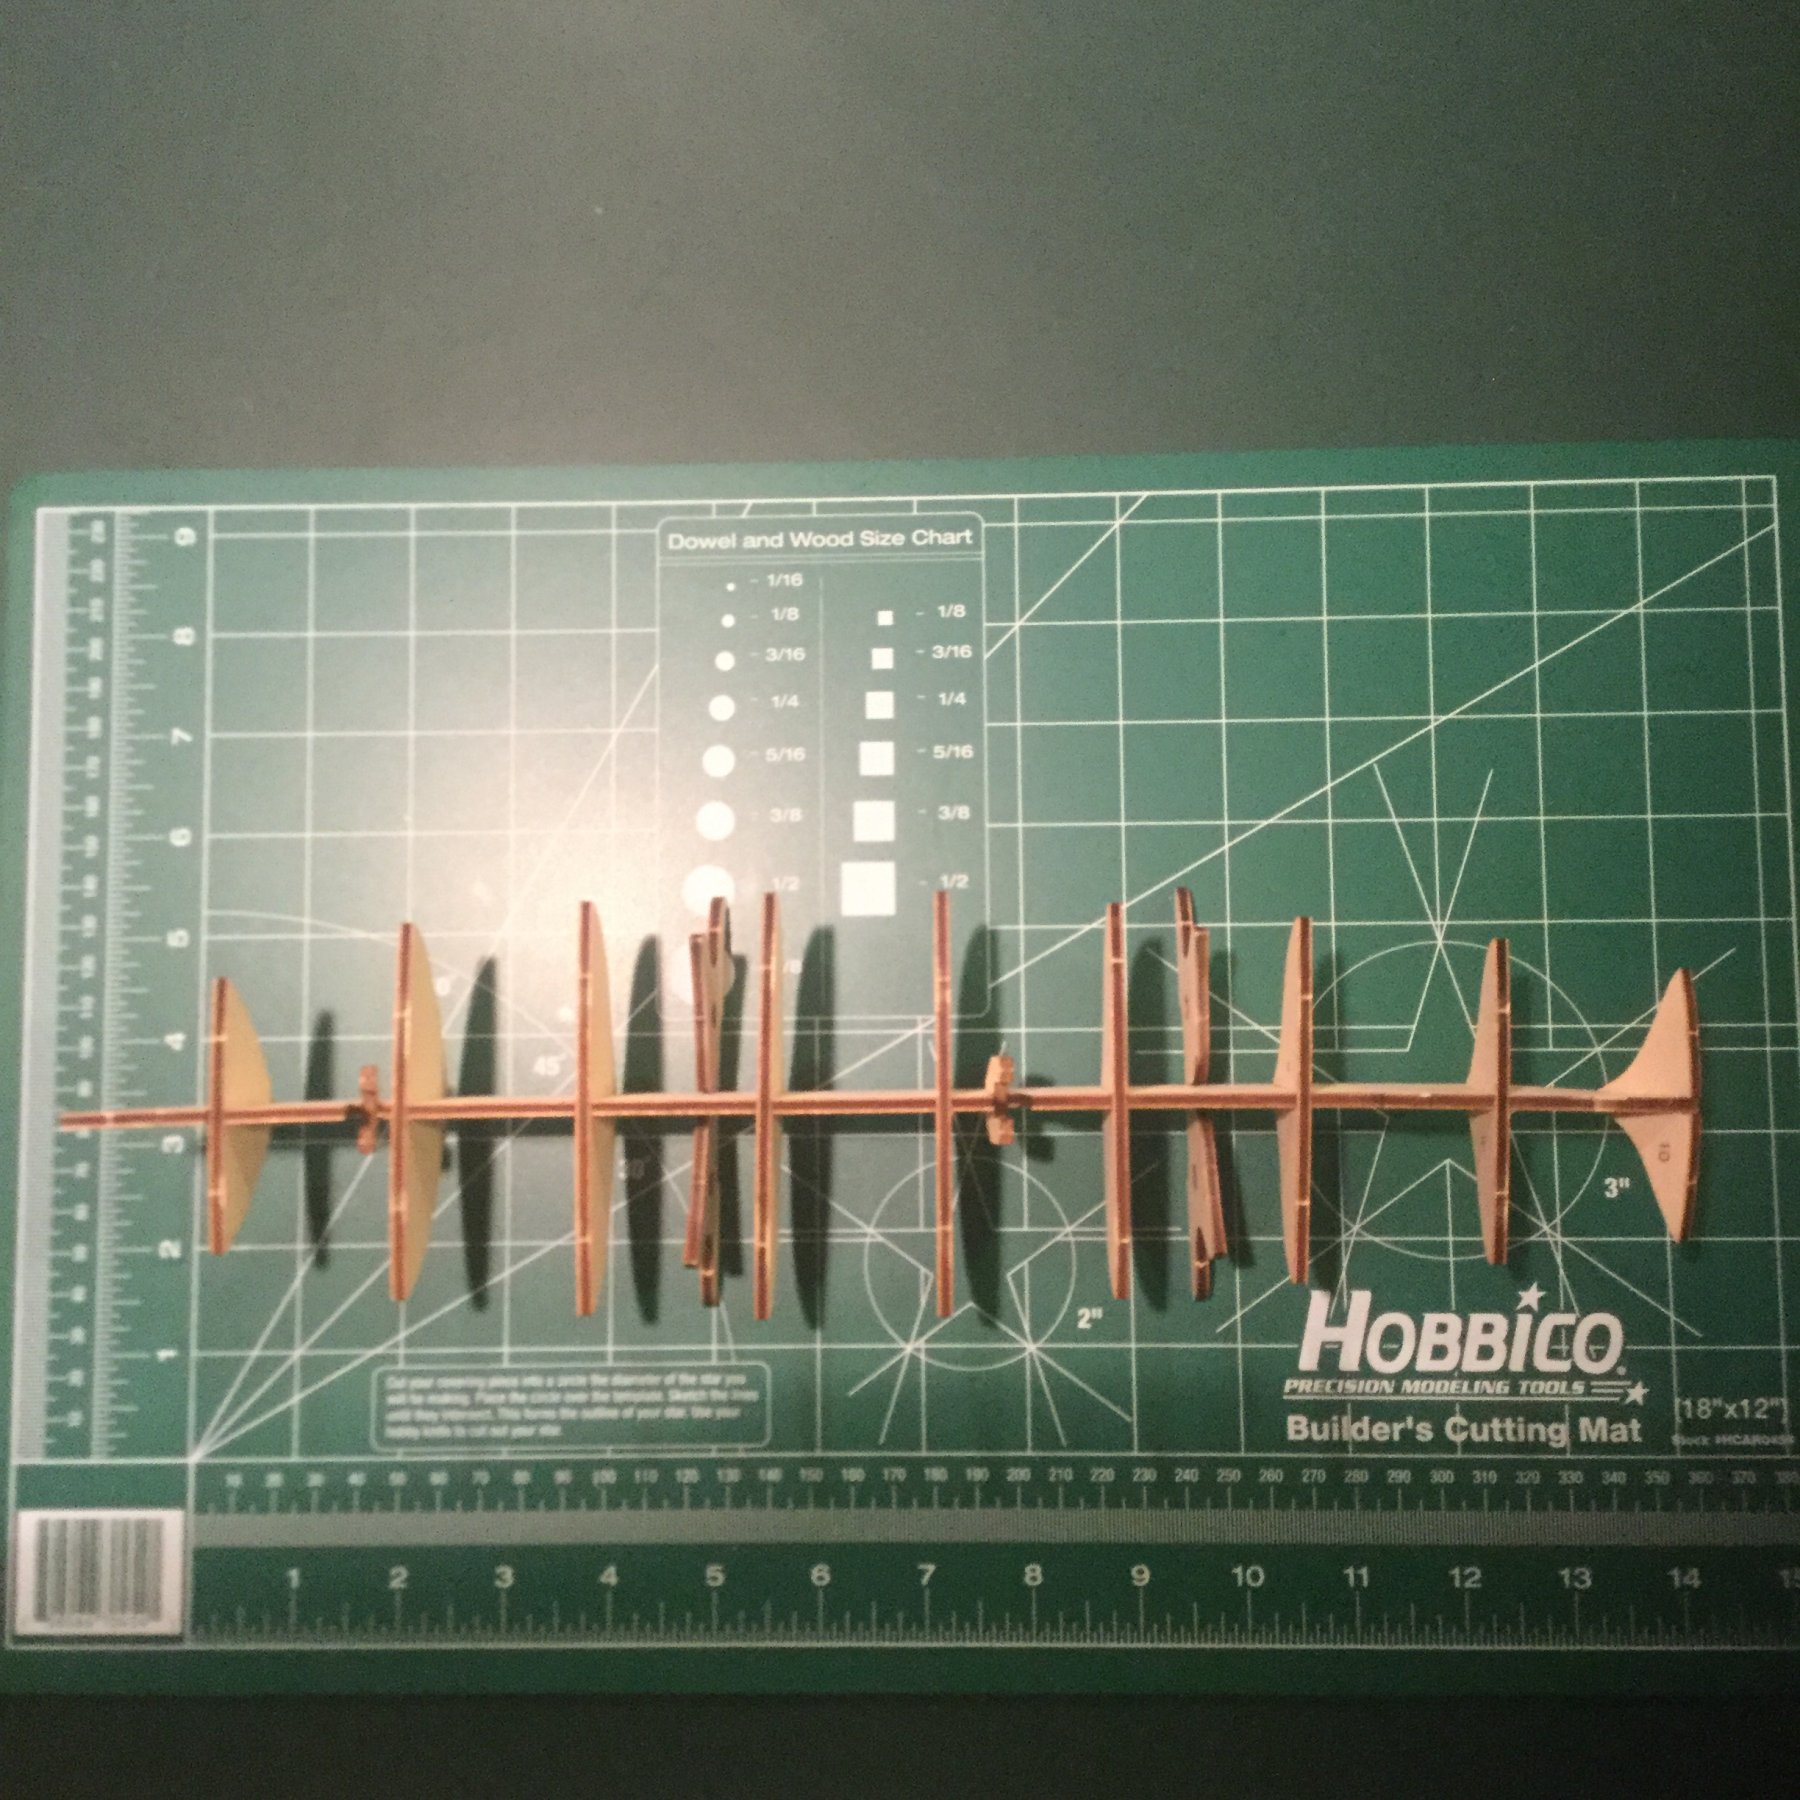
 I am new to the forum and to ship building. Well sorta new. I began the Swift in 1999. Life and work conspired and the Swift went into storage after the bulkheads and main deck planking were completed. I recently dusted off the box and started again. I have the rigging left to do. I made a ton of mistakes. So far I have been alone to sort the probems out. But at this point I'm not sure about things. So I Googled them. And that lead me here to your forums and build logs. They are a Godsend of information. I've just mounted the main and fore sails to their respective masts. Next I'd like to mount the Jib on its halyard and stay (correct terminology?). I am studying the plans to understand exactly where each line goes. My plans don't have much detail. For instance I found that the flag and throat halyards have to feed through little holes drilled into the masts. NOWHERE are these holes indicated on my plans. I only found out about them by looking at pics in Gabe K.'s build log. Great log BTW!!! When I worked the hull I got my first big surprise: As I know more than one Swift builder has discovered, the bow profile you get, does not match the required stem post contour. A little wood putty? Not hardly. Way too big a gap to span safely. I used little blocks cut from a spare bass wood plank and glued them into a random mosaic pattern to build out to the needed profile. You can just see the little squares in two of the hull photos. That did the trick. My first big thrill came with planking the deck. I included 2 photos of the planking. I was inspired by "Historic Ship Models" by Wolfram zu Mondfeild and "Ship Modeling from Stem to Stern" by Milton Roth. I don't know if a Virginia Pilot ever had a deck like mine, but the books made it seem plausible, I like it, and at ths point its here to stay. Even so I would appreciate any feedback on the deck and it appropriateness. So if this is an error, I will know better next time. Next surprise was due to a big mistake I made in the bulwark planking. I did not check to see if I had enough plancking to do the bulwarks. As a consequence of using a complex planking pattern on the main deck, I ran short of planks to do the the outer bulwarks. BUMMER. I contacted AL for more. The wood was cheap. The shipping was not. I conserved the few remaining original planks to randomly intersperse with the new ones. The new blanks are much lighter and have a much tighter grain than the 16 yr old originals. Going down it looked horrible but on completon is hardly noticeable. When I had to get the replacment wood from AL, I ordered twice the wood that I needed "just in case." Good thing as the shipment got mangled during transit ruining a third or more of each plank. But the extra wood covered the loss. Note the hull pic with some bulwark planking done, you can see the the hull is waiting for new wood. BTW this has the best veiw of the mosaic used to fill in the bow. Another consequence was spare time while waiting for new wood. So I decicded to build the deck houses. I planked the houses with the narrow sepalia (mahogany like) strips. When the new wood came in I switched back to hull planking, where I finished the upper bulwarks straight way and dived into the 2nd hull planking proper. Here I made a big mistake, for the lower hull I continued to use the narrow sepalia planking that I'd started with on the deckhouses. The wide sepalia planking was the correct stuff to use. Needless to say I ran out of the narrow planks. Too far in to it to back out, I devised a jig that let me cut the wide planks into narrow ones. This allowed me to finish the hull. A comment about mistakes like this: They make you feel really stupid, but sometimes they workout. The narrow planks fit around the hulls compound curves much better than the wide planks ever could have. Plus it just looks better and probably is closer to scale. Checkout the finished hull pic. The Sapalia (mahogany look alike) really shines and is just gorgeous. Lesson: Take your victories where you can. Also note the mix between old and new Mukali (bass wood like) in the upper bulwark. Not too bad given the disaster it could have been.
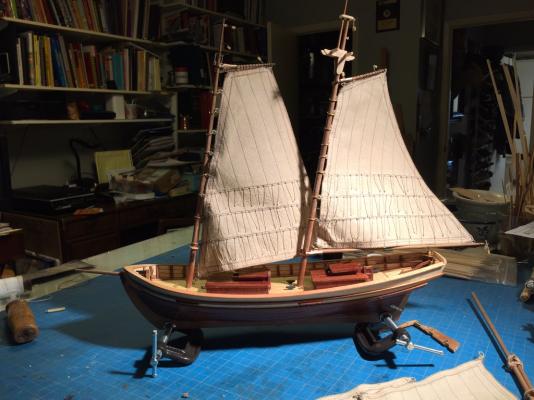


- 21 replies
-
- 6
-
-
- Swift
- Artesania Latina
- (and 1 more)