All Activity
- Past hour
-
 Haliburton reacted to a post in a topic:
The War Trophy by RGL - diorama with Fowler D6 steam tractor (DModels) and Krupp 21 cm Mörser (Takom) - PLASTIC
Haliburton reacted to a post in a topic:
The War Trophy by RGL - diorama with Fowler D6 steam tractor (DModels) and Krupp 21 cm Mörser (Takom) - PLASTIC
-
Bob Cleek reacted to a post in a topic:
La Créole 1827 by archjofo - Scale 1/48 - French corvette
-
Sluicemaster reacted to a post in a topic:
HMS PEGASUS by giampieroricci - Scale 1:36 - Swan-Class Sloop from plans by David Antscherl & Greg Herbert
-
Sluicemaster reacted to a post in a topic:
Sloop Speedwell by Chuck - Ketch Rigged Sloop, 1752 - POF
-
 Thank you Steven for all the sources of information. I will have a look at all of those. I´m also reading in Danish and Norwegian history sites to find out how a crew of a merchant ship would have looked like. The regular crew were the Holumeen which were armed but not comparable to warriors (as far as I understood it). But I will have a deeper look into it and it looks like I have to change some other medieval figures in 1:24 since there is not much available in 1:25 at all. We will see, maybe I have to carve my own ones (even if I`m not good in carving people). The last option would be not to build a diorama but leave the ship on a nice stand as display model. I rather would prefer it in a diorama, sailing along a shore line... but when there is no crew - there won´t be a diorama since ships need a crew to sail... Micha
 -
AON reacted to a post in a topic:
Santos Dumont No. 18 Hydroplane 1907 by Greg Davis - Scale 1:16
-
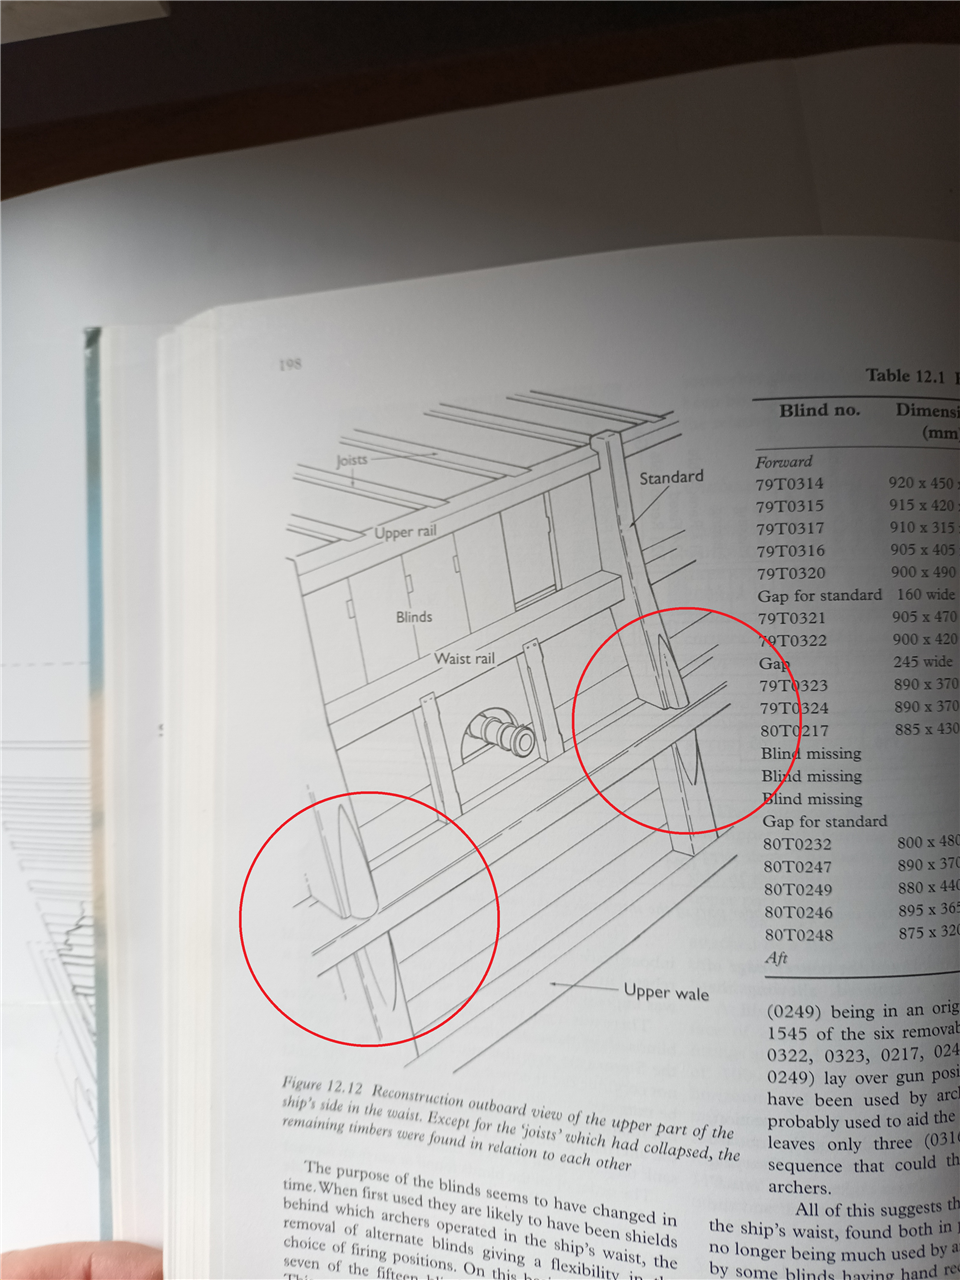
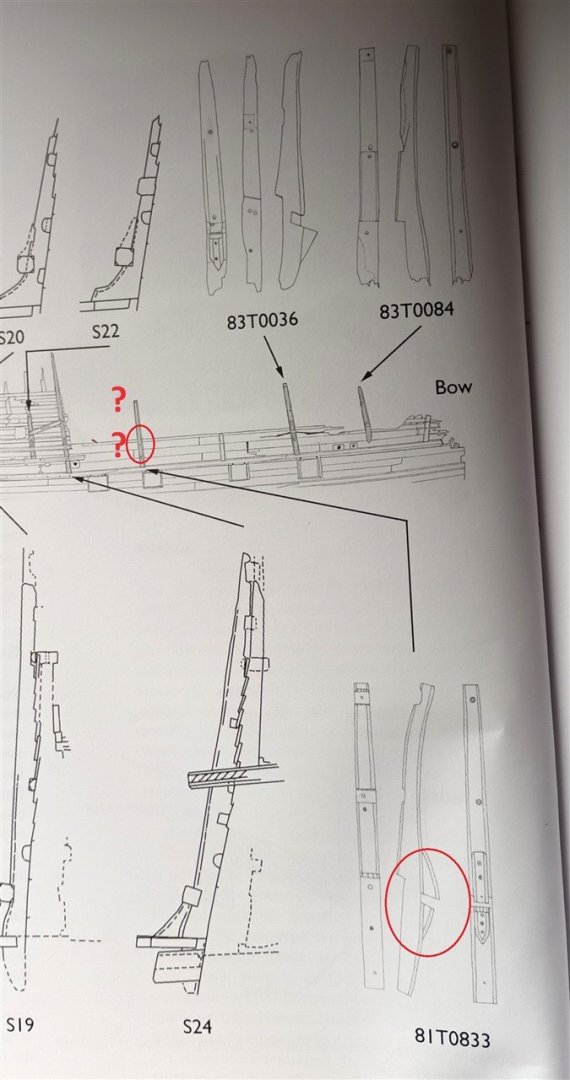
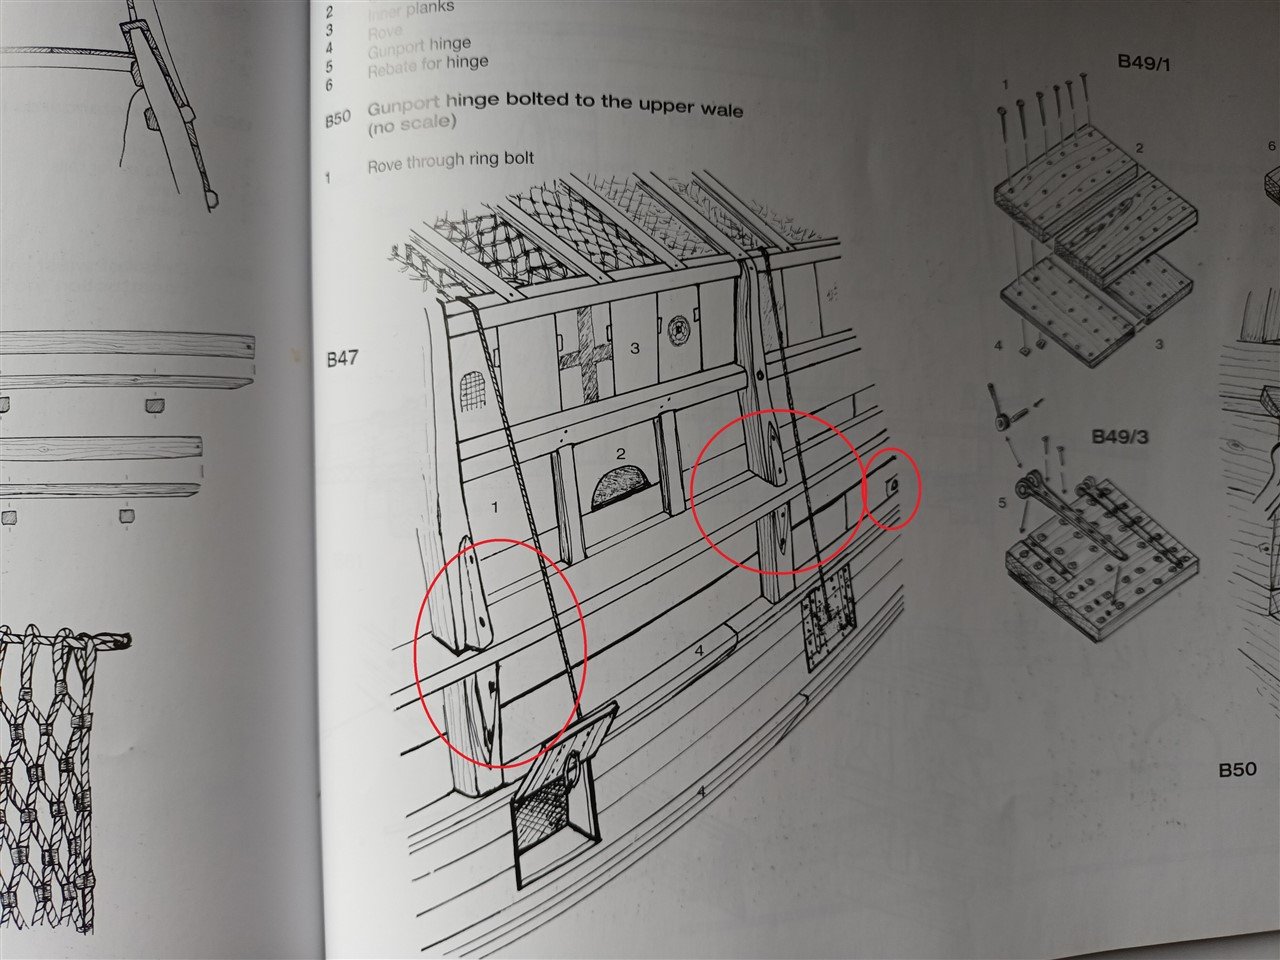
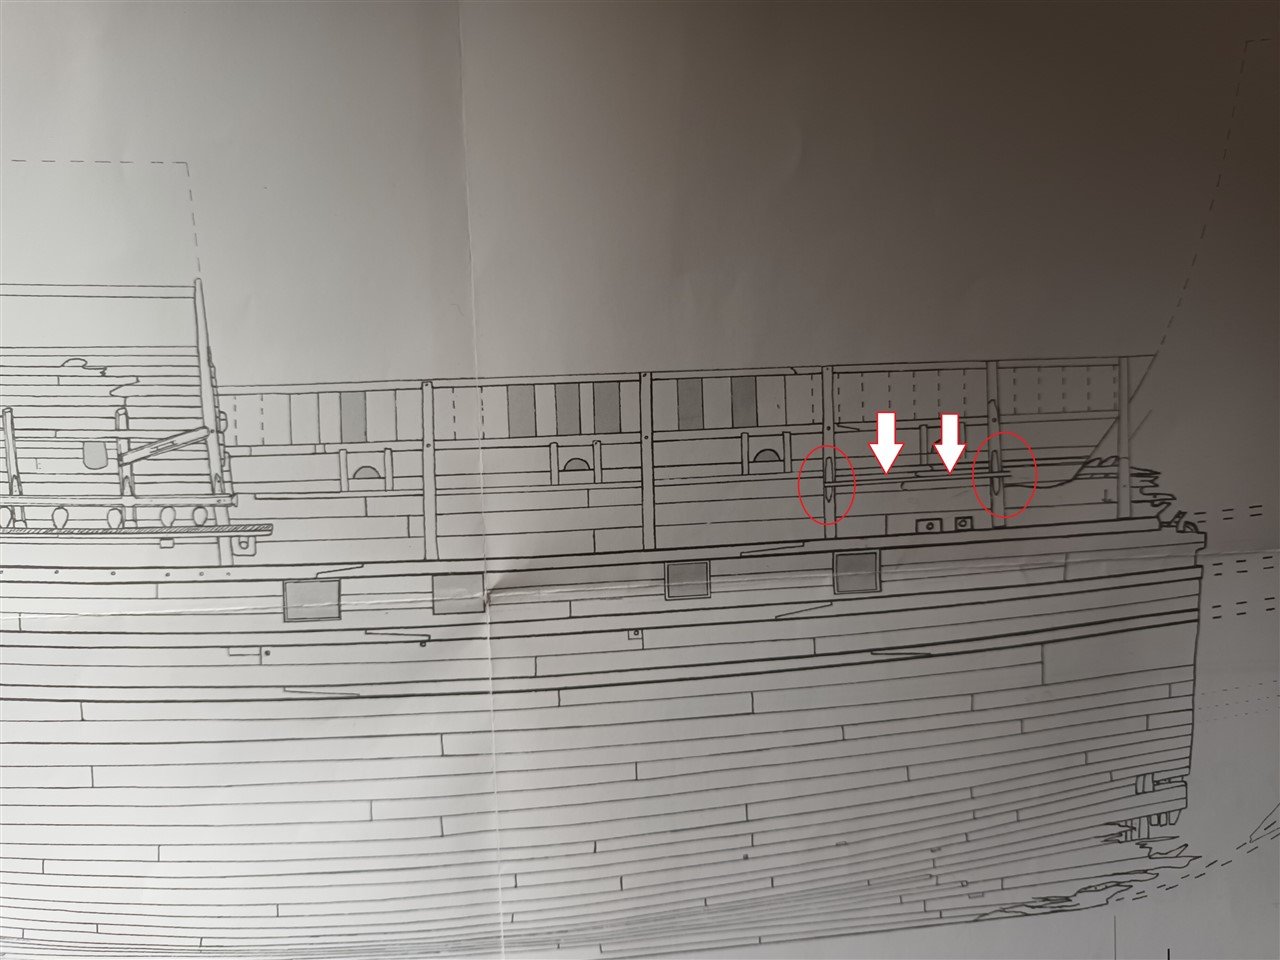
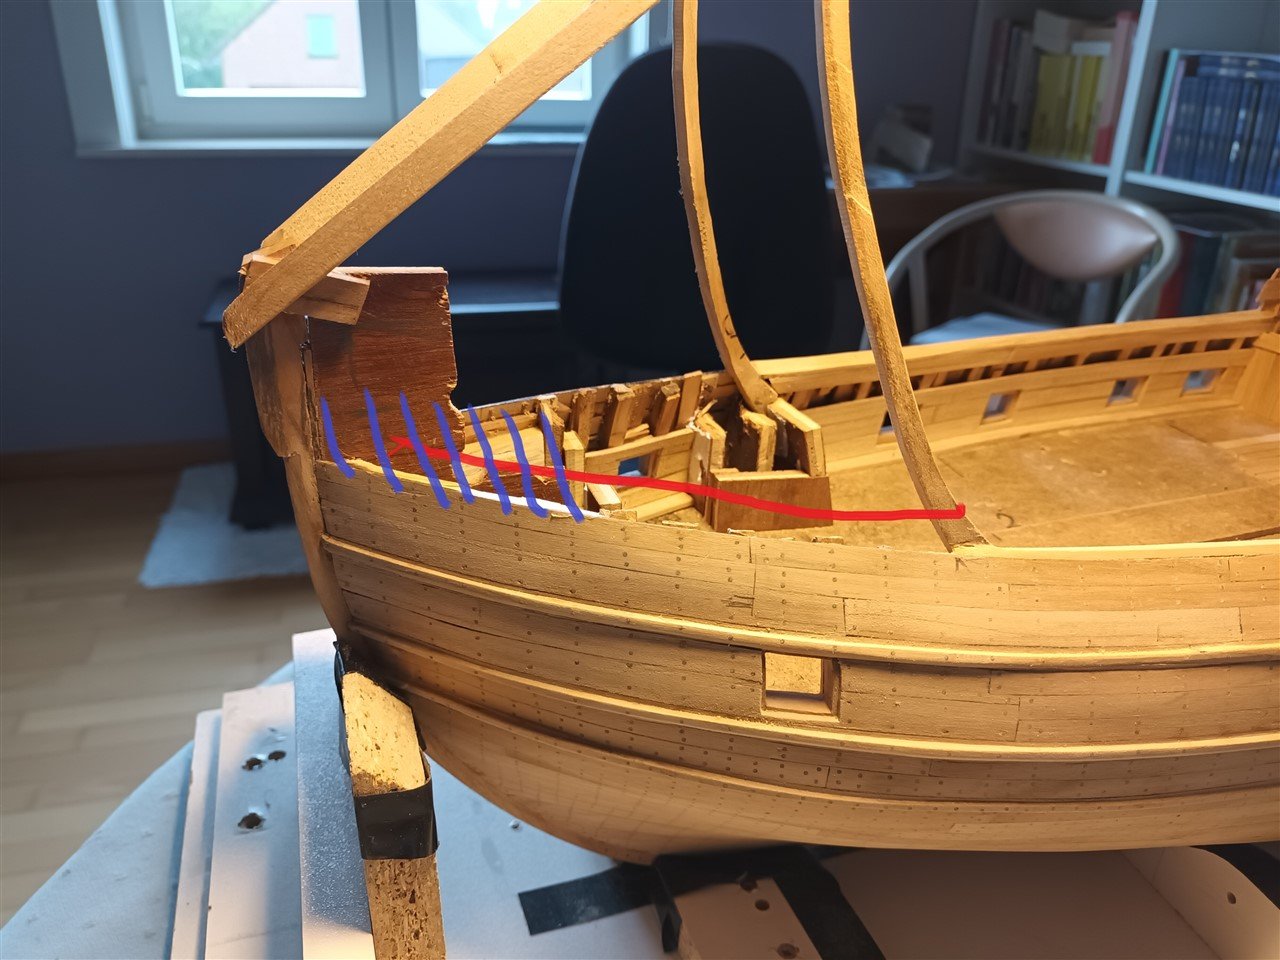
 Well, that's where we are at the moment. I think the books have some errors... Standard 81T0833 This arrangement is therefore not correct at all. And is shamelessly copied in the next book. And this is what it actually looks like in the drawing. A channel or rigging rail a little bit lower. The Calderkraft model also follows this arrangement. Thanks @Mr Pleasant And so does our Russian colleague. https://www.shipmodeling.ru/phpbb/viewtopic.php?f=45&t=71379 thanks @firdajan next horizontal planking or curved straight Most from this period seem to go for horizontal. The curved straight ones are starting to become a bit old-fashioned in this period, it seems to me Thanks for following

-
JpR62 reacted to a post in a topic:
La Mahonesa stern cross section by KLarsen - Scale 1/48
-
Scottish Guy reacted to a post in a topic:
11th century viking crew and freight in 1:25
- Today
-
Baker reacted to a post in a topic:
The San Marco mosaic ship c. 1150 by Louie da fly - 1:75
-
 It is indeed difficult to get Viking period figures who are ordinary people, not warriors or the rich. A site that gives a more realistic idea of what "normal Vikings" looked like is at https://sagy.vikingove.cz/en/the-interview-for-hella-the-viking-blog/ A well-off merchant might have looked like this - https://www.pinterest.com.au/pin/137219119871448037/ While a really high status Viking (probably a member of the nobility) might have looked like this https://www.pinterest.com.au/pin/948148527770532075/ (that cloak is copied from a real archaeological find, including that wonderful decorative border - click on the Pinterest link and it takes you to an article on the original find). Sorry I can't help with figures ( I have to carve mine), but cargo would yes, be barrels, perhaps oiled leather bags (for waterproofing) chests (There's the Mastermyr chest, which contained carpenters' tools https://en.wikipedia.org/wiki/Mästermyr_chest and https://www.angelfire.com/wy/svenskildbiter/Viking/vikchest.html, and is fairly typical, as well as the Oseberg chests https://loveevamk.life/product_tag/32008505_.html - but use those with caution, as they were in a royal grave). For my own nef - though it's from a few centuries after, ships hadn't changed all that much - I added a cargo of barrels - see post #193 and onward at Hope that helps. Nice to see someone doing a merchant ship instead of all the drakkars! Steven
 -
 No Idea reacted to a post in a topic:
Le Rochefort by No Idea - 1/24th Scale - First POF Build
No Idea reacted to a post in a topic:
Le Rochefort by No Idea - 1/24th Scale - First POF Build
-
Jorez de Saint Nazaire reacted to a post in a topic:
La Créole 1827 by archjofo - Scale 1/48 - French corvette
-
 Dear Johan, I was very impressed by your model, your approach, and your knowledge. I responded to your last post because I am currently working on the rigging of the main yard for the Granado (Bomb vessel's kit by Jotika). In the book (AOTS by P Goodwin), they mention quarter blocks for footropes (see picture). What is the difference between a quarter block and a double block (french translation "poulie de bas-cul" by David H. Roberts )? What is the function of quarter blocks? Are they also used for footropes ? Again "Bravo votre corvette est magnifique"
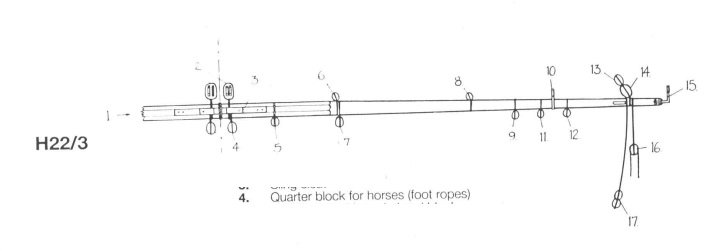
-
 BigRoy joined the community
 -
Amazing work, mate. Steven
-
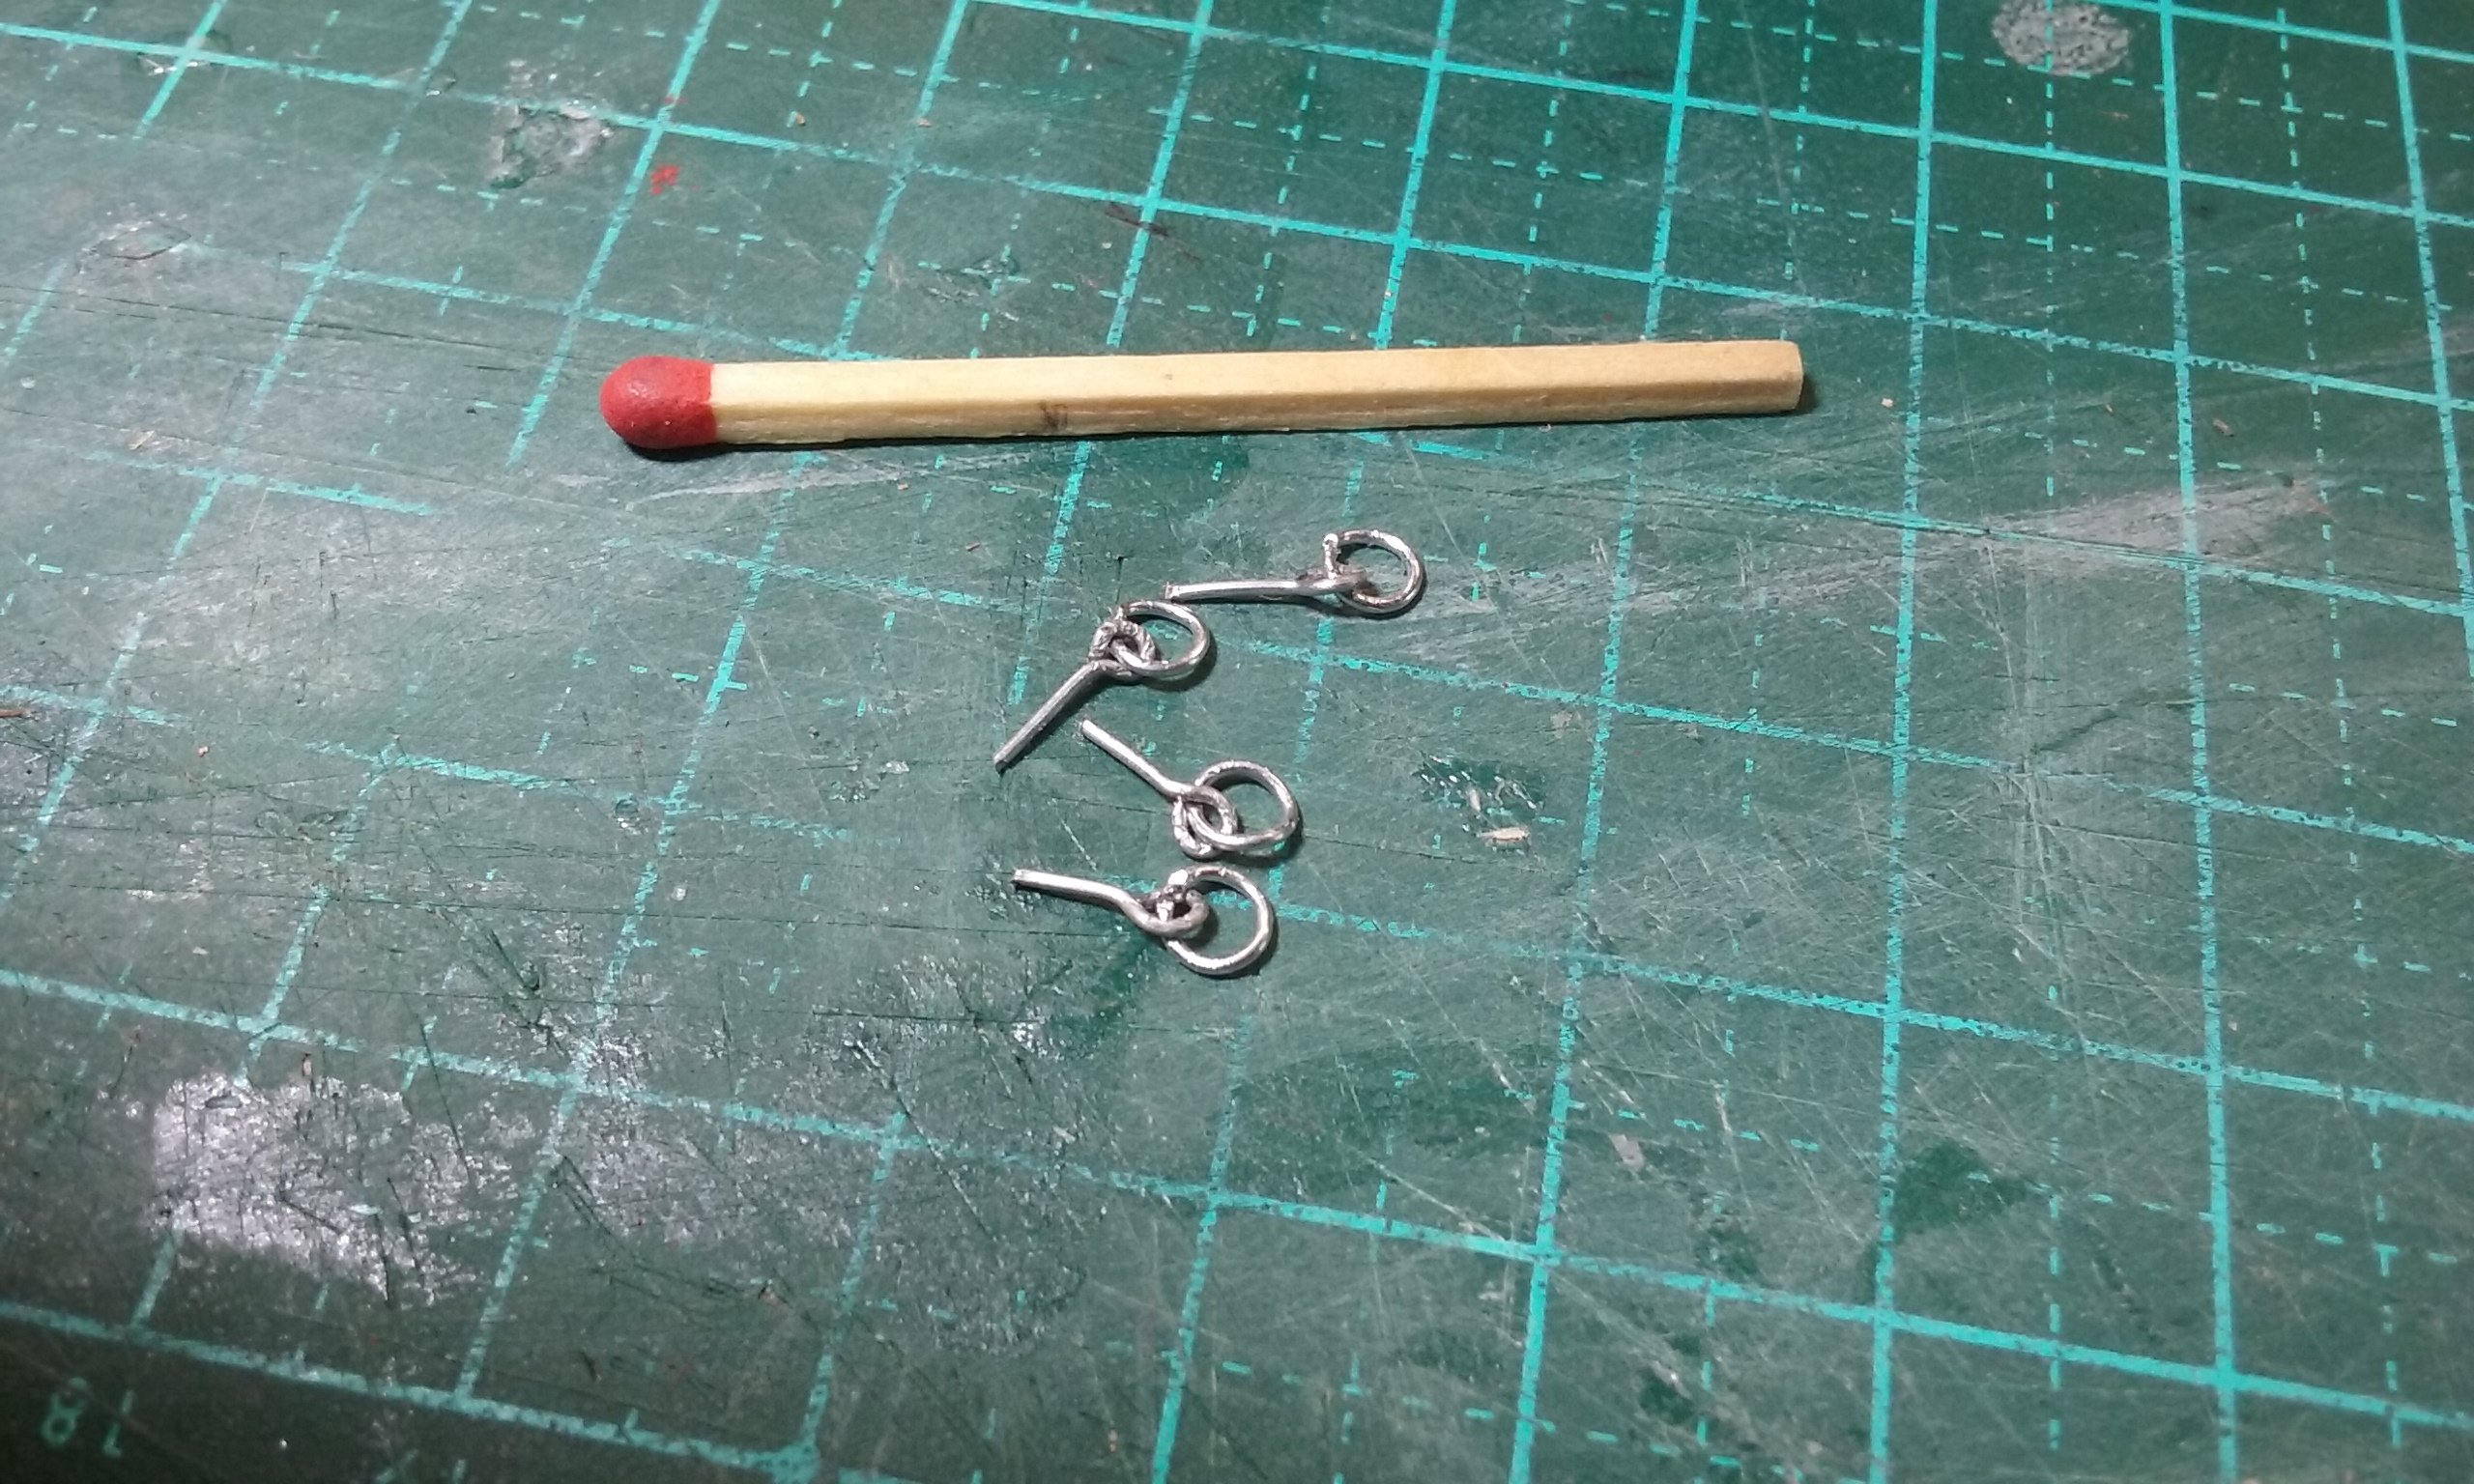
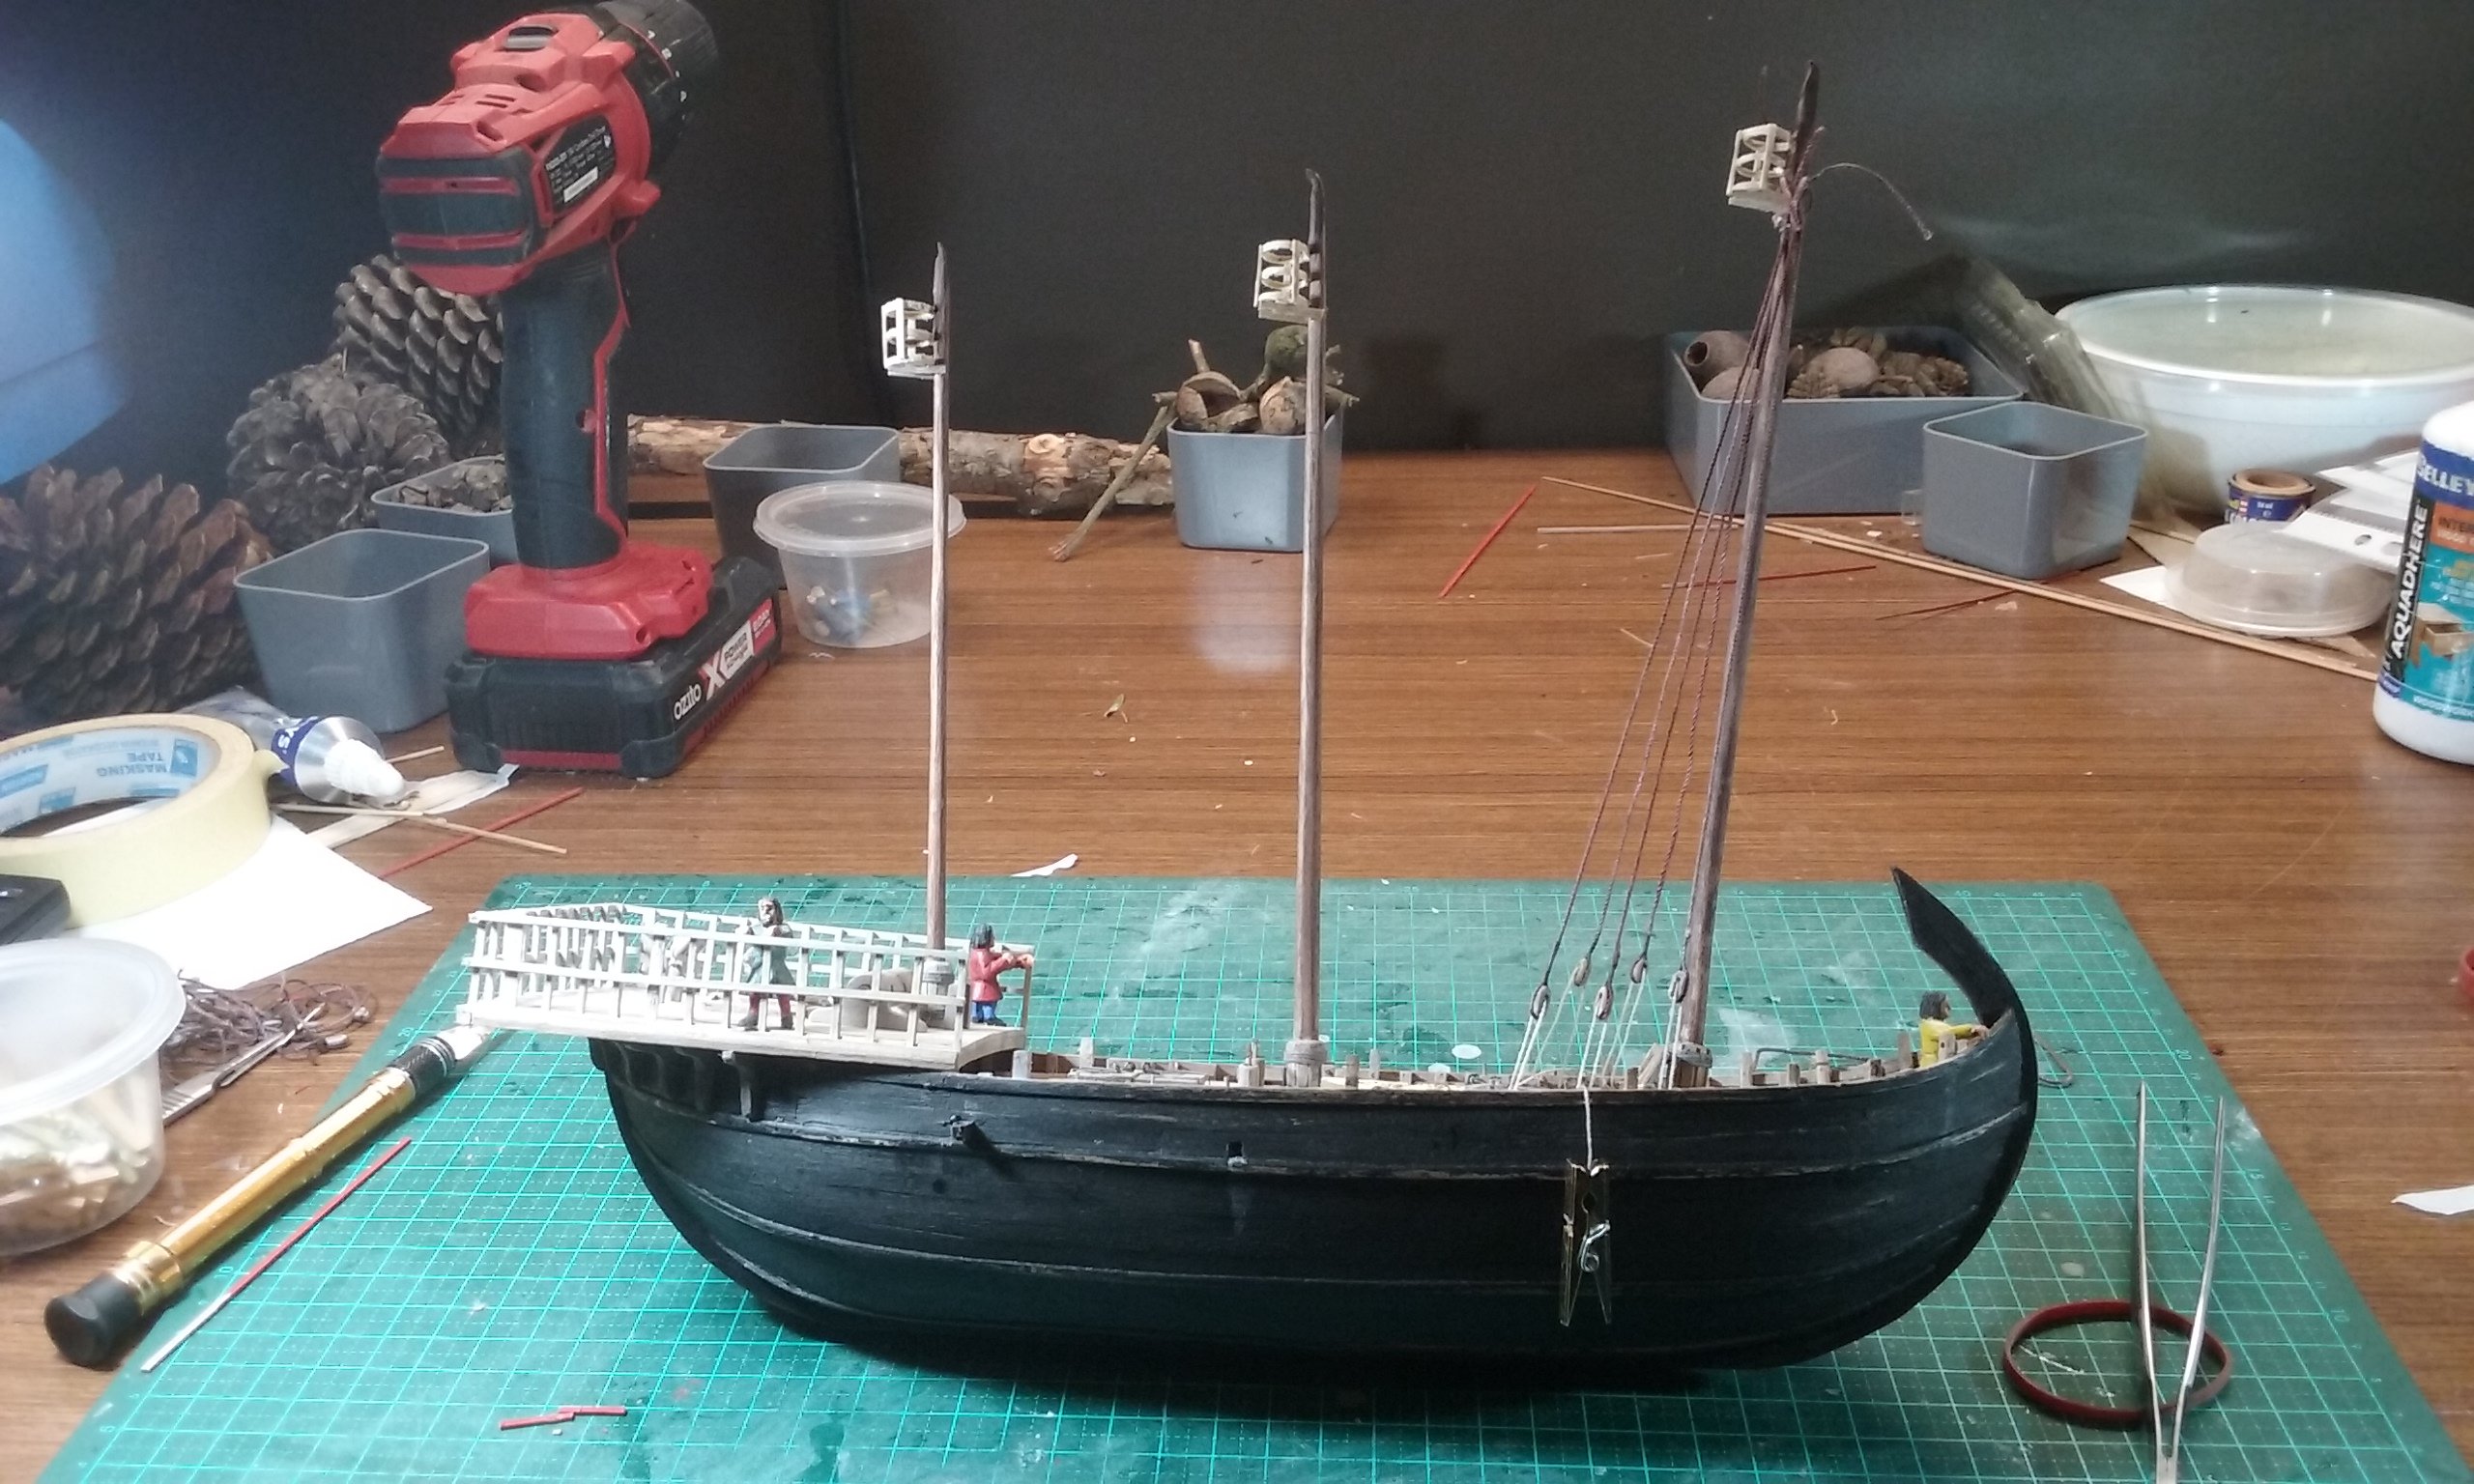
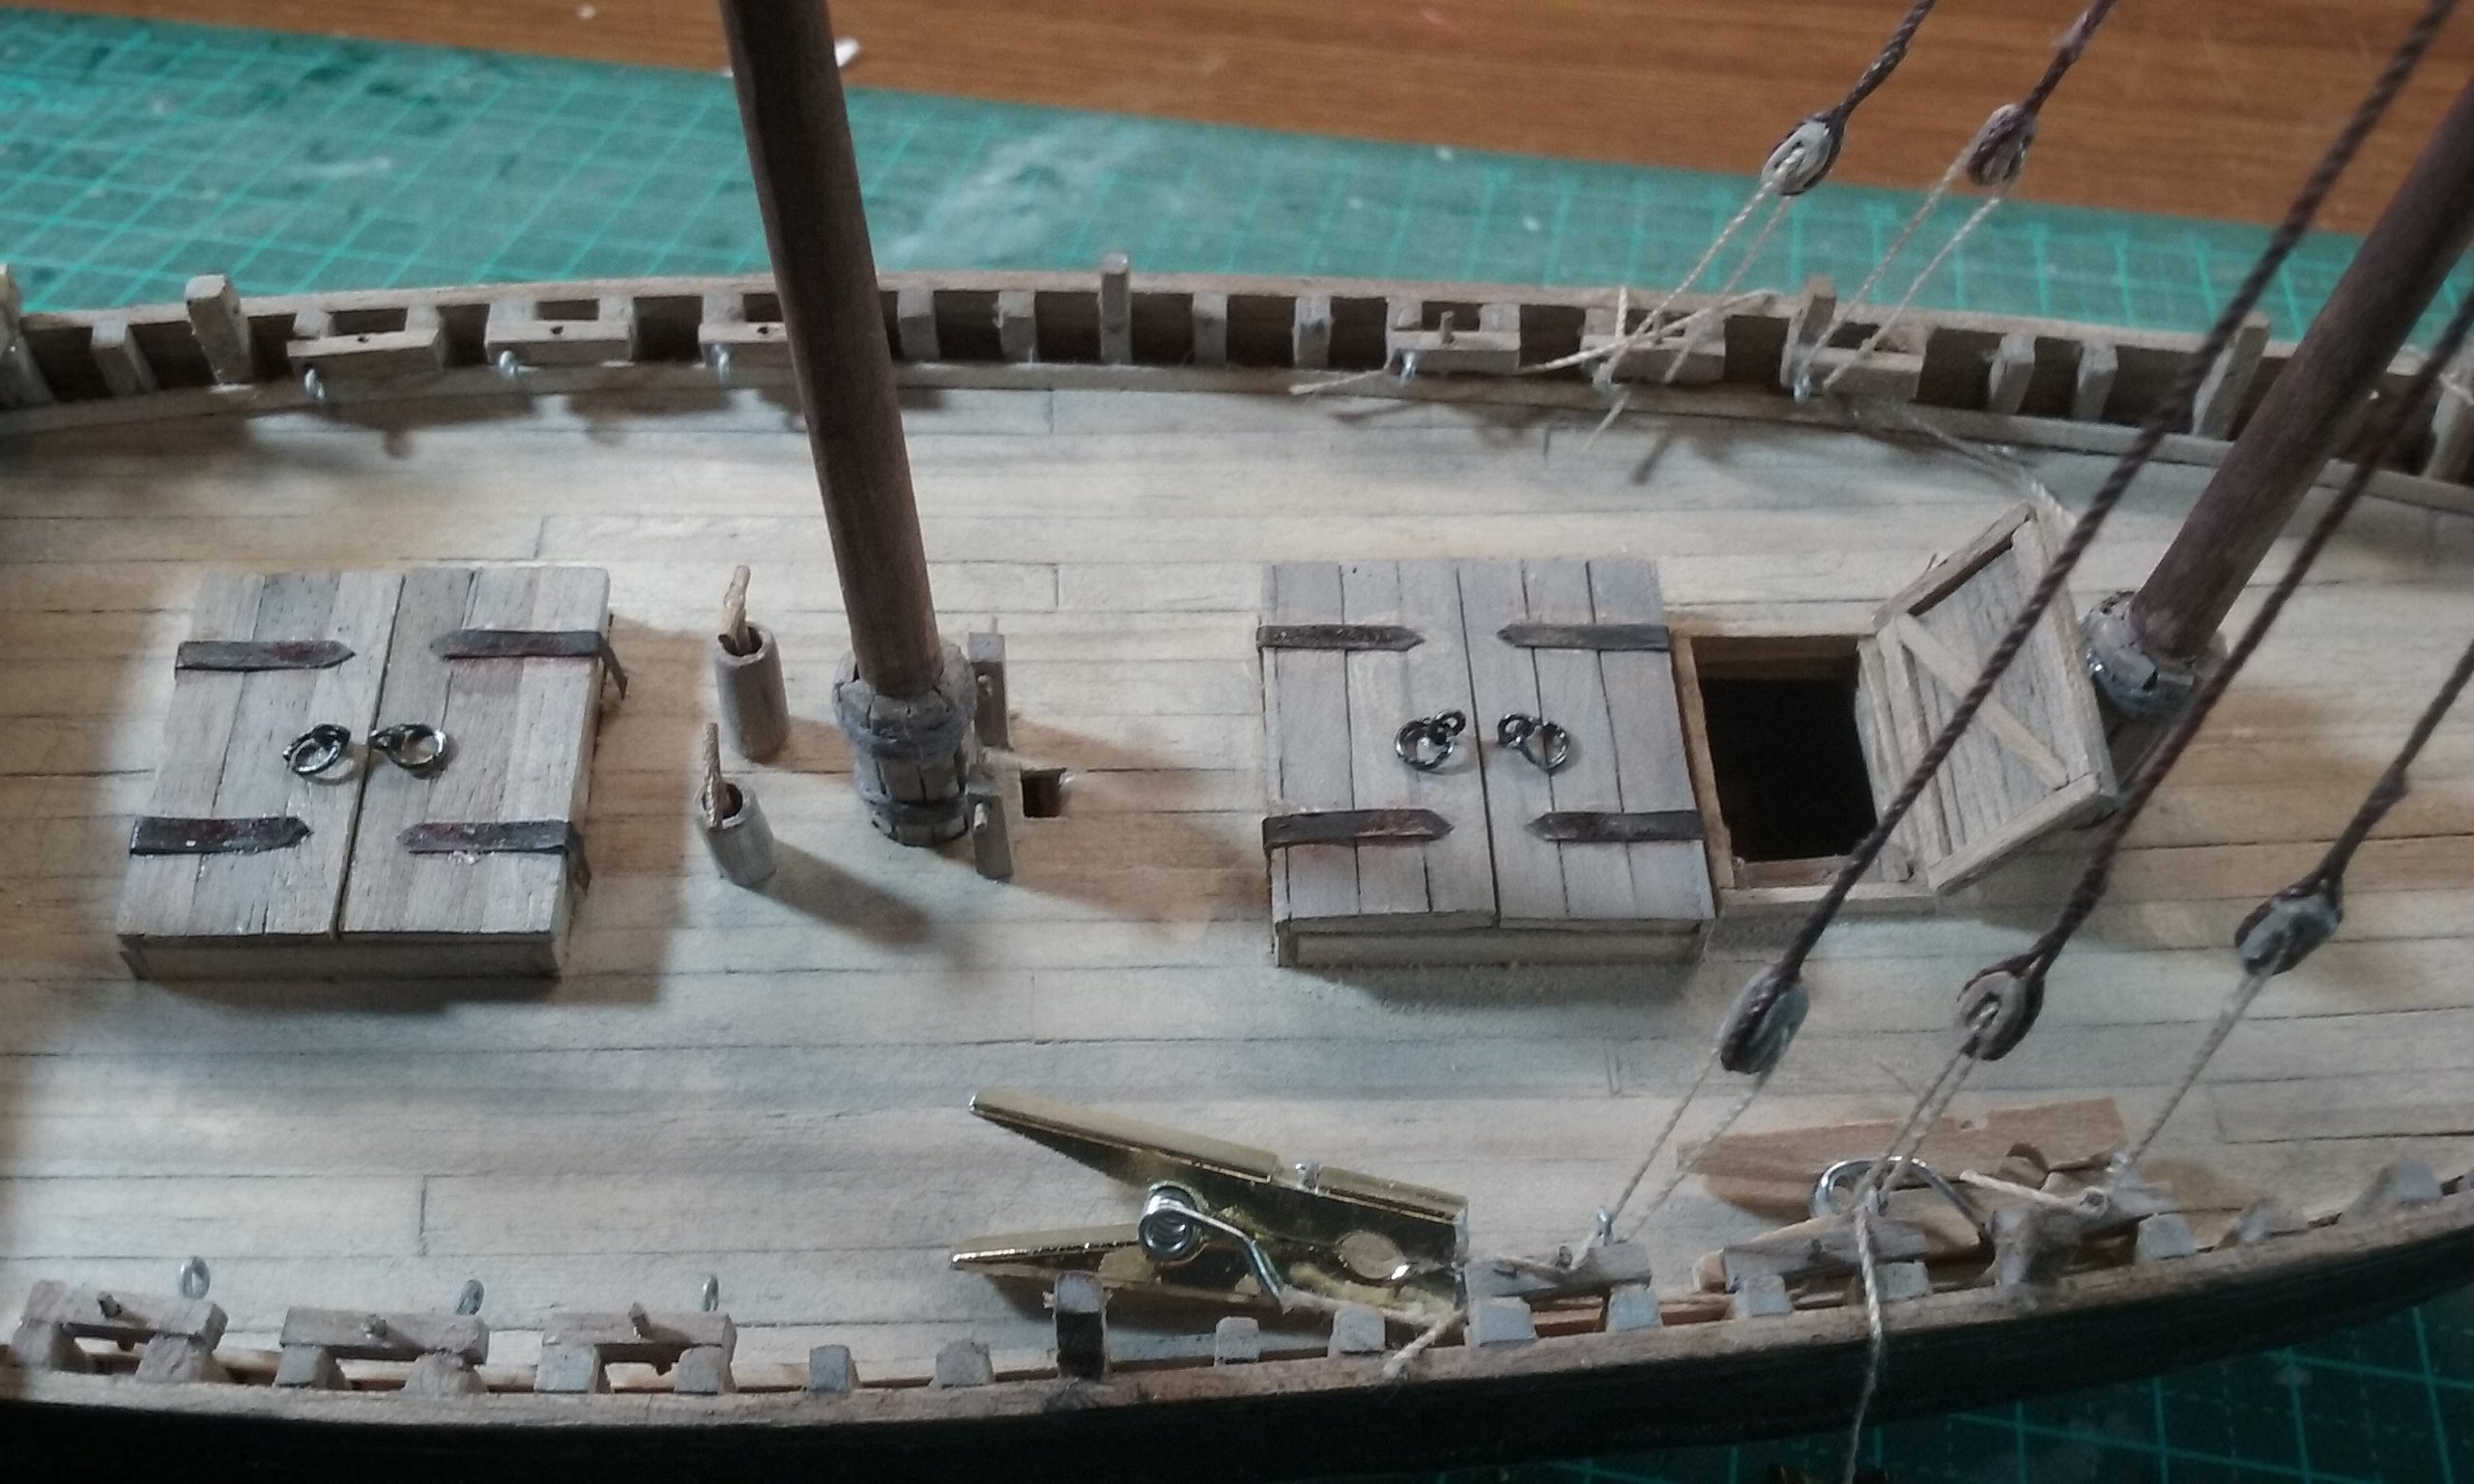
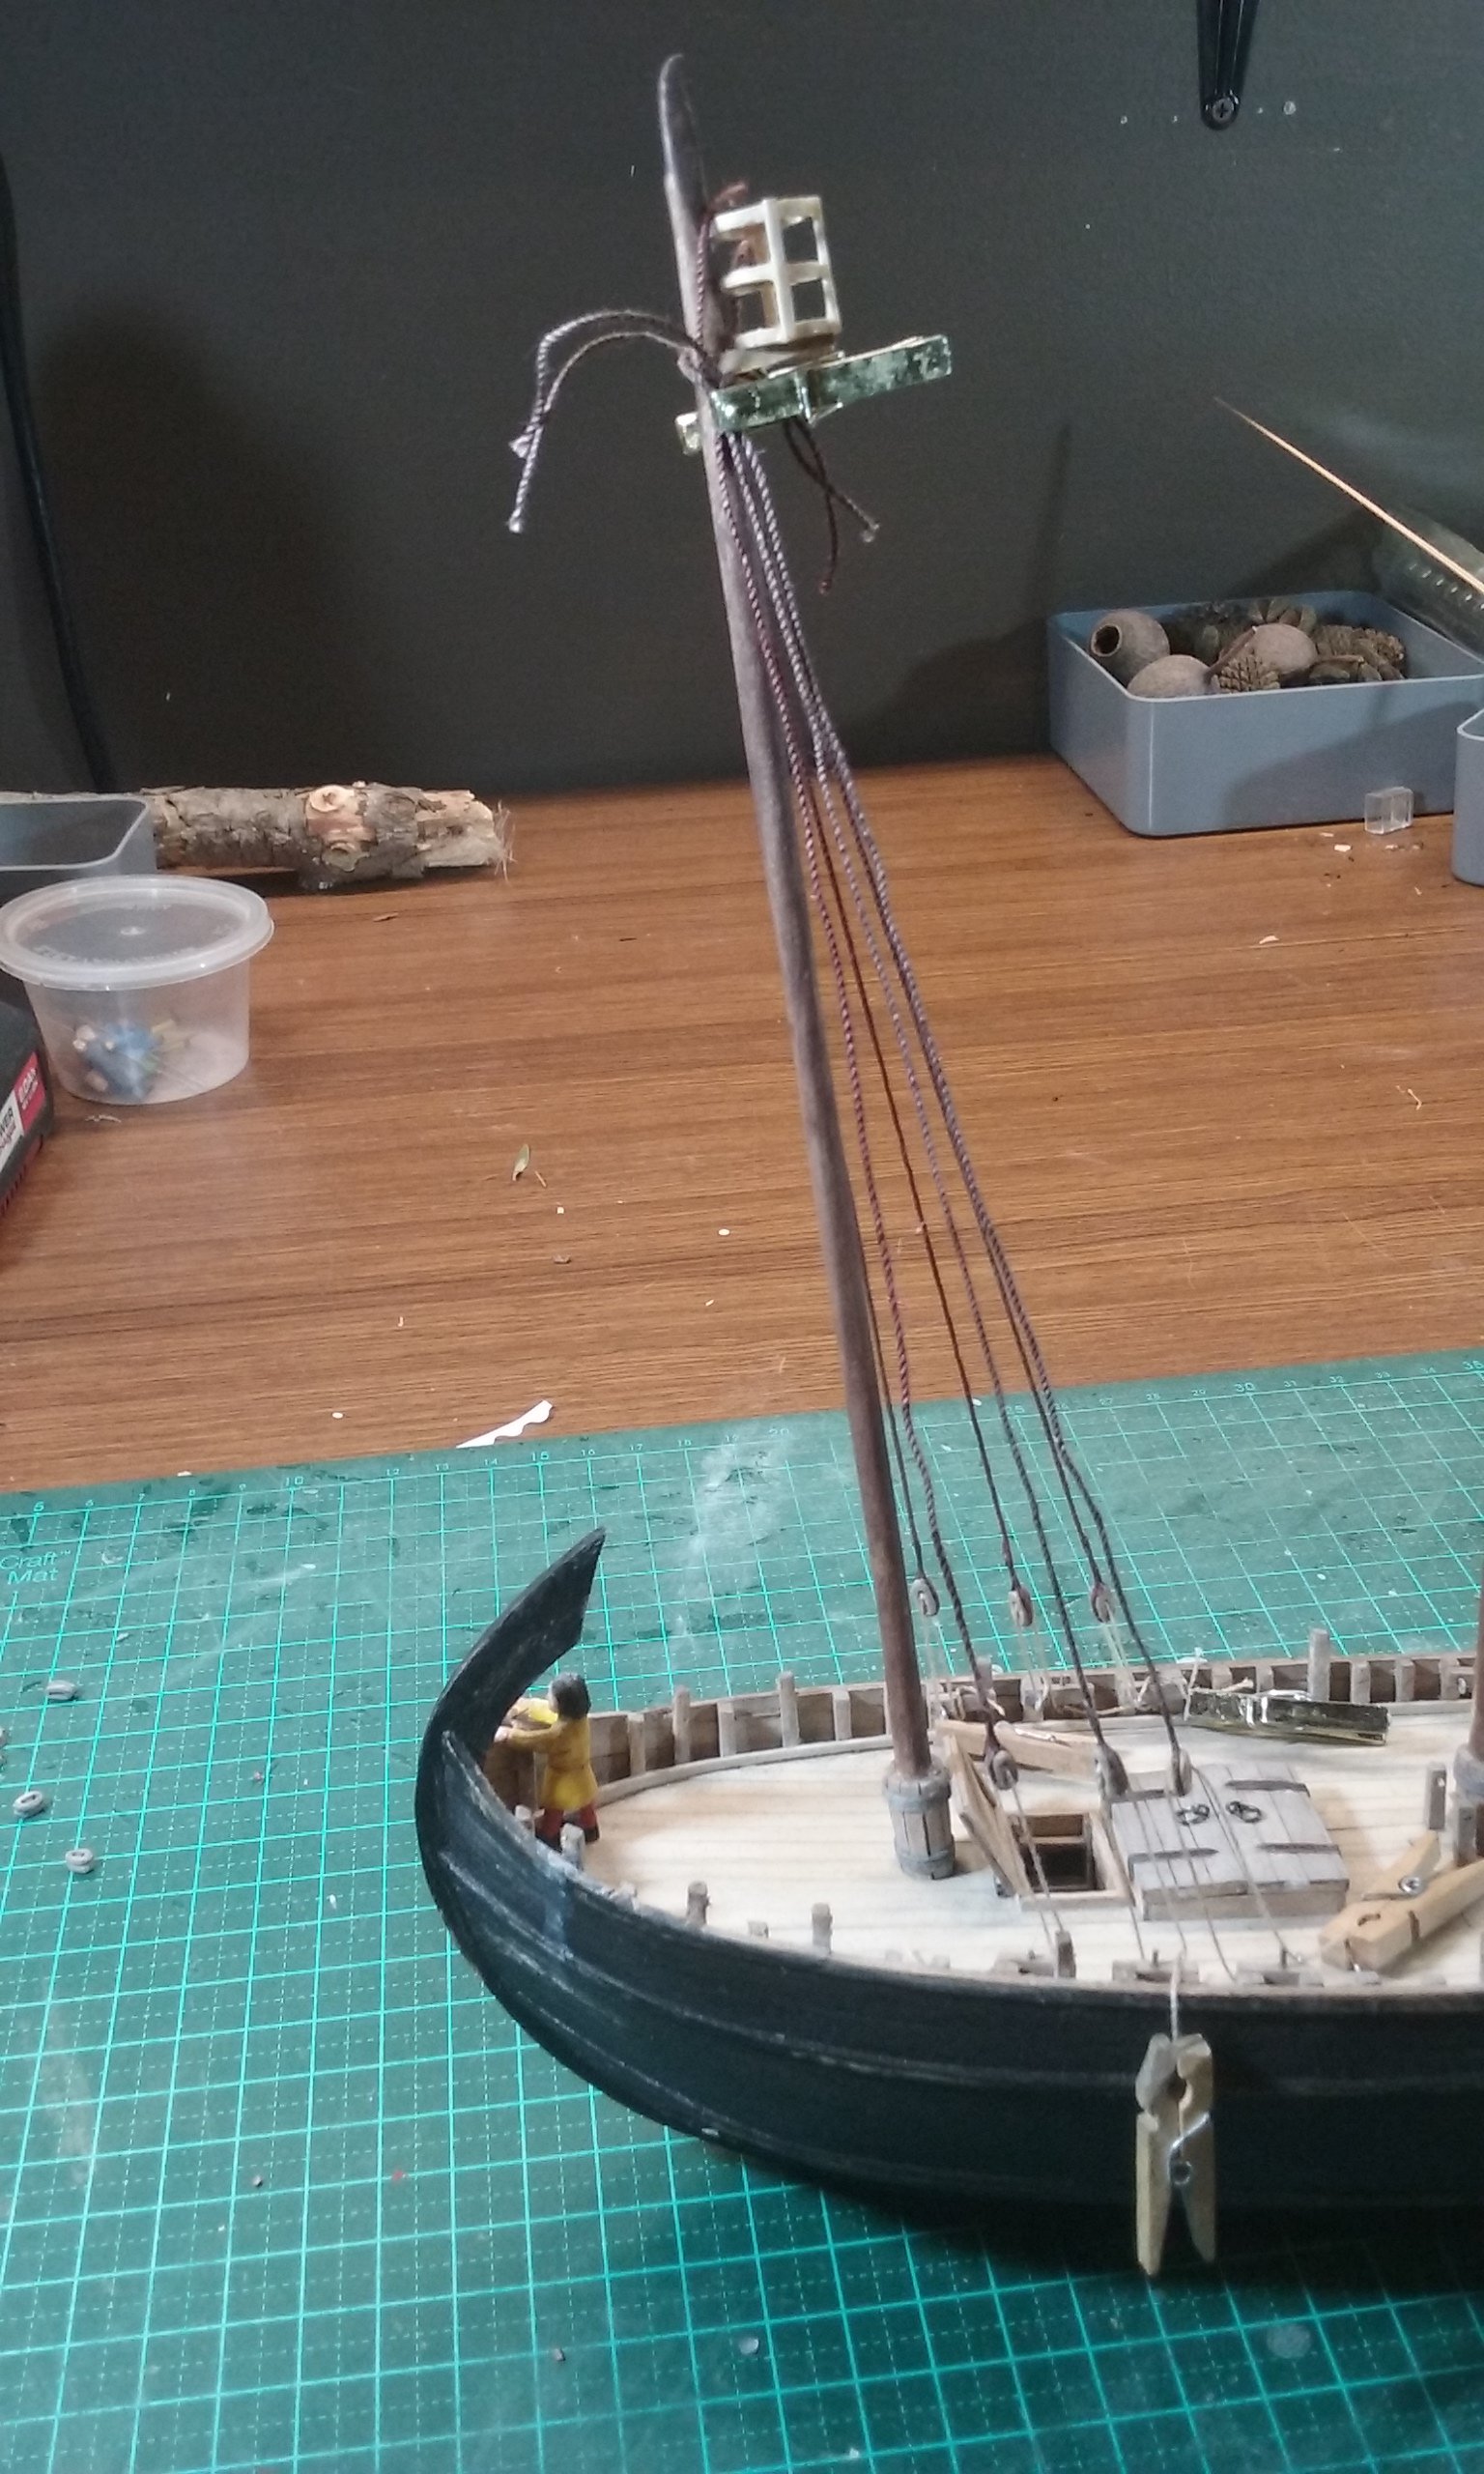
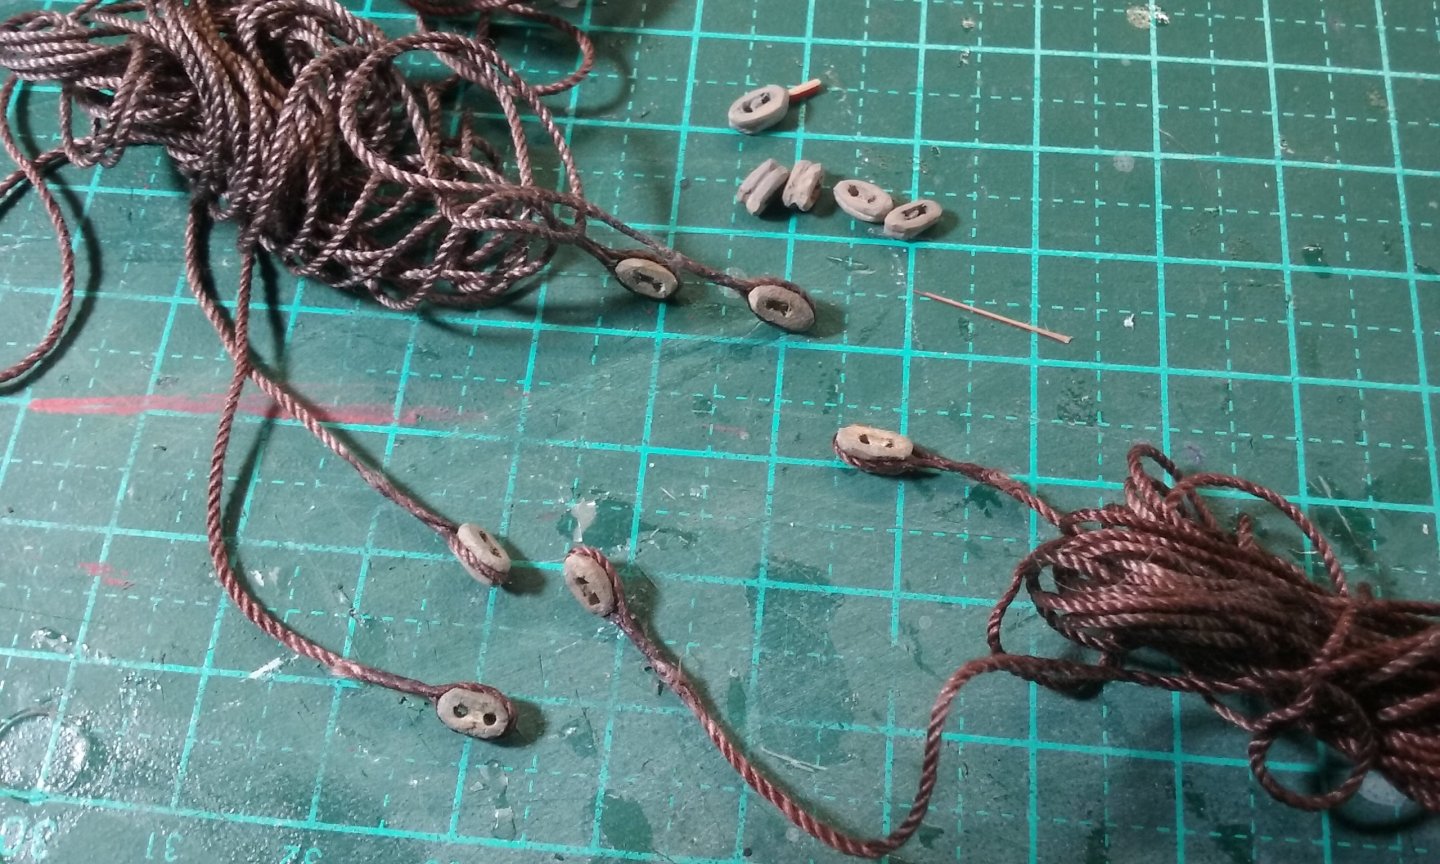
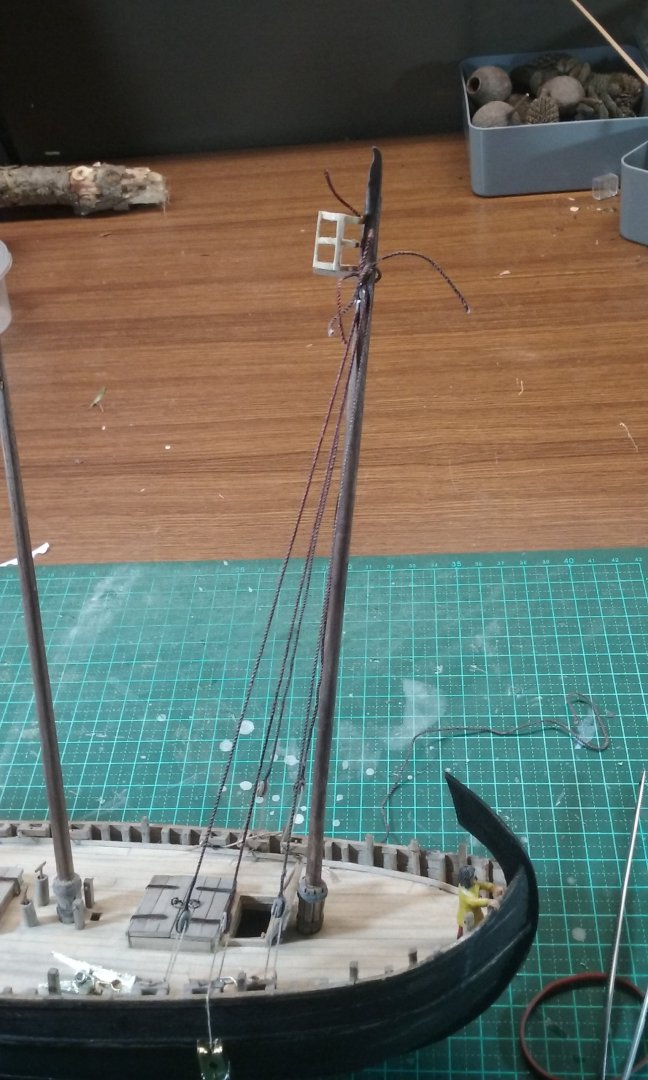
Ian, that block looks like an ordinary block with a toggle each side. Those toggles have been found in archaeology as far back as the 11th century, though I don't know if they've been found from the Classical Roman period. They are very useful for quick attachment and release of different parts of rigging on Mediterranean lateeners - for an example of the toggle in use see my post #1217 at Tony, thanks for your nice comment. Much appreciated. More progress on the San Marco ship. Grab rings for the hatch covers: Hatch covers in place and with grab rings (now blackened) in place. I had to wait until the masts were glued in before I could finalise the hatch covers, otherwise I wouldn't have been able to see the mast steps to guide the masts into position. Shrouds: Foremast starboard shrouds in place: All foremast shrouds in place. The port shrouds are loose because the lateen sail was within the shrouds - if the leeward shrouds were kept tight they would interfere with the sail as it bellied out with the wind. Getting ready for tomorrow's Modelling Exhibition! while I'm sitting there keeping people (and their precious little darlings) from touching my models with their sticky fingers I'll probably be working on positioning the halyards and their tackle, and adding the blocks for the tacks to the yards. Steven


-
 Well done, mate! John
 -
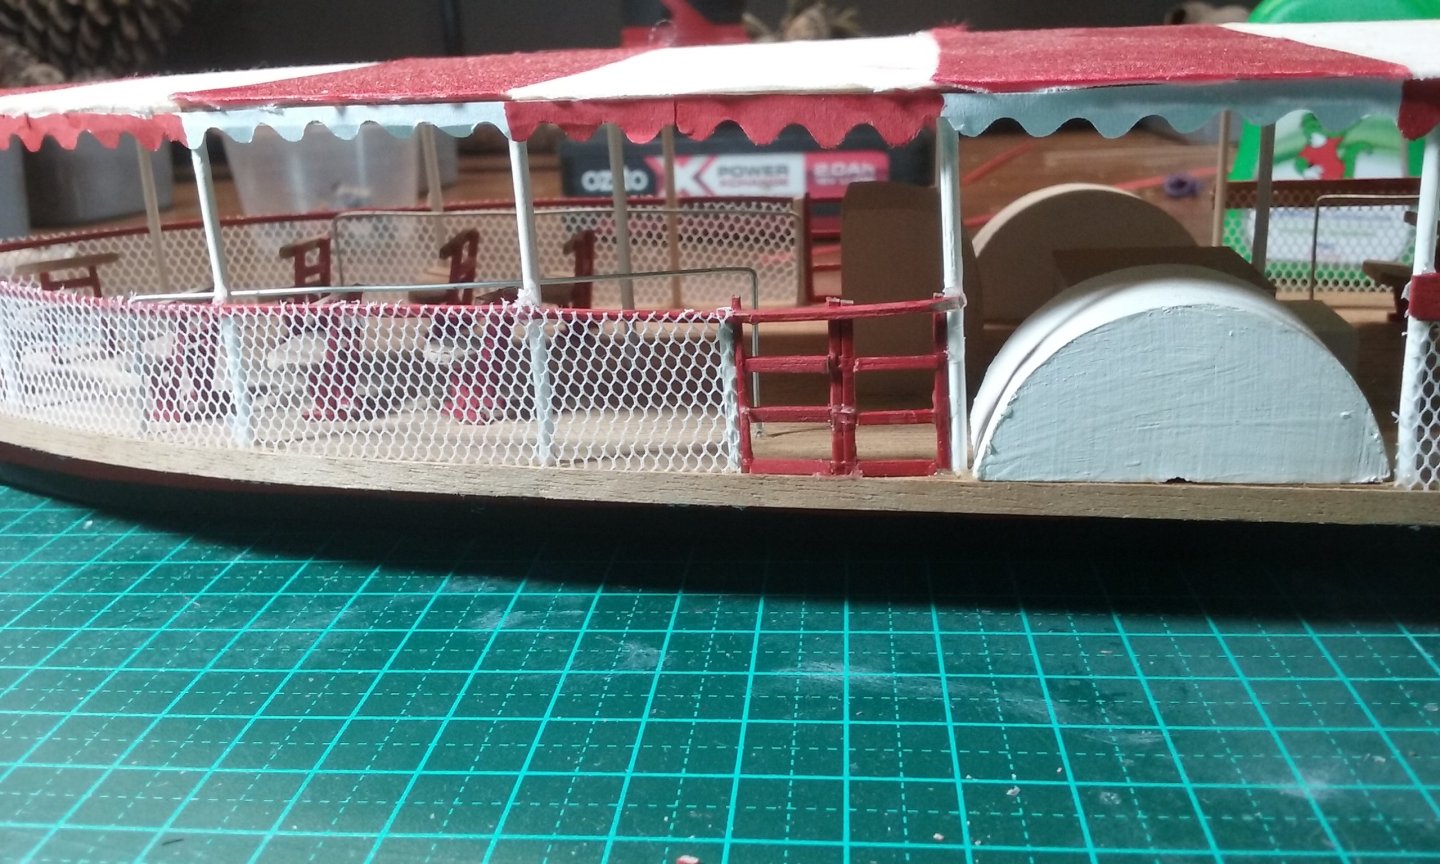
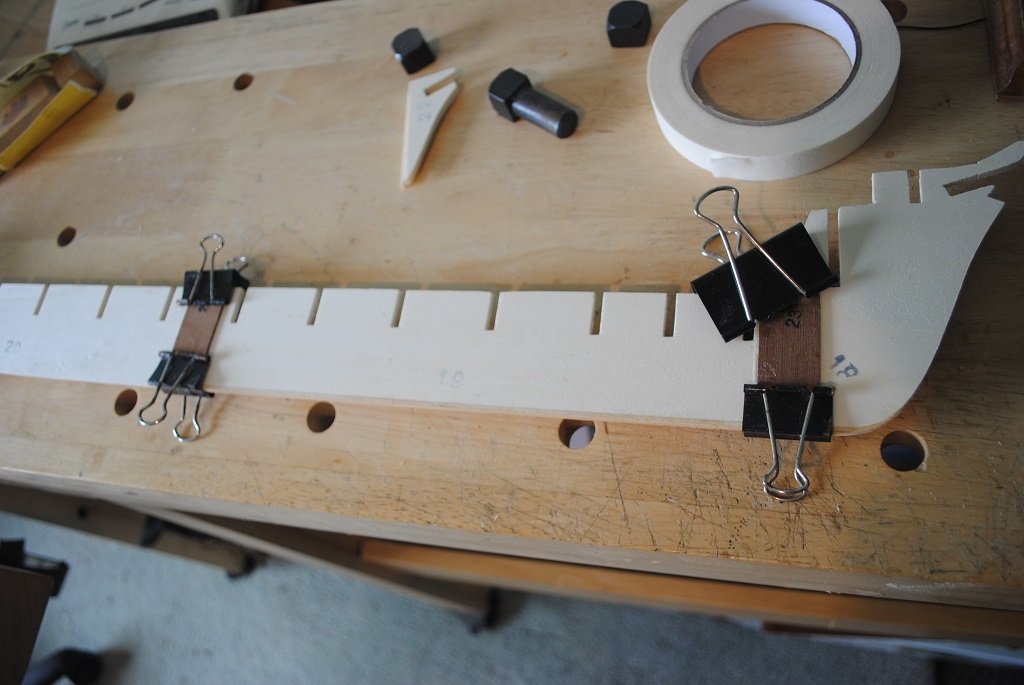
And the little gates fixed - a bit rough and ready, but at least well enough for a prototype. When it comes to the "good one" at 1:25 I'll be more careful and finish them better. Ready for tomorrow's exhibition. Steven
-
 Thanks, Jason. Progress is slow but encouraging. Hopefully I'll get back to a place where I can continue this model, but it's well beyond me at the moment until then, I walk past it every day and marvel that not so long ago, I did that! 😆 Great to see you making headway on your stunning Artois class. Rob
 -
I prefer much more the own little sail yacht, free choice of stopping points (harbours), free excursions and landing parties, much smaller, no crowded decks or restaurants and I get to eat what I want and not have to chose of something I might not like (and I love cooking)... but that´s just my personal choice. I love the freedom to go where ever I want with the sail boat and that it is much more private, even if you travel with friends (as guests / crew)... Micha
-
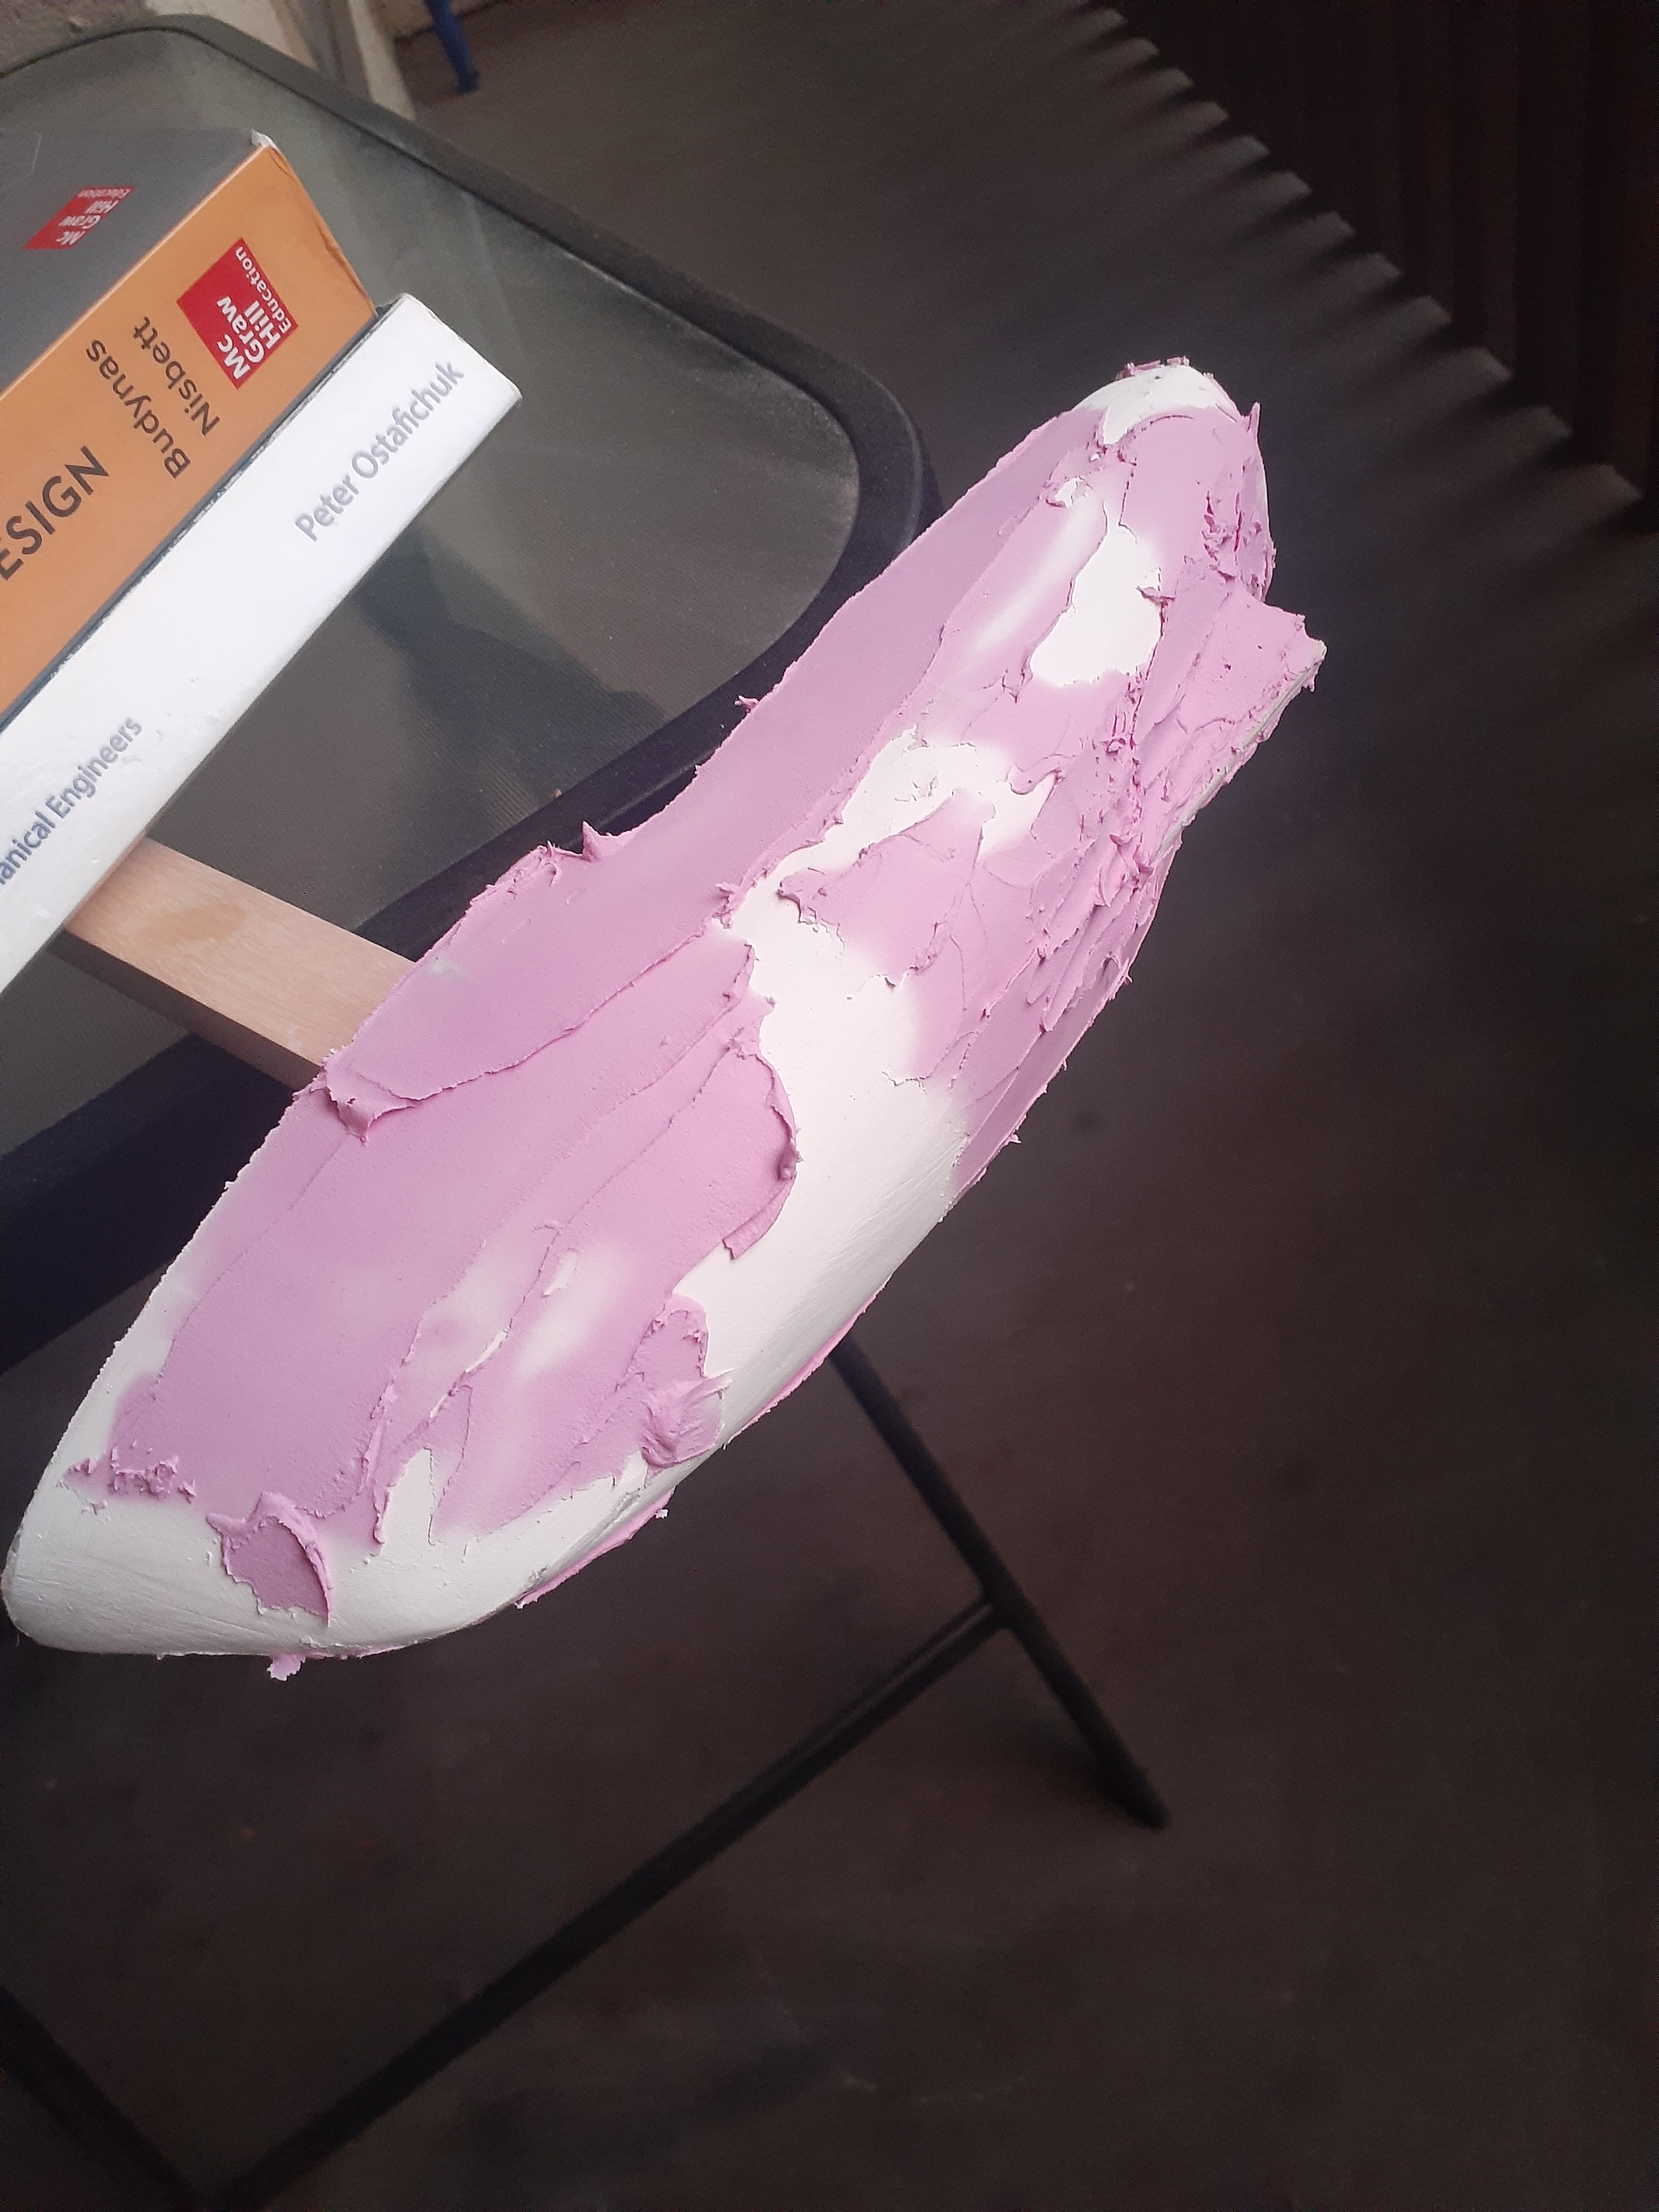
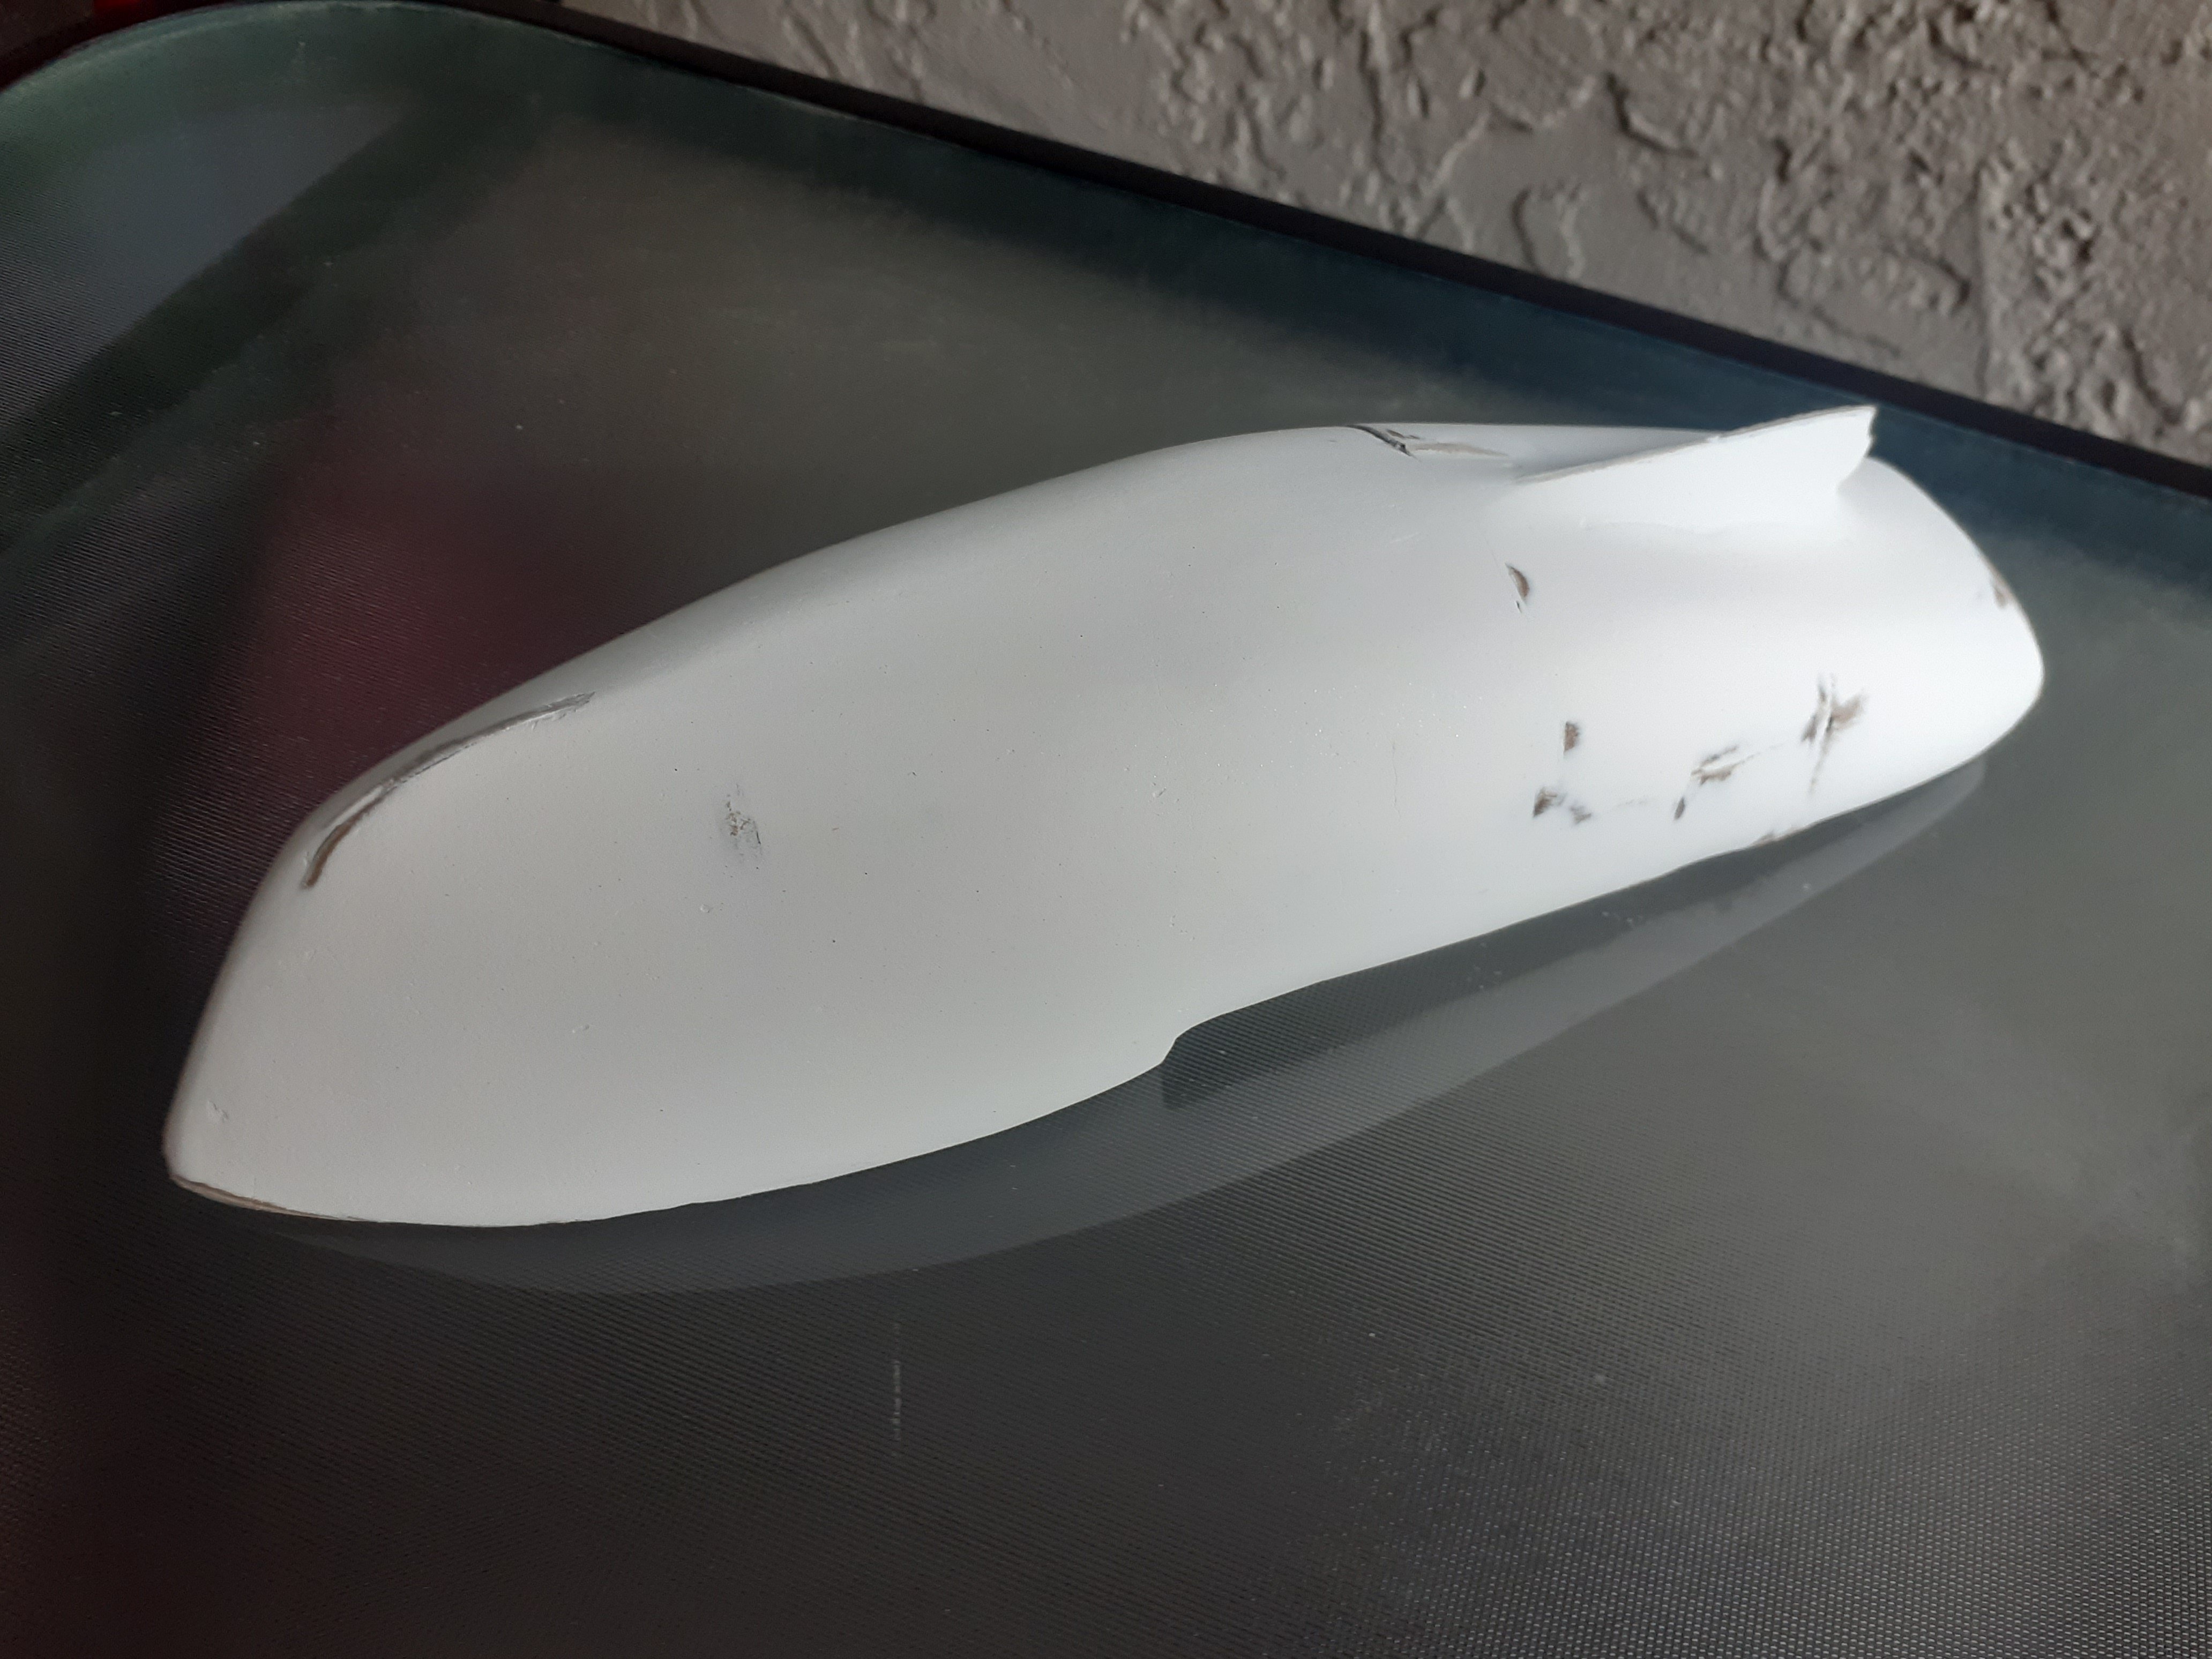
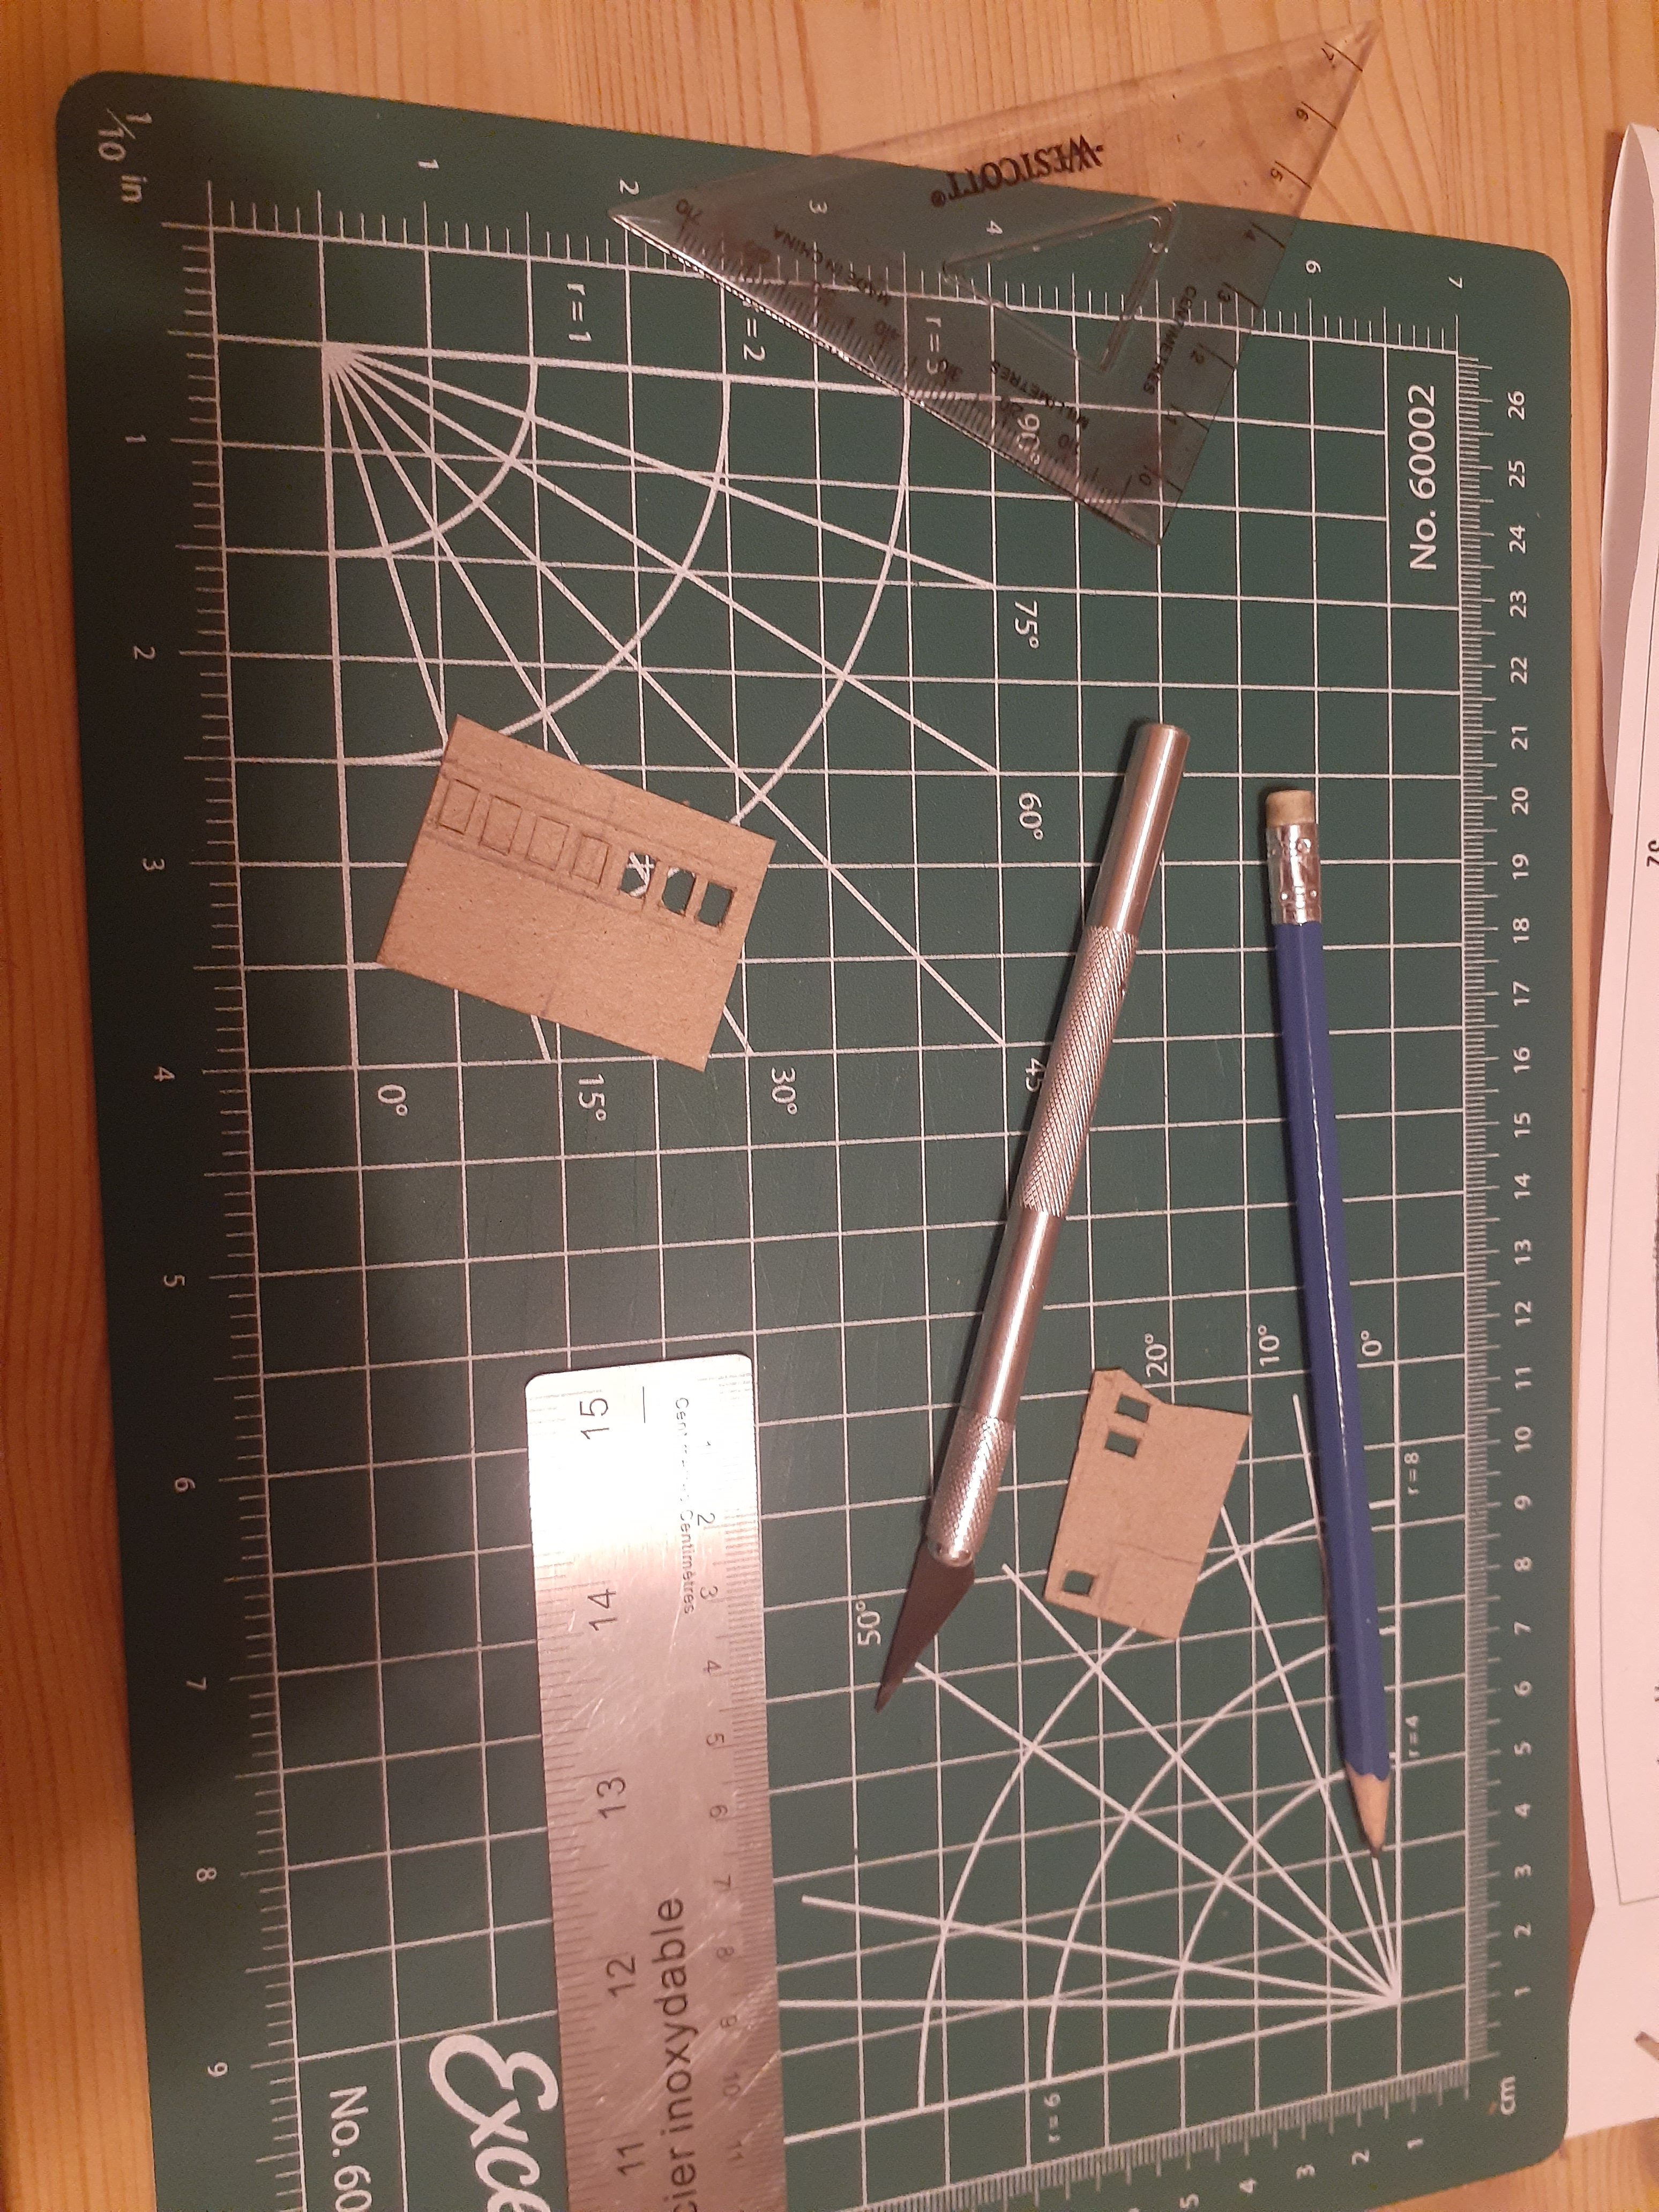
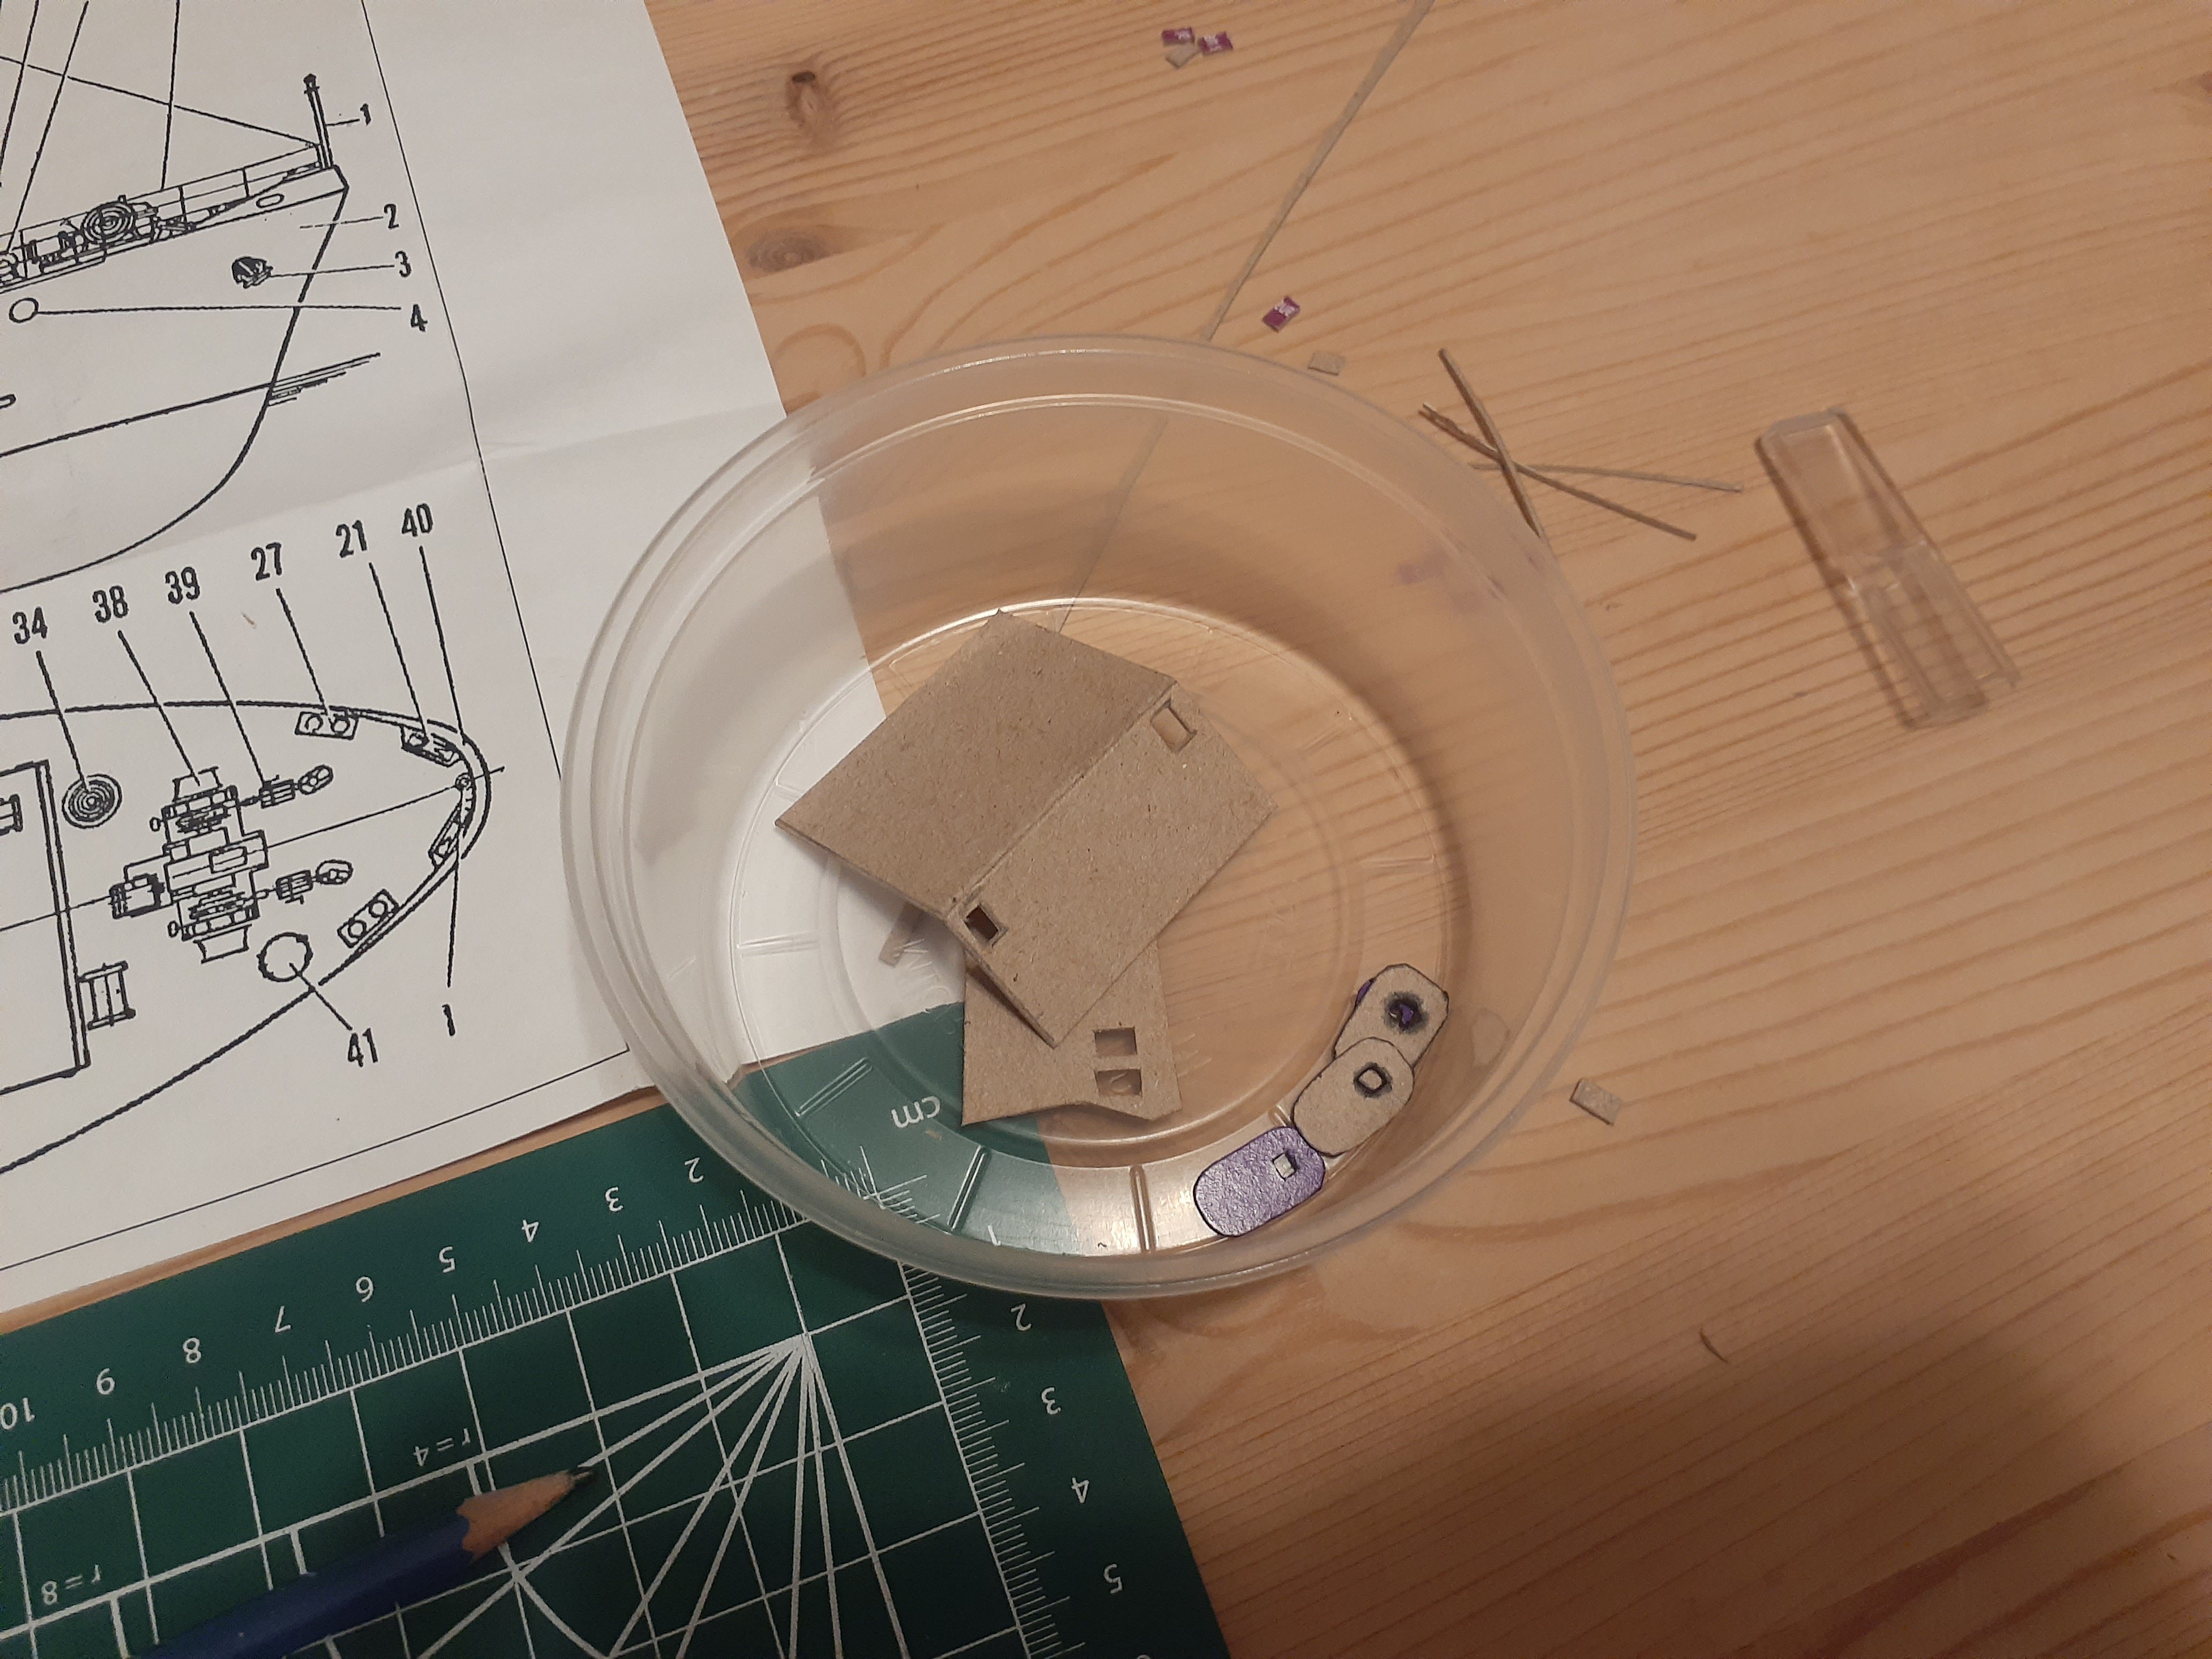
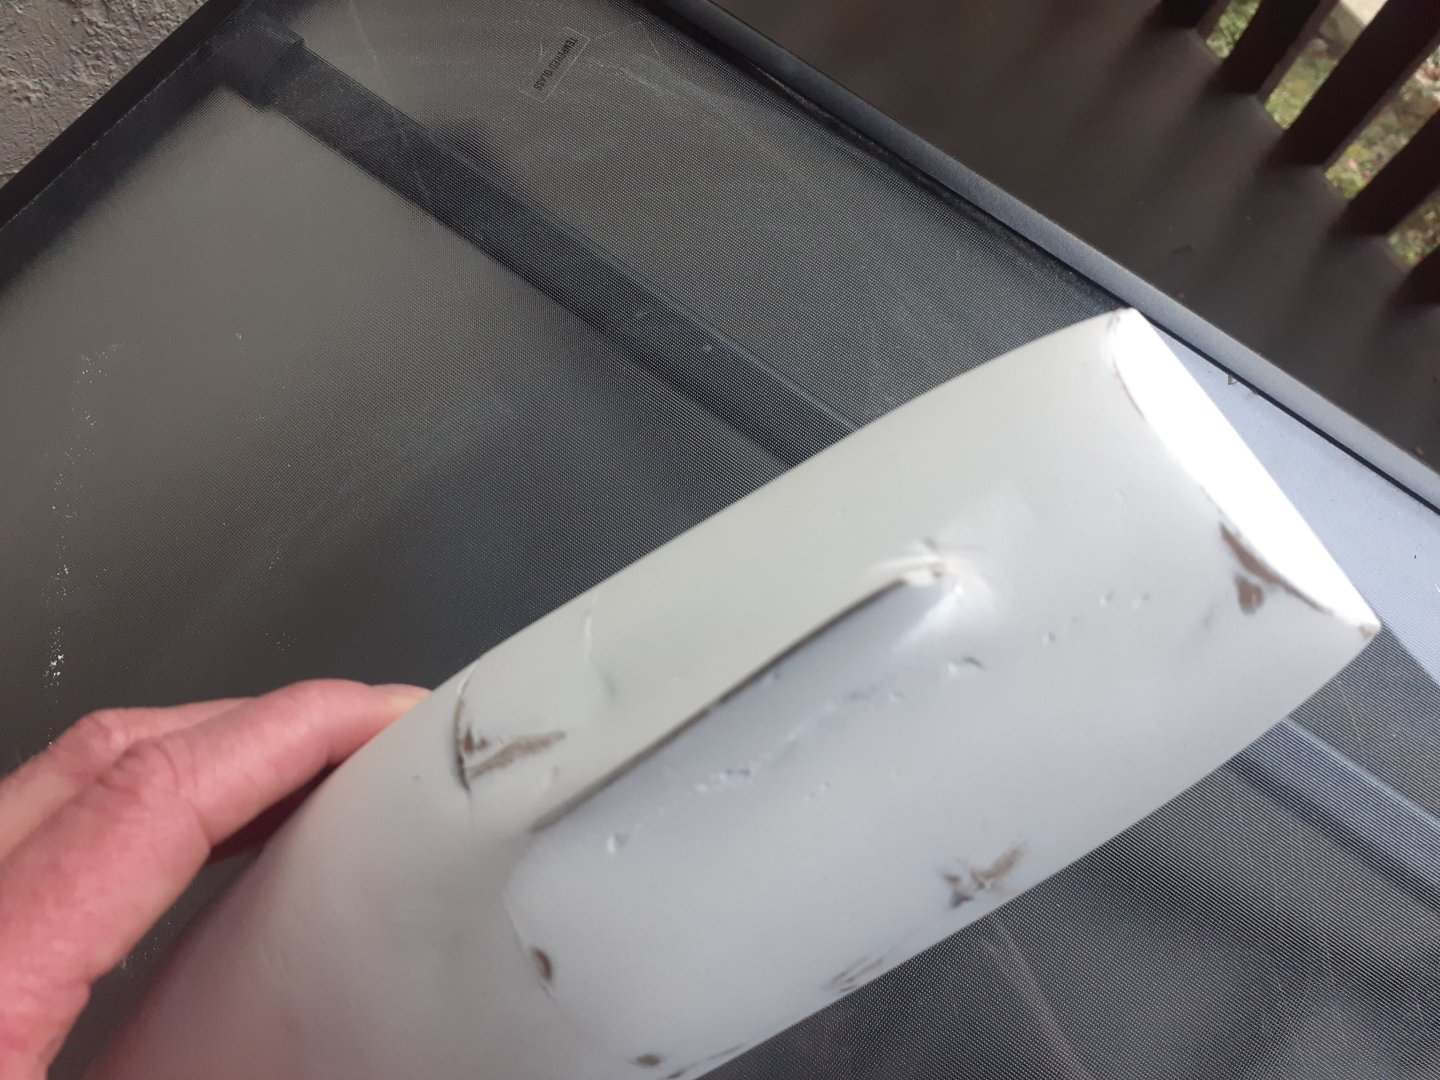
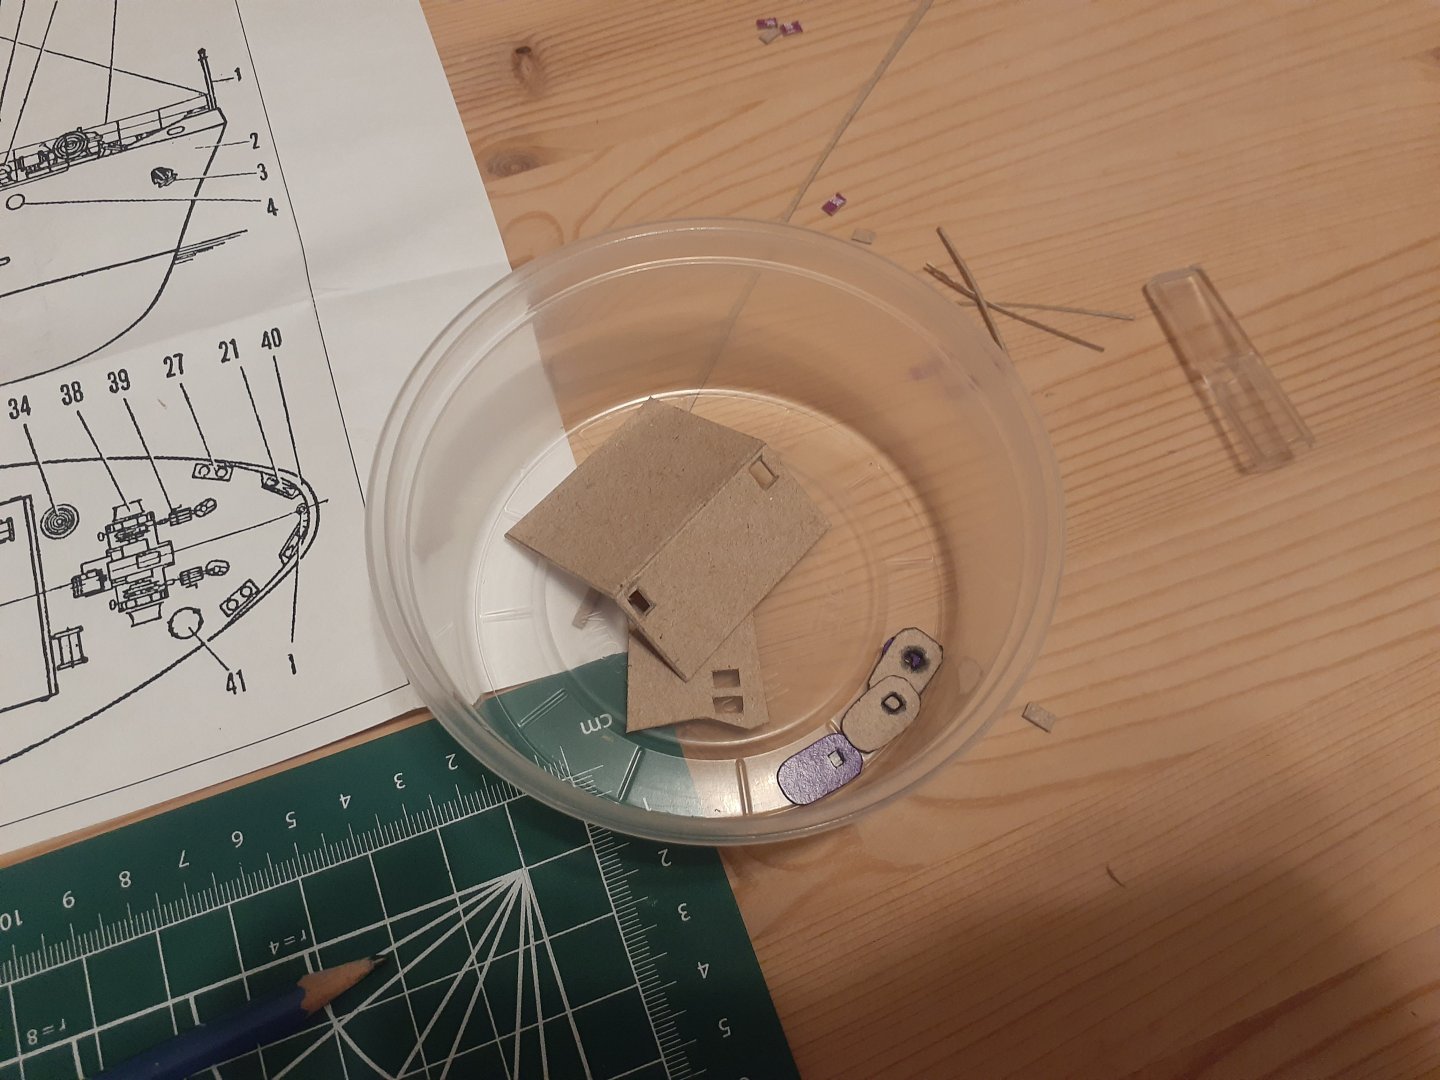
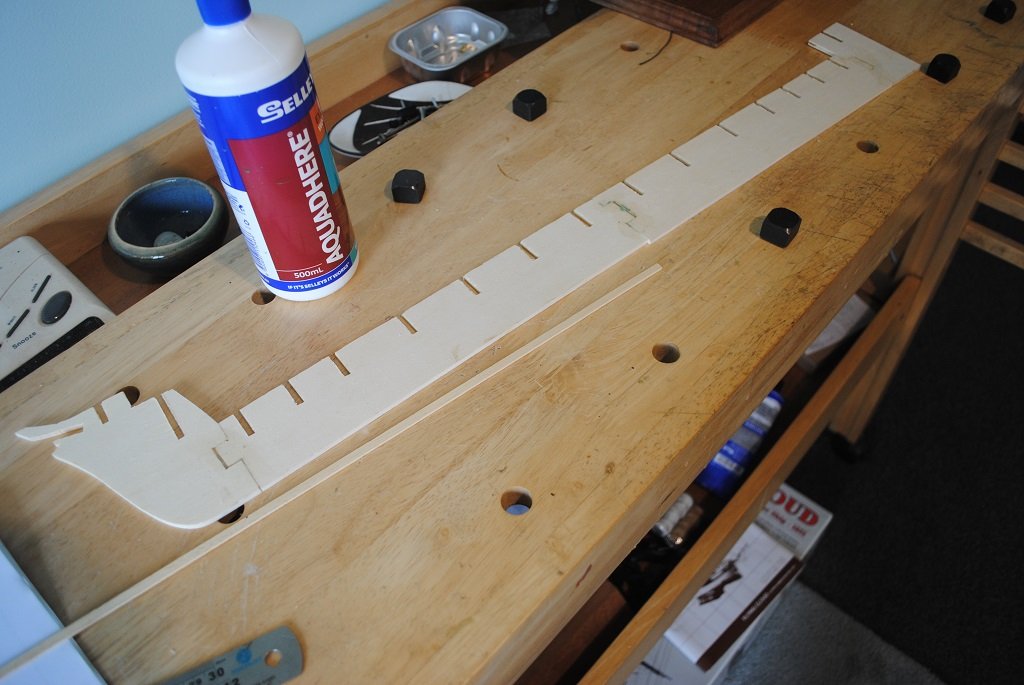
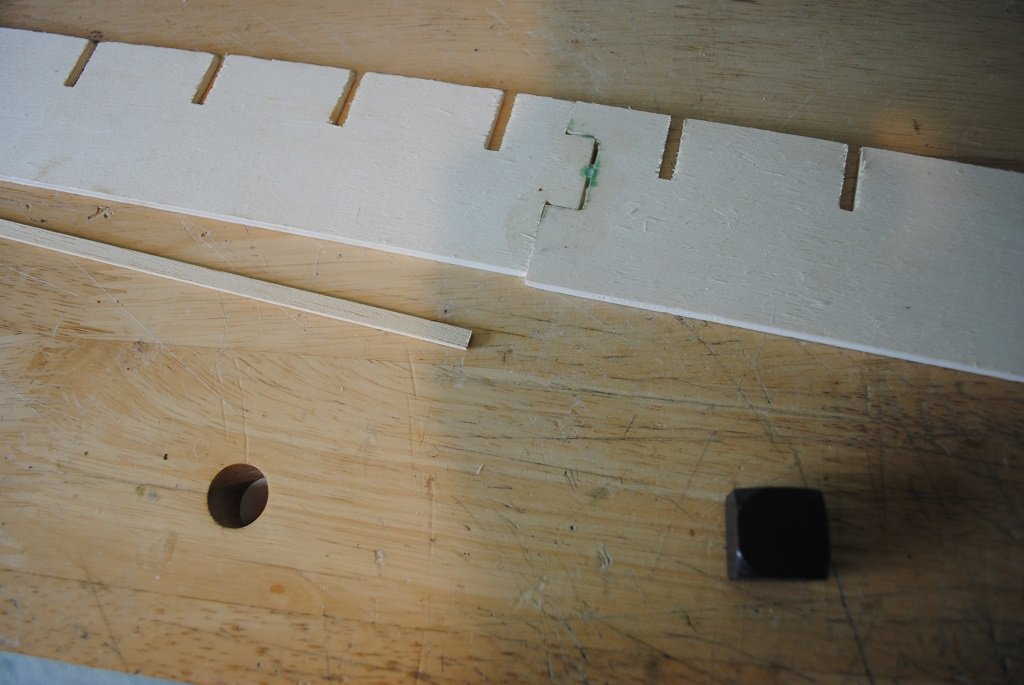
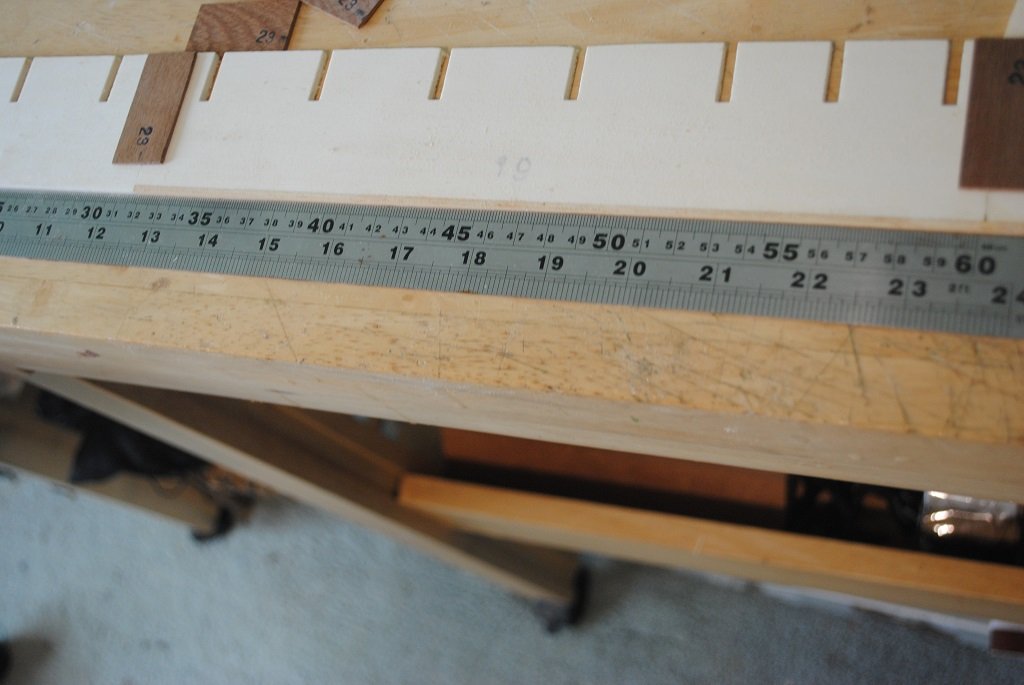
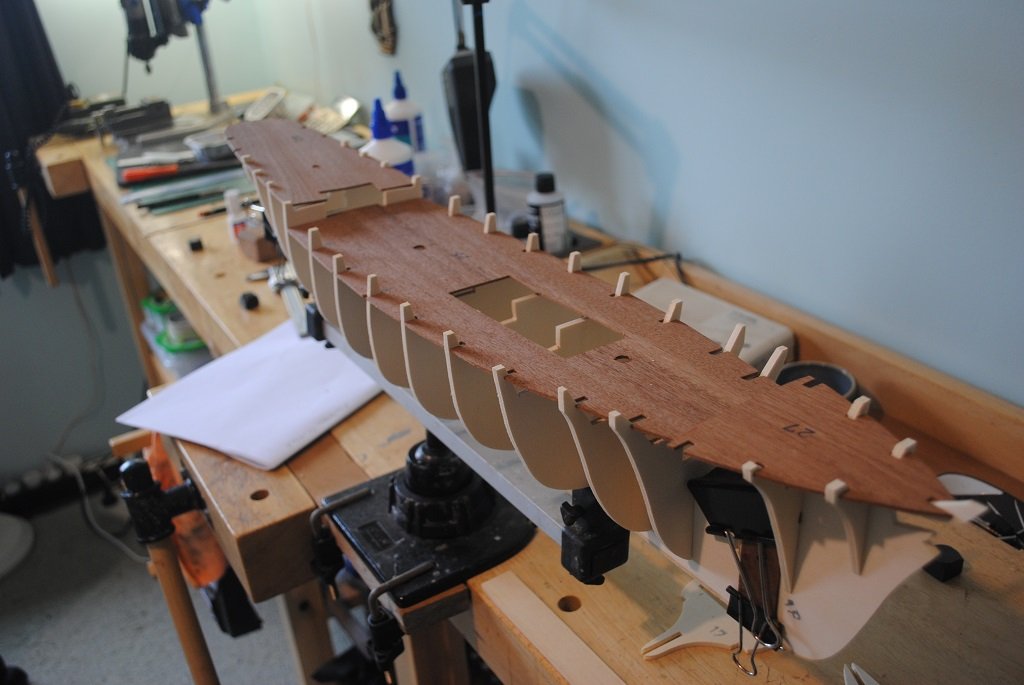
 Here is a brief progress update. Despite it being a busy week, I have applied a second coat of putty and started to sand down to 400 grit. Im pretty happy with the results so far. I still have some cracks and low spots that may need filling, but im going to try sanding them out a bit more first. One particular sticking point: Ive managed to sand through one of my card "planks, leaving a weak point and a bit of a hole. Its not huge, so im hoping a generous application of white glue might solve it, but if anyone has any recommendations, Im all ears! The plank in question is the uneven one on the port side. While thinking about this, I also had time to stat tracing out the bridge, which is starting to come together. My plan is to make windows from clear hard plastic packaging. Ive been thinking about the order of assembly, and I think the best would be: Trace inside of window frames in permanent marker, insert window panes, glue together bridge assembly, prime and paint inside and outside of bridge.


-
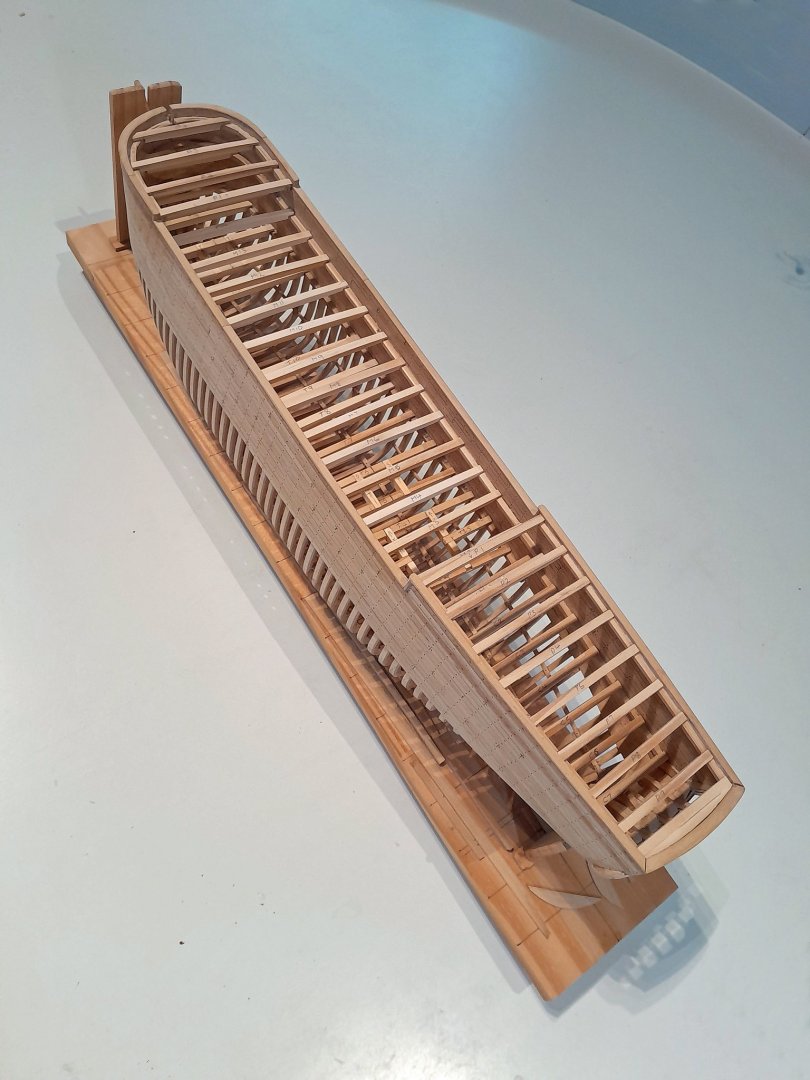
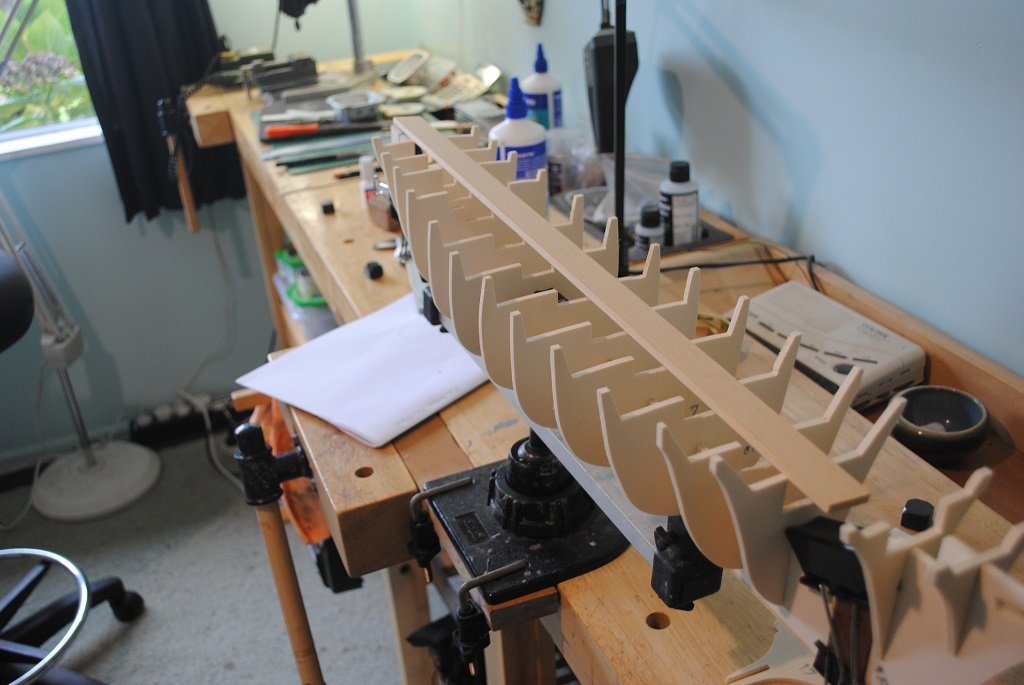
The manufacture of beams continues. All the beam 'blanks' have now been completed and I've started to work on the deck opening framing for them. Everything still, of nececcity, still unfixed, so everything needs to be carefully marked as it all goes together like a mad jigsaw puzzle. below are a couple of images of the forest of frames all roughly in place. John

-
Phil and Chris, thanks for the encouragement! Valeriy, those resources you shared are awesome. I was wondering about possible colour schemes, and the Project 1336 types you shared have certainly given me some ideas. The deck arrangement and side profile plans I found are also slightly different in terms of equipment layout it would seem than the article you shared. I wonder if the trawler went through a few design iterations before completion, or if it may have had different layouts based on the tyoe of fishing it was doing? With regards to your comment about warping and cracking: Unfortunately I dont really have the facilities to do any fibreglass work. I've helped build a carbon fibre sailboat before, and though I know fibreglass is much easier to work with, I think I would need a more dedicated workspace compared to my current setup on the kitchen table. I was planning on sealing the model with some kind of clear coat or epoxy once complete, which I think should be sufficient for my fairly low stakes project!
-
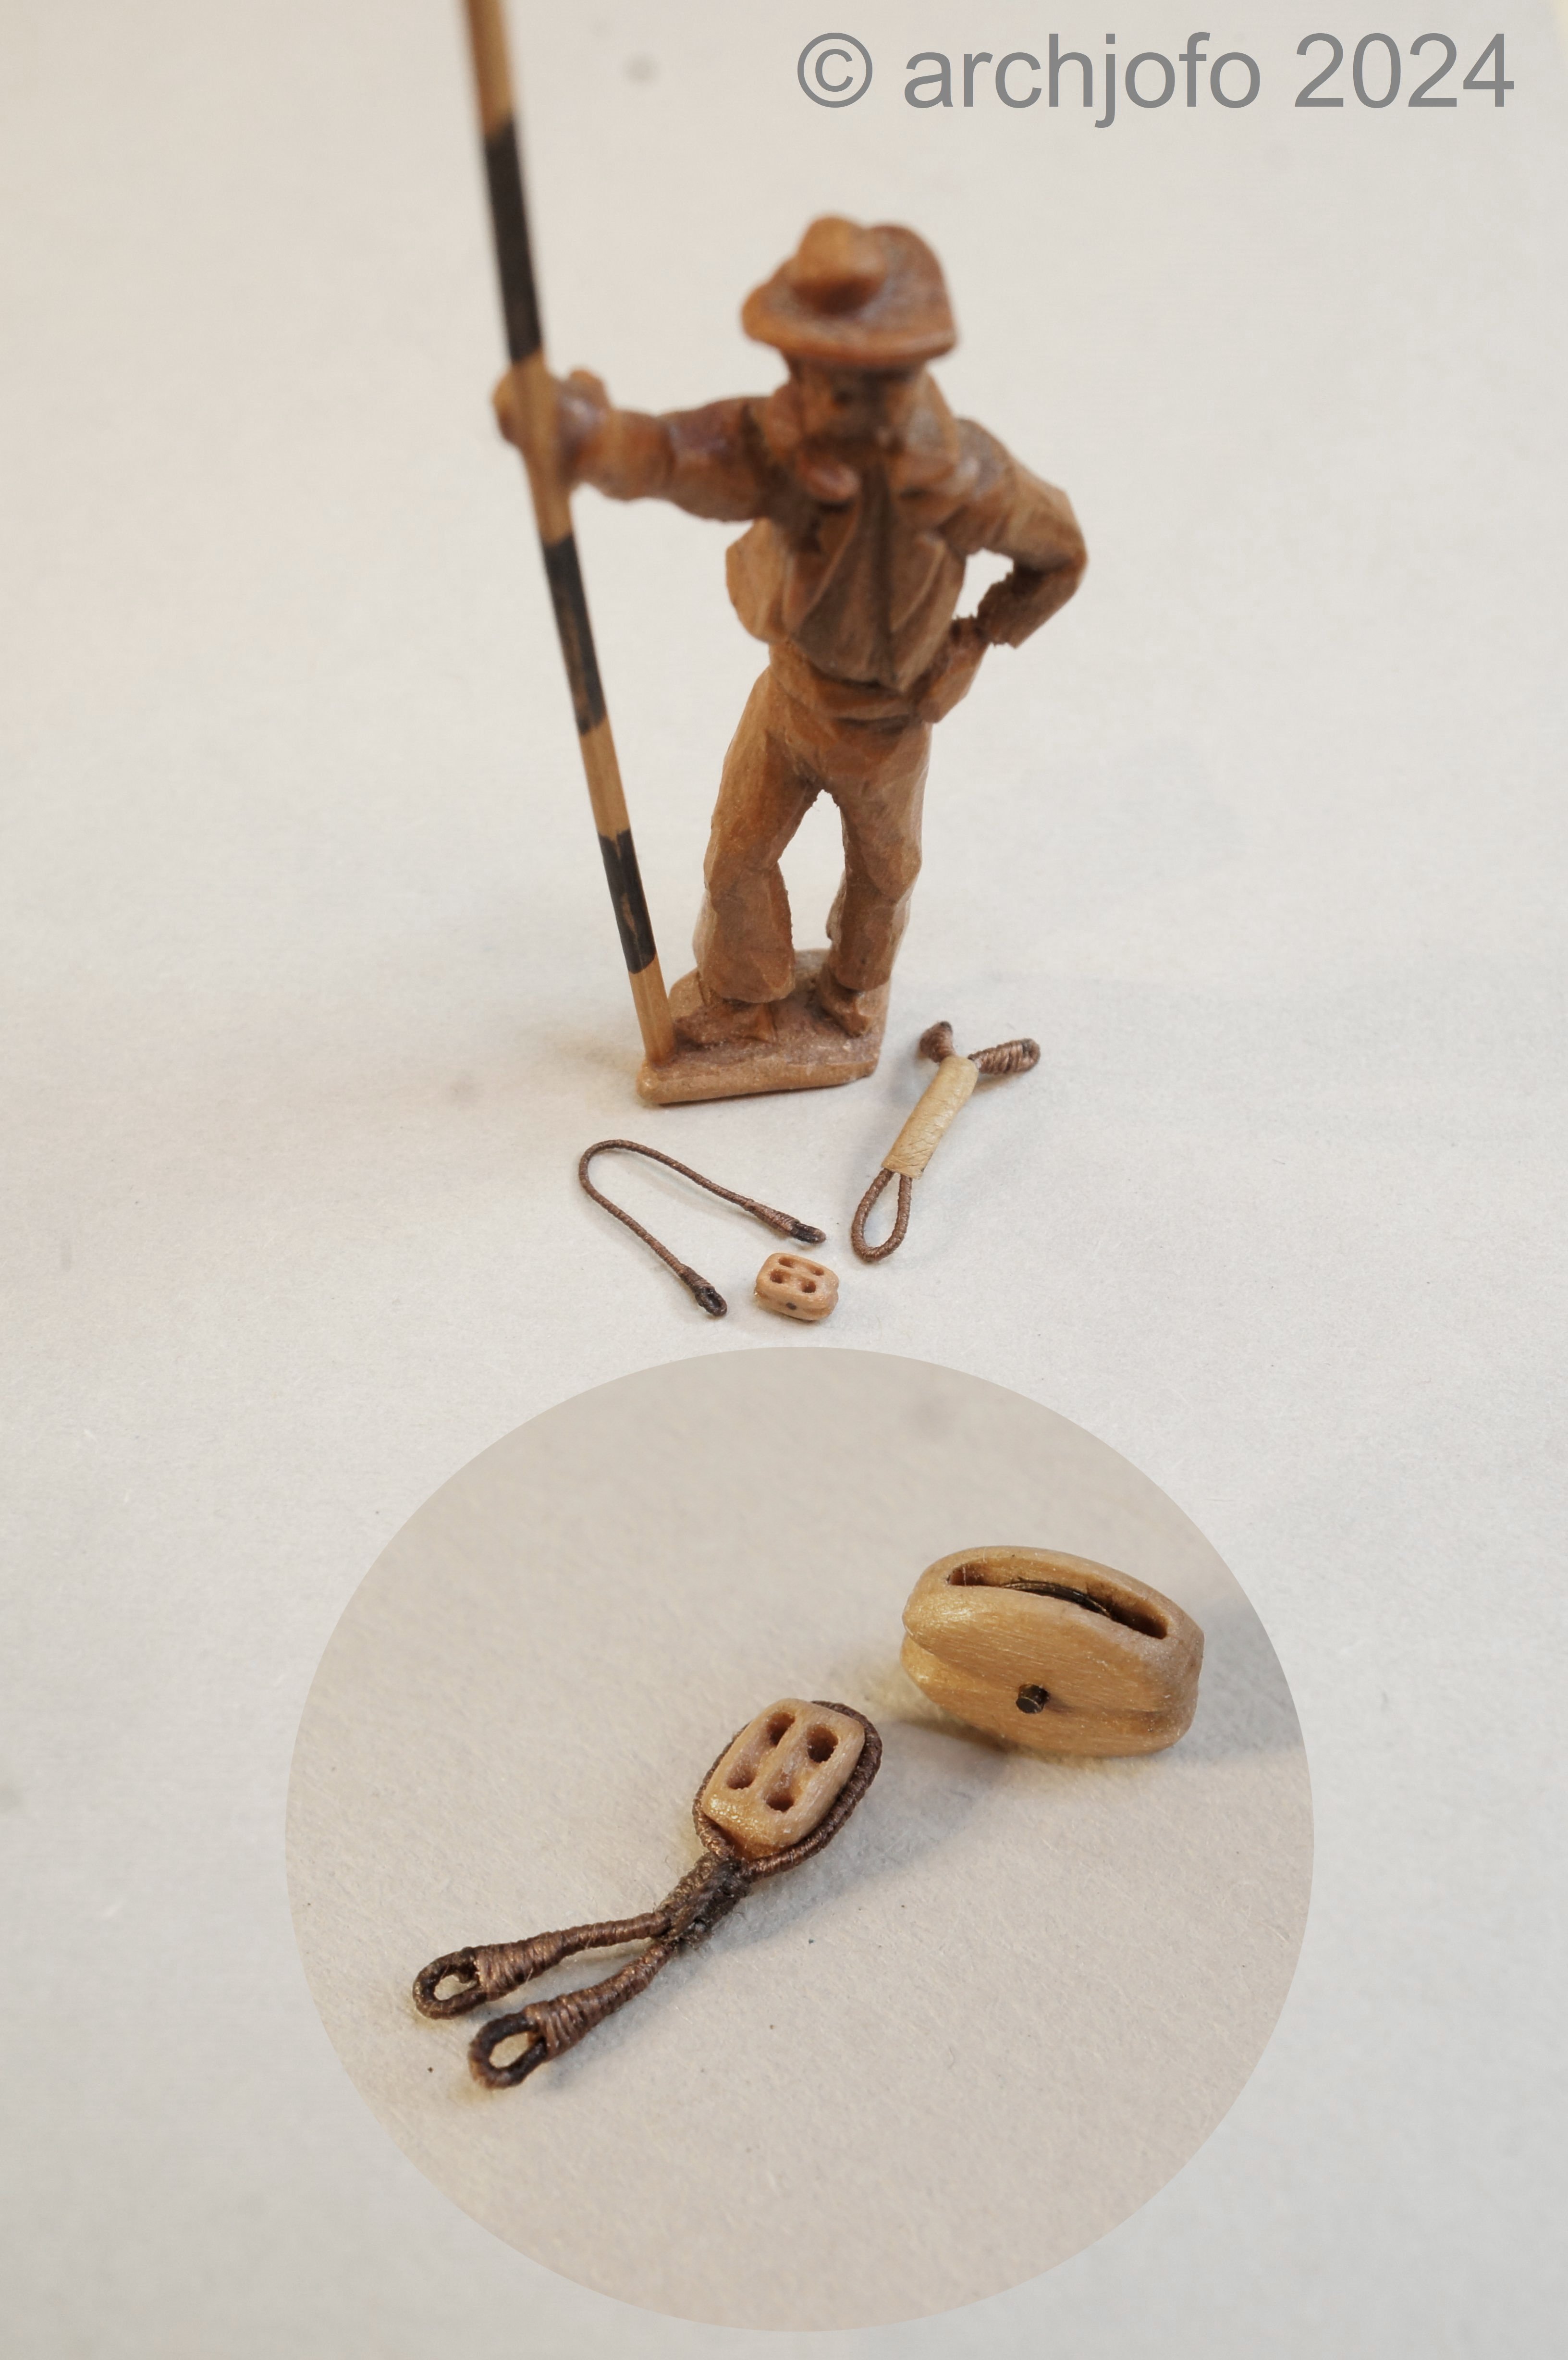
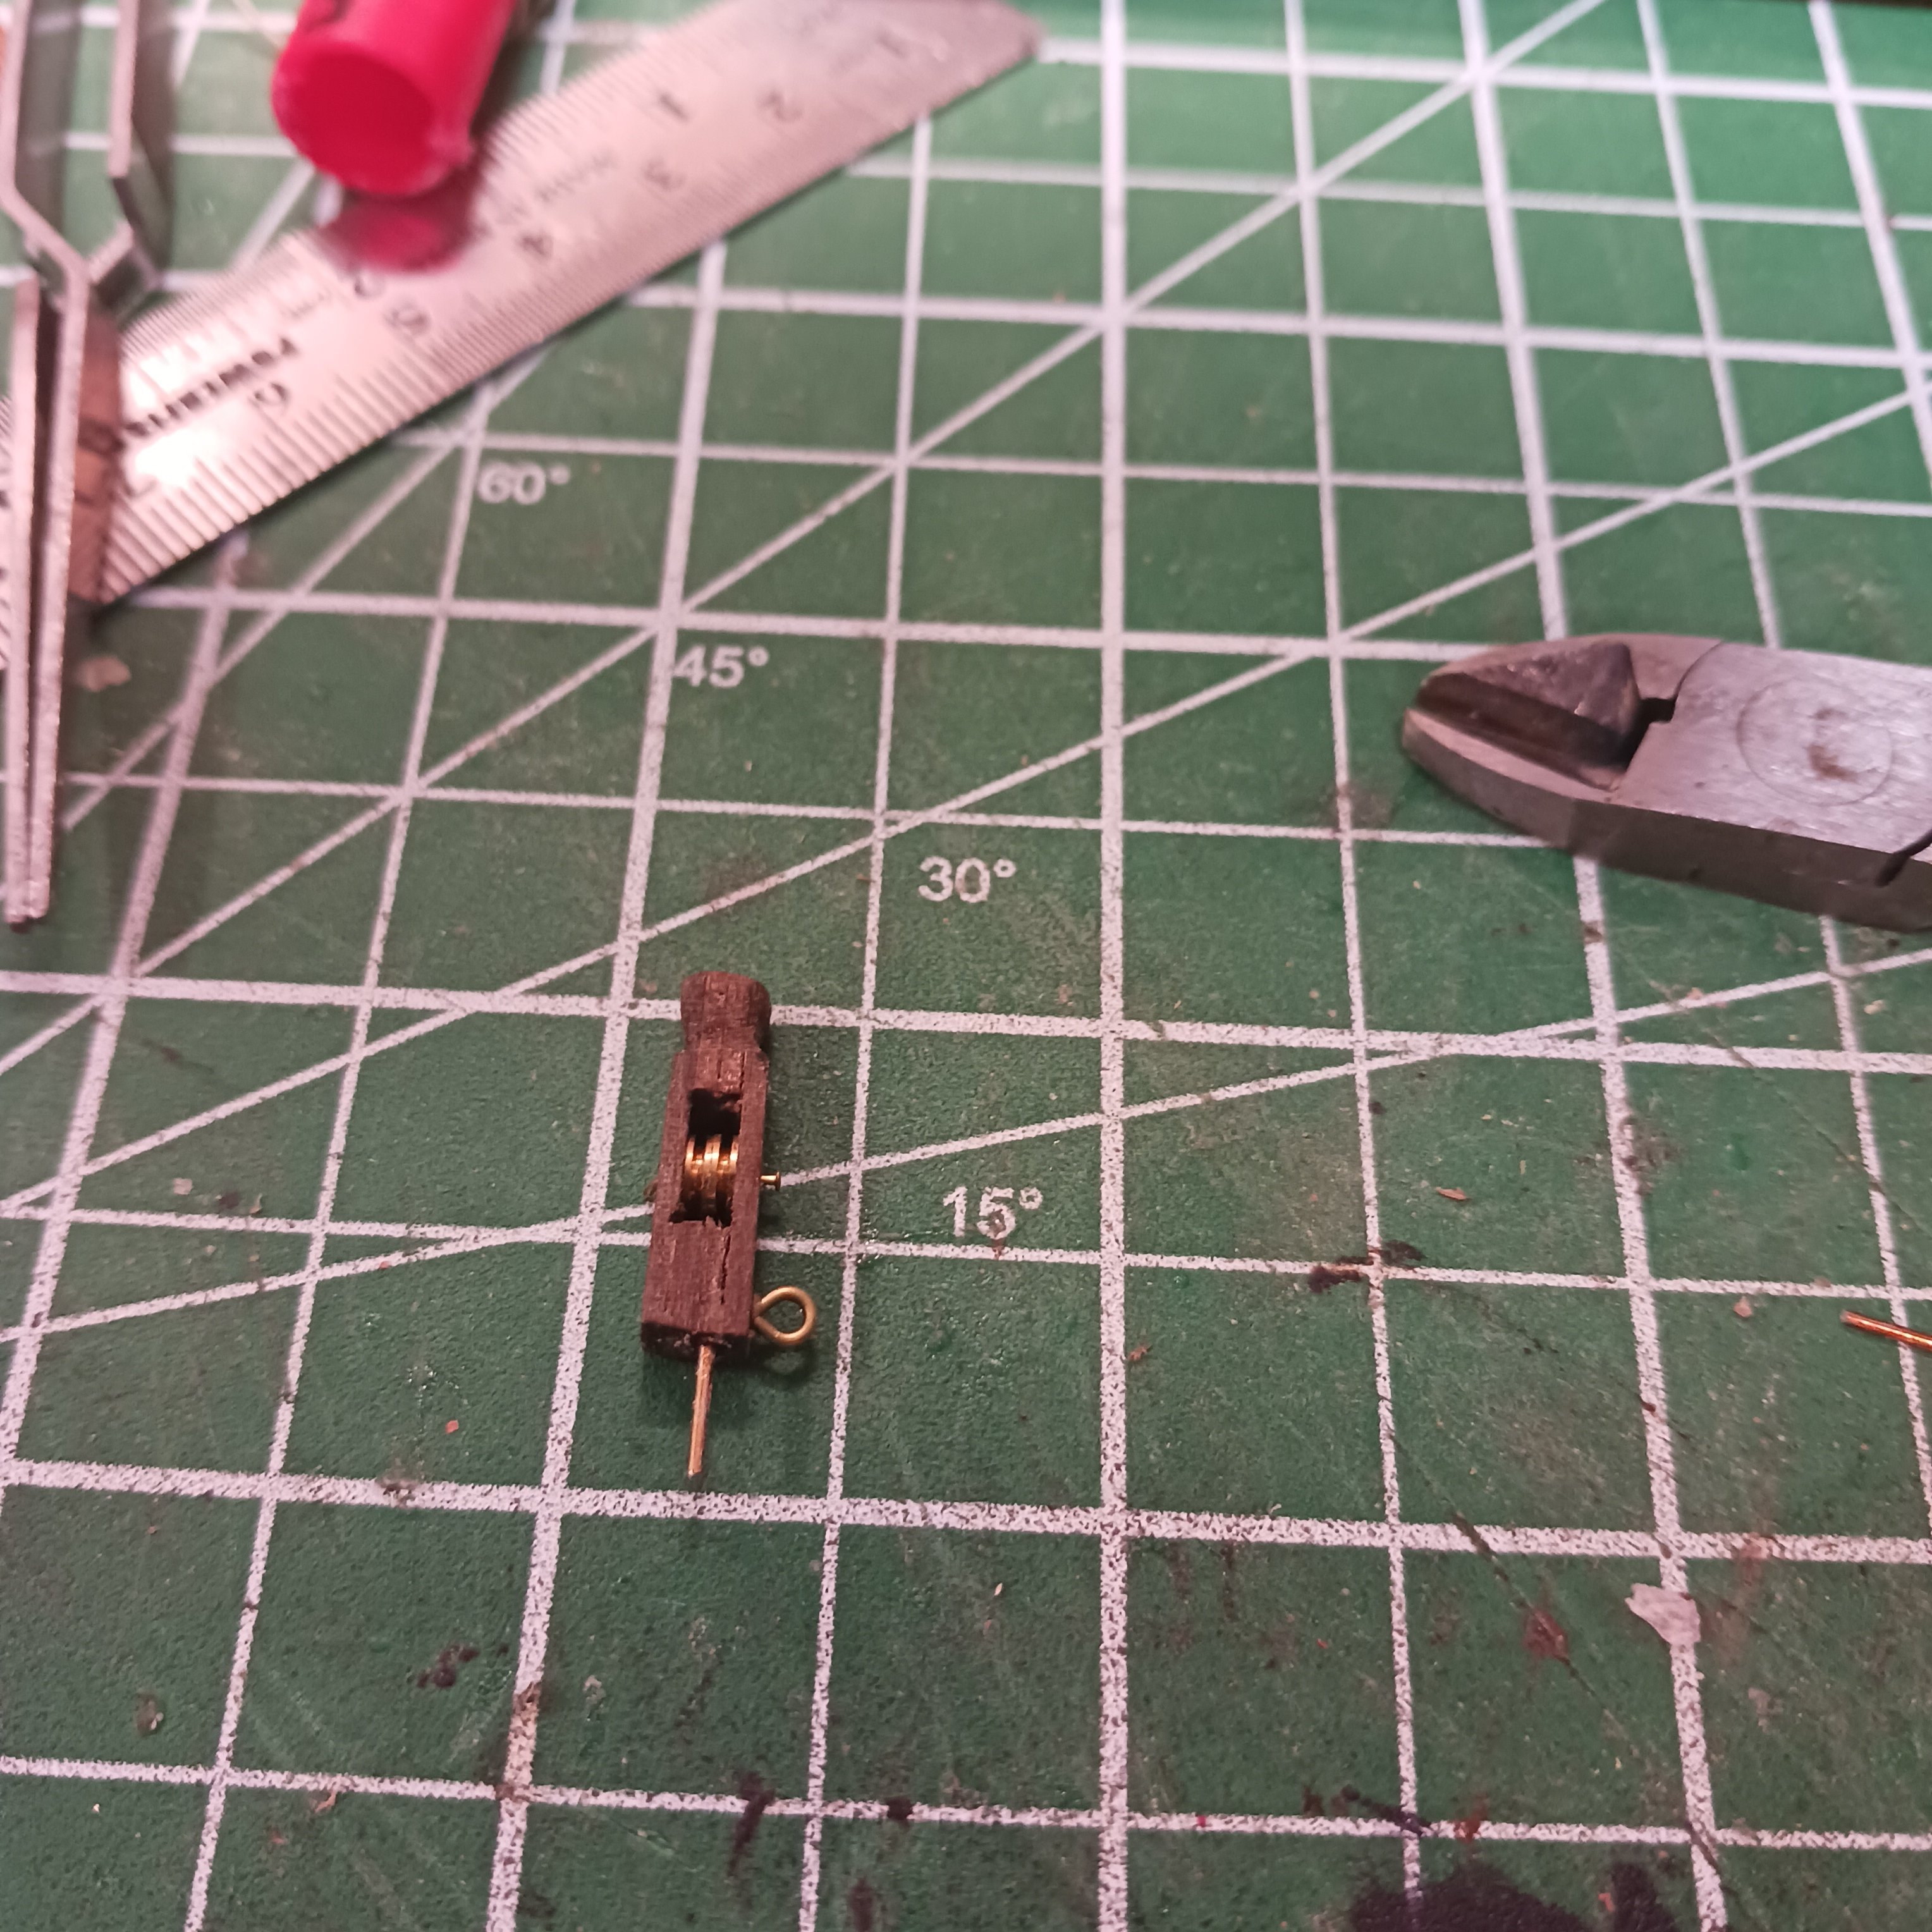
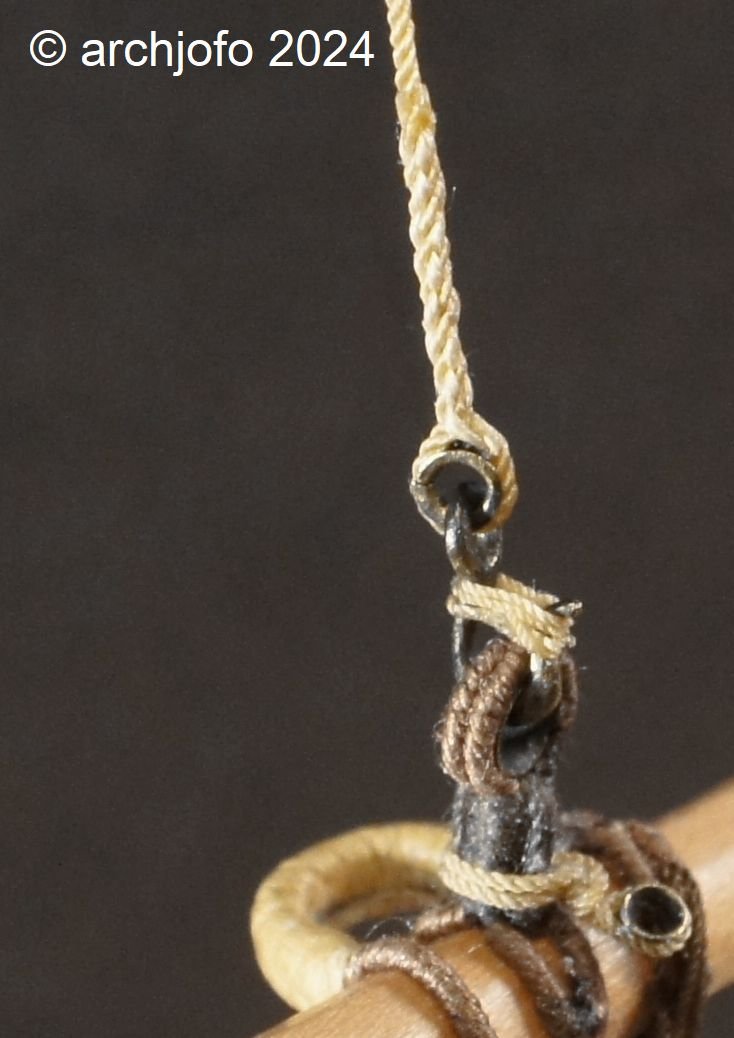
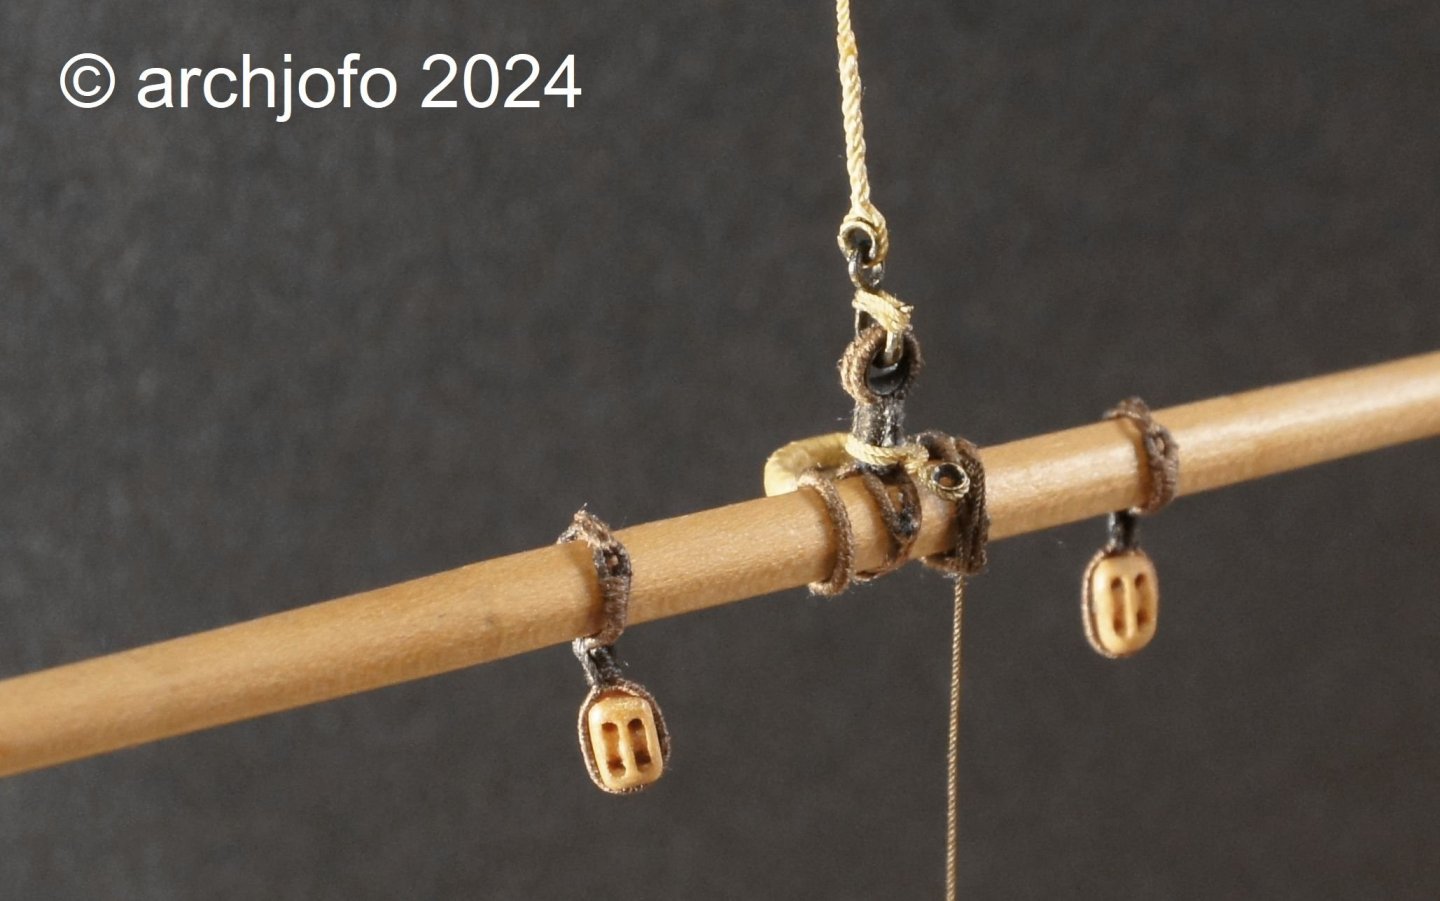
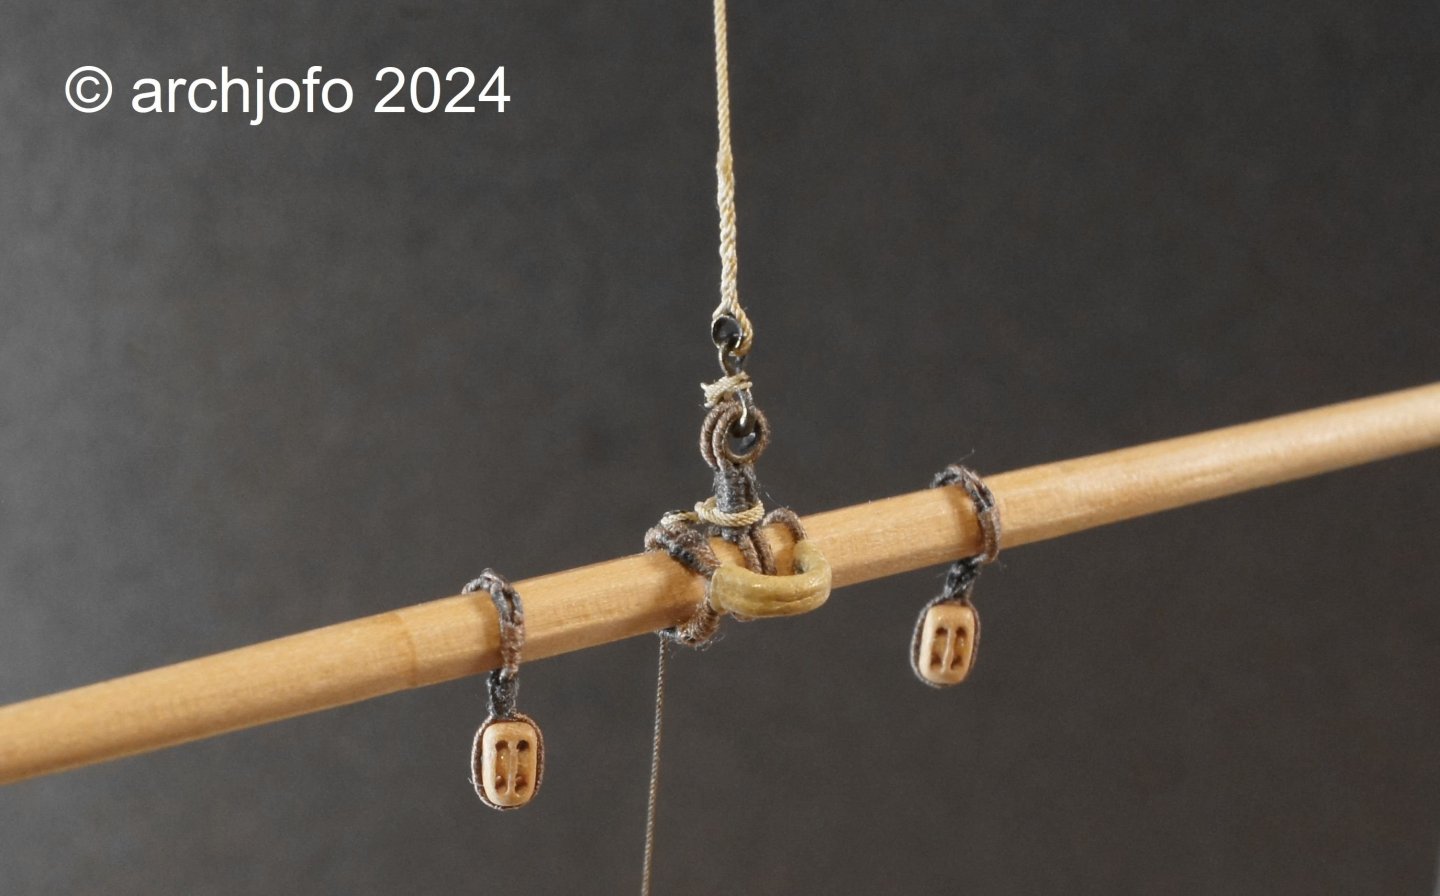
 @druxey Hello, I'm glad you like it. Thanks ! I would also like to thank everyone else for the LIKES. Continuation: Equipment of the mizzen topgallant yard – Vergue de perruche After a suggestion from model building colleagues, I secured the mousing of the hook for the tye with a thinner three strand rope with a diameter of 0.15 mm that was specially made for this purpose. We then continued with the quarter blocks (clew lines and sheets), which are among the smallest double blocks on the model. For the block ropes I used ropes with a diameter of 0.25 mm, which were served with silk yarn. The last two pictures show the arrangement of the quarter blocks with the truss already attached. Up soon …
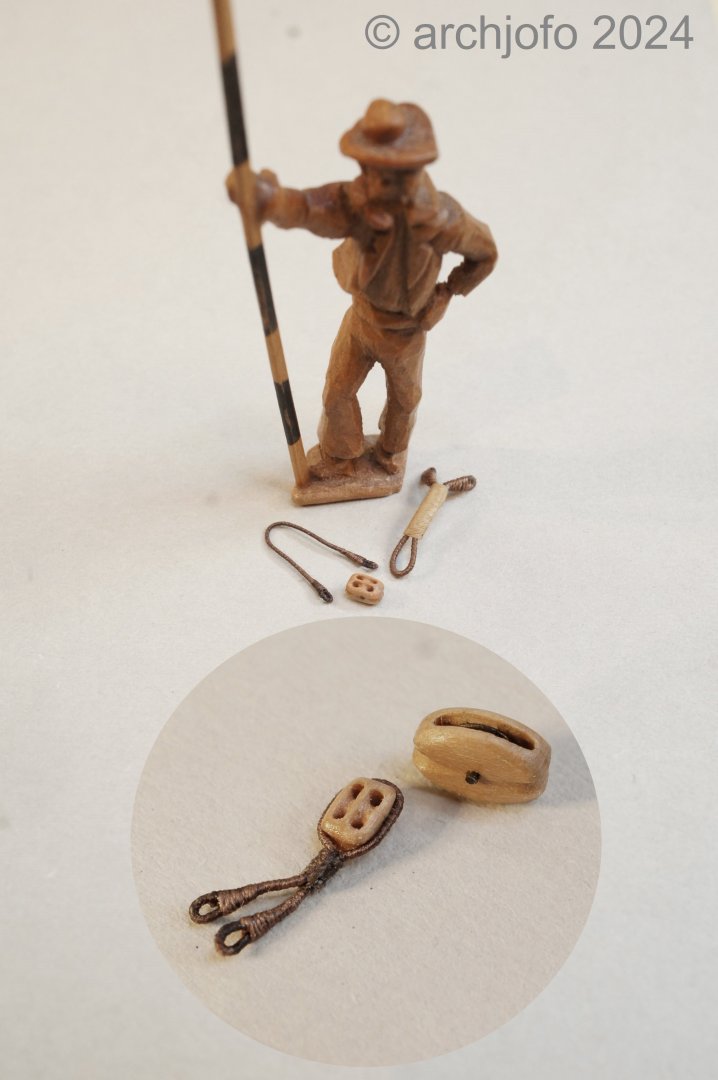
-
 Excellent work Greg - those should weather really well. OC.
 -
Keeping my head in the game.....
Old Collingwood replied to Egilman's topic in 3D-Printing and Laser-Cutting.
Excellent work brother. OC. -
 BruceWayne426 joined the community
 -
 Hi Chap, Just "Chiming in" here.... From experience, I'd go with #$ followed by #2 My effort with the Sergal/Mantua is on this site. (Search Cutty Sark by HOF00) I have #2 in storage. I think that the Sergal/Mantua version goes together very nicely, and the scale makes things a little easier. (Granted, the size is something to be considered.) Cheers....HOF.
 -
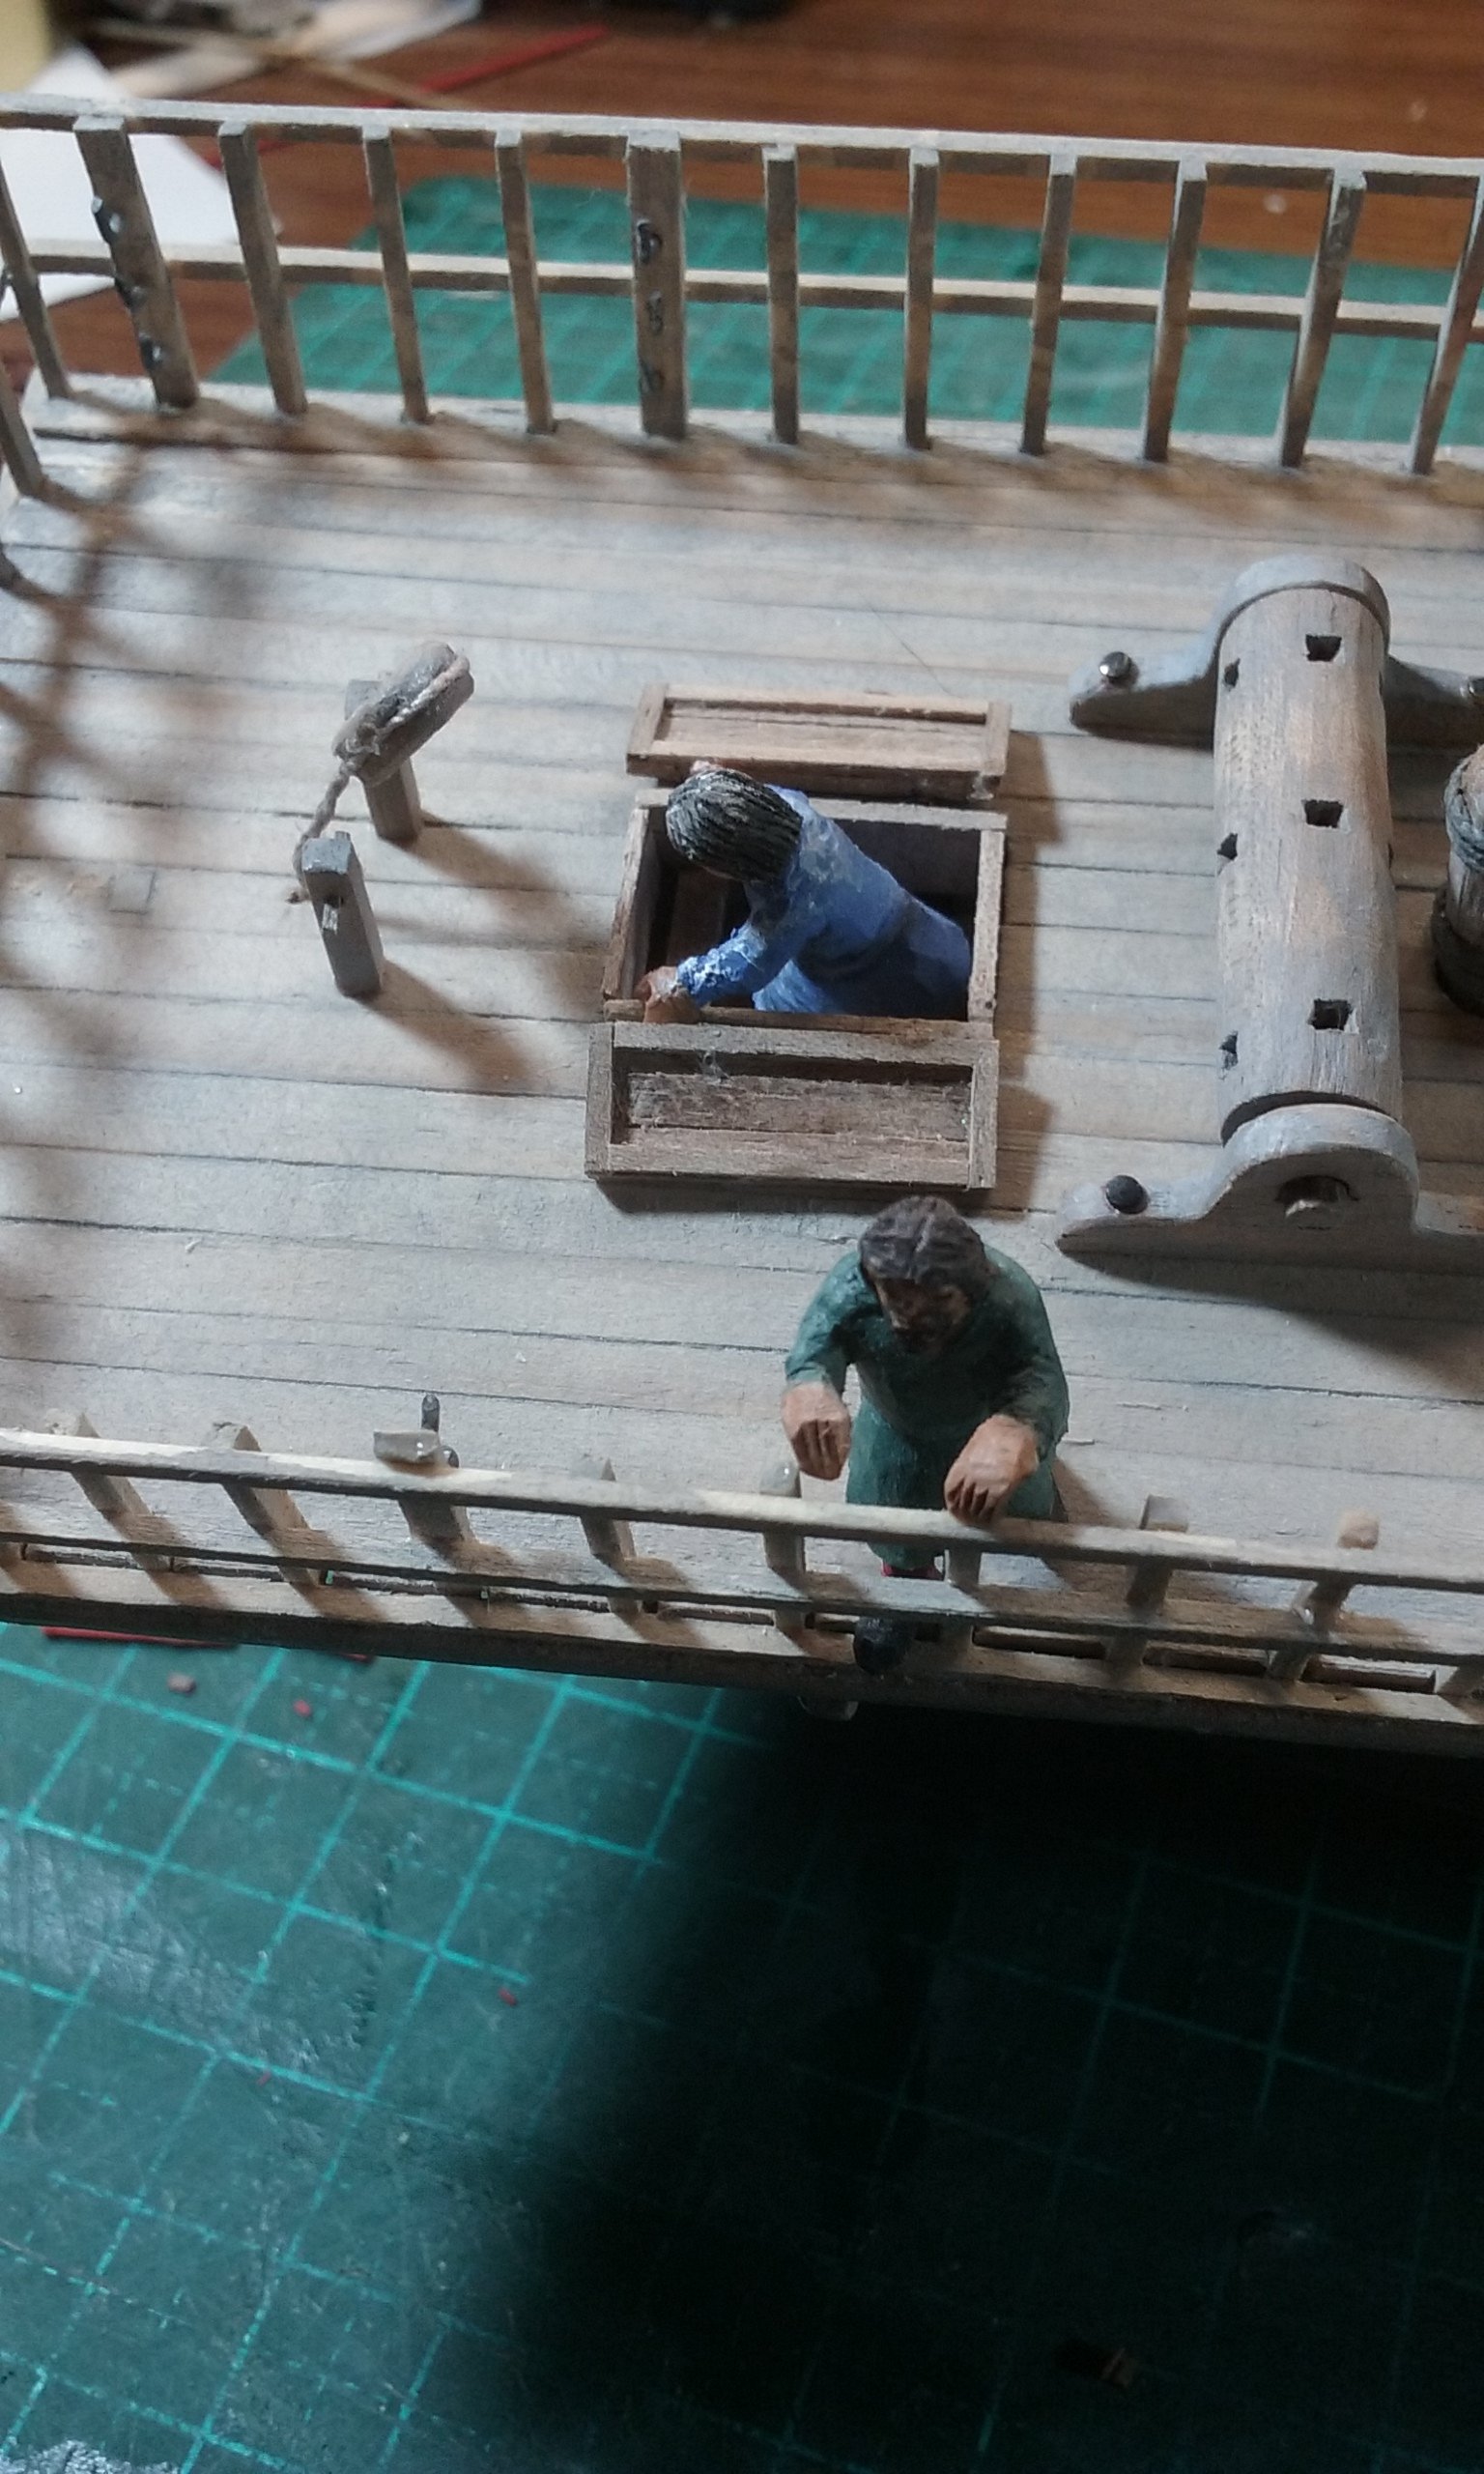
 I’ve made a start on hand painting the figures. Being civilians I wanted to mix up some colours. One I get my base coat down I’ll give it a clear coat before weathering
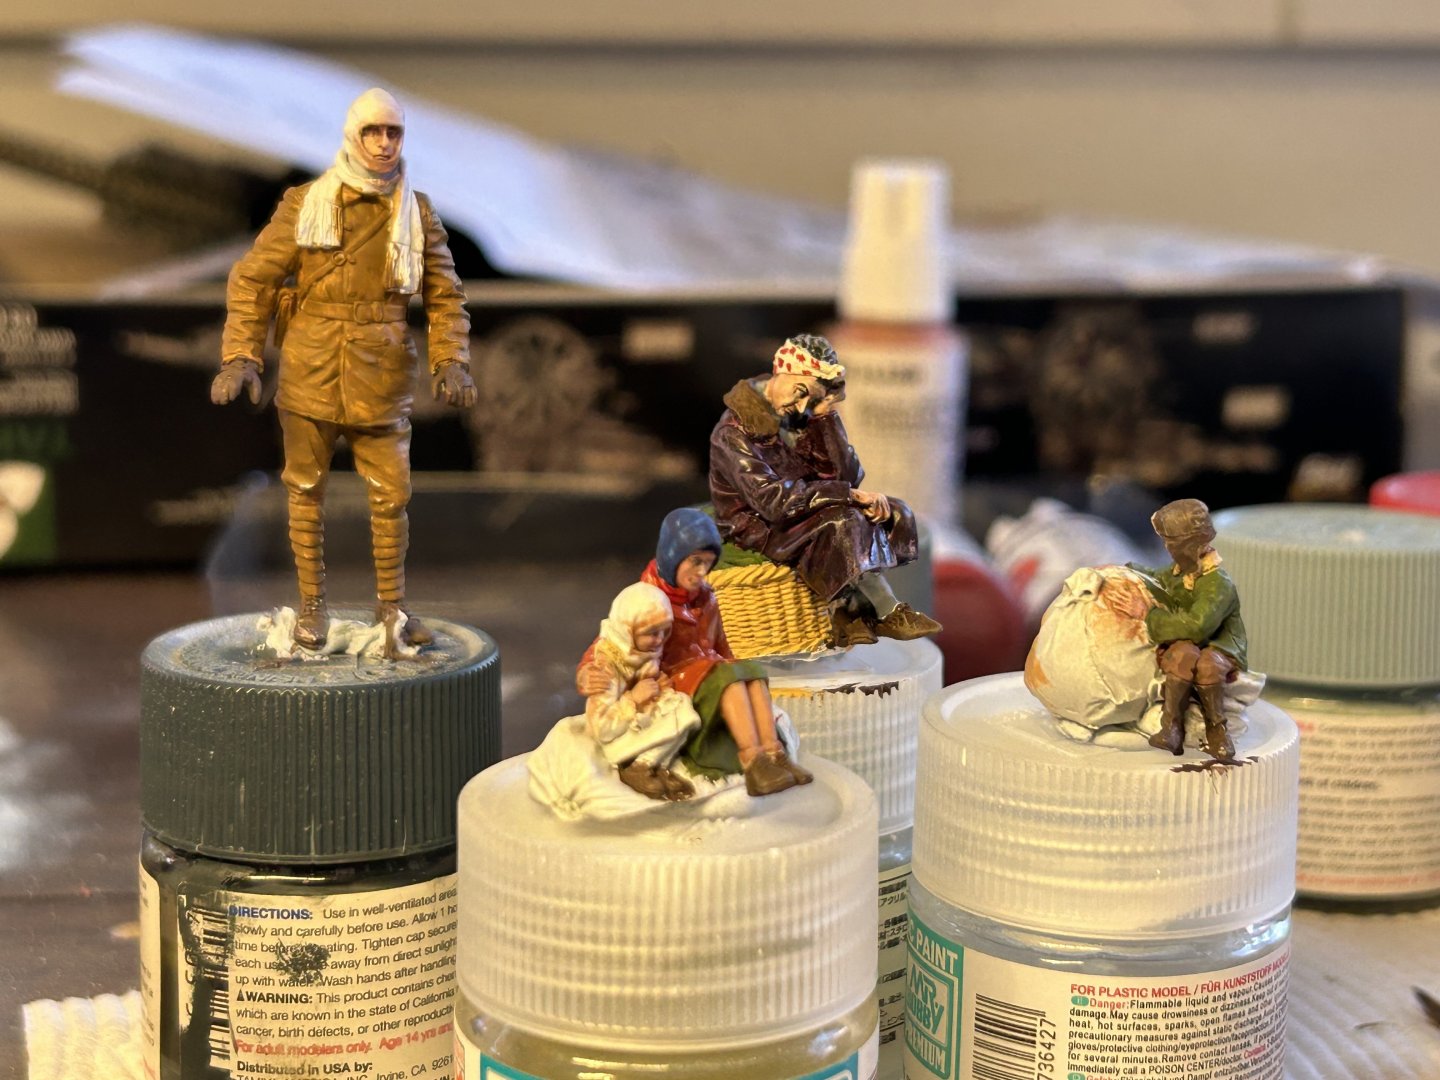
-
Hi All, Small update: Fixed Keel discrepancy Keel Doublers affixed I decided that I'd put the Keel in the "Clamper" and teat fit the Bulkheads, to my surprise they slotted in place very well!! (Not all Bulkheads are dry fitted as yet as the Doubler clamps are in the way at the mo.) There is a "Beam" that secures the Bulkheads, this is about 1.5mm too wide, I think that this doubles as the Mast Step. I'll cut my own as a template and then machine the kit "Beam" once my template piece is the correct size. The dry fit allows me to visualize/plan a little better. A cursory look at the kit "Stock," it appears that the Ramin Dowels are cut to length, I haven't measured the components as yet. I am hoping that there will be extra length to allow me to machine these, if not, I'll have to find my own stock. I'd be happy if anyone wants to "Chime In" regarding the First Planking. The kit describes the first plank laid at the Very top Stern, (Creating the Stern Upper Bulwarks and terminating some point at the Bow.) I have had a look, (You Tube), at the way Mr. Priske did his, he appears to have started First Planking at the Main Deck level. (I guess it doesn't really matter all that much at the end of the day.) Steve Priske also laid his Deck Planking on the False Decking, Decks installed after the Hull first Planking and inner Bulwarks completed. (The issue i have with that is how do you secure the Decks properly "Post" Hull Planking? My experience with the Cutty Sark was the planking the False Deck "Prior" to Hull Planking was not an issue. (I am not going to "Treenail" the Decki8ng as at 1/96 I don't think you'd be able to see this detail. Cheers.... HOF. Photos:

- 4 replies
-
- 2
-
-
- Flying Cloud
- Mamoli
- (and 1 more)
-
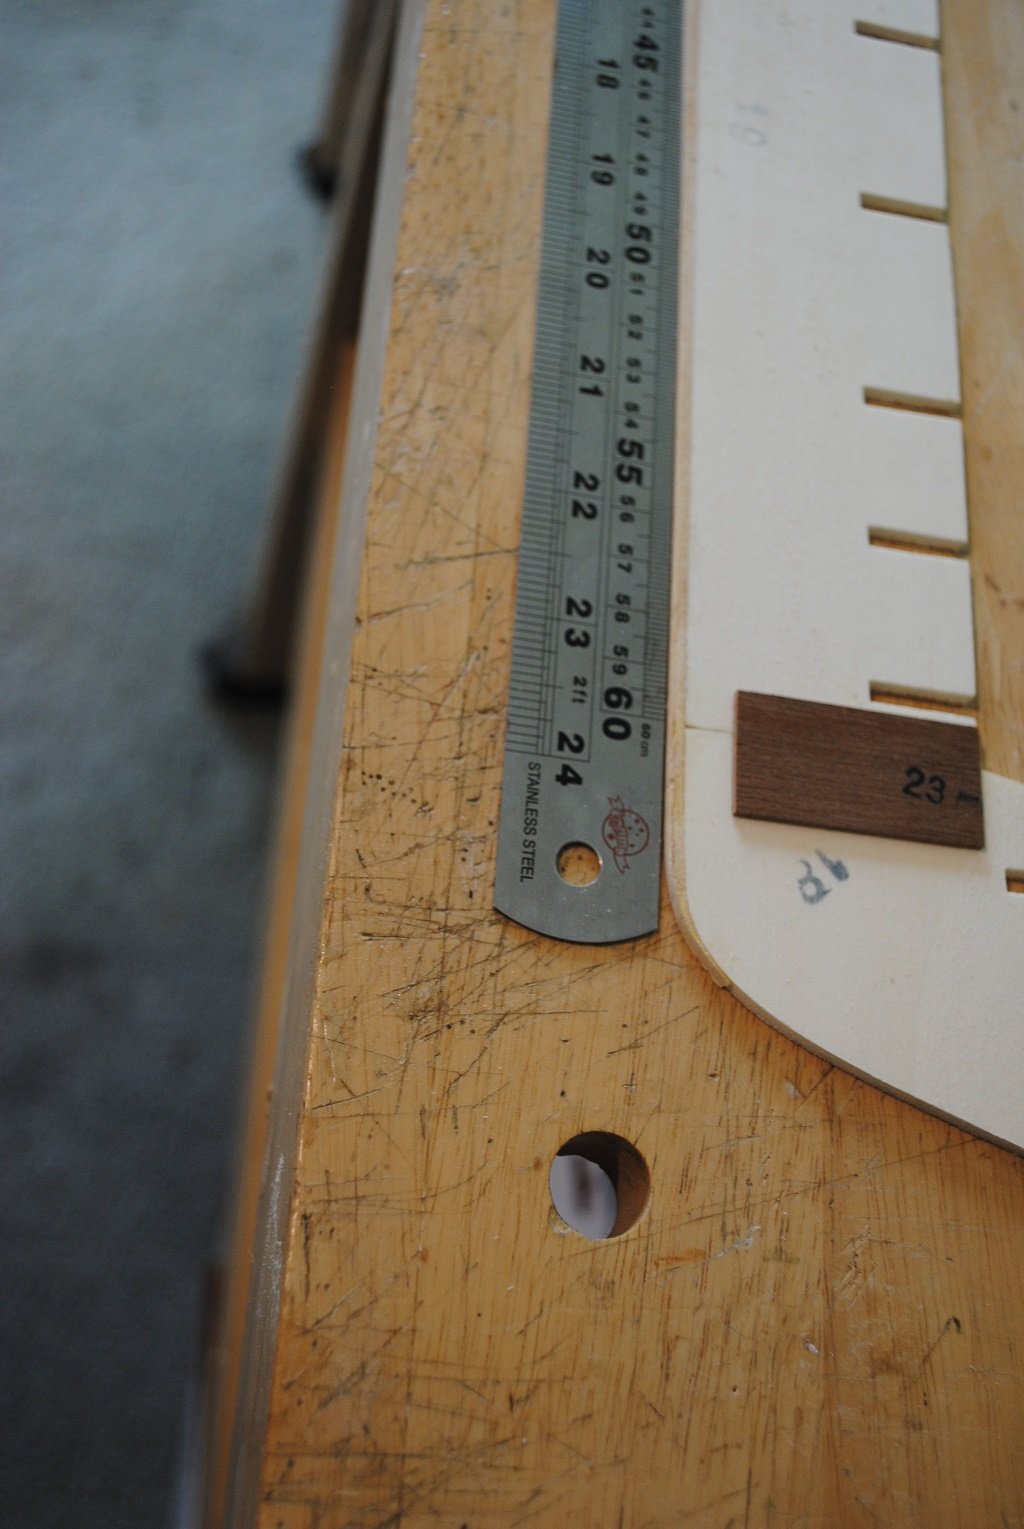
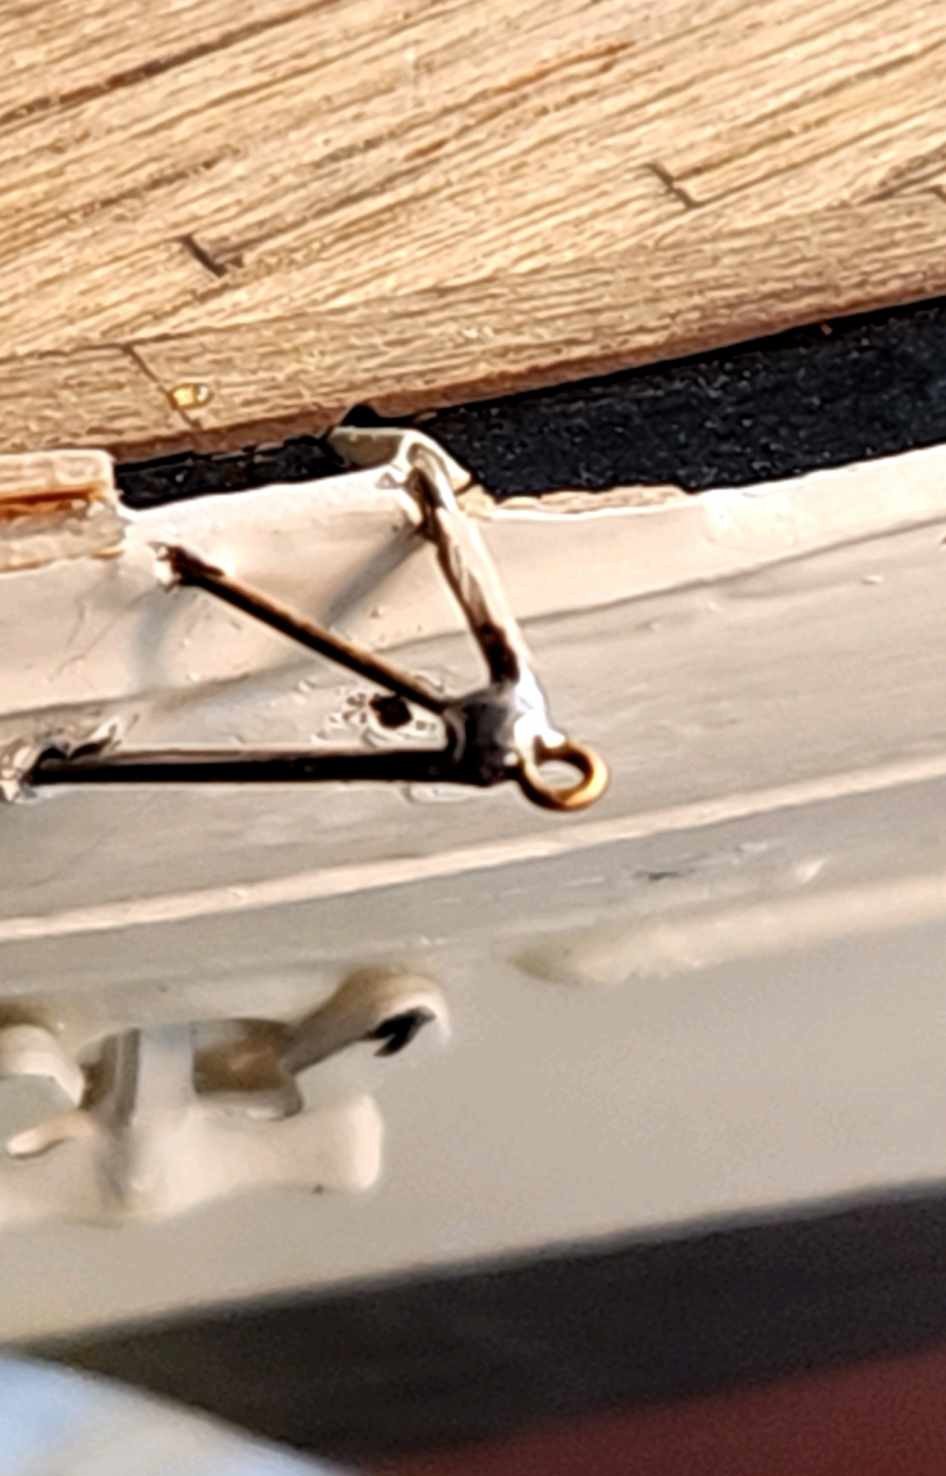
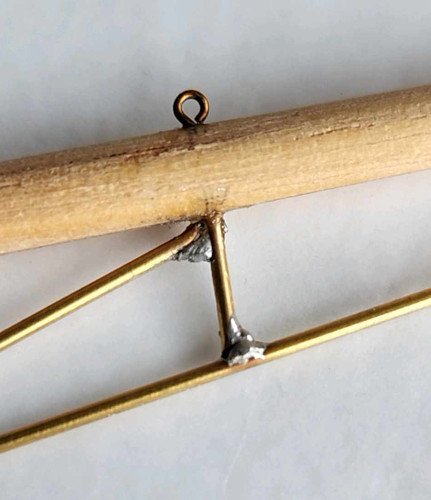
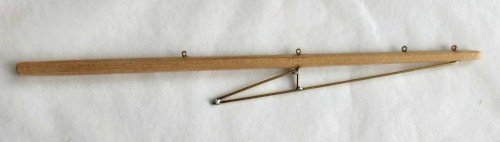
 For the new bowsprit, I tapered a 3/16" dowel using a drill and sandpaper. Then I constructed the bobstay, martingale stay, and dolphin striker using 1/32" brass tube, soldered at the junction points. This assembly is glued to the bowsprit using CA, after creating small indentations in the bowsprit at the contact points. I'm hoping this will be strong enough, but I may decide later to reinforce these glue points with PVA or epoxy. At key attachment points (for the staysails), I hand-drilled holes partway through the bowsprit, and inserted eyes cut slightly shorter than the hole depths, and glued them in with CA. I did this first on a test piece, and they seemed to be very secure. I'm not worried about the discoloration on the wood, as it will be painted later with Coast Guard spar color. I still need to add attachment points on the sides of the bowsprit to anchor the stays. While I had my soldering iron handy, I repaired the forward port-side bumpking, shown below. I'll paint it white when I repaint the hull.
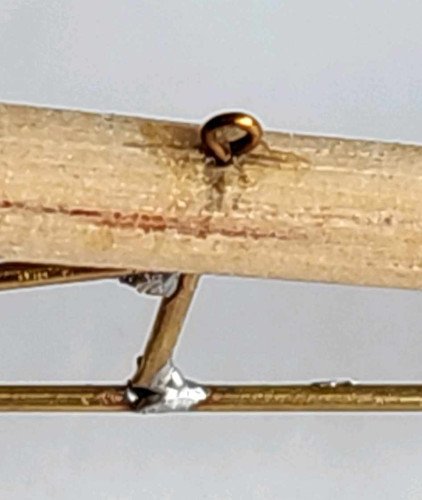

-
 Just found this despite trying to search for someone else building a Mayflower back in 2022. But it’s never too late. Your build is looking awesome. Cheers, Dave
 -
 Great way to rekindle those memories Mark; good luck with this project. cheers Pat
- 4 replies
-
- 1
-
-
- half hull
- half hull planking project
- (and 1 more)
-
 Kevin, I prefer Cruise Ship. We love Viking. No casinos, age restricted, free excursions at every port, amazing design and service. And no, I get no kickbacks... Ha!
- 64 replies
-
- 3
-
-
- Cutty Sark
- plastic
- (and 3 more)
-

Keeping my head in the game.....
Egilman replied to Egilman's topic in 3D-Printing and Laser-Cutting.
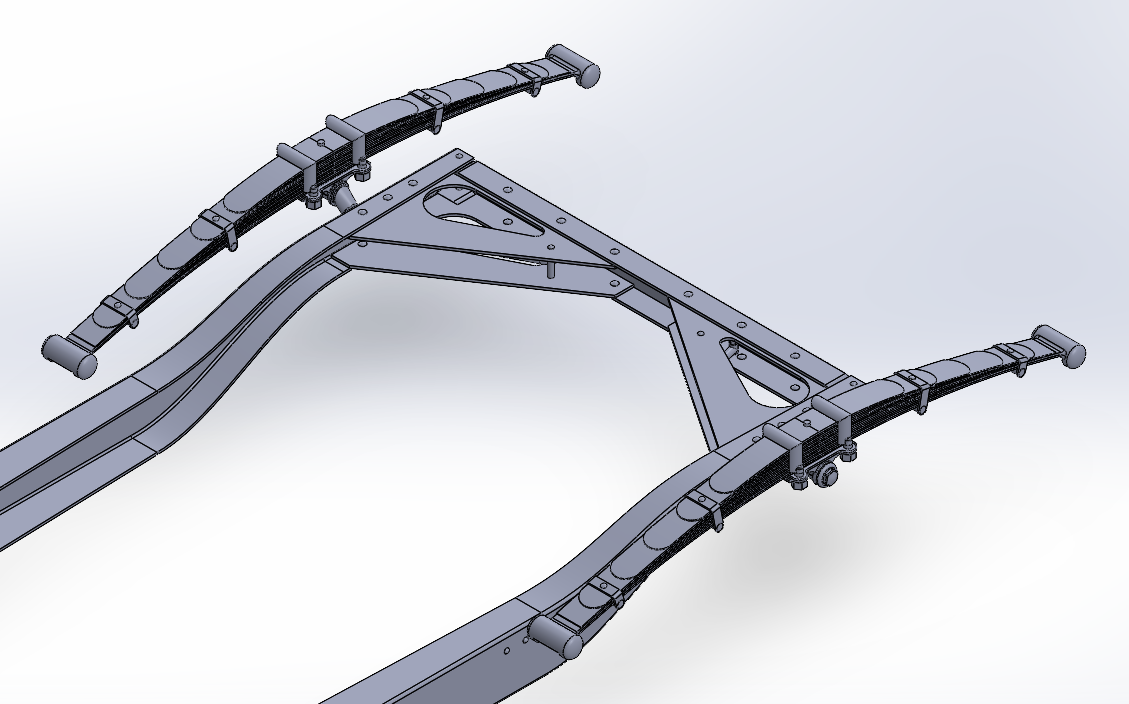
Well the Upper Rear Springs are done.... And the bottom side... And an overall view.... Now I have to repeat this but upside down to complete the lower half.... Onwards....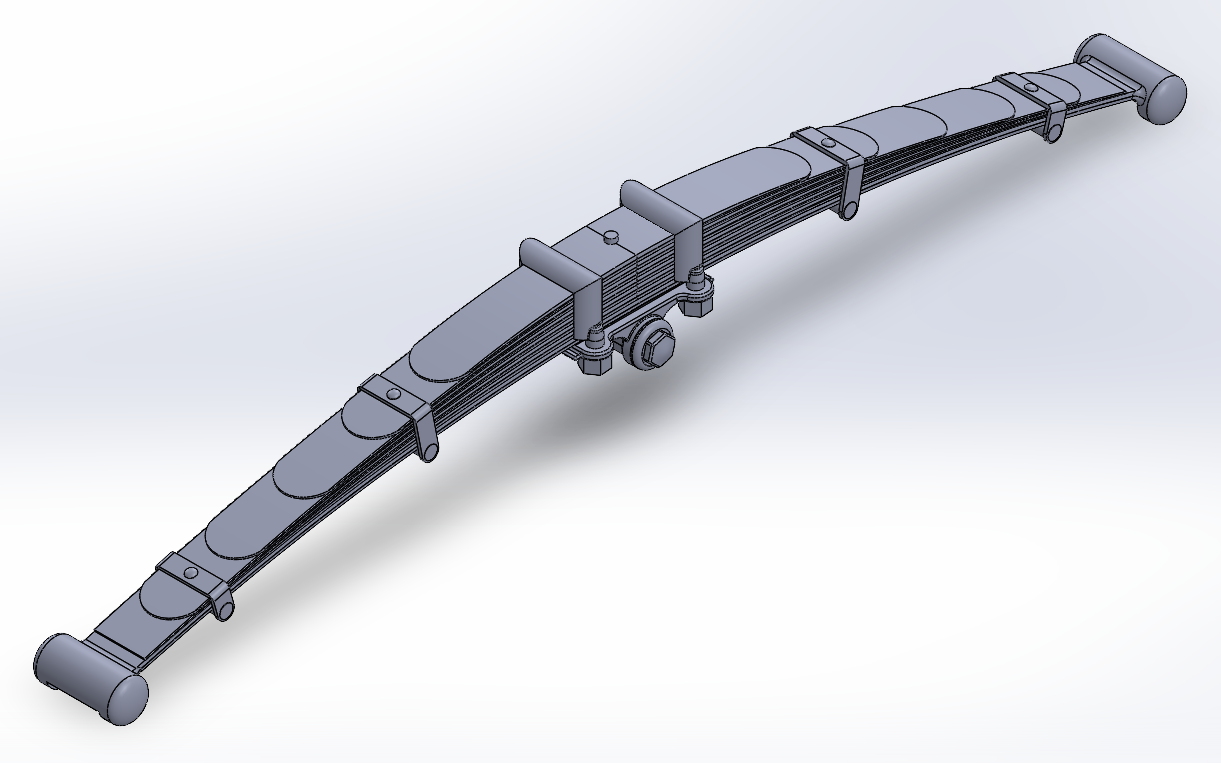

-
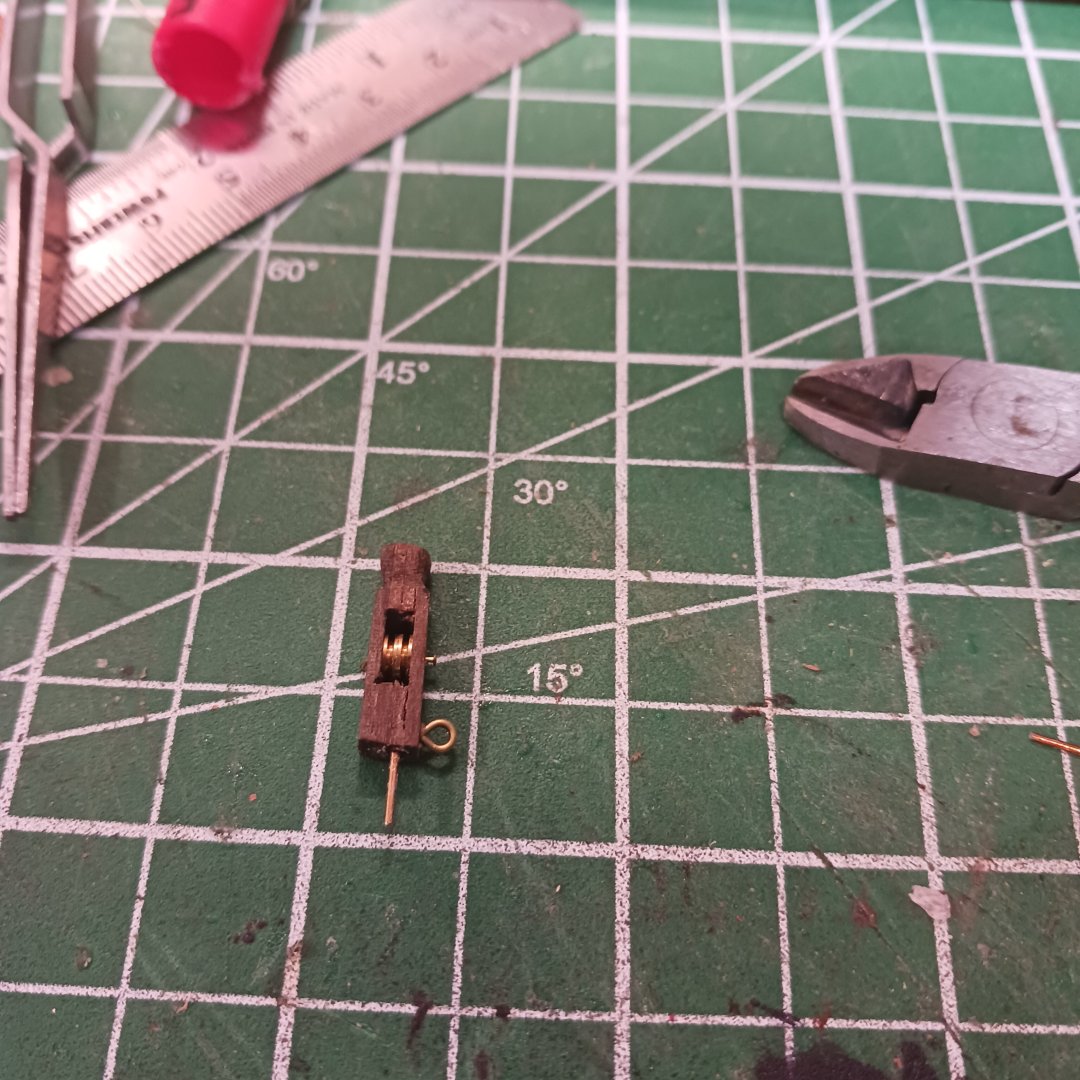
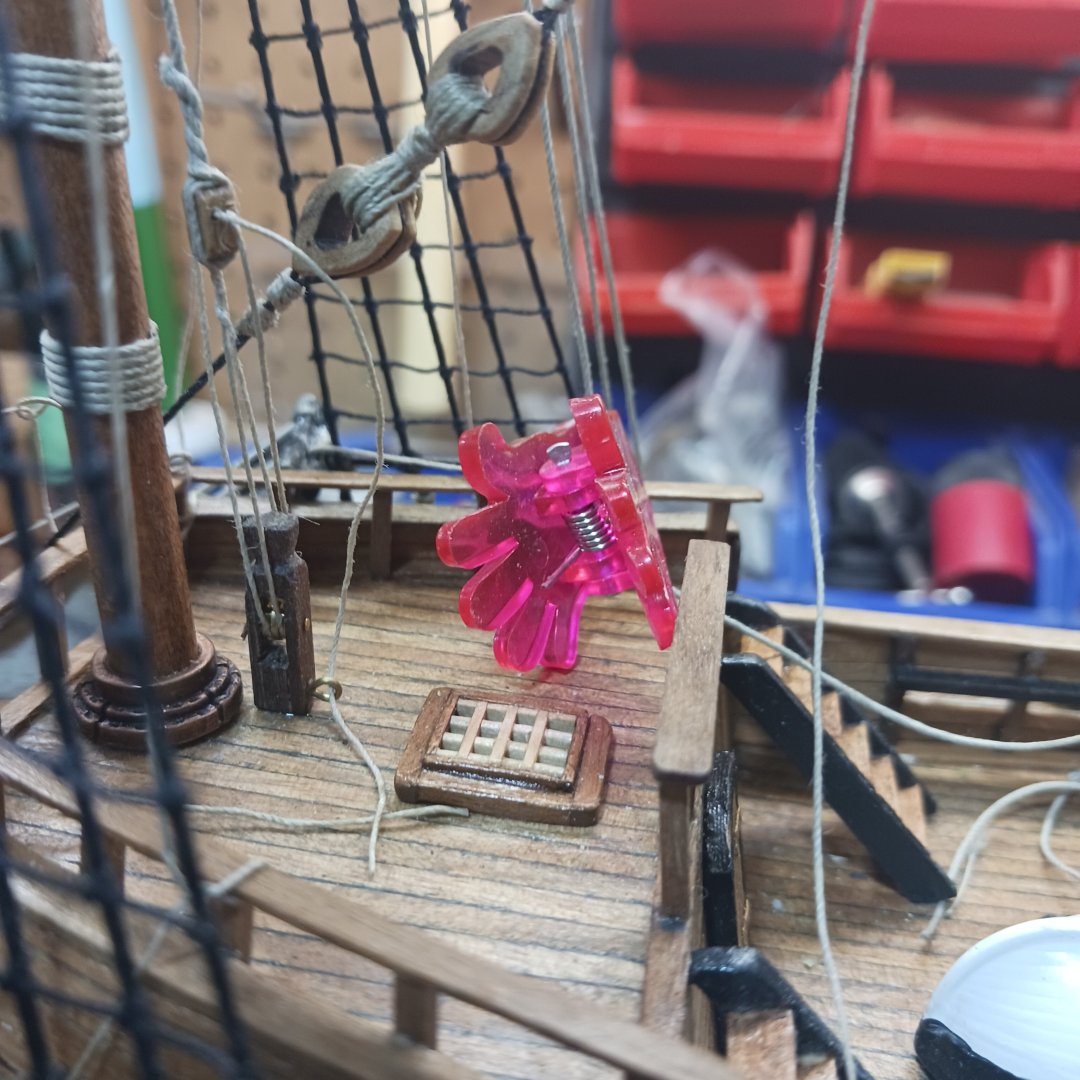
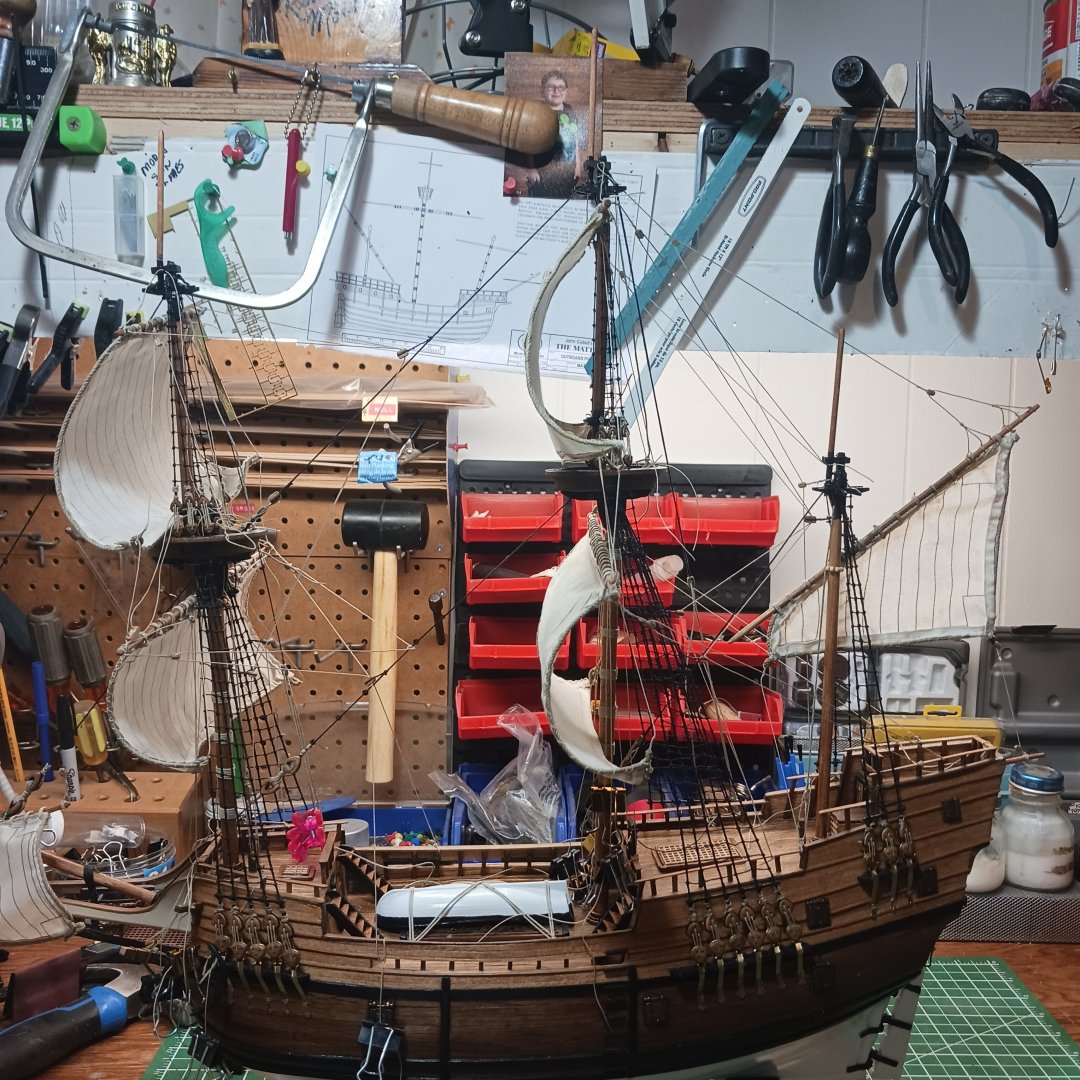
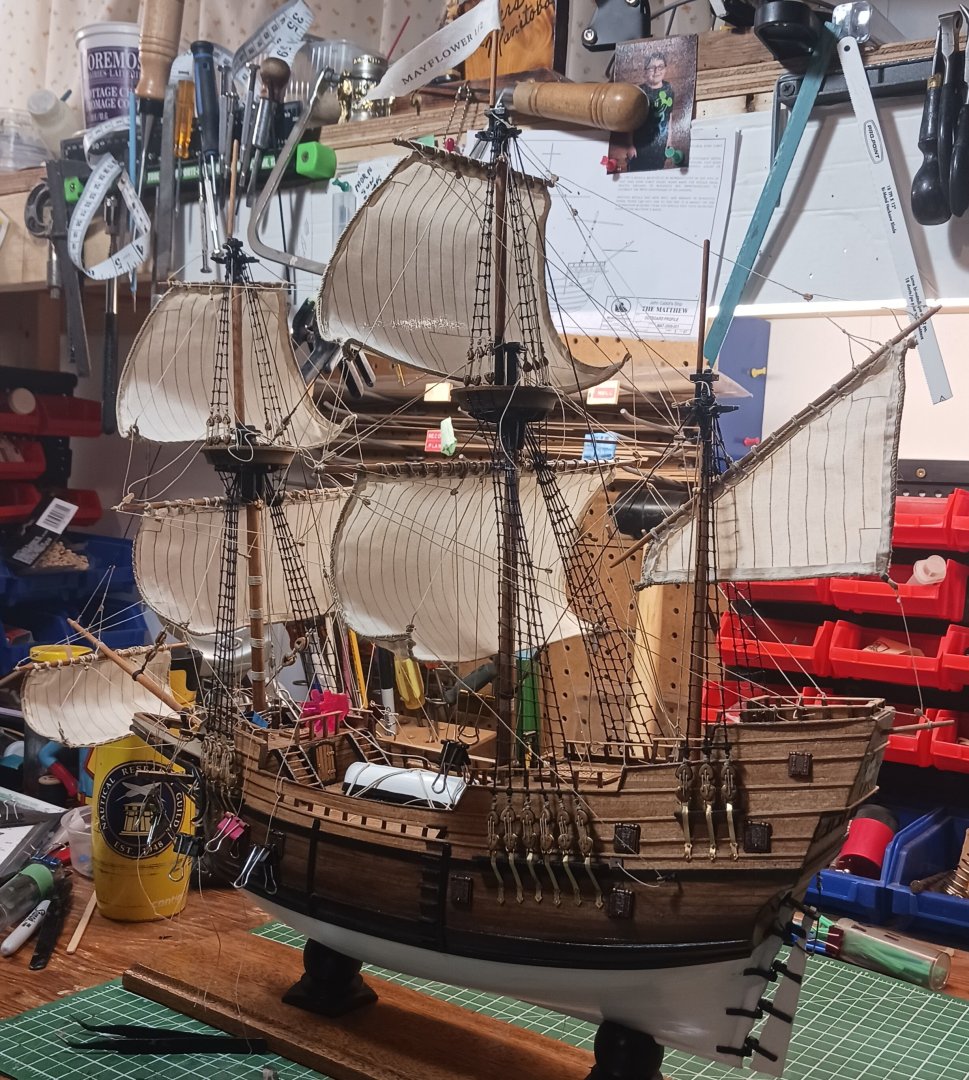
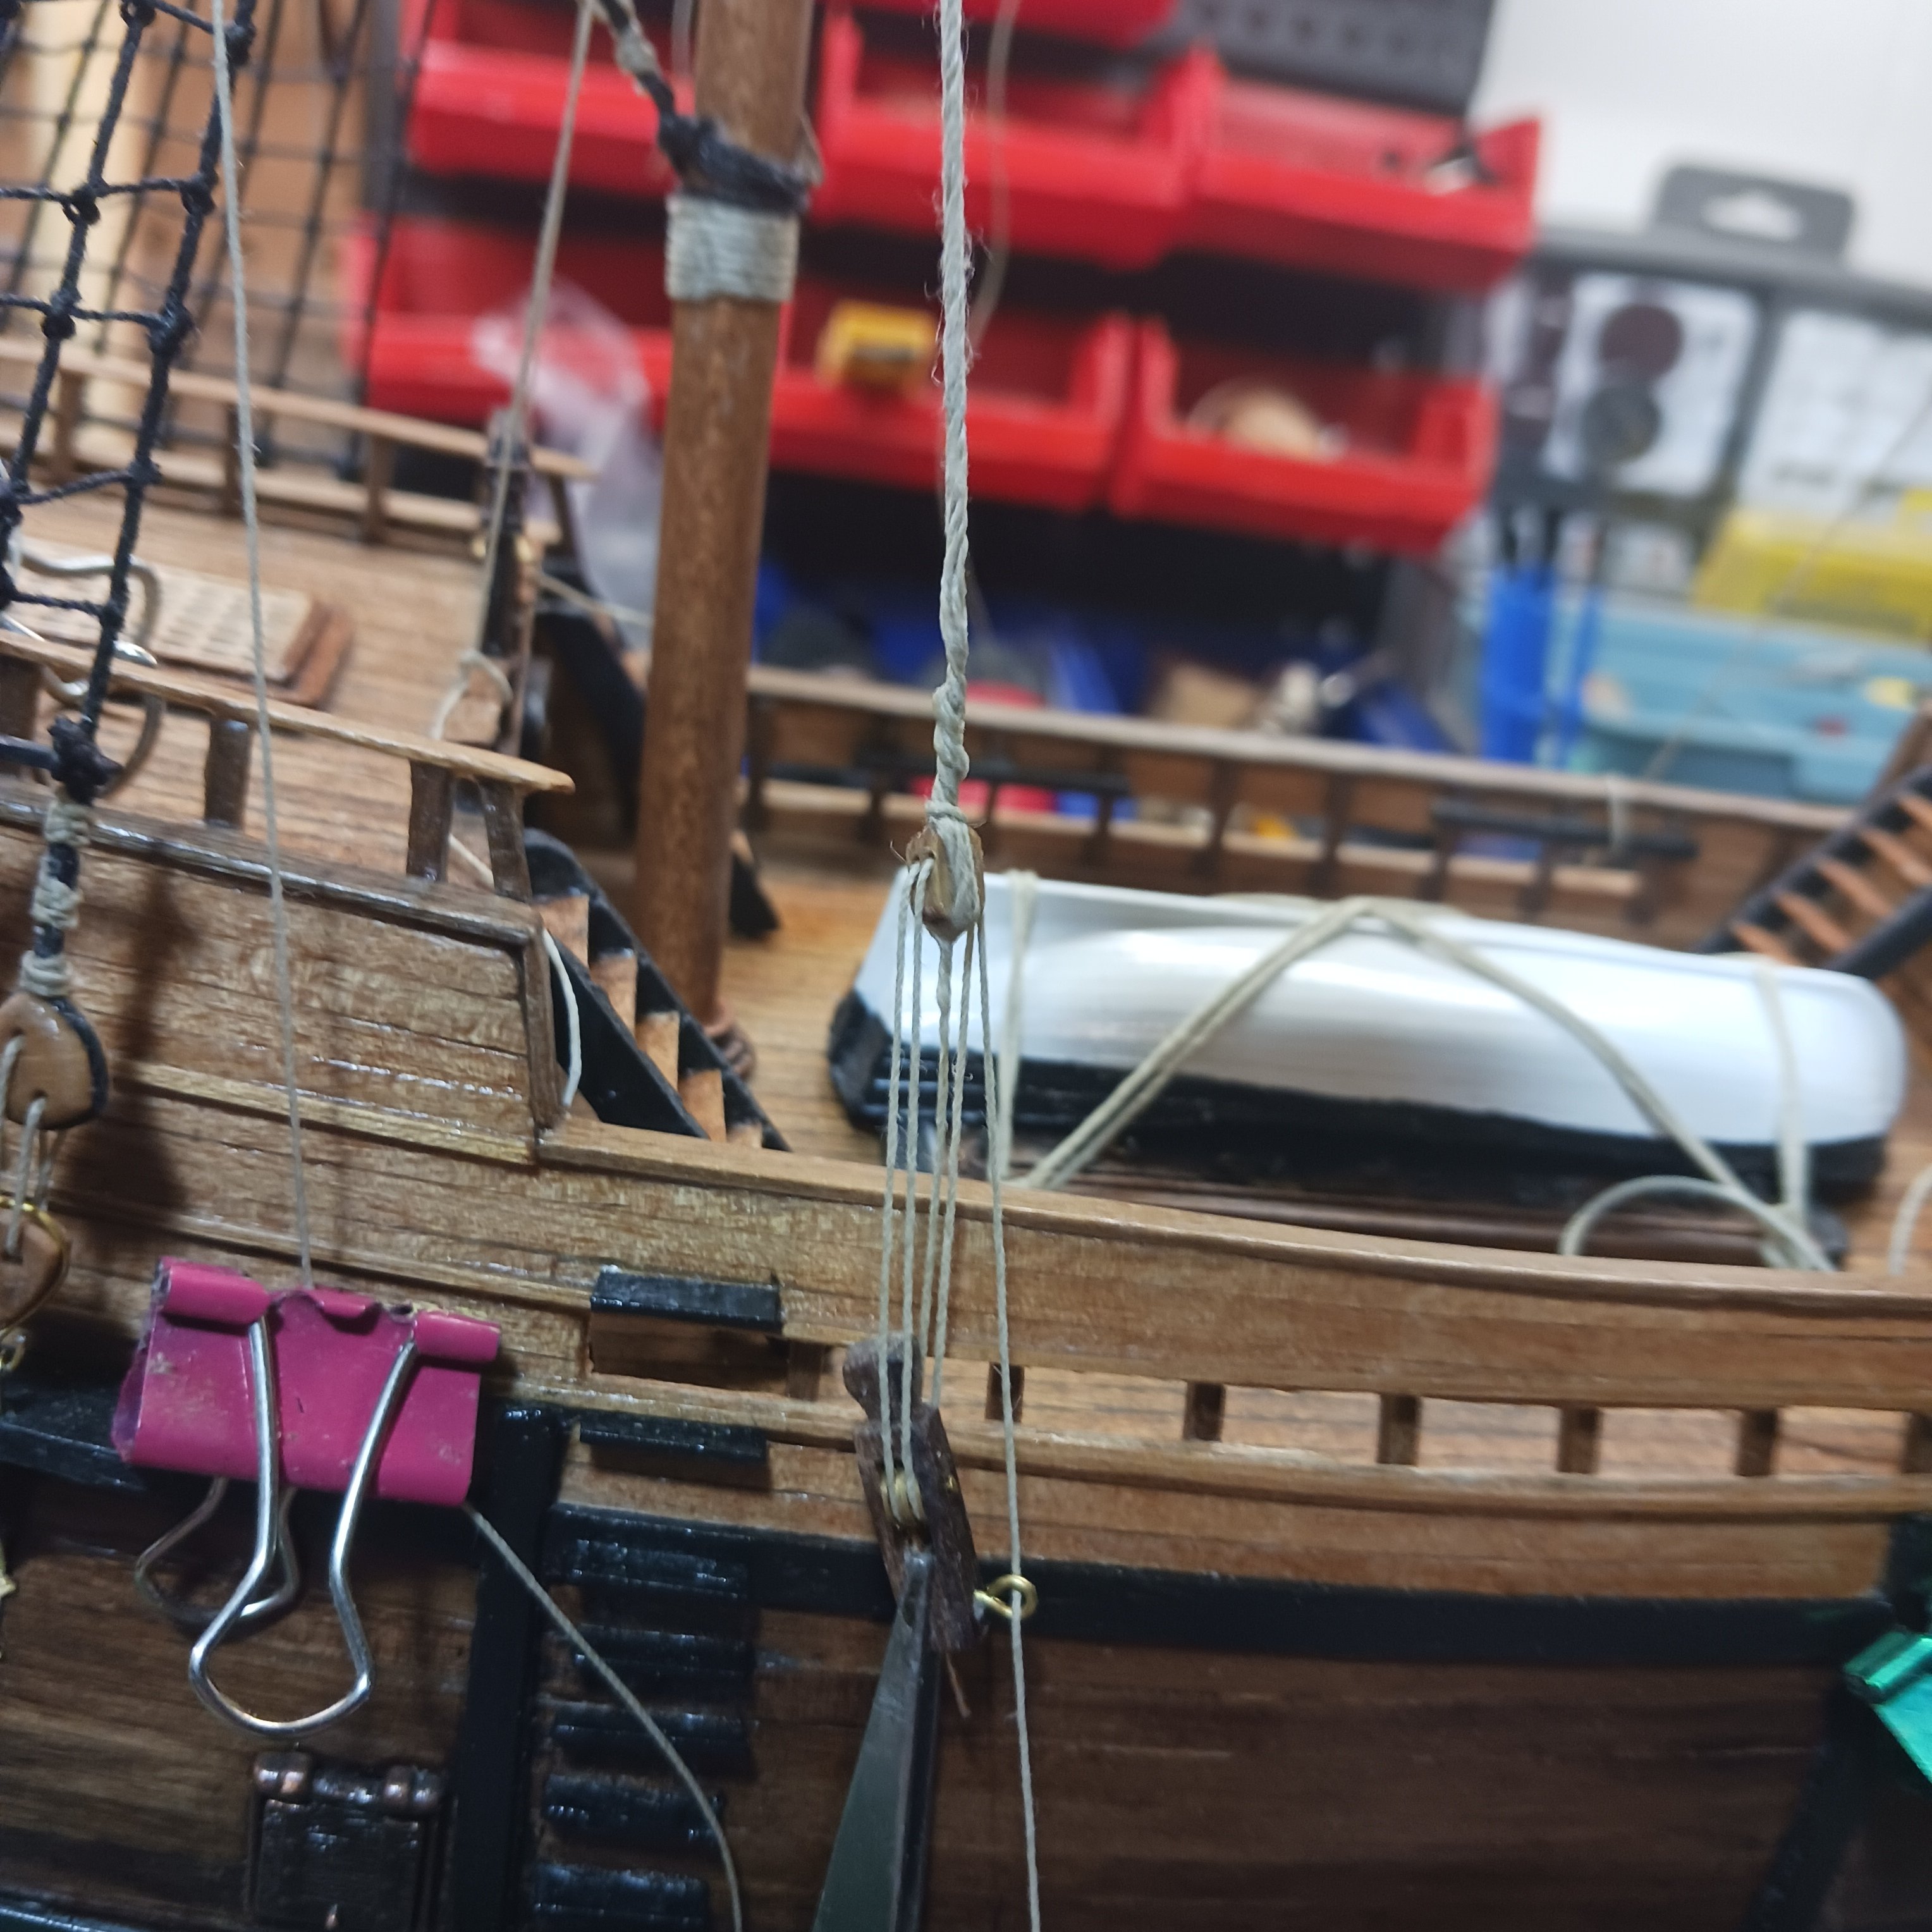
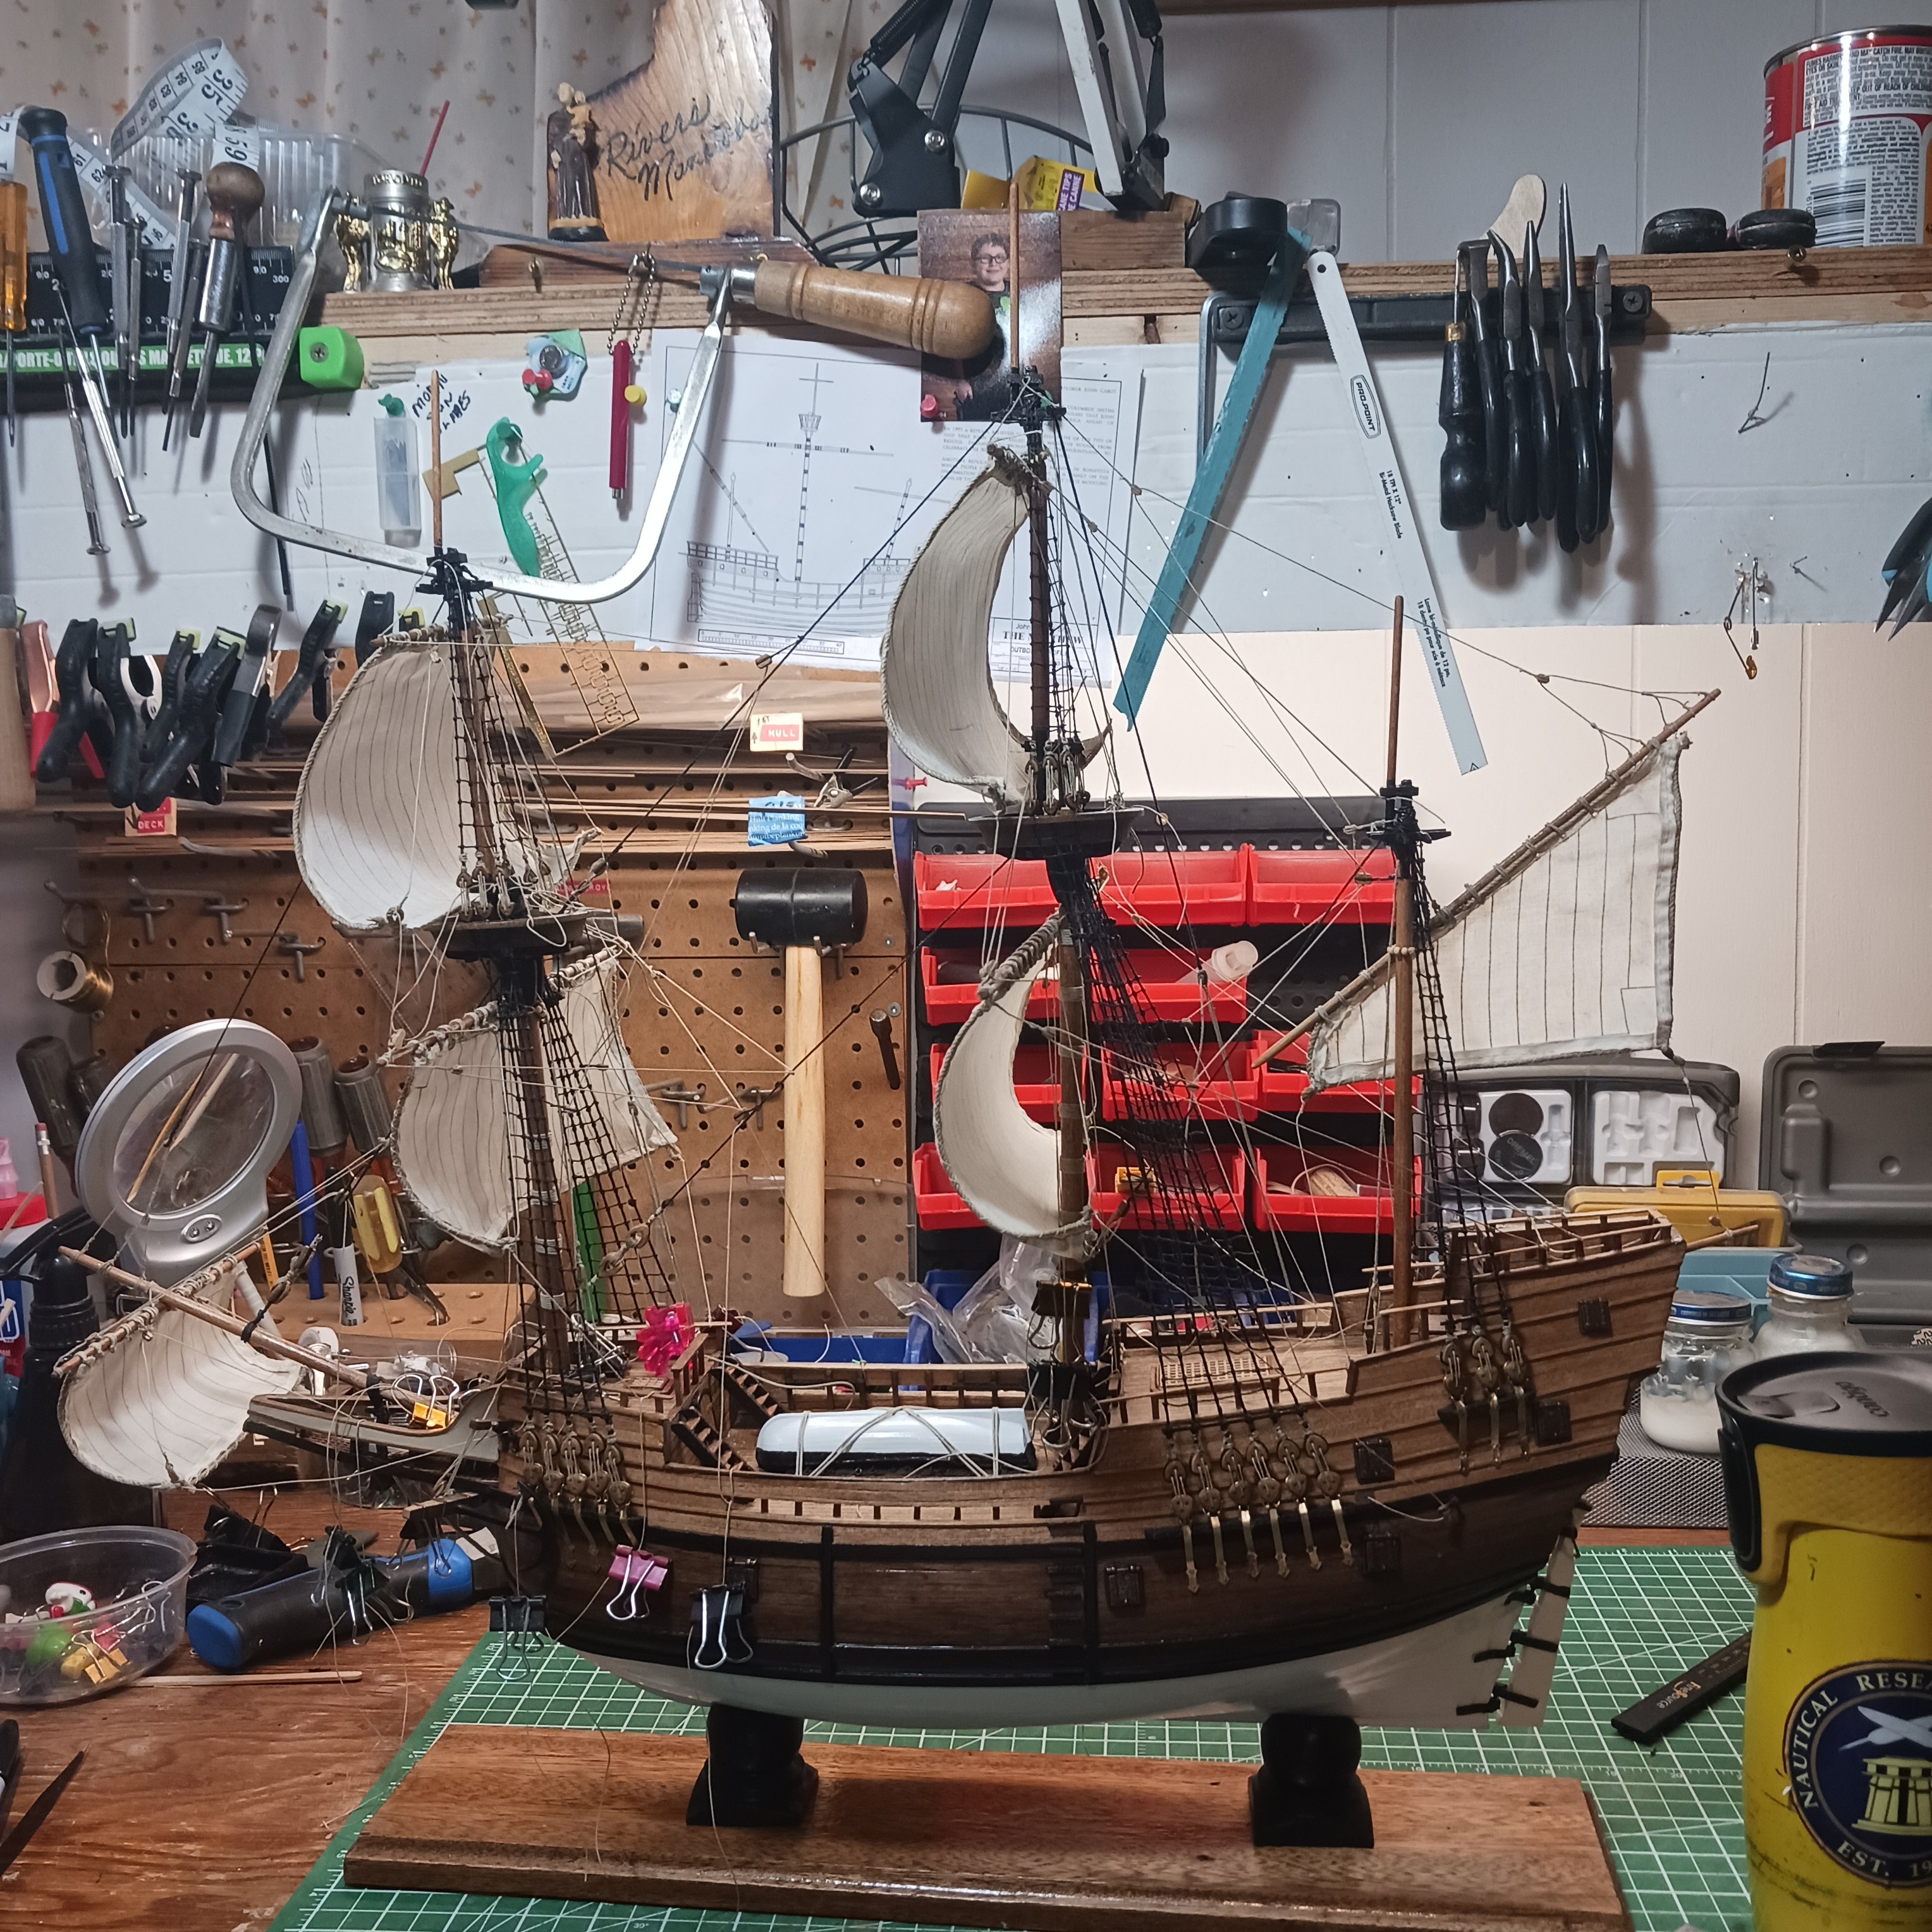
 Like @HardeeHarHar other members come to mind @mrcc the 400 looks good on my sails, I like them. Today I have to thank @David Lester for his tip on rigging bitts. Frist I pin a headless nail in the bitt. Then rigginged it off ship. Then I just glued it in place, let it dry really well, then snuged up the line ready for a coil. Thanks Dave I am sure I would have struggled with the way I was going to do them. This made them fun thanks . So many to thank. Rigging and more rigging, notts to tie , more lines to run. And two flags lol. Most fun ever,