All Activity
- Past hour
-
 king derelict reacted to a post in a topic:
B-25J Mitchell by Chadwijm6 - HK Models - 1/32
king derelict reacted to a post in a topic:
B-25J Mitchell by Chadwijm6 - HK Models - 1/32
-
Thukydides reacted to a post in a topic:
Sloop Speedwell by Chuck - Ketch Rigged Sloop, 1752 - POF
-
BenD reacted to a post in a topic:
Chris Watton and Vanguard Models news and updates Volume 2
-
 Indeed it is...it was supplied as stripwood in the first chapter.
 -
Chuck reacted to a post in a topic:
Sloop Speedwell 1752 by JeffT - Syren Ship Model Company - 1:32 scale - POF Sloop
-
 The false keel is just strip wood, not laser cut. Shawn
 -
CaptMorgan reacted to a post in a topic:
Sloop Speedwell by Chuck - Ketch Rigged Sloop, 1752 - POF
-
Trussben reacted to a post in a topic:
Sloop Speedwell by Chuck - Ketch Rigged Sloop, 1752 - POF
-
Dave_E reacted to a post in a topic:
HMS Pegasus 1776 by Moonbug - Amati/Victory Models - 1:64
-
 Outstanding work Jack! I love your cradle! It’s so not typical (everyone seems to use the brass pedestals) but at the same time it’s so perfect. I just may use your design. 😊
 -
CaptMorgan reacted to a post in a topic:
Sloop Speedwell by Chuck - Ketch Rigged Sloop, 1752 - POF
-
Glen McGuire reacted to a post in a topic:
TI Europe by Javelin - 1/700 - PLASTIC
-
Glen McGuire reacted to a post in a topic:
TI Europe by Javelin - 1/700 - PLASTIC
-
 I´m wondering if someone knows about some books or plans of japanese ships of the Azushi-Momoyama period (which was between 1568 to 1603) and the early Edo period (1603-1700). Unfortunately during the Edo period Japan started to isolate themselves again so there might not be much (at least not in a foreign language but Japanese - which I can´t read). I´m mostly interested in fishing and merchant vessel and galleys but also in traditional Japanese sail boats. From the Edo period I know that the English and Portuguese took influence on Japanese boat / ship building. That´s why I´m more interested in the traditional Japanese boats and ships. I can´t find much about those, only some vague plans and one book (about model building but not about historical backgrounds or traditional boat / ship building). Micha
 -
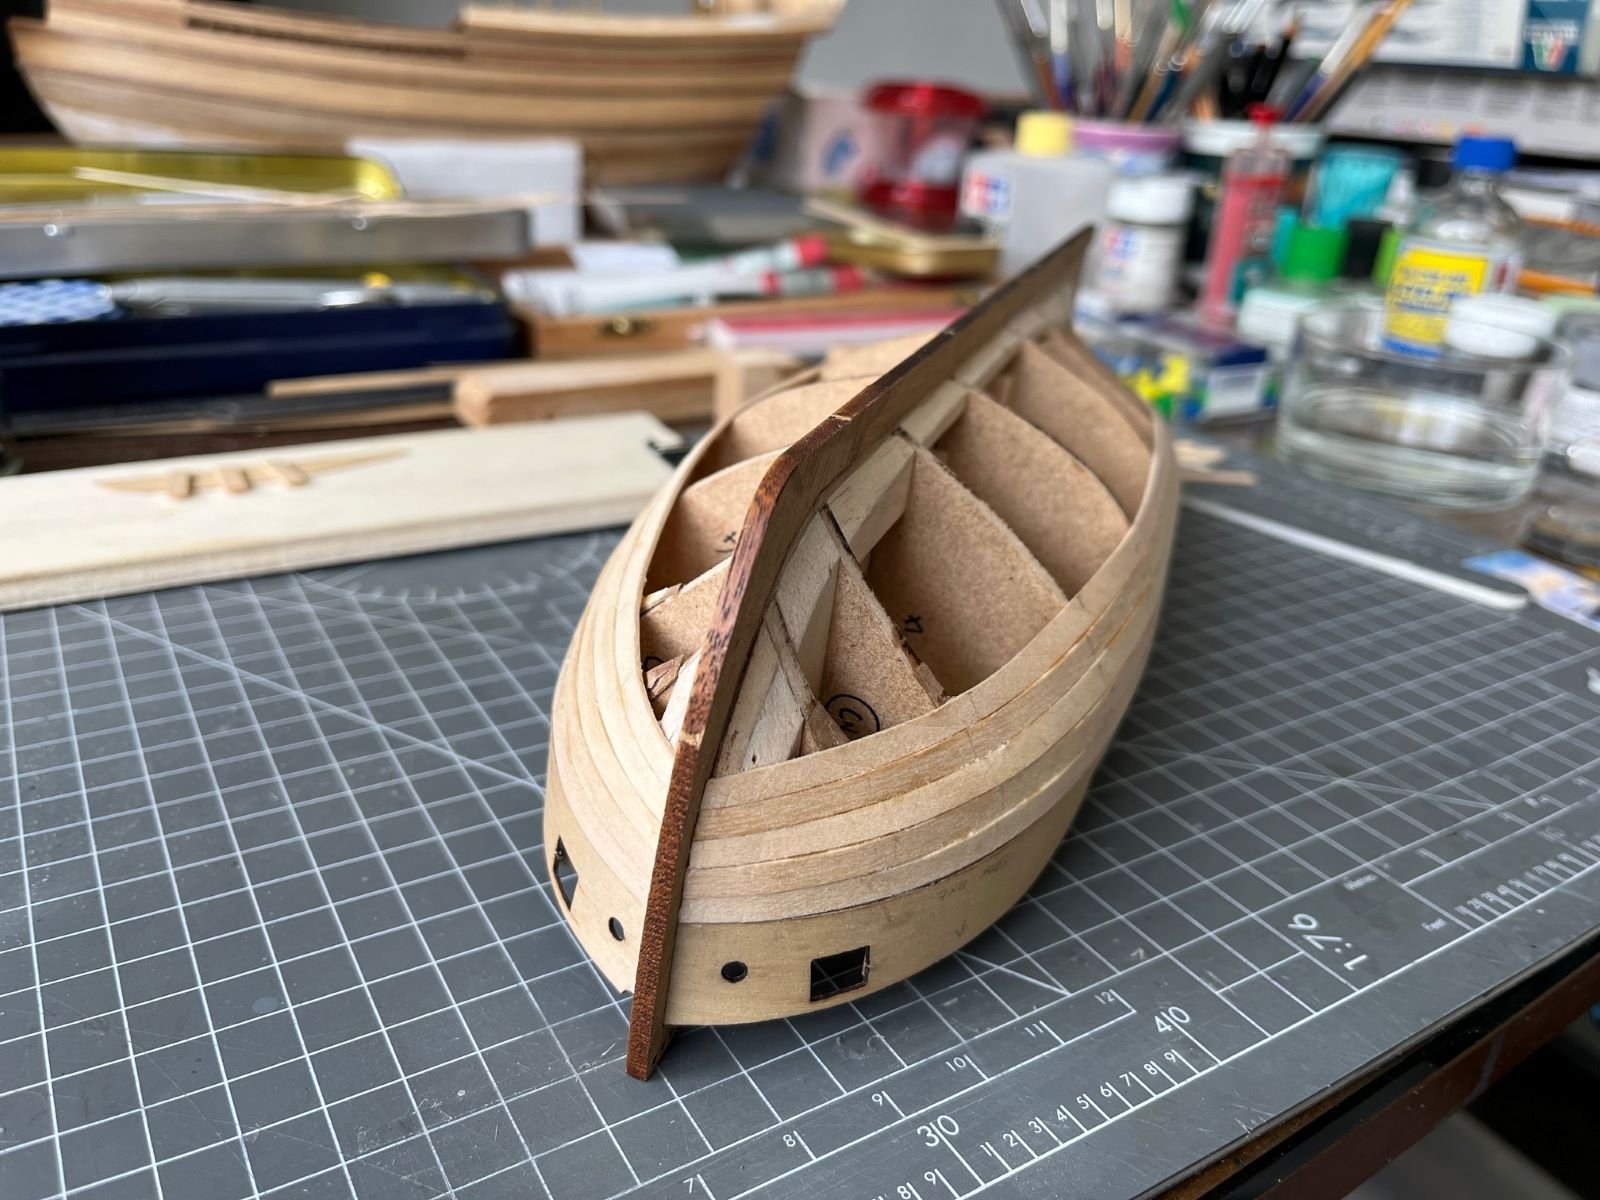
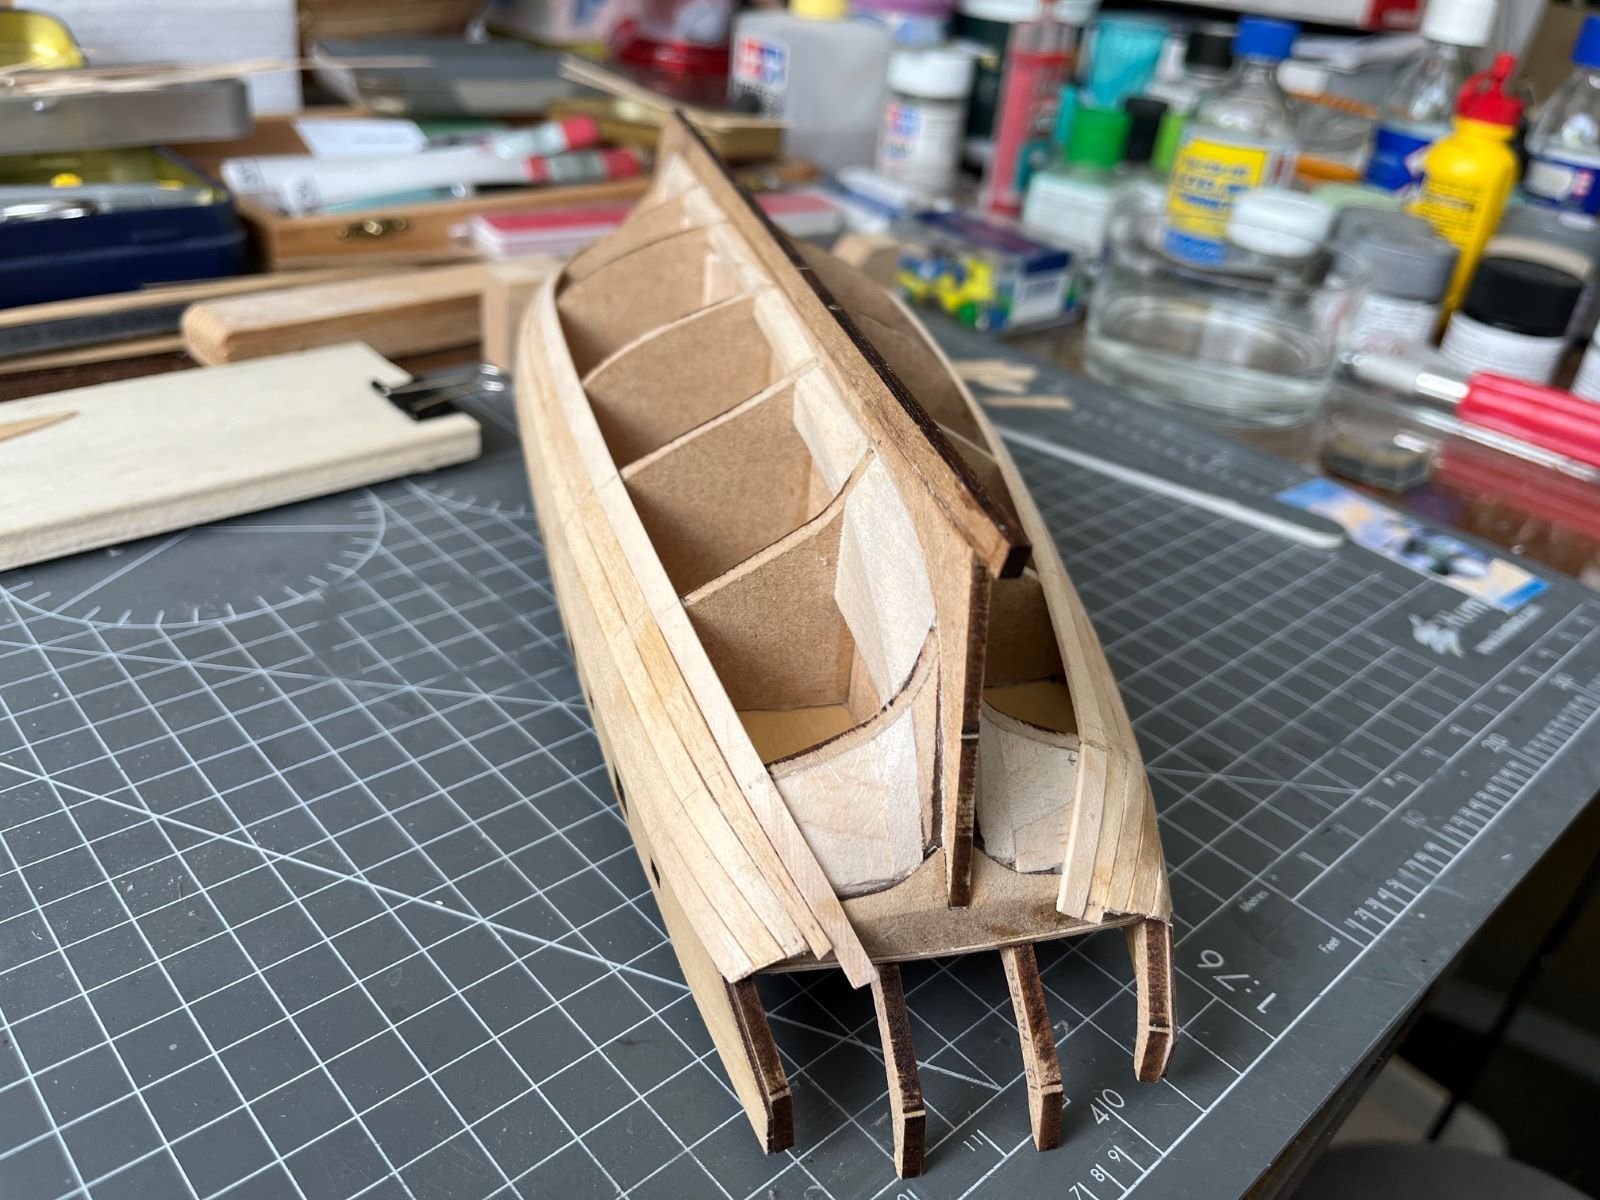
 Well I've retired and had a year of messing around and fun. Down to the retirement plan and the boat has come out to play as well. So to get to grips with the planking and as people have said, just dive in and see how we go and hopefully learn by my mistakes....
 -
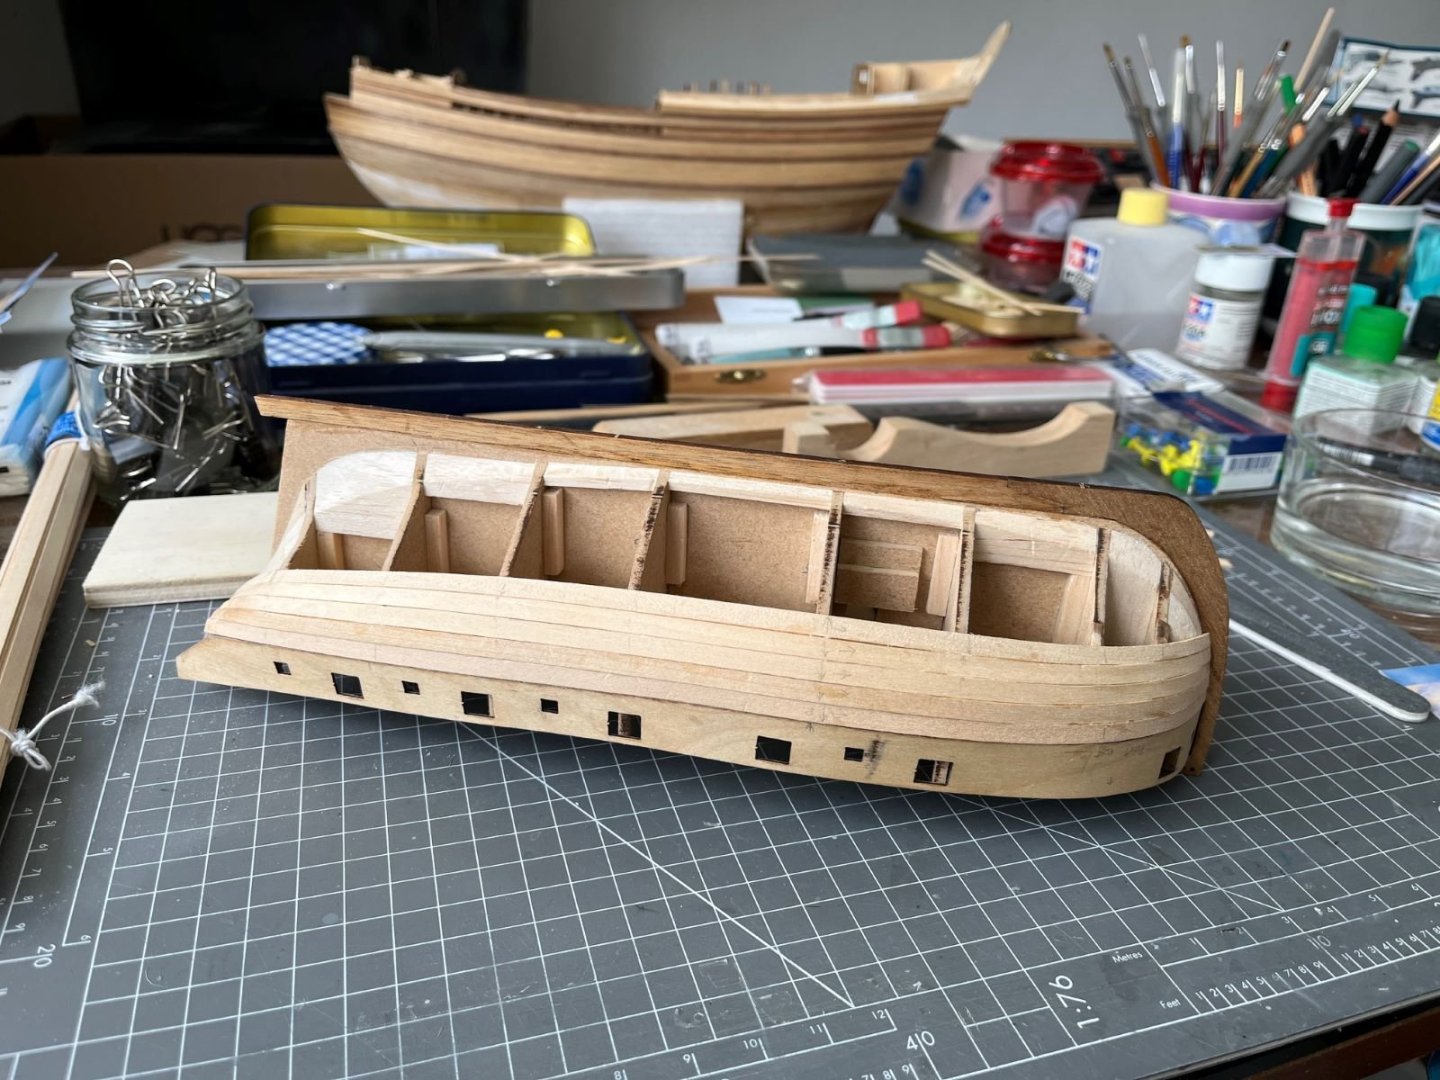
.thumb.jpg.c459ce4140b54c12eddb8eedfd446df3.jpg) Hi all, I started with planking the hull by laying the first five strakes down and I would like to show some preliminary results. I tried to follow the Chuck Passaro indications, i.e. tried to shape each strake by bending it within its plane. I had to make many trials per each piece, however I obtained what I think is a reasonable layout at the bow. At the same time, the overall result is far from perfect and each plank had an issue of alignment with the others. Probably, I failed to bend the planks to the right amount or to bevel them correctly. In addition, I had to 'beef up' the first two frames (no. 2 and 3) because otherwise there was no way I couldn't go around them correctly. I hope to be able to smooth down the various obvious defects later by careful sanding and filling. This is the way went around the stern so far: I am now continuing with another band of four strikes trying to keep them parallel as much as possible. Following also other builds, I will have also to see how to stop them at the bearding line on the dead wood. That is all for now, thanks for following, Dan
Hi all, I started with planking the hull by laying the first five strakes down and I would like to show some preliminary results. I tried to follow the Chuck Passaro indications, i.e. tried to shape each strake by bending it within its plane. I had to make many trials per each piece, however I obtained what I think is a reasonable layout at the bow. At the same time, the overall result is far from perfect and each plank had an issue of alignment with the others. Probably, I failed to bend the planks to the right amount or to bevel them correctly. In addition, I had to 'beef up' the first two frames (no. 2 and 3) because otherwise there was no way I couldn't go around them correctly. I hope to be able to smooth down the various obvious defects later by careful sanding and filling. This is the way went around the stern so far: I am now continuing with another band of four strikes trying to keep them parallel as much as possible. Following also other builds, I will have also to see how to stop them at the bearding line on the dead wood. That is all for now, thanks for following, Dan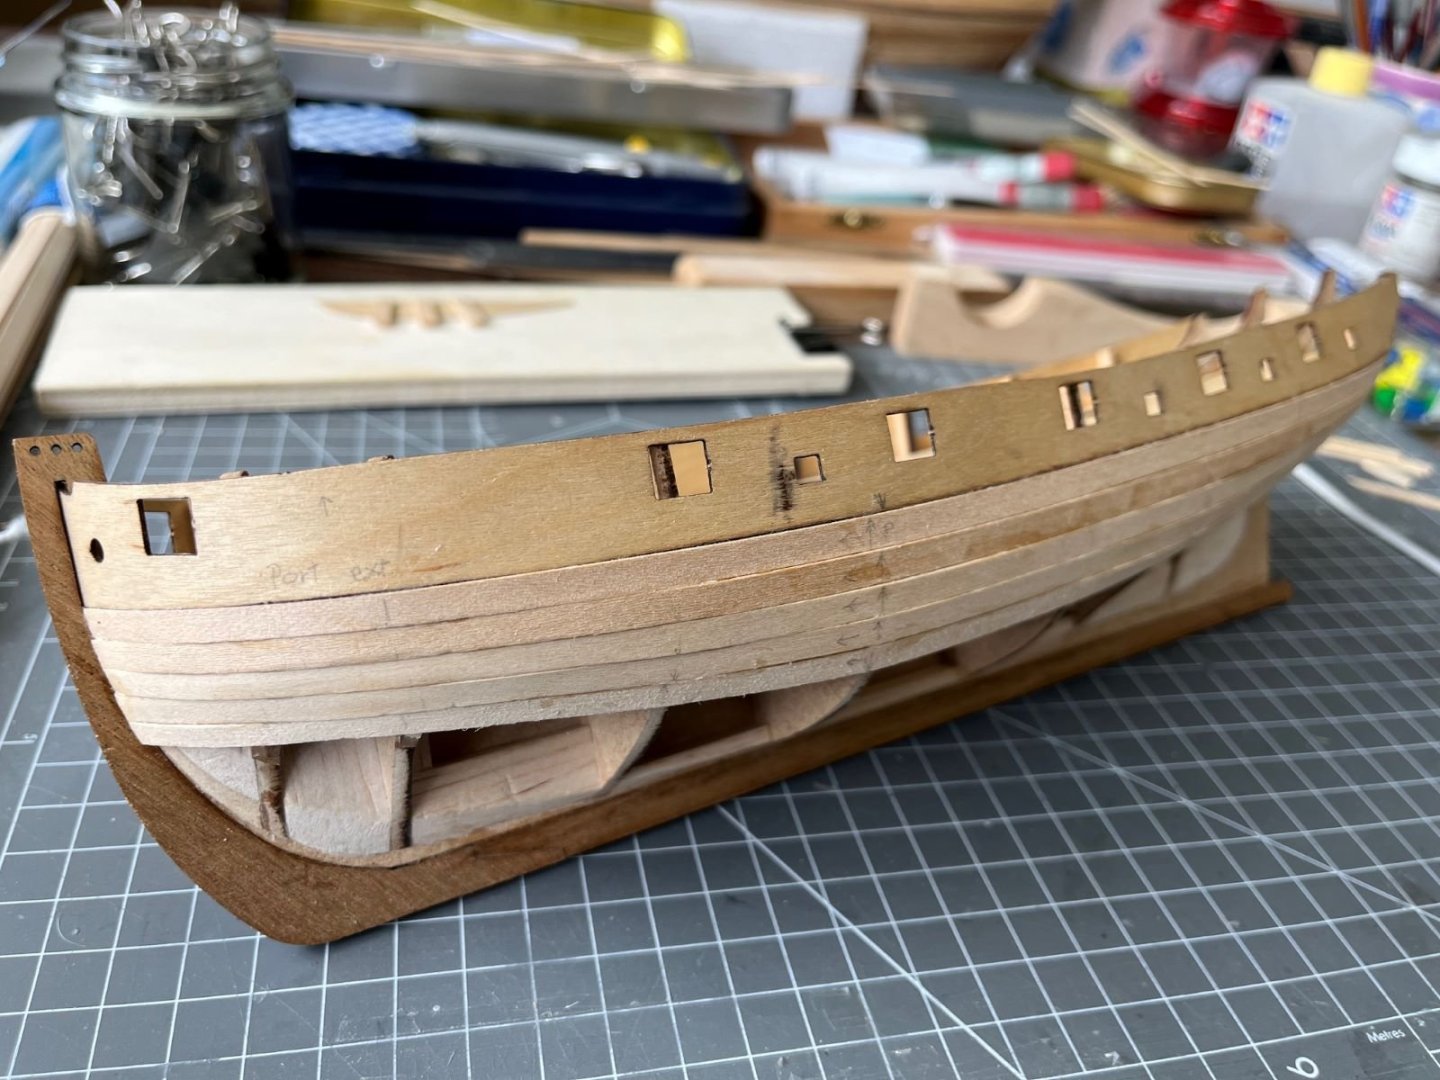

- 6 replies
-
- 1
-
-
- Lady Nelson
- Amati
- (and 1 more)
-

B-25J Mitchell by Chadwijm6 - HK Models - 1/32
allanyed replied to chadwijm6's topic in Non-ship/categorised builds
One of my all time favorite planes. Luckily I got to see one up close and personal and get on board the B25 owned by Ed Browing's Red Baron Flying team which sponsored Daryl Greenamyer's low altitude speed record flight over Mud Lake, Nevada. Great story and one of the greatest thrills of my life to work for one of the sponsors and be there to see it in person. A bit off topic but for an interesting read - https://www.916-starfighter.de/F-104RB_RedBaron_AirProgress1977.pdf Allan -
 All beautifully coped together.
 -

B-25J Mitchell by Chadwijm6 - HK Models - 1/32
Canute replied to chadwijm6's topic in Non-ship/categorised builds
I'm in, James. This is going to be one, big beast. -
Westland Sea King HU.5 by chadwijm6 - Airfix - 1/48
Canute replied to chadwijm6's topic in Non-ship/categorised builds
Great shot, OC.👍 - Today
-
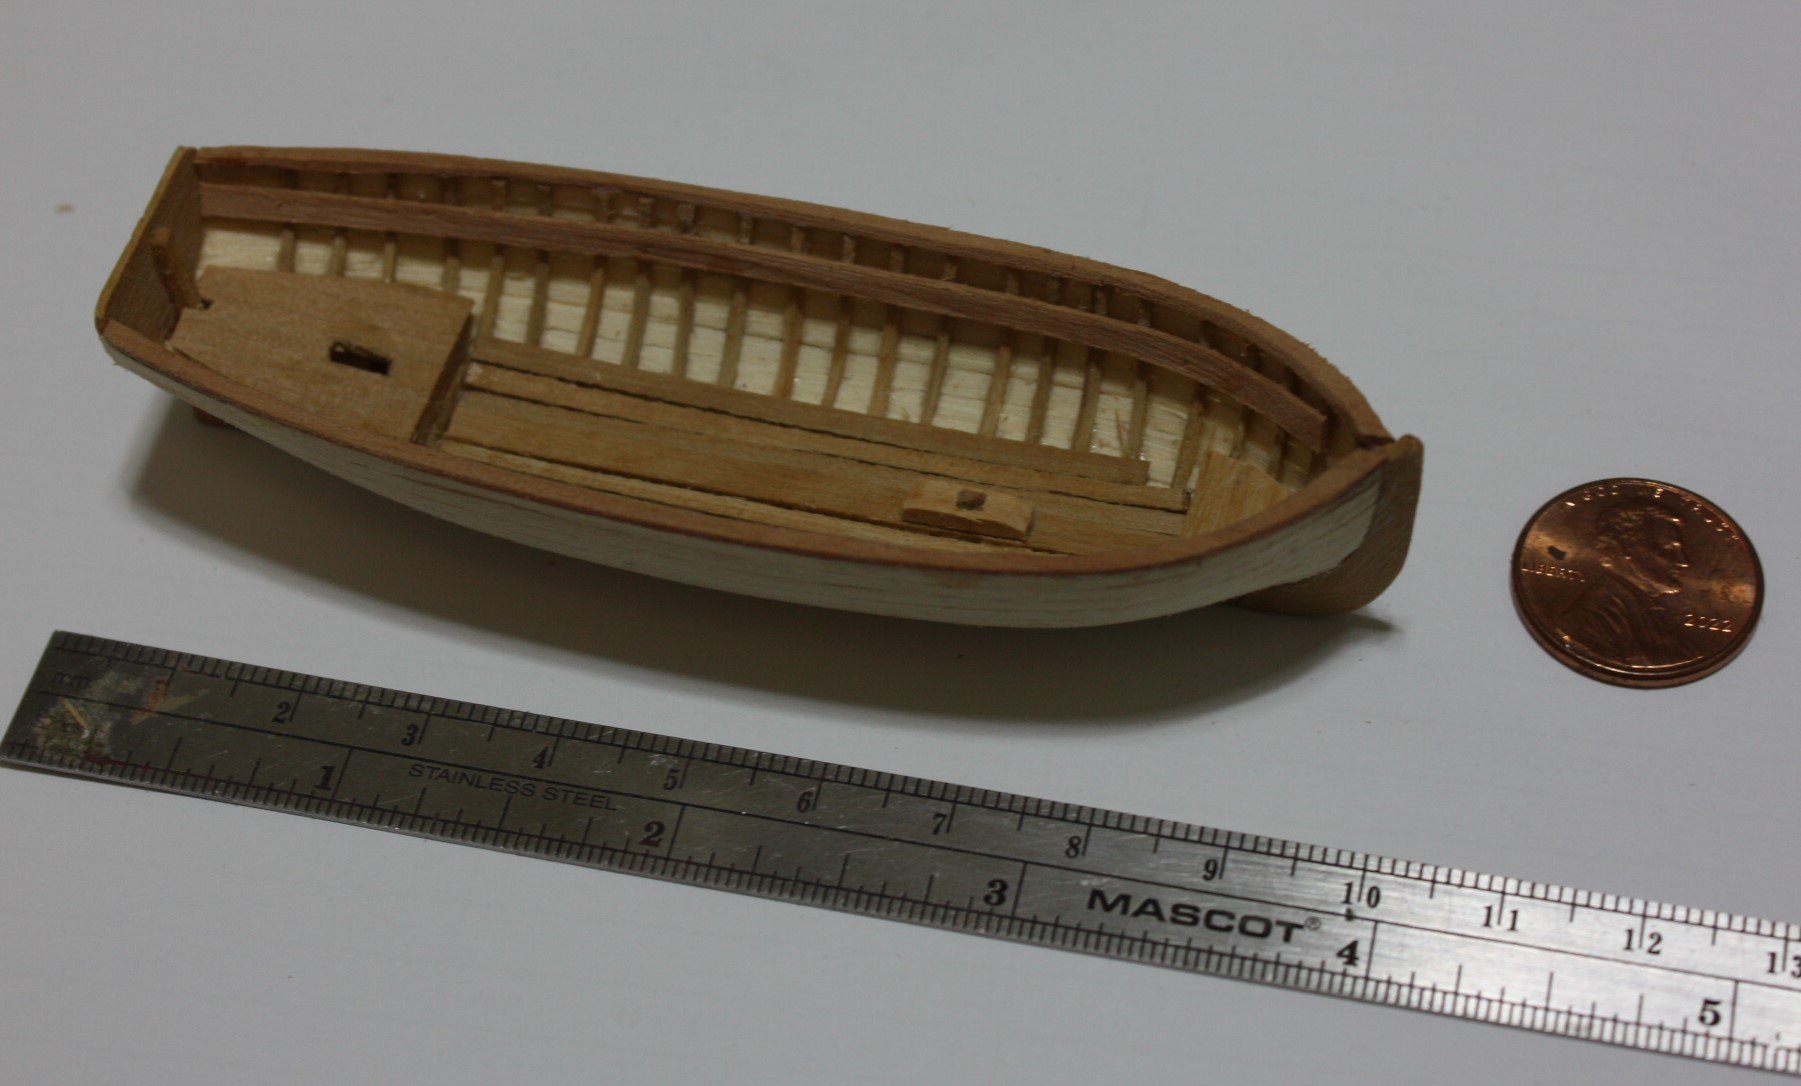
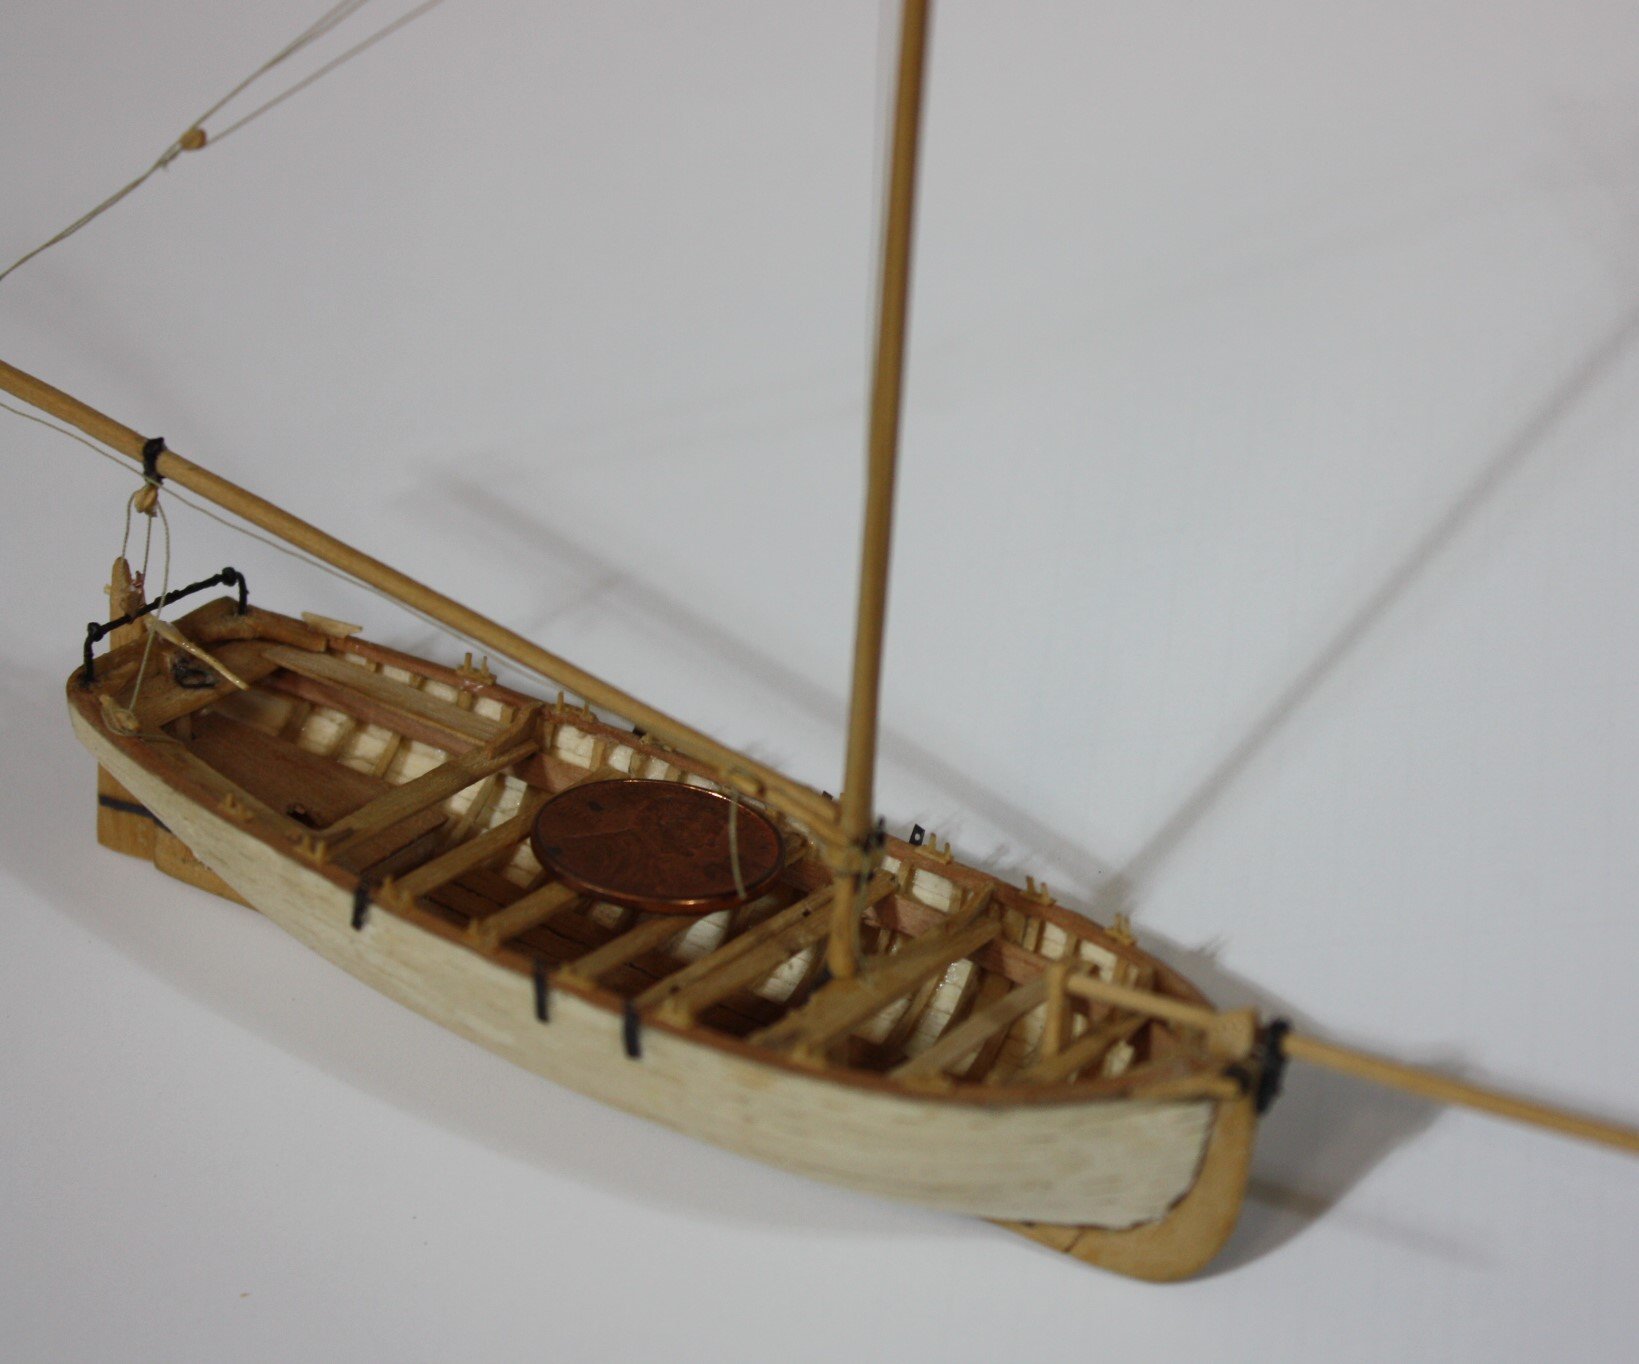
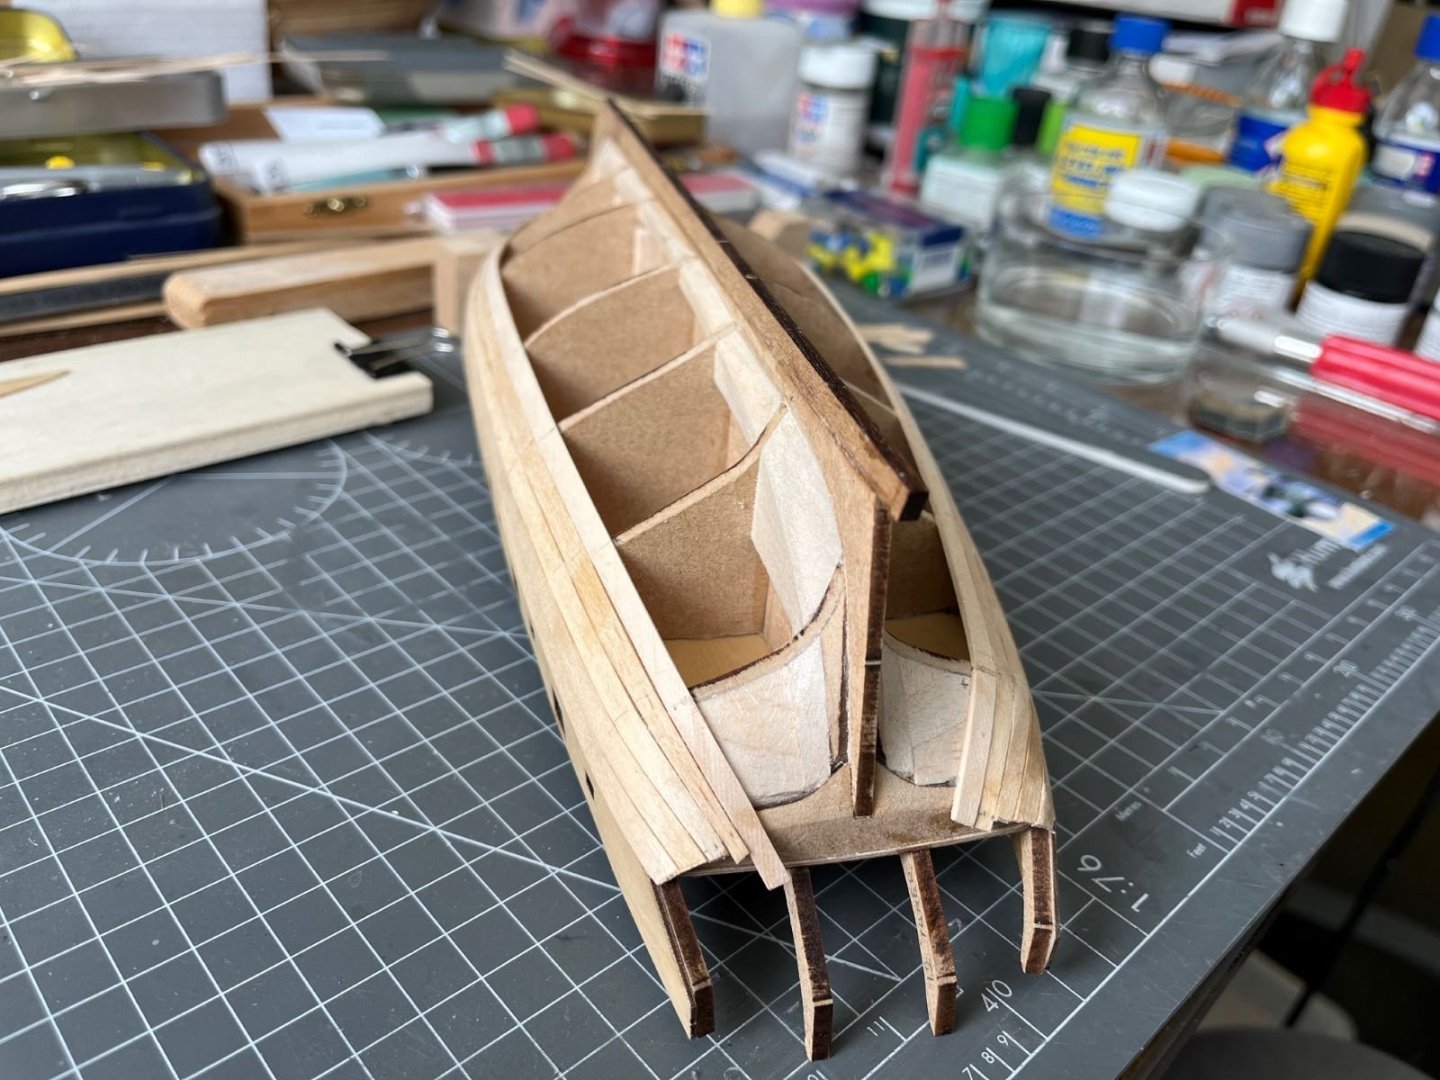
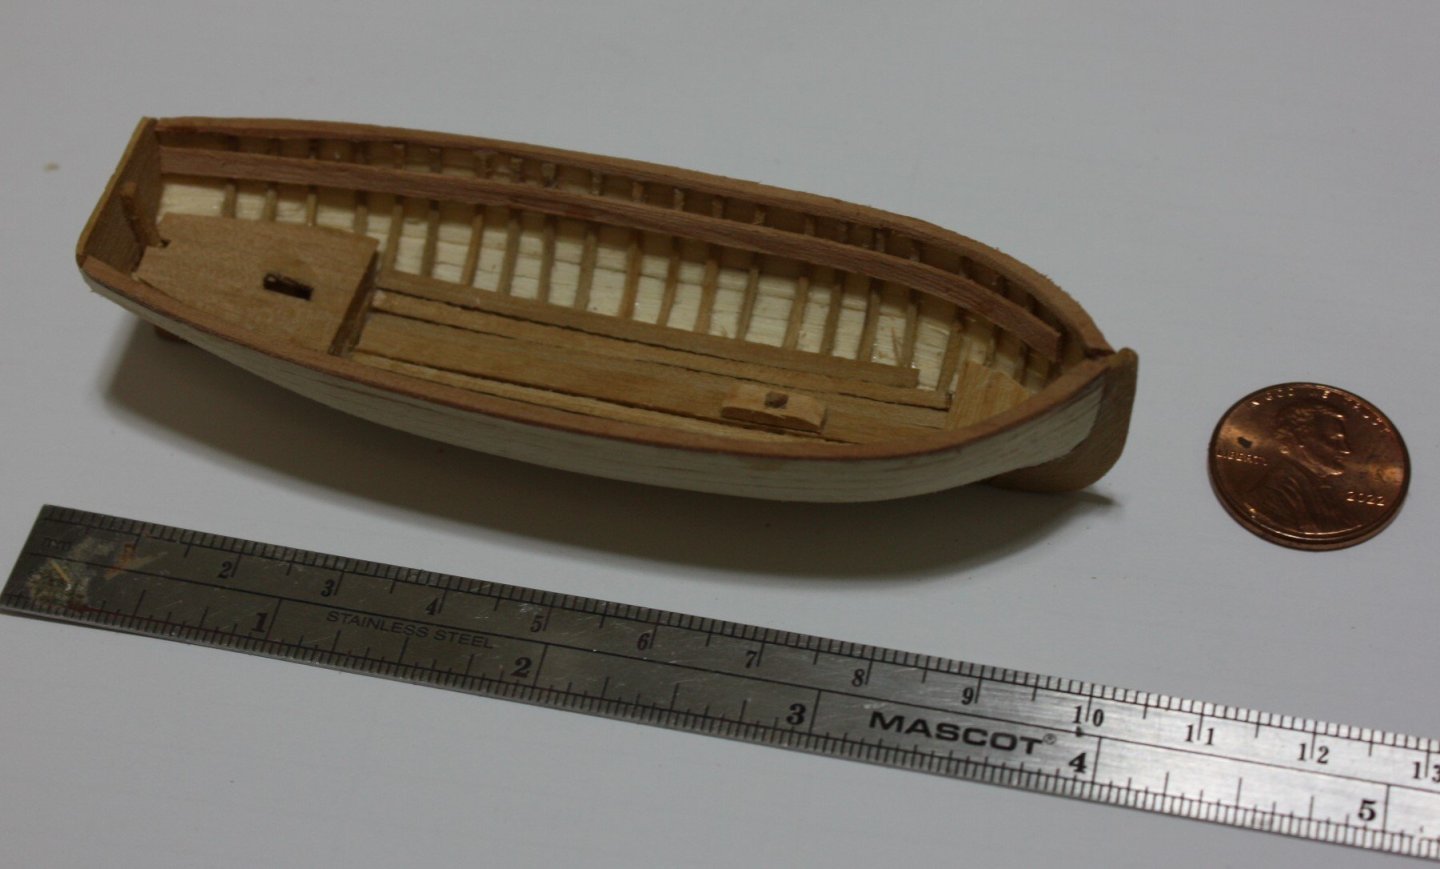
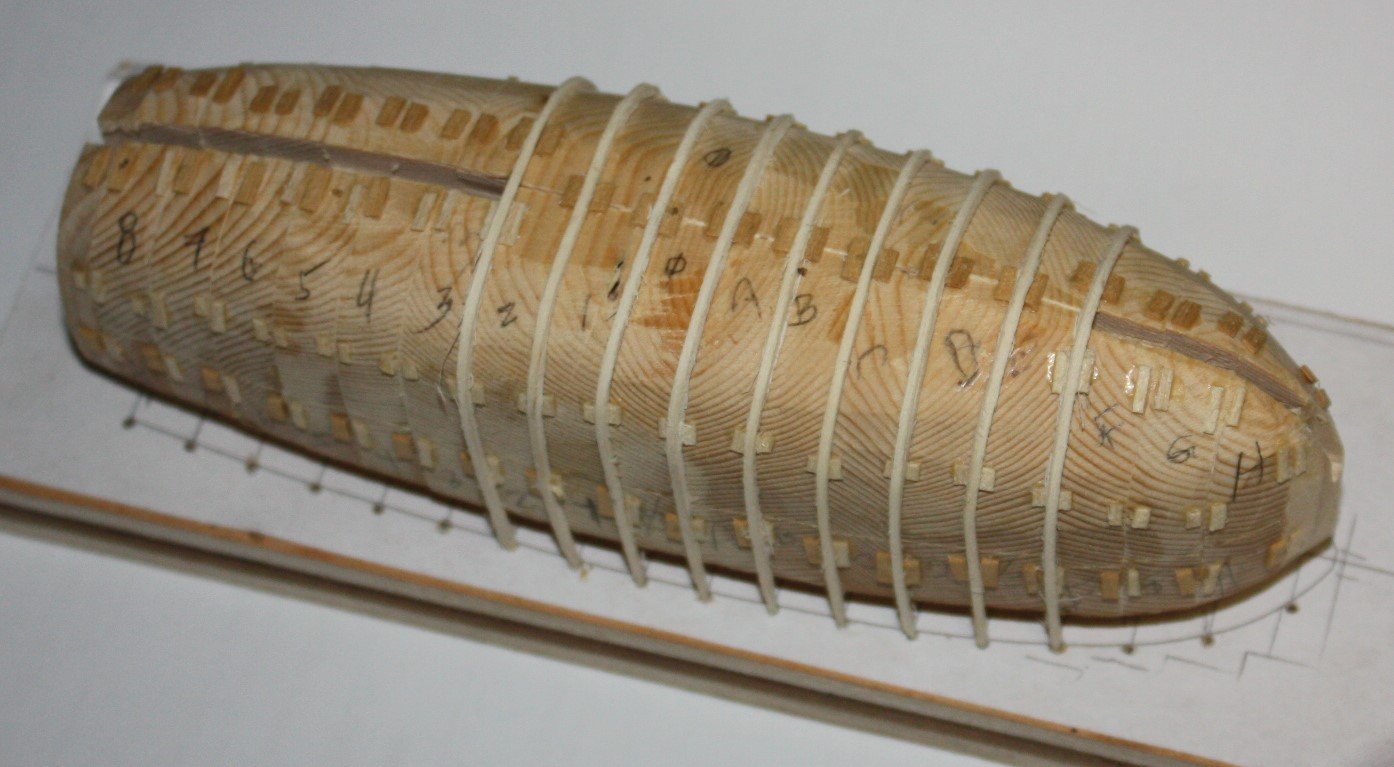
Hi Lucien, Many of us scrap first and second attempts so you are not alone by any means. One small suggestion, the plug looks to be grooved similar to the method Frolich details in his book The Art of Ship Modeling. I found this to be troublesome with the frames getting stuck in them at times. An alternate is to leave the plug smooth and glue tiny spacers where the frames go. Just need to be sure they are shallower than the frames. For scantlings of every part of many types of English boats, W.E. May's book Boats of Men of War is a great help. The below is 1:128 scale 31 foot long boat using the plug method so it can be used at least down to that scale. The last photo is a larger plug (1:48) that shows the spacers. Allan

-
Your little add-on looks very good, OC. Nice addition.
-
It'll be interesting to follow along.
-
 This one can probably be filed under “teachings about the sucking of eggs”, but as a one-time metalworker can I add a little bit of info. The wire you’re using looks like cold-drawn brass stock, meaning it’s pulled through a former to get its diameter. This causes the grain crystals to get elongated (oh look at me, showing off that I paid attention at college!) which makes it springy and harder to shape. If you heat it to about “ouch, that hurt”, and let it cool it’ll be annealed and hold its form, but my memory is that brass work hardens very easily, so keep that in mind. Or you can fish out the little bundle of mild steel 0.5mm gunport lid wires in the Heller victory kit (so I assume also in the SR), which seemed to be already annealed. Either that or the quality was so poor that it worked in our favour.
- 2,437 replies
-
- 2
-

-
- heller
- soleil royal
- (and 9 more)
-
 @GGibson Gregg - thanks for the wood supply referral - I may need to utilize this. I’m not sure what version of the Chopper I have - but IMHO it’s one of the most important tools I have. Especially for anything related to cutting planks or related parts. The reference lines are very useful. I bought this after following a discussion while working on my AL Swift model. -Cheers! Andre
 -
Exactly what I was going to write. Well said. I have two books by Endsor and for the 17th century they are fantastic. For overall usefulness, at least for English ships you have the the three I would put up at the top of the list, Lees (Masting and Rigging), Lavery (Arming and Fitting) , and Goodwin (Construction and Fitting) For scantlings- Steel's Elements and Practice of Naval Architecture, The Shipbuilder's Repository (1788) and the Establishments although these can be very expensive. These have been put together all in one book available from Seawatch Books. TFFM by David Antscherl offers a wealth of information on "how to" that is applicable in many ways to a host if ships, not just the Swan class around which it is centered. Allan
-
 The post you have drawn in blue is the sternpost. The post in red is the inner stern post. The blue sternpost you will leave thick as the keel itself. The inner sternpost does get thinned down. I have copied and provided for you images from Gaetan Bordeleau that have been a big help to me in understanding and shaping the stern and will be using for my own model. Brian D
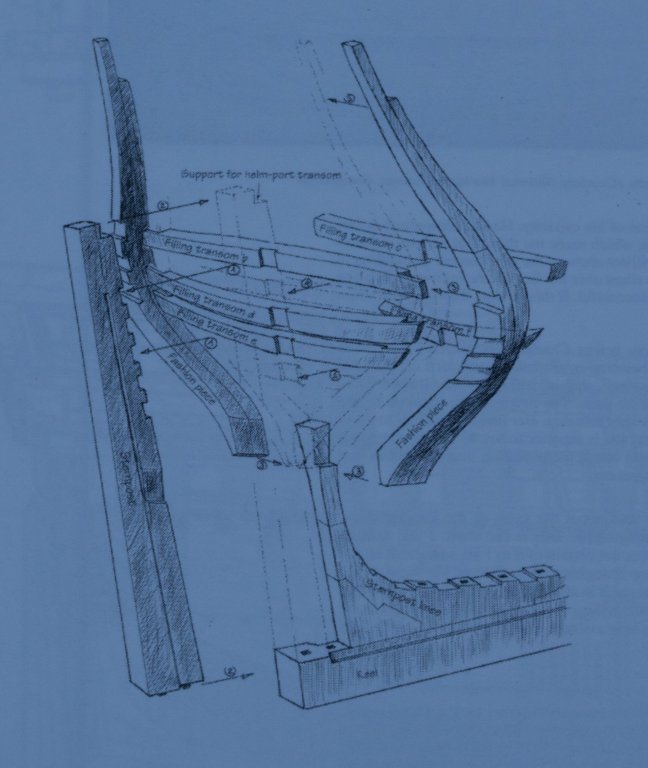

-
 Christiano, Thanks for all the explanations about the ships in the mediterranean. For a long time I have been researching the historical development of the chebec. Its origins, the early chebece, the later chebec and the chebec that was recreated by the French navy. As a result, I build models of Latin-rigged ships. There is also a major development in this, which is always about the ship with the same name. So I understand very well the complexity of these types of ships. They were built for trade purposes as well as for war. Ships that also had to do with this were for example the Tartane and the Venetian/Austrian Galeotta , of which I also built models. In this way I have learned a lot about the rigging of these ships and therefore I would like to advise on the construction of such ship models. www.constantwillems.nl I would like to end this conversation because it is no longer about Steve's topic. Constant
 -
Garage workshop
Scottish Guy replied to Frank Burroughs's topic in Modeling tools and Workshop Equipment
I definitely wouldn´t store finished models in the cold garage. I would keep them in a dry and temperated area. Not heated but temperated above zero. Like I stated before, I would keep wood anyways in a temperated space, not heated maybe but like I said, above zero at least so they don´t get moistured by the damp and steam. Micha -
 The answer, as so often, is that it depends what your interests are - time period, nationality, model building reference or historical reference? Merchant or Naval? British navy floating walls of the 18/19th century - Lavery. Restoration Navy (also useful for merchant ships of the time period - 17th century) then Endsor. I can speak to the quality of both options.
 -
 Marc I think they are looking fine. When I built my Victory I ordered Daniel’s (Dafi’s) chains. For my SR I decided to attempt to make my own as you are. I experienced the exact issues with finding the best spot to solder and when to attempt the crimp. It is frustrating. I think a fault I have in modeling that you don’t have, and I compliment you, is after a number of tries at perfection I give up and use my best attempt. Especially if it is an item I expect will not be that visible to others. Like chains under the channels. You however my friend, and again I compliment you, are an absolute perfectionist. You work truly shows it.
- 2,437 replies
-
- 1
-

-
- heller
- soleil royal
- (and 9 more)
-
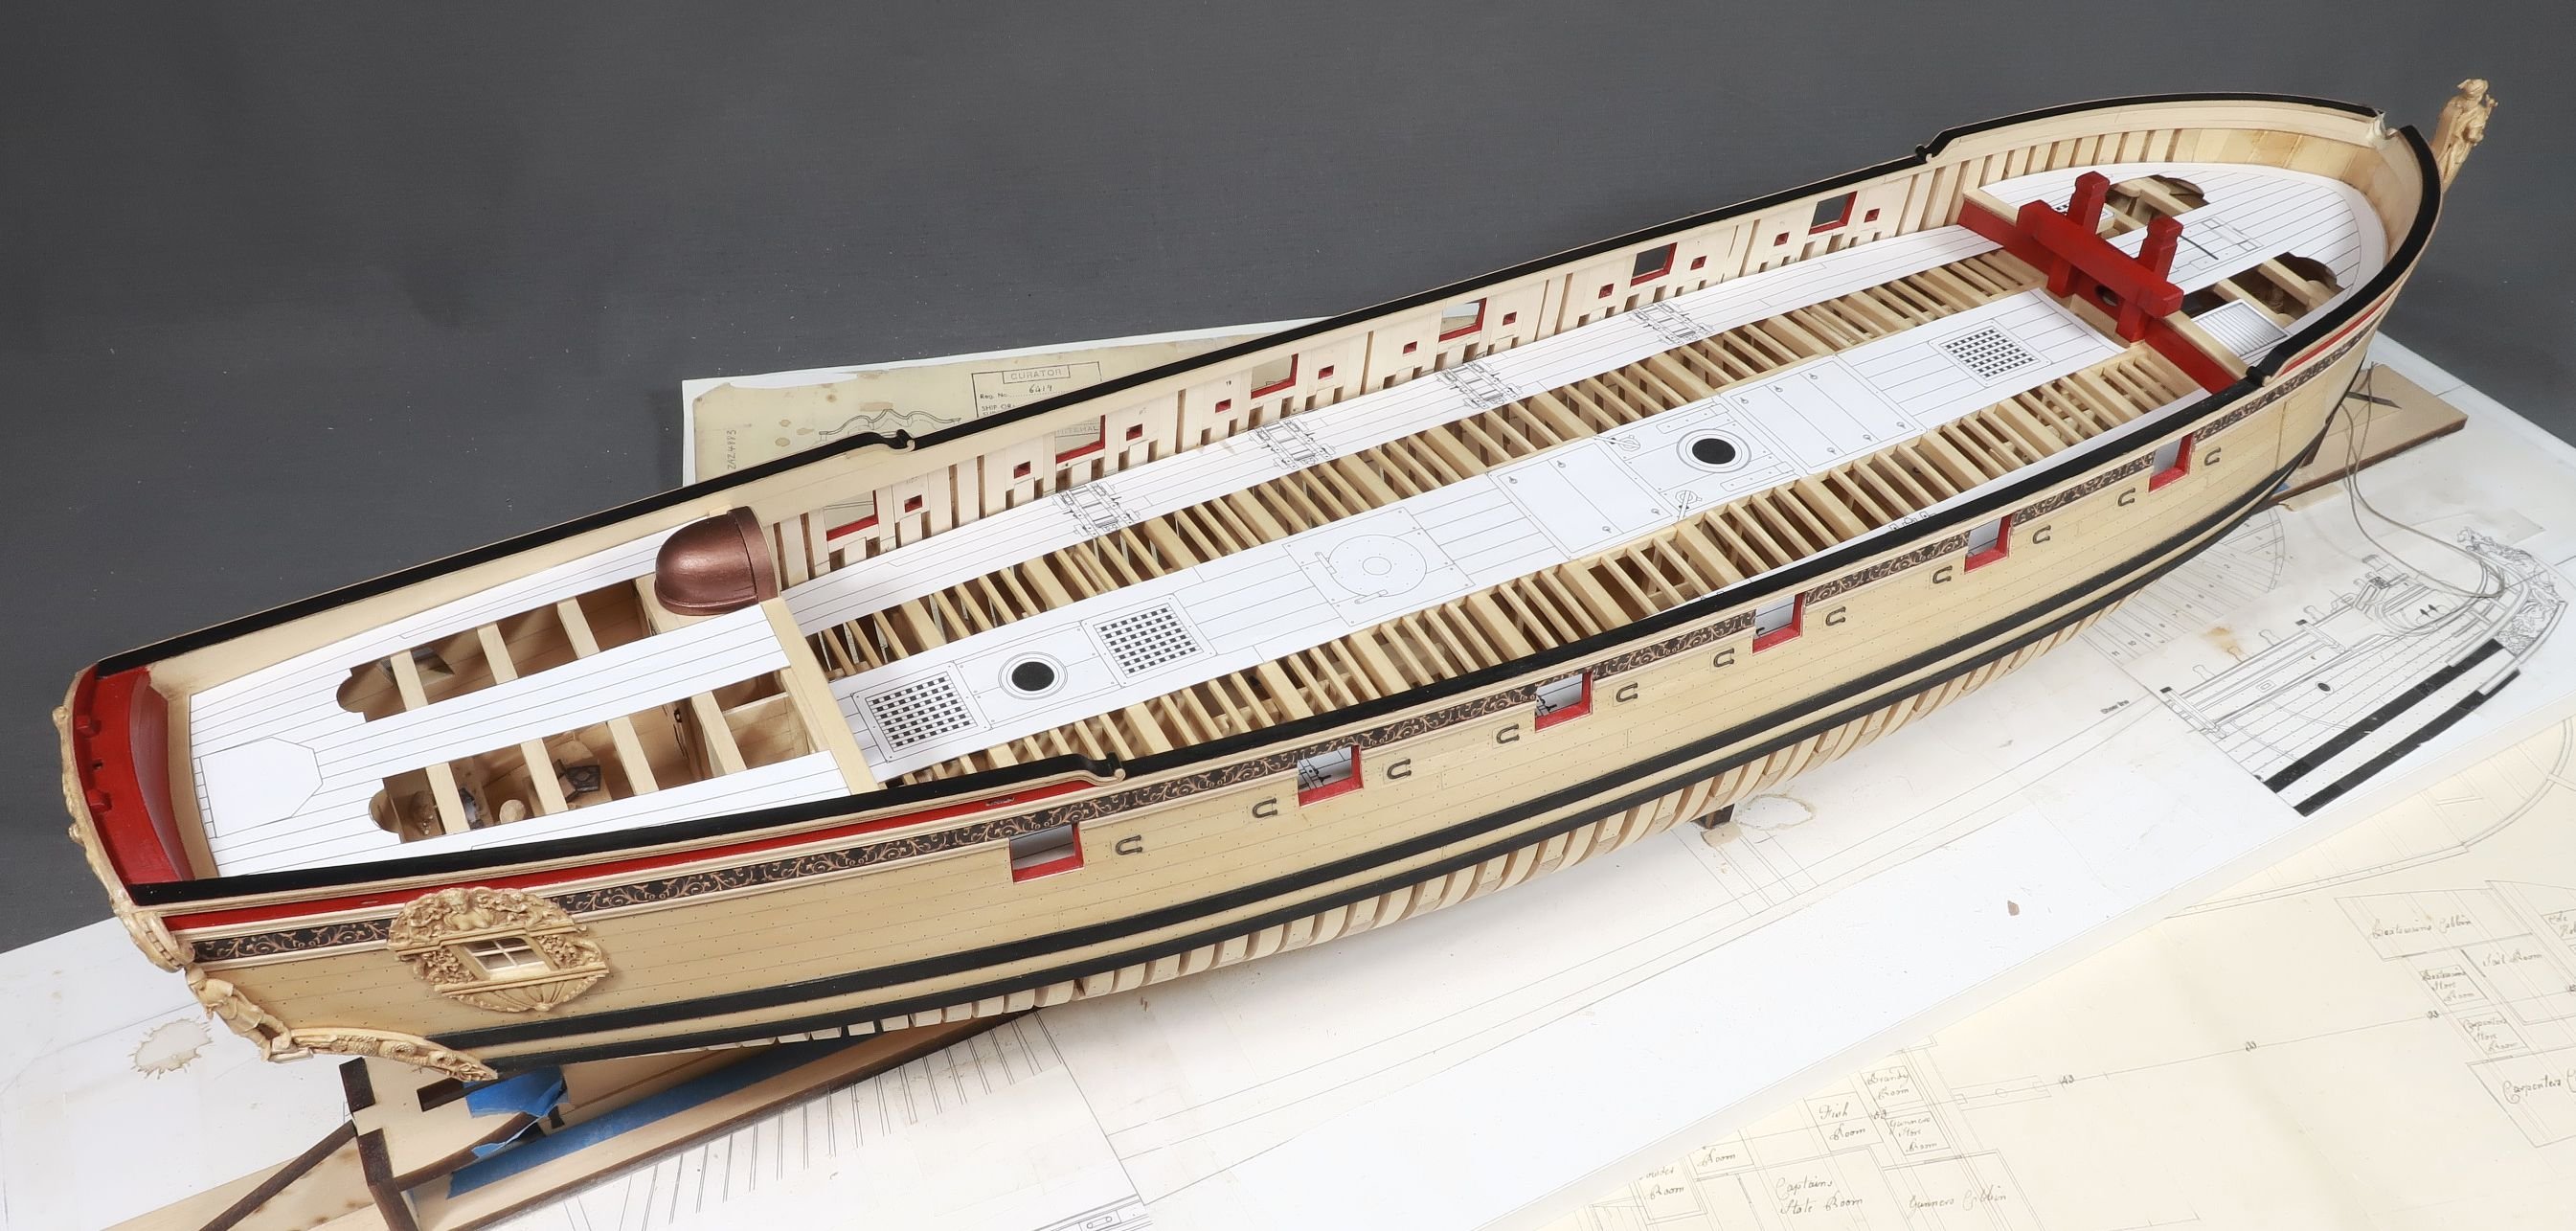
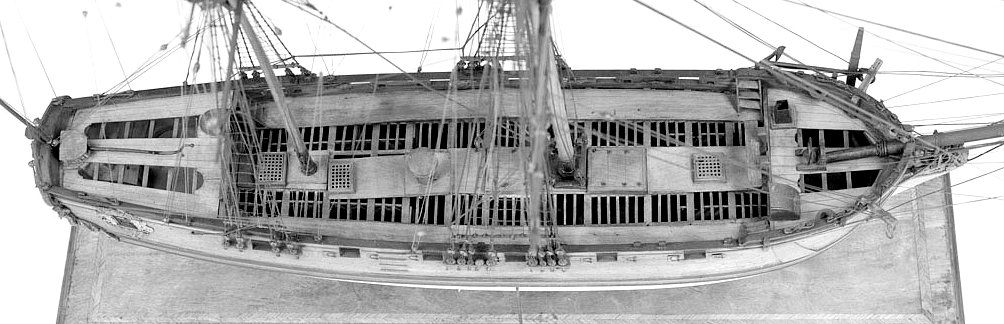
The knees wont be seen so they will be omitted. Its easy enough for folks to add should they want to. Thats a benefit of having Davids book while building the kit. But it will really complicate and make adding all of those ledges take forever. And all for something that will never be seen. I think most folks will be relieved not to make them. the contemporary model doesnt have them either. My guess is for the very same reason. It also reduces the cost and time to manufacture the kit quite a bit. I did add them on the fcastle however because the ends of the knees will be slightly visible in the open area left unplanked. So once the gun deck is planked…the casual viewer will actually assume you did add all of those knees for the entire model. LOL I will take a picture with the planking templates in position. You will see what I am talking about pretty clearly. The same is true of all the ledges down the center line. They will not be seen either. The contemporary model also omits these..whats the point really.
- 795 replies
-
- 7
-
-
- speedwell
- syren speedwell
- (and 1 more)
-
Looking excellent…its a close fit. Those are very tough to make. Well done.