All Activity
- Past hour
-
 Glad you are here, Jack. I’ll be leaning on your expertise I’m sure alan
 -
 mtaylor reacted to a post in a topic:
Are you an NRG Member???
mtaylor reacted to a post in a topic:
Are you an NRG Member???
-
mtaylor reacted to a post in a topic:
Are you an NRG Member???
-
mtaylor reacted to a post in a topic:
Are you an NRG Member???
-
The walls look like real weathered whitewash. Great work. Alan
-
Thukydides reacted to a post in a topic:
Sloop Speedwell by Chuck - Ketch Rigged Sloop, 1752 - POF
-
dvm27 reacted to a post in a topic:
Sloop Speedwell by Chuck - Ketch Rigged Sloop, 1752 - POF
-
JacquesCousteau reacted to a post in a topic:
Fridericiana Alexandrina Navis, 1st century Roman Danube River boat
-
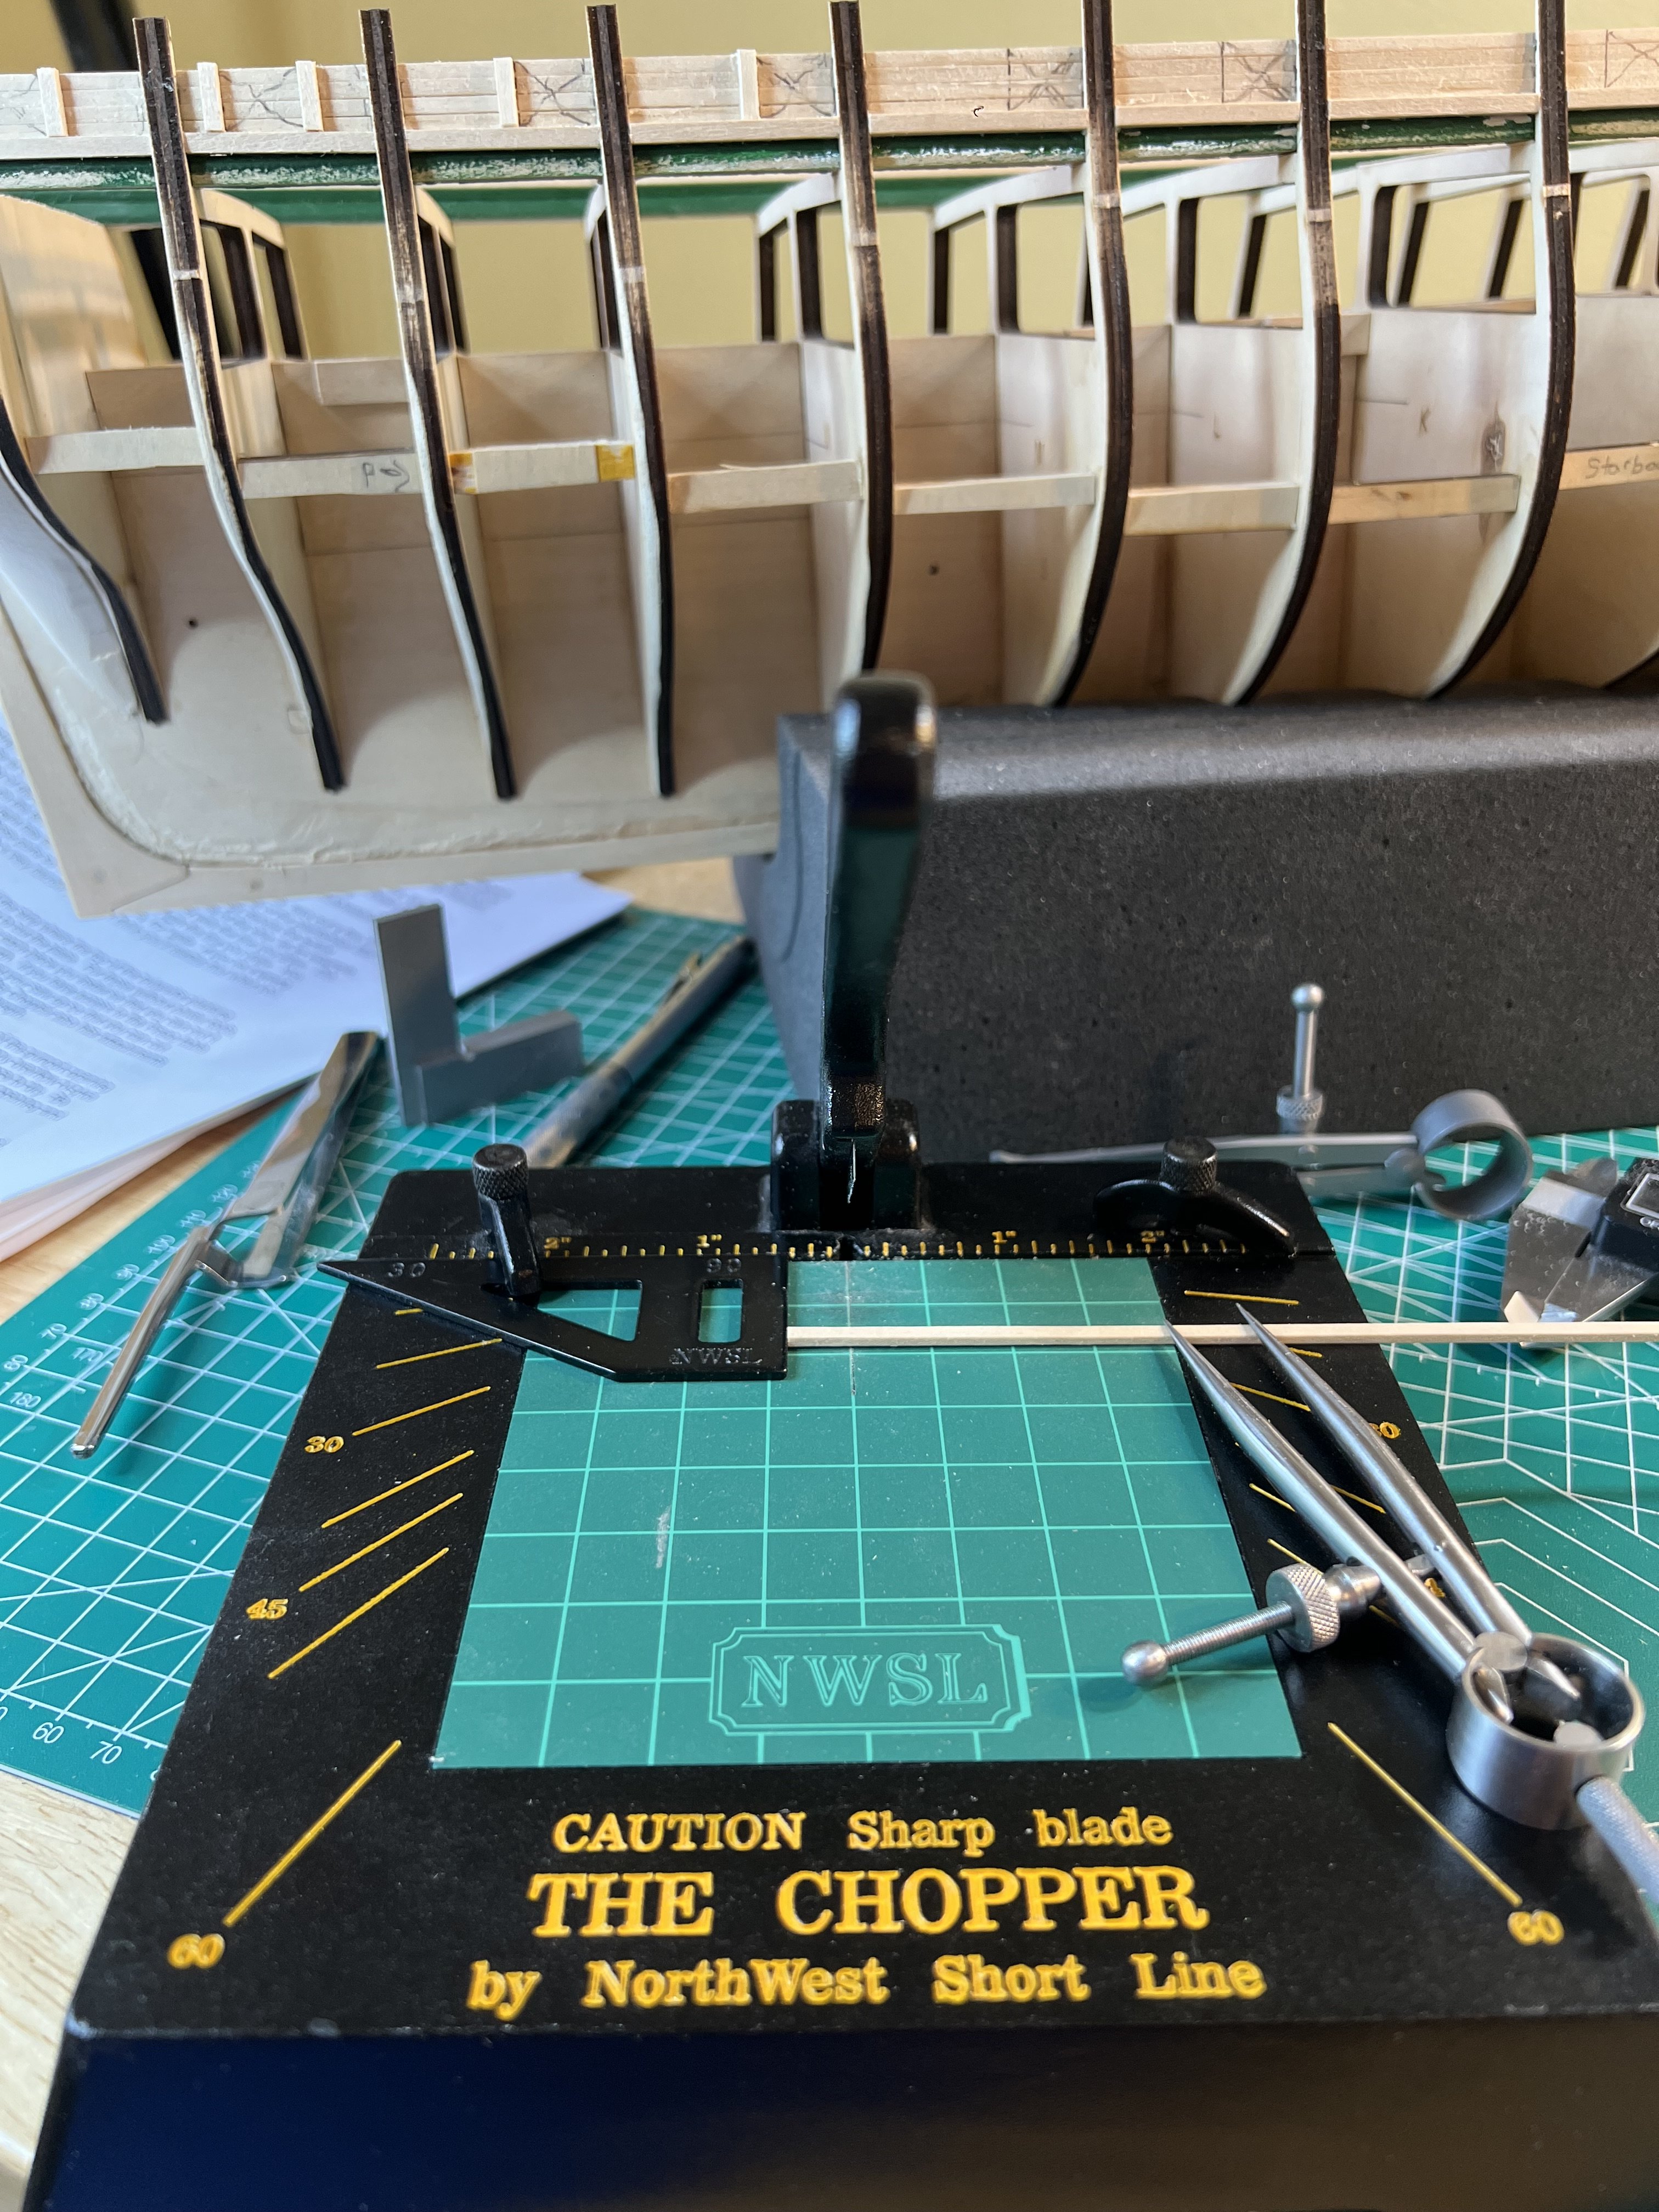
 “The Chopper” is great for cutting identical gunport frames. The metal attachments and reference lines can provide repeatable cuts. The unit is well built - very solid. The blades are single edged razor blades and are easily replaced. The provide a clean cut on the 1/8” basswood. I haven’t tried it yet on anything much thicker.
-
JacquesCousteau reacted to a post in a topic:
Polaris by David_T - OcCre
-
JacquesCousteau reacted to a post in a topic:
HMS Sphinx by KurtH - Vanguard Models - 1/64 - First POB Model
-
JacquesCousteau reacted to a post in a topic:
Rattlesnake by CapnJack43 - Model Shipways - 1/64 - American Privateer
-

Polaris by David_T - OcCre
David_T replied to David_T's topic in - Kit build logs for subjects built from 1801 - 1850
Thank you for the suggestions Snug Harbor. Unfortunately, events continued between my post and yours. 🙃 I read about that in another thread (apologies for not remembering where), but not confident enough in my creative side to attempt this. The deck has been attached to the false keel with the plank pattern suggested by OcCre. I also struggled to obtain a consistent peg hole size and alignment. I've made a note to create a template for the next project. While test fitting the deck, bending the deck revealed another place where the glue didn't hold. That was solved with a little bit of super glue. Unlike other's people's experience, I was surprised that the ribs fit into the deck cutouts with a soothing click. Glue and clamps were applied and I waited. Over the weekend, the battens (?) were glued in place at the bow and stern. Last night, the sanding began on the bow blocks. Comparing my bow profile to some other builds suggests I have the wrong profile. A test fit shows larger gap between the bow and plank that I think should there. It looks like I need to take more from the from the portion of the batten hidden by my finger. One deck plank at the bow was loo I'll start sanding the stern when time permits and gauge my progress with planks. Regards, David
-
 The next step is to install the ply upper hull side patterns: 1. Upper hull side patterns 2. Upper hull side patterns after having been soaked in hot water for 90 minutes and clamped to the hull. Upper hull side patterns installed: Next comes the first hull planking. I did hull planking down to the waterline in my BJ Connie build, but this will be my first foray into planking below the waterline. There are many methods and philosophies as to how this should be done, but I am inclined to go with what is described in the manual. I would like to proceed as if this were the final planking to get the practice of exacting tapering and bending so that when I actually do the second layer, I will have learned some lessons and will be in a position to do my best. I anticipate using filler to fill in dips and hollows but not the small gaps between strakes, as the final layer will hide these.
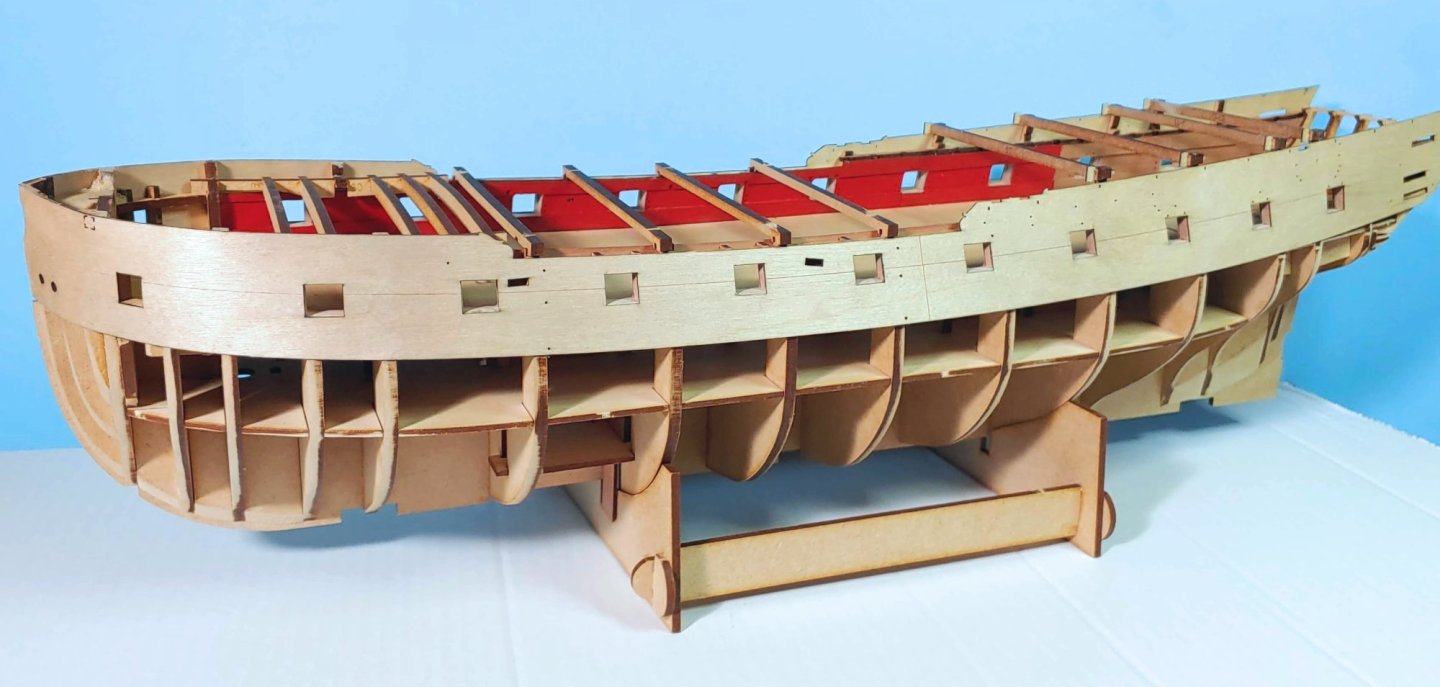
-
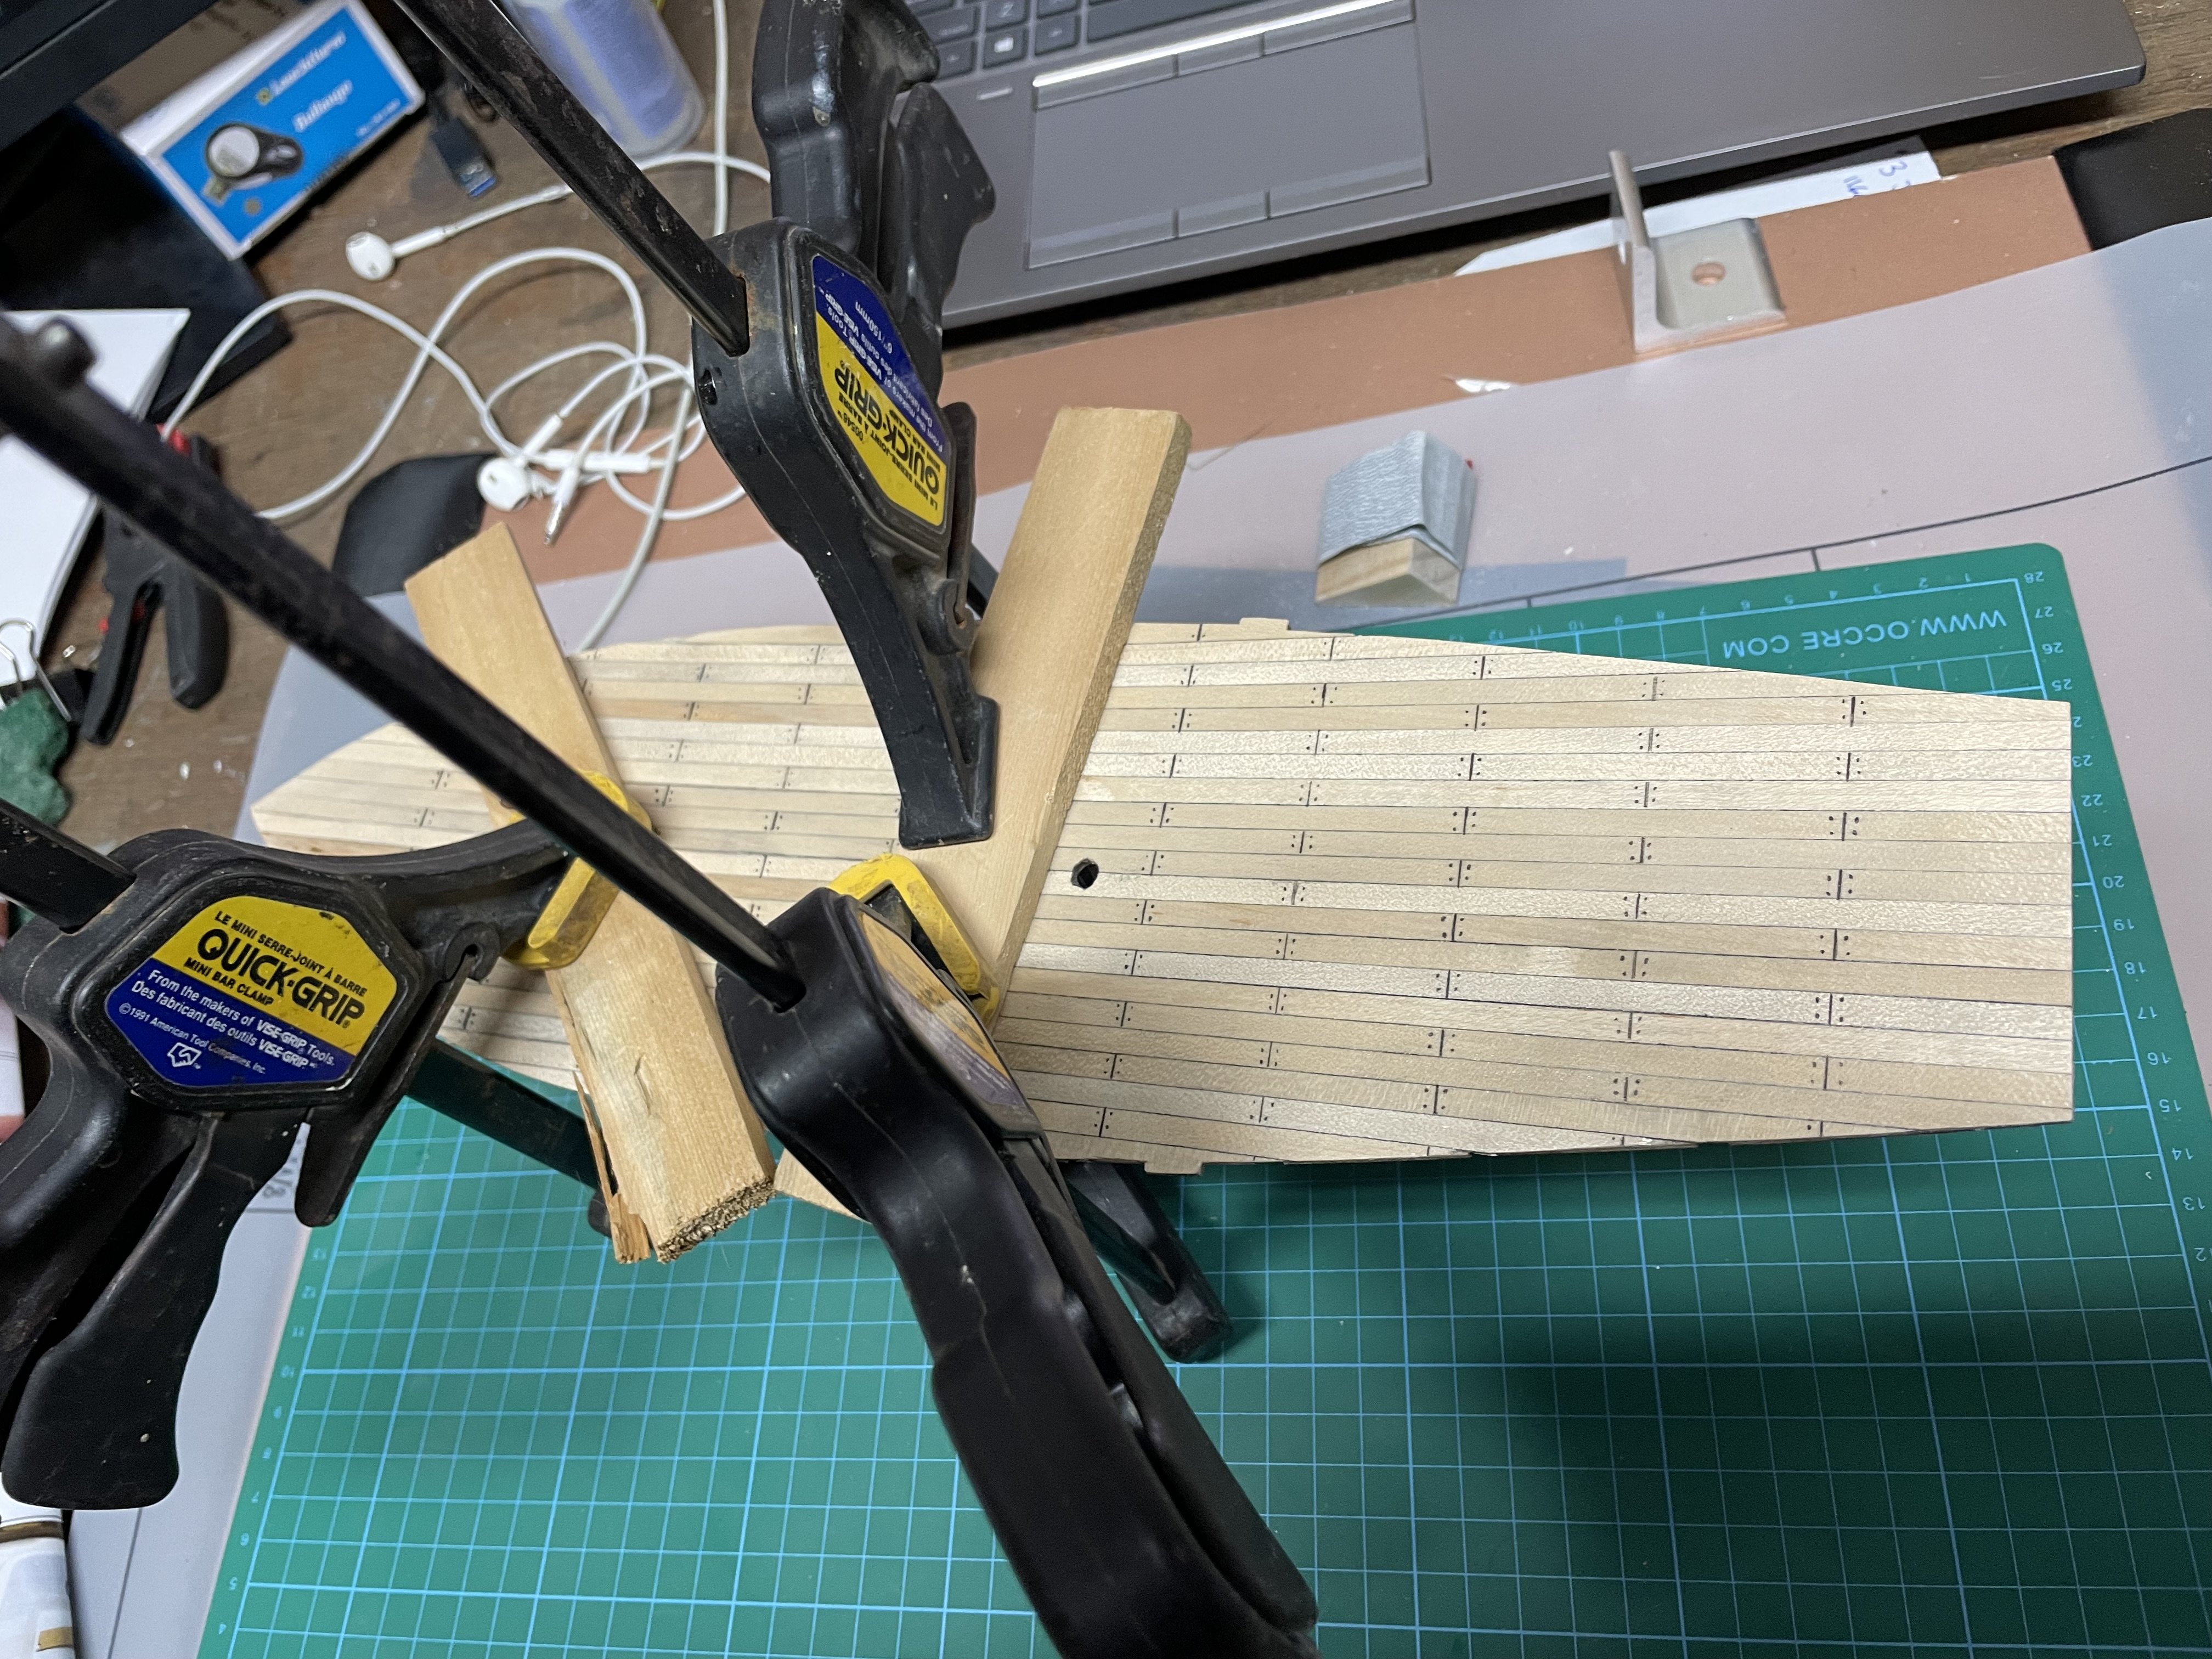
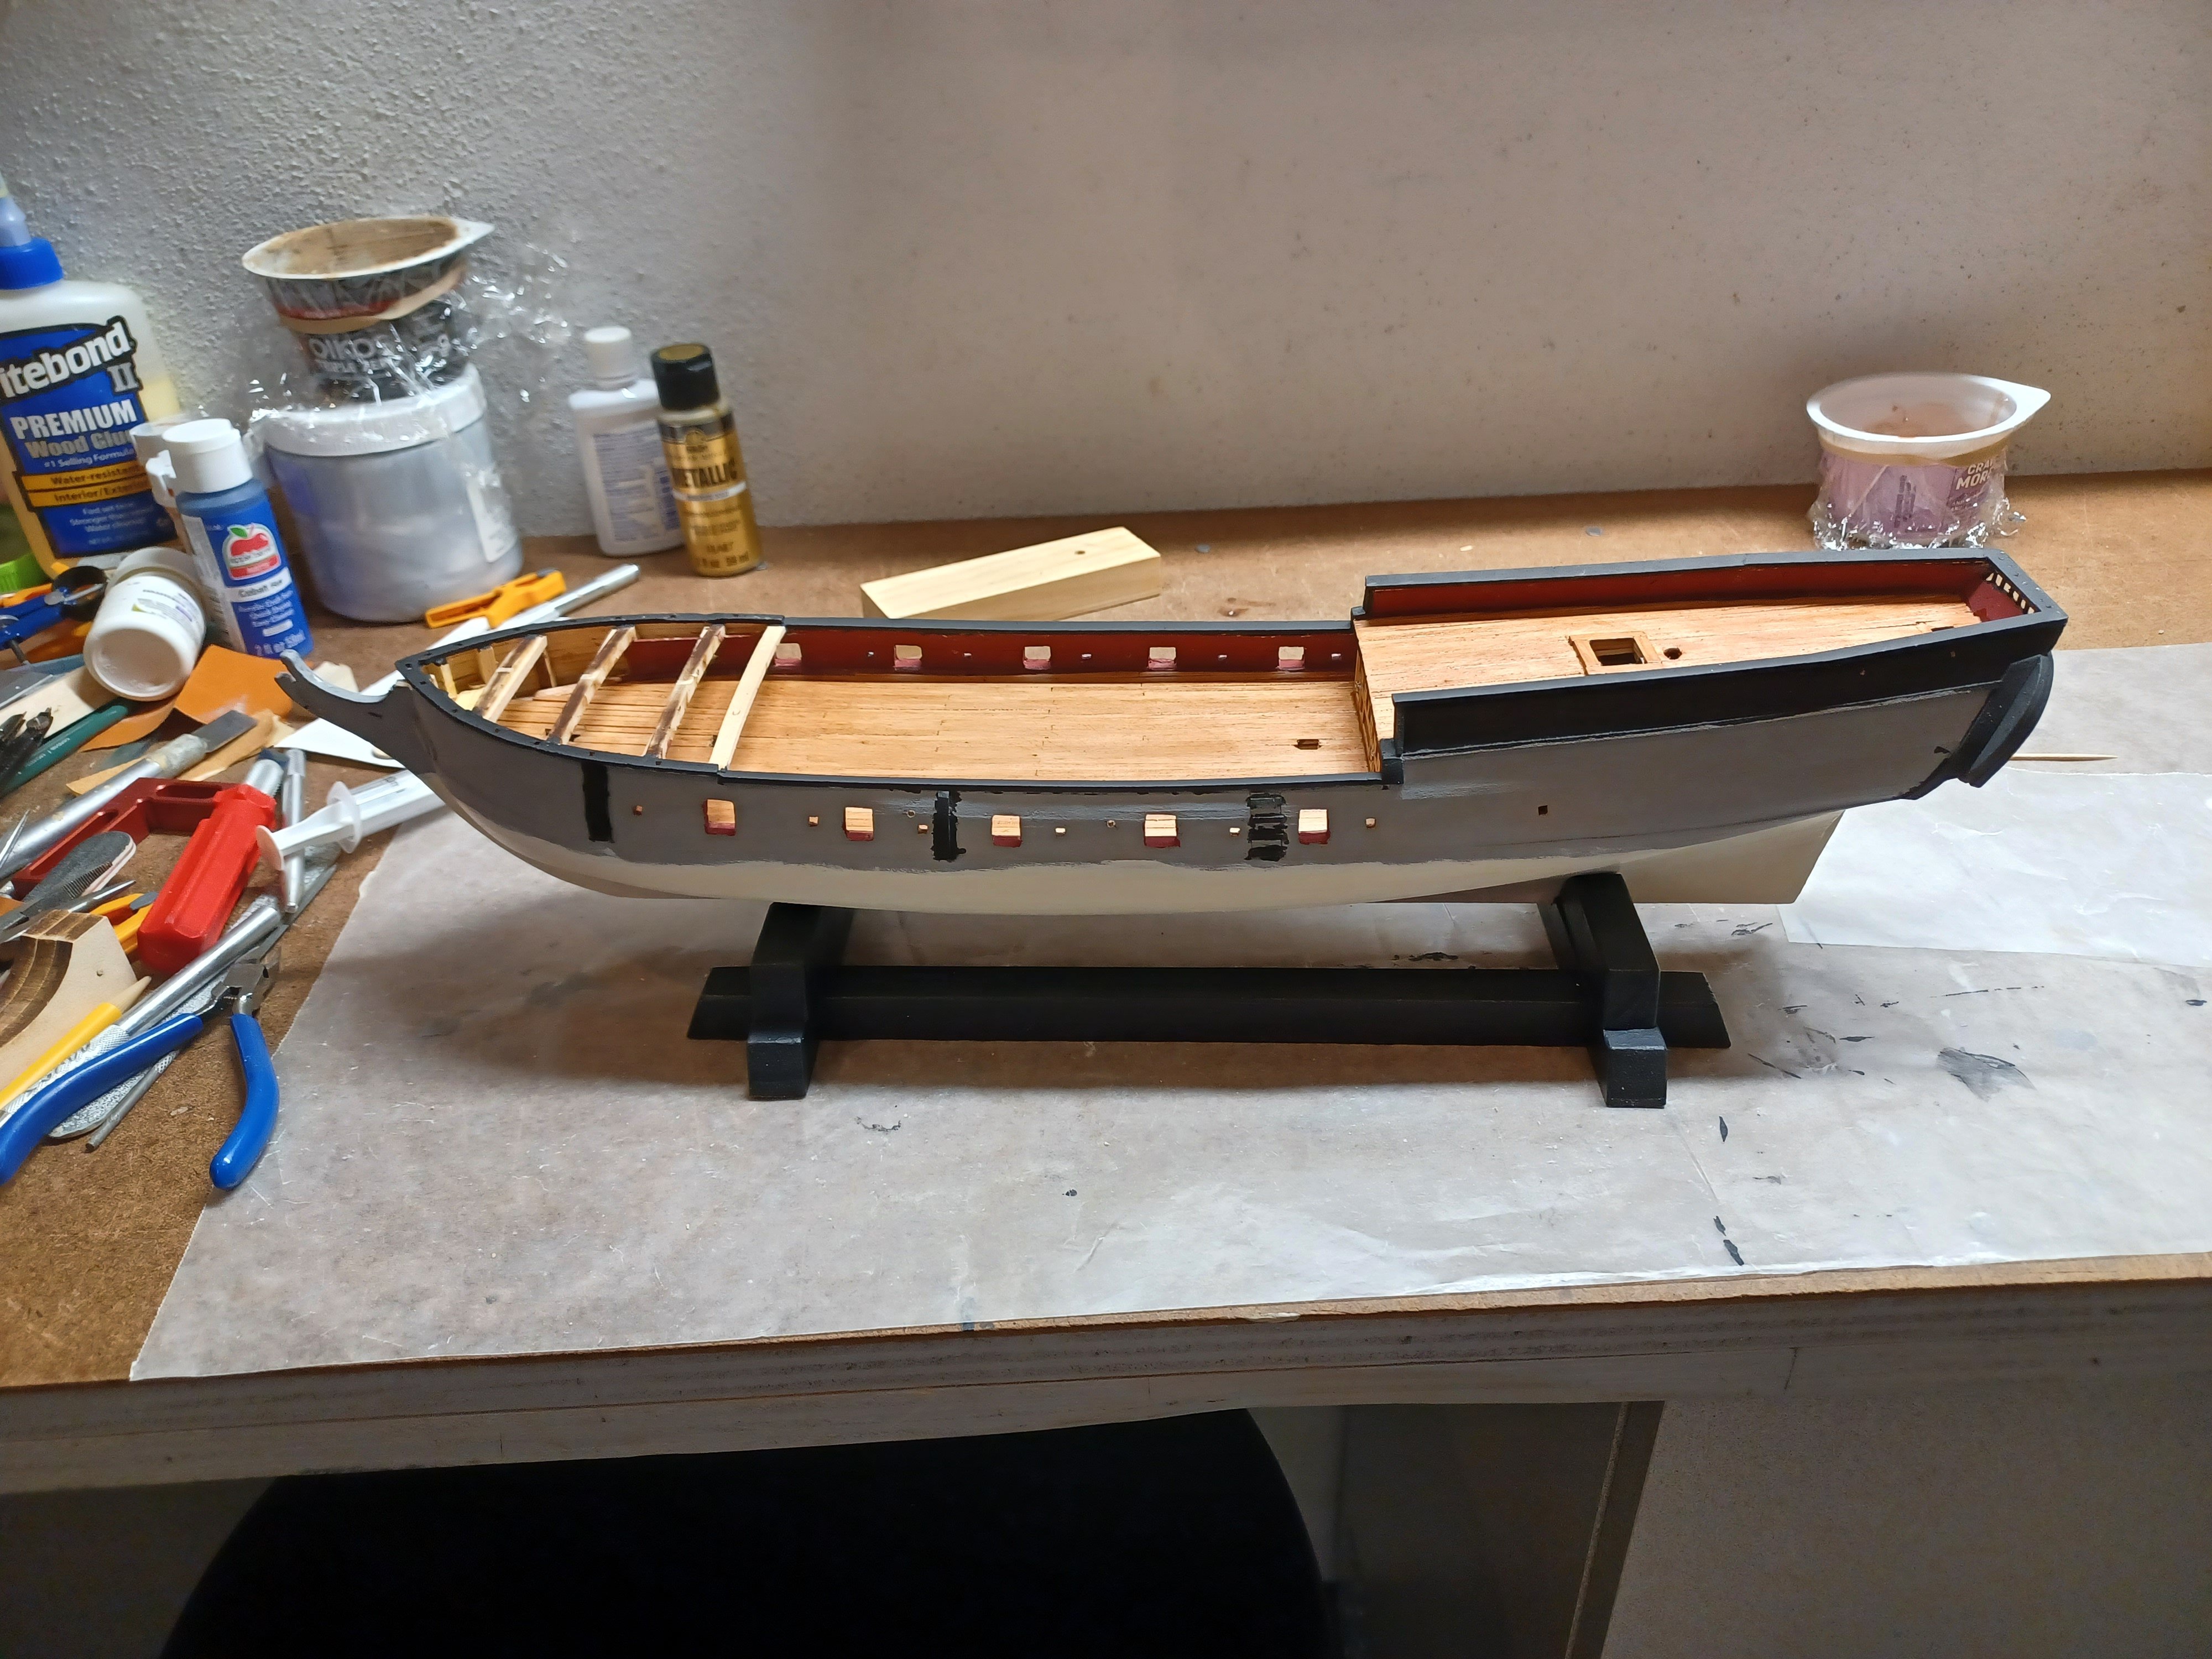
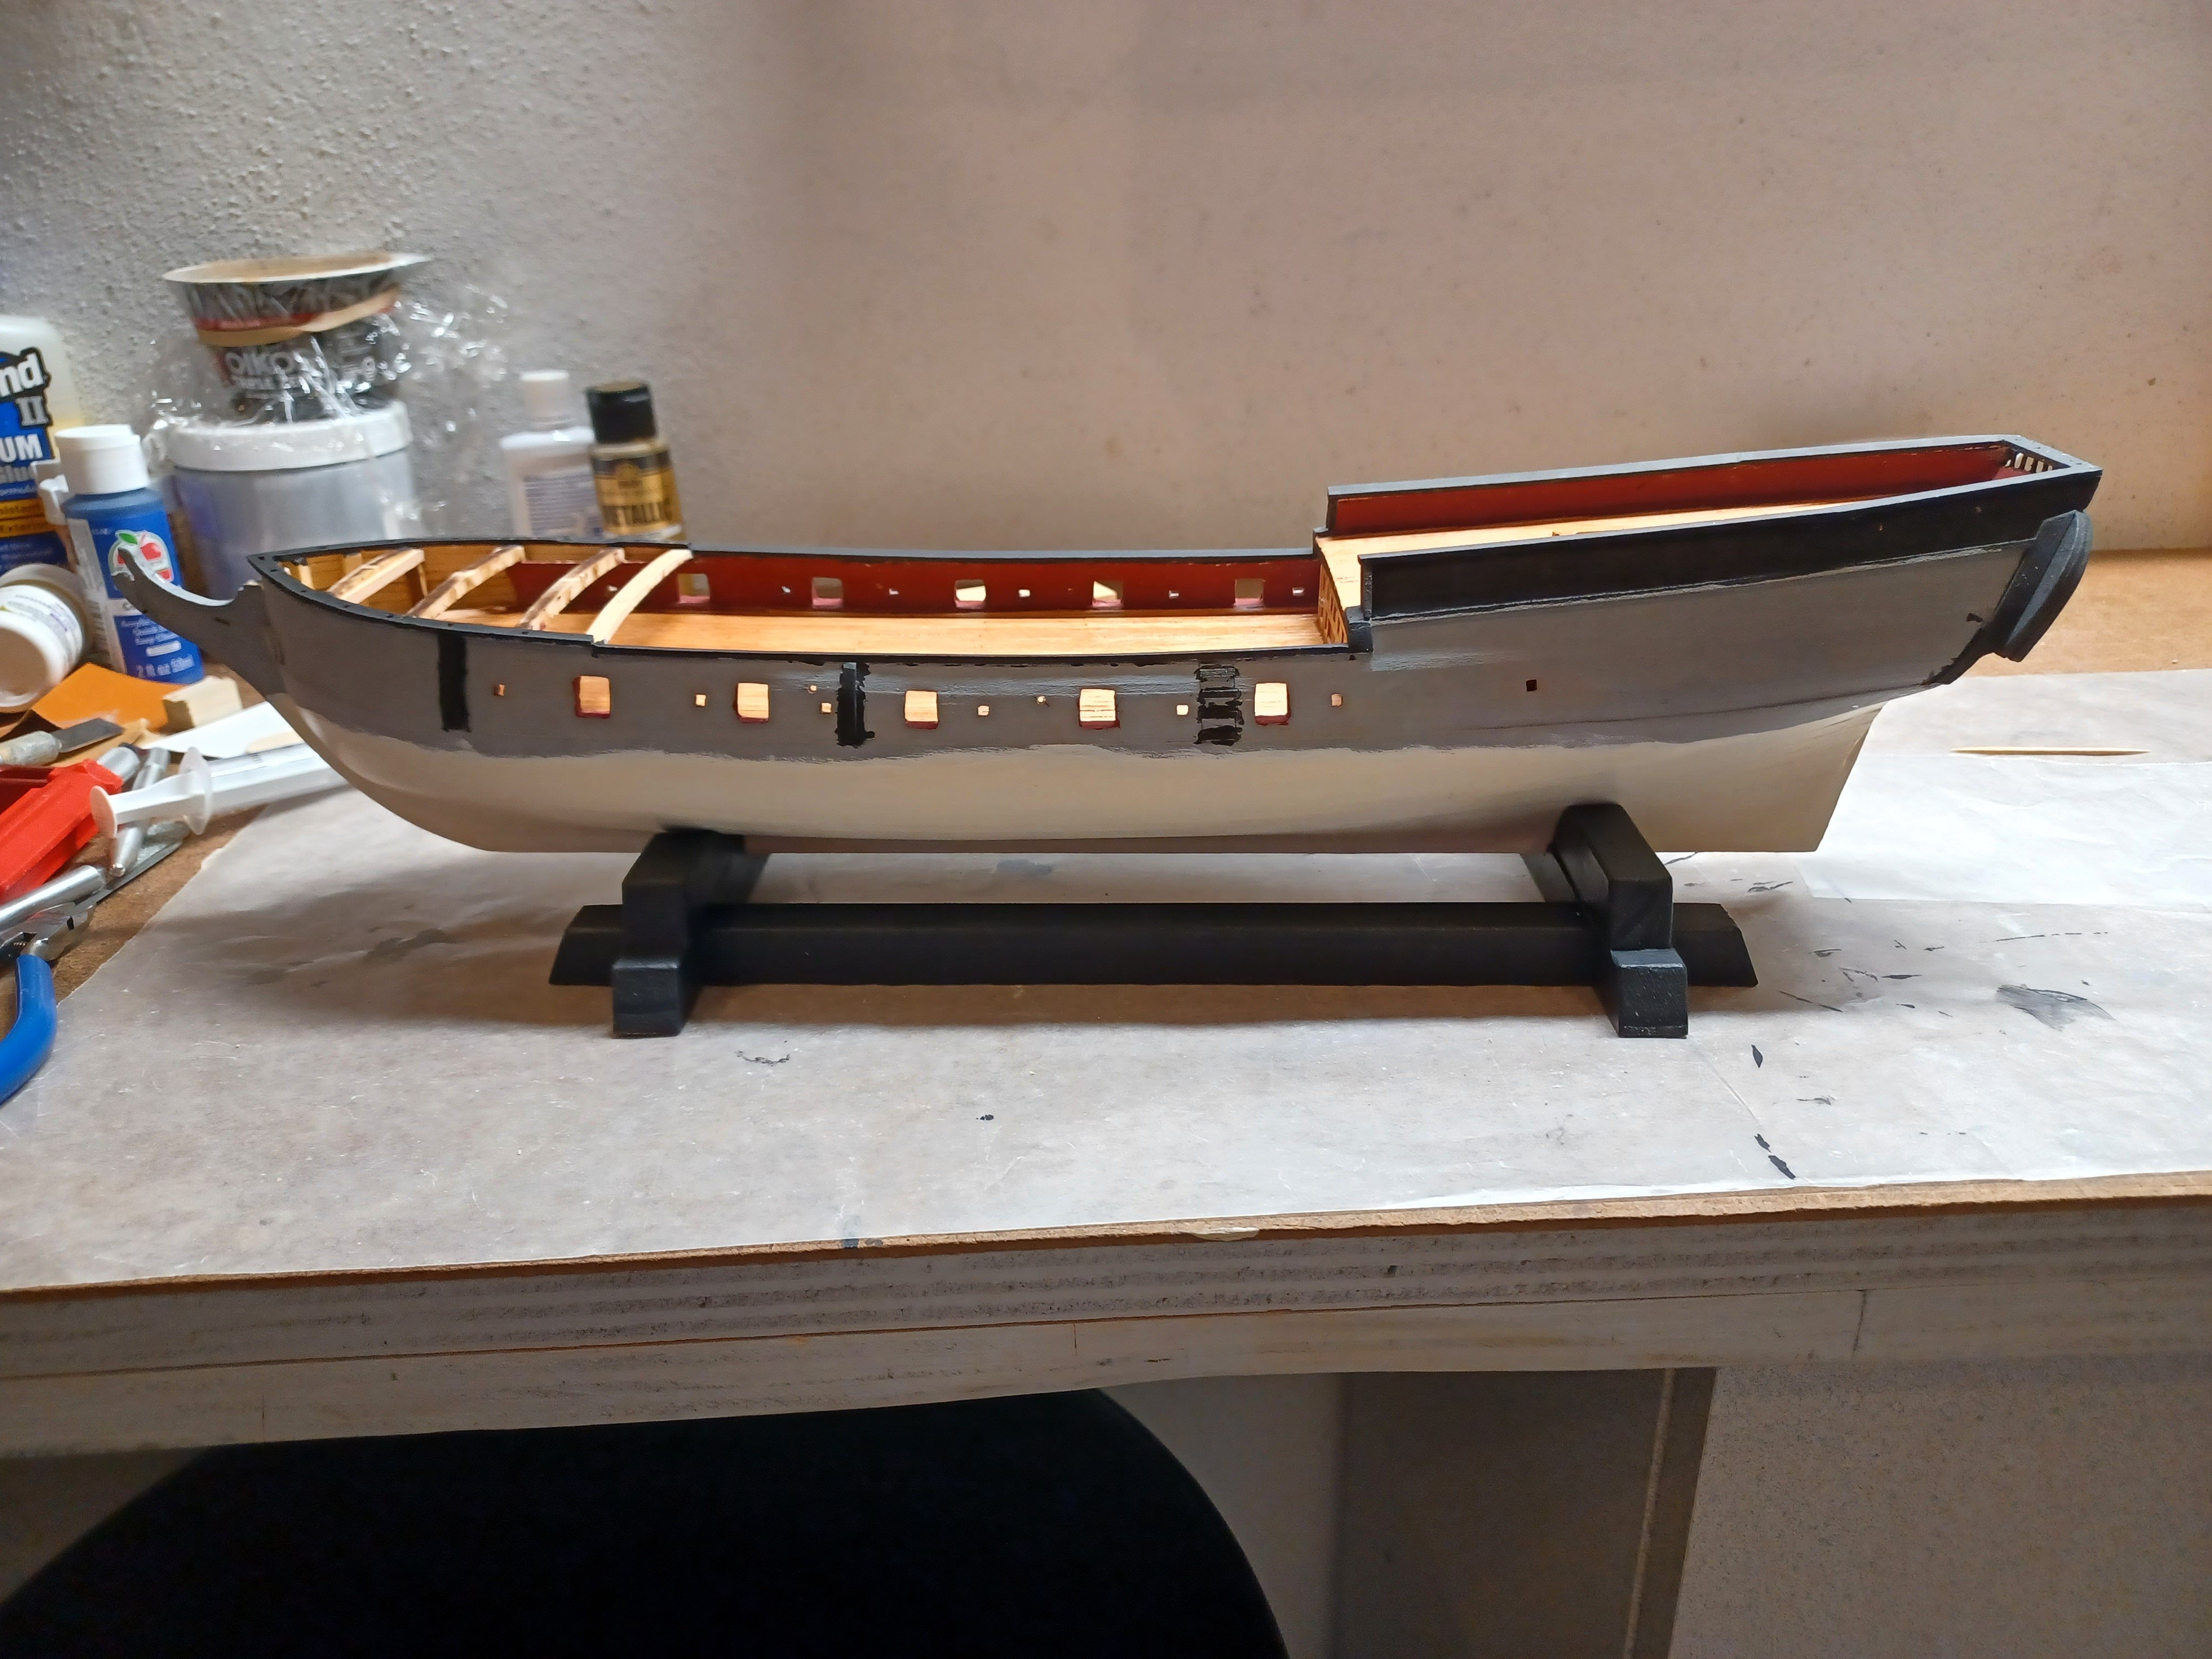
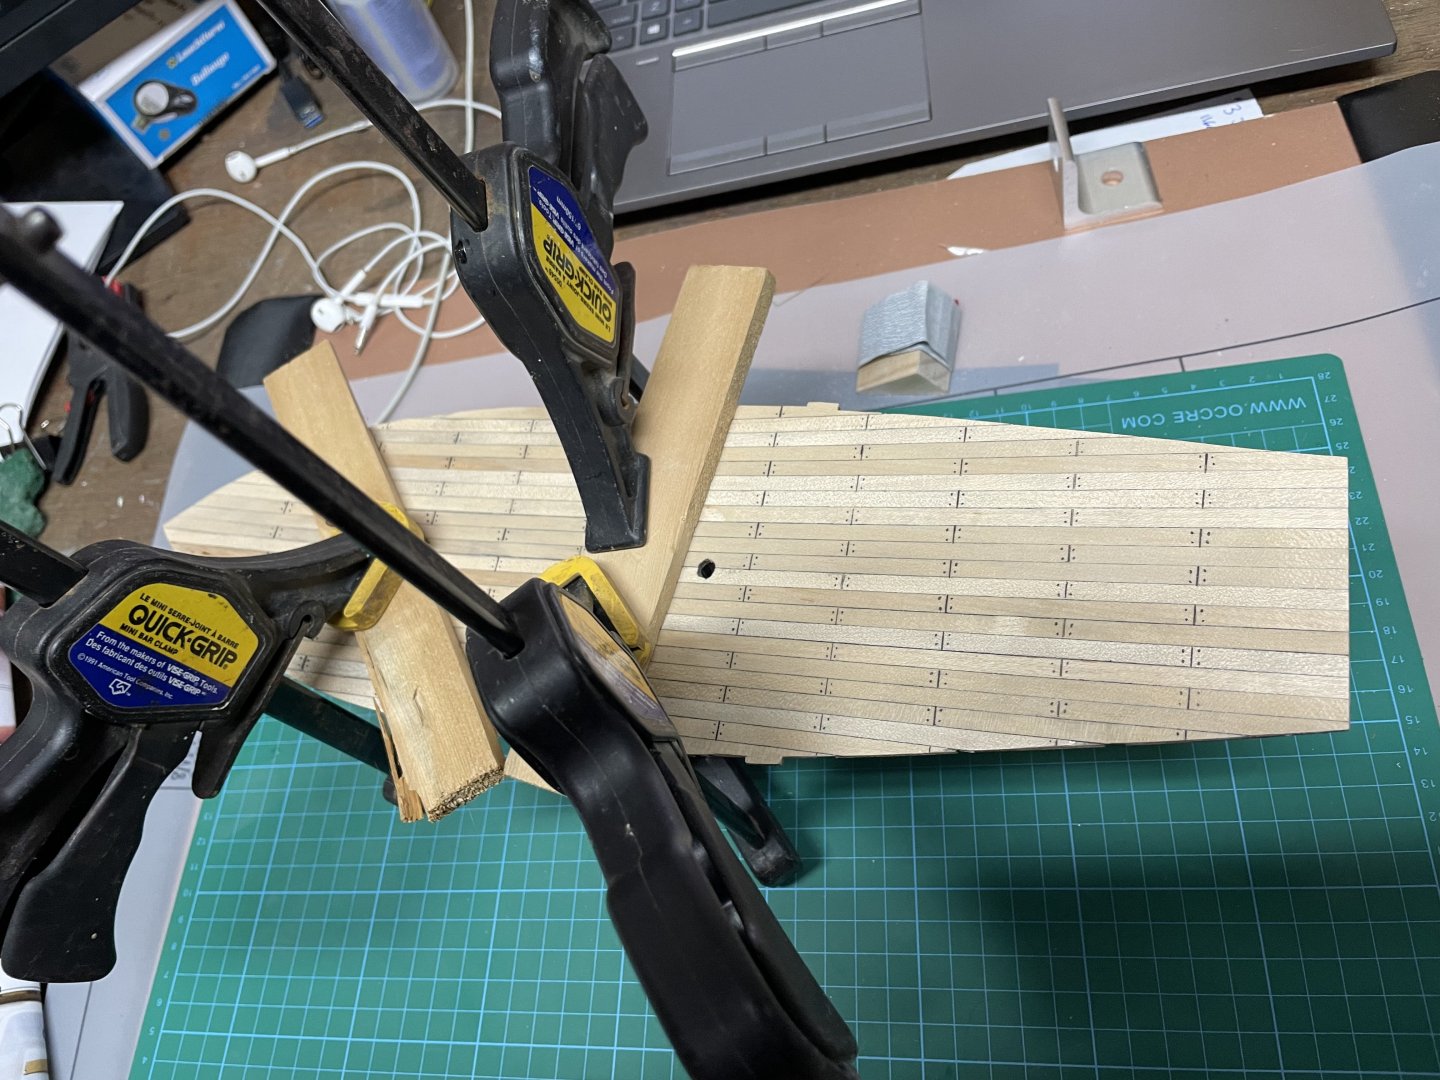
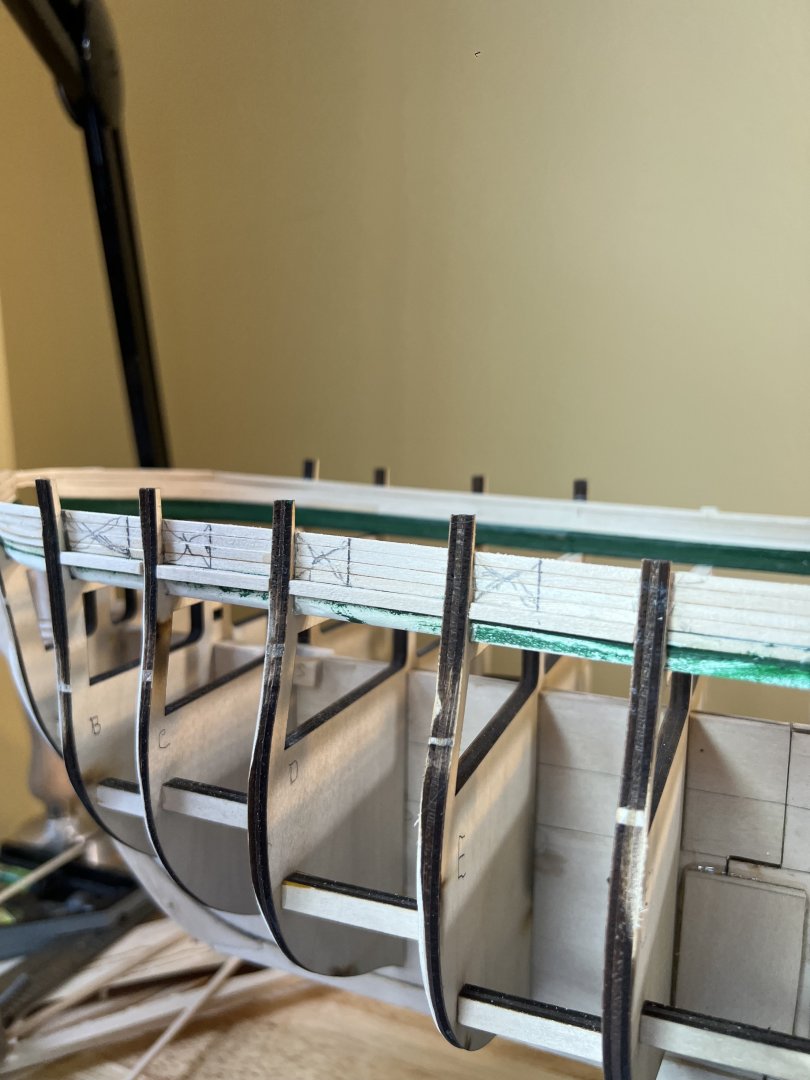
Gunport Framework I’ve measured out the gunports according to the guide. A few points - remember that no cutout exists on the Port side between bulwarks g&h. Be sure to put the line for your “X” to the correct bulwark (the one you measured from). I’ve noticed that the kit supplied 1/8” x 3/32” basswood stripes are not all uniform. Some are thicker - even within a strip. I keep fishing out the better ones from my pile. Hoping I don’t run out of the good ones b/c it’ll be a PIA to thin a bunch of these by hand.
- Today
-
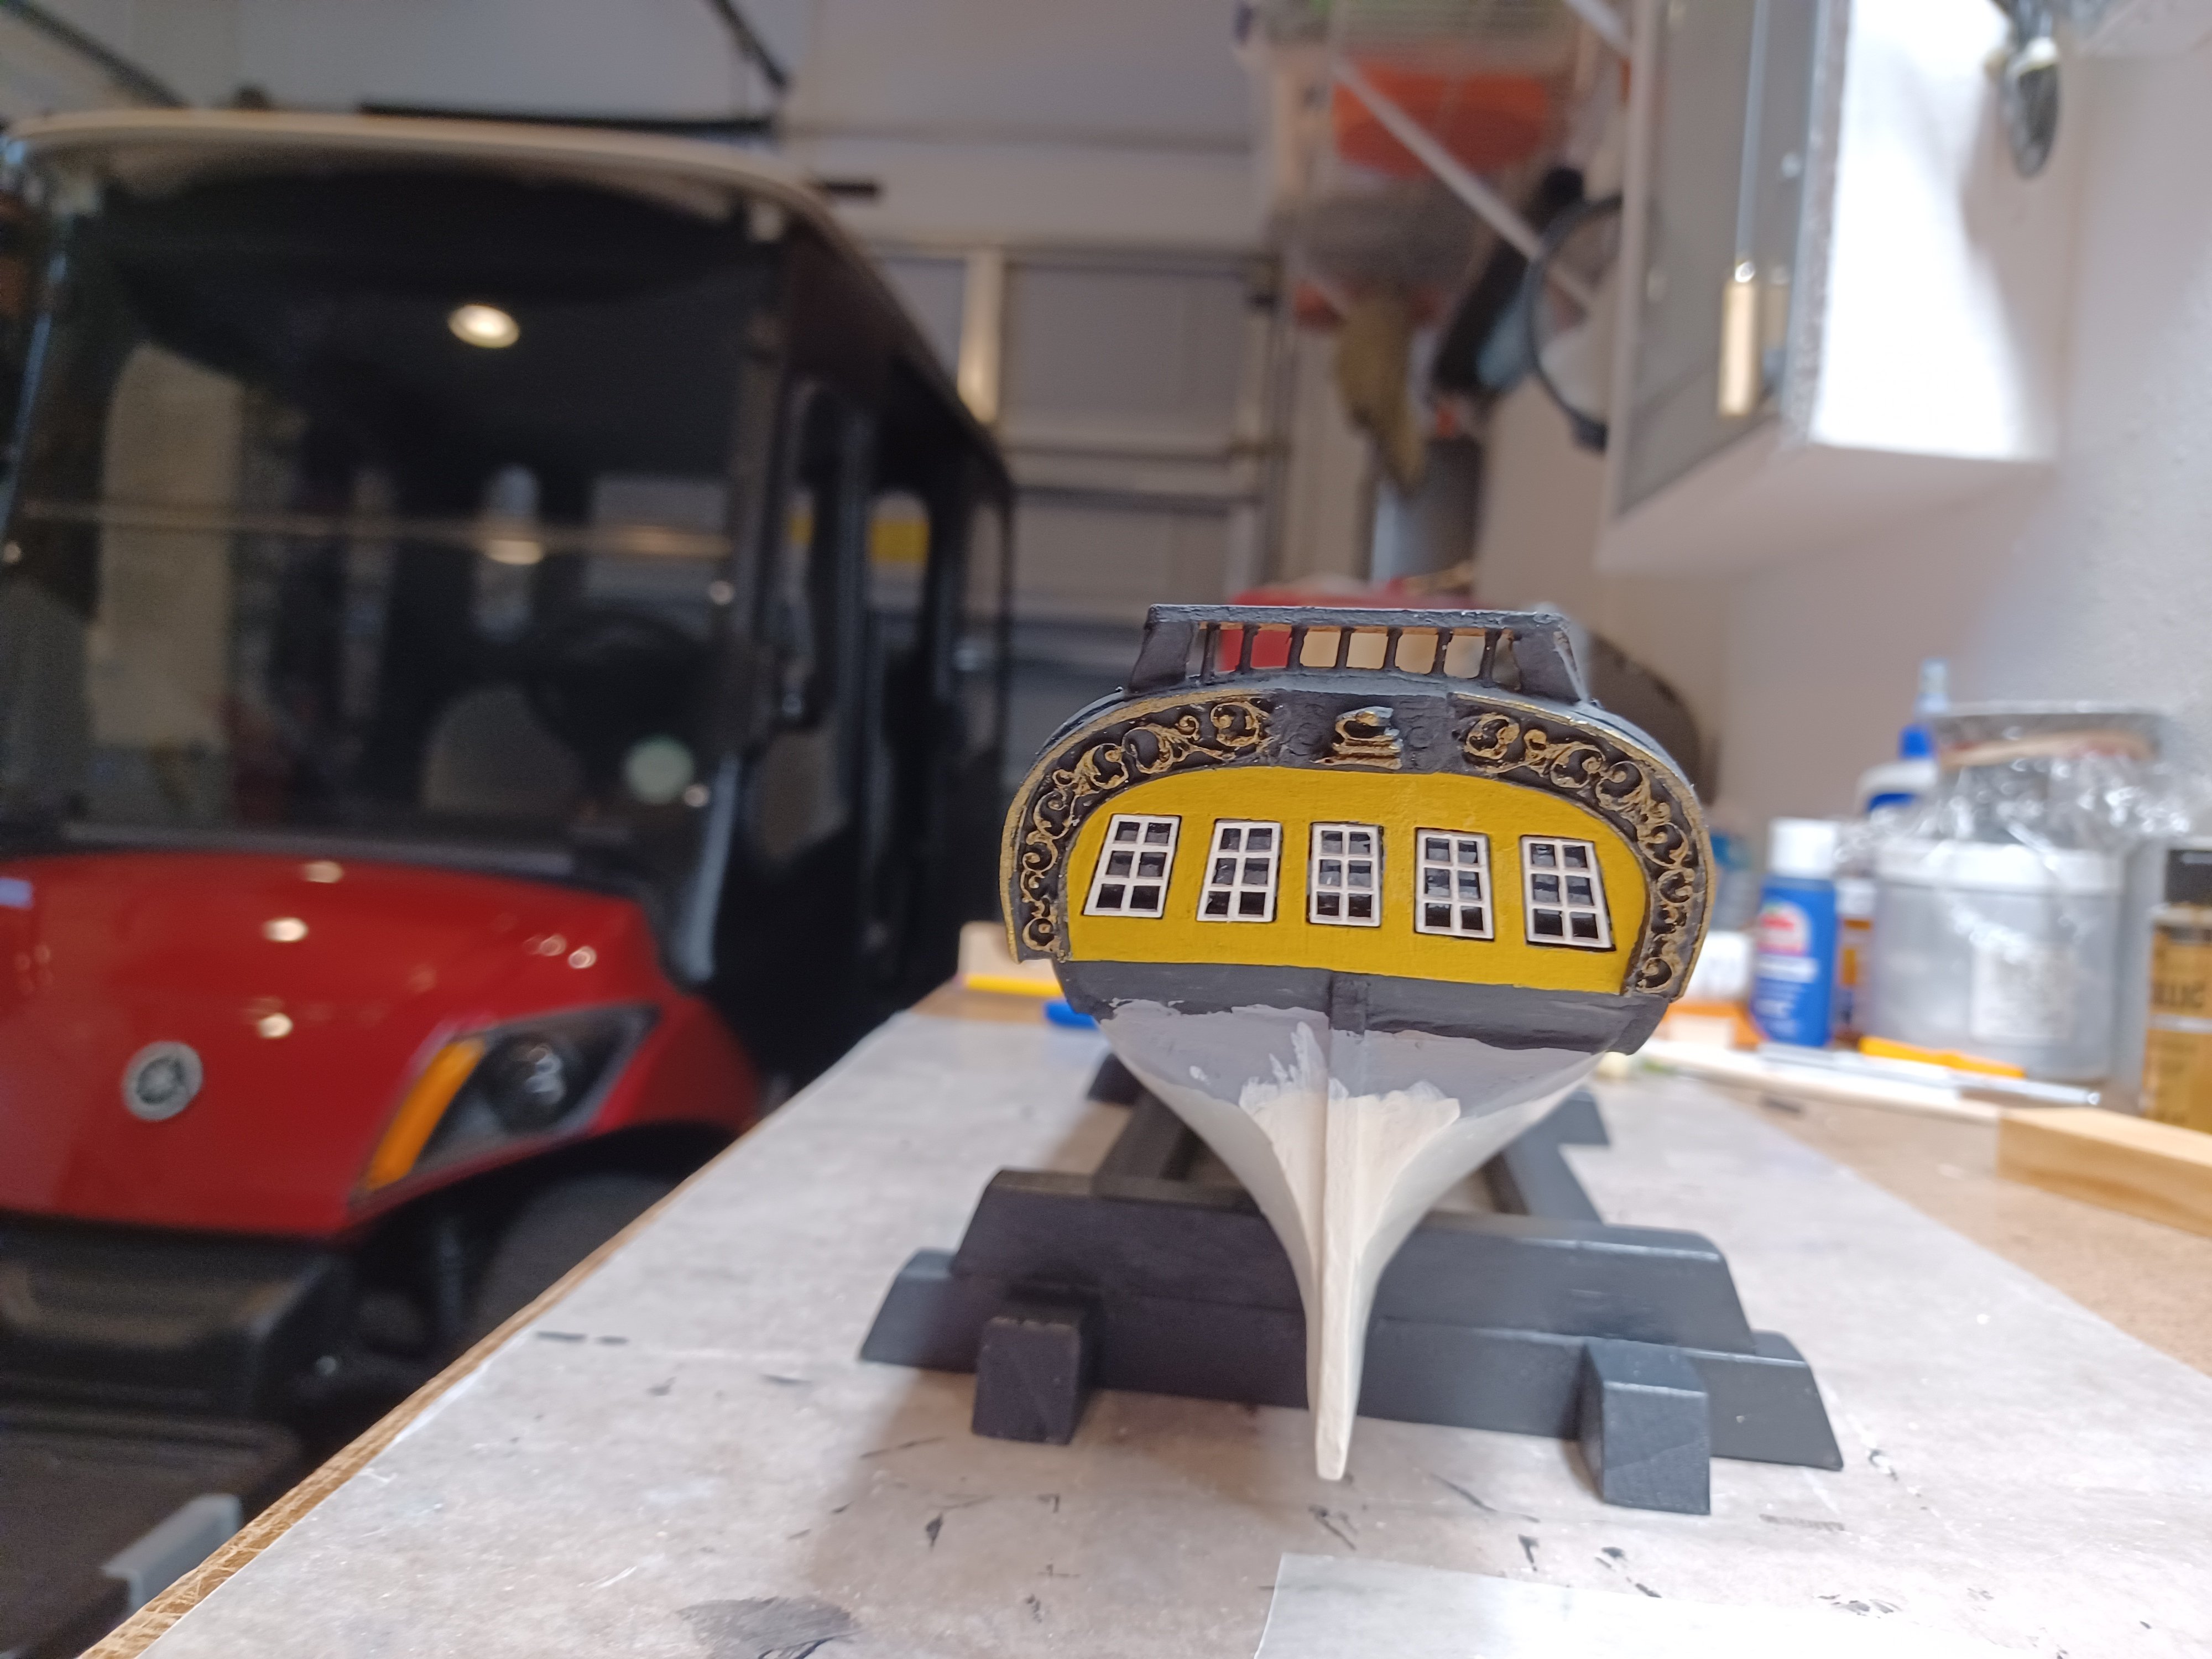
 Had to cut the Britannia fitting because it was too small, cut out the snake and mounted it on a piece of wood added the gold by dipping a q tip in gold and rolling most of it off on a paper towel before rolling it across the surface Window frames in white seem to make it stand out better
-
 i would be VERY interested in a kit trial build - I have the time and the room. what would be the requirements of me please ?
 -
 Thank you guys...it will be at least a week before I can do more on the model.
- 790 replies
-
- 1
-
-
- speedwell
- syren speedwell
- (and 1 more)
-
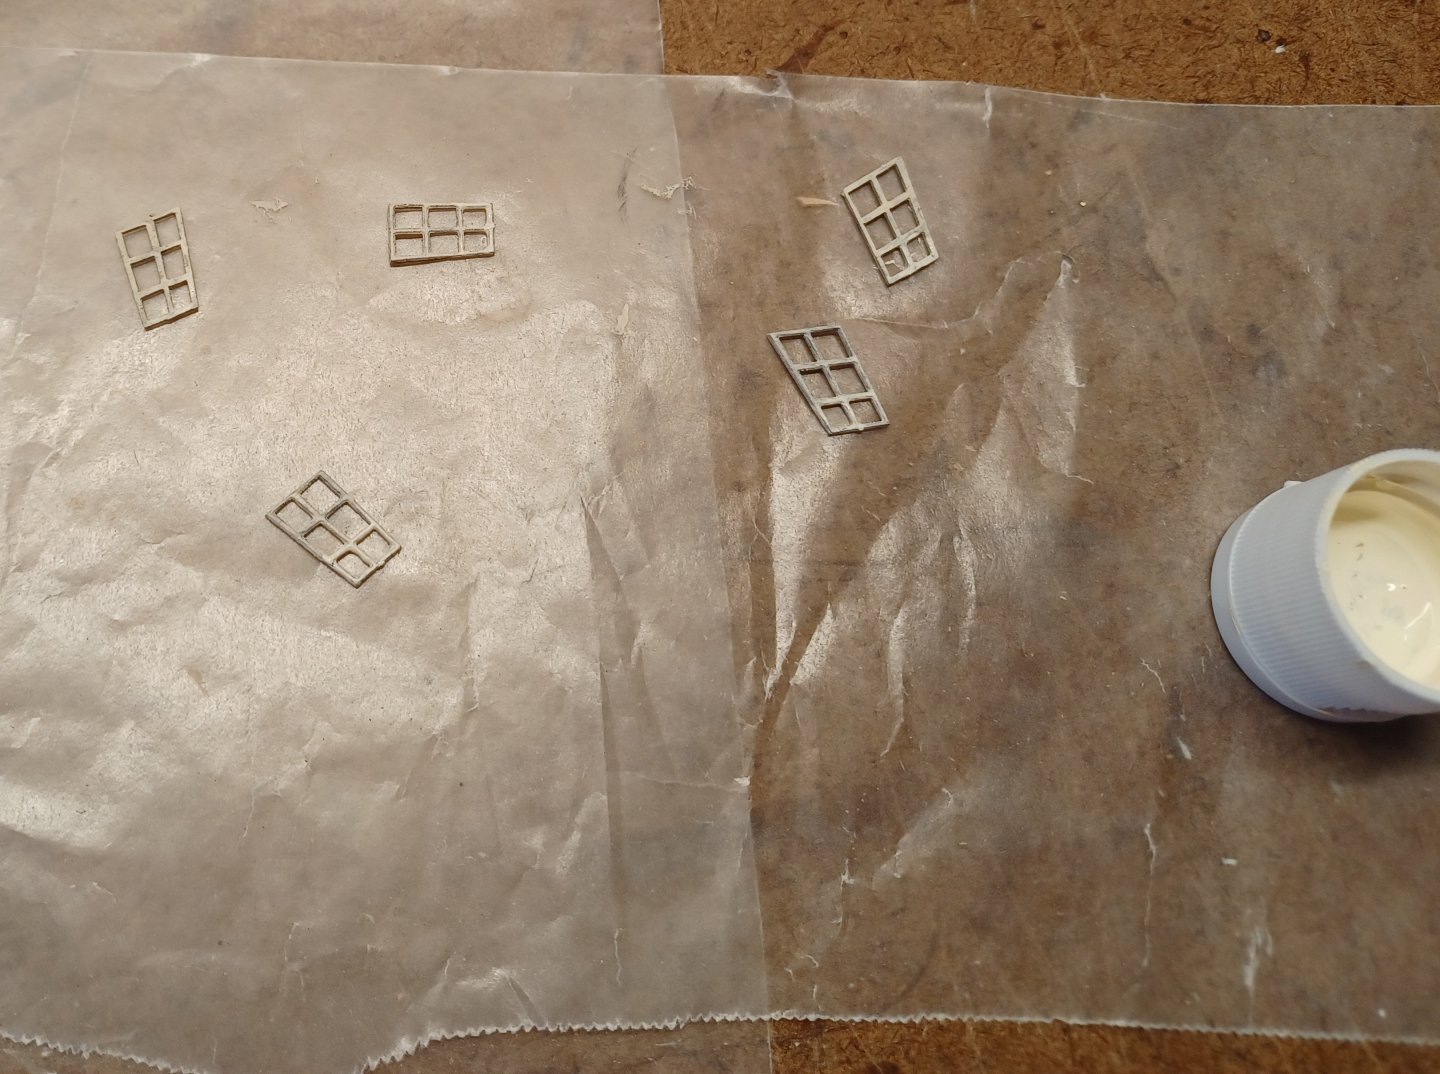
Window frames are painted and ready to install
-
Made a base out of 5/8 inch stock contoured it to the hull and fastened it with wood glue and screws


-
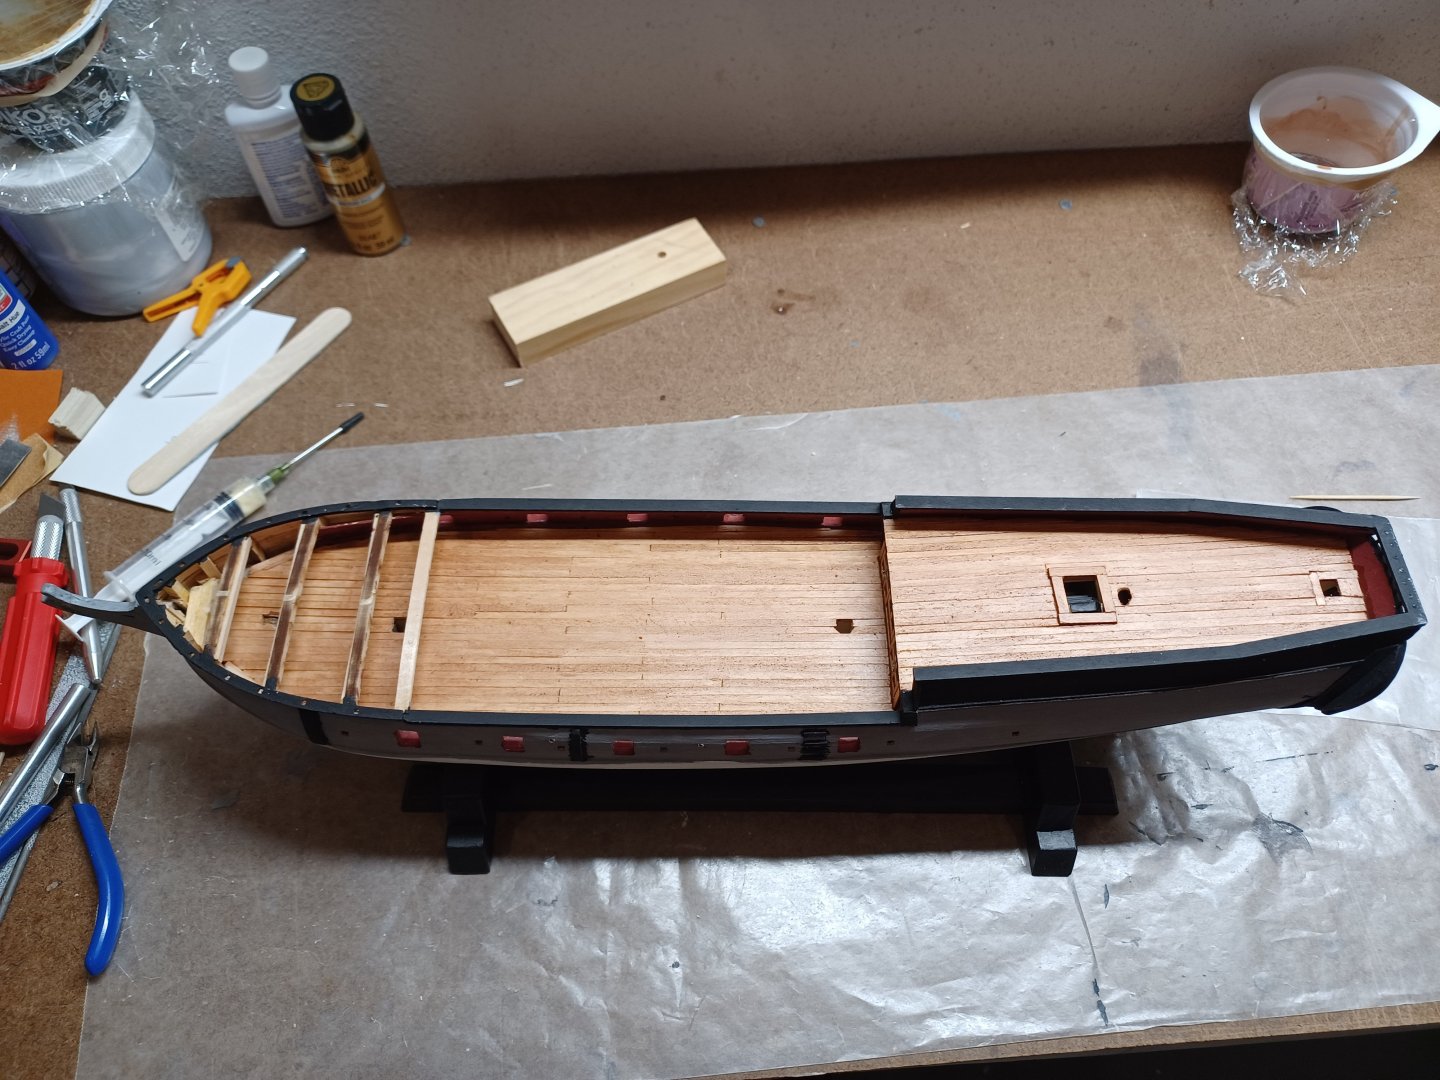
Tinted clear water based acrylic with some brown acrylic paint to darken the deck a bit
-
 Quick update on what has kind of turned into a project. (I was just interested in this before, but now things are moving along.) First, Interlibrary Loan was able to get me a copy of the Roland Bockius book. Wow. Just ... wow. Thanks for that recommendation! It is incredibly detailed (and in German, which means I can't read it) and it includes seven sheets of plans. I took those over to my local copy shop and made myself a set of plans. (By the way, I know the University of Chicago -- which is very close to me -- has a copy, but the copy I got was from Emory University, which is in Atlanta, GA, quite a long way from me. Hard to understand how these things work, but just glad it did.) And, second, I heard back from EGEA about the model. The price is 96.99 Euros (the kit plus shipping from Germany to the US) which is $104 today, not unreasonable at all. Since they don't seem to take any kind of electronic transfer like Zelle or PayPal or Venmo, I'll have to find some other way to do it, but that shouldn't be too hard to do.
 -
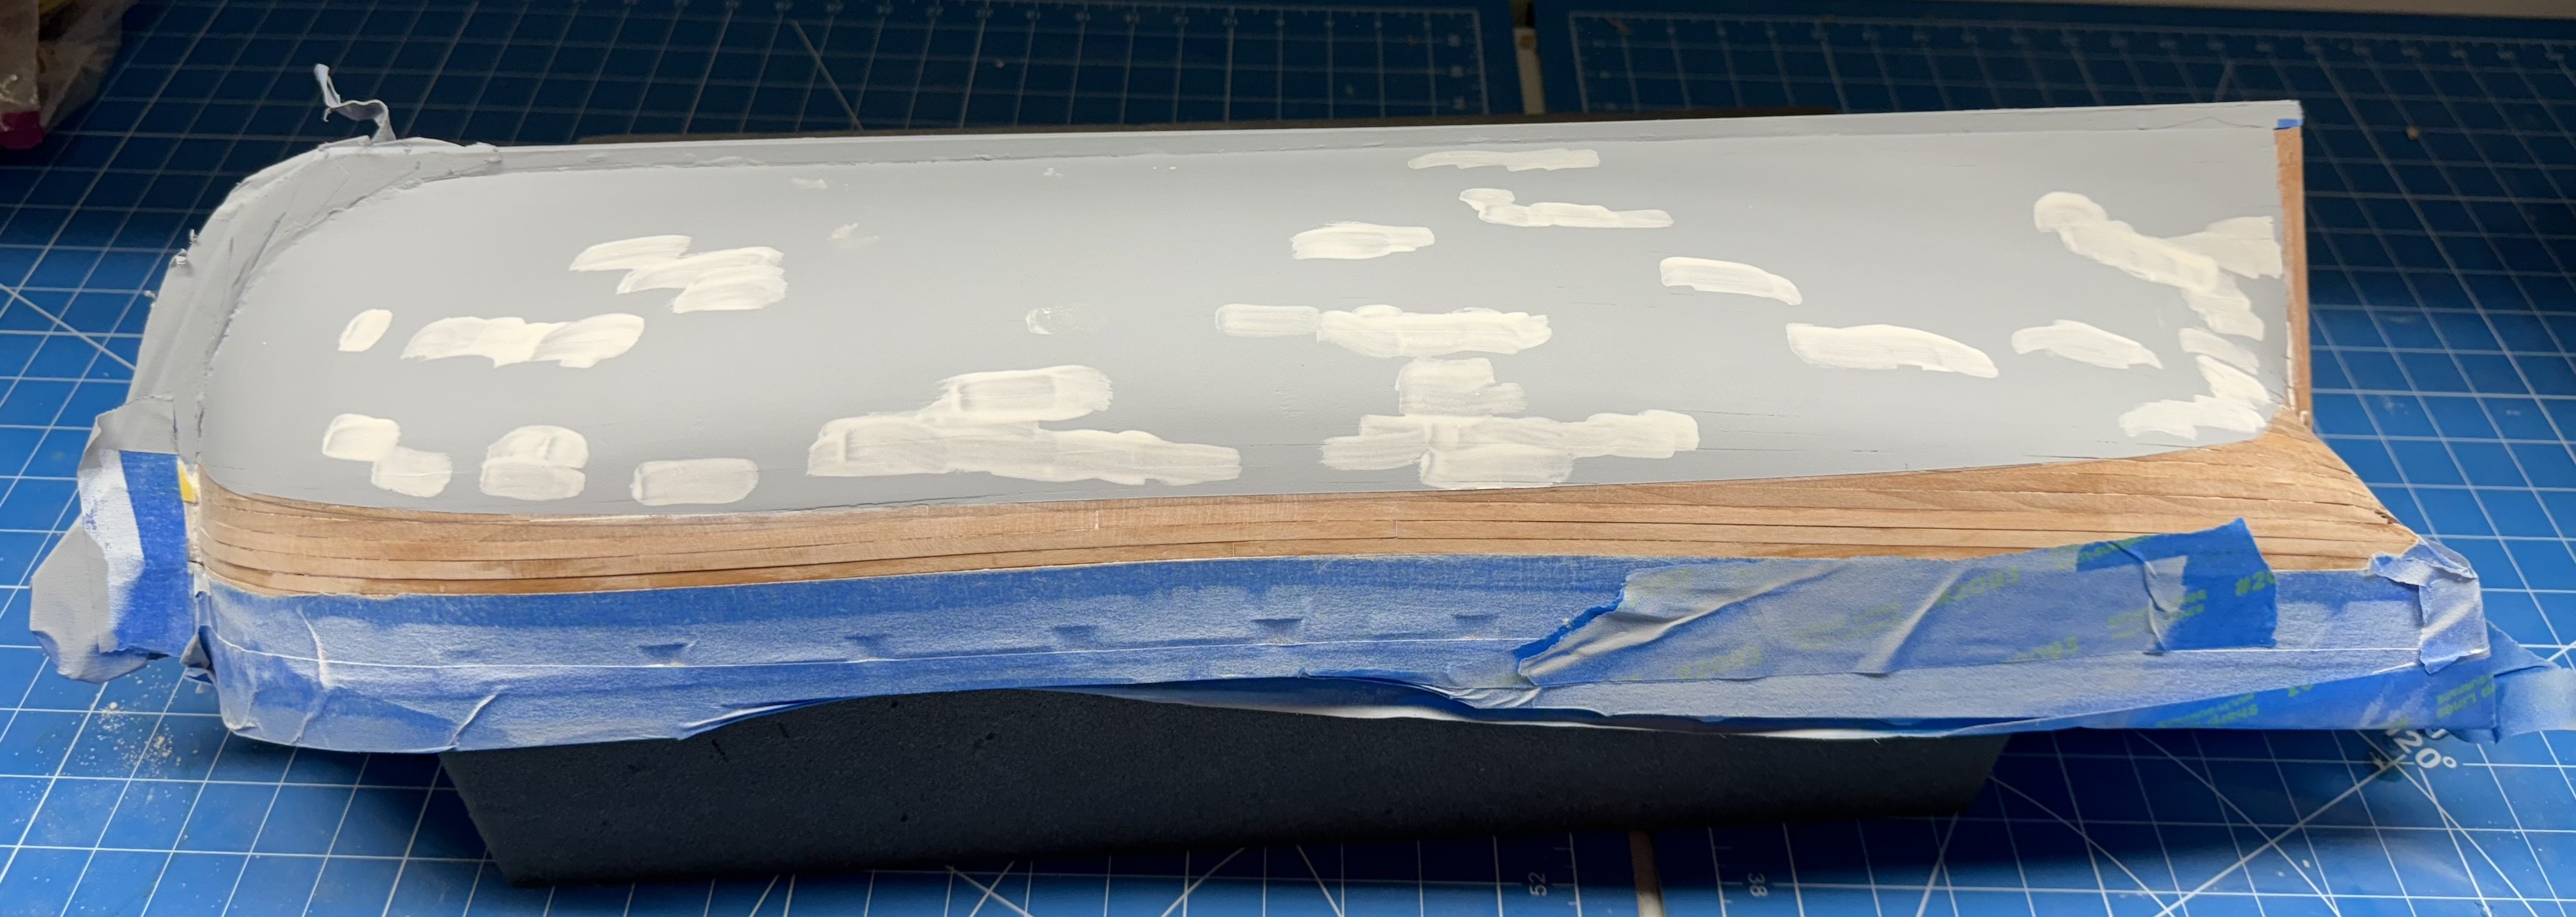
 Although it has been ten days since I posted last I have no been completely idle. The contractor just finished converting one bay of the garage to an air conditioned space so I have been busy out there trying to bring order to the resulting chaos. I was able to set up the paint station and make a pass over the hull using automotive gray primer with filler. I believe it a better choice than the flat white primer I started with. As expected (by me)m the gray showed more than a few areas that still needed attention. This time I added more water to the filler and "really" painted it onto the cracks and gaps that showed through the primer. Here one side after the filler was applied. The other side is similar. Now to sand this down (using 320 grit paper) and than back to the paint booth. This time I am going to mask at the waterline and hope this is the final pass before going with the final paint coats.
-
Found them and bought.
-
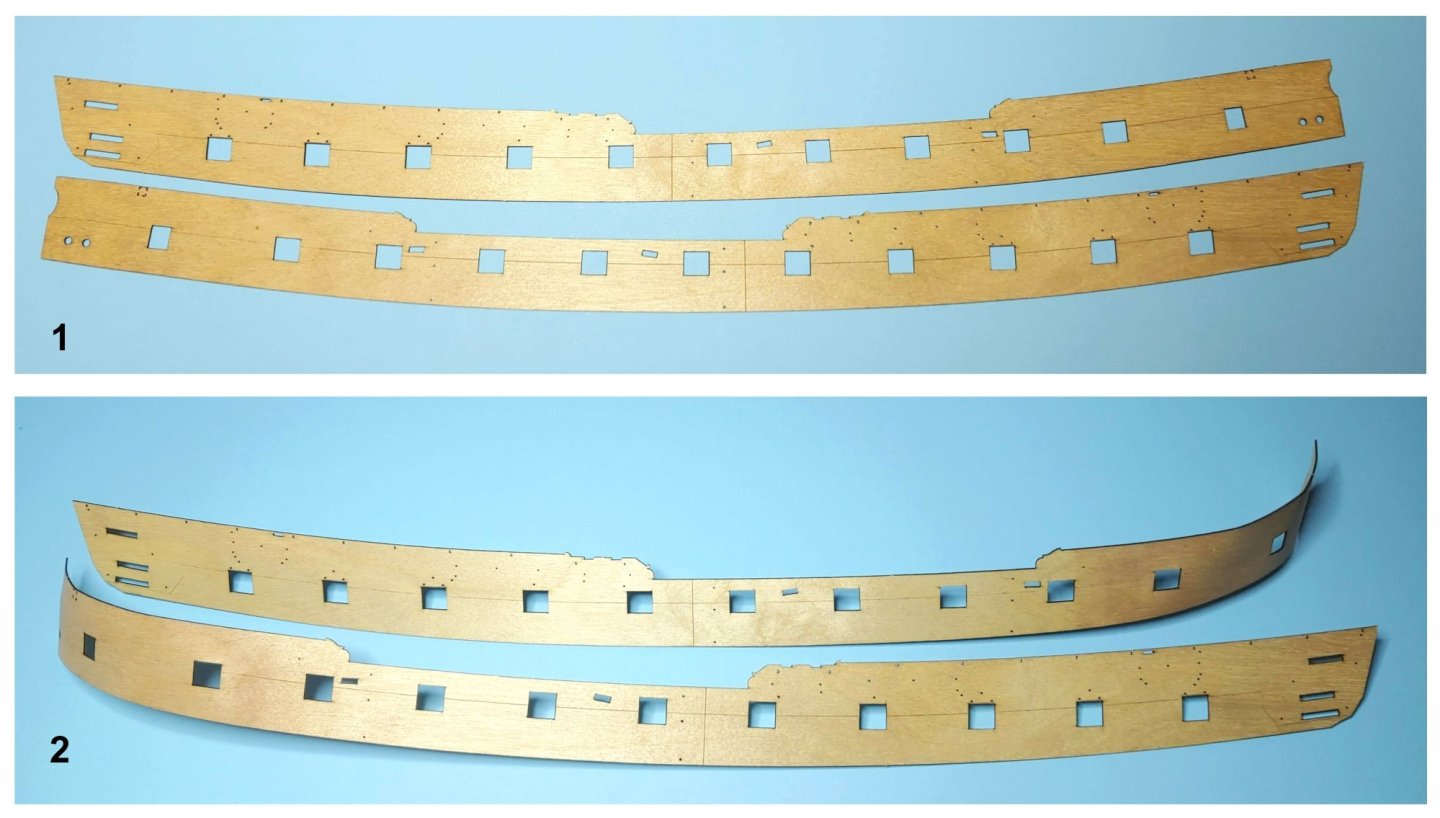
 1766, an other triple frames before 1770’s double frame was more common. By the way, Beaver’s prize was built in America. Double frames seems to be a more normal practice there. Before being converted to a privateer, she was a merchant’s ship.
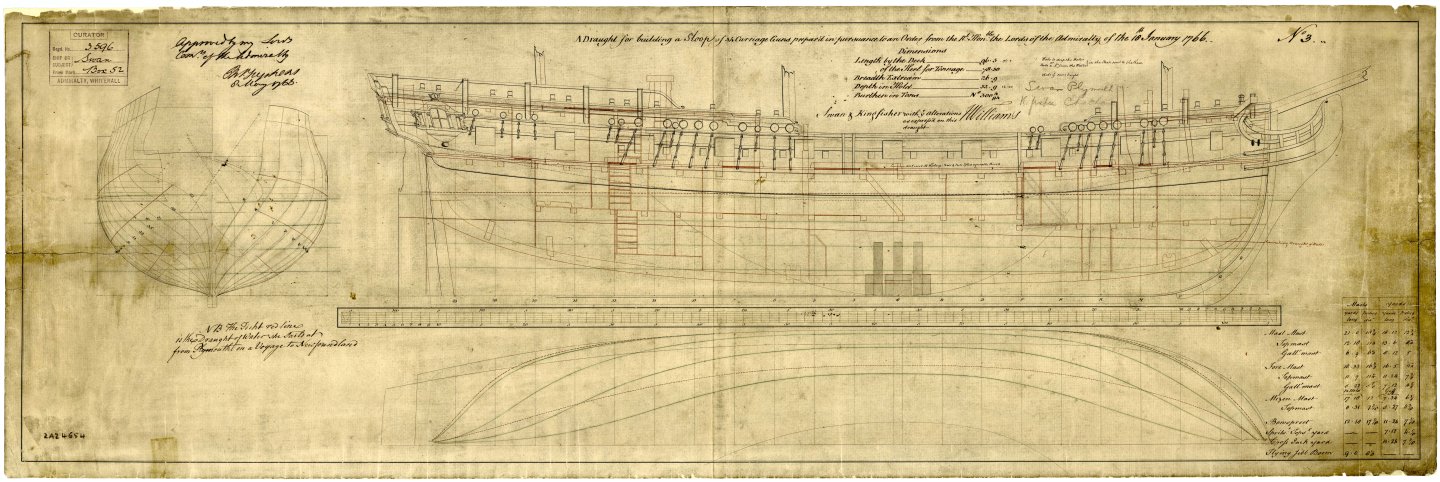
-

Westland Sea King HU.5 by chadwijm6 - Airfix - 1/48
chadwijm6 replied to chadwijm6's topic in Non-ship/categorised builds
How cool!! 😄 -
 Thanks Kevin. The TurboCarver bits on the mill were invaluable in making the pilasters. And the Tulle mesh is perfect. Trying to decide what’s next. Henry
 -
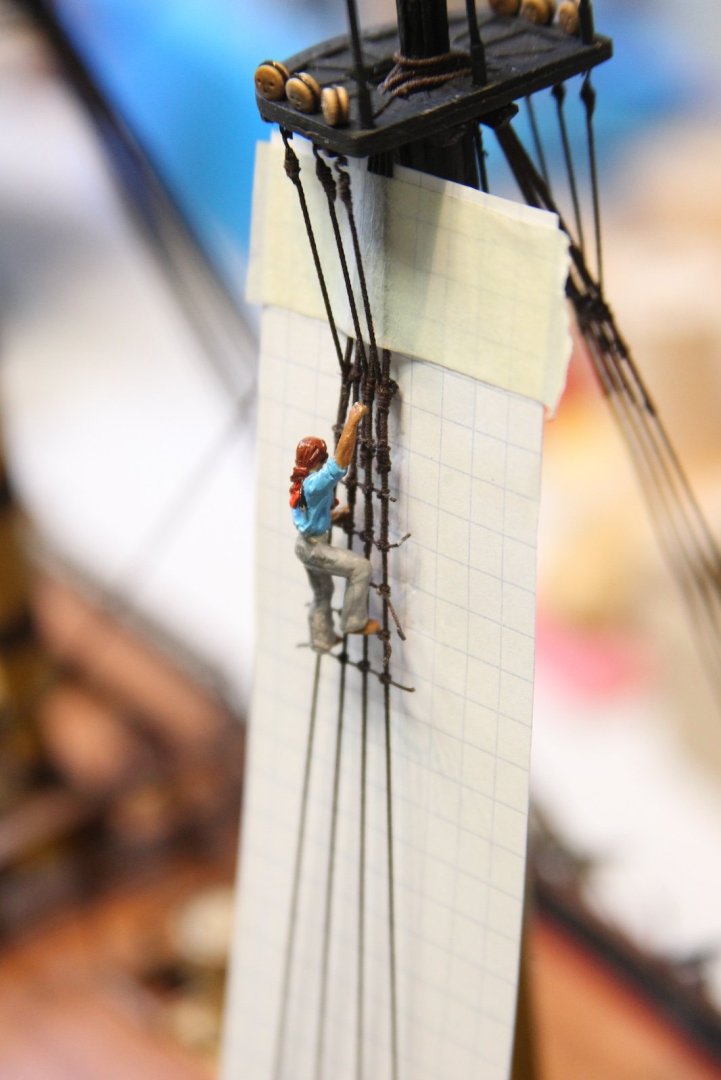
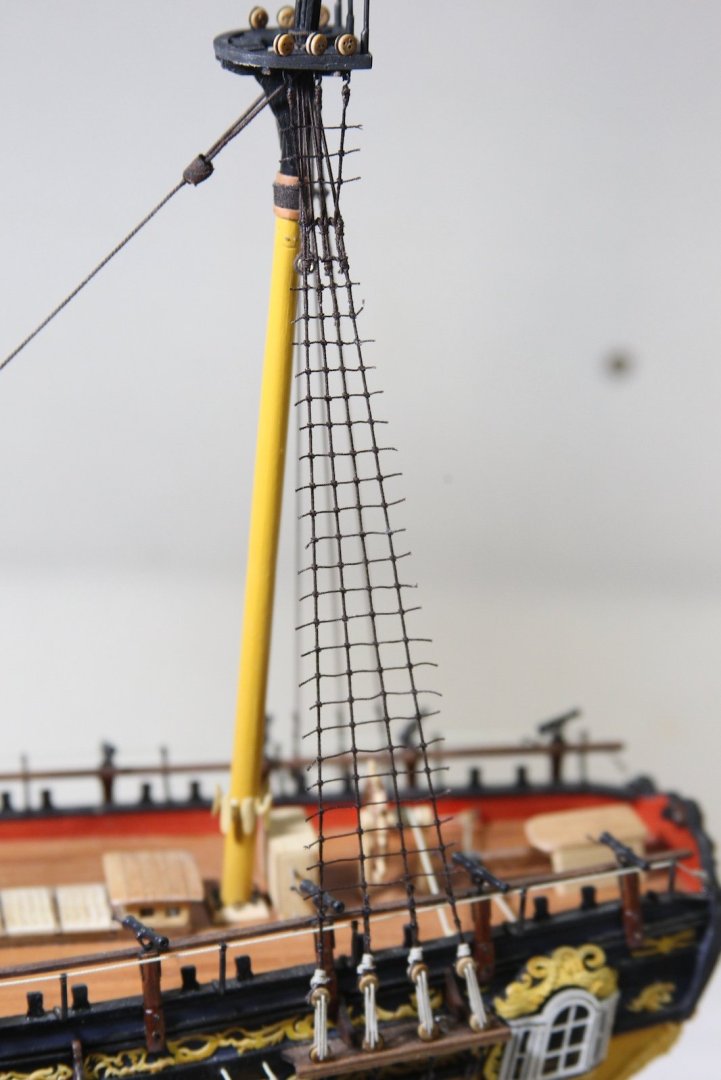
 The Great Ratline Color Debate Chevy versus Ford. Coke versus Pepsi. Boxers versus Briefs. These are just a few of the most notorious debates in our world. For those of us here in "ship nerd land" - the color of ratlines is right up there with the others. I think at this point I've read nearly every post on this forum about ratline colors over the last few months as I've neared this time in the build. Just as I thought I got to a decision - I'd see something else to change my mind. Early on I was definitely leaning toward a natural (non-tarred) rope for the ratlines. But as I looked at other builds from some of the most stalwart builders leaning toward darker ratlines - I was swayed that direction. Then, I see shots of the Victory using tan lines (even though it's obviously using more modern rope) and I started rewatching "Black Sails" for the upteenth time - more tan ratlines. Ultimately - it because a matter of contrast and aesthetics. This build is already going to have plenty of contrast between the running and standing rigging, especially since I'll most likely use tan for the crow's feet. So I finally landed on darker ratlines. My lines are a little over .10 mm as that's the smallest rope I can make with three lines of Gutermann Mara 150 spun tightly. I went with a distance of 13" between the lines; which at 1/64 is close to enough to 5mm. I pulled out some graph paper with 5mm squares and cut it to fit behind the mizzen shrouds - also adjusting the bottom of the graph paper to parallel the ship's lines, then taping it off. After the first handful of clove hitches at the top, I used my seaman to see if my distance was what I was looking for - he seemed ok with it, so I pressed on. It should be noted that my first few clove hitches were super bulky because when I looked up a clove hitch to job my memory - I ended up following some funky version that had the line cross back through itself in an odd way. I took all those knots out and started again with the basic clove hitch getting a much smoother result. To avoid the dreaded tugging of the shrouds, I skipped a few ratlines at a time, then went back to make adjustments, and only when I was satisfied did I go back and tighten knots and coat them all with diluted PVA. After giving the glue a day to dry, I'll go back and clean up all the ends and press on to the other side and rest of the masts.
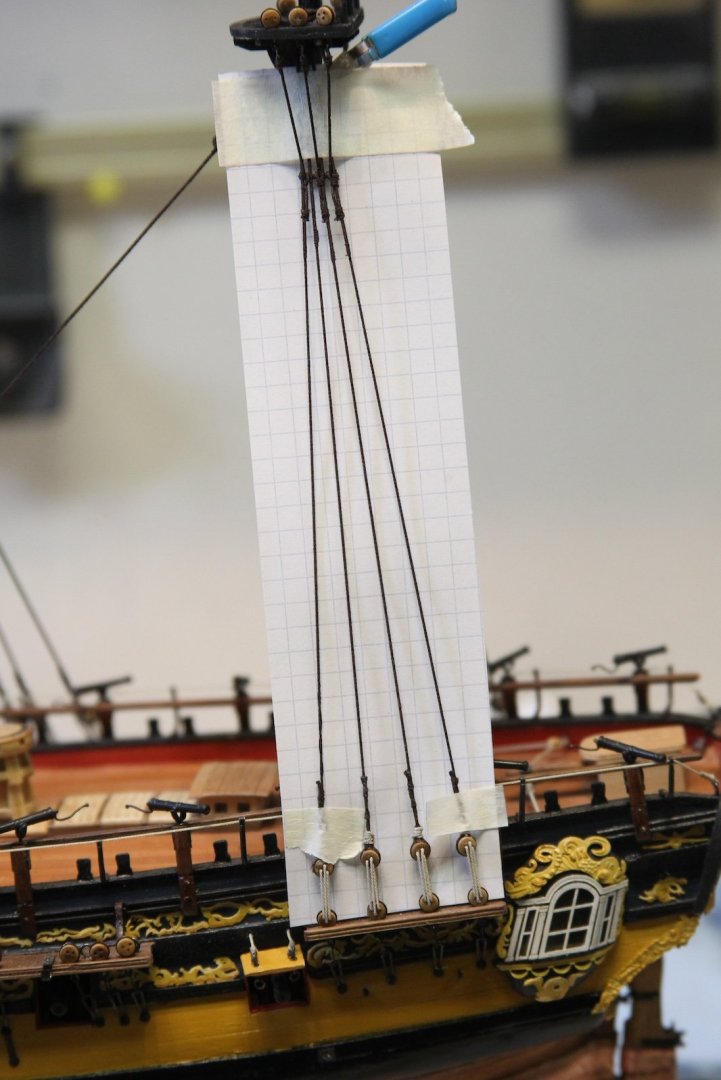


- 306 replies
-
- 3
-
-
- Victory Models
- Pegasus
- (and 3 more)
-
 Andre: I am new to this site and fairly new to the hobby. Like you, I completed one build (an AL Victory) before starting on the Constitution. Both ships were gifts from a friend. I am working on the Mamoli Constitution kit from 1980's and have recently started a build log. I have read your log (and others) with great interest. I am particularly interested in the differences in kits. I am not as far along as you are, but have already noticed differences parts and build sequence. As I understand from what others have told me, the Mamoli kit was an early Constellation Kit and created before laser cutting. Anyway, I am learning from you and others who are commenting on your progress. Thanks for sharing
 -
 The plan shown was not my own. It was a representation of what I wanted my bow to look like. I redesigned my own bow to reflect the online image. That picture is likely a photocopy, my designs are all drawn on paper with pencil. Go back and look at the original side profile of the boat. I hope that answers your question.
 -
 Thanks George, Glad to get them done! They are not consistent, hard as I tried. probably won’t be noticeable to most people! Tick
 -
 I saw your comment to mtbediz today and thought I would give a welcome aboard from a bunch of us USS Constitution active builders. We've been sharing our knowledge and comments with each other and we range from beginner to the more experienced. Although, as near as I can determine, there aren't many Mamoli builders for the Conny at present. There is one active (last post in January) builder, Oscardeuce and an excellent builder, Bill Edgin (Robnbill) who completed his Mamoli kit in 2021 that you might want to check out as you work on yours. Good luck and have fun Jon