All Activity
- Past hour
-
 Stevenleehills reacted to a post in a topic:
USS Constitution by Der Alte Rentner - Model Shipways - 1/76
Stevenleehills reacted to a post in a topic:
USS Constitution by Der Alte Rentner - Model Shipways - 1/76
-
Stevenleehills reacted to a post in a topic:
USS Constitution by Der Alte Rentner - Model Shipways - 1/76
-
 Tanganika does not bring up any result on the Wood Database. It appears to be a advertising catchall name for whichever wood the African wood supplier could provide that day. Walnut is a wood with a similarly misleading name. It is about the color, definitely not actual tree. one of many African Mahogany-like species. If the pattern holds, the Maple may be Obeche - especially if it is soft. All are probably coarse grain, brittle/friable, open pore, I predict that none of it will be rewarding to work. That it will fight you all of the way. Ideal is a variety of low cost readily available domestic species that are hard to very hard, straight grain, fine texture, no pores. For POB, the lower volume of wood needed allows some leeway on affordable prices for substitutes. For POF, volume for framing stock is significant.
 -
Rik Thistle reacted to a post in a topic:
Fokker Dr1 1/16 Scale COMPLETED Artesania Latina
-
Siggi52 reacted to a post in a topic:
Lightship ELBE 1 by Mirabell61 - scale 1:87 - launched 1948
-
Siggi52 reacted to a post in a topic:
Trireme Olympias by Richard Braithwaite
-
CDW reacted to a post in a topic:
Sopwith Camel by gsdpic -- Artesania Latina -- 1/16th scale
-
CDW reacted to a post in a topic:
Sopwith Camel by gsdpic -- Artesania Latina -- 1/16th scale
-
Mr Whippy reacted to a post in a topic:
HMS Diana 1794 by newbee - Caldercraft - 1/64
-
Mr Whippy reacted to a post in a topic:
HMS Diana 1794 by newbee - Caldercraft - 1/64
-
Mr Whippy reacted to a post in a topic:
HMS Diana 1794 by newbee - Caldercraft - 1/64
- Today
-
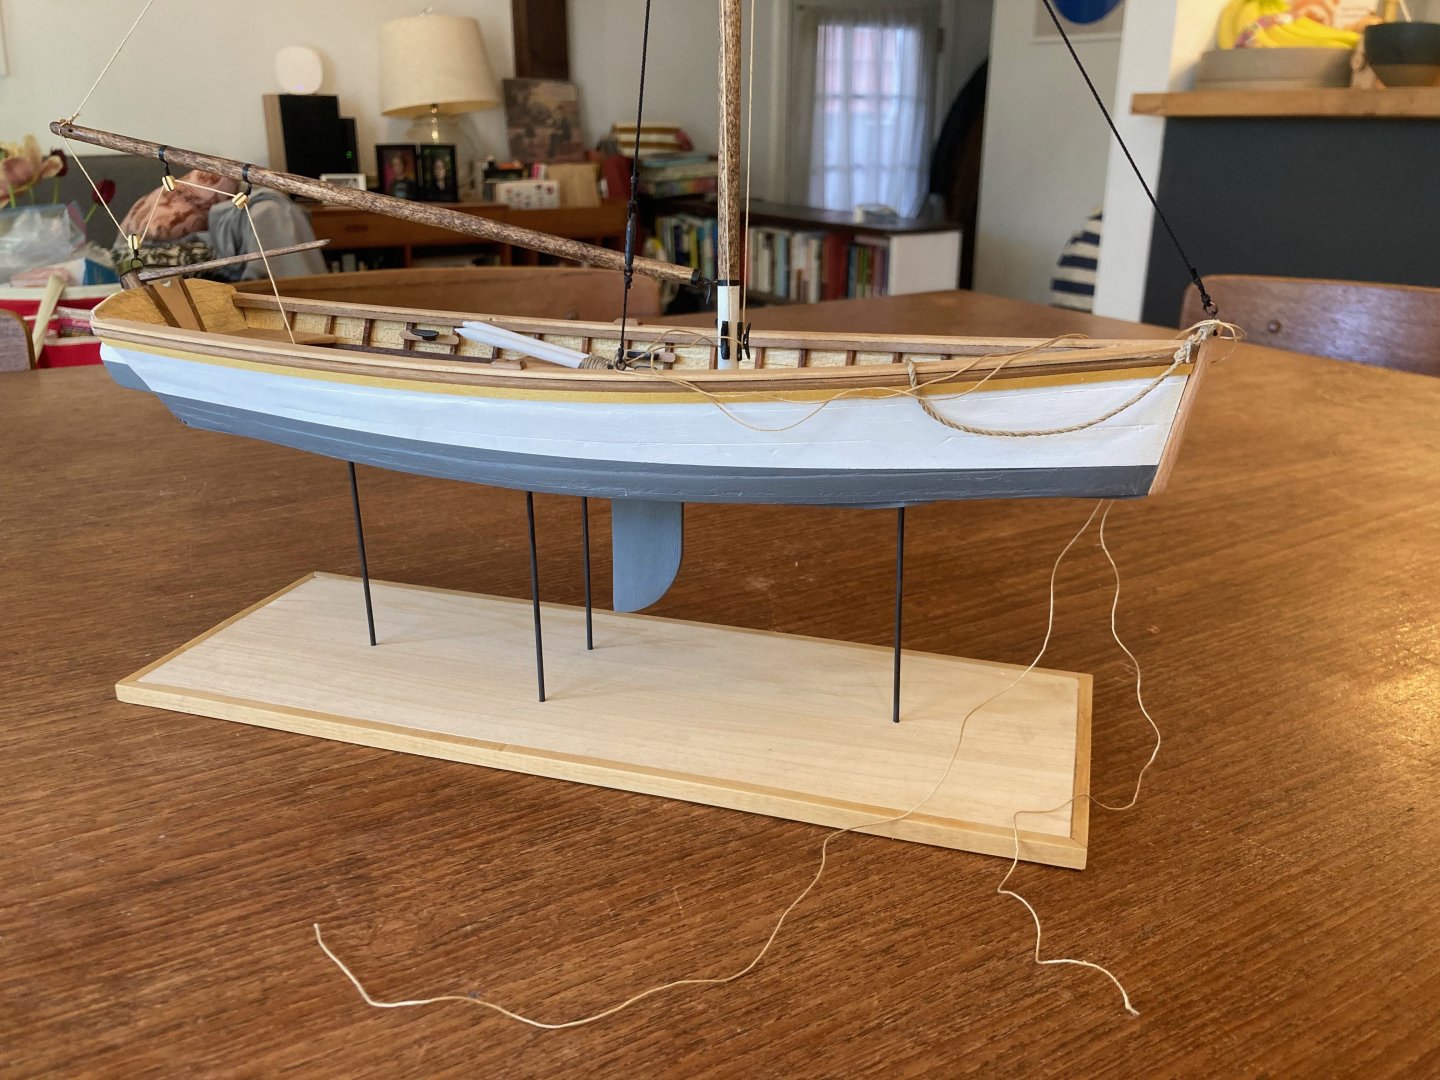
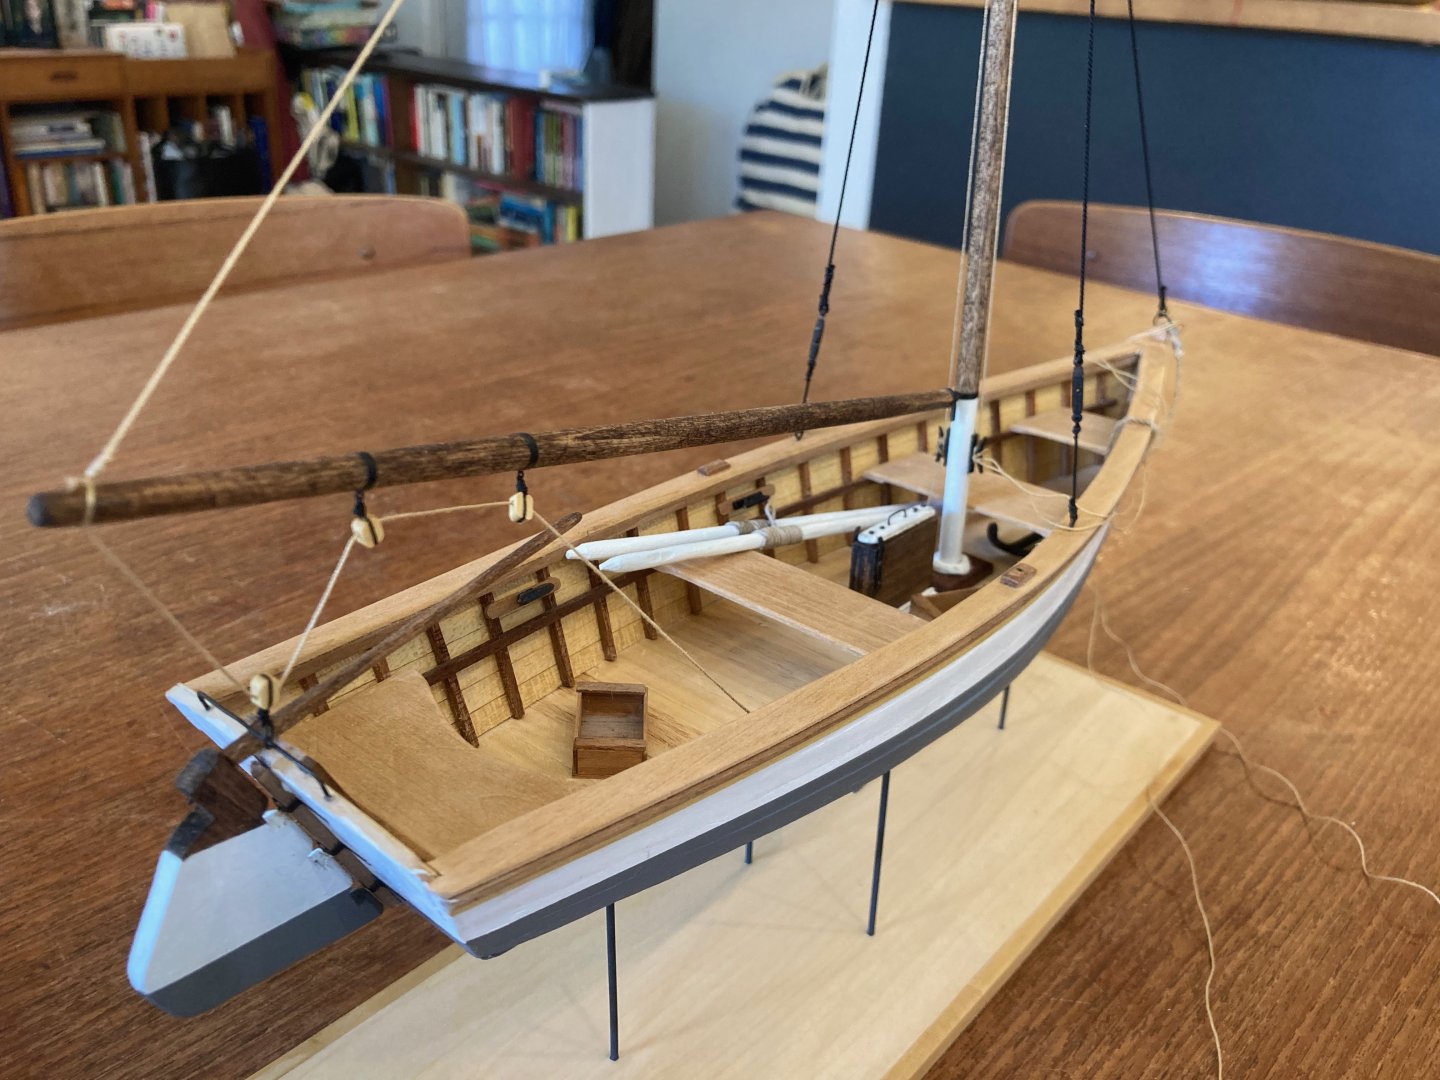
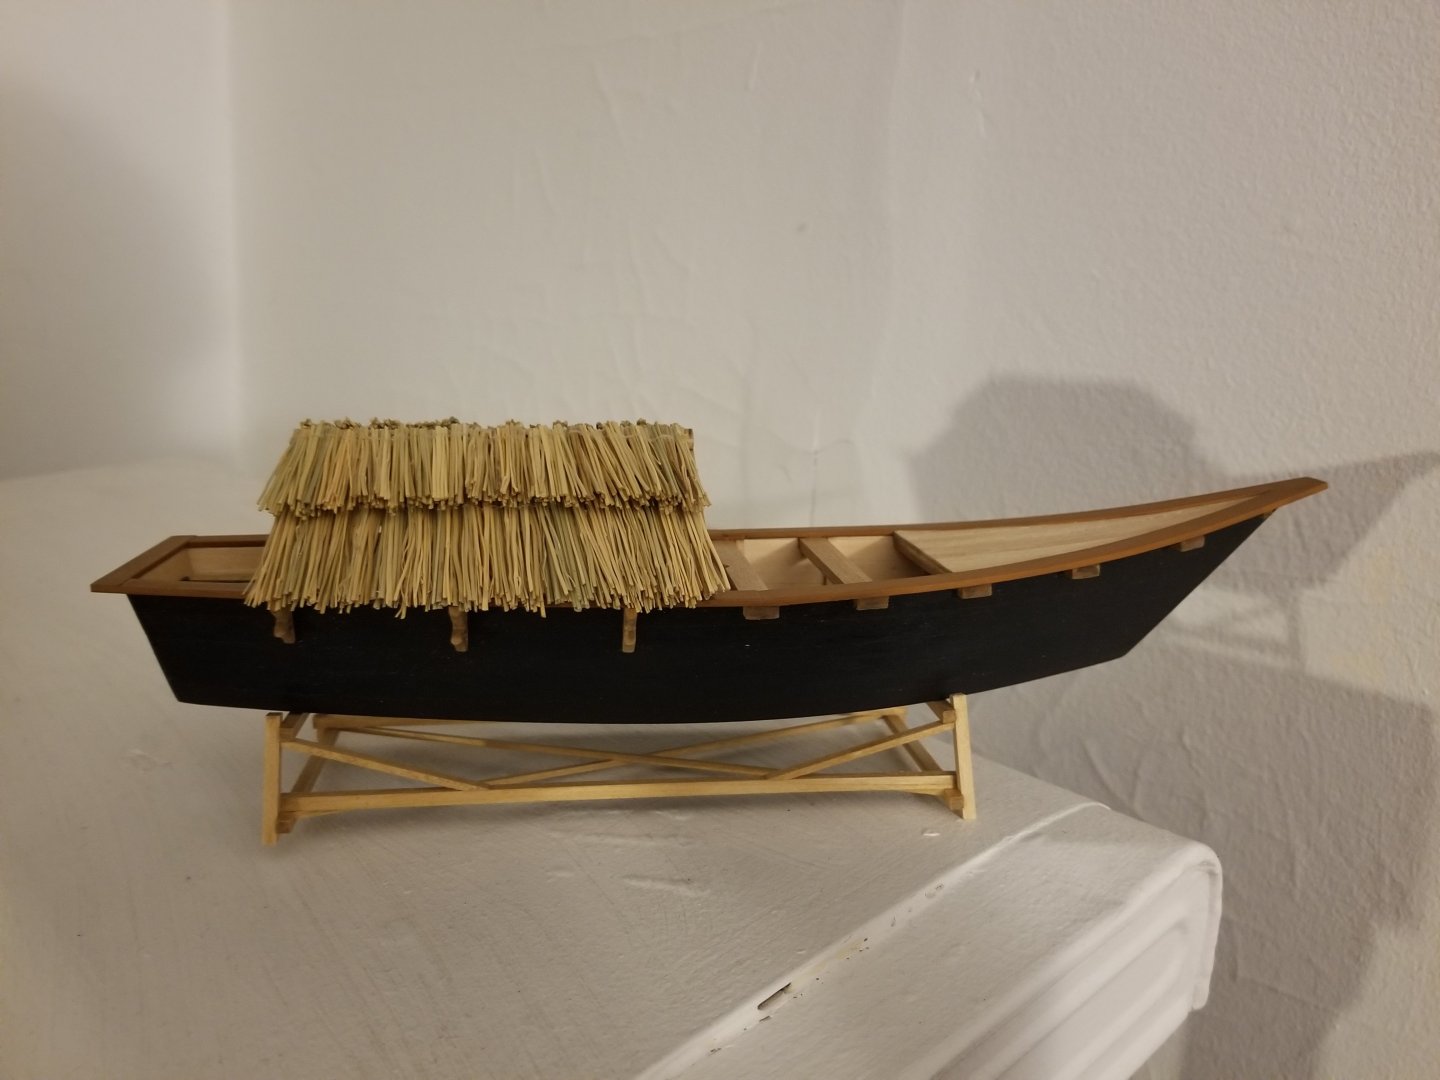
 I think the stand quite matches the somewhat improvised look of these boats.
 -
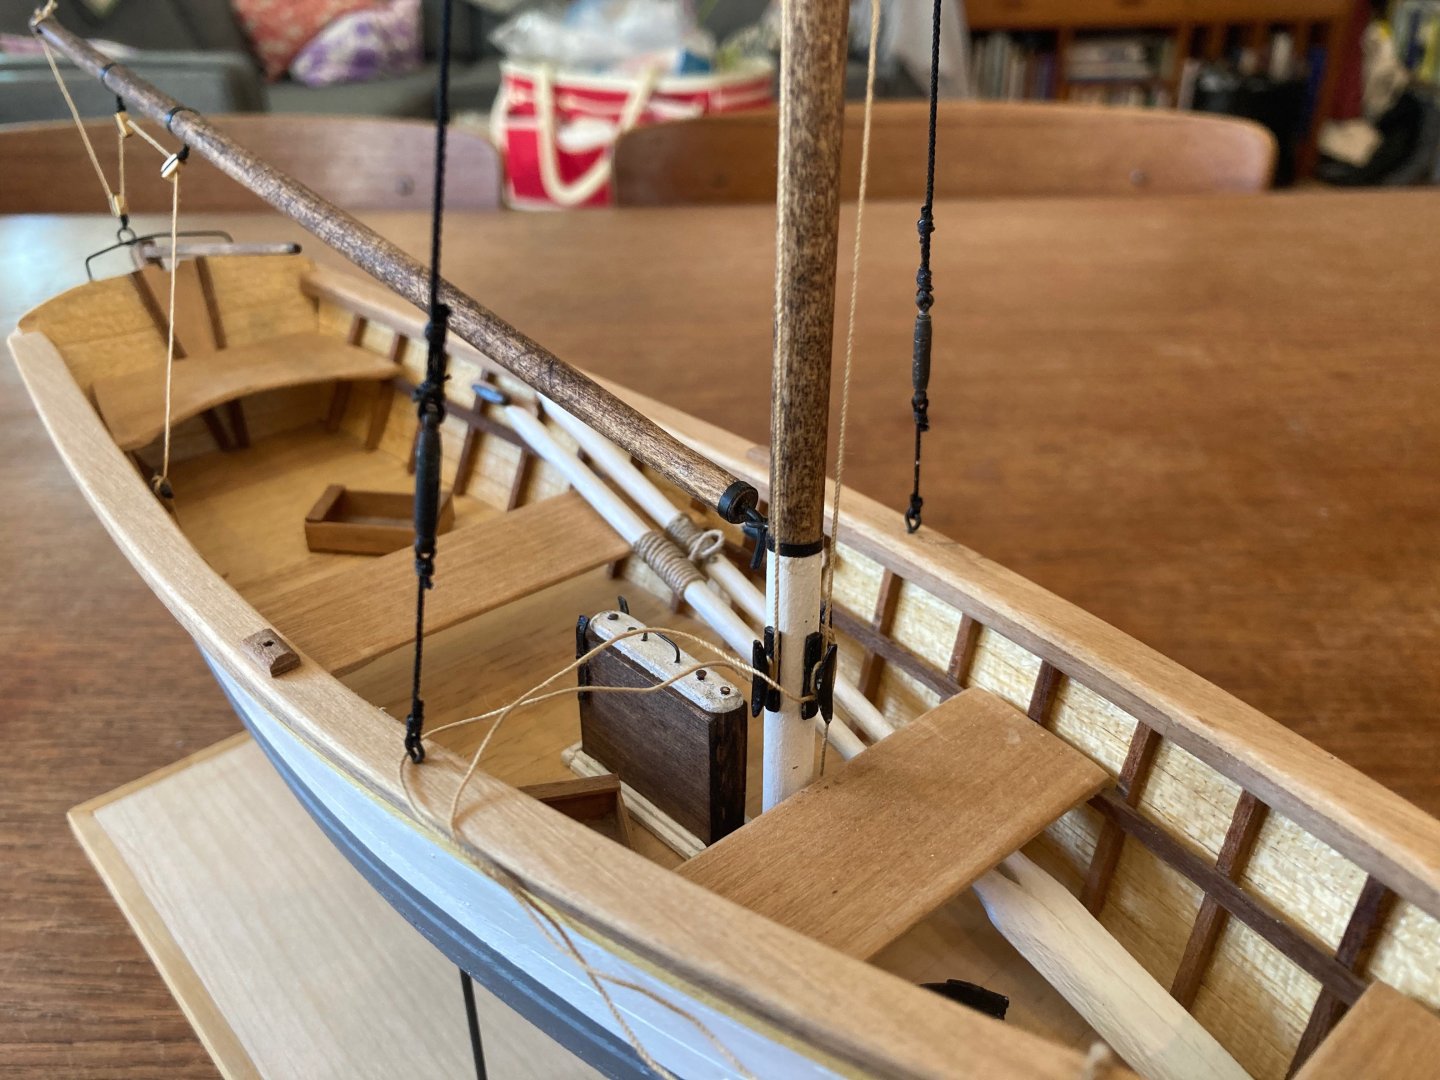
 I have noticed now that the wale needs to be raised up to sit higher against the stem. One of the best things about taking photos as you govis they can really highlight errors before they become a problem. Cheers for now. David.
 -

Mini Revenue Cutter 1829 by Bill Hudson
Dr PR replied to Bill Hudson's topic in - Build logs for subjects built 1851 - 1900
Copper plating was introduced in the last half of the 1700s. But it was expensive and not used on many smaller vessels. A common anti-fouling surface was a mixture of turpentine, white lead and tallow. This is the "white" bottom you see on many vessels of the 1700s and 1800s. -
 No further progress on this marvelous build? I'm certain we would all love to see more of your excellent craftsmanship. I hope all is well with you, Kmart.
 -

Fokker Dr1 1/16 Scale COMPLETED Artesania Latina
PvG Aussie replied to PvG Aussie's topic in Non-ship/categorised builds
Thanks Mike. I fully appreciate encouraging words from my modelling peers. I l don't have a 'shelf of doom' because I refuse to give up on models that cost more than they are worth! Cheers, -
Gary, don't hold your breath waiting for the parts. They usually take at least a month to get to Australia! Sorry I sound like a sad loser. It is just that I know exactly what you're going through. If I were you, I would start to think of my next build. Cheers,
-
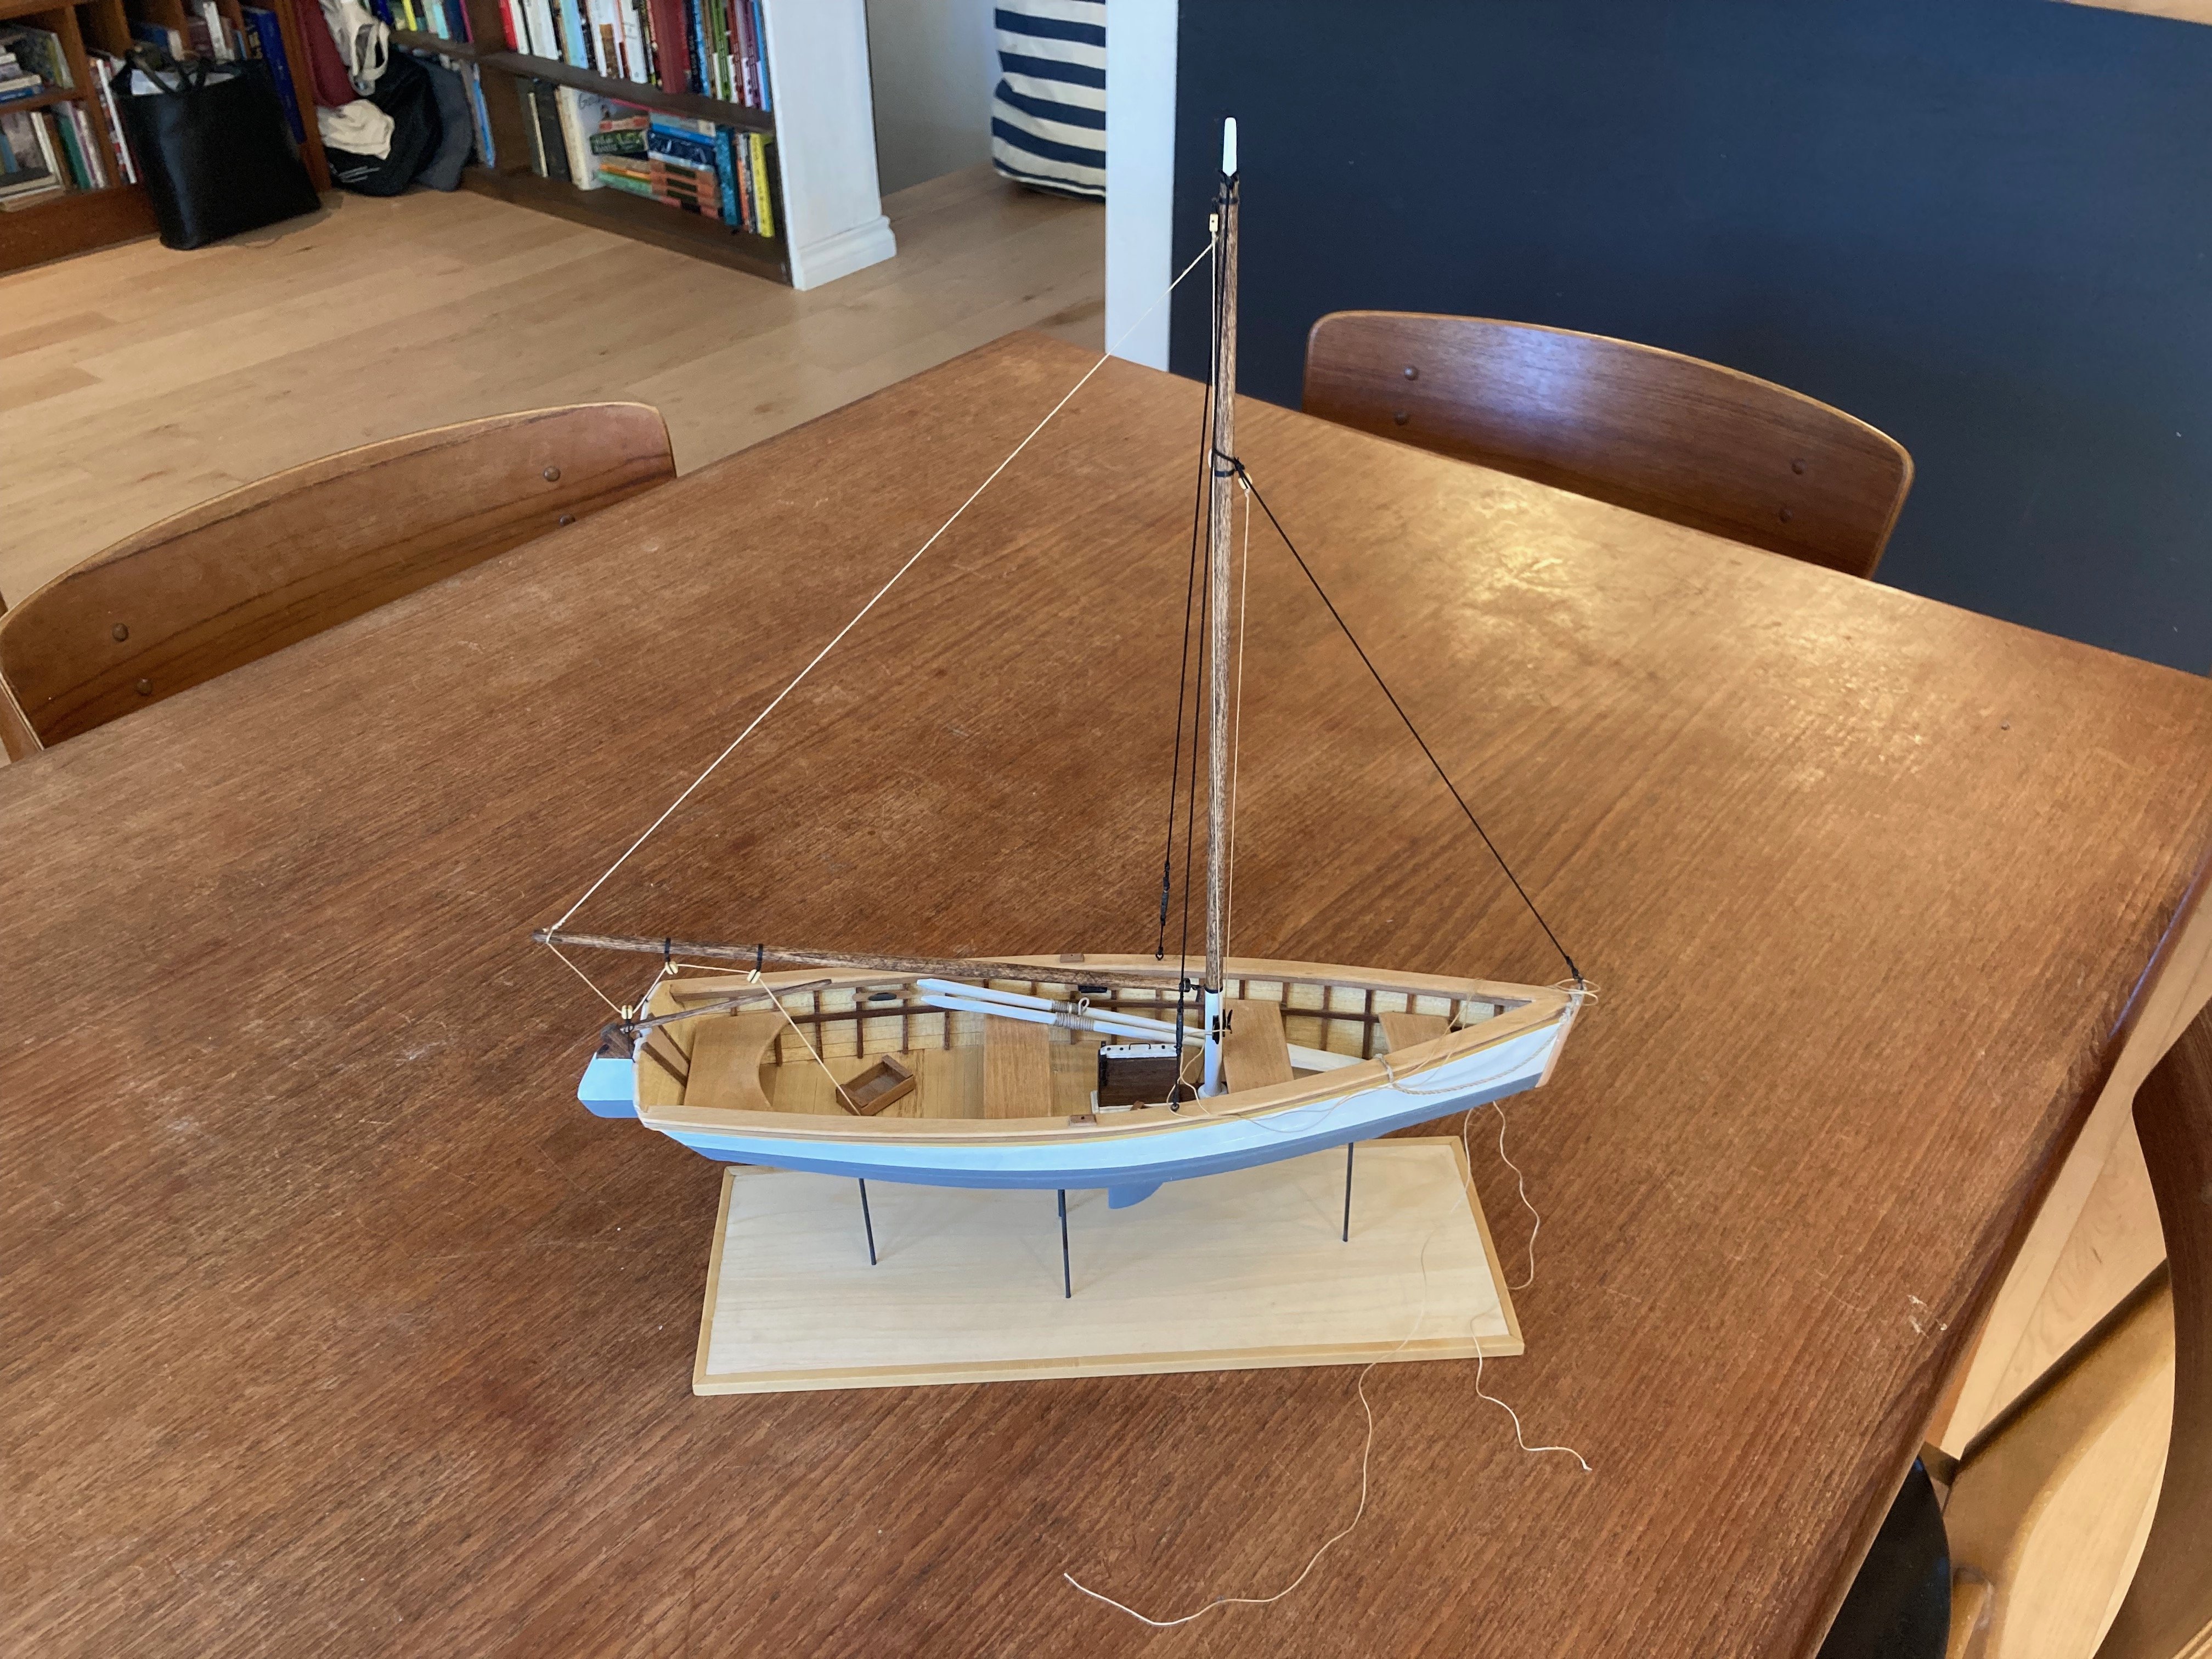
 This is the pilot cutter Pellew, a vessel that is significantly larger than either the Lizzie Annie or the Devin Collins. A point of note is the topmast stay and the fact that the jib is still on a traveler. This eliminates the need for furling ropes or manropes on the bowsprit. The second stay and taller mast both exist because the Pellew has a standing gaff topsail. I am sticking with a jackyard topsail as is flown on the Lizzie Annie.
 -
 I am thinking blue with white below the water line. I like the look of copper but I'm not sure if copper was used back then. Quite possibly lead (pewter) though. Lead would oxidize to off white or light gray; still in the thinking box with colors. I feel I need to have the hull painted before I go to above the deck work.
 -

Redoing Oseberg
KrisWood replied to KrisWood's topic in CAD and 3D Modelling/Drafting Plans with Software
First step is trying to read the numbers from https://www.academia.edu/49550641/Rekonstruktion_af_Osebergskibet_Bind_II plan 2 (page 26). This will be necessary for the curvature of the keel, which is what all other numbers are based on. I've got all the numbers plugged in from page 29. The green lines are the stations. Lines below the base line are ones for which no height was given in the plans.
-
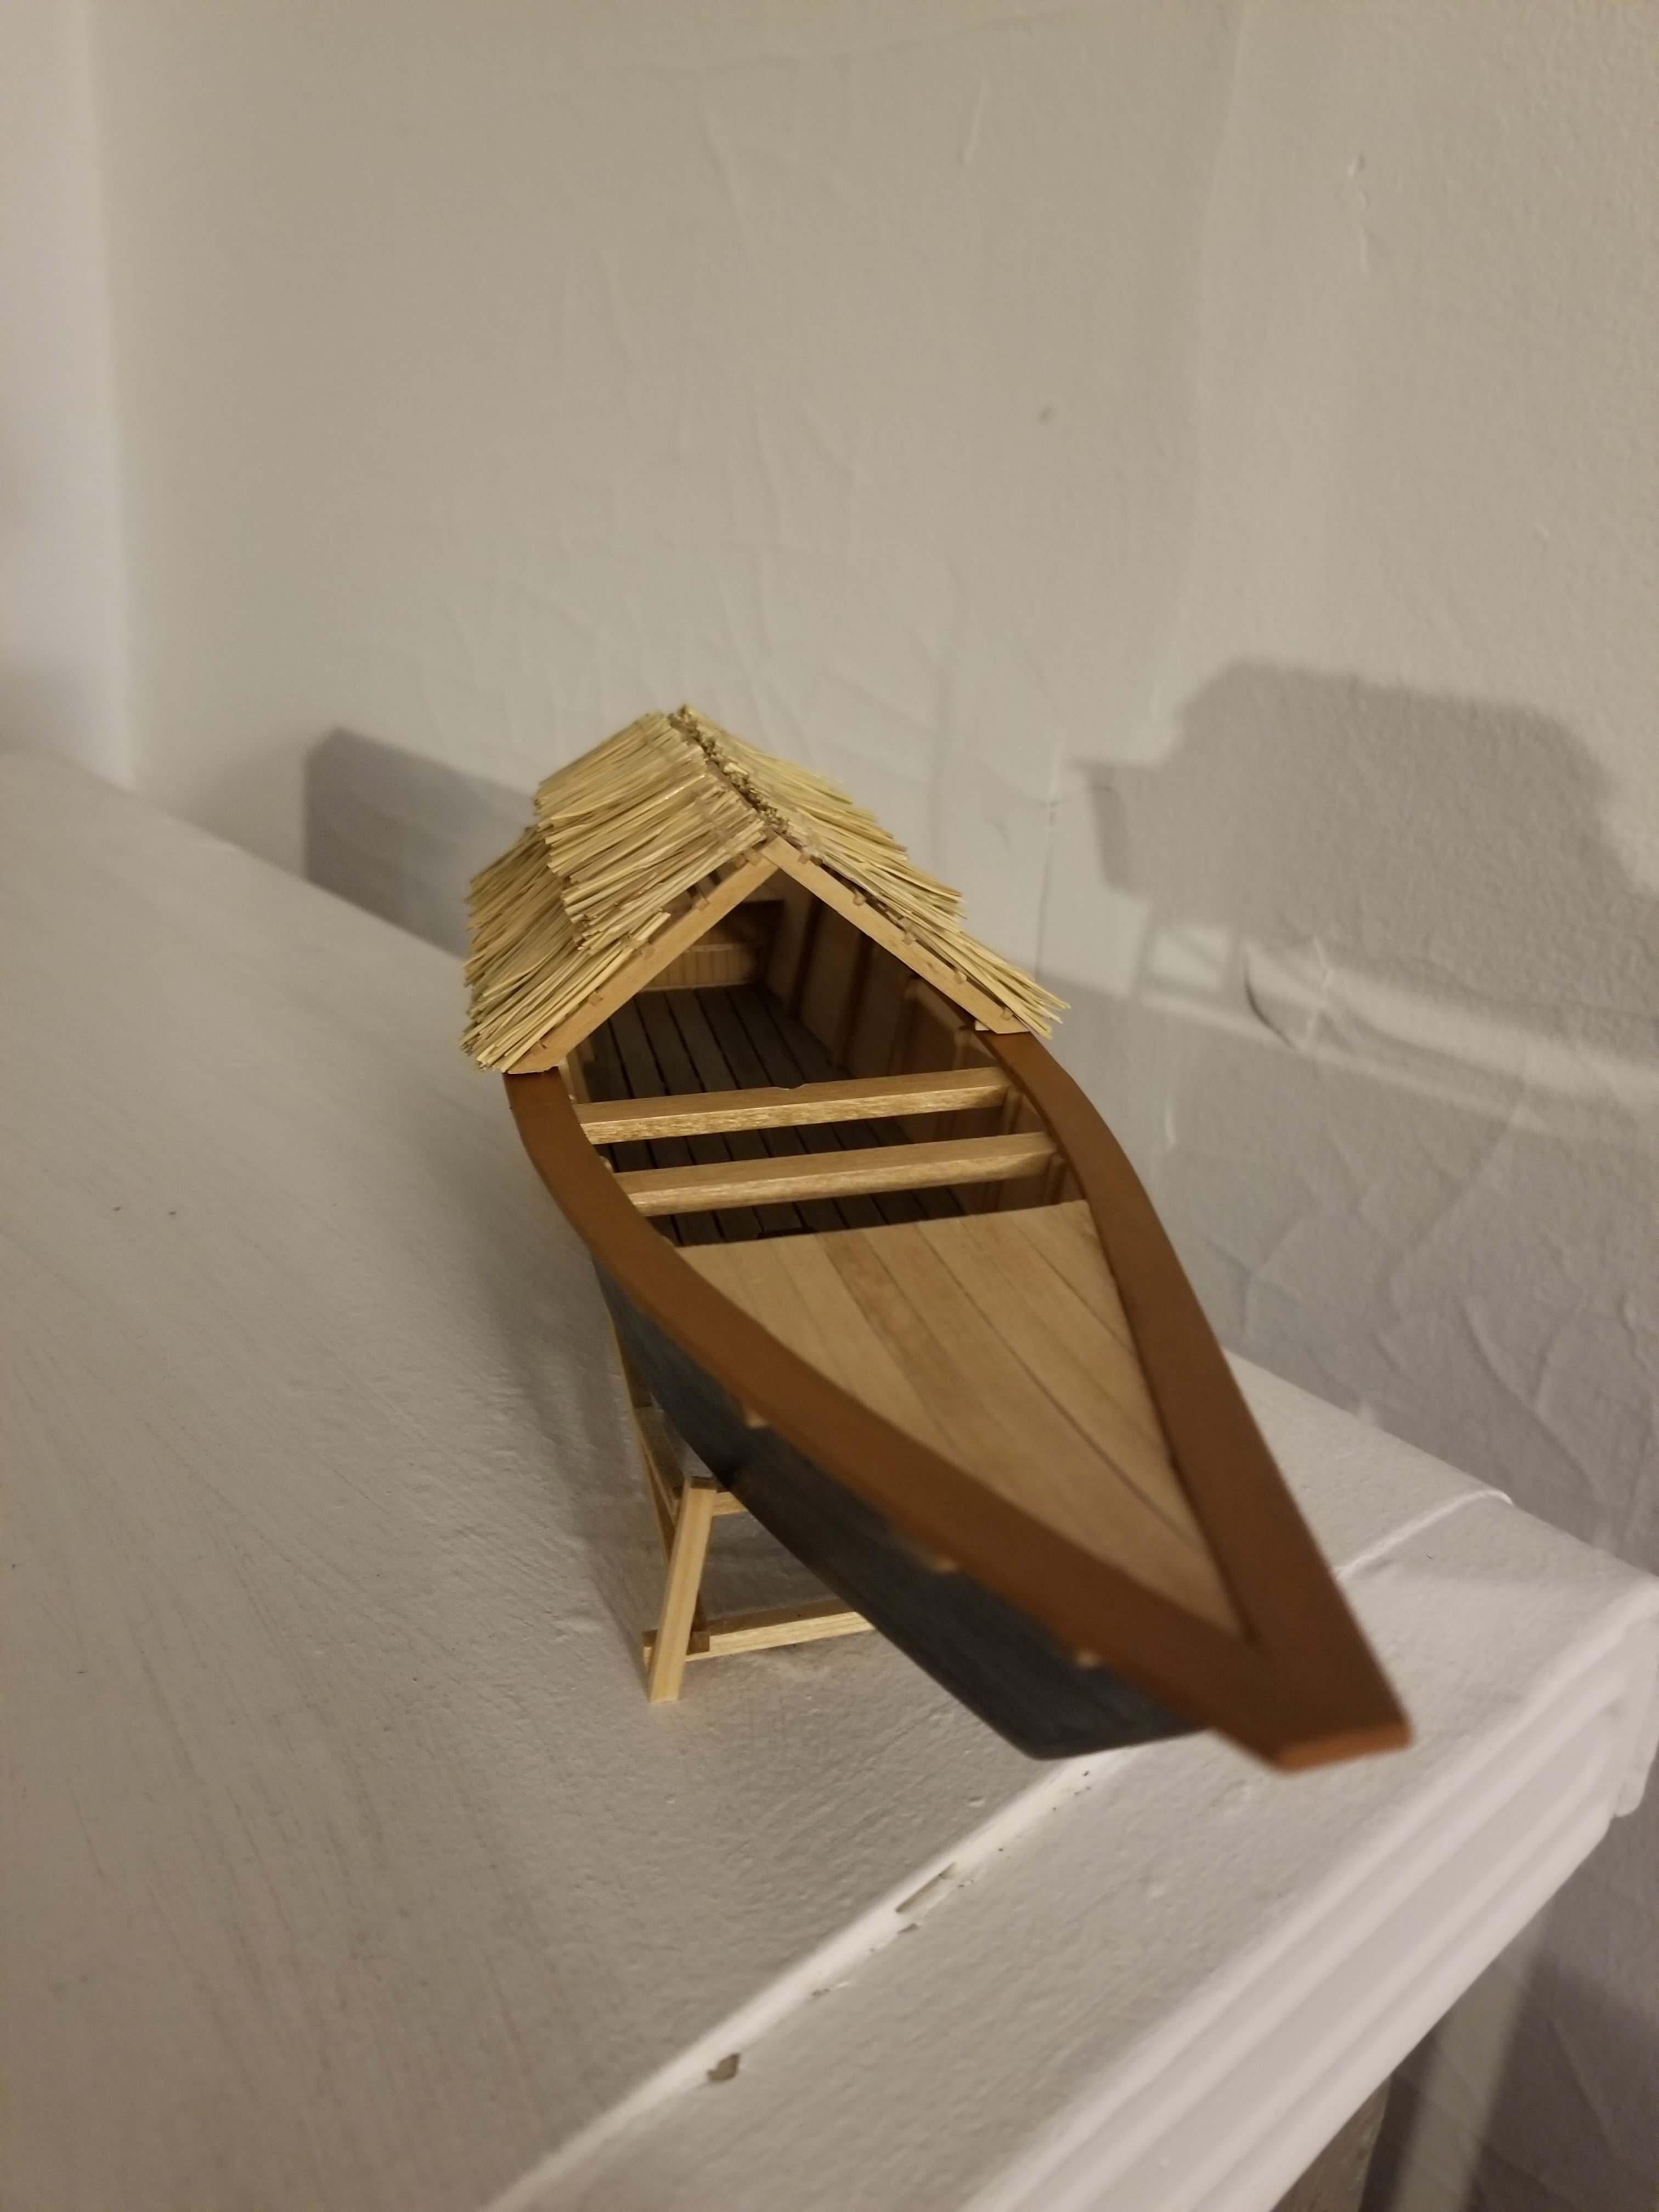
 Hi there: I just realised that after almost 3 years (has it really been that long!!), I still haven't put an end to this build log and called it done.....this is for a few reasons, most obviously that in getting back into modelling again, I started juggling this build, the Corel Bellona and my scratch-built Bluenose. Now that Bluenose is done, and the Bellona is well underway, I realised that I still have some stuff to do with this little skiff. I needed to re-do the stem piece, which was damaged for some unknown reason, complete the rudder and do some little details. I had considered earlier adapting her by adding a rig, but put that idea on the back burner until a couple of weeks ago, when I was looking through a book of small boat designs by Edwin Monk and came across the "Truant", whose rig I thought could work (at least aesthetically) with this skiff. It did mean that I would have to file a slot through the bottom of the boat/keel for a dagger board, but this was not too difficult to accomplish. The rigging arrangement and dagger board design were all taken from the Monk "Truant" design. At this point, I've also made and added a main sail and jib, but I don't have photos of these. I just need to add a few rope coils at this point and she'll be done. Here are some photos prior to the addition of the sails - I should be done this one by the end of the week and will post some completion photos here and in the gallery when that's done. In the meantime, enjoy! hamilton

-
 WOW... I´m speechless and impressed. Sorry for the late response, I´m back to work after six month being home because of an injury. So my build will be slow down now a bit... but really impressive, really. Micha
 -
 Good day Michael, What a microscopic parts!!! :))) Looks very readable + work of imagination and I could say in this scale You made it pretty good! One of the option , these guns gears could be ommited at all as they often performed on classic museum models...where scematic gun cariages shown only... but from other side - it is demonstration of your modelling skills! All the best ! Kirill
 -
 Andre: I have been watching several Constitution builds and enjoy seeing the differences in kit composition and parts offered. As near as I can tell, the kit I have was copyrighted in 1982, anyway that is the date on the printing which may or may not have anything to do with the actual production. The price tag on the box was $129.95 which is a little clue as to how old the kit is. Thanks for your reply.
 -
Greg: Replacing the 1700 (the number given in the instructions) little green chips is one of the things I will change. I have been following mufasa's build. Wow! What a craftsman. When I get to that stage, I plan on asking him about the source for his copper strips. I really like how they look.
-
 Pete . . . My name is Michael Holder and I would like to know if you still have the plans you used to build the Stars & Stripes '87. I would like to build a model of S&S'87 for a friend of mine that sailed on her a couple of years ago in Sint Maarten. Him and I have been America's Cup fans since the 1970 Race in Newport, RI. We were in the Navy serving on the USS Basilone DD-824 when she was the host ship for that race. Any help would be greatly appreciated. You can reply here or contact me at snow00plow@gmail.com . . ., Thanks !
 -
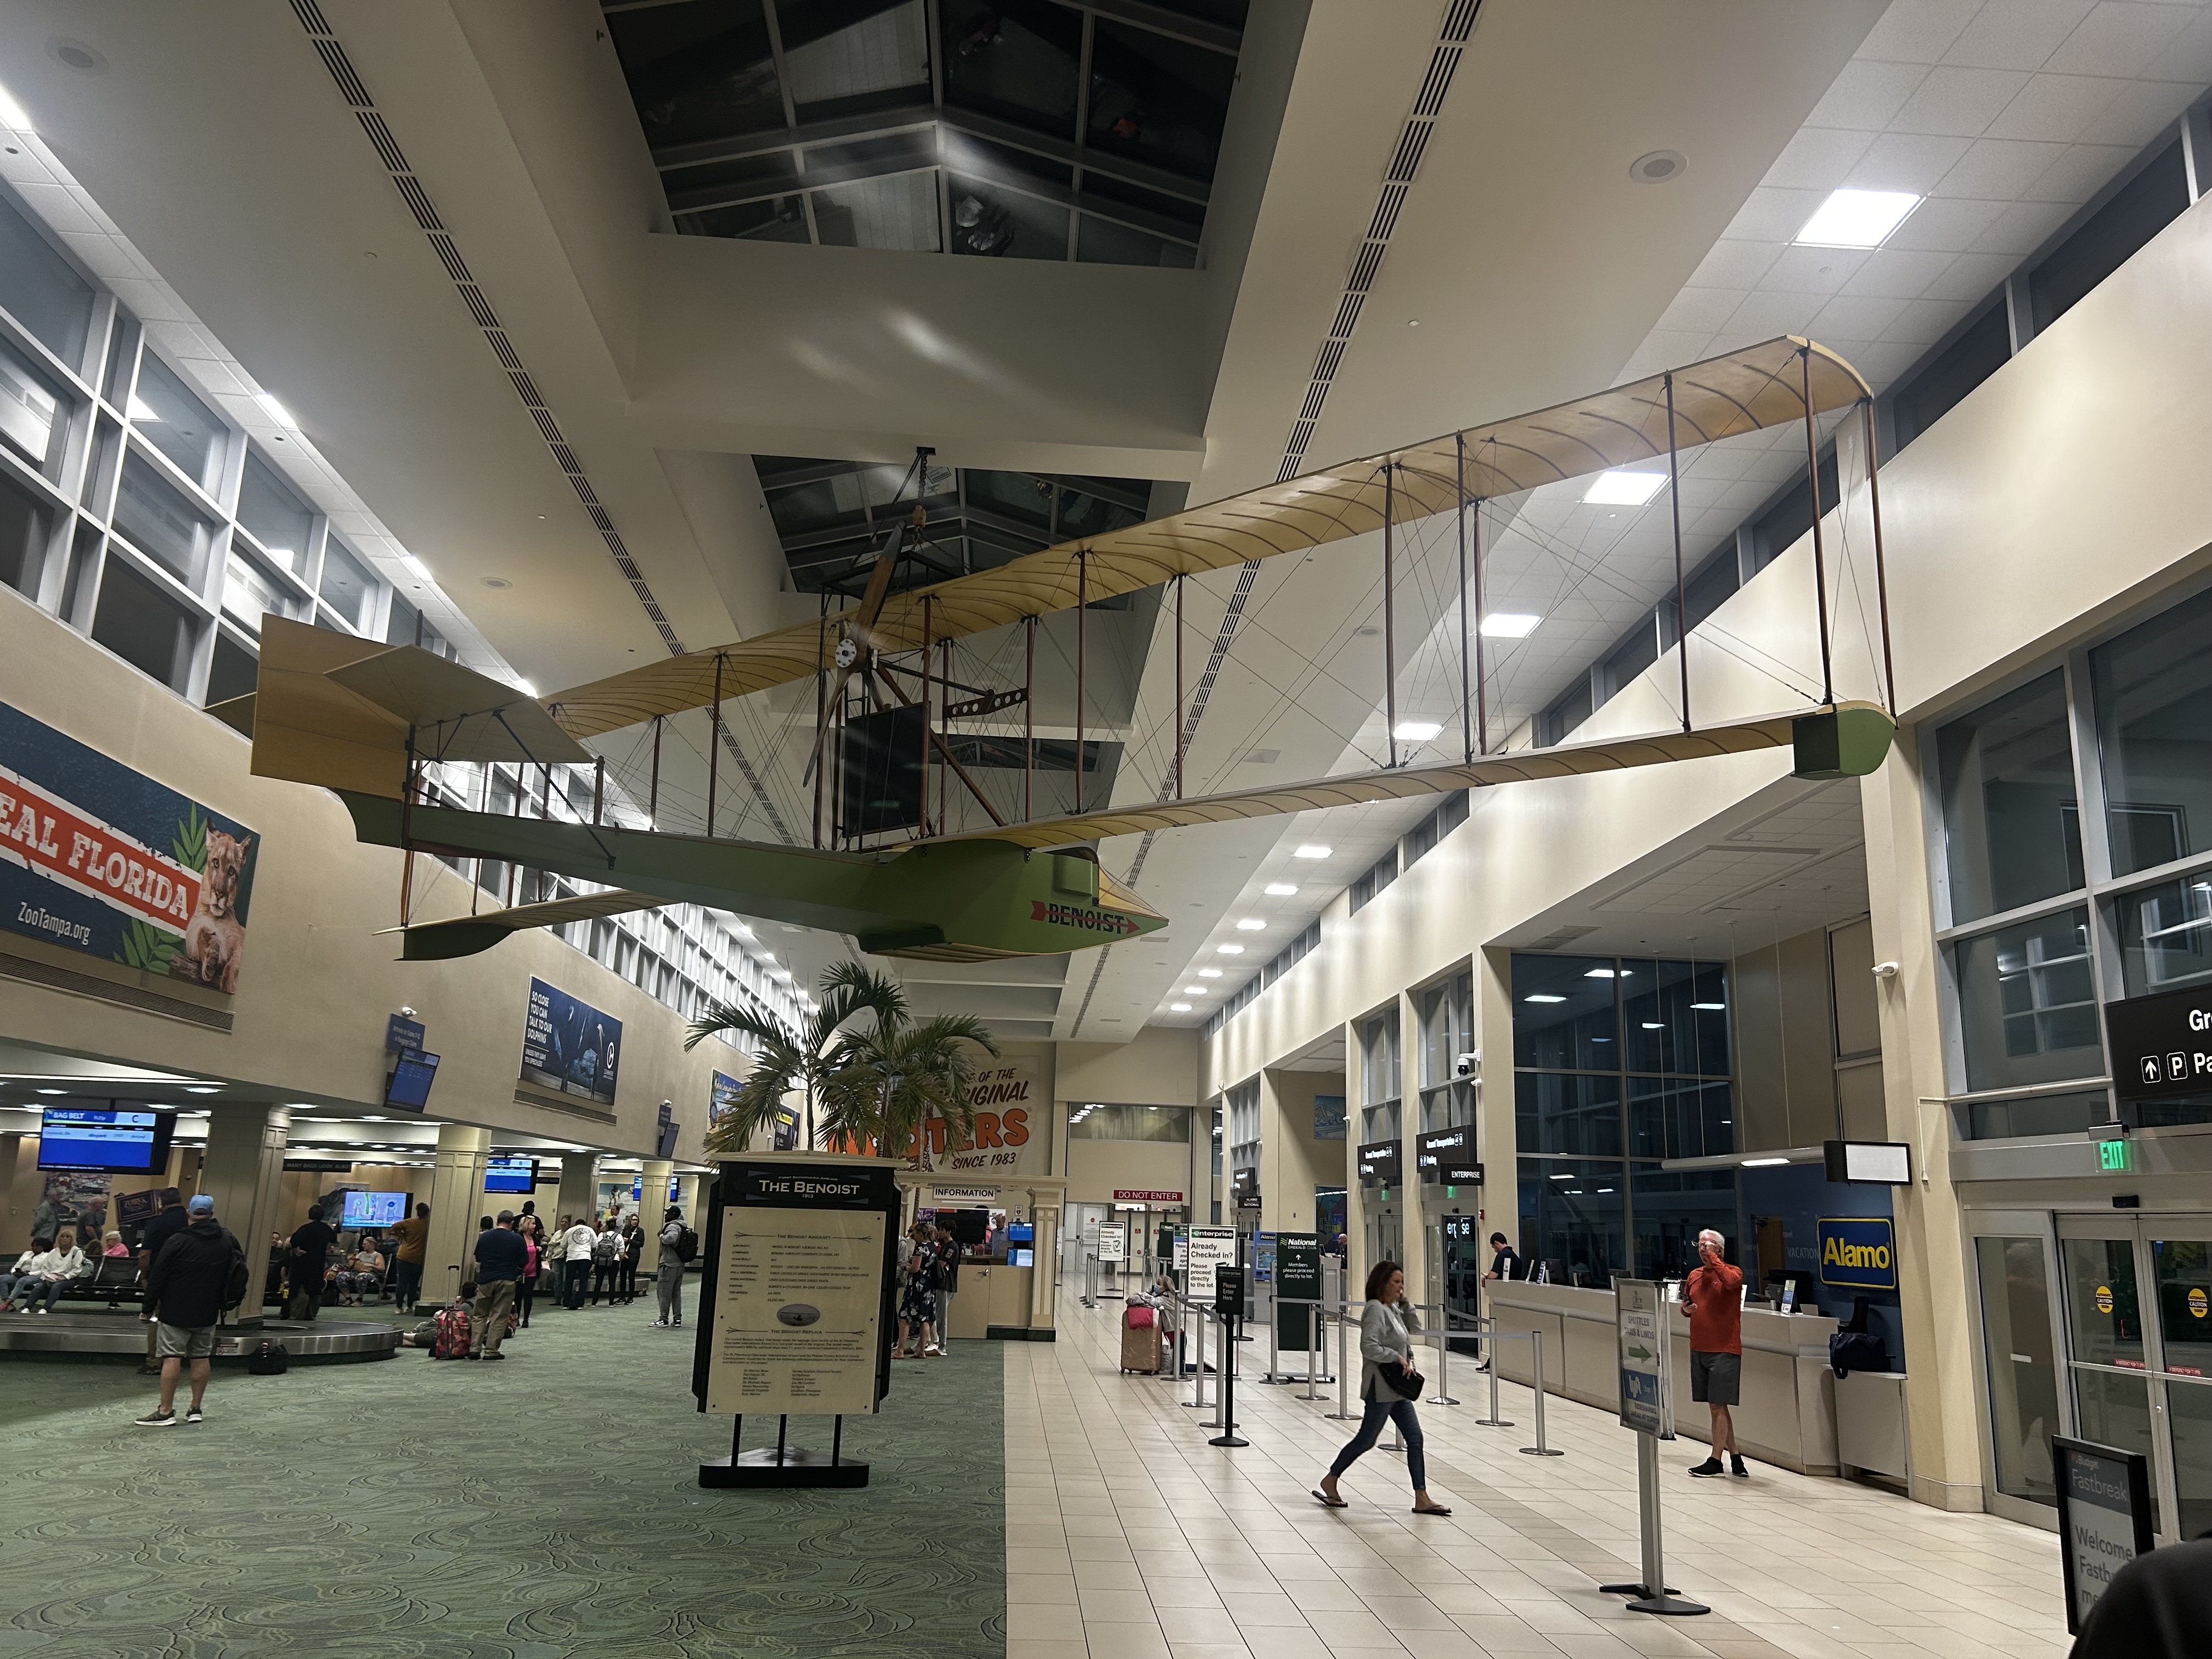
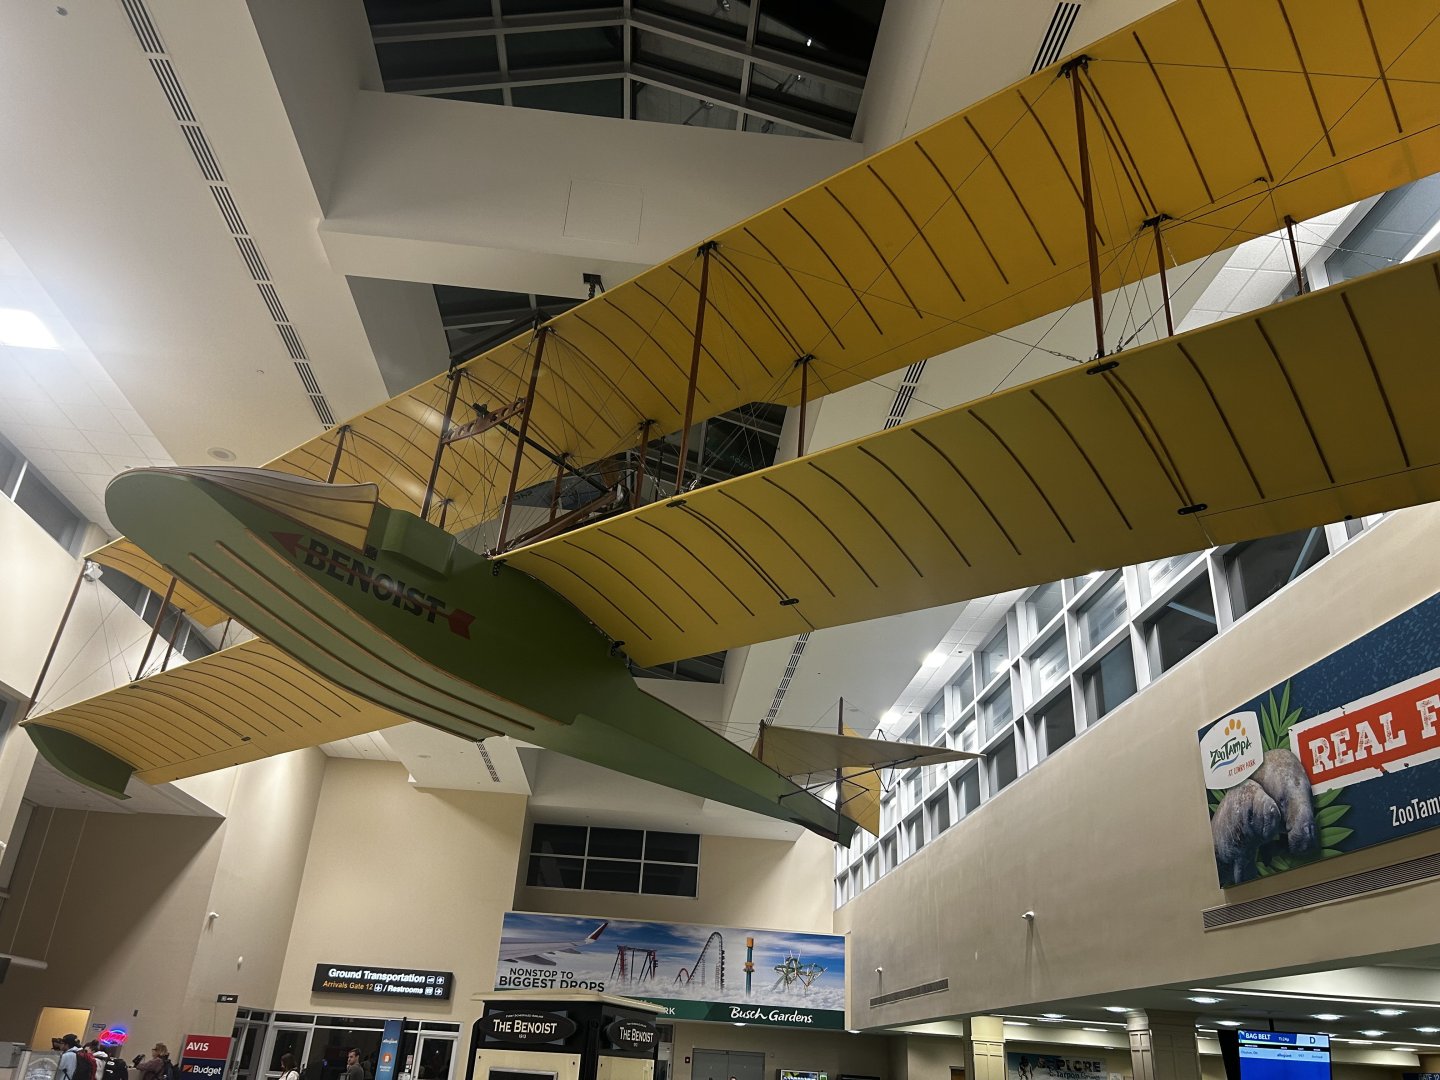
 Waiting for the wife’s flight to arrive, took a few photos of a historical item of interest.
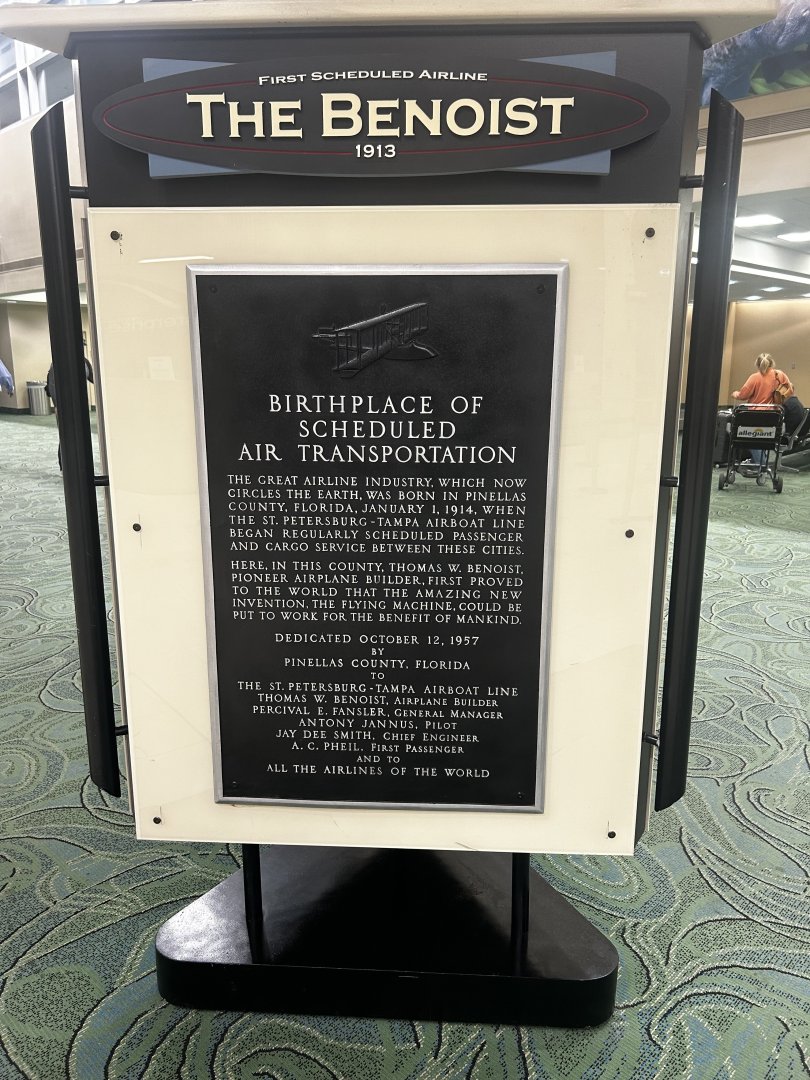

-
 John - Thanks for your interest! It will certainly get done, sometimes I just have a problem with jumping around on multiple projects at the same time. Some people call it multitasking, but it more likely lack of focus at times. I had built the Santos-Dumont 14bis (because it looked really interesting) as a winter break from milling wood and sanding frames for my L' Invention model. That was not to take a long time, but then I came upon pictures of the No. 18 Hydroplane and making a model of this machine has moved up high on the to do list. I believe that now I am going to be making fairly regular progress on the hydroplane model. It seems that I've figured out how to construct the pontoon and nacelles. I'm now thinking about how to do the metal work that connects these three parts. The metal work for the engine mount looks to be straightforward. Making a nice steering wheel will take some doing and I have a pretty good conjecture on how the steering would have been rigged. That then leaves the last big piece of work - the V16 Antoinette engine. I have two of the Model Airways Antoinette V8 engine kits that I plan to bash into a V16. From what I have been able to uncover, this is pretty much how the Antoinette V16 actually came about. So this is the basic plan of attack on the hydroplane and then back to L' Invention big time. Greg P.S. I may also be trying to finish a few other models that were started in the distant past concurrent with this project ... I hope I don't start anything else ... Is there a part of the MSW forum that helps people keep the number of projects manageable?
 -
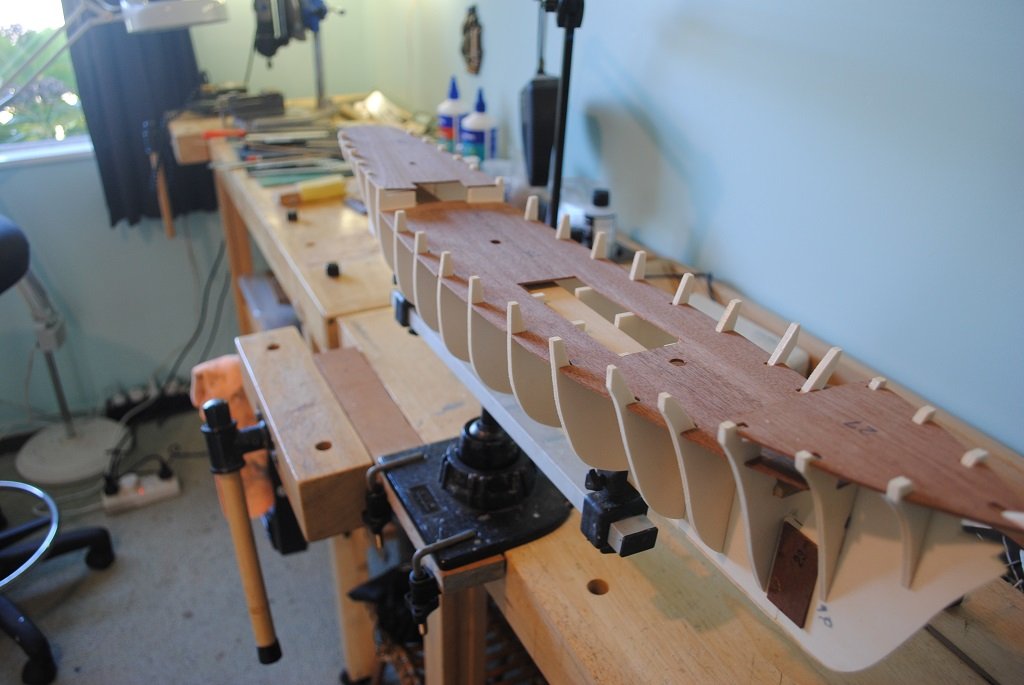
 Hi All, Small update: Machined the longitudal Beam that stiffens the Hull, I had to shave 1.5mm off this. Another gap, this time on the rear Main deck and dealt with this issue also. The Hull structure is looking a little better at this stage and various components are fitting better after a few "Tweaks." No Bulwarks, etc. are affixed in place yet. The mast material gives me a few mm in length at the Base of each mast, the length differs from Mast to Mast depending on the relation of Deck to the afore mentioned "Beam." I scribed a line down the center of the Beam to give me a true centerline for Mast orientation. The trick will be to get each Mast raked aft at 5.95". I am thinking a Brass rod at the end of each mast, offset forward and hole drilled in the Beam to "Step" the Masts. (I don't want to "Glue the Masts in place, I'd rather have them set-up, removeable with the Standing Rigging to hold them in place.) Anyway, enough of me today.... 🙂 Cheers.... HOF. Photos:
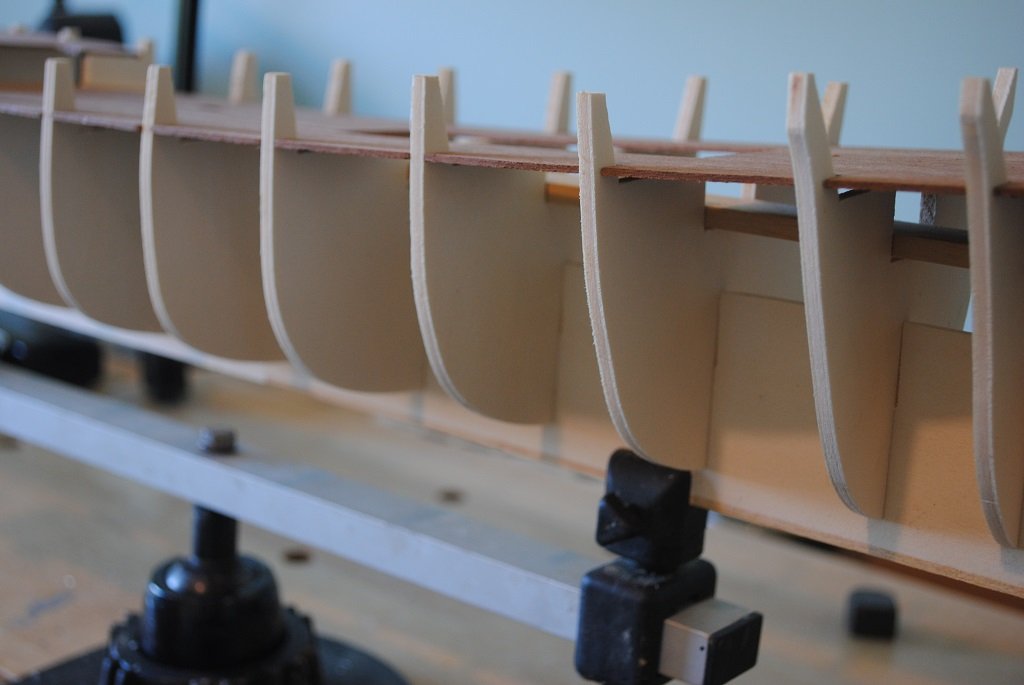
- 7 replies
-
- 1
-
-
- Flying Cloud
- Mamoli
- (and 1 more)
-
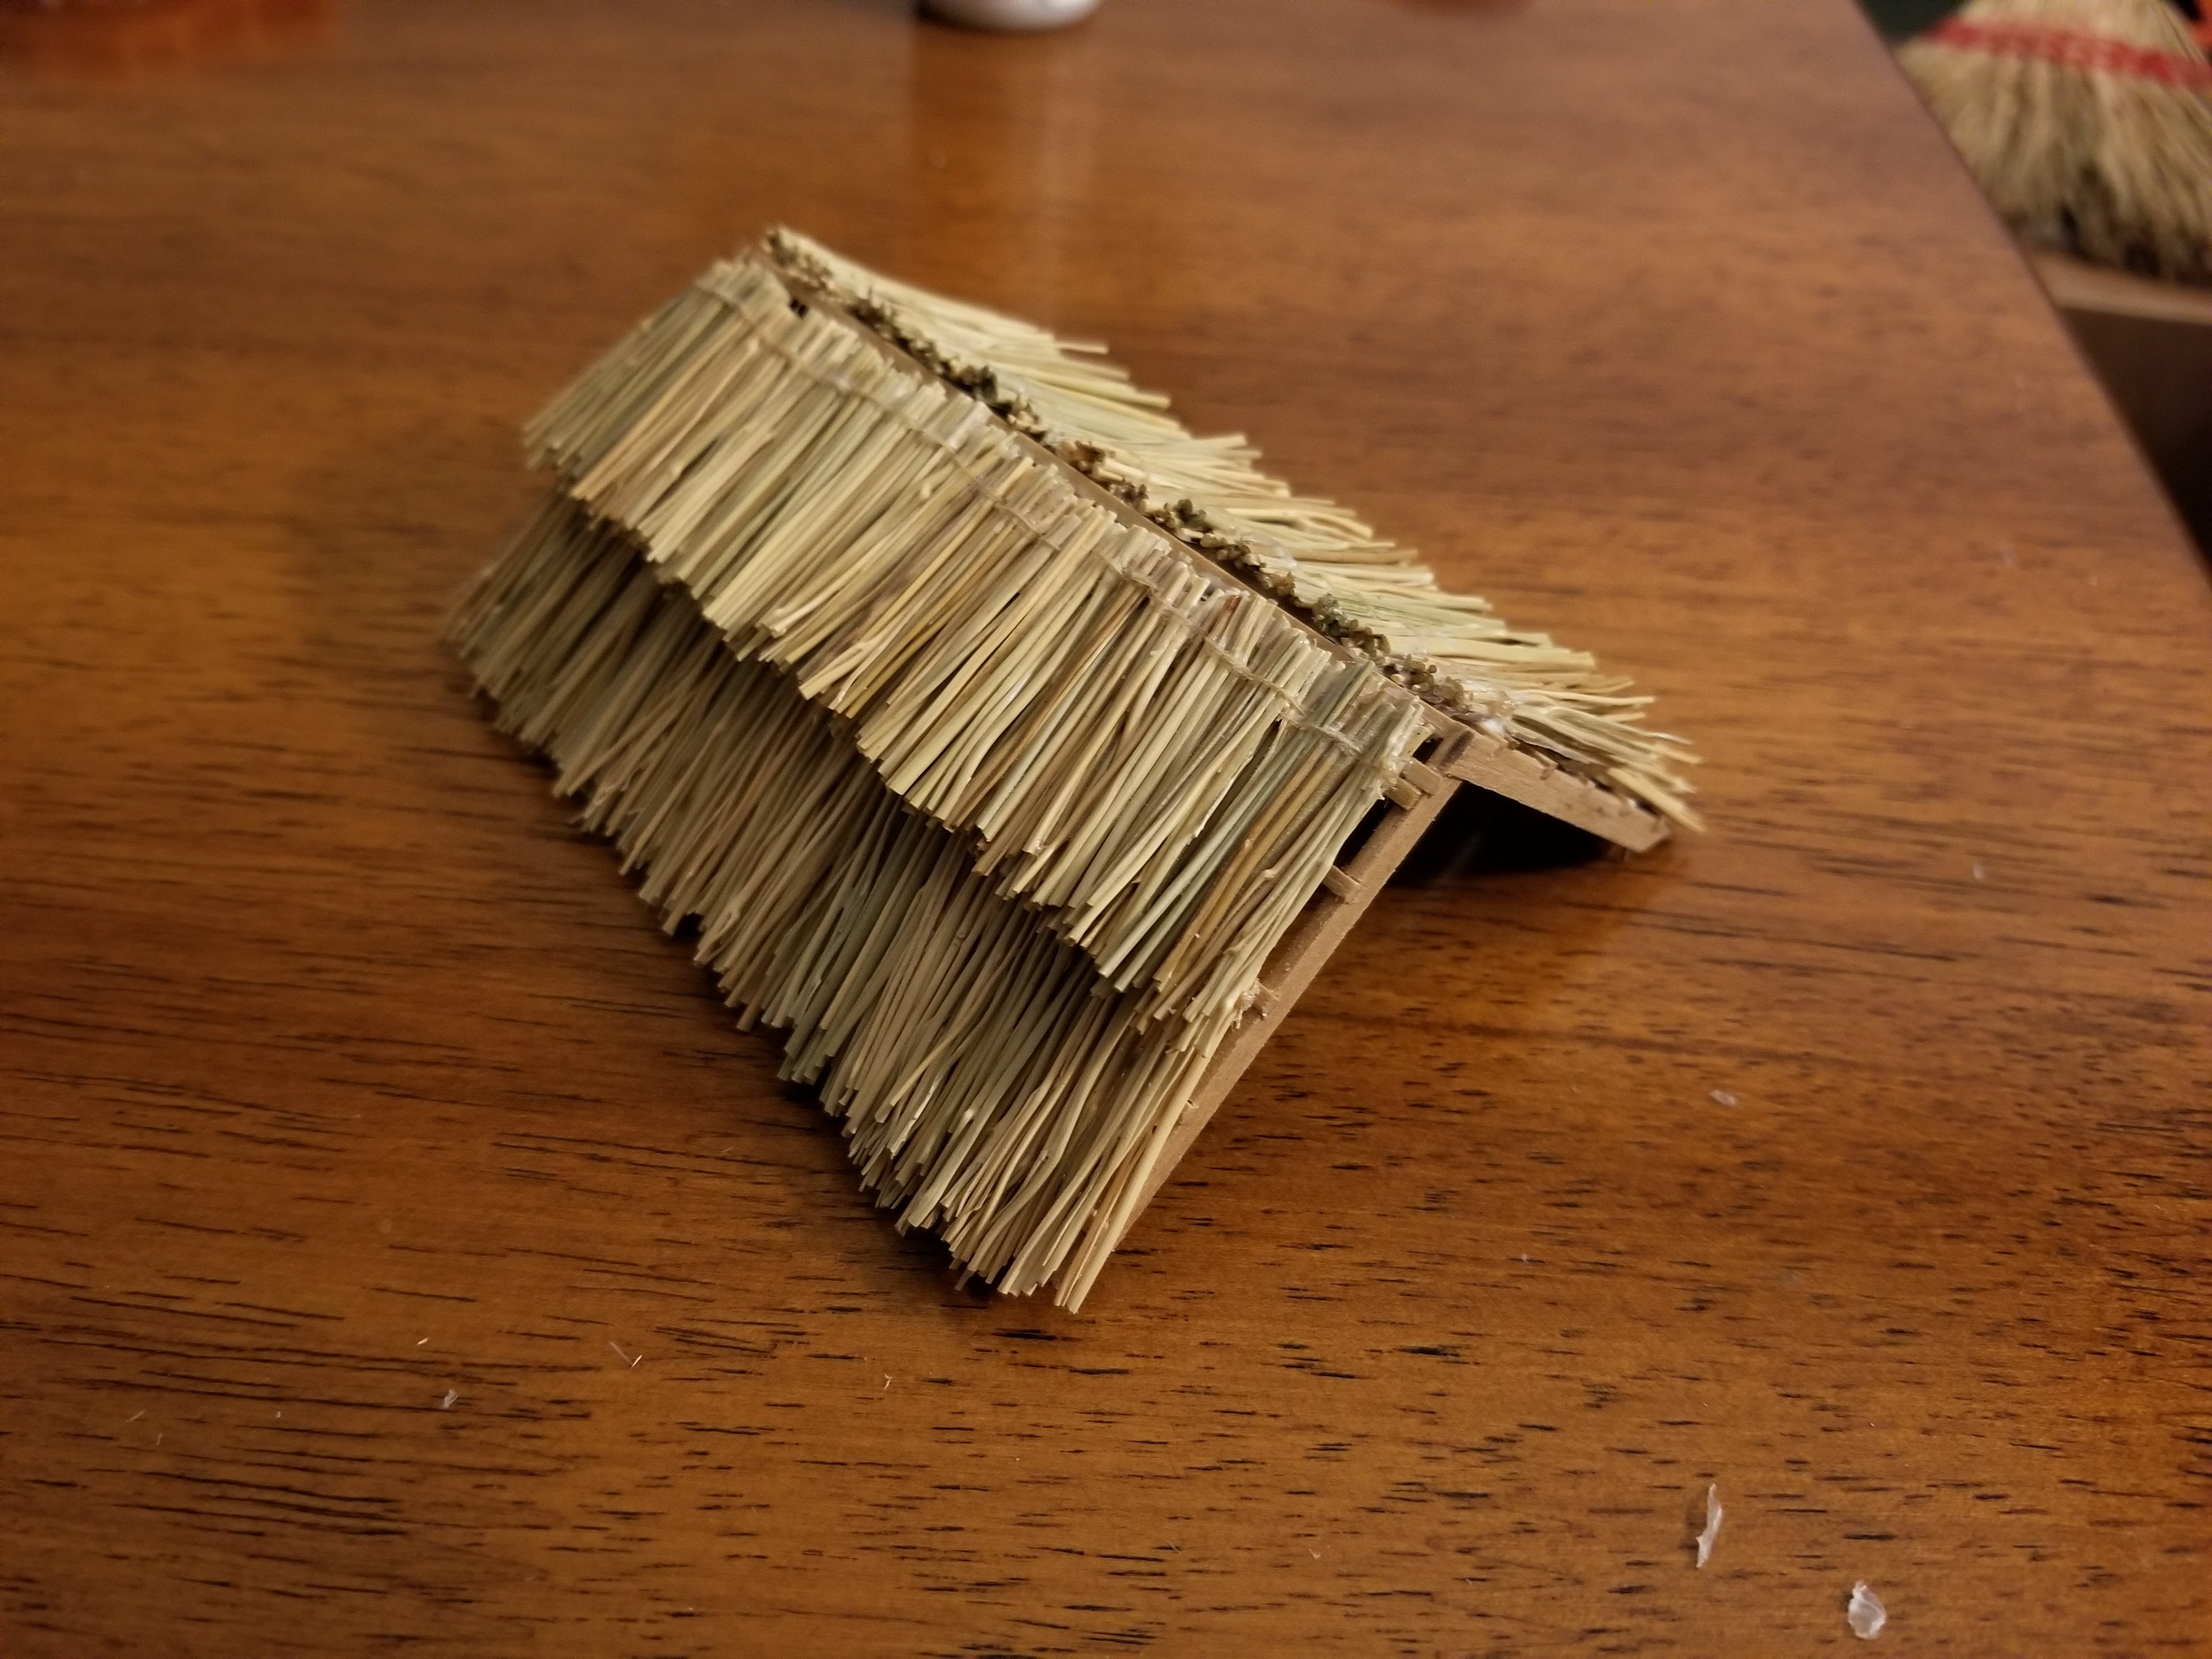
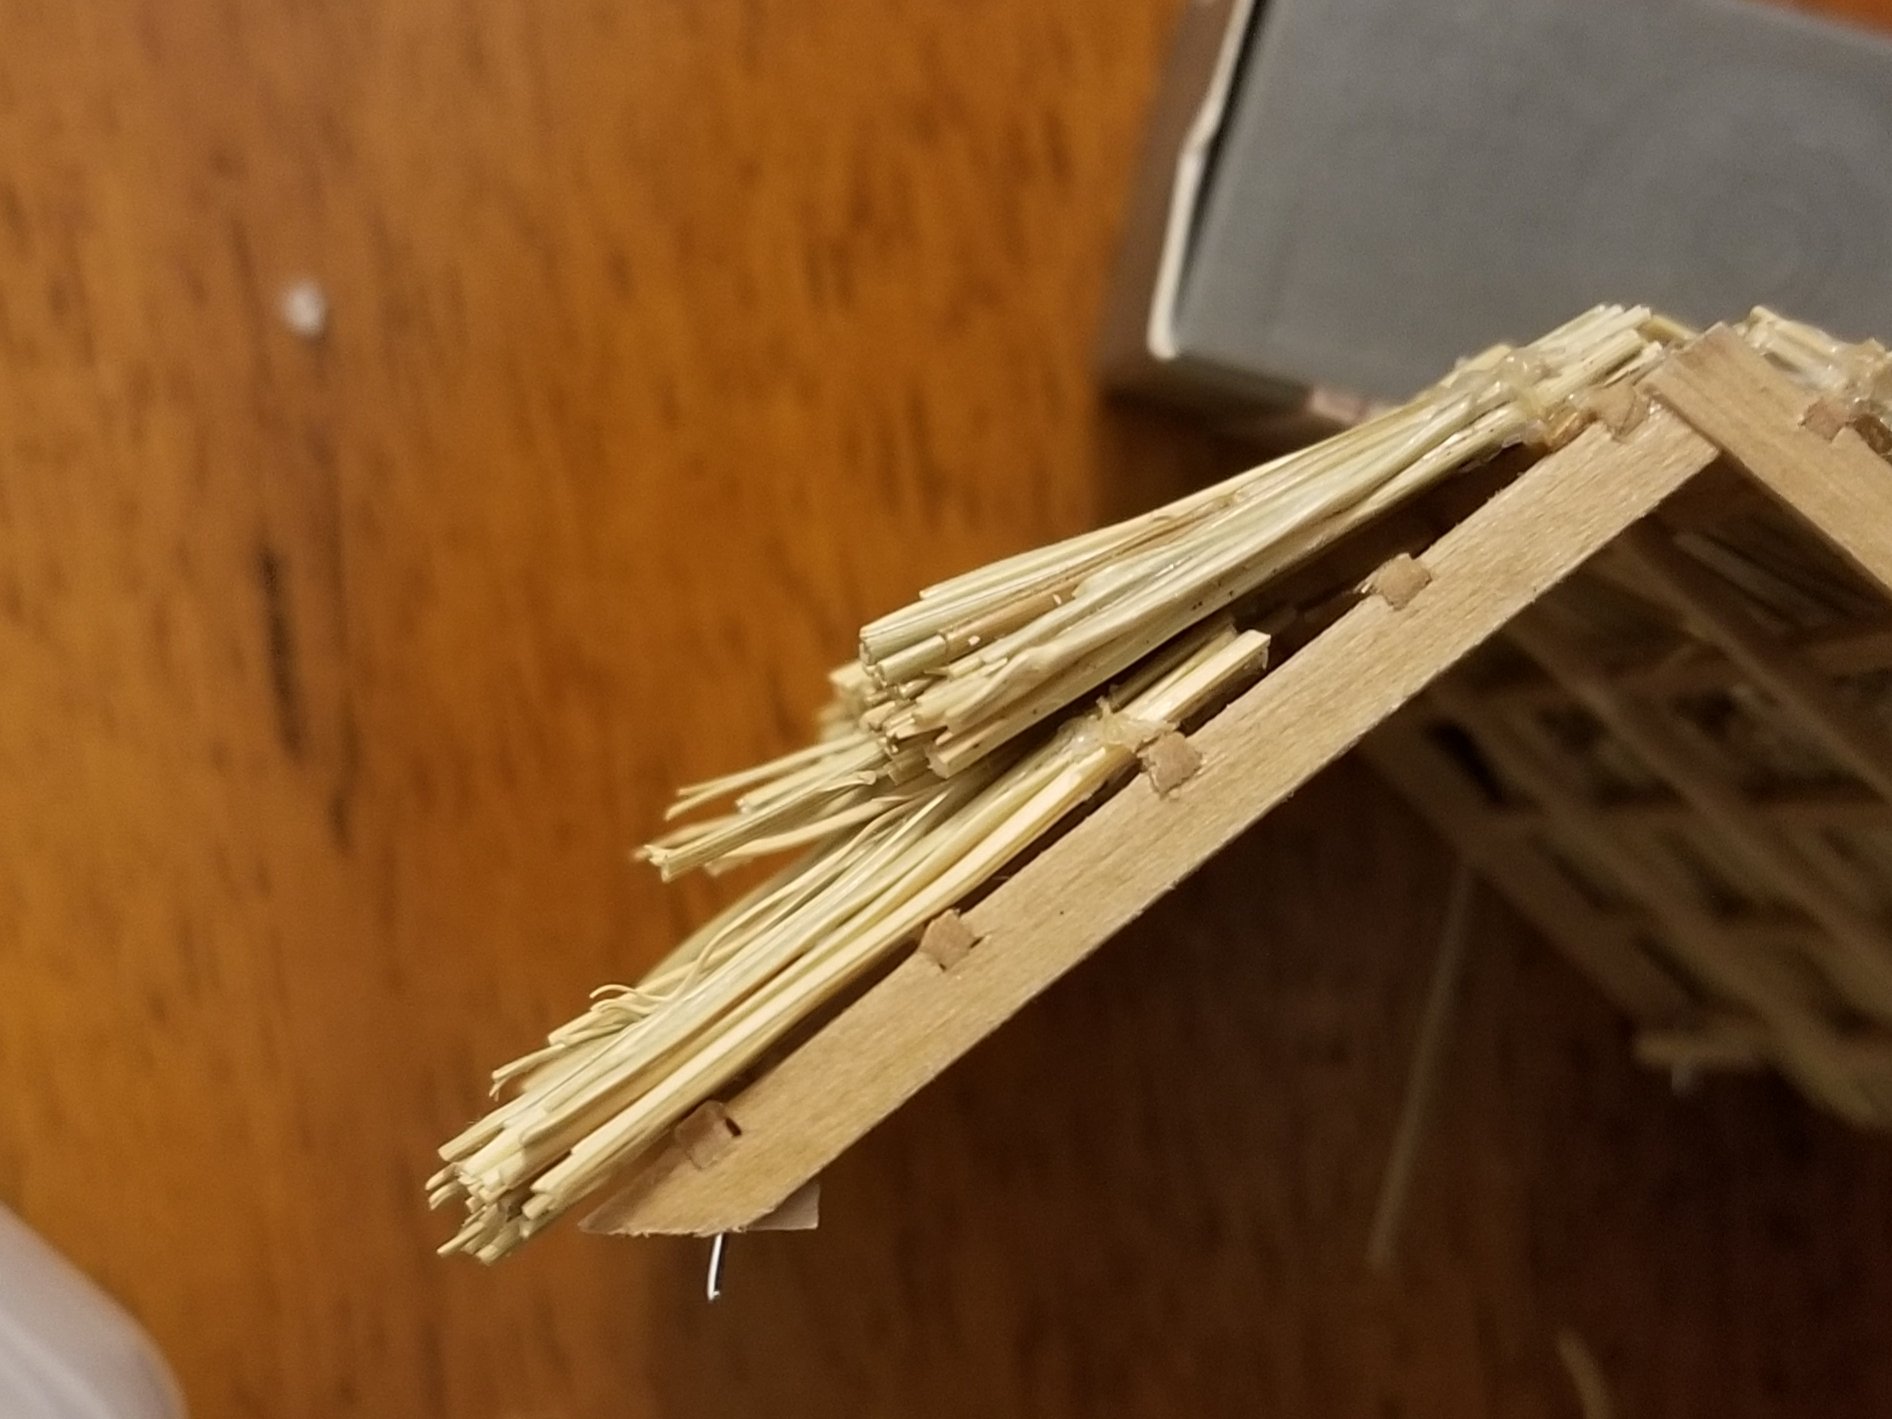
 @Harvey Golden Thanks! I may look into a base board. The stand is just stained basswood, so it wouldn't be hard to match, although I would probably have to pre-treat the board so the stain comes out evenly. Well, I finally got the upper layers of the thatching on. The results are.... a bit mixed, I think. As can be seen, I ended up doubling the upper support crosspiece so there would be more of a gluing surface to work with. The very top will be covered with some cloth, which seems to be what was done on the actual vessels if I'm interpreting the photos correctly. While I avoided the unnaturally straight edge I unintentionally gave my first attempt, I'm not totally happy with this one. As can be seen, the layers are each very thick. This wasn't a problem on my first attempt, as the layers were much thinner, but on this one it's very noticeable. While photos make it clear that plenty of actual canoas did have layered thatching, it never seemed to stick up so much like this. From some angles, and from a distance, I don't think it looks bad. But from others, it looks like a bad haircut. So, I'm a bit torn about how to proceed. As I see it, I have a few options: 1) I could redo it with just a single layer so that I don't have to worry about any overlap, but that seems daunting. I've already spent months working on the rancho, and while I'm not on any timeline for completion, I would like to actually finish the build at some point, and I especially would like to be able to move on from the rancho into more interesting parts of the build. 2. I could redo it with a simple wood rancho. It would be a lot easier and faster, but I have to admit that I think it would be visually less interesting. 3. Leave it as it is, accept that I've done a lot on this already and have learned some lessons about considering how parts will come together while scratch-building, and hope that I one day come to love it, bad haircut and all. 4. Continue with it, but see if I can lesson the jarring transition between layers by sticking some additional individual pieces of straw into the gap, as I've started testing (without glue) below. I think I'll try option 4 for at least a bit to see how it turns out. I don't think it's going to make the haircut look worse, at least.
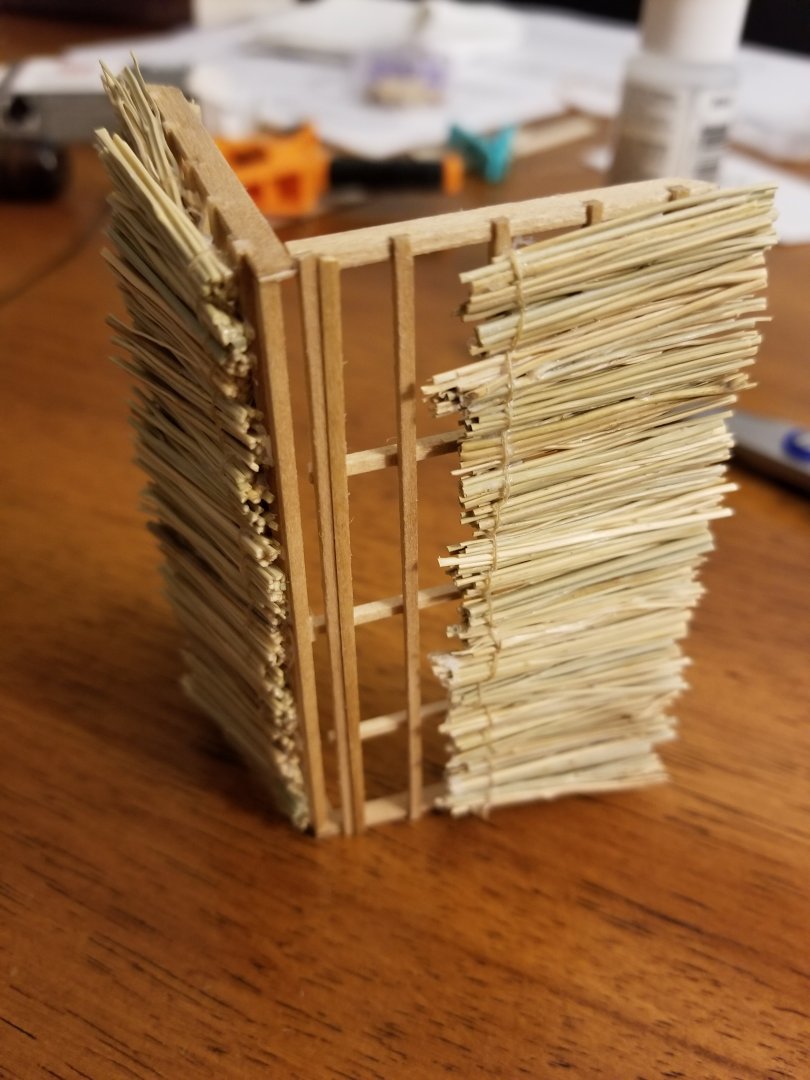


-
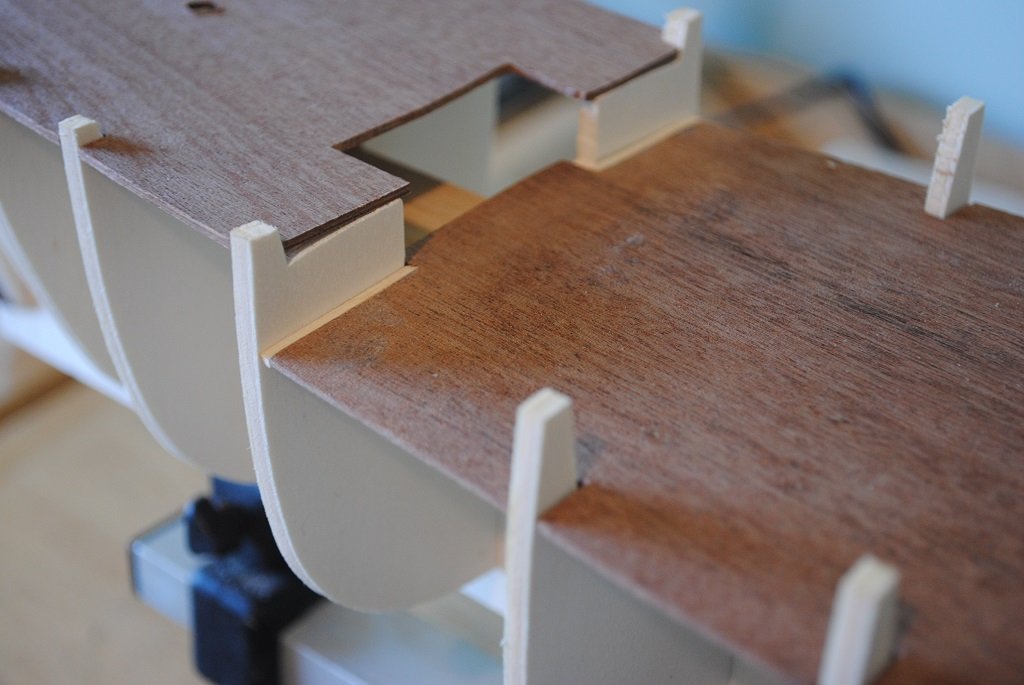
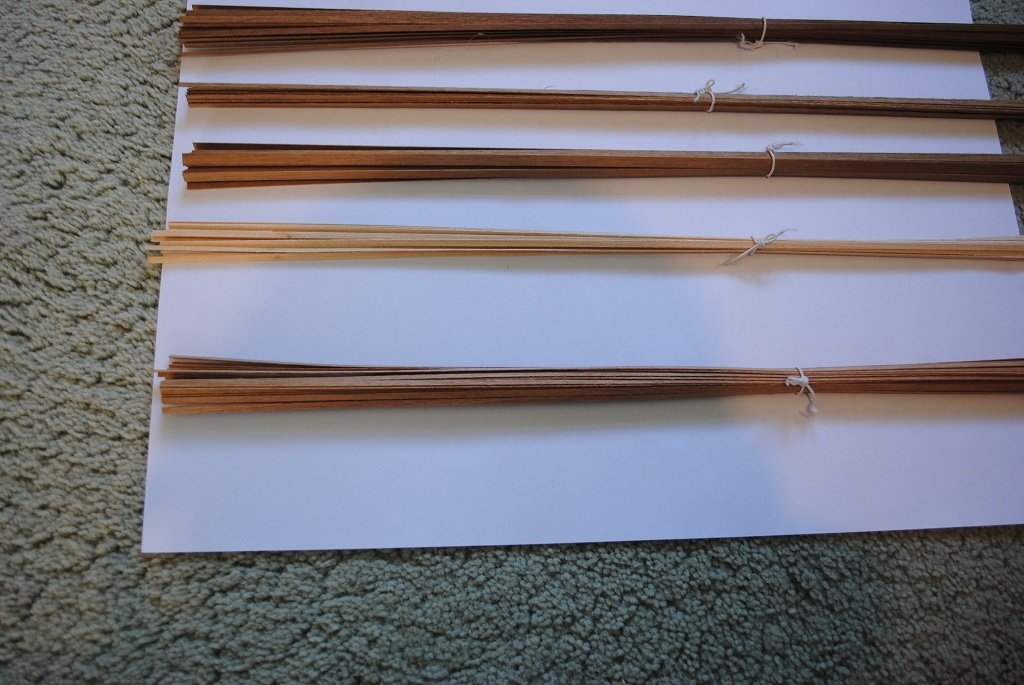
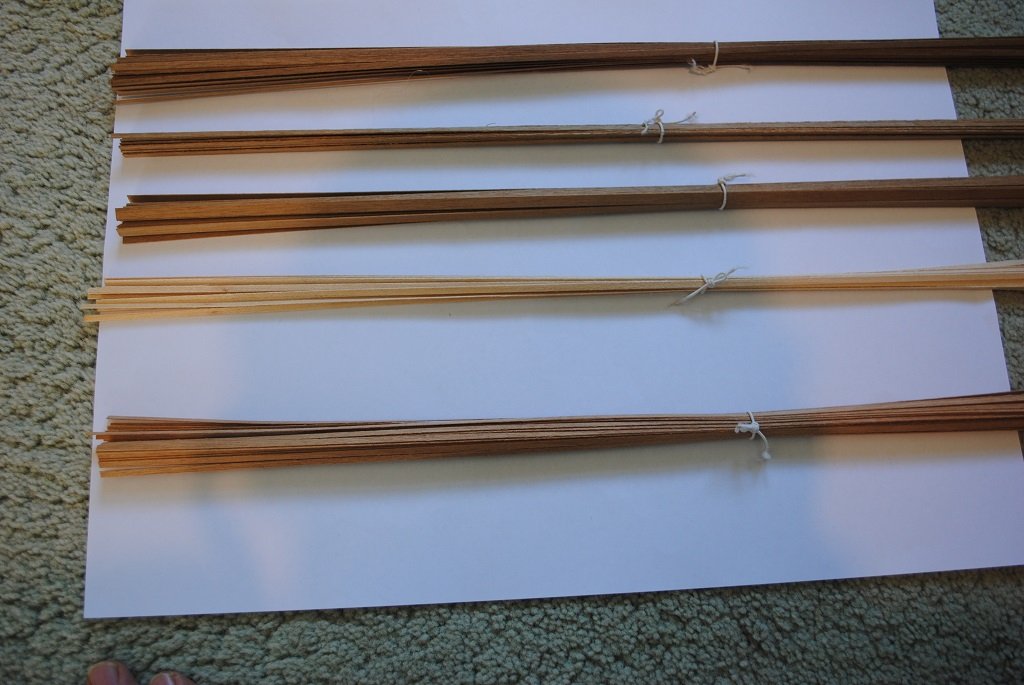
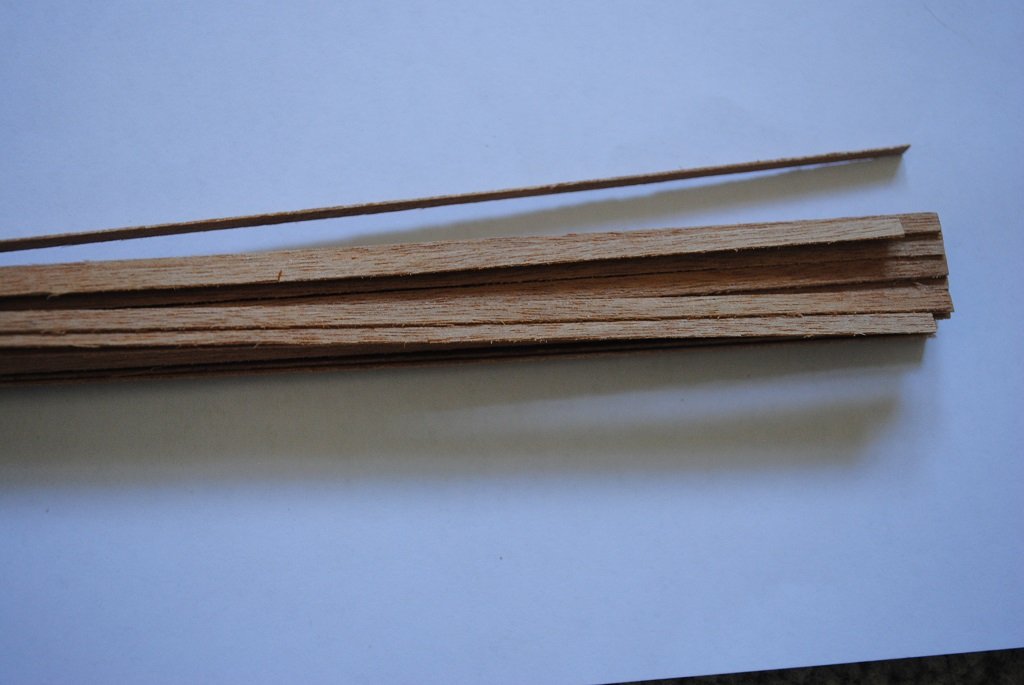
Thanks Mike, I have not had a look at your ships yet, I have been preoccupied with resolving the Second Planking/Deck planking. I had a "Deep Dive" into the second planking.... (The kit provides "Just enough" material in my calculations.) In the first couple of photos the top three bundles are Walnut for the majority of the Hull. (Short the Rubbing Strakes which I am assuming is in the Strip Wood bundle, not shown.) The second to bottom bundle, is, the only thing I can think of, is planking for the Inner Bulwarks, definitely not Maple.... The third bundle is what I am assuming is Deck Planking, (The third photo is a closer view of this material.) Tanganika? (It doesn't even come close to the "Key" on the kit box.... 🙂) Cheers and Regards, Harry.
-
 Welcome aboard - and especially to another USS Constitution build! I’ve heard good things about the Mamoli kits. There are several active Consitution builds going on - in quite different phases. They could still be of help. Regardless of the maker - the builders here can share great technical skill and help you kill your budget with tool ideas 🙂 Have a great journey - and have fun!! -Andre
 -
Great planking - and thanks for the new clamp 🗜️ idea - always looking for new tools!!
-
 Except for someone left behind to guard the cargo?😁
 -
 Great looking fishing boat!