-
Posts
70 -
Joined
-
Last visited
-
Ol' Pine Tar started following L'Etoile by Tom Cadman - Maquettes Gerard Schmitt - 1:40
-
Ol' Pine Tar changed their profile photo
-
 Ol' Pine Tar reacted to a post in a topic:
Fair American by Pine Tar – Model Shipways – 1:48
-
 Ol' Pine Tar reacted to a post in a topic:
Fair American by Pine Tar – Model Shipways – 1:48
-
 Ol' Pine Tar reacted to a post in a topic:
HM Cutter Cheerful 1806 by Chuck - FINISHED - 1:48 scale - kit prototype
-
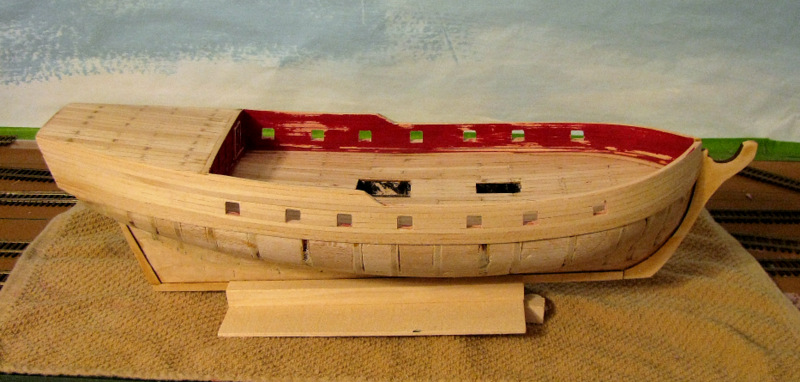
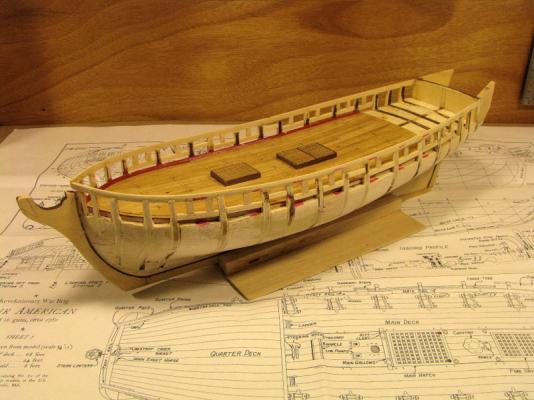
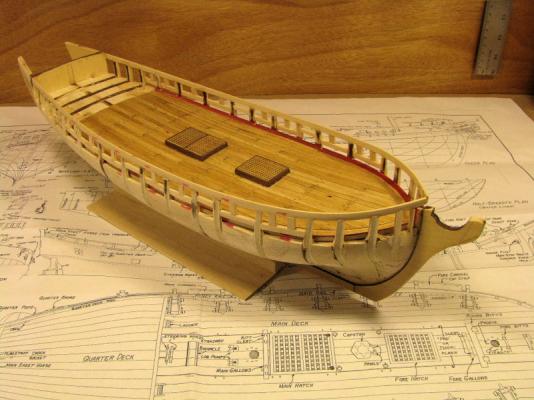
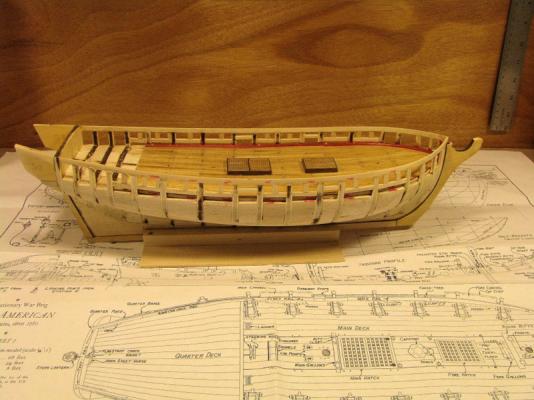
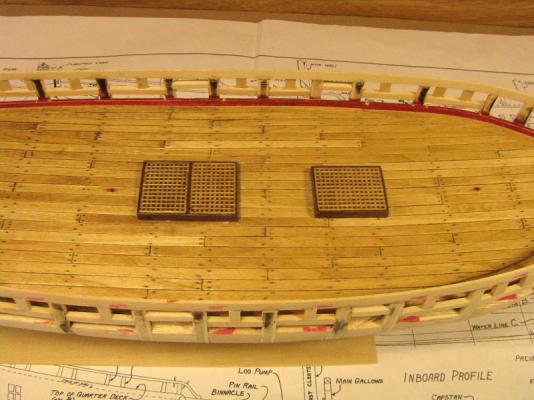
I posted earlier this week that my FA build was being retired. Well not so fast... Its been almost 2 years since I did any model ship work. I've spent most of that time trying get settled into retirement, selling big house, buying smaller house, moving all the work shop stuff, the work bench, the model railroad, all the wife's artsy-crafty stuff... Then unpacking, finding everything and getting it all set up in a newer, smaller space... I'm sure most of you have "been there, done that" Anyway, a couple of weeks ago I finally got around to getting the FA back on the workbench. Man, what a mess. The gun ports were the wrong size and way out of position, the quarterdeck was too high, the deck planking was just plain bad. I really considered scrapping the whole build and starting on something else, but after a couple days of looking it over I thought better of it. So I got busy and rebuilt everything that didn't look right, including re-planking the main deck. The quarterdeck is going to get re-planked this weekend. Lot happier with it now, so I guess this build will continue after all. Sort of where we're at now... I want to thank all the folks here who take time to post their work. Its so helpful and inspirational to all of us. Thanks!
-
 Ol' Pine Tar reacted to a post in a topic:
Syren by JesseLee - FINISHED - Model Shipways - scale: 1:64
-
 Ol' Pine Tar reacted to a post in a topic:
Syren by JesseLee - FINISHED - Model Shipways - scale: 1:64
-
 Ol' Pine Tar reacted to a post in a topic:
Syren by JesseLee - FINISHED - Model Shipways - scale: 1:64
-
 Ol' Pine Tar reacted to a post in a topic:
US Brig Syren by _SalD_ – FINISHED - 3/16" scale
-
 Ol' Pine Tar reacted to a post in a topic:
Cutter Cheerful by Maurys - 1:48 POB
-
EEEgads! Four months since a post. Lotta water gone under the bridge since then - no pun intended... Been lurking about the Forum, just a lot of distractions. Revamped the mancave/workshop/office. Bought some stuff, sold some stuff, Goodwilled a bunch of stuff, threw a bunch of stuff in the dumpster. Still trying to get completely retired. Sometimes I think retiring is more work than work - maybe by August. Fixin' to put the FA back on the work bench. I see all of y'all have been doing some mighty fine work and making a lot of progress on your projects. Best to all and, hopefully, we'll have the shipyard up and running here in a few days.
-
Congratulations, Gary! One very nice model. Thanks for taking time to post your build. I've learned a lot from your experiences.
- 206 replies
-
- fair american
- model shipways
-
(and 1 more)
Tagged with:
-
Thanks everyone for the comments and “likes.” I see Ken has finished his Fair American. Beautiful ship! Looks like I'd better get to moving smartly. I constructed the deck hatches and gratings. I used walnut for the coamings and the grating supplied in the kit. I sanded the bottoms to shape using a sheet of sandpaper taped down to the deck and glued them down. Next I framed the gunports. Following Ken and others lead, I put a 1/8 x 3/32 piece across the tops of the bulkheads to facilitate the larger gunports. After a good bit of trial and error – mostly error – I managed to build up the fixed sheaves somewhat like Bob's. Notice the “somewhat”... Thanks, Bob. Got them framed in. Thanks again everyone for taking time to look and comment!
-
Ken, Your excellent model shows the result of a lot of talent, skill, and perseverance, enhanced by your photography. Thanks for taking time from your build to photograph and post your work.
- 455 replies
-
- fair american
- model shipways
-
(and 1 more)
Tagged with:
-
Ken, Excellent work and photography. "The boat as seen from the dock" photo is definitely a winner. It has that "sunrise through the rigging" look to it. Thank you for taking time to share your work on MSW.
- 455 replies
-
- fair american
- model shipways
-
(and 1 more)
Tagged with:
-
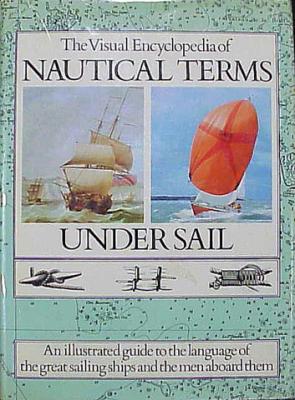
I'm sure this book is a fairly common part of most MSW member's libraries but I didn't find a review or mention of it here. Anyway, I've found it to be a good reference plus being fun just to look through. The Visual Encyclopedia of Nautical Terms Under Sail Basil W. Bathe, George P. B. Naish, Alan Villiers, et al Crown Publishers, 1978 - 352 pages This book is an excellent source for terminology dealing with seafaring for both the neophyte and the old salt alike. It is divided into a number of chapters according to the types of words being dealt with. Each word is defined clearly and concisely. Where necessary, clear line drawings illustrate terms that are difficult to completely explain in words. Also there are some comical illustrations for some of the more humorous items of sailor's slang. It also has sections relating to ship types and construction, sailing, sailors' customs, flags, calls and commands, navigation, weather, pilotage, tides and currents, fishing, and mooring and has a comprehensive index. The book is readily available on both ebay and Amazon used for as little as $10 USD.
-
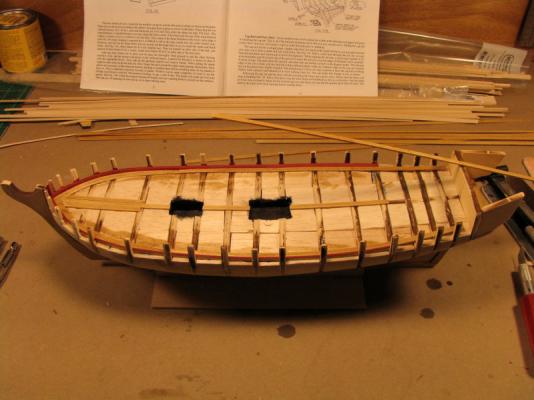
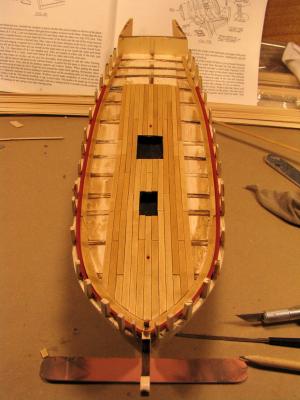
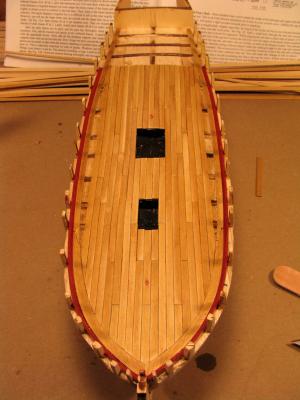
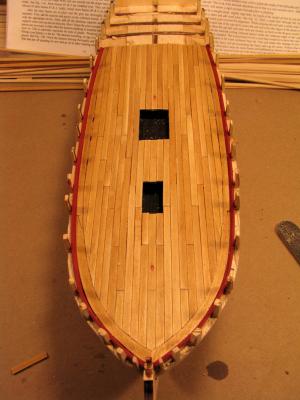
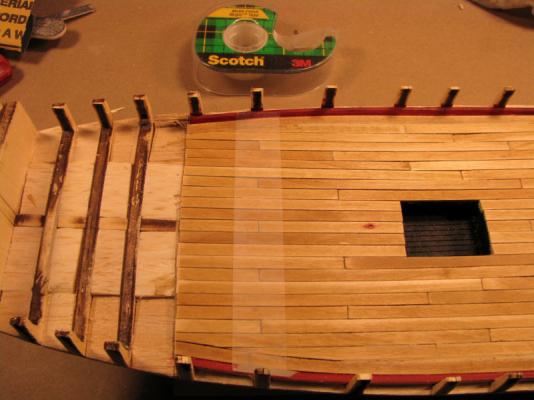
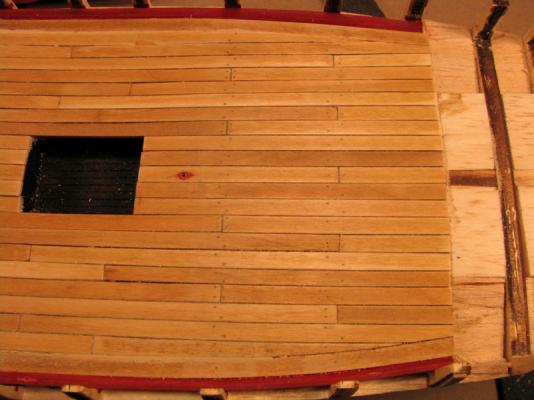
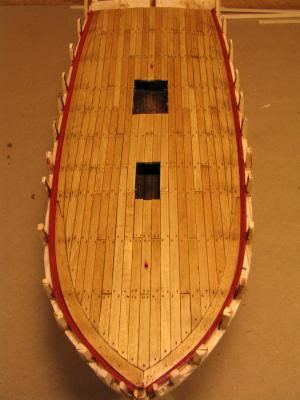
Thanks everyone for the comments and the “likes.” I decided to go ahead and plank the main deck with the 3/16” basswood supplied in the kit. Before I cut and glued the planking, I sanded each piece with 220, 400, and 600 grit, applied Minwax Pre-stain conditioner and then stained the pieces with Minwax Golden Oak stain. Used a #2 pencil to mark the caulk lines. As for glue, I normally use Aleene's Tacky Glue, but this time I thought I'd try a medium CA. Worked just fine. Main thing was I didn't have to clamp and wait for the glue to dry before putting down the next plank. I applied just a drop to the top edge of each bulkhead the plank covered and laid the plank in. The medium CA gives you some wiggle time to get the plank in straight and butt-up to the previous one. Fifteen seconds or so and the plank is stuck. After the planking was down, I used Scotch tape to mark the guide lines and drilled the trunnel holes. I then lightly sanded the deck down to fill the holes with sanding dust and applied another coat of stain and a couple coats of Minwax satin finish Wipe-On-Poly. Overall no big problems. The scarph joints in the margin plank were a little rough and I'm still having a time getting the planking more level, but we're getting there. I did have some problem with the stain wicking up the grain on the butt ends of the planks and the trunnel holes with the basswood. I'm not quite ready to invest in a stock of alternative woods, but I will certainly consider some boxwood, holly, or swiss pear for my next build. As always, your comments, suggestions and advice are always welcome. Thanks for taking time to look and comment.
About us
Modelshipworld - Advancing Ship Modeling through Research
SSL Secured
Your security is important for us so this Website is SSL-Secured
NRG Mailing Address
Nautical Research Guild
237 South Lincoln Street
Westmont IL, 60559-1917
Model Ship World ® and the MSW logo are Registered Trademarks, and belong to the Nautical Research Guild (United States Patent and Trademark Office: No. 6,929,264 & No. 6,929,274, registered Dec. 20, 2022)
Helpful Links
About the NRG
If you enjoy building ship models that are historically accurate as well as beautiful, then The Nautical Research Guild (NRG) is just right for you.
The Guild is a non-profit educational organization whose mission is to “Advance Ship Modeling Through Research”. We provide support to our members in their efforts to raise the quality of their model ships.
The Nautical Research Guild has published our world-renowned quarterly magazine, The Nautical Research Journal, since 1955. The pages of the Journal are full of articles by accomplished ship modelers who show you how they create those exquisite details on their models, and by maritime historians who show you the correct details to build. The Journal is available in both print and digital editions. Go to the NRG web site (www.thenrg.org) to download a complimentary digital copy of the Journal. The NRG also publishes plan sets, books and compilations of back issues of the Journal and the former Ships in Scale and Model Ship Builder magazines.

