


usedtosail
-
Posts
2,268 -
Joined
-
Last visited
Content Type
Profiles
Forums
Gallery
Events
Everything posted by usedtosail
-
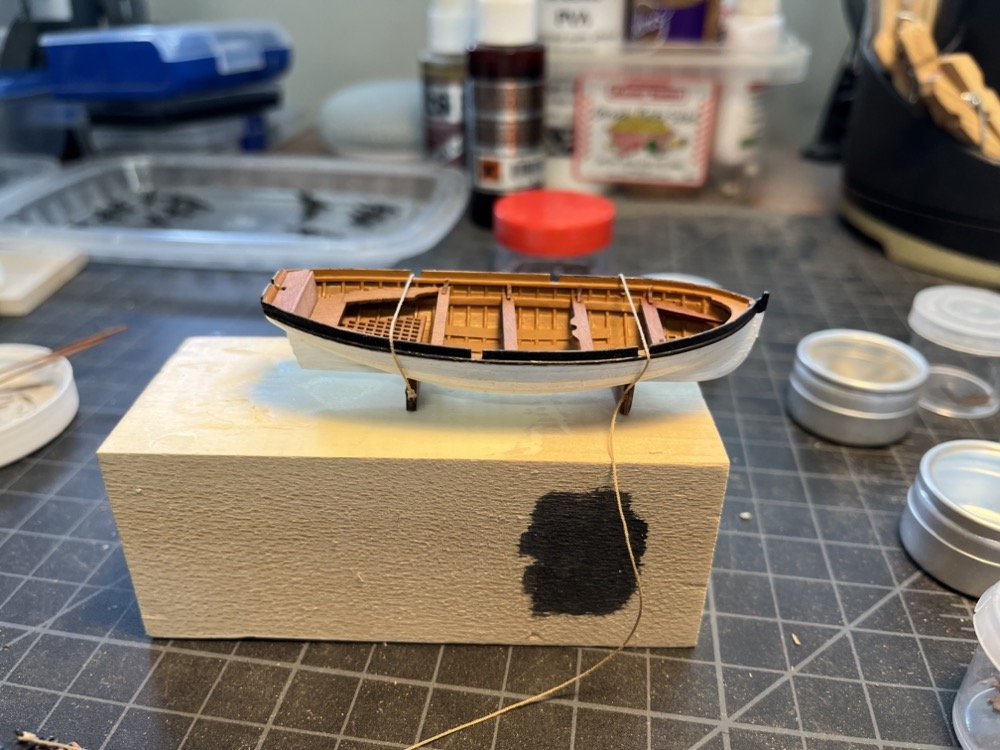
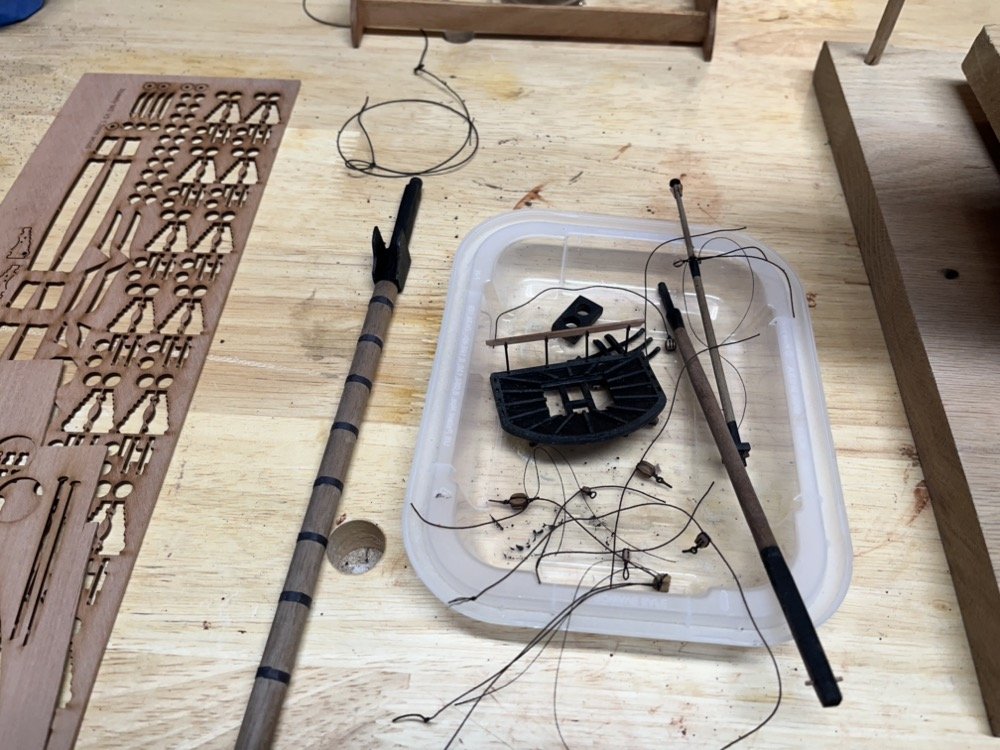
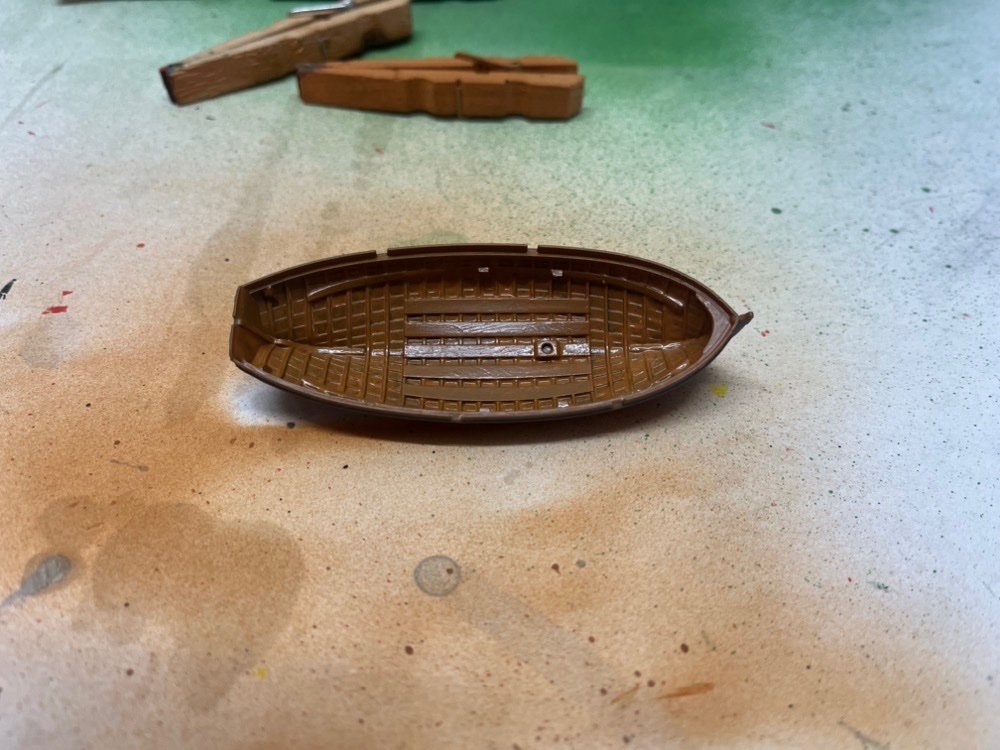
 Thanks Tom. I have a mill attachment for the lathe but I don't have a good way to hold and rotate the dowels when using the mill. I have a rotary table but it does not have a hole through the center so can only hold the dowel on the very end, which is nowhere near secure enough. I am a little worried about the fences on the tops but I wasn't sure how hard it would be to add them later. Hopefully I won't break them off too many times. Just a quick update on the cutter. I drilled the holes in the deck and slid the pins under the supports in place. I added the oars, rudder, boat hooks, and grapple to the inside of the cutter too. I am not sure how well that ladder works with the cutter in the way. Onto the anchors and upper yards.
-
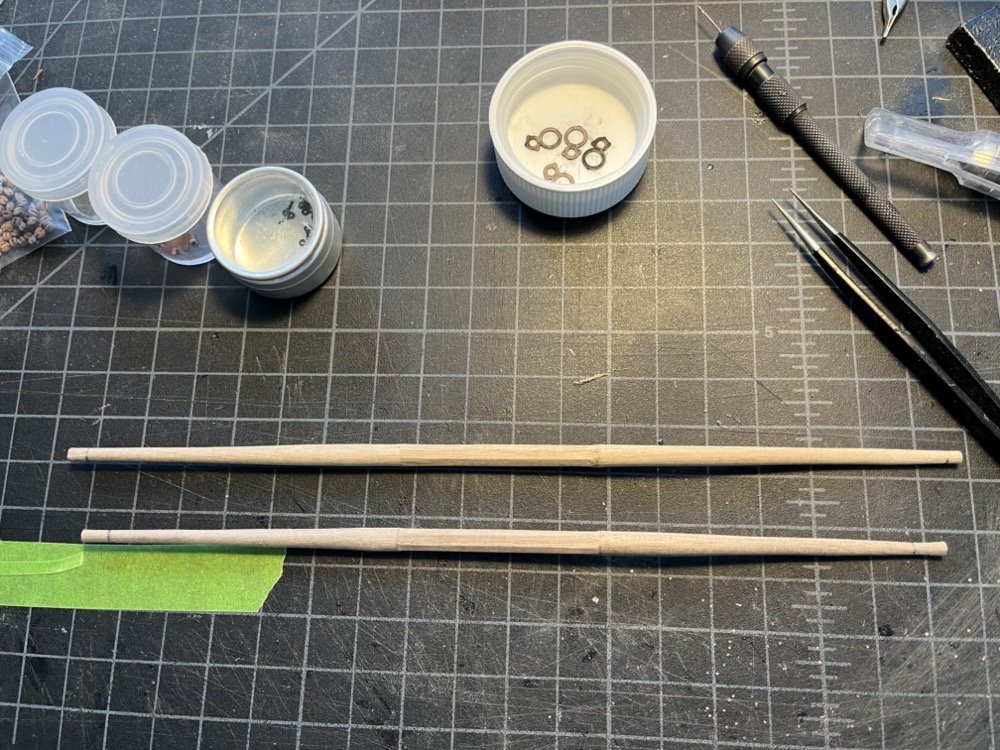
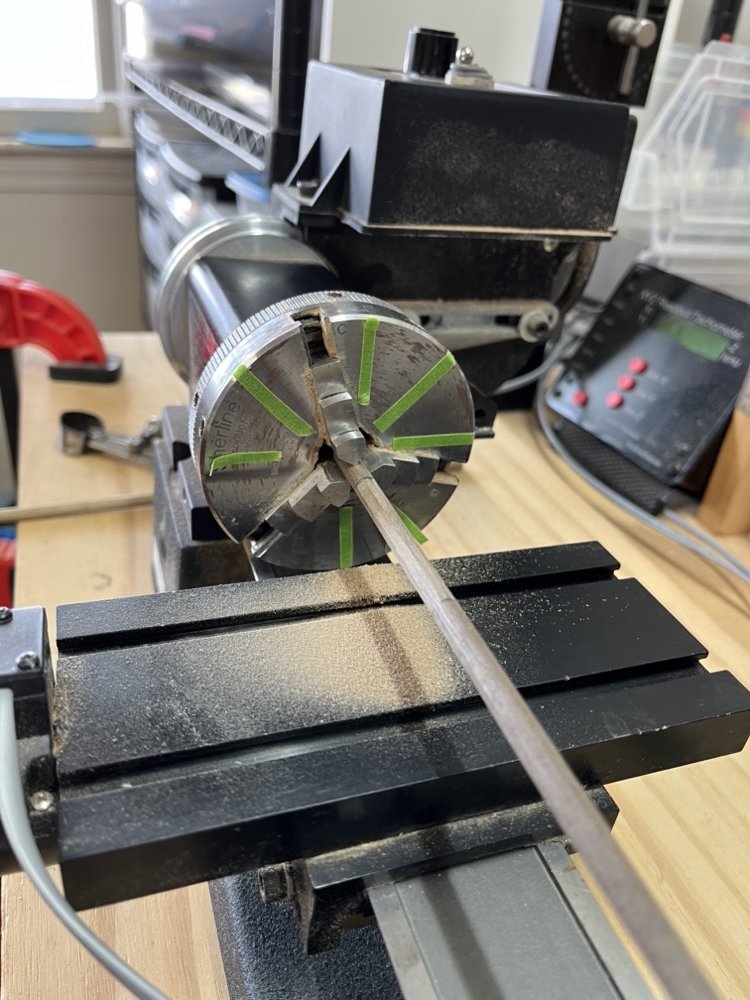
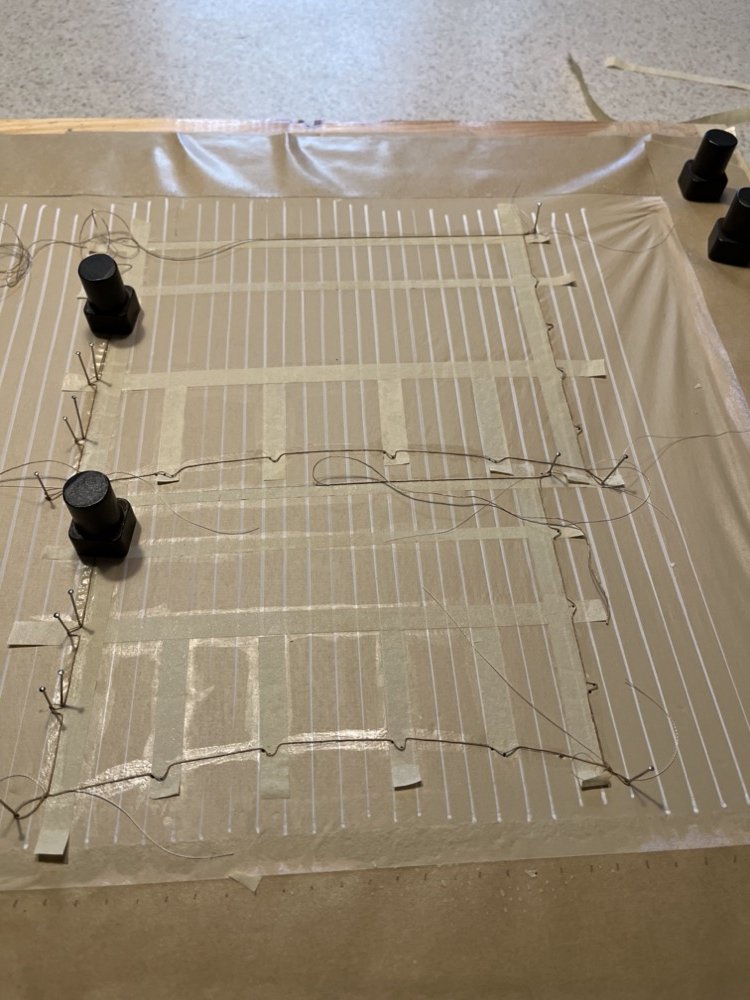
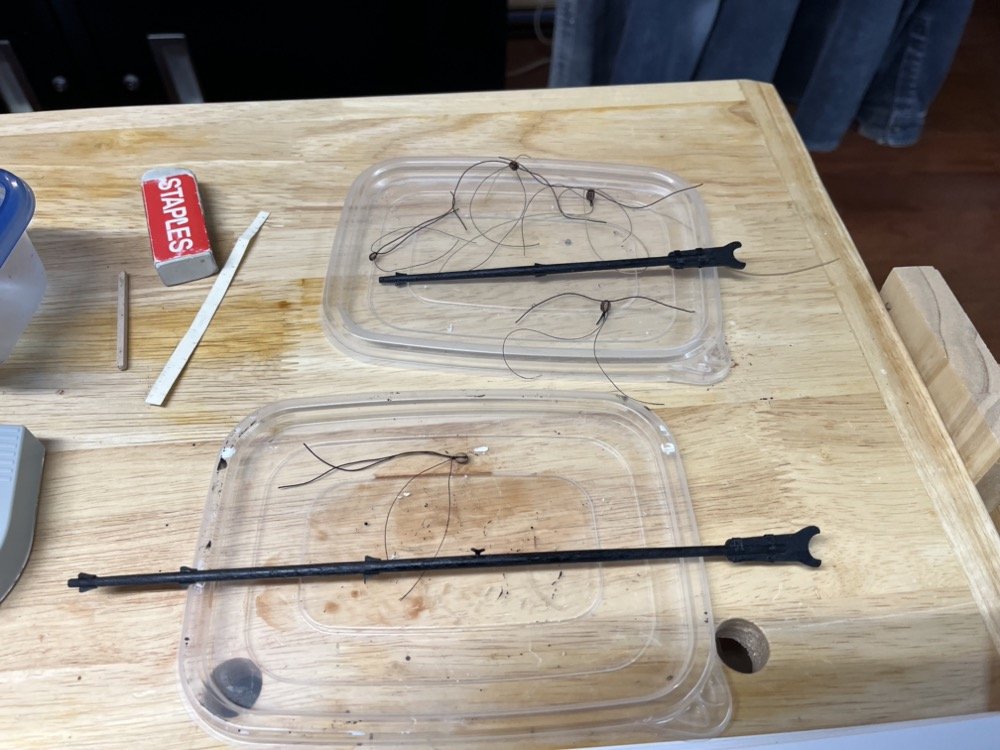
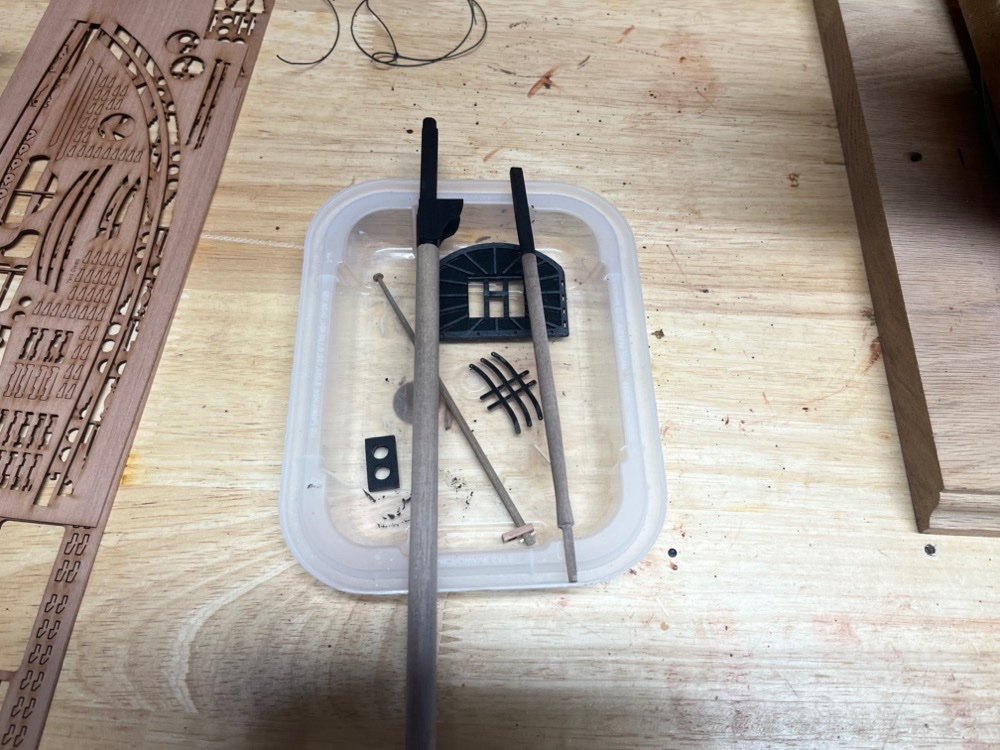
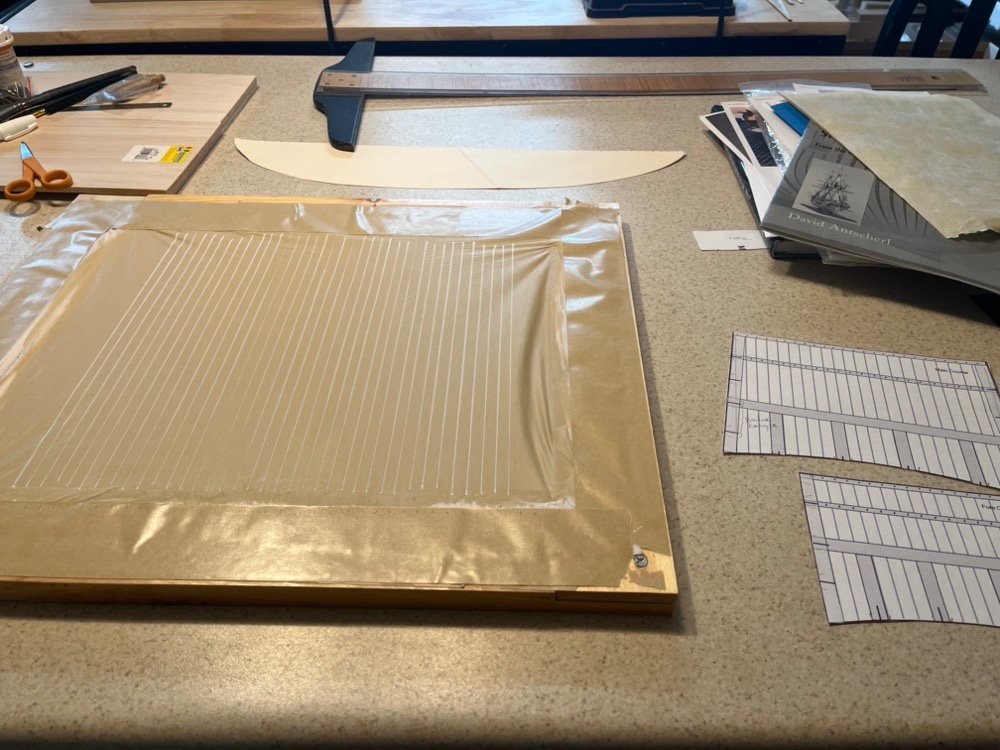
I don't find this stage hard, in fact this is what I really like - adding the small details, making the masts and yards, and all the rigging. I also like being able to work on many parts at the same time. As you will see I don't put the whole mast together before adding them to the model. I like to add them in sections (lower masts, topmasts, topG...), rig those sections, then add the next one. Then I add the yards starting with the lower yards and working my way up. I do add the whole bowsprit at one time though, as it is harder to add it in sections. Anyway things are progressing nicely. Let's start with the cutter. I added the wooden interior pieces and gave them a coat of wipe on poly. I also rounded off the oars and painted the rudder, blackened the grapple and boat hooks that came with the kit, and glued and tied the cutter to the chokes. I did all this off the model so I still need to drill the holes in the deck and place this assembly to the deck, but I will wait a bit to permanently install it. All of the mast sections are completed but only the lower masts are installed. The bowsprit is also completed and is ready to start rigging. I have started working on the yards at this time too. I started with the lower yards. These have an octagon section in the center but they are made from wooden dowels. I know how I would do this if I started with a square section of wood, but this is the solution I came up with for the dowels. I marked off 45 degree angles on the 3 jaw chuck for my lathe, then used them to index the dowel as I filed the top of the dowel in each position. This worked out really well. When I had the octagons done I then rotated the dowels in the lathe to shape them. The sails are almost done. I am in the process of adding the reef points, which is the last step before cutting them out. I'll have photos of the competed sails when I cut them out.


-
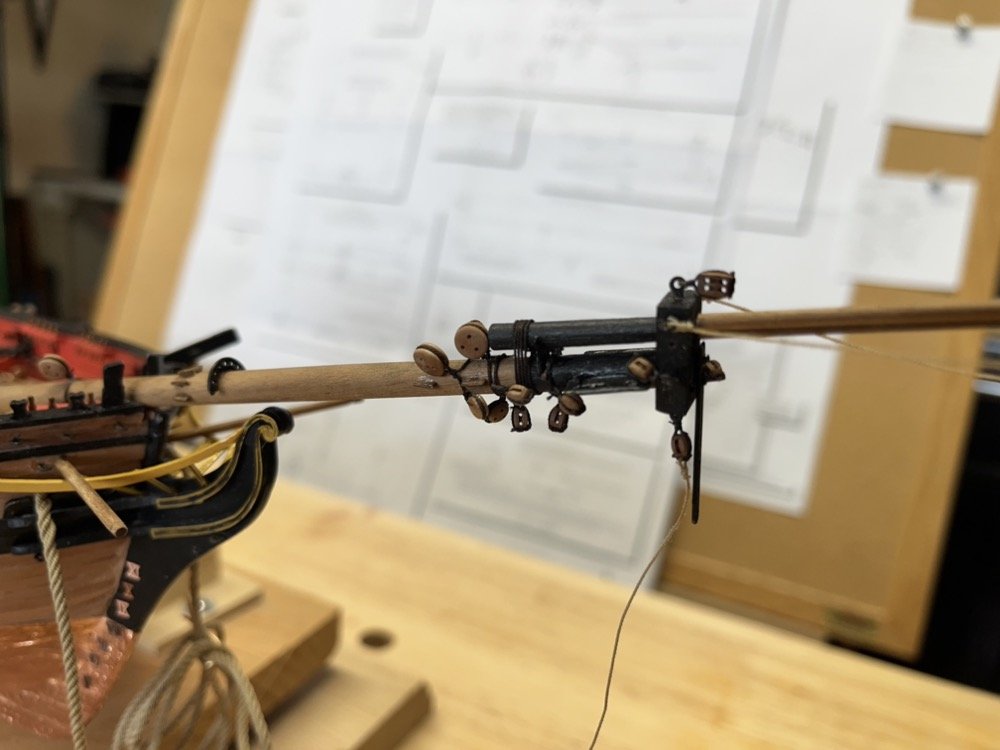
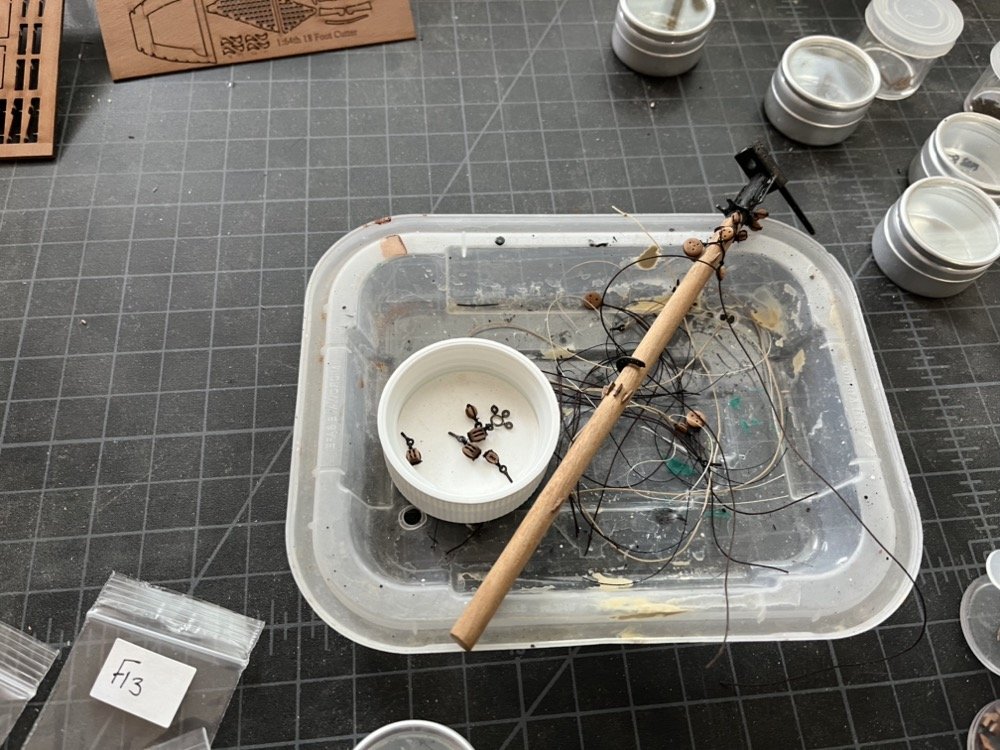
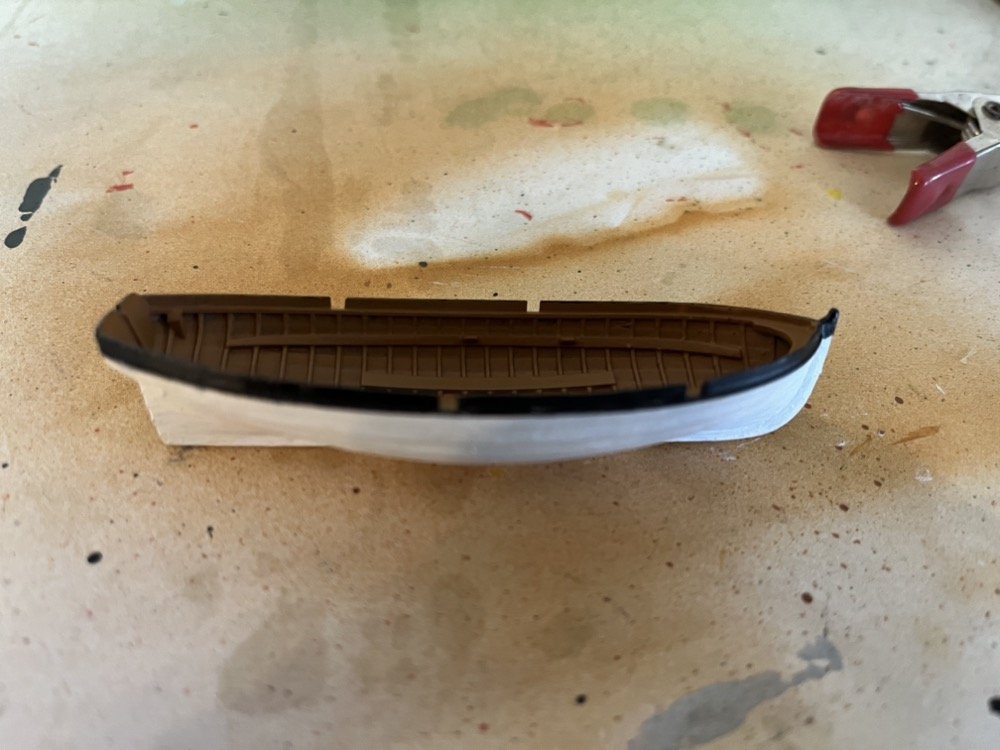
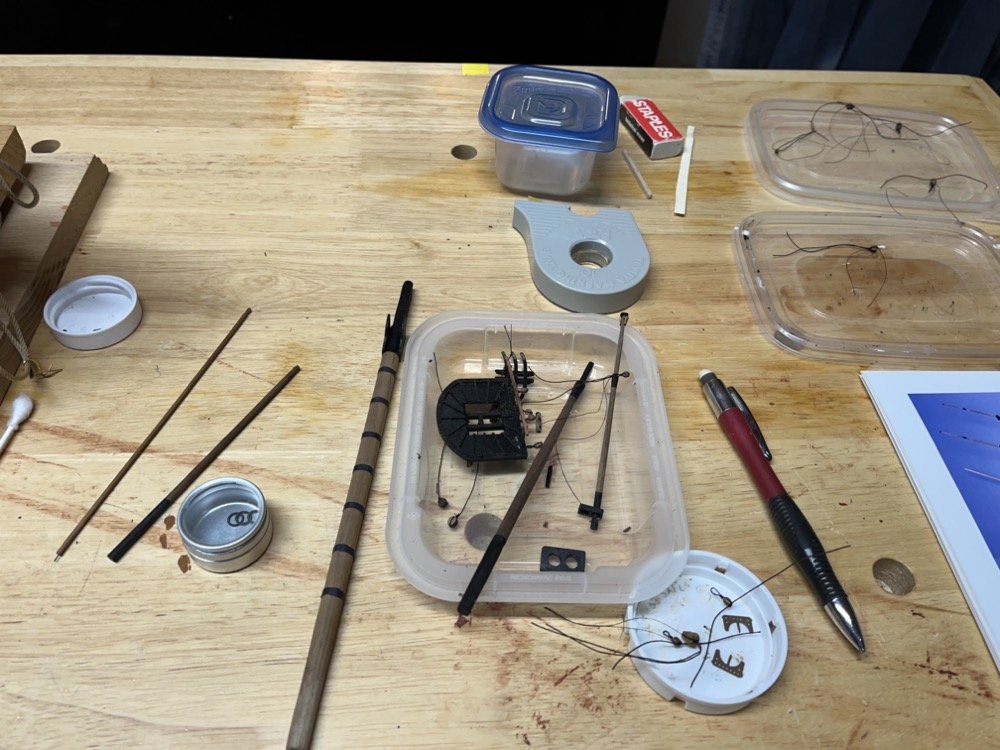
I have been making progress on many fronts but nothing completed yet. I wanted to provide a status of the build up to this point though. First the sails. I am in the process of adding the bolt rope to the fore and main courses, after adding the reinforcement pieces. I have been progressing from loop to loop on each sail so I can do about three loops a day because of the time for the matte medium to dry. Once the bolt rope is done I will be making the holes along the top of the sails and in the thin reinforcement strip for the reefing points. I have finished painting the 3D printed cutter. I used a bright white paint for the outside of the hull but gave it a wash of diluted unbleached white paint as a final coat. I painted the rub rail and the hull up to the gunwales black. I have started adding the interior wood pieces so I should have that finished up soon and lash it to the deck. The rest of the activity has been focused the bowsprit, masts, and booms, I have the sections made and finished, so I am adding the details and stropping and adding the blocks and deadeyes. Bowsprit: Booms: Main mast: Fore mast: Hopefully I'll have some completed items to report on soon.
-
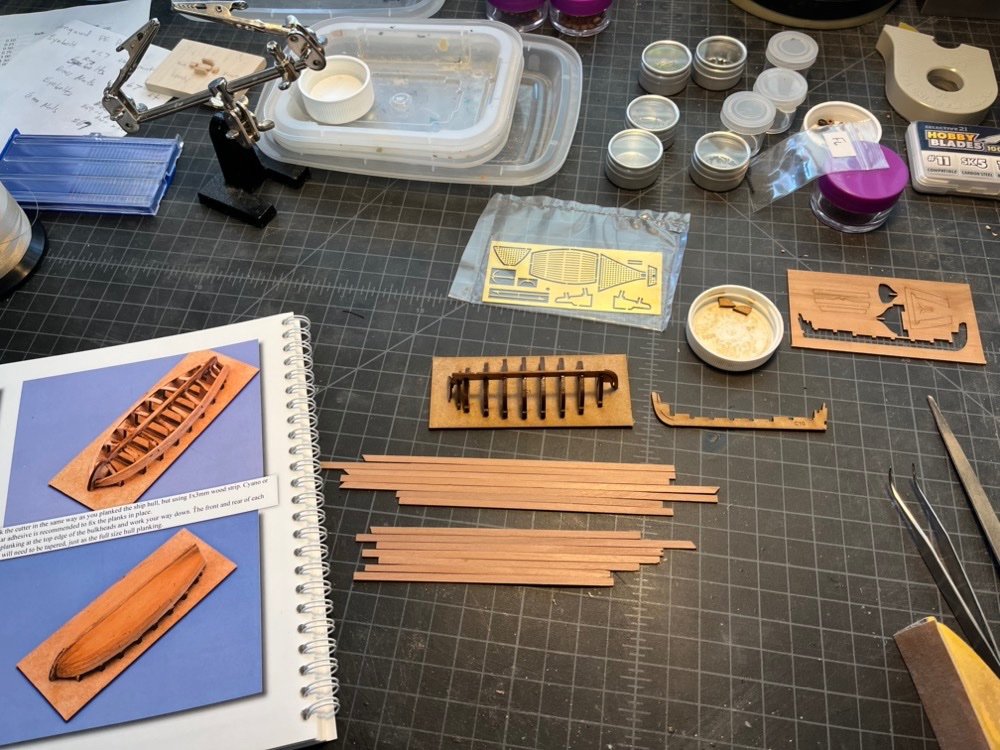
Yes I bought this kit about a year and half ago so it is the vintage kit. So for the cutter I decided to order a 3D printed version from Vanguard which arrived last week while we were away on vacation. It has a lot of detail. I am putting the cutter kit aside for now but will probably assemble it sometime in the future when I don't have so many other things to work on. The 3D printed hull needs to be painted so I started with the interior which is a brown wood color. The exterior will be off white with black trim. The paint was still wet when I took this picture so it looks shinier and darker than it is now. I have the two masts and the bow sprit pieces shaped and dry fit, so I painted the black sections before adding the details to them. I started with the bow sprit, adding the metal parts for the jib boom saddle, sieves, and fair lead. I have also activated the sail making again, now that I have the exact dimensions for the courses. I have the silk span ready to go and I think I can make both sails at the same time from this one piece.
-
I do have the sheet with those items Jeremy, but it does not include any planks. The instructions say to use the same planking as used on the hull.
-
I have started building the cutter using the parts that came with the kit. My kit came with two keels pieces, one in MDF the same width as the frames and a thinner one in pear. I glued the frames to the thinner one but the slots are bigger than the keel, so I also used some thin CA with the wood glue to help hold the frames to the keel. The two transom pieces fit perfectly though as their slots were cut for the thinner keel. The instructions say to plank with 3mm wide strips, but my kit only came with 4mm pear strips for all planking. I have enough end cuts from planking the hull so I ripped these down to 3mm using the Byrnes saw. I have also shaped the two lower masts and one of the topmasts (they are both the same on this ship according to the plans). I started by shaping the square sections by hand using files, then used the lathe to shape the round sections. No pictures yet though.
-
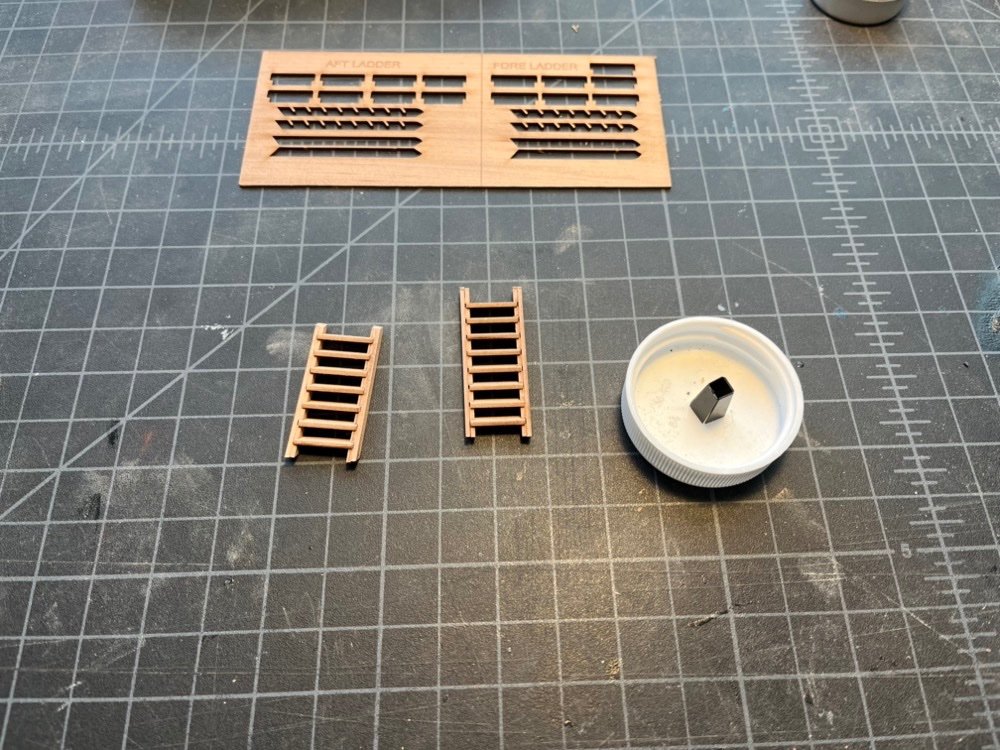
Thanks for your responses guys. I know I didn't do that. After taking more measurements yesterday I think this is a cautionary tale about small errors adding up - the wales are a bit too high, the channels are a bit too low, the bottoms of the gun ports may have been filed down a bit too far, etc. creating about a 2mm error in the location of the chain plates. Oh well, time to move on. I added the rest of the deck fittings today, which was pretty straight forward. The aft ladder was too tight in the coaming so I filed the sides of the coaming and deck a bit until it fit nicely. The anchor lines I made from 0.076" line I made when I built the Duchess of Kingston model. I am going to build the ship's boat next but also the masts at the same time. I have four sails still to make and I have to make them one at a time, so I would like to get started on them soon. But I need the exact heights of the mast sections and stays to size them accurately.
-
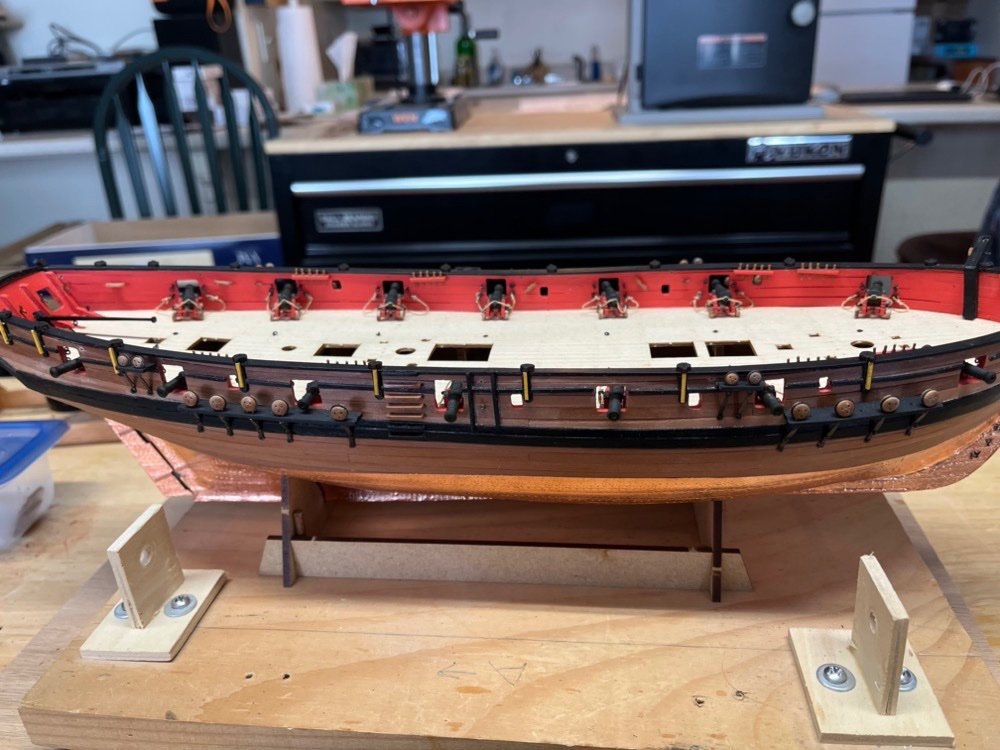
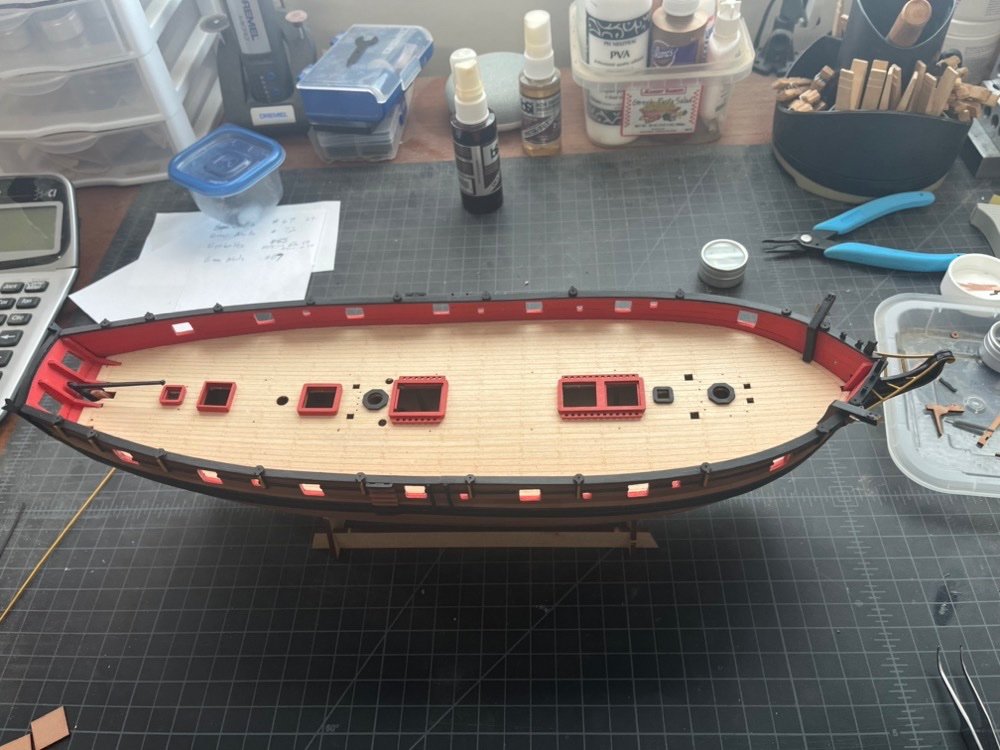
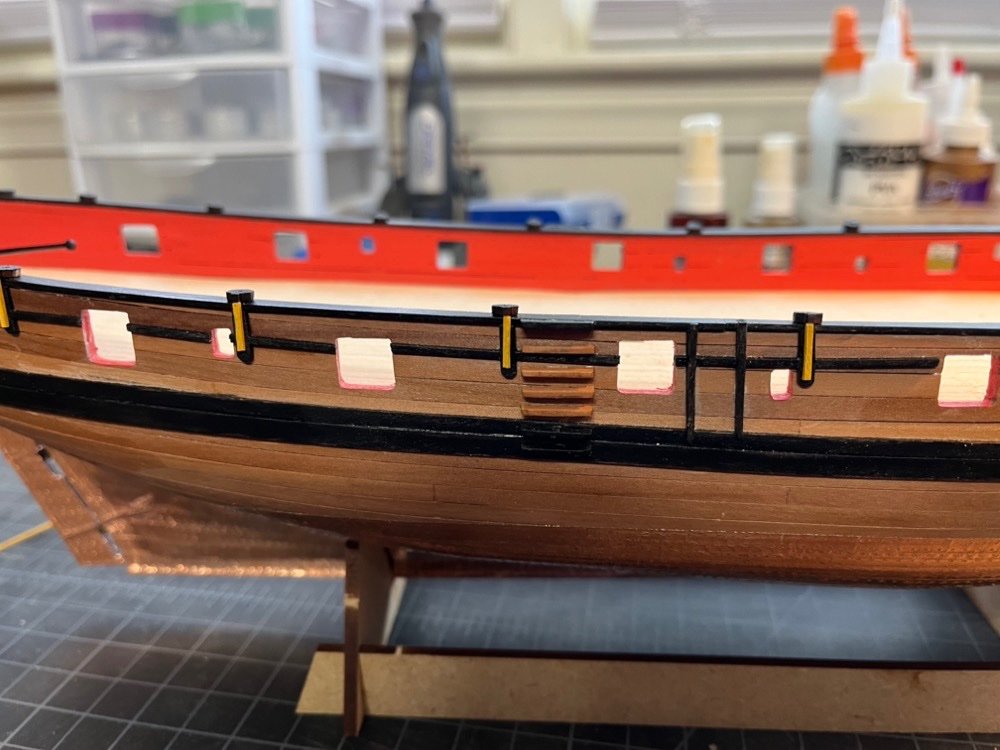
I added pins to the channels and glued them to the hull. I added the deadeyes to the chain plates and slipped them into the holes in the channels, then used a piece of dowel with a string on it to get the angles of the chain plates. I drilled holes in the wales and glued in cut off nails to hold them. You can see that I was only able to get the top holes on the wales for the large deadeyes. The height of the channels is set by the lower edge of the gunport and the position of the wales was marked on the outer bulwarks so I am not sure why they didn't match up unless the chain plates are a little too long. I went ahead and added a nail through the lower holes under the wales which looks OK to me. These holes are come out under the deck so I could use a whole nail for them, unlike the chain plates for the small deadeyes that go through the bulwark. These holes have to be pretty shallow so they don't show on the inside, so it is tough getting the small cut off nails into these holes. I will be adding all the deck items next. My kit came with wooden gratings along with the PE ones. I am using the wooden ones, which I gave a coat of wipe on poly. They fit the coamings perfectly and look great. I am also adding the cannon balls to the rakes on the coamings before adding the coamings to the deck.
-
Thank you Theodosius. I have to give another shout out to @chris watton on the ladder kits that came with this ship kit. Again they are different than what is shown in the original instructions, but they fit together sooo nicely and look great when completed. The steps fit into the side rails with just enough pressure so that they hold together even before gluing. These were the easiest ladders I have ever built and also the best looking. Thanks again Chris.
-
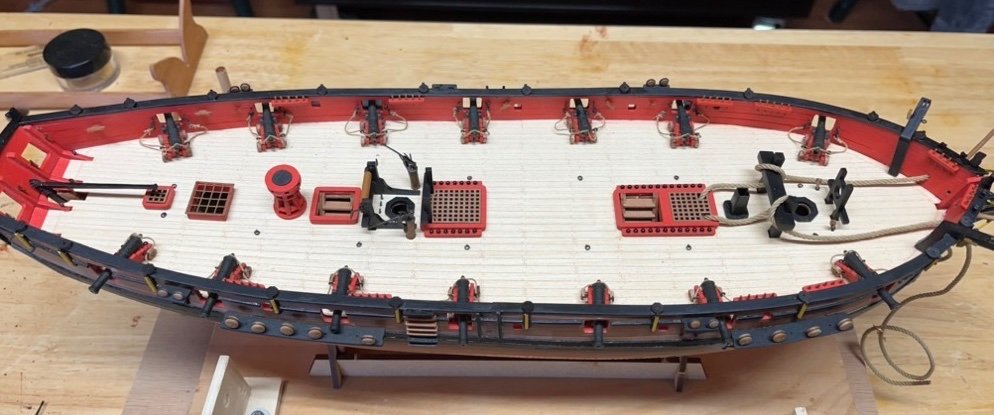
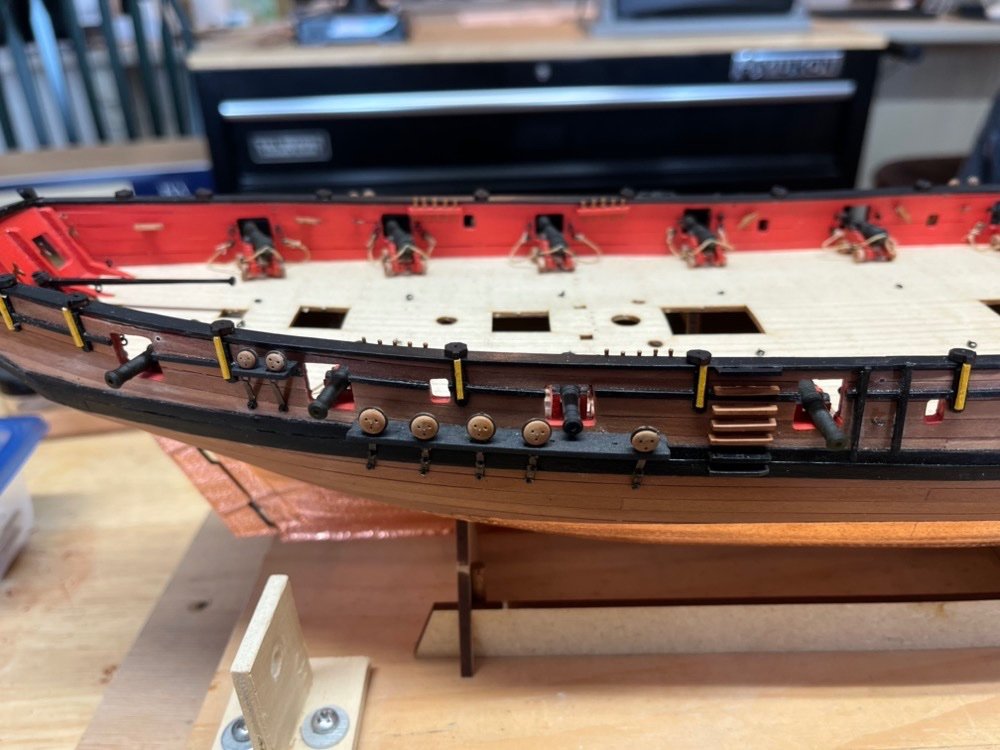
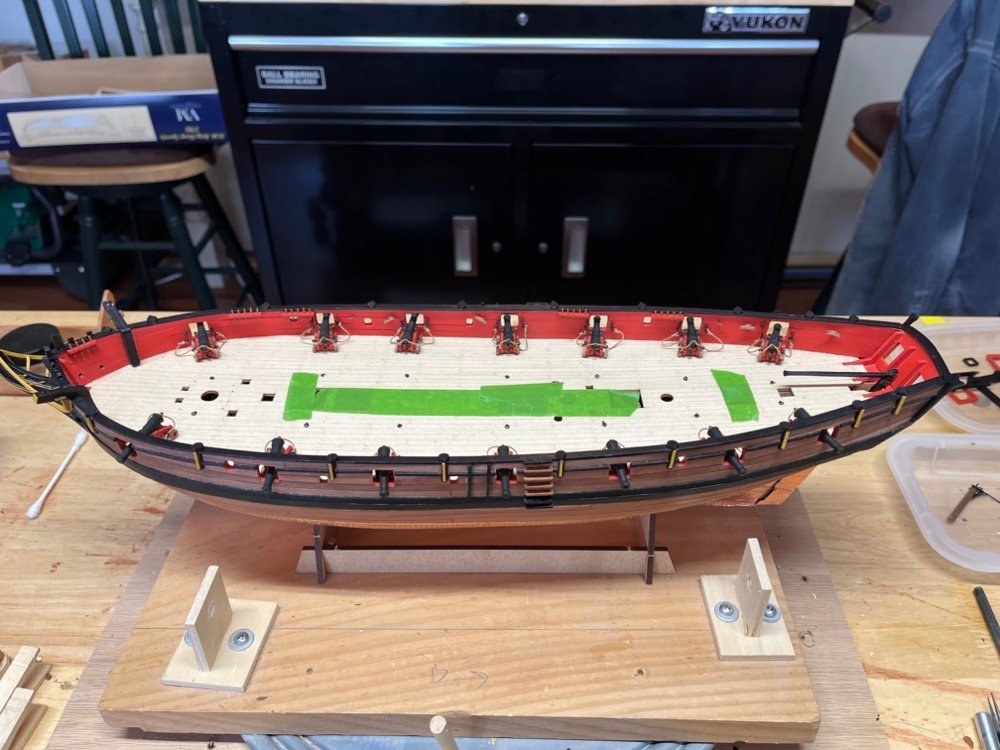
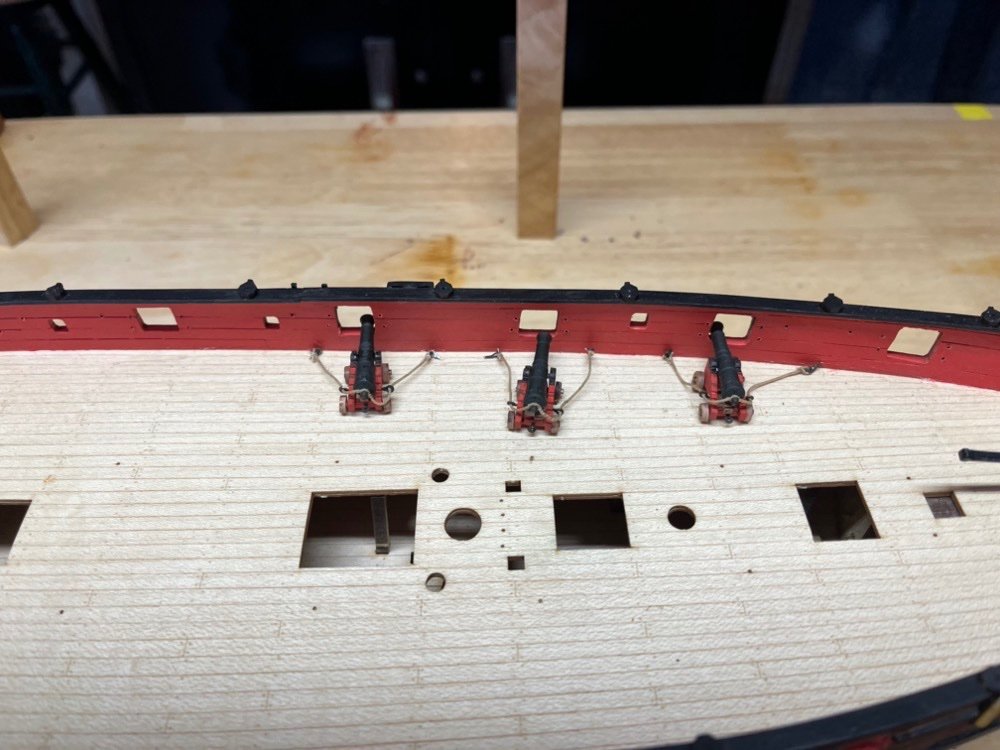
Making progress on the deck and bulwark fittings. I have secured the cannons and attached the ring bolts on the ends of the breaching lines to the bulwarks. I have also added the tackle ringbolts to the bulwarks, as well as the metal and wooded cleats. The starboard pin rails are installed too. I installed the first couple too low but was able to remove them and move them up higher so the tops of the belaying pins were above the rails. I drilled out the marked holes in the deck (thanks Chris) and pushed in the deck ring bolts I made. Here is how they came out.
-
Wow your workshop is as impressive as your models.
-
Chris I am glad you provided both cap squares. I was really happy with the way the painted wooden cap squares looked when painted black and much less fiddly, but having both options was good.
-
I have finished all the cannons and most of the rest of the items for the deck and inner bulwarks. I will start by gluing the cannons down first then attaching the breech ropes to the bulwarks. I will also be adding the cleats and ringbolts to the bulwarks at the same time. I will be adding the pin rails after all the lower items are installed on the bulwarks. Then I will add the deck fittings and the ring bolts for the training tackle. For these I used the rings from the kit but with a piece of 28 gauge wire bent through it. This will be placed in a hole in the deck so that the eyebolt doesn't protrude from the deck. I saw this method in one of @Chuck 's latest posts.
-
Absolutely stunning!
-
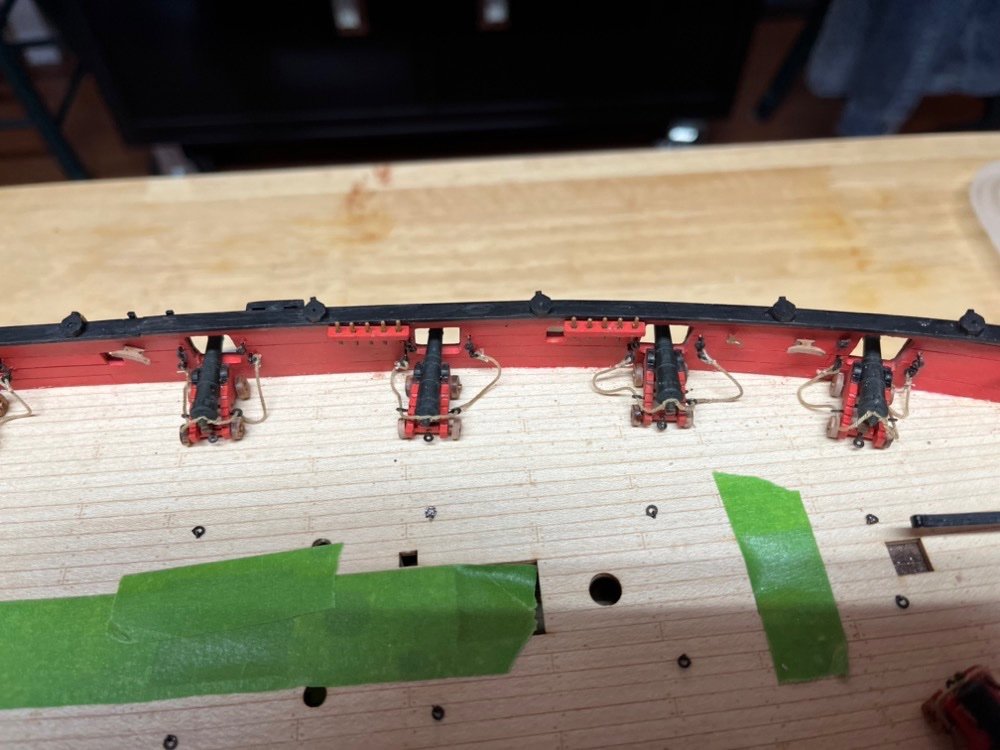
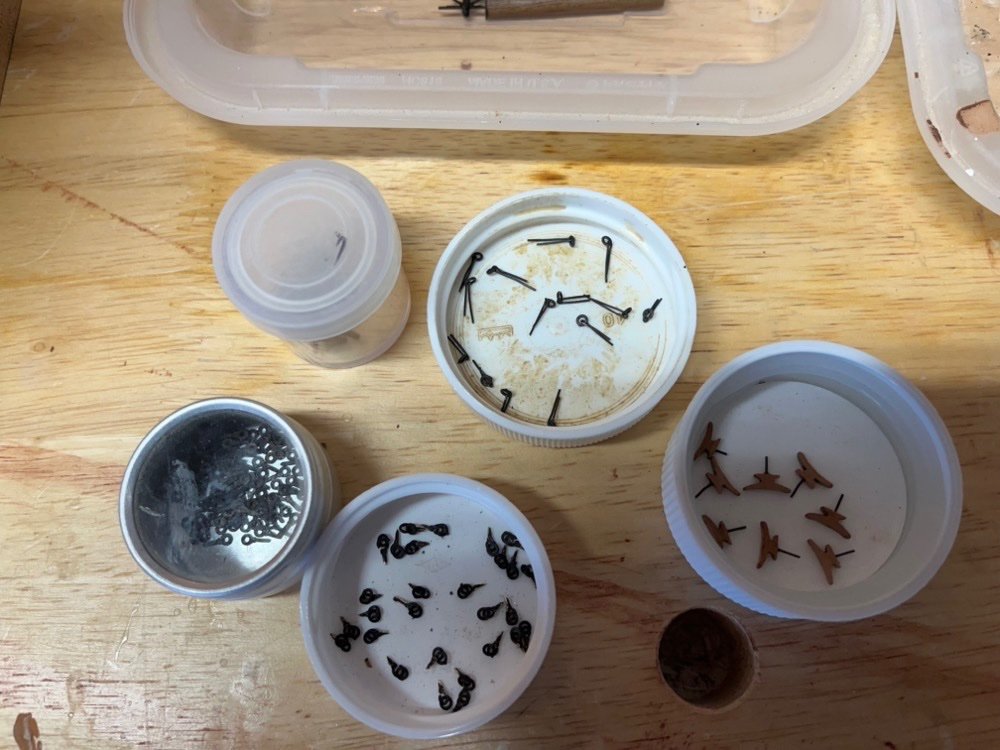
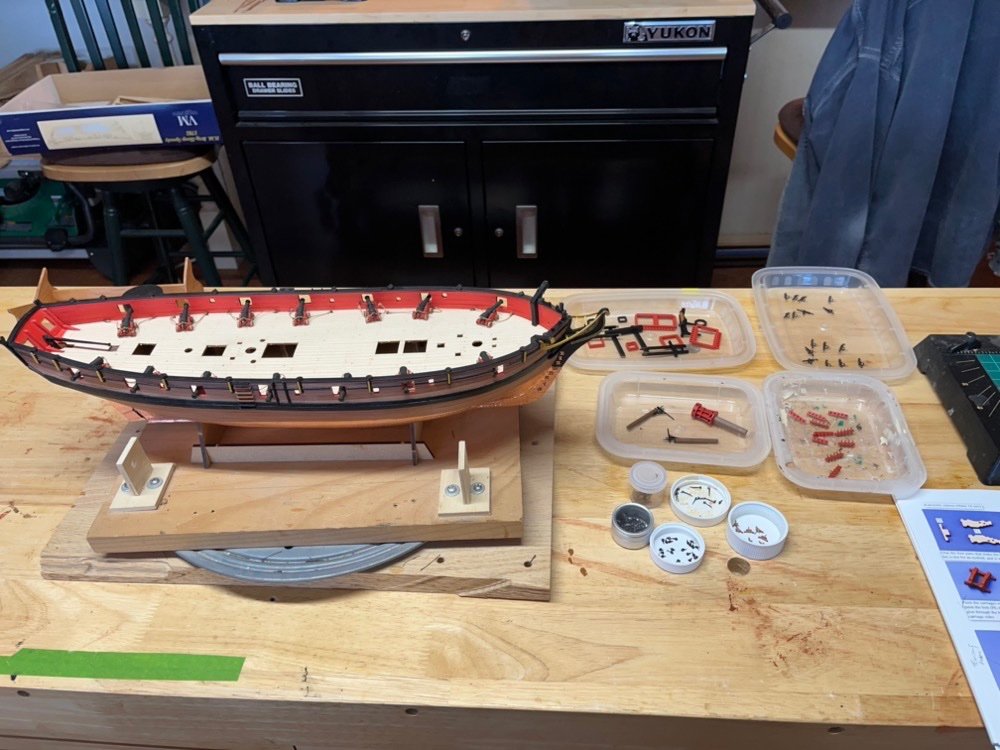
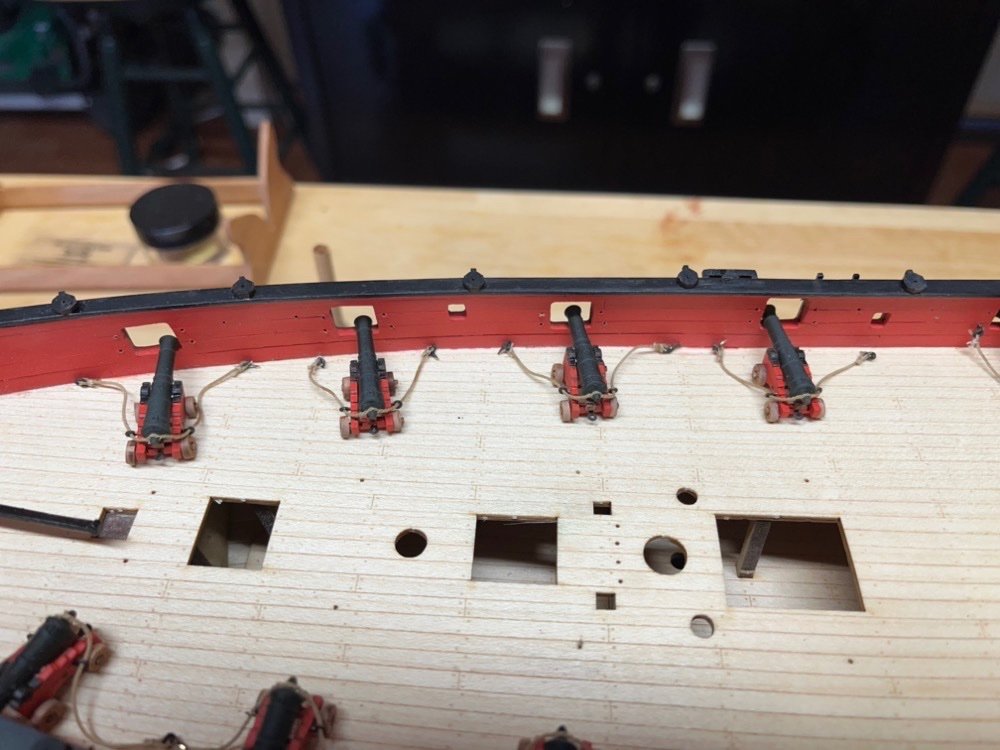
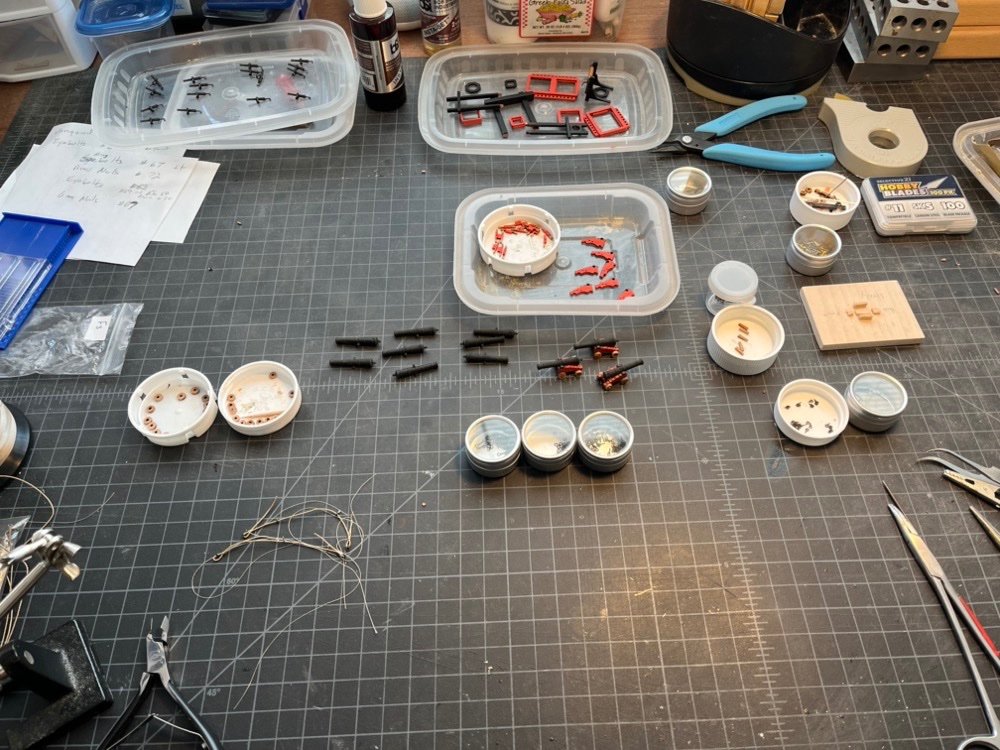
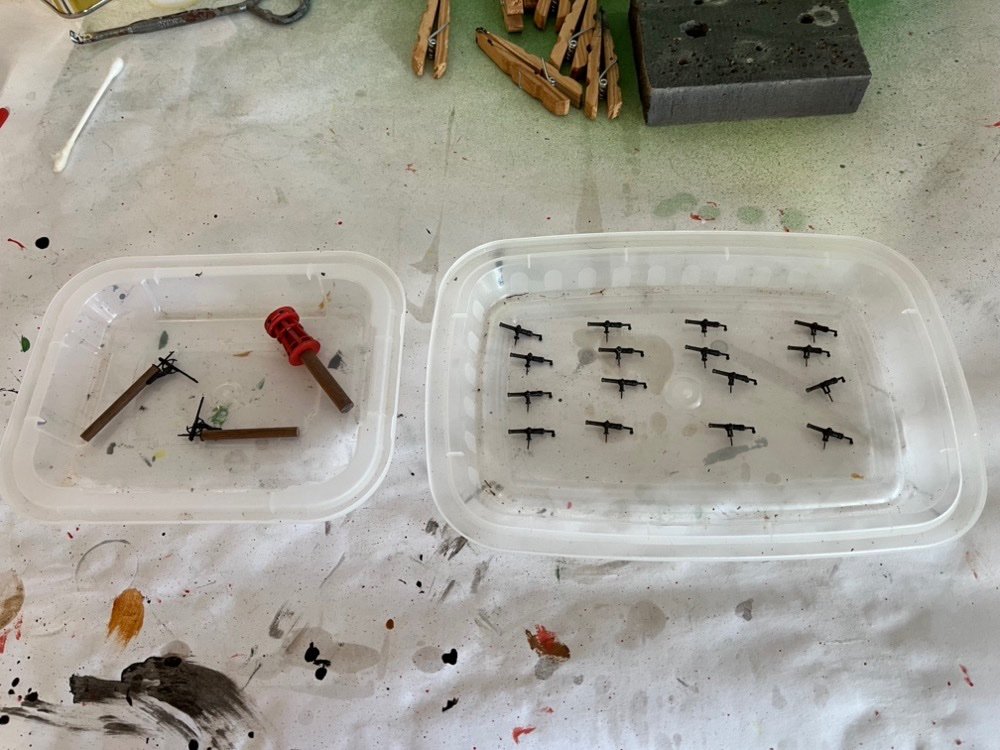
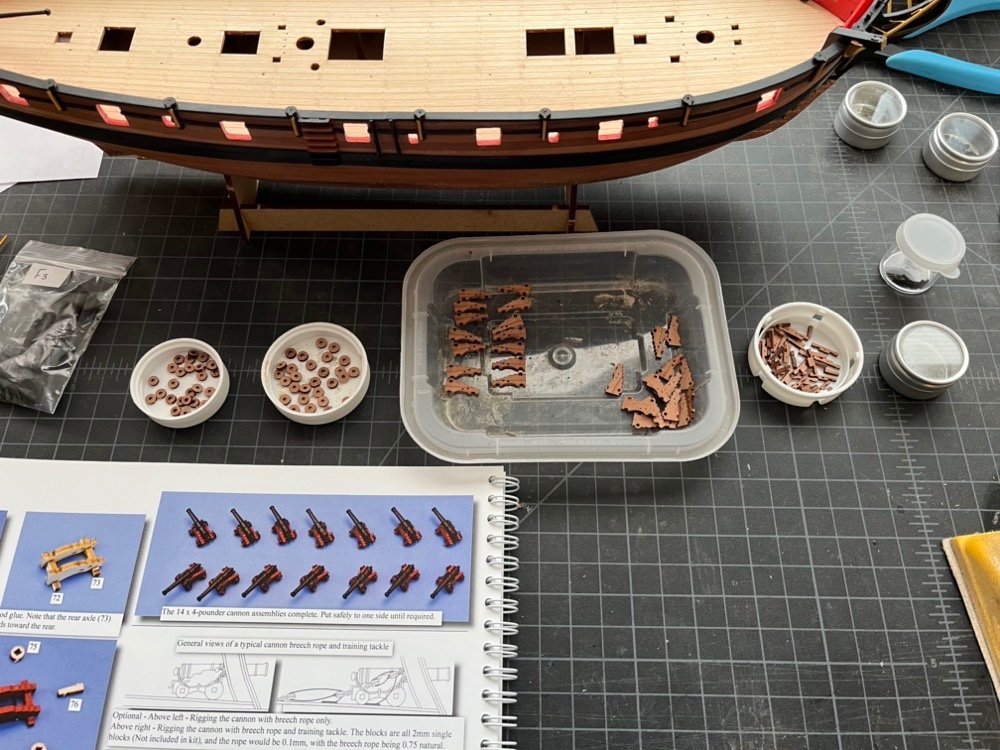
Cannon production is in full swing. I have been painting the sides and axles of the carriages. I used a small file to make the axles round where the wheels fit on. I painted the parts in two batches, but I managed to paint mostly left sides in the first batch so I could only assemble a few carriages from the first batch. Not sure how I managed that. When assembling the carriages, I add the cannon barrel and the bolt through the sides before gluing them to the axles. I found this easier than trying to add the bolts later. I then add the quoin, wheels and eyebolt in the back axle. I am making up the breach ropes off the cannon, as you can see in the above picture. I slide on a ring bolt, two eyebolts, and another ring bolt to a piece of 0.025" line, then seize the ring bolts to the ends. I don't fix the seizings yet so I can adjust the length of the breach line. I then open up a loop in the middle of the breach line and slip it over the cascabel of the cannon. I glue the two eyebolts into the holes in the carriage sides, then adjust the length of the breach rope to be about even with the end of the barrel. Here are the first three cannons ready to be installed. I'll glue them down first then glue the ring bolts on the ends of the breach ropes to the holes in the bulwarks. I'll also add empty ring bolts to the other two holes at each gun port. For this model I am just rigging the cannons with breach ropes. I drilled out all of the holes along the inner bulwarks for the cannons and cleats so they are ready to go. I also have the pin rails ready to be painted after adding pins to each one.
-
Yes varnish will slow done the "patina"-ing of the copper plates. That's a really nice plating job there.
-
I painted the cap black on the three sets of carriage parts to test the assembly and then built three carriages using the jig I made. I have to say they went together easier than I thought, even with having to cannon barrel in between the two sides as I lined everything up. I also like the look, so I will use the carriage sides as is. I still need to add the bolts, wheels, and quoins to these but I don't anticipate problems with them. I went ahead and started painting all the carriage parts red. I also used a toothpick as a mandrel in a Dremel tool to sand the char off the wheels.

-
Fantastic work on the whole model but especially those side decorations.
-
Thanks for the responses Nipper and Ron. I made a jig like I usually do to glue up the sides and axles, but in testing it out I realized that if I use the sides as they are I have to put the cannon barrel in the sides before I glue them to the axles. This also means I need to paint the individual parts before glueing so I don't have to paint around the barrel. I am painting three sets of carriage parts now and will try assembling them as is, but if I find it too awkward I may do as you suggest Ron and file or cut off the wooden cap part of the sides.
-
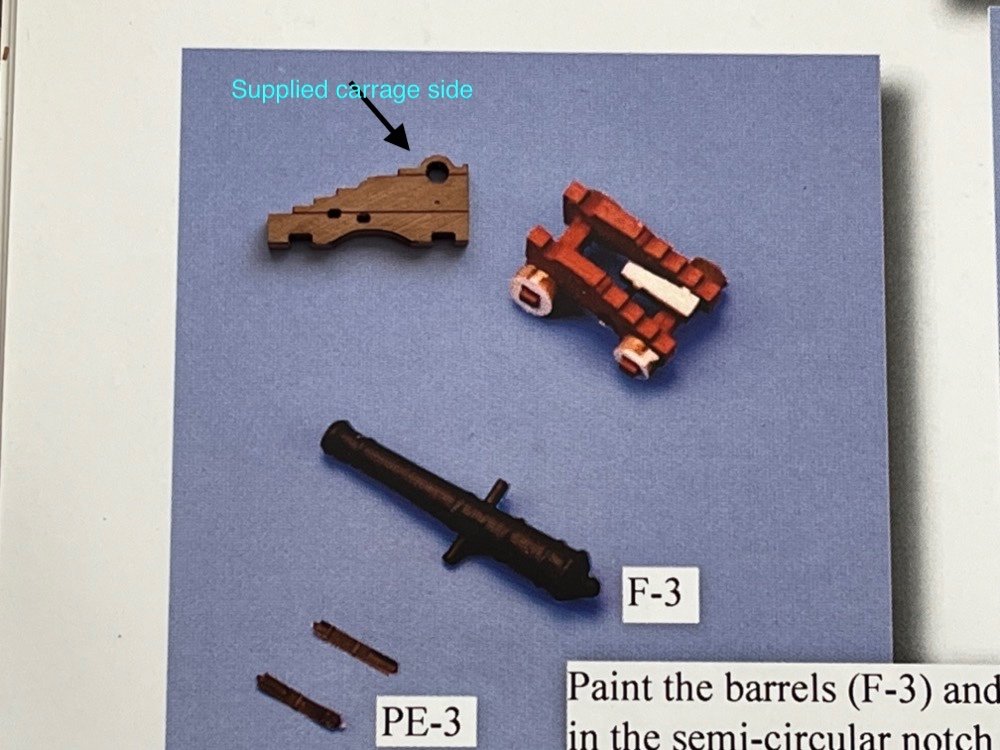
I finished the bitts and windlass but put them away before taking pictures. I then made up the capstan, pumps and swivel guns. I am going to put 8 swivel guns per side, unless that looks too crowded. I certainly don't want to fill all the swivel gun supports. The capstan went together so nicely. The laser cut pieces just fit together do problem. The pumps weren't too hard either, except when I cut the middle pieces from the PE I cut off the pin that is supposed to be glued into the side of the shafts. To compensate I drilled a hole into the top of the shaft and glued the part of the pump into the hole. I also glued the pump to the side of the shaft using CA and held it until the glue dried. They seem to be attached well but I don't want to risk catching anything on them so I will wait until much later to add them to the deck. Now I am working on the cannons. I cut out all the pieces, which took a while, and started cleaning the char off the carriage sides. I am using a sanding block on the flat edges, a small Swiss flat file on the steps, and a small round file for the curved portion. I am also opening up the slot for the bolt on the back sides using a very small flat pointed file. I am going to use a mandrel to hold the wheels while I spin them to remove the char and a small file to carefully remove the char from those small pieces. One thing that confused me some was that the supplied carriage sides are different than those shown in the instructions, as you can see here: But, the PE caps (part PE-3 in the image) are also supplied. To me the supplied sides already have the cap as part of them. I did try adding the PE cap over that part of the side but it does not conform well to the wood. So I think I am going to paint that part of the wooden side black and not add the PE part. If this isn't correct, please let me know.
-
I have the hatch coamings and other deck fittings that fit around the larger holes in the deck ready to go. I used some sandpaper round a coffee can to sand the deck round up into the bottom of the larger fittings. These are just dry fit for now. I am now working on the bitts and windlass.
-
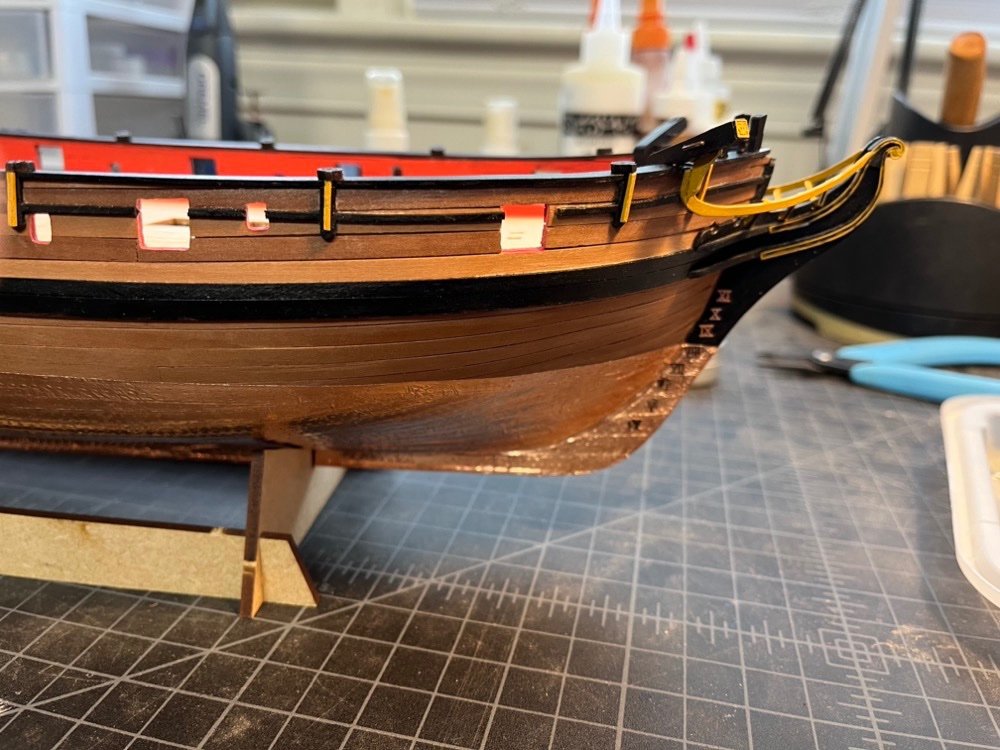
I added the outer stairs and the depth numerals to the hull. I put some black paint on the copper numerals that were added over the copper plating so they would show better. Next I am on to the deck fittings.
-
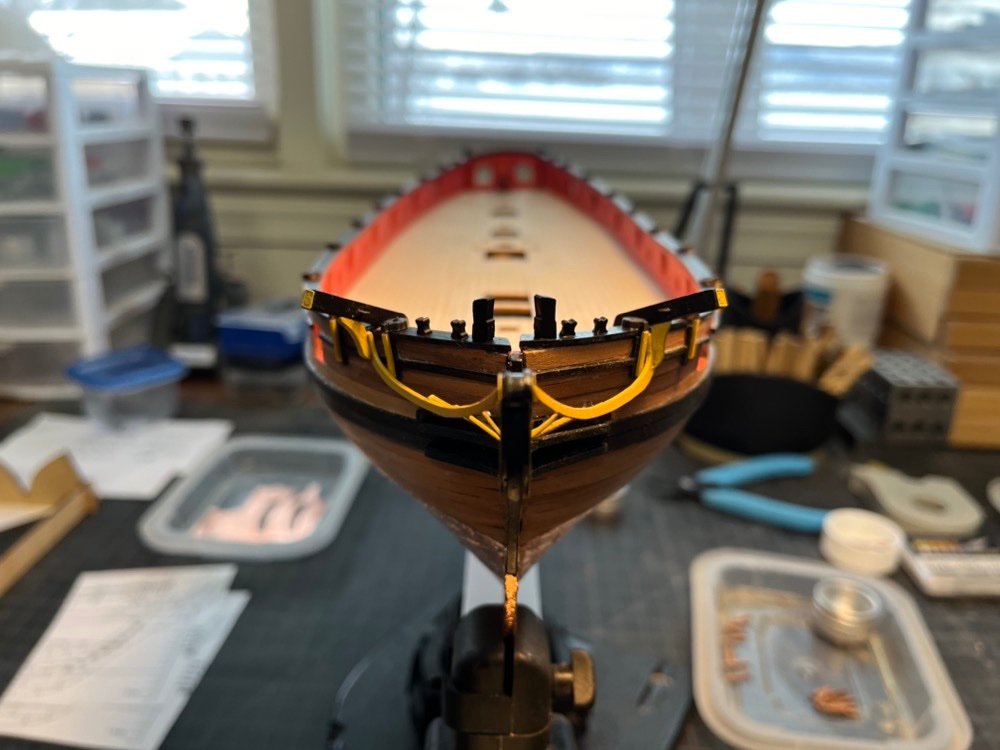
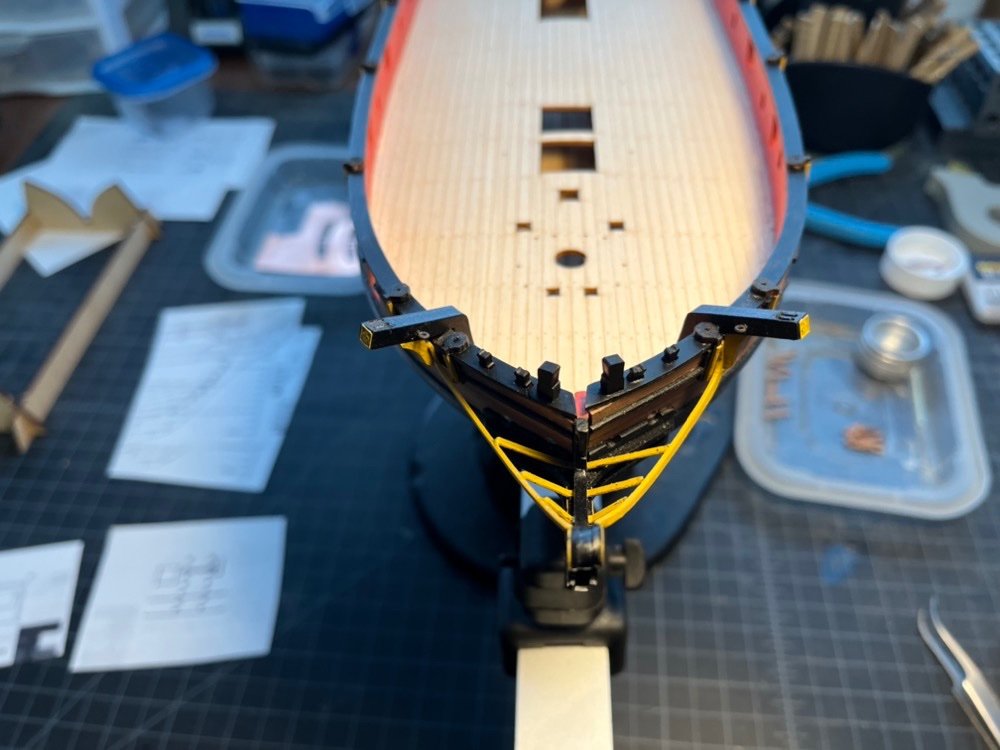
I have finished working on the bow area for now. I will add the boomkins at a later time. Nothing really to talk about here as everything went together pretty well. One thing I did do was use the mill to make some simulated sieves in the catheads. I also added an eye bolt to each cat head so I can rig blocks to them to hold the anchors. They also filled the otherwise laser cut unused holes in the cat heads. Next up I will be adding the outer stairs and depth markings.
-
Oops. I meant hemostat, like this one - https://a.co/d/8pynFKM Sorry for the confusion.
-
I have found that using heliostats (clamping pliers) to hold the eyebolts while inserting them into holes to glue them works well without scratching them up or removing the paint.

