torpedochief
-
Posts
369 -
Joined
-
Last visited
Recent Profile Visitors
2,566 profile views


-
 FreekS reacted to a post in a topic:
USS ETHAN ALLEN SSBN 608 by torpedochief - FINISHED - RESTORATION
FreekS reacted to a post in a topic:
USS ETHAN ALLEN SSBN 608 by torpedochief - FINISHED - RESTORATION
-
GrandpaPhil reacted to a post in a topic:
USS ETHAN ALLEN SSBN 608 by torpedochief - FINISHED - RESTORATION
-
GrandpaPhil reacted to a post in a topic:
USS ETHAN ALLEN SSBN 608 by torpedochief - FINISHED - RESTORATION
-
GrandpaPhil reacted to a post in a topic:
USS ETHAN ALLEN SSBN 608 by torpedochief - FINISHED - RESTORATION
-
GrandpaPhil reacted to a post in a topic:
USS ETHAN ALLEN SSBN 608 by torpedochief - FINISHED - RESTORATION
-
GrandpaPhil reacted to a post in a topic:
USS ETHAN ALLEN SSBN 608 by torpedochief - FINISHED - RESTORATION
-
GrandpaPhil reacted to a post in a topic:
USS ETHAN ALLEN SSBN 608 by torpedochief - FINISHED - RESTORATION
-
GrandpaPhil reacted to a post in a topic:
USS ETHAN ALLEN SSBN 608 by torpedochief - FINISHED - RESTORATION
-
Roger Pellett reacted to a post in a topic:
USS ETHAN ALLEN SSBN 608 by torpedochief - FINISHED - RESTORATION
-
KeithAug reacted to a post in a topic:
USS ETHAN ALLEN SSBN 608 by torpedochief - FINISHED - RESTORATION
-
Hey Shipmates! Comes a time when you just got too much and not enough space or time. So here I am. I have two of the very old solid hull, carve your own whale boat Charles Morgan Kits from Model Shipways. I also have all the metal parts for a third. In addition I have the plastic Lindberg River boat Robert E. Lee, A Aurora box of parts for the whaling ship Wanderer (no hull,) and a plastic Nantucket Lightship. $250 for everything and $25 Shipping in the USA
-
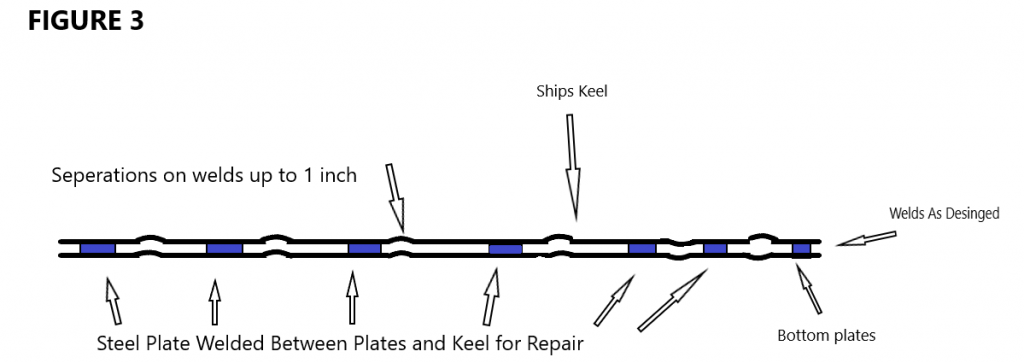
I don't mean to make mountains out of molehills or be dramatic, however, doing research sometimes leads even us not so bright people into questions. I Need some help. Any welders, marine engineers, or shipwrights I need your opinion. Suppose we have a ship 15 years old. Designed for one load line, however, it was decided to increase the load line with no internal work. During inspection, it was noticed the hull plates and the keel welds were separating, and the keel was hogged. Repairs were to use steel plates and wedges welded between the keel and the plates. Would this repair be sufficient for continued loading beyond the designed load line?


-
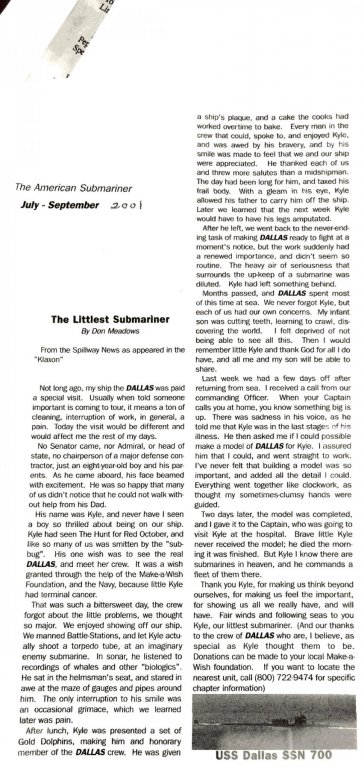
From many years ago. My COB found this and posted it.
-
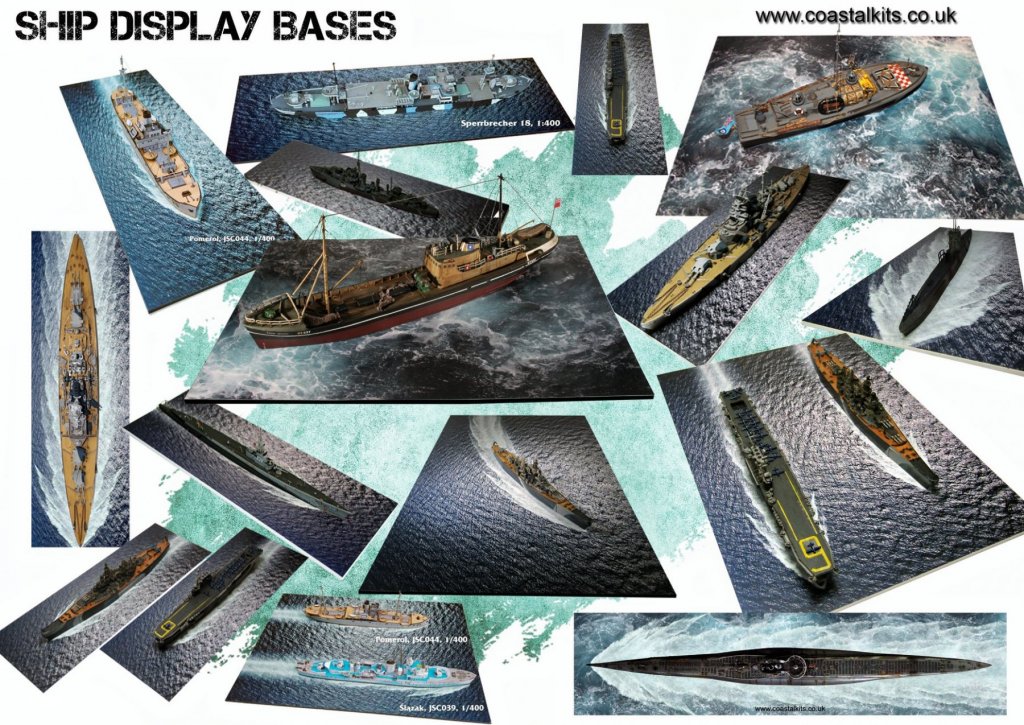
These guys have some great bases for your waterline type projects. https://l.facebook.com/l.php?u=https%3A%2F%2Fwww.coastalkits.co.uk%2Fnewstore%2Fships.html%3Ffbclid%3DIwAR0w-i8geoT0l2ymhm1R-7Rht0w0dhlQCC7QMmHhGRF-OD2afRNQnvEdS6I&h=AT07OBoXAXmm5i4u_JKyrid-TAhjAL1J_2p--8W2zsMSdy_wB8FfyYy3ExVSgmjxk3k_WkzZjpQC2mLN8ajkEgeVKjESb-Fk336d8nrY4JqgezbaavT2vupaXY-J8xfxdx3-rh_DYNJ07_TBAWDLldBkdqHcn0j_bmZMMAU67PyXPjqk348XmB7dMeaNTot6AoYn7UGEIG1976BbZTJ__Mfgletpwngzbh4xSHgrPanhAyP0HblBpHMJivFkKiTY37ai6JILcXVZOiIWn7H-Z5ZeglahZYmEWkyCL6d6GmOOCRlug2rQyl5jlSqzRDwCi4eVIucgofmMekJhRQaIKughX6uTiBmVJ5gEZ24DhCeA5ElxIRjPzeoDolSATQDvRGebVpK9t3AocCgOxacNfBvT_vbwpUe4UxohyQxhil_eG7vglt9VfXOgUetaQr-QzBZgRlycYfgJzaWRst_a1rnFp7M_KrO_DcY_8L_74bq_2tCYhGbWr2PhE2lwEnRbllbssRB6EtEgx1z1xG-sdakfC1pQUFhfymWF7CVNt_DQjAp22A2bUA9bEmUgd6ssa6ai3cIGFtVYwBhu7wCncVyADe495U7jTVj9gyu1VT8bLKySW-dDdoS_rujTnD_683vYQJbktA0t9taM88PkxJL5zBdkegkC0l99IOL7U5DmUkynURpD
-
torpedochief reacted to a post in a topic:
Santa Maria by luponero - FINISHED - scale 1/50 - carrack - from diagrams of Adametz
-
A tutorial I did for some impatient folks who wondered why making their scratch built submarine models took so long.
-
The cheaper the magazine the better. Most have that plastic coating, but the higher quality the paper the harder it is to remove the paper and leave the toner. Whatever you use just please be careful. Every one of you, in my opinion, is a master modeler and we need to keep that talent intact.
-
The paper needed is the annoying advertisement paper that comes with the newspaper. The flyers inside. Magazine paper also works. Wefalck these are reversed from where I was using another method. He is correct you need to have them like this. As for the size of parts I have been able to do 1/700 scale railing for the EDMUND FITZGERALD, Flood grates on My Submodels in various scales and Awards for my German tank crews in 35 scale.

-
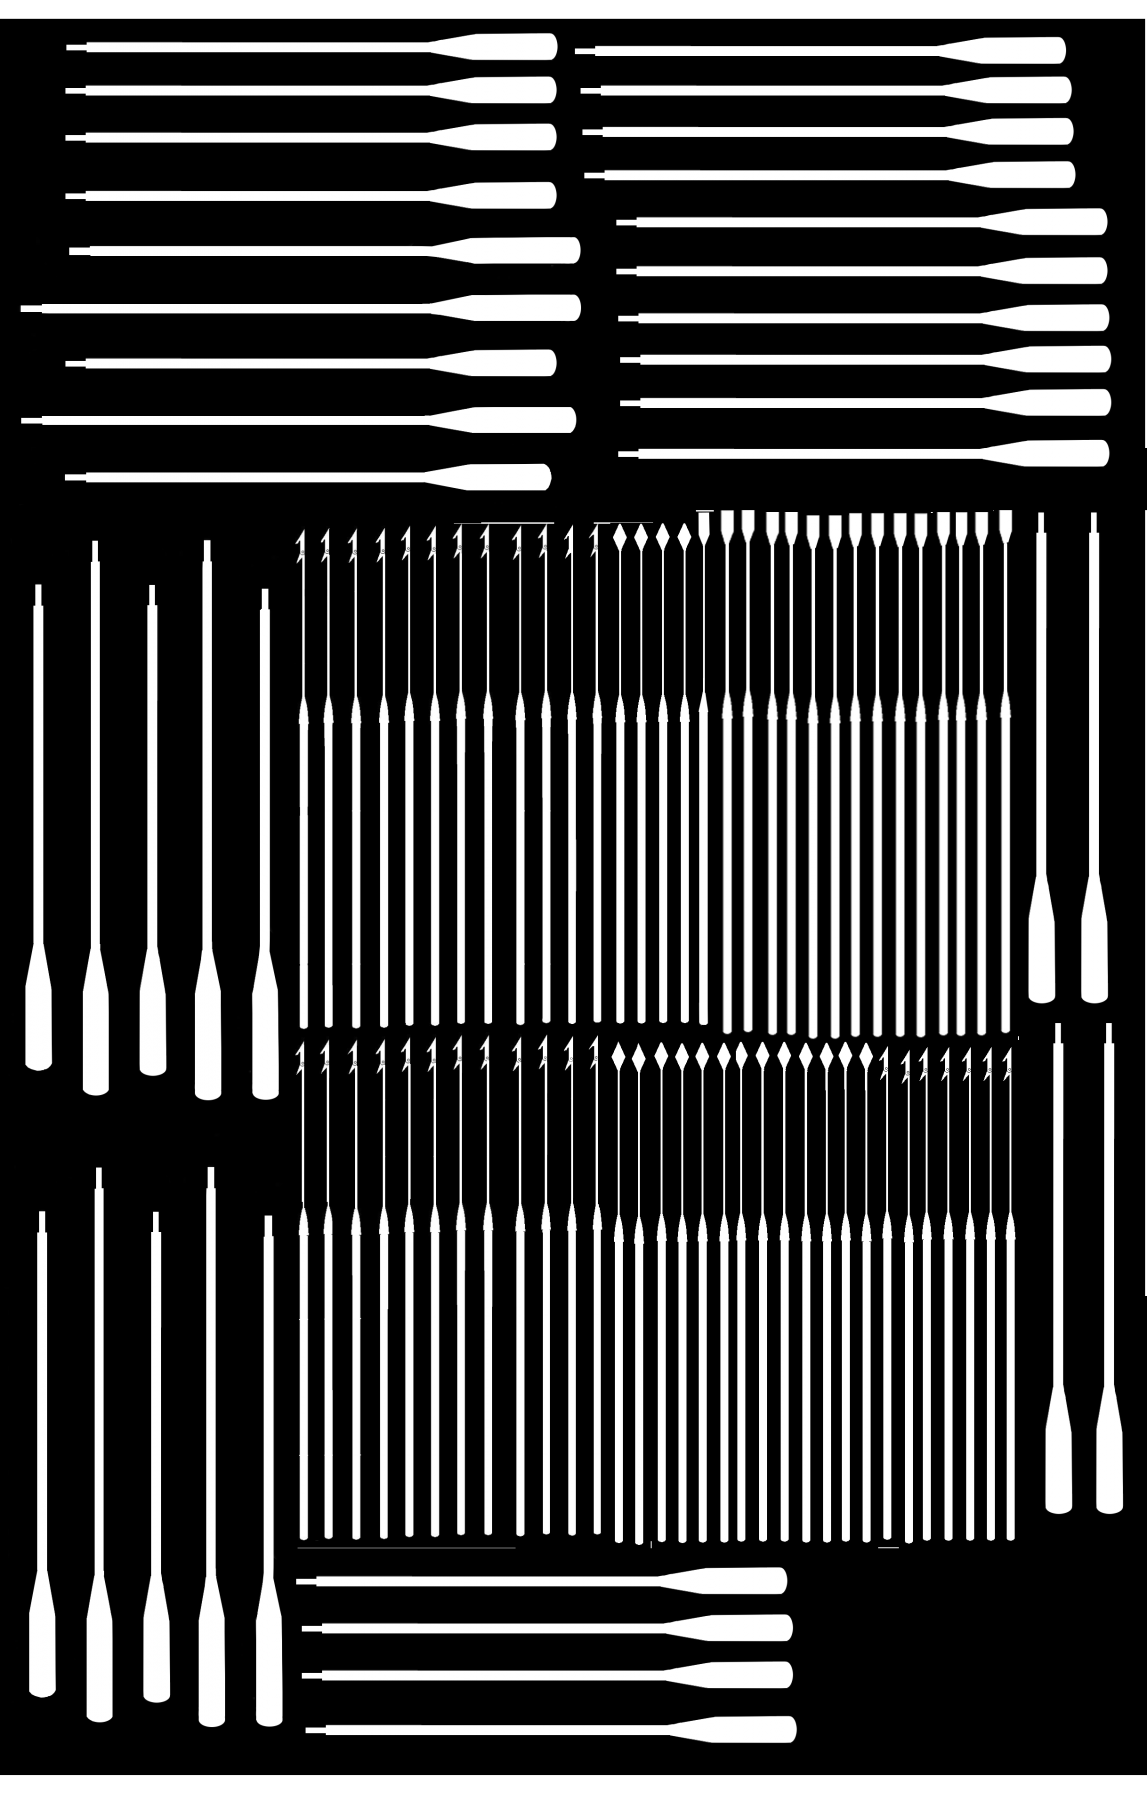
There is a way anyone can make photo-etched parts. You will need cheap newspaper advertisements the kind with the plastic coating, Ferrick Chloride, thin sheet brass, enamel paint, access to a laser printer, printing paper, clothing iron, 2 Plastic tubs, gloves, eye protection, plastic apron, and a well-ventilated area. 1. Design what you need using any program you want. 2. Using the laser printer, print the design on the cheap ad paper. The toner will melt onto the plastic which is what we want. 3. Clean the brass with wet 1500 grit sandpaper. Rinse with plenty of water and let dry. 4. When the brass is dry place the printed design face down so the black toner is in contact with the brass. 5. Place copy paper on top of the design. 6. Use a clothing iron on its high setting (NO STEAM) and go over the design. This is a slow steady process. Check the transfer of the toner to the brass by carefully lifting a corner. 7. Let the brass cool. 8. Soak the brass with the paper still attached in room temp tap water. The water will weaken the paper part and cause it to fall off. A gently rub with the fingertips helps some. This is another time-consuming process. 8. When the paper is totally gone you can see your design now on the brass. The toner acts as a resist to the Ferric Chloride. 9. Dry the brass and turn it over. Now use enamel paint orf Plasti-Dip to coat the back of the brass. This will stop the Ferric Chloride from eating everything. 10. When the enamel is fully dried you are ready to etch your parts. 11. Heat a pan of water. When just below boiling remove the pan from the heat. 12. Place the bottle of Ferric Chloride into the water and allow it to heat the chemical. 13. Fill one of your 2 plastic tubs with clean cool water. 14. Set both tubs next to each other. 15. When warm, and you have on your gloves, eye protection, plastic apron, and in a very ventilated area Pour the Ferric Chloride into the empty plastic tub just enough that it will cover your brass. 16. Place the brass into the chemical facing up. 17. Start rocking the tub back and forth. You will notice the brass dissolving from around your soon to be made parts. 18. When the waste brass is dissolved place the parts in the fresh water tub. Swirl them around to stop the chemical reaction. Change water and continue to swirl the parts. 19. If you used enamel paint, the parts are all loose unless you included a fret in your design. If you used Plasti-Dip they are embedded in the plastic. 20. Remove the parts and let them dry. Have a ball, my friends!! Here is a block and some lances and Harpoons I use


-
This is going to the AFTER BATTERY. A submarine club of the really old timers.
- 31 replies
-
- 3
-
-
- ethan allen
- submarine
- (and 2 more)
-
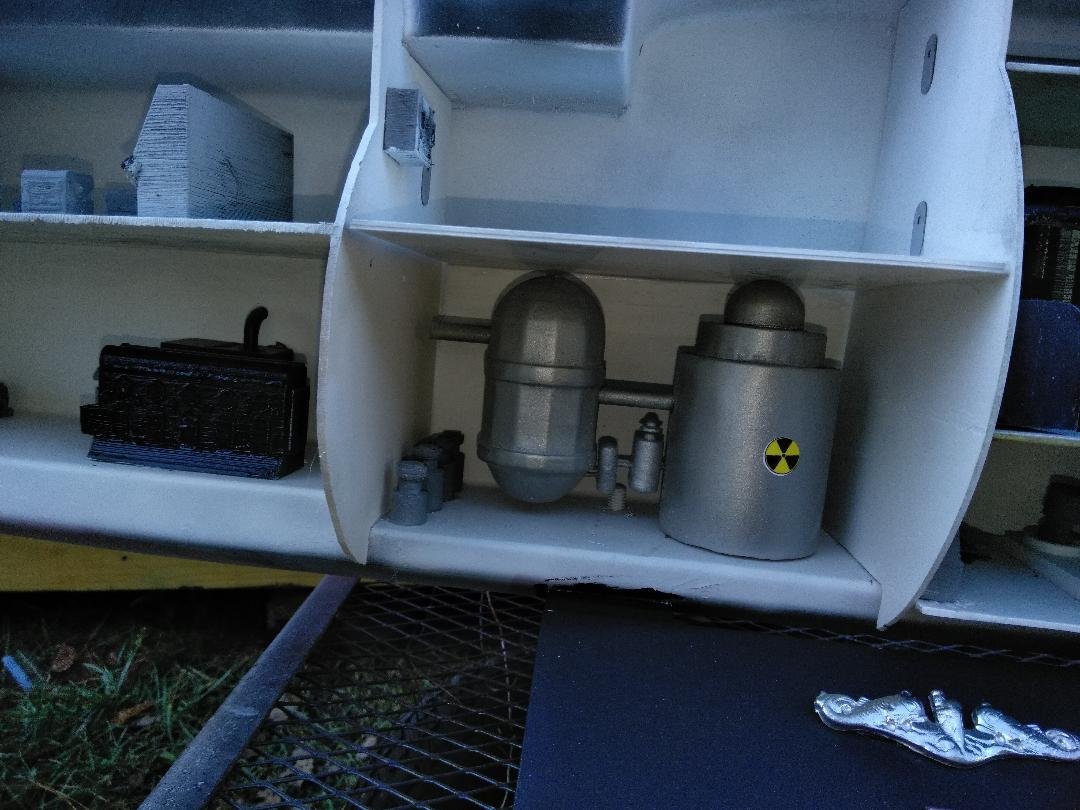
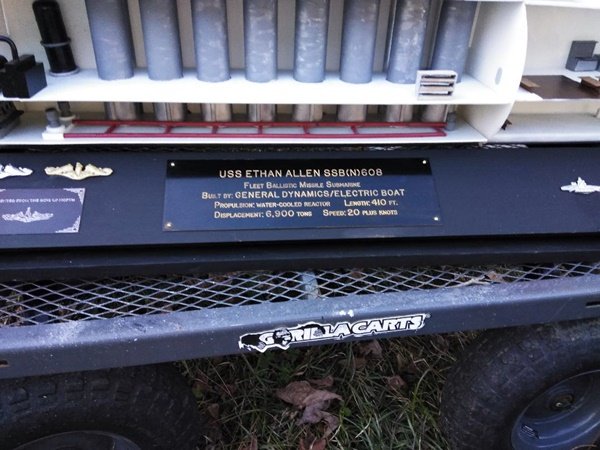
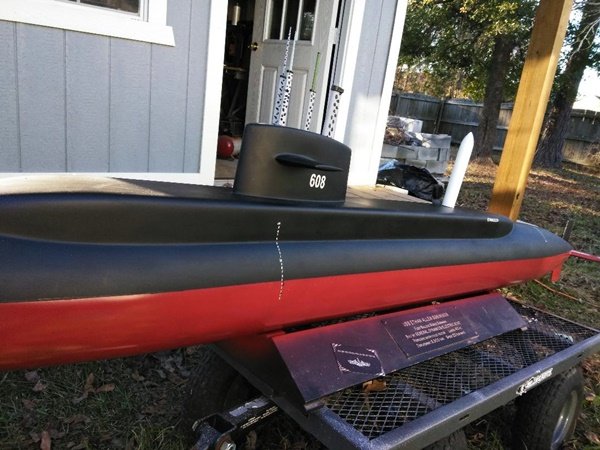
Unlike most SSBNs, Ethan Allen did not use gas generators to launch her missiles. Instead, a huge HP Air Flask was charged through compressors separate from the ship's service compressors This air was used to force missile up and out of the launch tube. Two aux compressors fed directly from the battery were used for emergency firing air.
- 31 replies
-
- 3
-
-
- ethan allen
- submarine
- (and 2 more)
-
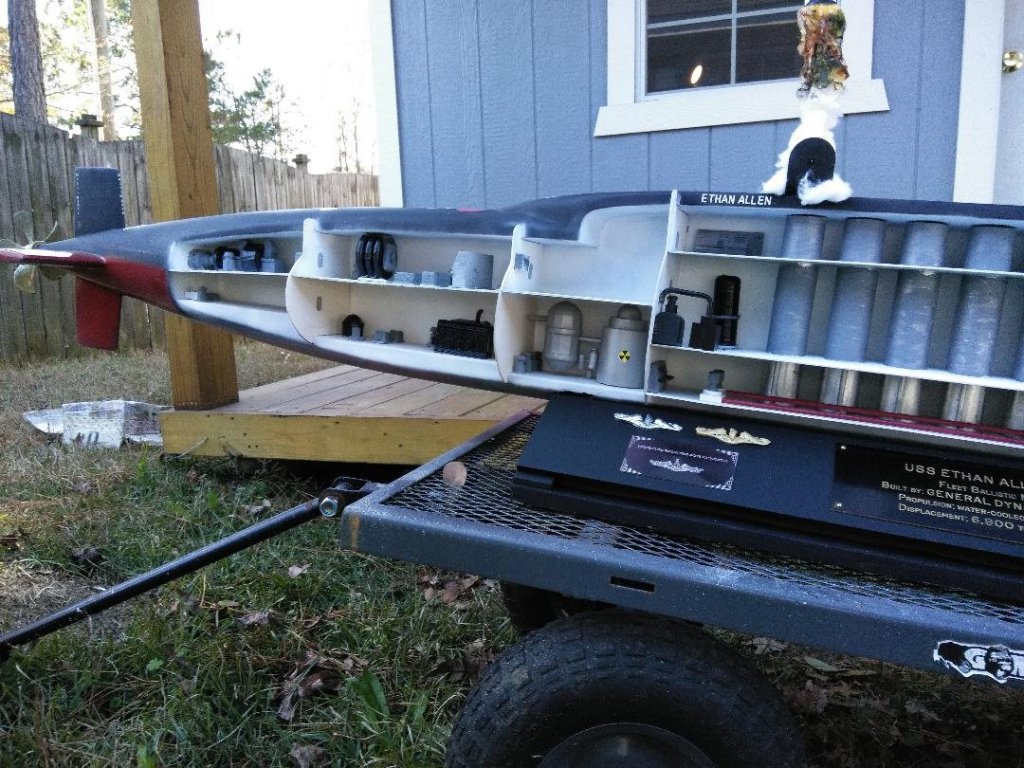
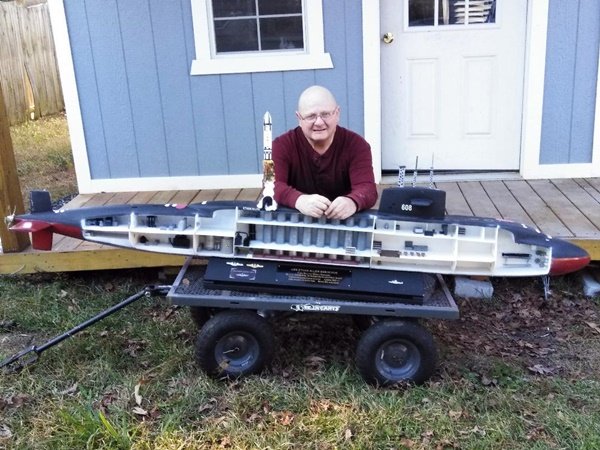
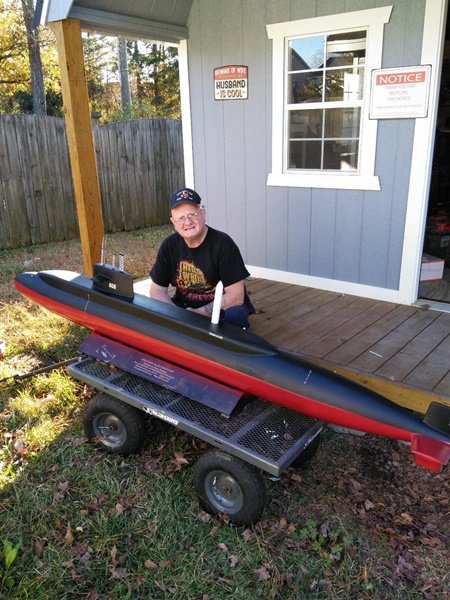
It is such a terrible and wonderful day. The restoration is complete. You would not think so looking at the pictures. Today I did a 30-hour straight effort to finish. Yesterday the former COB of 608 and legend in the Submarine Force received orders to his final command. Barry "BEAR," Randell a Torpedoman of the highest order your watch is over. Good and Nobel Sailor we your students, and Shipmates have the watch. Rest your oars. The lesson you taught are far too numerous. Your love of your Brothers of the Phin, your dedication and your love of the nation and to the Submarine Force is engrained in just about every American submarine that goes into harm's way. You have and will save many lives. Thanks, Bear for being that cranky, fun loving, wealth of technical knowledge you are. Today this model will be completed by 25 of your former shipmates. Each will place the remaining detail items one at a time into the model. As you would have loved there was a big demand to be the ones who installed the toilets. Men who were once young and vibrant honor you. Men of USS COBBLER, USS TANG, USS SEA HORSE, USS TULIBEE, USS STONEWALL JACKSON, and USS ETHAN ALLEN. Now the old ones come to honor you. But look Bear! When you are talked about there is a sparkle of youth in their eyes. For a brief second the men are the 17, 18 and 20- year olds who took to the sea in submarines. Loud bouts of laughter emit from tired lungs as the hundreds of old dirty jokes you told are retold. You live in all of us who earned and proudly wear the Dolphins of the UNITED STATES SUBMARINE SERVICE.


- 31 replies
-
- 10
-
-
- ethan allen
- submarine
- (and 2 more)
-
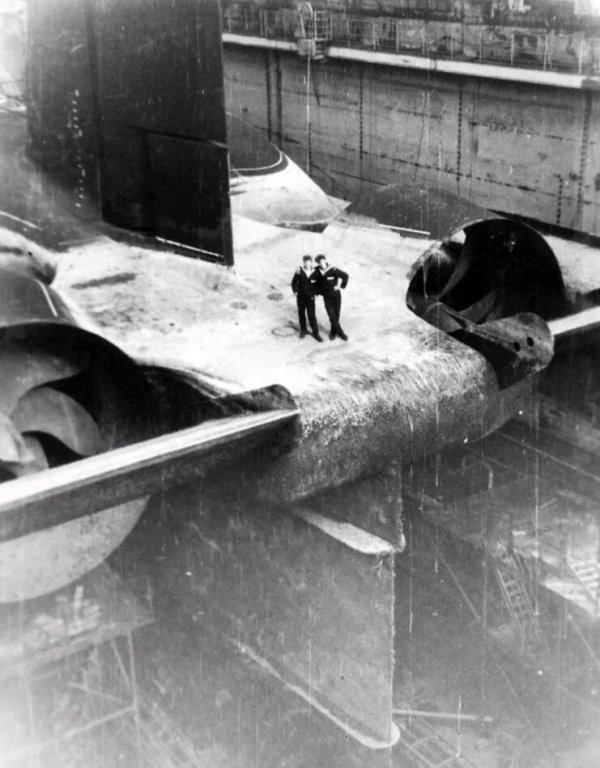
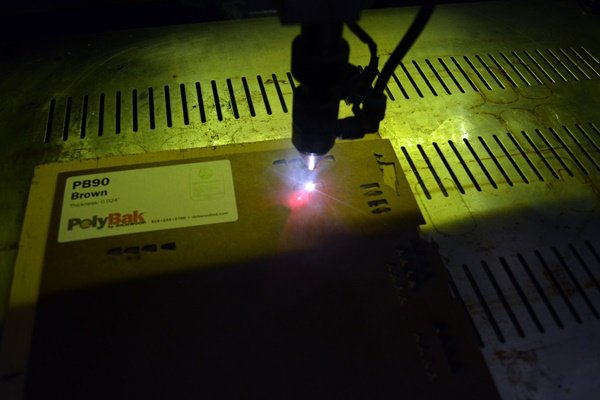
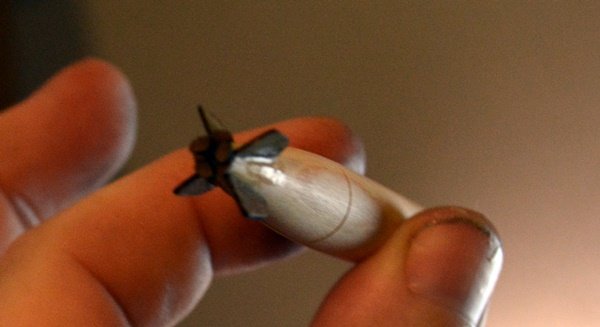
POLYBAK produces no odors at all while cutting with the laser. This stuff is strong I am tellin you what. Joe just remember the iceberg. If you only know how large they are out of the water.
- 31 replies
-
- 7
-
-
- ethan allen
- submarine
- (and 2 more)
-
Completing the MK 16 Torpedo for the ETHAN ALLEN SSBN 608. I have been using a new product in some of my building. Polybak is supposed to be used for backing used in countertops. However, as a modeling material, it is superb! It will not burn. It is eco-friendly. It will sand, take stain and paint, and bend. It cuts clean and with the laser, it can render very small parts. The fins and the screws were cut using of the 40watt CO2 laser at 35% power at 115 mm/sec. Once cut the fins are attached to the torpedo afterbody by CA adhesive and Zip Kicker accelerator.

- 31 replies
-
- 6
-
-
- ethan allen
- submarine
- (and 2 more)
-
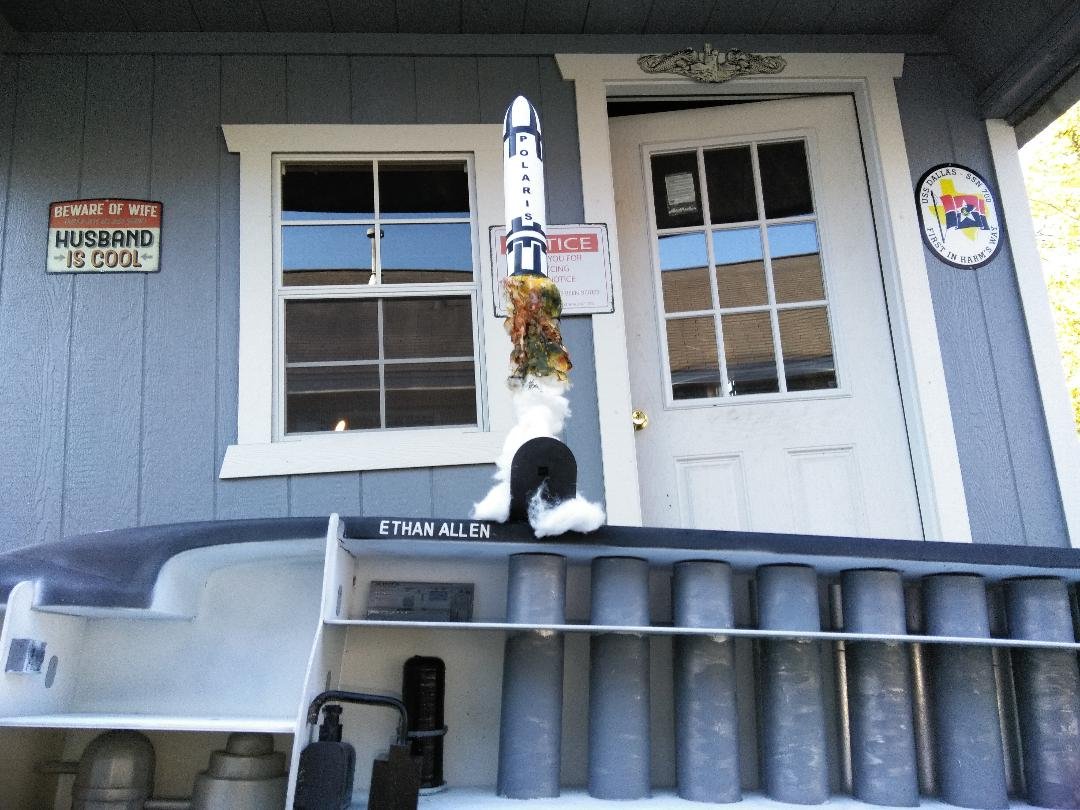
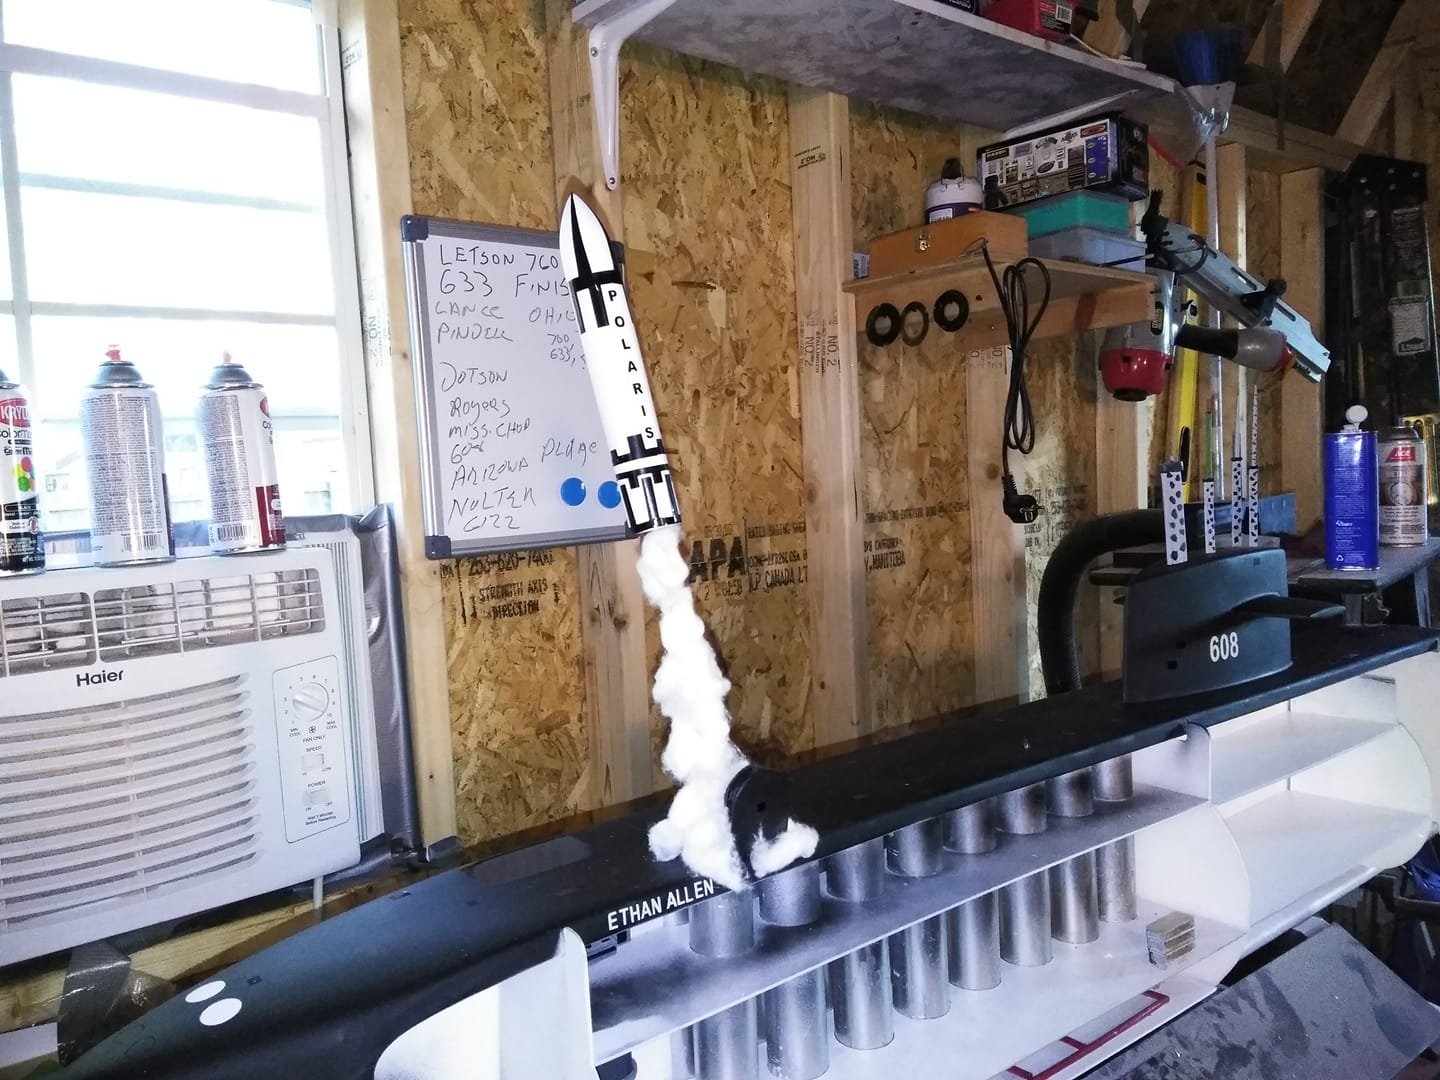
Painted and applied decals to the exterior. Put the masts in after carving and painting. I also made the Posiden A3 missile which still needs final painting. Decals were made with my CRICUT as described in my article for THE JOURNAL couple issues back.
- 31 replies
-
- 12
-
-
- ethan allen
- submarine
- (and 2 more)