


Jörgen
-
Posts
243 -
Joined
-
Last visited
Content Type
Profiles
Forums
Gallery
Events
Everything posted by Jörgen
-

Painting Problems
Jörgen replied to Neil10's topic in Painting, finishing and weathering products and techniques
I think you need to have a primer before the acrylic paint. Something I have used on wood with filler with good result is tamiya primer on rattle can. I also only use tamiya tape for masking. Here is a trick to put the glued part of the tape on the top of your hand to take away little of the glue before you use it. This is quite common in plastic aircraft modeling. Jörgen -
Jagdtiger by Jörgen - Tamiya - 1/35 - Weathering
Jörgen replied to Jörgen's topic in Non-ship/categorised builds
Are the photos working now? -
Jagdtiger by Jörgen - Tamiya - 1/35 - Weathering
Jörgen replied to Jörgen's topic in Non-ship/categorised builds
hm. i added the files here. will check what happened. -
Jagdtiger by Jörgen - Tamiya - 1/35 - Weathering
Jörgen replied to Jörgen's topic in Non-ship/categorised builds
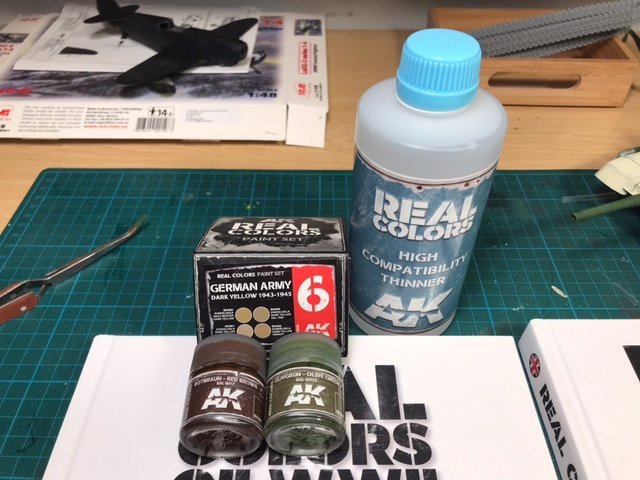
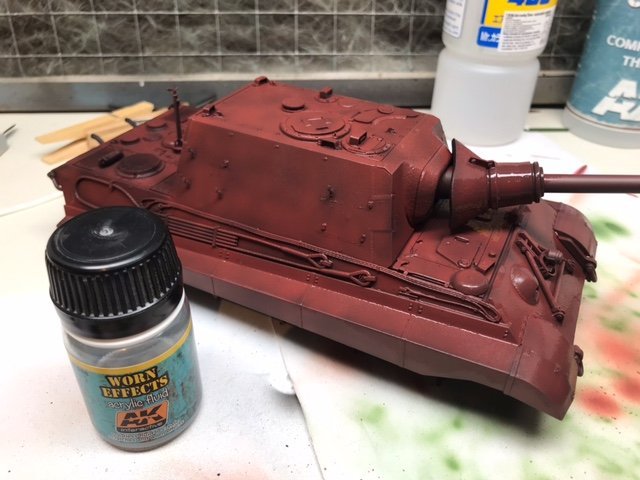
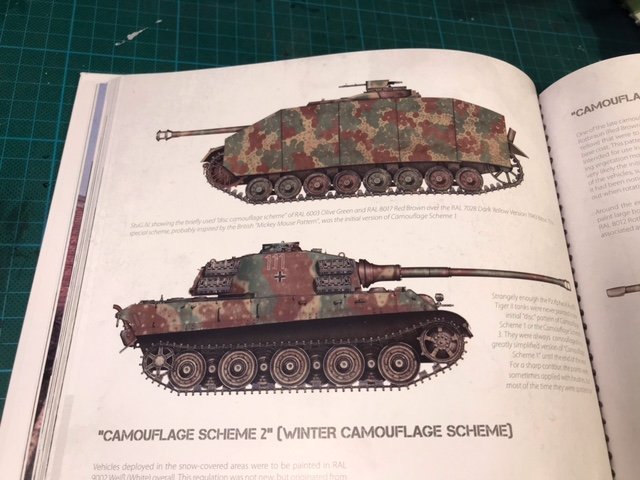
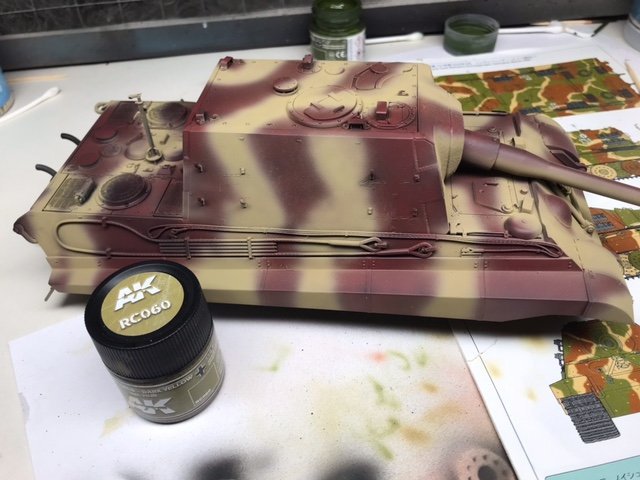
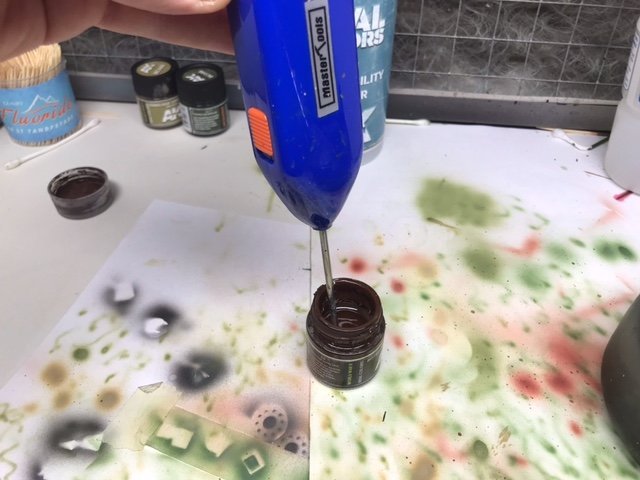
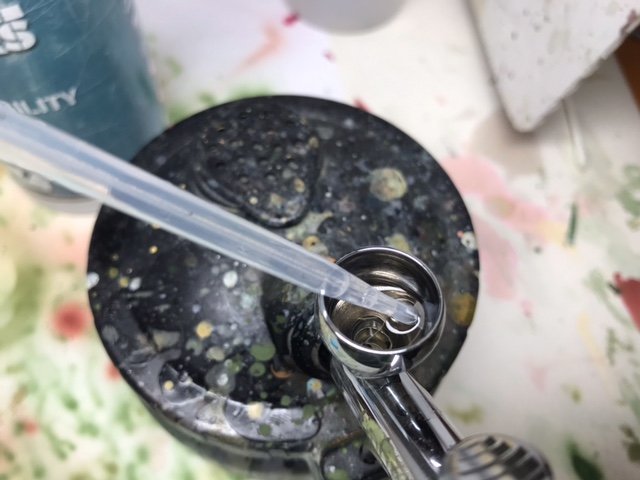
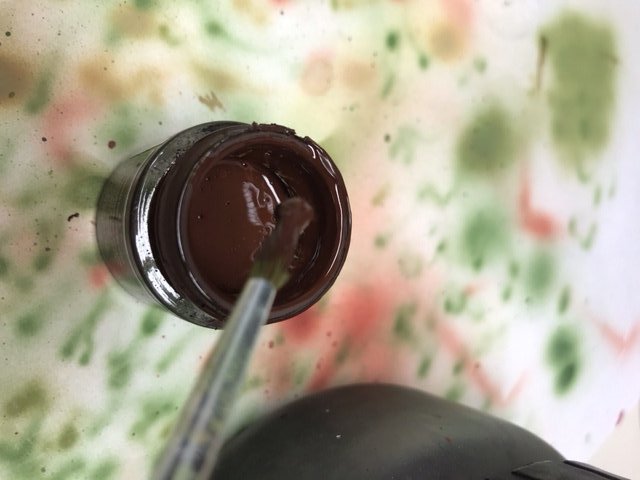
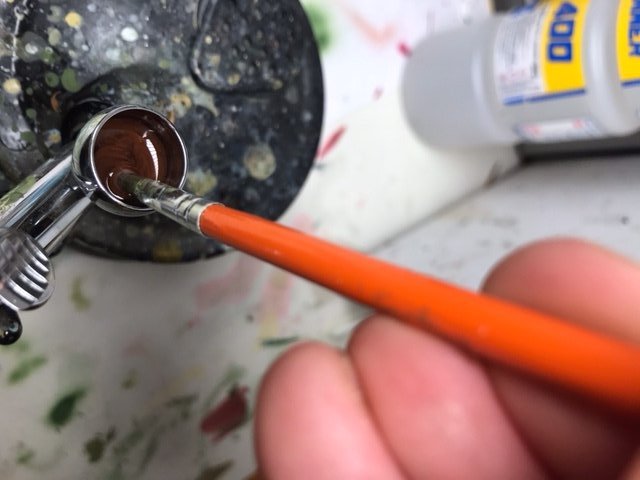
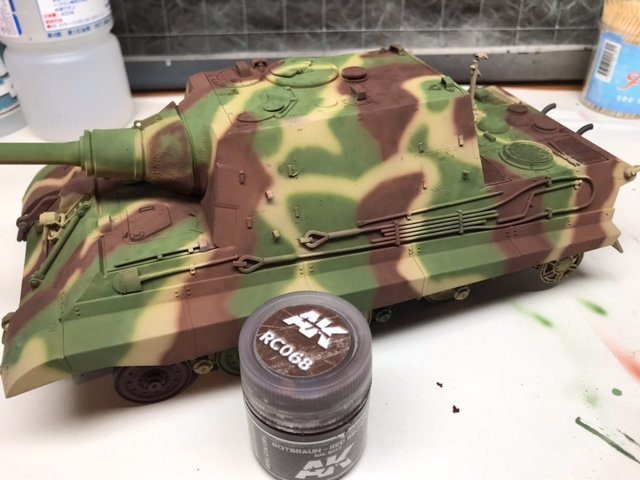
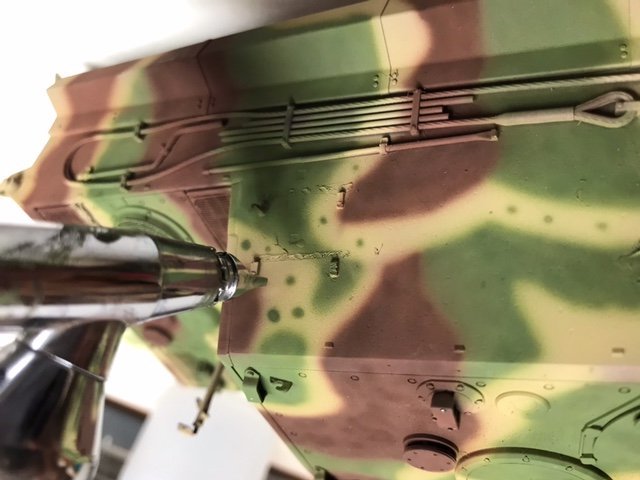
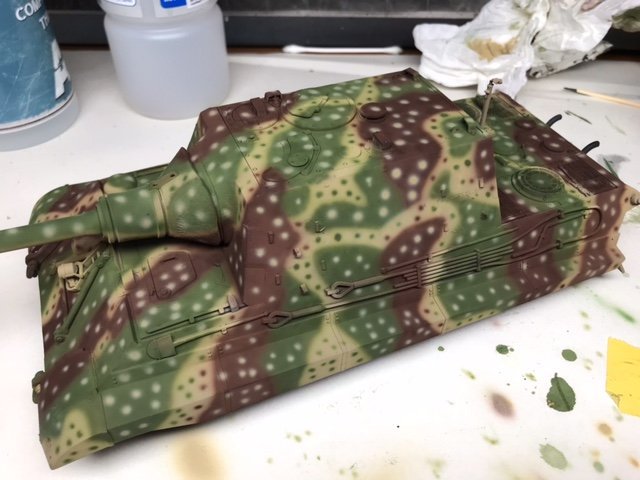
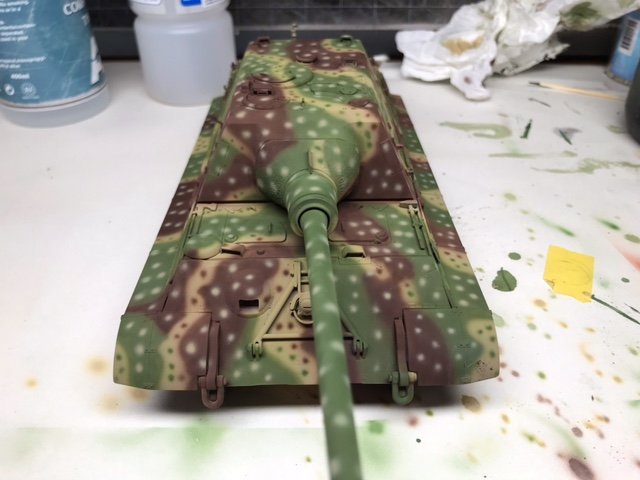
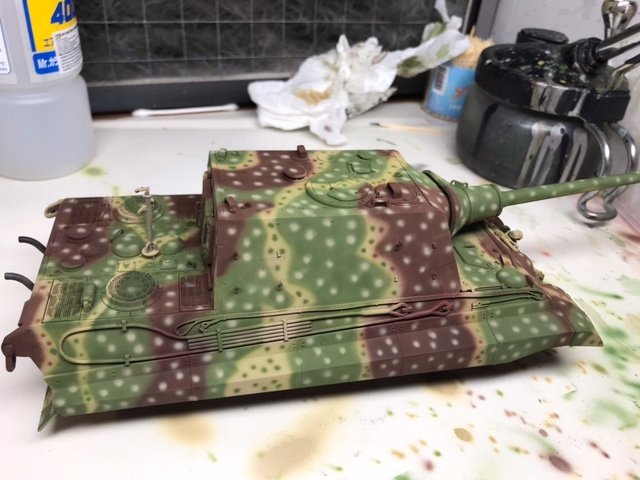
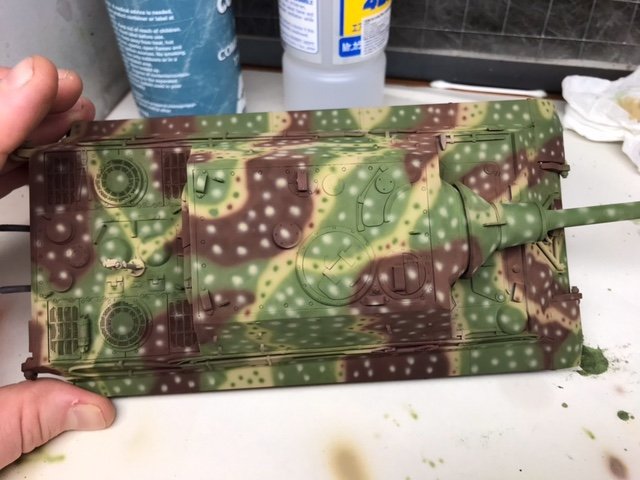
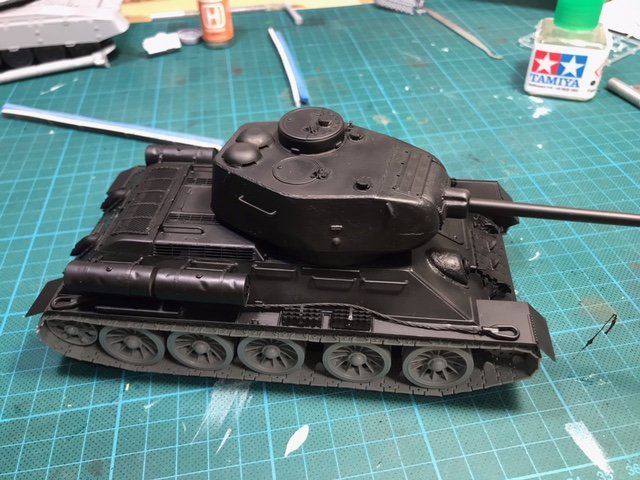
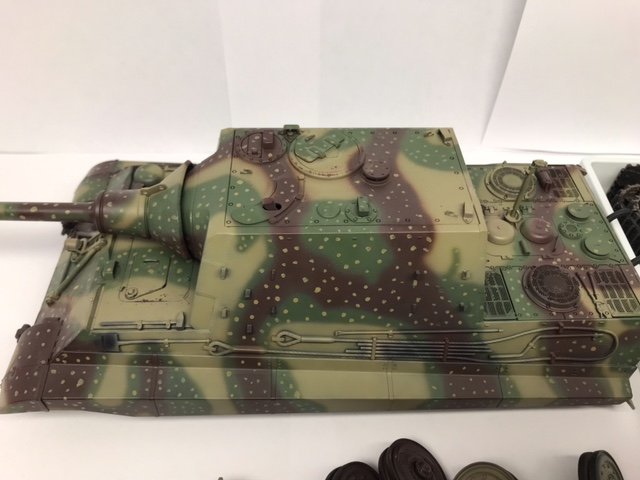
Hi again. I have now got the items I ordered and I will now continue with the work. I will go this path instead as you see in the photo. I can highly recommend these books and colors. I have played with the AK real colors and start to like them very much. In the upper right corner you can see a T90 that I am painting with the AK real color modern Russia set. First I put some layers of chipping fluid with the airbrush. The AK Real Color paint is really thick in the bottles so this is how I do to dilute them. First I stir up the paint. Then I add the thinner to the airbrush. Both the proper one from AK or Mr.Color leveling thinner work perfect for this color. Then I collect the color with the help of a brush and add it to the paint cup. I mix the color in the paint cup with the help of the brush. According to The Ak Real Color book the ambush camouflage is called "Camouflage Scheme 1 and was introduces in September 1944. The dots could be brushed or sprayed on. I start with AK RC RC060 and this color represent Dark Yellow Ral 7028 of 1943. Then I paint the green (all colors are applied with freehand airbrushing) with AK RC 047 That is Ral 6003 Olive green. And then the final color that is AK RC 068 Ral 8017 Rot Braun. After this it is time for the spots. I use a quite diluted mix and low air pressure. Here is the final result. I feel that the yellow spot got a little big so i will adjust it little with brown and green. I am now back to to the place I was before I took the decision to strip the color. And now can the weathering trials continue. Jörgen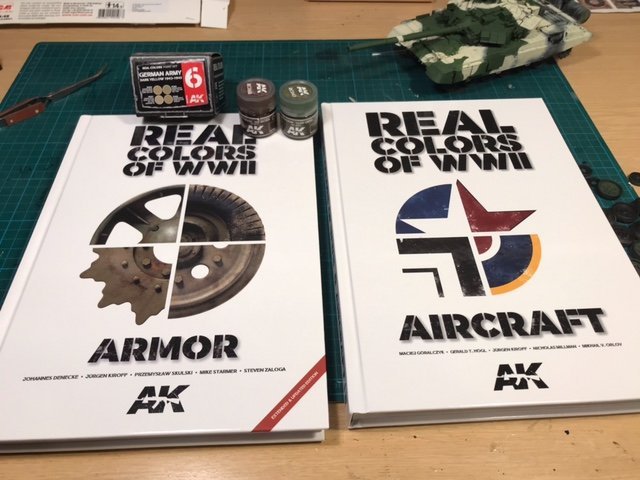


- 24 replies
-
- 13
-

-
Wefalck has right about the color-matching. If you really want to dig in to this, then just check all threads, opinions and hard debates on internet on the exact camouflage colors for world war II aircrafts The reason I use the red and yellow admiralty paint for my Shelbourne were because they look right to me and i didn't have found this tint in Vallejo's range that I have. But the reason they look right for me is because i have seen so many other models painted here on the forum with these colors so that has "formed" me in my opinion. The same thing have happened to me when I building aircrafts, many magazines are using gunze colors and there shades. If you choose another brand of paint for example RLM70 it would look different and I have to convince my self to use the other shade even if they are more correct.
-
Hi I have used them both. If you check my builds so is Endevour painted with vallejo color and sherbourne is painted with both vallejo and admiralty. Both of the colors is painted with a airbrush and both are diluted in Vallejo's airbrush thinner. I didn't noticed any difference between them and both worked perfect. I have not brush painted the admiralty paints but vallejo is perfect for this. Just use a wet pallet so you can dilute the paints little. Best regards Jörgen
-
Jagdtiger by Jörgen - Tamiya - 1/35 - Weathering
Jörgen replied to Jörgen's topic in Non-ship/categorised builds
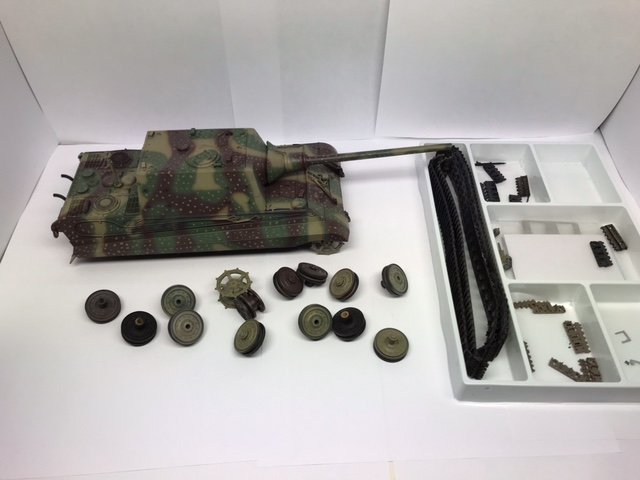
Hi all Thank you for the nice comments. Here is a interesting update... I realize that I had forgot to add the hooks so I had to glue them in. I think this finish looks really good but I have also start think little bit and I am not really happy with my dots. So I have decided to take another approach. I glued on the spare tracks and cover my the markings with Mr.Masking liquid. Then I made this This will be the base for what I am doing next. I will have more information to present in a week or so but you will still se a ambush camoflage. And you can aslo look forward to this: This is all for now:)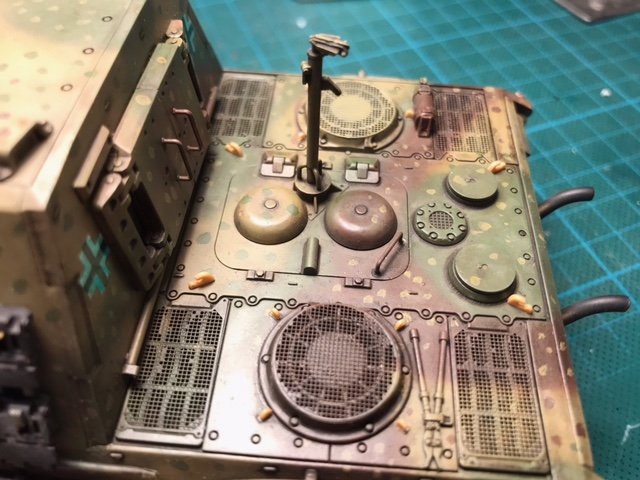
.jpeg.9c6447b2c62b690b841ff507d1dae675.jpeg)
- 24 replies
-
- 12
-
-
Jagdtiger by Jörgen - Tamiya - 1/35 - Weathering
Jörgen replied to Jörgen's topic in Non-ship/categorised builds
They are on my wish list Kevin, have I understand right that Ryefield Models has its origins in old Dragon? I really want to se a bield log on them. Bra, I am reading a very interesting book at the moment. It is Tigers in the mud by Otto Carius. A panzer ace of 502. I can highly recommend it. -
Jagdtiger by Jörgen - Tamiya - 1/35 - Weathering
Jörgen replied to Jörgen's topic in Non-ship/categorised builds
Hi again. Thank you all for the nice comments. Think this will be as interesting for me as for you. I have no idea how to make this weathering:) However, here is the start to prepare it for the weathering. I have finished the dots for the ambush camouflage but i am not so happy over the result. But i think this was added hasty by the crew so maybe it is ok. I have to fix some of the dots becouse they ended up behind the decals. If the crew put them on then they would be in the front of the decals.. The first step is to apply gloss varnish for the decals and protect the surface. I always do this with 50% tamiya x-22 and 50% Leveling thinner. After this I applied the decals with the help of Micro Sol and Micro set. Now it I sprayed the model again but this time with 50% tamiya x-286 and 50% Leveling thinner. This gives the shine that i like for my airplanes and i think it is good as a base for the weathering. I´m not sure about this Kevin. I think the lacquer market has exploded with paints. There are HATAKA, MRP, McColour and even Tamiya has released a range now. The are no compare between acrylic and lacquers when spraying them. I cant stand the acrylic becouse of the bad end result and the always stop in the airbrush. Maybe it is ok for bugger surfaces and but I always paint "panel for panel" over a black base. That gives total control over it. Btw, I am now finished (at last....) with a big renovation of my house so now I have time to fix half made models and get up to speed. As you see on the table there are a few projects ongoing at the same time. Jörgen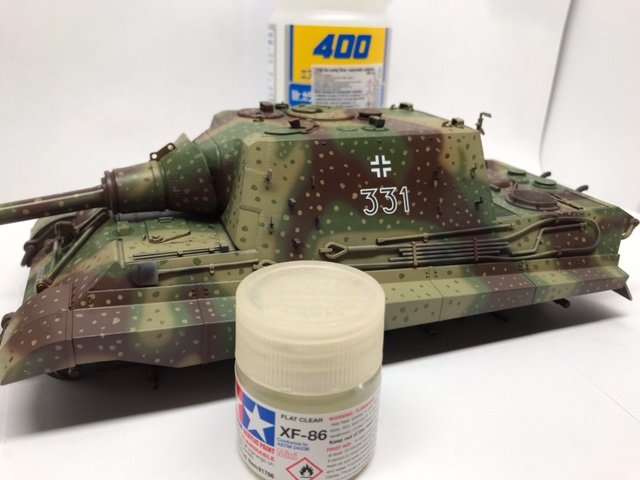
.jpeg.b7e410475ad0bcb02fb4022491fd018d.jpeg)

- 24 replies
-
- 12
-
-
Airplanes and Tanks in plastic by Jörgen
Jörgen replied to Jörgen's topic in Non-ship/categorised builds
Ok, I have started the weathering log for my JagdTiger. It is here: https://modelshipworld.com/topic/28601-weathering-a-jagdtiger/ -
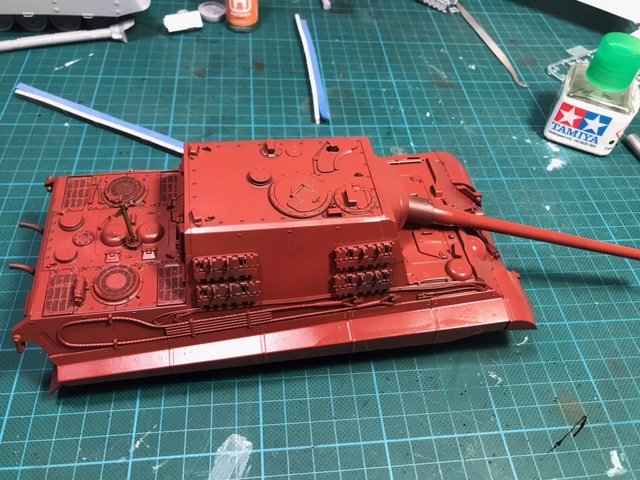
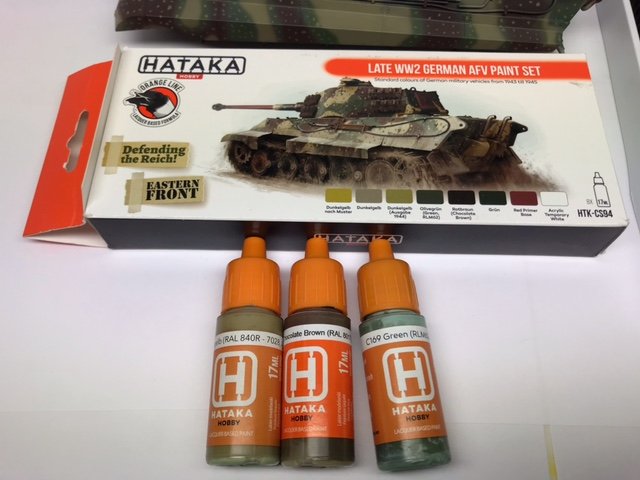
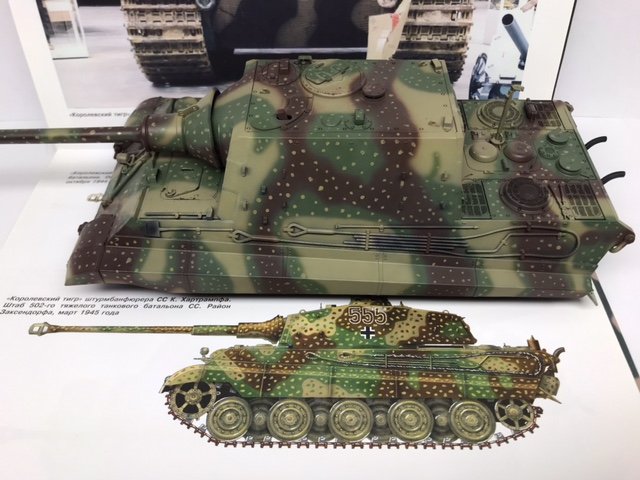
Hi all. I have been asked to do a build log on my plastic airplane and tank builds. Since I have to many build ongoing at the moment and I didn't want to start another one yet so did I get a another idea. In my opinion so have I at last nailed the airbrushing and I feel totally comfortable with it (the gamechanger for me was the start to use lacquer paints). What I feel totally lost in is the weathering and this is a field were I want to improve. I thought it could be fun to chare my trying in learning it with you all. I will use yputube as guides and this time i will follow this person that I enjoy to follow https://www.youtube.com/c/NightShiftScaleModels . So the object: This is a 1/35 scale of JagdTiger from Tamiya. It is built straight from the box. I have built the tank and almost finish with the painting. I want to have the really good looking ambush camouflage. The color quite interesting and this dark yellow existed in different variants during the war. I was looking around on different brands of paint manufactures to try to get it right. My choice was the orange box (lacqure) Late WW2 german AFV Paint set from HATAKA. This is how far I have come in the build. Still need to paint more dots in the camo:) I hope you will enjoy this. Jörgen

- 24 replies
-
- 13
-
-
Airplanes and Tanks in plastic by Jörgen
Jörgen replied to Jörgen's topic in Non-ship/categorised builds
Thank you all for the nice comments. I think I will start a log over my 1:35 JagtTiger. I have buildt it and paint the first part of it. However, I am totally new to weathering so I want to use guides on YouTube to se what I can do. This could be quite interesting for you also. I don't know at all what the outcome will be, maybe good or a disaster -
Airplanes and Tanks in plastic by Jörgen
Jörgen replied to Jörgen's topic in Non-ship/categorised builds
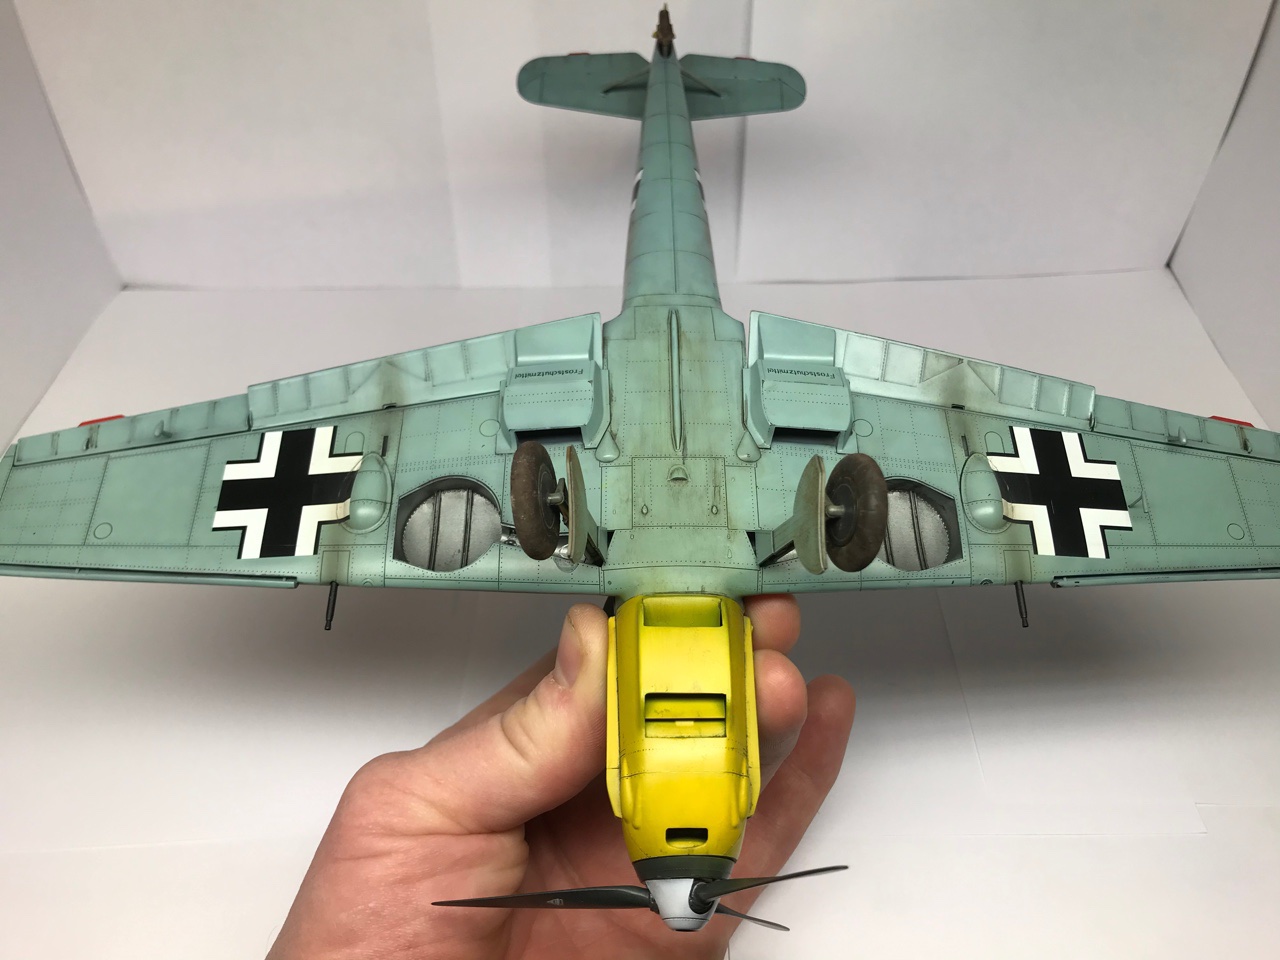
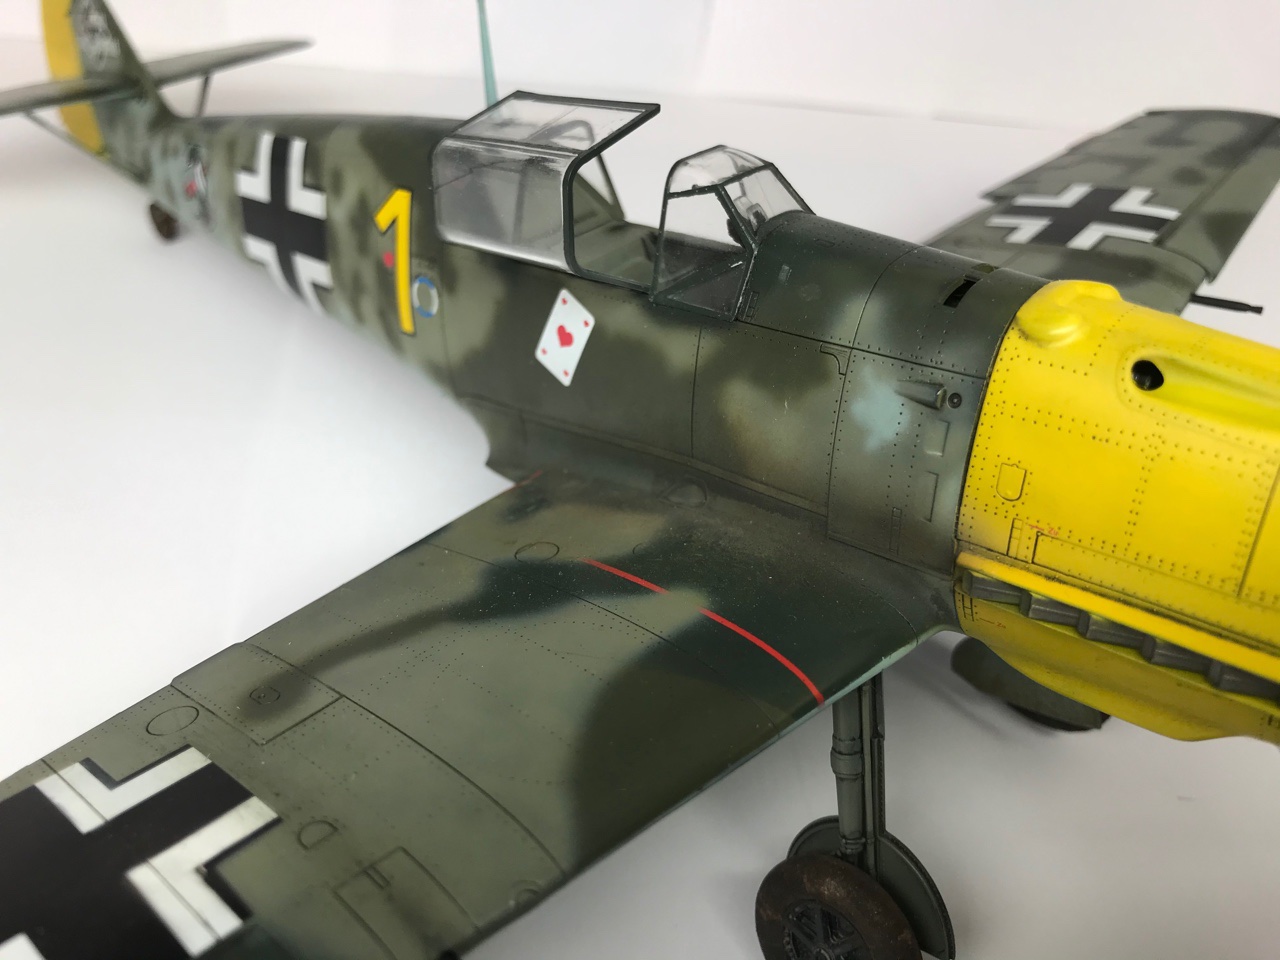
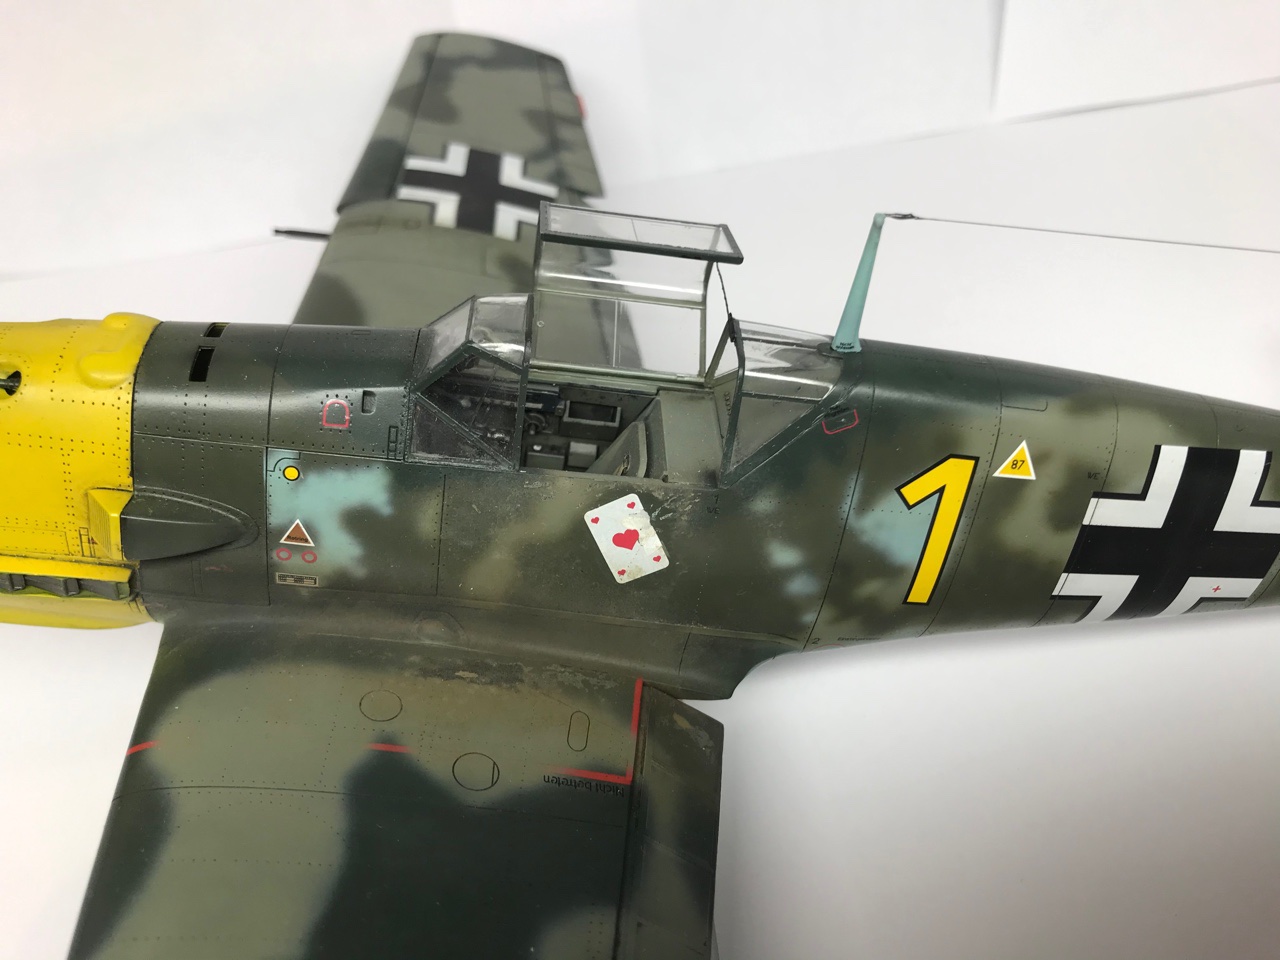
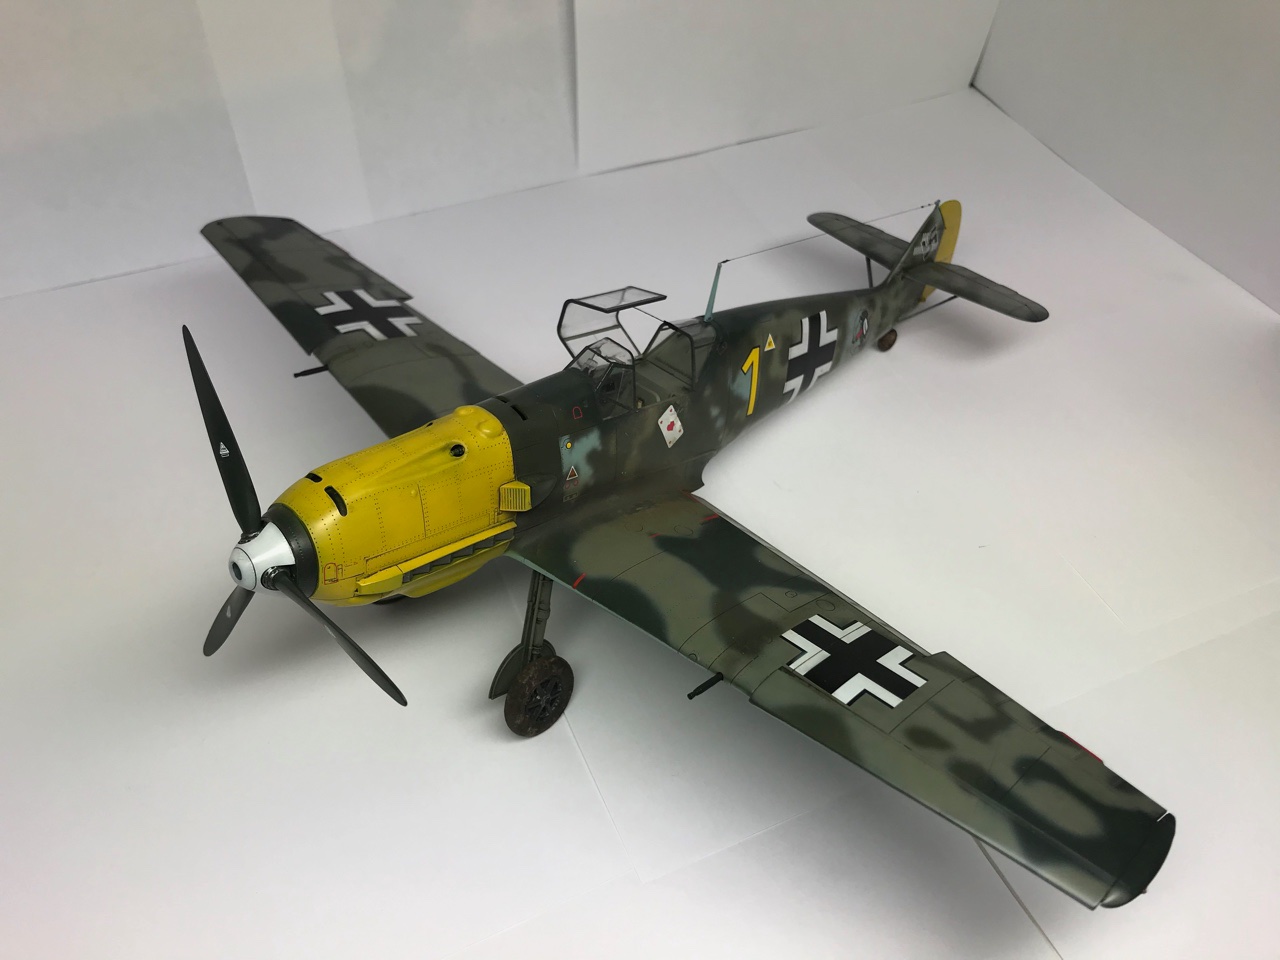
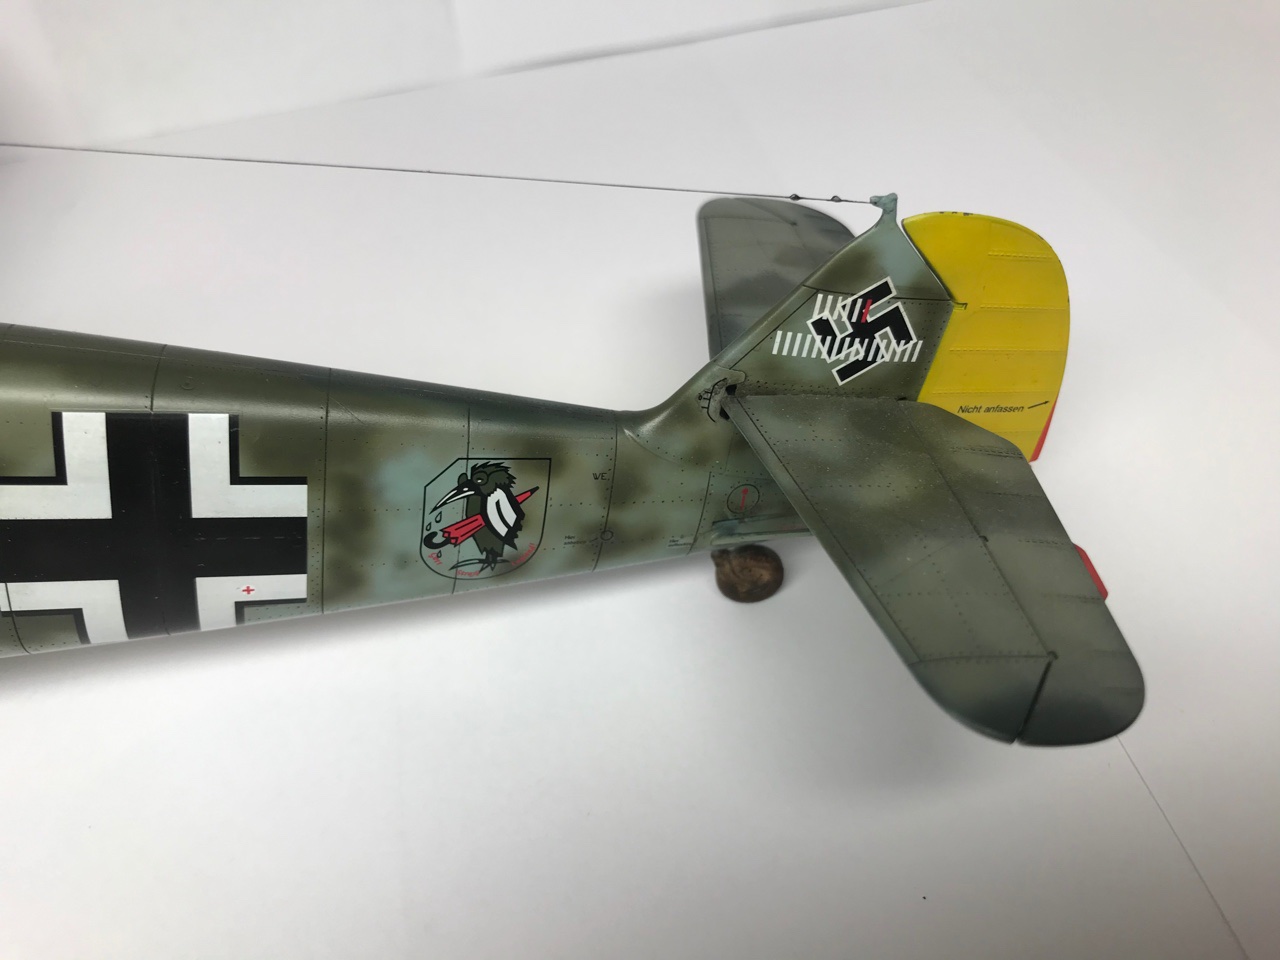
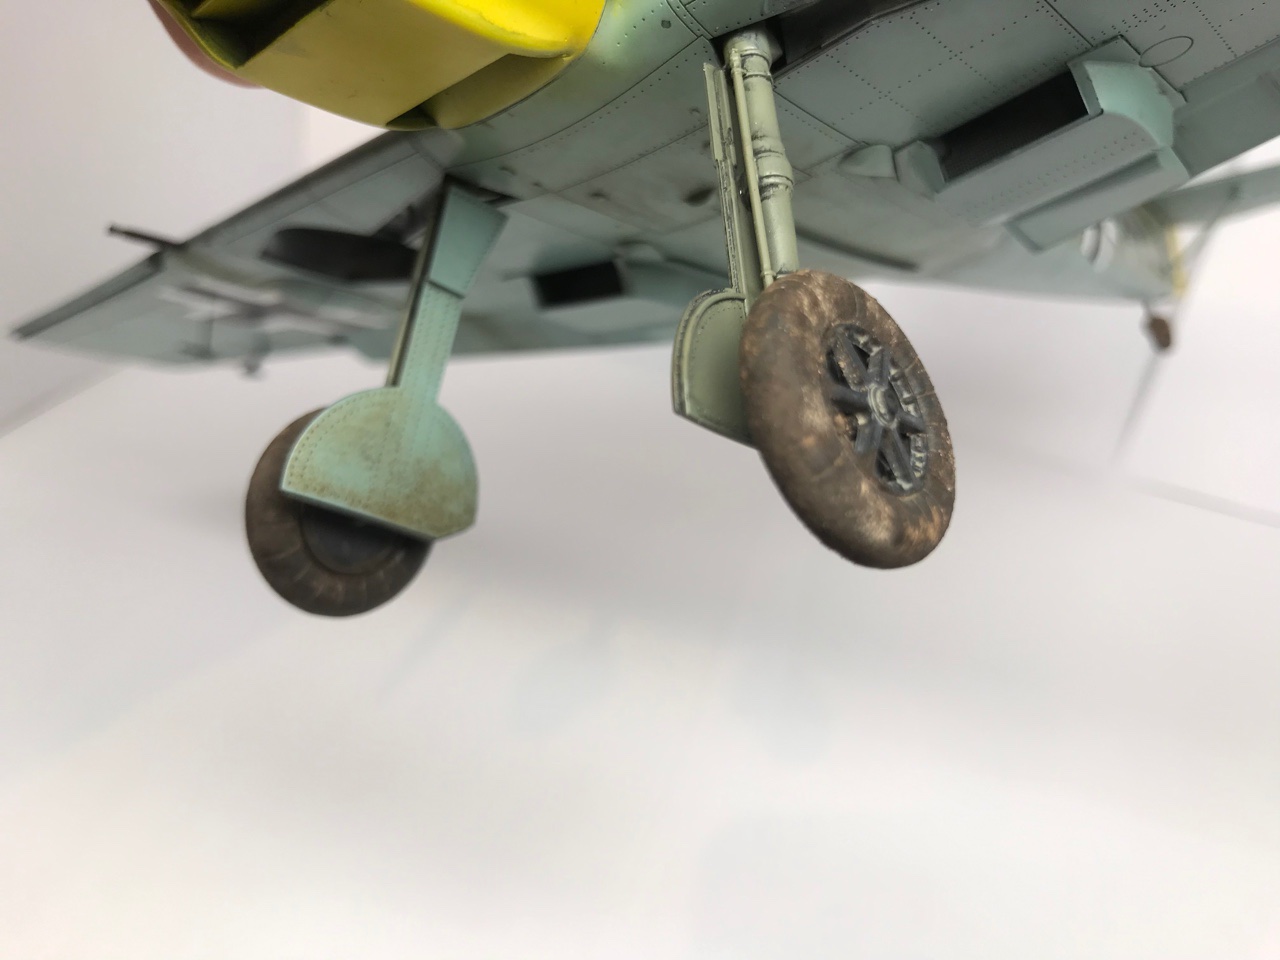
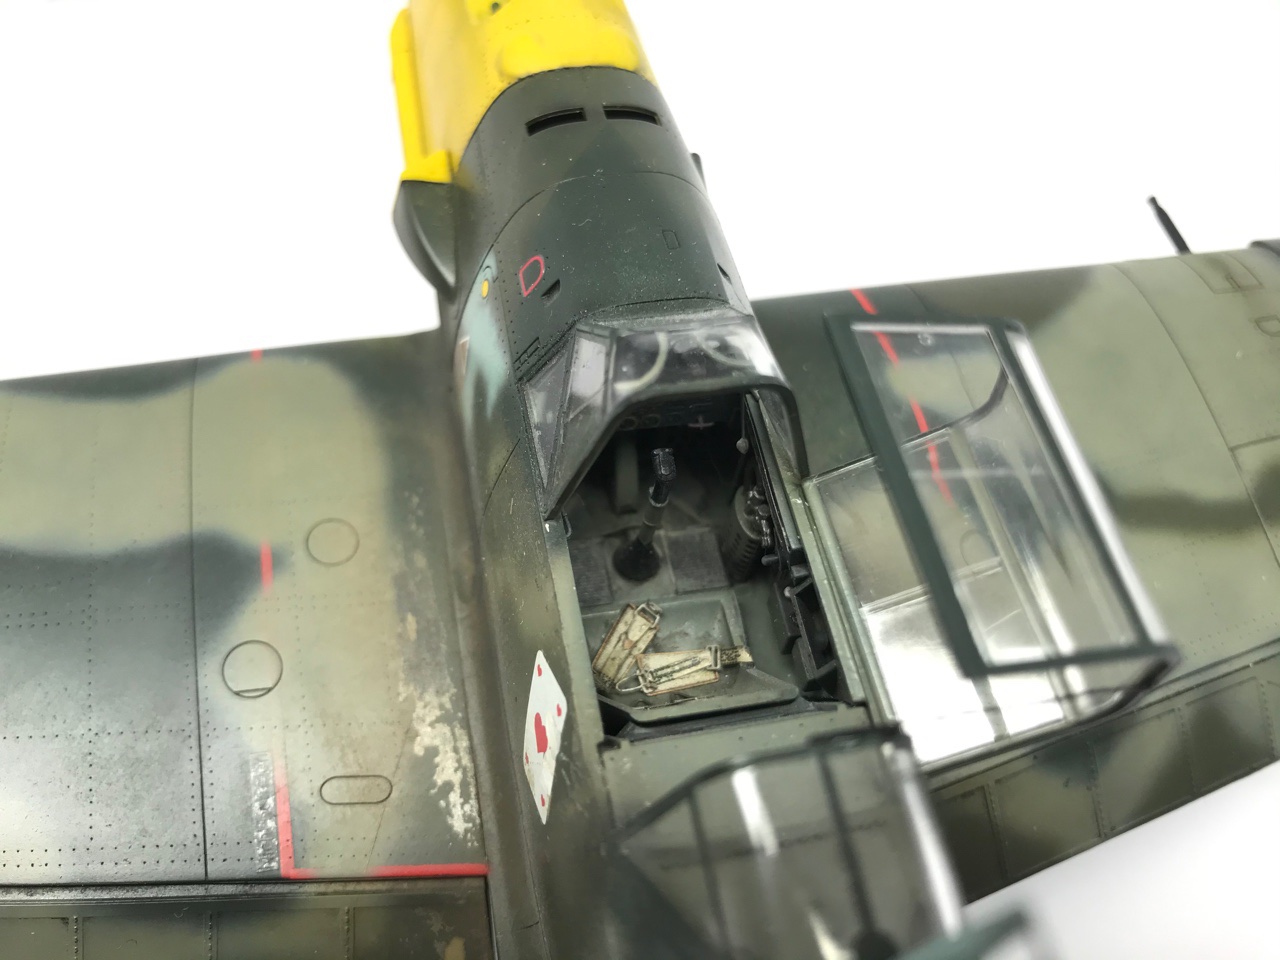
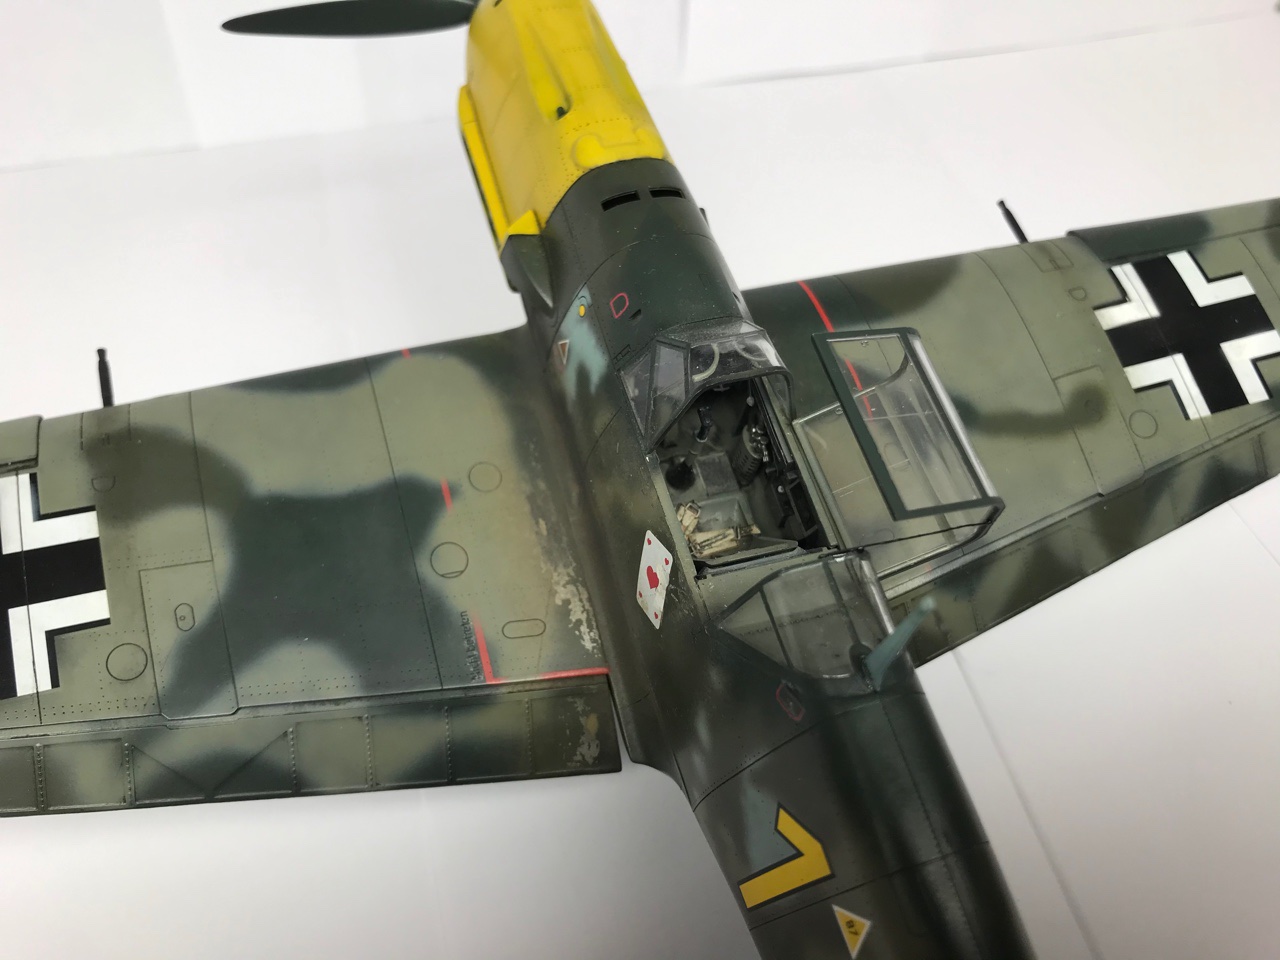
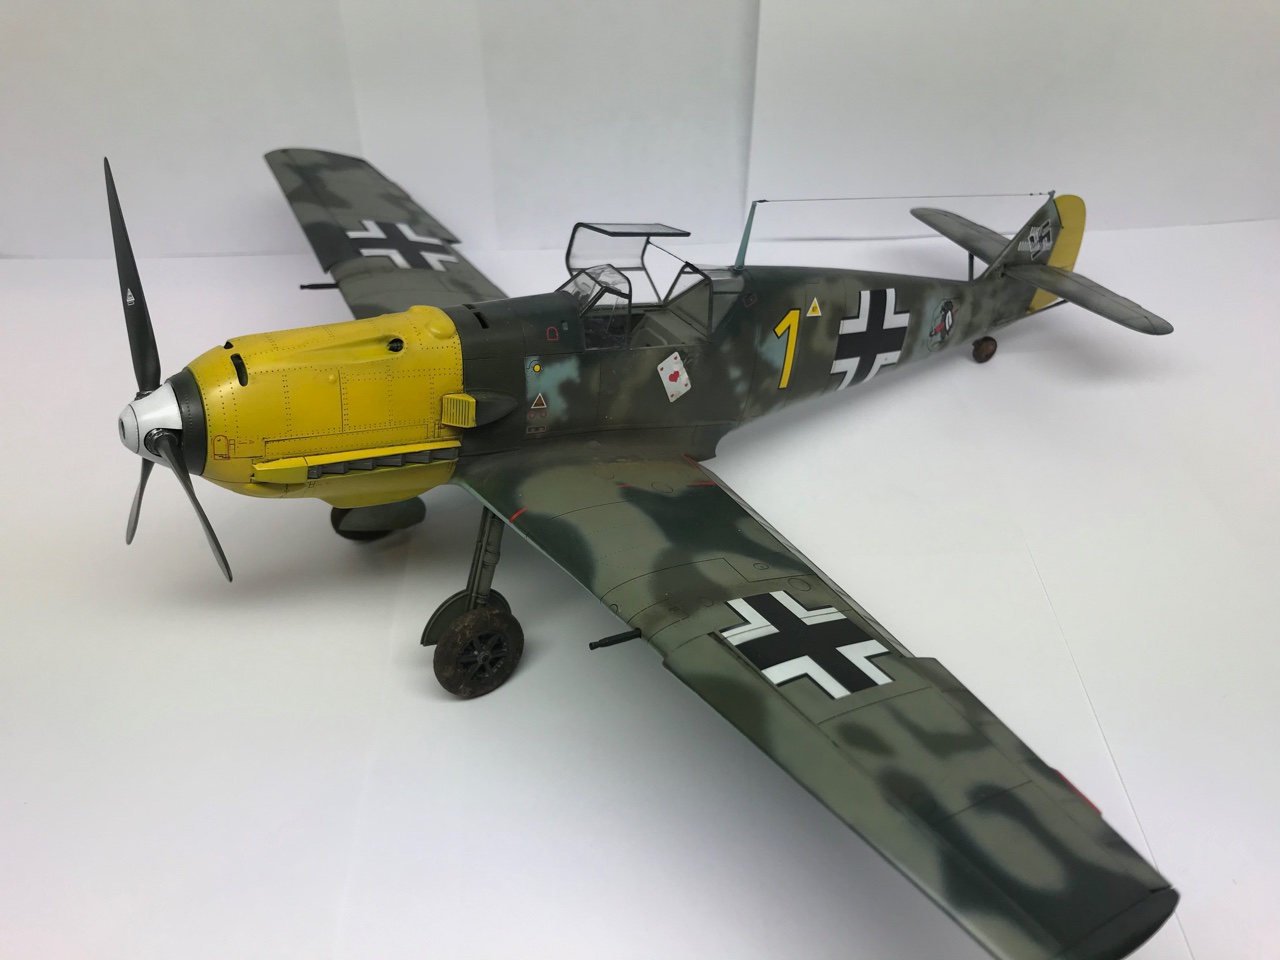
Hi all, I have not post anything in long time since I have so much other work to do. However, here is a finished Me 109 E3 in 1/32 by Eduard so you see that I am still here . It is built out of the box and painted with MRP lacquers colors. It is built as Josef Prillers Me109. I hope you enjoy. Jörgen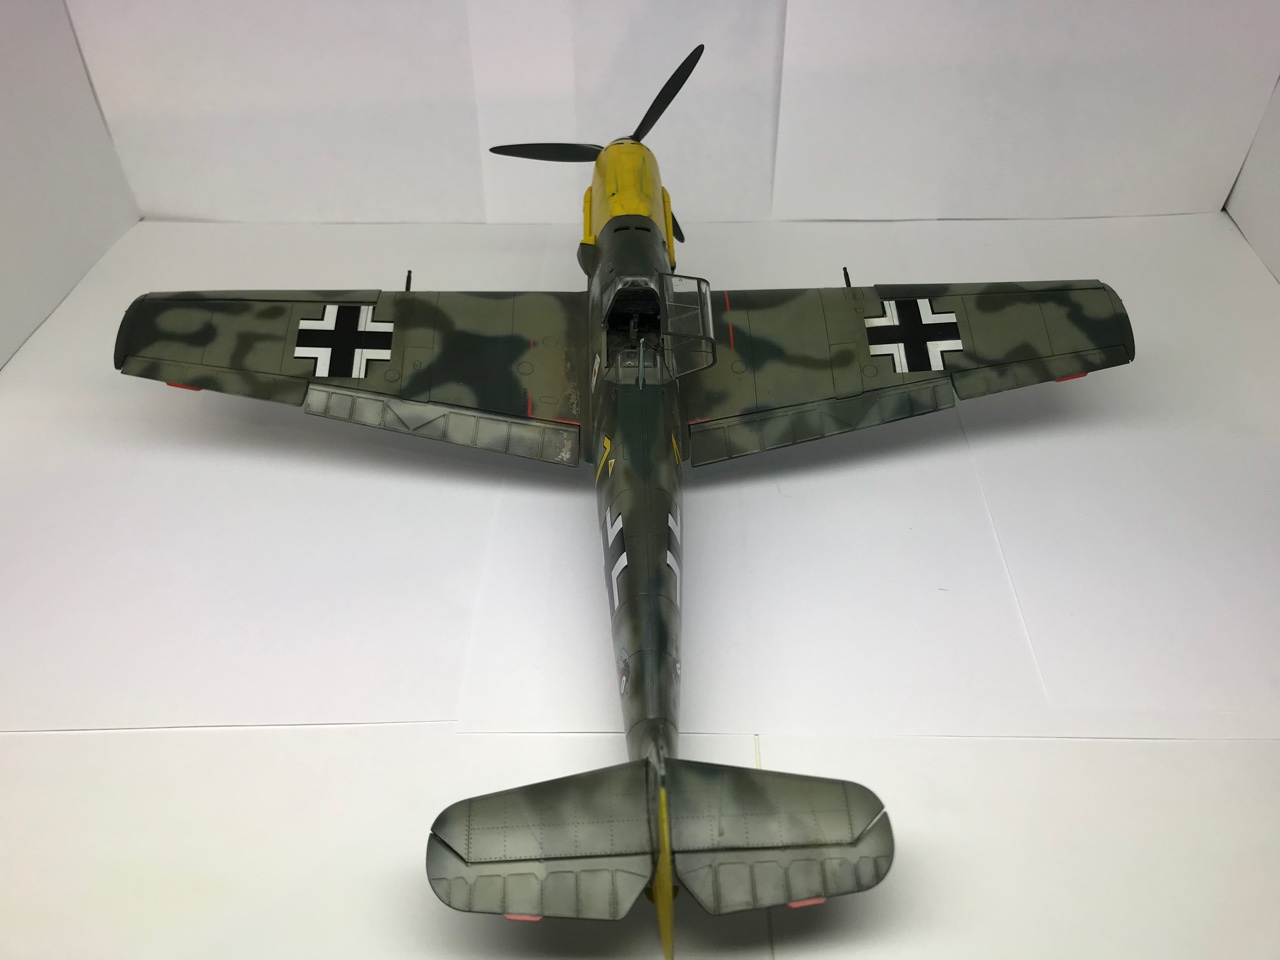
- 60 replies
-
- 13
-
-

-
I have both the BB Vasa and the DeAgostini on the building table (on hold at the moment). I should say, if you want to do the old painting (blue and gold, then go for the BB Vasa but if you want to do the new colorful red painting, definitely go for the DeAgostini one. This because the quality of the ornamnets are so much better and it can then be painted properly.
-
Welcome. Looking really good. Fråga, är du från sverige?
-
Welcome Kevin
-
Thank you Kevin. I am sorry that I haven't posted anything in a while but this is because I rebuilding my basement so all energy goes in to that project at the moment. I only build little on airplanes from time to time at the moment. But I will continue as soon as I am finished with the rebuilding. And good luck with your build. Don't hesitate to try our own things on it
-
Hello Kent. No no I am rebuilding my basement so have not so much time over for model buildnig at the moment. Have done little bit more on Sherbourne and build some 1:72 airplanes. Need to do little bit more for next update though.
-
Agree with Tony! Nice to have another one Good work so far.
-
Välkommen
-
You can also use perfect putty from Deluxe. You just take away the rests with water.
-
Välkommen:)
-
You can do as I did, use the brass letters in the kit (or buy smaller) and use these as templates and paint the name instead.
-
Looks very good and now you are ahead of me... The varnish should protect it better. I also have little bit cloth attached to the stand for further protection. I just tilt the ship on the stand so I can work with it.
-
Tack så mycket Yes it is that book. I use it lot of making the parts to Sherbourne. I have no idea of sailing and the name on things I can also recommend Lennart Pettersons Rigging books.
- 14 replies
-
- 1
-
-
- sherbourne
- caldercraft
- (and 1 more)