AntiSpiral
-
Posts
45 -
Joined
-
Last visited


-
 Obormotov reacted to a post in a topic:
HMS Victory by guraus - scale 1:48 plank on frames
Obormotov reacted to a post in a topic:
HMS Victory by guraus - scale 1:48 plank on frames
-
FrankWouts reacted to a post in a topic:
LE FLEURON 1729 by KUDIN - 1/48 scale - Kudin Andrey - YouTube
-
AntiSpiral reacted to a post in a topic:
Sovereign of the Seas 1637 - JOHN McKAY - OVERVIEW
-
Jeronimo reacted to a post in a topic:
LE FLEURON 1729 by KUDIN - 1/48 scale - Kudin Andrey - YouTube
-
Omega1234 reacted to a post in a topic:
LE FLEURON 1729 by KUDIN - 1/48 scale - Kudin Andrey - YouTube
-
mtaylor reacted to a post in a topic:
LE FLEURON 1729 by KUDIN - 1/48 scale - Kudin Andrey - YouTube
-
 Zdravstvuyte Andrey! I followed your build on the other site and recently found your youtube channel. thankfully im already studying russian so this should be helpful in many ways. Glad to see your skill show up on this site also! Looking forwards to seeing more. Regards, Peter
 -
mtaylor reacted to a post in a topic:
La Belle Poule 1765 by AntiSpiral - 1/48 - An Adventure in POB
-
Hi Mark, Unfortunately i haven't been able to do any kind of modelling recently let alone work on this model. I'm planning to start again if i can plan my situation a bit better, but i haven't done much more on this model. As for the bowsprit, depends on what kind of trouble you're having, might be able to help. Otherwise, have you seen Dmitry Shevelev's build of this ship on shipmodeling.ru?
-
PriceMachine&Design reacted to a post in a topic:
HMS Cumberland 1774 by AlexBaranov - FINISHED - 1:36
-
AntiSpiral reacted to a post in a topic:
HMS Dragon build by Siggi52 - Scale 1:48, English 74 Gunner 1760
-
AntiSpiral reacted to a post in a topic:
MORDAUNT 1681 by NMBROOK - Euromodel - 1:60 - Beyond Bashed
-
Canute reacted to a post in a topic:
La Belle Poule 1765 by AntiSpiral - 1/48 - An Adventure in POB
-
Canute reacted to a post in a topic:
La Belle Poule 1765 by AntiSpiral - 1/48 - An Adventure in POB
-
Canute reacted to a post in a topic:
La Belle Poule 1765 by AntiSpiral - 1/48 - An Adventure in POB
-
AntiSpiral reacted to a post in a topic:
La Belle Poule 1765 by AntiSpiral - 1/48 - An Adventure in POB
-
AntiSpiral reacted to a post in a topic:
La Belle Poule 1765 by AntiSpiral - 1/48 - An Adventure in POB
-
glad to see you're back working on your model nigel! looks amazing, cant wait to see more keep it up!!
-
Hello guys, sorry for not update in my log for so long. New changes in life have had me stop working on this for at least a while and new ideas. I've had to stop as a new job doesn't leave me much time and also a change in living quarters leaves me not much space and isn't very ideal especially if im making lots of noise, so im putting this log on hold for a while until i figure something out. Another possible reason for stopping is so i can use what stock i have of wood for a future build, potentially looking to buy chris watton HMS victory and doing some interesting work on that, new job doesn't pay much so saving up what i can. I'll come back to this log eventually and do a few updates maybe. Regards, Peter
-
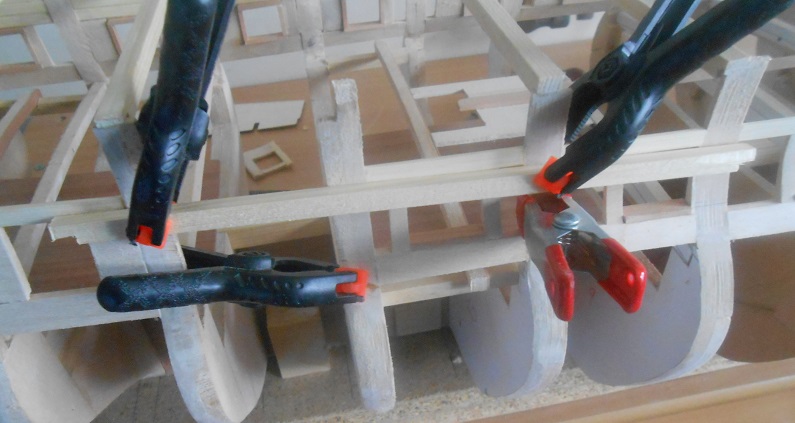
Yep! happened twice already but seeing as the frames wont be seen makes it a bit easier to just fix it and carry on but of course accuracy is key. hopefully the last time!
-
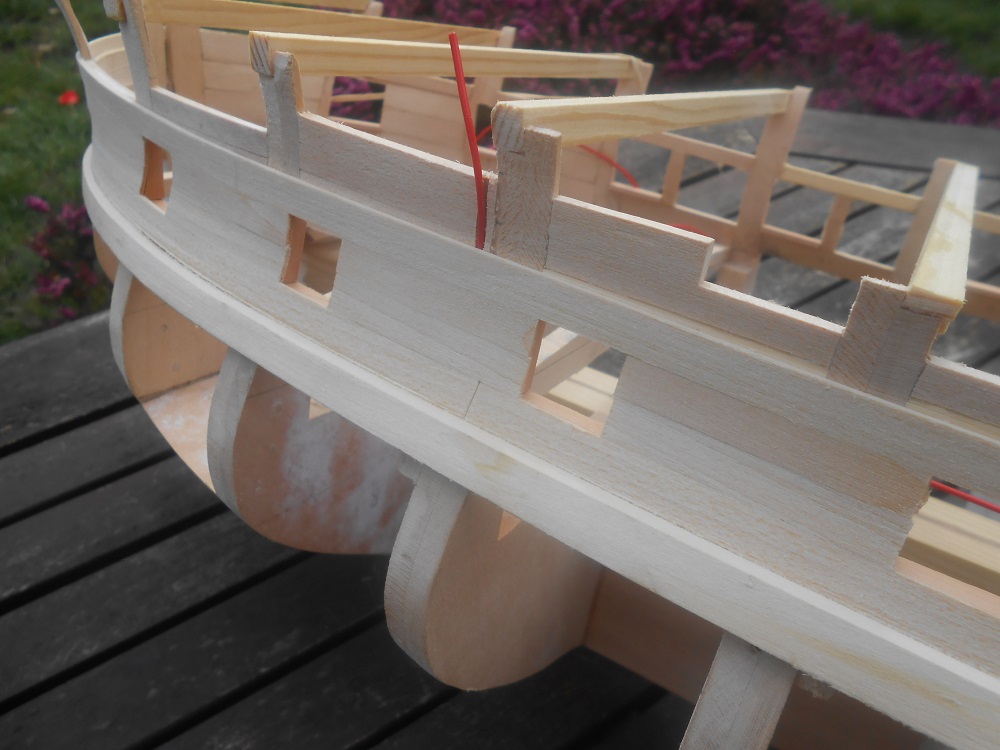
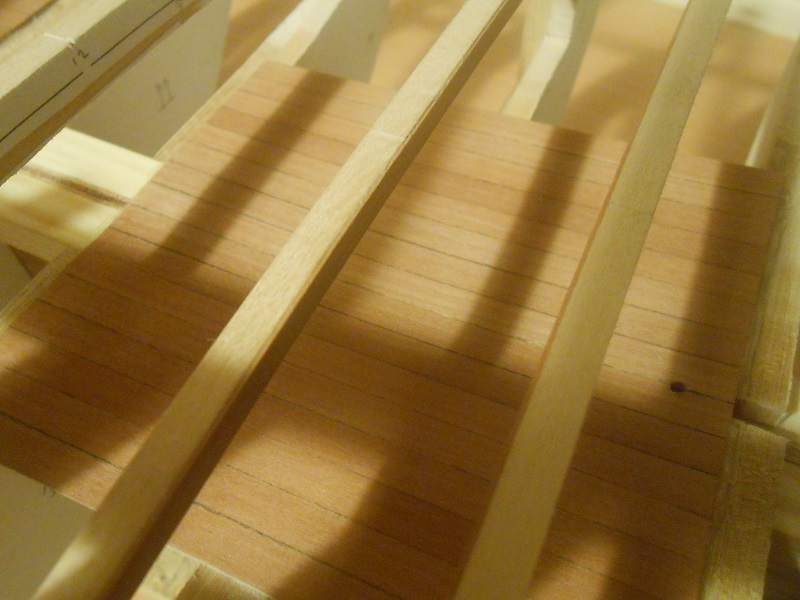
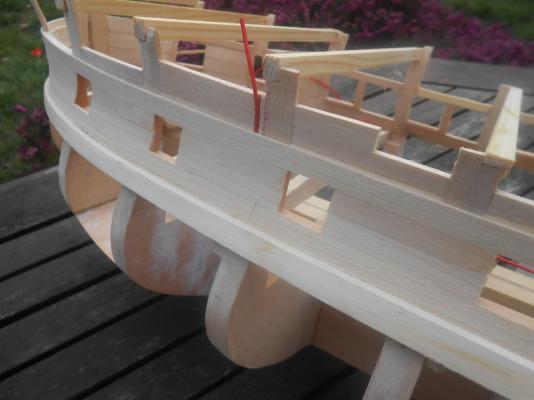
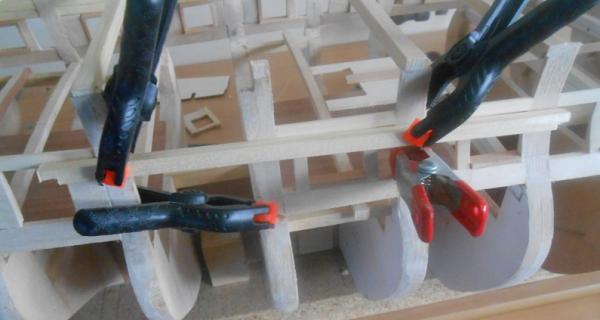
another small update, problems and planking. So there i was sanding down the protruding gun port linings. When bam! Frame collapses. Reason was obvious, sanding down too hard and not enough support... But.. somewhat fixable, even still looking back i probably would of made a lot of changes but so far its good enough. The other side how ever is looking good, planking with lime which will later be painted is quite nice, gives a nice smooth finish and even though being softer still a challenge to bend some of the thicker pieces. the right side will be more a challenge as i'll be using both lime and pear. Will carry on planking upwards after i figure out how to do the design on the next plank, will probably use pear for that as its finer and will hold a better sharper shape. As i'll only be using 1 layer of wood lower planking will take some patience.

-
AntiSpiral reacted to a post in a topic:
HMS Dragon build by Siggi52 - Scale 1:48, English 74 Gunner 1760
-
Hello cnemo! Keel length in 1/48 is 90cm total length is 101cm not rigged Rigged is 140cm, hope this helps!
-
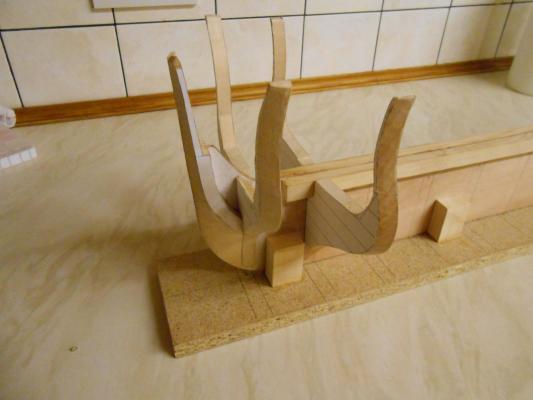
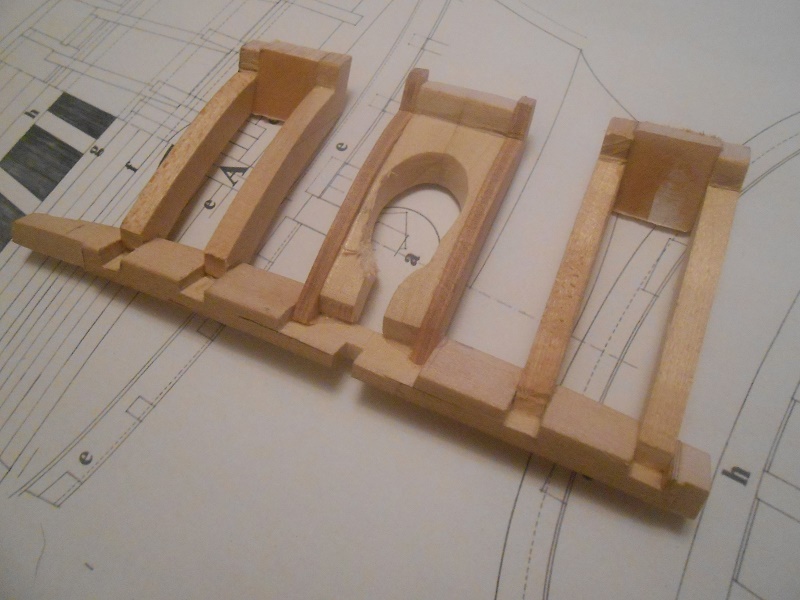
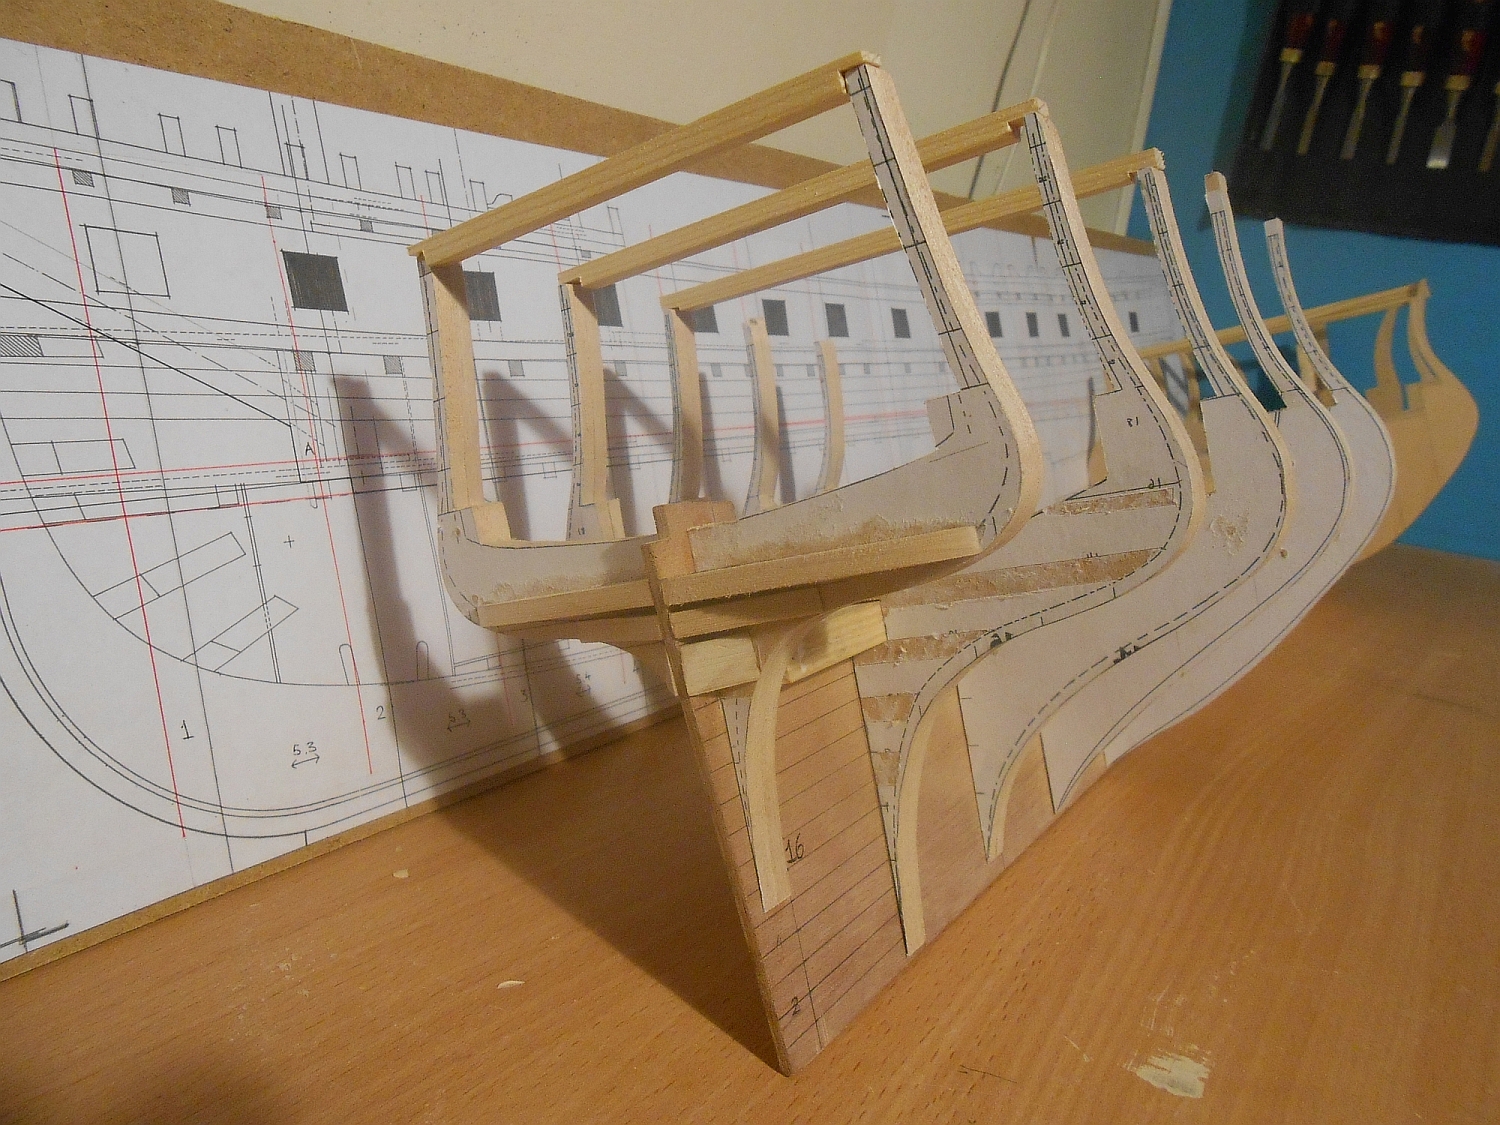
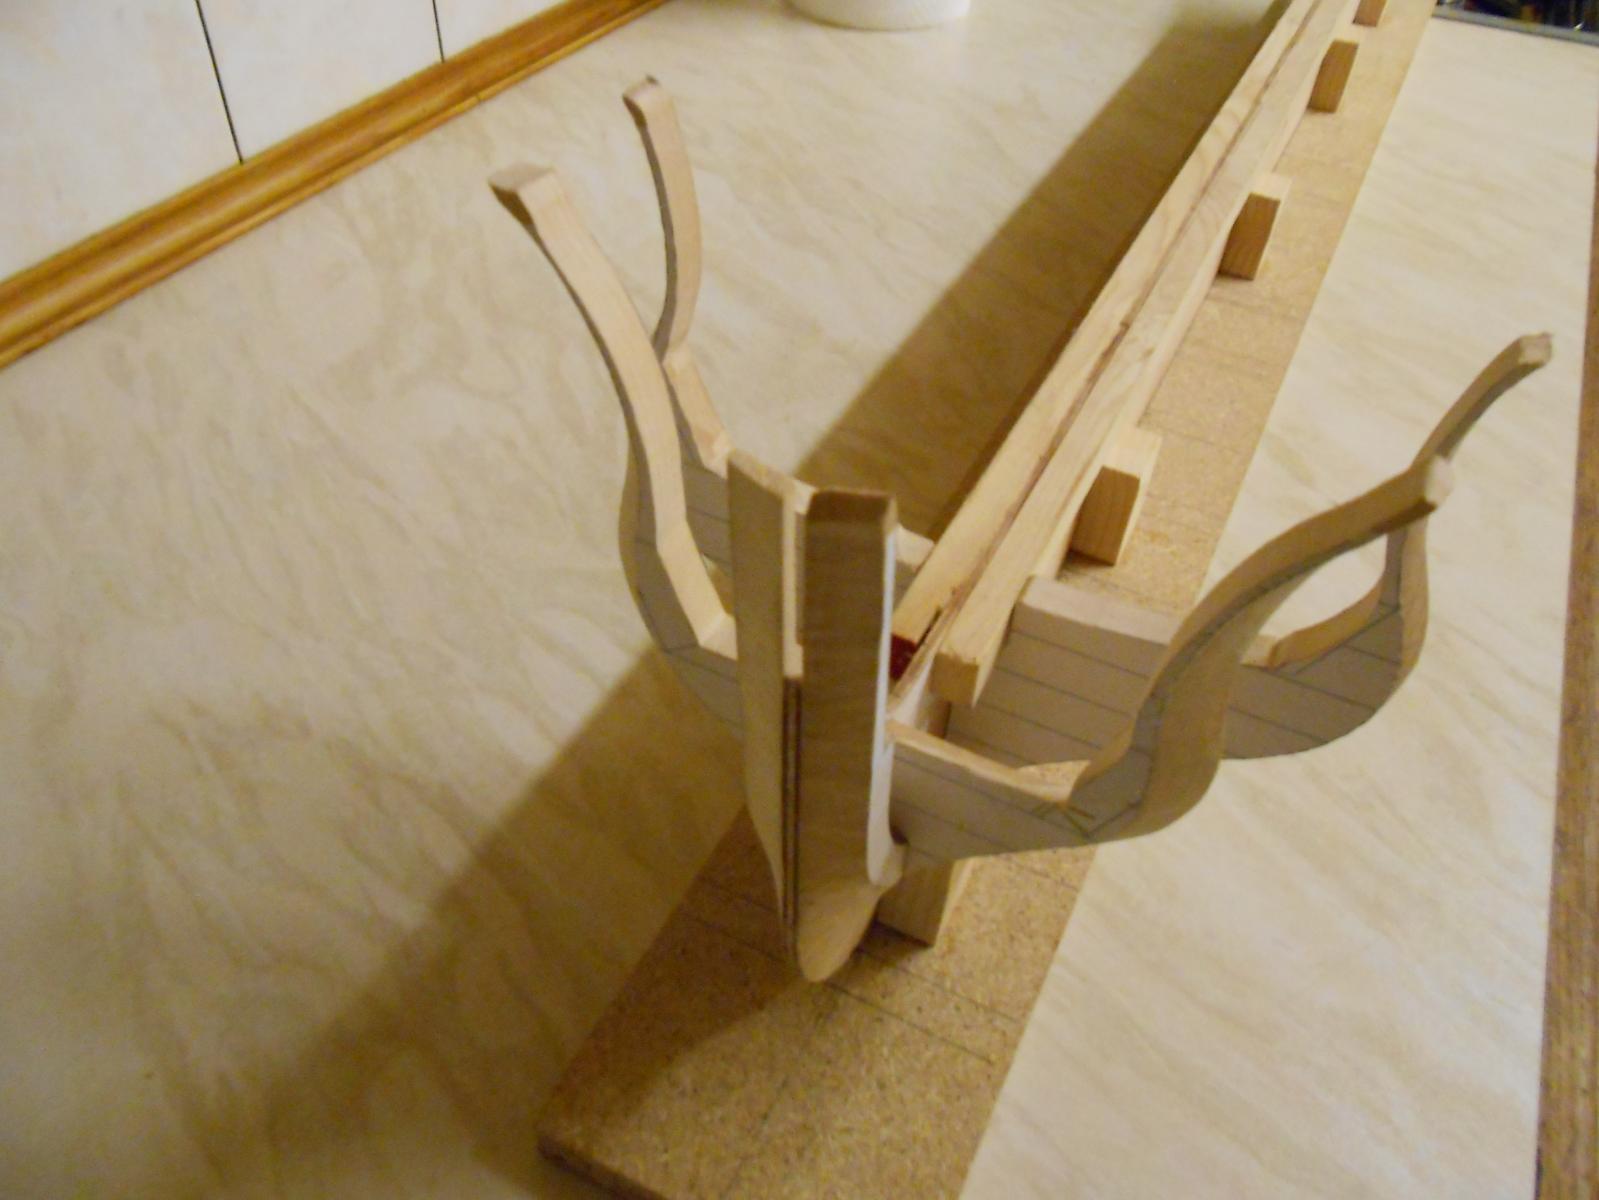
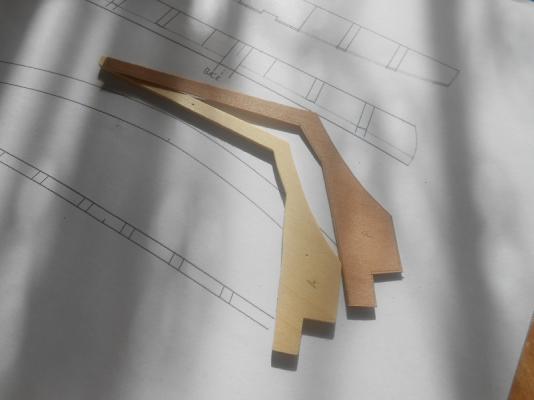
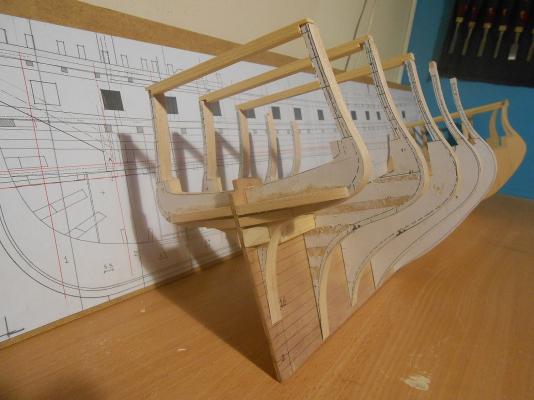
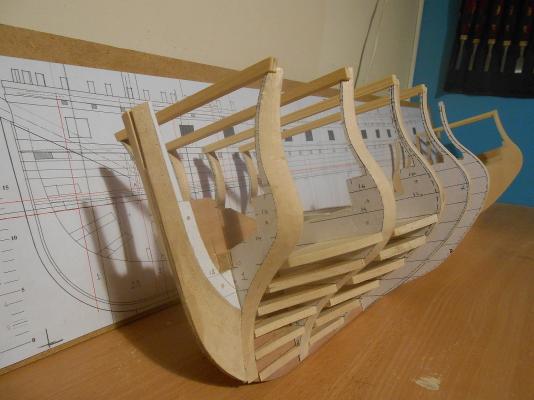
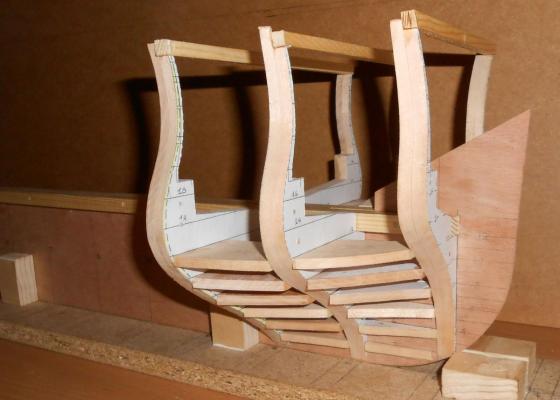
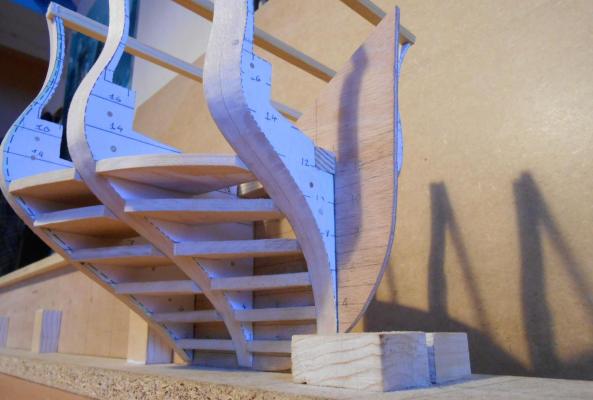
Thank you kind people for the comments! Time for a Little update, Considering all the time i have until i start my new job i haven't got much done, being my first scratch build everything is a bit off here and there and some problems that needed fixing and thinking through but i think once i get to the planking everything will atleast LOOK much cleaner. Having some problems with the stern making everything accurate, same with the gun ports(there is a problem in the centre hull which can be seen in one of the last pictures, this has been fixed). I think i've finally got the stern sorted so far. Heres the first terrible attempt. And heres the second attempt, Thank you nigel for the glueing the plans on the wood tip, so much more helpful. covered each side with some thin pear glued to some scrap from my sovereign just to make things easier getting sizes right, although this will only be seen where the windows will be. This attempt has made things a bit easier again getting the angles and making sure the 'stern frames' stay in their correct places. Here are a few other pictures. Pear deck has been covered with Teak oil as seen from another build of the belle poule which i greatly admire. This will be done with all pear on the ship.


-
AntiSpiral reacted to a post in a topic:
Le Fleuron 1729 by rekon54 - 1:24
-
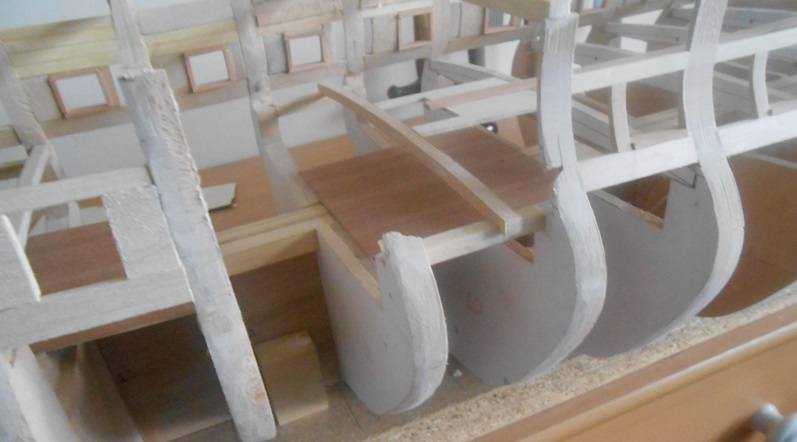
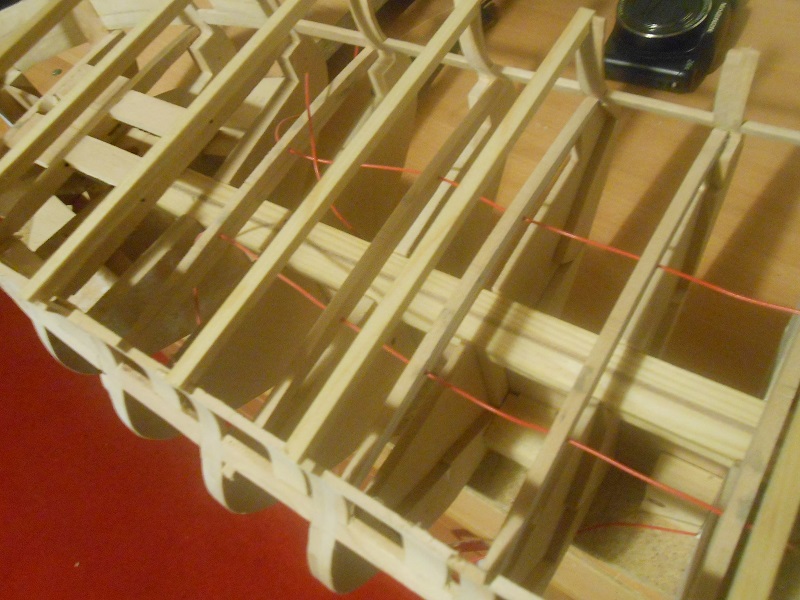
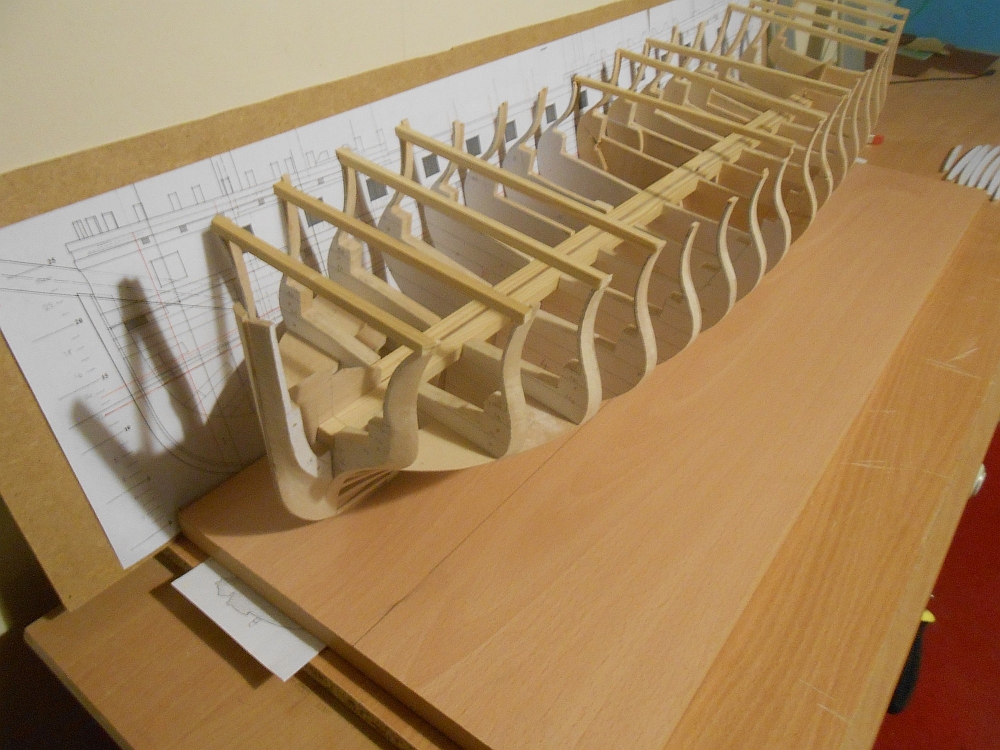
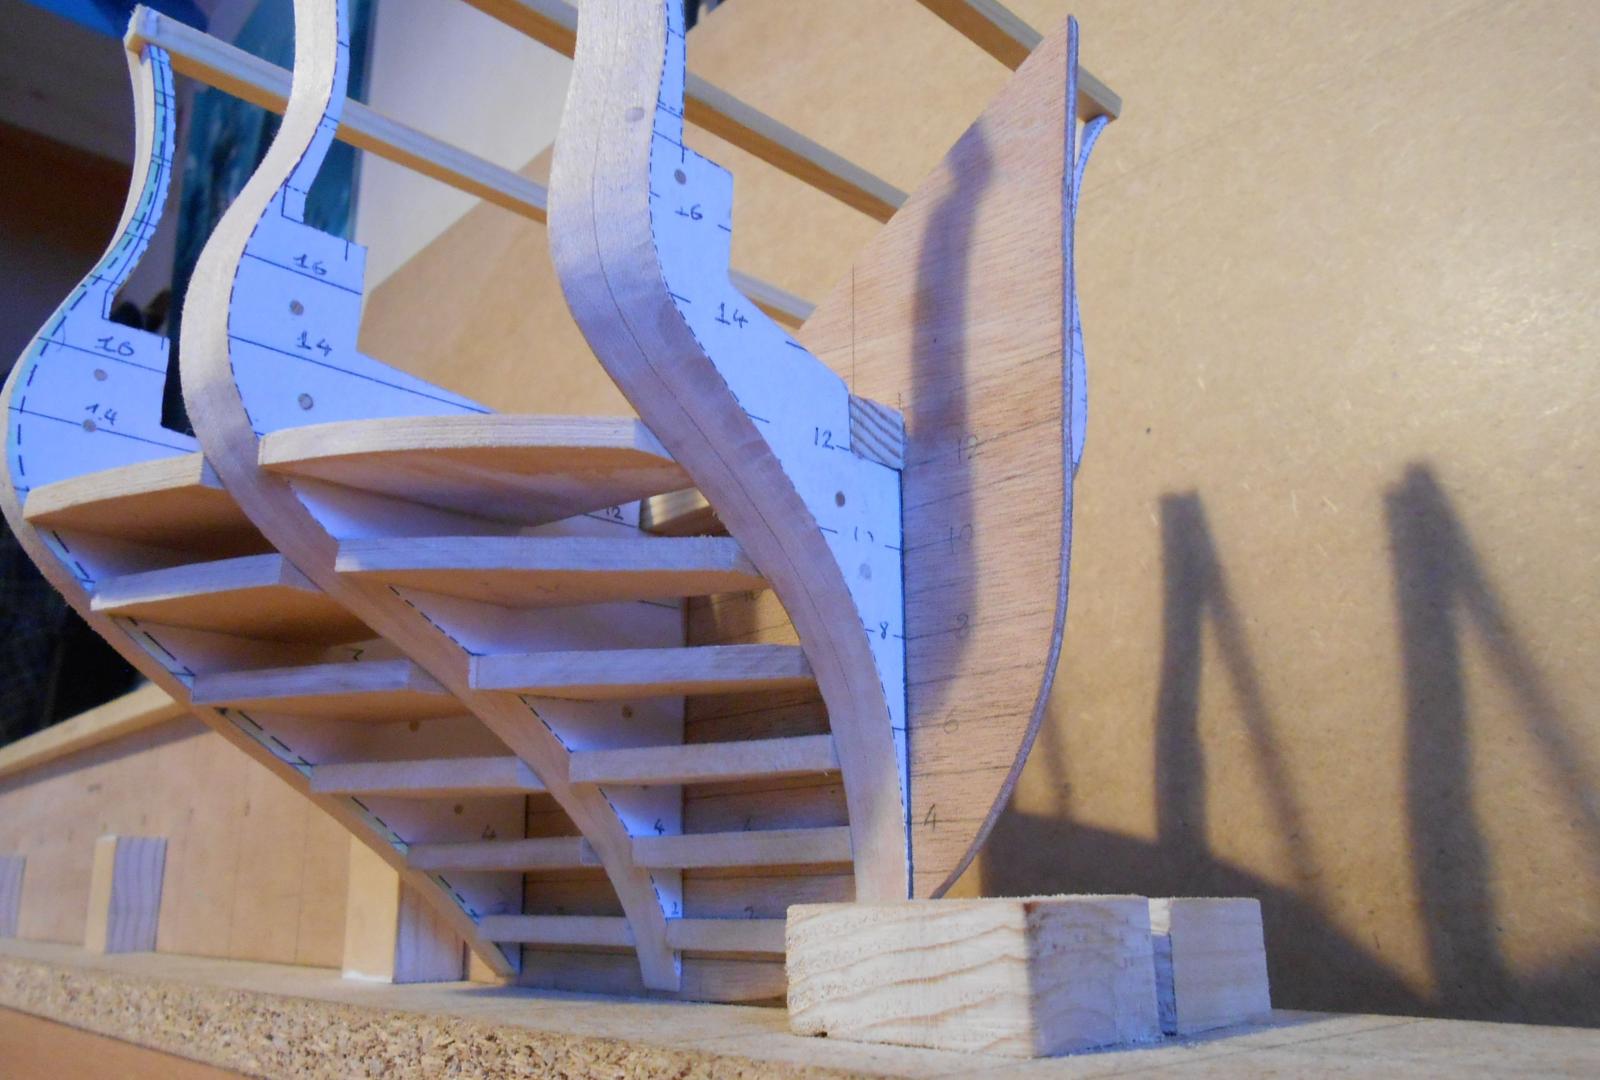
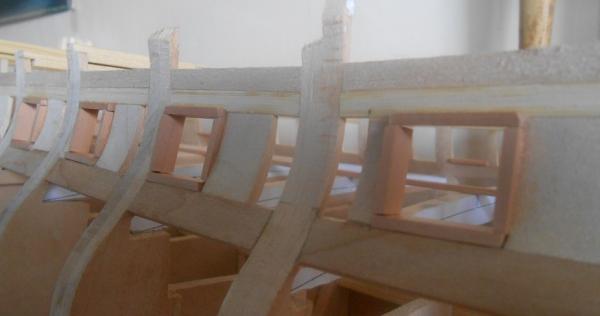
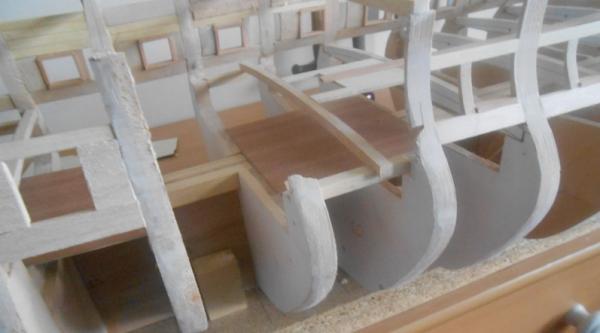
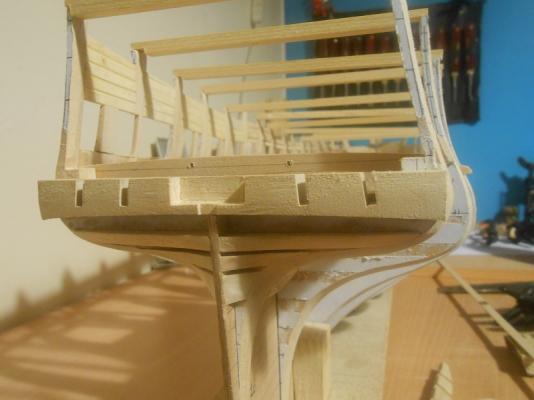
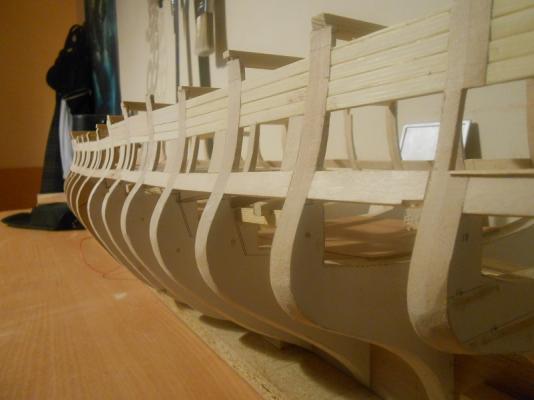
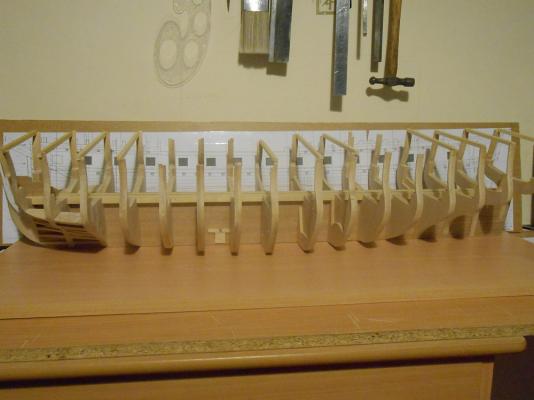
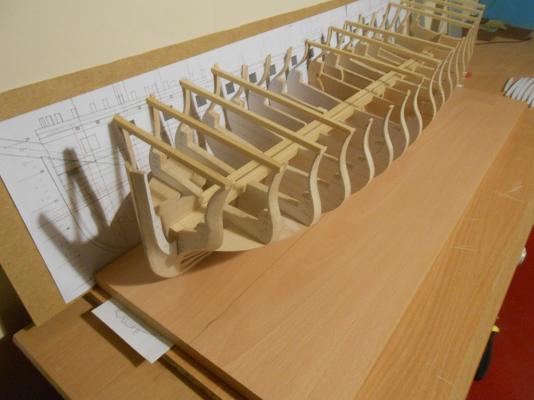
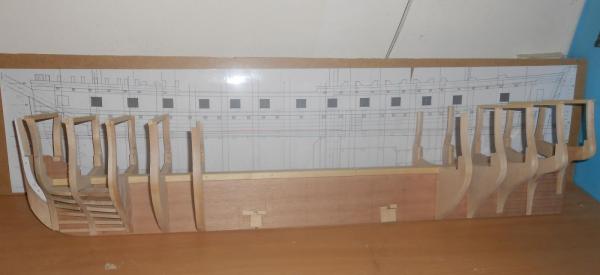
Finally all the frames are added, not perfect but its done. Ready for the beams and stern to be added, not sure how to go about making the stern yet as i will make it out of something harder than lime. (for some reason these images are never uploaded in high quality) Next time on POB La Belle Poule! Beams added Small deck added Starting LED wiring!


-
thanks nigel, think ive got some of that laying around, i'll give it a try!
-
AntiSpiral reacted to a post in a topic:
La Belle Poule 1765 by AntiSpiral - 1/48 - An Adventure in POB
-
AntiSpiral reacted to a post in a topic:
USF Essex by Cookster - 1:48, 1814 Configuration, POB and POF (first scratchbuild)
-
AntiSpiral reacted to a post in a topic:
Newsworthy updates from Chris Watton
-
thank you druxey! i've always wondered of the graphite way but wasn't sure if i could make it accurate or not, but im sure its possible to make it accurate. But the rubber cement method is interesting, i will look more into this thank you.
-
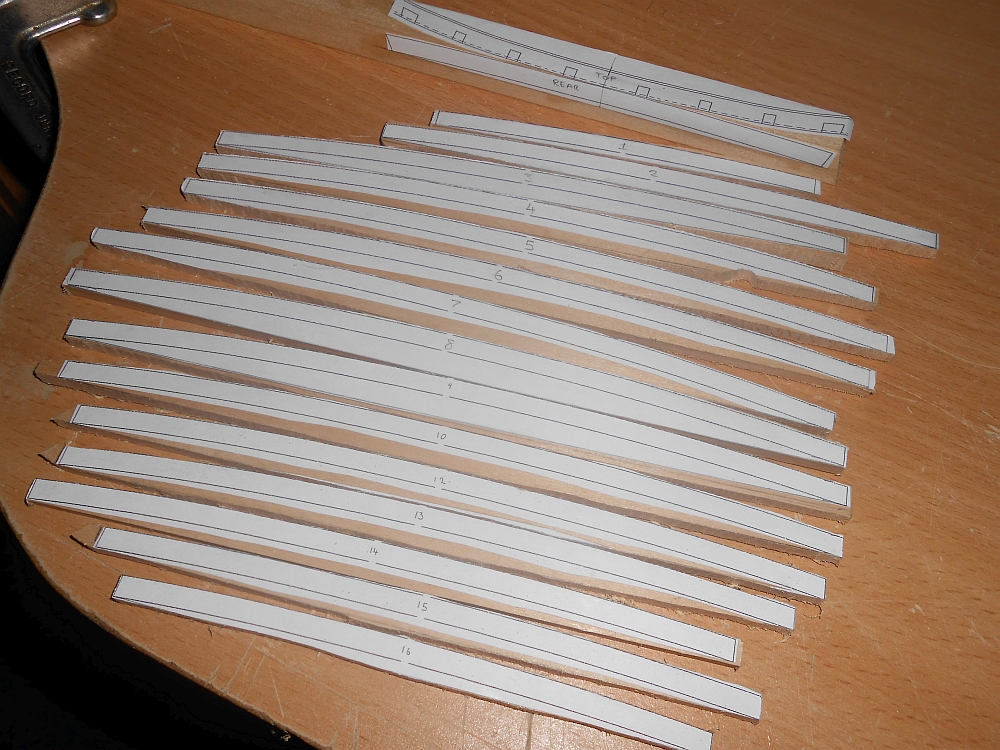
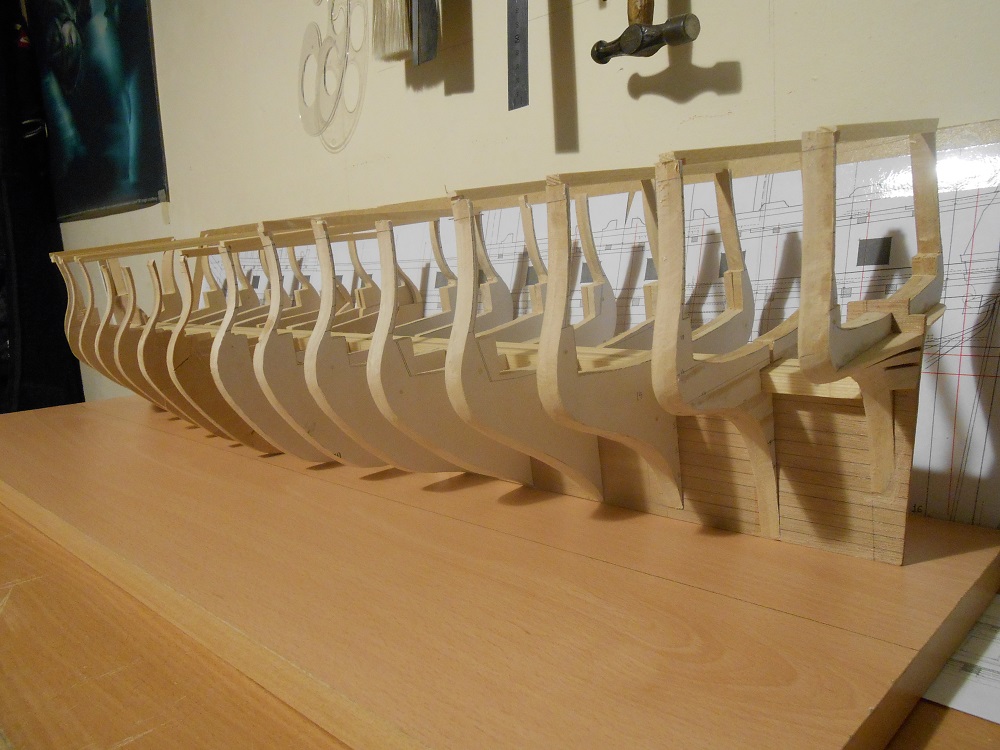
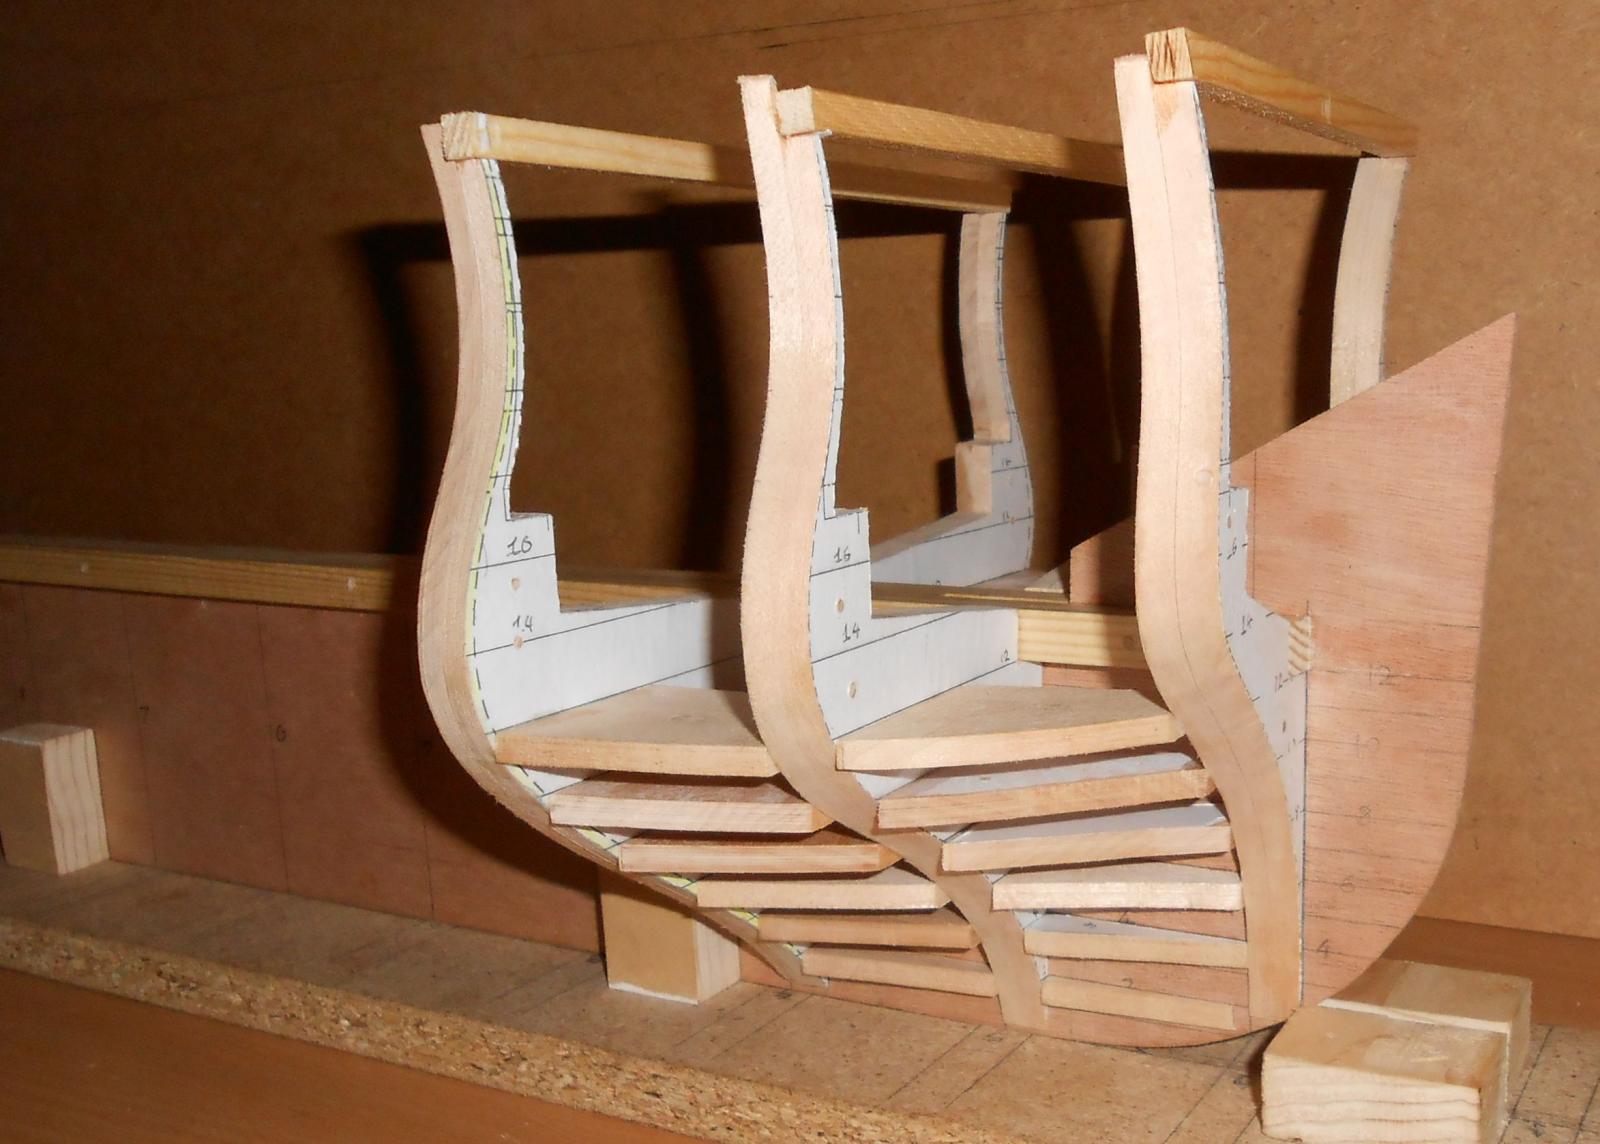
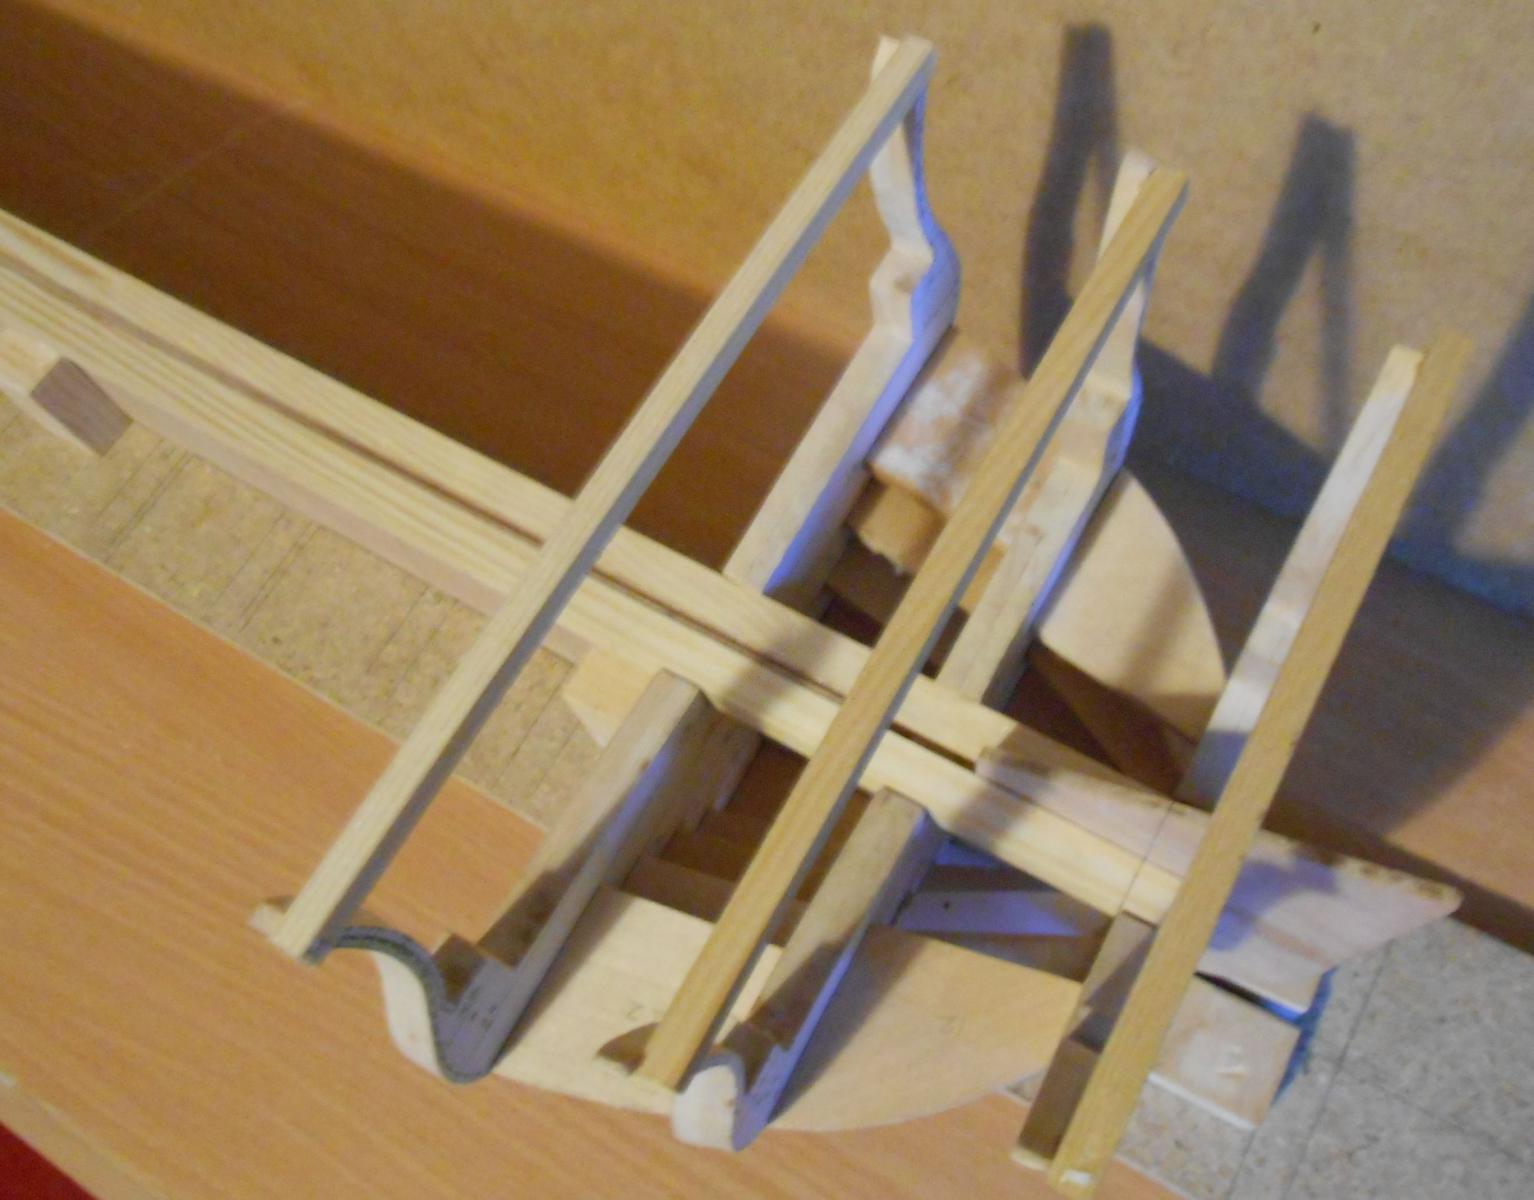
hate to keep the log quiet so here's a small update, slow builder so i've only built 7 frames or 28 each since the last update.. only 24 (6) more to go....... in the centre the parts for holding the small nuts in place look flimsy and weak but will later be reinforced with some infill. The stern is probably as detailed as the frame will ever get. Cant say the build so far is perfect but im happy with the results, from previous builds cant believe im actually going to say - looking forward to planking - im sure i'll regret those words! Progress so far! Looking for some tips and ideas, glueing on these paper plans to the wood may later cause some trouble for other parts of the ship, does anyone have any ideas whats the best way to transfer the plans to the wood? i've seen it done but no idea how unless its the same as they do with tattoos?
-
lovely build yancovitch and lovely colours, nice to see a painted ship and new techniques too.
-
Well weeks have gone past since my last update and nothing since for a good reason.. Many problems were found when i noticed the frames weren't align which would obviously cause many problems, i expected little inconsistencies when builing my first scratch but nothing as bad as that, so ofcourse i've had to start again which isn't as bad a problem as i thought. Tempted to restart the whole post but i think i'll just add these few pictures and next time post a big update. Starting again was the best idea because now the ship is more accurate and reliable for future building, simple changes have helped me ensure its correct this time and i've had loads of spare timber left over to make the parts so far, as i had only got as far as making 5 frames. The progress so far: Im very slow at this and am still waiting for stock of lime so im taking my time as to save money aswell.

-
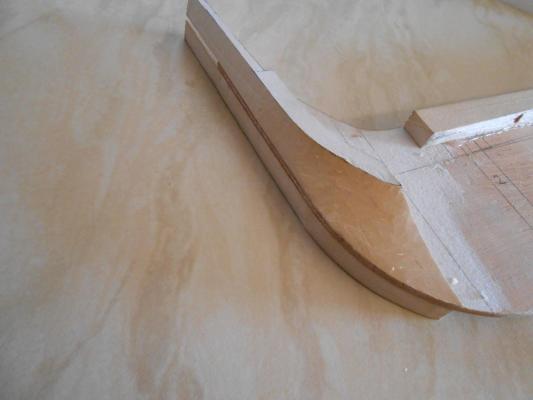
more work to show but not had much time to alot due to work, hopefully during the christmas time and after i'll be making progress. So far i've build a simple jig to hold while i add the frames and keep the keel straight when i fill in the gaps of the frames which will be done at a later stage. after that ive added on two pieces at the front to make it easier when adding planks, forgive me i've not yet delved into the ship jargon to know all the exact words for things! shaped using a chisel which was fun, never used one before but i also had help using a very sharp carving knife.... Same was done when shaping the first 2 frames along with the favourite sanding drum, thought best done while not glued on the keel. A little rough at the moment waiting for fine sanding. I'll carry on shaping the frames for now when i have the time then we can get onto the more fun stuff!