-
Posts
1,268 -
Joined
-
Last visited
-
 ccoyle reacted to a post in a topic:
Gokstad Viking Ship by jack.aubrey - FINISHED - Dusek Ship Kits - 1:35 Scale
-
 GrandpaPhil reacted to a post in a topic:
HMS Guadeloupe (ex french Le Nisus), Brick de 24 by Jack.Aubrey - 1:48 scale
-
 GrandpaPhil reacted to a post in a topic:
HMS Guadeloupe (ex french Le Nisus), Brick de 24 by Jack.Aubrey - 1:48 scale
-
 Louie da fly reacted to a post in a topic:
Ragusian Carrack by jack.aubrey - FINISHED - Marisstella - 1:59
-
 yvesvidal reacted to a post in a topic:
HMS Guadeloupe (ex french Le Nisus), Brick de 24 by Jack.Aubrey - 1:48 scale
-
 Siggi52 reacted to a post in a topic:
HMS Guadeloupe (ex french Le Nisus), Brick de 24 by Jack.Aubrey - 1:48 scale
-
 mtaylor reacted to a post in a topic:
HMS Guadeloupe (ex french Le Nisus), Brick de 24 by Jack.Aubrey - 1:48 scale
-
 ccoyle reacted to a post in a topic:
HMS Guadeloupe (ex french Le Nisus), Brick de 24 by Jack.Aubrey - 1:48 scale
-
 mtaylor reacted to a post in a topic:
HMS Guadeloupe (ex french Le Nisus), Brick de 24 by Jack.Aubrey - 1:48 scale
-
 yvesvidal reacted to a post in a topic:
HMS Guadeloupe (ex french Le Nisus), Brick de 24 by Jack.Aubrey - 1:48 scale
-
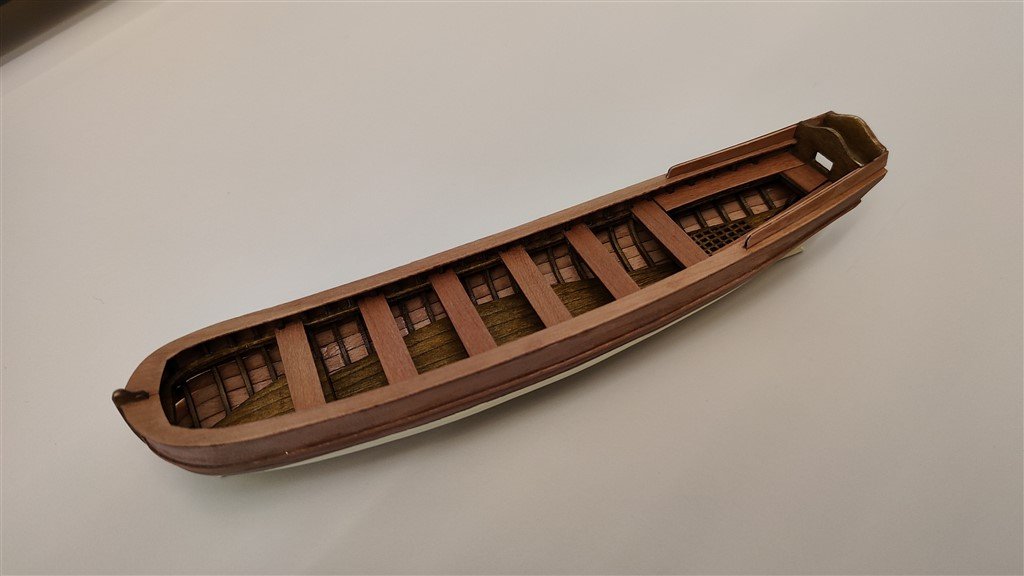
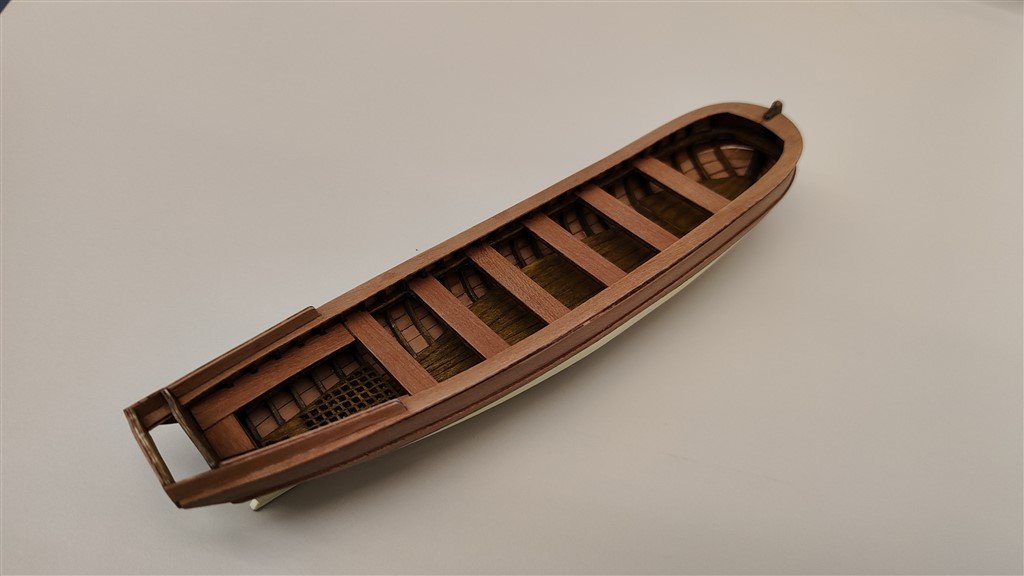
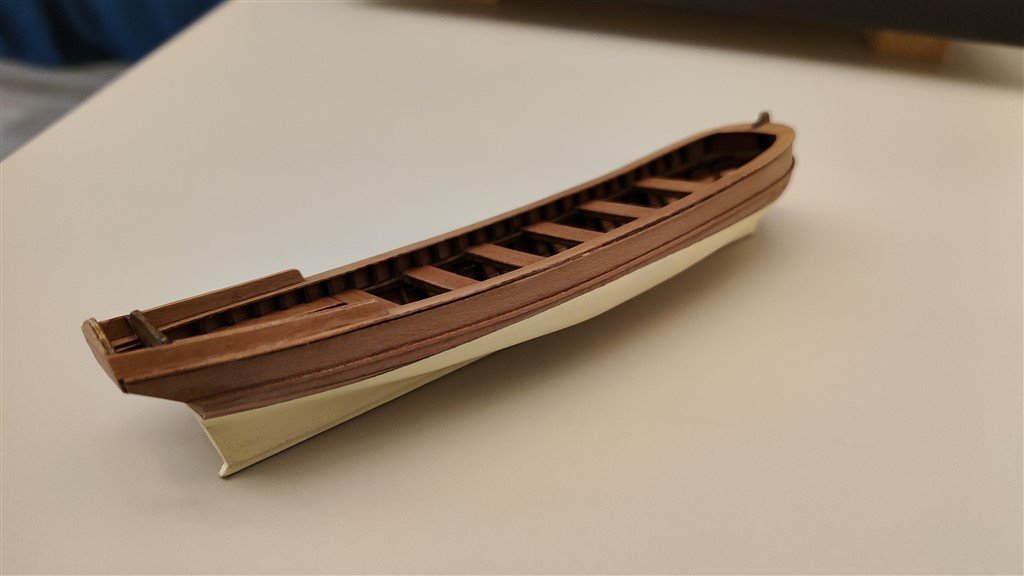
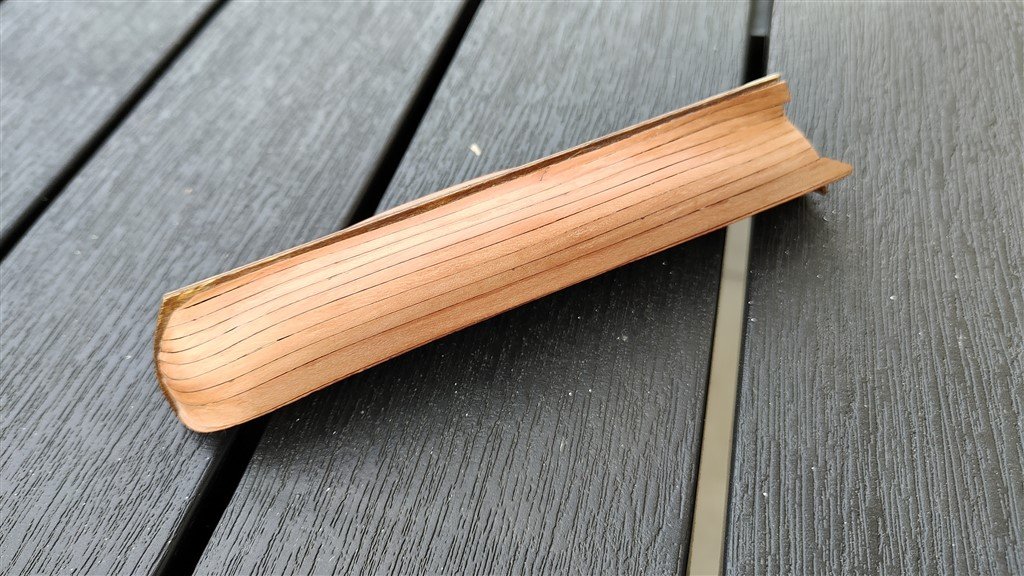
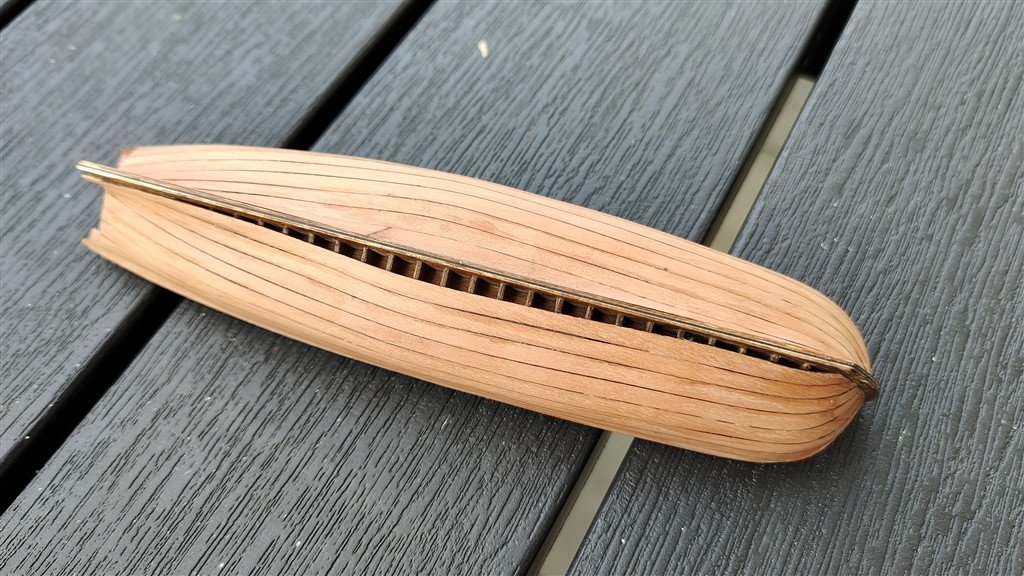
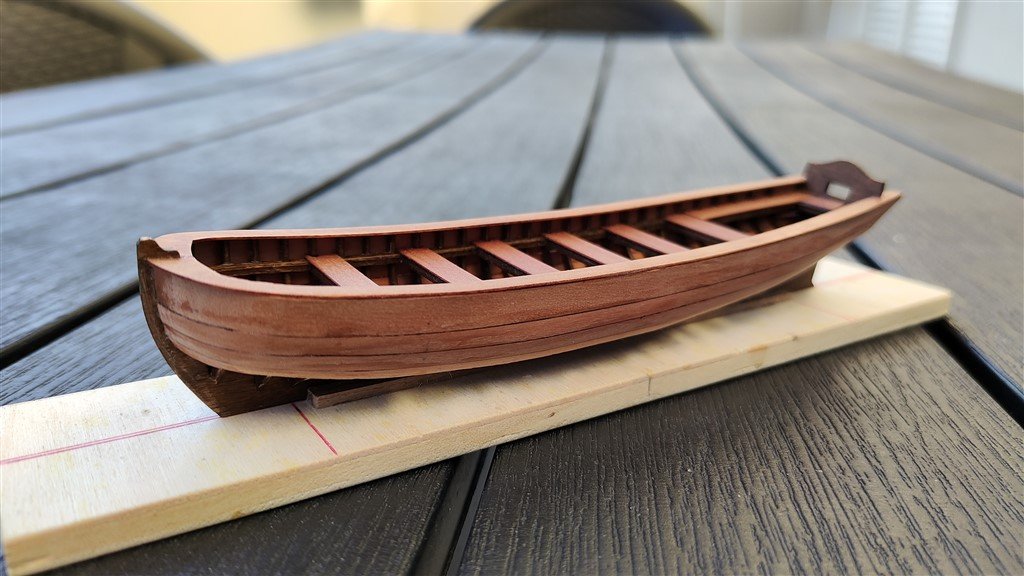
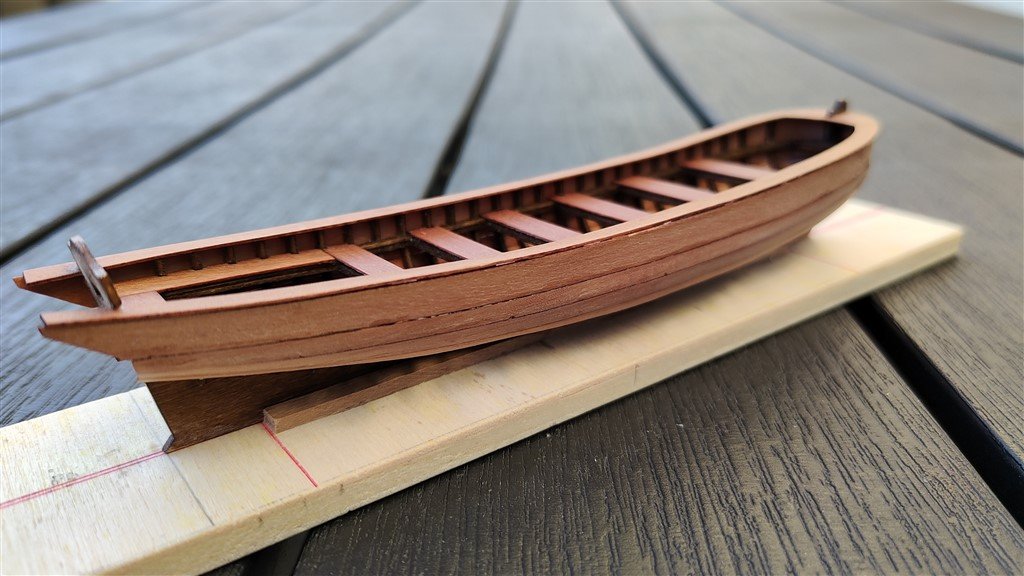
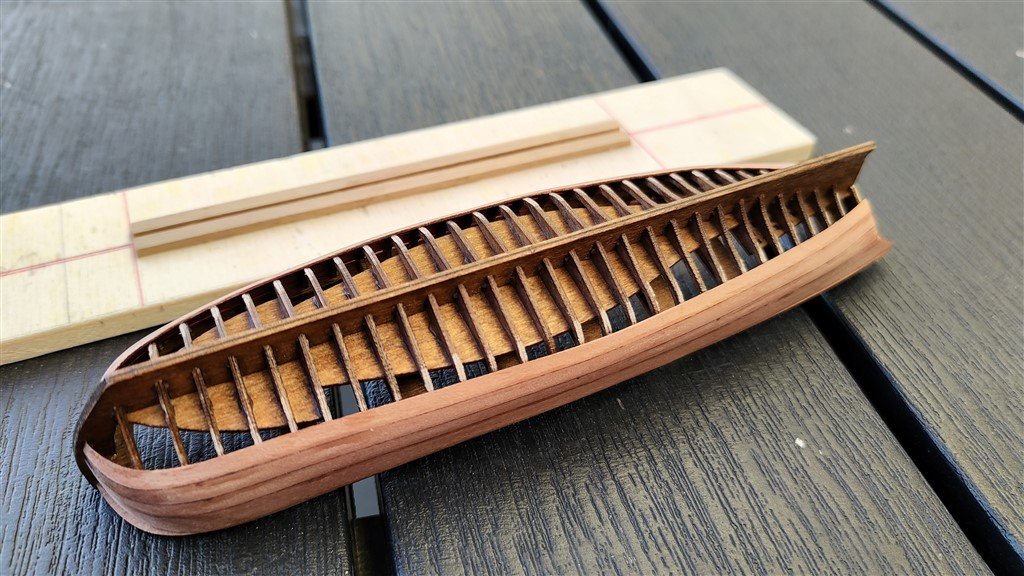
Friday, September 9th, 2022 I've been trying my hand with planking for a couple of days. The various courses of the planking are also laser pre-cut and therefore are quite precise in following the lines of the hull. However their installation is not a very simple task. First of all, it is necessary to hot-bend the strip in the bow area giving it the right curvature, then it is necessary to proceed very calmly and patiently so I am limited to installing a maximum of a couple of courses per session. However, until now, everything seems to be going well. There remains the concern for when I will have to install the last course: will it be accurate? will it be abundant? or will it leave an empty slot? We will see . . . 01 Brick de 24/09092022/IMG20220908184332.jpg 02 Brick de 24/09092022/IMG20220908184339.jpg 03 Brick de 24/09092022/IMG20220908184359.jpg See you next time, Jack Aubrey
-
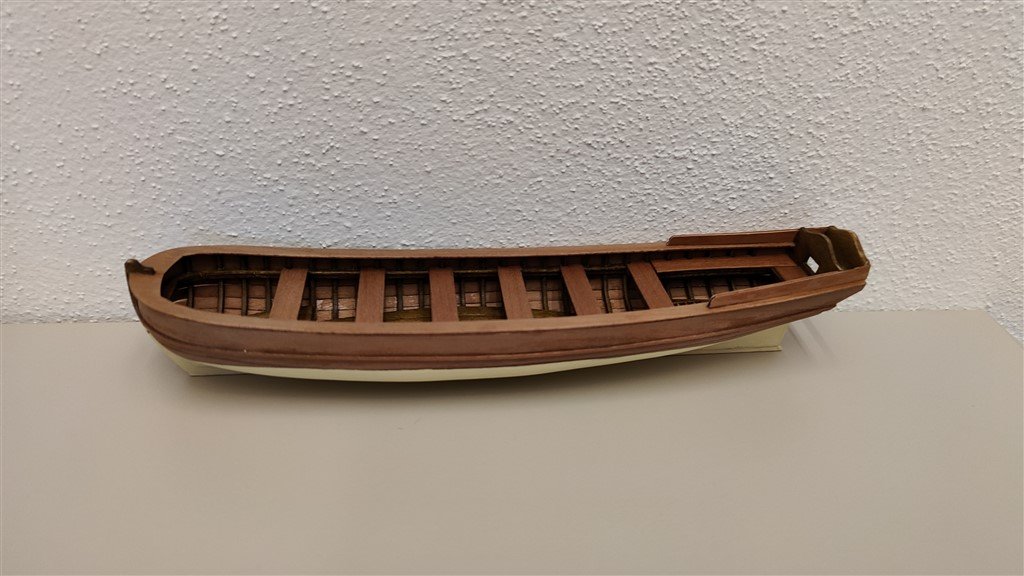
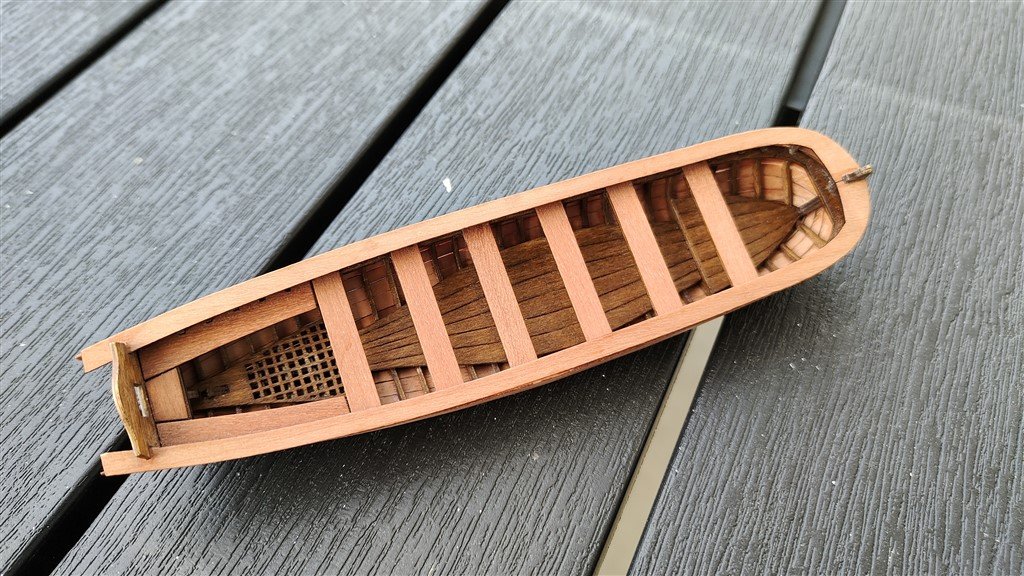
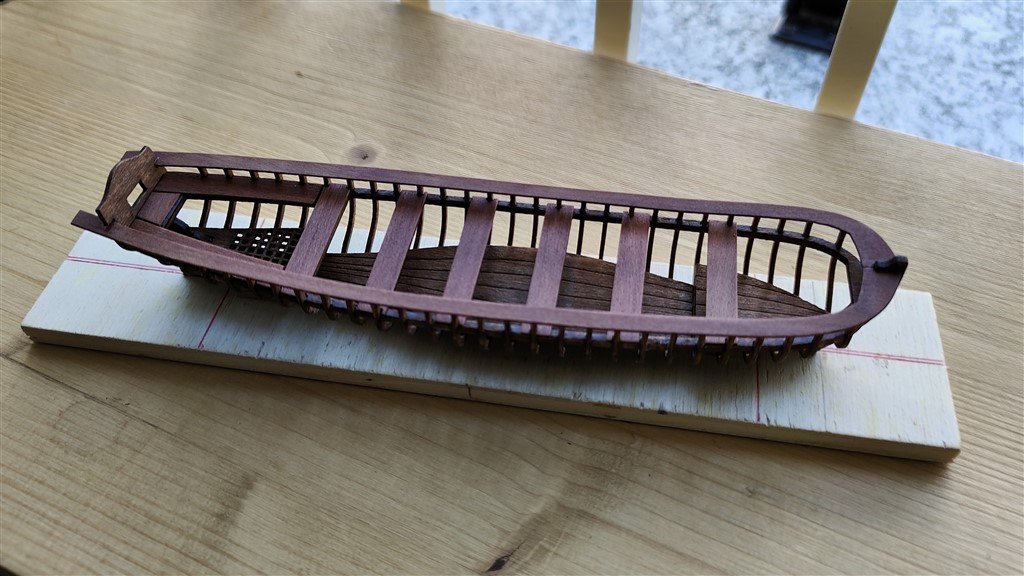
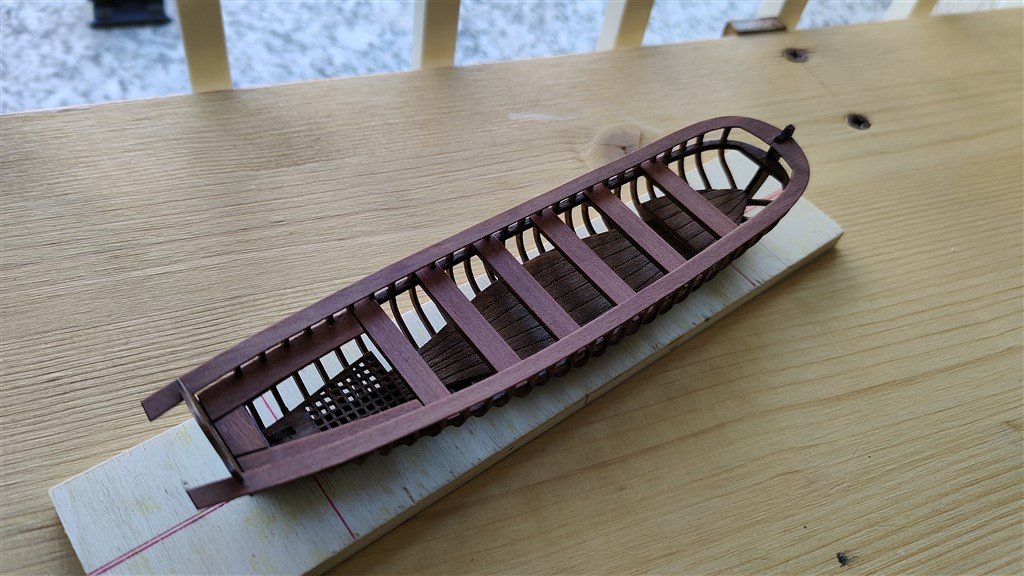
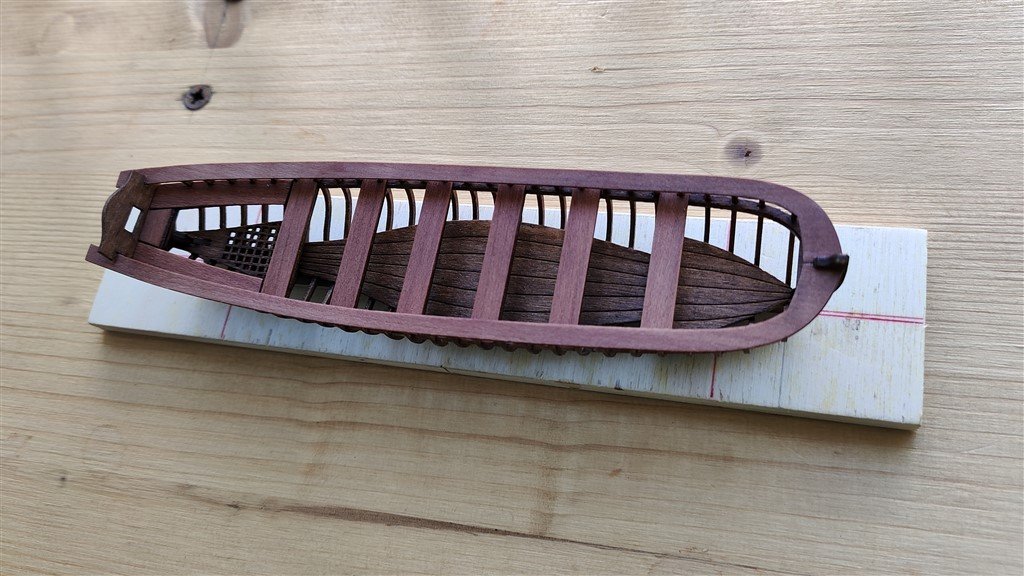
Monday, August 29th, 2022 Another element added to the lifeboat: these are two pearwood pieces that make up the gunwale. Its installation was not very easy but with a good amount of patience it succeeded very well. The boat structure should now be complete so that next step will be the installation of the planks. 01 Brick de 24/29082022/IMG20220829164723.jpg 02 Brick de 24/29082022/IMG20220829164755.jpg 03 Brick de 24/29082022/IMG20220829164806.jpg See you next time, Jack Aubrey
-
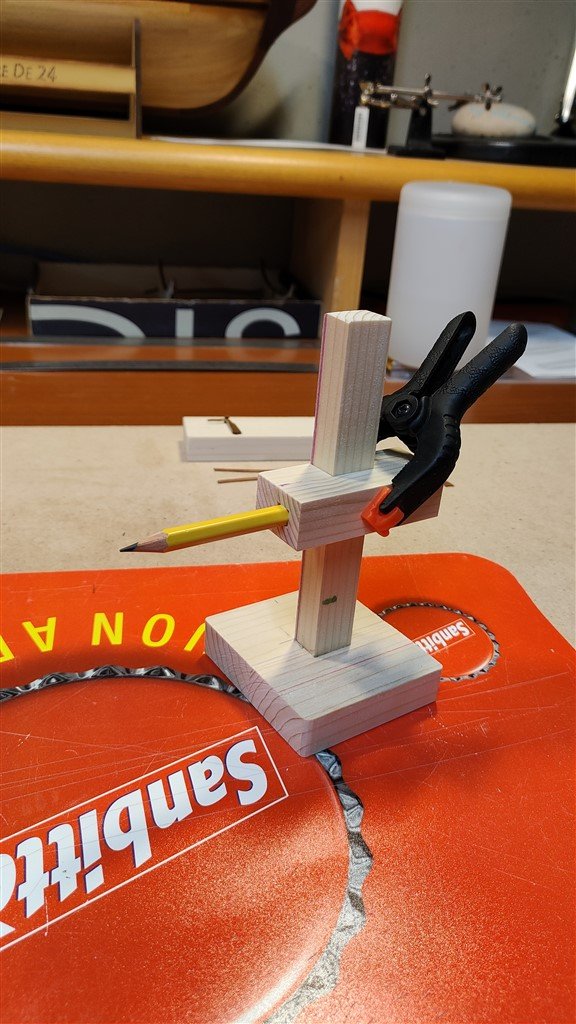
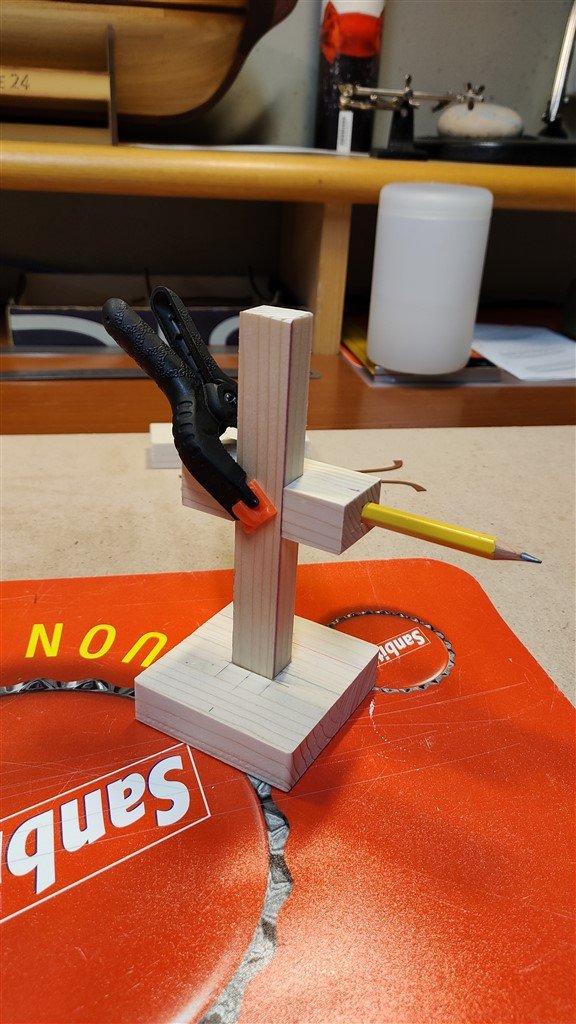
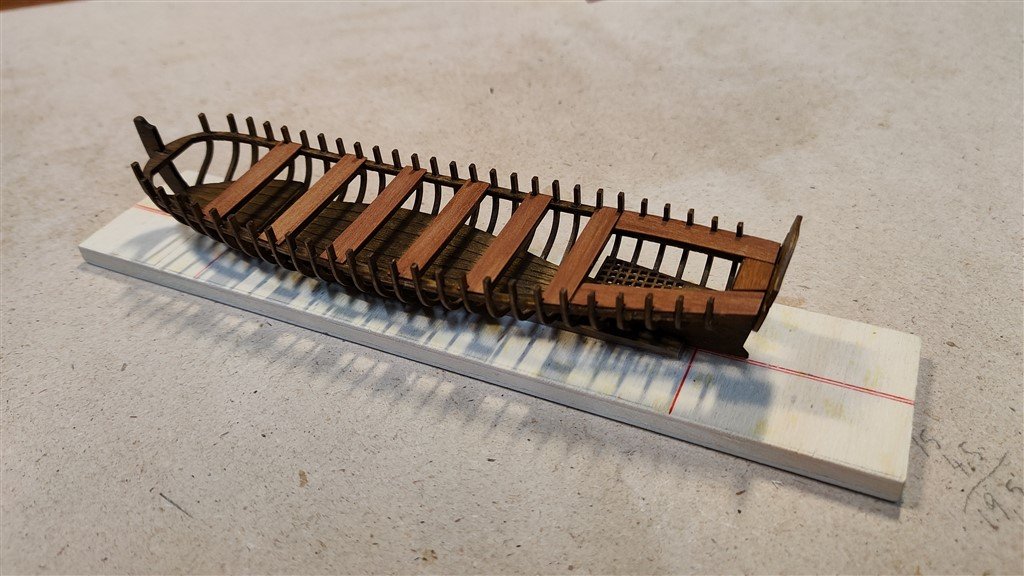
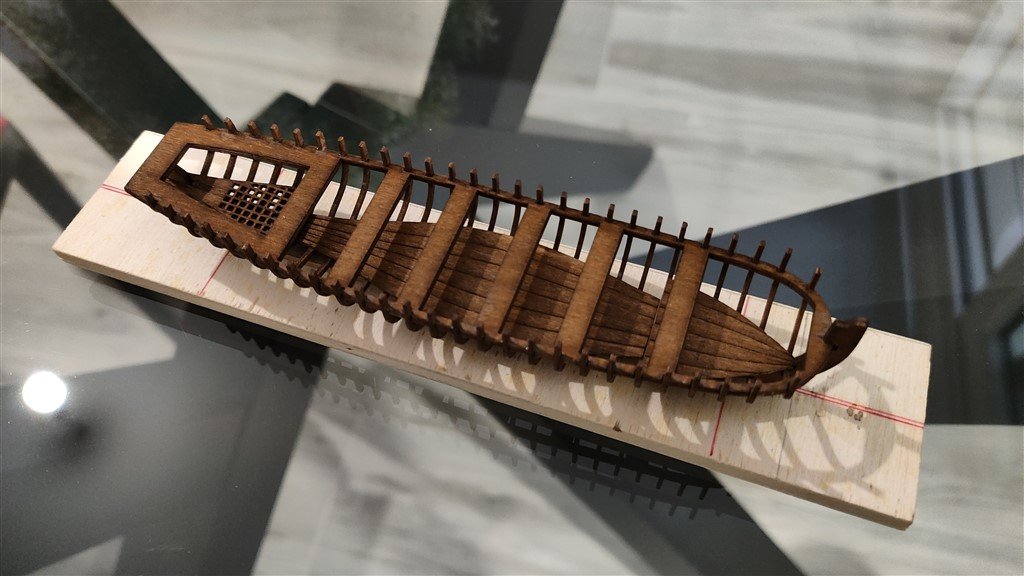
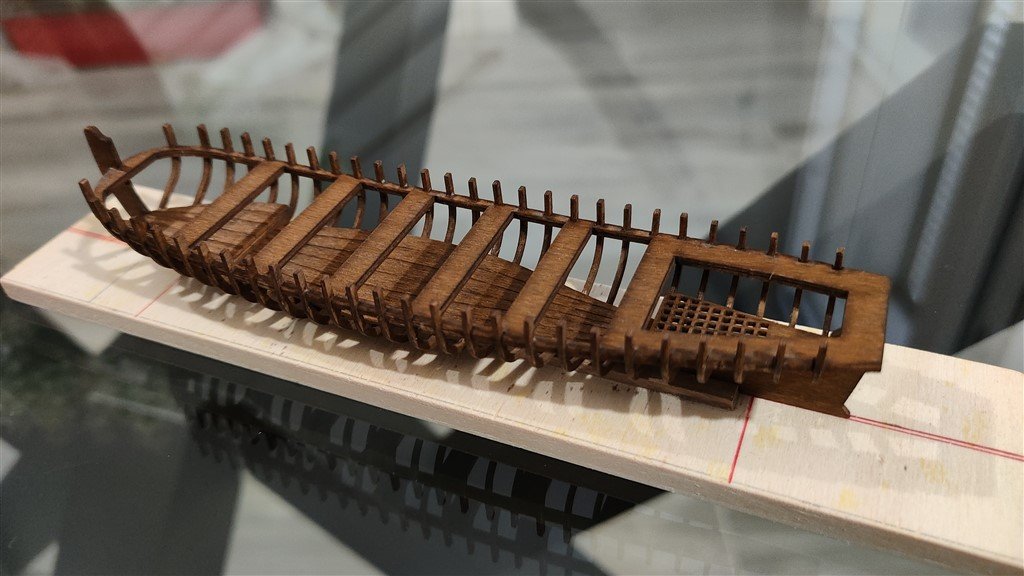
Sunday, August 28th, 2022 One of the preliminary operations to apply copper to the hull of the brick is to build a tool to trace the waterline, tool I built today. It is a quite simple and handcrafted object but it has all the necessary customization possibilities. 01 Brick de 24/28082022/IMG20220828174152.jpg 02 Brick de 24/28082022/IMG20220828174159.jpg Finally, I applied new elements to the lifeboat: in particular, these are pear elements that embellish the seats for the crew as well as reinforce them further. 03 Brick de 24/28082022/IMG20220828174313.jpg See you on the next time; a cordial goodbye from Jack Aubrey
-
Friday, August 26th, 2022 The fact I was successful to precisely glue the lifeboat frames, all of them well aligned and spaced apart, has enormously simplified the assembly of the next element that you can see in the two following images. The installation of this new element has also strengthened the overall skeleton of the lifeboat which, you have to believe me, is really a very delicate object to handle. 01 Brick de 24/26082022/IMG20220826185138.jpg 02 Brick de 24/26082022/IMG20220826185151.jpg See you soon, Jack Aubrey
-
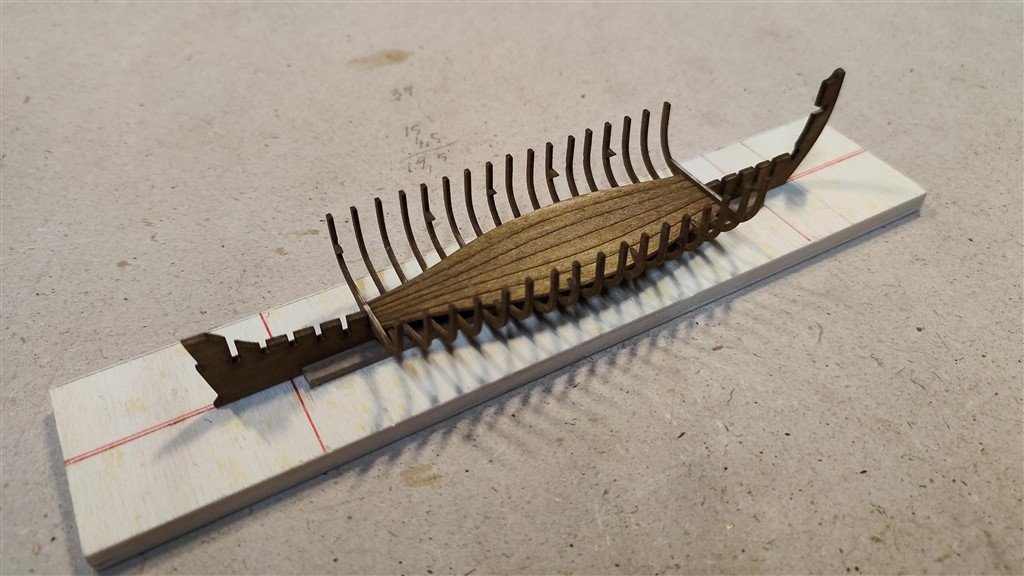
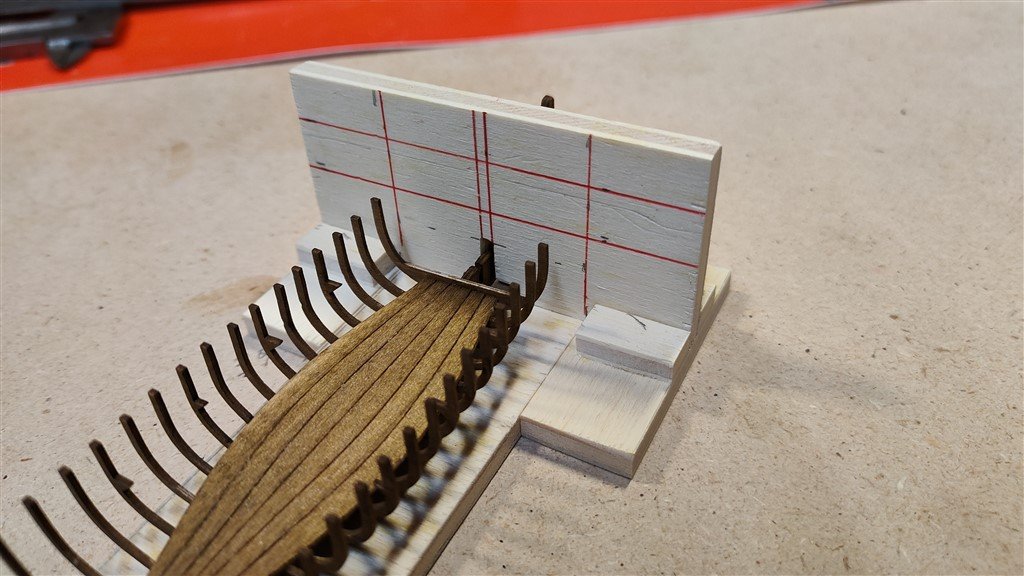
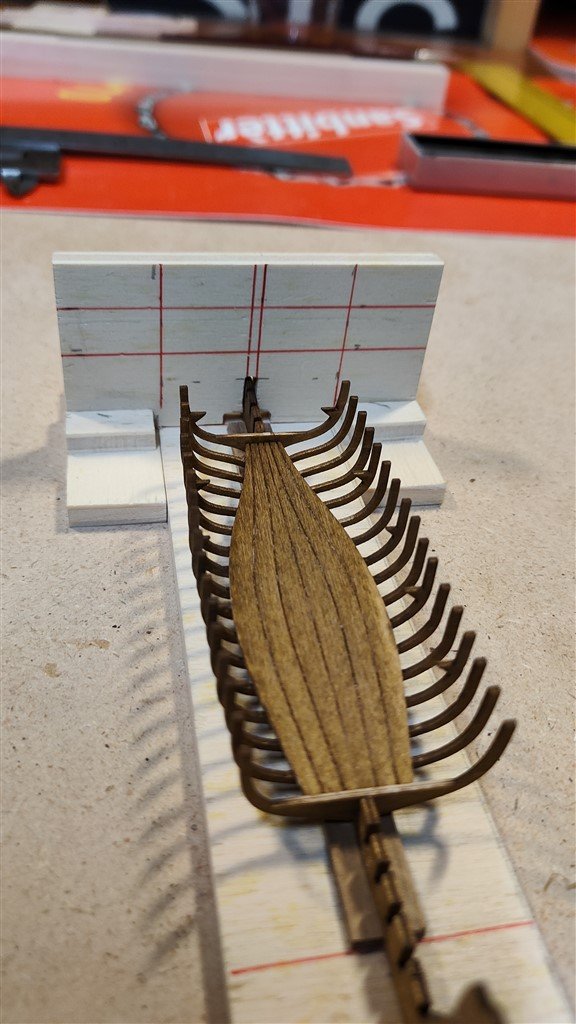
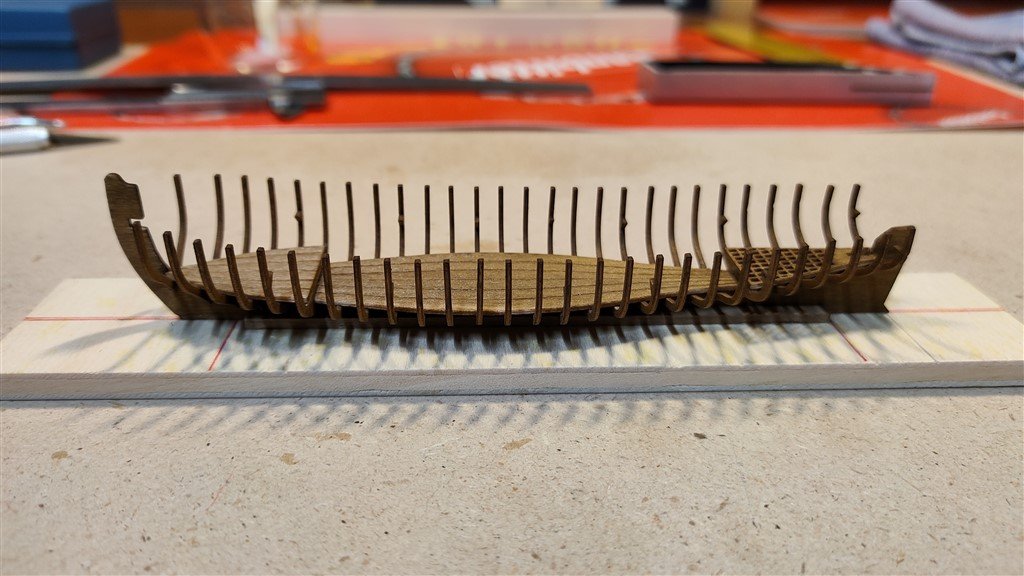
Thursday, August 25th, 2022 During the month of May I moved to my new house on Como Lake and I was able to setup my shipmodeling workshop in a garage under the house, garage purchased specifically for this purpose. Once the setting up was completed, setup which was not a simple task given the quantity of material to be arranged, I resumed the modeling activities. First of all I dedicated all myself in completing the model of the Ragusian Carrack; see also my specific build log for this model on this forum. Now I have finally finished the Carrack (only the plexiglass cover is missing, a job that will however be carried out by a specialist craftsman) and, finally, I can resume this model that has stood still for several years, I think since 2017 or maybe earlier. At the moment the situation of this model is exemplified in the following two images: the hull is almost ready to be covered with cooper. I wrote "almost" because there are still several preliminary tasks to do; we'll see them later. Brick%20by%20JackAubrey/P1100276_zpsg9mlx6or.jpg Brick%20by%20JackAubrey/P1100270_zpsyq8orfvd.jpg Unfortunately, the two lifeboats that I built with some difficulties for the brick are disappeared, used to complete the Ragusian Carrack display stand (I explain the reasons on my post dated Saturday July 2nd, 2022 on the same thread above) and then I'll have to redo them. By lucky chance I found on the internet a kit to build a lifeboat that has exactly the same size as one of the two I have to redo. The kit is very simple: it reproduces all the pieces on plywood of adequate thickness and on thin pear tree boards; all are laser cut. This saves me a lot of work for cutting the pieces. Instead, the assembly seems to me more complex than the ones I had built, but it is certainly not an insurmountable problem. So one of the two boats will be built using this kit. For the second boat I decided to proceed by scanning the laser pre-cut tablets and using them to reproduce the project with AUTOCAD. Once I have the project on the PC, I resize everything for the second lifeboat, print, cut, assemble and so on. Maybe, just to avoid making the same of the other, I will modify some details . . . But let's get to the first one: as I said, the assembly presents simple steps but to be carried out precisely. To ensure a precise assembly of the ribs in this very first phase, I had to prepare a simple keel clamper and a tool to glue the ribs that guaranteed me perpendicularity and horizontality. You can see the keel clamper in the following image: a very simple plywood board and a couple of wood strips. 01 Brick de 24/25082022/IMG20220824182050_BURST000_COVER.jpg The sliding element for gluing the ribs is illustrated in the next two photos: with this tool their assembly has been resolved in a routinary and patience task, without unexpected problems. 02 Brick de 24/25082022/IMG20220824182227.jpg 03 Brick de 24/25082022/IMG20220824182252.jpg Once the frames were glued, I then proceeded to install the elements of the bottom. this task also "strengthened" the whole. 04 Brick de 24/25082022/IMG20220825102558.jpg see you soon, Jack Aubrey
-
zoran started following jack.aubrey
-
Martedì 16 Agosto 2022 A review of details that I have been working on the whole today afternoon . . . 01 Ragusian Carrack/16082022/XX.jpg 02 Ragusian Carrack/16082022/XX.jpg 03 Ragusian Carrack/16082022/XX.jpg 04 Ragusian Carrack/16082022/XX.jpg 05 Ragusian Carrack/16082022/XX.jpg 06 Ragusian Carrack/16082022/XX.jpg 07 Ragusian Carrack/16082022/XX.jpg 08 Ragusian Carrack/16082022/XX.jpg 09 Ragusian Carrack/16082022/XX.jpg See you soon, even if it's very close now, as far as I am concerned, to finish. Jack Aubrey
- 190 replies
-
- ragusian
- marisstella
-
(and 1 more)
Tagged with:
-
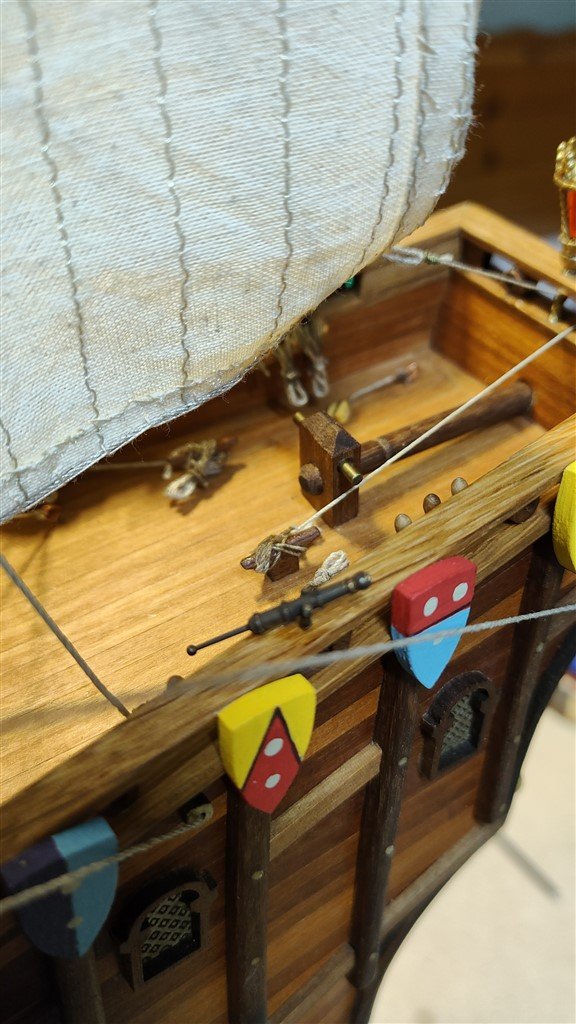
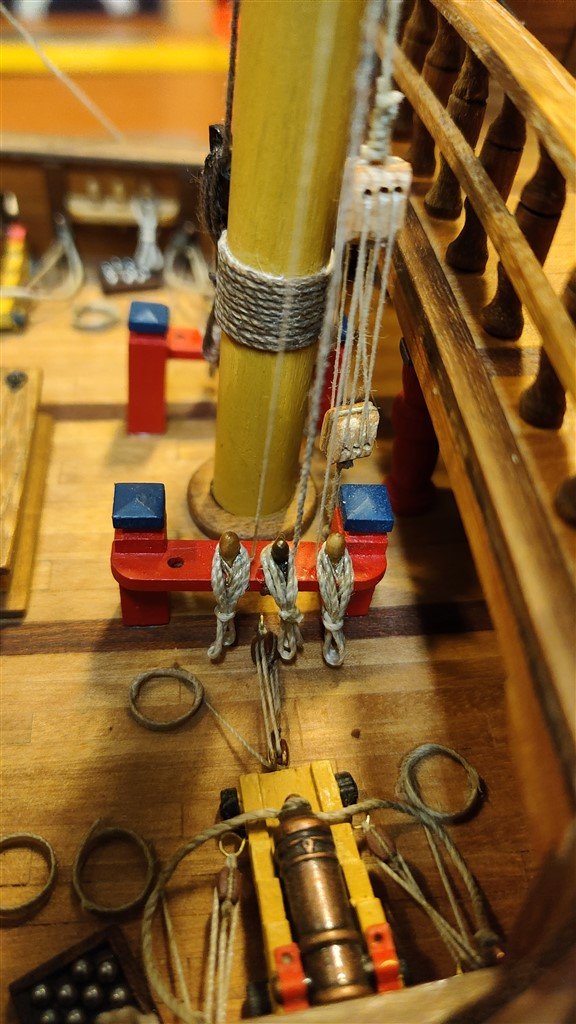
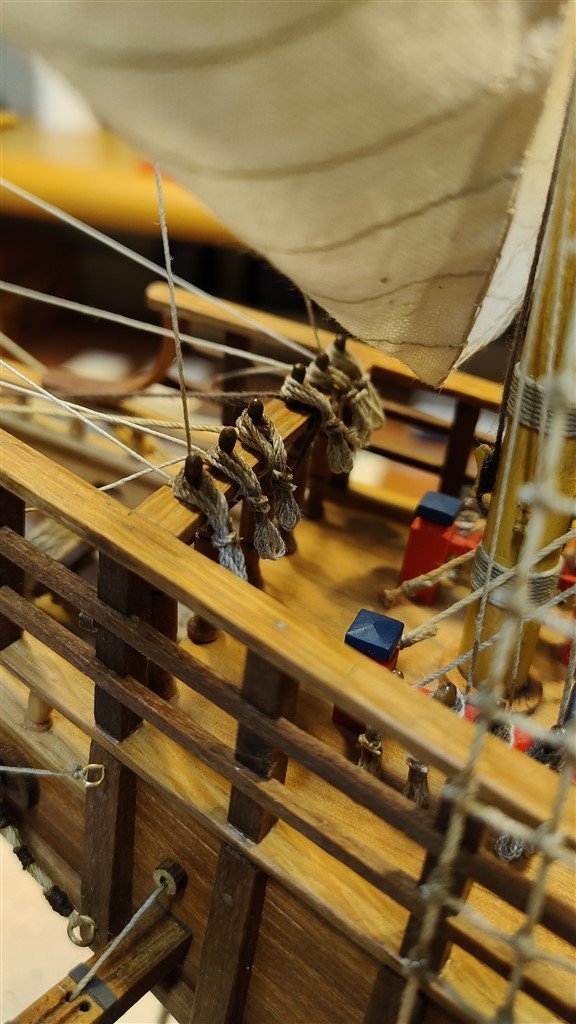
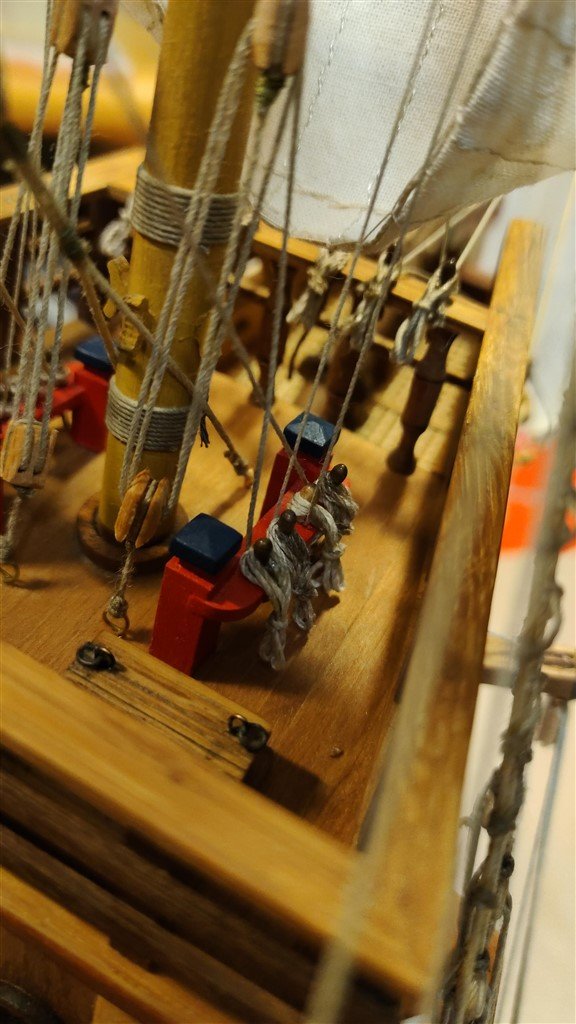
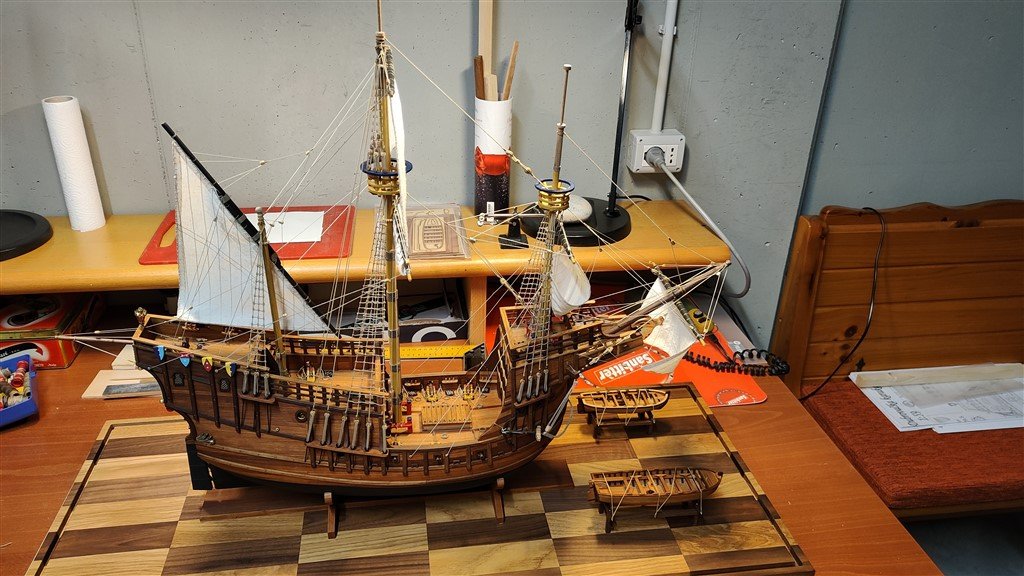
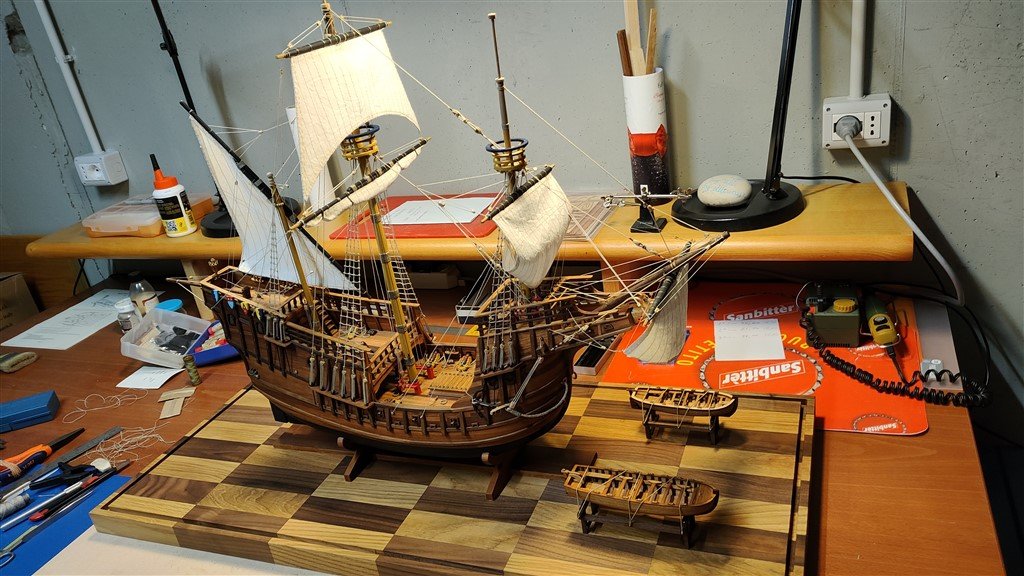
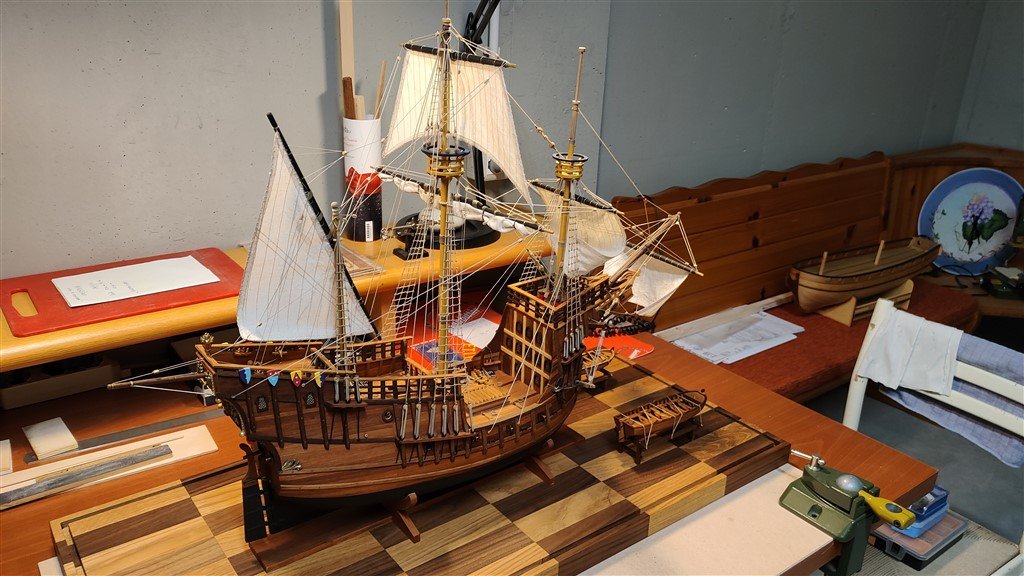
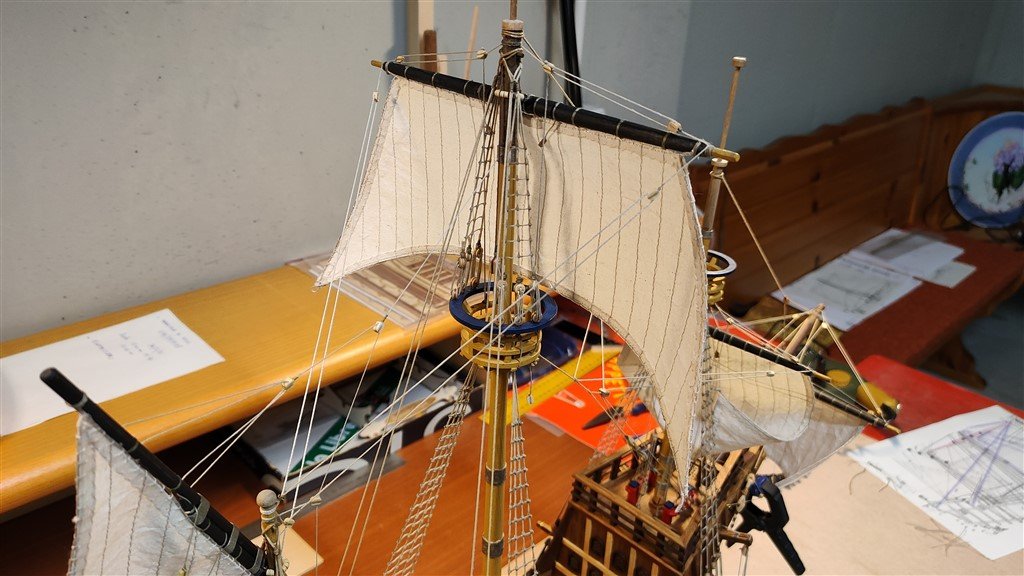
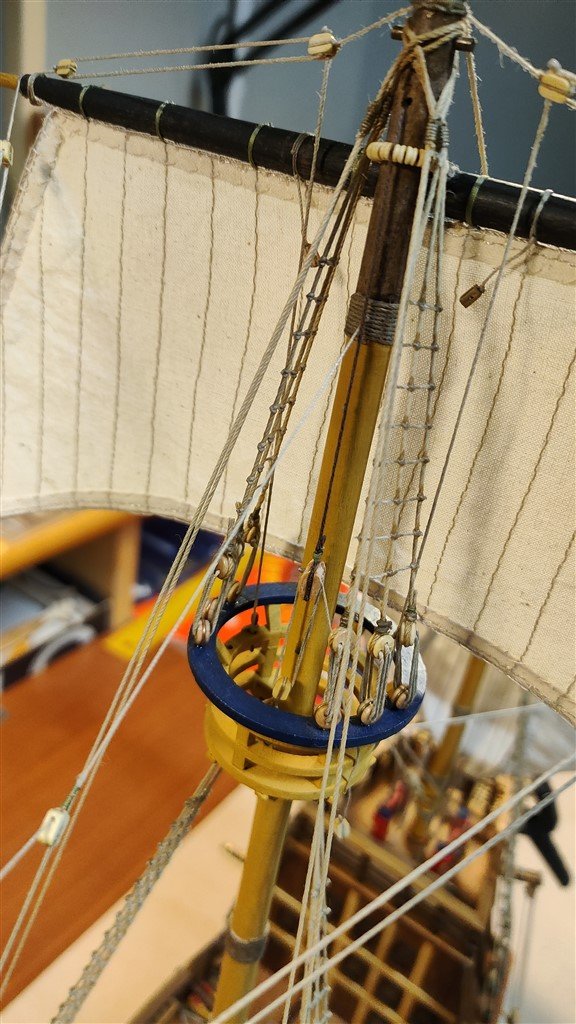
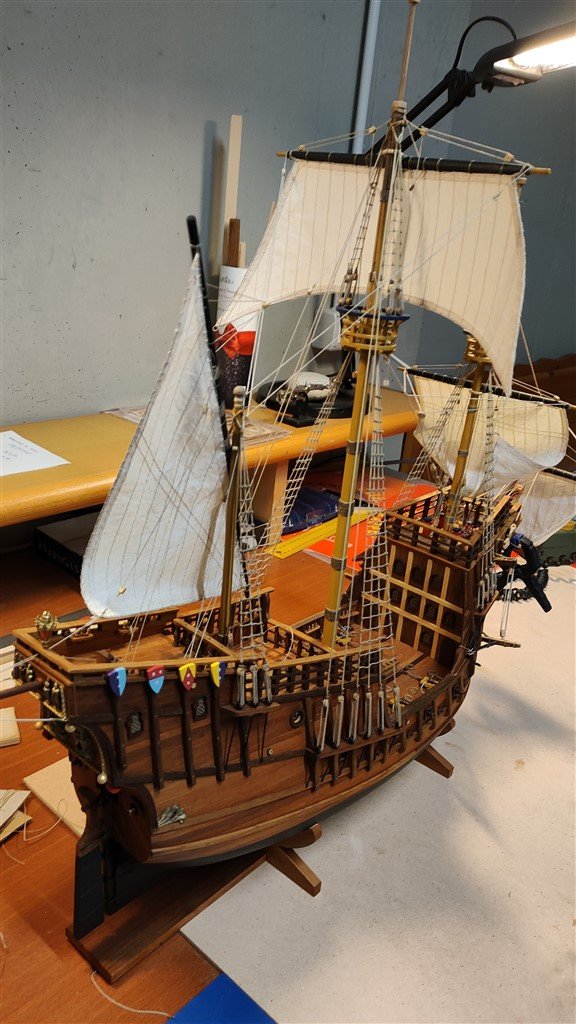
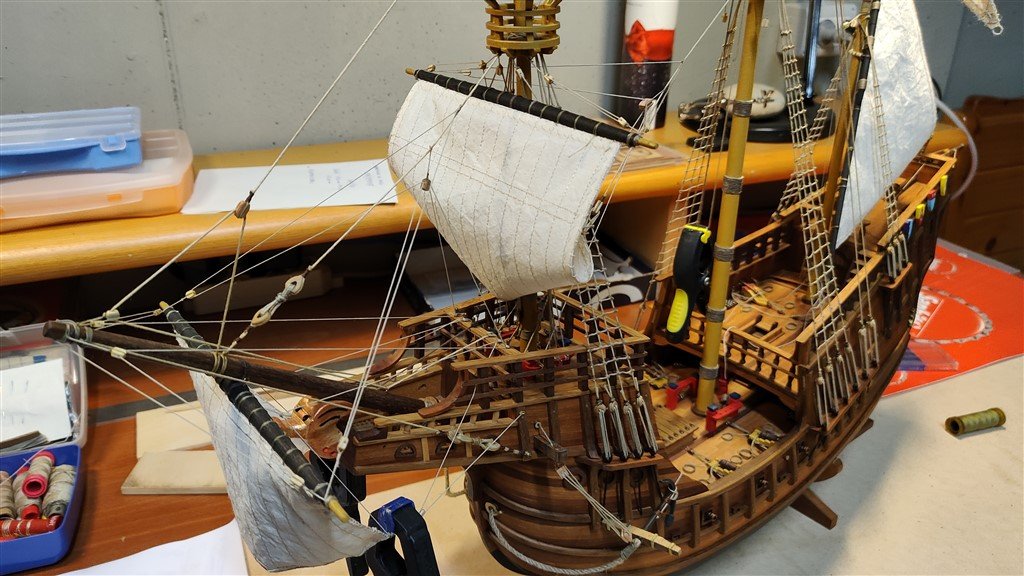
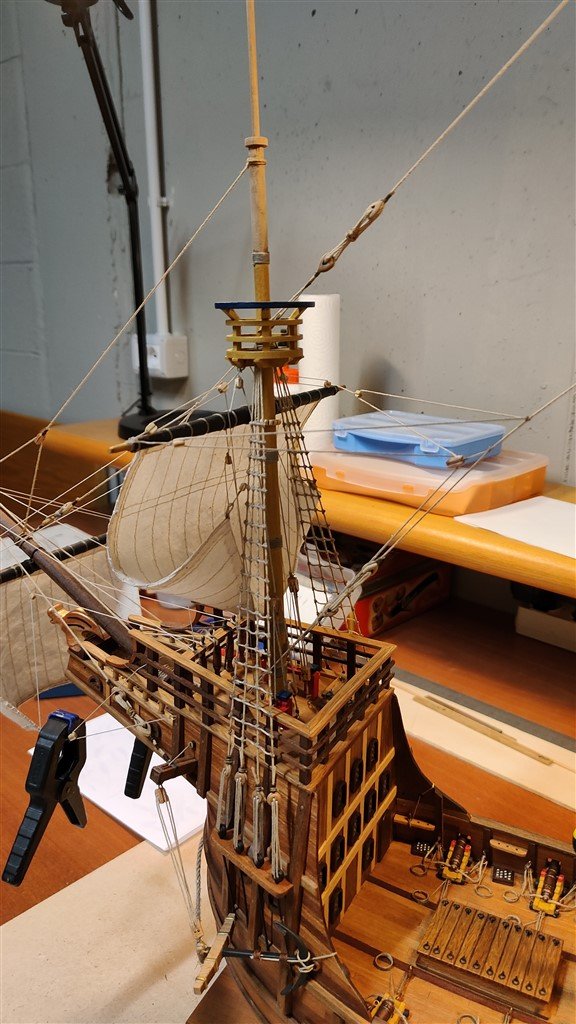
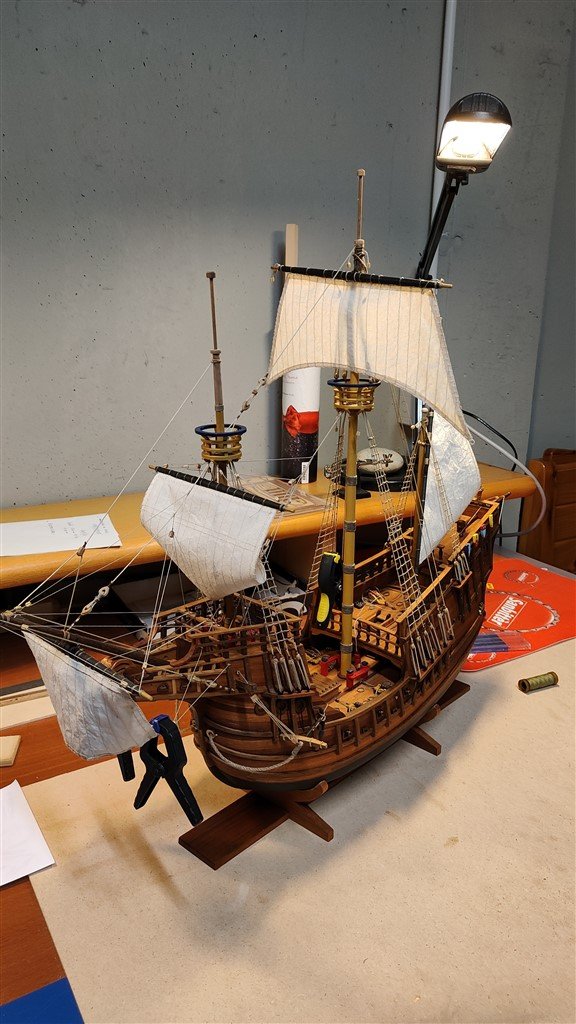
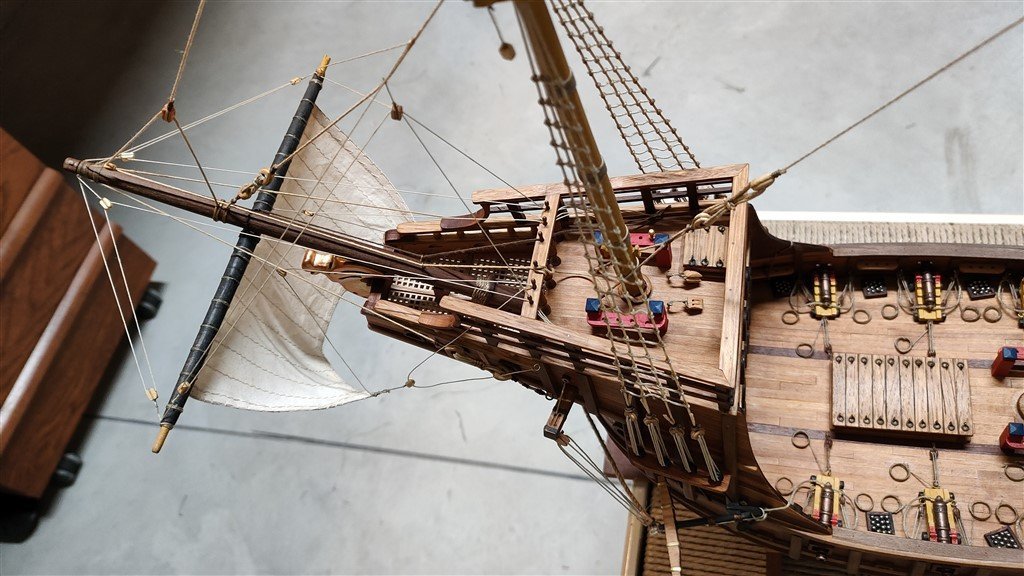
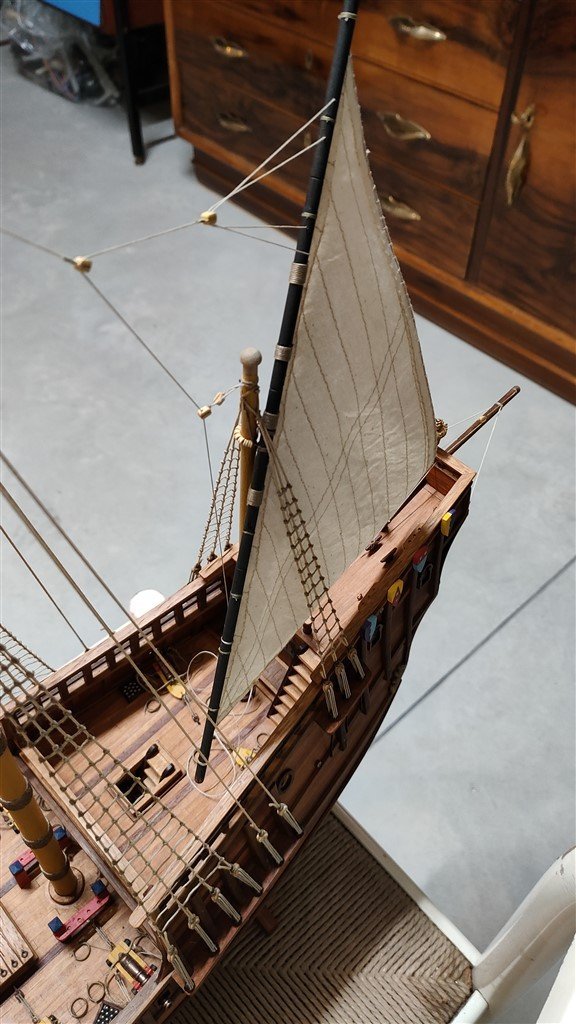
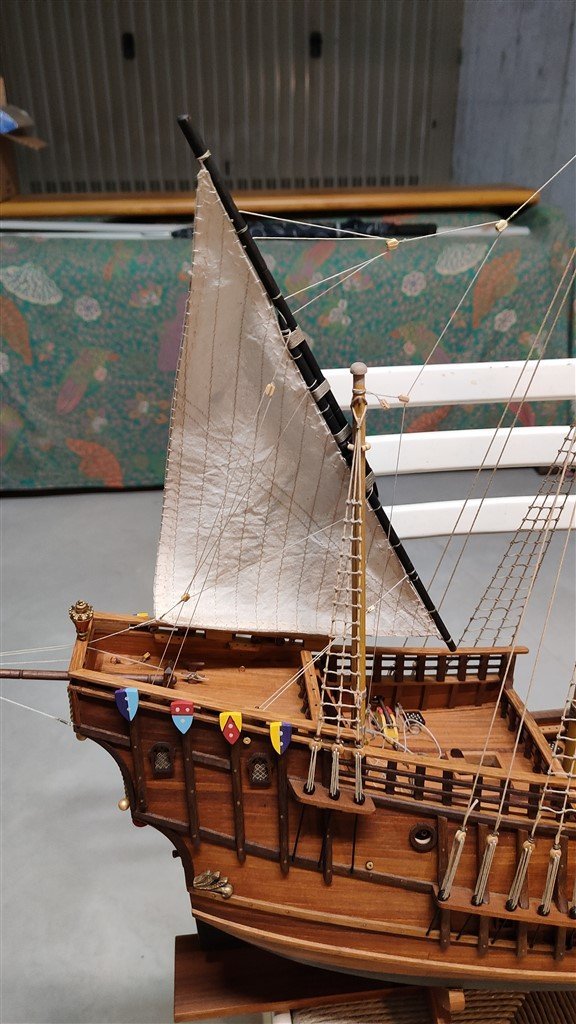
Friday, August 12, 2022 Yesterday I practically finished to install the yards, the sails and their running rigging. At this point the model is very close to be finished. In fact I'm missing few (however important) details to be able to officially declare that I have finished this model: 1) install the flags, 2) four falconets (pivoting cannons) still missing at poop and midship, 3) on the pinrailss I need to place some curls of rope to complete the aesthetic part of the rigggings, 4) the plexiglass cover; this detail will be performed by a specialist and I will almost certainly have to wait until the end of the vacation period to get it done. 01 Ragusian Carrack/12082022/IMG20220811184452.jpg 02 Ragusian Carrack/12082022/IMG20220811184527.jpg 03 Ragusian Carrack/12082022/IMG20220811184534.jpg That's all for today Cheers . . . see you soon Jack Aubrey
- 190 replies
-
- ragusian
- marisstella
-
(and 1 more)
Tagged with:
-
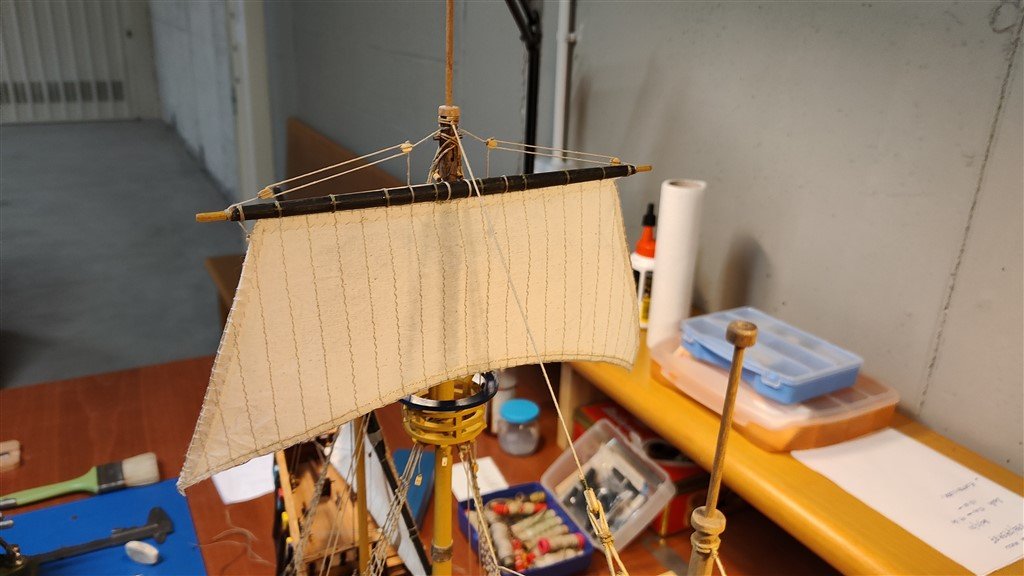
Sunday, August 8th, 2022 Yet another small step with the sails and related running rigging: mainmast topsail. 01 Ragusian Carrack/07082022/IMG20220807122408.jpg 02 Ragusian Carrack/07082022/IMG20220807122417.jpg 03 Ragusian Carrack/07082022/IMG20220807122425.jpg 04 Ragusian Carrack/07082022/IMG20220807122459.jpg Cordial greetings . . . See you soon. Jack Aubrey
- 190 replies
-
- ragusian
- marisstella
-
(and 1 more)
Tagged with:
-
Thursday, August 4th, 2022 Another small milestone with the sails and their rigging . . . . 01 Ragusian Carrack/04082022/IMG20220803185950.jpg 02 Ragusian Carrack/04082022/IMG20220803185959.jpg 03 Ragusian Carrack/30072022/IMG20220803190013.jpg A cordial goodbye . . . . see you soon. Jack Aubrey
- 190 replies
-
- ragusian
- marisstella
-
(and 1 more)
Tagged with:
-
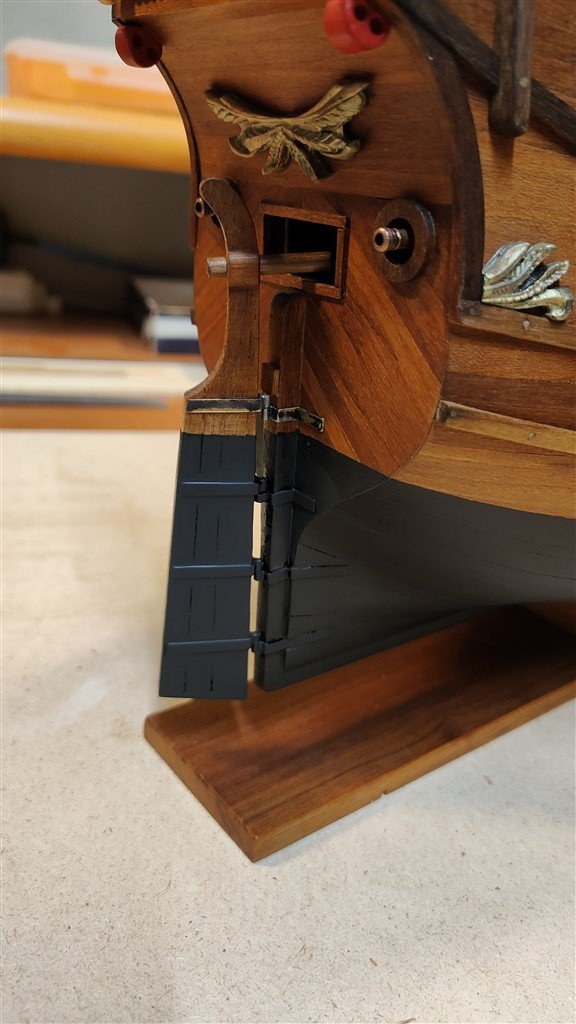
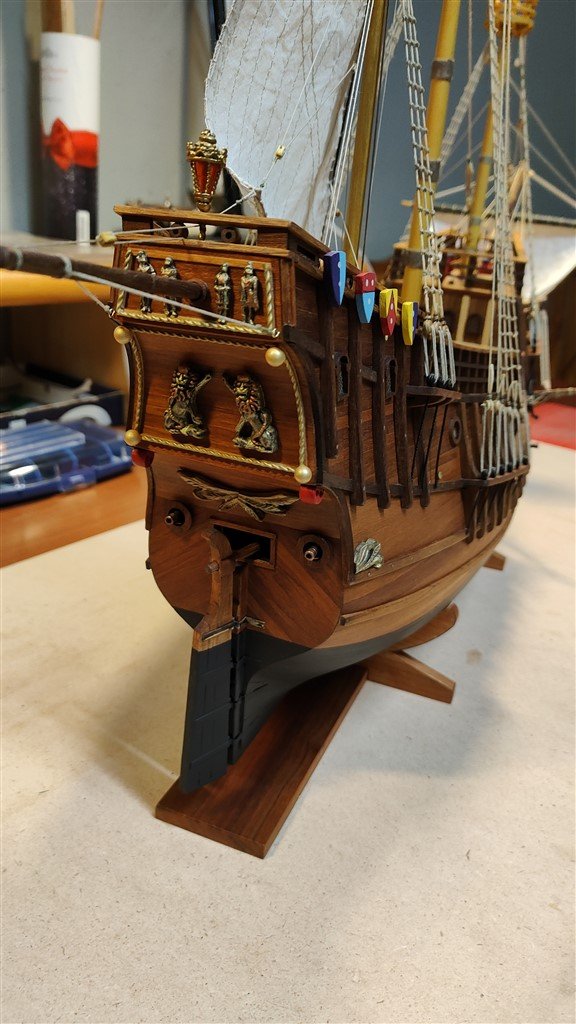
Saturday, July 30th, 2022 Finally, the rudder finished. Then I'll be back to the sails . . . . 01 Ragusian Carrack/30072022/IMG20220730164112.jpg 02 Ragusian Carrack/30072022/IMG20220730164245.jpg 03 Ragusian Carrack/30072022/IMG20220730164245.jpg A cordial goodbye. . . see you soon, Jack Aubrey
- 190 replies
-
- ragusian
- marisstella
-
(and 1 more)
Tagged with:
-
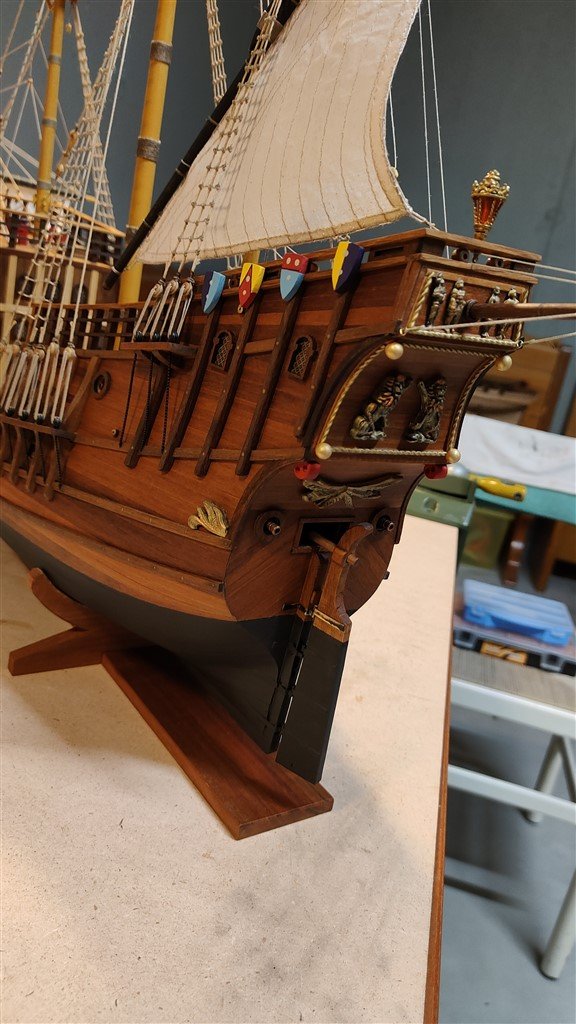
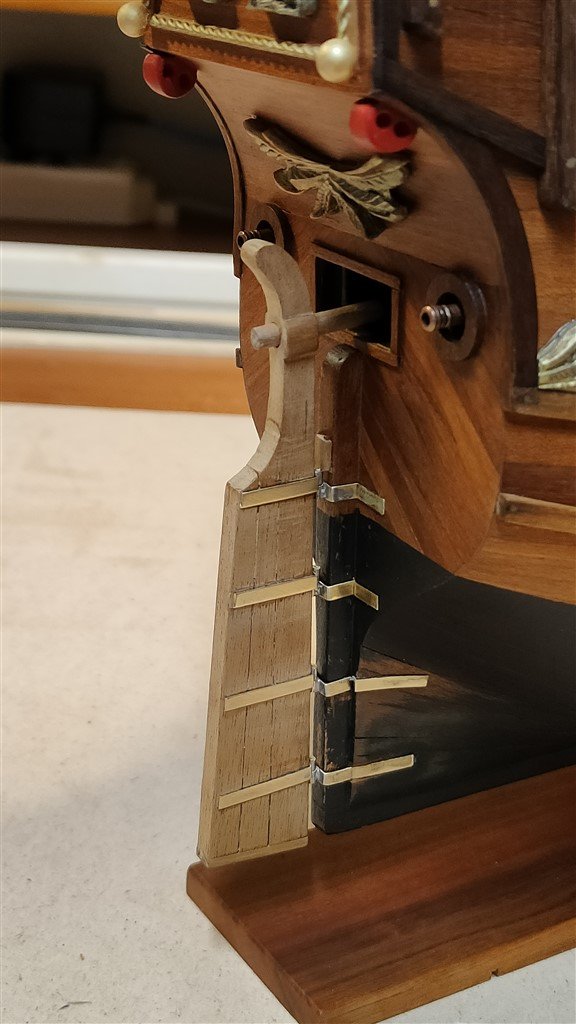
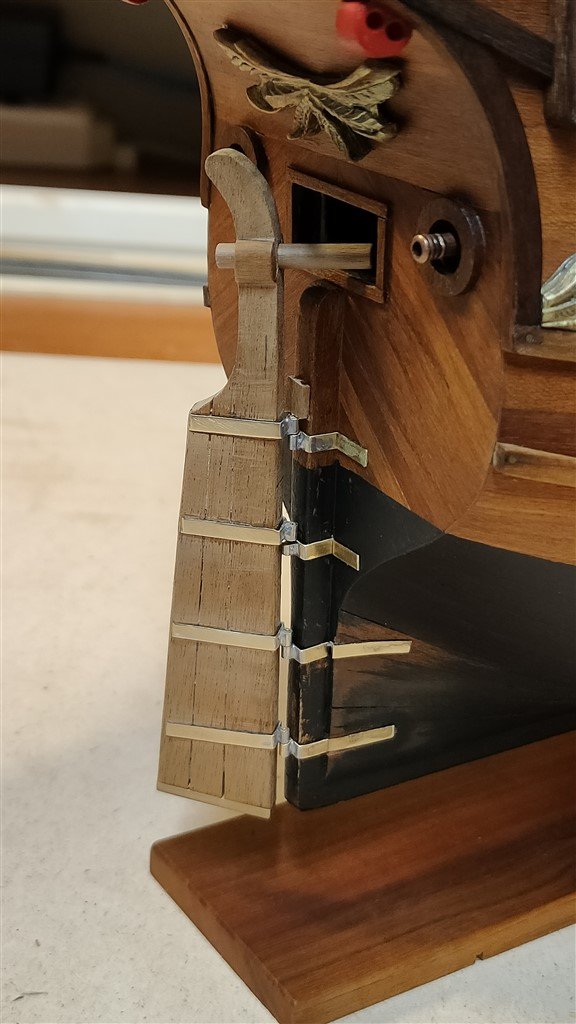
Wednesday, July 27th, 2022 Rudder: in this period of time I had many other things to follow and I wasn't been able to spend much time on this model. It was only this week that I was able to resume. And I decided to finish and install the rudder. The wooden base was already done, so I had to prepare the hinges that allow the rudder to move. I think the correct name is "gudgeon." and "pintle" even if I don't know which of the two is the part mounted on the rudder blade and which one is fixed on the hull. It turned out to be a job that requires great precision, both during the making of the pieces but, above all, during their installation on the rudder and the hull. The images below show the work done. Obviously now I have to retouch the areas of the hull painted in black. In fact, the paint has unfortunately proved to be a major weakness for the sealing of the cyanoacrylate glue and, to ensure a good seal, I had to remove it before gluing. 01 Ragusian Carrack/27072022/IMG20220727172135.jpg 02 Ragusian Carrack/27072022/IMG20220727172146.jpg A cordial goodbye. . . see you soon, Jack Aubrey
- 190 replies
-
- ragusian
- marisstella
-
(and 1 more)
Tagged with:
-
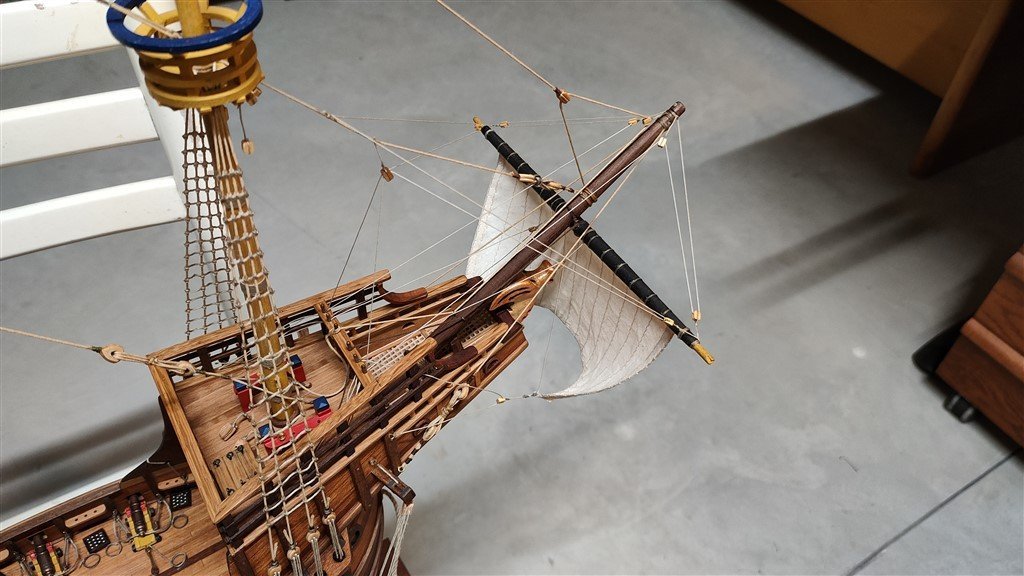
Monday July 6th, 2022 As anticipated, I started installing the sails. Spritsail and its yard: after studying the plans to understand the necessary rigging, after an afternoon of work I finally managed to install and position everything properly. Only the details of the terminations of the ropes near the fiferails are missing, activities that I will mamage all together at the end. At the moment some maneuvers are definitively fixed while others I have left for safety still modifiable. 01 Ragusian Carrack/06072022/IMG20220705172211.JPG 02 Ragusian Carrack/06072022/IMG20220705172220.JPG Then I started and completed the topmast studding sail at the mizzen. This was a little more complicated and took me two afternoons. Same procedure used for the spritsail even if the sail is totally different. The result can be seen in the next two photos. 03 Ragusian Carrack/06072022/IMG20220705172231.JPG 04 Ragusian Carrack/06072022/IMG20220705172302.JPG A final comment: this phase of period ship modeling is for me the one I like least. Even my patience, which is usually a lot, is critical and unstable in this situation. I console myself by thinking that this model has a sail plan relatively simple, I dare not imagine the rigging of a three decker . . A cordial goodbye. . . see you soon, Jack Aubrey
- 190 replies
-
- ragusian
- marisstella
-
(and 1 more)
Tagged with:
About us
Modelshipworld - Advancing Ship Modeling through Research
SSL Secured
Your security is important for us so this Website is SSL-Secured
NRG Mailing Address
Nautical Research Guild
237 South Lincoln Street
Westmont IL, 60559-1917
Model Ship World ® and the MSW logo are Registered Trademarks, and belong to the Nautical Research Guild (United States Patent and Trademark Office: No. 6,929,264 & No. 6,929,274, registered Dec. 20, 2022)
Helpful Links
About the NRG
If you enjoy building ship models that are historically accurate as well as beautiful, then The Nautical Research Guild (NRG) is just right for you.
The Guild is a non-profit educational organization whose mission is to “Advance Ship Modeling Through Research”. We provide support to our members in their efforts to raise the quality of their model ships.
The Nautical Research Guild has published our world-renowned quarterly magazine, The Nautical Research Journal, since 1955. The pages of the Journal are full of articles by accomplished ship modelers who show you how they create those exquisite details on their models, and by maritime historians who show you the correct details to build. The Journal is available in both print and digital editions. Go to the NRG web site (www.thenrg.org) to download a complimentary digital copy of the Journal. The NRG also publishes plan sets, books and compilations of back issues of the Journal and the former Ships in Scale and Model Ship Builder magazines.


