Shazmira
-
Posts
1,303 -
Joined
-
Last visited
Recent Profile Visitors
3,327 profile views


-
 GrandpaPhil reacted to a post in a topic:
San Francisco 2 by Shaz - FINISHED - Artesania Latina - Wood
GrandpaPhil reacted to a post in a topic:
San Francisco 2 by Shaz - FINISHED - Artesania Latina - Wood
-
GrandpaPhil reacted to a post in a topic:
18th Century Longboat by Shaz (Robbyn) - FINISHED - Model Shipways
-
GrandpaPhil reacted to a post in a topic:
US Brig Syren by Shazmira - Model Shipways - 1:64
-
john2013 reacted to a post in a topic:
HMS Vulture 1776 by Dan Vadas - 1:48 scale - 16 gun "Swan" class sloop from TFFM plans - Finished
-
Burroak reacted to a post in a topic:
Enterprise by src - Constructo - 1:51 - or Lessons in Adapt Improvise and Overcome
-
Burroak reacted to a post in a topic:
Enterprise by src - Constructo - 1:51 - or Lessons in Adapt Improvise and Overcome
-
Burroak reacted to a post in a topic:
Enterprise by src - Constructo - 1:51 - or Lessons in Adapt Improvise and Overcome
-
Burroak reacted to a post in a topic:
Enterprise by src - Constructo - 1:51 - or Lessons in Adapt Improvise and Overcome
-
Burroak reacted to a post in a topic:
Enterprise by src - Constructo - 1:51 - or Lessons in Adapt Improvise and Overcome
-
Shazmira reacted to a post in a topic:
Enterprise by src - Constructo - 1:51 - or Lessons in Adapt Improvise and Overcome
-
Shazmira reacted to a post in a topic:
1949 Chris-Craft 19' Racing Runabout by gjdale - FINISHED -Dumas - 1:8 Scale - RADIO
-
Shazmira reacted to a post in a topic:
1949 Chris-Craft 19' Racing Runabout by gjdale - FINISHED -Dumas - 1:8 Scale - RADIO
-
Shazmira reacted to a post in a topic:
1949 Chris-Craft 19' Racing Runabout by gjdale - FINISHED -Dumas - 1:8 Scale - RADIO
-
Shazmira reacted to a post in a topic:
1949 Chris-Craft 19' Racing Runabout by gjdale - FINISHED -Dumas - 1:8 Scale - RADIO
-
Shazmira reacted to a post in a topic:
1949 Chris-Craft 19' Racing Runabout by gjdale - FINISHED -Dumas - 1:8 Scale - RADIO
-
Shazmira reacted to a post in a topic:
1949 Chris-Craft 19' Racing Runabout by gjdale - FINISHED -Dumas - 1:8 Scale - RADIO
-
Shazmira reacted to a post in a topic:
1949 Chris-Craft 19' Racing Runabout by gjdale - FINISHED -Dumas - 1:8 Scale - RADIO
-
Shazmira reacted to a post in a topic:
1949 Chris-Craft 19' Racing Runabout by gjdale - FINISHED -Dumas - 1:8 Scale - RADIO
-
 She looks beautiful Sjors! So is she finished? What is next?
- 1,616 replies
-
- 5
-
-
- caldercraft
- agamemnon
- (and 1 more)
-
Mark, long time no "see". Wow you have made some serious progress since I last looked in. She is looking beautiful. Your attention to detail is paying off brilliantly!
-
Well, I was laying in bed last night wondering the exact same thing (there were 40 24" strips), then I remembered my new Rottie puppy had gotten into my wood a couple months back and used a couple packages of the boxwood I'd purchased as well as a couple bundles of the kit-provided basswood as a chew toy. Of course it turned out to be the wood I needed for my deck planking that fell to her humongous puppy teeth.

-
Well, smack dab in the middle of planking my deck and of course I have run out of boxwood strips. Placed an order with Crown Timberyard. I do hope their quality is up to the standards of Jeff' from Hobby Mill. But building is at a standstill again, while I wait for wood
-
Sam, I found mine online through JoAnn's Fabric. I am a pink kinda girl lol
-
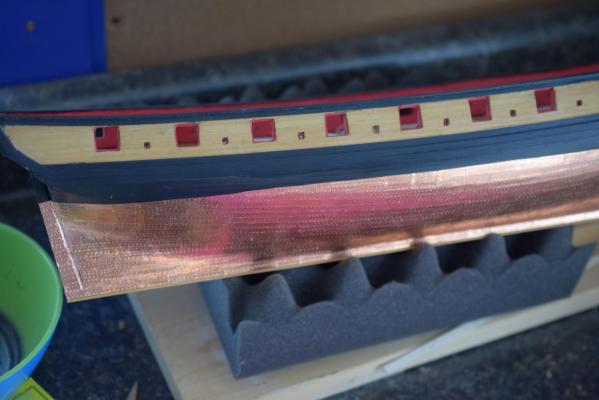
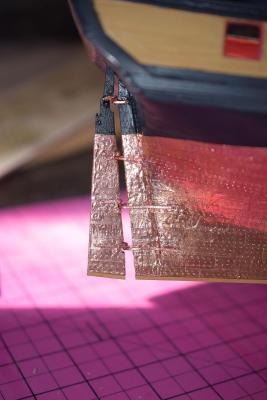
What I would really like to do is find a way to age it now, to get it to the proper lovely green, and then clear coat. Unfortunately those little corners of this copper tape, like to come up, and if I don't want damage to the hull I do need to do something to protect it. Not sure what is the best way to go though.
-
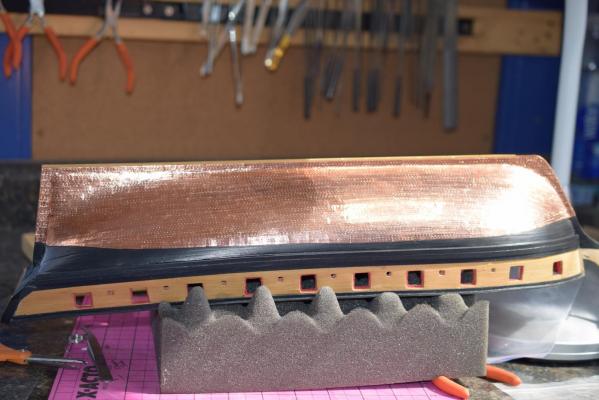
Well, the instructions said not to copper the false keel, so I did not. I do like the way it looks that way.
-
So after all that worry, it turned out the coppering really was not all that difficult. Here she is finished The rudder And all assembled Now that I have received my replacement pieces from ME, I can go back and get my deck planked at last!
-
Well Mark, it took me most of the day, but I have now completed your log from post one to here. Wonderful work, and I am heartened to see I am not the only one who goes through the deconstructions/reconstructions phases. It looks like painstaking work so for, but I would certainly be pleased with the result!
-
Well Crap! Here I thought I had a good idea...another "DOH" moment I guess. But thanks guys for pointing out the 2D would not transfer correctly to 3D. Guess I will just have to wait for my new Pounce wheels to come in, and start this process again. Really wish just once, I could get a new technique down correctly on the first try instead of tearing things out and repeating, 3 or 4 times until I get it where I can live with it. I know, I know, practice makes perfect right. Problem is my build time is so very limited right now, it is just frustrating as hell to make no progress whatsoever in 3 weeks of trying!
-
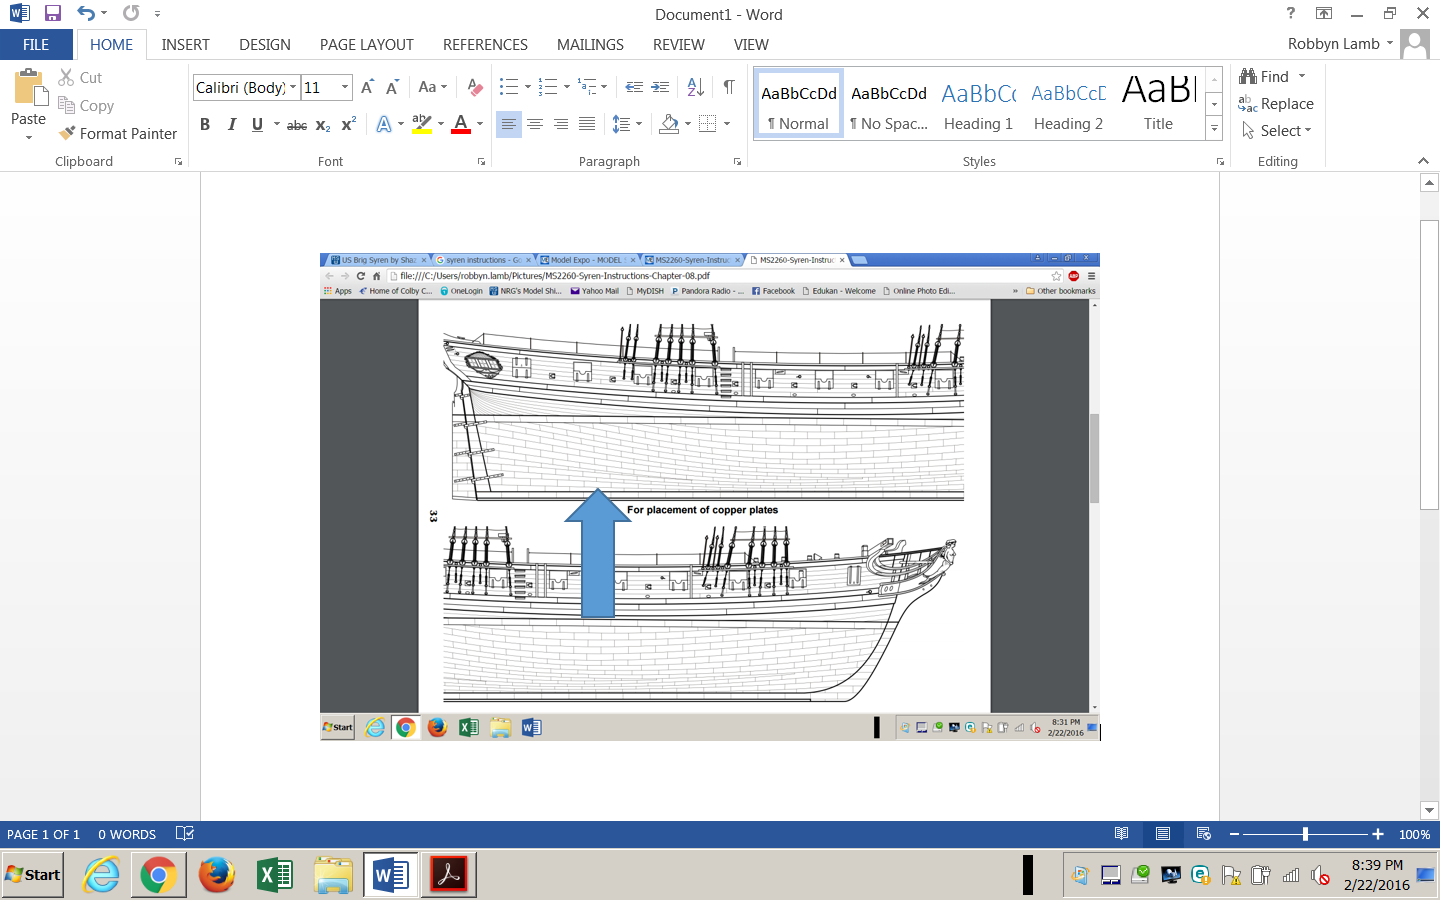
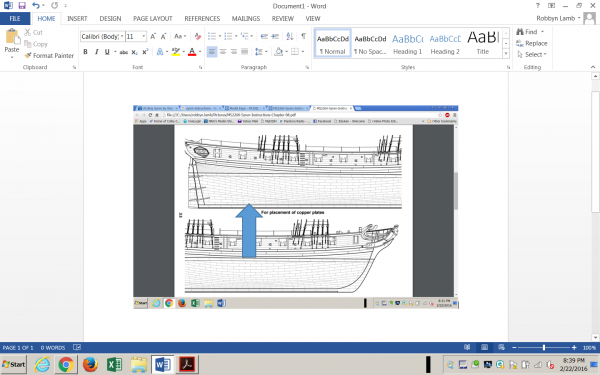
So since I have this full sized coppering plan, I was thinking I could make copies and use it as a template. I could then cut my strips of copper to fit each of the rows shown on the plan, even those which narrow down to a point. Would this be a more accurate way to place the copper?
-
Perfect Fam, that was showing me better how to get the flat retangular plates to follow the curvature. Much clearer now, thank you!
-
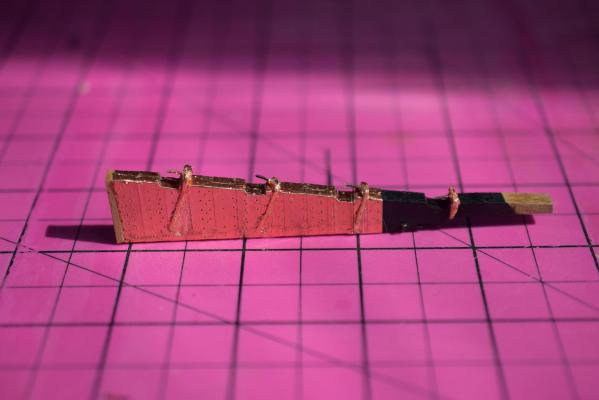
Thank you Gary, I had seen that particular pdf. I did order a set of pounce wheels as well, as the stamps I made gave me blurry results on my tiles. I keep finding all sorts of U-tube videos and the likes, but they all lack what exactly I am looking for. Even the logs on here show me the keep area very well, but none I have seen show me how to achieve the curve sweep of tiles up the bow, which is where I am having the most issues. I can't seem to get my lines to curve naturally, either in going row by row, or using the brick method.
-
Do you have a build log Gary, with pictures of this process?
-
Copper Plating help
Shazmira replied to Shazmira's topic in Building, Framing, Planking and plating a ships hull and deck
Thanks Steve, I will do a search and see if I can find it