Shazmira
-
Posts
1,303 -
Joined
-
Last visited
Content Type
Profiles
Forums
Gallery
Events
Everything posted by Shazmira
-
 She looks beautiful Sjors! So is she finished? What is next?
- 1,616 replies
-
- 5
-

-
- caldercraft
- agamemnon
- (and 1 more)
-
Mark, long time no "see". Wow you have made some serious progress since I last looked in. She is looking beautiful. Your attention to detail is paying off brilliantly!
-
Well, I was laying in bed last night wondering the exact same thing (there were 40 24" strips), then I remembered my new Rottie puppy had gotten into my wood a couple months back and used a couple packages of the boxwood I'd purchased as well as a couple bundles of the kit-provided basswood as a chew toy. Of course it turned out to be the wood I needed for my deck planking that fell to her humongous puppy teeth.

-
Well, smack dab in the middle of planking my deck and of course I have run out of boxwood strips. Placed an order with Crown Timberyard. I do hope their quality is up to the standards of Jeff' from Hobby Mill. But building is at a standstill again, while I wait for wood
-
Sam, I found mine online through JoAnn's Fabric. I am a pink kinda girl lol
-
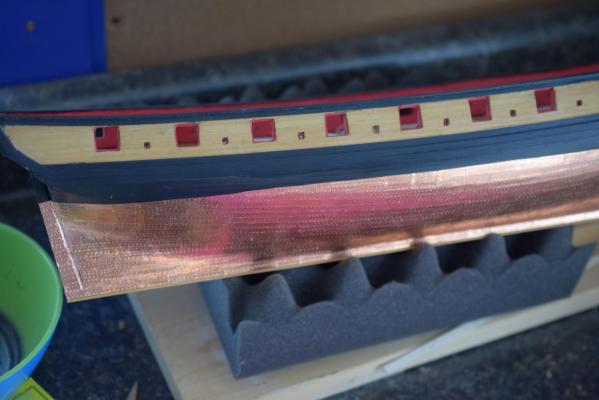
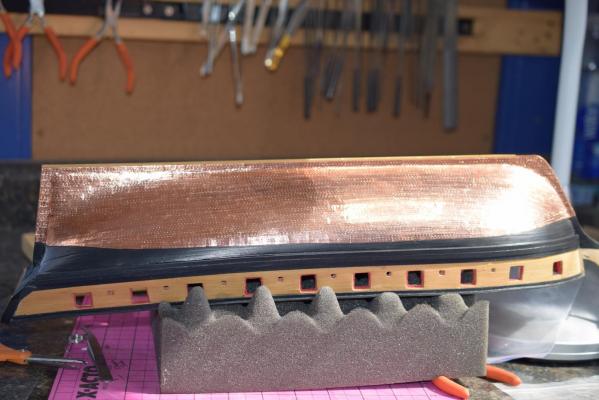
What I would really like to do is find a way to age it now, to get it to the proper lovely green, and then clear coat. Unfortunately those little corners of this copper tape, like to come up, and if I don't want damage to the hull I do need to do something to protect it. Not sure what is the best way to go though.
-
Well, the instructions said not to copper the false keel, so I did not. I do like the way it looks that way.
-
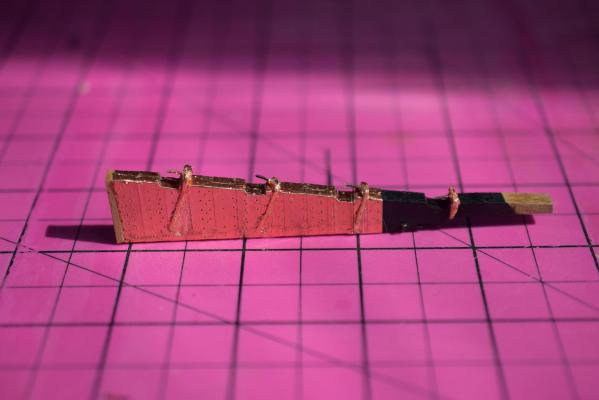
So after all that worry, it turned out the coppering really was not all that difficult. Here she is finished The rudder And all assembled Now that I have received my replacement pieces from ME, I can go back and get my deck planked at last!
-
Well Mark, it took me most of the day, but I have now completed your log from post one to here. Wonderful work, and I am heartened to see I am not the only one who goes through the deconstructions/reconstructions phases. It looks like painstaking work so for, but I would certainly be pleased with the result!
-
Well Crap! Here I thought I had a good idea...another "DOH" moment I guess. But thanks guys for pointing out the 2D would not transfer correctly to 3D. Guess I will just have to wait for my new Pounce wheels to come in, and start this process again. Really wish just once, I could get a new technique down correctly on the first try instead of tearing things out and repeating, 3 or 4 times until I get it where I can live with it. I know, I know, practice makes perfect right. Problem is my build time is so very limited right now, it is just frustrating as hell to make no progress whatsoever in 3 weeks of trying!
-
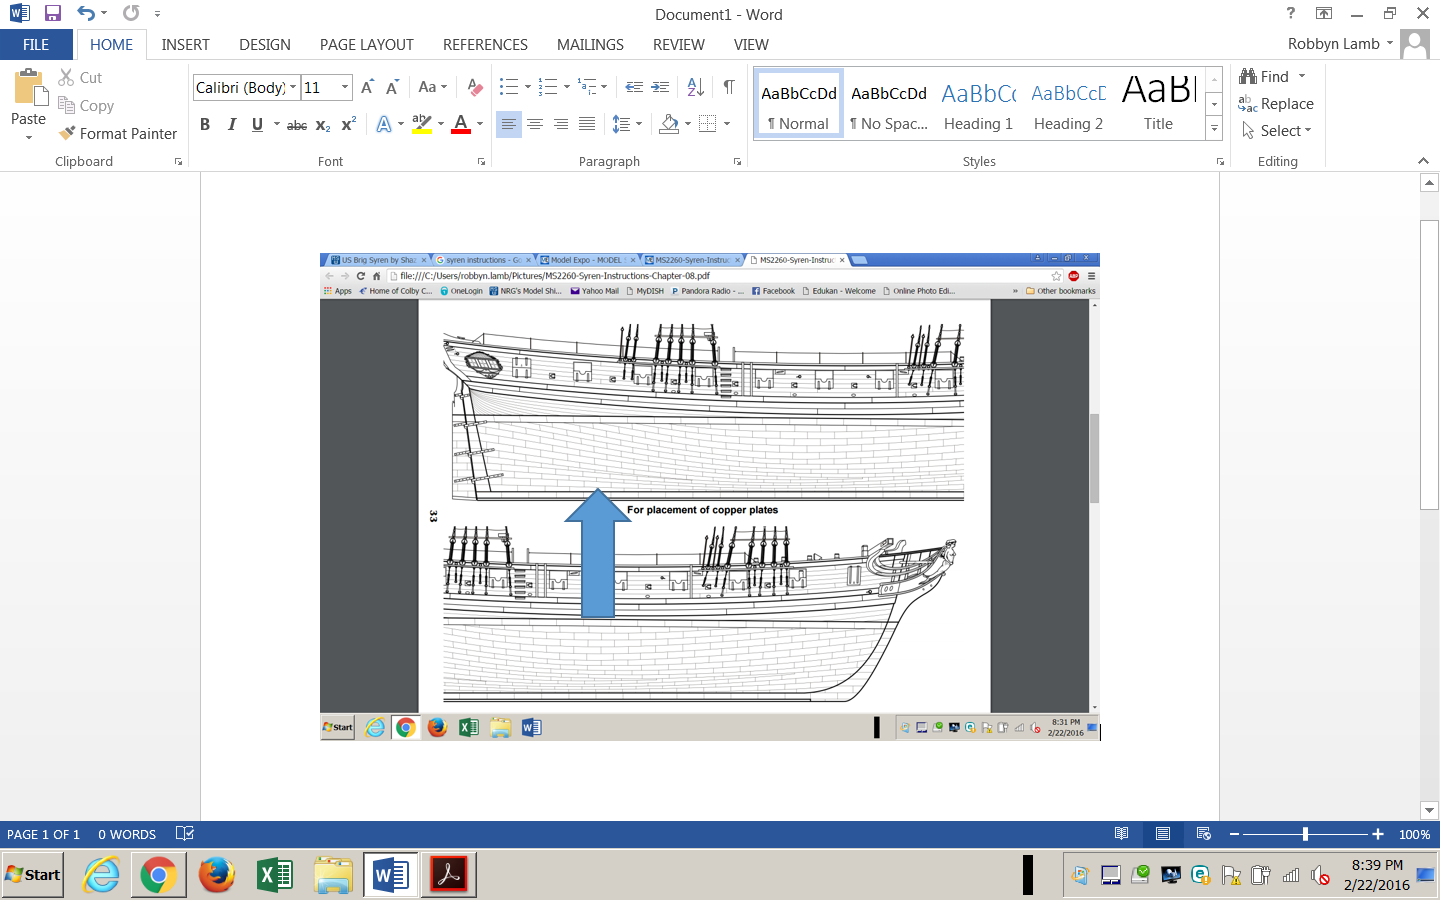
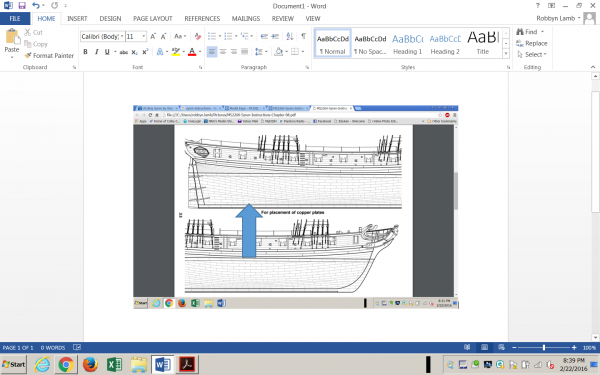
So since I have this full sized coppering plan, I was thinking I could make copies and use it as a template. I could then cut my strips of copper to fit each of the rows shown on the plan, even those which narrow down to a point. Would this be a more accurate way to place the copper?
-
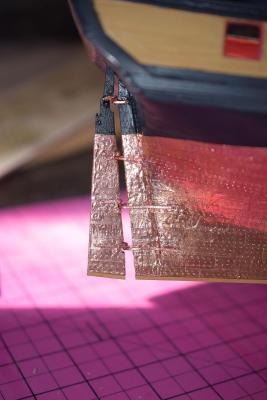
Perfect Fam, that was showing me better how to get the flat retangular plates to follow the curvature. Much clearer now, thank you!
-
Thank you Gary, I had seen that particular pdf. I did order a set of pounce wheels as well, as the stamps I made gave me blurry results on my tiles. I keep finding all sorts of U-tube videos and the likes, but they all lack what exactly I am looking for. Even the logs on here show me the keep area very well, but none I have seen show me how to achieve the curve sweep of tiles up the bow, which is where I am having the most issues. I can't seem to get my lines to curve naturally, either in going row by row, or using the brick method.
-
Do you have a build log Gary, with pictures of this process?
-
Copper Plating help
Shazmira replied to Shazmira's topic in Building, Framing, Planking and plating a ships hull and deck
Thanks Steve, I will do a search and see if I can find it -
I need serious help with the copper plaiting, see my plea for help http://modelshipworld.com/index.php/topic/12838-copper-plating-help/ here, thanks.
-
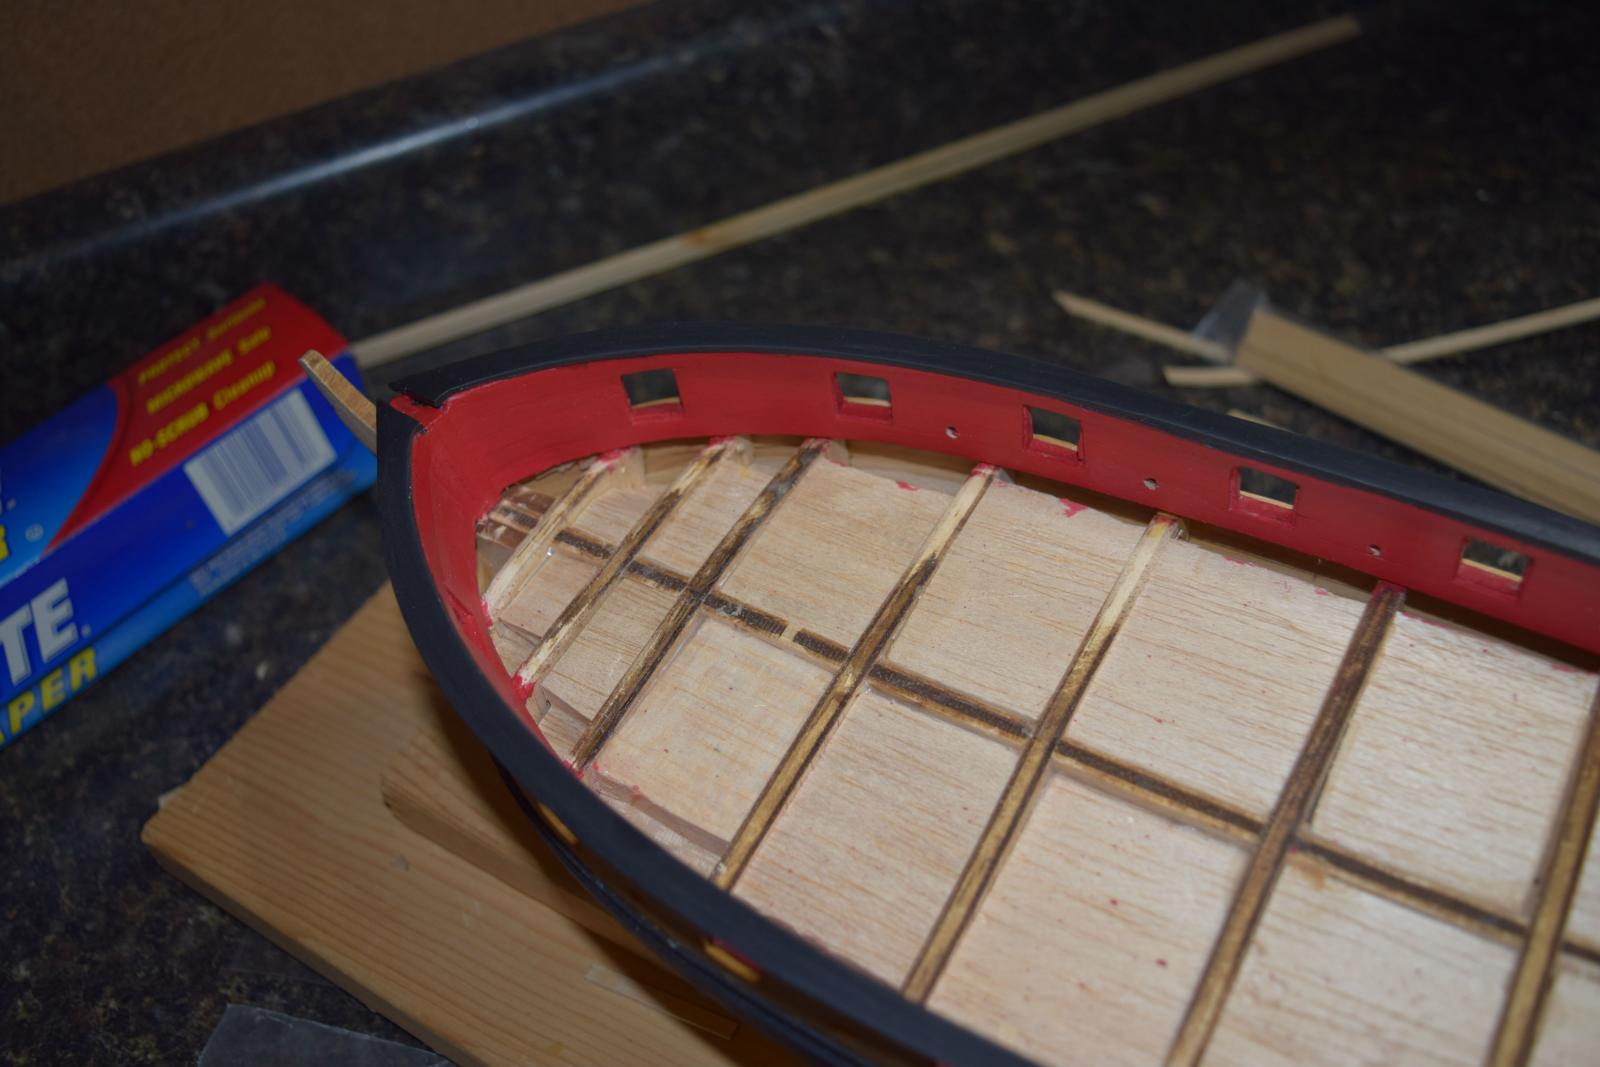
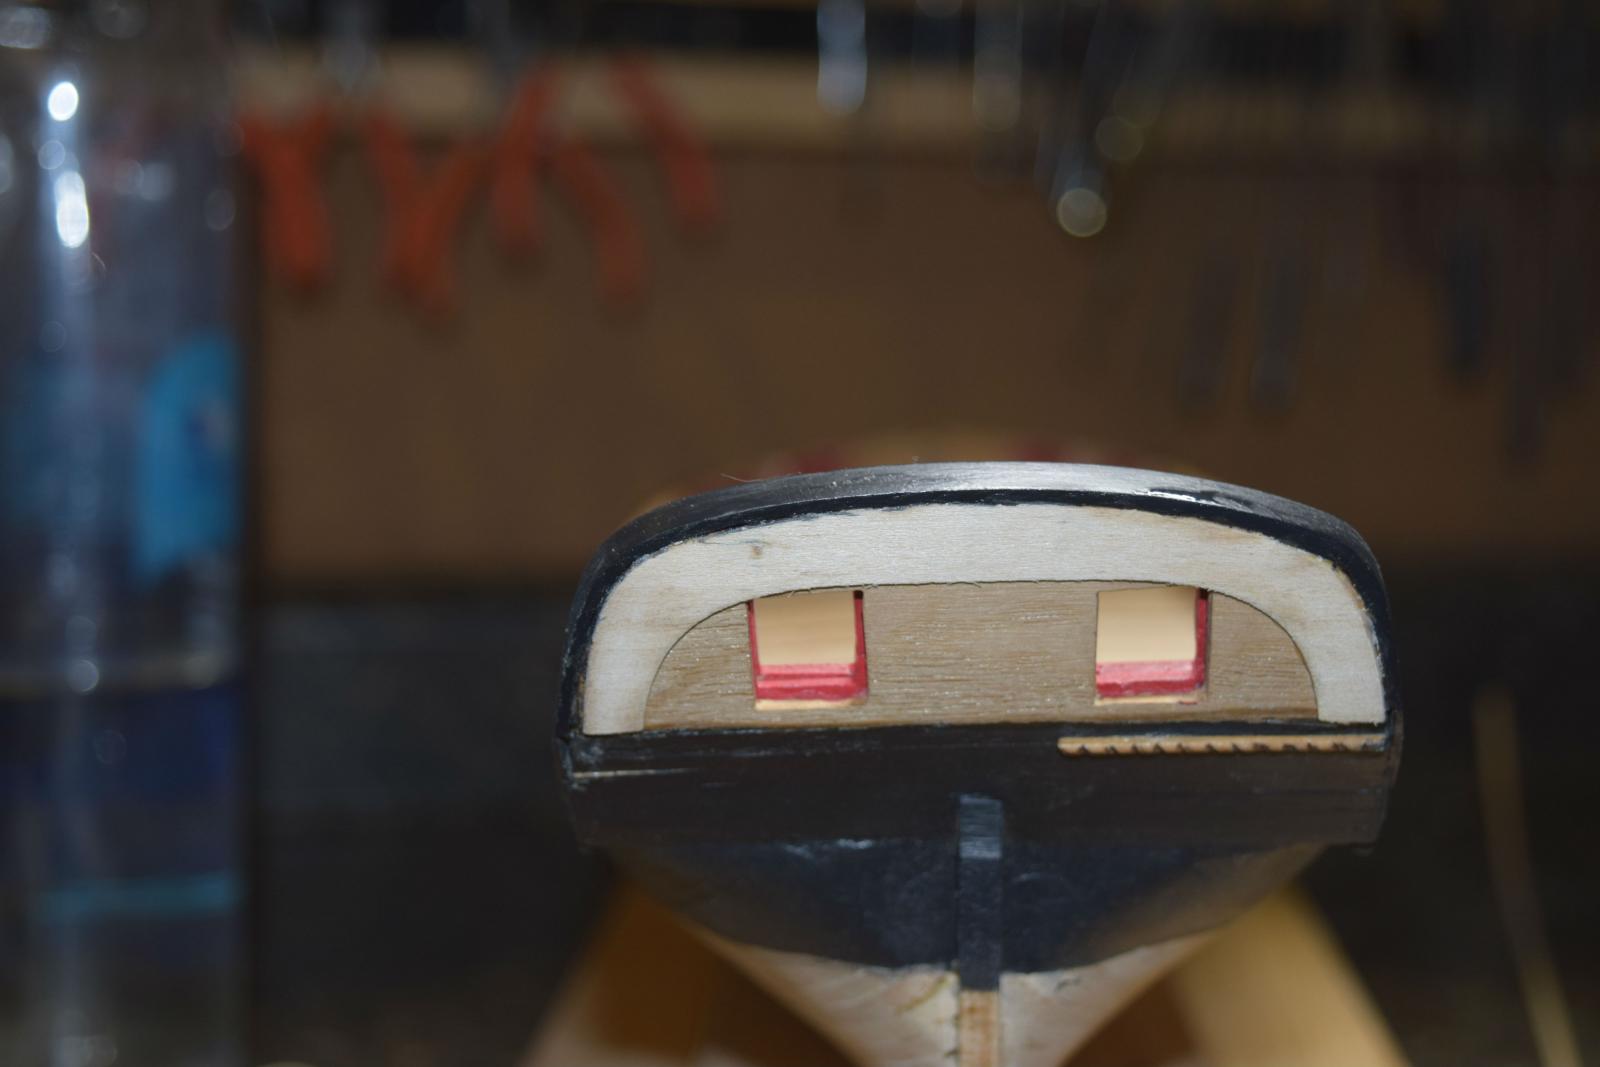
I am attempting for the first time to put copper plates on the hull of my Syren (actually I have started this process over 3 times already). I have looked through all the logs I can find through searching, which have copper plated hulls, and I have looked at many photos of the completed process, but I am at a loss on how to actually put the plates on the hull in the proper way. I have the copper tape, I have the plates made, but following the curve of the hull seems to be a major issue. Either I get my rows going too straight, or I can't seem to keep the proper curve going. Does anyone have any in-process photos of how they get the curve, and keep the plates on it correctly? Any help or suggestions would be most welcome.
-
You understood my last question perfectly. I was not aware I had to cut the tape into small plates after stamping (so yes, I am in idiot). That thought actually occurred to me during the middle of the night and I woke up and went DOH. I did try the pressing and rocking method as well, and got almost no imprint at all. I feel like my nails are too blunt, and as they are so close together in that tiny little space I do not have a file thin enough to try to "sharpen" them a it. When I struck with a hammer, it felt like the stamp was "jumping" slightly and the results look that way as well, as some of the "rivets" appear double struck, you know what I mean, just a hair off on the second strike. After I posted this I read through all the posts on coppering I could find in the "How Too" forum. I am thinking I will hobble my way into the basement today and go through my grandmas old sewing kit and see if I can find her old ponce wheel. I know using this will not leave the proper pattern behind, but I beleive it will be better than leaving the plates blank, as the instructions also suggest
-
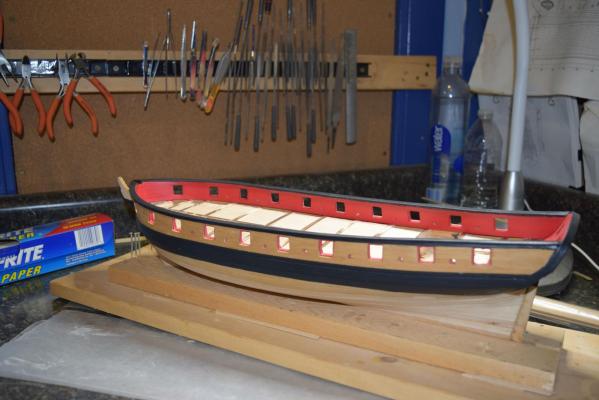
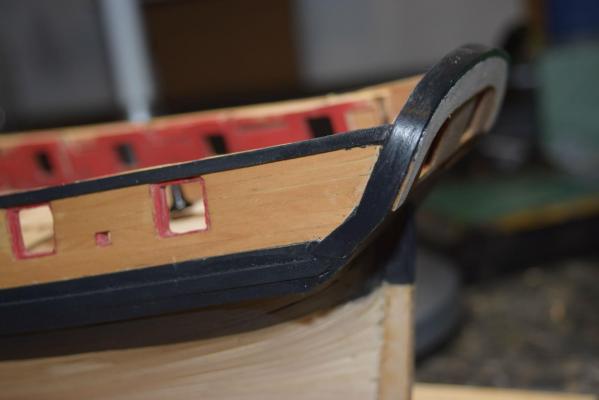
Progress has been made. I completed the planking of the inside of the bulwarks, and constructed, attached and painted my cap rails. Then I attempted to move on to the next step which is to put in my margin plank, then lay the planks on the deck. Well....that is on hold, as I discovered the two laser cut pieces I used for the bow of my cap rail were supposed to be the margin planks at the bow. I attempted to use the cut outs as a template and cut them from some spare wood I had laying around, but I ran into all kinds of problems. If I used wood the proper thickness, then because the curve often goes against the grain, my pieces kept breaking. So I broke down and contacted Model Expo for a replacement sheet for those parts. Now I am waiting, waiting, waiting. lol While I am waiting, I built the jig for stamping my copper according to Chuck's included plans. The jig itself was quite easy to build, the stamps however are proving more difficult. I made them, drilled the tiny little holes into which I dropped nails, but then of course when cutting the nails it was impossible to get them all to the same length. No problem thought I, I just used a metal file to bring them all to the same height. However, when putting them to actual use, the imprint I am getting on the copper tape, is not very clear at all. I have never done coppering before, so I am not sure if it is my stamps, or my technique. How in the world do you get a nice clear "stamp" onto the copper tape? The other question I have, is in the real world, this would have been done with plates (which have edges). When using the copper tape, how do you you make it look as if it is individual plates? Any suggestions on coppering are wlecome!

-
Thank you Sal! I guess I just needed to keep reading ahead and then it would have made sense. Wayne, angling the edge at the deck is what I was thinking too, and I will have to do that, as the deck is curved as shown above in Sal's picture.
-
Nope it specifically says camber. I want to lay the first inner bulkhead plank
-
Wow, Aaron, she really is coming together very nicely. I am so happy to see you have continued. As for length of time, hell my syren sat idle for more than a year while I dealt with my mom's death, kitchen and dry dock remodeling, and just a busy life. But I am back at her. Taking it slowly, when I have time. I might only get a day or two a week ( couple of hours) but that is okay. There is no time limit or rush. Al is great for making you use logic, planning, and ingenuity. But that comes in handy for other projects too!
-
Stupid questions time. I have moved on and thinned my bulkheads per the instructions. In reading the instructions it tells me to place my first bulwark plank and to maintain the proper camber of the deck while doing so. I had to look up the word camber and I understand it to be an angle. But does anyone have a photo of this inner bulkhead plank which shows the angle to the deck? I can't seem to wrap my head around it correctly and visualize what this should like.
-
No, I have not dropped dead, but I did take almost a month off to heal from surgery on my foot. Still wearing a lovely boot, and waiting for the incision to heal, but I am up and about and classes have begun for the semester. I have spent the last two weeks fighting with this stupid cap rail....really not sure what the problem was, broke more pieces than I can remember lol. Finally got one I was pleased with then realized the ends were not tapered correctly, so it did not sit up against the wales correctly, so it was back to bending again. Now I have one I can live with. Not perfect, but it will do, just a little touch up left to do, and fix my little decorative pieces that broke off, then I can finally move on.

-
Thanks for the advice Grant, I did not who to go to since Jeff retired. I was actually thinking about the same issue, but had put off asking as atm I have everything I ordered prior to Jeff's retirement, so I had not been in need. I am glad to hear Jason has stepped in to fill the need Jeff's absence has made, and glad to hear reviews are favorable. Ronald, I sent you a pm to answer your question about the jig. For everyone else, no progress to report. As soon as school was out for Christmas break I had surgery (nothing life threatening) and have been recovering ever since. I have 3 whole days left of break before the new semester begins, and now that I am weaning myself off the pain pills I am hoping I can spend some in the dry dock during those 3 days and then I will have some progress to report.