Cornish_K
-
Posts
28 -
Joined
-
Last visited
Recent Profile Visitors
287 profile views


-
 hexnut reacted to a post in a topic:
HM Schooner Ballahoo by Cornish_K - Caldercraft - scale 1:64 - First wooden ship build
hexnut reacted to a post in a topic:
HM Schooner Ballahoo by Cornish_K - Caldercraft - scale 1:64 - First wooden ship build
-
hexnut reacted to a post in a topic:
HM Schooner Ballahoo by Cornish_K - Caldercraft - scale 1:64 - First wooden ship build
-
hexnut reacted to a post in a topic:
HM Schooner Ballahoo by Cornish_K - Caldercraft - scale 1:64 - First wooden ship build
-
hexnut reacted to a post in a topic:
HM Schooner Ballahoo by Cornish_K - Caldercraft - scale 1:64 - First wooden ship build
-
hexnut reacted to a post in a topic:
HM Schooner Ballahoo by Cornish_K - Caldercraft - scale 1:64 - First wooden ship build
-
hexnut reacted to a post in a topic:
HM Schooner Ballahoo by Cornish_K - Caldercraft - scale 1:64 - First wooden ship build
-
hexnut reacted to a post in a topic:
HM Schooner Ballahoo by Cornish_K - Caldercraft - scale 1:64 - First wooden ship build
-
hexnut reacted to a post in a topic:
HM Schooner Ballahoo by Cornish_K - Caldercraft - scale 1:64 - First wooden ship build
-
hexnut reacted to a post in a topic:
HM Schooner Ballahoo by Cornish_K - Caldercraft - scale 1:64 - First wooden ship build
-
hexnut reacted to a post in a topic:
HM Schooner Ballahoo by Cornish_K - Caldercraft - scale 1:64 - First wooden ship build
-
 Ahoy there! After some time away from the hobby I've decided to have another crack at it. Some lower back problems have interfered with hobbying for me in general, but I'm starting to put some real effort into tackling it - to be honest I've rather neglected my upper body strength over the years, so it's my own fault. Anyway, I was finding the process of soaking the planks and pinning each one in position to dry overnight rather longwinded, so I purchased myself a heated plank bender - I've already tested it and it's clear it's going to allow me to work much quicker in this regard. Although I do have patience, I don't have unlimited reserves, so this will suit me more I think. Once I've finished planking the other side of the hull, I'll fill & sand to get the right surface shape for the 2nd planking. I'm also going to laterally bend the planks correctly this time.
- 28 replies
-
- 5
-
-
- ballahoo
- caldercraft
- (and 1 more)
-
Cornish_K reacted to a post in a topic:
HMS Jason by Beef Wellington - Caldercraft - 1:64 - Artois-class frigate modified from HMS Diana 1794
-
Looking very good, Eamonn. I'll be referencing this log regularly when I reach the same stages of my Ballahoo. It's serving as a very nice guide for me! Unfortunately, I've had a bit of a niggly back these last few weeks and haven't been haunching over the hobby desk to work on mine much. Should be back on it very soon though.
- 1,039 replies
-
- 2
-
-
- ballahoo
- caldercraft
- (and 2 more)
-
Cornish_K reacted to a post in a topic:
HMS Pegasus by Landlubber Mike - Amati/Victory Models - Scale 1:64
-
Cornish_K reacted to a post in a topic:
HM Schooner Ballahoo by egkb - FINISHED - Caldercraft - 1:64 Scale - First Proper Wood Build
-
Oh, fiddly is fine. But it's when the fiddliness is unneeded and there is actually an easier method to simply get through something a little quicker, it helps the overall process I think. The truly fiddly stuff will come later with the rigging!
- 28 replies
-
- 3
-
-
- ballahoo
- caldercraft
- (and 1 more)
-
Thanks guys. That's given me something to think about. I'll just finish off this first planking as it is for now, fill and sand it down. Then have a think about approaching the walnut 2nd planking a little differently. When the time comes, I'll practice the lateral bending on some of the leftover limewood first, before trying the walnut. I don't have any plank bending tools as such. I might knock up my own plank bending board, with hole's drilled for dowels, and weight the planks down when soaked. Actually, I could do with a plank bending board regardless. It gets a bit time consuming trying to shape each plank individually and get it to dry on the model itself. Very fiddly at times.
-
Cornish_K reacted to a post in a topic:
HM Schooner Ballahoo by Cornish_K - Caldercraft - scale 1:64 - First wooden ship build
-
Hi Steve, I'm on the lizard, quite a way further down than yourself! The planking directly under the gunport patten is certainly an interesting one on the Ballahoo. In theory, I'd like to be able to lay the plank all the way along, but the extreme lateral bending with the sharp rising bow produces an impossible amount of clinkering for me. Tapering the top of the plank at the bow (to half its width) is still nowhere near enough to allow a natural laying position. If I had much wider strips to work with I could cut some pre-curved planks which would obviously solve the problem. Since the plank would only be bending in one direction instead of two. I've read about some people pre-bending laterally with heat, then bending forwards again (while hot/wet) to shape the plank smoothly. Although I worry about the stresses on the plank doing all of that.
-
Cornish_K reacted to a post in a topic:
HM Schooner Ballahoo by Cornish_K - Caldercraft - scale 1:64 - First wooden ship build
-
Thanks for the compliment Eamonn, I'm finding the planking quite an interesting process - it's almost like trying to crack a puzzle. The 4mm strips in the kit can only be tapered so much, and solutions need to be found to avoid clinkering on the underside of each plank. I'm still not sure if my technique of letting the top few rise up to the gunport patten is strictly the correct way of doing it, but I'm happy enough with it so I'll just keep doing it that way!
- 28 replies
-
- 2
-
-
- ballahoo
- caldercraft
- (and 1 more)
-
Cornish_K reacted to a post in a topic:
HM Schooner Ballahoo by egkb - FINISHED - Caldercraft - 1:64 Scale - First Proper Wood Build
-
Cornish_K reacted to a post in a topic:
HM Schooner Ballahoo by egkb - FINISHED - Caldercraft - 1:64 Scale - First Proper Wood Build
-
Nice to see the progress, Eamonn. The model's looking great. I'm also a first time wood builder tackling the Ballahoo! It's interesting to see how you go about things. I've already noticed the rather sparse instructions don't make any mention of rigging the carronades at all. Quite a few photos of finished Ballahoos show them 'clean'. But looking at yours I think I'll decide to fully rig them. It looks far better that way.
- 1,039 replies
-
- 1
-
-
- ballahoo
- caldercraft
- (and 2 more)
-
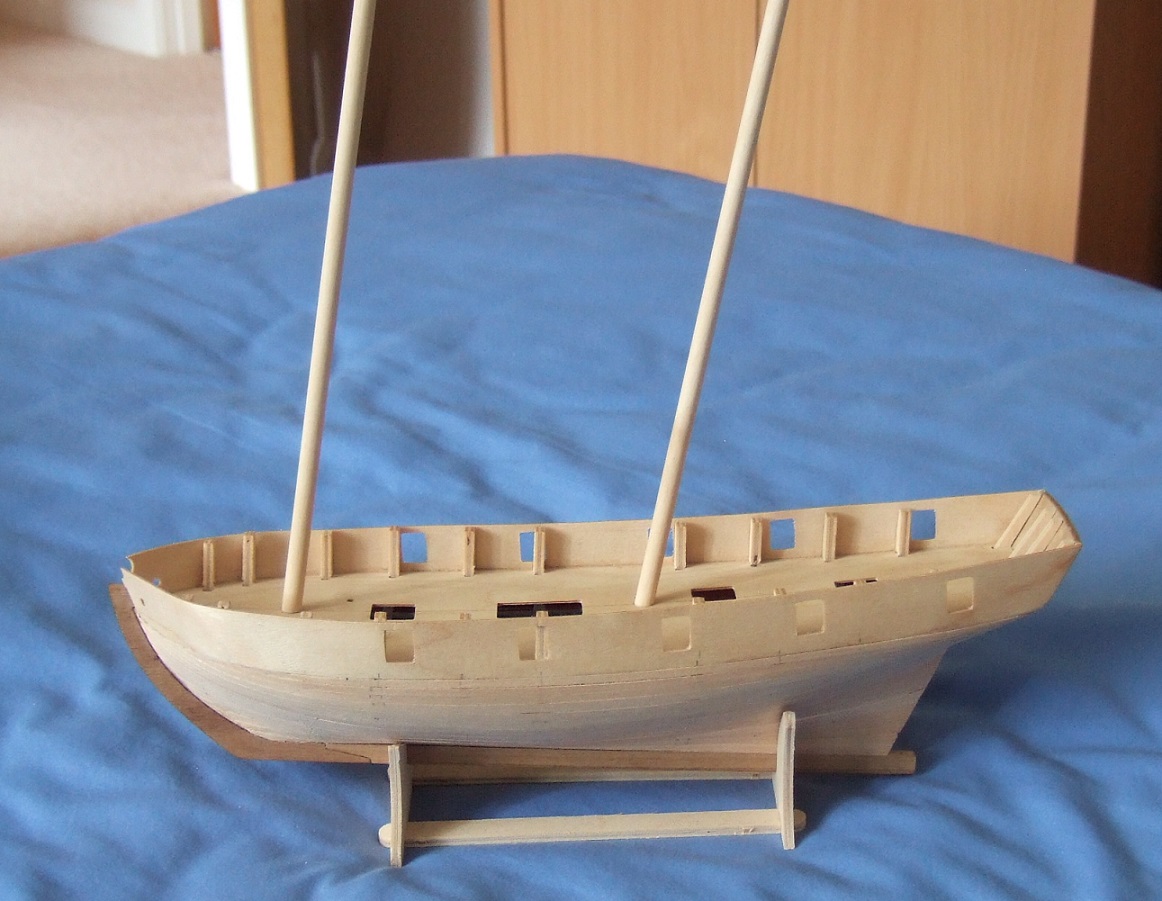
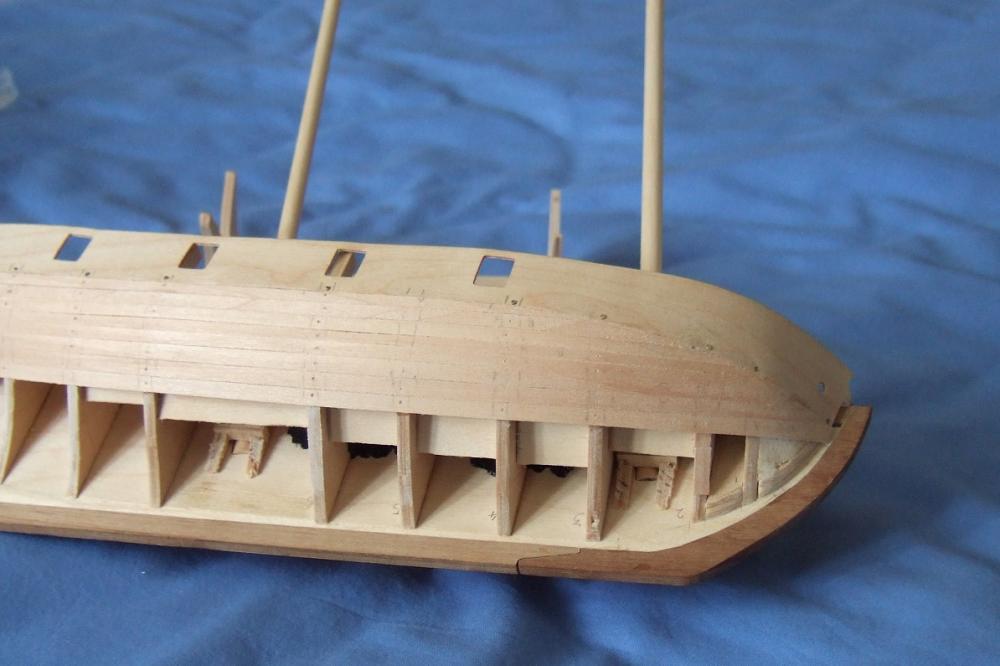
I've also taken this opportunity, before the hull is completely enclosed, to do a final check fitting of my improvised 'mast holders'. I've drawn a circle in pencil on the masts just above the false deck, so when the time comes I'll know when they've made a snug fit all the way down. Also, the model is really starting to look better and better with the masts in.

- 28 replies
-
- 4
-
-
- ballahoo
- caldercraft
- (and 1 more)
-
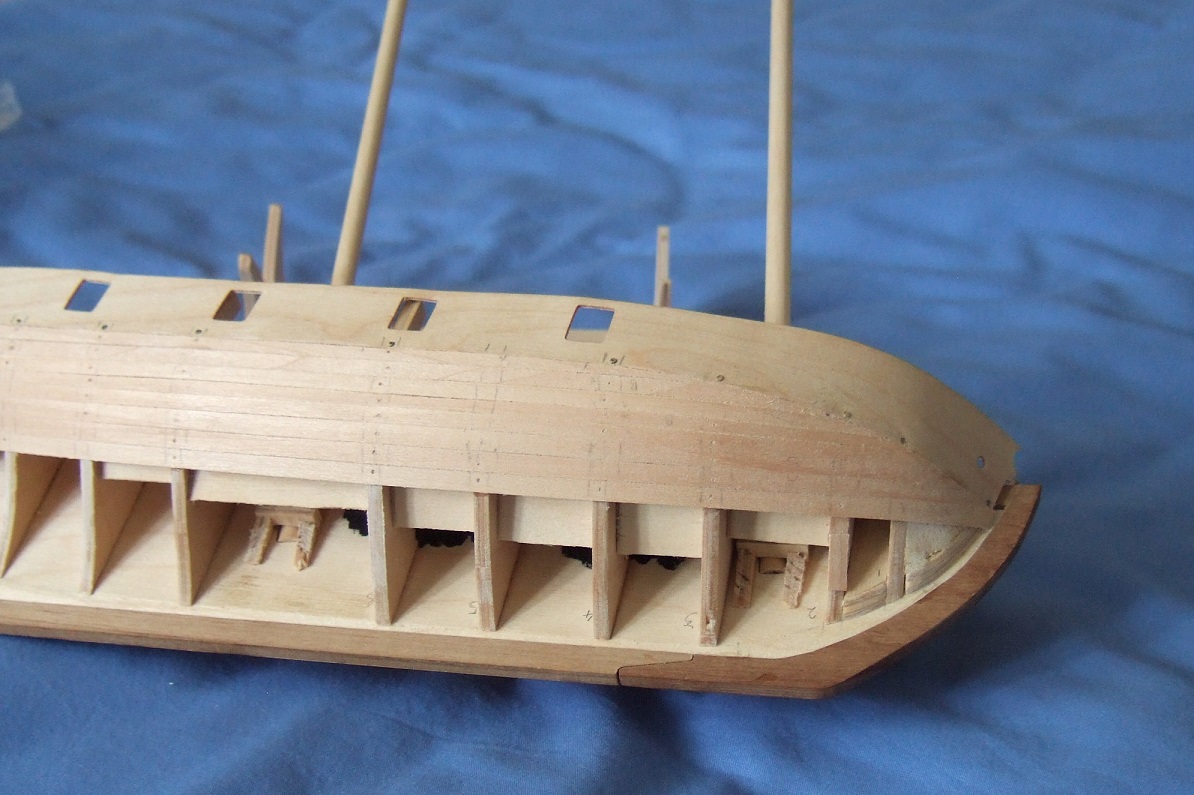
Update time! I have made good progress on the starboard side first planking, starting near the bulwarks. Note how I terminate the planks on the underside of the gunport pattens towards the bow, not at the actual front of the bow itself. From this point onwards, all the planks will be tapered from bow to stern. It's a slight departure from the instructions, but the instructions also tell you to let the planks lie naturally (which they are currently doing). But if I were to attempt to run the first plank all the way along the underside of the pattens, the clinkering would be extreme to the point of being impractical. It's possible with *massive* amounts of lateral bending I could do that, but this does seem a more straightforward method to me. It's such a sharp upwards curve on this model compared to some, I think it needs a slightly different planking solutions. Anyway, some photos:
- 28 replies
-
- 3
-
-
- ballahoo
- caldercraft
- (and 1 more)
-
Cornish_K reacted to a post in a topic:
HMS Agamemnon 1781 by Hennie - FINISHED - Caldercraft - Scale 1:64
-
whats an easier build for a first kit
Cornish_K replied to rdestefano01's topic in Wood ship model kits
I have to say, I picked the Caldercraft Schooner Ballahoo for my first build and sometimes wished I'd gone for something simpler - despite the Ballahoo being a 'beginners' model! We all have moments of high confidence and excitement - when I bought the Ballahoo there was a part of me that was looking at the expensive HMS Pegasus and didn't want to 'waste my time' on a little model I had no great personal love for. But I'm now incredibly happy I went for the small/cheap option, since there is always light at the end of the tunnel. I can see the steps laid out in front of me which will result in a completed model. Plus, it's the technique and process of wooden ship building itself that is something you have to explore. For some people, it just doesn't click. And when that happens it's better if happens on a $100 model instead of a $500+ model... -
I don't know if this applies to multiple manufacturers, but I think Caldercraft/Jotika missed a trick with their Ballahoo schooner beginners model which I'm currently building. The instructions are not designed for a beginner - they are simply a list of things to do in a sequence with minimal detail on technique or process. It's quite possibly one of the reasons why I bounced off the hobby for several years after getting 2 or 3 planks into the first planking. Thankfully I found a way back into it by looking elsewhere for guidance (such as this site) and I now feel up to speed on how to approach the build. But the whole process of learning the hobby is way too obtuse in my opinion; it's totally different to any other kind of model making and there needs to be a lot more hand-holding for absolute beginners if you ask me. Also, it really is in the manufacturers best interests to grab hold of newbies and shower them with amazing instructions on beginner models (I'm not suggesting they include a complete paperback guide, just... something substantial). It means once they've finished they will go back and buy a more advanced model that takes their fancy.
-
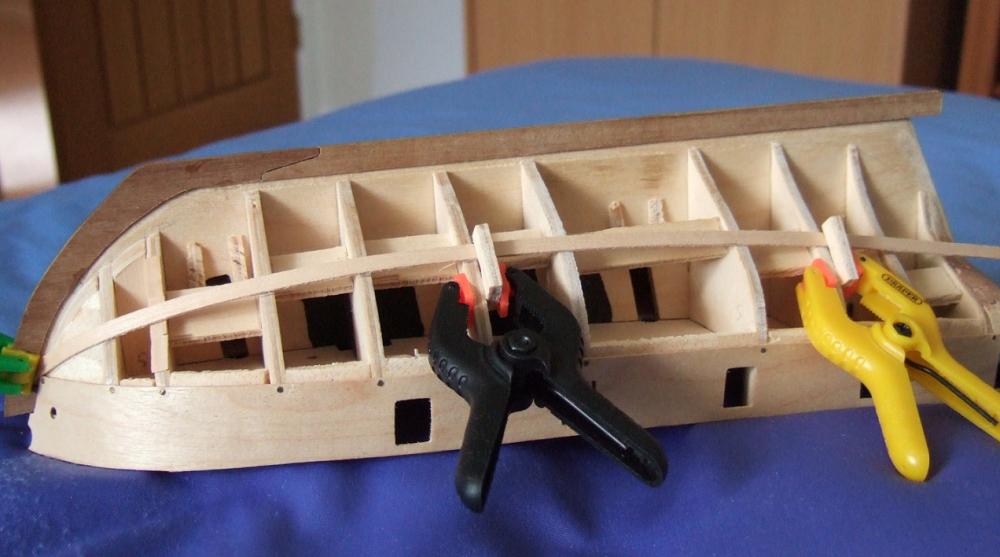
I've spent more time fairing the starboard bulkheads than I did with the port side. Bulkhead 2 is in my opinion too narrow in this kit, so I widened it a bit. I also think BH6 is a smidgen too wide (regardless of the fairing), so I took a millimetre off it, so the batten can run smoothly with no flat spots. Fingers crossed the planking will be fine once it's on, the batten is looking smooth all the way up and down. The natural run of the planks at the bow is a bit unusual on this schooner due to the sharp rise, compared to some bigger ships, so some thought has to go into the best way to lay them. Dare I say, a bigger ship may in fact turn out to be more straightforward in terms of plank positioning. We shall see.
- 28 replies
-
- 2
-
-
- ballahoo
- caldercraft
- (and 1 more)
-
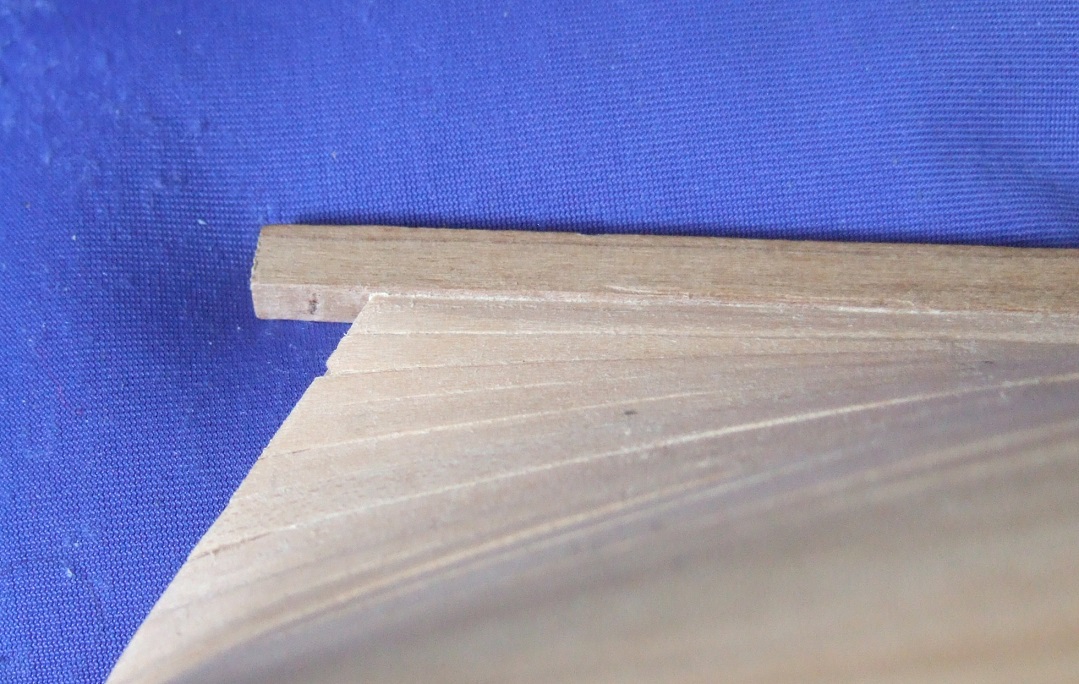
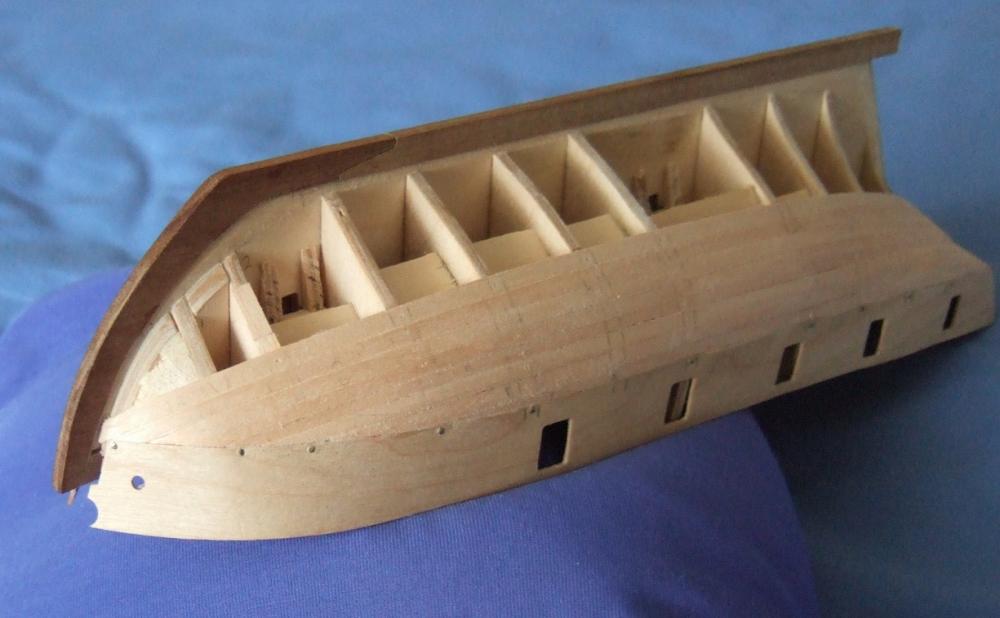
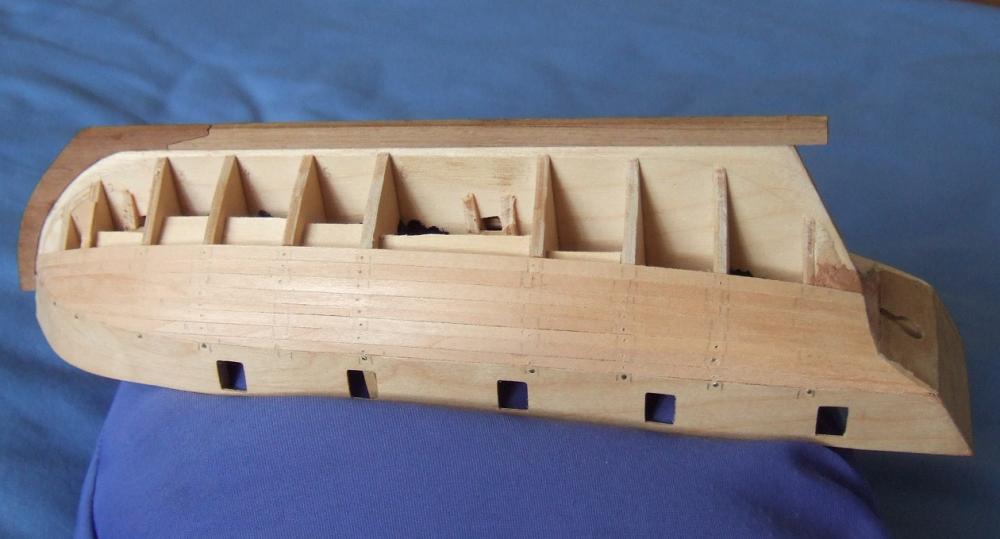
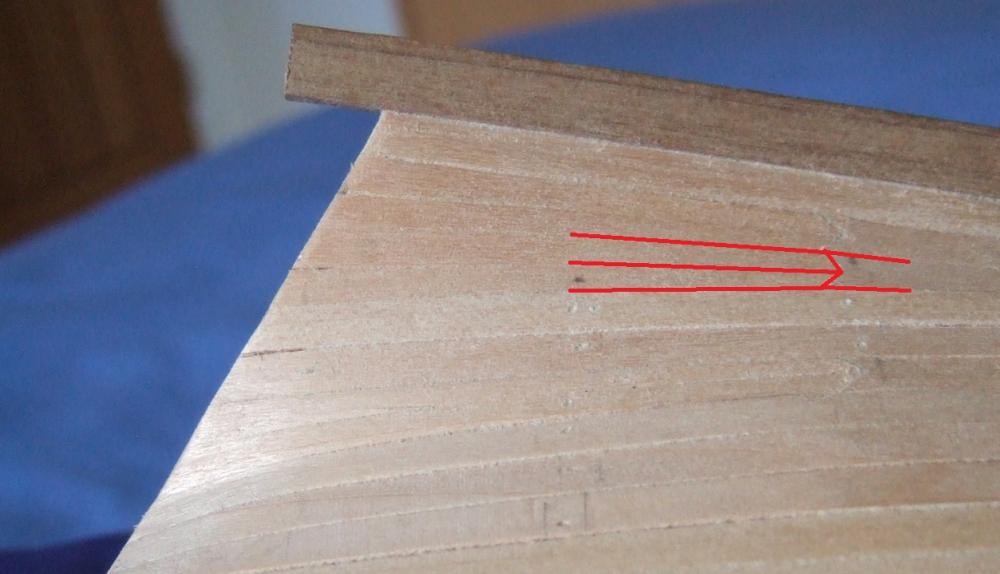
Just some close ups of the tricky stern section. I had to use a few stealers (or dropper planks?) to keep a nice smooth run on the planking. I basically terminated the original plank around bulkhead 8 with an inverted triangle - and shaped 2 new planks to carry on to the stern. The second photo shows some of the sanding I've done by the keel to allow for the second planking to lay properly. I should have prepared it more before I began the planking, but it'll work out in the end.

- 28 replies
-
- 4
-
-
- ballahoo
- caldercraft
- (and 1 more)
-
Cornish_K reacted to a post in a topic:
HM Schooner Ballahoo by Cornish_K - Caldercraft - scale 1:64 - First wooden ship build
-
Cornish_K reacted to a post in a topic:
HM Schooner Ballahoo by Cornish_K - Caldercraft - scale 1:64 - First wooden ship build
-
Thanks for the compliment Mike. I've actually been looking through your Pegasus build before today - it's a potential next model for me after I've finished this one (assuming it's a commitment I want to make!). I'll check out your Badger build later on. I've looked around and found a similar tungsten carbide set to yours from a UK site. I'll certainly need them before I start the next model, which will have much thicker bulkheads. I guess the heavy filing is mostly already finished on this one now, although my little cheap steel files are almost ruined as a result.
- 28 replies
-
- 2
-
-
- ballahoo
- caldercraft
- (and 1 more)
-
I need to look into getting a dremel. Does anyone have any recommendations? I've already got a part I need to make from scratch, after I snapped the stern taffarel in half. I could really do with a precise way of cutting a replica piece from the leftover walnut ply. I may invest in some bigger, more durable files also. The little files I'm using just don't remove enough when shaping the bulkheads, takes an age - even for a small model like this.