MichaelB
-
Posts
22 -
Joined
-
Last visited


-
 MichaelB reacted to a post in a topic:
Armed Viriginia Sloop by JpR62 - FINISHED - Model Shipways - Scale 1:48 - First wooden ship build
MichaelB reacted to a post in a topic:
Armed Viriginia Sloop by JpR62 - FINISHED - Model Shipways - Scale 1:48 - First wooden ship build
-
MichaelB reacted to a post in a topic:
Le Soleil Royal by EJ_L - FINISHED - Sergal - Scale 1:77 - 1669 Version
-
MichaelB reacted to a post in a topic:
Armed Viriginia Sloop by JpR62 - FINISHED - Model Shipways - Scale 1:48 - First wooden ship build
-
JpR62 reacted to a post in a topic:
Armed Virginia Sloop by MichaelB - Model Shipways - scale 1:48
-
EJ_L reacted to a post in a topic:
Armed Virginia Sloop by MichaelB - Model Shipways - scale 1:48
-
GuntherMT reacted to a post in a topic:
Armed Virginia Sloop by MichaelB - Model Shipways - scale 1:48
-
lmagna reacted to a post in a topic:
Armed Virginia Sloop by MichaelB - Model Shipways - scale 1:48
-
Ryland Craze reacted to a post in a topic:
Armed Virginia Sloop by MichaelB - Model Shipways - scale 1:48
-
russ reacted to a post in a topic:
Armed Virginia Sloop by MichaelB - Model Shipways - scale 1:48
-
DBorgens reacted to a post in a topic:
Armed Virginia Sloop by MichaelB - Model Shipways - scale 1:48
-
 Catching up on the my build log as I have recently gotten back working on my AVS. I have marked off the hull for the first planking. I followed Chuck's guied on this site for lining off the hull into equal bands with artist tape. For my hull, the math came out to 4 bands of 3 planks each (including the garbard). Each plank will be about 7/32" wide at midship. This equates to about 10.5" full scale. This also keeps the widest planks at the stern to be about 1/4" to correspond with the widest planks supplied in the kit. Next I installed the garbard plank. I left the entire plank 1/4" wide instead of tapering at the bow. I will have to adjust the rest of the planks a little narrower to compensate. I have now started working on the first band below the whale. I was going to try to run one long plank the whole way but ended up snapping it at the bow. Instead I did it in 2 pieces and found this was easier to deal with. Both in getting the correct width at each bulkhead and with any shaping that was required. For the bend up at the stern, I soaked the plank and clamped it in place to dry before gluing in plane. There is a flat spot near the bow so I'm going to need some filler and sanding to smooth everything out. But I feel pretty good with how it's turning out. I did go back and fix the end of the plank that sticks out a little in the last picture.

-
MichaelB reacted to a post in a topic:
Le Soleil Royal by EJ_L - FINISHED - Sergal - Scale 1:77 - 1669 Version
-
MichaelB reacted to a post in a topic:
Le Soleil Royal by EJ_L - FINISHED - Sergal - Scale 1:77 - 1669 Version
-
thibaultron reacted to a post in a topic:
Skippercraft runabout by DBorgens - 1:16 scale
-
Elijah reacted to a post in a topic:
Le Soleil Royal by EJ_L - FINISHED - Sergal - Scale 1:77 - 1669 Version
-
MichaelB reacted to a post in a topic:
Le Soleil Royal by EJ_L - FINISHED - Sergal - Scale 1:77 - 1669 Version
-
MichaelB reacted to a post in a topic:
Soleil Royal by BLACK VIKING - De Agostini - scale 1.70
-
MichaelB reacted to a post in a topic:
Soleil Royal by BLACK VIKING - De Agostini - scale 1.70
-
MichaelB reacted to a post in a topic:
Le Soleil Royal by EJ_L - FINISHED - Sergal - Scale 1:77 - 1669 Version
-
MichaelB reacted to a post in a topic:
Le Soleil Royal by EJ_L - FINISHED - Sergal - Scale 1:77 - 1669 Version
-
EJ_L reacted to a post in a topic:
Le Soleil Royal by EJ_L - FINISHED - Sergal - Scale 1:77 - 1669 Version
-
EJ sorry to hear about the issues you are running into. Your ship looks fantastic and I wouldn't have known there were problems if you hadn't pointed them out. Also thank you for sharing your thoughts on the kit and its shortcomings in making interior changes. As I one day hope to be able to add interior cabin details to a build this is invaluable insight.
-
Thanks for the compliments Ryland and Al. Good to hear just sanding the gun port should work. Al, I will look into the book. Thanks for mentioning it.
-
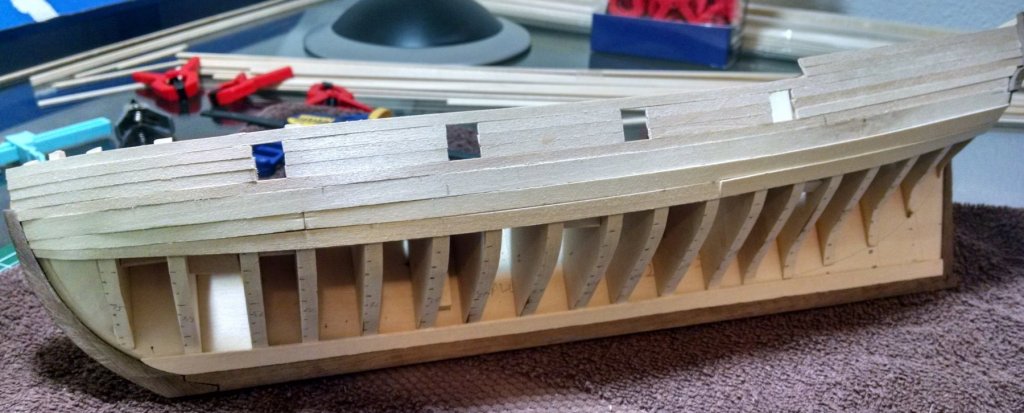
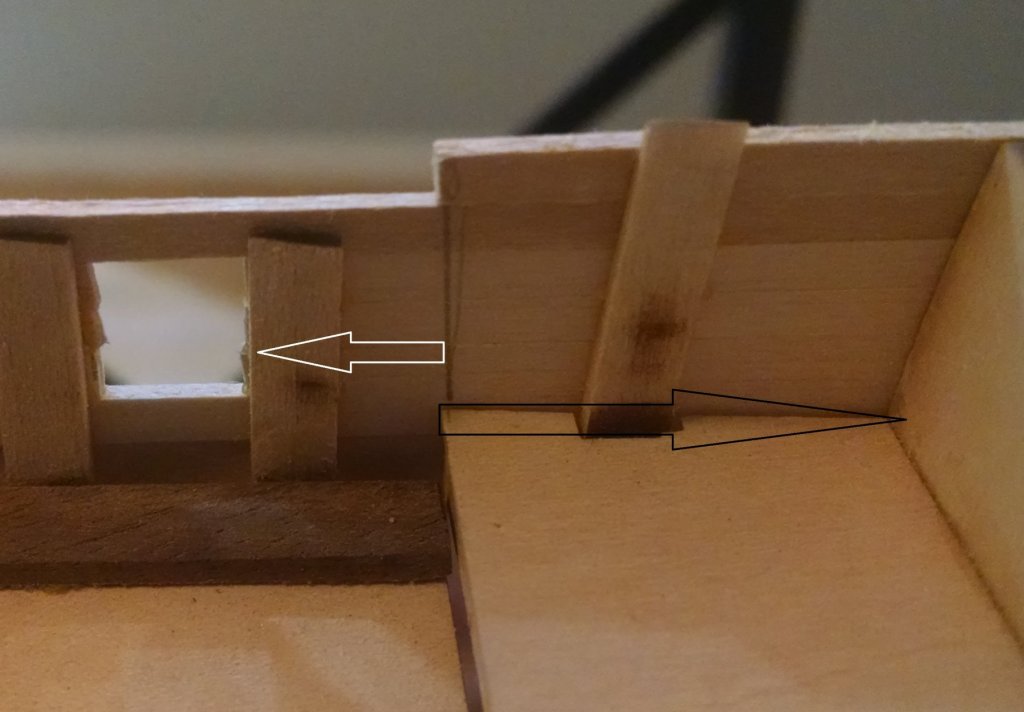
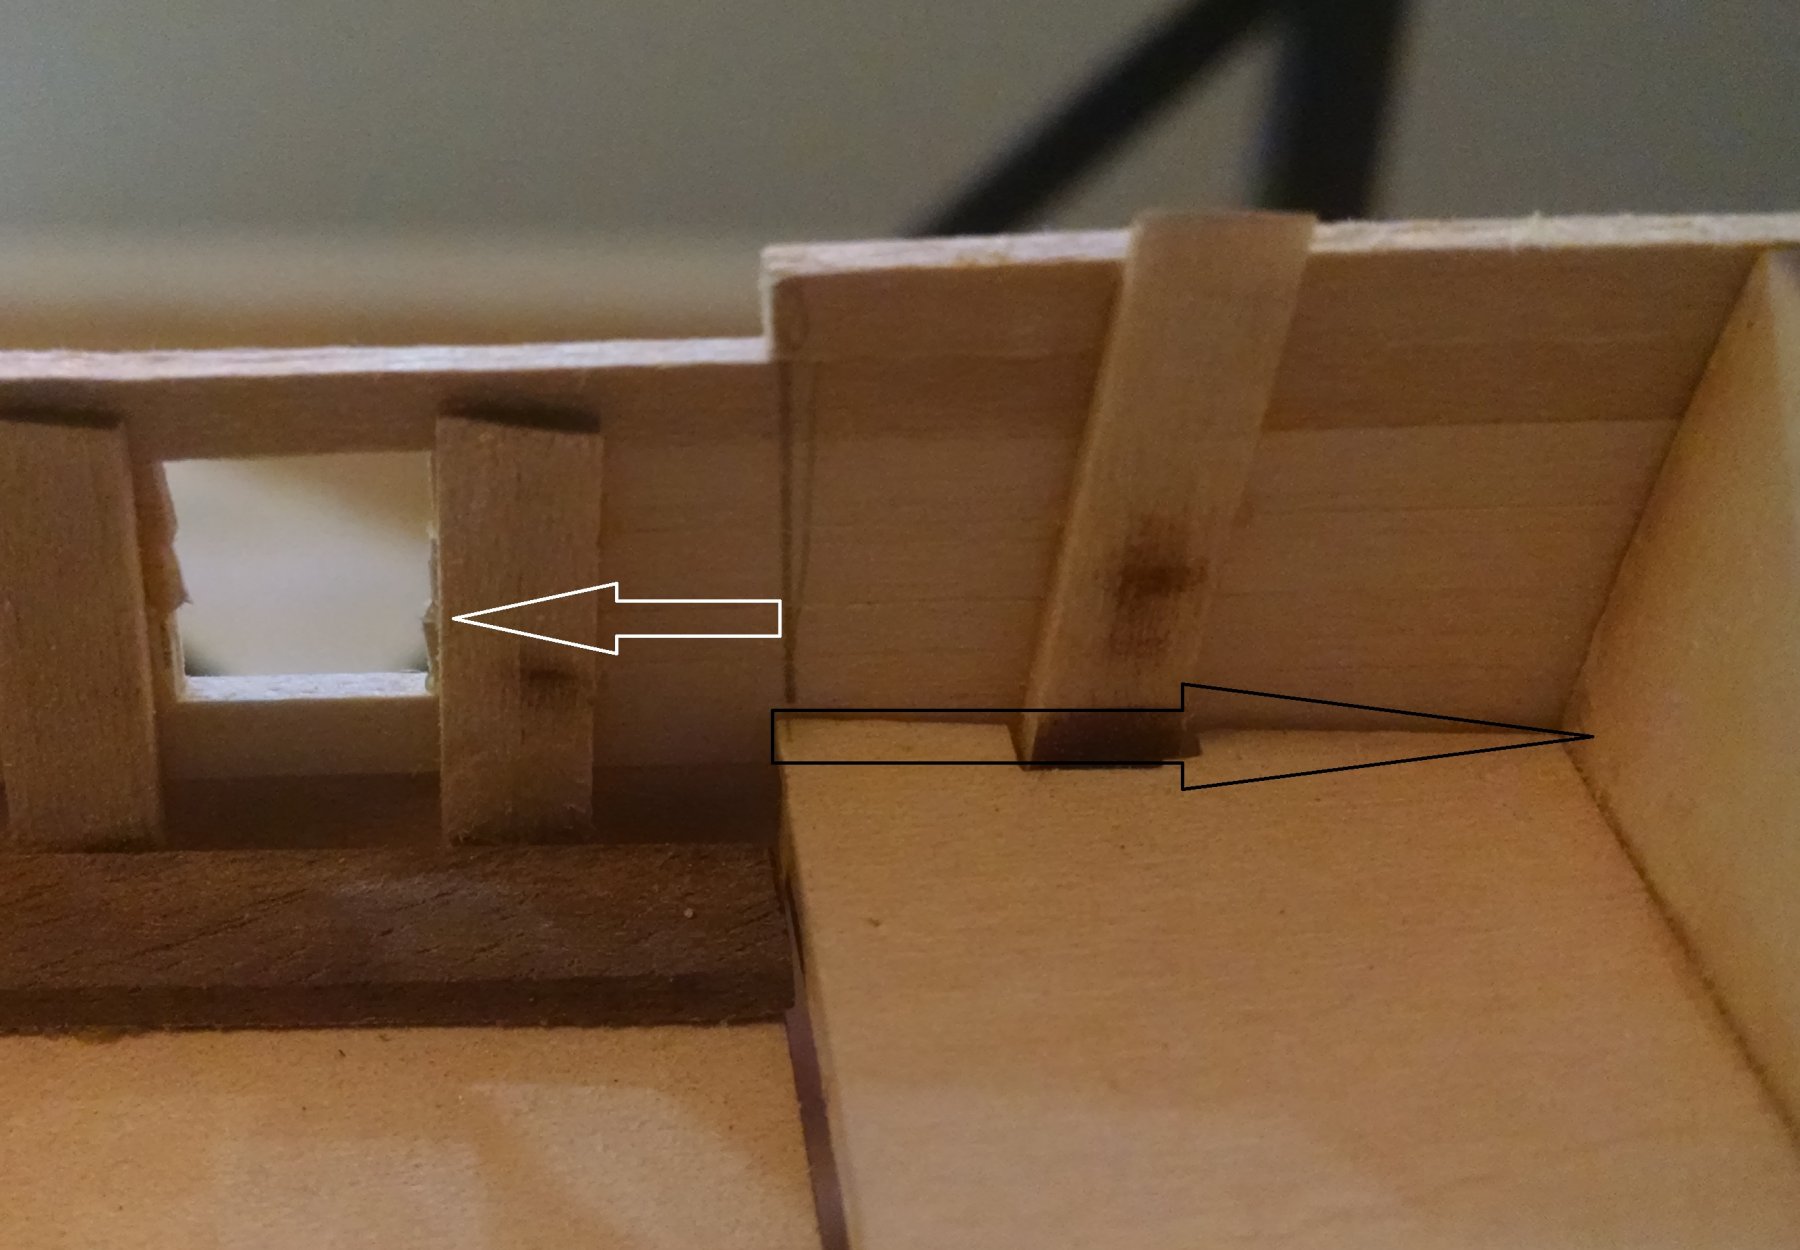
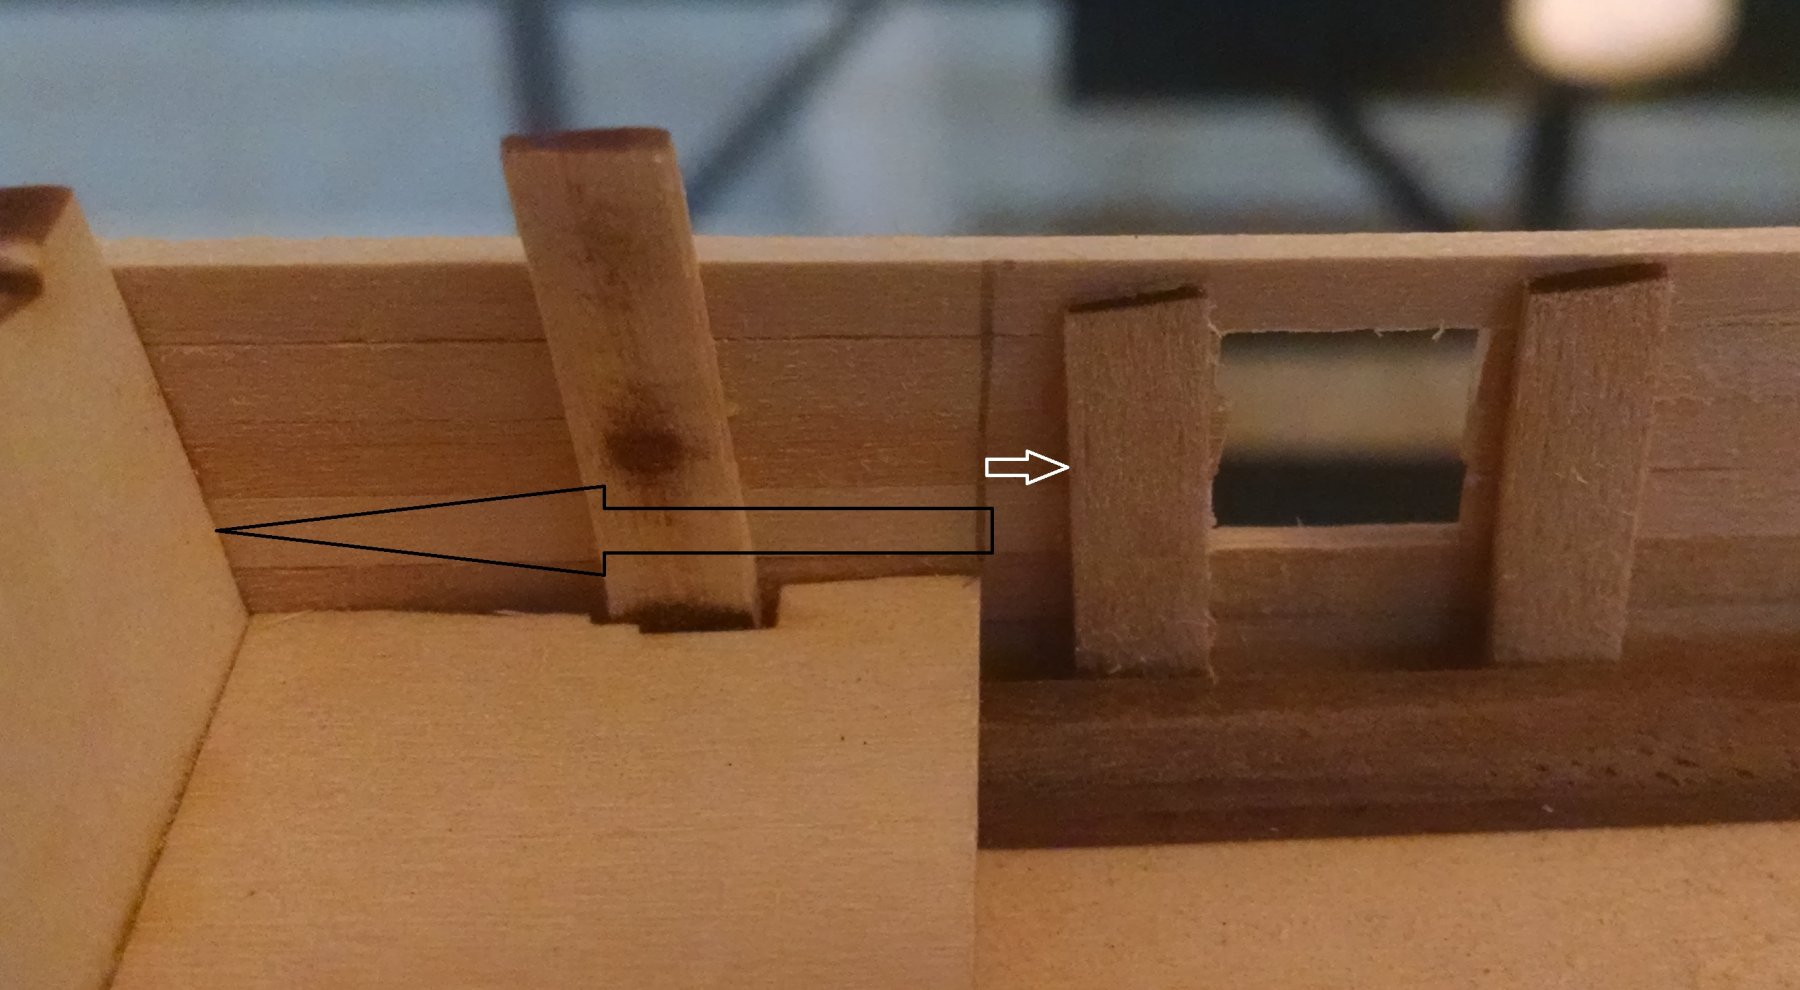
Thanks for all the likes! After a busy summer, I have been able to spend some time on my AVS. I have completed the first layer of planking above the wales. This was pretty straightforward with no major issues. The only issue I did have was I found the knightshead and timberhead on the port side were not shaped right. So I had to add some extra wood to the front of them. After fairing these down, I was much happier with the run of the planks at the bow. I still need to go back and clean up the gunports. I did notice one of my bulkheads is not straight during this process. This is causing one of my gun ports to be slightly too small. Everything else looks to be lined up correctly and its just this bulkhead that is misaligned. Hopefully the pictures show what I am talking about. The white arrows are indicating the difference. Measuring the distance for the black arrows is identical as well as to the stern. This is why I believe it is just this bulkhead that is not correct. For a fix I think I can just sand out the port to match the rest and this will be OK. Am I correct in this thought process?


-
Martyn, Great work so far! Your work looks very clean and smooth. Excited to follow your progress.
-
Dave, Nice work. The bench looks good.
-
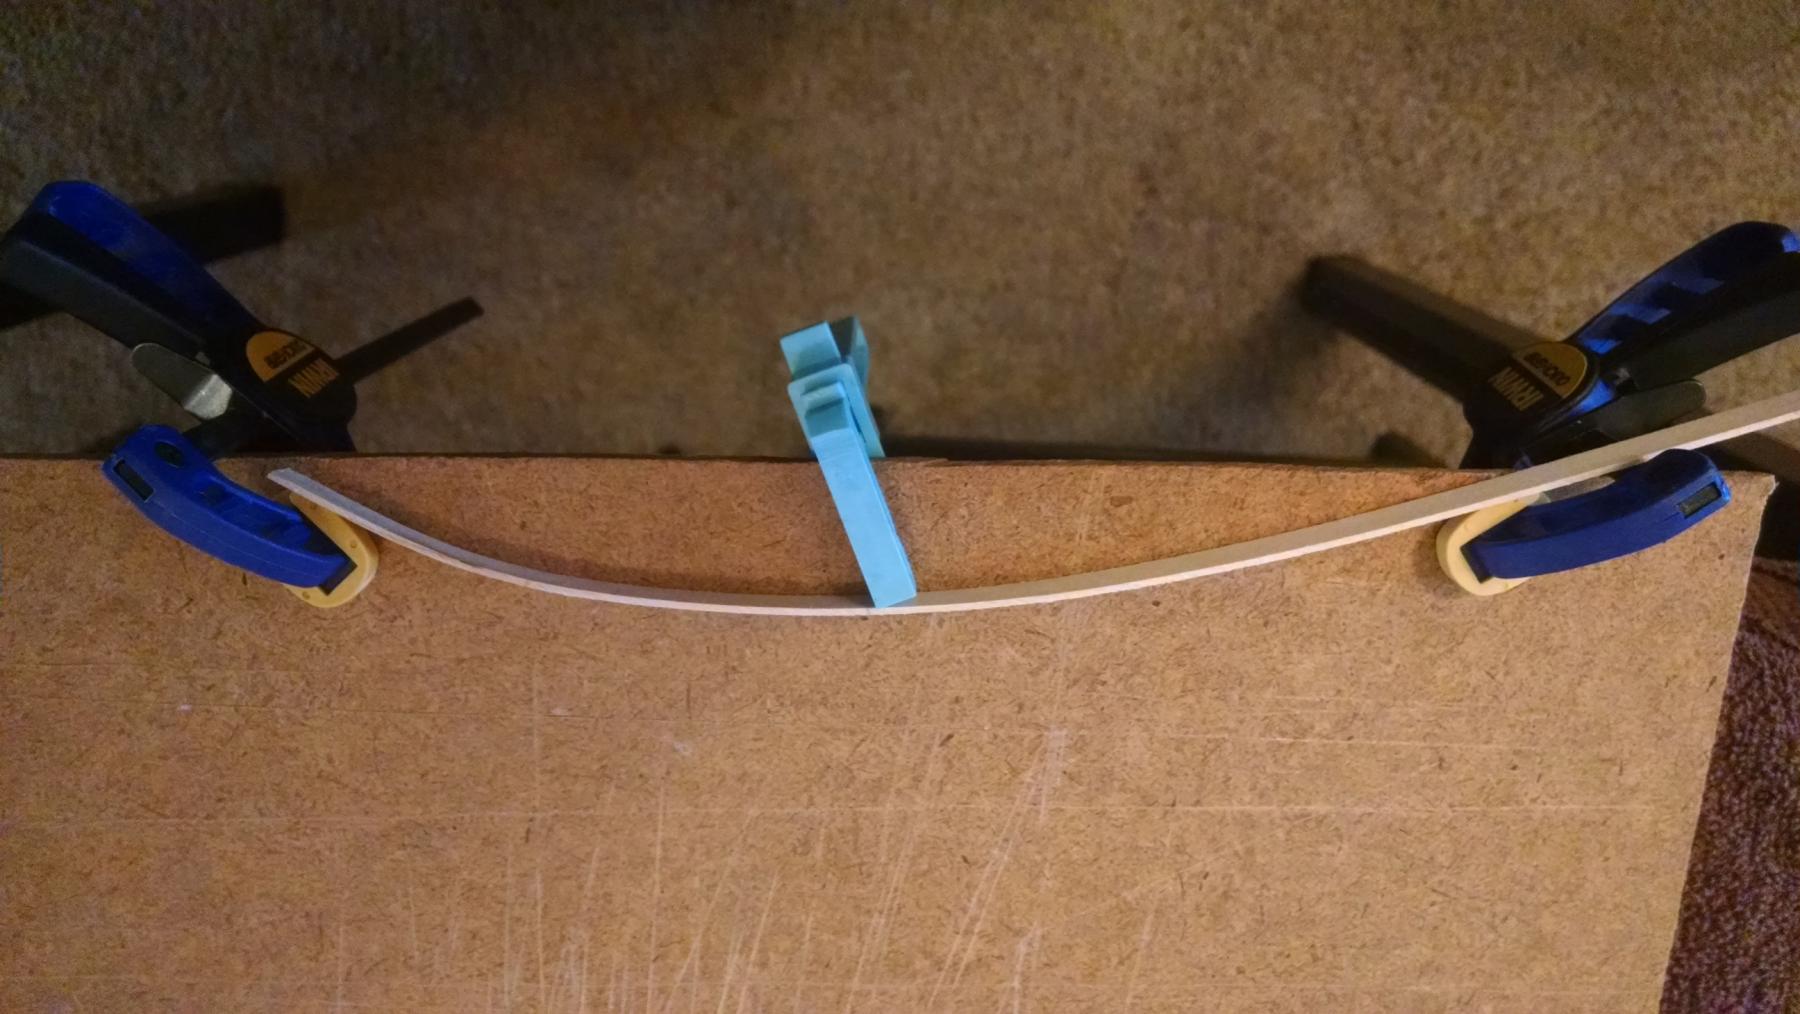
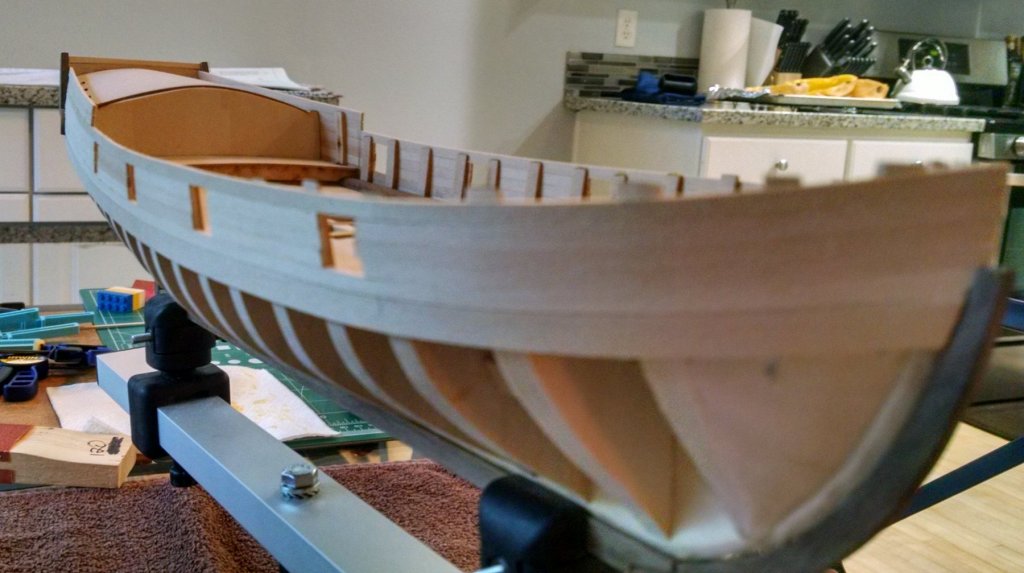
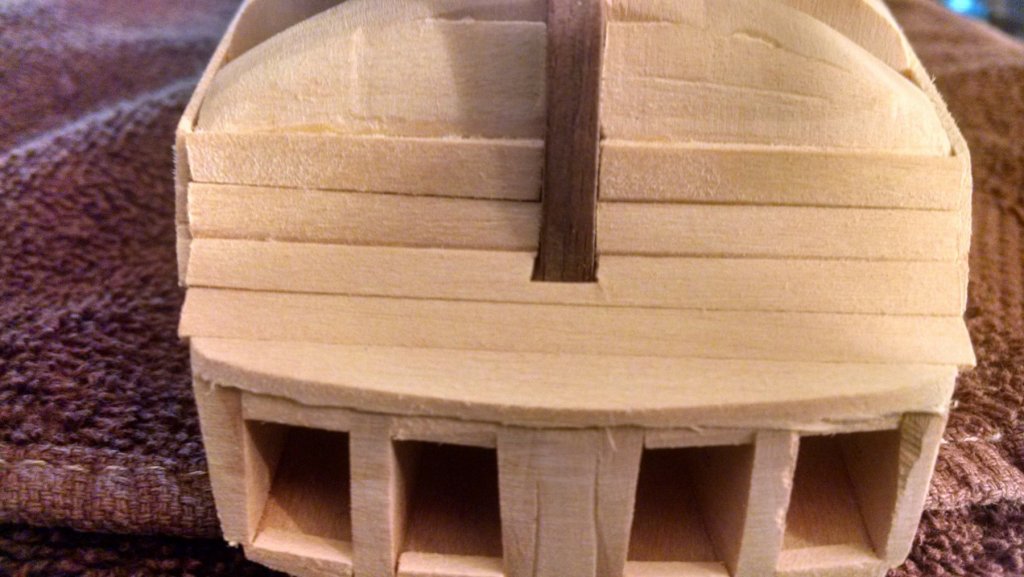
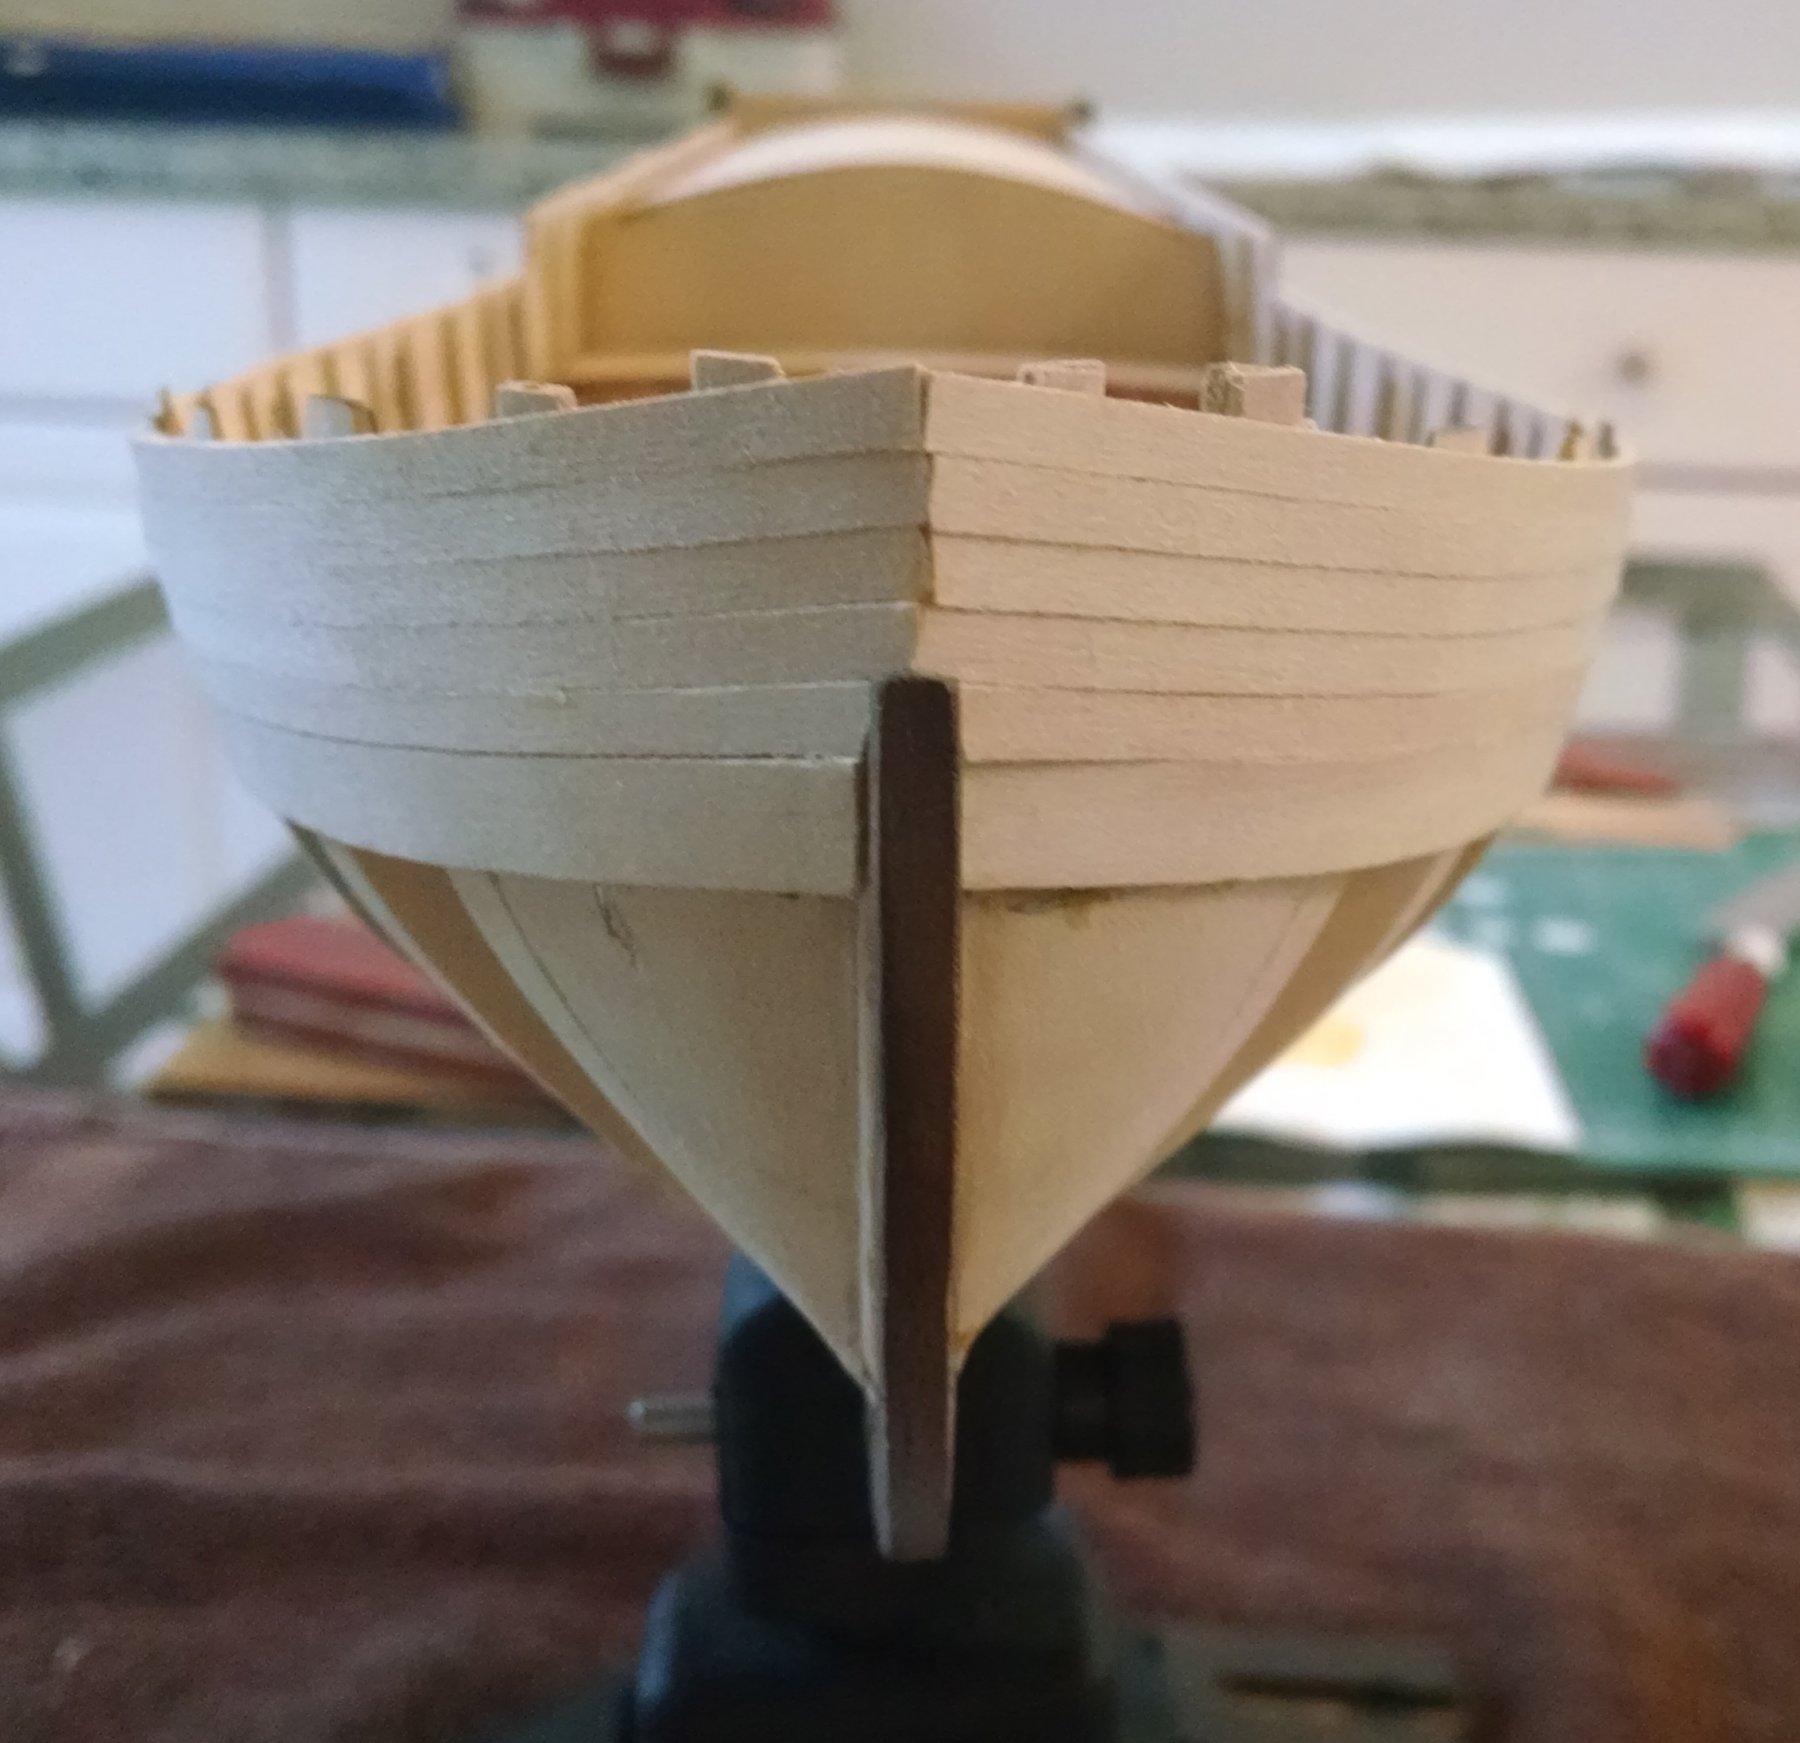
It's been a while since I posted anything on here. I have slowly been working on the stern planking more. I had some issues with getting the correct edge bend on the bass wood planks over the stern windows. Eventually I found soaking the planks and then clamping them in place worked the best. This shows how the first layer turned out before any sanding had been done. It’s a little rough but I am happy with how it turned out. To open the windows up, I used an xacto saw blade to cut out the window opening on each plank as I added them. This way I could have a consistent line across the stern on each plank. Then I used some small files to get the window openings to the correct size. Next I added the outer layer of walnut. Looking at the basswood planking, I decided I wanted the walnut planks to go straight across. So I glued on the first strip and sanded it flush with the frame on the bottom. To line this up, I used the bottoms of the windows as a guide. For the planks around the windows, I did each portion separately. Finally I filed out the windows to fit snuggly. Overall, I am happy with how this turned out. I didn't glue in the windows yet as I have not decided what color I want to paint them and if I want to find some window glue to fill them in with. After adding the walnut planks to the counter, I cut down the long stern planks and sanded it all into a shape that I liked. Now I am working on adding the fashion pieces. Any comments, suggestions, critiques are much appreciated.

.thumb.jpg.d3a7a8f2c9f0e1f0dc01d76b5b2a9d27.jpg)
.thumb.jpg.3bb9f0341b5074522d2f92f3d565c0ac.jpg)
.thumb.jpg.0ead9860d7f29d1a457af4cd5f4d5708.jpg)
-
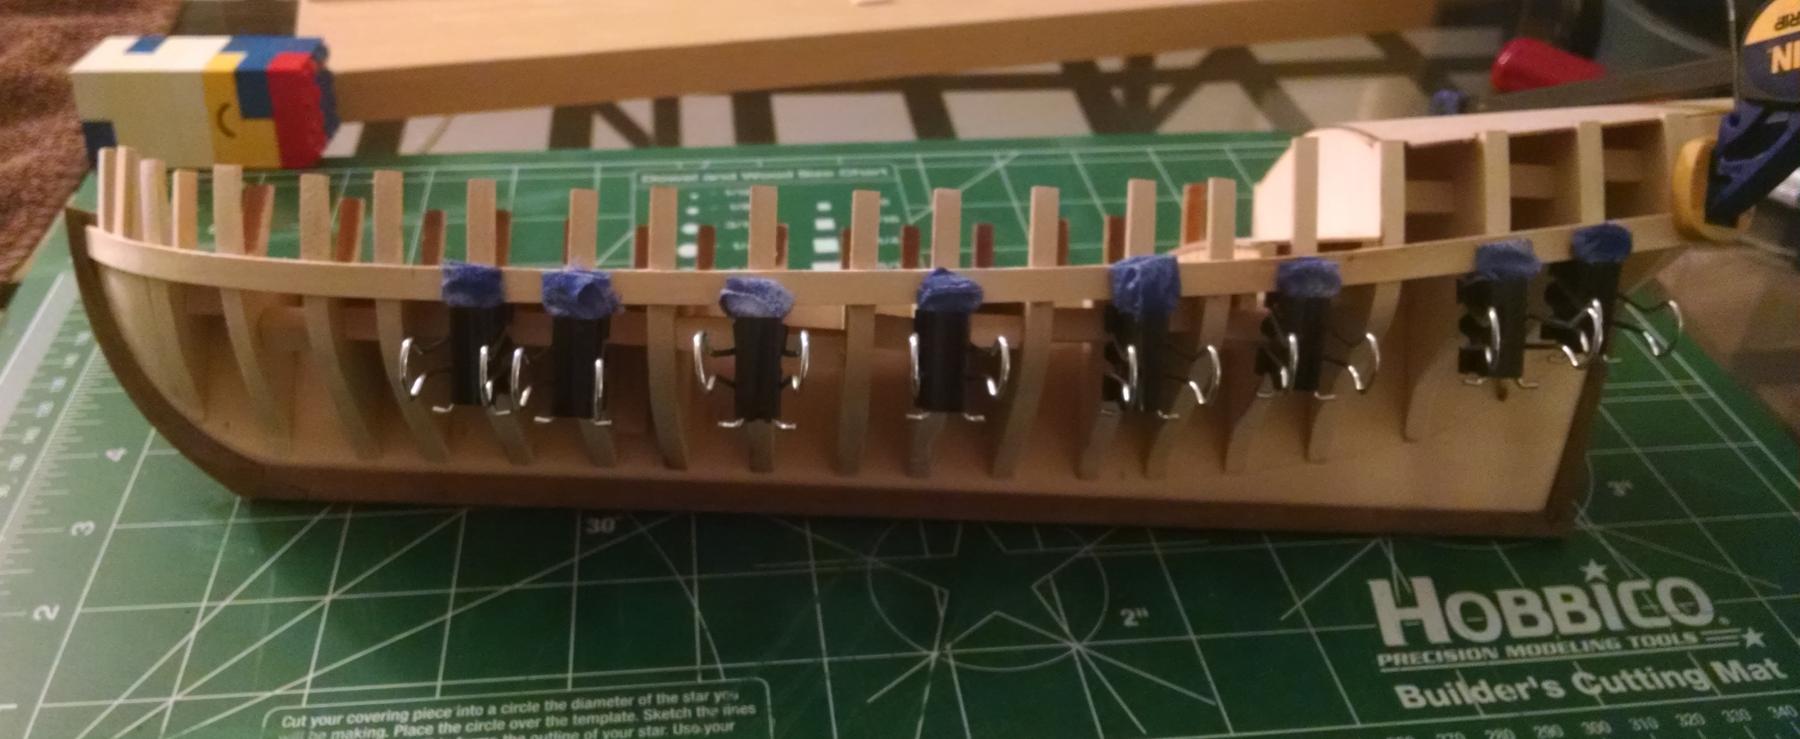
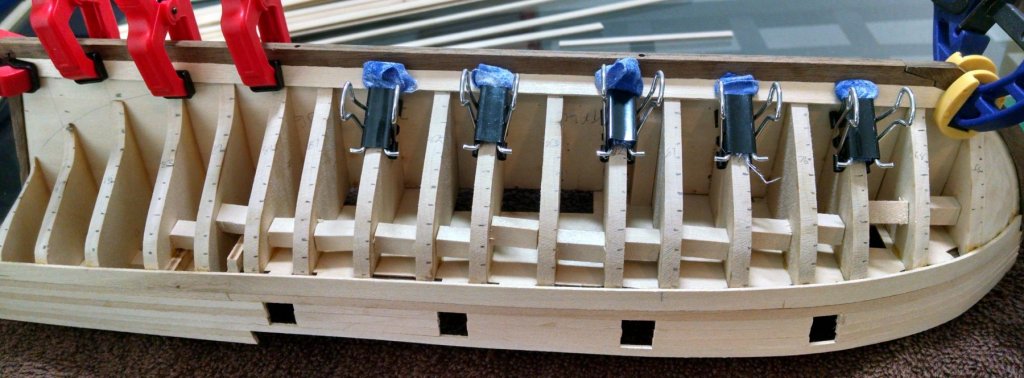
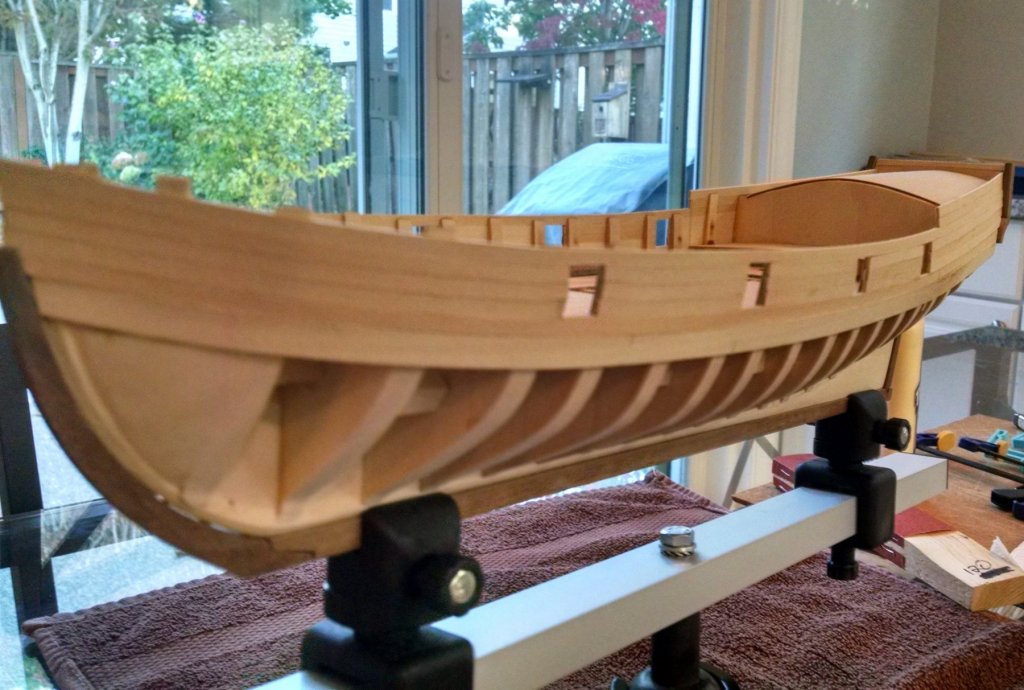
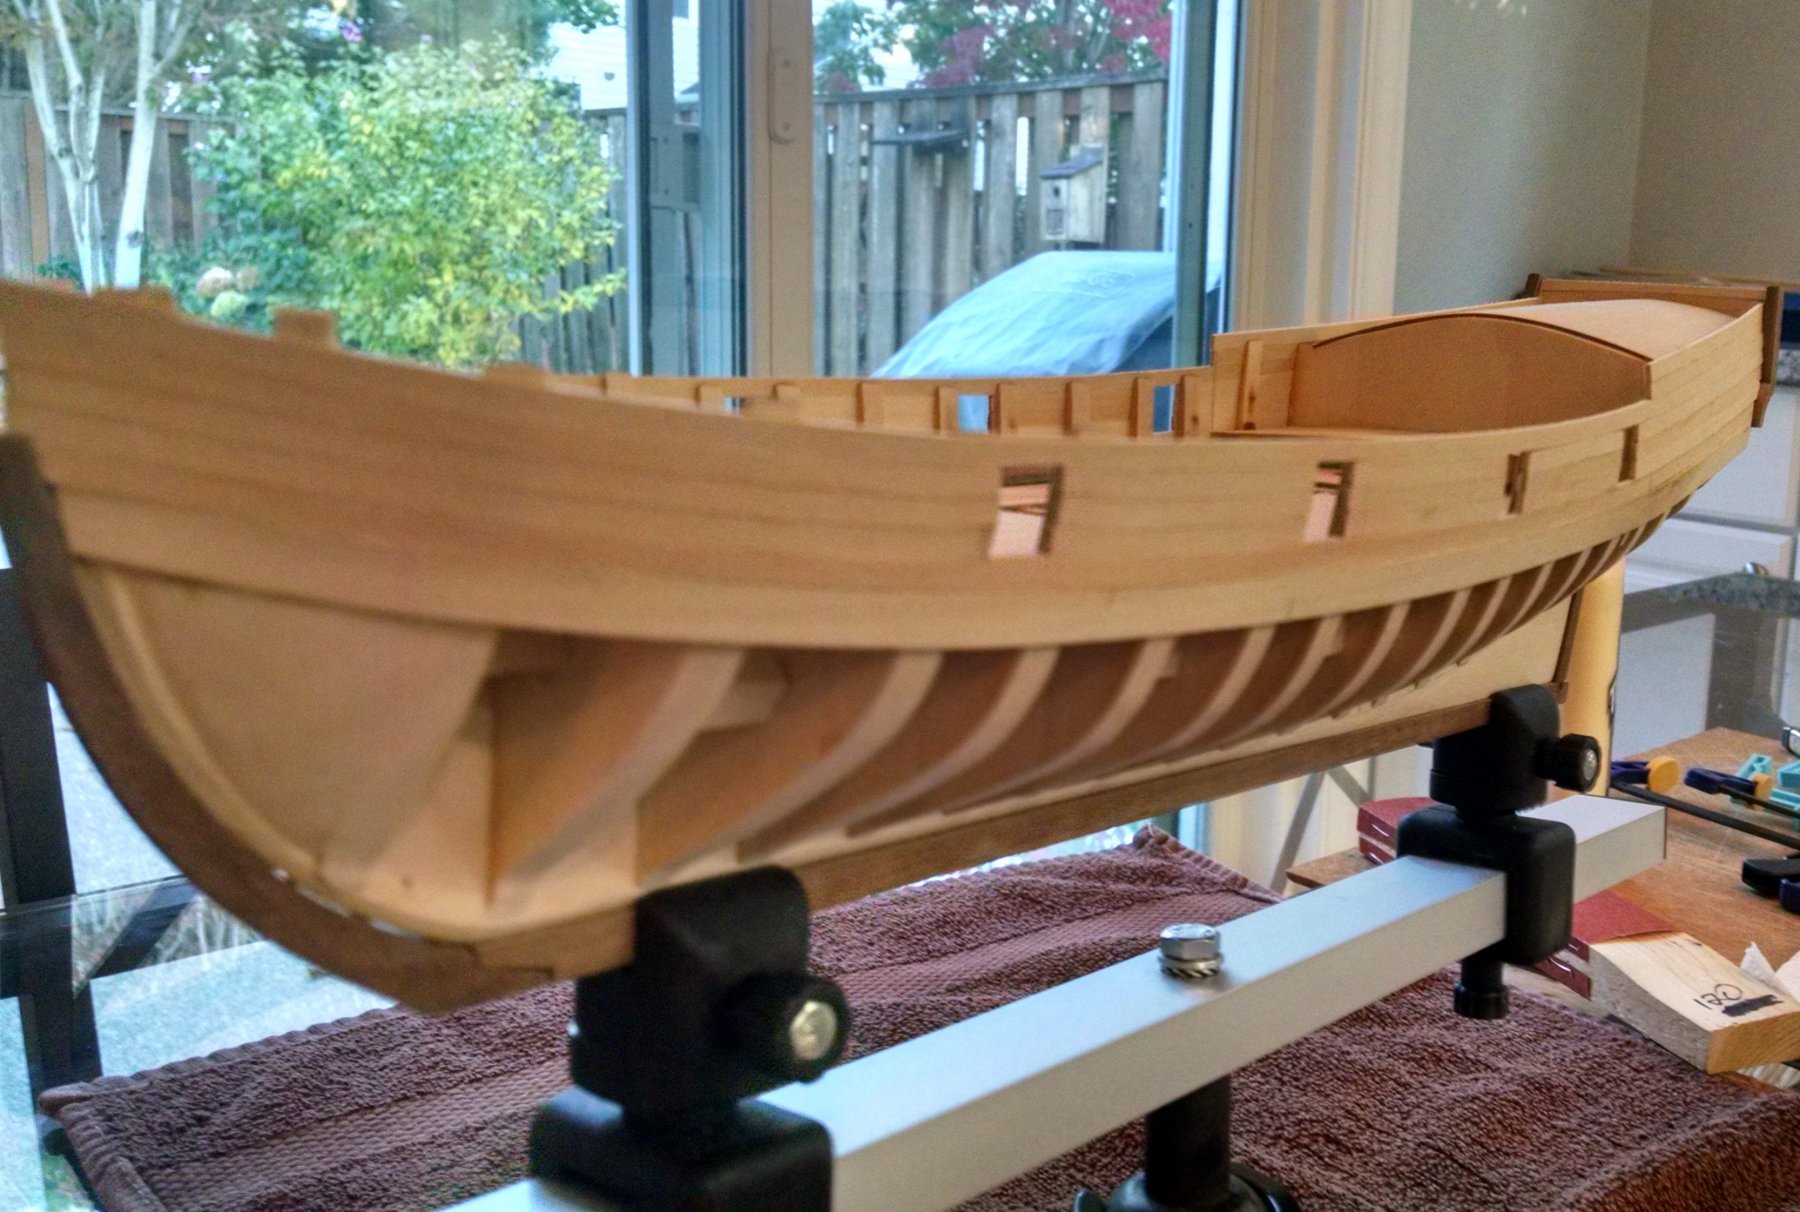
Work has been really busy the past few months so I haven't had much time to work on my AVS. When I did get a chance, I finished adding the two planks along each side of the hull and installed the waterways after fairing the inside of the bulkhead risers. I found that I wasn't heating the planks long enough before when shaping the planks. Heating them more allowed them to hold their shape better and made them much easier to work with. I also received a keel clamp for Christmas that works great for holding the hull. Fairing the inside of the bulkhead risers was a learning process. Since all my sanding sticks are too long to be useful, I ended up cutting out a section of a plastic milk jug that had a concave shape. This helped the sandpaper hold a concave shape. Using this, the fairing process went much smoother. After this, I started planking the stern area. Starting at the base of the transom, I glued on a piece of 1/4 inch wide basswood with some overhang. Then I sanded down the plank on the hull to match the curve of the stern. After this piece was shaped, I proceeded in adding 3/16 inch wide under this piece until they aligned with the bottom of the 1/4 inch wide plank along the hull. Partway through this process, I realized for the planks to lay smoother along the curve, I needed to bevel the edge of the plank some. This allowed the planks to fit better together. I still need to smooth out the planks and smooth out the edges. I am hoping work will be calming down some and I will have more time to spend on my AVS. Any comments and suggestions are much appreciated.


-
Per I borrowed the admirals hair dryer and used the high setting. I may not have heated the planks long enough.
-
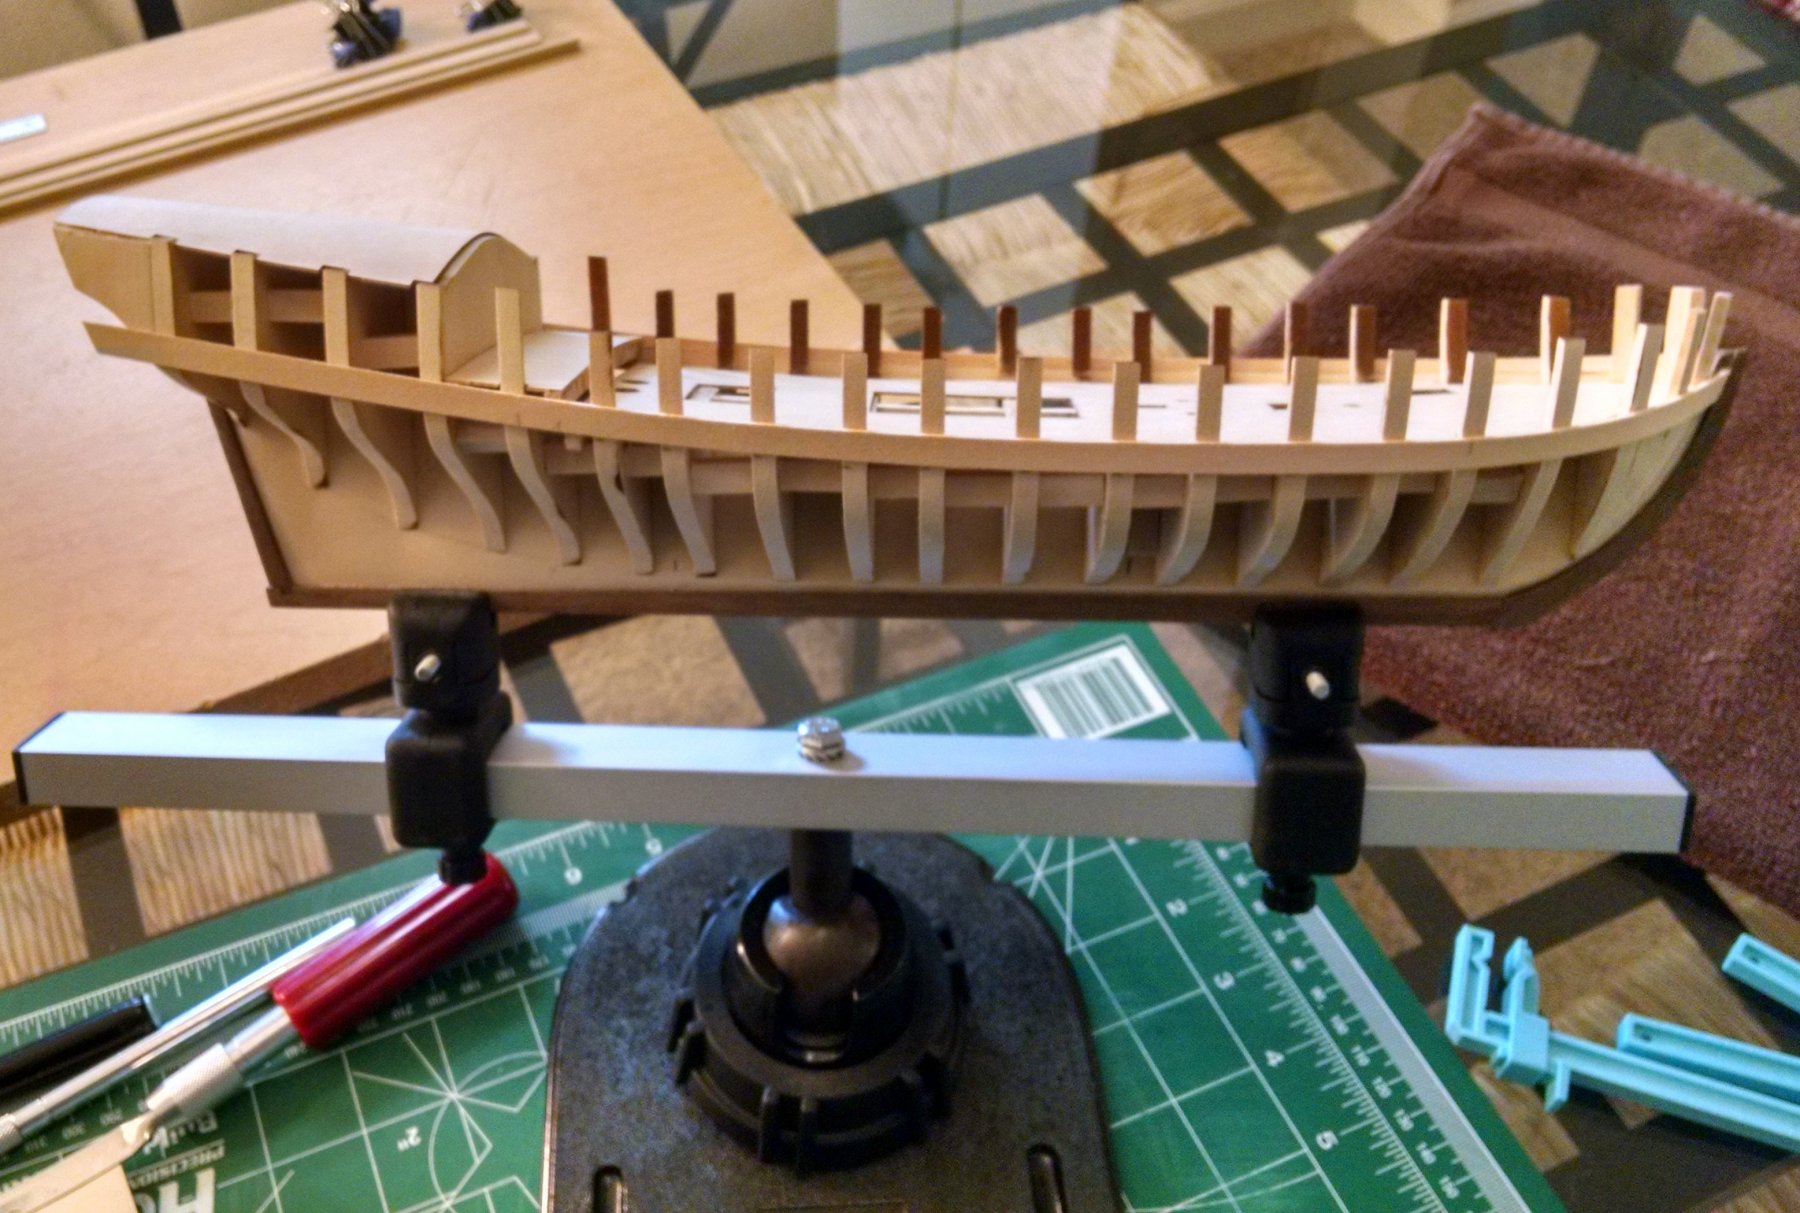
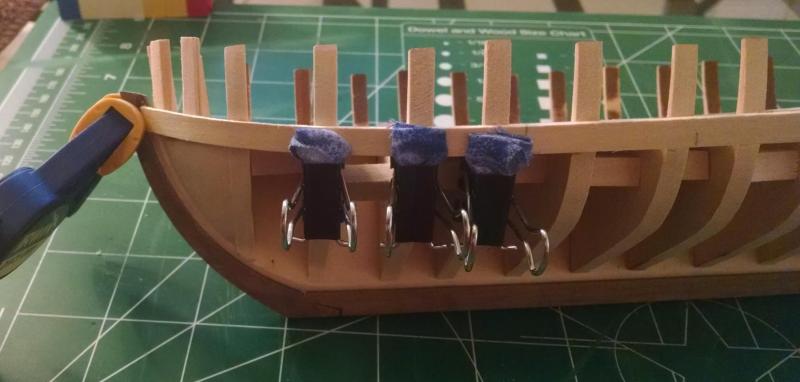
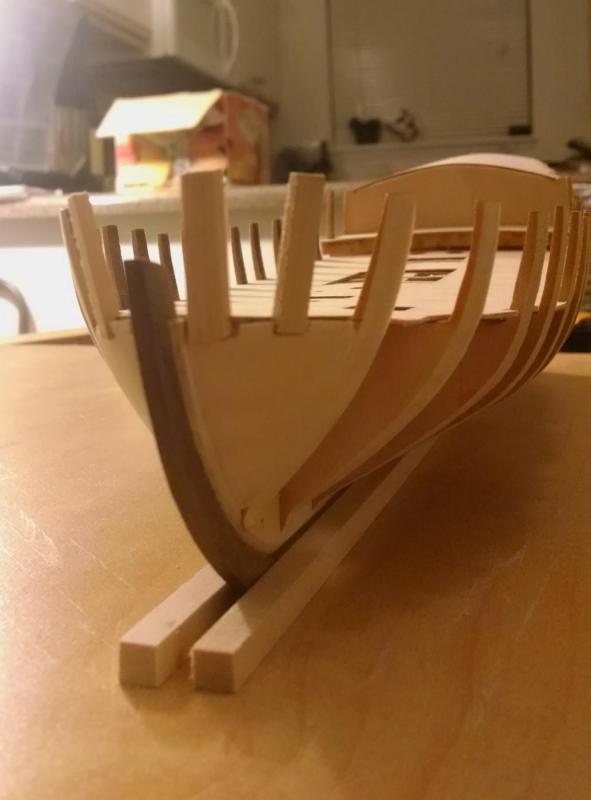
Life's been a bit crazy so haven't had much time to work on my AVS much. With all the knightsheads and timberheads glued in, I went over the hull with the sanding stick one last time to make sure I was happy with how the fairing was. The practicum has you add a 1/4 and an 1/8 inch basswood plank along the sub-deck line at this point. This is to reinforce the bulkheads where they rise above the decking as they are narrow and easily broken while fairing the inside. I worked on shaping the 1/4 inch plank that goes right along the sub-deck line. This required some edge bending as others have mentioned toward the stern as the blank bends up at the stern. I also found pre bending the curve of the hull made installation much easier. For this model, I am trying Chuck's method of bending planks with just heat and clamps. Getting the curve on the plank was more difficult than I first anticipated and took multiple tries to get this right. Initially I was not putting enough of a bend on the plank so I would need to force the plank to lie smoothly on the bulkheads at the bow. After some trial and error, I got a bend I was happy with and glued the plank on. Side note, I am using Titebond II for all the wood gluing on this model as I like the flexibility it gives in getting the placement correct. Unlike CA glue that sets too fast for me (and I don't like the smell of CA glue). Getting the bow portion right took a few attempts and ended up knocking out the knight and timber head in the process. But with some patience and multiple tries, I got a run I am happy with. Since I am not using CA glue, I found it was easier to let the bow section of the plank set up once I was happy with it before trying to glue the rest of the plank down. Once this was set, the rest of the plank went much smoother. With plank attached, I checked the alignment with the sub-decking and am right at 1/8 inch of the plank showing above the sub-deck plus or minus 1/32 in some places. I don't think these variations will be detrimental to the build (If I am wrong please let me know so I can address this) and I am happy with the look right now. Will have to see how the other side goes on to see if anything needs to be redone. Comments and suggestions are much appreciated.


-
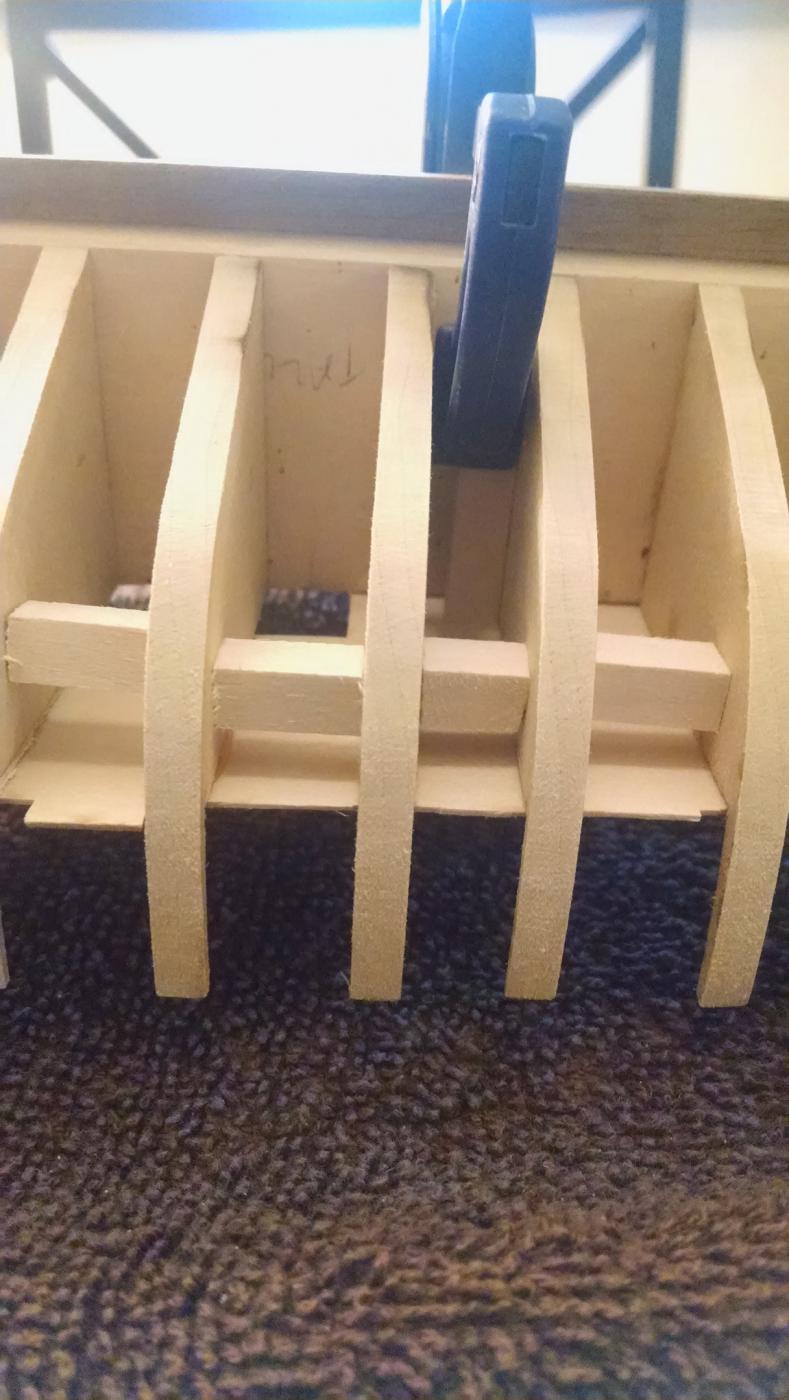
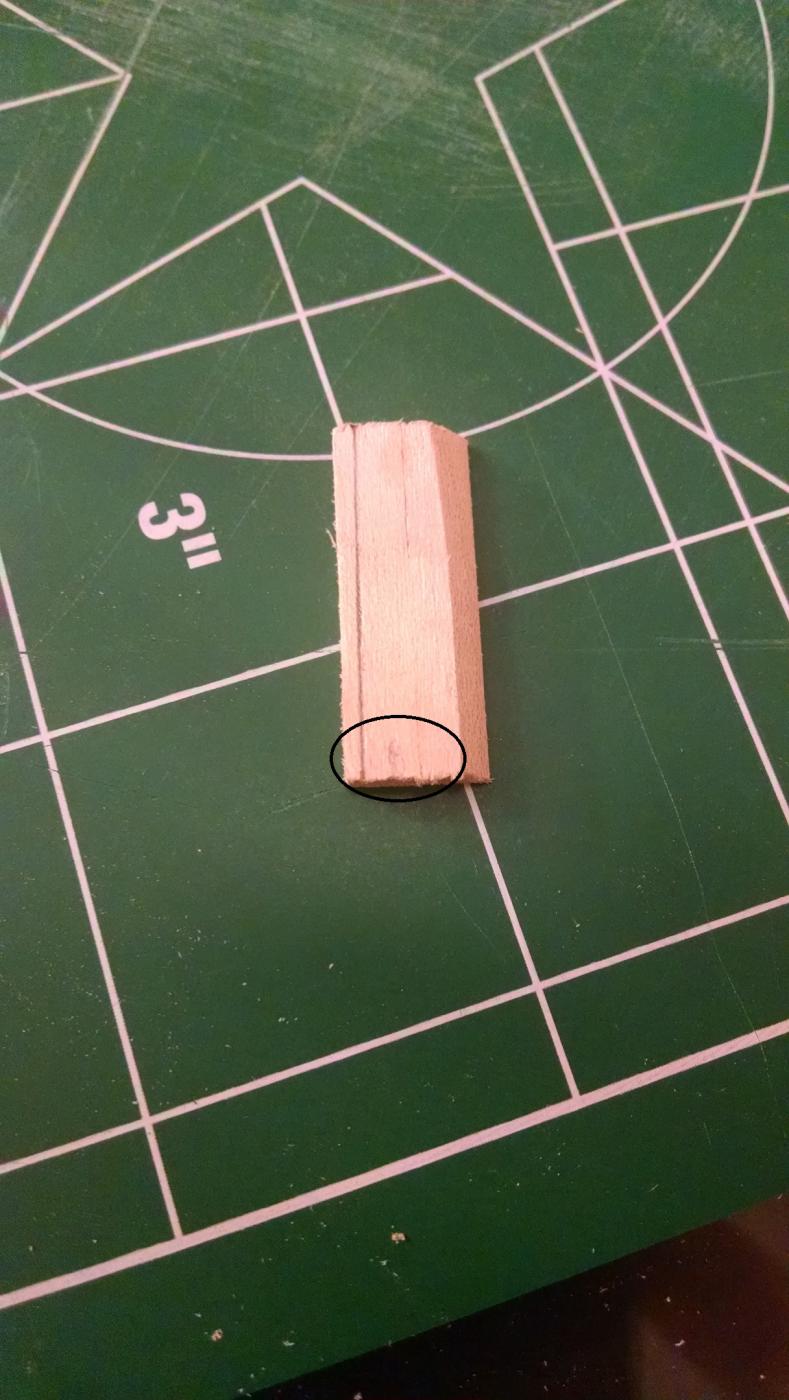
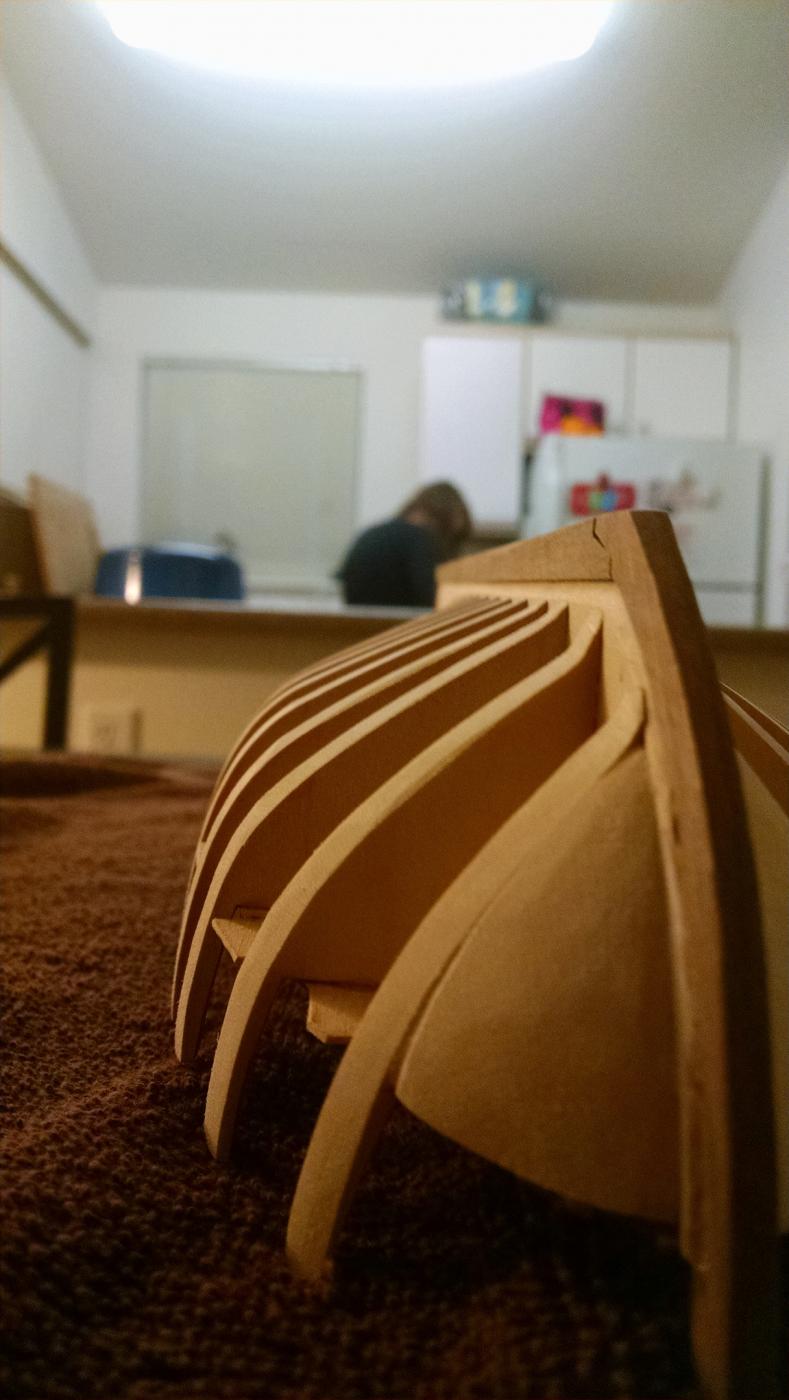
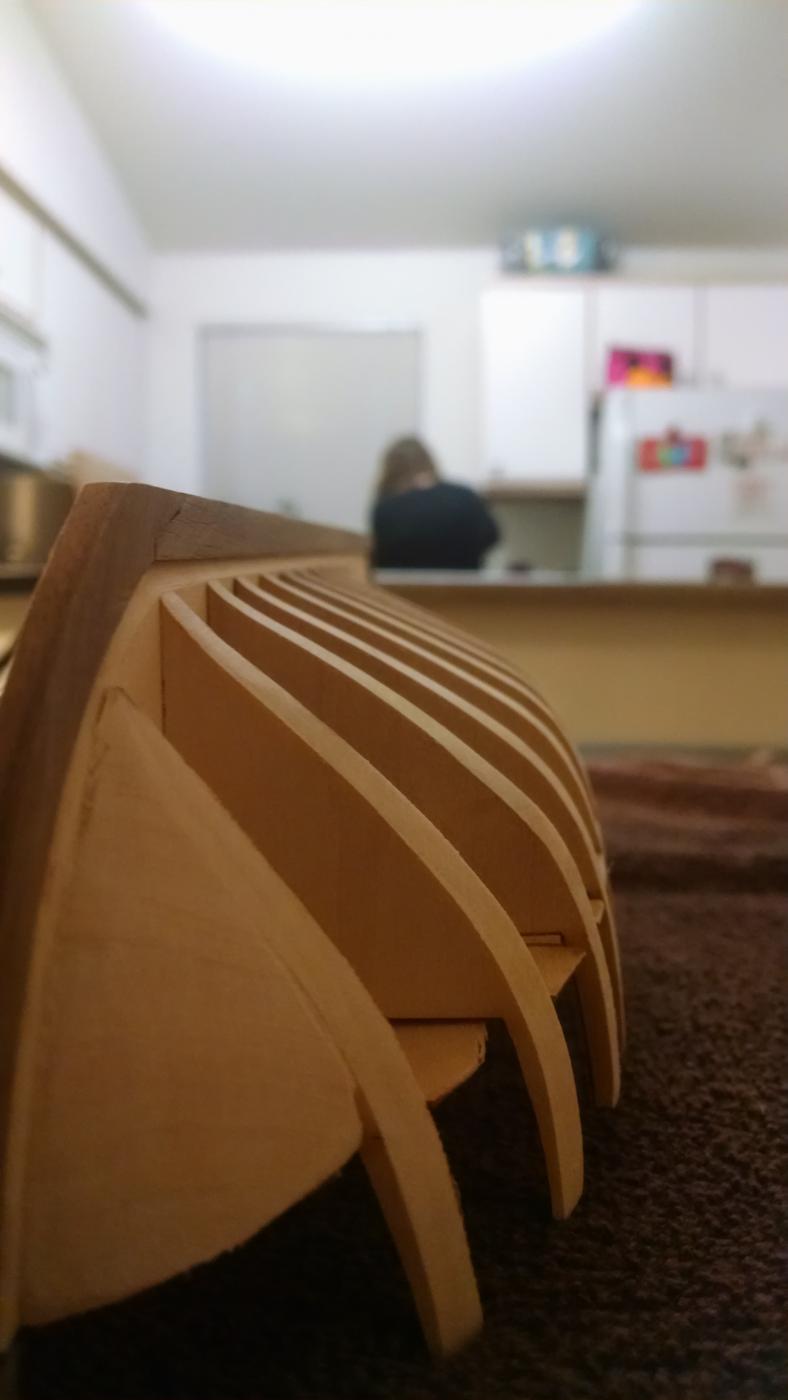
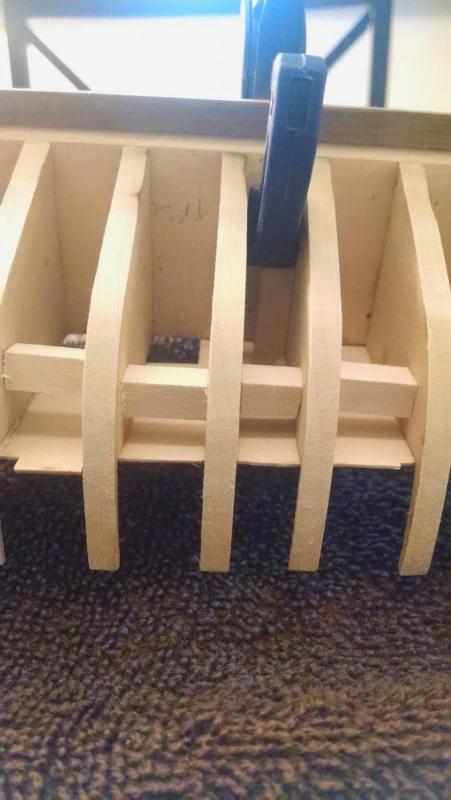
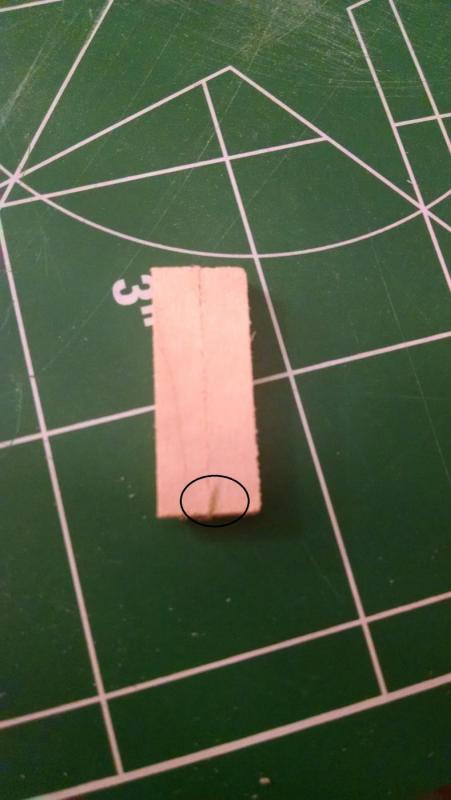
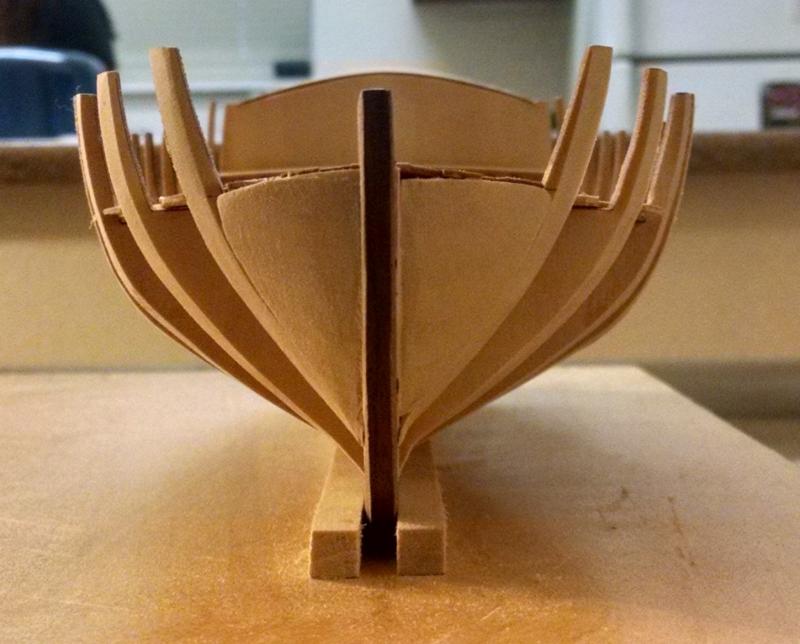
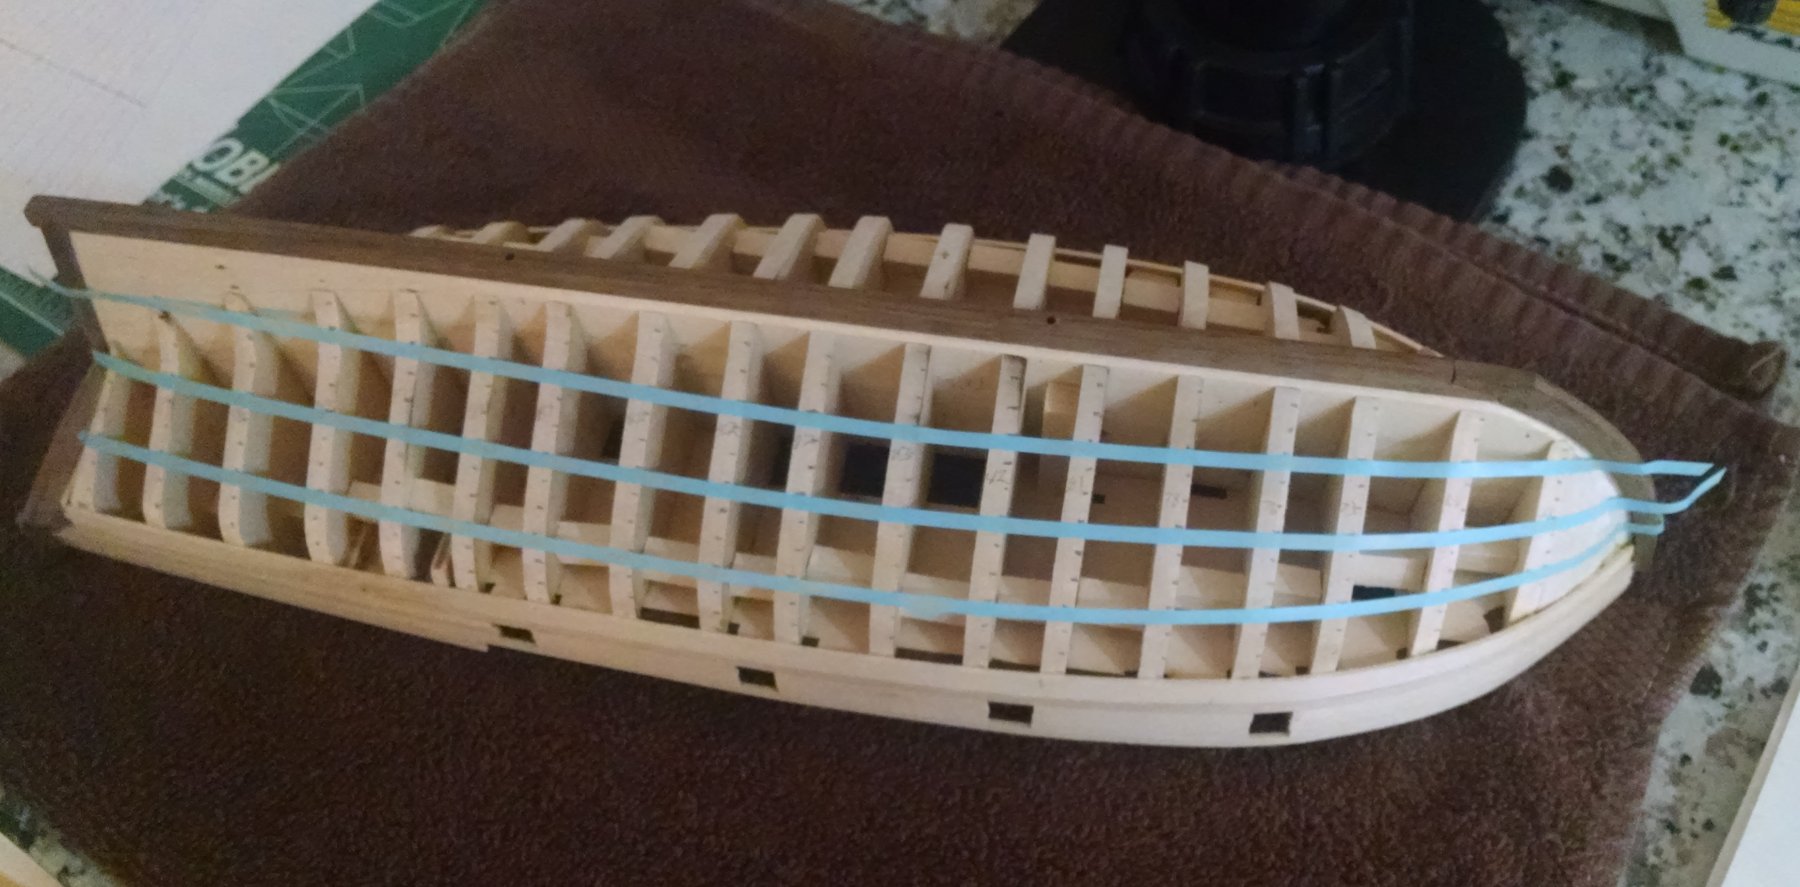
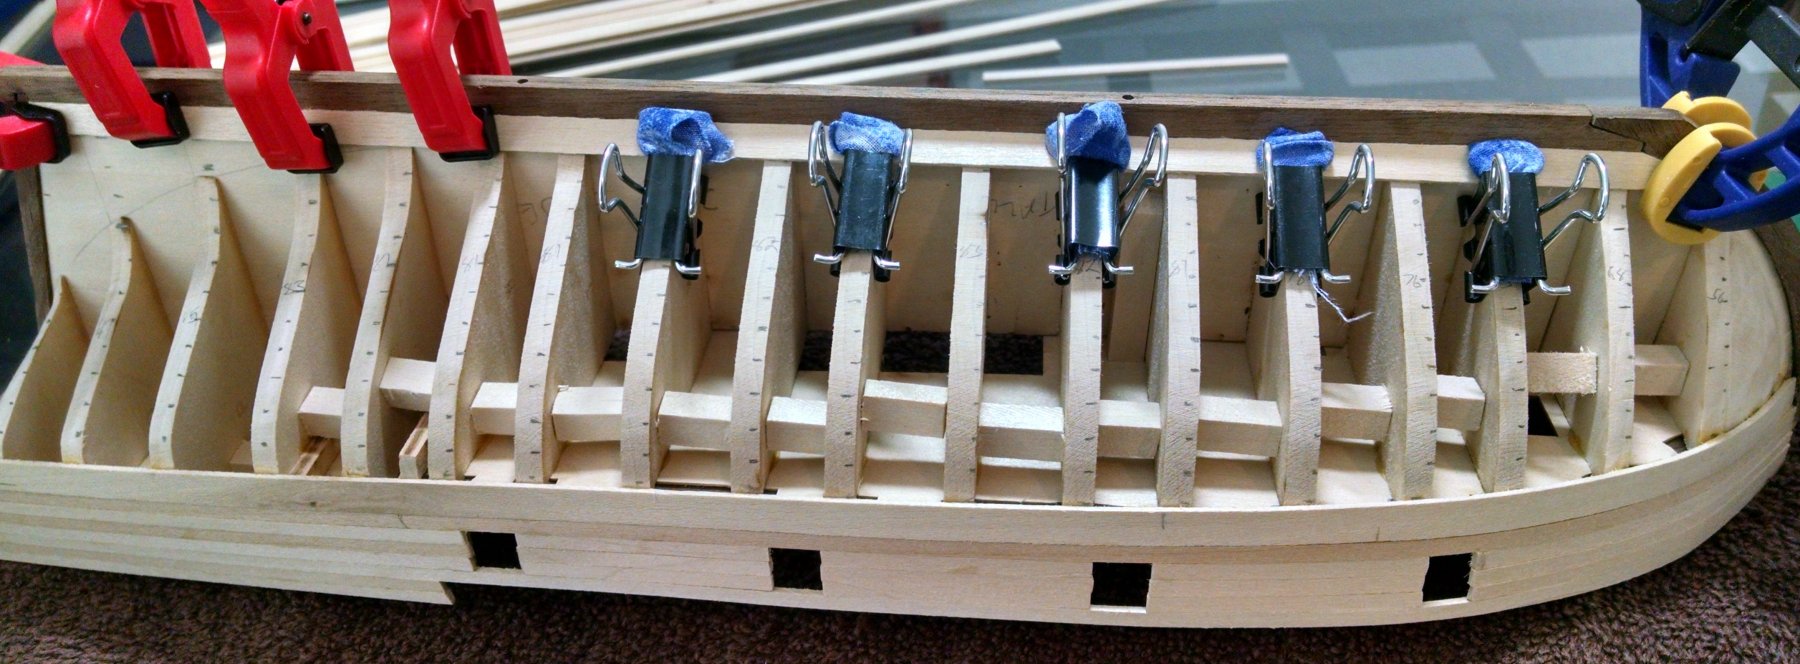
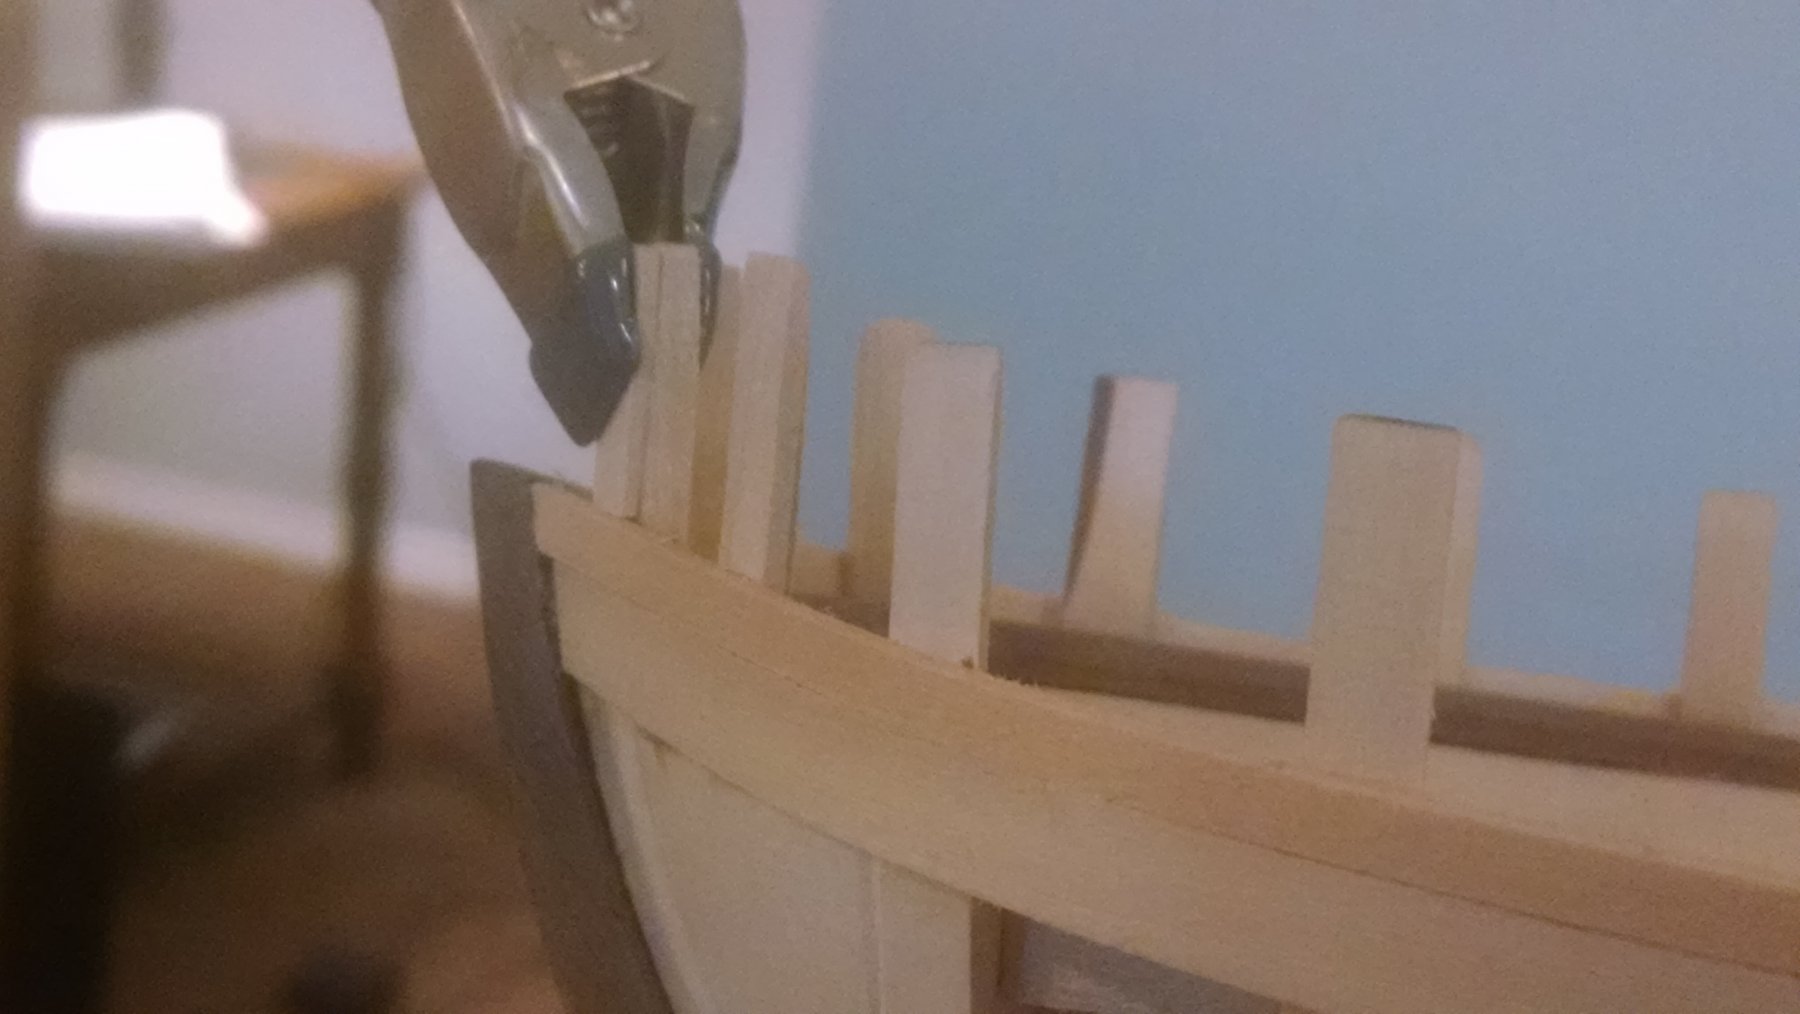
Some more slow progress made the past few days. I'm going to try to describe of my methods more so that I can keep track of them for future reference and in case others run into similar issues. Before I get too far and forget to do it, I added some wood to box in the mast mortise. Since I am pedestal mounting the ship, I used some of the wood for the launch much like I used for the supports between the bulkheads. I cut the wood extra long to allow more area for the glue to attach to since I wanted to avoid getting glue in where the mast will eventually go. Looking afterwards with a flashlight I think I was successful in this. Next I moved onto the timberheads and knightheads. I started by carving out the notches in the bow filler for each one. This was fairly straightforward just using a #11 xacto knife. Then I glued together two pieces of the 3/16 x 1/8 basswood for the knightheads since the parallelogram shape of the knighthead means the 3/16 wide piece of basswood is too narrow to make the 3/16 wide parallelogram shape. I set these aside to dry and started working on the timberheads. These ended up being pretty straight forward although the starboard side one did not set up well so I had to remove it and try again. It looks good so far but will have to check in the morning how firm the glue has set up. The first time, it had some wiggle and would have been impossible to sand without it falling off. When the knightheads were dry, I started trying to shape them properly. I tried the method in the practicum with drawing lines on the subdeck and transferring them to the knighthead but couldn't get my head wrapped around where the lines needed to be on the knighthead and my first attempt resulted in a far too narrow strip of wood. Next attempt I decided to try my own method. I started by carving the angle into one side of the knighthead. Once this was done I measured about where the inside and outside edge of the other side should be (faint marks in the middle of the circles in the pictures below). Then I cut off the extra part that wasn't needed being extra conservative with where my cut was (dark verticle line in the picture). After making the cut, I carved out the angle on the other side and sanded down the knighthead until it was a good fit.

-
Thanks Joe. Does anyone know if there are plans for sails available for the AVS?
-
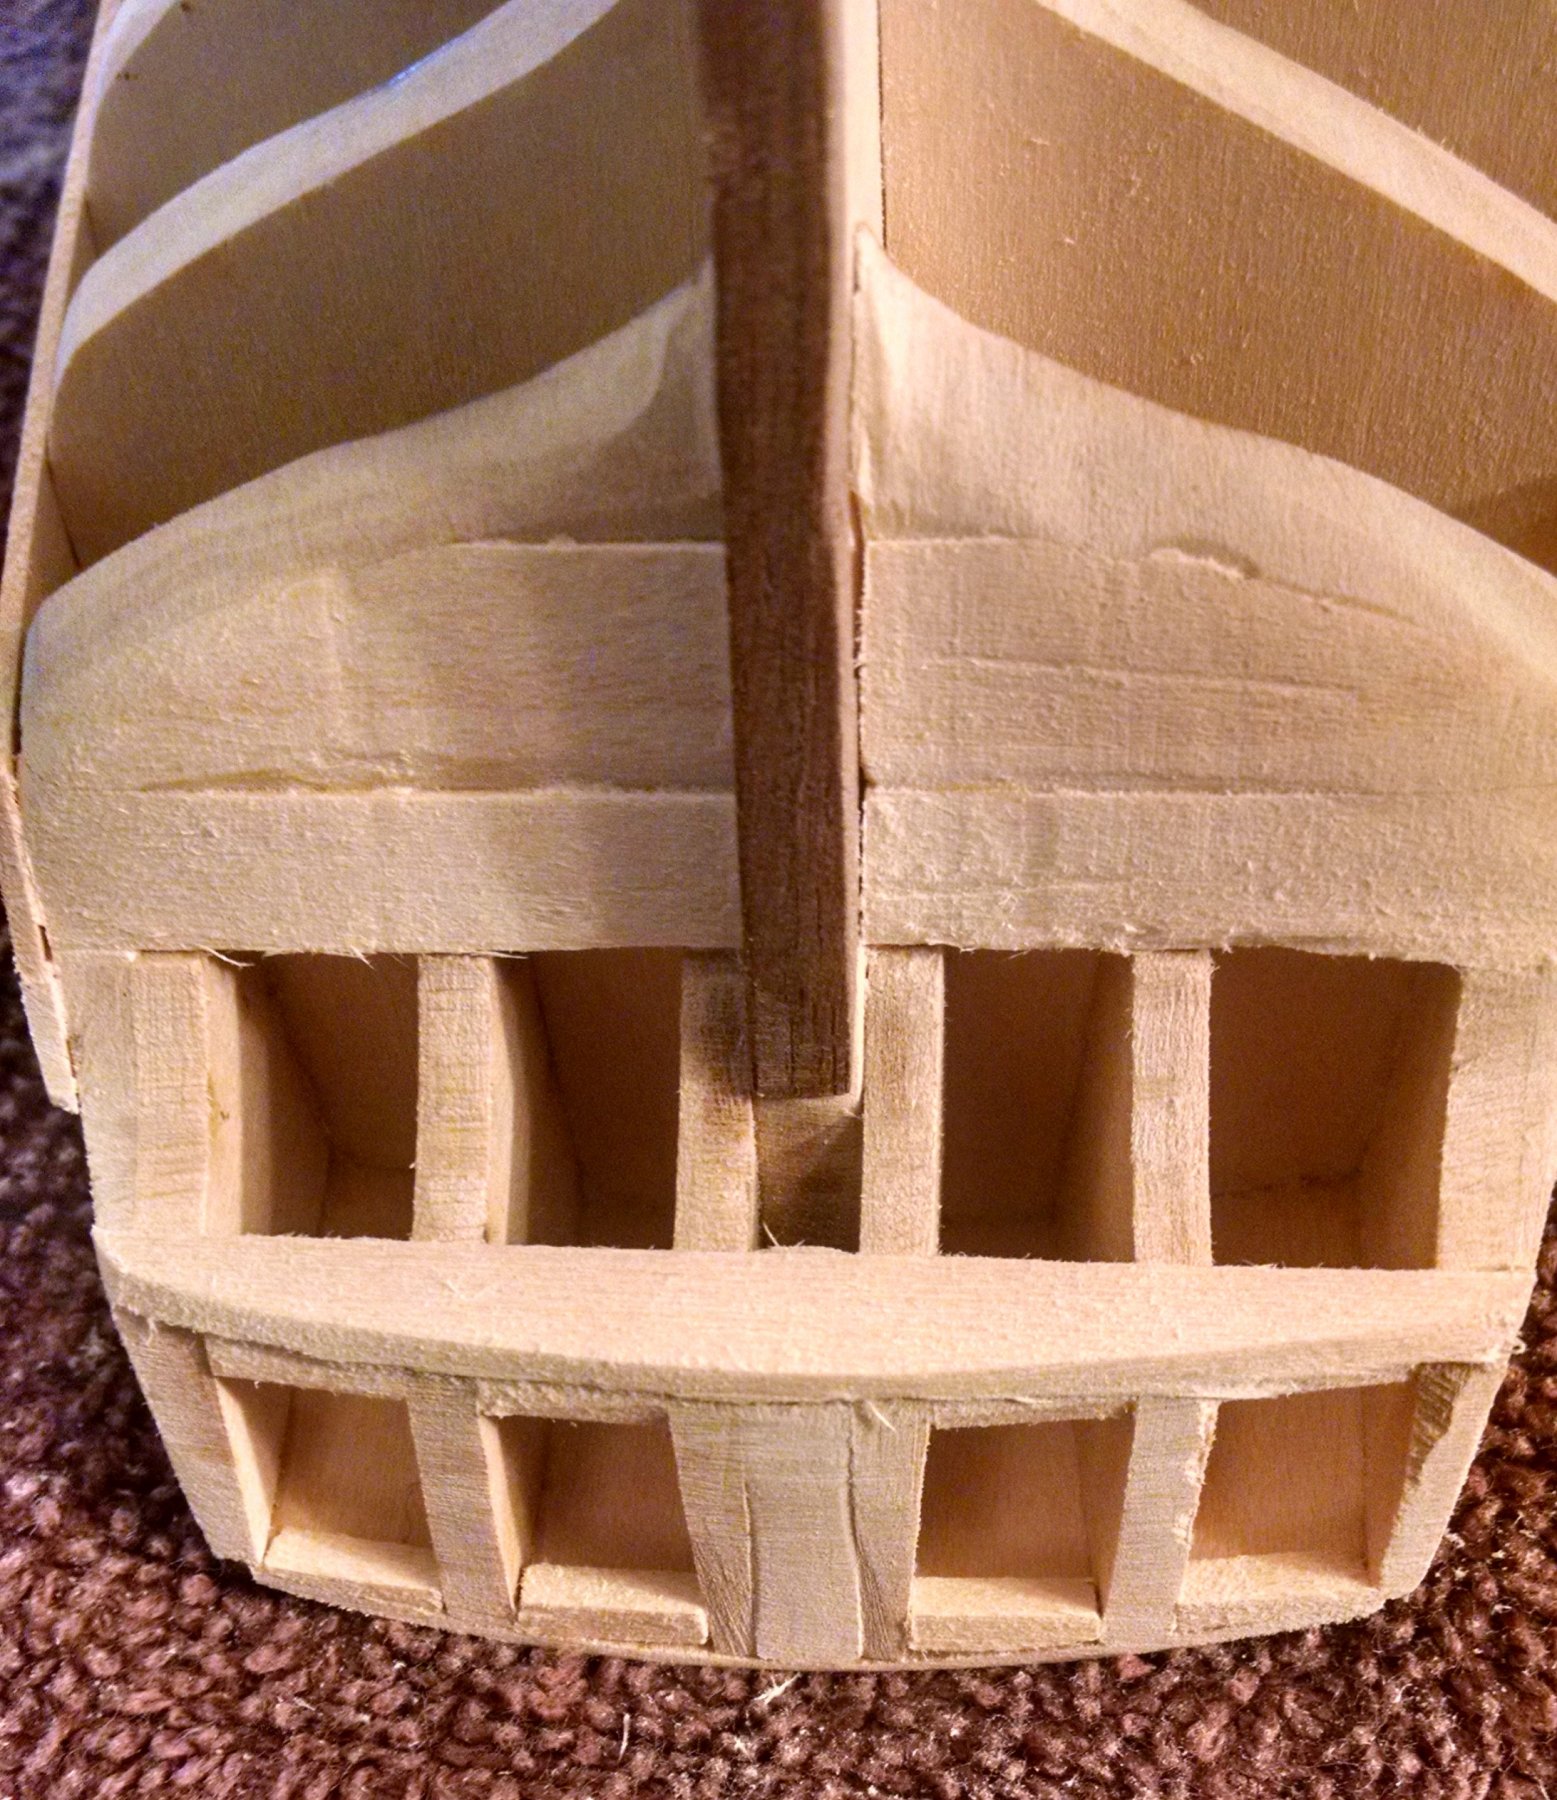
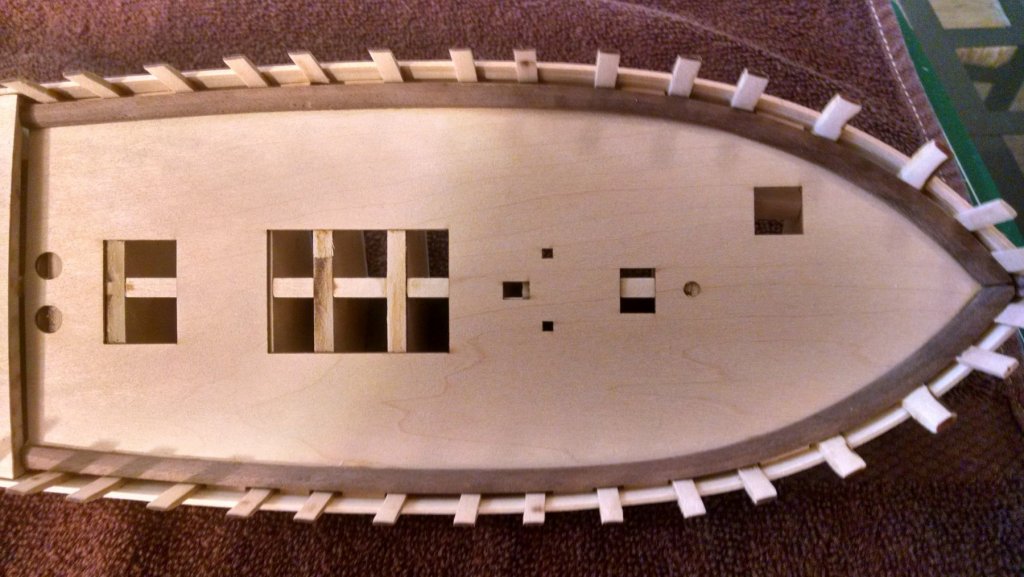
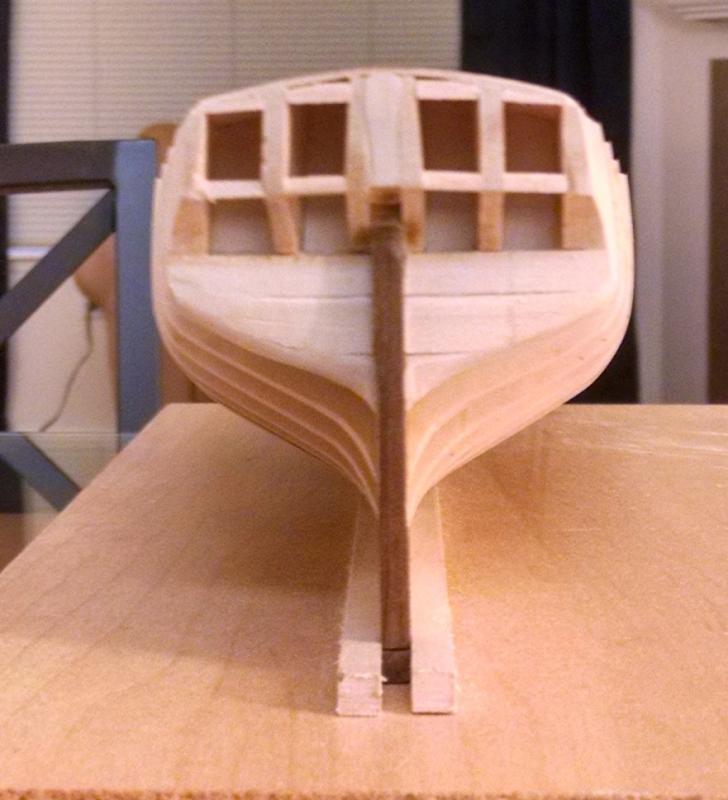
Joe with regards to the stern framing, I checked my plans and page two has two images that look to show different things to me. 2-G looks to show the window frames looking straight across. But image 2-J shows a slight arch in the actual planking. I personally like the flat look so I tried to get the frames as flat as I could. If I recall this kit is not based off a specific ship so I chose to go for the line that I thought looked better. Anyways thats my two cents.
-
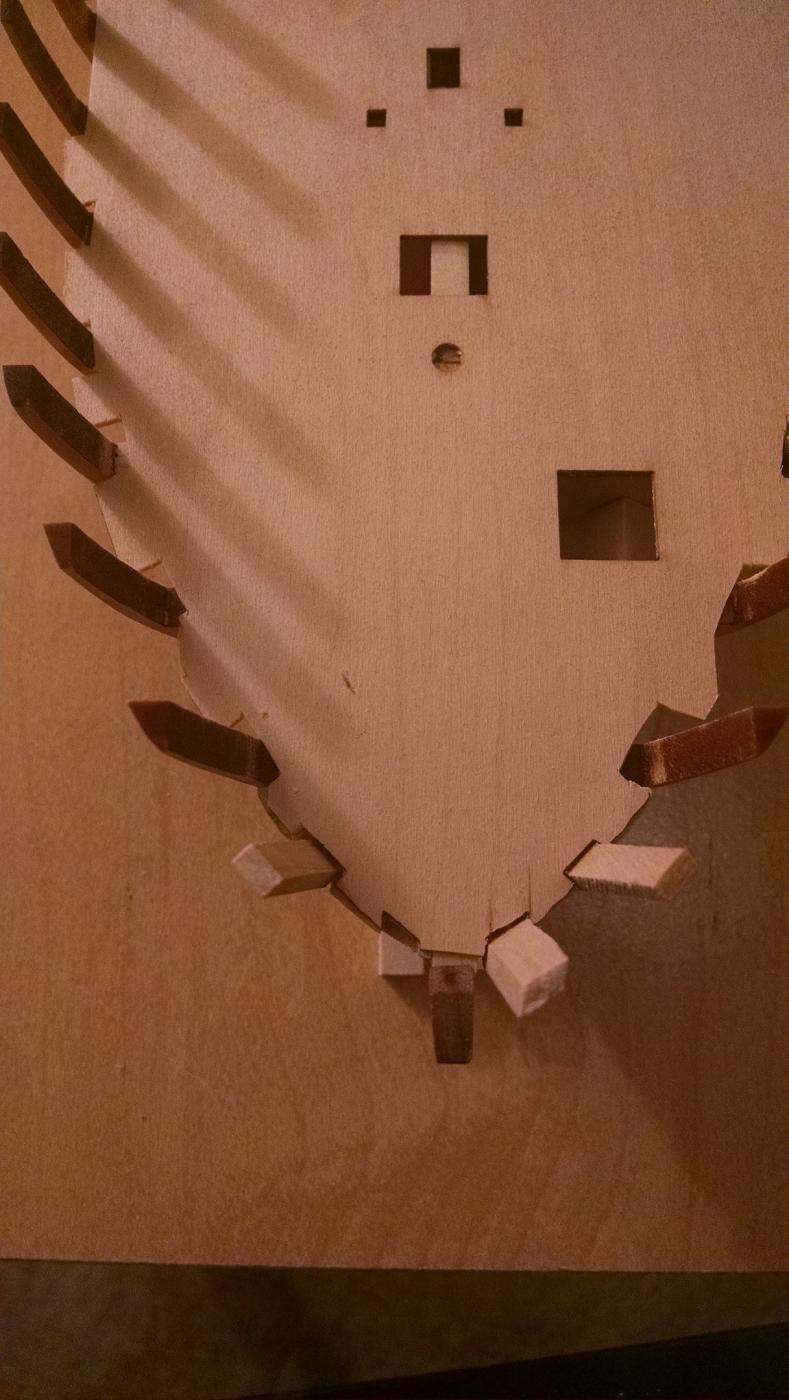
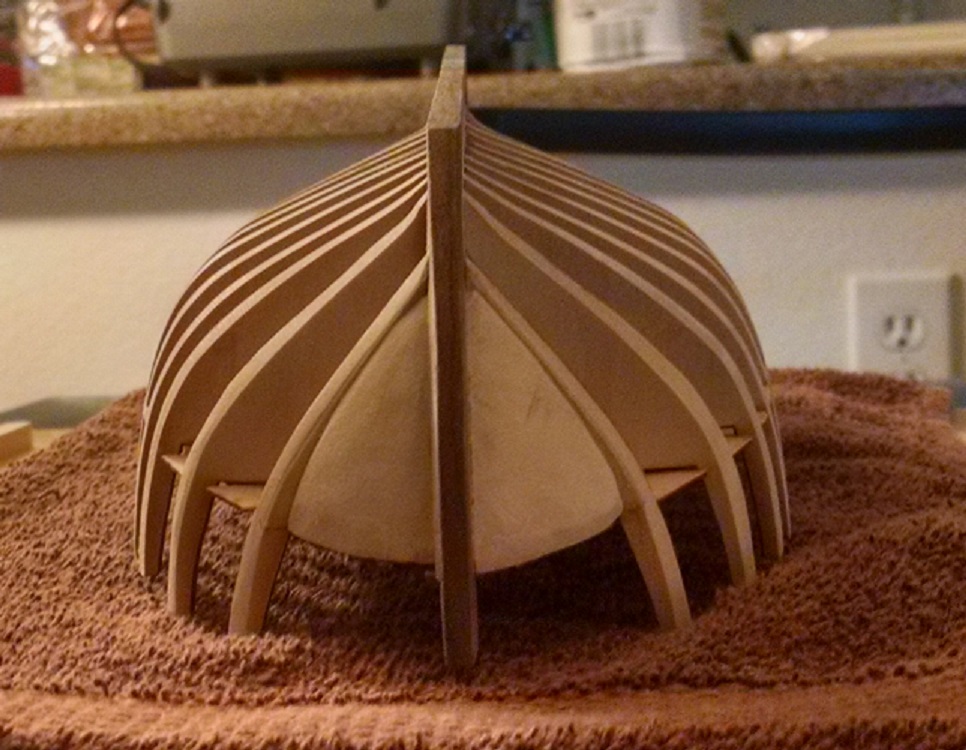
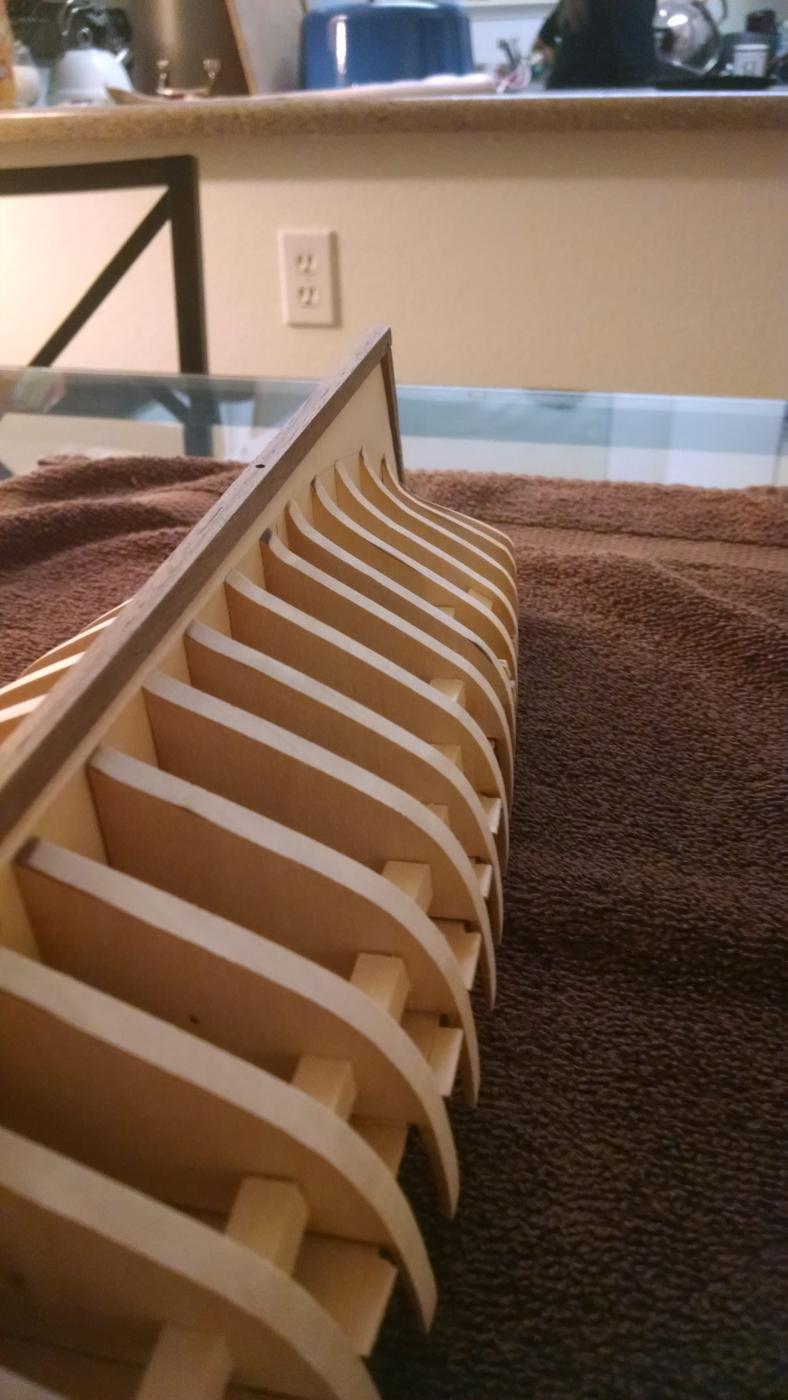
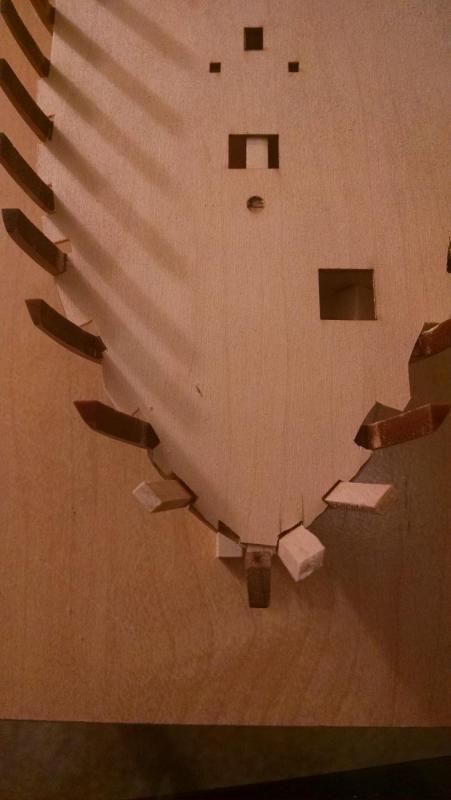
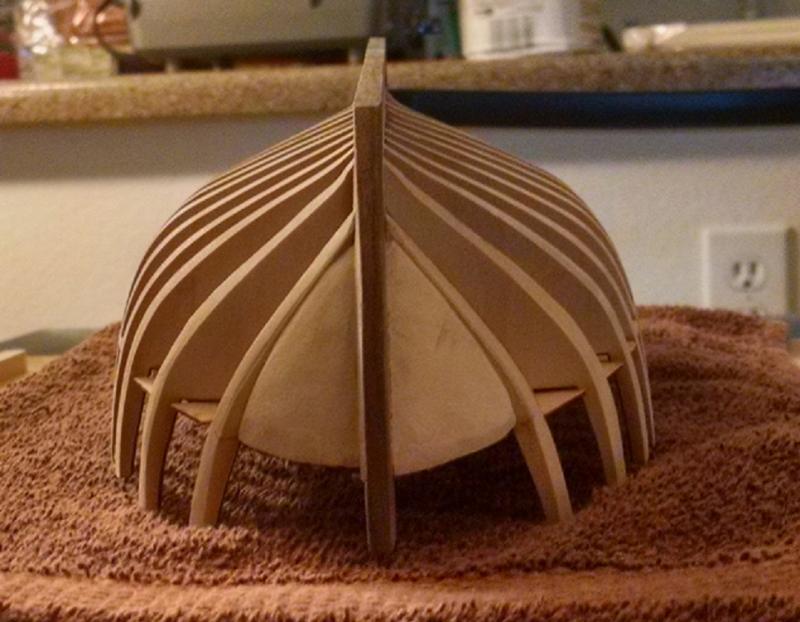
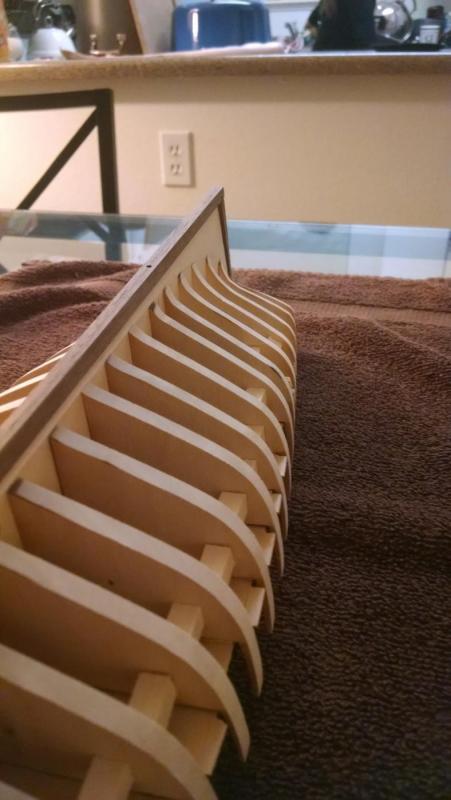
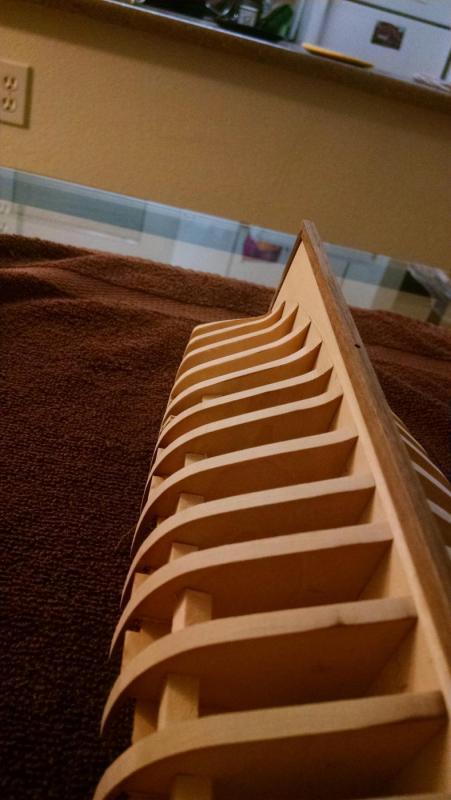
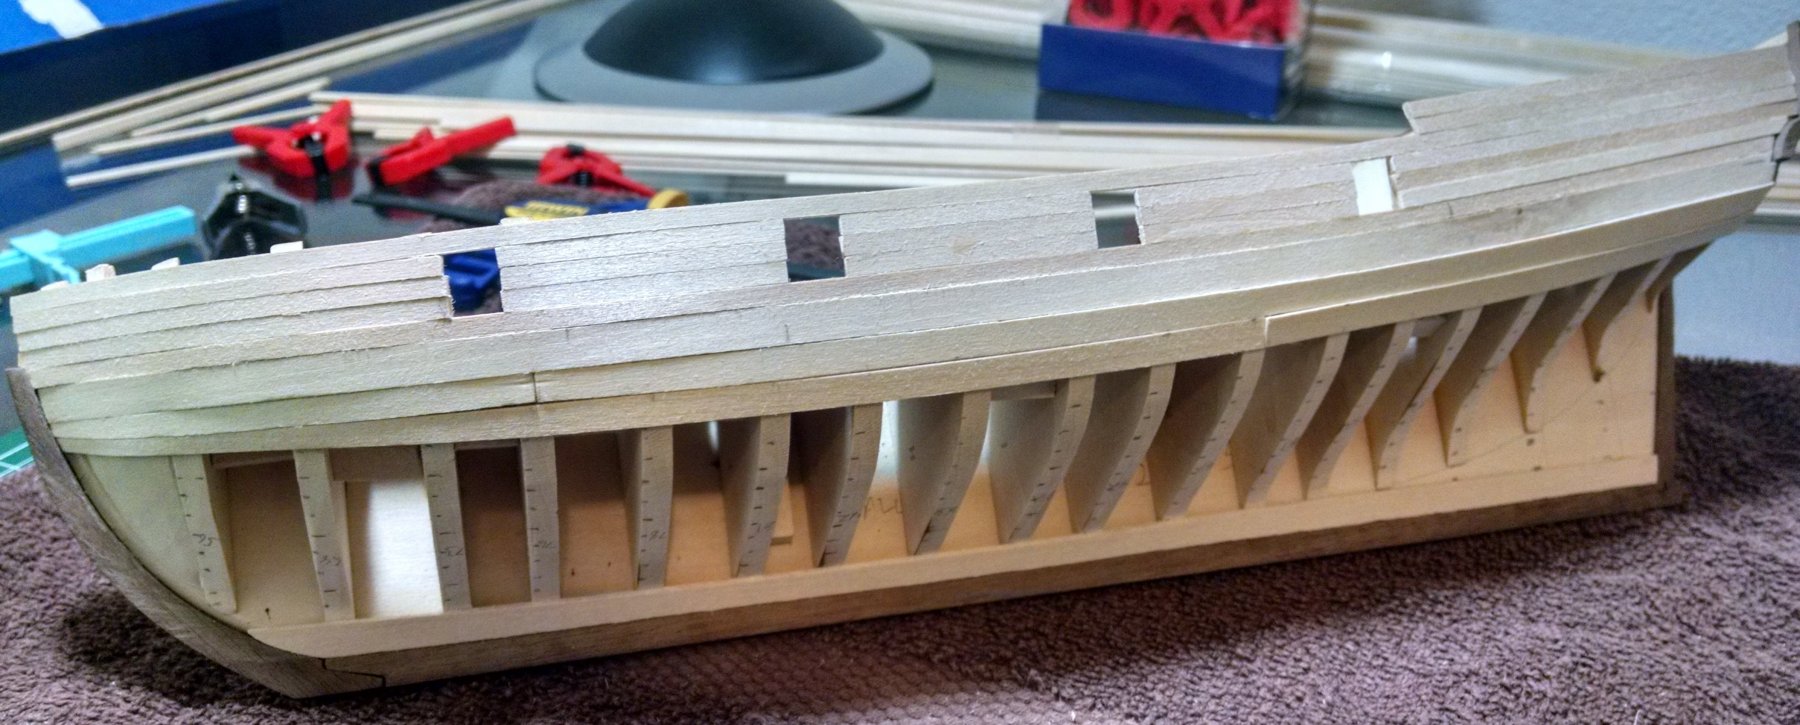
More work on my AVS the last few days. I carved the bow fillers and glued them in. This was my least favorite part of the build so far. Carving is not something I have a lot of experience at but the second one went much better than the first one. Bow after some sanding: After gluing in the bow fillers, I finished fairing the hull. I thought I had done a pretty good job until I ran a plank across the bulkheads. I learned just looking at the lines is not nearly as helpful as holding a piece of planking up and checking the run. Found the stern and bow needed some more work. Pictures I think give a good idea of how it looks right now. I am happy with how it is right now. Although after looking over these pictures, I need to clean up some of the transitions towards the rabbet at the stern on a few bulkheads. I also finished cleaning up the stern. I ended up breaking loose one of the bottom window frames while sanding but was able to glue it back in and finish sanding without issues. I ended up leaving the bottom outside window frames alone and after smoothing out the framing, I like how it looks and am going to leave it. I liked the look the plans have of the windows where they are level horizontally instead of on more of an arch as Bob's practicum (I am using Bob's practicum to help guide me through this build).


.jpg.c69b6f8ec6325b970ff1c534b4d925d3.jpg)
.jpg.38f648f4d3a6f11b483c7c3a5a039517.jpg)
.jpg.0848259f4e92d4e8e16c70a45ecb1e6b.jpg)