Louie da fly
-
Posts
7,543 -
Joined
-
Last visited
Content Type
Profiles
Forums
Gallery
Events
Everything posted by Louie da fly
-

The Ethel & the Ferret - a Tale of Two Ships
Louie da fly replied to Jim Lad's topic in Nautical/Naval History
I was wondering why the names Ethel and Ferret seemed familiar. But of course what I was really thinking of was Michelle and Ferret - -
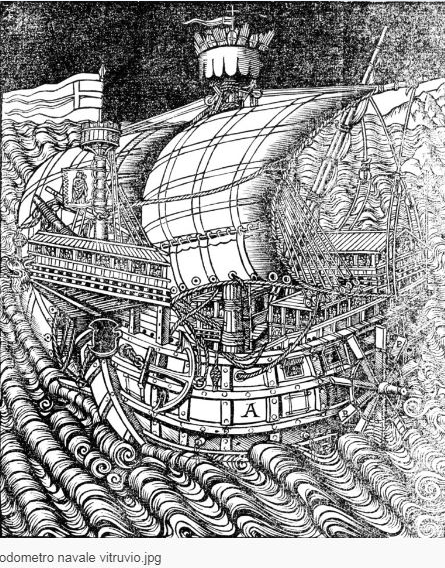
Oh, yes . . . The clue is in the caption - a "naval odometer" according to Vitruvius (https://en.wikipedia.org/wiki/Vitruvius ) Steven
- 29 replies
-
- 10
-

-

-
- Paddlewheeler
- Paddleboat
- (and 6 more)
-
That might be the problem. I may have done that. I've done that, and it worked that way, but I think I might have done it too many times. Thanks, Tony. Liteflight has promised me the wood from a box hedge he removed and I'm looking forward to that, but it'll probably need to season for a while. In the meantime I wouldn't mind having a try at the stuff you've got. I'll PM you with my address. And thanks, mate Steven
-
Thanks for all the suggestions, guys, but I've decided to go with wood - it just works better for me and I'm more comfortable with it. Steven
- 29 replies
-
- 6
-
-
- Paddlewheeler
- Paddleboat
- (and 6 more)
-
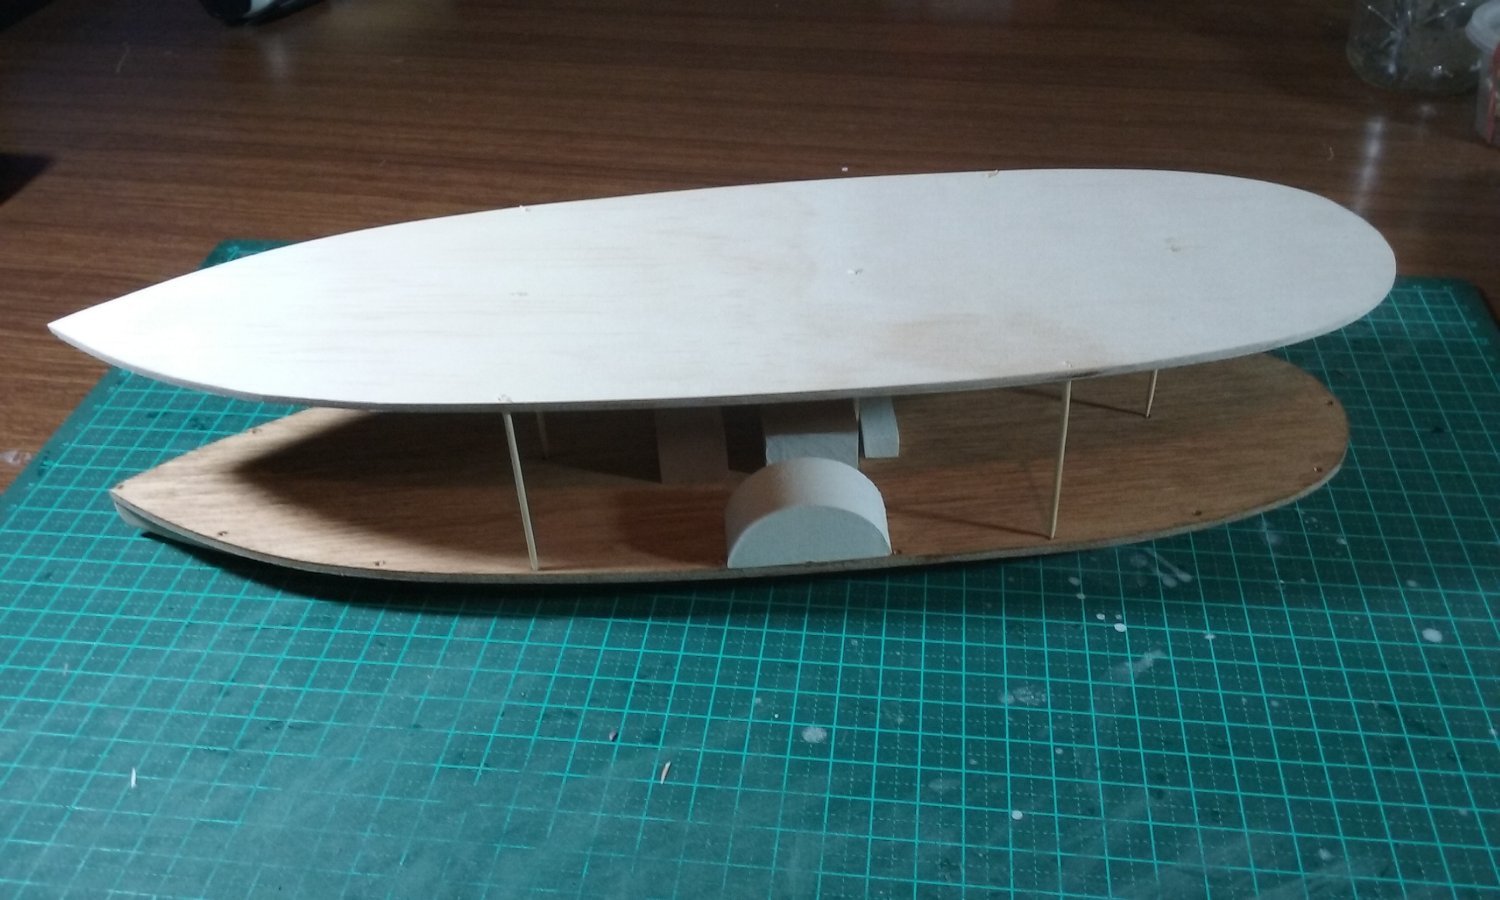
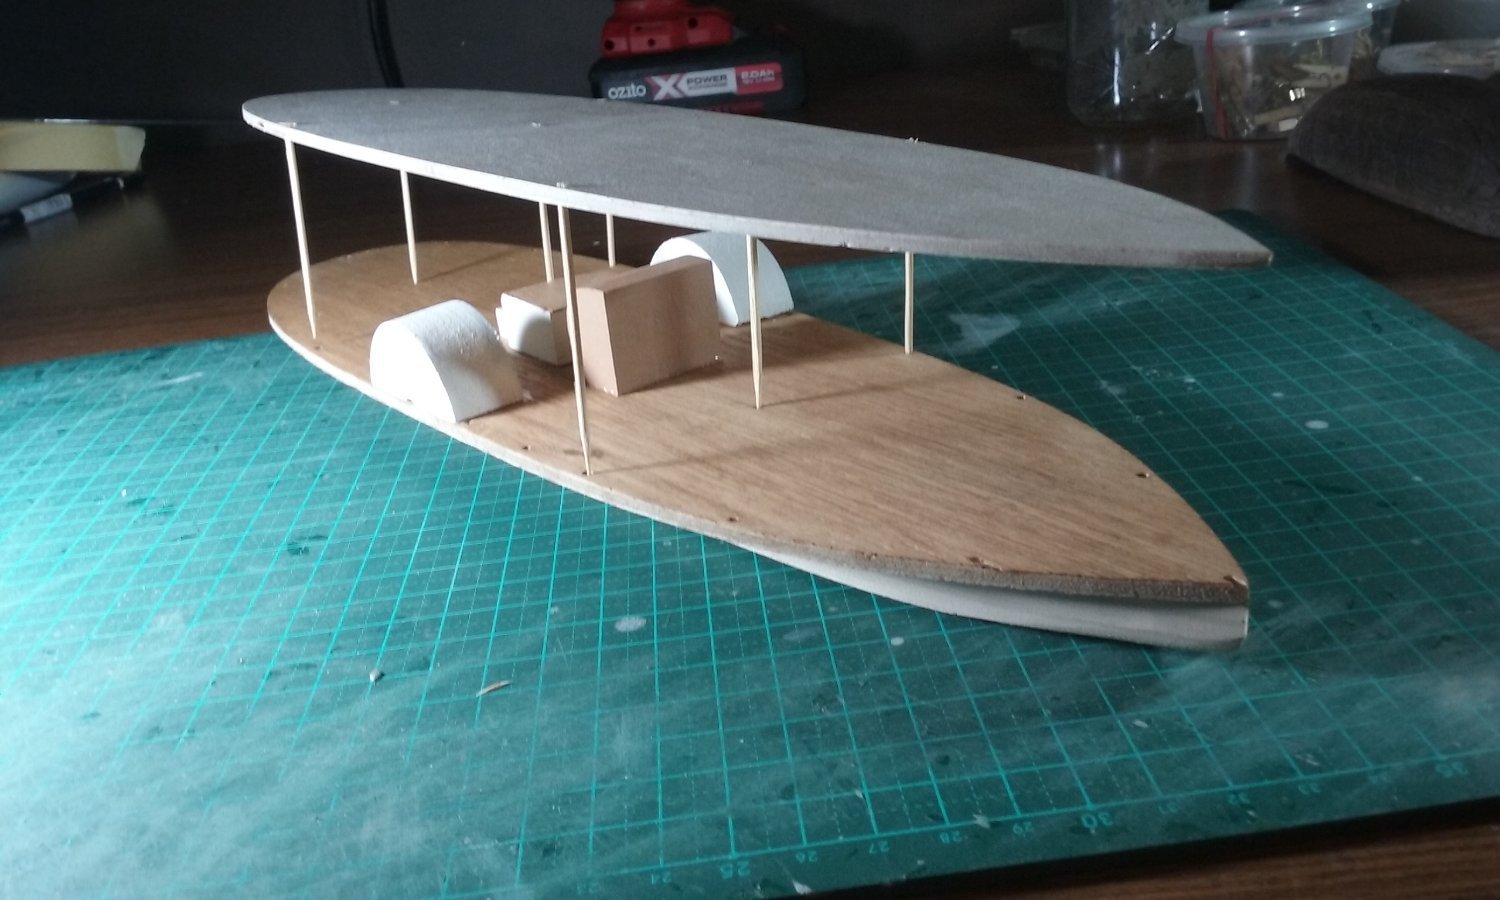
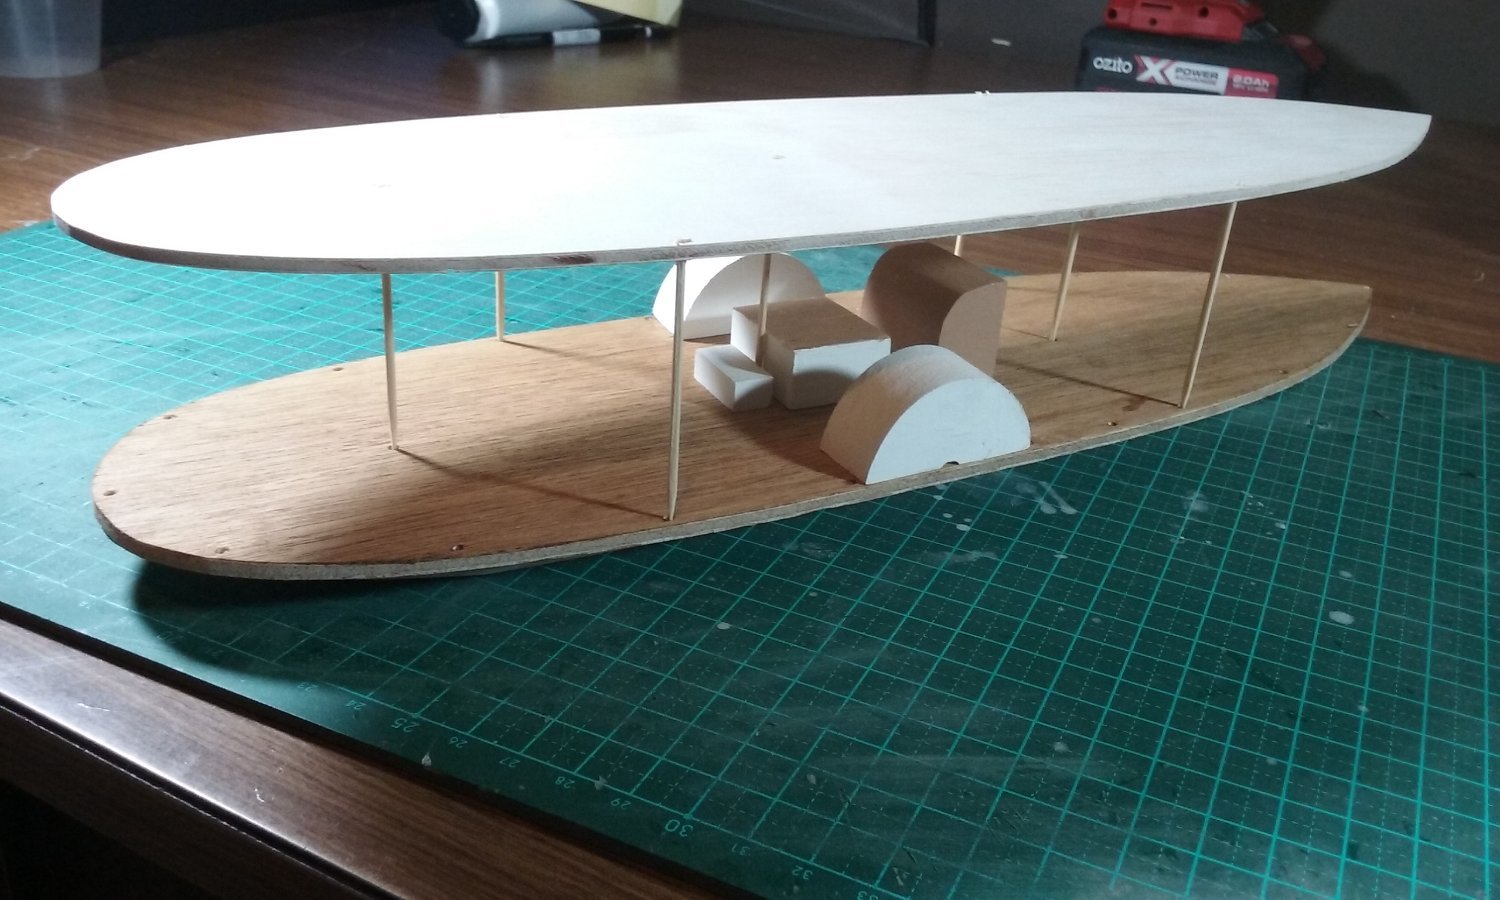
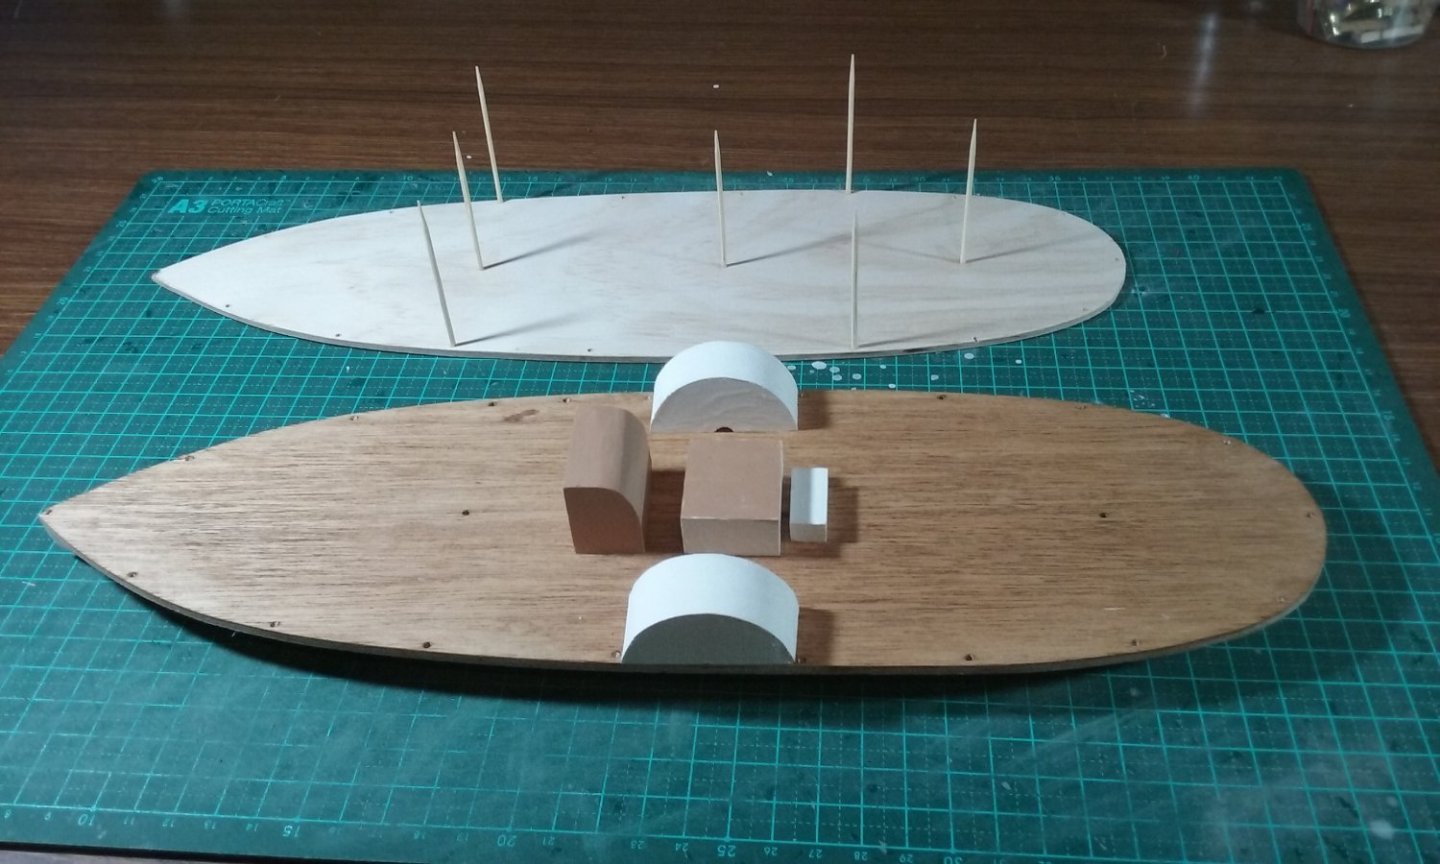
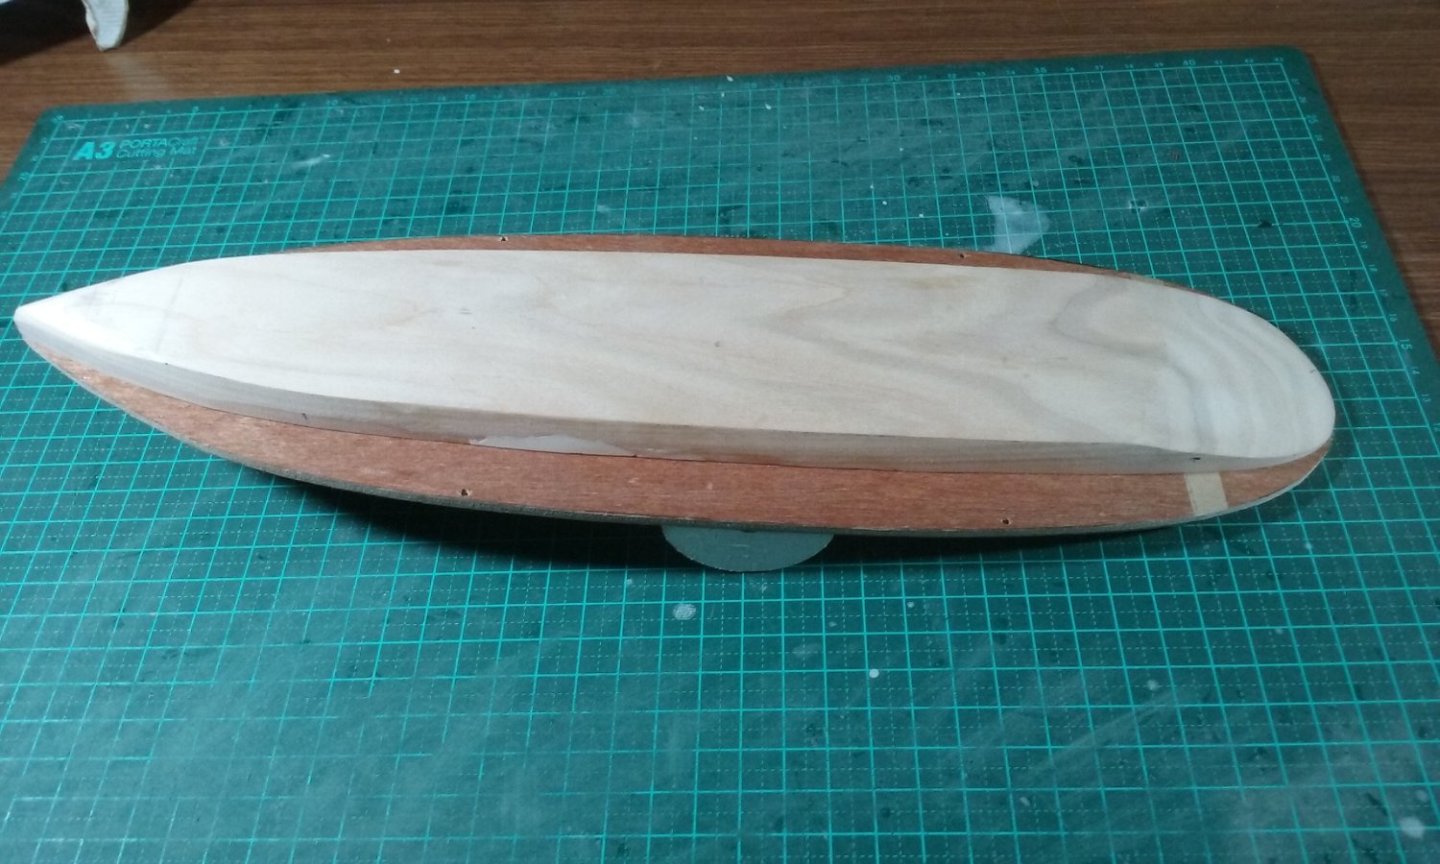
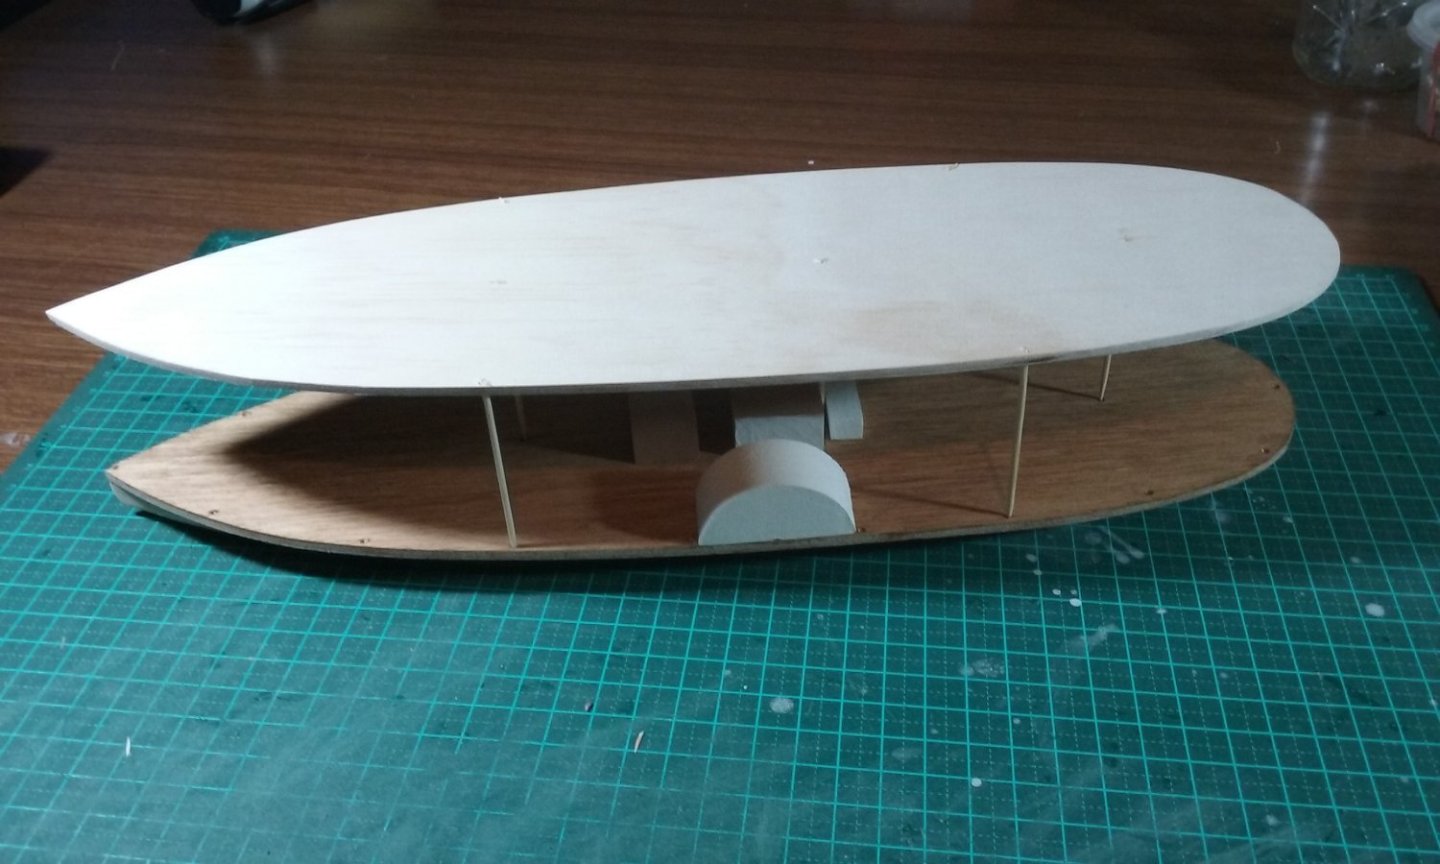
Well, I've given up on wire - I'll be using wood instead. I feel more comfortable with it and I think I can produce a better result, even if it isn't an exact reproduction of the real thing. For the uprights, I've used bamboo toothpicks. Here's the hull with paddlewheels and deck equipment attached (I still have to work out a way to mass-produce the passenger seats), plus the awning upside down with some toothpicks attached, to mate with corresponding holes in the deck. Here's the hull (upside down) with the deck glued to it. And the awning dry-fitted to the hull. Starting to come together. This is my half-size test piece. I've learnt a few things that will help make it easier to make the full-sized model, and subsequent mass-produced (simpler) half size models for sale. Steven


- 29 replies
-
- 11
-
-
- Paddlewheeler
- Paddleboat
- (and 6 more)
-
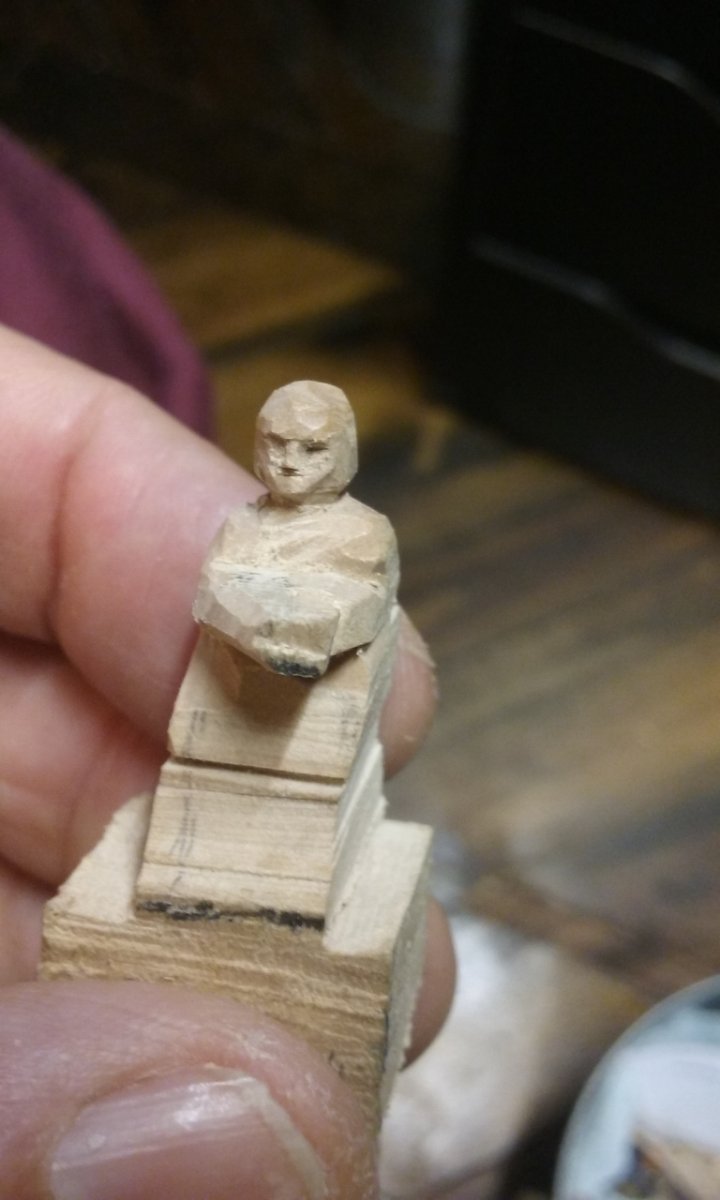
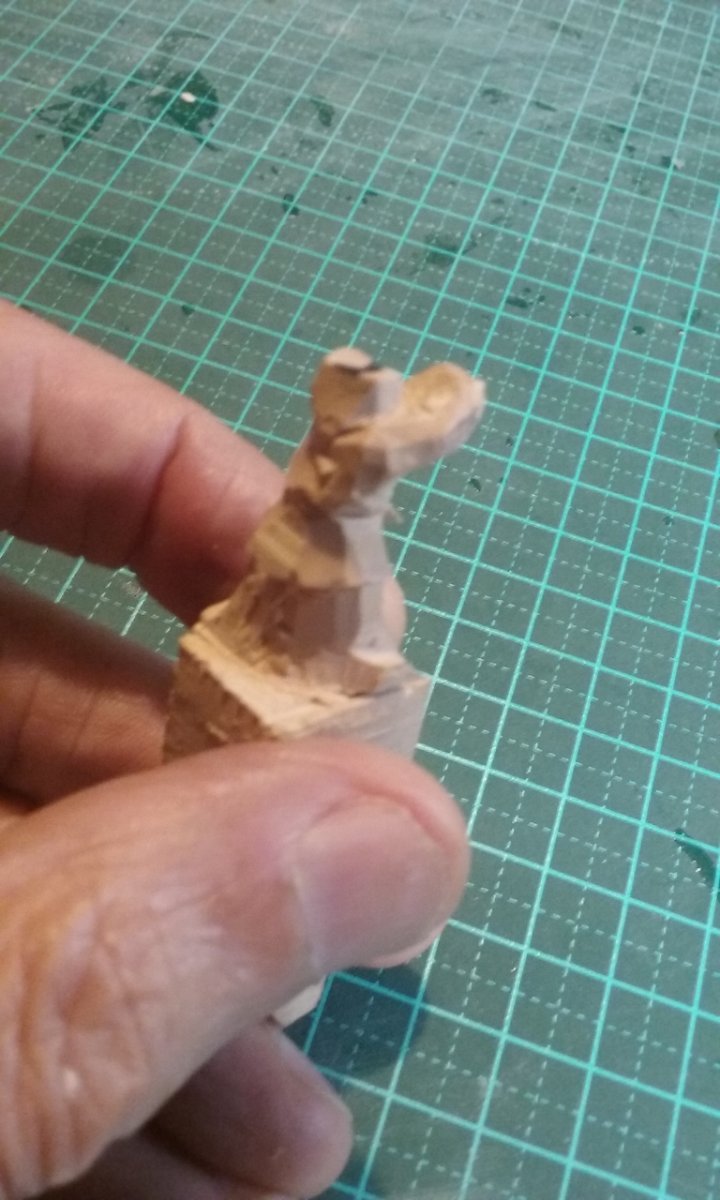
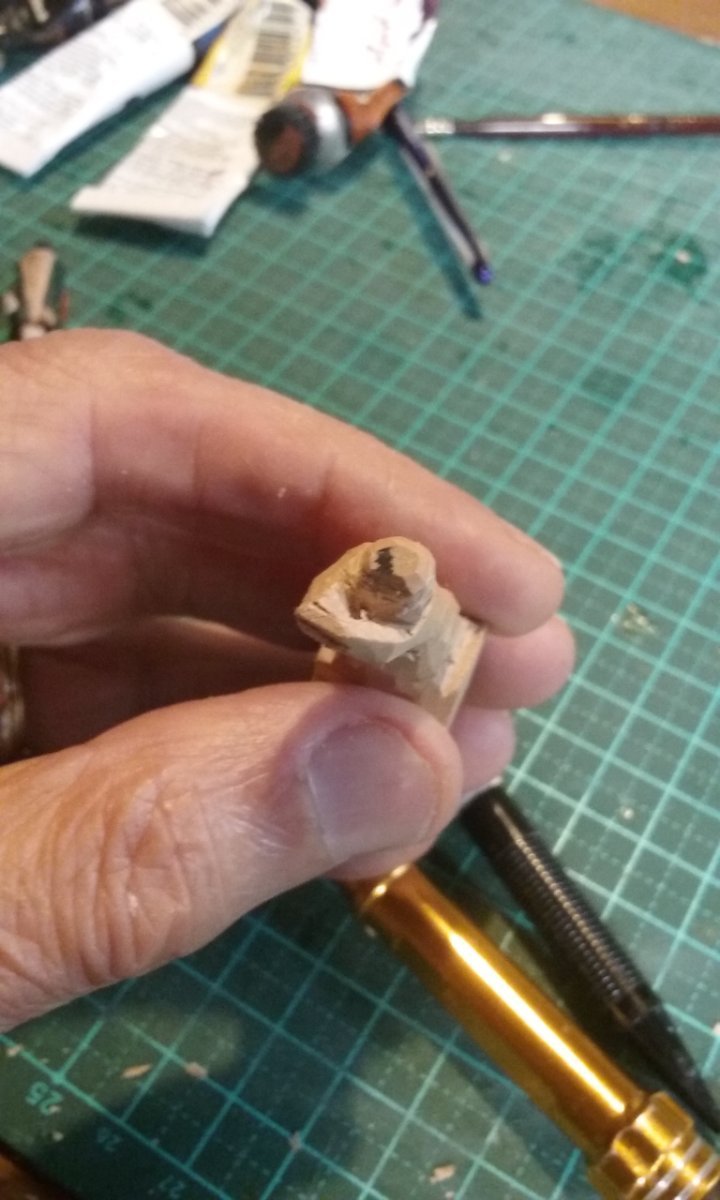
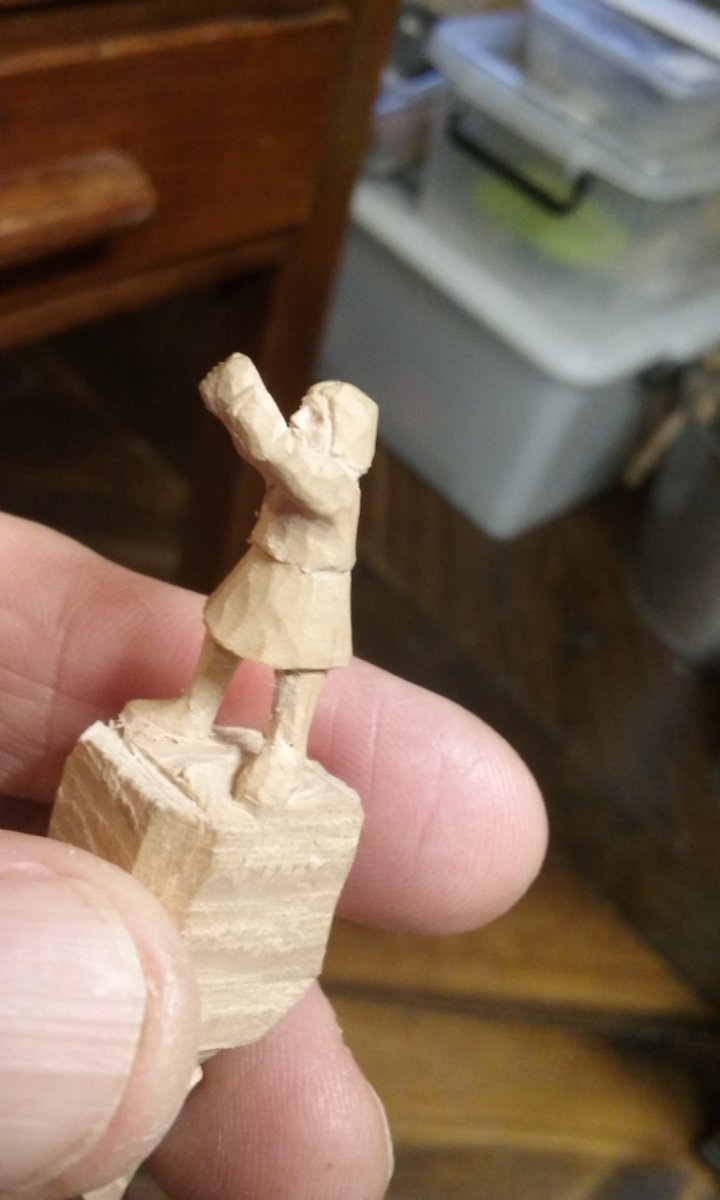
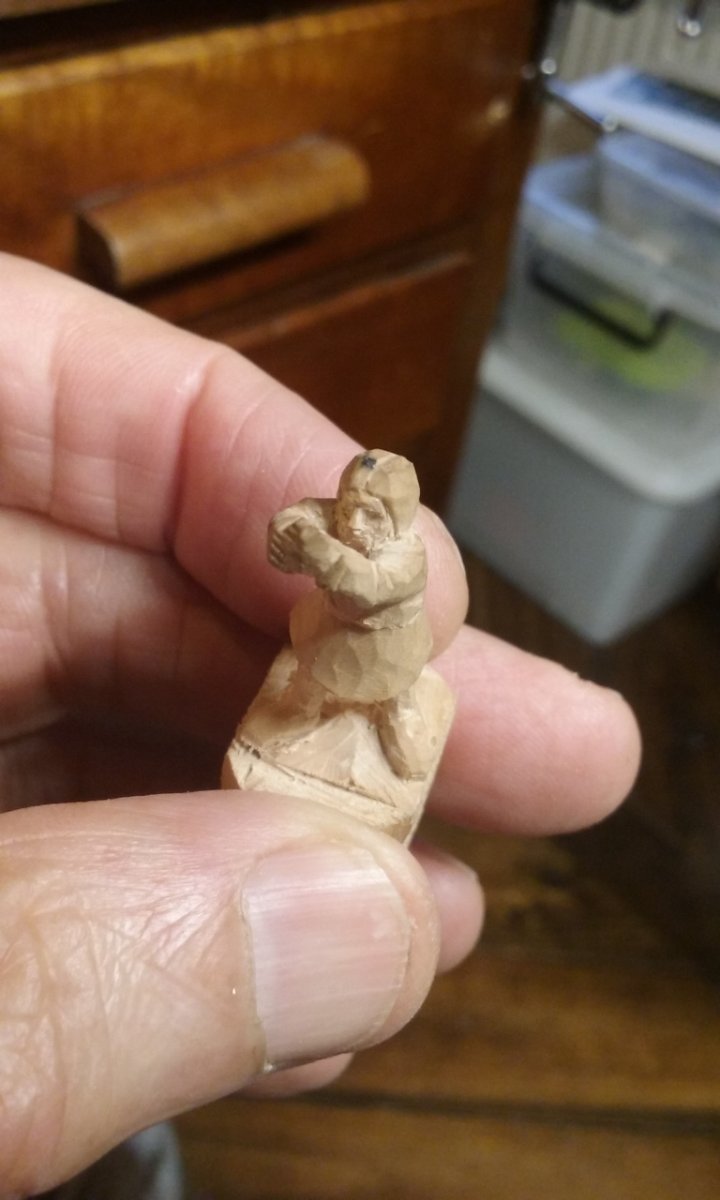
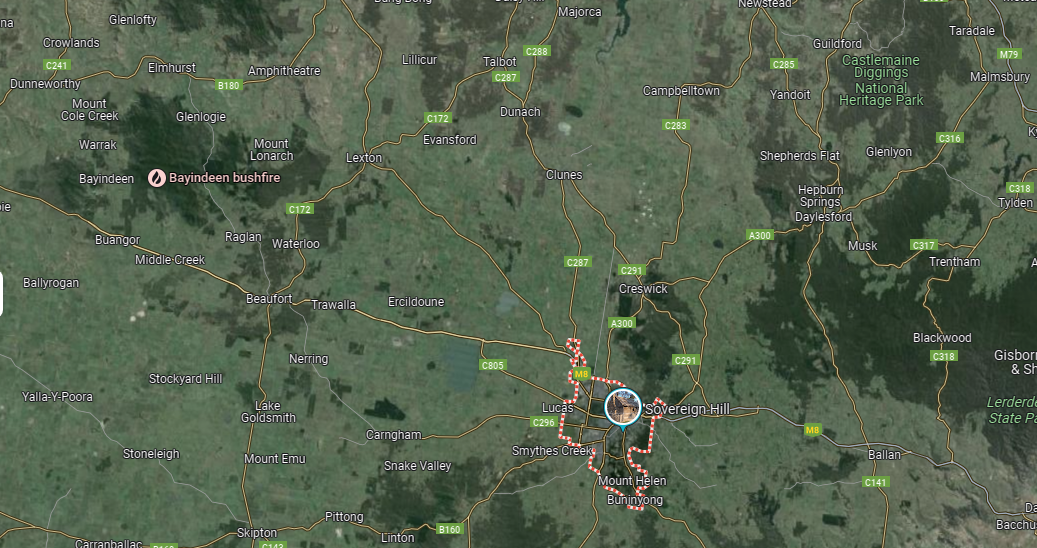
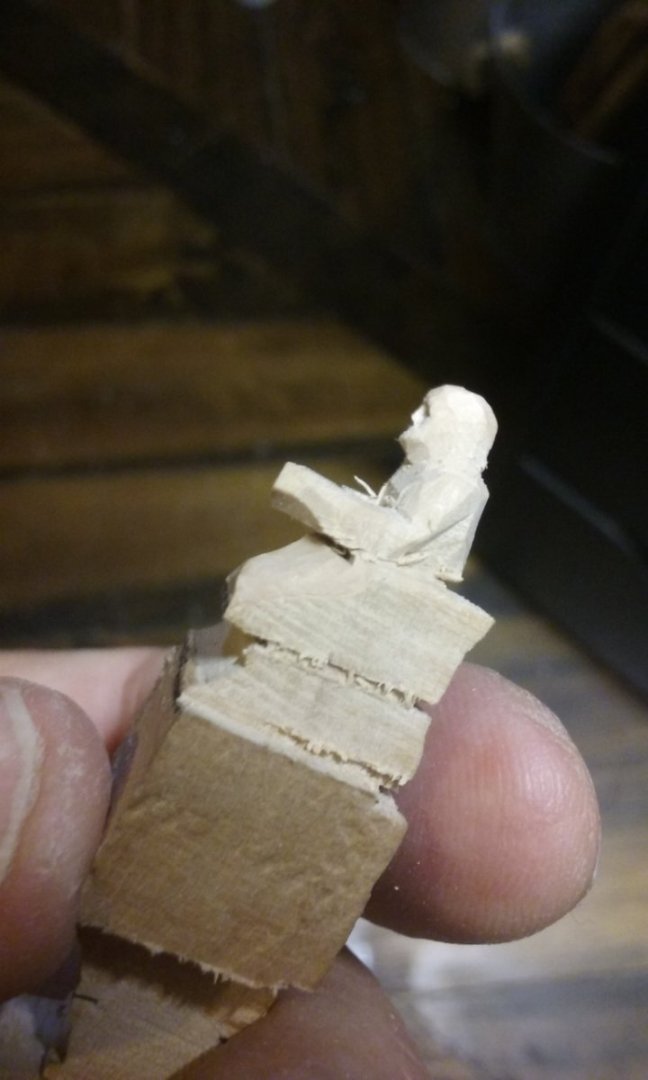
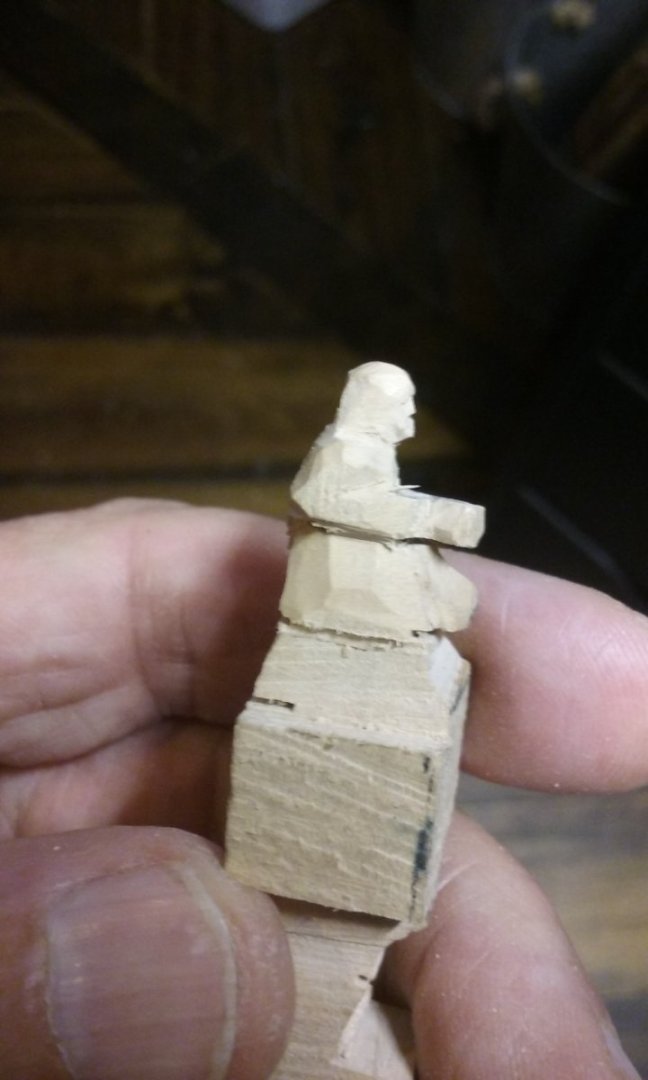
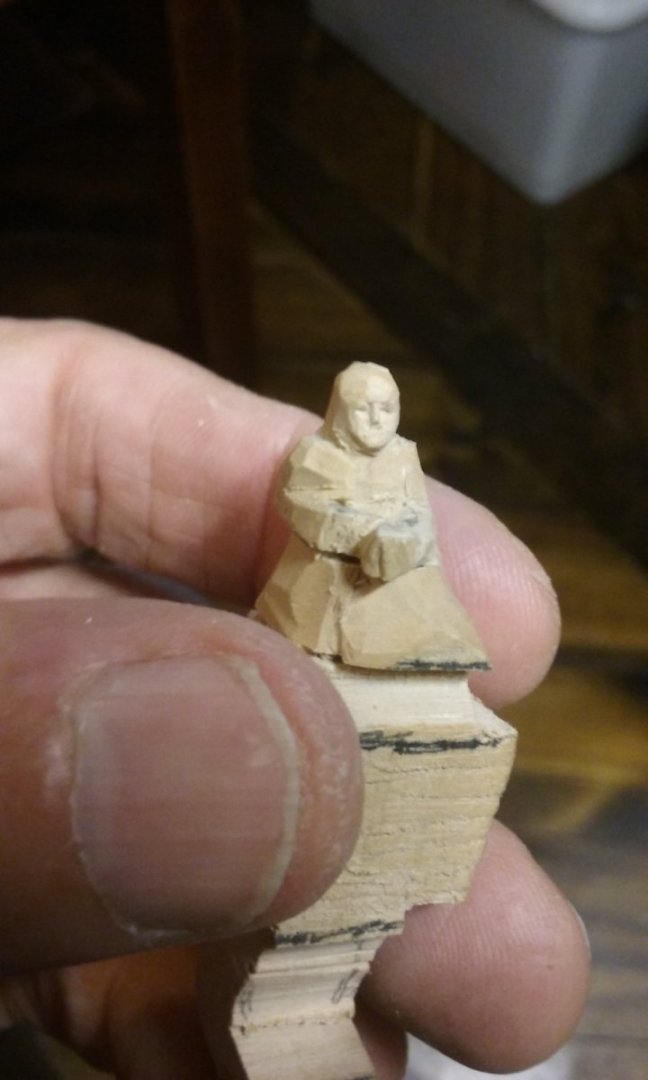
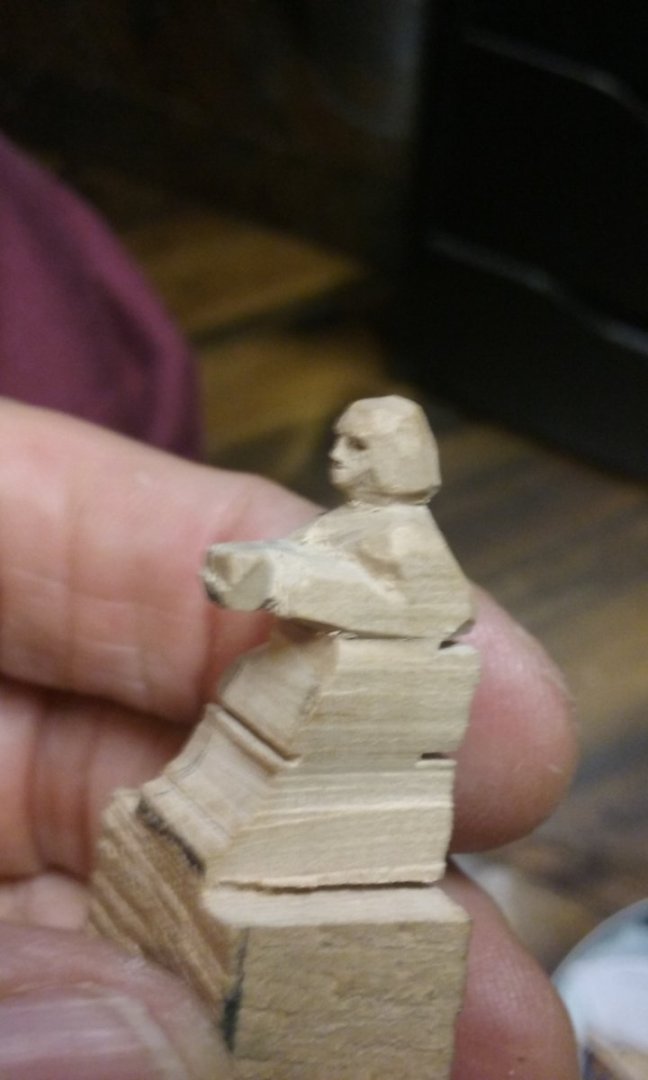
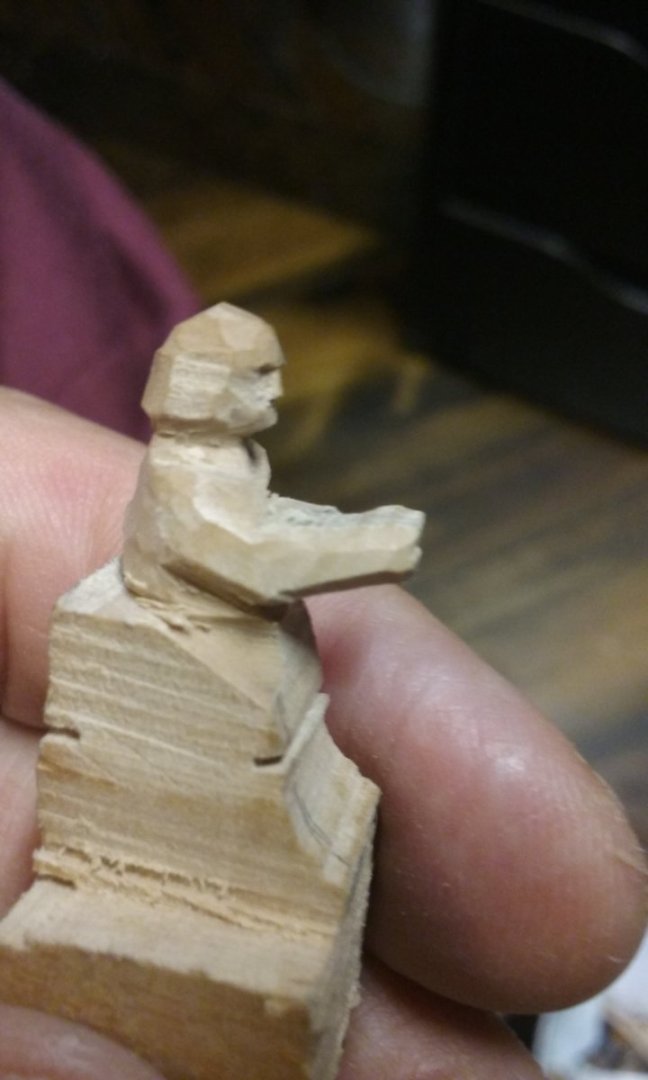
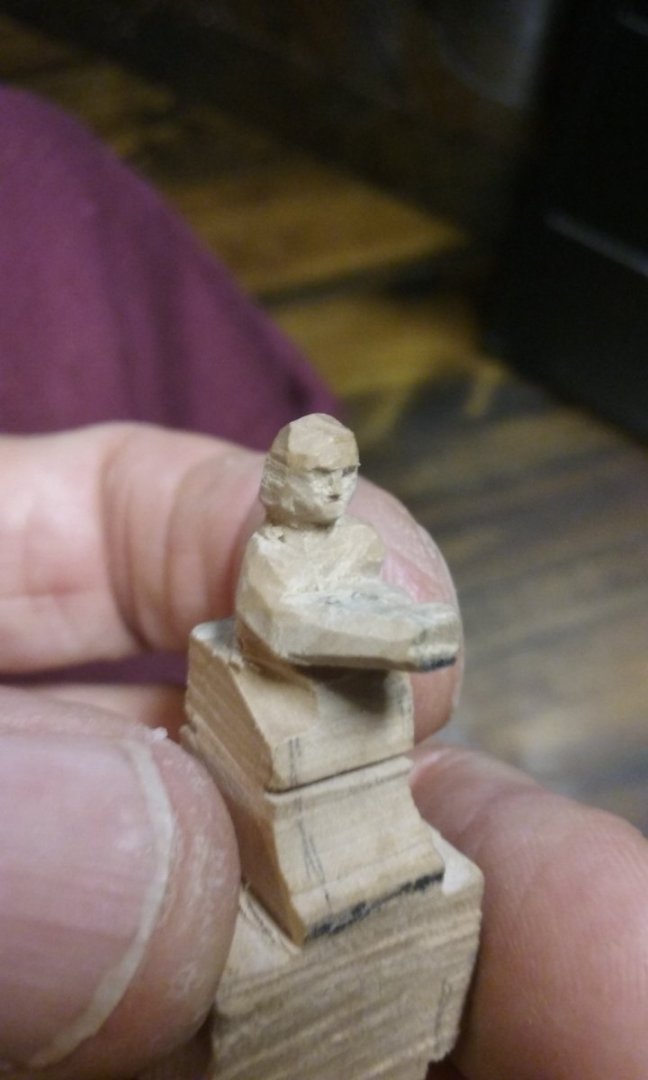
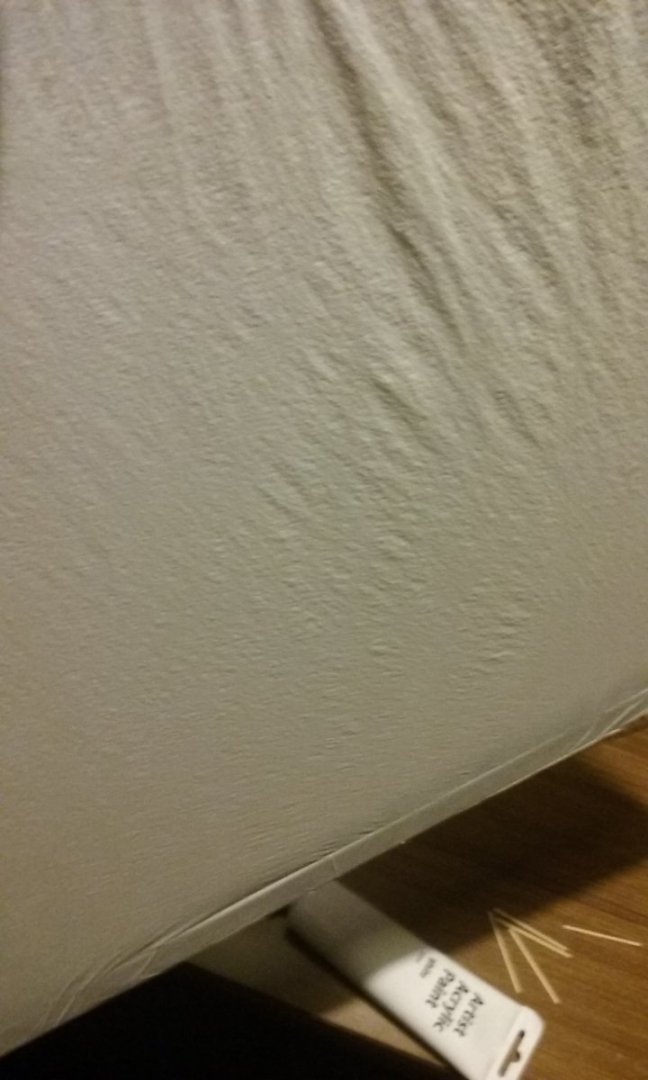
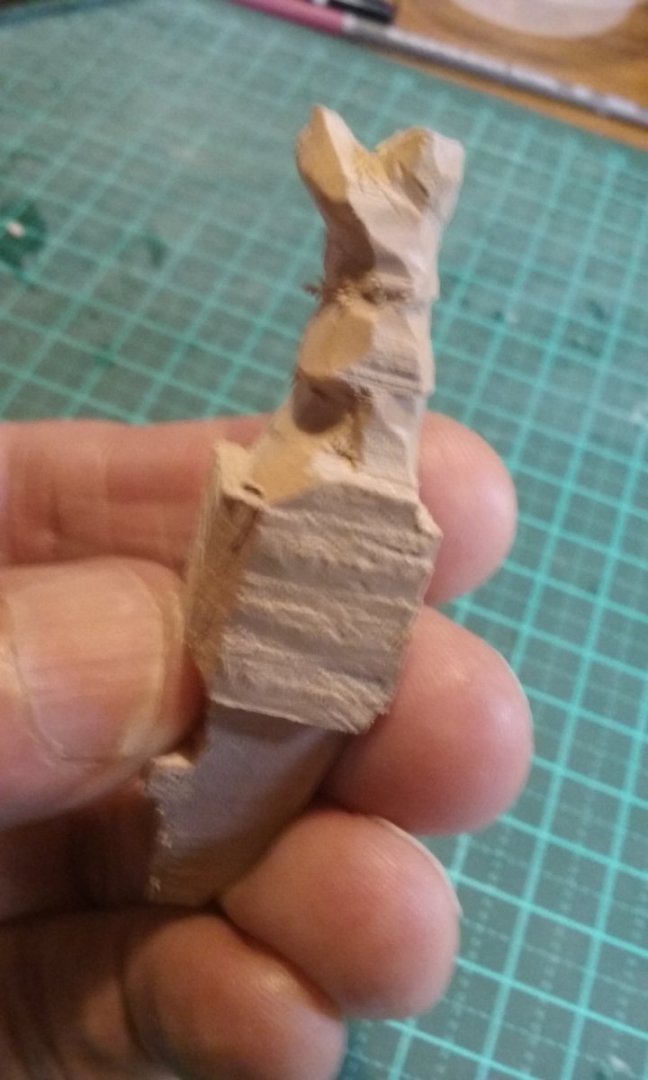
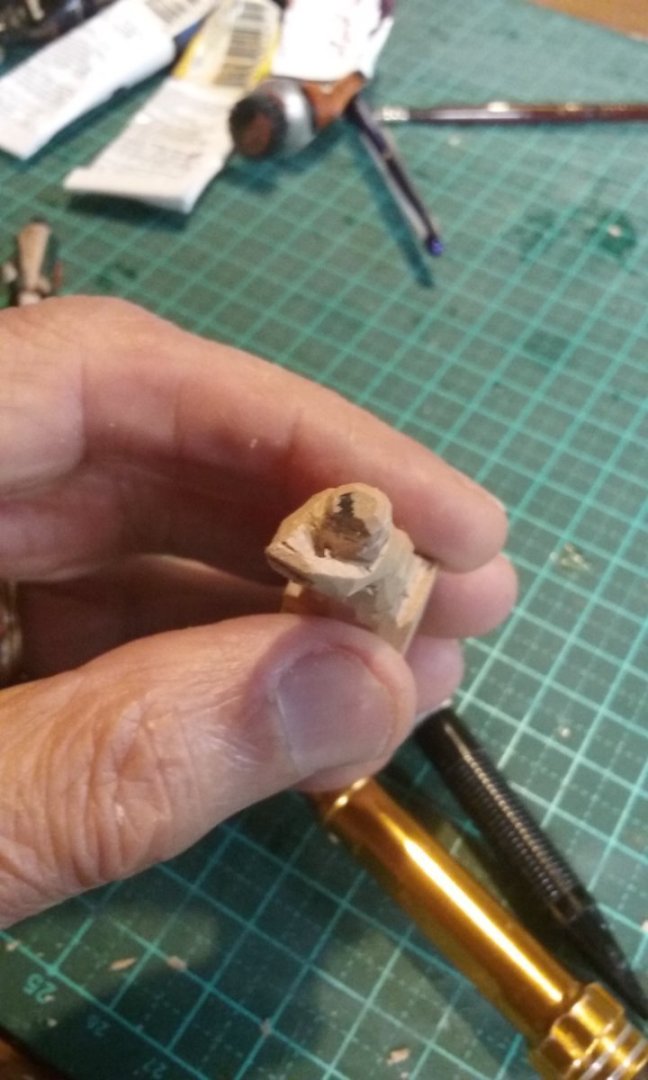
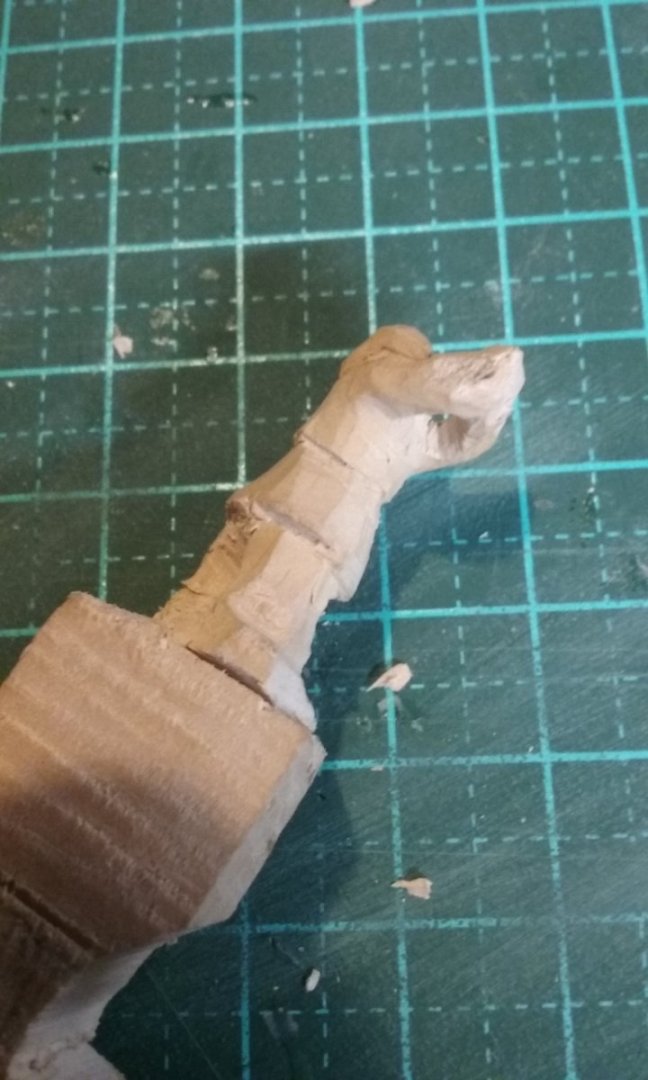
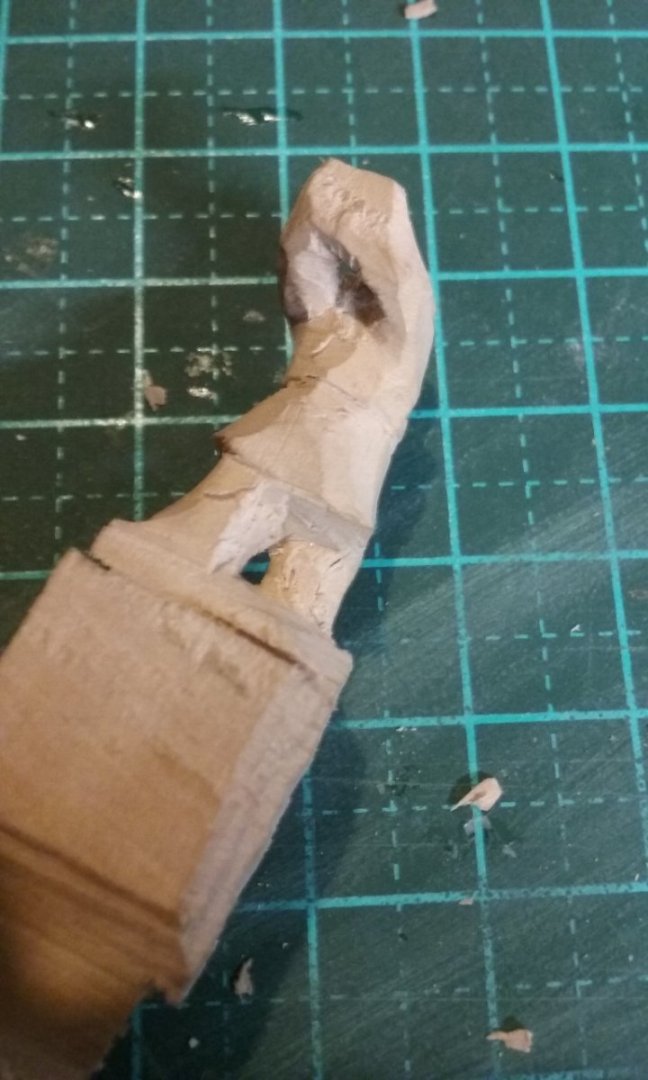
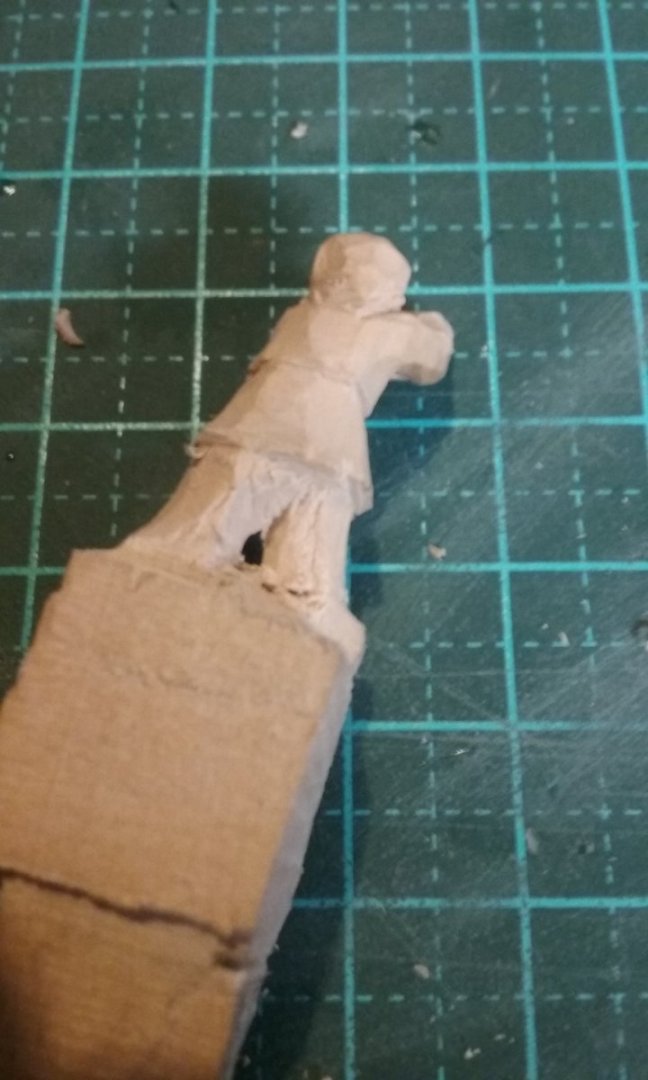
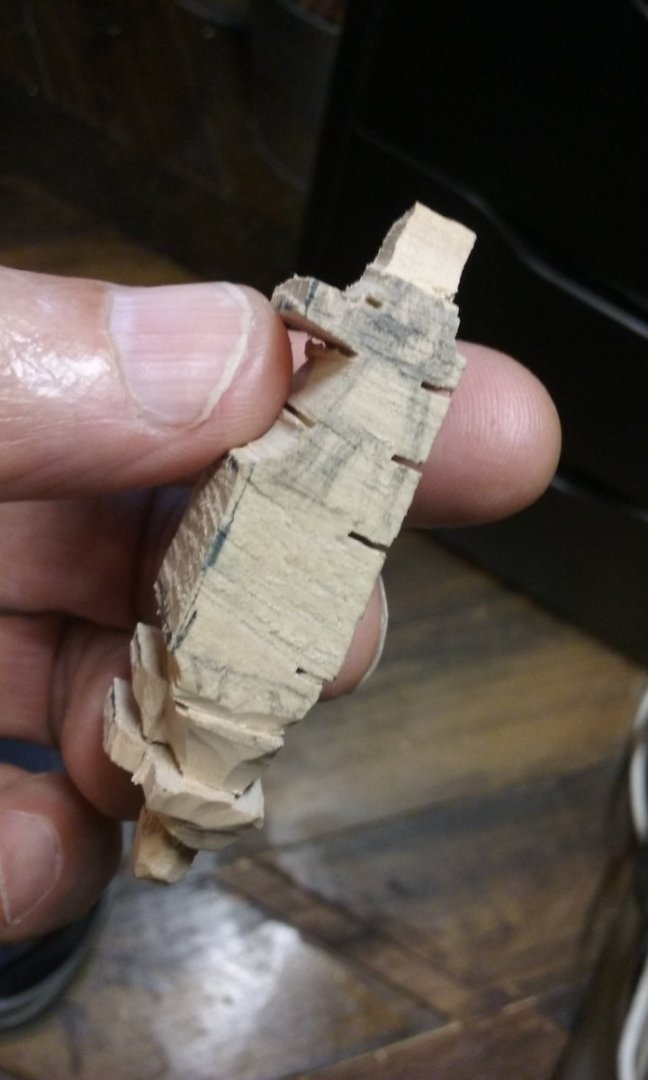
First, an update on the fires. They're still going and it's likely to be hot and windy on Wednesday - https://www.abc.net.au/news/2024-02-25/vic-fires-ballarat-beaufort-raglan-bushfires-warnings/103509258 . Here's a map showing where everything is relative to Ballarat (it's the outlined area - where the "Sovereign Hill" sign is - one of our most popular tourist attractions). Most of the surrounding area is pretty sparsely populated. The firies are preparing containment lines in preparation for Wednesday to protect nearby Beaufort and Lexton, which are fairly small towns. The surrounding areas are farmland - mostly grassland. The fire is at Bayindeen and surrounds, in rugged forest country, which is why the firies are having trouble controlling it. Fortunately, though there have been property losses, people have been sensible and left home before they were in danger and there have been no fatalities. Residents of Beaufort and surrounds have been evacuated to Ballarat and nobody has been allowed to return home yet. Unfortunately, bushfires are a fact of life in Australia, and the mild, fairly wet summer has provided perfect weather for foliage growth this year. Hopefully, the hot weather will break fairly soon and if we get heavy rain it will take care of the fires. Looking at happier news, here's some progress on the build. Even though I've got a fair way into carving the steersmen I think I'm going to need to re-think them yet again. I've worked out where the tillers will be and though the faces have turned out quite well and the arms are pretty much in line with the test photos, and these guys' arms seem to be in the wrong position to control the tillers. The tiller acts totally opposite from the standard one for a stern-mounted rudder - instead of running forward from the pivot point it runs aft, and I'm still trying to get my head around how that works. I either need to correct that (reorientation of the arms) or make a whole new pair of steersmen. More test photos needed, I think. Also, one of the steersmen has his head rather too far from his shoulders - look a bit like the Sphinx. Either replace him completely (as above) or a headectomy and move the offending piece lower down. I'll play with them a bit and decide what to do. I don't really want to waste all that work on the heads and faces, but they may just be beyond fixing. Next point - I stretched some silkspan on a frame and painted it with dilute acrylic paint - but it seems to have developed fine wrinkles or puckers in the surface. I think you can see them in this photo. I'm not so concerned with the larger wrinkles - I can probably just avoid using the bits that have them - but those fine ones seem to be right across the surface and just look wrong. I think I applied too many coats (it was quite a lot - I was trying to make the silkspan translucent instead of transparent ). I think this is beyond saving, and I need to try again, with fewer coats of paint - perhaps with more acrylic in the mix, just be satisfied with it still being a bit transparent. Any comments or suggestions? Steven


-
Going west at the moment, mate. Away from Ballarat. 14 degrees at the moment and they've predicted 24 degrees today. Steven
-
Mark, thanks for the concern. No, the fires are around Beaufort, about half an hour's drive away - in fact people from there have been evacuated to Ballarat. And though the fire's still going strong, the weather's cooled down (it was 36 degrees here yesterday - about 100 degrees F - but today was only 18 (64 F). Tony, thanks for the suggestion - I'd heard that, but so far haven't come across any at a decent price - or at all, to be honest. Steven
-
This is such a beautiful build and very inspiring. Magnificent work, Patrick! Steven
-
Artreides Ornithopter by RGL - Meng
Louie da fly replied to RGL's topic in Non-ship/categorised builds
Wonderful stuff, Greg! I'd always been disappointed that the previous screen versions of Dune wimped out on the ornithopters - no movable wings in any of them. And though this isn't how I'd imagined them (I was thinking they'd be more like the ones in Sky Captain) - - these ones are beyond brilliant. Really looking forward to seeing your completed model. Steven -
Thanks, Druxey. I'd thought it needed to be full strength. So you've saved me from making a ghastly mistake.🙂 Steven
-
Question re painting the silkspan - am I right in thinking the acrylic paint is to be used full strength, not diluted with water? Thanks. Steven
-
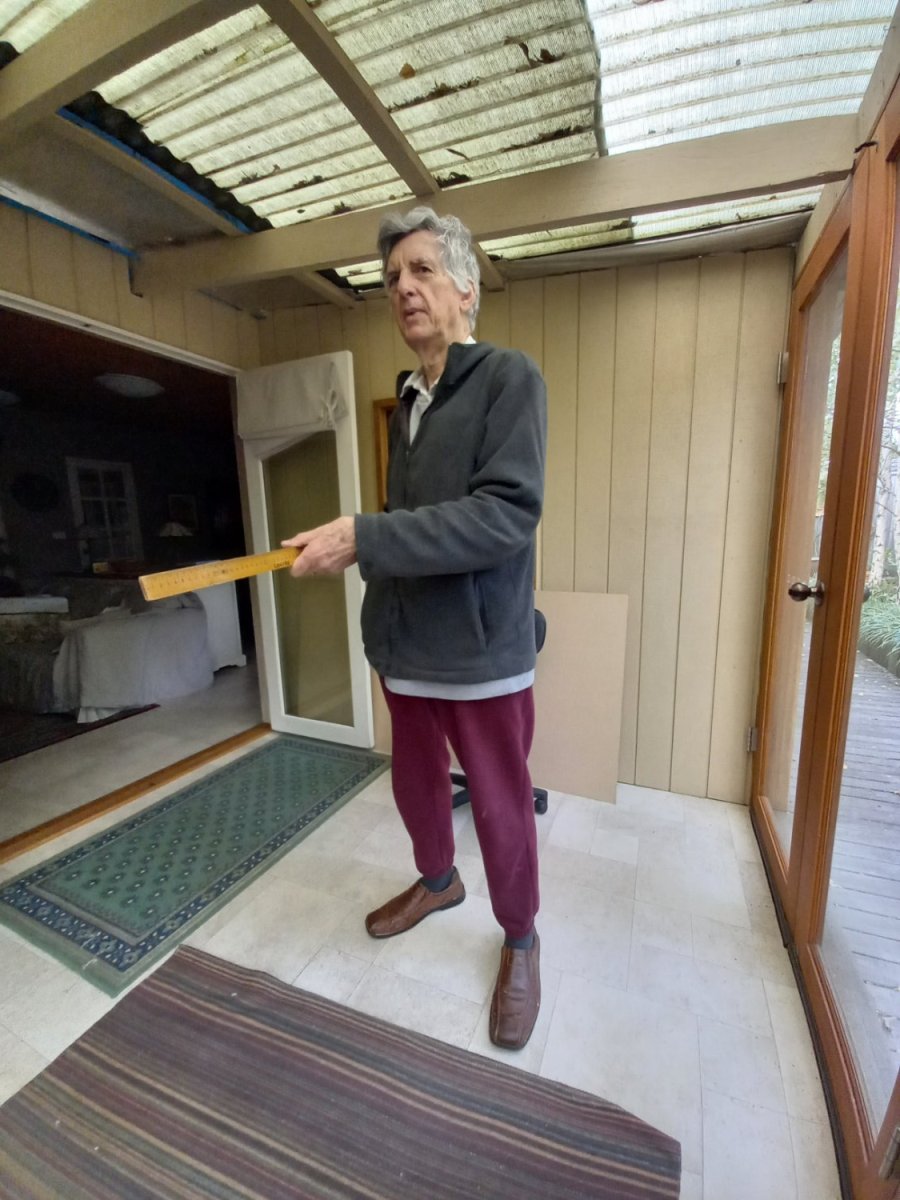
Thanks everybody for the likes and thanks particularly to Liteflight, Glen, Banyan and Roger for the replies. I got hold of an old picture frame from an op shop - 3 bucks - much easier than making my own and it still had the glass in it, which I expect to have a future use for. Liteflight, I echo your hope that I'll find a source of boxwood. Looking forward to seeing if it's as good for carving as people keep saying. Regarding kick-back on the tiller, I expect that's a factor, and also the bracing of the feet. Normally I have them fairly well spread apart anyway (it helps them stand up on their own without a stand), but I'll certainly take this on board (sorry!) when carving them. Legs and feet are usually the last things I finalise. I don't have any information regarding whether there were one or two steermen - I expect it would depend on the width of the ship at that point. I do know that when Tim Severin re-enacted Jason's voyage, his 'Argo' had only a single steersman working two rudders simultaneously, but that was a fairly small narrow vessel. Dammit, Glen! So I'm immortalising myself? I know some artists did that kind of thing, inserting themselves into their paintings, and Alfred Hitchcock used to appear in cameos in his movies . . . Yep, trakkie daks and a flannie and a sloppy joe and a koala jacket*. Can't be too warm. but this is Ballarat. And I really hate the cold. I usually rug up more than other people anyway. Thanks, mate. I think I'll use masking tape to hold the silkspan in as well - less likely to tear it. Steven *Gym pants, flannelette shirt, loose jumper, fleece-lined zip-up jacket.
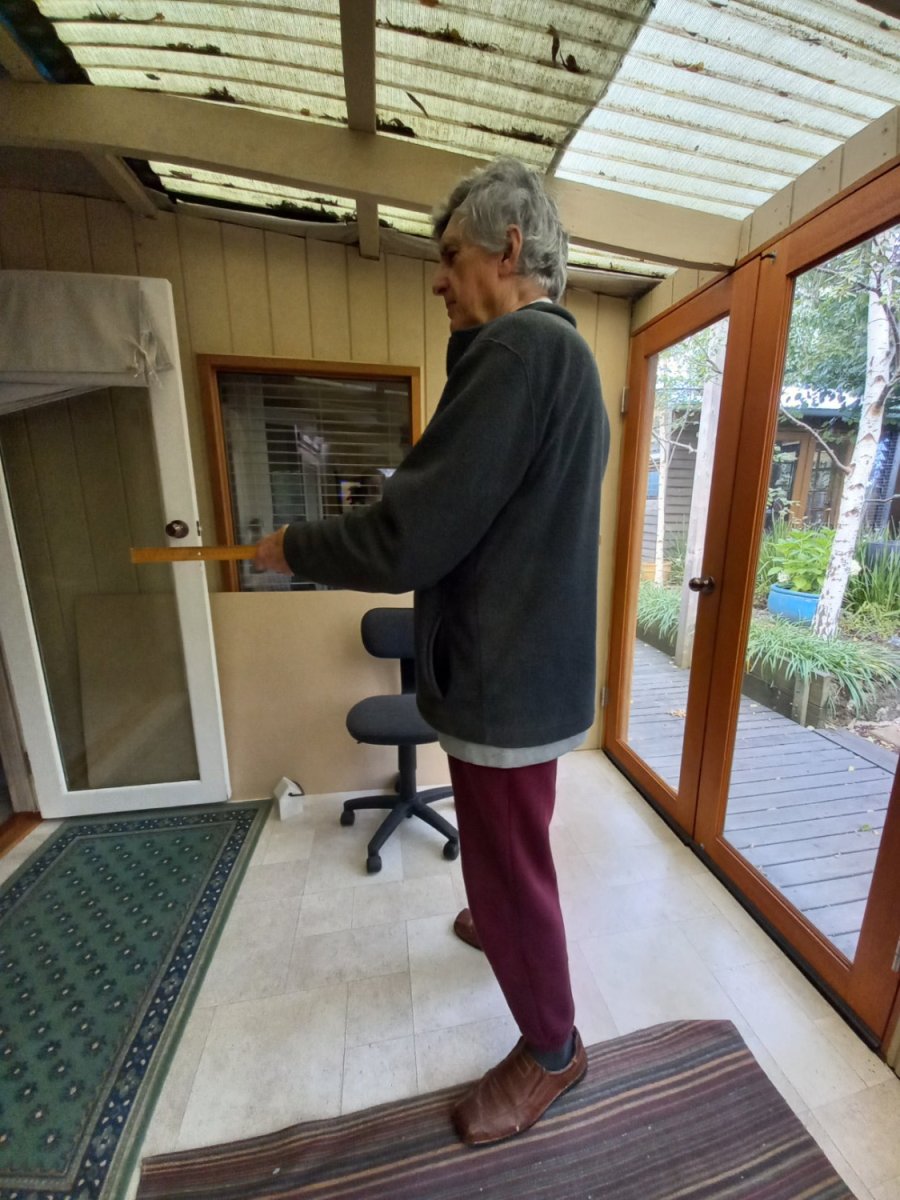
-
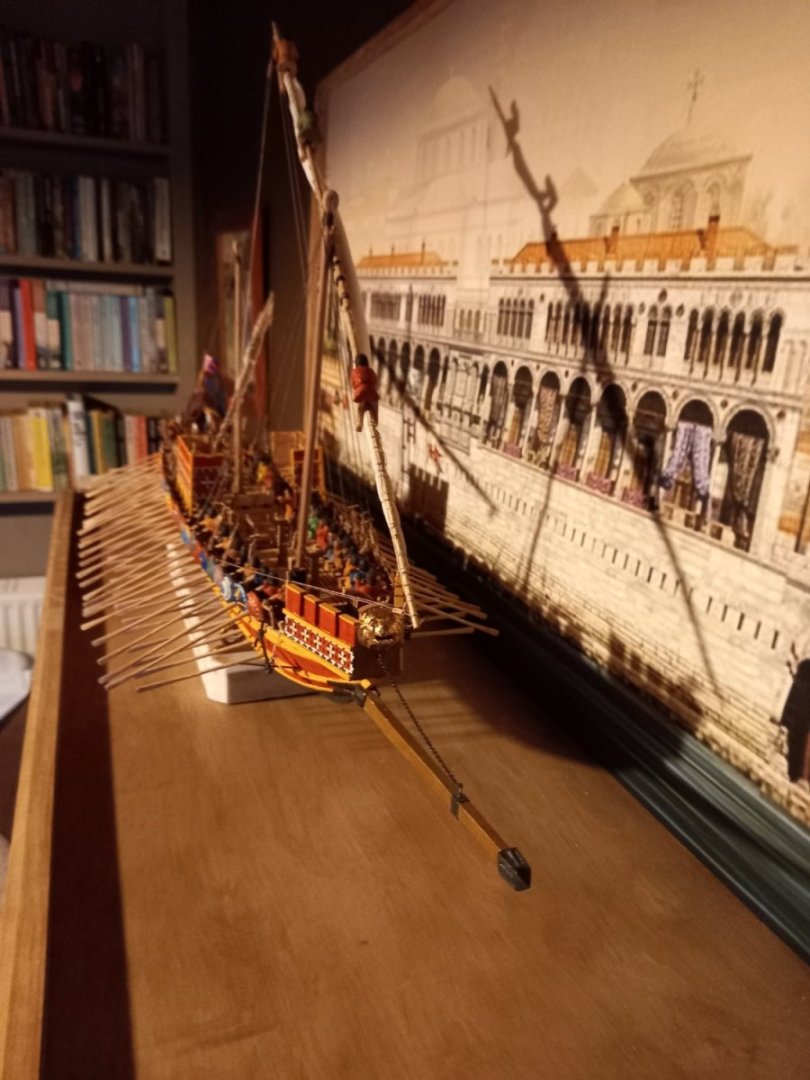
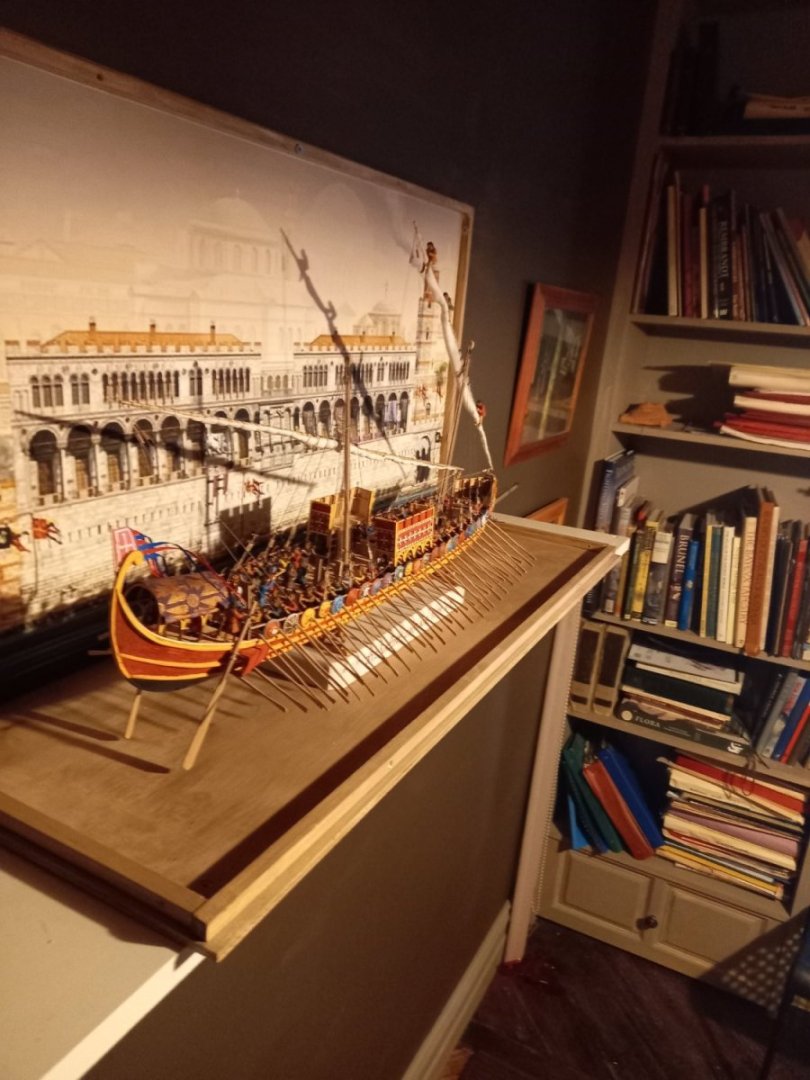
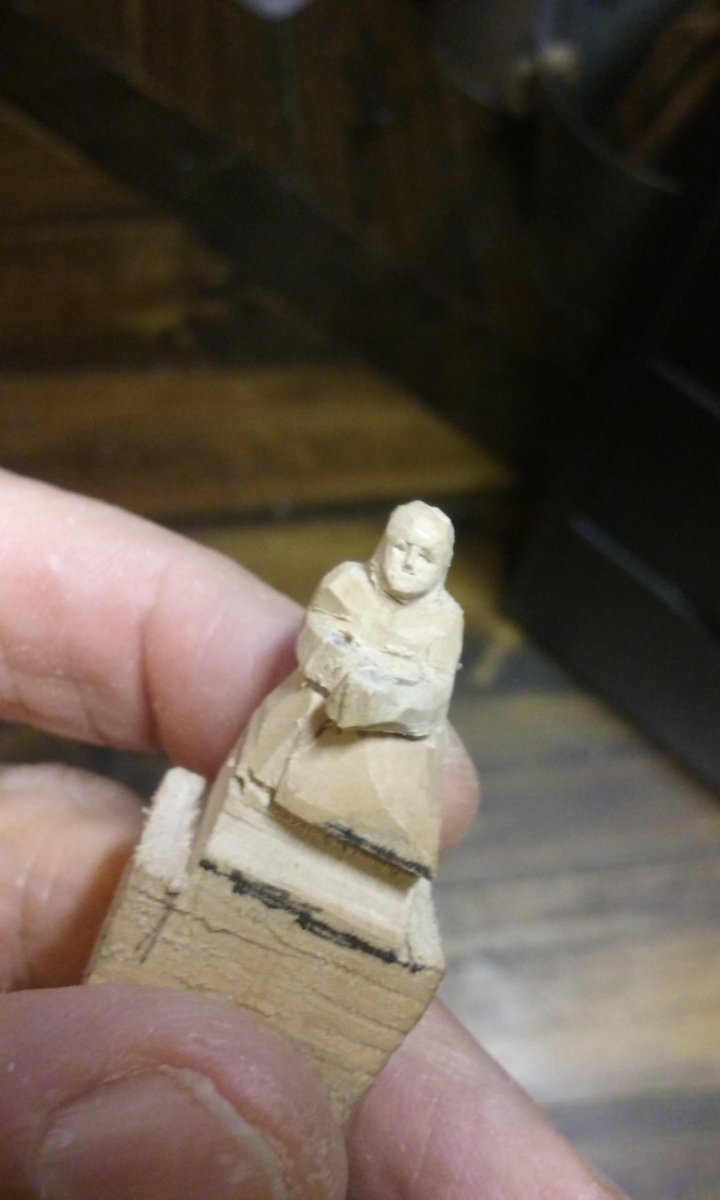
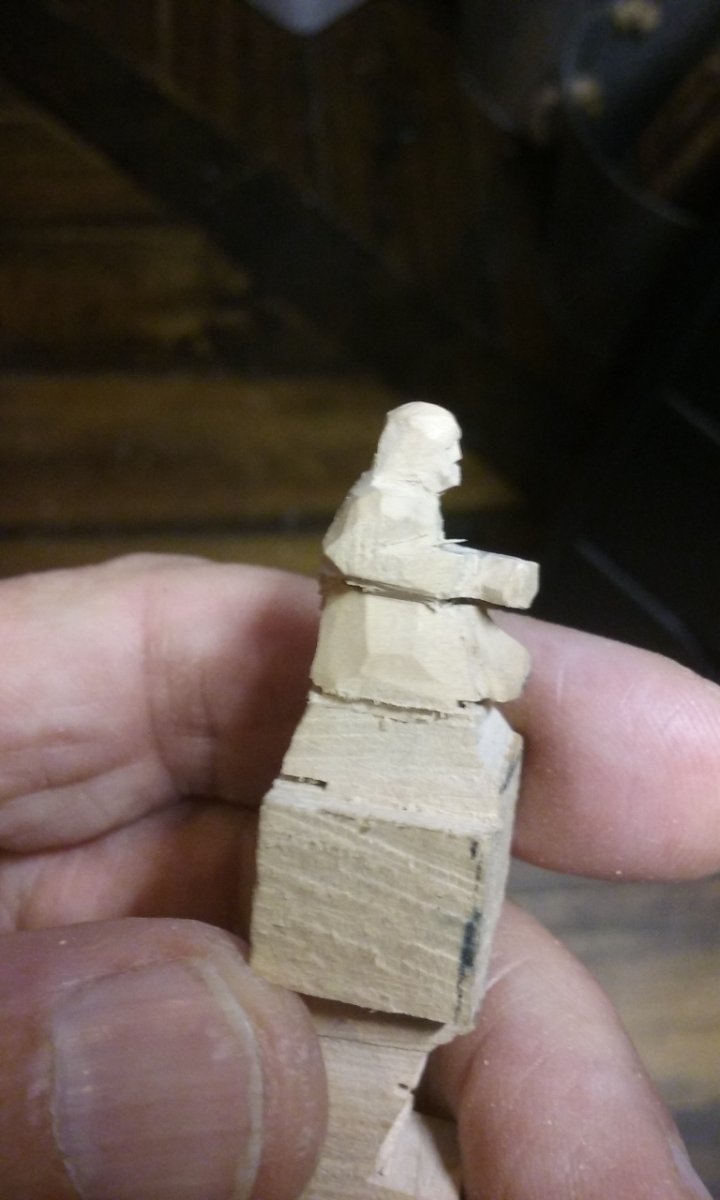
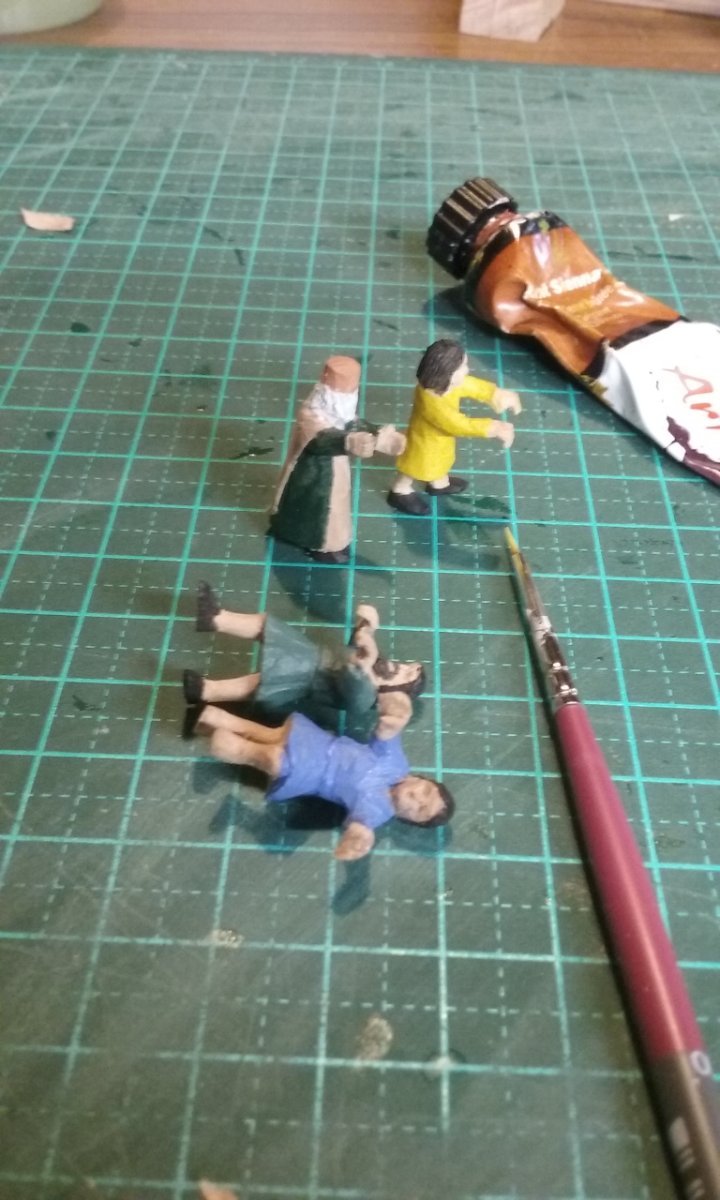
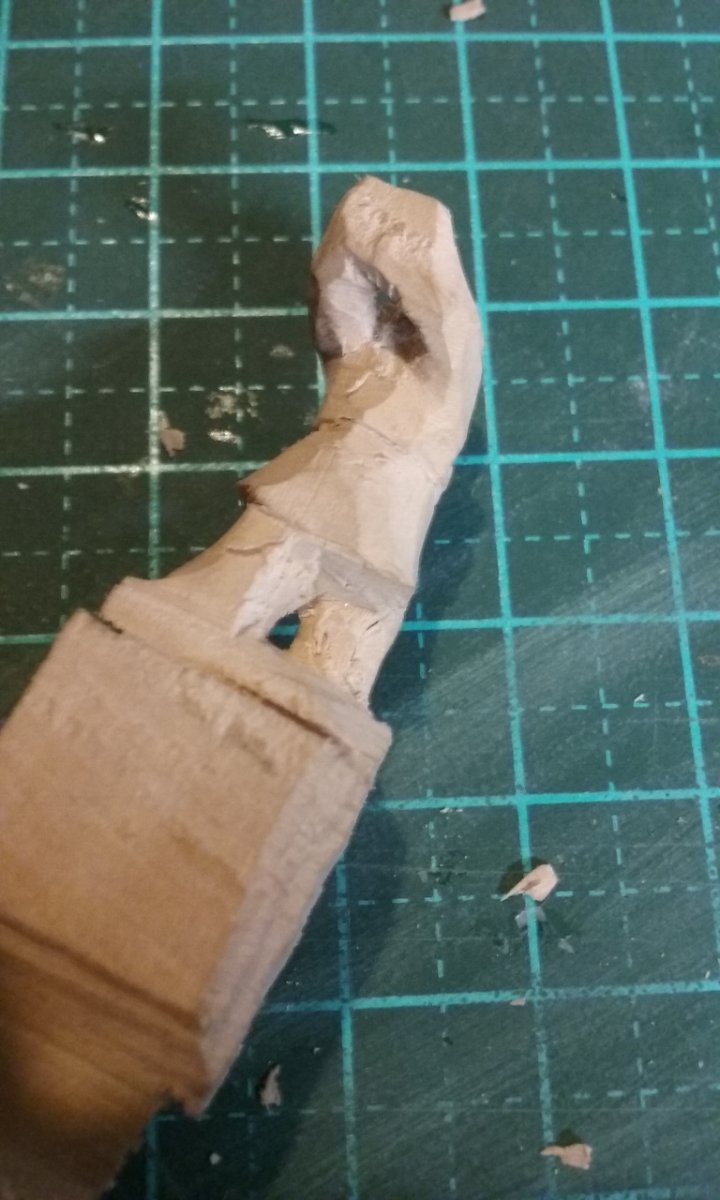
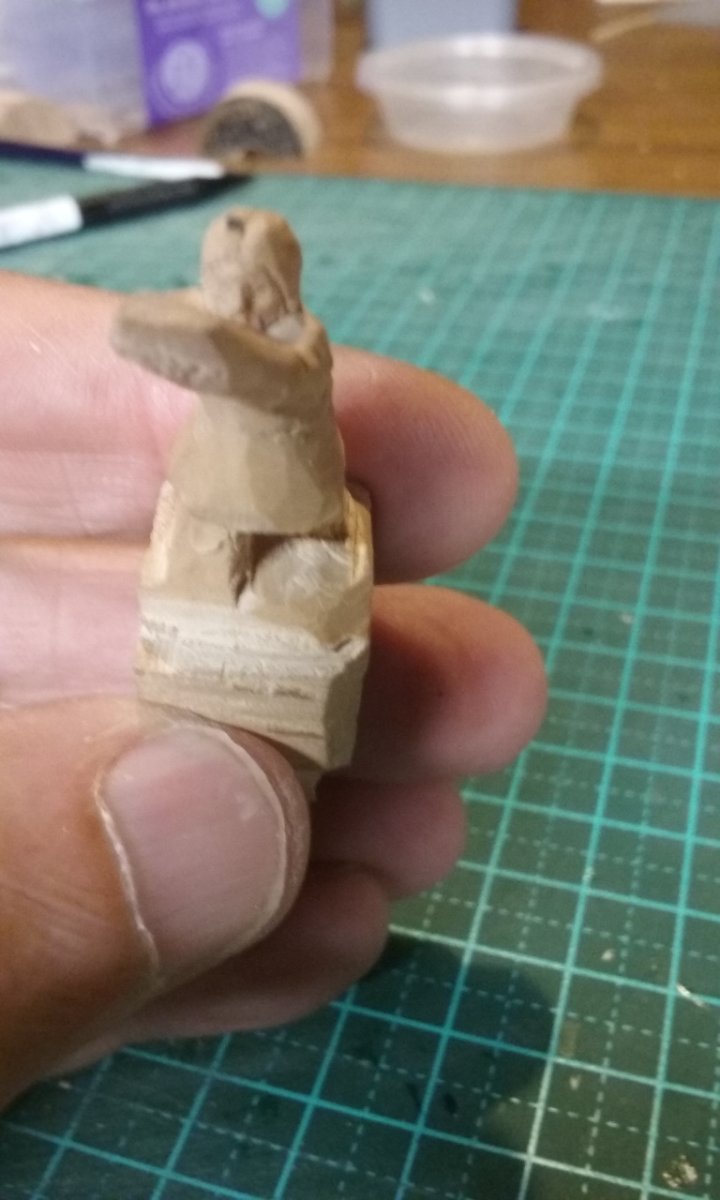
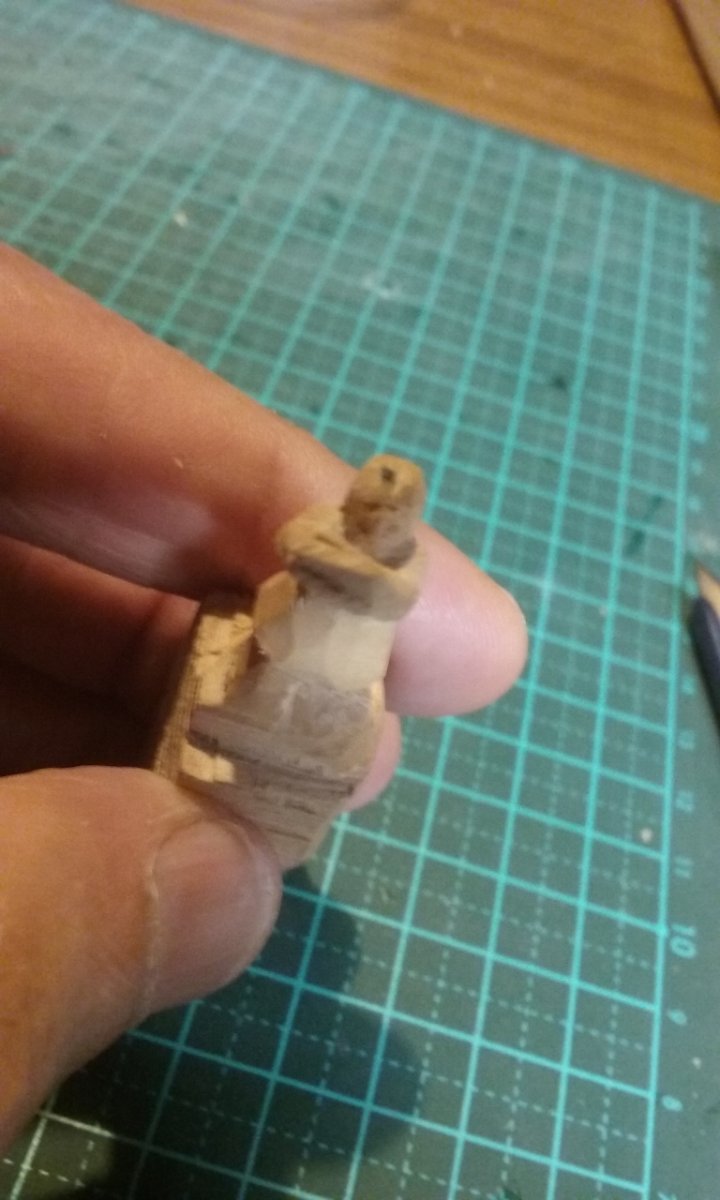
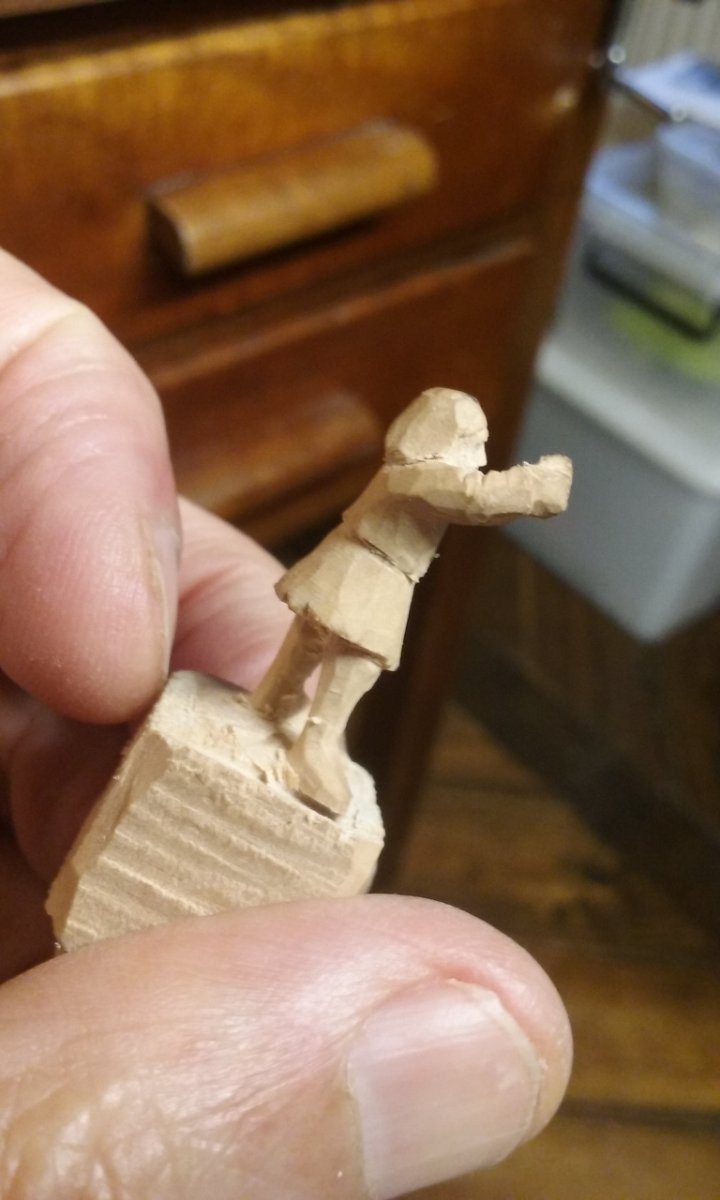
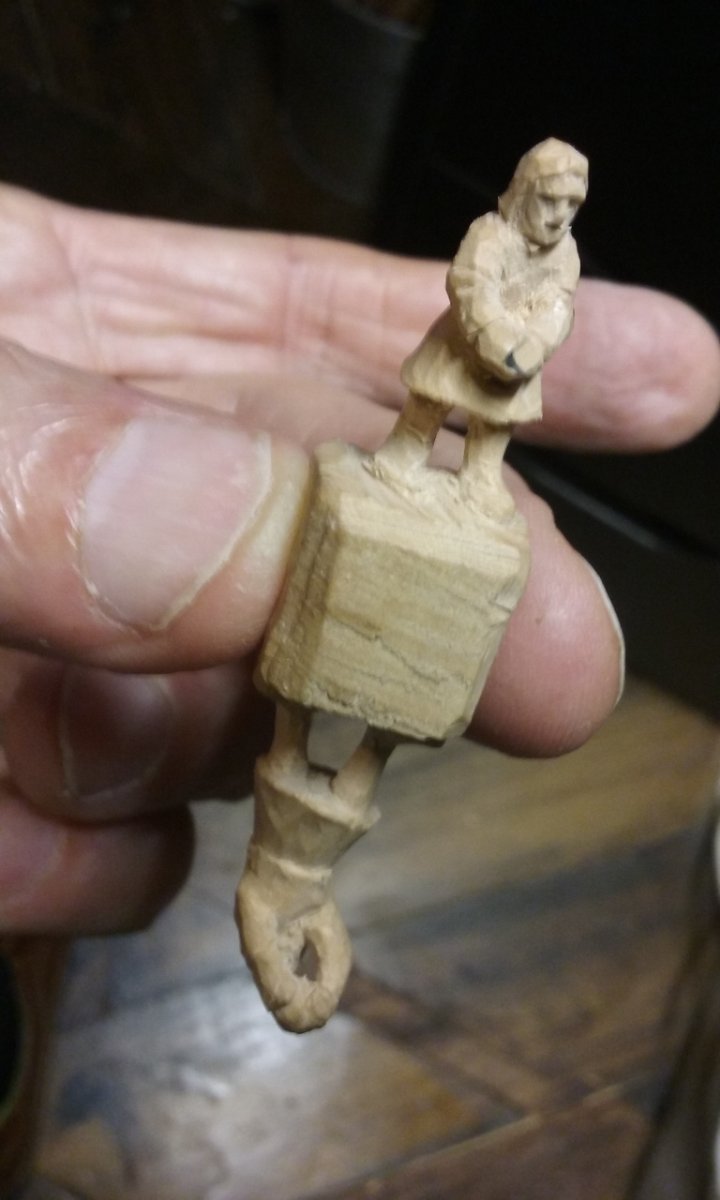
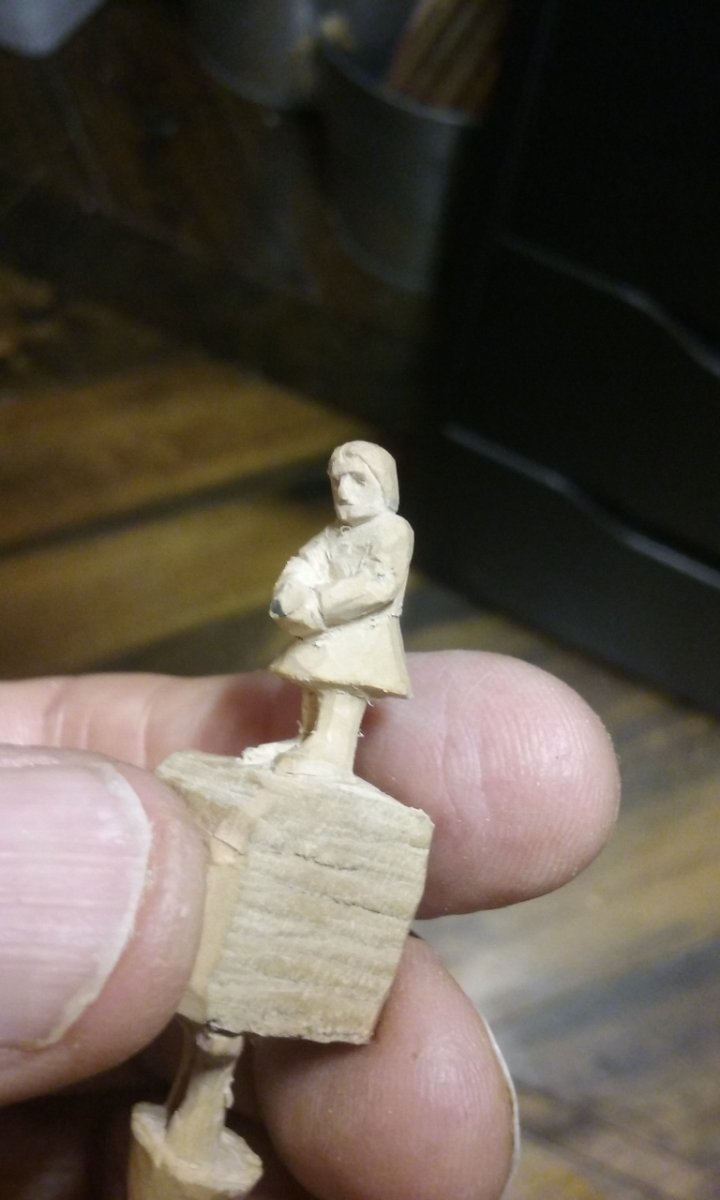
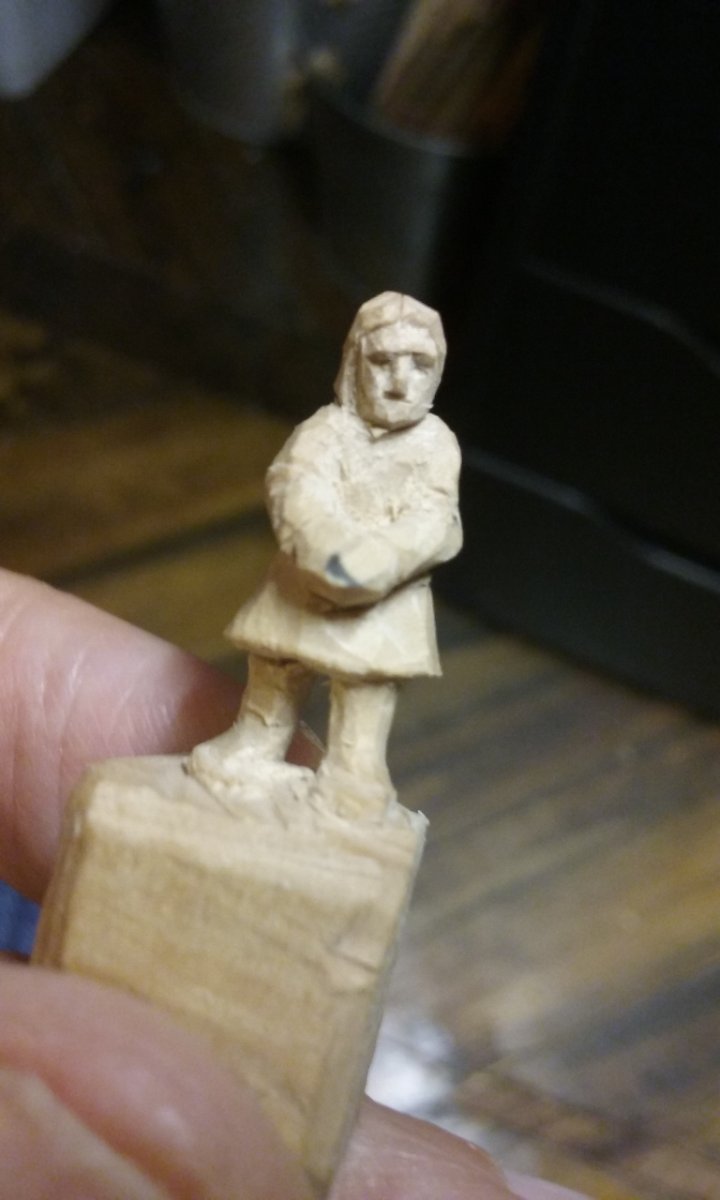
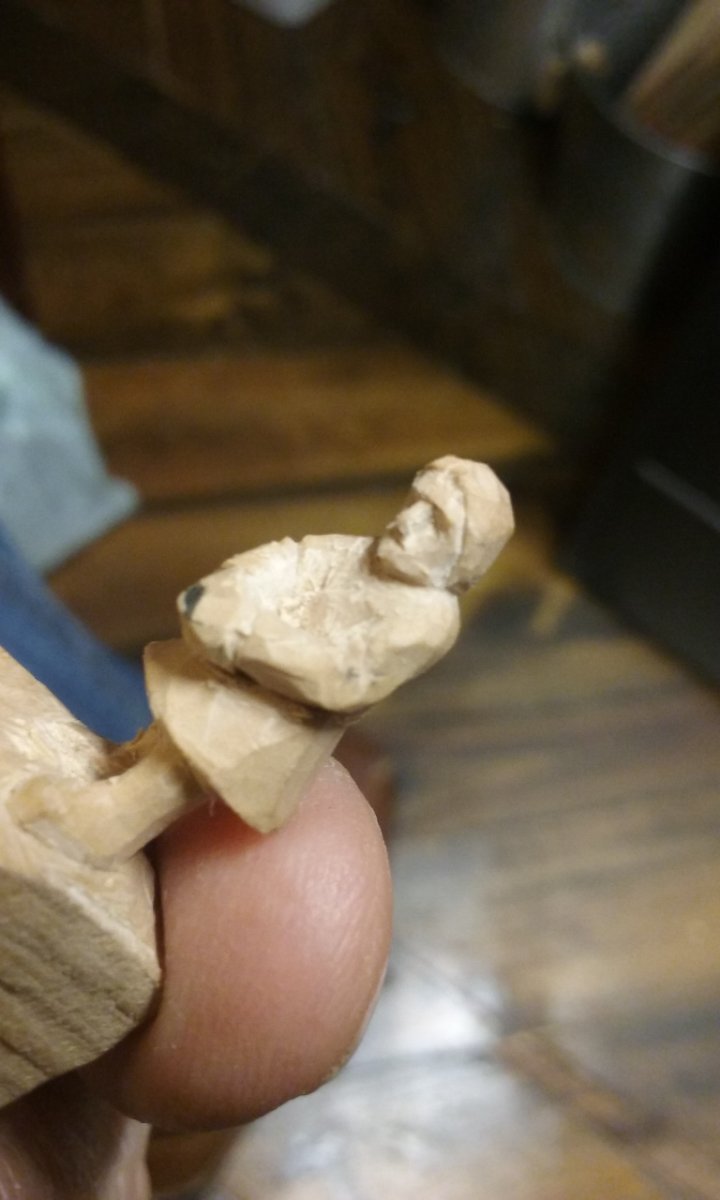
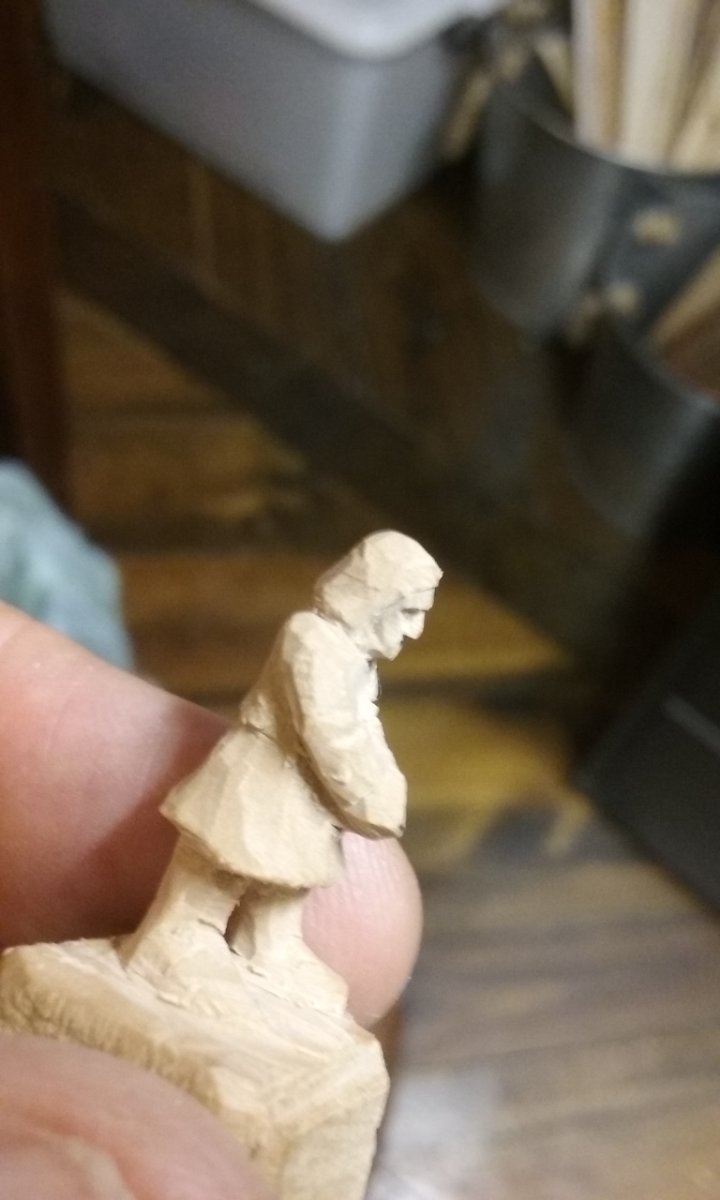
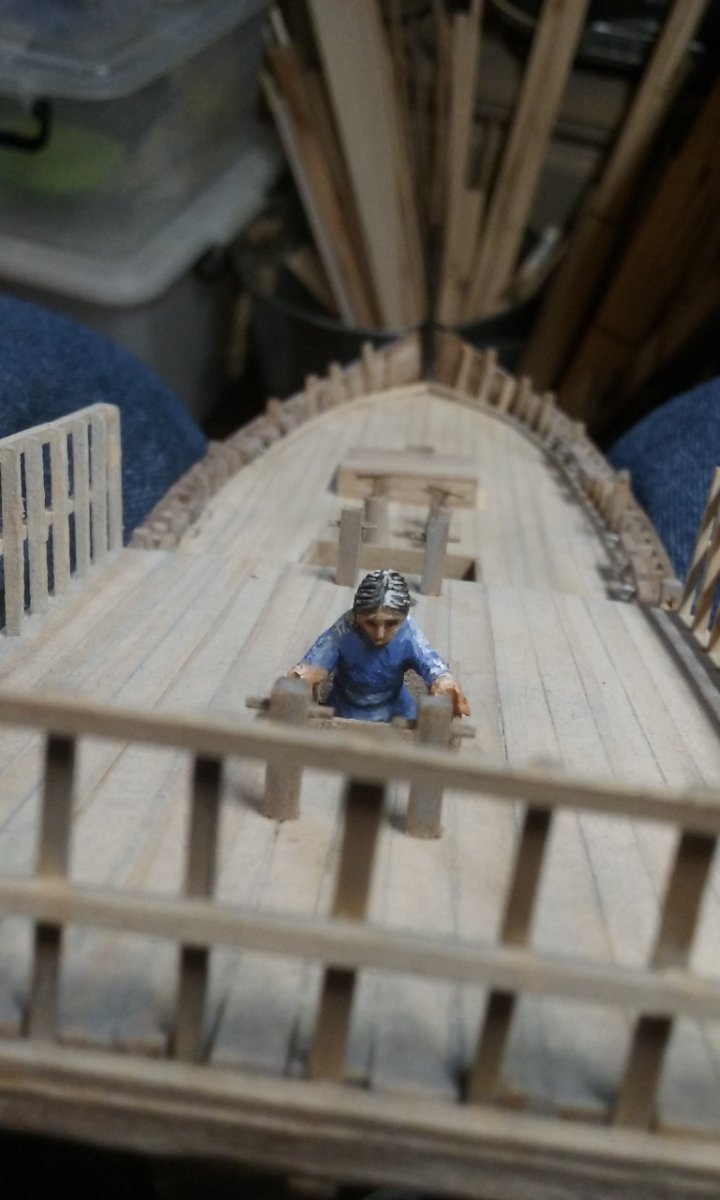
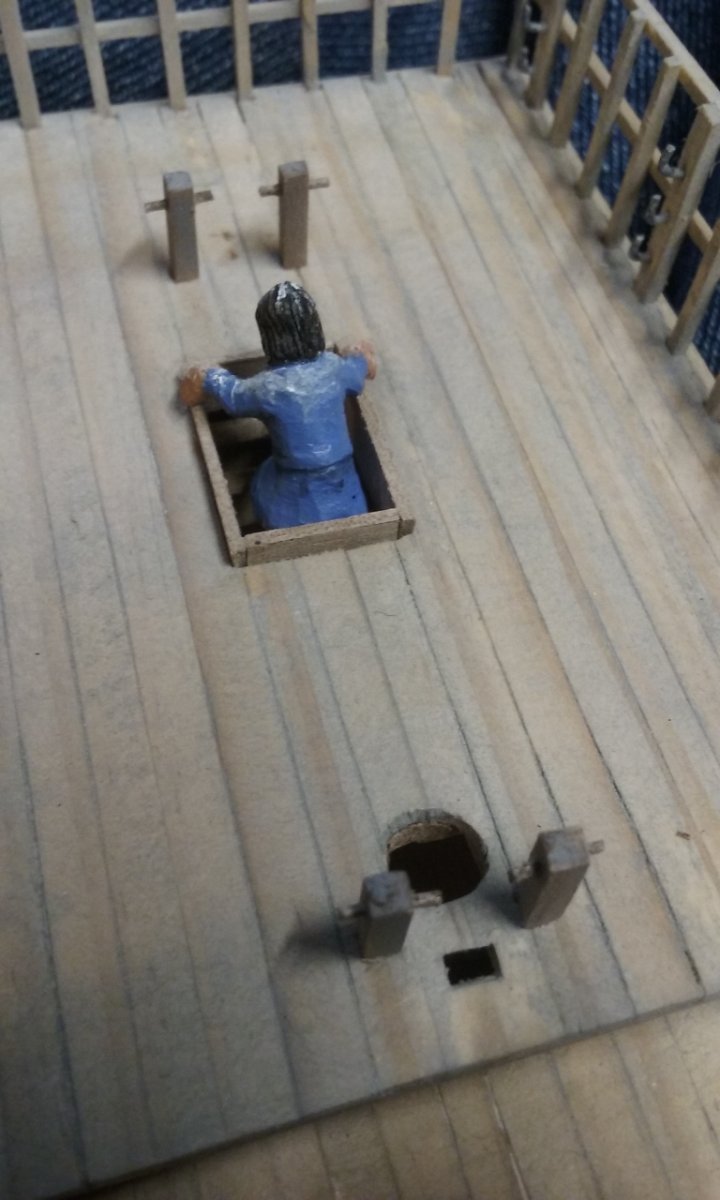
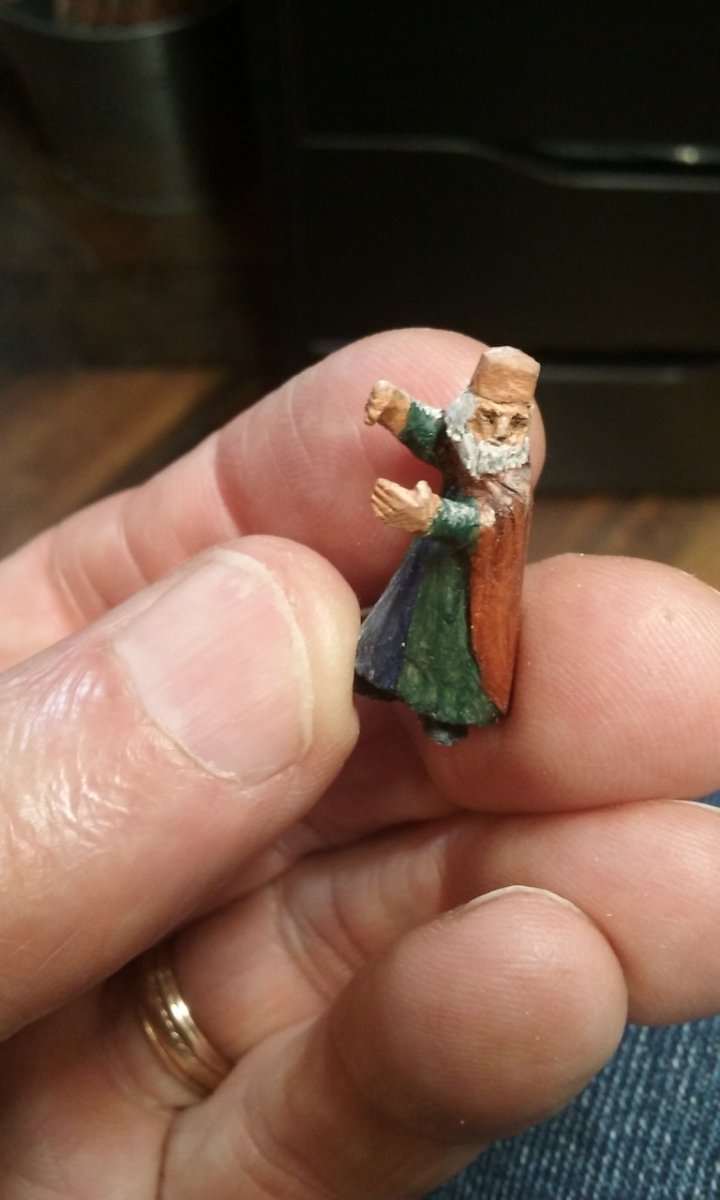
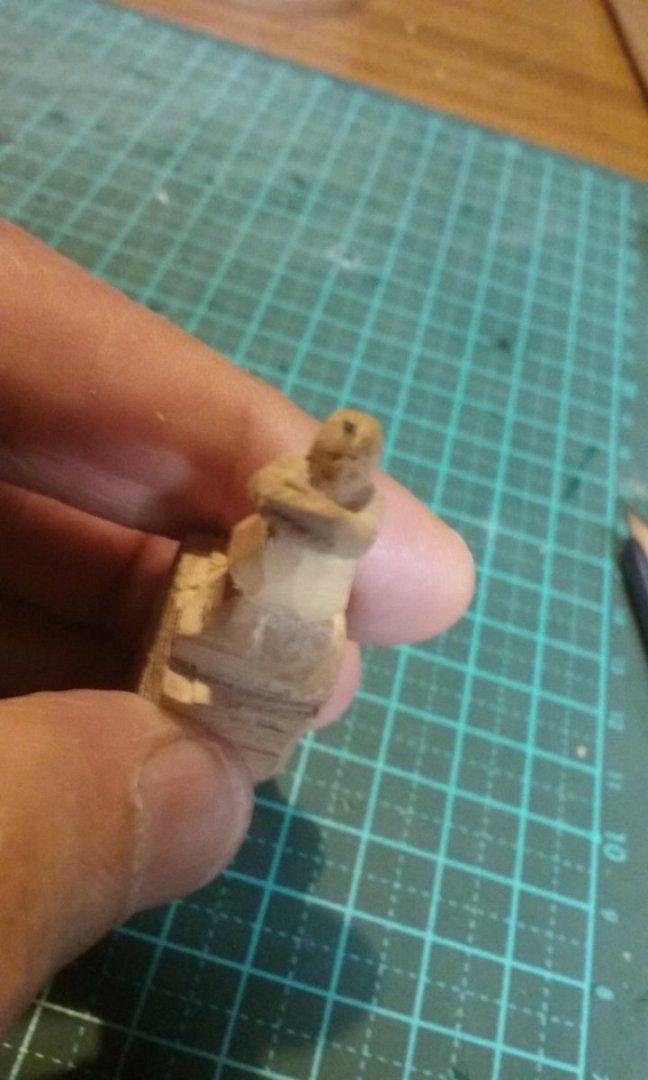
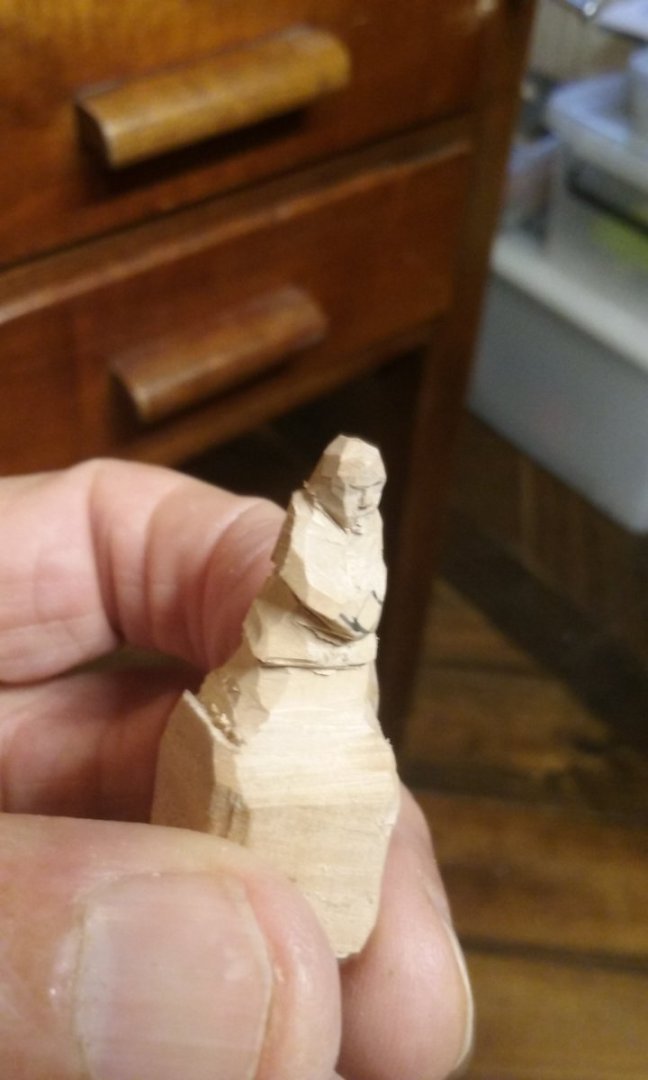
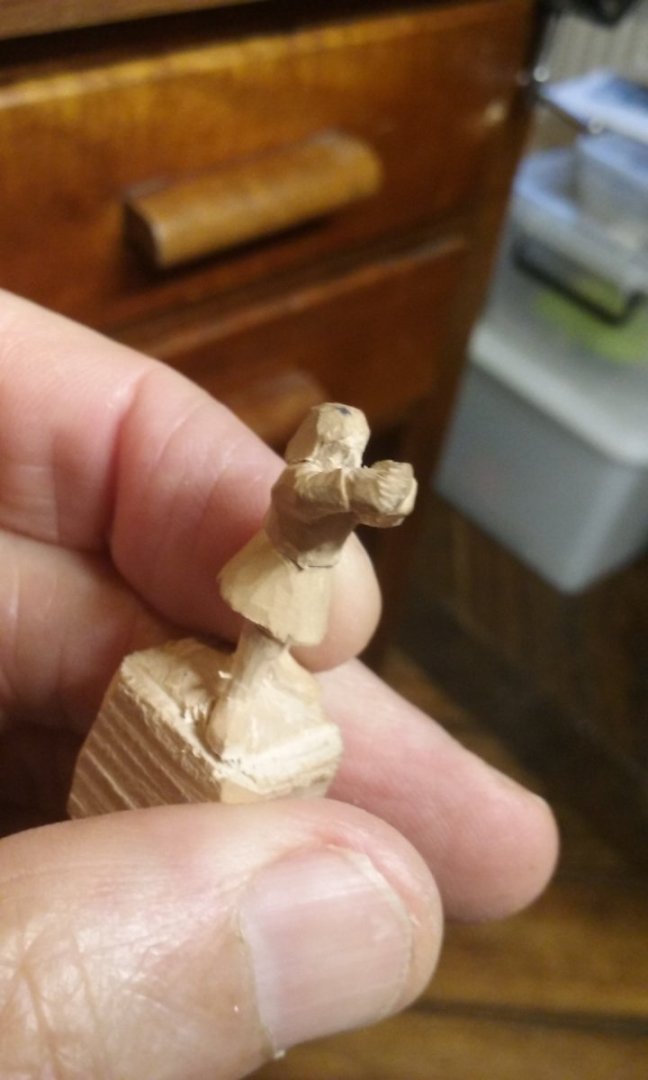
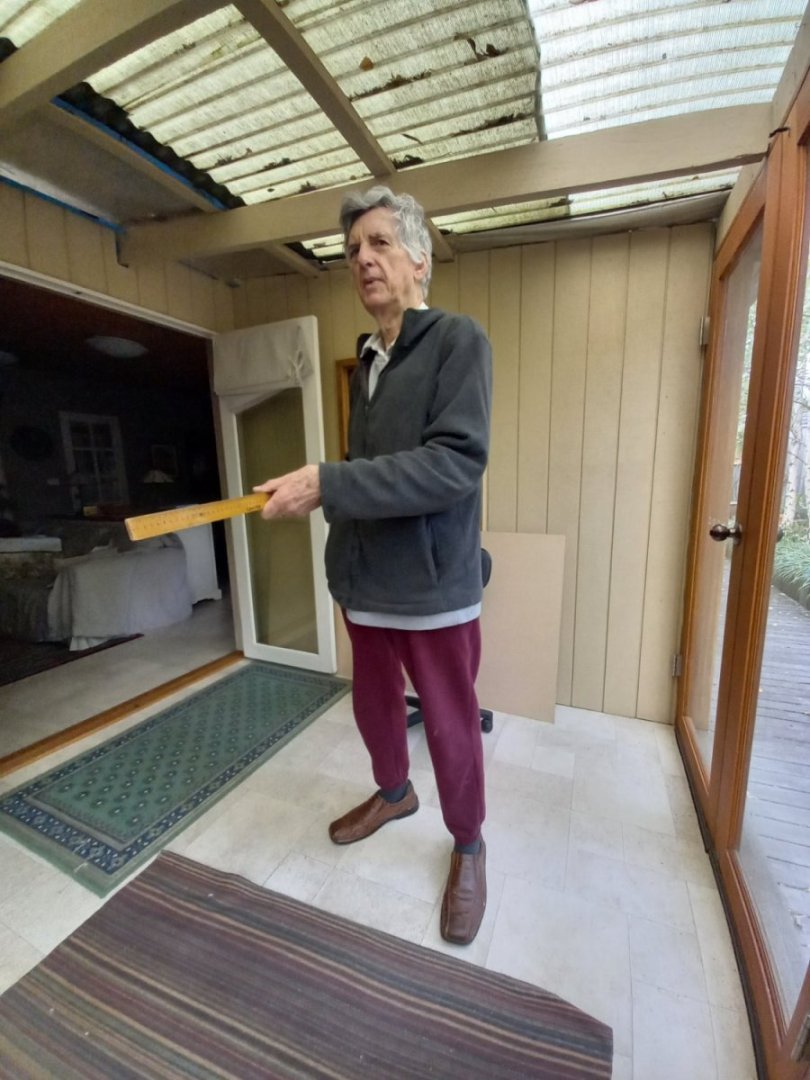
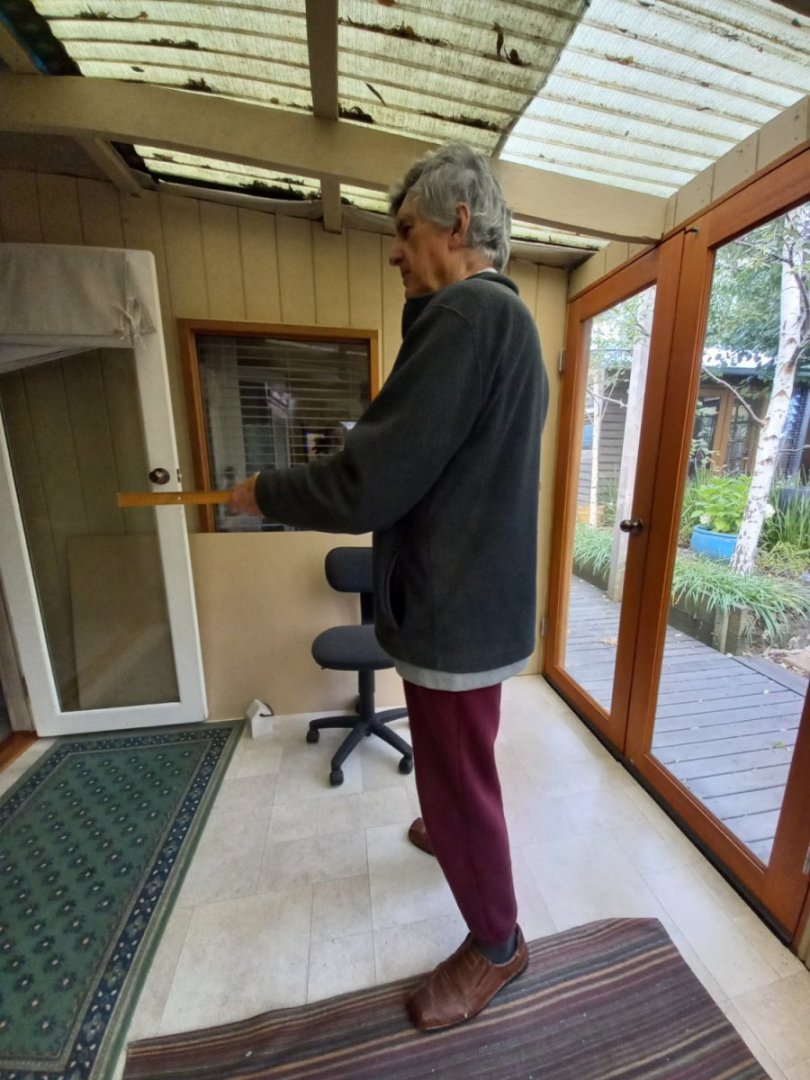
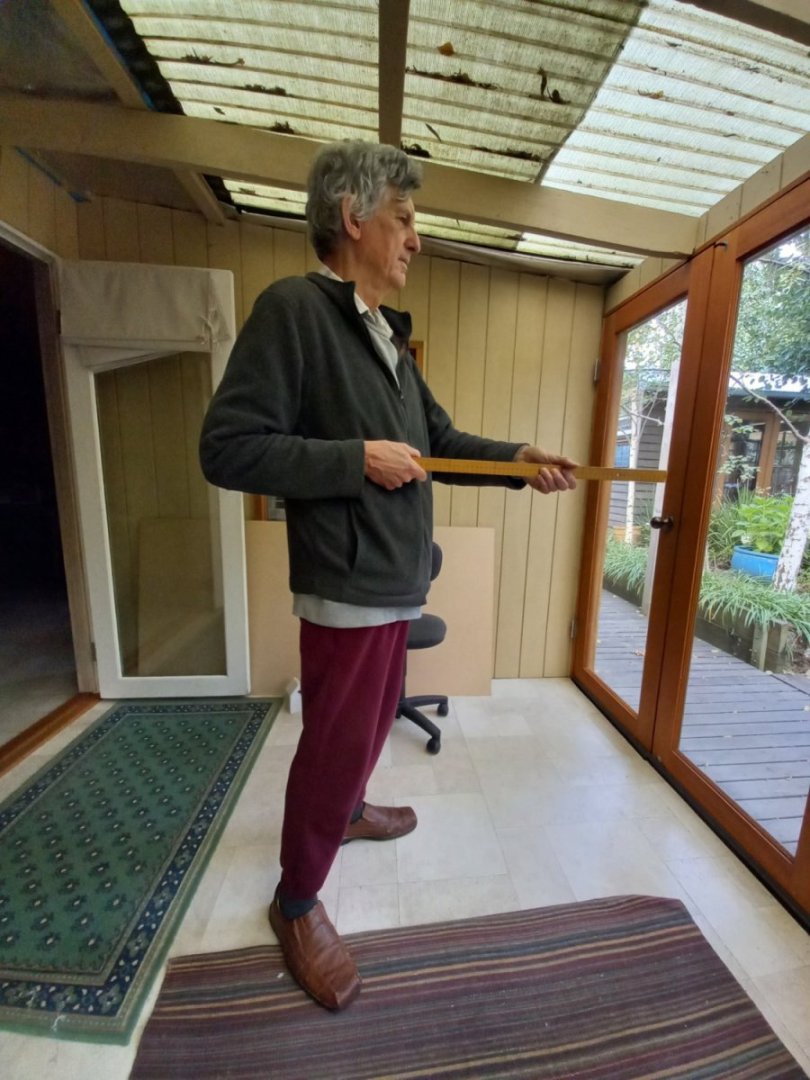
I've been a bit distracted by my other build, the Golden City paddlewheeler, but I've also been working on crewmen for the San Marco ship. Here are a bunch I've already finished and have now painted, and two of them I've also shaded. I've exaggerated the light and shade as otherwise they look bland. And two new crewmen letting go and hauling on the shrouds as the ship tacks. (Big lateeners had to move the yard to the other side of the mast every time they tacked, and to do this the shrouds had to be loosened off - after tacking the lee shrouds would be somewhat loose and the weather shrouds tight.) Crewman hauling down on (new) weather shroud. And opening up the gap between his arms And the legs . . . Normally I'd do his face early in the process, as if I got that wrong there'd be no point in continuing - but in this case I couldn't get at it until I'd opened up the arms And the hands and fingers . . . (I'm getting better at fingers). And another crewman, belaying a shroud. Looks a bit like Sir Ralph Richardson at the moment, but that will change. Now more like Noel Fielding . . . Or perhaps Richard Harris? Yep, Richard Harris . . . I've decided to discard the two helmsmen (in the top picture - one in yellow and one in green) in light of the Black Sea discoveries about tiller location on quarter rudders, and I'll be making new ones. So I had to get some photos taken to base their arm positions on. And here are the two helmsmen just started: Steven


- 379 replies
-
- 14
-
-

-
That's just amazing, Glen! You always come up with the most imaginative ideas, and the execution is always superb - that cliff-face, that water! Your work is inspirational - gets me thinking I ought to do some dioramas or introduce more interesting details into my own builds. Congratulations on another magnificent build. Steven
- 174 replies
-
- 4
-
-
- Waa Kaulua
- bottle
- (and 1 more)
-
Gettin back to it after 45 years
Louie da fly replied to gmlogan's topic in New member Introductions
Welcome to MSW! I think you'll find a lot of us are "returnees" - getting back into ship modelling after having done it as kids. But the hobby has certainly moved on - better kits, better instructions (usually!) and much more information available out there, as well as wonderful resources like MSW, where there are many people with years of experience ready and willing to give help and guidance, answer questions - and a wonderful audience to admire your modelling efforts. And there's such a wide range of skill levels here, and acceptance and encouragement, whether you're highly skilled or a total newbie. Don't forget to start a build log for your Polaris - it's a great way to get help and encouragement. Instructions are here: And check out the other Polaris build logs, which should give you pointers that will (hopefully) enable you to solve problems and avoid errors in advance. Best wishes, Steven -
Oh, dear. I've just had to change my whole attitude to quarter rudders, now that I've seen this video from archaeologist Kroum Batchvarov, who's been working on the Black Sea finds: I'll have to carve new steersmen to replace the ones I've done, with the tillers facing aft, not sideways! Steven
-
Yes, it's the translucency I don't like. I like your solution, and I'll give it a try. Thanks. Steven
-
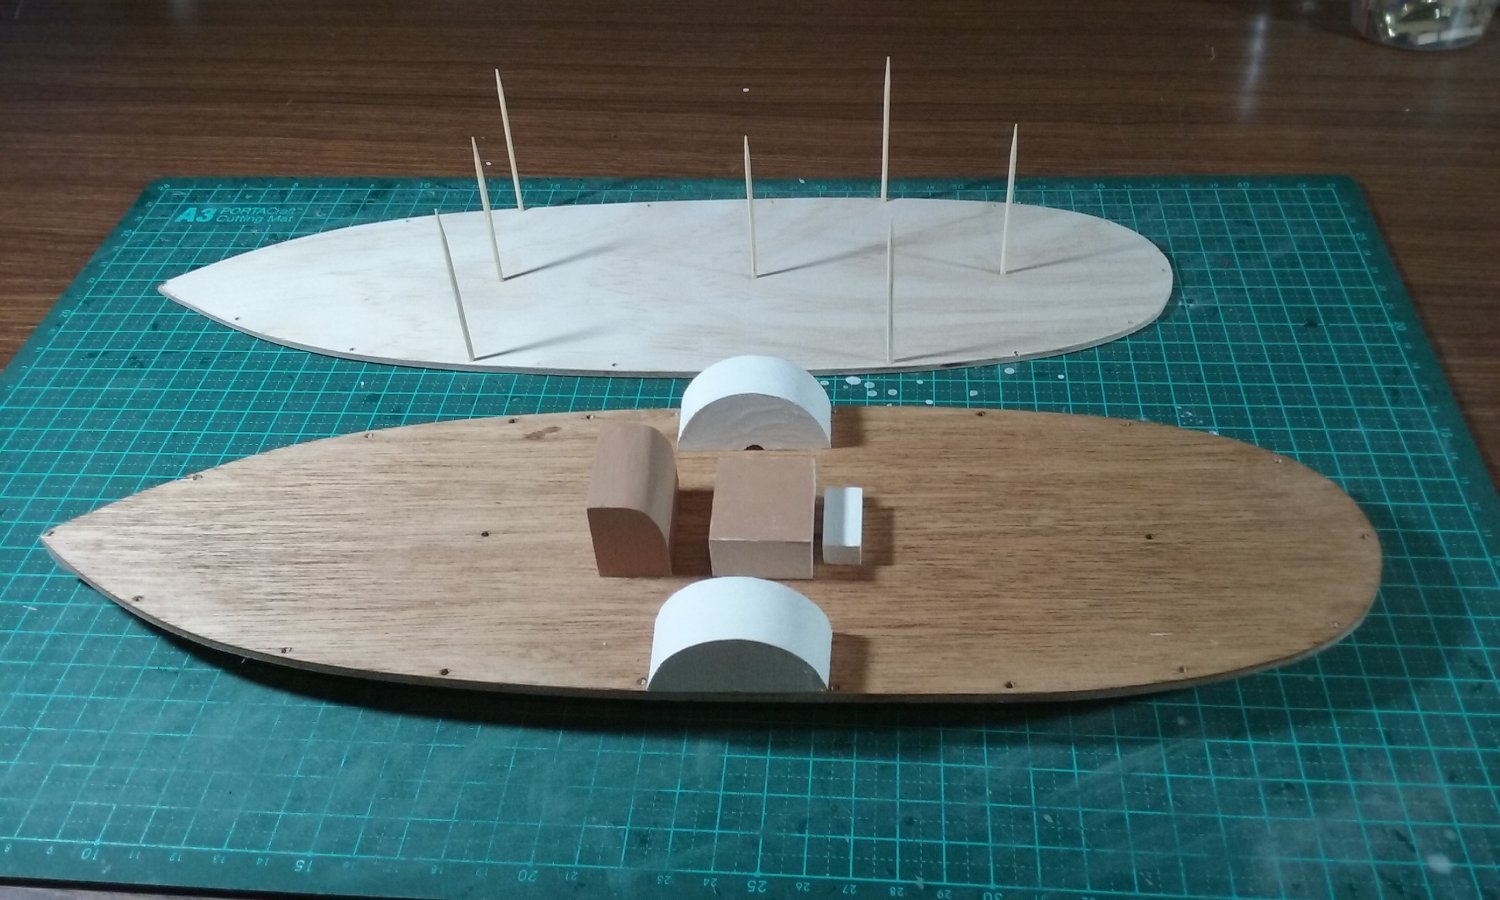
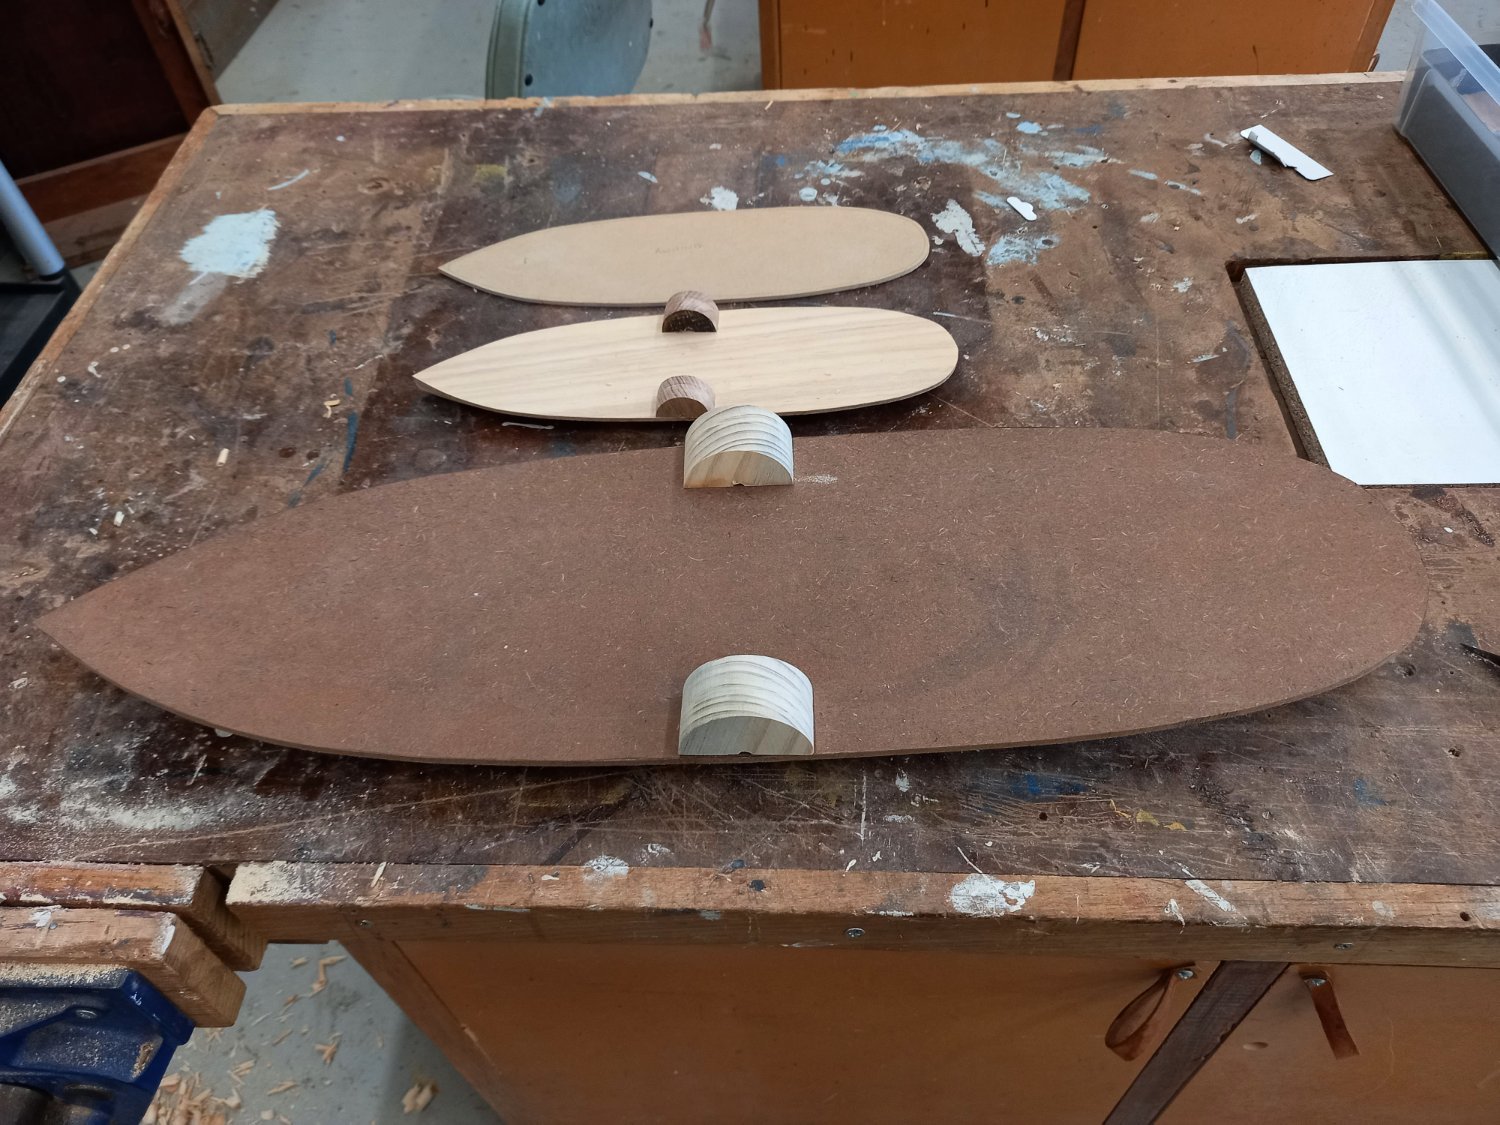
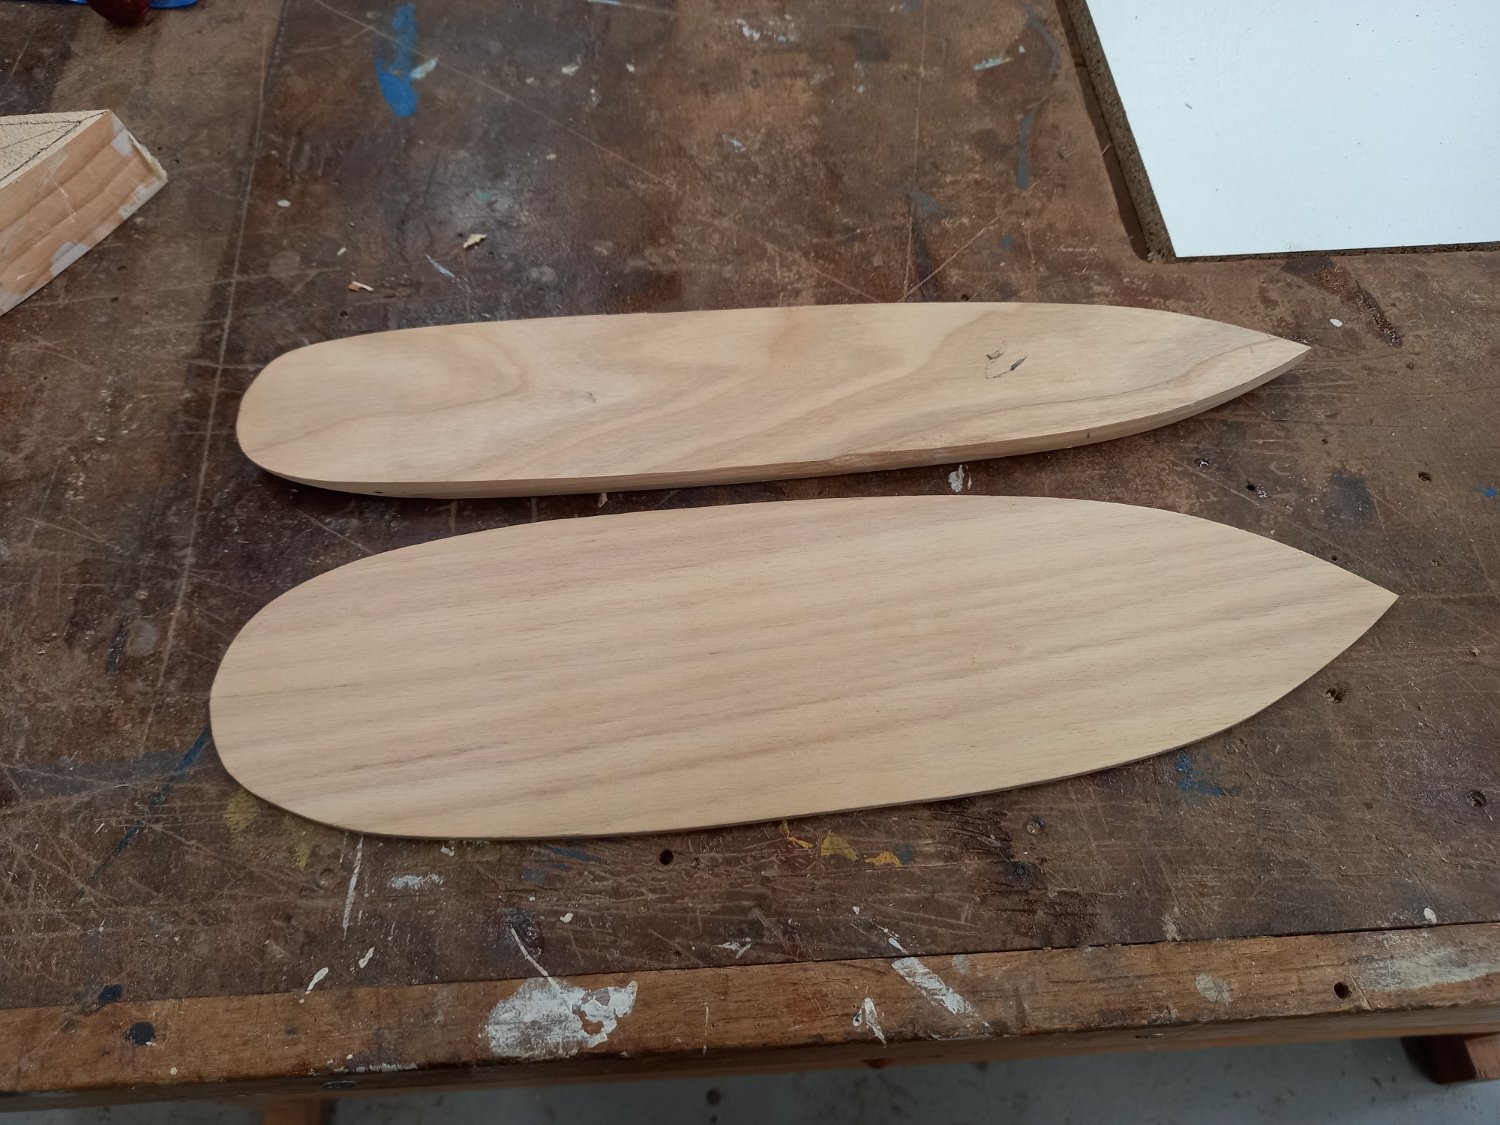
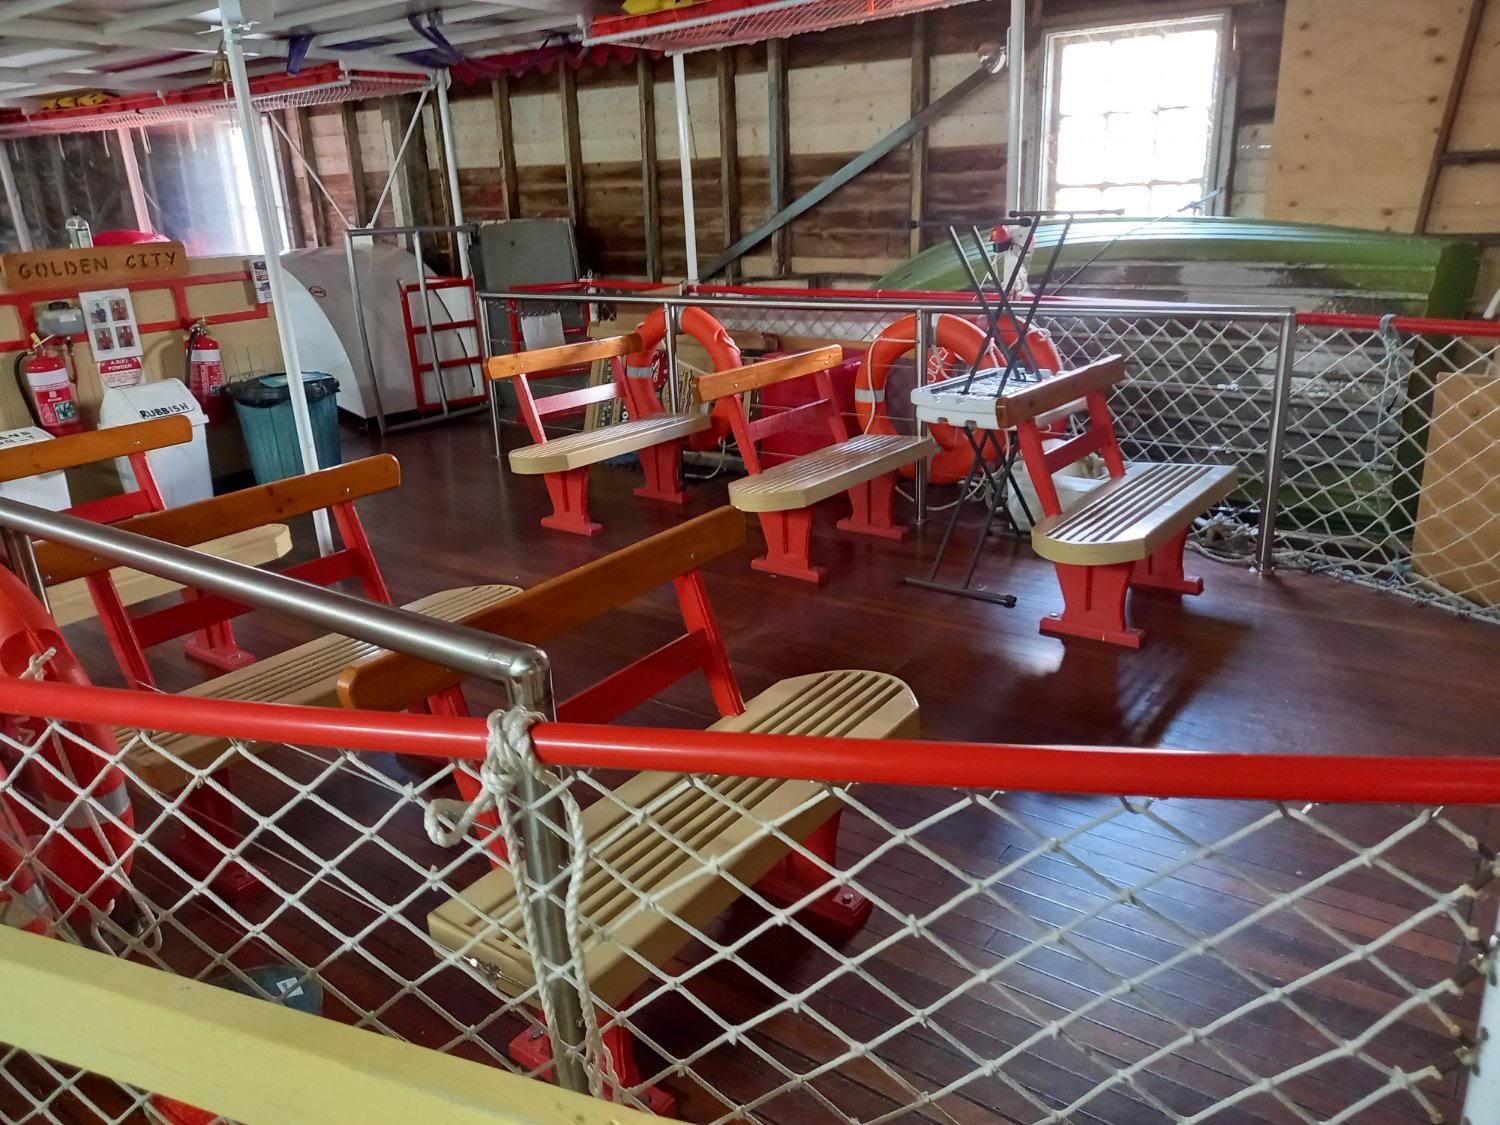
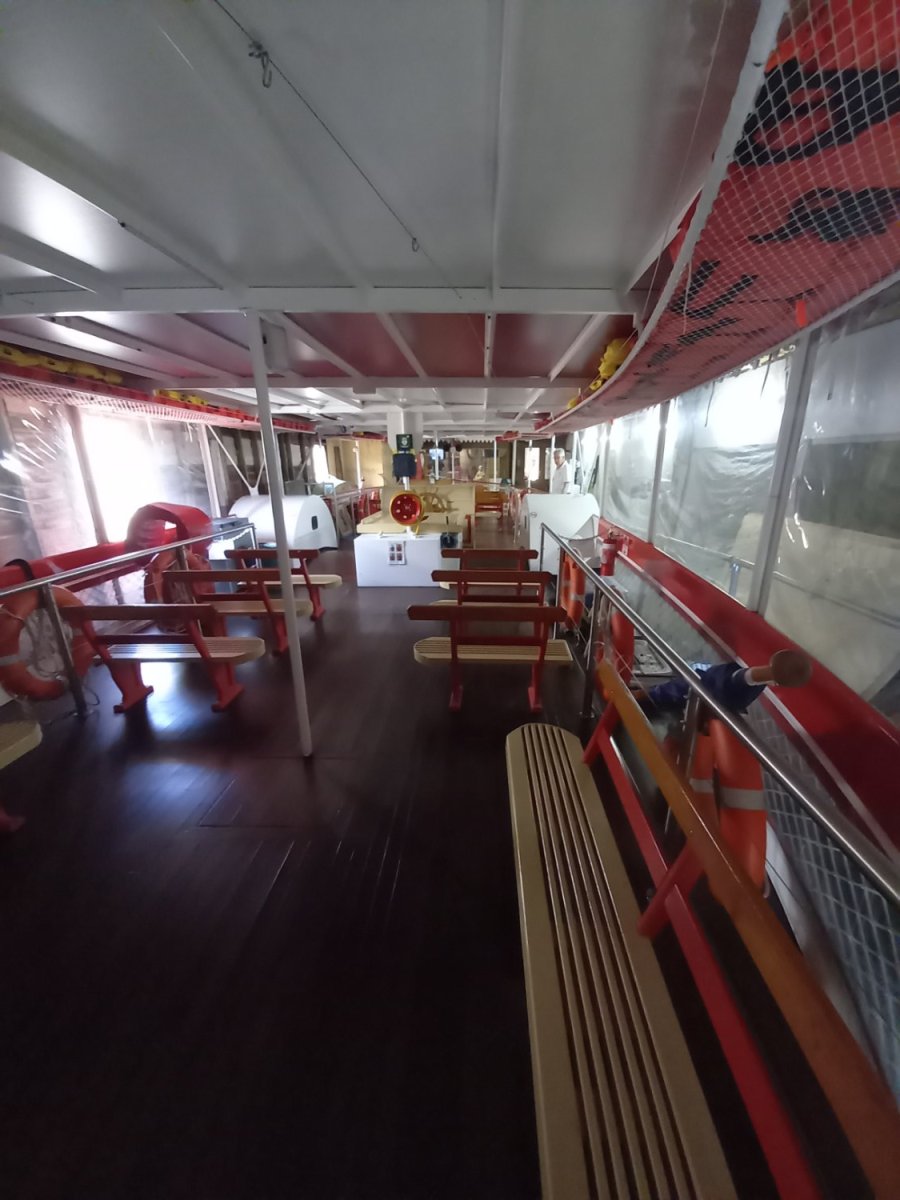
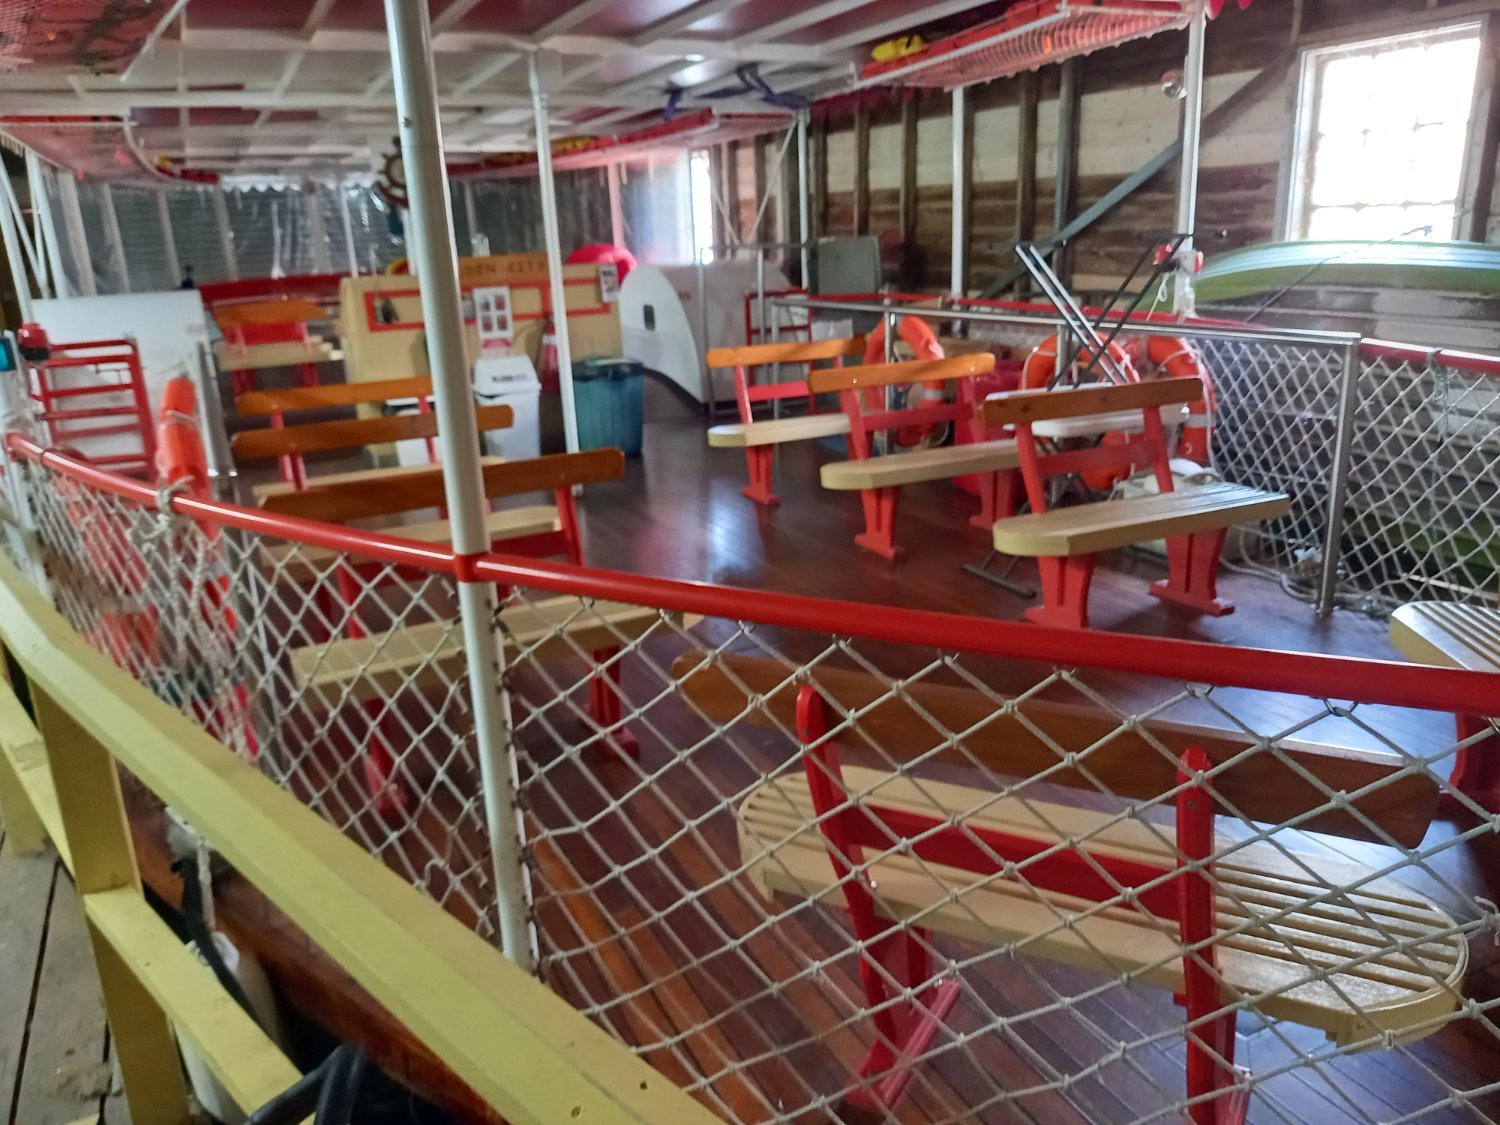
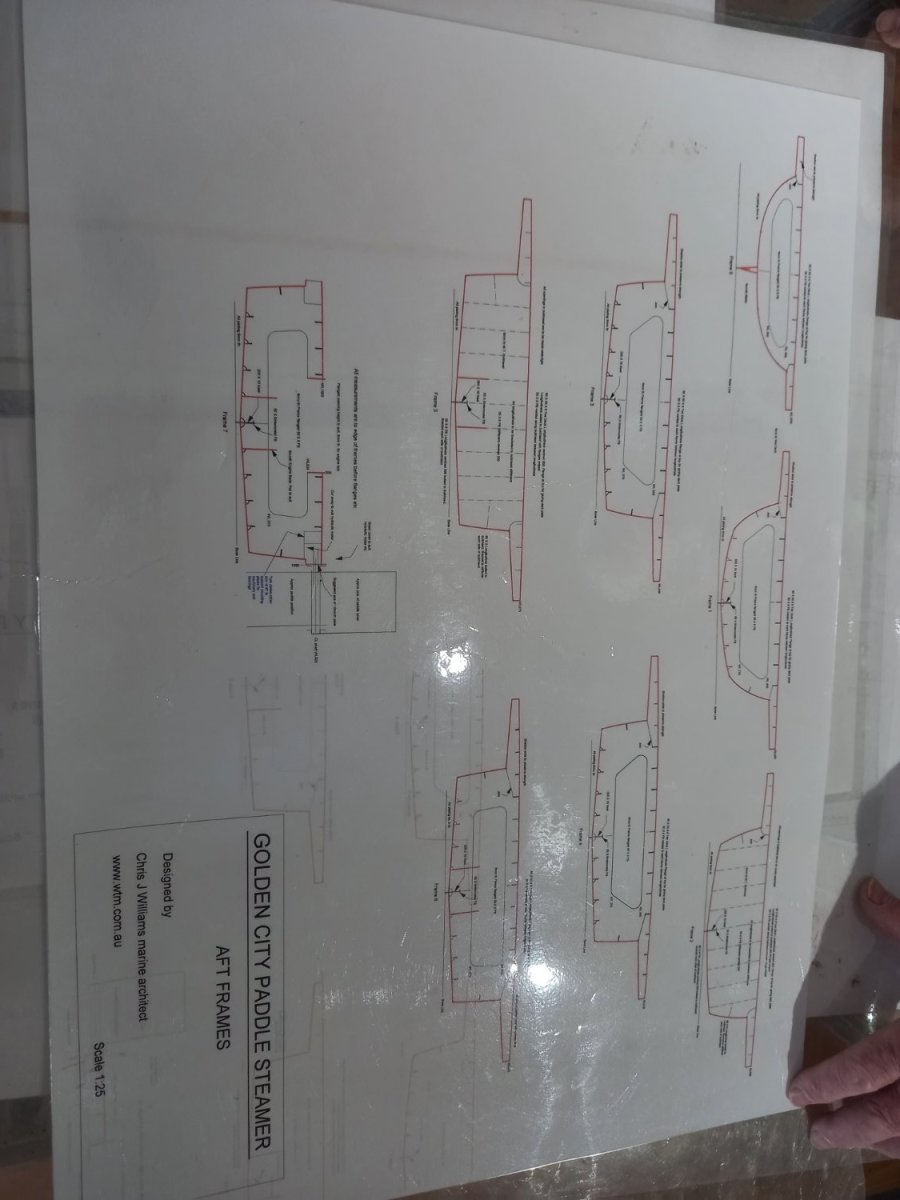
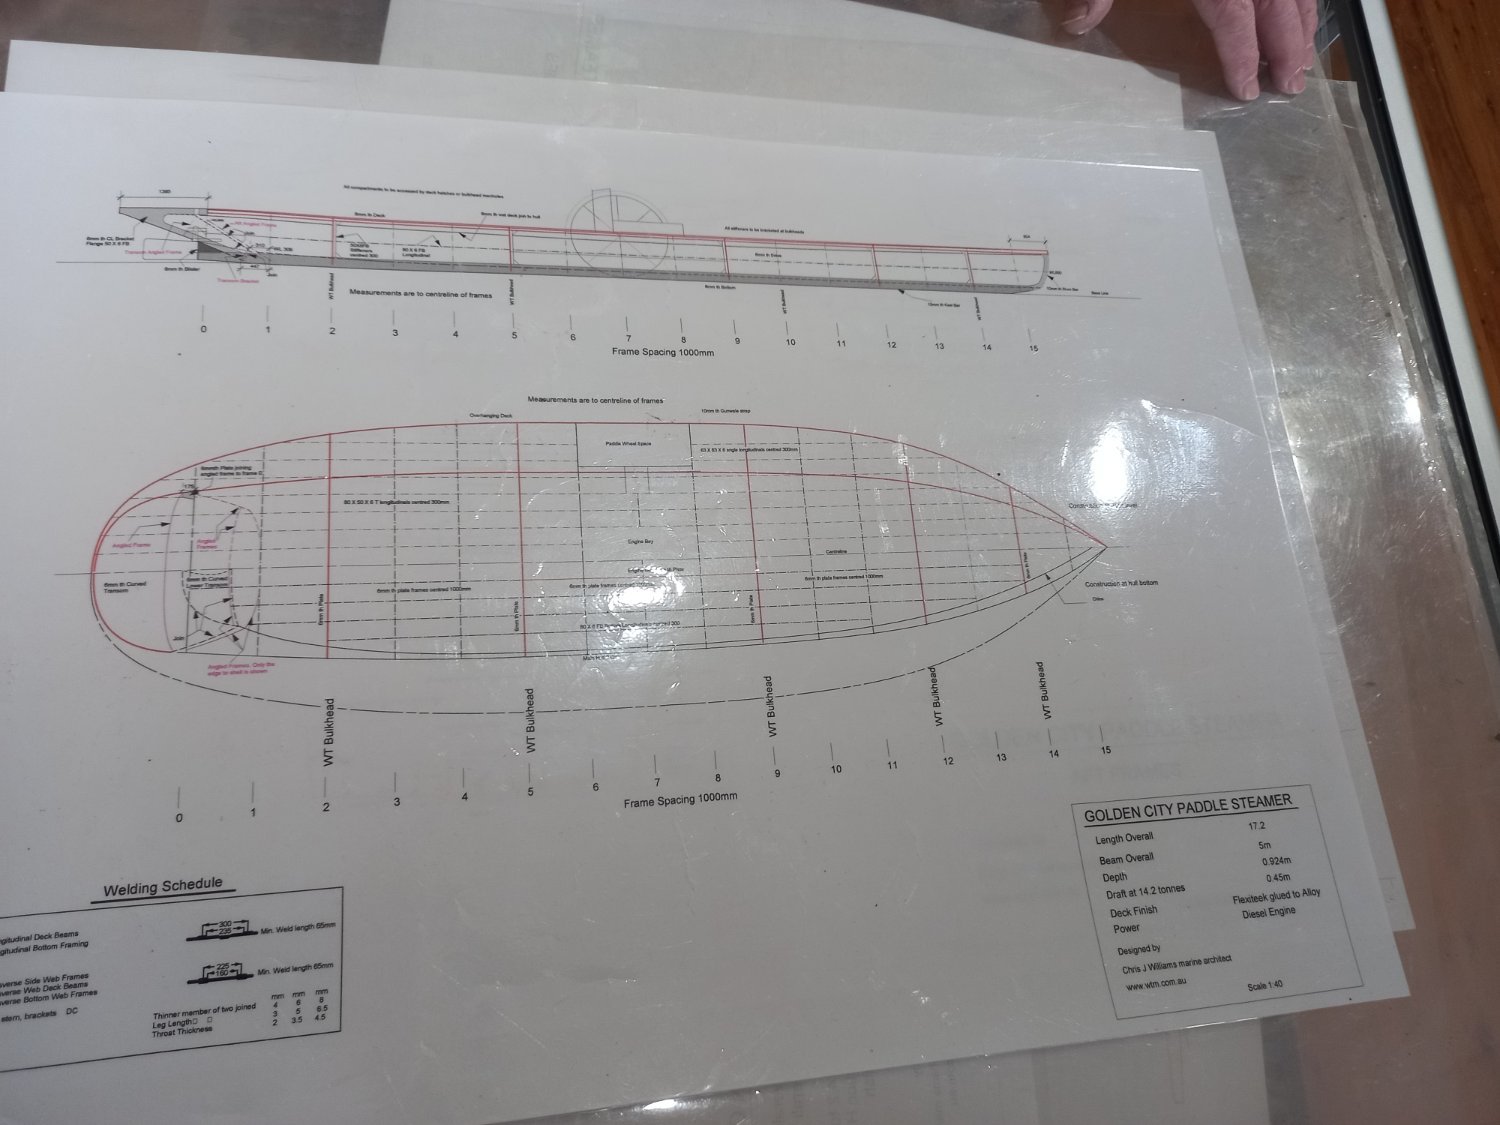
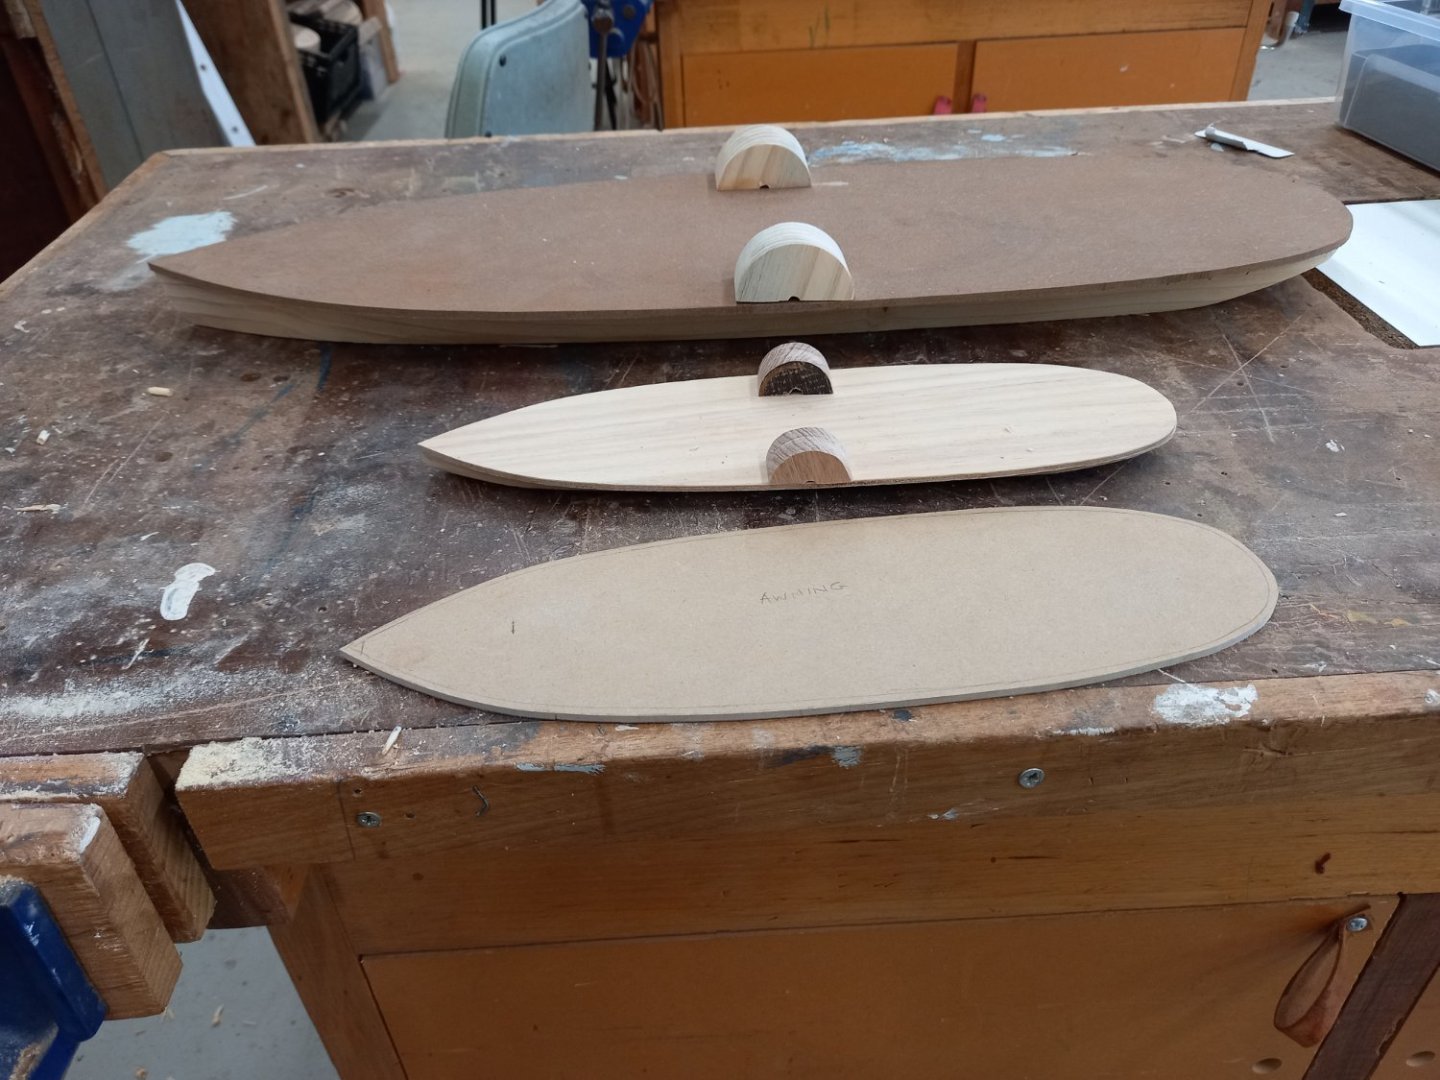
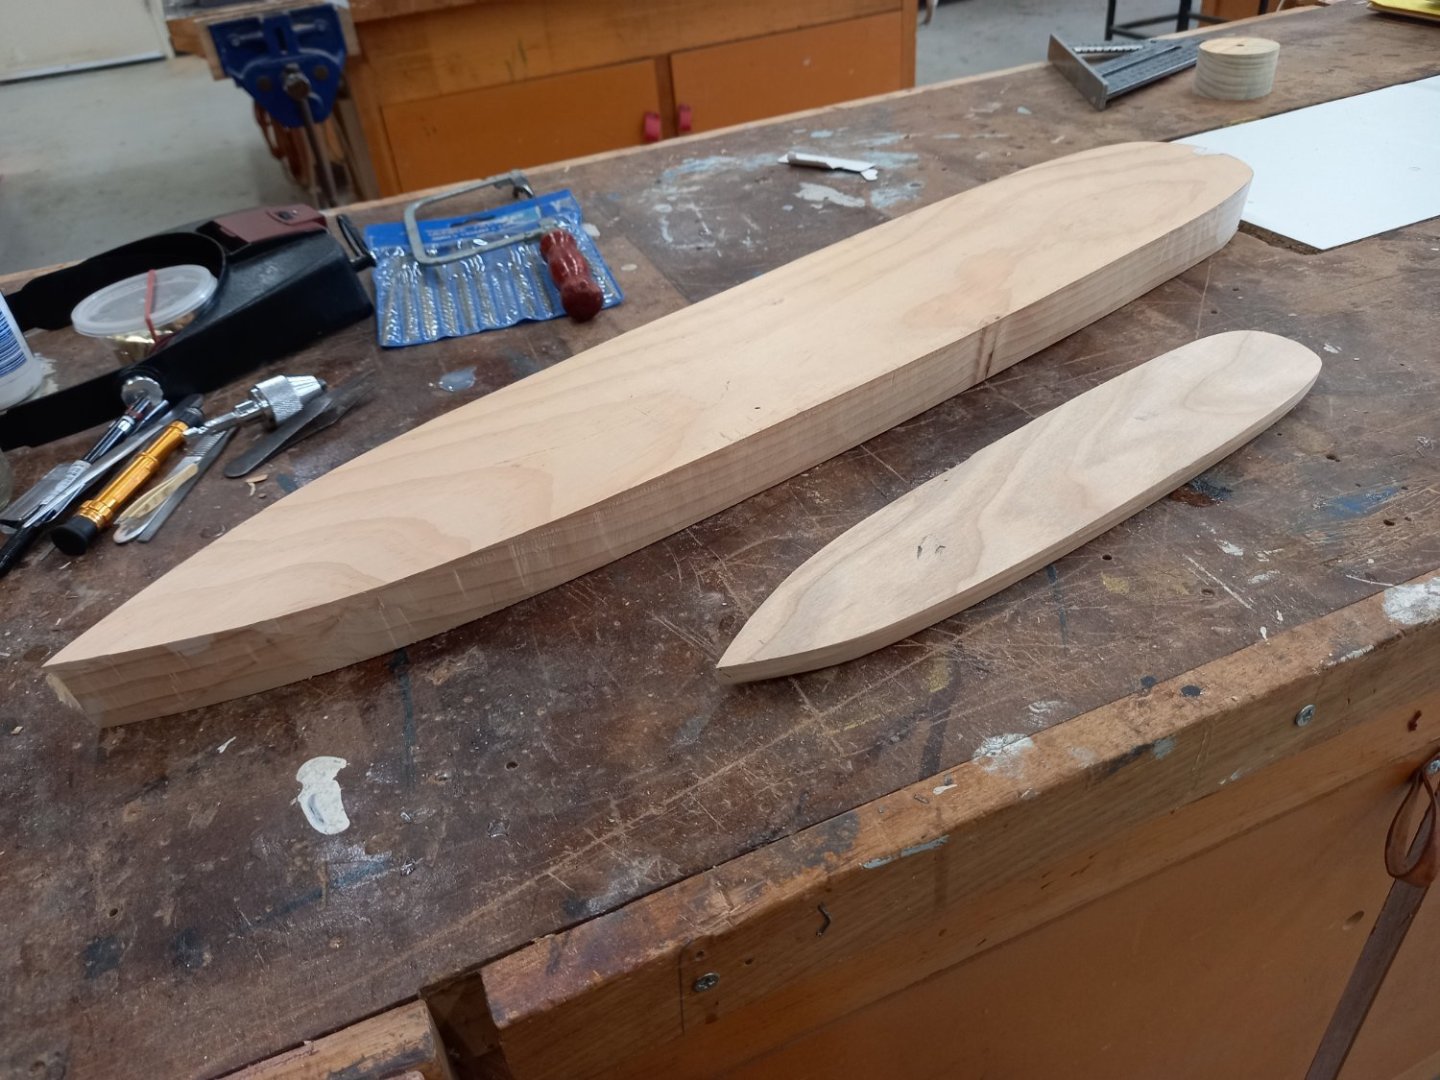
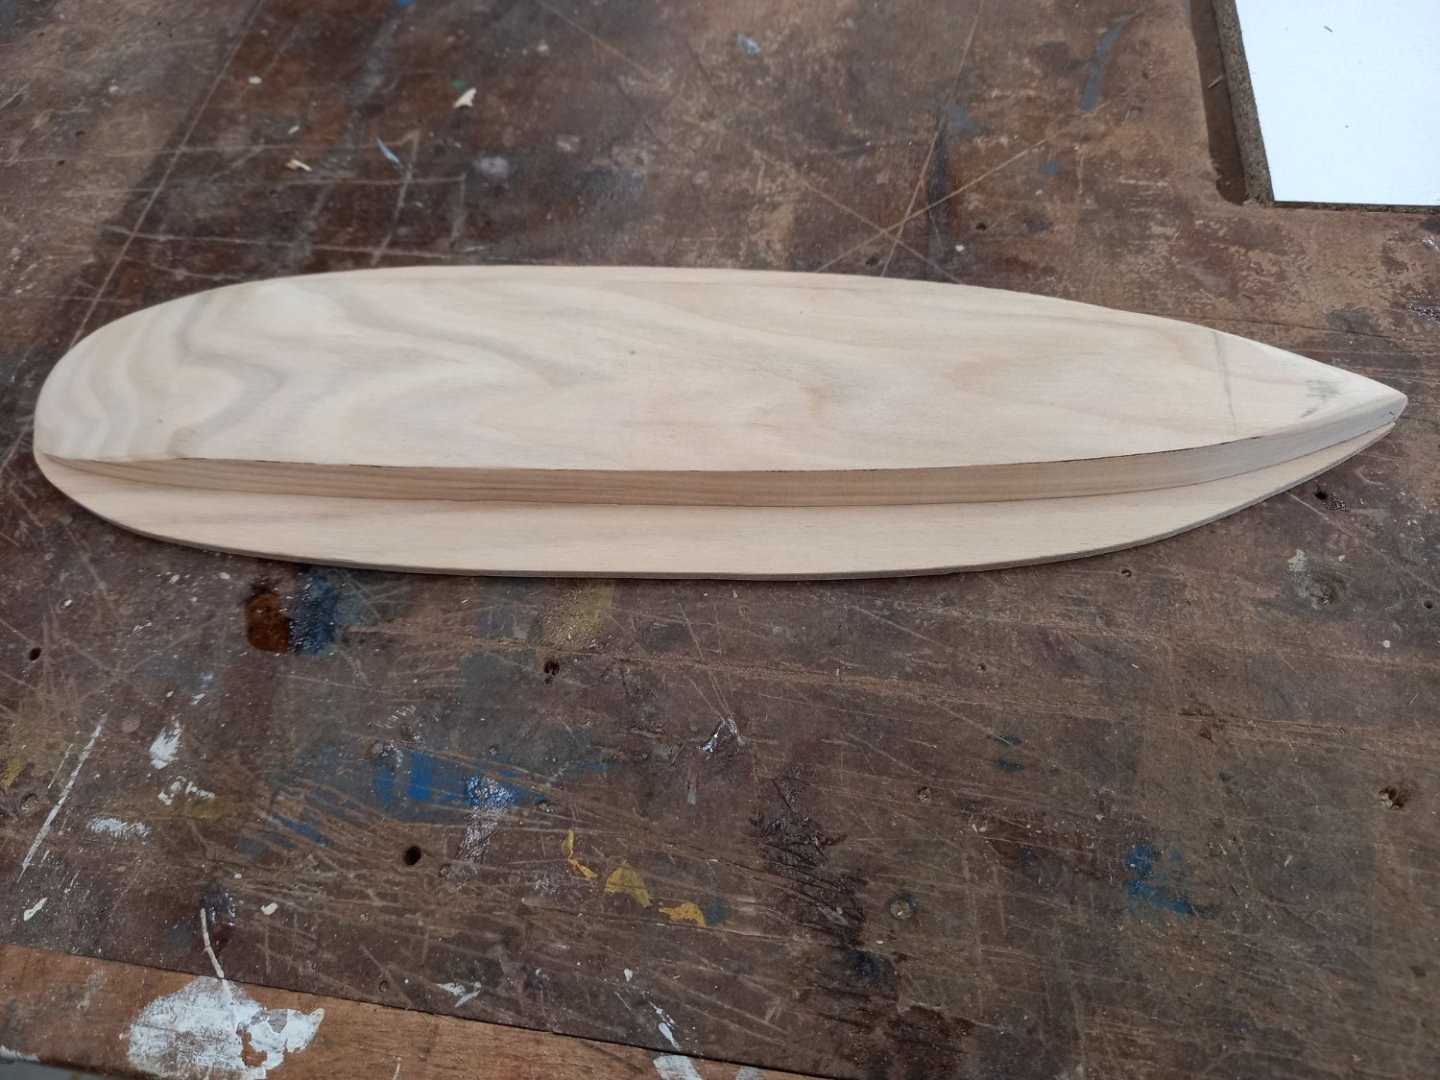
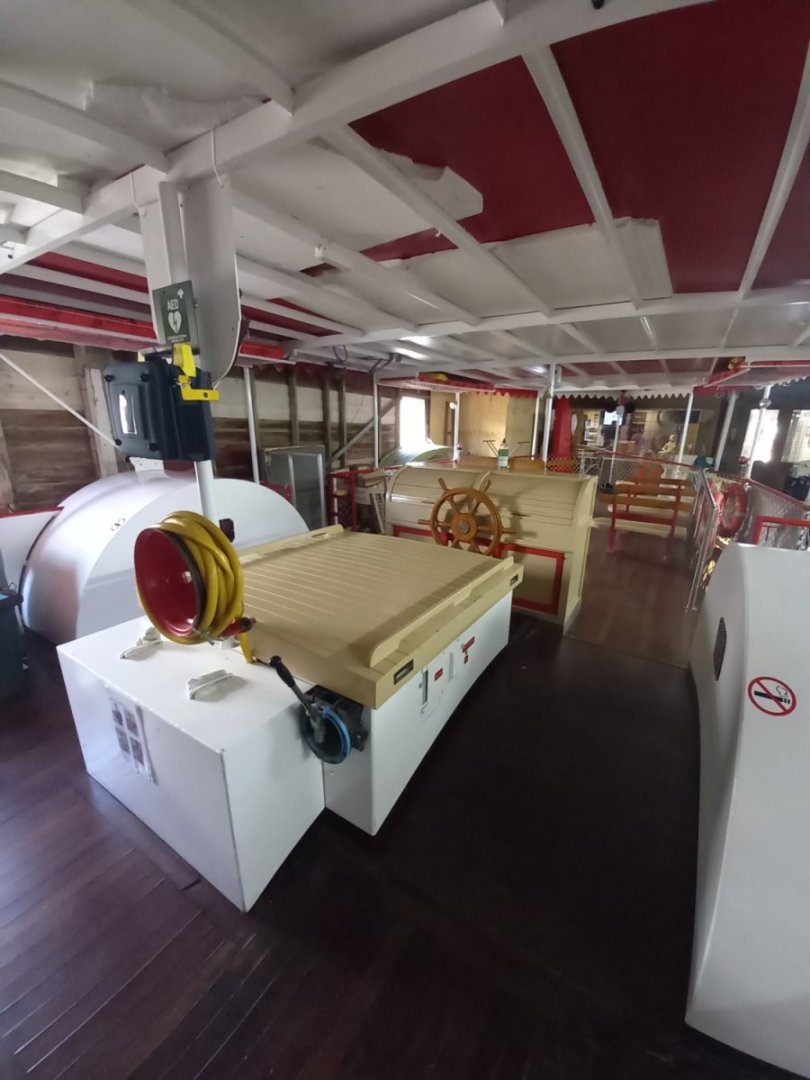
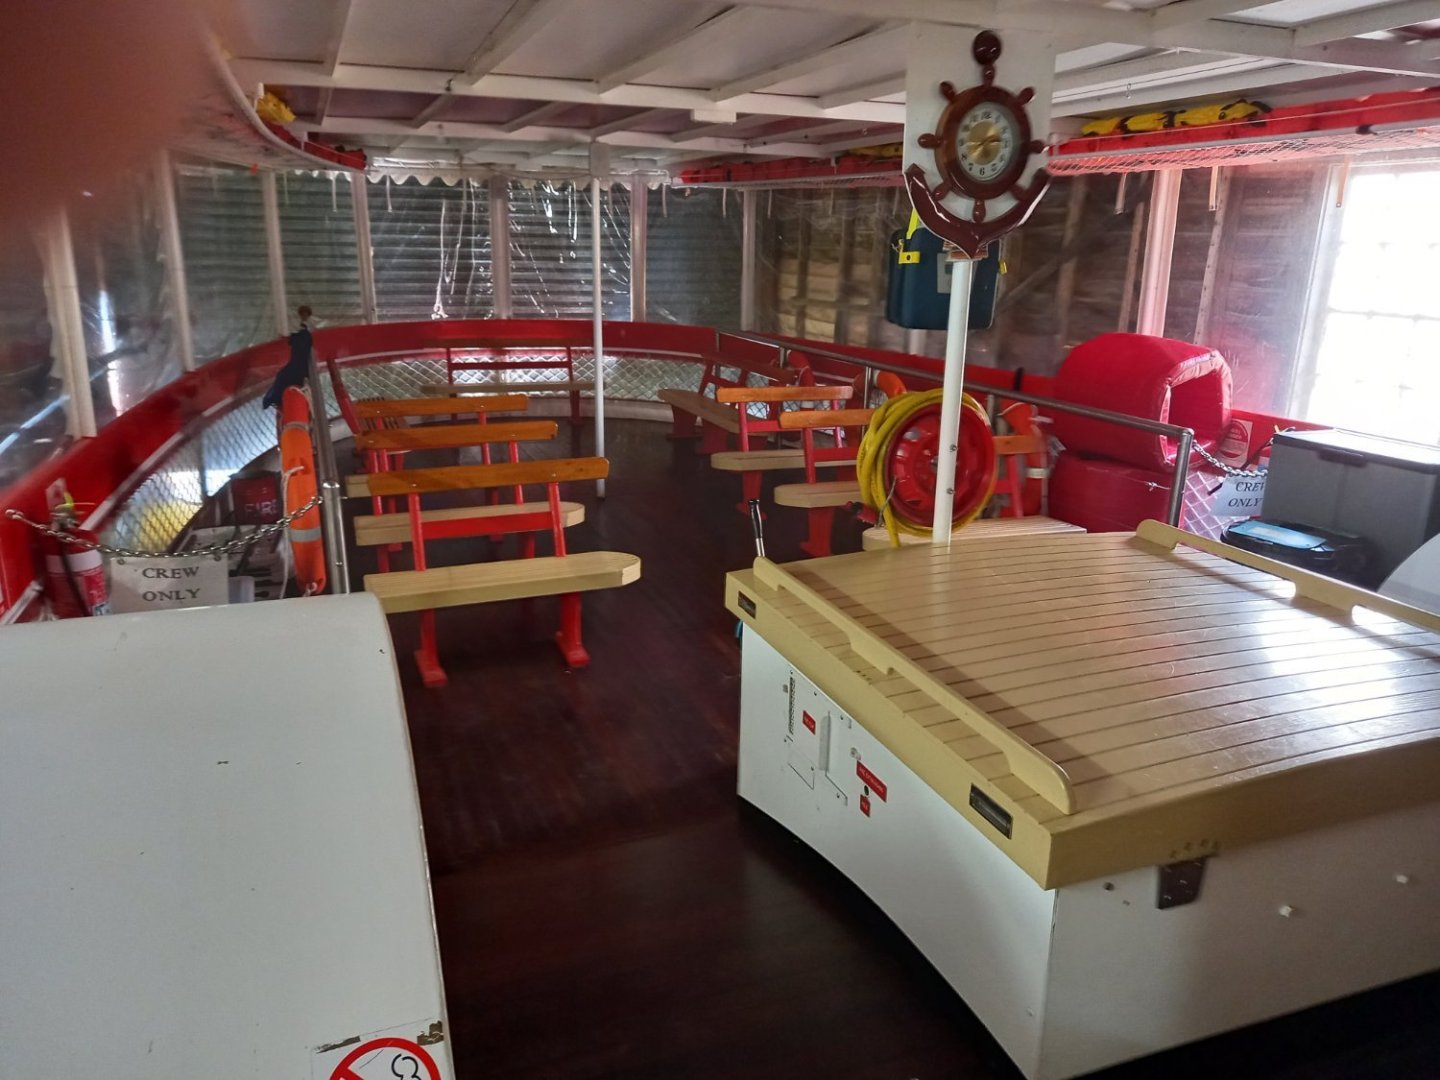
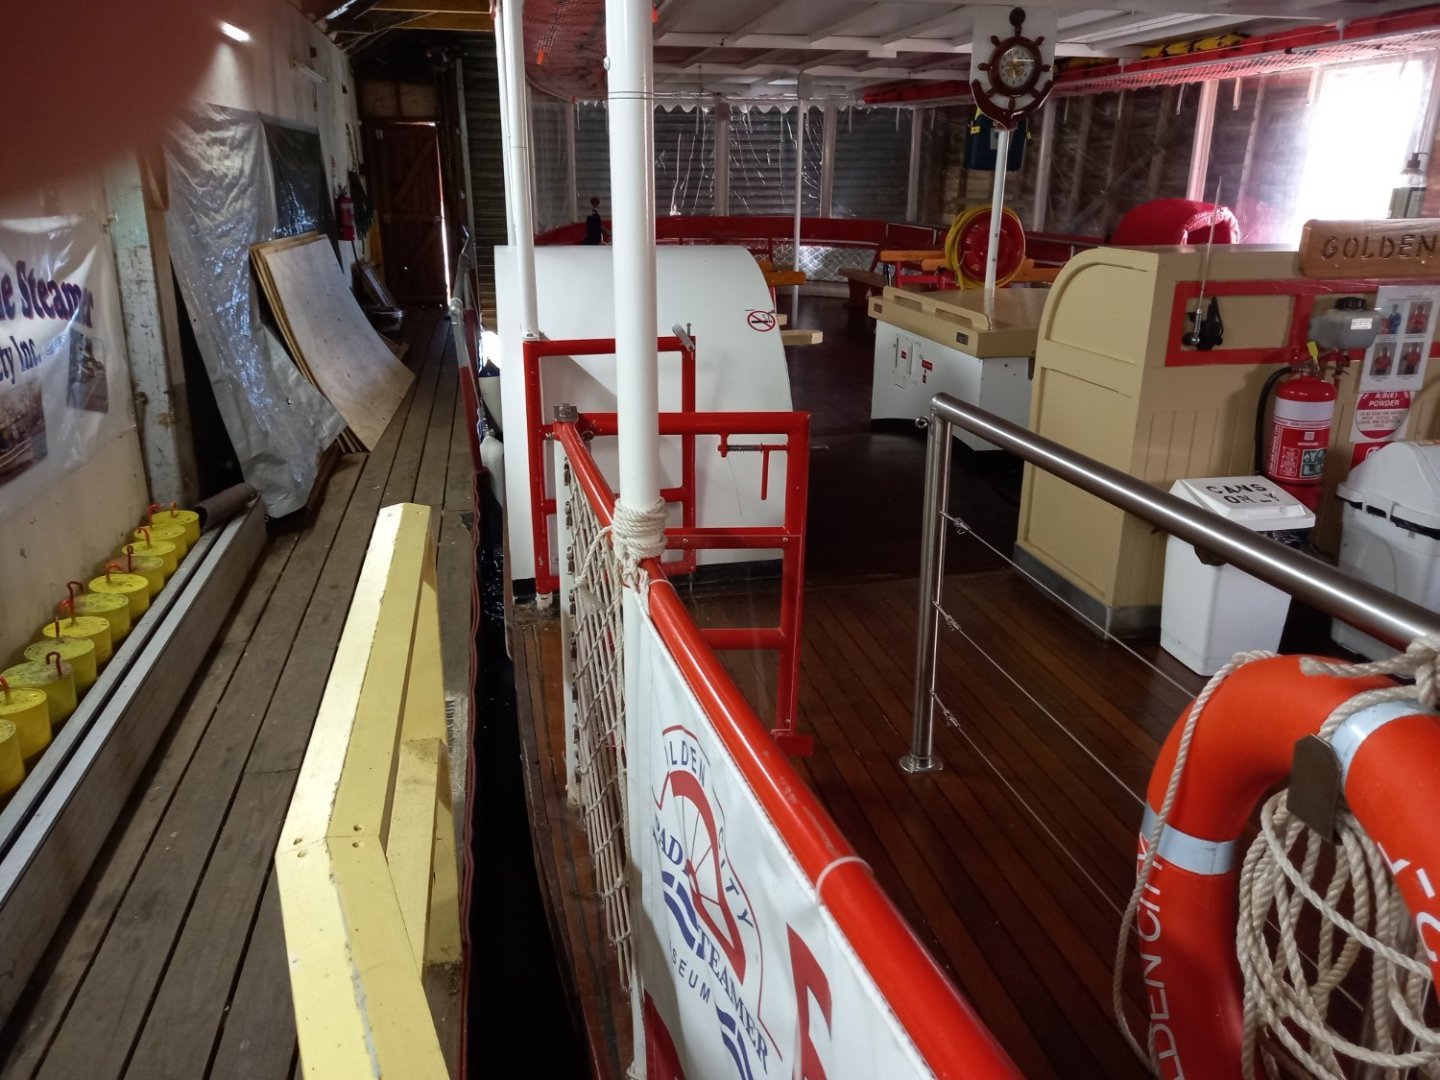
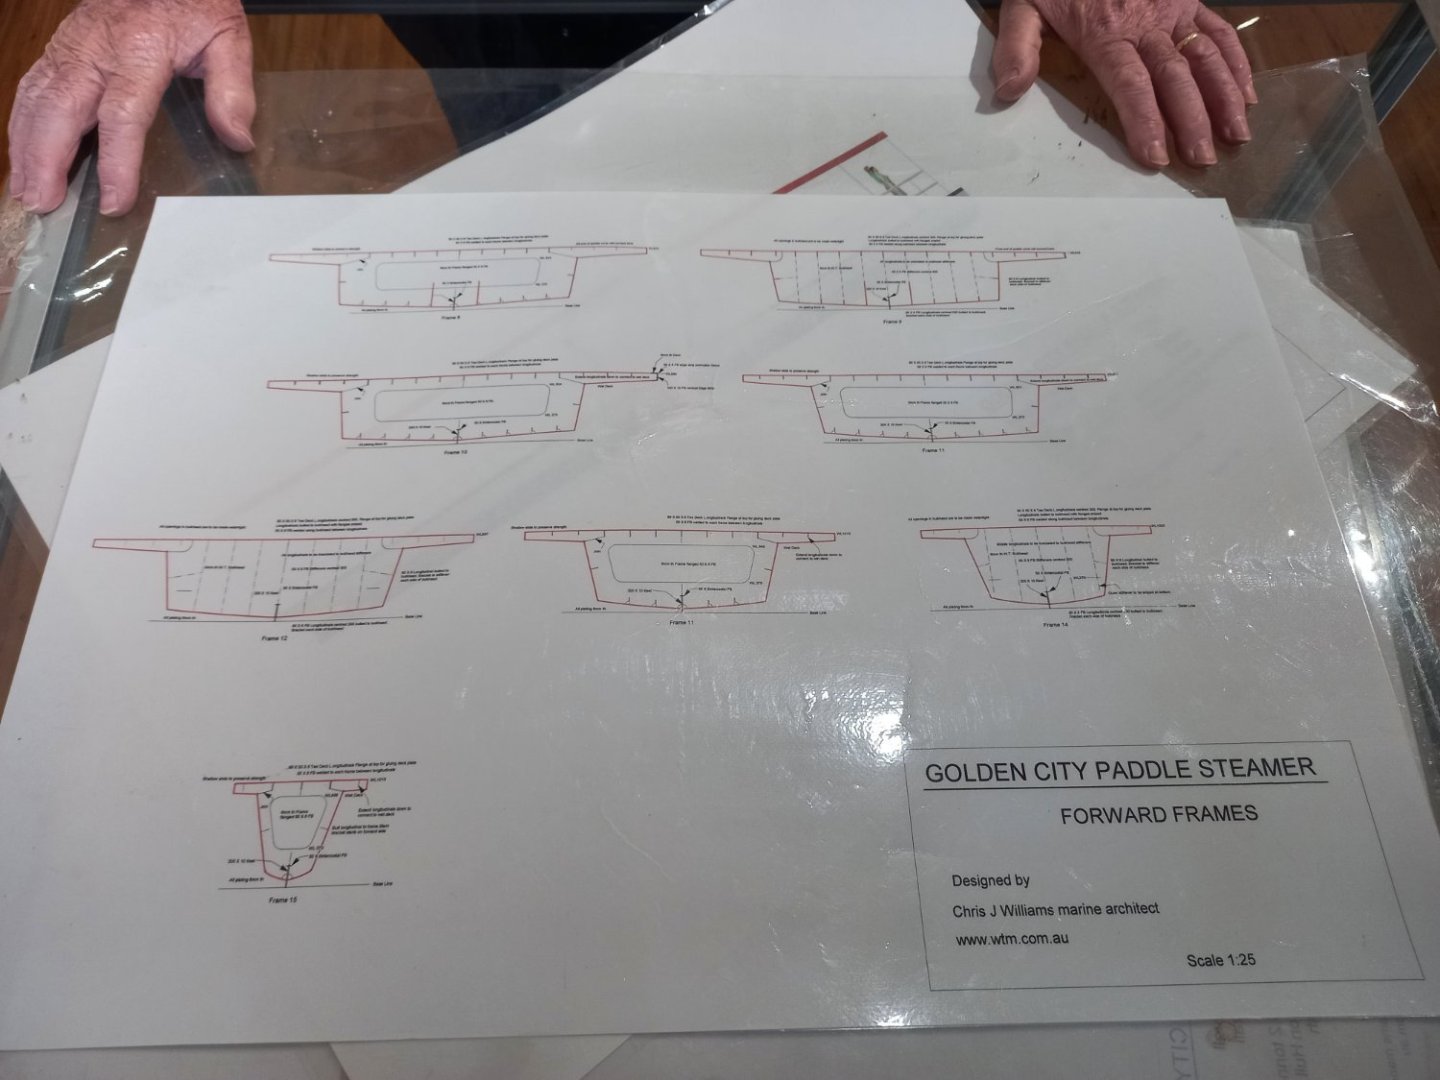
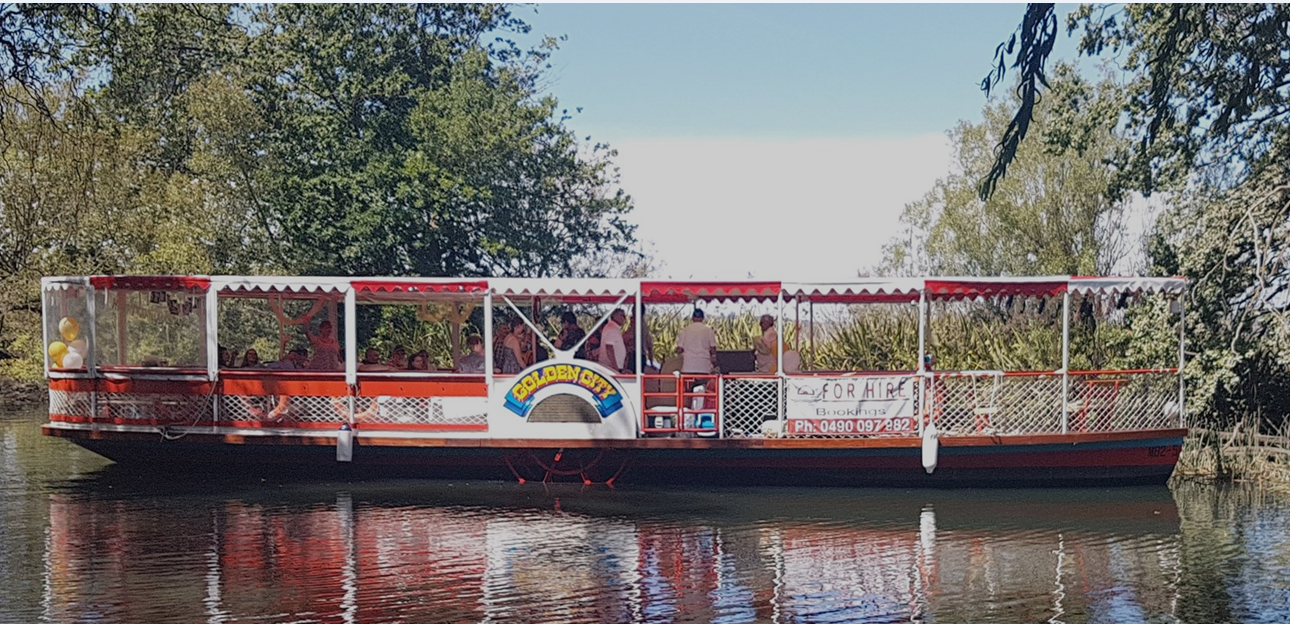
I'm starting on a model of the Golden City, a paddlewheeler which operates on Ballarat's Lake Wendouree, run by volunteers and taking passengers for trips around the lake every summer Sunday (weather permitting). It is a replica of one of the paddlesteamers which did the same thing back around the turn of the 20th century (unfortunately destroyed by fire some years ago). It will be a Solid model, and I'm first making one at 1:50 to iron out the bugs. After that I'll be making another at 1:25 to present to the people who run her, who also run a museum dedicated to the vessel itself and its history. I've spoken to one of the organisers who's very keen on the idea - apart from anything else, visitors to the museum get disappointed when they can't see the vessel if she's out on the lake, so a decent sized model (68 cm or 27 inches long) would be a great help. I've actually started on both models already, and if it all works out I'll simplify the design and make multiple 1:50 models to sell to visitors, as a fund-raiser for both the museum and for the Men's Shed where I make stuff (and which has so many wonderful boys' toys, like bandsaws, lathes, bench saws etc etc). Here are some photos of her And some I took close up while she was in her boatshed. Plus photos of the plans which the museum kindly got out for me, and which I then redrew to make the model. And here are the smaller and larger models so far. As you can see in the first and second photos the deck overlaps the hull considerably. Upside down, showing the overlap. And with 'paddleboxes' - just cut from a bit of 20mm wood with a hole saw and cut in half. Comparative sizes - 1:50 in front and 1:25 behind. The two together with paddleboxes. The bit in front is the roof awning, which fortunately is flat. And another shot of the two together. (The phone camera reduces the size contrast in the first photo and exaggerates it in the second.) I think the most difficult bit for me will be the posts that hold up the awning and the railings. I can't see any way to make them except out of wire, and I'm currently rubbish at soldering. Well, another skill I'll need to learn . . . Steven


- 29 replies
-
- 17
-
-
- Paddlewheeler
- Paddleboat
- (and 6 more)
-
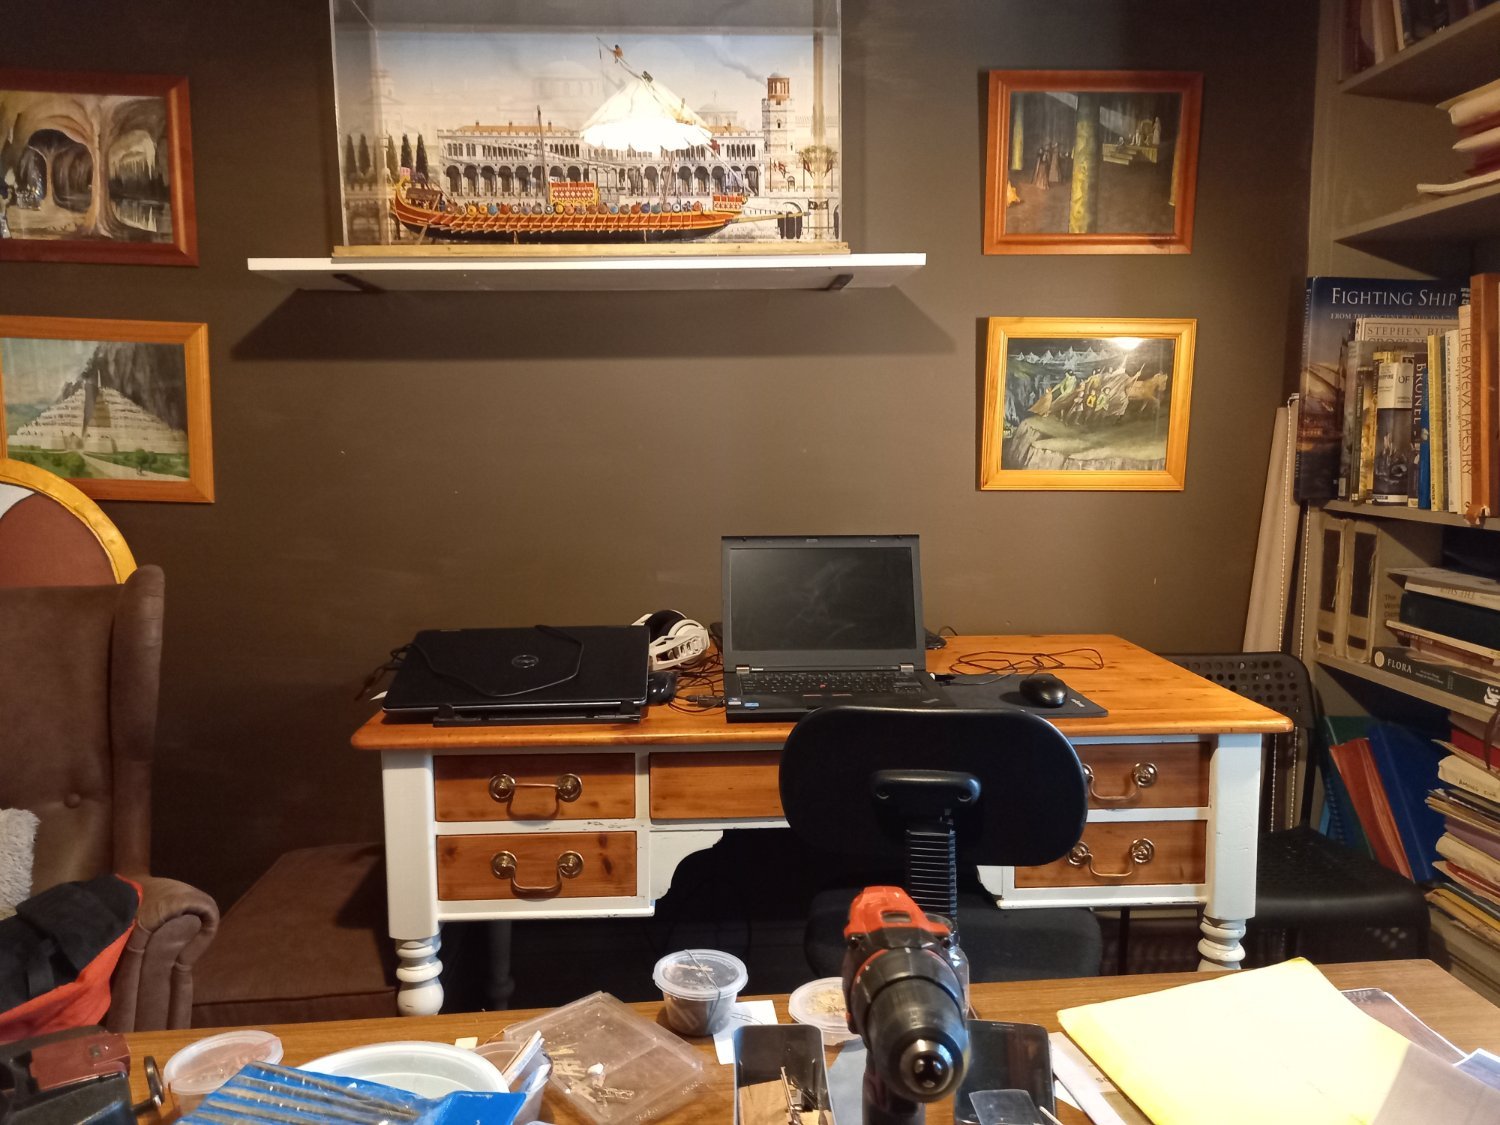
Thanks, Druxey, Pat, and those who've added likes. No problem with the corners. It's now encased in its acrylic box again, and the desk that was below it is back in position. Steven

-
Just to alert anybody who was planning to make a display case like mine, I have just discovered (when I shifted the case to a new room and took the opportunity to do a minor repair, for which I had to buy glue) that what I'd thought was clear polycarbonate sheet was actually acryclic. I've edited the posts that describe the process (from #1608 onward) to get rid of the error. And now she's in a new spot, here's a photo of her from two previously undiscovered angles. Pretty cool IMHO. Steven