Dandyfunk
-
Posts
58 -
Joined
-
Last visited
Recent Profile Visitors
1,189 profile views


-
Hi Dandyfunk,
Nice to contact you. Look, I have been looking for information about BW Latham. Today I am working in this model from AliExpress. It's an easy model but have some details. In my case is the planking in the stern. Information given with kit is poor. I revised your information in MSW but there is not pics or details related to this matter. Could be possible to get it? Thanks in advance.
Regards
Pablo Peralta
-
 timo4352 reacted to a post in a topic:
Glad Tidings by Dandyfunk - FINISHED - Model Shipways - Scale 1:24 - ultracondensed repost
timo4352 reacted to a post in a topic:
Glad Tidings by Dandyfunk - FINISHED - Model Shipways - Scale 1:24 - ultracondensed repost
-
tasmanian reacted to a post in a topic:
Benjamin W Latham by Dandyfunk - Model Shipways - Scale 1:48 - American Fishing Schooner
-
jbford reacted to a post in a topic:
Glad Tidings by Dandyfunk - FINISHED - Model Shipways - Scale 1:24 - ultracondensed repost
-
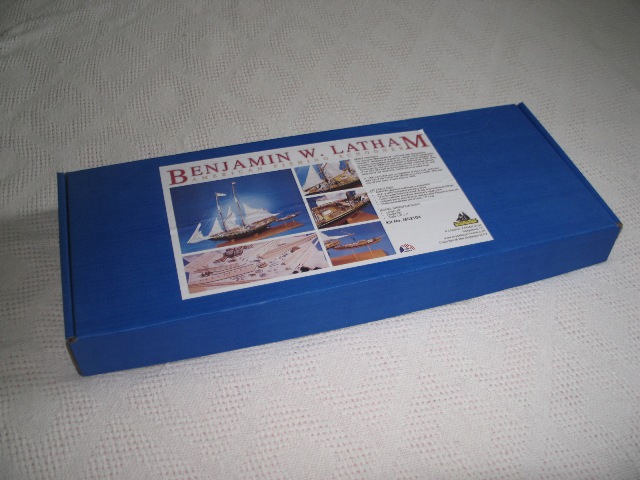
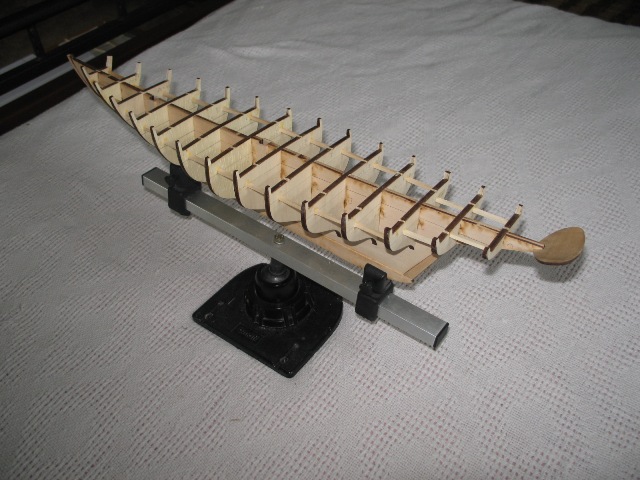
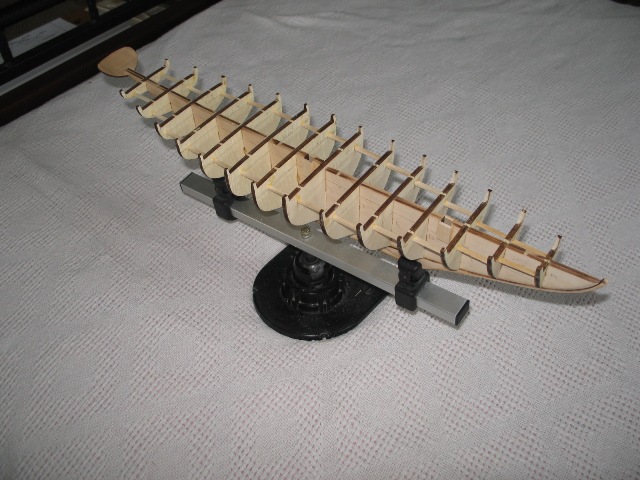
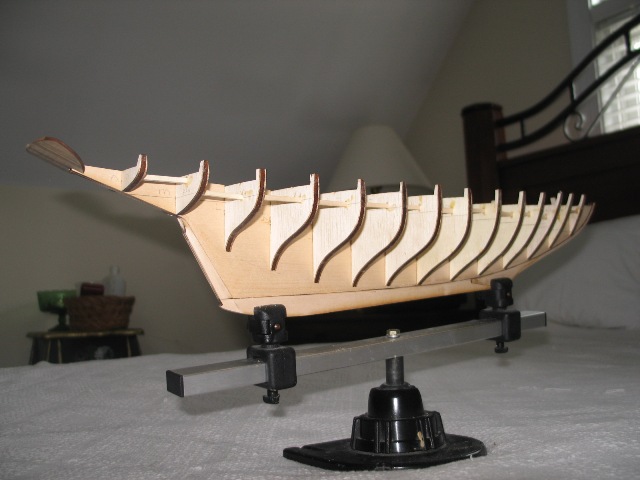
 I am finally resuming wooden ship kit building with Model Shipways' Benjamin Latham-American Fishing Schooner. I mentioned in previous posts that I had started the kit a number of years ago as my second build and intended to complete it. When I looked at the work already done I found the results unsatisfactory based on my current skills and that a tremendous amount of rework was required to get the kit to an acceptable condition. So, I took advantage of one of Model Expo's sales and decided to start from scratch. Following are pictures of the kit box and the new packaging plus photos of the center keel with the keel/stem, stern post and the bulwarks installed. I have cut the rabbett and done some tapering on the bulwark stanchions. The plans provide cuts to be made on the bulwarks to fair the hull prior to installing but I decided to fair the bulwarks after I installed them. That is one reason I added the spacer supports between the bulwarks and used epoxy to install the bulwarks. I have got the transom curved but will need to be careful with installing it to get the proper angle. I am looking forward to this build, I anticipate it will be a lot of fun and provide a lot more rigging detail than I have done on previous builds. It is also a big enough scale to permit a lot of detail to be added as I desire.
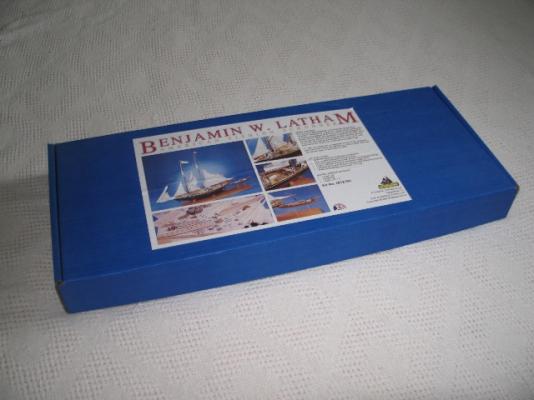


-
Richard: I really like your A-frame, you did a very good job on it. Obviously your soldering skills have improved significantly. The card stock for the dredge guards looks good, if it works use it!
-
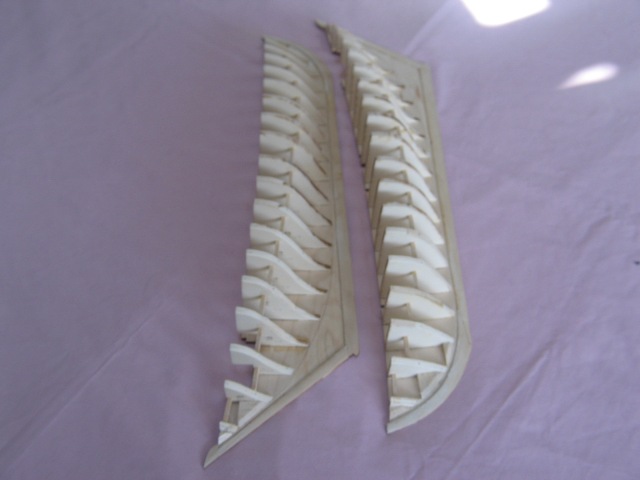
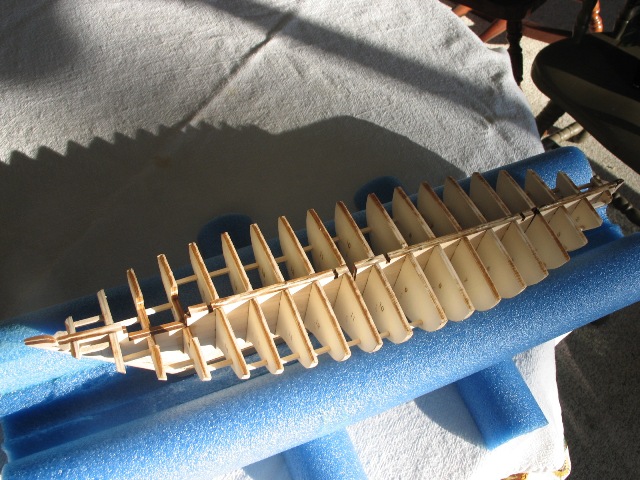
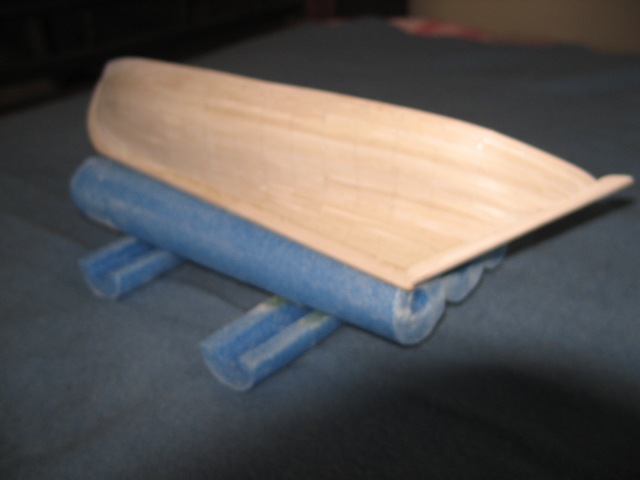
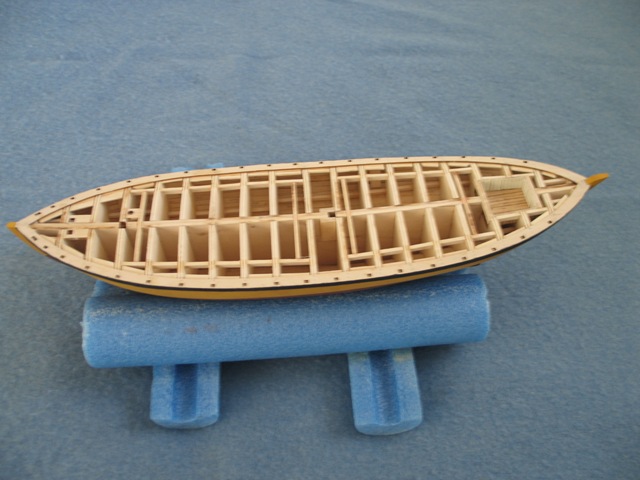
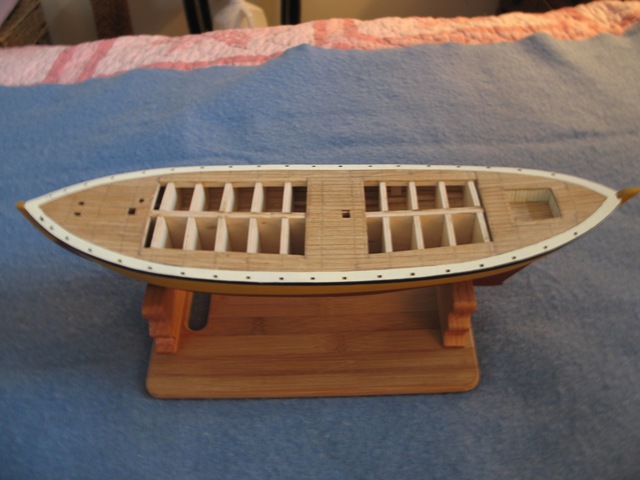
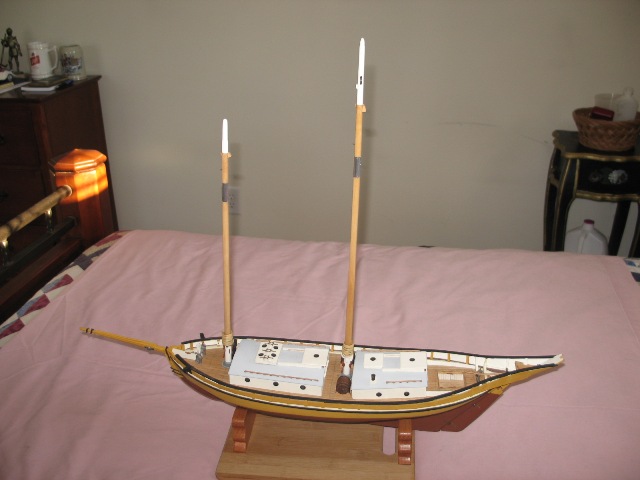
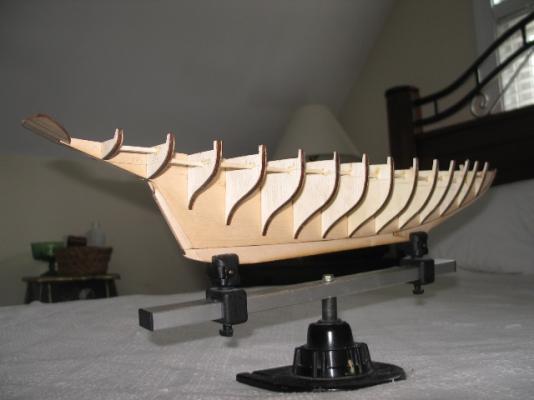
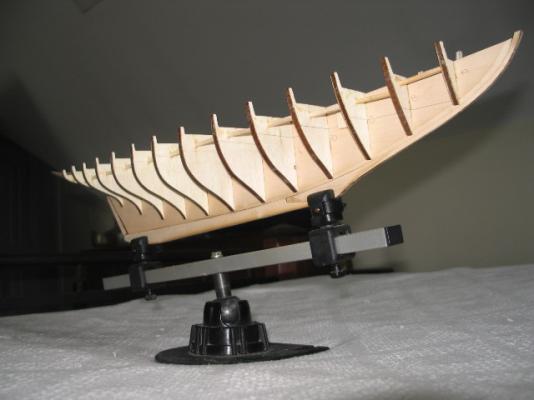
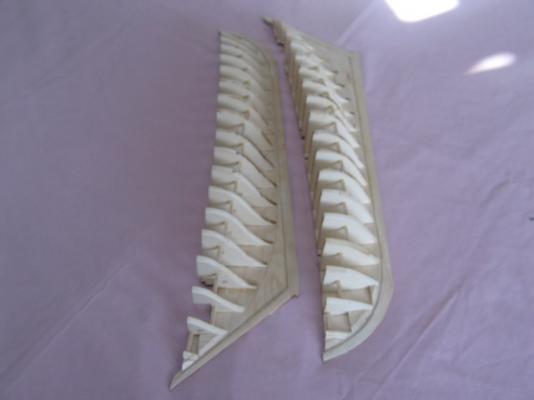
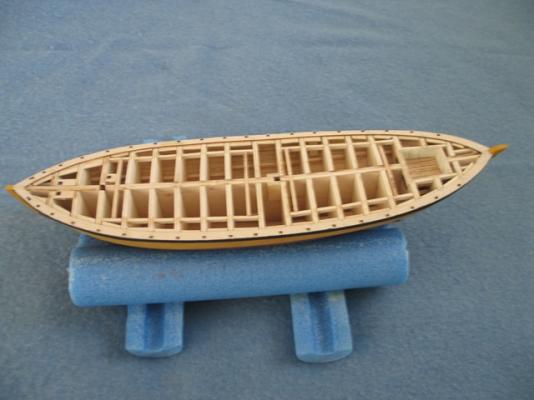
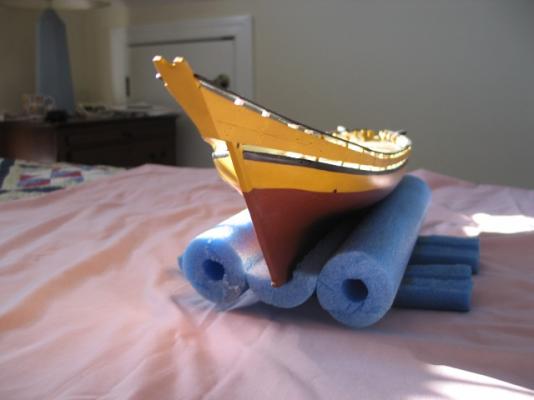
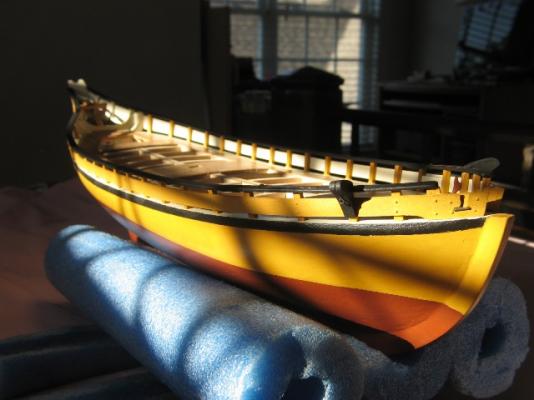
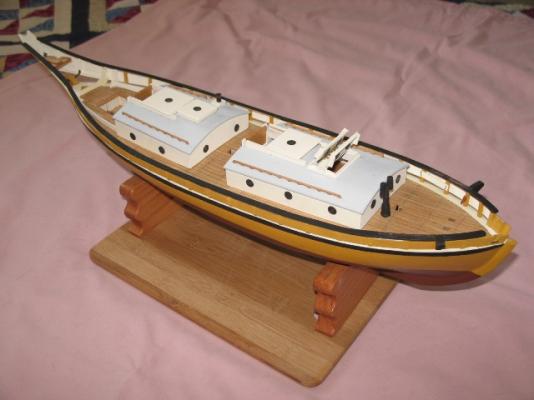
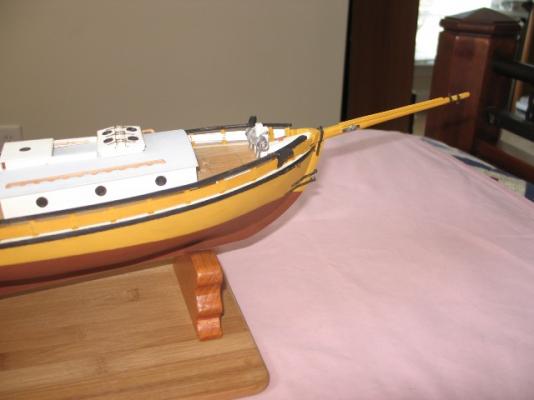
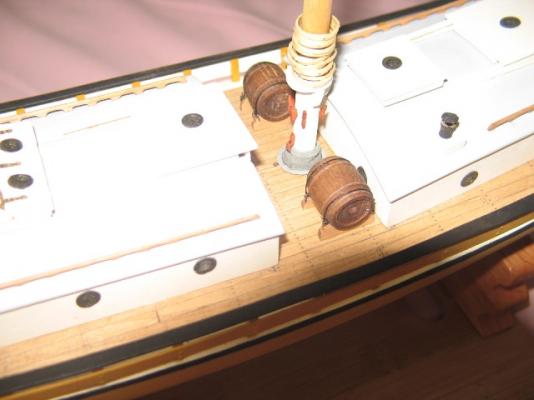
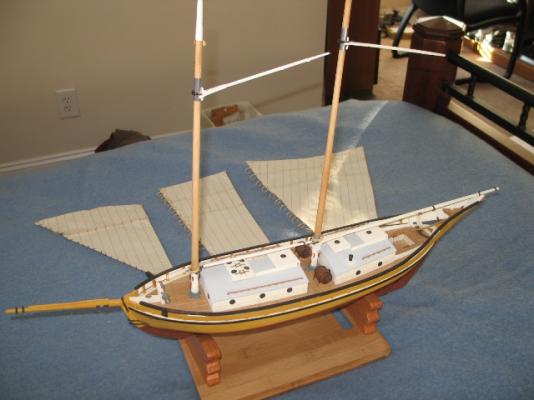
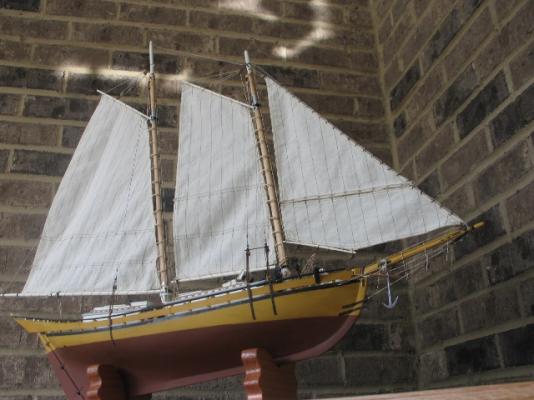
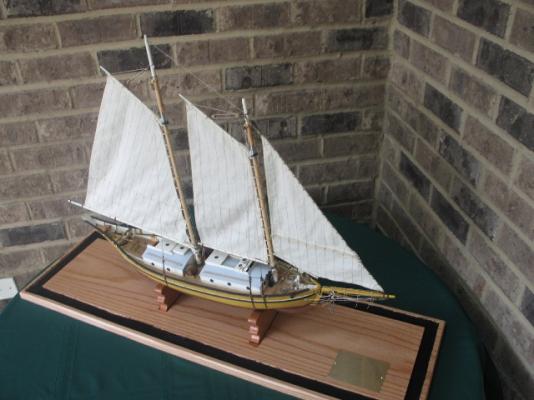
This picture of the center keels with the bulwarks installed shows the first decision I had to make regarding the build. Due to Model Shipway’s manufacturing limitation of 3/16” thick laser cutting, the ¼” thick keel was provided in 2 -1/8” thickness keels to be glued together to obtain the ¼” thickness. The decision I had to make was when to glue the keel halves together, before planking the hull or planking the hull halves then gluing together. I was leaning towards planking the halves separately due to the ease of working with a half that would lay flat on the workbench then realized that this method would not permit me to eyeball the hull to try to keep the port and starboard planking symmetrical. I glued the keel halves with the bulwarks together then planked the hull in the normal fashion. Center keel halves assembled and ready for planking. Here is a photo of the planked hull. Planking was quite a task due to every plank other than the sheer strake having to be spiled. Fortunately, Model Shipways provided a planking layout with the kit that permitted me to cut the plank shape then sand or cut to fit the actual condition. This, I believe, saved me from creating a lot of scrap. Beams, carlins, bitt blocks, stack support, cockpit and planksheer installed. I also installed the floor drain in the cockpit and drain outlet in the hull at this time. Deck has been planked and nailed with .020 pins. I used scotch tape run across the deck in line with the bulwarks to maintain a reasonably straight line of nails. After I used the pins, I had second thoughts that perhaps I should have used treenails but it was too late to make any changes. Two photos of the installed bulwark stanchions and strakes, tombstone, knightheads, hawse timbers, caprail and catheads. The instruction manual advised that installing the bulwark strakes may be the most difficult aspect of the kit and after careful study, I believed the manual. I intentionally took my time and gave each step thought before I proceeded. I deviated from the instruction manual’s method of installing the bulwark strakes. The manual advised to install the strakes then install the tombstone to the installed strakes. I could only envision the strakes not lining up with the tombstone resulting in a tilted and/or twisted tombstone. I decided to install the tombstone to the strakes off of the model then fit the strakes/tombstone assembly to the knees and stanchions. I was satisfied with the results and think this was best way for me to go. A photo of the completed cabins with operating skylights and companionways. I also replaced the kit provided galley and cabin heater stacks with stacks fabricated from brass tubing and sheet based on information from Howard Chapelle’s ‘The American Fishing Schooner’. I must also mention that I received some tremendous help from MSW members on how to fabricate the working hinges for the skylights. I now know how to anneal brass which was and will be extremely beneficial in fabricating metalwork. Just a photo of the installed bowsprit and windlass These photos are of the masts, mast hoops and mast coat. I replaced the kit provided laser cut mast hoops with hoops made from 1/32” thick basswood strips that were soaked, wrapped around a drill bit then glued to form the hoop. I also added brass wire to simulate rivets. I was not too keen on the instruction manual’s suggestion to form the mast coats from a block of wood, so I fabricated the mast coats from 2 pieces of brass sheet and some loose woven cloth. One piece of brass was used for the mast band, one piece for the deck band and the cloth was glued to both to make the mast coat. After I assembled the mast coats I wasn’t happy with the appearance but I installed them and decided they looked pretty good after all. This photo just shows the booms, gaffs and sails that I had decided to sew for the model. The kit does not provide cloth for sails but does provide a sail plan. Due to the scale and minimal amount of rigging I decided to make sails even though sails seem to be a controversial subject. There was only one problem, I had never used a sewing machine but did have access to one. After lots of practice and remakes, I was happy with the sails and think they do add this model. Complete!! I am going to add more photos of the completed model to the Completed Kit Gallery in an effort to post in the appropriate forum.


- 1 reply
-
- 2
-
-
- pinky schooner
- glad tidings
- (and 2 more)
-
Richard: I used cheesecloth for the netting and was happy with the results. I think the cheesecloth will provide a finer and looser mesh than the onion bag. I, also, am assuming you have some cheesecloth already in the kitchen so you don't have to make another purchase.
-
Richard: I really like the pump you made, it turned out quite well. Personally, I would polish the brass and install the pumps with the polished brass and not paint them. The decking also has turned out looking good but I have to ask if Model Expo supplied the decking with the kit with such a range of shades? I have built several Model Shipways' kits and have never seen such a range of shades in any of their wood.
-
Richard; I have been following your build with interest as the Willie Bennett was, also, my first build. My recollection of how I did the trailboards was that I cut out the pattern provided with the kit then, with the finest brush I could find, painted provided pattern then glued the the pattern to the trailboard. I believe this turned out well as there was no way I could have painted the trailboard by hand. My build is in the gallery if you might consider this tact. Your build is coming along quite well but there is a good bit more to come. Be patient and don't hurry!
-
Josh: Your Willie Bennett is looking great and I, also, want to thank you for your compliments on my Willie Bennett post in the Completed Ships Gallery. It seems that the Willie Bennett is a first build for a lot of people and it is a good kit to learn a lot of the necessary skills of wood ship model building.
-
Hamilton: I am glad you are enjoying the Glad Tidings build, I certainly did. Regarding the mast coats, I used the kit provided brass strip for the mast band. cut a ring from some brass sheet for the deck band and used some loose woven thin cloth from a shipping bag I had. I then used a socket from a socket wrench set with the necessary OD to accommodate the ID of the deck band, placed a drill bit of size to approximate the mast OD in the socket. This gave me a step down in diameters as a pattern for the mast coat. I also allowed clearance on the mast and deck bands to allow for the cloth used. I wrapped the cloth around the drill bit and socket then slid the deck band over cloth and onto the socket then slid the mast band over the cloth and drill bit. It required some fiddling to get a reasonable fit then I glued the cloth to the deck and mast bands while still installed on the socket and drill bit. As I said in my build log, at first I wasn't satisfied wiith the result but then installed the mast coats on the masts and deck and said this worked out a lot better than I thought. I will also say that I was glad to see that my build log was of benefit to others, it made doing the log worth the effort.