Dee_Dee
-
Posts
286 -
Joined
Recent Profile Visitors
2,728 profile views


-
 BETAQDAVE reacted to a post in a topic:
The Kit-Basher's Guide To The Galaxy
BETAQDAVE reacted to a post in a topic:
The Kit-Basher's Guide To The Galaxy
-
gulfmedic1 reacted to a post in a topic:
The Kit-Basher's Guide To The Galaxy
-
shipman reacted to a post in a topic:
A method for making panelled sails using paper
-
mtaylor reacted to a post in a topic:
A method for making panelled sails using paper
-
A method for making panelled sails using paper
Dee_Dee replied to Cathead's topic in Masting, rigging and sails
Cat, Very nice sails. For sewing on the bolt rope, I would like to make two product suggestions. I totally understand why your using the needle threader instead of a needle. There are needles with fine / small eyes, but threading them is a real pain. For the needle, I would like to suggest using "Beadalon Collapsible Eye Needles". The eyes collapse to the same size as the needle. These come in multiple sizes and should be faster to sew with. These are readily available, this link is to confirm the exact product. https://www.michaels.com/beadalon-fine-collapsible-eye-needles/M10427044.html There are other 'collapsible eye' needles, but I find these best for actual sewing. For the thread, Nymo is a beading thread that is a single ply and very fine. It's a nylon fiber and very strong. What's nice about this thread, it does not fray (untwist) very easily and if it does, nearly impossible to see. This needle and thread combination would allow sewing 'thru' the bolt rope instead of around it. Nymo Thread Size Thickness OO ? O 0.15mm / 0.006 in B 0.20mm / 0.008 in D 0.30mm / 0.012 in F 0.35mm / 0.014 in This link will provide info on available colors https://www.firemountaingems.com/search?keywords=nymo+thread .- 49 replies
-
- 2
-
-
- sails
- sail panels
- (and 1 more)
-
VTHokiEE reacted to a post in a topic:
Glad Tidings by Dee_Dee & Glacial Boat Works - Model Shipways - 1:25
-
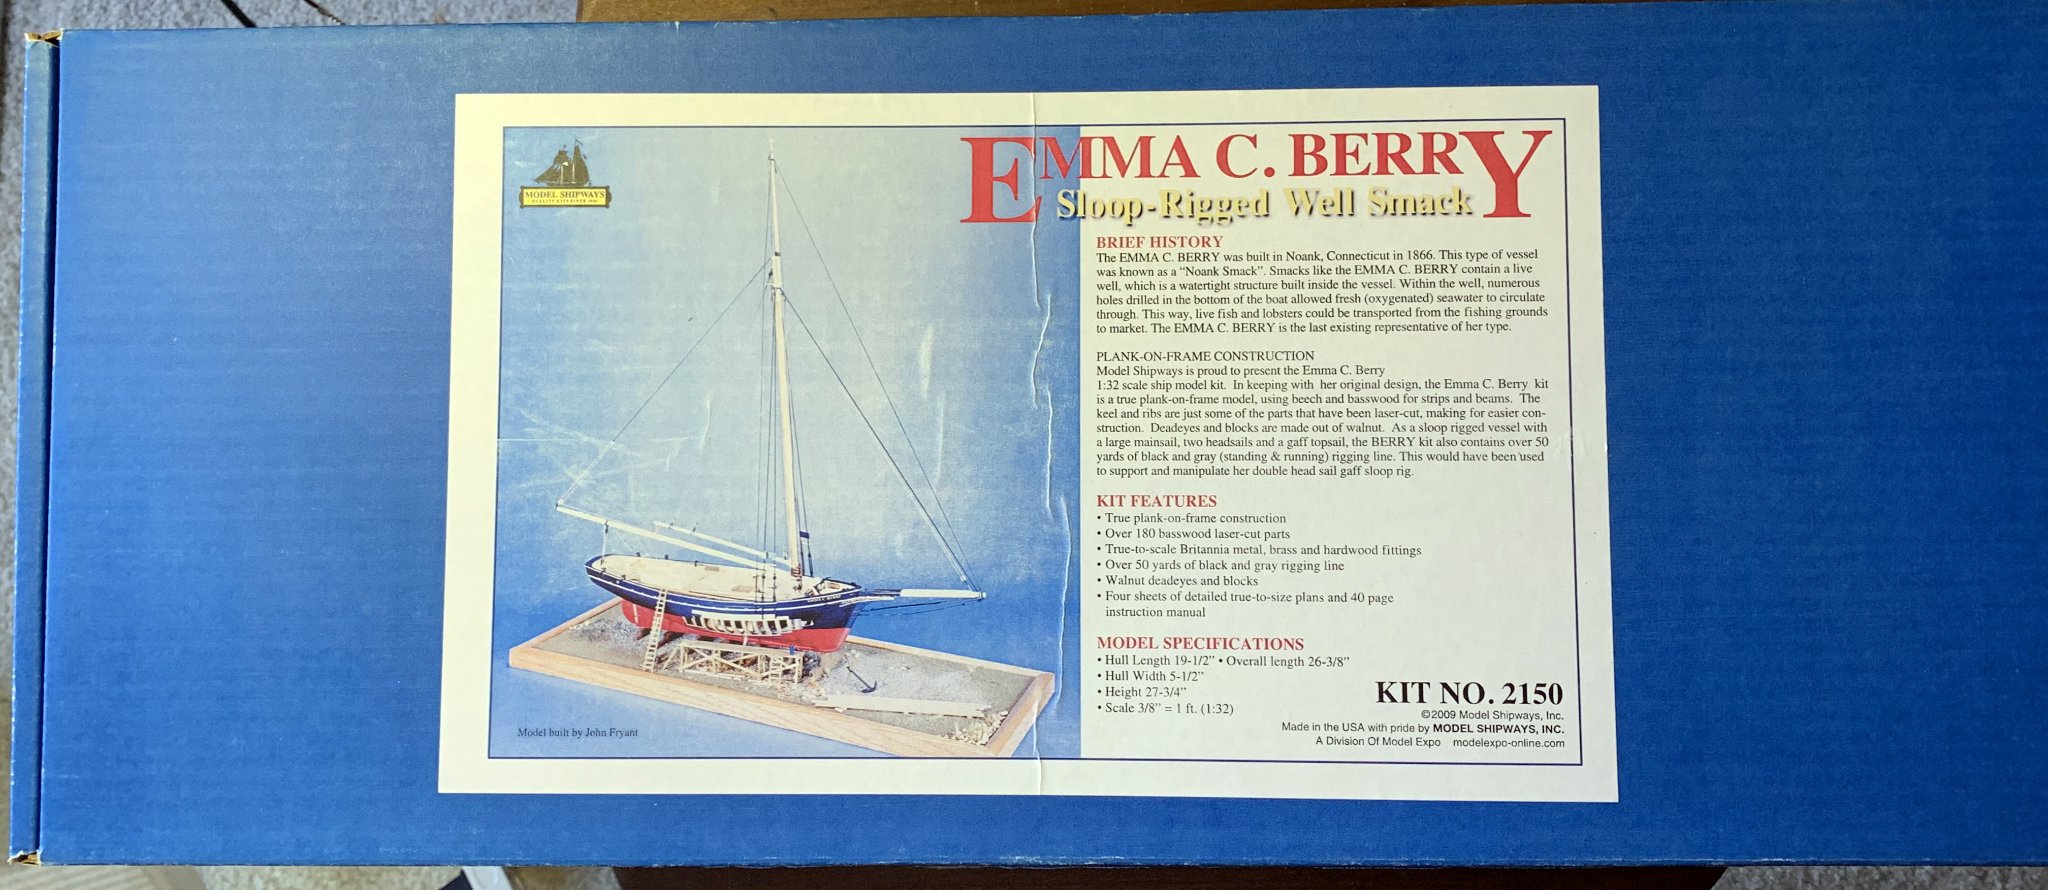
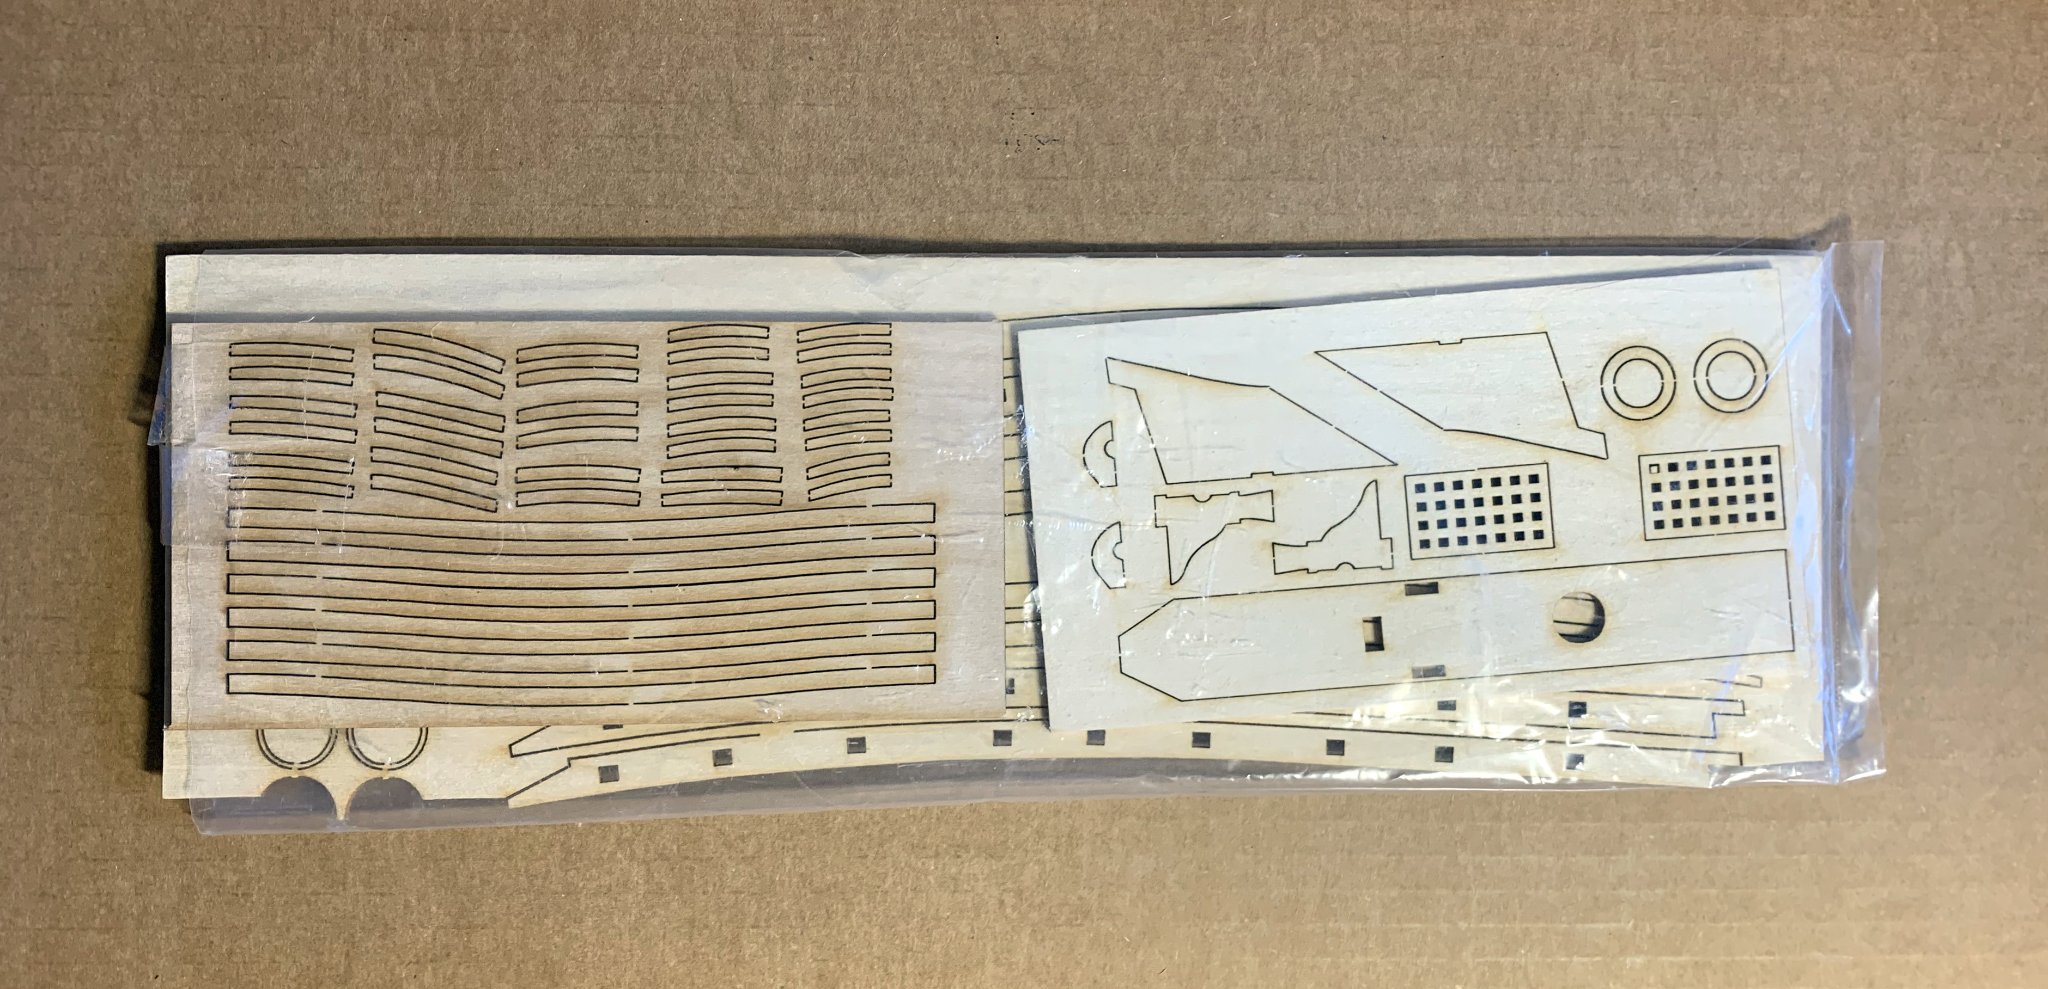
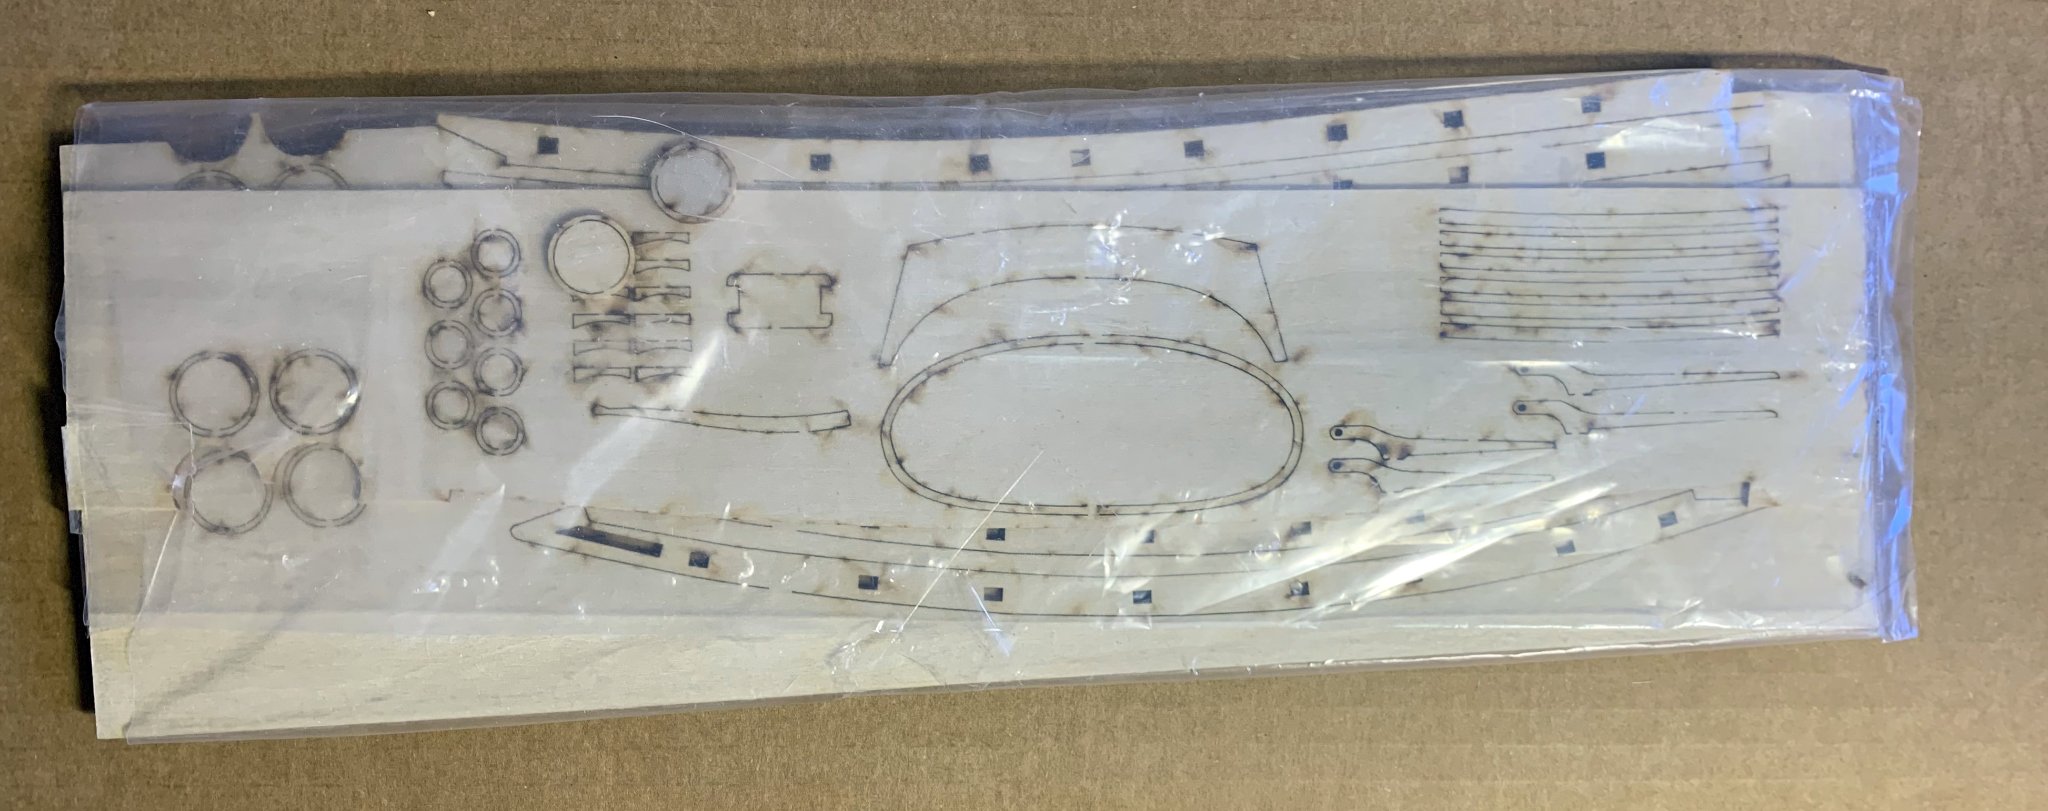
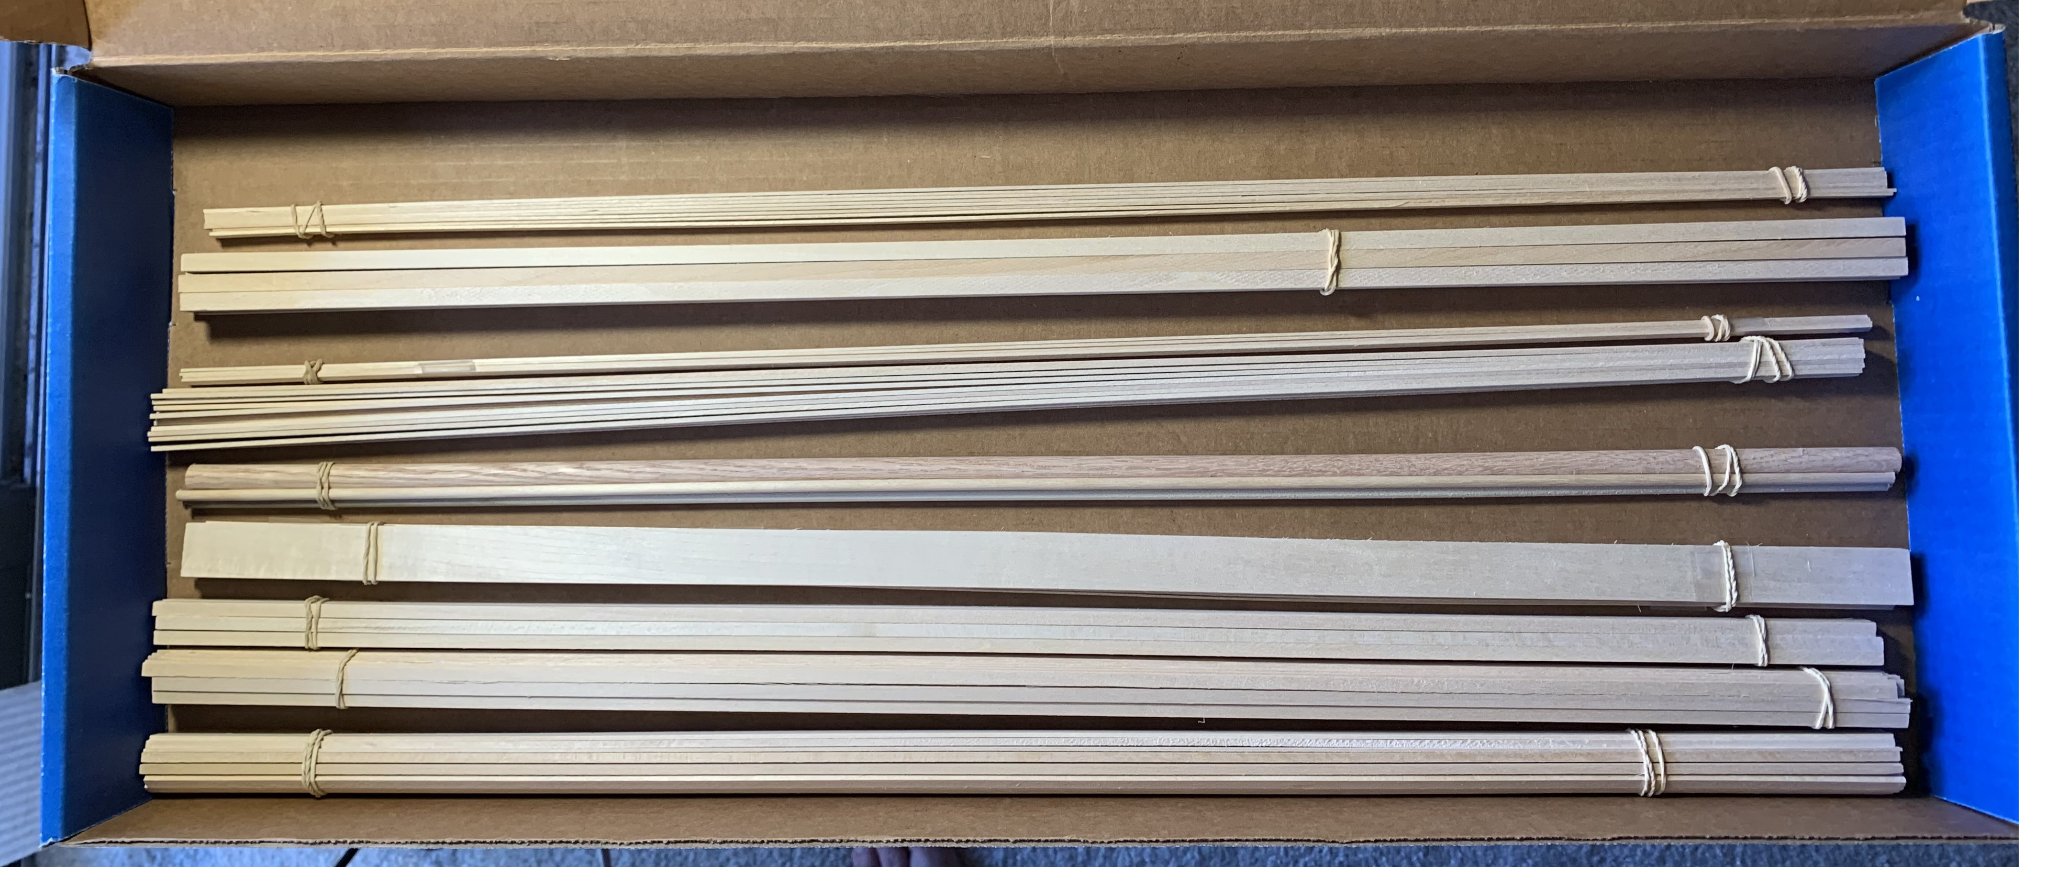
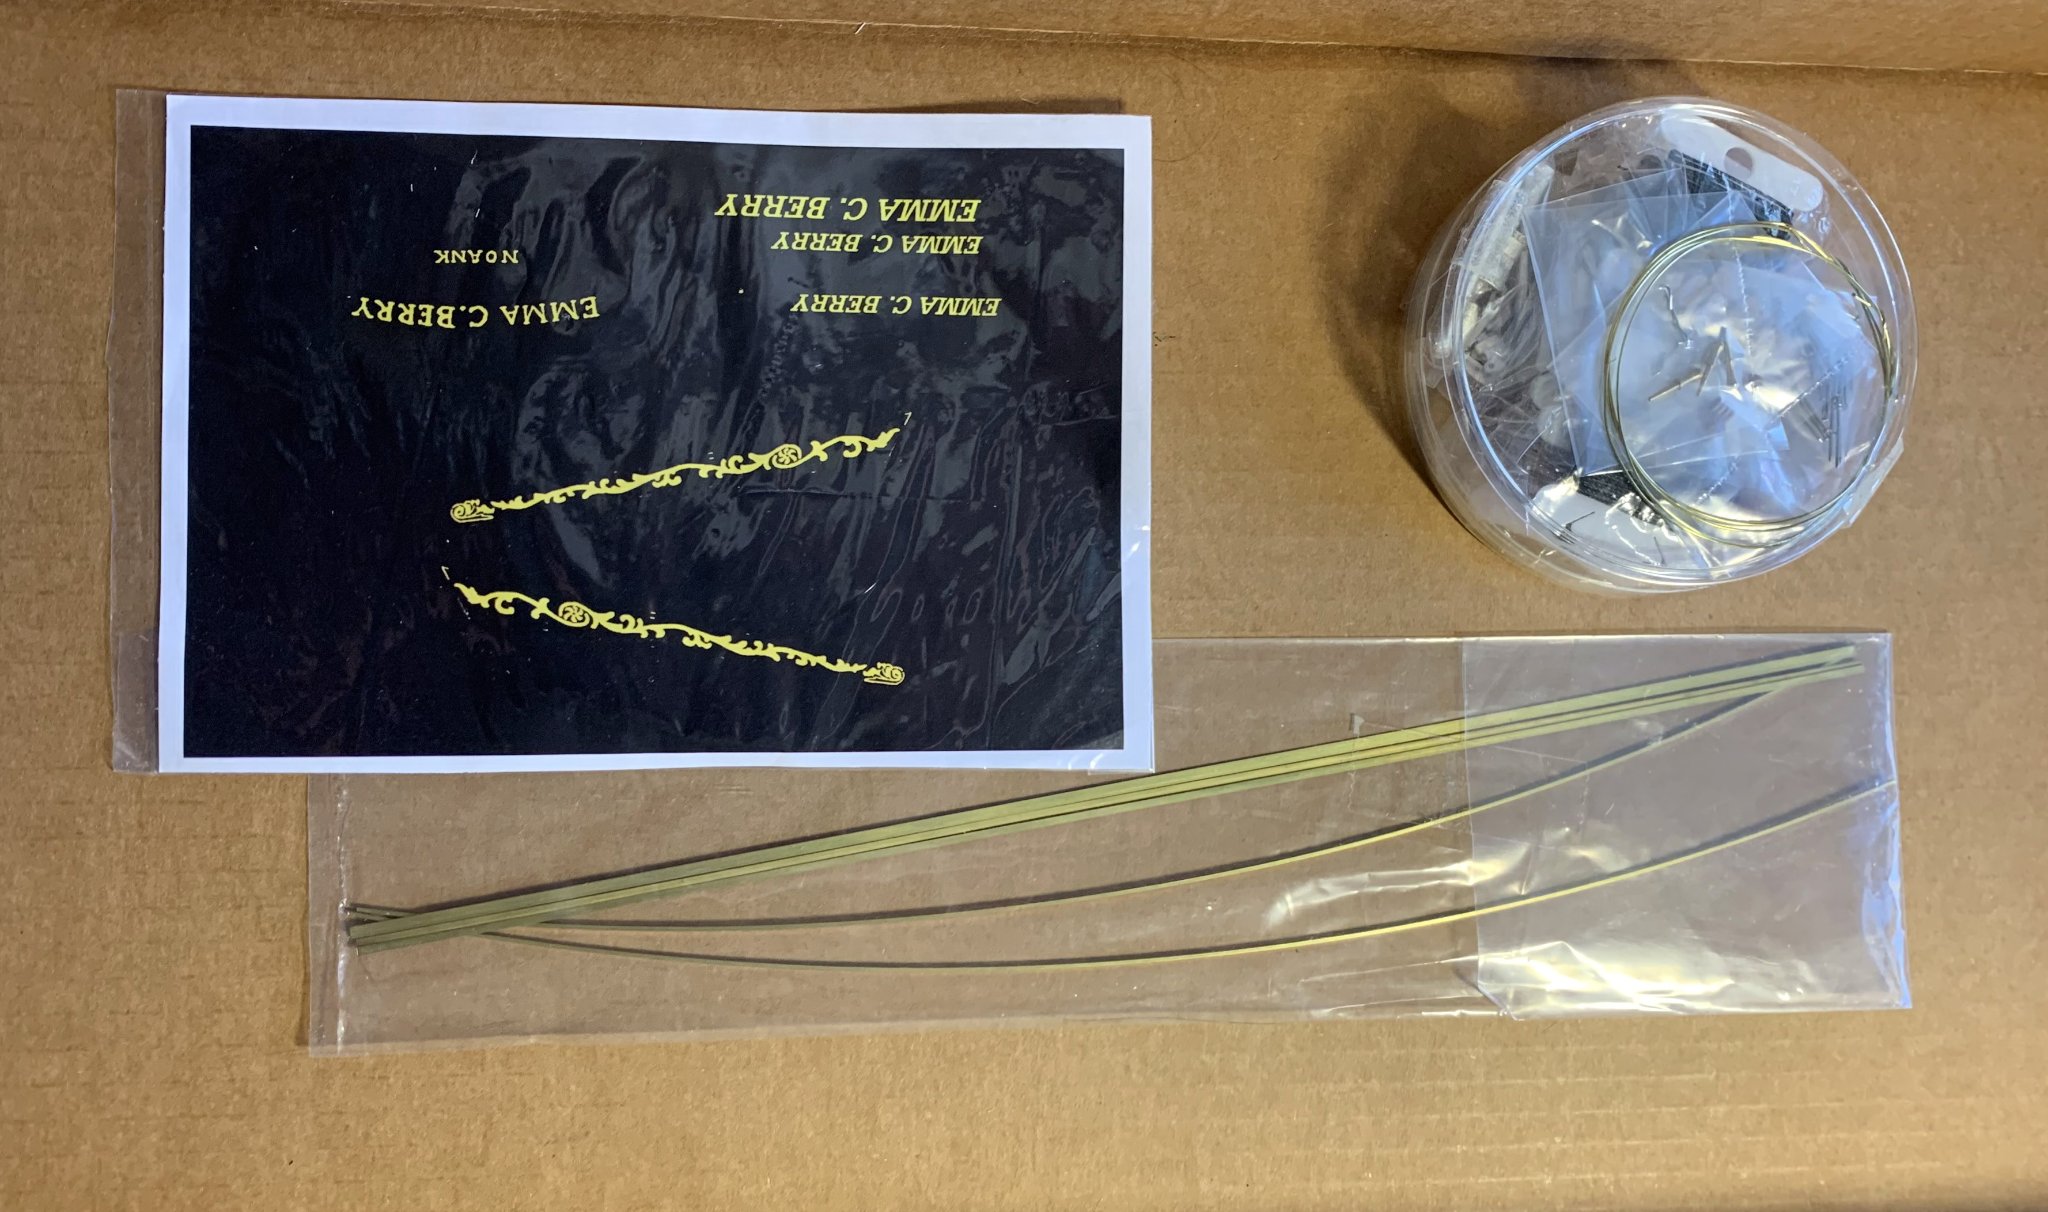
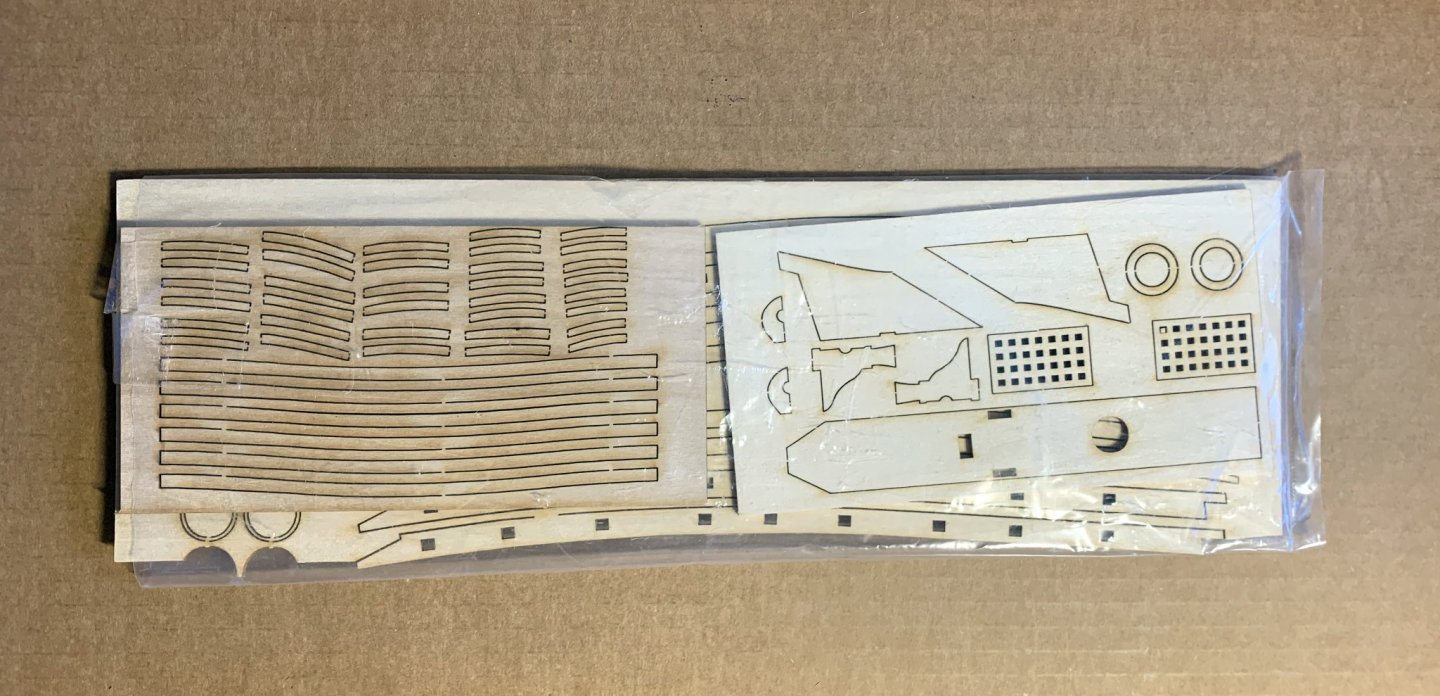
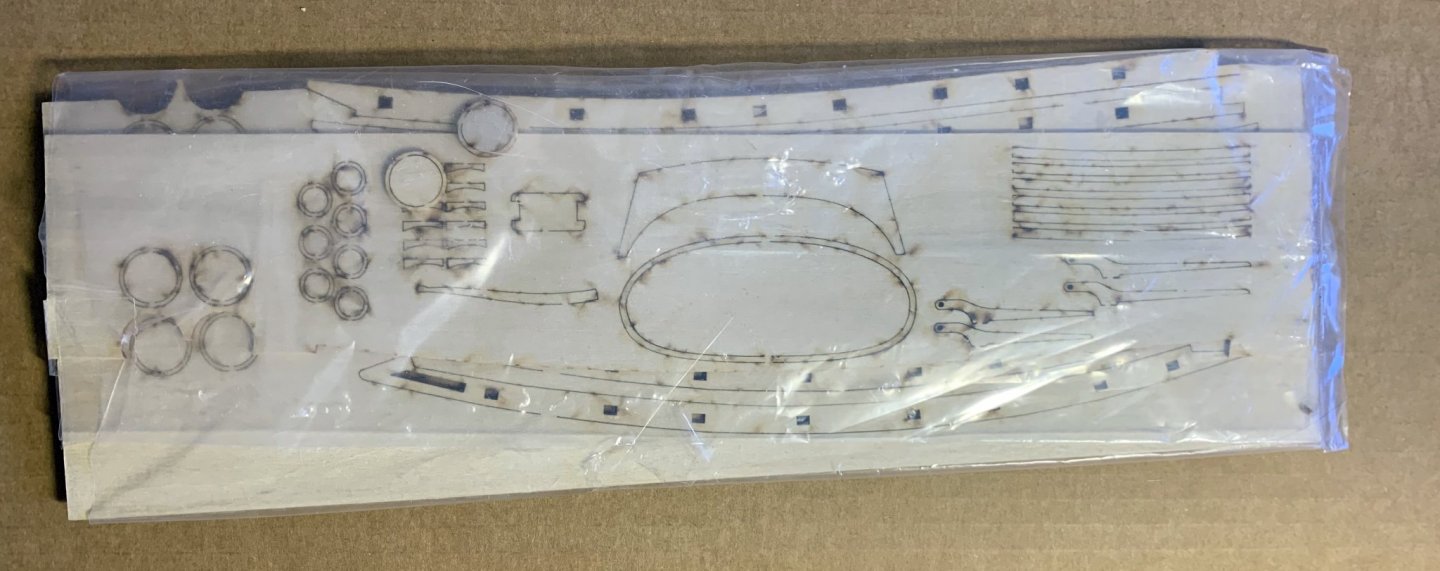
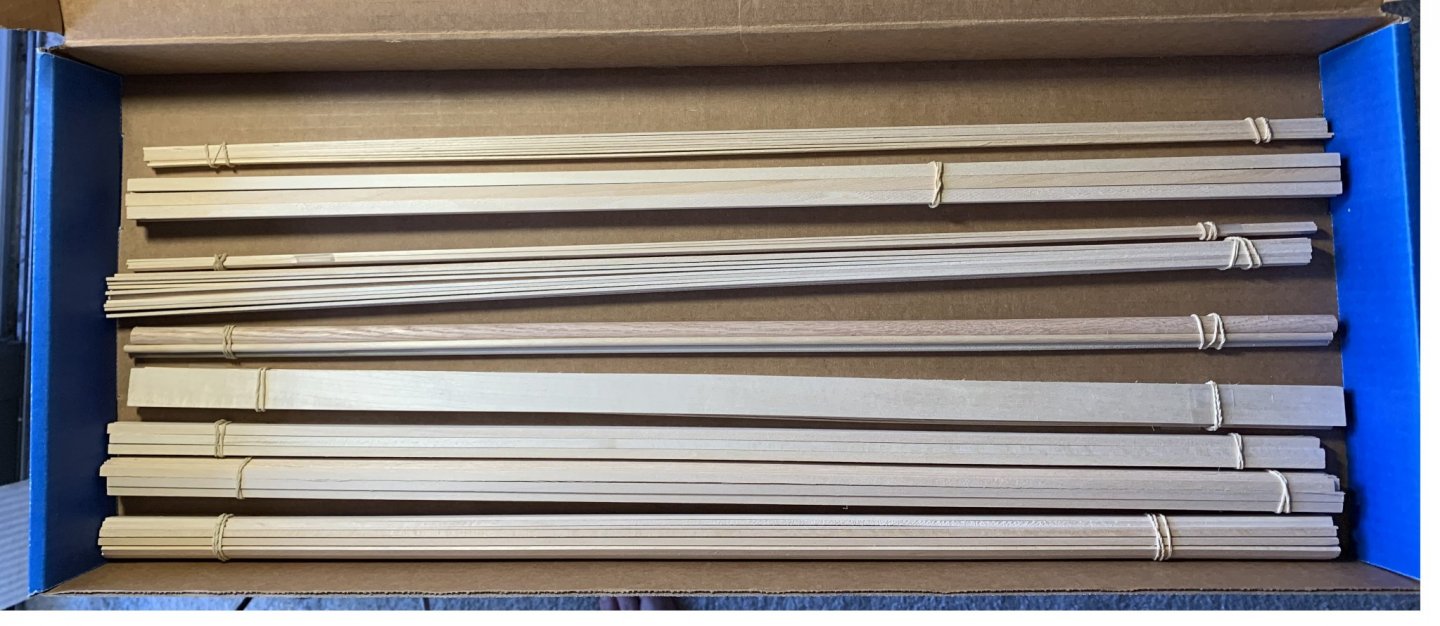
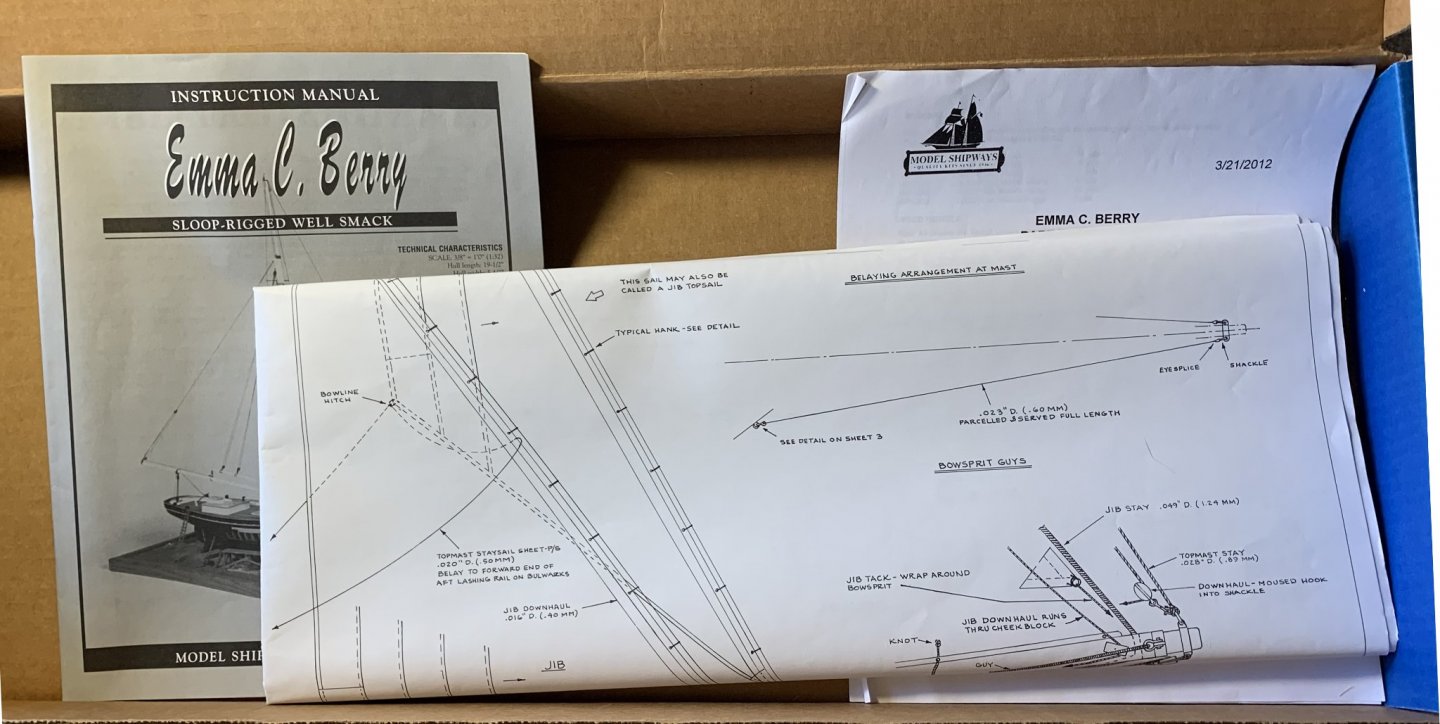
FOR SALE - EMMA C. BERRY by Model Expo - Blue Box I was looking forward to building ECB. But while building Glad Tidings, I came to the realization I need to dedicate more space to continue building Glad Tidings and that's not going to happen. The kit has been sitting on the shelf and the box has some shelf wear - 1/4" laser cut sheets are all intact - Thin laser cut sheets have been stored in a plastic bag One sheet was carefully cut to fit and avoid accidental loss of parts. - Small Parts are in the original small plastic container - Brass strips in plastic bag - Decal sheet has been stored inside the instruction book - Wood strips were sorted and taped together I think I might have used one or two strips, not sure what size. I've added some walnut, mahogany and basswood strips to make up for this - Prints were opened once - Instruction book was read through a few times Current Model Expo Price is $169.99 including postage $140 - shipped to the lower 48 only.


-
EricWilliamMarshall reacted to a post in a topic:
Gutermann Polyester thread for making rope.
-
thibaultron reacted to a post in a topic:
Adding numbers to yacht sails
-
allanyed reacted to a post in a topic:
Adding numbers to yacht sails
-
mtaylor reacted to a post in a topic:
Adding numbers to yacht sails
-
There are all sorts of ways to do this, but the least complicated is using better quality wax colored pencil, like Prismacolor, Staedtler, or Blick Store brand - these can be purchased individually. Cheap colored pencils have poor color pigment, icky wax and will not give the desired results. Simple How To: Using a very sharp colored pencil, lightly trace / outline the number, then, with a light touch fill in the outline GOING WITH THE FABRIC GRAIN. Hold the fabric taught with you other hand, to keep it from stretching / pulling. Wait 30-60 seconds, then add a second light layer of color pencil. Next is burnishing - place a 2" x 2" piece of paper over the color and lightly burnish in the color, 6-8 passes. Use paper heavier than copy paper and don't let the paper slide! The end of a medium size Sharpie works great for burnishing. Add two more layers of color pencil and burnish again. Repeat until you get the desired opacity. Colored pencils are a great way to add 'aging' and details to fabric sails, build depth by using color variations. Practice on the same fabric to be sure the colored wax does not get pushed thru the fabric. There is no real need to 'seal' the color pencil (unless you plan on washing your sails) and the wax will keep the pigment from fading. I've used colored pencils to add detail to art quilts - 20 years later, the detail is still there! .
- 8 replies
-
- 3
-
-
- small boat
- sails
- (and 1 more)
-
michael mott reacted to a post in a topic:
Gutermann Polyester thread for making rope.
-
Dee_Dee reacted to a post in a topic:
Syren by JesseLee - FINISHED - Model Shipways - scale: 1:64
-
Dee_Dee reacted to a post in a topic:
Young America by EdT - FINISHED - extreme clipper 1853
-
Dee_Dee reacted to a post in a topic:
Red Dragon by Vivian Galad - Artesania Latina - 1:60 - modified
-
Dee_Dee reacted to a post in a topic:
Red Dragon by Vivian Galad - Artesania Latina - 1:60 - modified
-
Dee_Dee reacted to a post in a topic:
Red Dragon by Vivian Galad - Artesania Latina - 1:60 - modified
-
Dee_Dee reacted to a post in a topic:
Red Dragon by Vivian Galad - Artesania Latina - 1:60 - modified
-
Dee_Dee reacted to a post in a topic:
Red Dragon by Vivian Galad - Artesania Latina - 1:60 - modified
-
Dee_Dee reacted to a post in a topic:
Red Dragon by Vivian Galad - Artesania Latina - 1:60 - modified
-
Vivian! Congratulations to you and your lovely bride on your wedding! May your journey in life together be blessed every day! Your sails are looking fabulous. Looking forward to seeing them added to your Red Dragon. Dee Dee
-
Chuck, There's a fabric glue that has not been previously discussed on MSW, called "Beacon Fabri-Tac" It's used by the fashion industry, applications include costume design and gluing sequins to wedding gowns. I've experimented with it and I'm really happy with the results: It's quick drying, doesn't stain / discolor or spread like CA glue does. When it cures, there is a very slight amount of stiffening, but the fabric remains fully flexible. A plus feature of this glue, it's acid free. It comes in 2 oz, 4 oz and 8 oz bottles and mini tubes. I purchased it at JoAnne Fabrics or it can be mail ordered. https://www.beaconadhesives.com/product/fabri-tac/ Dee Dee
-
Dee_Dee reacted to a post in a topic:
US Brig Oneida 1809 by rlb - The Lumberyard - 1:48 scale - POF - Lake Ontario Warship
-
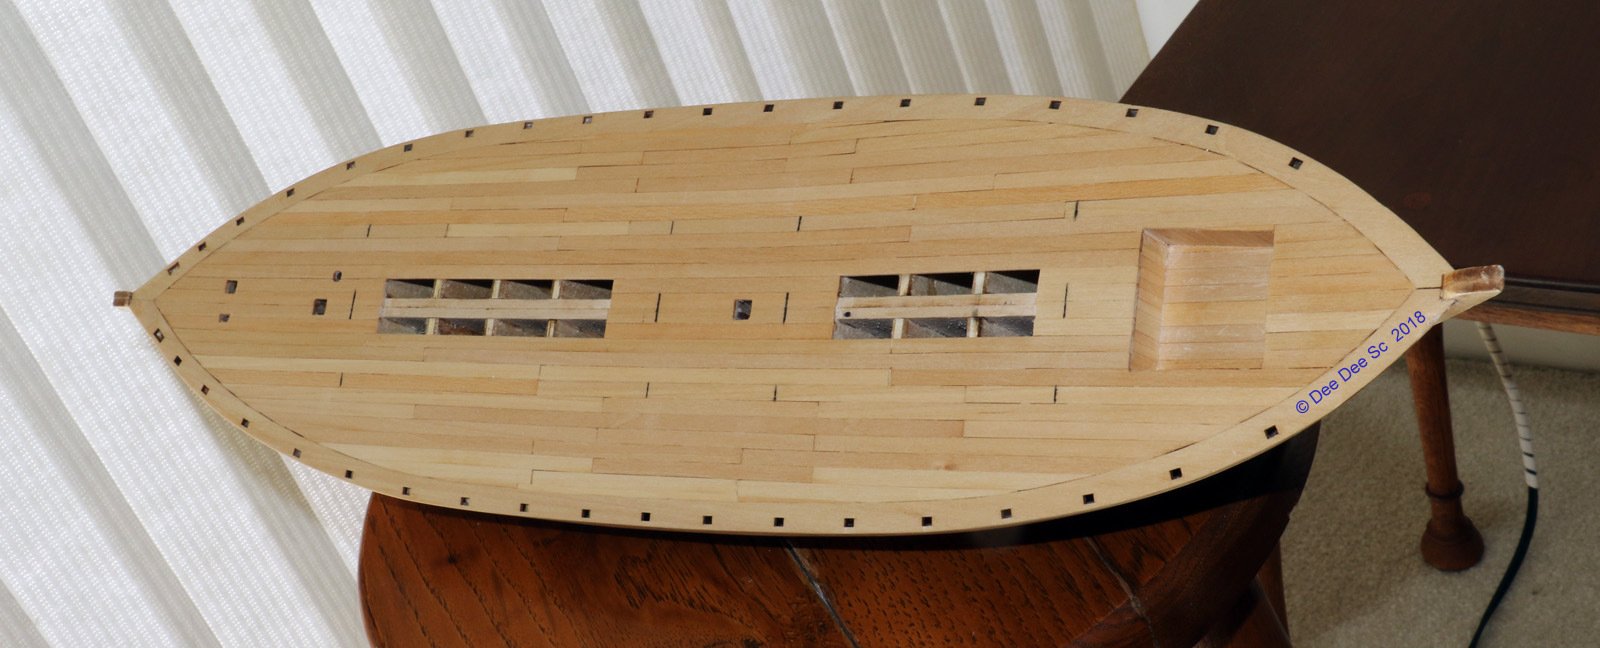
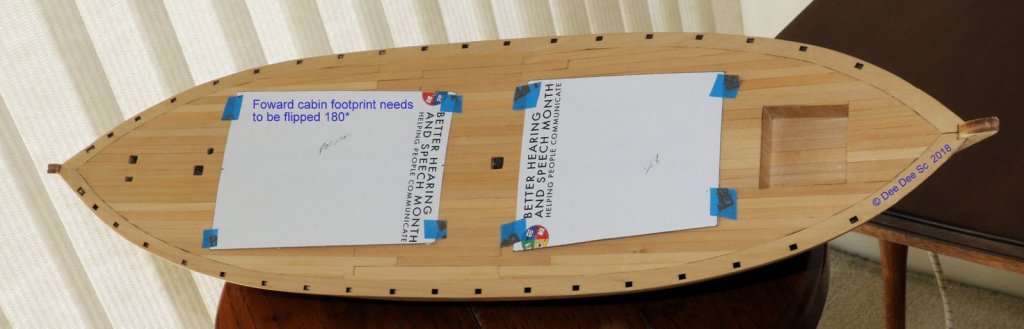
The decking is done! To get a level decking, I did a lot of scraping with a razor blade, some light sanding with some sandpaper and a sanding sponge. Then finished up with vacuuming! I wiped on a thin coat of shellac to act as a sealer, it's easy to scrape off where needed. The black lines are reference lines for the cabin placement. I'll glue on a 'cleat' to help align the cabin. These are the cabin footprints - Ooops! The forward cabin should be flipped 180* I'm disappointed with the lumber in the kit - Almost every piece had significant saw blade marks that had to be sanded down to get a tight fit. I coated the edges with some shellac before sanding and sanded just enough to get a flat edge. The kit was designed to use 12 planks on each side, covering just under 60mm. However, since each strip had to be sanded, 12 planks left me with a 2mm gap on both sides. I did some creative press fitting to fill the gap. I still need to figure out the personality and color scheme. I've decided to not use the round portholes, instead, I'll make rectangle shaped windows and skylights. I really like what John Earl did with his pinky, check out John's pinky here and here. Thanks for stopping by. Dee Dee

-
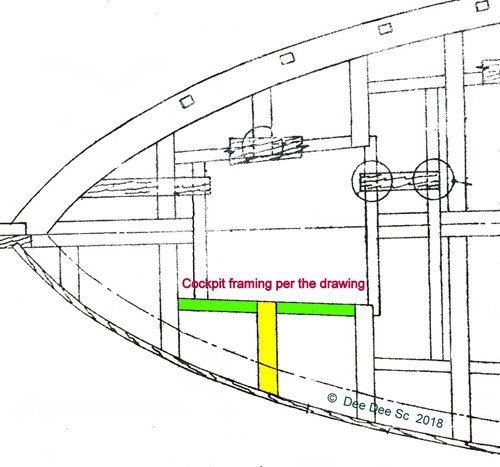
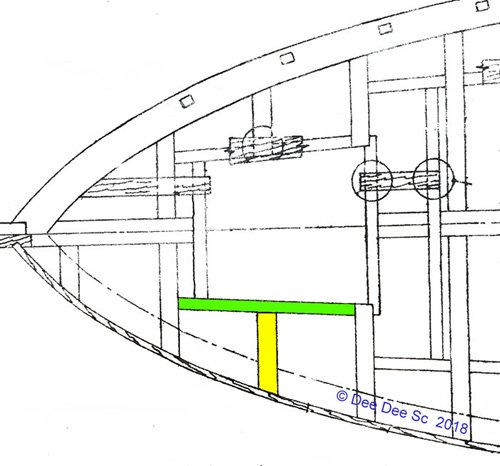
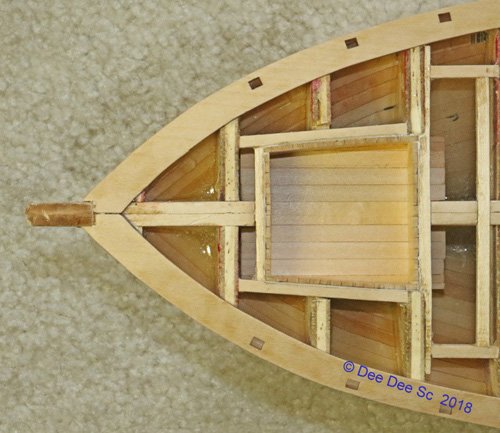
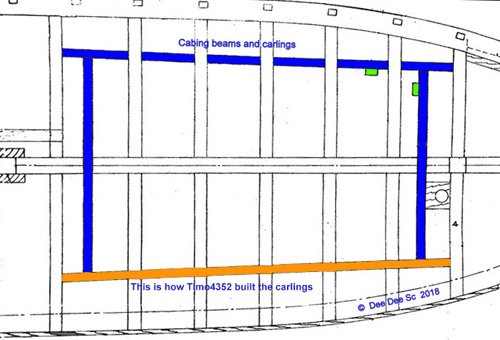
Glacial Boat Works is moving along..............slowly...................................... I made a small change with the framing for the cockpit. I lopped off a small section from bulkhead #17 (shown in yellow), and used one piece of 1/8" x 1/4" for the cockpit framing (shown in green). For the cockpit walls, I glued the pieces together, then backed each section with a strip of paper to give it some strength while sanding to size. The final height sanding was done after gluing. If you zoom in on the photo, you can see the paper backing. Silly me! I forgot to add the drain in the cockpit flooring. If I can find some thin black tubing, I'll add it. Deck Beams and Carlings The deck beams and carlings for each cabin (shown in blue) are not really needed. But if you're bashing the heck out of this build, you will need these and I suggest adding these as timo4352 did in his build here .... shown in orange. This is where I got the idea to do the cockpit as I did. The waterways are a bit 'delicate' and both broke due to the wood grain, an easy fix. Both ends needed sanding / shaping to fit the curves of the bow / stern stems and I heard a couple of 'crack's as I was gluing them on, but I don't see any cracks or lines. Phew!! Next up is planking the deck, I'll use the 1/16" x 3/32" basswood. Thanks for stopping by, questions, comments welcome. Dee Dee

-
Hey Eamonn! It's really nice to hear from you! Hope you are well! GT may be a small craft - but it's more than twice as long as my last build, with an overall length of 29.5" / 75cm. I need to make a big space on the shelf for this one! Joshua! Thanks for stopping by. Yep! I'm an anal analytical with lexdysic tendencies. It's not supposed to be overwhelming, rather, it's meant to be a simple way to sand each plank to size. When I plank my next build, I'll try a different approach, with less analysis. Your "Prince" is looking great!
-
Linen yarn is available for ropewalk stock
Dee_Dee replied to Jaager's topic in Masting, rigging and sails
Londonderry linen thread is a high quality linen thread with a smooth finish and also comes in sizes as small as 80/3 and a few colors in 100/3 and sold in small spools of 12-50m, each spool costs less than $3. It's available online from Threadneedle Street, located in Issaquah WA. Their website has numerous pages, this is the direct link to the page with the linen thread. Scroll to bottom for colors to make rope. https://www.threadneedlestreet.com/linthrd.htm There's also have a pdf guide for rigging: https://www.threadneedlestreet.com/LINEN RIGGING.pdf -
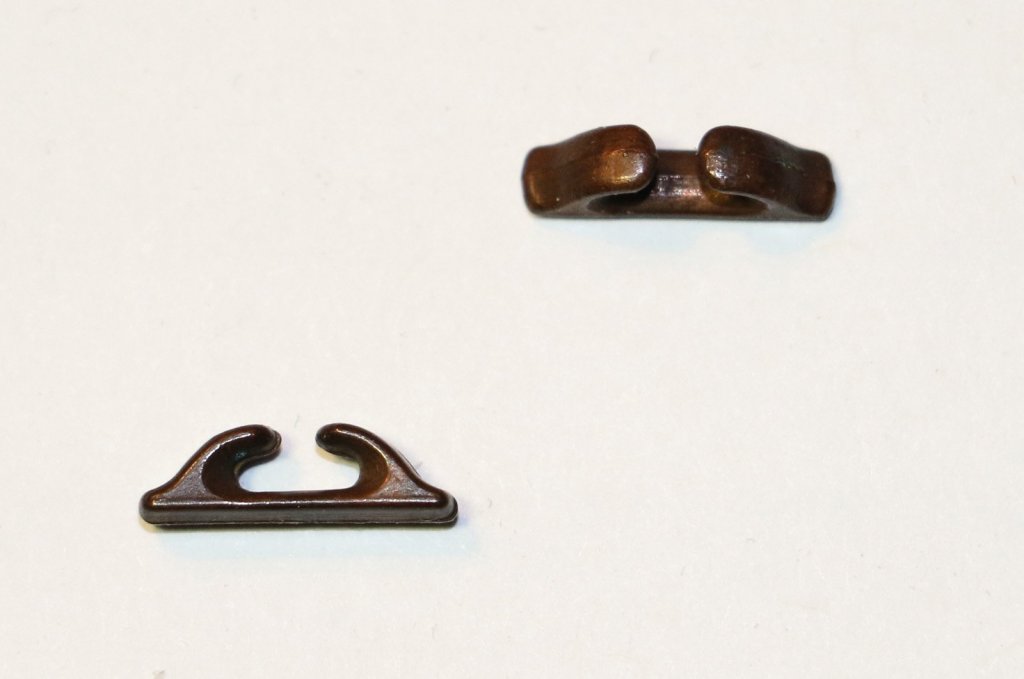
Kurt, I have two of these straight fairleads. They measure 12mm, made of white metal with an aged bronze plating or painting. I believe they came with the Blue Jacket 1:30 Endeavour J boat, but they were packed with two pair of oar locks that were 6mm long. If it will help, I can send these to you to make a mold / copies Also, check out this page at BlueJacket: http://www.bluejacketinc.com/fittings/fittings17.htm Dee Dee
-
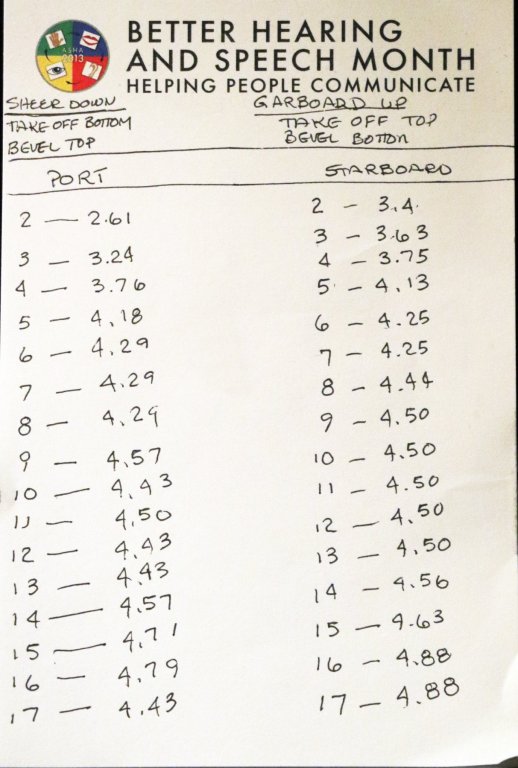
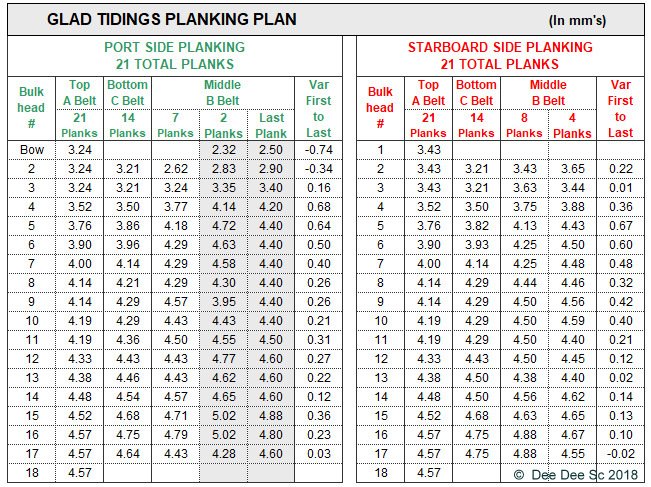
Don I like planking, but yes, it's always good to complete it. Now, I have to 'get back on the paper' and start reading the instructions and drawings............ Rob, I'm one of 'those' crazy analytical type personalities, where numbers need to make sense to me to confirm I'm staying on track. If I So if I go over the top, just tell me: "There you goes again! Getting all crazy and analytical again!" When it came time to actual planking, I keep it simple: What's the width of each plank at each bulkhead, then I wrote those numbers down on a note pad. The photo below answers that question for the eight planks of the starboard B Belt. After four planks, I redid the measurements and again wrote those numbers down. This hull was fun to plank and I hope you will still consider building Glad Tidings. Dee Dee
-
I posted this in reply to your thread on Naval history: I built the Corel sloup kit using photos from all of the above links; I bashed the heck out of it from the very beginning. When building this kit, it became apparent that EVERY Brittany sloop is different; a lot of it depended on what is the primary fishing, oysters, lobsters, sardines, location and more. The link to my build is in my signature. A place to start is with the 'Bergère de Domrémy, hull # B 5929', a scallop dredging sloop / coquillier built in 1936. It was rebuilt and now a French National Treasure. The French An Test website contains some details and history. There's lots of info on this website. http://bergere.antest.net/le-bateau/description/ Info on Auguste Tertu, who built the Bergère de Domrémy and many other boats http://bergere.antest.net/2013/12/auguste-tertu/ Page through Sophie's link for numerous photos and good info on the Bergère de Domrémy and other sloops: http://sophie-g.net/photo/bret/brest/bergere01.htm A blog with lots of photos of Bergère de Domrémy http://www.laroyale-modelisme.net/t9662-la-bergere-de-domremy The Brittany sloop is similar to the Irish Galway and Kinsale Hooker and many other Channel / Atlantic fishing boats. More info on these Irish boats here: http://www.tradboats.ie/index.php The "Douarnenez Festival" held every other year features numerous variations on the Brittany sloop / coquillier. Here are links to photos from the 2006 and 2012 festivals. Google 'Douarnenez Festival' for more photos. 2006: http://www.pbase.com/image/65376766 2012: https://www.flickr.com/photos/valendrevarzecois/7623197092/ Videos from 2012 Douarnenez Festival https://www.youtube.com/watch?v=8bwdXWwGRbY https://www.youtube.com/watch?v=lcetV8QmPGk This Pinterest page did a good job of assembling various fishing vessels from the Channel and Atlantic coast and includes some basic drawings. https://www.pinterest.co.uk/tomedom/french-traditional-boat-types-of-the-channel-and-a/
-
A place to start is with the 'Bergère de Domrémy, hull # B 5929', a scallop dredging sloop / coquillier built in 1936. It was rebuilt and now a French National Treasure. The French An Test website contains some details and history. There's lots of info on this website. http://bergere.antest.net/le-bateau/description/ Info on Auguste Tertu, who built the Bergère de Domrémy and many other boats http://bergere.antest.net/2013/12/auguste-tertu/ Page through Sophie's link for numerous photos and good info on the Bergère de Domrémy and other sloops: http://sophie-g.net/photo/bret/brest/bergere01.htm A blog with lots of photos of Bergère de Domrémy http://www.laroyale-modelisme.net/t9662-la-bergere-de-domremy The Brittany sloop is similar to the Irish Galway and Kinsale Hooker and many other Channel / Atlantic fishing boats. More info on these Irish boats here: http://www.tradboats.ie/index.php The "Douarnenez Festival" held every other year features numerous variations on the Brittany sloop / coquillier. Here are links to photos from the 2006 and 2012 festivals. Google 'Douarnenez Festival' for more photos. 2006: http://www.pbase.com/image/65376766 2012: https://www.flickr.com/photos/valendrevarzecois/7623197092/ Videos from 2012 Douarnenez Festival https://www.youtube.com/watch?v=8bwdXWwGRbY https://www.youtube.com/watch?v=lcetV8QmPGk This Pinterest page did a good job of assembling various fishing vessels from the Channel and Atlantic coast and includes some basic drawings. https://www.pinterest.co.uk/tomedom/french-traditional-boat-types-of-the-channel-and-a/ I built the Corel sloup kit using photos from all of the above links; I bashed the heck out of it from the very beginning. When building this kit, it became apparent that EVERY Brittany sloop is different; a lot of it depended on what is the primary fishing, oysters, lobsters, sardines, location and more.
-
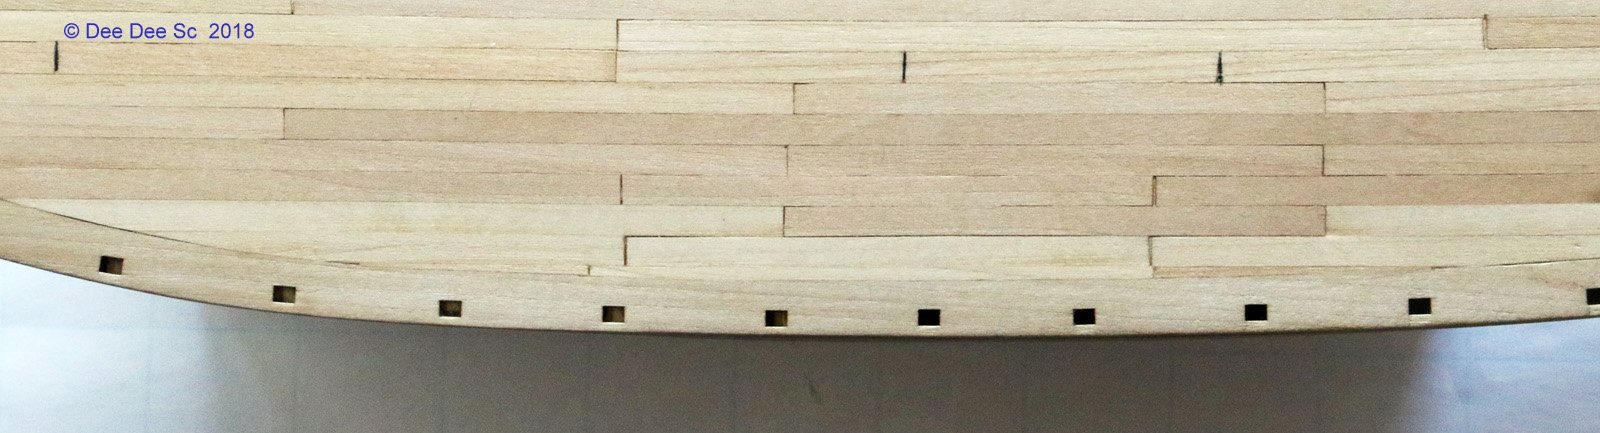
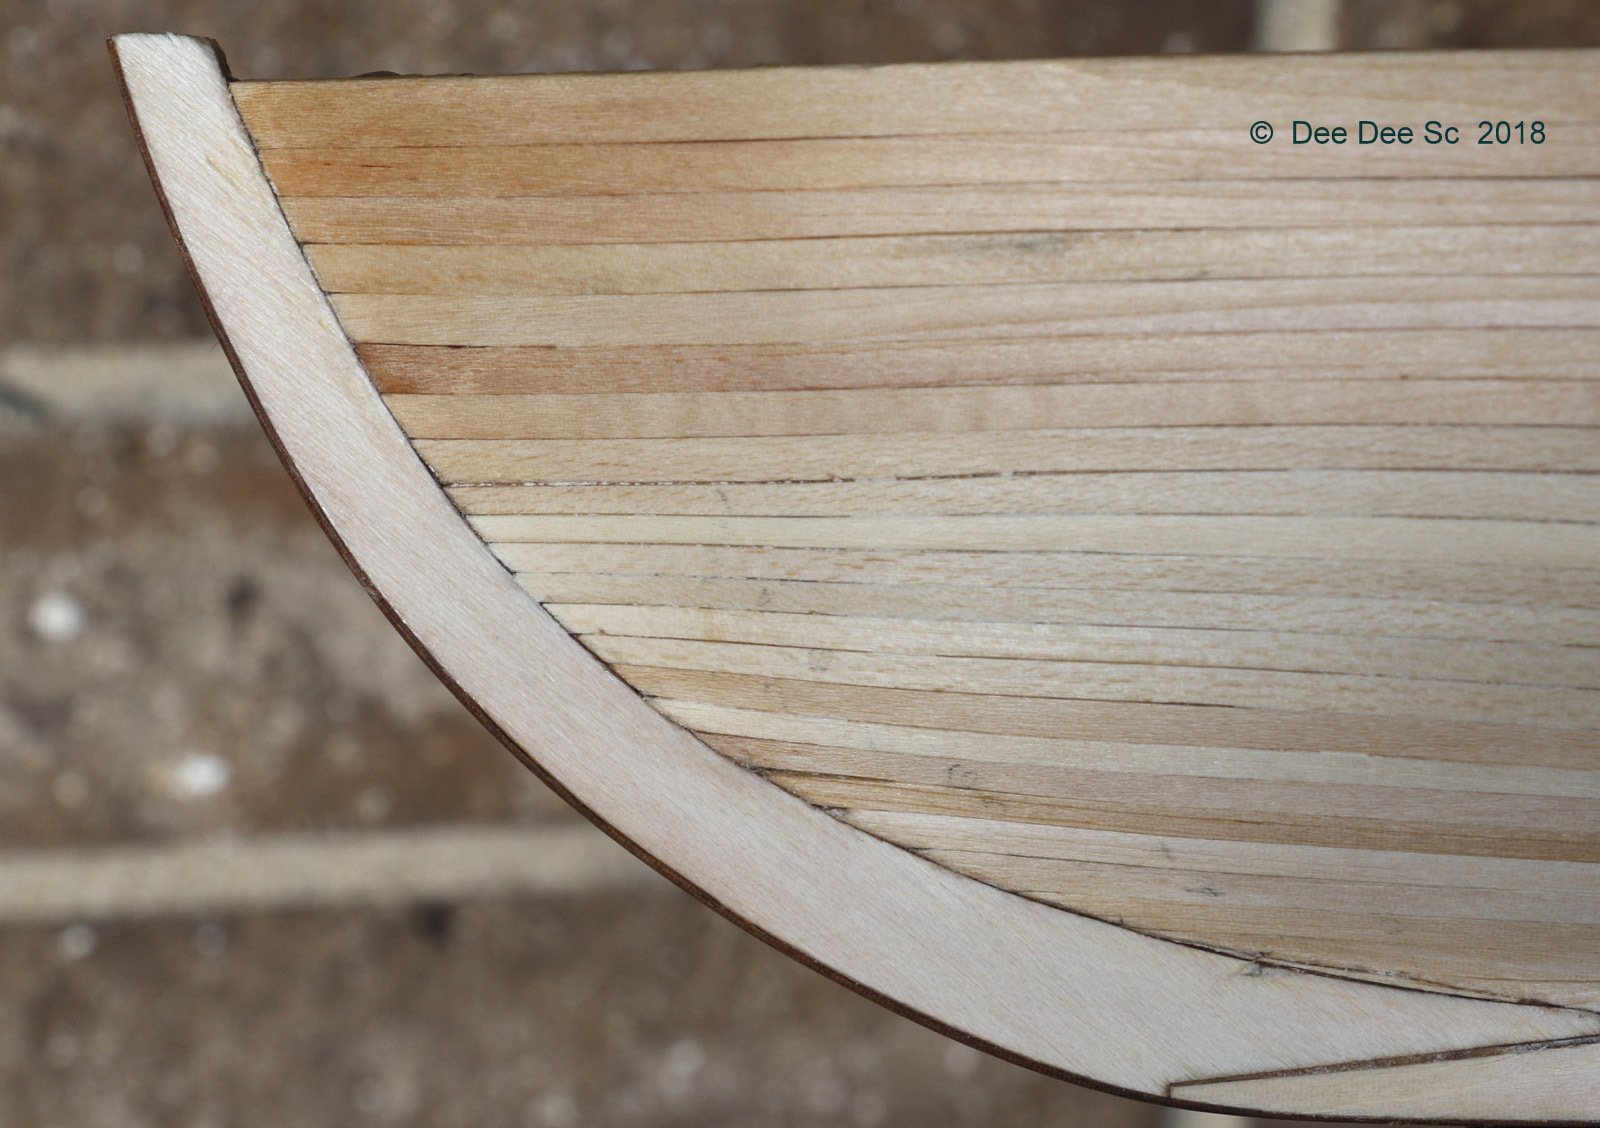
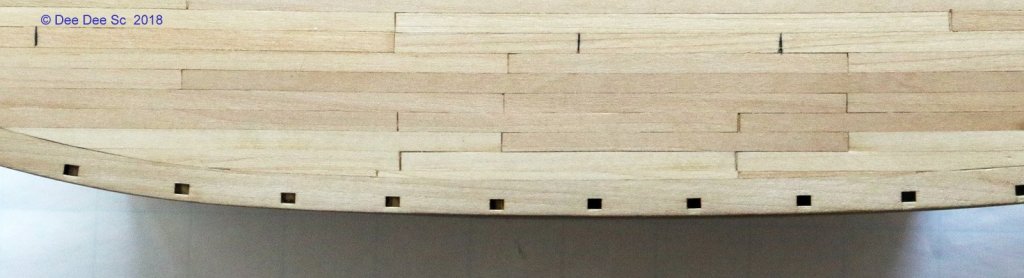
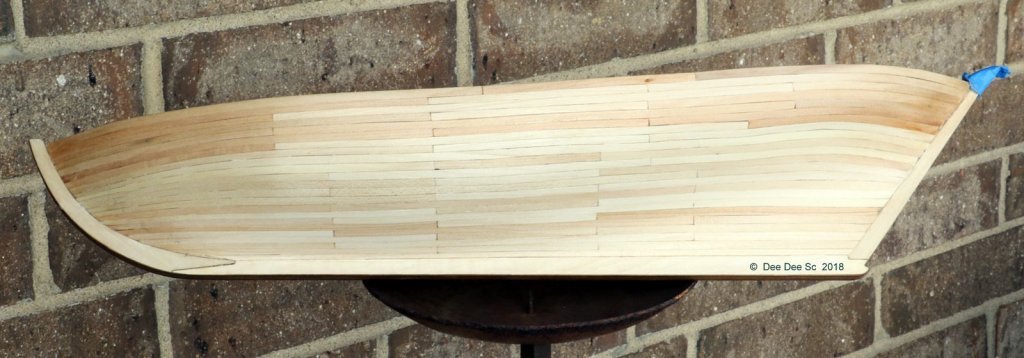
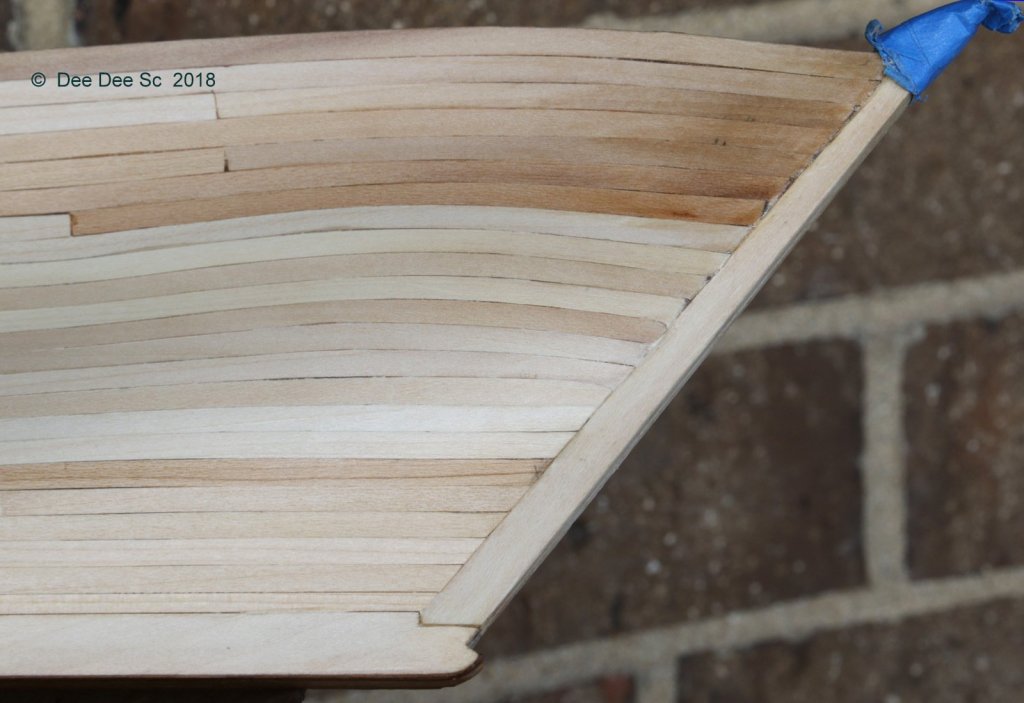
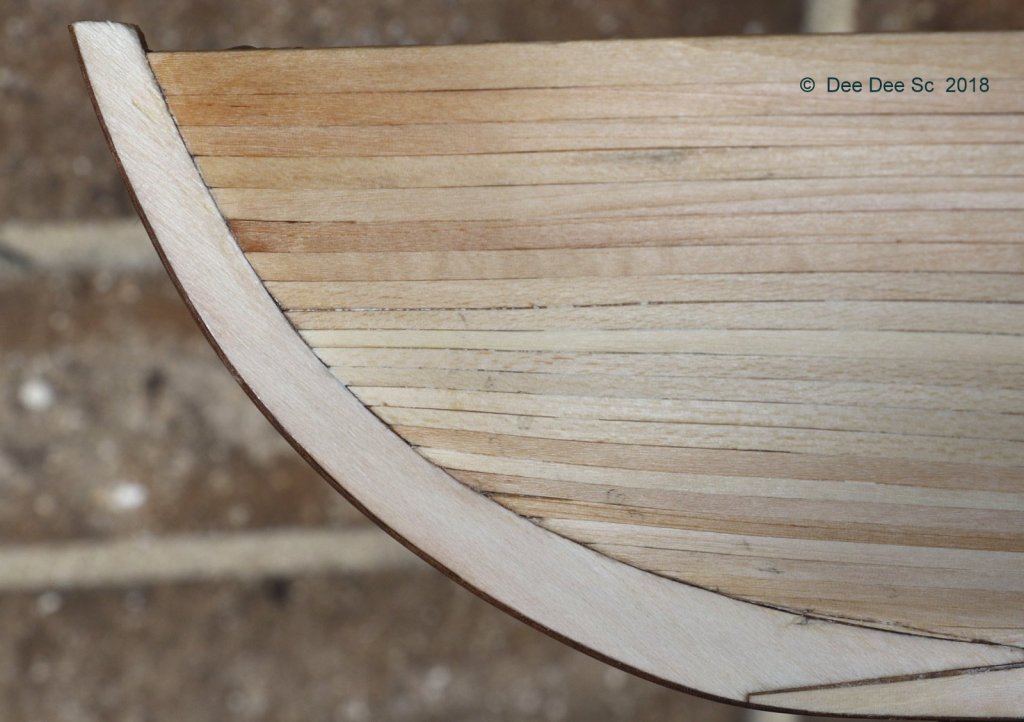
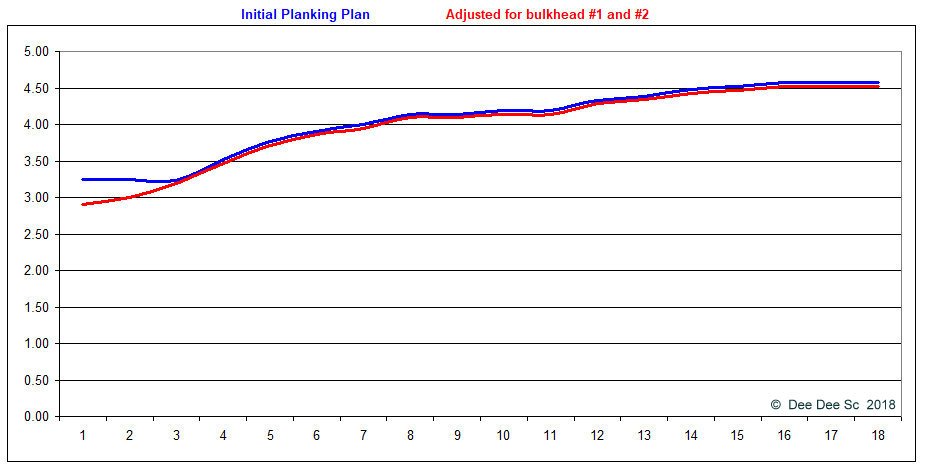
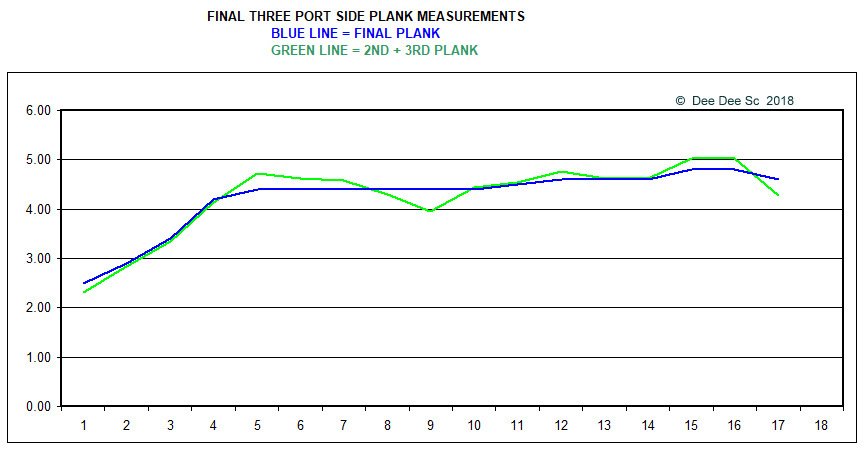
The planking is done! Yeah! After the last plank, I spent a few hours on each side with scrapers, sand paper and vacuuming! Also, mixing and adding epoxy to a few thin spots for support. Time well spent. When I started planking, I didn't have a planking plan, so belt A is different on each side. But somewhere I settled on 6 / 8 and 11 / 13. Thinking I should have had a third set of joints to break it up a bit more. The stern stem planking and the stem itself needs a little bit of filler. In the original plan, the planks at the bow stem were 3.24mm on the port side and 3.43 on the starboard side. Needless to say, I was a bit off. By the port side C belt, this measurement was down to 2.62mm. I contemplated "adding a plank" for about 10 minutes, I stayed with the plan of narrow planks. In this close up, you can see the difference in size as the planks hit the bow stem. When I did the original planking plan, I thought I was measuring correctly. To figure out where I went wrong, I 'charted' the planking plan. In the chart below, the blue line is the original planking plan - the plan flat lined for the bowstem and second bulkhead. Going back to basics, I 'smoothed' the numbers to follow the general line of the hull, the bow stem to 2.90 mm and 3.00 mm for bulkhead #2. These measurements would have been a better start until I was able to get a 'solid' measurement. OK, now I now better. THE FINAL THREE PLANKS!!!! I wanted to make sure the last plank would be easy to shape and get a tight fit. I remeasured and came up with a plan for the final plank, then worked backwards to get the measurements for the 2nd and 3rd to last planks. These measurements are highlighted in gray in the spread sheet below. In the chart, the blue line shows the smooth shape / plan of the final plank and the green line shows the wonky shape of the other two planks. It took time to get the 2nd and 3rd wonky planks shaped, but the last plank was really easy to make and fit. And THAT's the last of the charts and graphs! Need to do a bit more work on each side, then some sanding sealer and some covering to protect the hull from me adding unwanted nicks and dings in the hull. I still need to decide on paint colors Thanks for stopping by! Dee Dee
-
Mark, Glad my build log is helpful for you. Thanks for following and please, if you have any questions, don't hesitate to ask. Dee Dee