kmart
-
Posts
165 -
Joined
-
Last visited
Recent Profile Visitors
1,706 profile views


-
 kmart reacted to a post in a topic:
USS Constitution by Der Alte Rentner - Model Shipways - 1/76
kmart reacted to a post in a topic:
USS Constitution by Der Alte Rentner - Model Shipways - 1/76
-
kmart reacted to a post in a topic:
USS Constitution by JSGerson - Model Shipways Kit No. MS2040
-
kmart reacted to a post in a topic:
USS Constitution by JSGerson - Model Shipways Kit No. MS2040
-
kmart reacted to a post in a topic:
USS Constitution by JSGerson - Model Shipways Kit No. MS2040
-
kmart reacted to a post in a topic:
USS Constitution by JSGerson - Model Shipways Kit No. MS2040
-
kmart reacted to a post in a topic:
USS Constitution by JSGerson - Model Shipways Kit No. MS2040
-
kmart reacted to a post in a topic:
USS Constitution by JSGerson - Model Shipways Kit No. MS2040
-
kmart reacted to a post in a topic:
USS Constitution by Der Alte Rentner - Model Shipways - 1/76
-
usedtosail reacted to a post in a topic:
USS Constitution by kmart - Model Shipways - scale 1/76
-
 GGibson reacted to a post in a topic:
USS Constitution by kmart - Model Shipways - scale 1/76
GGibson reacted to a post in a topic:
USS Constitution by kmart - Model Shipways - scale 1/76
-
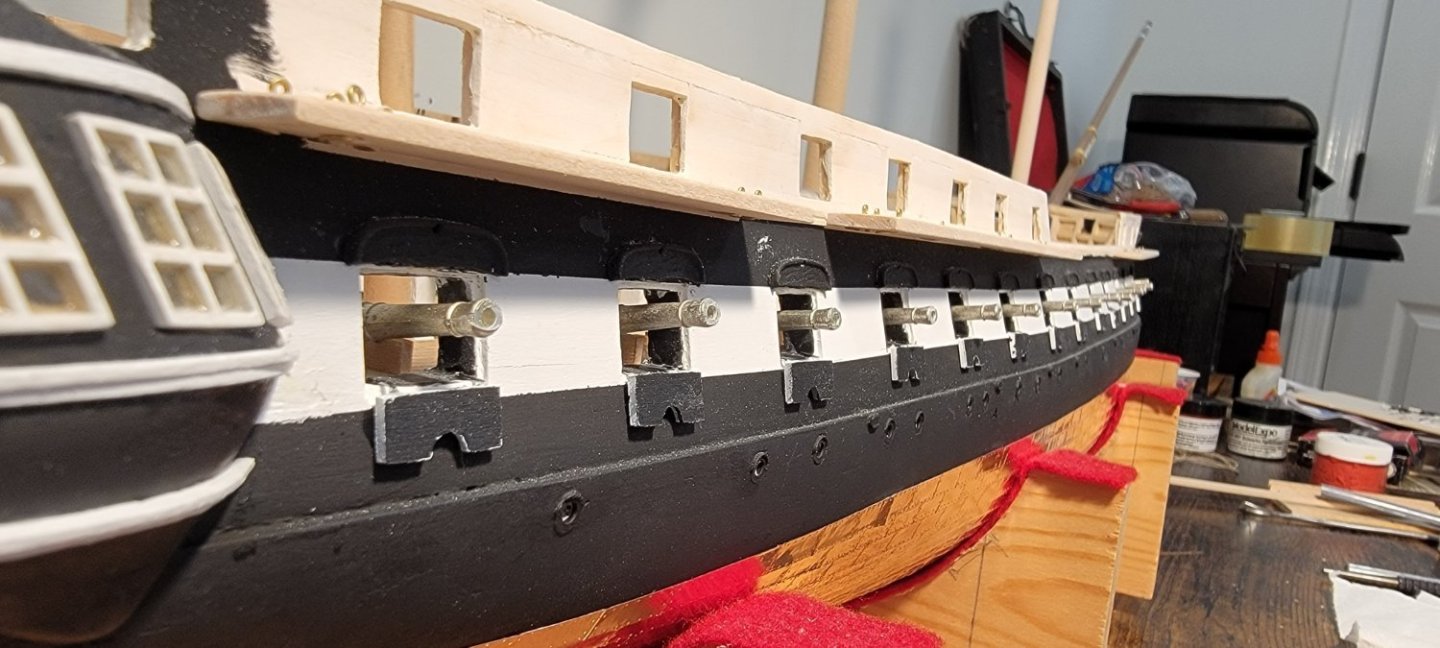
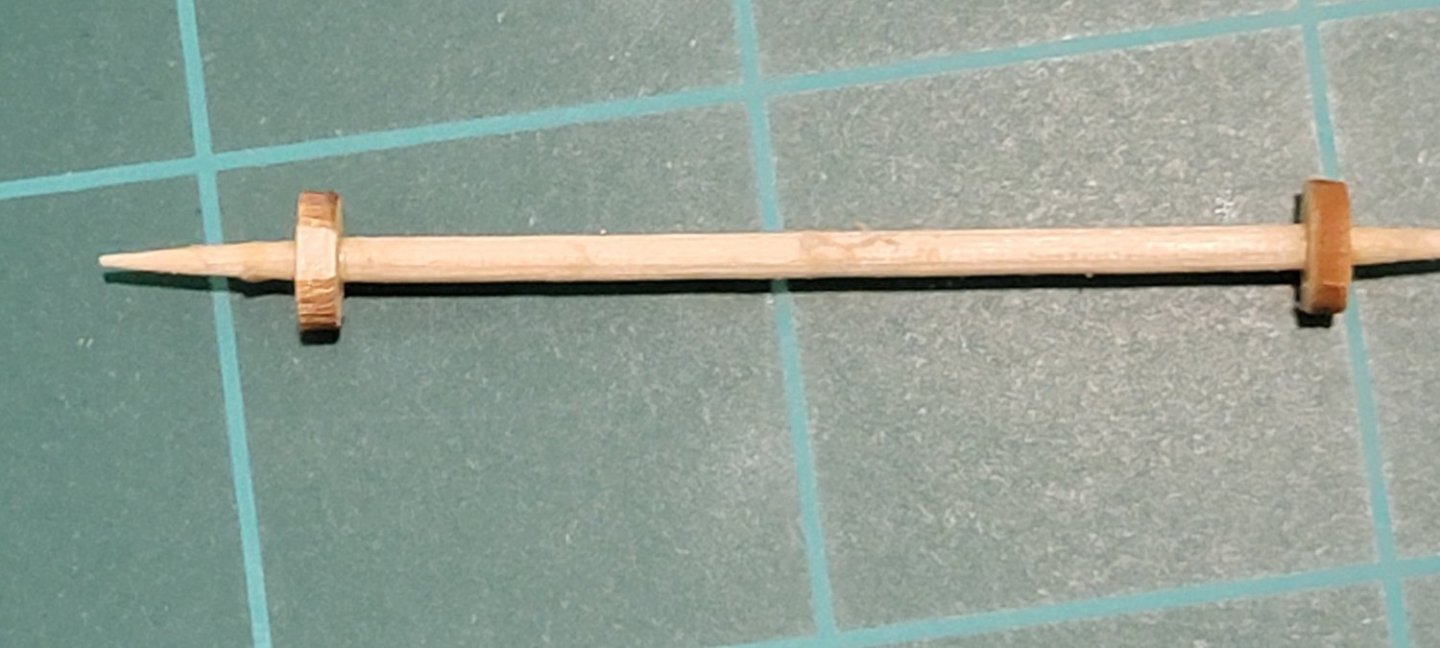
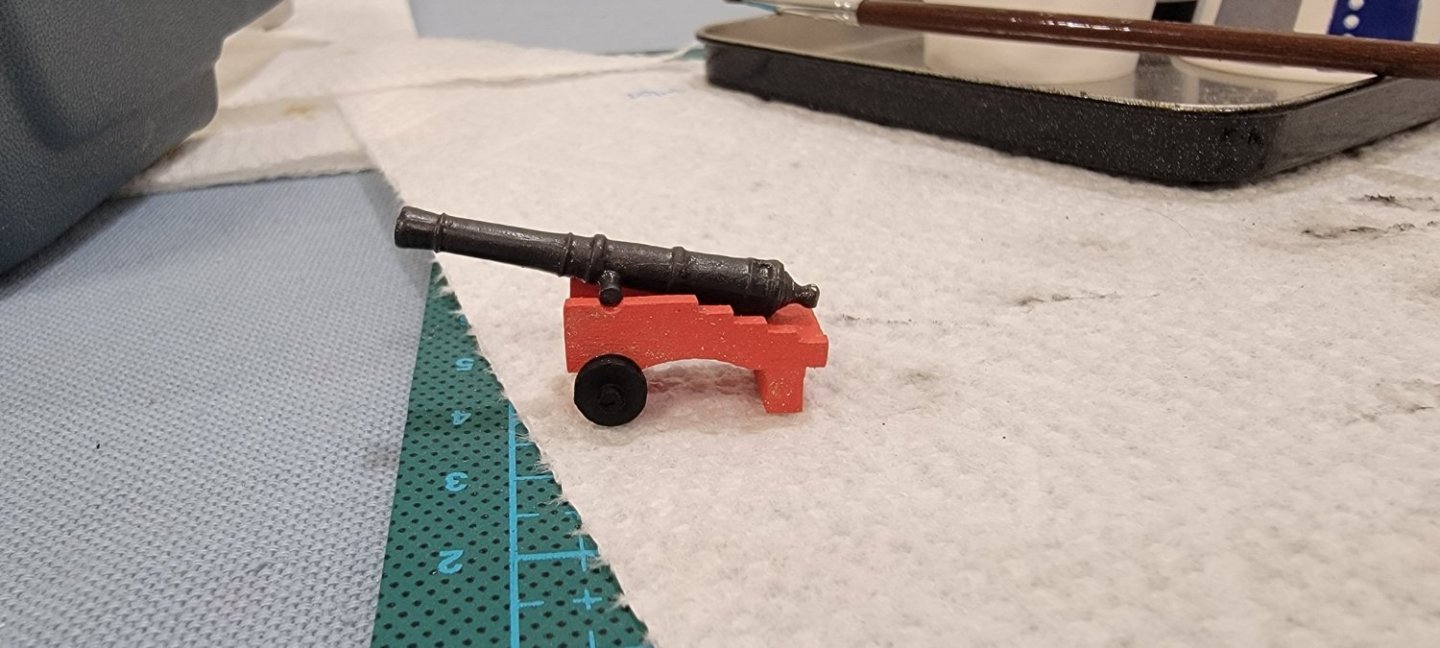
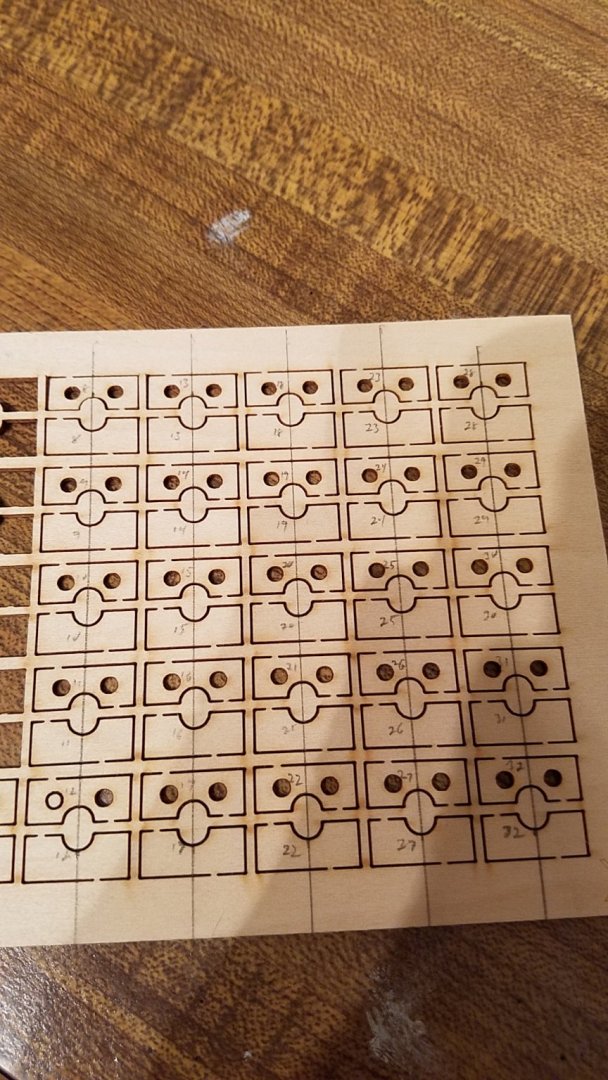
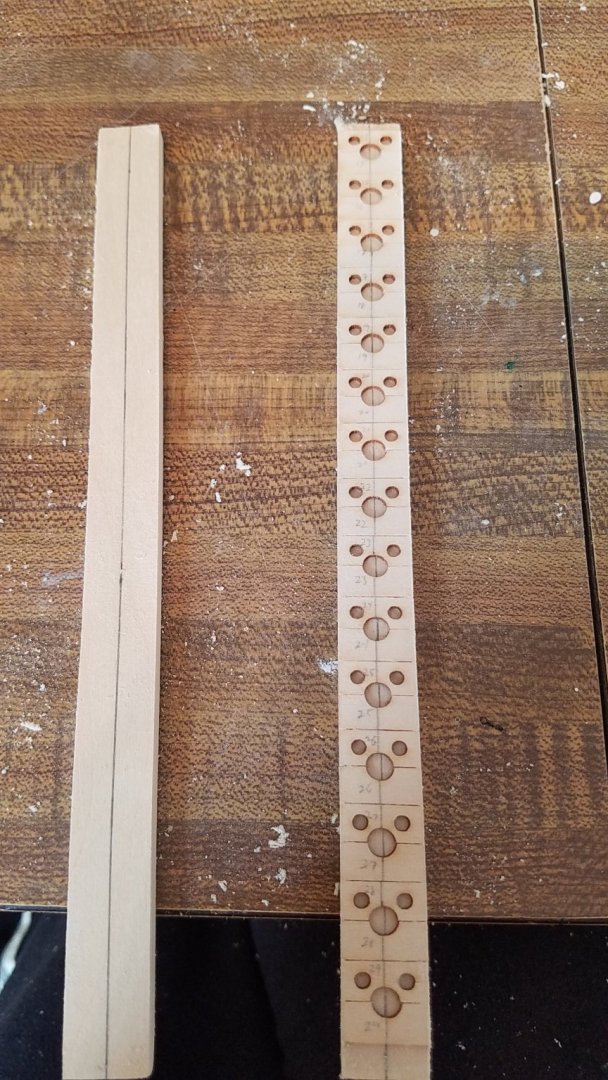
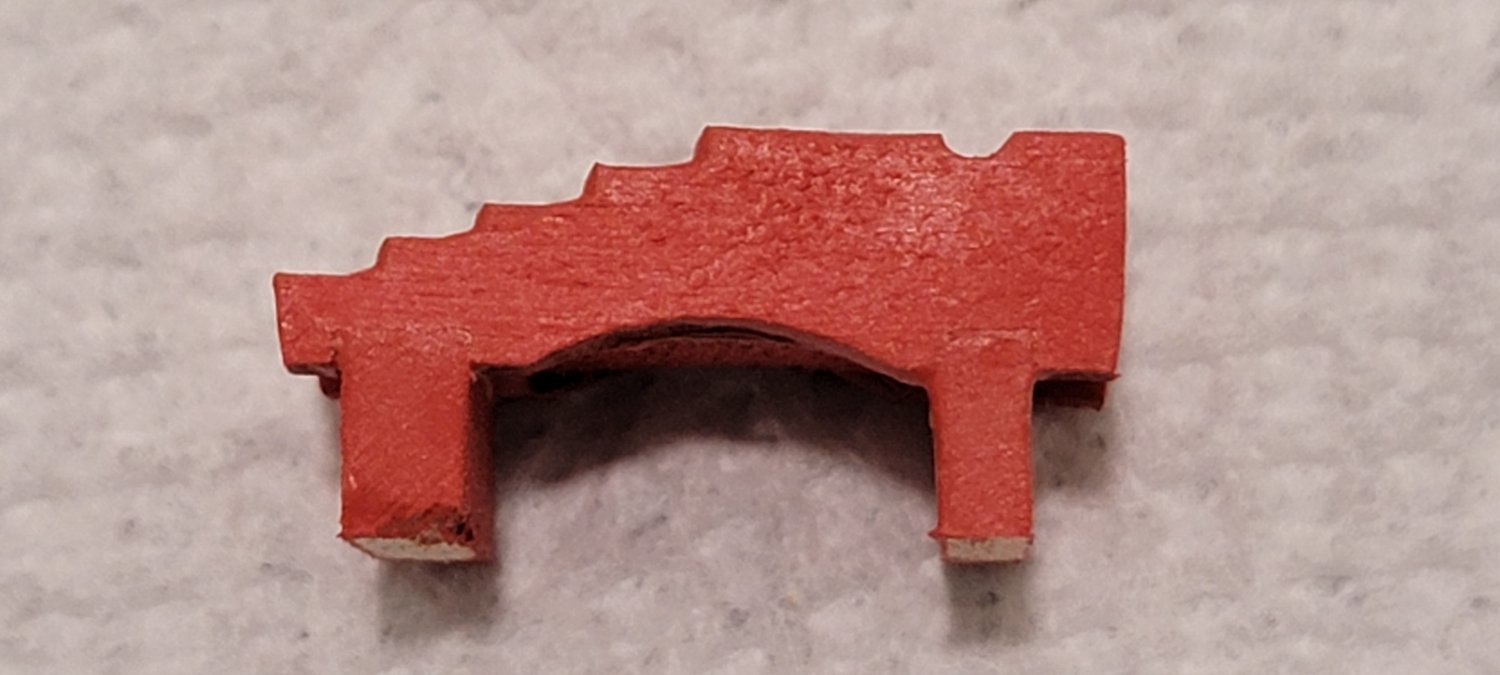
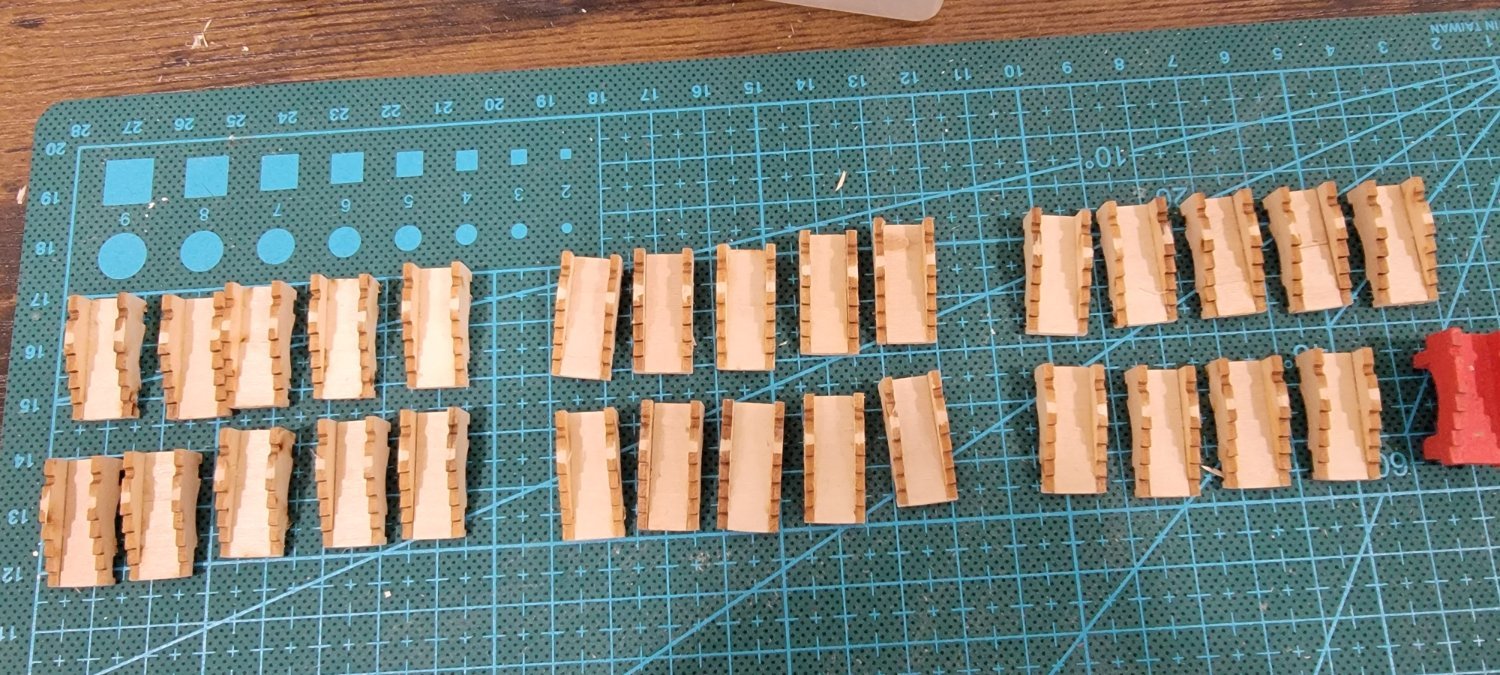
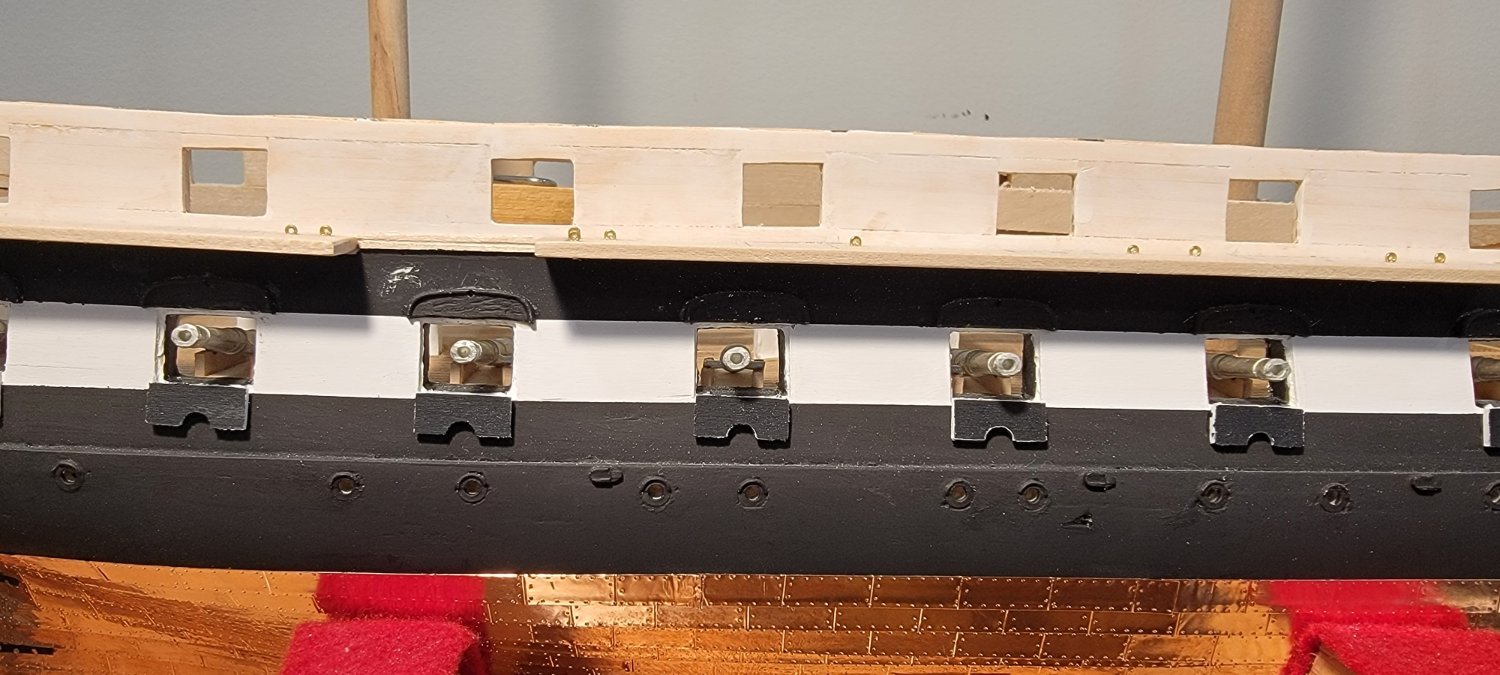
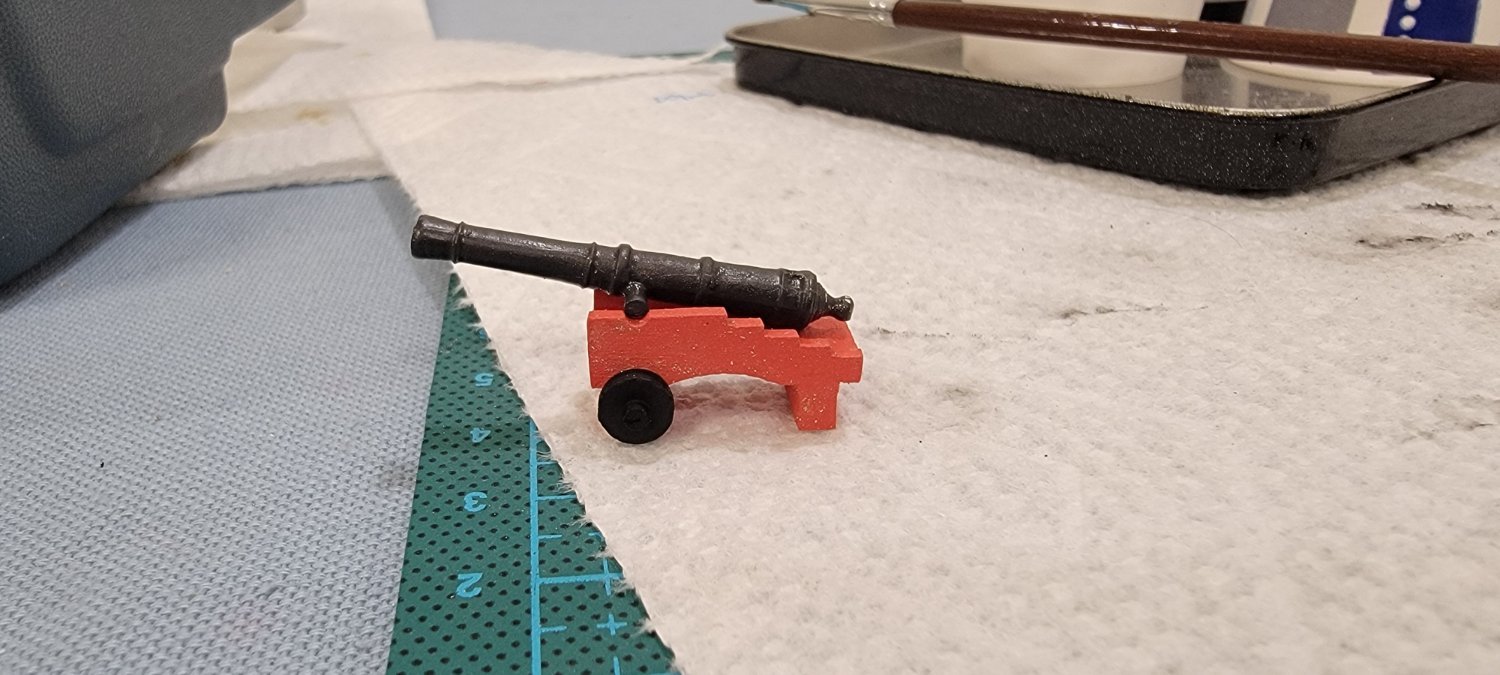
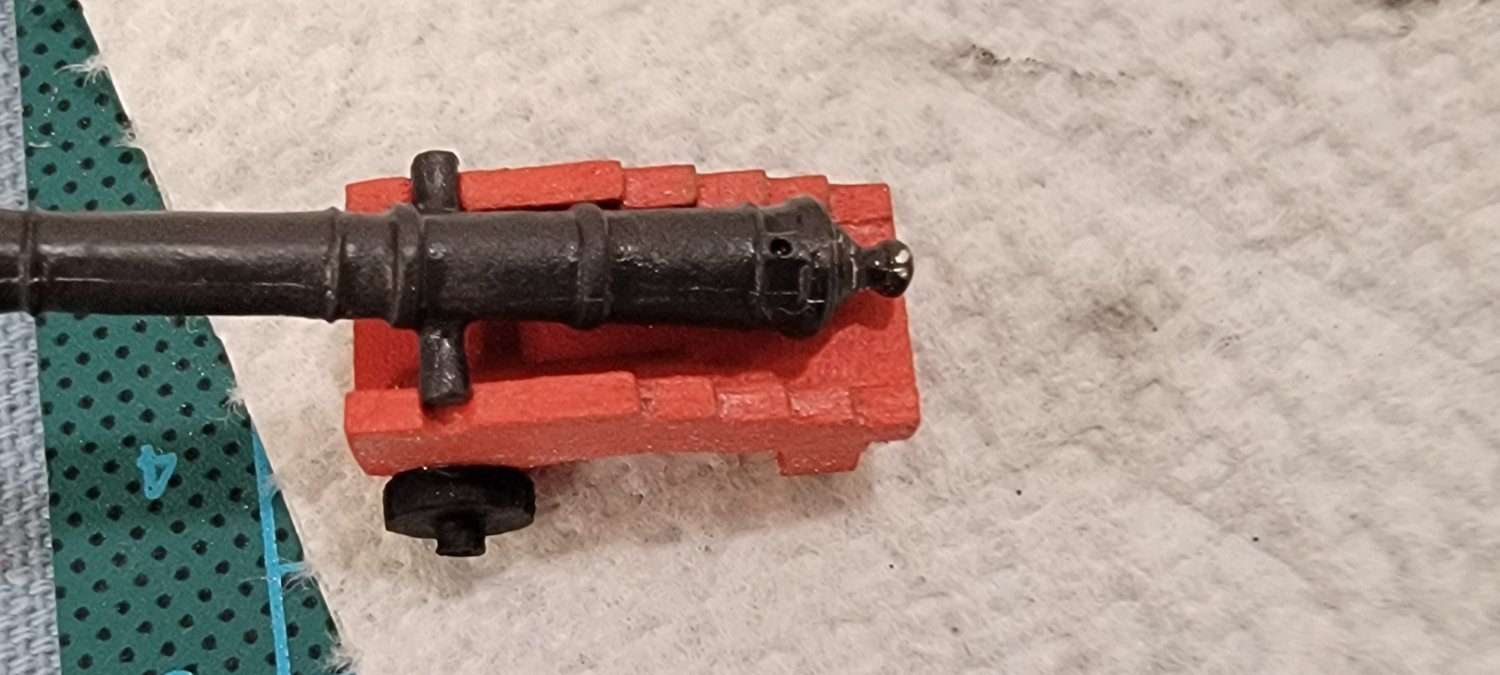
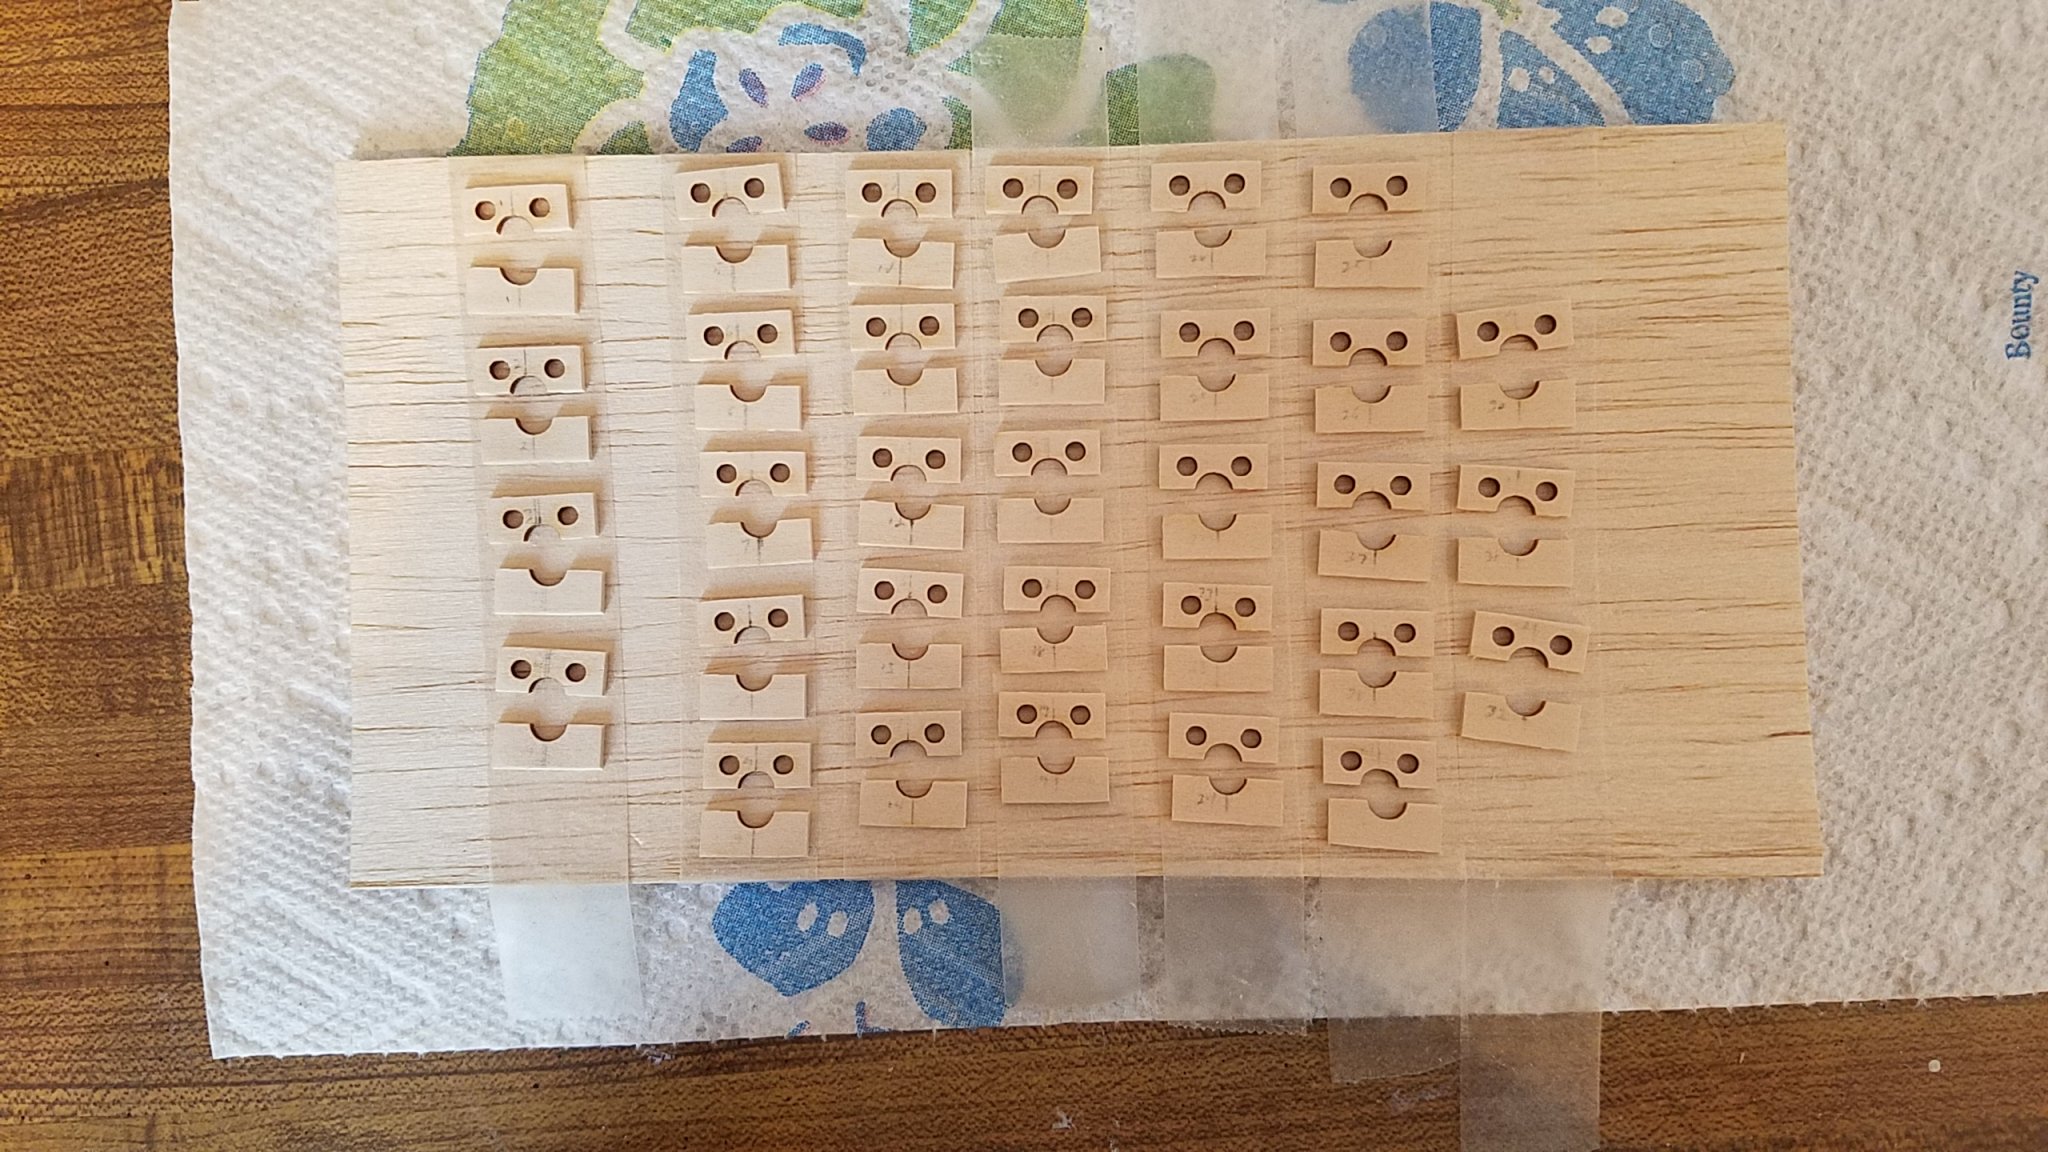
Starting to work on Guns for gundeck. So need to make 30 of them . I am going to use the ME cannon set. Not the dummy barrels that cam with the kit. Fairly common issue is the cannon carriage is to short. Without modification the barrel it will sit too low in the gun port. My solution was to replace the dowel axels with a taller pieces of basswood to raise the overall height. The wheels will just glue right on to these pieces flush with the deck. The wheels themselves will hide most of the piece. So they wont be as obvious. In some of my past builds, I've had canons break loose. The tiny wheels/trucks just don't have enough surface area connecting the deck to stay stuck. I tiny bump and they break loose. Typically this after deck is closed up and I can no longer access to fix. With these pieces, there will be a lot more surface area on the bottom piece's to glue to the deck. Mass producing the carriages Testing them on the ship For the wheels themselves, still want to show the nub of the axis. Trying to clean, enlarge the hole to fit the axes will split the wheel. Soo ill try using toothpicks. Glue the wheel on Saw off the pointy end flush with wheel. That's the side that will be glue to the new piece of wood/axil. On the center side of the toothpick, I'll cut short length after the wheel to simulate the end of a axil Once the carriages are done. 30x4 = 120 wheels to make. Geesh. Then I'll start looking at rigging. At a minimal I'll rig the breech's on all of them. I'll do more excessive rigging on the 8 cannons that can be seen though the open grating on the spar deck. As I'm aiming for an 1812 version of the ship, I'm leaving waist hatches off.


-
usedtosail reacted to a post in a topic:
USS Constitution by JSGerson - Model Shipways Kit No. MS2040
-
GGibson reacted to a post in a topic:
USS Constitution by JSGerson - Model Shipways Kit No. MS2040
-
Gregg, Definity encourage you to join the Connie Club. The ship itself as a subject is a work of art. The Model Expo kit is great. And there are multiple build logs as great reference material. Jon's is a great log. Also look up usedtosail finished build log. Its effectively a full blown practicum. But its not for the faint of heart and definitely not a race. I also started my build in 2017. At my current rate.. I'll need more than a few years to complete. Having Jon at roughly the same build phase has been great encouragement to keep me progressing and a great reference/ideas.. We might have leap frogged each other a few times. 🙂 Yup Jon... I cant believe its been almost a year since my last post. But the break was needed, and I'm glad to to get back to the shipyard. I'll post my progress on my guns shortly. I'm not super detailing them as you did. I'm just using the stock ME canons/carriages. (Not the dummy from the kit but the full cannon set.) I came up with a different way to modify the carriages to make them the proper height. Haven't decided how much rigging ill give them yet.
-
Jon.... Wow,, Just Wow. I took a bit of Hiatus from my Connie build. Come back to find you've been going crazy with your awesome build. Progressed well past where I'm at. It will take me awhile just to go through your log and catch up. I'm working on my gun deck now. Just started assembling the guns. So really interested in you log entries on that section. KenM
-
kmart reacted to a post in a topic:
HMS Royal William by KeithW - Euromodel - 1/72
-
bruce d reacted to a post in a topic:
HMS Victory by kmart - FINISHED - Panart - 1:72 Scale - Bow Section
-
Mr Whippy reacted to a post in a topic:
HMS Victory by kmart - FINISHED - Panart - 1:72 Scale - Bow Section
-
Mr Whippy reacted to a post in a topic:
HMS Victory by kmart - FINISHED - Panart - 1:72 Scale - Bow Section
-
yvesvidal reacted to a post in a topic:
HMS Victory by kmart - FINISHED - Panart - 1:72 Scale - Bow Section
-
Old Coastie reacted to a post in a topic:
HMS Victory by kmart - FINISHED - Panart - 1:72 Scale - Bow Section
-
Old Coastie reacted to a post in a topic:
HMS Victory by kmart - FINISHED - Panart - 1:72 Scale - Bow Section
-
kmart reacted to a post in a topic:
USS Constitution by JSGerson - Model Shipways Kit No. MS2040
-
Your moving right along at a great pace. She is looking really nice.
- 55 replies
-
- 2
-
-
- constitution
- model shipways
- (and 1 more)
-
Looking great. Like how you made the rails. I may copy that techneque when i get to that step. Question for you. What brand of paint and color did you use for gun carrages. I have the me paint set and the carrage red. But it looks to bright. The color you used looks better
-
Great build Jeff! You did Victory proud!
-
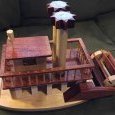
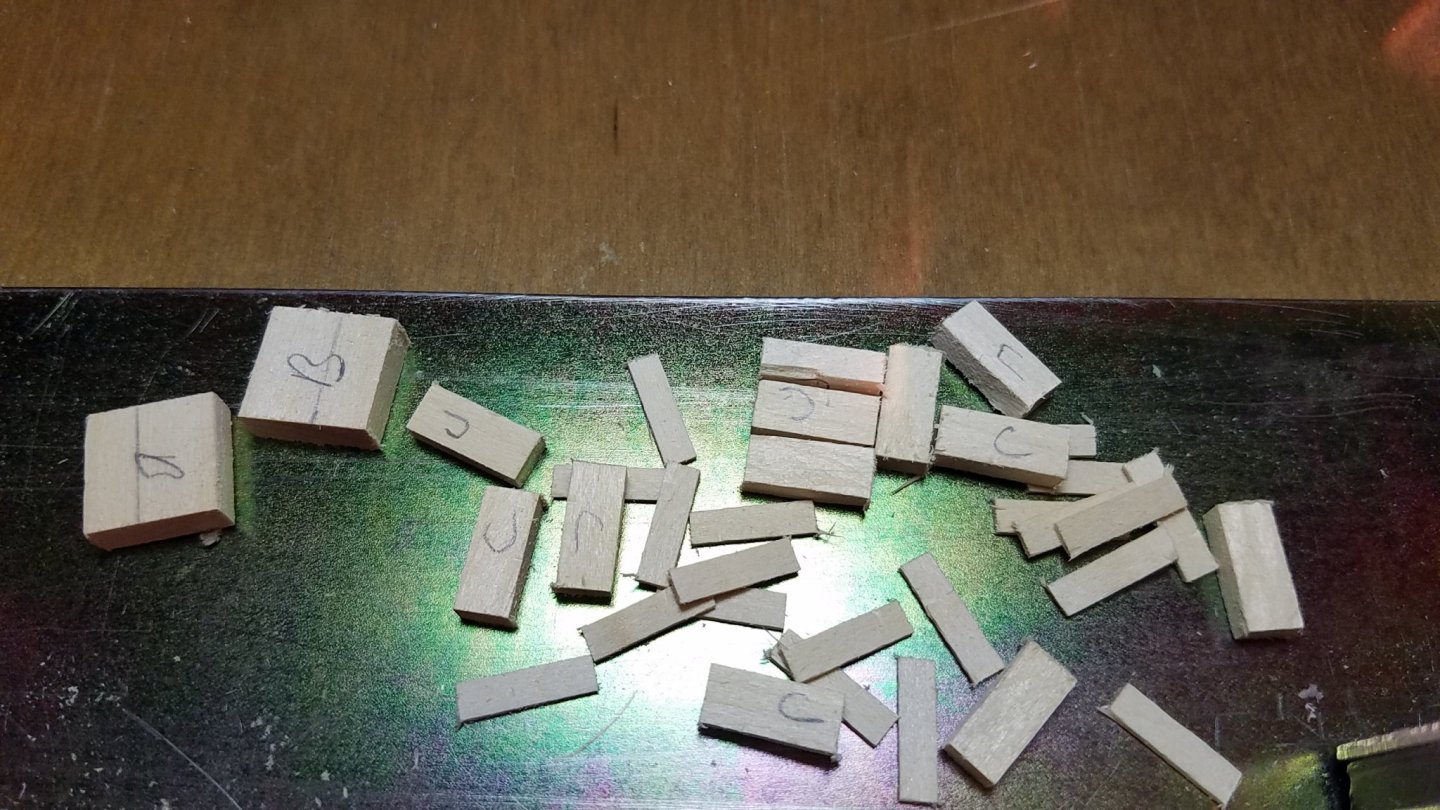
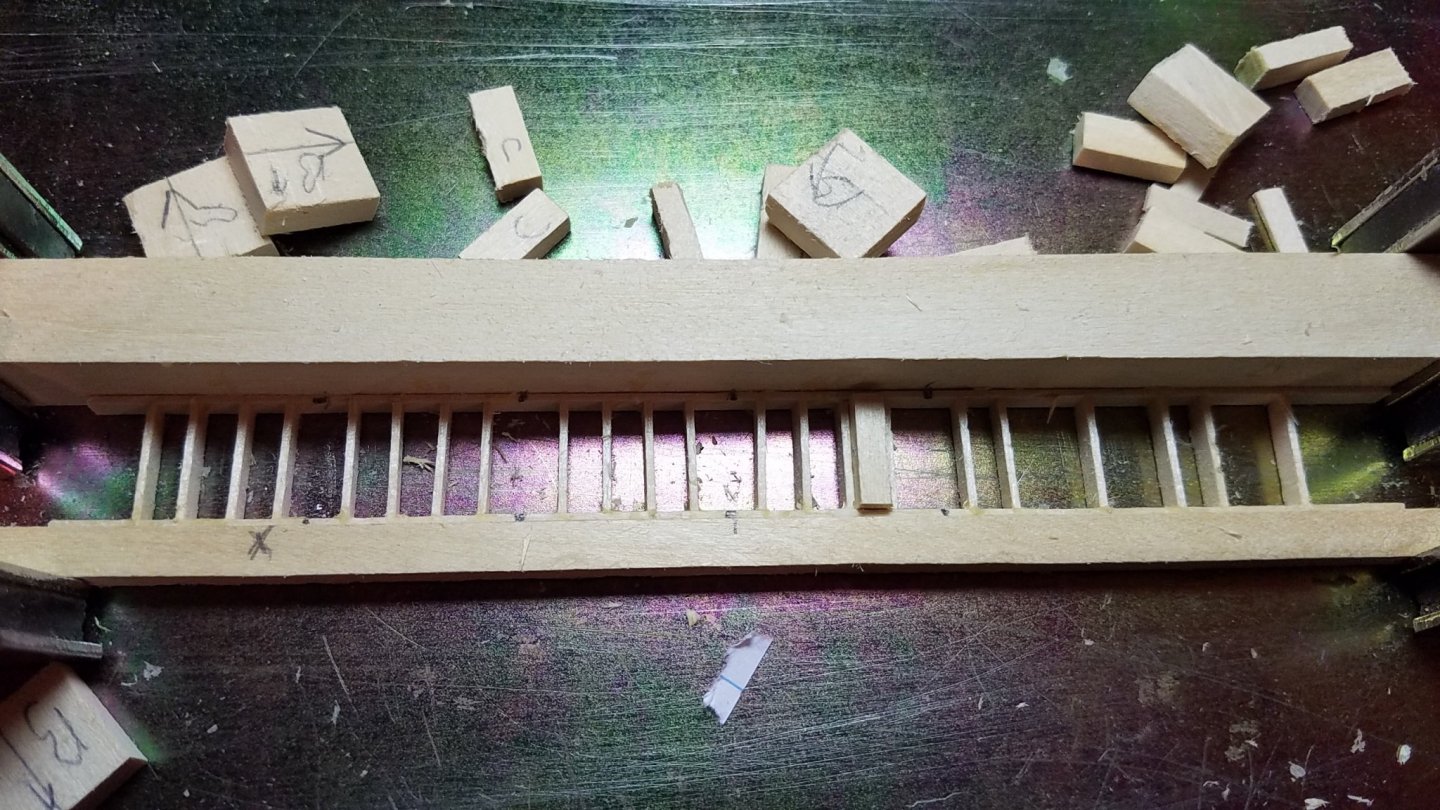
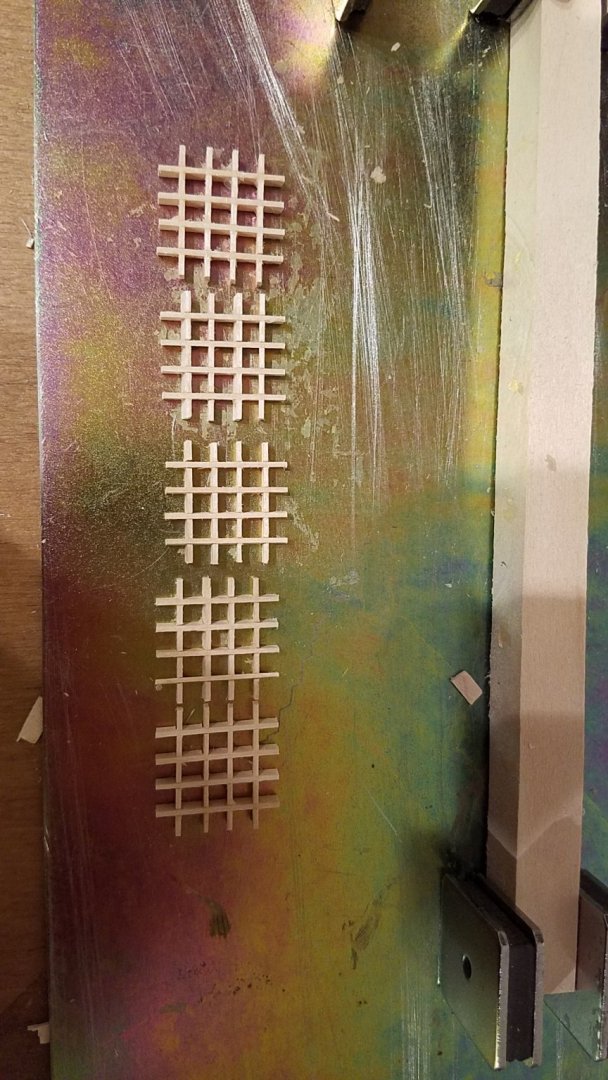
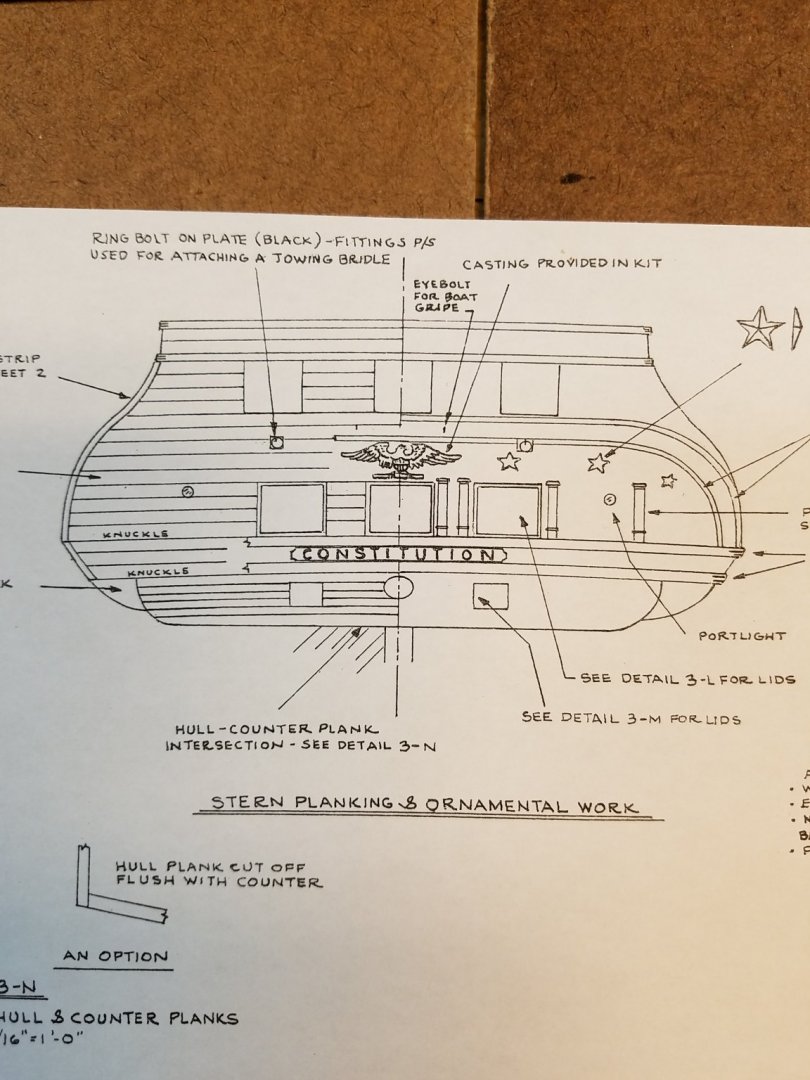
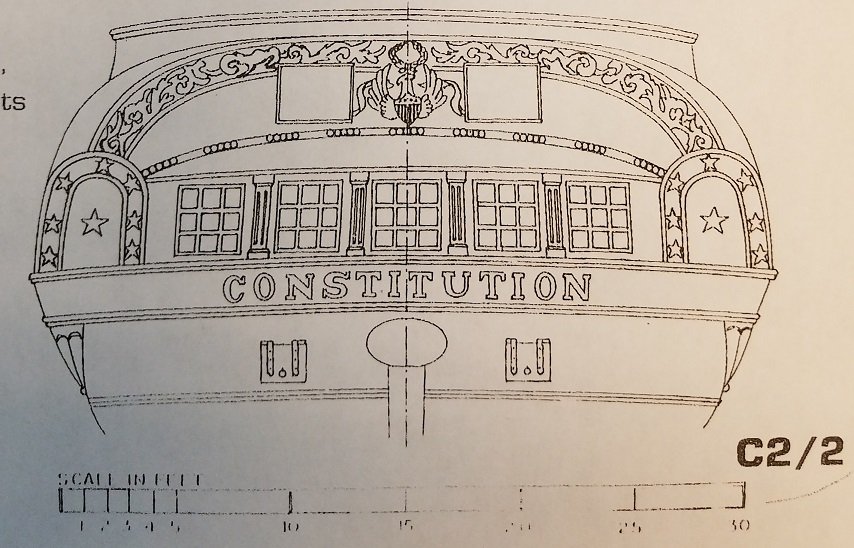
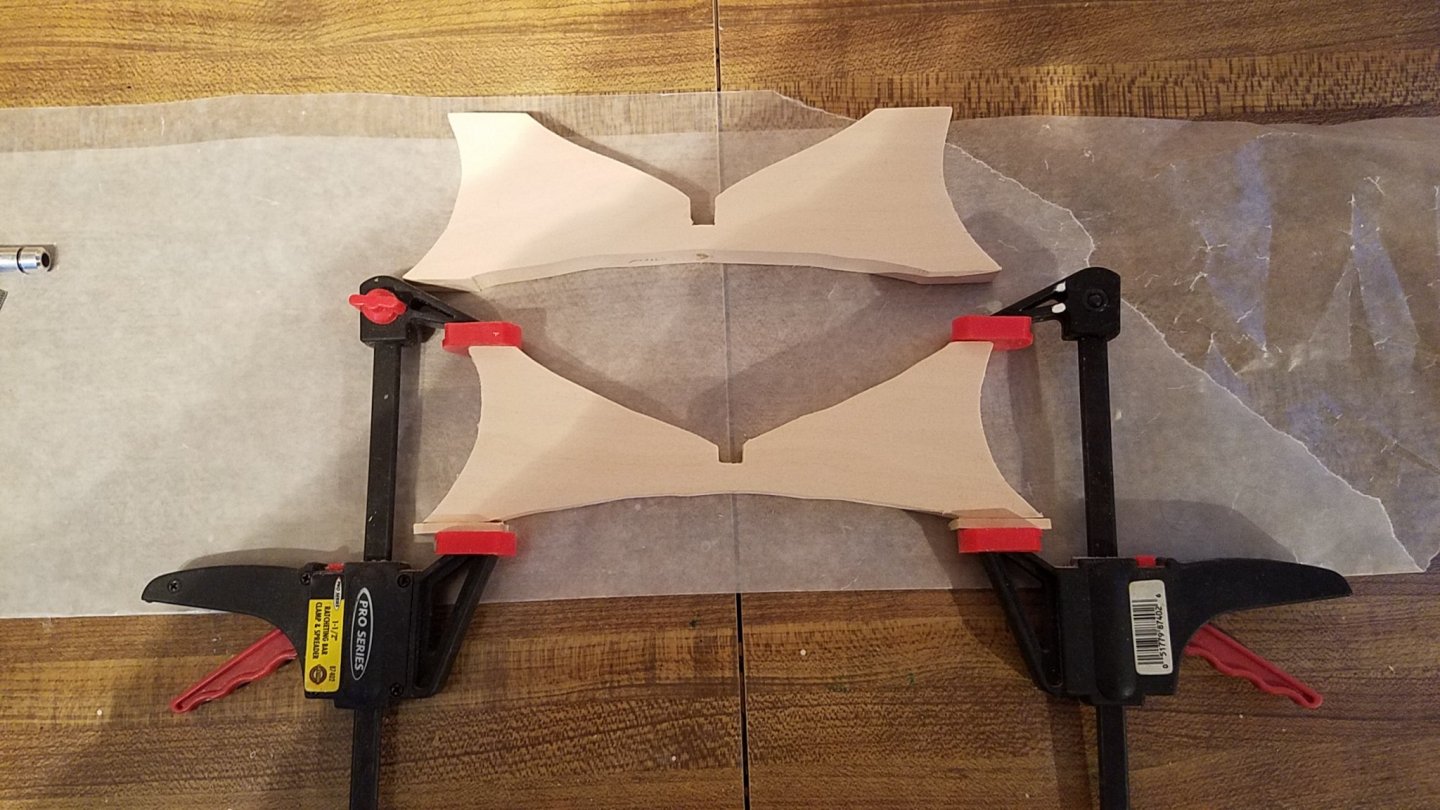
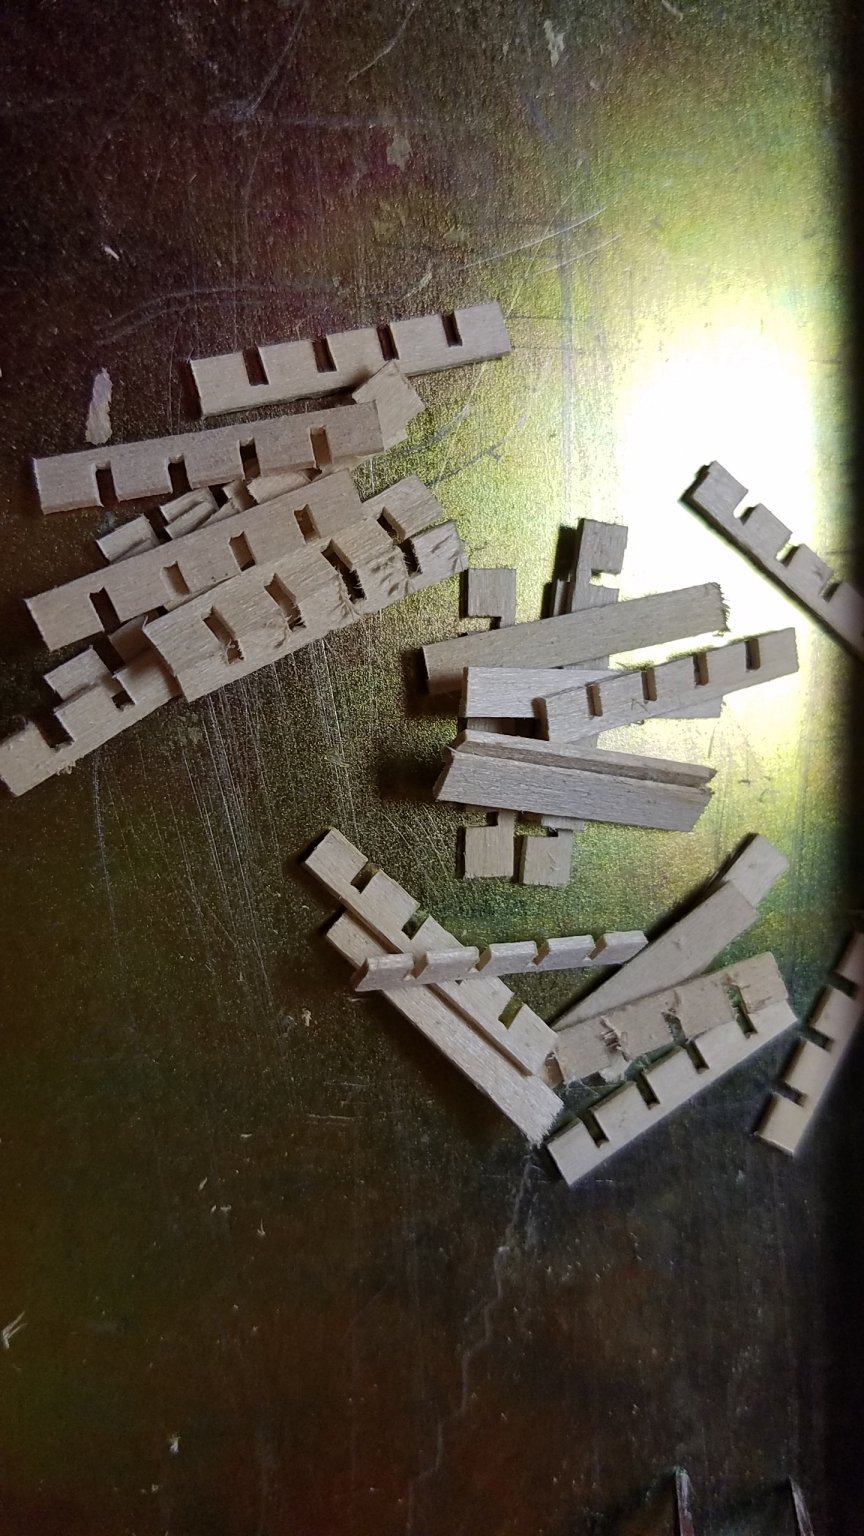
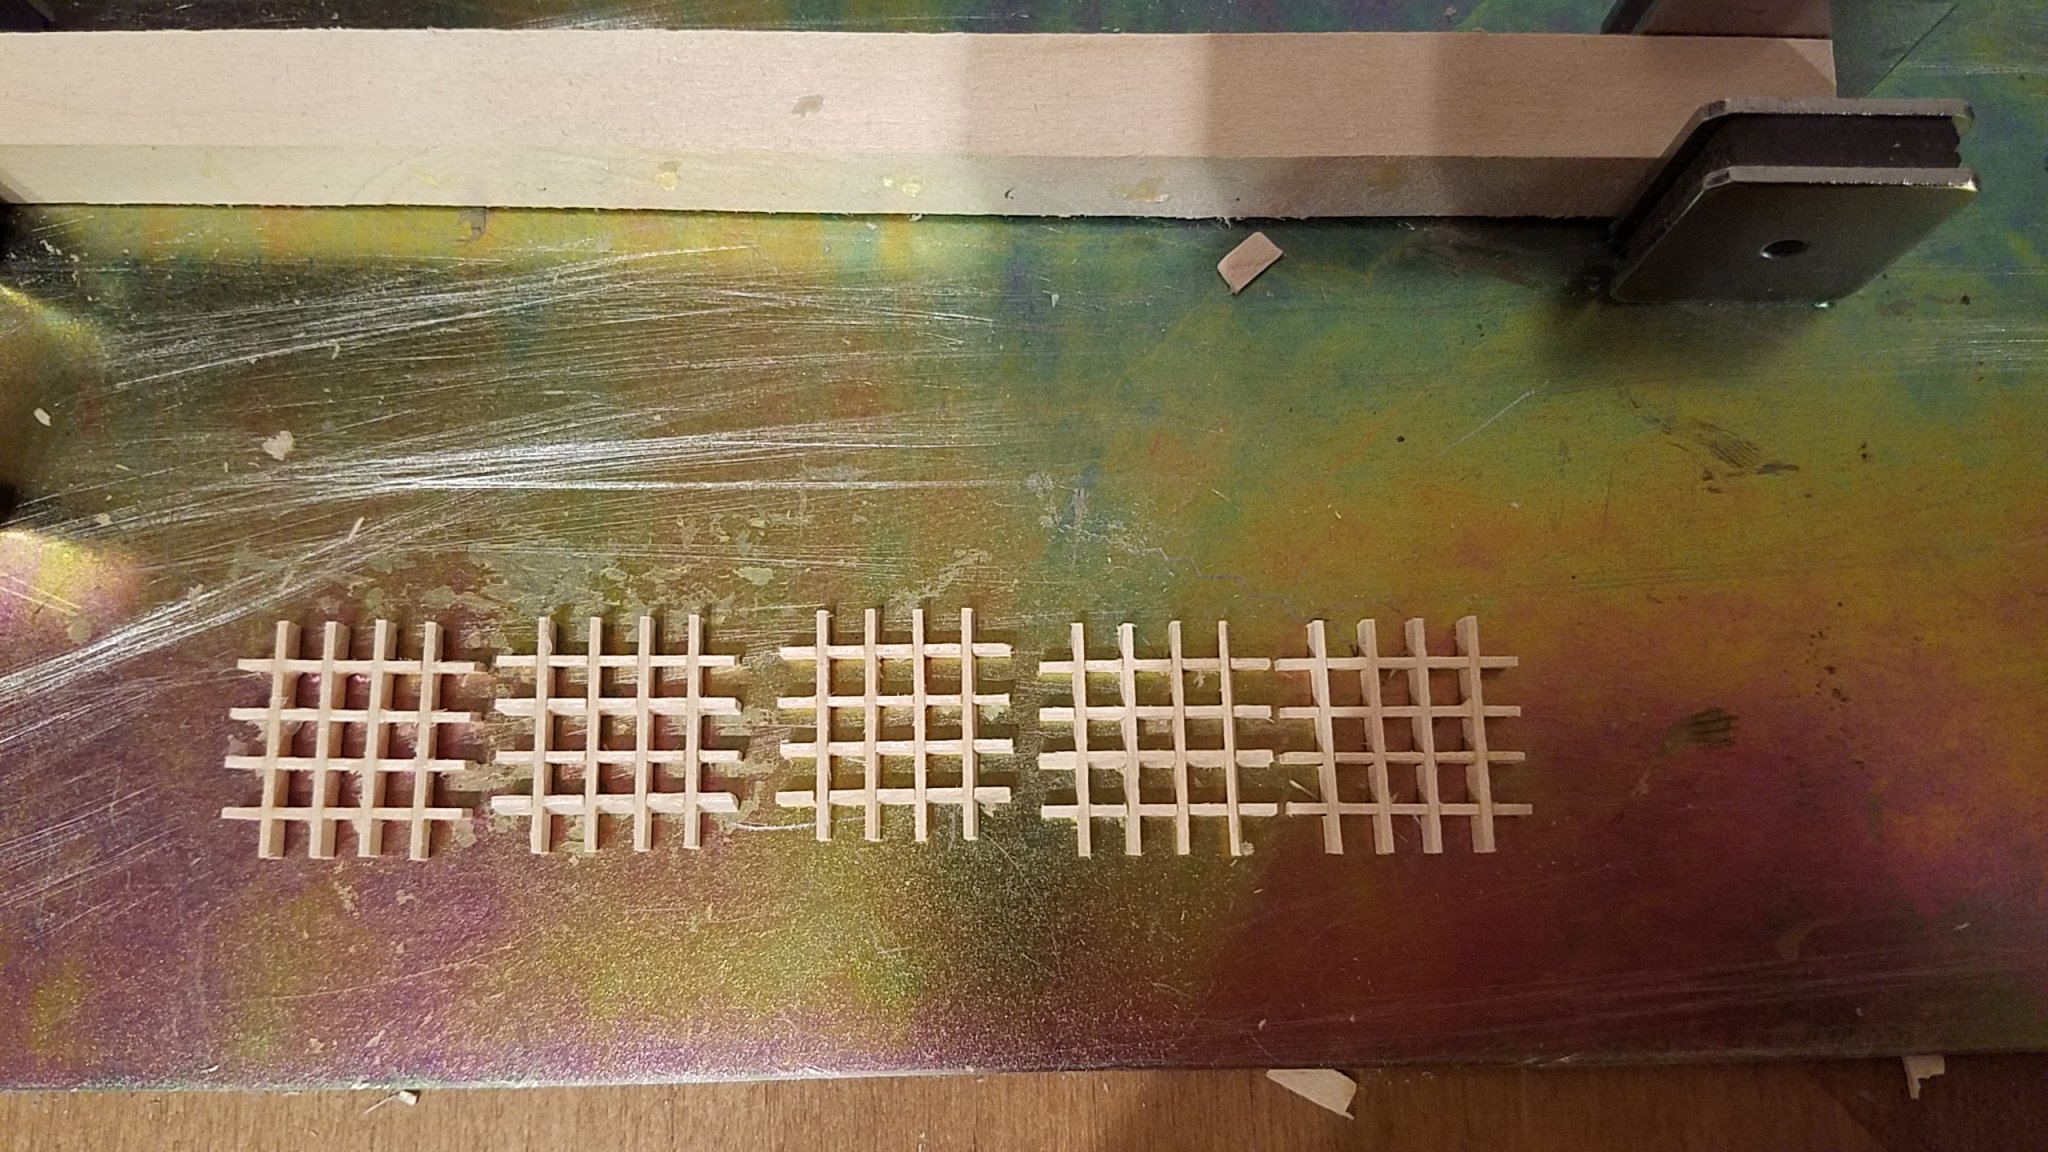
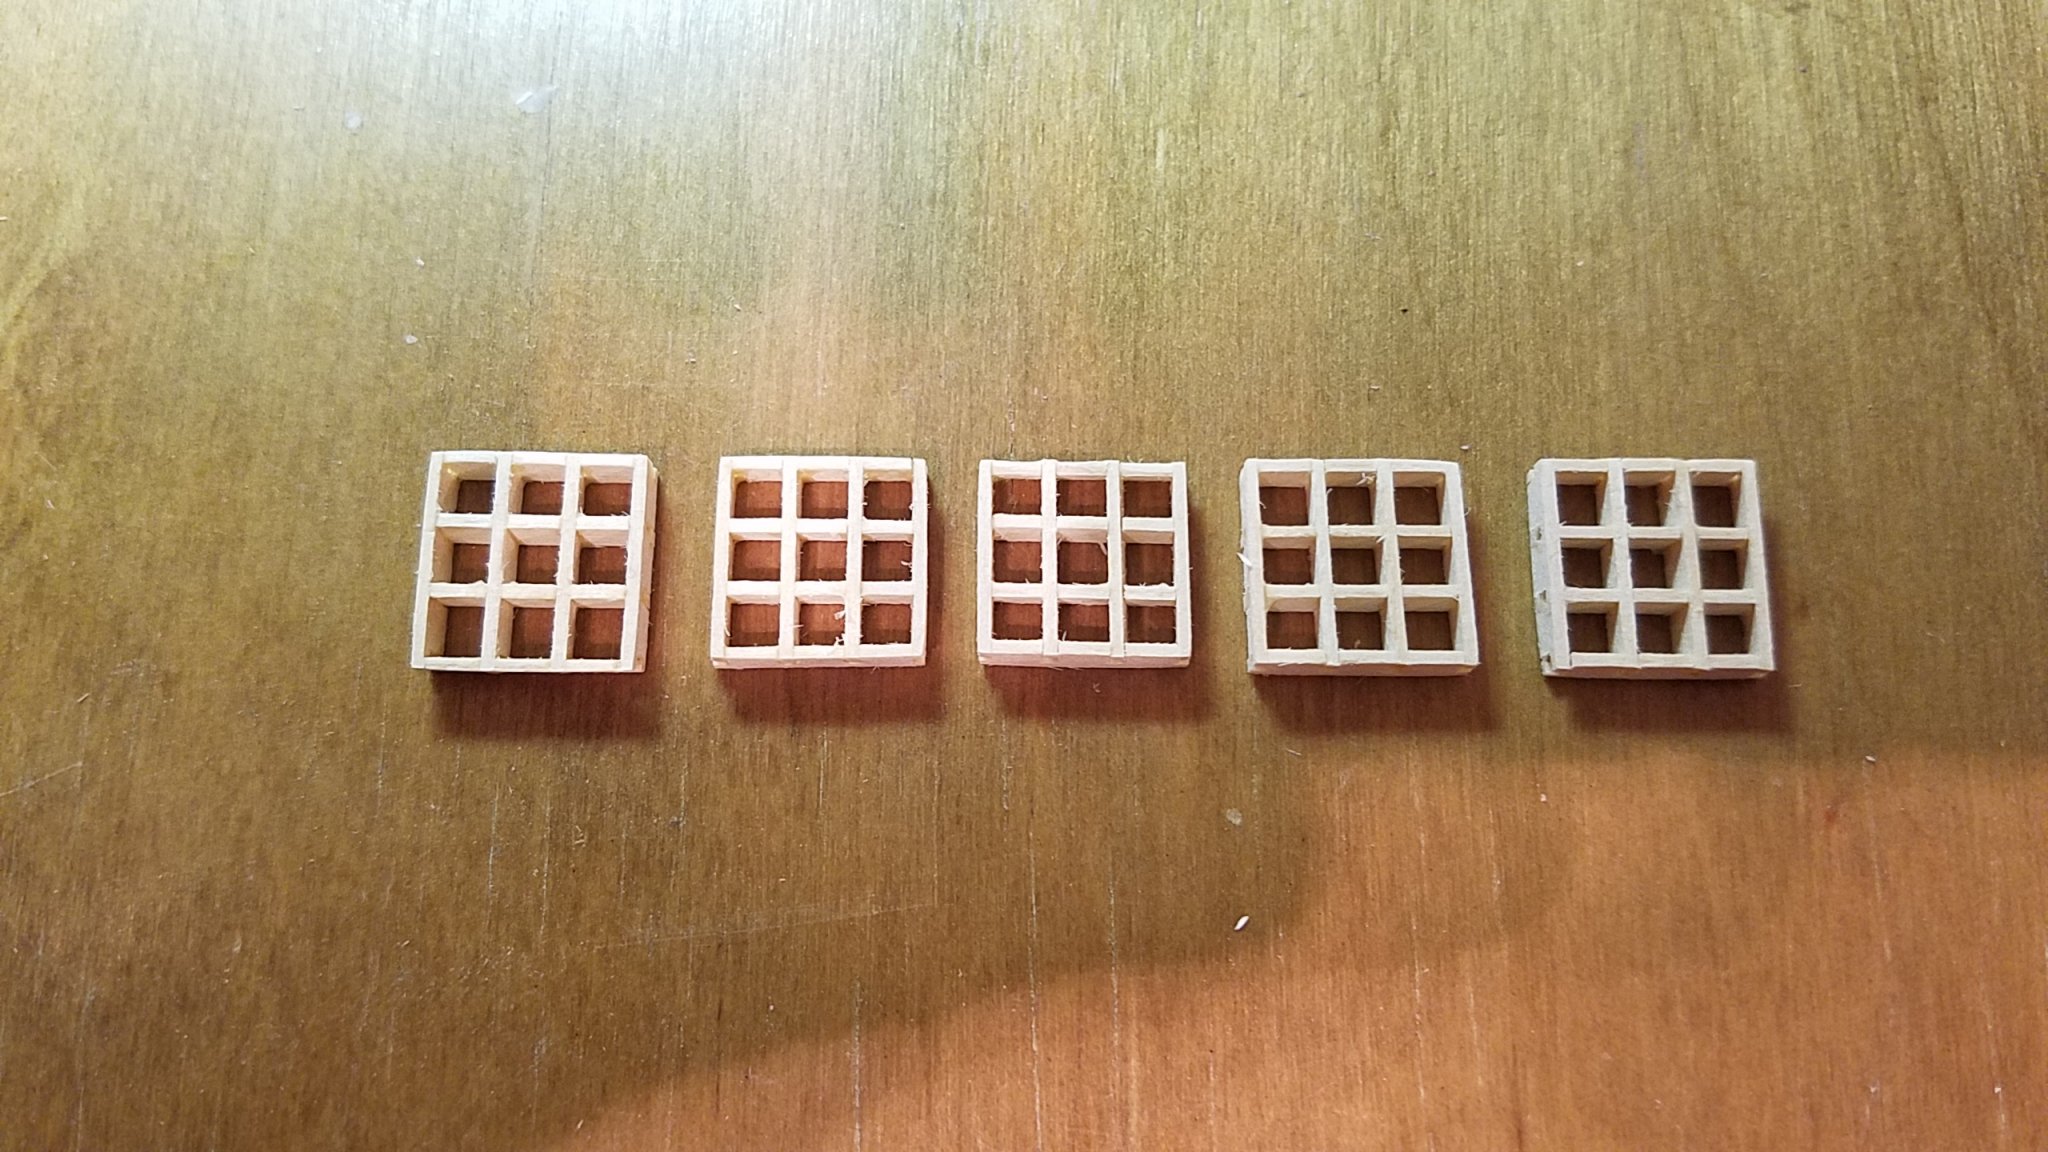
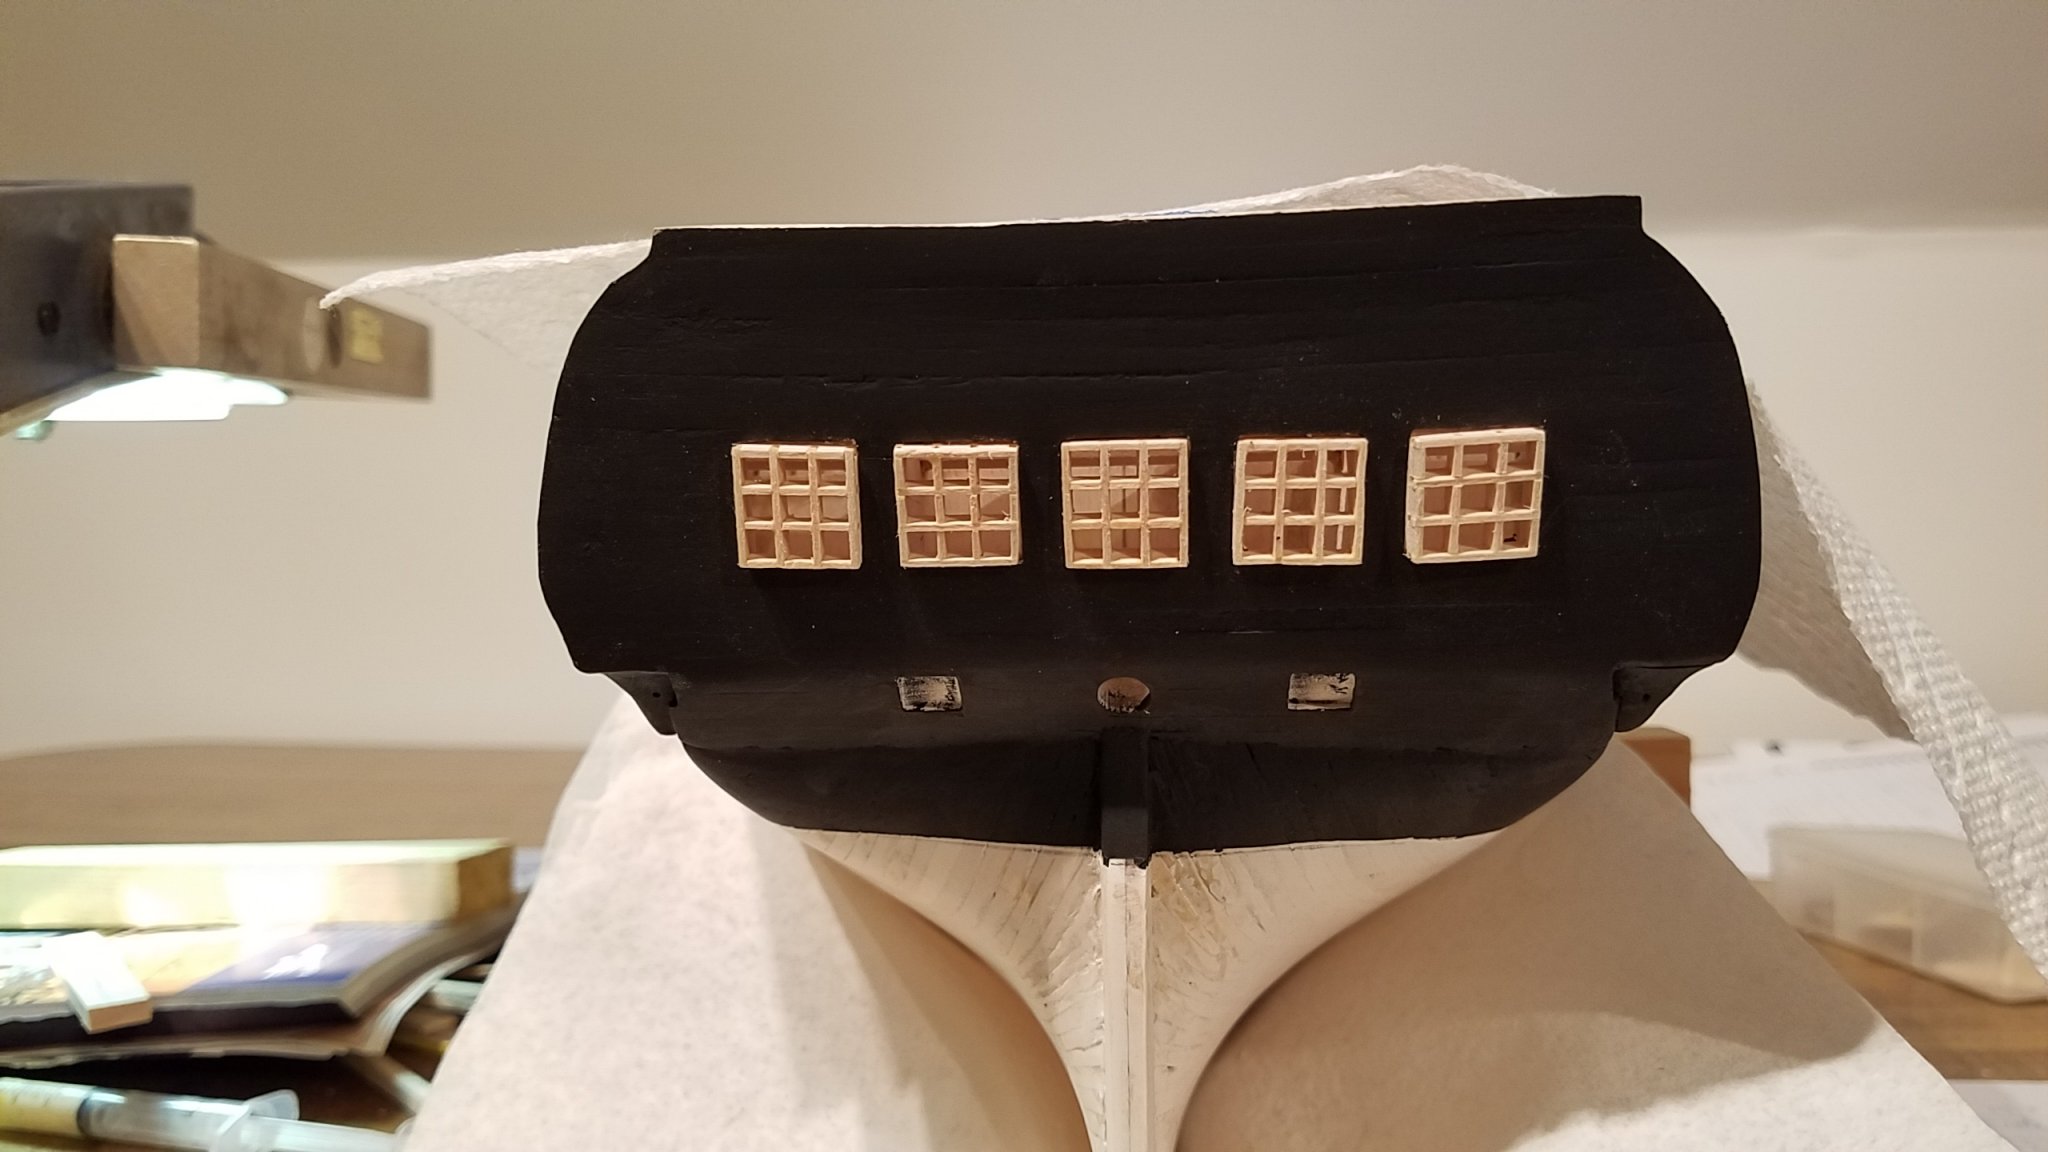
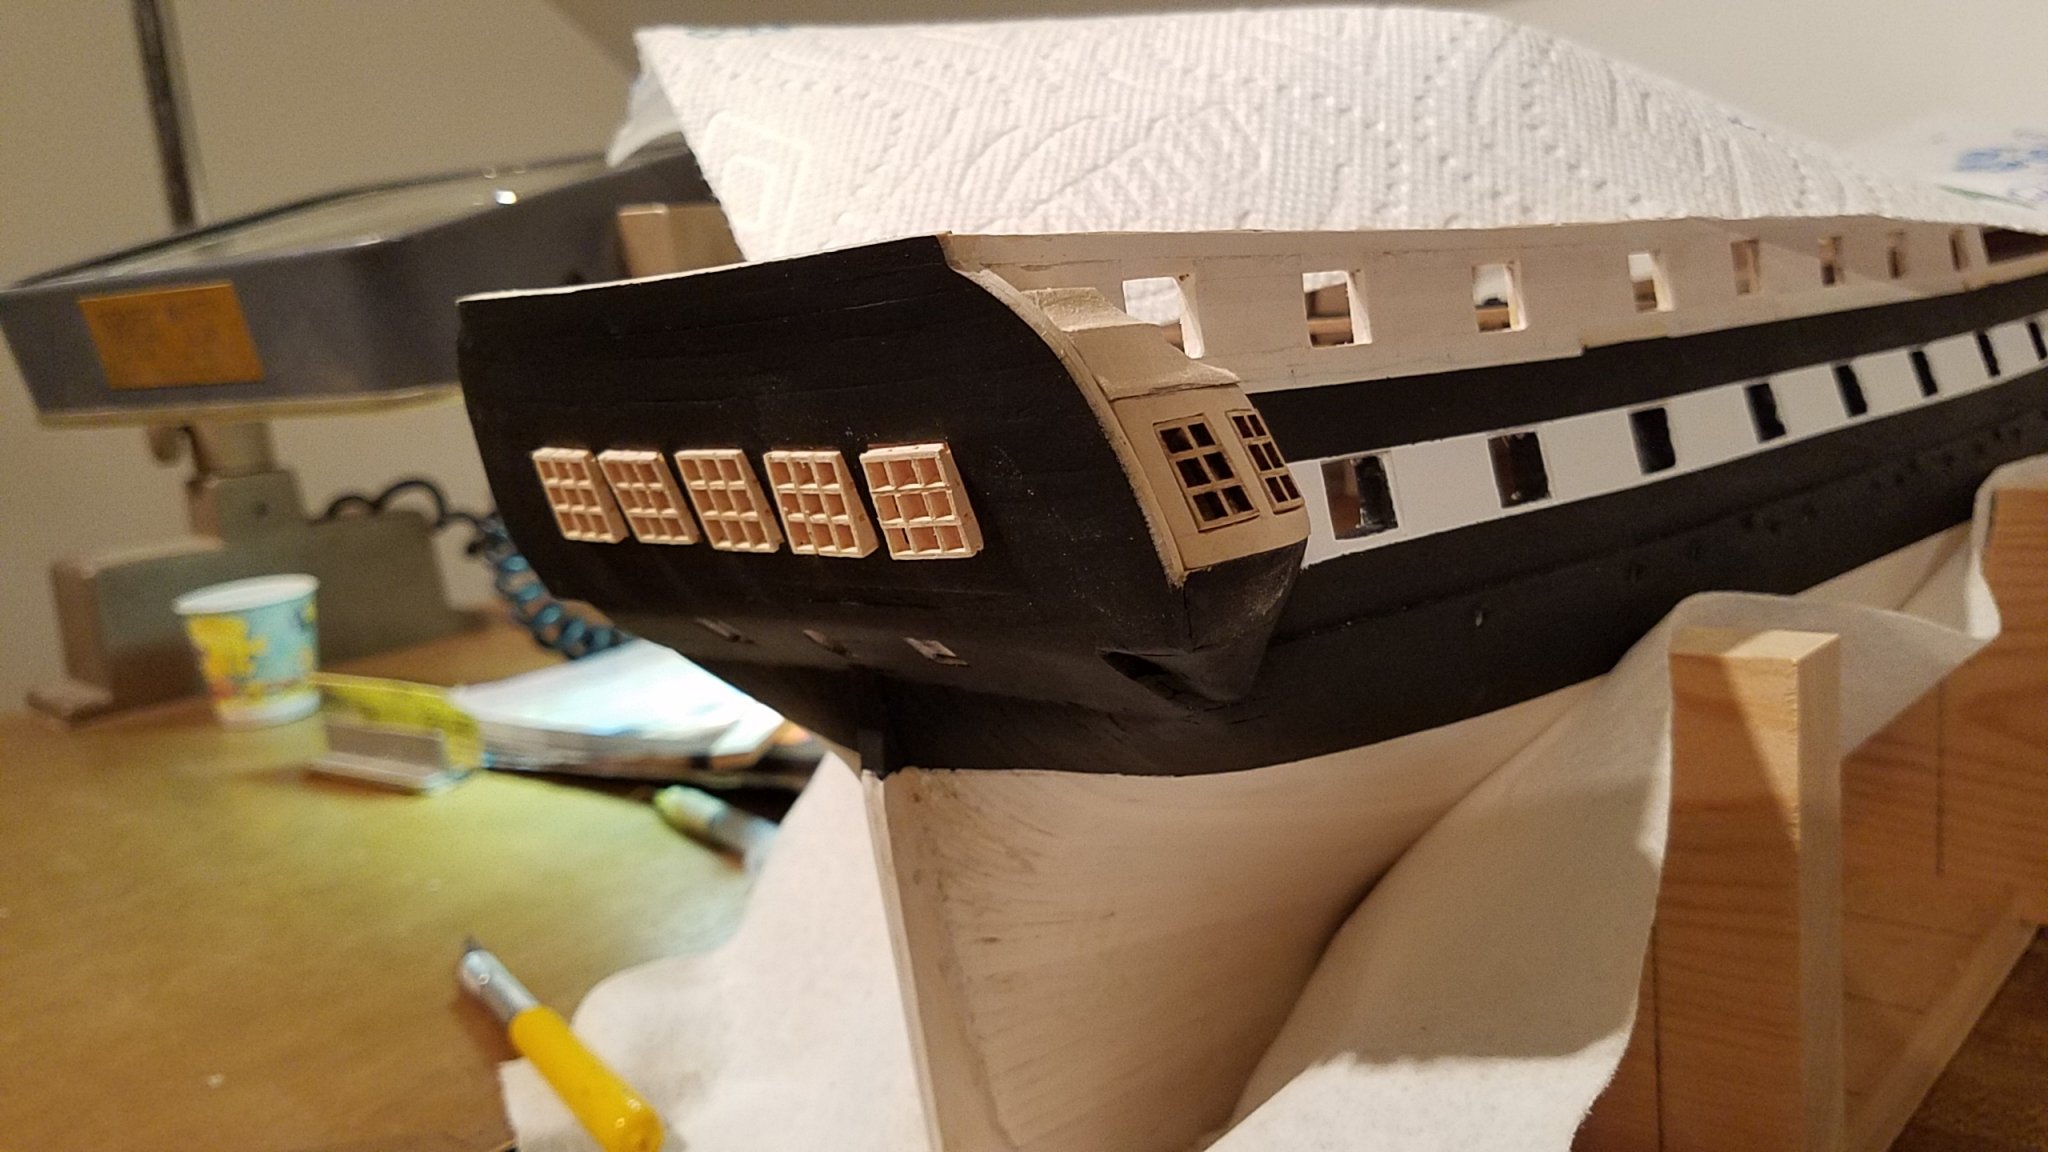
Continuing on, The stern windows, As the ME kit is of a modern version of the ship, the kit does not include the window like they do with the quarter galleries. But to look right, the windows need to be sized and be comparable to the quarter galleries. and did I mention they are TINY! Modern Stern The stern I'm aiming for... First Attempt. Did lots of math. Calculated all the spacers I needed. Cut up lots of tiny pieces of wood. Started framing out the windows using the spacers to make square frames Then added the two sets of vertical sashes? inside each frame. Again using the spaces to get them perfectly positioned So far so good. BUT, when I took them out of the jig. started to try and add the super tiny cross pieces. They were just too tiny to align right, and the surface area holding the frames together was soo small. The frames kept falling apart. I got a pile of wood pieces that looks like the first pic, but covered in glue. Attempt #2 Looking at the plans, I thought hmmm that kinda looks like a deck grating, but just larger holes... So, While I never successfully made my own gratings before. I kind knew the general idea. Lots more measurements, math and cutting more spacers.. I made a pile of these.... Glued them together. (this time they stayed stuck together) and got these. Cleaned them up... Still needs some more sanding and cleaning. Just set in place but.... They are actually the same height as the quarter gallery windows, even though they don't look like it in the pic. They came out way better than I expected.

.thumb.jpg.aaaa53f070fc266e1d6dc916c8d8811f.jpg)


-
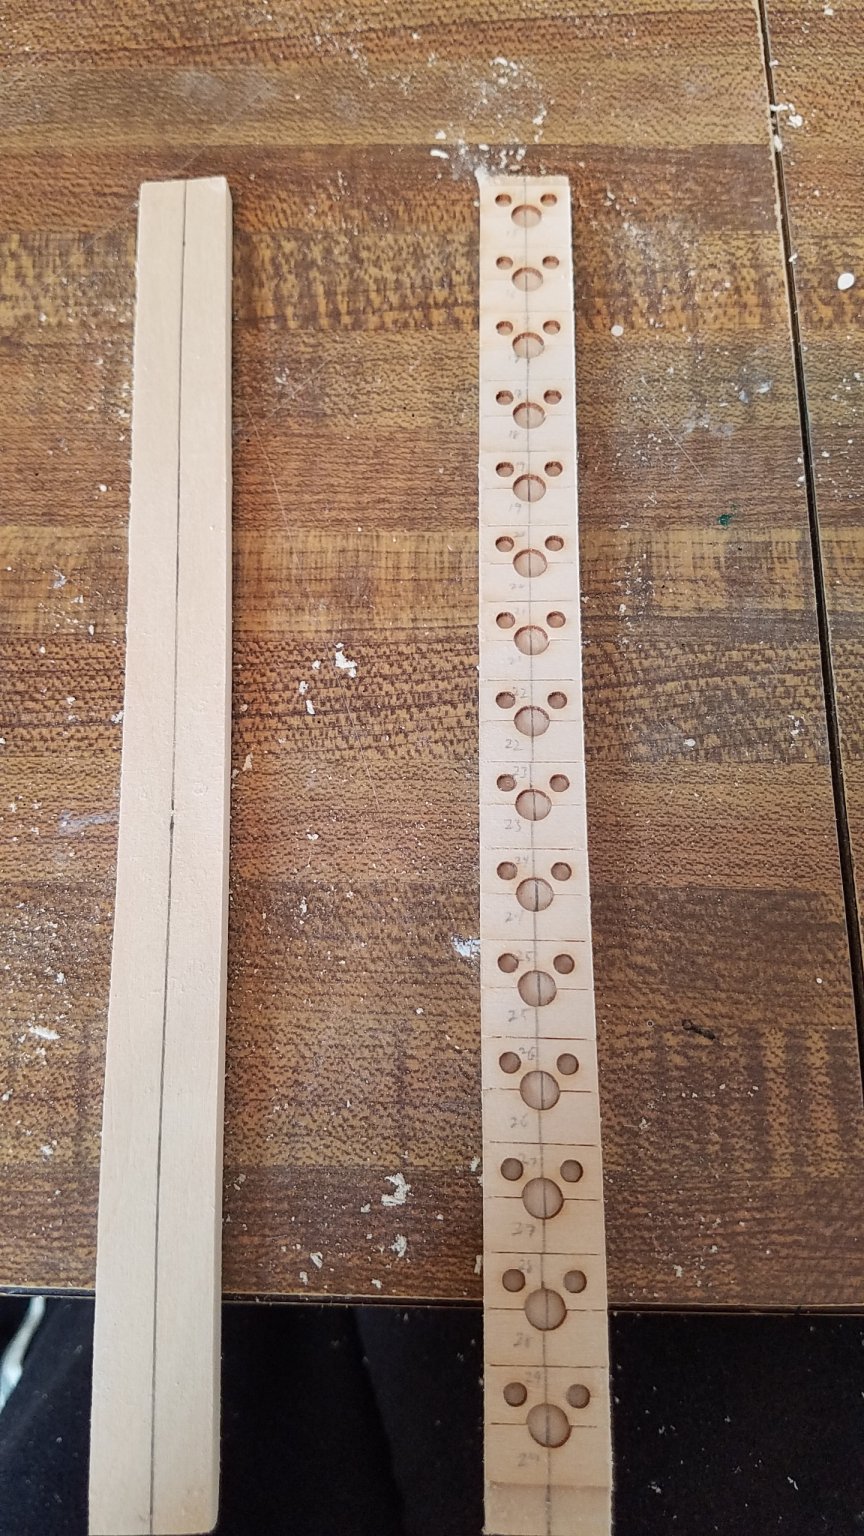
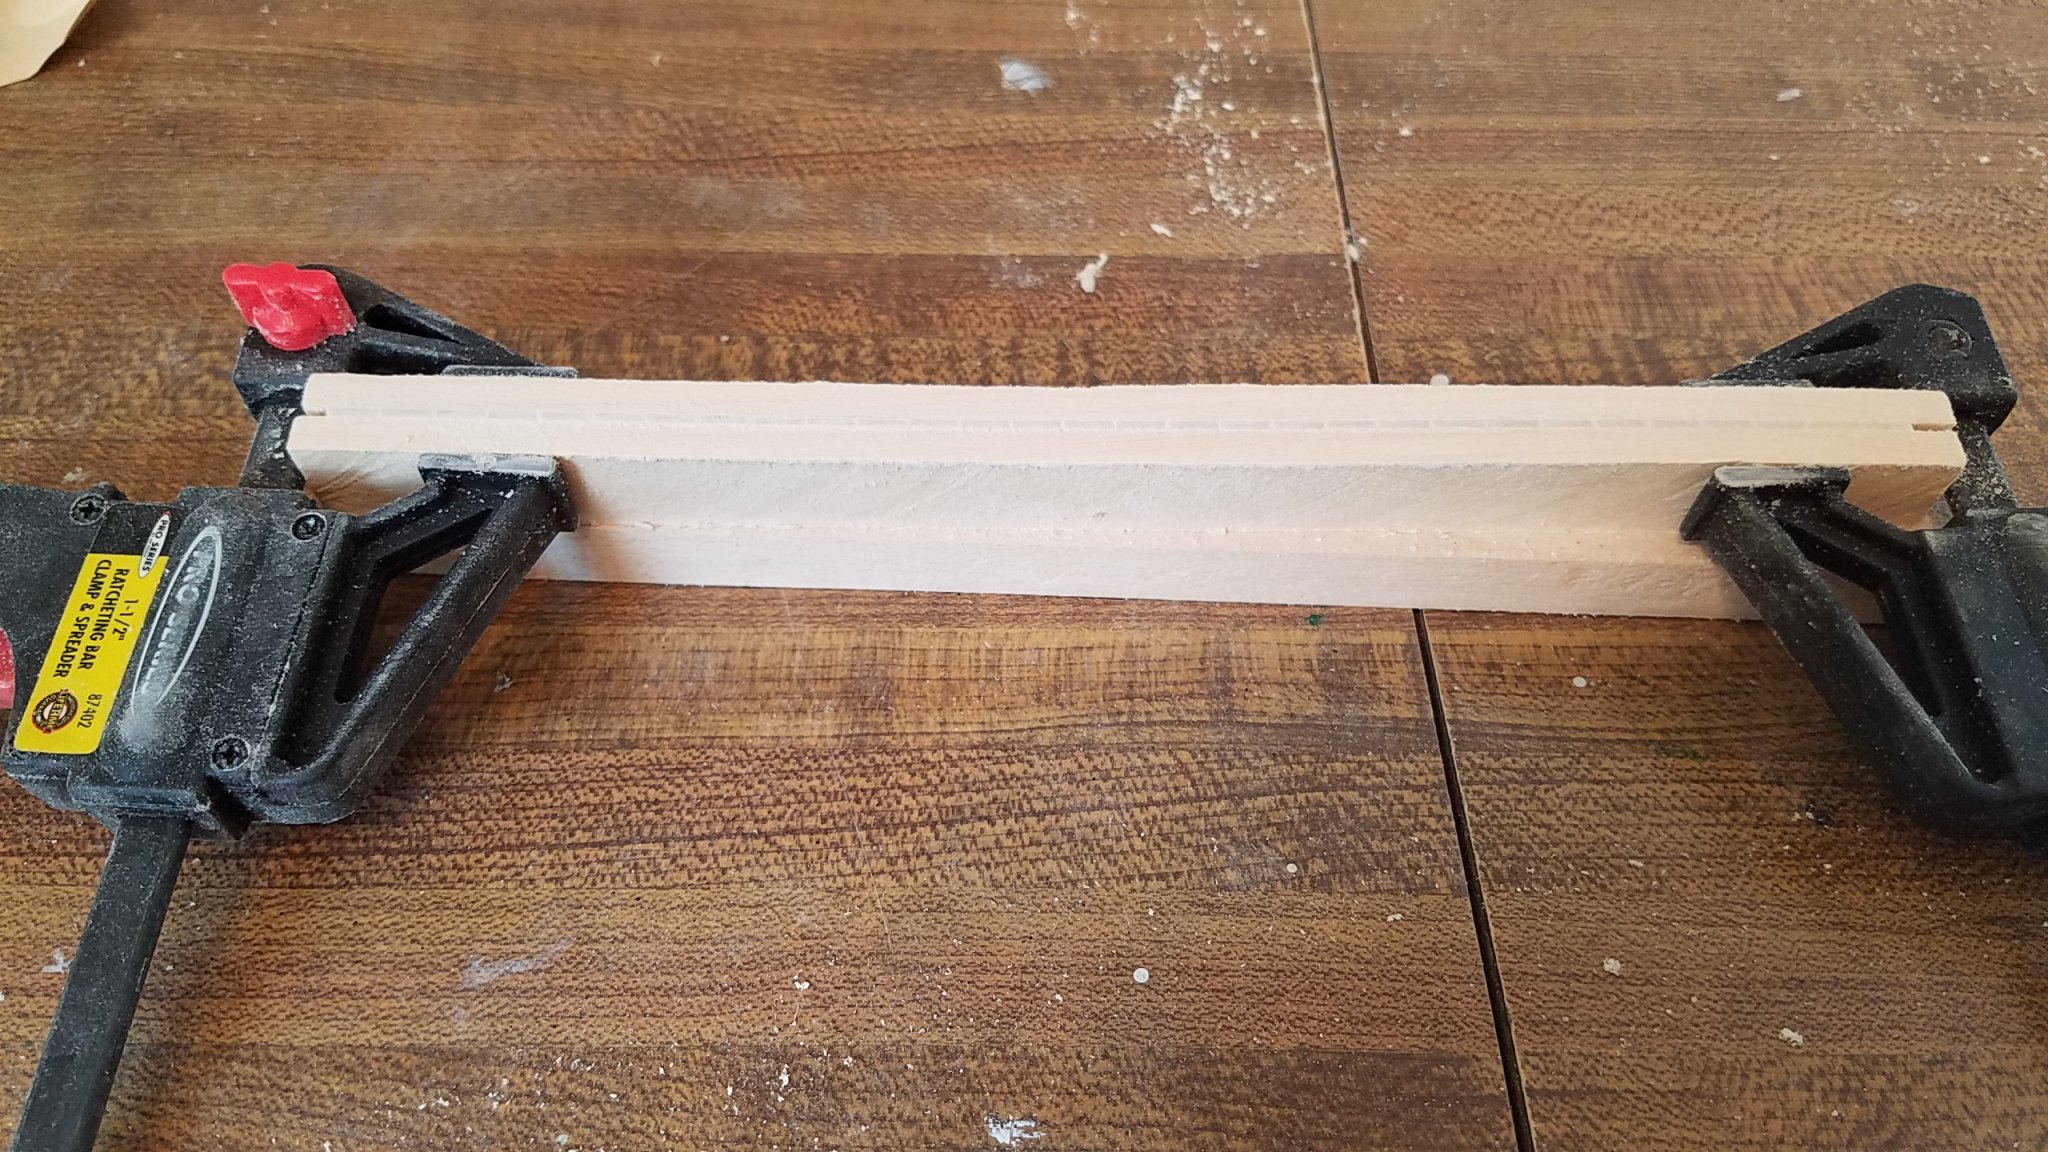
Next up, start the gun-port lids. Soo they gun-port lids all come laser cut... Nice! But it would be too easy if they just fit in the ports. No chance of that! Actual, after I cut them out and sanded off the char, the height was perfect, but the width was about 1 mm too wide. Now as the lids will be open, no one in the world would notice them being 1 mm too wide. But it would bother every time i looked at her me sooo. they must be fixed. Because the hole for the cannon and the portholes are in the center, I cant just take 1 mm off one side. Need to take 0.5 mm of each side. Evenly and square. And then do it 64 times.. (16 ports a side x2 sides x top and bottom piece) There is no way I can cut that precise and that consistently on my mini table saw. Plus the piece are so small... Id loose a finger tip in the attempt. : -( Had to find another way. So I cut 2 strips of basswood the proper width of the ports. In this case exactly 15mm wide. Drew a center line on all the lid pieces Drew a center line on the strip of wood I cut Put some double sided tape on one one piece and More double sided tape and Sandwiched the second piece on top of the lids. Sanded down the 1/2 mm sticking up. Repeated on the other side. And you get... Yes they are all the same size. What I was more amazed at was the gun-port frames were remarkably consistent. With only a couple of minor exceptions, lids all nicely fit the ports without adjustments. I still have to add the tiny photo etched hinges, and then paint both sides. That shouldn't be to hard. What I'm really stumped on is how to attach the things to the hull. The bottom hang straight down so I can almost just glue them right to the hull. But the upper lid is angled up. And any for kind of attachment, the eyebrows will be in the way of the attachment point. Any ideas/ suggestions on how to attach the lids?


-
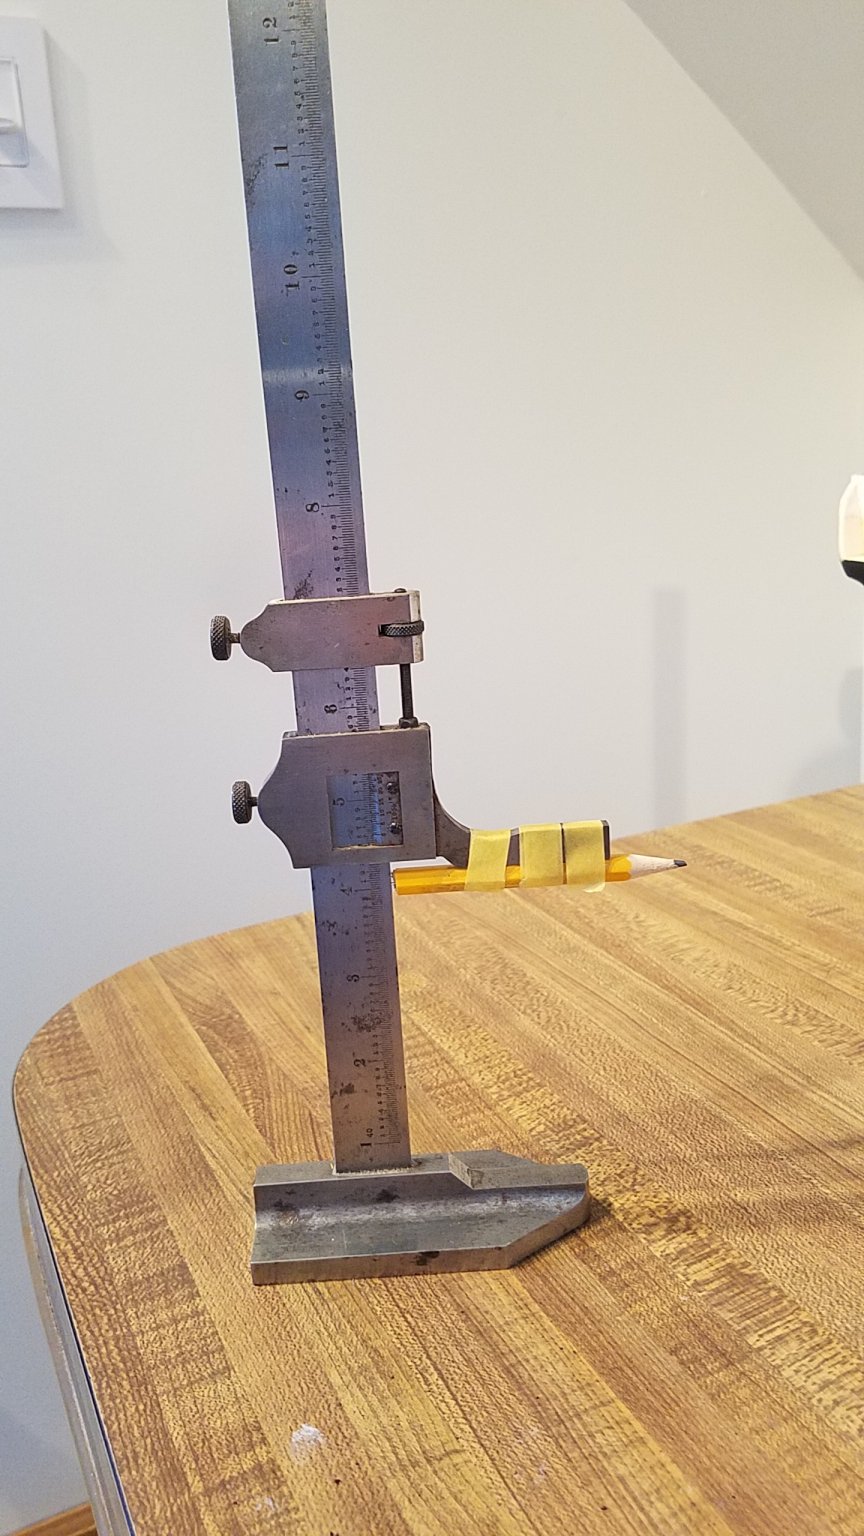
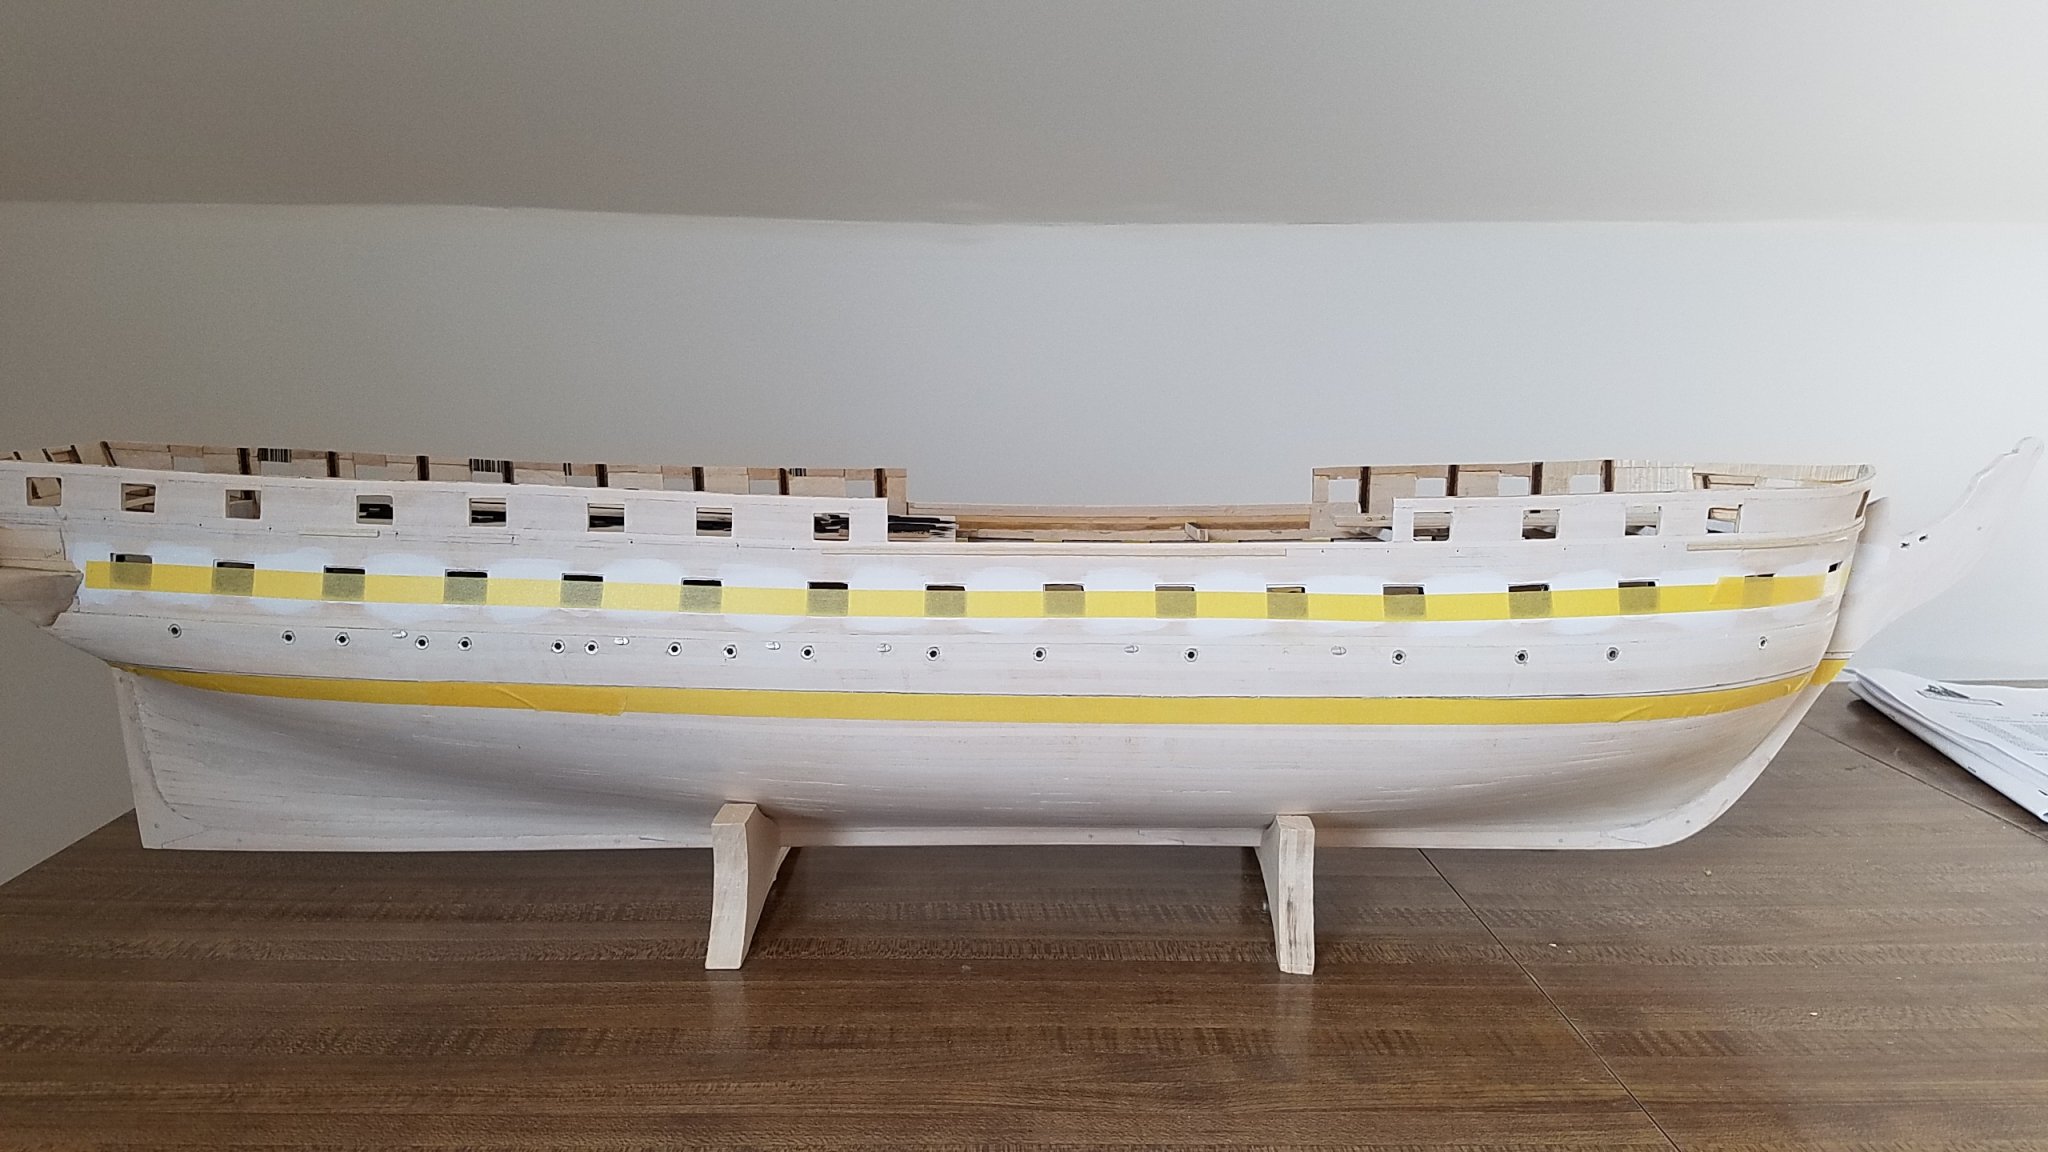
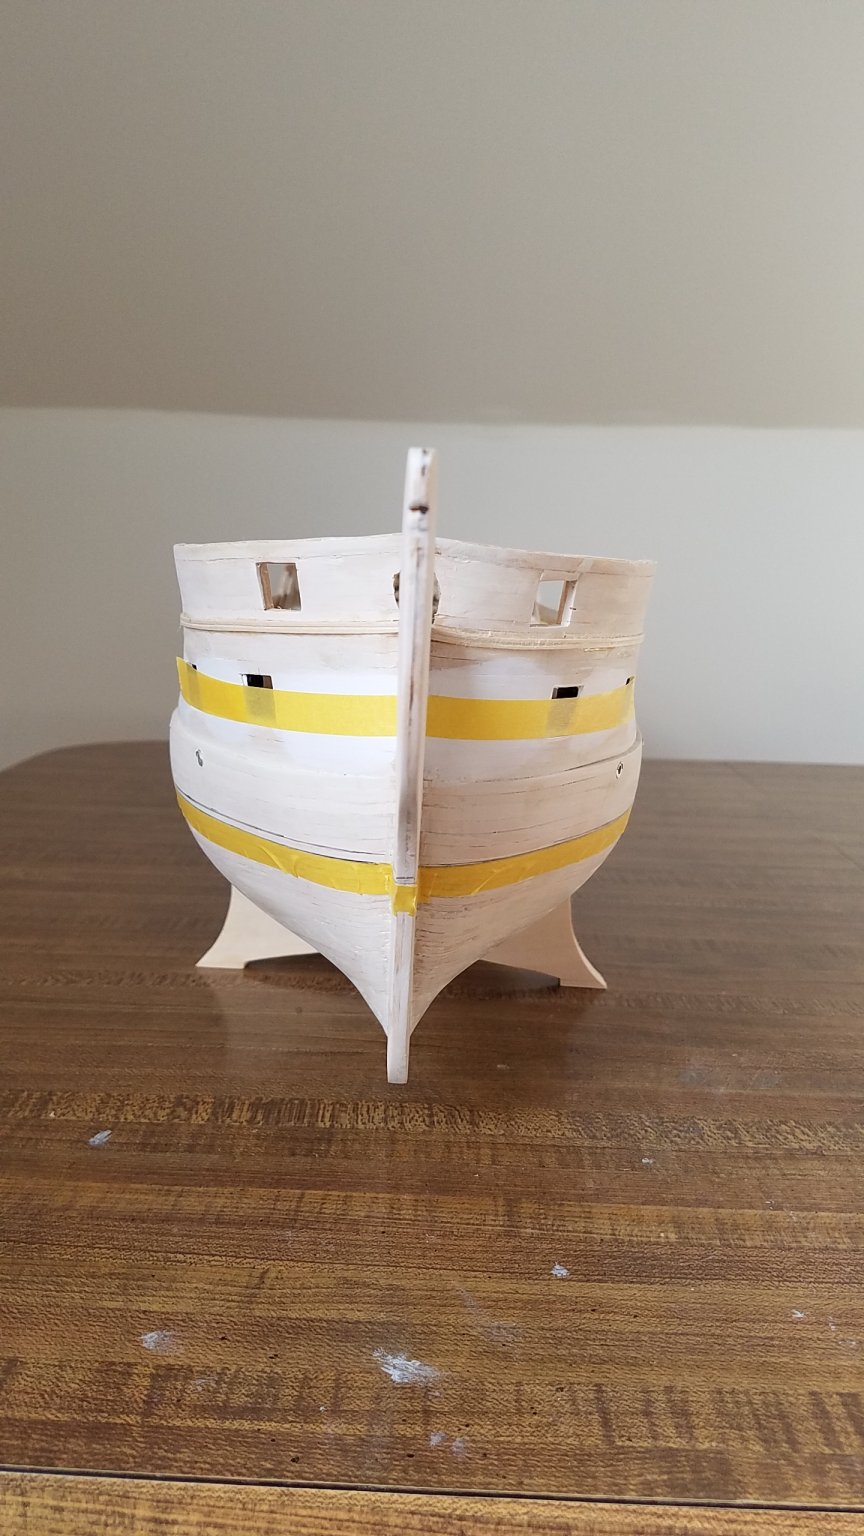
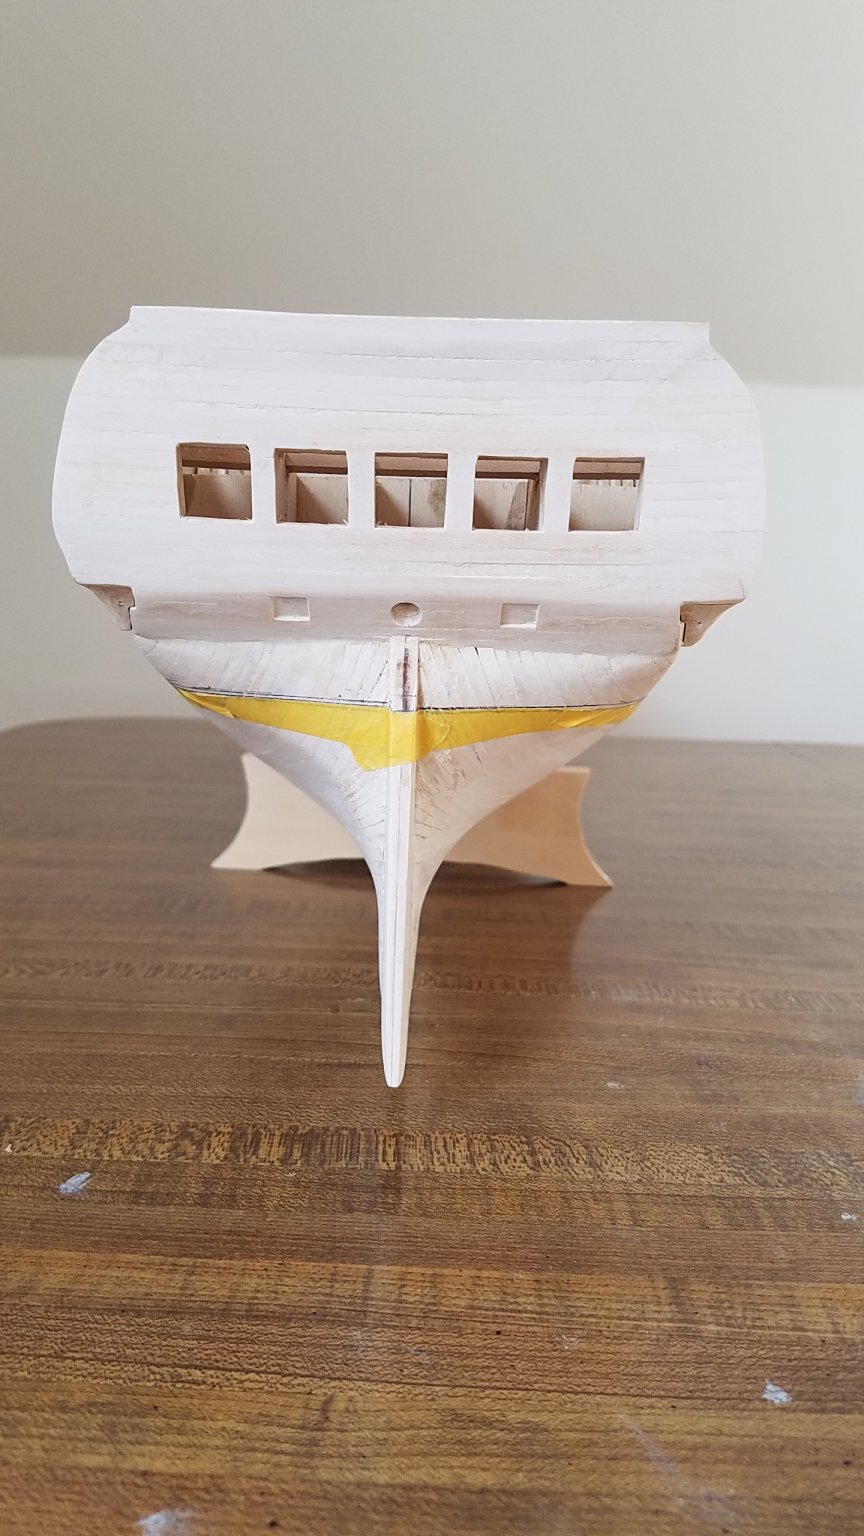
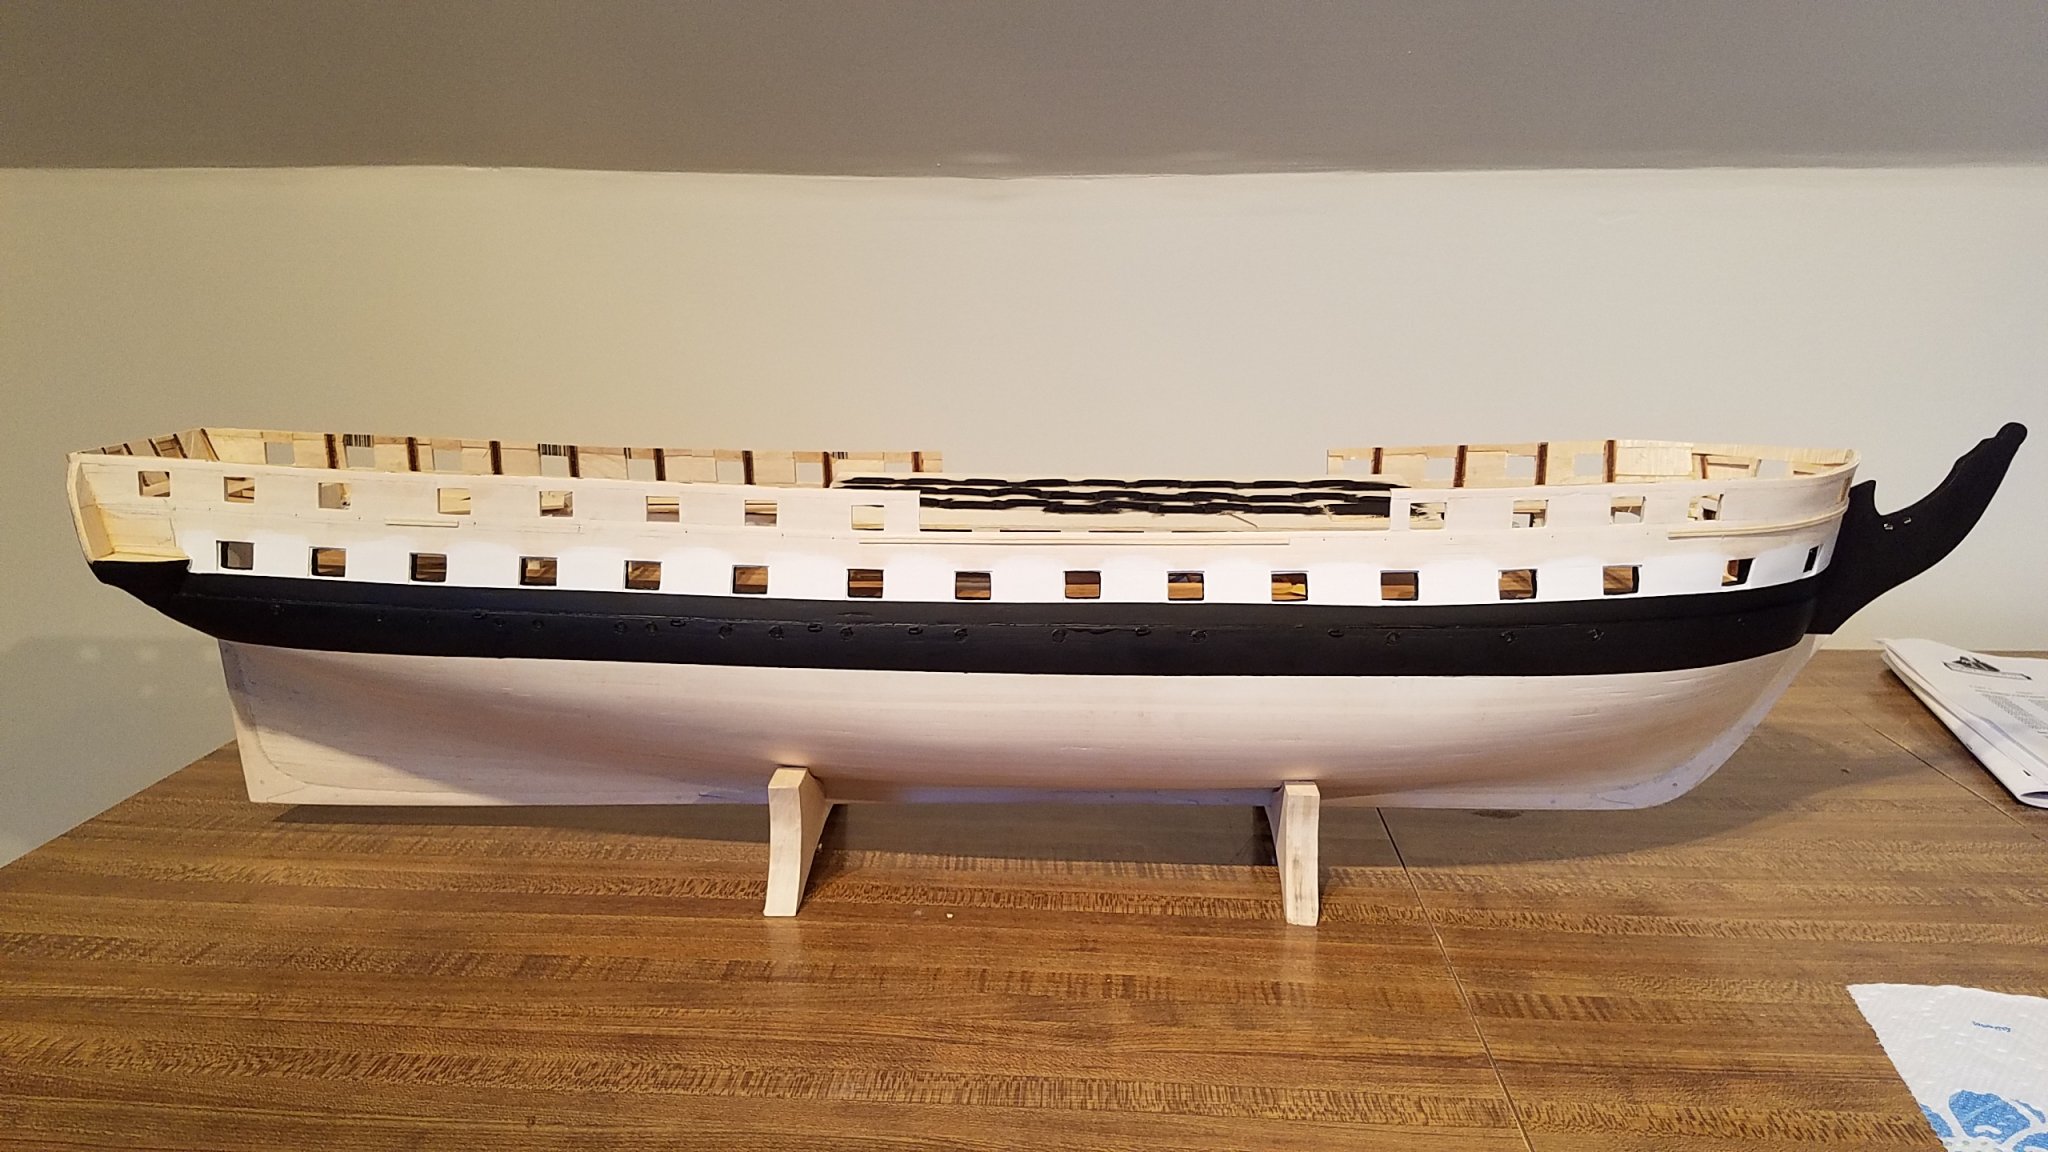
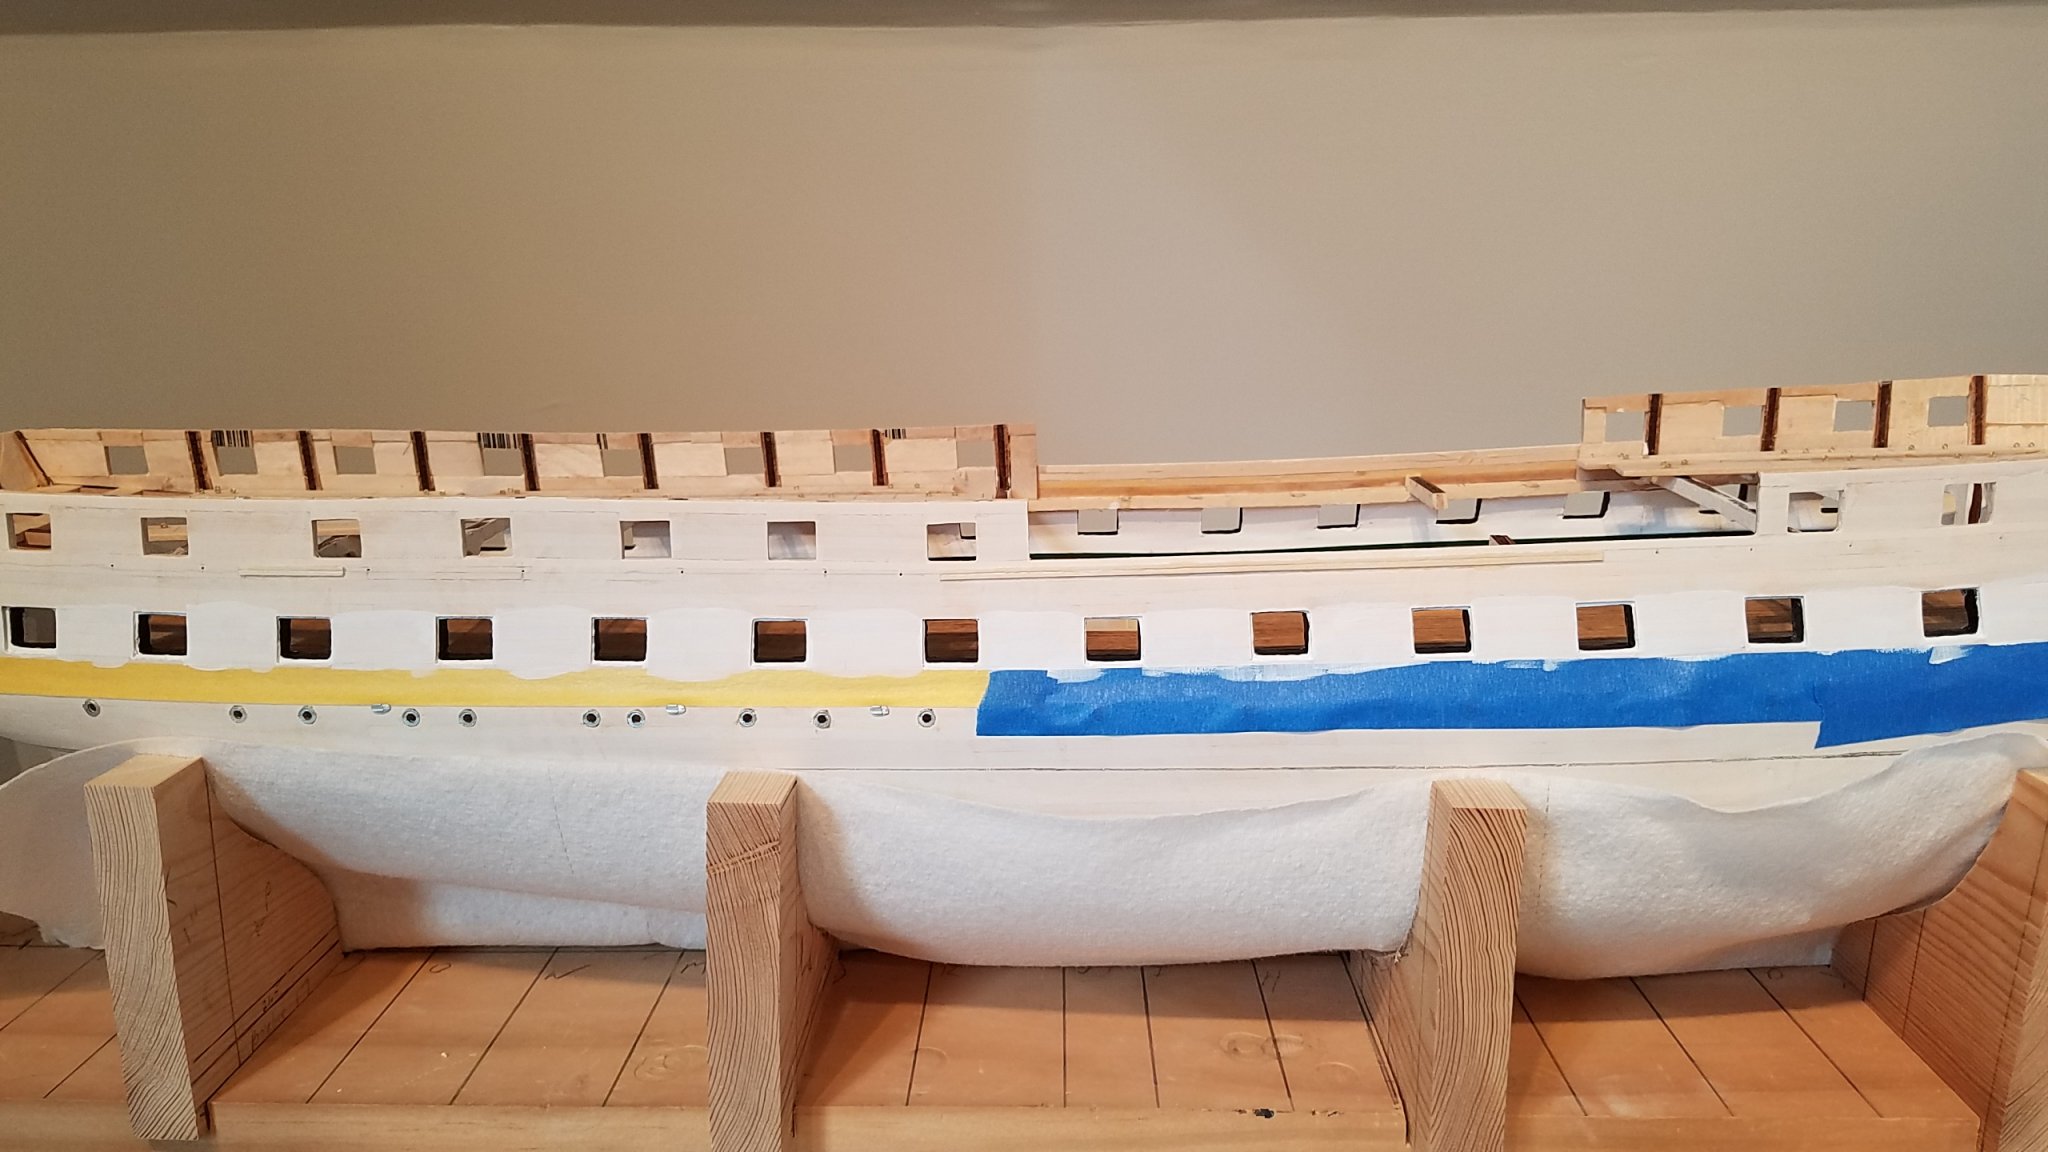
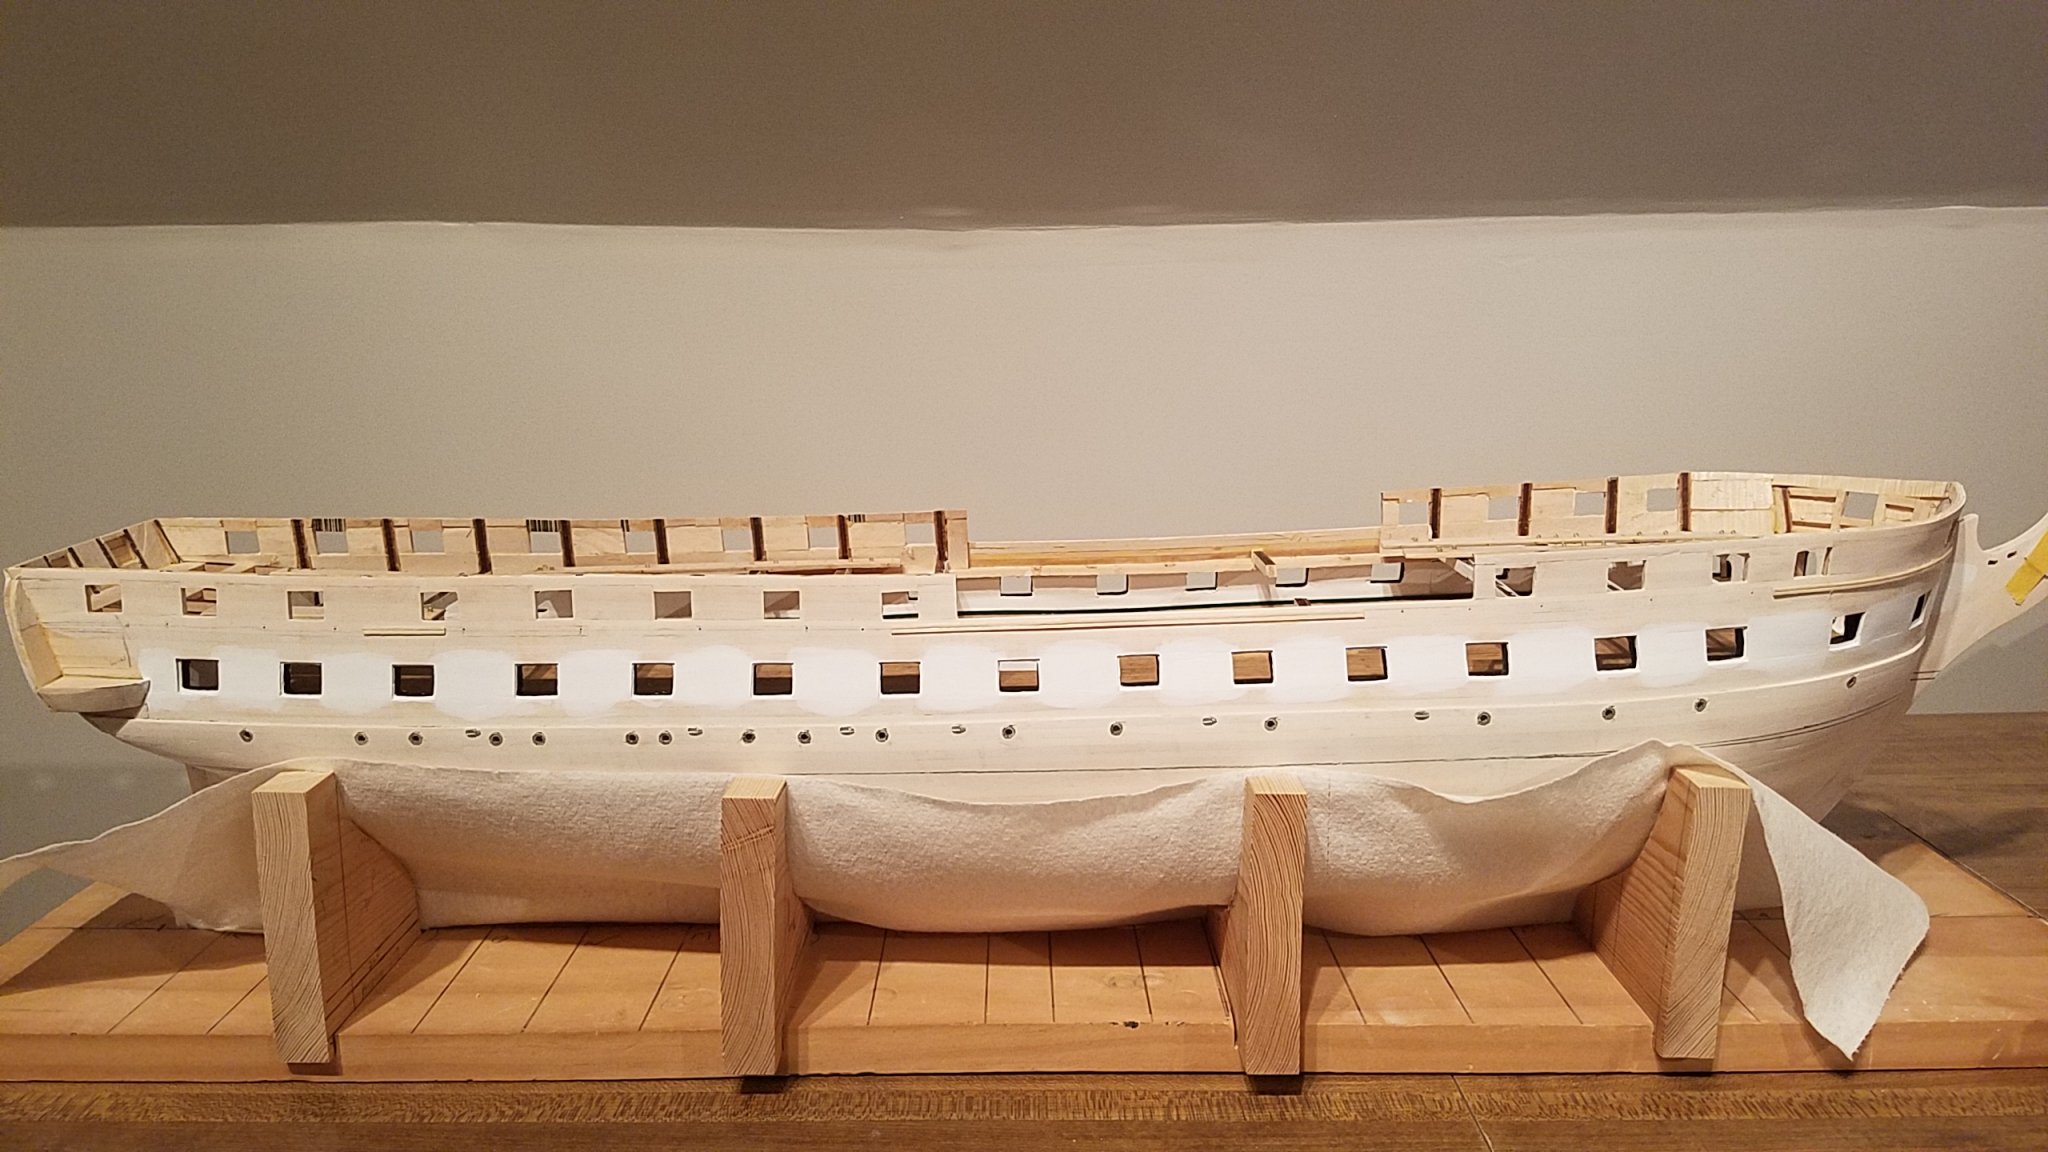
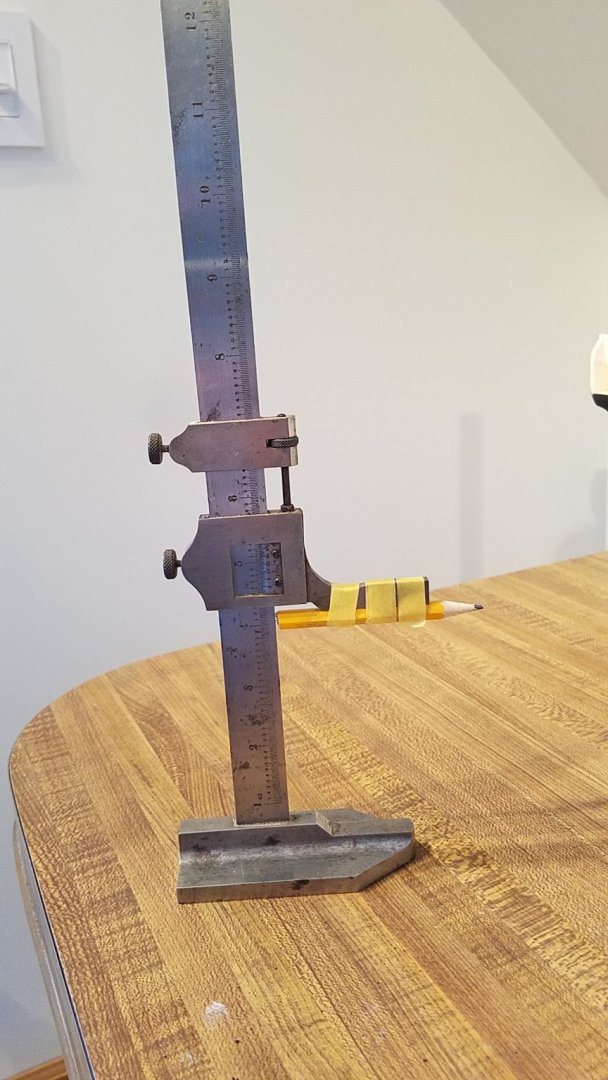
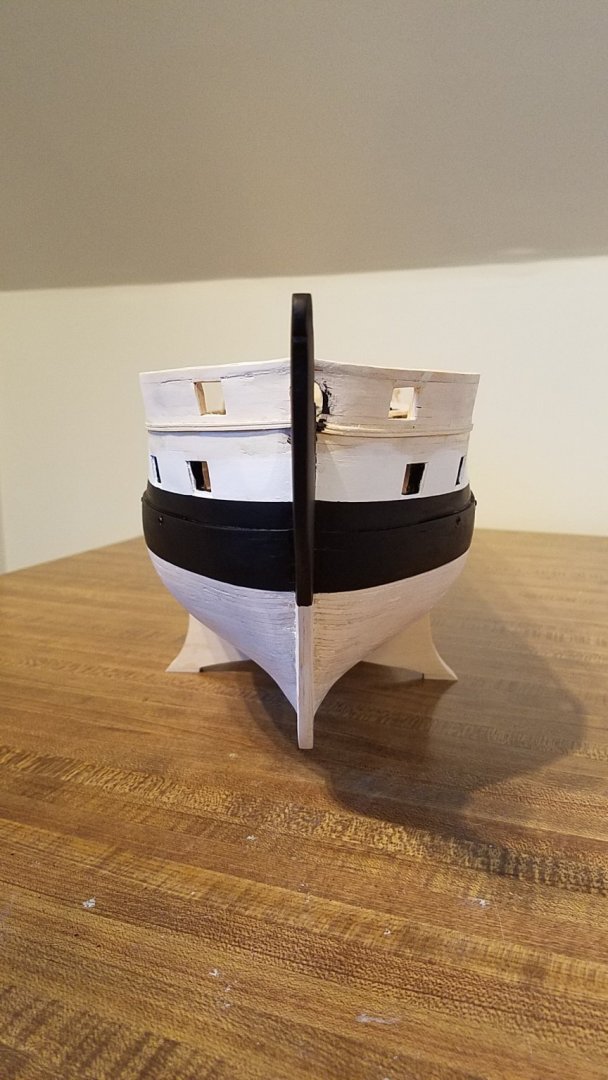
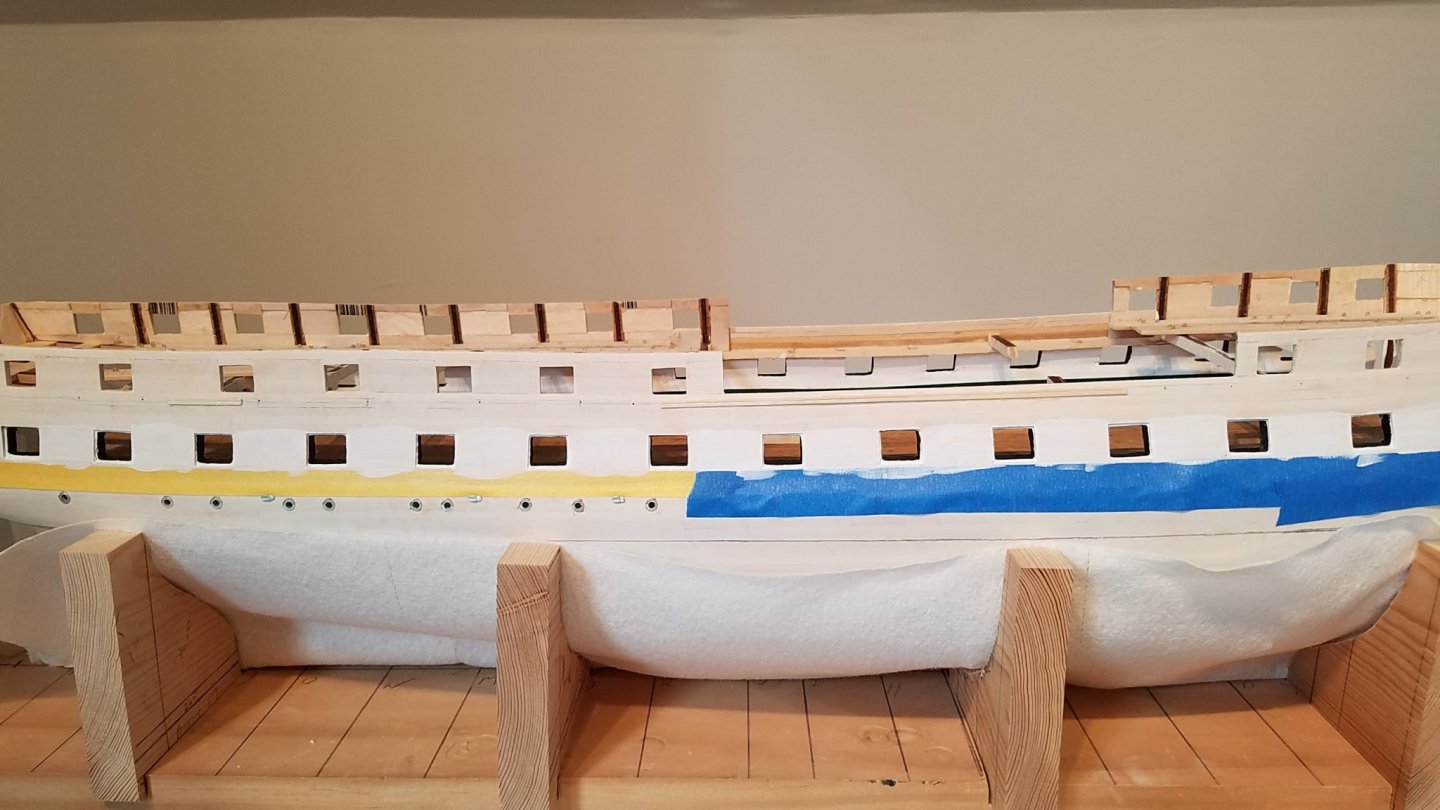
Marking the Copper line So first.... need to get the ship at the right angle to the reference baseline. The Keel is not parallel with the baseline. The bow end of the keel is about 8 mm higher than the baseline than the stern. When I roughed out my stand.. i didn't account for that and made them the same height. That's incorrect. The bow stand needs to be slightly higher. But NOT mm. something less than that. took me longer to do the geometry than to actually fix the stand. fix was just a shim of basswood glued on the bottom Then cleaned up. trimmed both to have similar silhouette Notice how the stand in foreground... the slot where keel rests is a bit higher.When the hull now is in the stand, is correct relative to the reference baseline in the plan. Next I need a waterline marker. I inherited the drafting / architecture tool from my Father. (Never used it until now) Taped a pencil to it and presto ...perfect waterline marker. calculated based on reference line + height of stand +height of top of copper-line. Adjusted pencil height to same... and marked away. Sorry... Didn't take a picture with just line. Here is taped right below the line and right above the bottom sill of the gun-ports. (ie bottom of white stripe). Checked bow and stern to make sure it looked parallel / aligned on both sides. Yes its level.. the picture is taken at a off angle. Annnd.. starting to paint Tape comes off Then I taped and painted between the top of the white stripe and the just below where the channel/chain-plates will go.
.thumb.jpg.2aba0df3e6d70eb97bf72446315bebb3.jpg)


-
Royal Willam by calt4 - Euromodel
kmart replied to calt4's topic in - Kit build logs for subjects built from 1501 - 1750
Hey Chuck. I have RW kit on my shelf. But years down the road befor i start her. Ill follow you build in the meantime. If you havnt aready. Search the forum. There was two fabulous builds of RF completed in 2019. Both with great build logs. Also. Before they went out of business. Euromodel had a user build practicion on their website free to download. Had 13 or 14 large pdf on slmost every aspect of build. If you dont have that but want it. PM me and i can send you. K -
Jonathan. My sympathy on the loss of your Mother. I like how you built your sheaves. Im aproaching that part soon. Hadnt yet figured out how i was going to male them. May do a varient of your techneque. K
-
Congrats. Very nicly done. I also like how your sails came out
- 72 replies
-
- 2
-
-
- Chesapeake Bay Flattie
- Midwest Products
- (and 1 more)
-
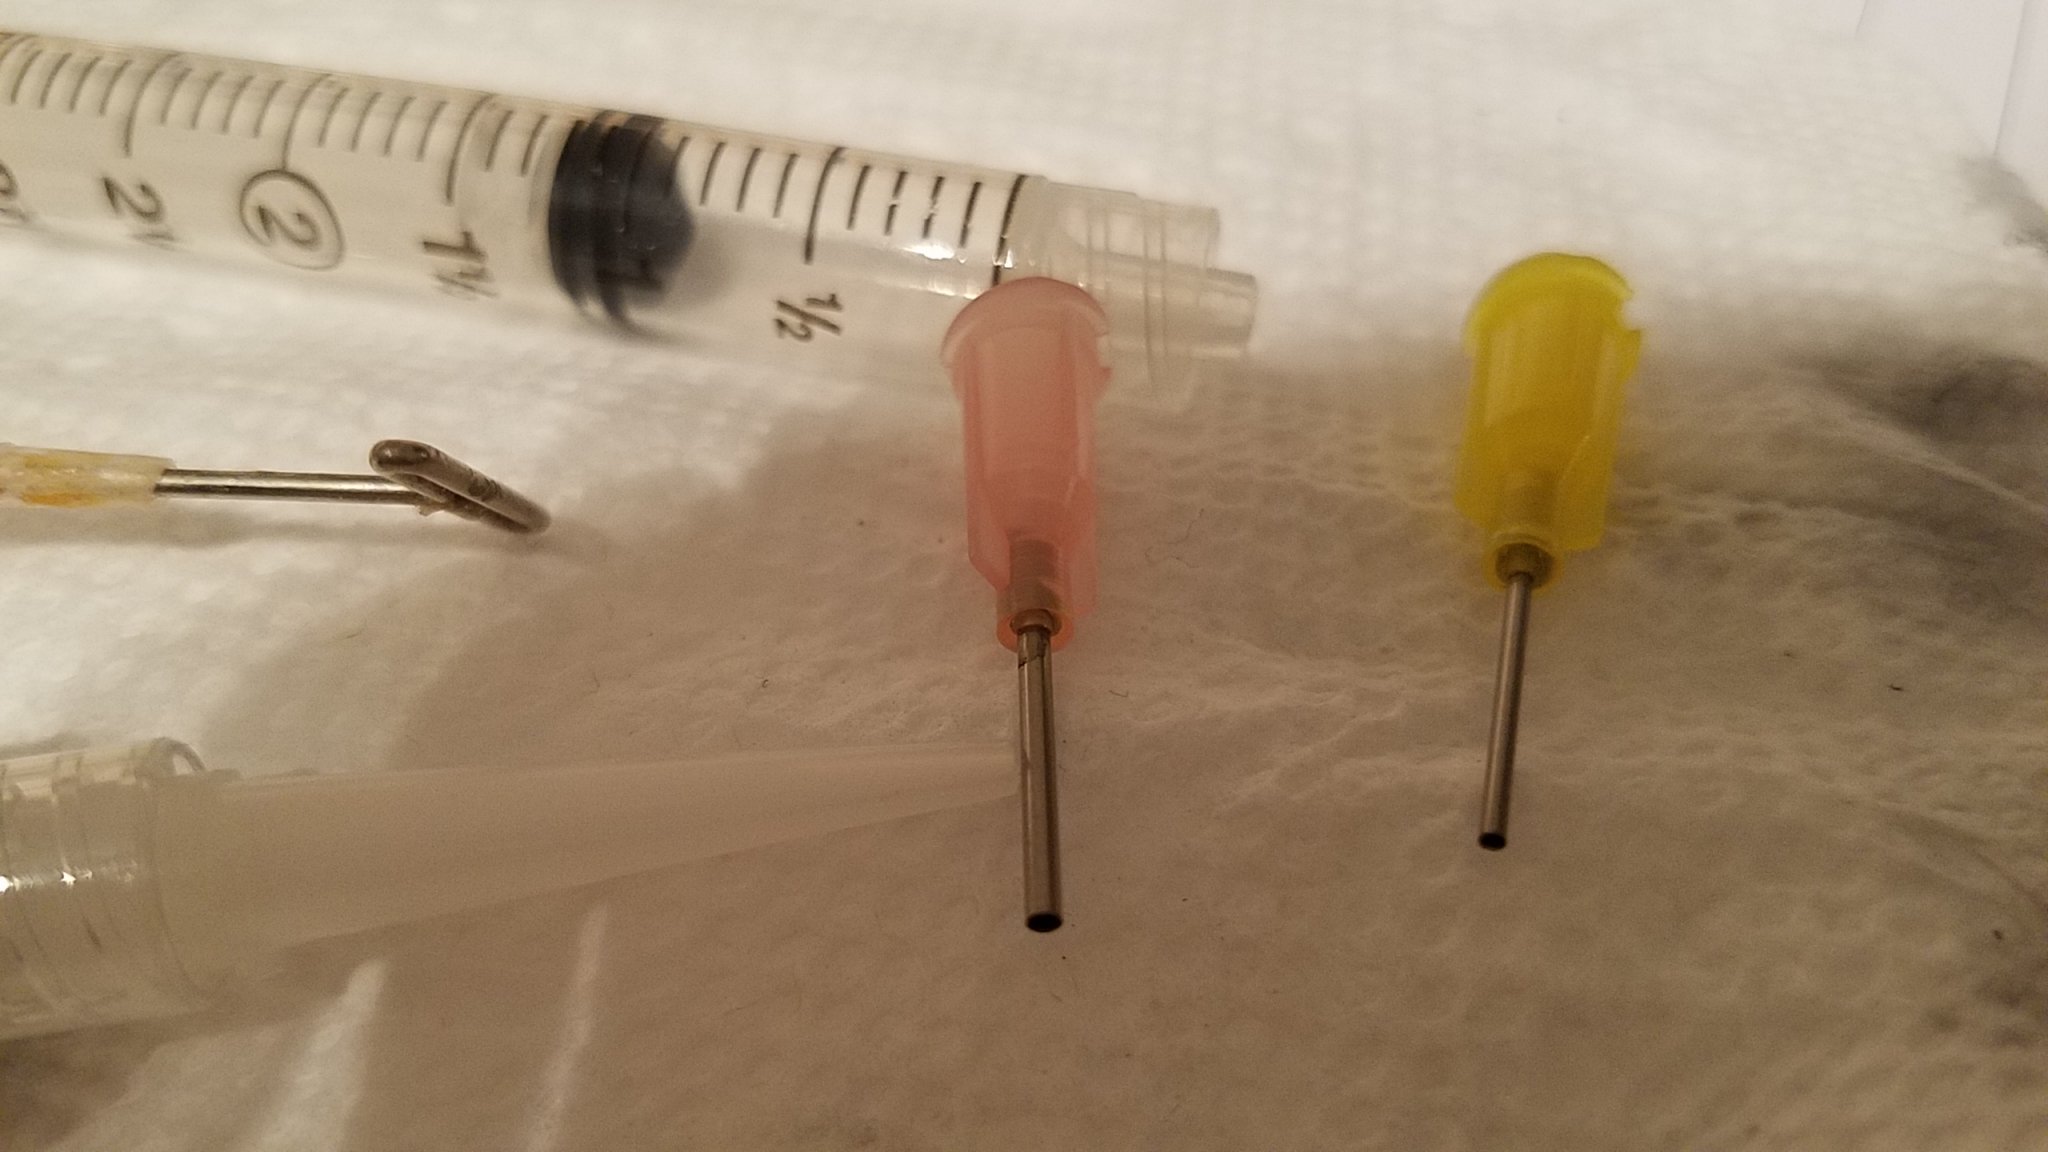
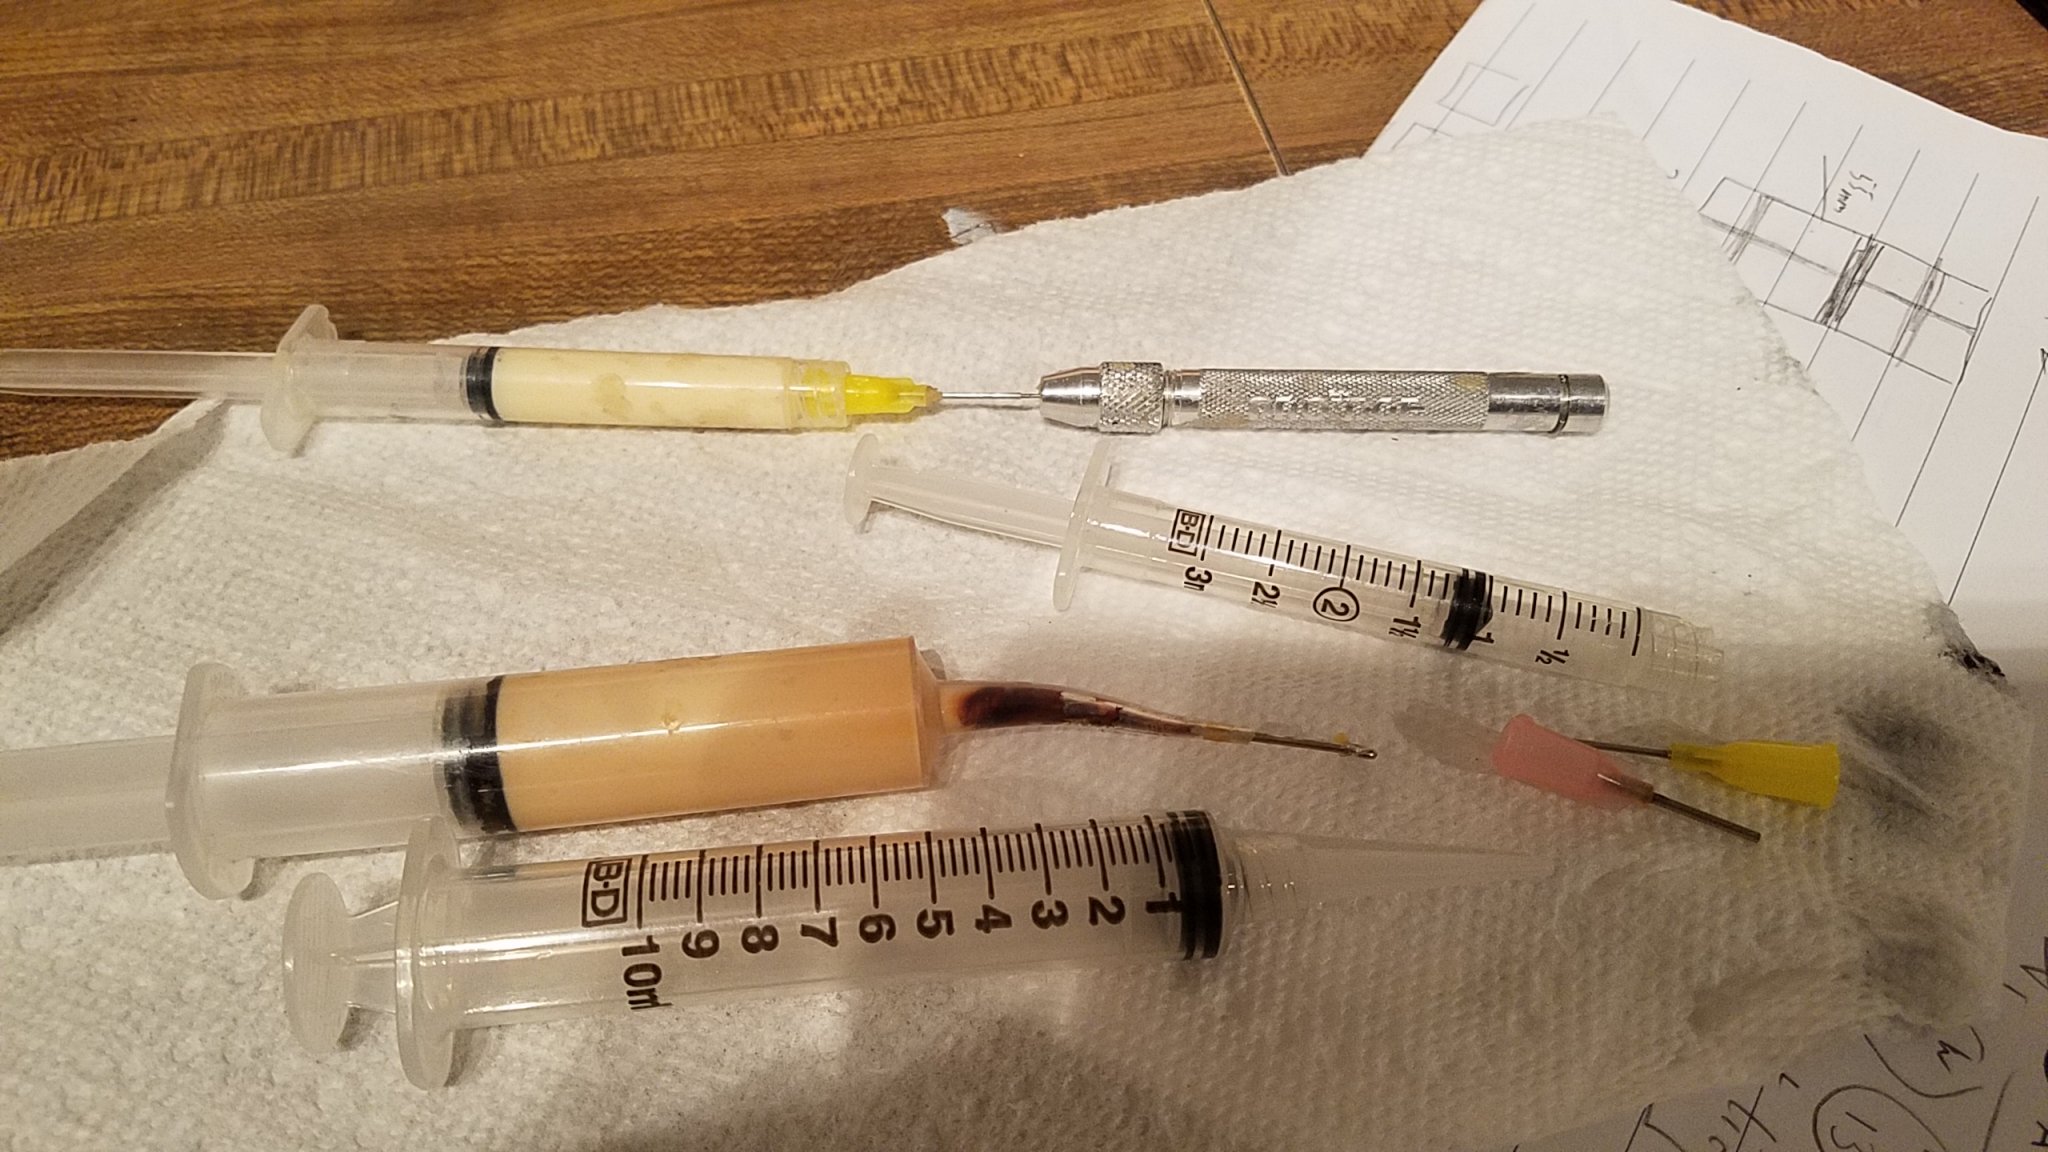
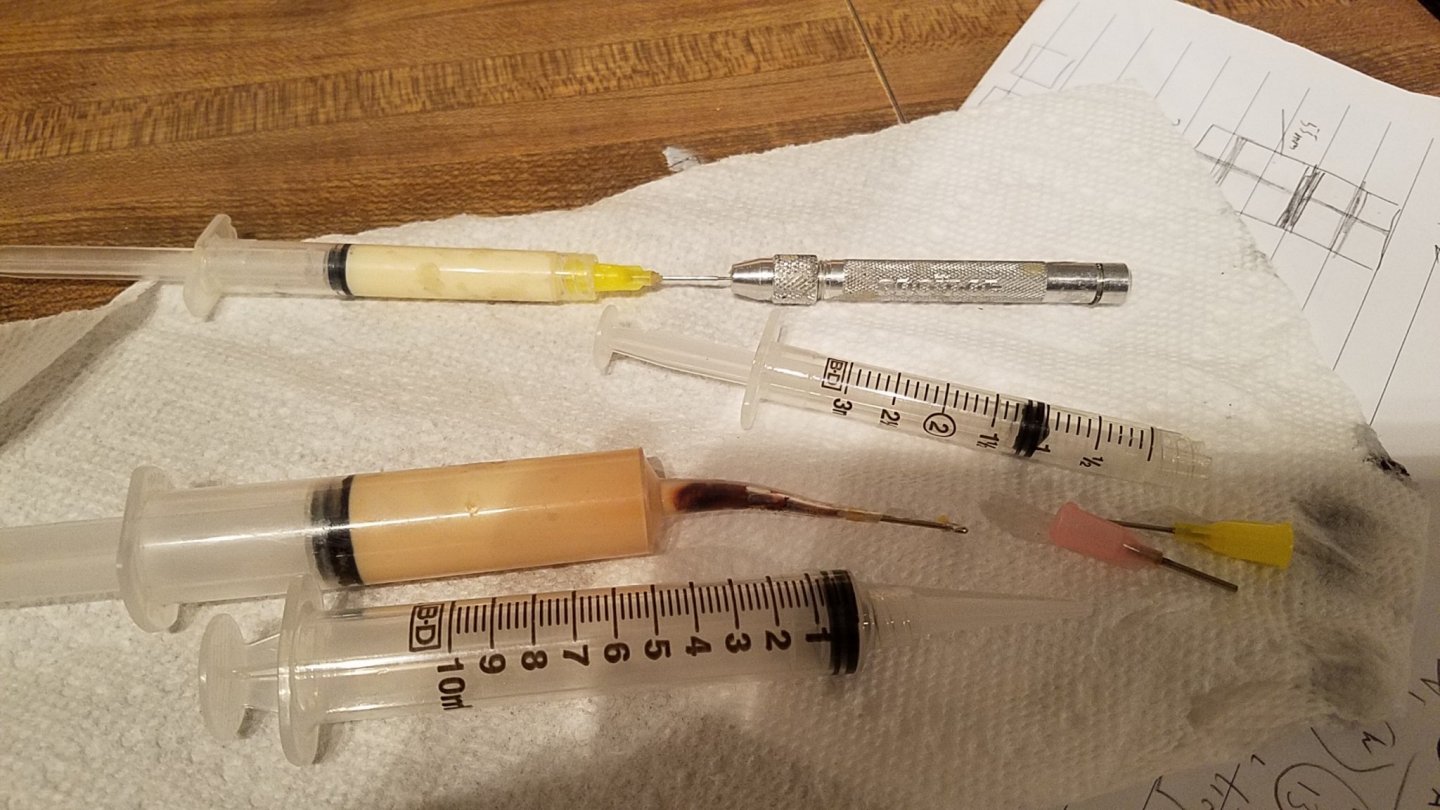
Lol. Well they are medical syrnges. But wont be injecting myself with glue using them. That would be a quick way to harden the arteries. 😁 Not pointy hypodermic needle . More like eyedropper tip. Dont need perscription. They actually work great for applying glue. Very small amounts in controlled fashion in exact spot. Glue doesnt dry out or clog in there. Just use a micro drill or t pin as a cap. Glue stays good. No clogs. Have used same syringe for a year now as my primary glue application tool. John.and usedtosail. Thanks for the positive comments. Means a lot to me. Im not so much fast as ocd. Wont touch the model for months and months. Then i get a long week like over Christmass and i disapear into worshop for entire duration. Only emerging to eat and sleep. I get obsessed to complete a phase and reach that next milestone.


-
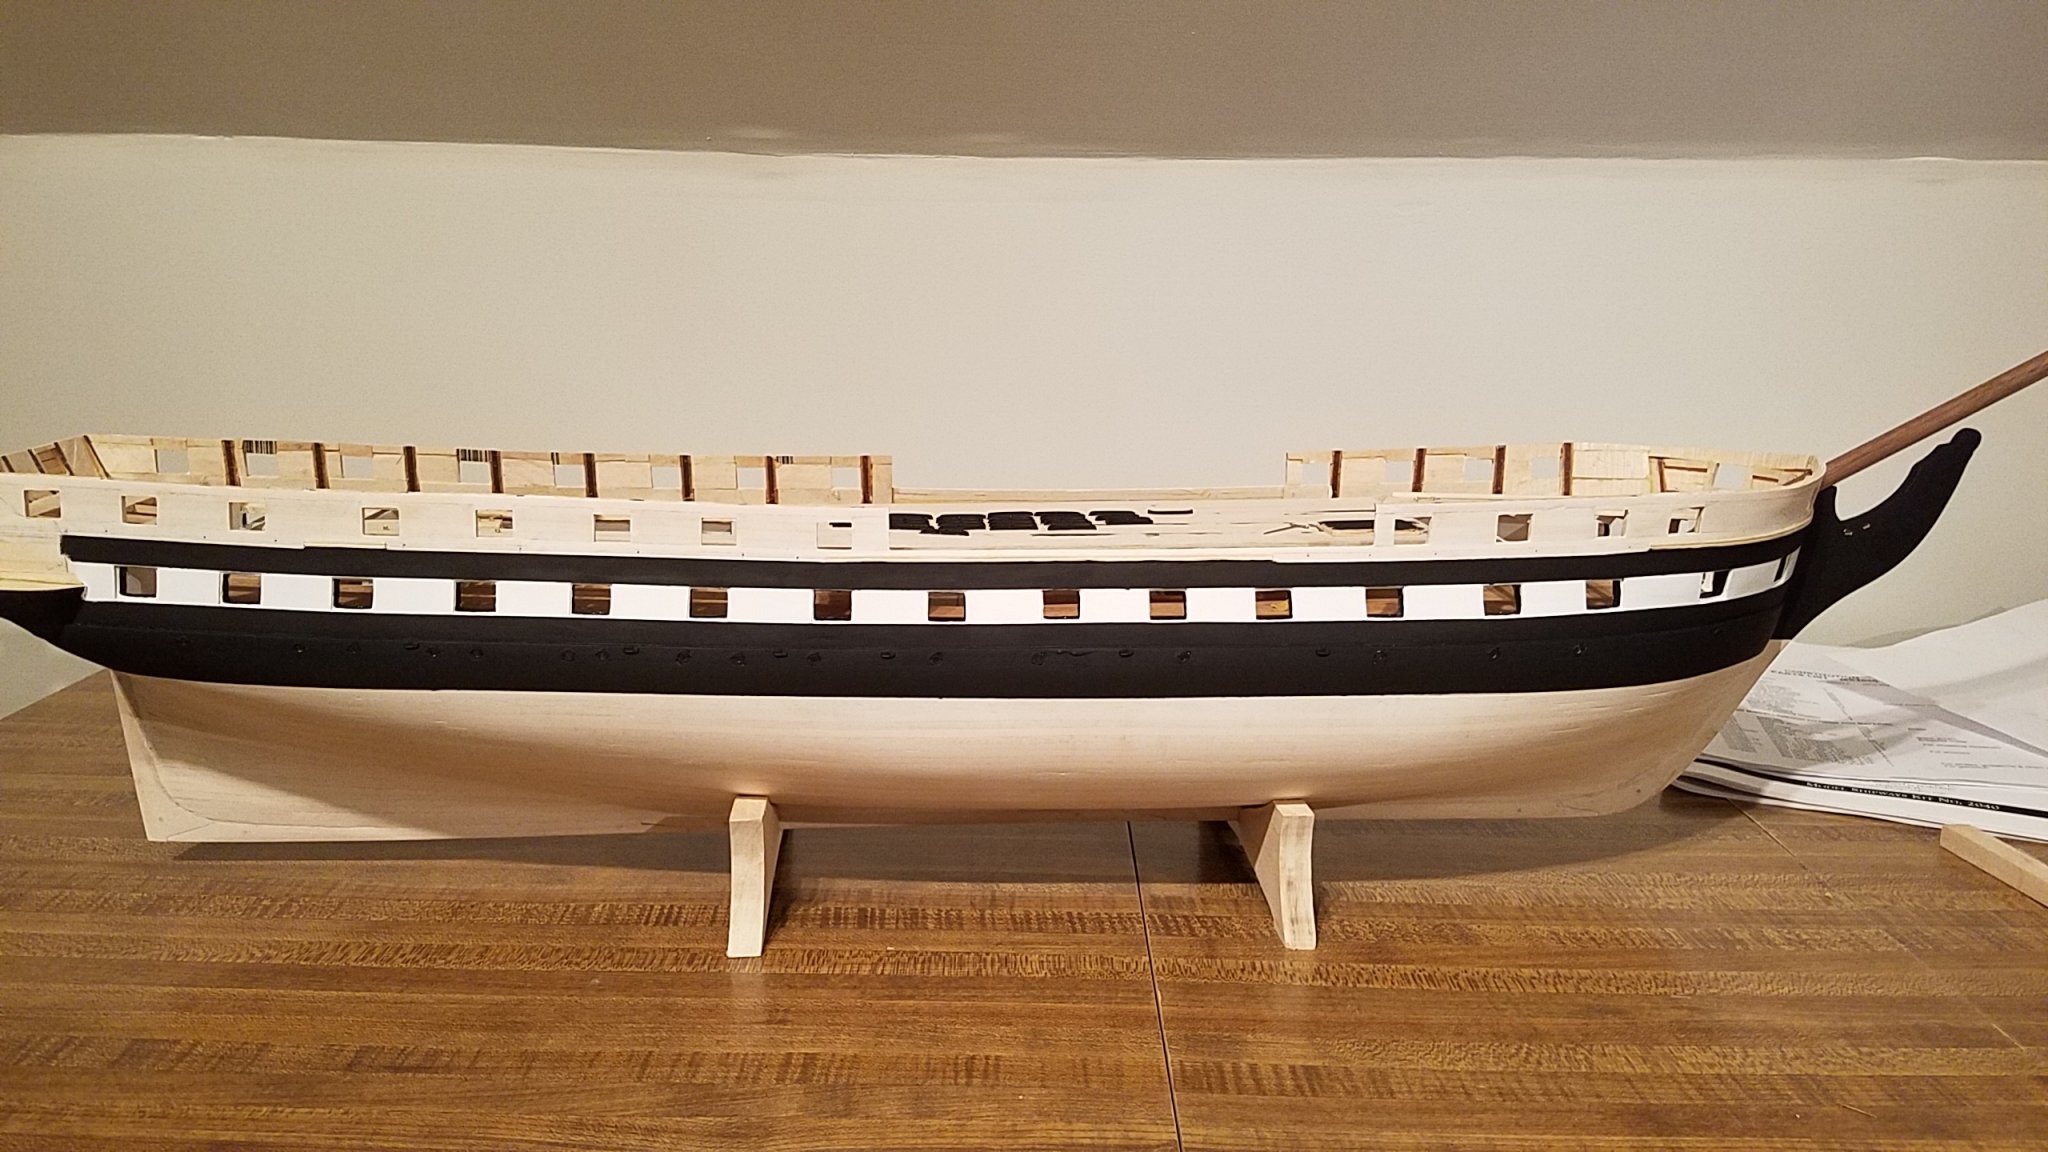
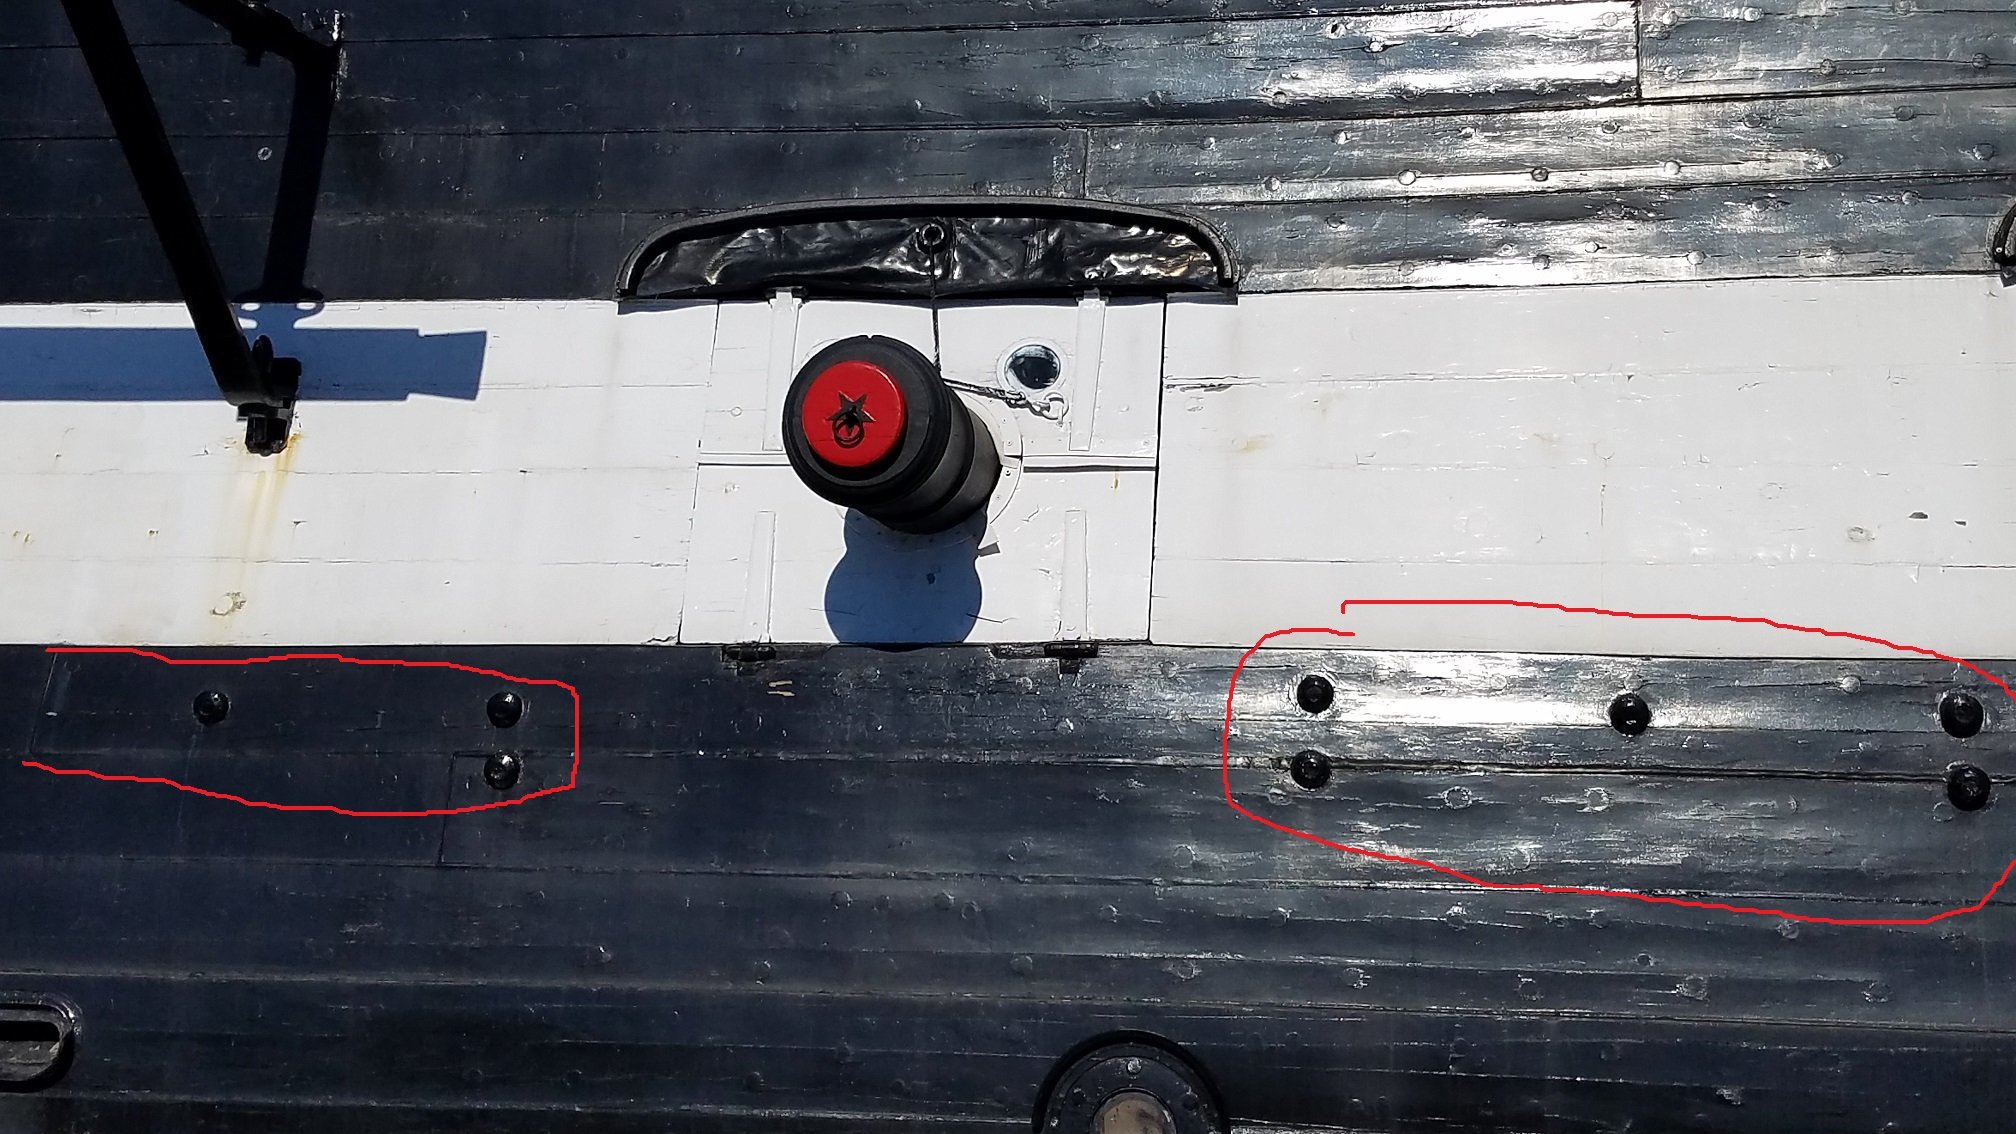
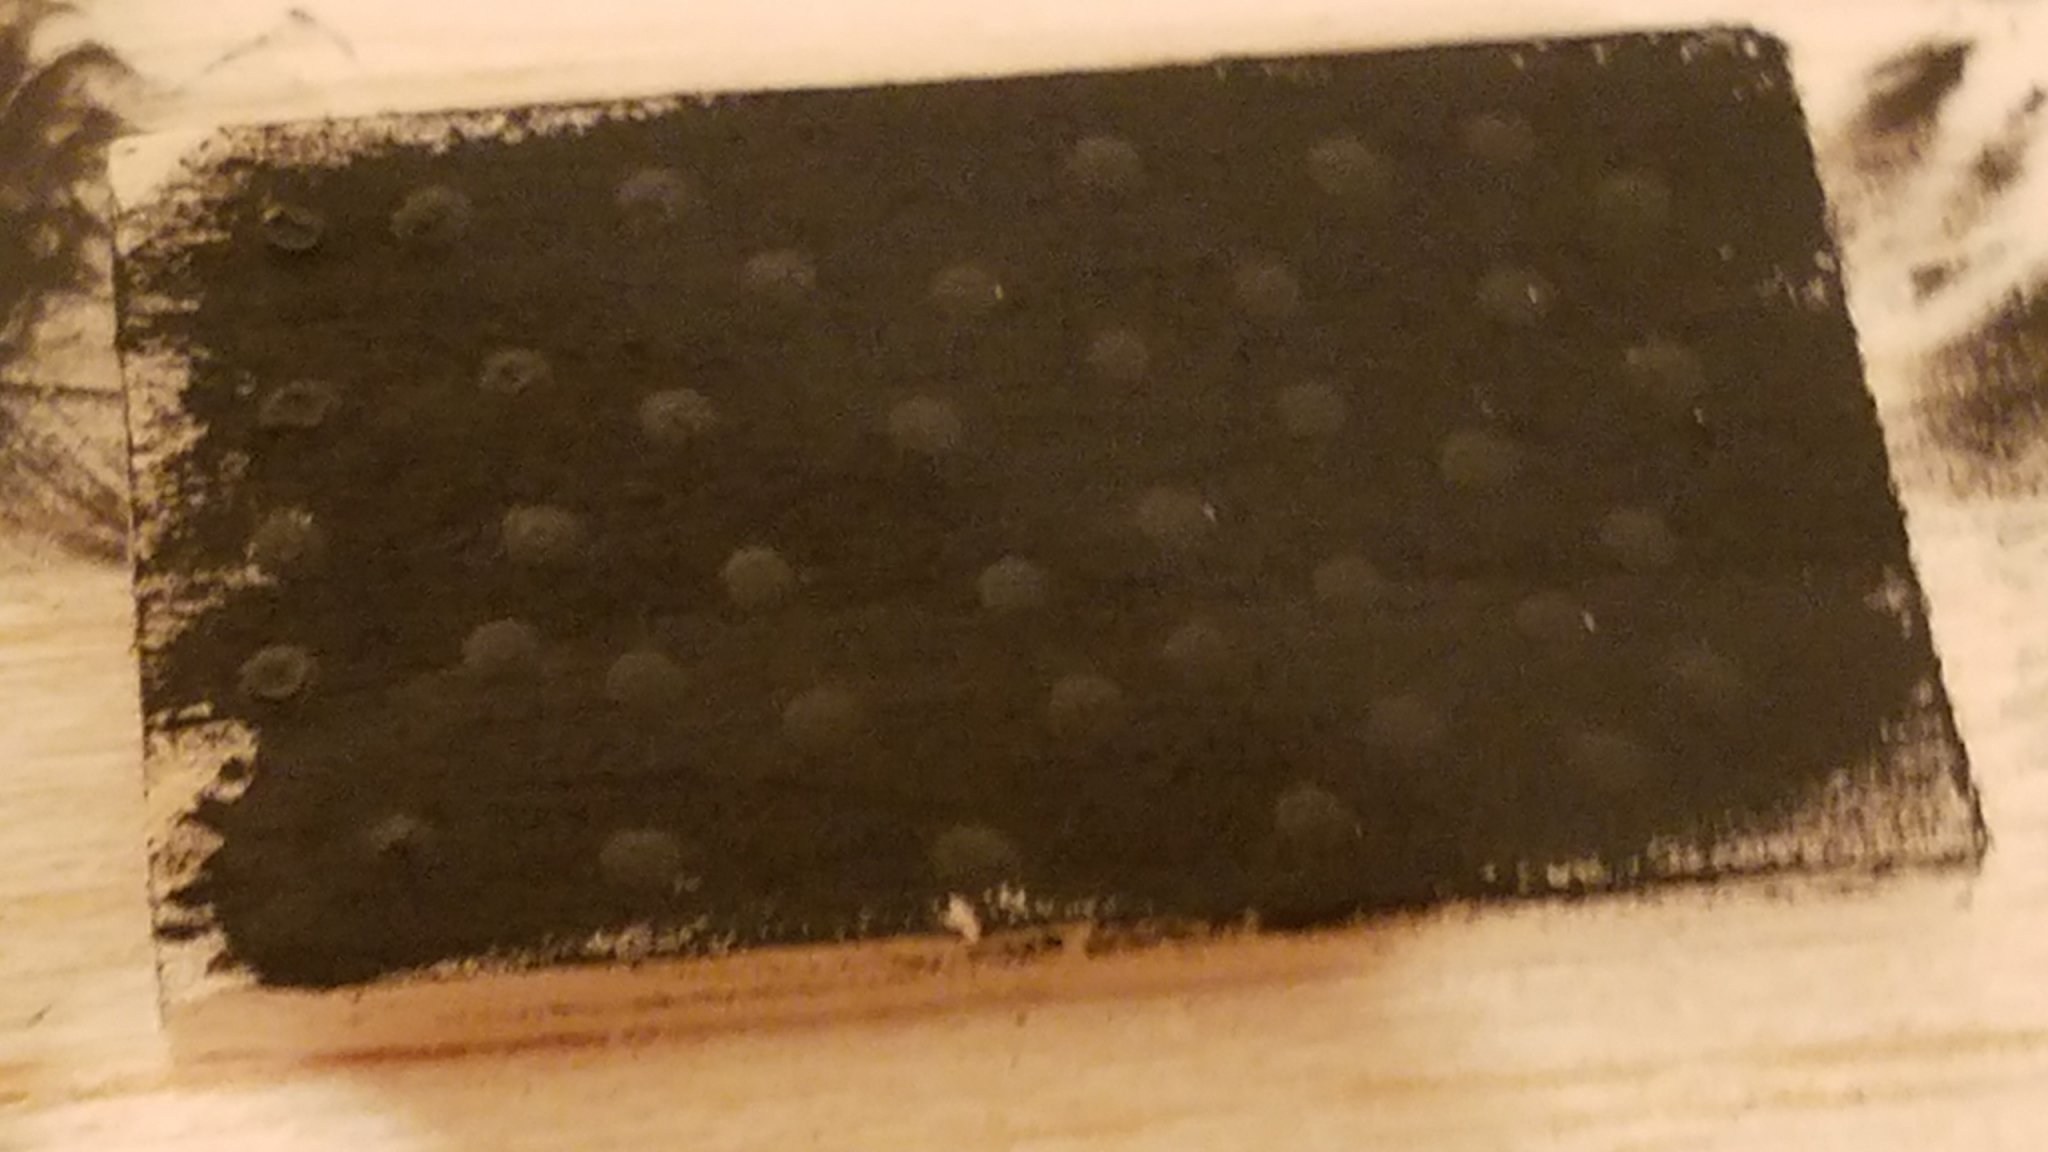
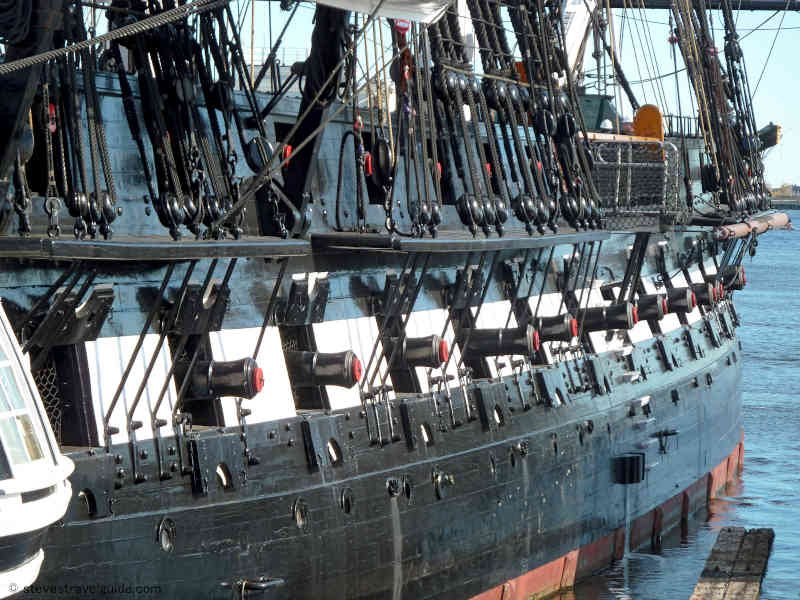
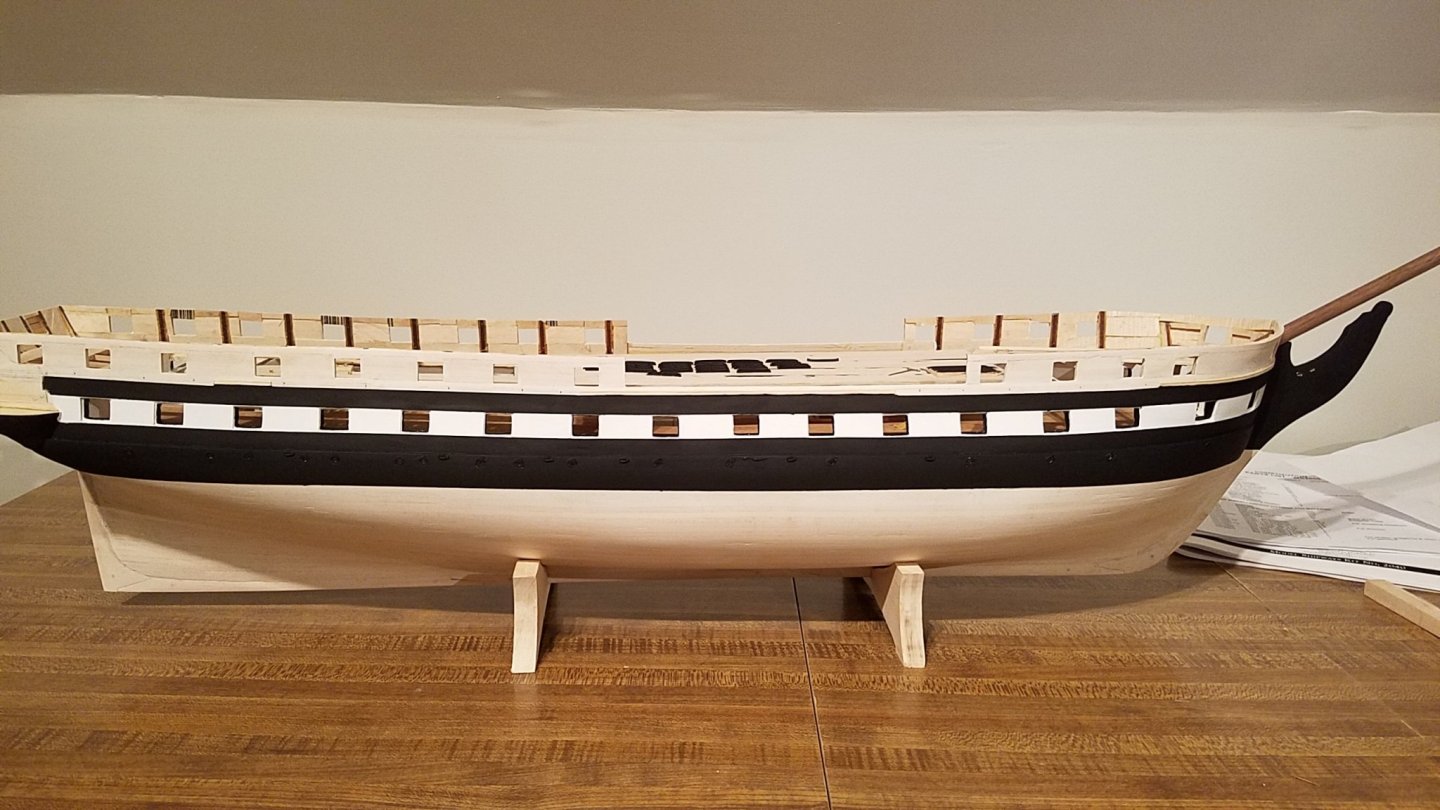
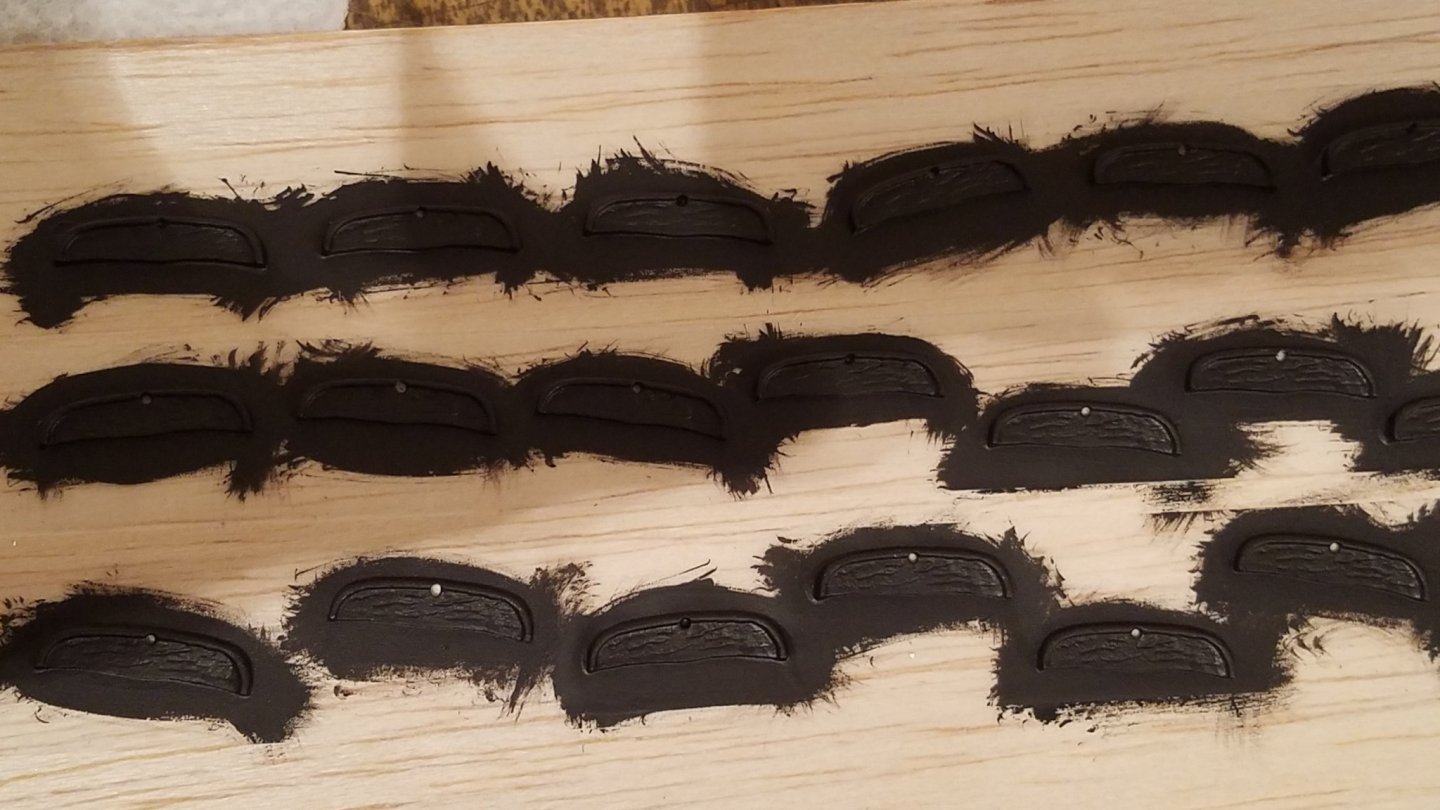
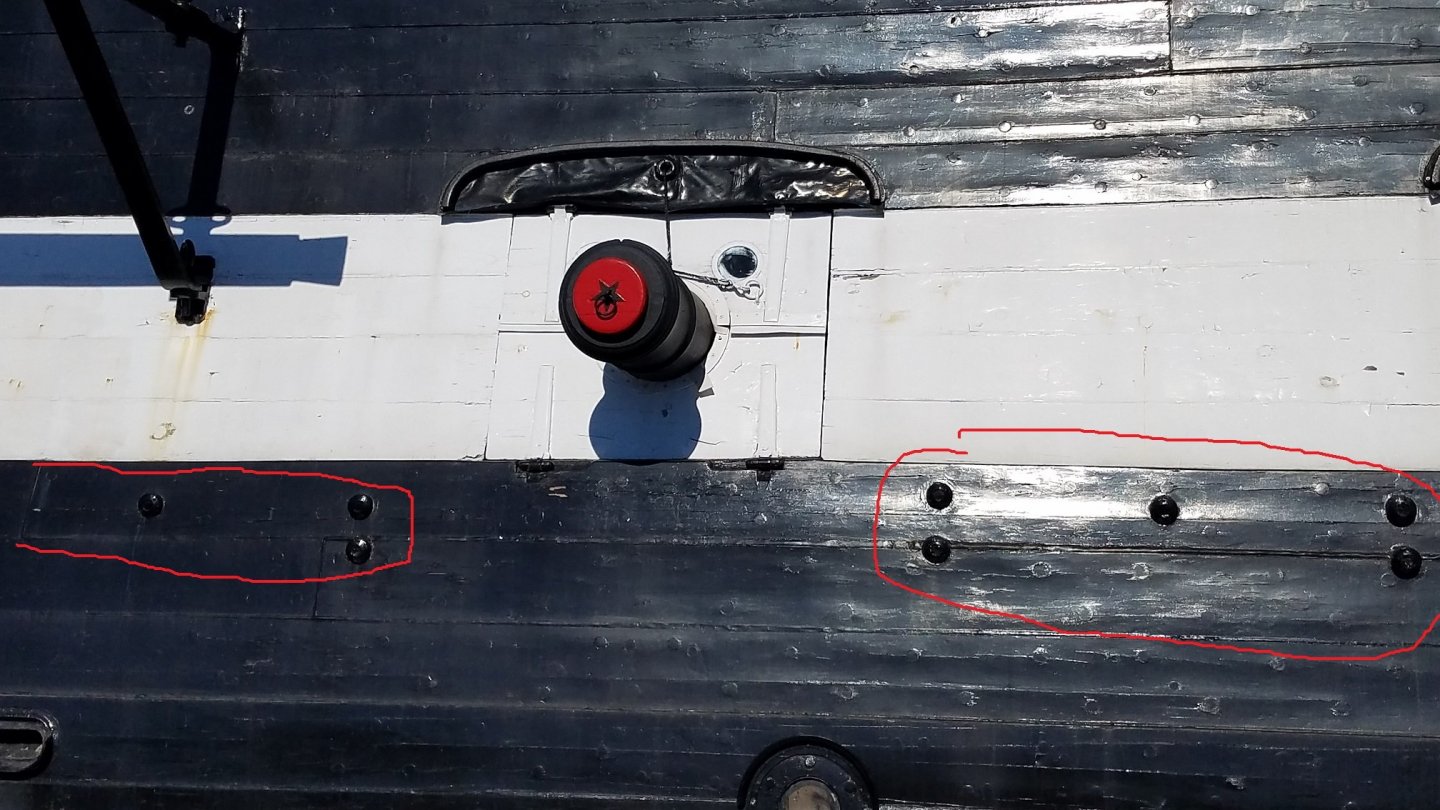
Sooo. Starting the white stripe decided to go with Vallejo paints instead of my old stock of floquil. After testing on some sacrificial wood. Vallejo was just so much easier to use. Went on with a brush very easy. levels right out nice, no smell. and the color look good. I was also really worried about using that really old Floquil. It looked ok, but didn't want to risk the model with it. This is coat #1. you can barely see it.. but its there I put on very thin layer at a time. it levels out very nice straight from the bottle. not thinned. Dries quick so I left 1 hr between re-coats This is around coat #4. After last coat (#6) I also started preparing the Eyebrows (Rigloi??) cleaned them up and painted black. Will glue them on.. so its wood to wood before I put black on the hull. Used double sided tape to stick them to a board. Made it much easier to hold them while painting Nest up.. While looking at pictures of the real ship.. I did see that there is a series of bolts on the side of the hull Basically just below the sill of and between each of the main gun ports : . : 2 - 1 -2 pattern So thinking about if I wanted to add this detail. I haven't really seen it on other builds. but they are noticeable enough on the real ship to at least consider adding. I'm guessing these are at back of the ring bolts used for the cannon tackle. the pattern and location certainly seem to match. Thinking ahead for the inboard green bulwarks on the spar deck will also have all the bolts heads . So I did a few tests to see if I can simulate bolts at the right scale to be used for both. Made a few test strips with very small brass nails but the heads still looked way to big/ out of scale. So I went and looked at several of the other Connie build logs I follow. JSGerson log. He had a ingenious method with a brass die punch. His turned out great with that method .. but I neither have a punch or the patients or skill John had to make the 1000s bolt heads by that method and come out looking good. UsedtoSail's is my other go to log (I reference that all the time. Its basically a build practicum the way he organized it!) He used small drops of white glue. turned out looking real good as well. and easy to replicate. so i copied the white glue technique. (using my yellow wood glue). I apply the glue using a small medical syringe. can put out very small drops. so I mad a test plate and painted with black. Looks big in the picture.. but the "bolt heads" are ~0.5 mm diameter. so they look the right scale. That test strip took me all of 1 minute to make all those heads.. So that looks like a winner as the way to go. I'll definitely do this for the bolts on the bulkheads. Now I just need to decide if I want to add the bolts to the side of the hull below the gun-ports. Probably will .. but still TBD That's about it for now. Will let the white acrylic paint fully cure for the week.... while I go to back work for the week. Want it fully Dry before I use masking tape on it. I've read that acrylics dry to the touch fast, but take a while to truly harden and cure. Else they can peel right off. Should be ready to add the black next weekend. Then she will really start to look like Connie.


-
Hello Delphic, I'll grab a front row seat on this one. Right at the start of your build. Always liked the looks of USS Rattlesnake. Always; eyeing that one when it goes on sale... maybe after I finish the kits already sitting on my shelf. 🙂


.jpg.8c9ce748997f8bfa126b657adc535f87.jpg)


.jpg.f3dc94f112f204a94559c3c3365a543c.jpg)