jfinan
-
Posts
53 -
Joined
-
Last visited
Content Type
Profiles
Forums
Gallery
Events
Everything posted by jfinan
-
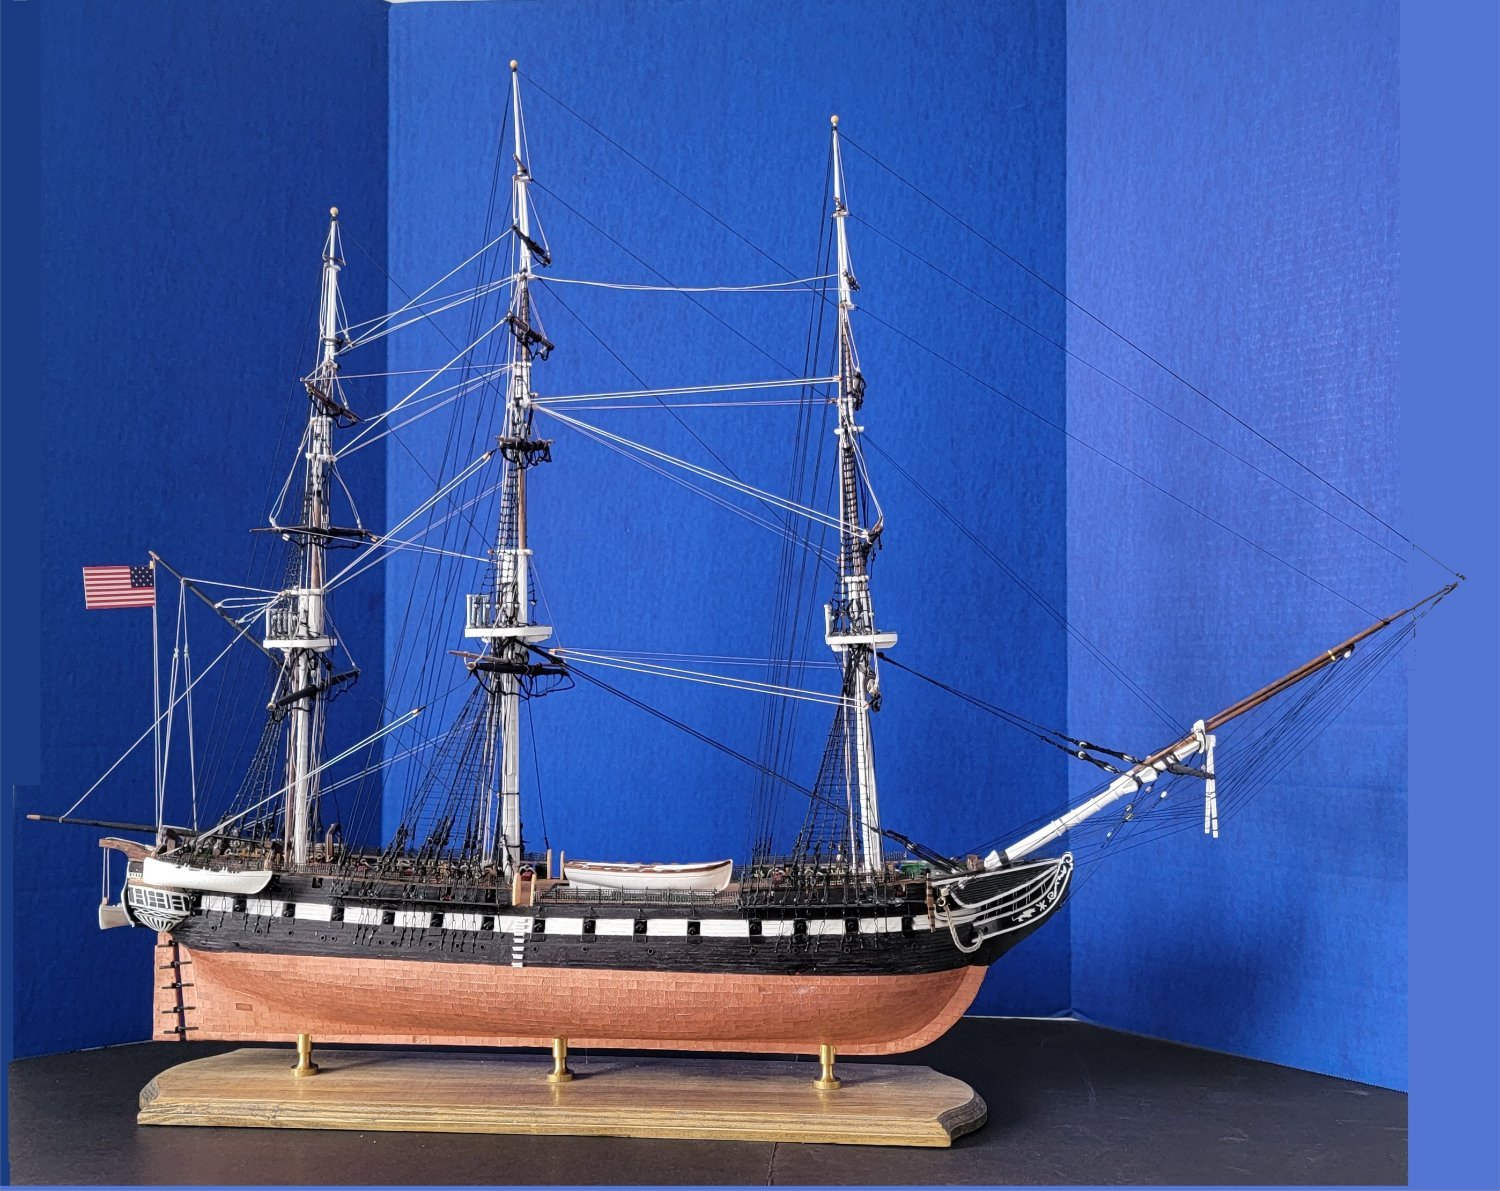
 When is a model finished? I mean, I could go on and detail until I go completely insane or I can finish the running rigging and call it complete. And that's what I've done. A bit of a rest and on to the next one. Thanks, Nic at Blue Jacket Shipcrafters, for the advice, encouragement, and support.
- 104 replies
-
- 11
-

-
- constitution
- BlueJacket Shipcrafters
- (and 1 more)
-
I agree with Jerry, Avi. Challenging but gratifying. I set out to make my Connie "museum quality". Nope, not happening. Hahahaha. Anyway I'm still enjoying it two years in. All the best with your build!
-
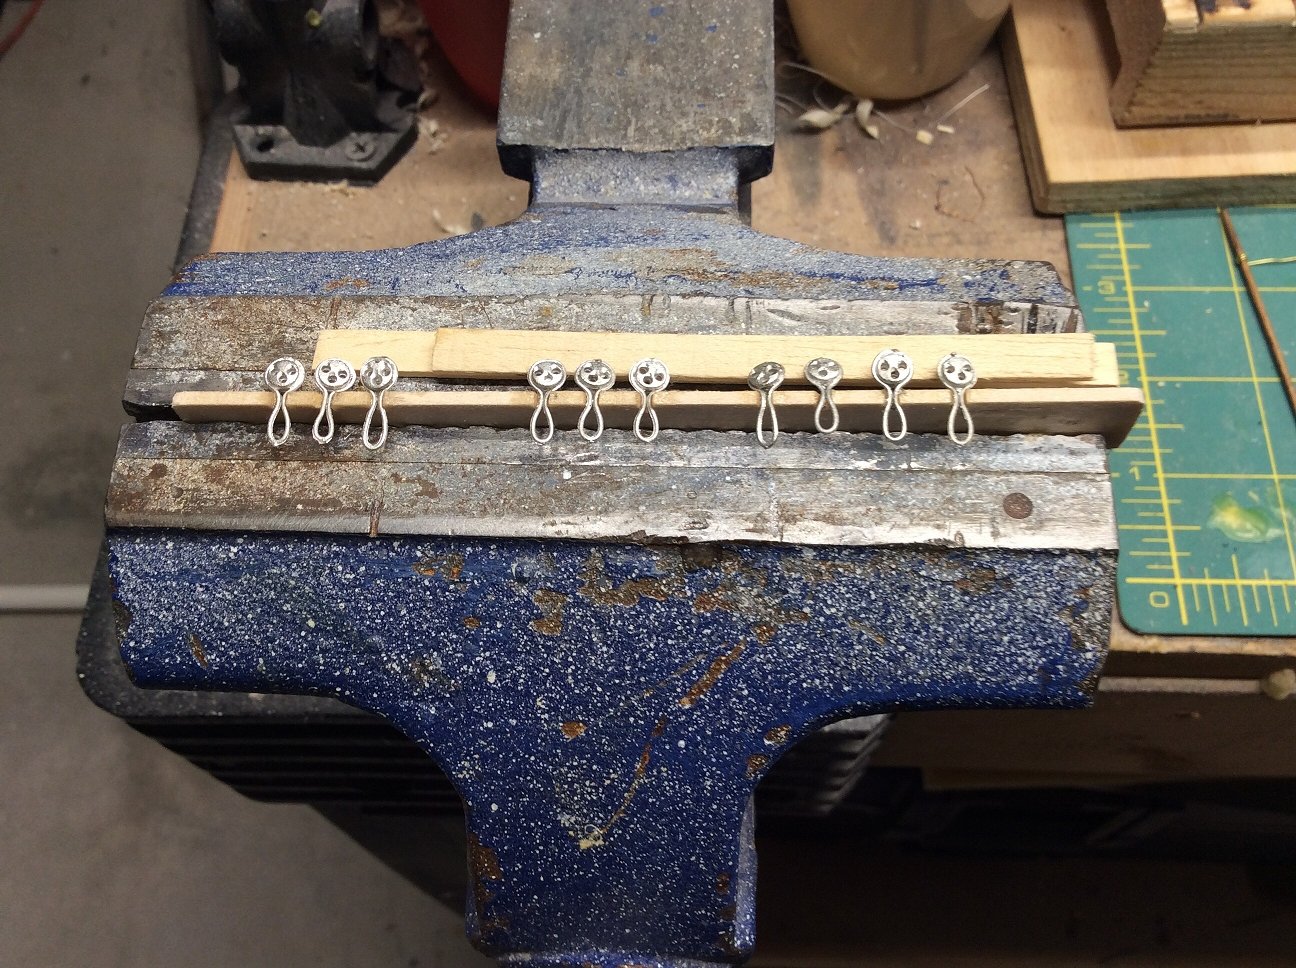
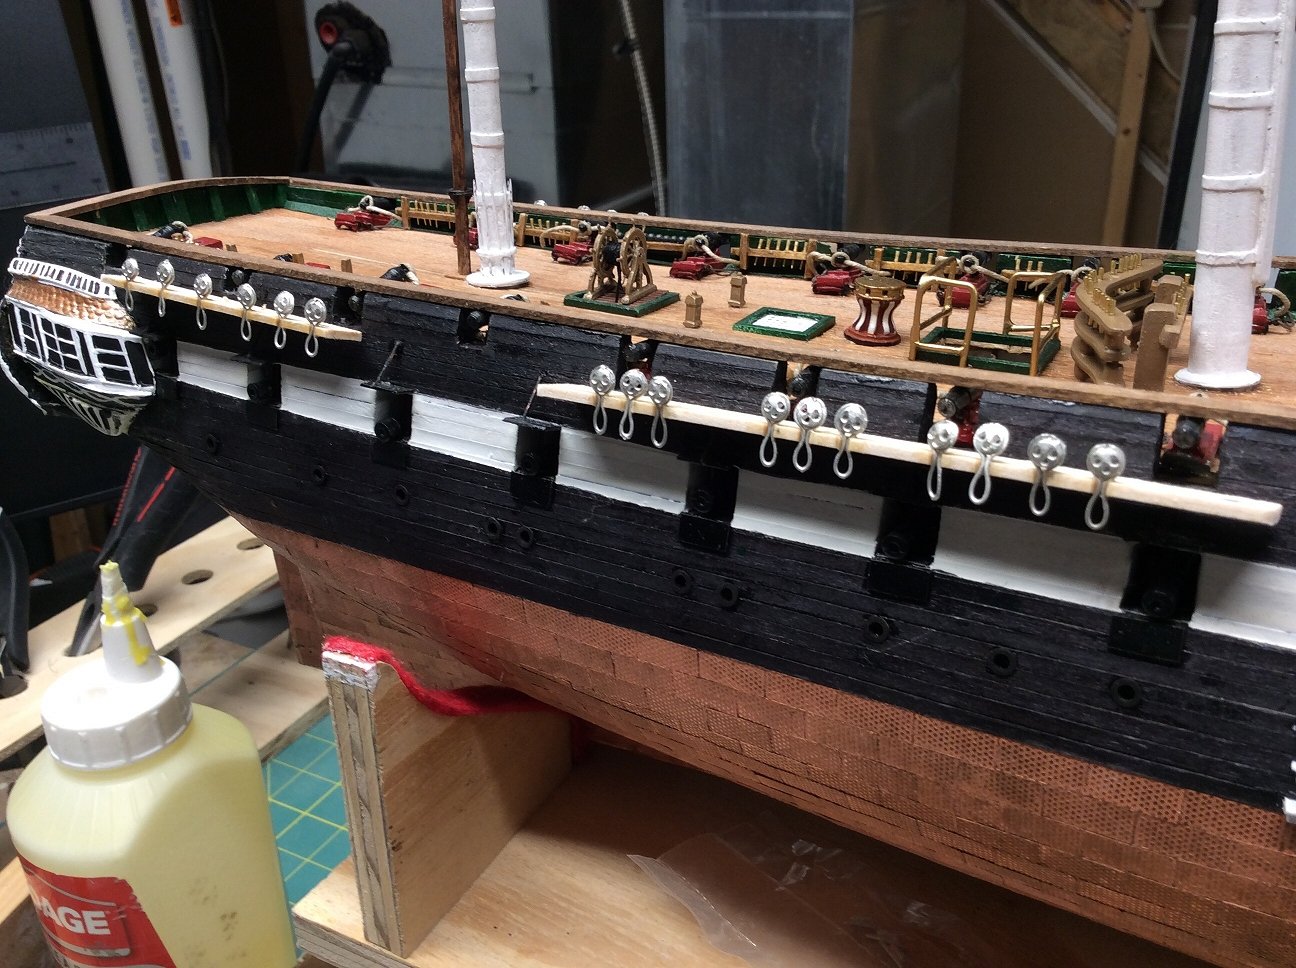
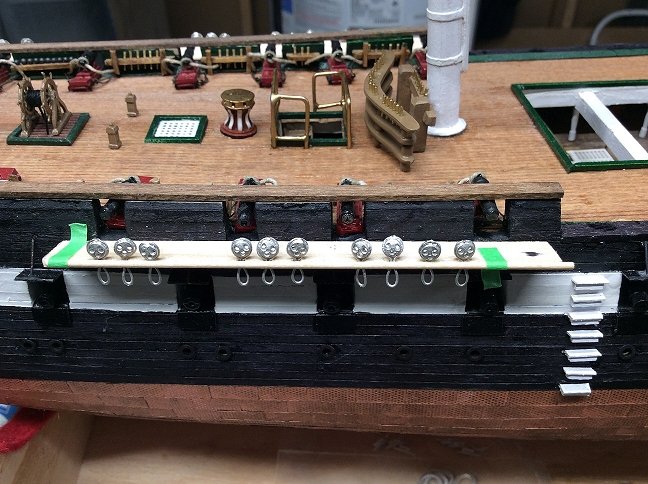
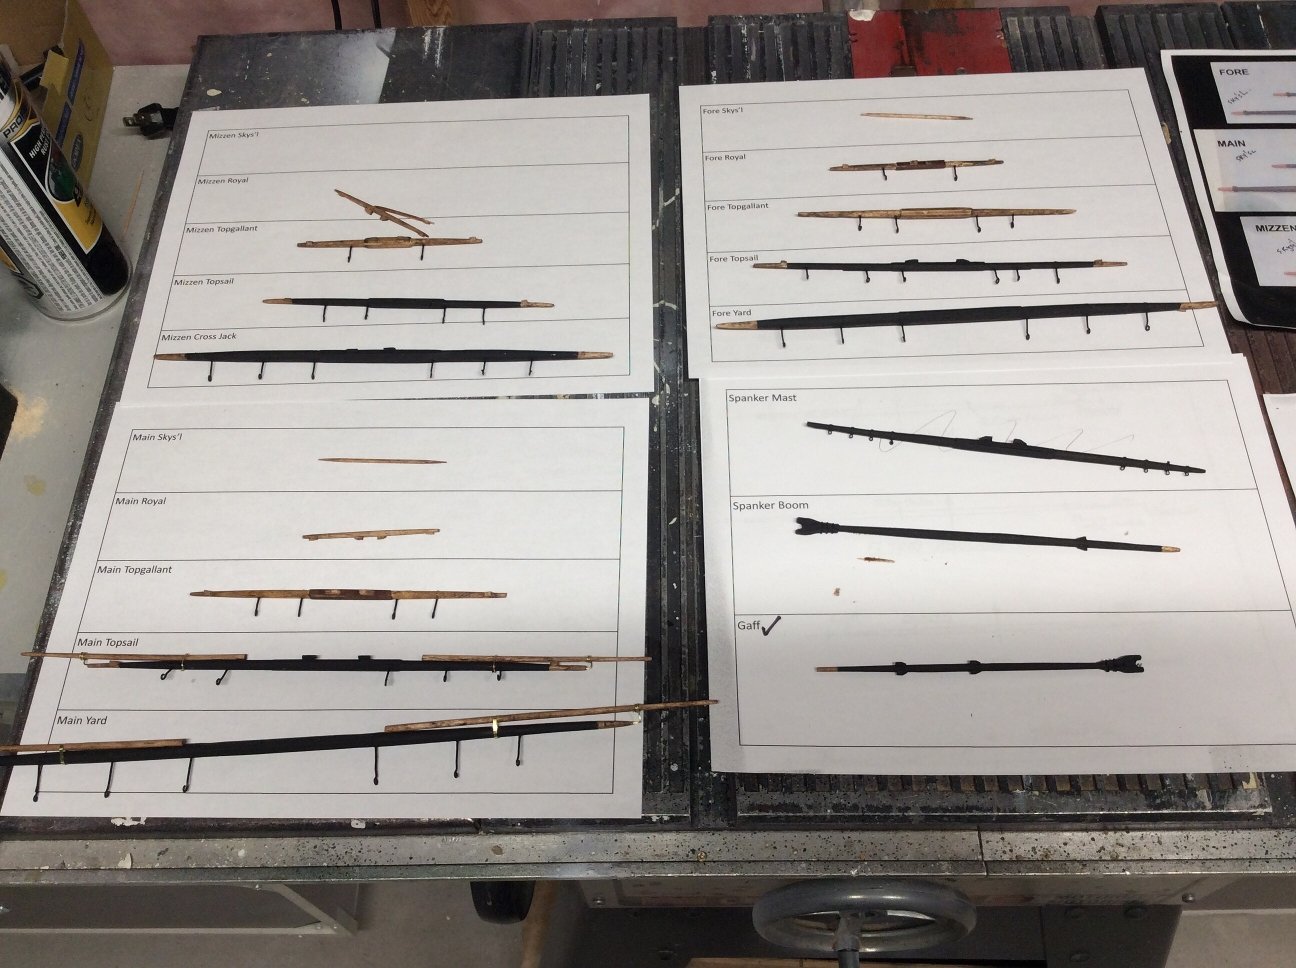
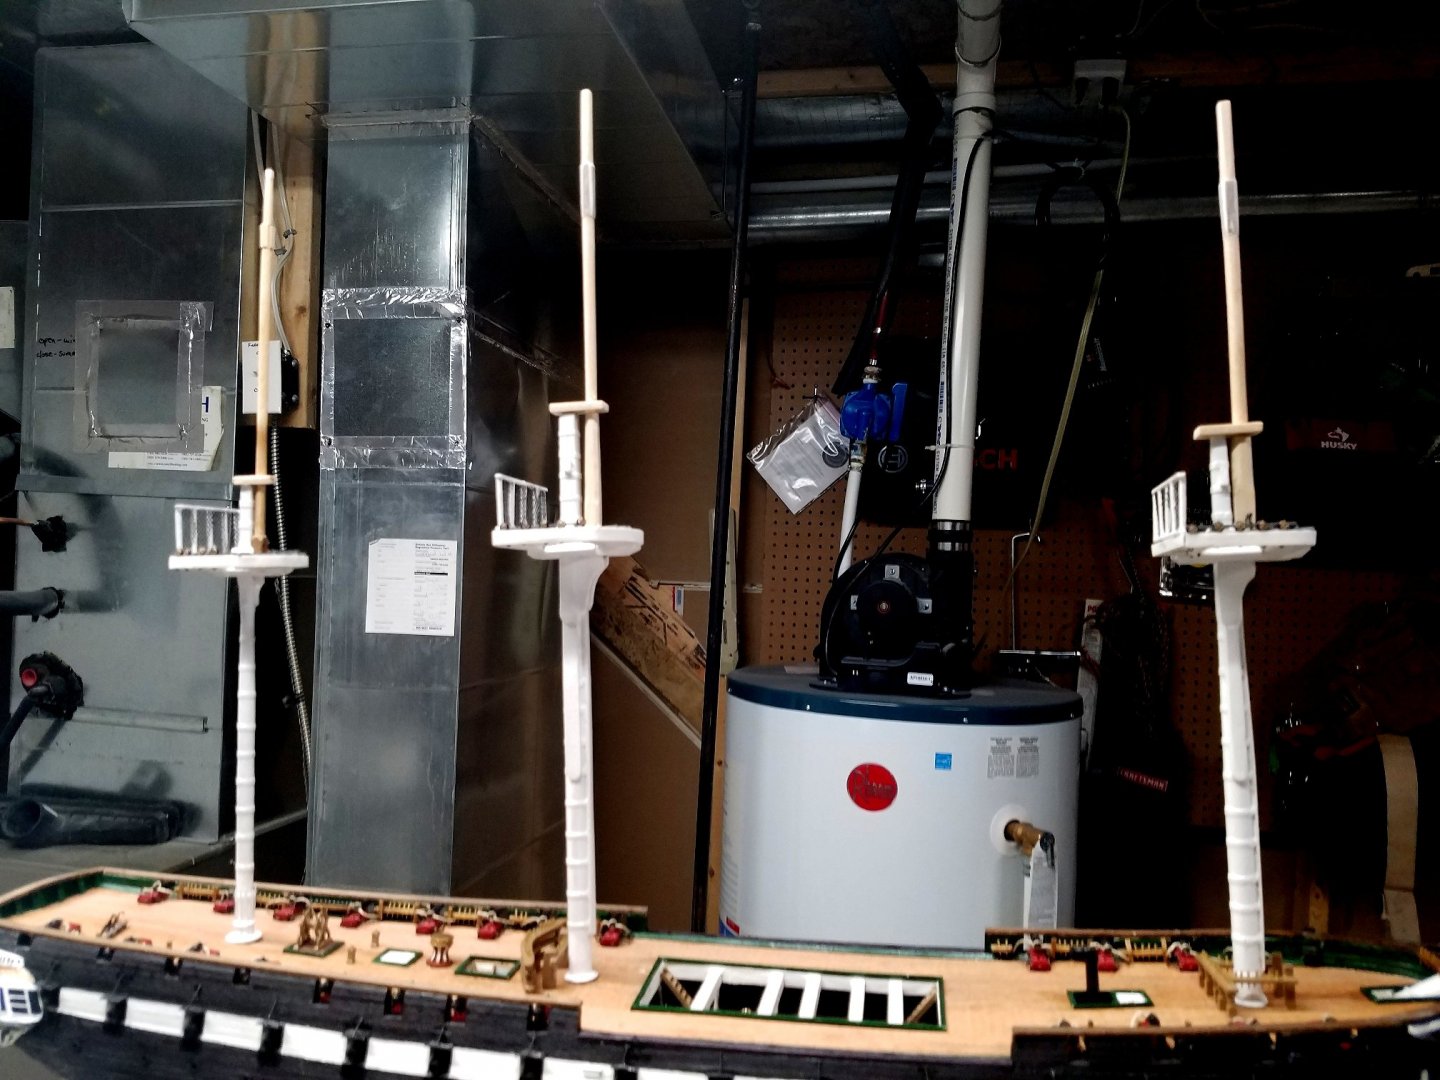
In research I've discovered several different ways of setting up the ratlines. I've decided to "fix" the lower deadeyes in place on the channels and build from there with the idea of having as few moving parts as possible. I added two small lengths of wire to the channels to assist in gluing the channels to the hull. The channels are "roughed in" and I'm contemplating the small half-round lengths to finish off. The deadeyes are cleaned then glued to the channels. The channels are rough fitted to the hull. I'm contemplating using some 1/2 round to tidy up the channel edge. Further, I've begun work on the spars. Note the sheets to keep things organized.
- 104 replies
-
- 10
-
-
- constitution
- BlueJacket Shipcrafters
- (and 1 more)
-
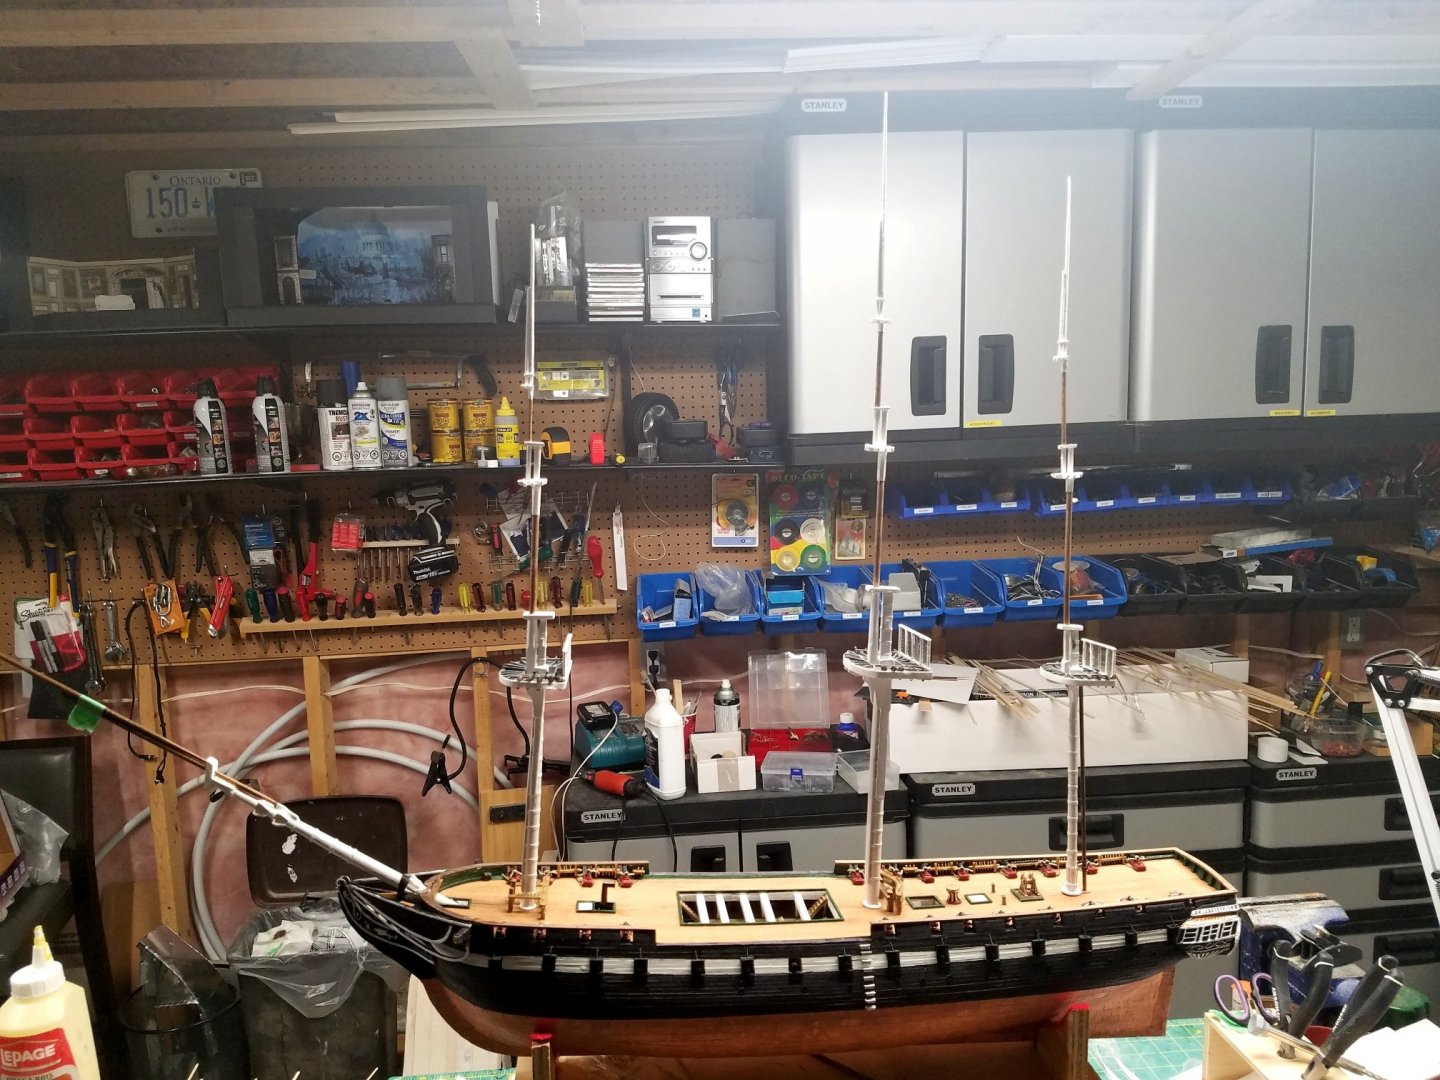
Topsails and royals are rough installed. Now on to the spars. I don't know how I managed without a mini-lathe prior to this. I'm wondering if I should have added the blocks before installing. Mmmmm.
- 104 replies
-
- 4
-
-
- constitution
- BlueJacket Shipcrafters
- (and 1 more)
-
Jay, can you flip these photos? I'm gonna lose my lunch!
- 104 replies
-
- 1
-
-
- constitution
- BlueJacket Shipcrafters
- (and 1 more)
-
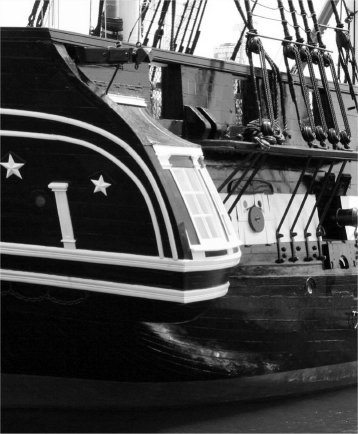
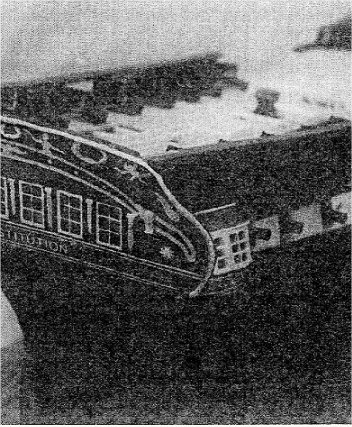
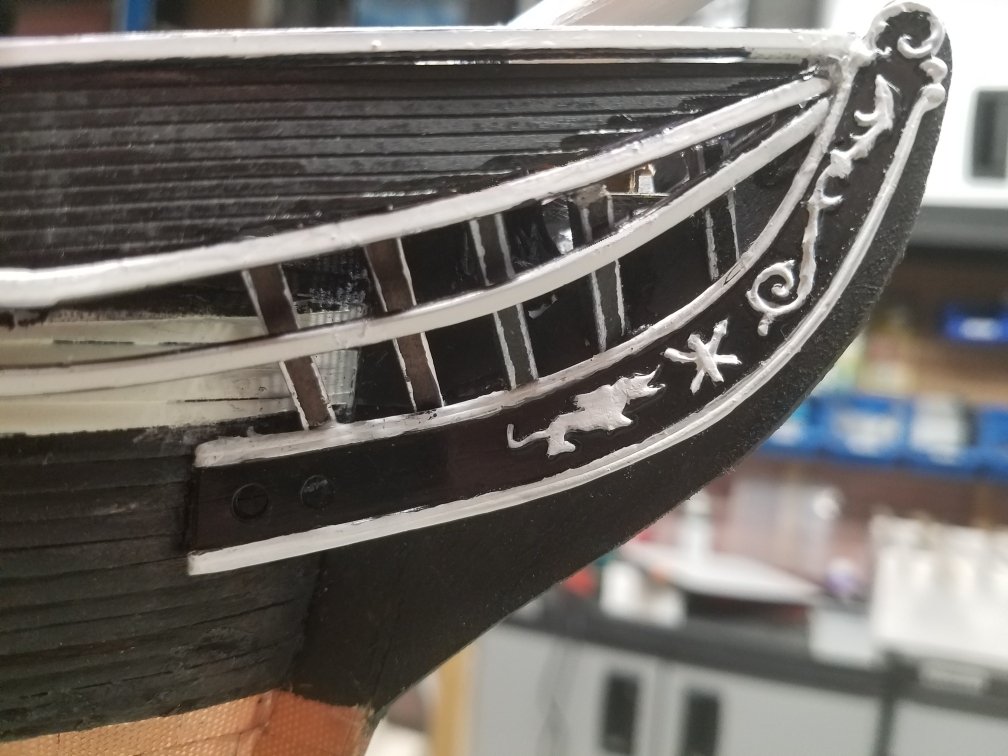
Just an update on the quarter gallery issue. As mentioned above, I've been trying to get the galleries to meet the port and starboard edges of the transom. I was doing this based on current photographs. Wrong! Nic Damuk has reminded me that the BlueJacket plans reflect the Connie as it was in 1812/15 where the galleries actually butt against the transom so that the transom sticks out beyond the galleries. Waddyaknow! I had it right the first time. For me, this means I don't have to rebuild! Thanks, Nic, for the reminder to FOLLOW THE *&*%^^ INSTRUCTIONS!
- 104 replies
-
- 6
-
-
- constitution
- BlueJacket Shipcrafters
- (and 1 more)
-
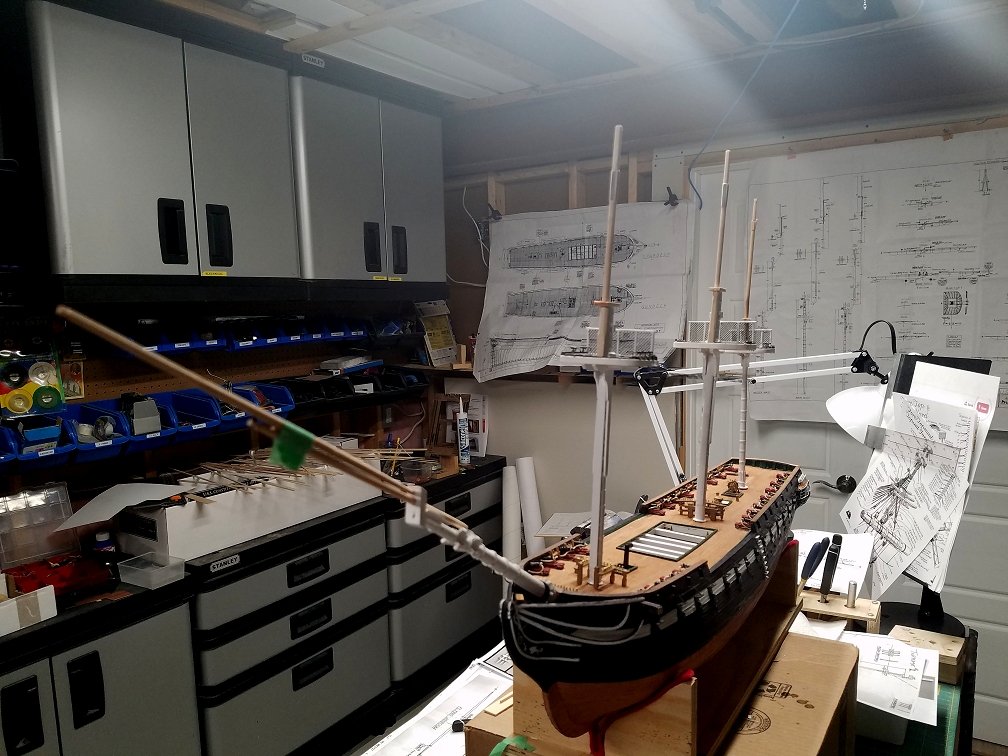
Thanks Jay. I share your pain regarding the galleries. I have attached my second attempt to the hull and I'm going to revisit them soon. I just can't seem to get them to line up with the edge of the brass transom plate. In the meantime, I've just rough fitted the top masts and jib boom after turning them on a mini-lathe ( a birthday present from my missus). As Kurt has pointed out they're a real challenge as, at different points, they are round, square, and worst of all, octagonal. For the last part, I started with square, added thin strips to the flat four sides, added filler on the seams, and sanded to "octagonal". Close enough!
- 104 replies
-
- 7
-
-
- constitution
- BlueJacket Shipcrafters
- (and 1 more)
-
Thanks Nic! I hope your ticker is functioning well and you are having a good holiday. One thing I've noticed. Photos don't lie. I've got some serious clean-up to do!
- 104 replies
-
- 1
-
-
- constitution
- BlueJacket Shipcrafters
- (and 1 more)
-
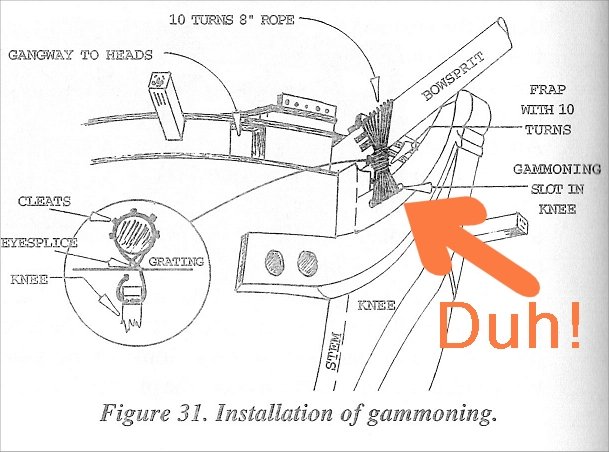
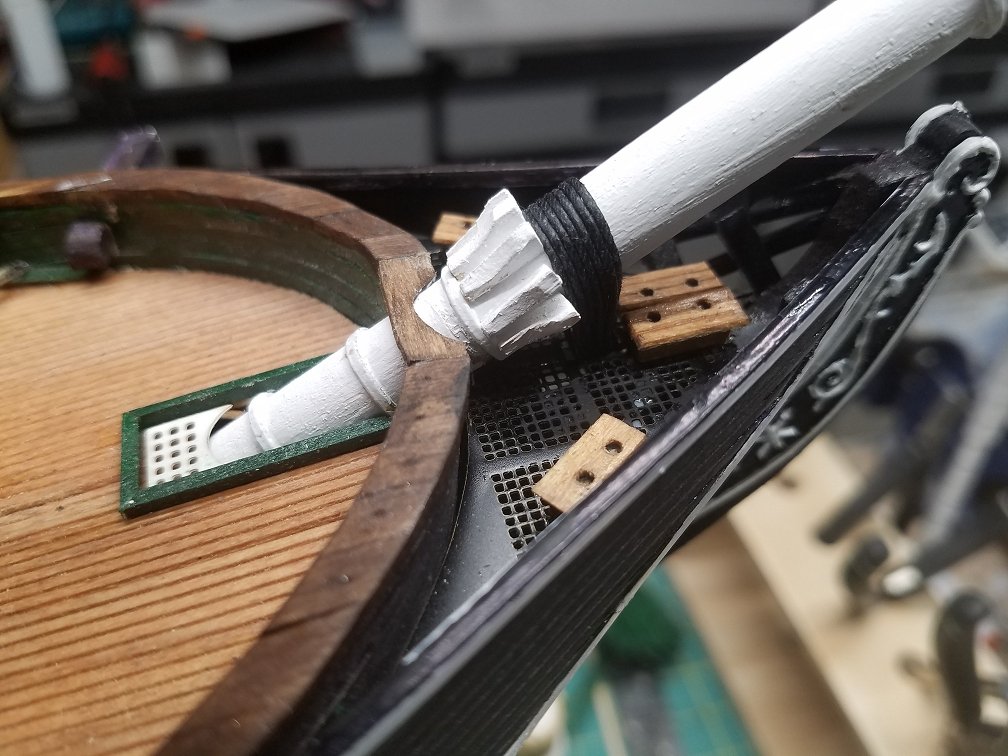
Have you ever missed a step that cost you a week of work? I was all set to install the gammoning that ties the bowsprit to the ship when I discovered that I had missed installing a "slot" in the knee through which the gammoning goes. To get in to install the slot, I had to remove all bowhead rails and timbers. Anyone who has built this boat knows what a pain they are! Each one is sized, cut, painted and placed individually. Anyway, a week later, it's done. I have revised and deleted all explicatives from this submission. 🙂
- 104 replies
-
- 6
-
-
- constitution
- BlueJacket Shipcrafters
- (and 1 more)
-
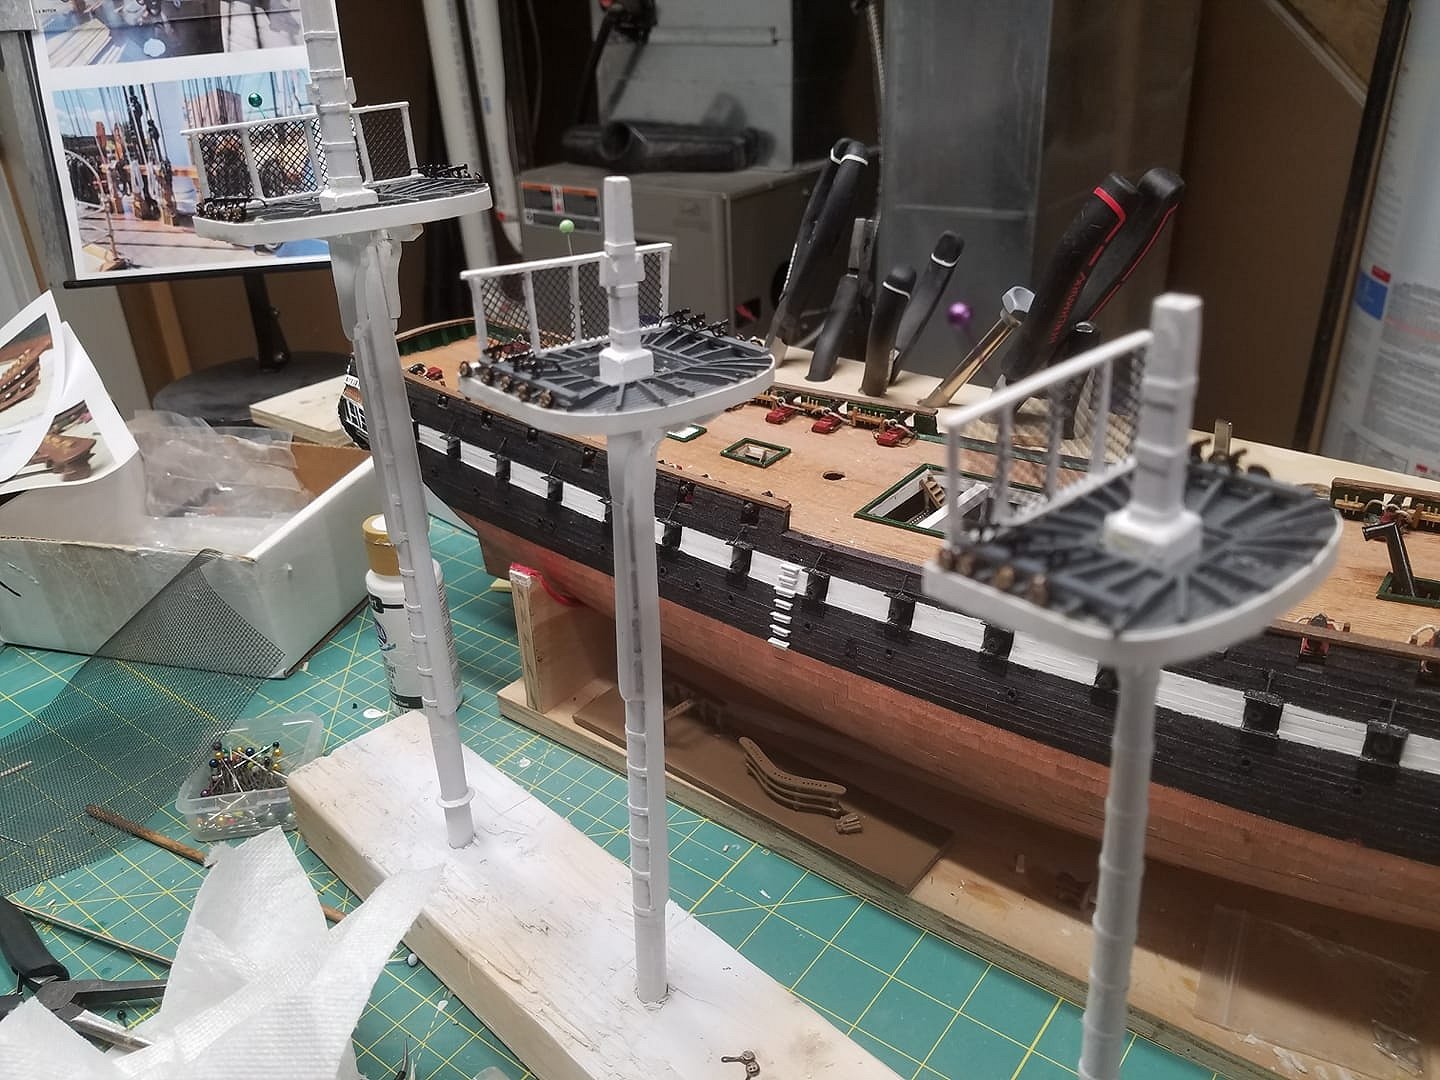
It's been some time since I've reported in. Several unsatisfactory attempts to form up and paint the stern galleries caused me to abandon the project for a while but I'm back at it. Here are the fighting tops finished and married to the lower fore, main, and mizzen masts. The netting on the tops is taken from standard vinyl screen used on screen doors. It's cut and mounted on the diagonal to better mirror the original. The trim around the tops and the rings on the masts is standard cardstock.
- 104 replies
-
- 10
-
-
- constitution
- BlueJacket Shipcrafters
- (and 1 more)
-
Enjoy the great weather and enjoy the trip. Pass on my best wishes to Nic Damuk at Blue Jacket who is recovering from heart surgery. Best wishes! Drive safely!
- 104 replies
-
- 1
-
-
- constitution
- BlueJacket Shipcrafters
- (and 1 more)
-
In the past, I have used a small plane to shape my masts and yards. I'm thinking it's time to invest in a small lathe with an accompanying chuck. I had settled on the one Mico-Mark sells only to discover they won't ship that item to Canada. I'm one disappointed Canuck! It seems to me the chuck is essential for this kind of shaping. Ideas (sources) are most welcome and thanks in advance!
-
I have the Marquardt book, purchased at the Constitution Museum gift shop, and indeed, it is a great reference. That said, I have resolved not to sweat any detailing that will not be seen. As my late Irish mother would say, "A blind man would like to see it". Thanks re: the deck. I had to fill to microscopic gaps (just big enough to grab the eye) but now they're pretty much invisible. I used the two decking sheets from Blue Jacket. In hindsight, I wish I had experimented with ink (wipe on/wipe off) between the planks to add some realism. I might still experiment on some stained deck scraps to see what I can come up with before adding any other superstructures to the deck. After that, I'll flip a coin as to what to tackle next...the transom detail or the bowheads. Either way.....yikes. As you have mentioned, Kurt, it's essential to look into the future and ascertain the consequences. What I would give for a simple "order of operations".
- 104 replies
-
- 1
-
-
- constitution
- BlueJacket Shipcrafters
- (and 1 more)
-
Dear fellow Audi Owner! To be honest, the build is a challenge. If you are a novice, you really should look elsewhere. The instruction book is a substantial compendium of historical information, such as differing descriptions of many iterations and renovations to the ship from 1797 onward, occasionally interspersed with model instructions and advice. If you are used to seeing straightforward step-by-step build instructions in chronological order, you won't find it here. That said, if you love having plenty of options, and enjoy personal research, this one's for you! Good luck!
- 104 replies
-
- 2
-
-
- constitution
- BlueJacket Shipcrafters
- (and 1 more)
-
I'd like to take a moment to say thanks to all of you who send along words of support and advice. This build is a monster! A special shout-out to Kurt Hauptfueher. His attention to detail is inspiring and humbling!
- 104 replies
-
- 3
-
-
- constitution
- BlueJacket Shipcrafters
- (and 1 more)
-
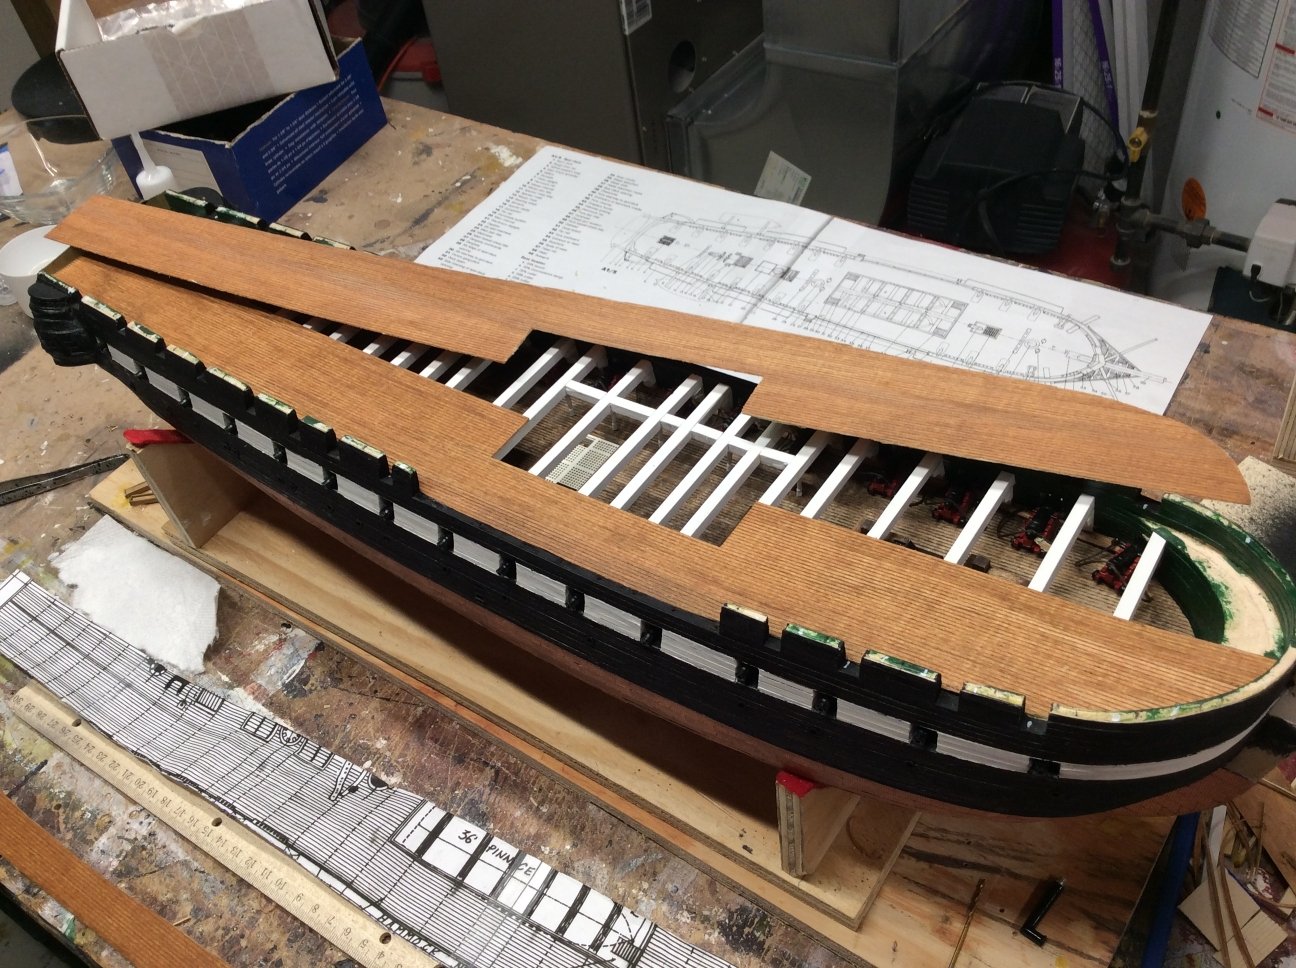
The knees, horizontal beams and the visible stanchions are in. Now I'm carving out the two halves of the spar deck. A lot of trial and error. More trial and less error I hope.

- 104 replies
-
- 15
-
-
- constitution
- BlueJacket Shipcrafters
- (and 1 more)
-
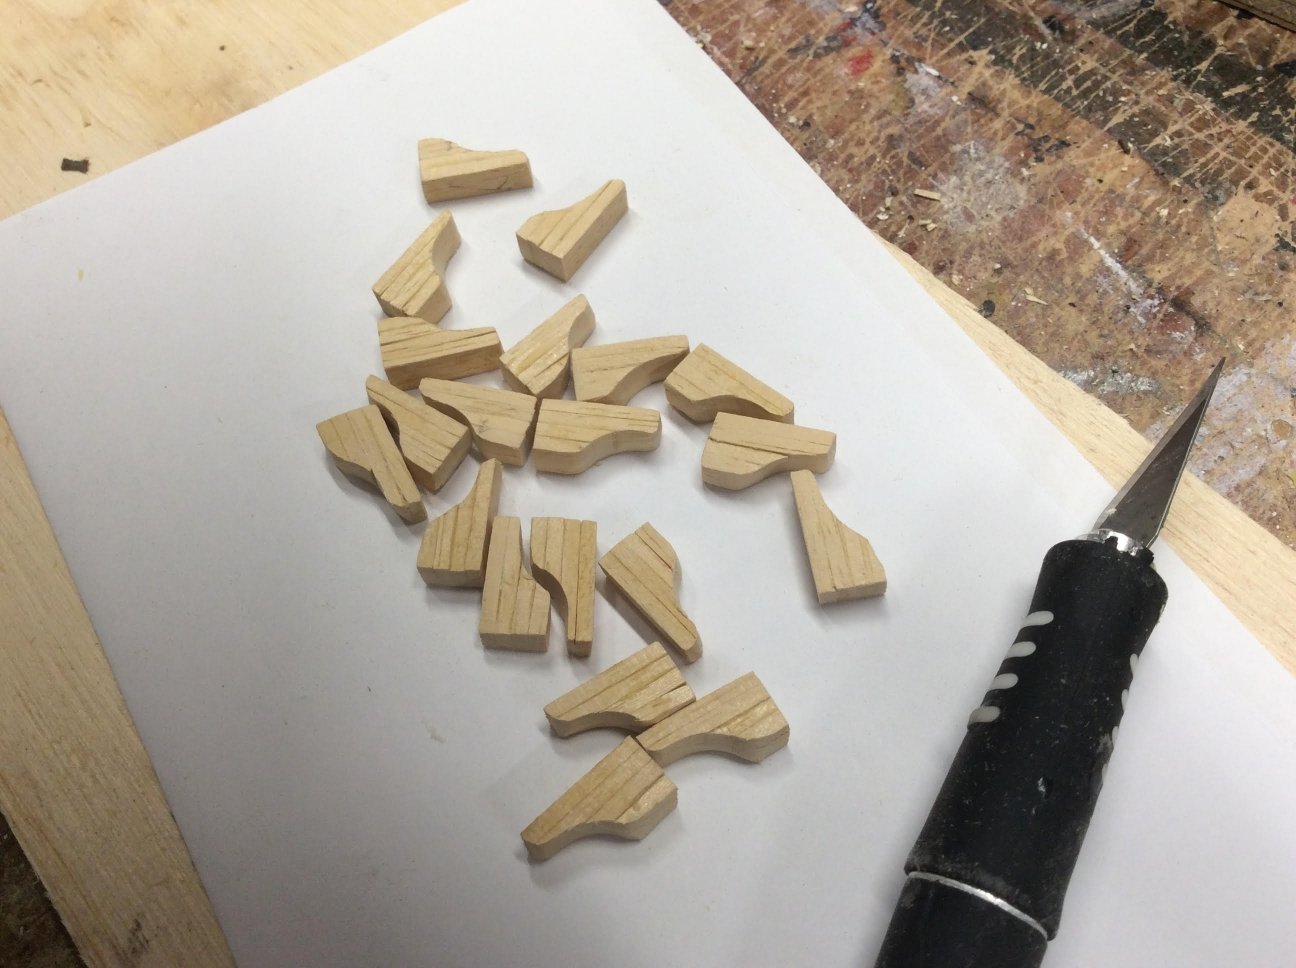
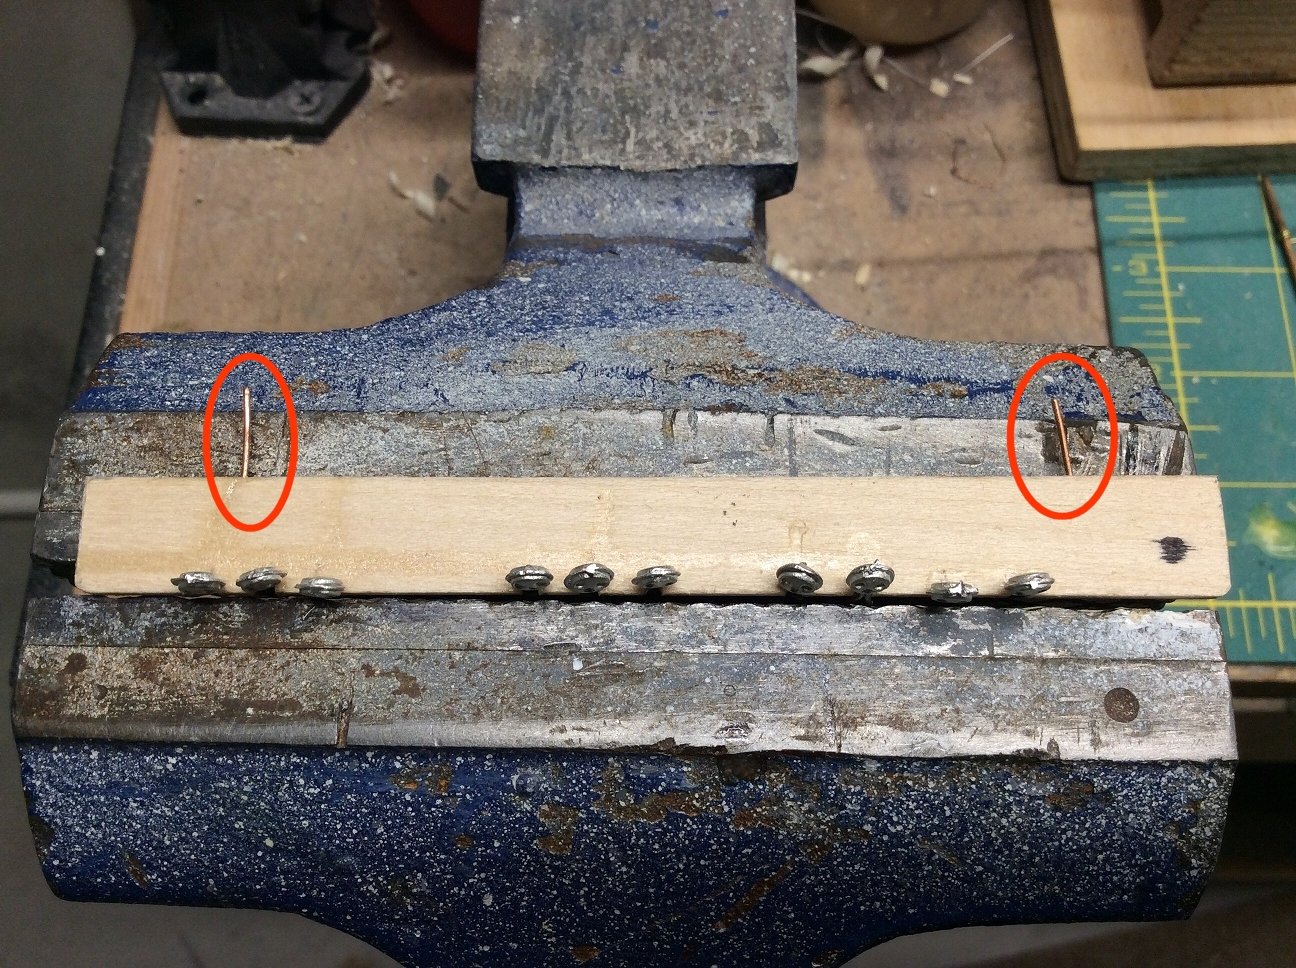
According to the instructions, sixty-two knees, that will support the beams under the spar deck, are to be jigsawed out of a single 5/32" plank. Since that sounded like a monstrous task to me I opted to make the knees by "glue-lamming" some hull planking left over from a earlier kit. Here's a few of them, shaped with the Dremel and lightly sanded. To fit the curved bulwark, each will have to be fitted individually.

- 104 replies
-
- 11
-
-
- constitution
- BlueJacket Shipcrafters
- (and 1 more)
-
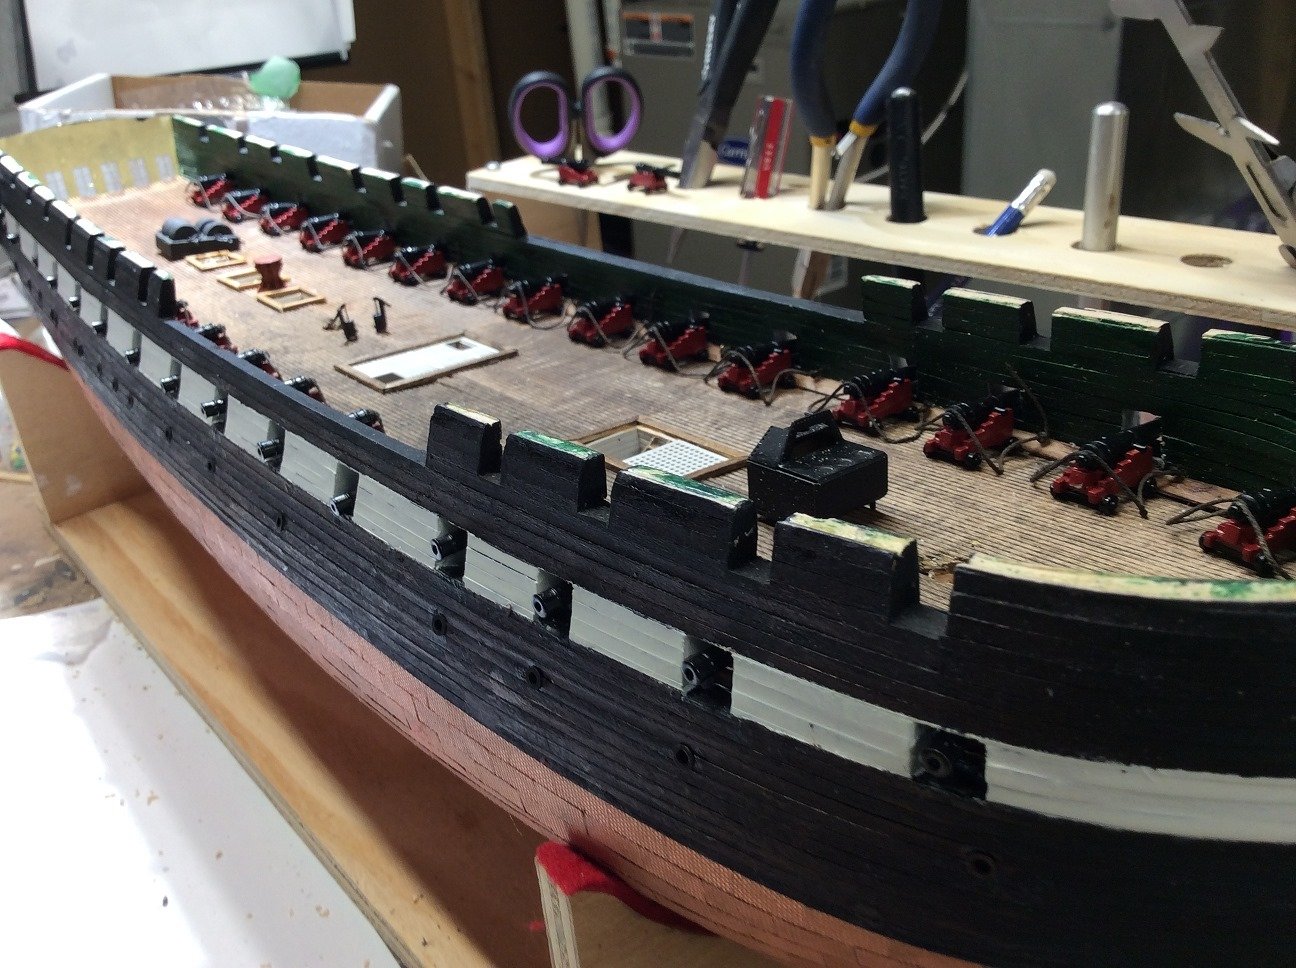
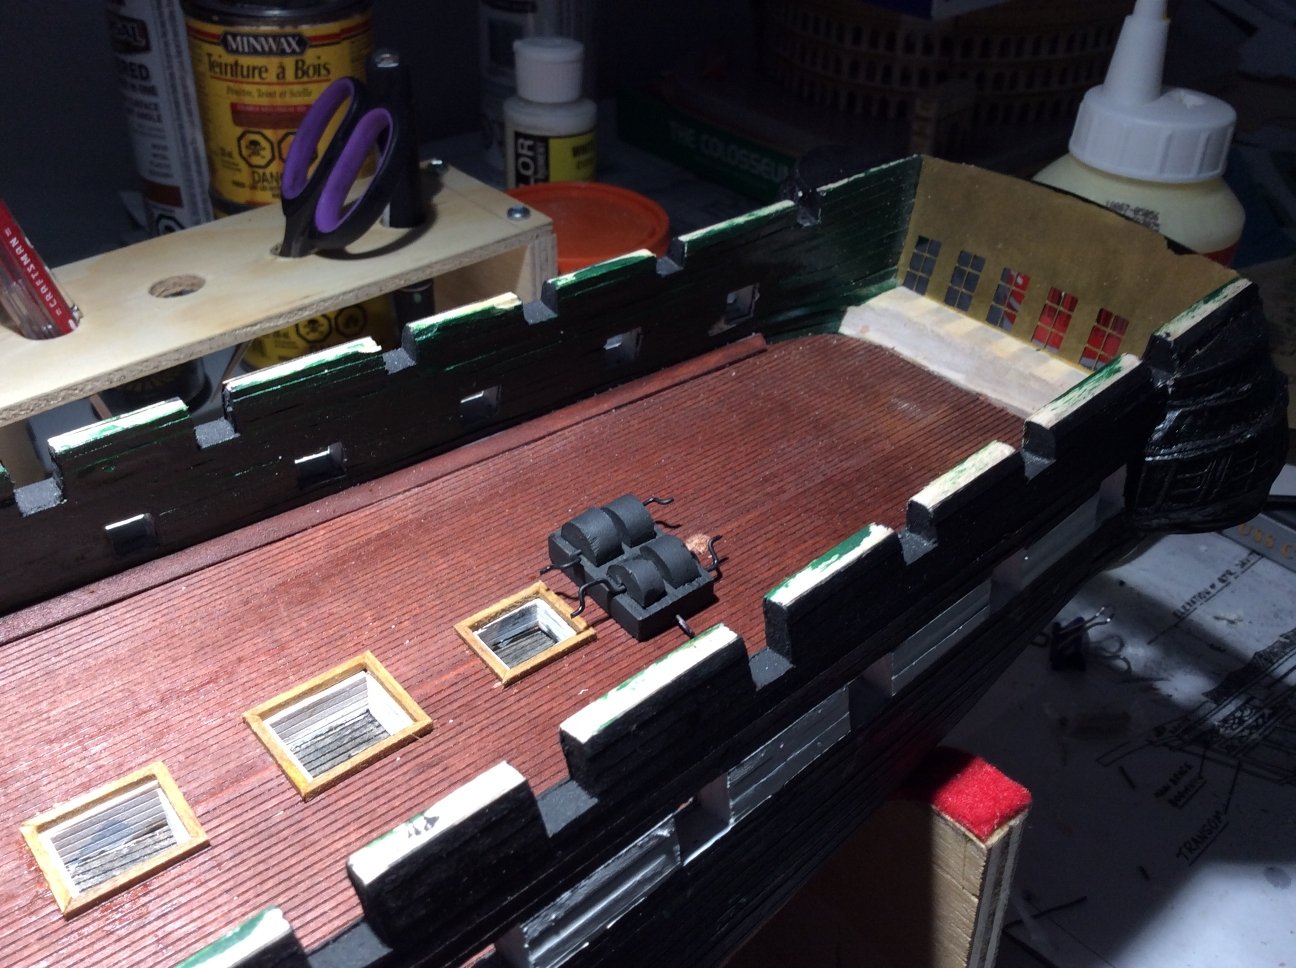
Lower deck guns, pumps, air ways and stairways installed. Ongoing touch-ups needed. The bottom half of the bulwarks should be white, but as they will not be viewable once the spar deck is in, the I've opted not to sweat the error.

- 104 replies
-
- 12
-
-
- constitution
- BlueJacket Shipcrafters
- (and 1 more)
-
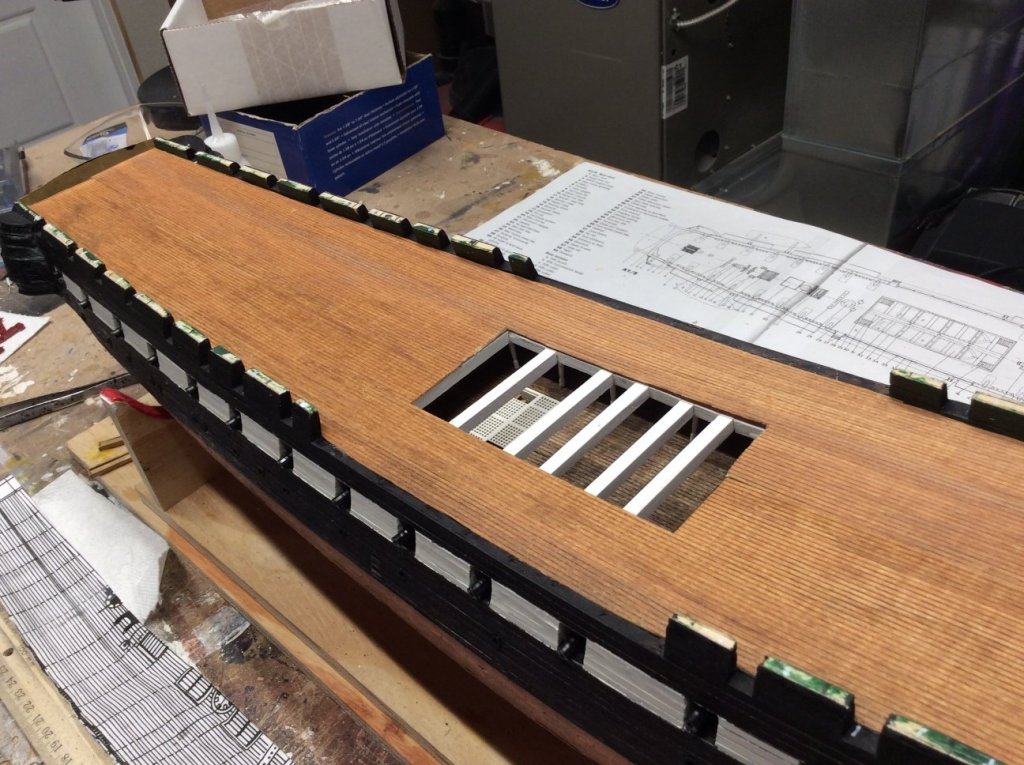
I'm back. After a two month hiatus thanks to knee replacement surgery, I've begun work on the items to be mounted on the gun deck. In the picture you can see a scratch-built chain pump and the hatch coamings. I've used some scrap to line the interior of the hatches. I was unhappy with my assembly of the galleries. It was my own error as I attempted to install them prior to fitting the transom. Lesson learned.

- 104 replies
-
- 7
-
-
- constitution
- BlueJacket Shipcrafters
- (and 1 more)
-
Thanks David, Kurt and Glenn for your suggestions. I couldn't find shot on the Blue Jacket website and shipping from England was cost preventative so after a thorough search (and an effort to keep the cost down) I ordered a package of 250 2mm OD ball bearings from Canada Bearings. Hopefully that will do the trick. Thanks again for your suggestions.
- 104 replies
-
- 1
-
-
- constitution
- BlueJacket Shipcrafters
- (and 1 more)
-
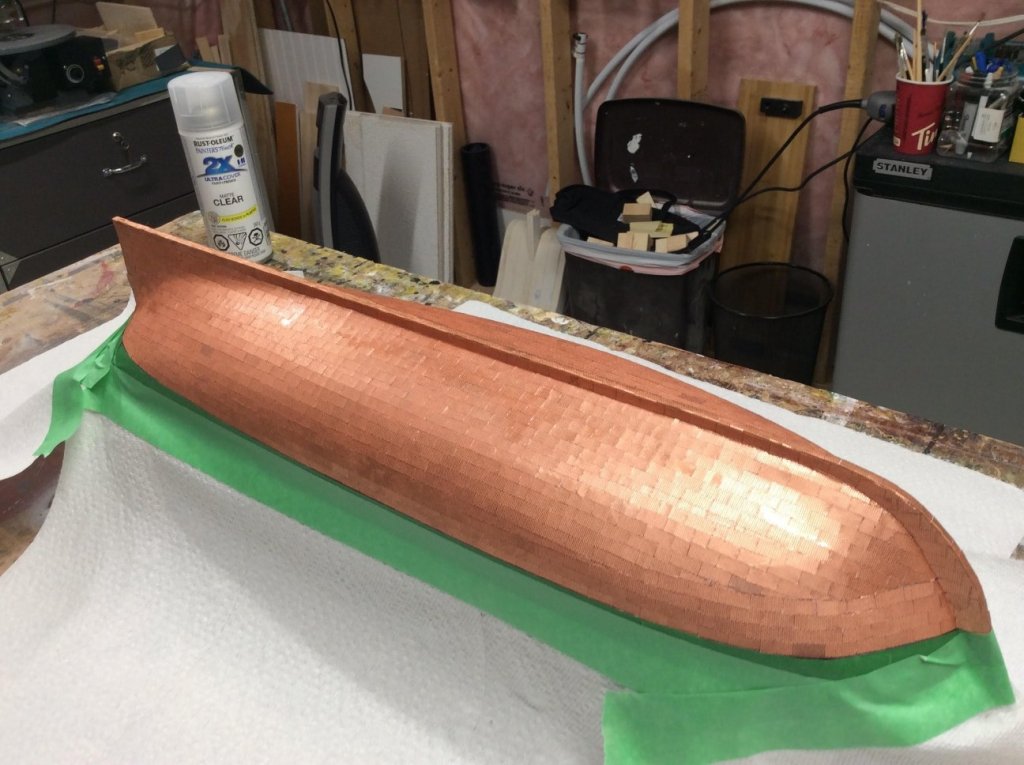
Thanks David! I'll check it out. I was at Home depot this morning and found some brass chain that might work. It looks very close to scale when held up against the canons:
- 104 replies
-
- 4
-
-
- constitution
- BlueJacket Shipcrafters
- (and 1 more)
-
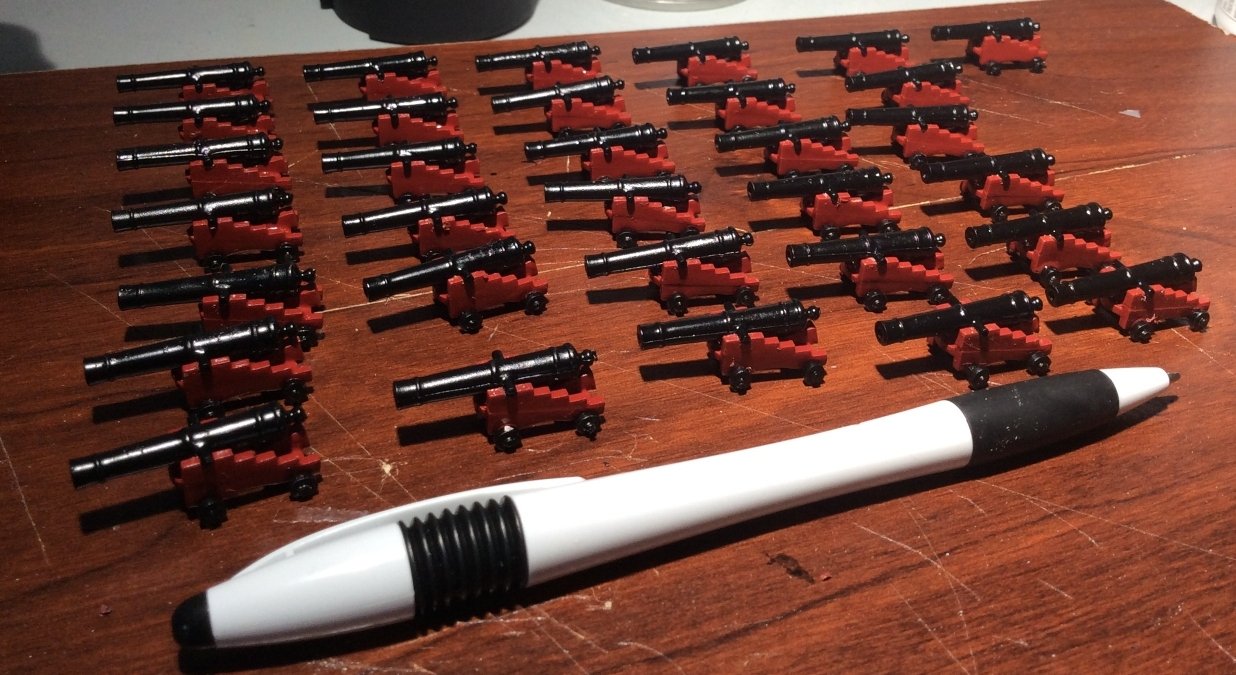
I came to a complete stop trying to envision the "hanging shot lockers" that reside on the inner bulkheads The kit sketches are....sketchy. Sorry Nic! No convenient Google images available. To further complicate matters I was (and still am) completely flummoxed as to where to source extremely small (we're talking 2mm diam.) canon balls. So.....I pivoted and made cannons. :-)

- 104 replies
-
- 7
-
-
- constitution
- BlueJacket Shipcrafters
- (and 1 more)
-
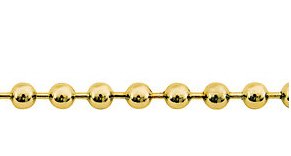
After two month's work and over three thousand individually applied plates the coppering of the hull and rudder is done. More than a few plates were removed and replaced to create a smooth finish. Now multiple applications or flat polyurethane. So far so good!
- 104 replies
-
- 16
-
-
- constitution
- BlueJacket Shipcrafters
- (and 1 more)
-
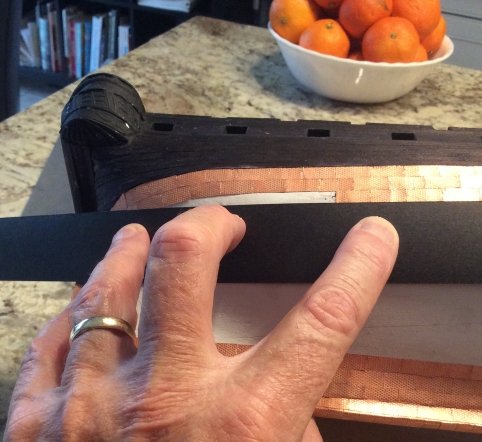
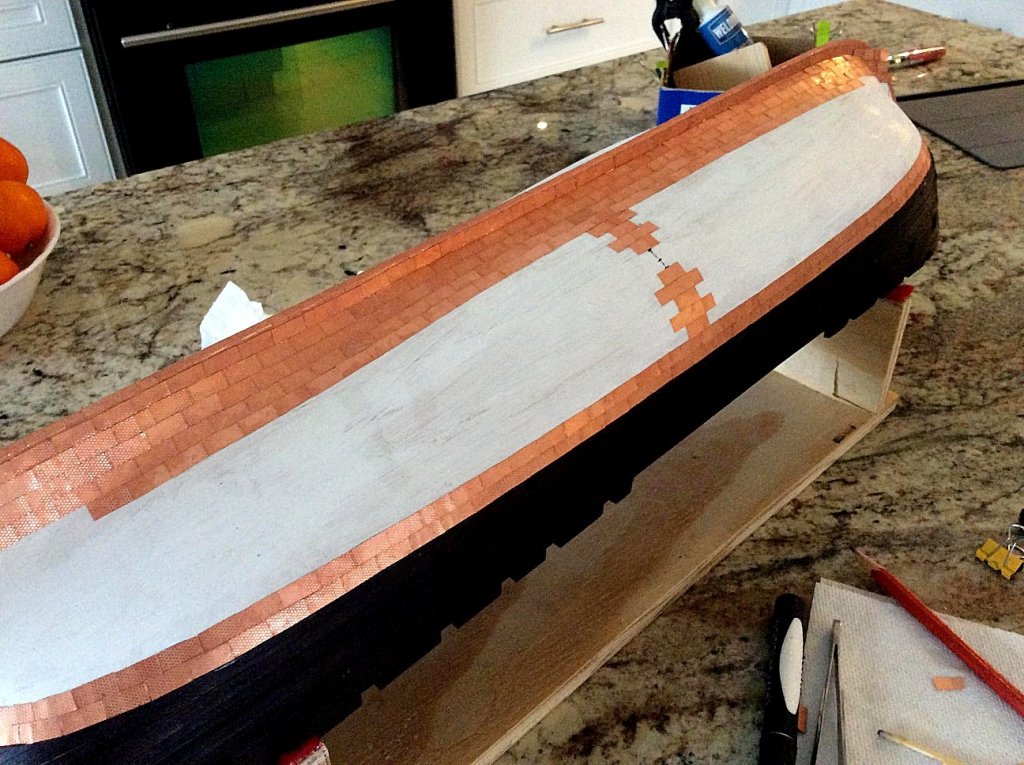
The fairer sex and model ships....they both have mysterious and vexing compound curves. I was a bit confounded as how to apply a straight line to a compound curve until I picked up a piece of highly flexible construction paper and had an "Ah-Ha!" moment. I'm going to clean up the plates above it before going further.
- 104 replies
-
- 5
-
-
- constitution
- BlueJacket Shipcrafters
- (and 1 more)
-
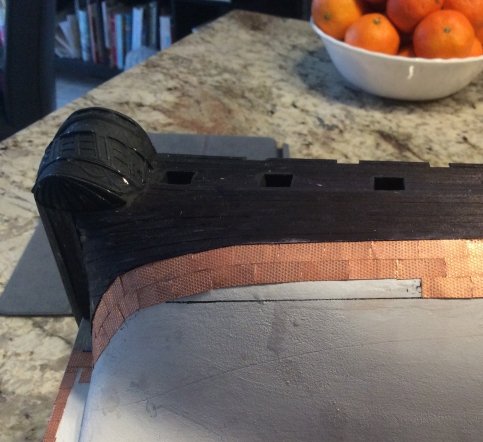
I found about six different references on the best technique to copper a hull. All different! As you can see below, I ended up inventing my own laying in two rows of dressing belt at the waterline and four rows at the keel, then locating the widest point of girth on the hull and drawing a line perpendicular to the waterline. At the end of most rows the plates will be trimmed to fit against the preceding row. As expected the widest point will require one or two "filler" rows. That's the plan anyway. At least it's tidy! A note for anyone considering coppering: give the hull a coat of copper colour paint before you start. A few very tiny cracks of "white" are peeking through. Hindsight really is 20/20.
- 104 replies
-
- 9
-
-
- constitution
- BlueJacket Shipcrafters
- (and 1 more)