laps
-
Posts
115 -
Joined
-
Last visited
Recent Profile Visitors
1,230 profile views


-
 petervisser reacted to a post in a topic:
Mary Ann by laps - Billing Boats - scale 1:33
petervisser reacted to a post in a topic:
Mary Ann by laps - Billing Boats - scale 1:33
-
yvesvidal reacted to a post in a topic:
Mary Ann by laps - Billing Boats - scale 1:33
-
yvesvidal reacted to a post in a topic:
Mary Ann by laps - Billing Boats - scale 1:33
-
yvesvidal reacted to a post in a topic:
Mary Ann by laps - Billing Boats - scale 1:33
-
yvesvidal reacted to a post in a topic:
Mary Ann by laps - Billing Boats - scale 1:33
-
 Base plate I made a simple base for Mary Ann. It's amazing what a piece f wood thrown out by somebody else can turn into. Walnut is fairly nice but crazy expensive to buy in Denmark as it has to be imported from North America. Don't mind the third hole - that was caused by Mr Boozo. It will be covered by the pedestal mount 🙂 I re-painted the inside of the bulwarks and I'm now ready to give the outside of the hull some primer - and then color. /Lars Peter
-
Gaffrig reacted to a post in a topic:
Mary Ann by laps - Billing Boats - scale 1:33
-
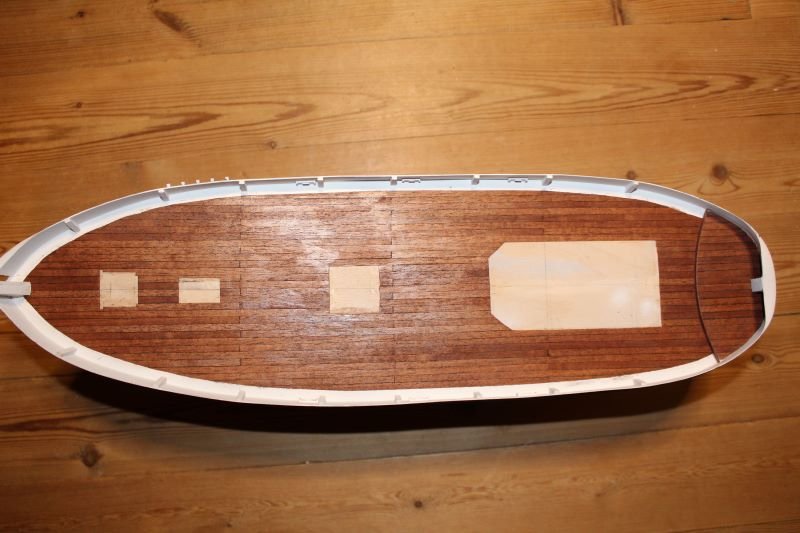
Deck planking complete I just completed planking the deck of Mary Ann. I used the kit supplied mahogany strips for this. They are 5 mm wide and probably a tad too wide scale-wise. I decided to plank around the various structures on the deck that give access below deck. Also, this hides any gaps. For example, I found it quite difficult to make the wheel house sit flush with deck because of the curvature of the deck. Caulking was simulated with a black marker pen on both sides of the planks. I then sanded the deck with 240 grit and gave it a coat of satin varnish (not quite dry when I took the photos). What's next? I want to completely mask of the deck and paint the waterways and bulwarks again - this time with proper thinning of the paint. I manage to make quite a few scratches to the paint while trimming the deck. Once this is done, I believe it is time to paint the outside of the hull. I have ordered some more paint as I was not quite happy with sky blue Vallejo - too blue 🙂 It is Humbrol duck egg blue + white (50/50) - at least I'll give it a try. So, hopefully I'll find the color I like. /Lars Peter

-
petervisser reacted to a post in a topic:
Mary Ann by laps - Billing Boats - scale 1:33
-
petervisser reacted to a post in a topic:
Mary Ann by laps - Billing Boats - scale 1:33
-
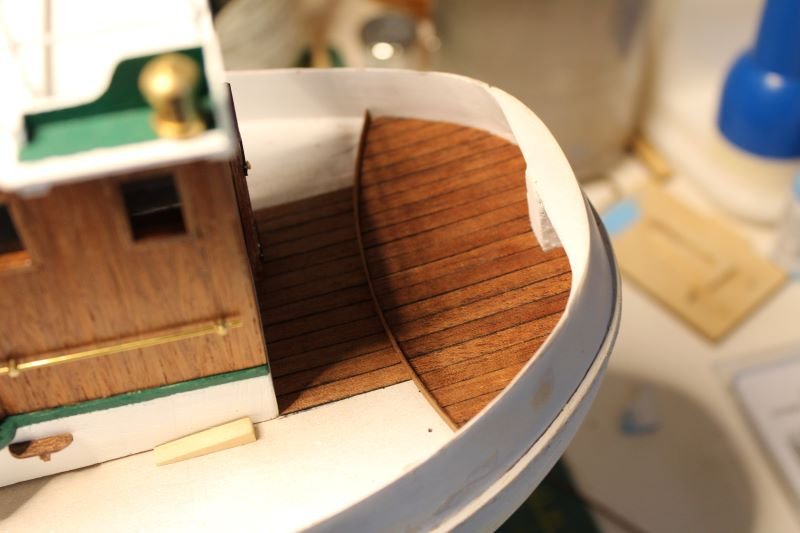
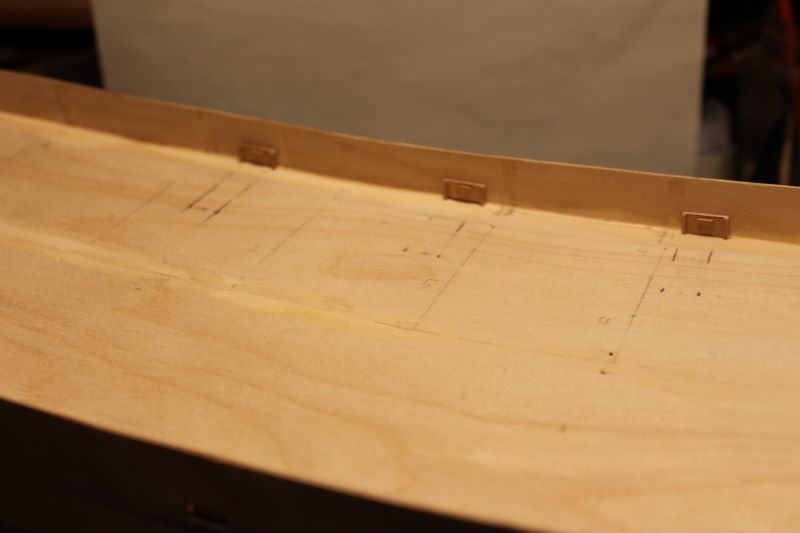
Planking the deck I've made a slow start on the deck planking. I started with the raised platform at the stern as per kit instructions. On the main deck I intend to plank around the wheel house, deck hatch and various items. This is a bit tricky as I don't have a scale plan. I tried to establish some reference points and then work from that, starting with positioning of the wheel house. I glued some temporary blocks to the deck to get the exact position. My intention is then to place the deck planks around starting aft and then moving forward. It is a bit tricky but the advantage is that any gaps where the deck items doesn't sit completely flat on the deck will be hidden if the gaps are less than 0.5 mm. I have now planked behind the wheelhouse. I can then remove the forward location block and start again from the middle and working my way forward and outwards. I have marked the waterways at one side and will mark it with masking tape to establish the outer side of the decking. We'll see how it goes. /Lars Peter
-
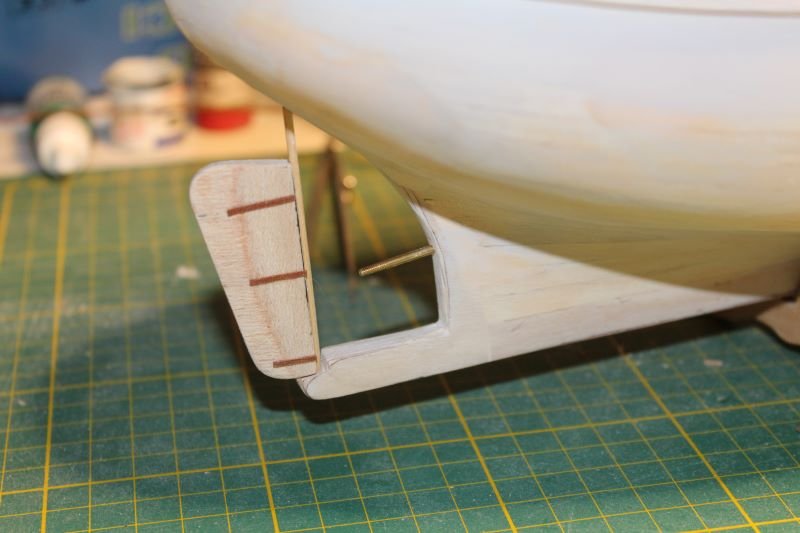
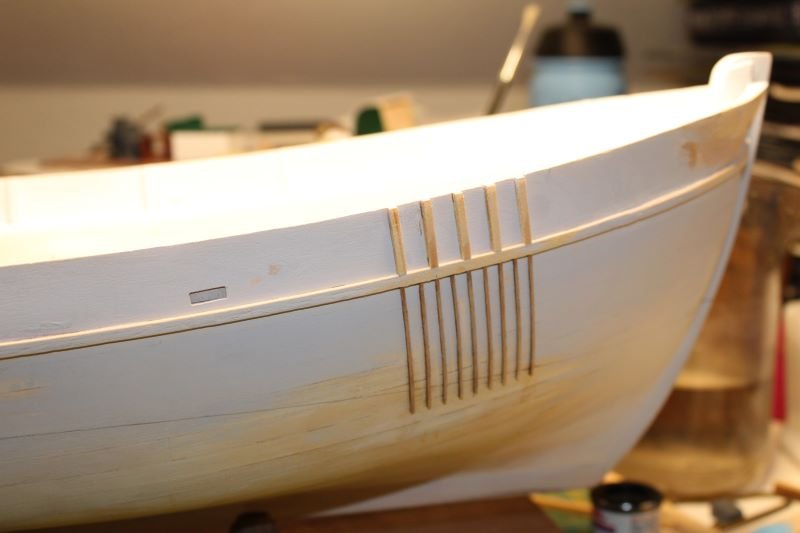
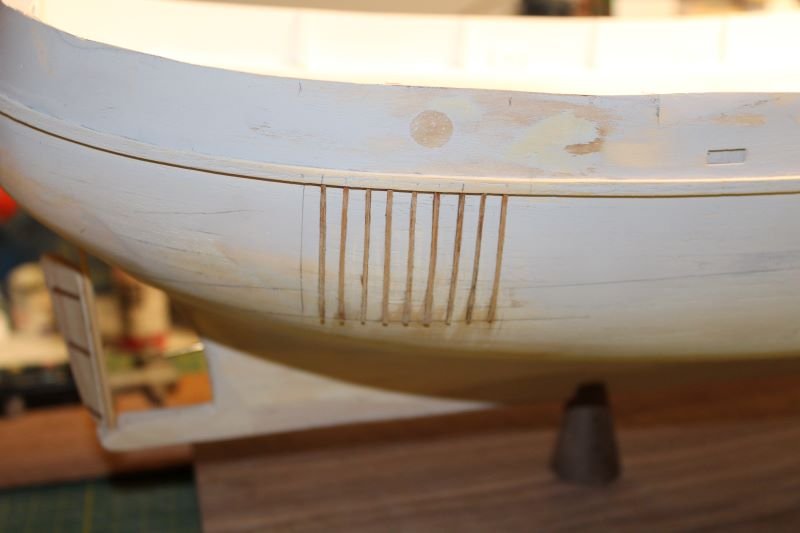
Thank you Niels. I have seen your restored Hjejlen. I have a very old kit in my stash which I will probably start when I finish Mary Ann. Nevertheless, Mary Ann is progressing well. I'm at stage where I have added the first paint to the model. Following up on the anchor pulley system, I now feel I have the correct shape. I cut out one of the cap rails (which I will not use) and use that to get the final shape. I tried to take a photo of this but it doesn't show much besides the previous pictures. I added the rudder as per kit instructions - two pieces of plywood glued together. The instructions doesn't mention anything about tapering the rudder, but I sanded it to half thickness at the rear. Also, the hole for the prop shaft was drilled. The shaft points downwards a bit which it should. The last to be done on the outside of the hull was to fit some vertical reinforcement strips to protect the hull when hoisting the trawl scoops on board. The last picture just shows the painted inside of the bulwarks. I'm using Vallejo acrylic - but still learning. It took a while as I didn't thin the paint before airbrushing. In hindsight that would have been preferred, but I didn't have distilled water for thinning. I've been debating whether to paint the outside of the hull before I do the deck planking. I will do the the deck planking first so I don't have the risk of damaging the paint. Also, I have not been able to find the right color in acrylic so I will stick with the old an trusted Humbrol enamel for the upper part of the hull. I have started with the small raised section of the deck at the stern. The provided mahogany strips are of very good quality but too wide scale-wise (5 mm). But I will use them anyway. I use a permanent marker on the sides and glue them on with super glue. The glue makes the ink bleed a bit if I'm not careful - so I am careful 🙂 /Lars Peter

-
yvesvidal reacted to a post in a topic:
Mary Ann by laps - Billing Boats - scale 1:33
-
Mirabell61 reacted to a post in a topic:
Mary Ann by laps - Billing Boats - scale 1:33
-
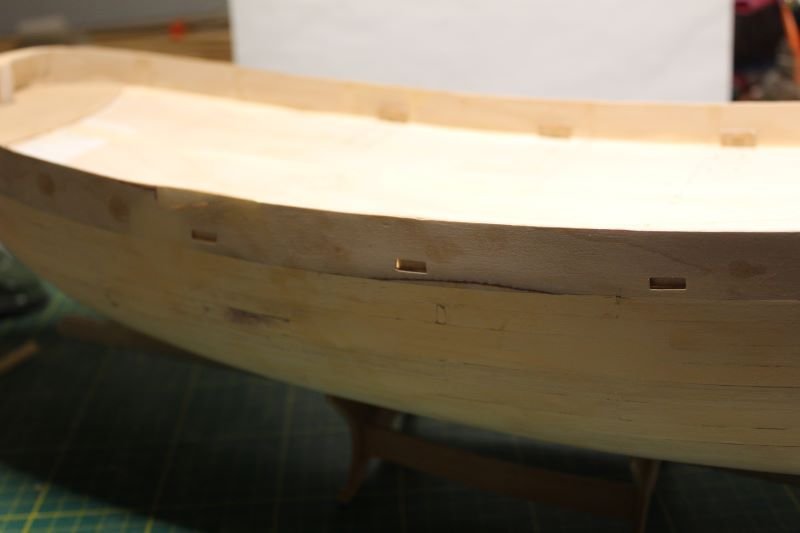
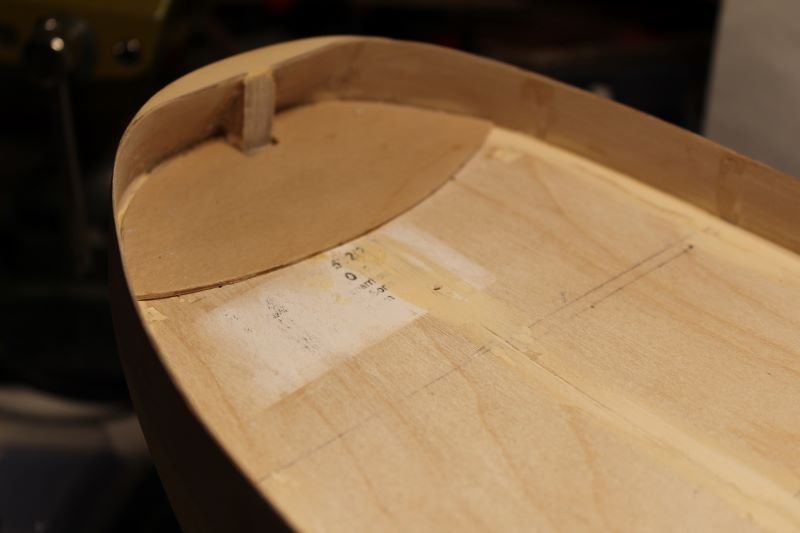
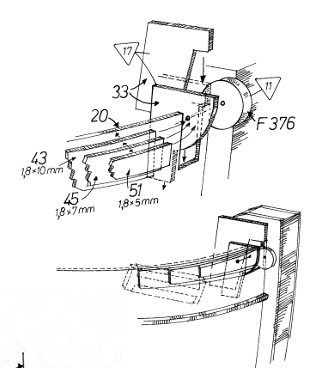
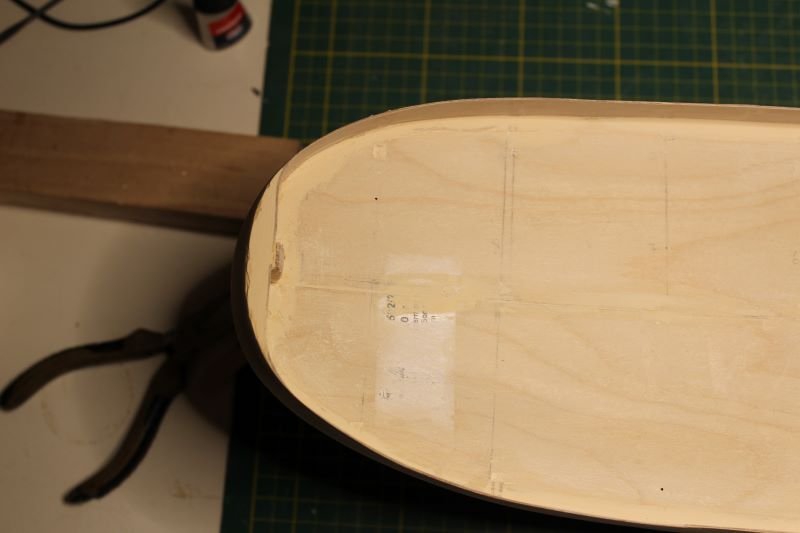
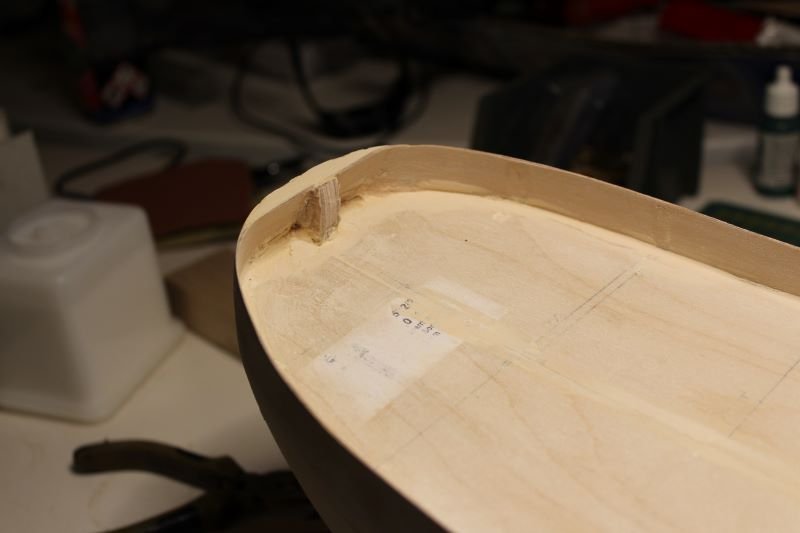
Anchor pulley system I've been working on the bow making room for the anchor pulley system. The bulwarks were build up using layers of wood strips and some sanding to shape. I cut the bulwarks to make room for the pulley system. Everything is just dry fitted for now. Now I can see the final shape of the bulwarks reinforcement. This I can build up with putty. After some final sanding I need to glue the pulley support into place without the pulley, I need to paint the bulwarks before I can put the pulley into place as this needs to be a different color. More to follow. /Lars Peter

-
Hi Peter, Thank you for the pictures - very nice model. I think it makes sense now what I need to do. My model is about the same age as your. It has just been hiding in box for a while before it was given to me. Funny though, I have seen many finished versions of the Mary Ann, and every model seems to be different. Mine is no exception. Kr Lars Peter
-
Scuppers and rear deck I have cut holes in the bulwarks for the scuppers - 3 on each side - and added the scupper gates (is that the name?) Also, I have added a piece of plywood at the stern deck to act as foundation for the slightly raised stern deck planking. Right now I'm trying to figure out how arrangement at the bow for the anchor pulley should work. It is not easy to see from the instruction how this should look exactly, so I will have to use my imagination a bit. So far, I have added the pulley support closest to the keel piece. Before I cut a hole in the bulwarks I'm going to reinforce the bulwark with layers of wooden strips of different widths, sand to shape and then cut the hole - hopefully without distorting the bulwarks. Still need to add the bulwarks support pieces. /Lars Peter
-
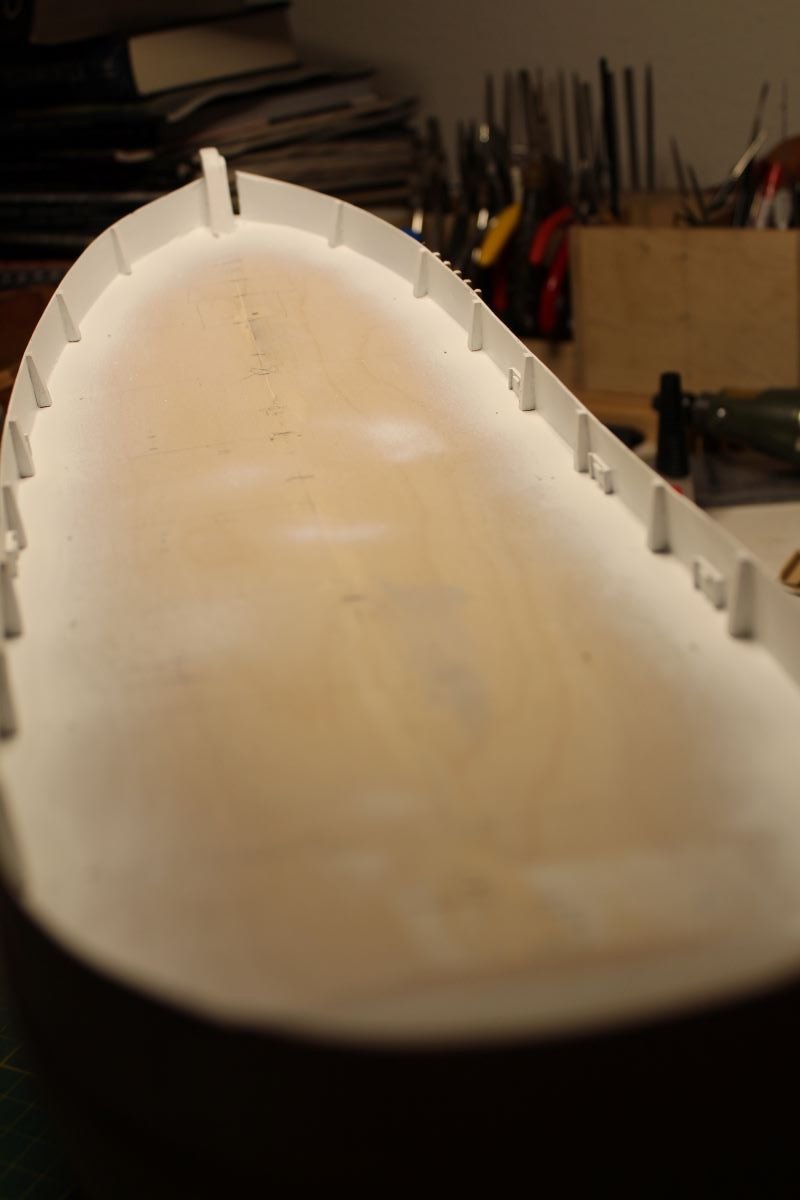
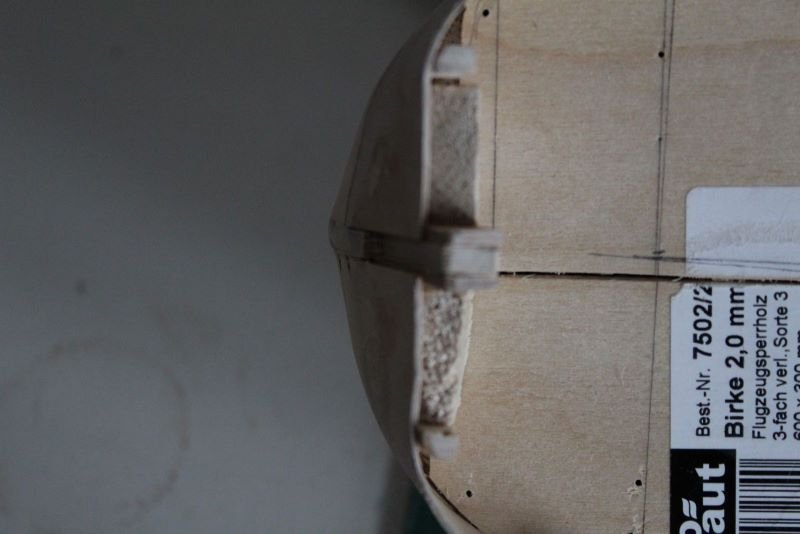
I think I got the right shape of stern now. I have build up layers of filler and then sanded to shape. Test fitting the cap rail pieces, it seems to be ok. However, this creates a new issue that needs to be solved. The top of the stern bulwark is now to thick to be covered by the cap rail. The top part of the keel pieces is a bit to bulky anyway, so I have started to cut this back a bit. It's a bit awkward but I don't want to rush this and risk damaging the bulwark. I have also started to remove the top of the frames (the plywood is to ugly and bulky, I think) and fill some gaps between the deck and the bulwarks. I consider painting the waterways brownish red and the bulwark themselves the same color as the hull. Painting is easier with the top of frames out of the way. I will add the new bulwark supports once the bulwark etc. have been painted. Also, I need to cut holes for the scuppers. I believe there are 3 on each side. The gates for these will also be added after painting. So, the sanding and filling continues. /Lars Peter
-
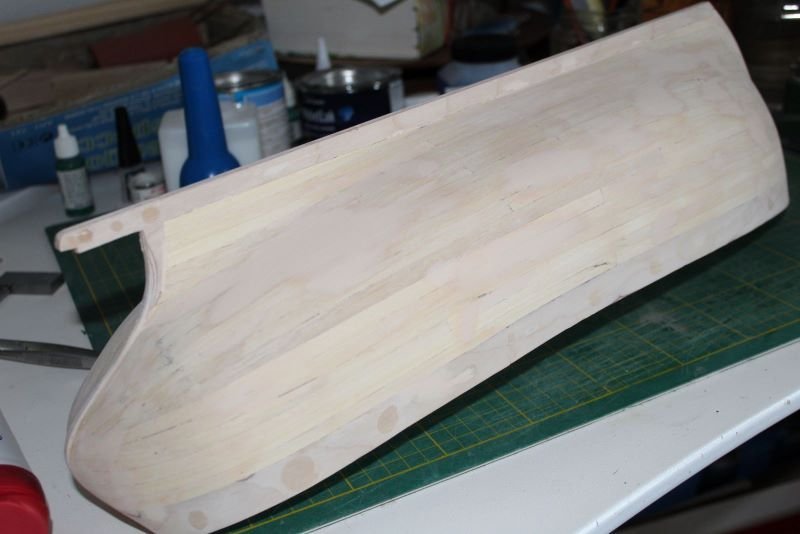
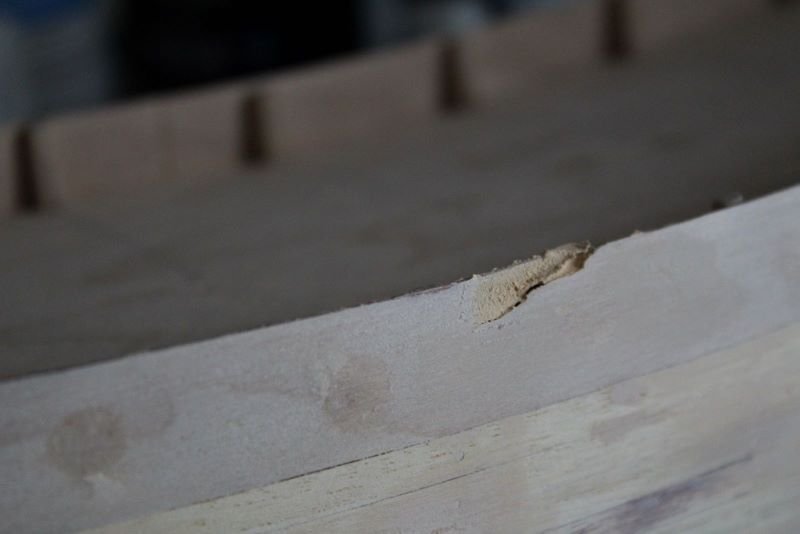
I have completed planking of the hull for Mary Ann. It has now been sanded and filled where needed (nail holes etc.). I will go over it again once I have applied primer to the hull. I manage to damage the bulwark during the sanding progress, so I need to fix this. I'm not quite satisfied with the stern of the ship . When I compare with the railings the stern is to square. It is not an easy fix. I can build up the middle a. Then I will remove the two support pieces on either side of the keel piece two get the plywood to move a bit more inwards. I guess I made these a bit two big when I made the skeleton the second time around. I may also cut the plywood with a saw just to get a bit more room. Some filler is definitely required. /Lars Peter
-
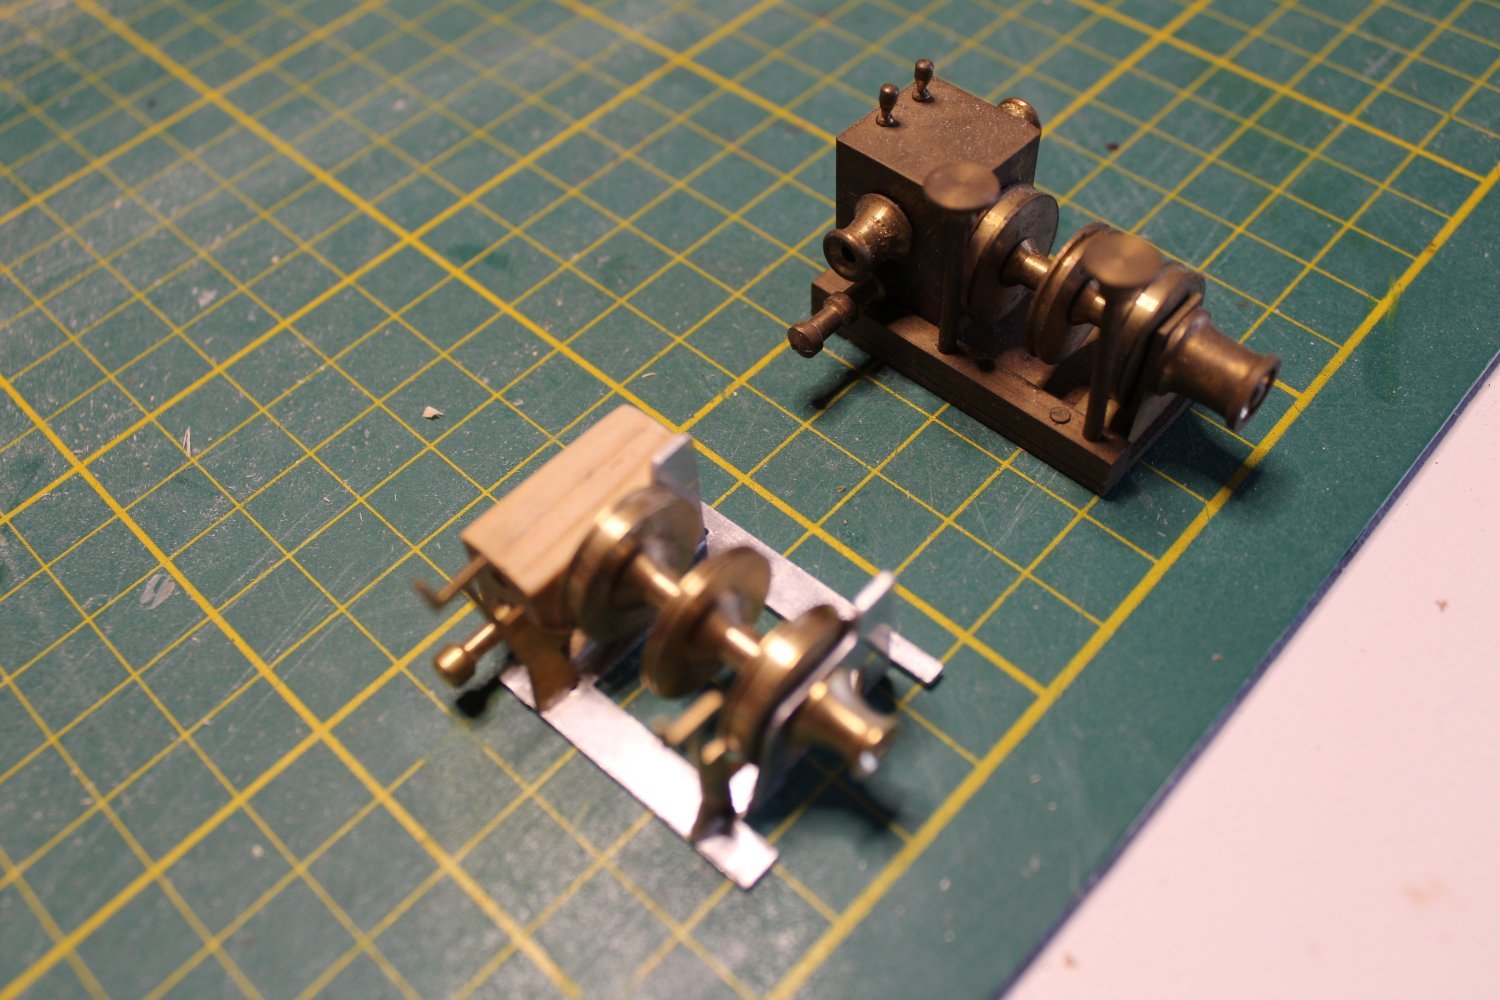
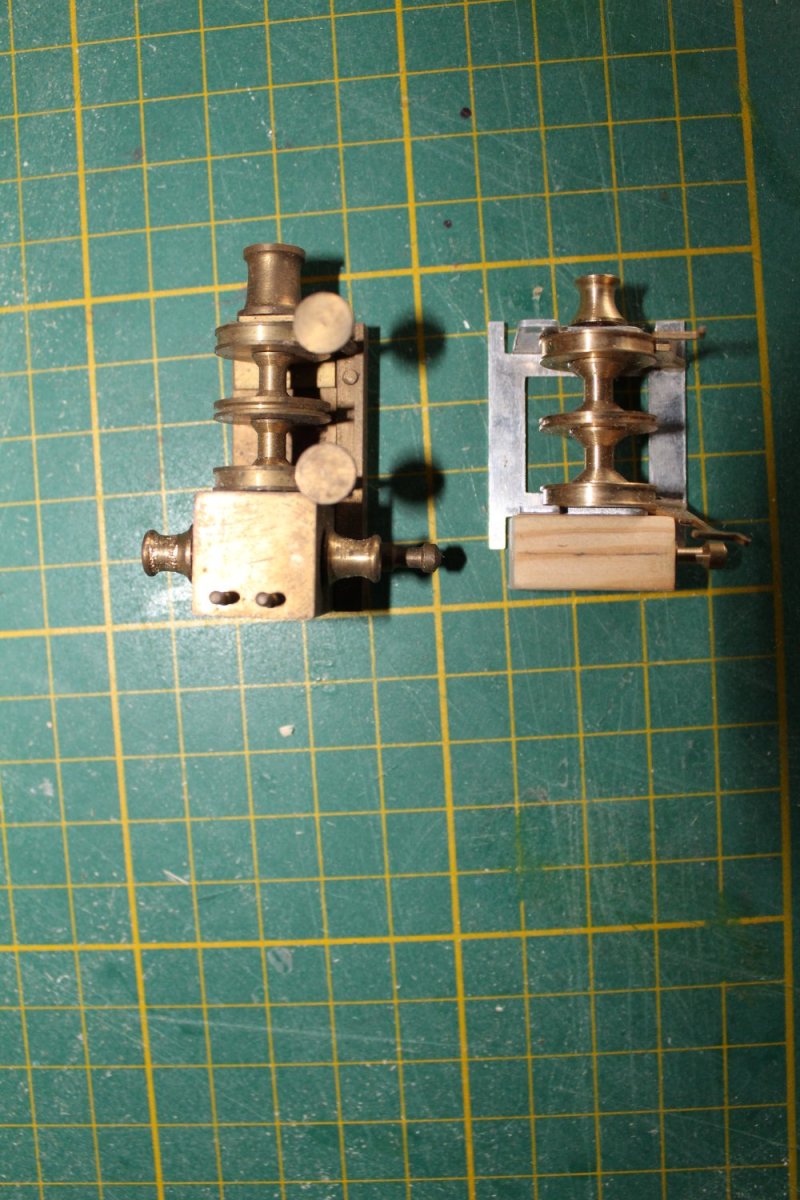
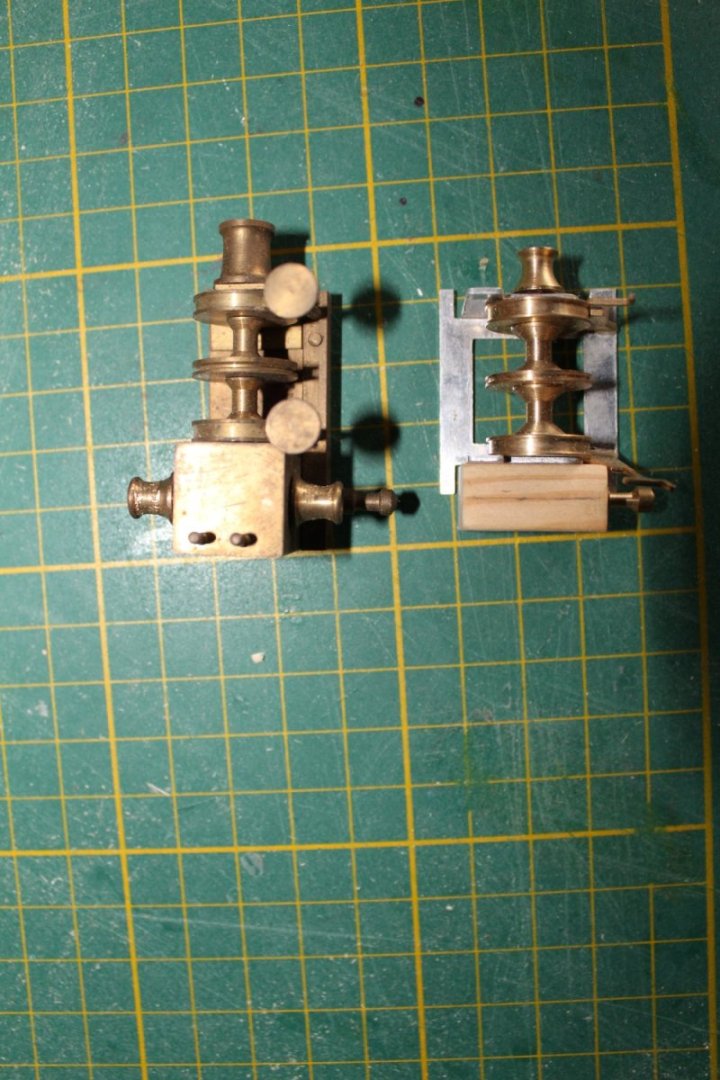
Winch issue In my first post I mentioned that I was given this old kit and some parts were missing. Most of the parts for the winch was included - a few pulleys are missing which I can still get. However, in the big box of fittings I was given with the kit, there is a complete all brass winch which look a bit similar to the one in the kit - just nicer and bigger. I am tempted to use the bigger one but would like to hear your opinion 🤔The brass version could be from an even older version of Mary Ann. She was the first model released by BB in 1958. I should mentioned that the rope drums are identical. So what do you think. Should I continue with the kit part (the one with the wooden gearbox) of swap it for the all brass version? /Lars Peter

-
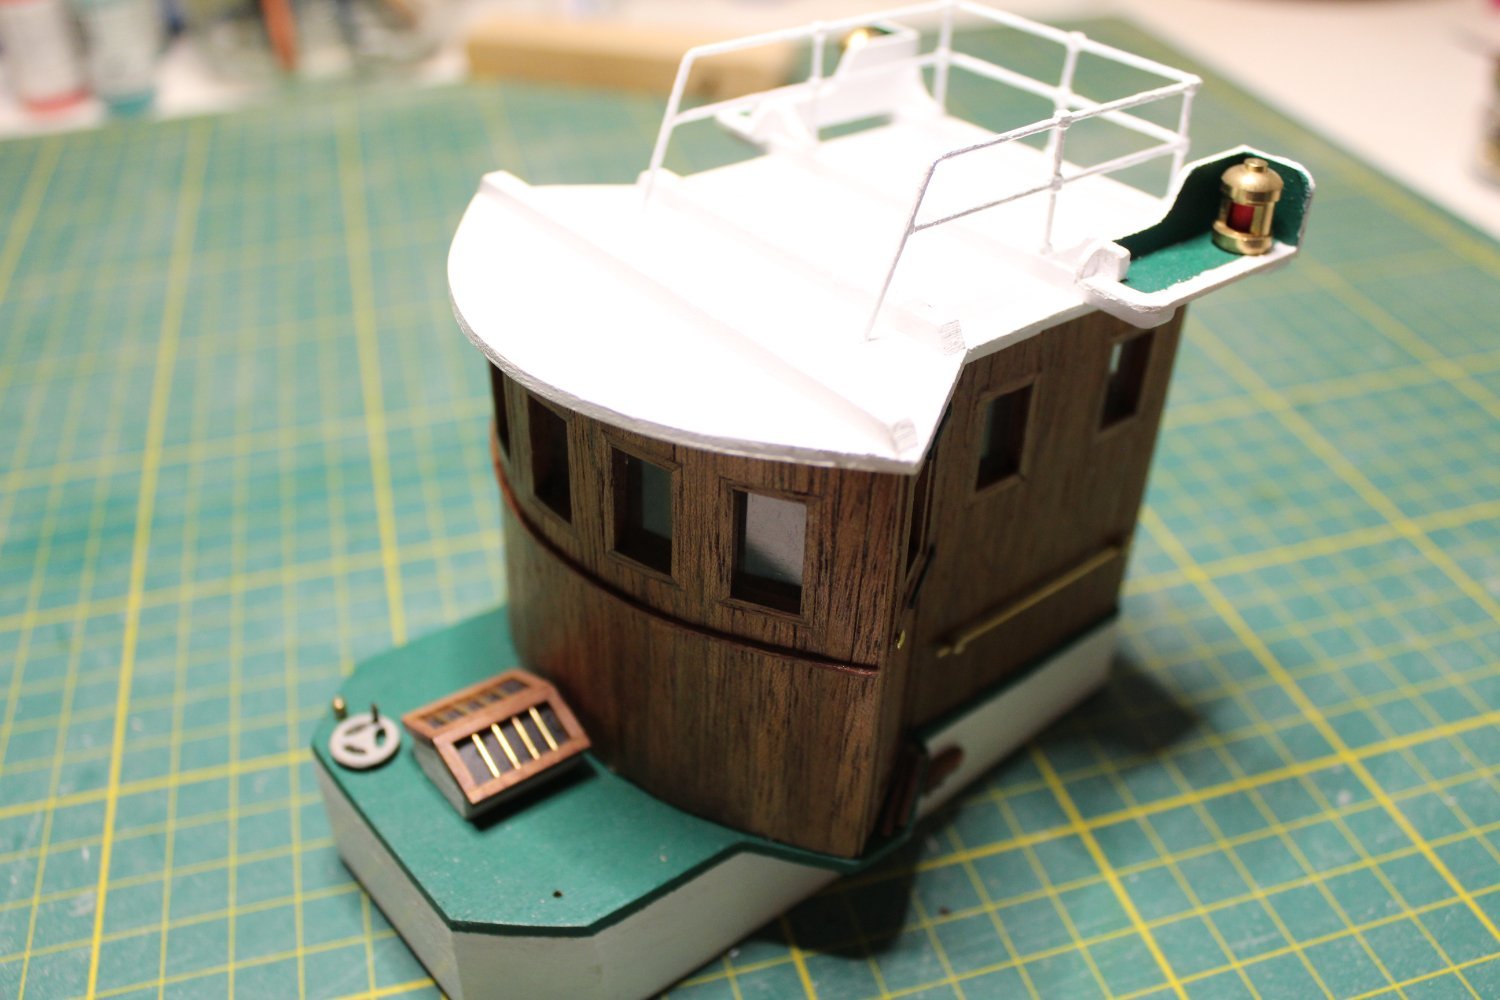
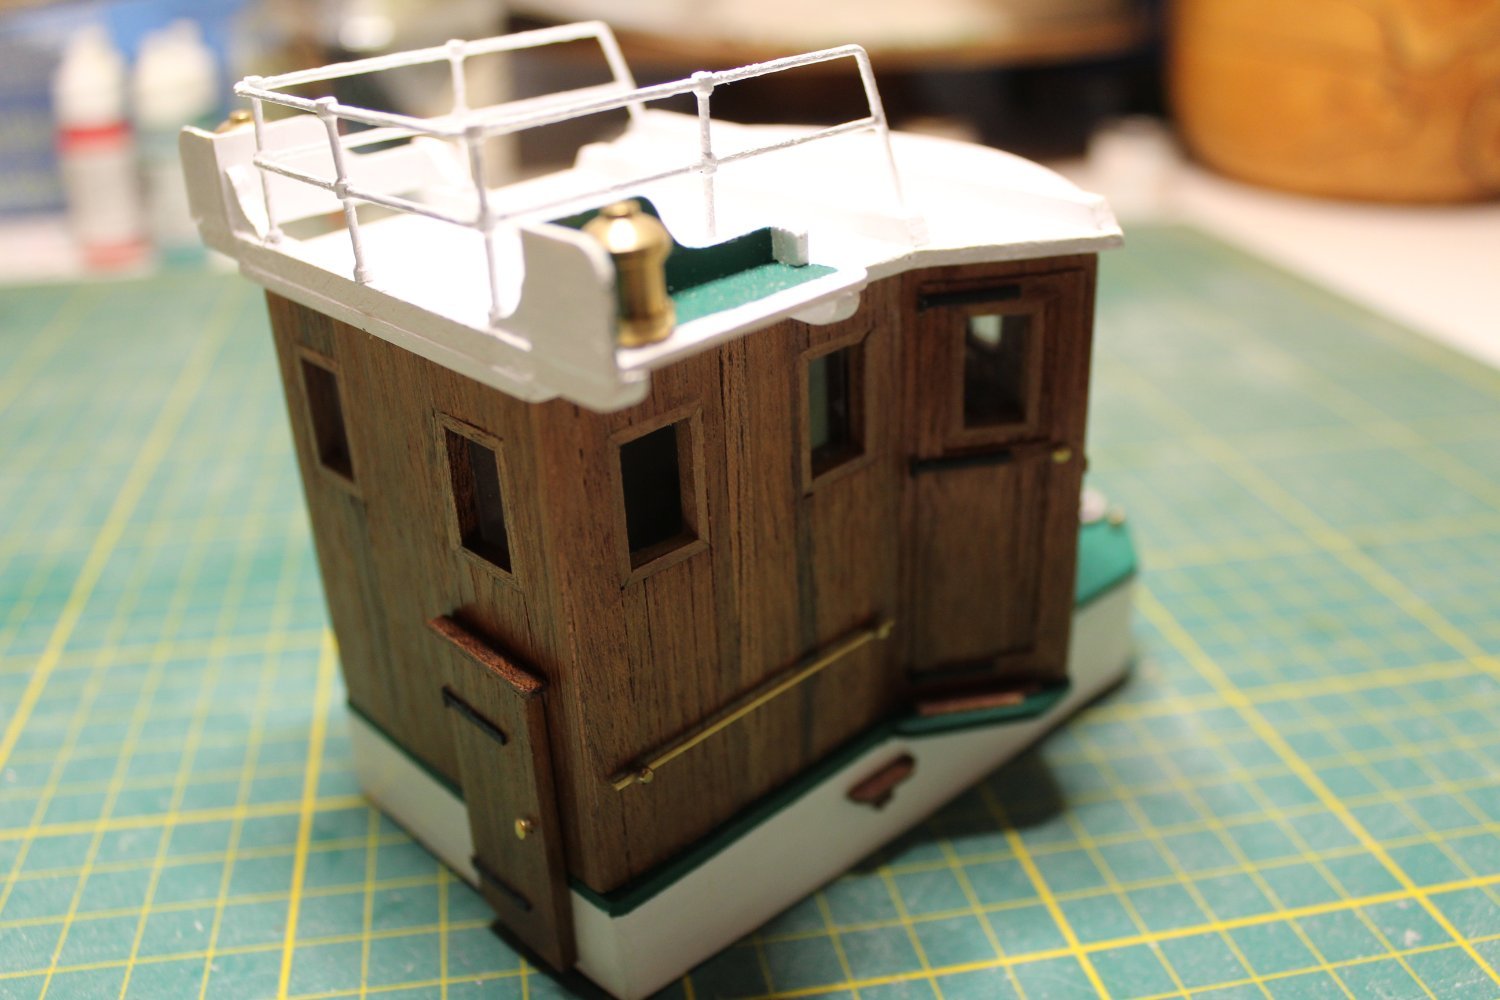
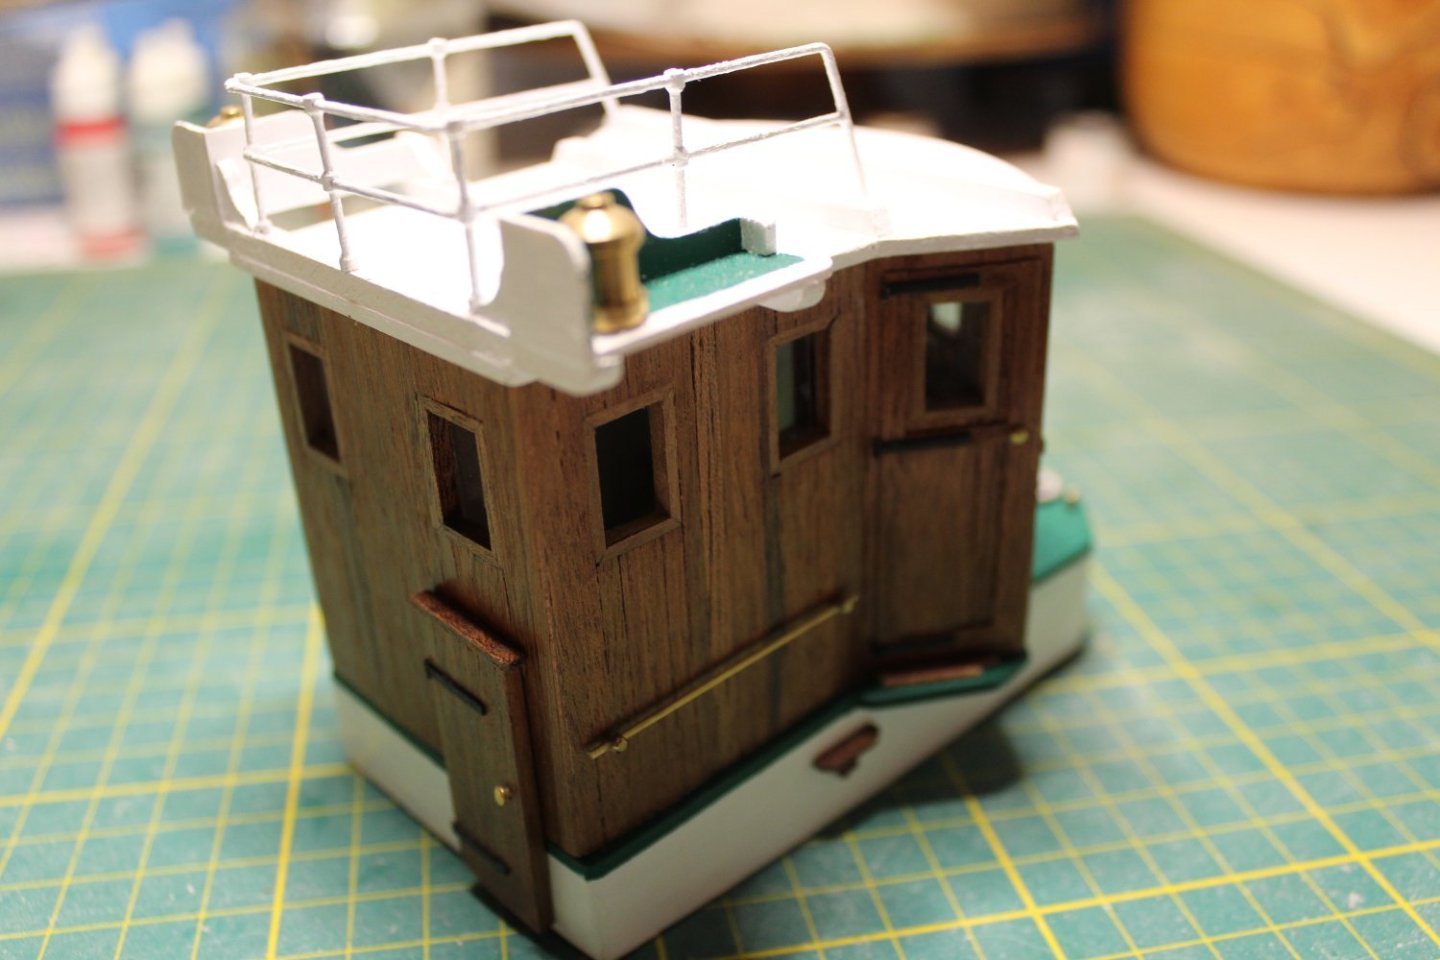
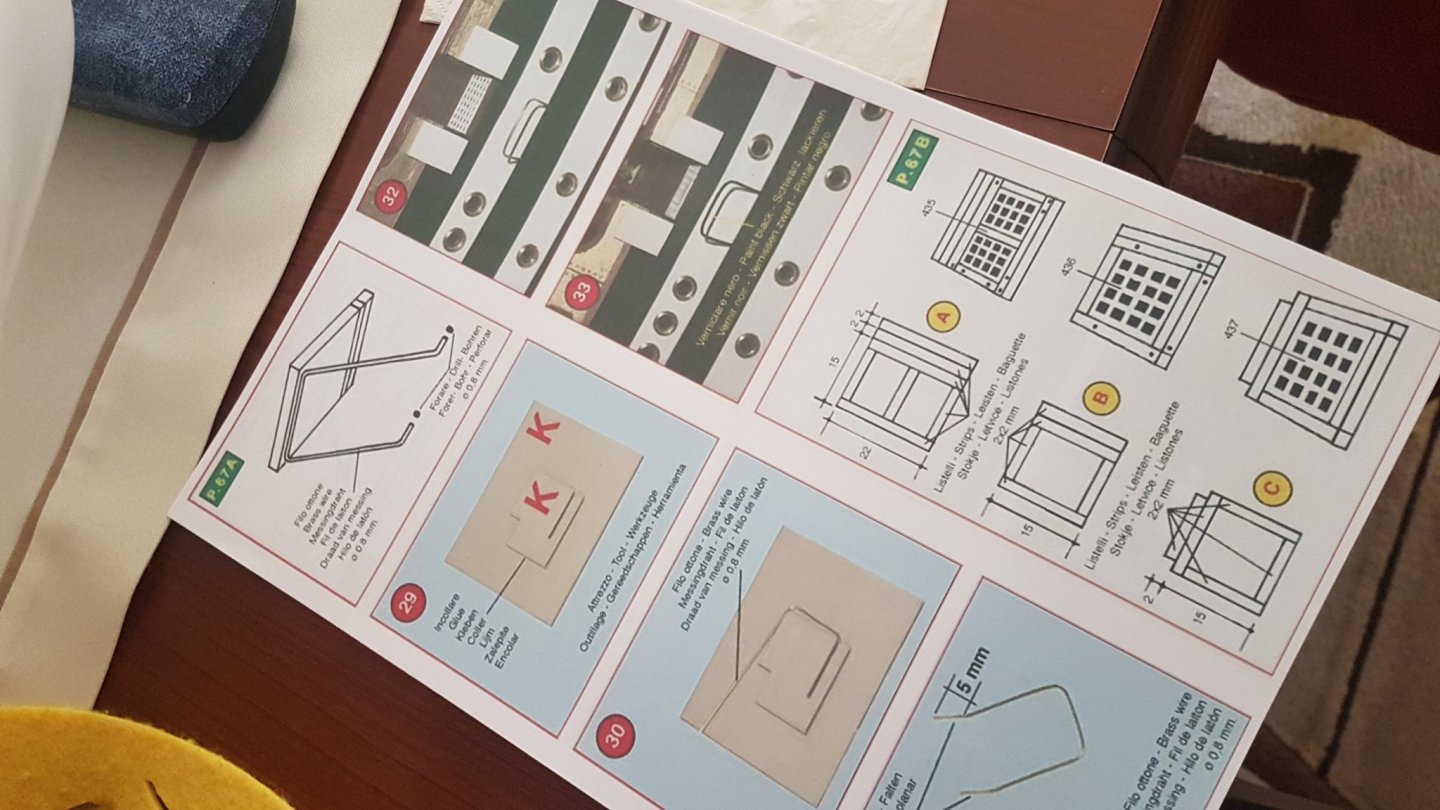
We continue where we left back in 2020. I'm almost at the same level with hull no 2 - just need to fit the plywood bulwarks. Then I can start the planking for the second time. The wheel house is almost done. I basically followed the instruction but instead of just using the printed plywood I covered the entire thing in mahogany strips. Hinges for the doors are made from a thin styrene strip. I glued the windows with wood glue. It is not very strong and of course I manage to push out one of the window which I cannot recover unless I tear the entire thing apart. Just imagine there has been a severe storm ... The engine room ventilation cover was made from a mahogany frame, brass wire and black paper as a backing instead of the printed plywood. The hand wheel was part of the kit - plywood that needed to be cut out - a bit fiddly. Handle made from a piece of brass wire. It seems like the newer kit include a plastic handwheel instead - a bit easier I will post more as I progress with planking of the hull. /Lars Peter

-
Hi All, Guess I'm back. Life got in the way of ship building - moved to a new house, got a family, renovations and lots of other things.😉 Weather is bad so I have dug out my ship building materials again and decided to continue with the Mary Ann... Well, basically start all over. The half-planked hull has been tossed around in my temporary workshop for the past 4 years, and I discovered that the keel was broken. So, I have made an entirely new skeleton and has now come to the phase of adding filler blocks before starting planking for the second time. And why is it than when you do things a second time, it is never as good as first time. At least that's my feeling. However, it will probably be ok in the end I have almost completed the wheel house. I will post some picture very soon and then hopefully continue with this model until it is done 😀 /Lars Peter
-
Cześć Laps,
Obejrzałem Twoją relację z budowy Amerigo Vespucci, jestem pod wrażeniem. Chciałem się zapytać czy w zestawie miałeś w zestawie rysunki i szkice maasztów, reji i takielunku. Ja o d znajomego dostałem niedokończony model, który próbuję dokończyć. W tym celu ściągnąłem z internetu zeszyty z instrukcją, w zeszycie nr 8. do modelu brakuje jednak szkiców masztów i reji, ich grubości i długości. Chciałbym prosić o pomoc w tej kwestii, jeśli posiadasz takie szkice czy mógłbyś mi je udostępnić w formie zdjęć lub skanów na maila mirekmotyka@interia.pl . Przesyłam Ci zdjęcia moich prac nad projektem oraz zeszytu później dysponuję. Serdecznie pozdrawiam Mirek.

-
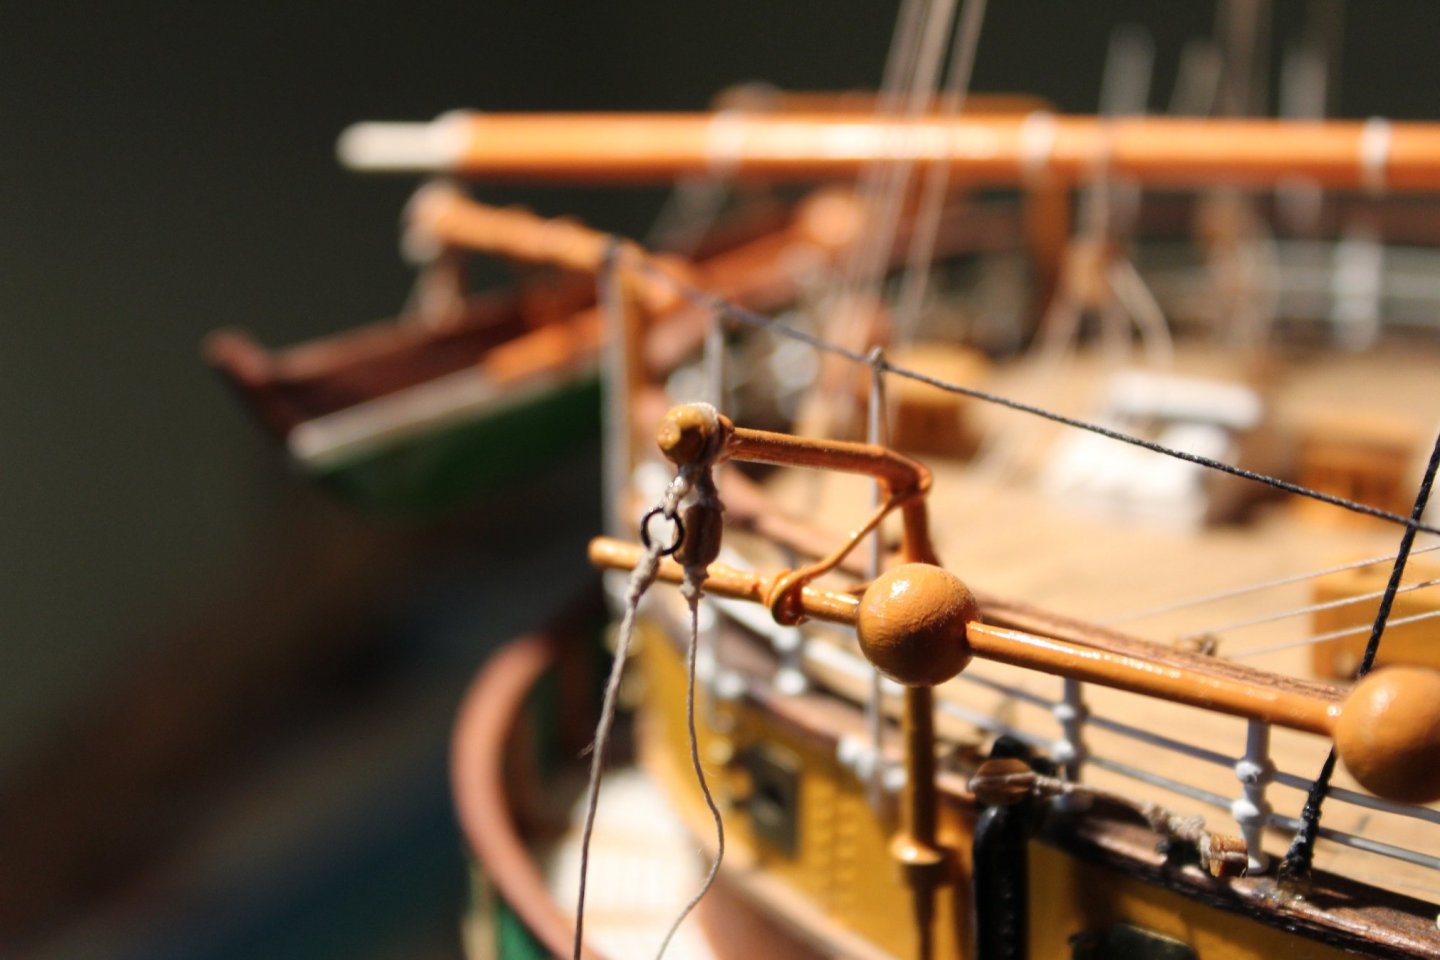
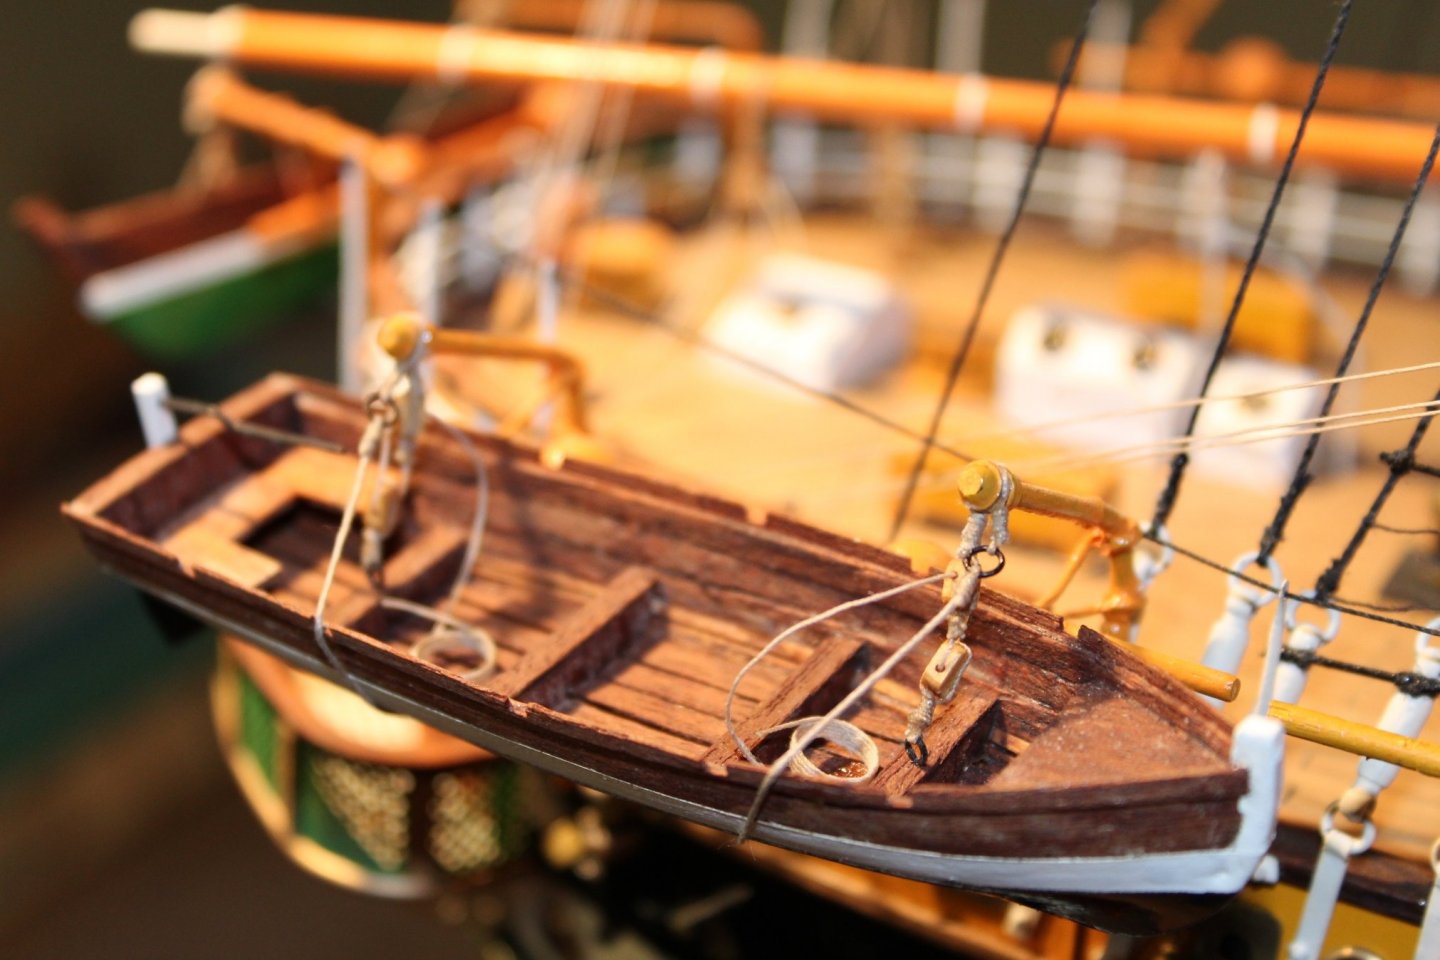
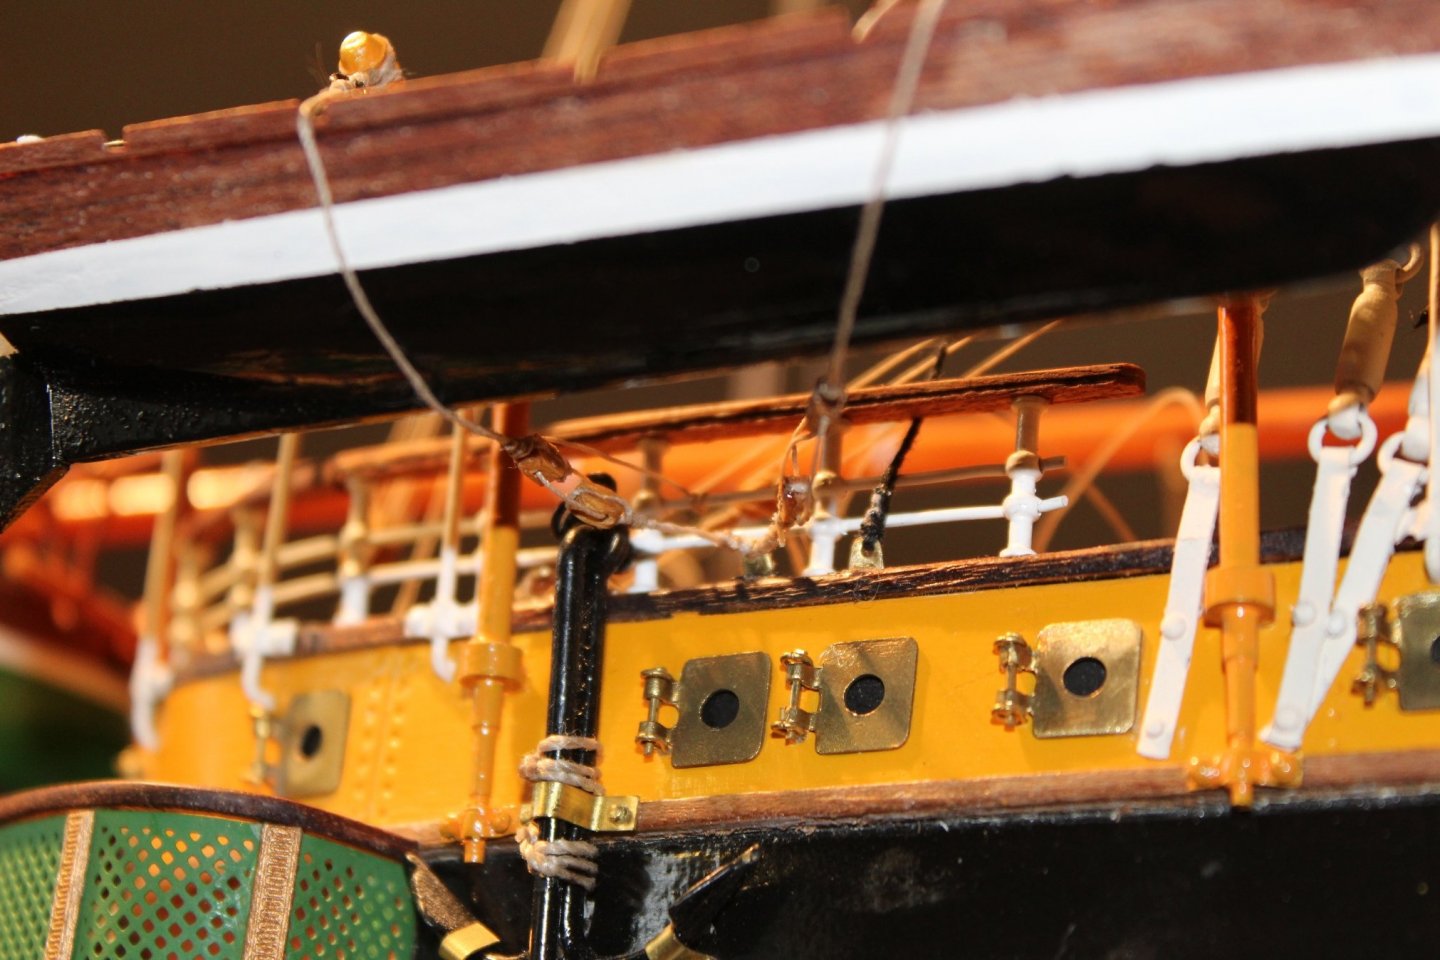
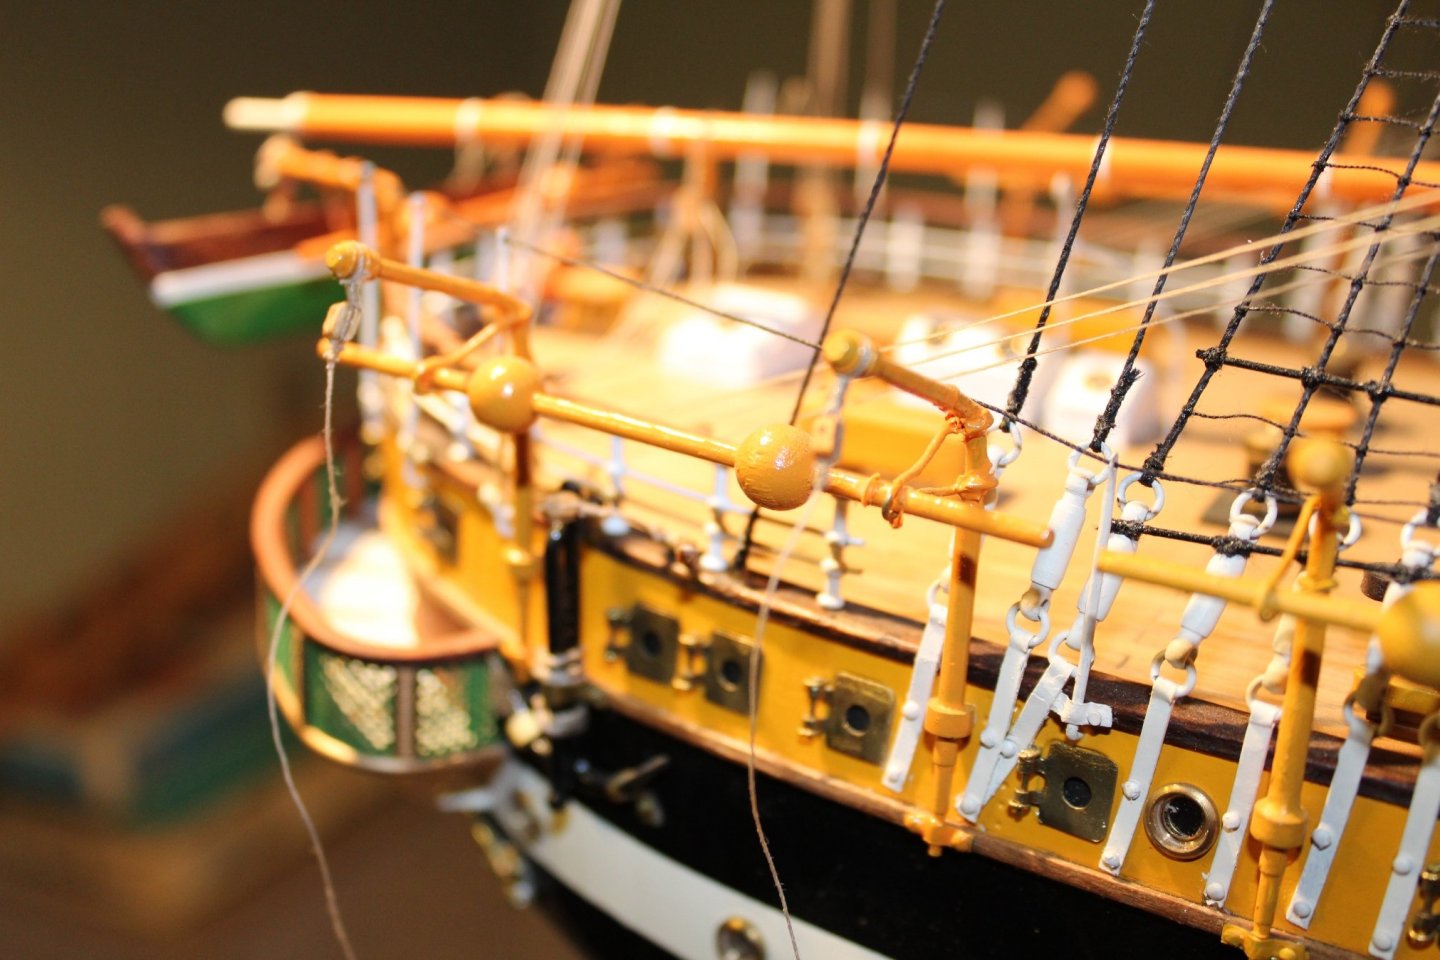
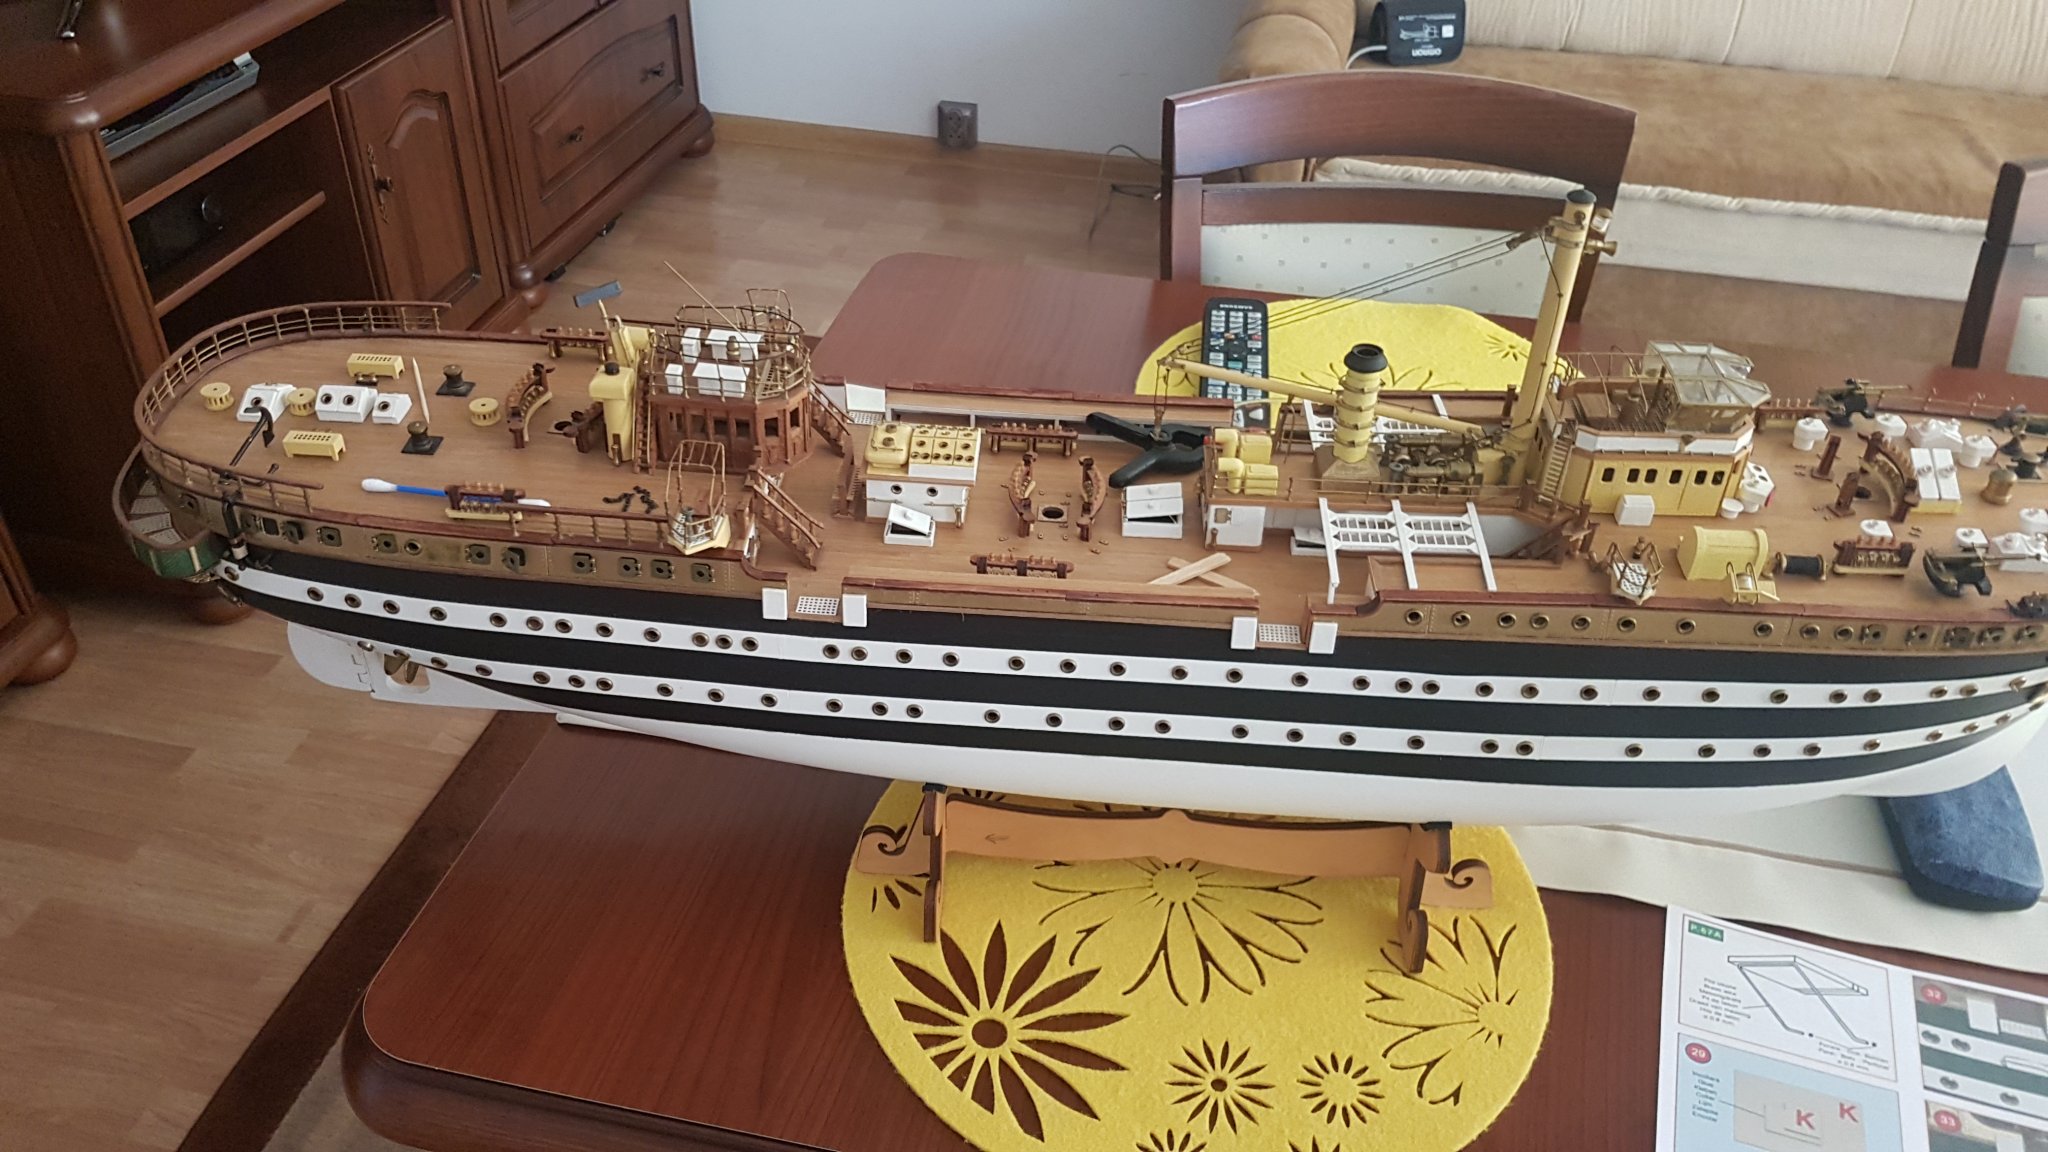
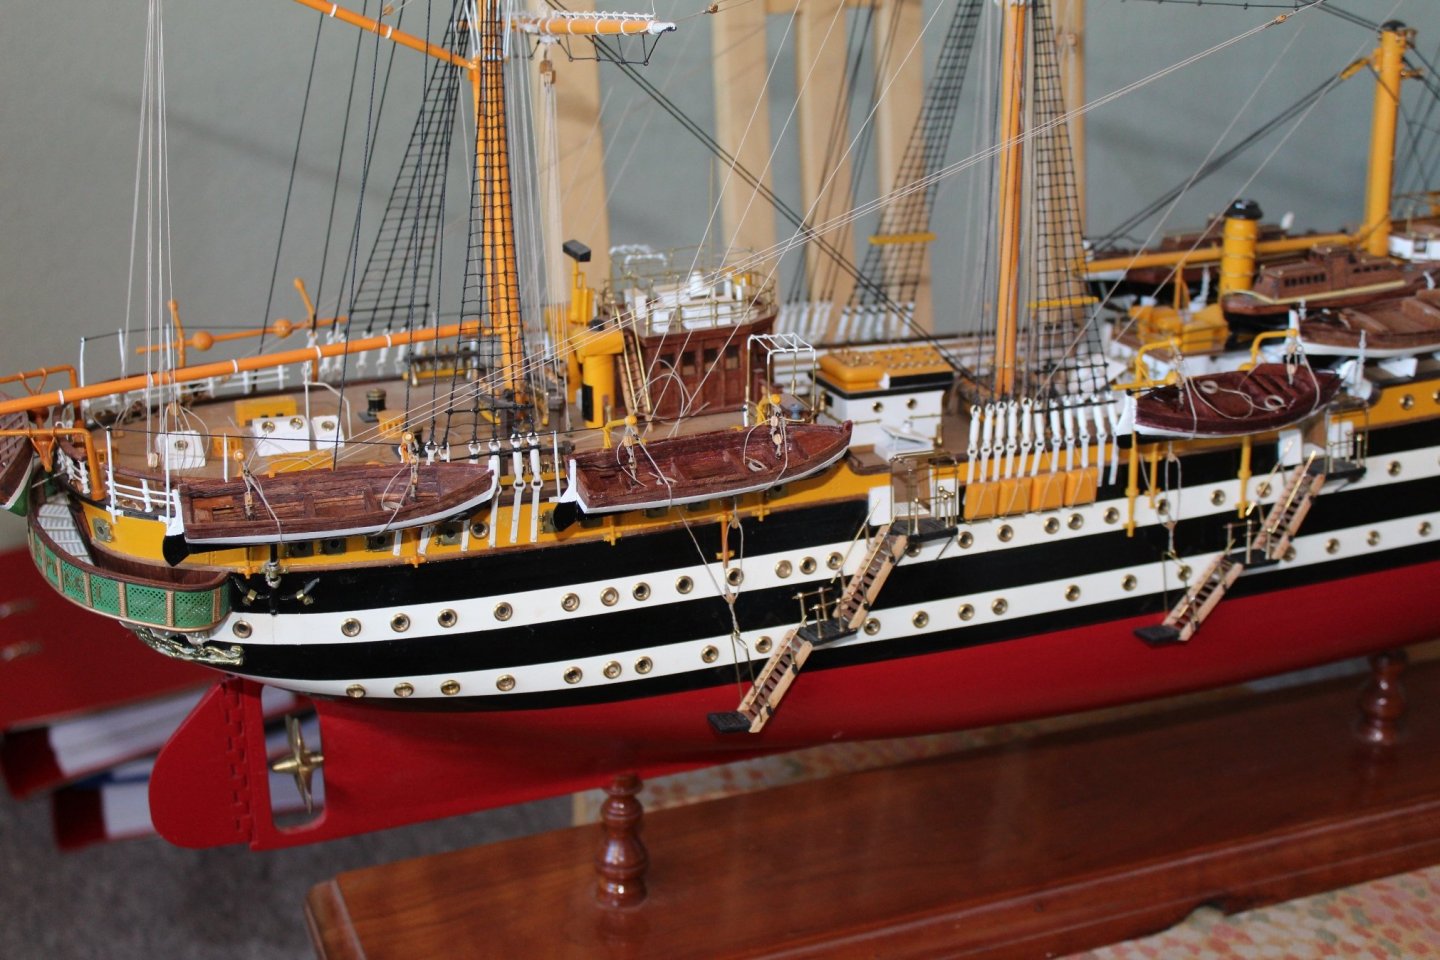
The starboard side of my AV is now more or less complete - just have to fit a few life preservers. The three small boats are in place in their davits and the stairs are complete. Now I can start all over with the port side 😄 /Lars Peter

-
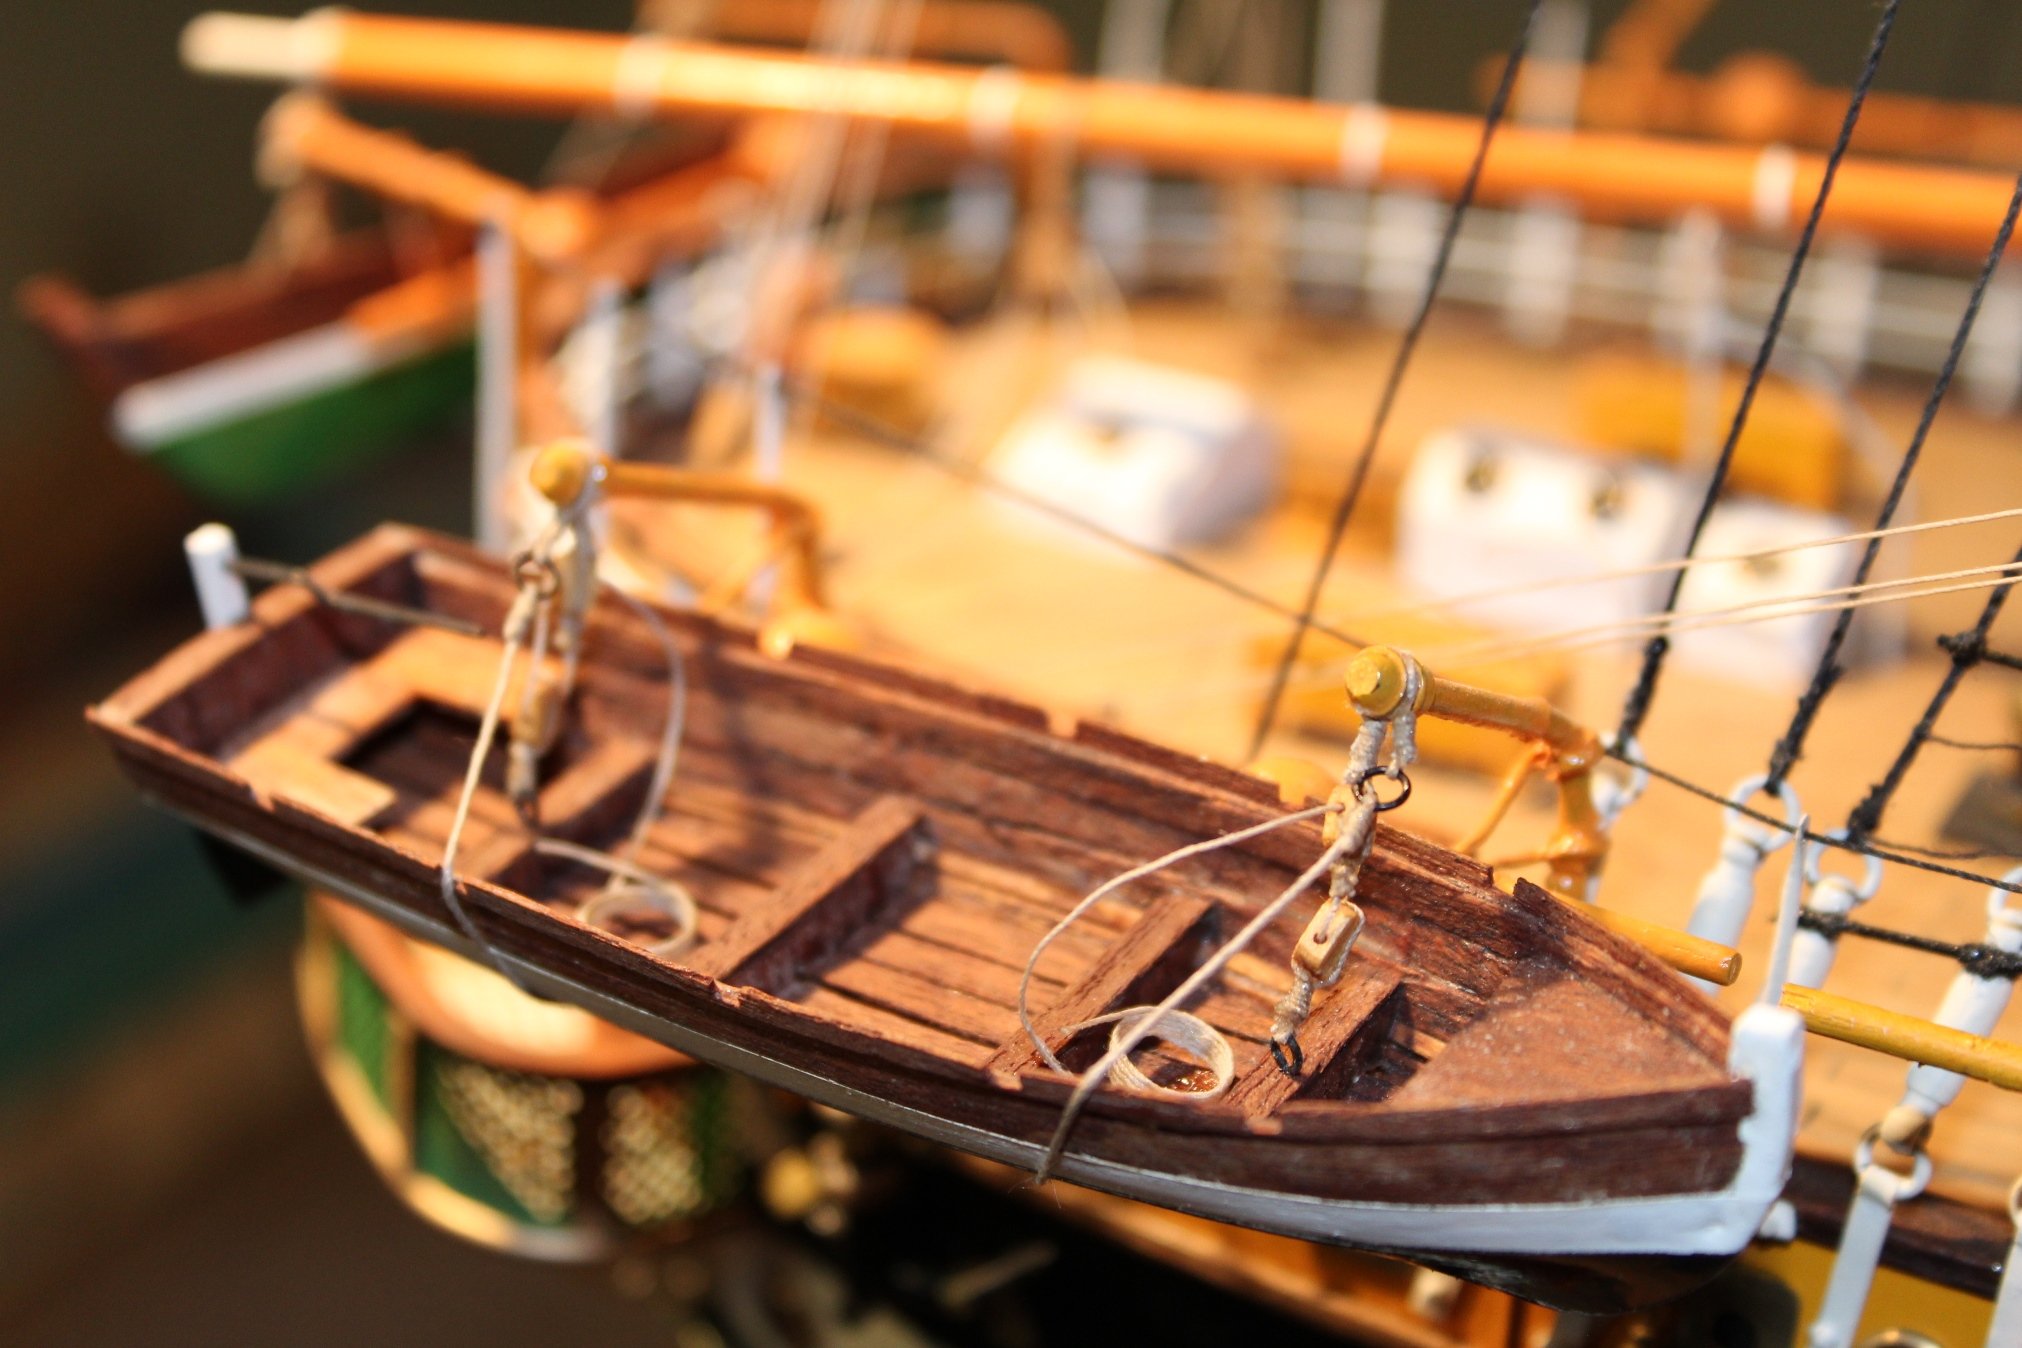
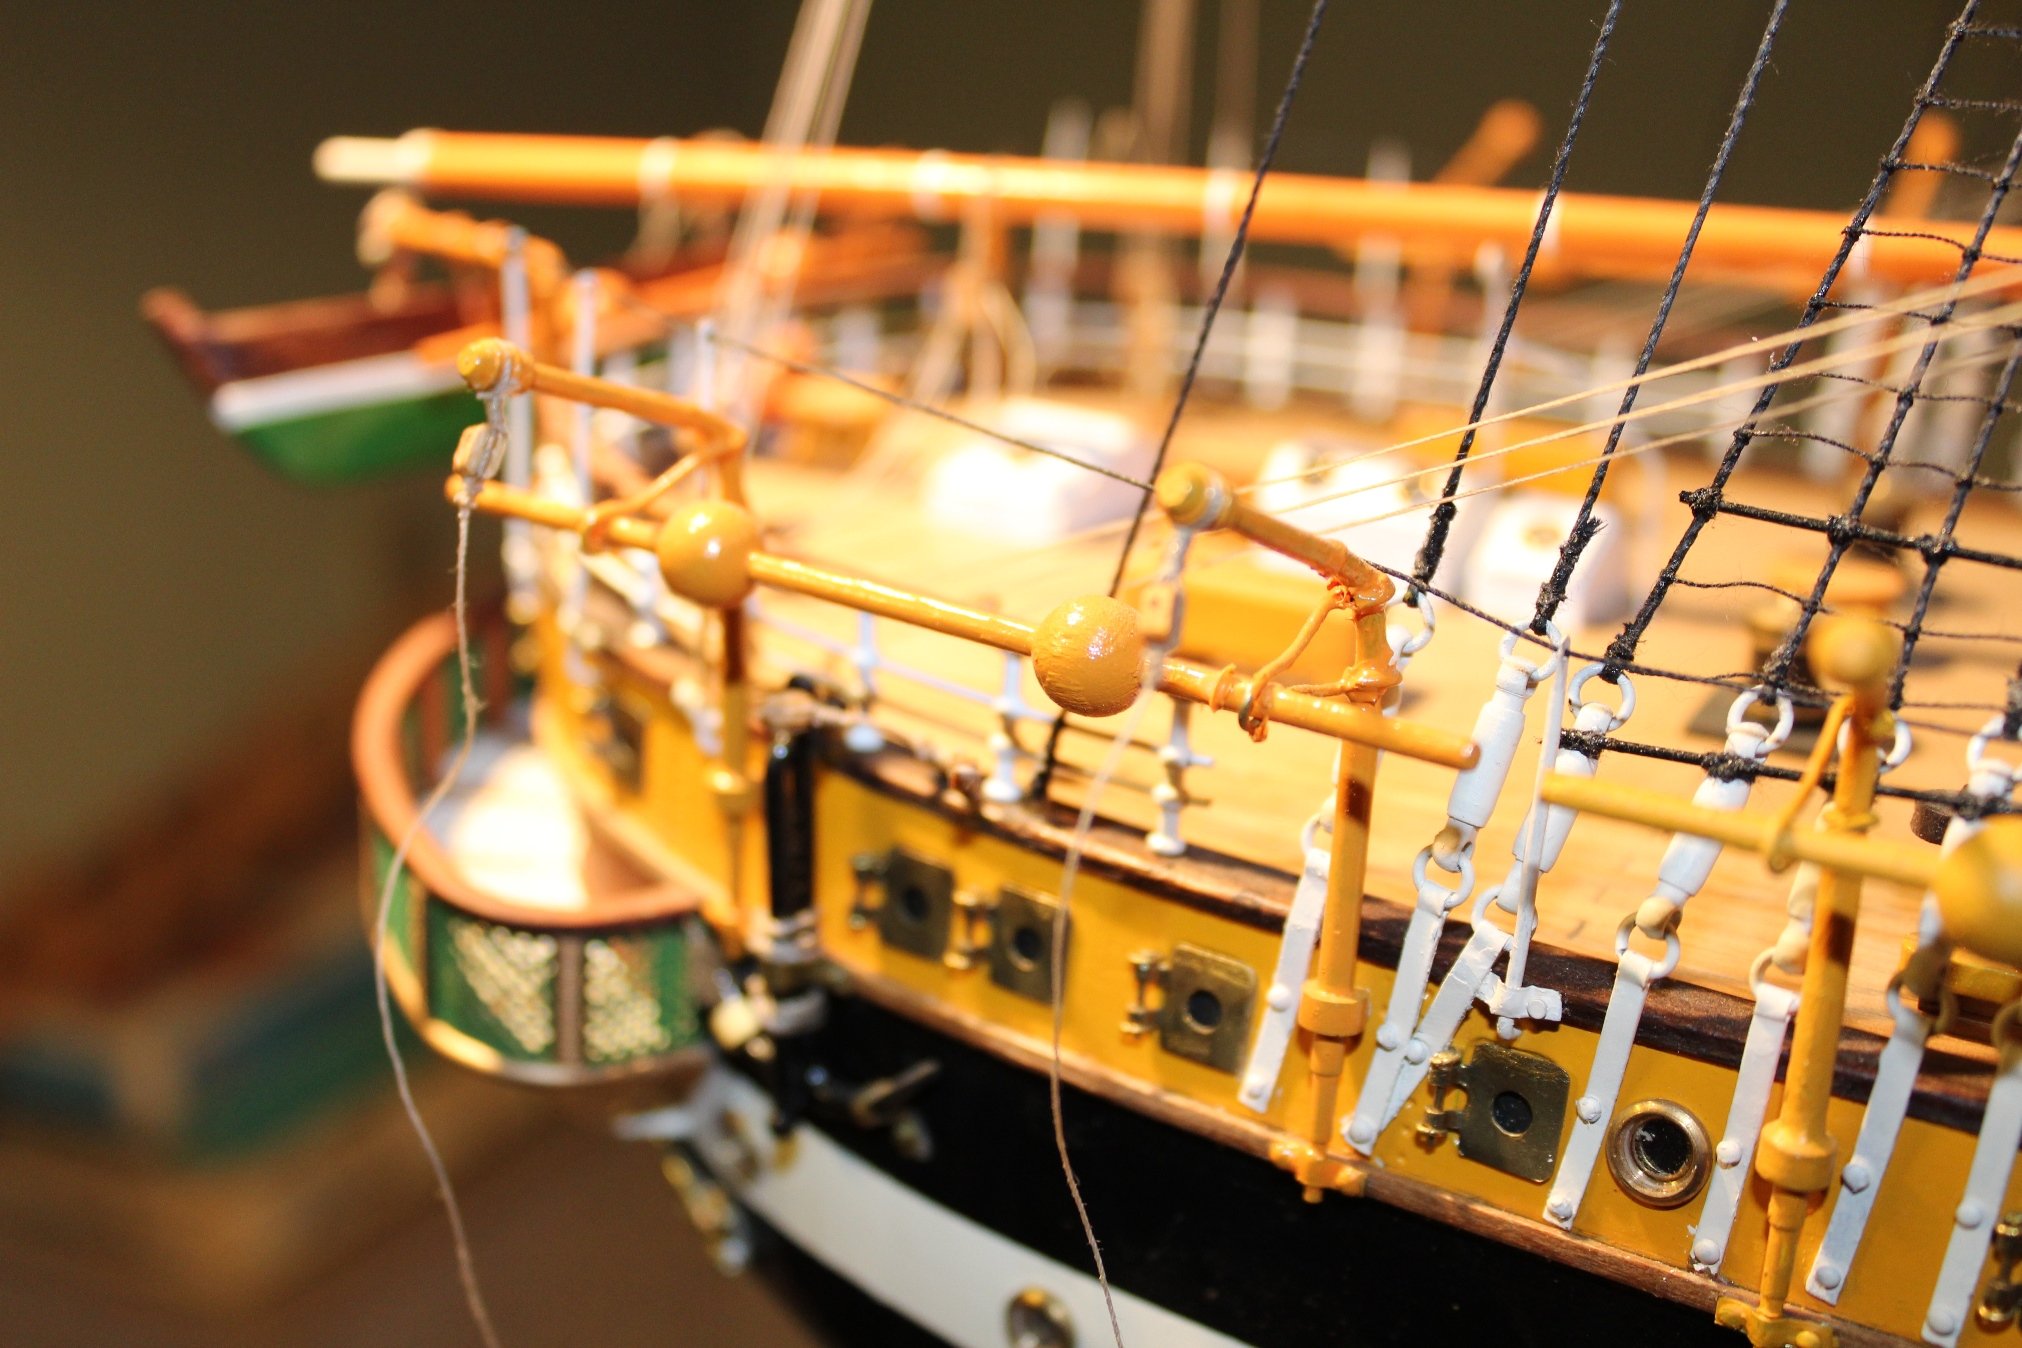
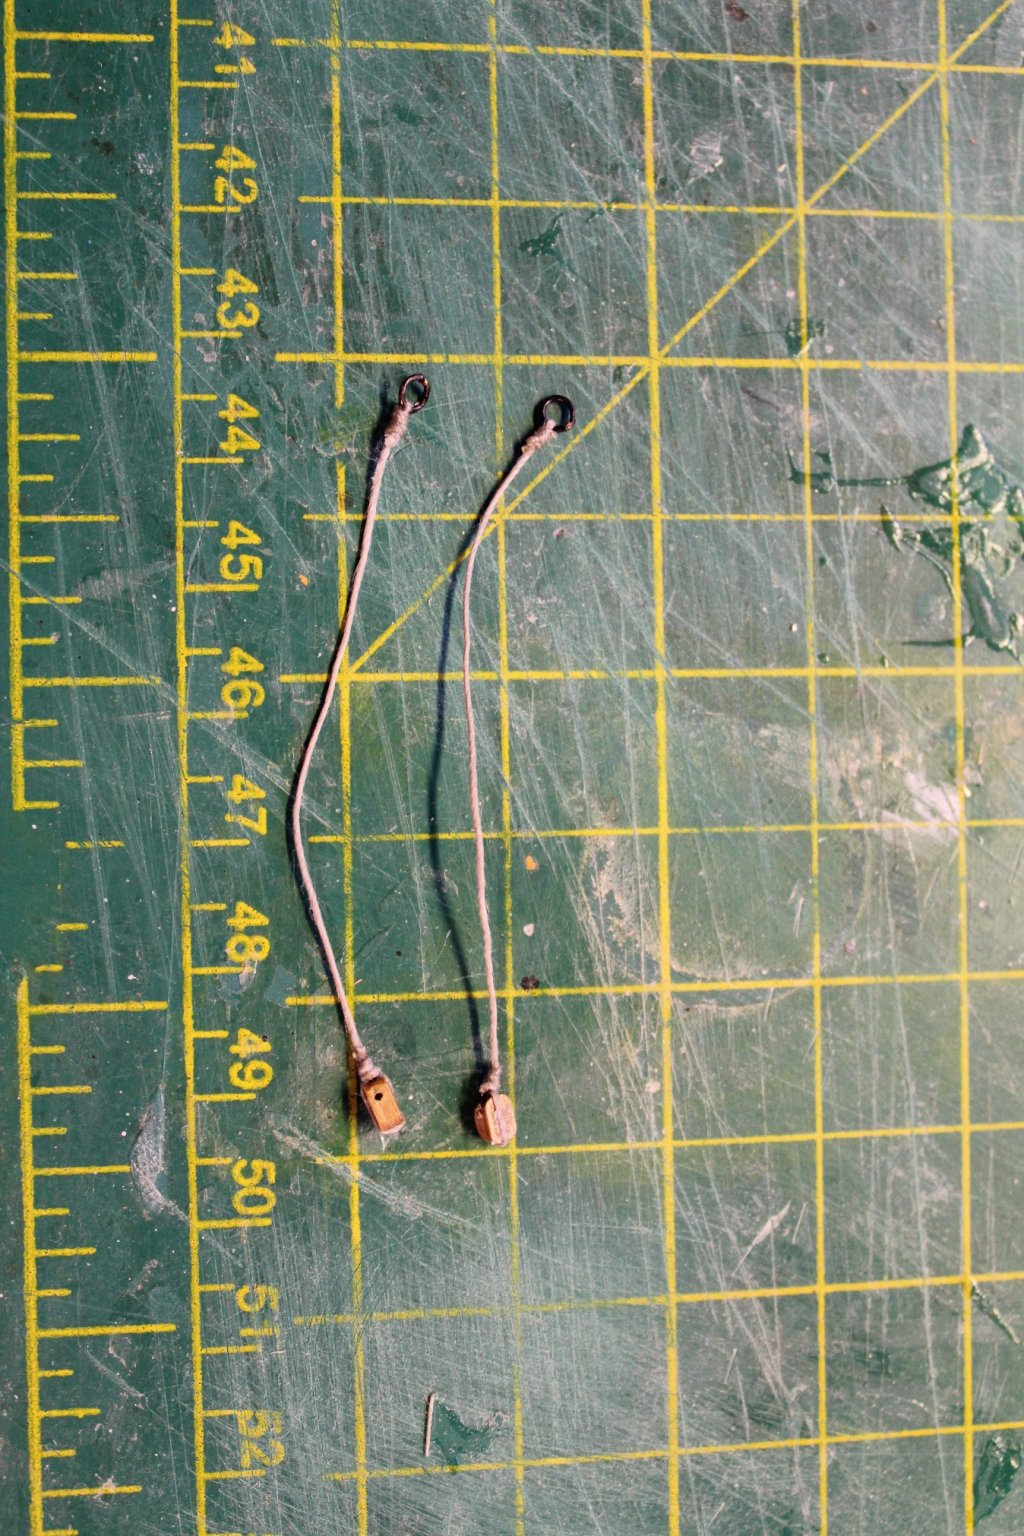
Rigging small boats I have started hanging the small boats from their davits, starting with the first rowing boat. This is time consuming work, took me around 3 hours for the first boat. A total of 8 blocks are needed per boat. First picture shows the attachment of the line to carry the weight of the boat. Next picture shows the two slings that will hold the boat to the davit. The slings are tied to the davit. Boat in place. The last picture shows the blocks for for the slings. I'm not sure where the lines for these should be tied off so for now I just tied them to the railings. Only 5 more to go 😩 /Lars Peter