vann
-
Posts
41 -
Joined
-
Last visited
About vann

Recent Profile Visitors
874 profile views


-
 GrandpaPhil reacted to a post in a topic:
HMS Victory by vann - FINISHED - Mini Mamoli - Scale 1:325
GrandpaPhil reacted to a post in a topic:
HMS Victory by vann - FINISHED - Mini Mamoli - Scale 1:325
-
GrandpaPhil reacted to a post in a topic:
Indian Girl Canoe by vann - FINISHED - Midwest Products - Scale 1:12 - SMALL
-
yvesvidal reacted to a post in a topic:
Indian Girl Canoe by vann - FINISHED - Midwest Products - Scale 1:12 - SMALL
-
yvesvidal reacted to a post in a topic:
Indian Girl Canoe by vann - FINISHED - Midwest Products - Scale 1:12 - SMALL
-
ccoyle reacted to a post in a topic:
Indian Girl Canoe by vann - FINISHED - Midwest Products - Scale 1:12 - SMALL
-
catopower reacted to a post in a topic:
HMS Victory by vann - FINISHED - Mini Mamoli - Scale 1:325
-
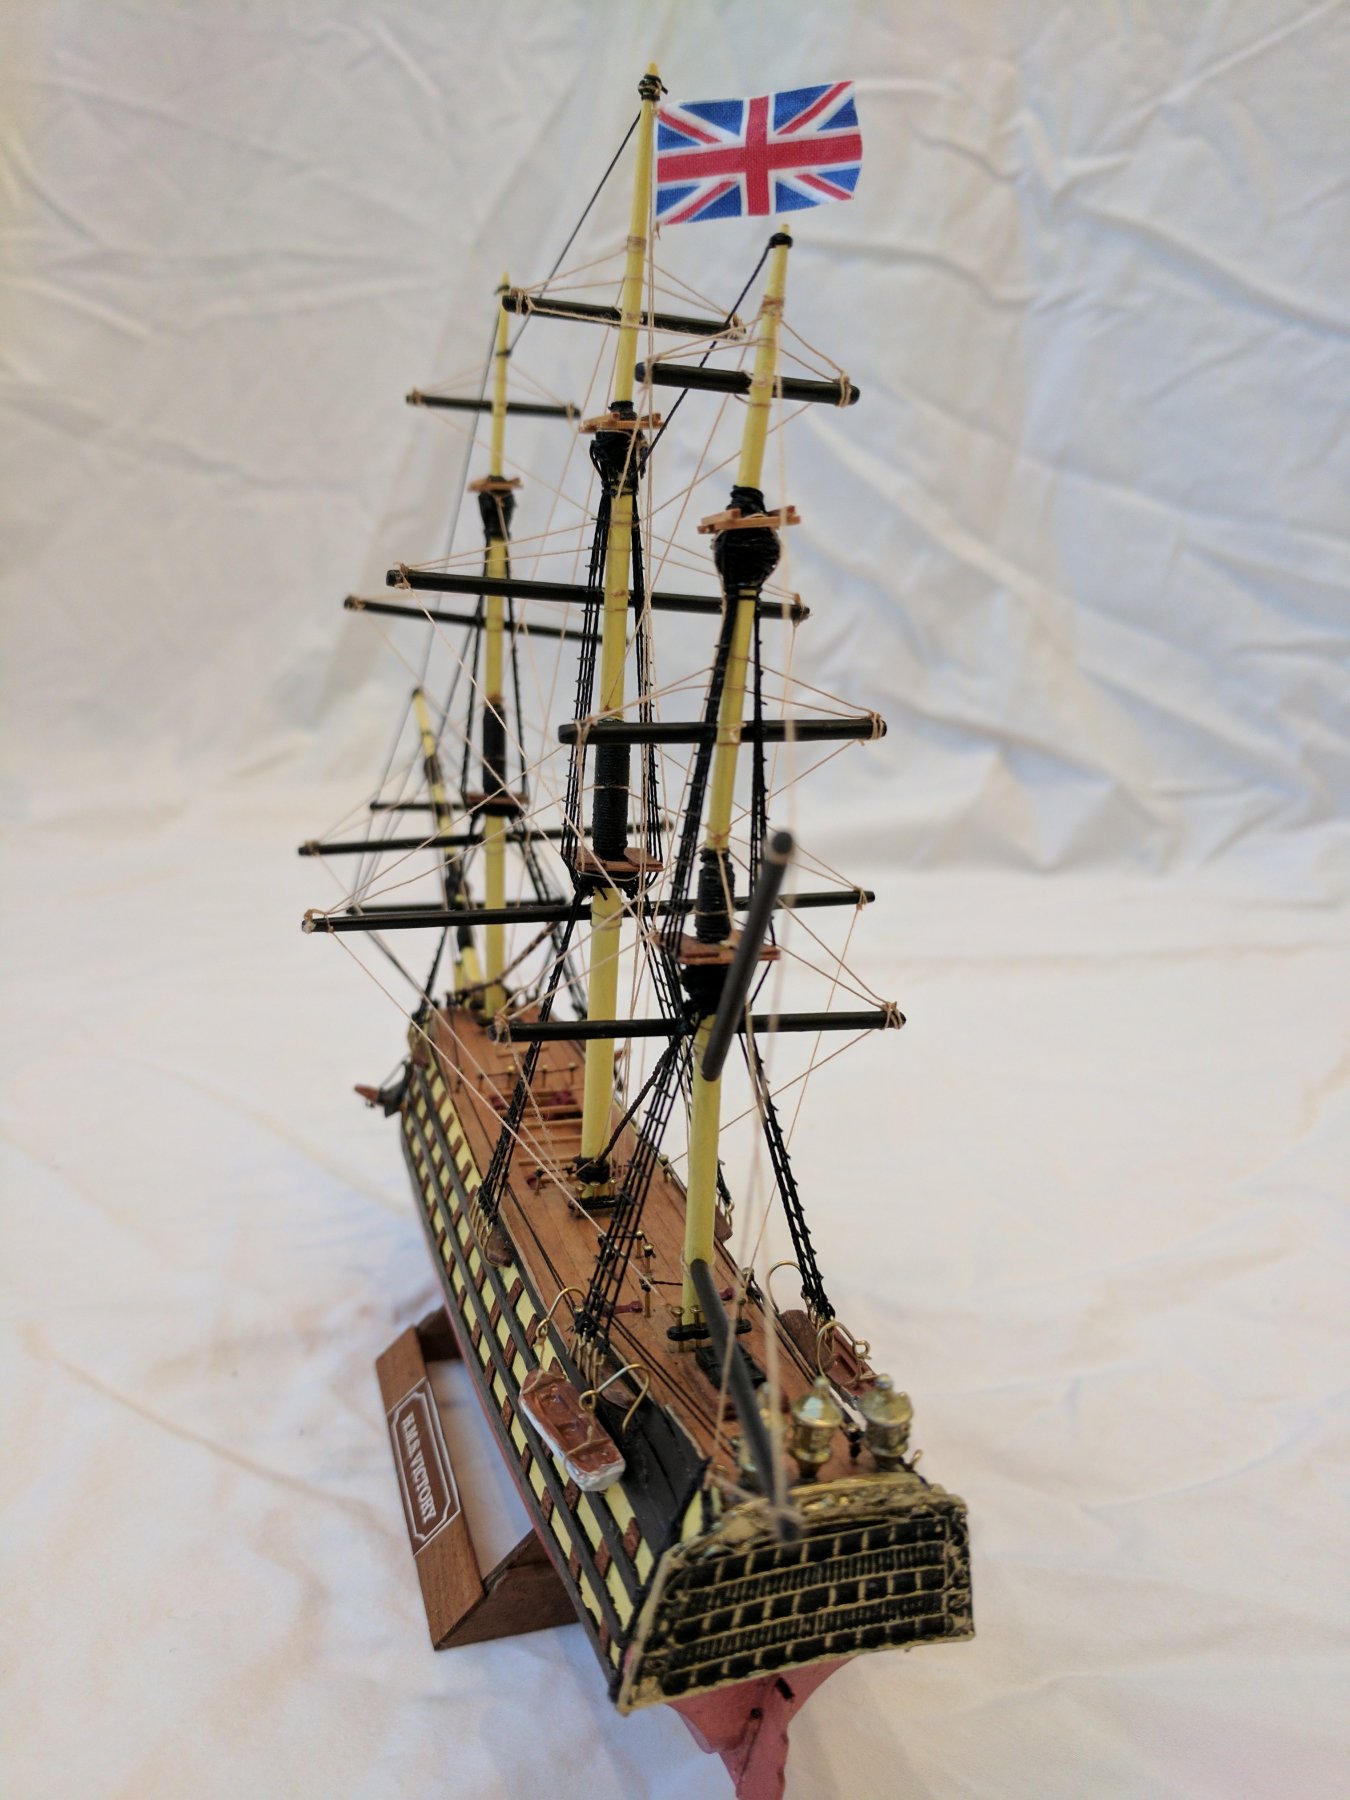
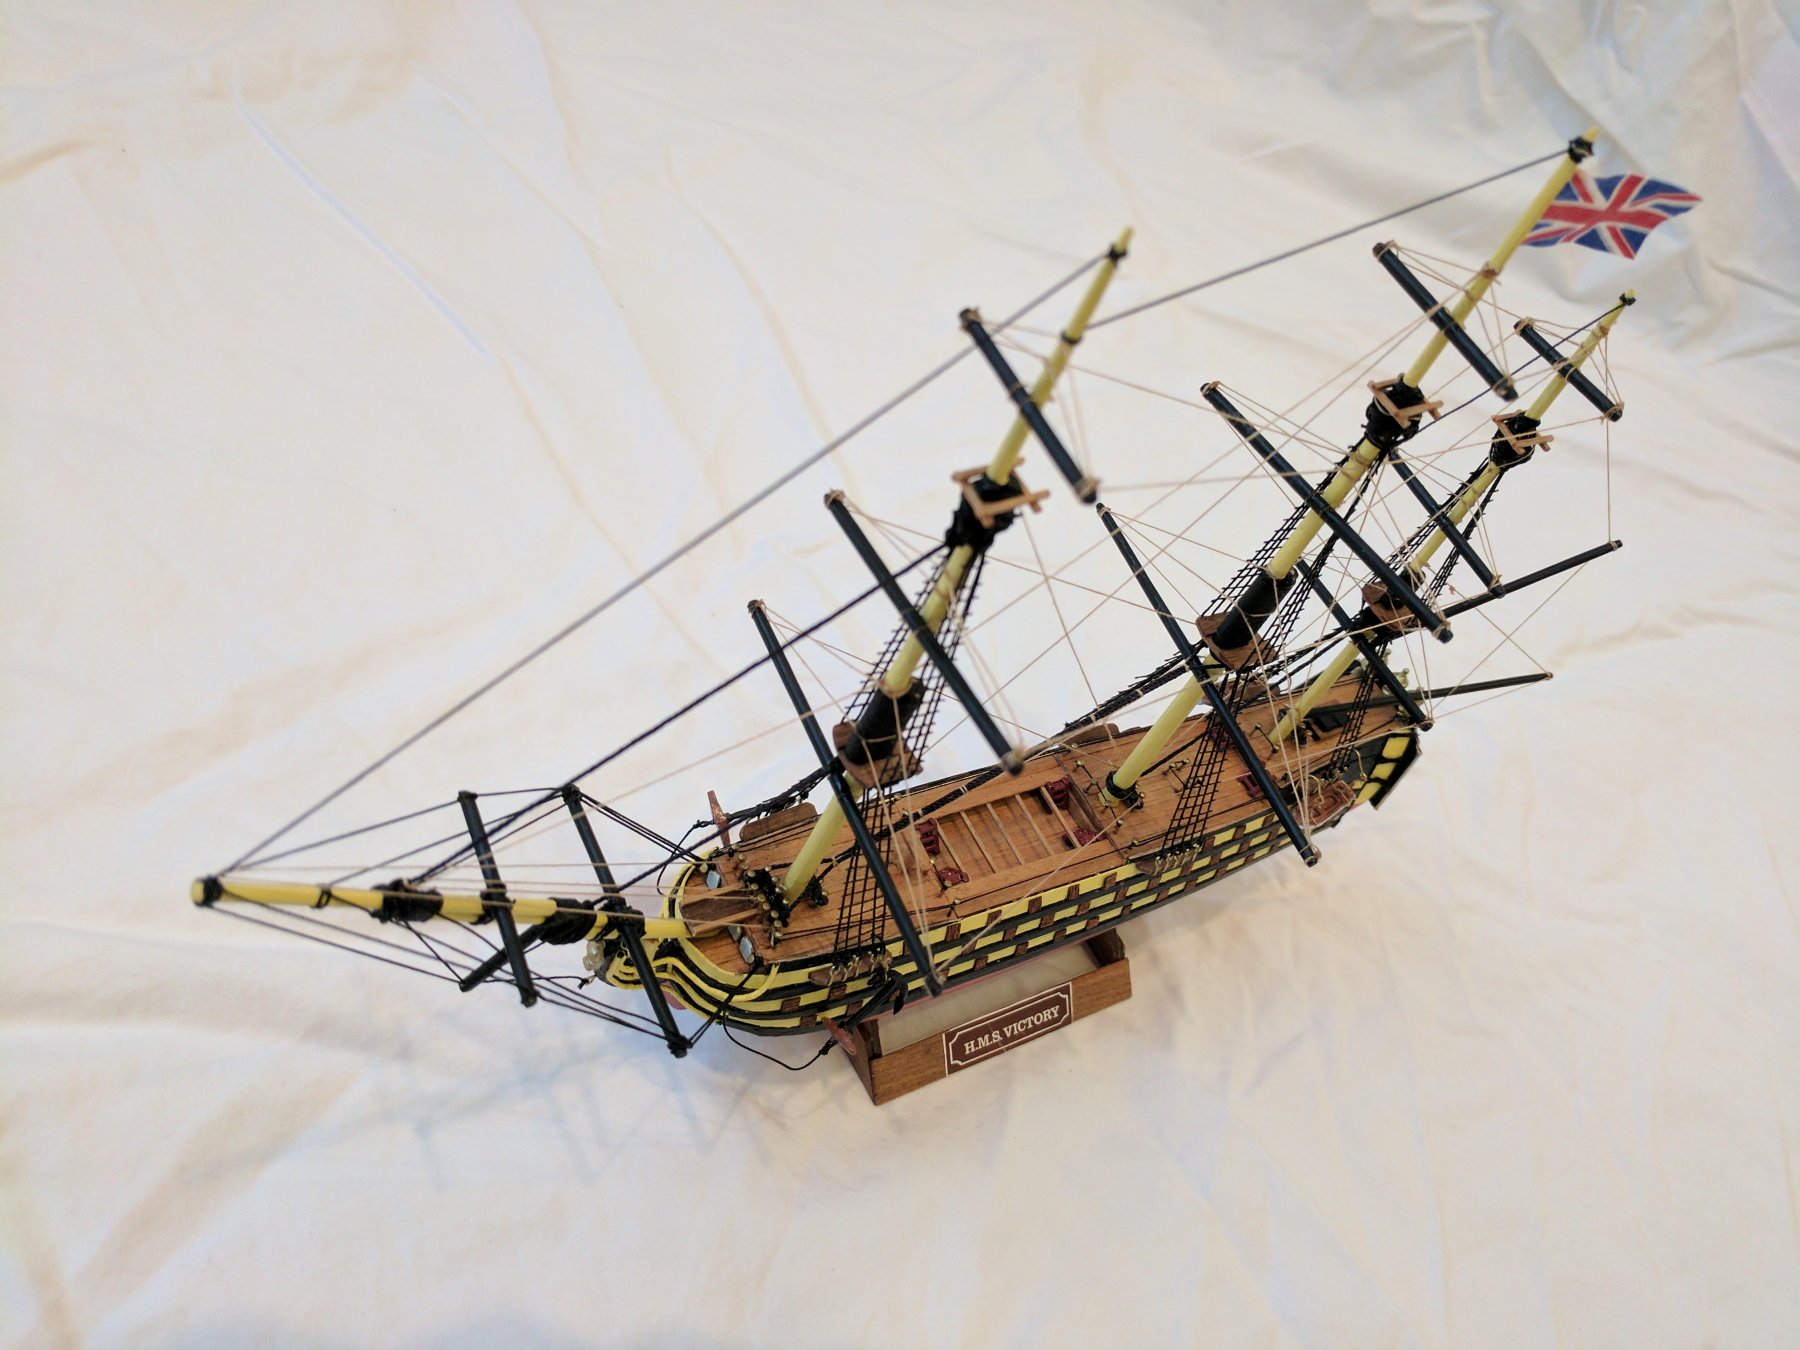
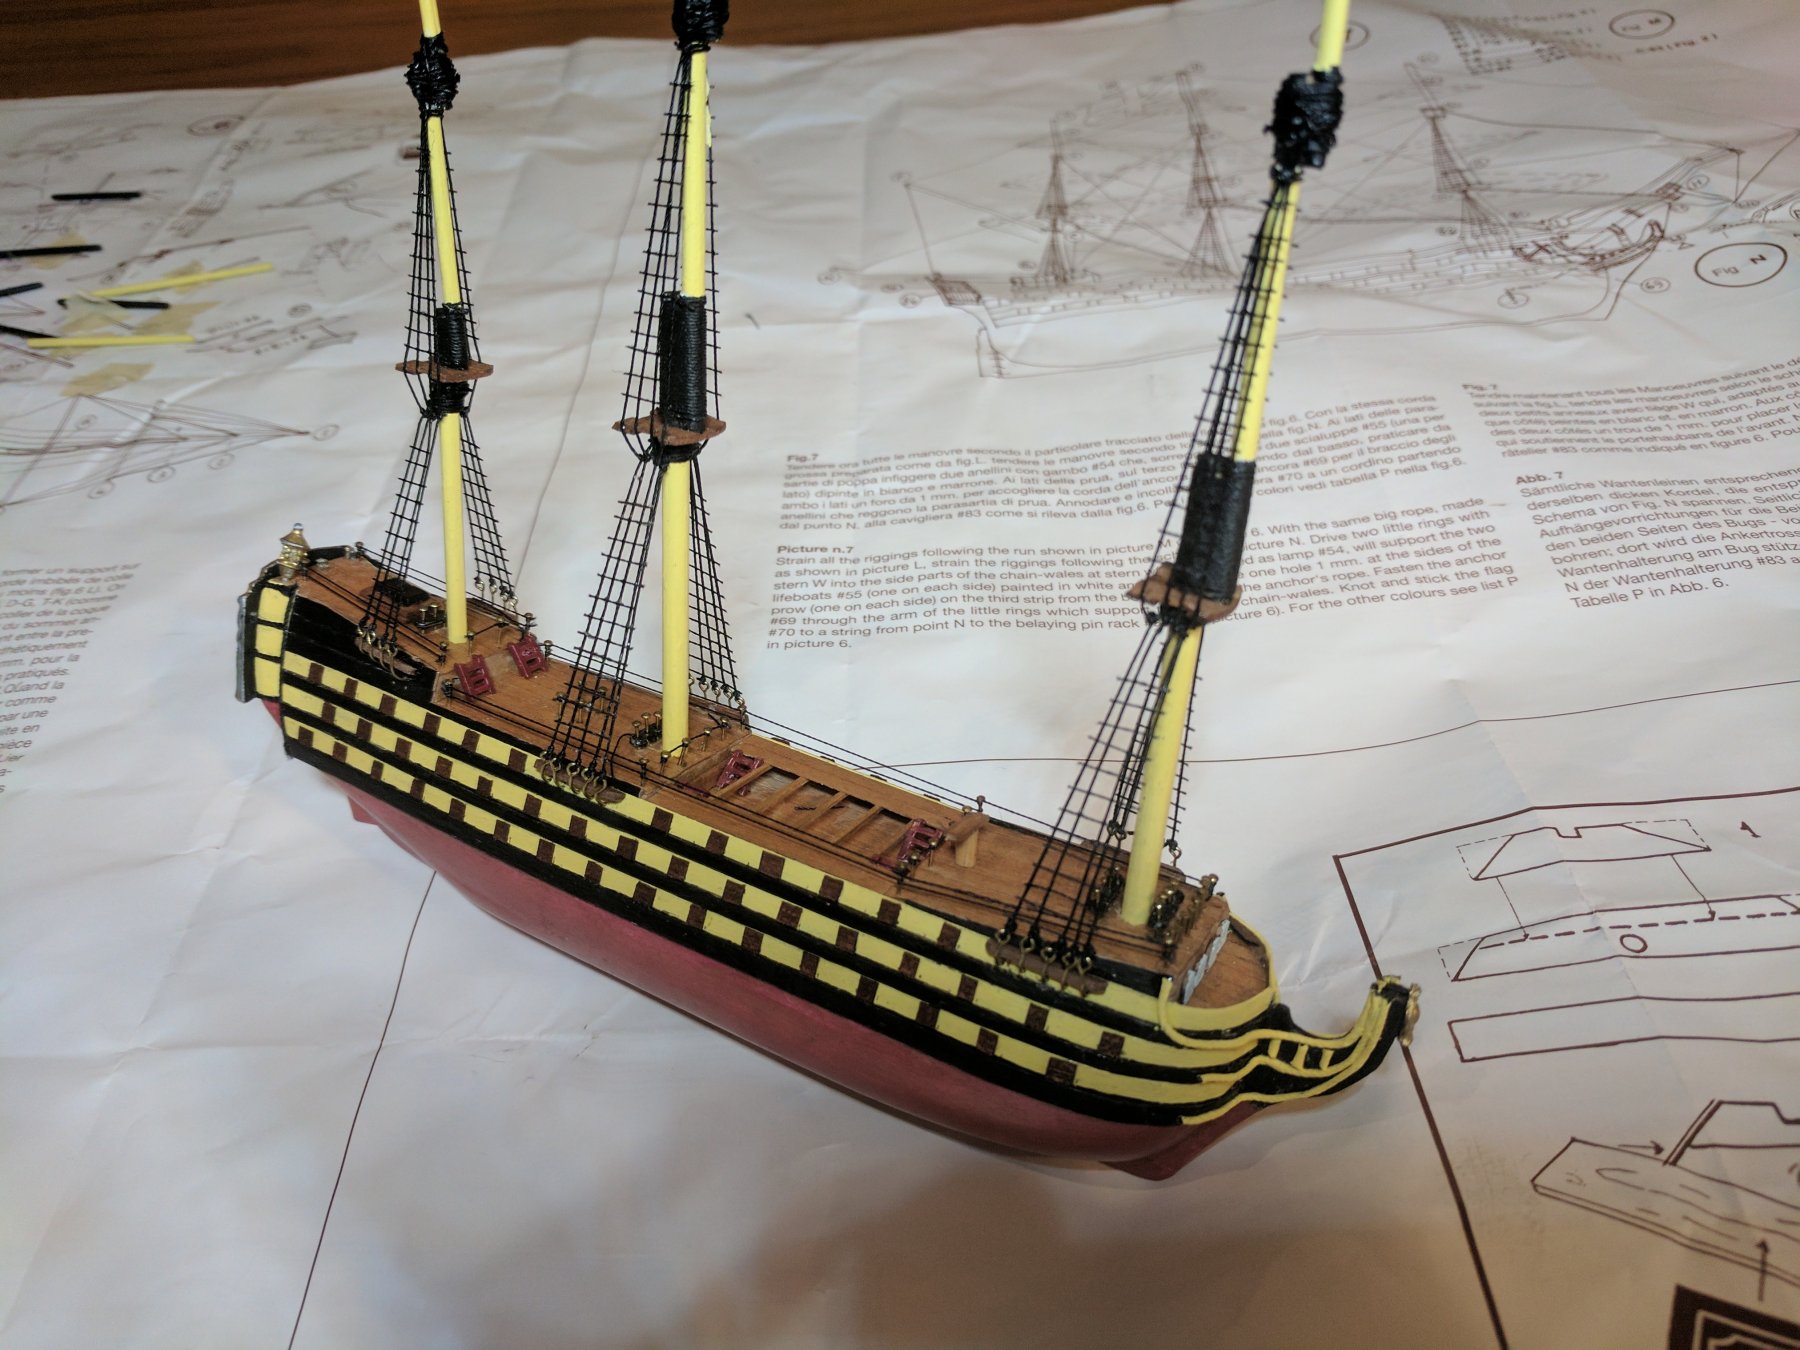
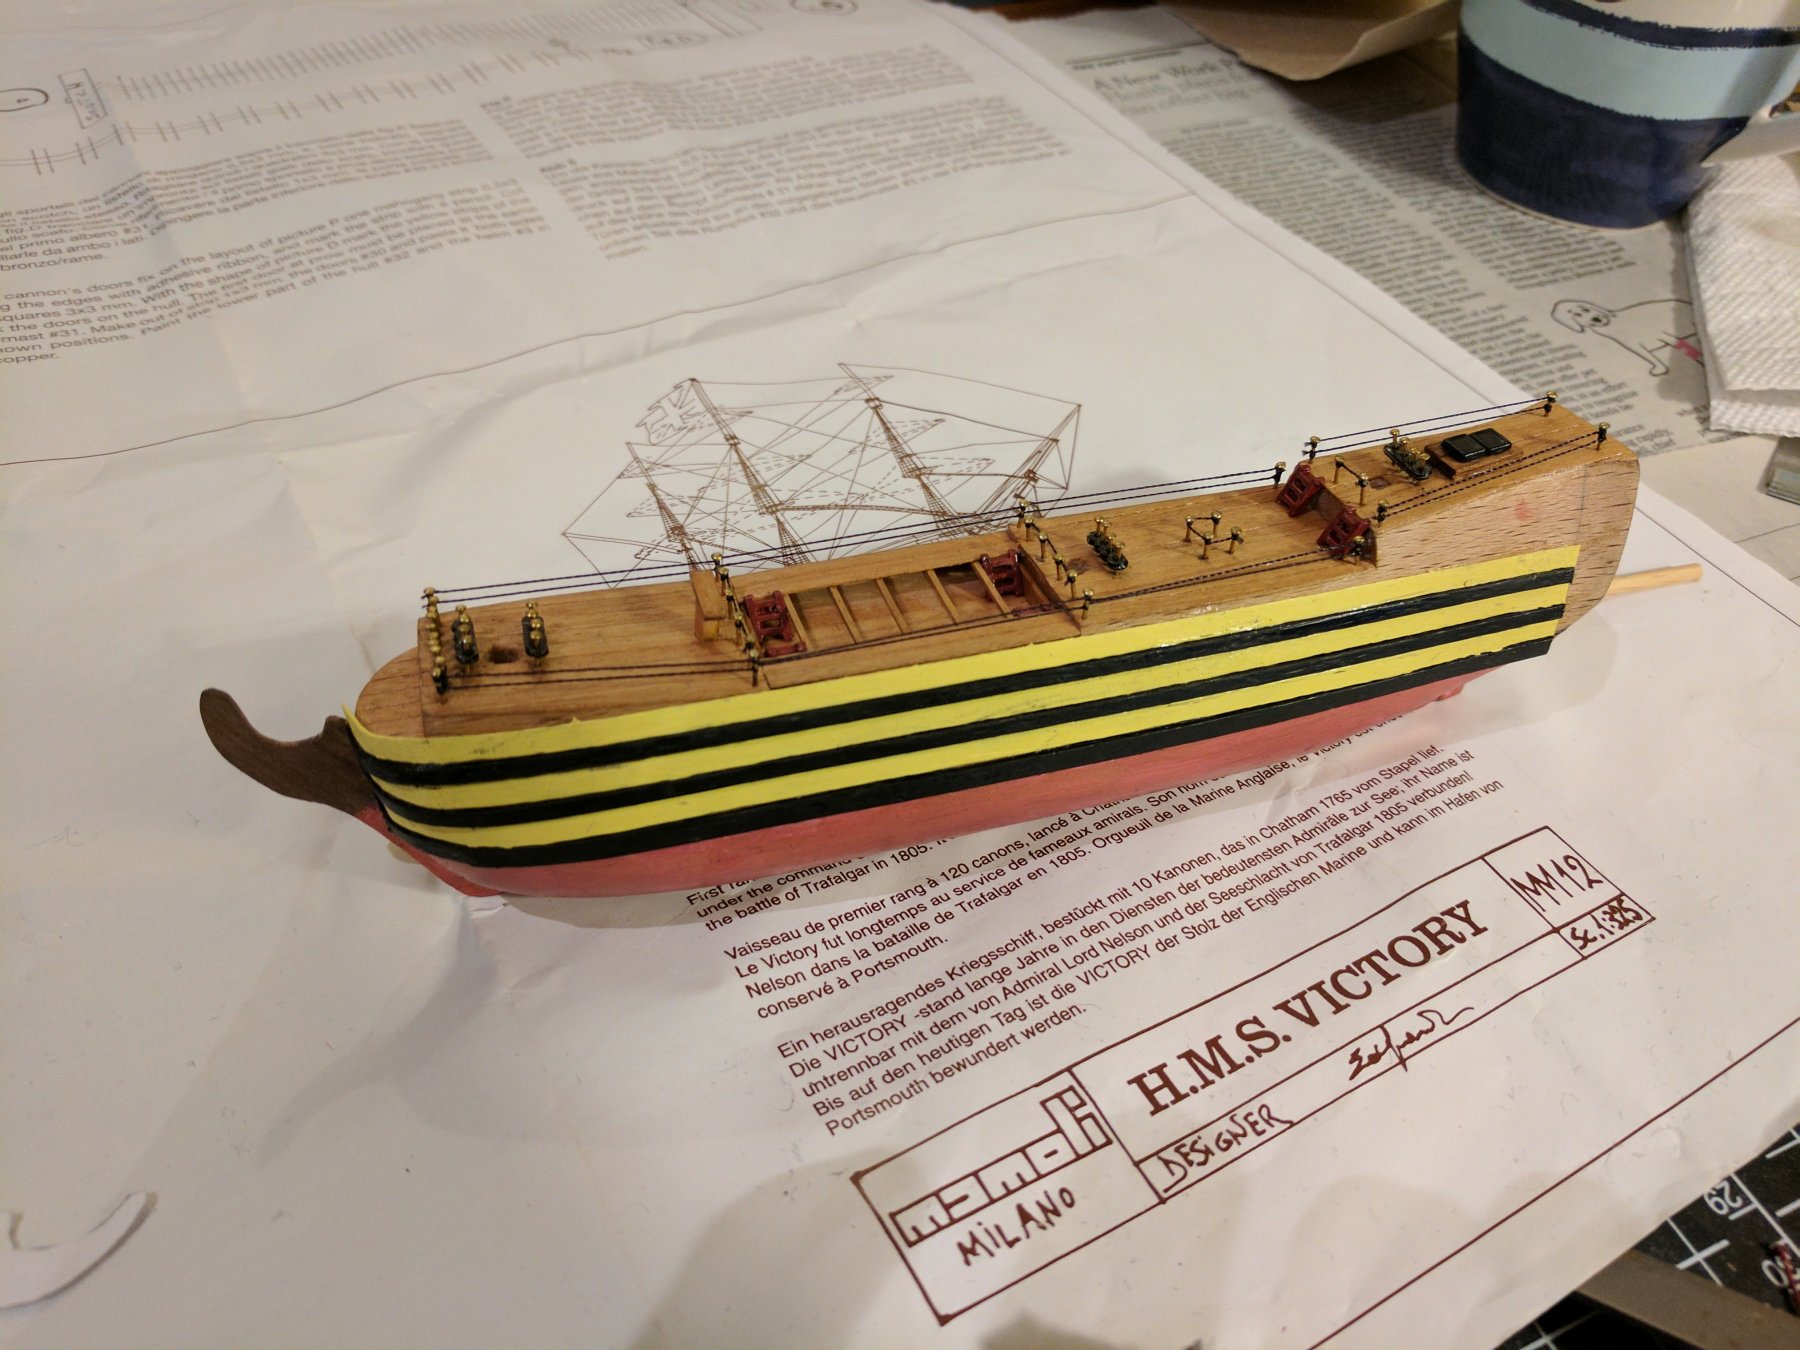
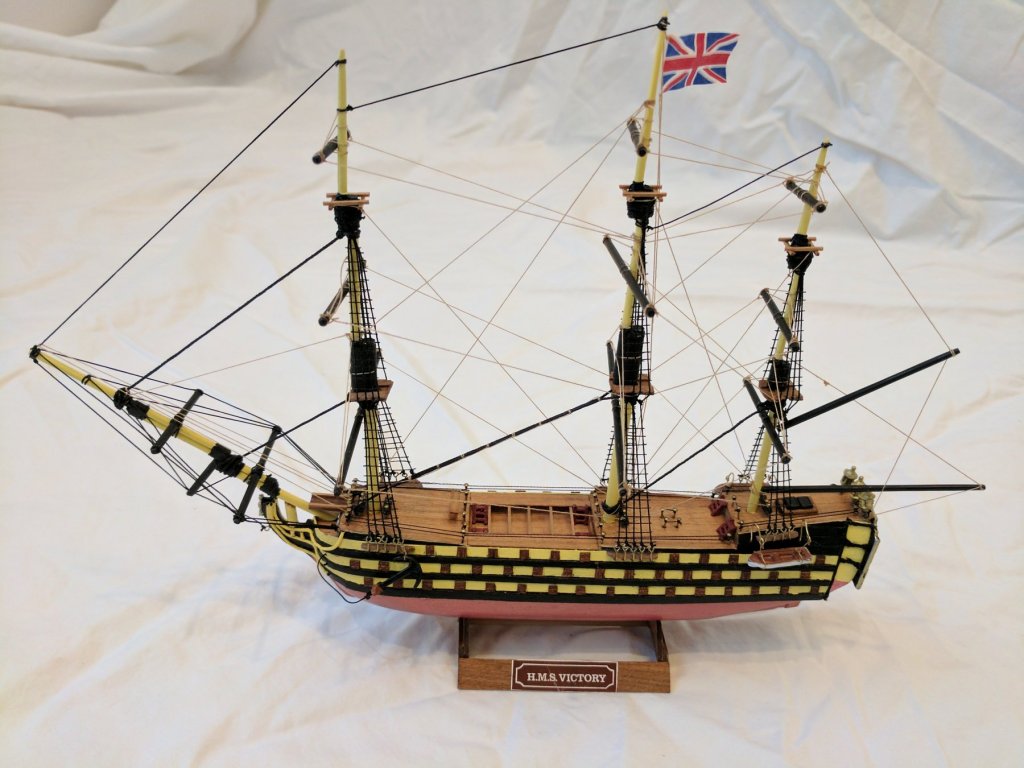
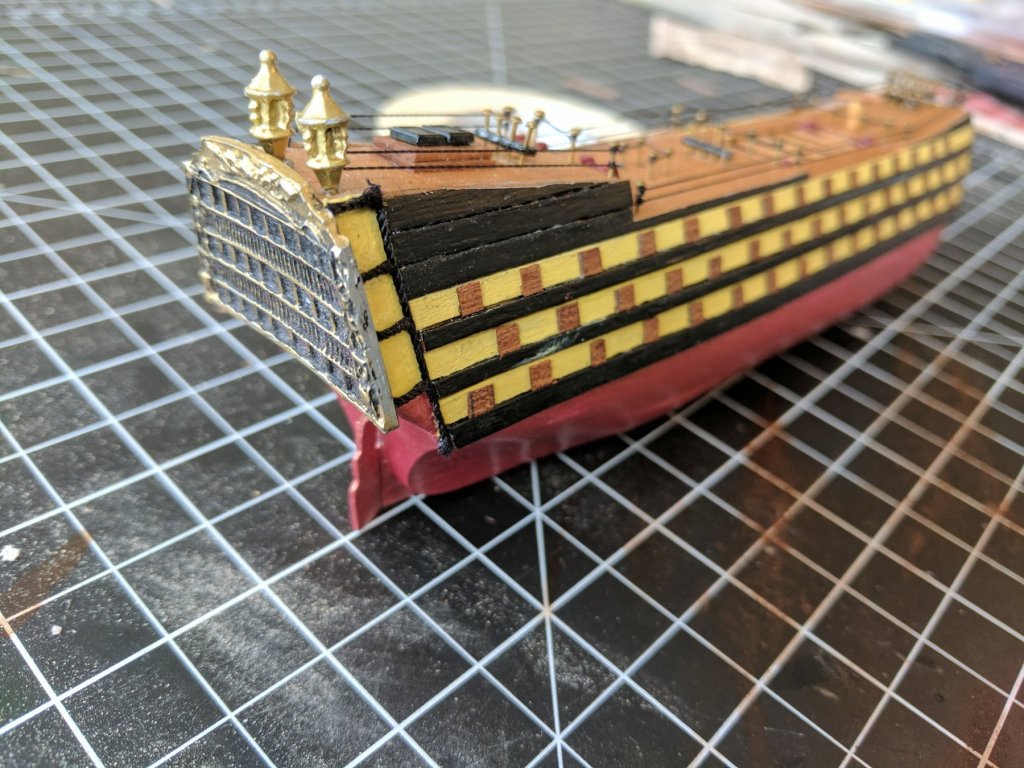
 The Victory is done! All in all, I think it came together pretty well. The instructions aren't as bad as I thought they might have been on the first read. It does take a bit of creativity. Interestingly you can see that the builder of the model for the box photo didn't follow the instructions very closely at all! I believe my model is actually closer than theirs. For anyone deciding to take this on, be prepared to make a few extra purchases. I made several orders for: * cordage - get a bunch, you'll go through it! Different sizes of black thread. * nails - you may be able to leave off a couple of the ones along the front of the deck at the bow, but if you follow their plans you'll run out * paint - of course! * 3mm x 1mm strips - this is odd... not sure if it was just my kit, but they didn't provide enough to complete the decking sides. There were probably a bunch of things I would have done differently, but the two that mainly come to mind are: * Positioning of bands on side - the instructions have you measure from the keel. But, this ends up completing the strips too early - I'm guessing that somewhere along the way the size of the hull itself changed. I'd recommend measuring *down* from the deck such that you know you'll get the right amount. You can use the keel to make the strip level, but start from the deck. * Make a jig for cutting the wood pieces for the gun ports. Cutting 3x3 mm squares without a guide is nearly impossible to do consistently. In the end it doesn't look too bad, but I would have been happier if they were more consistent. I'd definitely recommend the build. It was a lot of fun and enough of a challenge for a beginning modeler like me. It does take some time - I'm sure I have over 100 hours into it over a two month period. I think I saw somewhere that mini-mamoli's were 15-20 hour projects. Evidently not for me! @Daniel Dusek is bringing these kits back into production, so there should be opportunities to get new kits.
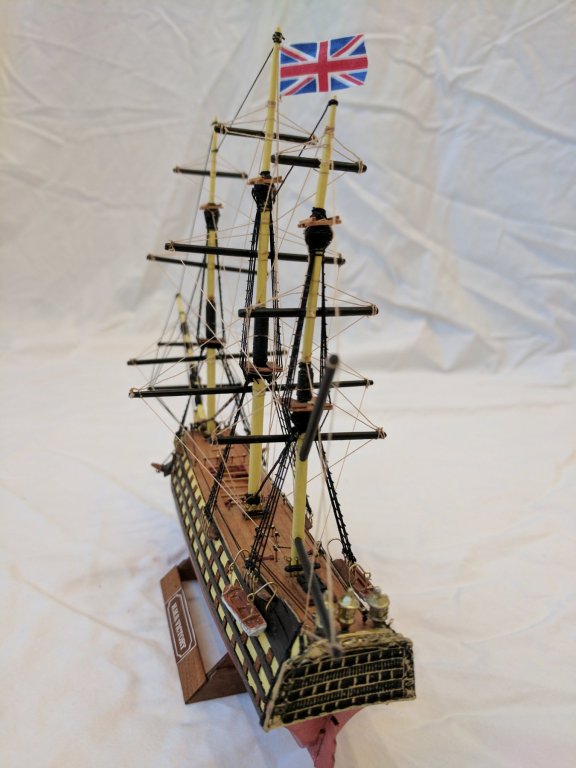

- 23 replies
-
- 5
-
-
- Victory
- Mini Mamoli
- (and 1 more)
-
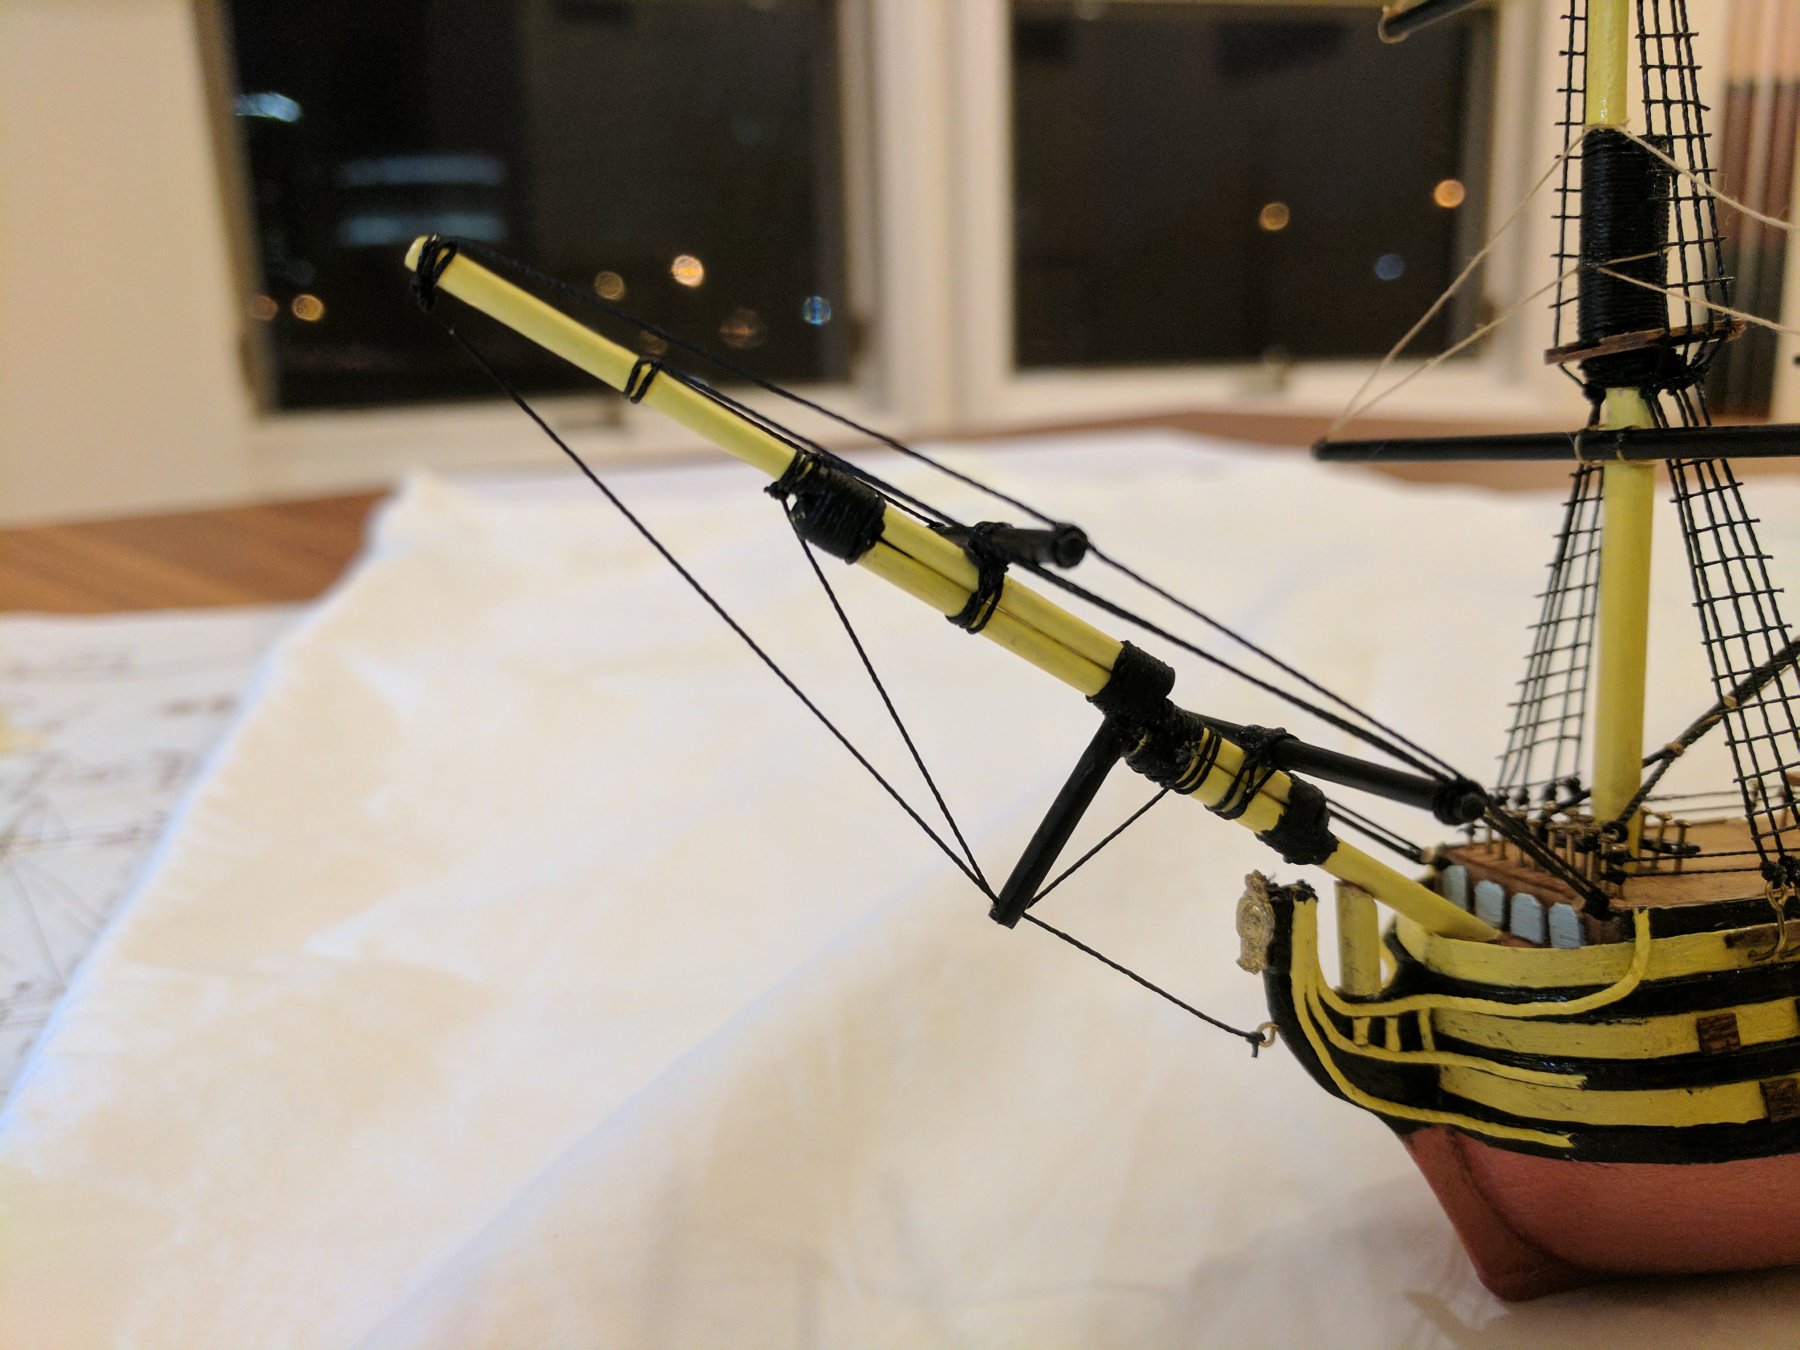
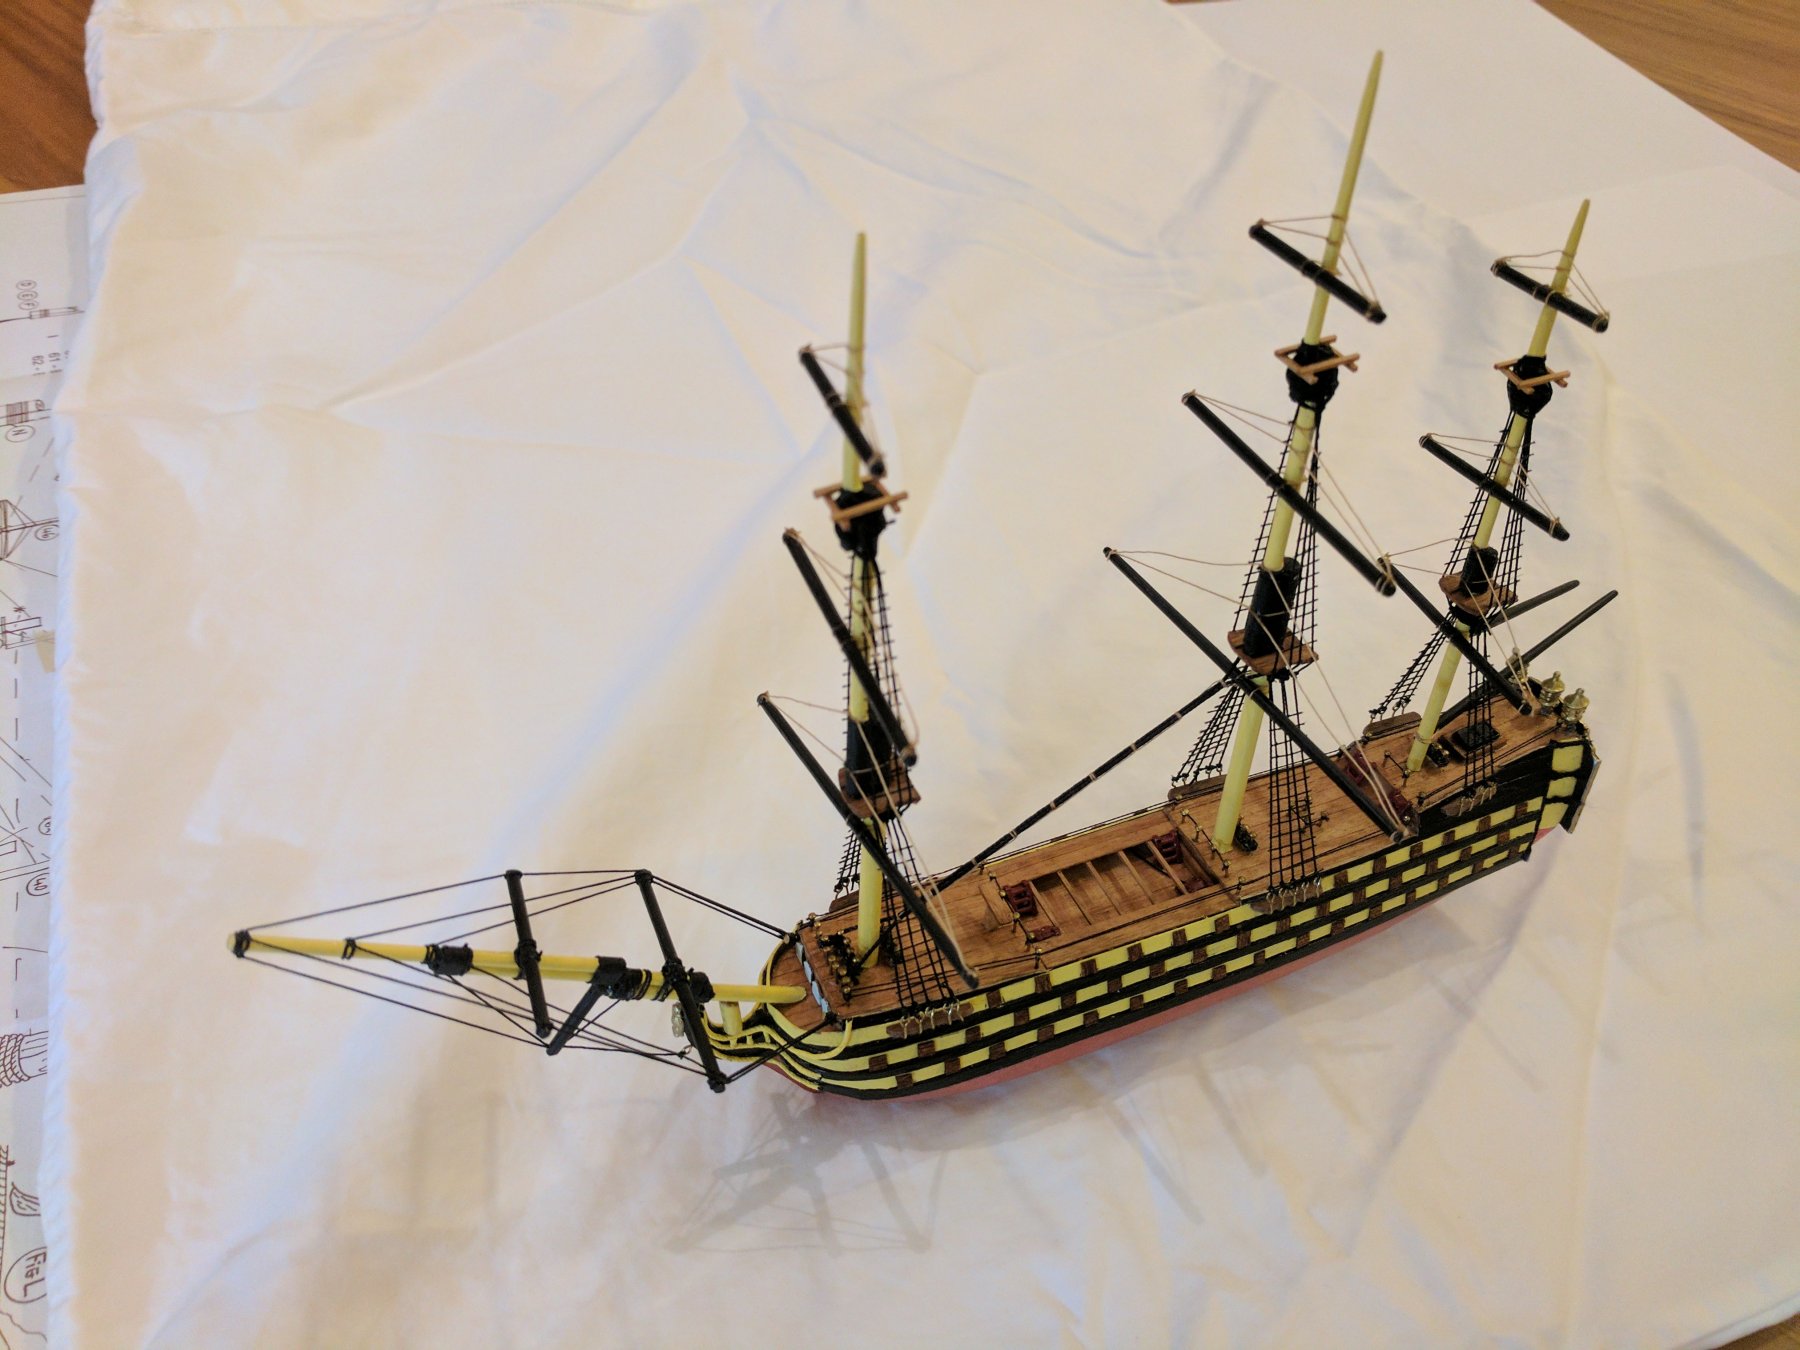
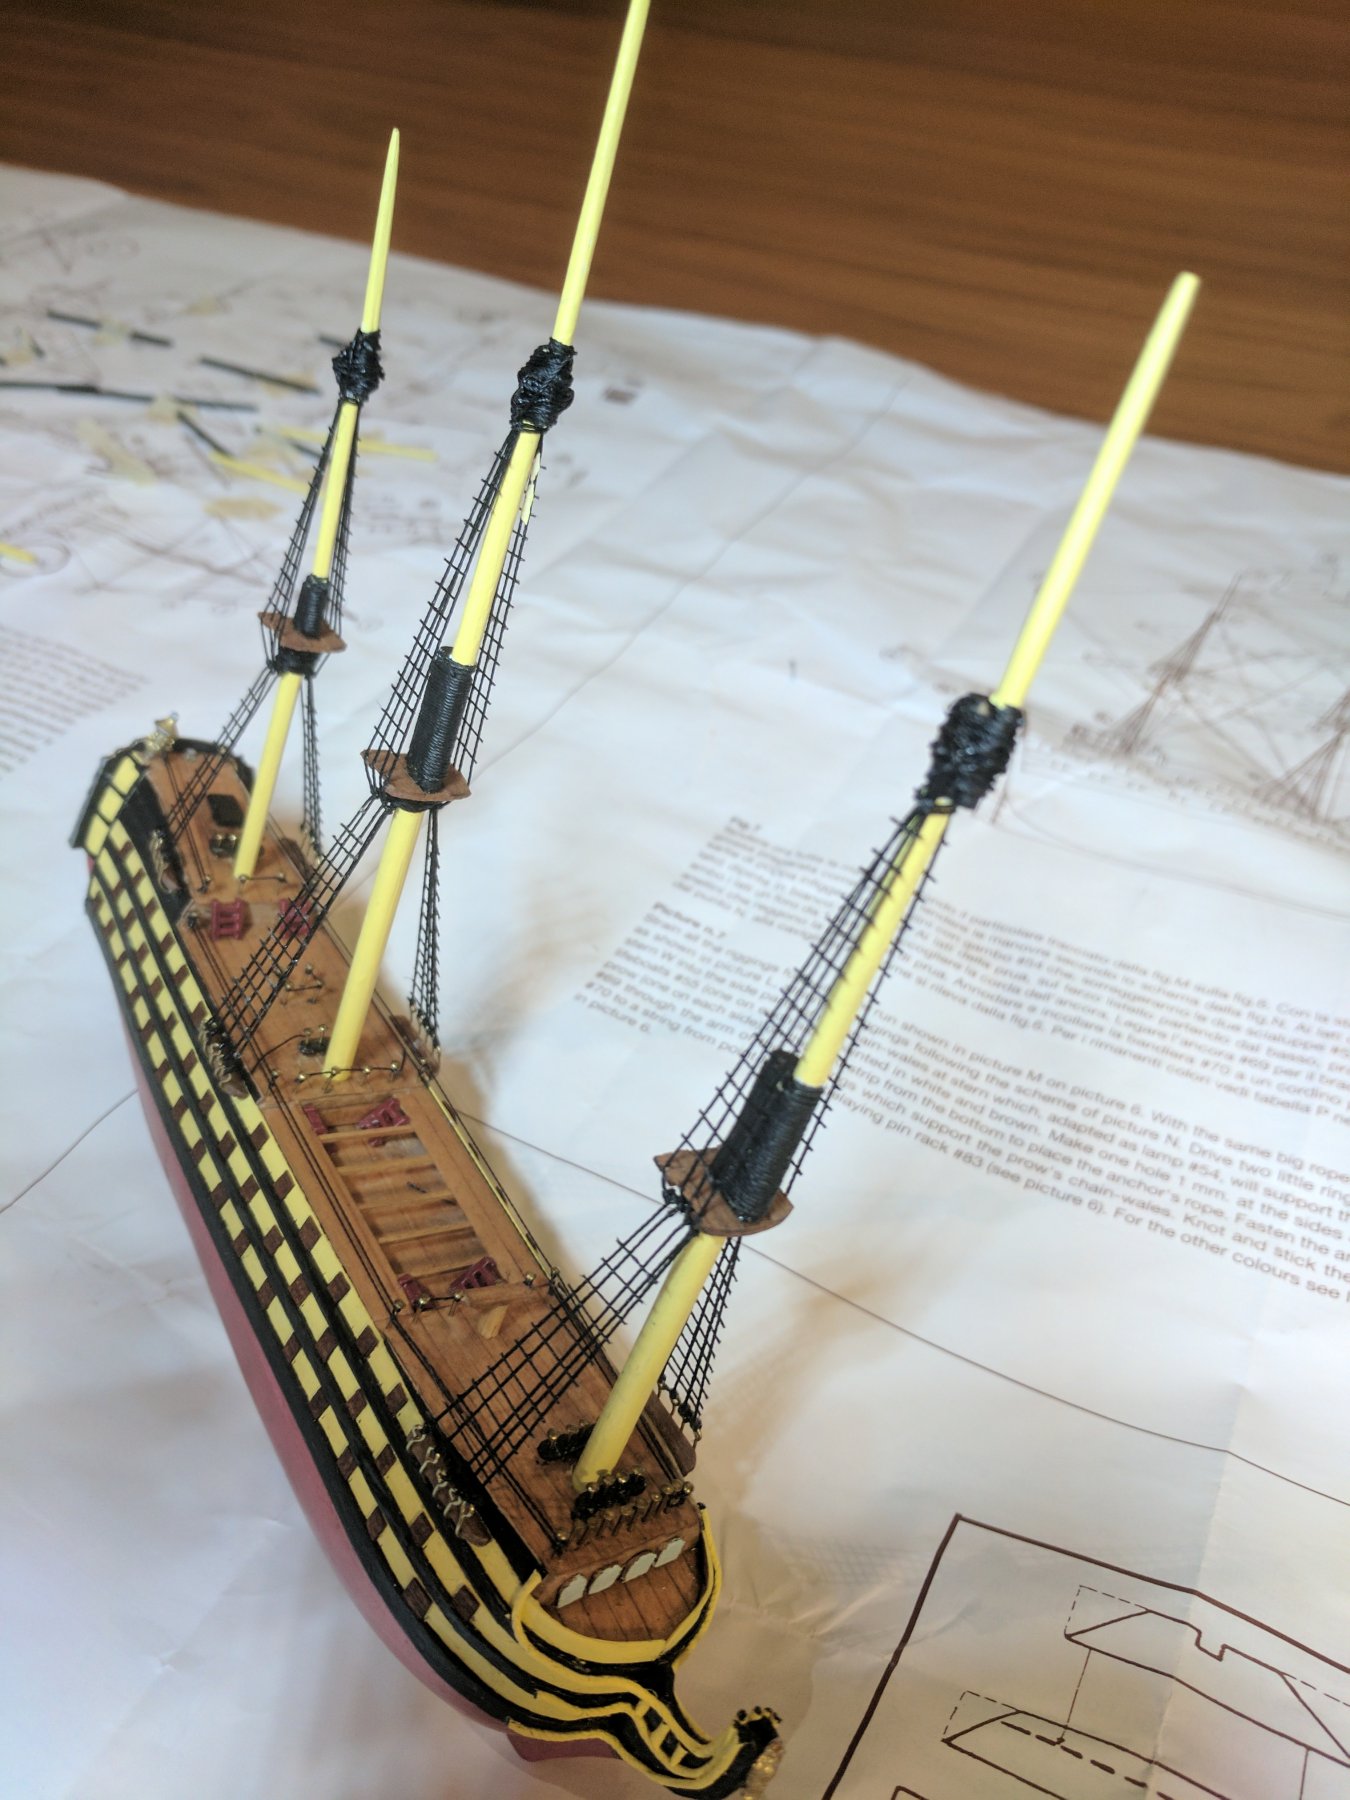
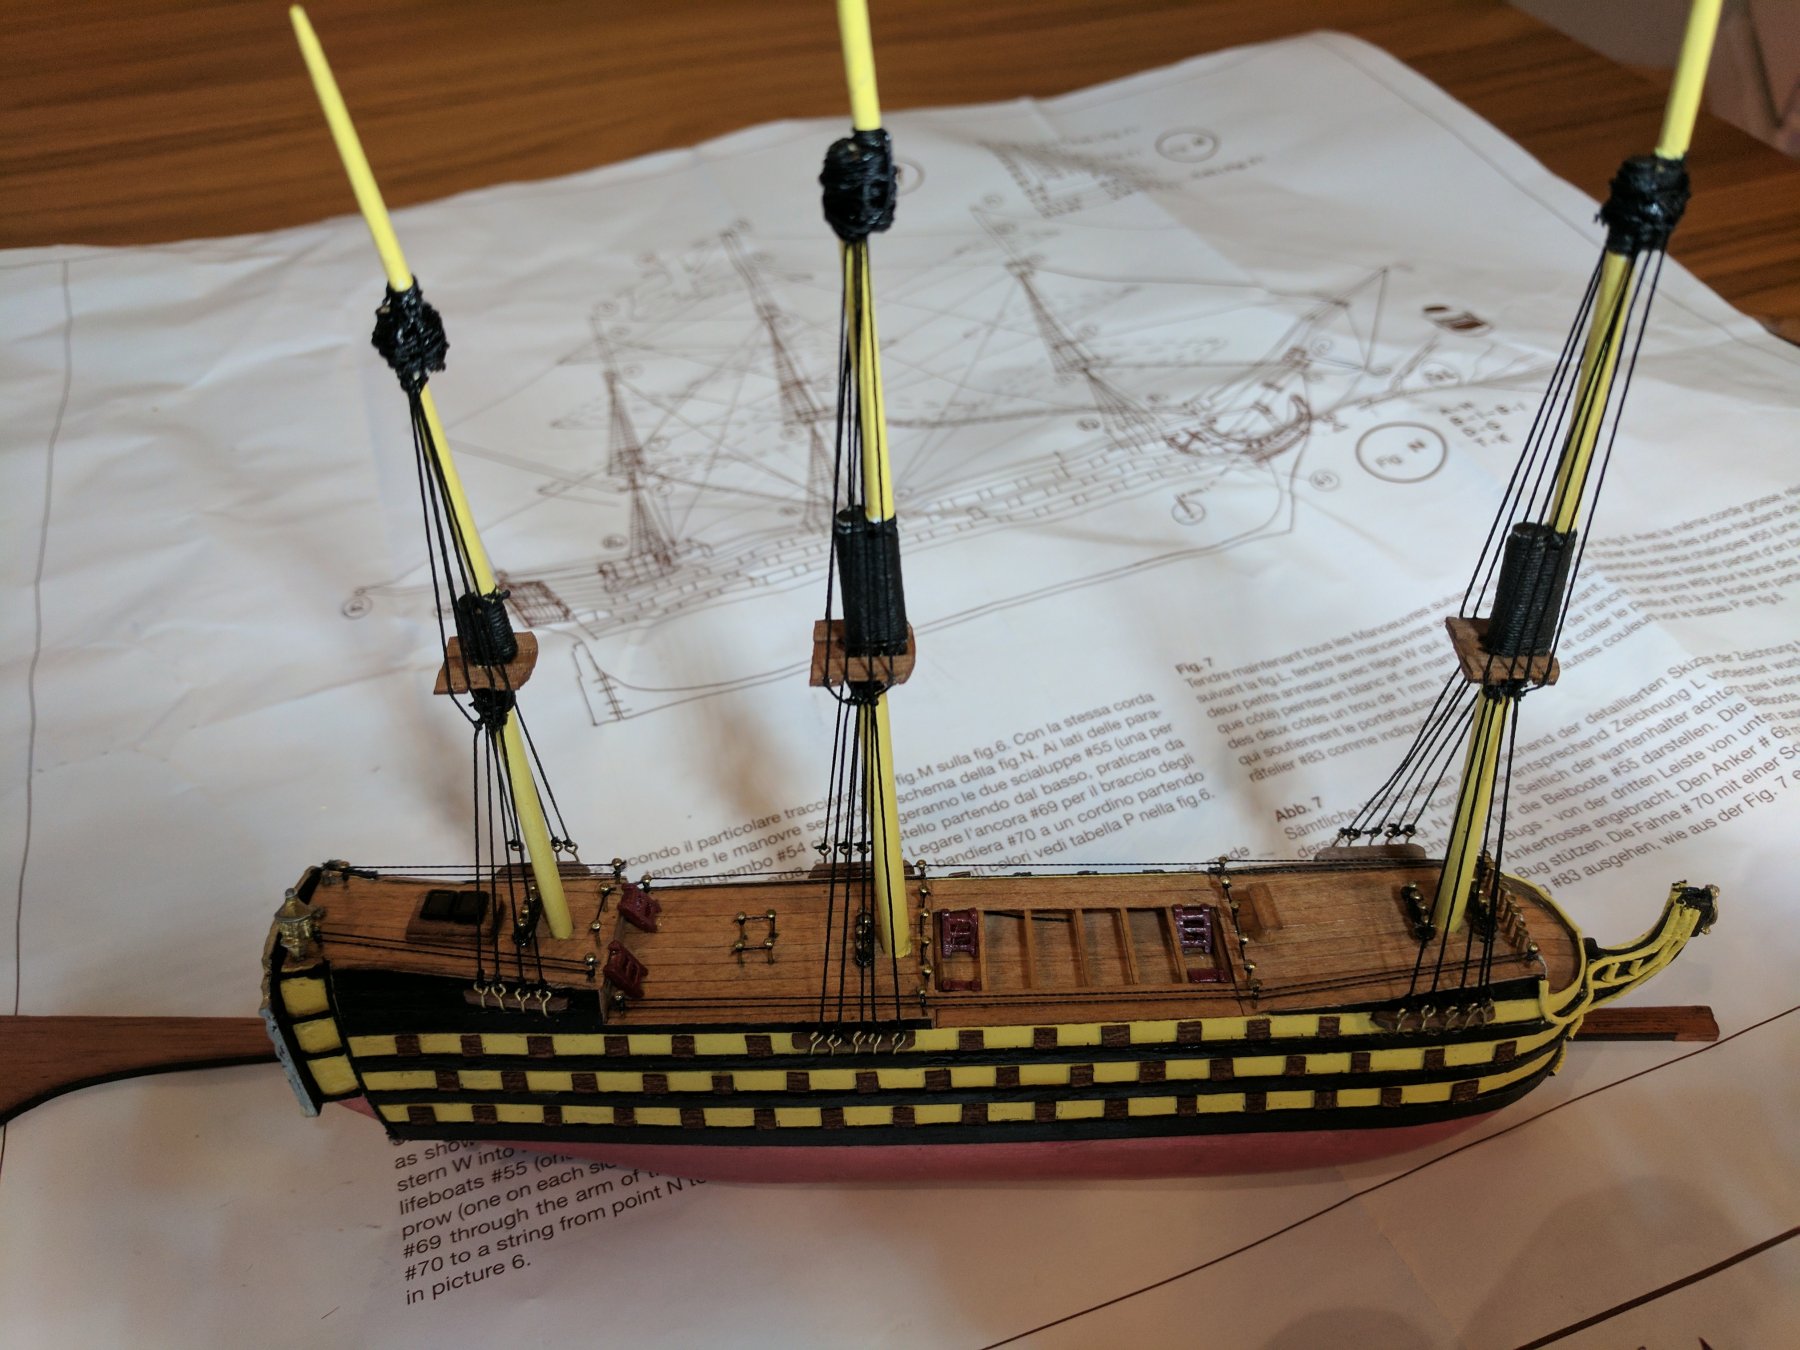
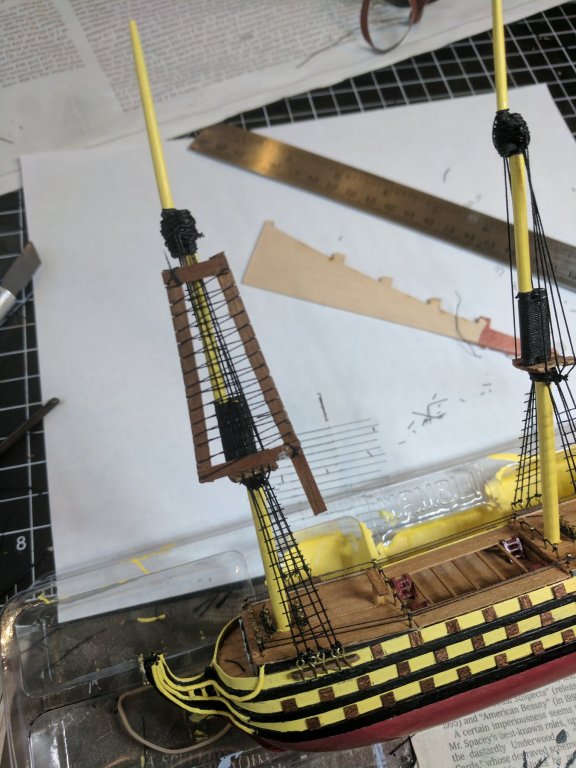
@DSiemens with the suggestion of the build! Wow - How did I not have these scissors before? I had what I thought were ok scissors that came from a sewing kit - they aren't remotely comparable. Thank you! The build continues and I have begun rigging. The spars are on. The bowsprit assembly is done. Really starting to come together, despite my continual attempts to destroy what I've already created. I'm convinced that rigging is there to teach us just how clumsy our giant hands really are. And, my thread seemingly has become self-aware - it certainly seems to go where it wants as if it had will anyway (and apparently it is none too happy with me). But, beat it into submission, I will. Lots of progress, but still a fair ways to go before it is done.


- 23 replies
-
- 2
-
-
- Victory
- Mini Mamoli
- (and 1 more)
-
vann reacted to a post in a topic:
HMS Victory by vann - FINISHED - Mini Mamoli - Scale 1:325
-
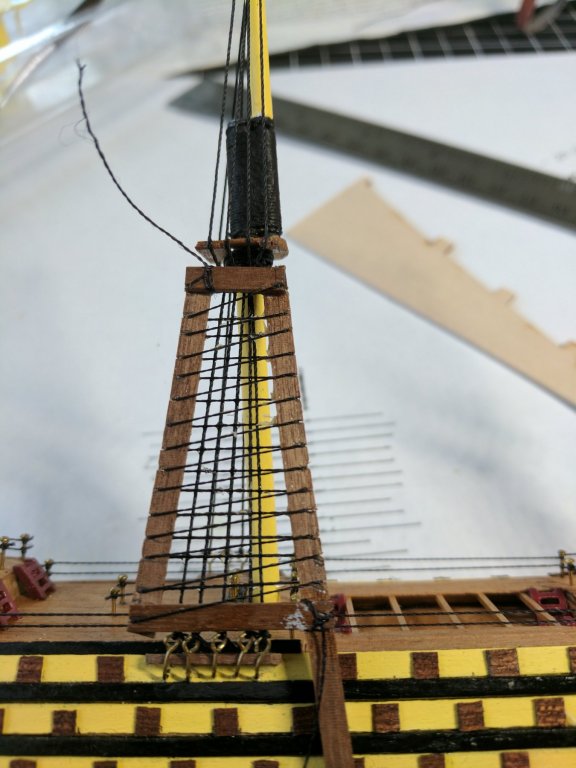
I saw the method that Alex had used (with Antony UK) for ratlines in their build of the Black Pearl: and copied it. The jig worked nicely and made reasonably short work of the ratlines. You probably could trim them closer, but I decided it was close enough for me. And, the risk of accidentally cutting a shroud was a bit too much to take. Ratlines are done! Now to put on the tops and then I believe it is off to work on the bowsprit. Progress!


- 23 replies
-
- 3
-
-
- Victory
- Mini Mamoli
- (and 1 more)
-
The shrouds are in place. Next step - ratlines. I'm going to try the glue method as @S.Coleman mentioned above. Clove hitches would be a bit of overkill on such a small model.

- 23 replies
-
- 2
-
-
- Victory
- Mini Mamoli
- (and 1 more)
-
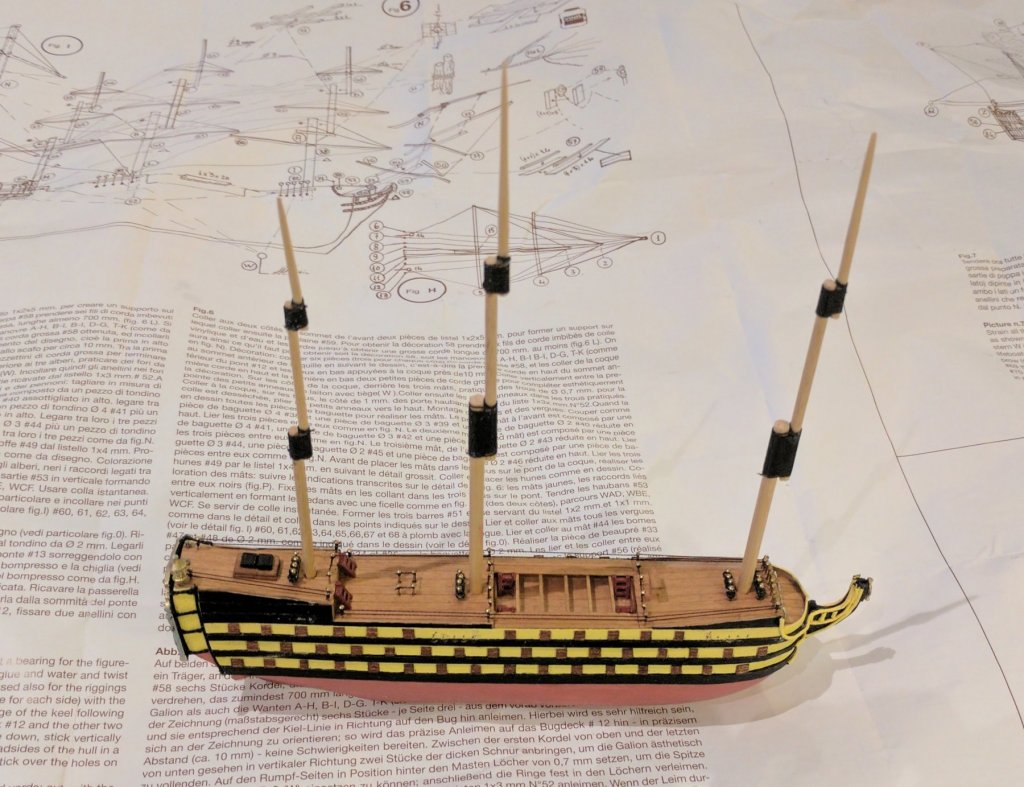
Completed the bow decorations and it is time to start the rigging! Which unfortunately hit an immediate setback as I broke my #75 bit while drilling for the shrouds. While the replacement is being shipped, I can get started with preparing the masts.
- 23 replies
-
- 1
-
-
- Victory
- Mini Mamoli
- (and 1 more)
-
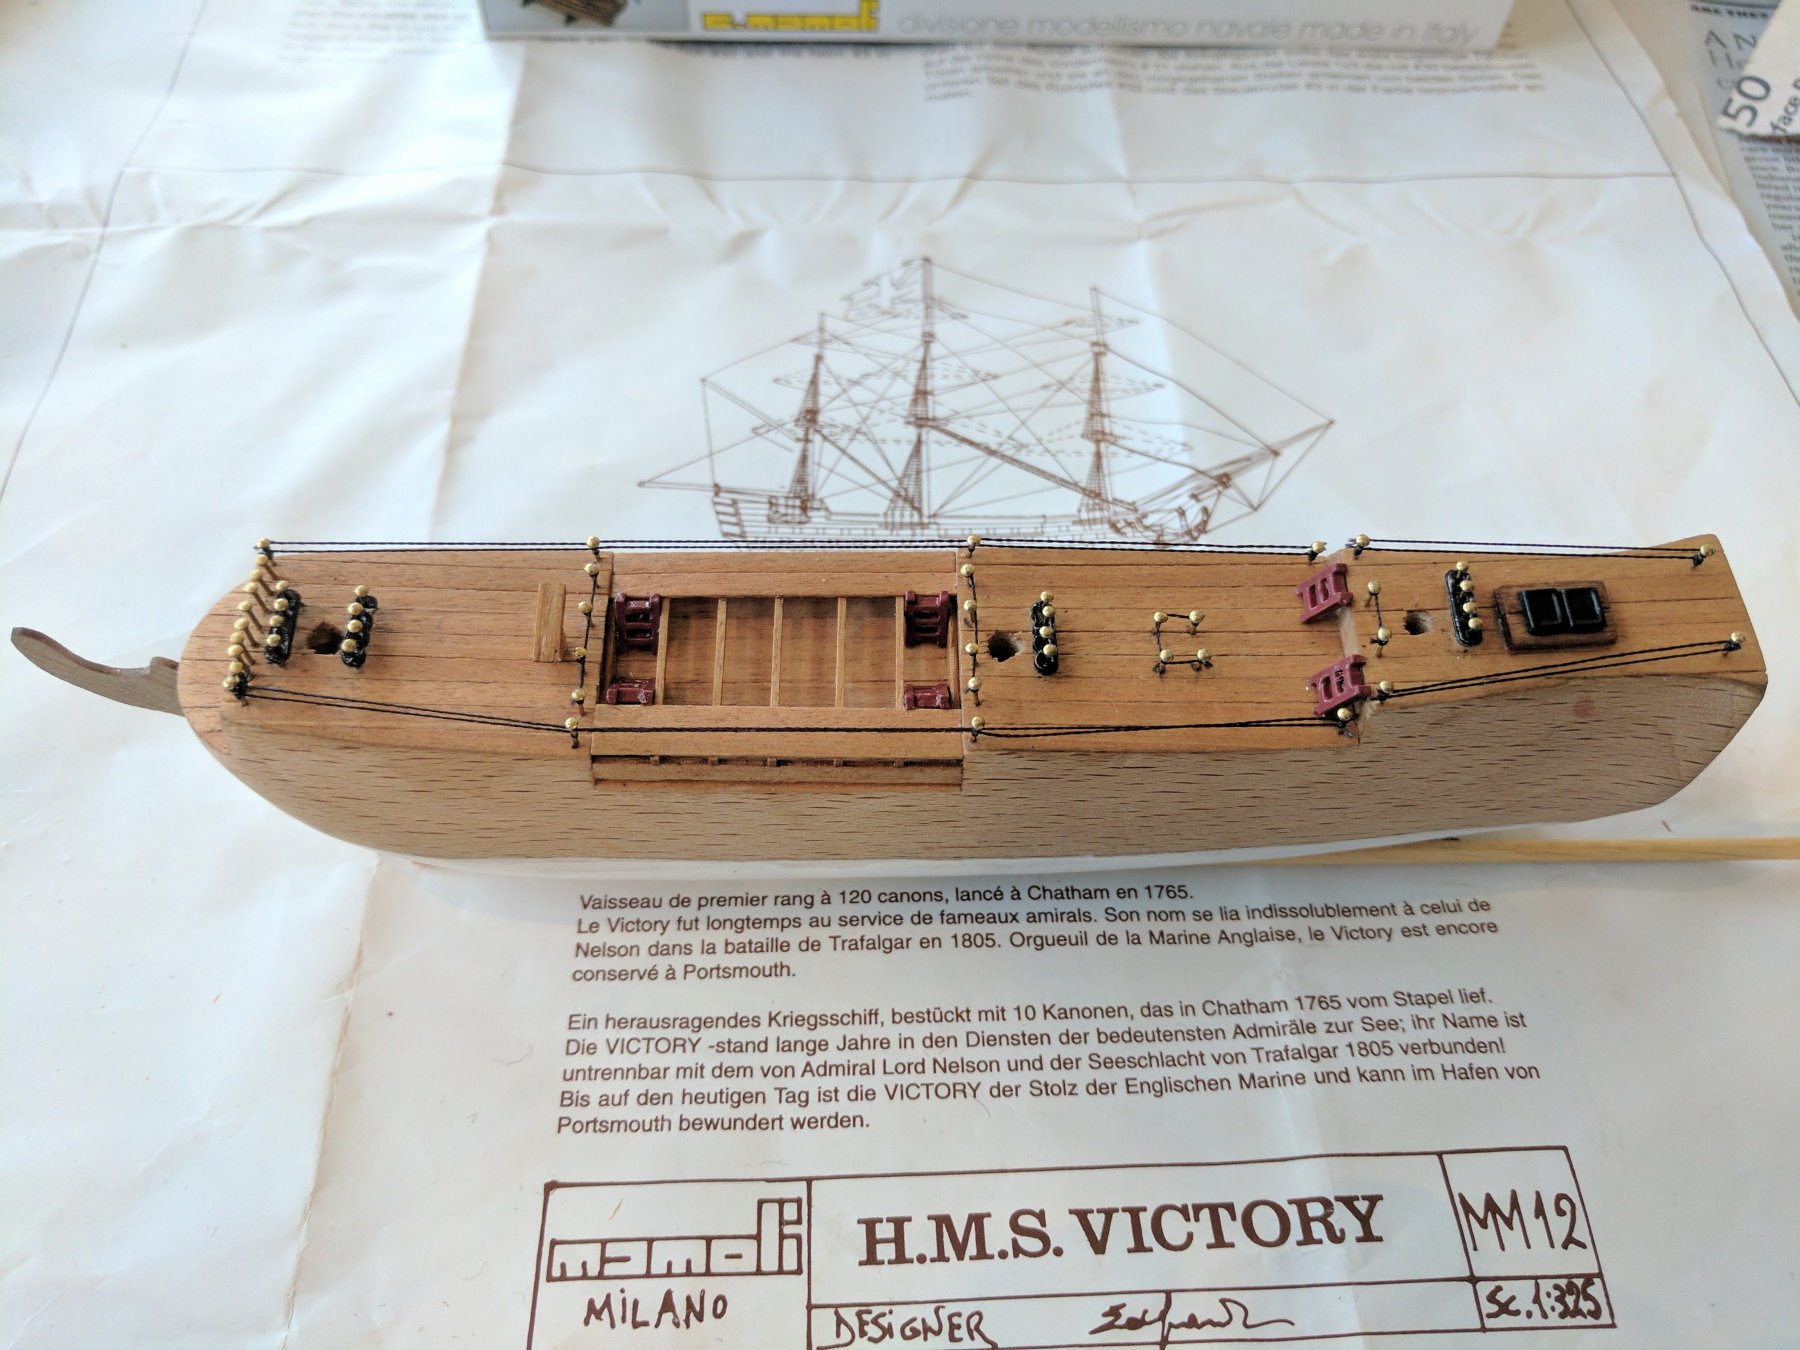
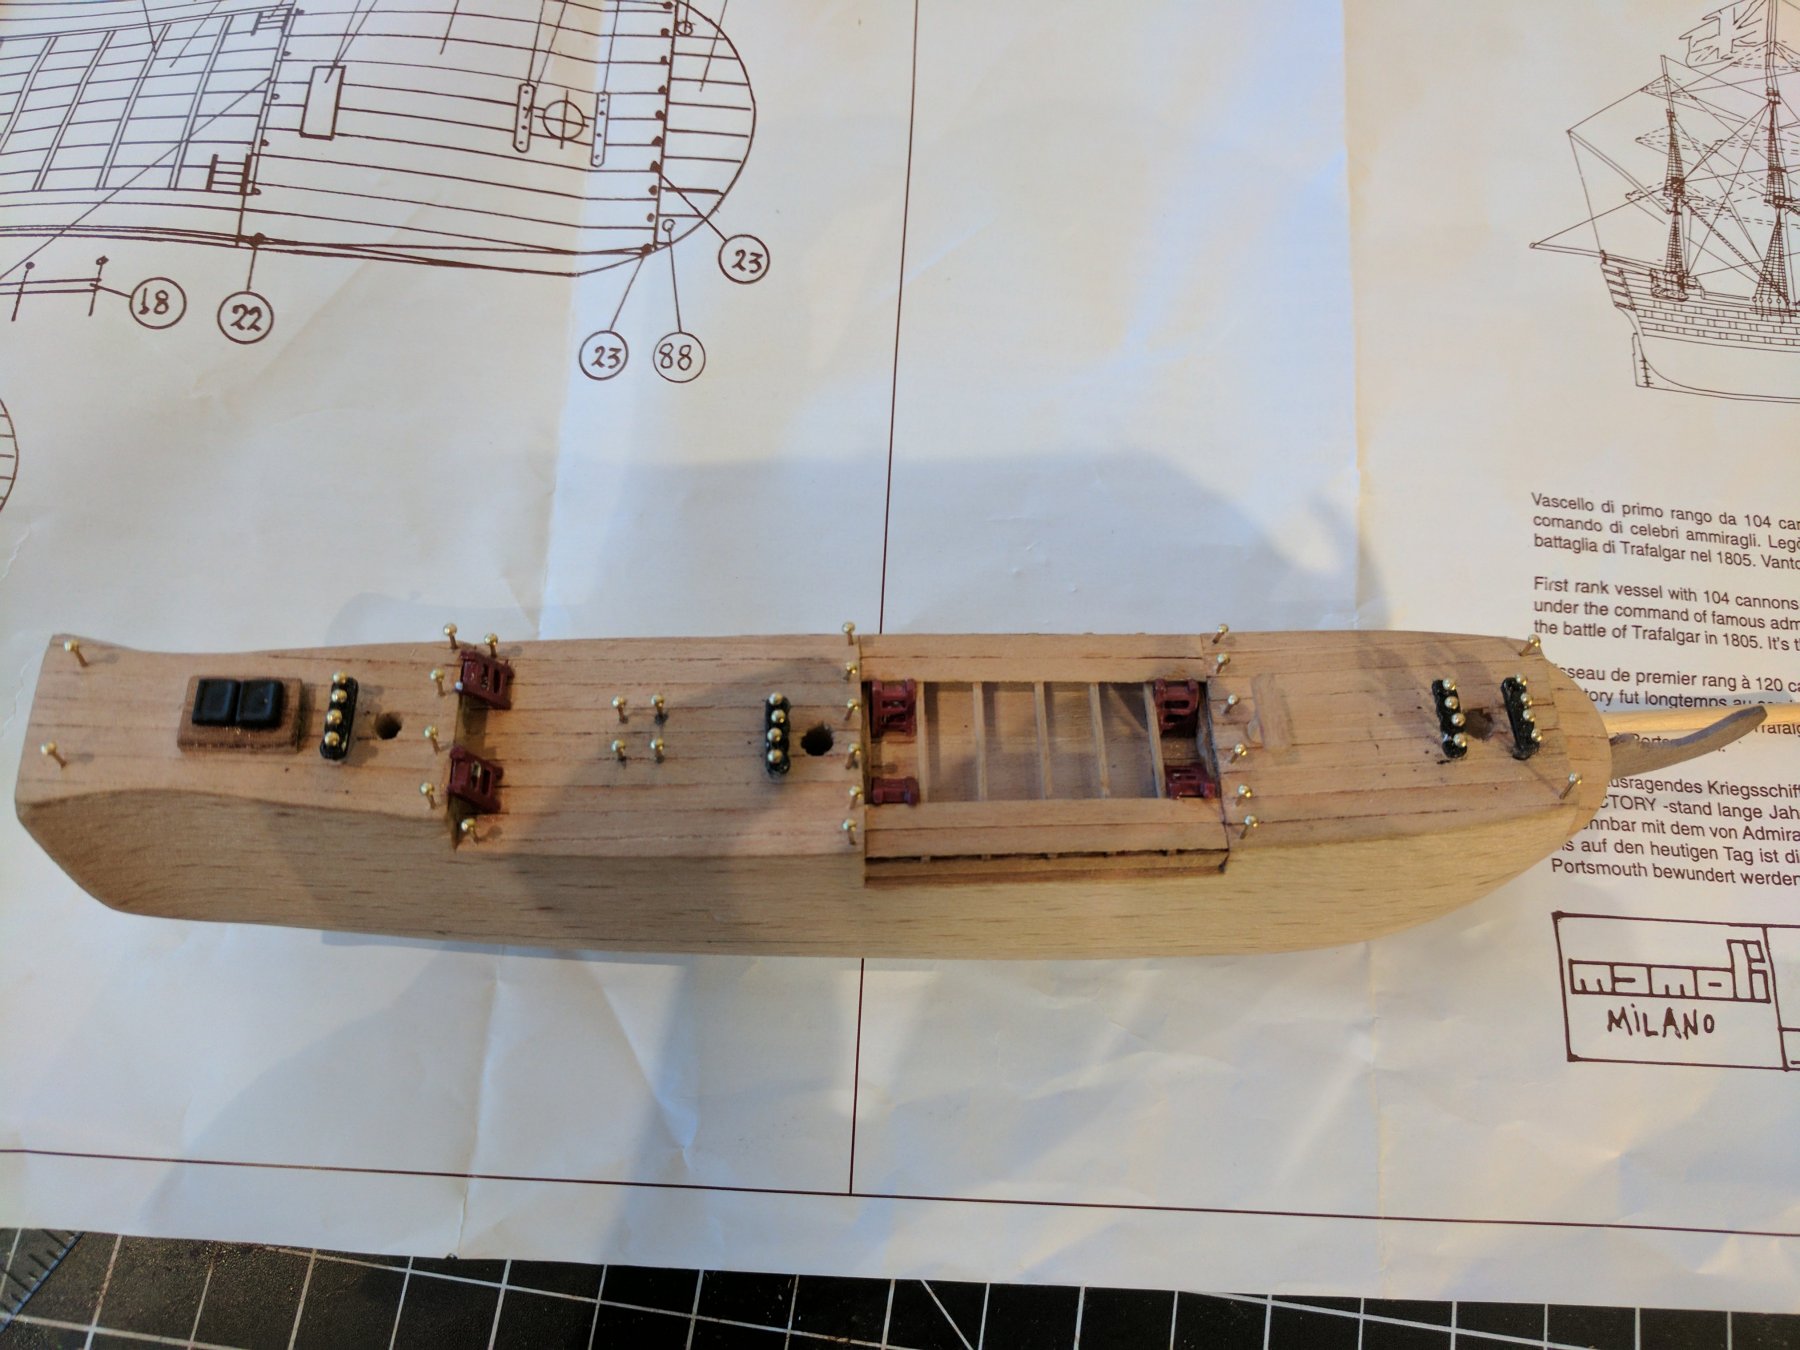
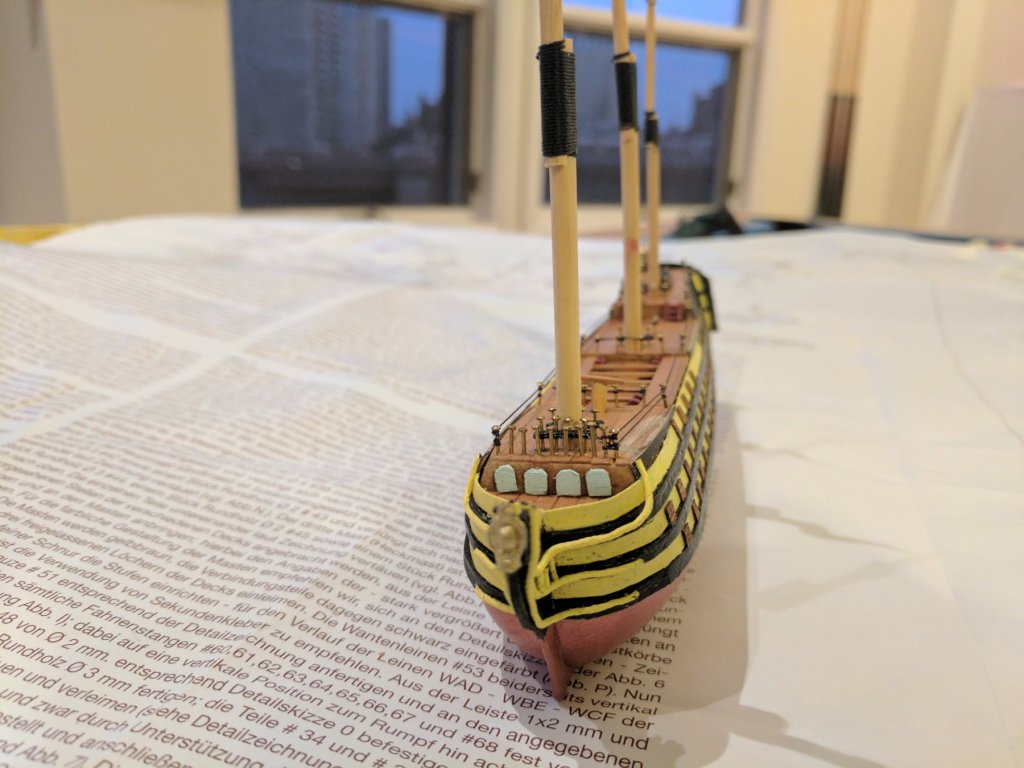
Progress continues! With the extra parts in hand, the deck is finished, side boards have been placed, transom fitting added, and gun ports made. The gun ports are a little all over the place in sizes, but hopefully, when the whole thing is complete it won't be that noticeable (along with my other, many mistakes!). Unfortunately, I broke the stem of one of the aft lanterns. I'm going to try and drill a hole and put a new stem in - fingers crossed that goes ok. Next step is to complete the decorative work around the bowsprit, then it is off to rigging!

- 23 replies
-
- 2
-
-
- Victory
- Mini Mamoli
- (and 1 more)
-
vann reacted to a post in a topic:
HMS Victory by vann - FINISHED - Mini Mamoli - Scale 1:325
-
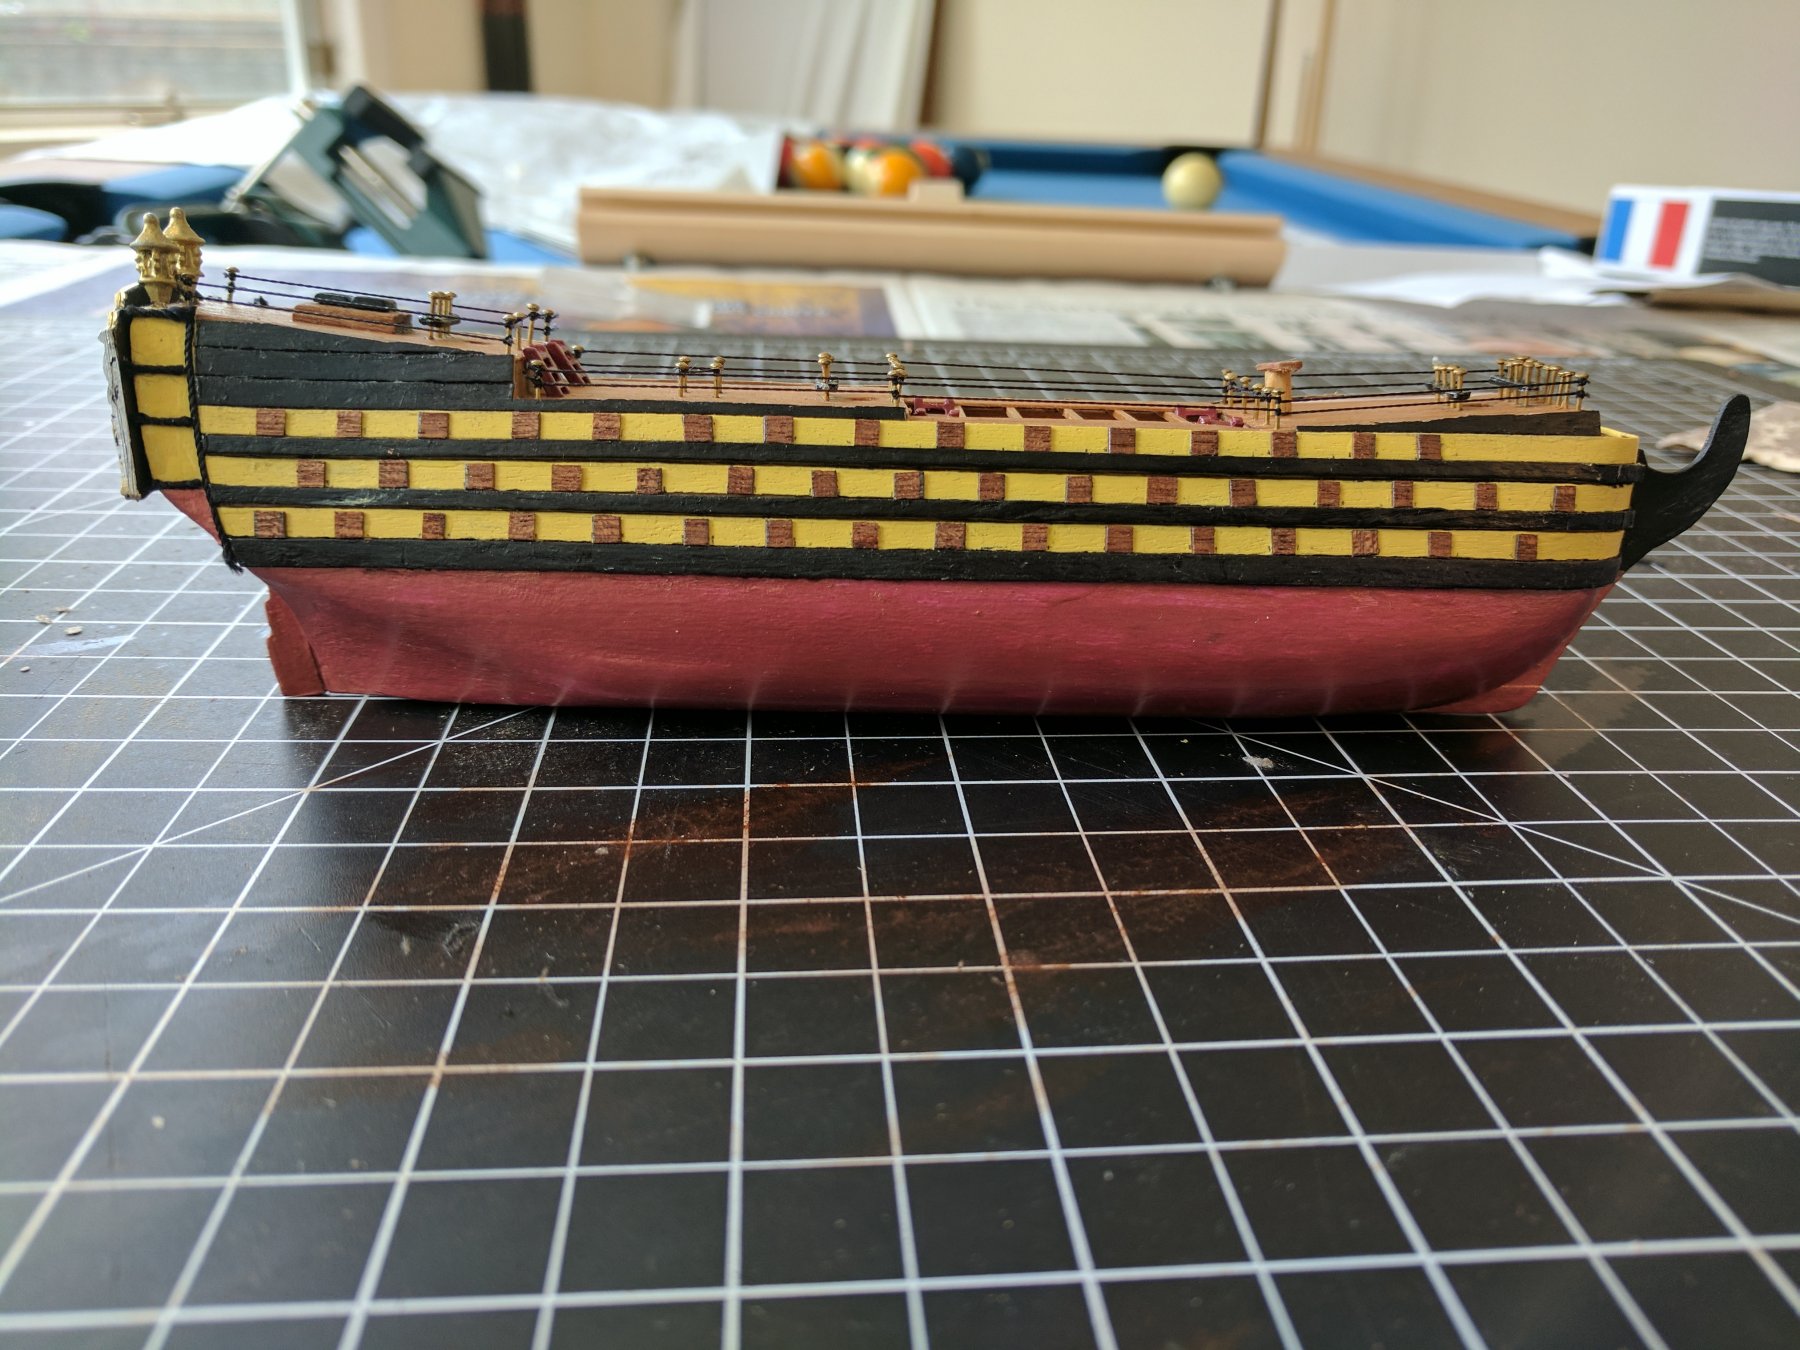
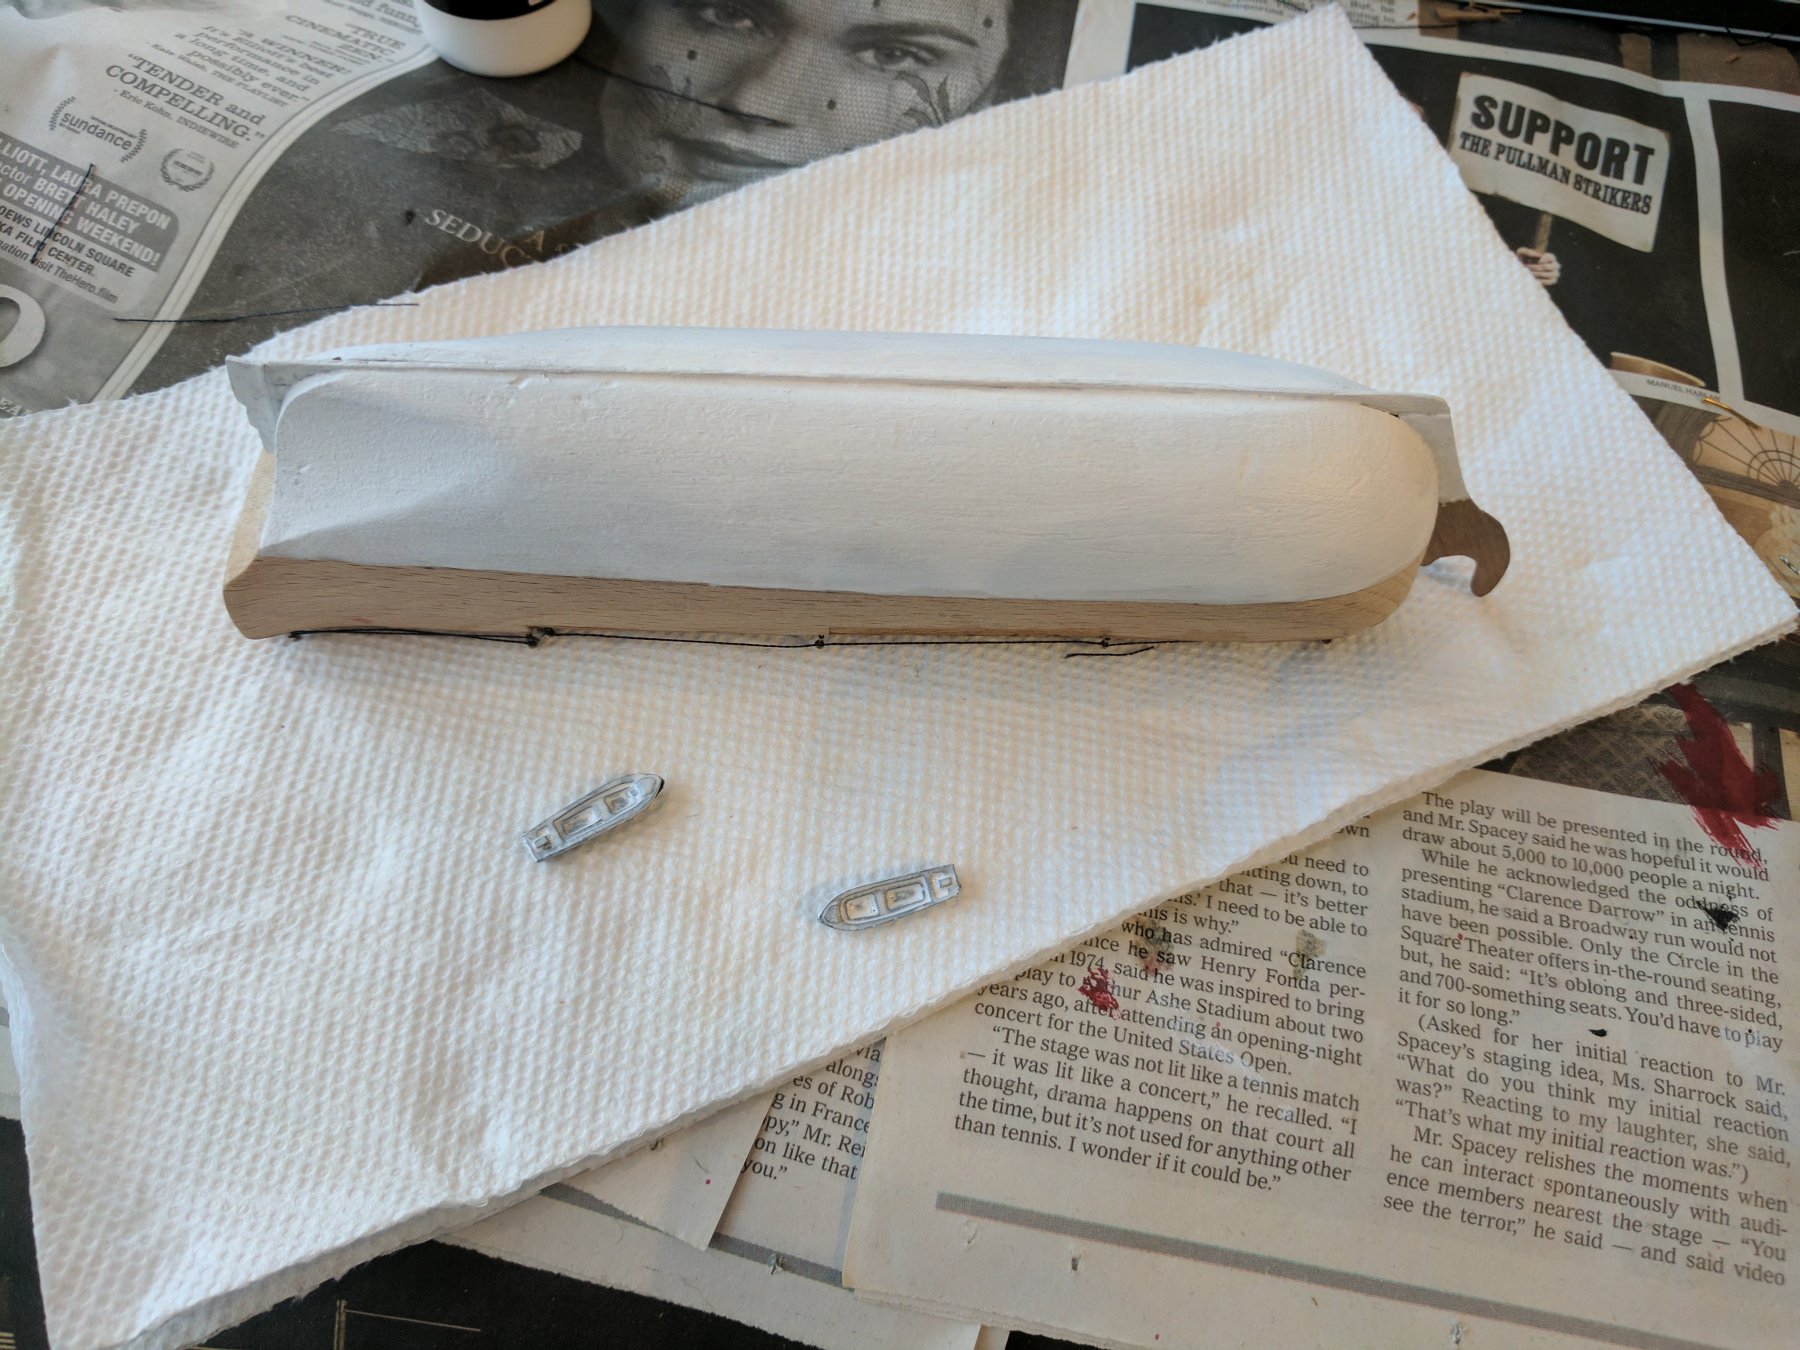
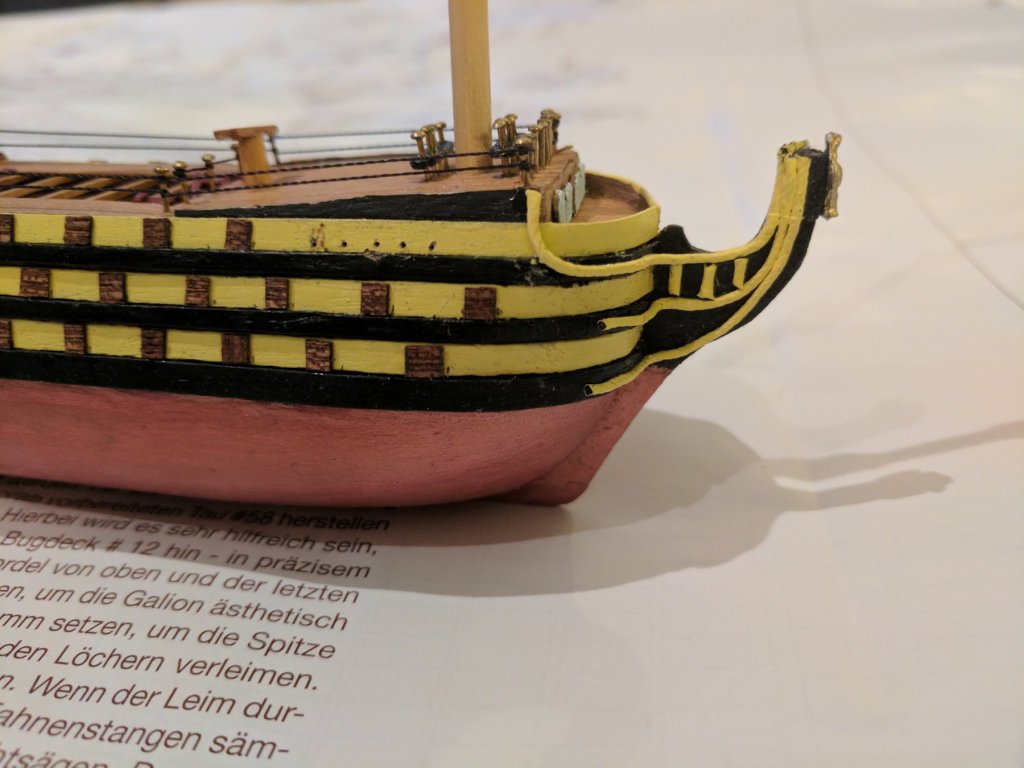
Yes, no deadeyes! But, those ratlines will be a challenge. I may end up with something approximating something approximating the shrouds and ratlines! Additional progress. The first couple coats of paint are on the bottom. I'll add one more before it is done. And, while I'm still waiting on lumber, I went ahead and started with the port side as I had enough to get it done. Coming together reasonably well. I followed the instructions carefully, but think I should have started my sideboards lower on the hull. There isn't really space to have another black strip over the top yellow. But, I think I can make it look reasonable anyway.

-
vann reacted to a post in a topic:
HMS Victory by vann - FINISHED - Mini Mamoli - Scale 1:325
-
The next big step is to add the planking on the topsides which will provide the black and yellow bands and gun ports. But, alas, I'm still waiting on my planks to arrive. In the meantime, I've started working on the copper paint for the bottom. I'm not much of a painting expert (well - I'm not much of an anything expert in ship modeling!), so hopefully, this will come out ok. The copper paint I have looks a bit to copper colored to me, but perhaps it will work out.
-
Made some more progress. The additional lines and brass tacks arrived from ModelExpo, so I was able to complete the deck. Added a couple coats of polyurethane to the deck - fortunately I was thinking a slight bit and did so *before* I rigged all the lines. The deck is looking reasonably good.

- 23 replies
-
- 1
-
-
- Victory
- Mini Mamoli
- (and 1 more)
-
vann reacted to a post in a topic:
HMS Victory by vann - FINISHED - Mini Mamoli - Scale 1:325
-
vann reacted to a post in a topic:
HMS Victory by vann - FINISHED - Mini Mamoli - Scale 1:325
-
Thanks, Antony! I'm enjoying it so far, but see some challenges ahead. The rigging is going to be interesting! Some progress over the last couple days. I've almost finished the deck fittings, but have run into a couple issues: 1) There aren't enough nails to fill all the spots in the plans. I've ordered some more which will hopefully look close enough. 2) I seem to be short one 1x3mm plank. Ordered more walnut planks. I may run close on the 0.5x3mm but as Model Expo is backordered, I'm going to see how far I can stretch what I have. I may be able to get it done with scraps. A bit annoying - particularly since I'm running into the issues one by one. Model Expo is making a fortune in shipping fees off of me! But, at this point I'm committed... Next step is to start working on the painted sideboards which provide the form of the gun decks. Should get interesting from here!

- 23 replies
-
- 3
-
-
- Victory
- Mini Mamoli
- (and 1 more)
-
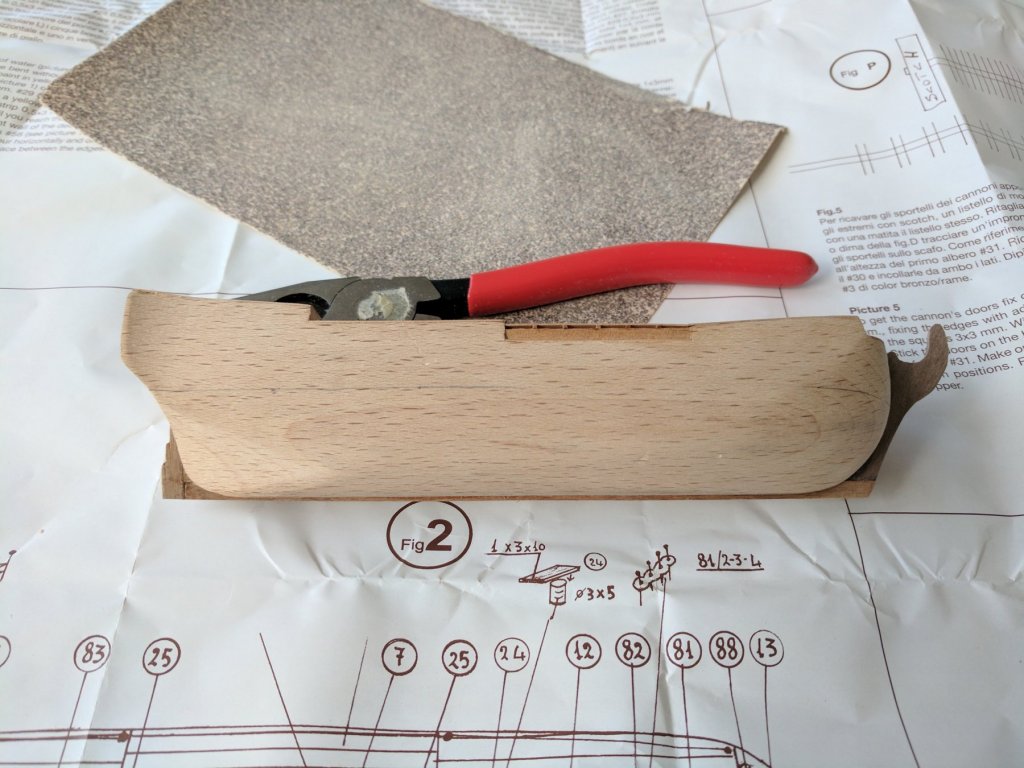
And constructed the keel. The transom/rudder didn't quite line up like the instructions indicated they should, so I improvised a bit. I think it looks close enough for my standards.
- 23 replies
-
- 1
-
-
- Victory
- Mini Mamoli
- (and 1 more)
-
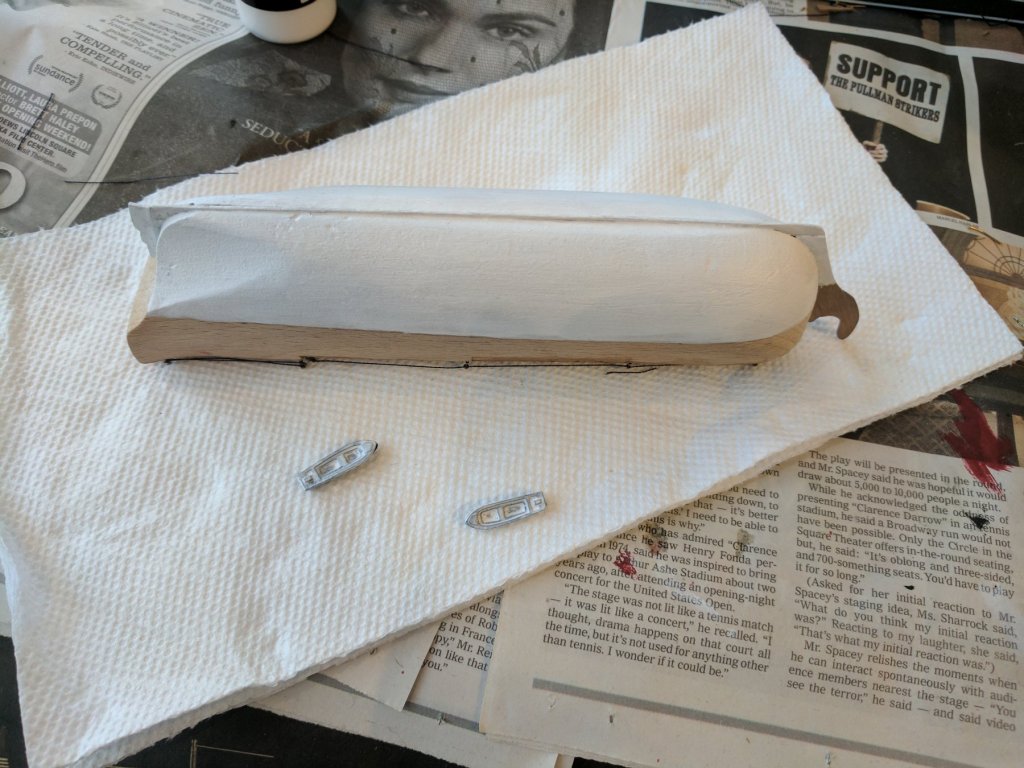
Completed the decking. I considered cutting the boards down into smaller lengths, but considering that the scale is already crazily off, I decided that full length was good enough.

- 23 replies
-
- 1
-
-
- Victory
- Mini Mamoli
- (and 1 more)
-
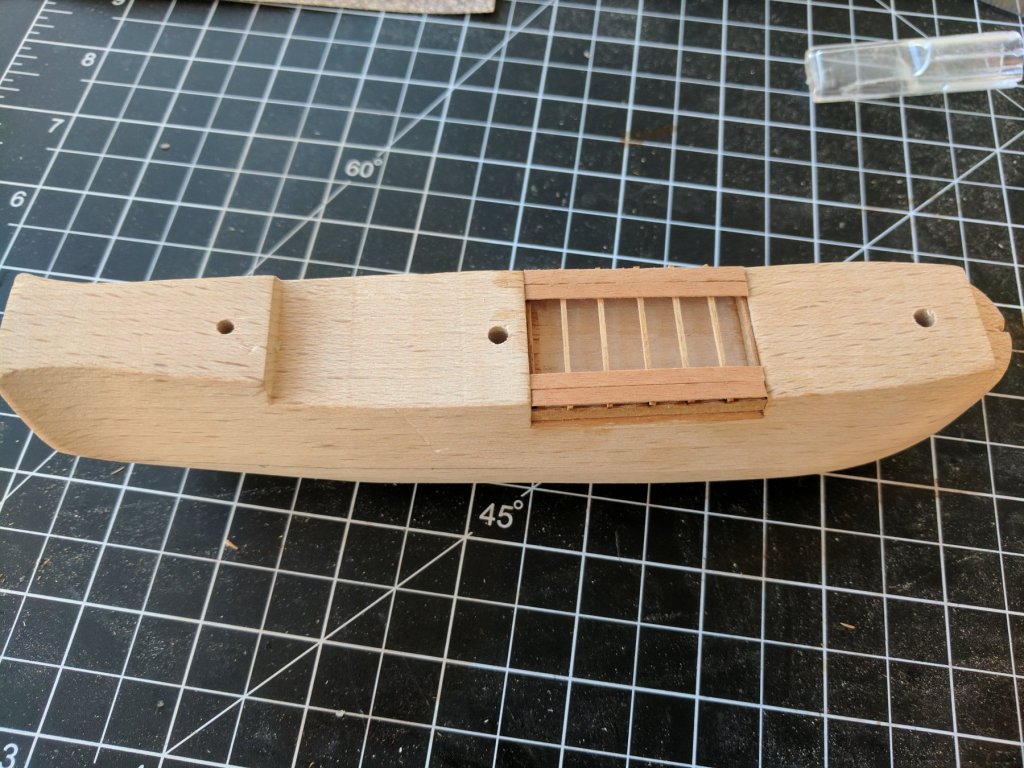
Step 1 - Sanded down the transom to the right angle and created the "box" for the open part of the deck.
-
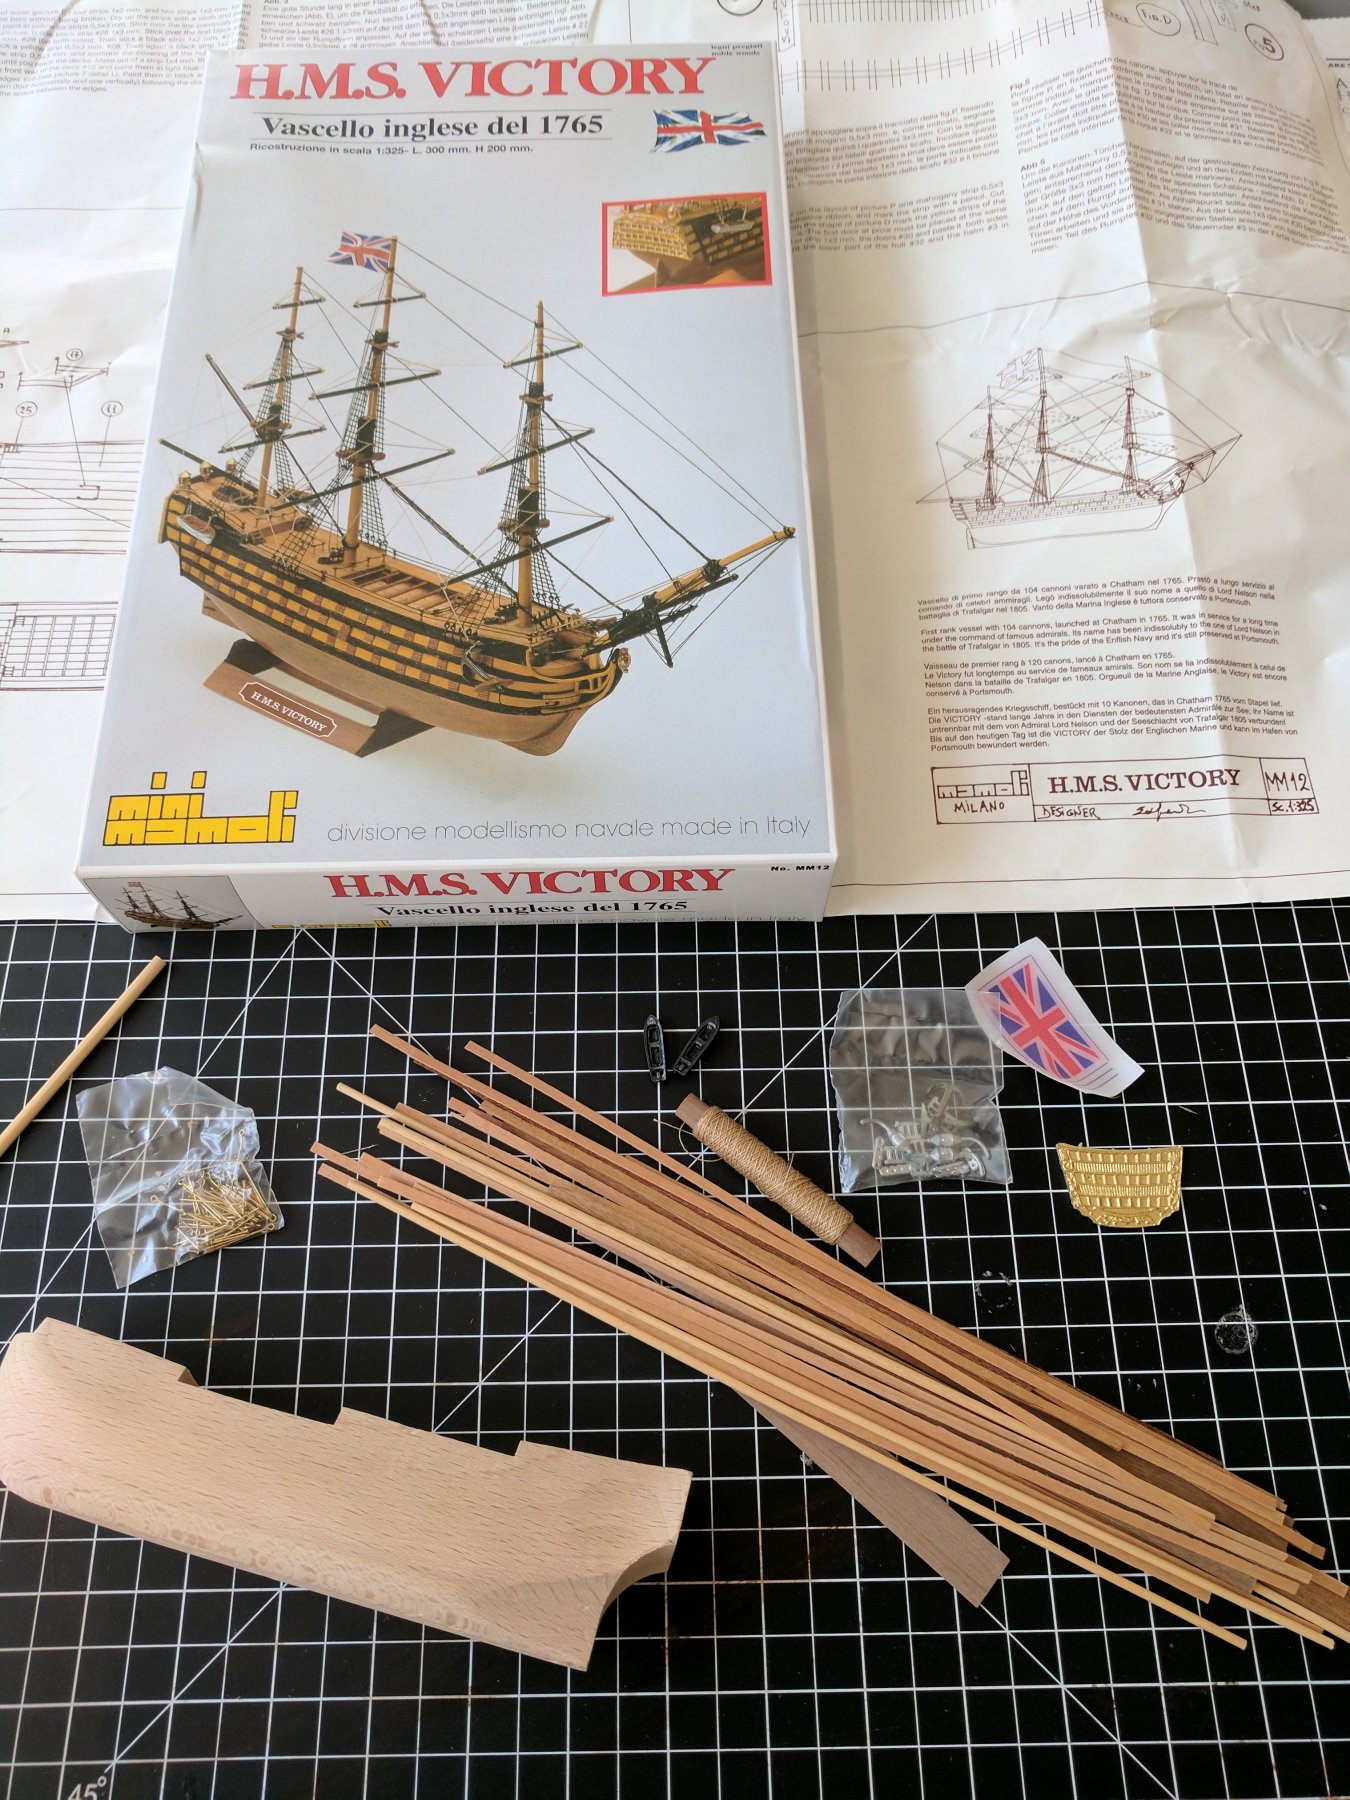
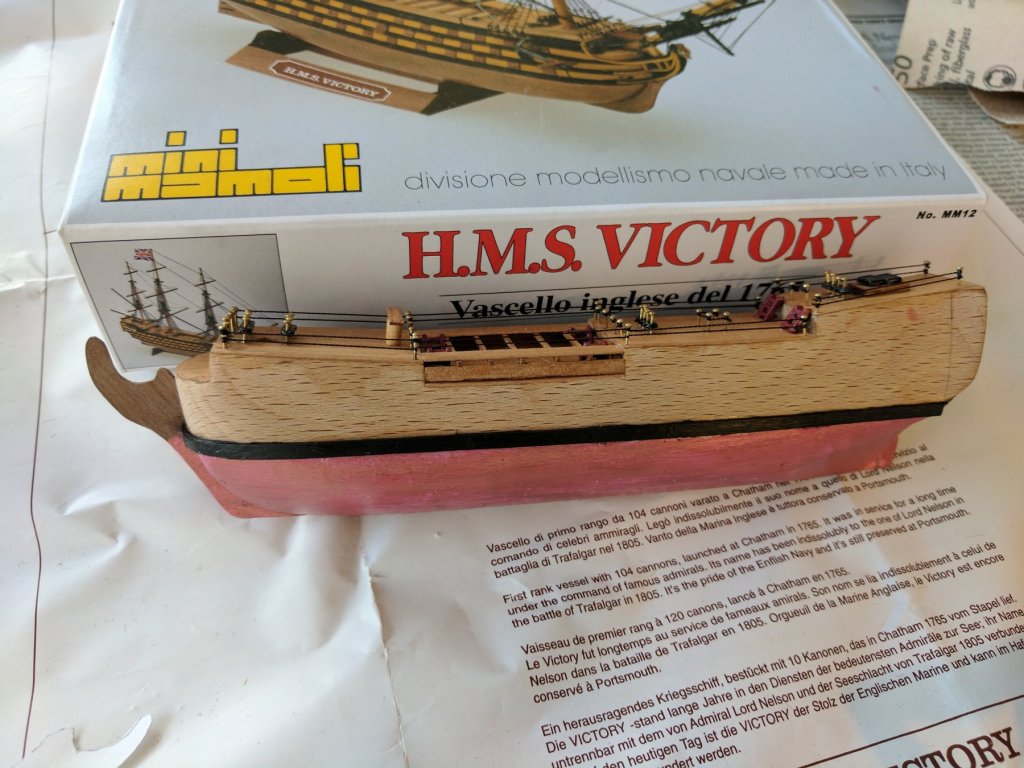
I thought I'd take on another relatively quick project and picked up a Mini Mamoli kit for the HMS Victory off eBay. I had been excited to hear that @Daniel Dusek was bringing the Mini-Mamoli kits back, but didn't have the patience for the supply pipeline to get rolling again. For the moment, they seem to be fairly available on the second-hand market and hopefully, Daniel gets the new kits rolling along soon. The Mini-Mamoli kits are billed as being for complete beginners, but while they clearly aren't full-scale models, I'm skeptical that many people would finish in the 15-20 hours that I've seen claimed. I'd spend that long on just the painting! But, in theory, I should be able to advance to the rigging reasonably quickly - and then we'll see how long that takes! Another thing for which to be prepared - The instructions are pretty poor. They are translated from Italian which doesn't help, but I'm pretty sure that even in Italian they leave out a lot of details/steps. So, be prepared to be a little innovative. Hopefully Daniel will be able to improve on the instructions with the new kits. Also - I feel like doing the project "right" requires more materials. The kit comes with a single diameter manila cordage, but the kit will look a lot better with some varied thicknesses of black cordage. I've ordered some from ModelExpo which hopefully should be here soon.

- 23 replies
-
- 1
-
-
- Victory
- Mini Mamoli
- (and 1 more)
-
vann reacted to a post in a topic:
Indian Girl Canoe by vann - FINISHED - Midwest Products - Scale 1:12 - SMALL
-
vann reacted to a post in a topic:
Indian Girl Canoe by vann - FINISHED - Midwest Products - Scale 1:12 - SMALL
-
Oh. And, @GuntherMT's build log: