EJ_L
-
Posts
2,227 -
Joined
-
Last visited
Content Type
Profiles
Forums
Gallery
Events
Everything posted by EJ_L
-
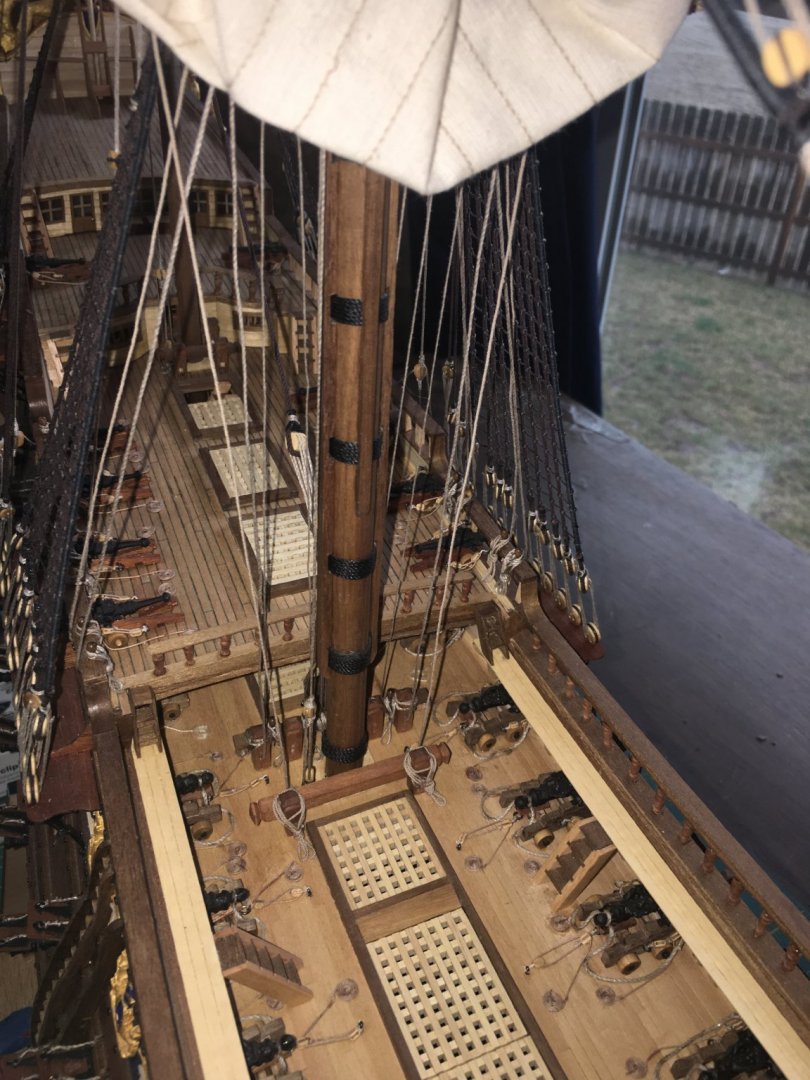
 Beautiful work and a shame indeed that it will all be covered up. You should put these pictures in a book to keep with the model so you can show the great details of these lower decks and framing.
 -
The top came out great as did the details on the hounds. I'm looking forward to seeing the decks start to come in. Have you decided what level of detail you plan to do on these lower decks? Typically, not much is visible but depending upon how the gratings line up or the open area around the gun barrels, there can be some good detail placed. I've also seen a few models where they used the chase ports with no guns in them to allow a glimpse into the lower decks. They had lighting to make things more visible but it was an interesting feature. I am thinking it may be something I model on a future build when I can scratch build those decks easier. The current builds I am working on being P.O.B.s do not allow for anything on those lower decks. Sorry to hear about the virus finding you. Best wishes to get well soon!
- 2,435 replies
-
- 6
-

-
- heller
- soleil royal
- (and 9 more)
-
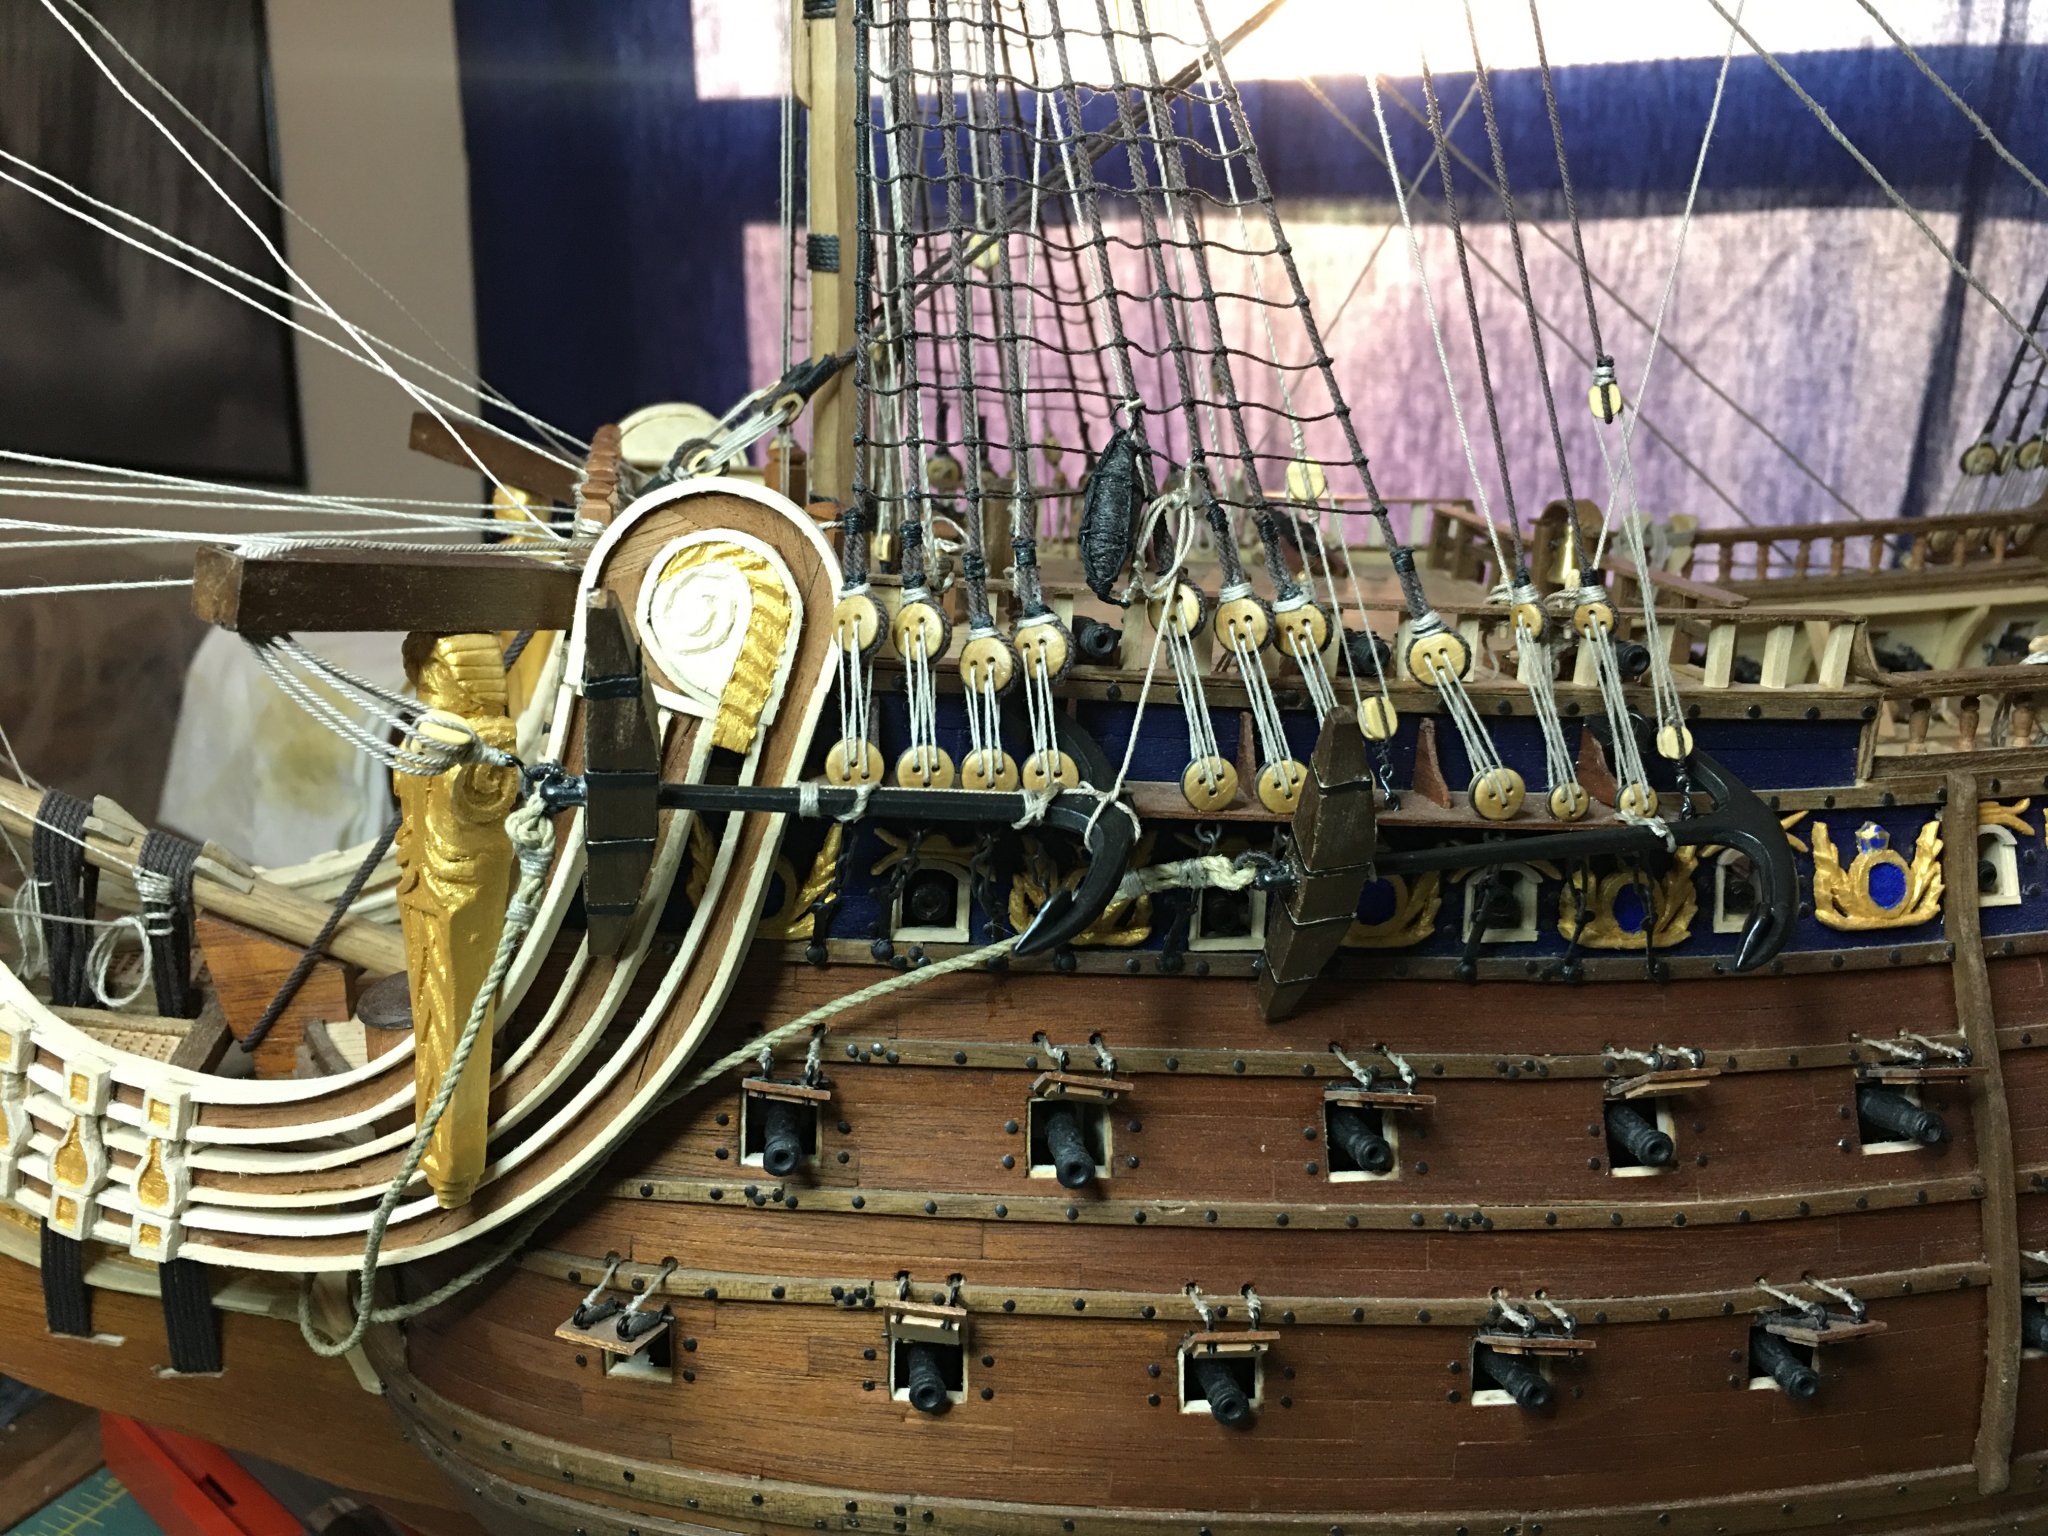
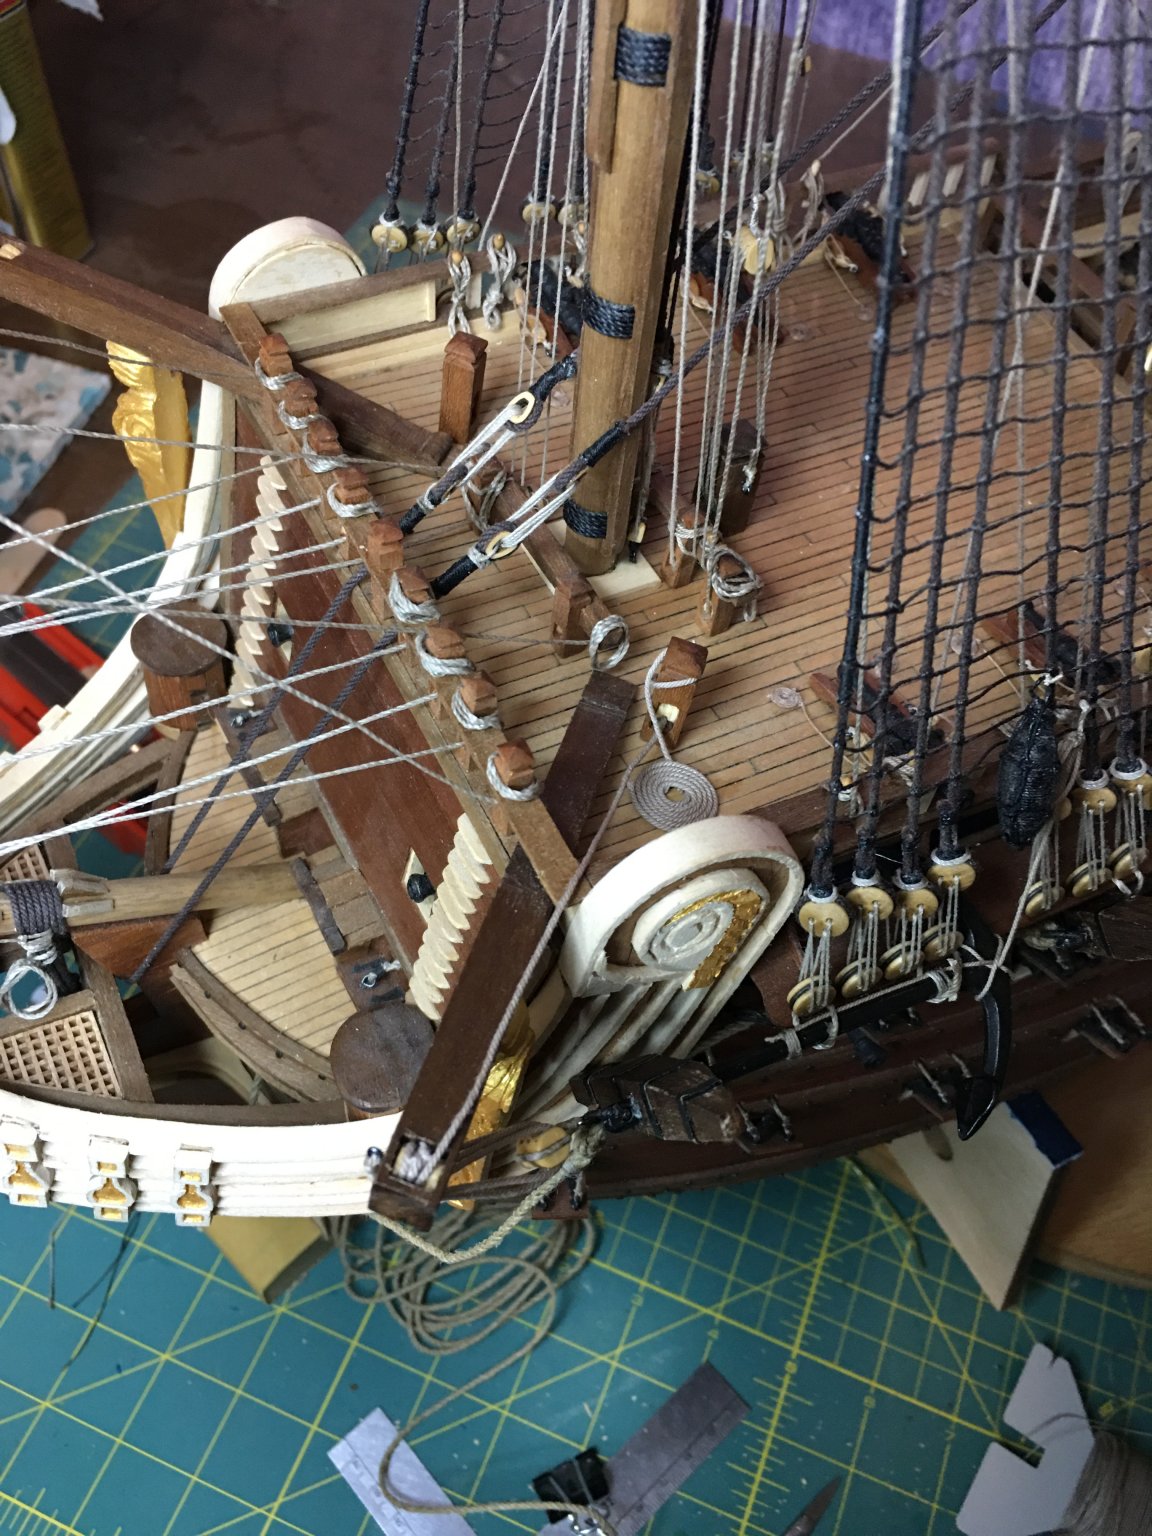
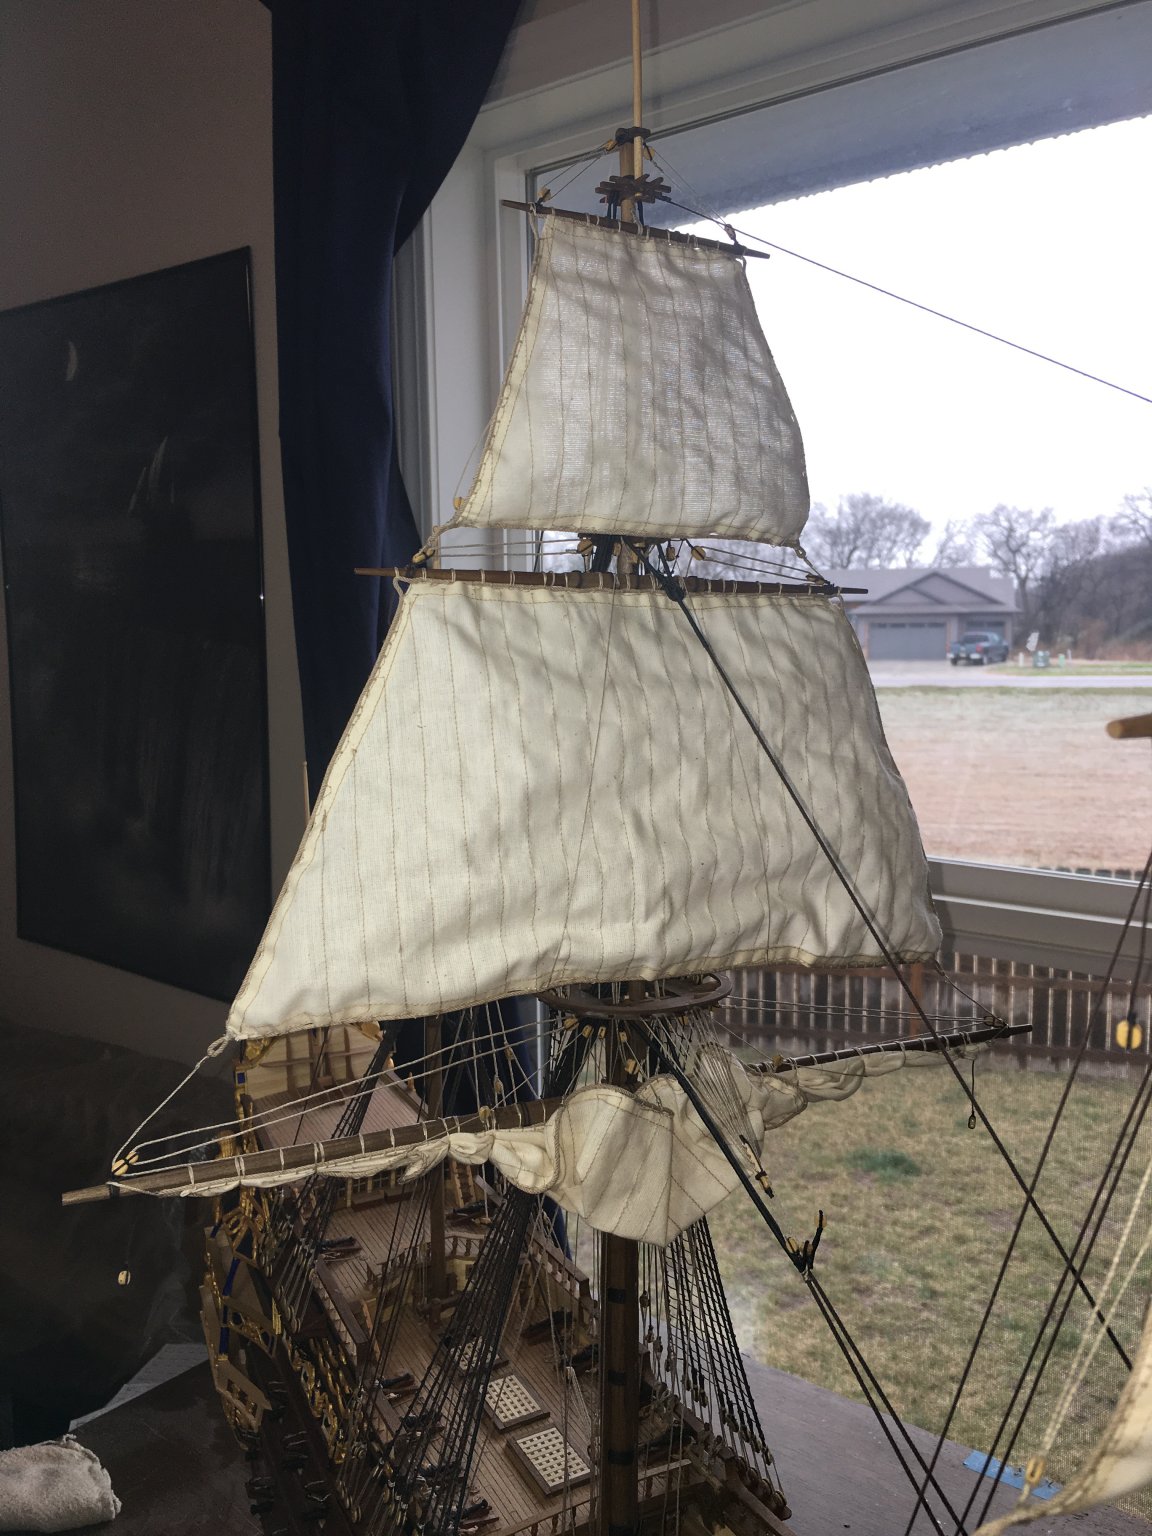
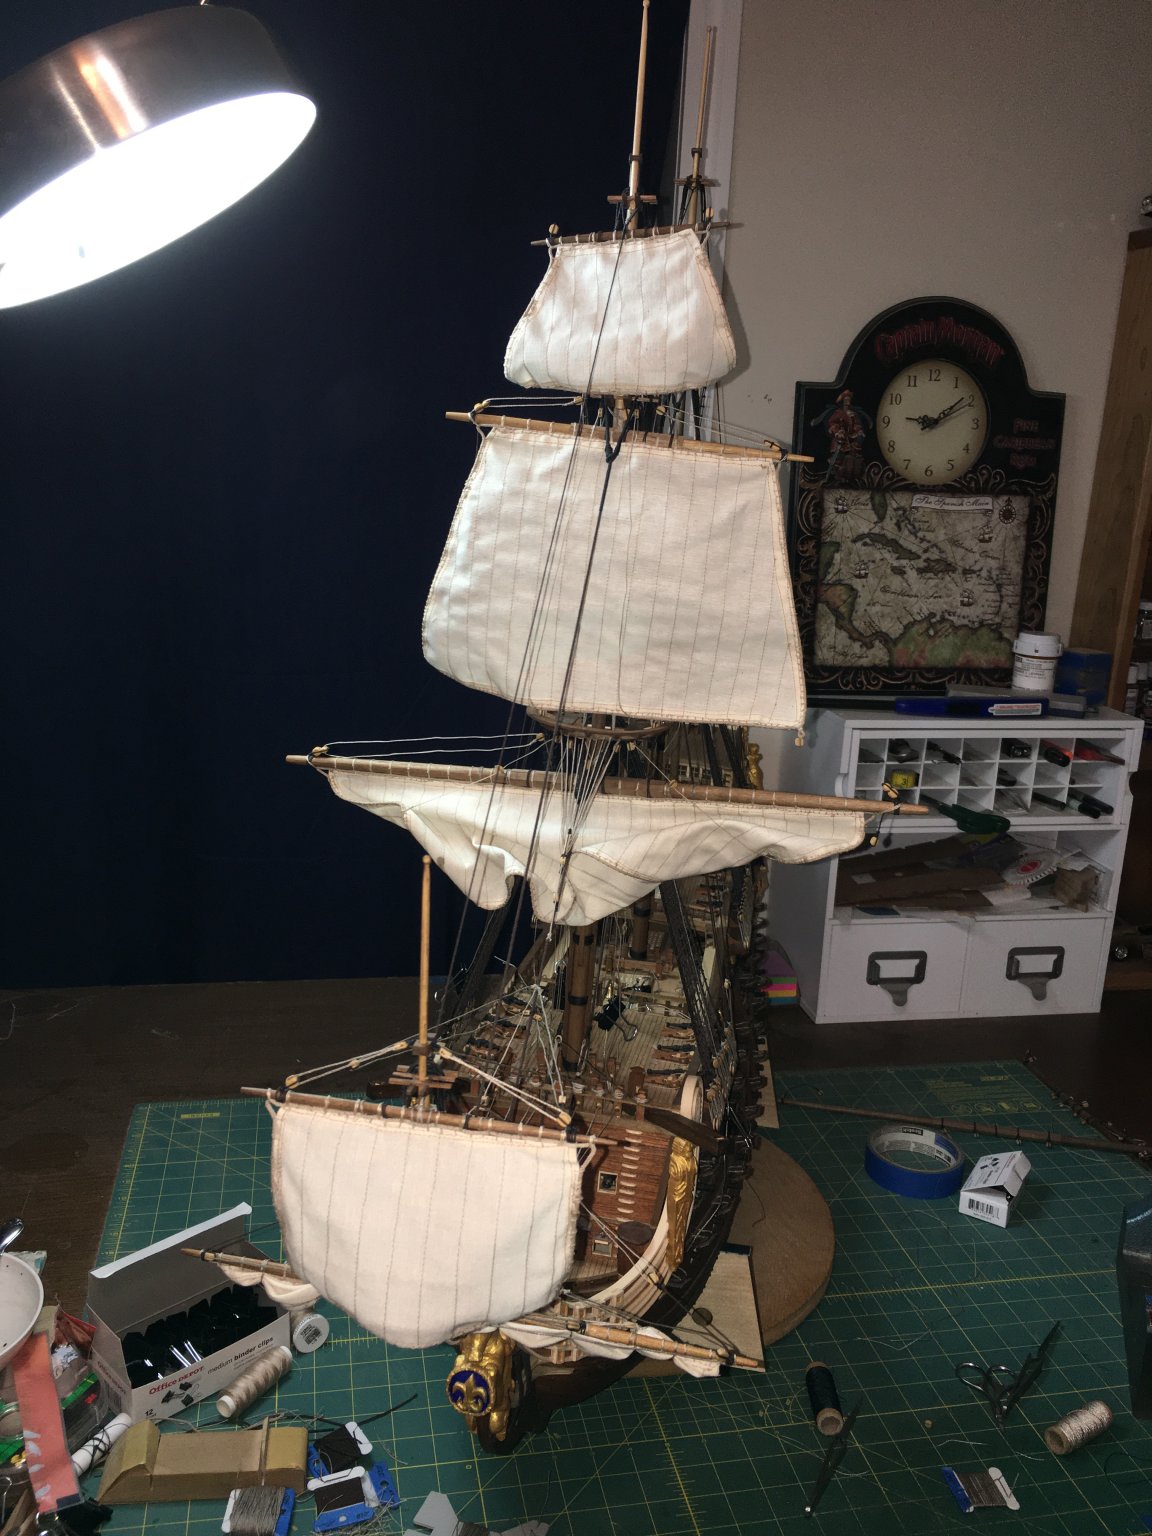
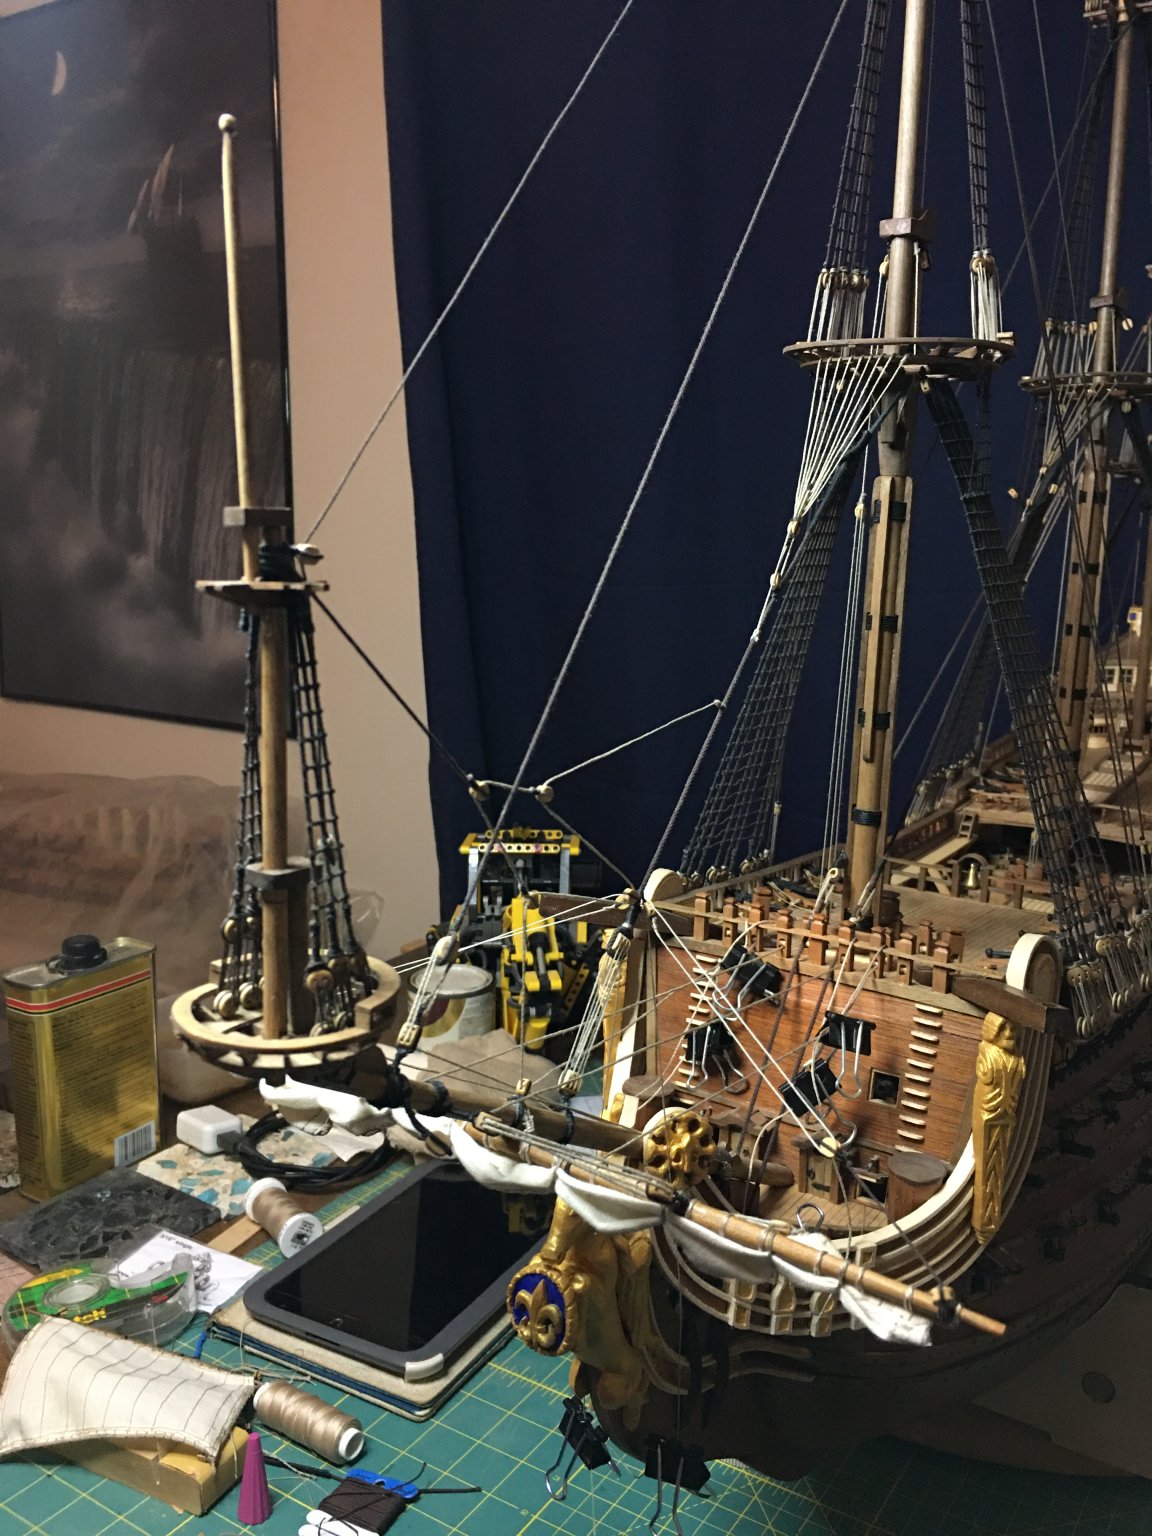
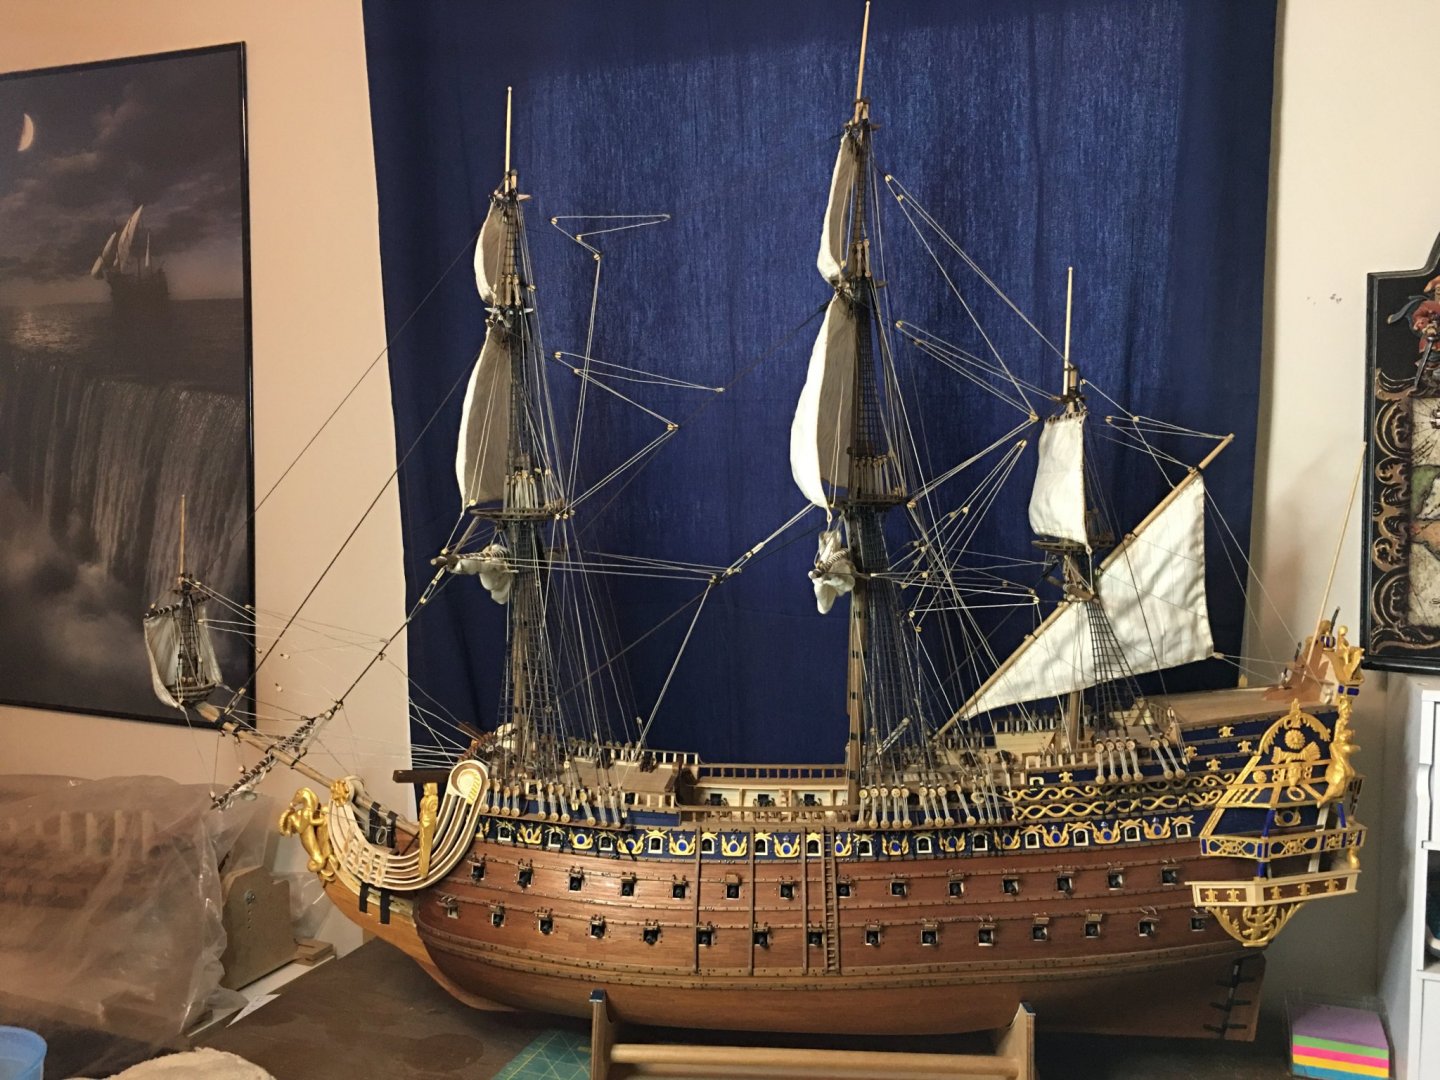
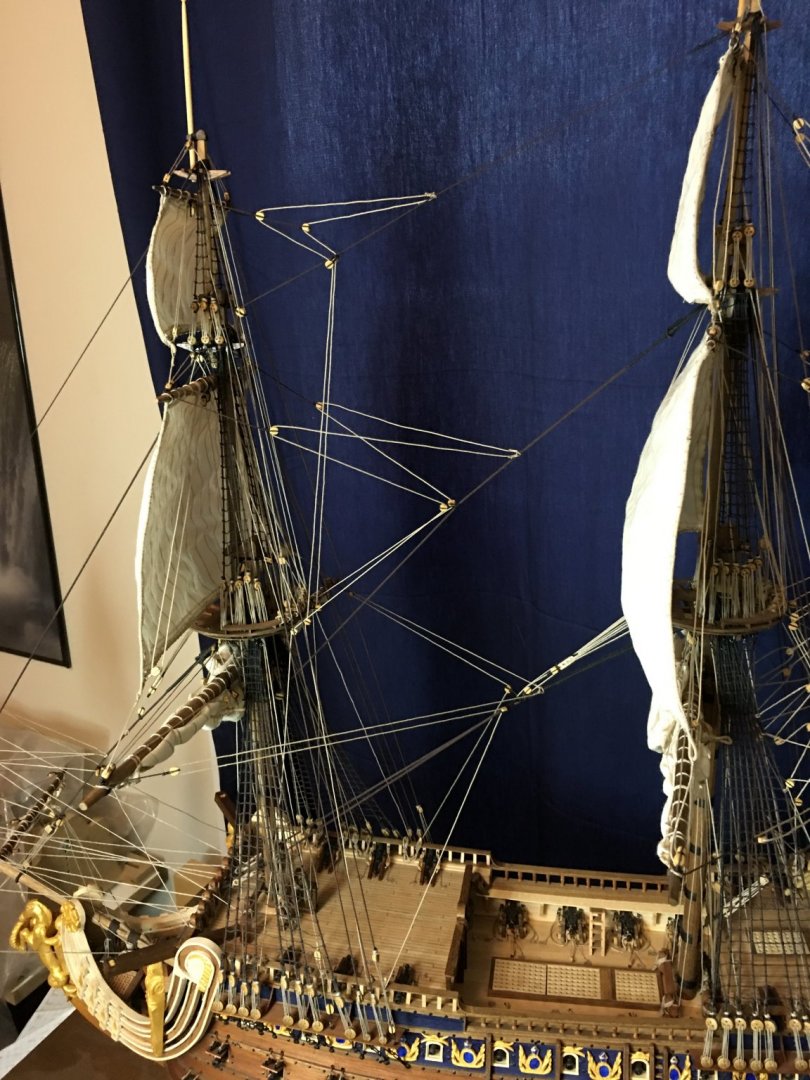
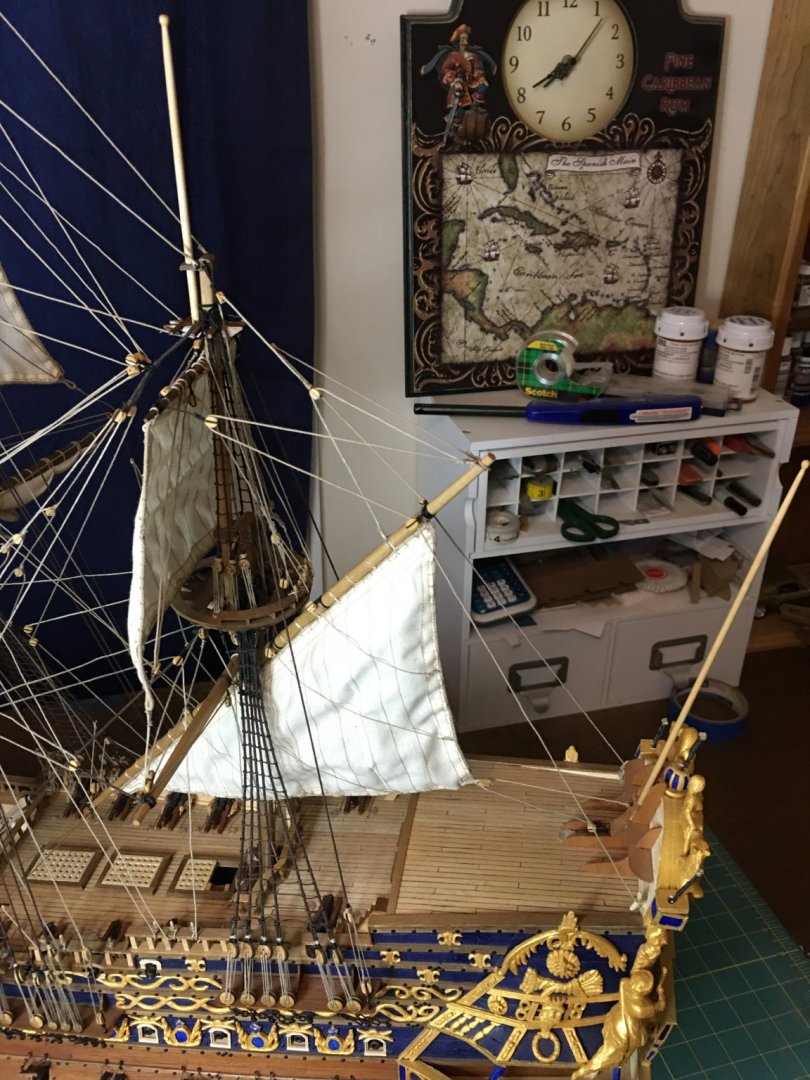
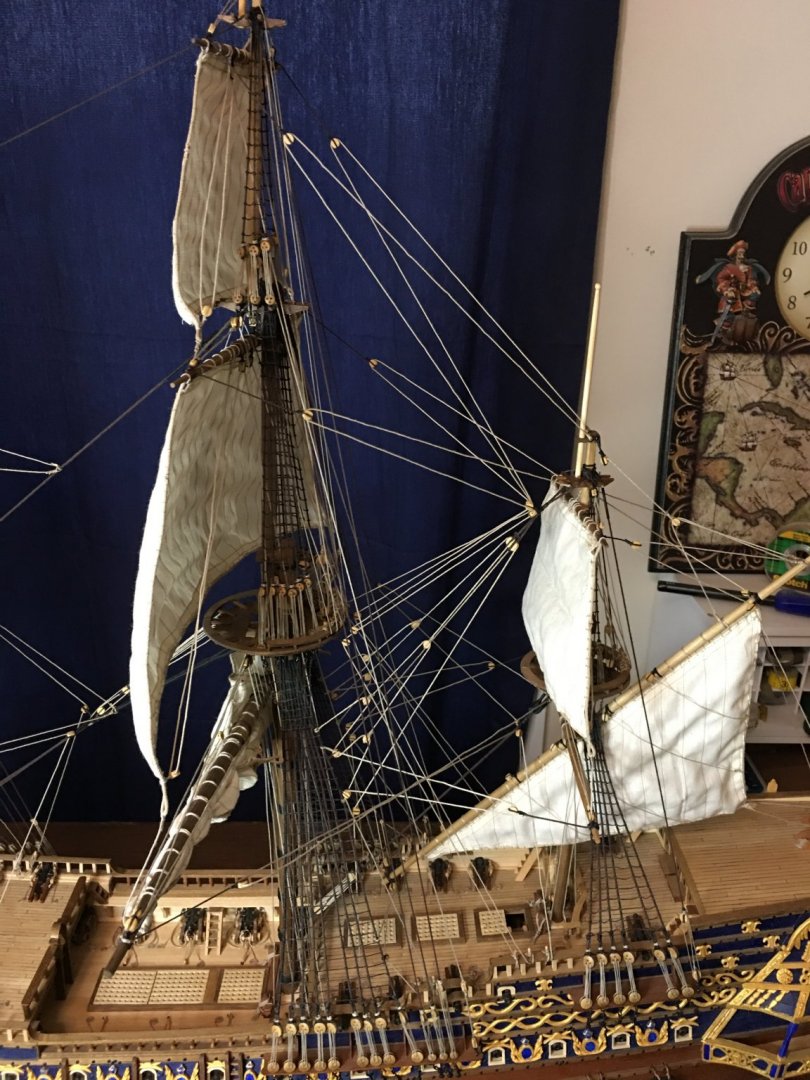
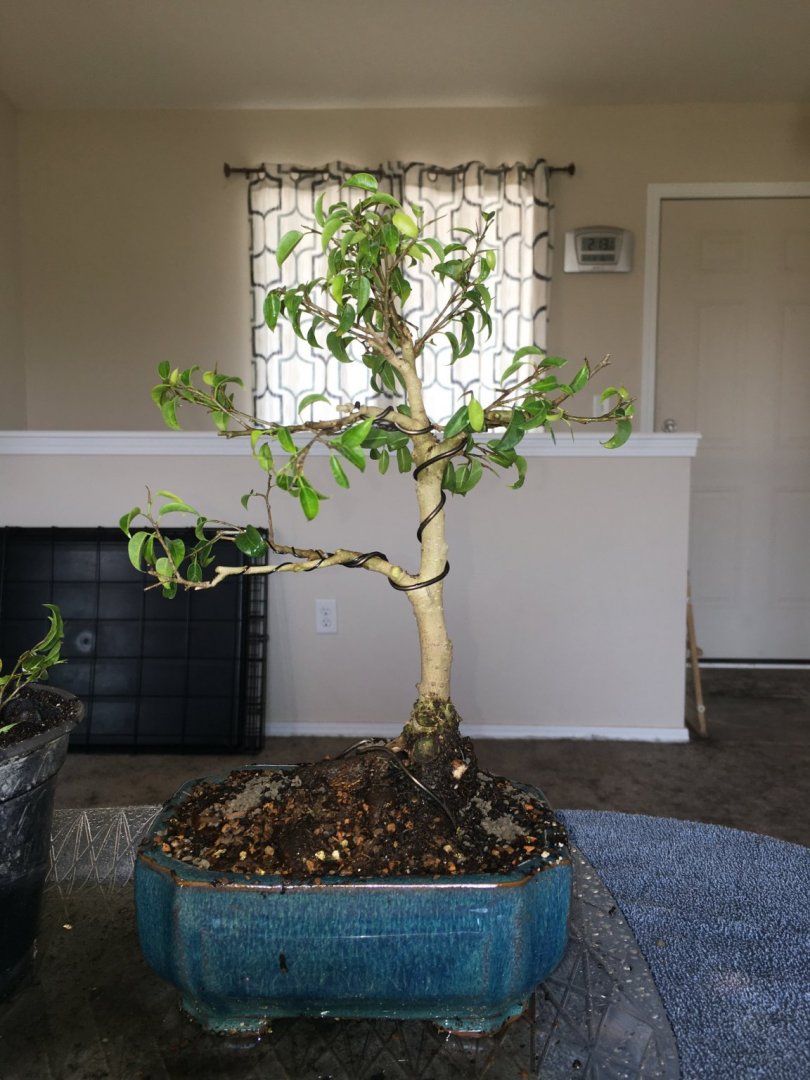
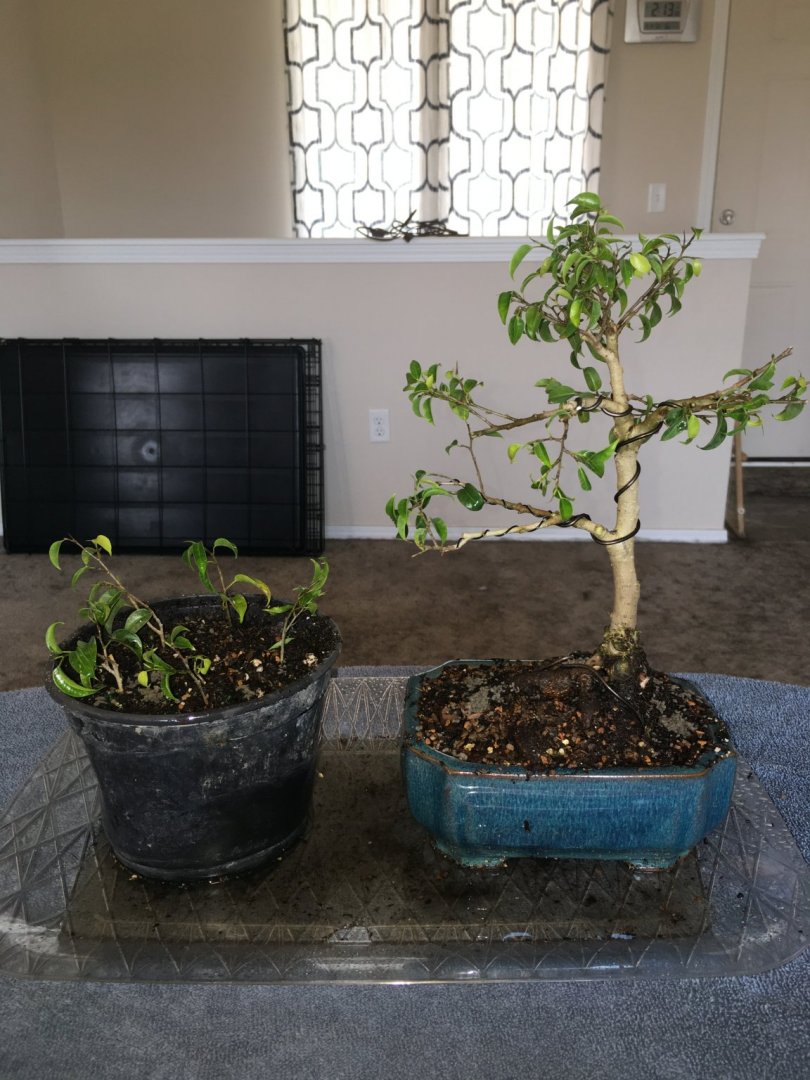
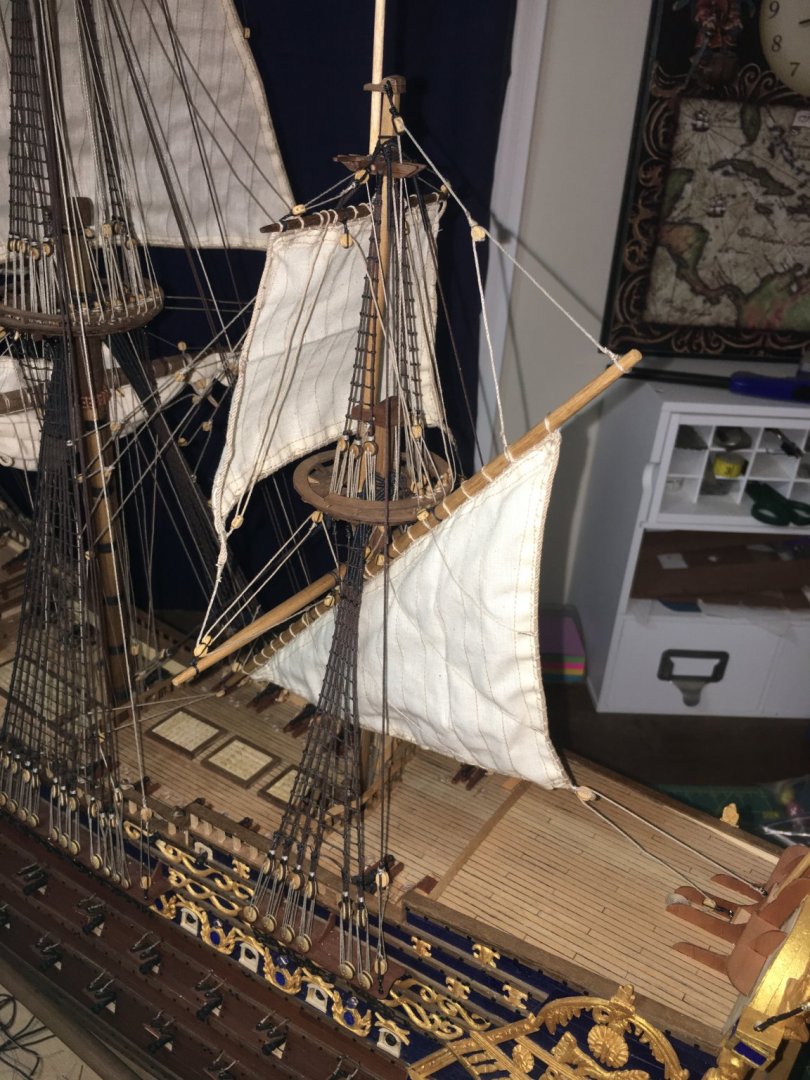
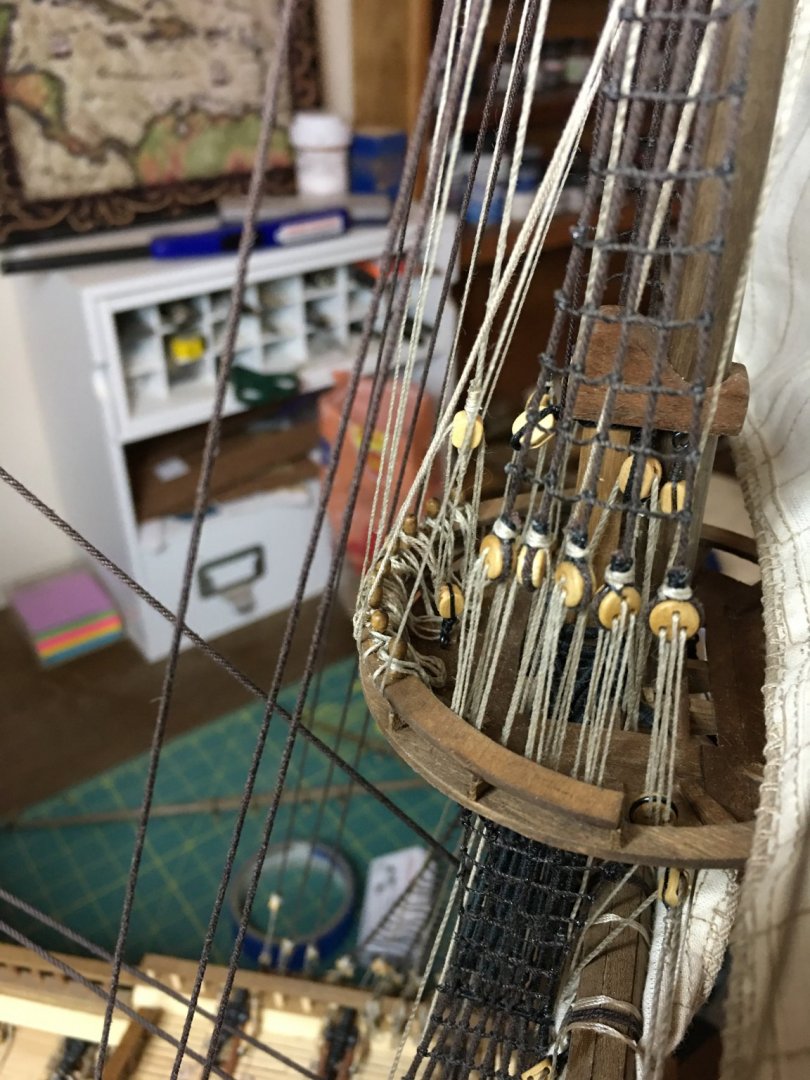
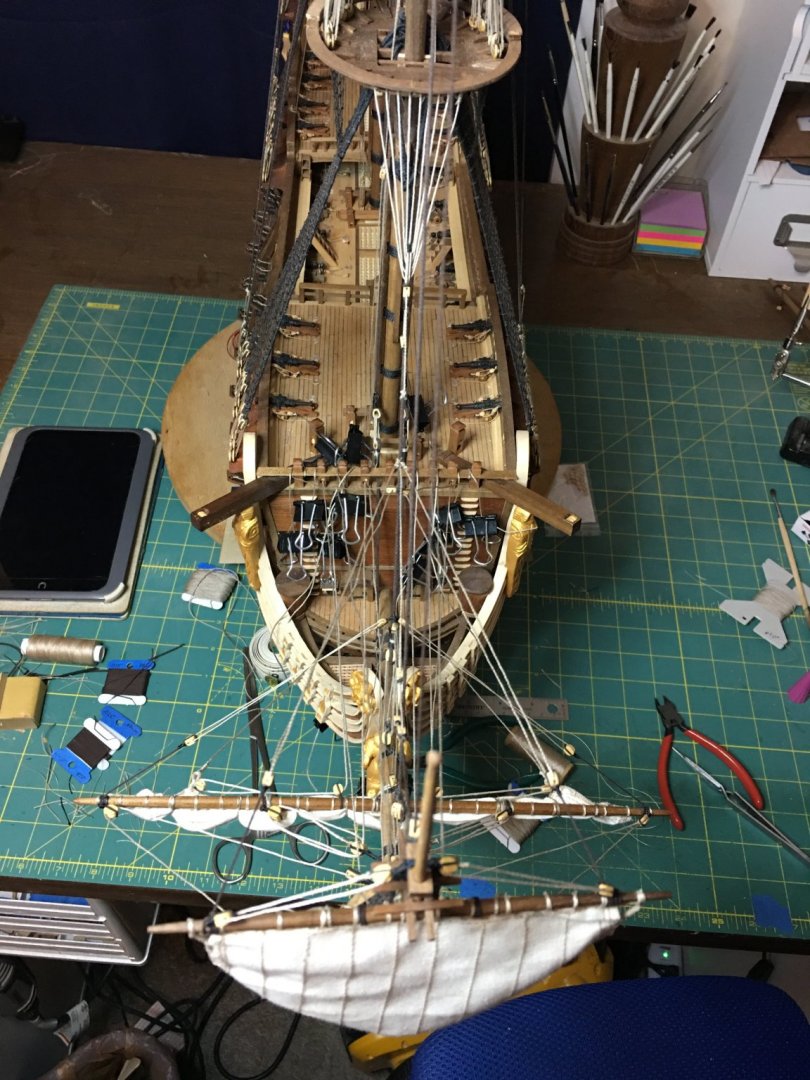
Latest update, I finished the braces for all yards. Only the fore and main course sheets left to go for sail rigging. I also dug the anchors out and will begin to assemble and install them. On a side note, I received a new bonsai tree for my birthday and spent a little time this weekend pruning and shaping it as well as replanting some of the clippings to try to propagate new plants. As always, thanks for following along and I hope everyone is staying safe and healthy.
-
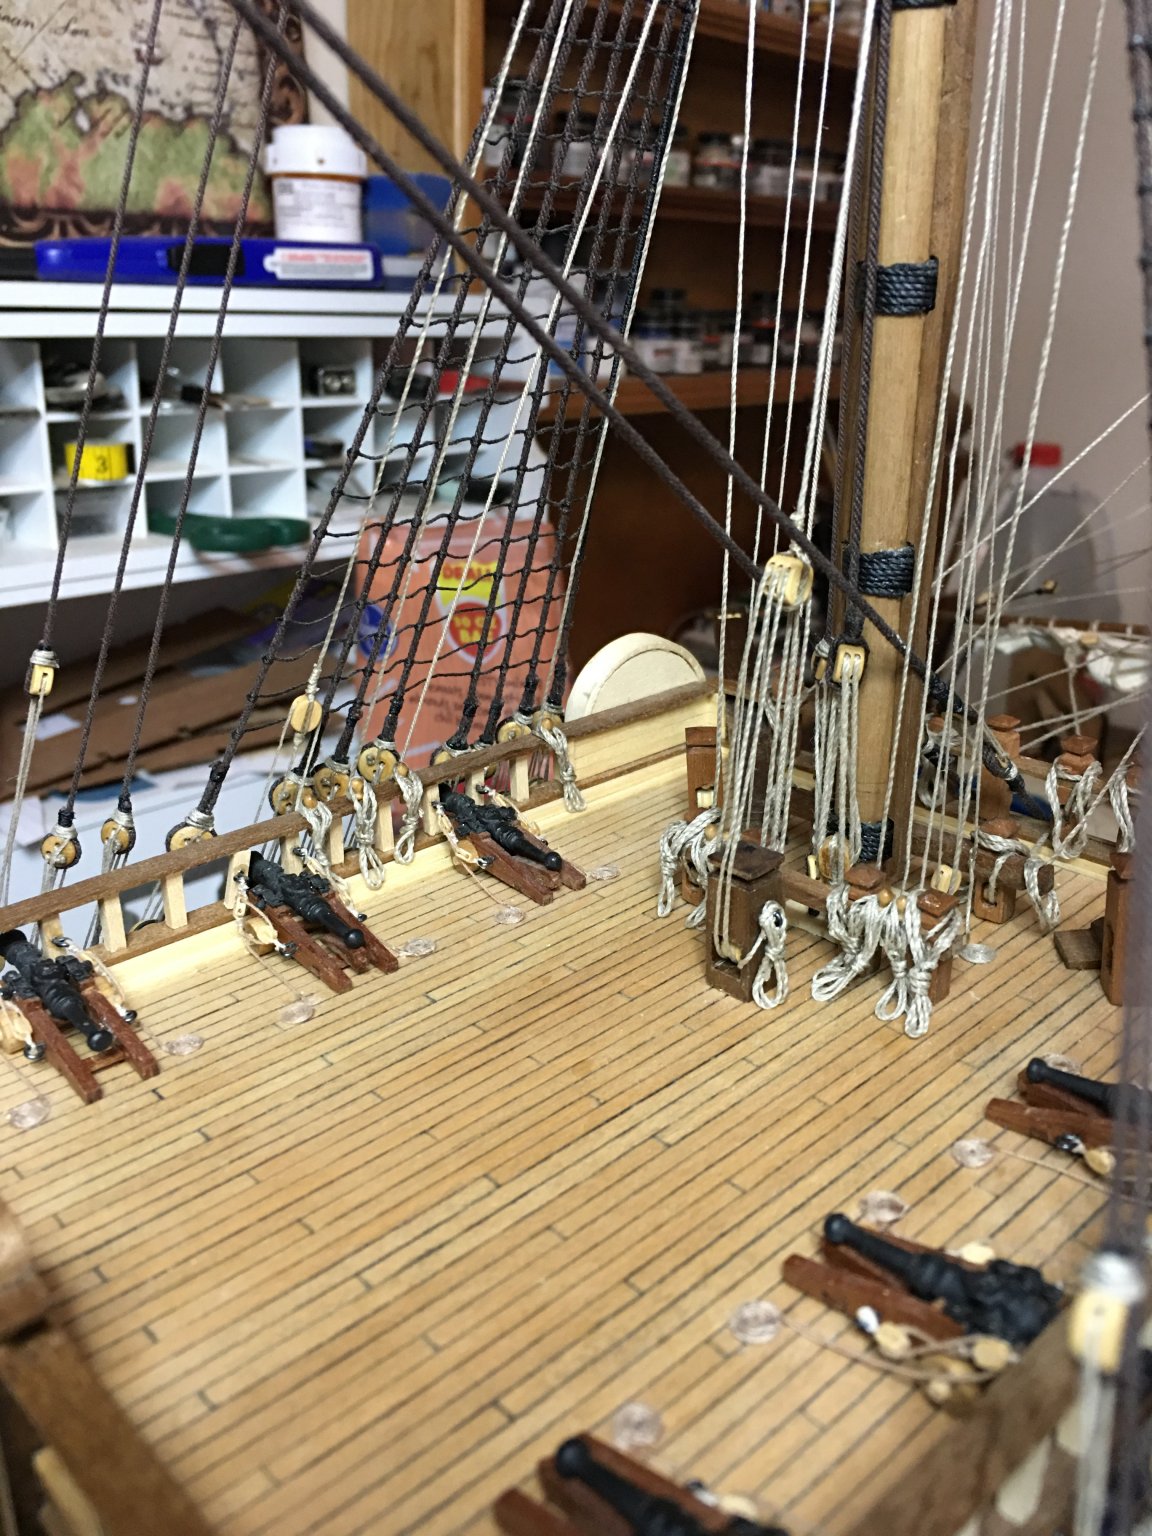
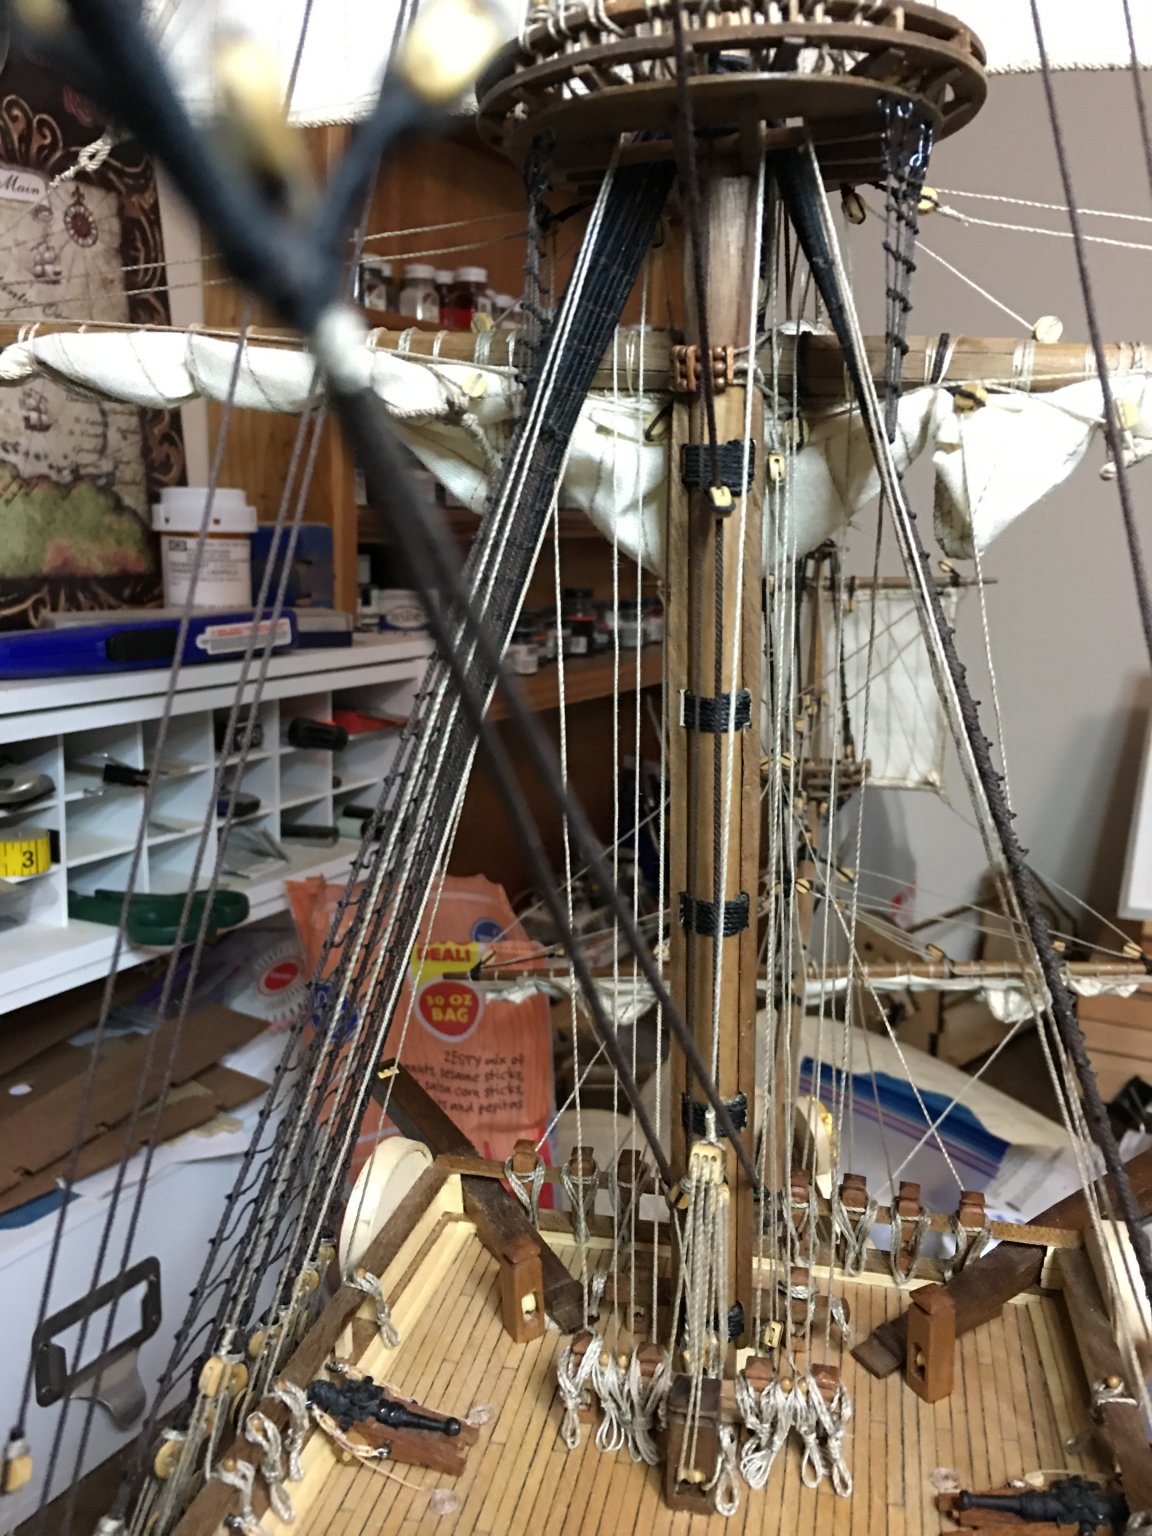
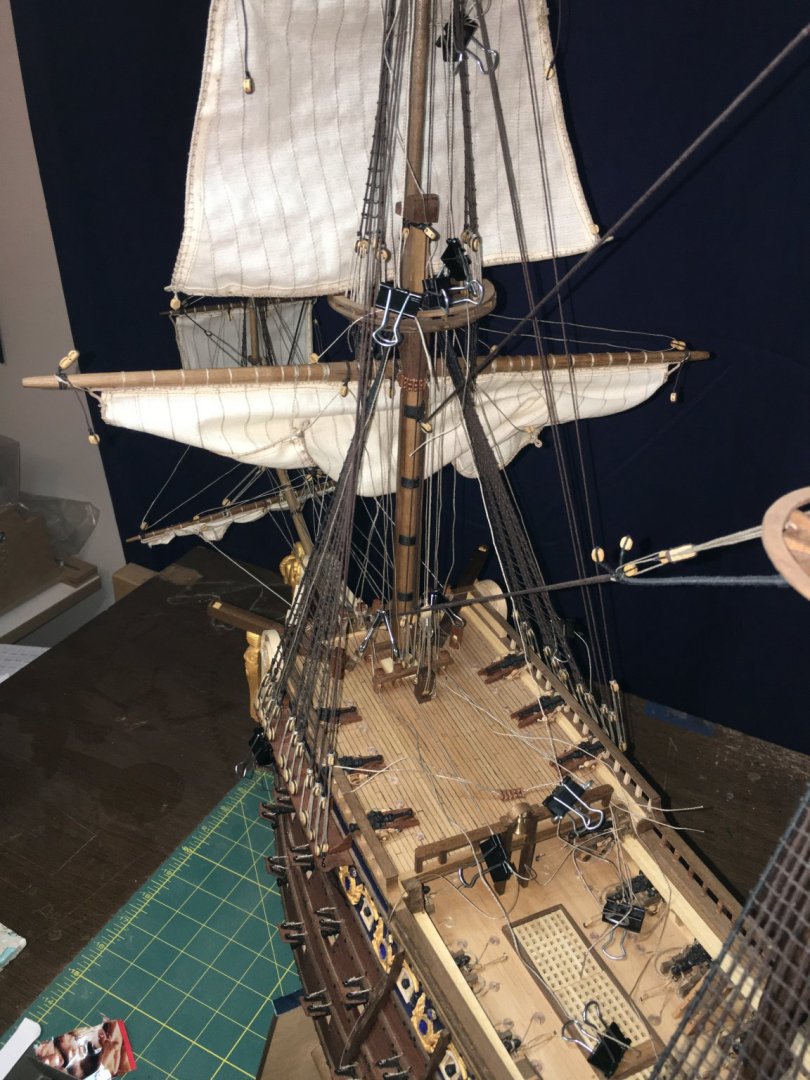
Thank you all very much for the nice words and likes. As always, it means a lot that you are enjoying the build as much as I am. I am moving along this week though I've had to slow down some as I ran out of belaying pins. The kit supplied ones were never going to be enough for all the additional rigging the sails added, but I had what I thought was a healthy supply of extras from other builds that I could use. It turned out that I was about a dozen short. To add insult to injury, I am also out of small diameter dowels which is what I typically make them from. I do however have plenty of toothpicks and so that is what the new pins are being made from. I did at least have the foresight to count up the number of blocks I still needed and managed to get those ordered a few weeks ago from Syren before Chuck was forced to close due to Corona19. For anyone who has not attempted sails before, be prepared to triple the required blocks for the rigging, and I am omitting several that would actually be used. The number of blocks and their various types that would be used in actual on these ships is incredible. I intend on trying to put together an inventory of parts that are on this model for the display case as I think that those numbers will be very impressive. I should have some more pictures this weekend as I hope to have the braces complete then. I have the fore braces in place and am working the main mizzen fittings now. Running the rope is the easiest part once all the blocks and pins are in place. Mapping out that route though takes a while.
-
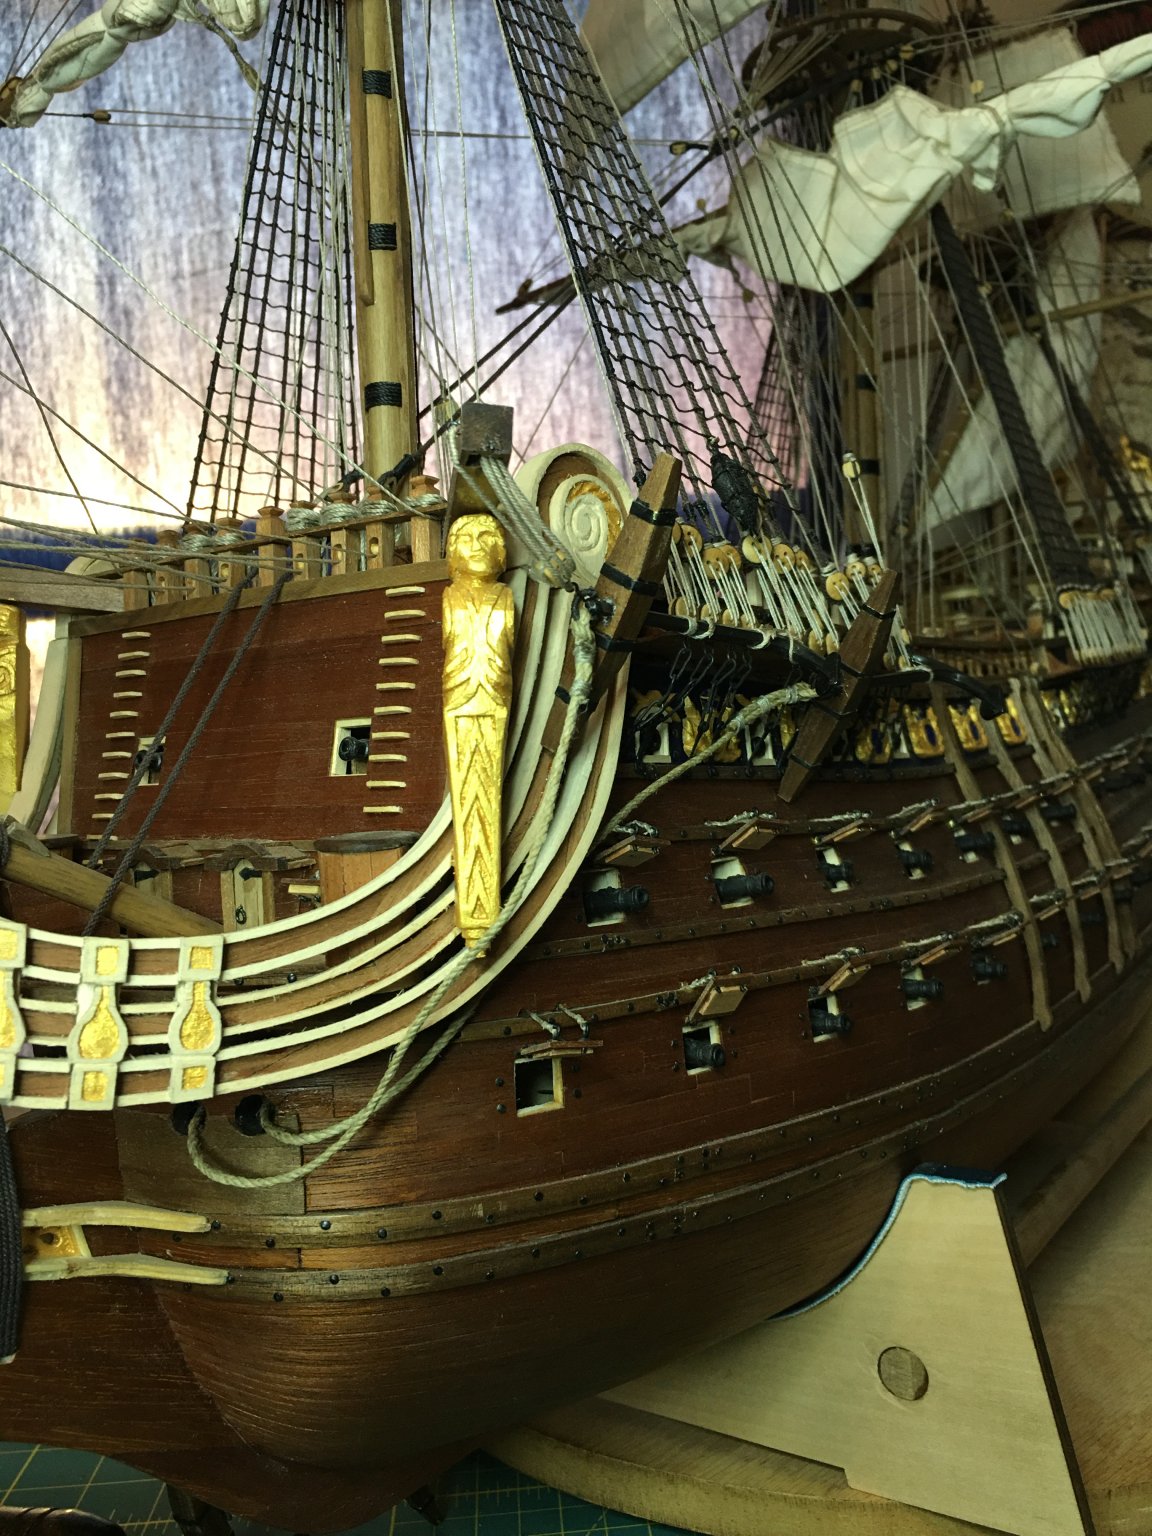
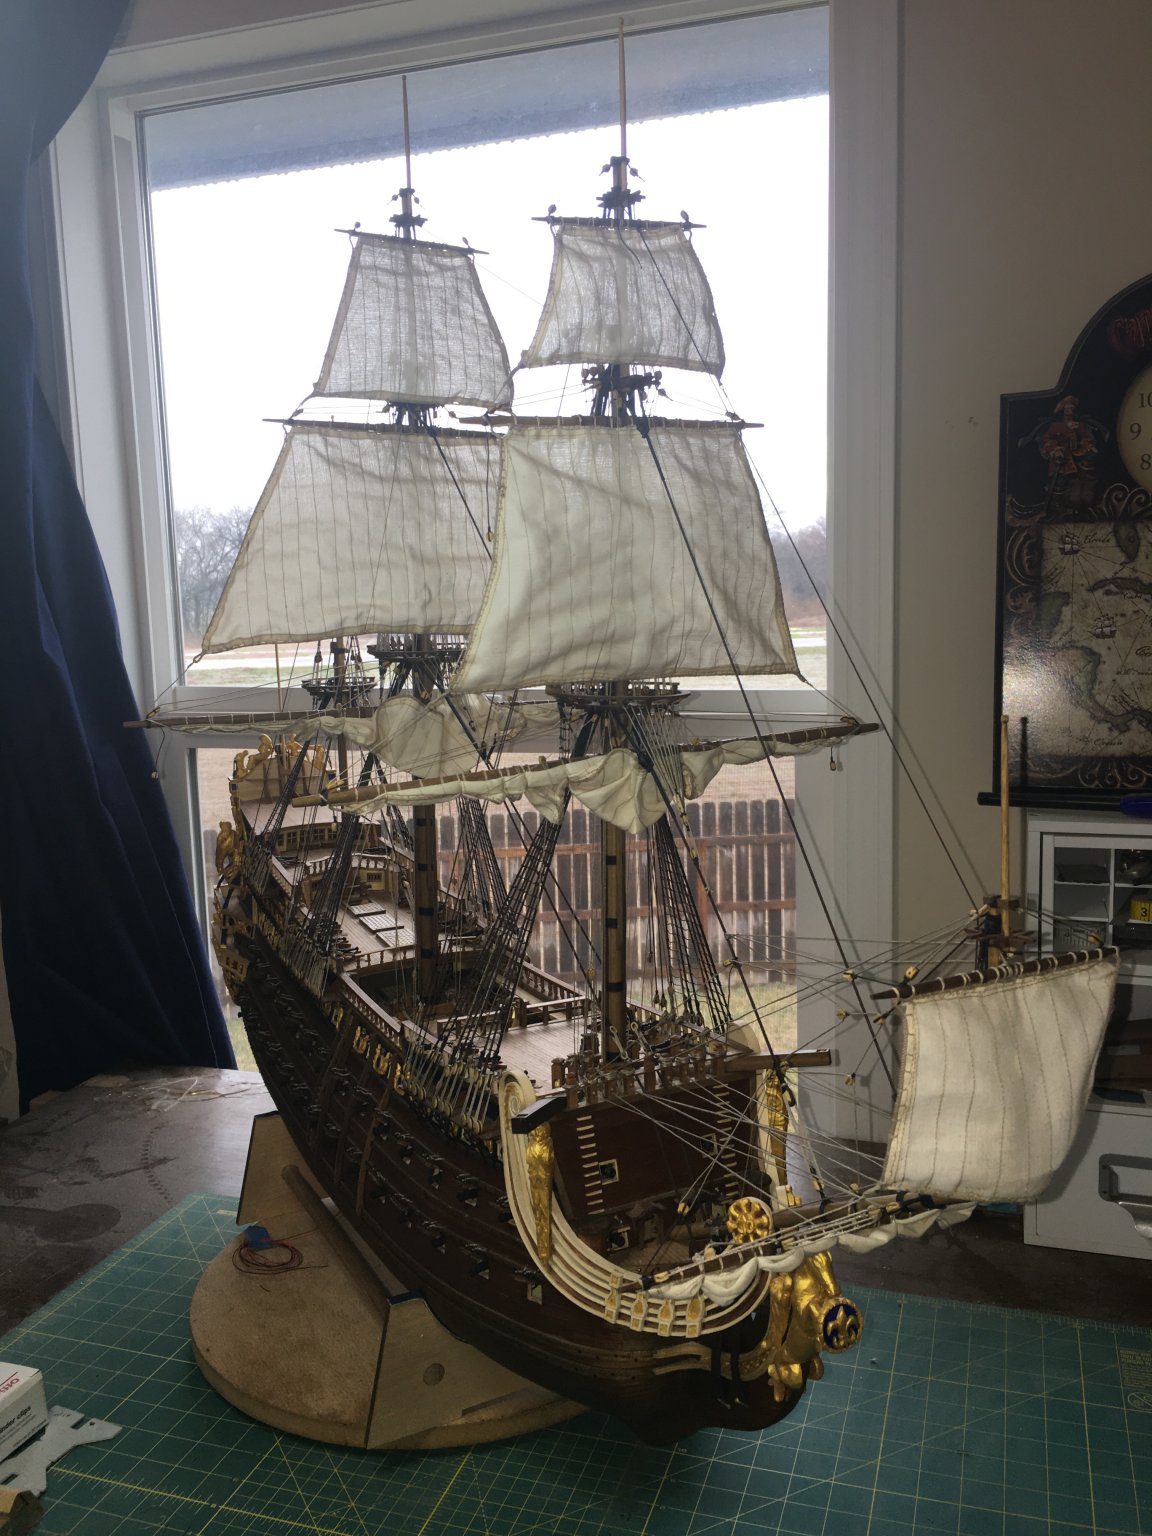
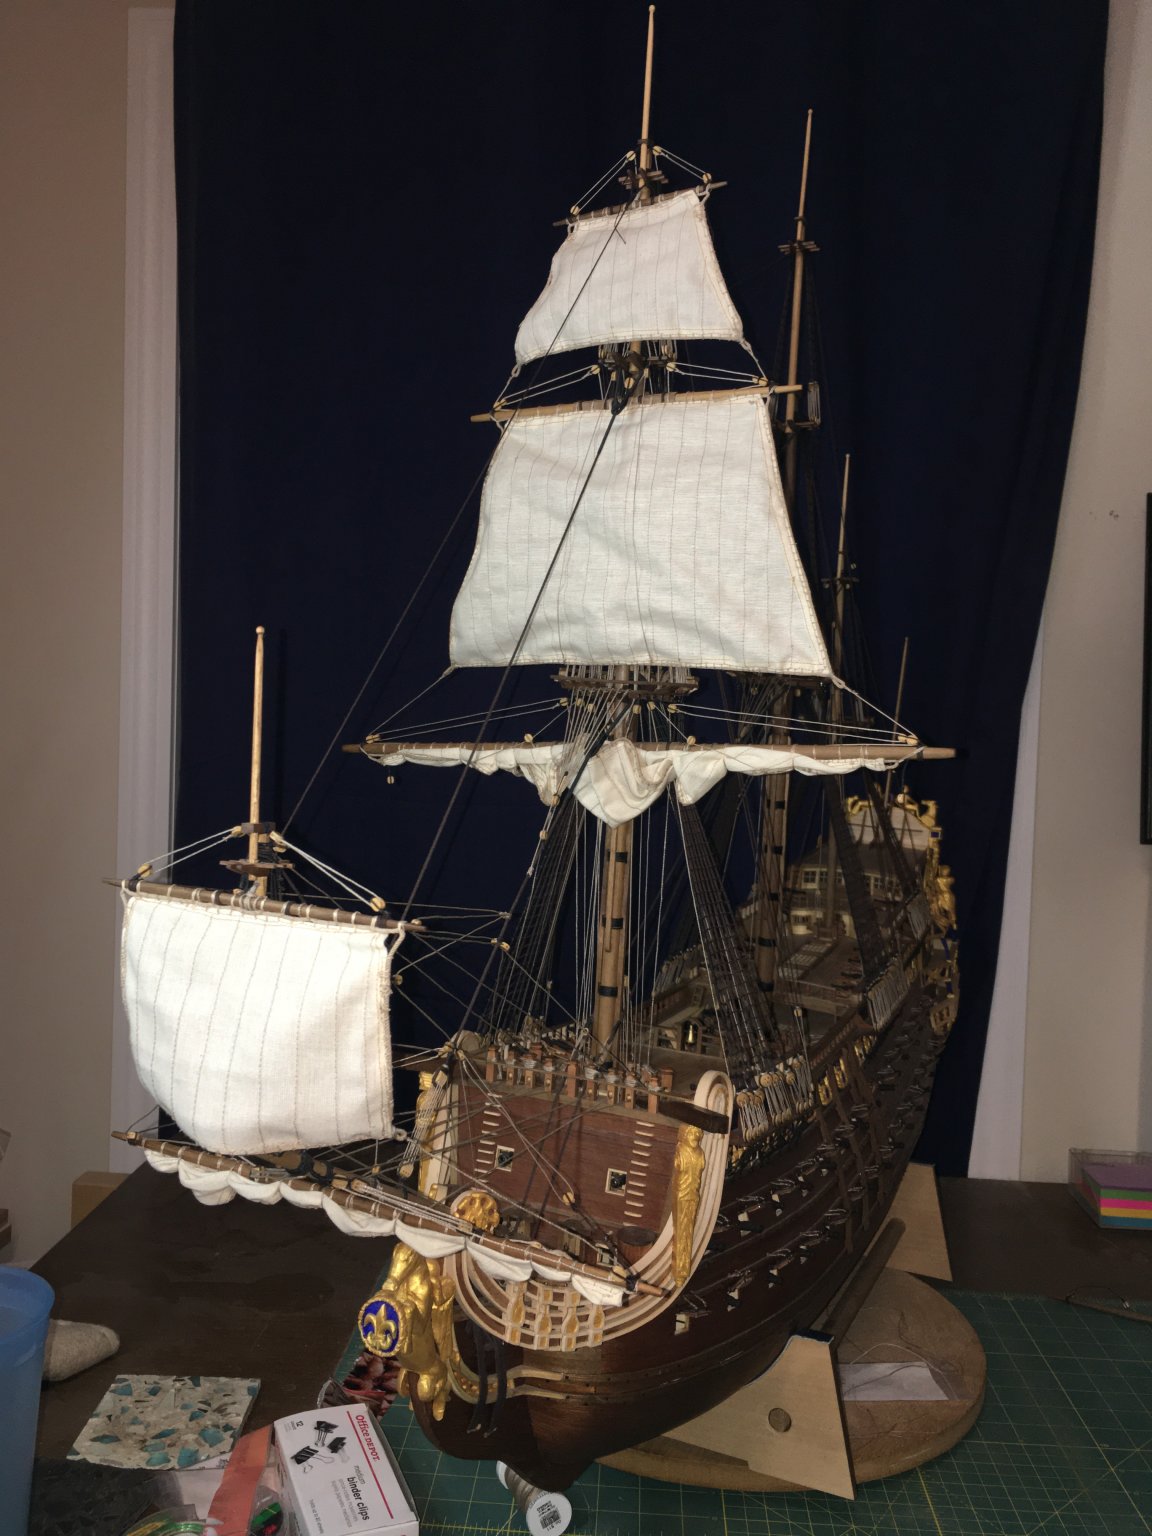
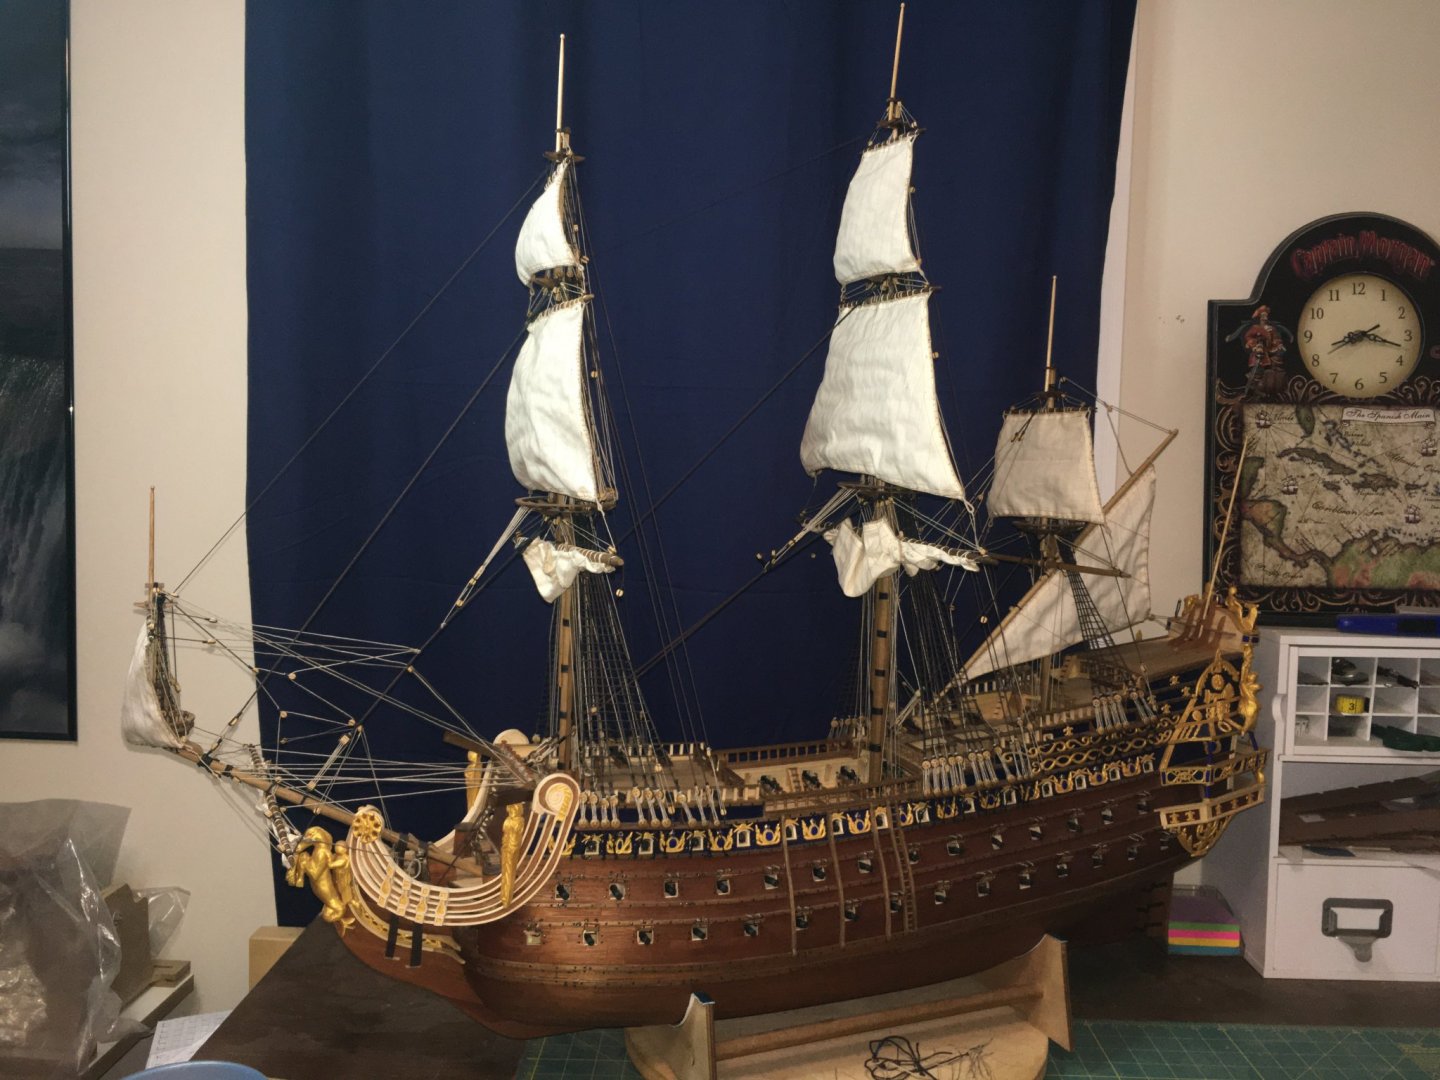
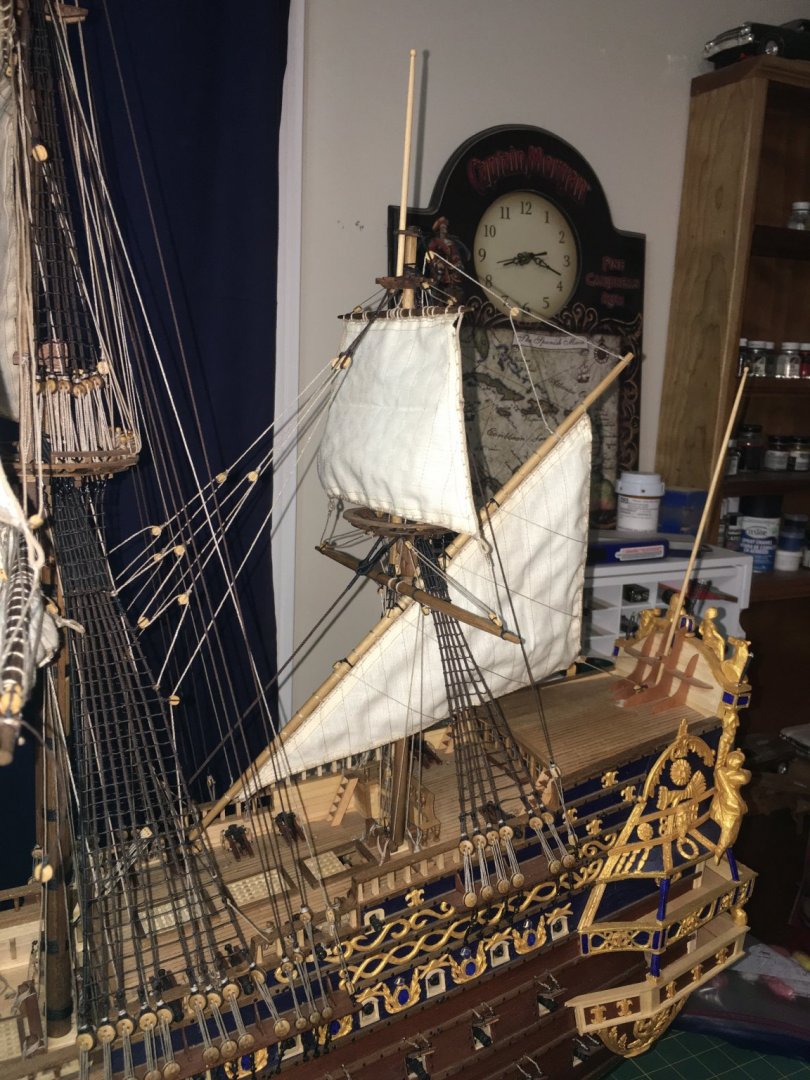
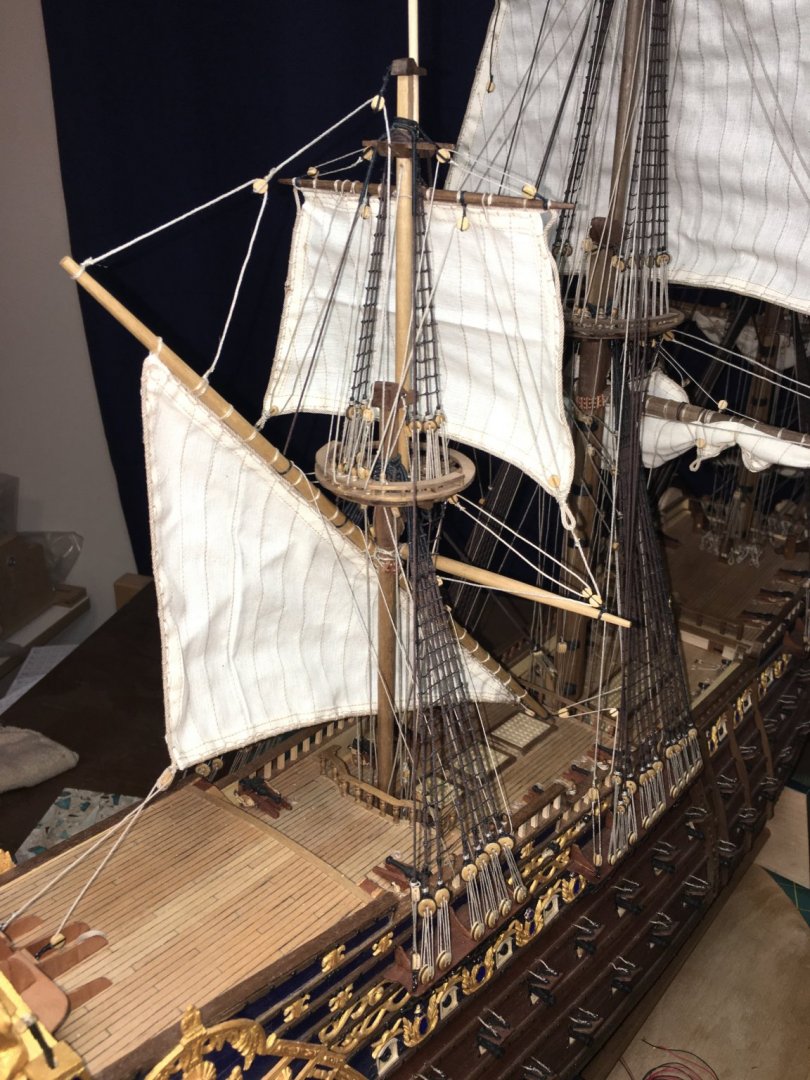
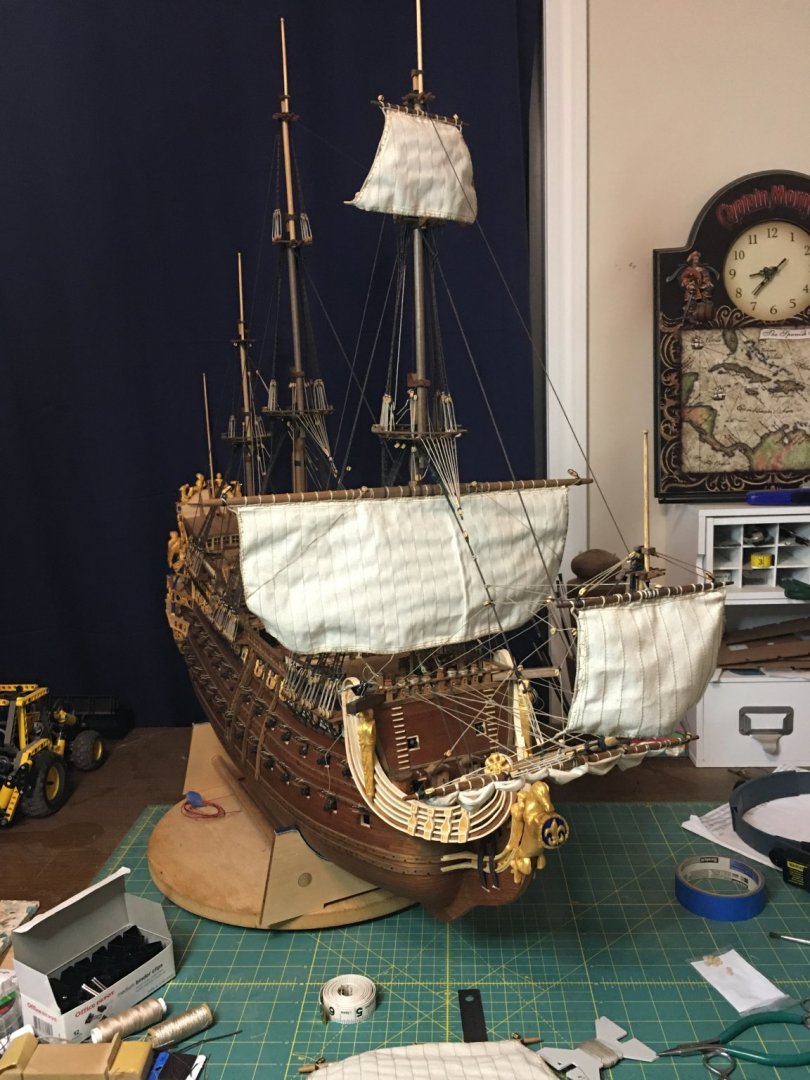
Mizzen sails in place. I decided to go ahead and leave the lanteen sail set as it did not block as much as I though it would and adds an interesting focal point as it is a unique looking sail. I still have a few rope coils to make and then I will start running the braces.
- 961 replies
-
- 13
-
-
This is excellent Robert! Great job on the weathering and details. A fun build, glad I caught it.
-
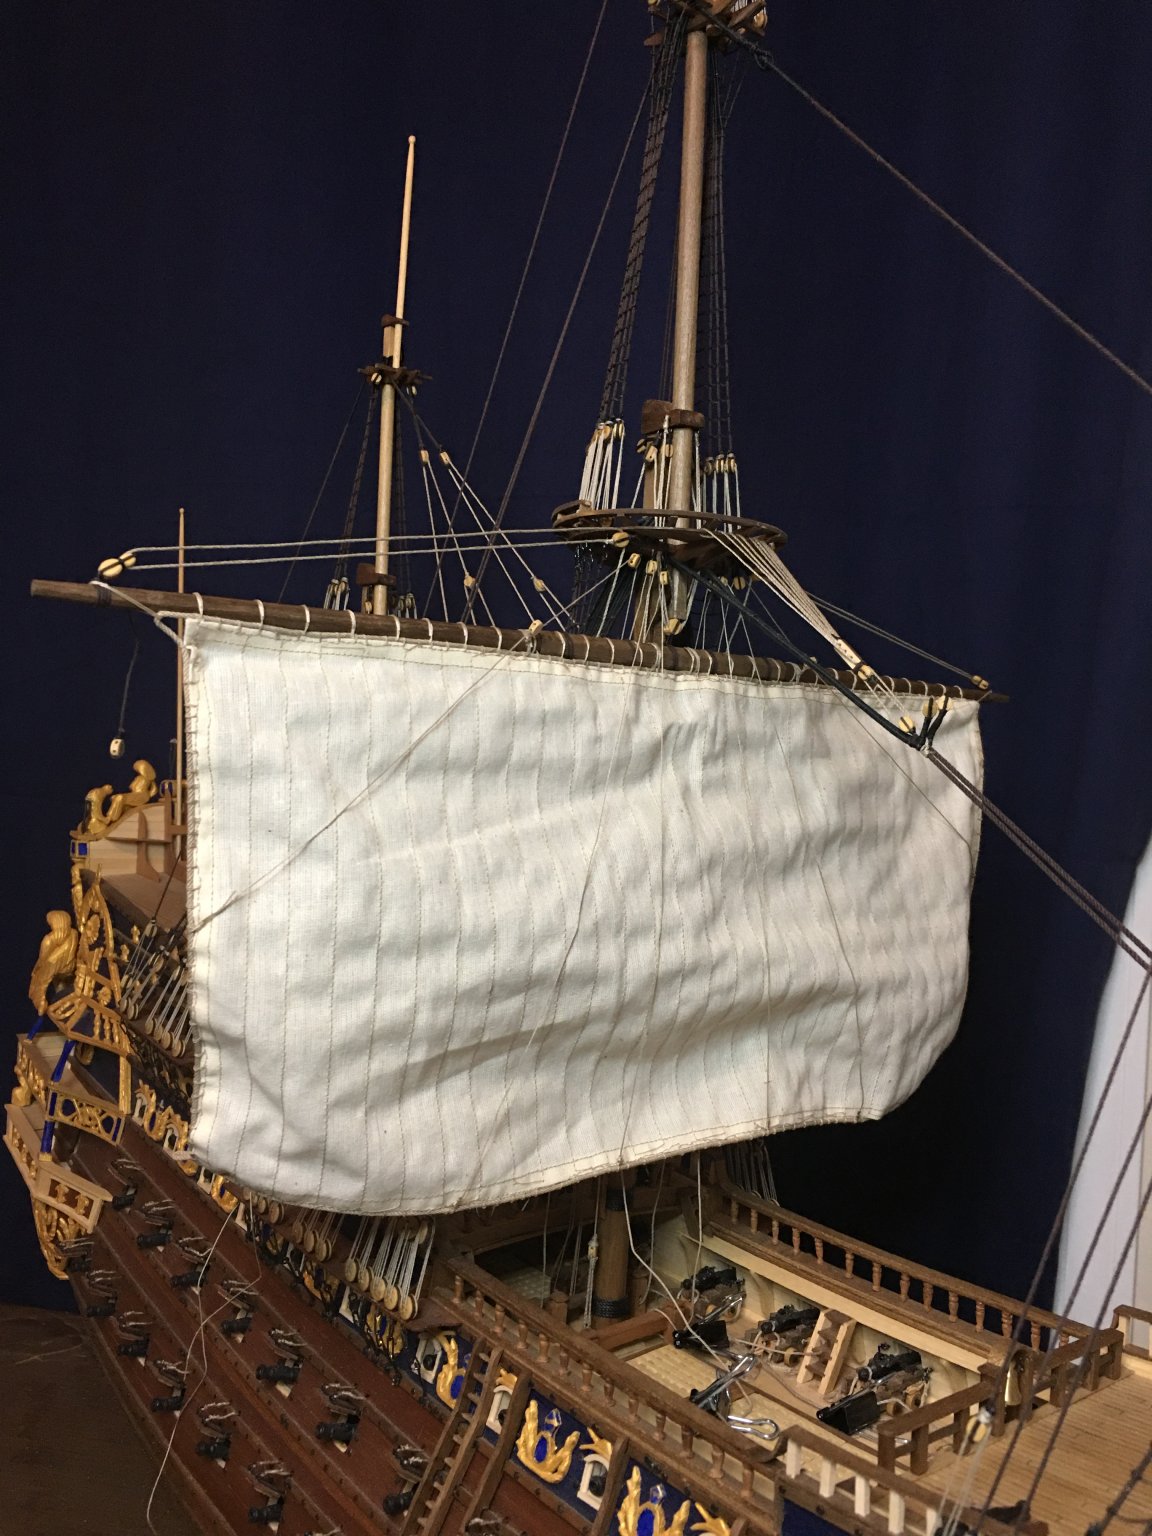
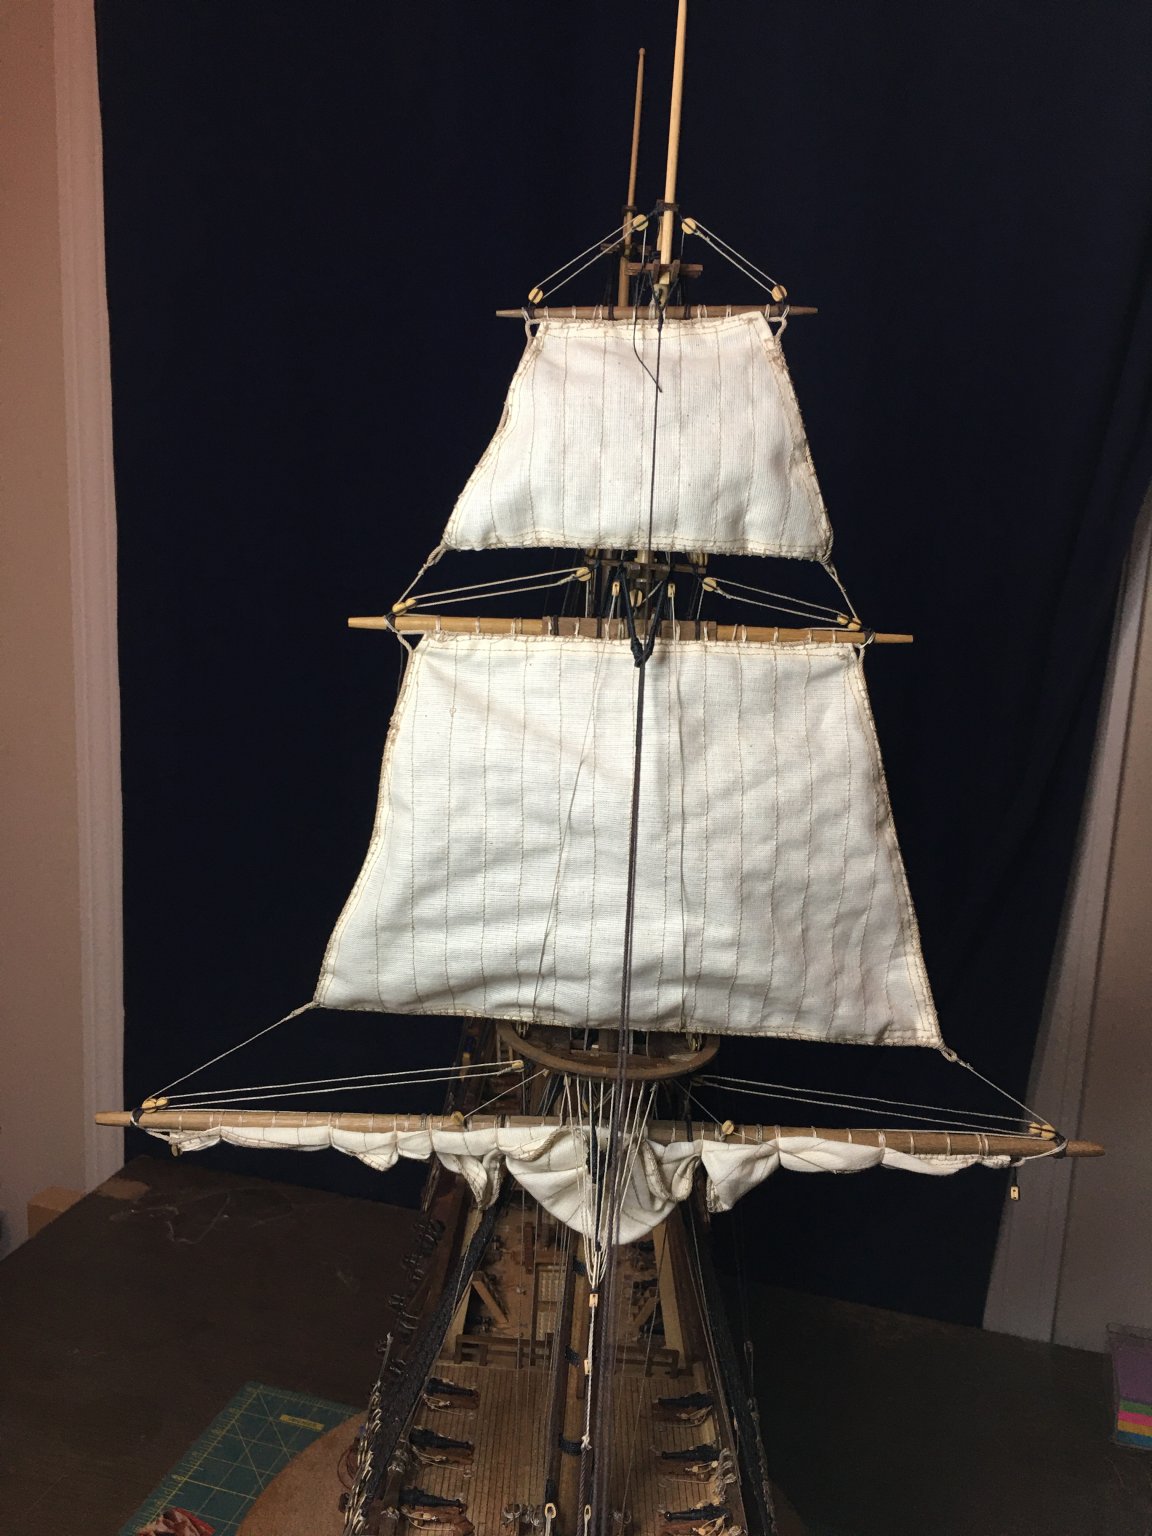
Thank you all for the kind words and likes. They always mean a lot and help keep the motivation going. I had decided to keep the courses furled mainly for viewing purposes. I had made them large enough that I could have displayed them either way, but after viewing the ship with them set, I did not like how they blocked the view of a lot of other details. It was not so bad right now as I can spin the ship and get in close to see things, but I thought about it when she will be in a case and viewing will be restricted. Having the courses furled and a ship under topsails was not unheard of in reality and that would eliminate blockage of the deck details. I'm still debating on the lanteen sail. It is a unique sail that could prove interesting to have set, but I wonder if it will block too much as well. Will look at it both ways also but I have a feeling it too will become furled.
-
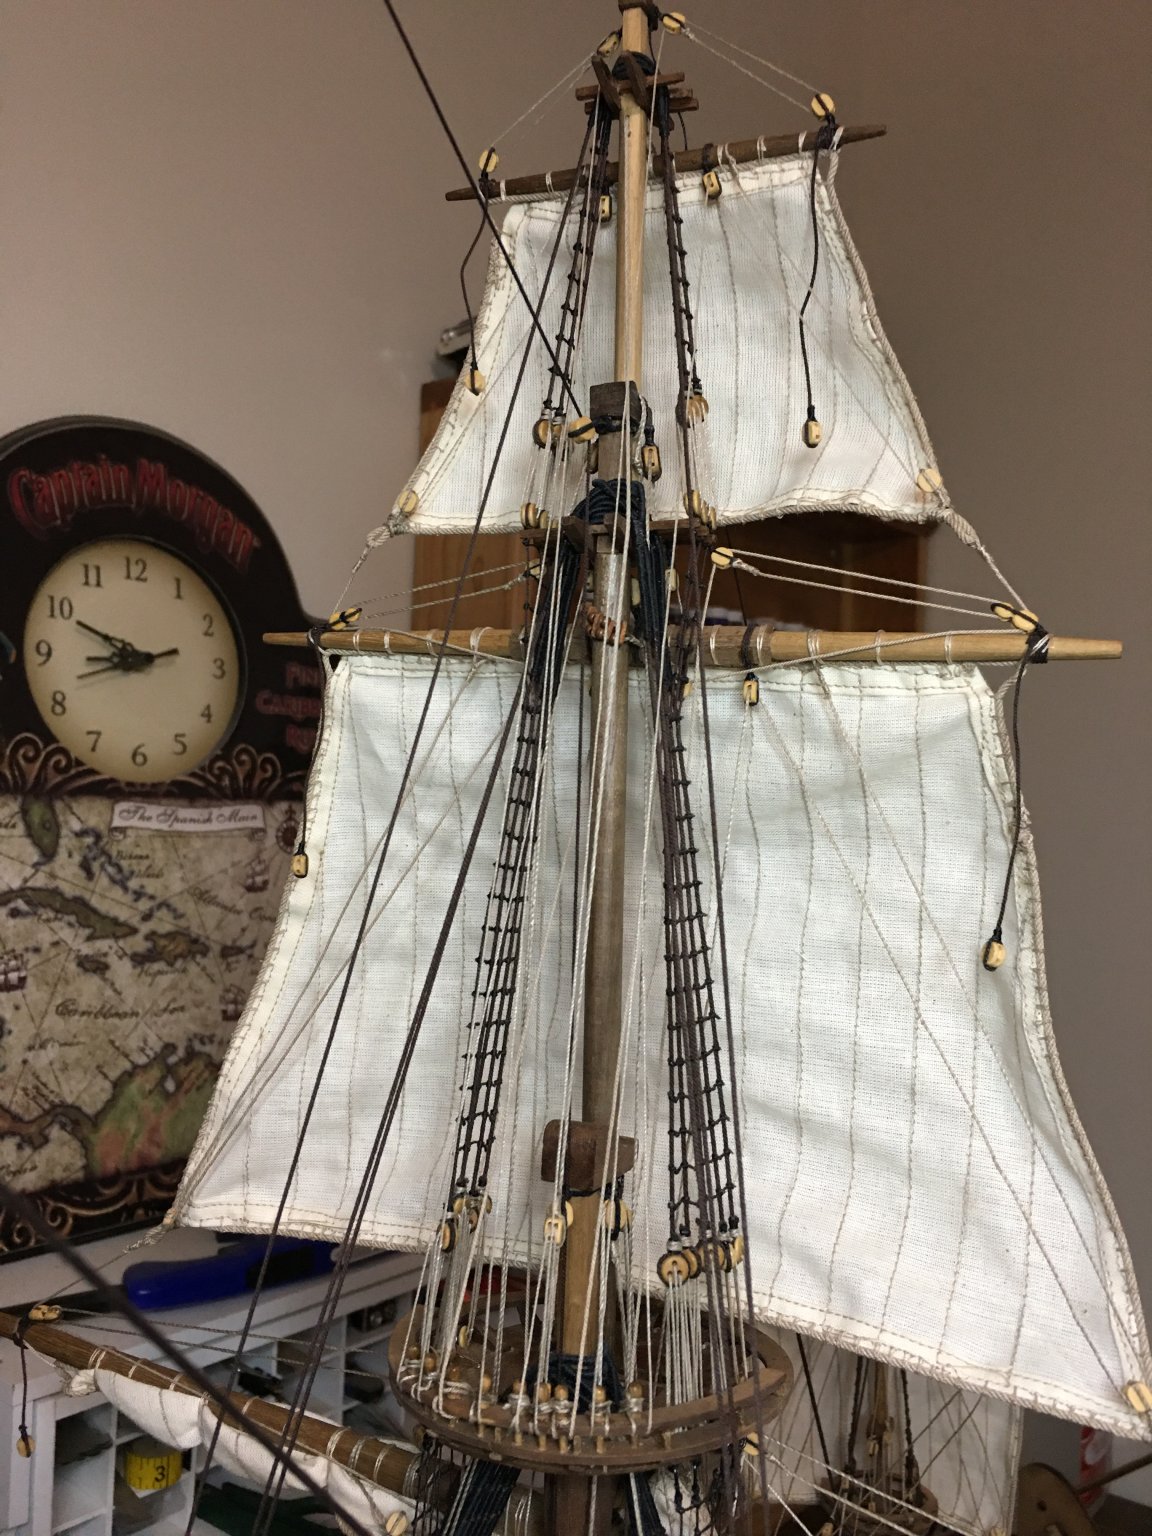
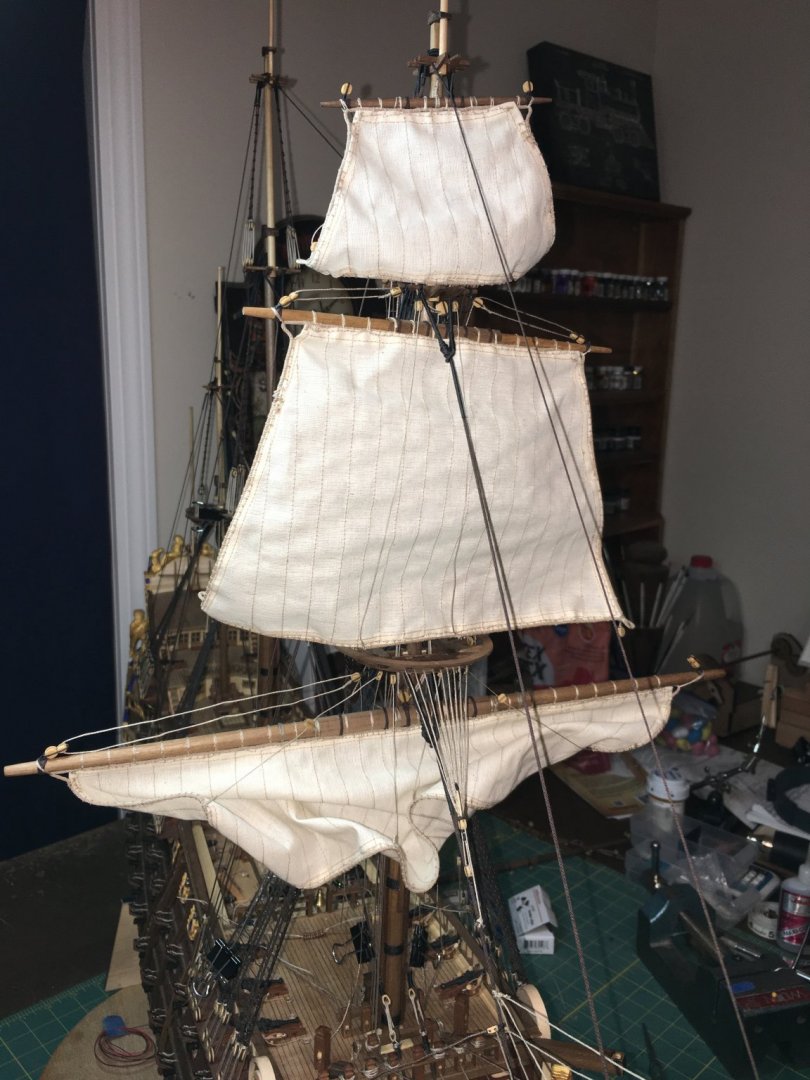
Main sails are in place and rigged. As with the fore sails, the braces will wait till other work is completed before I rig them as they just get in the way of any work on the interior. Now to work on the mizzen sails. The mizzen top will be similar to what has already been done but the lanteen will take some study. Once the sails are complete, there is not much left to build. Anchors and lanterns then she will be ready for a case.


- 961 replies
-
- 16
-
-
I'm a bit late to the build but it did give me a nice way to spend my lunch break reading through what you have done so far. Looking forward to another great build, and of a kit I have not seen before is always an informative adventure.
-
Bravo! Well done indeed, a fine model to display proudly.
- 120 replies
-
- 1
-
-
- crabbing skiff
- Chesapeake Bay crabbing skiff
- (and 3 more)
-
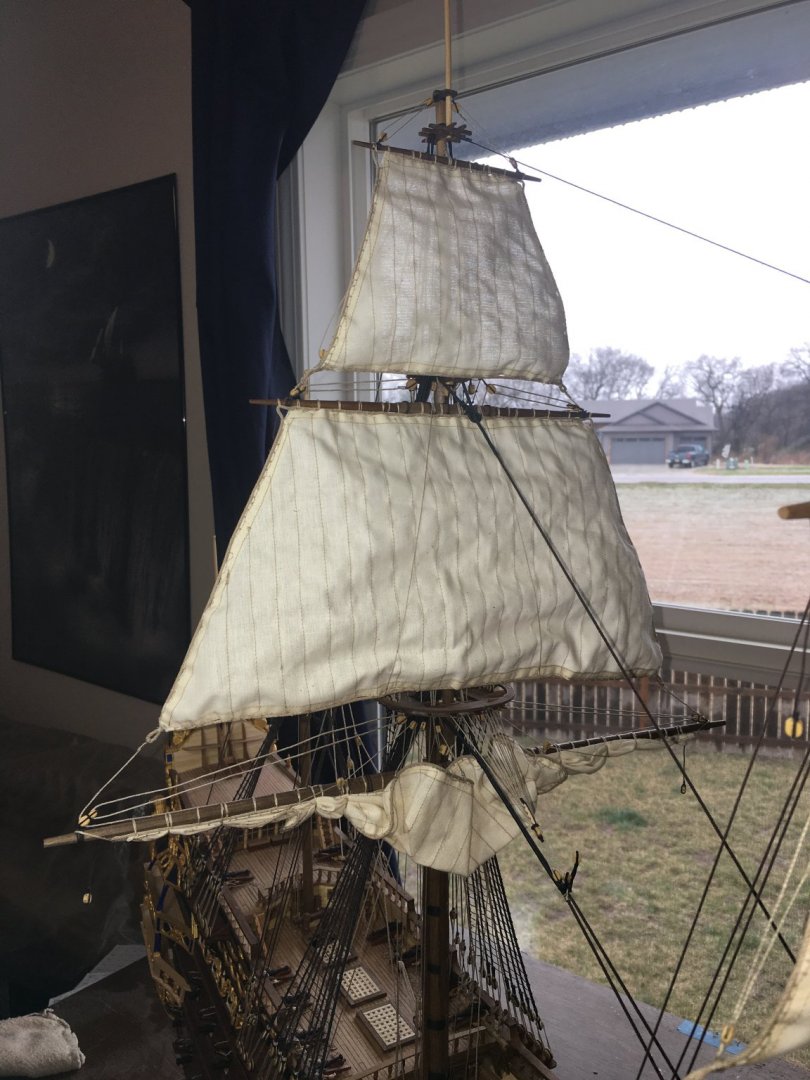
Tonight I finished the foresail running rigging except for the braces which will be installed after all the sails are rigged for easier access. I’ve learned a lot on this set of sails which I am hoping will allow for the main sails to go smoother and quicker as I will be basically reproducing what I just did.


-
Progress update on the sails, slow but gaining. There are some evenings when I spend an hour or two and may only have one rigged line to show for it. Lots of fitting, and refitting, adjusting and making sure the lines don’t foul each other. I am gaining ground and the nice part is that the main sails should go smoother as I will have the fore sails to reference.


-
Beautiful work indeed! I'm loving seeing this all come together. As you are modeling this to closely resemble Berain's drawing, where the four seasons will rest, in particularly the two inside figures, would you need those decorative mullions between windows 1&2 and 5&6? I'm having a difficult time determining if there is open space behind those figure as the shadowing kind of makes me think this, or if they are flat against the bulkhead as the outer two figures more closely present. This is one of those aspects of this drawing that has made determining the extent of the stern balconies difficult.
- 2,435 replies
-
- 3
-
-
- heller
- soleil royal
- (and 9 more)
-
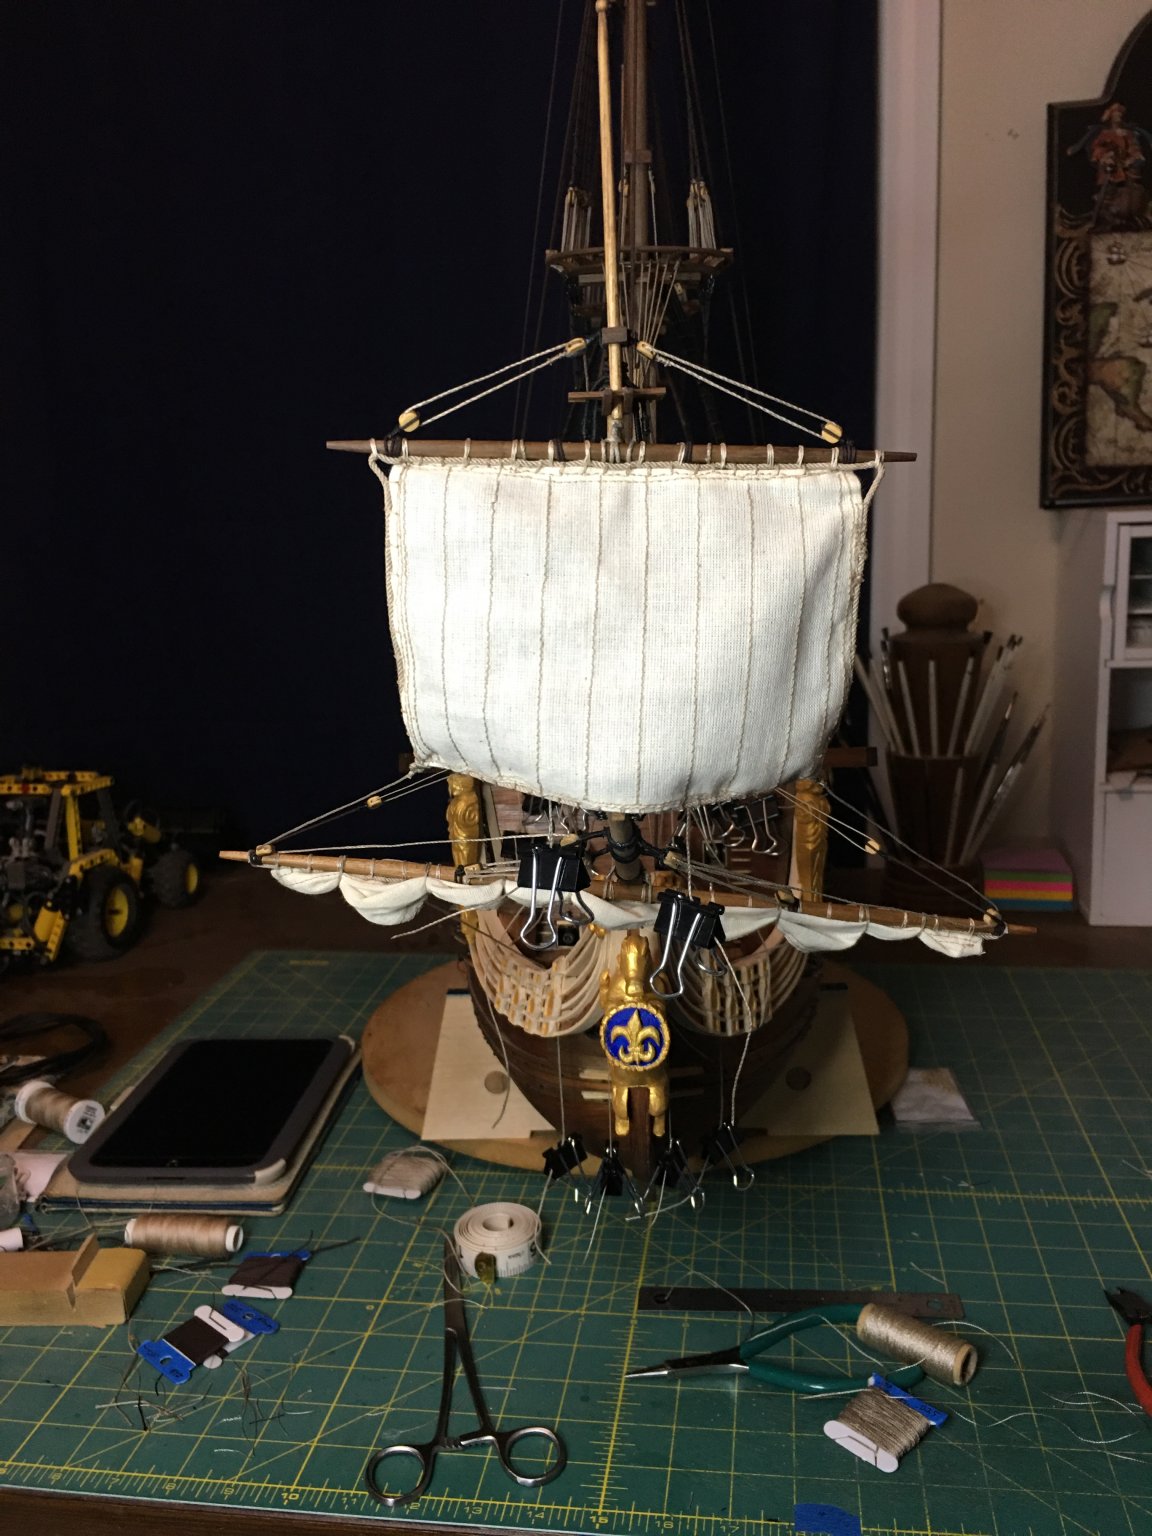
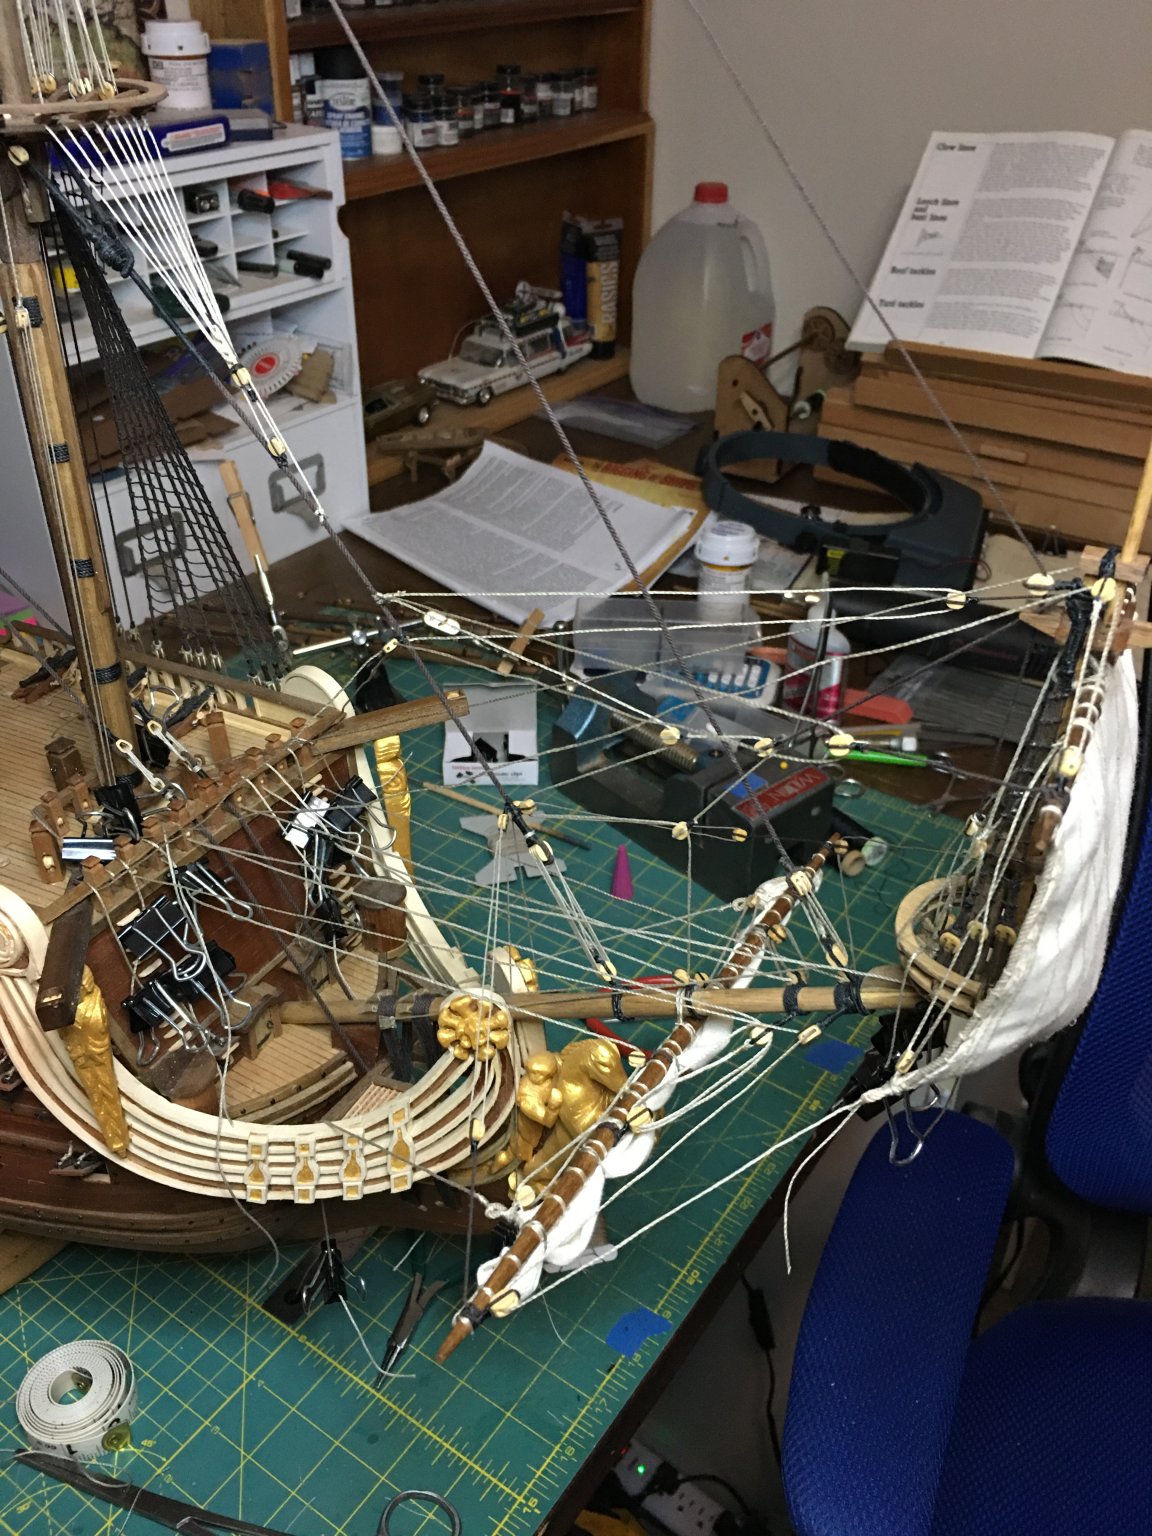
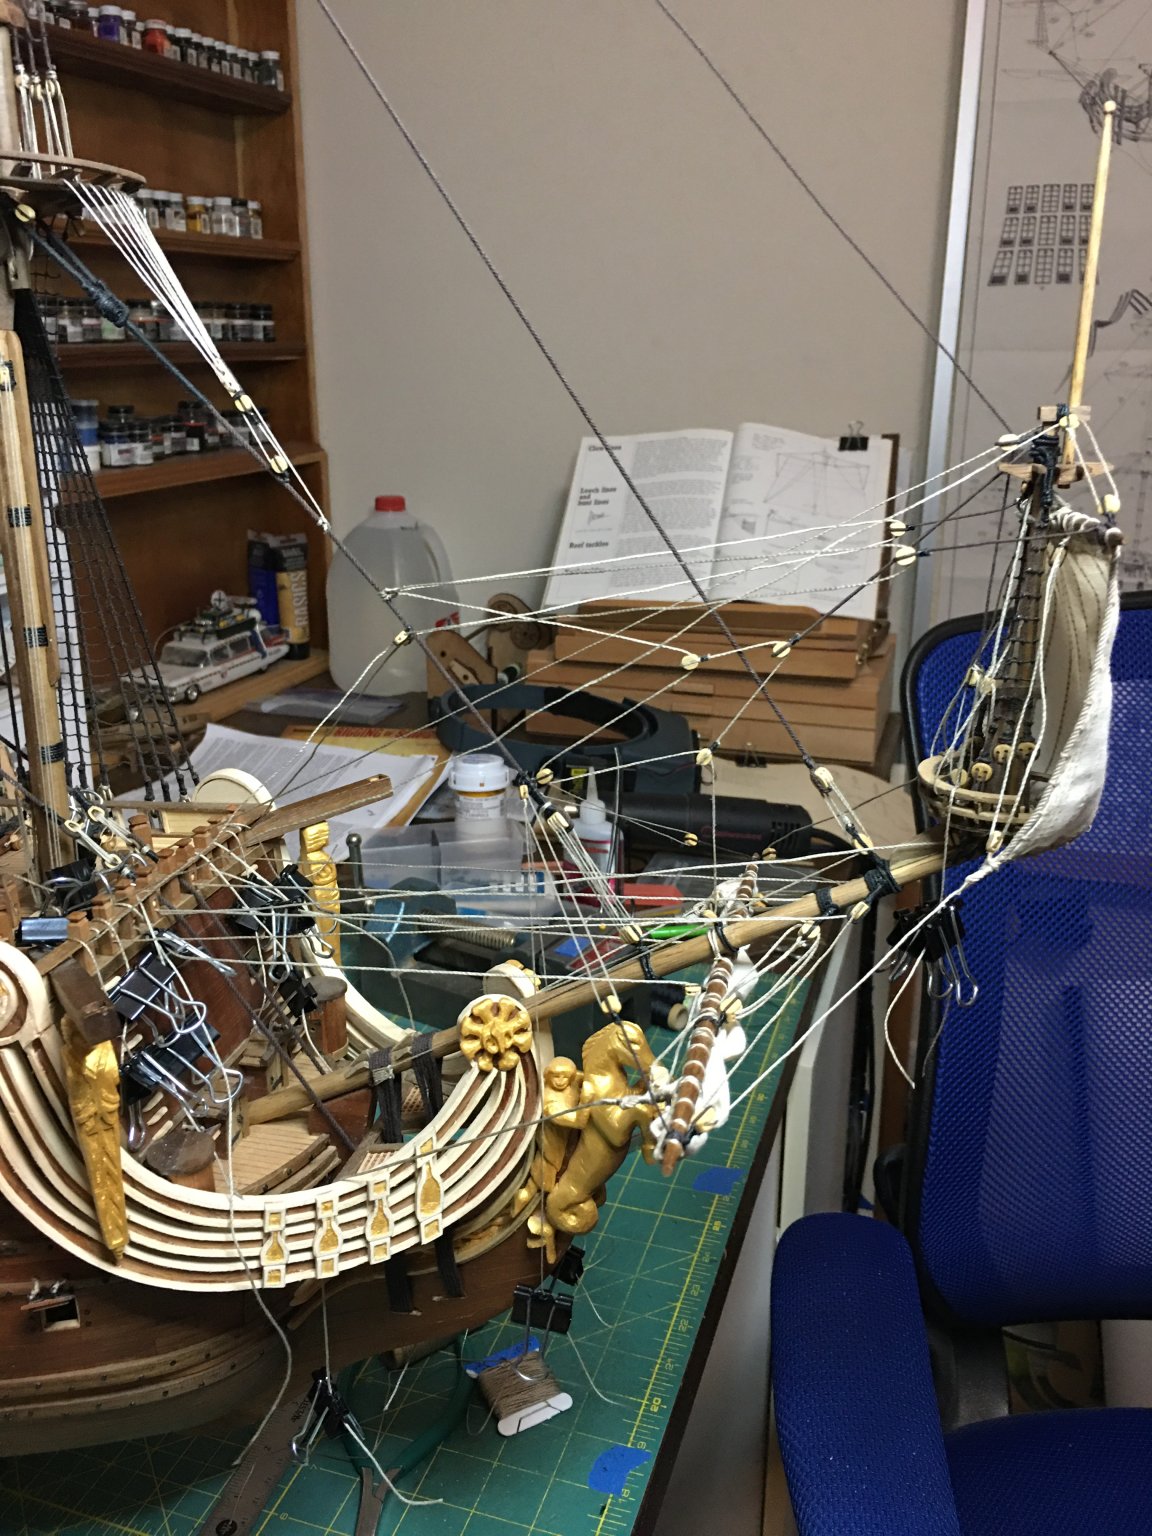
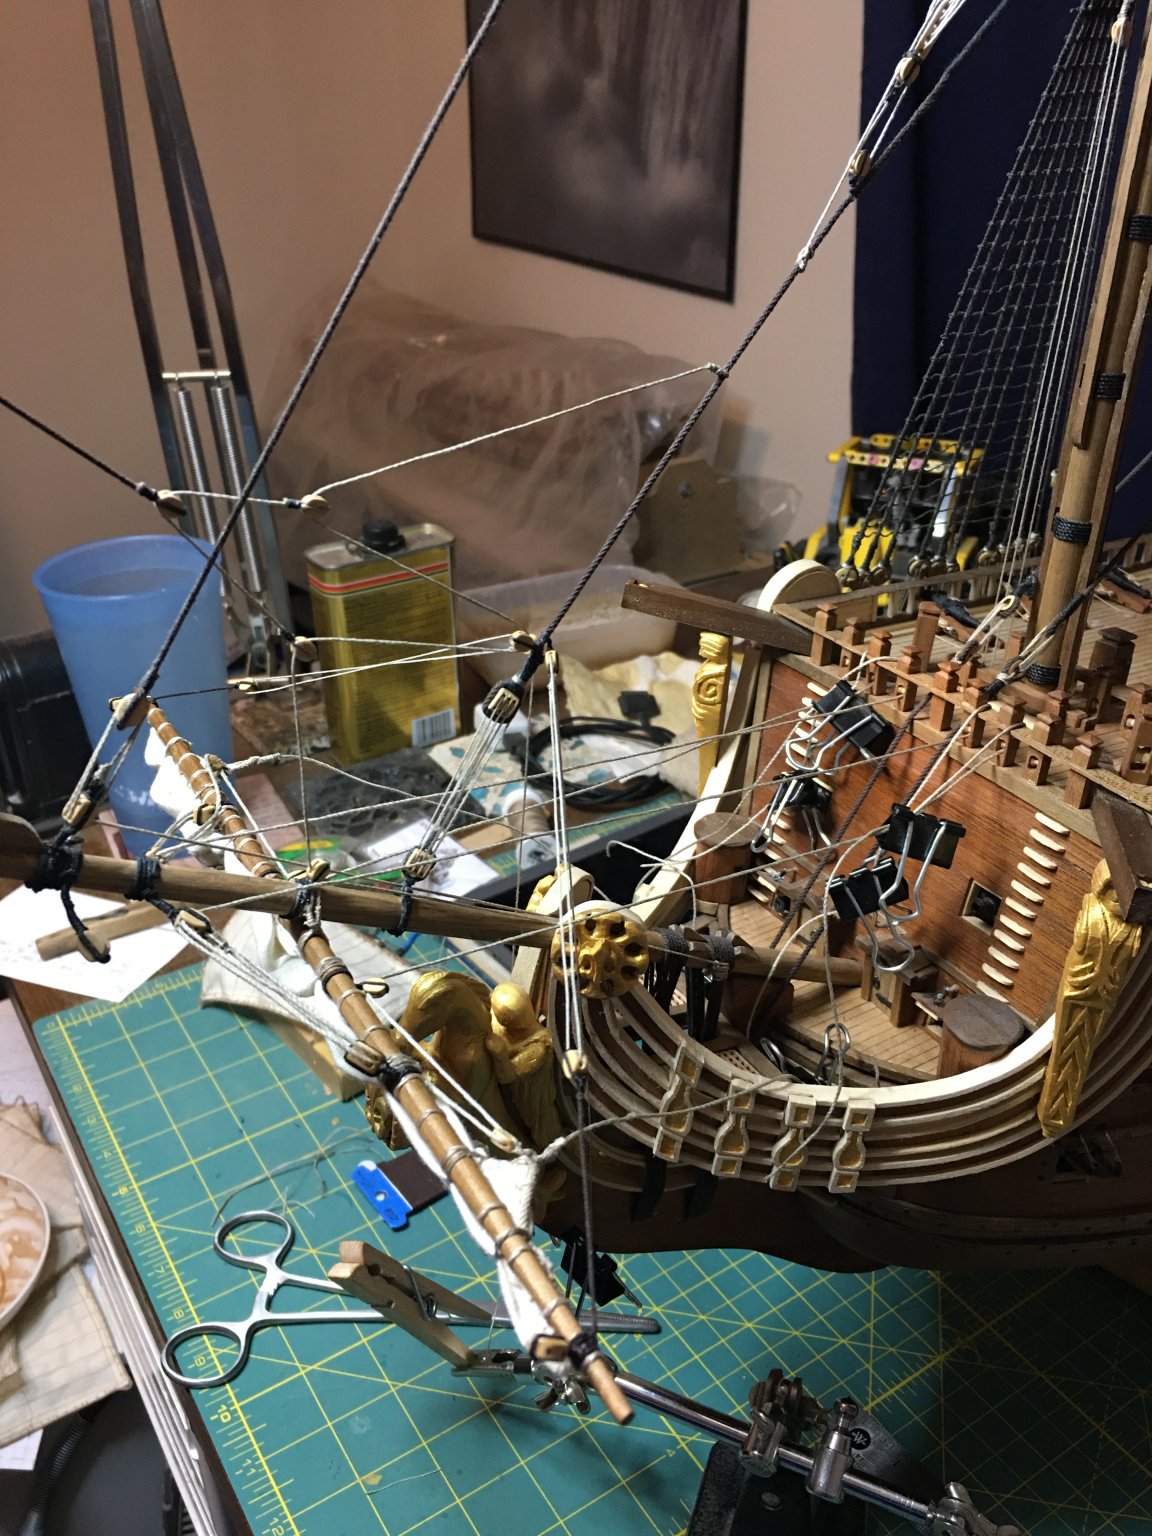
Just a quick update, both spritsail are secured in place and I am now fitting the fore sails. I bent all three to their masts this weekend and have finished adding all the clew, bunt and leech lines to the course along with their corresponding blocks. Now to start threading the lines and locating them to their belaying points.
-
The spritsail topsail is on the ship, all lines are in place and free of fouling. Now to secure them and then onward to the fore sails. Im very happy with how the sails are progressing so far. If not for this site, I doubt I would of attempted to do this. All of the great build logs have helped me immensely. A specific thank you to Michael (md1400cs) whose Vasa build gave me a lot of guidance.


-
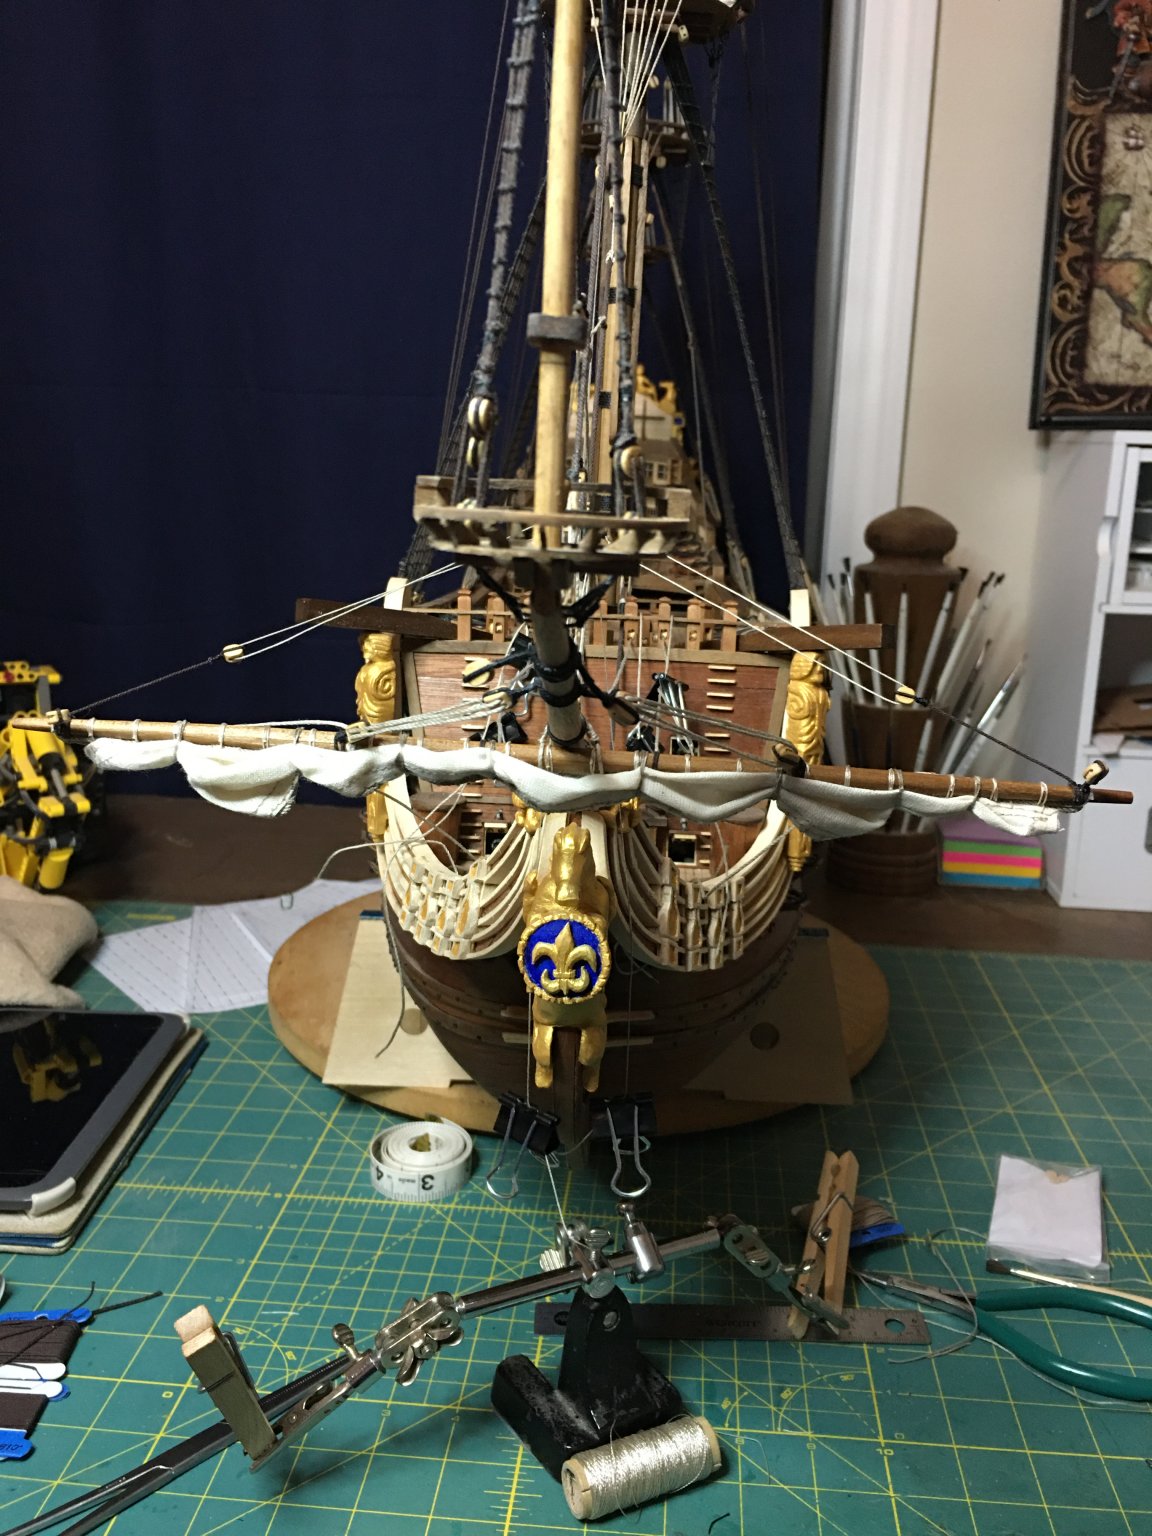
Thank you all for the nice compliments as well as the likes. Sail work continues and today the first sail is set on the ship. The spritsail is in place with her lines run though not secured yet. I did not want the sail to obscure the figurehead so I am leaving this one furled. Tomorrow I will work on the spritsail topsail.


- 961 replies
-
- 10
-
-
That is indeed a tangle of wires, a situation I fully understand as the aft cabins of my S.R. build hide a jumble of them as well. Well done routing them in such a small space. I'm still trying to figure out how I am going to run the wires through the display case to the switch also. I am thinking about creating a tube through the cradle itself to get it below the case's base. Once there, I can turn them and run to the switch with relative ease....
-
She turned out awesome O.C.! As others have said, the figures, the details, the overall appearance of the ship all contribute wonderfully in bringing her to life in a unique way. This has been a fun build to watch come together, glad I was able to take the journey with you. Hope to catch you for the next one!
-
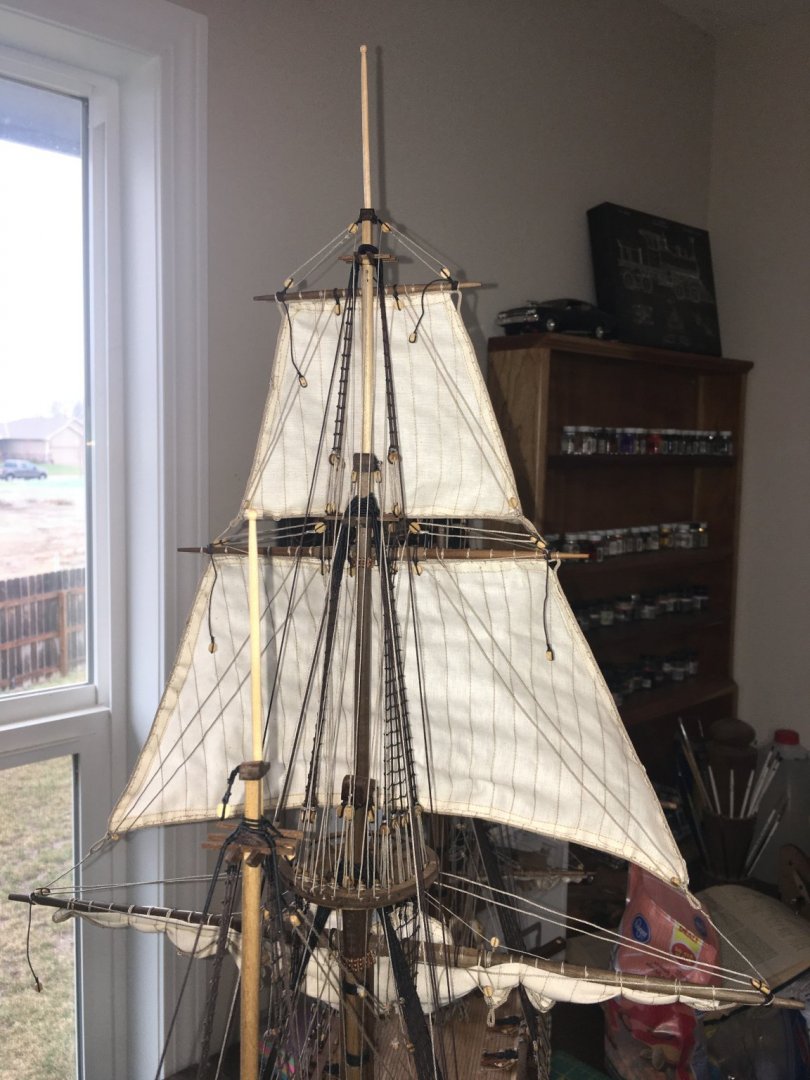
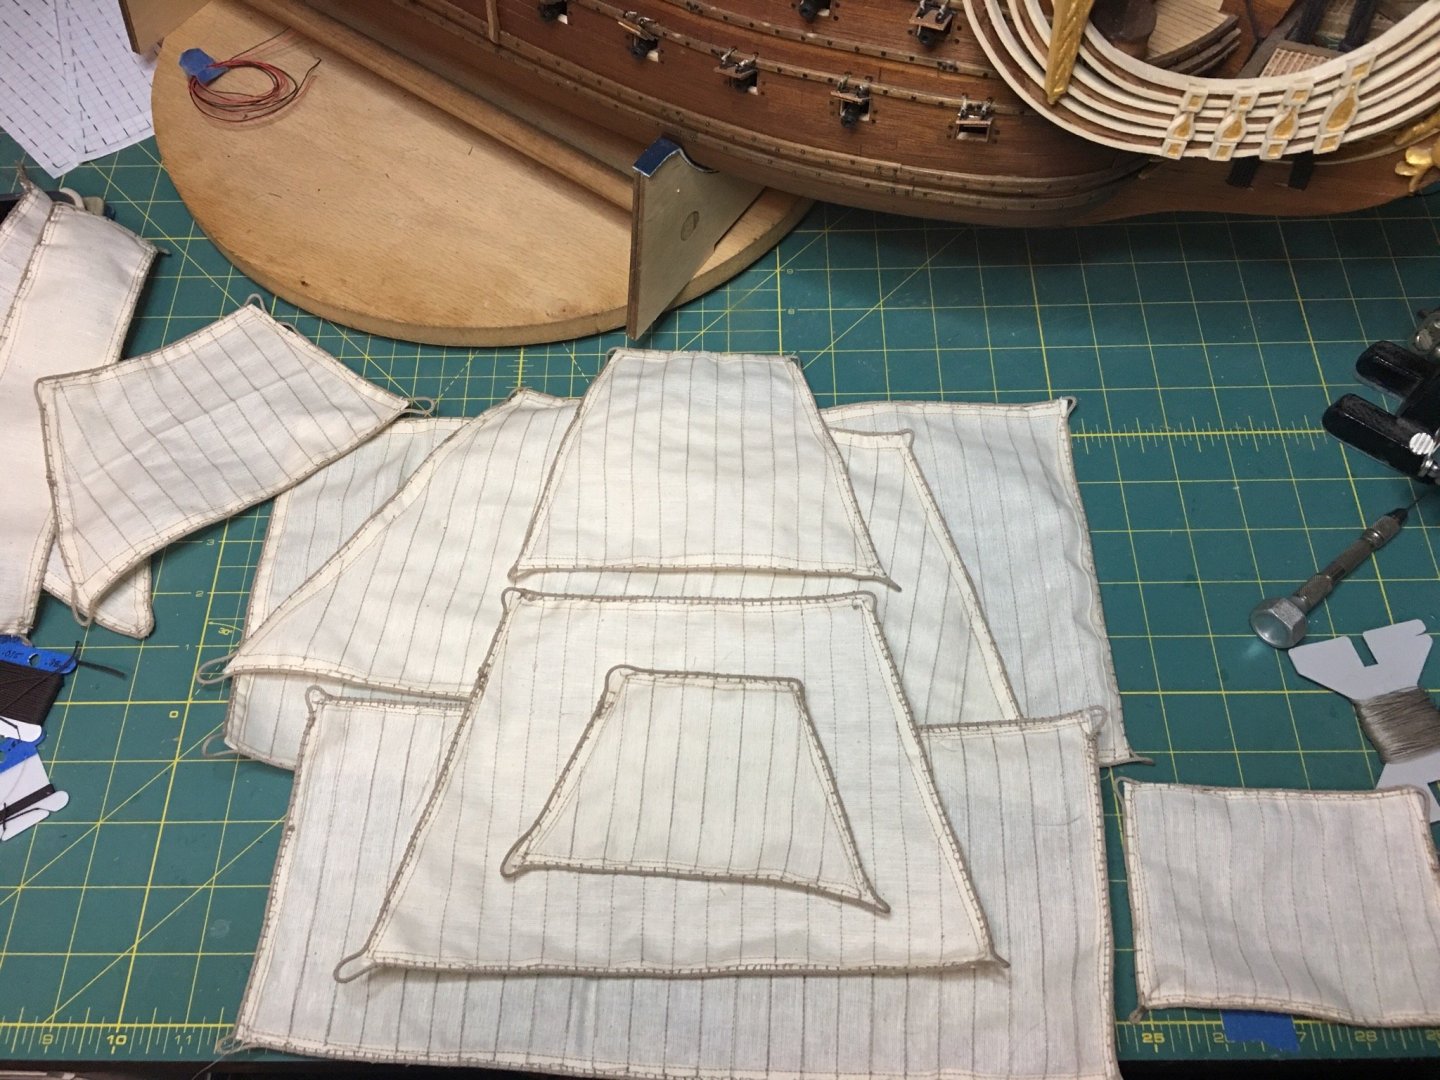
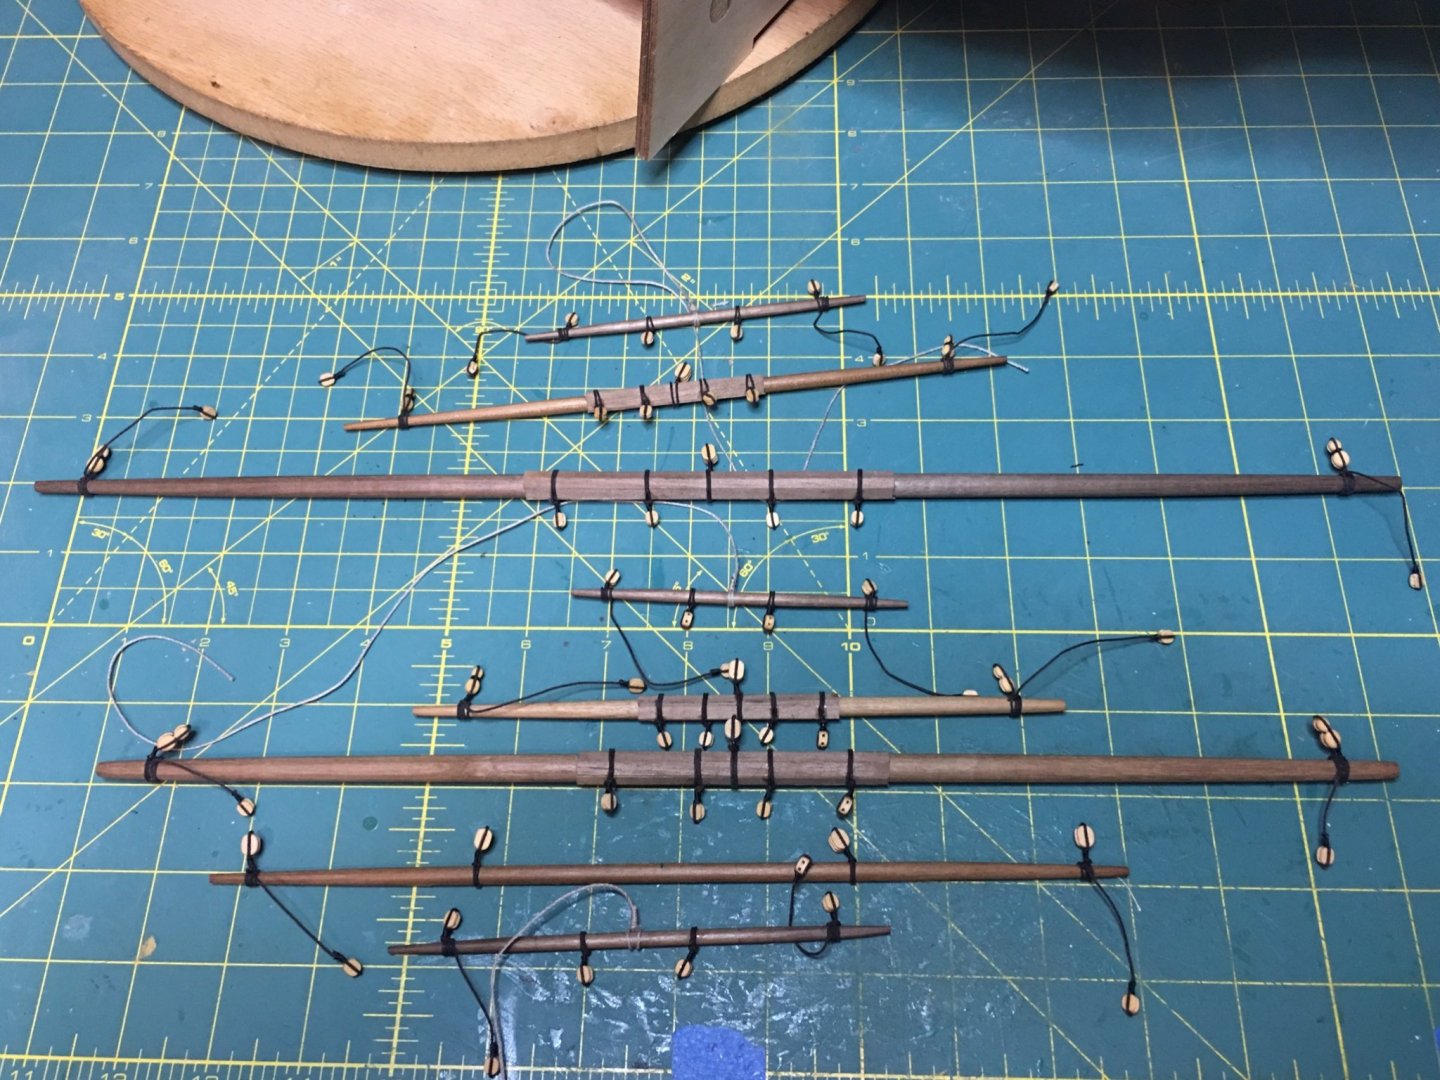
Another very productive week. Attached bolt ropes to the sails, leaving some slack to tie up the clews for rigging attachments. I also have set blocks on the spritsail, fore and main yards for the lifts, clews and braces. I will add the leech and bunt lines as needed as not all of the sails had these in this period, mainly the courses and topsails. Bending the sails to the yards will be up next starting with the spritsail and spritsail topsail.
-
The Pearl is looking great indeed! I'm enjoying this build as it is being presented in a unique way not typical to what is normally posted here in that instead of a nice, pretty new looking ship, we have a dark, weathered spooky vessel. Granted I know that is the whole point as that is what this ship is supposed to look like, but still it is refreshing to see it and you are doing a fantastic job. Now, some skeleton pirates would be a really cool element to add, though I have no idea where you could find any in this scale. Maybe if you know of someone who does 3D printing they could attempt to make you some? If not, regular pirates would be fitting as well since like O.C. said, they went back and forth between skeleton and normal forms. I believe the skeletons were only shown under the moonlight.
-
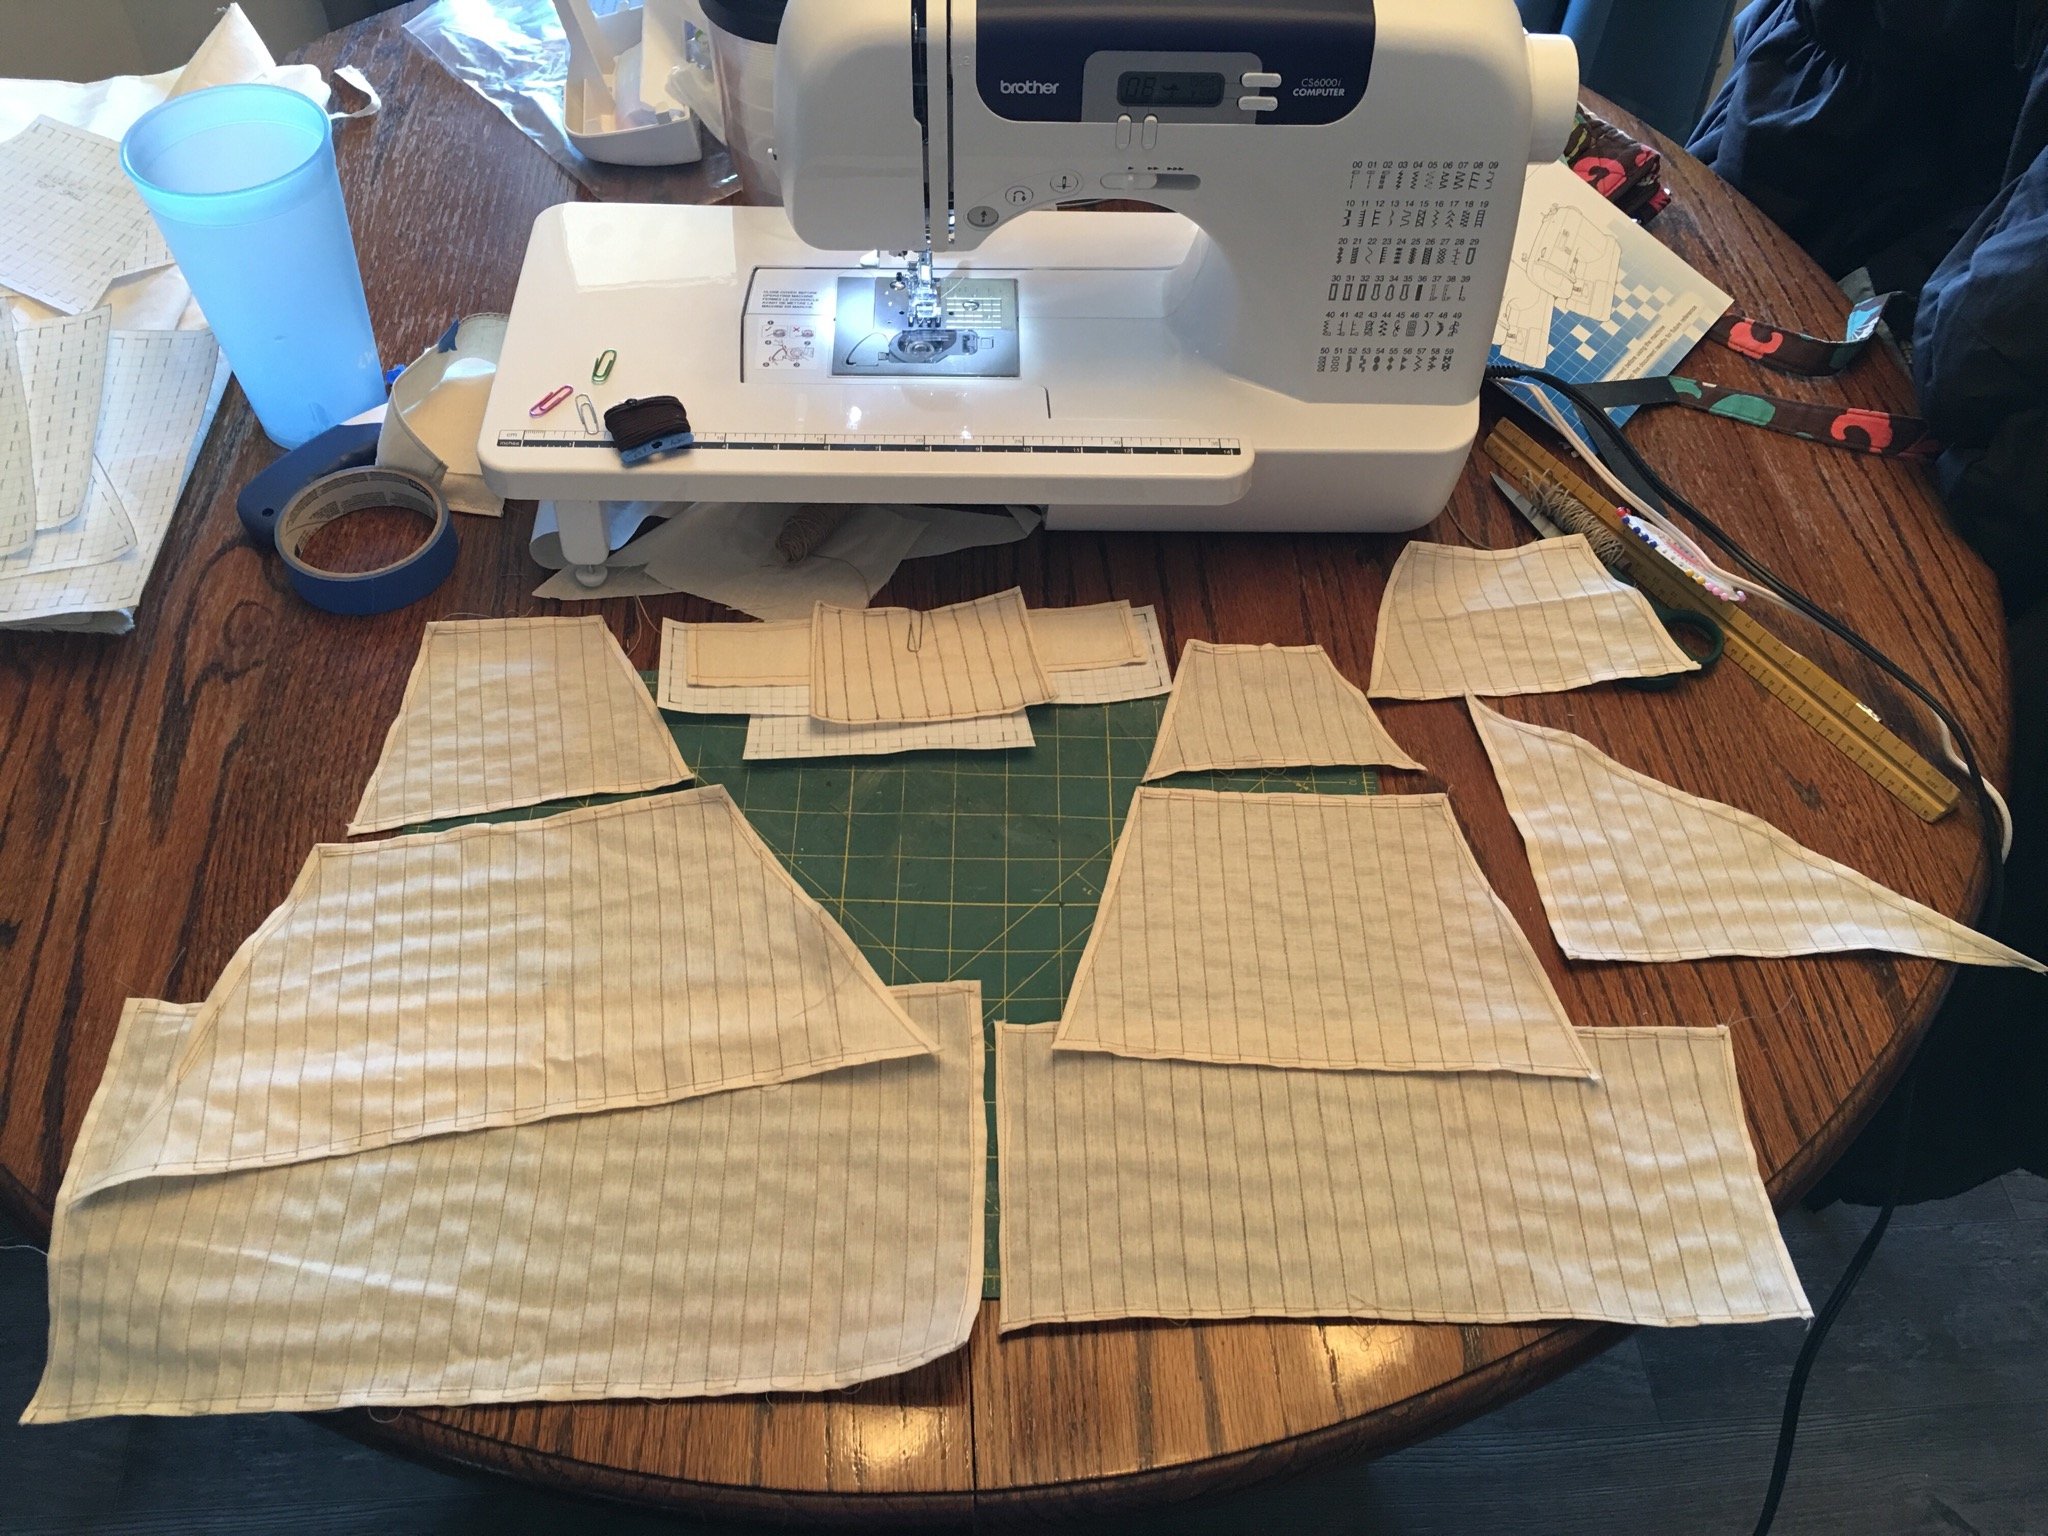
Sails are indeed a major undertaking especially with no rigging plan or supplied materials, but I think the effort will be worth while. This is my first ship with cloth sails. I’ve done the former plastic ones on my Constitution build but cloth does add extra challenges. Success! After learning how to use a sewing machine, some trial and error, I have a set of sails. I still need to clean them up and add details etc., but I have sails. More to follow.

- 961 replies
-
- 10
-
-
The stern is really coming together. You are making a strong argument for plastic modeling! The details you are achieving are incredible. I have never really thought about using plastic as a base for carvings, but I may need to look into it and experiment some for my Royal Louis build.
- 2,435 replies
-
- 3
-
-
- heller
- soleil royal
- (and 9 more)
-
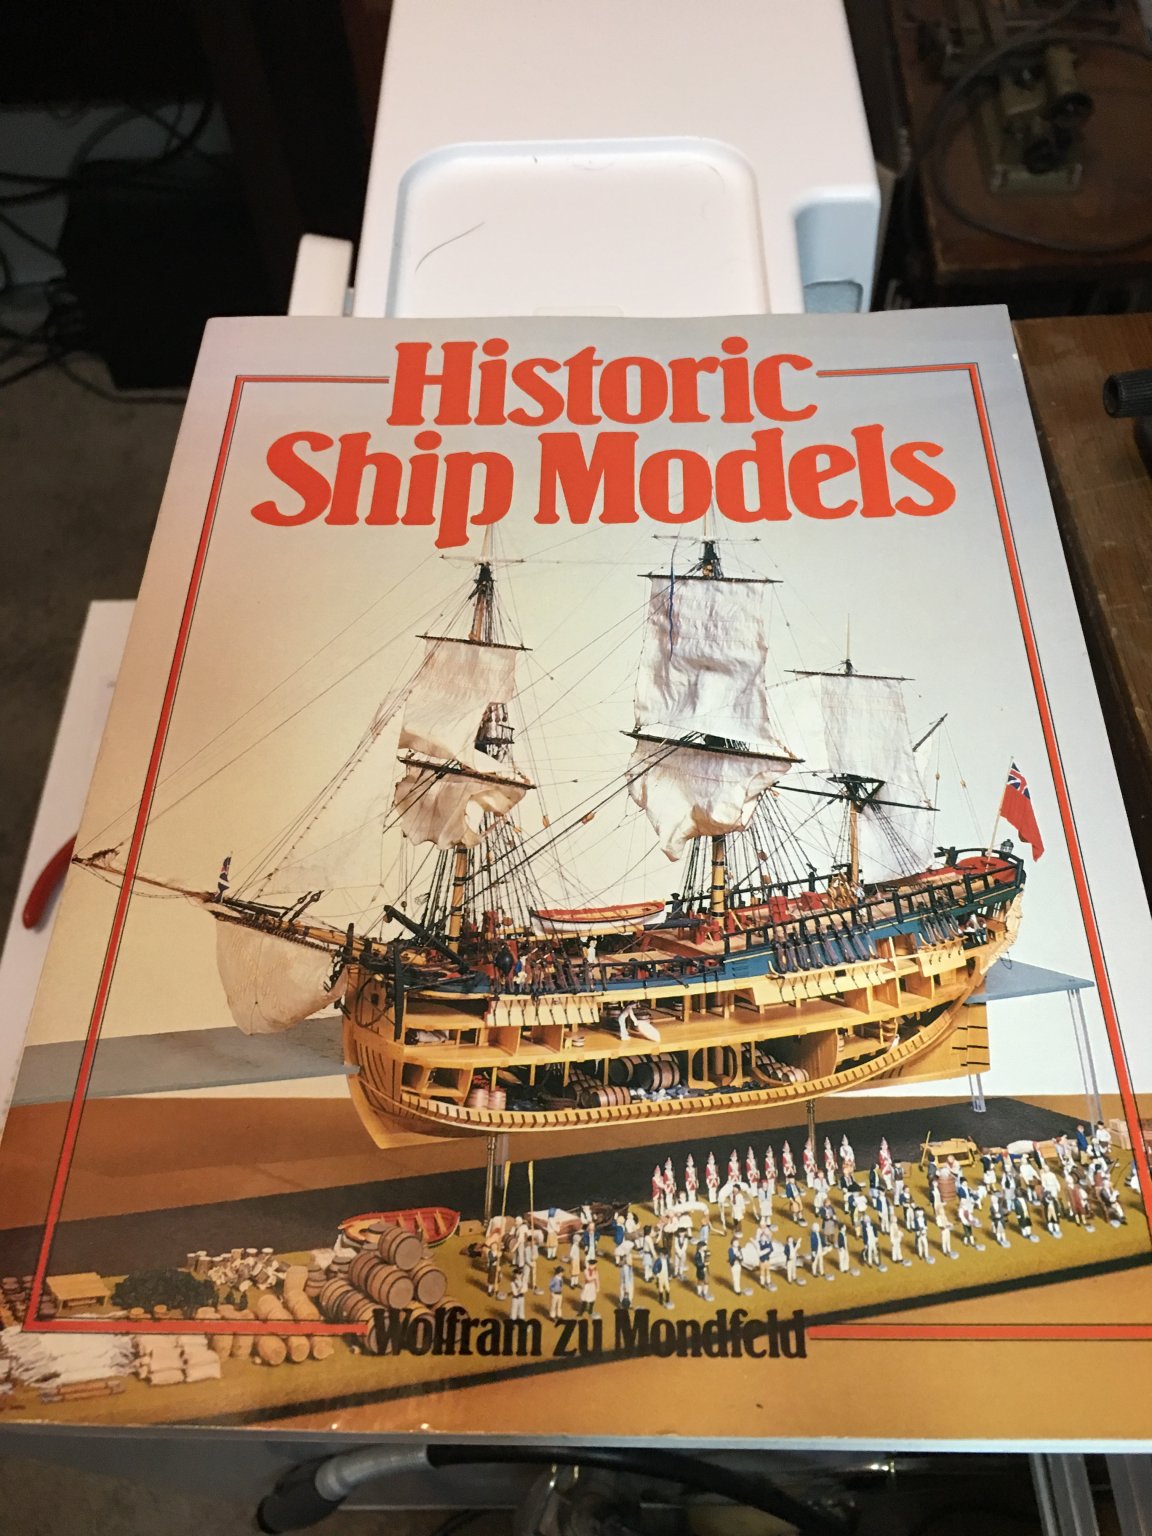
Picked up a book that has been on my wish list for some time now and I feel like a fog has been lifted and can see much clearer now. I will echo what many others have told me and that is this is a must have for any historic model sailing ship builder. A wealth of information and very clear drawings with excellent details. I really wish I would have had this book years ago.