


Torbogdan
-
Posts
252 -
Joined
-
Last visited
Content Type
Profiles
Forums
Gallery
Events
Posts posted by Torbogdan
-
-
Finally are the items have arrived! Shields and a baseplate. The complete model should be finished this weekend! I promise some pictures then.
-
Well, one order was returned to the company... They emailed me and asked if I wanted it. I have ordered from them in the past so my address is correct. It is in the UK som maybe Brexit have something to do with it.
The other order, some shields in 20mm scale is also lost. Same here company have sent it but nothing has arrived. This company is also in the UK...
If the first order, which is being re-sent, does not show up I will not order from the UK again. Obviously something is wrong with the delivery system from the UK to Sweden.
Funny. I thought this project was "done" just a base plate and some shields and it would be done in a week. That was like six weeks ago...
-
So far nothing has arrived... No shields and no baseplate. I won't name the companies yet, I'll give it a week or two more. Annoying.
-
Shields are on the way from Newline design. I hope they will fit the transfers I have. Mounting base also on the way from Cornwall ship models.
Everything should arrive this coming week. Then I can finally finish this model. In the first post I wrote this would be a quick build... I have learned that nothing is ever quick
") Mostly due to a long break when I did not feel like building. These last weeks it has been more or less waiting for parts. But... Soon... Done.
Mostly due to a long break when I did not feel like building. These last weeks it has been more or less waiting for parts. But... Soon... Done.
-
Work has kind of stopped for the moment. I have yet to find some nice shields for my transfers. A friend was going to 3D print some but they were to thin. I have emailed a company (Newline design) in the UK and asked how large their shields are but they have not replied yet. I also need a base. A friend was going to make one but work has stalled so I will order one from Cornwall model boats instead.
I annoys med that I cannot find some shields. How difficult can it be to find some 20mm scaled hoplite shields?
-
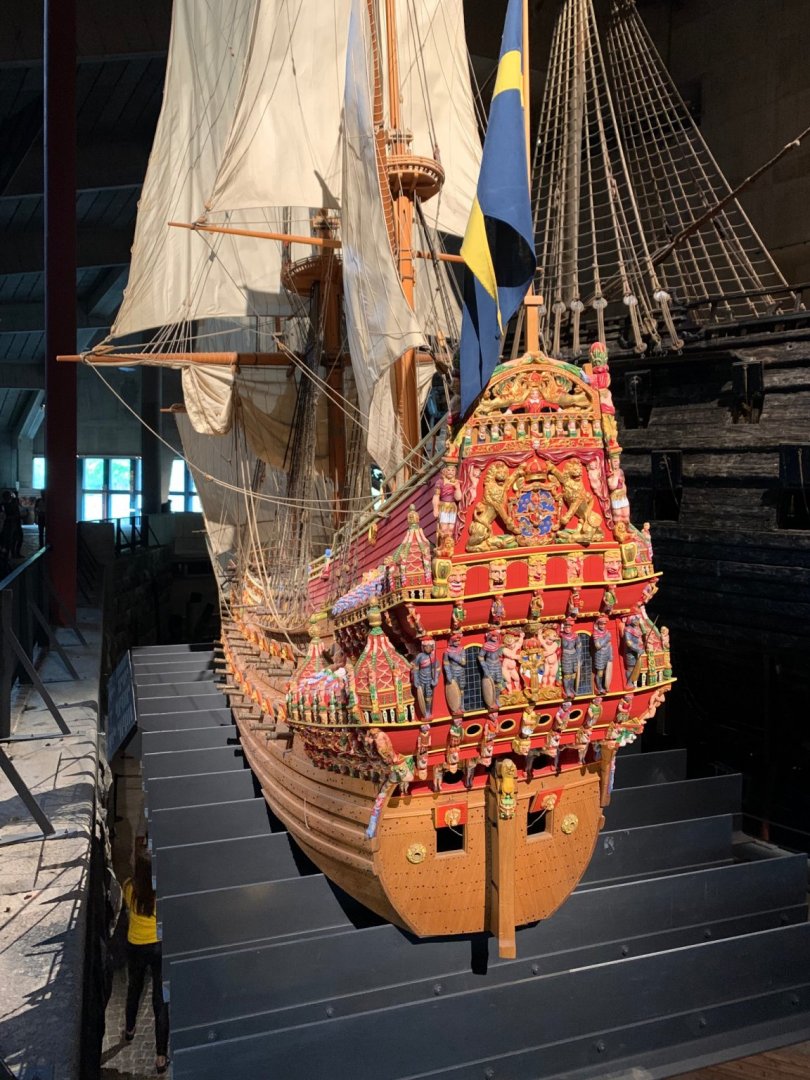
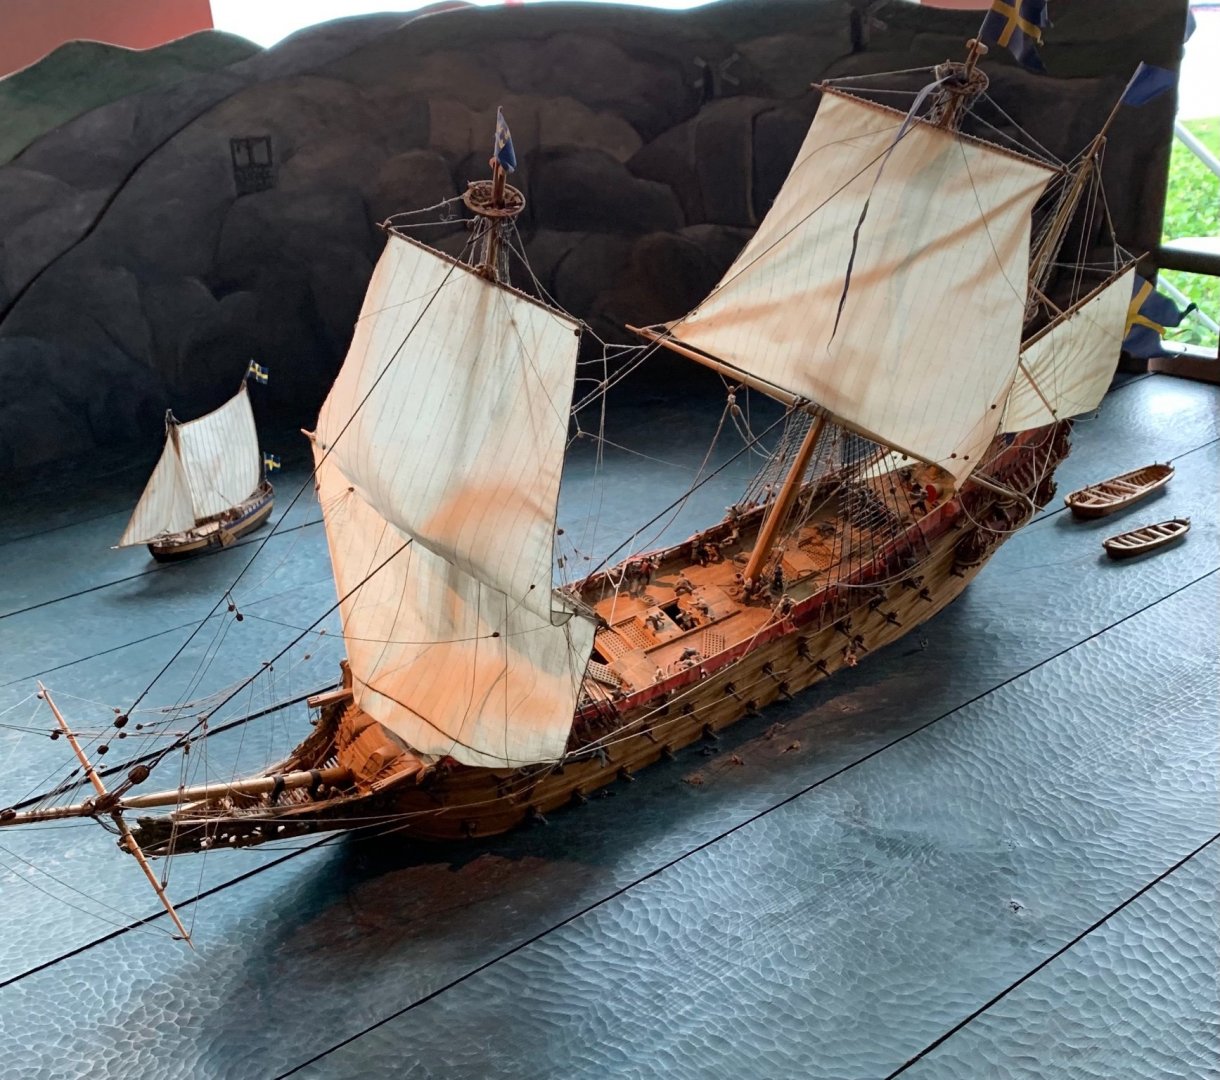
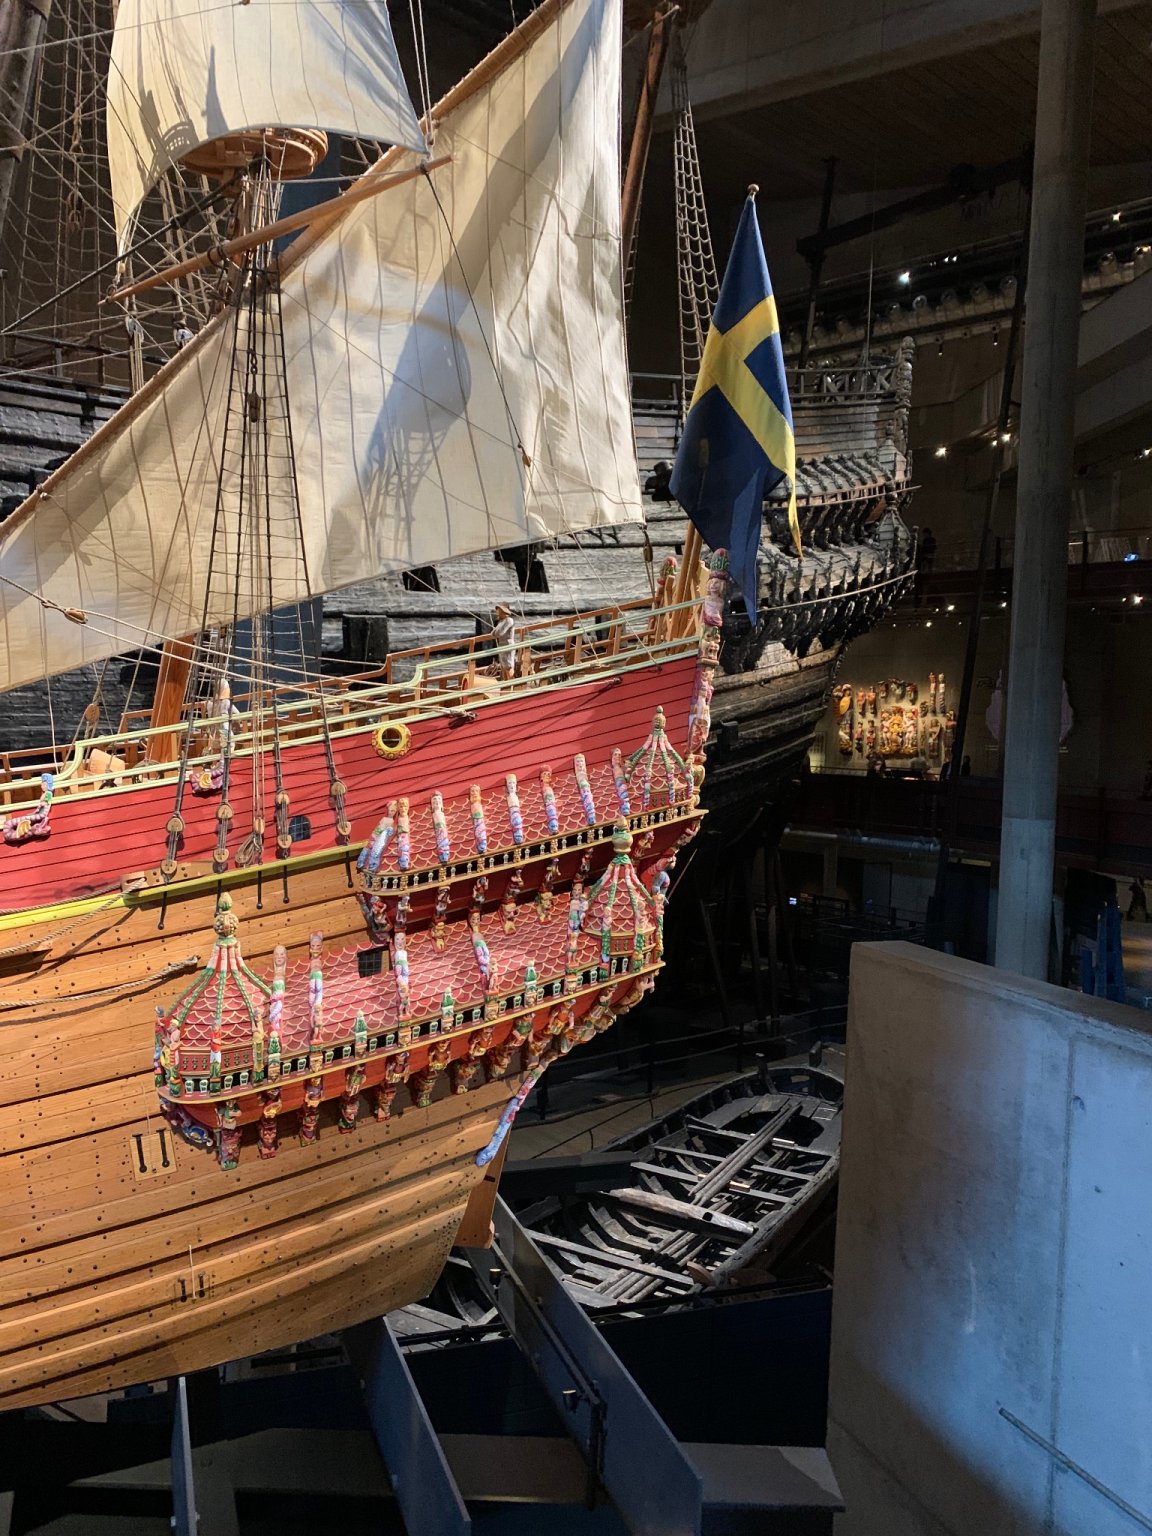
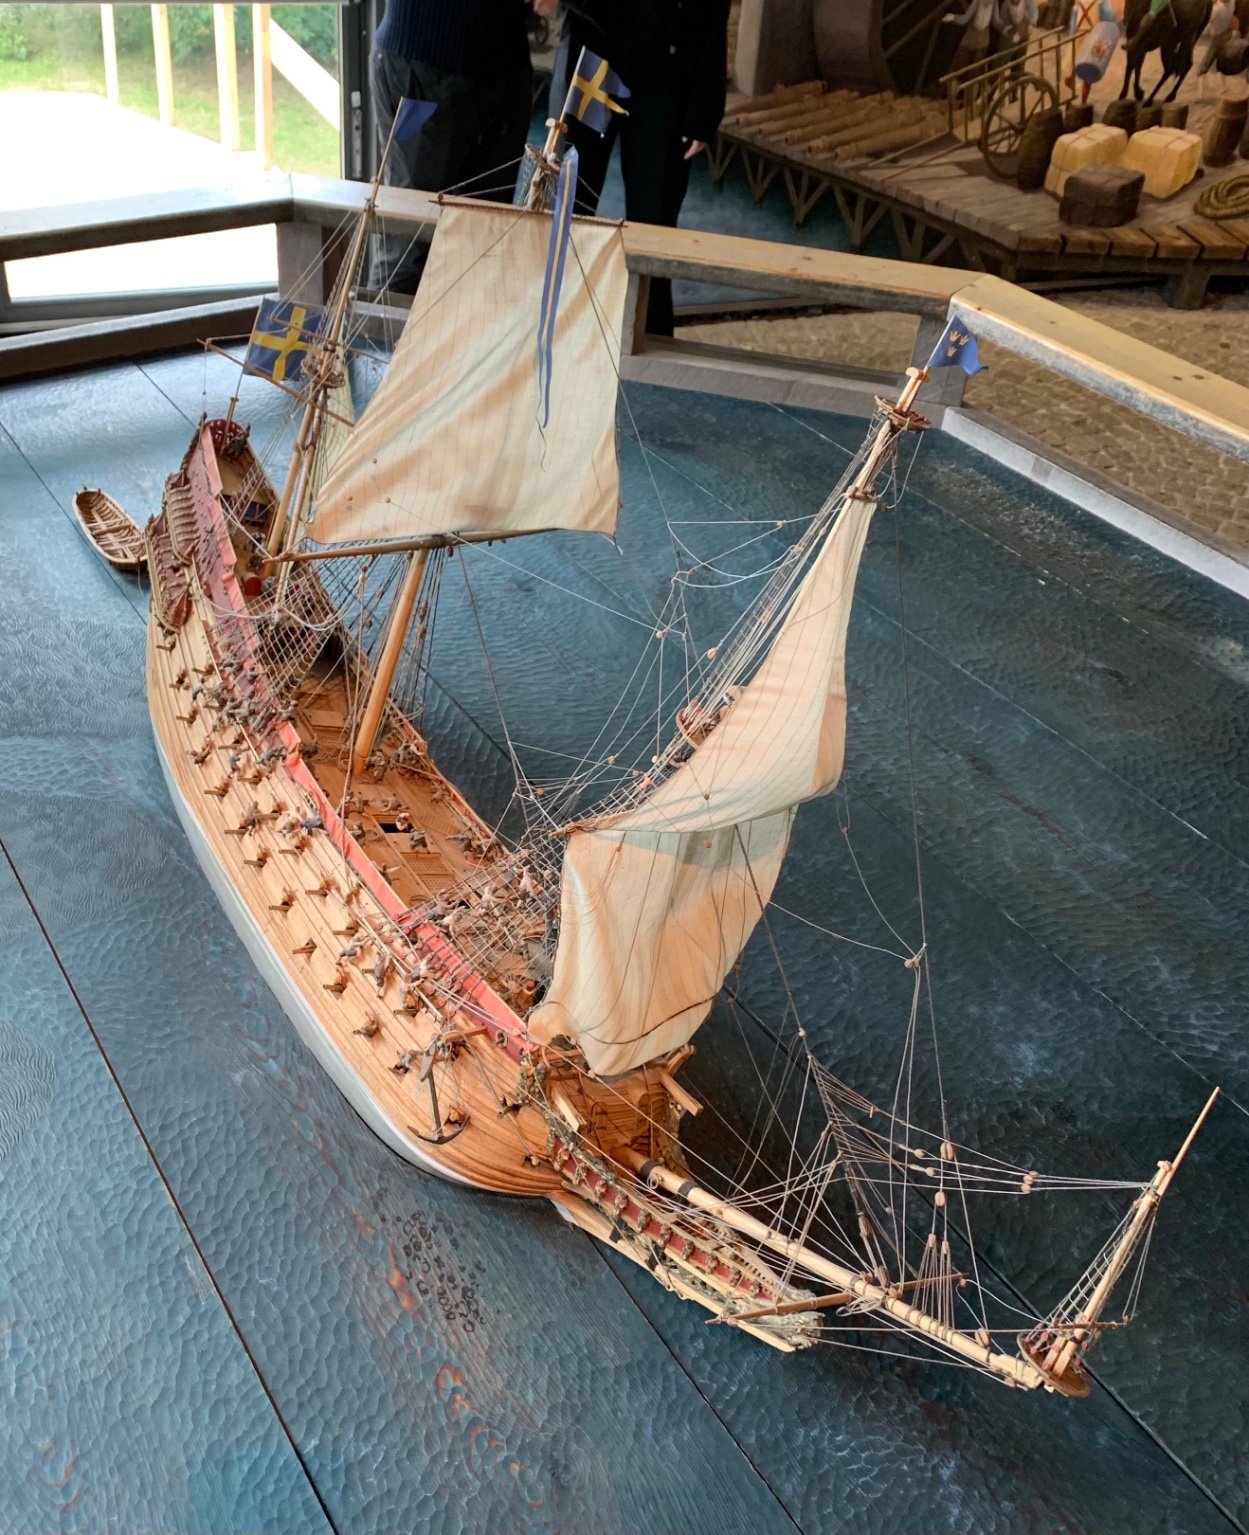
Yesterday me and my daughter went to the Vasa museum, at her insistence! I have been there several times but still like to go there. This time I took a few pictures of ship models. The first to are of the 1:10 scale model. It is absolutely huge (of course it is, it in 1:10 scale...😀) It must have taken quite some time and skill to build it.
The second model is of the ship slowly sinking. If you happen to visit Stockholm the museum is well worth a visit. You can easily spend a few hours there.
Children under the age of 18 is free admission.


- Louie da fly, tlevine, thibaultron and 15 others
-
 15
15
-
 3
3
-
I just found this blog. Interesting to follow. I would like to build solid hulls as planking is far from my favorite. And planking is almost 50% of building
")
I agree with black being good to find blemishes. it really brings them out, unfortunately.
Excellent work so far!
-
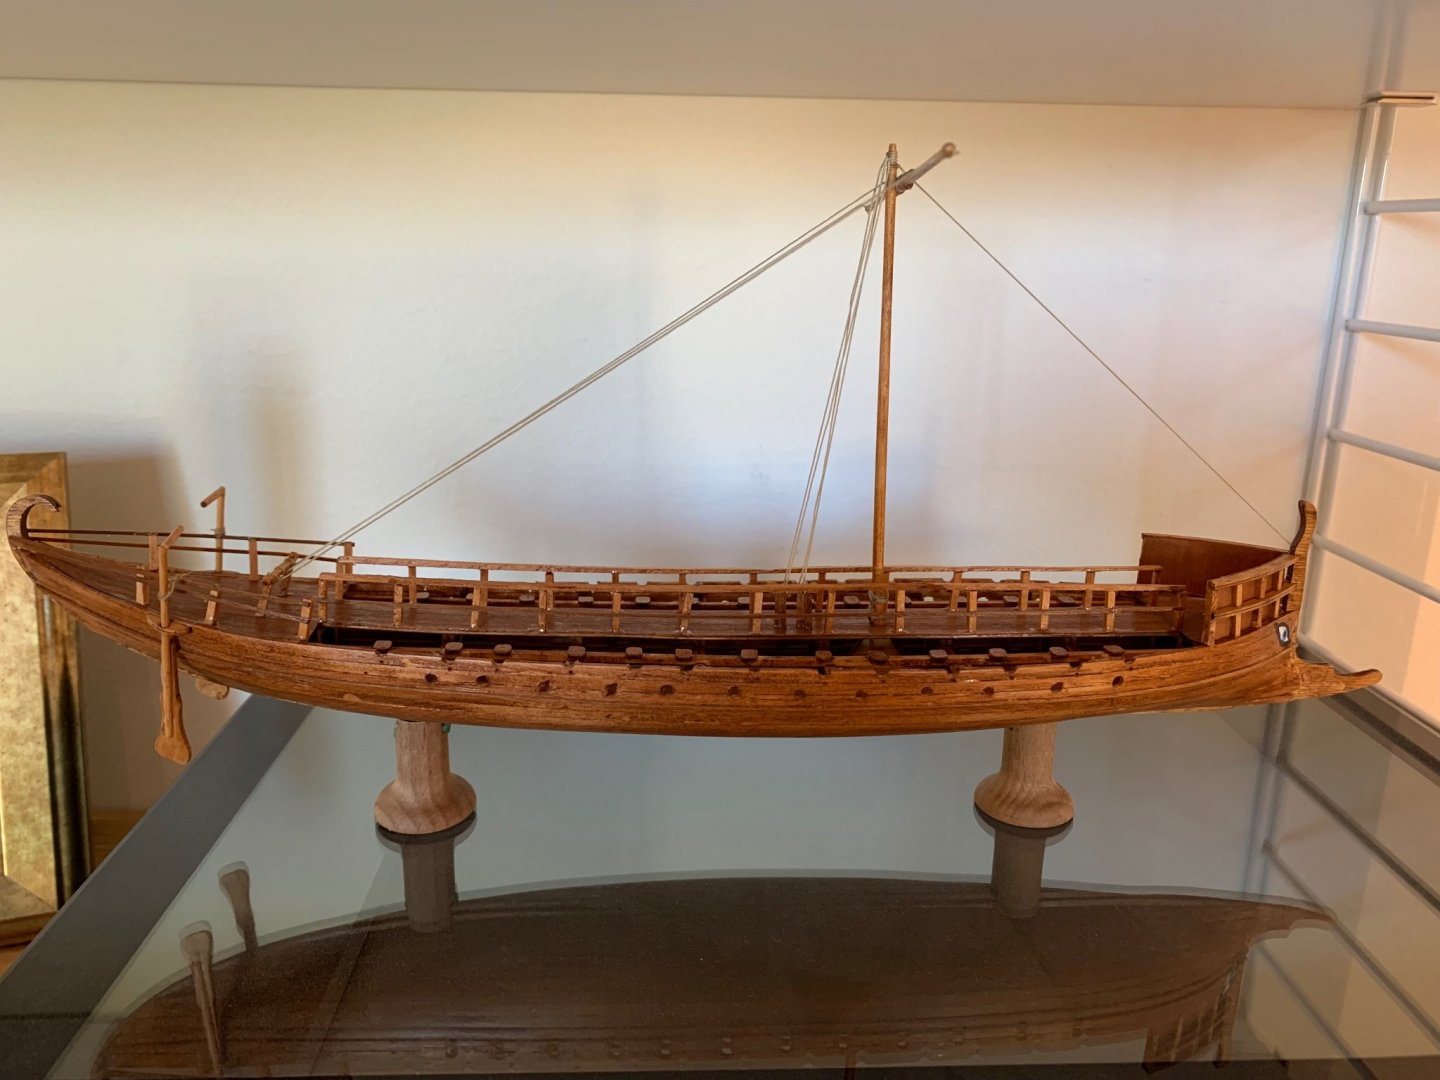
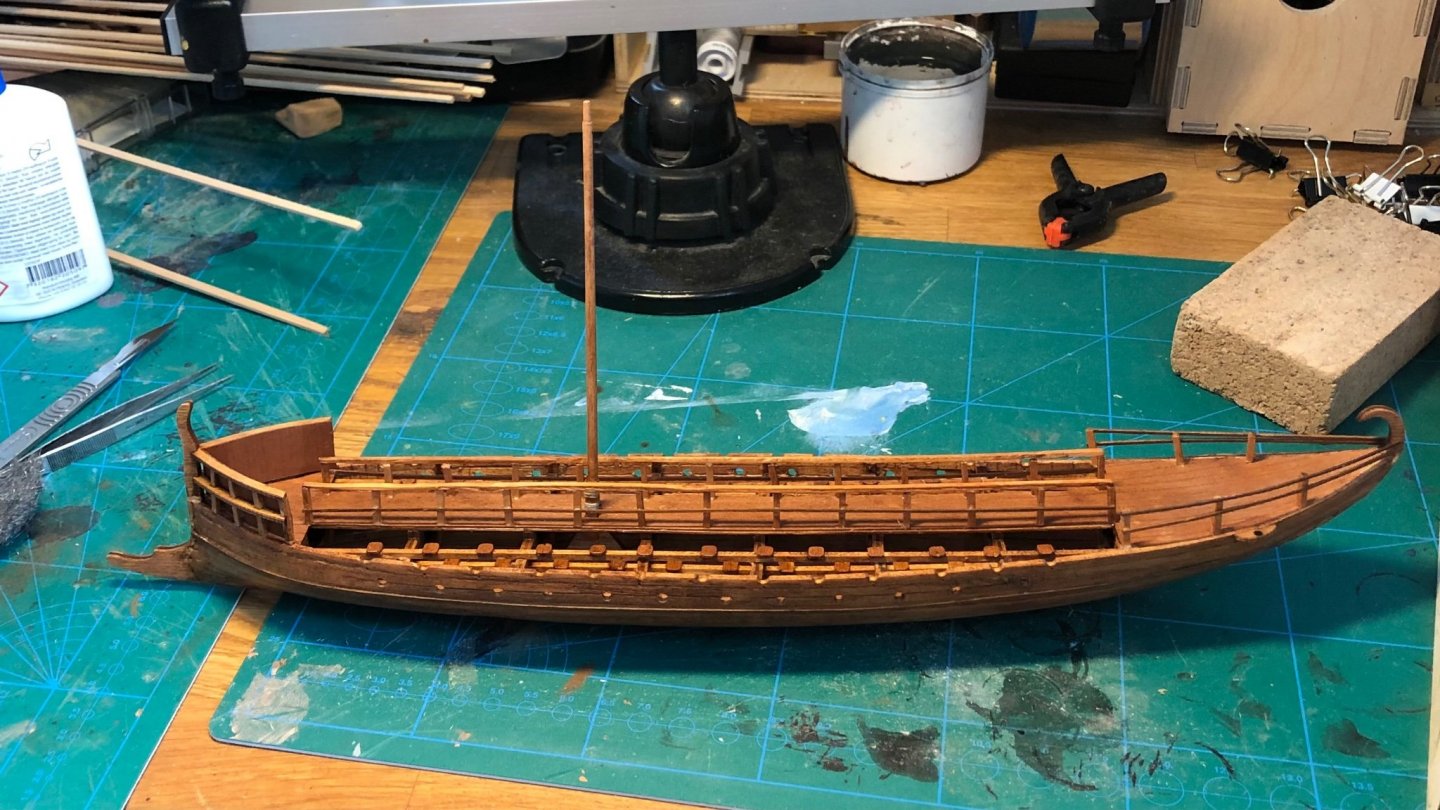
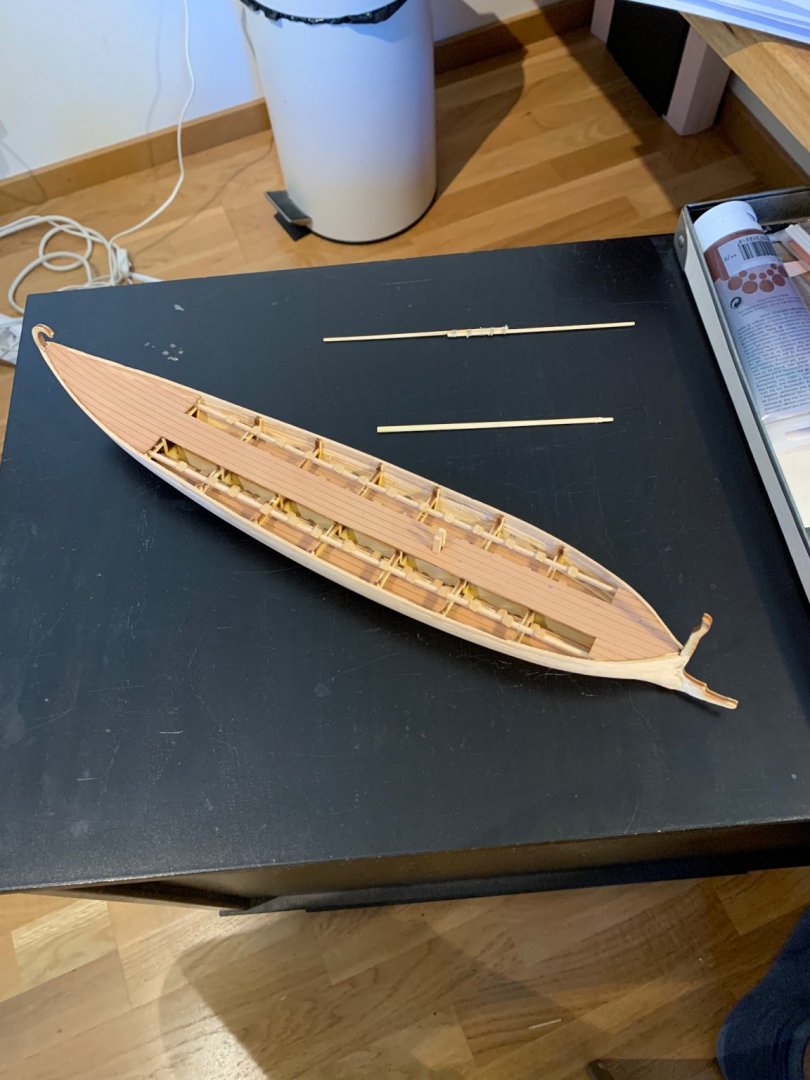
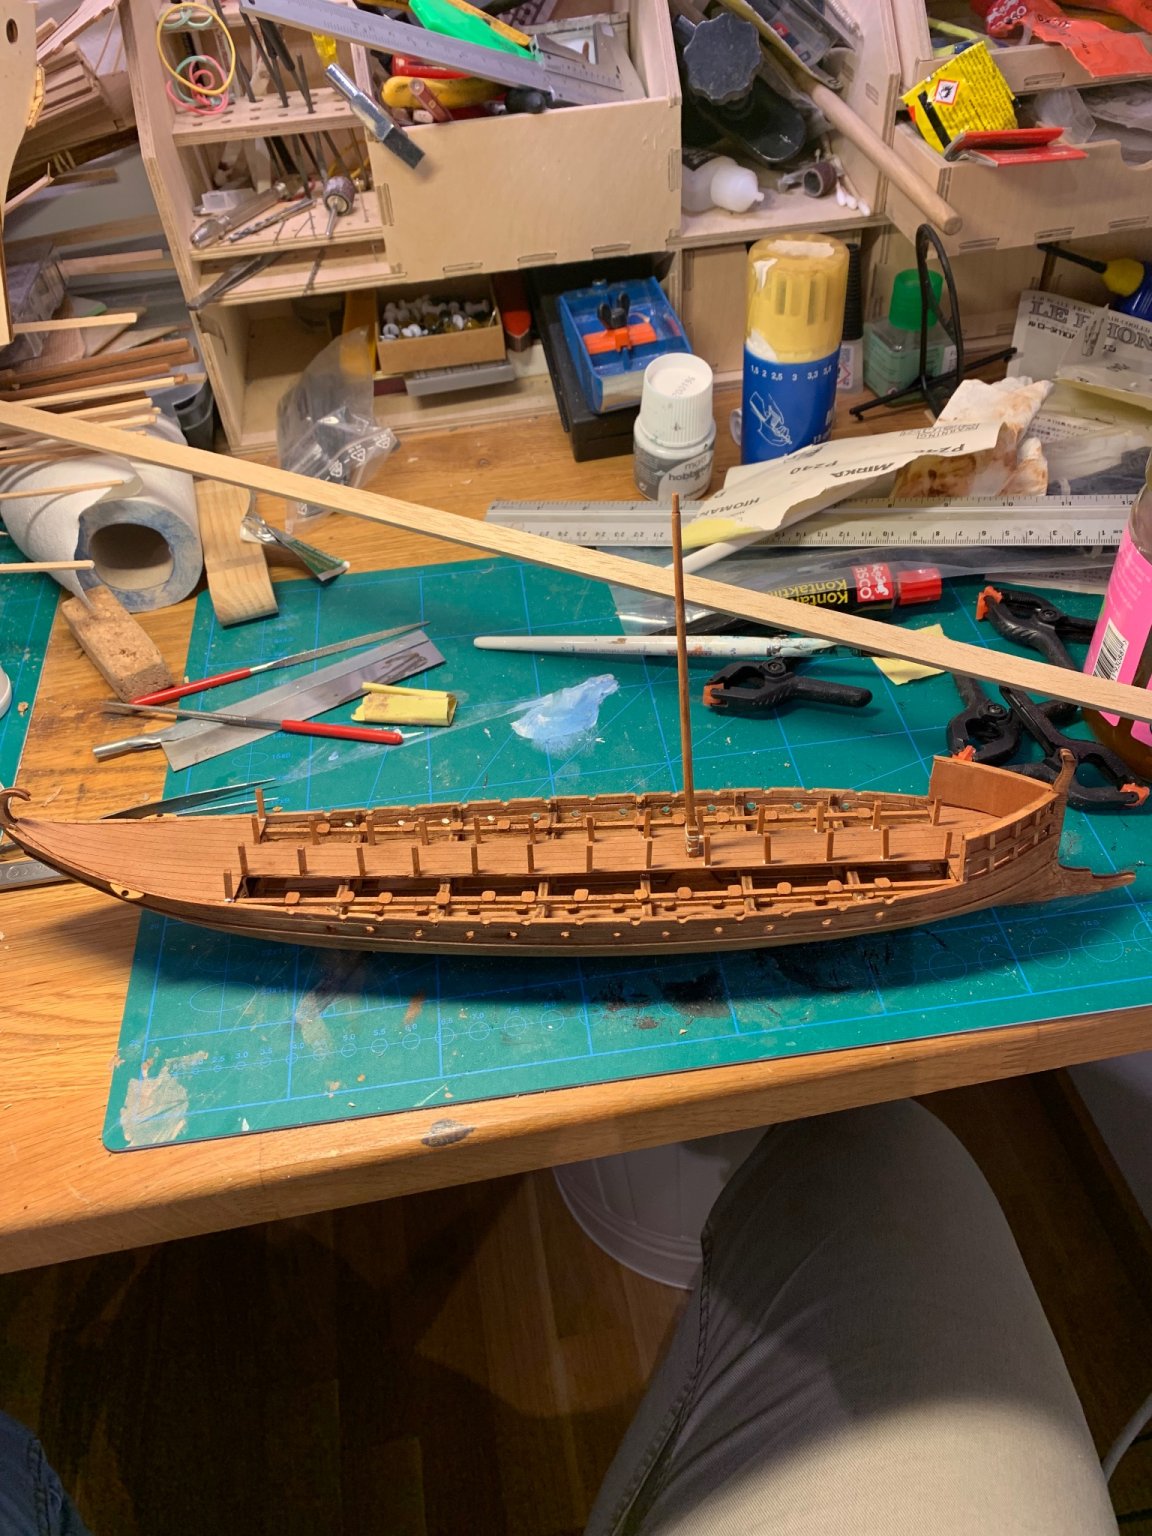
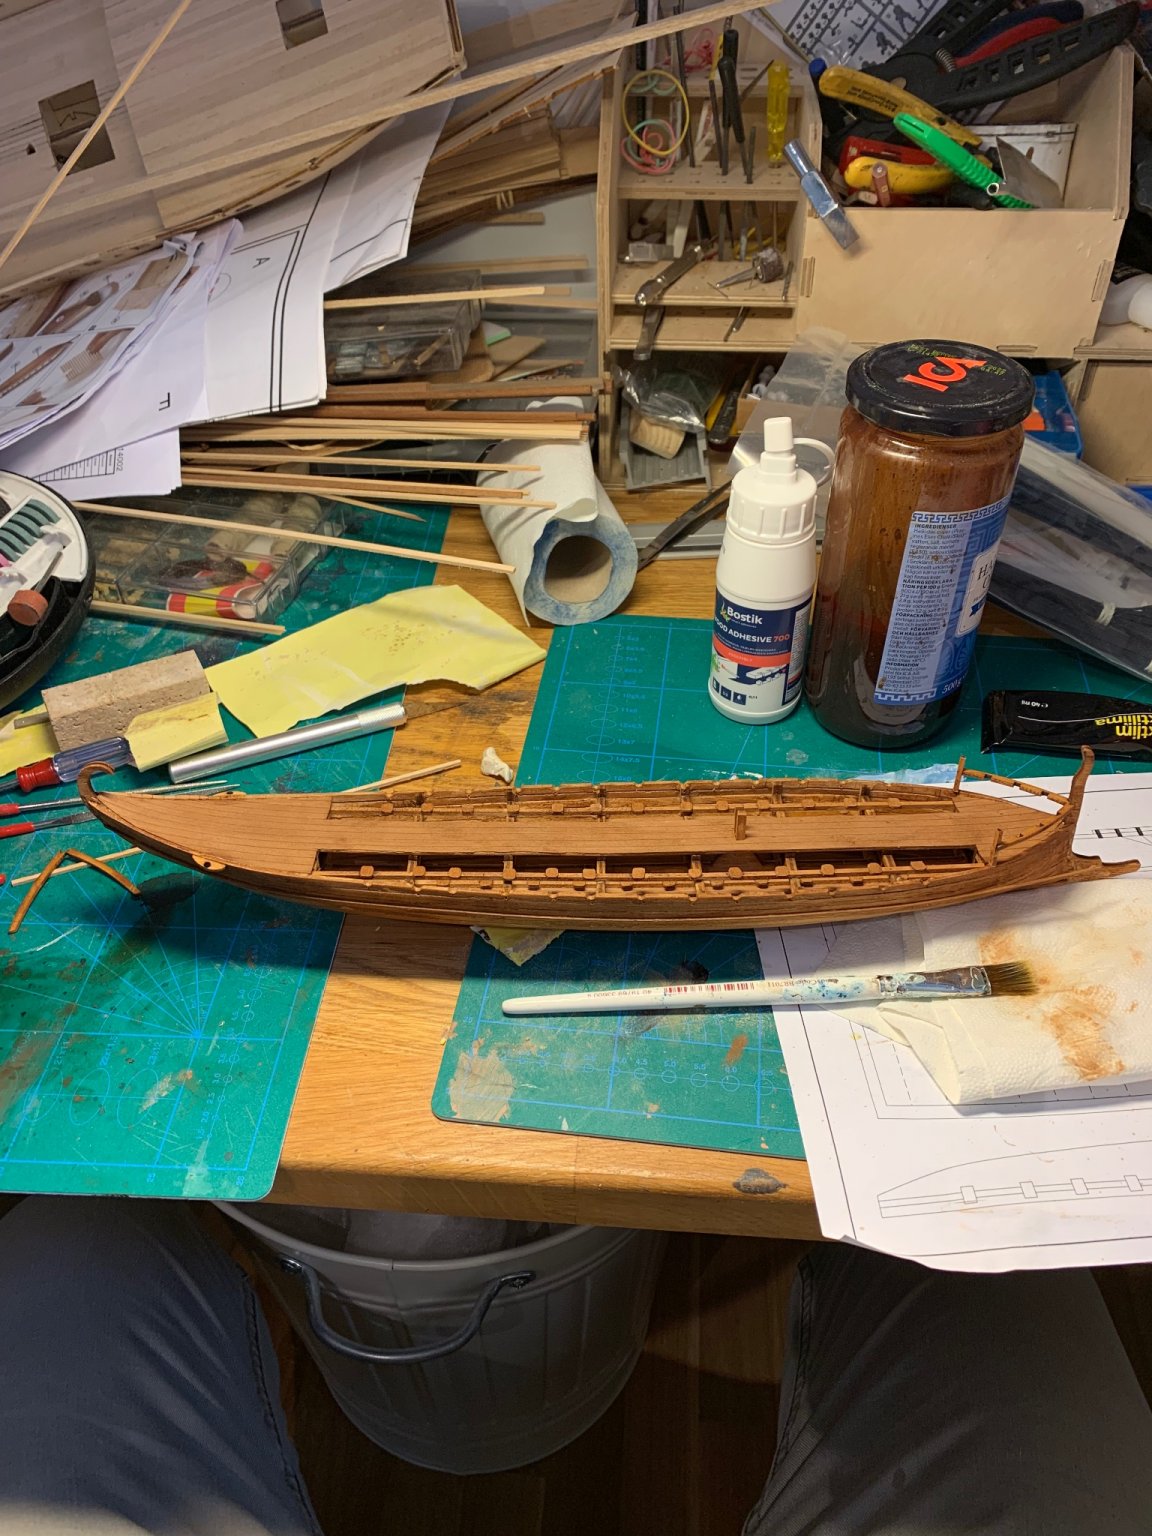
The ship itself almost completely done. I need to scrounge up some lead foil for the ram. Then it is the shields (waiting for the transfers and the 3 d printed shields), Fix the spears and the amphoras (also waiting for the 3d prints) Finally the base.
The sail should have been maybe a centimeter or two longer but it is ok for me. As always the "floating" rigging kind of annoys me but not much can be done about it. Gravity does not work on very light items 😃
- Louie da fly, BenD, GrandpaPhil and 3 others
-
6
-
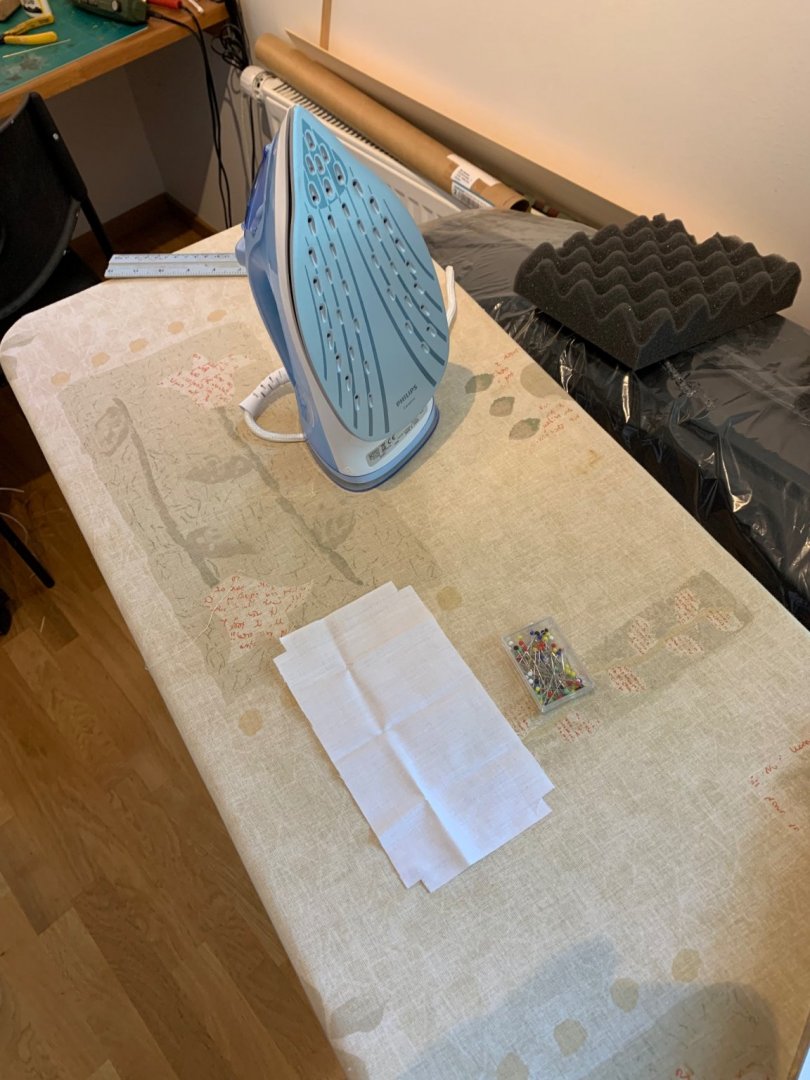
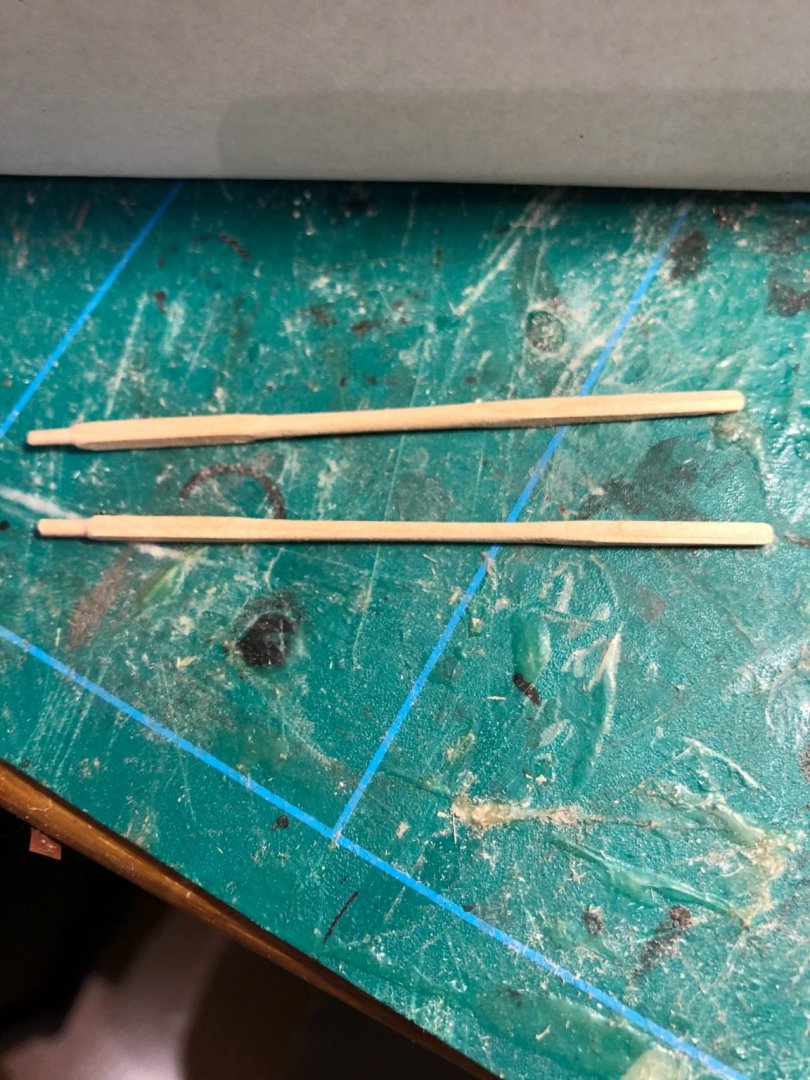
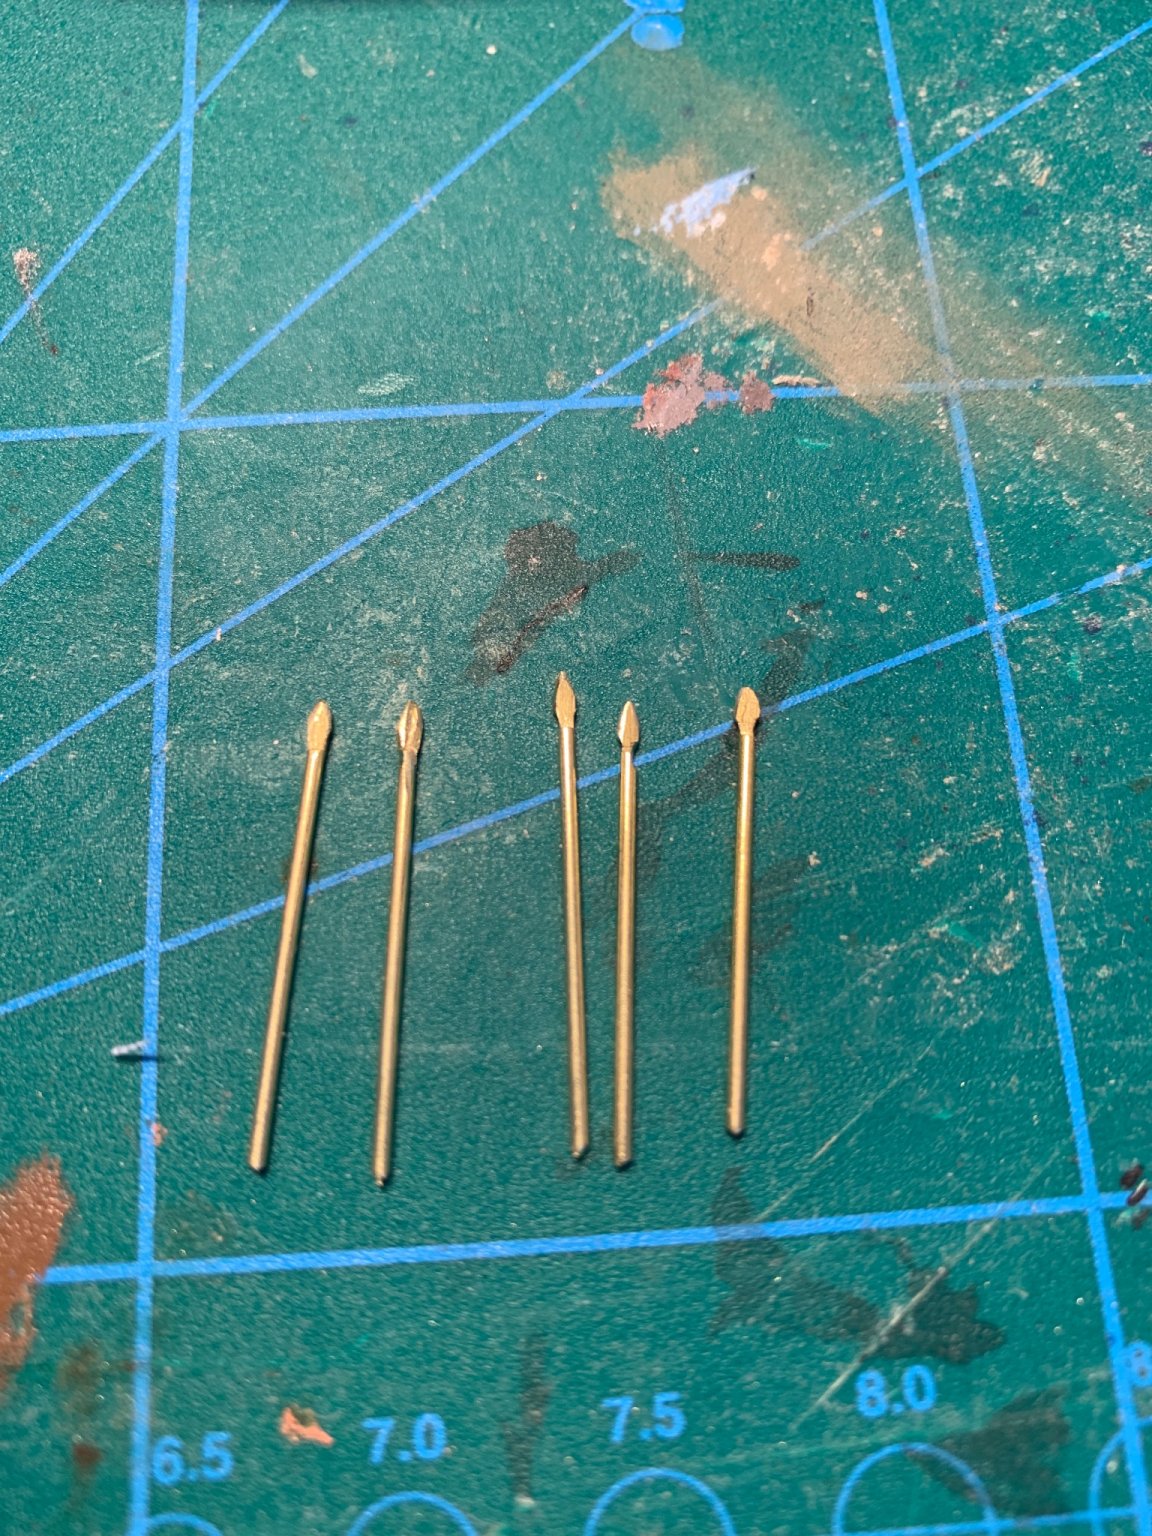
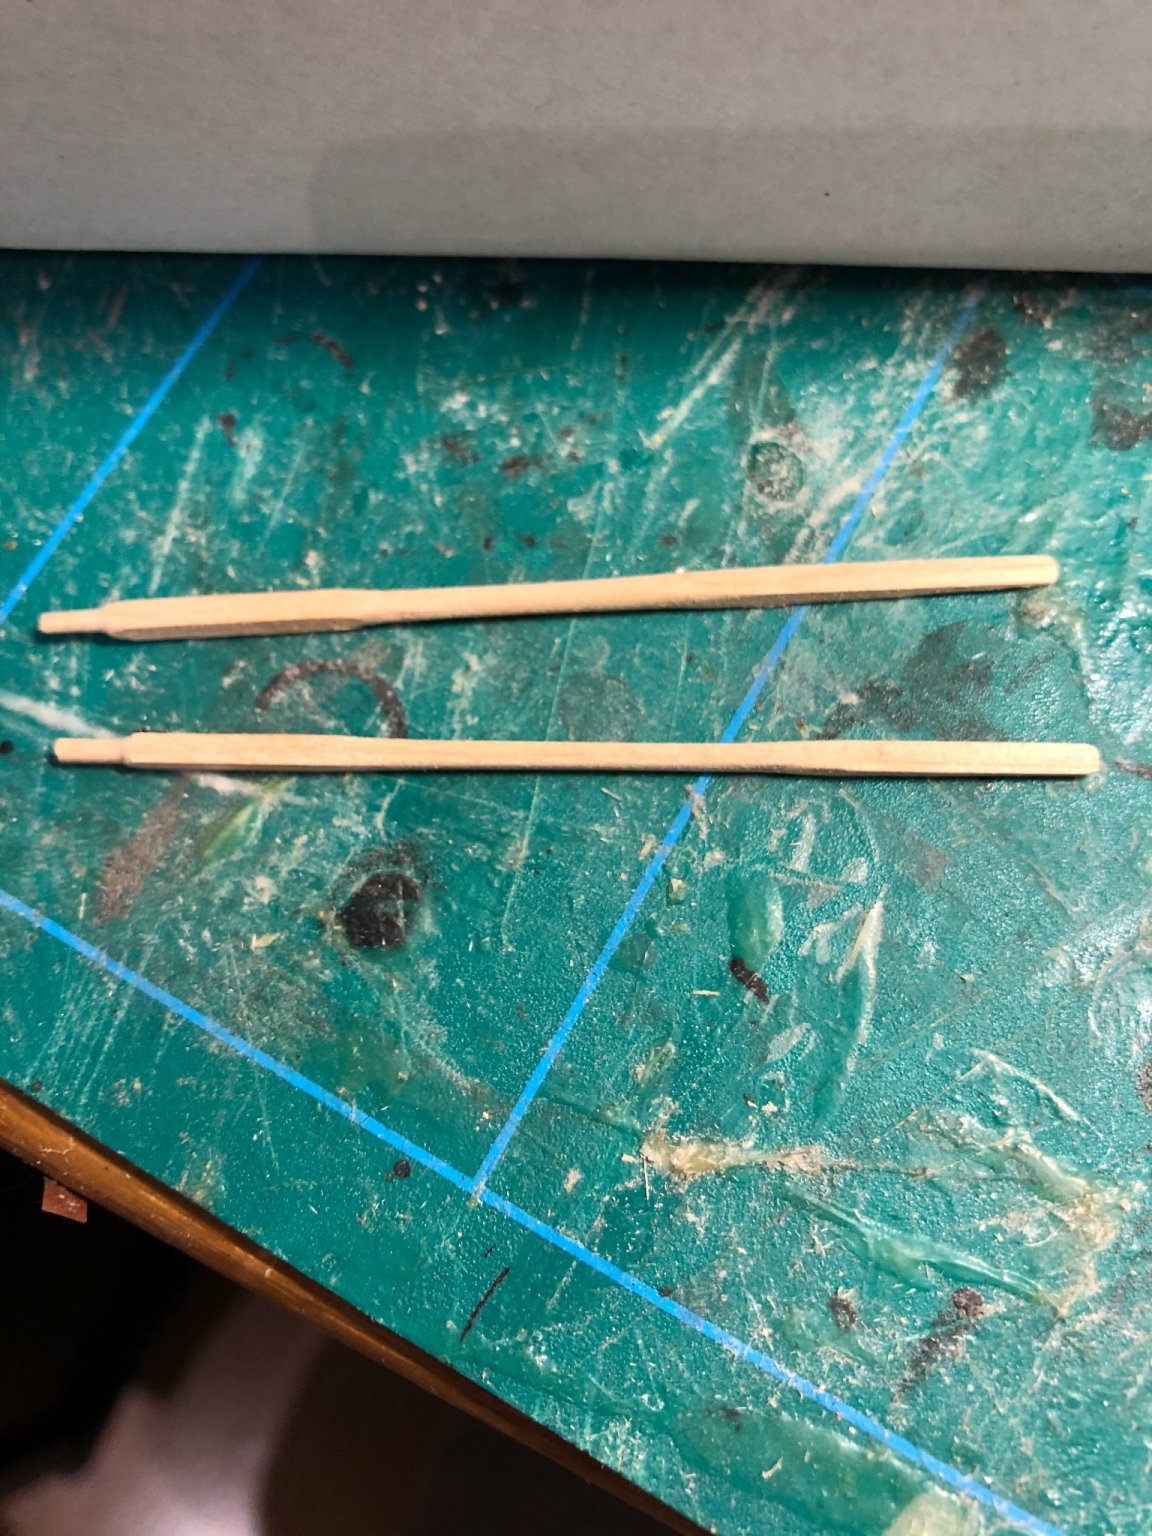
Home made spears. Sail about to be steamed and then sew the edges. I have also made some bows. the bows are made of .5mm brass wire. Spears made with 1mm brass wire. I flattened the point and then ground a spearhead with a Dremel tool. The standing rigging is done, now I just need to get the sail done so that I can add it and the rigging for the sail.
Some work have been outsourced to friend, Shields and the base. Also waiting for the shield transfers from UK. I'm quite excited, can't wait to get all the pieces and finish this!

- GrandpaPhil, bolin, Louie da fly and 1 other
-
4
-
Amazing how things start to come closer to completion when you actually work on them! Having been home for a few days taking care of sick children have had the fortunate side effect of time to build. Still some work to be done but it is getting close to finished. I'm pleased so far with it. A nice base has been ordered from a friend who has a most impressive wood workshop.
The advice to make a sturdy base has been heard, I'll try to avoid it tipping over on 25 hand made oars...
Time to start on the sail.

- BenD, Louie da fly, oneslim and 5 others
-
8
-
Very nice! Excellent work. I'm leaning towards a slimmer base, oars will stick out but I'll just have to be careful. Sometimes the smallest decisions can be the most difficult ones😀.
-
It is almost getting finished. I going to break out the sewing machine to sew the sail. Then it is the rigging. I have ordered som shield transfers and when I have them I will ask a friend to 3D print some shields. Then some painting. Also I think of adding some goods such as amphoras and bundles of cloth.
What size should the base be? the ship is approx 40 cm long. With oars deployed it is approx 20 cm wide. Should the base be 40 x 20 cm then or should the oars "stick out" from the base? What is most pleasing for the eye or most practical?
-
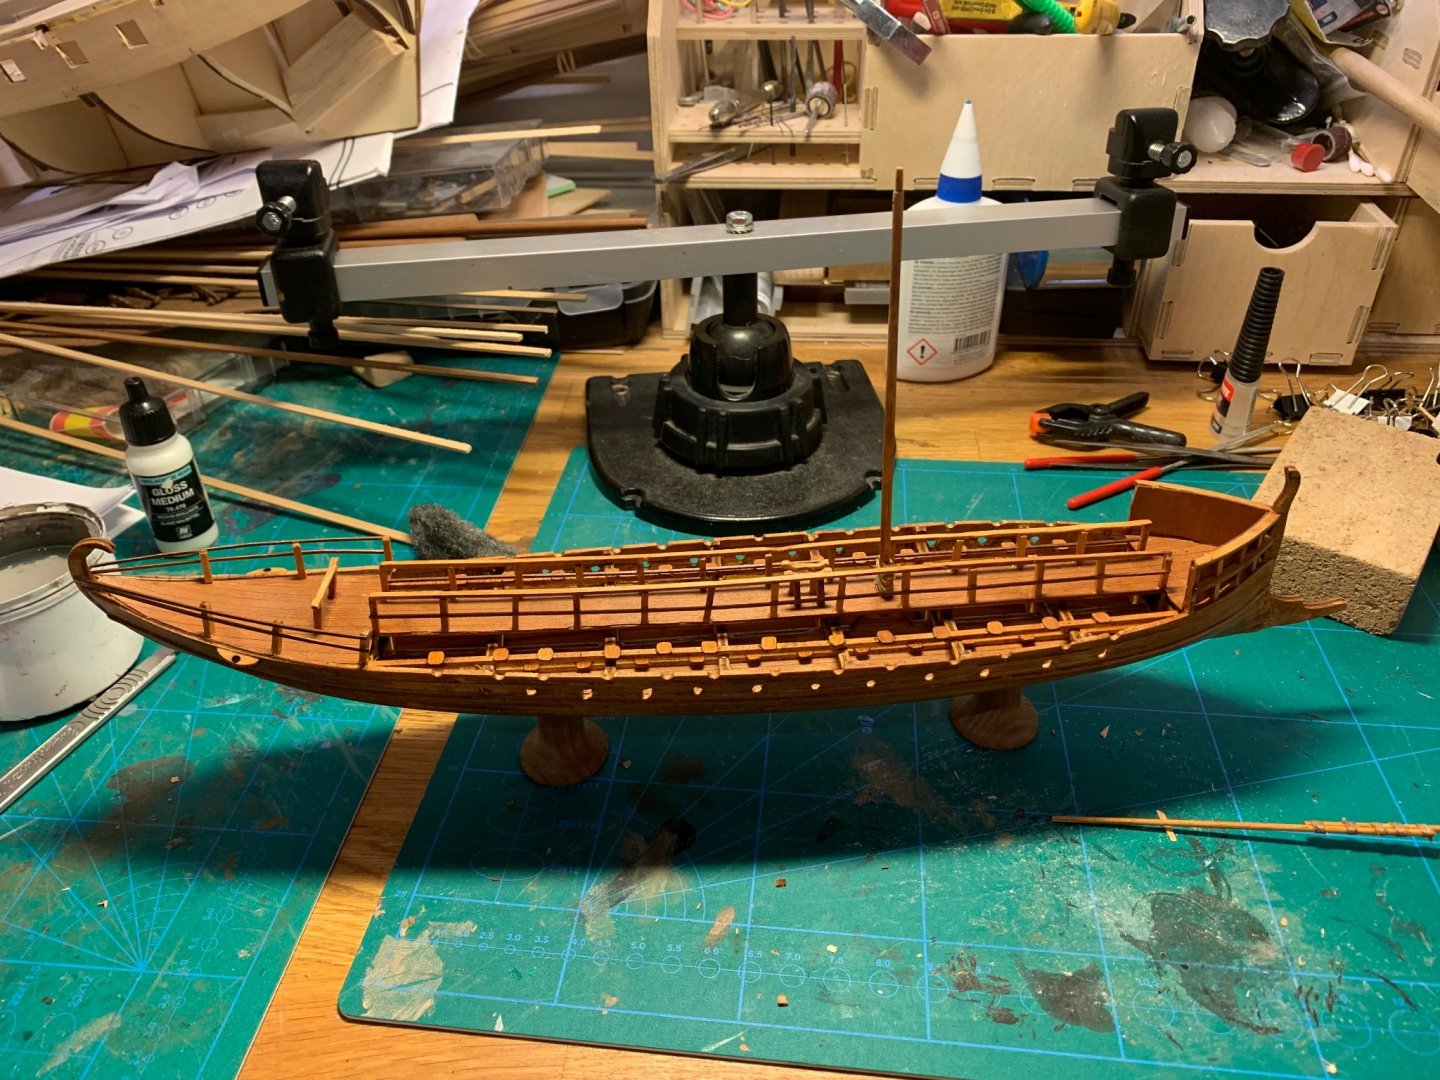
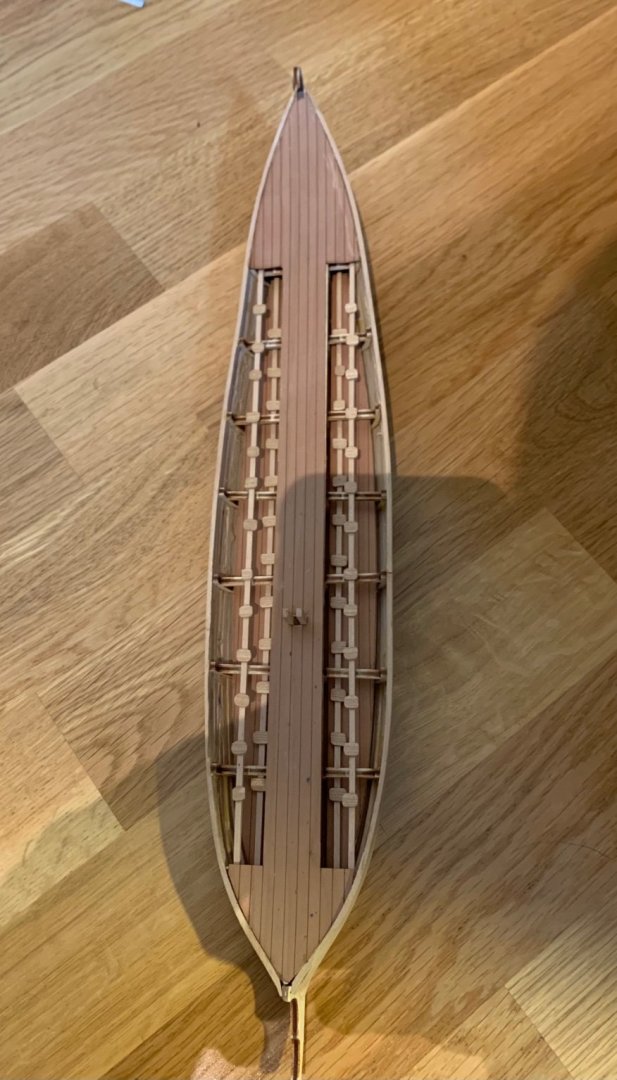
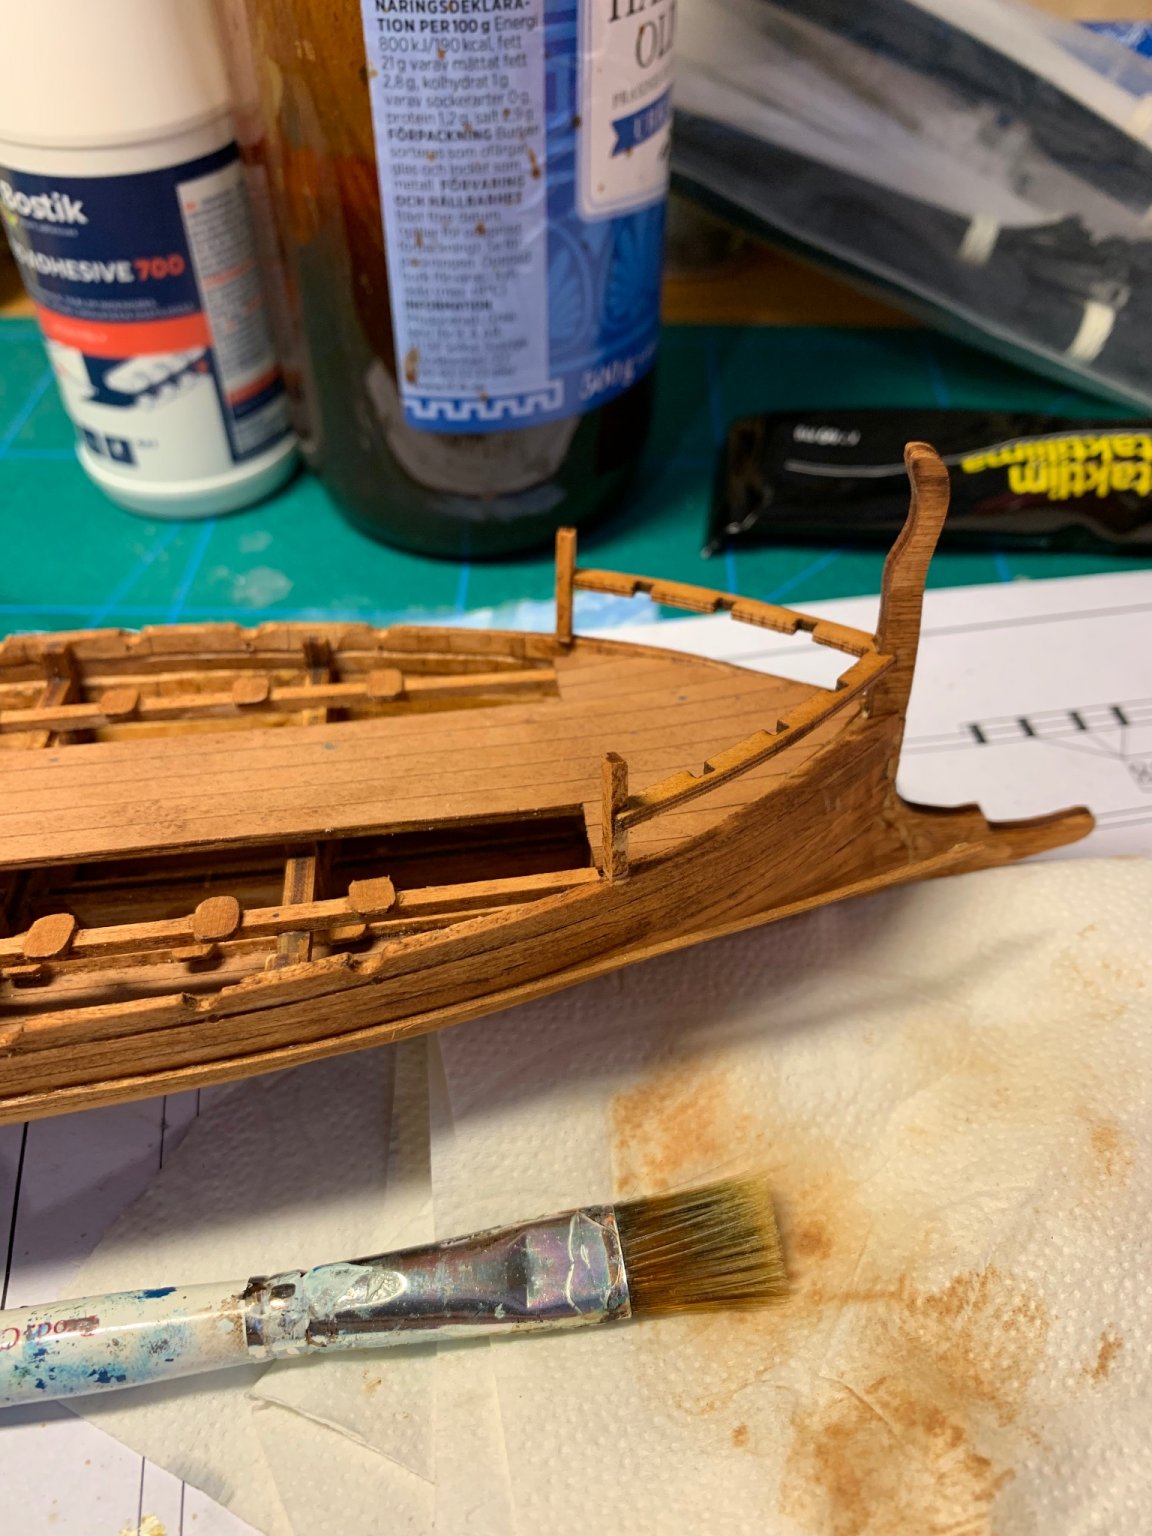
Mast in place and some railing between the rowers seats. After this picture I have added some more railing. It looks better in real life than the picture. The ship looks more alive than here. All oars have been washed, varnished and sanded with steel wool. When the ship is built I will varnish it and sanded with steel wool to get a nice smooth finish.
I believe it would have actually been better to have used a pure raw umber wash but it is what it is. Anyway it is coming along quite nicely. Except for my photo skills which need some improvement

- GrandpaPhil, VTHokiEE, bruce d and 1 other
-
4
-
Some pictures of the painted (washed) hull. I made my own wash with raw umber and burnt Sienna, oil colours from Winson and Newton and paint thinner. If the shade is historically correct I have not the slightest idea but I like the look. So much for historical accuracy in other words. I have had a few days off from work so have made some progress. The only thing that has slowed me down (quite a bit actually) is that I ran out of quicksetting white glue. All I had was "ordinary" slow setting white glue. In other words I would glue a part or two, wait an hour. Glue another part, wait... Well you get the idea.
I will most likely I will do something about the ram, it does not look that good with it being in wood. I'm thinking of adding some shields and spears to give it a more lived in look.


- ccoyle, Louie da fly, Danstream and 4 others
-
7
-
A picture so far, almost. Since I have painted the hull in a burnt Sienna look. I was a bit eager though as I forgot to add a few details. So I will have to add the afterwards and paint them later. In the picture is also the mast and main spar.
- GrandpaPhil and Cathead
-
2
-
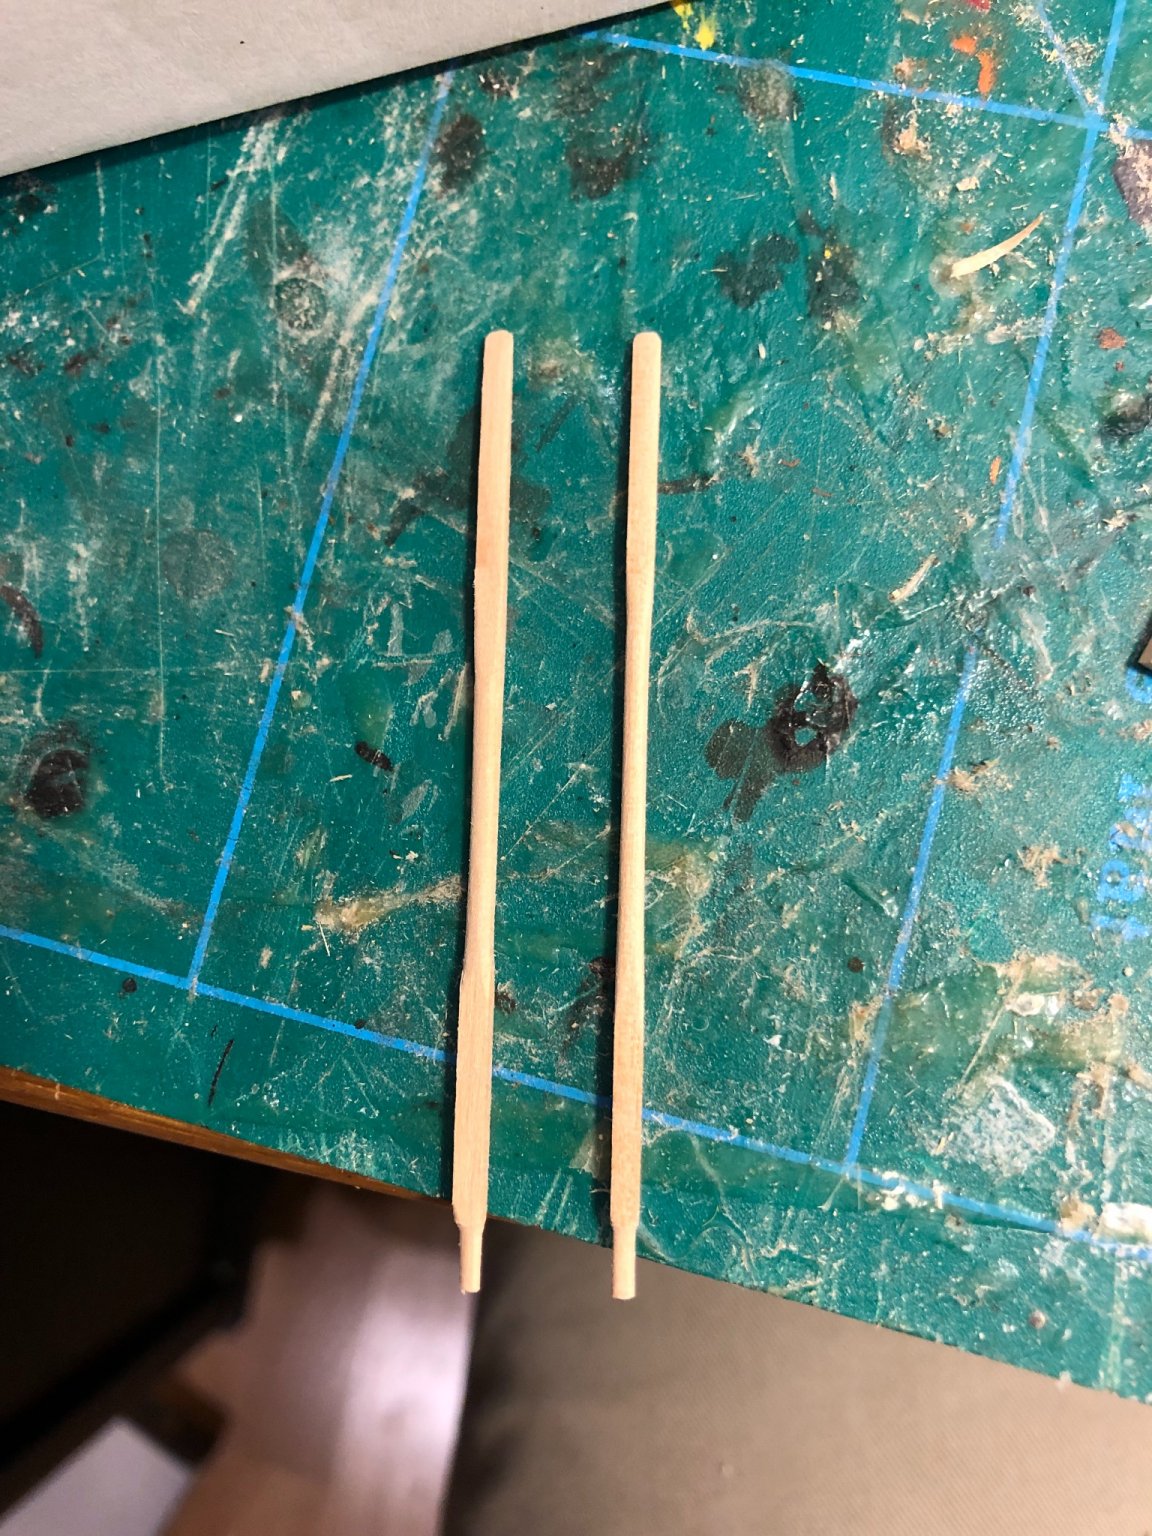
Sanding oars ar bOARing... (sorry). 38 done the rest in different stages of completion. I even aligned all 38 for a picture and took the picture with the wrong phone (work phone) which doesn't synchronize with my computer. Sometimes nothing goes easy...
the remaining 12 should be finished tomorrow.
-
Amazing thread! Building the model half a century ago (well almost...), keeping it and then disassemble it and build it again, amazing. Excellent work!
- Keith Black, Jeff T, mtaylor and 1 other
-
4
-
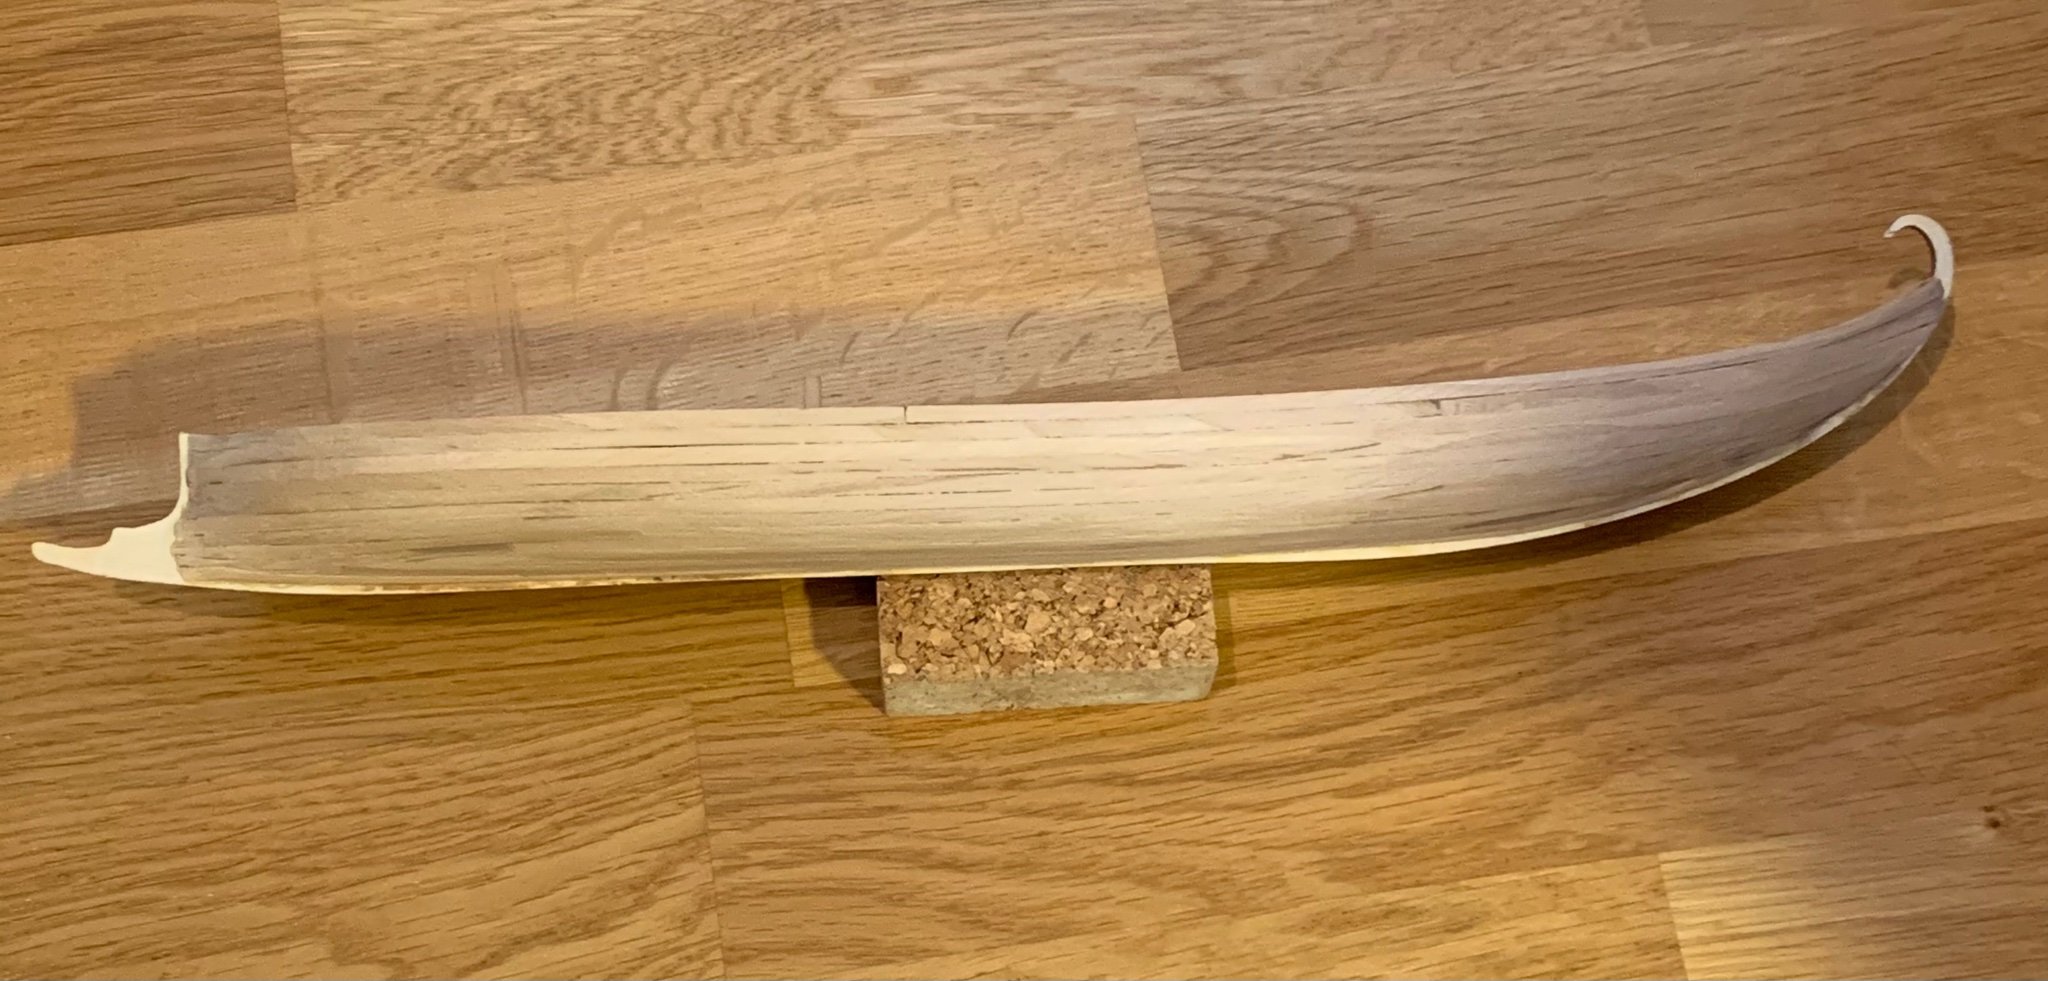
Three pictures of the hull. It has been sanded once but I will do some more sanding to smooth out some "bumps". Still working on the oars. All together I need 48 oars, Done about half of them. It is very boring sanding oars


- Cathead, GrandpaPhil, bruce d and 1 other
-
4
-
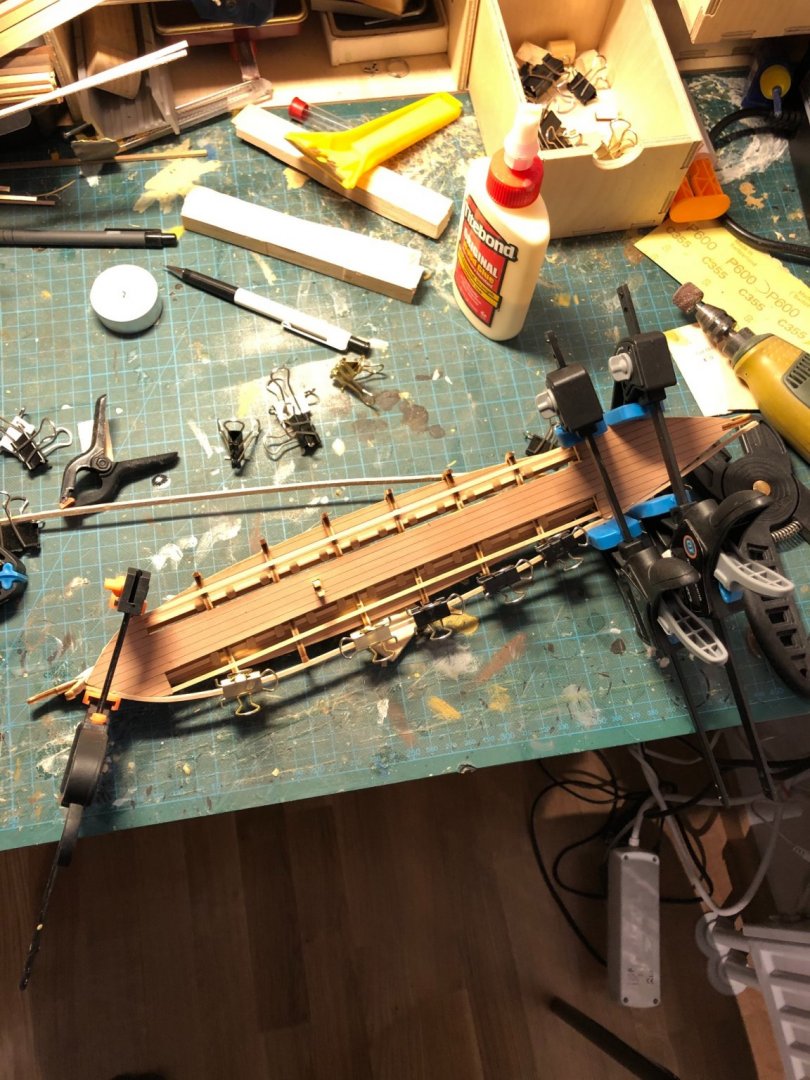
Today I have sanded some oars. Done about ten more of them. All together I need 48 and have therefore about half of them done. I have also started to sand the hull. So for now there will be sanding, sanding and more sanding. The planking is fairly thick so there is ample wood to get a smooth hull. The downside is that it takes time and sand dust
-
-
-
Planking is coming around slowly but surely. About 75% done. To do something different for a while I have started on the oars. 50 needs to be done. So two done forty eight to go!
I use my Dremel as a mini lathe. Stick the wood in the chuck and grind it down with sandpaper. Works very well but one needs to be careful or the wooden stick might snap if too much pressure is applied.

- bruce d, Louie da fly, Cathead and 1 other
-
4
-
Slowly but surely the hull is taking shape. No pictures as there is not much to see (except some more planks...)😉
Usually I can add one plank per side per evening. The glue needs to dry and so on. But sometimes life intrudes so maybe 3-4 planks per side per week is more realistic.
I look forward to the rigging part, working with rigging is my favorite part in model ship building.
-
Time for a quick update. didn't have any spare time to build while on vacation but now everything is back to normal so finally some time to work on this model!
The instructions says to fit the top plank first so I have done that, so far so good. When planking I usually fit one plank per side per day. My process is fairly slow, test fit, if necessary bend it using a plank bender, test fit again, put it in hot water for a while to soften it, fit it in its place, waiting for it to dry, and finally glue it into place, wait for the glue to set and done. It takes time though so getting more than one plank a side per evening is difficult.
@Louie da fly, your model is stunning. I'll be very very happy if mine is half as nice as yours
- ccoyle, bruce d, Louie da fly and 2 others
-
5


Greek Bireme by Torbogdan - FINISHED - Dusek - 1:72
in - Kit subjects built Up to and including 1500 AD
Posted · Edited by Torbogdan
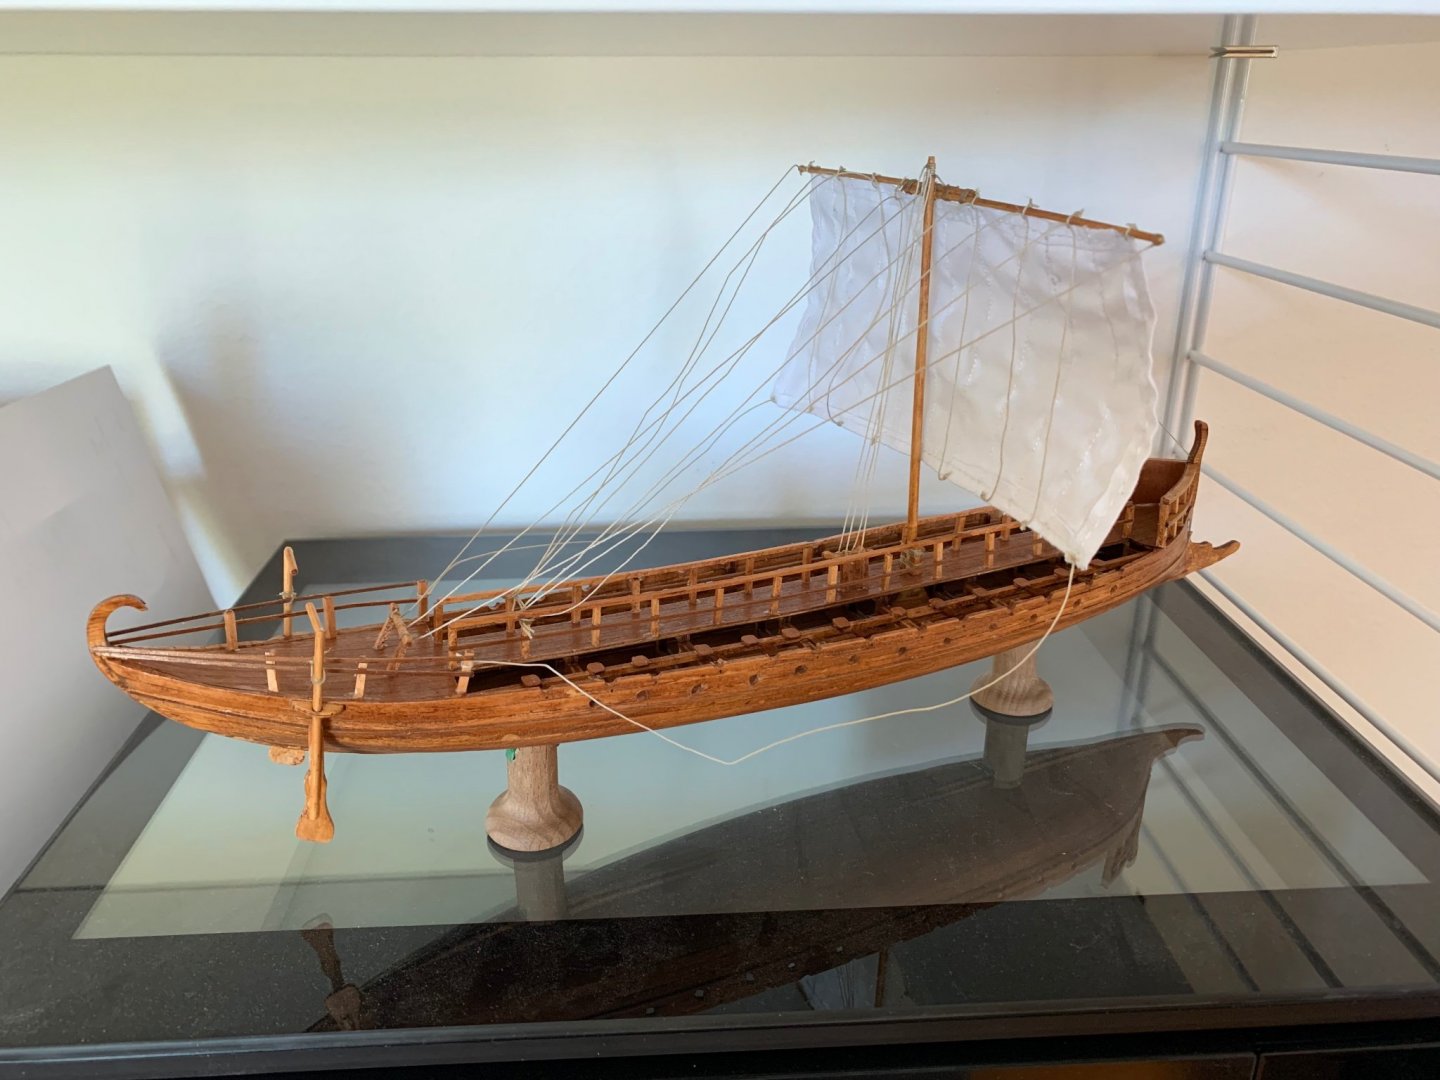
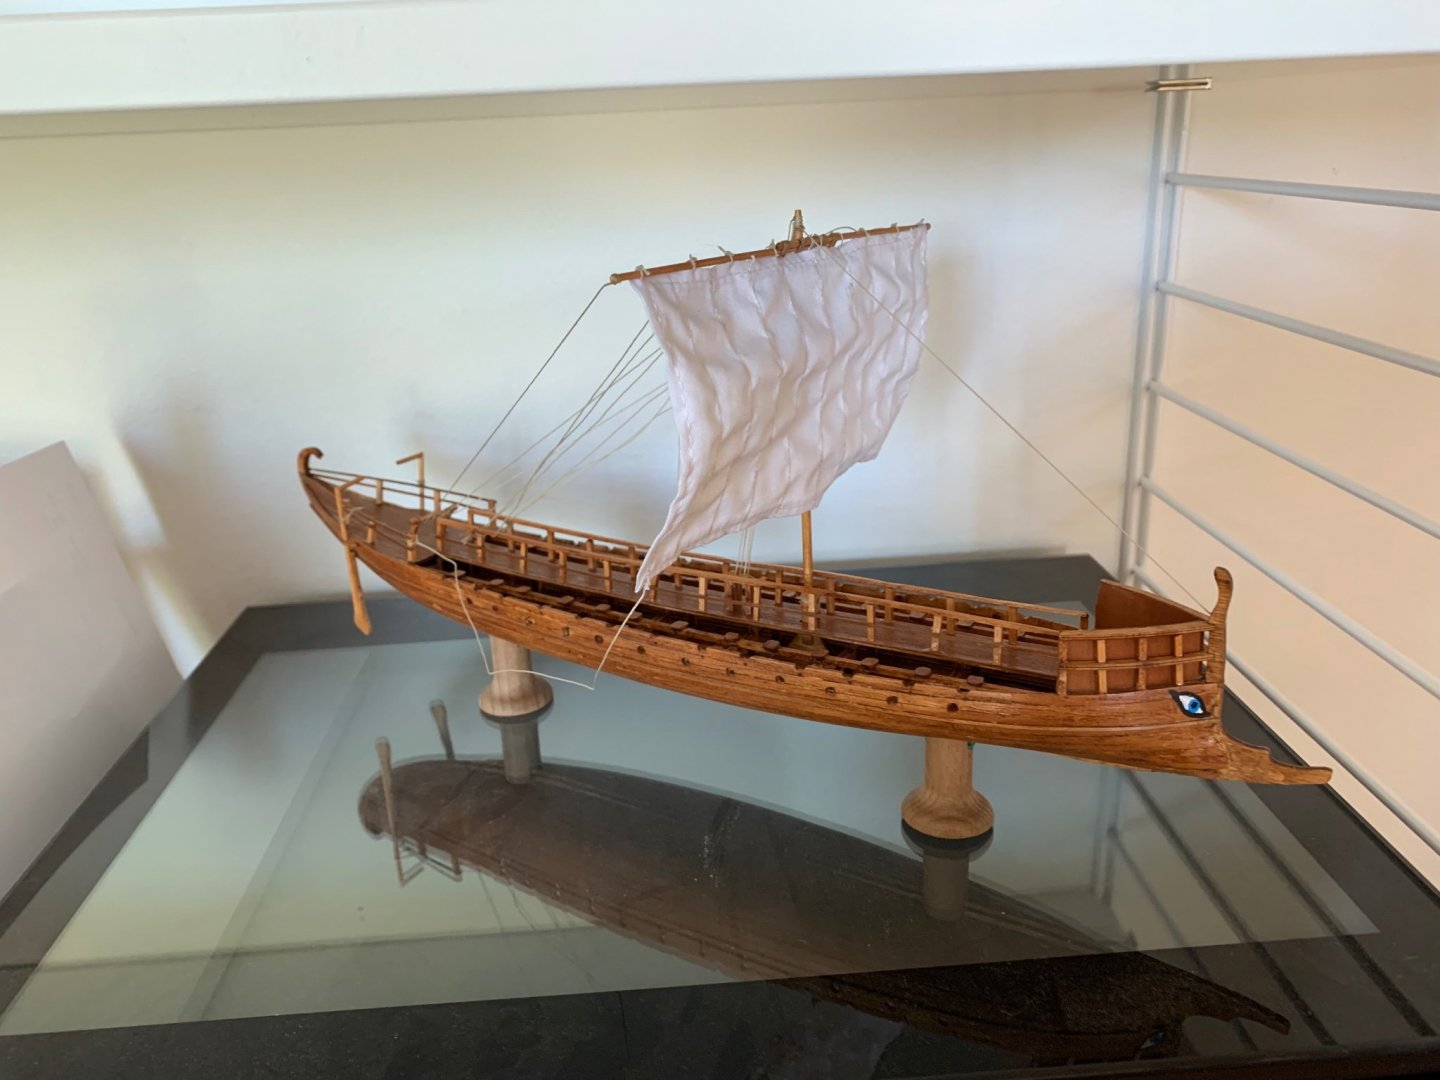
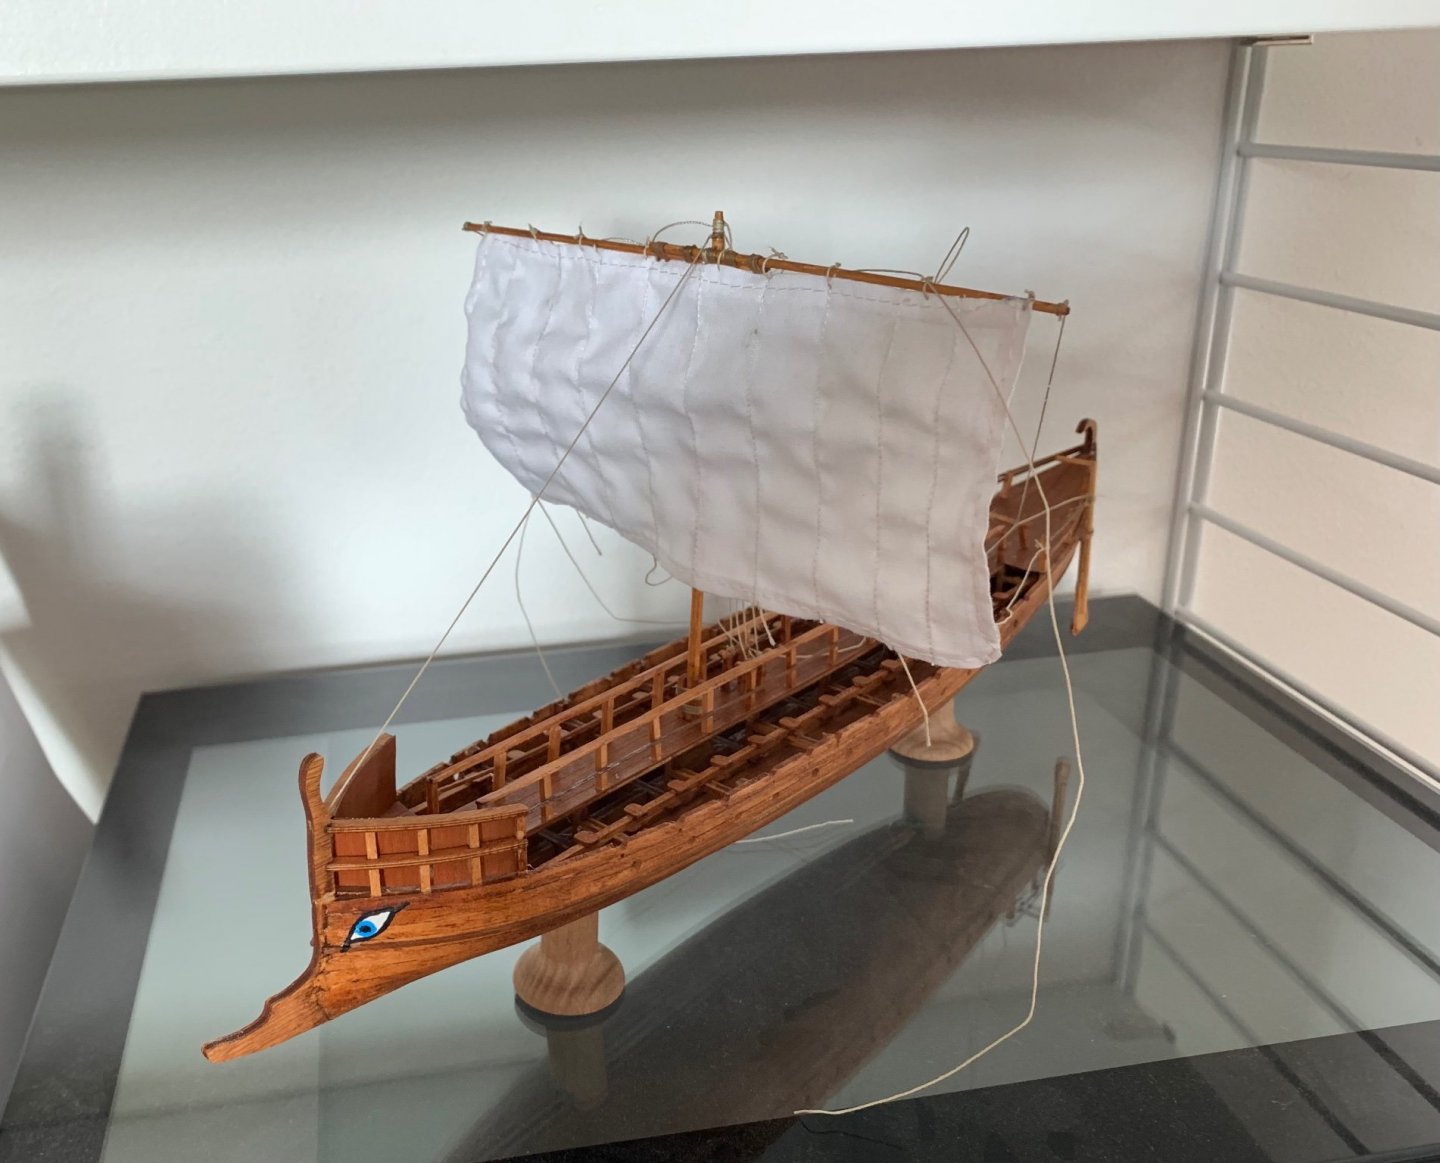
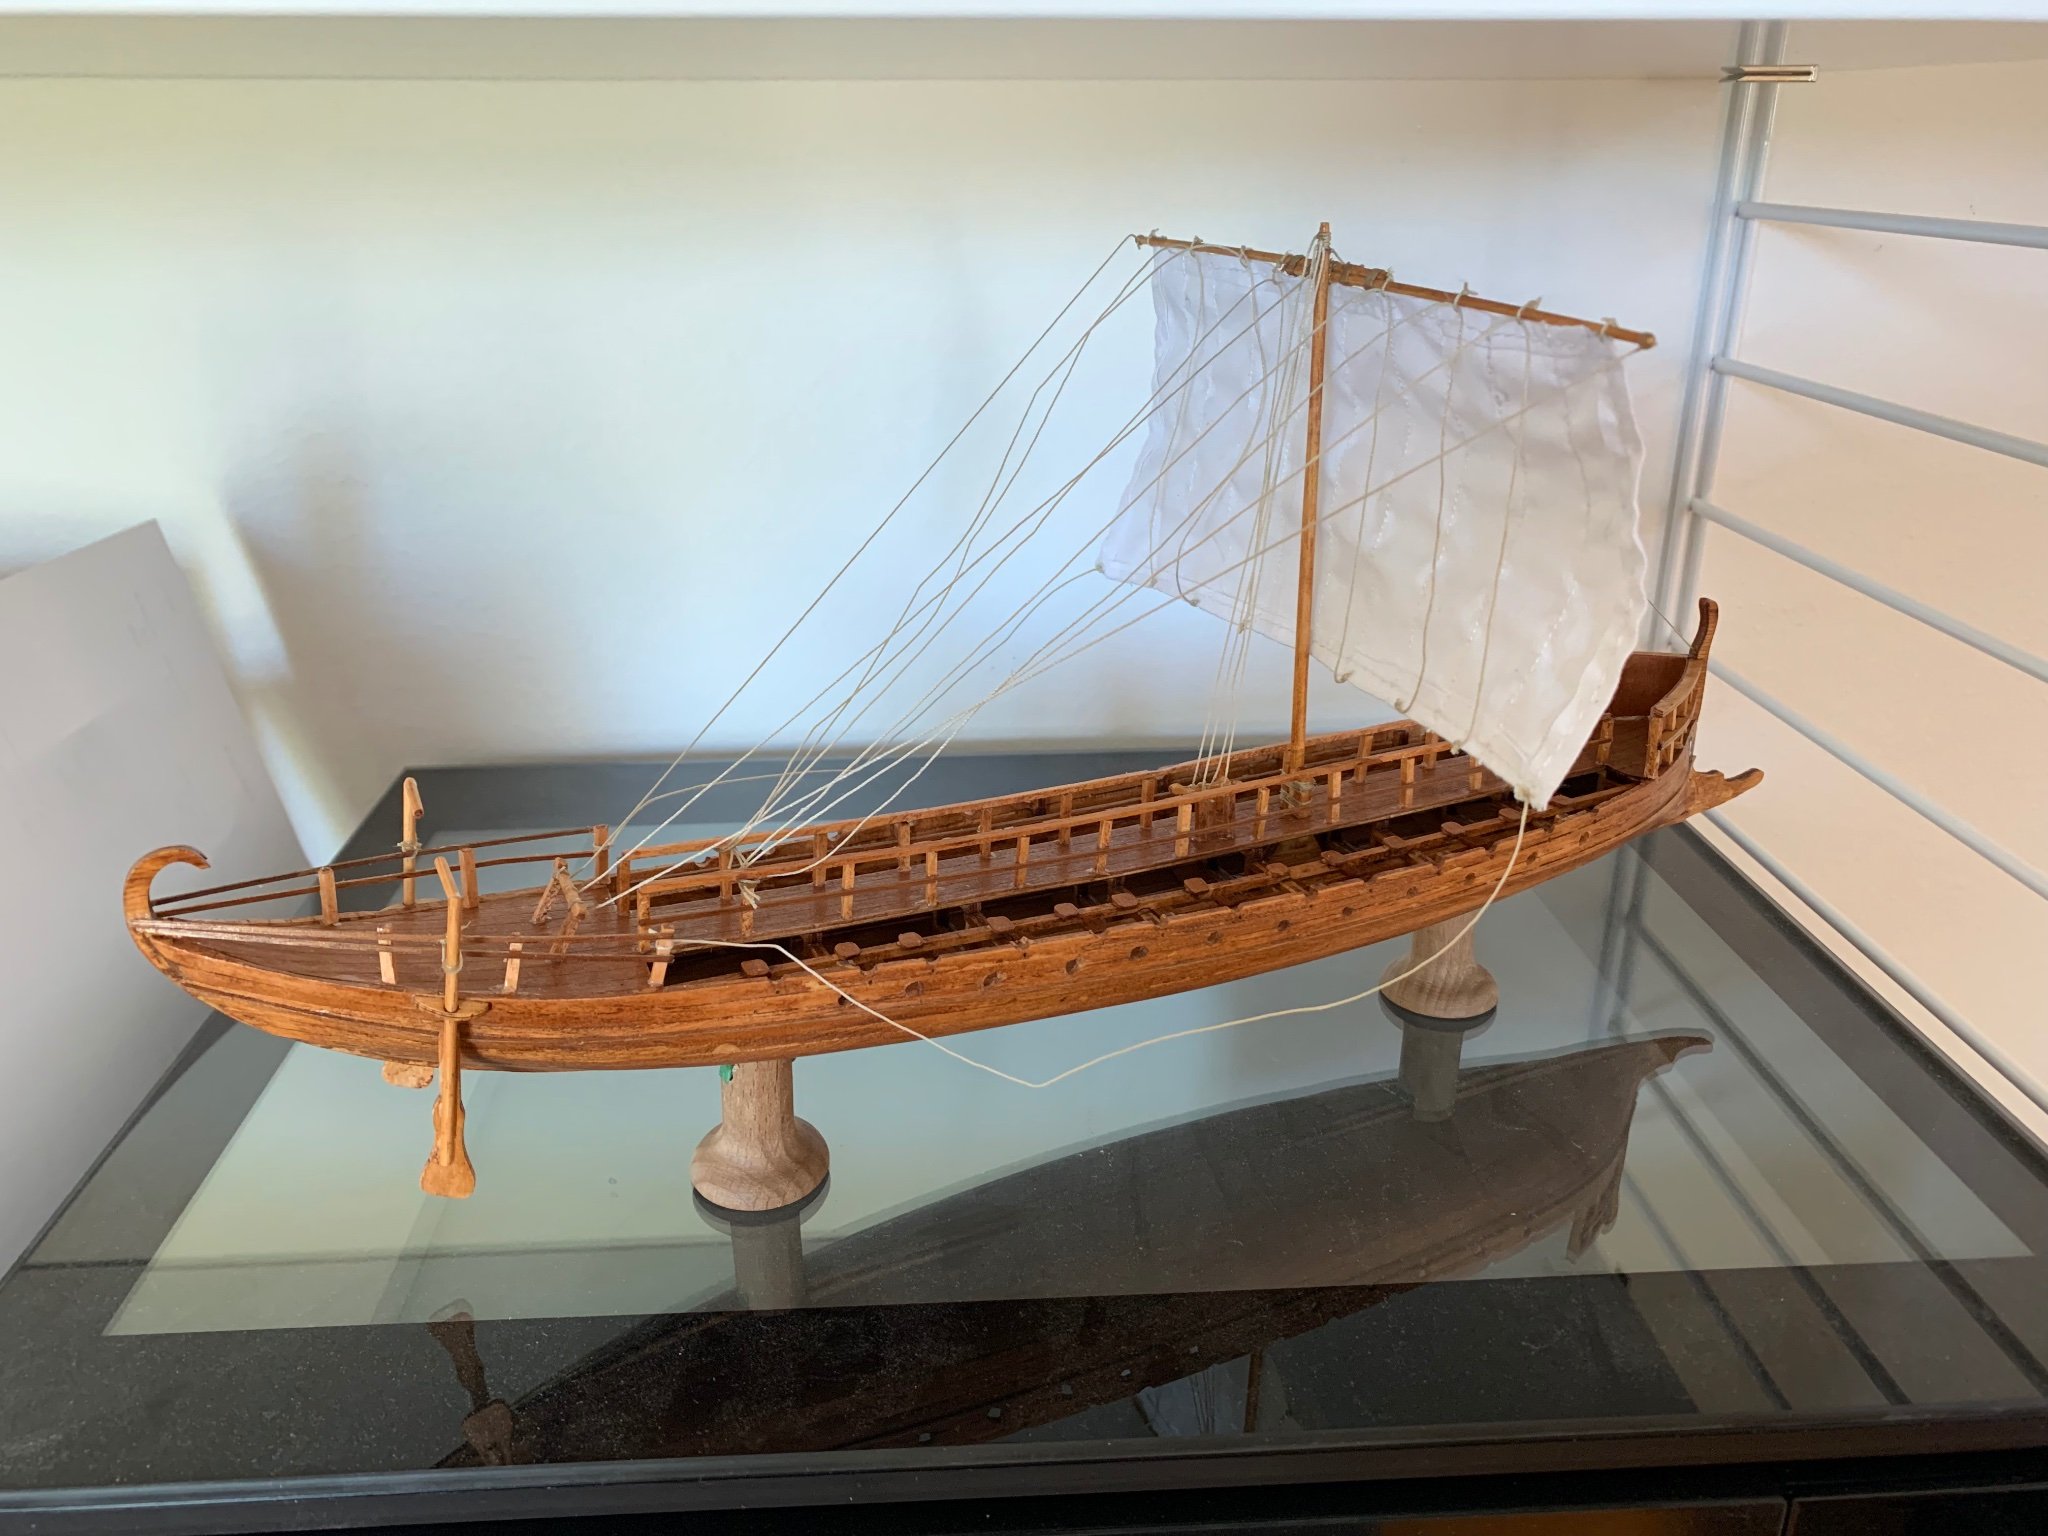
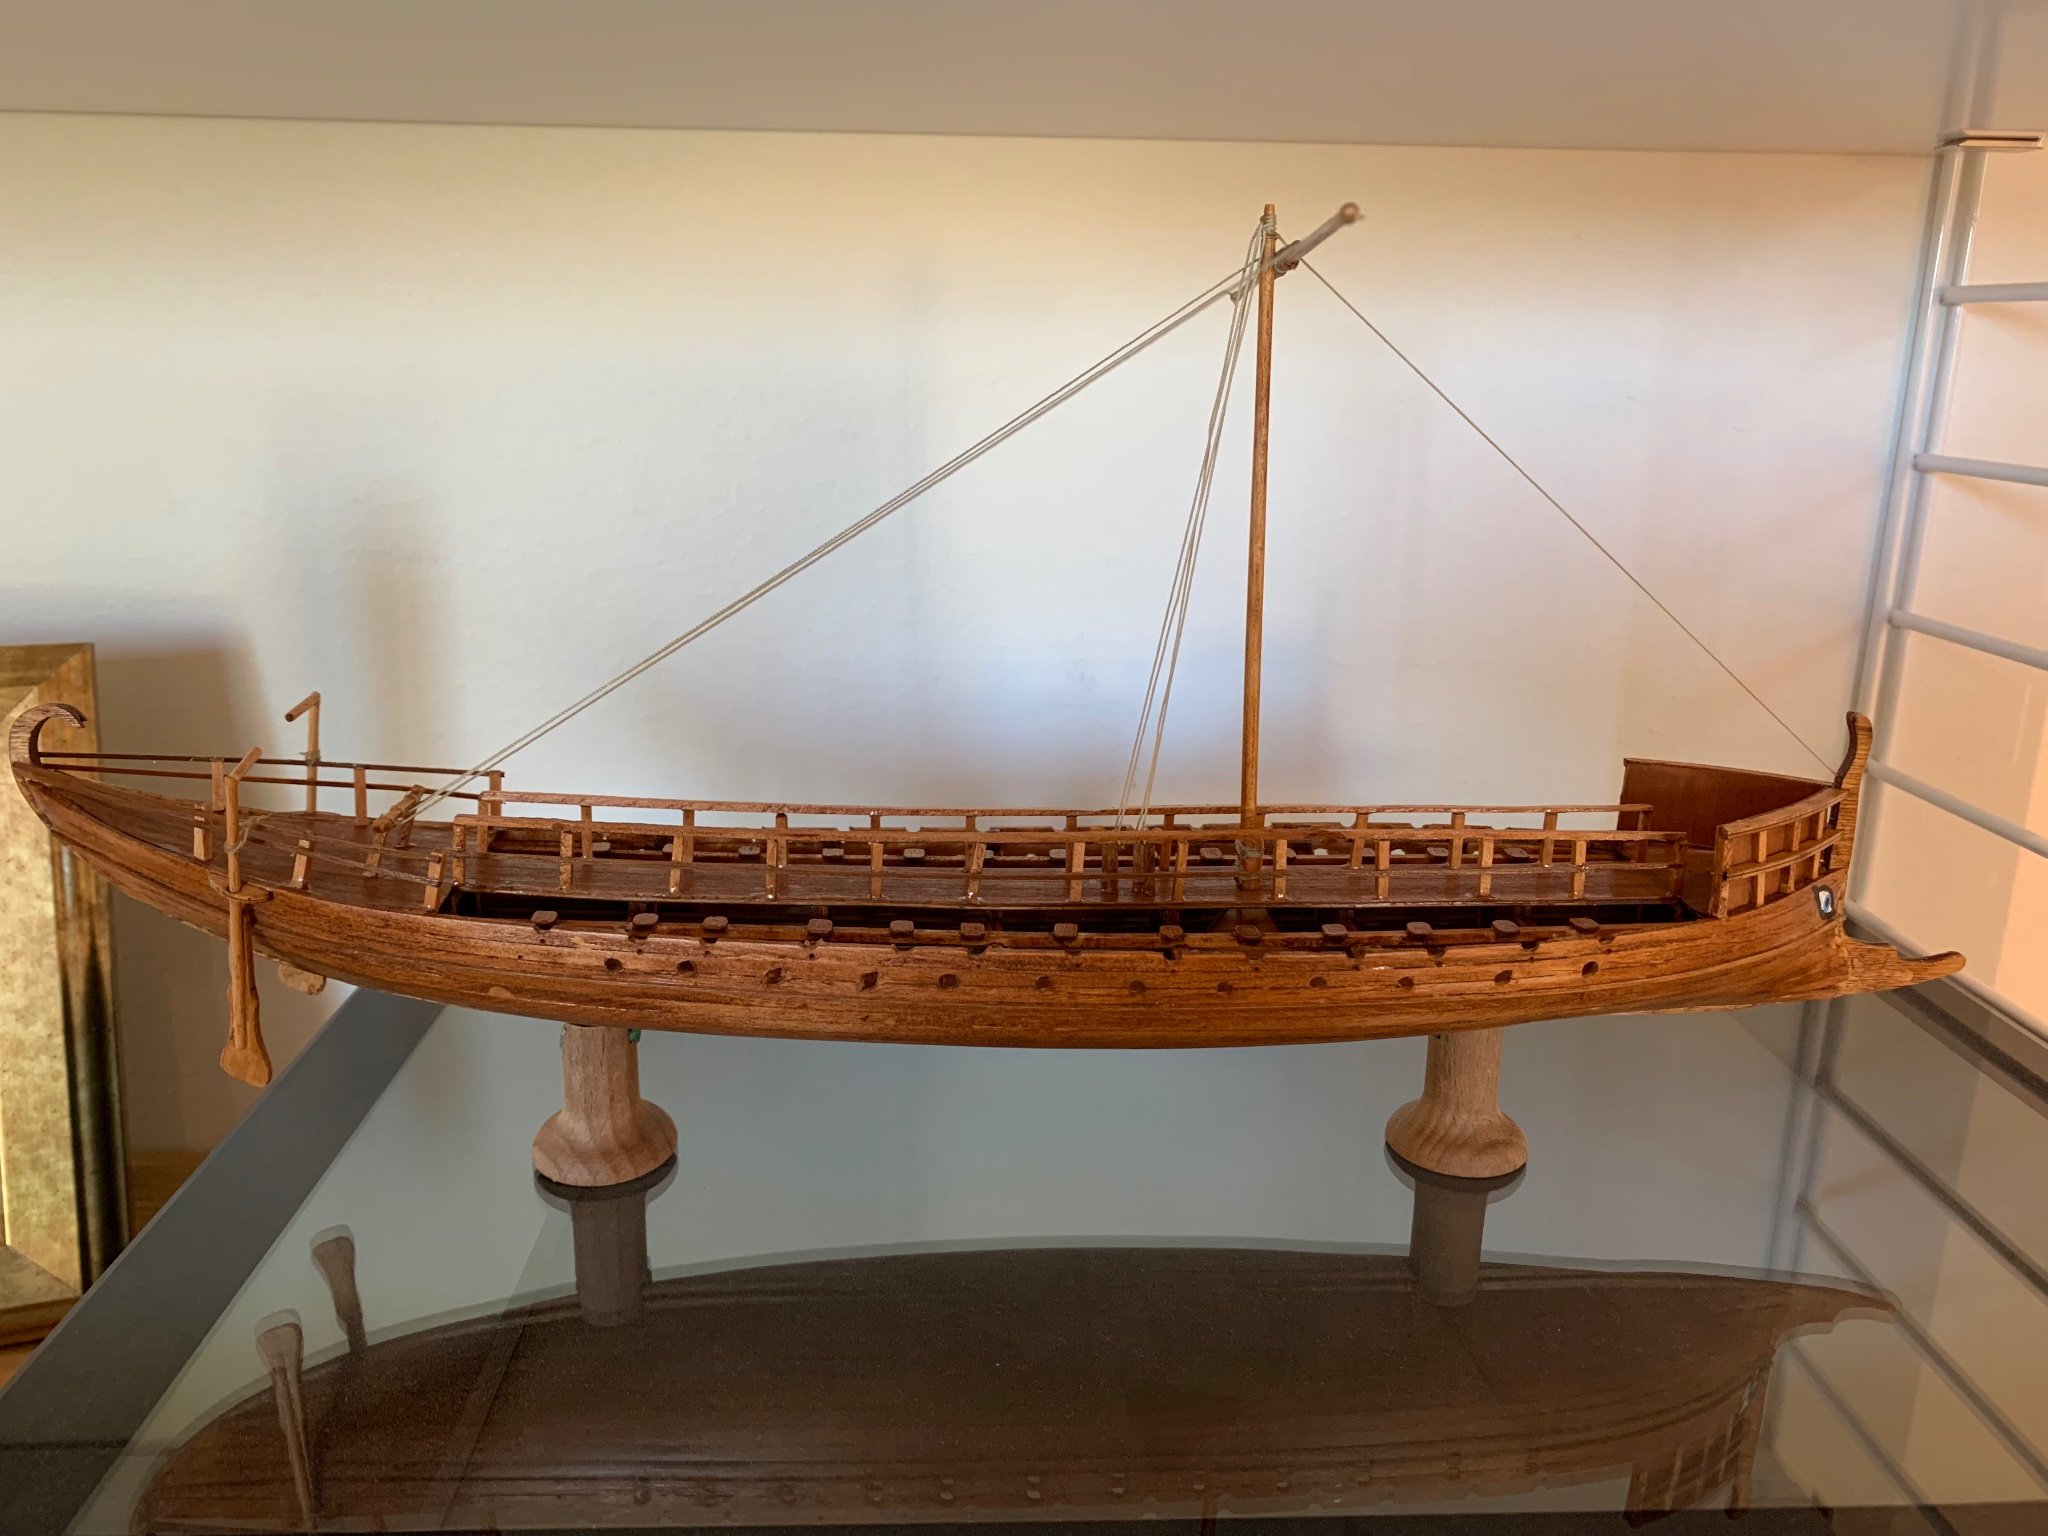
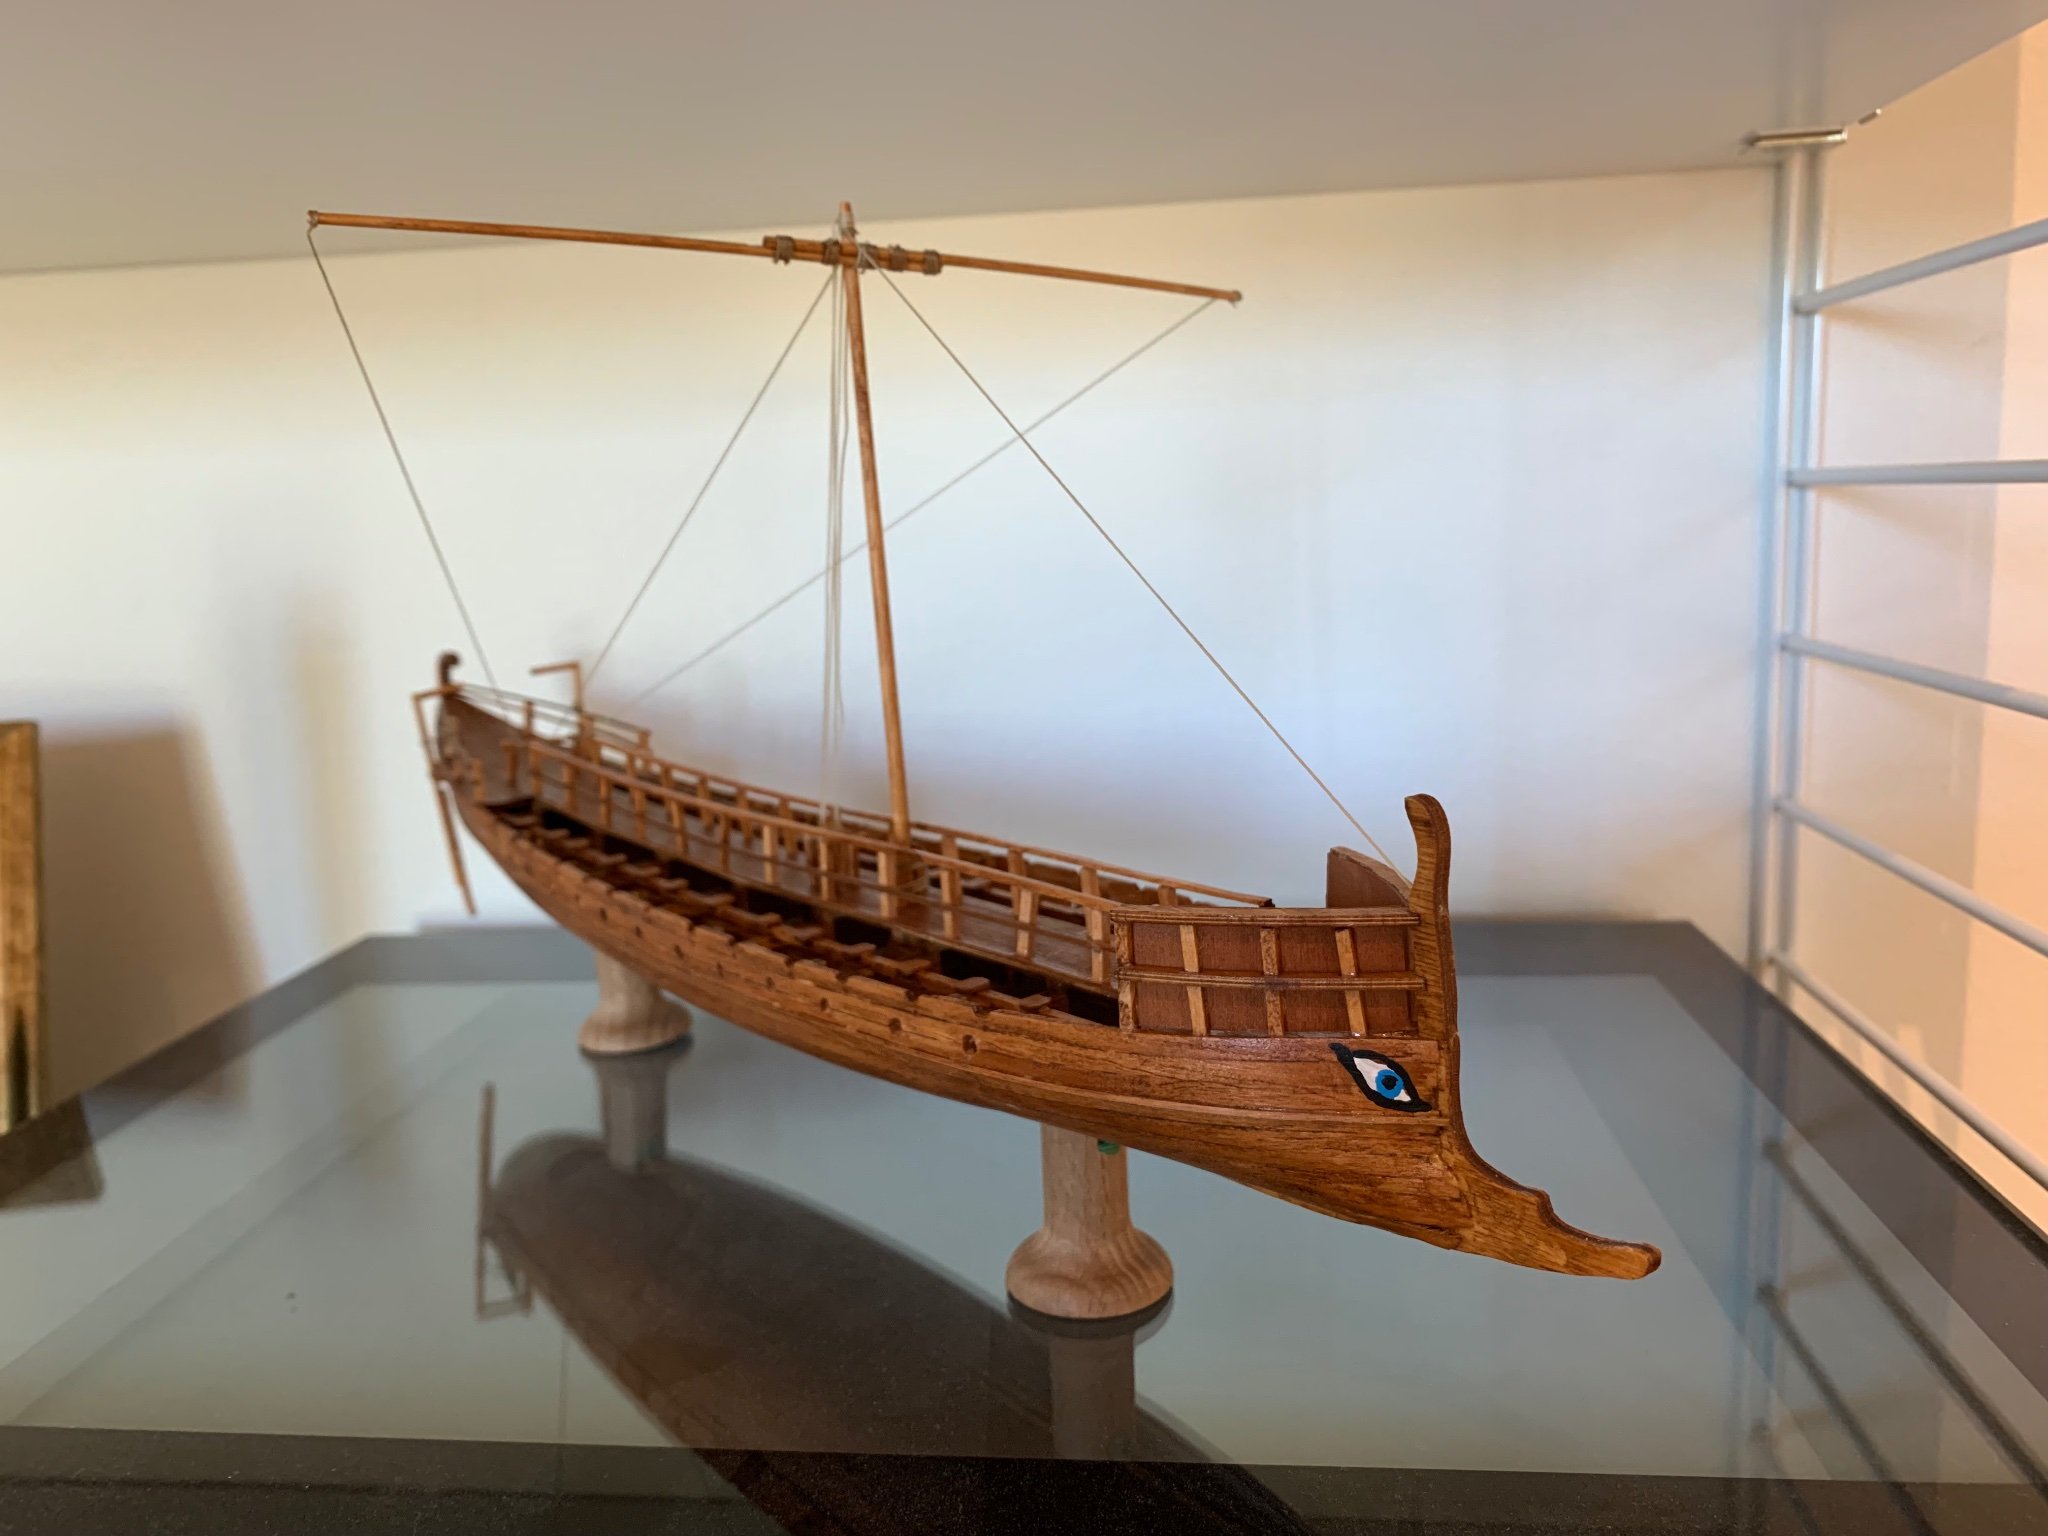
Finally, it is done! Yes, finished! A very "on and off" project. My plan was to build it from the box and fairly quickly, well that plan did not survive long")
I´m satisfied with it. There are things I could have done better or "cleaner" ( no glue sloppiness) but all in all it is ok. Finishing models are important to me. if it is finished it is good. But I always find things I can improve on and do better next time. What bothered me quite a bit was the last finishing touches. It took forever get the shields and base plate. It is no fun when you just want to finish something and it takes forever to get the parts to do it.
The shields added a nice touch. The transfers were really easy to apply and gave some color to the model. Same with the shields and amphoras. I think it gives the model a more "lived in" look than a empty, sterile ship. Others have built the same model kit much better with much more historical accuracy, mine is more just out of the box with some added details, cause I like how it looks!") . The sail should have been a centimeter or two longer towards the hull. I have no excuse, somehow my measuring skill abandoned me and I did not have the energy to sow a new one.
. The sail should have been a centimeter or two longer towards the hull. I have no excuse, somehow my measuring skill abandoned me and I did not have the energy to sow a new one.