


gjdale
-
Posts
4,813 -
Joined
-
Last visited


-
 gjdale reacted to a post in a topic:
Keeping my head in the game.....
gjdale reacted to a post in a topic:
Keeping my head in the game.....
-
gjdale reacted to a post in a topic:
Chris Watton and Vanguard Models news and updates Volume 2
-
gjdale reacted to a post in a topic:
HMS Pegasus 1776 by Moonbug - Amati/Victory Models - 1:64
-
gjdale reacted to a post in a topic:
Sloop Speedwell by Chuck - Ketch Rigged Sloop, 1752 - POF
-
a49kid reacted to a post in a topic:
The Shipyard at Foss' Landing (Diorama) by gjdale (Grant) - FINISHED - SierraWest - Scale 1:87 (HO)
-
gjdale reacted to a post in a topic:
HMS Tiger 1747 by Siggi52 - 1:48 - 60 gun ship from NMM plans
-
mtaylor reacted to a post in a topic:
Ghost Ship Jenny by Glen McGuire - 1/400 - BOTTLE
-
 mtaylor reacted to a post in a topic:
Ghost Ship Jenny by Glen McGuire - 1/400 - BOTTLE
mtaylor reacted to a post in a topic:
Ghost Ship Jenny by Glen McGuire - 1/400 - BOTTLE
-
Canute reacted to a post in a topic:
Ghost Ship Jenny by Glen McGuire - 1/400 - BOTTLE
-
Keith Black reacted to a post in a topic:
Hannah by gjdale (Grant) - FINISHED - Amati - 1:300 - BOTTLE
-
Javelin reacted to a post in a topic:
Hannah by gjdale (Grant) - FINISHED - Amati - 1:300 - BOTTLE
-
BobG reacted to a post in a topic:
Hannah by gjdale (Grant) - FINISHED - Amati - 1:300 - BOTTLE
-
 Thank you Wayne. And thank you Bob. I can’t really answer your question Bob as I don’t record hours spent on the model. But looking at my start and finish posts it was about 3 months from start to finish - noting of course, that I am one of the slower builders goin’ around!
 -
Keith Black reacted to a post in a topic:
Ghost Ship Jenny by Glen McGuire - 1/400 - BOTTLE
-
mtaylor reacted to a post in a topic:
The Shipyard at Foss' Landing (Diorama) by gjdale (Grant) - FINISHED - SierraWest - Scale 1:87 (HO)
-
 Glen McGuire reacted to a post in a topic:
Ghost Ship Jenny by Glen McGuire - 1/400 - BOTTLE
Glen McGuire reacted to a post in a topic:
Ghost Ship Jenny by Glen McGuire - 1/400 - BOTTLE
-
That is possibly your best yet Glen, although you set such a high standard it’s a difficult call. Love the lone penguin too - just the right touch.
- 88 replies
-
- 4
-
-
-
- Ghost Ship
- Jenny
- (and 1 more)
-
gjdale reacted to a post in a topic:
Ghost Ship Jenny by Glen McGuire - 1/400 - BOTTLE
-
gjdale reacted to a post in a topic:
Ghost Ship Jenny by Glen McGuire - 1/400 - BOTTLE
-
gjdale reacted to a post in a topic:
Sloop Speedwell by Chuck - Ketch Rigged Sloop, 1752 - POF
-
I can’t believe I missed the start of yet another of your magnificent SIB projects Glen. Just got caught up and all I can say is WOW! Love what you’ve done so far and looking forward to the insertion of penguins. 🤣
- 88 replies
-
- 6
-
-
-
- Ghost Ship
- Jenny
- (and 1 more)
-
gjdale reacted to a post in a topic:
Ghost Ship Jenny by Glen McGuire - 1/400 - BOTTLE
-
gjdale reacted to a post in a topic:
Ghost Ship Jenny by Glen McGuire - 1/400 - BOTTLE
-
Thanks Wayne, Yes, it’s HO scale (1:87). The only ‘accessories’ I bought were the figures and the blue truck, plus some extra track, sleepers and ties. Oh, and a little grass/shrubbery. All bought online.
-
Looking forward to following along with another of your excellent (and instructional) builds Rusty.
-
Nice work Jeff - it’s all coming together very well.
-
More good progress there Wayne, and thanks for the heads-up about further tweaks needed to make everything fit properly. My build is having a little break while I’m away on a cycling trip over Easter - four days cycling through the Lachlan Valley area (Koorawatha, Cowra, Canowindra, Eugowra, Goolagong, Grenfell and back to Cowra). Yesterday was a long but enjoyable 85km - we were pretty tired by the time we rolled into town. Beautiful countryside and fabulous weather for it. Getting ready for an even tougher 80km today. Don’t be too disappointed by a lack of responses on your log. There will be fewer people interested in this type of build, but also some people only log on every once in a while to catch up. They will generally only comment if they have something to add to the conversation. A “like” tells you that they are interested in what you are doing even if they have nothing to add. That is a good thing really as it means that your log doesn’t get filled up with a lot of superfluous content. Rest assured that I for one am certainly enjoying following along seeing how you tackle the various problems that inevitably arise. As you have already discovered, the Billings instructions are next to useless, so a degree of difficulty is added from the outset. I look forward to your next instalment.
- 31 replies
-
- 6
-
-
- African Queen
- Billing Boats
- (and 2 more)
-
This looks like a really interesting project Adam. I’m pulling up a chair in the front row (next to the bar of course!).
-
No, I haven’t had the engine running yet Wayne. I had assumed that the gas tank would be filled from a butane bottle as used to be used for filling cigarette lighters. A piece of the black silicon tube would be great - thank you!
- 37 replies
-
- 5
-
-
-
- live steam
- radio
- (and 2 more)
-
To answer your questions Wayne, I did some testing with various viscosity super glue (see my post #19). In the end I settled on Extra Thick Maxi Cure (Bob Smith Industries brand) and that has worked well. My planks are 1mm thick and I cut them from sheets of Alaskan Yellow Cedar. I made my planks approx 14mm wide so that at maximum width, there would be three planks per “band” on the hull for the most part, with one “band” requiring four planks. Then I planked up to the ridges and after sanding it all blended into one smooth surface. My planks were a maximum of about two thirds the length of the hull. I didn’t worry too much about “scale length” as the planking won’t really be seen in the final outcome (remembering that the original hull was steel). What I haven’t shown in the build log is that I took the time to mark some “station lines” (ie vertical lines) on the hull - arbitrarily spaced - and then divided the remaining gap of the planking band by the number of planks to be fitted and made marks on the station lines. A pair of proportional dividers makes this easier, but they are not essential. These marks then became reference points once the sticky tape was placed over them. The white ABS hull gives a nice surface for drawing pencil lines, or even fine permanent marker. Once the tape was in place, one edge was traced along the previous adjacent plank and the opposite edge marked at the reference points. The tape was then removed and applied to a piece of card (Manila folder) and the reference points (dots really) were joined with a ruler to give the rough shape of the plank. The card was then cut out and tested against the hull to see if it was a close enough fit and if it was, it was then traced around on the plank and the plank cut/planed/sanded to final shape. A little bending/twisting with a steam iron to help the plank conform to the shape of the hull and the plank was then glued in place. I generally applied glue for a few inches at a time and worked my way along the plank. Sounds a lot more complicated than it really is! One other tip is to apply a slight bevel to one edge of each plank as this will help achieve a tighter fit. I hope the above rambling helps you with your planking….
- 37 replies
-
- 6
-
-
-
- live steam
- radio
- (and 2 more)
-
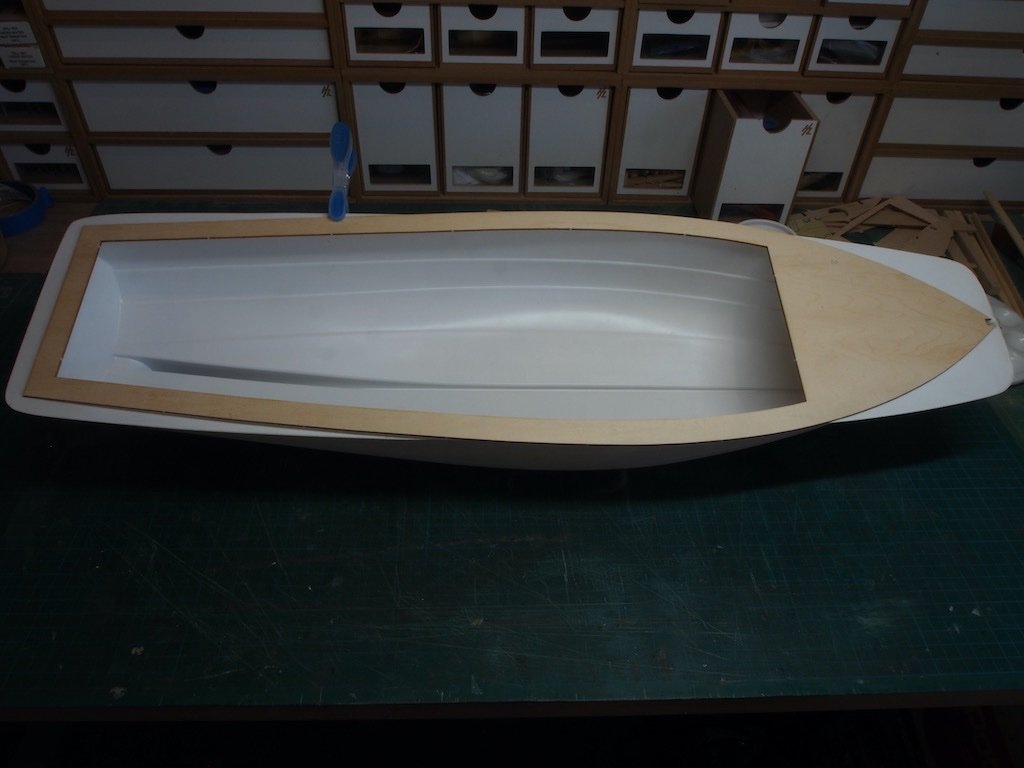
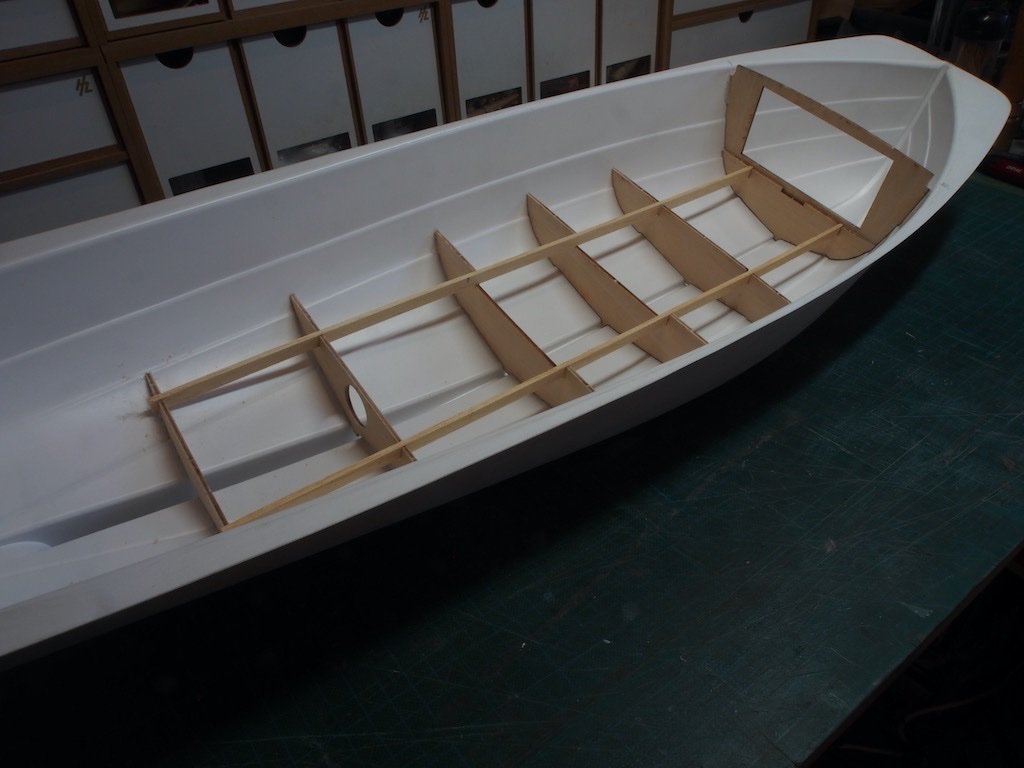
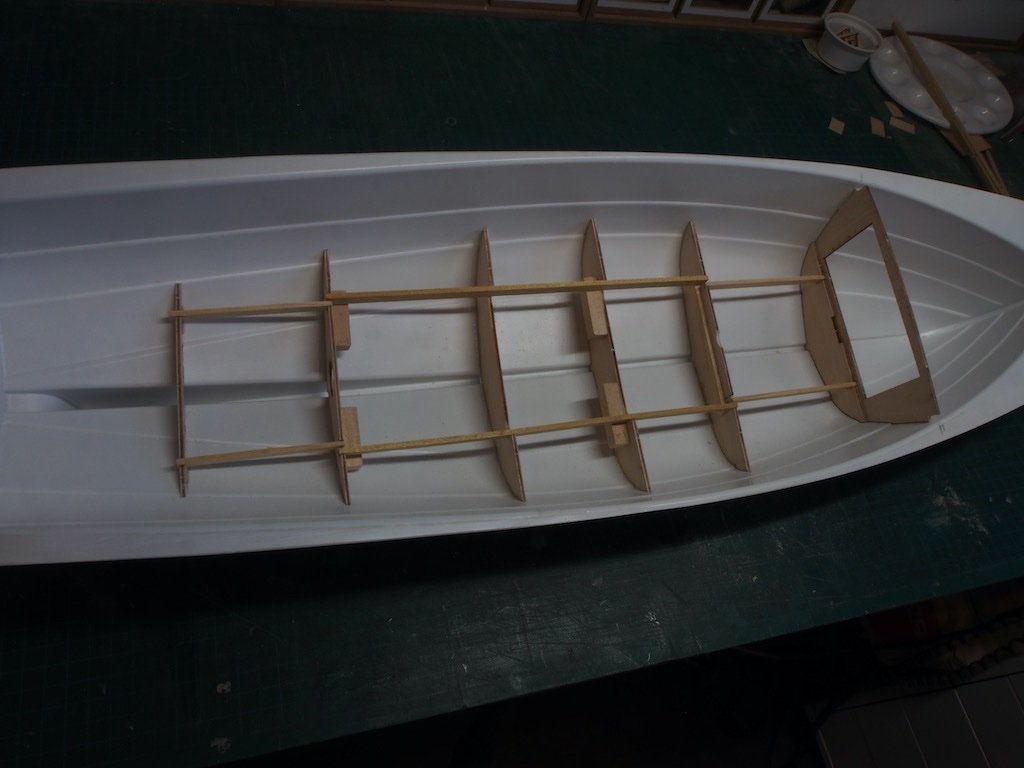
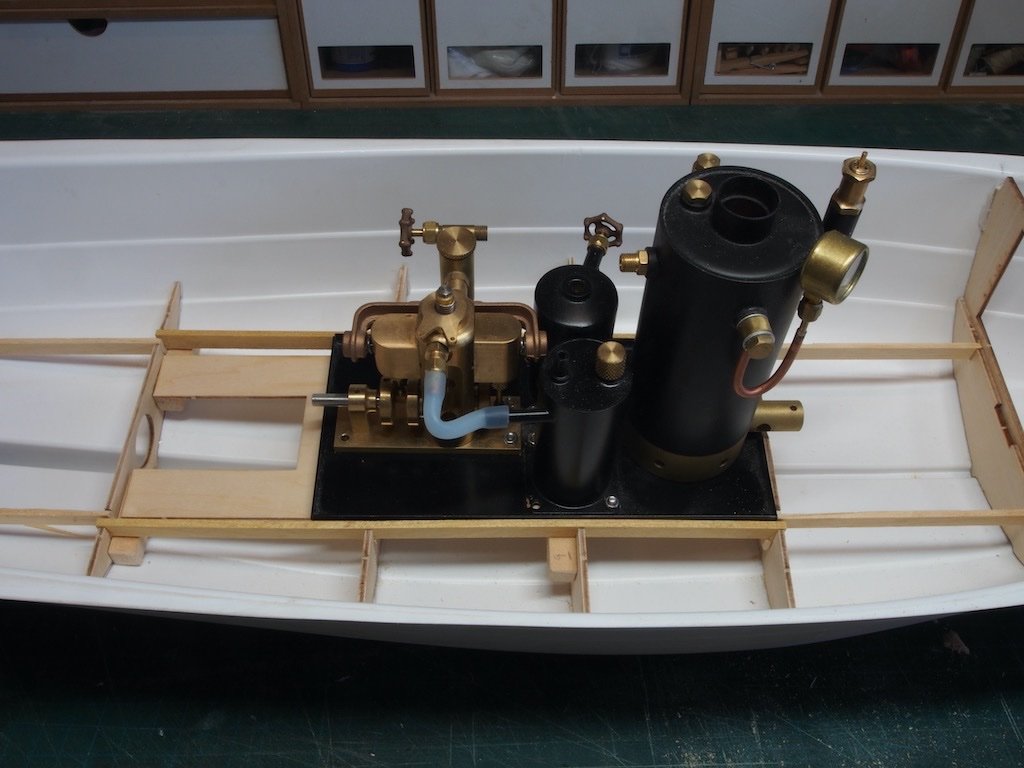
I have decided to hold off on trimming the excess ABS from the topsides. After reading a caution from another member (Wayne @a49kid) doing this build, I decided it would be prudent to test the fit of the deck. As can be seen in the photo below, it is not a very close fit. It only just reaches at the stern and does not follow the line of the gunwhale very well at all. I will therefore keep the ABS intact for now. I also decided to diverge from the sequence given in the instructions and fit the internal floor frames prior to fitting the inboard gunwhale and upper frames. After fitting the longitudinal stringers, I read in Wayne’s log where he found that he had to move the stringers outboard to accommodate the additional width of the(non-kit) steam engine. So, some minor surgery, a visit to the scrap box for spares, and a little fettling was required to account for this. And the steam engine now fits comfortably (just placed temporarily in position for the photo). I'm glad that Wayne is ahead of me in progressing his build - I will be able to learn from his encounters and hopefully avoid any more traps!
- 37 replies
-
- 10
-
-
- live steam
- radio
- (and 2 more)
-
Looks like you’ve made a lot of great progress there Wayne. I may “borrow” some of your ideas as I progress my own build.
- 31 replies
-
- 2
-
-
- African Queen
- Billing Boats
- (and 2 more)