George-JK
-
Posts
57 -
Joined
-
Last visited
2 Followers


Recent Profile Visitors
825 profile views


-
 lmagna reacted to a post in a topic:
IJN HIEI by IJNfan - FINISHED - Fujimi - 1/700 - PLASTIC
lmagna reacted to a post in a topic:
IJN HIEI by IJNfan - FINISHED - Fujimi - 1/700 - PLASTIC
-
mtaylor reacted to a post in a topic:
IJN HIEI by IJNfan - FINISHED - Fujimi - 1/700 - PLASTIC
-
George-JK reacted to a post in a topic:
IJN HIEI by IJNfan - FINISHED - Fujimi - 1/700 - PLASTIC
-
robdurant reacted to a post in a topic:
Fairmount Alpine by George-JK - Billing Boats - 1:75 - RADIO
-
Hello Harbourmaster, This is exactly the thing! WOW Now I can move forward a bit on the build again. Thank you very much! Cheers, George
- 90 replies
-
- 1
-
-
- fairmount alpine
- billing boats
- (and 1 more)
-
No Idea reacted to a post in a topic:
Fairmount Alpine by George-JK - Billing Boats - 1:75 - RADIO
-
Hi Rob, Mark @Rob: Thank you for the link, the stanchions from the second link look exactly right. Many thanks! Even if they are slightly off, it will be fine, as long, as they have the correct shape,which they do. @Mark: Many thanks for your build images! I actually once found these pictures, and decided to go with the Fairmount as well. However I lost the link in the passage of time. So thank you for posting the link here. Cheers, George
- 90 replies
-
- 1
-
-
- fairmount alpine
- billing boats
- (and 1 more)
-
Canute reacted to a post in a topic:
IJN HIEI by IJNfan - FINISHED - Fujimi - 1/700 - PLASTIC
-
Hi, thank you for the suggestion! Can you send me, post here a detail of the stanchion? Also how tall are they, the ones I used are 14mm 3hole ones, if these are similar in size, that would be perfect. Thanks! Cheers, George
-
Very good looking model! I also am a big fan of IJN ships. The weathering looks awesome, much better then what I can produce. 😀 Regarding the weathering, I personally feel, it is a bit too much for a ship in service, meaning it looks more like an abandoned ship, then a ship in service. But this is just my personal opinion on the matter, never seen a ship coming back from deployment in a war, so can't comment on how rusty they are. I just go off what can be seen on modern working ships... Never the less if you like how the model looks, that is the most important thing. I don't mean to start any argument here, just my opinion on the weathering, even so I think it looks very nice, and very good job, keep at it. Maybe one question, what you use for the rigging? I build model in 1/350 scale, but never do the rigging, as I couldn't find what to use, to make it look realistic, everything I tried looked just way too thick. Looks great! Cheers, George
-
George-JK reacted to a post in a topic:
IJN HIEI by IJNfan - FINISHED - Fujimi - 1/700 - PLASTIC
-
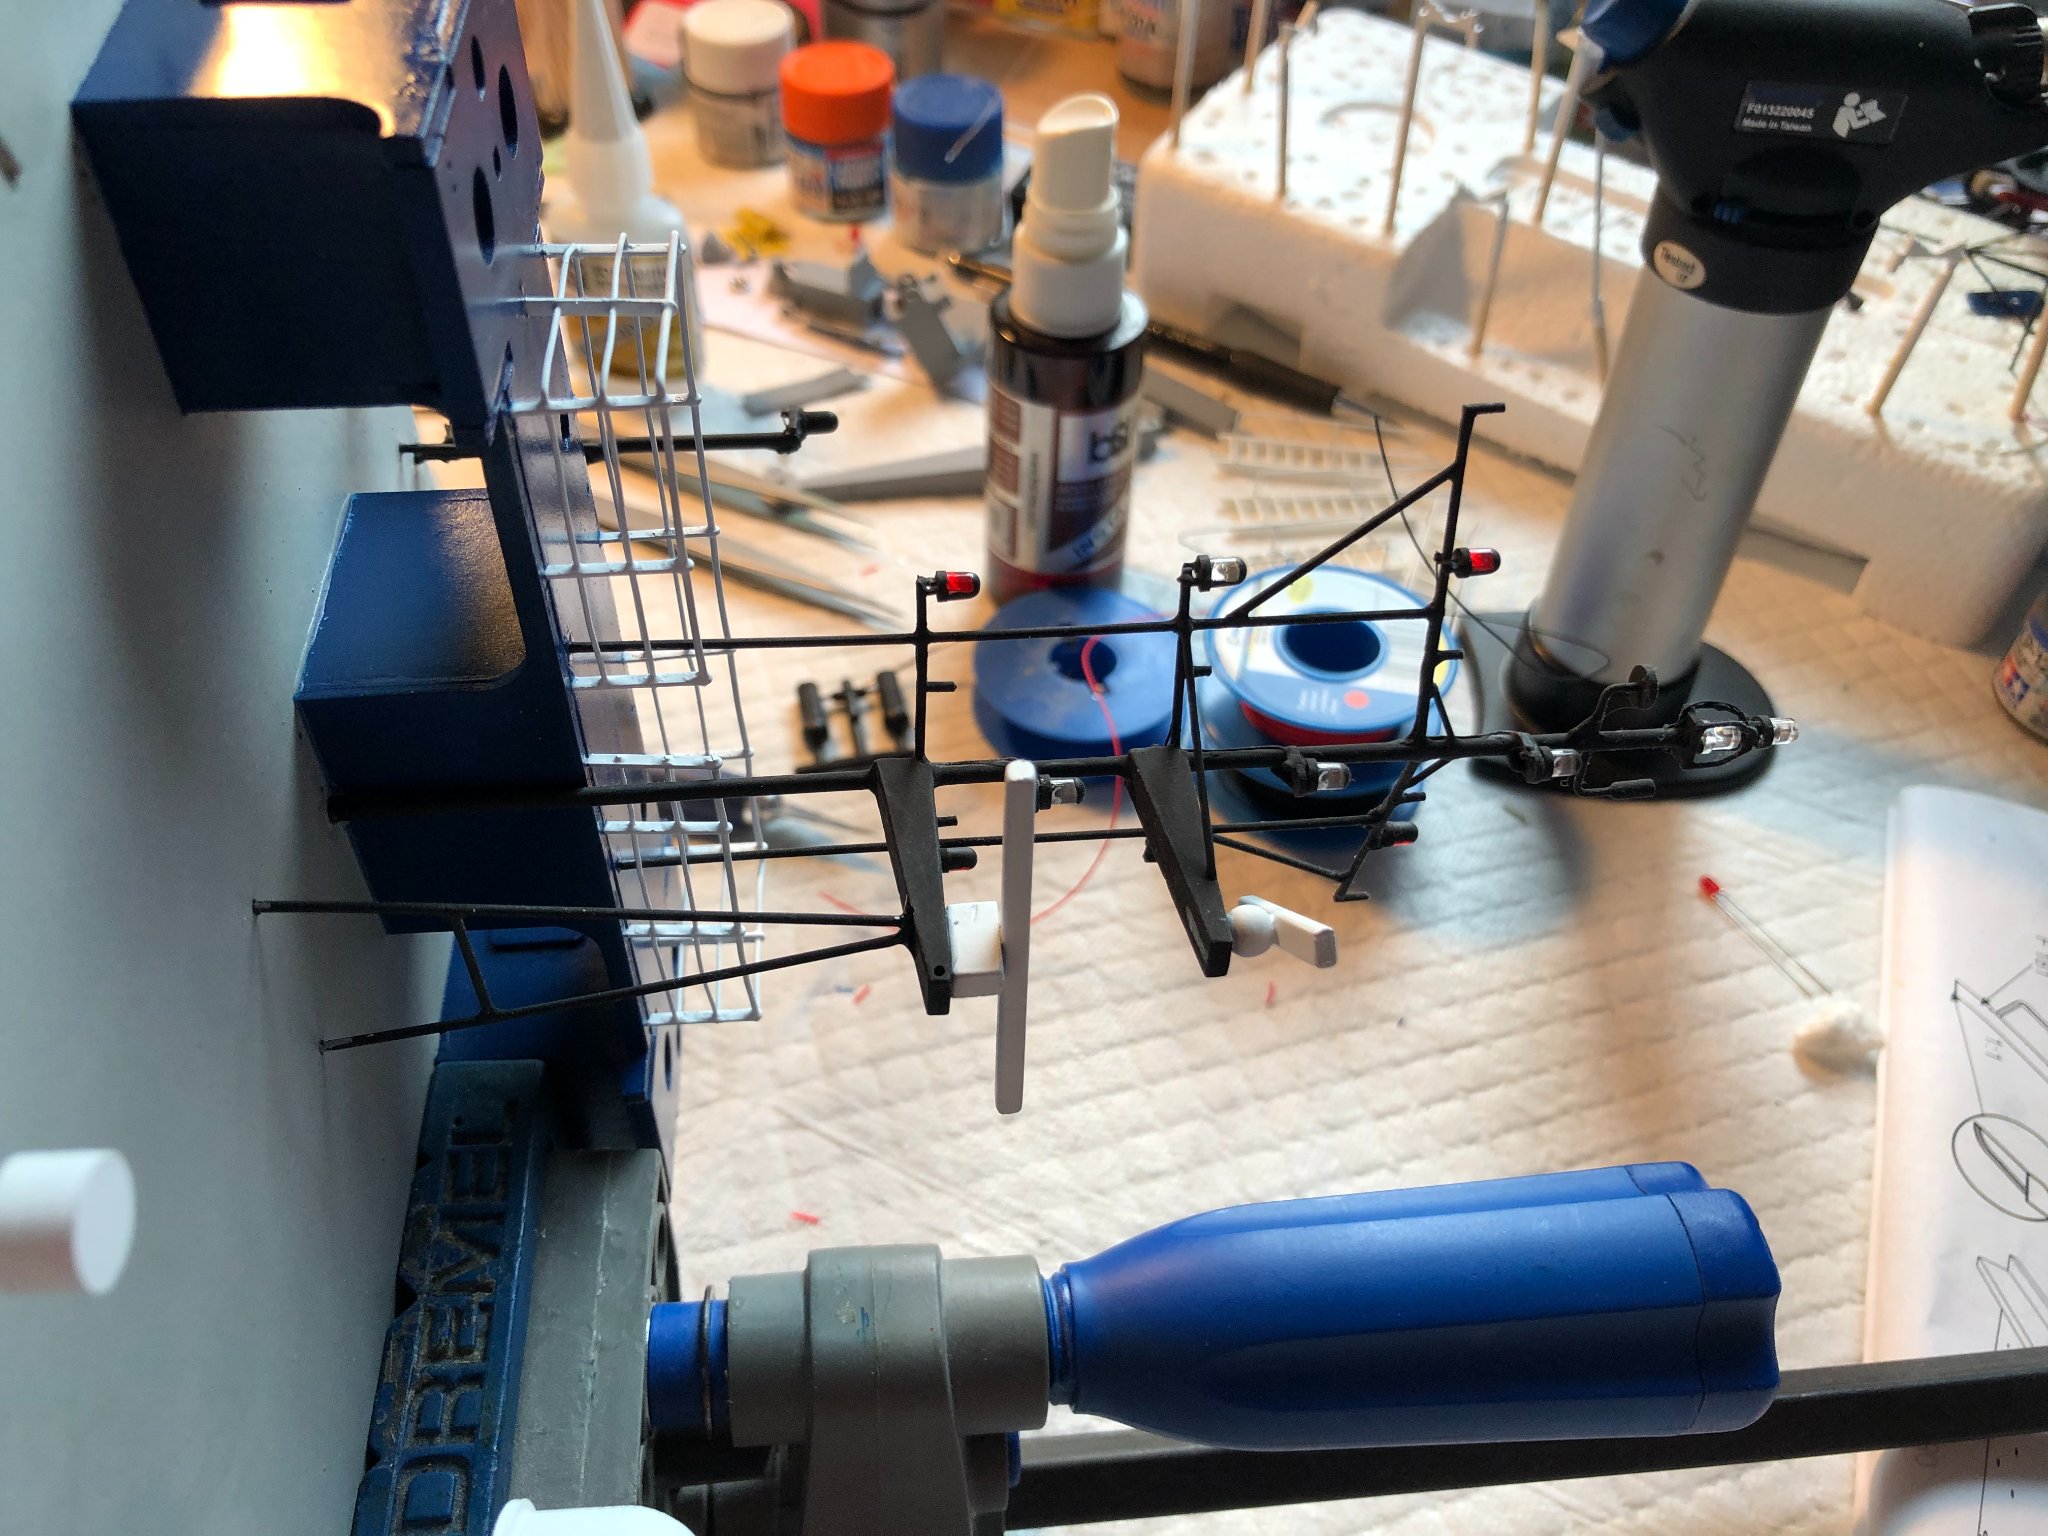
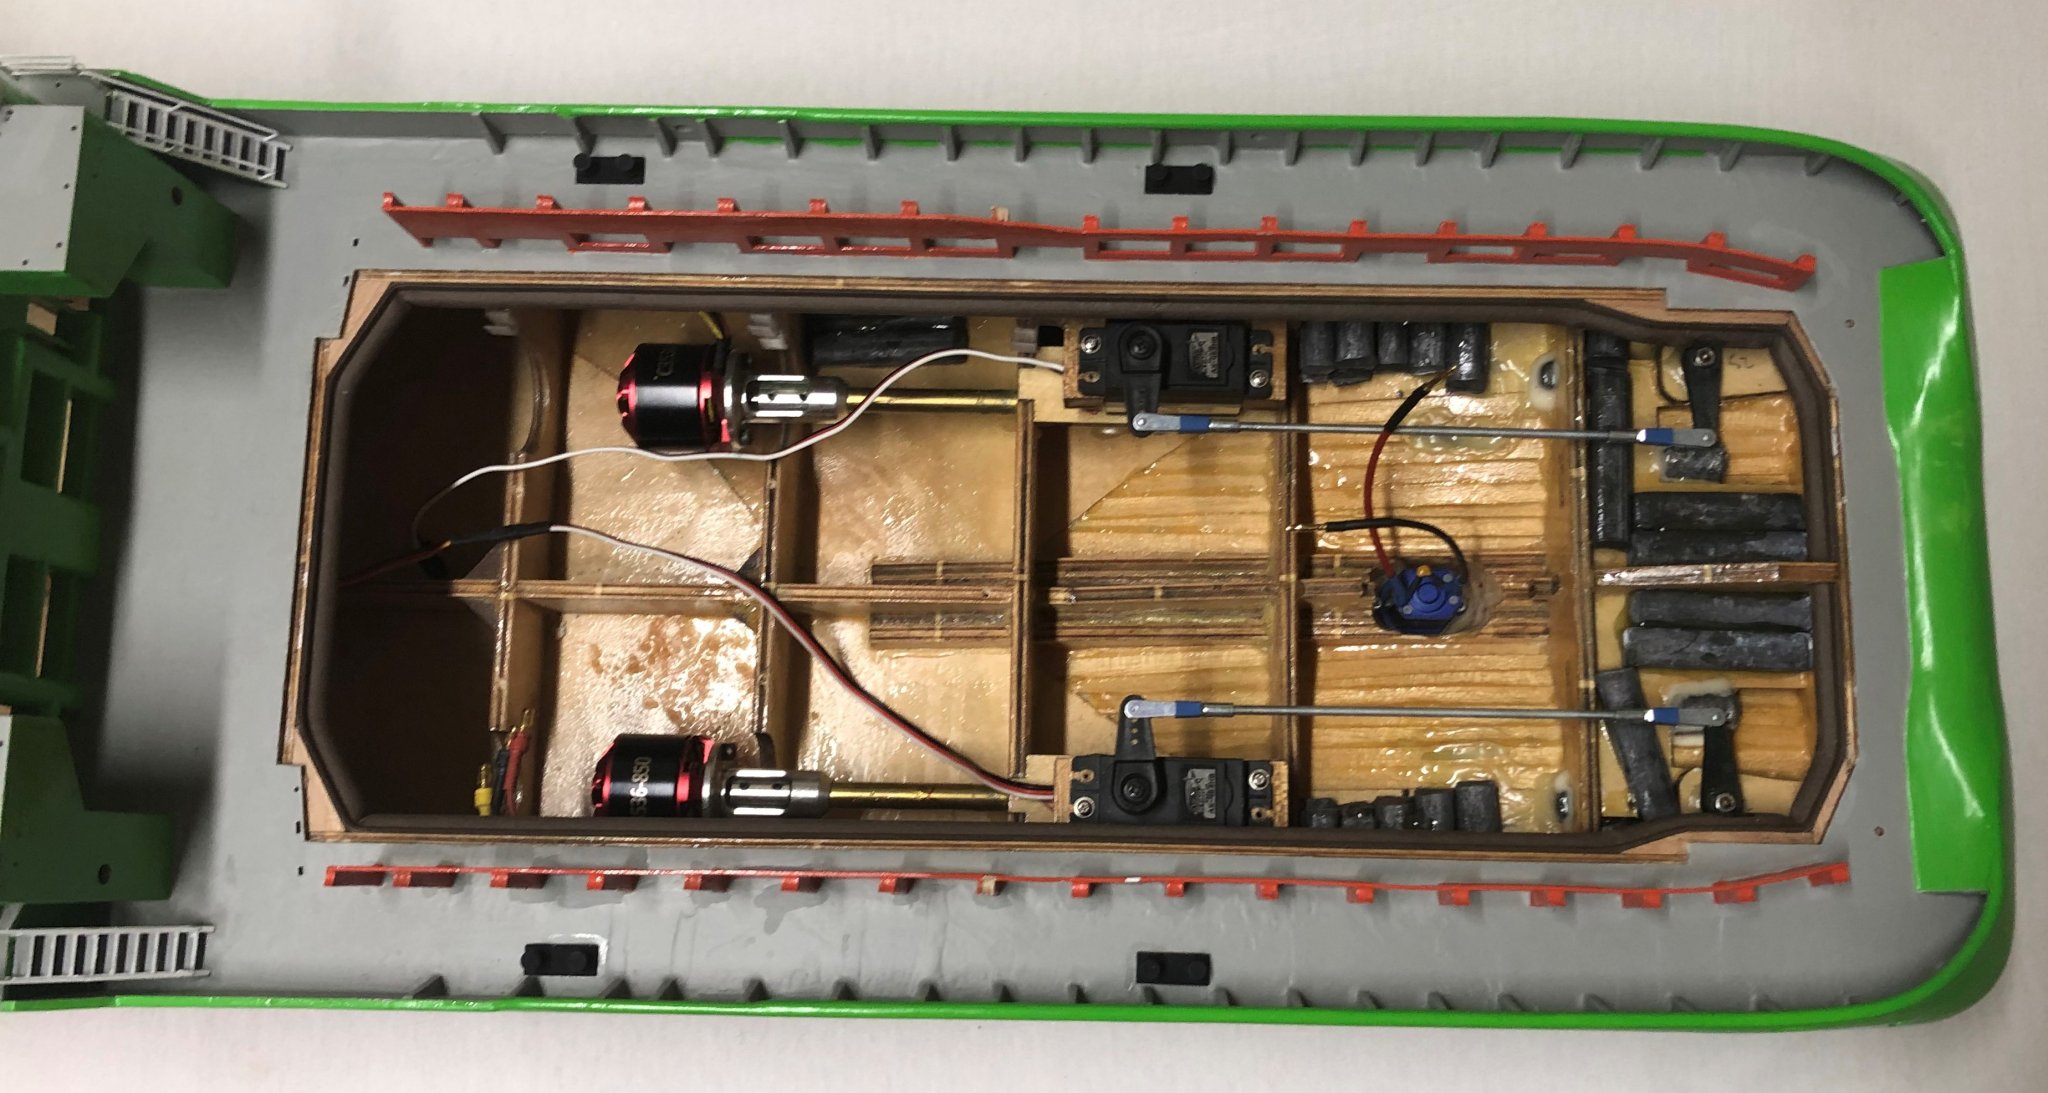
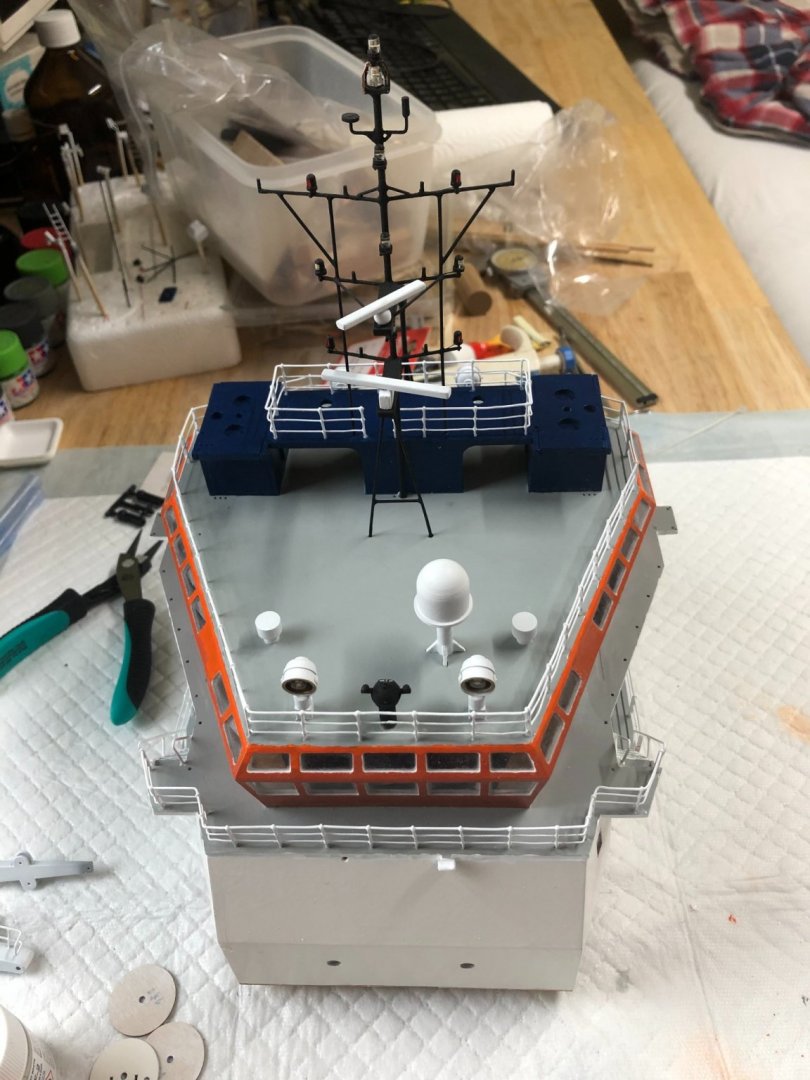
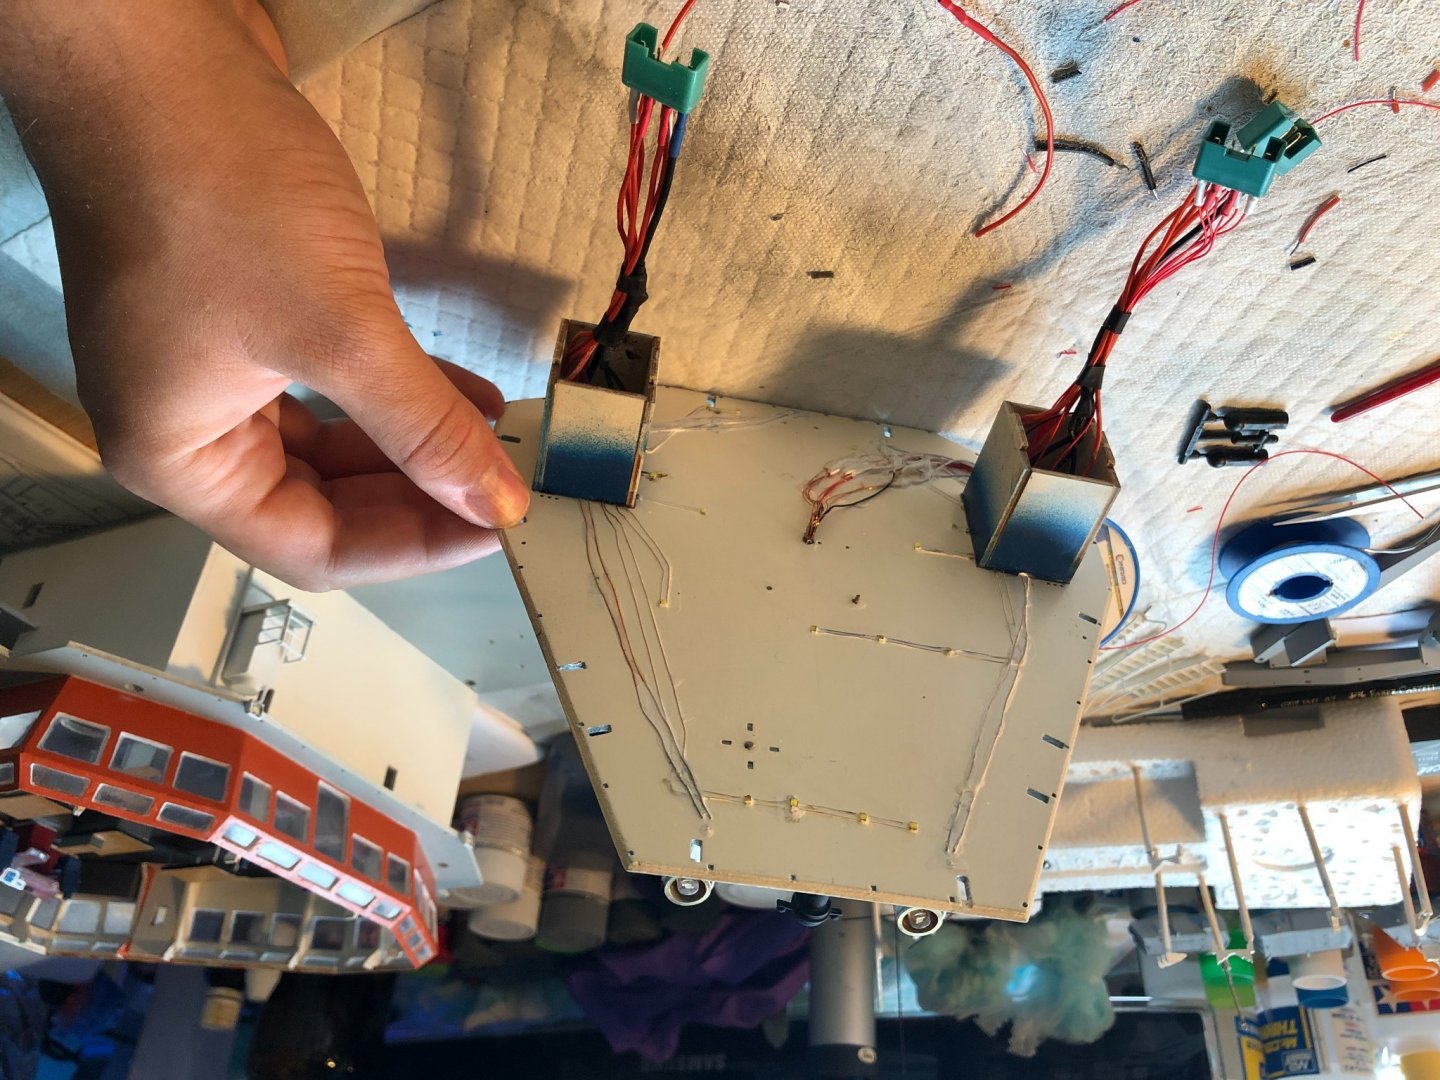
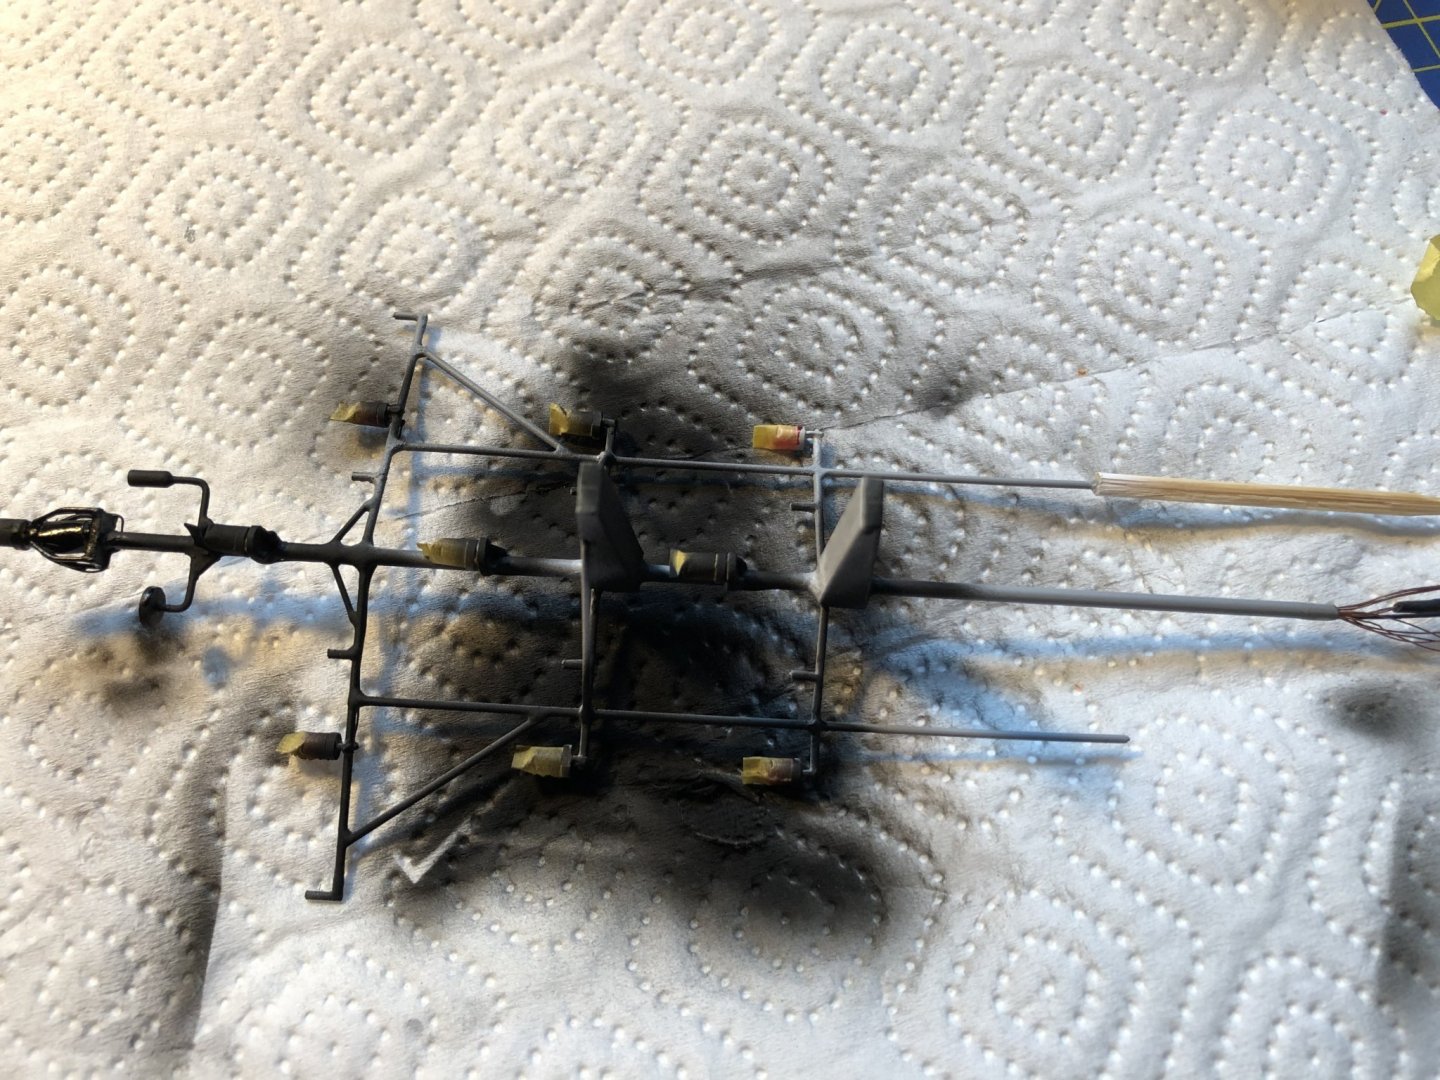
Hello All, A short update on the progress of the build. It is still ongoing, but very slow. The reason is that I miss 20 rail stanchions to finish the bridge railings, and since the Graupner, company that made the ones I used, vent bankrupt, again. There is no stock anywhere of this tipe of railing stanchions. But none the less here are a couple of progress pictures. I worked on the superstructure, assembling the main mast and the bridge roof. Gluing of the mast onto the roof, I fastened the roof in a Dremel vice top to hold it on its side. A big cable mess coming out of the mast, through the chimney down the bridge. Finished the connector soldering on all the lighting on the roof. And the "finished" superstructure. By this time I already managed to knock off the top LED once, but luckily it was a relatively easy fix. A couple of words for the intermediate conclusion. First let me mention a couple of things I found the KIT can improve upon: 1. The plans of the vessel in any part of the included building instructions, and the big plan DO NOT SHOW the picture of the LEFT SIDE of the vessel. I didn't manage to find any reasonably good pictures online, to see where to place all the details on that side of the boat. 2. Some details are not mentioned in the instructions, where they go to, presumably they are meant for the left side. But also one piece on the hull going on both sides (a stripe of wood 1x1mm by 40mm long) just appears on one detail in the plans, easy to overlook, just like it happened to me... Maybe it is me being incompetent. But I find the the instructions, for a KIT quite incomplete... I have build, successfully, the HMS Pegasus by Victory Models, yes there are master-full build logs on here featuring this model, but still, the instructions had all the necessary information to build the kit. Other issue, completely my fault is that, the model does swell in the water, I didn't correctly seal the wood. As I found out acrylic and lacquer paints do not seal the wood, who would have guessed. So whenever I sail the boat, everything, that was not epoxied swells and cracks. I should have used an enamel based primer, which would solve the problem, however it is too late for that now. That is also the reason why the build is taking so long, I don't know how to move on, as the boat, meant for being in water, can't really go in water for longer times. Cheers, George


-
Hello Jerry, I am glad to help you. Cheers,
-
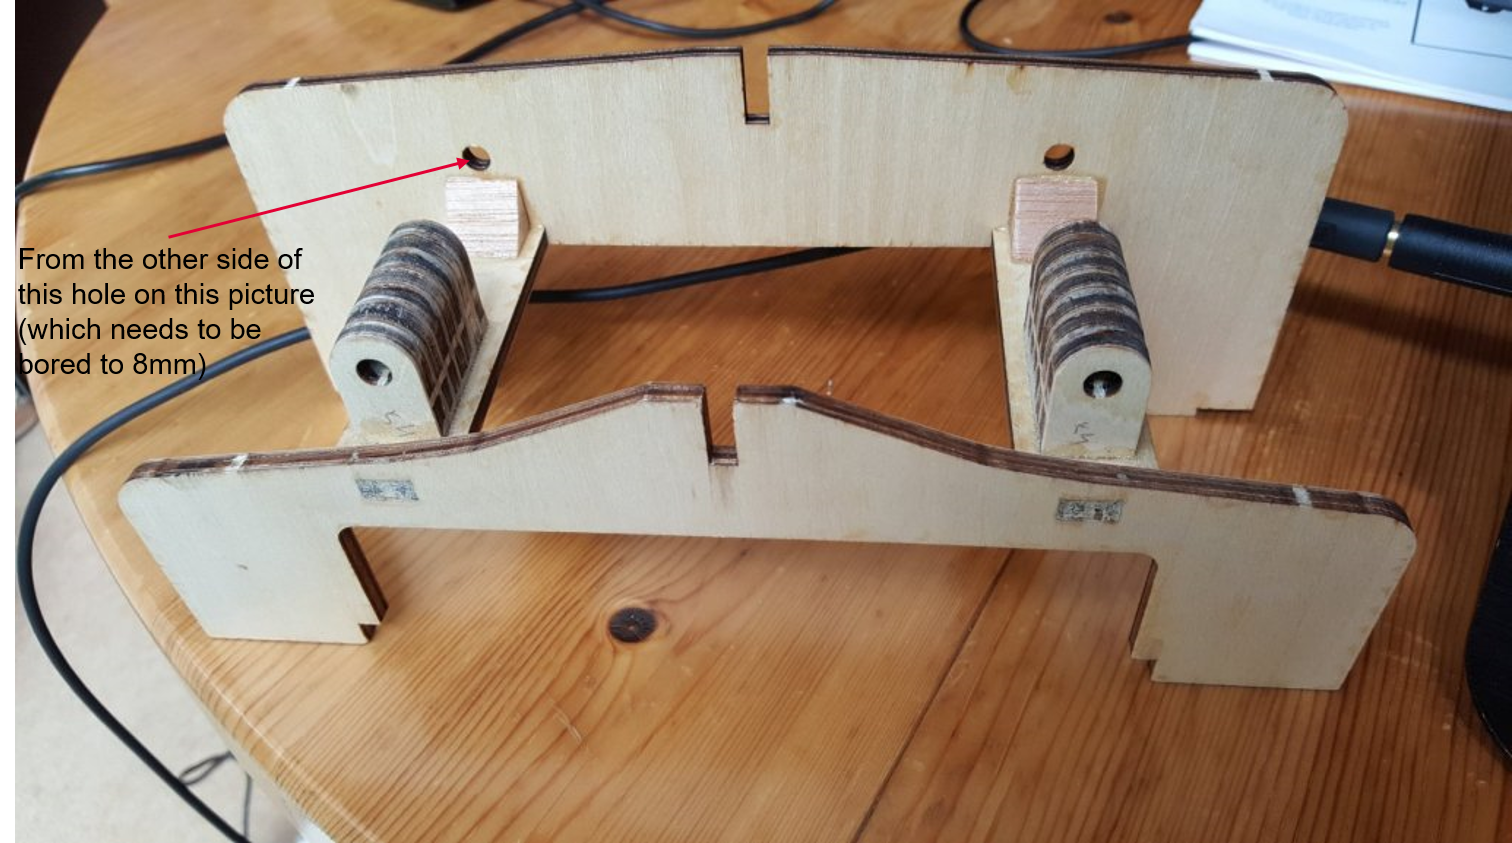
Hello Jerry, I measured the shaft, only roughly, but they seem to be the 255mm variant, which would fit their size quite well. However I suggest once you start building the stern, you do a quick measurement from the rudder shaft axis until the inner side of the wooden shaft pass-through. This would give you the minimal length of the shaft itself, without the engine flange. I think this distance is something less then 200mm, so I opted for the 255mm shafts as I was not sure how long the shaft flange is. What I mean is these two holes, naturely when the bulkheads are on the keel, properly spaced: I hope it is clear what I mean. Do not forget, all the hole, through where the shafts are going, need to be bored to 8mm if the MP Jet shafts are used. Cheers,


-
Hello Jerry, I am glad the information helped you. I understand your issues. Well at least the motor can be anything you can get in the US, the only requirement are the mounting hole placement, and the KV number (the number of revolutions per Volt, lower is better). The propshaft can be a bit more tricky, as I haven't seen anyone else do the same design, even though it is the best way to ensure that the two shafts are coaxial, motor/sropshaft. Cheers,
-
Hello Jerry, Thanks for the clarification. The "silver" joiner is a aluminium hard joint that was supplied with the propshafts. Simply they are Alu rods with 4mm hole dia and 4x M3 grub screws, two per side. They are good if the shaft-motor axes are concentric, then they are the best solution, as they minimize the noise. I think I had to drill the holes, because they are supplied in 3.2/4 mm size, typical for the intended brushed motor shaft of 3.175 mm. I believe one can get even a 4/4 mm ones in the aftermarket parts. Then regarding the motor mount itself, the bigger Alu part, is a "600" size motor flange, this is taken from the size of the standard brushed motors. This is dependent on the hole spacing of the used motor. the entire shaft assembly is build by the Czech company MP-JET, here is the link to their website with the prop shafts: https://www.mpjet.com/news/index.php/en/boat-parts/compact-boat-shafts I hope this answered your question, I am glad to be of help to you. Cheers,
-
Hello Jerry, Sorry for my late reply. I am not sure I understand what you mean by couplers. If you mean the Electronic Speed Controllers or ESCs (for big machines they are called inverters), then I used a chinese version of these ones: https://www.hobbywingdirect.com/collections/seaking-series/products/seaking-30a-v3-esc?variant=840986853 But any brushless ESC that has a forward/reverse mode should be fine. Be careful if they are sensored as many of the ECS for RC cars that have FW/REV mode are for sensored motors. They don't need to be extremely powerful for these kinds of boats (if you would be building a speedboat, that is of course a different story). I hope I understood your question correctly. So the main point would be, if the selected brushless ESC has a forward/reverse mode. Additionally if they are waterproof even better, as the brushless ones are really bad with water, know this from personal experience. Cheers,
-
maddog33 reacted to a post in a topic:
Fairmount Alpine by George-JK - Billing Boats - 1:75 - RADIO
-
maddog33 reacted to a post in a topic:
Fairmount Alpine by George-JK - Billing Boats - 1:75 - RADIO
-
maddog33 reacted to a post in a topic:
Fairmount Alpine by George-JK - Billing Boats - 1:75 - RADIO
-
maddog33 reacted to a post in a topic:
Fairmount Alpine by George-JK - Billing Boats - 1:75 - RADIO
-
@popeye the sailor The PE hand wheels are supplied by a Polish model shop super-hobby, they have multiple web addresses, depending where you live in EU, each is in that country language, I use the Austrian one, but lined is the UK shop... https://www.super-hobby.co.uk/products/Hand-wheels-1-selection.html They have quite an extensive assortment of things for plastic models. Cheers George
-
popeye the sailor reacted to a post in a topic:
Fairmount Alpine by George-JK - Billing Boats - 1:75 - RADIO
-
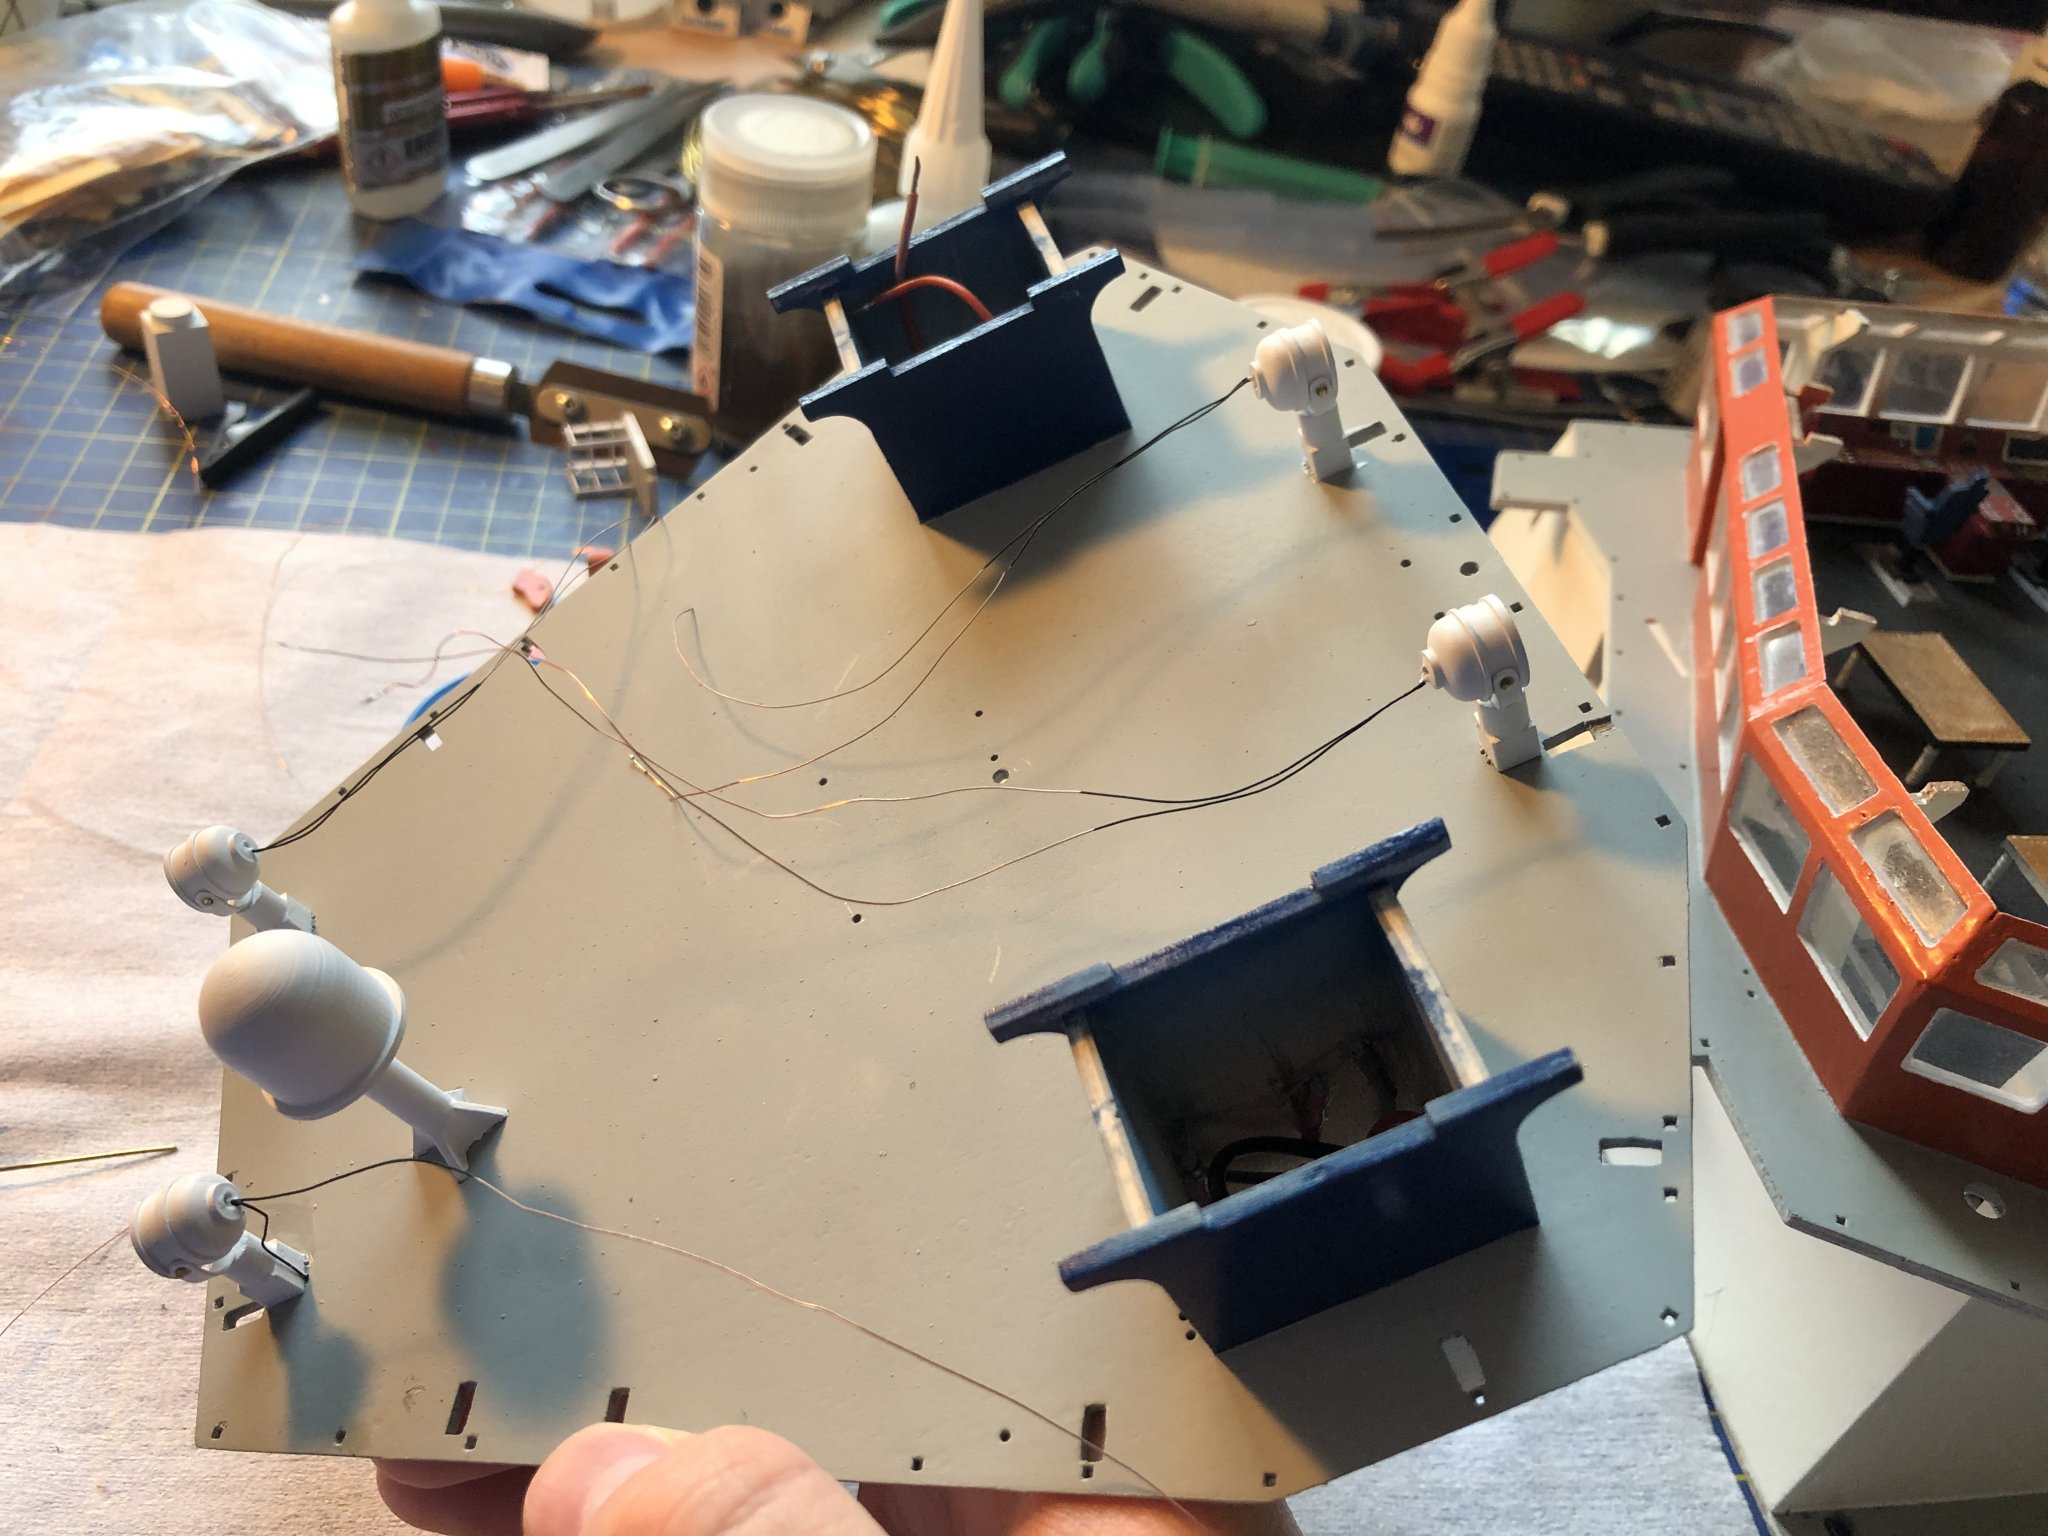
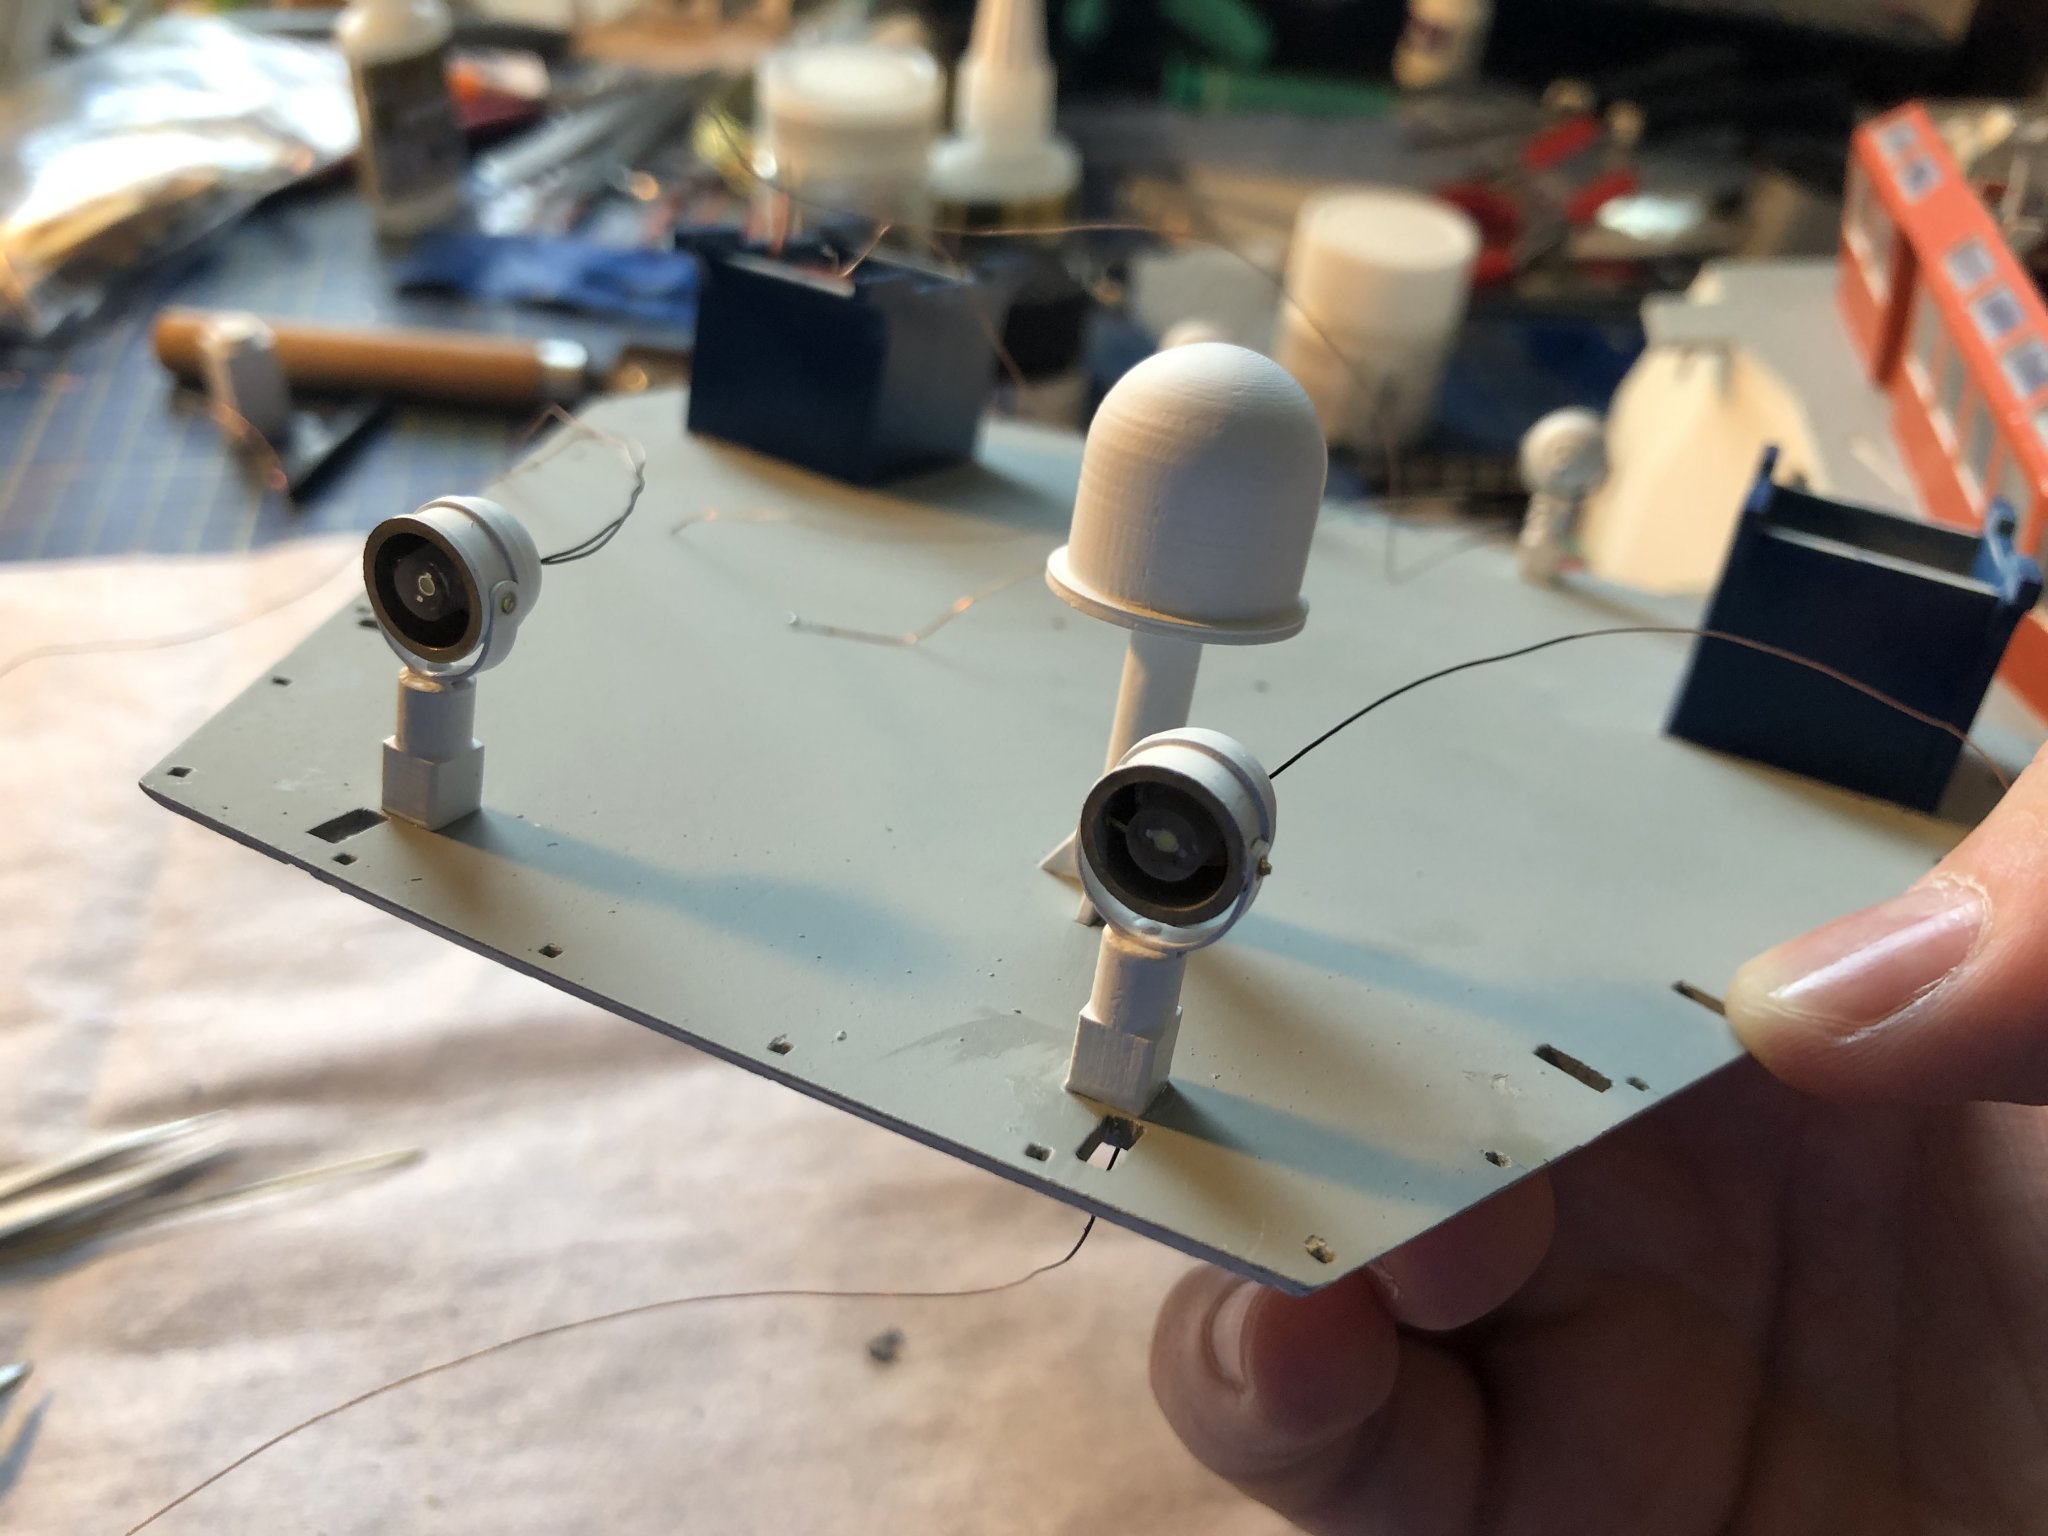
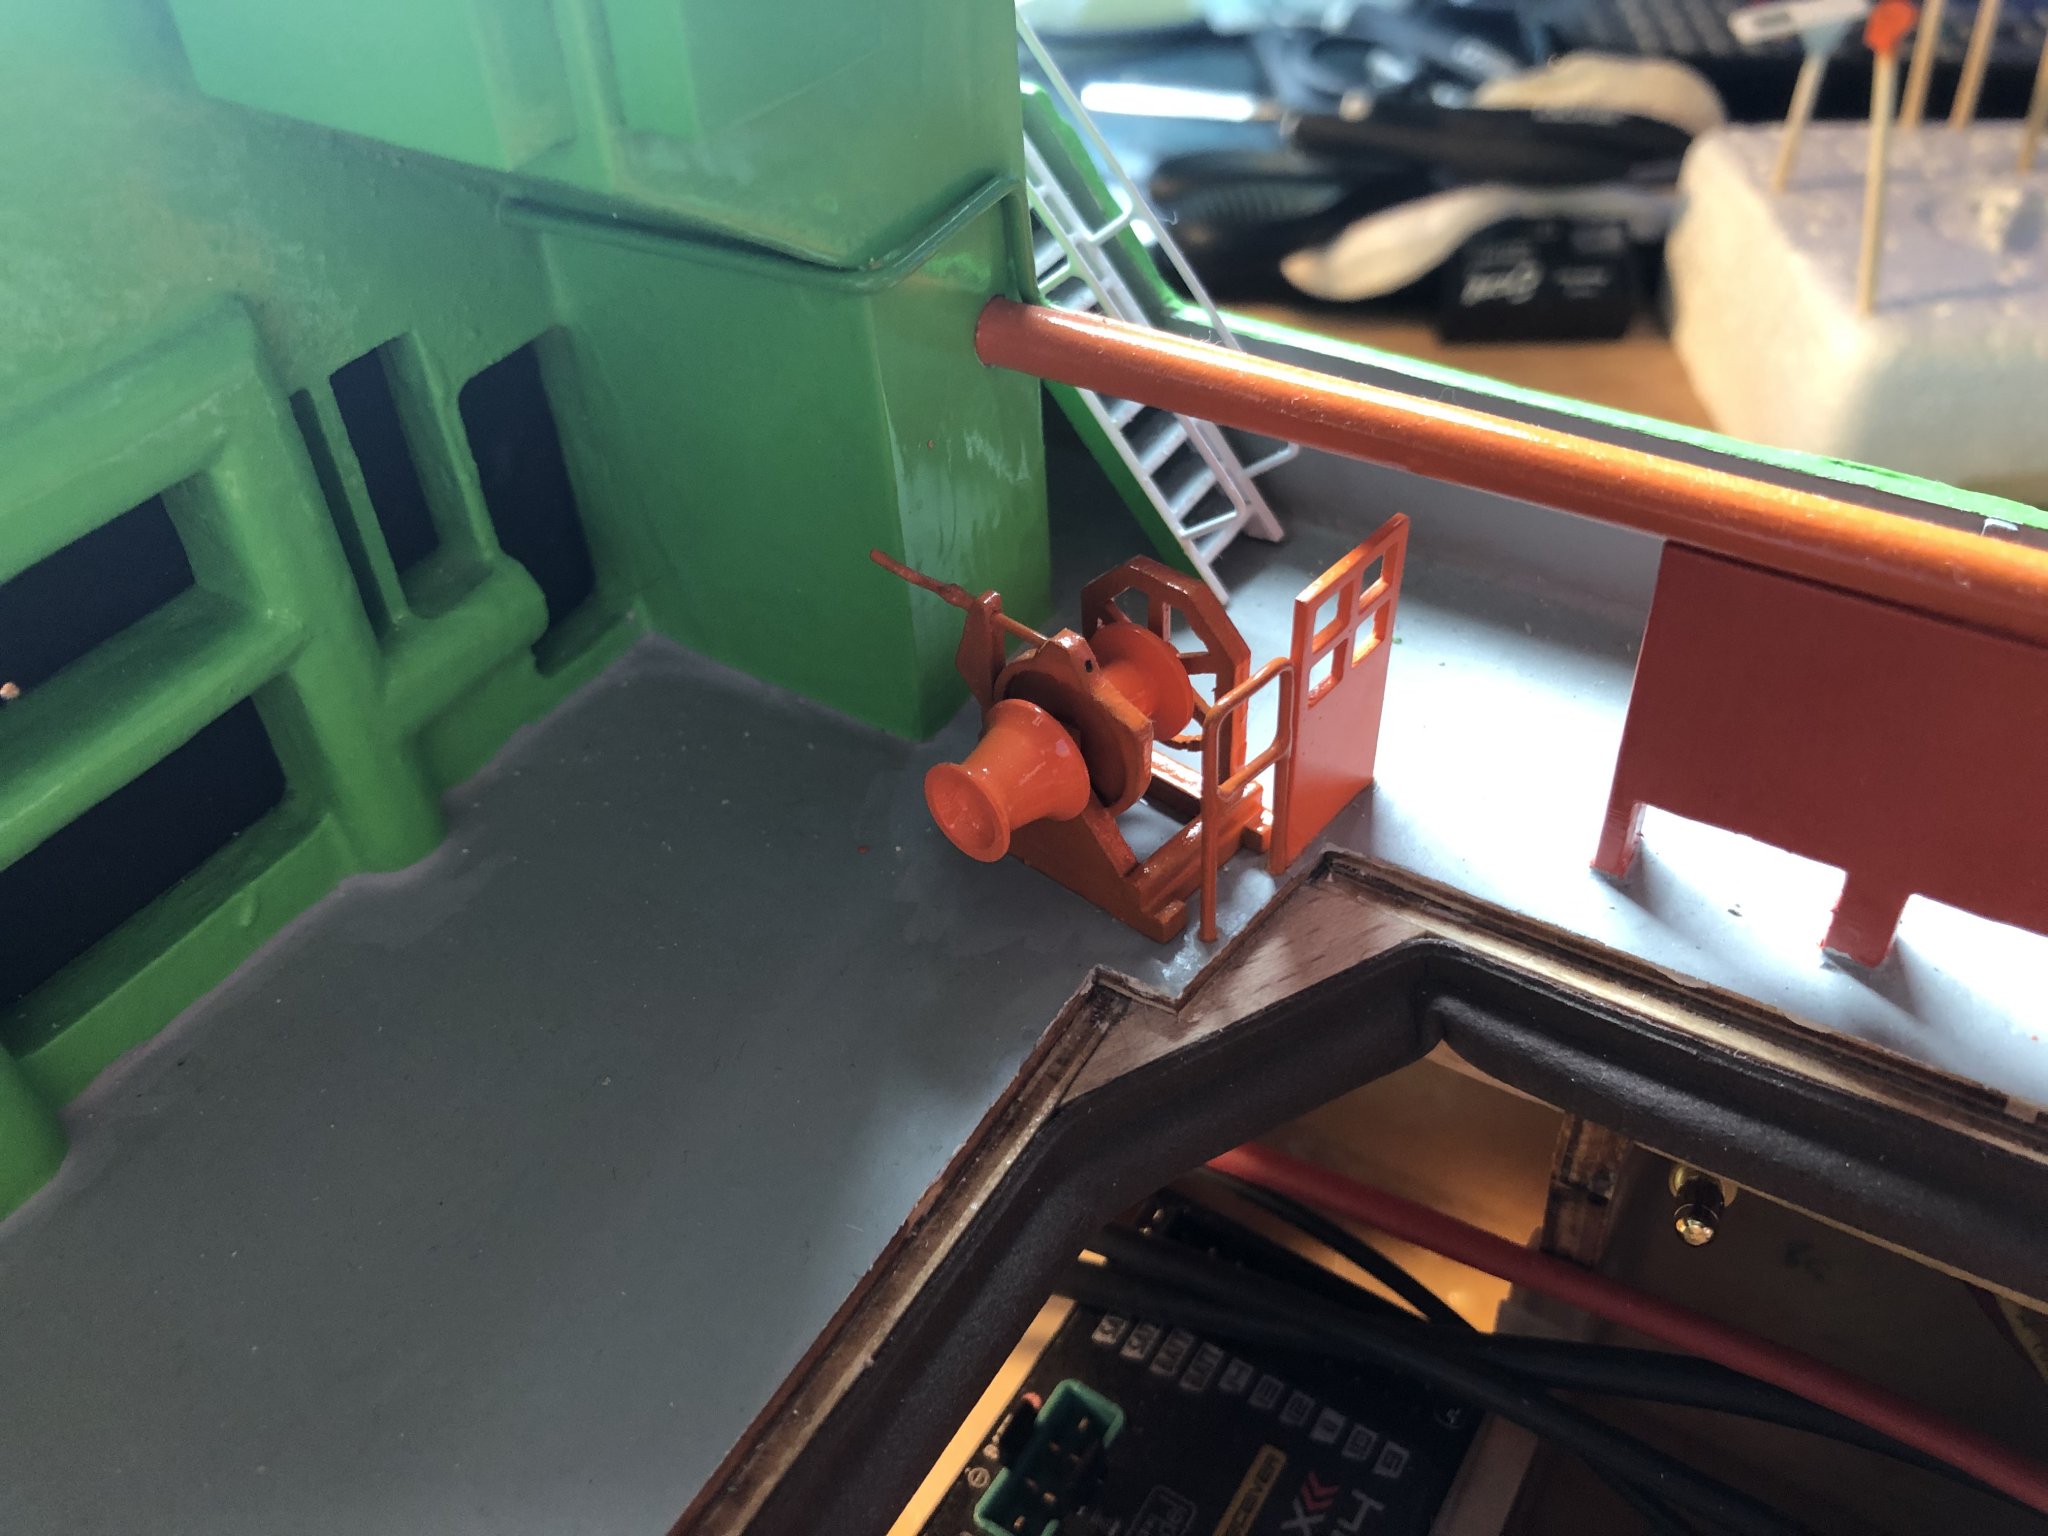
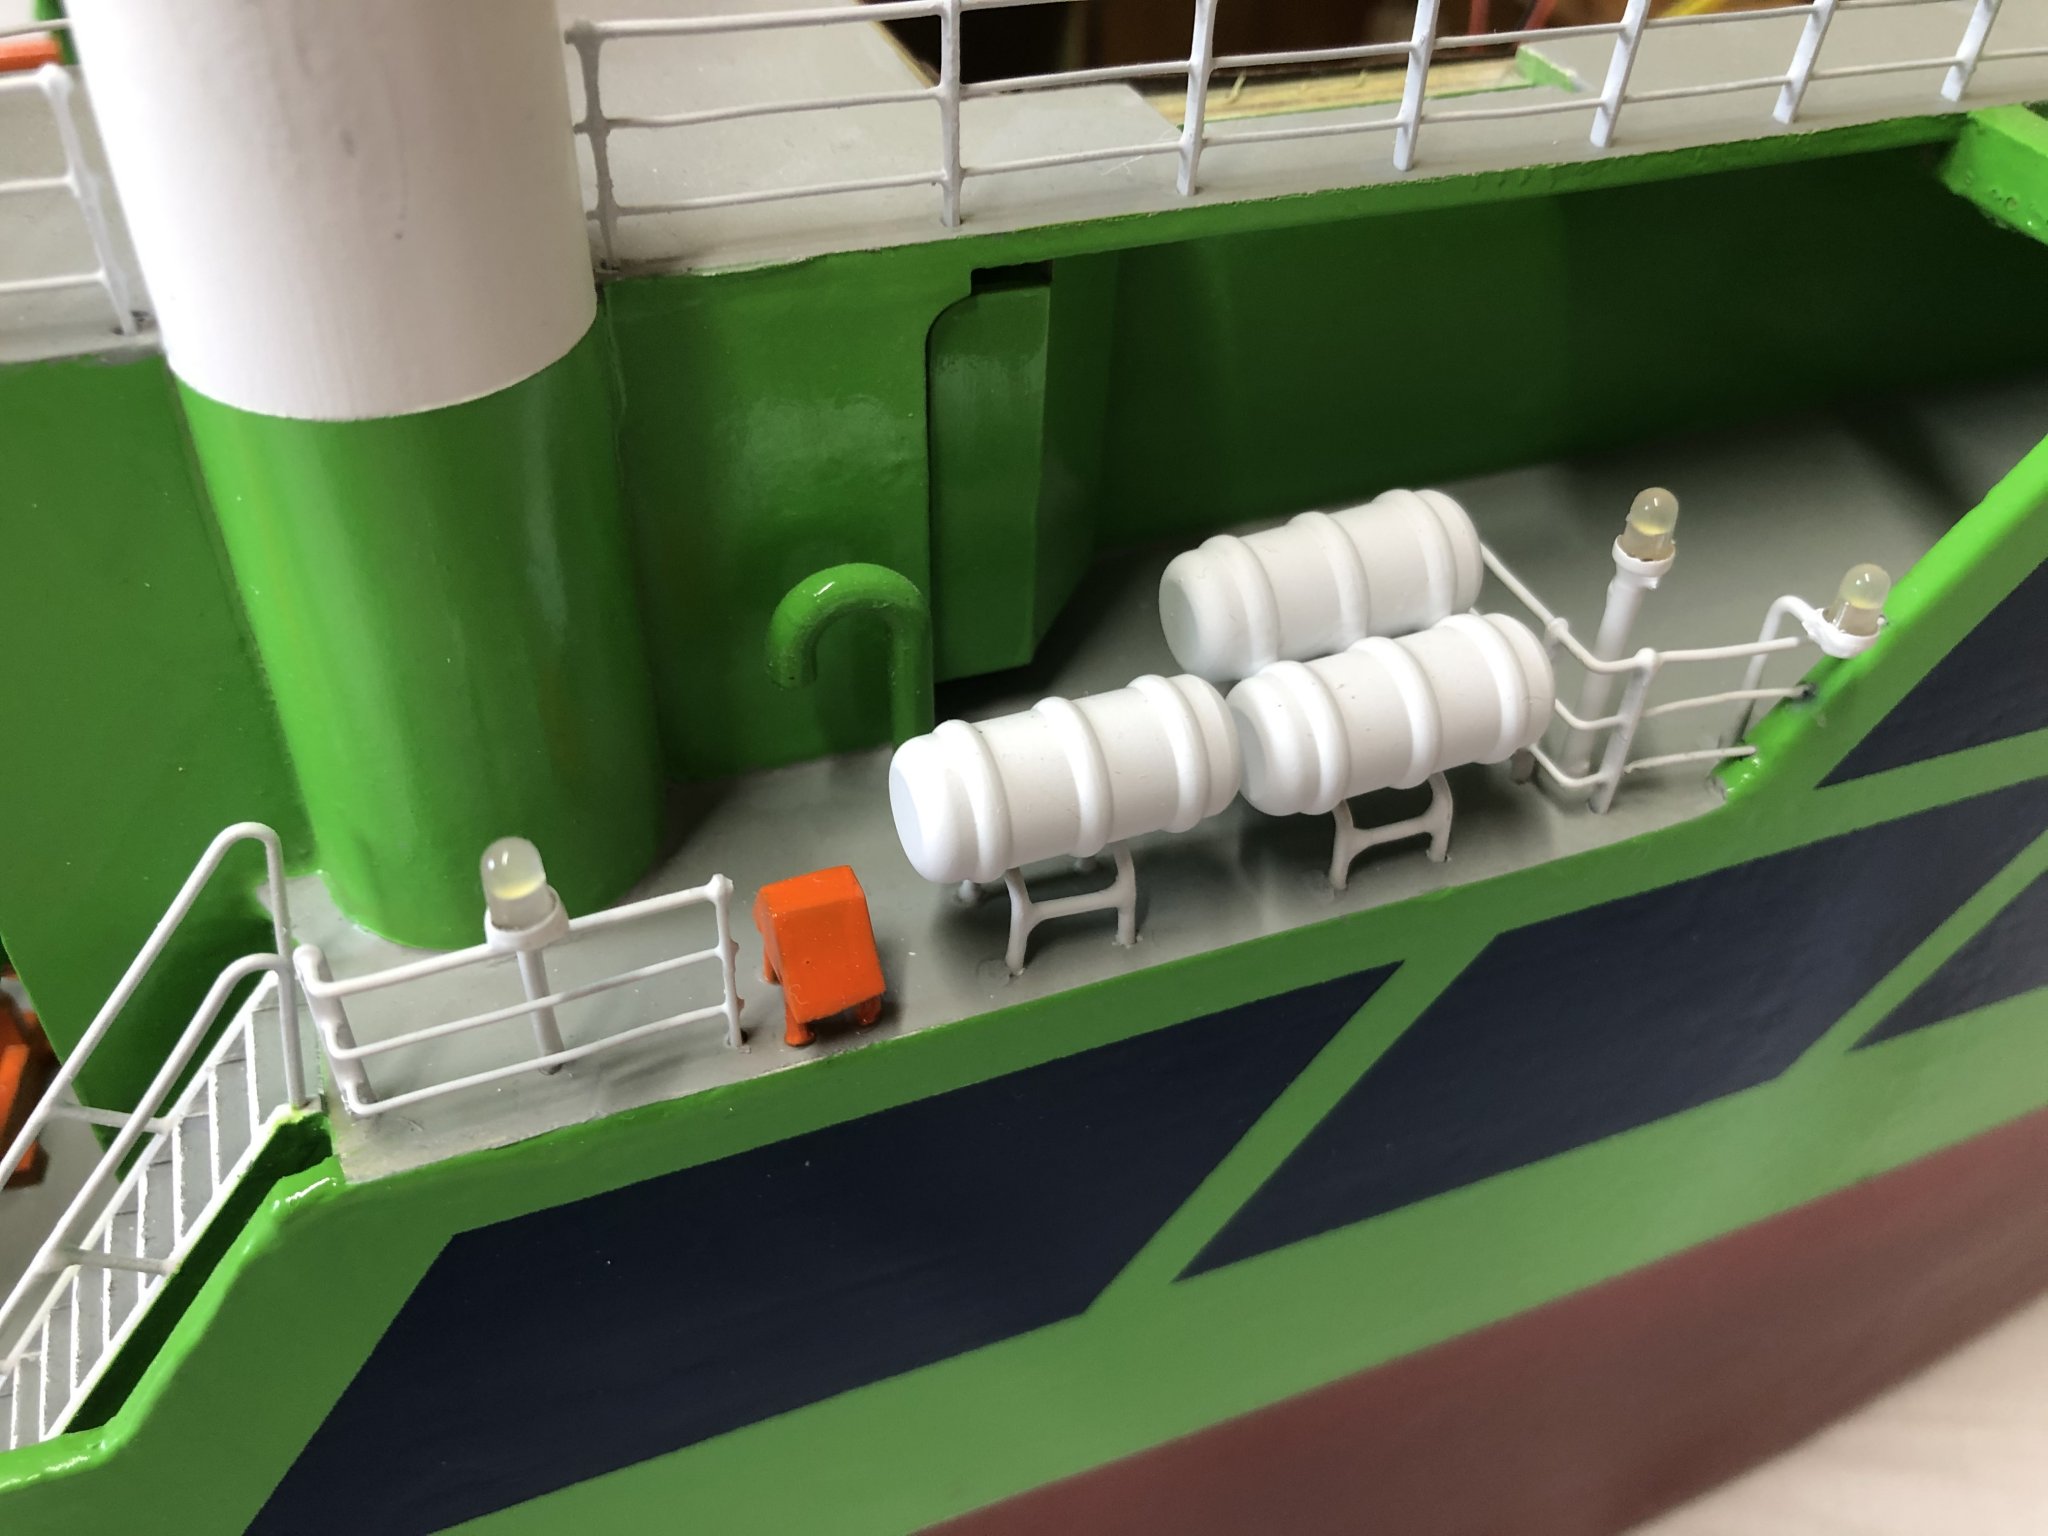
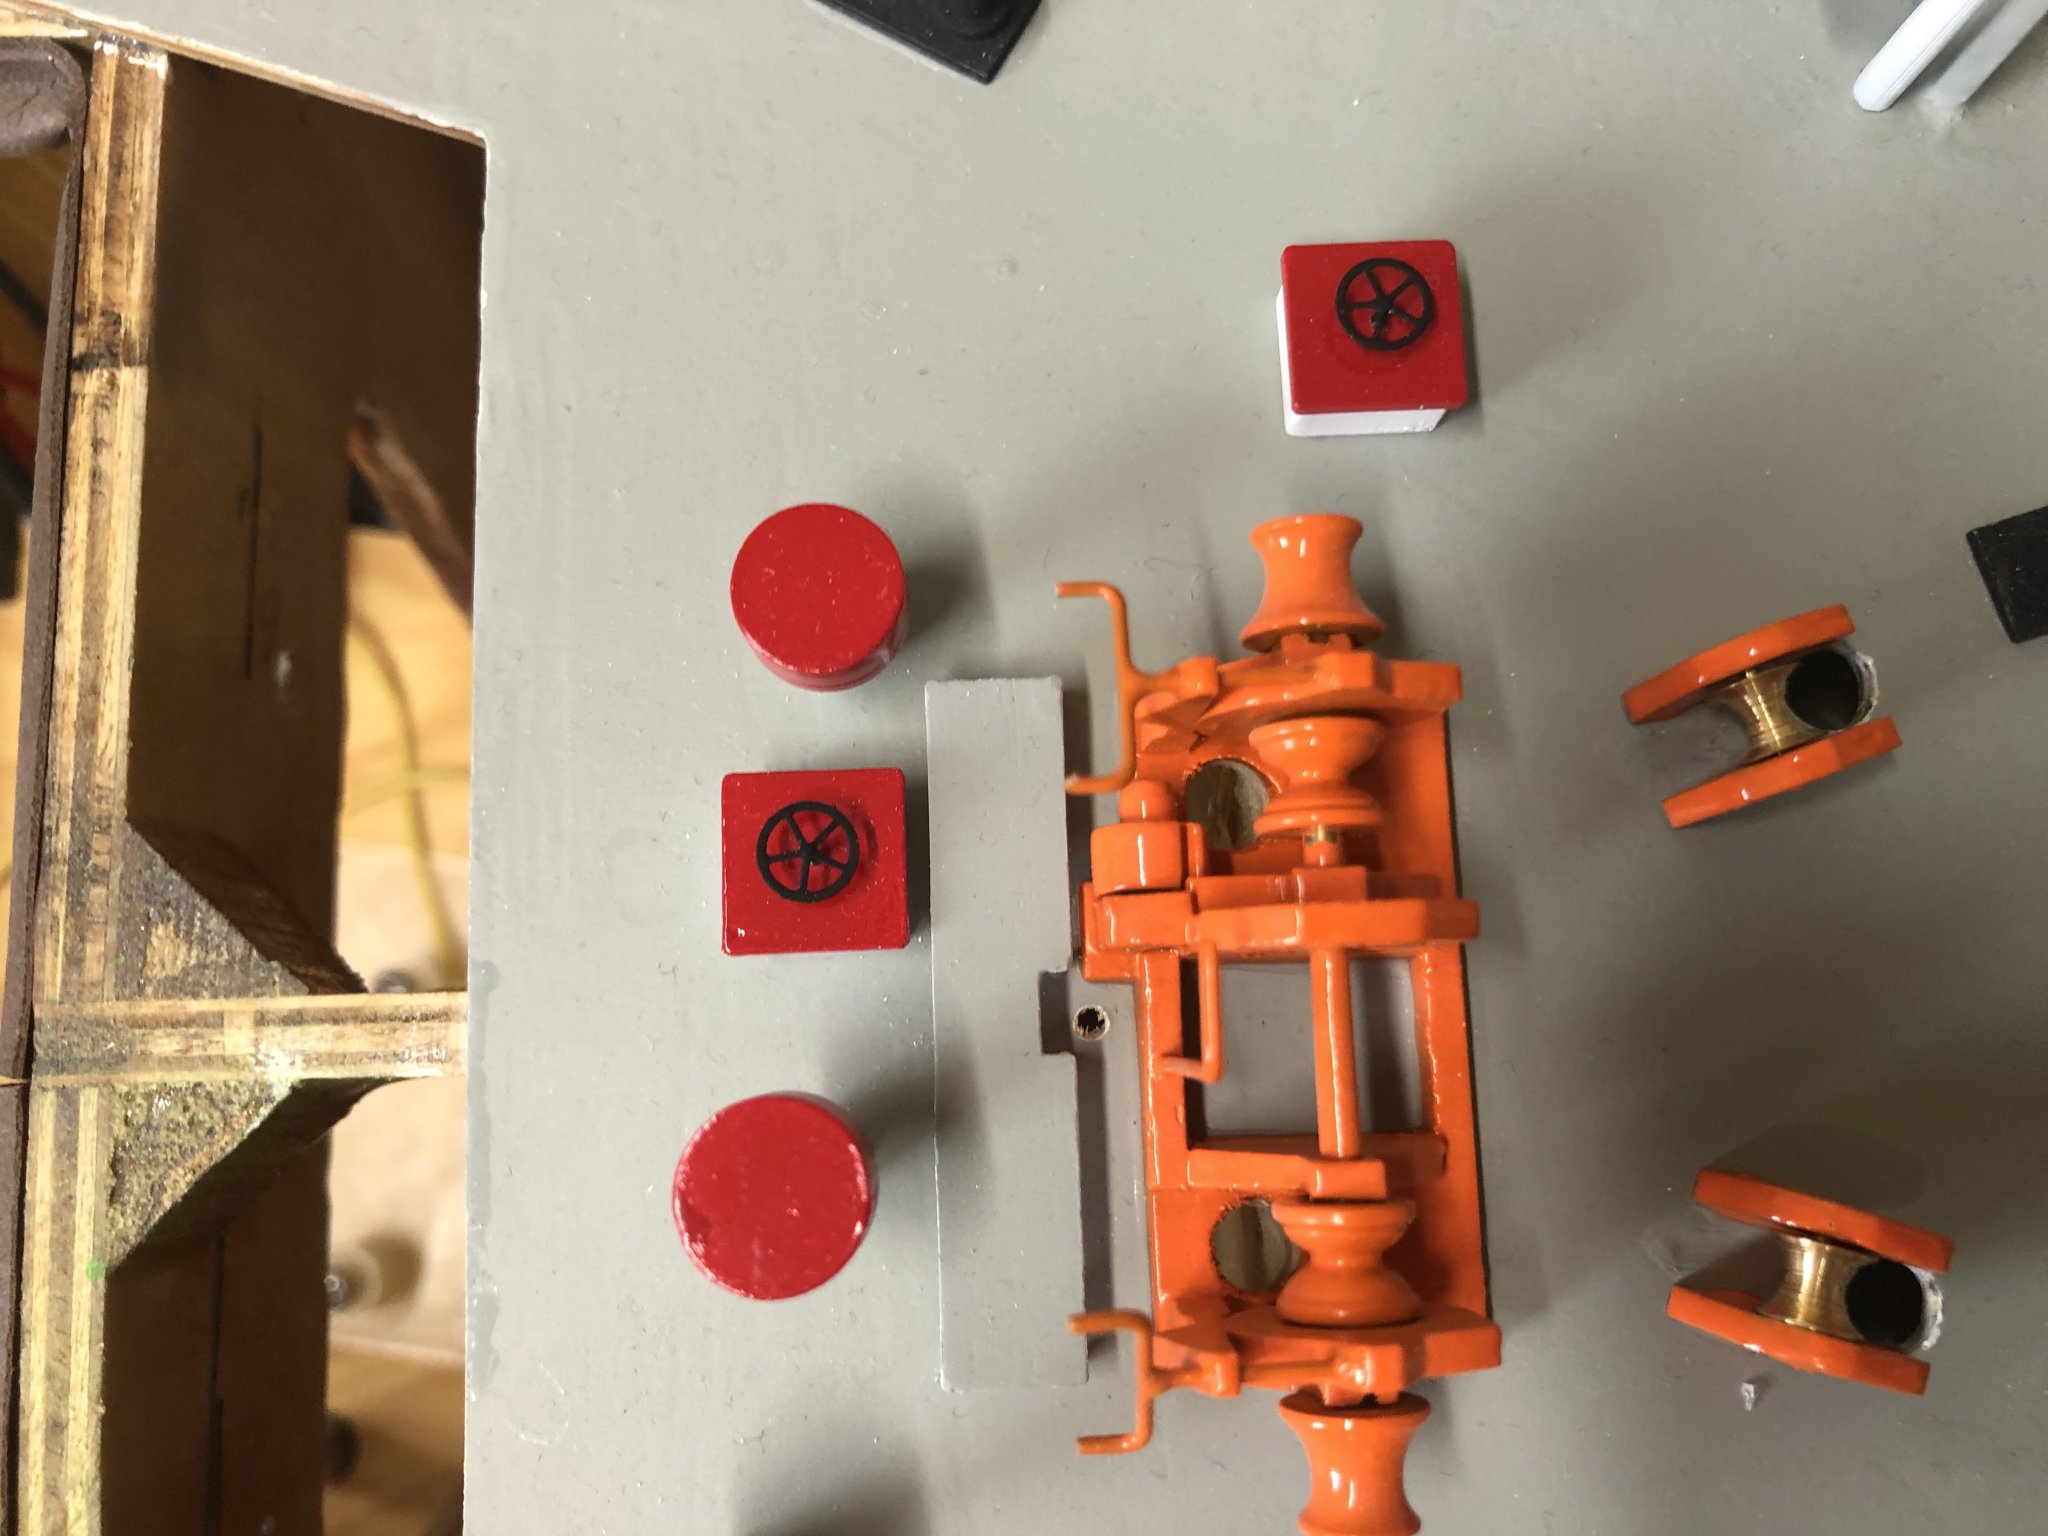
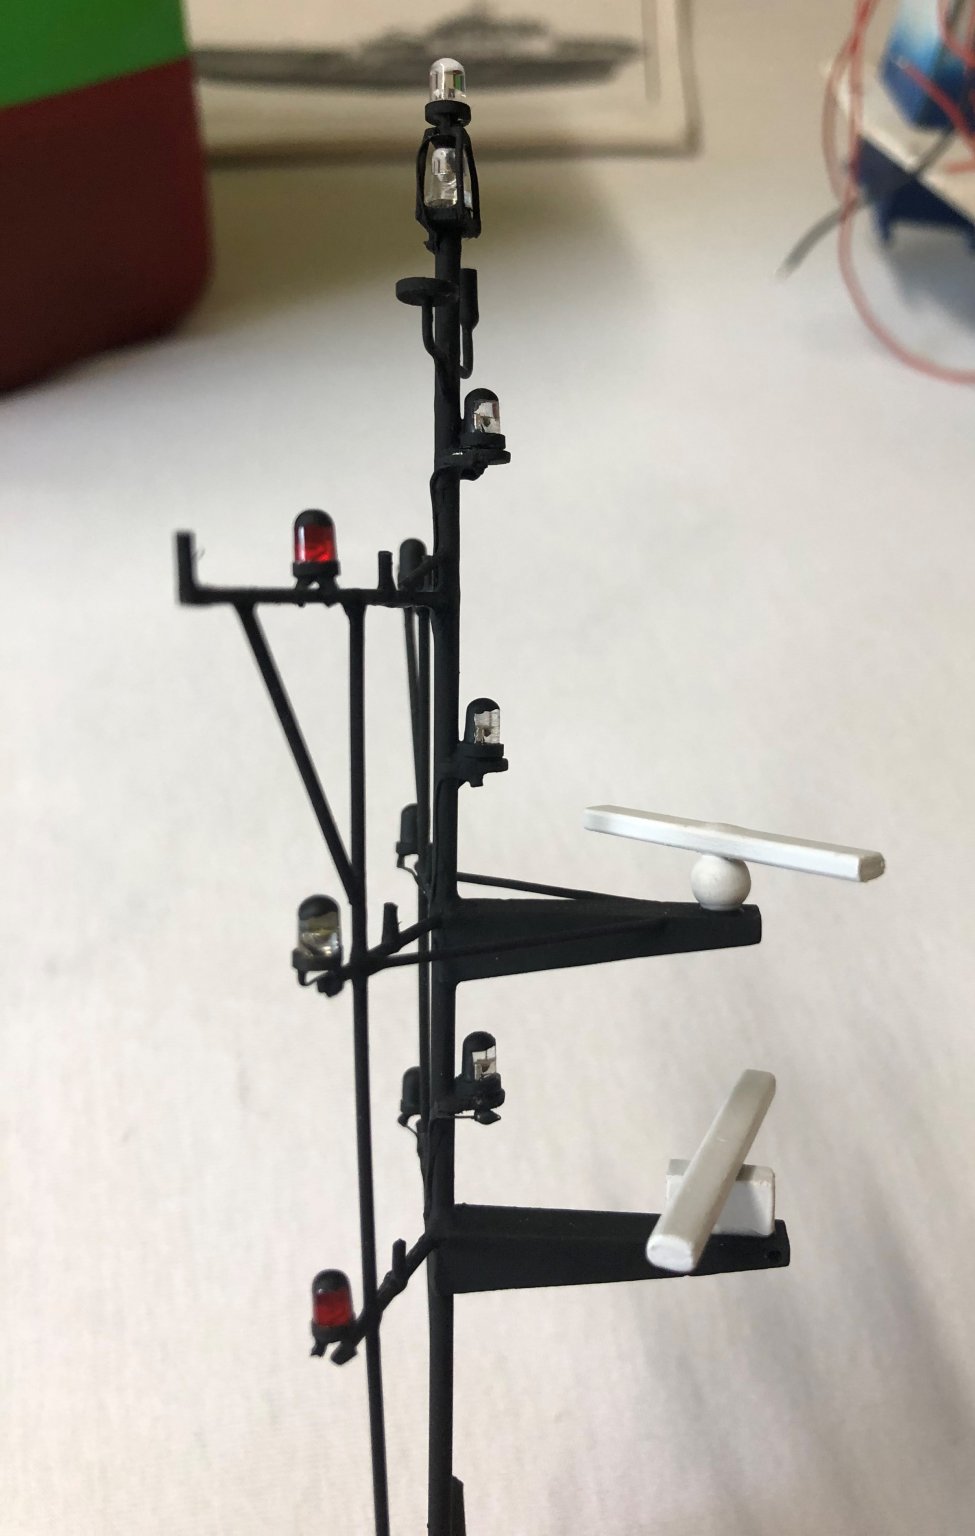
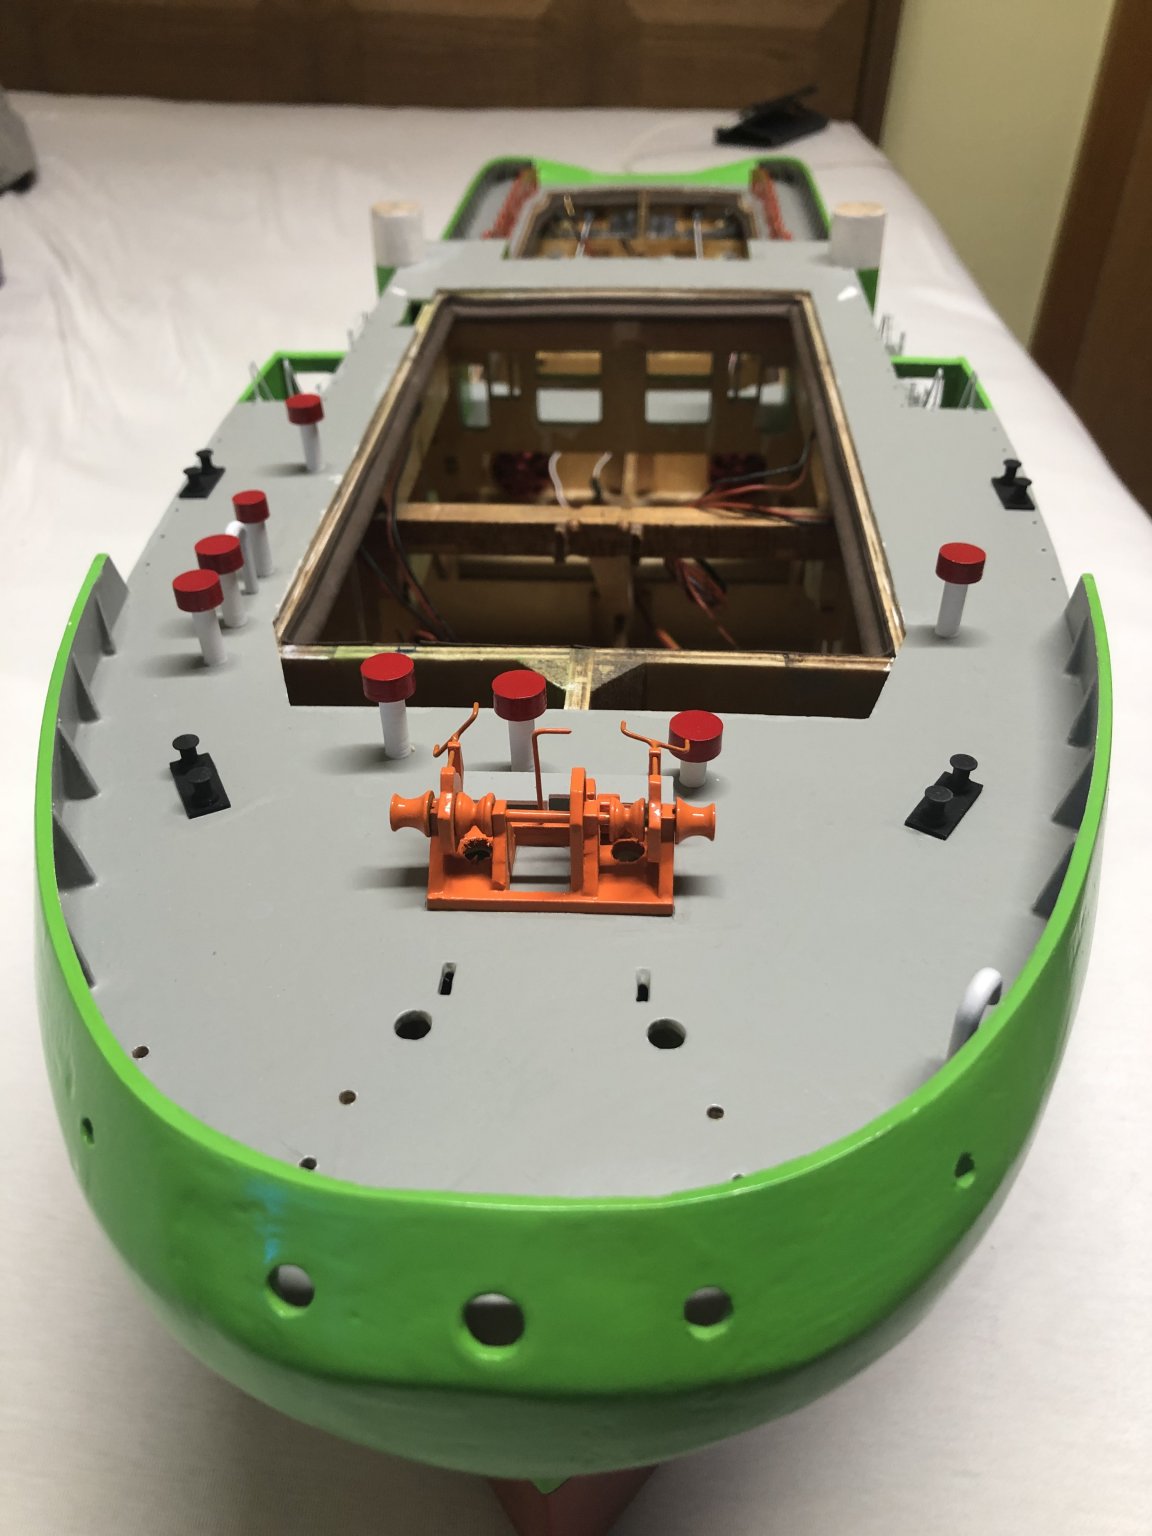
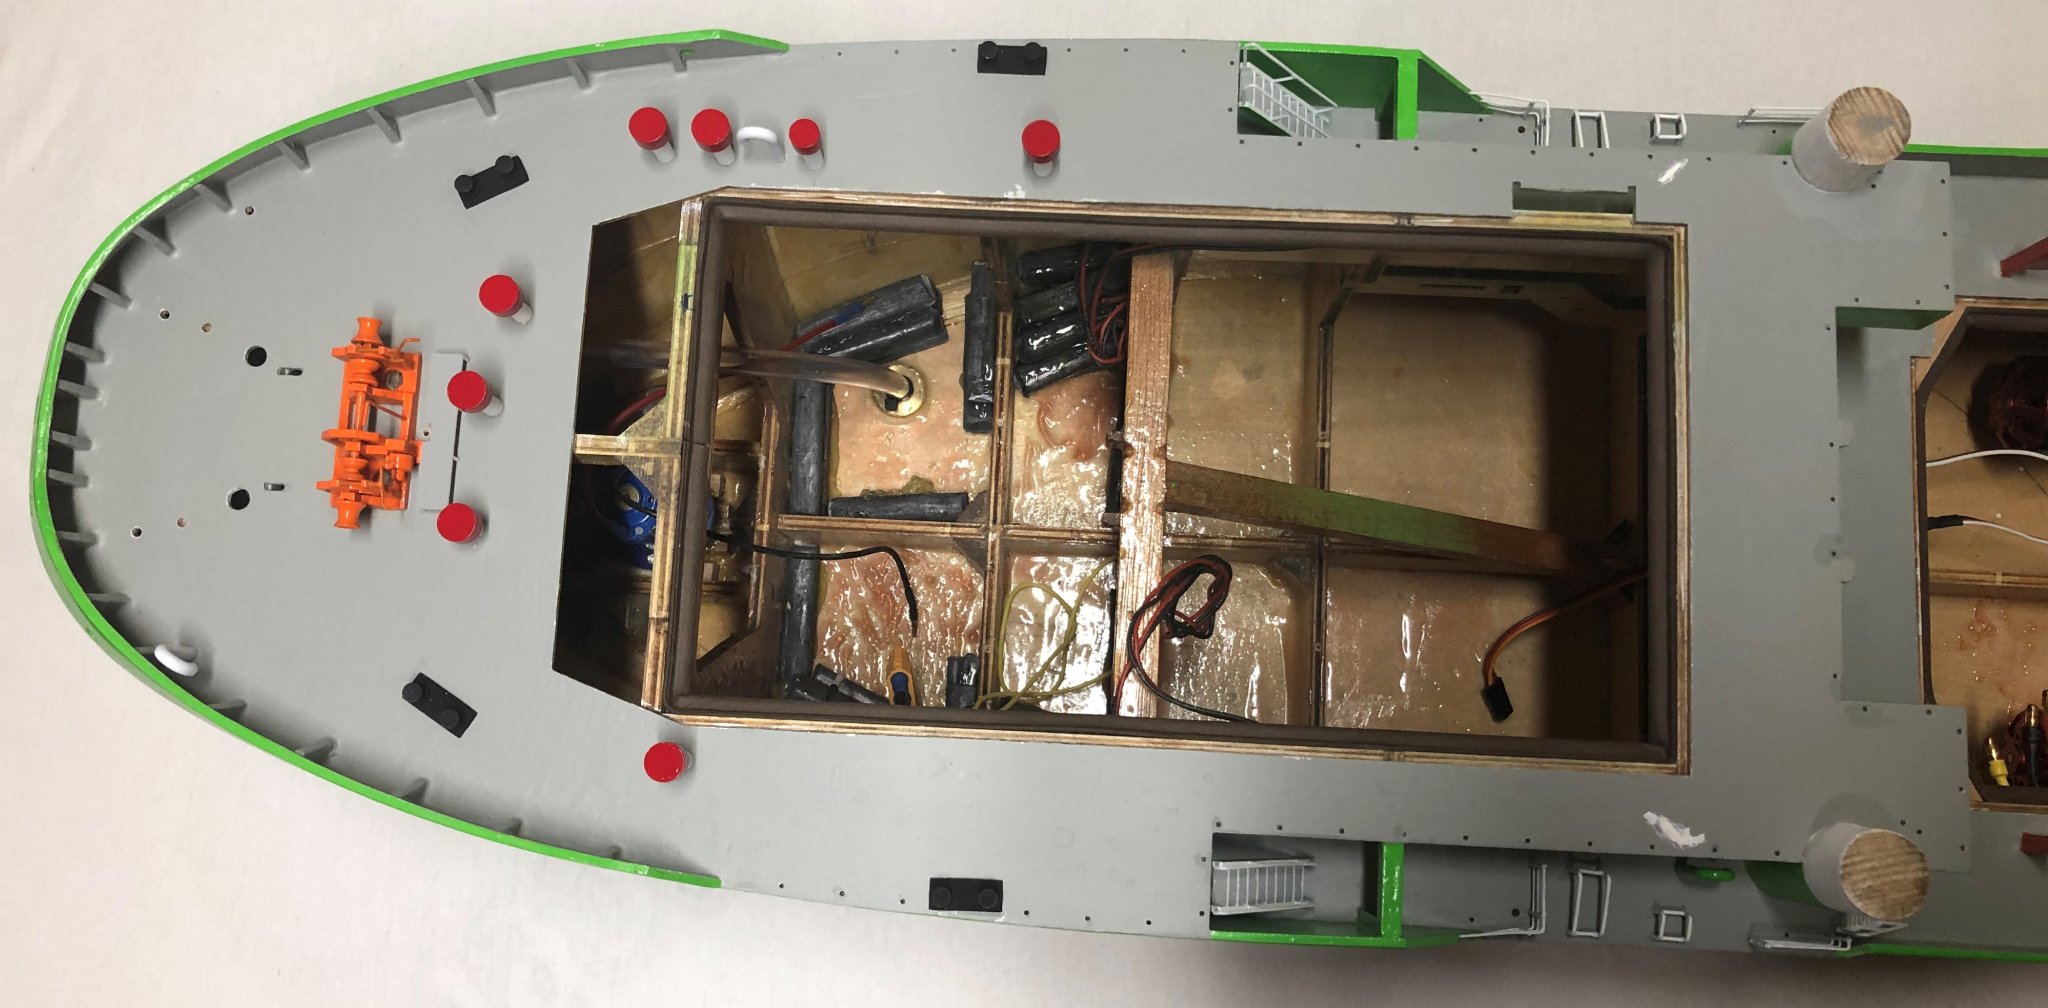
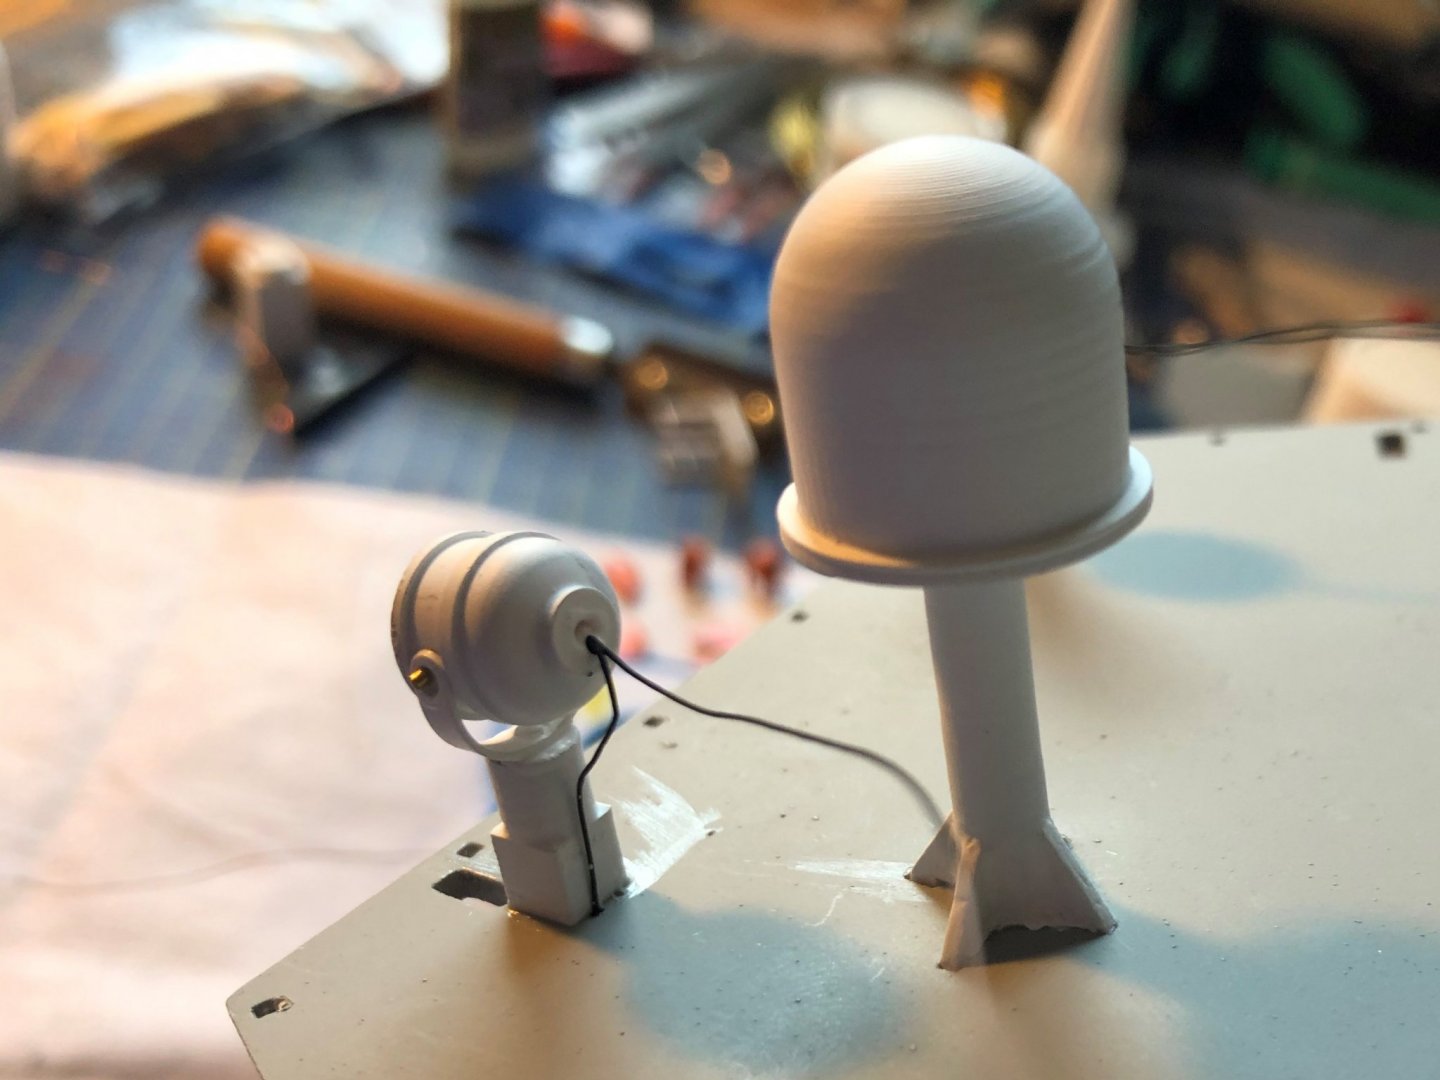
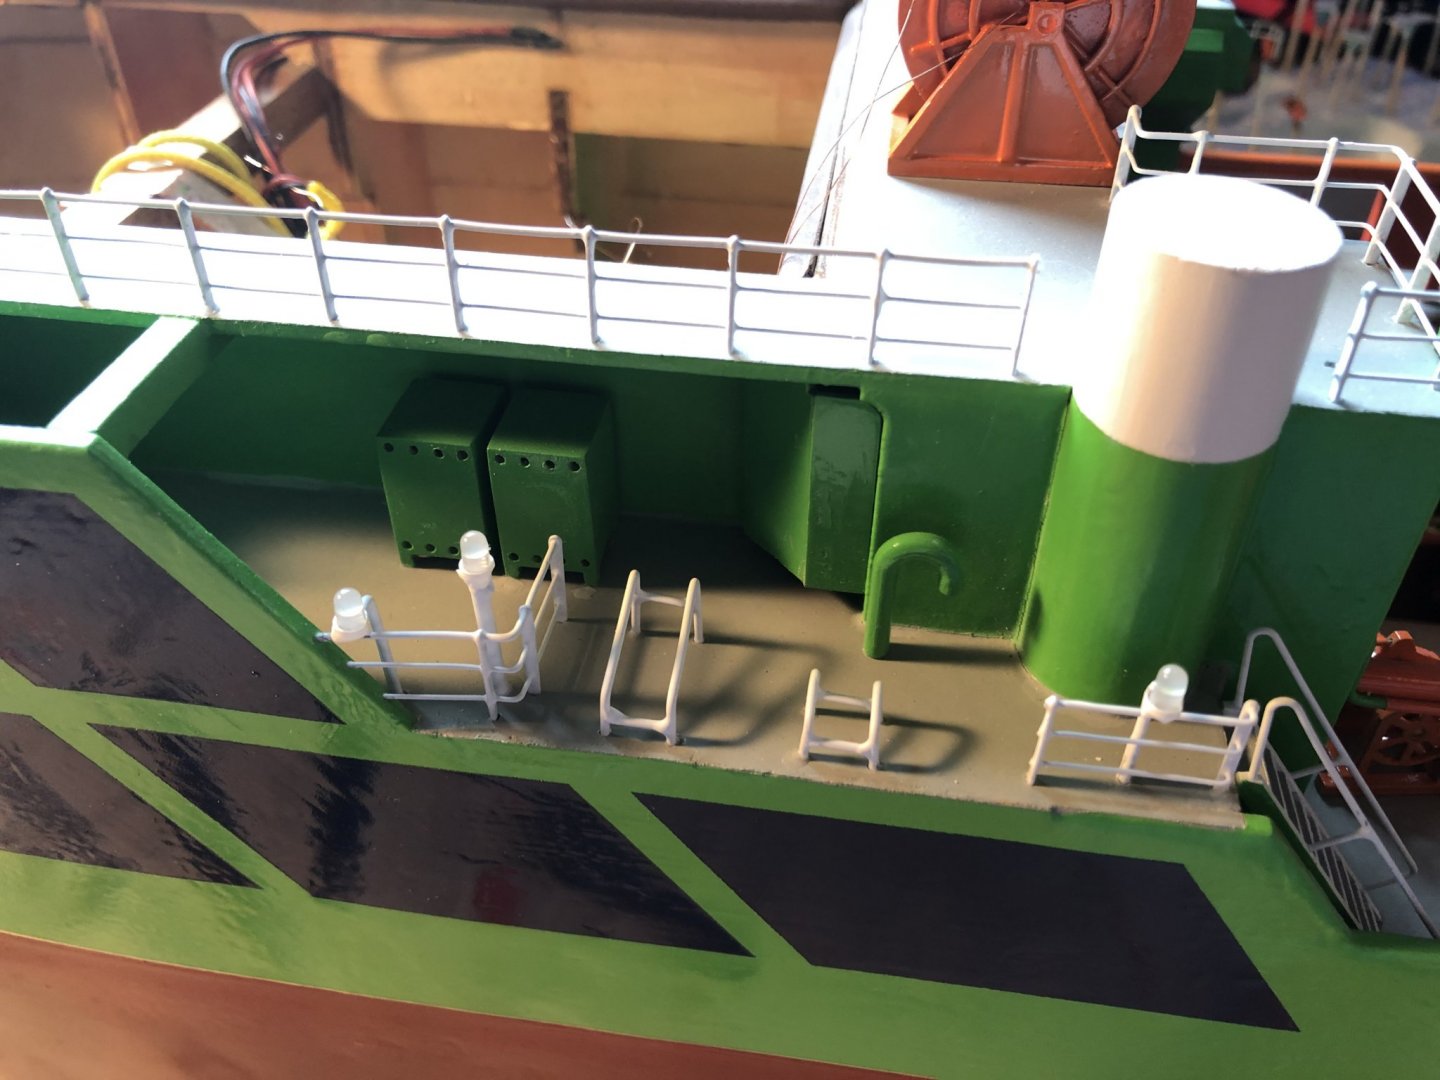
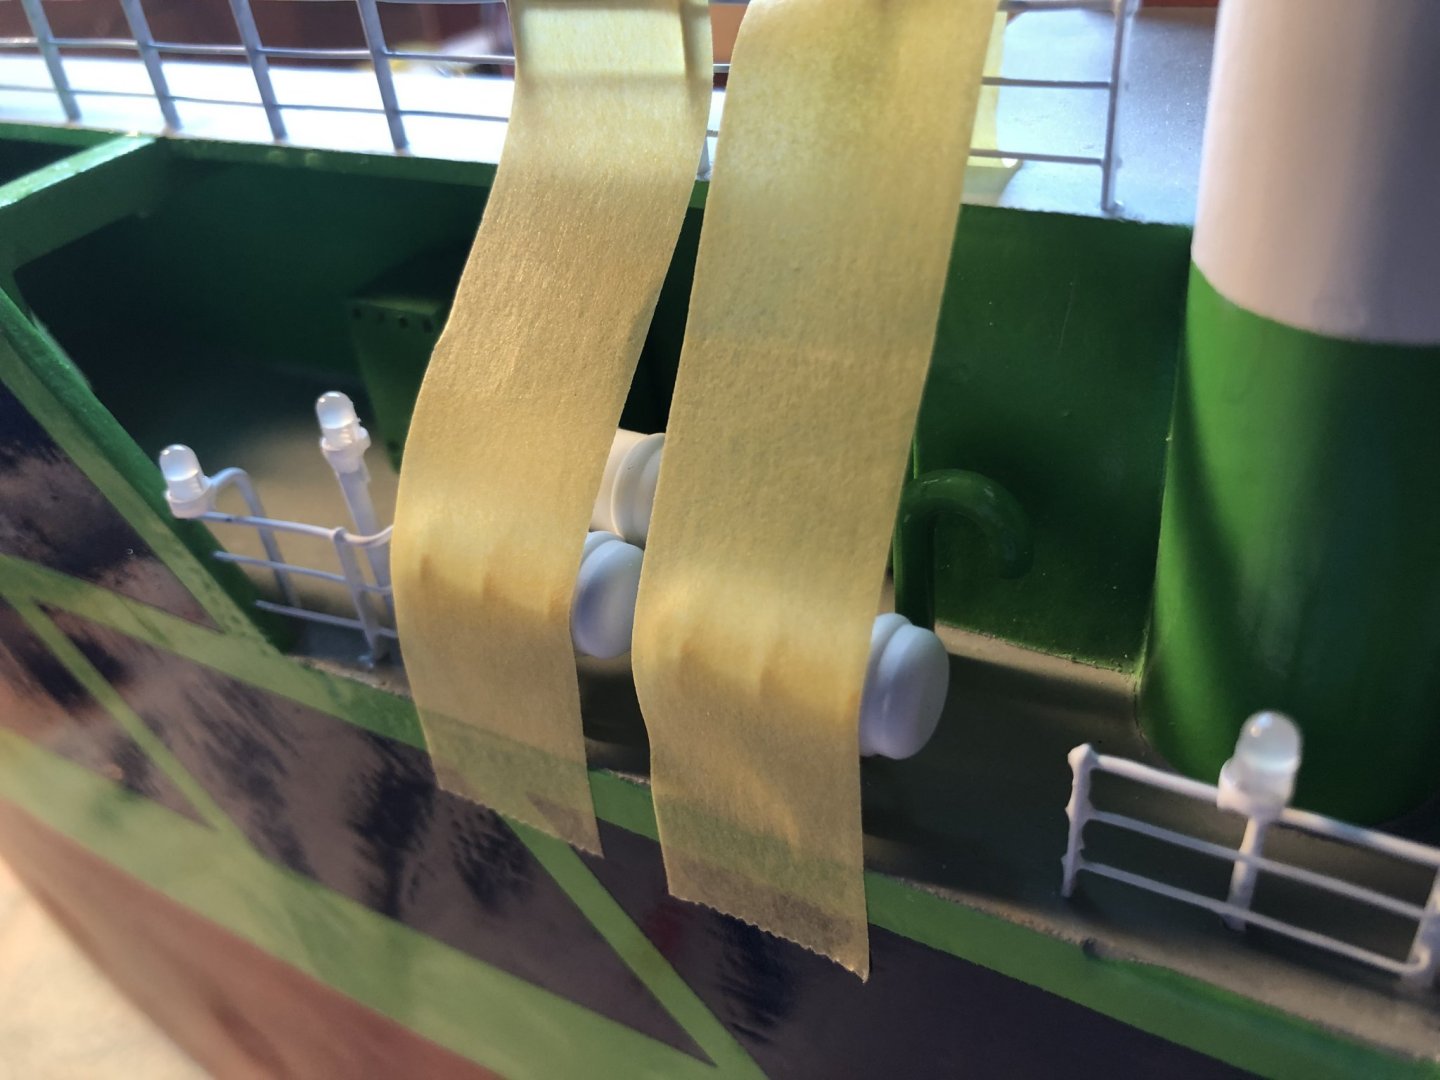
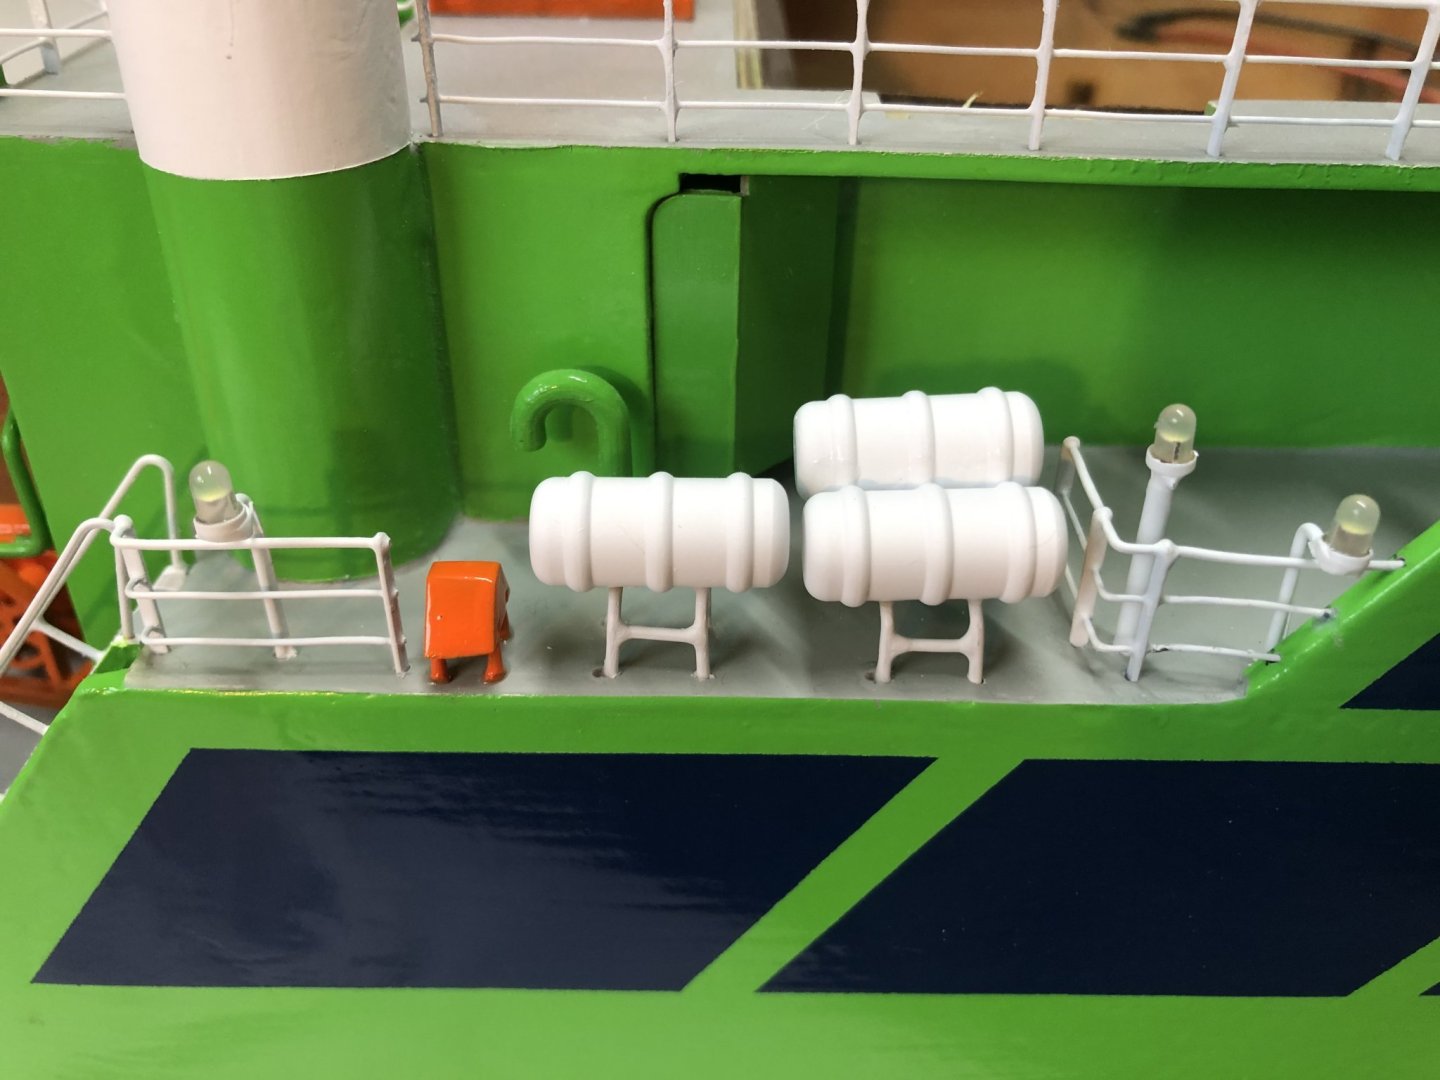
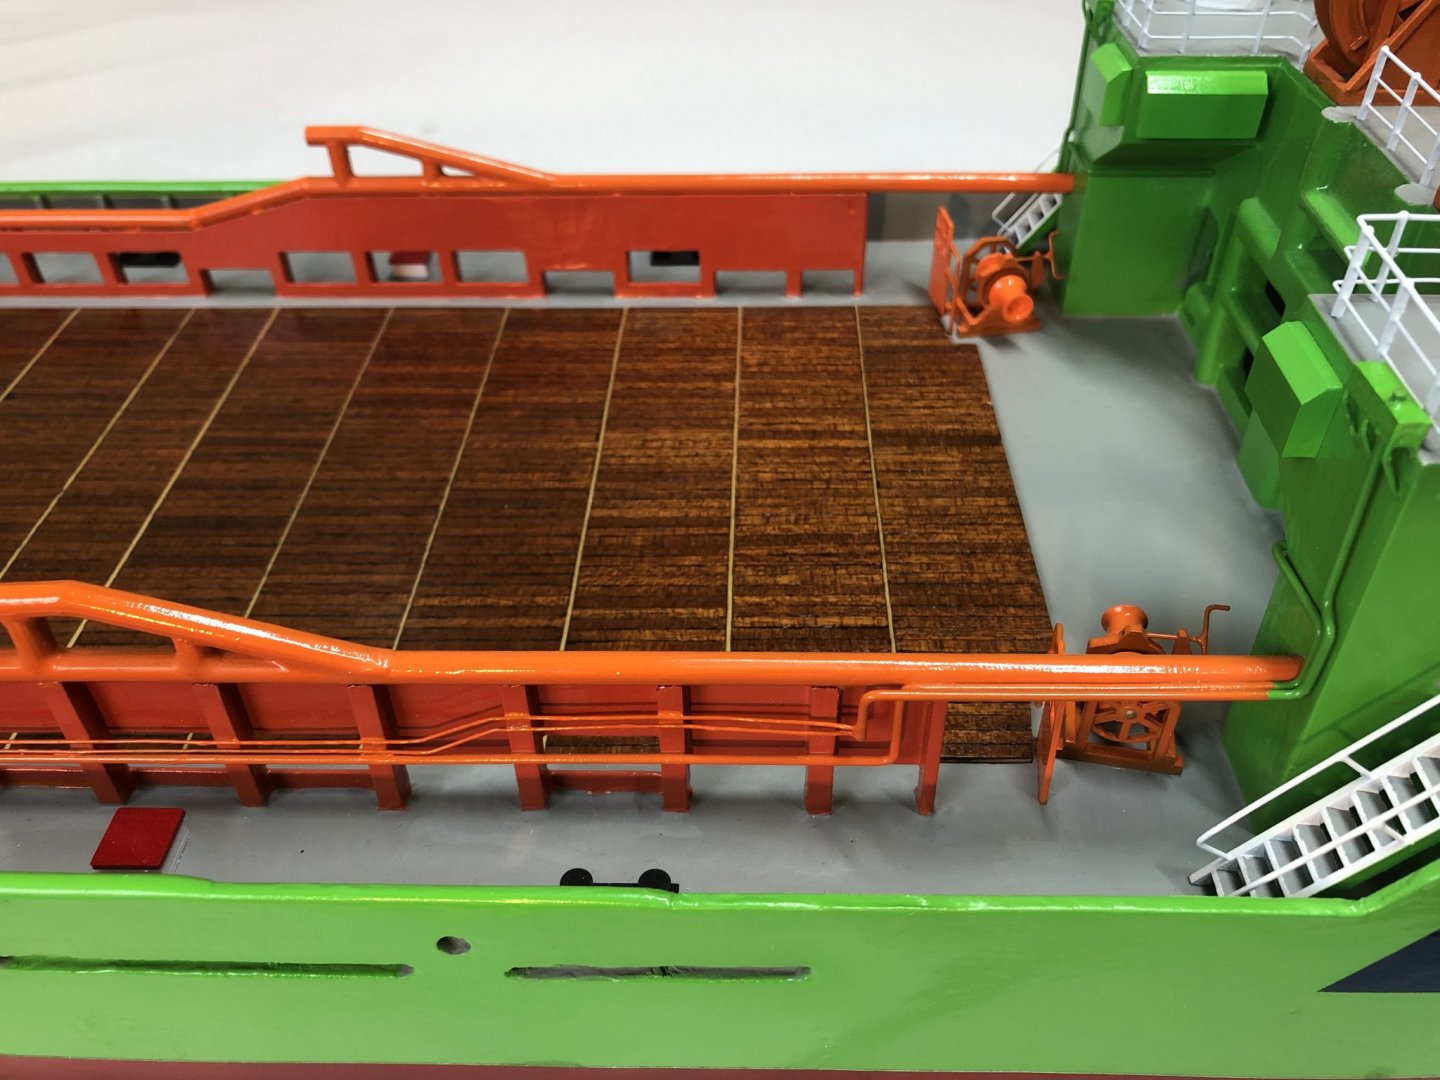
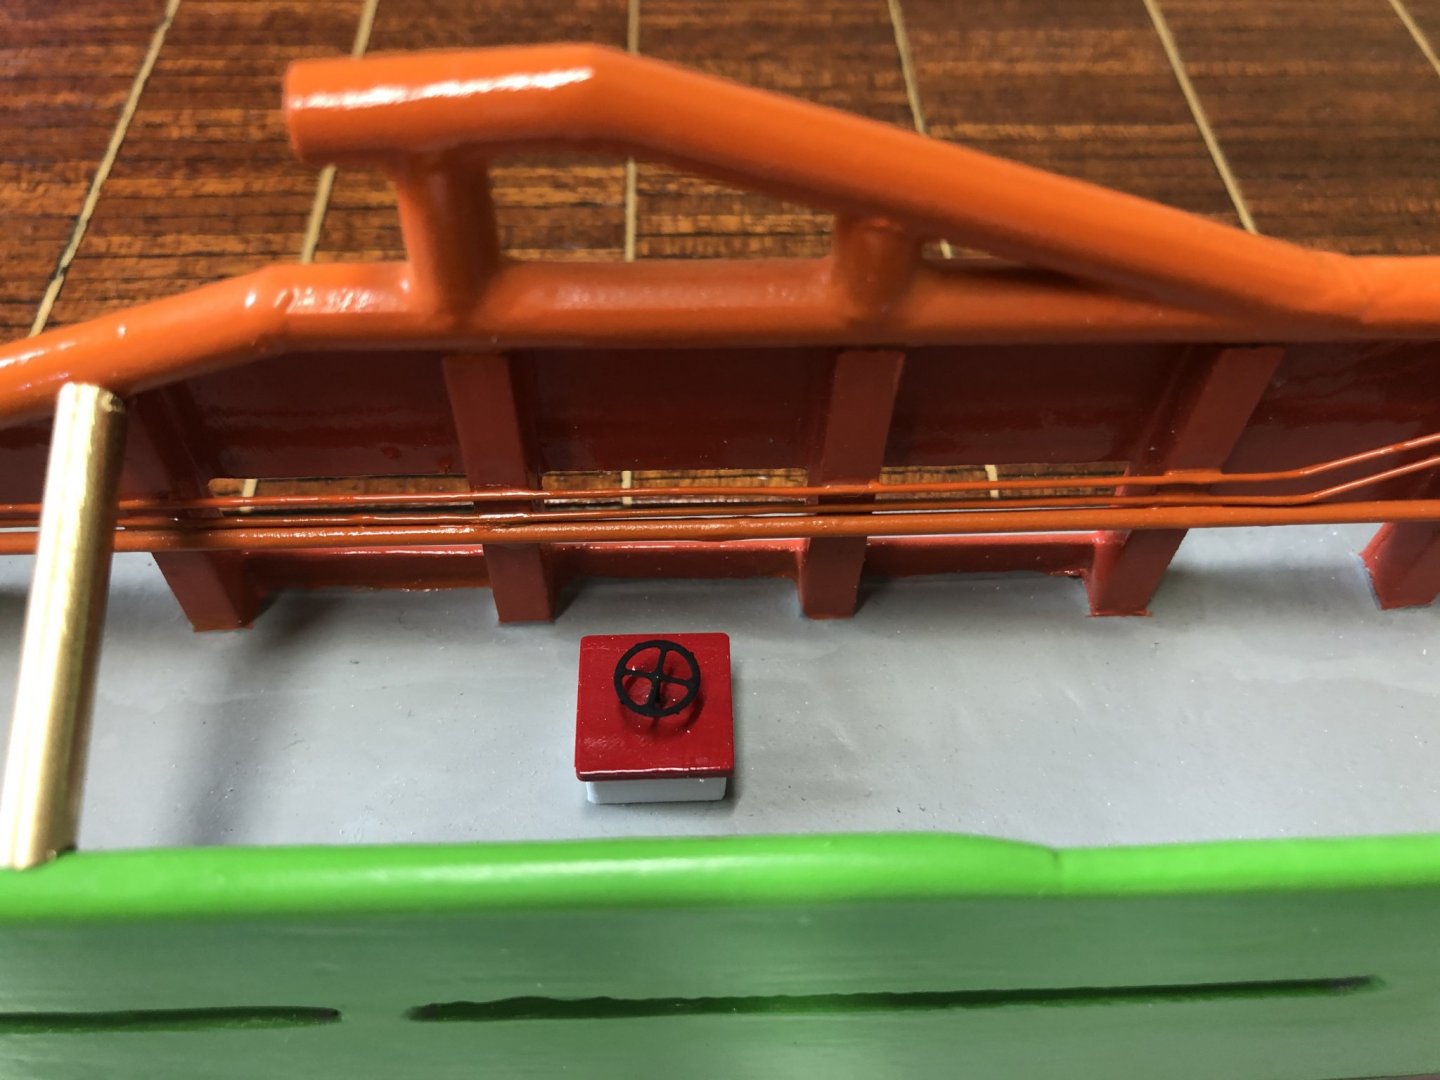
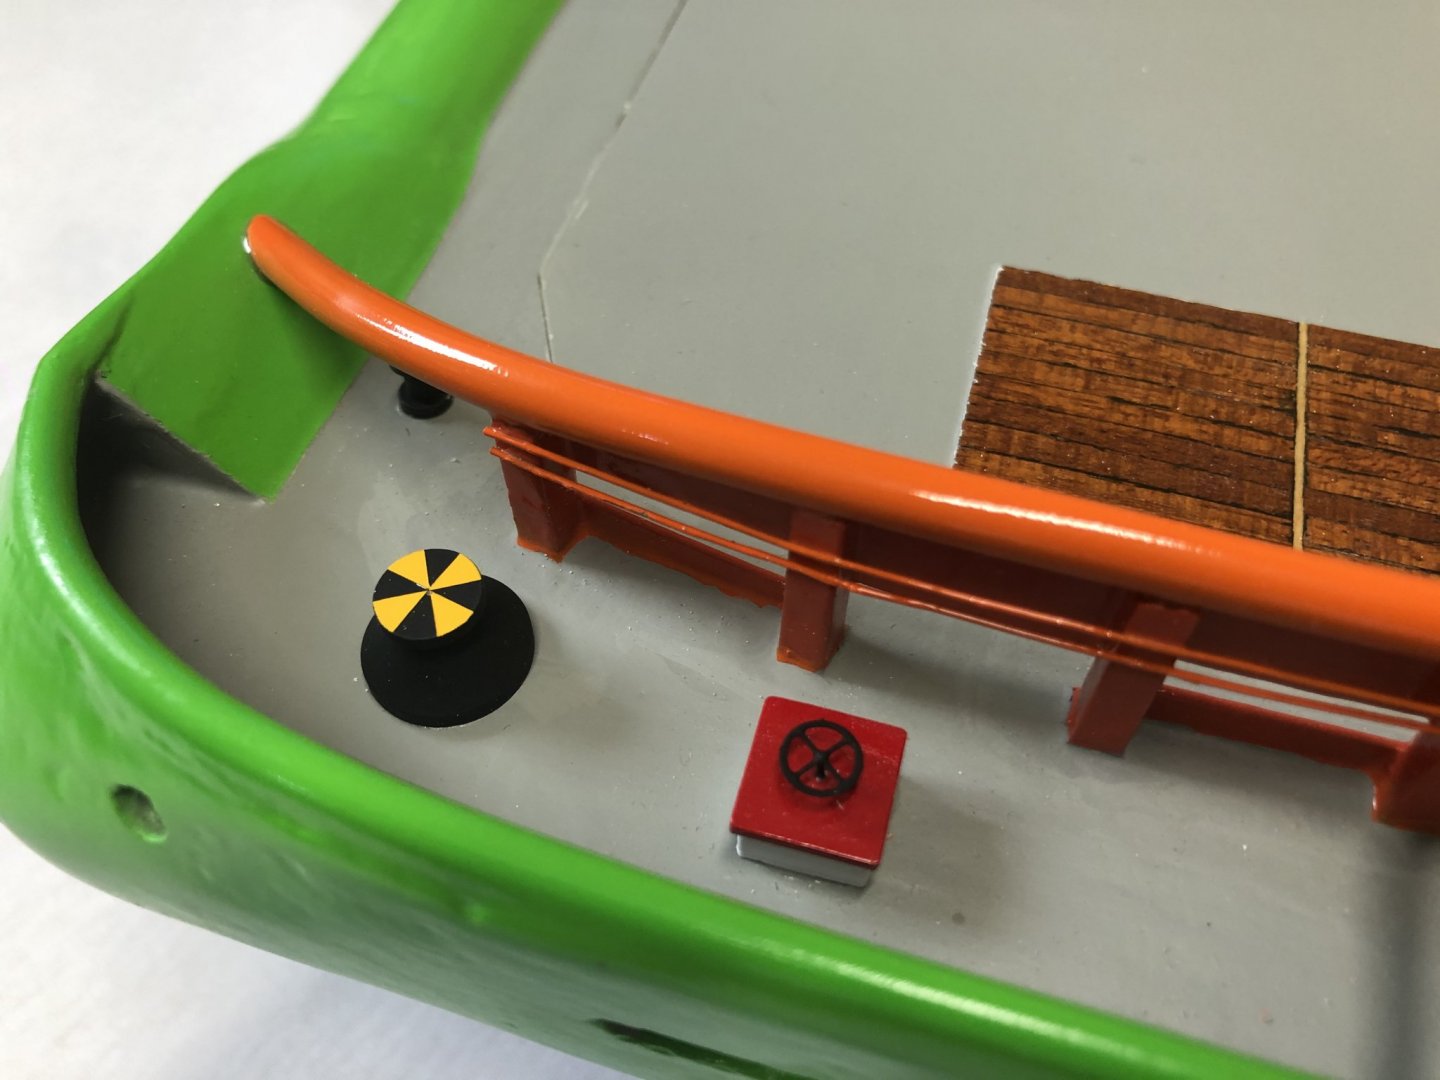
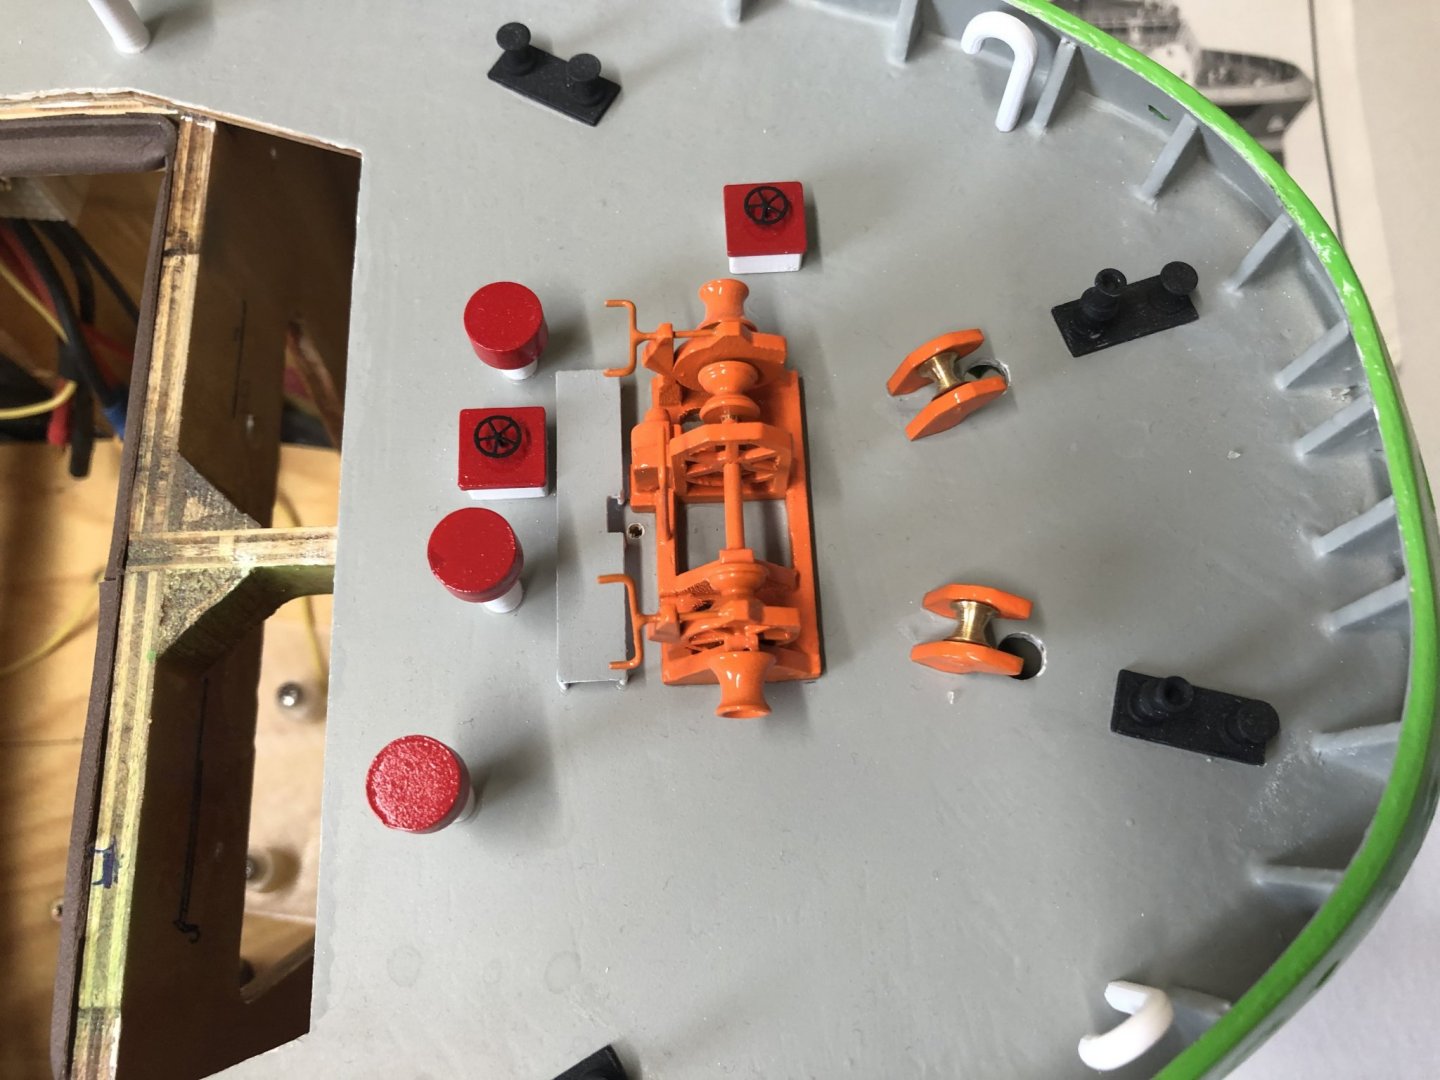
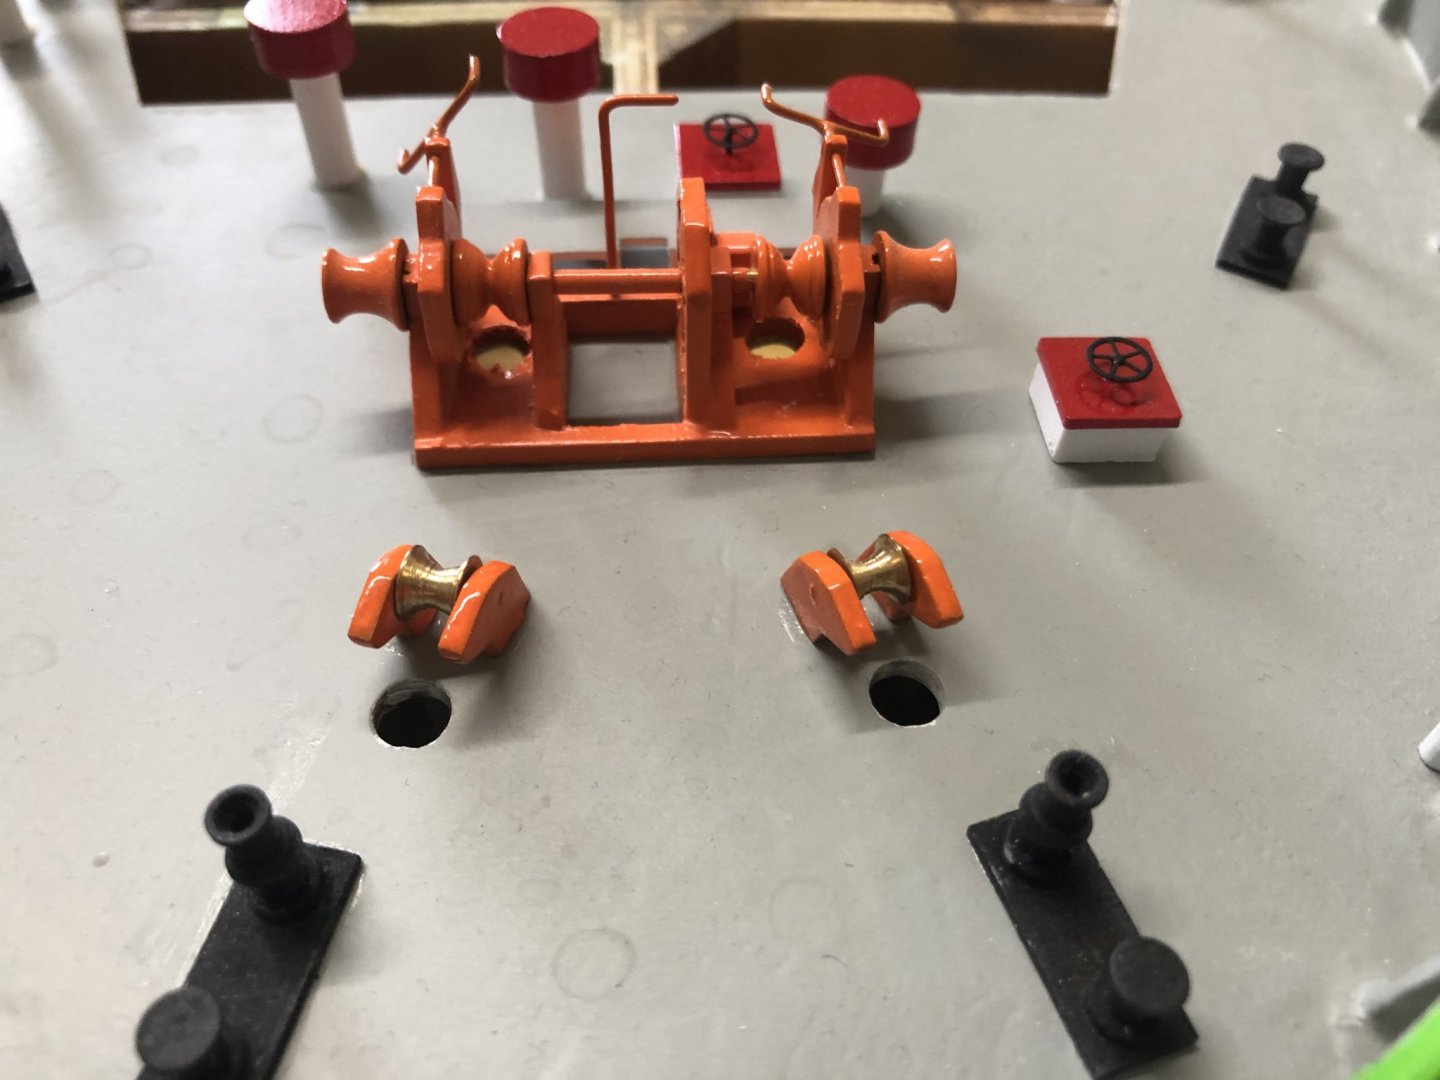
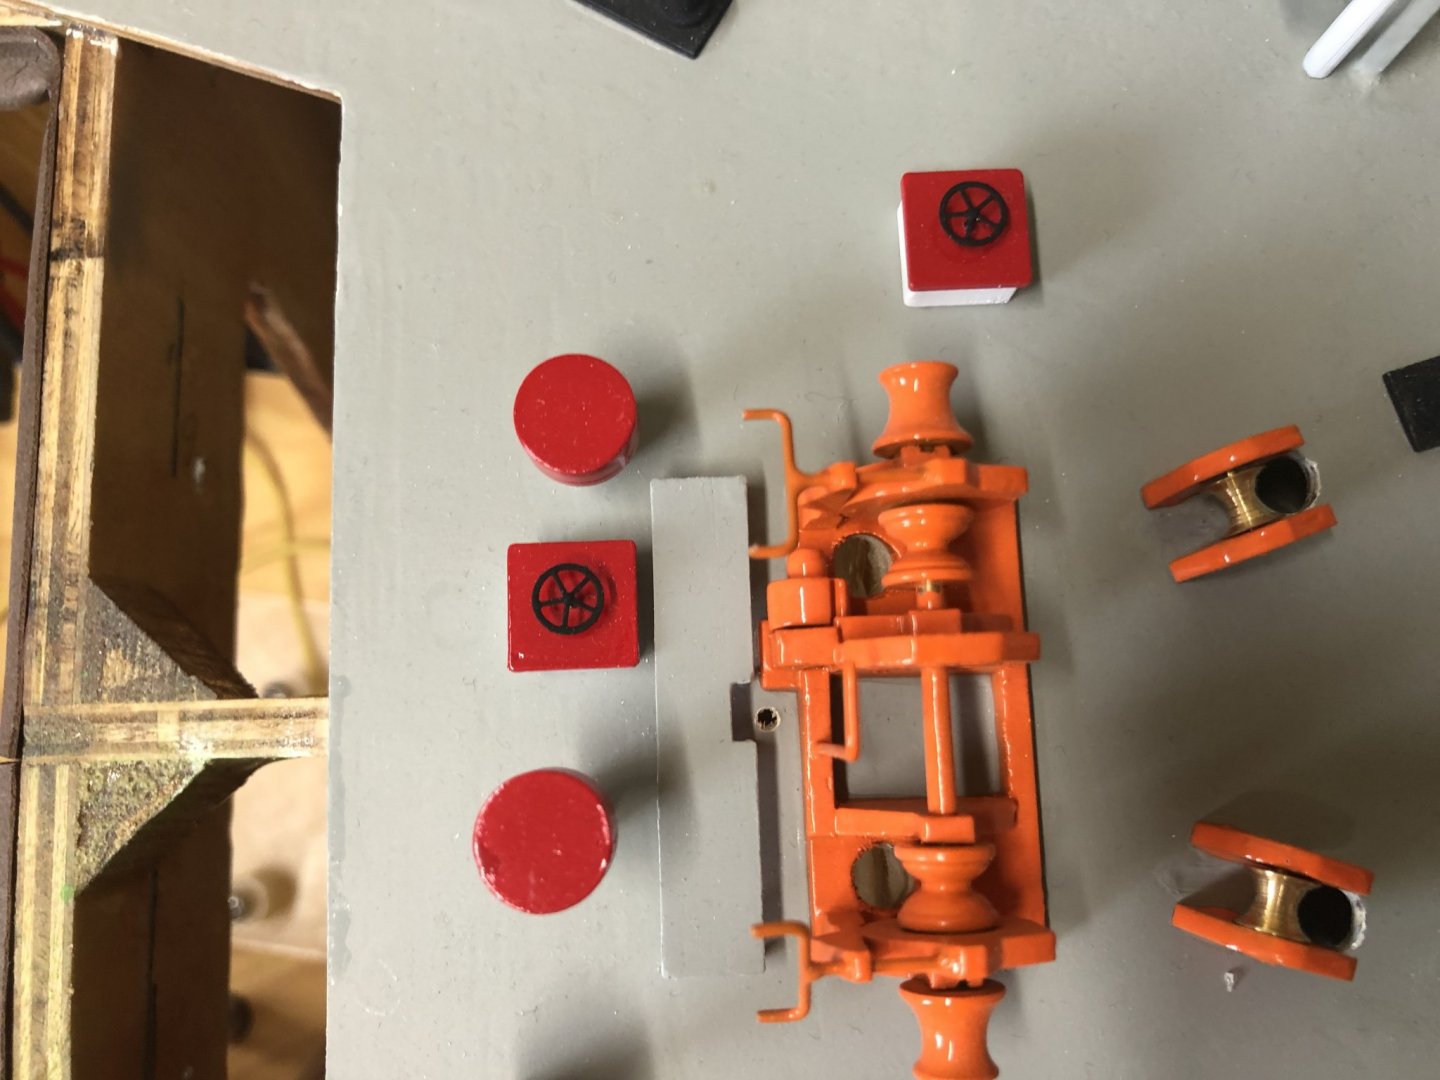
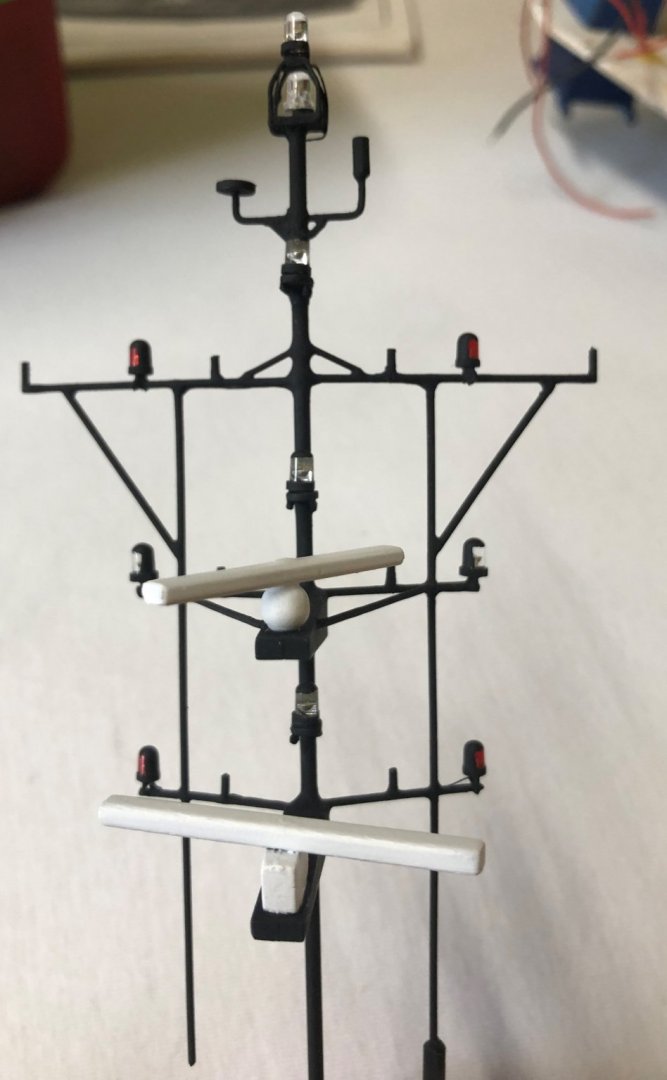
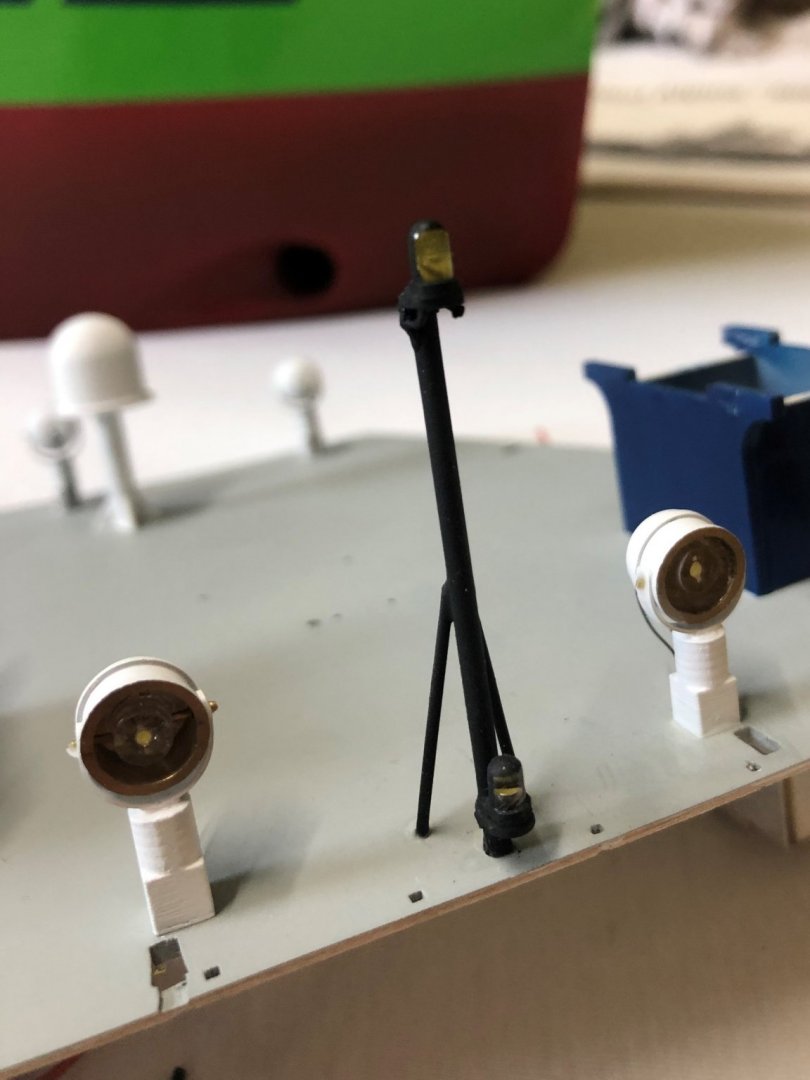
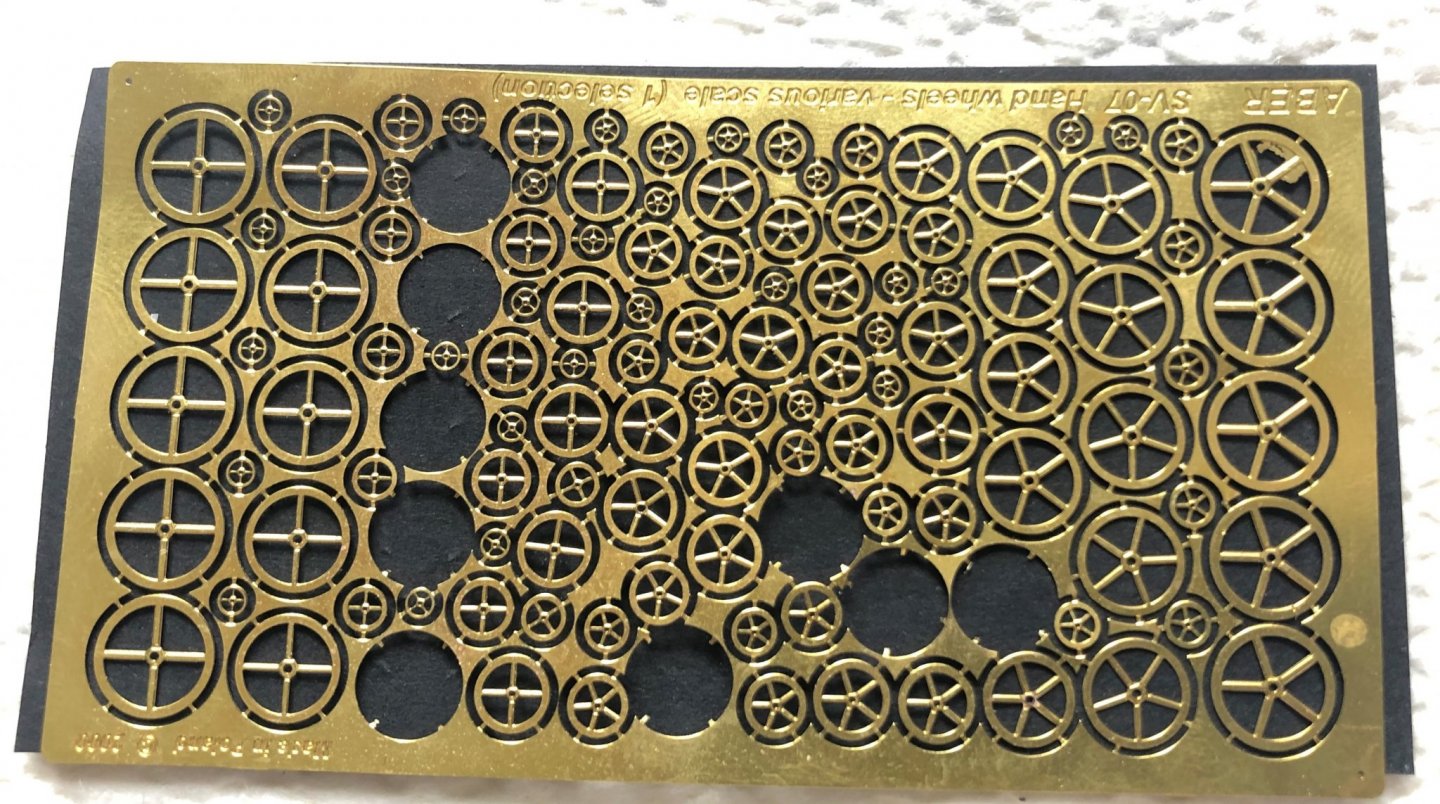
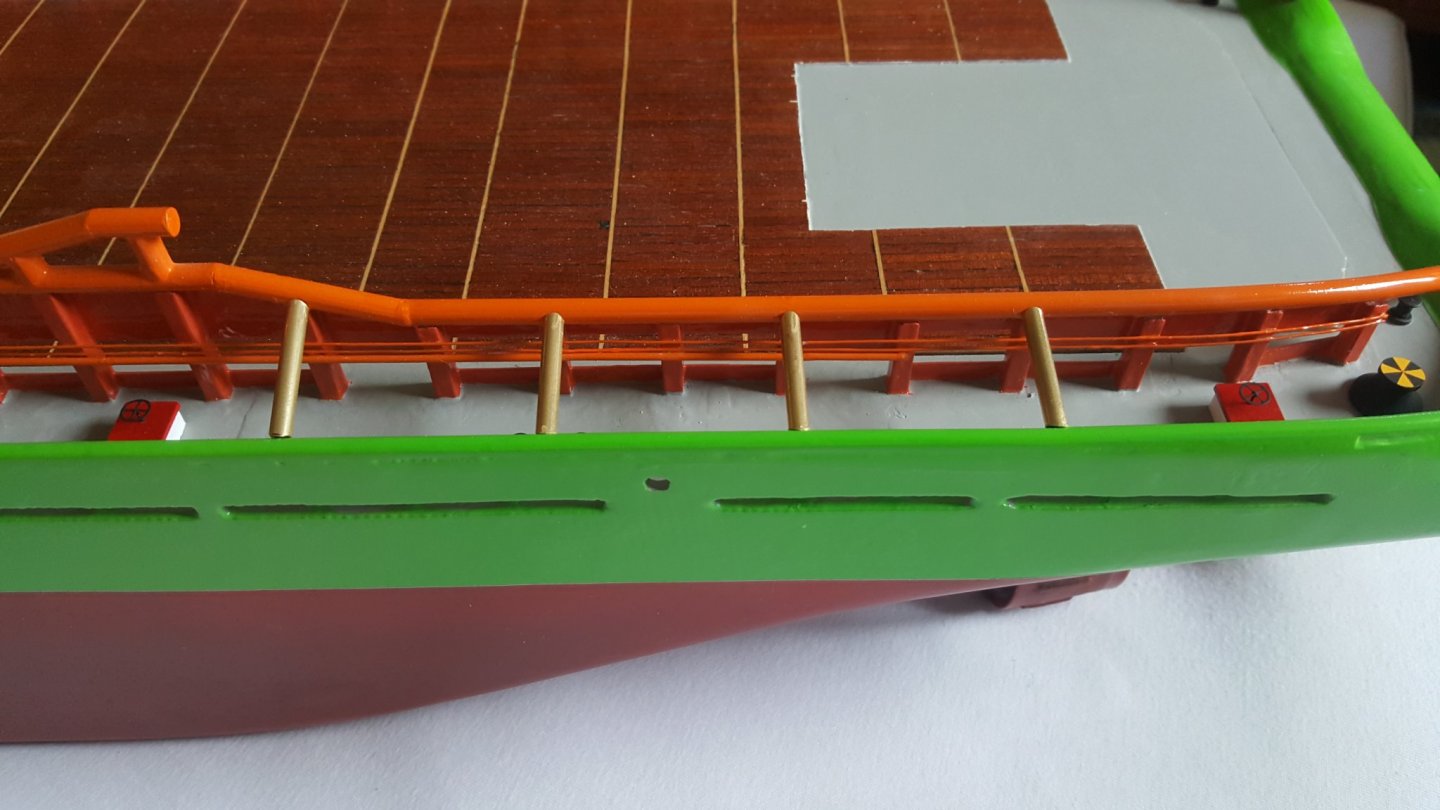
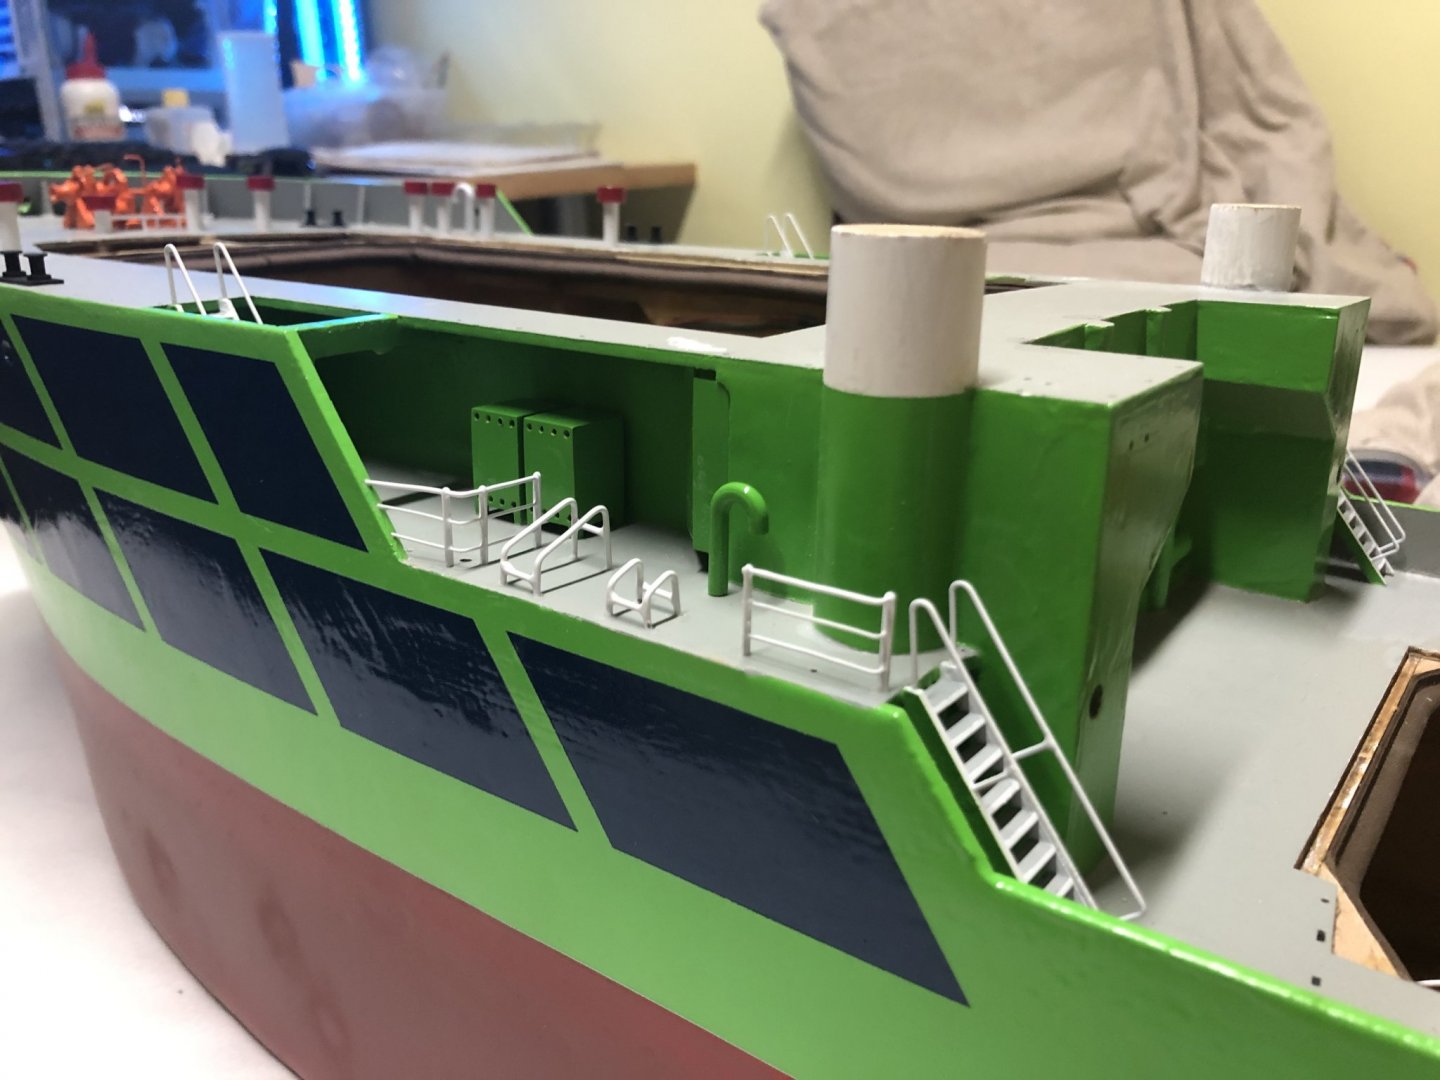
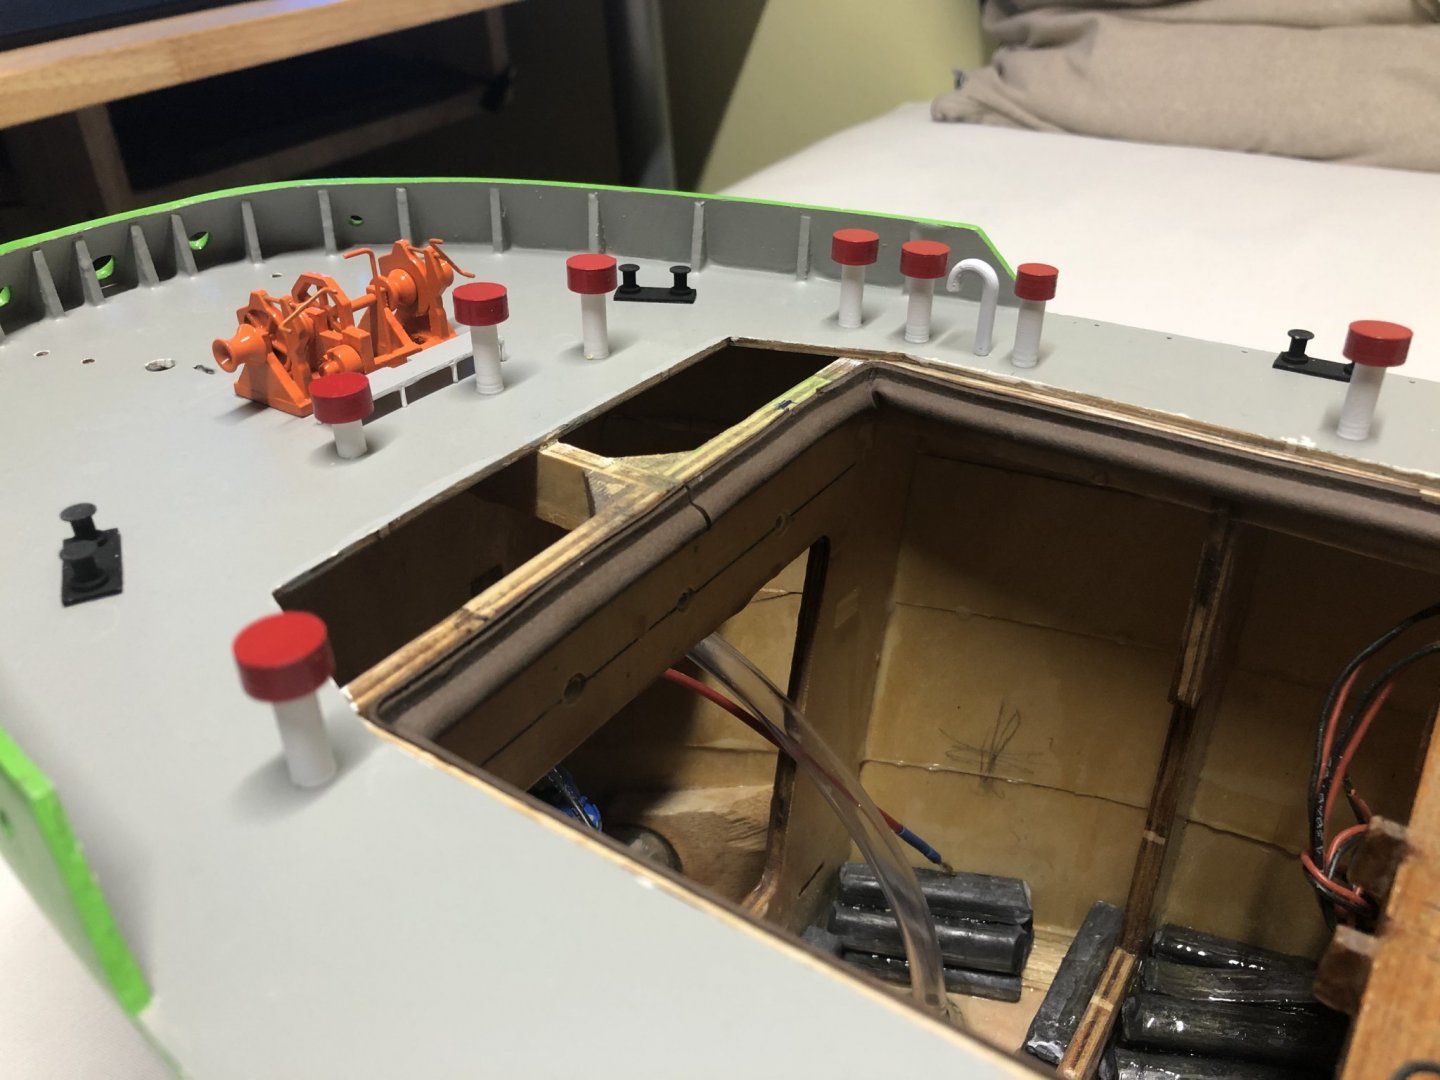
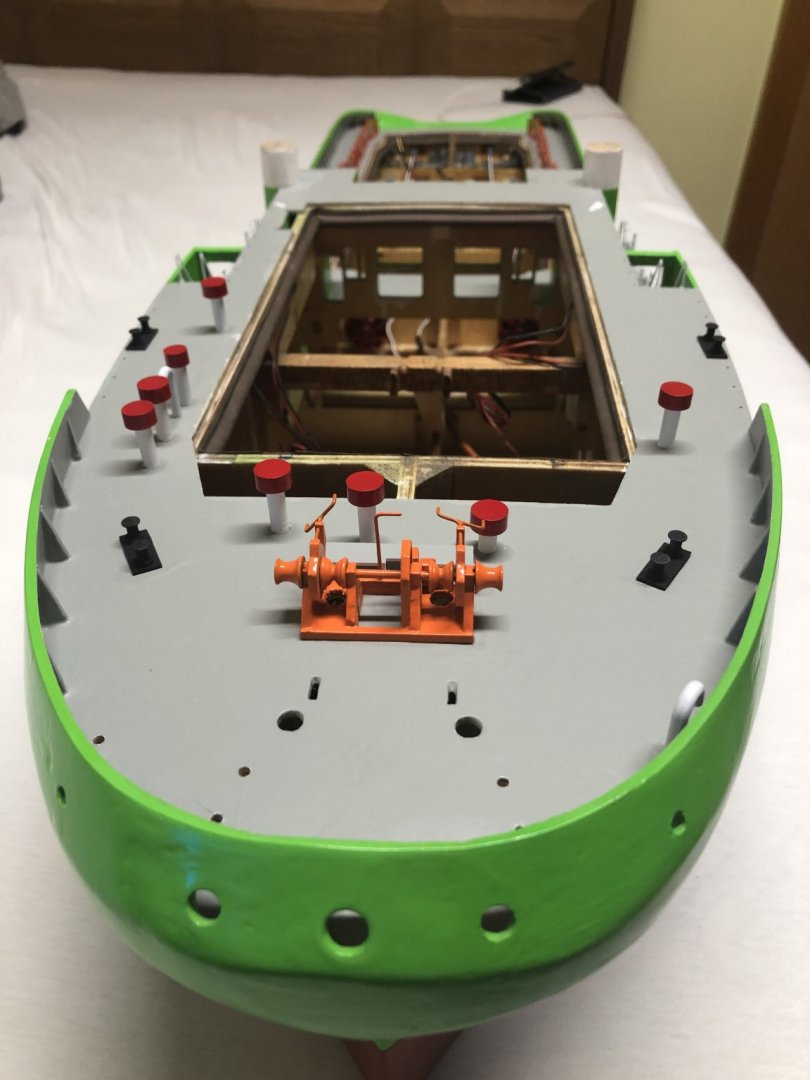
Hello All, Sorry for the long response time, I was doing some different builds for some time. In the mean time I mostly finished the hull. There should be just a couple of pieces left, that need to get pained and glued on. I added the life floats on the mid decks on both sides as well as the lights to these decks. The following picture shows the gluing of the life floats, the kit supplied ones are made of brass, they look really nice, but are terribly heavy, so I will see how long they will survive glued on with super glue... The used LEDs are some cold white 3mm diameter ones with high brightness. I will later paint their tops with silver and white, so that they don't shine just to the sky. Similar to how i did it with the mast LEDs, pictures will follow. Afterwards I added the winches and windlasses, that were still missing, as well as control wheels to the red square things on deck (no Idea of their names). For the control wheels I found a photo etched sheet with different wheel sizes and used ones that looked appropriate for the scale. Here is the photo etched sheet itself, for each size there are 5 wheels, with 4 and 5 spokes. Since I needed 6 in total, I used two 5 spoke ones for the fore deck, and four 4 spoke ones on the stern deck. Lastly the pieces that are still missing in the hull, should only be the braces between the rope guides and side rails. These are made of brass 4/3mm OD/ID tube. Originally they are to be mady from 4mm round wood stock. However I couldn't find the one supplied with the kit, probably lost it somewhere in the general mess, or just spend all of it on the stern rails, as they are also made of 4mm round sock. Nevertheless I find making them out of brass is better, as the surface finish is relatively easy, compared to making wood into smooth metal like finish. Regarding the Superstructure: I Started slowly attaching the bigger details as light, and so on. I went for simplicity and made them non movable, as that would over-complicate the build even more. The black wires are actually functional, I tried to bend them so sort of realistic shape, don't know if it passes... The main and mizzen masts are mostly finished as well. As I mentioned before, I painted the LEDs on them, to make them into the corresponding sector lights. I painted them first with a coat of silver paint, to at least reflect some of the unused light out of the LEDs in the right direction. Aftervards I pained them in a coat of black, to match the masts. I will try to post more frequently, but with the quarantine I actually have more projects ongoing, so I forget to upload here. Sorry for that. Cheers George.


- 90 replies
-
- 3
-
-
- fairmount alpine
- billing boats
- (and 1 more)
-
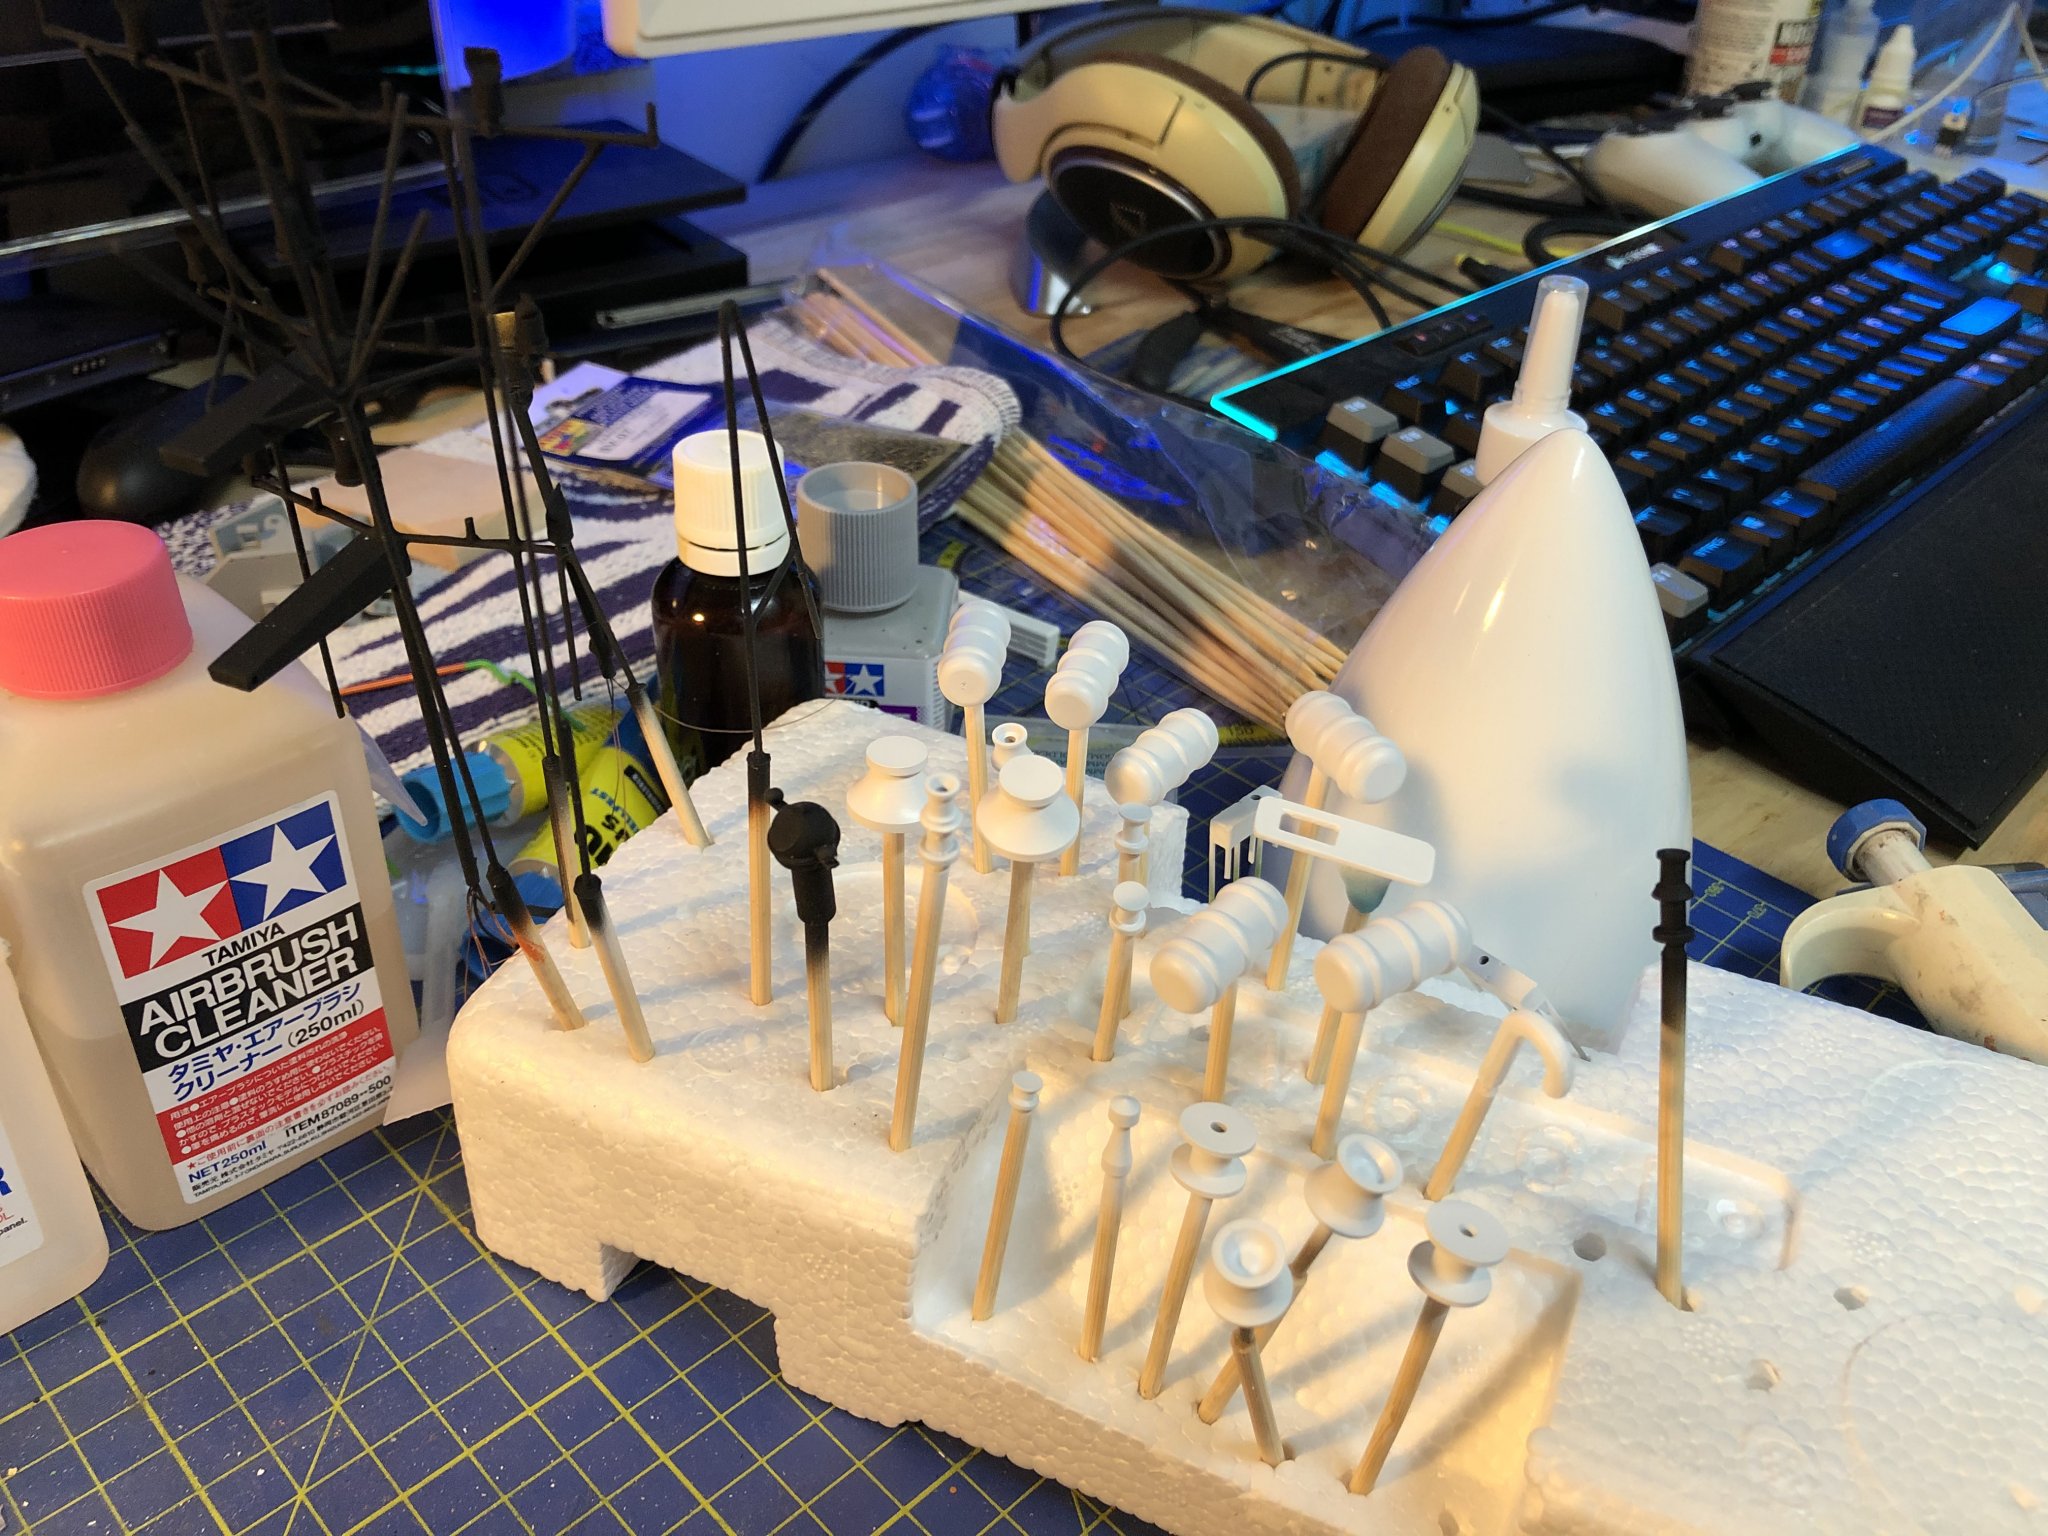
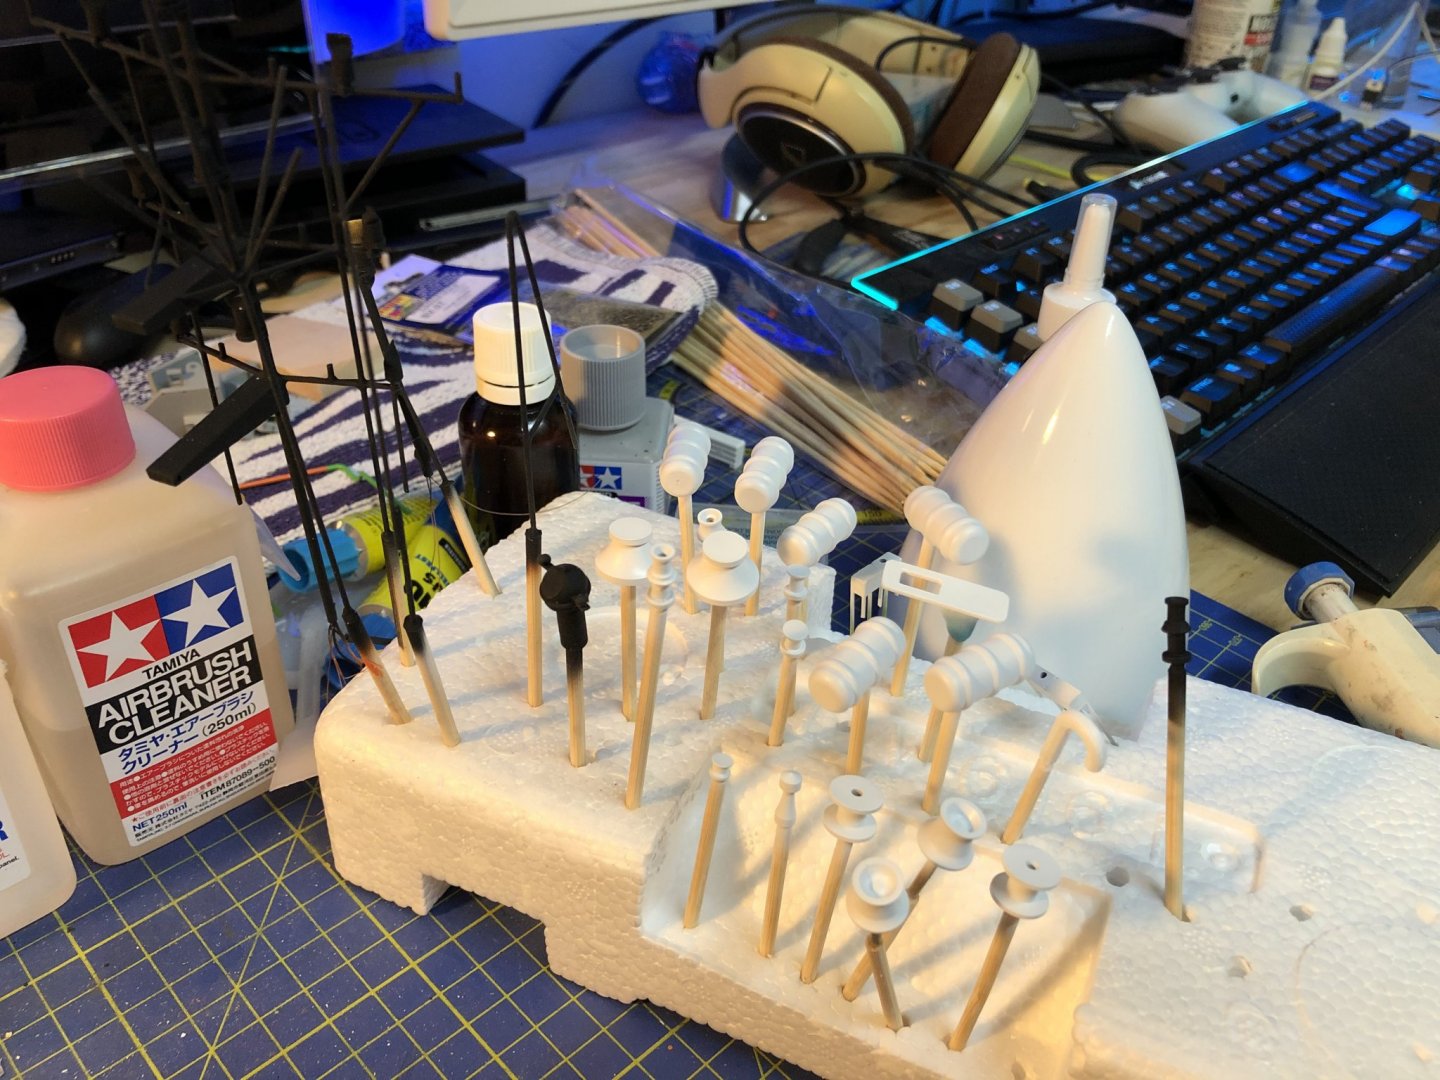
Hello All, Just a short update, I need to start making more pictures... But here are some preview photos of the progress up to now. Gluing of the rope guide rails with epoxy. Yes the shade of the orange is completely diffident... But it will have to do now. And some detail painting, first the main mast being painted in the black, and then some miscellaneous details being primed in white. I must apologize for the composition of the last picture, next time it will be better as I cleaned my table on Sunday. And yes that thing behind is an airplane nosecone waiting to be painted as well. Cheers, George

- 90 replies
-
- 3
-
-
- fairmount alpine
- billing boats
- (and 1 more)
-
Hello All, @popeye the sailor Thank you, I use these occasional sail as a motivation for the build. @Imagna Yes I can imagine that the Alps here produce similar vistas to those in the Northwest US. Although I only seen that part of the world in pictures... I like that spot on the pictures because usually the water is calm there, and since even in Sommer the water does not reach temps higher than 15ºC there are usually no swimmers. Cheers George
- 90 replies
-
- 1
-
-
- fairmount alpine
- billing boats
- (and 1 more)
-
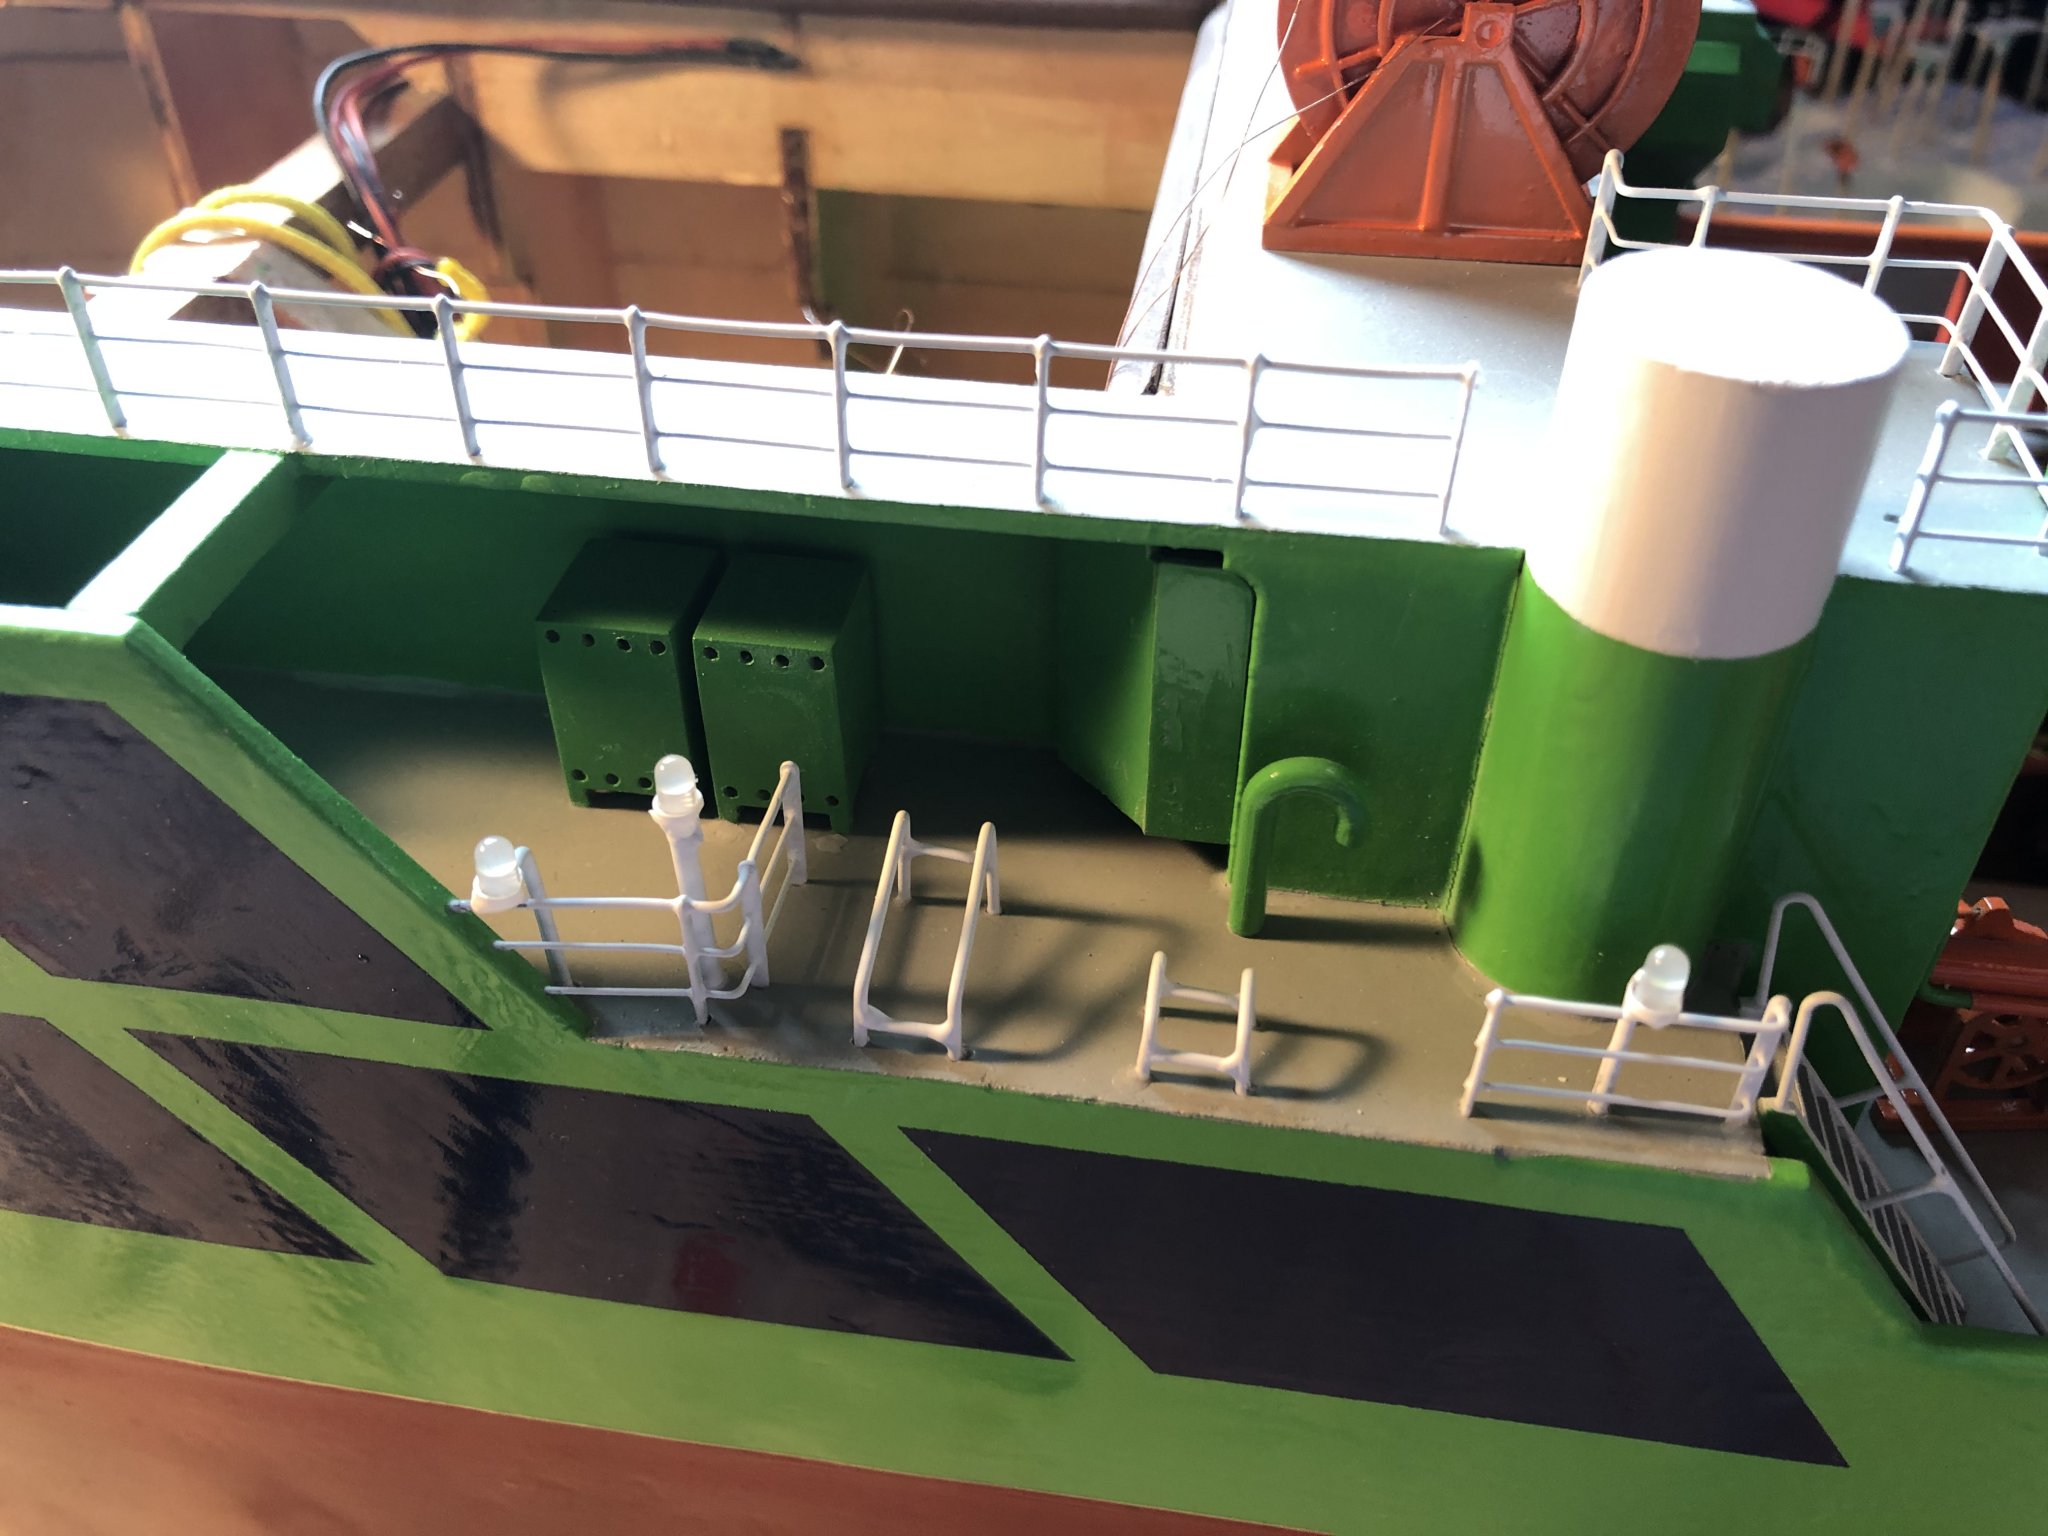
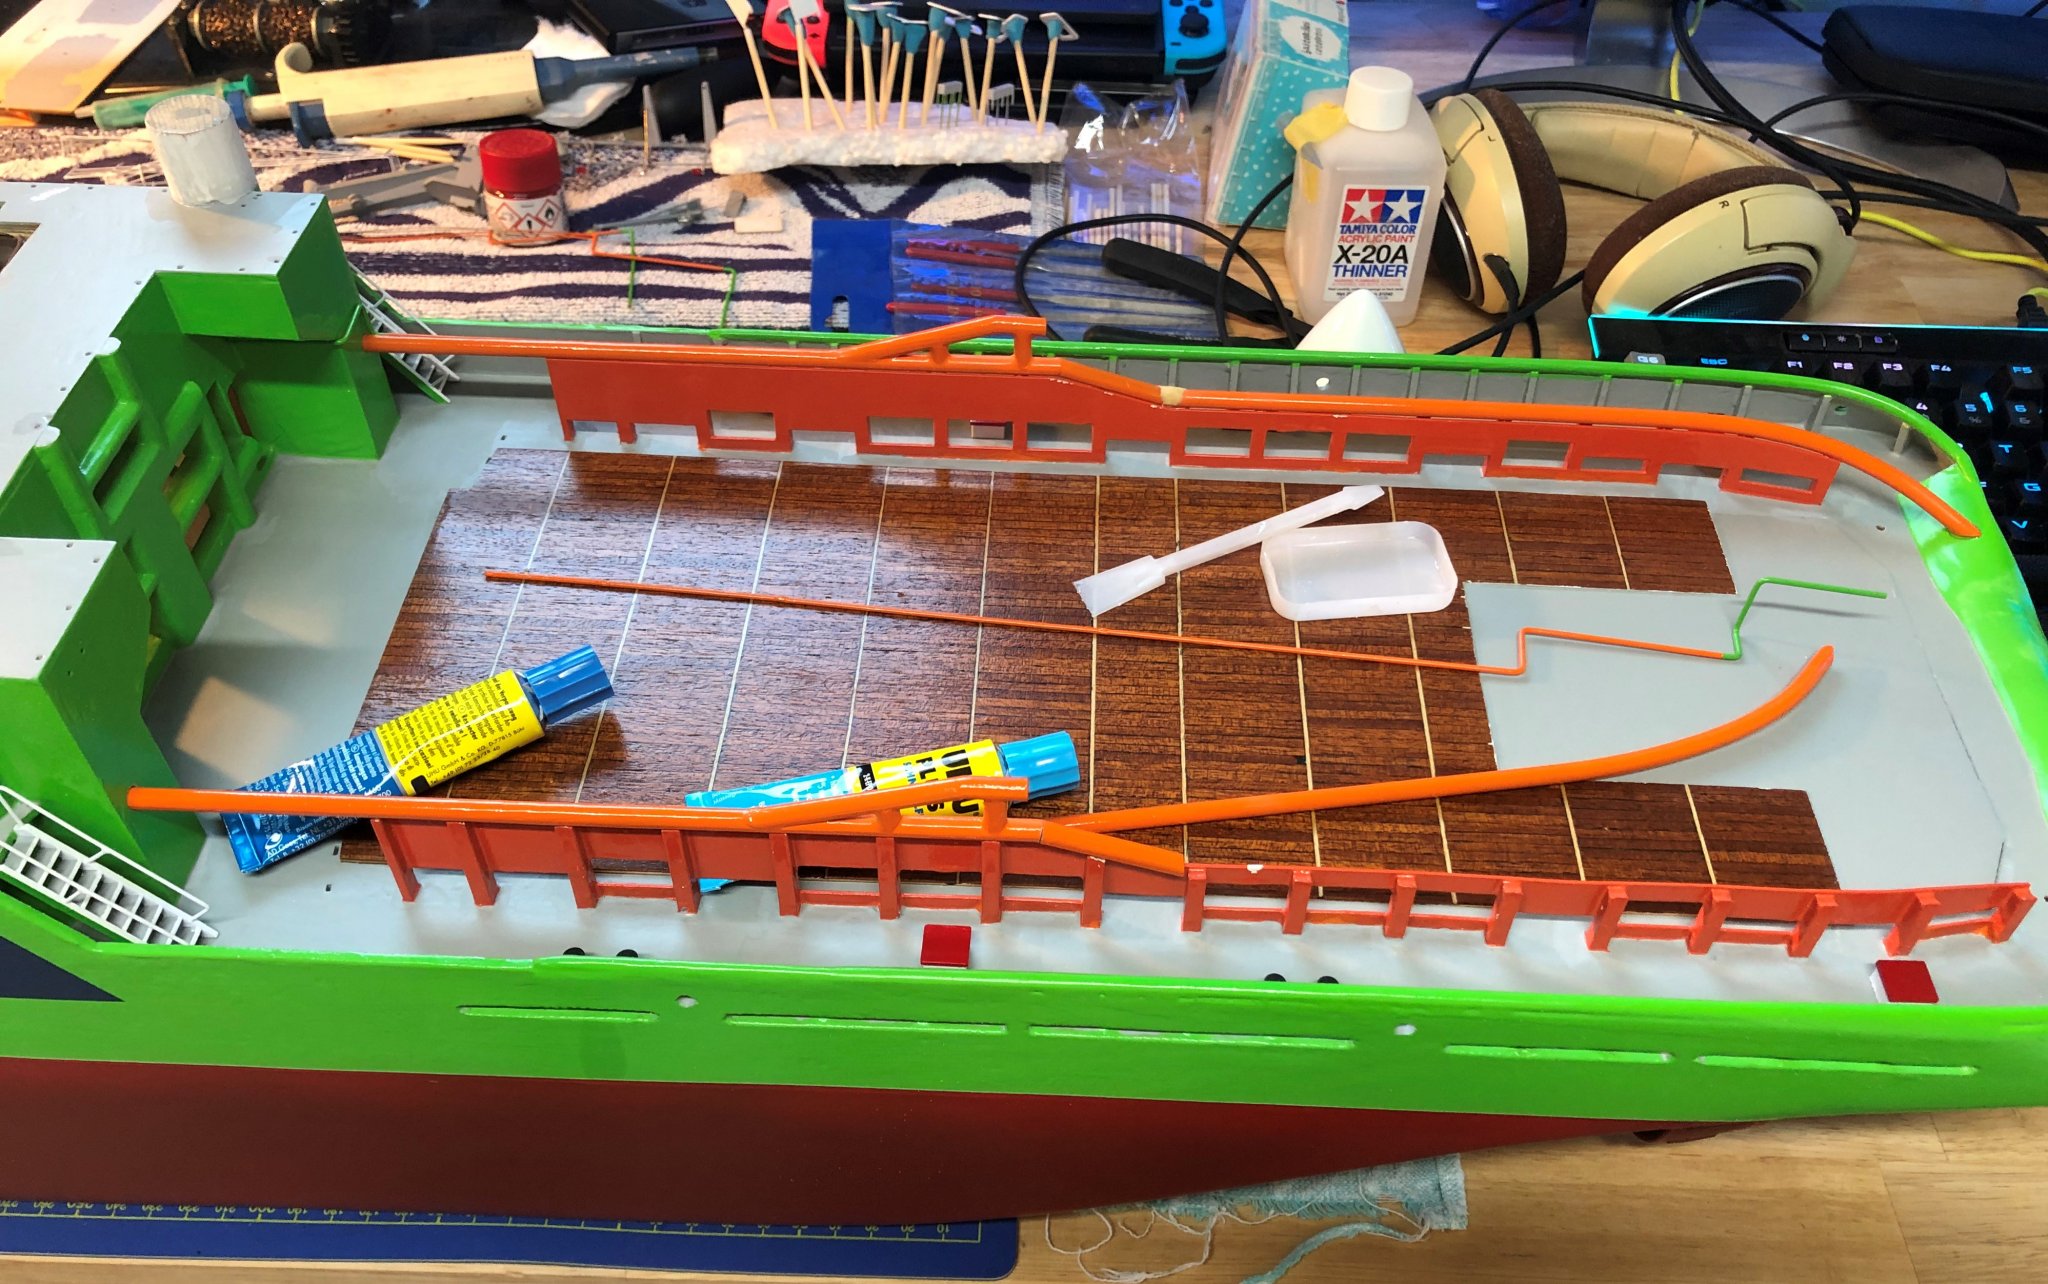
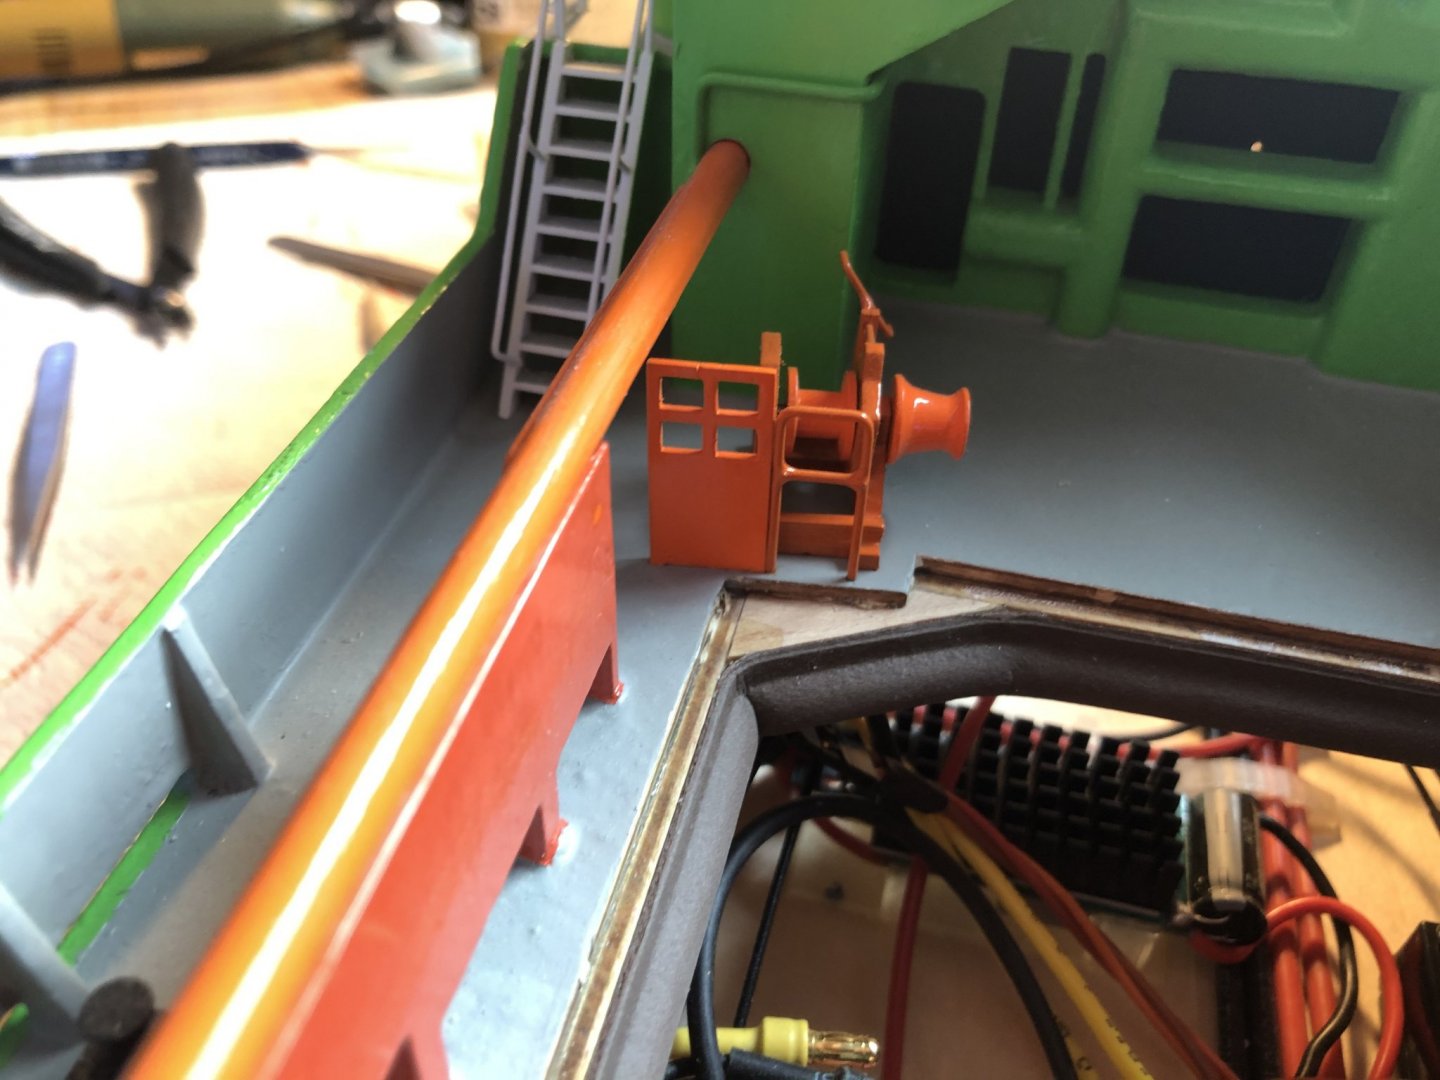
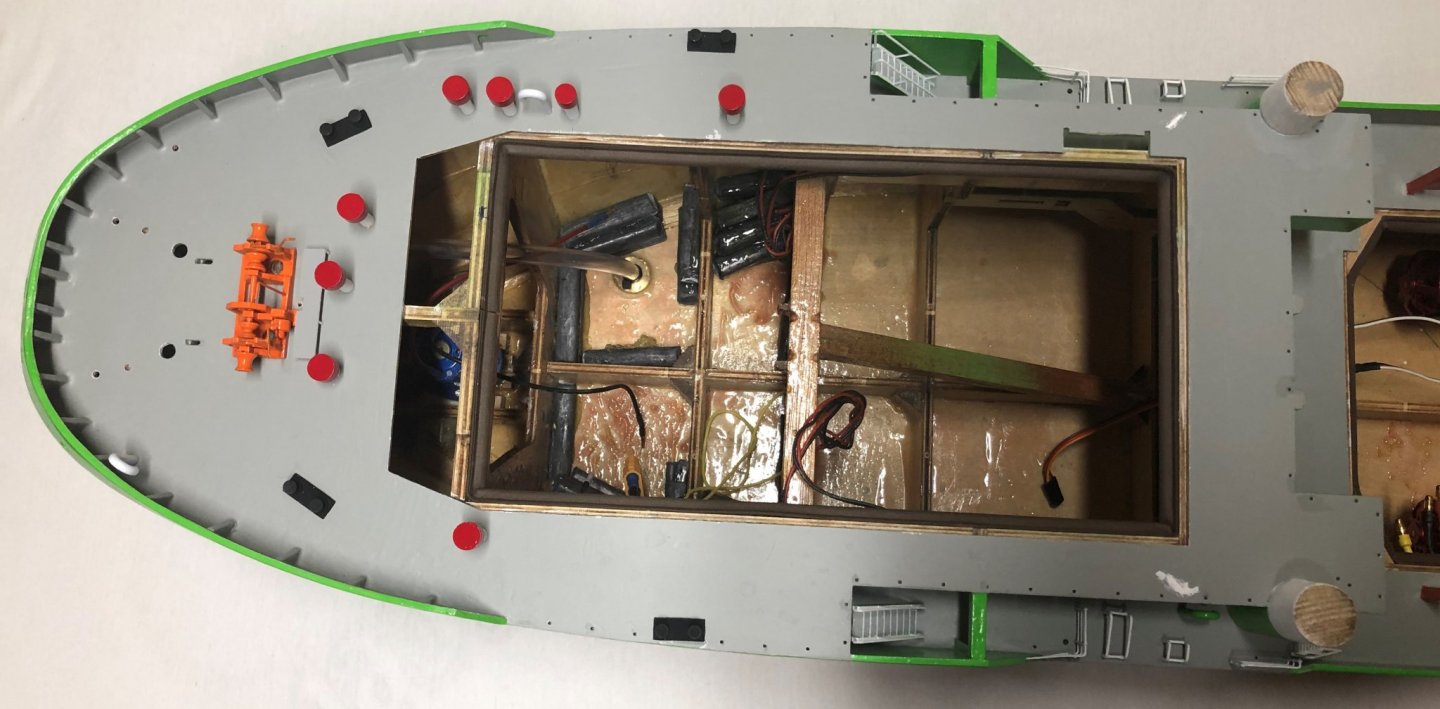
Hello All, As I said here are the pictures of already installed details. The rest of the finished details is waiting for the main towline guards (the pair of orange tubes running on sides) to be painted orange. Cheers George

- 90 replies
-
- 6
-
-
- fairmount alpine
- billing boats
- (and 1 more)