


Modeler12
-
Posts
1,716 -
Joined
-
Last visited
Content Type
Profiles
Forums
Gallery
Events
Everything posted by Modeler12
-
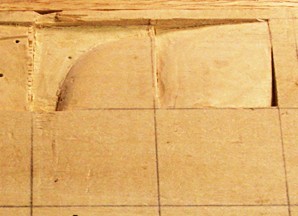
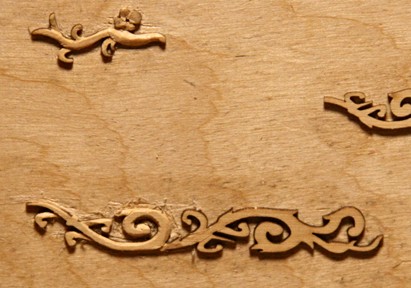
 Here are a couple more of my trial board carving. I am a bit shaky and that does not help. It takes a steady, continues cutting action when using the chip knife. The cross grain try to the far left was done with a V-gouge and the results also leaves a lot to be desired. But a little more practice should be in order. I think I will leave the rest for later. This is not the right place for this discussion.
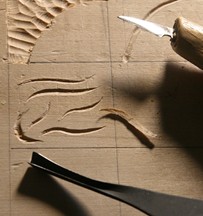
-
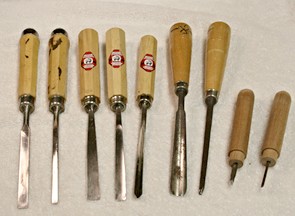
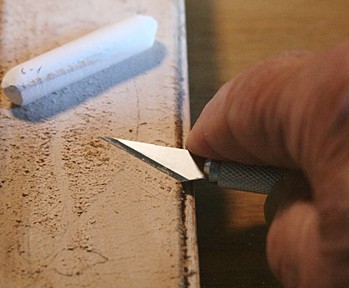
Tools: Perhaps I am going too deep into this discussion with the trial cutting. But let me explain my situation about 'wood working' tools for carving> I have collected a few chisels, bought some 'dogs', but settled on a few that I have used over the years. Now comes Chuck and his promise to make us all into expert carvers of micro sculptures: and what do I have to work with? The two to the left are part of a series of wood-working chisels, not carving chisels (and there is a difference). But I have used them for my carving attempts. Then I decided to buy some 'micro carving tools'. I know a better way is to buy individual tools as-needed, but for a novice I took the plunge. Those are the ones I am now using for the 'practice board' mentioned above. I am slow, so bear with me. The 1.5 inch squares in a piece of basswood could not be easier to cut you think. Hold on. I stripped a couple of those borders very nicely and will ignore borders for now. There is also the issue of grain direction!! The idea with part of the board is to carve concave and convex surfaces. The more I did this, the braver I got and went deeper. I am getting the hang of those gouges, not pretty but satisfying.

-
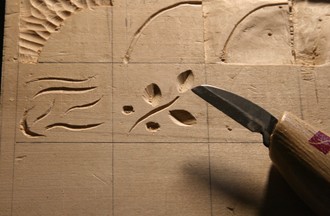
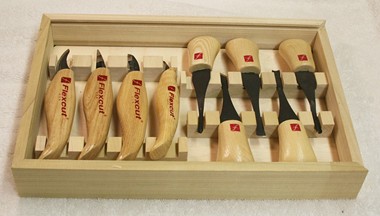
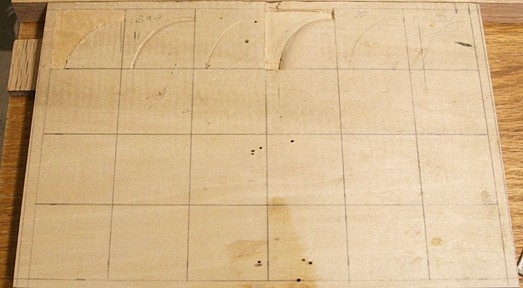
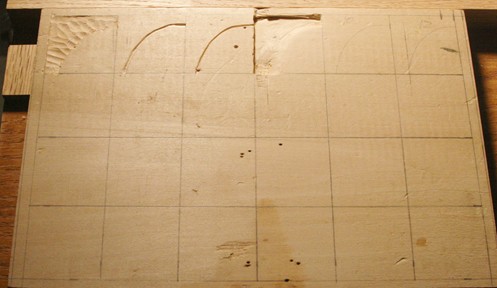
So, I started to do the beginner's carving exercise. I happen to have a piece of basswood that was close to what was called for. It had a few squares missing but, in general, the ideas I had in mind were ok, I started with a set of tools from Flexcut that include a couple of knives and some carving tools. Here is my first attempt of carving some squares per the 'book'. I will eliminate a couple squares because of the duplication. The first was taken with fluorescent light above and the second with an incandescent light from the left side. Whow. What a difference
- 47 replies
-
- 10
-

-
Sorry, it was not important. I was just curious how Ken was coming along with his carving. I am also right handed and when I put my knife down on the table, the sharp edge of the blade is usually pointing to the left. Ken's were facing the other direction. Perhaps that is why Ken was having trouble with the #11 blade
-
Ken, my guess is that you are a 'lefty'. The way you put your carving tools down How are you coming along with the carving?
-
Some criteria for starting a new group project
Modeler12 replied to Chuck's topic in Group Projects on Model Ship World
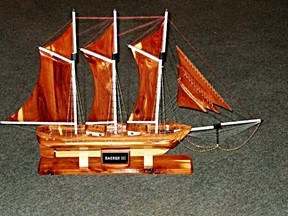
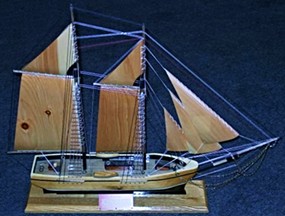
Hmmm. How about the way the inmates at one of the jails in Maine make sails? Wood!!! Sails in Jails!!!! Several years ago I bought a schooner there that had wooden sails. They still make them and here are some more and the web site, in case you are interested. http://www.maine.gov/corrections/industries/boats/large/index.html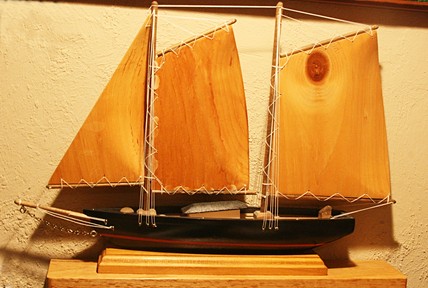
-
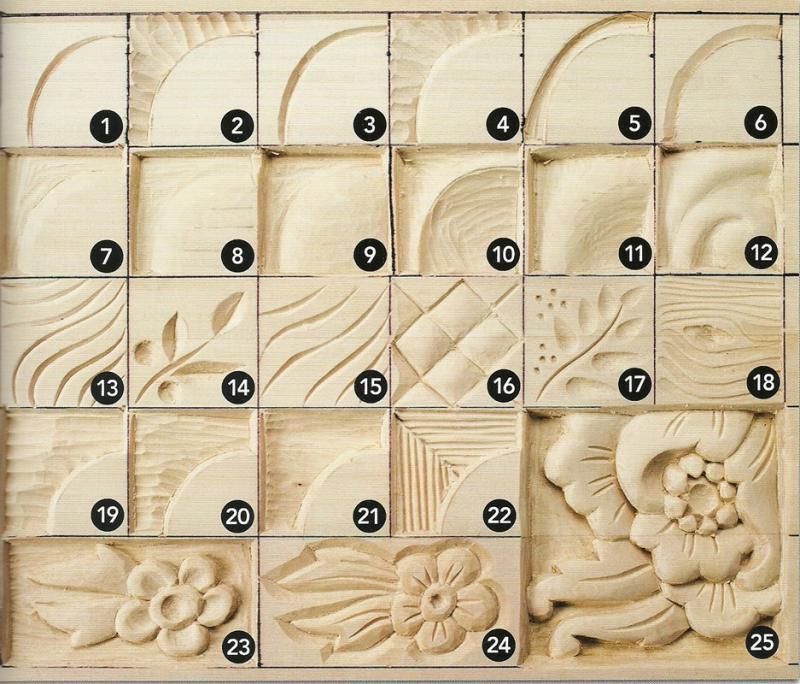
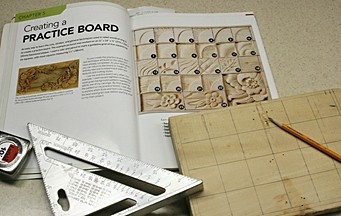
Back to books. I came across a very useful book by Lora Irish. It is 'Relief Carving Workshop' and provides lots of good information about tools and how to use them for beginners. She explains how to use chisels, knives, gouges, etc. The book has a practice board with several square sections that allows you to practice the various techniques. Although it is intended for larger pieces, I find learning about the tools and how to use them interesting and helpful. Each of the 25 examples are explained with more pictures of how and what. PS The author allows you to copy this for personal use.
- 47 replies
-
- 12
-
-
Some criteria for starting a new group project
Modeler12 replied to Chuck's topic in Group Projects on Model Ship World
I would like to second this suggestion. Making sails can be very challenging and interesting. It requires some new skills (like carving wood was new to me) and perhaps the use of a sewing machine (my wife's and no harm done). But it also involves selecting material and all the details of how to finish the edges, etc. So how do we get started?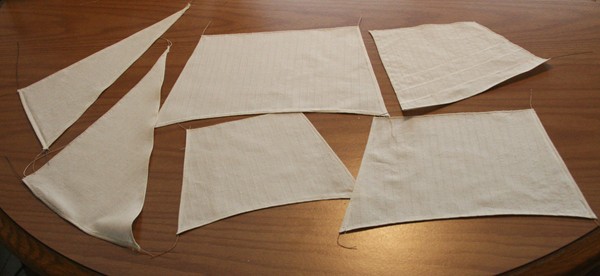
-
Perhaps this is a bit naif, but to start carving with a rotary tool is also a bit 'lazy'. I am sure that people like Bill Short did not buy expensive motors and bits to find out if he liked carving wood. I looked at some of the prices for sets such as offered by Gesswein and others and I decided to hold off for a while: like, a long time. Meanwhile I like to see what rotary tools can do and keep buying lottery tickets.
-
Good start, Dave. Don't forget the 'stop cuts' where the branches leave the stalk. They add more depth.
-
Ken, you are right, but than again there is good bourbon and the stuff I drink (sometimes). With all due respect to Chuck, I think that making this kind of ornamentation from scratch (no laser cutting) would be my next endeavor. I started to do this with a piece that was a bit thick and found that the #11 blade was not able to cut uniformly to the outline. Now that I have some small chisels (bought and made from small files) I might try this again. My ultimate goal would be to do some 3-D carving like we all admire and have seen done by some great artists here. All it takes is practice, practice and more of the same.
-
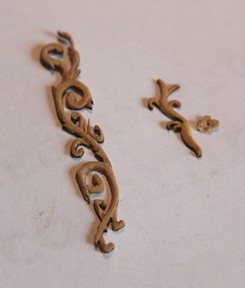
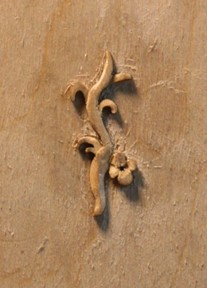
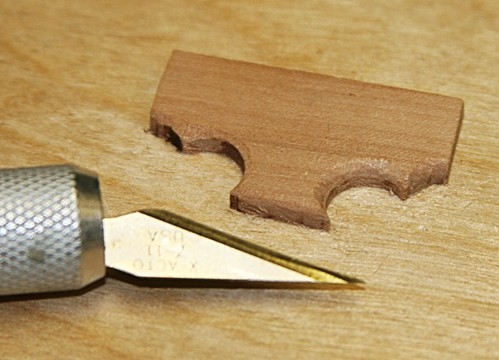
Thank you, Chuck. Your idea of using alcohol to loosen the pieces worked very well. I dabbed the two pieces a few times and after about two hours they came sliding off just fine. I wonder if bourbon would also work. I think the solution to the problem Joost had is to use the white Elmer's glue, the kind kids use. 'Carpenter's glue' could be harder to get rid off. It turns out that the small piece lost its flower. I must have cut too deep at the intersection. But if I were to use these pieces, it would be a simple matter to glue it in place. I think this concludes my first 'carving' experiment. Thank you all for your interest and comments.
- 47 replies
-
- 11
-
-
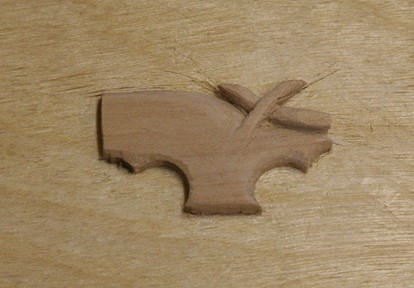
OK, here is the result of a couple hours (on and off between turkey and desert) of 'carving'. At least for the turkey I did not have to use a #11 blade. Now that I look at this picture, I see a few spots that need some touching up. Then I am going to try to remove this piece by soaking in alcohol, like Chuck suggested. The hardest part was to be careful with the thorns (or side brackets). They are easy to break off.
-
Just in case some of you were wondering; Kralingen, my birthplace, is a district in Rotterdam. Carl also came from Rotterdam, but not as nice a district Most of the time I was carving these designs with the tip of the #11 blade. I learned very quickly that you don't prey the wood loose, you have to cut and slice or break the tip. I also strop the blade frequently to keep the tip very sharp. I took an old leather belt and glued it to a piece of scrap wood. Some white chalk and a few strokes back and forth is all it takes.
- 47 replies
-
- 10
-
-
Joop, you are doing the right thing. I think we all like the fact that Chuck got us started with laser-cut pieces, but in reality we all need to know how to make carvings like this from scratch. There are lots of books and on-line 'how to' instructions, but they are all for much larger carvings. To work at our scale requires a bit more care and some ingenuity. So go for it, drill tiny holes and carve those babies. We are all watching, experimenting and learning.
-
Thanks Carl. Just don't call me 'Knack the Knife'.
-
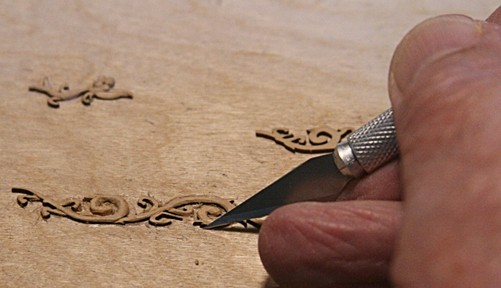
Next comes a couple of those long branches. I am glad I 'practiced' on the smaller one because that is helping me now. I have to be careful and not cut off those thorns More to come. Where are those carving knives I ordered?
- 47 replies
-
- 11
-
-
Mike, I love to help you with those short pieces of cedar, but I cannot figure out where you live. Kleppe Norway is way up north. Are you sure you don't have north and south mixed up What is an American doing in a place like that? Do you mind visitors?
-
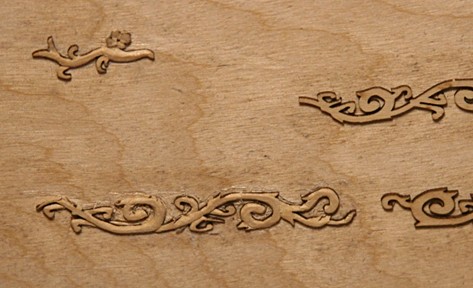
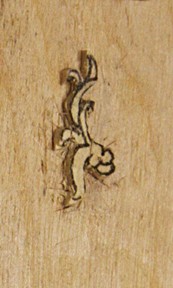
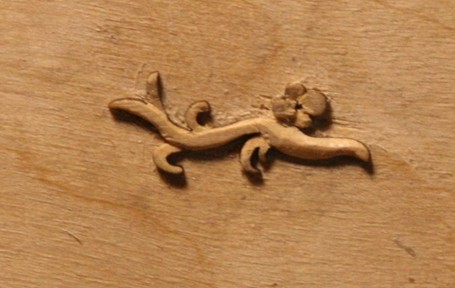
I finally received the laser cut pieces and started with the small flower design. Again I used a number 11 Exacto knife with some background lighting to help with the detailing. Being new to this, it was slow going but I learned a bit about what to do with the larger pieces. Ignore the background scratches because the next step is to dissolve the glue and touch up the final piece. Of course, the laser cut perimeter on these pieces makes life a lot easier, but that may not be the case in the future. So, I tried to do this from scratch. I took a piece of .020 inch thick Swiss pear copied the design and gave it a try with the #11. This is just a start and not very impressive. The #11 blade just does not handle cutting the perimeter of this thicker piece. Meanwhile I ordered some carving knives and will use those when they arrive. I have to be careful how I orient this design, because now it looks like a horny lizard taking a flower to his beloved.
- 47 replies
-
- 12
-
-
Nice bit of carving, Ryland. Why go back to the same old Longboat shipyard when you have a future in carving?
-
Somewhere I read that the light you use during carving helps to show the shadows. Fluorescent lights tend to equalize or diffuse the carving whereas a direct spot light enhances the shadows. Of course, the latter also shows the defects more. The first picture was taken under my shop lights; the second with incandescent light from above. Under cutting the 'ropes' also helps to create more of a 3D effect.

-
I've ordered Chuck's pieces but while I am waiting for them, I decided to experiment with a scrap piece of Swiss pear, 1/8 inch thick. I have a few chisels and a chip knife, but the following was done with a 11 blade. This is my first real try at 'carving' and it is fun. As was said before, the close-up pictures show a lot more 'flaws' than I could see. In the real world, a touch up with sandpaper would be fine I think. At first I rounded off the corners of the round hole. Then I decided to try to cross two ropes. Here is my first try.

-
The picture you showed, Ray, is indeed impressive but I don't think it represents a carved piece of wood. It is a drawing and to 'shade' carved wood would be redundant. The following is probably more in line with what we are trying to accomplish here. The 'stop cuts' and deep relief carving are very nicely done, in my opinion.

-
I have used carpet tape for other projects and it does as you mentioned, but the residue is hard to remove unless you use acetone. The same applies when using contact cement in a spay can. It works great but don't let it cure too long with small pieces. That brings me back to what Chuck suggested.
-
Some criteria for starting a new group project
Modeler12 replied to Chuck's topic in Group Projects on Model Ship World
In my case, doing this in my 'office' (which is inside, instead of the 'work shop', my garage) gives me a good excuse to the admiral who continues to ask 'when are you going to finish your cross section?' Now that fall is here and winter around the corner, my office is a great place to cut some small chips and not too much dust. I just placed the order for the boxwood pieces and will start with one of the crowns.
