


hervie
-
Posts
68 -
Joined
-
Last visited


.thumb.jpg.9b9e7a7246b971562249e229b3f2c5ad.jpg)


-
 Pogy647 reacted to a post in a topic:
US Brig Syren by hervie - Model Shipways - Scale 1:64
Pogy647 reacted to a post in a topic:
US Brig Syren by hervie - Model Shipways - Scale 1:64
-
 Pogy647 reacted to a post in a topic:
US Brig Syren by hervie - Model Shipways - Scale 1:64
Pogy647 reacted to a post in a topic:
US Brig Syren by hervie - Model Shipways - Scale 1:64
-
Pogy647 reacted to a post in a topic:
US Brig Syren by hervie - Model Shipways - Scale 1:64
-
Pogy647 reacted to a post in a topic:
US Brig Syren by hervie - Model Shipways - Scale 1:64
-
STSCM reacted to a post in a topic:
US Brig Syren by hervie - Model Shipways - Scale 1:64
-
tasmanian reacted to a post in a topic:
US Brig Syren by Gahm - Model Shipways
-
cristikc reacted to a post in a topic:
US Brig Syren by hervie - Model Shipways - Scale 1:64
-
cristikc reacted to a post in a topic:
US Brig Syren by hervie - Model Shipways - Scale 1:64
-
hervie reacted to a post in a topic:
La Couronne by EJ_L - FINISHED - Corel - 1:100 - 1637 Version
-
hervie reacted to a post in a topic:
La Couronne by EJ_L - FINISHED - Corel - 1:100 - 1637 Version
-
hervie reacted to a post in a topic:
Syren by JesseLee - FINISHED - Model Shipways - scale: 1:64
-
_SalD_ reacted to a post in a topic:
US Brig Syren by hervie - Model Shipways - Scale 1:64
-
Gahm reacted to a post in a topic:
US Brig Syren by hervie - Model Shipways - Scale 1:64
-
hervie reacted to a post in a topic:
Syren by JesseLee - FINISHED - Model Shipways - scale: 1:64
-
hervie reacted to a post in a topic:
US Brig Syren by Gahm - Model Shipways
-
hervie reacted to a post in a topic:
US Brig Niagara by 6ohiocav - FINISHED - Model Shipways - Scale 1:64
-
hervie reacted to a post in a topic:
HMB Endeavour by ca.shipwright - Corel - 1:60
-
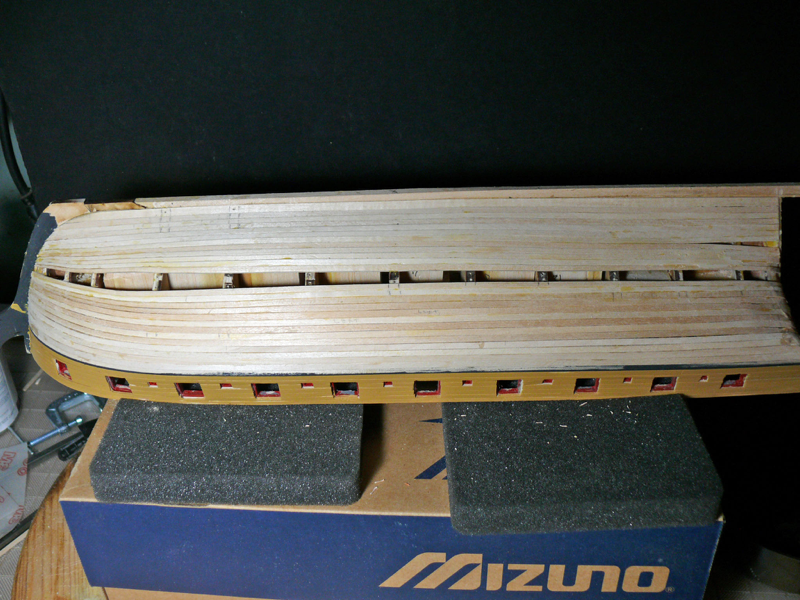
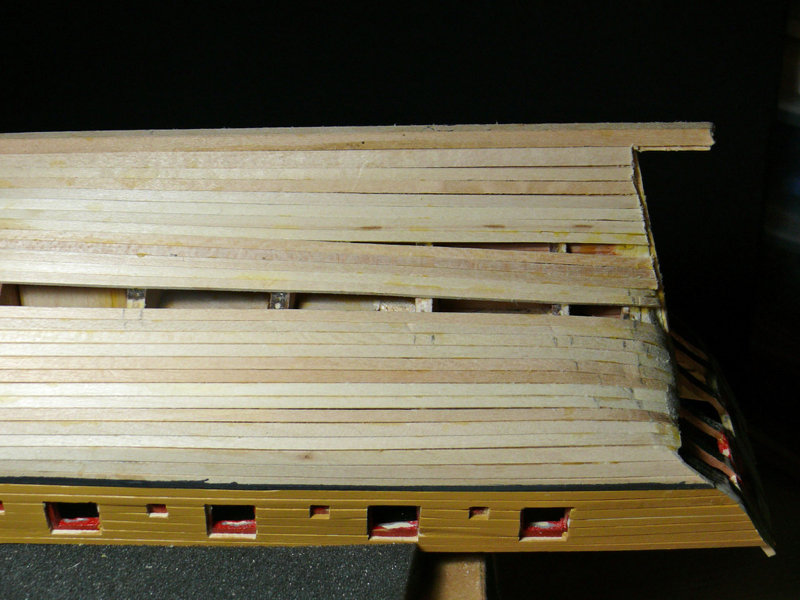
 The wales Gluing the wales was routine. Here are some pictures. Temporary shutdown The shipyard will be closed for the winter on account that it is located in an unheated garage. Don't have much of a vocation for freezing my tush. The shutdown will give me time to explore other projects I've been postponing for awhile, but in no way is an indication that I'm abandoning the Syren. I'll be back. To be continued ...
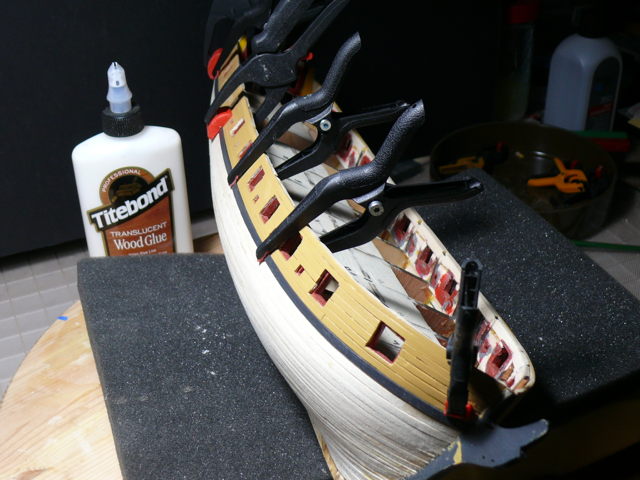
-
US Brig Syren by Gahm - Model Shipways
hervie replied to Gahm's topic in - Kit build logs for subjects built from 1801 - 1850
All I can say is Wow ! (Again) -
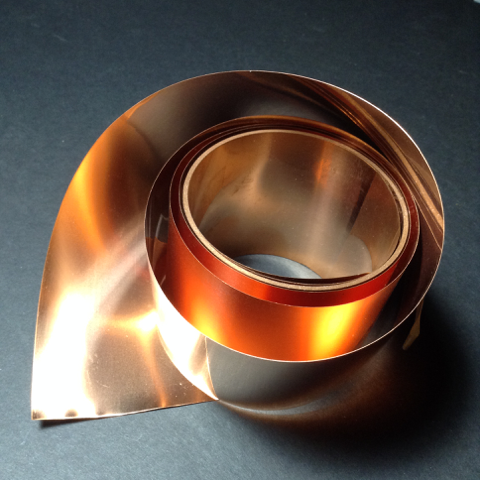
David, Most likely tape, although i have a nice roll of thin copper I found in a scrap business around here. I did use it on a larger scale model using contact cement for every plate, very time consuming. Tape will be faster. reklein, thanks for the suggestion. I did not see a reference to sealer in Chuck’s instructions but it is something to consider.
-
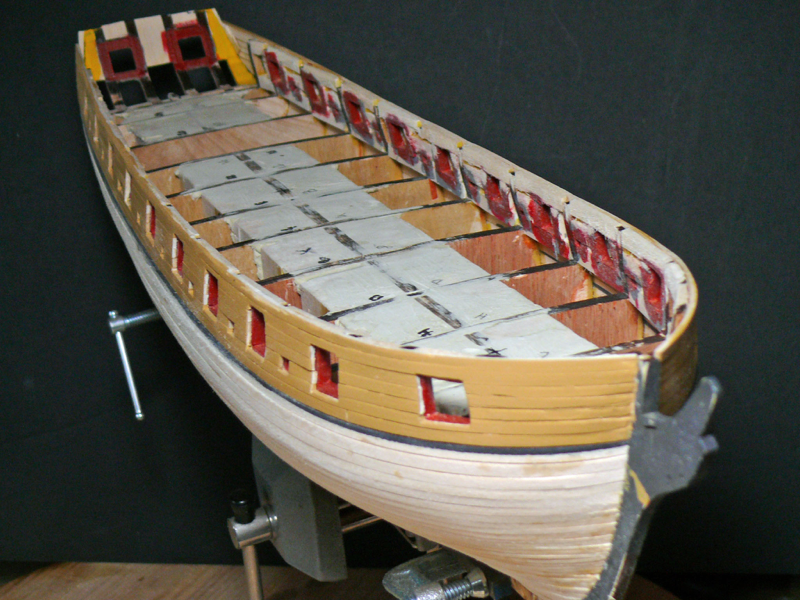
EJ_L, thanks for the comment and encouragement. I like to think of myself as a finisher, although sometimes with this model I have some doubts, not because of the monotony of particular tasks, but because I don't think I'm doing a very good job. My goal is to finish the stern, internal planking, coppering and deck. After that I'll reevaluate whether it's worth continuing, or just starting again from scratch. Gary, thanks for the heads up and advice, and for keeping an eye on my build. I sort of figured up there could be no difference in plank elevation before coppering, and your advice confirms that. Thanks also for letting me know there's sufficient copper in the kit to experiment.
-
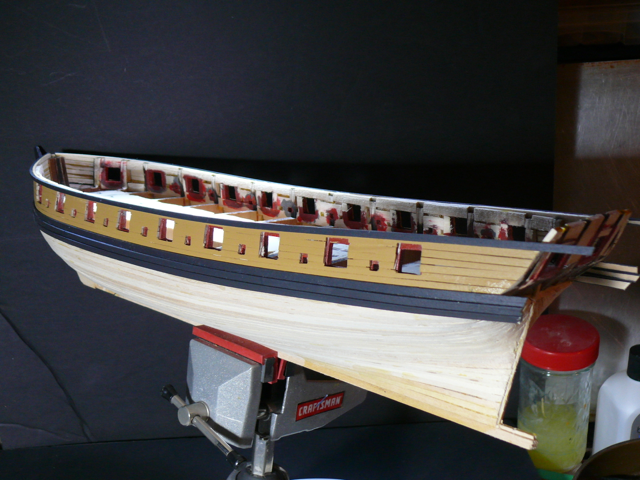
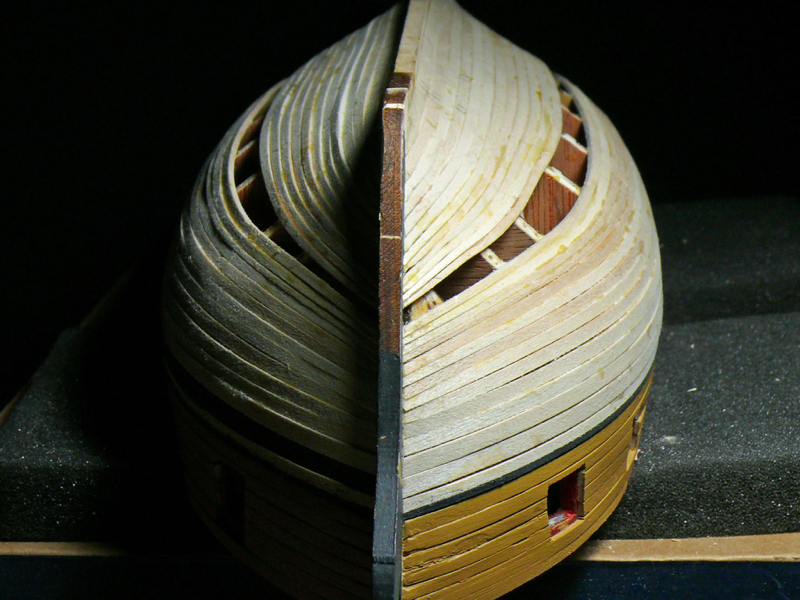
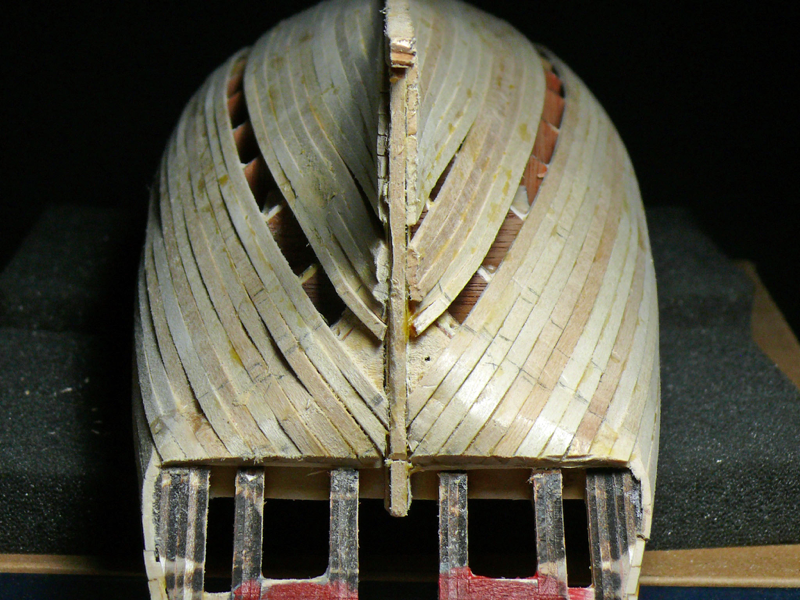
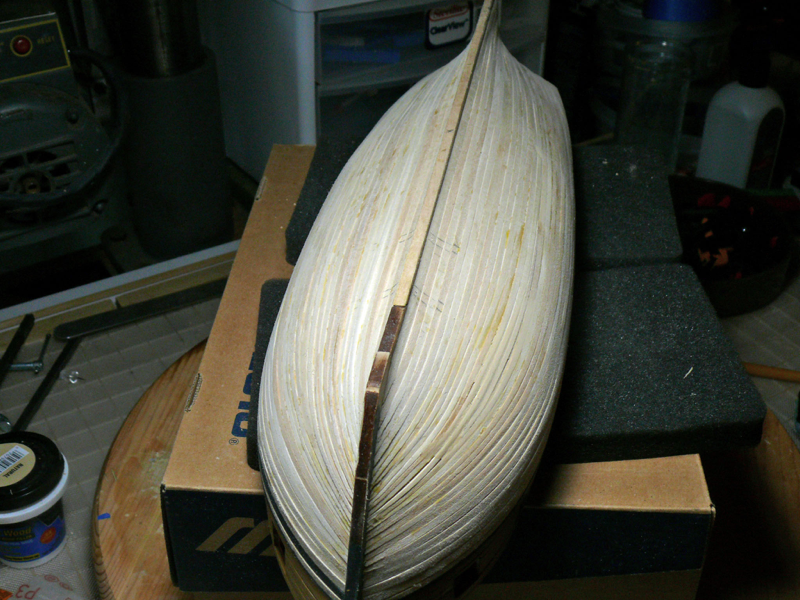
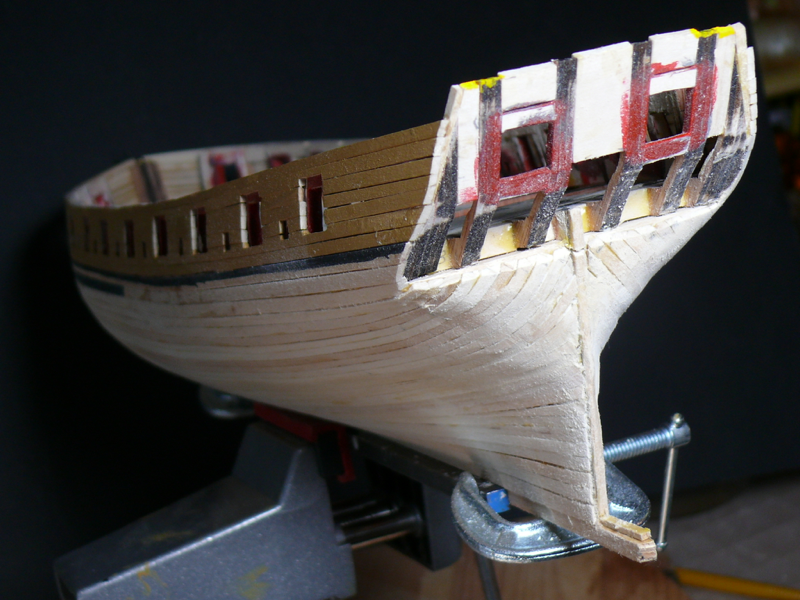
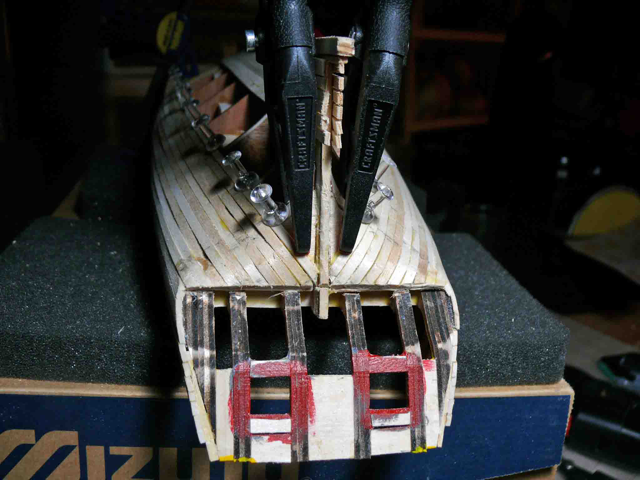
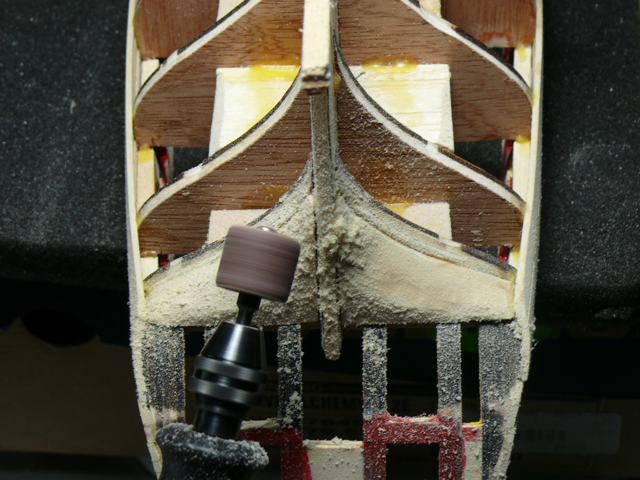
End of Planking Phew! I’m done. My patience and enthusiasm was severely tested with this planking job. I’m not sure I passed. Approaching the end of the job it became obvious I would have to fit a few odd shaped planks. Thank goodness for coppering to camouflage all this. The stern was particularly troublesome. Macro photos are very unforgiving, yet the reality was even worse! The width of the planks at the bow became smaller and smaller. Looks like my tapering skills are not up to par yet. And the stern! Well, no comment ... Eventually, with lots of sanding and some filler it became this. I wonder if the copper plates adhesive will bond to wood filler … Back on the saddle. View from the front. and the back. The moral of this story is that with enough elbow grease even ugly ducklings can turn into swans … or almost.

-
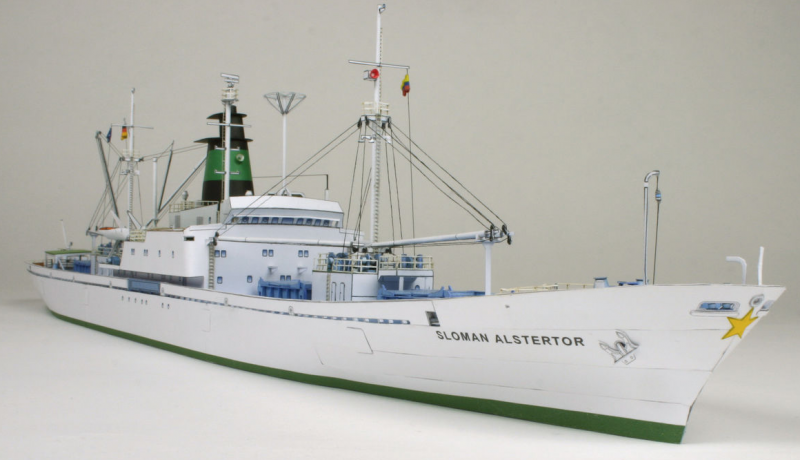
EJ_L, Thomas, thanks. And thanks for the likes. I just received the kit for the paper model Alstertor. Nice but way too complicated for a first paper model! The instructions being mostly in German doesn't help, nor does the very small size of many parts. So it goes to the back burner , and I'll be looking for a simpler one. Till then it's back to the Syren with renewed enthusiasm! -------- Addendum. Actually on closer inspection, the instructions are quite clear and the project now seems doable. So it goes back to the front burner along with the Syren. The key will be to practice complicated assemblies on separate paper first.
-
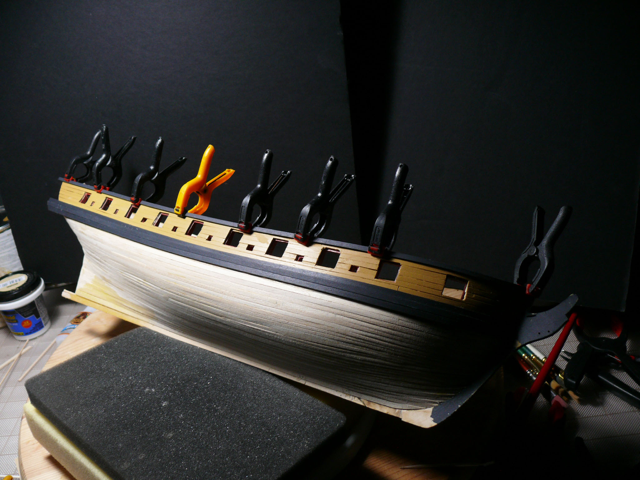
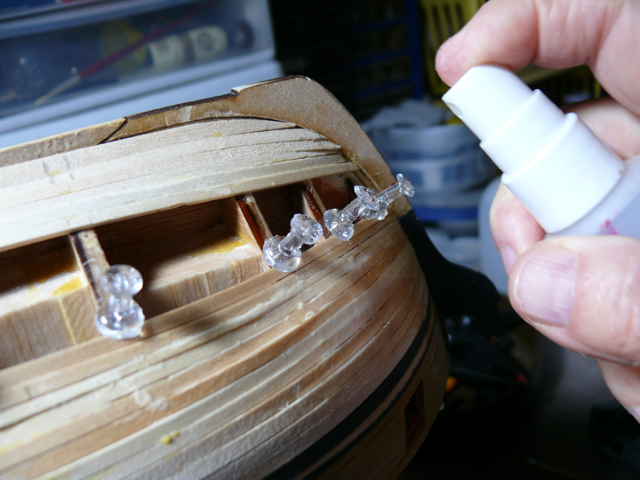
Planking Progress … sort of It is definitely slow going. Here are some pictures. First the gardboard. Then more top and bottom planks. While there was no tapering of the planks, and more empty space between them, I could work on 4 planks at a time. Eventually it got slower. Just two planks at a time. To do two planks takes one hour (excluding drying time). Each plank requires 10 steps step 1: taper the plank for the bow section. step 2: position the plank on the hull and insert the pins (see below) step 3: mark the section of the plank for bending at the stern step 4: remove the pins and the plank. step 5: bend the plank at the stern step 7: dry fit the bended part at the stern, Trim the plank. step 8: remove the plank and pins one more time.. step 9: put glue on the hull for the entire length of the plank. step 10: glue the plank and reinsert the pins to hold it in place while drying fun fun fun Positioning each pins starts by marking the spot on the hull with an awl. Best way is to rest the awl on the dry fitted new plank and mark the spot a small distance from it in a way that most of the pin will cover the plank. Then drill with a #58 bit and insert the pin. Here is marking where to bend the plank at the stern making sure the final position of the plank will remain the same. Bending with the method described in the previous post Once the entire stern counter was covered, all planks were trimmed using a Dremel saw bit. As more planks are inserted the torsion stress on the planks at the bow becomes more serious. After pinning and dry fitting the planks they are moistened with a spray bottle and left to dry. And that’s it for planking. My next post will show the final result. So much for the Syren. But now it has some company in the form of a card model which I am about to start. Thanks to Mirabell61's mention of card models in his log I discovered a whole new world of modeling i did not know existed! Paper (or card) modeling. So I’ve done some research last week and came upon this site in Germany. http://www.kartonmodellbau.de/epages/63481486.sf/en_GB/?ObjectPath=/Shops/63481486/Categories/ships/civil Apparently countries in Eastern Europe have evolved paper modeling to a level unmatched in the west. I’ve always wanted to build a mid century cargo ship. So I couldn’t resist and ordered one of the last conventional or classical freight ships before the emergence of container ships, the Sloman Alstertor. http://h-m-v.de/sloman_alstertor.0.html?&L=1 This kit has 1600 parts! It will slow down the Syren, I know, but I need some faster action every so often If it works, there is a whole world of card models to discover.

-
Thanks EJ_L, it makes sense. Now I need some practice.
-
Beautiful work, Nils. As always. Coincidentally I run into some historical references to the Grosse which might be of interest: April,1897 "The world was growing more chaotic and speeding up. Rudyard Kipling could be spotted in his six-horsepower motorcar thundering around at fifteen miles an hour. The race among the great shipping companies to see whose liners could cross the Atlantic in the shortest time intensified and grew more and more costly as the size and speed of each ship increased and as the rivalry between British and German lines became freighted with an ever-heavier cargo of national pride. In April 1897 at the Vulcan shipyard in Stettin, Germany, thousands of workers raced to prepare the largest, grandest, fastest oceanliner yet for its launch on May 4, when it would join the stable of ships owned by North German Lloyd Line. Everything about this new liner breathed Germany’s aspiration to become a world power, especially its name, Kaiser Wilhelm der Grosse, and its decor, which featured life-size portraits of its namesake and of Bismarck and Field Marshal Helmuth von Moltke. The launch was to be overseen by Kaiser Wilhelm II himself." "Thunderstruck, by Erik Larson, Broadway Books, 2006" I am reading your entire log from page one to get an idea of what's involved in building this type of ship from scratch. It is definitely a project beyond my capabilities ... but maybe one day ,
- 2,625 replies
-
- 8
-
-
- kaiser wilhelm der grosse
- passenger steamer
- (and 1 more)
-
I do not know whether the tapering should be: 1) symmetric — both edges of the plank converging to the tapered end --, or 2) just one edge of the plank leaving the other edge straight. And if (2), which edge, the top or the bottom one? Any ideas? Thanks.
-
Michael (ca.shipwright?), EJ_L, I get it. I'll be more careful with the tapering than I was planning to be. Good to know you two are watching over my shoulders
-
EJ-L, thanks for the word of caution. I will be tapering, and the manual has a description on how to to that for this ship. Sal’s log (_SalD_) applies Chucks' method to the letter, jet, even then, could not prevent some plank “creep” from happening. Since the hull will be coppered below the water line, I’m not too concerned about this. I am more interested in producing a smooth surface for coppering, so it’s OK if I end up with a few odd shaped planks here and there. (This must sound as sacrilege to some builders, I know).
-
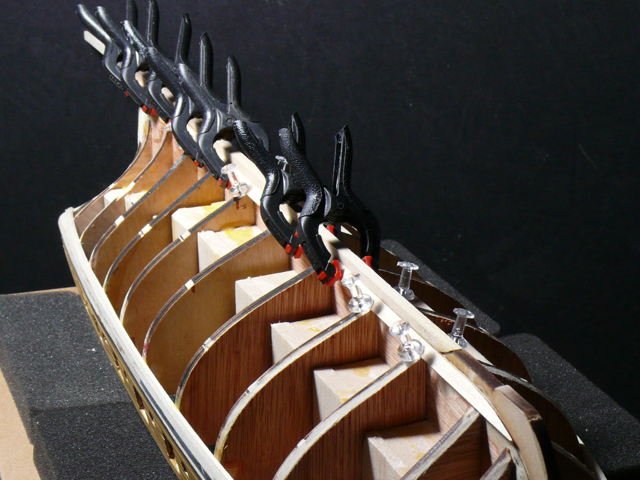
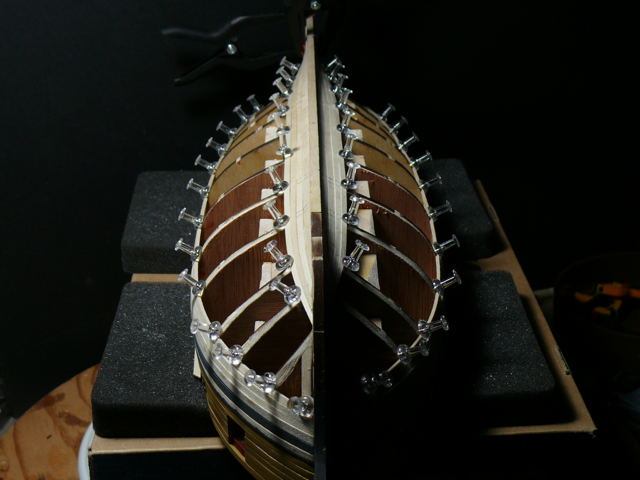
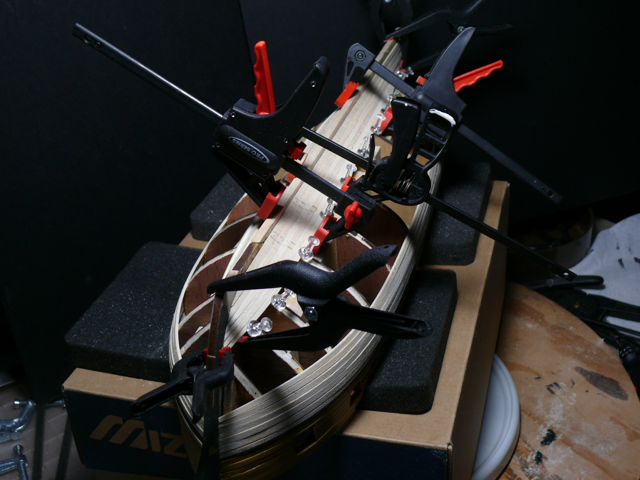
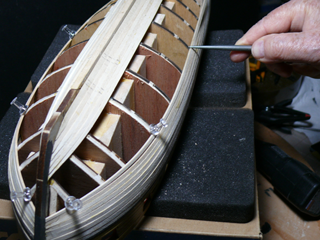
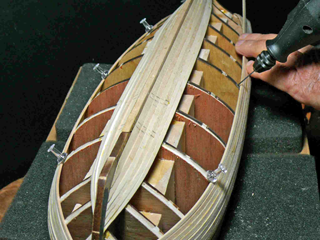
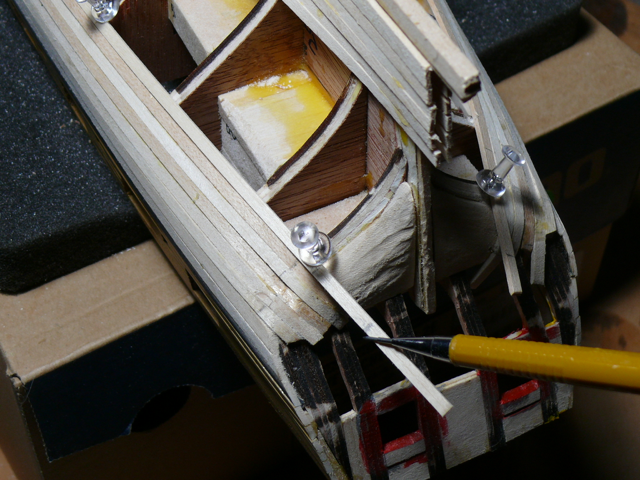
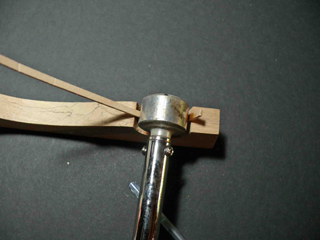
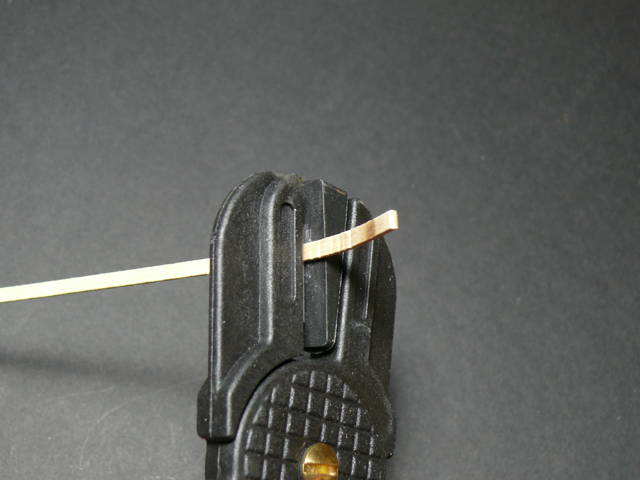
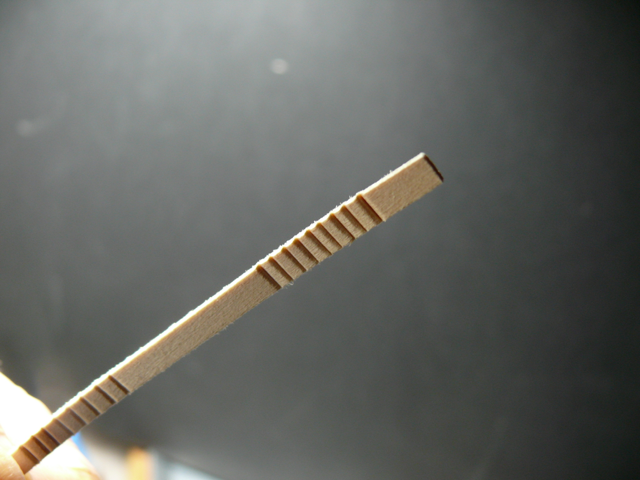
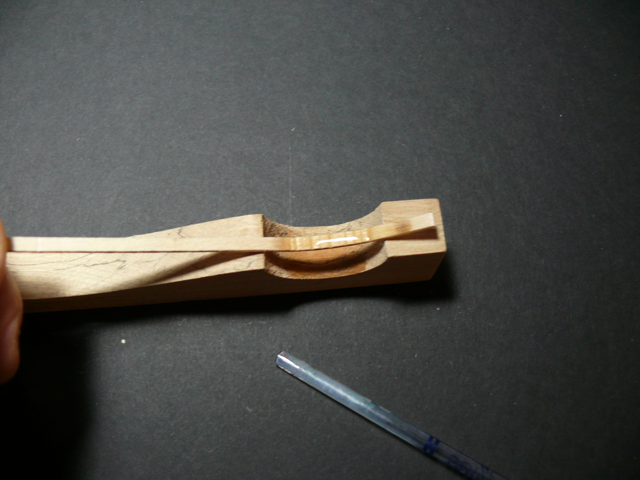
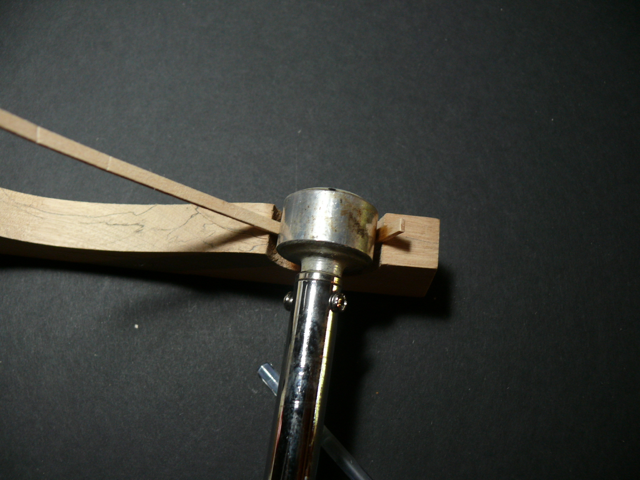
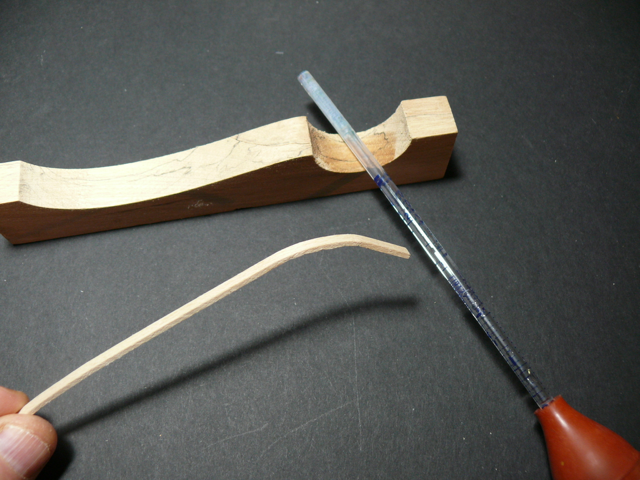
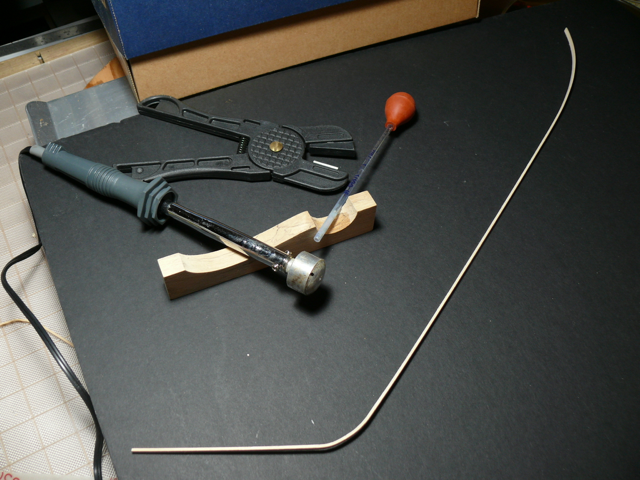
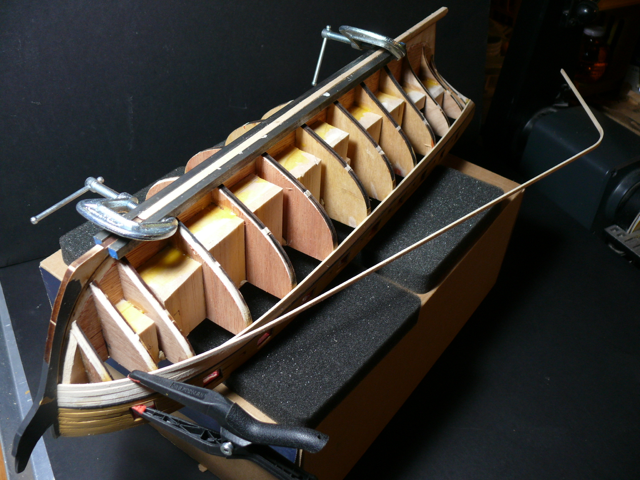
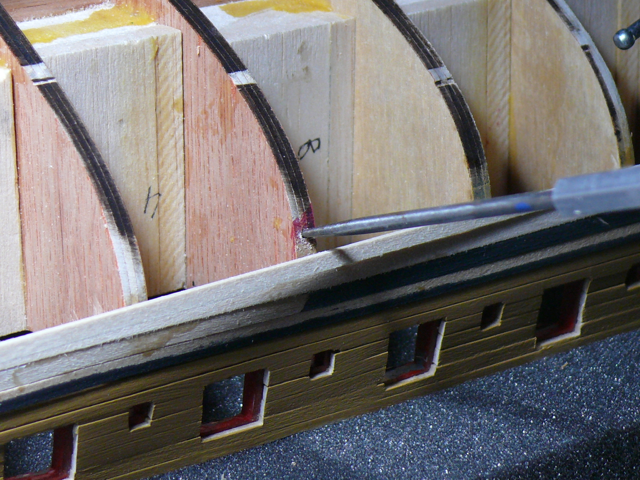
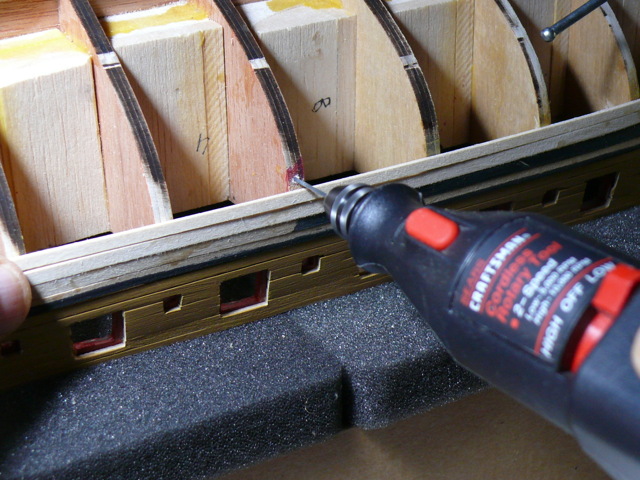
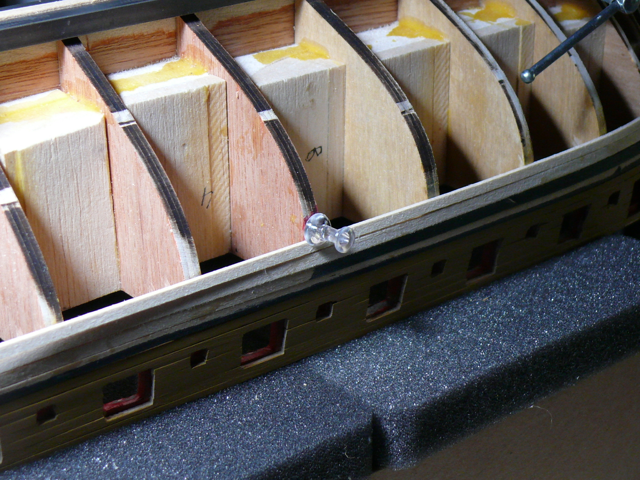
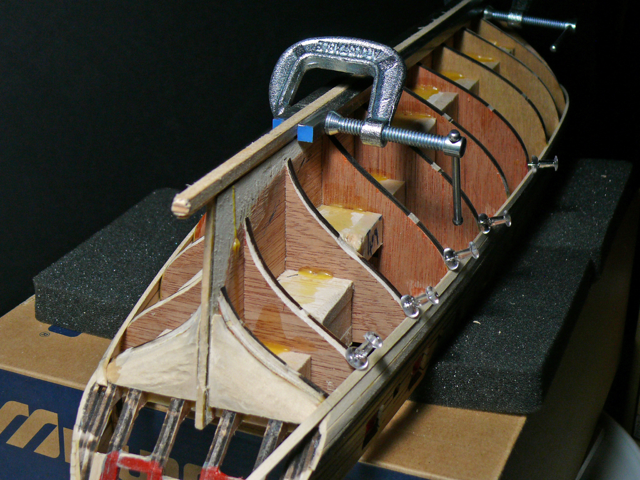
Bending and Gluing Planks The first plank below the wales begins to get into the extreme curve of the stern. Here I practiced a method for bending planks using two specialized tools I bought years ago. These are shown in a photo below. To practice, on a spare plank I produced several close notches using the first plank bending tool. One side of the tool jaw is flat, the other has a dull blade. Using this tool by itself would be sufficient to produce gentle curves. The key for good results with this tool is to do close, evenly spaced and fairly deep notches. In preparation before using the second tool, a hot iron, some drops of water were placed on the notched part. Then the iron is used to produce the sharp curve.. The result. Obviously I need more practice. Now for the real thing.. First, the filler blocks under the stern were reshaped to produce a smoother curve. Previously a few planks were pre-formed in the plank bender jig used before. That takes care of the plank's bow section. A plank was temporarily attached to the hull, and the spot where the plank needs to be bent at the stern was marked. Then the plank was removed to make the stern curve. Here is the result. Now the plank can be glued to the hull, first the bow section using CA glue, then the rest using PVA glue. I decided to switch back to PVA glue. The CA glue fumes are to obnoxious for me, whereas PVA produces no toxic fumes. That means I had to get a method of securing the planks to the hull while the PVA glue is drying. After trying a few methods, I settled on one using push pins. The biggest problem when using push pins is that they need to be pinned to the bulkheads, and the bulkheads are too hard to penetrate. Pre-drilling solves the problem. First the spot for the push pin was marked using a sharp tool to facilitate placing the drill bit. Then the hole was drilled. (the plank is not glued at this point). and the push pin inserted. Here are a few push pins in place. I can see the next time around I’ll need to drill the holes closer to the plank. But it will work. I like this method because it can be used for all planks regardless of where they are. Having settled on this method of planking will helps for the rest of the planking job. However progress will be slow for a while due to some software projects I’m involved with. Hopefully I’ll be back soon with more progress to report.
-
Jablackwell, Elijah, FriedClams, thanks for your interest. ca.shipwright thanks for your ongoing support, and thanks for your tip for securing planks. I think I came up with a different method using push pin which works well for me and which is described in my next post.
-
US Brig Syren by Gahm - Model Shipways
hervie replied to Gahm's topic in - Kit build logs for subjects built from 1801 - 1850
impeccable work Thomas, as well as the photos and presentation. I particularly appreciate your detailed descriptions and ingenuity in solving problems, which will help many of us when we reach the same point in our builds. I love the compass! Thanks for sharing.
