


JamesG
-
Posts
19 -
Joined
-
Last visited
Content Type
Profiles
Forums
Gallery
Events
Everything posted by JamesG
-
Thanks for the advice, sounds like a good method for me to try! Unfortunately no airbrush and I would prefer to hold off on one until I have more experience, this is only my second model. If I go with spray cans I'll definitely be careful with how thick it gets, otherwise I could invest in a good quality wide brush. Thanks again, much appreciated.
-
I'm currently building the Amati 1:80 Endeavour and have completed the hull and mast so need to apply paint and finishes. Does anyone who's built the kit before have advice for what paints I should be using? I was wondering if a basic spray can primer with some sanding work well enough, on top of that I don't know what sort of paint I should be looking for, enamel or acrylic, and matt, satin or gloss? I'll also be going with the natural wood on the lower half of the hull, so far I've considered tung oil and linseed oil, or is there something better I could use? Should I also use some sort of clear top coat to cover the whole hull after painting? It's a lot of questions, unfortunately I've not been able to find a lot of information through my own research.
-
Thanks popeye, I probably should have looked at a few more tutorials and guides about planking, the main problem I had was that I didn't want to spend too long on it, I go back to university soon and wanted to finish the model before then. I'm happy with it and it has turned out better than expected when I get the Bluenose I'll start a build log for that one too, and it's one I'd want to try and make perfect (as far as possible) so if you spot it in the forum I'm sure I'd need all the help and advice I can get!
- 32 replies
-
- 2
-

-
- billing boats
- norden
- (and 2 more)
-
Thanks for the kind words from everyone, I appreciate it! I'll keep this advice regarding the bow in mind
- 32 replies
-
- 1
-
-
- billing boats
- norden
- (and 2 more)
-
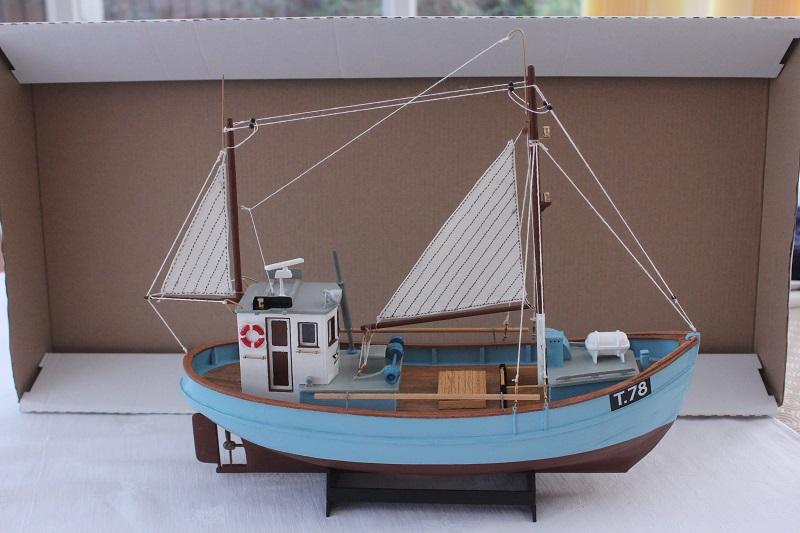
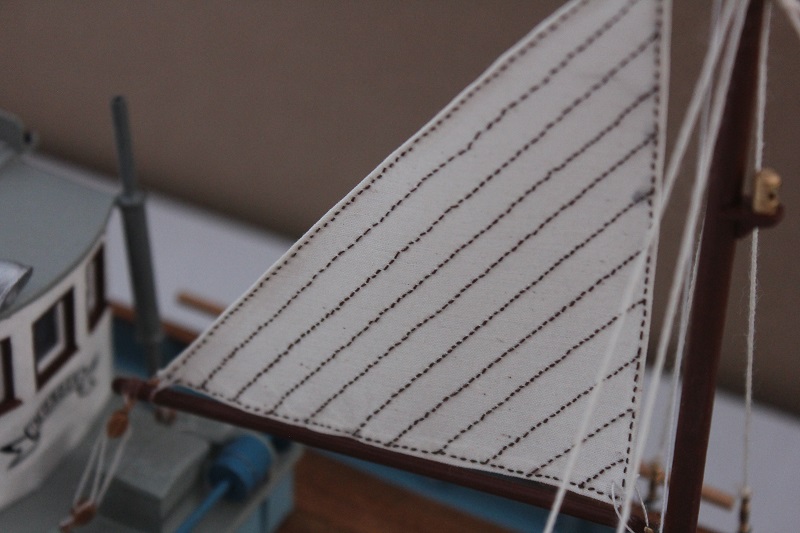
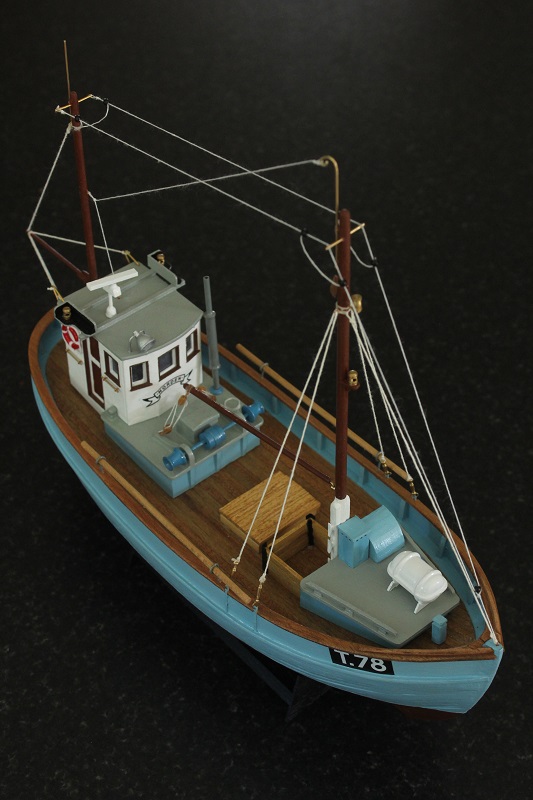
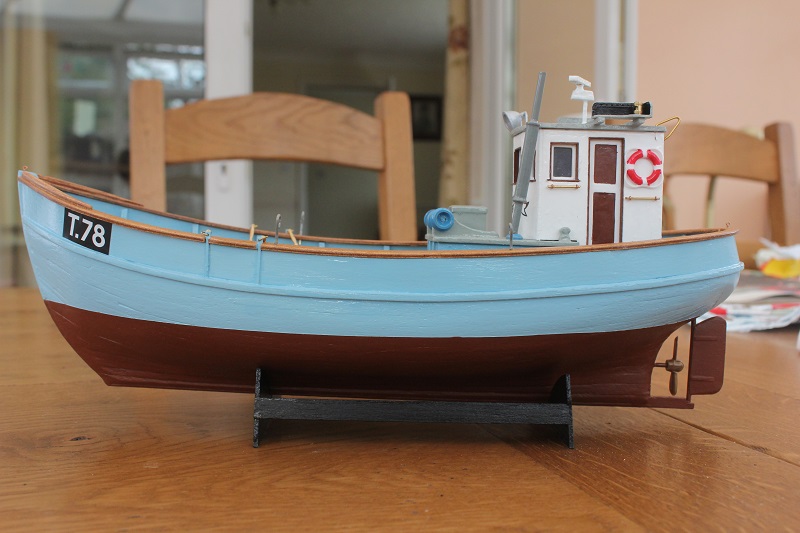
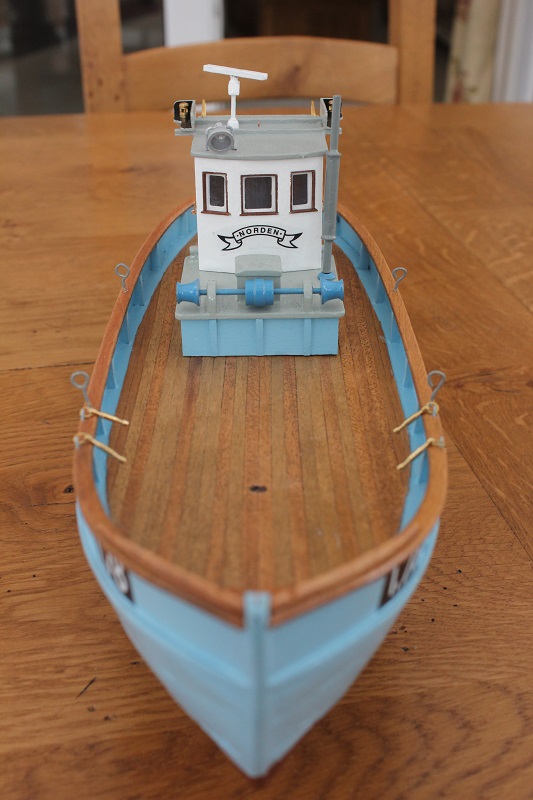
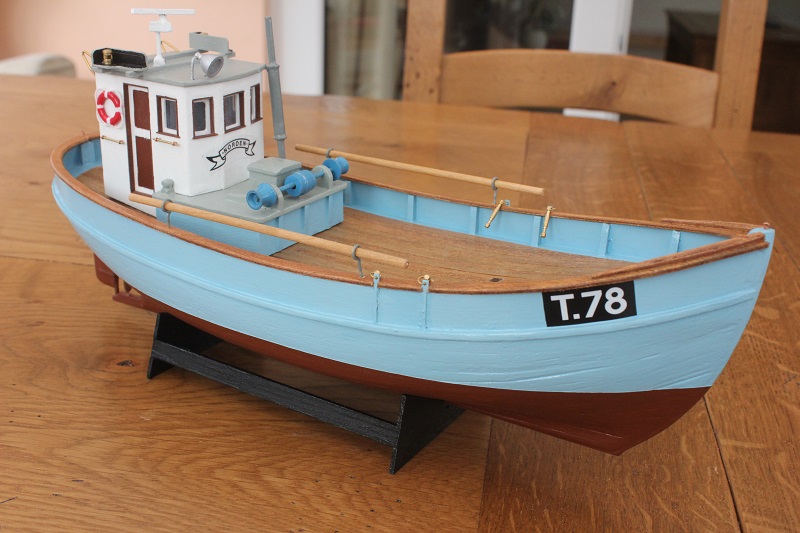
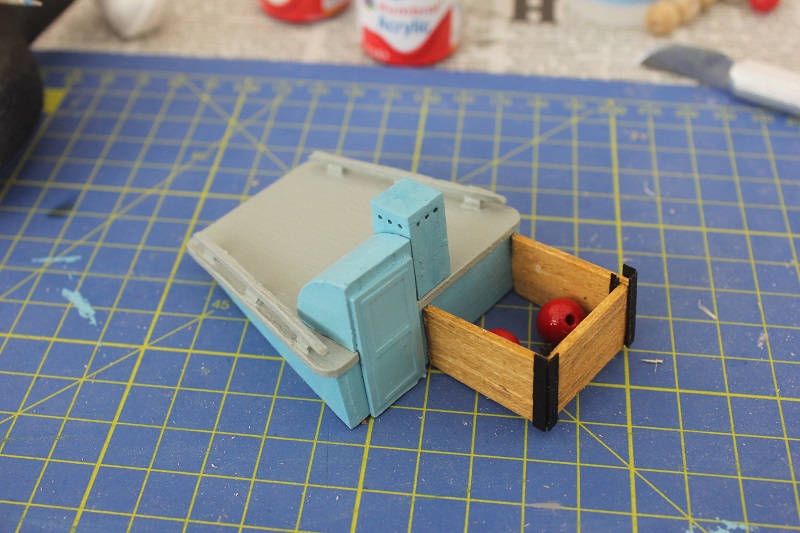
Any opinions on the sails? As I said in my last reply I've done all the stitching by hand, I did the larger sail second so it's a bit neater than the rear sail as I had managed develop something of a technique (but still not as neat as I'd like). Clearly it would never be as neat as a sewing machine or someone with a bit more experience in needlework than me! I would guess that both sails took me around 5 (Maybe 6) hours to complete, so if it takes me that long to complete the two small sails on this boat I think I'll invest in a small sewing machine for my next model I'll have to find a good source of information on how to properly make sails and do rigging, I wasn't 100% sure how to attach everything so I used knots that I usually use when fishing. I also used small amounts of glue on some of the rigging which I would have preferred not to do, luckily it isn't very noticeable. I've decided I would like to build the Model Shipways Bluenose next (probably next summer), I definitely want to finish the rigging and sails properly and without glue on that model All that's left to do now is fix on the winch, make a few small fish boxes and add a couple of hatches on the deck, just a few small details
- 32 replies
-
- 6
-
-
- billing boats
- norden
- (and 2 more)
-
Thanks Rob, I definitely am proud of it I've done the stitching on the rear sail and will do the other one tomorrow, so it may be completely finished tomorrow. The stitching isn't perfect, I've done it by hand and I'm not really sure what the best methods are, but it's good enough for now
- 32 replies
-
- 1
-
-
- billing boats
- norden
- (and 2 more)
-
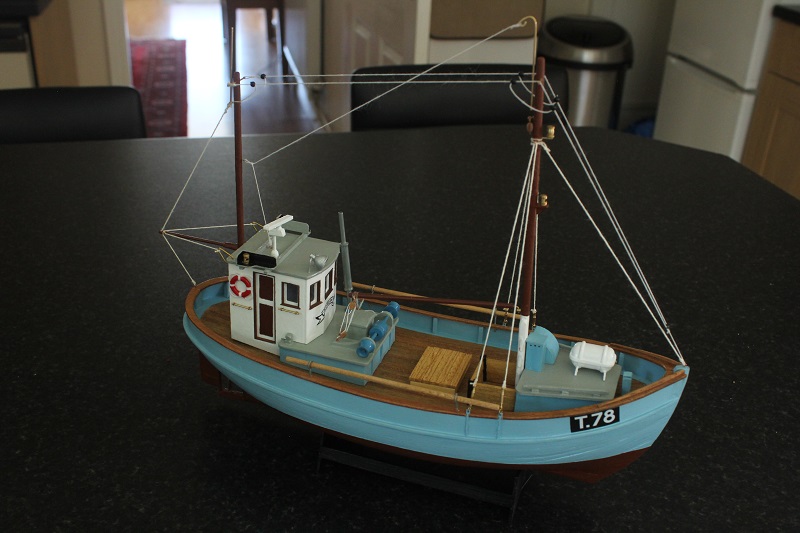
All rigging is now complete, excluding the sails, they're still the most daunting part for me! Overall this has all turned out much better than I expected, I'm sure it could be neater or built more precisely but as it's my first build I didn't want to spend too long on it, plus I've not got long until I return to university so I needed to be finished before then or I wouldn't be able work on it for over 3 months. There's still a few more details I need to add, such as the winch, fish boxes and anchor but these shouldn't take long. This was a great introduction to the hobby and I certainly aim to start another model as soon as I can, now that I've had some experience (and much of it was easier than I anticipated) I feel that I could handle the Model Shipways Bluenose which also has the advantage of better instructions and far more build logs to use as references I will also be able to spend more time and be more precise on my next build.
- 32 replies
-
- 7
-
-
- billing boats
- norden
- (and 2 more)
-
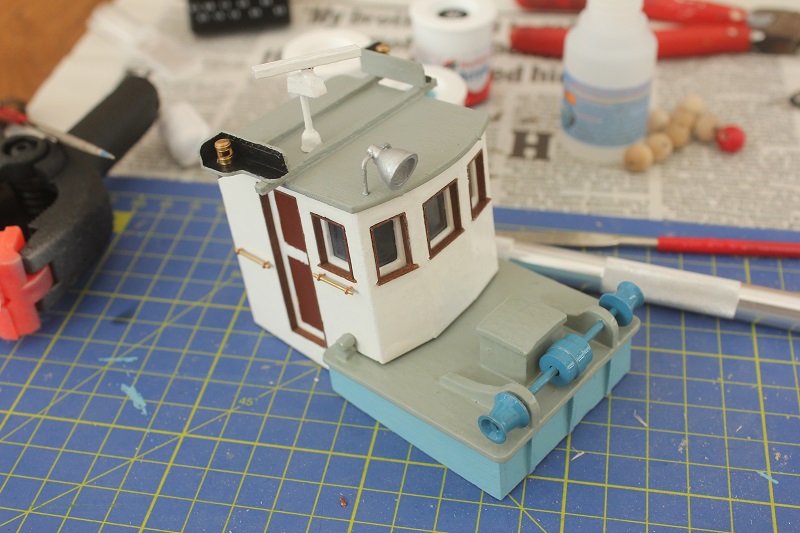
I haven't been able to do much over the last couple of days as I normally work on the boat in the conservatory, however recent hot weather has made it difficult to stay in there for any length of time! Although I don't think there's much left to do as a whole, I've finished the front mast so I'm mainly just working on rigging Let me know what you think!
- 32 replies
-
- 5
-
-
- billing boats
- norden
- (and 2 more)
-
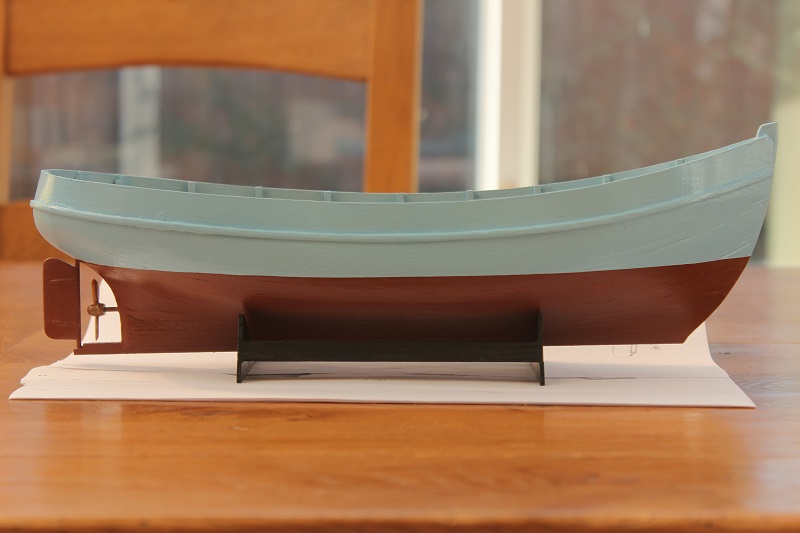
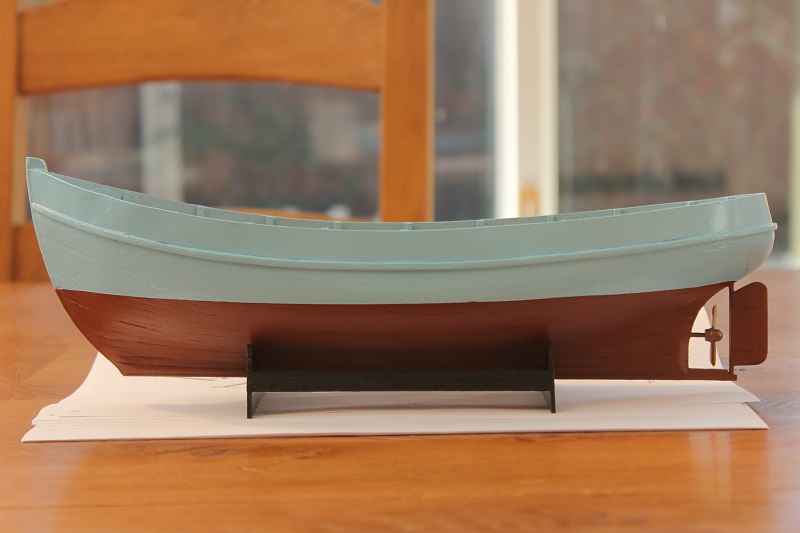
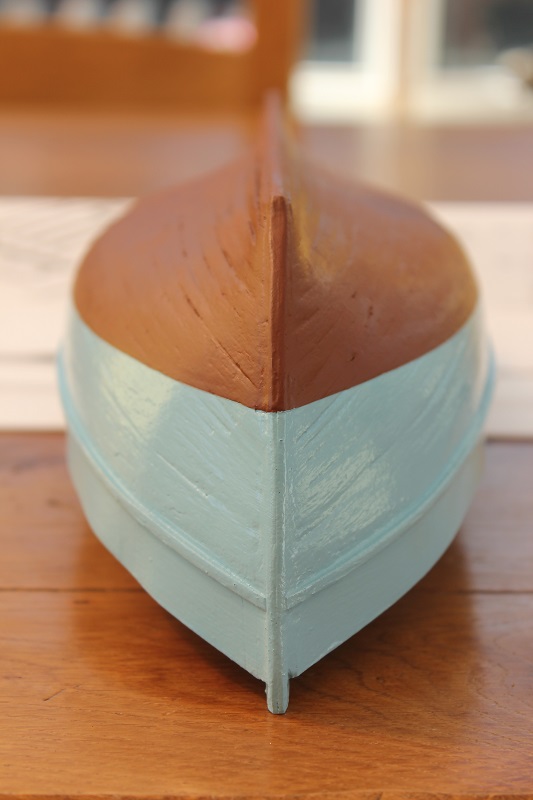
The Hull is now painted and I am very pleased with how it turned out, the flexible Tamiya tape working wonderfully and I was able to paint below the waterline up to it by hand much easier than I expected. It's probably not perfect and there's always room for improvement, but I'm very happy with it so I'm not going to complain!
- 32 replies
-
- 3
-
-
- billing boats
- norden
- (and 2 more)
-
Thanks for the replies it's great to hear that it's going well, I appreciate it, and it's very motivating!
- 32 replies
-
- 2
-
-
- billing boats
- norden
- (and 2 more)
-
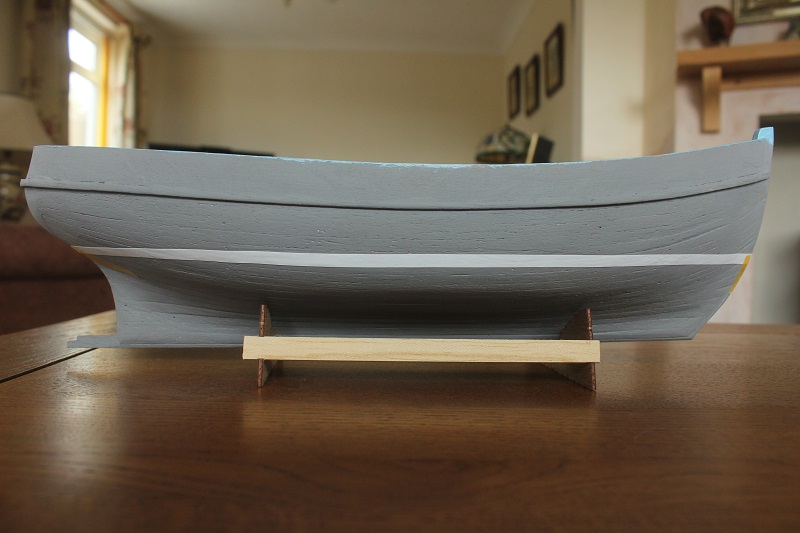
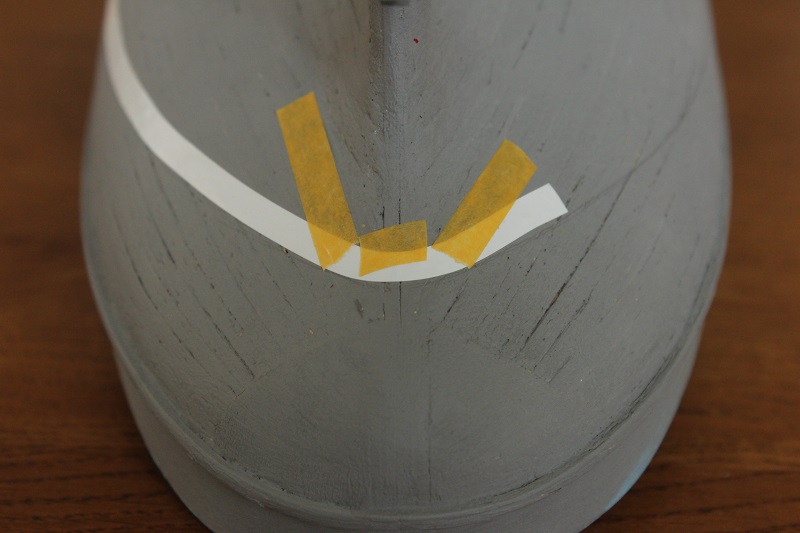
Unfortunately there's been a large delay in posting progress of the boat but I haven't given up I was a bit demotivated by the problems I had with the waterline but I think I've finally managed to get somewhere with it, the two pictures below show what I did with the Tamiya tape, let me know what you think, i.e., if it's straight enough! While being annoying with the waterline I built and painted some of the pieces that go on the deck there's a few more to do but these are the largest parts. I was also able to place and stain the deck planking.
- 32 replies
-
- 8
-
-
- billing boats
- norden
- (and 2 more)
-
Thanks Craig, it has gone better than expected I have to say, I think the painting I've done so far could be better but I'm still happy with it, especially for my first build I'll post some pictures of the progress soon if I remember!
- 32 replies
-
- 1
-
-
- billing boats
- norden
- (and 2 more)
-
Thanks for the replies, I'll try and redo the line with the hull on the stand and see how I do, although I might try to find a try square as a better platform to clamp the pencil to. And I'll definitely get some of that Tamiya tape, it looks very useful! Thanks for the recommendation
- 32 replies
-
- 1
-
-
- billing boats
- norden
- (and 2 more)
-
Well I've been trying to do the waterline for a few hours over a couple of days and cannot get it right. It's the first part of the build that's really frustrating me. I clamped a pencil to a right angled piece of wood and used that to trace the line with the hull flat on its keel however it seems to go down towards the bow, it looks that way on both sides. The main problem I have is getting the masking tape to follow the curves of the hull flat while also following the pencil line I made. Also, when one colour is painted on the hull, what's the best way to apply the second colour against the water line?
- 32 replies
-
- 1
-
-
- billing boats
- norden
- (and 2 more)
-
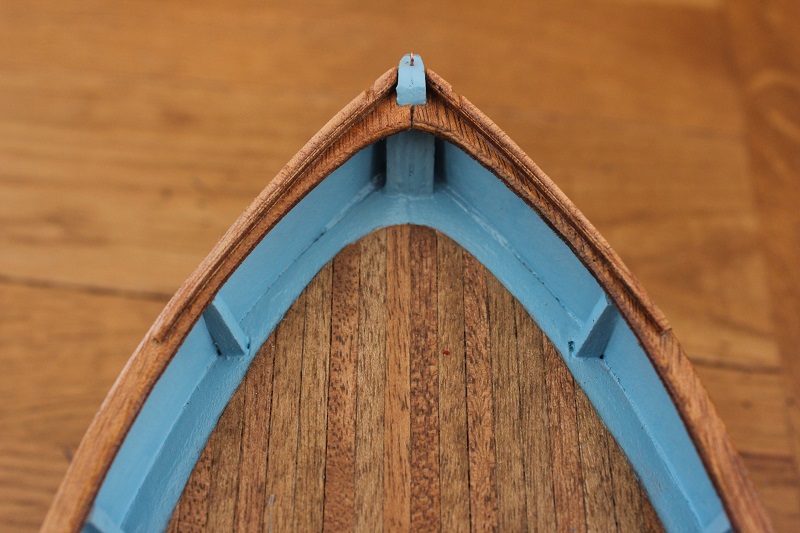
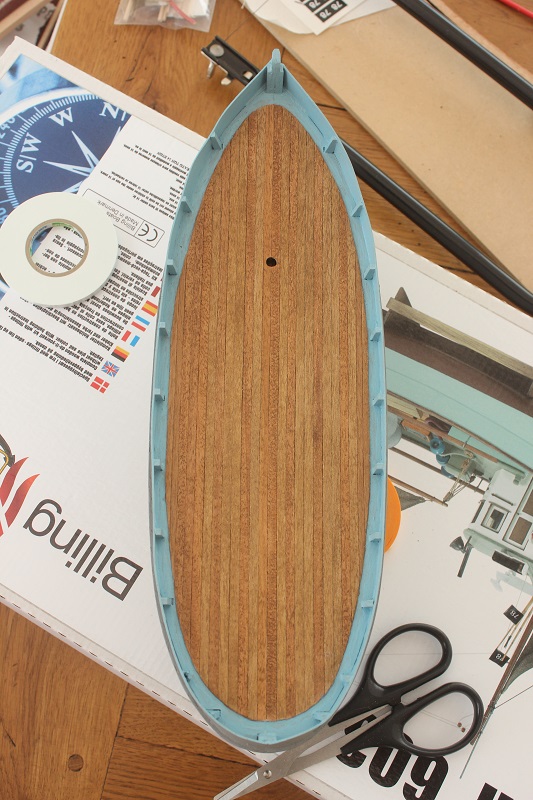
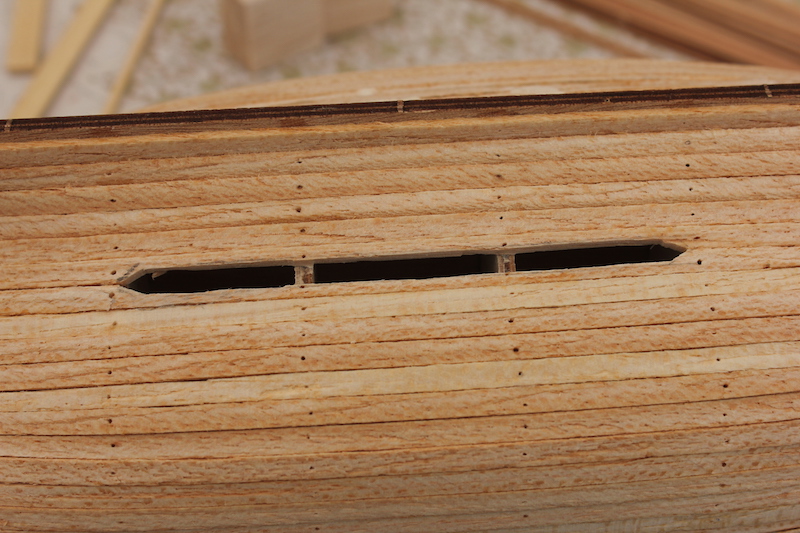
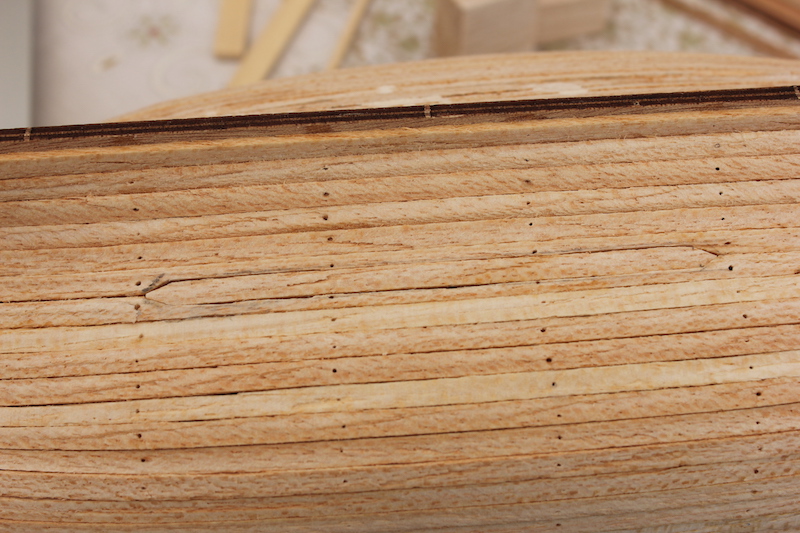
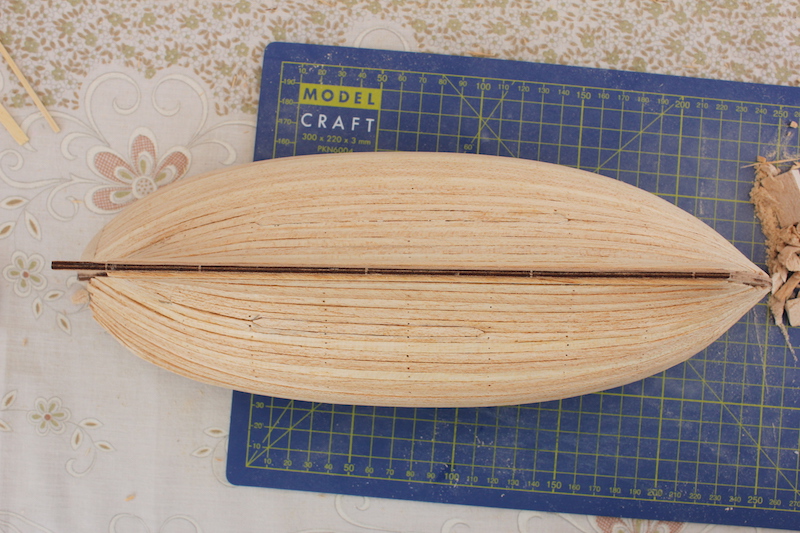
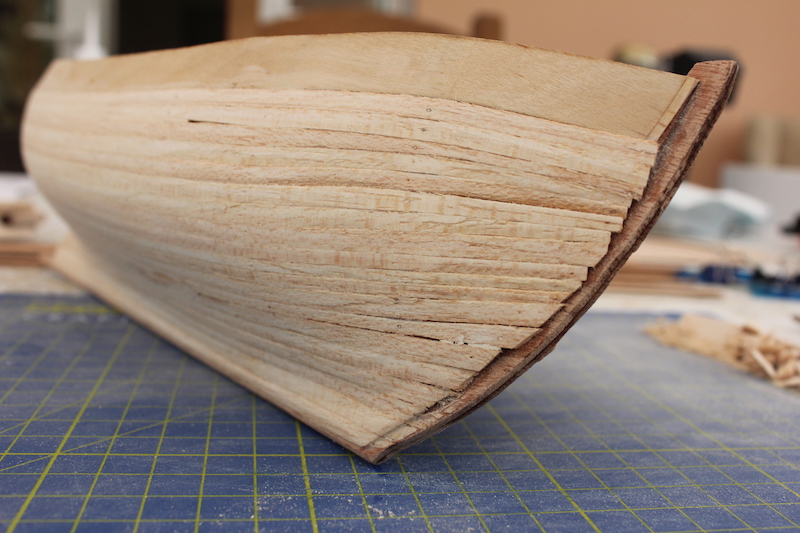
I've made a bit of progress now, I have completed the hull and deck planking and for my first attempt I think it's gone fairly well! I just need to figure out how to finish the plank ends at the bow so they taper nicely into the keel. On both sides I had a small gap of 1-2mm across 4-5 bulkheads, this is how I filled it (a stealer?) and it seems to have worked rather well! I've done most of the sanding on the hull so I'm now almost ready for painting, although I'm not sure what paint to use, the recommended Billing Boats paints don't have gloss/satin/matt labels but some of the Humbrol equivalent paint colours only seem to be available in gloss such as No. 22 White and the hull colours. So are they supposed to be gloss? Thanks, James

- 32 replies
-
- 5
-
-
- billing boats
- norden
- (and 2 more)
-
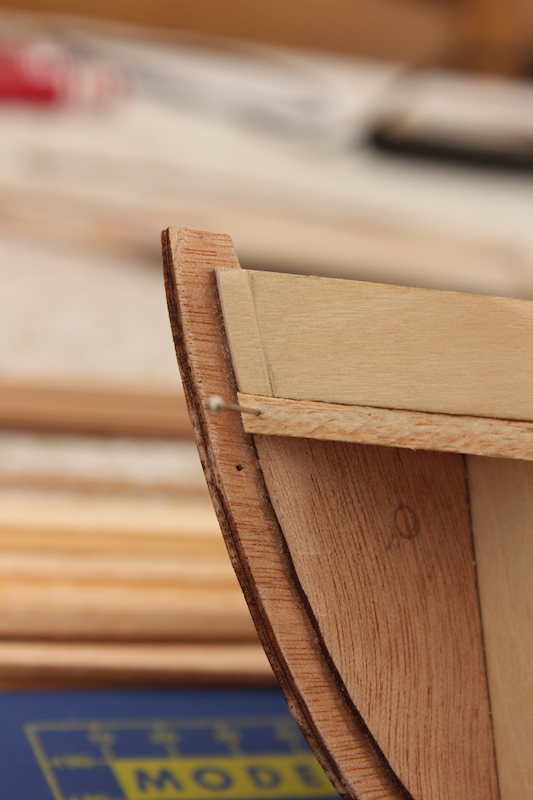
Bulwarks are now in place, not perfect and I probably could have done better but they're as good as I was able to get them I've put the first plank in place with pins, would someone be able to give me some advice about the placement? First of all, is the one I've got in the right place? And is the best way to complete the planking to go from the top and bottom then meet in the middle? I'm also not sure how to finish the planks at the bow, I was going to end them following the contour of the inner piece of wood, then sand them later to make them finish flush with the keel.
- 32 replies
-
- 8
-
-
- billing boats
- norden
- (and 2 more)
-
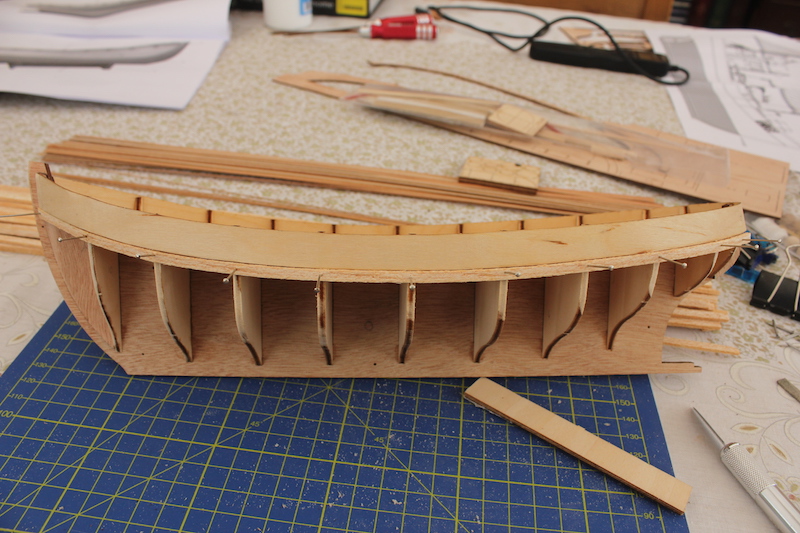
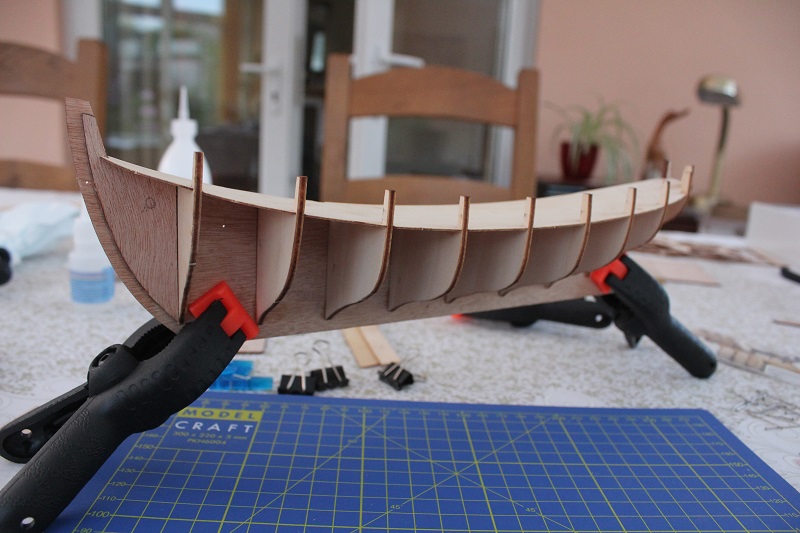
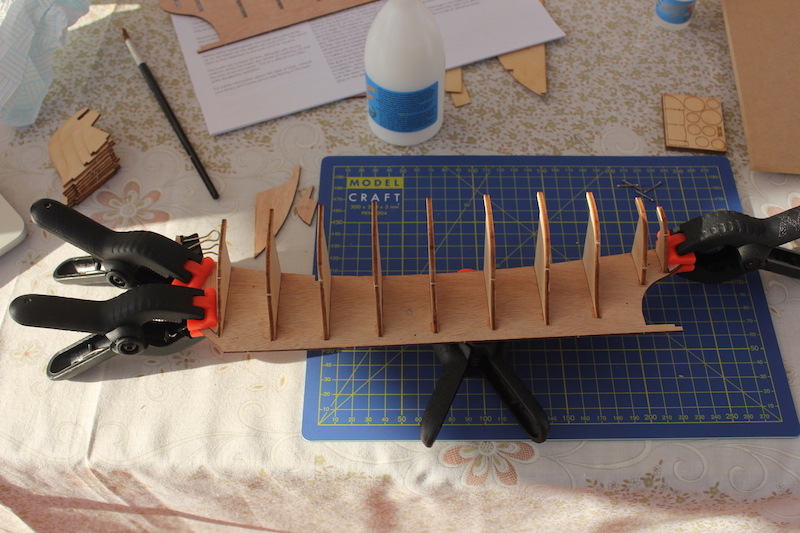
The first deck is now in place and the second half of the hull now has the bulkheads in place. I think I will glue the two halves together before I start the planking as Albuk did in his Norden build. I'm sure I'll have a lot of questions when I get to it!
- 32 replies
-
- 6
-
-
- billing boats
- norden
- (and 2 more)
-
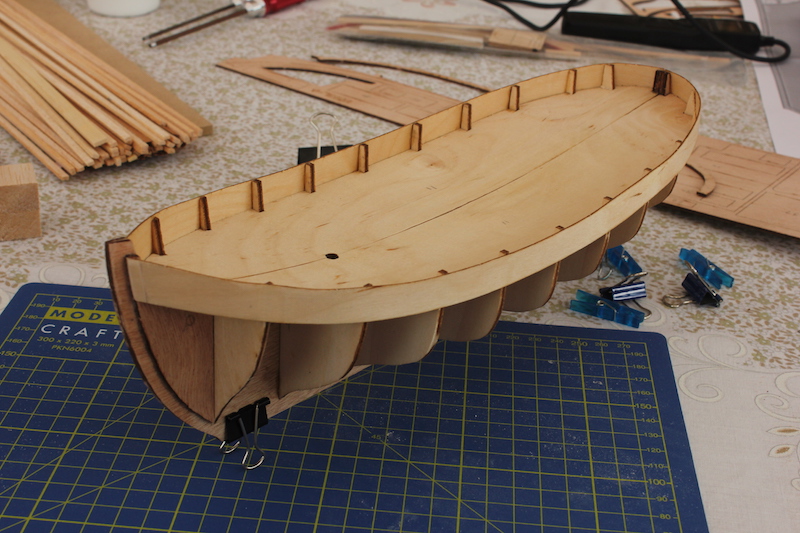
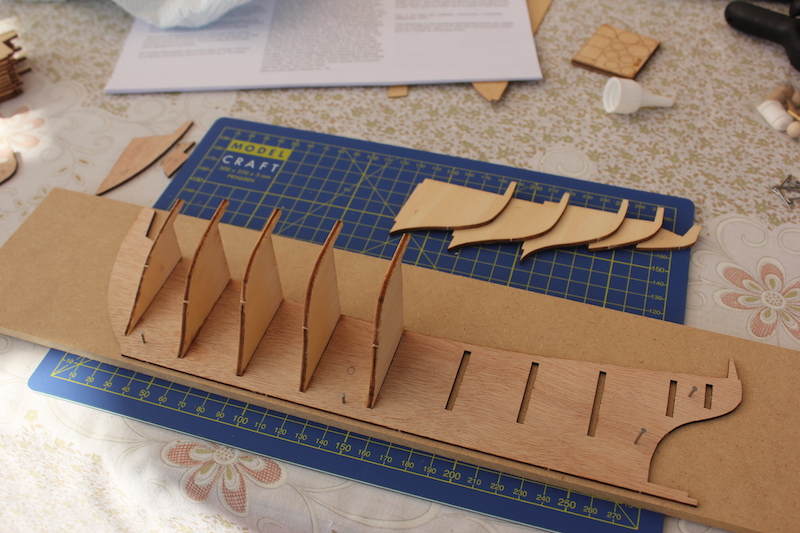
After getting some great information on my first thread I ordered the Norden and some tools, and today it arrived. Everything was present in the box so I got started I think it's a good first kit and will help me get to grips with the main aspects of building model ships, and there's not too much rigging or sail work, which is the most daunting part for me! Plus I love working boats. Although I think I'll be going for a Model Shipways kit for my next build whenever that may be, the Billings instructions are rather vague. So far I've relied more on two good build logs. So far (the first 2 hours or so) I have added the bulkheads to the first half of the hull and glued the two wood pieces at the bow and stern, I am just waiting for that glue to dry before adding the deck and starting the other half of the hull. I'm already enjoying this new hobby! If anyone has any other tips or notices anything I have done wrong or should do differently, let me know
- 32 replies
-
- 4
-
-
- billing boats
- norden
- (and 2 more)